500 Internal Server Errors: What They Are & How to Fix Them
Troubleshooting an HTTP 500 internal server error is like solving a mystery.
You don’t know what exactly happened or why it happened — all you know is that something’s wrong and you need to fix it.
To guide you through the hassle of troubleshooting the dreaded HTTP 500 internal server error, let’s go over what it exactly means and its most common causes and solutions.

Here’s what your 500 error page might look like in your browser:

How to Fix a 500 Internal Server Error
Unlike other server-side errors like a 502 code or a 503 code, a 500 internal server error is it doesn’t immediately tell you what the problem is, nor does it tell you how to fix it. If the error persists for too long on your site, it could even negatively impact your SEO.
So, let’s dive into a few potential causes of the error. Then, we’ll present some solutions so you can try to fix the issue.
Potential Causes of a 500 Internal Server Error
A 500 internal server error is, as the name implies, a general problem with the website’s server. More than likely, this means there’s an issue or temporary glitch with the website’s programming.
Some potential causes of a 500 internal server error include:
- Corrupted or broken .htaccess file
- A permissions error
- Faulty third-party plugins or themes
- The PHP memory limit being exceeded
Fortunately, there are a few effective solutions for fixing most of these problems.
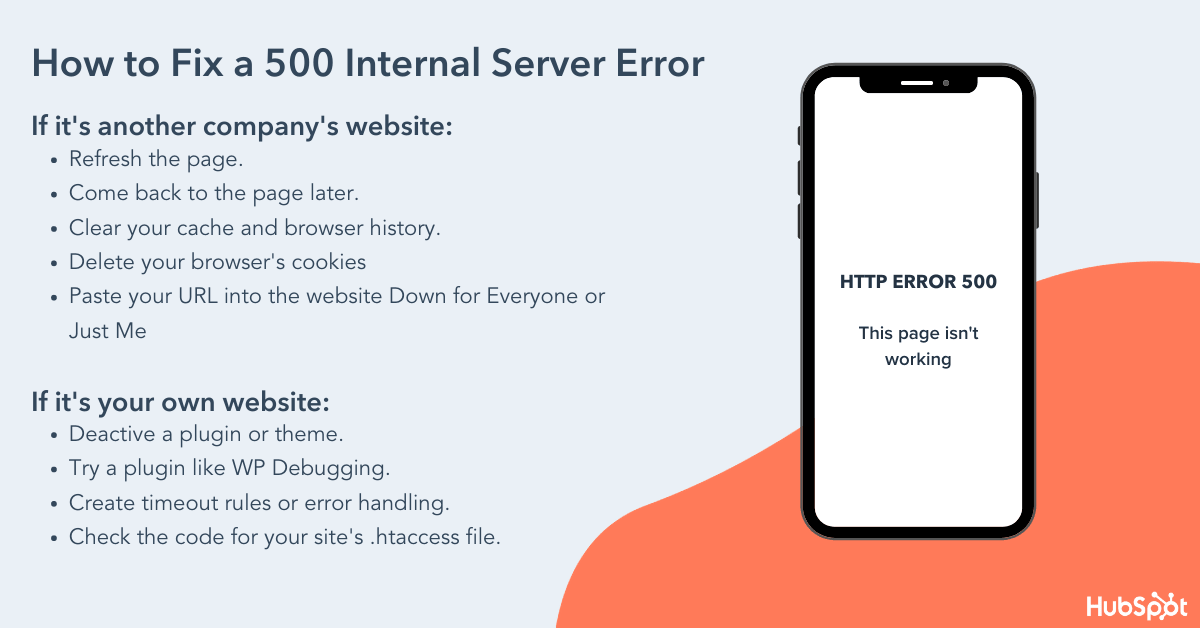
If You’re Trying to Load a Page with a 500 Internal Server Error:
1. Refresh the page.
This might seem obvious, but if it’s a temporary loading issue, you might find success if you refresh the page. Before trying anything else in this list, reload the page and see what happens.
2. Come back later.
Since the error is on the server side, I’m willing to bet the website owners are working as quickly as possible to resolve the issue. Give it a few minutes or up to an hour or so, and then reload the URL and see if the development team has fixed the issue.
3. Delete your browser’s cookies.
If clearing the browser history doesn’t work, you might try deleting your browser’s cookies. If the cookies are associated with the error-prone webpage, deleting the cookies might help reload the page.
4. Paste your URL into the website “Down for Everyone or Just Me.”
Head to downforeveryoneorjustme.com and paste in the URL where you’re seeing the internal server error. You’ll either be told that the website is only down for you, or that the website is down for everyone.
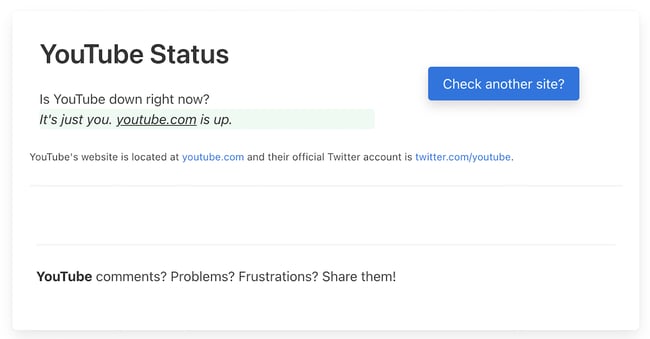 If it’s a problem with your server, this should help assuage any concerns that it’s an issue with your own computer.
If the 500 Internal Server Error is on Your Own Website:
1. Deactivate a plugin or theme.
Newly activated software, add-ons, or third-party scripts might be conflicting with your current server configuration. To determine this, try (carefully) deactivating or uninstalling your software add-ons one at a time to identify what exactly is causing the internal server error.
If you run a WordPress website, this is easy to do with plugins. From your dashboard, choose Plugins > Installed Plugins, then deactivate the first plugin. If the error resolves, you know this plugin is part of the issue. Reactivate the first plugin, then repeat this deactivate-reactivate process one at a time for all plugins to determine which ones are causing your error.
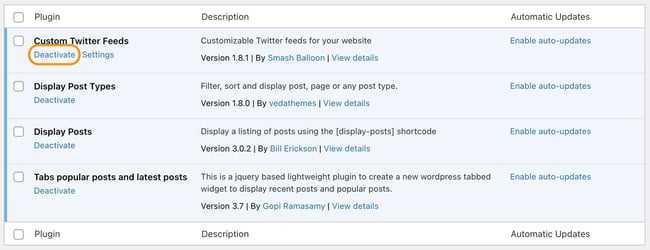 You might find that having fewer active plugins on your site helps things run more smoothly.
Alternatively, if you just upgraded your software, your current plugins or themes might not be compatible with the new upgrade. Deactivating plugins or themes one at a time until the error disappears is the best way to find the root cause of your problem.
2. Use a plugin like WP Debugging to identify the issue.
If your site is powered by WordPress and you’re comfortable with WordPress debugging processes, consider installing a plugin to help you identify the issue with your server.
The debug plugin WP Debugging, for instance, helps you figure out exactly what’s wrong with your site, which will result in a speedier fix.

3. Ensure your PHP setup is configured correctly.
If the issue is related to a PHP timeout, consider creating timeout rules or error handling in your script to resolve the issue. Here’s a full list of php.ini directives to configure your PHP setup.
Additionally, wrong permissions on a file or folder that has a script, like a PHP or CGI script, won’t allow the script to run. Check your permissions and make sure you set them correctly on your server.
4. Check the code for your site’s .htaccess file.
Incorrect coding or improper structure with your .htaccess file could be the reason you’re seeing the 500 internal error. The .htaccess file helps you manage how long resources should be stored in a browser’s cache. Try editing the file if you’re seeing a 500 internal server error.
To locate your .htaccess file, access your website files through a file manager like cPanel or via FTP/SFTP. The file will probably be located in your public_html directory. There’s a good chance your server will hide this file from view by default and you’ll need to toggle hidden files on to see it.
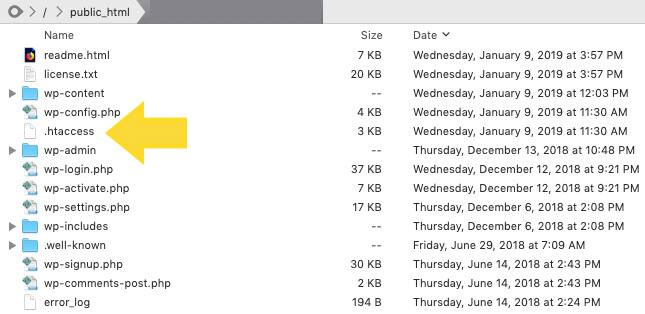
Coding errors in .htaccess and custom scripts can also cause an HTTP 500 internal server error.
5. Ensure your new software is installed correctly.
Finally, check to see if your recently installed or upgraded software actually failed to install or upgrade. To refresh your software, check the vendor’s website for instructions.
Last Resort: Ask a Server Administrator for Help
If troubleshooting popular software problems or debugging server-side scripts doesn’t fix your HTTP 500 internal server error, you should read about the most common causes for this type of issue in your server’s documentation — an HTTP 500 internal server error can occur in different operating systems for a multitude of reasons.
You can also ask your service provider to access your error logs and find evidence for the root cause of your problem.
Internal server errors are irritating because they’re unhelpful — it’s basically the web server’s way of saying, “Eh, I’m not sure.” Hopefully, one of the above steps will resolve the problem so you can get back to life as usual.
Editor’s note: This post was originally published in October 2018 and has been updated for comprehensiveness.

The Parts of a URL: A Short & Sweet Guide
If your website is like a house, then your website’s URL is like that house’s address. It defines where your website lives online, similar to how your home address determines where you live in a neighborhood, helping your visitors easily find your site. URLs also help Google understand what your website’s pages are about.
There are technically five elements of a URL, and they’re discreetly important for optimizing your site’s user experience (UX) and SEO. To help you develop a concrete understanding of every part of a URL, let’s explore each of them in detail.

Below is an illustration of the different parts of a URL.
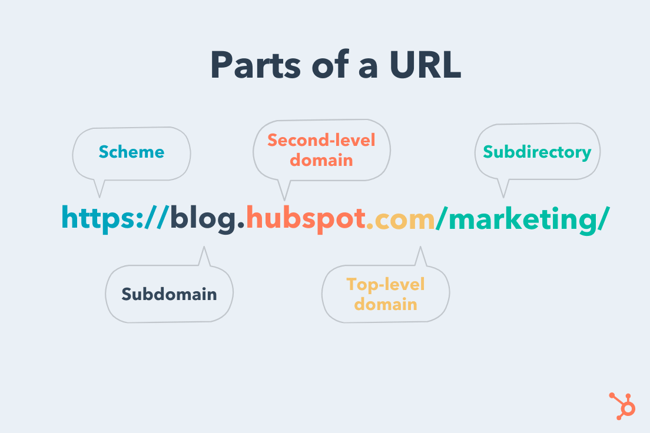 Let’s break down this URL structure below.
URL Structure
Scheme
 The scheme tells web servers which protocol to use when it accesses a page on your website.
Nowadays, HTTPS — which stands for Hypertext Transfer Protocol Secure — is the most common scheme. It tells your web browser to encrypt any information you enter onto the page, like your passwords or credit card information, so cybercriminals can’t access it. This security protocol protects your website visitors and implementing it will help your site rank better on Google. That’s why implementing SSL is a must-do on any technical SEO guide.
Other schemes you might see are mailto://, which can open your computer’s default email service provider to help you draft an email to the email address you entered in the URL, and ftp://, which is a standard protocol for transferring computer files between a client and server on a computer network.
Subdomain
 If your website is like a house, your subdomains are like specific rooms in that house. A subdomain in a URL indicates which particular page of your website the web browser should serve up. For instance, subdomains like “blog” or “offers” will provide your website’s blog page or offers page.
Subdomains also bucket your website into its main content categories and shows Google and your visitors that there’s more information on your site than just a homepage.
Second-level Domain
 Your second-level domain (SLD) is the name of your website. It helps people know they’re visiting a certain brand’s site. For instance, people who visit “mlb.com” know they’re on Major League Baseball’s website, without needing any more information.
Top-level Domain
 The top-level domain (TLD) specifies what type of entity your organization registers as on the internet.
For example, “.com” is intended for commercial entities in the United States, so a lot of American businesses register with a top-level domain of “.com”. Similarly “.edu” is intended for academic institutions in the United States, so a lot of American colleges and universities register with a top-level domain of “.edu”.
Subdirectory
 A subdirectory — also known as a subfolder — helps people as well as
web crawlers understand which particular section of a webpage they’re on.
For instance, if you own an online store that sells t-shirts, hats, and mugs, one of your website’s URLs could look like “https://shop.yourstore.com/hats”. Notice that the subdomain is “shop” and the subdirectory is “hats.” That means this URL would serve up the “Hats” page, which is a subfolder of the “Shop” page. T-shirts and mugs would be other subfolders of this page.
URL Structure: Subtle Yet Essential
Even though URLs might seem simple and frivolous, they’re actually important for your website’s UX and SEO. And now that you understand the anatomy of a URL, check out the blog posts below to learn more about technical SEO.


How to Write About Your Professional Background
A great way to share more about your background is to have a prepared document, like a professional bio.
A professional bio can be shared with prospective employers, shared with your colleagues, included in your social media profiles, used for speaking engagement announcements, or used as an author bio on a blog.
Writing about your professional background for the first time may feel challenging or awkward, but it doesn’t have to be.
Here, we’ll explore some tips to help you feel more comfortable when writing your own professional background. Let’s dive in.

Your professional background includes previous jobs you’ve had, successful projects you’ve worked on, significant accomplishments like promotions or awards, professional networking organizations you belong to, and anything else you’d share with someone who wants to know more about you professionally.
Not only is sharing more about your background a great way to tell more about yourself to others, it’s also an opportunity to wholly reflect on your professional journey and the goals you’ve achieved — plus, what you hope to achieve in the future.
Next, let’s dive into how you can get started.
1. Don’t start from scratch.
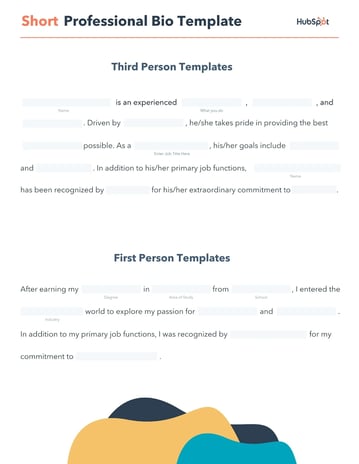
If you’re having trouble figuring out where to start, try using a professional bio template to guide you. Templates, like the ones featured below, make it easier for you to focus on your personal information and accomplishments, without having to worry as much about the structure.
Featured Resource: Professional Bio Templates and Examples
2. Know your audience.
Take into consideration who will be reading your professional bio and cater to your reader.
You may also want to draft different versions of your document to best fit specific audiences. For example, the version you post on your LinkedIn may not be as detailed as the version you post on your personal website, and if your reader is a potential employer, it would help to include details that specifically highlight why you’re the best candidate for the role for which you’re applying.
HubSpot Founder Dharmesh Shah uses different bios for different platforms. On Twitter, for instance, Dharmesh’s bio is short and sweet, which is perfect for Twitter’s character limit.
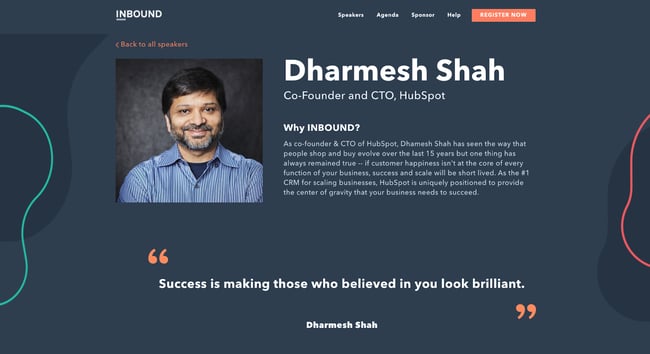
 Alternatively, on INBOUND’s website, Dharmesh’s bio is written in third-person for attendees. This bio makes Dharmesh’s current role clear while providing some key background information.
 Finally, in his OnStartups bio, Dharmesh’s voice is personable since he’s speaking directly to the reader. This gives readers more insight into Dharmesh’s background directly from his perspective.
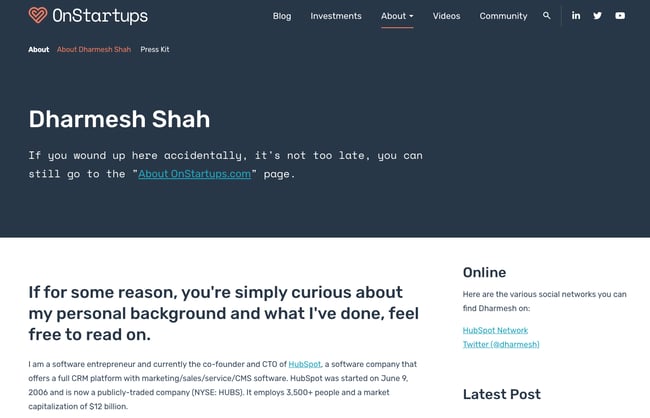 The best part about this approach is that you can create as many versions of your bio as you’d like, or simply recycle a general version whenever you need it.
3. Show professional progression.
As you’re writing, think about structuring your professional bio in a way that creates a timeline to show your progression. Explain what your different roles were like, and emphasize responsibilities that set you up for success in your latter roles.
It’s important to note that your timeline doesn’t have to be linear.
“Look for a theme that runs throughout several of the jobs you’ve held, and present your choices in a way that shows common threads running through each of your career decisions,” explains career strategist Jenny Foss.
The goal is to clearly show your audience the different roles you’ve had, and how all of your experiences have contributed to your overall professional development.
4. Highlight your accomplishments.
One of the best things about writing your professional background is that it’s the perfect opportunity to brag about yourself — and I don’t mean humble brag.
Think of the most successful projects you’ve been part of, the strategies you’ve helped develop and execute, the deals you’ve closed, the revenue you’ve generated, and anything else that stands out as a major accomplishment.
“A former manager once told me to keep a ‘brag sheet’ in a document on my computer. The idea was to create a running list of noteworthy accomplishments, media mentions, awards, and letters of recommendation that I could reference to make it easier to write about myself. It also doesn’t hurt to open up this document whenever you’re having a tough day to remind yourself what you’re capable of,” Carly Stec, HubSpot’s Team Manager of Content Conversion, told me.
It’s also important to consider how success was measured in your previous roles — and how that might shape the way you write about it.
If success for you tends to be measured in quantifiable metrics, include strong statistics. It might look something like this:
- “In my first six months, I was able to sign up X amount of customers that generated an average monthly recurring revenue of $X.”
- “I helped boost customer retention by X percentage.”
- “With the strategy I developed, my team was able to lower customer acquisition costs by X percentage.”
If your role is primarily measured through qualitative goals, share a highlight that speaks to skills you excel at. For example:
- “I successfully executed a major project using strong time management skills and communicated the results to C-suite stakeholders.”
- “I was able to complete a project that was projected to take an entire quarter in half the time because of my organizational skills.”
- “I was selected to lead a database cleanup project due to my attention to detail and strong team collaboration skills.”
5. Be personable.
Timelines and accomplishments are great, but being personable is even better.
Readers should feel like they’re getting some sense of who you are from your professional background. This gives readers the opportunity to know more about you beyond a professional scope. If you have any cool niche hobbies that you enjoy outside of work, this would be the time to share.
Here’s a list of prompts to help you brainstorm the right “fun facts” to highlight:
- What TV show are you currently binging?
- Do you have any pets?
- What’s something most people don’t know about you?
- What languages do you speak?
- What are you most proud of yourself for?
- What’s something you’ve done that’s bucket-list worthy?
- What do you do to relax?
- What are three of your must-have apps?
- What would your favorite colleague say about you?
- What’s the best advice you’ve ever received and how do you apply it to your life?
Being personable is also a great opportunity to address any unconventional moments in your professional background. For example, maybe you’ve made a drastic shift in your career path, or you took a sabbatical at some point.
These types of stories can make you more relatable to your audience, and you never know who you may end up connecting with over one of your hobbies or more personal moments.
6. Ask for feedback.
Constructive feedback is key when you’re writing about yourself. While many choose to source feedback after completing a draft of their bio, it’s just as beneficial to get feedback from your peers at earlier stages of your drafting process.
Oftentimes, our peers can help identify our strengths and where we have opportunities to improve. If you’re having trouble developing a clear timeline or pinpointing which highlights you should mention, get together with a peer to brainstorm ideas.
Reflect on successful assignments that you’ve collaborated on and ask your peer to provide honest feedback about what you did best — and include that feedback in your bio.
If you need help getting started, here’s a list of discussion questions to use with your peers to uncover professional strengths you might be overlooking in your own self-assessment:
- What role do you think I tend to play in group work?
- How have I helped you be more successful?
- What do you think my most impressive project has been?
- What was your first impression of me?
- What do you think my strengths are?
If you’re feeling stuck, don’t be afraid to leverage our free professional bio templates to help you get started.
Next, let’s go over professional background examples from both tenured and early-career professionals.
Professional Background Examples
1. Bozoma Saint John
 Bozoma Saint John opens her biography by covering her most recent role at Netflix, then goes all the way back to the beginning of her career. From there, she provides a detailed overview of her accomplishments, inserting the names of the most notable organizations she has worked with.
Notice how she familiarizes us with her by using her nickname, “Boz,” throughout her professional background. In the same way, you can use your nickname throughout your bio (if you’re writing it in third person).
We’d recommend writing a background like Saint John’s if you’re seeking speaking or presenting opportunities.
2. Jim Kowalski
 Jim Kowalski walks us through his passions before describing his work experience and accomplishments. He makes it a point to connect his love of the automotive industry to his ethos in his work. Another notable feature of his professional background is that he mentions a brand he invigorated (it was “almost dead,” he asserts). He closes with his fascinating adventures around the world, including building a home in Thailand.
Mention ways that you’ve prevented clients and other companies from failing. If you’ve had noteworthy adventures, consider bringing them into your professional background as well. A background bio doesn’t have to be wooden; it can be fun, too, as long as you remain within reason. Plus, it gives the reader a chance to connect with you.
3. Katherine Gundlach
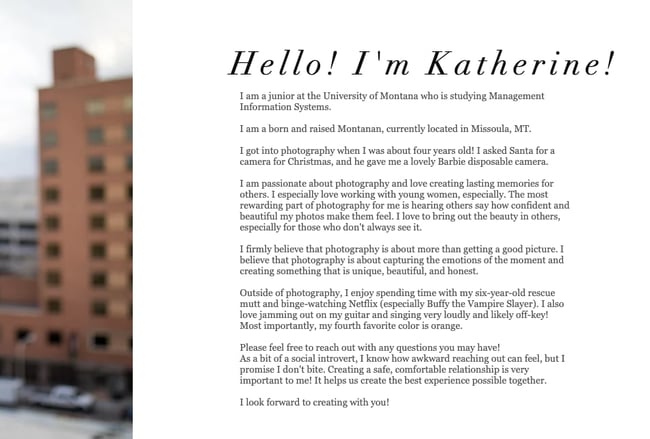 If you’re a college student, you might not have a long list of professional accomplishments, but you can take note from Katherine Gundlach’s example and write about what you love to do — and why you love to do it.
Katherine Gundlach opens her professional background with her current status as a college student, then goes into an anecdote that describes why she became a photographer. In the latter half of the bio, she describes her mission when photographing others. In your own bio, describe the purpose of what you do (or the reason why you want to pursue a certain field).
She also says where she’s from. Mentioning personal information in your professional bio can be a way for readers, hiring managers, and colleagues to relate to you.
4. Erick Rheam
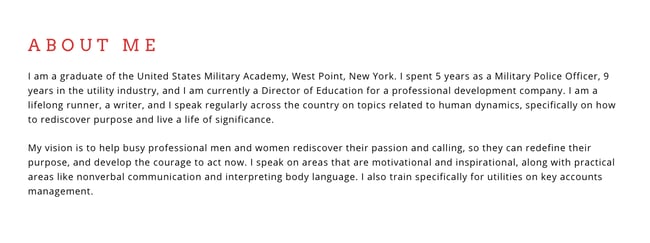 Erick Rheam’s professional background effectively outlines his path to becoming a motivational speaker. He also cements his expertise by stating that he speaks regularly across the U.S. After, he outlines his vision and purpose for doing what he does. Like some of the other examples on this list, he includes personal information about himself: that he’s a runner.
This professional background is done well because it’s succinct and balances professionalism, expertise, and personality. Consider achieving a similar balance in your own background document by dedicating 1-2 sentences to each aspect of your professional and personal life.
5. Dr. Houyuan Luo
 Dr. Houyuan Luo’s professional background is a classic example of a bio that’s inspirational, professional, and persuasive.
In the medical industry, education is immensely important — how long you studied can determine your level of expertise. Dr. Luo immediately lists his academic background, then details how passionate he is for his field. He emphasizes his humanitarian values most, cementing him as an excellent candidate for clinical training and speaking opportunities.
If you work in the healthcare, non-profit, legal, educational, or environmental industries, consider emphasizing your values and ethos in your professional background. Like Dr. Luo, you can leave mention of your current position for the last sentence.
6. Claire Buswell
 Claire Buswell immediately establishes herself as a relatable persona by going over her personal history first — then connecting that to her role today. Because she was once in the same position as her clients, Buswell is better prepared to help them professionally. She makes that clear in her professional background and is vulnerable about how hard it was to find a job.
If you’ve created a business that solves a problem that you experienced, consider bringing that into your professional background. Don’t be afraid to be vulnerable. In fact, being vulnerable can make you more relatable, and your level of success now will be testament to your methods’ effectiveness.
Ready to start writing?
Keep these tips and examples in mind as you’re writing about your professional bio. Your final product should be a written statement that boasts your most notable skills and achievements. As you continue to progress in your career, take time to update your bio like you would your resume, and continue to impress your readers.
Editor’s note: This post was originally published in November 2020 and has been updated for comprehensiveness.

How to Build a Website: 2 Methods, 9 Easy Steps, & 35 Amazing Tips
Studies show that 76% of consumers research a business online before visiting in person. That means having a website is as necessary for companies today as having a phone number.
Maybe you’re starting a new business venture or developing your personal brand.

Or, maybe you’re looking to update your company’s outdated website. Whatever the case, creating a new website can feel overwhelming, particularly without technical expertise or a budget for web developers.
Steps to Make a Website
We’ve put together a comprehensive, step-by-step guide to creating a website. Best of all, you won’t need a coder, web designer, or big budget to create one — you’ll just need to follow the steps below.
In general, you’ll carry out these steps before launching your site. But before you get started, you’ll need to choose a platform.
We’ll walk you through the two options you have: a website builder or a content management system (CMS).
Start building your website by choosing a platform.
The first thing you’ll need to decide is whether you want to create a website using a website builder or a CMS.
Let’s take a look at the definitions of each below.
| Website Builder | Content Management System (CMS) |
|
A website builder is a solution that offers domain names, SSL certificates, and templates in one package, typically at a monthly or yearly subscription fee. |
A content management system is a platform where you place your website’s content and media files. Domain names, SSL certificates, and hosting is typically purchased separately. |
Both website builders and CMS platforms provide the out-of-the-box features, pre-designed templates, and extensions required to create a custom site without coding, but they offer different experiences for creating and managing a website.
Below, we cover some of the differences you should consider before making a choice.
Website Builders vs. Content Management Systems
| Website Builders | CMS Platforms |
|
|
Website builders provide everything you need to launch a site. You get website building tools, hosting, domain registration, SSL certification, templates, and support in one place, often for a low monthly rate.
This ease of use and pricing appeals to many site owners; however, free website builders, as well as the more expensive alternatives, tend to be limited in flexibility. For example, you can’t add your own custom code, or drag and drop elements anywhere on your posts and pages.
If you want more control over the functionality and appearance of your site, use a CMS. A CMS will provide the content management features, advanced functionality, and customization options required to build larger, more complex sites.
If you decide that a CMS is the best option for your business, consider the software, ease of use, customizability, security, and pricing of different platforms to narrow down your selection.
Let’s look at some examples of both website builders and CMS platforms you could potentially use.
| Website builder examples | cms systems examples |
|
|
Here are some resources comparing some CMS systems with popular website builders:
- HubSpot vs Drupal vs WordPress vs Joomla: Which Is the Right CMS for You?
- WordPress.org vs WordPress.com: What’s the Difference?
- Which Should You Use, Wix or WordPress? Things to Know
- A Head-to-Head Comparison of Weebly vs. WordPress
- The Most Critical Differences Between Squarespace & WordPress
- Shopify vs. WordPress: Where Should You Set Up Shop?
Below, we’ll walk you through the steps to build a website using both a website builder and a CMS.
How to Build a Website with a Website Builder
Have you decided that you’d like to use a website builder? Excellent! This is the easiest way to start for most beginners.
You won’t need to know how to code, and everything you need is typically included in one convenient package — so if you don’t want to go through the hassle of finding a hosting service, domain name, and SSL certificate, this is the option for you.
Let’s go through the process of creating your site using a website builder.
1. Choose a website builder.
First up, choose a website builder that fits your needs and budget. You’ll need to consider the following:
- Cost: Your budget will be by far the most important factor when choosing a website builder. Most require a paid subscription to include premium features such as domain names and increased storage.
- Features: Website builders typically offer different features depending on their target market. Shopify, for example, is specifically designed for ecommerce websites, while WordPress.com is primarily known for blogging.
- Extensions: Check out the extensions and add-ons library for each website builder you’re considering. If they don’t offer something you need for your site, skip that builder.
- Themes and Templates: Some website builders provide more themes and templates, while others provide less variety but more well-designed choices. Check out the template library so you can see what your site could potentially look like once it’s finished.
- Ease-of-use: All website builders are designed to be easy to use: simply sign up on the platform and start building. But some are more intuitive than others. Play around with different builders to find out which one you prefer.
- Support: Is the website builder’s support team known for its responsiveness? Do some research beforehand to ensure the premium subscription will also get you premium support.
No matter what, you’ll want to start with a free trial — that way, you can give the platform a test run before committing.
While most website builders come with a free subscription tier, it doesn’t offer a free domain name or the features you need to build a strong website. Our recommendation is to opt for a paid subscription once you’ve decided on a platform.
Below, we break down some of the most popular website builders you could choose.
| Website Builder | Plans | Good Fit For: |
| WordPress.com | $4 to $8/month | Blogs |
| Wix | $14 to $39/month | General Websites |
| Weebly | $6 to $26/month | General Websites |
| Shopify | $29 to $299/month | Ecommerce Stores |
| Squarespace | $12 to $40/month | Creative Websites |
Here are a few more resources to help you choose a website builder:
- Best Website Builders Today and How to Choose One
- Best Free Website Builders to Check Out This Year
- Top Ecommerce Website Builders
And here are some posts listing alternatives:
2. Sign up for a subscription plan that meets your budgets and needs.
As we mentioned above, you won’t want to go for a free plan because those typically don’t include enough features to launch a professional website. You’ll want to upgrade, but you’ll need to take a close look at the features included in each tier to choose the right subscription for you.
Consider the following questions before choosing a subscription plan:
- How much storage will you need?
- Do you want ads to be removed from your site?
- Will you be setting up an online store?
- Will you want a professional email with your domain name?
- Will you want to customize the site using CSS and HTML?
- How much support do you expect you’ll need?
Most website builders have a pricing page that lays out the differences between plans in an easy-to-scan list. The best part is that you can start with the simplest subscription, then upgrade as you require more features and functionalities.
3. Choose a short and catchy domain name.
Some website builders offer a free subdomain for your site, but you’ll want to upgrade to a paid subscription to get a custom domain.
A custom domain name is one of the easiest ways to appear more professional and legitimate as a company. Imagine you were looking for a freelance writer.
Are you more likely to hire me if my website address is carolineforsey.weebly.com or carolineforsey.com? An extension like “weebly.com” can confuse visitors and dilute your brand identity.
Worst case scenario: a visitor might assume you can’t afford a premium hosting service or custom domain, and draw conclusions that your business is not fully established.
The good news is that after you upgrade, your premium website builder subscription will include a domain name for free, at least for the first year. You’ll be able to choose it as you’re setting up the site, or do it later.
When choosing a domain name, pick something short and descriptive. The .com top-level domain will work for most websites, but if you’re planning on launching an organization, you can also consider the .org domain.
Domain names are a surprisingly complicated art — you must choose something memorable that doesn’t yet exist. As you make your choice, avoid the following:
- Including dashes
- Using numbers
- Using a trademarked name
Before signing up on your website builder platform, consider looking up available domain names using a service such as GoDaddy. That way, you can make sure the domain you want is available before you pay for a subscription on the website builder platform.
Here are some more resources for picking the perfect domain name.
- The Plain-English Guide to Domains & Domain Names
- Tips for Choosing the Perfect Domain Name
- .net vs. .com, and More: What’s the Best Domain Extension?
4. Pick a premade website template.
During your setup process, the website builder will take you to a template library, where you can choose a premade layout to set up your site.
Most website builders will create a different template depending on the type of business or brand you run. For instance, you can choose a template that’s specifically made for:
- Freelancers
- Bloggers
- Local Businesses
- Creatives
- Resume Websites
Every template should have essential features such as a built-in responsive setting and drag-and-drop page editor.
Your website builder should also allow you to import demo data, so that you only have to replace the images and text and not tinker with anything else during the setup process.
5. Customize the template.
You don’t want your site to look like anyone else’s, so you’ll need to customize the template to your liking.
On most platforms, you’ll be able to change the color palette, replace the images, insert social media icons, add personalized forms and menus, and change the size, colors, and fonts of buttons.
Have fun, and don’t forget to use your brand colors. This will be the best part of building your website: making it look like you want it to.
6. Add pages to the site.
Next, it’s time to add pages to your site. You’ll need to create, at a minimum:
- A home page
- An about page
- A contact us page
- A services page, if you’re offering any
- A product page, if you’re selling any
- A blog page
You’ll also want to create specific service pages.
For instance, if you’re selling “Digital Marketing Services,” you’ll want to create pages titled “Social Media Marketing Packages” and “Search Engine Marketing Services” under the digital marketing services umbrella.
Our top suggestion would be to put the topic of your page — or your target keyword — in the title of these new pages.
Instead of having a page titled “Services,” you would title it “Digital Marketing Services.” You’ll want to do the same thing for your home page. You don’t want it to be titled “Home.” Instead, title it “Freelance Digital Marketing Specialist – Your Name.”
Your title shows up in the search results, so it plays an important role in telling visitors what you do.

Here are more resources on creating great page titles:
- What’s a Website Title (Title Tag) & Why Does It Matter for SEO?
- How to Write the Perfect Page Title With SEO in Mind
7. Write optimized content.
This is arguably the most important step. Now that you have your pages set up, what will you put on them?
It’s time to write optimized content to put on all of the pages you’ve created. Get content ideas from your competitors, and don’t forget to aim for at least 800 words per page.
Remember, however, that you can always come back later to write more content. So if you have to write short pages at first, it’s totally fine. Set a date for when you’ll return and add more copy.
Write your content in an editor such as Google Docs and use a grammar checker such as Grammarly to ensure your copy is error-free. When you upload images, be sure to compress them beforehand with a tool such as Toolur or TinyJPG. These steps will ensure your content helps you rank on Google and other search engines.
Check out the following articles on how to write optimized content:
- The Ultimate Guide to Content Creation
- What Is Content Writing? Plus Tips to Take Your Content to the Next Level
- The Ins and Outs of Writing Long-Form Content
- The Ultimate Guide to On-Page SEO
- How to Do Keyword Research for SEO: A Beginner’s Guide
8. Fill in general settings.
Before pushing your site live, you’ll want to fill in general settings. It’s the same list you would run through if you were setting up your site on a CMS platform.
Here’s what you’ll want to adjust:
- Page titles
- Headings
- Meta descriptions
- Image alt-text
- Structured markup
- Page URLs (or slugs)
- Internal linking
- Mobile responsiveness
- Site speed
Make sure you include a site title and tagline in the “Settings” of your website builder. Go through, and check out the URLs — are those optimized for search?
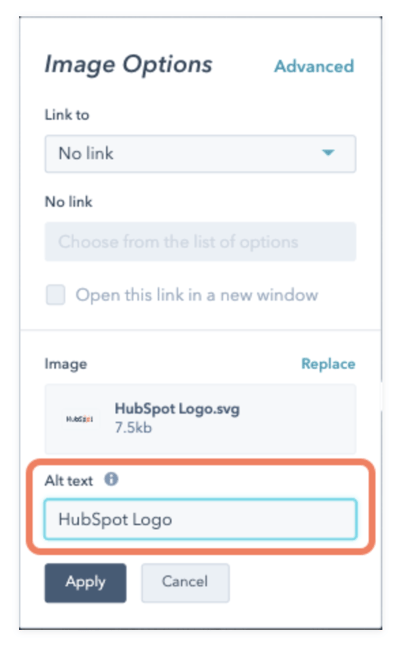
Any website builder you’re using to build your site should make it easy to optimize these elements on every post and page. With HubSpot, for example, you can add image alt-text, meta descriptions, headings, and custom URLs right in the CMS.
9. Install extensions and apps.
Last but not least, install add-ons that will increase your website’s functionality. Each website builder typically has a library of extensions and add-ons that you can choose from.
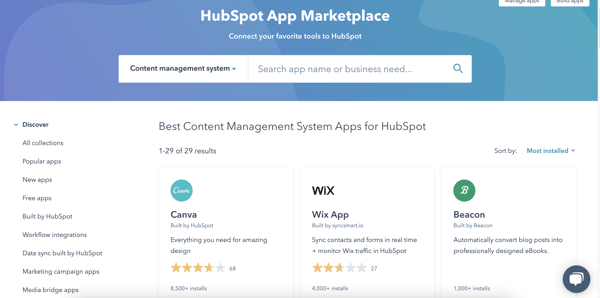
For instance, in the HubSpot App Marketplace, you can filter for, browse, and add a number of different CMS apps and integrations.
Once your pages, content, and plugins are in place, it’s time to push your site live!
The website builder will typically have a button you can click to launch your site into the web. After, simply watch your organic traffic grow.
And remember: if your website builder doesn’t work for you, you’ll always be able to switch over to a CMS. Speaking of CMS, let’s review the steps involved in building a website with a CMS next.
How to Build a Website with a CMS
Have you chosen to go with a content management system instead?
The process of building a website with a CMS is a little different than setting up a site with a website builder — mainly because you’ll have to buy a domain name and web hosting on your own.
But the process is just as simple, and the powerful customization options make the extra steps worth it.
Here’s some advice from HubSpot’s CMS Hub Senior Product Marketing Manager, Alex Girard, about building a website:
When building a website, you want to make sure your content helps your customers achieve their goal with your business. If you sell professional services, can customers learn more about the services you offer and easily get in touch with your team if they have specific questions? If you’re an ecomm business, how easy is it for your customers to purchase something right off your website. Interview your customers about their experience on your website, and don’t be afraid to run experiments on your copy or on other elements of your website. Constantly iterating on the experience you provide your customers will help you perfect your website over time.
Below, we cover the process of building your website using a CMS from start to finish.
1. Choose a CMS.
The best CMS system for your business will align with your site’s needs and goals.
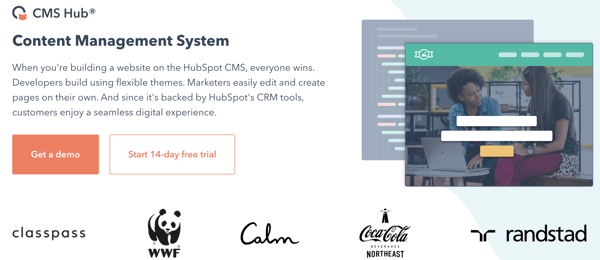
Let’s talk about some of the features you’d get from using HubSpot CMS Hub to give you an idea of some of the benefits of using content management software.
Example of CMS Software: HubSpot CMS
Price: $300/mo (Professional), $900/mo (Enterprise)
HubSpot CMS Hub is a web content management system that’s build on HubSpot’s all-in-one CRM Platform As a result, your team will have the tools necessary to offer a delightful and modern digital experience.
Below, we break down some of the most popular website builders you could choose, including CMS Hub.
| CMS | Plans | Good Fit For |
| CMS Hub | $300/month or $900/month | Scaling Businesses |
| WordPress.org | Free | General Websites |
| Adobe Experience Manager | Custom Pricing | Enterprise Businesses |
| Joomla | Free | General Websites (Recommended for Advanced Users) |
| Drupal | Free | General Websites (Recommended for Advanced Users) |
It’s worth noting that while WordPress.org, Joomla, and Drupal are free, you’ll have to pay for domain names, SSL certificates, hosting, and premium themes and templates, adding to your set-up costs. You might also need the help of a developer if you opt for Joomla and Drupal.
It’ll be hard to choose, but you can narrow it down with a few questions.
For instance, do you need a platform that allows you to add your own custom code or one that supports multiple languages? Would you like a proprietary CMS to help share the responsibility of protecting and maintaining your site, or would you prefer an open-source CMS?
You might also narrow your list by comparing the selection of templates and add-ons offered by each system.
Here are some resources to get you started:
- The Best CMS Systems Today and How to Choose One
- Features Your CMS Absolutely Needs
- The Best Content Management Systems for SEO & Why
- CMS 101: The Beginner’s Guide to CMS Hub
- 8 Things You Need to Know to Get Started With HubSpot’s CMS
Here are some comparison and alternatives posts:
- Drupal vs WordPress vs Joomla vs HubSpot: Which Is the Right CMS for You?
- Sitecore vs. WordPress: Which CMS is Best for Your Business?
- WordPress Alternatives & Why You Might Want Them
- Drupal Alternatives to Check Out This Year
- Joomla Alternatives & Why You Might Want Them
- Adobe Experience Manager Alternatives to Check Out
Once you’ve chosen the best CMS platform for your needs, continue to step two.
2. Select a hosting plan.
Web hosting is a service that enables individuals or businesses to run a website on the internet. The service provider, known as a web host, will store your website files on a secure server that it keeps up and running, and then deliver and display that web content to visitors who type in your URL in their browser.
Website builders include hosting in their packages. Content management systems, however, don’t work this way.
You’ll have to find your own hosting provider, which will take time and lots of research. There are hundreds of web hosts on the market. Each one might offer different types of hosting, including shared hosting, VPS, and dedicated hosting.
Let’s briefly look at the differences below.
- Shared Hosting: In shared hosting, your website shares the same server and resources with other websites. It’s the most popular type of hosting, particularly among new site owners, because it’s the cheapest option.
- VPS Hosting: If you go for a Virtual Private Server hosting solution, your site will sit on the same server as other websites; however, it will isolate server resources for your site specifically. That means your site will be able to handle higher volumes of regular traffic. It’s a pricier alternative to shared hosting.
- Dedicated Server: With a dedicated server, your site will sit on a server whose resources and space is reserved for your site only. If you’d rather not share a server with any other website, you can upgrade to dedicated server hosting.
Virtually every web host offers shared hosting. However, because your website has to share the same server with many other websites, it can’t support high volumes of traffic and is most vulnerable to hackers and other security threats.
Once you’ve decided what type of hosting you need, you can pick a provider. DreamHost, HostGator, and Bluehost are among the most popular third-party providers and offer free domain registration for the first year. That will simplify the next step in building a website.
Here are resources about hosting you’ll want to check out:
- The Ultimate Guide to Web Hosting
- What Is VPS Hosting? Why It Might Be the Best Option for Your Site
- The Best WordPress Hosting Providers This Year
- Best Free WordPress Hosting Providers This Year
- Bluehost Review
And some comparisons to help you choose the best one:
- SiteGround vs. HostGator Review: Which Is Better for Your WordPress Site?
- Bluehost vs. HostGator: Which Is Better for Your Website?
3. Get a domain name from a domain name provider.
No matter what type of CMS you chose to build your site, you’ll likely have to purchase a domain name.
Purchasing a domain name is typically inexpensive — even for those who sign up for a hosting plan that does not include free domain registration for a year. There are two different approaches you can take.
You can visit a domain site, purchase and register a domain name there, and then connect it to your hosting account. Both Godaddy.com and Namecheap.com are cheap, secure, and effective options for buying a domain name, with added benefits such as SSL security and Office 365 inboxes.
Or you can complete the entire domain name search and registration process on your hosting provider’s site.
Here’s where it gets tricky. You’ll need to choose a domain name as similar as possible to the name of your company, but with over billions of websites out there today, your company’s name might already be taken.
If your ideal domain name is already taken, consider using a different extension. Use one of the three most common extensions if you can: .com, .net, or .org. However, if it makes sense for your business, you might want to check out an alternate extension like .us or .shop.
As we covered in the previous section, avoid using dashes, numbers, or trademarked words. Play around with it.
Once you’ve chosen and paid for a domain name, you’ll usually also get personal email accounts attached, so make sure you’re happy to use your domain name as your main online identity.
Below you’ll find some resources about choosing and buying a custom domain:
- Best Domain Registrars to Consider This Year
- How to Choose a Domain Name
- Everything You Need to Know About Custom Domains
- The Simple Guide to Transferring a Domain to Another Registrar (A good read if you’ve already purchased a domain name.)
4. Choose a theme for your site.
Now, for the fun part.
Themes allow you to easily change the look and feel of your site without having to code HTML and CSS from scratch. Themes are made up of templates, modules, images, and global content that control your site’s overall design.
On whatever content management system you chose, take the time to browse through the selection of themes available. Many will come with a directory of free themes, where you can use filters or the search bar to find themes related to your industry, with a specific layout, and more.
Tip: It’s important your theme is responsive, so your site will look the same on all devices.
Other considerations will be specific to your business and site. You might be looking for a static header or a slideshow header, for example.
Or you may need a theme that comes with a front-end builder. Below are some questions you can answer to find the right theme for your site:
- Do you need a variety of layouts or just one?
- Are you looking for a theme with built-in social media widgets or any other functionality?
- Would you like to install a demo site or start from scratch?
- Do you want to purchase a theme that includes its own theme builder?
Ultimately, no one knows your business better than you. Take the time to consider which theme would best represent your brand and most likely appeal to your ideal demographic.
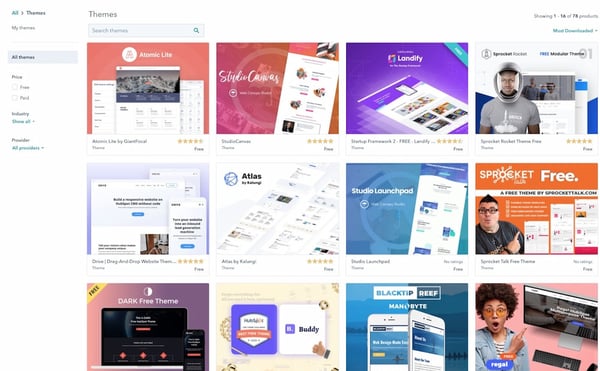
You’ll have a wealth of choices right in your CMS. Take a look, for instance, at the theme marketplace in CMS Hub:
You’ll want to stay away from hard-to-read fonts or flashy backgrounds that could distract a consumer from understanding your core message. When in doubt, you can’t go wrong if you choose something clean with straight lines and a limited amount of text.
If you can’t find a free theme that meets your exact specifications, try looking for premium themes in third-party marketplaces.
Below are some resources to get started if you’ve opted for the WordPress CMS:
- The Ultimate Guide to WordPress Themes
- Best Small Business WordPress Themes
- How to Use Multiple WordPress Themes on Your Web Pages
- Best Clean WordPress Themes
Once you’ve selected and installed a theme on your site, move on to the next step.
5. Customize your theme and templates.
Once you’ve chosen a theme, take the time to customize it and its individual templates. Your site’s design and functionality are your chance to persuade an audience to take a closer look.
It’s imperative your design makes sense to your ideal consumer and works to enhance your product’s success rather than hinder it.
That’s why you should think of your theme and templates as a starting point, rather than the final look. Depending on the website platform you’ve used to build your site, you’ll have different degrees of control over your site’s appearance.
On more flexible platforms like CMS Hub, you’ll be able to edit your theme’s global settings to make sitewide changes. That means you can make changes to your font and other elements in one place and they’ll be implemented across all pages on your site.
Here’s a great resource if you’re using WordPress:
6. Add pages to your site.
It’s important to plan exactly which pages you’ll need to include in your site. While it varies from business to business, you’ll need at least a homepage, an “About Us” page, a “Services/Product” page, and a “Contact Us” page.
You should also add a blog homepage. There are serious benefits to business blogging.
While every CMS is different, it’s typically easy to add and remove pages on whichever platform you use. Let’s take a closer look at the process on WordPress, for example.
- Start by logging into your WordPress dashboard.
- On the left side of the screen, click Pages > Add New.
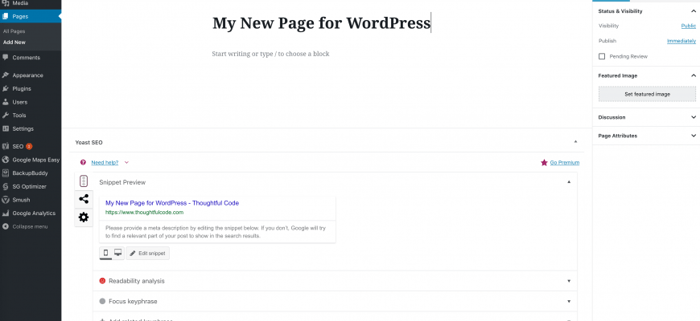
- You can add text, insert images, embed videos, and make any other changes you like.
- When you’re ready, click Publish.
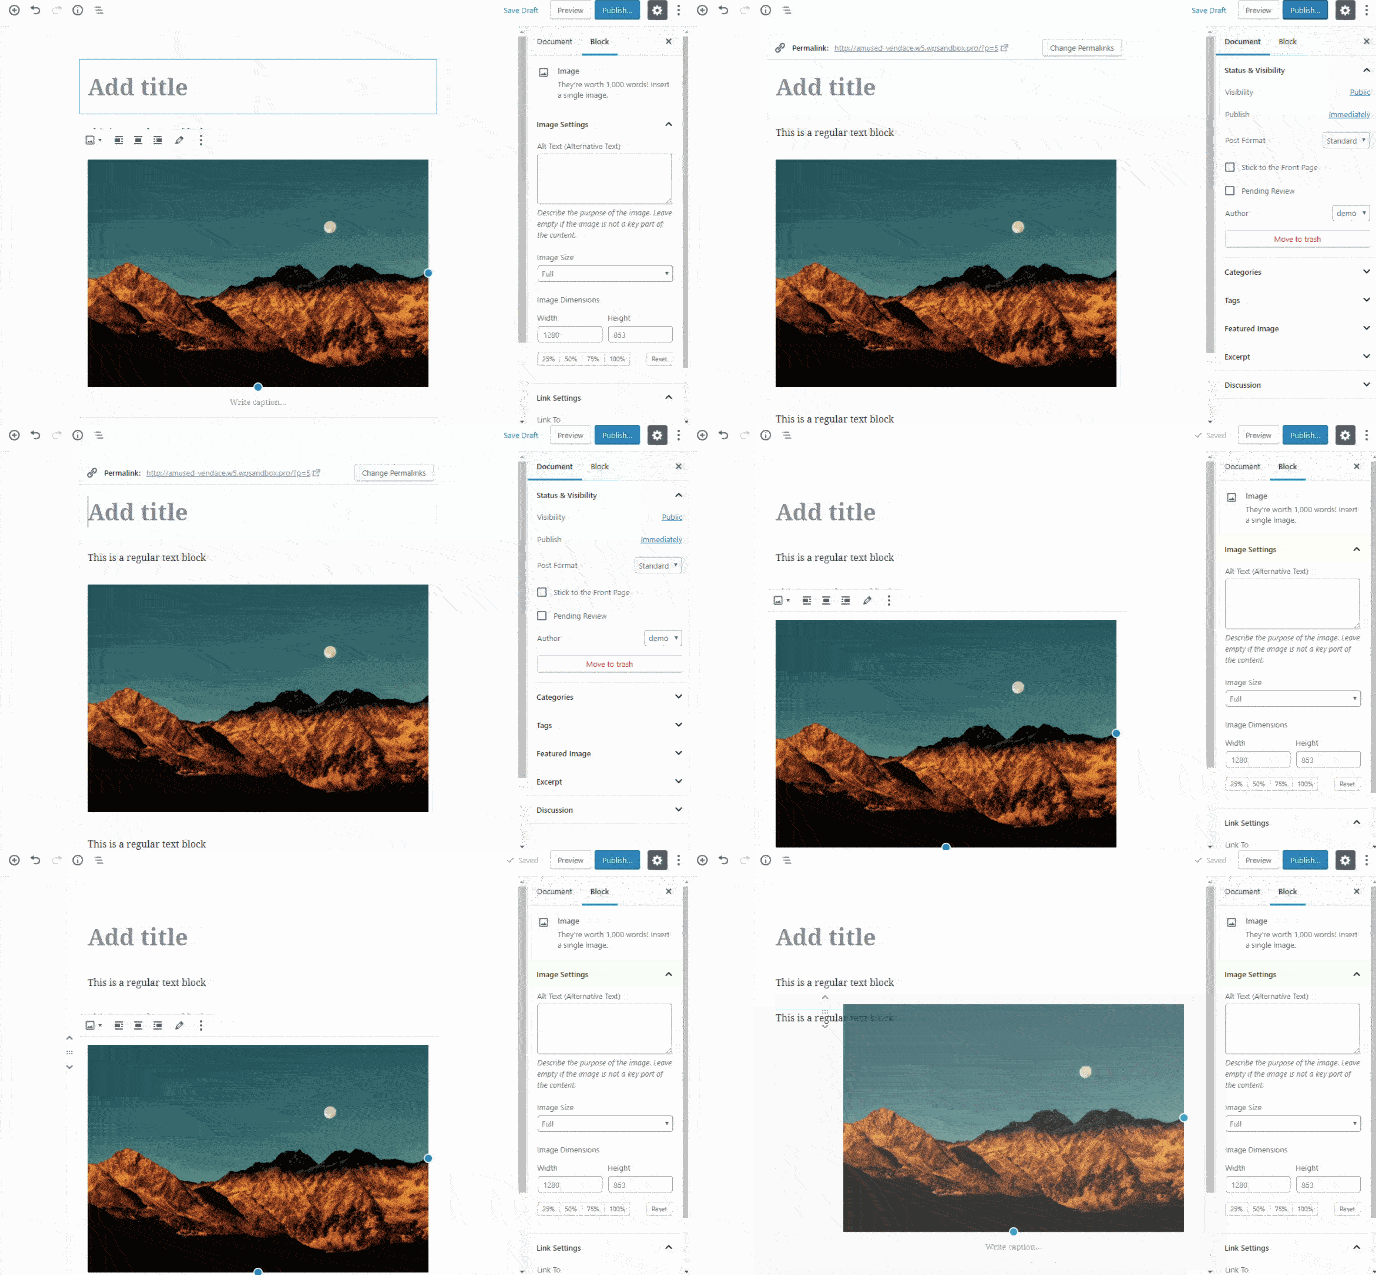
Once you’ve decided what pages you need on your site, make sure to add them to the navigation bar. You can rearrange page topics any way you want, or combine them.
You can visit other company websites within your industry to get ideas for how to organize your navigation bar, or which pages to include and exclude if you’re unsure.
7. Write content.
You guessed it: It’s time to write the content you’ll put on your site.
Write rough drafts for pages like your “About Us” page and landing page. Talk with coworkers and stakeholders — what message do you want to put out there? What tone do you want to set? Should you make jokes and be funny, or aim to be more inspirational?
If your online audience stumbled across your site, what questions would they have first?
Imagine your website is your only chance to have a full conversation with a potential customer.
The home page is the preliminary introduction: “Hey, we do XYZ.” Your “About Us” page digs deeper: “We are XYZ.” And your products or services pages are your big push to the finish line: “You want to work with us? Great, here’s how you’ll benefit.”
During this stage, it’s imperative you do your keyword research.
For instance, if you’re selling eyeglasses, and you notice “retro eyeglasses” is a more popular search term than “vintage eyeglasses,” you might use this research to steer the direction of the content on your site.
If you’re stuck, check out competitor’s websites to gauge what other companies in your industry are doing.
We’ve compiled a few more resources to help you get started:
- The Ultimate Guide to Content Creation
- What Is Content Writing? Plus Tips to Take Your Content to the Next Level
- The Ins and Outs of Writing Long-Form Content
- The Ultimate Guide to On-Page SEO
- How to Do Keyword Research for SEO: A Beginner’s Guide
8. Fill in general settings.
Once you’ve filled in your pages with optimized content, it’s time to fill in the general settings. By adding or adjusting the SEO elements, you can increase your search visibility.
It’s the same as if you were building your site on a website builder. On your pages, you should include:
- Page titles
- Headings
- Meta descriptions
- Image alt-text
- Structured markup
- Page URLs (or slugs)
- Internal linking
- Mobile responsiveness
- Site speed
Each of these elements is essential to your on-page SEO. They not only help to tell Google about your website and how you provide value to visitors and customers — but they also help optimize your site for human eyes as well as search engine bots.
9. Install add-ons.
Lastly, take a look at your site and figure out what you’re missing. Ideally, your platform will offer all the add-ons you need to extend the functionality of your site.
It’s important to note these add-ons might be called apps, extensions, modules, integrations, or plugins, depending on the platform you use.
If you’re running an ecommerce site on HubSpot, for example, you might use HubSpot’s Shopify extension.
Or, maybe you want to ensure your WordPress website is secure, to protect client data. In that case, you might download the Wordfence Security plugin for firewall protection against attacks, malware, and other threats.
If you’re lacking out-of-the-box features for security, SEO, image compression, and social media, check if your platform offers an app or integration to add that functionality to your site.
It’s much easier to do all this work in one place rather than having to log on to several disconnected platforms.
How to Make a Website with HubSpot
Let’s take a look at how to make a website with CMS Hub. If you’re already using HubSpot’s CRM platform, it probably makes the most sense to build a website within HubSpot to integrate all your sales and marketing needs in one place.
CMS Hub offers a variety of plugins and extensions, themed templates, and sophisticated tools for SEO analysis.
If you want to build a website with CMS Hub, it’s easy and intuitive. Don’t forget to get a domain name and hosting before starting to build your site.
Here’s how:
1. Create a homepage.
Within your HubSpot portal, click “Marketing” on the dashboard at the top of your screen. Navigate down to “Website,” then click “Website Pages.”
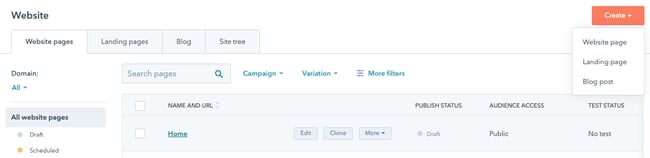
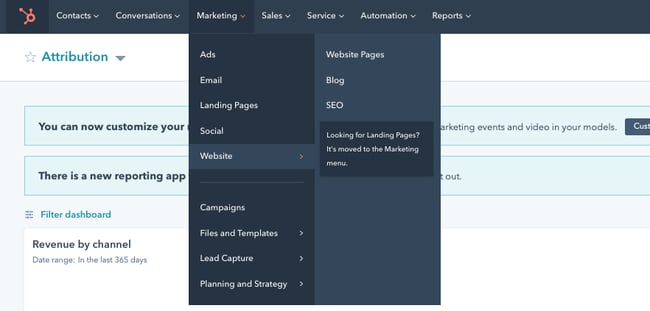 After that, click the orange “Create” button and choose “Website Page” from the drop-down.
2. Select a theme.
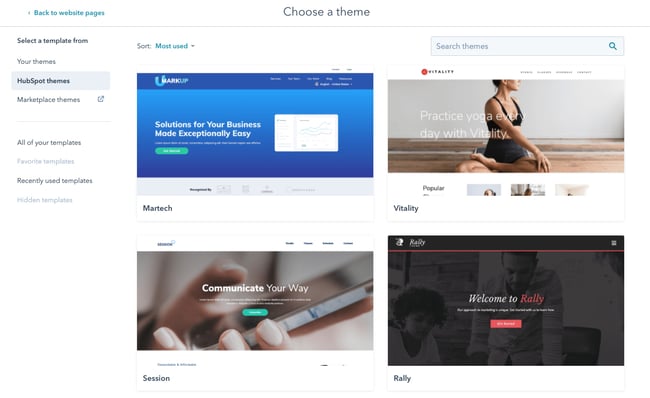
Now, you’ll be taken to this “Choose a theme” page. Scroll through your options, search page templates, or check out the Marketplace. When you’ve found a template you like, select it.
3. Edit the modules.
This is your page. You can scroll over text boxes, images, or other modules to edit them. In the below picture, I scrolled over the “Practice Yoga” Banner Text, and when I click it, it allows me to edit that text.
 You can also click the “Contents” tool on the left side of your screen and edit from there. For instance, I selected one “Rich Text” option, which directed me to the “Vinyasa” paragraph on the page.
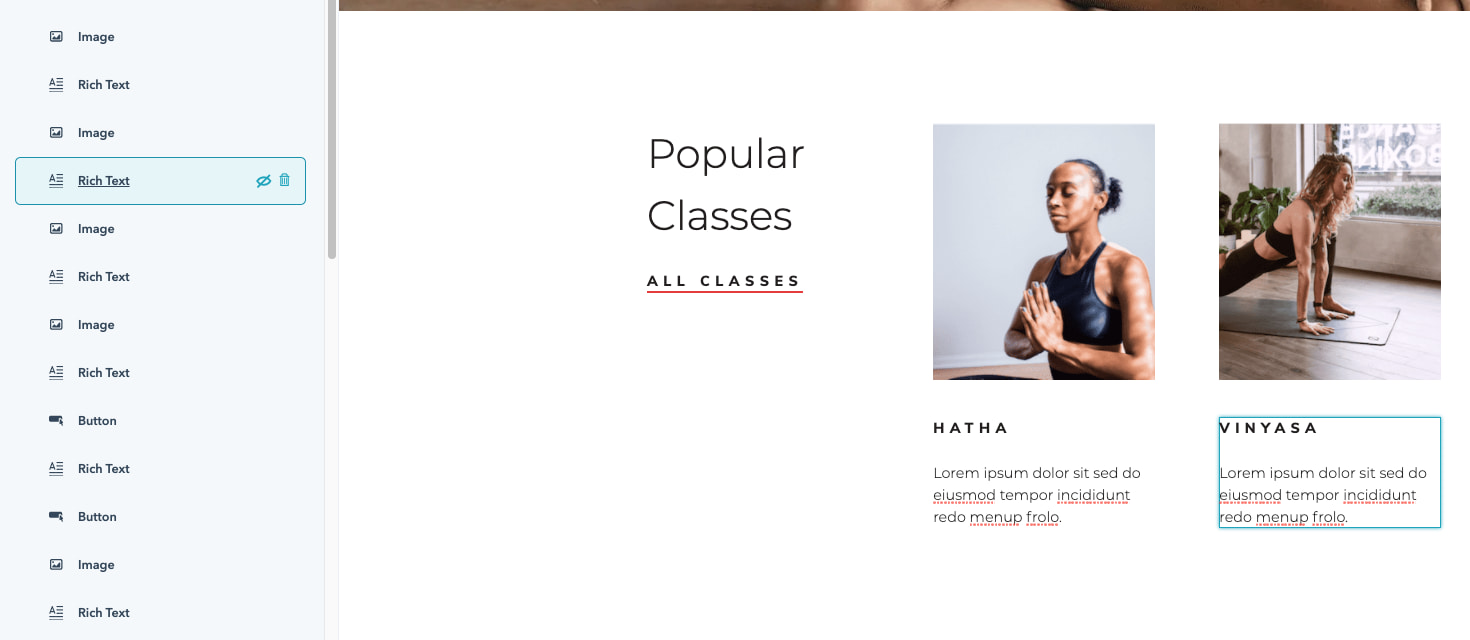 You can then add text, images, sections, forms, and more when you edit it in the “Expanded” view.
4. Create other pages on your website.
When you’re happy with your landing page and want to move on, go back to your dashboard and click “Marketing” at the top of your screen, and then “Website Pages” again.
Here, you’ll click the orange “Create” button and name your page, just like your home page. Then, you’ll be taken through a similar process of choosing a template and adding content. If you want a more in-depth tutorial, check out a quick tour of website pages.
5. Incorporate social media accounts.
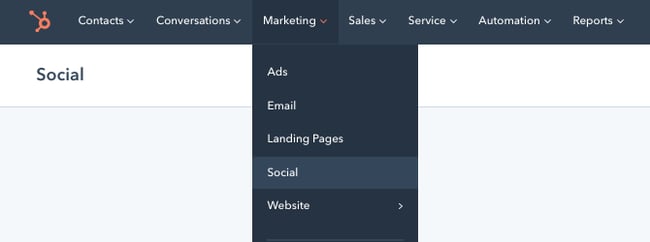
If you want to incorporate your social media accounts, go to “Marketing,” then “Social” on your dashboard. You can monitor all your social media accounts and also publish tweets, Facebook statuses and comments, Instagram pictures, and other content straight from your HubSpot dashboard.
6. View analytics.
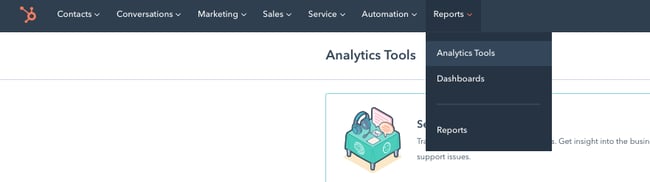
If you want to check out your site analytics, go to “Reports” and then “Analytics Tools”. You’ll need to install the tracking code, which is easy to do within the HubSpot platform by clicking the orange “Install the tracking code” button.
If you’re still unsure, check out how to install the HubSpot tracking code.
7. Add a blog to your site.
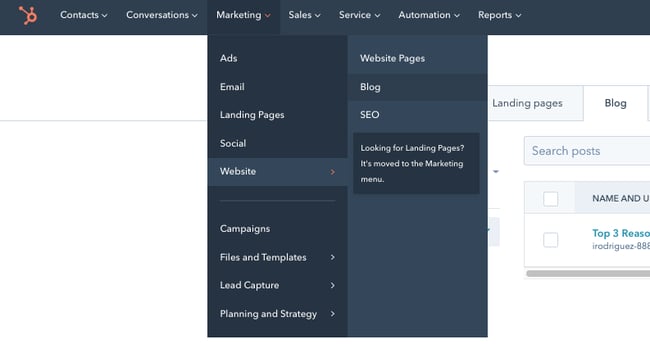
If you want to write blog posts, go to “Marketing” > “Website” > “Blog” on your dashboard to create, publish, and monitor your website’s blog posts.
8. Install add-ons.
Last, it’s time to install an app from the HubSpot marketplace to extend the functionality of your website. Here’s how.
- In your HubSpot account, click the Marketplace icon in the main navigation bar.
- Under Manage, select Connected apps.
- Click Visit App Marketplace.
- Use the filters in the left sidebar to browse for an app.
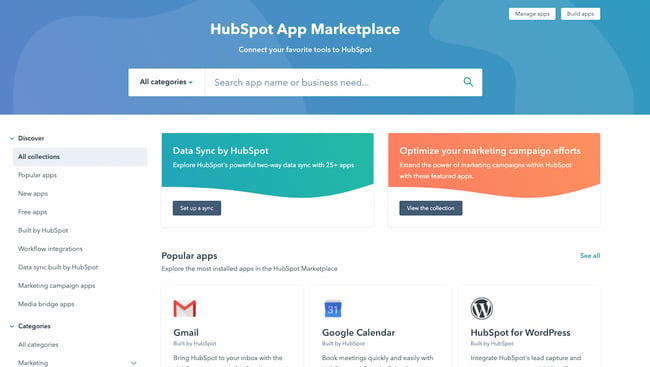
- Click on an app to see more information.
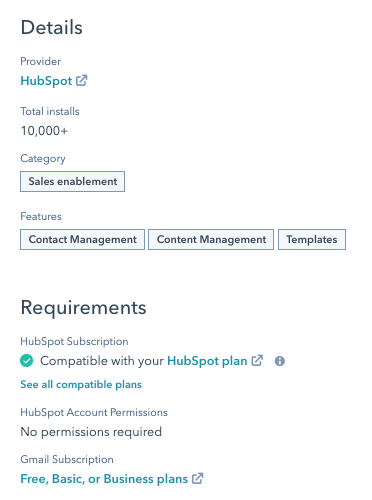
- On the right, you can review the details of the app. Under Requirements, check whether or not the app is compatible with your HubSpot subscription, and see if there are any app-side subscription requirements.
- When you’re ready, click the Install app button in the top right corner of the screen.

Once you’ve completed these steps, just click “Publish” and your site is ready for use.
This is a fairly broad and general overview to get you started building a website with CMS Hub, but there are plenty of more in-depth features and tools you might want to explore with a HubSpot specialist, or by checking out some courses on academy.hubspot.com.
Once you’re done building a website via CMS Hub, it’s important to check that you’re not missing any crucial elements or going live with any glaring errors.
Once you’ve gone through this list above and feel like you’re close to a website launch, check out your website launch checklist for a detailed list of things to check before you go live.
Build a Website: FAQs
Below, we cover some frequently asked questions about building a website.
How much does it cost to build a website?
The cost of building a small business website can range from $500 to $2,500, but the price can be higher if you’re working with a developer. You should also take into account recurring costs such as hosting, domain name registration, and SSL certification.
Here’s a resource to help you gauge costs:
How hard is it to build a website?
Building a website isn’t hard at all, especially if you opt for a website builder that packages everything for you. In general, you won’t need to touch a single line of code.
How do you create a website for free?
You can create a website for free by signing up for a free subscription on a website builder platform such as Wix or Weebly.
However, you’ll have a branded subdomain from the provider (e.g. yourname.weebly.com). You’ll also have the branding on your website, and free websites are often limited in design, features, and functionalities.
We recommend avoiding it unless you’re a hobbyist or only wanting to practice before launching your site.
How do you build a website from scratch?
You can build a website from scratch using HTML, CSS, JavaScript, and sometimes, PHP. You compile these files and then upload them to your web host’s file manager. (You’ll still need to purchase a hosting service and register a domain.)
How much does it cost to hire someone to build a website?
Thumbtack reports that a freelance web designer costs from $640 to $1,000. Upwork reports a $15 to $30/hour range for hiring a web developer on their platform. This is on the low end and accurate pricing for building a small website.
For hiring a web developer for a custom or long-term project, you can expect to pay in the $8,000 to $25,000 range.
Here are some more resources:
- How to Hire a Freelance Web Developer
- Web Designer vs. Web Developer: What’s the Difference & Who Should You Hire?
How long does it take to build a website?
A website takes, on average, three to six months to build if your brand is small or just getting started. If you’re creating a custom or complicated project, you can expect your website to take a year or longer before it is up and running.
Build Your Website: Tips
Ready to build your own site? Let’s take a look at tips you can use to guide the creation of your site.
- Choose a one-page design if you want to launch your site more quickly.
- Include a high-contrast button on the top right of your navigation bar telling visitors to contact you.
- Use Lorem Ipsum text to preview what the written content will look like as you adjust the layout. That way, you don’t have to write all the content right away.
- Buy an SSL certificate if your CMS doesn’t include one already.
- Make good use of white space to keep your site as simple and easy-to-read as possible.
- Set your domain and hosting subscriptions on auto-renew to avoid service interruption.
- Create Terms of Use and Privacy Policy documents if your site gathers user data.
- Double-check that your website is responsive by accessing it from your mobile device. Most CMS systems and website builders will automatically make your site responsive, but you always want to double-check.
- Resize your browser window to test what the elements look like at different browser sizes.
- Access your site from different browsers (Safari, Chrome, Opera, Microsoft Edge) to see how the elements render depending on the browser.
- Learn basic HTML and CSS so you can more easily customize your site later.
- Include high-contrast buttons throughout the page that allow visitors to get in contact with you.
- Stick to five navigation bar itemsat most.
- Ensure your navigation bar shows up on all pages.
- Create submenus for your navigation items to effectively group your subtopics.
- Create an XML sitemap for search engine crawlers to find and index your site.
- Submit your website to Google Search Console once you’ve launched it. That way, Google can crawl it much more quickly.
- Use an analytics tool such as Google Analytics to see who’s accessing your site and from where.
- Link internally from page to page so that search engines understand how the pages are related to each other.
- Use keyword-rich anchor text when linking to internal pages.
- Link to other strong sites in your niche to signal relevancy to Google.
- Add your business or personal brand to social media sites and link back to your website.
- Research other sites in your niche and get content ideas from them.
- Compress all images to under 250KB. The smaller, the better.
- Publish and maintain a blog — we’re serious about that. Try to post once a month.
- Aim for a minimum of 800 words per page and per blog post.
- Use a grammar-checker such as Grammarly to ensure your copy is error-free.
- Avoid duplicate and boilerplate content — even one paragraph can be enough to hurt the credibility of your page.
- Recheck your site architecture to make sure that your page hierarchy makes sense.
- Create a backup of your site whenever you make major changes.
- Seek guest posting opportunities and link back to your site in your author bio.
- Join industry organizations and link back to your site from your member profile.
- Avoid duplicating pages to use the same layout. If you do, double-check that your slug doesn’t read .com/original-page-copy. This happens more often than you think. If it happens, change your slug. Here’s how to change your slug in WordPress, in case you’re using that CMS.
- Keep your page URLs short and user-friendly. If the title of a blog post is “50 Ways to Conquer Your Fear of Heights and Fly Worry-Free,” don’t have a URL that reads example.com/20XX-03-25/blog/50-ways-to-conquer-your-fear-of-heights-and-fly-worry-free. Consider instead: example.com/conquer-fear-of-heights.
- Add breadcrumbs to your website to clarify your site structure. Here’s how to add breadcrumbs in WordPress.
Build a Website to Grow Your Online Reach
Building a website is a must-do for anyone who wants to be online. Without it, you won’t be found at all, and it can help you look more professional and established. Using this guide, you’ll be sure to publish a site that helps your business or your personal brand grow better.
Editor’s note: This post was originally published in May 2018 and has been updated for comprehensiveness.

Everything You Need to Know About Segmentation Bases
Market segmentation is a powerful process because it separates your audience into groups so you can effectively target them based on traits such as the challenges they’re facing and/or how they’ll respond to certain marketing efforts.
The most effective way to determine which traits you’ll use to group your audience is by using segmentation bases.

In this blog post, we’ll cover the definition of segmentation bases, how to apply them at your company, and how you can use multiple segmentation bases at once.
Before we dive into the five segmentation bases, let’s cover the basics.
Segmentation Bases in Marketing
Marketing segmentation assumes all of your customers are unique and can be categorized based on common defining characteristics or traits that you establish. Those characteristics or traits almost always fit within the five segmentation bases, which we’ll review below.
Benefits of Using Segmentation Based in Marketing
By using segmentation bases in marketing, you’ll unlock opportunities that will help you:
- Improve the customer experience.
- Effectively market your products.
- Develop targeted marketing and sales enablement materials.
- Identify areas for product development.
- Show your target audience how you can resolve their challenges.
Segmentation Bases in Marketing Operations
Marketing operations is defined as the, “… people, processes, and technology that power a business’s overall marketing strategy and increase chances of success.”
While working on marketing, data strategy, implementation, and reporting, the marketing ops team can associate leads and contacts with your segmentation bases. That means they can surface strategies to effectively target those customer segments as well as reports, relevant dashboards, and metrics to track your success at marketing to those audience members.
As a result, your greater marketing team will have access to more organized marketing segments, contact data, reports, and relevant metrics. That means better customer experiences that convert more audience members.
Now, let’s look at the five segmentation bases and their defintions.
1. Psychographic Segmentation
Psychographic segmentation refers to someone’s psychological traits. This includes your audiences’ lifestyle preferences and patterns, and why they think the way they do. It also covers their typical activities, interests, and opinions.
2. Demographic Segmentation
Demographic segmentation refers to the statistical description and socioeconomic traits of your audience. This includes age, education, and gender, birth rates, gender, marriage status, income, and employment status.
3. Geographic Segmentation
Geographic segmentation refers to the location in which your audience resides and/ or works. You can go as broad or as granular as you want with geographic segmentation — for instance, you may group your audience by continent, country, state/ city, town, neighborhood, and so on.
4. Firmographic Segmentation
Firmographic segmentation refers to a company’s attributes and is helpful for B2B companies that are developing their segmentation bases. This includes but is not limited to their size, industry, and location.
(You might think of firmographic segmentation as demographic segmentation but for a business.)
5. Behavioral Segmentation
Behavioral segmentation refers to an audience group’s actions, habits, and interactions. If you’re thinking this sounds a bit like demographic segmentation, you’re not wrong. But it goes deeper into one’s buying habits than demographic segmentation does.
For instance, behavioral segmentation provides insight into the benefits that one gets from buying and using a certain product as well as how ready (or not ready) they are to convert into a customer.
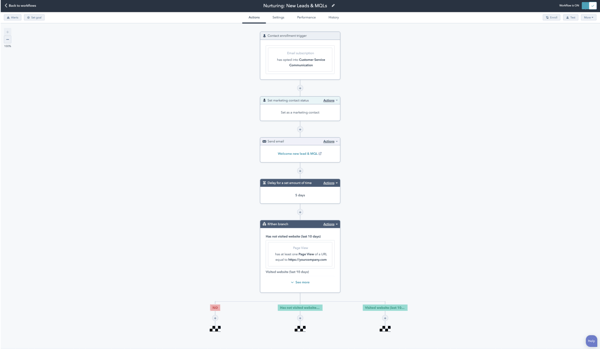
Other relevant features you’ll have access to with HubSpot’s Behavioral Targeting tool are:
- Insights about the way your audience interacts with your site/ content.
- Active lists for advanced segmentation, targeting, and audience building.
- Event-based triggers for sending audience members messages at the right time.
Using Multiple Segmentation Bases
You don’t have to just use one or two segmentation bases — you can use all five, or a mix of them.
And once you select the segmentation bases you’re doing to move forward with, you aren’t stuck with them forever. As your business evolves, so do your customer base and target audience. That means you’ll naturally want to review, update, add to, and remove from your list of segmentation bases over time.
The key is using the segmentation bases that matter to your business accurately and applying them in a way that allows you to effectively target and reach the audience members within them.
Before we provide some tips on how to use multiple segmentation bases, let’s take a moment to cover why you’d want to use multiple segmentation bases.
Why Use Multiple Segmentation Bases
Businesses use multiple segmentation bases — a process that’s also known as multi-segment marketing — because the product or service that they sell applies to target audience members in different ways.
For instance, a business that sells tennis skirts may sell skirts to customers who play a lot of tennis, and to other customers who don’t play tennis but want a workout skirt for other forms of activity (e.g. running, walking, etc.).
Multiple segmentation bases are also commonly used if your business sells more than one product or service. For instance, the company that sells tennis skirts may also sell tennis rackets and tennis shoes. The customers who need a skirt versus a tennis racket or shoes will need to be targeted differently. Especially if those tennis items are for both men, women, and kids.
How to Use Multiple Segmentation Bases
By using multiple segmentation bases, you’ll get a better understanding of the people who complete your target audience — as a result, you’ll be able to more effectively target them, meet (and exceed) their needs and expectations, and convert more of them into customers.
Here are some tips to remember while using multiple segmentation bases:
- Determine which segmentation bases you want to establish for your unique audience and how granular you want to go within those segments.
- Collaborate internally across marketing (and even sales) while identifying and defining your customer segments to ensure they’re as accurate and helpful as possible.
- Review and update your segmentation bases if and when needed (e.g. take a look at them quarterly to ensure they evolve alongside your business).
- Get feedback from your team members (you can do this across marketing and sales) about the way your segments are organized. You can also survey (and incentivize) your current customers, or those who recently converted in some way, to ask for their feedback around your marketing content and targeting efforts.
Use Segmentation Bases to Grow Better
Using segmentation bases has a number of benefits. You can better understand your audience, target your leads and prospects more effectively, create and offer marketing and sales materials that better meet their needs, identify product development and marketing opportunities, and more. Begin working on your business’s segmentation bases to grow better.

The Beginner’s Guide to Usability Testing [+ Sample Questions]
In practically any discipline, it’s a good idea to have others evaluate your work with fresh eyes, and this is especially true in user experience and web design. Otherwise, your partiality for your own work can skew your perception of it. Learning directly from the people that your work is actually for — your users — is what enables you to craft the best user experience possible.

UX and design professionals leverage usability testing to get user feedback on their product or website’s user experience all the time. In this post, you’ll learn:
What usability testing is
- Its purpose and goals
- Scenarios where it can work
- Real-life examples and case studies
- How to conduct one of your own
- Scripted questions you can use along the way
What is usability testing?
Usability testing is a method of evaluating a product or website’s user experience. By testing the usability of their product or website with a representative group of their users or customers, UX researchers can determine if their actual users can easily and intuitively use their product or website.
UX researchers will usually conduct usability studies on each iteration of their product from its early development to its release.
During a usability study, the moderator asks participants in their individual user session to complete a series of tasks while the rest of the team observes and takes notes. By watching their actual users navigate their product or website and listening to their praises and concerns about it, they can see when the participants can quickly and successfully complete tasks and where they’re enjoying the user experience, encountering problems, and experiencing confusion.
After conducting their study, they’ll analyze the results and report any interesting insights to the project lead.
What is the purpose of usability testing?
Usability testing allows researchers to uncover any problems with their product’s user experience, decide how to fix these problems, and ultimately determine if the product is usable enough.
Identifying and fixing these early issues saves the company both time and money: Developers don’t have to overhaul the code of a poorly designed product that’s already built, and the product team is more likely to release it on schedule.
Benefits of Usability Testing
Usability testing has five major advantages over the other methods of examining a product’s user experience (such as questionnaires or surveys):
- Usability testing provides an unbiased, accurate, and direct examination of your product or website’s user experience. By testing its usability on a sample of actual users who are detached from the amount of emotional investment your team has put into creating and designing the product or website, their feedback can resolve most of your team’s internal debates.
- Usability testing is convenient. To conduct your study, all you have to do is find a quiet room and bring in portable recording equipment. If you don’t have recording equipment, someone on your team can just take notes.
- Usability testing can tell you what your users do on your site or product and why they take these actions.
- Usability testing lets you address your product’s or website’s issues before you spend a ton of money creating something that ends up having a poor design.
- For your business, intuitive design boosts customer usage and their results, driving demand for your product.
Usability Testing Scenario Examples
Usability testing sounds great in theory, but what value does it provide in practice? Here’s what it can do to actually make a difference for your product:
1. Identify points of friction in the usability of your product.
As Brian Halligan said at INBOUND 2019, “Dollars flow where friction is low.” This just as true in UX as it is in sales or customer service. The more friction your product has, the more reason your users will have to find something that’s easier to use.
Usability testing can uncover points of friction from customer feedback.
For example: “My process begins in Google Drive. I keep switching between windows and making multiple clicks just to copy and paste from Drive into this interface.”
Even though the product team may have had that task in mind when they created the tool, seeing it in action and hearing the user’s frustration uncovered a use case that the tool didn’t compensate for. It might lead the team to solve for this problem by creating an easy import feature or way to access Drive within the interface to reduce the number of clicks the user needs to make to accomplish their task.
2. Stress test across many environments and use cases.
Our products don’t exist in a vacuum, and sometimes development environments are unable to compensate for all the variables. Getting the product out and tested by users can uncover bugs that you may not have noticed while testing internally.
For example: “The check boxes disappear when I click on them.”
Let’s say that the team investigates why this might be, and they discover that the user is on a browser that’s not commonly used (or a browser version that’s outdated).
If the developers only tested across the browsers used in-house, they may have missed this bug, and it could have resulted in customer frustration.
3. Provide diverse perspectives from your user base.
While individuals in our customer bases have a lot in common (in particular, the things that led them to need and use our products), each individual is unique and brings a different perspective to the table. These perspectives are invaluable in uncovering issues that may not have occurred to your team.
For example: “I can’t find where I’m supposed to click.”
Upon further investigation, it’s possible that this feedback came from a user who is color blind, leading your team to realize that the color choices did not create enough contrast for this user to navigate properly.
Insights from diverse perspectives can lead to design, architectural, copy, and accessibility improvements.
4. Give you clear insights into your product’s strengths and weaknesses.
You likely have competitors in your industry whose products are better than yours in some areas and worse than yours in others. These variations in the market lead to competitive differences and opportunities. User feedback can help you close the gap on critical issues and identify what positioning is working.
For example: “This interface is so much easier to use and more attractive than [competitor product]. I just wish that I could also do [task] with it.”
Two scenarios are possible based on that feedback:
- Your product can already accomplish the task the user wants. You just have to make it clear that the feature exists by improving copy or navigation.
- You have a really good opportunity to incorporate such a feature in future iterations of the product.
5. Inspire you with potential future additions or enhancements.
Speaking of future iterations, that comes to the next example of how usability testing can make a difference for your product: The feedback that you gather can inspire future improvements to your tool.
It’s not just about rooting out issues but also envisioning where you can go next that will make the most difference for your customers. And who best to ask but your prospective and current customers themselves?
Usability Testing Examples & Case Studies
Now that you have an idea of the scenarios in which usability testing can help, here are some real-life examples of it in action:
1. User Fountain + Satchel
Satchel is a developer of education software, and their goal was to improve the experience of the site for their users. Consulting agency User Fountain conducted a usability test focusing on one question: “If you were interested in Satchel’s product, how would you progress with getting more information about the product and its pricing?”
During the test, User Fountain noted significant frustration as users attempted to complete the task, particularly when it came to locating pricing information. Only 80% of users were successful.
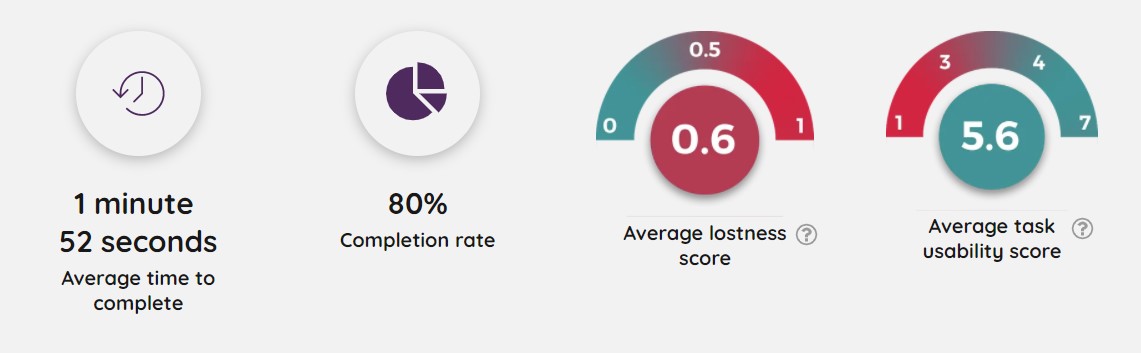
This led User Fountain to create the hypothesis that a “Get Pricing” link would make the process clearer for users. From there, they tested a new variation with such a link against a control version. The variant won, resulting in a 34% increase in demo requests.
By testing a hypothesis based on real feedback, friction was eliminated for the user, bringing real value to Satchel.
2. Kylie.Design + Digi-Key
Ecommerce site Digi-Key approached consultant Kylie.Design to uncover which site interactions had the highest success rates and what features those interactions had in common.
They conducted more than 120 tests and recorded:
- Click paths from each user
- Which actions were most common
- The success rates for each
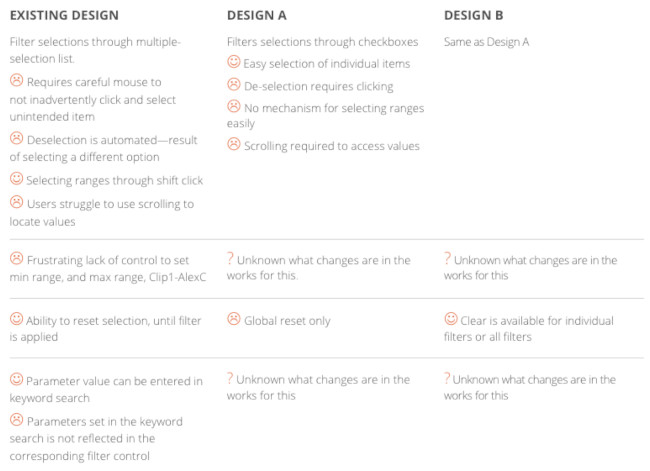
This as well as the written and verbal feedback provided by participants informed the new design, which resulted in increasing purchaser success rates from 68.2% to 83.3%.
In essence, Digi-Key was able to identify their most successful features and double-down on them, improving the experience and their bottom line.
3. Sparkbox + An Academic Medical Center
An academic medical center in the midwest partnered with consulting agency Sparkbox to improve the patient experience on their homepage, where some features were suffering from low engagement.
Sparkbox conducted a usability study to determine what users wanted from the homepage and what didn’t meet their expectations. From there, they were able to propose solutions to increase engagement.
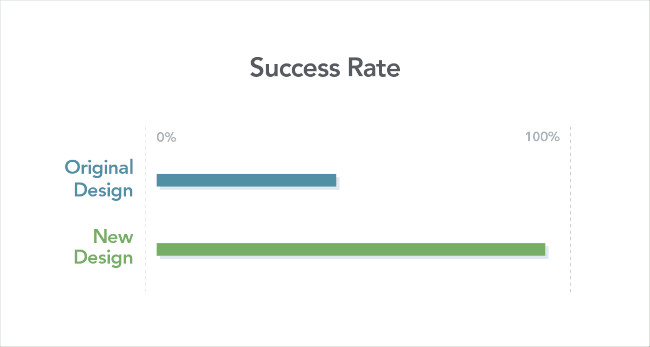
For example, one key action was the ability to access electronic medical records. The new design based on user feedback increased the success rate from 45% to 94%.
This is a great example of putting the user’s pains and desires front-and-center in a design.
The 9 Phases of a Usability Study
1. Decide which part of your product or website you want to test.
Do you have any pressing questions about how your users will interact with certain parts of your design, like a particular interaction or workflow? Or are you wondering what users will do first when they land on your product page? Gather your thoughts about your product or website’s pros, cons, and areas of improvement, so you can create a solid hypothesis for your study.
2. Pick your study’s tasks.
Your participants’ tasks should be your user’s most common goals when they interact with your product or website, like making a purchase.
3. Set a standard for success.
Once you know what to test and how to test it, make sure to set clear criteria to determine success for each task. For instance, when I was in a usability study for HubSpot’s Content Strategy tool, I had to add a blog post to a cluster and report exactly what I did. Setting a threshold of success and failure for each task lets you determine if your product’s user experience is intuitive enough or not.
4. Write a study plan and script.
At the beginning of your script, you should include the purpose of the study, if you’ll be recording, some background on the product or website, questions to learn about the participants’ current knowledge of the product or website, and, finally, their tasks. To make your study consistent, unbiased, and scientific, moderators should follow the same script in each user session.
5. Delegate roles.
During your usability study, the moderator has to remain neutral, carefully guiding the participants through the tasks while strictly following the script. Whoever on your team is best at staying neutral, not giving into social pressure, and making participants feel comfortable while pushing them to complete the tasks should be your moderator
Note-taking during the study is also just as important. If there’s no recorded data, you can’t extract any insights that’ll prove or disprove your hypothesis. Your team’s most attentive listener should be your note-taker during the study.
6. Find your participants.
Screening and recruiting the right participants is the hardest part of usability testing. Most usability experts suggest you should only test five participants during each study, but your participants should also closely resemble your actual user base. With such a small sample size, it’s hard to replicate your actual user base in your study.
To recruit the ideal participants for your study, create the most detailed and specific persona as you possibly can and incentivize them to participate with a gift card or another monetary reward.
Recruiting colleagues from other departments who would potentially use your product is also another option. But you don’t want any of your team members to know the participants because their personal relationship can create bias — since they want to be nice to each other, the researcher might help a user complete a task or the user might not want to constructively criticize the researcher’s product design.
7. Conduct the study.
During the actual study, you should ask your participants to complete one task at a time, without your help or guidance. If the participant asks you how to do something, don’t say anything. You want to see how long it takes users to figure out your interface.
Asking participants to “think out loud” is also an effective tactic — you’ll know what’s going through a user’s head when they interact with your product or website.
After they complete each task, ask for their feedback, like if they expected to see what they just saw, if they would’ve completed the task if it wasn’t a test, if they would recommend your product to a friend, and what they would change about it. This qualitative data can pinpoint more pros and cons of your design.
8. Analyze your data.
You’ll collect a ton of qualitative data after your study. Analyzing it will help you discover patterns of problems, gauge the severity of each usability issue, and provide design recommendations to the engineering team.
When you analyze your data, make sure to pay attention to both the users’ performance and their feelings about the product. It’s not unusual for a participant to quickly and successfully achieve your goal but still feel negatively about the product experience.
9. Report your findings.
After extracting insights from your data, report the main takeaways and lay out the next steps for improving your product or website’s design and the enhancements you expect to see during the next round of testing.
The 3 Most Common Types of Usability Tests
1. Hallway/Guerilla Usability Testing
This is where you set up your study somewhere with a lot of foot traffic. It allows you to ask randomly-selected people who have most likely never even heard of your product or website — like passers-by — to evaluate its user-experience.
2. Remote/Unmoderated Usability Testing
Remote/unmoderated usability testing has two main advantages: it uses third-party software to recruit target participants for your study, so you can spend less time recruiting and more time researching. It also allows your participants to interact with your interface by themselves and in their natural environment — the software can record video and audio of your user completing tasks.
Letting participants interact with your design in their natural environment with no one breathing down their neck can give you more realistic, objective feedback. When you’re in the same room as your participants, it can prompt them to put more effort into completing your tasks since they don’t want to seem incompetent around an expert. Your perceived expertise can also lead to them to please you instead of being honest when you ask for their opinion, skewing your user experience’s reactions and feedback.
3. Moderated Usability Testing
Moderated usability testing also has two main advantages: interacting with participants in person or through a video a call lets you ask them to elaborate on their comments if you don’t understand them, which is impossible to do in an unmoderated usability study. You’ll also be able to help your users understand the task and keep them on track if your instructions don’t initially register with them.
Usability Testing Script & Questions
Following one script or even a template of questions for every one of your usability studies wouldn’t make any sense — each study’s subject matter is different. You’ll need to tailor your questions to the things you want to learn, but most importantly, you’ll need to know how to ask good questions.
1. When you [action], what’s the first thing you do to [goal]?
Questions such as this one give insight into how users are inclined to interact with the tool and what their natural behavior is.
Julie Fischer, one of HubSpot’s Senior UX researchers, gives this advice: “Don’t ask leading questions that insert your own bias or opinion into the participants’ mind. They’ll end up doing what you want them to do instead of what they would do by themselves.”
For example, “Find [x]” is a better than “Are you able to easily find [x]?” The latter inserts connotation that may affect how they use the product or answer the question.
2. How satisfied are you with the [attribute] of
Avoid leading the participants by asking questions like “Is this feature too complicated?” Instead, gauge their satisfaction on a Likert scale that provides a number range from highly unsatisfied to highly satisfied. This will provide a less biased result than leading them to a negative answer they may not otherwise have had.
3. How do you use
There may be multiple ways to achieve the same goal or utilize the same feature. This question will help uncover how users interact with a specific aspect of the product and what they find valuable.
4. What parts of [the product] do you use the most? Why?
This question is meant to help you understand the strengths of the product and what about it creates raving fans. This will indicate what you should absolutely keep and perhaps even lead to insights into what you can improve for other features.
5. What parts of [the product] do you use the least? Why?
This question is meant to uncover the weaknesses of the product or the friction in its use. That way, you can rectify any issues or plan future improvements to close the gap between user expectations and reality.
6. If you could change one thing about
Because it’s so similar to #5, you may get some of the same answers. However, you’d be surprised about the aspirational things that your users might say here.
7. What do you expect [action/feature] to do?
Here’s another tip from Julie Fischer:
“When participants ask ‘What will this do?’ it’s best to reply with the question ‘What do you expect it do?’ rather than telling them the answer.”
Doing this can uncover user expectation as well as clarity issues with the copy.
Your Work Could Always Use a Fresh Perspective
Letting another person review and possibly criticize your work takes courage — no one wants a bruised ego. But most of the time, when you allow people to constructively criticize or even rip apart your article or product design, especially when your work is intended to help these people, your final result will be better than you could’ve ever imagined.
Editor’s note: This post was originally published in August 2018 and has been updated for comprehensiveness.


What is Lead to Account Matching, and Why It Matters
As an organization gets larger, it becomes more and more difficult for different departments, and different employees within the same department, to communicate. Unfortunately, this can lead to a “left hand doesn’t know what the right hand is doing” scenario.
It’s bad when the communication failure occurs internally, but it’s considerably worse when potential or existing customers are privy to the breakdown.
From a sales standpoint, you may have sent a sales email to a prospect, only to be met with a reply of, “I’m already working with John” or “I’ve been a customer for five years … and no one has gotten back to me from my last question. Can you check into that?“
This is precious time that the salesperson and the organization can never get back. The salesperson could have spent that time emailing actual prospects. Instead, they’re now tracking down the person in charge of that account or someone who can fix the customer’s problem. Plus, they’ve wasted the customer’s time (and potentially irritated them).
If this has become an issue inside your organization, and you’d like your salesforce to do what they were hired to do — bring in more business — it may be time to consider Lead to Account Matching tools.
What is lead to account matching?
Lead to Account Matching is connecting leads to the appropriate accounts through an automated process. When this is enabled, a new lead that comes in will be automatically attached to the organization they belong to, and if that organization is already represented by a sales or account rep from your company, they’ll be connected to their record.
Why is lead to account matching important for your business?
Time is money, no matter what industry or space you exist in, and keeping your customers happy is the only way to create ongoing revenue and a healthy pipeline. If too much time is spent chasing the wrong lead, you may miss out on a quality lead that’s now buying elsewhere. Thankfully, Lead to Account Matching can help you make the most out of the leads you receive and:
Minimize Wasted Time
Any time that sales people spend not making phone calls, not sending emails, and not prospecting for new customers or checking in with their current customers, is wasted time. That means any running around they have to do to find answers to questions or work with other salespeople on that person’s existing customer, is a waste of time and a loss of revenue.
Lead to Account Matching ensures that the right person is notified when a lead comes in and then your salespeople can spend more time bringing in actual sales for your organization.
In addition, massive database cleanups can take days if not weeks to complete. Rather than wasting manpower on a project of this magnitude, allow the program to be consistently working.
Minimize Customer Annoyance and Loss of Trust
Put yourself in your customer’s shoes for a moment. Your inbox is about to burst. You’ve got sales emails coming out of your ears, and you just got one more. The worst part is that now, you’re being introduced to a company and a product that you already use.
It’s not only infuriating and a waste of time, but it also degrades your trust in the company. After all, if one person doesn’t know what another one is doing, how are they handling your actual business?
Salespeople need to instill trust in the company, the product, and the service … not degrade it. Lead to Account Matching can help you avoid this embarrassing and detrimental snafu.
Increase Efficiency
Paying for leads, or acquiring them through other means, is absolutely useless if you don’t treat them properly. If your sales team is spending time on the wrong leads, that’s money down the drain. A Lead to Account Matching tool helps them to set and follow a good lead flow so potential and existing customers are handled quickly and efficiently for maximum return on investment.
Measure Smarter
A murky database filled with duplicates and expired contacts will never produce the true data that can help you evaluate your sales performance to improve your processes and provide training where necessary. A clean database, on the other hand, will allow you to gather the data you need to make necessary changes.
How does lead to account matching work?
Depending on which Lead to Account Matching technology you use, there are different features available to you. However, every tool works off of one basic concept. It will scan your leads for specific characteristics and then match those leads to the correct account. It does this using different fields in your lead record.
For example, this software can associate a contact with a company by matching the domain in a contact’s email field to the company’s domain name field. That means that Bob@thebestcompanyever.com will be associated with www.bestcompanyever.com. Let’s say that another salesperson in your organization is working with another employee at Best Company Ever when Bob’s lead comes in. That lead will be assigned to that salesperson.
Sure, you could do this manually, but why waste your most valuable asset on clerical work that could be handled more efficiently using technology. Products like Leadangel will do this automatically, integrating with your existing CRM and bridging the gap between marketing automation and your CRM.
If you’re using a full suite CRM like HubSpot, this tool is built into the system and ready to work for you. In order to enable this function in your HubSpot account:
1. Go to the settings icon from the main navigation bar.
2. Navigate to Objects > Companies on the left sidebar menu.
3. From the Automation Section, select the checkbox to Create and associate companies with contacts.
4. To allow HubSpot to create new company records and associations based on your existing contacts’ email addresses, click Yes.
This will not only associate new contacts with company records based on their email addresses, it will also go through your database to update existing records.
Lead to Account Matching technology is not only helpful for your business, it’s essential. Why waste time and money contacting people who are already engaged with your company and working with another member of your sales team? Turn your sales department into an efficient, money-making machine and see more sales and happier customers.

Best Mailing List Software to Improve your Email Marketing Strategy
When I first began my marketing career, I was envious of emails.
While this sounds like an interesting quirk, I’m pretty sure most marketers can agree: some emails are hard not to envy.

From sparkling campaigns to flawless design, sometimes I open a newsletter and I’m surprised at how brands segment me into a list that’s so accurate.
Email lists are an essential aspect of any marketing strategy since they enable marketers to target the right subscribers and grow leads.
An example of this would be segmenting blog subscribers and only sending specific blog posts to that list based on criteria you establish such as their interests or past purchases.
To personalize marketing emails and improve ROI, email list management is a crucial step in marketing efforts. It can help your team generate leads while simultaneously creating a more delightful and personalized customer experience.
Mailing List Software
Using mailing list software or other email management tools is an easy way to segment your audience, send targeted emails, and analyze email metrics that matter most to your team (CTR, subscriber count, etc.). Often, mailing list and email management tools provide robust insights and suggestions on how to improve ROI through email.
To save you the hassle of researching the best software tools for email list management, we’ve done the heavy lifting for you. Take a look at the best email list management software tools below.
1. HubSpot Email Marketing Tools
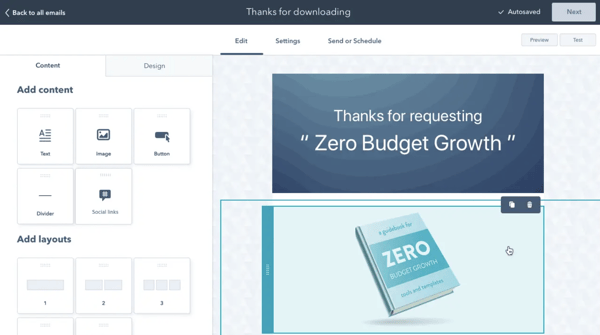
Price: Free; $45/mo (Starter), $800/mo (Professional), $3,200/mo (Enterprise)
With HubSpot’s Email Marketing Tools, you’ll be able to create, personalize, and optimize all of your marketing emails without the need for code, designers, IT, or other technical support.
With HubSpot, it’s easy to increase ROI because the tool helps you create and automate personalized emails for each individual recipient.HubSpot’s Email Marketing Tools are also powered by your all-in-one CRM platform, meaning the data that you need to customize your emails are at your fingertips and up-to-date.
A/B test different versions of your emails to determine which convert the most recipients and then analyze all email campaign data to continually improve upon your email marketing strategy.
2. Zapier
Price: Free, $19.99/ mo (Starter), $49/ mo (Professional), $299/ mo (Team), $599/ mo (Company)
With Zapier, you can easily build and create email workflows — which sync to apps such as Dropbox and Gmail — to automate your email marketing strategy and campaigns.
Zapier lets you import your subscriber list from Facebook, Eventbrite, or Google Sheets so you can quickly send your emails to the right group of people. Lastly, share and back up Zapier data to Google Sheets to analyze your email campaigns and collaborate with your team.
3. OptinMonster
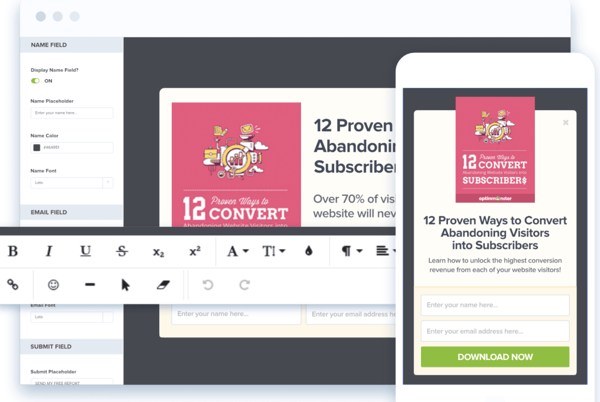
Price: $14/mo (Basic), $30/mo (Plus), $47/mo (Pro), $49/mo (Growth)
OptinMonster offers an email form template that lets you decide how to set up your emails for different customer segments. The tool supports multiple campaign structures and has different toggles for the metrics you choose to track and analyze. OptinMonster makes it easy to ensure you’re establishing a workflow that works with the type of campaign you’re rolling out.
4. Campaign Monitor
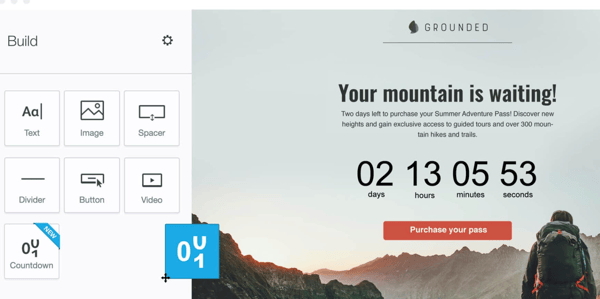
Price: $9/mo (Basic), $29/mo (Unlimited), $149/mo (Premier)
Campaign Monitor is ideal for creative professionals who handle email campaigns — it makes the process of managing email marketing from multiple accounts easy. The tool also offers email personalization, email template builders, RSS email, A/B testing, and analytics so you can handle all aspects of your email marketing strategy from a single tool.
5. Mailchimp
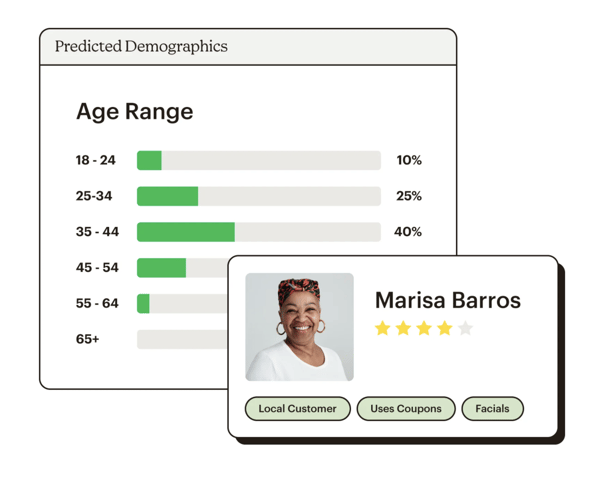
Price: Free, $9.99/mo (Essentials), $14.99/mo (Standard), $299 (Premium)
Mailchimp is a marketing platform with a variety of email, ecommerce, marketing campaign, audience management, and marketing automation tools. The software makes it easy to brand, design, and customize all of your emails.
The pre-made templates and the drag-and-drop builder make the process of creating your emails easy and efficient. You can set up automations so that your emails are triggered and sent based on when certain criteria are met (e.g. when someone subscribes to your blog). There are transactional email options that you can have Mailchimp automatically send after a purchase, sign up, and more.
Mailchimp also tracks and visualizes the success of your email campaigns in real-time via the internal dashboard so you can keep an eye on the metrics that matter most to your team.
6. Constant Contact
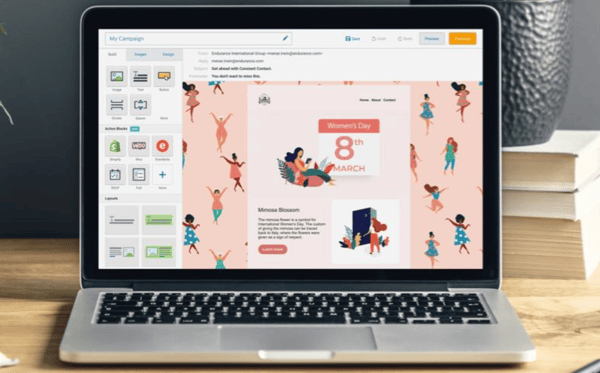
Price: $10/mo (Website Builder), $20/mo (Email), $45/mo (Email Plus), $195/mo (Ecommerce Plus)
Constant Contact offers customizable email templates — you can edit the templates with one click, making email creation and design easy. The tool comes with open-rate tracking, click-rate tracking, and social media integration (so your email and social campaigns and contacts are integrated).
7. ActiveCampaign
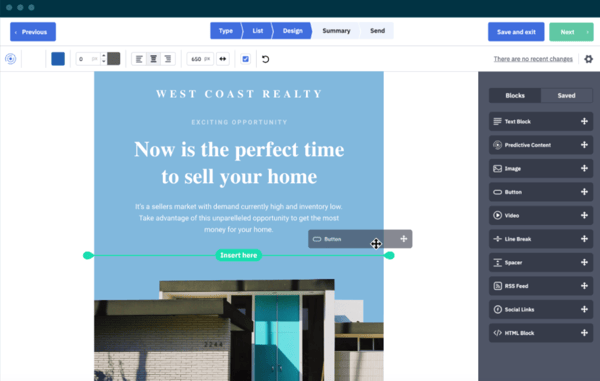
Price: $9/mo (Lite), $49/mo (Plus), $129/mo (Professional), $229/mo (Enterprise)
ActiveCampaign helps you create customized emails, customer segments and lists, and campaign reports so you can analyze your results. You can create broadcast emails, trigger emails, targeted emails, and email funnels.
Automate the process of sending emails by scheduling them in advance. The tool also lets you test emails before you send them as well as sets up auto-response emails based on criteria that you establish.
8. Mad Mimi
Price: $10/mo (Basic), $42/mo (Pro), $199/mo (Silver), $1,049/mo (Gold)
Mad Mimi makes it easy to create, send, and track email newsletters. All of your emails are automatically mobile-friendly and the user interface makes it simple to design emails no matter your technical background.
In fact, the tool is a great choice for beginners who are interested in diving into the specifics of email creation because it provides walkthroughs of some features that might be difficult to understand, like RSS to email and drip campaigns.
19. AdRoll
Price: Free, $19/mo (Growth)
AdRroll blends email marketing, display advertising, and social media planning — meaning, the tool enables you to establish and maintain a holistic view of your email marketing strategy. Subscriber lists from other platforms can be uploaded onto the platform seamlessly so all of your data is centrally stored.
Start Using Mailing List Software
Identify the right mailing list software for your team and start creating, customizing, sending, tracking, and analyzing your business’s marketing emails.
Editor’s note: This post was originally published in January 2020 and has been updated for comprehensiveness.

How RevOps and the ‘Rhythm of the Business’ Drive Alignment at HubSpot
Educator and computer pioneer Alan Kay once said, “The best way to predict the future is to invent it.”
If you work for a growing company, be it a startup or scale-up, you’ll know that attempting to “invent” the future isn’t a matter of waiting around for flashes of inspiration and eureka moments — rather, it requires proactive planning, excellent execution, and awesome alignment. You’ll also know that these ingredients aren’t easy to come by. Not by a long shot.

That’s why I swear by a simple, unique framework to help me and my team at HubSpot prepare for the future. It’s called ‘rhythm of the business,’ and it involves visually mapping out the key events, milestones, and activities scheduled across the business year and ensuring that every team is intimately familiar with the plan — or rhythm — for the months ahead.
As a member of HubSpot’s revenue operations team, understanding the ‘rhythm of the business’ is critical for our success. Our team’s north-star goal is to remove friction for our customer-facing teams and help them to pass that friction-free experience on to customers.
The RevOps model sets us up for success because it breaks down silos between operations professionals, unifies them as a central team, and allows them to work collaboratively on the systems and processes that power a business.
As a result, duplicative work gets weeded out, repeatable tasks get automated, and time is spent proactively improving the customer experience, not frantically reacting to glitches in the system.
As the RevOps model aligns teams around the customer, the ‘rhythm of the business’ framework aligns the entire company around key events in the business year — those moments where outsized impact is possible and execution is everything.
Together, RevOps and ‘rhythm of the business’ are greater than the sum of their parts; a combination of mindset and method that enables growing continually to delight customers, even as their internal operating model becomes more complex.
How I Became a ‘Rhythm of the Business’ Believer
It was during my time working for Amazon that I first embraced ‘rhythm of the business.’ I picked up the habit of keeping a record of important milestones throughout the year, noting on my calendar the “fire drills” that occurred during the year and color-coded them.
Annual kick-offs were highlighted in blue, big customer events were orange. I used a printed wall calendar, which I know is “old school,” but it allowed me to visualize the entire year in a nanosecond.
Later in my time at Amazon, when I was in charge of planning, strategy, and enablement, I looked at the previous year’s calendar and noticed that some events had gone well for my team while others should have been given more preparation time. In short, I realized that we needed to plan better for the next 12 months.
So, when the time came to map out our calendar for the year ahead, I was able to take the learnings from the past 12 months and provide some informed structure to what otherwise would have been, in essence, an act of guesswork.
By structuring my team’s year in this way, not only were we able to kick off earlier than most teams, we gained the time needed to develop and refine our hypotheses, test them, and lay out a defensible data-driven strategy for the future.
This in turn enabled us to pursue better investments, see greater returns on those investments, and then be in a position to make greater investments going forward. The process took the form of a flywheel, feeding off its own momentum.
When I joined HubSpot in 2018, I brought the ‘rhythm of the business’ approach with me. Although the company had been growing well, it was about to hit a new phase of scale and we had the opportunity to improve our operating model by taking a step back from the whiteboard and considering the ebb and flow of the year.
This enabled us to kick off planning at the right time and be prepared for major milestones throughout the course of the year.
3 Ways ‘Rhythm of the Business’ Helps HubSpot Scale Better
At HubSpot, we have an annual planning cycle, and we recently observed that there were some areas of misalignment between teams. That was causing internal friction, and where there’s internal friction, it’s never too long before that friction seeps into the customer experience.
For example, at times our engineering team and product team were at advanced stages of their annual planning before other teams had fully defined what they needed from them.
At best, this type of disconnect can lead to a lot of lost time in meetings trying to re-assess plans, and at worst it can lead to ineffective, disjointed strategic execution — a thought that would keep most operations professionals I know up at night.
We turned to the ‘rhythm of the business’ model to root out this misalignment and implemented it with three straightforward steps that are easy for growing companies of any size to replicate.
1. Map the milestones.
The first thing my team at HubSpot did when adopting the ‘rhythm of the business’ was to note on our physical calendar when other teams were doing their annual planning and when their key milestones were due to occur.
We worked backward from those dates to set deadlines for the deliverables we owned for other teams’ key milestones, and once finalized, we distributed the calendar digitally across the company.
That allowed us to align our activities and priorities with those of other teams, giving us a tightly knit strategy for the year ahead.
2. Look long-term.
As important as it is to have the rhythm of the forthcoming year mapped out, it’s just as important to have a long-term plan in place.
At HubSpot, we recently mapped out a three-to-five-year plan, which is critically helpful from a systems perspective — it enables us to build a business strategy that is consistent, coherent, and clear. It also gives us the opportunity to ensure we’re making investments in the right systems at the right times.
Without this foresight, each team would likely pursue its own agenda and strategy, leading to different departments pointing in different directions, fractured investments, and potentially a clunky, cobbled-together tech stack — something that’s deeply detrimental to the customer experience.
3. Be a theme player.
With the key milestones for the year mapped out, it’s helpful to group them together under certain themes or seasons. This makes it easier for teams to organize their work mentally and remain focused on the overarching business purpose of their activities at any time of the year.
Here’s an example of how we at HubSpot group milestones by theme:
Q1: Kickoff Season
We kick the year off, set targets, and make sure that people have a clear understanding of their goals and feel motivated by them.
Q2: Think-big Season
We step back from the business and explore big opportunities and plan long-term. We look at what’s working well, we think about the future that’s not yet illuminated, and we assess the external factors that could impact our business.
It’s one of my favorite seasons because we consider the trends that might emerge three to five years from now. And that thinking helps inform the company in Q3.
Q3: Compass Season
We plan for the next year and identify the big plays we want to make, as well as the opportunities we will omit.
These choices are made with the learnings from Q2’s “think-big” season fresh in our minds, helping us to make decisions in the short term that will set us up for success in the long term.
Q4: Planning Season
You wrap up the year, finalizing the subsequent years’ targets, goals, investments, and divestments…and take some time to recharge!
Alignment Over Strategy
The ‘rhythm of the business’ framework has allowed the revenue operations team at HubSpot ensure that all teams are aligned on not only our priorities for the year ahead but also our vision of the future.
This in turn allows us to effectively create processes, construct systems, and organize data for our customer-facing teams, setting them up to successfully deliver a friction-free experience to our customers.
As our Chief Customer Officer Yamini Rangan often says, “Alignment eats strategy for breakfast.” This has become a mantra for us RevOps professionals at HubSpot as we ride the rhythm of the year.
After all, a strategy is only as good as its execution, and execution is entirely dependent on alignment, particularly at a scaling company.
To get started with “rhythm of the business” in your organization, start by looking back through your calendar — whether print, digital or memory-based — and mark down when key milestones occurred over the course of the previous year.
Then earmark when you began planning for each milestone and assess whether your team’s preparation was adequate or if it would benefit from more time, information, or support next year.
Once you’ve constructed this simple plan, you’ll be able to give your team a clear sense of the rhythm of your business for the next year. And in doing so, you’ll not only be able to prepare for the future, you’ll be able to invent it.
Final Thoughts
If you’d like to look into visualizing the future with the “rhythm of business” model, explore whether your company has rhythm or how to create a rhythm of business model. I also recommend a book we use at HubSpot, “Playing to Win,” which helped us ensure that we were all using similar nomenclature and frameworks.
Ultimately, the specific nomenclature or framework doesn’t matter. What matters is that everyone is on the same page and uses it – this speeds up communication, decision-making, and results.


How to Create a Wikipedia Page for Your Company
If you’re anything like me, you probably mainly consider Wikipedia a good source for a behind-the-scenes look at the production of Game of Thrones, or a collection of random facts on Zebras.
In short, you likely haven’t given it much thought as a channel for brand awareness.
But, if you think about it, Wikipedia is one of the best third-party sources for ranking on page one of Google. Typically, when you search an intended keyword, you don’t have to scroll far before you see its accompanying Wikipedia page:
Additionally, it’s a recognizable website, so it’s often one of the first pages someone will click on if they want to learn more about what your business does.
If you want to boost your business’s visibility online, take a look at this quick guide so you can create a Wikipedia page for your company, today.

1. Create an account.
Go to Wikipedia’s homepage and click “Create account” in the top right.

Enter the necessary information, including username and password, then click “Create your account”.
2. Get promoted to an autoconfirmed user.
When you first join Wikipedia, you’ll see a box pop-up that reads, “Help improve Wikipedia” with a link to start editing an article:
Before creating your page, you’ll need to become an autoconfirmed user.
These are Wikipedia’s typical guidelines for an autoconfirmed user: “Although the precise requirements for autoconfirmed status vary according to circumstances, most English Wikipedia user accounts that are more than four days old and have made at least 10 edits (including deleted ones) are considered autoconfirmed.”
Here, you’ll need to practice patience — spend the first couple days once you open an account editing other people’s pages. Once you click “Edit a page”, there are links on the top right of every paragraph with the word “Edit”, so it shouldn’t be too time-consuming.
Once you’re autoconfirmed, proceed to the next step.
3. Create the page.
Now we’ve reached the most challenging part — creating the page.
First, go to Wikipedia’s “Writing an article” page. As you scroll down the page, you’ll see a blue button that reads, “Article wizard: an easy way to create articles.” Click this button (as long as you’re autoconfirmed):
Next, you’ll be redirected to Wikipedia’s Article Wizard. Here, you have two options — immediately begin creating your page by clicking “Next”, or practicing editing your page in Wikipedia’s sandbox, first.
For our purposes, we’ll click “Next”:
 It’s important to note — since there’s likely no Wikipedia page already available for your company, you can include as much or as little information as you want. Additionally, you’ll want to structure the page for easy readability, featuring some of the most important and basic information (like what your company does), first.
For instance, take a look at how HubSpot’s Wikipedia page is structured:
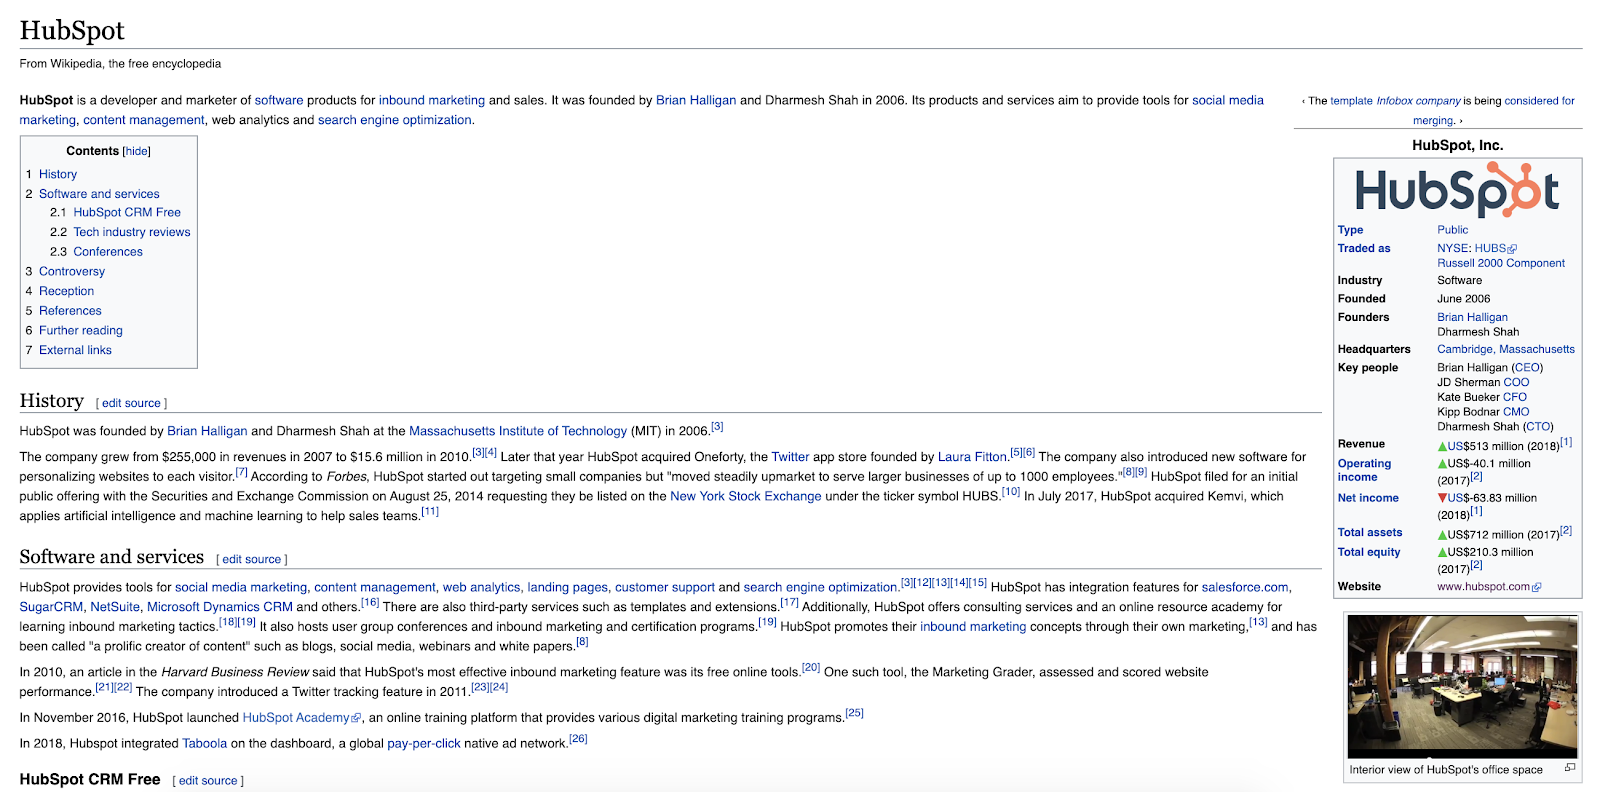
The page starts with a two sentence overview of what HubSpot does, followed by a table of contents on the left, and a “fact sheet” on the right. Below the table of contents you’ll first find HubSpot’s history, followed by a description of HubSpot’s software and services.
On HubSpot’s Wikipedia page, the information that is above-the-fold is likely most useful for a new visitor who hasn’t heard of HubSpot before — a quick glance at the page can tell her, for instance, what HubSpot does, how much revenue HubSpot makes, what third-party sources such as Forbes say about HubSpot, and who HubSpot’s founders are.
While readers can continue scrolling for more product-specific information, it’s critical Wikipedia is mainly used as a broad brand awareness platform.
We’ll look at more examples later on.
4. Provide citations.
Wikipedia is ultimately an encyclopedia, so to prove the validity of your topic, you must include citations to various articles and third-party sources.
Before you begin creating your page, Wikipedia warns you of this, stating — “the topic of an article must already be covered in reliable sources that are independent of the subject. These include journals, books, newspapers, magazines, and websites with a reputation for fact checking. Social media, press releases, or corporate/professional profiles do not qualify”:
 Ultimately, citations give your business credibility and allow the reader to trust your company is real. Look for magazine or newspaper articles that mention your company, other websites that backlink to your website as a resource, or directories that link to your company’s profile.
5. Submit the page for review.
When you’re finished with your page, submit it for review. Once Wikipedia deems it a credible source, it will be uploaded as an official Wikipedia page.
6. Update it regularly.
Remember — the hard work isn’t over, just yet. As your Wikipedia page begins ranking on page one of Google for your company name, it’s vital you regularly update it to ensure it provides the most up-to-date information regarding your products or services.
Additionally, by updating it regularly with company developments, you’re maintaining transparency, which is comforting for both your customers and leads.
Examples of Company Pages on Wikipedia
There are over 6 million articles in the English Wikipedia. A good chunk of those are company pages. The best company pages share the following characteristics:
- adequately describe the company
- maintain a neutral point of view
- include references to notable, independent sources
- includes a link to company website
Below we’ll take a look at two examples of company pages that can inspire your own.
World Wide Technology
World Wide Technology’s wikipedia page is an excellent example of a company page. First, it offers a brief overview describing what type of company it is, how much revenue it earns, and how many people it employs. It then offers a timeline of notable events, starting with when it was founded and ending with its latest recognition in TIME magazine in 2021.
The page ends with a comprehensive list of independent reliable sources, which have been published about the organization. Such a list helps Wikipedia understand why the organization is notable and avoids the appearance of a conflict of interest. Without such a list of references, your company page could be deleted.
Urban One
Urban One’s wikipedia page is another excellent example of a company page. It begins by describing what the company is, who its primary audience is, and how large it is. While details like the fact that it’s the largest African-American-owned broadcasting company and one of the highest-earning African-American-owned businesses in the United States are impressive, they are stated objectively and cited properly to avoid the appearance of self-promotion.
Wikipedia requires significant coverage in multiple independent sources for articles on organizations to be considered noticeable — a requirement which Urban One has easily met. Towards the bottom of the page you’ll find a references section with over 54 entries.
Getting Your Company on Wikipedia
Nowadays, a quick Google search provides us with an abundance of information — including social media profiles, directories, and press releases — on a given subject. By ensuring you have an up-to-date Wikipedia page, you’re covering your bases and giving viewers a trustworthy source of information related to your business or brand.
Editor’s note: This post was originally published in October 2019 and has been updated for comprehensiveness.