What is a Project Charter? The Complete Guide
Project charters provide a guiding light for any new initiative. So, whether you work as a project manager or operations professional, you’ll need to become a pro at writing these documents.

Besides providing you with the authorization to begin projects, project charters help you sell your project’s viability to stakeholders. This document will also help get your entire team on board with your plans and deadlines.
In this guide, we’ll explore everything you need to know about project charters. We’ll cover:
- What is a project charter?
- The Benefits of Creating Project Charters
- How to Write a Project Charter
- The Anatomy of a Project Charter
- Project Charter Examples
- Mistakes to Avoid When Creating a Project Charter
The Benefits of Creating Project Charters
“The project charter is such an important document that a project cannot be started without one,” says Rita Mulcahy, a renowned project manager, trainer, and author. This document can keep your team on track to achieve your project objectives on deadline.
Here are other benefits of creating a well-written project charter:
- You’ll decide on a project budget.
- You can define the project outcome.
- You’ll avoid scope creep and meet your deadlines.
- You can get stakeholders’ buy-in for your project.
- You can set the expected start and end dates of the project.
- You can clearly explain how your project goals align with organizational objectives.
Next, we’ll explore best practices for writing a project charter.
How to Write a Project Charter
When writing your project management charter, it’s important to get it right from the onset. “You shouldn’t change a project charter after its approval,” says Mary Beth Imbarrato, author of The Project Roadmap. Last-minute changes can make stakeholders question the project’s feasibility.
This step-by-step guide will help you write a great project charter from the get-go.
1. Gather insights from your project team.
Talking to your team members is essential when creating project charters. Your colleagues can help you set realistic project timelines. They can also help you uncover the goals, scope, and risk mitigation plans for the project.
“You should set aside time for your team members to discuss the project, how they want to approach it, and what’s their current bandwidth,” says Will Yang, Head of Growth at Instrumentl. “Doing this ensures your project team is on the same page.”
2. Store the charter in a central location.
To foster collaboration, store your project charter in a central hub so team members can comment on and edit it.
This gives everyone a sense of ownership of the project. Programs like Google Drive and Dropbox offer co-editing capabilities.
3. Keep the project charter brief.
You may be tempted to capture every detail in your project charter. But remember: You should go in-depth in your project planning document, not in the project charter.
“Stakeholders won’t have the time to read a verbose 15 pages charter because they have other priorities,” advises Konstandinos Christofakis, head of marketing at ULTATEL. “That’s why charters should be a high-level overview of projects, remain short enough to be useful, and long enough to be valuable.”
If information is digestible, the chances of project approval rise, according to Christofakis.
4. Add visuals to your charter.
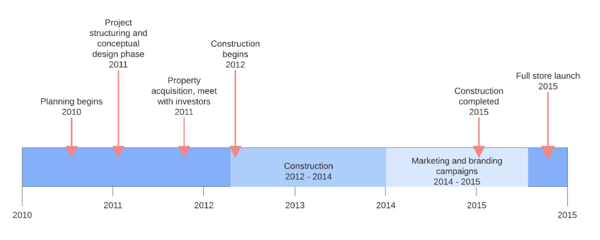
Using images or design elements can help improve the readability of your project charter and keep your document brief.
For instance, if you want to outline a lengthy communication plan or milestone in your charter, a Gantt chart can help. These charts also stand out in the project charter, allowing team members to reference them easily.
5. Create a project charter template.
Have you written a project charter in the past? Or perhaps the document you just completed is a masterpiece. Turn these documents into templates that you can use in the future.
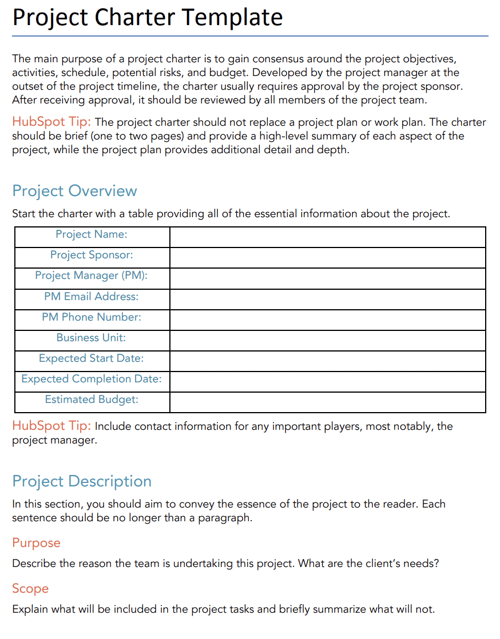
Having a template for your project management charter helps you save time and maintain consistency in the future. This approach to project charters also ensures you don’t skip important elements in your document.
Pro tip: If you don’t already have a template, you can browse options online. HubSpot offers a free project charter template that you can download at any time.
Now that you know the basics of creating project management charters, let’s go over the anatomy of a project charter.
The Anatomy of a Project Management Charter
After developing a project charter, project managers send them to the project sponsor to get approval. A sponsor may include the government, individual financier, or top management of the organization executing the project.
Here are the elements your project charter needs to get approval from sponsors.
1. Project Objective
The project objective is the high-level reason for undertaking the project. Tying objectives to your company goals is a brilliant way to pique stakeholders’ interest in your project.
Pro tip: Use the SMART framework to make your goals Specific, Measurable, Achievable, Realistic, and Time-bound.
2. Project Overview
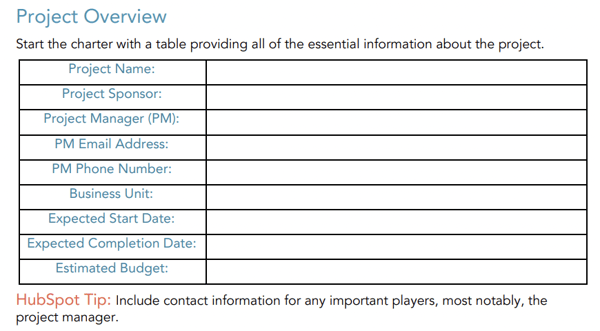
Your project overview goes into greater detail about the timeline and ownership of a project. This section outlines details like the project name, project sponsor, project Manager, expected start and completion dates, and estimated budget.
Pro tip: Add a table to your project overview. This makes information skimmable and easy to find.
3. Project Deliverables
This is a list of the services or products the project team will provide to stakeholders. Be clear on what your team is delivering to avoid any disagreements that’ll make you extend your deadline.
4. Project Scope
The project scope explains the boundaries of the project. While PMs typically write detailed project scopes, keeping it brief in the project charter is a best practice. Why? You can create a detailed scope statement in the project planning phase.
5. Project Stakeholders
This is a list of the names and responsibilities of the parties involved with a project. Stating who’s responsible for different tasks holds your team members accountable.
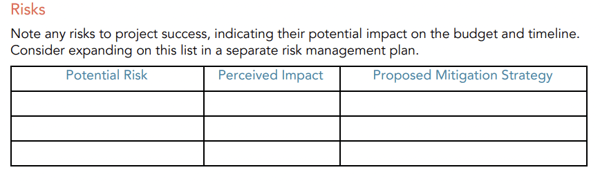
6. Project Risks
Outlining the risks to a project will help you identify blockers to the success of your project and their potential impact. Doing this enables you to devise risk mitigation strategies.
Pro tip: Create a table of potential risks. Be sure to explain why the risk poses a threat to your project and the mitigation strategies you plan to enact.
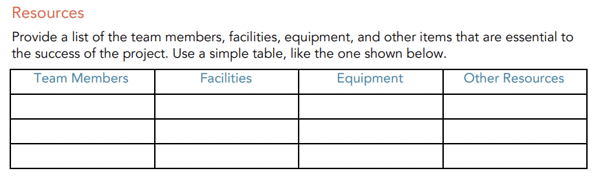
7. Project Resources
Always create a list of resources your project will need. And that’s not just money. Your resources should include team members, facilities, equipment, and other essential items which are critical to the success of your project. This helps you account for everything you need to take the project to the finish line.
Project Charter Examples
1. Project Management Charter for Lean Six Sigma
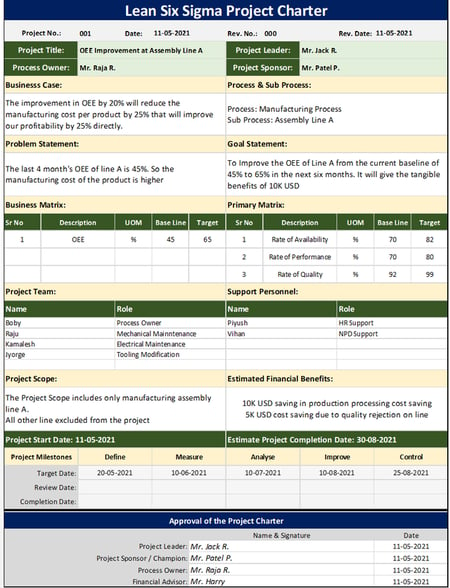
This sample project charter follows the Lean Six Sigma format, one methodology for project management. Teams that already use this framework may opt to structure their project charter in this way.
What we like: The Lean Six Sigma project charter offers a clear scope of work. Project goals also follow the SMART framework, making how the project will benefit the company extremely clear.
Project charter limitations: While this charter outlines key information, including the project goal and problem statement, some key information is missing. The process owner didn’t state the project costs or risks. If you emulate this format, be sure to include this information.
2. Project Management Charter for Website Redesign
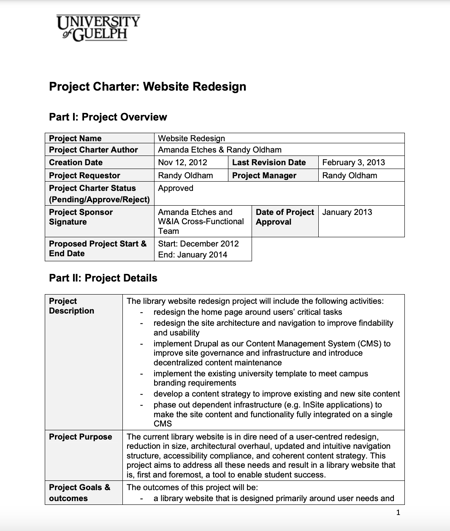
In this project charter, the University of Guelph explores exactly what its web team must do to redesign the school’s library website. That includes all of the necessary stakeholders and who’s owning the project.
What we like: This project has a well-defined scope and timeline. Sponsors know exactly who is working on what and when.
Project charter limitations: While this project explores the risks associated with the project, mitigation plans would improve this section of the document.
Mistakes to Avoid When Creating Project Management Charters
1. Missing a Clear Purpose Statement
Every project should have a clear goal and purpose. But sometimes, the primary objective becomes unclear. To combat this, apply the illusory truth effect, which states the use of repeated information increases understanding.
Lauren Carter, principal consultant at Lauren Ashley Consulting, says she uses this strategy to help her team remember the purpose of projects. In Lauren’s words:
“Project members often lose the ‘North Star’ in the thick of the work. One effective way I prevent this is by having a clear purpose statement in the charter, which I repeat in several ways throughout the project’s lifecycle.”
“This can be as a header on project documents, putting it at the top of timelines or charts, or using it as a metric against which you evaluate planned and unplanned activities that arise.”
2. Creating a Charter Mid-project
Project charters should kick off your initiative. Writing this document halfway through can lead to scope creep, ill-defined responsibilities, and confusion.
“Changing the project charter after initiation and planning means you’ll have to review any work you’ve completed and even rework some completed tasks,” says Mary Beth Imbarrato, a 25-year veteran in the project management industry.
She adds, “This can lead to delays, elevated costs, and create more project risks.”
Mary Beth also says changes to the charter may impact how team members view a project. The result? Reduced commitment and engagement.
The bottom line: Creating the charter before starting the project will help you avoid scope creep, prevent wasted time by redoing work, and keep extra risks to your project at bay.
3. Ignoring Your Company’s Project Charter Template
Using existing project charters as templates can save you time and ensure consistency.
Instead of creating new charters from scratch, request a sample of a completed charter document the company liked and use it as your template. This template will help you understand how your organization prefers to present ideas, allowing you to follow suit and begin projects on the right foot.
Start New Project Without Missteps
A well-thought-out charter is a roadmap for achieving your project objectives in record time.
Get started by gathering input from your team and creating a project charter that will get the green light from stakeholders.

The Ultimate List of 394 Email Spam Trigger Words to Avoid in 2023
After spending hours creating an email marketing campaign, the last thing you want to do is get blocked by your recipients’ spam filters. Luckily, by avoiding common email spam trigger words, you can successfully prevent your emails from getting routed to spam folders.

Not only does spam email marketing betray the trust of customers, but it can also contain malware and viruses. Ultimately, you’ll want to avoid sending spam emails because your customers won’t read them.
Let’s look at what spam trigger words are, what gets emails sent to spam, and which spam words you should avoid when creating your email campaigns.
Spam filters can be triggered for a variety of reasons, causing your email to skip recipients’ inboxes and land straight in their spam inbox. One of the easiest ways to avoid spam filters is by carefully choosing the words you use in your email’s subject line.
Trigger words are known to cause problems and increase the chances of your email getting caught in a spam trap. By avoiding these words in your email subject lines, you can dramatically increase your chances of getting beyond the filters.
Spam trigger words alone aren’t enough to send your email to spam. For instance, if you are offering a 3-for-1 discount sale, you can still advertise that in your emails and not get sent to spam. It’s important to understand all the factors that come into play when emails get identified as spam.
What causes emails to go to spam?
Email providers look for a number of factors when deciding whether to automatically send your emails to spam. If you’ve made it on an email blacklist, that means you’ve repeatedly sent emails to recipients who haven’t signed up for your email list.
Your emails can get sent to spam if you:
- Don’t include an unsubscribe button in your email: It’s best to give recipients the option to opt-out of emails. Provide an unsubscribe link.
- Send poorly-designed emails with broken or glitchy code: Poorly-designed emails create an unpleasant reading experience. Readers will regret opening your note in the first place if the format is hard to read and the design doesn’t render properly.
- Address your recipient by “my friend” or “dear” (or not by their name): To get the best results, add a personal touch in the subject line or message to increase your open rate and provide a better customer experience.
- Buy email lists online and mass-send messages to email addresses that don’t exist (resulting in a high bounce rate): Not only do the recipients not know you, you could quickly ruin your IP reputation and put your email deliverability at risk. If you do business in Europe, buying email lists could also be a violation of the General Data Protection Regulation (GDPR) which requires explicit permission from your contacts to send them emails.
- Use all-caps text and extreme punctuation (!!!!! or ?????): Many spam detecting software will automatically register emails formatted in all-caps as spam. It also doesn’t help to look like you’re shouting at the reader.
- Include strangely formatted fonts (𝖑𝖎𝖐𝖊 𝖙𝖍𝖎𝖘): Similar to using all-caps, weird fonts are more difficult to read and are likely to trigger spam detecting software.
- Provide links to fraudulent websites: This should be obvious, but never link to fraudulent websites in your emails. It’s harmful to your contacts and undermines your credibility.
Now that you know what not to do, let’s go over some best practices to ensure your emails steer clear of spam folders.
How to Become a High-Reputation Email Sender
Email providers only want to deliver emails from high-reputation senders. To be a high-reputation sender, do the following:
- Include an unsubscribe button: Communication is a two-way street. Ensure your contacts can opt-out if they choose by placing an unsubscribe link in your email.
- Design your emails with clean code using a tool such as Marketing Hub: Take the guesswork out of designing emails. With these tools, your emails will open glitch-free every time.
- Personalize your emails with the recipient’s first name: 71% of consumers expect email personalization. Address them by name and watch as your open rates improve.
- Only email those who’ve subscribed to your email list: If you don’t have any, you should learn to naturally increase your email list subscribers.
- Keep your email deliverability high: Doing the tasks above will improve deliverability but you should also make sure you are compliant with the legal guidelines in your region. Most marketing software is compliant with web laws but if you’re handling email in-house, you’ll want to double check your emails are compliant.
- Keep the text free of odd formatting and extraneous punctuation: Clean and clear copy ensures your note is easy to read and dodges spam detectors.
- Only link out to reputable websites: Only link to reputable sites you trust. After all, your reputation is on the line. Don’t lose credibility by sending your contacts to shady websites.
If you meet these criteria, you can get away with using “classic” email spam words in your subject line and your email. The text surrounding the spam phrase also matters, as does your history as an email sender. If email providers don’t have a reason to mistrust you, they simply won’t.
Email Spam Words to Avoid
When writing your email subject lines, you want to avoid:
- Over-sensationalizing
- Over-promising
- Using strange formatting to “stand out” in the recipient’s inbox
Next time you sit down to write an email subject line, consult the exhaustive list below. In fact, you might want to bookmark this list so you can refer back to it every time you craft an email subject line.
Commerce
- As seen on
- Buy
- Buy direct
- Buying judgments
- Clearance
- Order
- Order status
- Orders shipped by shopper
Personal
- Dig up dirt on friends
- Meet singles
- Score with babes
- XXX
- Near you
Employment
- Additional income
- Be your own boss
- Compete for your business
- Double your
- Earn $
- Earn extra cash
- Earn per week
- Expect to earn
- Extra income
- Home based
- Home employment
- Homebased business
- Income from home
- Make $
- Make money
- Money making
- Online biz opportunity
- Online degree
- Opportunity
- Potential earnings
- University diplomas
- While you sleep
- Work at home
- Work from home
Financial – General
- $$$
- Affordable
- Bargain
- Beneficiary
- Best price
- Big bucks
- Cash
- Cash bonus
- Cashcashcash
- Cents on the dollar
- Cheap
- Check
- Claims
- Collect
- Compare rates
- Cost
- Credit
- Credit bureaus
- Discount
- Earn
- Easy terms
- F r e e
- Fast cash
- For just $XXX
- Hidden assets
- hidden charges
- Income
- Incredible deal
- Insurance
- Investment
- Loans
- Lowest price
- Million dollars
- Money
- Money back
- Mortgage
- Mortgage rates
- No cost
- No fees
- One hundred percent free
- Only $
- Pennies a day
- Price
- Profits
- Pure profit
- Quote
- Refinance
- Save $
- Save big money
- Save up to
- Serious cash
- Subject to credit
- They keep your money — no refund!
- Unsecured credit
- Unsecured debt
- US dollars
- Why pay more?
Financial – Business
- Accept credit cards
- Cards accepted
- Check or money order
- Credit card offers
- Explode your business
- Full refund
- Investment decision
- No credit check
- No hidden Costs
- No investment
- Requires initial investment
- Sent in compliance
- Stock alert
- Stock disclaimer statement
- Stock pick
Financial – Personal
- Avoice bankruptcy
- Calling creditors
- Collect child support
- Consolidate debt and credit
- Consolidate your debt
- Eliminate bad credit
- Eliminate debt
- Financially independent
- Get out of debt
- Get paid
- Lower interest rate
- Lower monthly payment
- Lower your mortgage rate
- Lowest insurance rates
- Pre-approved
- Refinance home
- Social security number
- Your income
General
- Acceptance
- Accordingly
- Avoid
- Chance
- Dormant
- Freedom
- Here
- Hidden
- Home
- Leave
- Lifetime
- Lose
- Maintained
- Medium
- Miracle
- Never
- Passwords
- Problem
- Remove
- Reverses
- Sample
- Satisfaction
- Solution
- Stop
- Success
- Teen
- Wife
Greetings
- Dear [email/friend/somebody]
- Friend
- Hello
Marketing
- Ad
- Auto email removal
- Bulk email
- Click
- Click below
- Click here
- Click to remove
- Direct email
- Direct marketing
- Email harvest
- Email marketing
- Form
- Increase sales
- Increase traffic
- Increase your sales
- Internet market
- Internet marketing
- Marketing
- Marketing solutions
- Mass email
- Member
- Month trial offer
- More Internet Traffic
- Multi level marketing
- Notspam
- One time mailing
- Online marketing
- Open
- Opt in
- Performance
- Removal instructions
- Sale
- Sales
- Search engine listings
- Search engines
- Subscribe
- The following form
- This isn’t junk
- This isn’t spam
- Undisclosed recipient
- Unsubscribe
- Visit our website
- We hate spam
- Web traffic
- Will not believe your eyes
Medical
- Cures baldness
- Diagnostic
- Fast Viagra delivery
- Human growth hormone
- Life insurance
- Lose weight
- Lose weight spam
- Medicine
- No medical exams
- Online pharmacy
- Removes wrinkles
- Reverses aging
- Stop snoring
- Valium
- Viagra
- Vicodin
- Weight loss
- Xanax
Numbers
- #1
- 100% free
- 100% satisfied
- 4U
- 50% off
- Billion
- Billion dollars
- Join millions
- Join millions of Americans
- Million
- One hundred percent guaranteed
- Thousands
Offers
- Being a member
- Billing address
- Call
- Cannot be combined with any other offer
- Confidentially on all orders
- Deal
- Financial freedom
- Gift certificate
- Giving away
- Guarantee
- Have you been turned down?
- If only it were that easy
- Important information regarding
- In accordance with laws
- Long distance phone offer
- Mail in order form
- Message contains
- Name brand
- Nigerian
- No age restrictions
- No catch
- No claim forms
- No disappointment
- No experience
- No gimmick
- No inventory
- No middleman
- No obligation
- No purchase necessary
- No questions asked
- No selling
- No strings attached
- No-obligation
- Not intended
- Obligation
- Off shore
- Offer
- Per day
- Per week
- Priority mail
- Prize
- Prizes
- Produced and sent out
- Reserves the right
- Shopping spree
- Stuff on sale
- Terms and conditions
- The best rates
- They’re just giving it away
- Trial
- Unlimited
- Unsolicited
- Vacation
- Vacation offers
- Warranty
- We honor all
- Weekend getaway
- What are you waiting for?
- Who really wins?
- Win
- Winner
- Winning
- Won
- You are a winner!
- You have been selected
- You’re a Winner!
Calls-to-Action
- Cancel at any time
- Compare
- Copy accurately
- Get
- Give it away
- Print form signature
- Print out and fax
- See for yourself
- Sign up free today
Free
- Free
- Free access
- Free cell phone
- Free consultation
- Free DVD
- Free gift
- Free grant money
- Free hosting
- Free installation
- Free Instant
- Free investment
- Free leads
- Free membership
- Free money
- Free offer
- Free preview
- Free priority mail
- Free quote
- Free sample
- Free trial
- Free website
Descriptions/Adjectives
- All natural
- All new
- Amazing
- Certified
- Congratulations
- Drastically reduced
- Fantastic deal
- For free
- Guaranteed
- It’s effective
- Outstanding values
- Promise you
- Real thing
- Risk free
- Satisfaction guaranteed
Sense of Urgency
- Access
- Act now!
- Apply now
- Apply online
- Call free
- Call now
- Can’t live without
- Do it today
- Don’t delete
- Don’t hesitate
- For instant access
- For Only
- For you
- Get it now
- Get started now
- Great offer
- Info you requested
- Information you requested
- Instant
- Limited time
- New customers only
- Now
- Now only
- Offer expires
- Once in lifetime
- One time
- Only
- Order now
- Order today
- Please read
- Special promotion
- Supplies are limited
- Take action now
- Time limited
- Urgent
- While supplies last
Nouns
- Addresses on CD
- Beverage
- Bonus
- Brand new pager
- Cable converter
- Casino
- Celebrity
- Copy DVDs
- Laser printer
- Legal
- Luxury car
- New domain extensions
- Phone
- Rolex
- Stainless steel
Use Spam Trigger Words Sparingly and Within Context
So long as you use email marketing best practices and use spam trigger words within context, you can bypass spam filters. Spam filters have become much more sophisticated in recent years. Using one or two phrases won’t hurt you, but make sure to only email customers who want to hear from you and to always personalize your emails. Doing so will optimize the results of your campaign and keep you out of spam folders.
Thank you for reading this post from HubSpot.
Editor’s note: This post was originally published in March 2013 and has been updated for comprehensiveness.

International SEO: How to Optimize Your Website for Other Countries
You might think that you have mastered the art of SEO already, but international SEO is a completely different ball game. You’ll need to master this skill if you plan to turn your business from a domestic powerhouse to a global player.

Level up, and avoid potential pitfalls, with this guide to international SEO. You’ll learn what makes international SEO different, best practices, and what steps you can take to create an effective plan.
Table of Contents
- What is international SEO?
- What is an international SEO Strategy?
- Questions to Ask About International SEO
- Factors That Affect International SEO
- How to Develop an International SEO Strategy
- Tools for International SEO
- International SEO Best Practices
- International SEO Checklist
International SEO, allows search engines in other countries to quickly find your site. You can also signal the languages you’re using to target international audiences or native speakers.
How does international SEO work?
Google and other search engines are programmed to tailor results to the user’s language and geographic location.
With international SEO, you can communicate to search engines that your site caters to visitors in a certain country or to those looking for your products or services in a particular language.
Language targeting, rel=”noopener” target=”_blank” hreflang tags, certain URL structures, and other localization signals all play a role in international SEO.
What’s the difference between International SEO and Local SEO?
The biggest difference between local and international SEO is scale. While local SEO is focused on keywords and target audiences within a narrow geographic area, international SEO targets audiences across diverse geographic regions.
There are four primary differentiators between local SEO and international SEO:
- Cost. Owing to their scale and scope, international SEO efforts come with significant costs.
- Content. To ensure international reach, you’ll need to create significantly more content than you would for a local SEO strategy.
- Capture. International SEO expands the target market you’re trying to capture, which necessitates in-depth research to ensure your brand aligns with customer expectations.
- Competition. Competition for keywords and customers is much greater for international SEO efforts. Instead of simply competing with other businesses in the same local sphere of influence, you could be up against multinational corporations.
Why is international SEO important?
If you expand a global market or would like to in the future, you’ll need to understand international SEO. This process will increase the exposure of your product or service in worldwide markets. The more people who see your offerings, the more people are likely to buy.
To put it another way, you can expand your consumer base, which will, in the end, lead to an increase in conversions.
International SEO can also create an advantage over your competitors. If you see that your competitors aren’t optimizing their content for a different country or language, you can create content specifically for that region.
International SEO also leads to a boost in brand recognition. With an improved global user experience, you’re more likely to be seen as a global player in your market. Because of this, visitors will keep coming back to your site, which will ultimately boost sales.
What is an international SEO Strategy?
An international SEO strategy combines the policies, processes, and practices your brand uses to optimize search content for other countries.
An international SEO strategy for websites focuses on creating content applicable to local markets and developing a website structure that makes it easy for search engines to find and serve the right web pages to the right users at the right time.
Consider a company that sells window shades in the United States and is making a move into Canada. First, you’ll want to ensure Canadian customers are sent to the right pages on your website — pages that contain information about Canadian locations, Canadian shipping times, and costs in CAD.
You’ll need a website structure that includes both U.S. and Canadian pages and leverages enough metadata that search requests from users will direct them to the right page for their current location.
Does my business need an international SEO strategy?
It depends.
If you have no plans to expand beyond local markets, such as your current city or state, international SEO probably isn’t worth the time and resources required. In fact, international SEO can backfire if your business is entirely local.
Customers who land on international pages won’t be happy when they discover you serve a very small geographic area.
On the other hand, if you’re looking to expand beyond country borders, it’s worth spending on international SEO. Given the sheer number of companies competing on the global stage and the increased challenge of ranking highly for relevant keywords, a comprehensive strategy is critical.
Not sure how to get your international SEO efforts off the ground? We’ll explore questions that can shape your strategy below.
1. Where are you headed?
Depending on the part of the world you’re targeting, your international SEO approach will change.
For example, if you’re headed to China, Baidu is the most popular search engine. Each search engine has its own approach to SEO, meaning it’s worth doing your research to find out what matters most for rankings.
2. Should you target language or country?
This is a common international SEO question: Are you better served to target a specific language or a country? The answer depends on your goals.
Language optimization may be the answer if you’re looking to appeal to a broad audience regardless of where they live. If you’re looking to grow brand awareness in a specific part of the world, opt for country-based SEO.
3. What localization factors matter most?
Localization is the process of optimizing your website and content to reflect the local language and culture. Two of the most important factors here are accuracy and common use.
First, it’s critical to make sure that translations of any keywords or slogans are accurate. Direct translations can open your brand and services to misinterpretations, such as the always-classic “Come alive with Pepsi” slogan translated as “Pepsi brings your ancestors back from the dead” in Chinese markets.
Common use is the other concern. The words and phrases used to describe your business may not be the same in different languages, even if the literal translation of words gives that impression. Find out what words locals use to describe your products and services and use those instead.
4. How can you build local links?
Building local links back to your site also helps with international SEO. Here, it’s a good idea to write articles for local blogs, get sponsored mentions on websites that offer advice or useful information, connect with local social media influencers, and sponsor local events.
5. Does social media matter?
While Google has expressly stated that social media doesn’t factor into international SEO rankings, you can increase brand awareness and local influencer connections with a strong social media presence.
6. Are current keywords good enough?
While your current keywords may help you rank in the top 5 locally, the sheer number of companies competing for these keywords in global markets means you need to take a look at who’s using these keywords, where they rank, and whether other similar keywords might drive better results.
7. Do you have the right tools and talent?
Finally, consider if this is something you can take on yourself or if you’re better off hiring an experienced international SEO company.
Factors That Affect International SEO
Multiple factors affect international SEO, including the following.
Customer Reviews
Customer reviews on your website or on local review sites can positively or negatively impact your SEO efforts. Better reviews mean a better connection with your primary keyword, in turn boosting your visibility.
Mobile Responsiveness
The responsiveness of your website on mobile also matters to overall search rankings. As a result, it’s worth finding a content delivery network (CDN) capable of providing a top-tier website experience regardless of where users are.
Google My Business Account
Your Google My Business Account can help boost your SEO efforts — so long as you ensure to update where your company is operating. This is a starting point for Google to seek out geographic and language metadata on your site.
Link Building
The more links heading back to your site from international sources, the better. As mentioned above, it’s a good idea to write for local blogs or connect with influencers to point links back to your website.
How to Develop an International SEO Strategy
Ready to develop your international SEO strategy? Start here.
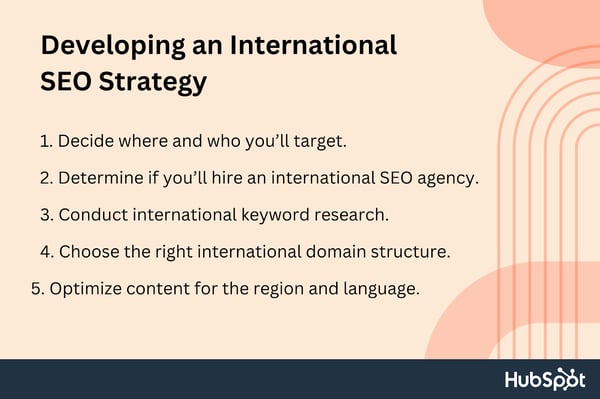
1. Decide where and who you’ll target.
First, pick your target market and target audience. For example, you might decide to target the larger market of Brazil, then hone in on a subset of that market that has the means and motive to buy your product.
The more focused your decisions are around “where” and “who,” the better your results.
2. Determine whether you’ll hire an international SEO agency.
Do you want to do the heavy lifting of international SEO yourself or outsource this effort? There are advantages to both.
You know your brand better than anyone else, but SEO experts are skilled at understanding local preferences and creating a strategy to match.
3. Conduct international keyword research.
Using relevant keywords is a critical component of search engine optimization. It’s not enough to just translate your keywords if you’re working on international SEO. In most circumstances, you’ll need to transcreate them.
On a case-by-case basis, handle your keywords. It will be more challenging to convert certain keywords than others. Some global businesses, such as health or IT, commonly use English terminology, even if it isn’t the country’s official language. Therefore, translating these keywords would be meaningless.
If you’re a law company trying to grow, you should be aware of the important keyword distinction between, say, trial lawyers in the United States and barristers in the United Kingdom.
Find out exactly what people in your target market are typing into search engines and modify your keywords accordingly. For instance, the United States and the United Kingdom celebrate Mother’s Day on different days. This implies shoppers in both nations will be looking for Mother’s Day gifts at different times of the year.
When you’ve finished translating or researching your keywords, you should see how often they’re searched for.
To choose which keywords to use in your international SEO plan, you may use a tool like Google’s Keyword Planner to research the number of times they are searched for each month in each target area.
4. Choose the right international domain structure.
The domain structure of your website makes it easier (or harder) for visitors and search engines to find your content. Different options include the following.
ccTLD
Country code Top-Level Domains (ccTLDs) are two-letter domains assigned to specific countries. For example, .us is for the United States, .ca is for Canada, and .uk is for the United Kingdom. To improve international SEO, you may choose to create a unique ccTLD site for each country where your products or services are available.
Example: mybusiness.ca, mybusiness.uk
gTLD
A generic Top-Level Domain (gTLD), meanwhile, refers to domain extensions with three or more characters. These TLDs are maintained by the Internet Assigned Numbers Authority (IANA). Common examples include .com, .gov, and .org.
Using a gTLD means that search engines won’t restrict results based on region, but it may reduce total traffic since many users prefer sites that include their country code TLD.
Example: mybusiness.com
ccTLD or gTLD with subdomains
You can also create subdomains for your site that combine aspects of both ccTLDs and gTLDs.
Example: ca.mybusiness.com
This offers the benefit of a country code and the advantages of a gTLD.
ccTLD or gTLD with subdirectories
Subdirectories, meanwhile, change the location of the country code:
Example: mybusiness.com/ca/
5. Optimize content for the region and language.
Finally, ensure all your content is optimized for your target region and its local language. This includes double-checking all TLDs, translations, and content assets to ensure they align with local expectations.
Oh, and don’t forget the rel=”noopener” target=”_blank” hreflang tag. This HTML attribute specifies the geographic area and language of a webpage. It’s used to differentiate similar web pages aimed at different audiences so that search engines don’t count them as duplicate content, and it looks like this:
<link rel=”alternate” rel=”noopener” target=”_blank” hreflang=”x” rel=”noopener” target=”_blank” href=”https://ift.tt/uEpg14a” />
Tools for International SEO
The right tools can also help you maximize the impact of international SEO by providing actionable data around traffic, click-throughs, and time spent on your site. Some of the most popular tools include the following.
HubSpot
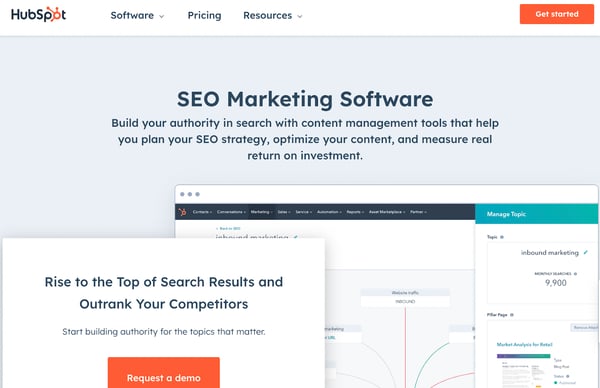
HubSpot’s SEO software allows you to create an international content strategy, gives you live tips to improve your on-page SEO, and lets you organize your website in a way that’s easy for both search engines and users to understand.
Google Search Console
Google Search Console lets you see what queries are driving traffic to your site, determine your position on Google Search, and analyze global site impressions.
Arel=”noopener” target=”_blank” hrefs
Arel=”noopener” target=”_blank” hrefs is an all-in-one SEO toolset that lets you optimize your site, analyze your competitors’ rankings, and find the best keywords for your brand.
Moz
Moz offers site audits to determine potential issues, tracks keyword rankings across more than 170 search engines, analyzes backlink profiles to evaluate performance, and offers keyword research tools to find out how you stack up against the competition.
Semrush
Semrush lets you identify high-value local and national keywords, analyze the backlink profile of any domain, and track your site’s SERP positions daily.
Google Analytics
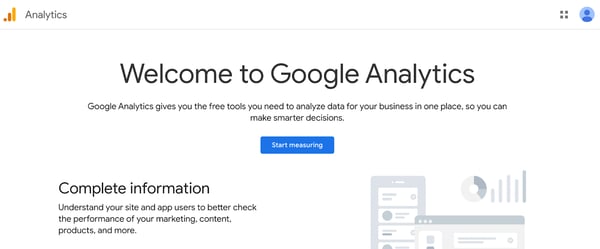
Google Analytics is an interconnected suite of tools that helps you analyze the impact of your website content worldwide.
International SEO Best Practices
No matter what approach you take to international SEO — language-focused or country-based, outsourced or in-house — the same best practices apply. Let’s take a look at a few below.
1. Define your market approach.
The methods used for SEO in one country may not be appropriate for use in another. Your company and its target customers should inform your strategy.
If you sell the same products in multiple countries, but to people who speak different languages, you should use a language-based segmentation strategy. This means ensuring all of your website’s content is translated into all the languages important to your company.
Your business will need to take a country-by-country strategy if its products and services vary across international markets or if it uses a distinct brand name in each country’s local language. You need individual country-specific websites optimized for their respective international markets.
2. Do your market research.
You should identify the potential buyer persona for your product or service and learn about their priorities before implementing an international SEO strategy.
To do this, you may conduct keyword research and investigate the channels through which these demographics frequently discover new products. Following that, you’ll better understand which audiences to target and how.
3. Do competitor research.
Analyze your potential competitors to see how they are doing with search engine optimization, content marketing, and paid advertising.
You can use international SEO to discover unexpected opportunities if your competitors aren’t yet optimizing their content for particular markets or languages.
4. Answer questions in the region’s native language and in the right context.
If there’s one thing to get right for international SEO, it’s ensuring you speak the same language as your customers. This means doing your research to ensure you’re always answering questions in their native language and in the appropriate context.
5. Think about how your strategy will affect the user experience overall.
International SEO isn’t just about keywords and content. It’s also about making sure the entire user experience is seamlessly aligned across your site.
That includes filling out forms in many languages, viewing prices in local currency, and accessing multimedia assets that include native speakers.
6. Pick the audiences that you’re most interested in targeting first.
You don’t have to optimize your content for every country and language at once when it comes to worldwide search engine optimization. There may be more than one phase to the rollout.
To learn how to execute international SEO, focus on reaching only one additional audience at a time. You and your team may learn about international SEO and acquire momentum for future projects by doing so.
7. Translate existing content carefully.
While translation tools provide a literal conversion of words and phrases, they’re often not used that way by locals. Customers will quickly recognize that something isn’t quite right.
Instead of translation, you’re really looking for “transcreation.” You want to recreate the same content but use the culture and language of your target market as a guide.
8. Optimize your website’s language options (or website pages).
You must use the correct language for each page, regardless of whether you have chosen country-specific subdomains or a single domain with many subfolders.
This will send a strong message to Google and other search engines about the location-specific relevance of your material, increasing the likelihood that your pages will be ranked highly by those services.
It will also improve the experience for local users, which increases the likelihood that they will make a purchase or revisit your site.
Adding subfolders with specific pages in each language of your target countries is an alternative if having country-specific domains is either impractical or not strategically necessary for your business.
9. Avoid automatically redirecting users based on their IP address.
It might seem like the perfect solution. However, automatically redirecting visitors or search engines based on IP addresses can annoy users. It can be confusing for search engines too, meaning visitors may never find certain content.
Instead, let visitors and search engines know about an alternative version of a page. Show a banner at the top or bottom with a message and a link to the suggested page.
10. Topics should be adapted to local cultures.
Your country-specific pages should only contain content that is pertinent to the local audience. It’s possible, for instance, that Australians won’t find your coverage of American fashion or politics particularly interesting.
If this is the case, you should make an effort to produce content that is particular to and helpful for the demographic of people who will visit the specific country site.
It’s advisable to seek some input from a native speaker of the target language before you start writing or designing anything for an international market.
11. Develop a link-building strategy, for each market.
Keep in mind that, similar to local SEO, the value of a link varies based on its point of origin. Google will see that your content is relevant to German users if you have a high number of inbound links from .de domains.
Consequently, it might adjust your page’s ranking in the relevant regional search engine results pages (SERPs).
Spending time developing a solid link-building strategy for each page is time well spent, as local links will have the greatest influence on search results.
12. Take into account other SEO signals.
A website can also signal to search engines that it is intended for a certain nation by using techniques such as:
- Having a site hosted on a local IP address.
- Local content linking.
- Improving search engine rankings on country-specific platforms like Russia’s Yandex and China’s Baidu.
In addition to the best practices described earlier, it is important to consider these signals to determine whether or not they are relevant to international SEO strategy.
International SEO Checklist
Ready to get started on building your international SEO strategy? We’ve created a checklist to ensure you don’t miss any step of the process.
- Determine what international content you offer and for which markets/languages.
- Make a keyword plan with appropriate terms for certain markets or languages.
- Create an international SEO-friendly URL structure.
- Build a sitemap.
- Choose a language and a country to target.
- Allow visitors to change the language of the website.
- For language targeting, use rel=”noopener” target=”_blank” Hreflang tags.
- Convert prices to local currencies.
- Make sure that the wording of each image’s alt text is appropriate.
- Fix any bad redirects you discover.
- Fix mistakes, broken links, and crawling problems.
- For each market, develop a link-building strategy.
- Keep abreast of local and worldwide search trends.
- Make sure each topic you intend to discuss has good SEO potential.
- To keep your content current, employ native content developers and industry specialists.
SEO: Improving Your International Impact
The right SEO strategy sets your brand apart from the crowd. While this is important in home markets, it’s even more critical if you decide to go international because it will ensure your website is optimized to support high-value content and keywords across countries.
By considering local customs, language, and context, you can boost consumer engagement and maximize your international impact.
Editor’s Note: This post was originally published in Dec. 2021 and has been updated for comprehensiveness.

Mobile Form Design: A Beginners Guide to Converting Mobile Users
Think about a time when you were on the train, sitting in the airport, or simply lying on the couch, and you had to complete an online form on your smartphone. Did you ever pay attention to the mobile form design?
Chances are you haven’t noticed. That’s the goal — to give users an intuitive experience that gets them to seamlessly fill up the form and continue with their day.

In this guide, we’ll review the most effective ways to do just that. Here, you’ll learn how to design mobile forms that are not clunky or misaligned, but that help boost conversions and create a great user experience.
Table of Contents
Mobile vs. Desktop Form Design
Today, your website visitors aren’t just browsing your site, viewing your content, and completing your forms from their desktop computers. They’re also completing these tasks from their mobile devices.
Mobile was responsible for nearly 60% of global website traffic from April to June 2022. That means it’s critical for your form to be simple to review, complete, and submit via a mobile device.
Why is mobile form design important?
The best mobile form design allows for a positive user experience, which ensures a happy website visitor who’s more likely to convert to a customer and become a returning user.
The design, layout, and functionality of your mobile forms play a large part in your website’s overall user experience.
If your forms aren’t mobile-friendly, you may experience fewer conversions, a loss in mobile site traffic, and an increase in unhappy and frustrated customers. And who wants that?
Why should mobile form design differ from desktop design?
“Everything works differently on mobile, so marketers need to make sure any elements of their websites are always optimized for mobile,” says Lilach Bullock, an award-winning marketing influencer and strategist.
“And that, of course, includes forms — especially since it feels like you constantly have to complete forms while on mobile.”
Specifically, think about the difference in the display or screen size between a mobile device, such as an Apple iPhone, which typically ranges from 4.7″ to 6.7″ in size; and a Mac laptop or desktop, which typically ranges from 13” to 24” in size. It’s safe to assume a form that fits an iPhone screen wouldn’t fit a desktop screen perfectly.
If your mobile visitors cannot easily read, complete, and submit your form, you may lose their business. So creating a mobile-friendly form that fits the screen of any mobile device is crucial to creating a great user experience in order to leave a lasting impression on your visitors and help you boost conversions.
What is responsive web design?
If you want to take mobile form design a step further and ensure your entire website is functional on all types of devices, you can implement a responsive website design.
Responsive web design takes into consideration the user’s screen size, platform, orientation, and environment. This is a simple and effective way to create a great user experience since so many people are constantly visiting and browsing different websites on various devices.
There are several ways you can make sure your site has a responsive design. For example, if you’re a WordPress user, there are several responsive WordPress themes that you can install and use to design your site.
Additionally, if you’re building, or have built, your site with software such as Squarespace, your site may automatically come with responsive web design.
Today, responsive web design is a popular choice for businesses due to the sheer number of people visiting websites via a variety of different mobile devices. But for now, let’s get back to discussing mobile form design.
Mobile Form Design: 11 UX Guidelines
“When designing your mobile forms,” explains Bullock, “it’s important to keep things simple and make them as quick as possible. [Forms] are more difficult to complete on mobile and everything feels like it takes longer than it should.”
In other words, the most important thing is simplicity for the end-user. When creating a mobile-friendly form, there are some steps you’ll want to take to provide the best user experience possible for your visitors. Let’s review 11 of these mobile form design best practices that you can begin implementing today.
1. Minimize the number of form fields.
Ever heard the saying, “less is more”? Well, that’s precisely what you should be thinking while creating your mobile form.
Between the size of a mobile device’s screen and the amount of content you need to place in your form, it’s easy to accidentally make your form feel cluttered. Remember to remove unnecessary fluff. Only keep the form fields for information that you absolutely need.
To streamline the process, you’ll also want to label your form fields clearly and succinctly, and mark optional fields as “optional” or include an asterisk next to the required ones.
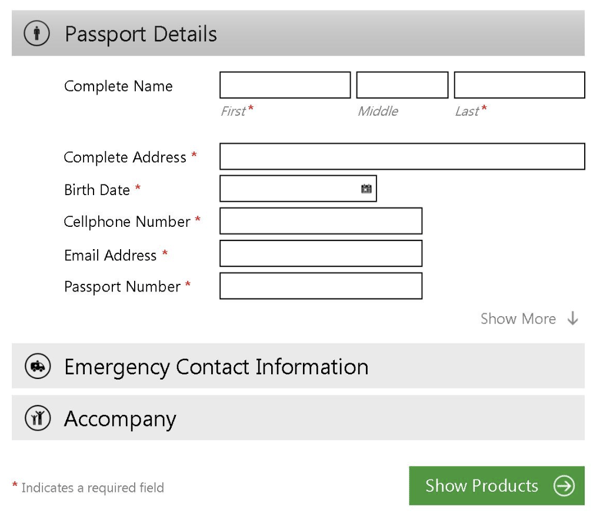
The aim is to make the form as easy as possible to fill out so that the chances of people completing the form go up.
2. Automate inputs when possible.
If you accidentally mistype your street address and the form corrects the spelling for you, the form autocorrects your response.
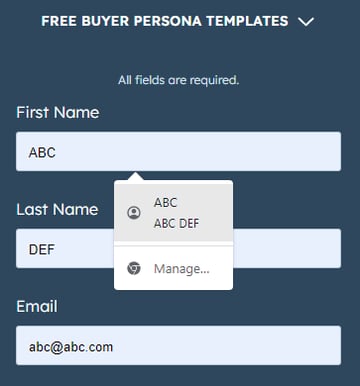
If you begin typing your shipping address and a box pops up with the rest of your address asking you if you want to “autofill” the rest of the form fields with your saved address, then your form is autocompleting your response for you.
By implementing autocorrect and autofill features on your mobile forms, you’ll improve user experience by making it quick, simple, and straightforward for users to enter their details.
In the below example, a person can easily autofill their information by clicking on the small pop-up that appears.
3. Use a single-column layout.
When you’re creating a long or multi-step form, list all of your content in a single-column layout.

Single-column form layouts are:
a. Easier to read.
Placing all your form fields in a single-column format allows your visitors to focus on only one item at a time, making your form easier to read.
b. Less daunting.
If you look at a form, especially in a tight space as you would on a mobile device, and see a large amount of content smushed together, you may feel overwhelmed. That’s why separating your content by rows and placing your form fields in a single-column format make your content look and feel less intimidating.
c. Quicker to complete.
When you place your multi-step form in a single column, leads can complete it more quickly than they would a multi-column form. That’s because the format makes the form easier to read and work through step-by-step.
Take a look at this sign-up form on the HubSpot website when viewed from a desktop or a laptop.
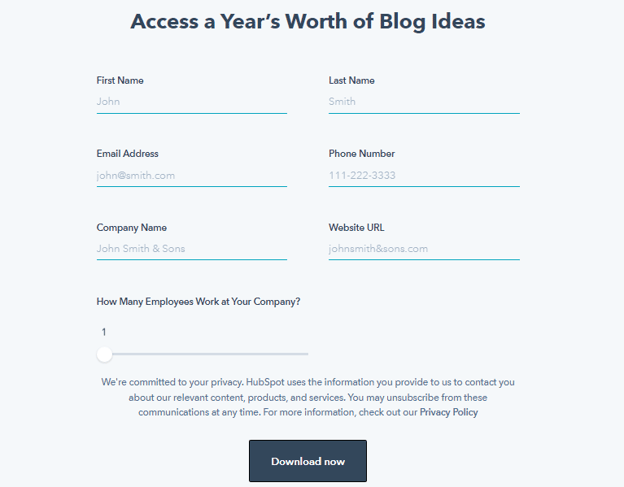
The two-column layout makes sense here, as there’s plenty of space on the wider screen to work with. Now check out the same form when viewed from a mobile device.
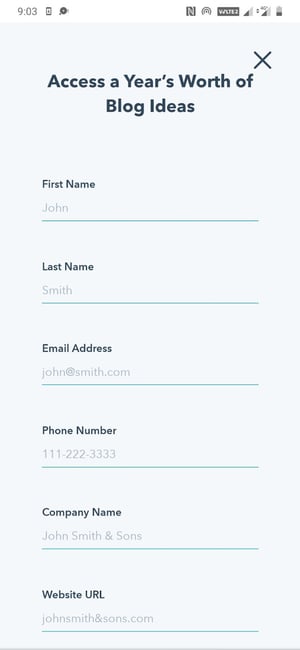
This single-column layout allows the eye to flow naturally while preventing clutter on the compact mobile screen.
4. Consistency matters (and so does form appearance).
How do you close a folder or an open tab on your laptop?
By clicking the ‘x’ button in the top-right corner.
But what if the button didn’t appear while on a particular application? How would you feel when you went to close the window?
Confused or irritated, maybe. You might spend a minute or two figuring out how to shut the application.
This is just a broad example but serves well to illustrate the importance of consistency. Watch this video to learn more.
Consistency in form design applies not just to style (colors, typography, logo, etc.) but to generally-accepted conventions that people are used to.
Here are some tips to ensure a consistent experience:
- Match your form’s look and feel to your brand and website.
- Ensure your form’s styling and formatting are consistent and complementary (nothing should look jarring or out of place).
- Align your form field inputs to the left.
- Affix each label above its corresponding input box and left-align it.
- Use an asterisk to indicate compulsory questions.
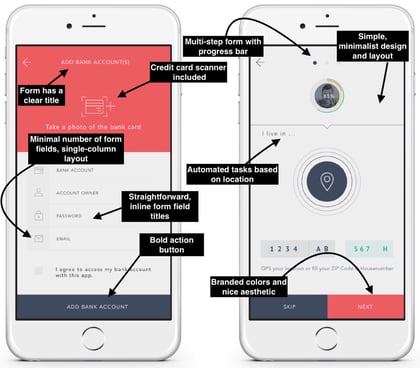
First impressions leave a lasting impression (in life and in business). That goes for your mobile forms. Nobody wants to complete a dark, difficult-to-read, cluttered, and unattractive form.
Your mobile form should be highly functional as well as aesthetically pleasing. Its appearance should contribute to its readability and positive user experience. To achieve this, use a simple and easy-to-read font style and size, a color palette that doesn’t feel overwhelming, and minimal form fields.
5. Keep in mind the touch experience.
Think about how you hold your phone while texting.
Most likely, gripping the phone with two hands while using your thumbs to interact with the screen. Or you might even do it single-handedly or type by using your index finger.
We interact with smartphones much differently than a laptop or desktop (cue the texting thumb), and mobile form design should reflect that.
Here are some suggestions to keep in mind:
- Have adequate whitespace to keep the form clutter-free and avoid accidental button presses.
- Ensure buttons are logically positioned (for example, the submit button near the bottom of the form, so users don’t have to scroll up to find it).
- Check that the text (font size and style) is legible on the small mobile screen (no one wants to pinch their screen and zoom in to be able to read the text).
- Make sure the form fields and buttons are large enough to be comfortably tapped with a finger.
- Make the form pop-up towards the lower part of the screen (where possible) to make it easy to reach.
6. Leverage input constraints.
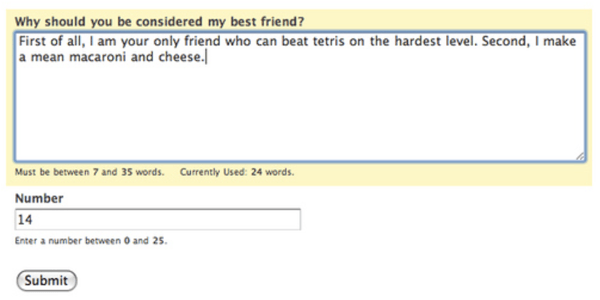
Input constraints restrict the type of response a person can enter in a form field. This can include a word limit (say, while filling out a job application form) or only being able to input digits (in the case of a phone number).
This is seen in the form below, where a numeric keyboard pops up when a person goes to enter their phone number.
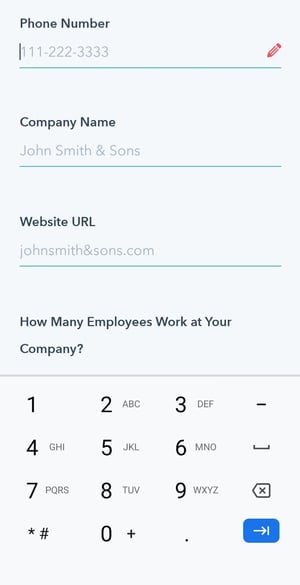
Input constraints maximize form efficiency by limiting inadvertent mistakes, delays, or confusion. For example, if someone was trying to make a reservation for a table at a restaurant and accidentally selected a date in the past, the constraint would prevent them from actually being able to select and confirm that date.
This is especially crucial when designing for mobile as smaller screens make it harder to enter information accurately. By setting input constraints, you’ll save people time while completing your form fields, and prevent yourself from receiving long-winded or invalid answers.
Here’s another example of an input constraint.
7. Create clear action buttons.
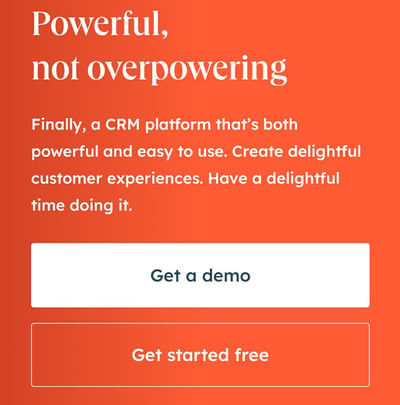
Buttons are an underrated aspect of mobile form design. Think about it: You get a form submission or conversion only after the right button is pressed. So you really can’t overlook this element.
This UI cheat sheet and UX Planet blog are great resources for designing effective buttons. Here’s a quick run-through of some of the mentioned principles that you can apply to your mobile forms.
- Too many buttons spoil the broth (just like form fields, keep only the essential buttons).
- Style and label your buttons consistently (capitalization, formatting, alignment, etc.).
- Let the focus shine on the primary button (the main action you want the user to take) by making it stand out by size or color.
- Right is right — a common rule of thumb for mobile is to position the main button on the right side and the second one on the left (though this can vary according to individual needs).
- Specific labels are almost always the answer (“Edit this page” over “Edit”).
8. Provide card scanners for payments.
Tried entering your credit card details in a form via your smartphone? Typing a bunch of numbers on a small screen with a small keyboard can be a tedious process.
Card scanning apps, such as Microblink, have become increasingly popular for that exact reason. When making a purchase, your visitors can click a button that takes them to a screen where they can use their mobile device’s camera to take a secure photo of the front and back of their card, whether that be their license or credit card.
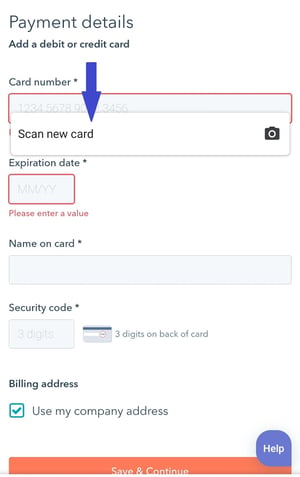
With just a couple of pictures, your leads will be finished with one of the most time-consuming parts of the mobile form completion process — keeping your visitors efficient as well as frustration and error-free.
9. Explain the need for specific information.
While completing a simple email signup or a registration form, have you ever been asked to provide personal information that has nothing to do with the signup form itself?
This is a common occurrence in all types of forms (not just mobile). Asking someone for personal or other sensitive information without explaining your need for it can seem sketchy.
When asking a question that doesn’t directly relate to the reason your visitor is filling out the form, it’s essential to create a summary box (with additional information) that the person can click on to understand why you’re asking for this information.
Such indicators can also help provide extra guidance on completing a form field when the instructions are not immediately apparent. In the image below, a summary box pops up when a person hovers over the icon.
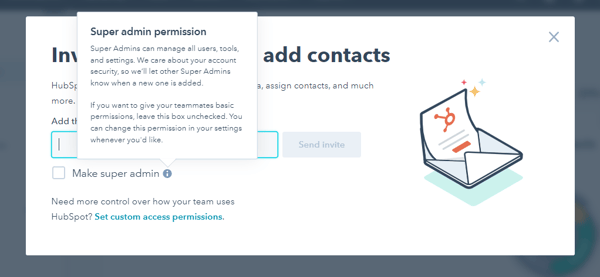
These small details will make your form feel professional and thoughtful while reducing the odds of the user leaving halfway.
10. Gather validation and feedback.
User experience is at the heart of good mobile form design. And validation and feedback play an important role in providing a great UX.
Validation lets people know if the information they’ve entered is right (or not). Notice the green ticks in the form fields below.
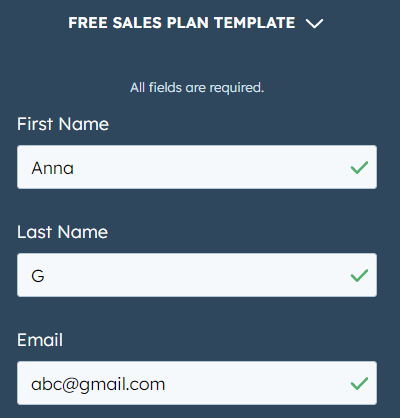
While completing mobile forms, your visitors are bound to make a mistake here or there. The form should flag these errors in real-time so the user can correct them immediately.
For example, if someone adds the incorrect zip code alongside their street address, the mobile form should display an error message. This should indicate — in easy-to-understand language — the error location and how the person can rectify it (as seen in the image below).
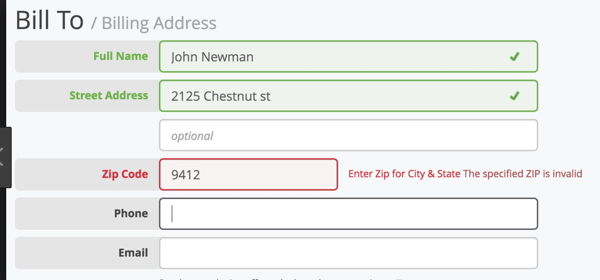
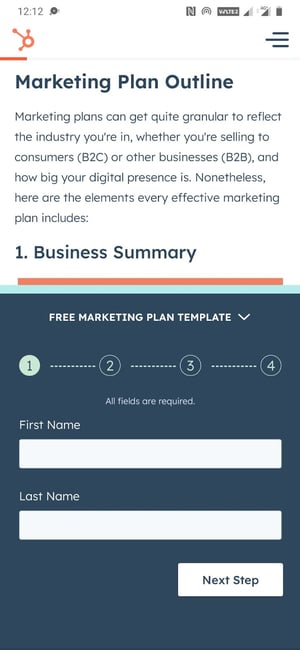
It’s also crucial to give people feedback as they go through the form. For example, a progress bar on lengthy, multi-step forms can make the form-filling process more engaging by showing users how far they’ve reached and how long they have left to complete it.

Consider a person filling out the above form without a progress bar. They’ll be clicking the ‘next’ button with no idea of when the form ends, and might even abandon it just before the final step in frustration.
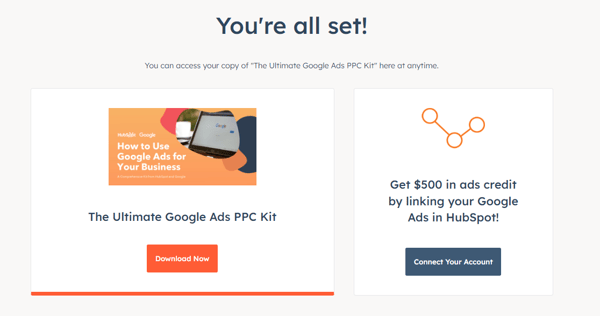
Once people submit their forms, you should direct them to another screen or page that says something like, “Success!” or “Thank you” so they know their submission worked.
Here’s an example of a success page on HubSpot that appears after a user signs up to receive a free Google Ads kit.
11. Make forms accessible.
Accessibility is fundamental to the usability of your form. Forms designed with accessibility in mind can be used by a wider range of people, including those with visual, physical, sensory, and cognitive disabilities.
Here are some specific recommendations for creating accessible forms from the World Wide Web Consortium Web Accessibility Initiative, WebAIM, and The A11Y Project Checklist).
- Check that the text doesn’t pixelate or become fuzzy when zooming into your form (for better visualization).
- Label your form elements in a way that can be clearly understood when read by a screen reader.
- Ensure your form is accessible in both portrait and landscape modes.
- Avoid the use of a time limit (where possible) to give people sufficient time to respond.
- Include captions or transcripts for any video or audio components in your form.
- Keep color contrast in mind. Here’s a free tool that can help with that.
- Check that your form is fully-usable with just a keyboard.
A great way to ensure that all of the above mobile form design strategies stick is by exploring what you should not do in form design. The below video looks at some examples of what not to do when designing forms on both mobile and desktop.
Back To You
It’s no secret that your website visitors are completing and submitting your web forms via their mobile devices. That’s because it’s convenient and efficient, as most people carry some type of mobile device with them everywhere, making it crucial for your forms to be mobile-friendly.
Otherwise, your forms will be difficult to read, complete, and submit, which may frustrate your leads or cause you to lose their business altogether.
By considering your mobile form design and implementing these guidelines, you’ll enhance your mobile form user experience, build positive relationships with your leads and customers, and boost your conversions.
Editor’s Note: This post was originally published in Dec. 2018 and has been updated for comprehensiveness.

How to Repost on Instagram: Ways to Reshare Content From Other Users
Instagram is a powerful social media platform to help increase brand reach and drive new business, but it can be time-consuming and expensive to consistently share content you need to see your engagement grow in the long-term — which is why you should learn how to repost on Instagram.
In this post, we’ll show you different free ways to repost on Instagram in a few simple steps. But before diving in, let’s discuss why reposting on Instagram can benefit your brand.

Why should your brand repost on Instagram?
Instagram is one of the largest social media sites on the market. With over one billion monthly active users, brands that incorporate the site into marketing strategy can reach larger audiences and gain visibility faster over other social media channels.
And with an audience like that, you want to consistently post high-quality content — but that can take time, effort, and resources that may not fit your budget just yet. Since most marketers post between 3-4 times per week, you should have a backlog of content to keep up with demand.
Additionally, user-generated content (UGC) performs exceptionally well. In fact, 90% of consumers say UGC holds more influence over their buying decisions than promotional emails and even search engine results.
For instance, consider the power of Warby Parker reposting this funny image from one of its customers, @cjronson:
Not only does the image likely appeal to Warby Parker customers, but it ultimately made Warby Parker marketers’ jobs easier — they didn’t need to create that content in-house.
Reposting to Instagram can help you highlight brand endorsements from your customers, brand loyalists, and employees. UGC is typically considered more trustworthy since a consumer isn’t gaining anything by promoting your product or service (unless it’s an advertisement) — they’re just doing it to tell their audiences that they like your product.
How to Repost on Instagram
Instagram allows you to repost other users’ Reels and posts to your own Instagram Story using its native reposting functionality. However, it has its limits: It doesn’t let you repost to any permanent part of your Instagram profile, including your feed, Reels, or videos.
In other words, Instagram only lets you temporarily share someone else’s content for 24 hours max. If you do want to keep it permanently, you can add it to an Instagram Story Highlight.
If you’re looking to add a post to your permanent feed and credit the original creator, read about how to do that in the next sections. For now, let’s learn how you can repost content to your Story and add it to your highlights.
1. Navigate to the post, Reel, or video you want to repost.
First, find the right content to share with your followers. You can do this through several avenues:
- Search for industry hashtags and repost popular posts by other brands and influencers
- Search for branded hashtags, which will show you user-generated content made by your customers and fans
- See the posts you’ve been tagged in and repost any that align with your brand
- Find brands that you admire and repost the content that most aligns with your brand
Remember that you can only repost content from users and brands with public profiles.
Note: You can also repost other people’s Stories, so long as you’re tagged in them. You can find those who’ve mentioned you in their Story in your Direct Messages.
2. Click the paper airplane symbol on the post or Reel.
On photos and videos, the button will be located next to the Like and Comment buttons.
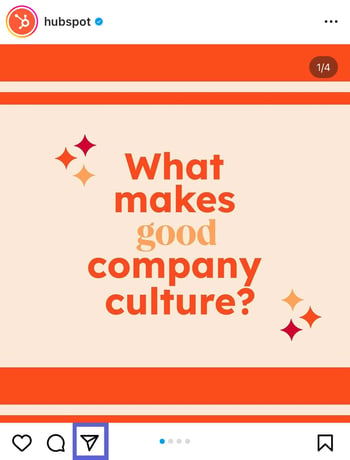
On Reels, it will be located between the Comment button and the three dots.

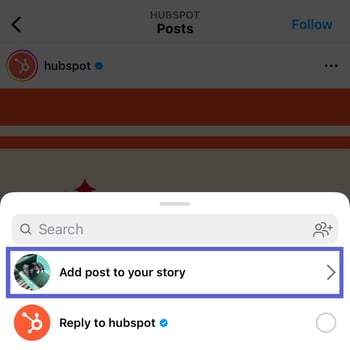
3. On the pop-up menu, click “Add post to your story.”
A pop-up will appear with several options. If you’re sharing a post, you have the option to add it to your story, reply to the poster (if they allow replies), or send the post via Direct Message to anyone you’ve messaged recently.
 Similar options appear when you try to share a Reel.
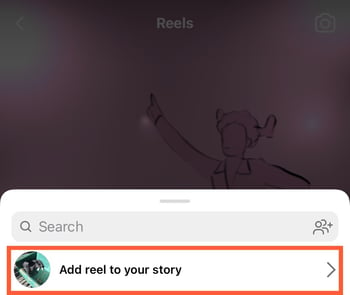
Click Add post to your story or Add reel to your story.
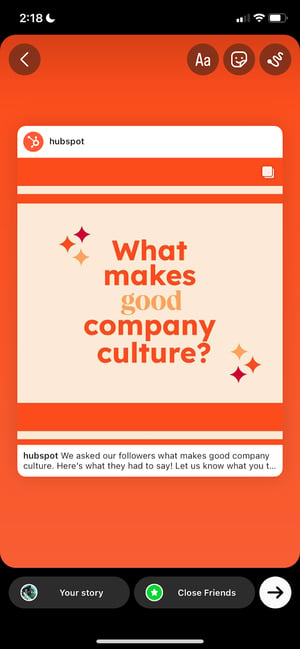
4. Tap to show and hide the post’s caption.
Next, you should see a draft of your story.
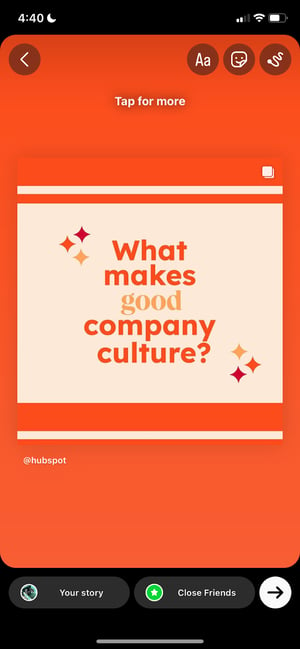
You have the option of either showing or hiding the caption. Simply tap the post to toggle between the two.
5. Add text, stickers, hashtags, and other elements.
To get the most engagement possible and align the repost with your brand, spruce up the story with text and other elements. You can even add a link or a call-to-action. Learn how to customize your Instagram Story here.

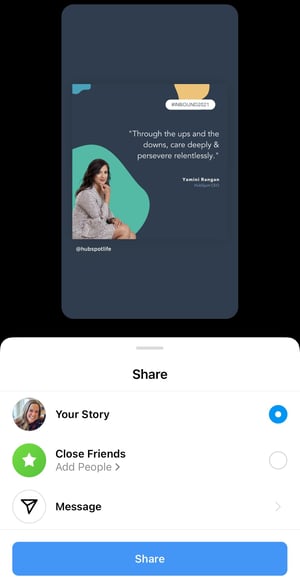
6. To share, click “Your Story.”
It’s time to finish your repost. At the bottom, click the button that says “Your Story” at the bottom. This will automatically share it with no additional action required.
You also have the option to click “Close Friends”, if you only want a select group to view your story. Last, if you click the right-hand arrow, you’ll see additional options to share the post via DM or with your close friends.
7. Add the shared post to your Highlights.
While Instagram doesn’t allow you to share posts directly to your permanent feed, you can add it to one of your Highlights, which will remain permanently on your profile. Learn how to create Highlights here.
Here’s one example from a stationer called MARK+FOLD:

With Stories, the same best practices should be followed as for sharing a post. If you don’t know the person and suspect the content you’d like to re-share might be licensed material, ask for permission first. Give credit to the original posters whenever possible.
The screenshot method doesn’t require other websites to repost on Instagram. It’s worth nothing that this method only works for reposting photos, not videos.
Here’s how to do it.
1. Find a photo on Instagram you’d like to repost, and take a screenshot with your phone.
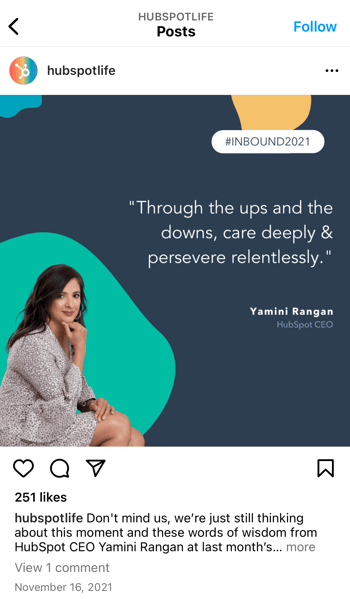
- For iOS: Press down on the home and lock buttons simultaneously until your screen flashes.
- For Android: Press down on the sleep/wake and volume down buttons simultaneously until your screen flashes.
2. Tap the new post button.
Once you’ve got your screenshot, return to your Instagram account. Tap the “new post button” in the top right of your Instagram screen (the plus sign inside a square).
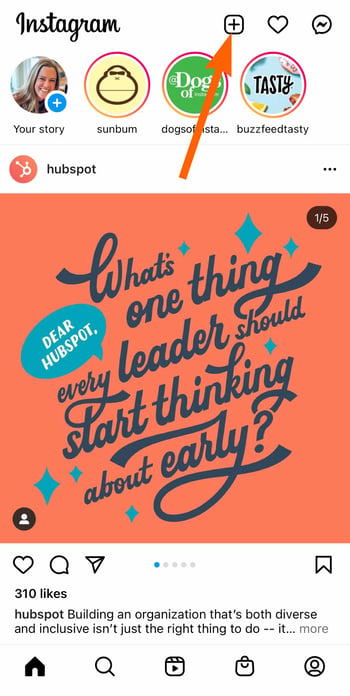
Then select “Post” (other options include “Story” “Reels” or “Live”).
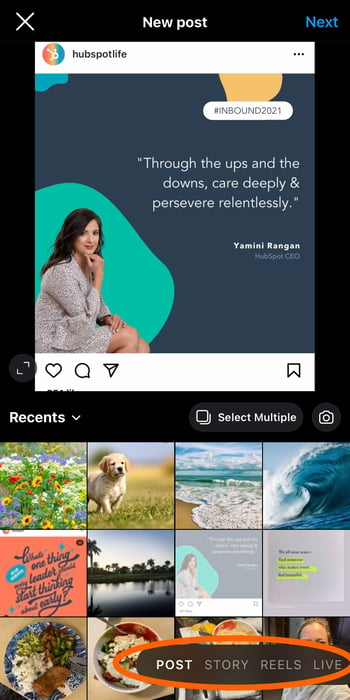
3. Resize the photo in the app.
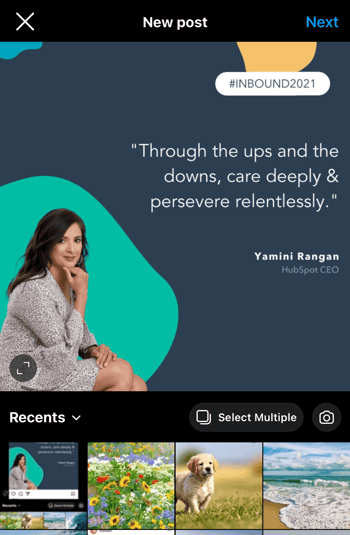
Keep in mind that your phone will take a screenshot of everything on your screen, not just the photo you want to repost. So, be prepared to crop the sides of the screenshot to capture just the image you want to share with your followers.
After you’ve cropped or resized the photo to your liking (by pinching the image and then widening your fingers apart), click “Next” in the top-right of your screen.
4. Edit and add filters of your choice.
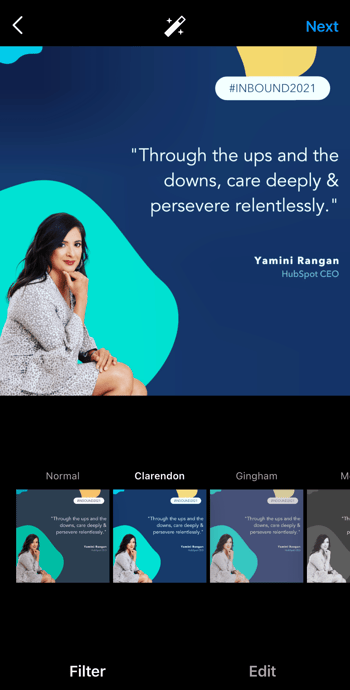
Edit and filter the post like you would any other Instagram post.
5. Add a citation.
The repost won’t include a citation, so we suggest adding one by typing “@ + [username]” to credit the original poster with the photo you’re reposting.
6. Add a caption.
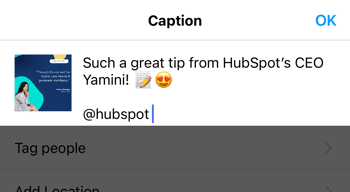
At the top you’ll see a preview of your post along with space for a caption. You can choose to tag people or organizations, and add a location.
7. Click share.
Once you’ve finished customizing the post with the options above, click share at the top right corner. The post will be live.
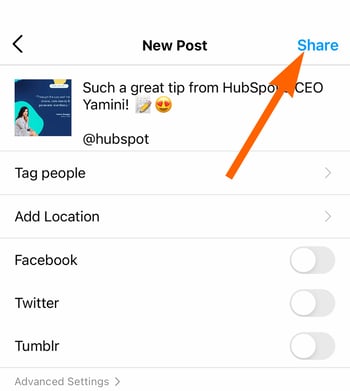
Here’s how the finished product looks:
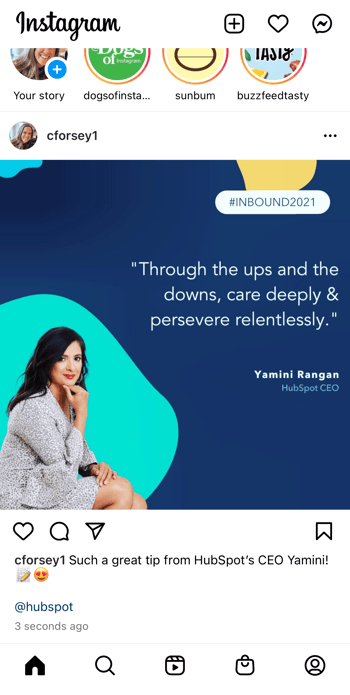
Pro Tip: When reposting content through screenshots, make sure you properly tag or give credit to the original content owner either within your story by linking to their account, or in the description of a post or reel.
Best Apps for Reposting on Instagram
1. Repost: Posts, Stories, Reels
Price: Free with in-app purchases
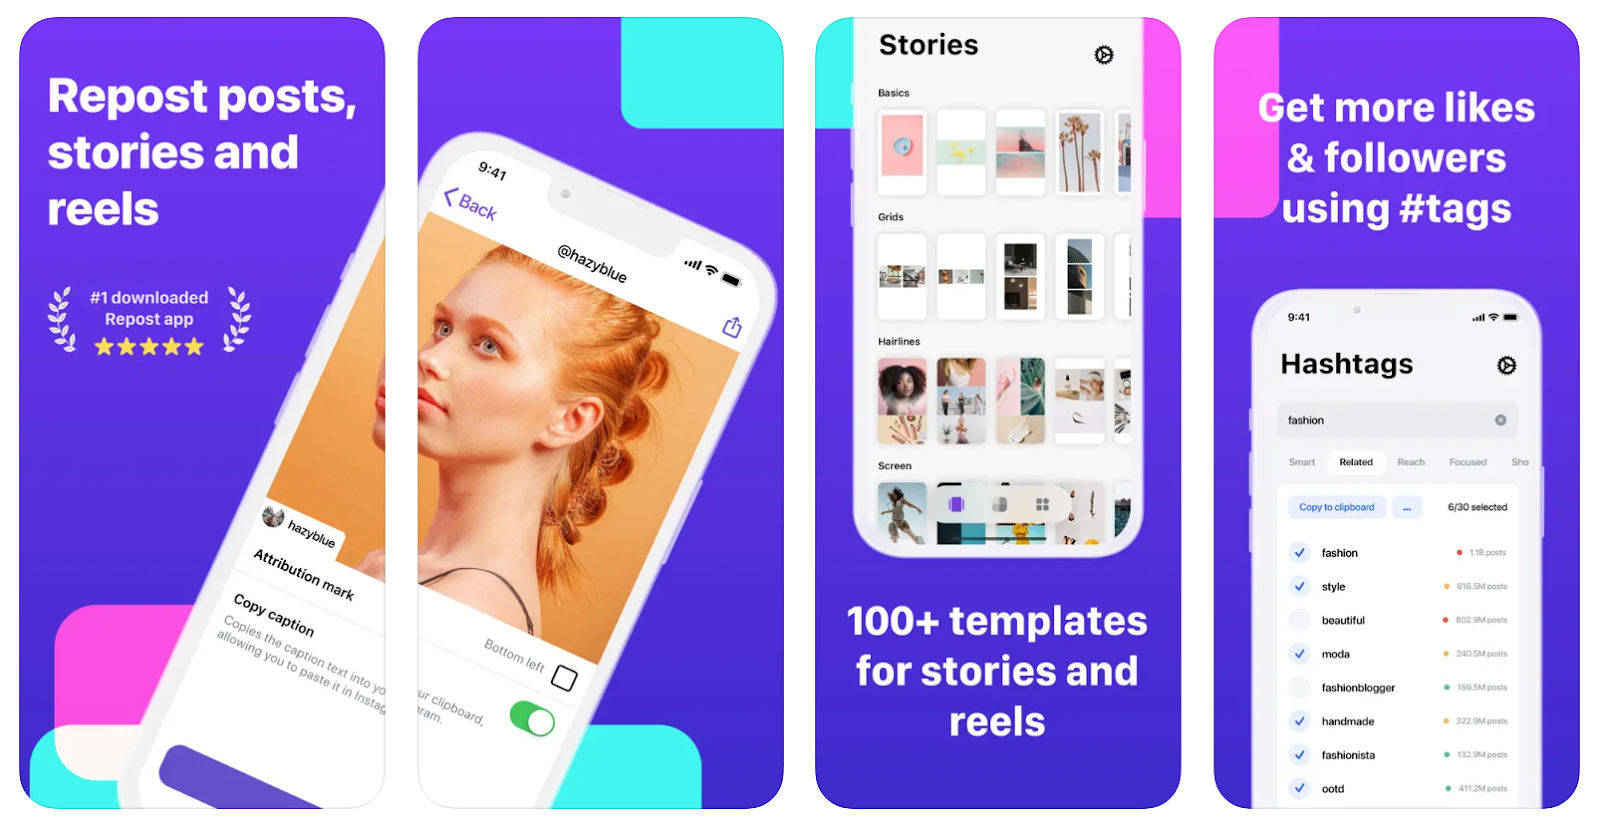
For Instagram for iOS or Android. The app integrates directly with Instagram so you can share content from other Instagram users from your mobile device.
If your brand’s Instagram profile follows a distinct brand style guide, Repost can help you customize your reposts to adhere to those guidelines. Users can pick from 50+ different text styles and symbol art to create eye-catching captions to capture more attention.
2. Reposta
Price: Free
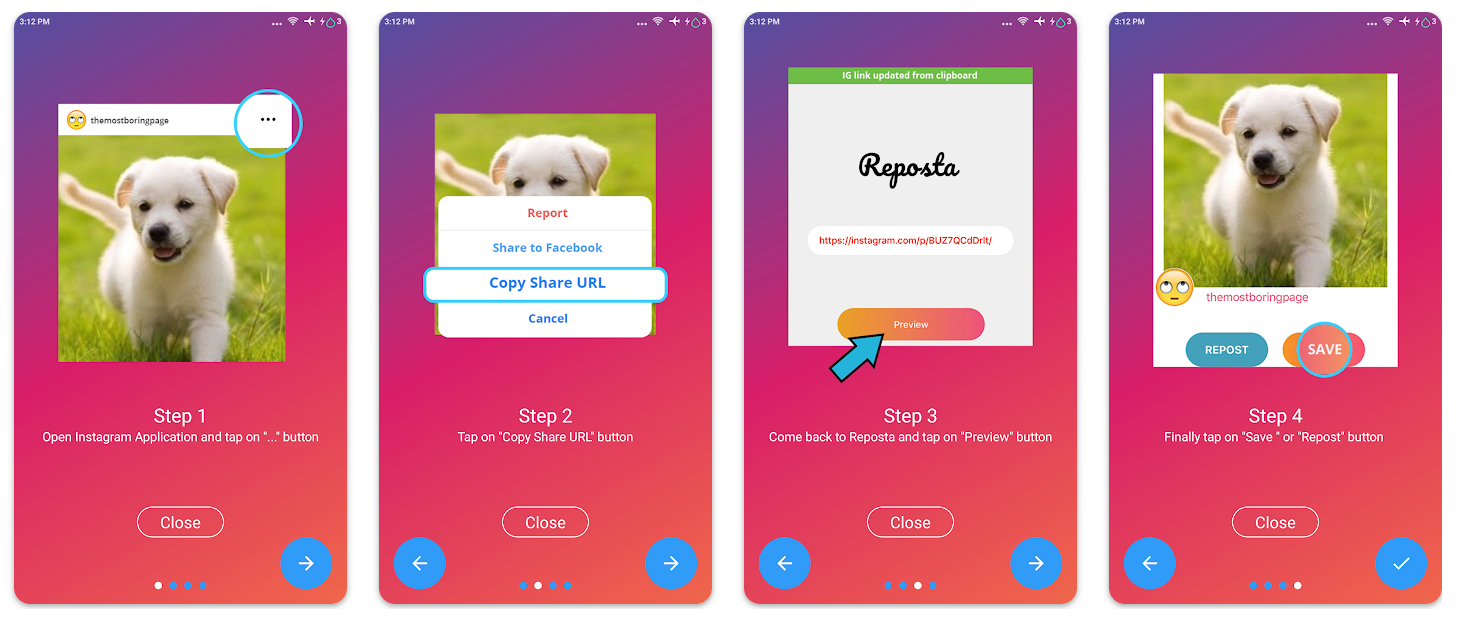
For Instagram for iOS or Android. Reposta for Instagram is a straightforward way to repost your favorite photos and videos on Instagram while giving credit to the original poster.
When you find something you want to repost in Instagram, simply copy the share URL and open Reposta. Then in Reposta, you can position the attribution mark and send the reposted media back to Instagram.
3. DownloadGram
Price: Free
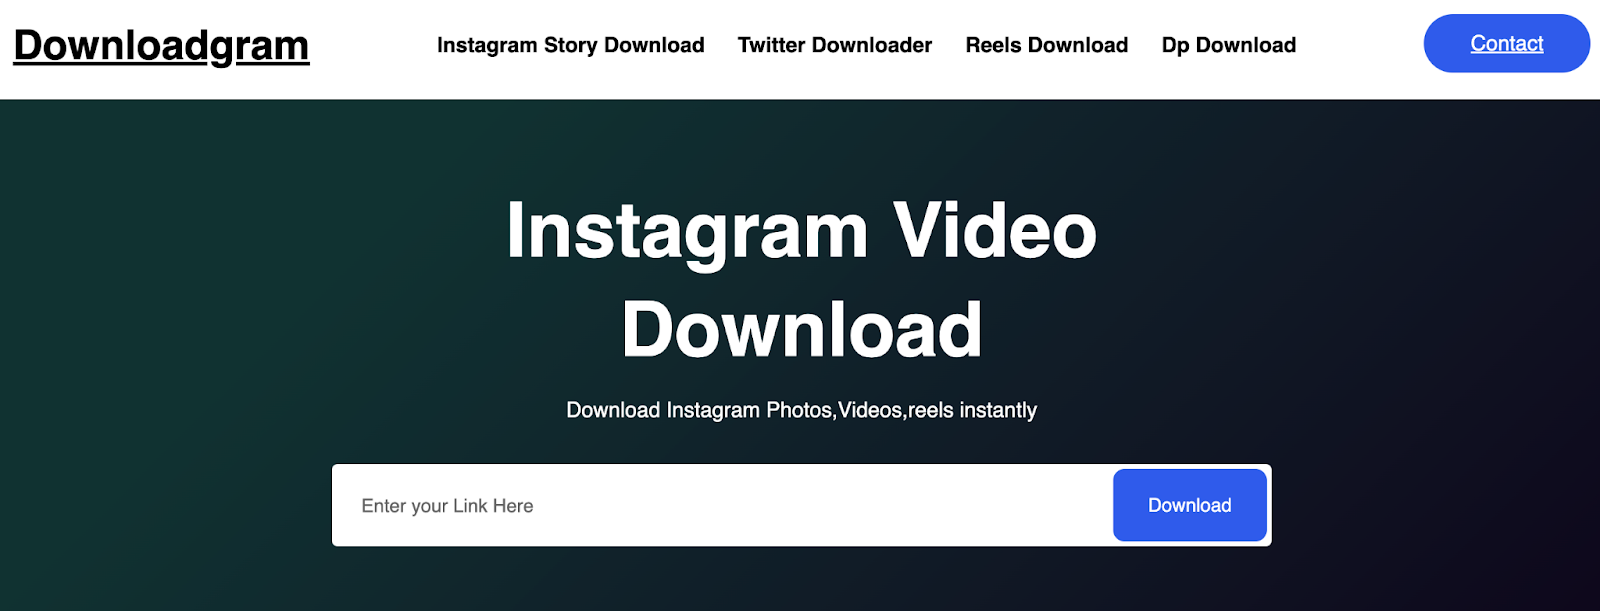
DownloadGram lets social media users download high-resolution copies of content to repost from their own accounts on channels like Instagram and Twitter.
There’s no app you need to download to repost using this process, instead you can copy and paste the URL to download video, photos, reels or stories to repost via PC.
Share Your Favorite Instagram Posts
Now that you’ve learned how to repost on Instagram, you can diversify your profile with content sourced from friends, family, and brands. Use the methods above — being sure to cite the source of the original post — to quickly and easily reshare your favorite content.
This article was originally published in November 2020 and has been updated for comprehensiveness.

How to Create a Social Media Calendar to Plan Your Content
What do cross-country road trips, wedding speeches, and social media marketing have in common? Planning. I can’t help you with your road trip or wedding speech, but I have a solution for planning your next social media marketing campaign — using a social media calendar!
Most marketers now recognize that social media is integral to an effective inbound marketing strategy. With so many social networks available to us, it’s crucial to stay organized and plan for when and what you will share on these platforms.

Before we dive into our list of top tools to stay organized, here’s what you need to know about social media calendars and why they’re essential.
What is a social media calendar?
How to Create a Social Media Calendar
Social Media Content Calendar Tools to Plan Your Messaging
The Benefits of Using a Social Media Content Calendar
Social Media Calendar Examples
How To Create a Social Media Posting Schedule for Your Business
How To Create a Content Calendar
What is the best social media calendar?
What is a social media calendar?
A social media calendar is a rundown of your upcoming posts organized by date and time. A social media calendar can be a spreadsheet, digital calendar, or interactive dashboard.
To get the most value out of your social media calendar, it may include the following:
- The date and time a post will go live
- The social media account or network will go live on
- Materials that will be included, such as copy, hashtags, links, and graphics
How to Create a Social Media Calendar
To create an effective social media calendar, you should:
1. Conduct a social media audit.
A social media audit assesses your social media presence, accounts, and engagement so you can see what’s working, what’s not, and where improvements need to be made. To learn how to conduct a social media audit, click here.
2. Choose your social media channels and the content you’ll post.
After conducting a social media audit, you should comprehensively understand which channels your audience uses and the kind of content they prefer. You should use your findings to determine which social media channels you’ll leverage and the content you’ll post.
For example, you may notice your audience prefers your behind-the-scenes content on Instagram but goes to Twitter to ask questions and learn more about your product. In that case, you can post fun behind-the-scenes photos and Reels on Instagram, then use Twitter to share information about your product and answer consumer questions.
3. Decide what your calendar should include.
Your social media calendar should be tailored to your business and goals, so you’ll need to include information in our calendar that will make your desired results.
To start, your calendar should include the following:
- The platforms you’re using
- The day and the time your posts will be published
- Links, graphics, videos, and copy
As you become more adept with your calendar, you may want to expand it to include the following:
- Platform-specific materials include Reels, TikTok LIVE, polls, shoppable posts, etc.
- Geo-targeting
- The associated or vertical campaigns, such as product launches and contests
4. Get feedback.
Once your calendar is complete, share it with your team and stakeholders to get their feedback to ensure it meets everyone’s needs. As you use the calendar, you may find ways to improve or expand upon it; you’ll need to be open to ongoing feedback.
Social Media Content Calendar Tools to Plan Your Messaging
1. HubSpot’s Downloadable Template for Excel
Content Calendar
Price: Free
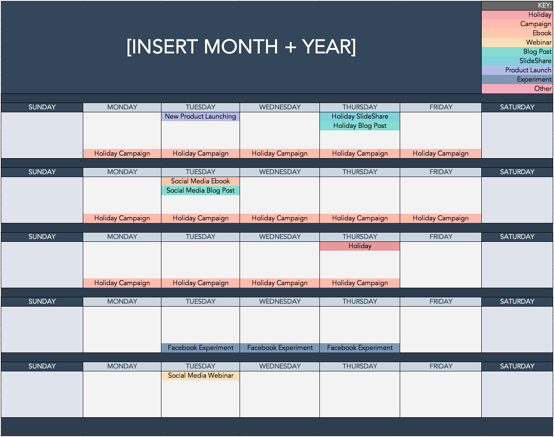
Marketers might already use Excel for different types of reports and data analysis, but this multifaceted tool is also perfect for social media content calendar organization. Excel can be customized according to the priorities and metrics your team is focused on, so it’s a great option for planning.
The good news? We’ve already done the heavy lifting by creating a free, downloadable social media content calendar template using Microsoft Excel. Marketers can easily use this template to plan individual social media posts— monthly or annually — while keeping an eye on more significant picture events, holidays, publications, and partnerships.
- Use the Monthly Planning Calendar Tab above to get a bird’s-eye view of what’s coming down the content pipeline in a given month.
- In the Content Repository tab, you can add the content you’ll be publishing on this tab to keep track of which pieces have been promoted already and to recall older content that can be re-promoted easily.
- You can draft and plan out social media posts in advance on the Social Network Update tabs. These tabs are for organizational purposes. After planning out your social media posts, you’ll manually upload the content of the posts to a social media publisher.
For more on how to use the templates, check out this in-depth guide from my colleague Basha Coleman.
This free resource can draft social media posts or bulk-upload them into a publishing app to maximize efficiency. (HubSpot customers: You can use this spreadsheet to organize content and upload it directly into Social Inbox. For instructions on this, check out the template’s cover sheet here.)
Why we like this social media tool:
Marketers with small teams and heavy workloads will love this intuitive template. It acts as a social media content planner, tracker, and archive, making it perfect for sharing your social plan with stakeholders and referring to it when you need to repurpose old content.
2. Google Drive
Content Calendar and Asset Organization
Price: Free for personal use. Google Workspace plans for businesses start at $6 per month.
Google Drive has several helpful features that make it easy for social media marketers to build an effective content calendar.
Here’s an example of how a team might use Google Calendar to track their editorial and social media calendars to ensure posts align with new blog content. Multiple teams can easily share these calendars to avoid scheduling conflicts and align campaigns.
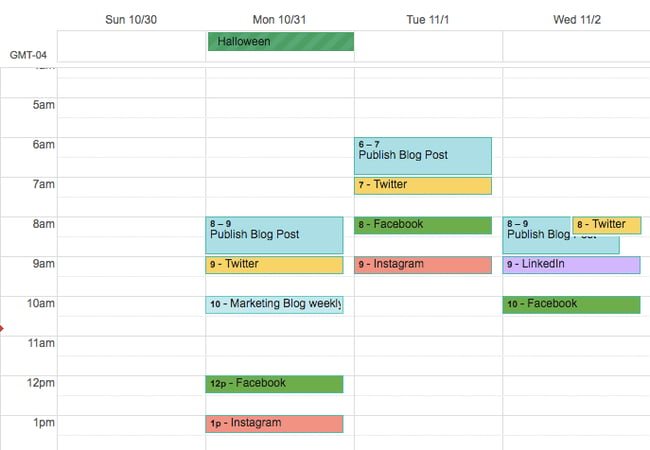
Marketers can also use shared Google Sheets to schedule posts on social media, track the status of different pieces of content, and assign tasks to team members without switching between platforms.
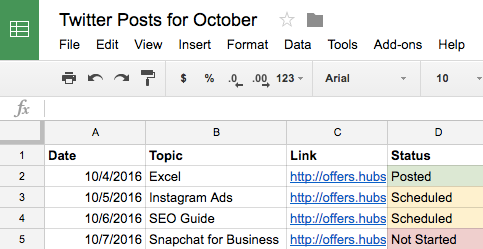
With the help of Google Docs, users can keep comments in one place and collaborate on different projects without emailing back and forth or scheduling a meeting. This is a handy feature when editing content for social media, which may need to be drafted and approved quickly.
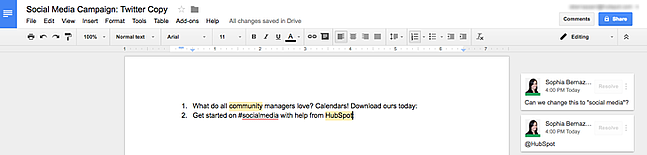
Why we like this social media tool:
Google has several products that can be used together to create quick, seamless workflows. So you’ll find value in the Google Drive system if you publish dozens of daily posts across multiple platforms or ramp up one channel for your freelance business. The best part is that HubSpot customers can easily link their Google Drive accounts to the HubSpot portal to upload files from Drive into the HubSpot software.
3. Loomly
Content Planning, Creation, Publishing, and Calendar
Price: 15-day free trial. The Base plan is $26 per month for two users and 10 accounts when you choose the annual agreement.
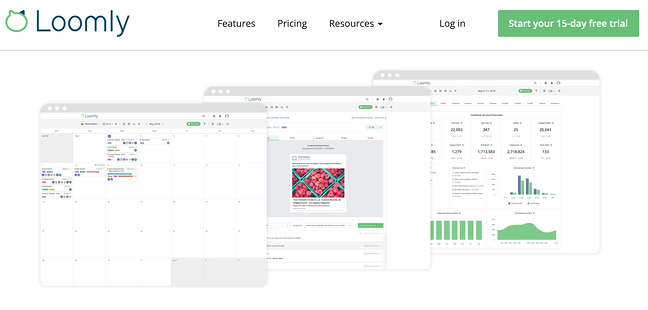
If you want more mileage from your content calendar, you can turn to an all-in-one content planning and publishing platform such as Loomly.
Loomly offers tools beyond content scheduling and management. This tool provides inspiration and direction to help you create content. It also allows you to manage your content assets, schedule posts, view them as a list or a calendar, and analyze what posts are working versus which ones need work.
Loomly’s most robust feature set includes a collaboration and approval environment so teams can submit mockups, provide comments, see version logs, and flag for approval. This can help you streamline processes for efficiency when there are “too many cooks in the kitchen” on a particular project.
Why we like this social media tool:
This tool can do both if your team is responsible for organic and paid social. And your team who wants to avoid using their personal account for social media duties can respond to comments and replies directly in Loomly — that means they won’t need to log in to each native platform to engage with followers.
4. Trello
Task Management and Content Calendar
Price: Free for individual use. The Standard plan starts at $5 per user per month, billed annually.
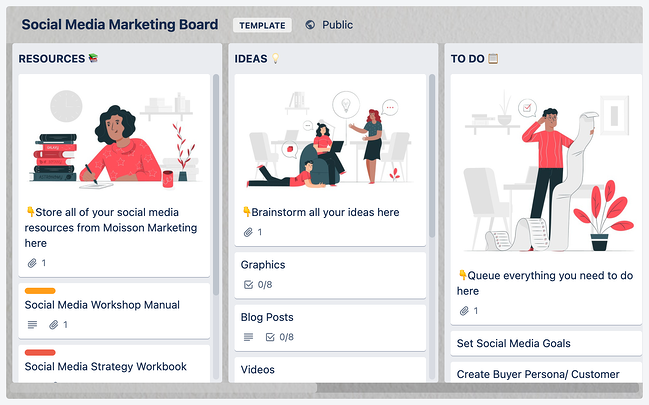
They are looking for an organizational tool that’s highly effective for team collaboration. Try Trello. This platform offers a full calendar view, making it easy to visualize what content is going out and when. More specifically, social media managers can use Trello’s flexible assignment “cards” and customizable “boards” and “lists” to map out to-do lists, manage a content calendar, plan a campaign, and store brainstorming ideas.
You’re not limited to just one structure, however. Users can customize boards according to their needs. For example, a team could create a board to organize social media posts for a given week on a specific platform or post ideas around a topic, such as a campaign or awareness day.
Why we like this social media tool:
Trello cards can be assigned to different team members, marked with due dates, and commented on. Users can even customize labels with varying statuses of publication so the entire team can see the progress of their social media posts and when they’re due on the calendar. The labels could also indicate different social networks where content is being published.
5. SproutSocial
Social Publishing and Content Calendar
Price: The Standard plan starts at $249 monthly for five social profiles, billed annually.
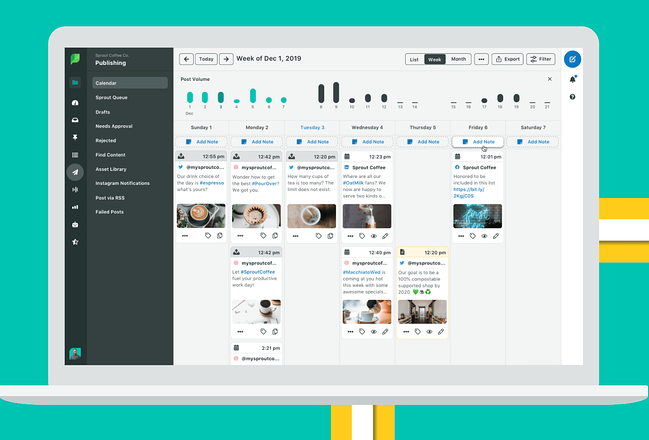
Sprout Social’s social media calendar and publishing tool make it easy for teams or individuals to plan and schedule their social posts. You can schedule content to automatically post to Twitter, Facebook, Instagram, LinkedIn, Pinterest, and more.
You can also tag each social post and add notes to track and report your posting strategy and campaigns. Additionally, their publishing suite includes Optimal Send Times, which analyzes your social media data and automatically publishes when your audience is most engaged.
Why we like this social media tool:
Coming up with social media content ideas can take time and effort. Sprout Social’s social listening tool lets marketers like you uncover niche conversations that your audience is interested in. From there, you can join the conversation for brand awareness or start your discussion on the topic to grow your following.
6. Evernote
Content Calendar, Task Management, and Asset Organization
Price: The Basic plan is free. Create a custom template using the Personal program for $8.99 per month.
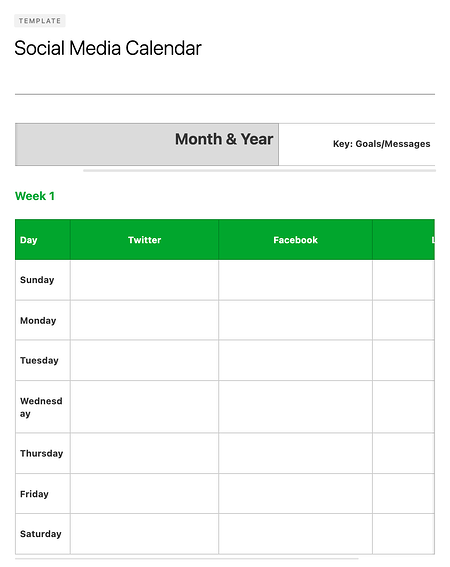
Evernote is a note-taking app that marketers can use to keep track of all the moving parts of a social media campaign.
The tool also features yearly, monthly, weekly, and hourly logs, making it easy to track when you’re publishing content on social media when you’re producing blog content and other team-wide priorities. (Evernote offers customizable templates for each of these that can be downloaded into the app.)
Another helpful feature is Evernote’s Web Clipper extension for Chrome. Marketers can use this tool to easily save links to their Evernote Notebook for sharing later on.
Why we like this social media tool:
The Evernote mobile app also boasts interesting features to help marketers keep their social content ideas straight. For example, you can easily snap a photo and save it to your Evernote files for review later. This feature is of particular value for social content creators looking to maintain a backlog of photos to publish on Instagram.
7. Hootsuite
Social Publishing and Content Calendar
Price: The Professional plan starts at $49 per month and begins with a free 30-day trial.
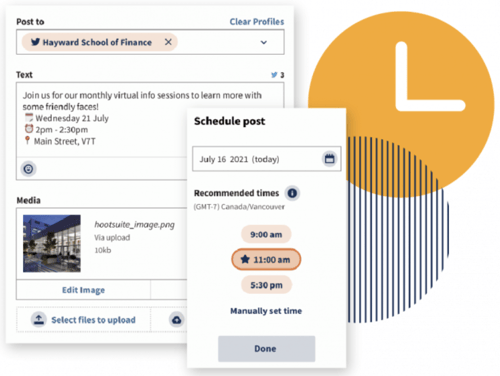
Hootsuite offers a built-in Planner tool to help you create campaigns, identify publishing gaps, and collaborate with your content creation team. Its primary features are in social publishing so that you can release content to your networks in advance, but it also has rich features for collaboration and post approvals.
You can even curate content from other sources without logging into your account. Once your content is created, you can preview it with the Composer tool, which displays it according to each social network’s unique format.
Why we like this social media tool:
Cross-collaboration is a big deal on any marketing team, and Hootsuite has a way of making this even more accessible. The social publishing platform has a built-in content library serving as the single truth point for your entire organization. Does your sales team need a product feature cheat sheet? Customer service looking for details on the latest product feature? All that and more can be found in your team’s Hootsuite content library.
8. Agorapulse
Social Publishing and Content Calendar
Price: The individual plan is free, or you can use the Pro plan for small teams starting at $79 per month.
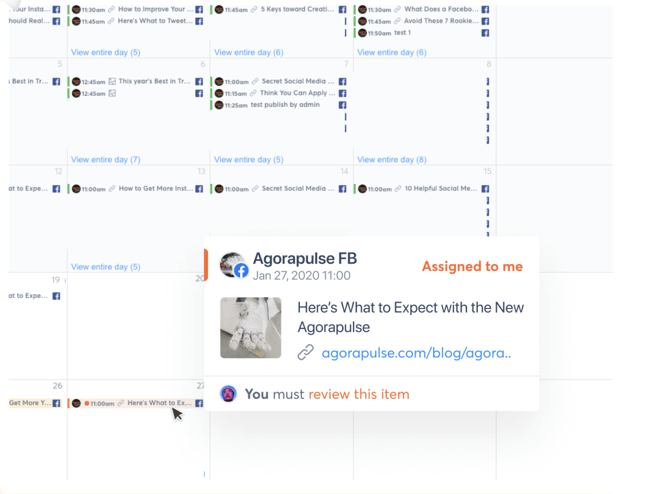
Like Hootsuite, Agorapulse offers social publishing tools and a content calendar to manage your social media accounts easily. This includes scheduling (or rescheduling), queuing, and bulk uploading posts, which is incredibly helpful for teams who use quarterly or monthly content plans.
Why we like this social media tool:
What makes Agorapulse different is its social inbox, which allows you to manage all the interactions from various platforms in a single place. After all, content isn’t just a one-and-done activity; it’s about building awareness and engagement with your readers.
9. StoryChief
Content Planning and Distribution
Price: Team pricing starts at $100 per month, billed annually.
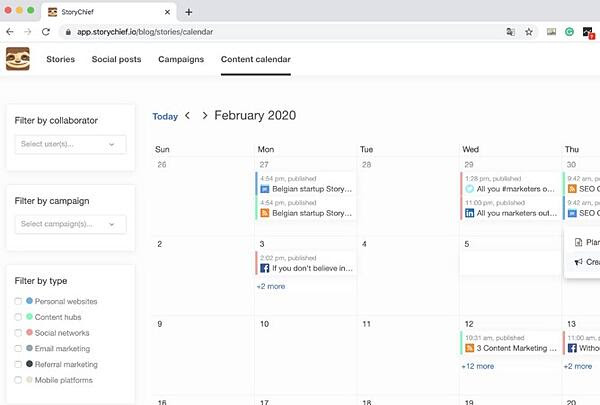
If you want more from your content calendar than knowing when posts go live, StoryChief is your option. With StoryChief’s smart calendar, you can better strategize and plan your content strategy across channels.
It displays much more than your timetable — it also allows you to assign collaborators to tasks and filter them by the campaign. StoryChief self-describes its tool as a “content distribution platform” that unifies analytics and publishing across multiple channels for a more simplified approach to content creation. Best of all, it syncs with HubSpot and your favorite calendar apps.
Why we like this social media tool:
Believe it or not, there are quite a few similarities between social media marketing and SEO marketing— StoryChief bridges this gap with its SEO Copywriting tool. By highlighting the areas you can improve your copy for the reader (and subsequently the search engines), you can write more precise, more engaging content that works on social media and your website or blog.
10. ClearVoice
Content Creation and Management
Price: Prices for Level 1 users start at $510 per month.
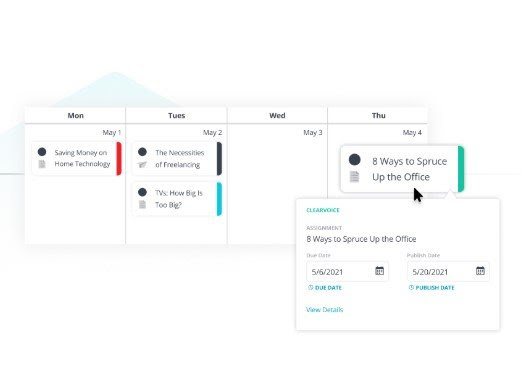
So what about content planning and creation? ClearVoice offers content creation tools to fit into your workflow. Their big claim to fame is their Talent Network Search which allows you to find and connect to content creators to work on your projects. Yet, ClearVoice also has features for task management for internal and external collaborators.
You can create, edit, and approve projects in an interface that makes editorial management easy. It also includes a dashboard and dynamic editorial calendar with plenty of interactive functionality and integrations with other popular software.
Why we like this social media tool:
Not every social team is working for a big agency or client. For freelance content teams who want to stay organized and on time with their social media publishing, ClearVoice offers some of the same great features at a price customized to your team.
11. Zerys
Content Creation and Management
Price: Use Zerys’ pricing calculator for an estimate.
Zerys is another platform that matches you with your ideal content creation freelancers. However, it markets itself as a platform dedicated to content success, offering content planning, production, publishing, promotion, conversion, and analytics features.
Why we like this social media tool:
You can manage unlimited content projects, plan keywords and titles for blog content, hire writers, and view deadlines on an integrated calendar. With the project management features that Zerys offers, in-house writers can use the platform to produce quality work on time every time. It also integrates with HubSpot, so publishing is a breeze.
Social Media Templates
HubSpot’s Social Media Calendar Template
If you’re new to setting up social media calendars, HubSpot offers a free, pre-made downloadable template that you can use to schedule out full weeks of posts.
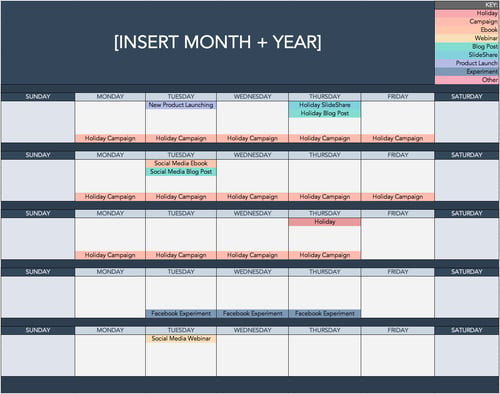
HubSpot’s Social Media Content Calendar Template for Startups
This template is very similar to the one seen above, but it includes tabs that work as a repository for content ideas. The template also includes helpful tips for posting on specific social media networks.
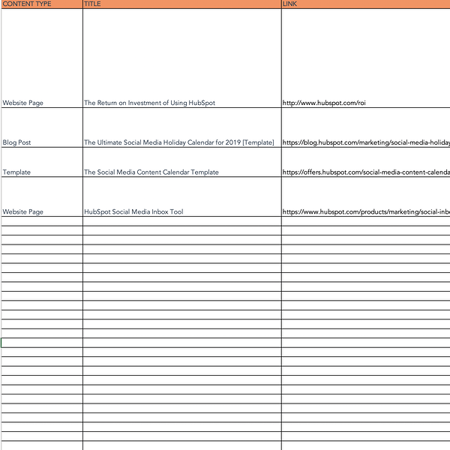
If you’re aiming to get all your ideas down to develop a big-picture plan for your social assets, we recommend starting with this template.
The Benefits of Using a Social Media Content Calendar
We’re all busy, and inevitably, tasks slip through the cracks. Social media content is no exception.
Like with blogging, a successful social media strategy requires regular publishing and engaging with followers to see positive results — whether blogging, a successful social media strategy requires traditional publishing and engaging with followers to see positive results — whether that’s in terms of SEO, brand recognition, lead generation, or all three.
So, if you’re not already using a social media content calendar, here are three facts to pique your interest:
- You can pivot flawlessly when plans change by using a content calendar. With a social media content calendar, marketers can plan out posts for entire weeks or months in advance, which frees up working hours to strategize for the future.
The best part is that you can always leave space for breaking news or current events in your industry. Otherwise, you’ll spend valuable time searching the internet daily for content to share, a known productivity killer.
- Grow your audience on each platform by curating content specifically for them. Social media marketers should take the time to craft custom messages for each network because the audience expects to see something different on each one.
For example, your Instagram followers want to see Reels and Videos, while your Twitter followers like quick sound bites and shareable quotes. Planning this content using a social media calendar will save you time throughout the week and ensure you’re thoughtful and intentional when posting on each site.
- Optimize your social strategy by tracking the performance of your content each month. Without a calendar, social media marketers are publishing content into the void. They cannot track big-picture and past performance.
With a calendar, marketers can look back and analyze which content performed best so they can adjust their strategy accordingly. If a particular type of post received a significant amount of views, you could recreate it for a different topic and see the same success.
- Take advantage of social media holidays to reach a new but relevant audience. With the help of a calendar, marketers can plan for holidays and observance days, such as National Cat Day, when they can tailor their content and engage with a broader audience.
Social Media Calendar Examples
1. JotForm Social Media Calendar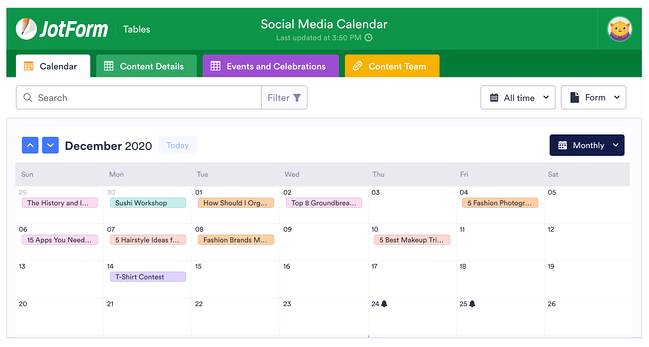
JotForm’s social media calendar isn’t just visually appealing and functional. The tabs at the top reveal your social plan for every channel you execute your strategy on, including in-person or virtual events.
If you’re modeling your social calendar after this one, remember to include a tab for content details and who on your team will be responsible for creating the content. You might also have a separate tab for each month to keep things organized.
2. Firefly Marketing Social Media Content Calendar
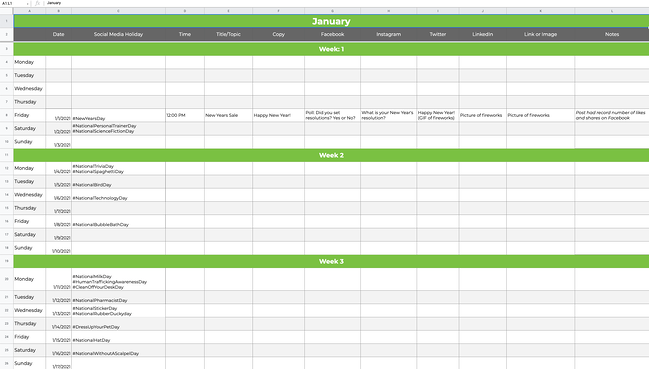
Going a more traditional route with your social media calendar? Try a Google Sheets template like the one created by Firefly Marketing. Each tab is dedicated to a different month, while the worksheet includes every channel you might need across the top.
The rows are separated by a week, so you can quickly identify the date and time a post is scheduled for publishing. Our favorite part of this template is the pre-populated social media holiday column with fun dates that your audience will love.
How To Create a Social Media Posting Schedule for Your Business
Scheduling your business’s social posts can keep you organized and help you consistently deliver content to your followers without worrying about looming deadlines. Content posting strategies can differ depending on the social media platform, and you should consider not only what you’re posting but also when and how often.
By creating a social posting schedule and adjusting the schedule to fit each platform, you can increase the chances that your posts will reach your audience.
Facebook’s Meta Business Suite makes scheduling posts and stories for your business easy.
Scheduling a Facebook Post on Desktop
Step 1: To schedule a post using the Meta Business Suite on your desktop, start by selecting your business’s Facebook Page from the dropdown menu in the top left of your sidebar.
Step 2: Next, click Posts & Stories or Calendar, then click Create Post.
Step 3: Click Facebook News Feed to schedule the post to your news feed.
Step 4: Enter the details of your post, including text, media, and a link or location. If you add a photo to your post, you won’t be able to add a link preview. Click Call to Action or Feeling/Activity to add an optional call to action or feeling/activity to your post. You cannot add both a call to action and a feeling/activity.
Step 5: A preview will appear on the right as you build your post. You can change the preview to see how your post will look on both desktop and mobile by using the dropdown menu at the top of the window.
Step 6: After building your post, click the arrow next to Publish and click Schedule Post. Select the date and time you want your post to be published, and click Schedule to schedule your post.
Scheduling a Facebook Post on Mobile
Step 1: Using the Meta Business Suite mobile app, you can also schedule Facebook posts on mobileMeta Business Suite mobile app. Start by tapping Post to create a new post.
Step 2: Enter the details of your post, including text, media, links, a background color, and a feeling/activity. Then choose your business’s Facebook page to publish to Facebook.
Step 3: Tap Schedule for later and select the date and time you want your post to be published. Then tap Schedule to schedule your post.
Like Facebook, Instagram also uses the Meta Business Suite to schedule posts.
Scheduling an Instagram Post on Desktop
Step 1: To schedule a post to Instagram using the Meta Business Suite on your desktop, start by connecting your Instagram account to the Meta Business Suite.
Step 2: Once your Instagram account is connected, click the dropdown menu in the top left of your sidebar and select your Instagram account.
Step 3: Click Posts & Stories or Calendar, then click Create Post. Click Instagram Feed to schedule the post to your Instagram feed.
Step 4: Enter the details of your post, including text, media, and an optional link or location. If you choose to add a link to your Instagram post, it will not show a photo preview.
Step 5: A preview will appear on the right as you build your post. You can change the preview to see how your post will look on both desktop and mobile by using the dropdown menu at the top of the window.
Step 6: After building your post, click the arrow next to Publish and click Schedule Post. Select the date and time you want your post to be published, and click Schedule to schedule your post.
Scheduling an Instagram Post on Mobile
Step 1: Like Facebook, you can schedule Instagram posts on mobile using the Meta Business Suite mobile app. Start by tapping Post to create a new post.
Step 2: Enter the details of your post, including text, media, and links. Then choose your business’s Instagram page to publish to Instagram.
Step 3: Tap Schedule for later and select the date and time you want your post to be published. Then tap Schedule to schedule your post.
LinkedIn does not give users the ability to schedule posts. Still, by using third-party software such as Hubspot’s social media management tools that are included with HubSpot’s Marketing Hub Professional accounts, you can easily create and schedule LinkedIn posts.
Step 1: To schedule LinkedIn posts using HubSpot’s social media management tools, start by logging into your Marketing Hub Professional account.
Step 2: Next, navigate to Marketing > Social and click Create Social Post.
Step 3: In the right panel, click LinkedIn. Create your post in the text box, including emojis, hashtags, mentions, tags, and a content link. When using HubSpot’s social media management tools, you can only mention or tag LinkedIn company pages, not LinkedIn users.
A post preview will appear if you add a content link to your post. You can add up to four images to your post by clicking the image icon or add a video to your post by clicking the video icon.
Step 4: Click Preview to preview how your post will appear on LinkedIn.
Step 5: To schedule your post, click on the When dropdown menu, choose a date and time and click Schedule post.
Step 1: You can schedule Tweets for your business by logging into your Twitter Ads account and navigating to the Creatives > Tweets tab. To access the Creatives tab in your Twitter Ads account, your account must have a credit card on file.
Step 2: Click on New Tweet in the top right corner and create your Tweet. If you would like your Tweet to only be seen by users you have targeted in a Promoted Ads campaign, click the Promoted Only checkbox. Leave this unchecked if you would like the tweet to be seen organically by your followers.
Step 3: Once you’ve written your tweet, click the down arrow next to Tweet, click Schedule, and select the date and time you would like the tweet to be posted.
Scheduling a Pinterest Post on Desktop
Pinterest allows you to schedule up to 100 Pins. You can schedule one Pin at a time, up to two weeks in advance.
Step 1: To schedule Pins for your business, log into your Pinterest Business account. Next, click Create at the left corner of your screen, then click Create Pin.
Step 2: Choose an image or video, and add a title, description, and link.
Step 3: Click Publish later and choose the day and time you’d like to publish your Pin.
Step 4: Choose a board from the drop-down menu, or create a new board by clicking Create board.
Step 5: Click Publish.
Scheduling a Pinterest Post on iOS
You can also schedule Pins using the Pinterest app on iOS.
Step 1: To start, log in to your Pinterest Business account.
Step 2: Tap the plus icon, then tap Pin.
Step 3: Take a photo for your Pin, select an image or video from your device, and tap Next.
Step 4: Add a title, description, and the destination website to your Pin.
Step 5: Below Schedule Date, tap the edit icon and select the date and time you would like to publish your Pin.
Step 6: Tap Done.
Step 7: Tap Next.
Step 8: Choose an existing board to save your Pin to or tap Create board to create a new board.
How To Create a Content Calendar
-
Download HubSpot’s content calendar template.
-
Draft your content goals.
-
Determine what types of content you want to publish.
-
You can choose which platforms you will post on.
-
Plan the most efficient posting schedule for your content.
Step 1: Download HubSpot’s content calendar template.
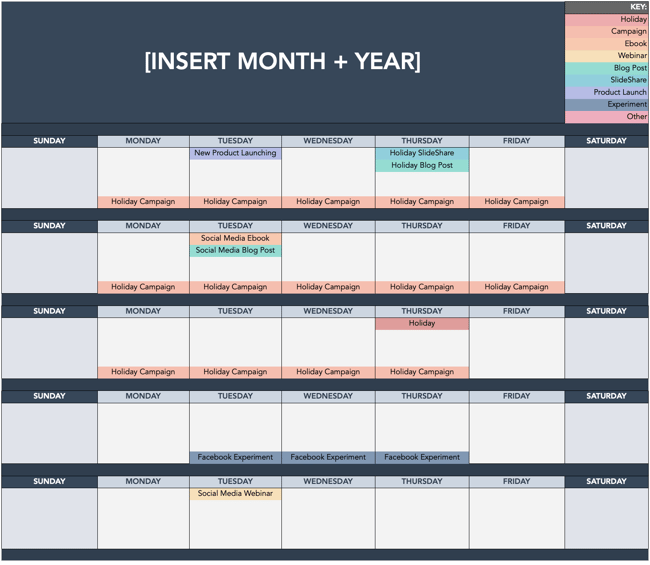
Consistently posting content is key to making the most of your business’s social media accounts. HubSpot’s content calendar template makes it easy to set up a monthly posting schedule for your business’s social media accounts. The template can be opened in Excel or uploaded to Google Sheets, so you can easily plan content with your team from anywhere.
HubSpot’s content calendar template includes a monthly planning calendar, a content repository, and posting schedules for Twitter, Facebook, LinkedIn, Instagram, and Pinterest. With HubSpot’s content calendar template, your team can view and manage your business’s social media posting schedules and deadlines at a glance.
Step 2: Choose your content goals.
Americans spend around 2 hours on social media every day, making it a great way to reach out to your business’s current and potential customers. It’s not enough to know what you want to post; you must also understand why your business posts content.
Posting content to social media can help your business achieve many goals, including raising brand awareness, driving traffic to your website, introducing new products and services to your customers, and even launching rebranding campaigns, to name a few.
When choosing your business’s content goals, consider what your brand most needs to accomplish. Are you looking to reach out to a new demographic and generate leads? Do you want to increase your customers’ engagement with your business? Knowing your content goals can help to ensure that your business’s content reaches the right audience with the right message.
Step 3: Determine what types of content you want to publish.
Once you know your business’s goals, decide what types of content your business will post. Each type of social media content has advantages and disadvantages. For example, blog posts and articles can help your business build credibility, but they can be time-consuming to create. Meanwhile, Tweets can help your business gain consumer insight and hone its brand voice, but Twitter’s limit of 280 characters per Tweet means your business may have to use long threads of multiple Tweets to get your message across. Carefully choosing the types of contentyour business will post can help ensure that your content provides value to your audience.
Step 4: Determine what platforms you will post on.
Once you know your business’s content goals and the types of content you will publish, it’s time to choose where your business will post.
Your business’s social media presence should be informed by its content, goals, and target audience demographics. For example, while posting on Instagram may help your business reach a young audience and market goods, the photo and video sharing platform may be a poor choice if you want to increase blog traffic among professionals in your industry. Likewise, a LinkedIn post may help drive traffic to your business’s blog but may not help you drive traffic to your online store.
Considering each social media platform’s strengths and weaknesses can help you accomplish your business’s content goals without wasting time and money marketing to users who are outside of your target audience.
Step 5: Determine the most efficient posting schedule for your content.
After deciding on your business’s goals, the types of content you will publish, and where you will post the content, you need to create the posting schedule that your business will use. Each social media platform has peak engagement times — certain days and times of day when users are most likely to view and engage with posts. Therefore, knowing the best times to post on each social media platform will help you maximize the reach of your business’s posts. For instance, user engagement on Facebook peaks between 11 a.m. and 1 p.m. on Wednesdays. User engagement on Facebook is lowest on Sundays, before 7 a.m. each day, and after 5 p.m. each day.
When creating your business’s content calendar, account for the engagement patterns for each of your social media accounts to demystify the scheduling process, save time, and get your posts in front of your audience when they are most likely to see them.
What is the best social media calendar?
Now that we’ve reviewed a few helpful tools to kick your social media strategy into high gear, it’s time for you to experiment with them. The best social media calendar saves you time, streamlines processes, and helps you work smarter, not harder.
Several of the platforms we’ve suggested are free to use or offer a free trial. Have one person on your team test one out and report their findings. You might find the tool that helps you reach your next social media KPI. Remember, every social media team is different. Combining these tools could help you execute your strategy efficiently to drive ROI.
Editor’s note: This post was originally published in 2017 and has been updated for comprehensiveness.


YouTube Ads for Beginners: How to Launch & Optimize a YouTube Video Advertising Campaign
You’ve spent months perfecting the script, storyboarding, finding the right talent, shooting, and editing. The end result? A blockbuster video that’s sure to rake in hundreds—maybe thousands—of views.
With all that time invested, you can’t stop at just embedding the video on the homepage of your website or sharing it on social media and hoping someone watches. Running YouTube ads on your videos is one way to make sure more of your target audience finds the content you’ve produced. And with new formats and tracking capabilities, you can also use this information to report on its ROI.

In this post, we’ll guide you through YouTube ads—how they work, how you get paid, and best practices for growing revenue from your YouTube channel through advertising. By the end of this guide, you’ll be ready to launch advertisements across your YouTube channel as part of your overall YouTube marketing strategy. Let’s get started.
What’s New With YouTube Advertising
Advertising on YouTube is very different from running a PPC or paid social media campaign. There are specific creative constraints and a ton of options for this platform, and you need basic knowledge before you even scope out your next video project to make the most of the paid possibilities.
In recent years, Google has rolled out a series of changes that makes YouTube advertising an extremely worthwhile investment. Let’s take a look.
More Rigorous Brand Safety Efforts
In the past, the platform has made major efforts to protect viewers and advertisers from harmful content, and those efforts have persisted as of November 2022. The latest updates include “clearer language” and “specific guidelines” around ads not being placed on adult content, violence, harmful or dangerous acts, sensitive events, videos with inappropriate language, and drug-related content.
Targeting Based on Users’ Search History
A few years ago, Google announced it would allow advertisers to reach more viewers on YouTube — especially across mobile devices, where 50% of YouTube views take place. Among the changes it rolled out, possibly the biggest announcement was that advertisers would be able to target viewers based on their Google search history, in addition to their viewing behaviors YouTube was already targeting.
Marketers can now target ads at people who recently searched for a certain product or service. If the content of a video ad is closely related to a search the viewer has been researching, they might be more likely to watch the entire ad or click through the ad to the website.
Audio Ads
Audio has grown lately — you needn’t look further than podcasts and the new social media app Clubhouse. To keep up with the changes, Google is now allowing YouTube advertisers to create audio-only ads. While we’d recommend starting with a video ad first, you can later consider using audio once you’ve perfected your brand voice and learned what your audience likes to engage with the most.
Upgraded Data Attribution Models
Google has also upgraded YouTube’s data attribution model so you can better measure how users engage with your ads. You can also determine cost-per-conversion and see your YouTube ads’ performance alongside your Search and Shopping ads’ attribution reports.
Keywords are relatively less expensive to target on YouTube than in traditional Google Search, where the average cost per click is estimated to be between $1-2.
While great content is bound to be found, it’s important to be proactive about gaining the attention of prospects and educating those who are unfamiliar with your brand. YouTube ads allow you to do just that. It’s a cost-effective way to target your audience with a more engaging form of content — video or audio.
The Types of YouTube Video Ads
There are several key types of video ads in which you can invest on YouTube. Google outlines the basic formats here. Below, we go into more detail.
1. In-Feed Video Ads
In-feed video ads show up on the YouTube homepage, search results pages, and as related videos on YouTube video watch pages.
This ad appeared after performing a YouTube search:
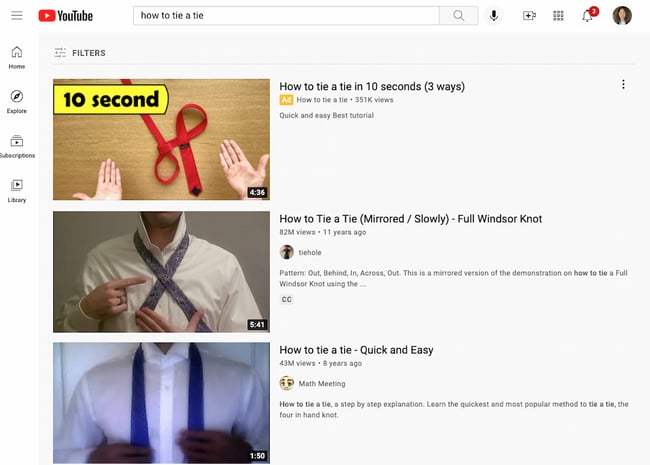 Once a user clicks on the ad, the destination video page features a spot on the right-hand column where a companion banner display ad will appear.
2. Skippable In-Stream Ads
Skippable in-stream ads are the standard video ad type on YouTube. Advertisers only pay for these ads when a user watches the ad for at least 30 seconds, until the end of the video, or if the viewer takes an action, such as clicking on a call-to-action. YouTube requires that skippable ads be between 12 seconds and 6 minutes in length.
You’ll see these ads play before someone watches the video they’ve selected on YouTube. Viewers sometimes have the option to skip the ad after watching it for five seconds. You can also have them play anywhere in the Google Display Network (GDN) — or sites that purchased Google video ad space.
In-stream ads also let marketers customize video ads with different CTAs and overlay text, as highlighted in the skippable in-stream ad example below from Grammarly.
Notice that there’s another CTA from Grammarly on top of the right-hand suggested video columns.
What Skippable In-Stream Ad Videos Can Include
Skippable ad campaigns can include videos with people, dialogue, and music that was retrieved with permission — or is considered royalty-free. However, it’s best not to run a standard promotional commercial. Because these videos can be skipped, you need to give your audience a reason to keep watching, and product plugs historically don’t get the views you might expect.
Instead, tell a story with the time you have in this video. People love seeing case studies of those who faced a struggle that they can empathize with. It’s a source of entertainment that makes your brand memorable and less tempting to skip.
With skippable in-stream ads, advertisers can gain a ton of information about the performance of their ads for optimization and testing purposes.
Using their Google Ads account, YouTube account managers can collect data on an ad’s completed views, partial views, channel subscriptions, clickthrough rates on CTAs, views sourced from a user sharing the content, and views on the brand’s other content that can be attributed to a person initially viewing a video ad.
These actions help advertisers better understand the full value of their video ad spend and where to allocate budget to increase results.
3. Non-Skippable In-Stream Ads
Non-skippable ads can play before, mid-roll, or after the main video. They can be 15 to 20 seconds in duration. Here’s an example:

Non-skippable mid-roll video ads appear midway through a YouTube video that’s 10 minutes or longer. On the desktop, viewers will see a five-second countdown, and on the app, they’ll see yellow markers where the ads are placed.
What Non-Skippable Videos Can Include
Non-skippable ads give you just as much freedom as skippable ads in their allotted content. You can include people, dialogue, audio, and more elements that you find best represent your brand in 15 to 20 seconds.
Because non-skippable ads can’t be skipped, these videos are best created with a call-to-action (CTA) so you can optimize the attention you do have from the viewer. In other words, encourage viewers to click on your ad and receive something in return. Perhaps you’ve released a new product or are promoting a major event this season — use non-skippable ads to get those clicks.
4. Bumper Ads
Bumper ads are the shortest type of YouTube video ad available to you. At just six seconds per bumper, these ad spots play before a viewer’s chosen video. It’s also non-skippable.
 Bumper video ads obviously can’t tell a good-enough story in just six seconds, but they make terrific complements to larger video campaigns on a new product launch or event. Just be sure to use the six seconds wisely, and include only the components of your brand you want your audience to remember.
5. Overlay Ads
Overlay ads are a type of banner ad that hovers at the bottom of the video, as shown below. This type of ad is ideal to supplement your other in-stream video campaigns. A banner ad helps to avoid advertising your product in an intrusive way while still reaching your target audience.
Now that you’re familiar with the types of ads you can run within the YouTube platform, let’s cover the nuts and bolts of launching a YouTube ad campaign.
How to Advertise on YouTube: Launch an Ad Campaign
Once you’ve created a marketing video you want to advertise on YouTube, it’s time to create your video ad campaign.
If you haven’t made a video yet, here’s how to get started with Animoto or Wistia, along with a few great examples of YouTube ads.
Step 1: Upload your video to YouTube.
 Step 2: Login to or Setup your Google Ads account.
Now, you’re ready to set up your advertising campaign. First, go to your Google Ads account. If you haven’t made one already, you can sign up with a Google Workspace email (either personal or business).
When you first sign up, the screen might prompt you to start creating a campaign right away. Look for an option that says “Are you a professional marketer?” or “Set up without creating a campaign” and click. That way, you can get to your brand new Google Ads dashboard.
Step 3: Create a new campaign.
When you access the dashboard, click the button that says “+ New Campaign”.
Step 4: Choose the goal and campaign type.
You’ll be prompted to select a goal, then a campaign type. Choose whatever goal you’d prefer. Under campaign type, select “Video.”
Step 5: Choose the campaign subtype and strategy.
You’ll be prompted to select a campaign subtype: Video reach campaign, outstream, or ad sequence. Choose “Video reach campaign.”
In the same screen, select your method for reaching your goal: Either “Efficient reach (Bumper, Skippable in-stream, or a mix)” or “Non-skippable in-stream.”
Step 6: Enter a campaign name.
Next, enter a name for your campaign. Leave the bid strategy as is.
Step 7: Enter a budget.
Set your budget per day or for the entire campaign. Setting a daily budget can help you keep daily costs low while ensuring you don’t run out of money too quickly. Setting a campaign total budget can help you establish a fixed investment amount that Google won’t go over.
After that, choose a start and end date.
Step 8: Choose networks, locations, and languages.
Decide where you want your ad to appear.
- YouTube search results: Your video ad will appear in results for searches and will appear on the YouTube homepage, channel pages, and video pages.
- YouTube videos: This runs skippable in-stream ads that appear pre- or mid-roll during a YouTube video.
- Video partners on the Display Network: With this option, you can choose for your video ad to appear before or around videos across the Google Display Network.
You should create separate campaigns for YouTube search results and YouTube videos, as this will help you to better track performance metrics. These ads are served to people performing very different activities and require a different amount of commitment from the viewer, so it’s best to monitor performance separately.
Next, define the location of users whom you want the ad to be shown to. You can also exclude certain locations.
Last, choose the languages that your target audience speaks.
Step 9: Set up content exclusions and excluded types and labels.
These options are for those who wouldn’t like to advertise their brands on videos that have profanity or sexual content.
Choose between “Expanded inventory” (excludes videos that have excessive profanity and graphic content), “Standard inventory” (excludes videos with strong profanity and graphic content), and “Limited inventory” (excludes videos with moderate profanity and graphic content).
Under “Excluded types and labels,” you can also prevent your ads from showing up in embedded YouTube videos and live-streaming videos. In addition, you can exclude content based on their content labels (G, PG, MA, and so on).
Step 10: Choose related videos.
You have the option of adding related videos to appear below your ad. You can add up to five.

Step 11: Configure advanced settings.
In the advanced options, you can specify the operating system, device, and carrier for more granular targeting. This is especially useful for mobile app ads, and there’s an option to increase or decrease your bid based on if the video ad is shown to someone on a mobile device.
You can set beginning and ending dates for your campaign, create a custom schedule for when your video ad should be shown, and limit the daily impressions and views for users. This all helps you to get the most return for your ad spend.
Step 12: Set up demographics and audience segments.
Next, define the audience you would like the video to be shown to — options include gender, age, parental status, and household income. You can also target individuals by their interests, such as beauty mavens, cooking enthusiasts, horror movie fans, etc.
Try running multiple campaigns to target different groups of users to discover who is most engaged, rather than including everyone you want to target in one campaign.
Step 13: Select target keywords, topics, and placements.
You can also target individuals by keywords, topics, or placements where you would like your video ad to appear. Keyword targeting with in-display ads can be a powerful tool for finding individuals who are looking for a visual answer to a question. Be sure to do your research, and try testing out different groups of keywords to see which leads to more views, clicks, or conversions.
Additionally, you can use video ads to remarket to people who have been in contact with your brand already. This can help you to re-engage those who are already familiar with your brand.
Step 14: Start bidding.
Next, determine the max price you will pay for each view, which you can adjust to increase the number of projected views your video may receive.
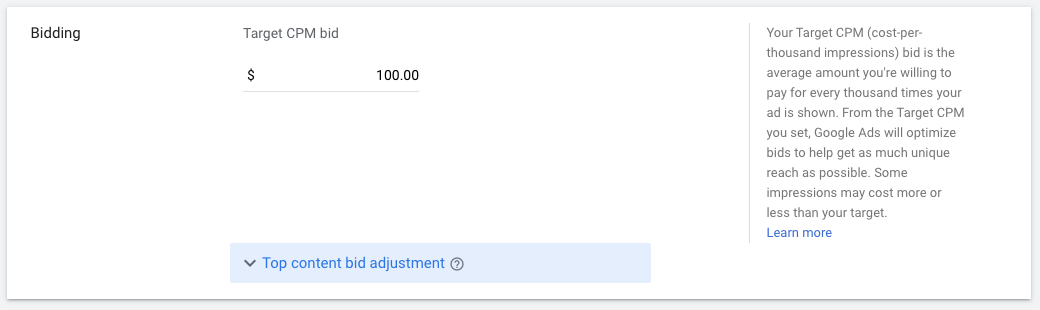
Step 15: Create the video ad assets.
Last, insert the YouTube link for the video you would like to run the ad for. You will then choose whether you want this to run as an in-stream ad or an in-display ad.
For in-display, you’ll need to include a title and short description, which is entered on two separate lines. Note: Titles are limited to 25 characters, and the description lines are limited to 35 characters each.
In-stream ads provide you with the option to overlap a display URL on top of the video. You should use a vanity URL that directs to another final URL to make it more memorable. You can include advanced URL tracking options. In addition, a companion banner made from images from your video will appear on the right side of the video ad.
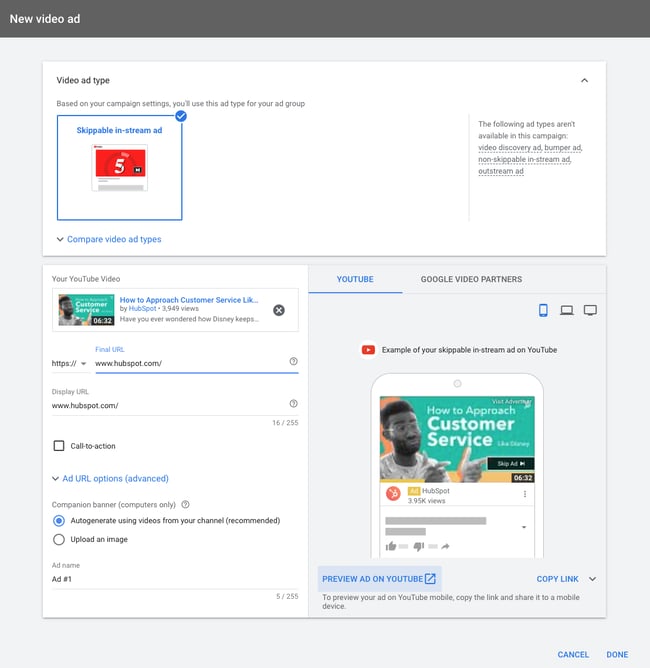
Click Done, then click Create Campaign.
Finished! Google will then prompt you to put in your credit card information (if they don’t have it already) so they can begin running your ad.
Step 16: Link your Google Ads account.
You should link your Google Ads account to the YouTube channel where the video is hosted if you haven’t already. On the top navigation bar, click “Tools & Settings.” Under “Set Up,” go to “Linked accounts.”
Choose YouTube from the screen, and you’ll be prompted to add a channel.
10 Tips for Optimizing Your Video Ads
Launching a video ad campaign is a great step, but there are some things you should set up prior to starting to pay for views. That way, you make the most of your budget and see the highest return on investment.
1. Define your metrics and goals.
When analyzing the results, there are four main categories of metrics you can track for each video.
Views and Impressions
Under the “views” category, you can better understand what percentage of the ad people viewed and understand how the ad drove earned views. You can also see how it increased views on your brand’s other videos.
Audience
This category can be used to track engagement metrics split up based on age, gender, household income, and parental status.
View Rate
The view rate could signal if the creative and message are interesting or entertaining enough for people to watch the ad. By increasing your view-through rate (VTR), you will lower your cost per view.
Conversions
Conversions will help you better understand if your ad is driving leads and returning a high ROI for your brand.
Depending on the goals for the brand, you should determine a few goals based on these metrics and formalize a plan for optimizing creative and trying different targeting criteria to improve results. Your goals should also determine the type of content you will feature in the ad — some metrics are better for branding goals and others will drive leads and conversions.
2. Track low performing placements.
If you’re running in-display ads that will appear across the Google Display Network, you can review where the ad has appeared in by navigating to Video Targeting > Placements > Where ads were shown > Display network from your Google Ads Campaigns dashboard. Review this list to see if any particular sites are contributing to poor performance for your desired metrics. Exclude these sites from your ad campaign moving forward to increase your average CPV.
3. Use a custom thumbnail image.
Design or use a high-quality still image from the video to entice a viewer to click on your video. Remember, this image needs to be legible by users on different devices, including mobile. If your image contains a person, make sure they’re looking into the camera. If you are featuring a product, make sure the background isn’t distracting.
4. Drive people to buy with cards.
A YouTube card is teased with a small “i” symbol, which the viewer can click to expand. You can time this appearance so only users who engaged with the video and content will see the notification.
With cards, you can feature a product related to or featured in the video to drive product purchases. You can also use cards to drive fundraising donations, traffic to a URL, or traffic to other videos as shown in the example below from our YouTube channel. Each format will allow you to customize the card with text, images, and other options.

5. Create calls-to-action.
When promoting a video on YouTube, you can include call-to-action overlays that link to a URL. You could link to a landing page, product page, information page, career page … whatever you’d like. You could also send people to a favorable report or interview featuring the brand.
6. Create a YouTube end slate.
Create an end screen to drive subscribers to your channel, promote your social networks, or increase interest in your brand. If someone has watched a video until the end, it’s a good sign they enjoy your content and might be interested in subscribing to your channel for future updates.
This end slate by HubSpot increases subscribers and social media fans while also highlighting other interesting topics its host has featured. Once you build the image, you will be able to annotate the end screen in YouTube’s video editor.
7. Use negative remarketing.
If you are running a campaign for a longer period of time and want to only attract new users to a brand, consider creating a list of people who your ad will not be shown to.
You can stretch your campaign budget and target only unique users by excluding those who have previously viewed the specific video, who have visited your YouTube channel, or who have shared, liked, or commented on any of your videos.
8. Use close captioning to cater to viewers’ needs and wants.
This tip applies to all YouTube videos — but it’s a general best practice that’s not followed by many brands. Include a quality video transcription you’ve generated and approved. Only user-uploaded transcriptions are indexed by Google because YouTube’s automatic captioning can be less than reliable. Depending on your target audience, you may also want to include transcriptions in various other languages. You can also offer users the option to download or visit a site page with the full transcription in your video description.
9. Qualify viewers.
Sometimes, your ad will be seen by people who have no interest in your product. Encourage them to skip the ad if the content isn’t relevant so you don’t have to pay for the view and they don’t waste their time watching irrelevant advertising.
10. Consider making your ad longer.
When it comes to skippable in-stream ads, if the ad is under 30 seconds, you’ll pay only if a viewer watches until the end. If the ad is longer than 30 seconds, you pay if the viewer watches it for at least 30 seconds. In both cases, you pay if the viewer interacts with your ad before it’s over. Consider this when you are coming up with ideas for content for the ad. You may want to put messaging at a certain point so uninterested viewers can skip the ad, or you might provide special offers towards the end of the video.
The Future of Video is Bright
Video content is a must-have part of your content strategy. This is even more relevant now that YouTube lets marketers target users based on their search histories. YouTube advertising is more targeted than ever, and it’s less competitive real estate than the world of Google Search. Try your hand at creating a YouTube ad campaign of your own and see the results for yourself.
Editor’s note: This post was originally published in February 2017 and has been updated for comprehensiveness.

5 Marketing Trends That Might Not Survive in 2023 [HubSpot Research]
Few marketing trends last forever. In reality, they come and go at rapid speed — and marketers must adapt.
Because marketing is always evolving, your marketing playbook should, too. But if your strategy looks the same as years prior, it’s time to do some housekeeping.

Here, we’ll cover five marketing trends that are losing steam and how marketers can respond.
1. Celebrity endorsements on social media.
Have you ever seen a sponsored post from a celebrity on social media and thought, “Do they really use that?”
For example, Beyond Meat’s collaboration with media personality Kim Kardashian became a viral moment in 2022, but not for the right reasons. After releasing a promotional video of Kardashian sampling its vegan products, viewers were quick to accuse Kardashian of “fake chewing,” leading many to question the authenticity of her endorsement.
While celebrities offer more exposure, consumers need to trust the celebrity and believe the endorsement is authentic. But building that trust is getting harder.
Research shows that trust in celebrity endorsements is decreasing. Only 44% of Gen Z-ers trust endorsements from a celebrity or athlete. This number drops to 38% for Millennials.
Unsurprisingly, the same study found that influencers are more trusted as brand spokespeople. We predict social media influencers – specifically micro-influencers — will start dominating this space.
Micro-influencers have a smaller following than traditional celebrities, but their audience is highly engaged. On top of that, they are seen as “everyday” people, so their audience is more likely to trust their recommendations.
Brands seem to be catching on: more than 56% of marketers who invest in influencer marketing work with micro-influencers.
2. The heavily filtered Instagram aesthetic.
If you’ve scrolled through Instagram recently, you may notice the aesthetic is changing.
Gone are the days of heavily filtered photos and perfect Instagram feeds. Nowadays, influencers, brands, and everyday users are pivoting towards a more unedited, imperfect look.
What’s the reason for this pivot? Many users feel a sense of fatigue over the highly processed aesthetic that has dominated the platform. The Gen Z crowd, in particular, values authenticity over appearing too polished online. It’s no wonder they gravitate to TikTok, where raw and unfiltered content is the norm.
Brands are starting to take notice of this shift, including Glossier. These days, the brand plays into the “anti-aesthetic” movement by sharing candid shots, unedited photos, and even cute animal photos.
 Although this is just a shift in aesthetics, it points to a bigger trend with young consumers: they crave authenticity from brands. In other words, snapshots of avocado toast and heavily filtered selfies won’t cut it. Instead, brands must explore how to appear more accessible and relatable online.
3. Audio chat rooms.
Audio chat rooms — like Clubhouse and Twitter Spaces — surged in popularity during the start of the pandemic, when many people were seeking opportunities to connect with others.
Fast forward to today, and more than a quarter (29%) of marketers are planning to stop investing in audio chat rooms in 2023.
From a marketing perspective, the biggest problem with audio chat rooms is that users prefer to speak with people — not brands. In fact, only 7% of Gen Z consumers prefer audio chat rooms for discovering new products.
Audio chat rooms are also losing popularity with younger audiences. Only 14% of Gen Z consumers have visited Twitter in the past three months, and a slim 13% have visited Clubhouse. If your audience skews younger, it’s worth exploring other strategies.
4. Long-form videos for social media.
It’s no secret that short-form video has dominated the social media landscape this year, and it will continue to pick up steam in 2023.
In fact, short-form video will see the most growth of any trend in 2023, according to HubSpot’s 2023 Marketing Strategy & Trends Report. On top of that, a staggering 96% of marketers agree that the optimal length of a marketing video is under 10 minutes.

Of course, this isn’t to suggest long-form video doesn’t have its place — or that it’s going extinct. Longer videos can offer more information about a topic, product, service, or brand.
However, the challenge is keeping your videos engaging enough to hold the audience’s attention. Shorter videos, on the other hand, work well on social media because they align with the fast-paced attention spans of online audiences.
5. Marketing in the metaverse.
Marketing is all about experimentation, and the metaverse became a new playground for marketers to explore. However, this initial excitement seems to be fizzling out.
29% of marketers plan to stop marketing in the metaverse (e.g. Horizon Worlds and Roblox) in 2023. In addition, more than a quarter (27%) plan to stop leveraging VR and AR.
Although the metaverse is intriguing, it’s proving difficult to execute. The equipment is expensive, the hardware is uncomfortable, and adoption is slow.
That said, the metaverse is still in its infancy. As it continues to evolve, things could turn around.
Back to You
Marketing is always evolving, so your marketing playbook should, too. As we inch closer to 2023, it’s essential to take stock of which trends you want to leverage, and which ones are better left behind.


Nonprofit Email Marketing: The Ultimate Guide To A Successful NPO Email Strategy
Effective email and newsletter marketing is crucial for a nonprofit organization’s (NPO) success. With scarce resources, limited staffing, and divided leadership attention, investing in marketing efforts can often take a backseat to more urgent matters.
Luckily, email marketing is both cost-effective and less time-consuming than other NPO marketing strategies. Regularly sent out, well-crafted newsletters can give your nonprofit authority while also helping you stay at the forefront of your donors’ minds.

By reading this post, you will discover how your nonprofit can stay connected with donors and attract exciting new prospects through personalized and meaningful email marketing.
Table of Contents
- Why does email work for nonprofits?
- Email Marketing Best Practices For Nonprofits
- How to Write an Amazing Nonprofit Newsletter
- Examples of Nonprofit Fundraising Emails
- Free Email Marketing Software for Nonprofits
Why does email work for nonprofits?
Studies show that email continues to offer the highest return on investment (ROI) of any outreach strategy. TruConversion reports that an email marketing campaign can deliver a return of $40 for every $1 spent. This makes email the channel with the highest ROI that nonprofits can use to reach prospective donors.
Additionally, 91% of all US consumers still use email daily. Email can therefore enable NPOs to reach audiences that might not otherwise engage with their marketing efforts on social media.
Pro tip: Before starting a new email campaign, make sure it aligns with your nonprofit marketing plan and helps you reach your organization’s goals.
Email Marketing Best Practices for Nonprofits
1. Commit to regular sends.
Nonprofits are often stretched for resources, and it’s easy to set marketing aside for matters that seem more pressing. However, regular email marketing is one of the most effective ways to grow your organization. A content schedule for your emails can keep you organized you can frequently engage with and steadily grow your donor base.
Making email sends an “always on” part of your marketing strategy will play a big role in your success on the channel. “Always on” doesn’t mean that you’re bombarding your email list with constant messages — it means that you’re committed to consistency in how often you send your emails.
Send informative emails on a predictable schedule, instead of only when you’re actively running a campaign or seeking donations. This will help nurture your audience towards deeper forms of engagement (like donating or attending an event) in the future. Remember: the goal is building long-term relationships.
Setting the right cadence for your emails is important to keep the members of your list engaged with your organization. When you’re first starting out, this requires a careful balancing act. You don’t want to send too few emails, but you also don’t want to veer into potential spam territory. More on that in the next section.
Pro tip: Double-check that your email offers value to your readers before sending. Value could include the latest information about your nonprofit, ways to get involved, upcoming events, or recent projects your organization has completed.
2. Be wary of spam folders.
If your audience is only used to hearing from you on a one-off basis, you’ll need to gradually shift to sending more emails. A sudden switch could trigger some users’ email clients to send you to the spam folder.
Email deliverability can be a complex subject, but here are a few important things to remember if you’re transitioning to more frequent email marketing.
- Don’t directly embed forms or include attachments in your emails. Linking out to web pages with forms is a better practice.
- Send your emails from a recognizable address. If you can, avoid sending from a noreply@yourwebsite.com address. Use a name your readers will recognize.
- Lead with informative subject lines instead of direct calls for donations. Check out our blog post on picking great email subject lines.
- If you’re emailing a list that isn’t used to frequent sends, let them know what’s going on. Tell your readers that you plan to start sending more informative emails, and most importantly, allow them to opt out. It might seem counterintuitive in the short term, but cleaning disengaged folks off your email list is important to the long-term health of your email program.
Pro Tip: Assign a staff member to send your monthly newsletter using their name. This increases your chance of avoiding donors’ spam folders.
For more tips on improving your email deliverability, check out our blog post on the subject here.
3. Leverage personal connections with your audience.
Personalizing your emails is a simple — but powerful — step that you can take to create a personal connection with readers.
First, make sure you’re using an email tool that enables personalization. It might be an investment upfront, but having access to personalization features will greatly improve the value your audience gets out of your email sends.
Worried about coming off as creepy or not sure where to start? Focus on personalizing emails based on actions your email recipients have taken on your website, advises Rachel Leist, a VP of marketing, automation, and demand generation at HubSpot. Instead of using personal data in your contact management system, perhaps thank them for a donation or downloading a report.
“If a person receives an email that refers to an action they took on your website, they will not be as nervous as they would if you were personalizing around specific personal information you happen to have on them,” Leist explains.
Pro tip: Personalize your emails by using first names and interesting taglines. Emails with personalized subject lines generate six times higher transaction rates.
4. Segment your database.
A segmented email list can help you ensure that the right person receives the right email at the right time. While everyone on your email list believes in your organization, you don’t need to send every email to everyone. Each person in your database is at a different stage on their journey with your organization, and the emails they receive should reflect that.
For example, someone who has donated $5 to your organization in the last year is probably not as engaged as someone who has donated $1,000 to your organization in the last month.
Factors like donation amount, events attended, and actions taken on your website or social media channels can all be important indicators of engagement level, and shouldn’t be ignored when you’re sending out emails.
More engaged audience members will likely respond more positively to more frequent emails, while folks with fewer touch points should receive fewer emails giving them more basic information about your NPO.
Pro tip: When people download your content or subscribe to your newsletter, make sure you enter them into a specific drip campaign that sends them automated emails relevant to the topics they are interested in.
5. Test, analyze, and adapt accordingly.
Finally, running an email program is not a “one-and-done” marketing strategy. You’ll need to note key performance indicators and make changes to your approach based on real-world data.
If you’re just getting started, industry benchmarks can be a useful point of comparison. But remember, not all NPOs are the same, and not all NPO audiences are going to respond the same way to emails.
To start, keep track of a few key email metrics, measure them with each email send, and look for trends over time. Our article on email marketing metrics for beginners offers a helpful starting place if you’re not sure what to track.
Pro tip: Regularly monitor your email open rate using the Hubspot email health tool.
How to Write an Amazing Nonprofit Newsletter
1. Write an eye-catching subject line.
Subject lines can be tricky. You’re looking for a short phrase that communicates your intent while retaining your non-profit’s unique voice. An interesting subject line should include the following elements.
- Urgency. You want recipients to feel the urgency to both open emails from your NPO and take action.
- Specificity. If you have an interesting statistic or data point to share, be sure to put it in the subject line.
- Upcoming events. To increase engagement, your newsletter should let people know what upcoming events they can attend or volunteer at.
- Name recognition. Pique your audience’s interest by including their name in the subject line (when appropriate).
- Relevancy. If current events or politics influence your nonprofit’s goal(s), referencing those events can make your newsletter more relevant and timely.
Pro tip: 46% of email opens take place on mobile, so be sure to make your subject lines 50 characters or less so mobile viewers can read the entire message.
Explore this blog for more subject line best practices.
2. Give compelling updates.
An amazing nonprofit newsletter should include the latest and greatest from your organization. Inform your recipients of recent goals reached, heartwarming stories of those you help, life updates of staff and volunteers, and anything else of note.
Pro tip: To make your emails visually interesting, take pictures during events to include in your newsletters. With permission, include the names of the volunteers pictured and describe what activities took place.
3. Have an attitude of gratitude.
Your cause is near and dear to those who subscribe to your newsletter. Their time spent volunteering and money donated should always be received with a spirit of gratitude.
Let email recipients know the immediate impact of their donations with interesting data points. For example, “Your donation helped x number of families” or “Your volunteer efforts fed x number of children.”
Pro tip: Some of your newsletter recipients will be more involved than others. Consider opening the line of communication with these donors by sending a personalized, non-automated email that references their specific efforts to the cause.
4. Include a Call-to-Action
A call-to-action (CTA) is an invitation to your audience to do something. In an email or newsletter, your CTA should be a button that links to the action you want recipients to take next.
Examples of CTAs for your nonprofit email could be “Subscribe to the newsletter,” “Donate now,” “Refer a friend,” or more. Don’t be afraid to get creative with your CTAs, and be sure to measure your conversion rate.
Pro tip: There are lots of CTA tools you can use to make linking to the next step easier. Explore common options here.
Examples of Nonprofit Fundraising Emails
Want to put together an effective fundraising email? Check out some examples to get a sense of what your newsletter can look like.
Alzheimer’s Association
This Welcome email from the Alzheimer’s Association doesn’t lead with a request for a donation. Instead, the team connects recipients to the cause by providing them with resources to learn about the disease.
The main CTA urges readers to “learn the facts.” By gaining a greater understanding of Alzheimer’s email recipients are encouraged to act — either by advocating for the group, volunteering, or donating.
What we love: There are several resources shown in this email, targeting different groups affected by Alzheimer’s disease. A loved one could access a support group. A family looking for care solutions can explore their options. Most importantly, people living with Alzheimer’s are given autonomy and can get matched with a care team.
Black Girls Code
This email from Black Girls Code focuses on one webinar that is open to all. By including events and participation opportunities, the nonprofit demonstrates value to those on its email list. As a subscriber, you’ll make sure you never miss an event.
What we love: This email utilizes design to strategically focus readers’ attention. The graphic that includes the panel’s speaker information and time are beautifully designed with eye-catching colors that pop over a black background. The only other colorful elements? Two bold registration CTAs in lavender.

The End Child Poverty California Coalition (ECPC)
ECPC’s email demonstrates the importance of keeping your donors and volunteers informed. This section of the group’s newsletter explains how much the coalition’s Imagine Campaign secured and where funds were used. An infographic makes understanding the complexities of state budgeting easy.
What we love: ECPC has mastered transparency. The group acknowledges that not all of its priorities were included in the state budget. After, the coalition celebrates wins they were able to achieve. The use of honesty makes the nonprofit feel trustworthy and garners even more support.
The Trevor Project
Awareness days, holidays, and important anniversaries offer special opportunities to engage your audience. This is especially true when you can tie the event to your nonprofit’s mission or research.
The Trevor Project sent a dedicated email on Intersex Awareness Day. In the email, the organization explains what it means to be intersex and the importance of acknowledging this community. Then, it links to a report where people can learn more about the well-being of intersex youth.
What we love: Not only does this email highlight Intersex Awareness Day, it also reminds recipients that October is LGBTQ History Month. Readers who didn’t have their calendars marked are now informed and will be more likely to engage with other Trevor Project research.
The International Rescue Committee
The International Rescue Committee (IRC) faces the urgent task of assisting people in conflict zones and disaster areas. This email both explains what the organization does and its historical impact.
What we love: Highlighting articles and the organization’s history increases the subscriber’s emotional investment. Readers will also have a better understanding of the IRC’s values.
The Smithsonian Institution
The Smithsonian Institution is one of the largest museum and research networks in the world. Keeping up with each museum and department would be exhausting. Luckily, the nonprofit’s marketing team has gathered the highlights into one, easy-to-read newsletter.
What we love: When we go to museums, we marvel at the artifacts and objects on display. The Smithsonian newsletter uses photographs to replicate this experience on any device.
Save The Children
When folks first sign up for your emails, it’s a good indicator that they’re feeling engaged with your mission. Check out this automatic welcome email from Save the Children introduces the organization to a new subscriber and requests a donation at the end. Your audience wants to help — don’t make them wait!
What we love: Save the Children created a simple infographic to show how a small donation can make a big impact. This can encourage supporters to contribute.
Citizens’ Climate Lobby
Citizens’ Climate Lobby (CCL) demonstrates in the email below how to update subscribers on important current events. By referencing recent policy changes that were helpful to their cause, CCL can both thank their email subscribers for their hard work while getting them excited about future progress.
What we love: This email does a good job of providing relevance and timeliness to the nonprofit’s conversation. 
826 Boston
826 Boston is a writing, tutoring, and publishing nonprofit that works with students and community members. As a local nonprofit, community events offer an opportunity for Boston residents to get involved and learn more about the organization. This email highlights Books for Breakfast, including critical information about where the event is held and when.
Pro tip: If your organization relies on donations from corporate sponsors, email offers an opportunity to showcase your partnership. This creates added value for the businesses you work with.

Wikimedia
Not every donor or subscriber should be emailed every day. Wikimedia is sparing with its calls for donations, making their infrequent sends more impactful. By highlighting a past action and demonstrating urgency for a repeat donation, recipients will be more likely to give.
This type of email works best for past donors and less active members of your email list. Even though they don’t visit your website daily, they may be willing to donate on occasion.
What we love: This email from Wikimedia shows what percentage of your donation goes to which parts of the organization. This creates transparency and makes donors feel good about their contributions.
Free Email Marketing Software for Nonprofits
Want to use professional email software for your nonprofit without breaking the bank? There are several free versions of professional marketing software that you can use. Check out what some of the most popular programs offer. Then, decide which option works best for you.
1. HubSpot Email Marketing Software
HubSpot offers a free version of its paid email marketing software that integrates with its free CRM software. Users can run a sophisticated marketing campaign and get access to forms, landing pages, and Facebook, Instagram, Google, and LinkedIn ads, as well as templates.
HubSpot also has access to contact management and live chat capabilities. These tools allow you to optimize the experience for each subscriber. There are also traffic and conversion analytics capabilities for campaign optimization.
2. Sender
Want to reach lots of people with beautiful, personalized emails? Sender could be just right for you. This program has extensive HTML editing and personalization capabilities. Sender also has impressive analytics capabilities that allow you to track the delivery and opening of individual emails. You’ll also be able to build individual recipient profiles to further optimize your strategy.
3. Sendinblue
If you’re looking for variety in your emails, Sendinblue has you covered. This program includes over 70 responsive templates for emails that can be designed for any screen. The free version gives you the ability to send 300 emails a day.
You also have the ability to use A/B testing to find email content that works and segmenting options to make sure the right person receives your message.
4. SendGrid
SendGrid specializes in email campaigns that are tailored to individual preferences. Its free version gives you access to a wide range of personalization tools, including APIs, Webhooks, and STMP Relay.
You’ll also have granular control over who receives your emails with a wide range of delivery optimization tools. Plus, you can access sophisticated email editing and analytics tools that allow you to optimize sends for your target audience.
Start Today
You don’t need to be a professional marketer to get professional results from email marketing. However, you do need to set some time aside to get started.
Remember, email marketing when done thoughtfully, can have a big payoff. Get started today if you haven’t already, and you could generate more buzz for your organization than ever before!


How to Make a QR Code in 5 Easy Steps
From restaurant menus to bathroom stall doors, you can find QR codes just about anywhere these days. In fact, they’ve become so ever-present that 45% of shoppers used marketing-related QR codes in 2021.
There’s no denying the popularity and convenience of the QR code. But, what exactly is it and how can you create one for your next marketing campaign?

Keep reading to learn the magic behind QR codes and how to create your own.
QR codes typically look like this:
Not every QR code is shaped like a perfect square. Sometimes they have unique patterns, colors, and logos displayed inside. You’ll find them in non-digital spaces like direct mail, signage, billboards, and even TV shows where you can scan the code on the screen using your phone.
Both barcodes and QR codes can be scanned using a laser or a smartphone as long as the tool being used has the correct capabilities of reading vertical and horizontal data. Although most smartphones scan QR codes automatically, many won’t scan barcodes so easily — you’ll need a special app for that.
Does the rise of QR codes mean traditional barcodes are a thing of the past? Of course not. Traditional barcodes are still a common way for businesses to identify consumer packaged goods (CPGs) and manage their product inventory.



However, there are several differences between barcodes and QR codes — both in their uses and their characteristics. Below are three important differences.
QR Codes Are Shaped Differently
Barcodes are typically rectangular, which requires scanning devices to read the barcode’s data horizontally. QR codes are often square-shaped, displaying their data vertically and horizontally.
QR Codes Hold Different Data
QR codes are often used differently than barcodes. Barcodes hold key product information at the point of sale, such as the price and name of the manufacturer. QR codes offer more passive and intangible information, such as location data and URLs to promotions and product landing pages.
QR Codes Hold More Data
Due to a QR code’s square shape, it can hold much more data compared to a barcode. QR codes can hold hundreds of times more encrypted characters than a barcode can.
We learned a little bit about how barcodes and QR codes differ, but how exactly do QR codes work?
Let’s say a consumer sees a QR code. They can take out their mobile device, download a free QR code scanning app, or simply use their phone’s camera, and scan the QR code to gain more information about what they saw.
If you wanted to create, say, a bus stop advertisement promoting your podcast, you could display a QR code on that printed ad that brings people right to your iTunes page when they scan it with their phones. Pretty simple, right?
The QR code creation process is pretty straightforward, regardless of the device you’re using. Here’s how to get started.
How to Create a QR Code on Any Device
Step 1: Head to qr-code-generator.com.
Using any browser on any operating system, head to qr-code-generator.com. Keep in mind that you don’t necessarily need to use this tool; you can choose any web-based QR code generator. If you need some ideas, check out our list.
Step 2: Enter your URL.
For most QR codes, you’ll want to redirect users to a URL. In that case, enter the URL in the tool. You can also choose from other content types, including contact cards, PDFs, and MP3s. At the bottom, you also have the option of creating QR codes for Microsoft Word and PowerPoint files. The exact content options will vary by tool.
After you select the content type, a field or form will appear where you can enter the information that corresponds with your campaign. For instance, if you want your QR code to save contact information, you’ll see a set of fields where you can enter your email address, subject line, and associated message.
Once you enter your URL or upload your file, it will immediately create a QR code that’s ready for download. However, we recommend customizing it to strengthen your brand identity.
Step 3: Customize your QR code’s frame, shape, and color.
The fun part of creating QR codes is customizing the design of the codes to fit your brand. Want your code to contain your logo? Go for it. Want it to reflect your website’s design scheme? No problem.
The front-end generator on qr-code-generator.com offers limited frame, shape, and color options that allow you to customize your QR code. If you want more options, we highly encourage you to sign up on the website and edit your QR code through the tool’s creator portal.
Here’s one example of how you can customize your QR code once you sign up for a QR Code Generator account:
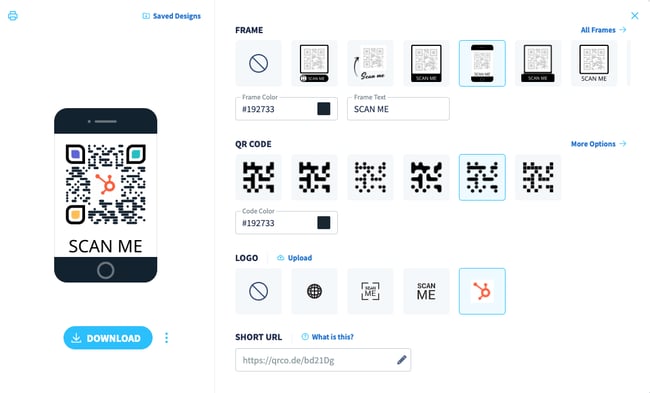
Keep in mind that not every QR code maker offers these design options either before or after signing up. Depending on the QR code you’re looking to generate, you might find some tools limited in their functionality.
Step 4: Click “Download” and save the file to your computer.
 If you’re just trying to quickly create a QR code, don’t worry about signing up. Instead, click the Download button.
Your download will start immediately, but the website will try to trick you into signing up. Ignore this message unless you truly want to sign up. At the top, you’ll see a message that says your QR code is getting created and that you shouldn’t refresh the window. A pop-up download window will come up within 2 minutes.
Step 5: Add the QR code to print collateral.
A QR code won’t be able to do its job unless people see it. So make sure you add the code to any materials that will help you market your business. This could include displaying it in print ads, on clothing, or in physical locations where people can take out their phones to scan it. Scroll down for more tips on properly displaying a QR code.
As for how you’ll add the JPG or vector file to print collateral, you can do so with a variety of tools, including:
- Canva: Canva is an online design tool that lets you import JPG files and add them to your design. It offers flier and brochure templates for easy creation.
- BeFunky: BeFunky is a similar tool to Canva and also allows you to add JPG files to a design. It also offers templates for you to choose from.
- Adobe Illustrator and InDesign: If you’re a more advanced user, you can use a dedicated graphic design tool to add your QR code to pamphlets and brochures. Illustrator is a good fit for one-page designs; InDesign is a better fit for multi-page brochures.
If you’re on a mobile device, good news: You can easily create a QR code that you can share with colleagues and prospects on-the-go. You’ll need the Google Chrome app to do so.
How to Create a QR Code on Android
Creating a QR code on an Android device is simple with the Chrome app. You can only make QR codes for URLs, but this is a handy tool for when you need to quickly share product pages or blog posts with someone.
Here are the steps:
- Download the Google Chrome app from the Google Play Store.
- Navigate to the URL you want to share.
- Click the three vertical dots (⋮) on the top toolbar.
- Tap Share.
- On the pop-up, select QR Code.
- Either click Download at the bottom or hold your phone up for someone to scan the code.
How to Create a QR Code on iOS
Just like in Android, you can easily make QR Codes on any iPhone or iPad. Here’s how:
- Download the Google Chrome app from the App Store. Note: You can’t create QR Codes from the Google search app, only the Chrome app.
- Navigate to the URL you want to share.
- Tap the Share button on the upper right-hand corner.

- Select Create QR Code.
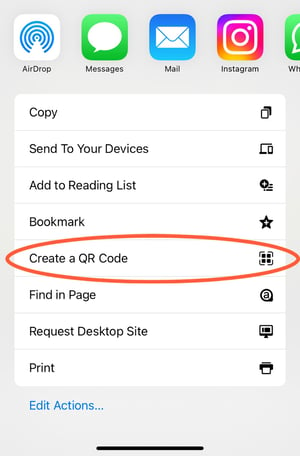
- Either hold it up for someone to scan or tap Share. This option will allow you to print your QR code, save the image to your camera roll, or save it to your files.
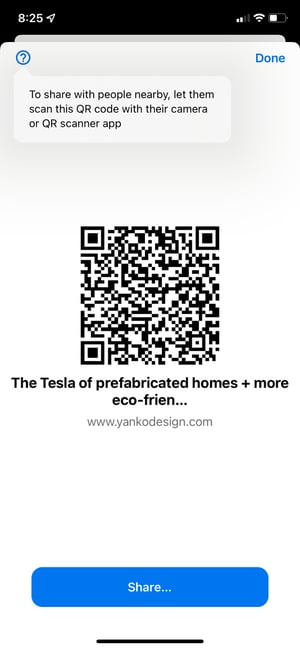
How to Create a QR Code for Desktop Using Chrome
Creating a QR code with Chrome on desktop is just as easy as it is on Android and iOS. Here’s how to do it:
- Open Chrome on your desktop.
- Go to the URL you want to share.
- For Linux, Windows, and Mac computer users, navigate to the right-hand side of the address bar, click Share, and select QR code.
- For Chromebook users, navigate to the address bar and then QR code.
- Either copy the QR link, click download to download the QR code, or scan the QR code with a camera on another device.
How to Use QR Codes (And How Not to)
Now that you see how simple the QR code creation process can be, let’s talk about some best practices that’ll increase the likelihood that your QR code actually gets used.
Display your QR code where it’s convenient for people to scan.
Put QR codes in places where scanning them is easy and there’s enough time for the consumer to scan the code. While you may often see QR codes on billboards and TV commercials, they’re not exactly the most user-friendly locations. It’s a safety hazard to entice people to pull out their phones while driving to scan a code, and a 30-second commercial might not be enough time for someone to find their phone and scan the TV.
Instead, think of places where consumers have the time and ability to scan the code. Places with a strong Wi-Fi connection will help, too.
Optimize the QR’s destination page for mobile devices.
Mobile-optimize the page to which you’re sending people. Consumers will be using their phones when scanning the QR code, so they should arrive at a page with a positive mobile experience.
Include a CTA that prompts people to scan your QR code.
Offer a call-to-action (CTA) with the code — that is to say, tell people what they’re supposed to do when they see the code, and what they’ll receive if they scan it. Not everyone knows exactly what a QR code is, and those that do won’t be motivated to scan it unless they’re sure there’s something worthwhile on the other side.
Don’t limit your QR code to one mobile scanner.
Don’t require a special QR code scanner. Your QR code should be app-agnostic so anyone can scan your code with any reader. A lower barrier to entry makes success more likely for you and the user.
Use your QR code to make someone’s life easier.
Don’t use a QR code just for the sake of using one. For instance, it’s common for marketers to think, “How can I bridge the offline experience with the online experience? Uhhh … QR code!” That’s not wrong, but it’s not always right, either.
If you have content that makes sense to deliver to a mobile user, and you have an appropriate channel to do it (see use #1 at the beginning of this section), it’s more likely your QR code will drive results.
Earlier, we showed you an example of how to create your own QR code, but you don’t have to create it from scratch. A QR code generator can speed up the process (and take a lot of math out of it, too.)
There are tons of QR code generators out there. The best ones give you many customizable options for using your QR code, and compatibility with just about all mobile QR code reader apps.
Other things to look for when choosing a QR code generator are whether you can track and analyze performance in real-time and design a code that’s unique to your brand.
Below are some of our favorite QR code generators that make custom QR codes quick and easy to create.
1. Kaywa
Kaywa is a simple, no-fuss QR code generator that creates basic codes for coupons, URLs, and contact information. Simply enter your information, choose whether you want a dynamic or static code, and generate it.
Why we like it:
If you’re using your QR code as part of a marketing campaign, you can track analytics through Kaywa when you create an account. That way, you’ll have the latest data on who engaged with your code, where they engaged, and when.
2. GOQR.me
GOQR.me is a simple QR code generator that works best with short URLs, but it can be used to store text, geolocation, and event data. Simply click on the icon that corresponds to your data and fill in the fields.
Why we like it:
You’ll get a live preview of your QR code in real-time which speeds things up if you’re adding finishing touches to your marketing campaign. For an additional fee, you can also have your logo added to your QR code by a GOQR.me-affiliated designer for a custom look.
3. Free QR Code Generator by Shopify
QR codes work best when you have something to offer the people who scan them. And chances are, you’re probably selling to people who buy products online with their phones every day.
Why we like it:
Shopify makes it easy to create a QR code in just one click. The best part is that you don’t have to own a Shopify store to use this free tool.
4. Visualead
Looking for a one-of-a-kind QR code that suits your brand to a “T”? Visualead is the tool we recommend for the job.
Why we like it:
Visual QR codes are popular and can generate more interest in your users than a typical black and white code can. That means you could see more scans and engagement on this type of QR code.
5. The-qrcode-generator.com
The-qrcode-generator.com features a simple UI that lets you create a unique QR code in minutes. Simply add your URL or the information you want to share and your QR code appears instantly.
Why we like it:
If you’re creating several QR codes at once, you might find it worthwhile to download the Google Chrome extension for a faster workflow.
6. QR Stuff
As one of the more robust QR code generators, QR Stuff can create codes for just about any type of data you want to share with the world. YouTube videos, Zoom meeting invitations, and even bitcoin information are supported through this tool.
Why we like it:
In just three steps, you’ll have a free, customizable QR code that will function properly and look great. Plus, there’s no limit to the number of codes you can create.
7. Qr-code-generator.com
We used this QR code generator in our how-to guide above, and for good reason. Qr-code-generator.com is a simple tool that’s user-friendly for even the least tech-savvy of us. Simply drop your link into the box, and let the generator do all the work.
Why we like it:
QR-code-generator.com is intuitive. It’ll automatically detect the type of URL you’ve added and produce a QR code in seconds.
8. QR Code Monkey
If the way your QR code looks is important to you, but you don’t want to pay extra for a custom design, try QR Code Monkey. Once you add your URL, you can change the color, add a logo, and further customize the pixels in your code at no cost.
Why we like it:
With QR Code Monkey, the design possibilities are virtually limitless. All you need to create a branded QR code is a creative eye and a little patience.
QR Code Best Practices
1. Sign up for an account on a QR code generator website.
One significant pitfall to making a QR code is that you can’t edit the data it contains once you print it. But by signing up for an account, you can edit this data. This is especially important if you expect to use a lot of QR codes in your marketing strategy.
With a free membership to QR code generators like qr-code-generator.com, you can print a dynamic QR code, scan it, and pull up an editable form where you can modify the data your visitors will receive when they scan the QR code themselves. You can also track performance analytics, which we’ll cover below, and create a new customized version of your code.
2. Customize your QR code.
QR codes can be boring to look at, but not if you customize them as much as possible. If you sign up for an account on a QR code generator website, you can customize your QR code further — adjusting the colors, adding a logo, creating social options, and more.
Keep in mind, however, that some customizations can make it more difficult for QR code scanning apps and smartphone cameras to properly read the code. To cover your bases, it’s a good idea to generate two versions of your QR code — one plain version and another with your preferred design.
Speaking of this…
3. Test the QR code to make sure it scans.
Don’t forget to check to see if the QR code reads correctly, and be sure to try more than one QR code reader. A good place to start is the free tool Google Lens, which takes a picture and then tells you what link or item it “reads to.”
Another great free tool is the app QR Code Reader, which automatically takes you to whatever it “reads.” Most smartphones these days include a built-in QR code reader, so you should test to make sure your code is readable there, as well.
4. Track and analyze performance.
Just like any marketing campaign, you should follow up on any collateral or campaigns using QR codes to see whether they’re actually working. How much traffic comes from each specific code? Are people scanning your code but not redeeming their offer once they get to the landing page? Or are they not even compelled enough to scan your QR code in the first place?
Knowing the answers to these questions will help you troubleshoot and adjust poorly performing QR codes to more closely mirror those that work well.
I recommend you include a UTM tracking code on your URL so you can better measure performance. This is particularly important if you use closed-loop marketing analytics or if you perform more in-depth reporting on your campaigns.
Create Your QR Code Today
Now it’s your turn! You’ve spent enough time scanning QR codes, why not make your own? Follow the steps in this article and use one of the free QR code generators we’ve recommended to put your business, project, or event out there in the real world.
Editor’s note: This post was originally published in January 2021 and has been updated for comprehensiveness.