
8 Inclusive Advertising Tips for 2021, According to Microsoft’s Head of Inclusive Marketing
Advertising can help create a direct connection between consumers and your brand, and is a critical component of marketing.
And inclusive advertising can yield dramatic results and increase brand trust, loyalty, and better overall brand perception. In fact, 64% of people said they are more trusting of brands that represent diversity in ads, and 85% of consumers said they will only consider a brand they trust.
Advertising that works hard for your company has never been more important as we come off the heels of a challenging year affecting all businesses. However, there is one concept that rang true for us all that can inform our approach in advertising for 2021 and beyond – that is, we are all interconnected and interdependent, both as consumers and as advertisers.
In this post, we’ll provide eight tips curated from Microsoft’s Marketing with Purpose Playbook to help you create more inclusive advertising, reach more customers, and grow your business.
1. Showcase human diversity in your campaigns.
Inclusive advertising means having diversity authentically represented in your ads and promotions, while aligning it to your local market’s composition of diversity. It also means considering the many dimensions of human diversity, including (but not limited to) age, gender, ethnicity, sexual orientation, location, language preference and gender expression.
Additionally, you’ll be able to expand your ability to connect and tailor ad creative and promotions with your audience when you consider experiential diversity like ability, parental status, marital status, military status, affinities, and job function.
Ultimately, inclusive advertising is understanding with empathy who your customers are, representing them accurately, and more importantly, recognizing who you’re excluding in your marketing materials.
2. Perform a landing page and website audit for audience diversity.
Inclusive advertising doesn’t end with the ad. In fact, half of the customer experience with your advertising resides where you send them after they click — which means it’s critical you demonstrate diversity in your landing pages or website, as well.
Considering 64% people are more likely to consider or purchase a product after seeing diversity or inclusion in advertising, it’s critical you ensure your landing pages and website represent true diversity.
Does your website’s collection of photos and images match the audience representation you created across your entire ad campaign? Does each inclusive advertisement point the customer after the click to the landing page that matches the inclusive spirit of the image creative? If not, it should.
However, while it’s relatively easy to spot-check a landing page with the corresponding ad creative, how can you collectively evaluate your entire website for the right amount and variety of diversity?
For an easy way to review what images are across your site’s web pages, simply use Bing.com and type in the search bar the command, “site:” and then add your website’s URL after the colon.
For example, let’s search Bing for the clothing brand Tommy Hilfiger, which looks like this in the search bar: “Site:https://usa.tommyhilfiger.com“. Then, hit “Enter”. Bing will produce a search engine results page indexing all your web pages:
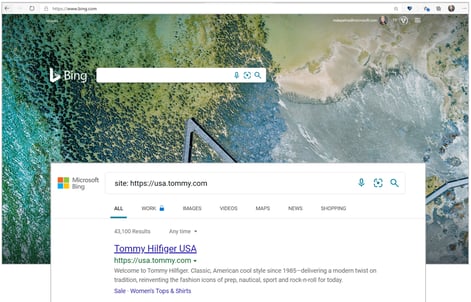
Then click on the “images” in the search engine results page for your “site:” search in the navigation bar:
This will produce all the images found on the website. You can quickly scroll through to get a sense of the diversity — or lack of diversity — in the collection of images on your website.
Your audit can be used as a general website check, or a search for specific dimensions of diversity that you feel are underrepresented in your upcoming advertising campaign.
3. Align your advertising messaging to the nine feelings of inclusion.
Emotions are becoming increasingly linked with brand outcomes. As Maya Angelou once said, “I’ve learned that people will forget what you said, people will forget what you did, but people will never forget how you made them feel.”
Feeling included so that a person feels that this brand is for me is at the heart of
brand trust, love, and loyalty.
There are actual identified feelings of inclusion in advertising, which can create connection and drive trust. Inclusive advertising can conjure two major feelings: joy, and trust. As a marketer, it’s critical you look for brand connection points in product or features that can create these two main feelings.
However, there is more to it than that – there are actually nine feelings that make up joy and trust, which is great news for advertising. If you can find a genuine and authentic way that your product creates any one of these feelings, this can convey inclusion, which – you guessed it, builds trust, brand love, and loyalty.
This product marketing approach facilitates connections with people, making them feel like part of a community. Here are some marketing ideas to evoke feelings of joy and trust:
- Celebration: Of people, their successes, honoring of holidays, etc. How does your product celebrate them?
- Zest: For life (for ours, theirs, and that of the planet). Convey enthusiasm and energy. How does your product create a zest for life?
- Hope: Bringing hope to conquer challenges and/or societal issues. How does your product give your consumers’ hope?
- Relaxation:Instead of portraying the need to be on guard, remove tension or anxiety for your customers. How does your product produce relaxation?
- Relief: From concern or worry, removing something distressing or oppressive. How does your product bring relief?
- Safety: Create experiences or highlight how your brand extends safety to all people. How does your brand experience make someone feel safe?
- Confidence: Instill a sense of confidence—the belief that we strive to act in the right way. How does your product give your consumers’ confidence?
- Acceptance: Of others’ differences, typically to be included as part of the group. How does your product make someone feel accepted or demonstrate you are accepting of others?
- Clarity: Bring a sense of certainty, clarity, and transparency in ambiguity. How does your product bring clarity to a confusing situation?
4. Incorporate three metaphors of inclusion.
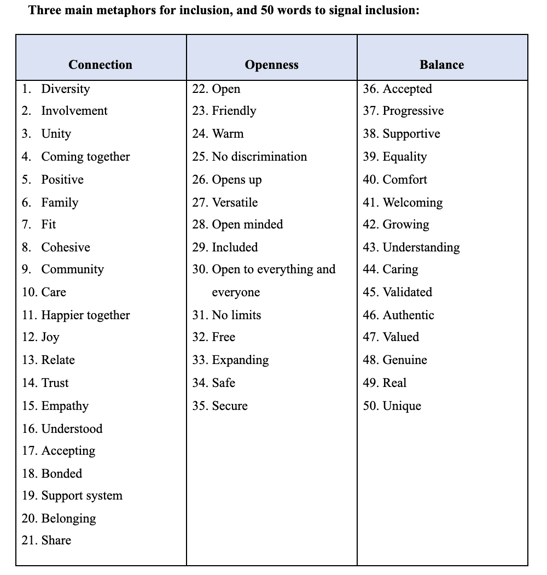
Another customer touchpoint that can help your brand emotionally connect with people in your advertising is language cues and context, which evoke positive feelings.
Discovered in our research, The Psychology of Inclusion and the Effects in Advertising at Microsoft Advertising, we uncovered the following fifty language-based cues that signal inclusion, as well as three metaphors of inclusion which are inextricably tied to emotions.
If used in context and in a genuine and authentic way in your ad copy, website, or digital content marketing, these metaphors can help convey inclusion and drive brand performance.
5. Practice inclusive and authentic image selection.
Authentic representation in advertising is important. It drives trust and brand support — so the images you choose matter. It is worth noting that from the Microsoft Advertising research around trust, we found that there is a strong tie between trust, love, and loyalty.
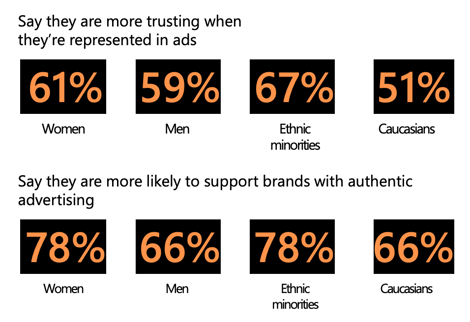
Once trust is established as the baseline, a brand can begin to build love and loyalty. To do this, brands must go the extra mile to make someone feel understood through inclusion, and that means authentic imagery, too. Inclusion was found to be a key brand attribute that creates loyalty.
The same story threads are woven through our inclusive advertising research. Our research uncovered that authentic representation in advertising builds trust and brand support, with 72% of people saying they’re more likely to support brands with authentic advertising.
Choosing imagery is an important part of the process in constructing a meaningful and inclusive customer experience. Inclusive advertising isn’t just about representing everyone — it’s also about making everyone feel your products or services are for them.
Here are some tips to help identify and select inclusive imagery:
Tips to illustrate “Connection”:
- Have more than one person in an image
- Include realistic diversity: use authentic and genuine imagery, which is best conveyed using real people being themselves, that reflect everyday life, not actors hired to play a part
- Create a visible relationship between people that is positive
- Include people in photos rather than featuring the product only
Tips to illustrate “Openness”:
- Include people with disabilities
- Feature non-traditional dimensions of diversity like people with larger bodies
- Include unique subsets of diverse populations
- Include multiple people of color
- Have people with intersectionality in diversity
Tips to illustrate “Balance”:
- Everyone is featured with the same prominence
- Equity is conveyed
- Ensure multiple dimensions of diversity are represented in an image
- Within your campaign, have the creative represent the spectrum of people that your potential customer base could be
Lastly, it’s good practice to include a diverse representation of people in the review of your creative to uncover blind spots, such as non-obvious negative connotations, stereotypes, cultural inaccuracies, or negative associations.
6. Perform an accessibility audit on your ads, content, and landing pages.
Would you want to turn away one in four people from buying your product simply because your ad or website was not in the right format for them?
Conversely, wouldn’t you want to increase your reach by 25%? I hear you saying, “Yes, of course!”
Without accessible advertising, no matter how perfect your product or offer is for someone, one in four people in Europe or the United States might not get your message. This is the ratio of people with disabilities to the general population. According to the United Nations, more than one billion people globally live with disabilities.
Digital inclusion is important because it provides access to services, products, data, information, and education for everyone. We, as advertisers, can recognize these exclusions, solve for them, and make a difference for the one in four people — and also in our business performance.
- Download the plug-in for your browser https://accessibilityinsights.io/ and begin to learn how to make your landing pages for your campaigns accessible. This free open-source tool by Microsoft will highlight what accessibility issues are present and how to fix them. It could not be more turn-key, it’s free.
- Use the Accessibility Checker in Microsoft 365 to make any media or content more accessible.
- Learn the ten accessibility principles to building accessibility into your advertising from the start.
7. Develop an inclusive keyword library.
Nothing replaces the value of first-hand customer experience as you develop an inclusive keyword library for your brand. Begin with customer focus groups with the audience you are trying to reach, and you’ll be surprised what you uncover. You can even start by sourcing this information from your internal Employee Resource Groups.
To develop an inclusive keyword library, you’ll want to consider the consumer decision journey for the product or service you offer. Next, layer on the journey for the consumer with a physical disability, cognitive difference, military status, age consideration, gender expression, or other dimensions of diversity.
Include their lived experience and map the unique keywords that they might use to seek out your product. By understanding the consumer decision journey from their perspective, you will develop your own inclusive keyword strategy for your business.
One simple example is understanding gender differences. In Microsoft Advertising‘s Inclusive Automotive Marketing webcast, we shared the difference between men and women in the consumer decision journey when shopping for a car. An inclusive keyword strategy can inform not only your search engine marketing (SEM) but could shape you content marketing, as well.
As suggested earlier, don’t stop at the usual dimensions of diversity — go further and see what you can uncover to help you connect and give people the feeling that you’re “a brand for someone like me.”
8. Root out bias in your ads and your data.
Contending with and working towards eliminating bias applies to all of us. As marketers, our job is to understand and identify potential bias that can live within our datasets and our marketing models. Bias in data produces biased models, which can be discriminatory and harmful. Bias can lead to missed opportunities in marketing, or even damage your brand’s reputation.
There is a long list of bias types, and it’s good to become familiar with many of these. A great resource is the Harvard Implicit Bias Tests, which you can use to explore and learn about the variety of biases.
For instance, a marketer might conclude that a luxury accessories brand should target women, because gender appears to correlate with a higher purchase probability. You might assume that only women buy luxury handbags. However, gender may just be a red herring. Income could correlate to a much higher degree with conversion.
The resulting bias of only targeting women, then, would limit your opportunity. I invite you to have deliberate curiosity about long-held beliefs, because you might be accidentally leaving out other buyer personas.
Additionally, it’s critical you’re cognizant of gender-neutral pronouns in your marketing materials. Refer to “they” or “them” when writing about people (rather than “he” or “she”), and ensure you offer at least a third option when asking for gender in customer profile forms.
As we start 2021 and work to find new ways to drive business impact while making a positive impact in the world, we hope these eight tips for inclusive advertising help get you there. Let’s work together to build a more inclusive world today.

How the HubSpot Blog Generates Leads [+ How Yours Can, Too]
It’s hard to believe that if the HubSpot Blog were a person, it would currently be in high school.
That’s right – for well over a decade, content has been published on the HubSpot Blog to help hundreds of millions of readers discover best practices in the areas of marketing, sales, customer service, website development, agency work, and general business best practices.
Behind the scenes, our team also thinks about how we can convince as many readers as possible to become leads and access more information, tools, and resources from HubSpot – and anyone who has worked on lead generation knows that accomplishing this task is much easier said than done.
Effective blog lead generation requires both creative and analytical skills. It’s about knowing what numbers to crunch, how to analyze your existing data, and how to make projections based off of traffic, monthly search volume, and conversion potential.
Additionally, any good marketer needs to understand the human aspect behind this process and not lose sight of the people reading your blog and the problems your business can help them solve.
Over the years, the team at HubSpot has landed on a process that continuously generates leads day-after-day, with a reliable blog view-to-lead conversion rate and a steady flow of traffic.
Here are the steps my team at HubSpot takes to generate leads from our blog.
1. Audit existing blog metrics.
To develop a process for growing our blog lead number, we first needed an understanding of how well we were performing.
To capture the current state of blog lead generation, we looked for the overall traffic number and number of leads generated from the blog. These two numbers gave us a baseline conversion rate (in this case, number of leads generated, divided by the total views to the HubSpot Blog in a given time period) from which we knew the team could only go up.
While the number of leads was the ultimate goal for our team, we wanted to take a deeper look at the overall conversion rate and how it changed month-over-month – this number would let us know for sure if we were growing traffic to posts and topics that were most likely to convert their intended audiences.
The big-picture conversion rate gave us an important directional view, but if we ever saw a major shift in that conversion rate, we needed to know where that shift was happening. For example, if we saw a surge in traffic to a low-converting post, that would hinder the overall conversion rate for the blog.
To drill down further, we also looked at all of our post-level data – that is, each post’s traffic number, number of leads generated, and CVR. By exporting and tracking this data monthly, we were able to see which posts were dragging down our CVR, which posts were keeping it strong, and which posts were prime candidates for a better CVR.
How to complete this step:
- Choose a time period (last quarter, last month, etc.) for which you want to know your conversion metrics.
- Determine your overall data for traffic and leads generated in this time and calculate overall blog CVR.
- Export your traffic and lead numbers for individual blog posts for this time period. Depending on your analytics tool, this may require you to export data from two different sources and combine metrics using a VLOOKUP on Excel or Google Sheets.
- For each post, divide the number of leads it generated by its traffic number to get post-level conversion metrics.
2. Group common posts together.
Over the years, HubSpot has published thousands of blog posts – and while this was immensely helpful for growing HubSpot’s email subscription base and ranking for countless keywords, it made the process of organizing and analyzing conversion metrics extremely difficult.
Luckily, the blog and SEO teams developed a model to group posts with similar search intent with the pillar-cluster model. In a nutshell, this model was the result of a massive audit to better organize our blog, reduce redundancy on the blog, and help search engines understand which pieces of content we wanted to be considered the most authoritative on a given subject.
As a result of this project, all of our blog posts were given a relevant “topic tag” – or the cluster for which each post belonged. For instance, any Instagram post is assigned an “Instagram Marketing” tag, and links back to our Instagram Marketing pillar page.
This process ensures effectiveness when analyzing metrics. For instance, when exporting blog metrics, we can analyze blog posts by tag (i.e. all “Instagram Marketing” posts), of which we have a few hundred — rather than analyzing each individual URL, of which we have over 10,000.
How to complete this step:
- Export all of your blog posts from your CMS or website analytics tool onto a spreadsheet.
- Categorize each of your keywords into a topic cluster. These topic clusters should be high in search volume, anchored by a long and high-trafficked post, and related to each other when it comes to search intent. For example, rather than put all of our posts on social media in one giant “Social Media” cluster, we created more niche clusters for Facebook, Twitter, LinkedIn, and Instagram to help us categorize with more specificity.
- With each post properly categorized, organize your data with a pivot table to look at the numbers generated by each cluster rather than each URL. Your pivot table should include the number of posts in each cluster, the views generated, and the leads generated. From there, you can calculate the cluster’s CVR by dividing total leads by total views.
3. Determine the best content offer opportunities.
One of the major benefits of grouping your posts together is identifying a content offer opportunity that can be effectively promoted on multiple blog posts, as opposed to an individual post.
As acquisition marketers, it’s tempting for us to attempt optimizing the conversion paths for high-traffic posts. However, these high-traffic posts are oftentimes too general and unrelated to what it is we’re trying to market.
This mismatch results in misplaced efforts and unmet lead goals, as we’re quick to ignore blog posts which – on their own – may have lower traffic numbers, but together have a substantial traffic number.
Ask yourself – which of these two options is a better pursuit for lead generation?
- A blog post that has little or nothing to do with your products or services, but is viewed 100,000 times a year.
- 10 individual blog posts that have a clear connection to your company’s core competencies, but on average generate only 10,000 views each per year.
In either scenario, you’d be optimizing the conversion path for 100,000 readers – it’s only by grouping these posts together that you’d realize option #2 is a much better option for lead generation.
To address this issue, we organized all of our blog topics by the potential number of leads they could generate, but readily discounted any topic cluster of which we doubted the conversion potential. This crucial step ensured we only considered ideas that we believed would be worth our time and resources to create.
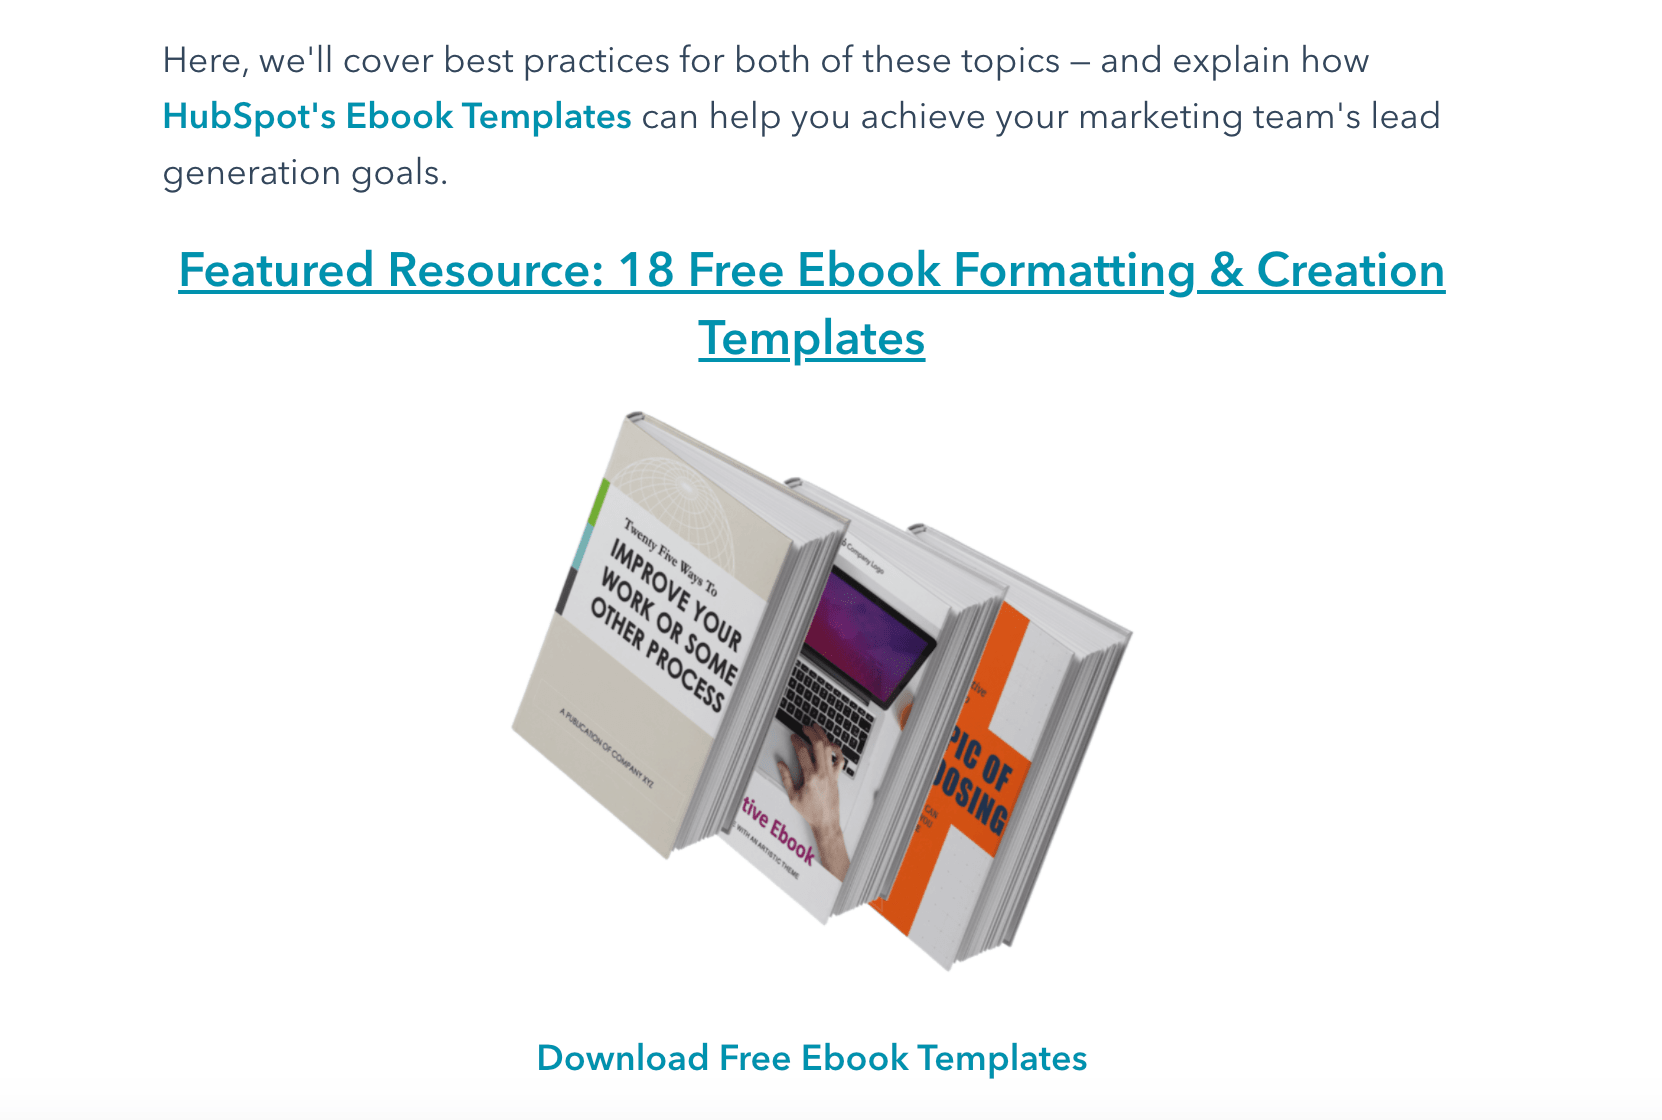
Along with dedicated CTAs for each blog post we create, we also create featured resources for certain topics we believe have high conversion potential. For instance, in this Ebook Format blog post, we created a special featured resource, 18 Free Ebook Formatting & Creation Templates:
How to complete this step:
- Calculate how many leads each topic cluster could be generating. At HubSpot, we do this by subtracting each cluster’s actual CVR from its target CVR, and multiplying that difference by the traffic number for the desired time period.
- Organize data by each cluster’s lead generation opportunity – looking first at the highest opportunity and at the lowest opportunity last.
- Work through your list of high-opportunity clusters and remove any low-intent clusters from your consideration, ensuring you’re only left with topic clusters that have a direct connection to your products/services.
- Select one (or many) topic clusters which you want to support with a lead-generating content offer.
4. Create lead-generating content.
By this point, you’ve identified topic clusters which you feel would benefit from a new, dedicated piece of lead generating content. Now, it’s time to create that piece of content.
Understanding what kind of content to create comes from knowledge of your industry, your market, and your buyer personas. In our experience, we discovered HubSpot’s Blog audience responds to actionable, personalized, and customizable content in the form of templates, tools, and kits.
However, this is not the case for all organizations – so figure out which content format works best for your audience by auditing the performance of your current library or testing out different formats to see what resonates with your blog readers.
With the knowledge of what formats work best for our readership, we got to work on creating templates for our most-read but lowest-converting clusters, so that readers would see our content as an actionable next step for them to apply the knowledge they gained in the blog post. Below are a few examples of how we mapped an offer to a topic cluster.
|
Blog Topic Cluster |
Content Offer |
|
Customer Experience |
|
|
Sales Training |
|
|
Product Marketing |
|
|
Pricing Strategy |
|
|
Facebook Advertising |
The most important thing to remember during this step is to not overcomplicate your content. Remember, to secure a conversion, you need to convince a reader of your content’s quality and relevance. If you’re struggling to make the connection between your blog content and your offer’s content yourself, how well do you think a reader skimming your blog posts will make that connection?
How to complete this step:
- Look through the posts in the topic cluster you want to optimize with new content and think about what a natural next step would be for the reader.
- Cement an idea for a piece of content you can create that aids your readers in that next step.
- Create the content in your desired format (PDF for ebooks, Google Sheets or Microsoft Word for templates, etc.) and launch it behind a lead-generating form on your website.
5. Promote content with CTAs.
To facilitate a blog conversion, you’ll need to let blog readers know about the new lead-generating piece of content on the same page as your blog content.
Blog CTAs can take a variety of formats. Two of the most popular are:
- Anchor Text CTAs – Hyperlinked text to the landing page of the offer you’re promoting. Remember to keep anchor text direct and clear so readers know what they’re clicking – action words like “download” and “access” are useful here.
- Image CTAs – Hyperlinked images to your offer’s landing page. These CTAs might look like a banner ad and contain an image of the offer alongside copy explaining the value of it. These image CTAs could also be an image of the offer itself, which makes sense if promoting a template or a tool.
At HubSpot, the majority of our posts contain at least three CTAs – one anchor text, and two image. Depending on the intent we expect readers have on a specific post, we may include several more. However, all of these decisions are based on years of data collection and A/B testing – which we encourage you to rely on as well to ensure a non-intrusive CTA experience on your blog posts.
How to complete this step:
- Determine the CTA types you want to include for the blog posts you’re optimizing.
- If necessary, create CTA imagery with a design tool like Adobe or Canva.
- Add CTAs to each post, either by utilizing a CTA tool or hyperlinking each image or line of text you add into your blog posts. We recommend the former.
6. Analyze your results.
We gained confidence that this approach worked best for us when the results confirmed so.
After 30 days of launching a new content offer on a series of blog posts, we always answer two questions:
- How many leads did each blog generate before we optimized it with the new content offer?
- How many leads did each blog generate after we optimized it with the new content offer?
Far more often than not, these clusters see a notable increase in CVR, with some increasing by more than 1,000%.
However, there have been times where we missed the mark and the offer did not perform as expected. When that was the case, we reverted the changes and went back to the drawing board – equipped with the knowledge of what didn’t work, which helped us determine what would help us generate more leads in the future.
How to complete this step:
- Calculate the traffic, lead, and CVR numbers for each blog post optimized with the new offer before swapping out the CTA.
- Calculate the same for a set time period after the CTAs were swapped.
- Calculate the difference in leads and in CVR for each post.
- If the post did not increase in CVR as expected, consider reverting your changes and creating a new content offer.
7. Align with SEO.
When we discovered that this process was helping us hit our goals, our immediate thought was protection. HubSpot writers and SEOs work hard to ensure our blog posts continuously rank on the first page for the search results of their intended keywords — and we don’t want to lose that hard-fought real estate.
However, like all teams, SEO needs to prioritize which blog posts are most in need of protection from losing their SERP rankings and traffic – so it became our job to ensure HubSpot’s SEO team knew which posts were most important when it came to generating leads.
We’re fortunate here at HubSpot to work with expert SEOs who are able to quickly and effectively prioritize the right content.
As my colleague Braden Becker – HubSpot Senior SEO Strategist – said when we spoke about this topic at INBOUND 2020, “Traffic doesn’t pay the bills.”
Once we were all on-board regarding prioritization, our teams came to an agreement on how to best manage an SEO strategy for high lead-drivers while respecting the importance of maintaining high traffic numbers for posts across the HubSpot Blog.
The team takes the following steps to ensure lead generation goals are met:
- Protect the traffic to high-traffic, high-converting blog posts by regularly checking performance and making as-needed updates to the content of these posts. By frequently optimizing these posts, we let search engines know we’re quick to add the most relevant information onto these pages.
- Grow the traffic to low-traffic, high-converting blog posts – or ensure that these posts have maxed out their organic traffic potential.
- Create posts for keywords that we have not written articles for – but align with related content offers or clusters – as these posts could generate substantial lead numbers for us. This step requires keyword research to ensure these new posts generate traffic.
- Stop protecting traffic to high-traffic, low-converting posts. While strong traffic numbers are great, we came to the conclusion that a lower traffic number is acceptable if it means redirecting our historical optimization efforts away from posts that might not generate as much traffic, but will generate significantly more leads than other posts.
How to complete this step:
- Come up with a list of blog content that you’d like to see an increase or decrease of traffic to for lead-generation purposes.
- Present this list to your colleague(s) in SEO to determine what work can be done to redirect traffic growth efforts to the right posts. Note: it’s important to set expectations here, as an SEO cannot wave a magic wand and increase demand for a low-ranking keyword. Sometimes, a post is ranking as well as it can be – but that doesn’t mean you shouldn’t double check to see if there’s opportunity to grow traffic where possible.
- Present a list of high-traffic, high-converting blog content to see if there are similar keywords which could be written about in a new (or updated) blog post, in addition to potential keywords that could be the basis for net new posts.
- Come with data. SEOs aren’t in the business of risk-taking, so explain how a sacrifice of traffic in some areas could result in a stronger CVR and higher lead number from your company’s blog.
8. Repeat the cycle!
HubSpot’s bloggers are always creating new blog posts and historically optimizing existing ones. In other words, my team is always presented with opportunities to create new lead-generating content and ensure the content we’ve already made still holds up and is of value to our leads.
Whenever we create a piece of gated content, we always follow the seven steps above, and we’re consistently rewarded with an increase in leads from our blog.

11 Social Media Calendars, Tools, & Templates to Plan Your Content
What do cross-country road trips, wedding speeches, and social media marketing have in common? Planning.
You could improvise all three, but it’s better to have a plan for what direction you’re heading — especially when developing your social media content strategy.
By now, most marketers recognize that social media plays an integral role in an effective inbound marketing strategy. And with so many social networks to manage and publish on, it’s important to stay organized and have a plan for when and what you’re going to share on these platforms.
The Benefits of Using a Social Media Content Calendar
We’re all busy. And when we’re busy without a plan in place for the tasks we have to get done, things inevitably slip through the cracks. Social media content is no exception.
Just like with blogging, a successful social media strategy requires regular publishing and engaging with followers to see positive results — whether that be in terms of SEO, brand recognition, lead generation, or all three.
So, if you’re not already using a social media content calendar, hear me out:
- Calendars help you get organized to avoid the dreaded scramble when things come up. With a social media calendar, marketers can plan out posts for entire weeks or months in advance, which frees up working hours to strategize for the future — and to dash off any posts about breaking news in your industry. Otherwise, you’ll spend valuable time each day searching the internet for that day’s content to share, which is a known productivity killer.
- A calendar helps you plan for each social network to customize posts instead of spamming all platforms with the same message. Social media marketers should take the time to craft custom messages for each network, and doing this in advance will save time throughout the week and ensure you’re being thoughtful and intentional when you do post.
- Calendars can help you track performance and plan for future posts. Without a calendar, social media marketers are publishing content into the void and are unable to track big-picture and past performance. With a calendar, marketers can look back and analyze which content performed best so they can adjust their strategy accordingly.
- With the help of a calendar, marketers can plan for holidays and observance days, such as National Cat Day, when they can tailor their content and engage with a wider audience.
Now that you understand the merits of having a social media content calendar in place, check out our list of top tools to stay organized and on top of your game.
Social Media Content Calendar Tools to Plan Your Messaging
1. HubSpot’s Downloadable Template for Excel
Content Calendar
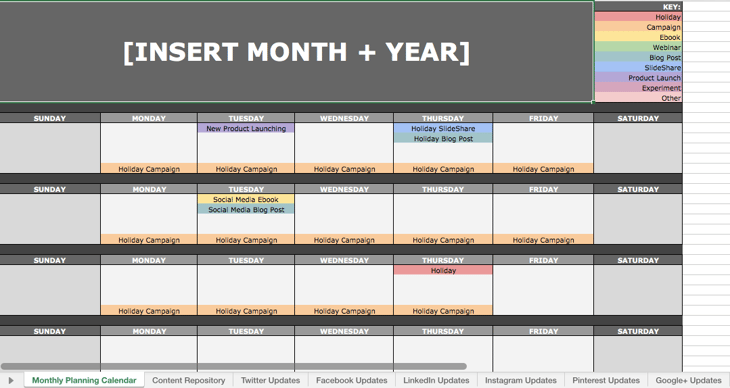
Marketers might already use Excel for different types of reports and data analysis in their roles, but it’s a highly useful tool for social media content calendar organization, too. Excel can be customized according to whatever priorities or metrics a team is focused on, so it’s a great tool for planning ahead.
The good news? We’ve already done the heavy lifting for you by creating a free, downloadable social media content calendar template using Microsoft Excel. Marketers can use this template to easily plan out individual social media posts — monthly or annually — while keeping an eye on bigger picture events, holidays, publications, and partnerships.
- Use the Monthly Planning Calendar Tab above to get a bird’s-eye view of what’s coming down their content pipeline in a given month.
- In the Content Repository tab, users can record the content they’re publishing on this tab to keep track of which pieces have been promoted and to easily recall older content that can be re-promoted on social media.
- On the Social Network Update tabs, users can draft and plan out social media posts in advance. These tabs are for organizational purposes, and the content of the posts themselves must be uploaded into a social media publisher.
For more on how to use the templates, check out this in-depth guide from my colleague Lindsay Kolowich.
This free resource can be used to draft social media posts, or it can be bulk-uploaded into a publishing app to maximize efficiency. (HubSpot customers: You can use this spreadsheet to organize content and upload it directly into Social Inbox. For instructions on how to do so, check out the template’s cover sheet here.)
2. Google Drive
Content Calendar and Asset Organization
Google Drive has several helpful features that make it easy for social media marketers to build out an effective content calendar.
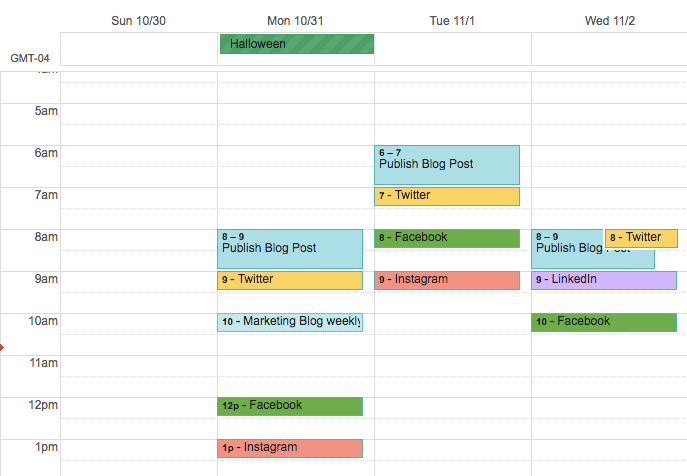
Here’s an example of how a team might use Google Calendar to track both their editorial and social media calendars to make sure they’re aligning posts with new blog content. These calendars can be easily shared with multiple teams to avoid scheduling conflicts and ensure that campaigns are aligned.
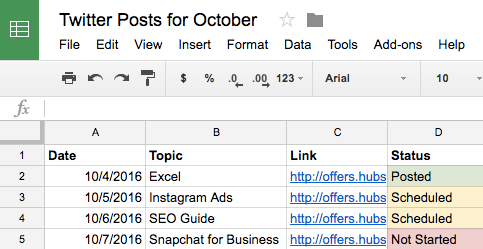
Marketers can also use shared Google Sheets to schedule posts on social media, track the status of different pieces of content, and assign tasks to team members — all on the same platform as their calendar.
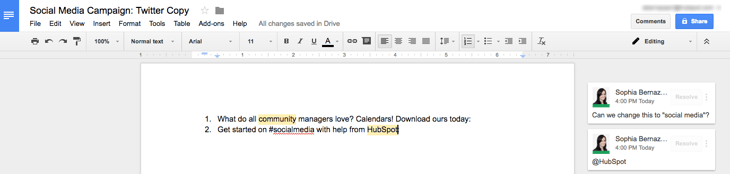
With the help of Google Docs, users can keep comments all in one place and can collaborate on different projects without emailing back-and-forth or having to schedule a meeting. This is a particularly useful feature when editing content for social media, which may need to be drafted and approved quickly.
(HubSpot customers: You can link your Google Drive account to your HubSpot portal to easily upload files from Drive into your HubSpot software.)
3. Loomly
Content Planning, Creation, Publishing, and Calendar
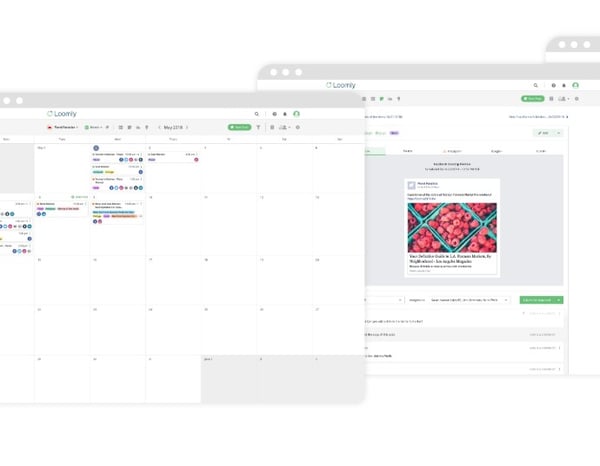
If you want more mileage out of a content calendar than publishing dates, you can turn to an all-in-one content planning and publishing platform such as Loomly.
Loomly offers tools beyond the management of content, going even so far as to provide post inspiration and ideas to help you create content. It also allows you to manage your content assets, schedule posts, manage them in both a list view and a calendar view, and analyze what’s working.
Their most robust feature set, though, includes a collaboration and approval environment so that teams can submit mockups, provide comments, see version logs, and flag for approval. This can help you streamline for efficiency when it may otherwise seem as though there are “too many cooks in the kitchen” on a particular project.
4. Trello
Task Management and Content Calendar
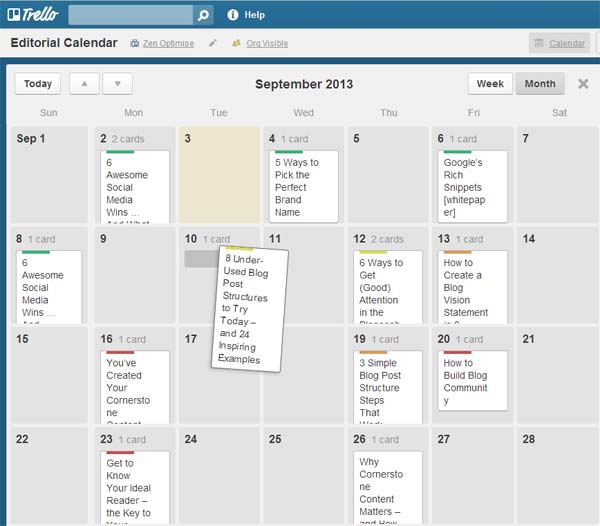
Trello is another organizational tool that’s highly effective for team collaboration. Trello also offers a full calendar view (shown above) which makes it easy to visualize what content is going out, and when. More specifically, social media managers can use Trello’s flexible assignment “cards” and customizable “boards” and “lists” to map out to-do lists, manage a content calendar, plan a campaign, and house ideas from a brainstorm.
But you’re not limited to just one structure: Users can customize boards according to their needs. For example, a team could create a board to organize social media posts for a given week, on a specific platform, or post ideas around a topic, such as a campaign or awareness day.
Trello cards allow for a ton of customization as well. You can track progress toward completing a checklist, which could be useful for social media marketers looking to track campaign progress.
Additionally, Trello cards can be assigned to different team members, marked with due dates, and commented on. Users can even customize labels with different publication statuses so the entire team can see the progress of their social media posts and when they’re due on the calendar. The labels could also indicate different social networks that content is being published on.
5. SproutSocial
Social Publishing and Content Calendar
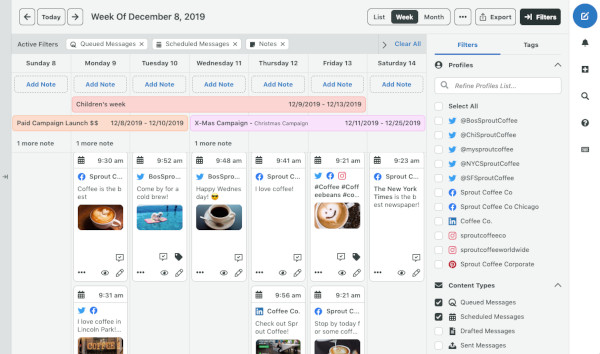
Sprout Social’s social media calendar and publishing tool makes it easy for teams or individuals to plan and schedule all of their social posts. You can schedule content to automatically post to Twitter, Facebook, Instagram, LinkedIn, Pinterest and more.
You can also tag each social post and add notes to better track and report on your posting strategy and campaigns. Additionally, their publishing suite includes a tool called Optimal Send Times which analyzes your social media data and automatically publishes at a time your audience is most engaged.
6. Evernote
Content Calendar, Task Management, and Asset Organization
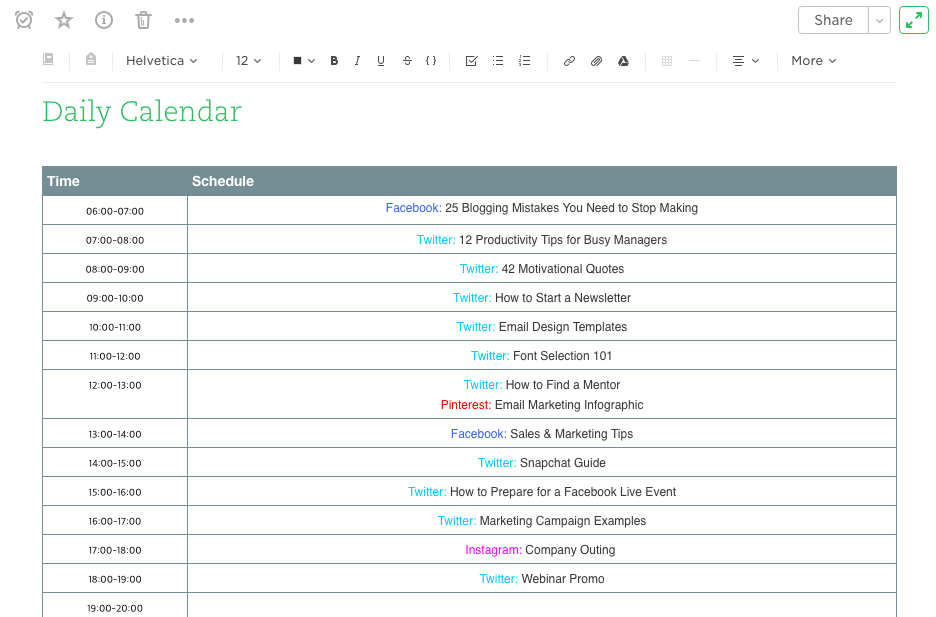
Evernote is a note-taking app that marketers can use to keep track of all the moving parts that comprise a social media campaign.
The tool also features yearly, monthly, weekly, and hourly logs, which make it easy to keep track of when you’re publishing content on social media, when you’re producing blog content, and other team-wide priorities. (Evernote offers customizable templates for each of these that can be downloaded into the app.)
Another useful feature? Evernote’s Web Clipper extension for Chrome. Marketers can use this tool to easily save links to their Evernote Notebook for sharing later on.
The Evernote mobile app also boasts some interesting features to help marketers keep their social content ideas straight. For example, you can easily snap a photo and save it to your Evernote files for review later.
This feature is of particular valuable for social content creators looking to maintain a backlog of photos to publish on Instagram.
7. Hootsuite
Social Publishing and Content Calendar

Hootsuite offers a built-in Planner tool to help you create campaigns, identify publishing gaps, and collaborate with your content creation team. Its primary features are in social publishing so that you can release content to your networks in advance, but it also has rich features for collaboration and post approvals. You can even curate content from other sources without logging into your account. Once your content is created, you can preview it with the Composer tool, which displays according to each social network’s unique format.
8. Agorapulse
Social Publishing and Content Calendar
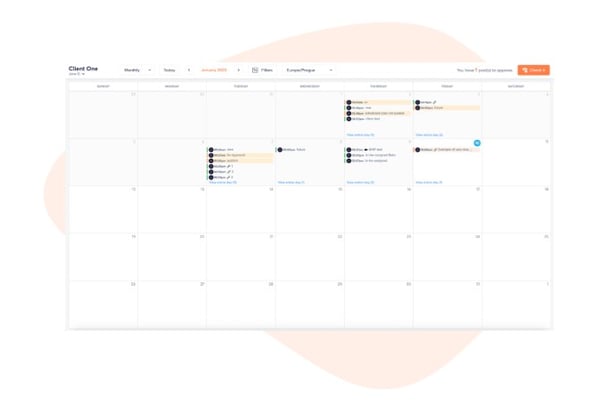
Similar to Hootsuite, Agorapulse offers social publishing tools and a content calendar so that you can manage your social media accounts with ease. This includes scheduling (or rescheduling), queuing, and bulk uploading posts, which is incredibly helpful for those who do quarterly or monthly content plans. What makes Agorapulse different, though, is its social inbox that allows you to manage all the interactions from various platforms in a single place. After all, content isn’t just a one-and-done activity; it’s about building awareness and engagement with your readers as well.
9. StoryChief
Content Planning and Distribution
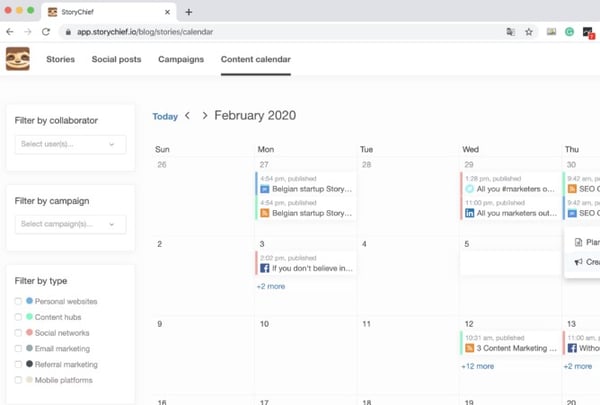
If you want more from your content calendar than simply knowing when posts go live, StoryChief is a good option. With StoryChief’s smart calendar, you can better strategize and plan your content strategy across channels. It not only displays your timetable; it also allows you to assign collaborators to tasks and filter by campaign. StoryChief self-describes their tool as a “content distribution platform” that unifies analytics and publishing across multiple channels for a more simplified approach to content creation. Best of all, it syncs with your favorite calendar apps as well as HubSpot.
10. ClearVoice
Content Creation and Management
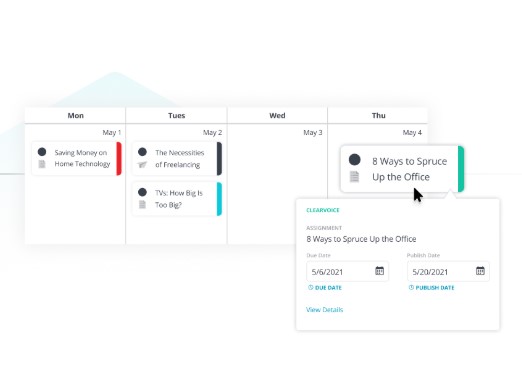
So what about content planning and creation? ClearVoice offers content creation tools to fit into your workflow. While their big claim to fame is their Talent Network Search which allows you to find and connect to content creators to work on your projects, ClearVoice also has features for task management for internal and external collaborators. You can create, edit, and approve projects in an interface that makes editorial management easy. They also have a dashboard and dynamic editorial calendar with plenty of interactive functionality, and there’s integrations with other popular software.
11. Zerys
Content Creation and Management
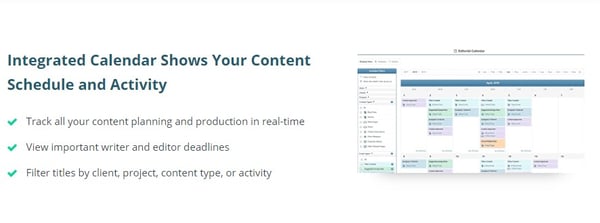
Zerys is another platform that matches you with your ideal content creation freelancers. However, it markets itself as a platform dedicated to content success, offering features for content planning, production, publishing, promotion, conversion, and analytics. You can manage unlimited content projects, plan keywords and titles for blog content, hire writers, and view all deadlines on an integrated calendar. Your in-house writers can use the platform, too, with the project management features that Zerys offers. It also integrates with HubSpot so that publishing is a breeze.
Social Media Templates
HubSpot’s Social Media Calendar Template
If you’re new to setting up social media calendars, HubSpot offers a pre-made, free, and downloadable template that you can use to schedule out full weeks of posts.
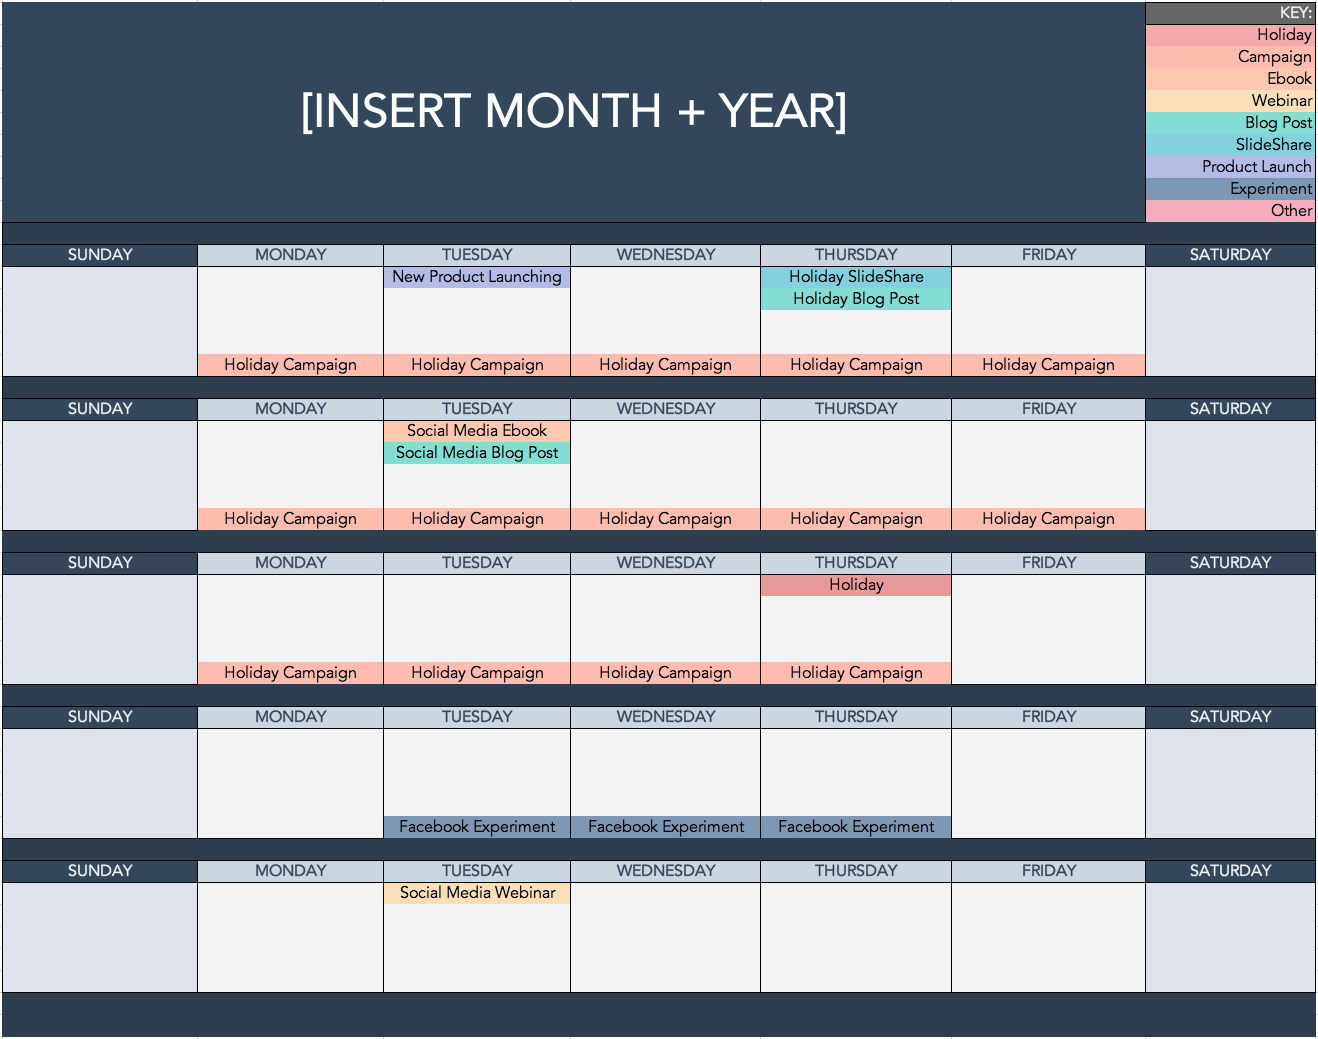
HubSpot’s Social Media Content Calendar Template for Startups
This template is very similar to the one seen above but also has tabs that work as a repository for content ideas. The template also includes helpful tips for posting on specific social media networks.
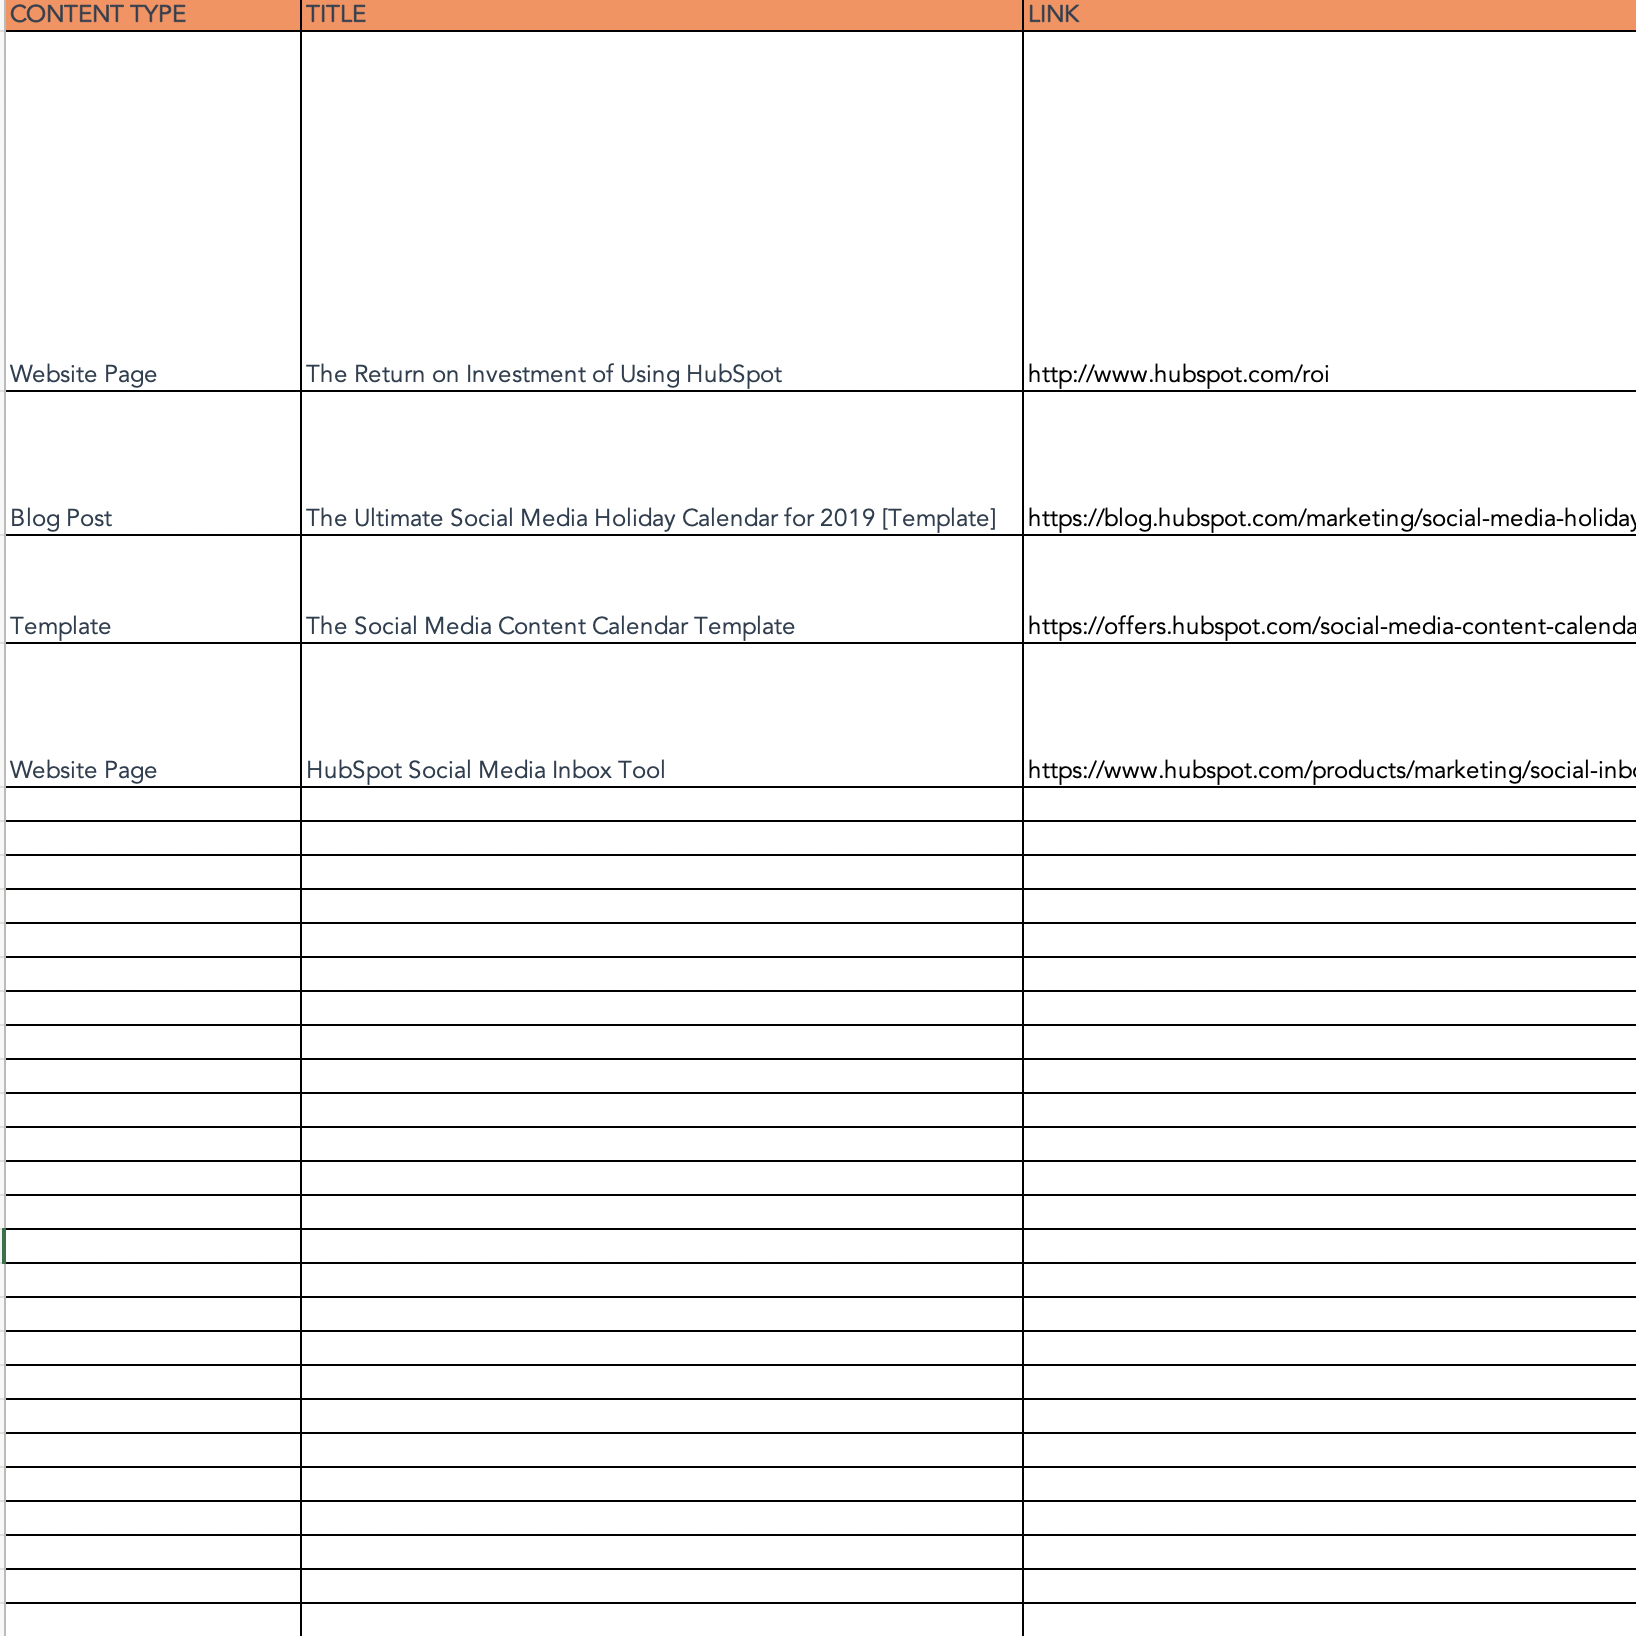
If you’re aiming to get all of your ideas down in order to develop a big-picture plan for your social assets, we recommend starting with this template.
Getting Started on Your Social Media Schedule
Now that we’ve reviewed a few helpful tools to kick your social media strategy into high gear, experiment with them. Every social media team is different, and it could be a combination of these tools that helps you execute your strategy efficiently to drive ROI.
Editor’s note: This post was originally published in 2017 and has been updated for comprehensiveness.

How to Design a Process Infographic (And Where to Find Templates)
Have you ever wished you could just use a picture to explain a process instead of words (or your hands)?
A process infographic could be just what you need to show your audience how to do something or how a process works. A well-designed one can establish you as an authority on whatever subject you choose to cover — whether you’re trying to show how your business’s coffee is sourced or train the new hire remotely.
Even better, they’re easy to create using a template or from scratch, meaning you can get started on one today.
What is a process infographic?
A process infographic simplifies and explains the steps of a process in primarily visual terms. Generally, it illustrates what happens during each step or phase with an intuitive layout that’s easy for the viewer to follow from start to finish. A well-designed process infographic makes the concept you want to share more accessible and saves you and the audience time.
Chances are, you encounter process infographics in some form pretty regularly in your daily life. Just imagine how much (more) complicated it would be to build your new Ikea desk if the instructions only included words and no visuals. Pretty daunting, huh?
Process infographics allow us to visualize how a process works more quickly and with more clarity. This makes them excellent training and educational tools — but also a smart marketing strategy.
Here’s an example of a process infographic that explains mechanical recycling:
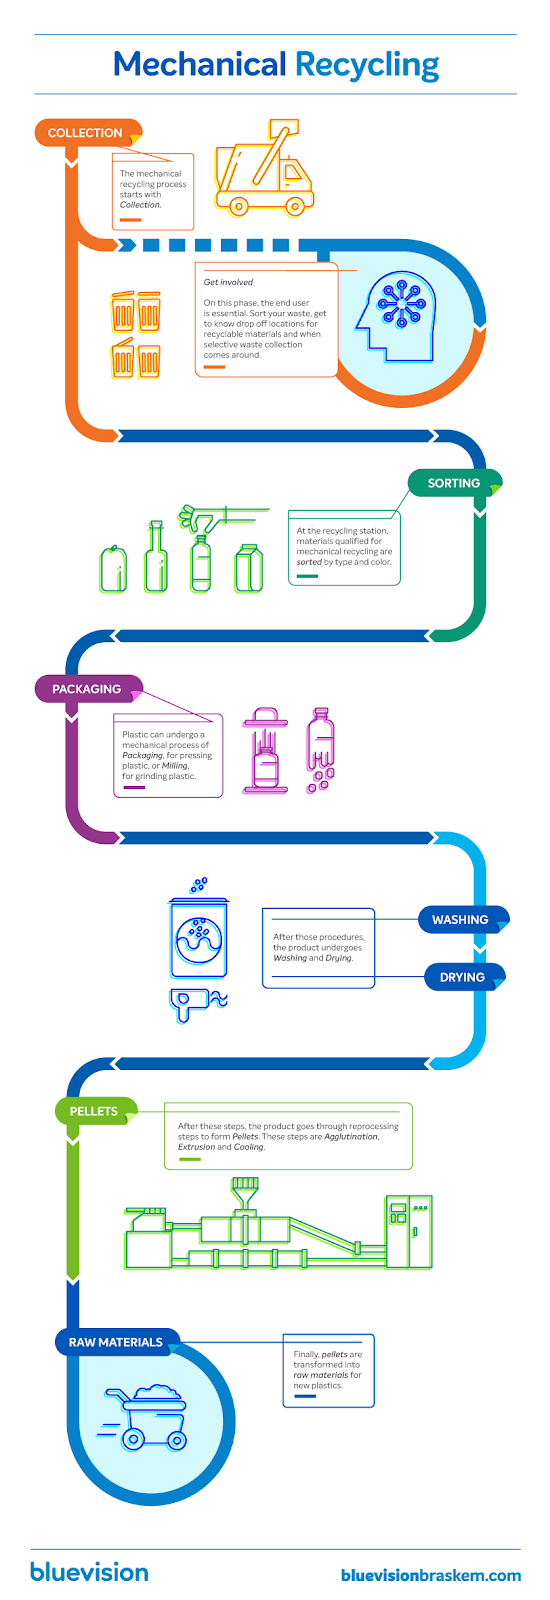
Image Source: bluevision
For marketers — particularly those of us who are trying to market products or services that require a bit of explanation — process infographics are extremely helpful for connecting with potential leads and communicating your company’s value. Explaining how your company’s offerings can provide value to customers with visuals can make your marketing materials more memorable and impactful than using copy alone.
Where to Find Process Infographic Templates
If you want to create your own process infographic with a template, here are a few offerings for every budget.
Venngage
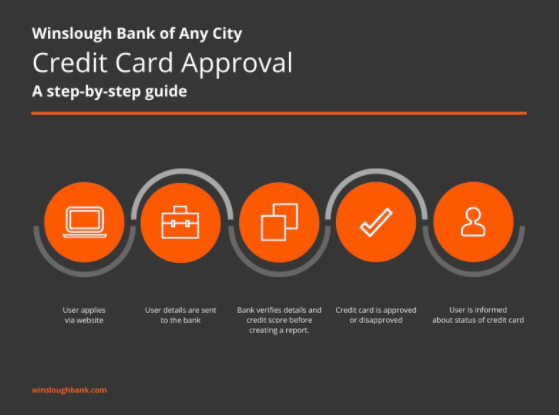
Venngage has a wide variety of process-specific infographic templates for a number of different purposes. If you’re looking to essentially plug your process into a finalized design and go, you’ll likely find what you want on Venngage. Monthly and annual subscriptions are available that give you full access to their template library and the ability to create and download your own process infographics.
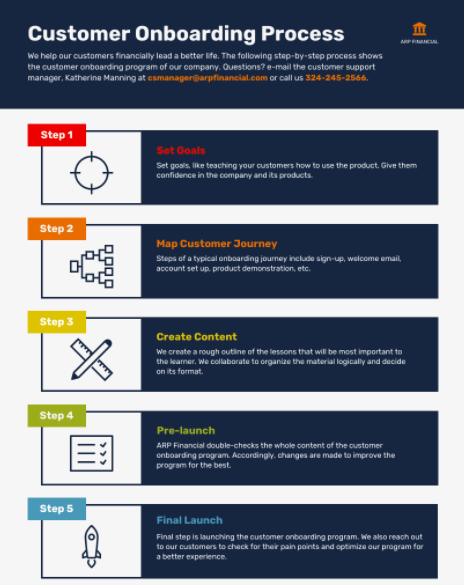
Template available on Venngage
Canva
Canva has ready-made infographic process templates ideal for fun activities, recipes, and the occasional life hack. You can also create a blank infographic process template on the site if you can’t find one that fits your project. Canva has a free and paid version depending on your needs.
Template available on Canva
Visme
Visme’s library of process-specific templates includes an extensive variety of different options, including more flowchart-style process templates than other infographic builder sites. If you’re looking to translate a particularly complex process into a visual medium, Visme is a smart place to start your search for the perfect template. You can set up an account for free or get access to the full library as a premium member.
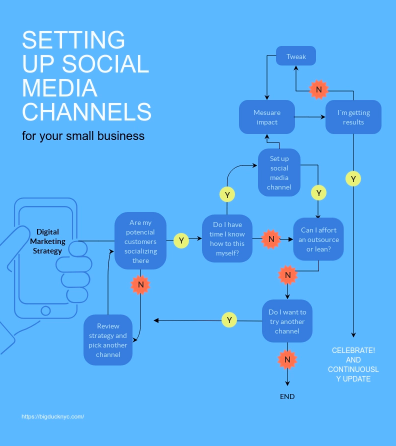
Template available on Visme
HubSpot
We would be remiss if we didn’t mention that HubSpot offers free infographic templates, including a number of process-specific templates that are easy to customize. All of our templates are free to use and compatible with PowerPoint, so you don’t need to download any new programs or apps to use them.
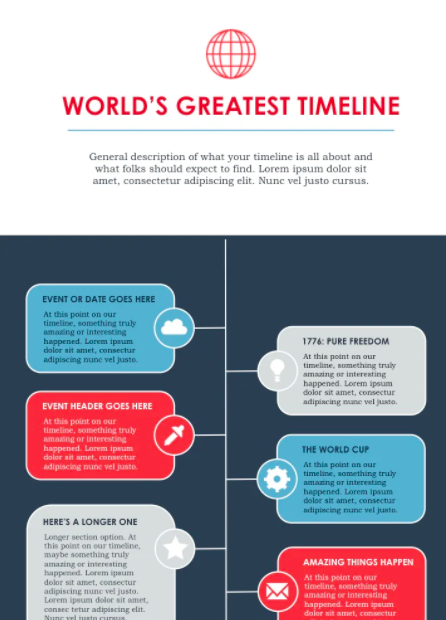
Template available from HubSpot
DesignCap
DesignCap is an online graphic design tool with a curated selection of process infographic templates available to customize to your needs. While their selection is technically smaller than other template tools on this list, every template was created by a professional designer. They offer many templates for free and have paid plans starting at $4.99/month.
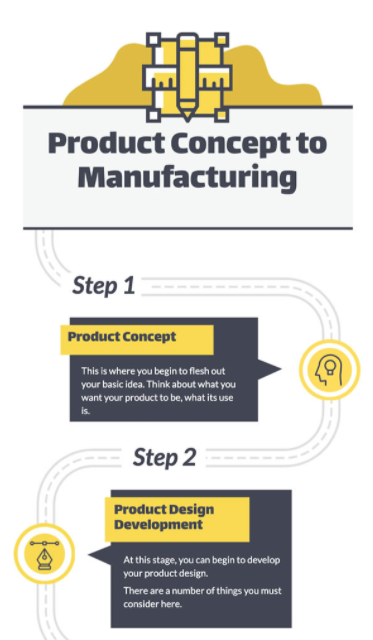
How to Create a Process Infographic Without a Template
If you can’t find a process infographic template that fits the process you want to visualize, you can always create your own from scratch.
For the mechanics of conceptualizing, structuring, and creating a cohesive design for your infographic, you can check out our step-by-step blog post here to develop your own infographic design in PowerPoint. Below, we’ll chat through a few tips specific to process infographics you can apply to any design.
Pick one process to explain.
Process infographics are good at breaking down complex subjects, but you still want to limit the scope of your design to one single topic that can be explained in a linear way — i.e., things that have a start and an end. Trying to explain too much in one visual can make your design confusing. Stick to one central idea per infographic.
Speak to your audience, not yourself.
This applies to most marketing strategies, but it’s always important to remember that you are — more often than not — not your target audience. Chances are, you know a lot more about the subject of your infographic than your audience, so it’s easy to fall back on that knowledge as you plan your design.
Because your audience knows less than you do about this subject, it’s important to approach any complexity from their perspective, taking the time to explain more elements than you would need yourself.
Map out each step with a clear start and end.
As you start outlining your infographic, identify where your audience will start (what they likely know about the process before reading the infographic) and where you want them to end (what you want them to know by the end). With those specifics in mind, map out the steps of
Experiment with the layout.
What’s the best way to structure the information of your process infographic? This will ultimately depend on the “shape” of your information.
For example, a supply chain infographic will likely benefit from a straightforward, linear way of displaying information, but a process like how your company recommends specific products for different needs would need more of a flowchart style design. Experiment with different ways to lay out each step of the process you’re describing until you find one that makes sense.
Edit for clarity.
Once you have a draft of your process infographic completed, give it a re-read and check for areas that might be unclear or confusing. Or even better, ask someone else to review your work with a fresh pair of eyes.
Don’t skip this final review — the goal of your infographic is to make something complex more accessible, and not everyone learns new information in the same way. Having someone else take a quick look can help you refine your infographic so it suits a wider audience.
Visuals succeed where words can fail.
We’ve avoided using this particularly relevant cliche for this entire article, but here it comes: a picture really is worth a thousand words. Using visuals to aid in your explanations of complex subjects or processes can help make your marketing materials more accessible and human.
The next time you’re tasked with breaking down a subject that seems to resist clear explanations, consider making a process infographic instead.

How to Find & Add Nofollow Links to Your Website [Step by Step]
Ever watch those game shows where contestants have to find the designer product in a sea of knockoffs?
Watching the contestants squint to examine the products is my favorite part. One, because I love game shows, but also because upon first glance, you really can’t tell the difference.
Well, nofollow links are kind of like that. You can’t tell them apart from regular links just by looking at them.
As Google continues to prioritize links in its ranking criteria, keeping track of them should be on your SEO to-do list.
So, how do you check for nofollow links and add them to your webpages? All those answers, and more, below.
This matters because links greatly impact your search engine ranking. And whether you’re linking internally or externally, doing so tells Google the destination page is valuable. This, in turn, may increase the page’s ranking — it’s called “link juice.”
The better your link building, the better your chances of ranking higher.
So, when you tell Google to ignore a link, the destination page will not get any link juice. For instance, let’s say a food blogger uploads a blog post. The blogger can add a nofollow attribute to the comment section to tell Google, “Hey, any link included here isn’t associated with me and I don’t vouch for it.”
With Google tightening up its linking requirements, it’s important that brands understand how they work.
How To Tell if a Link Is Nofollow
To find a nofollow link, you can follow one of two routes: Use a tool that will do it for you (jump to that section here) or check it yourself. For the DIY option, here are the steps:
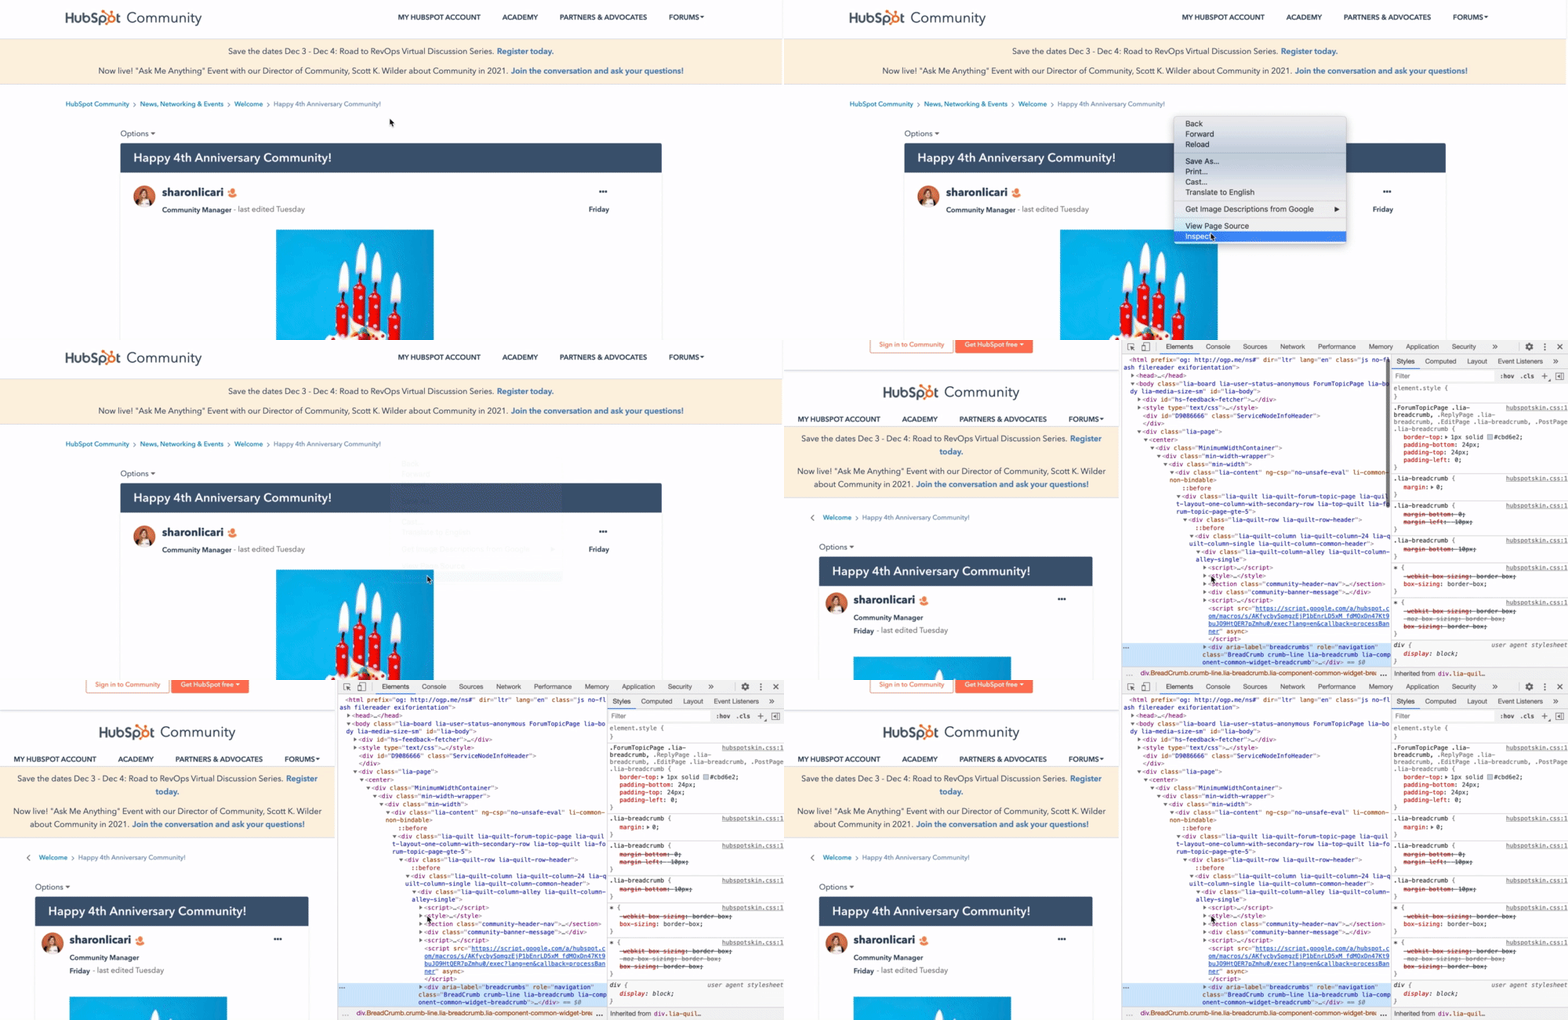
1. While you’re on the page, right-click and select the “Inspect” option.
2. Hold Command + F or Ctrl + F to search for “nofollow” in the code.
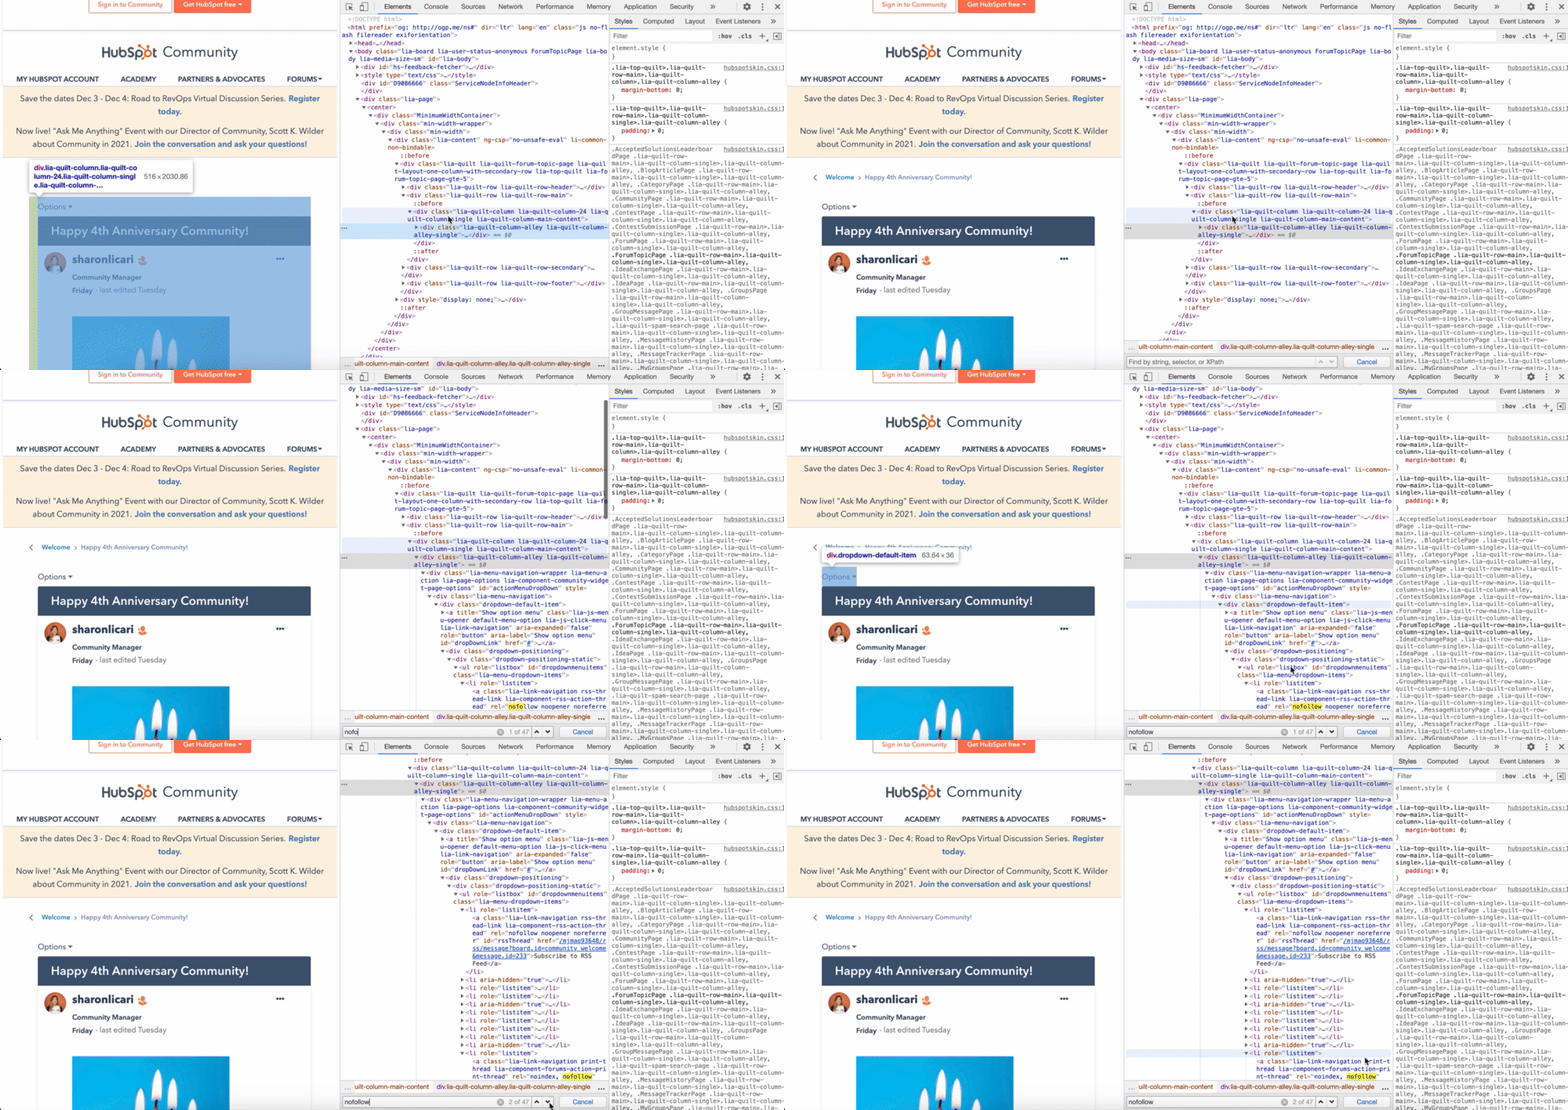
3. Scroll to find the highlighted nofollow attributes. It should look something like this:

How To Make a Nofollow Link
Making a nofollow link is as simple as adding rel=”nofollow” to the anchor tag within the HTML code. If that made no sense, no worries. Here’s the breakdown:
The code for a regular hyperlink looks like this:
When you’re adding a nofollow link attribute, the attribute will go between the destination URL and the linked text, like this:
Here’s an example using the HubSpot Blog:
Once you have the link, you can add it to the appropriate section of the source code on your content management system (CMS).
How To Make a Nofollow Link in WordPress
When making a nofollow link in WordPress, you have two options: manually inputting one into the HTML code or using a plugin. Find the steps for each below.
Making a Nofollow Link in WordPress Manually
1. Select the anchor text you want to add a link to.
2. Click the link symbol to add a link into the field.
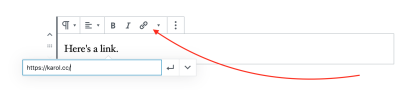
Image Source
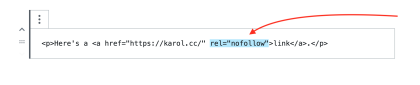
3. Click on the three dots and select “Edit HTML.”
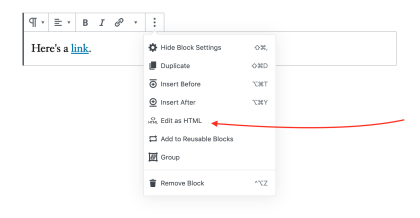
4. Add the rel=”nofollow” attribute and you’re all set.
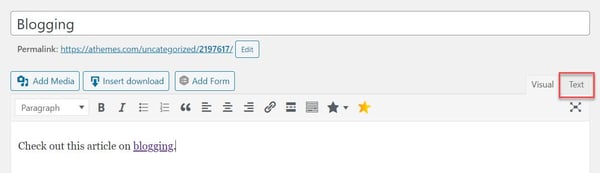
If you’re using an older version of WordPress, you may have to access the source code through the “Text” tab.
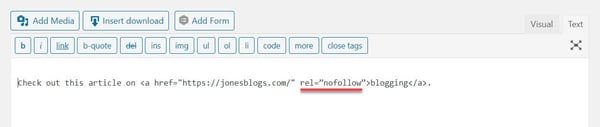
Then, manually add the nofollow attribute.
Once that’s done, go back to the “Virtual” tab and continue editing the post.
Making a Nofollow Link in WordPress With a Plugin
When making a nofollow link with a plugin, the steps will vary depending on the plugin you install. However, here’s an example of how it works using the “All in One SEO for WordPress” plugin.
1. Start by downloading the plugin and making it active.
2. Create or edit a post or page.
3. In your editing text box, select the anchor text and click on the link symbol.

4. Paste the destination link into the field.
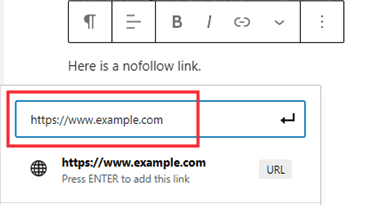
5. In the same box, you’ll also see additional options for the link, including the “Add ‘nofollow’ to link” option.
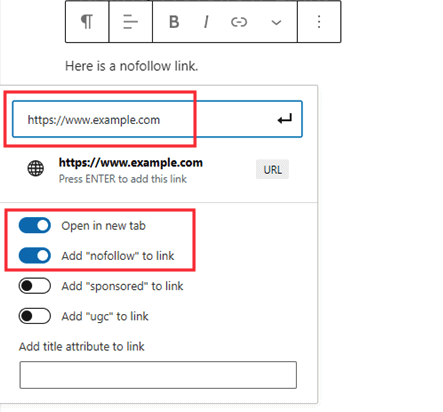
6. Make sure this option is selected, and you’re done.
Pro-tip: A lot of SEO plugins have the nofollow link feature included. So, if you’re looking to optimize your site, you can install a plugin with multiple SEO features.
1. MozBar
This free Google Chrome extension, created by the SEO software company Moz, highlights all of the nofollow links on a page in one click.
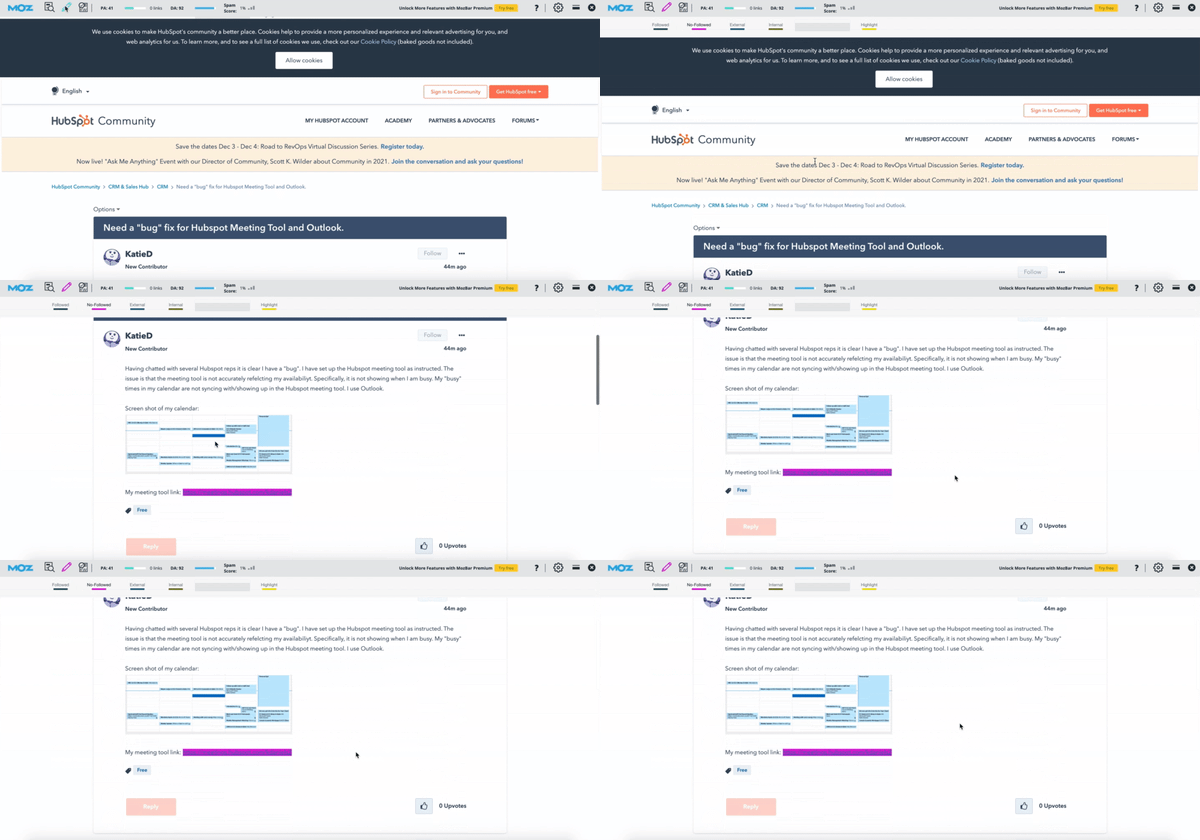
It also tracks followed, internal, and external links as well as keywords on the page. MozBar identifies each link type by color, making it easy to quickly scan the page and find what you’re looking for.
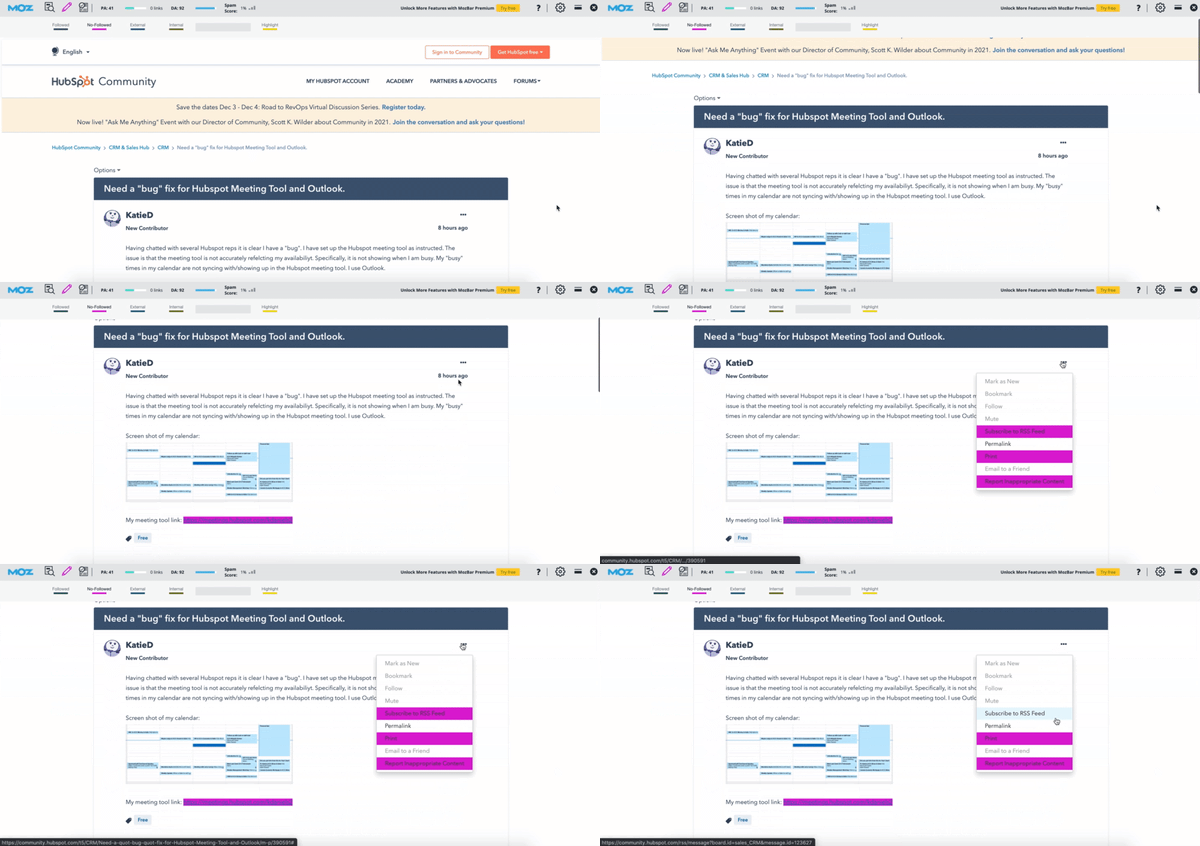
One thing to keep in mind while using the extension is that nofollow links under dropdown menus will not appear as you scroll down. You’ll have to click the menu to reveal the nofollow links. Confused? See the GIF below.
2. Varvy
With Varvy’s free nofollow tool, finding nofollow links is as simple as entering the page’s URL and clicking “Test.” It doesn’t offer a visual for where the nofollow links are located on the page, but it does tell you how many there are.
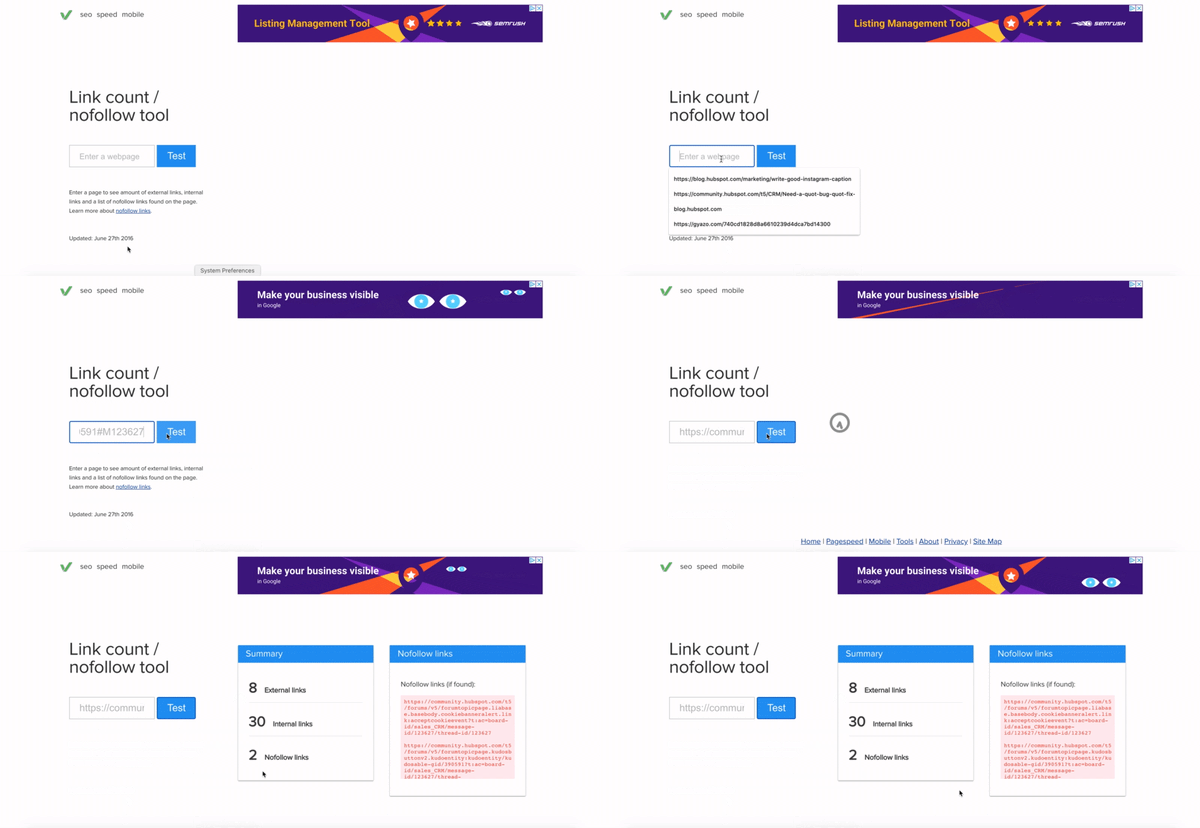 This is one of the simplest ways to get an idea of how many nofollow links you have. From there, you’ll have to find other tools to accomplish your next steps.
3. NoFollow
NoFollow is a free extension available on Chrome and Firefox. Similar to MozBar, it identifies the nofollow links on the page and highlights them using a red dotted box.
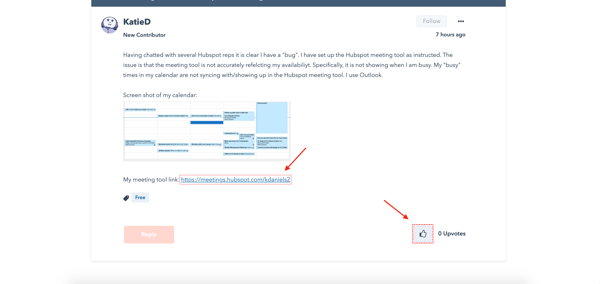
As long as the extension is active, it will work on every page you visit without prompting. Just as with the MozBar, if a link under a dropdown menu has a nofollow attribute, you won’t see it until you click the dropdown menu.
So, think of yourself like a game show contestant. To win the SEO game, you have to take a closer look at your website links. This will keep you on Google’s good side and increase your odds of landing (and staying) on the first page of the SERP.

A Comprehensive Guide to LinkedIn Sponsored Updates
When it comes to growing your brand and boosting your revenue, social media matters.
Here’s why: More than three billion people worldwide now have social media accounts, and 54% of those users leverage social media to research products.
The biggest challenge? Finding the right platform for your social media posts where you can connect with your ideal audience.
While many businesses leverage sites like Facebook, Instagram, and Twitter to promote their content and increase conversion rates, there’s also a case to be made for more business-focused frameworks like LinkedIn.
In this comprehensive guide to LinkedIn sponsored updates we’ll tackle the big questions — what are LinkedIn sponsored updates, how do they work and how much do they cost?
We’ll also offer a list of sponsored updates best practices to help your brand make the most of this social content solution.
What are LinkedIn Sponsored Updates?
Let’s start at the beginning: What exactly are LinkedIn sponsored updates?
Also called sponsored content, the official LinkedIn help page says a sponsored update is, “a LinkedIn Page update that is sponsored as an advertisement and is delivered to the LinkedIn feed of members beyond those who follow your company.”
In practice, LinkedIn sponsored updates are advertisements created by your company or marketing team which are then served to LinkedIn users who either follow your page or follow pages in a similar content space.
These ads are served as part of the native LinkedIn feed and typically include a combination of relevant text and contextual images or videos, in turn helping them blend in with similar user content rather than stand out as paid-for advertisements.
When designed and deployed well, LinkedIn sponsored updates can help drive organic interest in your brand from both current followers and a wider audience of LinkedIn members. Worth noting? While these posts are designed to follow the format of familiar user updates, they’re always labeled as “sponsored content” to ensure there’s no misleading users or confusion.
What Types of Sponsored Updates are Available?
Brands can create four types of direct sponsored updates:
Single Image Ads
Single image ads include one image and text that are displayed directly in targeted member LinkedIn feeds.
Carousel Image Ads
Carousel ads contain multiple images in succession that users can scroll through to get a better sense of your products or services.
Video Ads
Video ads offer a way to include multimedia marketing with in-feed videos that users can watch on-demand.
Single Job Ads
If you’re looking to expand your team, you can create single job ads for your targeted audience. They must promote a single job opportunity and be linked to an active job post on LinkedIn.
You can also create what’s known as “direct sponsored content”. These ads won’t display on your LinkedIn Page or Showcase Page before being served as advertisements.
As a result, they’re often used by companies to test several marketing approaches and see which one produces the best results and use it as the basis for more robust sponsored content updates.
How much do LinkedIn sponsored updates cost?
The short answer is that more resource-intensive ads — such as videos or carousels — will cost more than their single-image counterparts.
The long answer is slightly more complicated. First, it’s important to understand that LinkedIn uses a bidding model for sponsored ads; you select and create your ad type and then specify how much you’re willing to pay — a minimum price exists to ensure advertisers are fairly paid, but you’ll never be charged more than your maximum upper limit. Differing ad providers then bid on the service and the lowest price wins.
Ad price is also determined by your target audience and relevance score. If your target audience is in high demand, you’ll be charged more because there’s greater competition to capture user interest. You can also lower your ad costs by creating relevant ads. The more relevant and content-rich your ad, the less you’ll pay — because there’s a better chance of engaging LinkedIn users.
It’s also worth considering the best cost model for your ad: Cost-per-click (CPC) or cost-per-impression (CPM). CPC means you only pay when users click on your ad and visit your site, while CPM means you pay for every 1,000 views or “impressions” of your ad.
If your goal is generating brand awareness, opt for CPM. If you have an established audience and are looking to drive click-throughs and conversions, choose CPC.
LinkedIn Sponsored Updates Best Practices
Want to get the most from your LinkedIn sponsored updates? Keep these best practices in mind:
1. Follow LinkedIn sponsored update specs.
Each type of sponsored content comes with its own specifications.
Single image ads: Up to 255 characters for the ad name, 150 characters of intro text to avoid truncation, URLs with “http://” or “https://” and JPG, GIF or PNG files that are 5MB or smaller.
Carousel ads: Use a minimum of two cards and a maximum of ten. Each card has a maximum file size of 10MB and dimensions of 6012 x 6012px. Supported formats include JPG, PNG and non-animated GIFs.
Video ads: Video ads must be three to 30 seconds in length, between 75KB and 200MB and in MP4 format. They must also be less than 30 frames per second (FPS).
Single job ads: Single job ads should be concise, relevant, and clear and follow the same image guidelines as single image ads. They must also link to an active job posting on LinkedIn.
Failure to follow these guidelines may result in ads being rejected. If ads contain misleading or inappropriate content, LinkedIn may choose to remove the ads or terminate your LinkedIn account.
The service also makes it clear that “spam” posts are not permitted: According to their Best Practices for Sponsored Content page, “Businesses that post updates excessively are subject to review by LinkedIn and could risk having their LinkedIn Page deleted.”
2. Don’t overshare.
While targeted, relevant content can help drive user interest, too many ads too quickly can result in over-saturation.
LinkedIn recommends regularly tweaking your content strategy to deliver analysis rather than simply news, include curated content (with credit) from other sources, and repurpose older content where applicable.
3. Test, test, test.
As noted above, direct sponsored content is a great way to try out new advertising efforts and see what sticks.
With the social media market continually evolving, it’s worth evaluating ad performance every few weeks to see what’s working, what isn’t, and where specific changes can help.
4. Spend wisely.
Sponsored updates can get expensive as you incorporate new advertisements and use multiple ad types.
Here, it’s worth tracking your ad spend and switching from CPC to CPM models once click-through rates start to rise. If ads begin losing steam, consider moving back to CPM to generate increased awareness.
5. Find new markets.
While engaging your target market is critical, diversify ad objectives is also important to expand your overall impact. LinkedIn recommends using tools such as Lead Gen Forms to find better leads, assess ROI and manage your advertisements at scale.
LinkedIn’s sponsored update model offers a streamlined solution to help brands reach their target market, expand brand awareness, and boost ROI. Best bet? Start with direct sponsored content to see what sticks, then choose the cost model that makes the most sense — CPC or CPM — and adjust as needed to reach the largest LinkedIn audience.

How to Successfully Migrate a Website Without Harming SEO [Checklist]
An outdated website won’t represent your brand well.
Web design experts recommend a site redesign every 2-3 years to keep up with web standards and design trends. This can often be accomplished with a simple facelift or re-skin. However, in some cases, you may be up against a site migration.
The end result of a site migration may include a cleaner interface, a new or improved user experience, an easier editing experience, and more. However, the choice to migrate your website should not be taken lightly. If executed poorly, you could end up with status code errors, negatively impacted SEO performance, and even irritated website visitors.
Why might you migrate a website?
Here are the circumstances in which you might need a site migration over a simple redesign:
- You need to move your site’s location from one server to another.
- You are changing the CMS platform your site operates on.
- You are changing your domain name or URLs.
- You need to make major changes to your site’s architecture (not just aesthetics).
Website migrations can be done on your own or professionally. (For example, HubSpot offers migration services to customers switching to HubSpot’s CMS.)
If you’re considering a website migration, keep in mind that you must leave yourself time to prepare and execute. Migration specialists usually take about three weeks, so plan accordingly. Now, let’s get into the details of migrating a website.
Pre-Migration
1. Crawl the existing site.
A website crawler retrieves the URLs and markup on your site, “seeing” this information similarly to how Google would.
Performing a crawl gives you a starting point for your URL mapping (more on that later) as well as a list to refer to in case something gets lost in translation. You can crawl your website yourself with a third-party tool such as Screaming Frog.
2. Record your benchmarks.
In some cases, analytics data can get erased during a site migration, and this historical benchmarks can be valuable, so it’s best to retain it.
You should also take the time to review your analytics and ensure you know how visitors currently navigate the site and which pages are your most valuable. This context can help inform your redesign and site architecture decisions.
3. Map your URLs.
If you’re making major changes to the URLs on your site, you’ll need redirections in place to guide Google and your website users from your old URLs to your new URLs.
- From a usability standpoint, if a page no longer exists, you don’t want your users to get a 404 status code error. Instead, they should be guided to the page that has taken the old page’s place.
- Improper redirects can mean a big hit against your SEO. They tell search engines and visitors of your website that a page has changed, whether it’s been removed, or no longer exists. They also tell search engines what new pages have replaced old ones.
- From an SEO perspective, you don’t want to lose all of the history, backlinks, and (in essence) “authority” that the old page built up. A redirect tells Google where to attribute those signals instead.
To get redirects implemented, you must first strategize by mapping your URLs. This involves building a spreadsheet with two columns: one for the old URL and one for the corresponding new URL.
Don’t be concerned if there aren’t “perfect” replacements for every piece of content. Just do the best you can to direct your users based on their original intent.
If you have tons of pages, manual mapping probably isn’t in the cards for you, so to save time, look for patterns in your URLs that can be redirected in groups or sections.
Existing redirects should be migrated as well. Try to keep as many existing redirects as possible to lessen the workload, and make sure your URLs are mapped before you test redirects, to make sure you have backups if you lose them.
For more information on how to update URLs, check out this article.
4. Make sure you’re retaining titles, meta descriptions, and HTML markup.
Recall that website migrations help with website organization. As such, pages should be uniform and contain the same information as they did before. To illustrate, if the HubSpot Marketing Blog underwent a site migration, the content and descriptions for each blog post would be the same, just look different.
You can always update or rewrite titles, meta descriptions, and HTML markup, but you should still ensure that each page includes the proper information.
5. Try out the new build on a test server (aka sandbox).
Seeing mockups or testing in a local environment will not give you a full picture of the new site’s functionality and implementation. For a seamless transition, take it online for a test drive before the official migration.
6. Choose the right date for the migration.
Hiccups will happen no matter what, but you can minimize them by avoiding peak hours.
Day of Migration
7. Prepare to update your site’s DNS settings.
If you’re moving your site to a new server, part of the process will include “pointing” to the site’s new location. Coordinate with your web/IT team and/or your hosting providers (new and old) to accomplish this.
8. Launch.
Set up your forwarding redirects, unpublish, and implement.
If DNS changes were involved, the site may be down momentarily.
If you’re not switching servers or platforms, the migration should be nearly instantaneous.
9. Crawl the new site.
Once the new site is live, you can do a crawl to see if it has been migrated how you expected it to. One thing you want to look for is proper indexability and crawlability.
10. Identify and resolve missing and duplicate content.
Using the crawl report, see if you find any anomalies, including duplicate content or 404 errors and broken links. In addition, you should click around the new site and look for issues.
11. Check for redirect chains.
Now that your site has been migrated, you have a lot of new redirects on your hands. If redirects already existed, chains may have been created.
Here’s what I mean:
If you were already redirecting A to B, your migration may have added a redirect from B to C.
This creates a chain of redirects: A to B to C.
Redirect chains can slow your site down and impact performance. You can avoid this by breaking the chains, redirecting A to C and B to C.
12. Ensure Google Analytics and Google Search Console are implemented.
To avoid any gaps in data and reporting, these should be up and running the same day.
13. Mark the date in Analytics.
Google Analytics allows you to make “Annotations” of important dates or events. This can help you contextualize the data and measure performance pre-and post-migration (unless you opted for a new Analytics setup).
14. Submit sitemaps.
Once everything is up and running, ensure your XML site map has no errors. Then, you can submit the sitemap in Google Search Console to invite Google to crawl the new implementation.
Post-Migration
15. Monitor performance.
While temporary dips in traffic are common after a migration, you should still be keeping a pulse on your analytics to ensure nothing big was missed that could be affecting performance.
16. Run site audits.
Sometimes, third-party tools can find issues you didn’t know about. SEMrush’s site auditor is excellent in situations like this.
17. Update your platforms.
If you have ads running or other platforms that may be using old URLs, be sure to add fresh links.
18. Have publishers update backlinks.
If your redirects have been implemented correctly, you’ll still get traffic and authority from your backlinks. However, it’s still best practice to use the freshest URLs possible. With that in mind, reach out to the publishers of your highest value links to notify them of the swap.
Website migration can be a lengthy process, but it’s not impossible. With preparation, you can have a migration that’s successful and friendly with your existing SEO efforts.
Editor’s note: This post was originally published in December 2019 and has been updated for comprehensiveness.

How to Get a Google Ads Certification
Google Ads is one of the most effective advertising tools to get more traffic to your website, and generate more leads. In fact, most businesses see an average of 200% ROI on their Google Ad spend.
To create better, more powerful ads on Google, it can be helpful to receive a Google Ads certificate. Additionally, it’s a great resume booster.
If you’re looking to get a Google Ads certificate, you’ve come to the right place. Here, we’ve created a guide that will explain why a Google Ads certification through Google’s Skillshop is helpful, and how you can prepare and get certified.
What is Google Skillshop?
Google Skillshop is the home for all e-learning courses offered by Google product experts. This is where you’ll head to become Google product certified, including in Google Ads, Google Ad Manager, and Analytics Academy.
Whether you’re a beginner looking to dive into the world of Google products or an experienced marketing professional ready to up-level your skills, you’ll find what you need in Skillshop.
Increase your knowledge in Google Ads Display, Ads Video, Shopping Ads, or even Google Ads measurement. Not sure why you’d go deeper than a working understanding of Google’s product suite? Let’s talk the “why” of getting certified, below.
Why get a Google Ads certification?
Years ago when I was applying for work, I interviewed a couple dozen people who worked in the digital marketing industry to learn about their jobs and the application process. Many emphasized the importance of getting a Google Ads certification.
The truth is that many employers search for people with this certification on LinkedIn to find employees for their marketing team. LinkedIn generally offers a talent pool of higher-quality than standard job boards like Indeed. Plus, the demand for marketers skilled in Google Ads is high, while the supply of qualifying candidates is relatively low.
Thanks to the internet, it’s easier than ever before to apply for a job with little effort, so employers are swimming in low-quality choices.
To find qualified employees, then, many hiring managers use LinkedIn’s search engine to find anyone with a Google Ads certification because it’s one of the few defining qualifications that can show proven knowledge and skill. The certification shows the hiring manager that you’re somewhat savvy about the industry.
The good news is that a lot of fresh talent don’t have a certification on their LinkedIn profile or resume since they don’t know the value of it. In other words, you can easily stand out if you get certified.
Even if you don’t want a role in PPC, the certification is still helpful for any marketer. PPC advertising, especially through Google Ads, makes up the bulk of online advertising. If you understand the principles of Google Ads, you can translate those principles to other marketing efforts.
Additionally, having an understanding of neighboring areas of marketing helps with your communication among team members, and empathy. Ultimately, having that certification under your tool belt will only make you look better to employers.
How Applicable is the Certification in the Marketing Industry?
To be fair and objective, let’s acknowledge the case against getting certified.
First, in terms of actual skill and practice, a certification isn’t entirely applicable in a real marketing role. It’s possible to score well or even perfectly on this exam without having actual experience with the platform, especially when there are exam answers online.
The exam can, at times, teach you the best answer in theory, which isn’t close to the best answer
in practice.
Having been in the Google Ads platform myself, I know that a few questions are unnecessarily complicated, not applicable, or biased toward a response focused on spending as much money as possible on Google’s platform. Google makes money when you spend money on ads, regardless of whether the ad leads to a sale, so their intentions make sense.
With all that said, most of the questions are still valuable because they help you learn how to navigate the platform and make accurate calculations. You can grow a lot through preparing for this exam even if you initially have little to no knowledge of Google Ads.
You should take the test without cheating, learn from your incorrect answers, and retake it to improve. Otherwise, you may have a tough time with the platform later on, which can seem detailed and intimidating to beginners.
Here’s another huge reason why you should get certified and make sure you learn a lot during the preparation process, rather than speed through it — any decent marketing agency or department that you’d like to work for is going to test you on your understanding of terminology and pay-per-click reasoning during the application process. They’re going to find out whether you really know what you’re talking about.
Therefore, the knowledge that the exams offer does have some real-world value. That doesn’t mean you have to be a total whiz. But you should understand most of the concepts tested.
Treat the Google Ads exam as an opportunity to learn rather than a task to check-off a list. Your mindset shift will make all the difference because you’ll be learning from every question asked, while others rush through the exam just to finish it.
Topics and Exam Duration of the Google Ads Certifications
Google Ads Exam Topics
There are Google Ads certifications for different topics, including video, mobile, display, and shopping advertising. The most important version is the search advertising exam since that’s the area marketers use most often on the platform. The second most applicable Google Ads test for marketers is likely Google Ads display certification.
Google Ads Certification Exam Duration
Each exam has a different time limit, but it’s usually between 60 minutes and two hours. I’ve got a good sense for how long it actually takes since I’ve sat in a classroom with a dozen people taking the exam and have seen how quickly people finish. It usually takes 50–75% of the allotted time. A small percentage of people will use up to all the time if they’re new or focused on learning from each question.
Google Ads Certification Badges
Once you’ve passed the exam, you get a certification badge that you can show off on your LinkedIn profile. Adding this badge to your profile adds credibility and makes your profile more search-engine friendly. As mentioned, recruiters look for this certification and care about it, so you’ll be showing up more often when they search.
Google Ads Certification Training
The training resources that Google offers are a handy starting point. You can learn a lot about the testing format, style of questions, and concepts that’ll show up on the exam.
Additionally, one of the best ways to prepare for the exams is through YouTube tutorials, demonstrations, and tutorial articles. Most people are visual learners, and they will learn better when they see the platform itself with a video, rather than reading about it. That said, some blog posts have great screenshots throughout to help you better understand their tutorial.
It’s important to note — many of the resources online are overkill. It’s easy for beginners to feel overwhelmed by the details. However, try to focus on learning the fundamental principles — like what to tweak to make a big impact on performance.
If a tutorial article is 5,000 words long, then it’s covering every detail of the platform, which is too much for the certification exam.
Additionally, the exams themselves can be training tools. If you don’t pass the first time, you can learn from your incorrect answers and retake it. You can use your first attempt to get familiar with the format and duration. Reflect on why you got a question wrong so that you can remember the right answer for next time.
Some of the questions asked are recycled and randomized with different numbers. You can gain a lot of applicable math skills by learning the principles behind calculations. Unfortunately, many marketers skip learning from the exam itself and miss out on the bulk of where they can grow.
Take the exam with an attitude of learning, rather than completing.
Tips for When You’re Taking the Exam
1. Take notes.
Have printed notes on hand that you can consult quickly whenever you forget minor details here and there (don’t expect to rely on these for the entire exam, though). These notes are useful in case Google decides to implement restrictive browsing limits for exam takers in the future.
2. Plan for plenty of battery.
Make sure your computer is plugged in so it doesn’t run out of battery life while you’re taking the exam. This tip may seem obvious, but you don’t want to find yourself in that painful situation.
3. Pace yourself, while answering.
Take your time with each question. Most people end up with extra time. Remember — it’s a marathon, not a sprint. You’ll be answering multiple-choice questions for at least an hour.
4. Practice self-care, pre-test.
Hydrate. Get enough sleep. Some people overlook simple things, like making sure you have enough water and food before the exam, which can affect brain performance. Foods high in omega-3 are great for brain power.
Ultimately, getting a Google Ads certification is a worthwhile investment for your career growth. Digital marketing employers look for any valid evidence that you’re above entry-level applicants.
5. Don’t rush through without understanding the topics.
While it’s possible to pass the exam without understanding many of the principles, you’ll be doing yourself a disservice in the long run. Treat the exam as a learning process and an opportunity to shore up your knowledge and application of PPC terms and methodology because it’ll help you during the job interview, and in your career.
You don’t have to know everything about Google Ads since real-world experience can help you learn. But the knowledge you gain in preparing for this exam will give you a head start.

11 Stats That Make a Case for Landing Pages
A landing page is a standalone website page dedicated to a specific marketing campaign that is meant to convert site visitors into leads. Landing pages typically offer visitors something that they may be interested in, like an Ebook or a free trial, in exchange for contact information. Getting this information then gives businesses the tools they need to further nurture leads and urge them down the purchasing funnel.
Since landing pages are tailored to customer interests, using them in your marketing strategy can help you convert a significant number of qualified prospects since you can assume that they’re ending up on a landing page because its content interests them.
If you’ve yet to consider using them or you want to update your current landing page strategy, this piece will go over 11 stats that make a case for using landing pages as a means to increase your conversion rates and generate more leads.
11 Stats That Make a Case for Landing Pages
1. The average landing page conversion rate across all industries is 9.7%.
Given that 10% is a benchmark for a good conversion rate, taking the time to create a landing page that carefully considers the interests of your target audience will benefit your business. Whether you sell SaaS or clothing, a higher conversion rate from landing pages means a longer list of leads to nurture into paying customers.
2. Landing pages are the least popular type of sign-up form, but they have the highest conversion rate (23%), and 62.6% of leading landing pages already use them.
Using landing pages to obtain customer contact information for lead nurturing is likely to bring higher conversions. If you decide to use forms, the highest-converting number of fields is 3, with an average conversion rate of 10%. The most popular combinations use email address and name (7%) and email address and birthdate (5.7%).
3. Businesses using optimization software for their landing pages see an average conversion lift of 30%.
While optimization is always an essential factor for generating traffic, using optimization tools to perfect your landing page strategy is valuable for increasing conversions.
4. Addressing buyer fears on landing pages can increase conversion rates by 80%.
Marcus Sheridan, a keynote speaker at Inbound 2019, ran an experiment where he found that addressing customer fears, like email spam or personal date use, on his landing pages increased his form conversion rate. If you’ve found that your landing pages aren’t converting as you’d like them to, consider using Sheridan’s strategy to be upfront with consumers about what will come from completing forms on your landing pages.
5. Personalized CTAs convert 202% better than default versions.
Consumers prefer personalization because it ensures that they aren’t overloaded with irrelevant information that doesn’t pertain to their interests. Given this, using personalized and targeted CTAs in your landing pages will likely increase your conversion rates.
6. 48% of top landing pages ranked in Google Maps and organic search query results
Ensuring that your landing pages are SEO optimized for both regular search and Google Maps results increases the likelihood that they’ll show up in both types of search queries, increasing exposure and the possibility of generating more leads. If you also link landing page CTAs in email ads, you’re ensuring exposure and visibility from three different channels.
7. 65% of top landing pages have their business name in the title tag.
Since customers value transparency, using a recognizable brand name and logo shows them that you’re not running a scam or being deceitful. You’re claiming ownership of the CTAs and personal information you’re asking for. Therefore, Including your business name on your landing page is a simple step you can take that can help you increase conversions.
8. 30% of top landing pages use video content.
If you already use video as a part of your marketing, incorporating it into your landing page strategy can help you increase conversion rates. In fact, relevant embedded video content can increase conversions by 86%, and 80% of video marketers say that video has directly increased sales.
9. 36% of top landing pages have testimonials, 11% have reviews.
You likely already solicit reviews and testimonials from current customers. Repurposing them to use on your landing pages can increase customer trust and higher conversion rates, especially considering that 60% of consumers think that user-generated content (UGC), like reviews, are the most authentic form of content a brand can use.
10. 55% of top landing page submissions on the HubSpot blog came from Ebook offers.
If you have a blog or website that wants to distribute long-form instructional content, offering Ebooks in your landing pages can help increase your business conversion rates.
11. 49% of marketers report that increasing customer acquisition is their primary objective in 2020, and a top priority for marketers was generating leads.
If you fall into either of these categories, landing pages can be a valuable element of your marketing strategy to generate leads and increase customer acquisition.
Landing pages are a valuable piece of your marketing strategy.
Considering the above stats, we can see that marketers who create landing pages that build trust with page visitors, provide valuable information, and use different content types see higher conversion rates.
Whether you already use them and aren’t obtaining the results you desire or you’re new to landing pages in general, using them will likely help you draw in new customers and drive revenue.

How to Create a Stunning Presentation Cover Page [+ Examples]
When you’re focused on creating a meaningful, persuasive presentation, it’s easy to overlook the cover page. But giving that first page of your deck a little more love can actually go a long way towards grabbing your audience’s attention early on and setting the tone for the rest of your presentation.
A stunning presentation cover page can intrigue your audience into wanting to know more and increase engagement with the information you’re presenting. On the other hand, a lackluster slide, or even the lack of one, can dampen audience enthusiasm for your presentation, and maybe even your own.
You’ve put so much work into your presentation — why waste that valuable real estate on the first slide of your deck?
In this post, we’ll cover the basics of creating a presentation cover page that’s informative and attention-grabbing. Let’s dive in.
What’s included in a presentation cover page?
A good presentation cover page accomplishes three simple things:
- It introduces the topic with a straightforward title.
- It introduces you (and your organization, if applicable)
- It sets the tone of your presentation.
Title
We probably don’t need to tell you this one, but your presentation cover page should be centered around a title. And ideally, a title that’s straightforward, descriptive, and simple. If you’re finding it hard to keep your title short, add a subtitle (in smaller print) to clarify what you’ll be speaking about.
Speaker
Next, identify the person (or group) who will be giving the presentation. In some cases, this will be as simple as including your own name, and in others, you’ll want to include your company name, logo, department, or other identifying information. As a general guideline, you’ll need less identifying information if you’re giving an internal presentation.
If your audience is mainly folks outside of your company (or there are plans to distribute your deck externally) you’ll typically want to include more information to identify your company clearly.

Tone
A successful cover page sets the “tone” of your deck — but what does that really mean? The colors, imagery, fonts, and placements of different elements on your cover page all create a specific visual style that the rest of your deck should follow.
A well-designed page conveys a sense of professionalism and preparedness that a simple monochrome text slide simply cannot. Even if you’re not a design expert, you need to pay attention to the aesthetics of your cover page. Fortunately, it’s easier than ever to find free, professional-looking presentation templates without needing a degree in graphic design. Whatever you choose, it’s important to remain relevant to your presentation (and, if applicable, your company’s branding).
We’ll explore a few examples of cover pages below so you can see how different elements converge to set the tone for a variety of different presentations.
Presentation Cover Page Examples
Below, we’ve compiled a number of presentation cover pages that succeed in different areas. Remember: there’s no single perfect format for a presentation cover page, but hopefully, you get some inspiration from this list.
Setting An Emotional Tone
The right presentation page can set an emotional tone as well as a visual one. This presentation cover page for a nonprofit conveys a mission-driven approach to protecting nature, with a well-selected, relevant image, and a call-to-action directly in the subtitle. (Photo by Andy Køgl on Unsplash)

Focusing on a Photo
You don’t need to overcomplicate the format of your cover page, especially if you have a great photo to use as a full background image. A simple stock photo here provides a clean backdrop for this presentation on remote work. Just make sure your title text is legible over any background photo you decide to use. (Photo by Corinne Kutz on Unsplash)

Leading With Your Brand
Even if you’re the central speaker for a presentation, it might make more sense to highlight your team or brand on your cover page, instead of including your own personal information (you can always include your own contact info at the end of your deck for follow-up questions). Context (if you’re speaking at a particular event or annual meeting) can be important to highlight as well on your cover page.
Go Minimal
There’s a big difference between a cover slide you didn’t put much thought into and a slide that makes good use of whitespace and leans on strong copy. Sometimes, the best way to lead an audience into your presentation is to create space for a little mystery.
If you’re giving a more casual presentation or a pitch that doesn’t need to follow a particular format, consider going the minimal route and opening with a simple cover page slide that asks your audience a question (one that you of course plan to answer).

Set a Purpose
Many presentations include an agenda slide directly after your cover slide, but that doesn’t mean you can use your cover slide to set a clear purpose upfront. Consider using your subtitle to explain a more robust (but still simple!) description of what you’ll cover.
Presentation Cover Page Templates
Instead of creating your presentation cover page from scratch, using a template can take much of the work out of the process. Check out these websites for templates that you can use for your presentation or for inspiration to create your own designs.
Canva
A tried-and-true favorite of many marketing teams, Canva offers up a wide selection of modern, drag-and-drop presentation templates with truly unique cover pages. If you’re on the hunt for a cover page that looks like you hired a graphic designer to create it just for you, Canva is a good place to start your search. Canva offers both free and paid options.
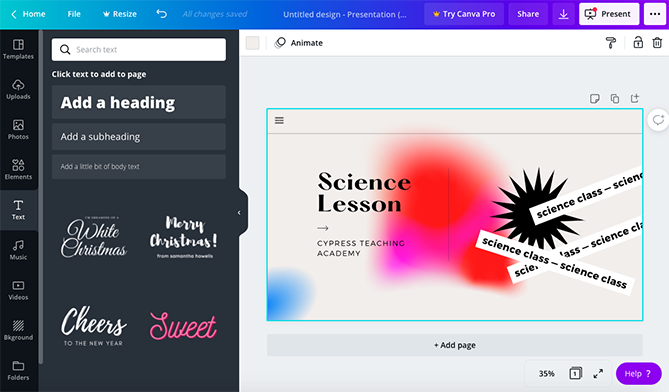
Beautiful.ai
Beautiful.ai has an intuitive, highly-customizable presentation builder that allows you to import your own visual elements directly from your computer or a Dropbox folder. Like Canva, they offer a number of free and paid template options (with great cover pages). Their biggest differentiating feature is their (frankly, very cool) adaptive AI technology, which intuits how you’re trying to design a slide and makes changes automatically to suit the direction of your project.
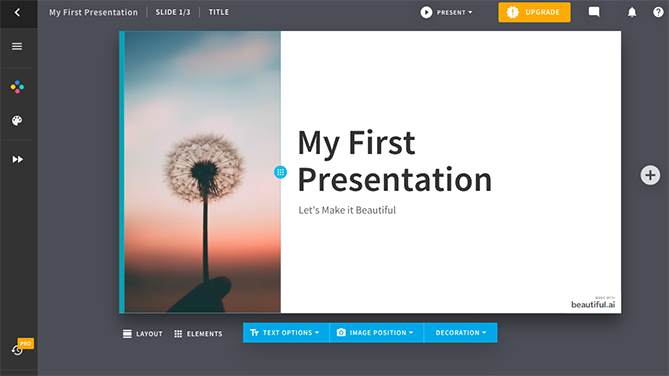
EDIT
For a completely free option with cover page starter template to suit a wide range of different projects across different formats, check out EDIT. Their online tool is specifically designed to create cover pages in a simple, easy-to-use interface.
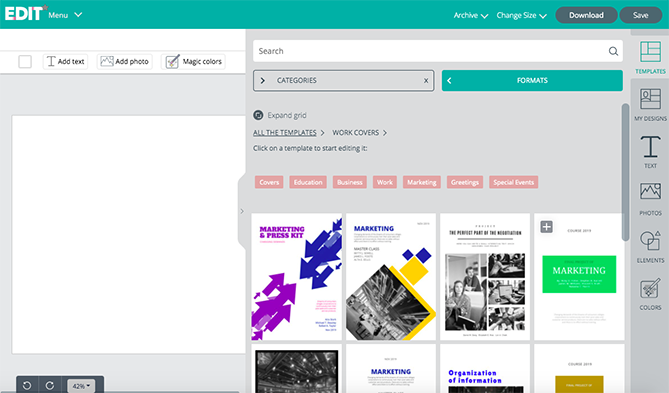
Visme
Another highly-customizable template source is Visme, which gives users the ability to select a starting template from their (expansive) library and customize elements in a simple web editor.
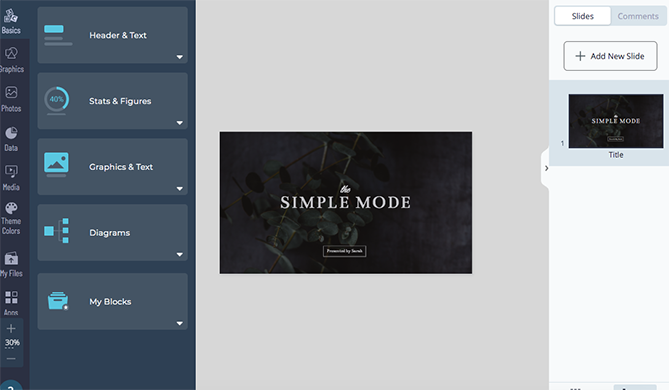
VectorStock®
VectorStock® has a massive selection of PowerPoint presentation cover page templates for purchase if you’re looking for something that’s ready to plug and go without the need for customization (beyond adding your own name and title, of course).
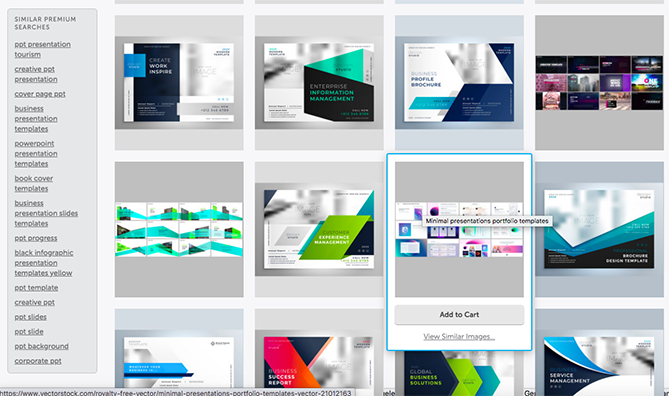
First Impressions Matter
For better or worse, audiences will judge a presentation by its cover page. Because of this, it’s vital that you give your cover page the care and attention that it deserves. Ultimately, a cover page isn’t simply a placeholder, it’s a vital component that can drum up interest for your presentation. The best part is that with the tools available online, you don’t have to be an artist to create a stunning presentation cover page.
The featured image on this post was created using a Canva template.
