
Everything You Need to Know About Ecommerce Marketing
With nearly every marketing operation now taking place online, it can be tough to distinguish between the various types of digital marketing people use today.
For example, take ecommerce marketing — what is it and how does it compare to practices like social media, content, search engine, and email marketing?
Ecommerce marketing and digital marketing are not mutually exclusive. Ecommerce websites can use all of the above digital channels to promote a product and grow their business.
This ecommerce marketing guide will explore all of the digital media available today.
Ecommerce marketers can use social media, digital content, search engines, and email campaigns to attract visitors and facilitate purchases online.
Before we dive into more detail about what ecommerce marketing is and how to implement a strategy of your own, let’s review the definition of ecommerce advertising and advertising’s parity with marketing for an ecommerce business.
Ecommerce Advertising
In similar fashion to the way advertising falls beneath the umbrella of marketing, ecommerce advertising falls beneath ecommerce marketing — and when used in tandem, you have the ability to more effectively reach your audience members to boost conversions and improve brand awareness.
As mentioned in our definition above, ecommerce marketing is about driving awareness and action towards your product or service.
Meanwhile, ecommerce advertising includes the methods through which you actually promote your product. In terms of online or ecommerce marketing and selling, these ads may come in the form of display ads, banner ads, or rich media ads.
The main takeaway here is that ecommerce advertising is a highly-effective method to implement while developing your ecommerce marketing strategy to focus your product or service promotion.
Now, let’s get back to our in-depth discussion about ecommerce marketing.
Types of Ecommerce Marketing
To give you a sense of what an ecommerce marketing strategy looks like, here are some common marketing channels and how you’d use them to build an online store.
Social Media Marketing
Brands, publishers, contractors, and growing businesses all launch pages on today’s most popular social networks to connect with their audience and post content that the audience is interested in.
As an ecommerce marketer, you can do the same thing, but the campaigns you run might look a bit different, and not every social network is a good fit for your needs.
Ecommerce websites are highly visual — you have to show off the product, after all — so your success on social media depends on your use of imagery to drive attention and traffic to your product pages.
Instagram is an appropriate platform for ecommerce businesses because it enables you to post sharp product photography and expand your product’s reach beyond its purchase page.
You can take your social media posts a step further by creating shoppable content, which is content that enables visitors to buy right away. That can include anything from strategically placed display ads within a social feed to additional tags that take users directly to a shopping cart. These methods help you eliminate friction from the buying process.
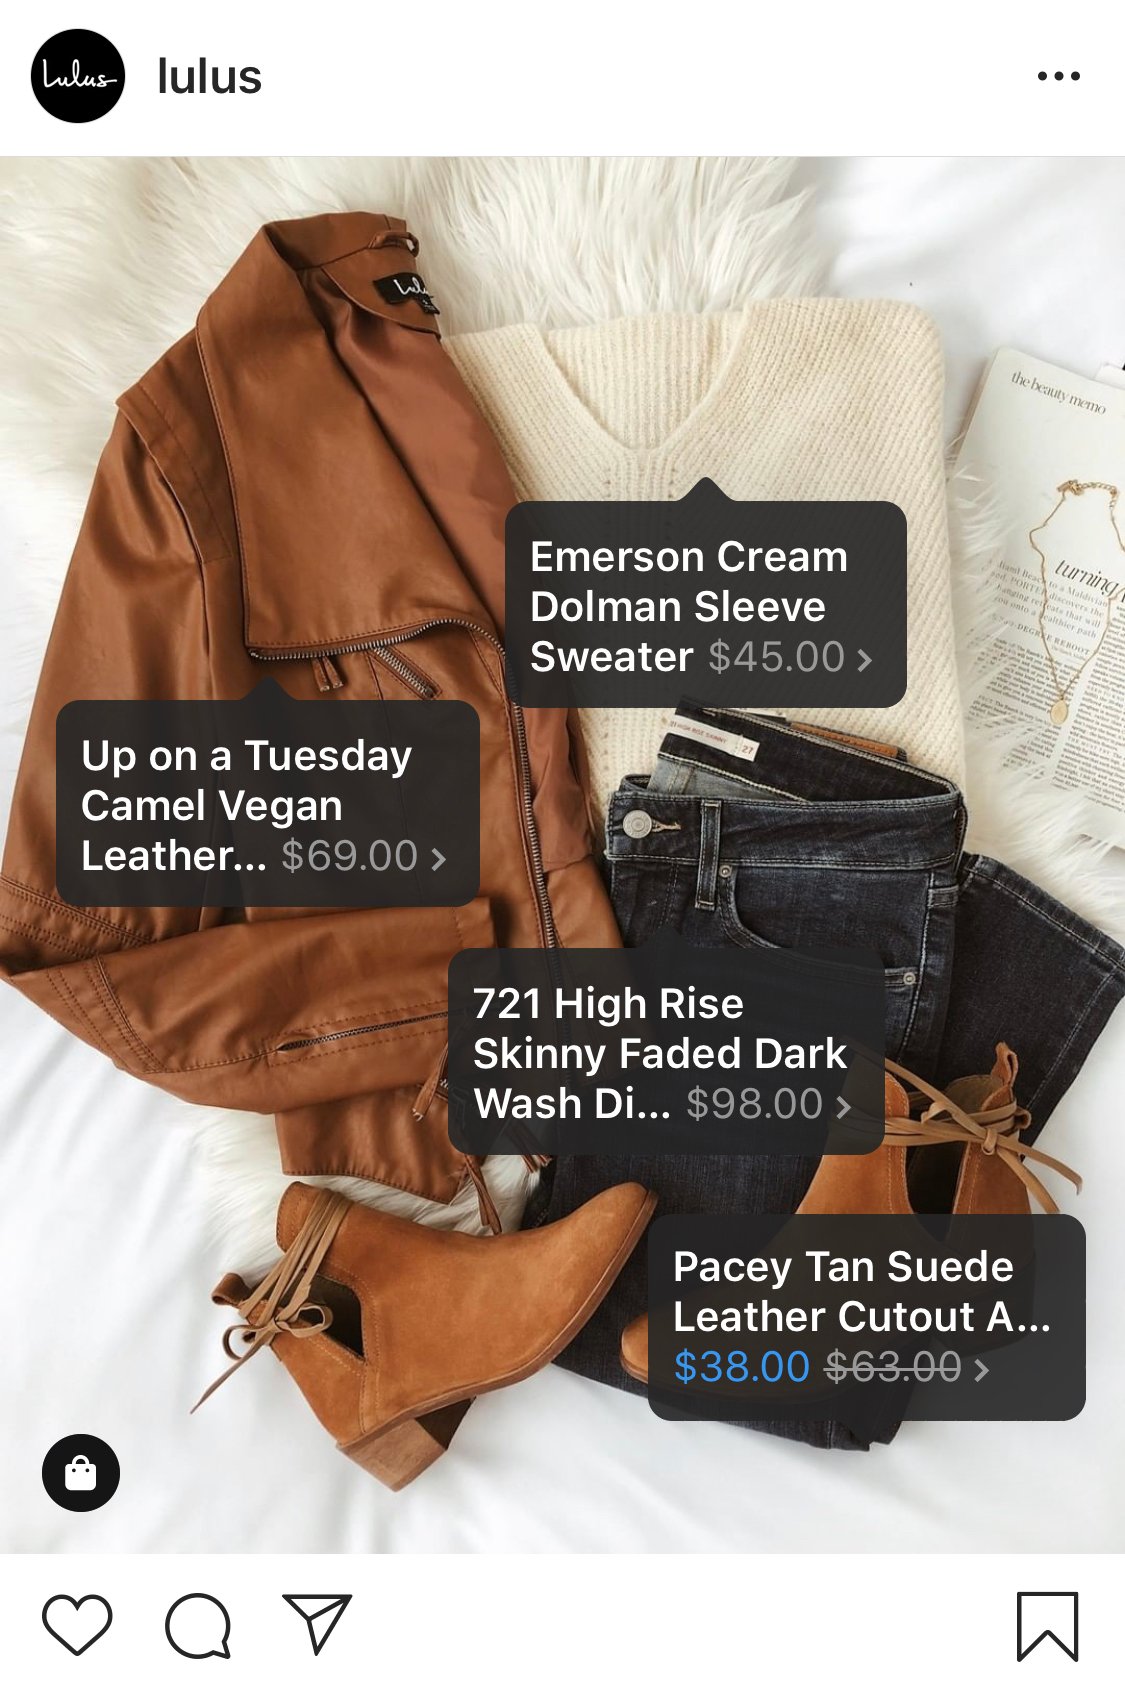
An ecommerce business is no stranger to product reviews, either. Using a Facebook Business Page to share product praise is a perfect fit for businesses that already solicit customer reviews across their online store. We’ll dive deeper into product reviews below.
Content Marketing
When you hear “content marketing” you might think of blogging and video marketing — content that is meant to improve your website’s ranking in search engines and answer questions related to your industry. But if you’re selling a product online, do you really need articles and videos to generate transactions? You sure do.
Here are some ways to use content to market your ecommerce store.
Optimize your product page copy.
Optimize your product pages for short, product-driven keywords that include the name of the product. If you sell wedding dresses, for example, a Google search for “brown bridesmaid dress” is more likely to produce product pages like yours if you’ve included that term on the page.
Also, make sure that your page titles, headers, and image alt text focus on the right keywords so search engines know to return your ecommerce store for the right query.
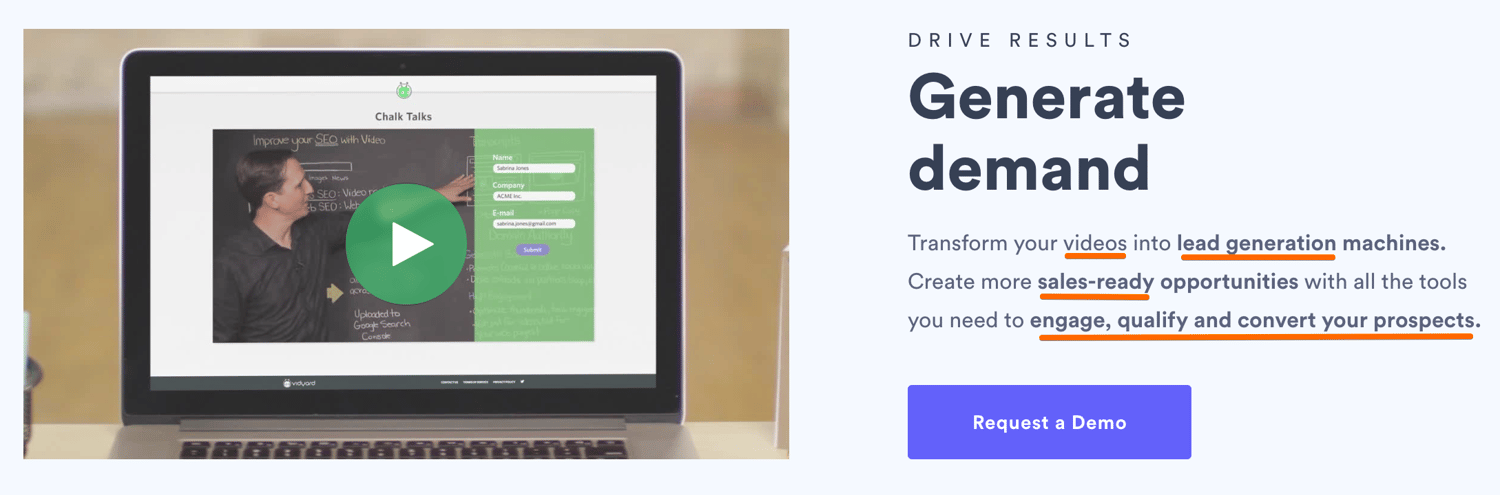
Write relevant blog posts.
If you manage an online wedding dress store, writing blog posts about “how to plan a wedding” can attract everyone involved in wedding preparations no matter where they are in the planning process.
As visitors become more engaged, you can create posts that will move them into consideration, like “how to select the right wedding dress”, and turn them into leads, like a downloadable “wedding planning checklist”.
Create guest posts for external websites.
Guest posts can get you and your products in front of relevant audiences (oftentimes for free). Submitting guests posts will also help you get more domain authority for your ecommerce site, thereby telling search engines that you have a reliable site.
You’ll need to search for sites that rank for keywords related to your product. Sometimes you won’t even need to create an entire post. If a site already has a relatable post, offer to expand on it by providing additional context, like a video or infographic with a link to your site.
Put product-related videos on YouTube.
YouTube has over a billion active users … chances are your target audience is somewhere in there. It’s also the second-largest search engine behind Google. If you’re looking for a massive, captive audience, YouTube is where you’ll find it. Use highly searched keyword terms to determine your topics, then share videos that are related to your product and helpful to your audience.
This is also a great option for tutorial videos that show current customers how to use your product — these videos can show people how best to use your product, increasing customer satisfaction and building long-term relationships with website visitors.
Include a keyword-driven FAQ section on your website.
If your audience is asking questions related to your product, then you need to be the one to answer them. Create an FAQ page on your website with responses to high volume, long-tail keyword searches to get users to your site. You’ll be building both authority and traffic — two crucial components of a successful ecommerce store.
Search Engine Marketing
Search engine marketing (SEM) includes both search engine optimization (SEO) and paid advertising. While SEO relies on your knowledge of Google’s ranking algorithm to optimize content, SEM can involve pay-per-click (PPC) campaigns, display campaigns, or product-specific ad campaigns (think Google Shopping), which allow you to pay for top spots on search engine results pages.
On Google, PPC campaigns guarantee that potential buyers will see a link to your page when they enter search terms that match the terms of your campaign. But because you’re paying Google each time a person clicks on your result, the payoff to you should be high.
This is why ecommerce marketers often register with Google AdWords and promote their product pages through PPC campaigns. The campaign puts searchers right in front of the business’s product when they click on a paid result, increasing the likelihood that the searcher will make a purchase before leaving the business’s website.
Email Marketing
Email marketing is one of the oldest forms of digital marketing, and believe it or not, it holds specific value in the world of ecommerce marketing.
The best part about email marketing? It can be automated. Automation means that you can set up a successful drip campaign to subscribers that are segmented by interest or stage in the buyer’s journey and let your email campaign do its magic. It’s one less marketing tactic that you need to worry about on your long list of tasks.
Even so, it’s imperative that you’re meticulous about your email list so you maintain trust among your leads. In a time when data privacy runs high on an internet user’s priority list, not every commercial email is welcome in that user’s inbox. Ecommerce marketers need to be careful when and how they add website visitors to their mailing list.
Here are two ways an ecommerce marketer might use email marketing.
1. Post-Purchase Follow Up
If a user has already purchased a product from your website — and agreed to receive emails from you during the checkout process — sending a follow-up email a few days after the product is delivered keeps the conversation going and gauges their future interest in your product line.
A post-purchase follow up also shows that you care about them beyond a sale and that your company has an interest in their success using your product. It gives you an opportunity to get feedback on their purchase experience, which, in turn, helps you reduce friction for future customers.
Some best practices for this type of email are to ask them to write a review of your product and/or read original content on how to use your product (those YouTube videos you created would be perfect here).
2. The Abandoned Shopping Cart
Users abandon their shopping carts for a number of reasons, and emails to diagnose the problem and retain their business can make the difference between a purchase and a lost customer. We’ll cover ways to reduce shopping cart abandonment below.
If a website visitor fails to complete a transaction while they’re in your shopping cart, consider sending a polite email to remind them to complete the checkout process, offer assistance, or recommend other related products to get their mind back on you and their browser back to your ecommerce store.
Learn more about why users are abandoning your shopping cart and how to fix it.
Influencer Marketing
Influencer marketing focuses on people or brands that influence your target market. The term is commonly used to denote Instagram accounts with several thousand followers, but it could also mean a celebrity or community that your target audience follows or belongs to.
Influencers build communities of people that know, like, and trust them. It is, therefore, easy for them to garner attention around your online product through a recommendation, or “sponsored post.”
Affiliate Marketing
81% of brands employ affiliate marketing, and ecommerce sites are particularly good candidates. Affiliates are people or businesses that help sell your product online for a commission.
Unlike most social media influencers, affiliates generate interest in products via old fashioned (yet effective) marketing tactics. They often use paid advertising, content marketing, and other means to drive traffic to your their pages on your product — it’s like having a team market for you.
Local Marketing
This is an often-overlooked tactic for ecommerce businesses, but local marketing allows you to double down on the areas where most of your prospects are (if you have a large population of them in one area) and allows you to offer incentives to your potential customer base.
Here’s how: use tracking cookies to determine where your prospects are located. Then, offer discounted (or free) shipping to potential customers in the areas where you have warehouses or shipping facilities. The incentive might be just what you need to gain a new customer.
There are countless ecommerce marketing tactics that you can employ to drive visitors to your online store beyond the traditional methods that we reviewed above. Let’s get into some more creative ways you can market your ecommerce business.
1. Use personalization.
Companies that use personalization are seeing revenue increases ranging from 6-10%. What is this magic bullet?
Personalization is finding ways to cater to individuals within the marketing materials that you already have; it is tailoring your outputs to reflect the unique needs of your consumer.
This can come in the form of a prospect’s name in the subject line of an email, recommended content or products based on a visitor’s behavior, or even showing smart content on a webpage when a user visits for a second time or has moved along their buyer’s journey.
Personalization can move people along their buyer’s journey faster — instead of searching for what they need, you put it right in front of them, making it easy for them to take your desired action, that is, make a purchase.
2. Capitalize on user-generated content (UGC).
What if you could have your customers market for you for free? That’s exactly what user-generated content, or UGC, is. It’s about finding ways for your customers to promote and share your business.
This helps in a couple ways: 1) It drives traffic to your ecommerce store, and 2) it builds an authentic following of people who are interested in what you offer.
Coca-Cola® did an amazing job of this with their “Share a Coke” campaign by creating customized Coke® bottles with people’s names, which naturally was shared across social media platforms.

Here are some effective ways to drive UGC:
- Competitions, where customers enter to win by displaying your product in some way
- Review platforms, where customers share feedback about your product
- Social media hashtags, where users submit content using a branded hashtag
3. Build a loyalty program.
A loyal customer is a long-term customer, and who doesn’t want repeat business? A loyalty program provides an incentive for a customer to continue doing business with you through relevant offers and discounts. While building a customer loyalty program takes some planning and work, it pays off in repeat business, UGC, referrals, and retention.
There are a couple of things to consider as an ecommerce business when building out a loyalty program. For one, consider diversifying the ways in which customers can show loyalty, whether it be through repeat purchases, mentions on social media, or sharing your content. Also, think about how you will pay off their loyalty, be it through points, discount codes, or exclusive perks.
Generate Word-of-Mouth Marketing (WOMM)
Word-of-mouth marketing is one of the most powerful marketing tools out here. It’s based on the premise that people want advice from others like them. As buyers becoming more skeptical of marketing tactics from companies, the need for word-of-mouth marketing in your business becomes more apparent.
While you can make this to happen organically by providing a great customer experience, you can also encourage, and even create, forms of WOMM that are equally as effective.
Reviews
Remember how I just said that prospects trust companies less and less? Well, customer reviews help mitigate that mistrust because they come from people who are not invested in the success of your company — instead, they’re an authentic and oftentimes brutally honest review of your product and how it worked out for them.
Reviews serve as marketing tools for you because they include mentions of your product and oftentimes they do the selling for you … people think, “If it worked for them, it might work for me, too.” Encourage your customers to leave reviews however you can, and that post-purchase email we talked about above might be a good start.
Referral Marketing
When customers solicit their friends, family members, and co-workers to buy from you, that is a referral. Sure, this may happen naturally if they really enjoy your product, but you can ensure that it happens more frequently through a referral program.
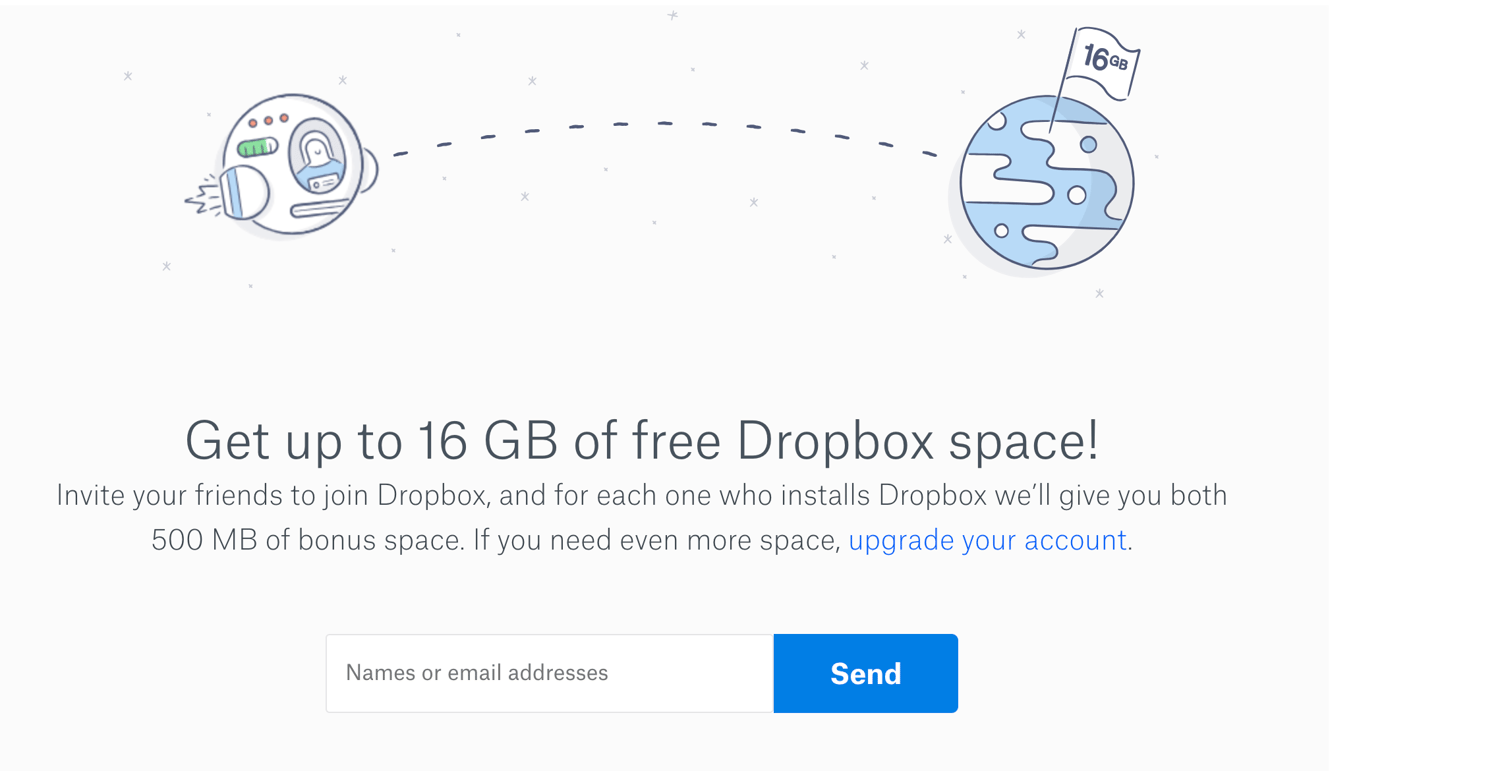
Simply ask your customers to refer others in exchange for something of value (e.g. discount, money, free gift) that you can offer to either your new customer, your existing customer, or both. Dropbox does a good job of this — they offer additional cloud storage space when you refer a friend to sign up.
Testimonials
You can use customer testimonials to get the word out about how great your product is. Testimonials are essentially tailored reviews because you typically produce them from interviews where you can ask specific questions that get to the points you want to address and share with prospects.
Being that you have an ecommerce store, some topics you might want to focus on for your testimonial interviews would be ease of the buying process, the level of customer support, and frictionless delivery and setup methods.
Case Studies
Case studies allow you to promote customers’ successes in a way that pushes prospects over the edge. They are meant to relate to your buyer persona, so you should interview customers that most closely represent your target audience. Case study best practice is to show a customer’s life before your product and how it has drastically improved since.
4. Invest in live chat.
Chatbots — you’ve heard about them, right? Well, they’re one of two ways to employ a live chat strategy. Depending on your business size, you can have a live person available to chat with potential customers who visit your store.
Whether you decide to go the bot or human route, live chat will prove especially effective while people are browsing your store so they can get answers right away and when they’re in the checkout process to mitigate any objections just before buying.
5. Cater to the shopping cart.
We discussed the reasons why people abandon their shopping cart above, and a lot of it has to do with trust in your business, in the product, or in the delivery system. You want to give customers every reason to want to buy from you without hesitation by confronting their objections head on.
Some ways to mitigate shopping cart abandonment are:
- Money-back guarantees
- A clear and simple return policy
- Superior delivery options
- Immediate access to customer support
If you’re using WooCommerce to run your online shop, take a look at HubSpot for WooCommerce to add abandoned cart sequences into your marketing program.
6. Implement a responsive website design.
No matter which aspect of your ecommerce strategy you’re working on, it should include a responsive design. Your ecommerce marketing tactics will be viewable and easily maneuverable via any device (e.g. laptop, smartphone, iPad or tablet).
Meaning, in a world where people are always on-the-go and visiting websites and viewing ecommerce marketing materials via a variety of devices from an array of locations, your content will be easy to read and simple to navigate for all users. (Check out this post for some examples of successful responsive web design.)
Ecommerce Marketing Strategy
Now that you know the ins and outs of ecommerce marketing, let’s put it all together and review some tips for building a successful marketing plan for your online store.
Set goals based on industry benchmarks.
Depending on your industry, location, business size, and a multitude of other factors, there are some standards you can use to measure your goals against — those standards are industry benchmarks.
Consider goals like website visits, click-through rates, conversion rates, and customer acquisition cost and compare those to other ecommerce business in your field.
Break down your strategy into small tactics.
When building out a marketing plan for your online store, there are several paths you could follow — we listed many of them above. It can be tempting to chase after every single one, but that’s a sure way to not be effective at any of them.
We recommend that you focus on a couple key strategies first that you believe will have the most ROI — and are the most accessible to you — and create action items for each.
For example, say you decided that you wanted to focus on a paid strategy to drive users to your store. A few of your action items would be: set up a Google Ads account, determine your ad spend, create an ad group based on your target keywords, and monitor your account daily.
This may sound oversimplified — that’s because it should be. You don’t want to get lost in chasing the next “great ecommerce strategy” without executing on one thoroughly and allowing it to work for you.
Delight your new and long-term customers.
Marketing doesn’t stop after a sale is made. Once someone becomes your customer, you should continue to engage, nurture, and delight them.
This way, you’ll support your customers’ long-term success which, in turn, will boost loyalty. It’ll also make your customers want to share their positive experiences with your leads and target audience members through cause studies, reviews, testimonials, and word-of-mouth.
Ready, Set, Sell
Ecommerce businesses have several marketing tools at their disposal. Using digital and inbound marketing just the right way, you can create campaigns that are designed to help your online store attract customers and grow better.
Editor’s note: This post was originally published in February 2019 and has been updated for comprehensiveness.

The Beginner’s Guide to Rich Media Ads
Recently, I was scrolling online and I came across an ad for Narcos. While I can easily ignore most banner ads online, this one stood out. It included interesting videos and animation.
This was a prime example of rich media ads. A rich media ad is an excellent, modern ad format for marketers to consider.
In fact, rich media ads outperform standard banner ads by 267%.
With statistics like that, it’s time to consider bringing your ads into the 21st century.
Below, let’s discuss what rich media ads are and how they’re different from other ad formats. Then, we’ll review how to create one for your company and look at some examples to inspire your own ad campaigns.
Rich media ads usually take much more time, effort, and capital to create. So, why do people use rich media ads?
Well, rich media ads are engaging and dynamic in a way that other ad types aren’t. They usually lead to more interaction, increased conversions, and a higher clickthrough rate.
Since many people have banner blindness like me, creating an ad that your audience wants to interact with isn’t easy. Rich media ads are a great way to create a better user experience.
So, how are these different from other ad formats?
Now, you might be wondering, “How do I go about creating a rich media ad?” Below, let’s discuss how you can get started with rich media ads.
1. Decide on the strategy.
Before you can create a rich media ad, it’s important to strategize. Decide what you’re advertising, how you want to reach audiences and the best way to engage them.
During this first step, you’ll determine what type of creative assets you want. For example, will you use video? If so, what will the video include?
Additionally, you might think about how to make the ad interactive. Will users be able to click through to another slide on your ad? What happens if they click on the ad? It’s important to discuss and plan these elements out before you create your ad.
2. Plan the creative assets.
Once you know more about your strategy, it’s time to list the creative assets you’ll need to get it done.
Then, you’ll want to either film or look through stock footage if you aren’t using your own imagery. This step will include either hiring actors, filming videos, taking photos, and writing text.
3. Use online tools.
At this point, you’ll have your strategy and assets all done. So, how do you actually build the ad?
If you don’t have a graphic designer on your team, you can use online tools to help you create a rich media ad.
For example, there’s Google’s Rich Media Gallery. On this site, you can create sophisticated rich media ads for free. While there are ready-to-use templates, you can also customize them by using your own creative assets.
However, if you have a graphic designer, you’ll want to meet with them at the beginning of your process so they know what you have in mind and can tell you if it’s doable.
4. Track and measure success.
When your ad is created, it’s time to start running it. You can use rich media ads on social media platforms like LinkedIn, Facebook, and Instagram. You can include them on search engines, as well.
Once you’ve started to run your ads, don’t forget to track and measure your success. Hopefully, you’ll see better results than your static display ads.
Now, you might be wondering, “What will this look like?” Let’s review some examples of rich media ads in action below.
Examples of Rich Media Ads
1. Lincoln Aviator

When Lincoln decided to create an ad for the new Aviator car, they wanted it to be interactive. When you click on this ad, you’ll be brought to a separate slide. This image is an interactive guide to the features of the car. You can click on different areas of the car to learn more about it.
This is a great example of how rich media ads are engaging and interactive. The audience can click on the ad and learn more about the car without being brought to a new webpage.
2. Jessica London

This Jessica London ad is another rich media ad that takes advantage of moving images. Moving images are a great way to make a static ad more dynamic and engaging.
Additionally, moving ads are eye-catching in a way that static images aren’t. This is a great example of a simple way to take your ads to the next level.
3. Netflix’s Narcos
This is the rich media ad by Netflix that I was talking about before. This ad includes a unique video from the actors and is presented almost like a trailer.
Then, if you hover over the image, the audience will see moving images that rotate. Additionally, if you click the ad, you can watch the actual trailer for the Netflix show. This is a great rich media ad that includes several media formats to engage the viewer.
Rich media ads are an amazing way to engage and interact with your audience. In an age where audiences have banner blindness, rich media ads are a great way to get your audience’s attention.

The 7 Best Leadpages Alternatives in 2020
It doesn’t matter how awesome your e-book is if no one can download it.
And you might have the perfect agenda for your webinar, but if it isn’t easy for your customers to sign up, it’ll all be for nothing.
That’s why you need an effective landing page builder.
Landing pages allow you to turn the traffic generated by your marketing campaigns into leads for your business. They’re simple pages — often with just a few lines of text and a form — to drive conversions and turn visitors into leads.
When done correctly, landing pages are an essential tool to help you generate leads and pass off those qualified leads to your sales team.
And one of the most popular tools for creating landing pages is Leadpages.
Leadpages offers a variety of tools that can help you create compelling landing pages — including pop-ups, a drag-and-drop page editor with a seemingly endless list of pre-made templates, and more.
But Leadpages doesn’t have a free version to help you get started, and doesn’t offer many marketing tools beyond landing pages.
If you’re looking for an alternative to Leadpages, there are a number of different tools that you can explore.
Let’s take a look at the seven best Leadpages alternatives.
The 7 Best Leadpages Alternatives
1. HubSpot’s Landing Page Builder
HubSpot’s landing page builder helps you build beautiful landing pages that fit seamlessly into your marketing campaigns.
The drag-and-drop page editor is easy to use, and comes with a variety of templates for a number of different content offer types.
It includes all of the modules you’d expect, like a rich text module and a forms module, but it also has a video module and a meetings module, so your prospects can book meetings with your sales team directly on your landing pages.
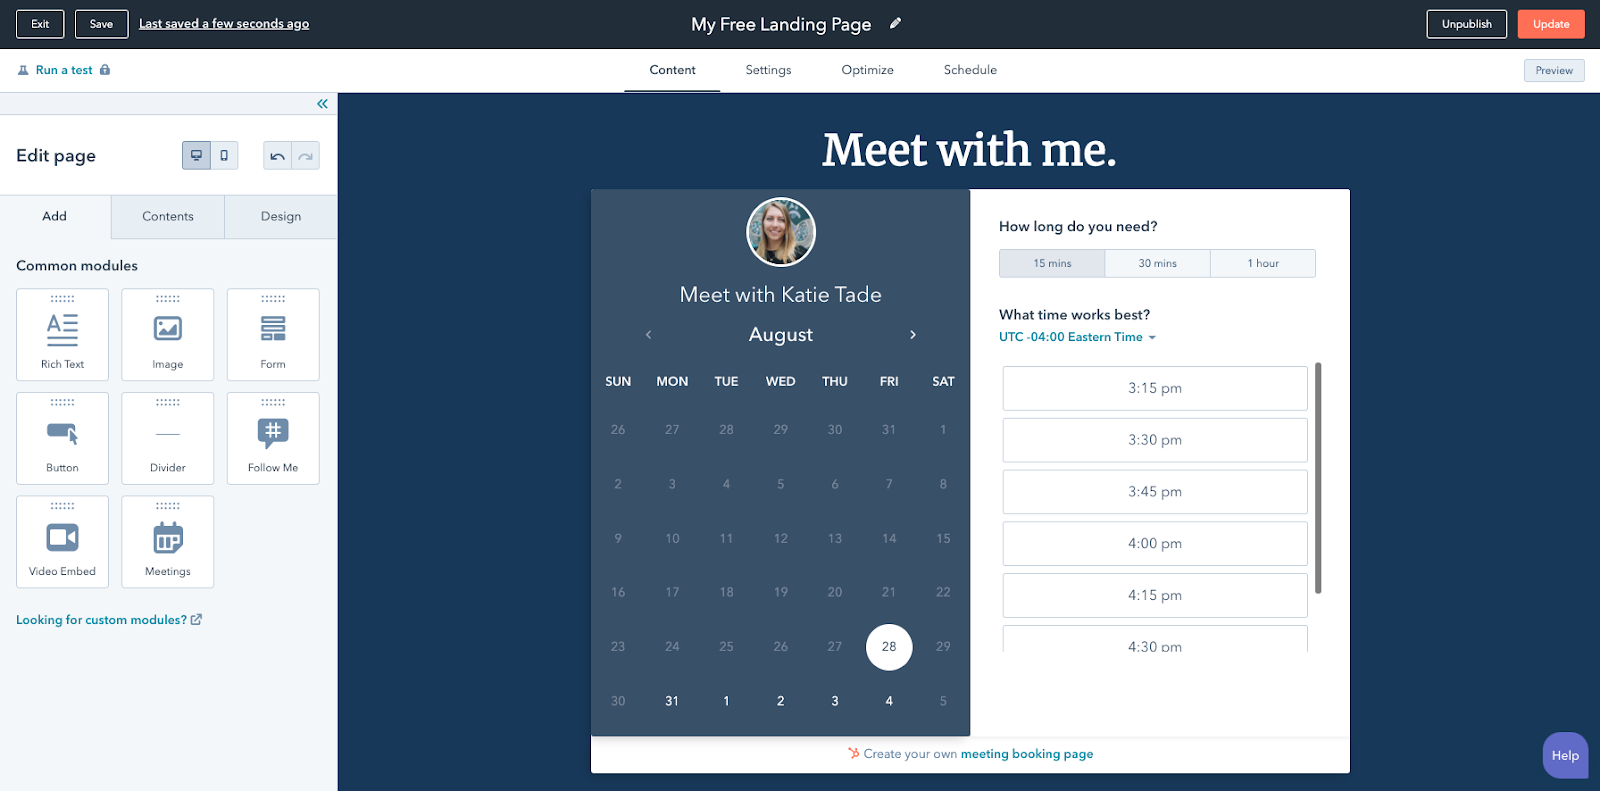
Best of all, HubSpot’s landing page builder is available for free, and comes with the HubSpot CRM included.
With the CRM, you can track every interaction your prospects have with your brand, allowing you to create marketing campaigns that focus on the end-to-end customer experience. And with HubSpot Academy, you’ll be able to learn how to effectively run a marketing campaign and easily apply those learnings to the next campaign you run.
Additionally, as you grow your business, HubSpot’s landing page builder grows with you. You’ll be able to run machine-learning powered tests on your landing pages to ensure you’re constantly optimizing your pages for conversions, aand revenue attribution reporting shows you exactly which offers are impacting your bottom line.
2. Unbounce
Unbounce is one of the most popular landing page builders on the market today.
They provide landing pages and pop-ups geared at turning traffic into revenue for your business. Unbounce comes with over 100 templates that you can easily customize in their drag-and-drop editor. All their templates also work with WordPress.
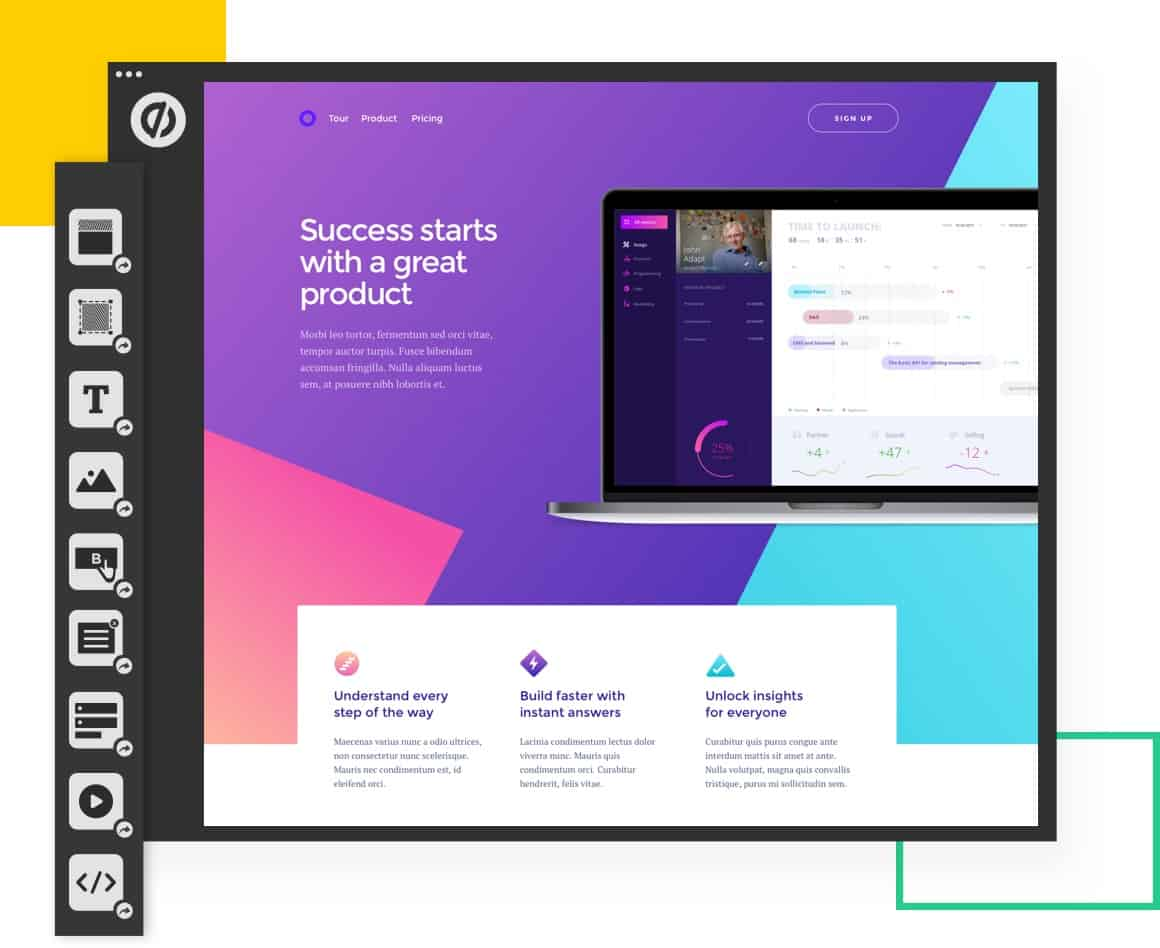
Although powerful, Unbounce starts at $80 per month, and charges you based on the number of conversions you receive on your pages. For growing companies, this can add up quickly as you generate more leads off your content offers.
3. Instapage
Like the other landing page builders on this list, Instapage offers an easy-to-use content editor, and a number of templates to create your pages.
Instapage also includes a feature called AdMap. With AdMap, you’ll be able to visualize how your ads match your landing pages, and report on the effectiveness of your ad campaigns personalization.
Their landing page solution also lets you leave comments on different elements of a landing page and @mention team members of yours, making it easy to collaborate on your marketing campaigns.
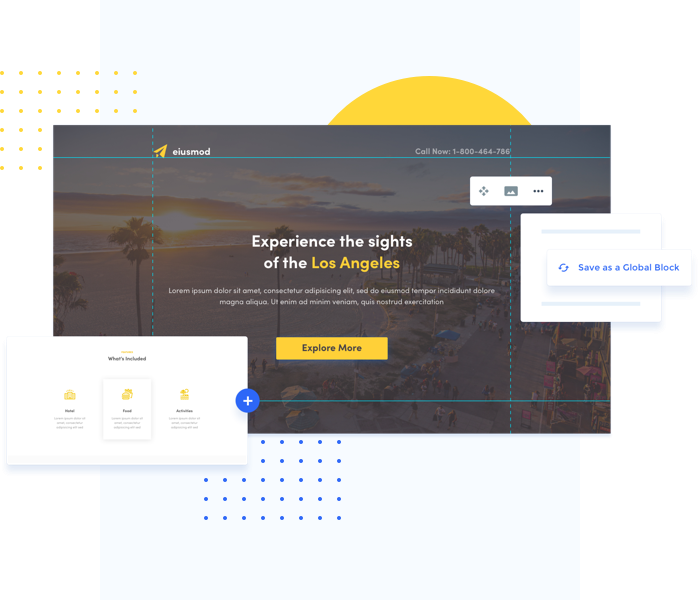
While powerful, Instapages starts at $149 per month and still limits the number of pages you can create, how many users you have, and the number of unique visitors to your pages.
4. Mailchimp
Mailchimp now does so much more than email.
They’ve built out a full suite of marketing tools that helps small businesses get up and running with their digital marketing efforts. Their landing page builder works alongside their ads, email, and social media tools.
Additionally, their drag-and-drop editor is easy to use and lets you create beautiful landing pages that match your brand.
You can get started with Mailchimp’s landing page tool for free, and upgrade to their paid tier to start collaborating with your teammates, get access to more templates, or start optimizing your campaigns.
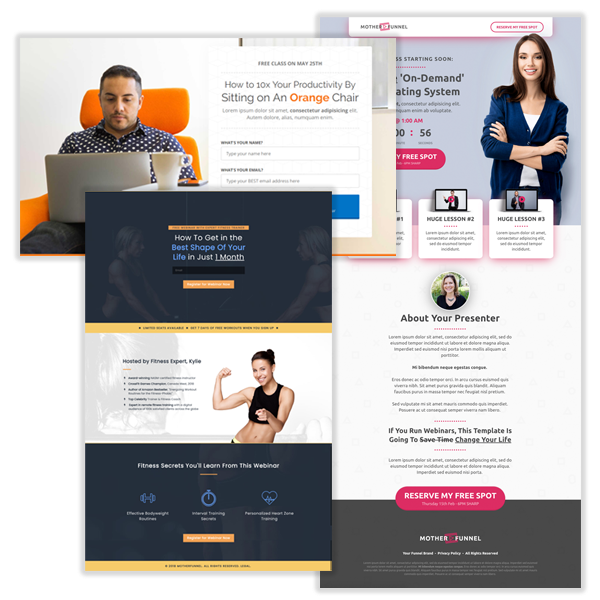
5. Clickfunnels
Clickfunnels is a landing page builder and marketing automation tool focused on the sales audience.
Clickfunnels believes that your content should produce results just like your best sales reps would, and it’s a solution aimed at moving prospects through a sales funnel into becoming customers.
Clickfunnels has a number of templates to choose from based on intent — such as up-sell or webinar event pages. To edit these templates, you can use their drag-and-drop page editor to create a page that works for you and your business.
Best of all, they have pre-built “funnels” that you can use to visualize your customer’s journey with your brand — including follow up funnels that will help you cultivate relationships with users who’ve converted on your content.
6. Sendinblue
Sendinblue is a simple marketing automation tool that features a number of different tools that SMBs need.
From email marketing, SMS, Facebook Messenger, and a CRM, you get a suite of tools that can help you communicate effectively with your customers.
Their suite of tools includes an intuitive and straightforward landing page builder with a number of pre-built templates you can choose from.
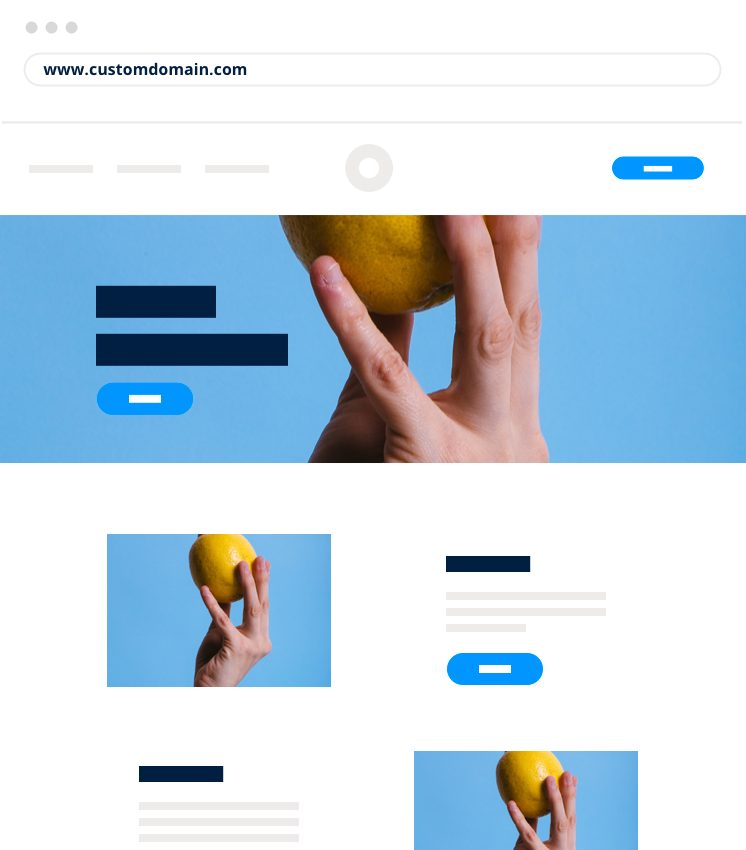
Although intuitive, their landing page builder is not included in their free product offering, and starts at $65 per month for five landing pages. However, other free offerings like their email marketing and SMS features are a great way to see if Sendinblue is right for you.
7. GetResponse
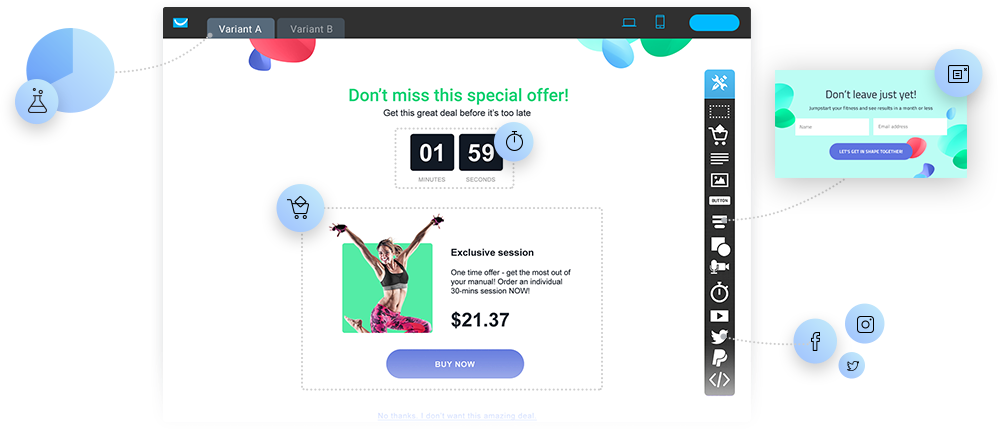
Like other landing page builders on this list, GetResponse comes with a number of other tools that can help you build amazing marketing campaigns.
With email marketing and pre-built sales funnels you can quickly begin marketing to the leads that you generate on your landing pages. What sets GetResponse apart are some of the features they include to help you fully design your pages.
They have built-in integrations with Shutterstock and Giphy to help you add compelling visuals to your landing pages, and they also include a mobile-first editor, in case there are a few tweaks you want to make to enhance your mobile-visitors experience.
Choosing the Best LeadPages Alternative
Ultimately, deciding what landing page builder you go with will depend on your business’ needs.
For instance, if you’re looking for a point solution, tools like Unbounce or Instapage will be great for you — alternatively, if you’re looking for a platform that you can use across all your marketing efforts, other tools like Mailchimp or GetResponse will be better-suited for your needs.
And, for growing teams looking to align their marketing efforts around the customer experience, HubSpot’s landing page builder is a powerful choice for you. You can get started for free, and track your customers’ journey with your brand through the HubSpot CRM.
Plus, as you grow, you not only avoid having to rip out other tools, but you gain access to more advanced solutions that will help you unlock even more insights on your customers’ experience.

5 Infographics to Teach You How to Easily Make Infographics in PowerPoint [Free Templates]
Despite the spattering of headlines that have popped up over the past several years proclaiming “infographics are dead,” infographics are, in fact, alive and well.
Infographics aren’t just alive and well — they remain a staple in many business’s content strategies. And while there are a lot of them, marketers who spend the time aligning the topic, content, and style of their infographics with the needs and preferences of their target audiences are still finding success among their audience.(And by “success” I mean driving traffic — and potential leads — to their websites and generating social buzz through people sharing and commenting.)
As of 2018, the use of infographics among B2B marketers has increased the most of any marketer in the last four years, now at 65%. And according to John Medina, a developmental biology expert, adding an image to written content can increase one’s ability to retain that information by 55% (wow).
Download 10 free infographic templates here to help you create professional-looking infographics without a designer.
But how can those who don’t necessarily have a design background — or the budget to commission an agency, hire a dedicated in-house designer, or purchase expensive design software — create professional-looking infographics that are able to captivate their audiences?
Here’s a little secret: You can do it using the software you probably already have installed on your computer. That’s right — PowerPoint can be your best friend when it comes to visual content creation.
To help you get started, we’ve created 10 fabulous infographic templates you can download and use for free right within PowerPoint. Don’t be shy … download them here.
And in this post, we’ll highlight five of the infographic templates from the download and teach you some PowerPoint infographic creation basics along the way. Just be sure to download the PowerPoint templates for yourself so you can easily customize the designs you see below!
5 Infographics That Teach You How to Create an Infographic in PowerPoint
1. How to Create an Infographic Filled With Data
Infographics and data visualization are the peanut butter and jelly of the visual content world.
When you have new data to reveal to the world, you can use an infographic to display that data as part of a cohesive, visual narrative. And that’s exactly what the “Data Geek” template is for.

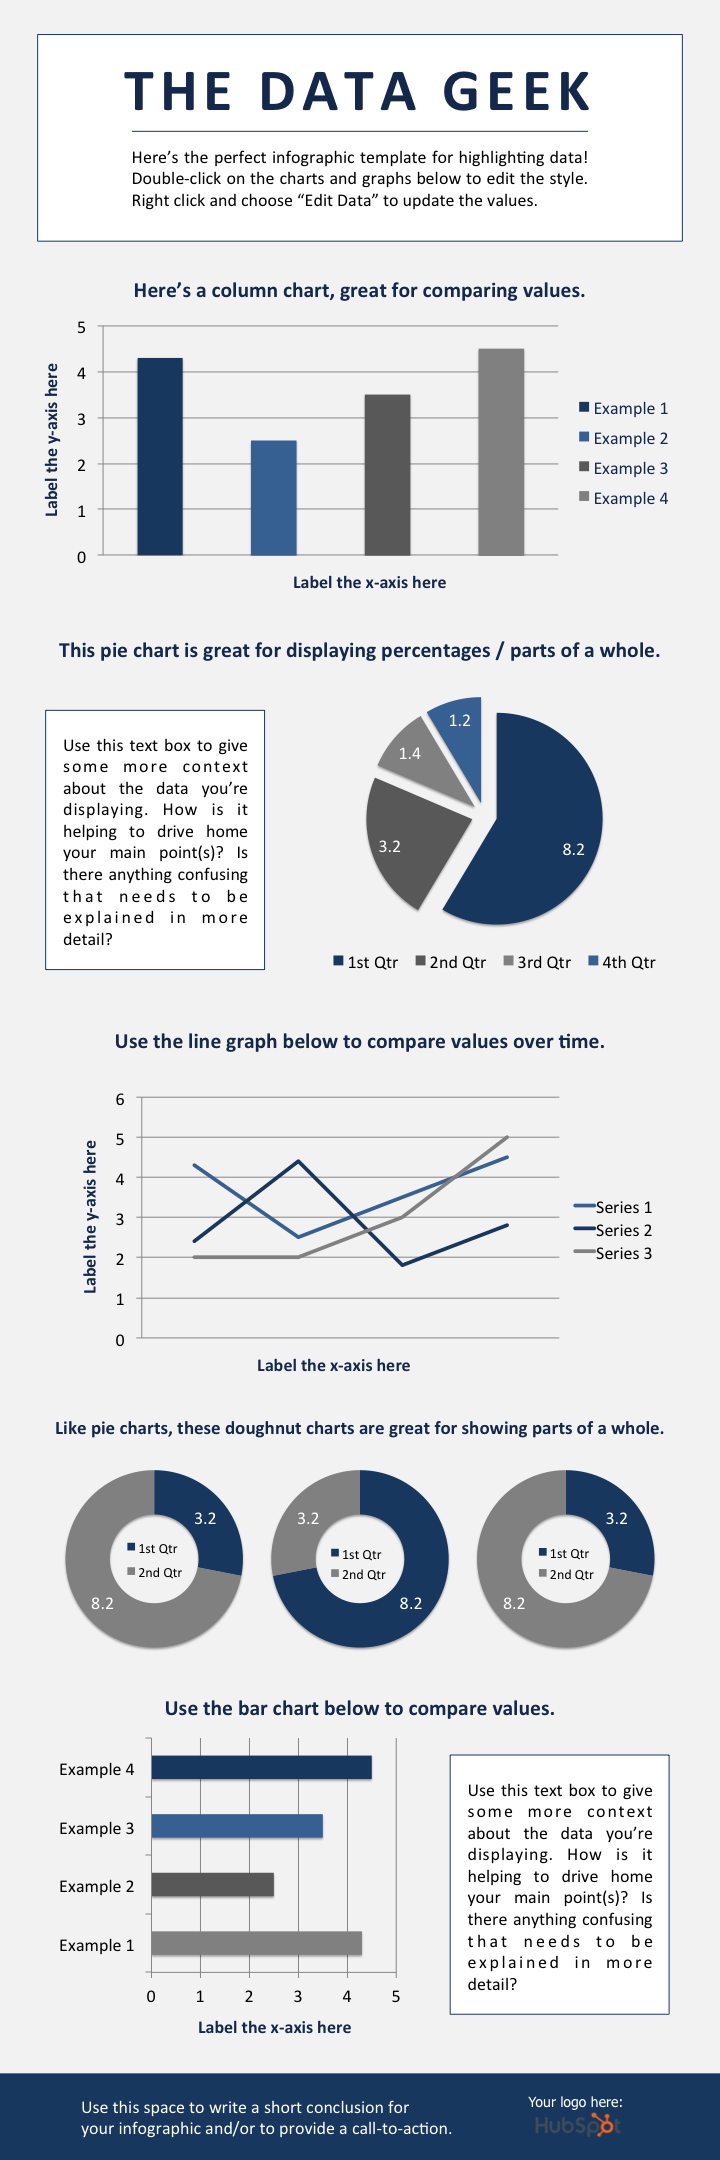
We’ve loaded this template with a variety of different charts and graphs, which you can easily update with your own data. (Just right click on a graph, choose “Edit Data,” and you’ll be able to customize the values in an Excel spreadsheet.)
Not sure which types of graphs to use for your different data sets? Here are some best practices to keep in mind:
- Column chart: Use for comparing different categories or for showing changes over time (from left to right).
- Pie chart: Use for making part-to-whole comparisons. (Note: They work best with small data sets.)
- Line graph: Use for showing data that changes continuously over time. Ideal for displaying volatility, trends, acceleration, or deceleration.
- Doughnut chart: Use like a pie chart. This stylistic variation allows you to put a number, graphic, or other visual in the center of the chart.
- Bar chart: Use like a column chart. (The horizontal bars make it easier to display long category names.)
2. How to Make a Timeline Infographic
Telling the history of a particular industry, product, brand, trend, or tactic can be a great topic for an infographic. And while there are a variety of different ways that you can visualize time — including in a circle, which is what we did with our Google algorithm updates infographic — the timeline is by far the most common and easiest design method to use.
Before we describe how to create a timeline via our timeline infographic template, find out below how to design a timeline from scratch using PowerPoint.
How to Make a Timeline in PowerPoint
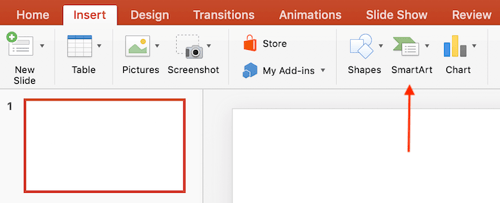
- Select “SmartArt” from the PowerPoint navigation bar.
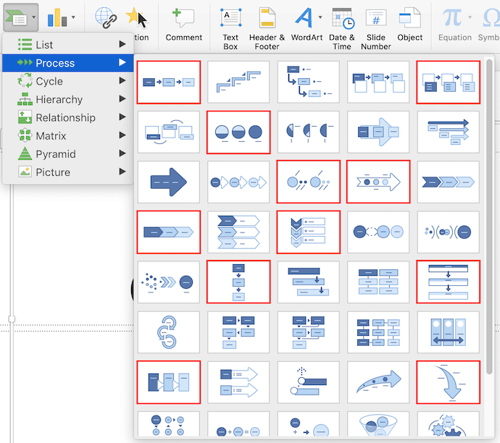
- Find a graphic that fits your data from the Process menu.
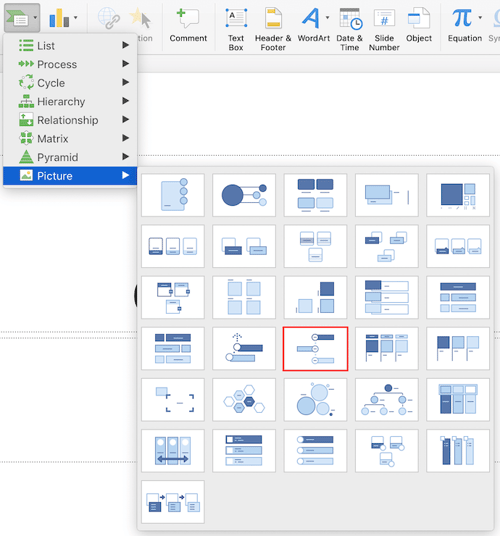
- Or, select “Alternating Picture Circles” from the Picture menu.
- Add or remove timestamps from your timeline graphic.
- Insert your data into the graphic.
- Edit the text and imagery of your SmartArt graphic.
1. Select “SmartArt” from the PowerPoint navigation bar.
To make a timeline graphic in PowerPoint, suitable for any infographic, open PowerPoint and click “Insert” from the top navigation bar, as shown below. Then, select the SmartArt icon beneath the navigation bar, where you’ll find several categories of graphics to choose from.
2. Find a graphic that fits your data from the Process menu.
There are two categories of graphics that make effective timelines. The first is the Process category. Click this option to expand the graphics menu shown below. To make your selection easier, we’ve highlighted in red a few of the most fitting timeline-related graphics.
3. Or, select “Alternating Picture Circles” from the Picture menu.
Aside from the Process menu of graphics, you’ll also find a viable timeline graphic in the Picture category. Select this category and you’ll find the “Alternating Picture Circles” option near the center of the graphics menu. We’ve highlighted it in red, below.
4. Add or remove timestamps from your timeline graphic.
For the sake of these instructions, we’ll use the “Alternating Picture Circles” graphic from the Picture menu. Once you’ve inserted this graphic into your first PowerPoint slide, you can add or remove circular icons to match how many dates or periods of time your data covers.

5. Insert your data into the graphic.
At this point, the size of your timeline graphic should match the amount of data you have. Begin to fill your timeline with the information you plan to report on using this timeline.
6. Edit the text and imagery of your SmartArt graphic.
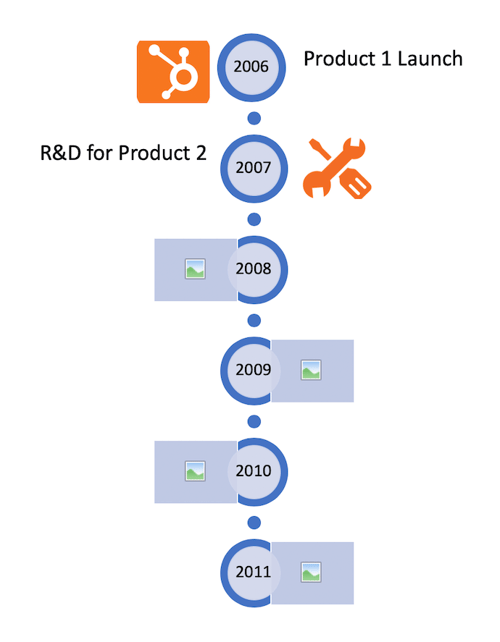
As with the other graphics available in PowerPoint’s SmartArt, you can edit the text and the images associated with your timeline to your liking. As you can see below, we’ve edited the years and the images to better represent what happened at each point in time.
To insert images into your timeline graphic, simply right-click the square landscape icon, select a graphic “From File,” and upload an image from your computer onto your PowerPoint slide.
Of course, if you’re willing to give up a tiny bit of creative freedom for a ton of convenience, you can download the timeline infographic template below — which opens directly in PowerPoint.
To tell your story with our timeline infographic template below, update the time periods in the center circles, replace the placeholder text, and adjust the visuals and colors to your liking. For those latter adjustments, you can choose “Insert” > “Shape in PowerPoint” to add in different visuals, and use the paint bucket (a.k.a. “color fill”) icon to change the colors of different elements.

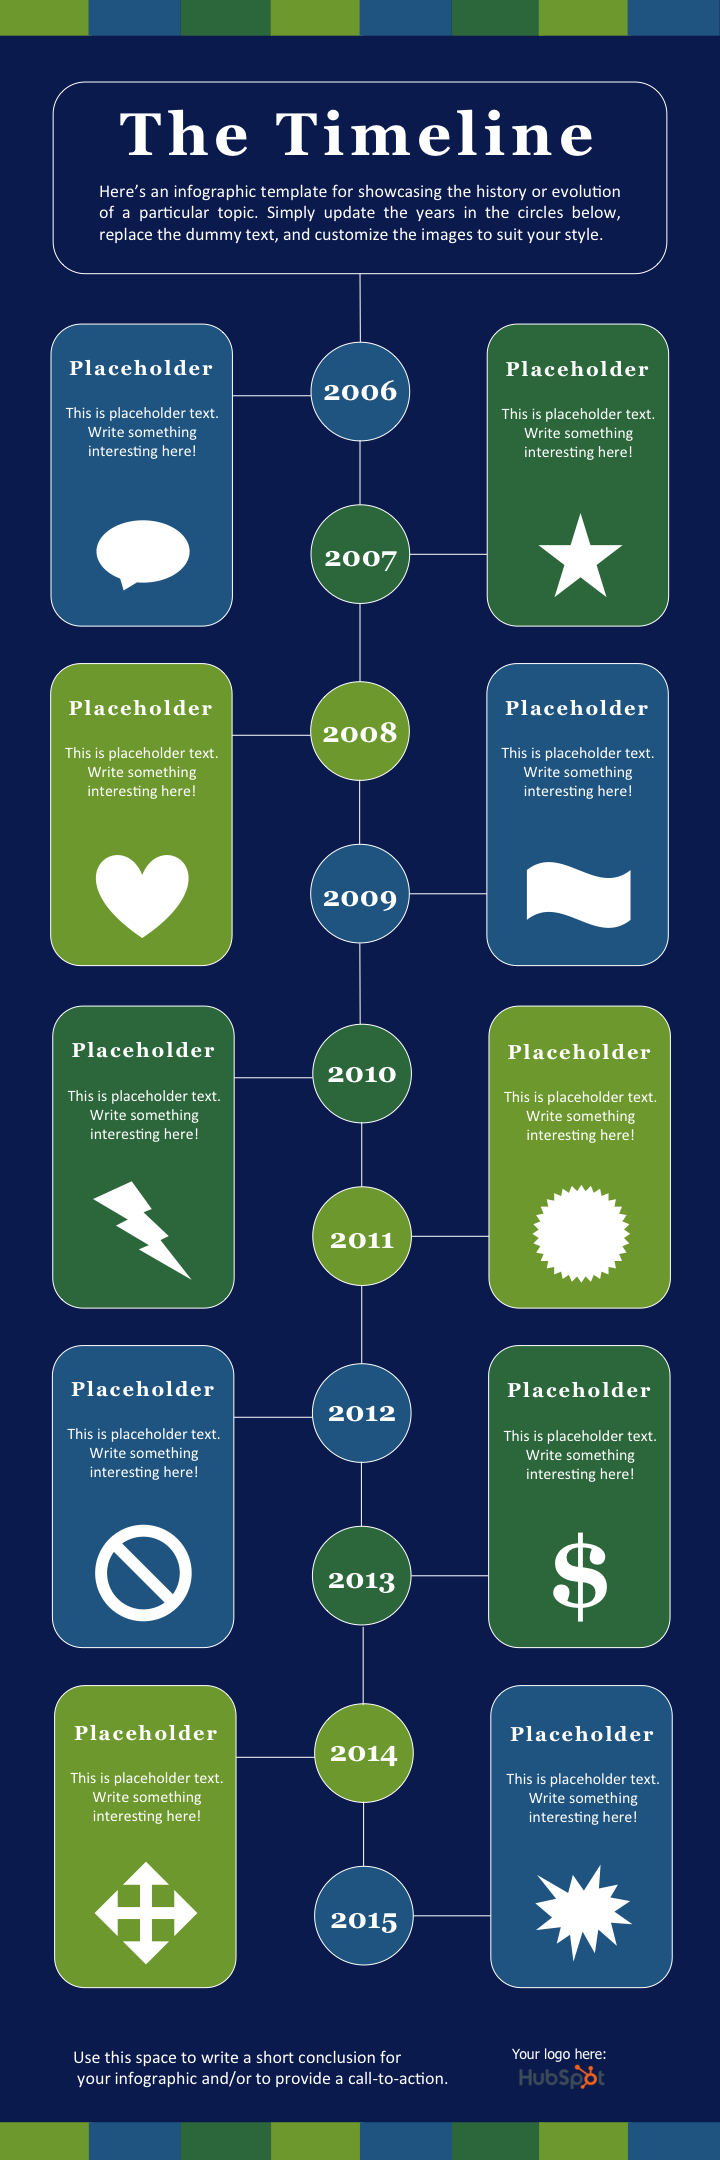
Want to make sure your timeline infographic hits all the right notes? Here are some tips to consider:
- Research. Research. Research. The best timeline infographics aren’t just beautifully designed — they also tell a great story based on extensive research. So before you start the design phase of your infographic, put in the time to surface the best information possible.
- Narrow the scope: Timelines that cover hundreds or thousands of years can certainly be interesting, but they can also require weeks or months of research. To keep your sanity, stick with shorter time periods.
- Keep your copy concise: Infographics are supposed to be visual. If you find yourself writing 100+ words for each date on your timeline, a blog post may be the better content format.
3. How to Design a Totally Hip Infographic
Ok, so “hipness” is definitely in the eye of the beholder. But for this infographic template we wanted to do something that reflected modern design trends, including using banners and arrows.
In terms of content, we provided plenty of space for both stats and copy. There’s also a column chart at the bottom. But remember, you can always add different charts and graphs to the template wherever you see fit. Just select “Insert” > “Chart …” and you’ll have several options to choose from.

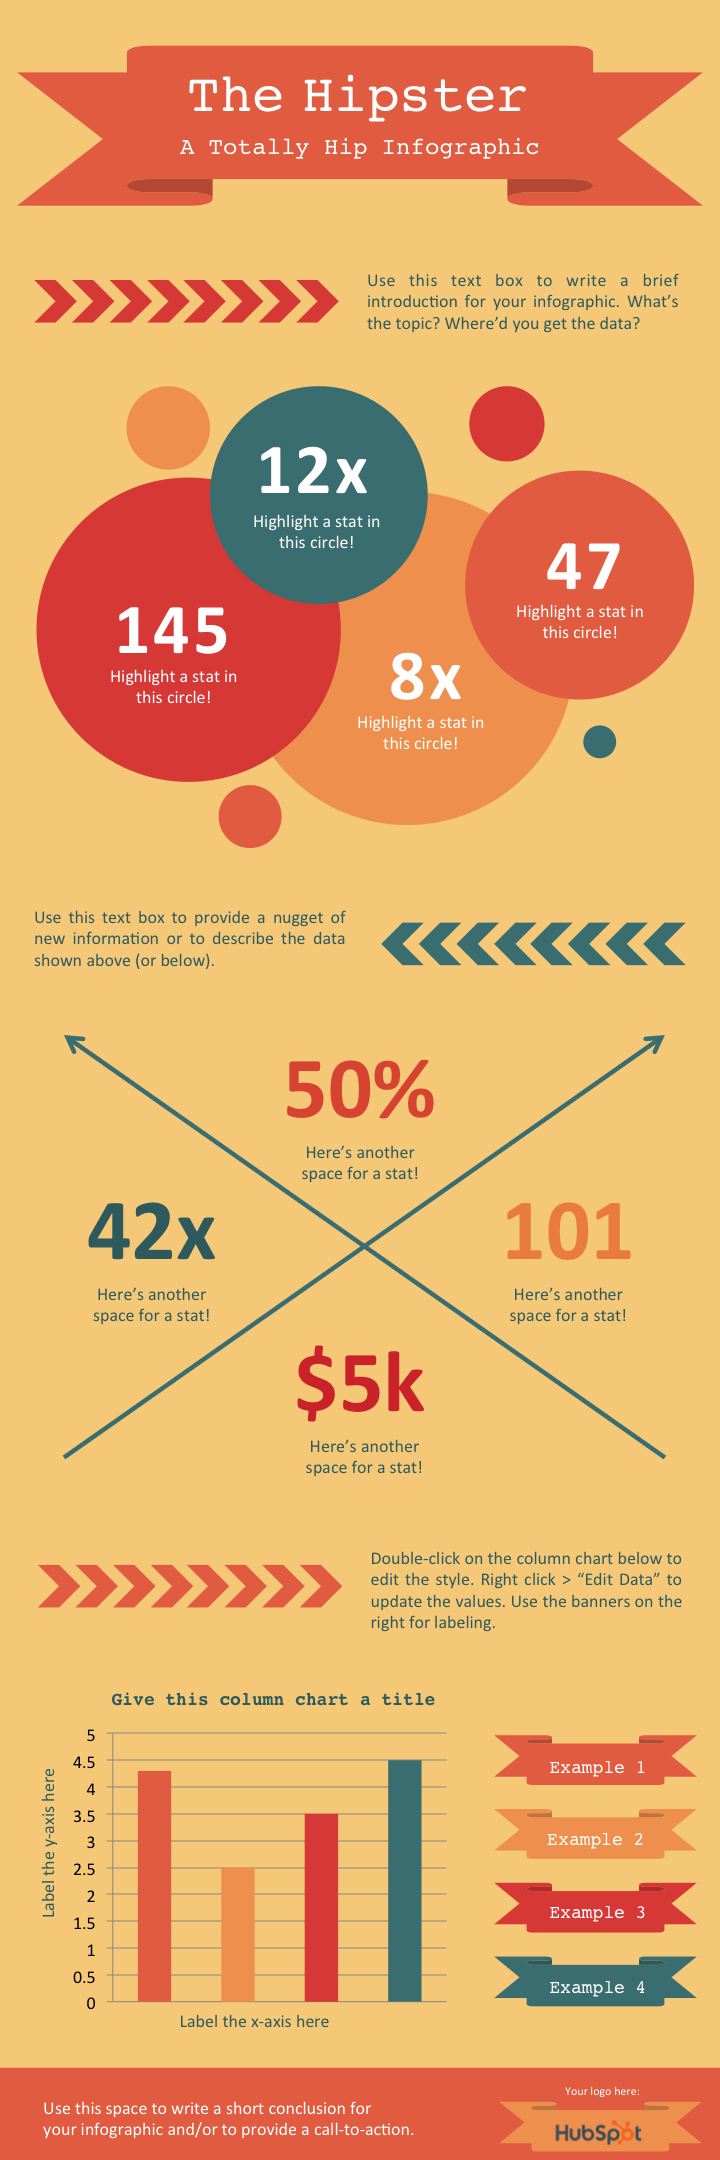
To make sure your end result is as hip as possible, here are some design tips to follow:
- Experiment with new color palettes. There are tons of free color palettes online. Don’t believe me? Do a Google image search of “color palette.” When you find a palette you like, drag the image directly into your PowerPoint presentation. Next, select the “color fill” bucket, choose “More Colors …” and click on the eyedropper icon. With the eyedropper tool, you can select colors from your palette and use them for elements in your infographic.
- Take the time to manipulate shapes. PowerPoint has an extensive library of shapes — including banners, ribbons, and arrows — that you can use in your infographic design. By clicking and dragging on the little yellow diamonds that appear on these shapes, you can customize them. For example, you can make the pointy ends of a ribbon longer or shorter, or make the body of an arrow thinner or thicker.
4. How to Create a Flowchart Infographic
Warning: Creating a flowchart-style infographic is not for the faint of heart.
While on the surface a flowchart infographic may appear simple and fun, a lot of thought and planning need to go into making sure the different sections flow into each other in a logical way.
In our flowchart PowerPoint template, we created a basic flowchart structure, with positive responses guiding viewers to a conclusion at the bottom left of the infographic and negative responses guiding viewers to a separate conclusion at the bottom right of the infographic.

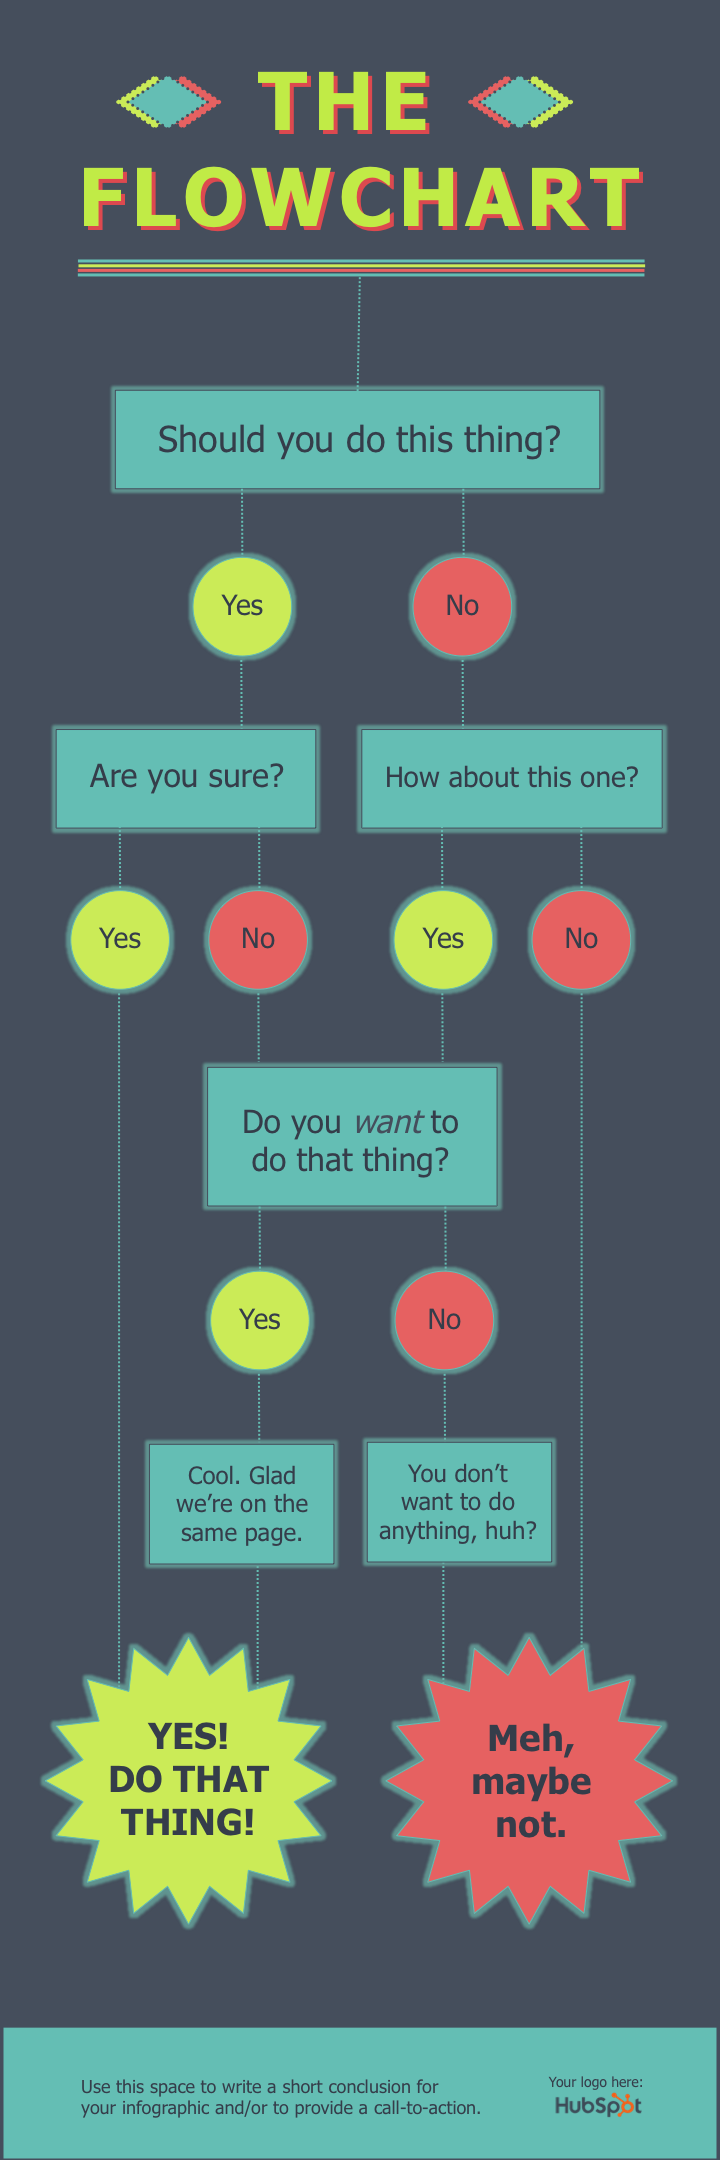
To ensure your flowchart infographic makes sense and is easy for viewers to navigate, follow these tips:
- Draw out the branches beforehand. Before you dive into PowerPoint, get out a pen and paper and do a rough outline of your flowchart. Test for weaknesses in your logic by answering questions in every possible combination and seeing where you end up. For best results, have a friend or coworker run through the flowchart too.
- The smaller the scope, the easier the execution. The more questions or stages you add to your flowchart, the more difficult it will be to create (and the harder it will likely be for viewers to understand). So try to narrow the focus of your flowchart.
5. How to Design an Image-Heavy Infographic
So far, the infographic templates we’ve looked at have relied primarily on illustrations that you can create within PowerPoint. But of course, there’s no reason why you can’t bring external photos and other images into your infographic design.
We’ve created this image-heavy infographic template for that exact purpose. It’s great for comparing different categories, ideas, or results, and since you don’t need to create or customize a lot of shapes, it’s a lot less work.


Here are some suggestions for ensuring your image-heavy infographic is easy on the eyes:
- Use high-quality images. It’s better to scale down a big image (e.g. 2,000 pixels by 2,000 pixels) than to scale up a small image (e.g. 20 pixels by 20 pixels) in order to fit a particular space. The latter approach will result in images appearing pixelated and grainy.
- Use borders. Adding borders to your images will help make them feel like their part of a cohesive design. In PowerPoint, you can control the size, style, and color of borders under the “Format Picture” tab.
- Save your infographic as a PNG file. This is a best practice for all infographics, but is particularly relevant when publishing an infographic that contains photographs. The PNG extension offers better quality than other options. To save your finished infographic as a PNG file, you simply need to choose “File” > “Save As …” and select PNG from the dropdown.
What are you waiting for? Grab your free infographic templates so you can start customizing fantastic-looking infographics of your own!
Want to learn more about infographics? Check out 10 Traits of Amazingly Awesome Infographics.

18 Instagram Apps to Make Your Posts Stand Out
With 500 million daily active users on Instagram, it’s not enough to just rely on the 24 standard filters and tools available within the app anymore. To truly set yourself apart from the other brands competing for attention, you’ve got to supplement your Instagram game with some extra apps.
Lucky for you, there are plenty of apps and tools available to help you edit Instagram photos, gain followers, attract likes, and analyze your performance. Unfortunately, a lot of these tools aren’t as helpful as they seem.
To help you take your Instagram posts to the next level, we’ve compiled a list of all the best apps and tools that will help you at any stage of your Insta journey. These tools will make your Instagram content distinguishable, memorable, and impactful. You might not be able to reach all 500 million potential customers, but you’ll be able to reach the ones that matter most to your brand.
Best Instagram Apps
- VSCO
- Priime
- Snapseed
- Pixlr
- Litely
- Followers for Instagram
- Social Rocket
- Crowdfire
- Tracker for Instagram
- Followers & Likes on Instagram
- InstaTag
- Get Instant Likes and Hashtags
- Magic Liker for Like Tags
- Instagram Insights
- Hootsuite Analytics
- Iconosquare
- Union Metrics
- Squarelovin
Instagram Photo Editing Apps
Instagram’s in-app filters leave something to be desired. If you’re looking for an easy way to make your photos look more professional and unique, try out one of these alternative photo-editing apps. Whether you’re looking for a wider selection of filters developed by professional photographers, or just want to remove blemishes from selfies, these will do the trick.
1. VSCO
- Price: Free
- Available on: Android and iOS
VSCO provides free filters that often beat Instagram’s in-app options in terms of quality and professionalism. VSCO also offers plenty of editing tools (like customized sharpen, brightness/contrast, and skintone correction), so you can fully tweak your photo before exporting to Instagram. Plus, like Instagram, VSCO offers its own social capabilities: you can follow people directly on VSCO, and post and share photos from within the app.


2. Priime
- Price: $2.99
- Available on: iOS
Priime offers a selection of over 100 filters created in collaboration with professional photographers. If you aren’t sure which filter will look best, you can even receive recommendations from Priime’s Smart Suggestions.


Images via App Store
3. Snapseed
- Price: Free
- Available on: Android and iOS
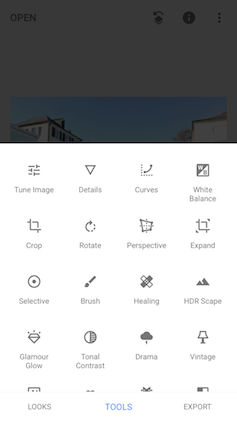
Sometimes, your photo has varying degrees of darkness and brightness and you don’t want to auto-enhance all of it. Snapseed’s brush tool allows you to selectively adjust for exposure, saturation, and color temperature, which is ideal for situations where you’d rather selectively edit. Snapseed also gives you plenty of control and fine-tuning, and even provides tools to remove small blemishes or unwanted objects.

4. Pixlr
- Price: Free
- Available on: Android and iOS
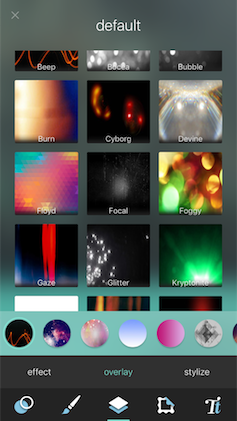
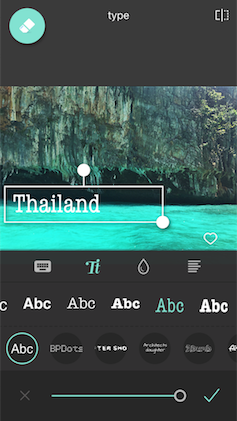
With Pixlr, you can build your own filters with effects, overlays, and textures. When you’re happy with a filter you’ve created, you can save that filter and use it again. This can be particularly useful if you’re trying to build a unique brand image. Pixlr also lets you selectively adjust your brightness and sharpness. It includes a red-eye fixer and an array of photo-editing tools.
5. Litely
- Price: Free
- Available on: iOS
If you’re frustrated by photos that look overly filtered and edited, Litely is the tool for you. Litely offers uniquely subtle filters with the intent of enhancing the natural beauty of a photo. You can drag your finger anywhere on the image to make adjustments, and tap your finger to compare “before” and “after” versions. You can also choose different variations of the same filter (like “argyle,” “argyle high,” or “argyle faded”) to ensure the filter looks natural with your photo.


Instagram Apps for Followers
There aren’t many automated ways to gain followers, which makes the task a tedious challenge for any social media manager. Fortunately, the following tools can combat this challenge. Although the apps won’t let you buy followers, they offer legitimate options to gain and manage followers organically. You can decipher why people unfollow you, how to improve your social media visibility, and how to keep your followers long-term. With the help of these tools, you can attract a larger following and ensure your current followers are happy.
6. Followers for Instagram
- Price: Free
- Available on: Android and iOS
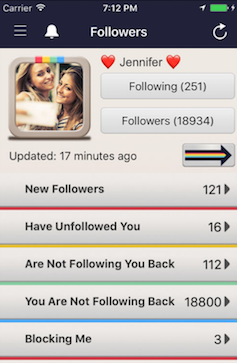
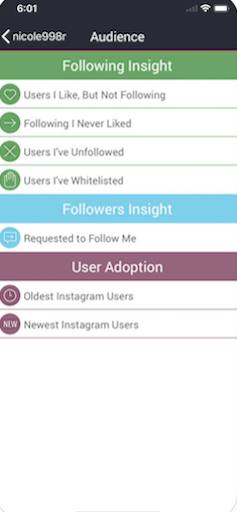
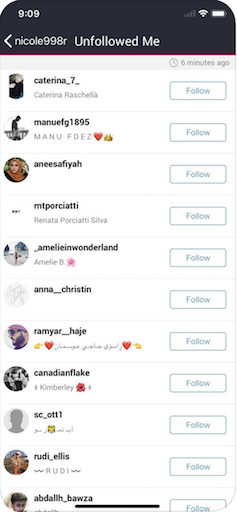
Followers for Instagram shows you accounts that unfollowed you, accounts that haven’t followed you back, and accounts you should be following based on similar accounts you already follow. You can use this data to strengthen weak relationships, make your followers happier, and understand the reasons an account might unfollow you. You might find that accounts are unfollowing you for simple, fixable reasons — like posting infrequently. Hopefully, fixing these issues improves your relationship to your Instagram audience longterm.
Images via App Store
7. Social Rocket
- Price: Free
- Available on: iOS
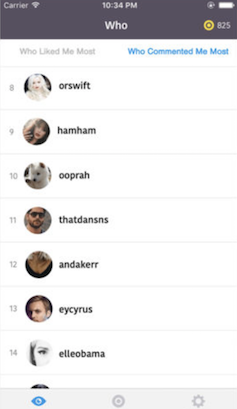
Social Rocket is a “likes/followers” marketplace: every time you like someone else’s post, you gain points to exchange for followers or likes on your own posts. Although this is probably an inefficient long-term solution, it can be helpful in the beginning when you’re trying to build an initial following and want your content to spread.

Images via App Store
8. Crowdfire
- Price: Free
- Available on: iOS
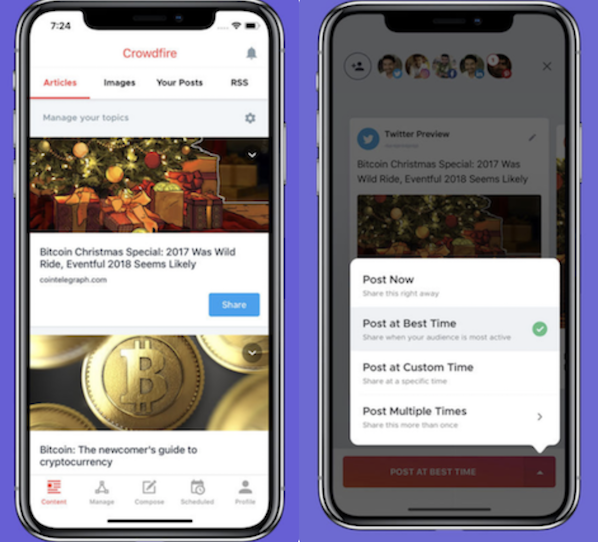
Crowdfire identifies your inactive followers. If you know your inactive followers, you can delete them from your followers pool and fix your ratio to get better analytics. Crowdfire also provides automated DM messaging, recognizes when people unfollow you, and helps you find new followers.
Images via App Store
9. Tracker for Instagram
- Price: Free
- Available on: iOS
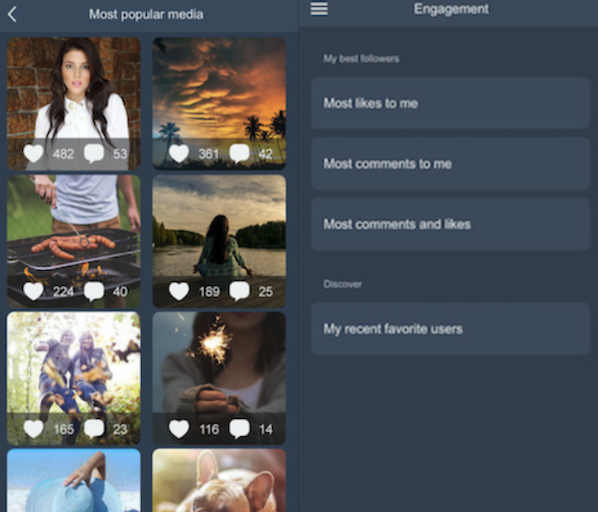
Instagram doesn’t offer any efficient tools for unfollowing or following accounts in bulk. Tracker for Instagram allows you to do this directly from the app. It also shows you your overall post performance, and analyzes how followers engage with your account, so you can discover your most active users.
Images via App Store
10. Followers & Likes on Instagram
- Price: Free
- Available on: iOS
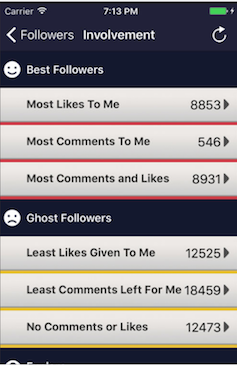
Followers & Likes on Instagram creates lists of your most engaged and least engaged followers, which is helpful because it gives you a better understanding of your target audience. It also shows you which posts attract the most likes and comments from your best followers. Knowing your most popular posts helps you evaluate and modify your future content strategy.
Images via App Store
Instagram Apps for Likes
On Instagram, likes are the strongest indicator we have when evaluating whether our audience is happy. Plus, the more likes your post gets, the higher it’ll appear on people’s feeds, and the more popular it’ll become. While there are no apps that allow you to buy likes, there are apps that help you attract more likes by offering suggestions, popular hashtags, and favorable captions.
11. InstaTag
- Price: Free
- Available on: Android
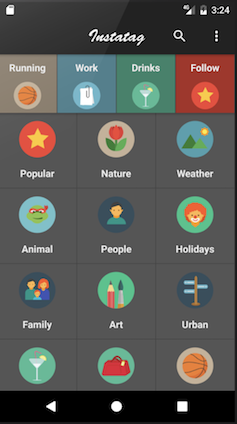
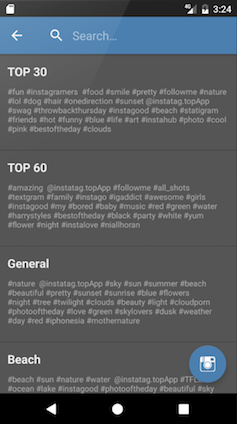
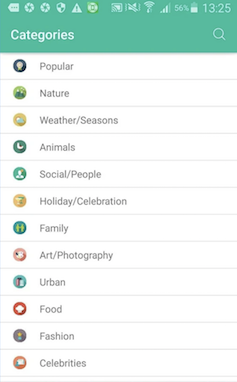
InstaTag allows you to discover the highest trending hashtags, which is valuable since popular hashtags change daily. By knowing the trending hashtags, your posts are more likely to show up ahead of the less relevant competition. There are dozens of categories and hundreds of tags, and you’re even able to search tags across categories.
Images via Android Apps on Google Play
12. Get Instant Likes and Hashtags
- Price: Free
- Available on: Android
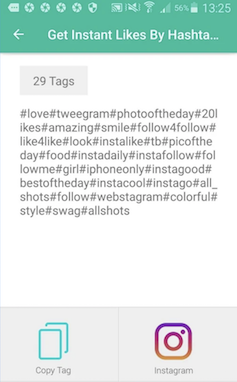
Get Instant Likes and Hashtags gathers the top tags for each category and shows you the most popular ones, making it easy to make hashtag decisions quickly. You can also add, edit, and remove categories, and create custom hashtags, so you can copy all your hashtags at once and paste them into your post.
Images via Android Apps on Google Play
13. Magic Liker for Like Tags
- Price: Free
- Available on: iOS
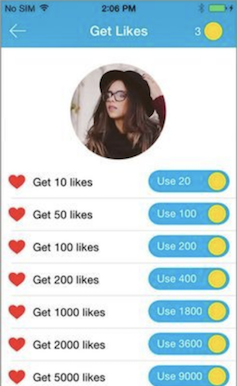
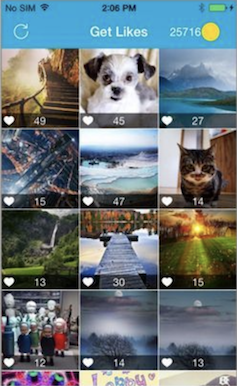
Magic Liker helps you search multiple tags at the same time, find popular tags suggested by the app, search through daily suggested tags, or search posts by category like, “only videos,” or “only photos.” It also provides captions that are currently popular, for additional caption-writing inspiration.
Images via TopAppsLike.com
Instagram Analytics Apps
Regardless of where you are in your Instagram strategy (i.e. still creating it, or have been implementing it for years), it’s important to gather analytics to figure out how well you’re doing, and where you could be doing better. With the right Instagram analytics tools, you’ll be able to improve your strategy, attract a larger audience, and make your existing followers happier than ever.
14. Instagram Insights
- Price: Free
- Available on: Android and iOS
Instagram actually does offer its own native analytics tool. Instagram Insights does require you to have a Facebook Business profile, but if you don’t have one, it’s a simple four-step process to get set up. The tool offers powerful insights, including how many times people use the Send Message option on your Instagram story, how many people have saved your posts, and how well your Instagram advertisements are doing.
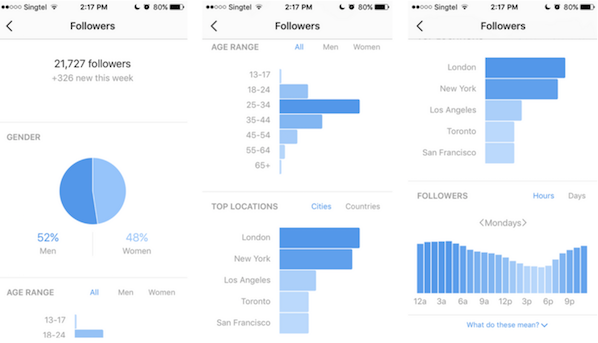
Image via Buffer Blog
15. Hootsuite Analytics
- Price:Free 30-Day Trial, Professional Version is $30/month
- Available on: Android and iOS
Along with metrics like audience growth and traffic, Hootsuite gathers insights like how people react to your posts according to language or gender, and what types of action your followers are taking. You can also customize the insights you collect, which is particularly helpful if you’re testing out unique engagement factors or collecting specific data.
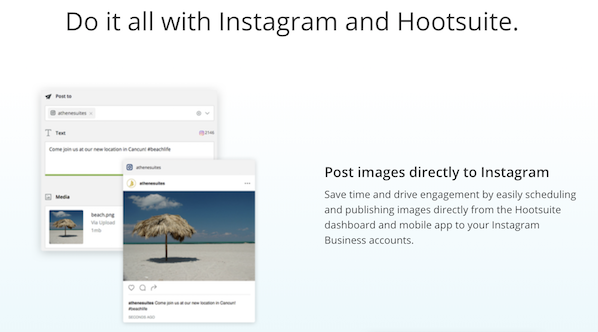
Image via Hootsuite
16. Iconosquare
- Price: Free 30-Day Trial, Professional Version is $30/month
- Available on: Android and iOS
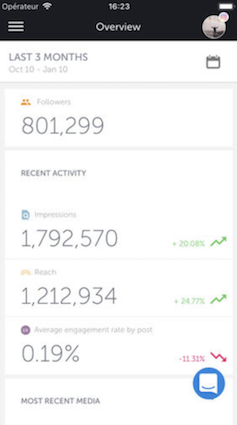
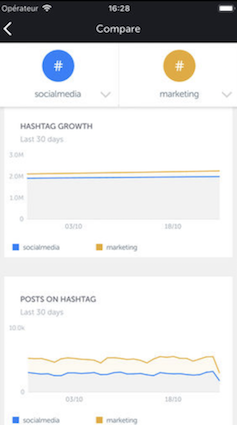
While the above two tools focus on your business alone, Iconosquare also examines the community (and competition) by identifying the most important Instagram influencers in your industry. This is great if you’re interested in hiring influencers to promote your brand, but aren’t sure where to find them. It’s also helpful if you’re just starting to build your Instagram strategy, and want to see what other brands are doing for inspiration. Iconosquare also provides analytics on engagement, and analyzes hashtag growth and popularity.
Images via App Store
17. Union Metrics
- Price:Free Account Checkup, Lite Version is $23/month
- Available on: Android and iOS
Union Metrics’ free Instagram Account Checkup shows you the best time to post for your network, your most loyal followers, your top hashtags, and your best-performing posts. The paid version gathers more specific information including a profile analysis, analytics, and hashtag monitoring. If you’re unsure about paying for it, test out the free Checkup Tool and see what you think.
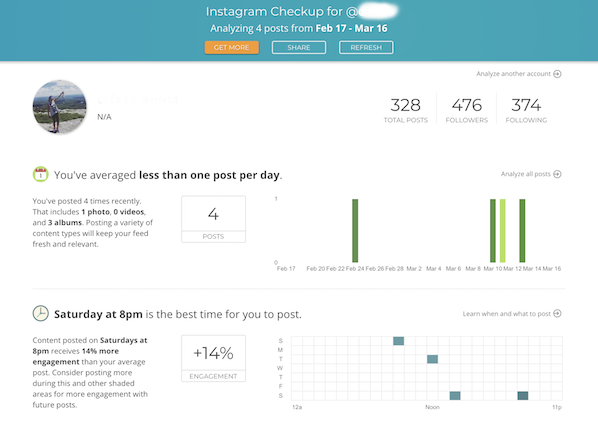
Image via Union Metrics
18. Squarelovin
- Price:Free
- Available on: Android and iOS
Squarelovin provides analytics regarding growth, engagement, number of followers, best and worst times to post, and top hashtags. Best of all, the analytics are delivered daily, weekly, and monthly, allowing you to narrow or broaden your focus and your analytics as you see fit. This is especially helpful if you want to A/B test a few different Instagram strategies throughout the month, and want to compare weeks or even days.
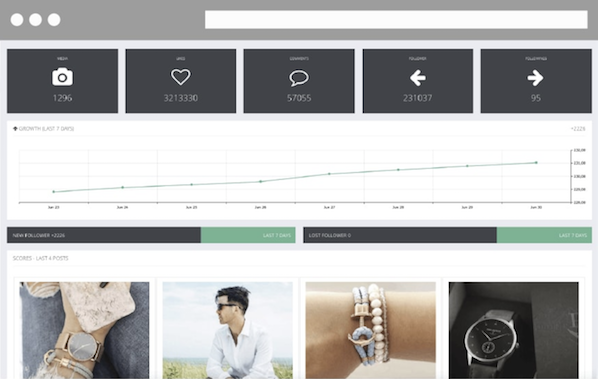
Image via Squarelovin

How to Promote Your Business on Facebook
I was only 12 years old when Facebook became available for anyone with a valid email address.
By the time I was 14, one of the top trends was to create a fan page that anyone could follow. I remember that feature being used by friends as a way to tell jokes and post funny content.
But things are a bit more sophisticated in the world of social media nowadays.
Now, Facebook is a great place to advertise your business and interact with prospective and current customers.
Below, let’s discuss how you can use Facebook to promote your business.
1. Sign up for a business page.
The first thing you need to do is create a business page. This is a simple process. All you have to do is log on to Facebook, click “Pages” in the left sidebar, and then “Create New Page.”
To get started, you’ll upload a profile picture, a cover photo, and basic information about your business. This will include what type of business you run whether you run a B2B business, a local business, or an ecommerce site.
Once you sign up, it’s smart to start optimizing your page.
2. Optimize your profile.
Now that your profile is up and running, you’ll want to optimize your page. This means writing your About section, adding business information like your website and business hours, and including a call to action button such as “Book Now,” “Shop Now,” or “Sign Up.”
Additionally, you’ll want to draft several posts that will engage your audience. Think about what type of posts they might like on social media. How are they interacting with your competitors? What posts perform well for your competition? This is the type of content you’ll want to model yours after.
Now that you’ve built and optimized your business page, it’s time to engage with your community.
3. Be active in Facebook groups.
A great way to promote your business on Facebook is to participate in Facebook groups. You can engage with public groups or join private Facebook groups.
To get started with this, you’ll want to consider what type of groups your audience would be a part of. Once you’ve finished brainstorming, you can join the same communities that your audience is active in.
4. Create your own Facebook group.
While it’s important to engage with your audience where they’re at, it’s also important to attract your audience to your own pages. You can do this with your own Facebook group.
Krystal Wu, a social media community manager at HubSpot, says, “Facebook Groups allow our audience to connect with each other and have valuable discussions. Businesses who center a Group around their brand or industry can build a community around it — making our brand and products even more valuable to potential customers.”
5. Promote events.
Another way to promote your business on Facebook is to use the social media platform to promote your events. If you’re a local business, this is especially important.
Attracting people to an event can feel like an undertaking, and you need to use all the tools at your disposal to promote it. That’s why you should post your event on Facebook and also plan an ad campaign.
6. Interact with your followers.
This might seem like social media 101, but it’s important to interact with your followers. The best way to get engagement on social media is to make sure your posts show up for your followers. To do that, you need to create interaction. Make sure you answer questions, respond to comments, and participate in your online community.
7. Use live streaming.
Facebook live is an excellent tool to promote your business and provide valuable content to your audience. You can use this feature to showcase your company culture, host a panel discussion on industry topics, or even display your industry expertise.
Additionally, you can host events virtually on Facebook live as a way to interact with your audience that can’t be at an event in person. This is a great way to promote your business because going live will notify your followers and prompt them to engage with your page.
8. Run Facebook ads.
One of the best ways to promote your business with Facebook is to use Facebook ads. The social media giant has created one of the most popular ways to reach your audience with its advanced targeting options.
To get started with ads, you can review this lesson from Facebook directly. Make sure that you review the types of Facebook ads and various bidding strategies to help you succeed.
9. Talk about your company culture.
When you post on social media, your content should promote your overall brand messaging. A great way to do this is to talk about your company culture. Showcase your employees and their day-to-day tasks.
You can also use Facebook as a recruitment tool, hosting panels on what it’s like to work at your company, or posting jobs right on your business page.
10. Manage contests and giveaways.
Encouraging engagement is one of the main objectives of Facebook promotion. To do this, you can host contests and giveaways that your audience will want to participate in. This will help increase brand awareness and encourage interaction from your followers.
11. Have a customer service representative field comments and requests from customers.
Social media is a great way for your customers to get in touch with you. However, if they choose to reach out to you on Facebook, you need to be prepared to answer their questions and address their requests. To do this, consider having a few people from your customer service team answer messages or comments from your customers.
12. Post valuable content.
Ultimately, the best way to promote your business on Facebook is to provide valuable content for your audience. Content is what attracts people to your social media profile and is the way you’ll build an audience online. You’ll want to include different types of content including images, videos, text, Stories, or even polls.
Facebook is an essential part of your social media marketing. No matter what type of business you’re running, it’s important to develop both organic and paid social media strategies to promote your business on Facebook.

6 Reasons You Really Need to Write A Business Plan
Starting a business can be a daunting task, especially if you’re starting from square one.
It’s easy to feel stuck in the whirlwind of things you’ll need to do, like registering your company, building a team, advertising, the list goes on. Not to mention, a business idea with no foundation can make the process seem incredibly intimidating.
Thankfully, business plans are an antidote for the new business woes that many entrepreneurs feel. Some may shy away from the idea, as they are lengthy documents that require a significant amount of attention and care.
However, there’s a reason why those who take the time to write out a business plan are 16% more likely to be successful than those who don’t. In other words, business plans work.
What is a business plan, and why does it matter?
In brief, a business plan is a roadmap to success. It’s a blueprint for entrepreneurs to follow that helps them outline, understand, and cohesively achieve their goals.
Writing a business plan involves defining critical aspects of your business, like brand messaging, conducting market research, and creating pricing strategies — all before starting the company.
A business plan can also increase your confidence. You’ll get a holistic view of your idea and understand whether it’s worth pursuing.
So, why not take the time to create a blueprint that will make your job easier? Let’s take a look at six reasons why you should write a business plan before doing anything else.
1. Legitimize your business idea.
Pursuing business ideas that stem from passions you’ve had for years can be exciting, but that doesn’t necessarily mean it’s a sound venture.
One of the first things a business plan requires you to do is research your target market. You’ll gain a nuanced understanding of industry trends and what your competitors have done, or not, to succeed. You may find that the idea you have when you start is not likely to be successful.
That may feel disheartening, but you can always modify your original idea to better fit market needs. The more you understand about the industry, your future competitors, and your prospective customers, the greater the likelihood of success. If you identify issues early on, you can develop strategies to deal with them rather than troubleshooting as they happen.
It’s better to know sooner rather than later if your business will be successful before investing time and money.
2. Give your business a foundation for success.
Let’s say you’re looking to start a clean beauty company. There are thousands of directions you can go in, so just saying, “I’m starting a clean beauty company!” isn’t enough.
You need to know what specific products you want to make, and why you’re deciding to create them. The Pricing and Product Line style=”color: #33475b;”> section of a business plan requires you to identify these elements, making it easier to plan for other components of your business strategy.
You’ll also use your initial market research to outline financial projections, goals, objectives, and operational needs. Identifying these factors ahead of time creates a strong foundation, as you’ll be making critical business decisions early on.
You can refer back to the goals you’ve set within your business plan to track your progress over time and prioritize areas that need extra attention.
All in all, every section of your business plan requires you to go in-depth into your future business strategy before even acting on any of those plans. Having a plan at the ready gives your business a solid foundation for growth.
When you start your company, and your product reaches the market, you’ll spend less time troubleshooting and more time focusing on your target audiences and generating revenue.
3. Obtain funding and investments.
Every new business needs capital to get off the ground. Although it would be nice, banks won’t finance loans just because you request one. They want to know what the money is for, where it’s going, and if you’ll eventually be able to pay it back.
If you want investors to be part of your financing plan, they’ll have questions about your business’ pricing strategies and revenue models. Investors can also back out if they feel like their money isn’t put to fair use. They’ll want something to refer back to track your progress over time and understand if you’re meeting the goals you told them you’d meet. They want to know if their investment was worthwhile.
The Financial Considerations section of a business plan will prompt you to estimate costs ahead of time and establish revenue objectives before applying for loans or speaking to investors.
You’ll secure and finalize your strategy in advance to avoid showing up unprepared for meetings with potential investors.
4. Hire the right people.
After you’ve completed your business plan and you have a clear view of your strategies, goals, and financial needs, there may be milestones you need to meet that require skills you don’t yet have. You may need to hire new people to fill in the gaps.
Having a strategic plan to share with prospective partners and employees can prove that they aren’t signing on to a sinking ship.
If your plans are summarized and feasible, they’ll understand why you want them on your team, and why they should agree to work with you.
5. Communicate your needs.
If you don’t understand how your business will run, it’ll be hard to communicate your business’s legitimacy to all involved parties.
Your plan will give you a well-rounded view of how your business will work, and make it easier for you to communicate this to others.
You may have already secured financing from banks and made deals with investors, but a business’ needs are always changing. While your business grows, you’ll likely need more financial support, more partners, or just expand your services and product offers. Using your business plan as a measure of how you’ve met your goals can make it easier to bring people onto your team at all stages of the process.
6. It makes it easier to sell your business.
A buyer won’t want to purchase a business that will run into the ground after signing the papers. They want a successful, established company.
A business plan that details milestones you can prove you’ve already met can be used to show prospective buyers how you’ve generated success within your market. You can use your accomplishments to negotiate higher price points aligned with your business’ value.
A Business Plan Is Essential
Ultimately, having a business plan can increase your confidence in your new venture. You’ll understand what your business needs to succeed, and outline the tactics you’ll use to achieve those goals.
Some people have a lifetime goal of turning their passions into successful business ventures, and a well-crafted business plan can make those dreams come true.

12 WordPress Live Chat Plugins to Connect With Users
Let’s be honest. No one wants to send a support email only to receive a (possibly automated) response 48-hours later. Similarly, no one wants to be put on hold for 30+ minutes while being told they’re the next caller in line.
We live in a world of instant gratification. Your customers are busy and they want to speak to you on their terms and get the help they need on their time.
Live chat allows for you to provide immediate, personalized, and efficient support for your customers and prospects.
So, if you’re part of the 37% of internet users with a WordPress website and you need live chat functionality, this guide is here to help. We’ll cover 12 WordPress live chat plugins to engage visitors and offer effective and speedy support.
1. HubSpot WordPress Plugin
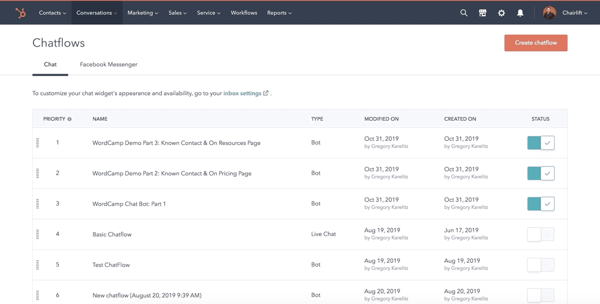
With HubSpot’s WordPress plugin, you get more than just live chat — you also get forms and pop-ups, CRM and contact management, email marketing, marketing automation, and reports and analytics. Plus HubSpot integrates with over 500 other tools.
In addition to the capabilities just mentioned, the plugin also allows you to add chatbots that function 24/7 to your site. This way, you can automate some of your support (e.g. use chatbots, rather than reps, to answer FAQs) and offer assistance to visitors when your team is offline (a.k.a. when reps are asleep). HubSpot’s WordPress plugin is simple to install and applies to all plans and products.
2. Tawk.To Live Chat
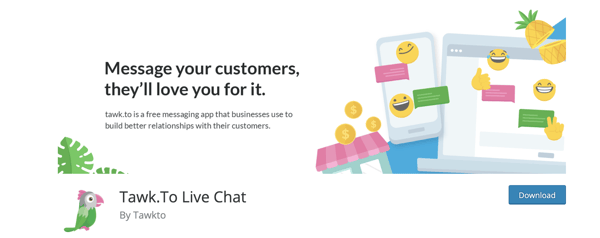
Tawk.To allows you to monitor live chat and engage users on your site in real-time for free. Interact with visitors from anywhere, whether on desktop or mobile. You can also use any of the free iOS, Android, Windows and Mac OSX apps to connect with customers.
The plugin has a single, multi-purpose dashboard through which reps can access multiple websites and work in tandem with other reps while answering live chat requests. All you need to do to get started with Tawk.To is create a free account.
3. Zendesk Chat
With Zendesk Chat, you can manage multiple live chat conversations through a single dashboard. The live chat widget is customizable and you can add mobile functionality so visitors are able to speak with reps via mobile device.
The plugin has triggers which allow you to automate actions when certain conditions are met by visitors who reach out via live chat — this way, you’re able to reach every visitor who wants support. You can add information about your customers, improve workflow routing, and handle spam requests too.
With the analytics dashboard, keep tabs on a visitor’s flow around your site and identifiable usage patterns to determine when a customer needs assistance.
4. Pure Chat
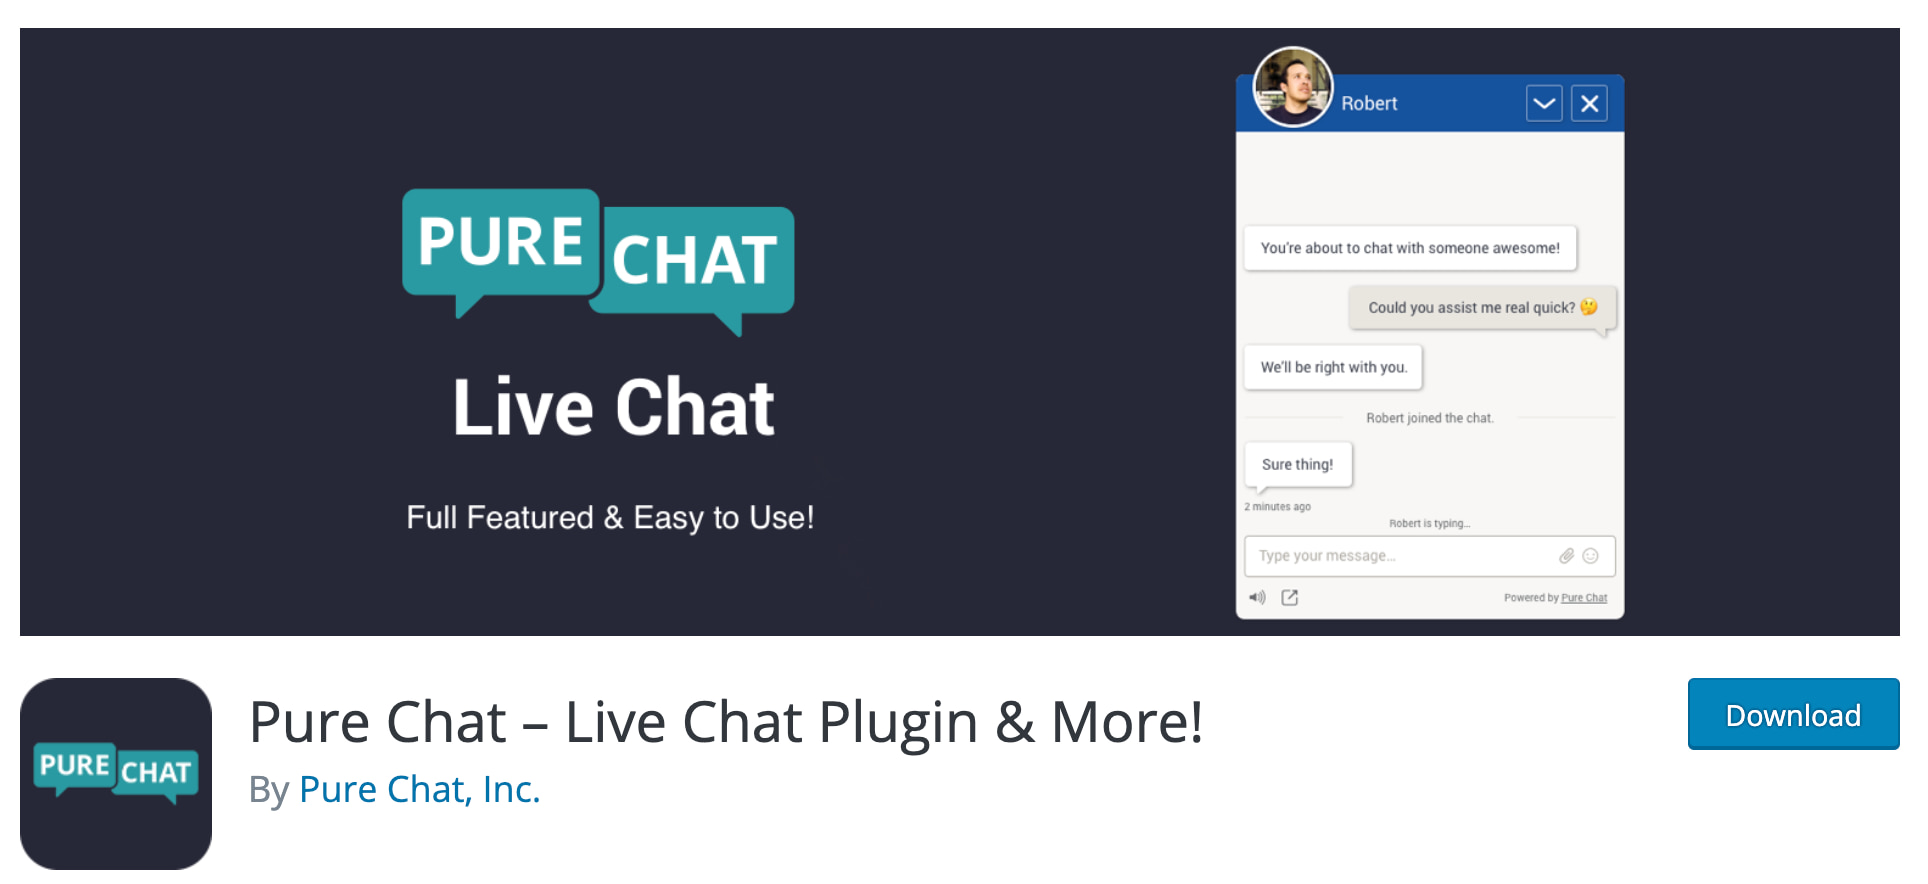
With Pure Chat, your live chat widget is fully customizable. Receive full transcriptions from rep-to-customer conversations and create automatic triggers for actions visitors take to boost the efficiency of the support you provide.
Decide whether or not you want your widget to display an offline indicator when reps aren’t available — this signals to customers that they should email support instead or check back later. Lastly, there are analytics and visitor tracking on your site to help you better understand customer behaviors and needs.
5. Drift
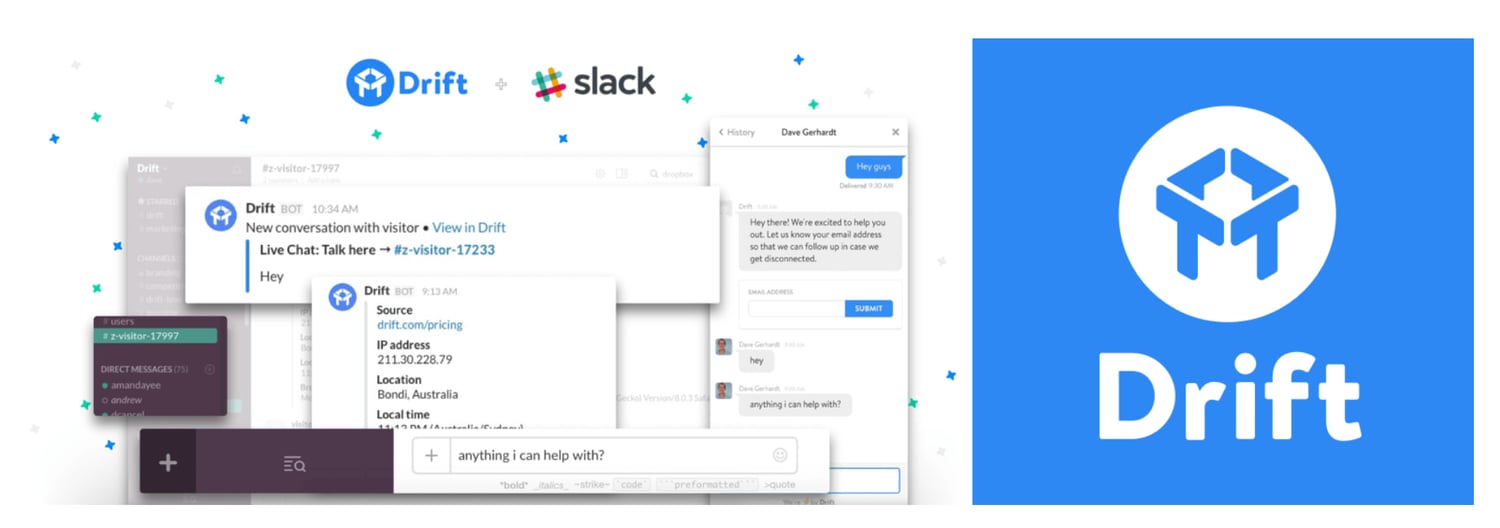
Drift makes adding free live chat to your WordPress site simple. With the plugin, you can get real-time notifications (on Slack) so your team knows when a customer is reaching out. You can also set the expectation that your support team is not available 24/7 on live chat by adding an offline/away mode to your chat widget.
The Drift plugin will help you capture and save visitor email addresses once they start the live chat conversation. You can also set up browser targeting to identify and set rules related to a customer’s actions — this feature provides you with information necessary to reach out to a specific visitor and engage them in a personalized way.
By adding the Tidio plugin to your WordPress site, you’ll get more than just live chat — you’ll also get access to other communication channels including chatbots, email marketing, and Messenger.
Email your visitors when they leave your website and/or live chat and send them campaign content with the plugin’s Email Automation feature. Also, customize the look of your widget so it’s complementary to your branding.
7. LiveChat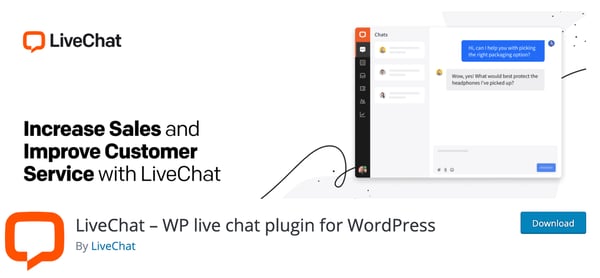
LiveChat has proactive chat invitations so your team can have personalized messages automatically sent to visitors. Work as efficiently as possible by managing multiple chat sessions at the same time and using canned responses for FAQs. Reps can also send links to visitors via live chat — this way, they’re able to share knowledge base articles, directions, product information, and more.
LiveChat seamlessly integrates with services and apps — such as your HubSpot CRM — and you can select which pages of your site include live chat widgets. In fact, you can add a live chat widget to all pages of your website, including the checkout page, if you choose.
8. Live Chat (Messenger API) + PolyLang
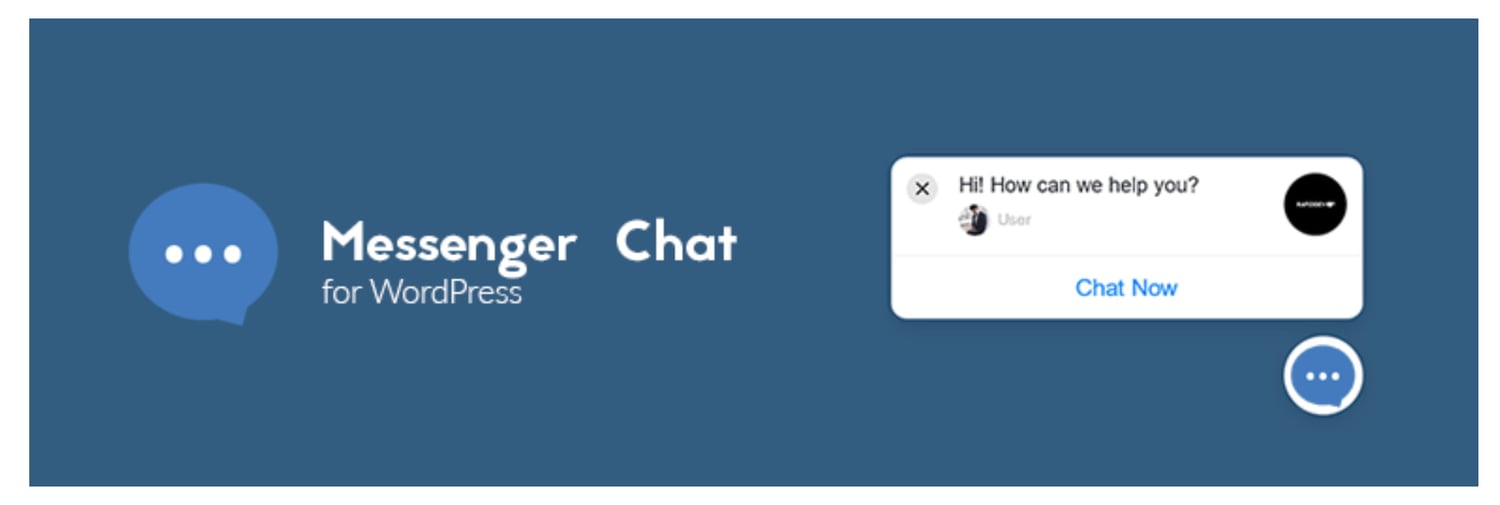
This plugin adds Facebook Messenger to your website and it’s integrated with PolyLang which is another WordPress plugin that helps create bi- or multi-lingual sites.
The chat widget is customizable — you can adjust its color, location, language, and more so it’s complementary to your branding. You can hide or delay the chat widget so it appears only when support is online or a few seconds after visitors land on your site.
9. Live Chat by Formilla
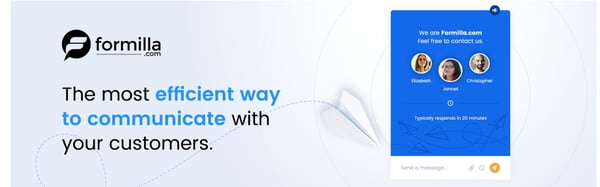
In addition to using this plugin for live chat, you can add AI-powered chatbots to your site to manage FAQs that don’t need human-to-human interaction. You can also create and share canned responses with site visitors to save reps time to focus on more complex customer challenges. Sign into your Live Chat account via app on an iPhone, iPad, or Android device to chat with visitors from anywhere.
There’s a language support feature so you can customize the text of your widget to accommodate a wide audience. The live chat widget is also responsive, meaning it’ll adjust in size based on whatever device your site visitors are viewing it from (desktop, mobile device, etc.).
10. WP-Live Chat by 3CX
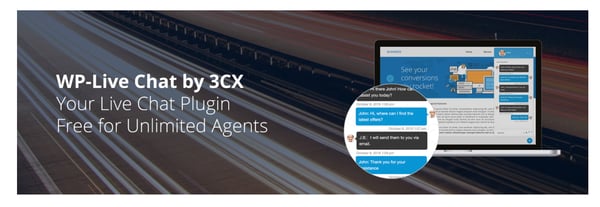
With WP-Live Chat, customize your site’s live chat by adding animations, surveys, and polls to make the experience of getting support more engaging for visitors. Create a custom message that appears when reps are offline and store all messages that are received while reps are offline for your records.
Make the chat anonymous to allow for greater visitor privacy if necessary. Additionally, WP-Live chat is compatible with multiple translation plugins so you can effectively help customers who are from or located in different parts of the world.
11. JivoChat
JivoChat doesn’t just offer live chat for your WordPress site — it also has communication capabilities for phone, email, and social media support so you can manage all conversations from a single tool.
If your business doesn’t offer 24/7 support, visitor inquiries that happen while reps are offline stay on-hold in an inbox. Those inquiries are paired with visitor contact information so your team can get in touch with them during work hours. Reps can also transfer chats to other team members — for instance, a rep can send a customer’s query to another rep who has greater expertise in that customer’s specific problem area than they do.
12. Crisp
With the Crisp plugin, you get inboxes for marketing, sales, and support. Use marketing live chat to get visitor contact information and tag specific conversations to create a qualified contact list for your team. Use sales live chat to answer questions that come in from prospects about your product or service. And use support live chat to help customers work through challenges and roadblocks that arise.
You can also share a live chat availability schedule on your site so visitors know the hours reps are online and ready to assist them.
Install a Live Chat Plugin
Live chat plugins have a wide variety of capabilities and helpful features to assist your team and make reps work more efficiently. This way, reps save valuable time that they can then put towards supporting customers with more complex issues. Get started by installing a plugin on your WordPress site to streamline the process of providing support to your visitors and customers.
Editor’s note: This post was originally published in April 2019 and has been updated for comprehensiveness.

7 Steps to Use Trigger Marketing in Any Content Campaign
When you hear the phrase “marketing automation,” what do you think of first? A detailed diagram of emails sent to different segments, broken out by email engagement, drawing a line from lead to customer? This has become the norm, yet it is among the least effective automation paths you can set up as a marketer.
The inherent flaw in this strategy is that it starts with the marketer’s timeline rather than the prospect’s. The marketer sits down and defines what information the prospect will consume next, what actions the prospect will take next, and the path the prospect will take from becoming a lead to becoming a customer.
But if we’re honest with ourselves, we would admit that the world is not as straightforward as that. You might define the funnel stages as Lead to Marketing Qualified Lead (MQL) to Sales Qualified Lead (SQL) to Opportunity to Customer, where leads download an ebook, then become an MQL when they start a trial, an SQL when the sales person follows up with that prospect, an opportunity when they do a trial review call, and customer when they purchase.
… But what if they start a trial and then download an ebook? Or what if they get into a sales conversation after just downloading an ebook, never become a customer, and then go cold until they start a trial months later? The reality is that you can’t control what your prospect does or in what order your prospect does it. What you can control, however, is how you react to your prospect’s behaviors. And this is where automation and trigger marketing becomes powerful.
The “triggering” event can be anything measurable by your CRM and automation software. Here are just a few examples:
- Form conversions
- Email opens (or lack thereof)
- Number of pages viewed
- Chatbot interactions
- Meeting certain descriptive criteria
As a result of the triggering event, you can automate tasks/actions with your marketing automation software. Here are some examples:
- Send them an email (or sequence of emails)
- Update their CRM record
- Add them to a list
- Assign them to a sales rep
- Send an internal notification about them
1. Understand your buyer persona.
Know your buyer persona: It should go without saying in the context of any marketing activity, but in marketing automation, it’s doubly important.
If you think through the lifecycle stages, pains, and motivations of your target audience(s), you can craft better trigger marketing strategies to guide them along their path to purchase.
The goal of marketing automation is to provide a great experience at scale, and part of that means meeting them where they are. When 80% of customers are more likely to make a purchase when brands offer personalized experiences, it just makes sense.
2. Think in terms of ‘ifs’ and ‘thens.’
Software is simple. It sees in black and white rather than the complex outcome that you’re moving toward. However, you can reverse engineer a great trigger marketing strategy using automation by thinking through your outcome and the path to get there as a series of if/then statements:
- If x happens, then do y.
- If the prospect fills out this form, then send them this email.
- If the prospect has visited the pricing page, then notify a rep.
The “if” is the criteria. The “then” is the action you want to take.
3. Figure out your triggering events.
In order to get your messaging to the right people at the right time, you must identify the “trigger” (in HubSpot, it’s called “enrollment criteria“). This is the “if” part of the equation, the concrete indicator that the software can use as a green light to execute the actions.
Triggering events are only limited by the information you have in your system and your marketing automation’s capabilities. Common ones include:
- Actions taken on the website
- Criteria met in the database
- Responses to past emails or campaigns
4. Determine the actions you want your system to perform.
Once you know your “trigger” or enrollment/starting criteria, then you can decide what happens next. This is the “then” part of the equation. Common actions include:
- Sending an email
- Enrolling in a sequence
- Categorizing the contact in the database
5. Craft personalized messaging.
Remember that 80% of customers are more likely to purchase after a personalized experience? If your action (“then” statement) includes a marketing task such as email sends or campaign enrollment, it’s critical to know exactly how this contact is different from others in your CRM and what messaging will uniquely appeal to them. Ask yourself:
- Where are they at in their journey?
- How can I provide value and move them to the next step?
6. Identify and eliminate repetitive marketing tasks.
If you’re still not sure where to begin with marketing automation, start by creating a list of your most repetitive tasks. For example, if you send the same email over and over again to multiple contacts, using automation to eliminate this task from your day will increase productivity and, as a result, performance. This will help you focus on higher impact tasks that can’t be automated.
7. Increase the value of your CRM.
As mentioned previously, your only limits are the capabilities of the software you’re using and the quality of your data. If you have messy data, marketing automation may hurt you. If you have incomplete data, you won’t be able to do the advanced personalization and segmentation that will make a world of difference.
With that in mind, you will have to understand how to make the most of your CRM. Part of this comes down to using automation to update CRM records and categorize contacts, but ultimately you’ll have to think about how your organization uses their CRM and ask yourself these questions:
- What data can you gather about your prospects (and when) to help the effectiveness of your campaigns?
- How can you use automation to ensure the cleanliness and accuracy of your database?
- How often can you audit your database to ensure the integrity of these efforts?
Trigger-Based Email Marketing
We briefly discussed that marketing automation provides a big opportunity for email marketing efforts. Triggered emails — automated marketing messages based on a prospect’s behaviors — are powerful because they are inherently relevant and timely. The key to an effective email is relevance plus timeliness plus value, and the first two are baked into triggered emails. It’s up to the marketer to jump on that opportunity and align a valuable offer to those recipients.
Not using triggered emails? Here are a few recipes of triggered marketing automation to get you started.
Trigger: Downloaded an Educational Offer
This is a great place to start if you don’t have any triggered emails set up, as this is the broadest trigger — engaging the prospects at the earliest stage of the buyer’s journey.
What to Send: Transactional Email With Next Step Call-to-Action
In this situation, your triggered email can be a transactional email — confirming the download (or registration or request) and including any information related to that download.
For example, if this is a follow-up to downloading an ebook, include the name of the ebook and a link to the PDF. If it’s a follow-up to registering for a webinar, include the webinar information, including the time and date and how to log in.
Once you’ve covered your bases on the transactional information, it’s time to think about what you want your prospect to do next. You have their attention — take advantage of it! Do you want them to convert on a middle-of-the-funnel offer like a demo request or complementary consultation? Or do you want to encourage them to share this offer with their network, to expand the reach of your content? Think about that ideal next step, and include a call-to-action for that in your follow up email.
Trigger: Took One Action in a Series, but Not the Next
Say your prospect gets close to taking the action you want — like starting a trial of your product — but they don’t quite get to the finish line. They visit the trial landing page, or view some content about your product, but don’t start that trial. This is an opportunity for you to follow up to get them to cross that finish line.
What to Send: Related Content and an Alternative Action
Perhaps they didn’t complete that action because of some hesitation — they didn’t want to fill out a form, or they had some additional questions that stopped them from starting that trial. This is an opportunity to follow up with related content (like product videos or resources for the trial) and an alternative action (maybe they don’t want to use a trial, they simply want to get a demo or speak directly with a sales rep).
You can even simply ask them in your email … what stopped you from signing up? Anything we can do to help? You’ll be surprised by how many responses you’ll get. After all, these are people who got close to taking an action but had some specific hesitation. You want to both discover and address that hesitation head-on.
Trigger: Viewed Specific Content
Whether you have content on specific topics (product pain points, for example), or content aligned with specific parts of the funnel (product pages vs. blog articles), when your prospects view that content, you have more data to use in your follow-up emails.
What to Send: Tailored Follow-Up Content
Whether you trigger an email immediately or save this intelligence for future communications, the data you collect about which content people view can be used to make your marketing that much more relevant on a one-to-one basis.
For example, if you have content on your website (case studies, blog articles, etc.) that’s related to specific industries or target markets, you can infer that people who view that content are in that industry, and tailor your future marketing messages accordingly. Or, if you have content on your website that is related to specific topics of interest or pain points that you address, you can infer that people who view that content care about that pain point, and tailor your future marketing messages around that topic.
Think about the various behavioral data points you have about your prospects, and what you can draw from that to determine what they care about.
Trigger: Recently and Highly Engaged or Lacking in Engagement
Figure out what your bar is for a highly engaged prospect (perhaps they downloaded at least three ebooks and viewed at least ten blog articles) as well as an unengaged prospect, and respond and market to them accordingly.
What to Send: Timely Next Step Call-to-Action or Reengagement Campaign
For your highly engaged prospects, you once again have attention you can leverage. One great option is to encourage them to share the content they just downloaded. But also remember that triggered marketing automation does not need to be solely external (sent to prospects), it can also be internal (sent to your fellow employees)!
When a prospect becomes highly engaged, this is a great opportunity to notify that prospect’s sales representative that this is a good time to follow up with the prospect. For your unengaged prospects, send a proactive reengagement email. You may even want to have multiple trigger points (e.g. haven’t clicked on an email in three months, six months, one year) where you send different campaigns to reengage these prospects.
For example, after three months, send a reminder to update their email preferences. After six months, ask them if the content is irrelevant and offer them to unsubscribe. And finally, after one year, tell them you will not email them anymore unless they respond.
Trigger: Interacted With Your Company, or Mentioned Your Competitors or Industry, in Social Media
As you listen to what your prospects are saying in social media, you have the opportunity to follow up with those who interact with your company, or those who mention your competitors or specific pain points that you address.
What to Send: Comparison Guides, Product Information, or Educational Content
Pick a common and valuable interaction that occurs between you and your prospects in social media — it may be asking questions about your product, mentioning that they’re evaluating a competitor, or simply asking a question that relates to the pain points your product addresses.
If responding by social media, you likely don’t actually want to automate your response — it will be very easy for your prospect to recognize the impersonal nature of that interaction. However, you can supplement your one-to-one social media engagement with a triggered email campaign with supporting content. For example, if your prospect asks questions about your product, you can send how-to and product feature information. If your prospect mentions they’re evaluating a competitor, you can send comparison guides, third party reviews, or case studies for them to use in their evaluation process. Or if your prospect simply asks a question related to your industry, you can follow up with educational content on the topic of interest.
At the end of the day, any of these triggered emails are likely to get a higher response — and higher return on your effort — compared to the typical linear marketing automation campaign. Using some of the same technology, you can reorient your marketing to work around your prospect’s timeline instead of your own, while continuing to drive the actions you desire.
Editor’s note: This post was originally published in April 2014 and has been updated for comprehensiveness.

The Surround Sound Series: How We Created A New Content Marketing Program & Improved SERP Visibility Beyond SEO (Part 2 of 3)
This post is a part of Made @ HubSpot, an internal thought leadership series through which we extract lessons from experiments conducted by our very own HubSpotters.
The way people shop has radically changed.
Back in the day, going shopping meant visiting a few shops — maybe some with brands you knew you liked. Now, customers have a wealth of options available online 24/7. They can compare features and prices, read recent reviews, or even get suggestions from influencers and magazines. They can go back and forth between their best options, until they find what suits them best.
In this new context, if you want your products or services to be considered when customers weigh their options, you have to be visible where they search for options. You have to be everywhere that matters — in recommended lists, comparison articles, review websites, etc. — so your brand stays top of mind. This is what we call creating a surround sound content strategy for your brand.
In this article, I’ll take you through how HubSpot uses surround sound to track and improve its products’ visibility and awareness.
What is the surround sound strategy?
At HubSpot, “surround sound” is the name Alex Birkett gave to a program that aims to make HubSpot products visible every time someone searches for a product-related keyword (e.g. “best help desk software” or “best live chat software”).
The goal is for potential users to see HubSpot mentioned in all or most of the pages that rank in Google top results for those keywords. This is the “surround sound” effect!
How to Start a Surround Sound Content Program
If you’re looking to start a surround sound program for your business, these next steps will show you exactly how to go about it.
It’s important to note that this guide is based on HubSpot’s last 18 months of experimenting with this program. While we learned a lot on this journey, this is still a work in progress with many opportunities to explore.
Depending on your industry, your program might need to be adjusted. So we hope these steps offer you initial guidance and help give you kick-start your own surround sound content program.
1. Define your product-exploration keywords.
As Alex Birkett mentioned in the previous post of this series, the goal with a surround sound content program should be to “be everywhere a customer is searching when they seek out products like yours”.
That means that you first need to put together a list of keywords that potential customers typically use to discover their options for a given purchase. We call these product-exploration keywords (or surround sound keywords).
Product-exploration keywords are search queries potential customers use to discover, for any given purchase:
- What options are available to them across the market (e.g. “language learning apps”)
- The most recommended solutions (e.g. “best language learning apps”)
- Alternatives to something they are already using but may want to change (e.g. “best Duolingo alternatives”)
Start building your list by following these three patterns. Certain keyword research tools like Ahrefs, SEMRush or MozPro can suggest related terms with high search volume. That way, you can build your list much faster and get extra information, like search volume or difficulty, to help you prioritize terms.
If you’re using Ahrefs, look for Keyword ideas by search volume to expand your list:
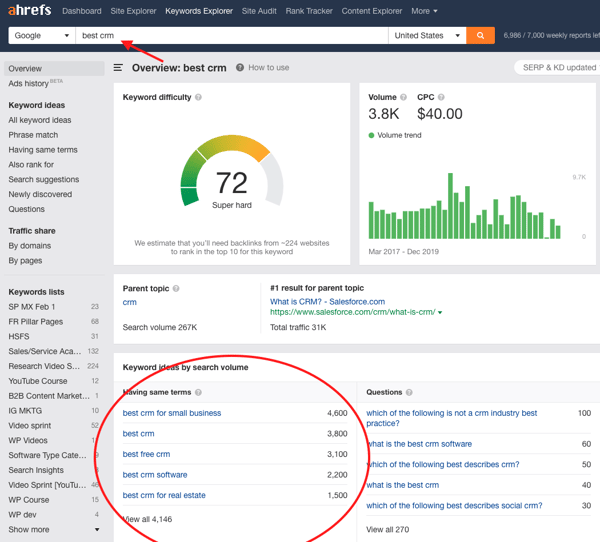
Product-exploration keywords are typically the highest intent and highest converting, but you can also expand your selection to “product-led content.” This is content that is centered around your product, but typically teaches something product agnostic.
For example, a product exploration keyword for ProProfs could be “best NPS survey software,” but they can also consider something like “how to create an NPS survey” as a product-led content keyword.
2. Determine your current performance for product-exploration keywords.
Once you have your list of product-exploration keywords, it’s time to see how many of the top 20 search results your product or service currently ranks for.
You can do this manually by checking each of the top 20 pages for your brand mentions:
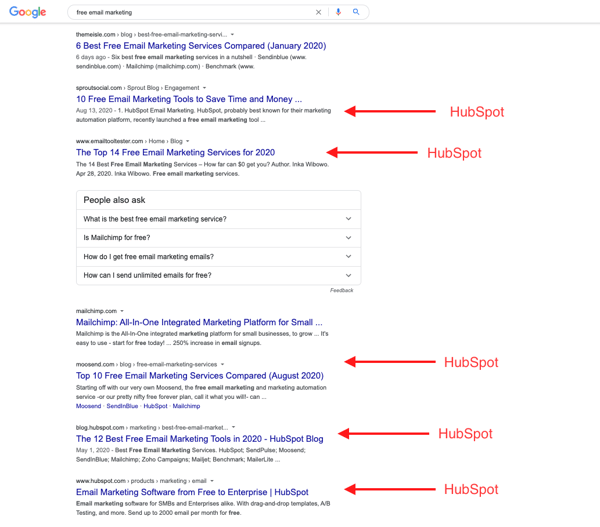
In the end, you should find yourself with a list of keywords, mentions, and visibility scores like this one:
| Keyword | Monthly search volume | mentions in top 20 | visibility score |
| CRM providers | 170 | 7 | 35% |
| sales management tools | 110 | 11 |
55% |
| enterprise CRM | 210 | 5 |
25% |
We calculate the Visibility Score as a % of mentions in the top 20. So, if HubSpot is mentioned in 7 out of 20 pages that rank for “CRM providers”, then the visibility score for that keyword is:
Visibility Score % = (7 ➗ 20) x 100 = 35%
At HubSpot, we’re monitoring around 600 product-exploration keywords. So, checking for mentions manually meant checking around 10,000 URLs (if we consider that some pages appear for more than one keyword).
That’s where Alex stepped in and built a “SERP tracker” — a tool that calculated the percentage of search results for any given query that mentions a brand, product, or service.
The SERP tracker was a game-changer for HubSpot’s surround sound content marketing program as it made monthly reporting and tracking changes a matter of hours, instead of days.
Note: If you’re looking for more information about Surround Sound reporting, stick around and follow this series as that’s exactly what the next post is about. In the meantime, you can geek out on this generic R script for the SERP tracker that Alex wrote about on his blog.
3. Understand your brand’s current visibility on the SERPs.
To understand your brand’s visibility when people are looking for products or services like yours, you need to measure your visibility at 1) a keyword level, 2) a topic level, and 3) a product level. This will allow you to understand your overall performance and track it against competitors.
At HubSpot, we track around 600 surround sound-specific product-exploration keywords grouped by feature, product, and Hub:

This allows us to either track our progress at a granular level or just look at the overall Hub performance.
Here’s an example of a dashboard for HubSpot Marketing I created using a mix of spreadsheets, the SERP tracker that Alex built, and Google Data Studio.
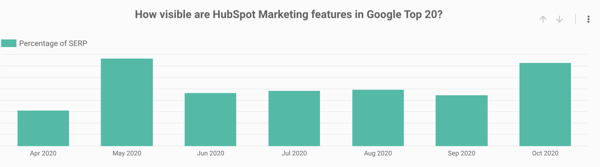
Once you have your visibility calculated, you’ve got your baseline from which you can start improving.
Expect your visibility score to fluctuate over time. This is because new content is constantly published that ranks for those keywords you’re monitoring. Depending on whether the content mentions your brand or not will affect your visibility score as well. There will also be fluctuations that are not related to a drop or an increase in visibility, but they are just a consequence of adding more keywords to your score calculation.
Most importantly, your own efforts to build partnerships will impact your visibility. The more successful you are at getting bloggers or review websites to mention your brand (in new or existing content), the more likely your visibility will increase.
A visibility increase can result in more referral traffic, direct signups, and generated leads, but more importantly (and far more difficult to tie to the bottom line), it can impact your brand awareness.
More people will know about and recognize your products or services simply because they stumble upon them every time they search for “recommendations of best X.”
4. Identify opportunities to improve your SERP visibility.
Spotting opportunities can be challenging when you’re monitoring mentions for more than 10 keywords.
At HubSpot, we monitor over 500 keywords for our surround sound program, so we built a formula that takes into account both our visibility for each specific keyword as well as the average monthly number of searches for that keyword.
Opportunity = (100% – Visibility Score) x Avg Monthly Searches
Say for the keyword “CRM software” (54,000 average monthly searches), our visibility in the Google top 10 search results is 80%. This means that HubSpot is mentioned in 8 out of 10 pages that rank in the Google top 10 for this keyword.
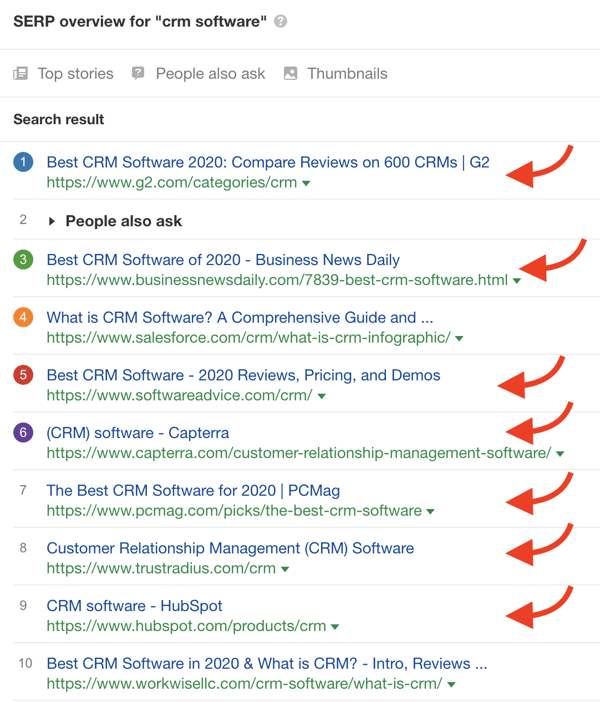
Opportunity for “CRM software” = (100% – 80%) x 54,000 = 10,800
To establish an order of priority, calculate the opportunity level for each keyword, and sort your list from highest to lowest opportunity value.
5. Define a clear goal for your visibility score.
Once you have your priorities in check, it’s time to dig a bit deeper and look at all the URLs that don’t already mention your brand. The question to ask yourself now is: Which ones of these would potentially mention my brand if I reach out to them?
Some websites, like big media publications, will never respond or update their content. So you’re better off by removing these in the first place.
You’ll be left with a list of potential targets (URLs and websites). To establish your surround sound goals, calculate your visibility scores for the same list of keywords — but this time, take into account the potential targets.
And there you have it: your baseline and your visibility goal.
Now what you need to do is figure out how you can persuade your target companies to mention your brand.
Types of Surround Sound Partnership Agreements
Depending on your industry and what companies rank for your surround sound keywords, you’ll be targeting many types of companies to potentially partner with.
Some of the most common ones we see ranking for our target keywords here at HubSpot are:
- Review websites such as G2, Capterra, and Digital.com
- Other SaaS companies and competitors such as Mailchimp and Zoho
- Other marketing blogs such as Neil Patel and Content Marketing Institute
- Big publishers such as Forbes, Inc., and ReadWrite
Each one of these companies has its own goals and objectives. The “secret” to succeeding with your surround sound content strategy is understanding these goals and how you can help and provide value to these companies and publications. In turn, you can extract value as well.
In other words, don’t expect other publishers to list you just because you reach out. You need to look at this as a partnership that you build for the long-run.
So here are some ways in which you can help your potential partners:
- Promote their products or content.
- Provide digital PR on their behalf.
- Include affiliate marketing links to their products or services.
Once you have a battle plan of how you’ll approach each partner so that each benefits from the collaboration, you’re ready to execute on your surround sound content program.
6. Start outreach for long-term partnerships.
This is the part that can make or break your surround sound content program.
A good outreach plan involves a relevant, personalized, timely (think about the tough social and economic times we’re transitioning), and well-targeted email sequence that’s persuasive enough to get your prospects to respond positively.
Remember this is not meant to be a one-off collaboration, but a long term, mutually-beneficial partnership. Your outreach goal should be to spark a conversation with your potential partner. To work together, you first need to learn more about their goals and the best way to meet both parties’ needs.
Note: If you’re new to outreach, check out this post on how to write the perfect cold outreach email, this extensive guide on email outreach and this list of tools you can try out. Email outreach is an art and a science, and getting this part right is crucial.
Once you have kick-started a genuine partnership, make sure you keep track of all of the communication so Sales and Marketing can see it if needed. The best way to do that is to use your CRM software.
At HubSpot, we’re lucky enough to have our own CRM to manage everything — from email sequences to project tracking and partner communications to reporting on our outreach progress.
On top of using the Google Data Studio dashboard to track our visibility progress, we use the HubSpot CRM to keep track of each individual partnership and the mentions that contributed to our growth.
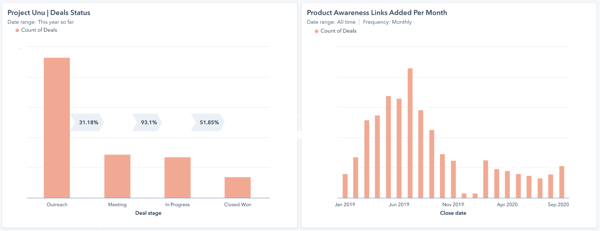
Summary: How to Successfully Execute a Surround Sound Content Marketing Program
The way people shop has changed, so marketing needs to evolve and adapt, too. That’s why the surround sound strategy is a tactic you need to consider for 2021 and beyond. It’s a simple concept, but the execution can pose some challenges.
That’s why we put together this step-by-step guide to hopefully help you structure your upcoming program. Here’s a summary of what it’s all about:
- Start with a list of keywords that are relevant to your products and services.
- Measure your visibility and opportunity for each keyword.
- Prioritize potential partnerships based on opportunities.
- Figure out how to get in touch with each partner and draft a message.
- Schedule a kick-off meeting and get to know your partner’s priorities and goals.
- Keep track of your partnerships (CRM).
- Measure your program results.
- Communicate regularly with partners and stakeholders.
Curious to learn more about the SERP tracker, and what results we saw at HubSpot with Surround Sound? Follow this series as we have more in depth posts coming in the next couple of weeks. In the meantime, don’t miss part one: a behind-the-scenes introduction to the surround sound content strategy.
This article walked through the execution of the surround sound strategy. Stay tuned for Part 3 that will dive into our results as well as the technical details on how we built internal tools to help us accomplish these feats.
