
How to Make an Instagram Post Template for Your Business or Brand
Instagram is an undeniably powerful marketing tool, but with over 25 million businesses on the platform today, it’s critical you take the time to create well-designed and thoughtful Instagram posts to stand out.
You’ll need to apply a strategic design plan to your business’s Instagram to attract a loyal following and find success on the app, long-term.
However, creating a clean and cohesive Instagram feed takes design skills you might feel you lack. Plus, Instagram’s algorithm favors brands that post at least once a day — that time commitment could be adding to your stress.
If that’s the case, you’re in luck — there are ways you can create pre-made Instagram post templates, so you’ve got a stash ready-to-go. Plus, by ensuring you use the same templates for different posts, you’ll have an easier time creating a cohesive and aesthetically-pleasing feed.
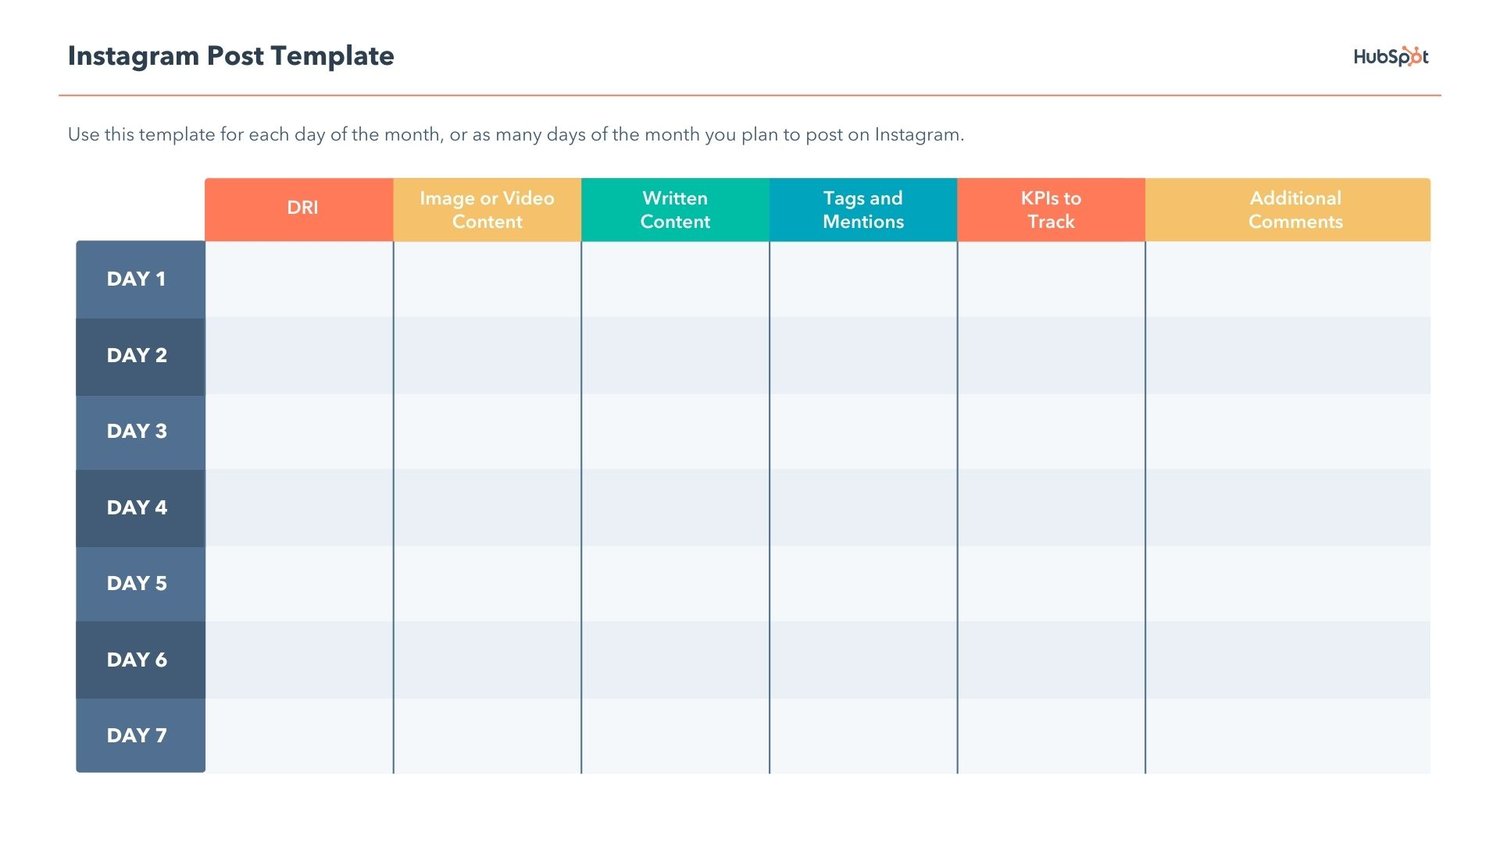
Here are some options to create and save Instagram post templates, so you can have stunning posts on-hand whenever you’re ready to publish.
1. Canva
Canva offers thousands of customizable Instagram post templates. To create an Instagram post on Canva, go to Canva’s Create a Design page, click “Instagram Post”, and then follow these steps:
1. On the left side, you’ll see an array of template options — some cost money, while others are free. Choose one.
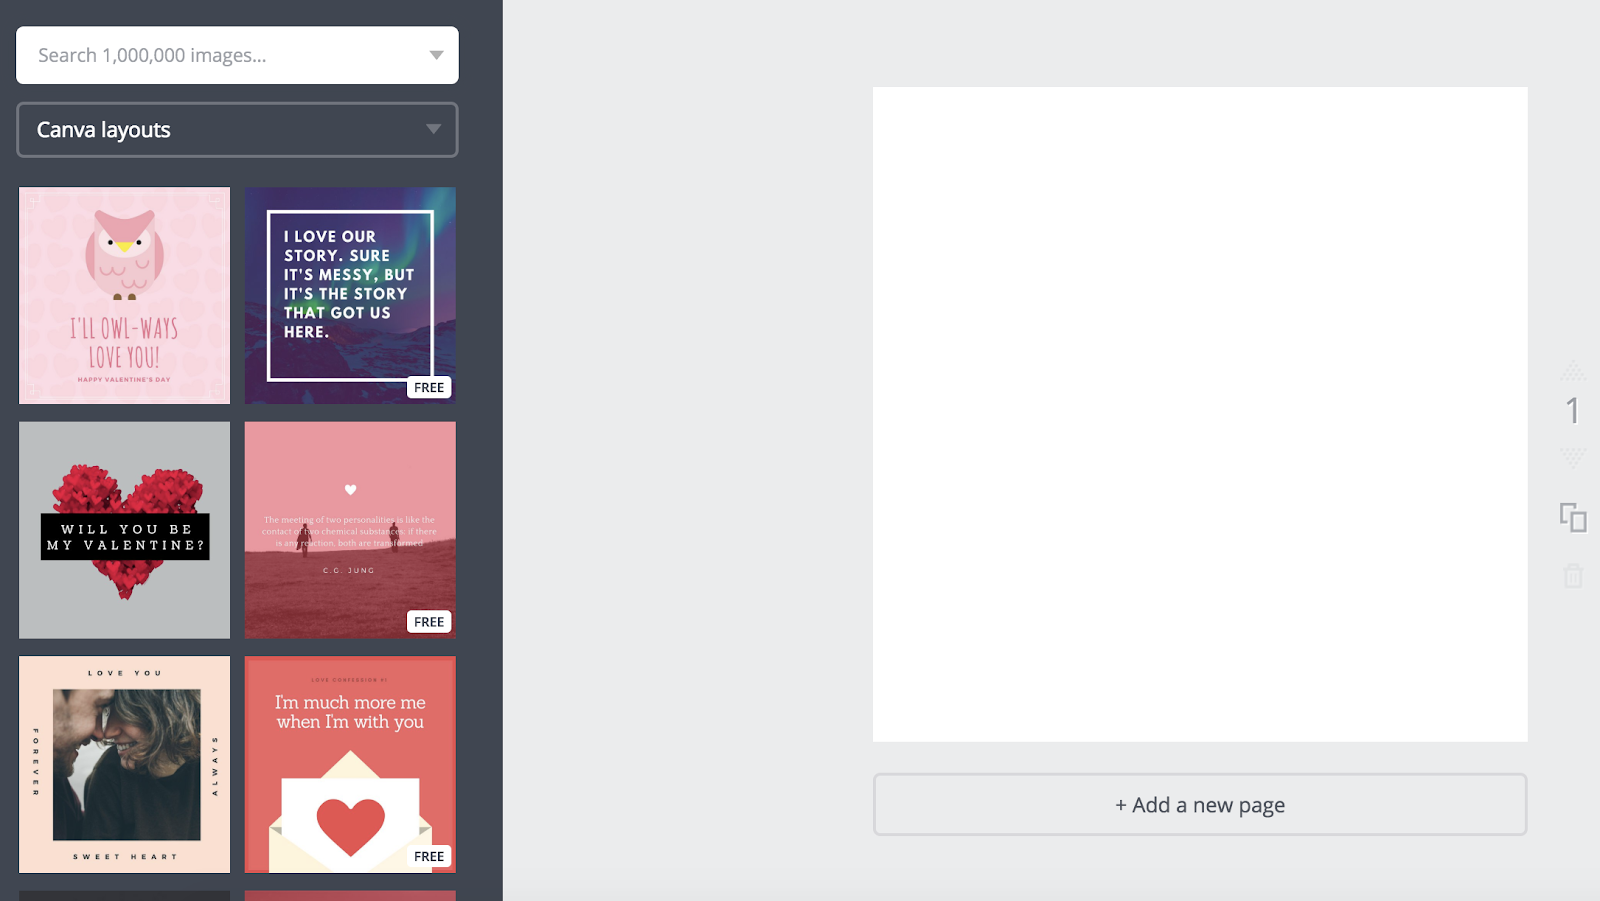
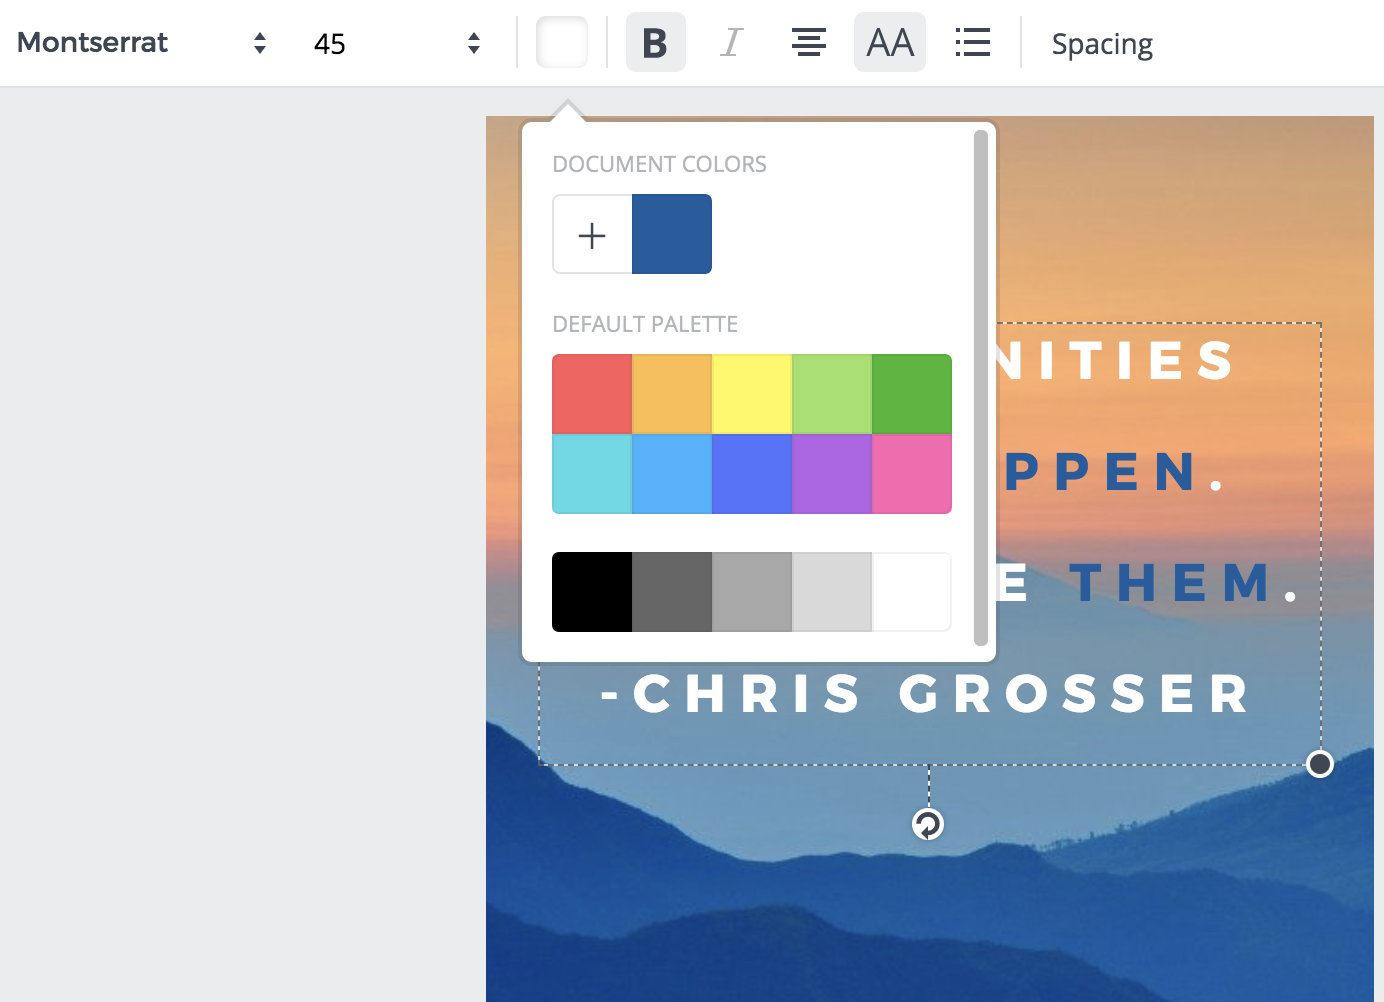
2. Once you choose a template, click on the text box to write something. There are colors at the top if you want to alternate your text color — you can also change font, size, and spacing.
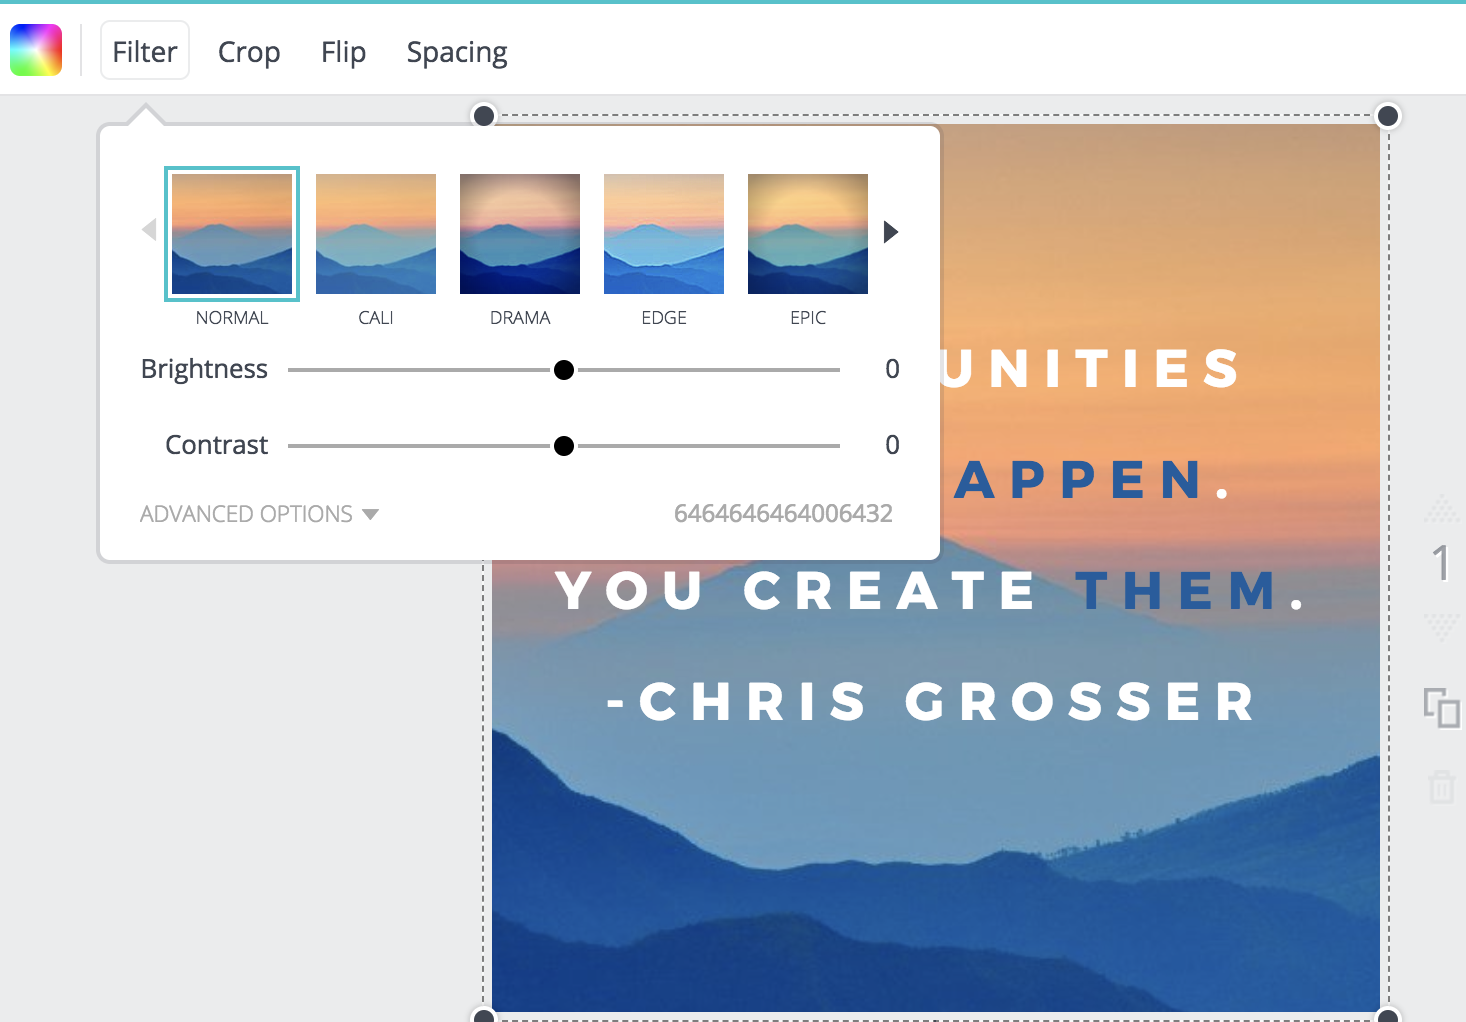
3. When you’re finished with your text, click the background of your image (outside the text box). This will allow you to filter your background, adjust the brightness and contrast of the image, and more.
4. When you’re happy with your template, open up the Canva app on your phone. Click on your Instagram post design.
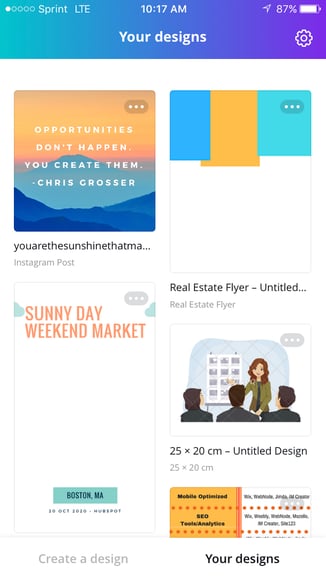
5. Click “Share” in the top right.
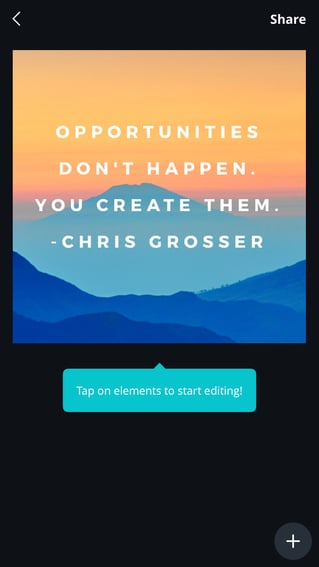
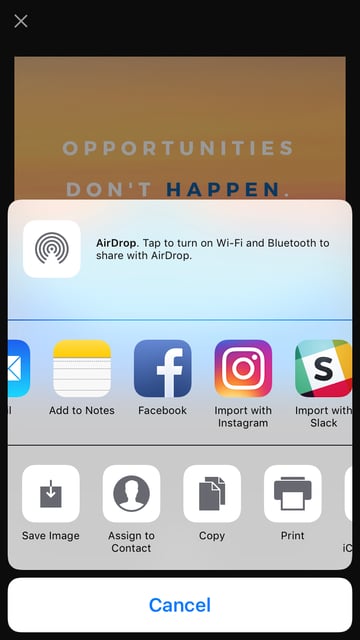
6. Now, you can post straight to Instagram by clicking “Import with Instagram”. If you aren’t ready to post it, you can also “Save Image” and it will appear in your camera roll for later.
7. If you are immediately posting to Instagram, choose whether you want to upload to your “Story” or “Feed”.
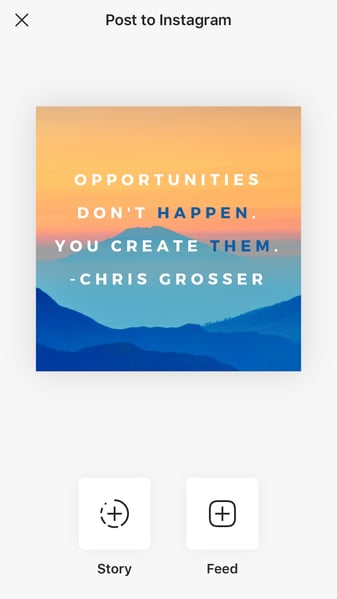
8. Edit the Instagram post like you would any other post — add tags, a caption, location, etc. When you’re ready, click “Share” in the top right.
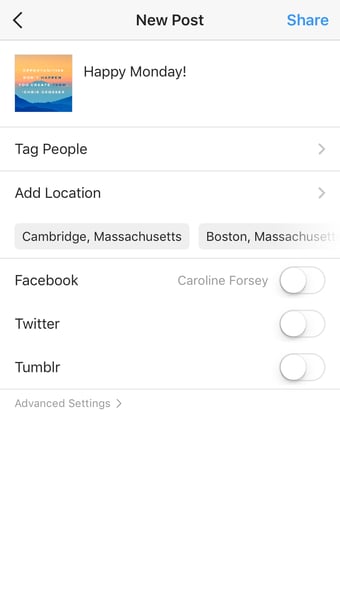
Remember, your template is automatically saved to your Canva account. You can access it in the future, on both desktop and app versions of Canva, and edit it with new text to post the same design again.
Alternatively, you might consider creating a few posts now, and then saving them to your camera roll to post them in the future.
Besides Canva, there are a few other design editors that offer free pre-made Instagram templates. In particular, here are three tools you might consider:
2. ReciteThis
If you’re interested in creating a template for quote posts, it’s easy to do — in fact, we’ve already curated a list of nine apps to help you make quotes for Instagram.
For our purposes, we’ll try just one — ReciteThis.
To create a quote template for Instagram, go to ReciteThis, then follow these three easy steps:
1. Enter your quote in the text box.
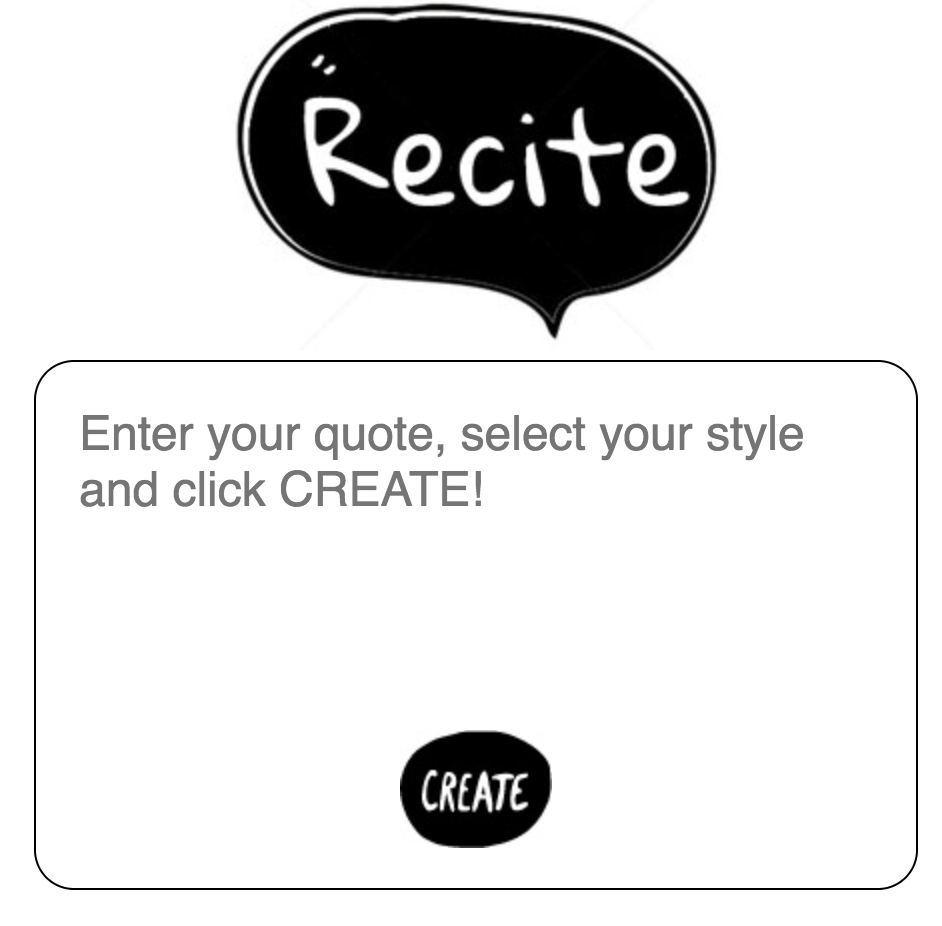
2. Below, click the left or right arrows to peruse templates and choose one you like. Once you’ve chosen a template and written your text, click the “Create” button in the text box.

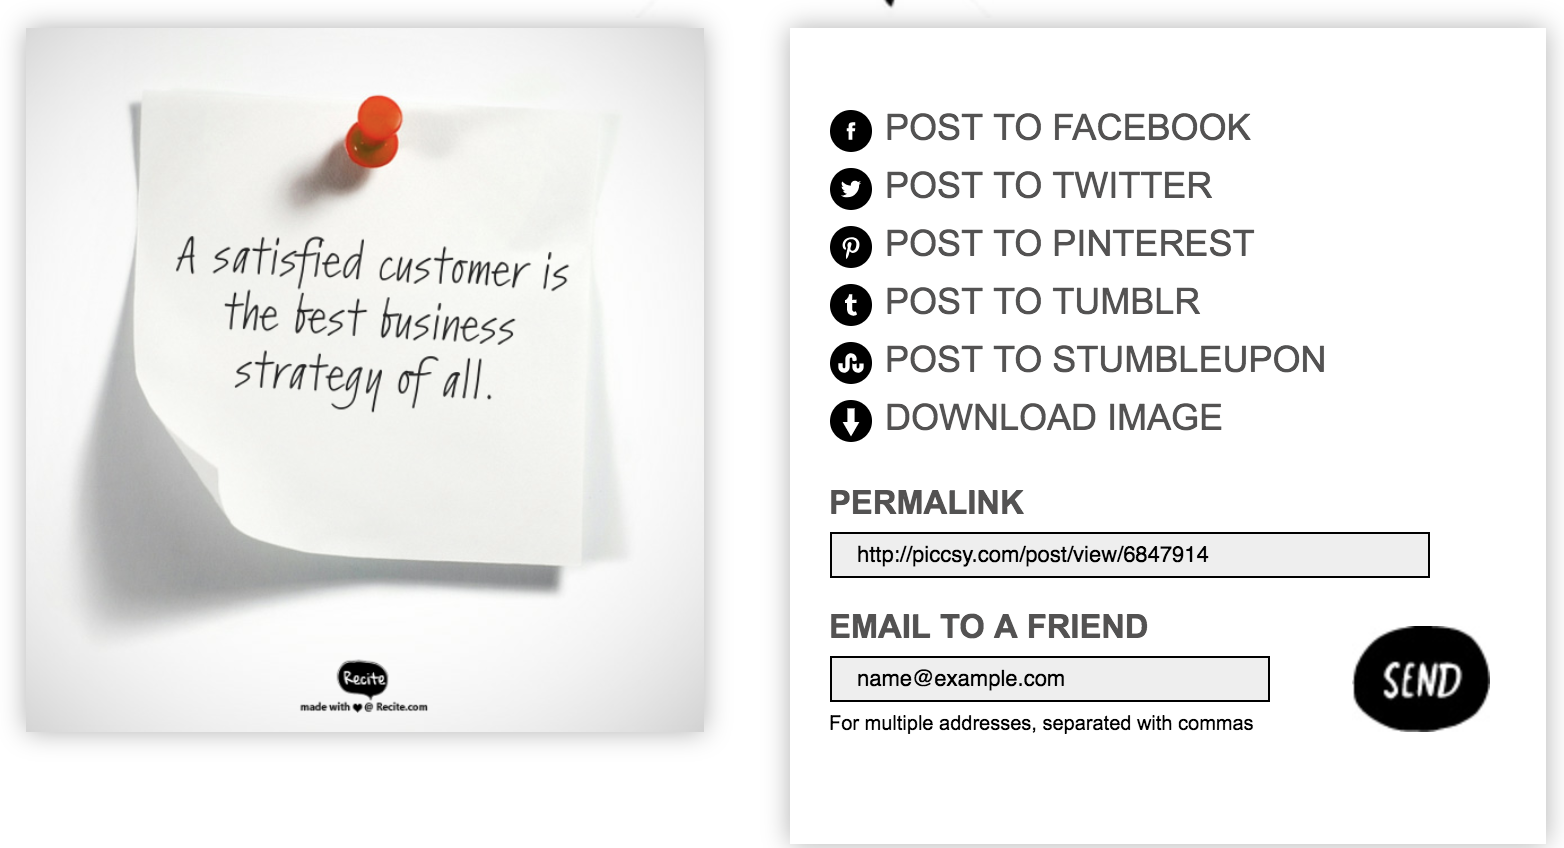
3. Click “Download Image” to post to Instagram’s desktop version, or email it to yourself to post on your phone.
3. Creative Market
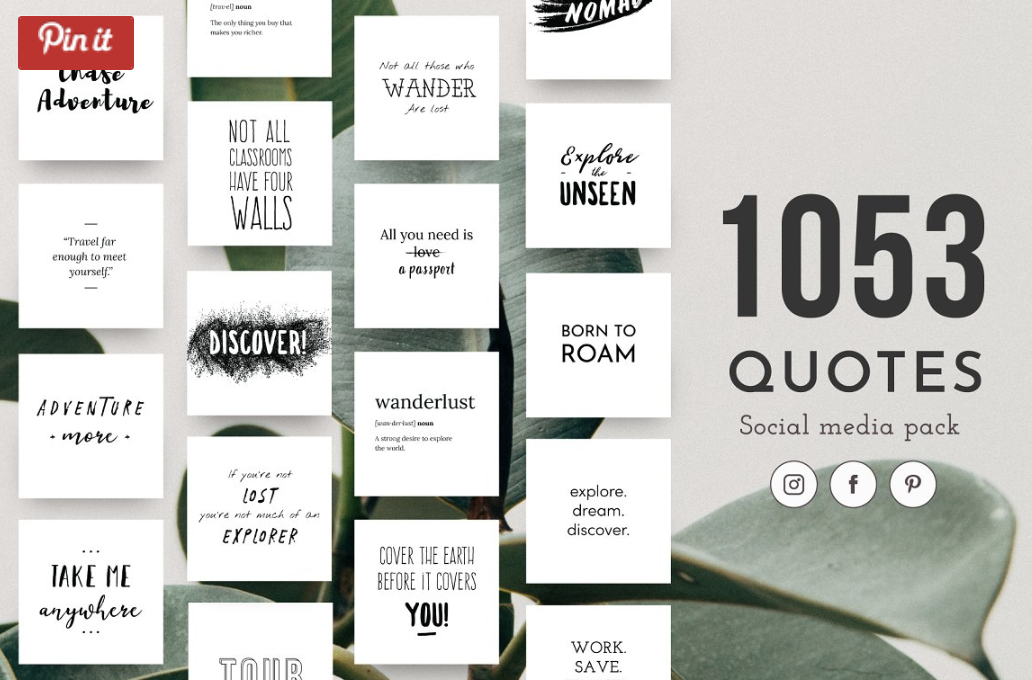
If you’re willing to shell out the cash, you might consider buying one of Creative Market’s Instagram Template bundles.
For instance, you could purchase this 1053 Quotes social media pack.
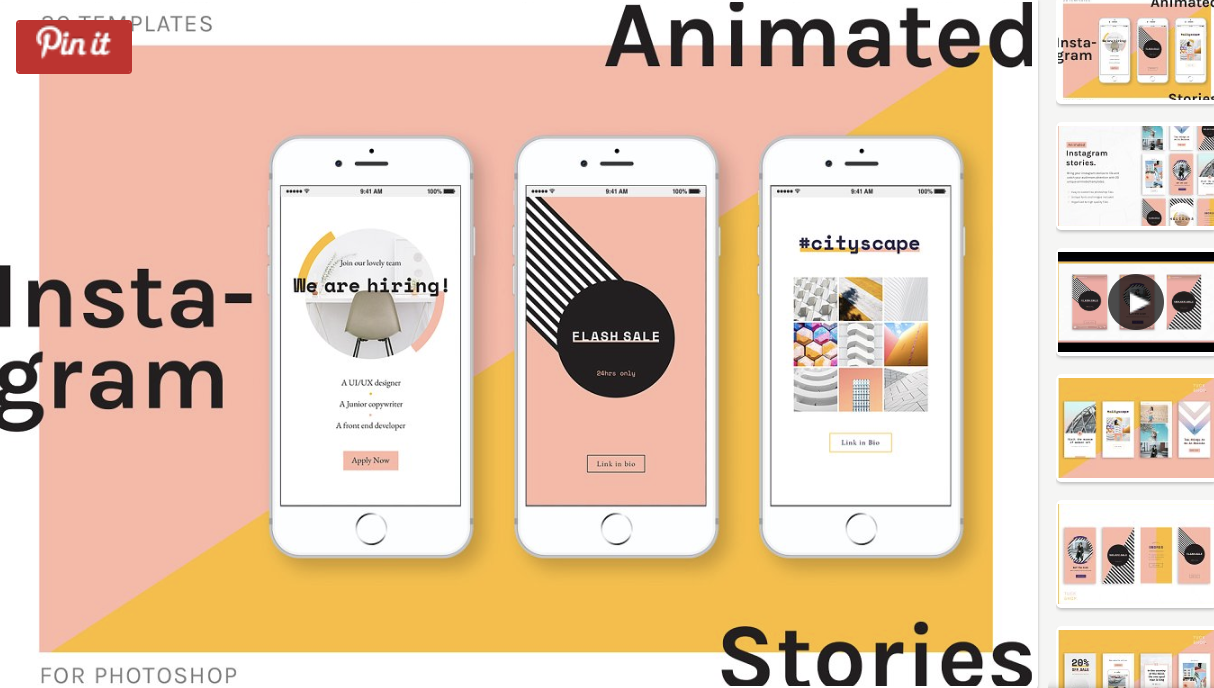
Alternatively, you can purchase a bundle with Instagram Story content, like this Animated Stories bundle.
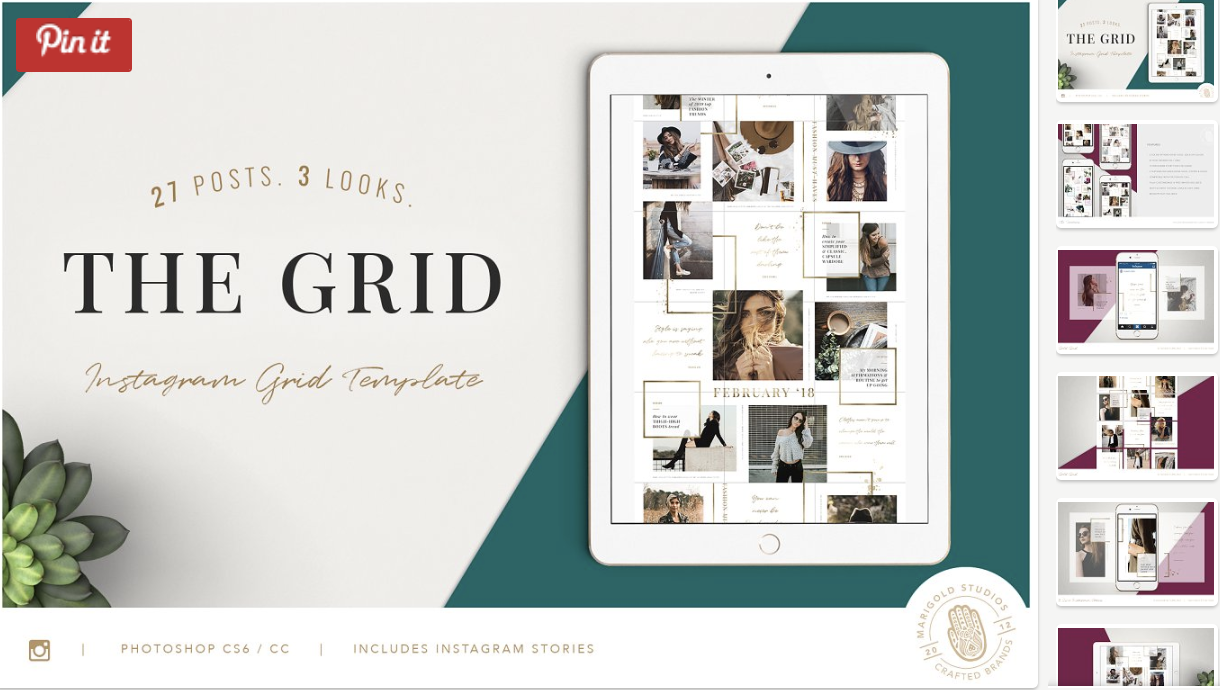
Finally, you might consider purchasing a bundle to help you create a cohesive theme for your Instagram feed, like this The Grid template.
And that’s it! You’re all set to create and save pre-made Instagram templates, so you can focus on attracting a loyal following without tediously designing a post from scratch every day.
Check out our Instagram Marketing: The Ultimate Guide for more Instagram tips and tricks.
Editor’s note: This post was originally published in October, 2018 and has been updated for comprehensiveness.

The Ultimate Guide to RFPs
Have you been tasked with the job of creating a request for proposal, or an RFP?
Whether you have no idea what that is or haven’t written one in awhile, today’s guide can help.
We’re diving into the specifics of what an RFP actually is, why you might need one, and how to create your very first one today.
To start, you should understand what all these letters even mean.
When your company has a new (often large) project, or one that’s more complex and requires a bit of outsourcing, an RFP can help you get the job done right the first time.
The RFP doc becomes a way for you to quickly uncover the strengths and weaknesses of potential vendors in relation to your project without having to spend too much of your time hunting for them yourself.
RFPs can also give you a sneak peek into different strategies you may not have considered since each vendor will include their own unique action plan along with their bid.
And you’ll have this information before you ever have to commit to the vendor.
Keep in mind, this should not be confused with an RFQ.
RFP vs. RFQ
An RFQ, or request for quotation, is slightly different than an RFP since it’s just the quote itself. Here, companies solicit multiple price quotes from various vendors to compare services based on price alone. While an RFP includes a price quote (along with several other specifics), an RFQ does not detail anything other than price.
As opposed to an RFP, an RFQ is a request for quote or quotation.
Here’s how to understand the difference:
While you’re technically receiving a quote in an RFP, you’re also getting information like the action plan, timeline of completion, deliverable schedule, and the list of services provided as well.
But with an RFQ, you’re only receiving the quote itself for the service or products you’re interested in purchasing.
In most cases, simply comparing quotes is not enough to see if a potential vendor is the right fit for your company, which is why an RFP is more appropriate in these situations.
The RFP Process Explained
Before potential bidders can submit their proposals, an RFP must be drafted by the company requesting the work. (P.S. We’ll show you how to do this later in this guide)
This gives potential contractors a better idea of what your company is looking for.
Once your RFP is sent out, contractors or vendors can review it and submit their best bids to compete for the job.
In these proposals, vendors generally include the following items:
- An action plan of how they’re going to solve the issue
- A timeline of what you can expect
- Any necessary background information
- How much they expect the entire project to cost
In certain cases, bidders may come back and say specific components of the RFP need to be adjusted based on their experience in the industry.
At this point, you can either review their feedback and create a new RFP to adjust for the changes, or you can leave the original as is and keep it in mind while considering the other submitted bids.
Once you receive all the proposals, it will be almost effortless to compare each one and determine which vendor is the best fit for your company.
Out of the stack of bidders, you’ll want to narrow this down to a handful of your top three, five, or 10 favorites to consider, depending on how many you receive or are interested in.
From here, you’ll want to spend time vetting potential vendors further to determine who’s really the ideal fit for the job.
Some companies may request one more best and final offer from their top vendors after they’ve started this negotiation process to ensure they’re not only getting the right person or company for the job, but at the right price, too.
While this may sound like an extra step, it’s one that may save you money, time, and headaches down the road.
But this also leads us to a big question: Is all of this really necessary?
Can’t you just spend time reviewing two or three vendors on your own?
As you’ll see next, that route is definitely not in your best interest.
Why Issue a Request for Proposal?
Let’s briefly compare these two scenarios:
- Option #1: Spend time finding the perfect vendor on your own.
- Option #2: Use an RFP to get potential vendors to come to you.
Choose the first route, and you’ll probably use your coworkers, friends, and networking groups to help solicit possible referrals for the job.
Or you might perform a Google search to check out the top vendors in your area.
After you review the website of a possible candidate for the job, you’ll craft the perfect message to reach out and learn if they can even help.
Then, you’ll have to explain the specifics of your project and you may or may not ask them to submit a proposal before deciding to choose them for your project.
It’s not a complicated process, but did we mention you have to repeat it for every promising referral or vendor you come across?
Imagine how long that’s going to take!
Now, what if these potential contractors already knew your project details and they came back with their best plan of action and a formal bid for you to review?
So instead of having to explain your needs each time, you would simply outline it once, and send it out to the masses.
And to save you even more time, it would be up to potential contractors — not you — to reach out.
The RFP route also gives you a sneak peek into each vendor’s real plan of action, not the one they talk you into over the phone or in person.
Since potential candidates have to submit a formal bid, they’ll need to spend time outlining the solution and really working through the problem at hand.
And if they don’t, you have an easy way to weed out vendors and cut through the stack of options fairly quickly.
But, to get to this point, you can’t make this next mistake.
Here’s What Not To Do With an RFP
If you want to find the right vendor, you need your RFP to be specific.
Only asking “yes” or “no” questions won’t get you anywhere.
That’s why you must create specific questions that require thoughtful answers.
Try to use sentences similar to these:
- Can you share an example of how you’ve solved this problem or a similar one for another company? Did you encounter any unforeseen roadblocks? What would you do the same or differently this time?
- With your proposed redesign, how long would it take a non-tech savvy person to complete the new registration form? How much time do you estimate this could save?
With these tips in mind, you’re ready to draft your first RFP.
How to Write an RFP
Here’s the basic structure of an RFP and what to include in yours:
1. Project Overview
Before you go into the specifics of your company, you should give a brief introduction to the project itself so vendors know right away if it’s something worth bidding on.
2. Your Company Background
This shouldn’t be a long history of your company. Rather, it should give contractors a better idea of what your company does and who you serve as a target market.
3. The Goals of Your Project
Clearly identify what you hope to accomplish with this project and what you see as a “win” so everyone is on the same page.
4. Project Scope
The details of the project are essential in an RFP. In the same way you don’t want to use vague questions, a vague project scope won’t help you find the right vendor either.
Spend time really detailing your project scope so there’s no surprises later on.
5. Target Deliverable Schedule
Even if your deadlines aren’t super tight, you should still have a target deliverable schedule in mind. This needs to be included in your RFP so potential vendors can properly gauge if they have the resources and bandwidth to complete the job on time.
6. Possible Roadblocks
Don’t hide your existing or potential issues under the proverbial rug if you want them to disappear. A successful RFP is explicitly clear about any technical issues or possible roadblocks, such as: Are you dealing with custom coding or an outdated platform? Does your team have limited resources?
By explaining these up front, potential vendors will know exactly what they’re getting into.
You’ll also naturally weed out contractors who can’t handle the task due to those constraints.
But you’ll also connect with companies that know how to work around these common issues with skill and finesse.
Remember, it’s far better to find this out now than after you’ve accepted the bid and started work.
7. Budget Constraints
It’s also important to be upfront with your budget too. The more you can eliminate surprises, the better for all parties involved.
8. What You’re Looking For in Potential Vendors
Another way to reduce or eliminate surprises is to explain exactly what you’re looking for in potential contractors.
All you have to do is outline what matters most to your project (i.e., time, solution, budget, etc.) and show how you’ll be evaluating their proposals based on that.
We’ll show you how this is done soon, but before we do, there’s one more thing to add here: an RFP cover letter.
Just like a cover letter for a resume, an RFP cover letter creates a professional image for your brand and sets the tone for prospective vendors. It signals that they should take the proposal and the project seriously.
The good news is there are a number of tools to make creating RFPs easier and less stressful than you’re imagining.
Proposal Software Tools to Help You Manage RFPs
In this article, we outlined 10 tools to help you manage and create professional looking proposals in less time.
For today’s purposes, the following five tools are great places to get started:
1. RFPIO
RFPIO Solves the problem of responding to RFPs, from project management to collaboration, to integrating with other software. Their solution includes reporting dashboards, auto-response features, and automated generation of proactive proposals from within your CRM. RFPIO also includes an intelligent answer library that turns previous RFP responses into on-demand intelligence that empowers revenue teams with enterprise content at their fingertips wherever the work.
And what’s better? RFPIO has an integration with HubSpot that will automatically sync your RFP with your portal, making it easy to share information with your team.
2. PandaDoc
To create customized RFPs with your own branding, consider using the proposal software PandaDoc.
Here you can set up your first RFP within minutes and even collaborate with team members using real-time updates within the document itself.
3. Nusii
Similar to other proposal software on the market, Nusii uses a drag and drop editor that makes building RFPs a breeze — especially for beginners.
Thanks to its clean, modern, simple design, it’s also really easy to figure out too.
One of the most helpful features of Nusii is using it for re-working existing RFPs to save you time. Just copy the content from an RFP you like and edit information to fit your new request.
4. Loopio
How do you plan on organizing all the responses to your RFPs?
One standout feature with Loopio is its RFP response library, which gives you instant access to all your answers from previous RFPs. This saves you the hassle of digging around to find what you need in a crowded inbox.
Their magic feature will even help you auto-populate a response if it appears similar to one you’ve already done.
Plus, you can manage your entire RFP process — including sending automated responses — and collaborate with your team all in one place with their intuitive dashboard.
And if proposal tools are out of the budget right now, or if you’d like to try your hand at creating your own first, use this template as a starting point.
5. RFP360
RFP360 streamlines your approach to RFP response management. Their intuitive knowledge management, workflow and collaboration features make it easy to create, review, update and approve compelling responses in a single library. Proposal automation and answer intelligence (AI) capabilities accelerate your ability to answer questions, suggesting the best possible responses and automatically completing them in bulk.
You can also import RFPs in various formats and generate polished final proposals, and integrated extensions allow anyone across your organization to use content from your knowledge library in Microsoft Office files, online questionnaires and forms — without leaving those applications.
Free and Editable RFP Template

Download a free, editable RFP template.
To use this template, simply download it here or fill out the form below. You can remove sections or pieces of information that don’t pertain to your project and add whatever else you need for your RFPs.
Over To You
Now that you have a better idea of what an RFP is and how to create your first one, you’re ready to get started.
Sit down with your team to narrow down your project’s specifics, goals, and scope of work. Then determine when the project needs to be completed and your budget before moving on to the drafting phase.
With this intel gathered, you’ll be ready to plug everything into our template.
You can also use this tried-and-tested proposal formula to ensure your RFP is professional and polished too.
Follow these steps and you’ll have an RFP template you can quickly update. Your next project will be a success that much faster.

How to Create Content for Every Stage of the Buyer’s Journey
No one wakes up in the morning and decides, “I’m going to buy something today.” Instead, they go through a path to purchase that includes research and evaluation before committing to a sales call.
That journey is called the buyer’s journey. Because consumers are more informed and more empowered than ever before, it’s important to deeply understand your buyer persona and the journey they make so you can create content that helps them along that path while positioning you as an authority in your space.
In this post, we’ll cover:
- Understanding the Buyer’s Journey in Marketing
- What a Marketing Funnel Is
- Marketing Channels for Each Stage of the Funnel
- Creating Content for Each Stage of the Buyer’s Journey
Understanding the Buyer’s Journey in Marketing
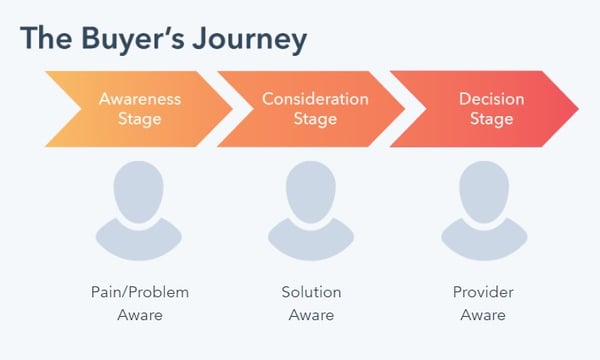
In most cases, with the exception of impulse buys, an individual begins their journey in an “unaware stage.” This individual likely fits the demographics of your ideal client (also known as your buyer persona), but they are not aware of your product or in need of it.
However, they may experience a triggering event that changes their situation or a pain that needs to be solved. This kicks off their buyer’s journey.
When you don’t have a complete understanding your audience, a disconnect is created between your business and your potential customers. For content marketers, this usually means you’re putting out content that your readers don’t really relate with, which can cause you to lose them.
As is the case in all marketing disciplines, it’s important to understand your audience: how they think, the answers they seek, and the path they tend to take to find a solution. From that research, you can begin crafting a documented content strategy that maps your content to the various stages of the buyer’s journey.
Developing the buyer’s journey for your business is the first step to creating content that resonates with your buyer and building out your marketing funnel so that you can meet them at each stage of their journey.
What Is a Marketing Funnel?
A marketing funnel — more commonly known as a sales funnel since its output is revenue — describes the different stages a customer goes through leading up to their purchase, from looking at your website for the first time and subscribing to your email list to reading your emails and talking to a sales associate.
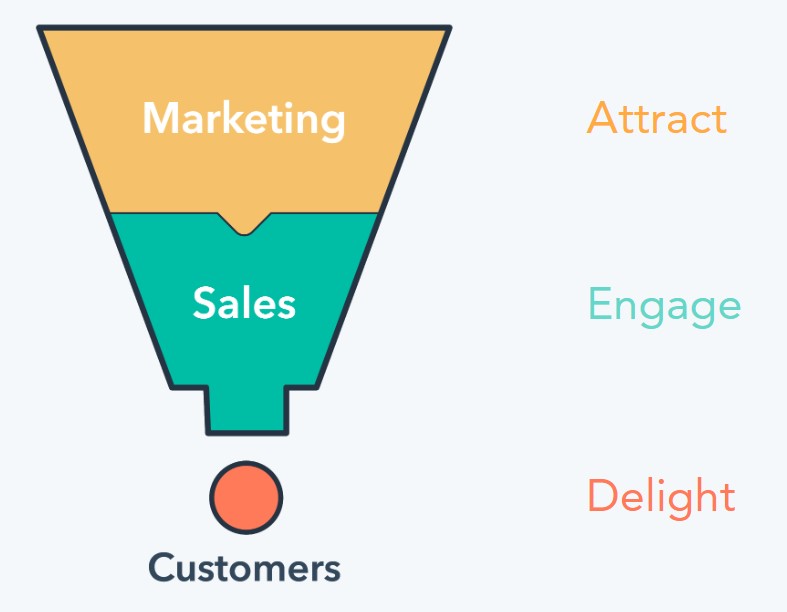
How the funnel works is simple. The top of the funnel indicates they are further away from a purchasing decision while those who make it to the bottom of the funnel are closer to a purchasing decision.
Often, it’s a marketer’s job to attract your buyer persona in the early stages of their journey and hand off qualified prospects to the sales team to engage them. Once they become a customer, your service team delights them so that they buy from you again and again and tell all their friends.
The funnel is a useful tool when used in the context of the buyer’s journey. However, keep in mind that the funnel has one issue: It puts customers as the output. At INBOUND 18, HubSpot officially retires the funnel in favor of the flywheel.
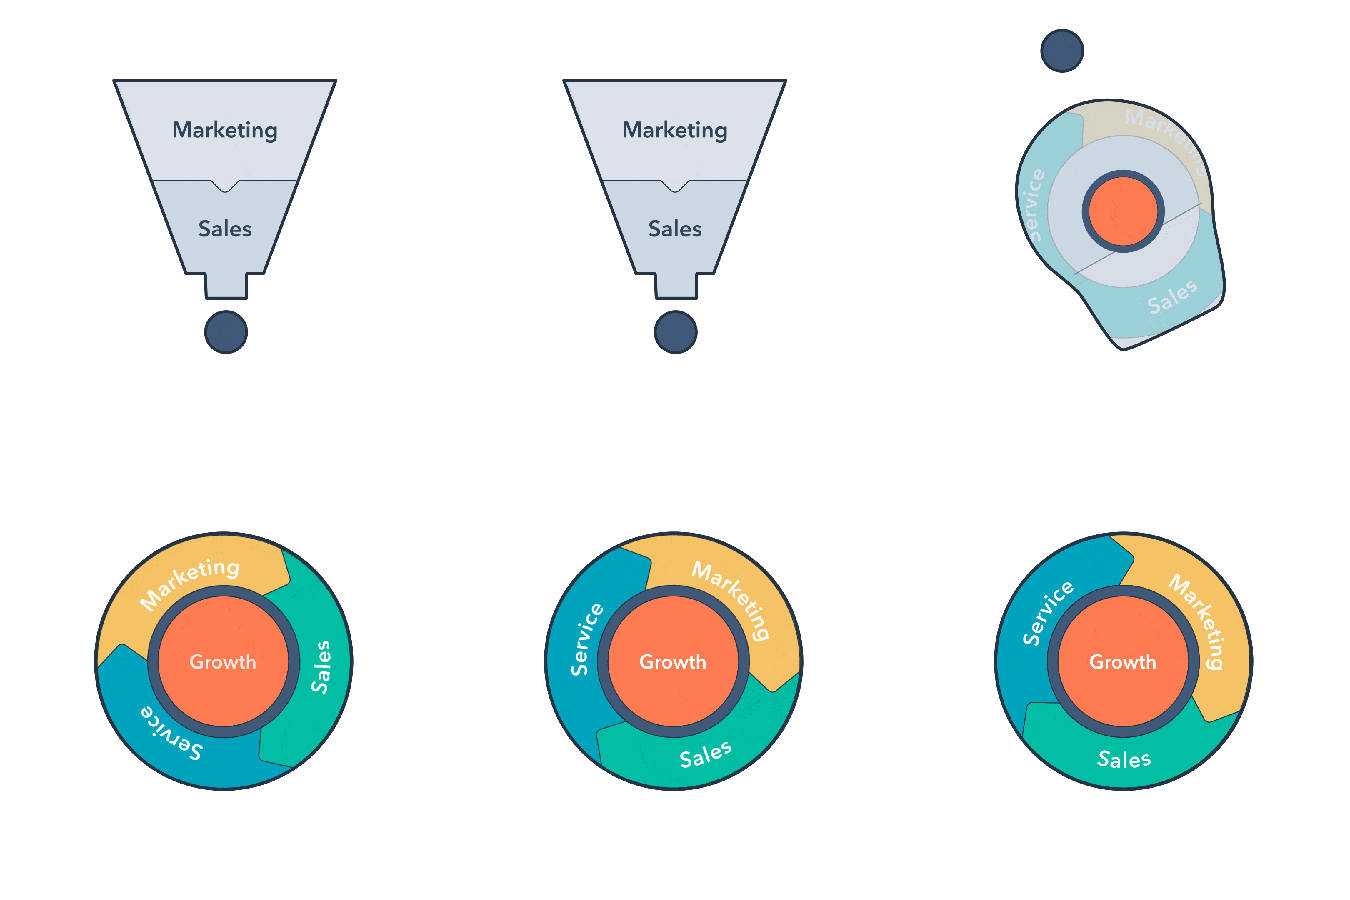 The result puts customers at the center, which creates a more unified and less linear approach to all your marketing, sales, and service activities.
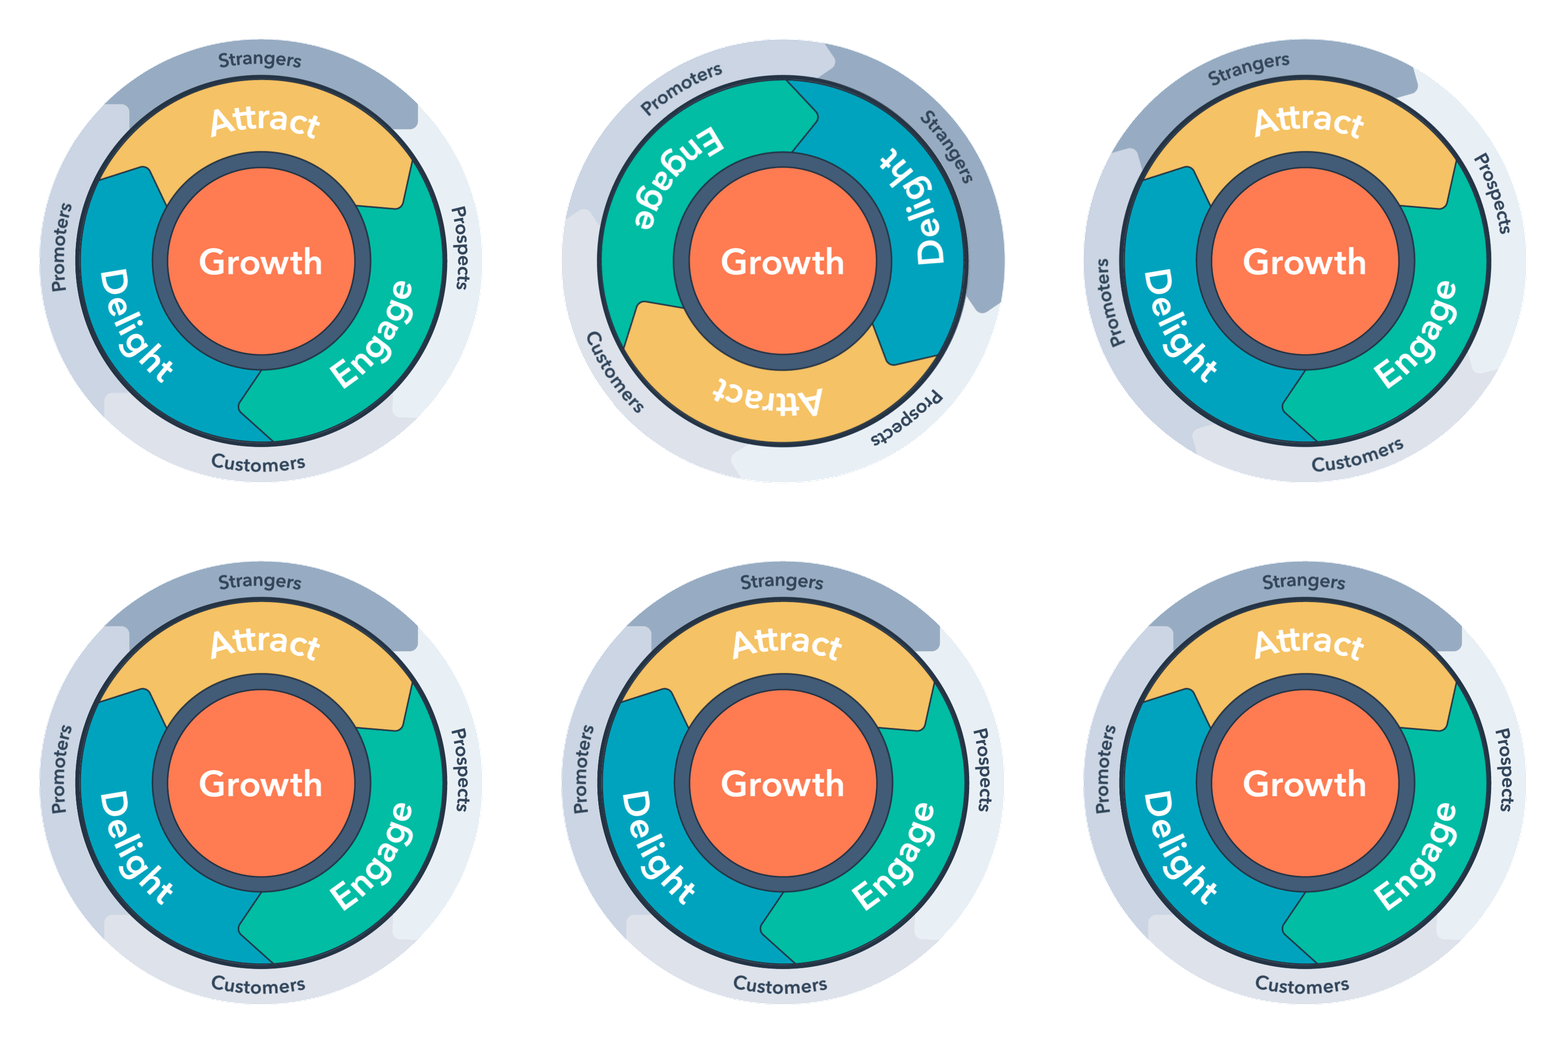
Marketing Funnel Stages
Even so, the funnel is still a good starting point before you begin moving to your flywheel strategy.
All you have to do take the buyer’s journey and ask the question: “How do we attract and engage this person so they become a customer?”
Whether you subscribe to the funnel or the flywheel methodology, earning business from your prospects comes down to three simple things:
- Attracting strangers
- Engaging prospects
- Delighting customers
As you create create content that performs these functions, you’ll consider the stage they’re at in their journey and the best channels to put the content in front of them.
The internet has made it easier for marketers (and salespeople) to engage customers at the various stages of their journey using content marketing. That’s one of the main reasons that 60% of marketers consider content as ‘very important’ or ‘extremely important’ to their overall strategy.
However, it can be challenging to create the right content, for the right people, at the right time.
Marketing Channels for Each Stage of the Funnel
Building a content strategy starts with identifying the channels in which you’ll reach your audience.
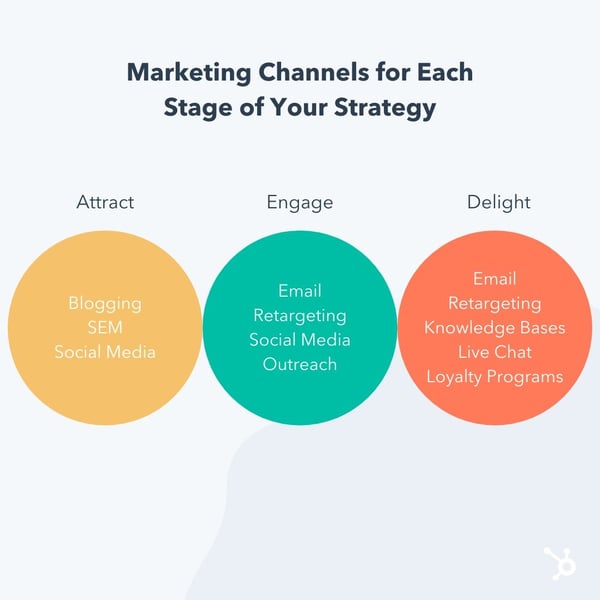
Marketing Channels for the Attract Stage
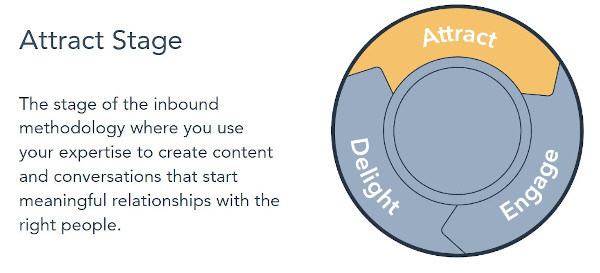 Remember, a large majority of your prospects may even be in the awareness stage of their buyer’s journey when you begin to attract them. That means your goal is to solve for their pains/problems by creating content they can easily discover and consume.
At this point, a buyer is trying to solve problems, get an answer, or meet a need. They’re looking for top-level educational content to help direct them to a solution, like blog posts, social content, and ebooks. Their value as a lead is low because there’s no guarantee that they’ll buy from you. But those who find your content helpful and interesting may journey on to the middle of the funnel.
The ideal channels for your attract stage may include:
- Blogging
- Search Engine Marketing
- Social Media Marketing
Marketing Channels for the Engage Stage
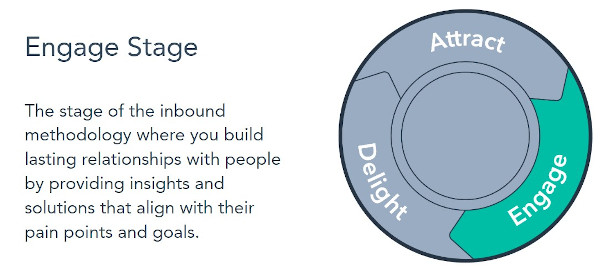
When someone moves into the middle of your funnel, it means you’ve captured their attention. They know they have a problem that has to be solved, and now they’re trying to discover the best solution. The need for a future purchase commitment creeps up as they’re evaluation their options.
While the top of the funnel is designed to educate a prospect, this is the stage where you want to show why your solutions in particular are the best fit.
(You also want to help people determine if they’re not a good fit, which will be very important later for healthy customer retention. If you convince customers to buy who aren’t a good fit for your business in the long run, you could be shooting yourself in the foot in the form of high churn rate later.)
The middle of the funnel is typically a point of extended engagement where you’re nurturing a lead, building a relationship, and establishing trust between the audience and your brand.
The ideal channels for your engage stage may include:
- Email Marketing
- Retargeting/Remarketing
- Social Media
You also need to engage prospects at the bottom of your funnel.
The bottom of the funnel is where someone is making the actual purchase decision. They’re ready to buy, but that still doesn’t guarantee that they’re going to buy from you. That’s the last choice they have to make: Where do they get the solution they’re seeking?
In most cases, leads at the bottom of your funnel just need that final nudge and that compelling call-to-action to get them to make a purchase decision. The right offer and content at this stage can have a dramatic impact on lifting your conversions.
You might also consider sales outreach to engage qualified prospects and continue to engage them through personalization and contextual marketing.
Marketing Channels for the Delight Stage
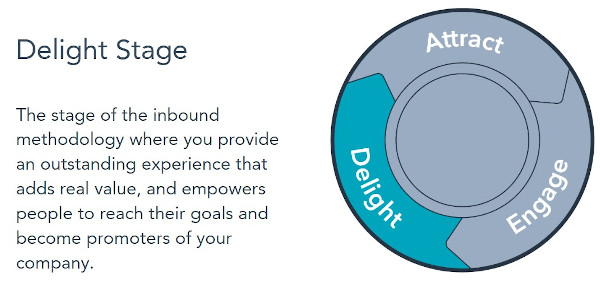
Marketing shouldn’t stop once someone becomes a customer. Cultivating a relationship with your customer beyond the sale can lead to higher customer lifetime value as well as word-of-mouth referrals and more.
The key here is to go above and beyond their expectations and provide a customer experience that’s easy and frictionless.
The ideal channels for your delight stage may include:
- Email Marketing
- Retargeting/Remarketing
- Self-Service Channels Such as Knowledge Bases
- Live Chat and Chatbots for Service
- Loyalty Programs
On the surface, this process seems really linear, but you can also target multiple stages of the buyer’s journey across channels.
For example, you may still be able to attract someone in the consideration stage or delight someone who isn’t a customer yet. Your knowledge base might convince someone in the consideration stage to buy since they perceive that you have great service, or someone in the awareness stage could engage your chatbot to find the content they need.
One of the joys of content marketing is thinking outside the box.
Creating Content for Each Stage of the Buyer’s Journey
Once you have an idea of who your buyer persona is and what channels will work best for your business, you can begin creating content for your buyer at different stages and tailor that content per channel.
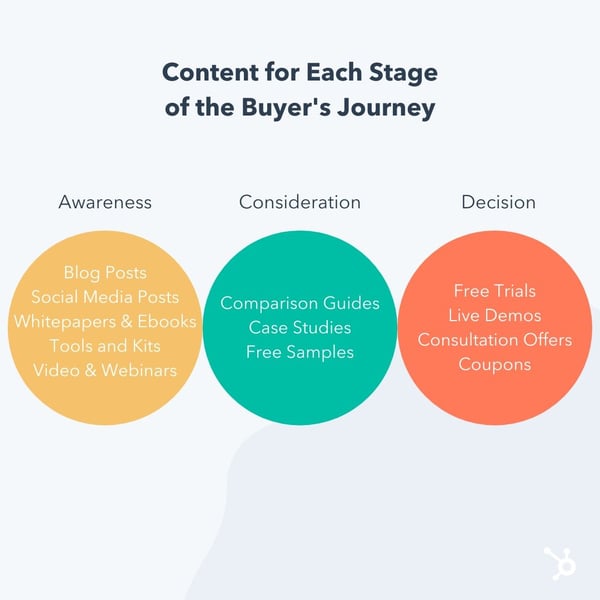
Doing so can help you map your content to the relevant stages of the buyer’s journey to make your funnel.
- Top of the Funnel: The “awareness” stage, where people looking for answers, resources, education, research data, opinions, and insight.
- Middle of the Funnel: The “evaluation” stage, where people are doing heavy research on whether or not your product or service is a good fit for them.
- Bottom of the Funnel: The “purchase” stage, where people are figuring out exactly what it would take to become a customer.
Your funnel may look very different depending on factors like your industry, business model, product, pricing, and audience. Some B2C customers, for example, spend very little time in the middle of the funnel compared to B2B customers that require far more nurturing, engagement, and relationship development before a purchase is made. A $50 pair of sneakers, for instance, requires a lot less handholding when it comes to making purchase decisions than a $10,000 business software investment.
Content Ideas for Each Stage of the Buyer’s Journey
Because audiences can vary so widely based on industry and intent, persona research is of the utmost importance. Only by understanding their unique process for awareness and evaluation will you be able to create a truly effective content marketing strategy, packed with custom content that best supports their journey toward making a purchase.
Blog Post
A blog post is an ideal piece of content targeting the awareness stage. By targeting a pain, problem, or other topic your target audience wants to discover and then posting it to your website, you’re creating a brand asset that’s crawlable by Google and discoverable by search engine users. You can also promote your blog content across other channels.
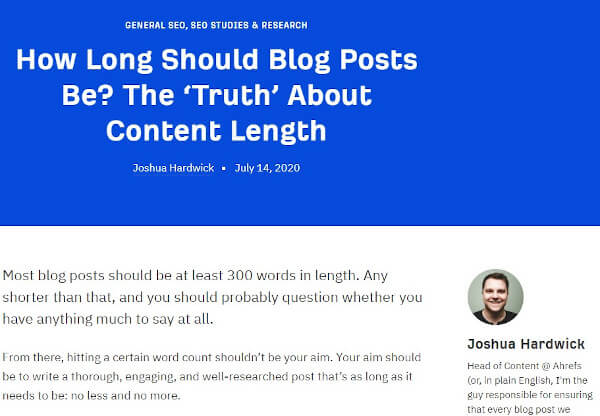
Ahrefs is a great example of a brand that does blog content right. They include original data and informational advice to create long-form articles that serve their audience.
Social Media Post
Social media is a channel that can be used to promote your other content, and you can also create content specifically for the channel. According to Pew Research, 72% of the public uses some form of social media, so it’s likely that your audience is native to this channel. Unlike blog posts, social media posts are likely shorter form, and video consumption is also on the rise.
In the above example, HubSpot Agency Partner Yokel Local shares attractive customer marketing tips on the LinkedIn platform. SlideShare formats are popular on LinkedIn, so the content is created to be snackable with short-form take-aways.
Whitepaper
A whitepaper is an organization’s report or guide on a particular topic. Whitepapers are especially useful as downloadable offers when a reader wants to go more in-depth on a particular subject they’re reading about. For whitepapers, it’s important to provide information that can’t be found elsewhere so that your audience understands the value of the report and is compelled to get it.
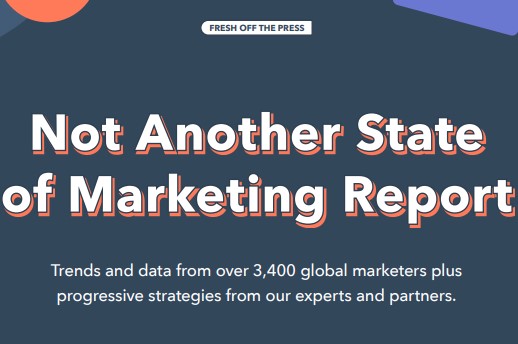
Every year, HubSpot publishes a survey on the state of marketing to provide helpful guidance based on thought leadership to marketers, sales professionals, and business owners. Inside, readers find statistics from a broad survey as well as industry experts’ opinions on what the data means and where the industry is going.
Checklist
For tasks that are complicated and have a lot of moving parts, individuals may simply want a blueprint that spells out what they’re supposed to do to achieve their end goal.
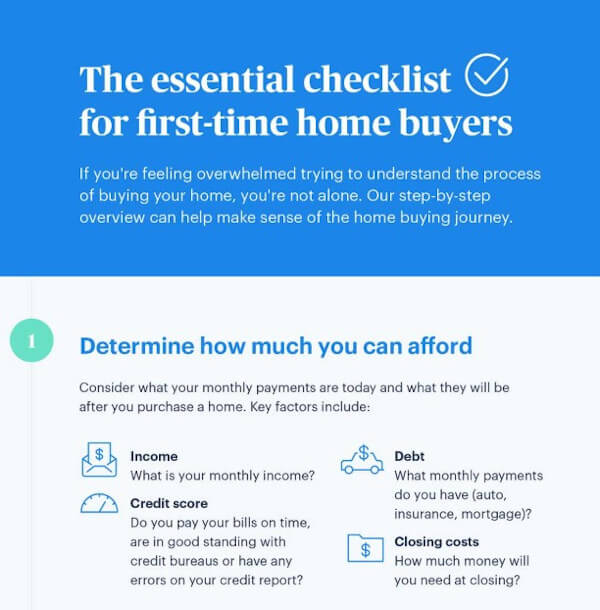
Buying a home is a perfect example of this, and Opendoor meets their audience’s need by providing a handy checklist (in infographic form!) for the reader that spells out all the steps that need to be taken. The graphic is aesthetically pleasing and even allows room for a few tips along the way.
How-To Video
Sometimes, the best way to solve a pain or problem is to learn a new skill. Sure, a purchase of some kind may be required along the way, but the audience may need to become more informed about the problem and how to solve it. That’s where instructional video content comes in.
Whiteboard Fridays is a popular video series by Moz where SEO principles are broken down to the audience in easy-to-understand language and visuals. Moz knows that SEO is a difficult subject and aims to make it accessible to their viewers.
Kit or Tool
Informational content provided to a broader audience may not always be enough for your buyer persona to make a decision or take action of some kind. In some cases, they may require a little more utility or personalization. That’s why kits and tools are a great piece of content to create to help the reader along their path to purchase.
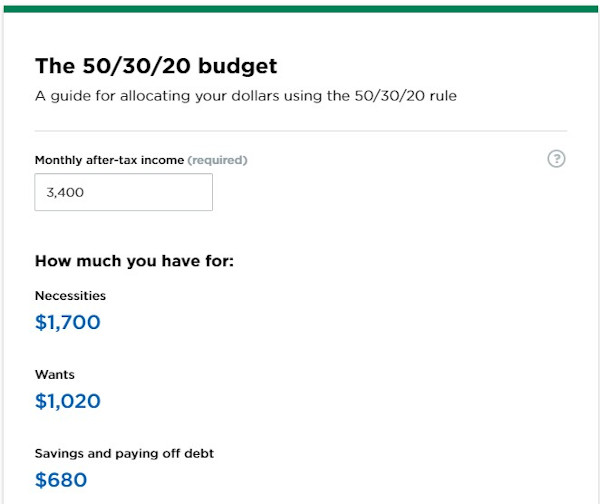
Nerdwallet creates content around several financial topics, budgeting being one of them. It can be difficult to create a budget, though, so they developed a calculator that allows the user to provide their own numbers in order to receive a customized recommendation.
Ebook or Tip Sheet
Similar to whitepapers, ebooks and tip sheets are great options for downloadable content. In contrast, they tend to be shorter form and more actionable.
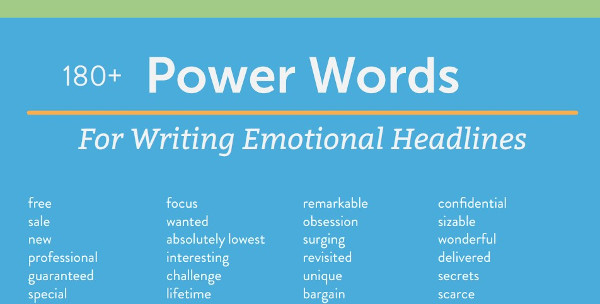
CoSchedule combines a few tactics by promoting their headline analyzer tool with a blog post about writing great headlines that drive traffic. On that blog post, they include a great tip sheet of powerful words to include in headlines if you want to catch a reader’s attention.
Educational Webinar
A webinar is a web seminar where information is typically provided through video. A webinar can be prerecorded or streamed live, and this opens up tons of possibilities to disseminate information to an audience who wants more visual and auditory content.
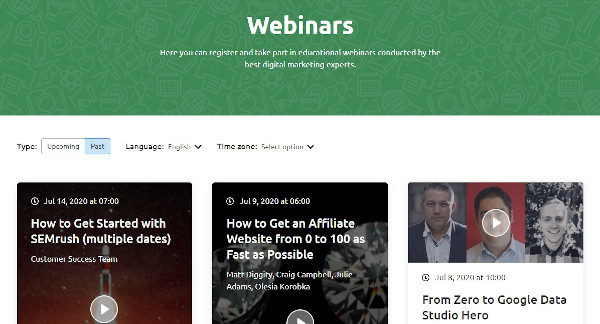
SEMrush makes webinars a key part of their content marketing strategy, often running a valuable topic multiple times to get more mileage out of the content.
Product Comparison Guides
In the consideration stage, the buyer persona is still considering solutions to their pain or problem. For this reason, product comparisons are a great way to help them make a decision.
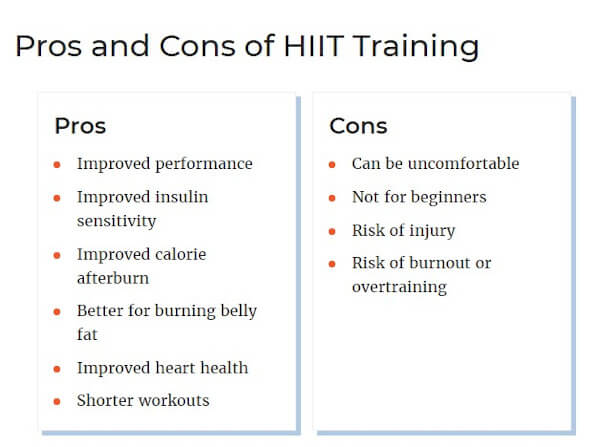
Verywell Fit provides such a comparison to help their readers choose between high-intensity workouts vs. steady-state cardio, providing the pros and cons and use cases for each.
Case Study
A case study can be used in both the consideration stage and the decision stage simultaneously by convincing the reader that the solution works by establishing that the provider achieves results for their clients by administering the solution. A good case study will appeal to the emotions and logic of the persona by providing detailed information and quantitative data on the final solution.
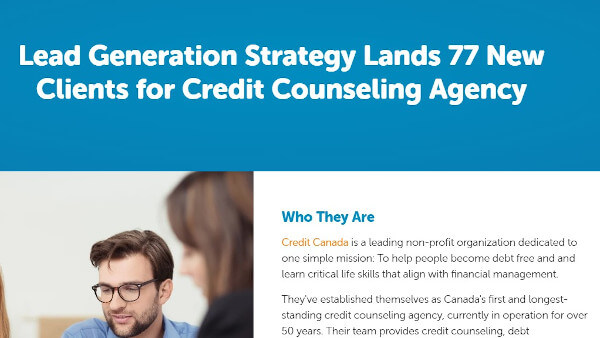
HubSpot Partner Agency Blueleadz does this by telling a story about their client and the problems they had while providing a detailed account of how they solved it.
Free Sample
A free sample is another example of content or an offer that overlaps between buyer’s journey stages. Consider this: An individual wants to paint the inside of their home, but they don’t know what color.
As they consider which color (the solution), they pick up paint chip cards from their hardware store. These cards are created by a provider based on their individual solution. When the individual falls in love with a color, they already know who the provider is that makes it.
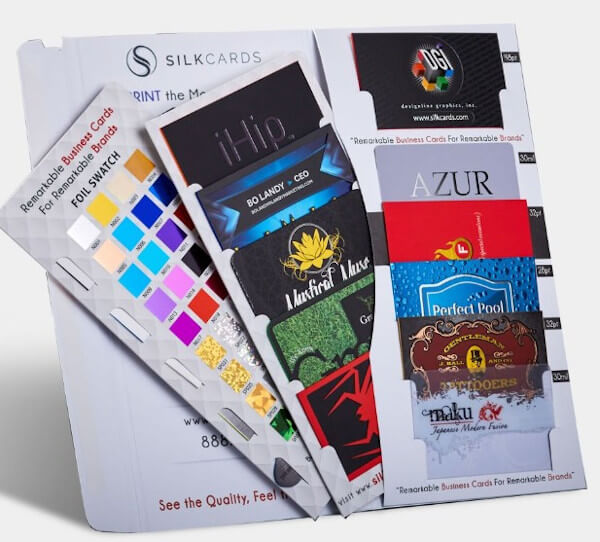
SILKCARDS taps into this buying behavior by offering samples of their unique printing methods on the content that they create. They know that their business is tactile, and digital content alone is not enough to close a deal. Once their prospective customer holds the sample in their hands, other business cards are put to shame.
Free Trial or Live Demo
What better way to know if you want to purchase a product than take it for a spin? Car dealerships have been using the “test drive” tactic for years because it works. If the product itself checks all the boxes the buyer has, all the sales team has to do is handle their objections and make the close.
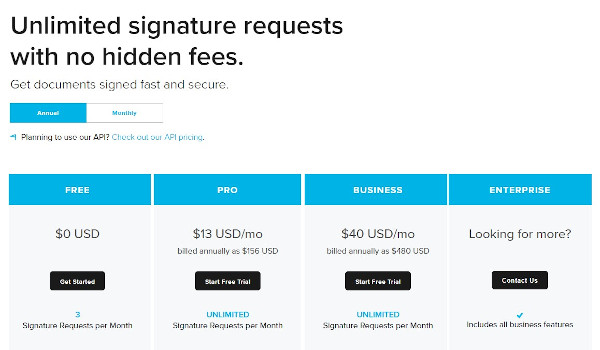
Hellosign does this well. Though they have a free option with limitations, they know that the key to getting clients into their larger tiers is by offering a free trial upfront. Their pricing page sets the prospect’s expectations and points them to the free trial.
Consultation Offer
A consultation is another example of providing just a little bit of service in exchange for the opportunity to close the sale. The best consultation offers reduce the anxiety of entering into a sales conversation by promising something concrete they can walk away with (a strategy or actionable advice) in exchange for their time.
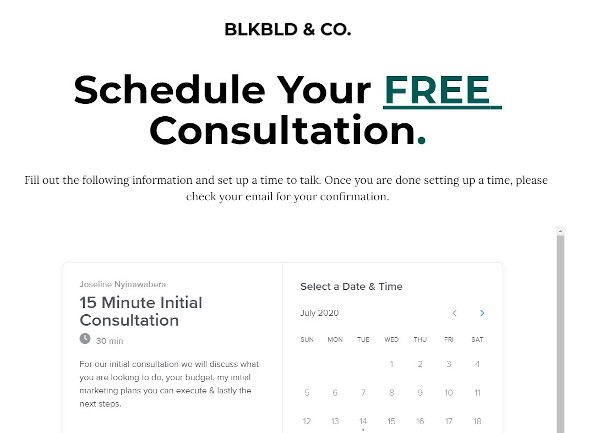
Blk Bld & Co.’s consultation offer is a great example because it reduces the friction of scheduling a consultation. By removing friction, this organization increases the chances of conversion.
Coupon
A coupon appeals to a fear of missing out (FOMO) mindset. By reducing the price by a certain amount, a coupon is handing a price objection while convincing the prospect that they’re leaving money on the table if they don’t use the coupon. This inertia enough to win the prospect’s business.
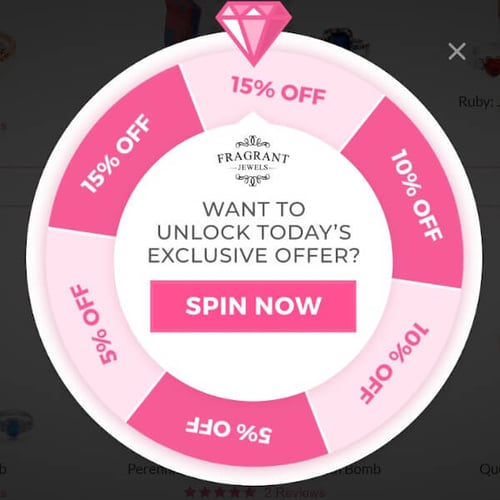
Fragrant Jewels does this well by gamifying their coupons. By spinning the wheel, the website visitors have the chance to get a coupon before checking out the products. They’ll likely be evaluating the products that are a good deal with the coupon they won.
In addition to decision stage content, you should also create content to delight your existing customers. This may include FAQ and knowledge base content to make the customer experience easier, coupons for the opportunity to upsell, and additional educative content that deepens their understanding of a topic.
Mapping Content Across All Stages of the Funnel and Buying Cycle
Every business has a unique sales funnel, sculpted and designed around their buyer’s unique journey. It’s a recipe that can’t necessarily be replicated from one business to another. When creating your own buyer’s journey, there are a number of factors specific to your business to take into consideration.
That said, the general approach remains the same: Understand your audience, develop your funnel around your industry and audience intent, and create a documented content marketing strategy that maps custom content specifically to each phase of their journey through the funnel.
Do it well, and this process will have the greatest possible impact on your customer relationships, as well as the greatest possible lift in your overall conversions.
Editor’s note: This post was originally published in August 2016 and has been updated for comprehensiveness.

The Optimal Instagram Story Dimensions [+ Tips for Best Quality]
New social media sites continue to emerge, new features are added, and algorithms are always being updated, making it tough to keep up with social media best practices.
However, social media is here to stay. According to Instagram, there are more than one billion active users monthly and more than 500 million Stories active every day.
In fact, Instagram Stories are a popular trend that isn’t going away. Pamela Bump, audience growth writer at HubSpot, writes about Instagram Stories in this blog. She says, “Instagram Stories serves as an outlet for brands to creatively show their products, services, or happy customers in action. Branded Instagram Stories also enable audiences to learn more about topics related to your brand’s industry. Helpful and valuable content might also allow prospective buyers to trust your brand more.”
With this knowledge, you want your marketing team ready to develop a strategy for your Instagram Stories. To create this strategy, your team should decide what kind of images or videos they want to post. How do you plan on taking those images? With phones or professional cameras?
Below, you’ll learn the Instagram Story dimensions and why it’s important to add Instagram Stories to your strategy.
How do I fix the quality of my Instagram Stories?
You might be asking, why do you need to know about the specific Instagram Stories dimensions? There are instances in which you might find that your Stories aren’t uploading with the quality that you’d like. The following tips can help you isolate the problem and improve the look of your brand assets:
1. Ensure your content is high-quality before you upload.
Instagram will compress images during the upload process, so an already grainy or pixelated image will only get worse it gets to the platform.
Check that your images are at least 72 ppi resolution and clear on your computer before you add them to Instagram.
2. Upload the right size and shape.
Instagram is strict about adhering to its dimensions in order to ensure quality photos and videos. When you upload a vertical image or video from your phone, you most likely won’t have to think about these dimensions because Instagram will automatically format them.
However, if you have horizontal photos that don’t fit the dimensions, Instagram will crop your photos, zoom in on content, or zoom out (making your image look small and placing it on a background). This typically results in lower quality images and videos.
3. Use photo editing apps.
Photo editing apps can help you control the quality of your Stories and ensure you’re always using the right dimensions. In order to edit your photos for Instagram, you can use sites including:
- Canva: This is the perfect option for creating images for your Instagram Stories. To get started, Canva has templates that are designed with the Instagram dimensions in mind. Canva offers free and paid plans.
- Lumen5: This software makes it easy to produce videos for Instagram Stories. Once you get started creating a video, you can choose the right dimensions on the platform. Lumen5 starts at $19/month.
- Easil: Easil has templates for Instagram Stories to help create engaging content. They have templates for single images, and multi-card Stories as well. Easil offers free and paid versions.
- Adobe Spark: Adobe Spark makes creating images and video graphics for Instagram Stories easy. You can build your own Stories with their typography and imagery options. Adobe Spark has free and paid plans available.
- Embed Social: Embed Social is a different kind of tool for Instagram Stories — with Embed Stories, you can make your Stories Shoppable by adding CTAs, and creating embeddable code that you can add to your website. Embed Social offers free and paid plans.
With these tools, you can input the specifications, upload images and videos, and complete the editing process. These work well if you have higher quality images taken with a camera or want to add graphics or text to your images or videos.
Here’s what the process would look like for Canva. Click on “Templates” and choose “Instagram Story” to see templates that are the right dimensions for Instagram.
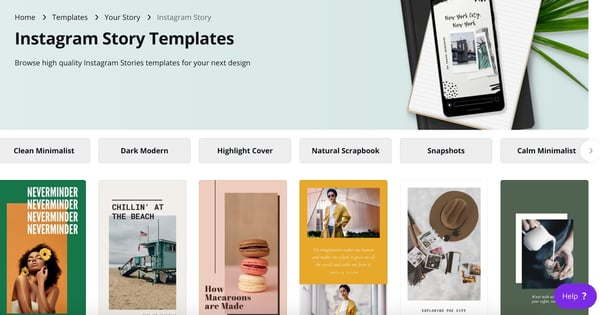
Image source: Canva
4. Check if the quality is better on other devices.
If your internet connection is poor, Instagram stories will appear lower quality than the would on a faster connection.
Instagram does this to save resources for user experience as you interact with other areas of the site. Consider asking someone you know if the quality is low on their end as well. They — and your audience — may be viewing your stories with no issues.
5. Turn off Data Saver.
Data saver is a feature that prevents videos from loading in advance, which helps reduce your data usage.
If your connection is fine but you’re still having issues with quality, this feature may be lowering the quality of your feed on your end.
6. Test photos from different cameras.
As a last resort, test whether there’s a difference in quality between your phone’s integrated camera vs. the Instagram camera. The photos you take with your phone’s camera vs. the in-app camera (or vice versa) may weather Instagram’s compression settings better.
Stats & Tips You Should Know About Instagram Stories
Why should you care about Instagram Stories? Here are a few stats from Instagram:
- 90% of accounts follow a business on Instagram
- More than 1 billion Instagram accounts worldwide are active every month
- More than 500 million accounts use Instagram Stories every day
Sophia Bernazzani, HubSpot blog writer, wrote about how to use Instagram Stories for business in this blog. She says you can use Instagram Stories to:
- Post footage of an office event
- Post breaking news about your industry
- Demonstrate your product
- Promote a company event
- Preview one of your company’s blog posts
- Mention other companies who follow or work with yo
Using Instagram Stories is a tactic that all marketers should consider. With active and engaged users, using Stories can improve your discoverability and increase brand reputation and awareness.
Editor’s note: This post was originally published in October 2019 and has been updated for comprehensiveness.

How Broadcast Journalism Helped Me Pivot to Social Media Management
Pivoting from a career in broadcast journalism was a big decision for me.
I loved everything about a newsroom environment: the breaking news, researching topics, identifying sources for stories, and feeling like I had a pulse on trends and issues taking place in the world.
I was successful at it, too. In fact, I worked at some of the biggest news corporations in the world, including CNN, ABC News, CBSLA and others.
However, at some point — because I was spending so much time on social media listening for breaking news and looking for story ideas — my interest in social media evolved.
I knew I wanted to make a transition, but I was scared of taking a leap and pivoting to social media marketing.
Today, I can tell you that I’m so happy I did. I learned that my job is not my entire identity, and through journalism, I have so many transferrable skills to thrive in any industry.
Switching careers can feel exciting, but comes with feelings of self-doubt and anxiety.
Here, I want to highlight how broadcast journalism helped me succeed in social media, and tips you can use if you’re considering a career shift of your own.
7 Takeaways From Journalism You Can Apply to Social Media
1. Ask the 5 W questions.
Who? What? Where? When? and Why? These questions are ingrained in any journalist.
The foundational questions to news gathering also apply in the context of content creation, marketing plans, and any content strategy. For instance, any marketer likely asks these questions daily:
Who is this message for?
What is the core message we want them to take away from this?
When (and where) are they most likely to be to consume this message?
Why should they care?
“Why” also goes a little deeper in social media. The internet is flooded with information and it’s your job to capture someone’s attention — and hold their attention for your content.
Why would someone click on this ad?
Why are we targeting this group?
Why is it important that they see this message?
The root of these questions have helped me cut through the jargon of promotions and company announcements to get to the root of the message in the simplest words.
Pro Tip: In journalism school, I learned to simplify the facts by “explaining this story to my mom.” This framework has really helped me simplify information down to its core. I practice this often when trying to take a complex company announcement and whittle it down to its simplest takeaway.
2. Focus on the core story, not the details.
When it comes to creating content, journalists have a unique element they bring to the table: storytelling.
Some people may get caught up in numbers, the tagline, a paragraph in an announcement, and so on.
As a former journalist, I think about the core of the message we want to convey in a social post.
The key takeaway could involve visual elements and emotional triggers, but its foundation will include a concise message or story.
3. Keep up-to-date on industry and competitor trends.
The advantage journalism has provided me when it comes to conducting research is that, even if you have an intuitive sense of your audience, your journalism instincts still compel you to “look into it” and confirm your hypothesis.
For instance, for conducing market research — including what my audience is feeling, thinking, struggling with, dreaming of, reading about, etc. — I put my “investigative” hat on and look within Facebook Groups, or other websites where people can leave comments or questions (such as Quora or Amazon reviews) to gather information about what my audience is seeing, thinking, and feeling.
Additionally, a couple of keyword searches gives me a framework to work with while doing research.
Referring to the latest studies, trends, and reports helps me identify any overlaps and enables me to be a successful social media professional because I keep a pulse on issues that are top-of-mind to my audience.
A little research goes a long way in social media content and writing.
Journalists are naturally curious people, so we sometimes find ourselves entertained by trends and topics that get people talking. We like to quickly parachute in on behavior like this and figure out what the hype is all about, source who started it, and figure out why it’s taking off.
It’s amusing, to say the least, but this innate skill in journalists has helped me in social media because I can (for the most part) keep up with the latest memes, videos, or other trending news that’s popular that day or week. It also helps me recall previous news events or trends that were popular in the past.
Context of topics, audiences, and trends helps me while making editorial or marketing decisions and creating content.
4. Create quality content, even with minimal assets.
When it comes to content creation, journalists have had to work with little or major constraints when it comes to telling a story. You might have only a few usable sound bites, poor video quality, or you’re working with only sound.
Broadcast journalism helped me feel comfortable with improvising and maximizing any assets available.
I learned how to do video, audio and photography editing. I learned different storytelling formats such as radio, TV, print, and online, as well as how to distinguish each piece (i.e. infographic, video, blog post, listicle) and how to adapt them to different social media platforms.
I learned to do this in the most concise way possible, which helped me tremendously while writing short headlines and easy-to-understand text that includes a call to action.
5. Write concisely, and make every word count.
Whether it’s copywriting, writing in a brand’s voice, creating catchy headlines and titles, creating copy that converts a user, incorporating a call-to-action, or enticing a reader to learn more … it’s all important in social media.
Broadcast journalism helped my social media career with my writing skills alone. Ultimately, packaging information in a concise way is so important in social media.
Twitter has a 280 character limit. However, I’m proud that I learned how to write tweets when it had a 140-character limit — including character counts toward photos, videos, and GIFs that were attached!
Brevity is always a best practice when it comes to writing on social media, and broadcast journalism has helped me succeed in that regard.
Effective writing helps your audience understand you, what you offer, and your value and is a critical skill for attracting an online audience.
Pro Tip: Practice reading your words out loud to catch typos or awkward sentence structures. I learned this while writing copy for TV news and it has helped me tremendously while crafting social media posts.
6. Learn how to communicate effectively in crises.
Social media is an extension of any brand, and understanding when something is a reputational risk is important.
My career in broadcast journalism helped me identify potential pitfalls or anticipate remarks people might make. The last thing I want to do is appear tone-deaf or miss the mark with marketing messages.
Working in broadcast journalism has trained me to never lower my guard and always keep my eyes open for threats or liabilities in social posts, marketing campaigns, and imagery.
I also understand news cycles, and during a crisis, I’ve learned how to evolve and adapt to new circumstances and information.
For example, during a crisis such as the COVID-19 pandemic, there were different phases of crisis communication companies needed to understand. It was important to pause, pivot marketing and messaging, and identify pain points and re-position your brand, among other things.
Working with so many PR and marketing professionals over the years taught me about how to “own the narrative” of a brand’s story and to serve as a brand steward on social media.
7. Stay resourceful and help your audience find answers to their needs.
I say I’m a digital content strategist, but really, I’m a professional problem-solver.
If I don’t have an answer, I’ll either find the answer or find someone who does.
Broadcast journalism taught me to be resourceful, help my audience with valuable and actionable information, and think quickly on my feet and pitch smart angles.
I’ve come across so many random scenarios while working in social media, including:
- Converting and transferring files
- Helping people with their wifi
- Syncing folders on Sharepoint
- Identifying fonts
- Pitching a story on behalf of the company
- Finding alternative channel or format to communicate a message
- Sourcing video to its original owner
You name it, I’ve probably helped someone figure something out, and because of it, I’m an invaluable asset to my team and my company.
I solve people’s problems (in person and online) which makes me feel like I’m doing a great social service.
Journalists have a big opportunity in the marketing, social media, content strategy, storytelling and advertising space — if you are on the fence, I encourage you to take the leap.

Lights, Camera, Action: How to Record a Webinar Worth Replaying
A few short months ago, I discovered the beauty of webinars.
I love to learn more about the marketing industry. Every chance I get, I’m on LinkedIn searching for engaging content that teaches me something new about social media or content creation.
And my favorite way to learn is by watching a webinar.
By taking an hour out of my day, I can gain valuable insights from industry experts about virtually any topic. In most cases, I’m introduced to a new thought leader in the space, as well.
The only downside to webinars is that a lot of them are live events. Most of the time, my schedule doesn’t allow for a “One-time only” experience, so I miss out on a lot of compelling webinars.
Fortunately, there’s a simple fix around that: Recording them.
If it sounds like a lot of extra work to record a webinar, edit, and figure out where it’ll live post-launch, don’t worry. This post will show you how to do it in five easy steps.
Ready to get started and press “Record”?
Why record webinars?
Webinars are a fantastic addition to your content marketing toolkit. Though they take time to produce, they can be extremely valuable for your audience. They’re basically vocal eBooks — They present educational lessons in a fun, engaging format.
For example, this webinar is a short, insightful discussion about how to manage a remote sales team:
You might want to consider recording your webinar for a couple of reasons. First, recorded videos can be edited. If this is your first time hosting a webinar, it might be useful to host it with no audience,. so you can make small tweaks.
Recorded webinars are also useful because they are accessible. If you decide to host yours during a time your audience can’t attend, recording the webinar ensures they can still catch the information.
Regardless of whether you’re a webinar pro or a beginner, there’s some extra things to keep in mind before you hit that “Record” button. Read on to learn more about recording, exporting, and sharing a webinar.
1. Choose proper video hosting software.
After the plans to record a webinar are set, the next step is choosing a platform. A lot of platforms are similar as far as what they offer, but go with one that will let you record and export. It’s a good idea to look for one that will also record for a longer time.
Some recording tools are only built for certain operating systems, so make sure yours operates on multiple different systems. Most platforms you’ll find work on both Mac and Windows devices, but keep a watchful eye as you’re researching.
Vidyard and Zoom are good places to start. Both offer recording options and are easy to use. You can also record, export, and upload videos from these platforms onto web pages. Alternatively, check to see if your computer comes with recording software, like QuickTime — it’s possible you won’t have to download a new tool if your computer already comes equipped.
Ultimately, choose one that will let you do everything you need. If you have to share your screen or ask for audience participation, make sure your software has those capabilities.
2. Decide where you will record.
The setting or background of your webinar shouldn’t be disrupting. If your attention can be taken away by something near you, so can your audience’s. Choose a place to record your webinar that’s quiet and fit for a professional presentation.
A quiet space with little outside distraction is going to be your best bet. If that’s hard to accomplish, try to change your setting so it’s more fit for a webinar. Think about what you want the background to look like in a video that will live past its original recording date.
For instance, if the space you have includes a bright green poster and some laundry in the background, take the poster down and move the laundry. Ultimately, you’ll want to present a space that won’t take away from the lesson.
Alternatively, if you decide your space isn’t camera-ready, you don’t have to show it. Turn your camera off and let the presentation be the visual, like this one from Facebook. If you go this route, though, you’ll likely need an animator or designer to make sure your presentation is engaging enough to keep the viewer’s interest.
3. Perform a practice version for mistakes.
Before you officially record, practice using the software. Familiarize yourself with how to export and upload a video so you’ll be comfortable when the time comes.
Practicing the full motions of the webinar helps with presentation and flow. When you watch it back, you can gauge how you come across, how you’re speaking, and the impact of the lesson. Additionally, you’ll see how to remedy technical difficulties — If it took you a little long to find Zoom’s “hand raiser” tool, for instance, you can practice the motion to speed up the process.
If you’re thinking that you won’t have time to fit in multiple test runs, don’t worry. You won’t need the full hour to practice your presentation. Instead, record the section you’re most unsure about — that way, you can tweak things to make it better.
Alternatively, maybe your test run tells you that you need more help with the creation part. If that’s the case, head on over to this guide for making a compelling webinar of your own. Otherwise, after you’re comfortable with your setting and presentation, you’re ready to record the real deal
4. Edit your presentation for professionality.
Recorded webinars aren’t live, and because of that, things don’t stop when it ends. After you finish your presentation, end the recording and then, export your video and watch it for any mistakes.
Small mistakes, like a fumble on words, are normal. If you come across them, don’t feel as if they should be edited out — after all, humans slip up every day. However, glaring mistakes, like recording the video too early, should be edited.
The great thing about recorded webinars is that you have the option to edit. And, if you’re not recording for a live audience, you have more room to tweak the final version. Look at your work before it goes up for the world to see so you and your company are represented professionally.
Additionally, if you need to change anything about your presentation based on timing, you can trim certain parts. If you’re recording it live, take note of any audience participation exercises that might be easy to replicate after the live version. Trivia questions can be fun past the live taping of the webinar, for example.
5. Share your webinar.
Now, you’re ready to share your recording! You might have a plan for how you want to distribute it — especially if it’s an event for your customers. But, if this is a stage you’re stuck on, here are some ideas for sharing.
Webinars have the great advantage of being extremely sharable. Even though it’s a long format, they usually contain highly valuable information that audiences want to see. Plus, video is an incredibly popular format and often does better than text for attracting a large audience.
1. Landing Page
Create a landing page where your webinar will live. It’s convenient to do this, as you can track page performance. You can use the extra space of a landing page for copy explaining what viewers will gain from the webinar, or helpful resources that relate to the lesson.
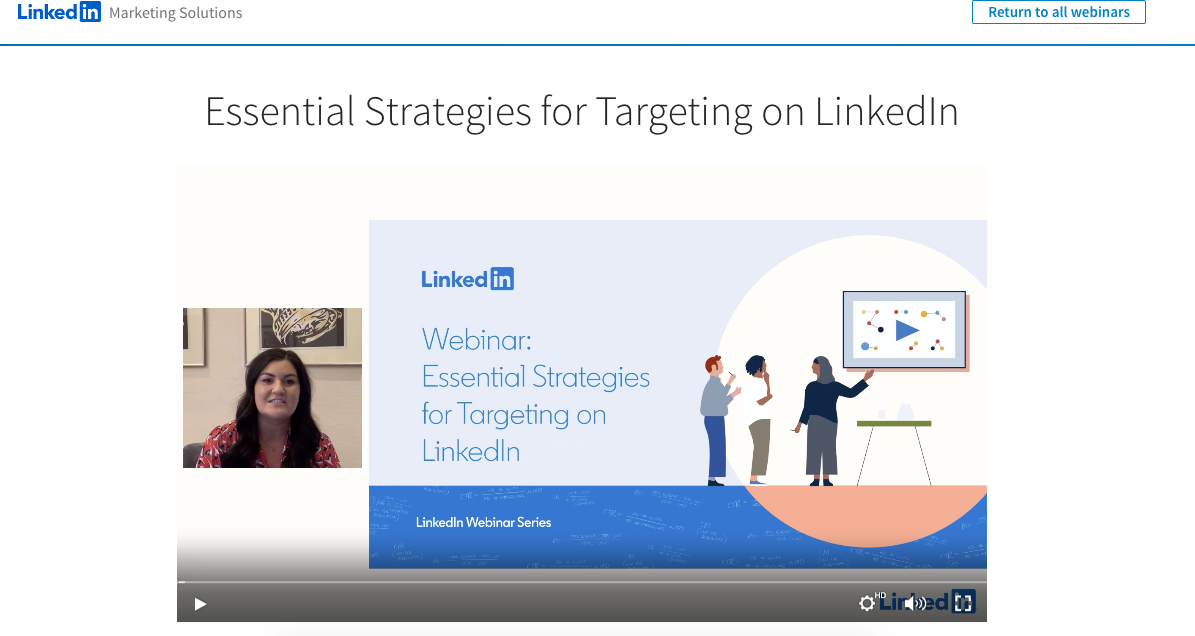
This one, from LinkedIn, is very minimal. Below, there’s a short description of the webinar, as well as background about the platform itself. Your page shouldn’t be busy, just informative. Tell the audience what they’ll get out of the lesson.
2. Social Media
Share your webinar with your followers to increase traffic. For example, this one, about a dental tool, was shared on Facebook:
LinkedIn is a popular social networking site for webinars because of its unique emphasis on professional content. If you go that route, it’s likely you’ll find qualified leads. Ultimately, though, go where your followers are. For instance, if most of your traffic comes from Facebook, choose Facebook.
3. Email Marketing
Don’t forget to remind your audience about the recorded webinar. In weekly newsletters, hyperlink the video. Your content will get more views, and your customers will love the extra content in their inbox. Check out the one I got last week, for instance:
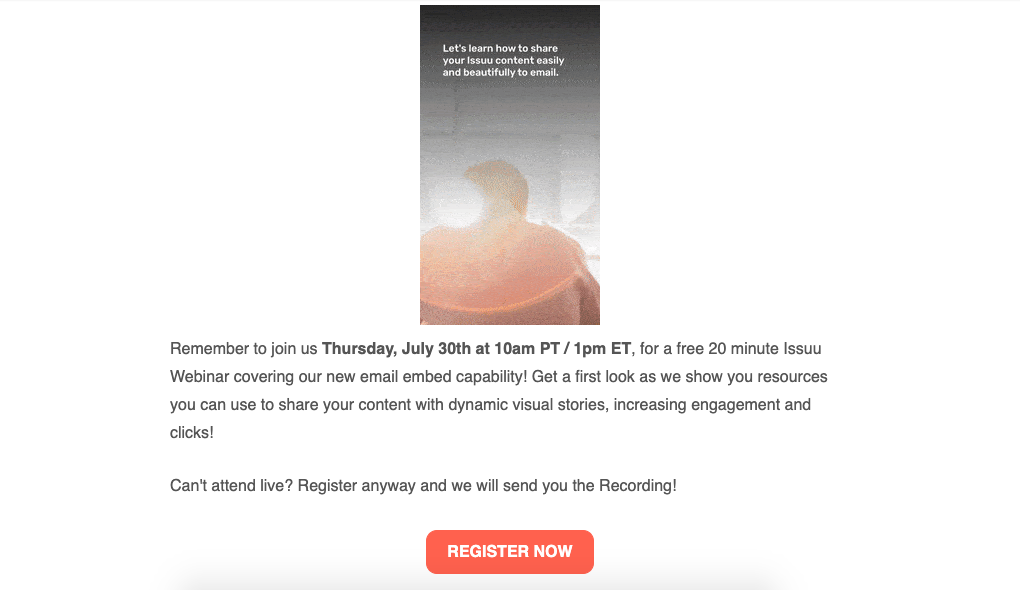
Before the email, I had no idea the webinar was happening. Even if you promote the webinar, you can’t catch every customer with just a couple of channels. Leverage multiple messaging channels to maximize participation.
4. Blog Posts
Webinars can live in multiple spaces on your website. If your recording was about social media marketing, and you have a guide on the subject, consider embedding a snippet of the webinar onto the post. You’ll snag more traffic that way, and make the piece itself more actionable.
Let’s look at this example:
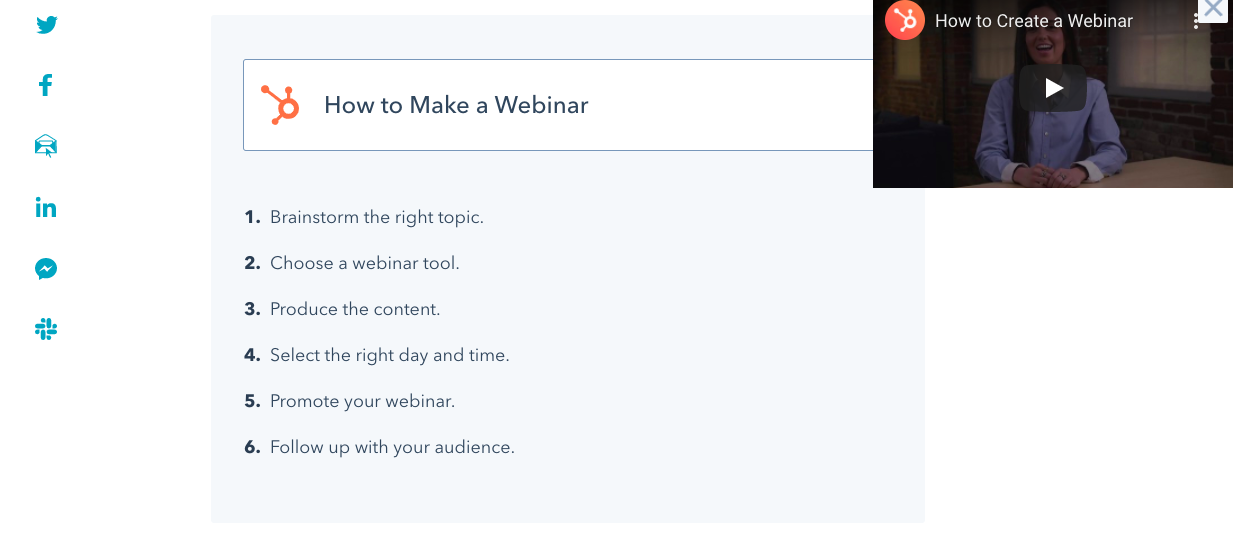
Here, we see the webinar added to the blog post to make it more engaging. Readers who want the full run-down can follow along with the post. Additionally, those who are visually impaired will find value in being able to hear the topic explained in an accessible format.
Webinars diversify the content you offer. Recorded ones are great for accessibility and extended value. Long after the initial recording, you can still earn leads from them.
Every day on my lunch break, I have a recorded webinar queued up and ready to go. The next time I’m scouring the internet, looking for the next winner, will I see yours among the rest of the amazing content?

How Using Humans And Chatbots Together Generated 182% More Qualified Leads
This post is a part of Made @ HubSpot, an internal thought leadership series through which we extract lessons from experiments conducted by our very own HubSpotters.
Prospect expectations for businesses have never been higher — in fact, according to Google, 61% of people now expect brands to deliver personalized experiences.
At the same time, the amount of people who want to reach a business through messaging continues to rise. Which means keeping up on chat can be tough, even for well-trained teams.
At HubSpot, we felt the brunt of that pain in early 2018. We have a specific sales team that handles chatting with people on our website. At the time, we’d been using live chat across most of HubSpot.com to engage with prospects in a way that felt natural.
Unfortunately, sales leadership began noticing we were losing out on valuable, high-intent prospects who were attempting to reach us via live chat. We simply didn’t have a guaranteed way of ensuring their needs were addressed by a member of our team — which meant we were losing out on potential sales, big time.
When my marketing team at HubSpot connected with the sales team to discuss the issue, we recognized live chat alone no longer suited our needs. To appropriately communicate with each prospect and create that highly personalized experience our website visitors crave, we needed to scale our sales team’s productivity with a chatbot.
Here, we’ll explore why we decided to build a chatbot, how we designed the experience, and why it might be an outstanding solution for your own business in 2019 — and beyond.
Why Live Chat Didn’t Work For Us
When the live chat sales team reached out to us, we knew we needed to make the team more efficient.
Live chat in-and-of-itself wasn’t a problem — but, unfortunately, we weren’t tailoring the conversations to the visitor and their problems. We knew sifting through each and every visitor’s inquiry was the right thing to do, since it helped solve for the customer and answer any prospect’s questions.
But, since they all fell under the same bucket, it became increasingly difficult for the sales team to keep up. And for the majority of people who didn’t leave us with a way to get back in touch, they were gone forever.
At one point, over a third of the people who chatted with us
never heard anything back.
Additionally, hundreds of the chats we received each month were from users who simply needed product support. This ate part of our sales team’s valuable bandwidth, making it harder for them to get in touch with site visitors who actually needed to speak with a sales rep.
Ultimately, this poor experience added unnecessary friction for our site visitors and sales reps.
Why We Decided to Build a Chatbot
After some internal discussion, we set out to build a chatbot that would engage with visitors, triage them, and get them to the right place, sooner. This would be a win-win for both visitors to our site, and the sales team.
To figure out what this chatbot should do, we first looked at live chat transcripts. They’re an invaluable resource when doing conversational marketing, since you can hear in the prospect’s own words what they want to do. There are technical ways to classify chats (like natural language processing), but a qualitative approach is fine to start.
We then bucketed intents from live chat into three buckets — sales, support, and a catch-all “other”. To start the chatbot, we prompted people to select the topic that best matched their intent.
After speaking with our support team, we learned that getting technical help with a product while on the website can be tricky. There are rich and thorough resources better-suited for getting these kinds of answers. So, rather than keeping someone in the chatbot, we used what we know about them in the CRM to point them in the right direction. The chatbot would look at their contact record, and then serve up a contextual web page depending on the products they were using.
Even though our prospects couldn’t connect with a human right away, we set them up for better long-term success.

Next, we recognized a large percentage of the people who interacted with live chat did, in fact, want to talk to our sales team. But that didn’t mean trying to connect them to a human right away was efficient for either group.
We interviewed and observed the sales team to understand their experience with chat. Right away, we noticed each sales rep needed to know three key facts about the user to tailor the conversation to their business — name, email, and website.
The sales team said in an ideal world, they wanted this context before chatting with a prospect — an issue we knew a chatbot could solve. We programmed the chatbot to collect this information in a natural, contextual way.
Additionally, we knew a prospect would become frustrated if they needed to repeat themselves — in fact, NewVoiceMedia found it to be the most frustrating aspect of customer experience. To combat this issue, we again checked the CRM, and if you’d ever filled out a HubSpot form, we’d skip the questions altogether.
Collecting this information up-front enabled the sales team to spend more time selling, and less time chasing down email addresses.
Our Results
At the beginning of this project, our main goal was to deflect support-related chats away from our sales team. But, even as someone who has been building chatbots for almost four years, I’ll admit — what we saw was shocking.
When compared to live chat, 75% more people engaged with the chatbot.
Additionally, over 55% of people gave real answers to the basic qualifying questions and reached a human. While the drop-off there may seem steep, sifting out low-intent people proved incredibly helpful for the sales team.

Ultimately, our chatbot’s success came in a few ways — first, the chatbot anticipated the next step of the conversation and used quick replies to drive a visitor forward. Opening up a chat and clicking a contextual button has less friction than typing in a text field — now, people didn’t need to come up with the first message themselves.
It makes sense that multiple choice options drive more engagement. Think of it this way — when you meet someone new, often the hardest part of the conversation is the beginning, when you’re trying to think of something to say. But once the conversation starts rolling, things become smoother.
The same is true for our prospects when they engage with a chatbot versus live chat.
Additionally, 9% of people who chatted with the bot needed support help — we were able to deflect those visitors away from humans in a helpful way, serving up the best place to get answers to their questions quickly.
It’s important to note when designing conversations, the hardest and most overlooked aspect is to write like a human. As consumers, we rarely process in our heads that we want to “talk to sales”. Instead, we only know we want to talk about “products I’m not yet using”. Writing with the “jobs to be done” in mind is a great philosophy for conversational design.

Takeaways for Your Business
At the end of the experiment, I’ve found a few takeaways that can help you and your business succeed, as well.
First, chatbots are a great opportunity to meet your visitors where they are. If you want to get started with a chatbot, look at chat transcripts, or interview your sales team to understand the types of questions people typically ask. Bucket those questions into a few critical categories.
Also, it’s critical you and your team think through and anticipate the best way to help those various buckets of people. The more you can personalize — perhaps through your CRM — the better.
Ultimately, using a chatbot to get people the help they need is a huge win for both your prospects and your business. In our case, site visitors now had the best resources for their support issues, and our sales team was able to capture more qualified leads.
The best part? Both sides did this in a frictionless, efficient way.
Editor’s note: This post was originally written in February 2019 and has been updated for comprehensiveness.

How HubSpot Personalized Our Chatbots to Improve The Customer Experience and Support Our Sales Team
This post is a part of Made @ HubSpot, an internal thought leadership series through which we extract lessons from experiments conducted by our very own HubSpotters.
You can’t talk about the future of marketing without chatbots. People are increasingly interested in communicating with brands in a more personal, conversational way — and chatbots can help.
Including chatbots on your website helps visitors find what they are looking for and connect them with your team in an immediate, frictionless way. Chatbots also follow the Inbound Messaging Framework.
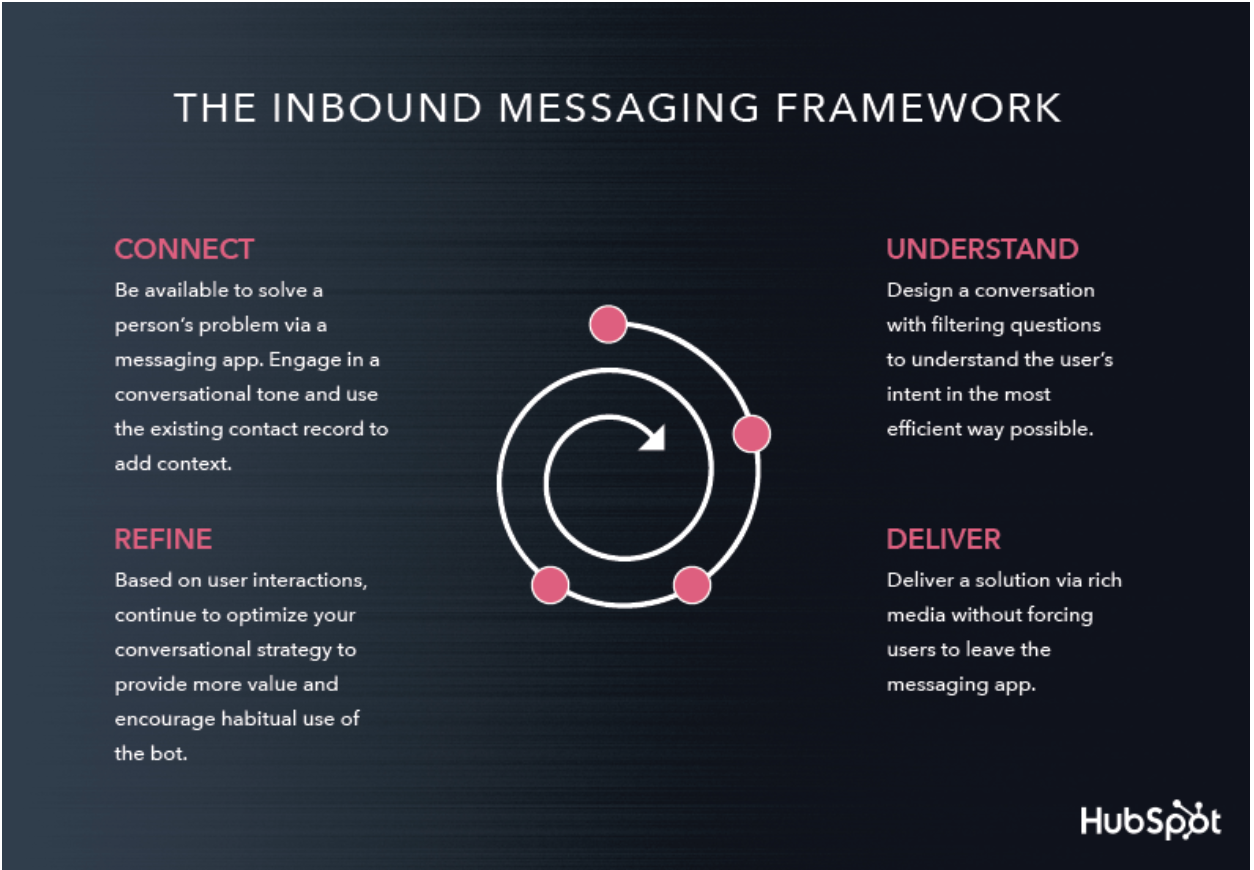
So, what are the secrets to building a chatbot strategy?
On HubSpot’s marketing team, we seek to deliver a world-class customer experience. We consistently ask: How can chatbots better serve our various audiences (visitors, leads, and customers) to help direct them to the right resources for their needs? Also, how can we use chatbots to support our sales team and reach our goals?
A Customer-Focused Bot Experience
Chatbots work when they’re contextual and relevant to specific problems folks are having. Through conversations with our sales team, we learned that 15% of chat questions on the website were about getting technical support. We were creating friction for our customers because our sales team (who answers chat questions onsite) is not as well equipped to answer these questions as our support team is.
So, we created a bot to direct our customers to the right resources for technical support (our support team, knowledgebase, and community). If they were not looking for technical support, we passed their questions about HubSpot features and pricing to our sales team.
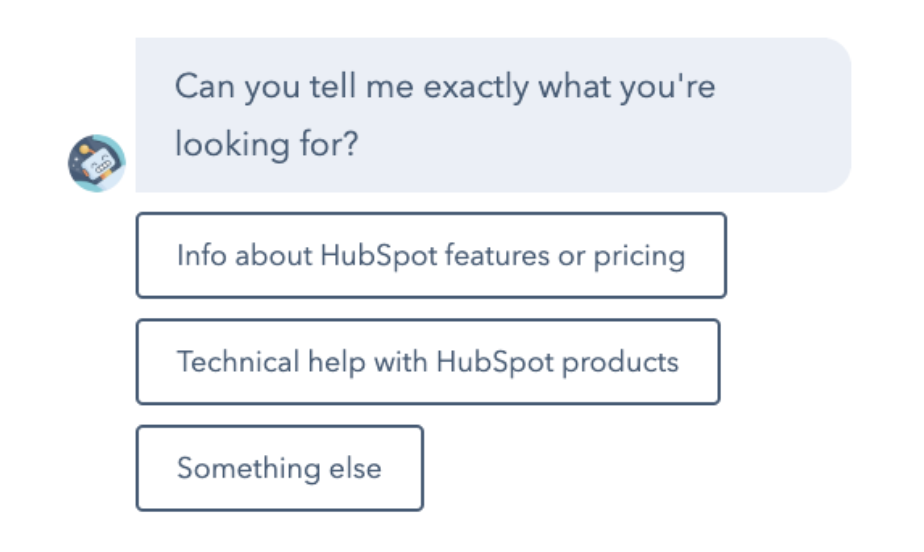
We rolled out these bots across the primary site pages and saw an 80% increase in our sales team efficiency: a measure of success based on the number of meetings we booked divided by the total number of chats handled. And, it was a far better customer experience, as our customers could access technical support more easily.
It was a big win, but our work was hardly done. As we took a step back, we realized that this “support bot” experience was not serving all of our users. About 70% of our audience is visitors and leads, compared with 30% who are users and customers. This first bot experience was designed with only 30% of our audience in mind. Ignoring 70% of our audience meant we were leaving money on the table.
A Personalized Experience for All Visitors
We needed to create a personalized experience for the visitor and lead audiences, too.
With the “support bot” experience, it was odd to ask visitors and leads if they needed support when we knew they weren’t using our tools yet. Rather than directing visitors and leads to chat or support, we wanted to give these visitors their own “self-help” option. Why not give them the option to get started for free with the HubSpot CRM? That way they could start using our free tools or chat with our sales team about features and pricing for advanced tools.
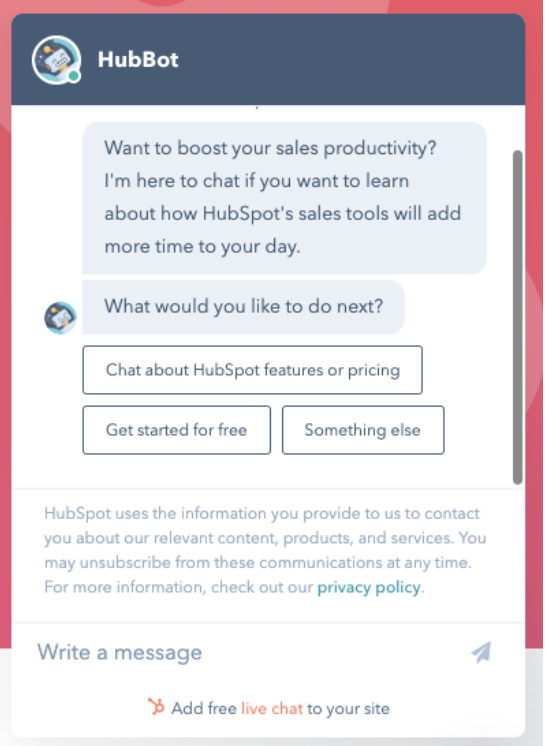
Now we had designed two personalized experiences: one for those already using our software (customers) and those who had yet to experience it (visitors).
We believed this to be a better experience for each audience, because it offered contextual options based on their relationship with HubSpot. However, we wanted to test it first with an experiment.
Setting Up the Experiment
In order to test our hypothesis that this would be a better experience for both of these users, we set up an A/B test on one of our product pages so we could see exactly how the bot for visitors performed against the current bot experience (designed for customers).
First, we defined our metrics for success. We looked at:
- Sales team efficiency: # of meetings booked by our sales team ÷ the number of chats they handled
- # of signups for the CRM
We also compared these for each bot (control vs. variant), and by each audience (visitors vs. customer).
We chose one of our product pages and directed 50% of its site traffic to a cloned page with the new bot experience. The test was live and ready to run for one month while we waited (somewhat) patiently for the results.

Me, waiting at my desk
Experiment Results
We isolated our results for the audience the test was focused on: visitors. We looked at how the control (support bot) performed against the variant (lead bot).
- Sales team efficiency: increased by almost 70% in the variant
- # of CRM signups: increased by 7%
The increase in CRM signups indicated that visitors were finding the right option for them (starting for free) and diving in to try out our software for free.
As a result, fewer chats reached our sales team, but we saw a similar number of meetings booked to continue the sales conversation after a chat. This meant a couple of things:
- The sales team was able to spend more time and focus on higher quality chats that were more likely to turn into sales
- We weren’t losing demand, because we still saw a similar number of meetings booked. We were still capturing those interested in having a sales conversation, just in a more efficient way.
Better segmentation makes life better for everyone. Making a bot personalized for visitors helped the customers’ bot perform better as well. We learned the customer bot works very well for the audience it was designed for — performing 52% better when shown only to customers than when it was shown to all visitors.
Takeaways for Your Business
It’s important to recognize that different segments of your audience have different problems and what works for one audience isn’t the best for another. By understanding the problems that our visitors are facing, and personalizing their chatbot experience onsite, you can create a better prospect and customer experience. When you anticipate the help that people need better, your metrics will improve as well.
And you may be thinking, “OK, that sounds pretty good for HubSpot, but what about my business? How can I create a more contextual bot experience for my business?” Here’s how:
- Create a list of the various audiences you are serving on your website.
- For each audience, describe the types of questions they might have.
- Determine the resources or people who can best answer those questions so you can help them find what they are looking for faster and with less friction.
Then implement it! The HubSpot Conversations tool gives you the ability to target your chat flows with segmented lists based on data in your CRM so you can create a personalized experience as well.
Chatbots work shoulder-to-shoulder alongside with our sales team to provide an excellent, personalized purchase experience that also helps us identify visitors who are possible good fit customers.
Chatbots can do the same for your business and audience.
Editor’s note: This post was originally published in July 2019 and has been updated for comprehensiveness.

Upstream vs. Downstream Marketing, Explained
How many times have you seen a term for something you already knew about? This probably happens a lot, right?
For example, before I took marketing classes in college, I had no idea that there was a term for making sure your content has a better chance of ranking highly on search engines. (Hint: This is search engine optimization, or SEO).
You may already know about upstream and downstream marketing. When I learned what these two terms meant, I found myself saying, “Oh, so that’s what it’s called!“
You’re probably here for the same reason. So, let’s talk about the difference between these two terms and how they work together. Are you ready for a quick introduction to upstream and downstream marketing?
Upstream Marketing
Upstream marketing is a long-term plan. It allows for marketers to conceptualize a timeline for future releases based on customer segments. To create an upstream marketing plan, start with a section of your audience that you want to focus on in the next year or so.

Your completed upstream plan should include the following:
- Identification of a portion of your audience’s problems
- A product or service that will solve those challenges
- A price and competitive edge for campaign assets
First, identify the challenges your customers are facing. Do this by referring to your buyer persona and researching the current market as well as gathering feedback from current customers.
For instance, let’s say your company offers a CRM and your team decides to use an upstream plan for improving the enterprise-level tier of offerings. The first step is to identify consumers’ pain points. After analyzing market and feedback data, you find that enterprise customers want software that will simplify testing campaign assets.
Enterprise-level customers need sophisticated, scalable software that enables them to analyze campaigns and engagement metrics. You and your team decide that’s where your new product is going to come in — it will focus on helping customers analyze campaigns that are impactful.
You decide on adding an adaptive testing feature to your CRM. It first will allow customers to automatically test web page performance for metrics like click-through rate, conversions, and session time. They can use that data to improve the effectiveness of those pages.
With the challenge and solution figured out, think about how much the tool will cost and how it can be set apart from the market. If you included competitor data in your research process, you can refer to it at this step to strategize your product’s market edge.
This strategy looks similar to deciding on a price. Factor in your customer segment, competitor pricing, and your own pricing model. With this information, you ultimately decide that the tool will be an add-on to your existing enterprise tier, and the marketing edge will be that the service is a complementary update.
Conceptualizing a product, its price, and its competitive edge sounds like it would happen pretty early on in the marketing process, right? It is, and, in fact, it should be done before considering downstream marketing. Upstream marketing helps companies plan roll-outs by providing a bird’s eye view of what can be expected in the long-term.
Now, you’ve come up with the who, what, when, where, why, and how. An adaptive testing feature will be added for enterprise-level customers within your company’s CRM within the next year. The marketing strategy will focus on its increased value for the enterprise tier.
With this plan in place, you can solidify a downstream process.
Downstream Marketing
If upstream marketing is the “big picture” planning session, downstream is the game plan. So, for the CRM company, the next step is to come up with a campaign strategy. That process involves downstream marketing.

Downstream marketing is more short-term than upstream marketing. It strategizes marketing campaigns and asks the question, “What resources can we leverage to make the customer want our product?“
Sometimes, downstream is used interchangeably with general marketing practices: Coming up with processes and activities that will effectively communicate the value of a product or service. This isn’t wrong.
Because the upstream process identified the product, its price, and its competitive edge, the downstream method can use this information to produce an informative, engaging campaign.
Your CRM company, at this point, will now have to decide the framework for your adaptive testing campaign. Think about what social media channels you will leverage, the angle of the promotional video, and offers you may want to draft. Decide how you will communicate the release of your updates to customers and leads.
For instance, in this step, you may decide to use LinkedIn Ads, email marketing, and an ebook offer. These channels will be used to acquire leads, excite existing customers, and explain how the update adds value to the existing product.
Upstream Marketing vs. Downstream Marketing
When upstream and downstream work together, the result is a smooth product development cycle that keeps marketing in mind. The two help you build the bones of a campaign at an early stage.
Let’s go back to the CRM company example. You used upstream marketing to come up with a product of value for your existing customers. It helped you to identify its market edge and campaign cycle.
Then, using downstream marketing, you developed a framework for the overall marketing strategy. You decided which channels would reach enterprise-level customers effectively. You decided how branding will play a part in solidifying the growth of your product, and how to shape messaging that will connect to your audience.
The two can create focused campaigns because they identify a customer segment, challenge, and benefit to be used for effective messaging. It keeps teams on the same track, even if the upstream ideas have to change.
For the long-term, what are some of the ways you plan to use both in future planning?

Upstream vs. Downstream Marketing, Explained
How many times have you seen a term for something you already knew about? This probably happens a lot, right?
For example, before I took marketing classes in college, I had no idea that there was a term for making sure your content has a better chance of ranking highly on search engines. (Hint: This is search engine optimization, or SEO).
You may already know about upstream and downstream marketing. When I learned what these two terms meant, I found myself saying, “Oh, so that’s what it’s called!“
You’re probably here for the same reason. So, let’s talk about the difference between these two terms and how they work together. Are you ready for a quick introduction to upstream and downstream marketing?
Upstream Marketing
Upstream marketing is a long-term plan. It allows for marketers to conceptualize a timeline for future releases based on customer segments. To create an upstream marketing plan, start with a section of your audience that you want to focus on in the next year or so.
Your completed upstream plan should include the following:
- Identification of a portion of your audience’s problems
- A product or service that will solve those challenges
- A price and competitive edge for campaign assets
First, identify the challenges your customers are facing. Do this by referring to your buyer persona and researching the current market as well as gathering feedback from current customers.
For instance, let’s say your company offers a CRM and your team decides to use an upstream plan for improving the enterprise-level tier of offerings. The first step is to identify consumers’ pain points. After analyzing market and feedback data, you find that enterprise customers want software that will simplify testing campaign assets.
Enterprise-level customers need sophisticated, scalable software that enables them to analyze campaigns and engagement metrics. You and your team decide that’s where your new product is going to come in — it will focus on helping customers analyze campaigns that are impactful.
You decide on adding an adaptive testing feature to your CRM. It first will allow customers to automatically test web page performance for metrics like click-through rate, conversions, and session time. They can use that data to improve the effectiveness of those pages.
With the challenge and solution figured out, think about how much the tool will cost and how it can be set apart from the market. If you included competitor data in your research process, you can refer to it at this step to strategize your product’s market edge.
This strategy looks similar to deciding on a price. Factor in your customer segment, competitor pricing, and your own pricing model. With this information, you ultimately decide that the tool will be an add-on to your existing enterprise tier, and the marketing edge will be that the service is a complementary update.
Conceptualizing a product, its price, and its competitive edge sounds like it would happen pretty early on in the marketing process, right? It is, and, in fact, it should be done before considering downstream marketing. Upstream marketing helps companies plan roll-outs by providing a bird’s eye view of what can be expected in the long-term.
Now, you’ve come up with the who, what, when, where, why, and how. An adaptive testing feature will be added for enterprise-level customers within your company’s CRM within the next year. The marketing strategy will focus on its increased value for the enterprise tier.
With this plan in place, you can solidify a downstream process.
Downstream Marketing
If upstream marketing is the “big picture” planning session, downstream is the game plan. So, for the CRM company, the next step is to come up with a campaign strategy. That process involves downstream marketing.
Downstream marketing is more short-term than upstream marketing. It strategizes marketing campaigns and asks the question, “What resources can we leverage to make the customer want our product?“
Sometimes, downstream is used interchangeably with general marketing practices: Coming up with processes and activities that will effectively communicate the value of a product or service. This isn’t wrong.
Because the upstream process identified the product, its price, and its competitive edge, the downstream method can use this information to produce an informative, engaging campaign.
Your CRM company, at this point, will now have to decide the framework for your adaptive testing campaign. Think about what social media channels you will leverage, the angle of the promotional video, and offers you may want to draft. Decide how you will communicate the release of your updates to customers and leads.
For instance, in this step, you may decide to use LinkedIn Ads, email marketing, and an ebook offer. These channels will be used to acquire leads, excite existing customers, and explain how the update adds value to the existing product.
Upstream Marketing vs. Downstream Marketing
When upstream and downstream work together, the result is a smooth product development cycle that keeps marketing in mind. The two help you build the bones of a campaign at an early stage.
Let’s go back to the CRM company example. You used upstream marketing to come up with a product of value for your existing customers. It helped you to identify its market edge and campaign cycle.
Then, using downstream marketing, you developed a framework for the overall marketing strategy. You decided which channels would reach enterprise-level customers effectively. You decided how branding will play a part in solidifying the growth of your product, and how to shape messaging that will connect to your audience.
The two can create focused campaigns because they identify a customer segment, challenge, and benefit to be used for effective messaging. It keeps teams on the same track, even if the upstream ideas have to change.
For the long-term, what are some of the ways you plan to use both in future planning?
