
How to Use Transferable Skills to Change Careers
Changing careers can be daunting without the right skills. The great news is that you probably already have the skills you need, you just don’t know it yet.
Your career path can take an unexpected turn. Maybe you’re bored with your industry and looking for a fresh start. Or maybe you’re just hoping to find something new to challenge you. Whatever the case, making a significant career change can be tricky.

What’s the secret to successfully changing careers? Using your transferable skills.
How Can You Use Transferable Skills to Change Careers?
The first step to using your transferable skills is to understand exactly what transferable skills are.
Transferable skills don’t have to be acquired on the job. They can be skills you learned through volunteer work, your hobbies, or even being a parent. Your transferable skills are the culmination of your life experiences. When considering what transferable skills you have, it’s important to keep an open mind and be creative.
That may sound complicated, but it doesn’t have to be. We’ve put together five quick tips for understanding and using your transferable skills. Check them out:
5 Quick Tips for Using Transferable Skills
1. Identify the Skills That Set You Apart
Before you can decide which of your skills are transferable, identify all of the skills you have. When people think of transferable skills, their minds tend to gravitate toward the same examples: teamwork, leadership, or people skills. The problem with relying on those skills is that most other job candidates have those abilities as well.
To make a successful career change using transferable skills, pinpoint what makes you unique. Take an hour out of your day to sit down and create a list of the skills you have, and place those skills into two different categories:
- Hard skills – Skills dealing with data and technology
- Soft skills – Skills dealing with people or communication
Each skill is significant at this point in the process, even those you think won’t matter. It works to your advantage to write down anything that might be relevant to your job search — you can always edit later. Once you’ve created your list, narrow it down to your four strongest or most unique skills. This will leave you with a few skills to focus on during your job search. Always be sure to use a mix of both hard skills and soft skills.
2. Understand How Your Skills Translate
The next step is understanding how your skills translate to a new industry. Human resources professionals evaluate people with linear career paths. That’s both an advantage and a disadvantage for anyone looking to change careers.
It’s a disadvantage because you’re not the typical candidate, and that might make an employer wary. It’s an advantage because you have skills other applicants don’t, and that can set you apart.
If you can connect the dots for the recruiter or interviewer, and show them why your skills are valuable, you’ve already cleared the toughest hurdle.
Companies are hiring people to fill existing gaps; show them how your skills can solve for that gap. If you can show someone why your transferable skills make you the best person to solve their problem, it won’t matter what industry you’re coming from.
For example, after working as an elementary school teacher for 20 years, Molly decided she’s ready to move into a second career. She’s always wanted to work in marketing, but fears she doesn’t have the right experience.
After reviewing the skills she acquired as a teacher, Molly’s decides her top four transferable skills are:
- Curriculum Creation
- Lesson Planning
- Classroom Management Skills
- Tutoring
Using these skills as a base, Molly decides that targeting project management jobs would be a good fit for her. Molly has experience creating complex lesson plans and leading a group of more than 20 people (her students) in completing daily tasks.
She also has experience working with several external teams (parents, school faculty, and the school district) in accomplishing set goals and meeting expectations (i.e., student test scores).
By understanding how her skills as a teacher translate to a project manager role, Molly is able to target new career opportunities and a new career field.
Taking the time to understand how your transferable skills can work across industries, and explaining that during your job search, will take you far.
3. Rid Yourself of Industry-Specific Jargon
Every industry has its own buzzwords and jargon. Those buzzwords can be crucial in signaling to others in your industry that you know what you’re doing, but they can be a hindrance if you want to change careers.
When targeting a new career path or industry, rid yourself of your industry jargon. If you don’t, you run the risk of alienating your interviewer or confusing them. Keep the message simple, and focus on your skills and how they can benefit the company.
The same goes for your resume and LinkedIn account as well. Remember, human resources managers and recruiters might not understand why you’re applying for a job outside of your current industry. Packing your resume with unrelated buzzwords will only confuse them more.
Your resume is probably going to be read by an Applicant Tracking Systems (ATS) before a human ever sees it. If you use too many unrelated industry buzzwords in your resume, it may get thrown out before you even get the chance to talk to the hiring manager.
4. Use the Right Resume Format
The traditional reverse-chronological resume format is good, but have you considered that there might be a better way to highlight your skills? There are three different resume formats, and each one has its advantages. As someone looking to make a career change, the functional resume format is an ideal choice. Here’s a look at what a functional resume format looks like:
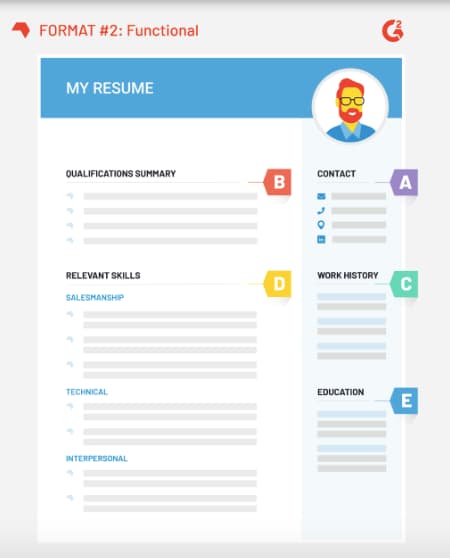
The functional resume format focuses more on your transferable skills and less on your career experience, making it perfect for anyone who wishes to make a career change. It places the focus on the skills you have, not the experience you lack
5. Use Your Cover Letter to Your Advantage
The final step for using transferable skills to your advantage is to write a convincing cover letter.
Remember, a cover letter is not a regurgitation of your resume. It’s your introduction to the company and your chance to explain why you’re looking to change careers. Your resume can only tell the story of what skills you have, while your cover letter tells the story of why those skills are valuable to the company.
Take time to talk about your transferable skills and explain why you’re changing careers. Focus on the positive, and explain how your unique skills can help the company solve its problems. You are a unique candidate, and a cover letter is your chance to pique their interest.
If You’ve Got It, Flaunt It
You’ve got mad skills; it’s just a matter of knowing how to use them. Remember that finding a clear way to communicate how your transferable skills work across industries is key for using transferable skills to change careers.
Looking for more career advice? Check out the HubSpot Careers Blog.

The 16 Best Digital Marketing Tools in 2019
I’m a big fan of finding the latest and greatest digital marketing tools.
While digital marketing tools will only help you execute a proper strategy (they won’t do the work for you), the right technology stack can really help you zoom past the competition.
Some tools out there are foundational — things like email marketing, web forms, analytics, and a CRM. However, other tools are more specialized, including keyword rank trackers, or design tools.
To take your marketing strategy to the next level, we’ve outlined the following 16 digital marketing tools every marketer should have in their tool belt.
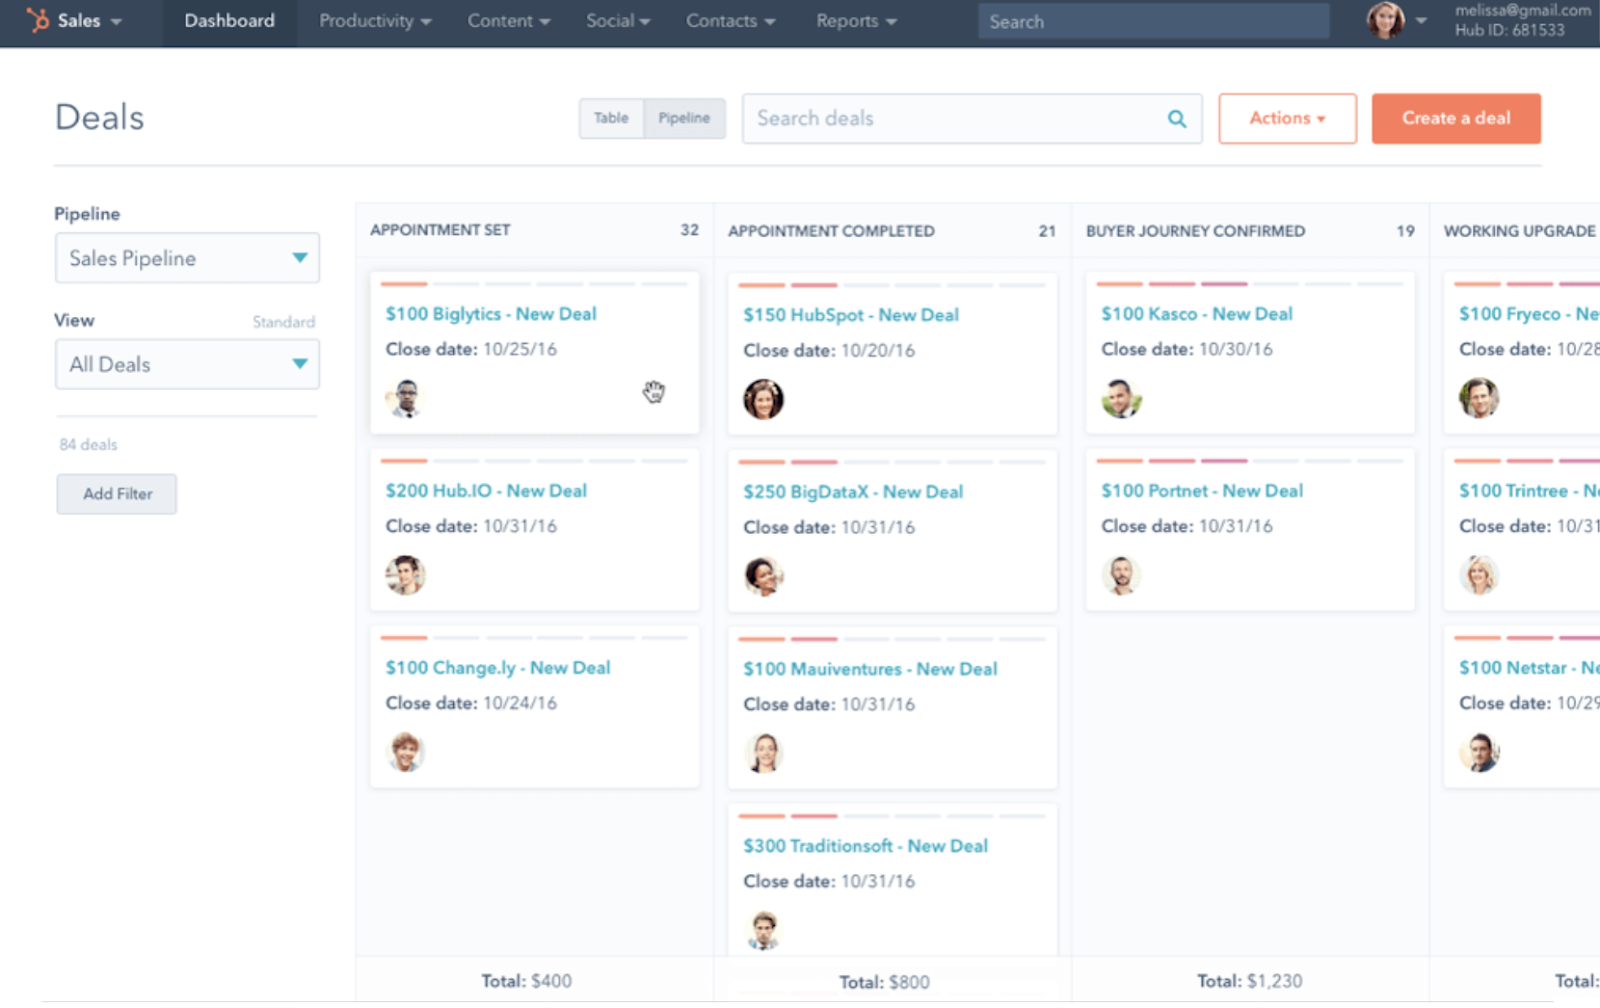
1. HubSpot Marketing
Price: Free to $3,200/month for enterprises, depending on your plan
HubSpot has several tools to help you grow your business, no matter what stage you’re at.
Starting out, there are several tools available for free. You can set up web forms, popup forms, and live chat software for lead capture. Then, you can send kickback emails, pipe all of your data into the free CRM, and analyze site visitors’ behavior.
When you expand into the paid tiers, things get really sophisticated with advanced marketing automation.
From managing your content and social media to tracking emails and connecting with your leads, HubSpot is an all-in-one solution — although it works well with other point solutions you may use (Typeform, HotJar, etc.).
Ultimately, the tool allows you to:
- Grow your traffic, convert leads, and prove ROI for your inbound marketing campaigns.
- Shorten deal cycles and increase close rates with the provided sales tools.
2. Ahrefs
Price: Tiered pricing, ranging from $99 to $399
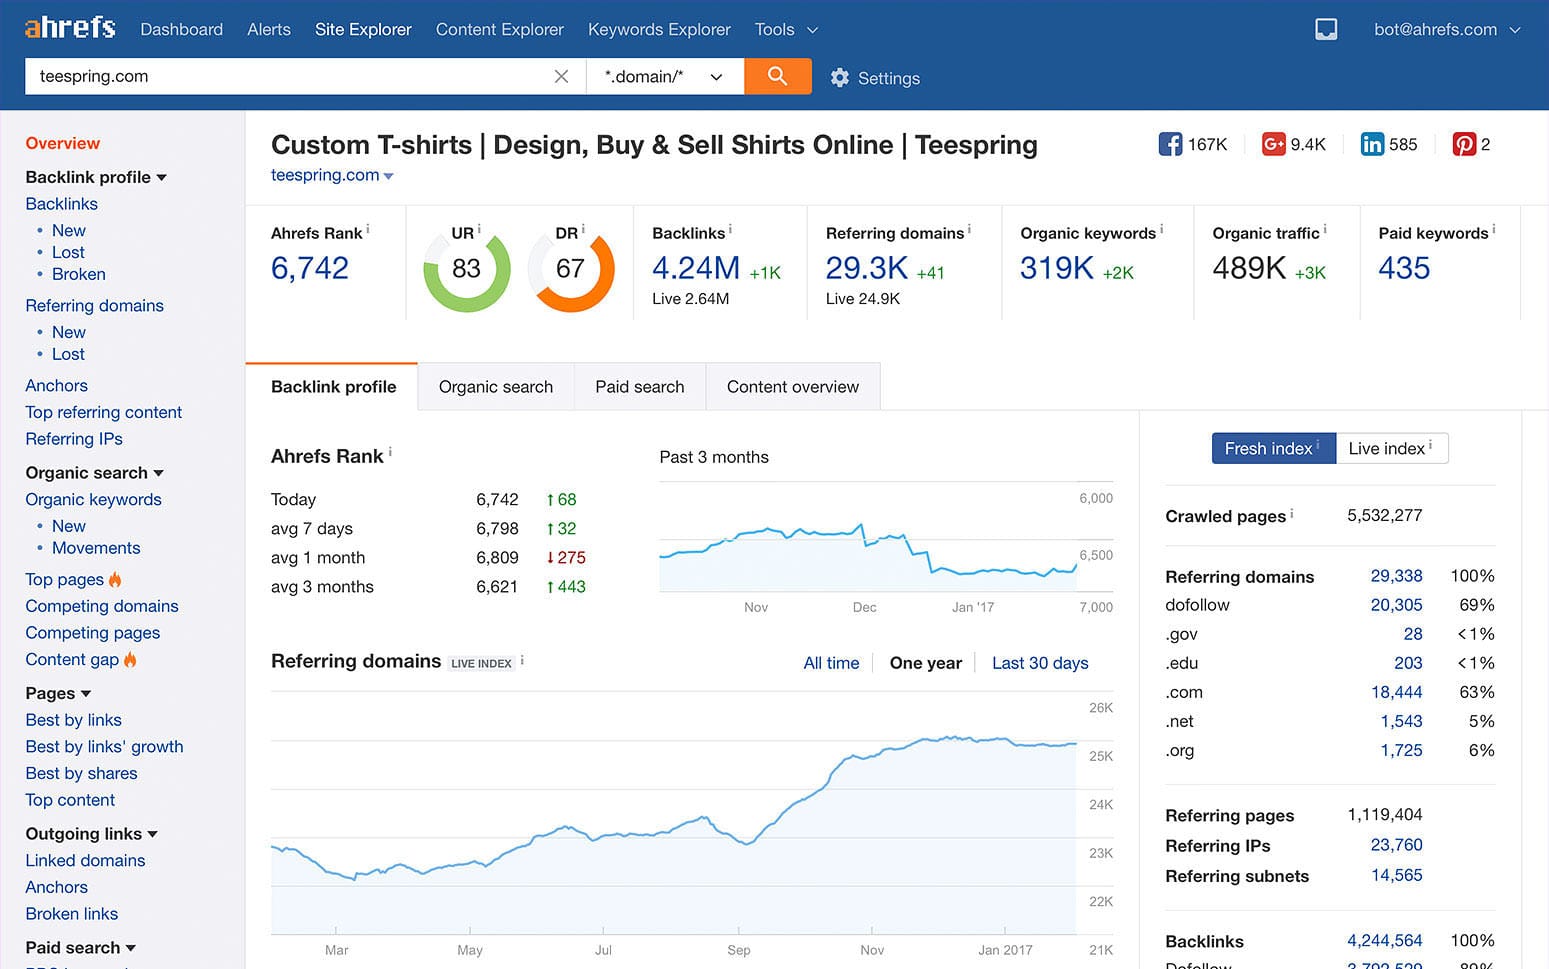
Ahrefs is a comprehensive SEO tool to help you punch up your website traffic. They have data for around 150 million keywords in the U.S., and even more for 150 other countries.
Ahrefs is great for competitive analysis, allowing you to check out who is linking to your competitors, what their top pages are, and more. You can see where their content ranks and, using the Content Gap tool, identify key weaknesses for your content areas.
The Top Pages tool lets you see which pages get the most traffic, and you can see the amount of traffic going to competitors’ sites.
Ahrefs is one of my favorite SEO tools. It constantly impresses me with features I use daily, and I learn about new features all the time. It’s easily the most robust product in this space.
3. Proof
Price: Tiered pricing based on the volume of your website traffic, starting at $24/month
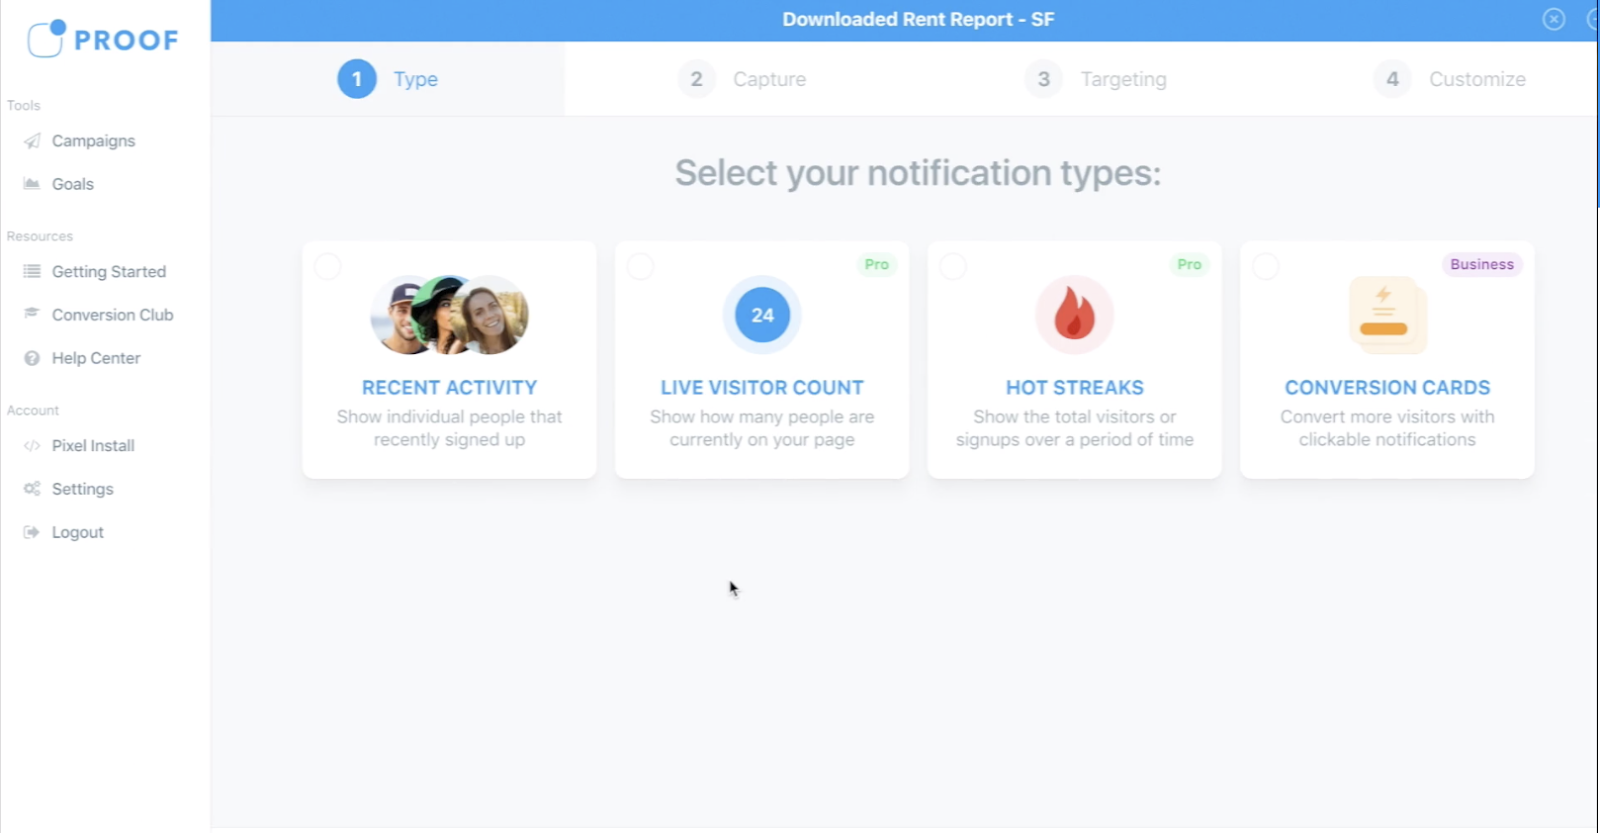
Proof connects to your CRM or website and uses social proof to boost conversions on your site. They implement social proof messaging (i.e. “25 people are viewing this post right now”), reviews, and videos geared towards targeted customers once they visit your site.
The popular Live Visitor Count and Hot Streak notification features boost customers’ perception of your brand, and lets prospects get a look at how other people respond to your product. Additionally, it’s super easy to install — you just copy and paste their pixels into your site.
You can identify your visitors and examine their journey throughout your site, which can help optimize your site design for higher conversions. It integrates with an impressive amount of other software systems and is optimized for mobile.
4. Survey Anyplace
Price: Tiered pricing, starts free and goes to $42/month for enterprises
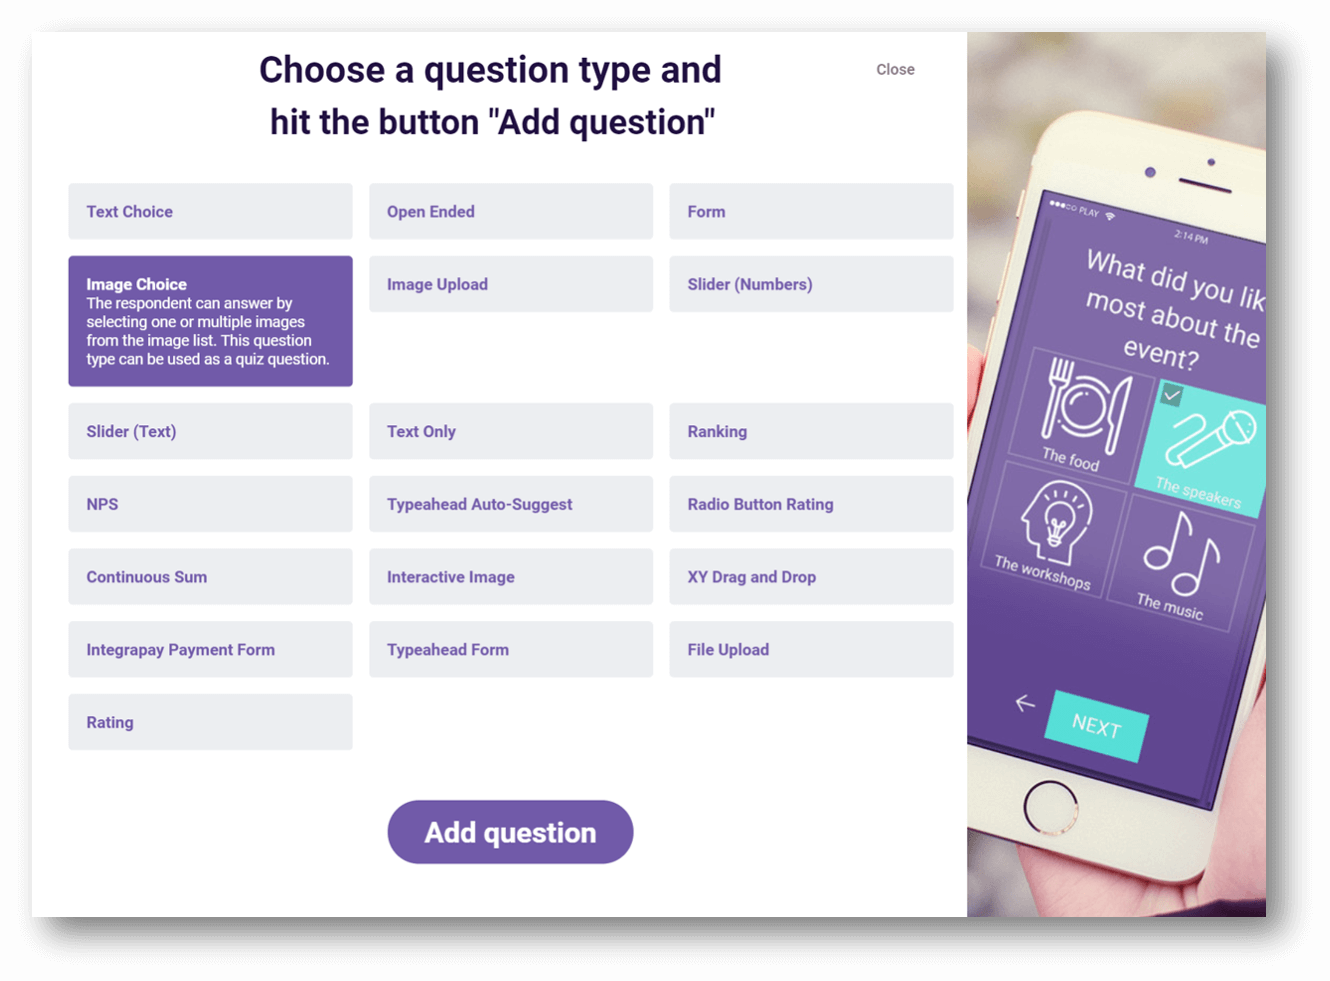
Survey Anyplace is able to reflect your branding on surveys and allows you to build your own, and they’ve improved upon the user experience. You can now formulate your own questions and include images as needed.
Their surveys are simple, well-designed, and compatible with mobile. Removing the friction from completing surveys increases their likelihood of completion.The better your survey, the more useful the insights gained can be.
5. Yoast
Price: The Yoast plugin for WordPress is free, but the paid premium plans range based off the number of sites you need monitored
Yoast is a very popular plugin that works with both Gutenberg and the Classic editor in WordPress. Yoast is an excellent tool to help you optimize your content for search engines.
Yoast helps you choose cornerstone content, focus keywords to help you rank, individual content URLs, and internal links for an additional boost. The plugin also evaluates your page readability and gives it a Flesch Reading Ease score.
It’s updated to reflect Google’s algorithm every two weeks, so you can always stay up-to-date on your SEO.

6. Slack
Price: Free for small or medium companies, custom pricing for enterprises
Slack is one of the favored communication services in business today.
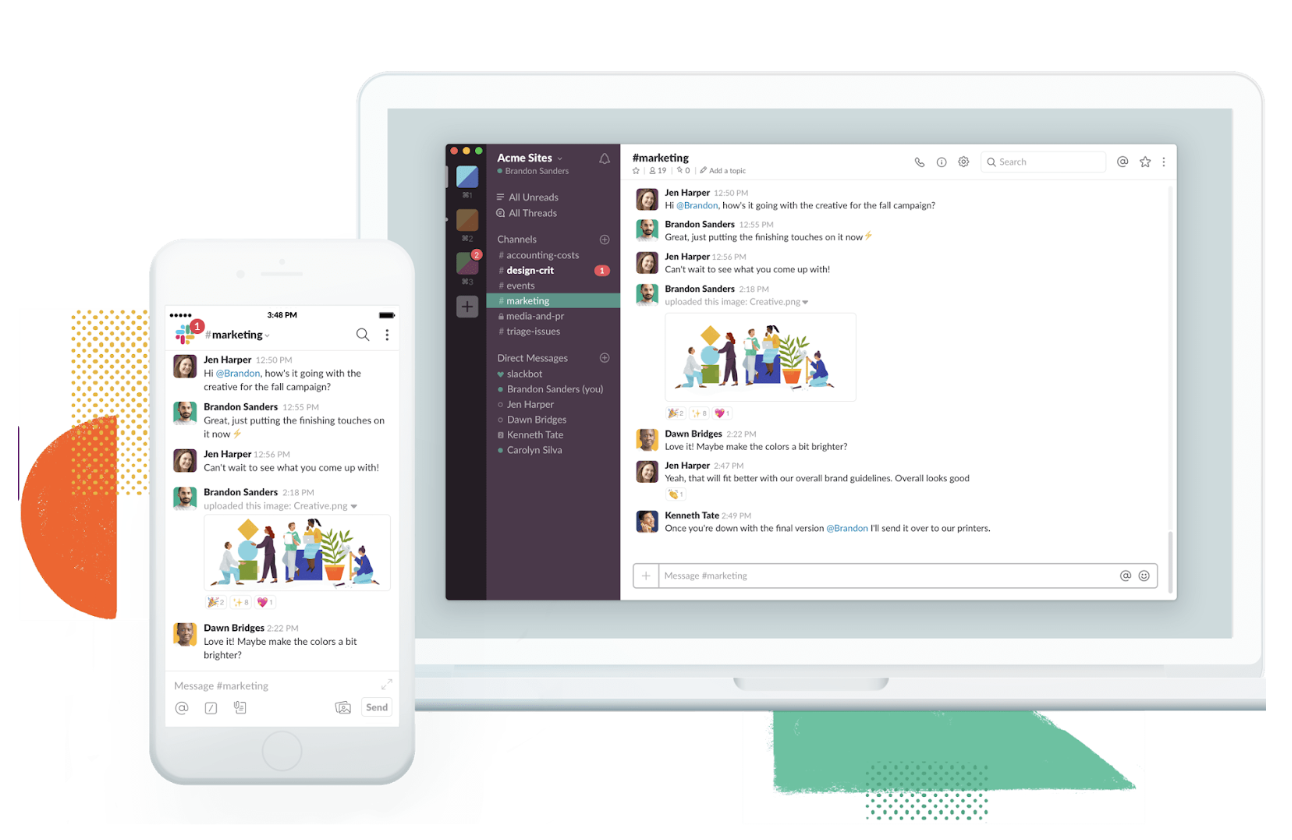
It operates in channels designated for certain information, so business conversations don’t get distracted or cut-off by tangents about where everyone wants to go for team lunch. It facilitates, de-silos, and focuses collaboration between employees and teams.
It’s an excellent tool for networking and meeting others in the digital marketing space, and gives you the freedom to join or leave channels as needed.
Because it’s such a popular communication channel, it has wide-ranging integrations with plenty of other tools. You can tack on a seemingly unlimited amount of integrations and Slack applications to make the tool even more powerful — for instance, many teams will pipe in A/B test results, analytics notifications, new customer or transaction notifications, or even sales or customer support bots. While undeniably powerful, Slack is easy to start using immediately.
7. Trello
Price: Paid plans range from free to $20.83 per month for enterprise
Trello is a content management tool that many organizations use for brainstorming and strategizing content — in fact, we use Trello at HubSpot to know when our blog posts are scheduled for publication.
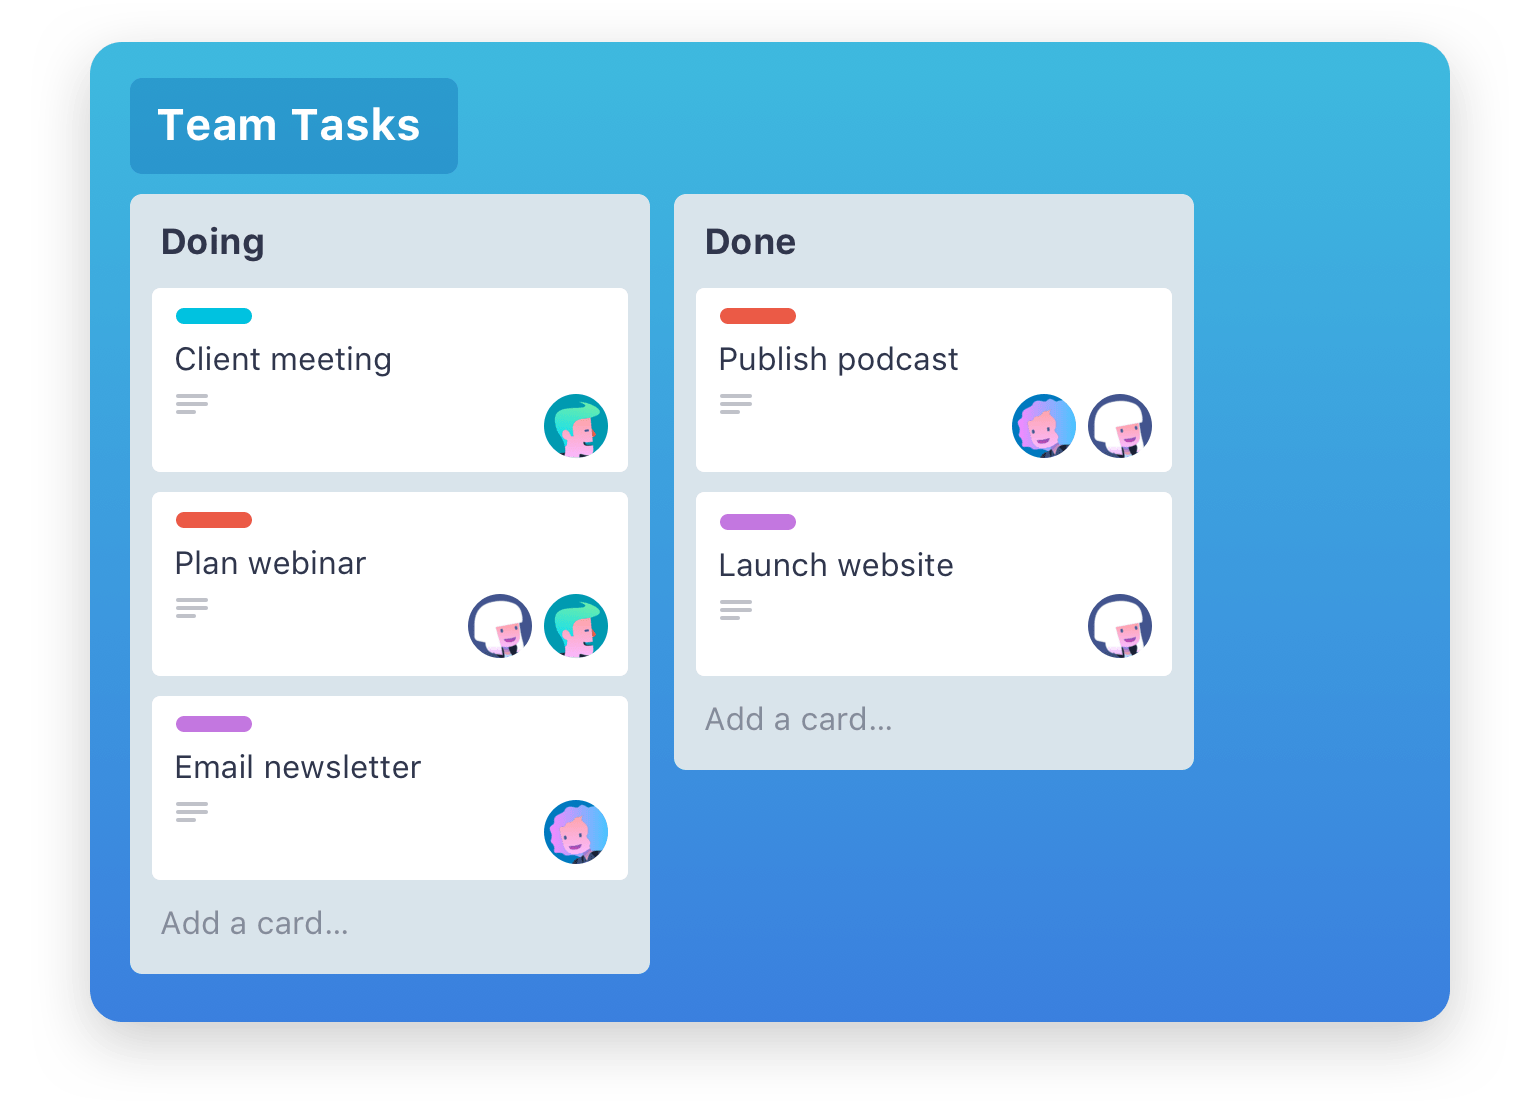
The reason Trello is so appealing is that it’s free for small teams and businesses, and it provides a visual way to brainstorm and schedule content online — even if your team is remote or global. Additionally, it’s easy to assign multiple employees to a card, so you know who’s in charge of writing, editing, or adding CTA offers to a post.
Users can create cards and include notes on the card topic, as well as create deadlines and assign topics to certain teams. Trello facilitates collaboration and provides clarity on projects in the pipeline.
8. Canva Business
Price: Plans start free, $12.95/month for teams, or custom pricing for enterprises
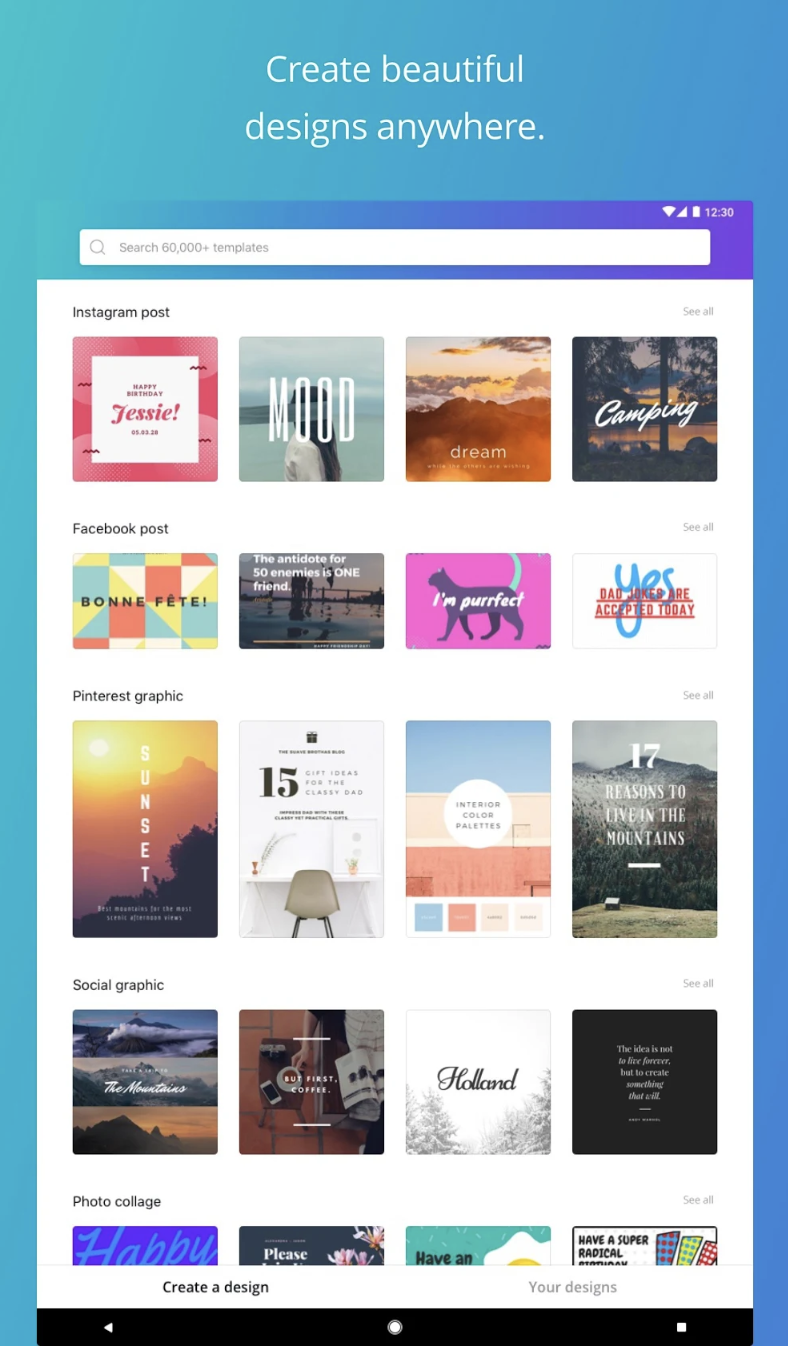
Canva is a drag-and-drop design platform that allows users to create images using custom pictures, icons, shapes, and fonts from the Canva catalog. It offers an aesthetically-pleasing, simple way to design your own logos, presentations, images, or graphs based off your team’s needs.
Additionally, Canva cuts out the need for an experienced designer and enables you to create the exact visual you have in mind using their vast image collection.
9. Google AdWords
Price: AdWords run on a pay-per-click model
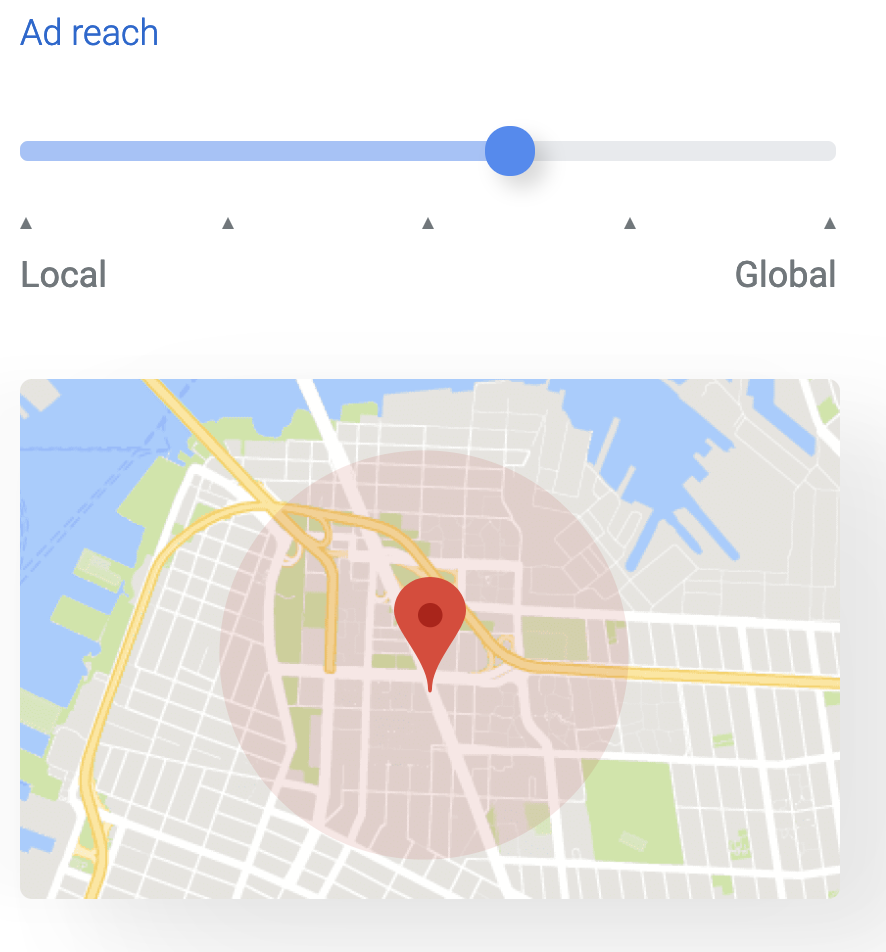
Google AdWords is one of the most popular options for advertising your business on Google’s search engine results’ pages. Payment is based on either a pay-per-click or pay-per-call structure.
Google AdWords hosts the Google Keyword Planner, where you can research which keywords you want to include in your ad and your other content. You can set budget caps on how much you want to spend. Ultimately, the tool helps you funnel more prospects to your website.
AdWords is an excellent way to display your products or services on Google’s results pages for very specific queries. For instance, let’s say someone searches for “best CrossFit gym in Austin”. Sure, you could work on your SEO and hope to appear organically — but you can also bid on the keyword and appear at the top of the page, enabling you to capture tons of high intent visitors.
10. Google Analytics
Price: Free
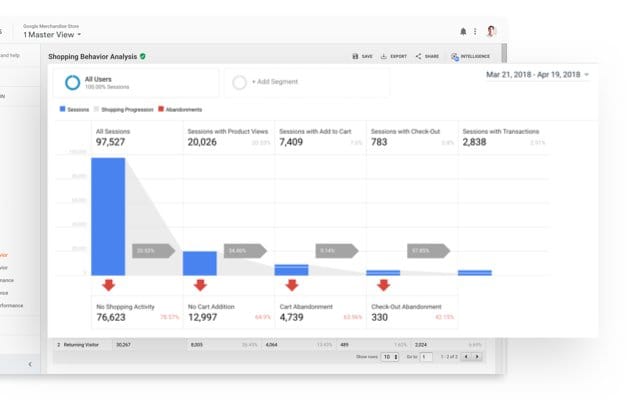
Google Analytics is the gold standard for website analytics. Nowadays, it’s hard to operate as a digital marketer if you don’t have some level of Google Analytics expertise.
At its most basic level, Google Analytics can show you who is coming to your website, from where, and on which pages they’re spending most of their time. Beyond that, you can set up goals to track conversions, build an enhanced ecommerce setup, and track events to learn more about user engagement.
Truthfully, barely a day goes by that I don’t use Google Analytics. To learn more, check out The Ultimate Guide to Google Analytics in 2019.
11. MailChimp
Price: Tiered pricing, plans start free and range up to $199
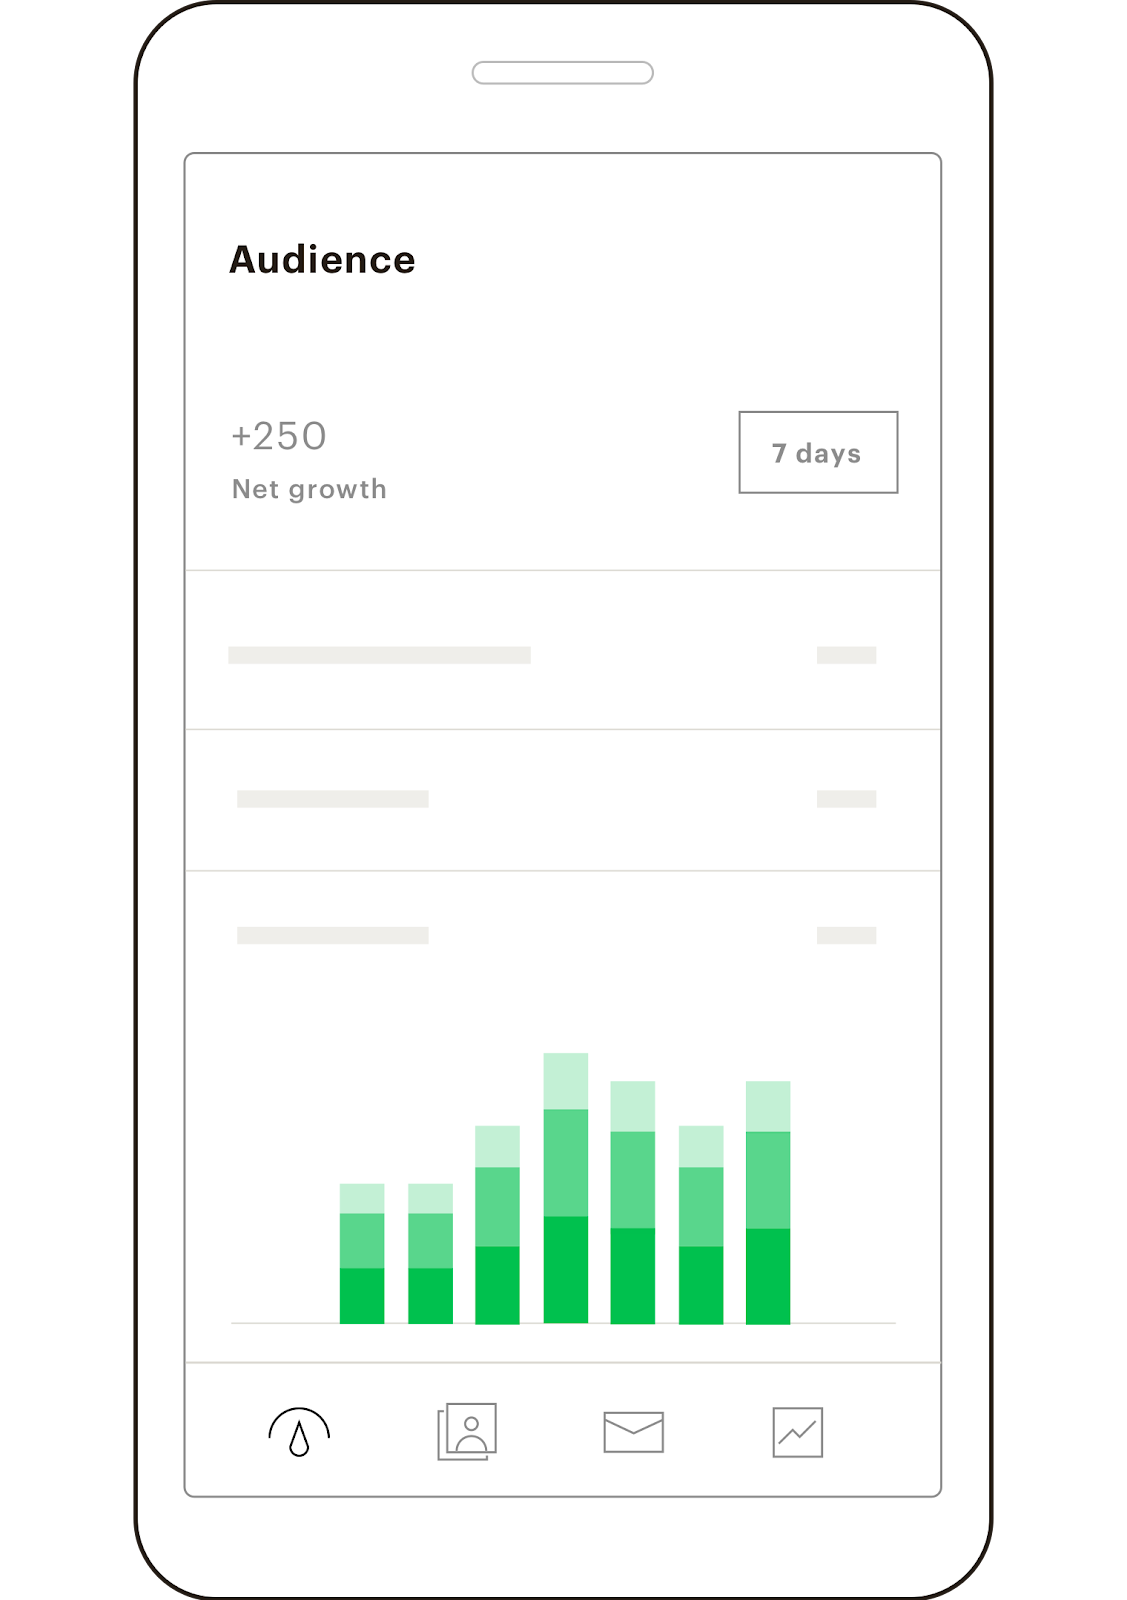
MailChimp is an email marketing and social advertising tool designed to automate and orchestrate campaigns.
You can track the traffic garnered from your campaigns — additionally, MailChimp offers multiple integrations with other SaaS companies. The tool is especially powerful for email drip campaigns. Ultimately, it’s a good option for engaging with your audience.
12. Asana
Price: Tiered pricing, free to $19.99/month, with custom enterprise options
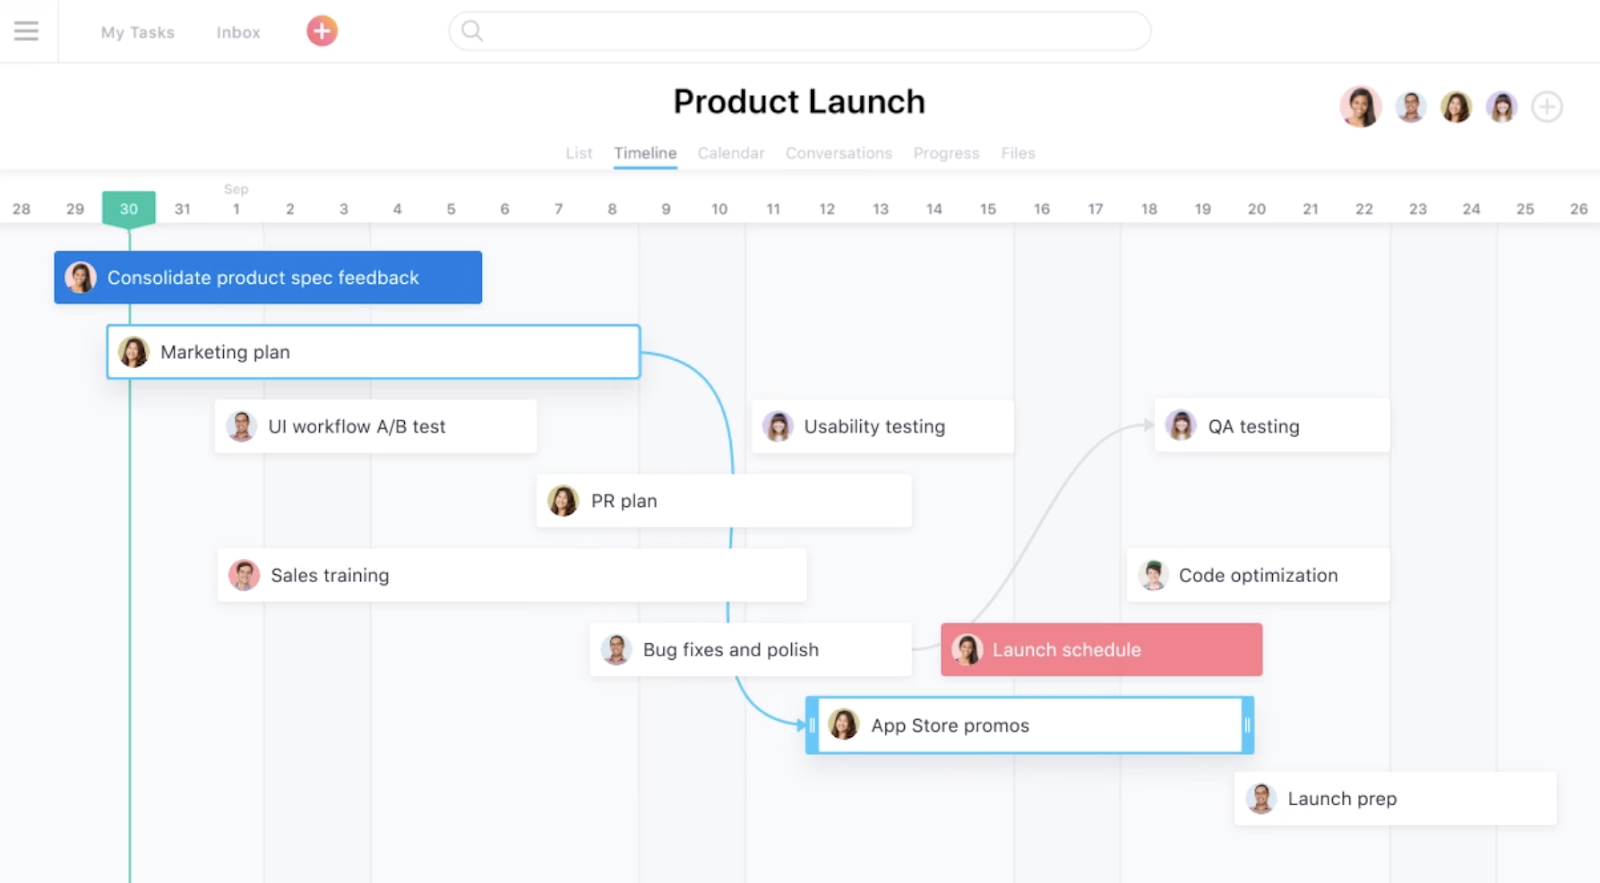
Asana is a collaborative workflow management system with a visual emphasis designed to streamline and de-silo information and goals between teams.
Asana allows you to do several things:
- Record and visualize projects to be completed
- Map out deadlines and prioritize tasks
- Assign tasks to certain team members
- Identify points of friction and bottlenecks
- Report on projects quickly and openly
- De-silo data between teams
The Portfolios function also lets you keep track of every project’s status, ensuring that your team members have the support and motivation to get out their digital marketing initiatives on time.
13. BuzzSumo
Price: Paid plans start at $79/month
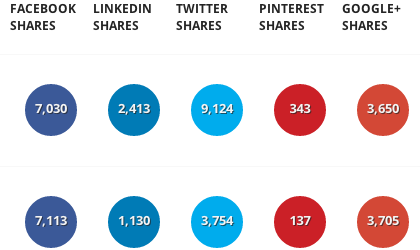
BuzzSumo is a unique content research tool that identifies top influencers in your industry and helps you connect with them.
You can look up trending topics and define the scope of your search to generate both evergreen content, or trending content aimed at your desired audience.
From there, you can look at your content’s analytics and social mentions, and then measure performance accordingly.
14. MeetEdgar
Price: $49/month
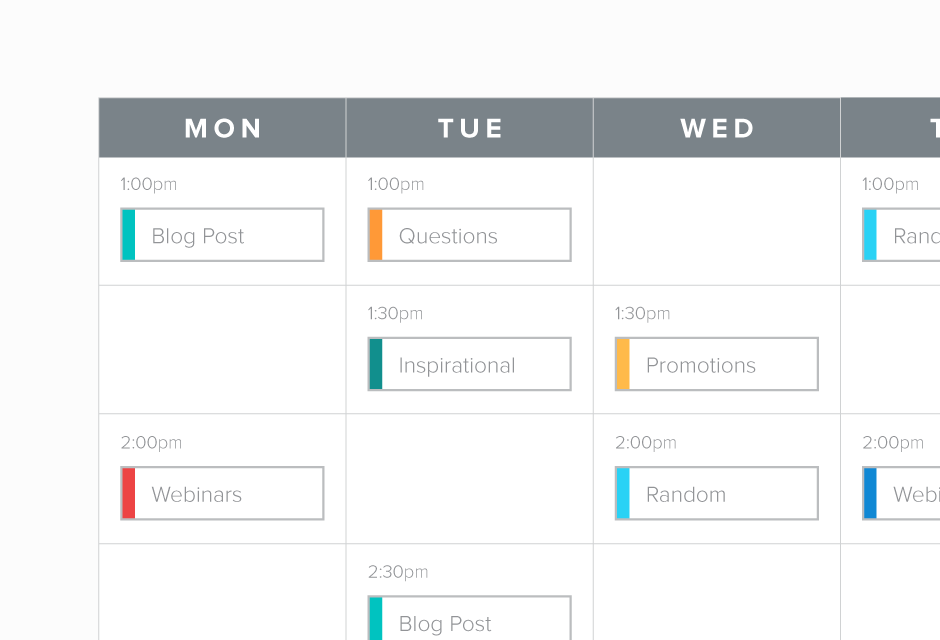
MeetEdgar is an excellent social media management tool.
Using the browser extension, it can write posts and extract up to five important highlights from your posted content for you to easily share. You can sort your content into categories and decide when you want content shared from each category.
It allows you to schedule posts 24/7, and if your queue runs out, it will mine previous posts and re-share them — which you can start and stop at any time. You can also use MeetEdgar to run A/B tests on your content to find the most optimal language and content for your posts.
MeetEdgar is integrated with LinkedIn, Twitter, Facebook, and Instagram.
15. Buffer
Price: Starts free and goes up to $199/month
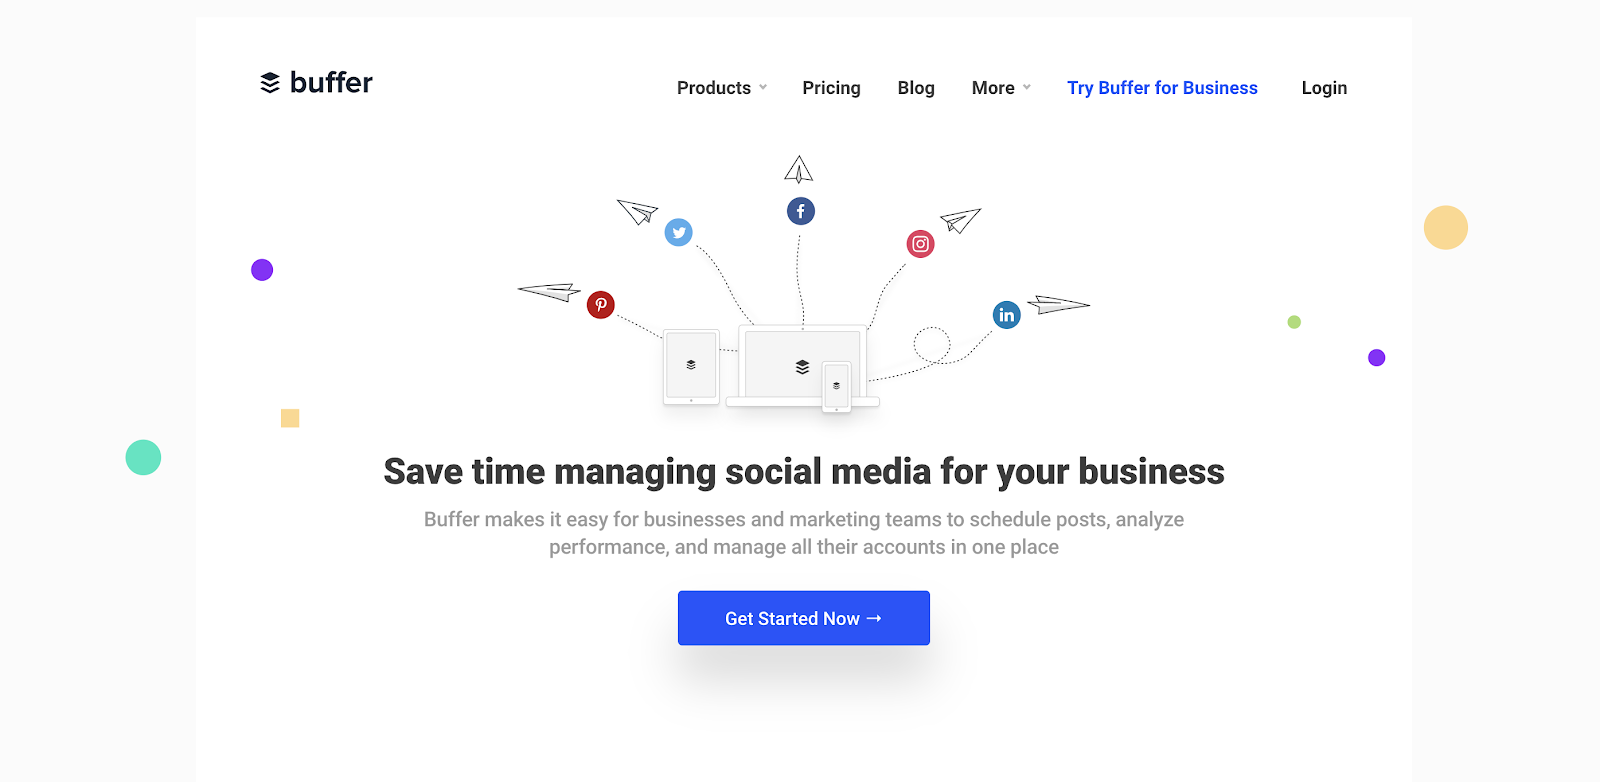
Buffer operates in much the same way as MeetEdgar for social media posting, but also offers analytics on posts, so it’s worth checking out, as well. It has tiered pricing, and plans range from free to $199 per month.
Buffer is one of my favorite social media tools. Its simplicity is its value proposition. You can easily get started in a matter of minutes, but it’s got plenty of features for the advanced user, as well.
16. Hootsuite
Price: Starts at $29 per month, or custom enterprise pricing
Hootsuite is more of an enterprise social media management solution, but it’s quite powerful and very popular. Hootsuite is able to store your approved content in a cloud that team members can access 24/7 for social media posting needs. It allows multiple posts to be scheduled at once with developed tags and keywords.
Using Hootsuite, you can track the performance of your social media content. Hootsuite can calculate ROI, conversions, and track public conversations about your brand or specific subject matter. Plans have tiered pricing, starting at $29 per month and ranging toward $599 per month for enterprise.
There are plenty of different tools for you to tackle your marketing problems head-on — you just need to decide where to focus first. Which tool works best with your company structure and ultimate goals?
If you want a free, comprehensive, all-in-one marketing service, check out HubSpot’s free marketing tools.

How to Get Sponsored on Instagram (Even if You Currently Have 0 Followers)
It’s no surprise you want to become a paid Instagram influencer — heck, the average price for a sponsored Instagram post is $300, and if you become more successful, like yogi Rachel Brathen, you could be making $25,000 per post.
But the idea of getting your posts sponsored might seem laughable to you. You’re not posting pictures skydiving in Australia — you’re posting pictures of your brunch. However, you could be more marketable than you think.
Instagram has become an insanely popular channel for brands to promote their products. In fact, Influencer Central found consumers consider Instagram to be the sixth most effective at influencing their purchasing decisions.
Instagram’s popularity might make you feel the platform is already too crowded for you to stand out. But here’s the thing — brands are quickly realizing the power of normal people to promote their products. Micro-influencers, or people with a small number of followers compared to the big players, see the most engagement out of their audience.
Think of it this way: I’m going to trust my best friend’s advice over Kim Kardashian’s when I’m purchasing a product. I trust my best friend, we share similar interests, and I know she’s genuine with her advice (no offense, Kim … ).
It’s the same concept for micro-influencers — with the right strategy, your audience will begin to see you as one of their real friends. The more they trust your advice when seeking out purchasing decisions, the more likely you are to get sponsored.
Here, we’re going to show you everything you need to do to get sponsored on Instagram, even if you currently have zero followers. Keep reading to get started or click the links below to jump to a specific section of this article.
1. Define your brand.
You’ll see the best engagement if you’re able to define your niche. Do you want to post food and health related content, or focus on fashion? Whatever the case, it’s important to establish your brand.
Besides the type of content you post, branding has a lot to do with your overall aesthetic. How do you want to style your posts? What’s your messaging? To further solidify your brand, you might want to consider creating a cohesive feed theme (use these feeds for inspiration).
Specificity is key. A good influencer’s posts are distinguishable and unique — when a user is flipping through her feed, she’ll be able to pause and recognize every time she sees a post from that influencer. As she continues to see similar content, she’ll grow to trust that brand as an expert in the field. If the influencer suddenly and randomly changed course, the user might not understand or trust the content anymore.
Additionally, you might want to connect your Instagram brand with an online presence. Creating a website with similar aesthetic and messaging is a good way to do this — the more you unify your social media accounts, the easier it will be for brands to distinguish how you can help them.
2. Know your audience.
Knowing your audience is critical for convincing a brand to work with you. It’s mutually beneficial for you, as well — if you understand your audience, you’re able to correctly identify which brands will see the most success from using you as their sponsor.
Start by gathering the basics — what is the gender, age, and geographical location of your core demographic? Which of your posts do they like the best? What times of day do they respond best to content, and what can you infer from this?
The demographic information you gather will help you pitch partnerships with brands. Brands want to know who they can reach if they work with you. Explaining “You’ll be reaching thirty-something, working women, primarily from New York, who often use Instagram first thing in the morning and prefer fitness content” is certainly more powerful than saying, “You’ll be reaching women.”
3. Post consistently.
CoSchedule gathered research from 14 studies to identity how often you should post on social media sites. For Instagram, they found you should post a minimum of once a day, but can post upwards of three times a day.
CoSchedule also found 8:00 AM to 9:00 AM, and 2:00 AM, are the best times to post.
To grow your following, it’s critical you post at least once a day. Instagram’s algorithm favors new and fresh content, and you don’t want your audience to unfollow you or forget about you from lack of consistency.
However, you’ll need to figure out what works best for you and your audience. Perhaps your audience feels bombarded when you post three times a day, or maybe they prefer it. Maybe your audience engages most with your posts at noon. It will take some trial and error, as well as Instagram metrics tools, to figure this out.
4. Use hashtags and geotags.
Hashtags make your content more discoverable, so they’re necessary for growing your following. You can use up to 30 hashtags per post, but TrackMaven found nine to be the optimal number for boosting engagement.
You’ll want to use hashtags as relevant to your content as possible. You’ll also need to check to make sure the hashtags you use aren’t broken or banned (take a look at this list of banned hashtags if you’re unsure).
It’s critical you choose hashtags that aren’t too broad. #Healthyliving, for instance, has over 20,000,000 posts, while #healthylivingtips only has 13,000. The less competition, the easier it will be for your content to get discovered.
When you peruse a hashtag’s page, you can also get a deeper sense of what types of content your post will be up against. #Healthylivingtips might typically feature posts with food recipes, while your post is about cycling — this could defer you from using that hashtag.
Geotags are equally important, but for a different reason. Geotags can help people find you if they’re interested in a certain location. This helps you gain more followers, and it also helps you appeal to brands that are interested in reaching a certain demographic. For instance, maybe a boutique sees you often post fashion tips from the California area, and they’re looking to appeal to people in that region — it’s a win, win.
5. Tag brands in your posts.
Okay, now you’re officially ready to begin reaching out to brands. You’ve defined your brand and audience and have created some quality, authentic posts. Now, you should have a pretty good idea what types of businesses would benefit from a partnership with you.
It’s important to start small. If you’re interested in skincare, don’t go straight for Estee Lauder — instead, try tagging small skincare start-ups you’ve seen across Instagram already.
Let’s take a look at an example — @Tzibirita, a travel influencer, posted this image of herself wearing a Paul Hewitt watch. The image is high-quality and fits with her brand, and she tags @paul_hewitt in her description. Even if you’re not paid by Paul Hewitt, you can still post the same type of content and tag their brand in the post. Ideally, it will at least put you on their radar.

Begin with small brands and tag them in your descriptions. Engage with your audience by responding to comments like “Where can I get one?” or “How much?” and the brand will soon see you’ve proven yourself a suitable sales partner.
6. Include contact information in your bio.
Consider your bio a chance to signal to brands your interest in becoming an influencer. Include an email or website so they can reach you, and include a press kit if possible.
For instance, @tzibirita doesn’t waste her bio space. She includes her email and website, and even adds a title — “content creator”. Brands will have no doubt she’s open to doing business with them.
 Furthermore, you should use a website or blog as your chance to expand on your brand and demonstrate your versatility. Consider adding a Press Page to your website, so brands can take a look at your services. Once you begin sponsoring brands, you can add them to this page so brands can see you have influencer experience.
7. Pitch paid sponsorships.
There’s nothing wrong with reaching out to brands and offering your services. With the right pitch, you might be able to land some gigs without waiting for brands to find you.
Look for brands that clearly invest time and money into their Instagram presence. You might start by researching what similar influencers in your industry already sponsor. Remember, it’s okay to start small. Working with smaller brands will allow you to build a portfolio.
Once you’ve curated a list of brands that might want to partner with you, send them an email. In your pitch, clearly and briefly outline who you are, what you do, and any achievements you have in the field that make you an expert. Then, explain why you’re a good fit for the brand, and include data such as follower count and average engagement rate.
Alternatively, you might consider sending a brand a DM straight from Instagram. It’s certainly more relevant to the job you’re vying for, but it might get lost if a brand get hundreds of DMs a day.
8. Know your worth.
Make sure you know how much you’re going to charge when brands reach out to you. The industry standard is $10 for 1,000 followers, but it could also vary depending on how many likes you get per post. Additionally, as you grow, you’ll be able to charge more.
While you’ll want to have a minimum set, you can negotiate to encourage brands to pay more. Perhaps for $300, you’ll throw in five Instagram Story posts, and a link in your bio to their website for 24 hours. You can use other Instagram features to sweeten the deal.
Once you have your pricing structure nailed down, you’ll need to know how to sponsor a post on behalf of the brand you’re working with. Now, keep in mind there are two different kinds of “sponsored” posts: those for which brands pay Instagram, and those for which brands pay another user.
Confused? Here’s what I mean:
What’s a Sponsored Instagram Post?
A sponsored post on Instagram is paid for by the poster to reach a wider audience. There are two main types of sponsorships: In one, a brand creates a post and pays Instagram for access to a custom audience. In the other, a brand sponsors another Instagram user — often called an “Influencer” — who creates a post that features the brand in some way.
Here’s more detail on each type of sponsored post:
Promoted Posts & Ads
Just like Twitter, LinkedIn, and Facebook, Instagram comes with a native ad management platform. Advertisers can use this tool to customize a target audience — using attributes like age, sex, location, and interests — and invest a specific amount of money to getting their post in front of Instagrammers who identify with this audience.
The thing to remember here is that the advertiser is making and publishing the post. They’re paying Instagram for the audience they want access to, but the post is theirs to create.
Paid Sponsorships
Paid sponsorships take place between a brand and another Instagram user. Typically, this user has a personal brand and attracts an audience of his or her own. This user is often called an “influencer.”
This person can then use the steps explained earlier in this article to find and work with brands that appeal to a similar audience. When they find a brand who wants to sponsor them, they can charge this client a certain amount to create a post that features their product or service. Think of it like social media product placement; just like a business might pay a TV show to have their brand of soda on the countertop in the series finale, they can also pay a person on Instagram to hold that same soda in a picture on their Instagram feed.
Clearly there are more creative sponsorship ideas you can come up with — I decided to go with a cliché …
Influencers are similar to Instagram’s ad manager in the sense that they both draw an audience that brands might not otherwise have access to. However, the differences in this type of sponsorship are that the brand is paying the influencer — rather than Instagram — for access to their audience, and the influencer — rather than the advertiser — is the one creating and publishing the post.
There are numerous influencers for each industry. Here’s a big list of today’s known influencers and the types of audiences they attract.
Using #ad and #spon Hashtags
In the past couple years, brands have come under fire for hiring influencers but not making it clear to the audience that these influencers were getting paid.
Department store Lord & Taylor, for instance, settled charges with the FTC in 2016 after paying 50 influencers to wear a dress in their posts without hashtagging #sponsorship or #ad.
Influencers are supposed to hashtag #ad or #sponsored in posts they’re being paid for, but these tags make some brands uncomfortable because it makes the post appear inauthentic.
In 2017, Instagram released a paid partnership feature to combat this issue — if you tag a brand in a post and the brand confirms the relationship, the ad will be marked at the top with a “paid partnership” label. This also helps the brand gather data regarding how well the campaign is performing.
It’s critical your followers know if you’re getting paid to promote a product. Ethics aside, it could destroy your account’s credibility if you’re caught, and lose everything you’ve worked hard to build — namely, an authentic, trusting community.
If you truly don’t want to post #ad or #spon, there are some ways around it — for instance, Airbnb created the hashtag #Airbnb_partner, to signal a paid partnership without using the word “ad”.
When in doubt, adhere to Instagram’s policies. You can read Instagram’s branded content policies in full here.
Ultimately, getting sponsored on Instagram isn’t easy — it takes time, effort, and perseverance. But if you work hard to differentiate yourself in the industry, and connect on a personal level with your followers, it can be extraordinarily rewarding.

6 Product Management Practices to Apply to Your Content Marketing
Content strategy is a phrase that means a lot of different things to a lot of different people.
For some, it’s a rigorous, drawn-out process that can take months to complete. For others, it’s a handful of slides. Or worse, whatever it takes for the client to sign off the annual retainer. It usually depends on the agency or in-house team you’re working with.

Product management, by comparison, is more standardized. And arguably more sophisticated. It relies on a range of frameworks and models that help product managers:
- Understand their users
- Build a user-base
- Plan for the future
- Prioritize their time
- Stay focussed on the big picture
Steve Messer is a product manager on GOV.UK, the United Kingdom’s online portal. As user bases go, GOV.UK is pretty massive. On a typical day, it gets around 4.9 million sessions from 3.5 million unique users.
Steve agreed to talk me through a handful of product management practices that would benefit any content strategist or creator. If you have questions or want to learn more about anything mentioned below, you can contact or follow Steve on Twitter at @StevenJMesser.
Product Management Practices for Content Marketing
1. Generative and Evaluative User Research
Product managers are serious about user research. It’s one of the key parts of their role. And they don’t just comb the internet for stats to drop into their decks. They survey users on a regular basis to find out what they’re thinking and how their product could be improved.
Why is this so important? Steve says, “You don’t want to spend time building the wrong thing. That’s a lot of wasted effort. For example, you could build an app which solved a problem you’ve been having for years — but without establishing whether anyone else needs that problem solved, you’ll just have wasted a ton of money.”
“Proper research can help you build the right thing, but it can also help you build it right. A good mantra for product development is ‘You are not the user,’ which reminds you that not everyone sees the world the same way. It’s important to understand the diversity of your user base.”
An interesting distinction Steve talked me through was how product managers differentiate generative and evaluative research.
“Generative research helps you define the problems to solve, and evaluative research helps you work out how well you’ve solved those problems.”
Marketers and product managers alike review quantitative data on a regular basis so they can keep track of user behavior and performance. But I wondered how often Steve’s team surveyed their users to gain qualitative insights.
“We try to hold research sessions with users once every two weeks, which helps us stay current and pick up on changes in user behavior.”
Things to stop doing
Cherry-picking stats that back up assumptions that you’ve already made.
Things to start doing
Having real-life conversations with users on a regular basis to find out more about them.
2. Early Adopter Mindset
Any content marketer who has launched a new domain or brand knows how hard it can be. Things take a while to get going. Often, you spend your first few months publishing content that gets seen by next to no one. It’s pretty crushing.
Product managers share our pain. They’re well-versed in launching apps and startups from scratch. And, true to form, they have a methodology of their own for identifying and reeling in those precious “early adopters.”
“Early adopters will help your idea get off the ground,” Steve says. “They’re usually people very interested in the area you’re working in, so they’re happy to answer questions and test things, in return for being one of the first people to use a new product.”
A great way to onboard early adopters is during your user research phase.
“Start off any new project with at least 20 customer interviews. That’ll give you a good idea of what to create and who it’s for. A great question to ask at the end of interviews is: ‘Is there anyone else you think we should speak to who’d be interested in what we’re doing?’ Most people who are passionate about something will know others who are too. Then you can build a community around what you’re doing.”
So, where can we find these people?
“Figure out where they’ll be and speak to them — and not necessarily online. This might mean speaking to people outside a supermarket, near a travel agency, on the bus, or on forums”
Things to stop doing
Staring at your analytics wishing someone would visit your new site.
Things to start doing
Figuring out where your early adopters hang out, contacting them, and asking for introductions.
3. Roadmapping
Product managers are serious about roadmaps. And it turns out they hate it when people confuse Gantt charts with roadmaps. Steve explains:
“It’s really annoying when people confuse roadmaps for Gantt charts. A Gantt chart shows what you’re going to deliver by what date, but that doesn’t always work out in the agile world. A roadmap shows what value you’ll create for users now, next, and later. A Gantt chart assumes that the solution has been perfectly scoped and built upfront, but the agile world is all about starting small and iterating. For that reason, you can’t really pin a date on things.”
So, why is having a roadmap so important? Steve explains, “It’s a good communication device. It tells your users, your team, and your stakeholders what value you’re going to create in what order. A roadmap can show your strategy for achieving the organization’s goals. It helps everyone understand how what you’re doing now relates to future work and priorities.”
When asked if he has any tips for content teams wishing to build more meaningful roadmaps, he says, “Start off with 3 columns: Now, Next and Later. In the first column, write all the pieces of work you’ll need to do now to make your users happy. These are your high-priority tasks. In the second column, write everything you’ll need to do in the future to keep them happy. Or anything you couldn’t fit in the first column. In the final column, write everything you’ll probably need to do at some point to keep adding value over time.”
“It’s that simple,” Steve explains. “Use a spreadsheet, a piece of paper, Post-its on a wall, a Trello board, anything your team and stakeholders can access easily.”
Things to stop doing
Focusing on when you’ll deliver things instead of what value you will create.
Things to start doing
Sequencing events based on what your users want, instead of what your marketing calendar dictates.
4. Value/Effort Mapping
Product managers sit at the intersection of the business, the users, and the development team. As a result, they’re often fielding a lot of requests.
This makes prioritization a key part of the job. You should be able to identify the highest-value tasks to make in order to allocate your time effectively.
“We focus on delivering the right thing in the right way, which means we’re constantly making prioritization decisions. One way we do that is using Value/Effort scoring, a simple technique for working out whether it’s worth doing something based on how much effort it will take you and what you’ll get back.”
How does it work? Start off by drawing a four-point axis, like this:
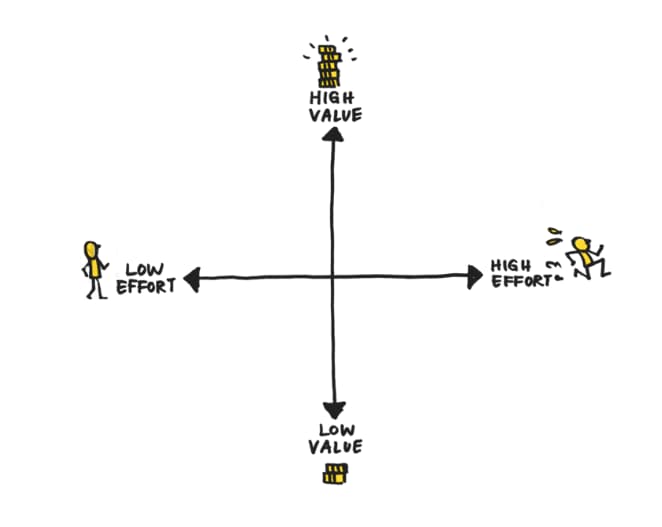 Image source: Mind the Product
Then, plot the requests or tickets that are currently live against it. Tasks that fall into the top-left quadrant are high priority. Tasks that fall in the bottom-right quadrant are low priority.
Things to stop doing
Creating never-ending to-do lists.
Things to start doing
Prioritizing tasks based on the level of value they create for the user and how much effort is required.
5. User Stories
User stories are a great way of bringing your user research to life.
Most marketers recognize these as being pretty similar to personas. However, I think user stories articulate a groups’ preferences and needs in a more human way, because they’re written in the first person. And, because they’re more concise, they can be stuck up on the wall to keep them front of mind.
“User stories are there to remind you that the work you’re doing is for real people, to help them solve real problems,” Steve says. “As the stories are written from the user’s perspective, their needs really come through.”
So how do you write a useful user story? Follow this simple structure:
“As a [type of user] I need [to use a product or feature] so that I [can achieve a goal/receive value/complete a task].”
Steve explains, “Once user stories have been written based on our research, we’ll bring these into team design sessions where we co-design a solution. Once we’ve estimated how much effort it will take to create that thing, we’ll bring the user story into a development sprint to be built and released.”
Things to stop doing
Letting your precious personas gather dust.
Things to start doing
Turning your personas into users stories, sticking them up on the wall, and referring to them in your brainstorms.
6. Stick Stuff On the Walls
This is less sophisticated than the others, but no less essential.
When you’re in the thick of it, it’s easy to lose track of the vision, the strategy, and the end goal. But as soon as this happens, you’re more likely to waste time. Keeping your roadmaps and user stories on the wall for everyone to see is a great way to counter this.
Steve says, “We’ll usually keep our roadmap near the team area, stuck up on a wall for others to see. This means we can point to it and remind the team of our strategy and why we’re doing what we’re doing. But it also allows us to move tasks around as needed.”
“You might expect digital teams to work purely with digital tools, but having something tangible really helps get things out of your head.”
Things to stop doing
Letting your precious roadmaps and user stories gather dust on Google Drive.
Things to start doing
Printing them out and sticking them up for all the team to see.
So, there you have it — six product management practices that will benefit any content team or marketing department.


How to Build a Landing Page: 15 Things to Double-Check
Whether you’re setting up a landing page for the first time or the billionth time, it’s easy to forget something.
It’s just one type of page on your website, but there are lots of moving parts you need to juggle. Some of those moving parts are more important than others — if they get lost in the building process, you can lose out on valuable conversions.
One of the best ways to make sure you’ve crossed your t’s and dotted your i’s when building a landing page is to have a checklist handy of all the things you need to do. That way, anytime you want to publish a landing page, you can do a quick scan of all the essentials to optimize each landing page to generate the leads your business depends on.

Want a checklist to help you build your landing pages? Keep reading. We’ll outline the essential elements you need to have on your landing page before you hit publish.
Keep in mind that this checklist is a jumping-off point — there are a number of other company- and technology-specific steps you need to take as well when optimizing your landing pages for success.
Landing Page Content
This section is dedicated to all of the content you put on the landing page — namely the copy, images, and form. It’s a zoomed-in look at the elements that you’re creating for the landing page. For bigger-picture issues such as the landing page layout or user experience, skip to the sections below.
Create a headline using actionable, value-driven words.
Your landing page headline is just like any other headline — it should entice people to do something. In this case, that something is filling out the form on the landing page. Make sure that your copy uses action-oriented words that communicate the value of the offer behind the landing page. For example, compare “Free Checklist: Your Go-To Guide for Optimizing Facebook Ads” to “Facebook Ads Ebook.” The first is much more enticing.
Make sure the headline matches your source copy.
How do people get to your landing page? You want to make sure that the copy on your landing page matches the copy at the referring source. For example, if your traffic is coming from someone who clicked a CTA on your blog, you should use similar language in your headline that you’ve used on your CTA. The referring source sets expectations on what’ll be on your landing page — don’t let people click through and be disappointed.
Write a sub-header that concisely describes the benefit of the offer.
Think of your sub-header as a more practical extension of your headline. Your headline should be flashy yet indicative of what people will get by filling out the form. Your sub-header is a much less flashy tagline — it’s very clear on what the benefit is of the offer. So if your headline is “Free Checklist: Your Go-To Guide for Optimizing Facebook Ads,” your sub-header would say something like “Learn all squeezing more traffic, leads, and customers out of Facebook.”
Write body copy that’s scannable, scrollable, and compelling.
Next up is the actual body copy of your landing page. People shouldn’t have to read this part of your landing page to know what your offer is about — the headline and sub-header should accomplish that. But if they want more info on the offer, the body copy’s the place to find it. There’s not a set length on the copy — just make sure it’s informative and enticing, yet easy to scan.
Bullet points can help with scannability. Also, think about keeping your paragraphs to only a few sentences — that’ll help people on mobile, in particular, scan through your page. If you need help with making your copy informative and enticing, get a checklist specifically for landing page copy here.
Optimize the page title, URL, and meta description for search.
If you’re hoping to get long-term traffic, leads, and customers out of your landing pages, you need to optimize for search engines. Make sure that the page title, URL, and meta description all have keywords in them — not necessarily to get you ranked in search engines, but to get people to click on your listing if they find you there. If you need to brush up on your landing page SEO skills, check out this post.
Include an image that shows users what they’ll get after filling out the landing page form.
People always say that you should use a “compelling” image. But what the heck does “compelling” mean if you don’t already know? The best landing page images are ones that tell you what lies behind the landing page. So if people will get an ebook on Facebook Advertising, your image should be a high quality visual representation of that ebook on Facebook Advertising. You wouldn’t put a high quality stock photo of, say, a beach, even if your offer promises to get the person who downloaded it a raise, which’ll end up allowing that person to take vacation. Make sense?
Optimize your image’s alt-text.
You should never optimize your marketing for the best-case scenarios — trust me, it never works that way in real life. So even if you’ve chosen a perfect image for your landing page, it’s possible it won’t show up. Maybe there’s something wrong with your visitor’s browser. Maybe there’s something wrong with your website. Whatever the reason is, just make sure you have a backup plan: adding alt-text to your images. Bonus: That text is crawlable, so it could give search engines one extra little reason to feature you in search results.
Landing Page Form
Ensure your lead-capture form is the proper length.
Your form doesn’t need to be short or long to be effective — it just needs to match the goal you have for the page. So if you want a lot of contacts from your form but don’t really care how high quality they are, keep the form short. If you care for quality over quantity, make it longer. The key is to know your landing page goal and stick by it with your form length.
Customize your submit button.
Look at the bottom of your form. Does the button that submits the form say “Submit?” STOP. This button should have action-oriented language, too. For example, on a landing page for an ebook, you could change that bottom copy to, “Get Your Free Ebook Now.” Much better than the generic “Submit.”
Allow your form to offer progressive profiling for return visitors.
Some people who fill out your landing page forms have already filled out forms on your website, which means if you have a contact database set up, you already have their information. So why make them fill out information you don’t need? Instead, you can enable progressive profiling — this’ll show new form fields to returning visitors. You’ll get more information on your leads and customers, and they’ll have much fewer form fields to deal with each time they come to your website (which is especially helpful on mobile).
Landing Page Layout
Now, let’s zoom out slightly to look at elements that affect the page as a whole — not just the content you’re creating.
Make sure your landing page content passes the blink test.
Even if you’ve checked off all of the above off your landing page to-do list, you still need to step back and take the “blink test.” Look at your page for five seconds (aka the time before you need to blink again). Do you know what your landing page is about? What the value proposition is? How to get the offer behind the landing page? If not, you’ll need to tweak the above items again.
Remove the top navigation menu bar.
This is one of the things you should test on your own to confirm, but from our tests, we found that removing our top navigation bar improved conversion rates on our landing pages. If you’re doing the same with your landing pages, triple check to make sure that top navigation is gone.
Make your page layout responsive to mobile devices.
You want people to be able to fill out your landing page form no matter what device they use. But if your mobile visitors are doing the frantic pinch-and-scroll, chances are they’re going to skip filling out your form. So make sure your landing page layout is responsive so people can access your landing page no matter the width of their browser. Your marketing software should have this capability baked-in already, but it’s always smart to double check that it’s working before you hit publish.
Landing Page User Experience
Let’s zoom out once again to look at some of the features of the page that play into the user’s larger experience with your website.
Make sure your smart content contains logical personalization tokens.
There are few things more embarrassing and noticeable than poorly set-up smart content. You’ve probably gotten emails before that say “Hi [FIRST NAME],” right? That’s unfortunate, but it’s only visible to one person — not everyone who visits your landing page. So if you’re going to go the extra mile to personalize your landing page with smart tokens, make sure the “default” ones are customized and logical in the place they’re used. For example, you can use “there” as the default token so that when you don’t have someone’s contact record on file, it just says “Hey there,” not “Hey FIRSTNAME.”
Set up a thank-you page and/or kickback emails.
Last, but certainly not least, make sure the entire conversion process is functional. After people fill out your form, are they taken to a thank-you page? Does it work every time? Do they get a kickback email where you can follow up with each user after they’ve downloaded your resource? Make sure this is all working properly so you don’t put your contacts through it.



Neural Adaptation: 5 Key Ways to Boost Your Conversions Using this Psychological Principle
I have a seven-month-old male Caucasian Shepherd puppy called Fierce. When I started walking Fierce at about three months old, I noticed the all-too-familiar struggle I’ve had with pretty much every dog I’ve owned: a struggle with the leash.
The first time I put Fierce on a leash, there was nothing I could do to get him to walk. He resisted every attempt to get him to move and tried everything to escape the leash. This struggle gradually reduced over time as Fierce got used to the leash. Now, he immediately runs after me anytime I grab it.

But this experience with Fierce reminded me of a concept I learned in Psychology class: neural adaptation (or sensory adaptation).
Have you ever thought about why you no longer feel your clothes or why it eventually feels as if they’re part of you? Or why, though it initially feels different, your shoes feel like an extension of your legs after you’ve worn them for a while?
Most likely, you haven’t thought about it. This is because you’ve gotten so accustomed to the clothes and shoes you wear, you fail to realize the clothes and shoes aren’t extensions of your body.
This is explained by a concept called neural adaptation: a gradual decrease in response to a stimulus due to constant exposure to it. This concept explains why our clothes, shoes, and caps feel like a part of our body and why we feel slight pain when we dip our hand (or body) in slightly hot water but feel almost nothing if our hand remains in the slightly hot water despite its temperature not changing considerably.
We’ve been wired to tune out stimuli — whether it’s pain, noise, smell, or vision — after constant exposure to it.
While it’s easy to picture my puppy, Fierce, resisting and struggling when I began to walk him, it might be difficult thinking about how that act might directly apply to your marketing or conversions. Allow me to explain.
Neural Adaptation is Why Red Beats Green
When it comes to copywriting, the debate about which CTA button color is best is one for the ages. Luckily, HubSpot has a landmark study comparing the red and green CTA button color:
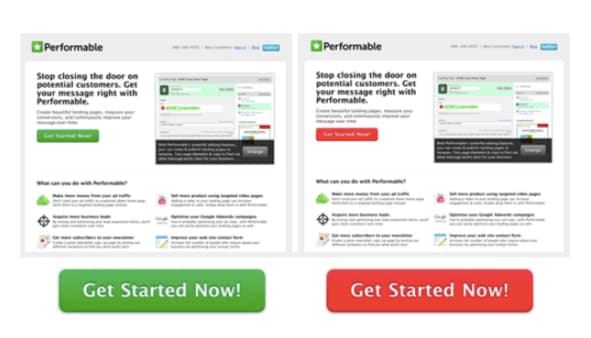
Image source: Performable
Many reasons were given to explain why the color red might have outperformed green, but we don’t have to look far to see another example of neural adaptation. Green is the color used in the test.
Users were accustomed to the color green on the page and were likely to tune it out until they no longer noticed it which weakened the effectiveness of a green CTA button. Red stood out, grabbed participant attention, and was more likely to be clicked.
When trying to boost your conversions, understanding neural adaptation can help you more effectively design your pages for maximum ROI. Ready to put all this to use?
5 Ways to Boost Your Conversions Using the Neural Adaptation Principle
1. Make sure your CTA button color stands out compared to your site’s color scheme
When choosing a CTA button color, it’s important to realize what’s most important isn’t whether you use the red, green, or orange button color.
Rather, it’s that your CTA button color stands out in comparison to the overall color scheme and elements of your site/page. A red button on a page with a red color scheme will likely perform poorly. A green button on the same page will likely stand out.
In this review of Bluehost, for example, while the page sports a blue color scheme and screenshots taken from Bluehost’s website also sport the color blue, the CTA button is orange which stands out from the overall look and feel of the website.
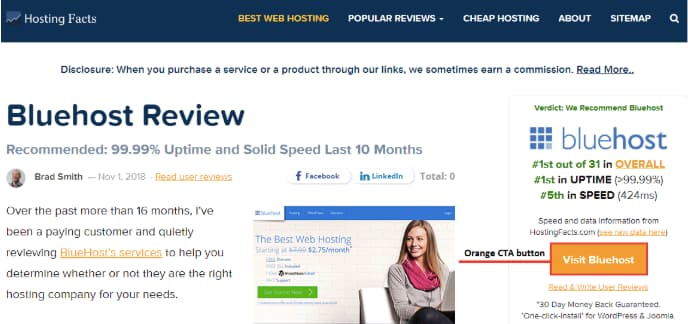
Image source: Bluehost
A blue CTA button would have been less effective on this page.
2. Make sure your CTA button is big enough to be noticeable
Often, it isn’t just about your button color. Size matters, too.
After writing many articles on the subject of CTA buttons, Unbounce concluded the best button for conversions is the “Big Orange Button,” or BOB. But instead of focusing on the color, let’s consider the size.
“Smashing Magazine” advocates using a bigger CTA button — up to 20% bigger than a site’s logo. In a case study involving SAP, WiderFunnel reported a 32.5% increase in conversions and 154% ROI by using a large orange button.
The whole point of neural adaptation is this: don’t let key elements you want users to notice blend in. When you optimize the size of your CTA button, they become more noticeable and users are more likely to click them.
3. Present fewer options for better conversions
In a study observing how shoppers in an upscale grocery store responded to choice, researchers Sheena Iyengar and Mark Lepper found more isn’t necessarily better.
In the study, shoppers were split into two groups: the first group was exposed to a table displaying 24 varieties of jams while the second group was exposed to a table displaying six varieties of jams.
While the table with more jams attracted the attention of 60% of shoppers, the table with fewer jams converted significantly more by a factor of 10 to one, or up to 900%.
Various studies have also found that presenting people with more form fields generally lowers conversion rates. And reducing form fields can boost conversions. In fact, one study found reducing form fields can increase conversions by up to 160%.
Present fewer CTAs, form fields, and requirements. This way, the options that are most important stand out and conversions go up.
4. Ensure your social proof elements stands out
In one of my recent articles about the bandwagon effect, I shared a case study involving a split test conducted by comScore, an Internet analytics company.
For its test, comScore focused on optimizing customer testimonials and used three variations:
- The original copy: Displayed a vertically aligned testimonial with no logo
- The first variation: Displayed a vertically aligned testimonial with a logo
- The second variation: Displayed a horizontally aligned testimonial with a logo
- The third variation: Displayed a horizontally-aligned testimonial with a logo
Each variation using a logo significantly outperformed the variations without a logo — and the reason isn’t far-fetched: The logo helped the testimonials stand out, keying into the neural adaptation principle.
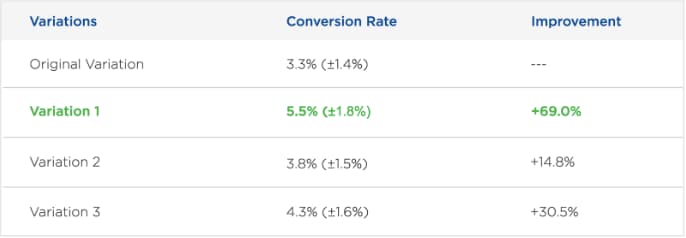
Image source: Optimizely
It’s important that your social proof elements stand out; this means they should include logos/pictures, be bigger, and be bolder.
5. Optimize your pricing to ensure your desired package stands out
There are two ways to use neural adaptation to optimize your pricing page:
Option 1: Use decoy pricing
In his famous decoy pricing experiment, psychologist Dan Ariely surveyed 100 of his students at MIT and asked them to choose between the following two options:
- Web-only subscription — $59
- Print and web subscription — $125
68% chose the cheaper $59 option, while 38% chose the expensive print and web option.
The option Ariely really wanted to sell was the print and web subscription, so he tweaked his offer to include a decoy; he added a third option, the “print-only subscription,” for the same price as the print and web subscription.
- Web-only subscription — $59
- Print-only subscription — $125
- Print and web subscription — $125
The result was stunning. 84% chose the print and web subscription and 16% chose the web-only subscription.
What changed? Ariely’s introduction of the decoy option disrupted things and made the actual option he wanted people to pay attention to stand out.
Option #2: Leverage the compromise effect
Take a look at this pricing from Aha!:
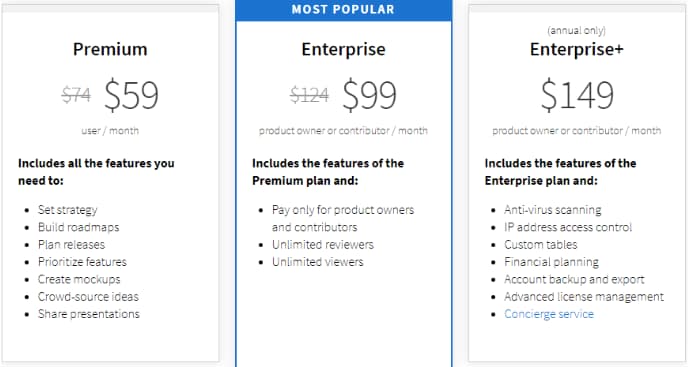
Image source: Aha!
See how the Enterprise plan stands front and center? It’s a compromise between the Premium plan and the Enterprise+ plan, and it is the option Aha! really wants to sell.
Not only is it strategically placed in the center, but both the options and the pricing indicate a compromise between the cheapest and most expensive plan. The blue overlay and the “Most Popular” text draw attention to it. As a result, it stands out compared to the other options.
What Blends in Gets Ignored
The point of neural adaptation is what stands out get noticed and what blends in get ignored. Make sure to focus special attention on elements you want readers of your pages to notice using one or more of the above principles.

Which Countries Get The Most Time Off Work? (Interactive Map)
Undoubtedly, paid time-off, vacation days, and parental leave are critical factors for long-term employee satisfaction — in fact, 43% of employees said annual leave is the work-related benefit that would make them feel most loved in the workplace.
But vacation days and PTO vary greatly depending on the culture in which they’re offered. Certain countries place more emphasis on the “Work hard, play hard” motto, for instance, while other countries are typically more lax in their time-off requirements.
Nowadays, moving overseas for a job is becoming increasingly common. The percentage of Americans ages 25 to 34 who are planning to move overseas has quintupled in two years, from less than one percent to 5.1 percent.
If you’re considering a global move, however, you might want to pay attention to the following interactive map, which displays data gathered from the World Policy Analysis Center, the International Labour Organization (ILO) and Globalization Partners. The map shows which countries offer the most potential time off — including paid, unpaid, parental, and sick time-off.
Whether you’re considering a move or you’re just curious, go ahead and take a look.
Map courtesy of Resume.io.

The 8 Types of Social Media Community Managers (+ Job Descriptions)
In the last decade, the need for social media managers has boomed. According to the U.S. Department of Labor statistics, this trend is not slowing down any time soon. The role of a social media manager or specialist is categorized within the “Advertising, Promotions, and Marketing Manager” sector of the labor force, which is projected to grow by 10% before 2026.
Although more companies are hiring social media community managers, the role hasn’t evolved much towards goal-oriented, metrics-driven marketing. This could be because many companies haven’t figured out the right way to measure the ROI of their efforts. Because of this, they don’t know how to hire someone who can help them drive real business results.
Download a ready-made job description for the social media manager role here.
With little focus on bottom-line social media efforts, companies relegate the social media role to people with little experience. Once hired, those social media specialists aren’t ready to lead successful goal-oriented efforts.
While a social media job might center around posting strategies, companies should broaden their search and look for experts who are also creative or strategic. Here’s an example of what a strong job description for a social media role might look like:
A strong social media manager should have versatile skills that span from copywriting to design, but each type of social role usually requires a primary focus or expertise.
If you’re a manager trying to hire your next social media maven, it’s important to identify how your company needs to grow first. For example, if you want to expand your brand on visual platforms, you will want to hire a social media expert with knowledge and experience related to multimedia production.
If you’re an aspiring social media manager, it’s also important to know which skills you should hone in on to become in expert in your field.
To help businesses managers and young social media specialists, we’ve crafted a list of eight social media job roles that could help a company grow.
Social Community Manager Jobs
1. Copywriter
Content is a key component in any marketing strategy, especially when social media is involved. Even if you have dedicated bloggers or ebook writers, text-based content still needs to be adapted to each social network. For example, a strong social media manager might write Instagram captions with a relaxed and relatable voice, but might write in a more business-oriented voice for LinkedIn
This role is typically responsible for the creation and adaptation of written content for specific social media networks. This person should be comfortable writing social posts that are as short as 140 characters or blogs over 200 words.
Skills Necessary
- Copywriting
- Understanding of Brand Voice
- Adaptability
- Positioning
- Creativity
How This Drives Results
Writing generic posts for all platforms might make your brand seem out of touch, so it’s important to have a social media manager who can maintain a brand voice while still adapting it to different platforms. A great caption or piece of written content that speaks directly to your audience could lead to more engagement.
2. Digital or Multimedia Producer
In 2018, 80% of marketers used visual assets as part of their social media strategy, and 63% were regularly using video.
With the growth of visual platforms like Snapchat and Instagram, and the launch of Story and Live Video features on most major social media sites, there is now a greater need for social media managers with multimedia skills.

This type of social media manager might focus on creating images or graphics to accompany Facebook posts, taking and curating photos or videos for Instagram, producing mobile-optimized stories for Snapchat, and creating other content from scratch that helps to grow your following.
Skills Needed
- Experience with Design Software
- Basic Photography and Videography
- Adaptability
- Creativity
How This Drives Results
Adapting visual content specifically for each social network yields more clicks and leads. For example, in an A/B test, we found that tweets including both a link and an image optimized for the platform yielded 55% more leads than tweets with just a link. Adapting and creating content for each specific network is critical to driving results.
3. Social Media Metrics Analyst
As all marketing roles become more and more data-driven, a social media community manager needs to be able to dig into the data, analyze that data, and draw actionable insights.
 That includes macro data, such as overall reach and leads generated, and micro data like individual experiments around content positioning. This person should also be able to set goals that are just out of reach — and find a way to hit them.
A successful social media community manager enjoys looking at data and knows how to use it to make informed decisions. At the same time, this person shouldn’t be so stuck in the data that it prevents experimentation and risk-taking.
It’s important for a social media community manager to constantly test new strategies, new content, and new campaigns. This person will be skilled at running experiments, such as post frequency tests, and refining their social strategy based on the results.
Skills Necessary
- Data Analysis
- Curiosity
- Experience with Running Scientific Experiments
- Strong Presentation Skills
How This Drives Results
Constantly testing and analyzing results helps social media community managers build more effective standards in their routines. For example, that Twitter image test discussed above was designed, implemented, and measured by one social media manager. That experiment’s results have had a serious impact on our social media efforts.
4. News Commentator and Curator
A successful social media community manager will be able to find new opportunities for the company by keeping track of their industry, news, and social media trends. They need to know where to look for the news and what people are saying about it. They also need to know what’s changing on social networks and in the industry. When shifts or new trends occur, they must be able to react and respond accordingly.
 They should be skilled at “tactful newsjacking,” meaning the ability to (tactfully) capitalize on a news story, trend, or hashtag. And if something goes awry, they need to be able to mitigate the issue calmly and diplomatically.
Recently, Netflix capitalized on the news that IHOP was changing its name to IHOB. The Netflix US Twitter account simply tweeted, “brb changing my name to Netflib.” See this list for a few other great examples.
The social media community manager can act as an extension of the PR team, connecting your team directly with journalists and reporters, which can result in increased coverage for the company. For global brands, it will also be important for the social media community manager to be able to think outside their own region.
Skills Necessary
- Content Curation
- Hungry for Information
- Effective Monitoring
- Quick Decision-making
- Good Judgment
- Can Think Globally
How This Drives Results
Staying on top of trends as they rise allows your social media community manager to newsjack. Posts relating to news or trends can boost social media traffic, encourage more engagement from followers who might re-share or retweet your content, and could even gain attention from journalists looking for story fodder.
5. Customer Service Representative
When someone runs social media, they are perceived as the voice of the company. They’ll constantly get questions and comments about their company’s products, services, and content which might not always be positive.
 The social media community manager needs to be able to communicate with people in different buying stages and mood dispositions. They’re the “traffic director.” They must be able to understand where a follower’s question or comment is coming from, address it appropriately, and provide a course of action or solution.
To successfully communicate with followers, they should be intimately familiar with their company’s brand, products, and services.
Skills Necessary
- Strong Communication
- Adaptability
- Calmness
- Desire to Solve Others’ Problems
- Ability to Troubleshoot
- Knows @here to Pass Complex Questions,
- Knowledge of the Company, Products, and Services
How This Drives Results
Having a link to customer service on social media allows you to respond to customer issues on your audience’s preferred platform. Responding to someone’s concerns on social media, rather than over a phone call, can also save your company time, money, and other resources.
Because social media is a public forum, your community manager can use these opportunities to showcase your company’s quality of customer service. For example, if a company is happy with your product or tweets about a positive experience, you can retweet or share the post.
6. Community Manager and Facilitator
Part of building a following on social media is helping that following connect with each other and become a community.
True communities don’t simply engage with the company or moderator; they engage with each other — which actually scales the social media community much better, too. But community management takes work, including asking questions to seed discussions and kicking out people who spam or otherwise detract from the community.
 A good facilitator asks relevant and thought-provoking questions in an engaging way. Another part is setting the tone for the community, being present, enforcing community guidelines, and sometimes even removing members or deleting posts when appropriate.
Skills Necessary
- Resourcefulness,
- Ability to Connect People
- Can Stimulate Discussion
- Firm but Empathetic
How This Drives Results
If your followers like your community, they’ll recommend it to others — either on purpose or inadvertently by commenting and having it show up on their timeline. This leads to more exposure, which leads to more reach.
To grow a social following, the social media community manager needs to help the company’s community get value from each other.
7. Funnel Marketing Manager
Social media is a powerful tool that can help the whole funnel, not just the top. It expands the reach of your content, attracts visitors to your website, generates leads, and nurtures those prospects into becoming customers. That means a social media manager needs to be able to pick and share content in a way that will accomplish each of those goals.

At the top of the funnel, they need to share social content that generates leads. As they get further down the funnel, the social media expert needs to engage one-on-one with potential customers who are considering a product or service.
Social media is also particularly effective as a lead nurturing tool because prospects use multiple media to consume information. Because social channels are more fast-paced than traditional media, like email, you can engage with leads in a more timely manner.
Social media community managers need to have a strong understanding of the sales and marketing funnel. Then, they must understand which content is appropriate for each level of the funnel.
To be effective, this manager will need to keep in touch with multiple teams in their company. For example, they’ll need to pass appropriate leads to the sales team or product feedback to customer service.
Skills Necessary
- Funnel Understanding
- Knowledge of Content for Each Funnel Stage
- Basic Sales Skills
- Strong Communication
How This Drives Results
Sharing conversion-oriented content on social media can attract more visitors to your site and convert them into leads for your sales team. According to a 2018 GlobalWebIndex Study, 40% of digital consumers use social media as a tool when researching products. With the right person at the helm of your company’s social media accounts, your posts could catch the eye of these users.
8. Project Manager and Campaign Coordinator
Many people across a company may want certain things posted, responded to, favorited or “liked.” It’s up to the social media manager to decide which requests to honor and when to honor them. This means they need to be highly organized and able to manage multiple requests.
 They need to be able to quickly assess whether a request would resonate with the company’s followers, or whether it’s too niche or too narrow. For example, a location-specific post might be too narrow to send to a company’s entire Twitter following.
Social media community managers also need to effectively coordinate with different departments to organize campaign launches, while still pushing launches and growth initiatives of their own.
Skills Necessary
- Strong Organization
- Strong Communication
- Ability to Negotiate
- Data-Based Decision-Making
How This Drives Results
Social media plays a big role in promoting initiatives from different departments and teams across a company. When a social media community manager effectively balances these promotions with other engaging and relevant content, they’ll be able to win the hearts and minds of their followers and internal stakeholders.
How to Think About Social Media Management
With this diverse and highly visible role, it’s hard to believe that the social media community manager position is often still considered entry-level.
These eight jobs should be in the back of any hiring manager’s mind as they interview potential social media managers. If we can change the perception of the role, we’ll have a good chance of mastering the ability to measure and value social media’s ROI.


How to Upload Documents and Presentations on LinkedIn
Does this content marketing formula sound (very) familiar?
- Create content
- Publish content on my company’s website or blog
- Post the link on all my social channels
- Cross fingers and hope my audience bites
This is a foundational play in most marketing playbooks — and sometimes, it works. But waiting and hoping to see if your audience can be convinced to click a link back to your website isn’t the only option marketers have anymore.
In April 2019, LinkedIn announced that users can now upload documents and presentations to the platform. Instead of having to convince users to take an extra step back to your website, you can now meet them where they’re already spending a lot time — their LinkedIn feeds.
Have a deck from a recent talk you gave? Or maybe an ebook your company wants to distribute to a relevant audience? This new feature enables you to post content assets directly to your feed for your followers to view without needing to download a file or visit a new location.
To give you a better idea of how this feature looks in action, here’s a recent presentation the HubSpot team shared on LinkedIn:
Uploading documents and presentations is a smart way to connect with your followers on a deeper level and encourage more meaningful engagement. In fact, investing in more visual and multimedia content on LinkedIn just might help you reach a broader audience outside of your direct network.
To get started using the new feature, you can follow the steps below.
1. First, navigate to your LinkedIn feed, or the LinkedIn group where you want to share your document or presentation. At the top of the feed, you will see the “Start a Post” box with three content type options. Click on the document icon, highlighted here:
2. Once you click on the document icon, you’ll be prompted to select a file from your computer to upload. LinkedIn accepts .pdf, .ppt, .pptx, .doc, and .docx file types.
3. You’ll be able to add a title, caption, and include relevant hashtags and user mentions in the description box before finalizing your file upload. You can also control who sees your file if you want to limit access to your connections only.
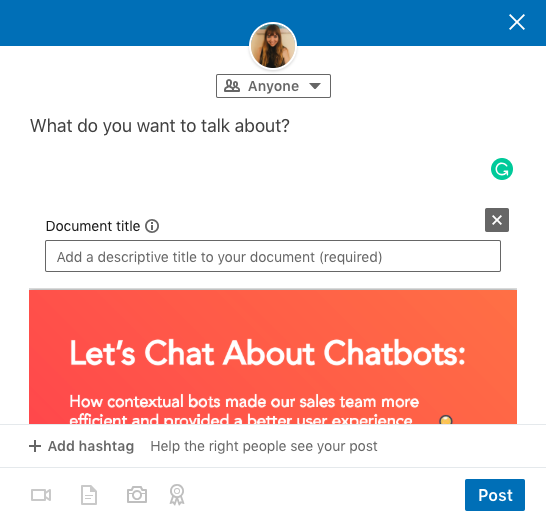 4. When you’re ready to go, click “Post” and the file will be shared on your feed with the audience you specified, or with members of the LinkedIn group you selected in the first step.
And that’s it! You can start sharing decks, presentations, ebooks, case studies, and more multimedia content assets directly on LinkedIn.

How To Leverage The Rise of “Near Me” Searches
Nowadays, voice-enabled devices such as Amazon Alexa and Google Home are becoming increasingly commonplace. Additionally, mobile searches for local services continue to rise, and by 2021, mobile devices are expected to influence $1.4 trillion in local sales.
All of which is to say — people searching online for local services is now more prevalent than ever before.
If you haven’t optimized your business for “near me” and voice-activated local searches, it’s time you consider doing so. Here, we’ll explore the importance of local SEO, how you can rank both on desktop and mobile for “near me” related searches, and how to optimize for voice search, as well.
The Rise of “Near Me” Searches
In the past two years, “Near me” searches have witnessed exponential growth, as highlighted in the stats below:
- There has been 150% growth for phrases like “near me now“. For example “Pizza near me now“.
- There has been a 900% growth for phrases like “near me tonight/today“. For example “clubs near me tonight“.
- There has been 200% growth for phrases like “now” + “near me“. For example “stores open near me now“.
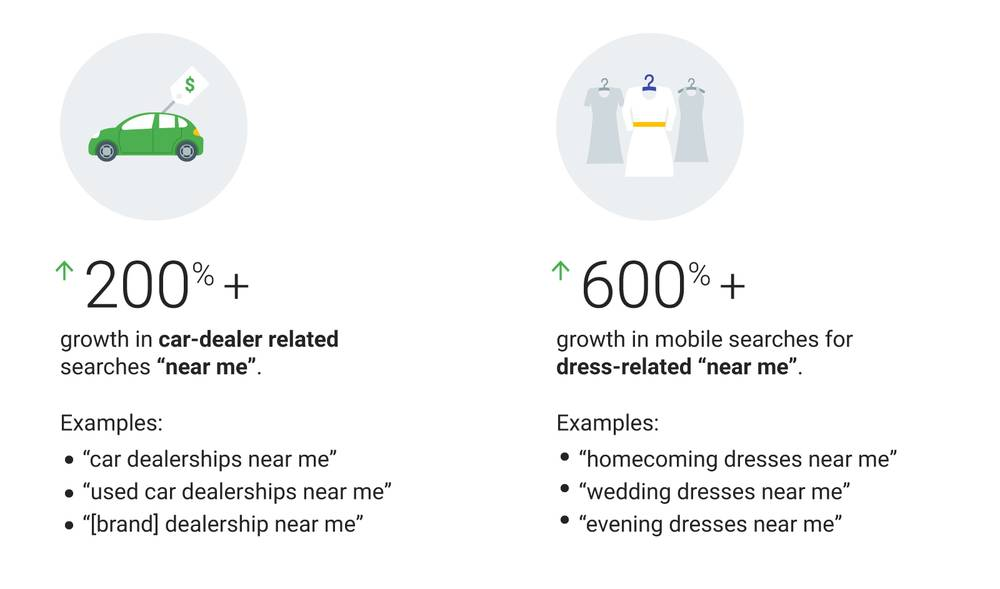
Additionally, from 2013 to 2017 there was a 900% increase in “near me” searches:
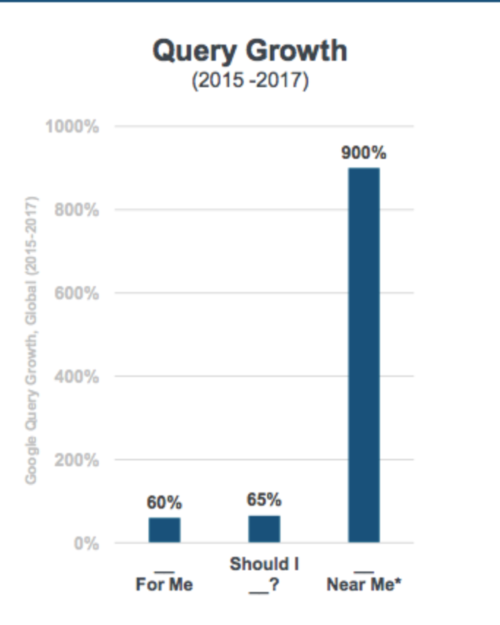
Most users now have location or GPS enabled on their mobile devices — and since most apps require this to be enabled, even users who previously had this turned off for privacy reasons now leave them on. This allows Google to automatically detect their current location and present the most relevant and localized search results to the user.
“Near me” searches are critical for marketers, since it allows you to reach your intended customers during micro-moments when they most desire your service or product.

As pointed out by Lisa Gevelber, Global VP Marketing, Google, “‘Near me’ searches are used to find a specific thing, in a specific area and in a specified period of time.”
The rise of “near me” search queries with purchase intent are rising considerably. In fact, there has been a 500% growth in “near me” mobile searches that contain a variant of “can I buy” or “to buy” over the last two years.
Adding “near me” searches at the end of a search query demonstrates the user’s eagerness to take immediate action on the search results. More than likely, the user intends on visiting a place to purchase a product immediately, or within the foreseeable future.
Now that we’ve explored the popularity of local search, let’s dive into the top categories that correspond the most with “near me” searches.
Top ‘Near Me’ Query Categories
A survey conducted by Uberall tracked the responses of 1,000 smartphone owners and found around 82% of smartphone users had conducted a “near me” search between July 23 and July 27, 2018.
The hierarchy of the categories are given below:
- Food: 84%
- Entertainment: 56%
- Banking: 50%
- Apparel: 41%
- Persona care: 38%
From the survey, it’s clear the maximum “near me” searches are conducted for food businesses, followed by entertainment and banking. However, apparel and banking businesses aren’t too far behind. The results clearly show the intent of the searcher. If you’re a business owner, then optimizing for “near me” searches is absolutely essential for the success of your business.
How Do You Optimize For “Near Me” Searches?
Optimizing your business for “Near me” searches is extremely crucial to increase your business presence in local search.
Here are some ways through which you can optimize your business for “near me” searches:
1. List your business on Google My Business and optimize it.
In order to get your business to the top of “near me” searches, you need to rank your business on local business results’ pages, as shown in the screenshot below:
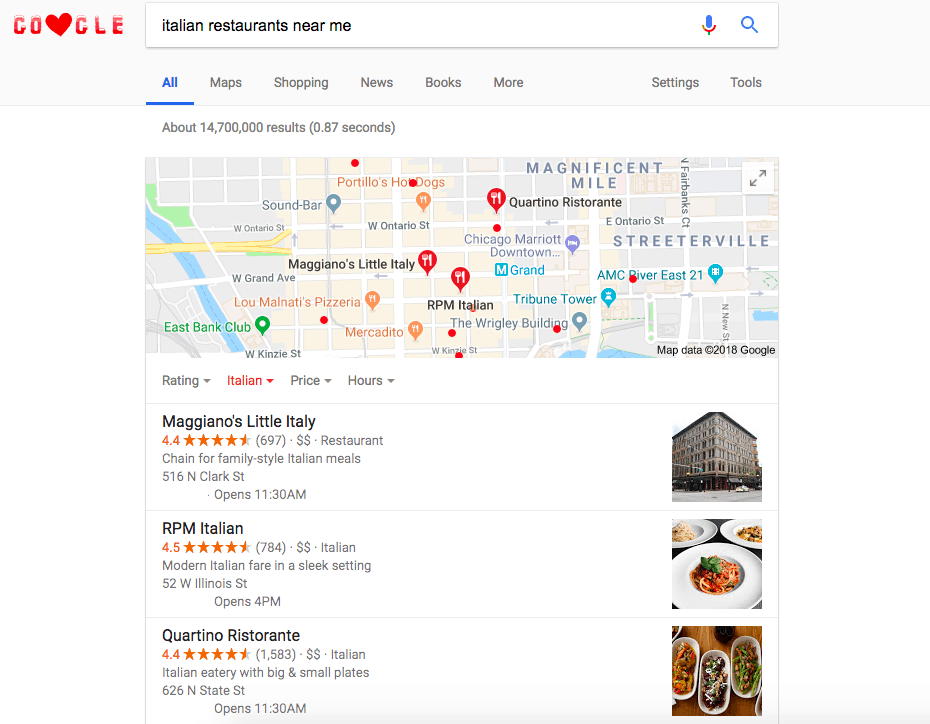
Maggiano’s Little Italy is ranking on top of the local search results when searched with the query “Italian restaurants near me” — but how?
In order to list your business in the local search results, you need to open a business account on Google My Business. Simply click “Start now” and follow the instructions provided to add your business on Google local.
It’s equally important to follow the instructions below to properly optimize your business listing in the Google local search results:
- Enter your complete business name and business address.
- Add the complete direction to reach your business address using Google Maps. Follow this guide to edit your business details in Google.
- Add your business hours and contact details like phone number and website.
- Include your business in the correct category and be as specific as possible.
- Add photos of your favorite services.
- Ask people to leave reviews on your business page. More than 145 million people visit Yelp each month just to read the reviews left by other users. Reviews are a great way to filter the best businesses from the average ones, and Google always prefers to list the best businesses on top. Hence, if you wish to move your business to the top of the local search results then you need to acquire a ton of positive reviews for your business.
- Make sure the NAP (Name, Address and Phone Number) remains consistent on each of your business profiles scattered around the web, including social media sites like Facebook.
- Ensure your business information remains accurate, comprehensive and up-to-date.
Lastly, you’ll want to add attributes like amenities your business offers, such as WiFi. For instance, have a look at the below screenshot that highlights the different amenities offered by the Marriott’s Grande Ocean Hotel to its guests:
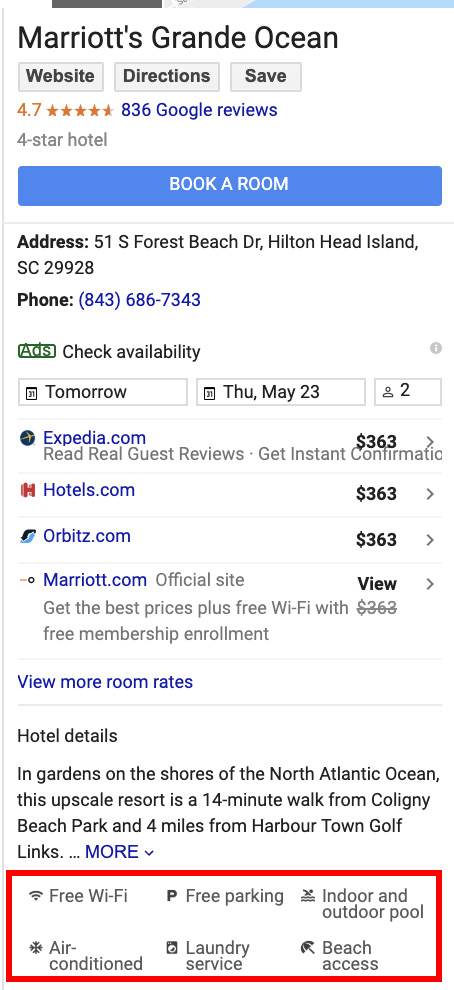
2. Use proper schema markup.
Schema markup is a great way to help your business stand out from competitors in the local search results. Schema data helps search engines acquire more information related to your business and present them in the form of rich snippets, which are immensely helpful for the user.
Have a look at the below screenshot, where proper holiday hours have been added in the business listing to avoid any confusion to the visitor. This information is added with the help of a schema markup:

Add schema markup to every location page that your business serves. The schema data should have the business address, hours of operation, and contact information.
Additionally, add the homepage schema markup to allow your business to show up in the Knowledge Graph and help ensure business information accuracy. An example of an organizational schema markup can be seen in the screenshot below:
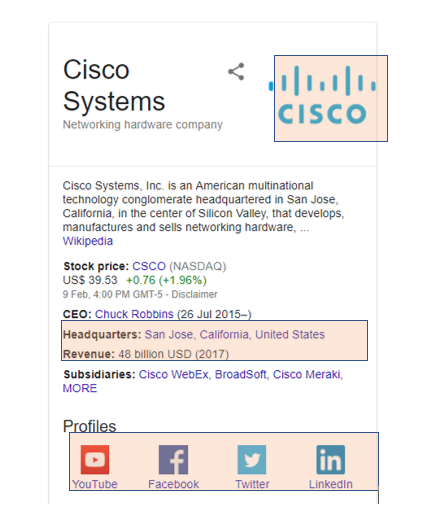
Use this sheet to add local schema markup on your website. Remember to include only the information in the schema markup that you have displayed in the webpage.
3. Acquire backlinks having geographic anchor text.
Backlinks work well to improve your business rankings on Google local. In order to increase your business rankings for “near me” searches, you need to acquire high authority/relevant backlinks with geographically-rich anchor text.
For example, if you want to rank for “near me” searches for the location “Los Angeles” and for the category “bakery”, then you need to use location rich variants of anchor text like “best bakery in Los Angeles”, “bakery in Los Angeles”, “Los Angeles bakery 3rd street”, “LA bakery 3rd street”, “cakes in 3rd street LA”, “fresh cakes LA”, etc.
4. Create pages targeting every location of your business, and optimize them.
If your business serves several locations then you need to create different pages for different locations. For example, if your bakery business serves five different U.S. cities including Los Angeles, Chicago, Washington, Boston, and Austin, then you need to create five different web pages serving each of these different cities.
Additionally, you need to optimize those web pages for “near me” searches by using the following tactics:
- Keep user-friendly URL structure for easier readability. For example, if you’re advertising a bakery in Los Angeles, then name your page “www.mysite.com/LA-bakery”.
- Optimize the title and meta tags for your target keyword.
- Add proper alt tags and title tags to the images used in the web page. It’s better if you provide an image of your bakery and use your location keywords in the alt and title tags of the image.
- Add a suitable description to your bakery and include store hours, your menu, store directions, and other amenities offered.
- Include a video of your store and add a video transcription to it. This way, you’ll be able to increase the relevancy of your web page with respect to the specific location your business is serving.
Lastly, use internal linking wisely. You can link to different location-specific pages in the footer of your site with the anchor text “near me” in them.
For instance, have a look at the below footer from TripAdvisor, which links to location-specific pages and also uses the words “near me” in the anchor:
5. Make your site mobile-friendly.
Google prefers to return those sites in the search results that offer the best experience to the user. Making your site mobile-friendly and improving your overall site speed are some of the best ways to improve your site experience for users and rank higher for “near me” searches. Here are some of the best ways to make your site mobile-friendly:
- Make your site responsive so that the same content and experience is delivered to all the visitors regardless of the device they’re using to visit your website.
- Improve your site speed and create AMP pages.
- Enable compression on your site by using Gzip.
- Use the search bar on your site to make it easier for people to look for information.
- Minify CSS, JavaScript and HTML.
- Reduce the number of redirects and remove render blocking JavaScript.
- Avoid using Flash as it degrades the user experience.
- Turn on auto-correct for forms and the search bar.
- Keep the button sizes large so that it becomes easier for the user to click on it.
- Leverage browser caching to improve your website loading time.
- Use the power of a CDN to distribute load so that your site loads even faster.
6. Create a blog and acquire local links.
Creating and maintaining a blog is one of the best ways to acquire local links. A blog lets you share articles on a regular basis, which allows users to remain updated about your business services when they subscribe to it.
A blog is a good way to earn local links — and, additionally, it can persuade users to buy your products when they are in the “I want to know” phase of the customer journey.
You can conduct interviews with local influencers related to your niche and publish them on your blog. The influencers might link to your blog in return, which will help you acquire relevant links.
Additionally, you can conduct local surveys and publish the report regularly on your blog. This is an excellent way to earn authority back link.
If you have an informative list of queries where people are looking to find answers to their questions, then you can create blog posts that specifically answer the exact query of the users.
“Near me” Searches in the Era of Smart Devices like Alexa and Google Home
The sale of smart devices are rising considerably — according to the National Public Media, there are around 43 million smart speaker users in the U.S. alone.
It’s no surprise that people love to ask questions to smart devices, and a ton of those questions contain the “near me” phrase. Some example queries are:
- “Alexa, what movies are playing near me?”
- “Alexa, what bourbon events are near me?”
- “What’s a good sushi place near me?”
- “Alexa, what restaurants are near me?”
- “Okay Google, find a tire store near me”
- “Okay Google, find a hiking trail near me”
- “Okay Google, is Pizza hut near me open now?”
- “Where are ATMs near me?”
You need to prepare a list of queries that people might ask smart devices like Amazon Echo and Google Home. After that, you need to optimize your Google My Business profile by using the above six strategies so that it starts to rank on the top search results for your selected voice-related queries.
Business owners who get in early to the game of optimizing their website for “near me” searches, and for voice search, will be able to defeat their competitors in the near future. Both Amazon Echo and Google Home have begun showing users the convenience of using voice commands, so business owners need to find a way to get their business recommended by these smart devices.
If you haven’t started optimizing your business for voice search and “near me” searches, then the time is just ripe to start doing so. Remember, the businesses who think ahead of their competitors and take efforts to keep their customers happy are able to generate maximum profits. Make use of the strategies discussed in this article to optimize your business for “near me” searches and satisfy your customers, both now and into the future.
