
What’s a Website Title (Title Tag) & Why Does It Matter for SEO?
To consider what a title tag is, and why it matters for SEO, let’s start with an example.
Let’s say I’m a true beginner in the marketing industry, and I don’t even have a firm grasp on what marketing is — so I turn to Google, and I type in my question, “What is marketing?”
With my question, I’m likely not looking for “marketing best practices” or “10 best marketing campaigns of 2018”. Sure, both of those titles have my keyword “marketing” in them, but they won’t answer my direct question.
So Google, understanding my intent, serves me this:
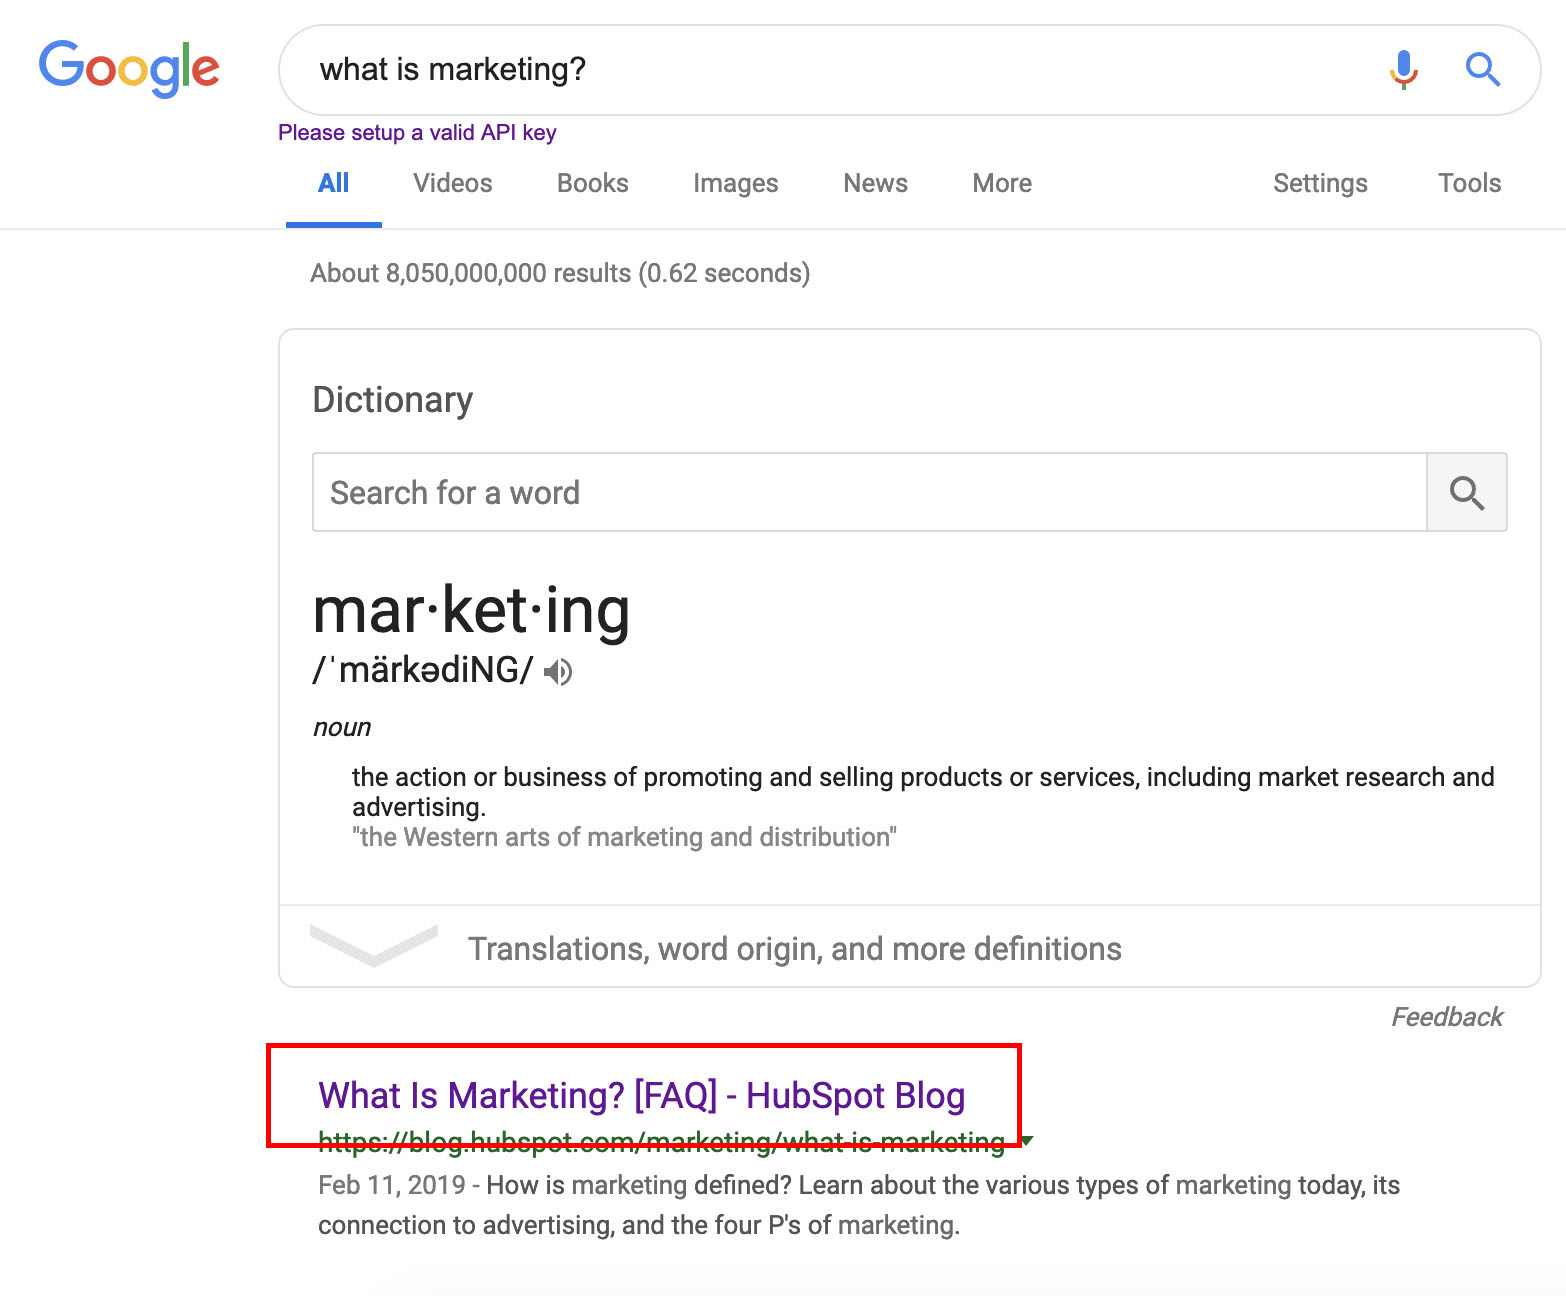
Undoubtedly, you can see how a title benefits both a user and a search engine.
While HubSpot’s “What Is Marketing? [FAQ]” piece needs to be compelling — and follow other SEO tactics — to land on page one of Google, it will never reach its desired audience with the wrong title.
A title, then, enables users to see what a web page’s content is about — and, equally importantly, tells search engines how it should rank the page.

What is a website title?
A website title, or title tag, is an HTML element that specifies the content of a web page. A website title is helpful for both users and search engines. An internet user needs a website title so they can see an accurate and concise description of a page’s content before clicking on a link in the SERPs. Alternatively, search engines need to determine the relevancy of a web page, so it can surface the content as a result for the correct search query.
A search engine knows the title of a web page by finding a title tag in the code — for instance, on “What Is Marketing? [FAQ]”, a search engine will find this in the HTML:

Along with being helpful for search engines and users, a title tag is also useful when someone has multiple tabs open. For instance, let’s say a user is researching marketing extensively, and using your resource as one of many (or, procrastinating on Facebook … ).
When the user needs to return to your web page, she can find the correct tab via your page’s title:

Now that we’ve covered why website titles matter, here are a few best practices when it comes to creating a good title tag:
- Keep it short, ideally under 60 characters
- Don’t use caps
- Don’t overdo keywords in the title — for instance, don’t title your piece, “What Is Marketing? Marketing Tips, Marketing Facts, Marketing General Information”
- Write compelling copy that would make you want to click on the link
- Make it relevant to the page itself
- Make your <h2> keywords different from the title tag
- Include your brand in the title, i.e. “Best Advertising Campaigns – Advertising Age“
To further strengthen your titles, take a look at How to Write Catchy Headlines and Blog Titles Your Readers Can’t Resist.
Website title examples
- 10 Best Nike Sneakers in 2019 [Buying Guide]
- Top 15 Ad Campaigns of the 21st Century – Advertising Age
- The Ultimate Guide to Instagram Hashtags for 2019
- 34 Essential Things to Know Before You Visit China – Y Travel Blog
- A Novel Way to Boost Client Satisfaction – Harvard Business Review
- SEO Is Back. Thank God. – New York Magazine
- Reflecting on My Failure to Build a Billion-Dollar Company – Medium
1. 10 Best Nike Sneakers in 2019 [Buying Guide]

2. Top 15 Ad Campaigns of the 21st Century – Advertising Age

3. The Ultimate Guide to Instagram Hashtags for 2019 – HubSpot Blog
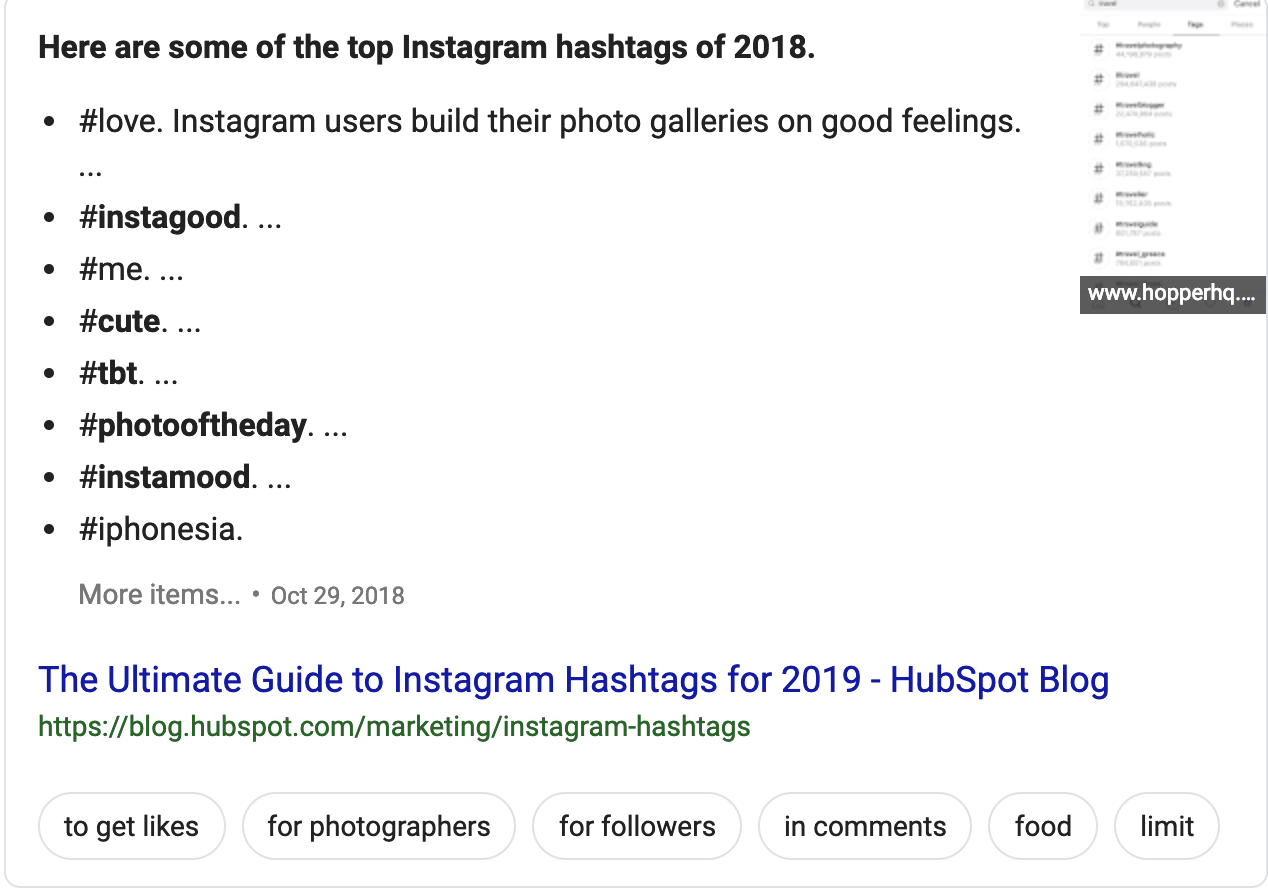
4. 34 Essential Things to Know Before You Visit China – Y Travel Blog
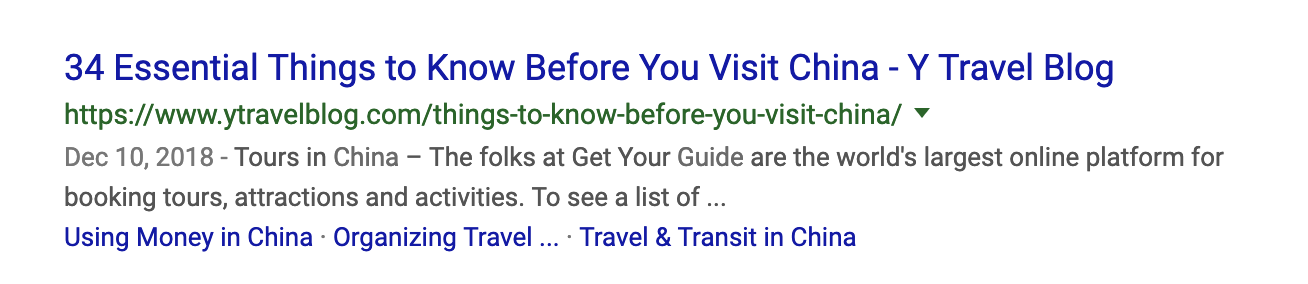
5. A Novel Way to Boost Client Satisfaction – Harvard Business Review

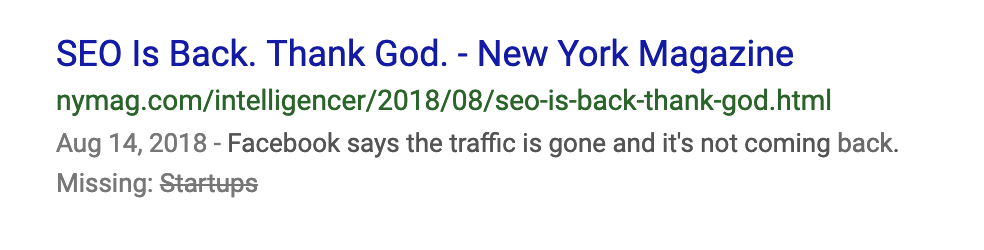
6. SEO Is Back. Thank God. – New York Magazine
7. Reflecting on My Failure to Build a Billion-Dollar Company – Medium


The Best Time to Post on Instagram, Facebook, Twitter, LinkedIn, & Pinterest
Social media is one of the best ways to amplify your brand and the great content you’re creating. But it isn’t enough to just post content to social whenever you feel like it. Some times are better than others.
So, what are the best hours to post on each social media channel?
Unfortunately, there’s no perfect answer. People browse each social network differently, and businesses may find different days and times work best for them. For example, while Twitter sees tweets perform well at hours like 6 PM, Pinterest sees certain posts perform well as late at 2 AM.
These aren’t your only (or best) times, though. Good post timing depends on the platform you’re using, as well as on how your target audience interacts with that platform, the regions and corresponding time zones you’re targeting, and your marketing goals (e.g., clickthroughs versus shares).

However, there is ample data out there on the best time to post on Instagram, Facebook, Twitter, LinkedIn, and Pinterest. The great folks at CoSchedule recently looked at a combination of its own original data and more than a dozen studies on this very topic — from the likes of Buffer and Quintly, just to name a couple — and created a helpful list of ideal posting times based on industry trends across today’s most popular social networks. The industries they analyzed include:
- B2C
- B2B
- Software
- Healthcare
- Media
- Higher Education
Bookmark this post as a go-to set of guidelines, and refer to it next time you need to find the optimal posting times for your business.
Best Times to Post on Social Media
The best times to post on social media are different with every social network and what type of audience you want to engage with. Facebook and Twitter both see high engagement at 9:00 AM, whereas one of the best times to post on Instagram is 5:00 PM. LinkedIn caters to B2B audiences, with an ideal posting time of 10:00 AM to 12:00 PM. Pinterest sees high engagement as late as 4:00 AM.
With many businesses facing a growing global audience, varying time zones have become a growing concern, especially when it comes to the best times to post.
To start, let’s take a look at the U.S. About half of the country’s population is in the Eastern Time Zone, and combined with the Central Time Zone, that accounts for over 75% of the total U.S population.
Given that sizable share, if you’re targeting a U.S. audience, try alternating posting times in Eastern and Central Time Zones — we’ll get into those specific times in a bit.
If you’re targeting users outside of the U.S., conduct some research to find out where they live and which social media channels they’re using. That kind of data is available through studies like Smart Insights’ Global Social Media Research Summary, or We Are Social’s annual Digital Global Overview.
1. Best Time to Post on Instagram
Instagram is meant for use on mobile devices. Approximately 60% of its U.S. users use the app daily, though it would appear that many engage with content more during off-work hours than during the workday.
- On average, the best times to post on Instagram across industries are 1:00 PM and 5:00 PM, during lunch and the end of the typical work day, respectively.
- B2B organizations have the most times of high-clickthrough rates to choose from: 12:00 – 1:00 PM, 5:00 – 6:00 PM, and even as late as 8:00 – 9:00 PM when people are winding down for the day.
- The best day to post on Instagram is Friday.
2. Best Time to Post on Facebook
People log in to Facebook on both mobile devices and desktop computers, both at work and at home. How it’s used depends heavily on the audience.
- On average, the best time to post across industries is 9:00 AM, when people are just starting work and going online for the first time.
- Facebook sees another increase in clickthrough rates between 11:00 AM – 12:00 PM, when folks are take their lunch break.
- The hours of 3:00 PM – 4:00 PM are also promising posting times for B2C, B2B, software, and higher-ed organizations.
- The best days to post on Facebook are Thursday to Sunday.
3. Best Time to Post on Twitter
Like Facebook, people use Twitter on both mobile devices and desktop computers, both at work and at home. How it’s used also depends heavily on audience — but people often treat it like an RSS feed, and something to read during downtimes in their day, like commutes, work breaks, and so on.
- Good times to tweet average around 8:00 – 10:00 AM, as well as 6:00 – 9:00 PM — which makes sense, given that it correlates with both morning and evening commutes.
- B2C companies have the most hours to choose from where they would see heightened clickthrough rates on their content: 8:00 – 10:00 AM, 12:00 PM, and then 7:00 – 9:00 PM.
- If your goal is to maximize retweets and clickthroughs, aim for noon or 5–6 p.m.
- For B2C companies, the best days to tweet are weekends. For B2B companies, the best days to tweet are weekdays. Coincidence? Not really. If you think about it, people shop for business needs when they’re working (weekdays) and personal needs when they’re off work (weekends).
4. Best Time to Post on LinkedIn
Roughly 25% of U.S. adults use LinkedIn, largely for professional purposes, during weekdays and the work hours. It’s used with slightly less frequency than some of the other channels on this list.
- Aim to post on LinkedIn between 10:00 AM – 12:00 PM.
- B2C, media, and higher-ed organizations have the narrowest windows for when to post for maximum performance: 12:00 PM, 8:00 AM, and 10:00 AM are their best times, respectively.
- The best day to post on LinkedIn is Wednesday.
5. Best Time to Post on Pinterest
Pinterest users skew heavily female, and 29% of users are active on this channel on a regular basis.
- The best times to post on Pinterest are 8:00 – 11:00 PM and, interestingly, 2:00 – 4:00 AM. This could indicate some interest in the platform in non-North American time zones, which means global content is all the more important here.
- Contrasting many of the other channels we’ve listed here, evening commutes tend to be some of the worst times to post to Pinterest. That could be due to the fact that it’s not as “browseable,” with many pins requiring navigation away from the channel.
There you have it, folks. Keep in mind that although each social network sees its engagement and clickthrough rates increase at specific hours and days of the week, your how much engagement you get depends on your audience and content you publish for them. Perhaps you’ve established a weekly video series that your audience always expects to see on Friday morning. In this case, don’t listen to the data above — you have an agreement with you followers, and this day and time works just for you.
Happy posting, tweeting, and pinning.

How to Set & Achieve Marketing Objectives in 2019
In the content marketing industry, setting objectives can be a double-edged sword. On the one hand, constantly raising the bar can incentivize your team to sustain your growth rate over long periods of time. But on the other hand, it can also incentivize your team to prioritize your company’s needs over your customers’ needs.
You might be thinking that this is the nature of content marketing today — in order to grow, you need to stay laser-focused on hitting your numbers. And, sometimes, to hit your numbers, you need to do what’s best for the business, even if it’s not the best move for your customers.
But contrary to popular belief, solely focusing on the results doesn’t actually produce results. Focusing on serving your customers is what produces results. Tim Cook, Apple’s CEO, is famous for sparking this customer-centric movement. In 2015, he spoke at Goldman Sach’s Technology and Internet Conference in San Francisco, and a reporter asked him what were some of Apple’s biggest accomplishments from the past year. He responded, “We’re not focused on the numbers. We’re focused on the things that produce the numbers.”
In content marketing, one of the most influential things that produce the numbers is a passion for your craft. But, sometimes, we can get so obsessed with optimizing for results that we forget what actually generates the views and leads we desperately desire — compelling content.
In this blog post, we’ll show you how to set realistic marketing objectives that will help you craft audience-centric content, prioritize your customers’ needs, and hit your numbers, all at the same time. Read on to learn how to identify your marketing objectives’ purpose and process and why it’s just as important as the numbers you aim to hit.
What are marketing objectives?
Marketing objectives are the goals your team wants to achieve during a certain period of time. They’re usually a hard number or metric that serve as metaphorical finish line for your team to sprint towards. However, setting marketing objectives isn’t just limited to determining what you want to achieve. You also need to specify how you’re going to reach your goals and why you want to reach them.
In his insightful blog post about setting goals, Jay Acunzo, the founder of Unthinkable Media, reveals a subtle yet potent problem that has pervaded the content marketing industry over the years — traditional goal setting lets you measure what you do, but it doesn’t lend itself to gauging how you do it or why, which is what ultimately gives your work meaning and pushes you to hone your craft.
In marketing, you obviously need to aim for concrete targets. But, like we said earlier, only focusing on the results can sometimes incentivize you to take a course of action that prioritizes your organization’s needs over your customers’ needs.
To help you focus more on your purpose and process instead of just your results, Jay recommends considering two other things when setting a marketing objective — your hunger and aspirational anchor.
Your hunger is your current dissatisfaction with your work today or why you want to achieve your goal. Your aspirational anchor is your vision of your work in the future or how you’ll achieve your goal. These two things drive your motivation and keep you on track to create work that better serves your customers. And when you add your goal to the equation, you’ll be able to simultaneously produce customer-centric work and hit your number.
To learn how to set objectives that help you focus on the “why” and “how” behind your marketing initiative, check out the following example.
Marketing Objective Example
Hunger (Why) – Our blog educates our audience well but it doesn’t resonate emotionally with them enough.
Aspirational Anchor (How) – Run a blog that consistently resonates with our audience and that people look forward to reading every time they receive our email digest.
Goal (What) – Increase blog subscribers by 25% month over month this year.
With this goal setting framework, you can see how the “why” and “how” behind a goal incentivizes behavior that better serves customers and hits numbers at the same time.
For instance, in the example above, this blog team refuses to just do whatever it takes to boost their blog subscription. They want to craft emotionally resonant stories that their audience actually values, or content that’s worth subscribing to, and this is what will lead to their growth in subscribers and create long-term value for their business.
If this blog team didn’t identify their hunger or set an aspirational anchor, however, the only thing that would guide them toward the finish line is the finish line itself. And that could incentivize short-sighted behavior that helps them achieve their goal at the expense of prioritizing their audience’s needs over their own.
Setting Realistic Marketing Objectives With the SMART Goal Framework
Now that we understand the “why” and the “how” behind setting marketing objectives, let’s go over how you can root the “what” in reality with the SMART goal framework.
SMART goals are realistic, quantifiable, and focused targets that you can easily aim for. If you’re wondering what SMART means, it’s an acronym that helps you clearly define your goals. Check out the framework below to learn more.
Specific
In terms of marketing, you should choose the particular metric you want to improve upon, like visitors, leads, or customers. You should also determine what each team members will work on, the resources they’ll have, and their plan of action.
Measurable
If you want to gauge your team’s progress, you need to quantify your goals, like achieving an X percentage increase in visitors, leads, or customers.
Attainable
Make sure that X-percentage increase is achievable in your specific situation. If your blog traffic increased by 5% last month, try to increase it by 8-10% this month, not 30%. It’s crucial to base your goals off of your own analytics, not industry benchmarks, or else you might bite off more than you can chew.
Relevant
Your goal needs to relate to your company’s overall goal and account for current trends in your industry. For instance, will growing your Facebook following lead to more revenue? And is it actually possible for you to significantly boost your organic reach on Facebook after their most recent algorithm change? If you’re aware of these factors, you’ll be more likely to set goals that are realistic, achievable, and beneficial to your company.
Time-bound
Attaching deadlines to your goals puts pressure on your team to accomplish them. And this helps you make consistent and significant progress in the long-term. If you don’t give yourself a deadline, accomplishing your goal will take too long to achieve long-term success. For example, which would you prefer? Increasing leads by 5% every month, leading to a 30-35% increase in half a year? Or trying to increase leads by 15% with no deadline and achieving that goal in a year?
Blending Hunger, Aspirational Anchors, and SMART Goals
By analyzing two different goal setting frameworks, we’ve learned how to identify the “why”, “how”, and “what” behind your marketing objectives . Now, we can blend the two frameworks to set a realistic goal that fulfills our customers needs first and helps us hit our numbers at the same time. Check out this example for more detail.
Specific (Include your hunger and aspiration)
Our blog educates our audience well, but it doesn’t resonate emotionally with them enough. Let’s start running a blog that can consistently resonate with our audience, that people look forward to reading every time they receive our email digest, and can attract more subscribers.
Measurable
Increase month-over-month blog subscribers by 25% this year.
Attainable
Last year, we increased month-over-month blog subscribers by 15%.
Relevant (Include your hunger and aspiration)
If we can craft emotionally resonant stories that our audience actually values, we can build deeper relationships with them, attract more subscribers who we can also build deep relationships with, and hopefully do business with them in the future.
SMART Goal
By crafting stories that consistently resonate with our audience and is worth subscribing to, we can increase our month-to-month subscribers by 25% this year.

6 Instagress Alternatives (That Won’t Shut Down Anytime Soon)
With one billion monthly active users, Instagram is undoubtedly one of the most popular social media platforms today. But the sheer volume of users can make the tool feel intimidating — how is your business supposed to stand out?
It can feel difficult to validate your brand on Instagram, particularly when there’s eight million other business accounts on the platform. If you’re a small business, you know the struggle of growing an audience and engaging with your followers.
Ultimately, when you spend time and effort curating the perfect Instagram presence, it can be frustrating when you don’t see an immediate return. For some, this is when buying followers or using a growth service becomes an option.
Here, we’re going to explore what a growth service is, options of growth services you can use to increase your follower count on Instagram, and alternative ways to boost your audience and engagement without using a third-party service.

What is a Growth Service?
A growth service is a third-party tool that can be purchased to grow followers and engagement on social media. Growth services can be organic or automated, and can sometimes violate a social media platform’s Terms of Service.
Purchasing followers is becoming more common as influencers rise and followers become a sort of currency. But your audience — your real audience — knows better. Buying followers is a tactic that is easy to see through, doesn’t impact long-term engagement, and can actually lower your brand’s reputation.
For a long time, the place to purchase followers was Instagress. Instagress was a growth service that used automation to artificially engage users through likes and follows.
The fall of Instagress can’t be pinpointed to one specific thing, but could be attributed to Instagram’s Terms of Service updates that make using a third-party service risky business, especially if it involves automation. If Instagram senses your followers are bots, or bots are engaging with users on your behalf, your account can be temporarily or permanently banned.
With that warning in mind, if you’re looking to increase your following, here are some Instagress alternatives you can use to increase your follower count, followed by ways to boost your following and engagement without relying on a third-party service.
Instagress alternatives
- SocialSteeze
- Magic Social
- Kicksta
- Combin
- Upleap
- Jarvee
1. SocialSteeze
SocialSteeze is a growth service that uses machine learning to engage followers by targeting accounts through usernames, location, and hashtags. SocialSteeze assigns you a dedicated account manager to build growth in engagement and increase followers over time. Since there is a real human behind this growth service, it complies with Instagram’s Terms of Service — therefore your account is safe from deactivation.
Pricing:
- Regular plan: $15/week or $38/month. Includes a targeted audience, a guarantee of real followers, and a fully managed service.
- Elite plan: $25/week, $99/month, and has the option of one payment annually of $449. Includes everything in the Regular plan, plus priority support and double the engagement.
2. Magic Social
Magic Social also connects your account to a dedicated growth manager, who engages with people on Instagram for you. Magic Social also uses targeting to connect you with relevant followers.
Like SocialSteeze, Magic Social is a low-risk alternative to Instagress and has great reviews for their services, plans, and pricing.
Pricing:
- Regular plan: $15/week or $38/month. Includes a targeted audience, a guarantee of real followers, and a maintained service.
- Professional plan: $25/week, $99/month, and has the option of one payment annually of $420. Includes everything in the Regular plan, plus priority support and double the engagement.
3. Kicksta
Kicksta uses human outreach to connect with Instagram users through likes, comments, and follows. You provide Kicksta with Instagram accounts that have followers with whom you’d like to attract. Then, via your account, Kicksta likes photos from those individual users to spark engagement. The hope is that since these accounts have similar interests to your brand, it will increase the chance that they’ll follow your business.
This service is similar to having an Instagram Community Manager liking pictures for you all day. And for less than $1.65 a day, it’s extremely affordable. But Kicksta only provides likes from your account, and cannot contribute to discussion via messages or comments — a vital point of the inbound marketing strategy you’ll be missing.
Pricing:
- Moderate Growth plan: $49/month. Includes up to 1,000 engagements a day, video onboarding, and 10 unique targets. This plan is marketed towards Instagram savvy influencers or entrepreneurs.
- Maximum Growth plan: $99/month. Includes up to 1,500 daily engagements, 40 targets, premium support, and more.
4. Combin
Combin is a follower engagement app that you can download on Windows, Mac OS, or Linux. The app provides you with an easy-to-use set of tools to organically boost your following. The tools it offers are focused on growing your followers and fostering relationships. With search tools and machine learning, you can find users who are already engaged with similar accounts and prioritize the users that are most likely to become your new loyal followers.
The interface itself is pretty easy-to-use. This is more of a self-management tool than a growth service. You aren’t paying someone else (or a bot) to do the work for you. It requires brand knowledge and time to input searches and discover potential followers.
Pricing:
- Starter plan: Free. This is a good way to try out the functionality of the application before purchasing.
- Personal plan: $10/month. Includes management of one account, 1,000 instant search results for posts and users, and in-app actions.
- Business plan: $30/month. Includes management of five accounts and everything in the Personal plan.
5. Upleap
Upleap pairs you with an account manager who is dedicated to growing your account. You can also sign up for a trial period to test if this growth service is right for your Instagram goals. Upleap uses targeting to find users who will want to engage with your content. Upleap guarantees that it will only interact with real users, which will hopefully help your engagement in the long-term.
Pricing:
- Lite plan: $39/month or $349/year. This plan is best for personal accounts and upcoming influencers.
- Standard plan: $69/month or $579/year. If you are looking for faster growth, this plan is for larger influencers and businesses.
- Premium plan: $99/month or $709/year. The fastest option for businesses and influencers.
6. Jarvee
Jarvee is Instagram marketing automation software. With Jarvee, you can automate responses to new followers — such as direct messages, likes, and comments — to engage with your audience. Instead of spending hours interacting with users yourself, Jarvee automates this process. The software also includes audience targeting based on hashtags and location. This growth service works across multiple platforms, not just Instagram, and you have the ability to set different automation settings for each account, including time between interactions and when to deliver messages.
With this service, you are managing your own accounts instead of giving an external agency access. You can also schedule your posts directly from Jarvee, a feature that is hard to find on other Instagress alternatives. Jarvee is currently only available on Windows.
Pricing:
- Starter plan: $29.95/month. Includes all scheduling and automation features, allows you to connect 10 accounts with premium customer support.
- Personal plan: $69.95/month. Includes all scheduling and automation features, allows you to connect 70 social accounts, and also includes premium customer support.
- Premium plan: $99.95/month. Includes everything on the other two plans, but allows connection to 150 social accounts.
Now that we’ve explored Instagress alternatives, here are some ways to grow an engaged, real following without a third-party service.
1. Implement an Instagram Ad Campaign
If you have the money to spend on followers who won’t actually increase your engagement in the long run, why not put that money behind a paid promotion? Start a campaign with the intent of brand awareness, and target an audience that is likely to be interested in your account.
You’ll have to create a high-value visual ad to ensure it performs well. Take a look at other ads from companies your target audience is following. Instagram ads are becoming more and more popular, so you’ll want to strike a balance between advertised content and content that your audience regularly interacts with, so your paid campaign isn’t disruptive.
To create your campaign, you’ll need to use Facebook Ads Manager. Ads Manager lets you choose your target audience through various demographics, your ad objective, and analyze your campaign’s performance.
2. Experiment with Content
When do you post to Instagram? How many hashtags are you using? Are you sticking to a certain aesthetic when you could be branching out?
If you post at the same time every day, you may be missing some of your target audience. Instagram best practice recommends posting between 2 p.m.- 3 p.m. on weekdays. While that’s the case for most accounts, best practice can be individual. Maybe your target audience is more active on their morning commute than during lunch. Try testing different posting times to see if your engagement increases.
Another thing to experiment with is the type of content you’re posting. If your account consists of only product photos, try a graphic quote or a meme. The posts that stick out from your usual content tend to capture attention. Who knows — maybe you’ll find a new content execution that you’ve never considered before.
3. Interact with Followers
One sure-fire way to increase engagement is to interact with your followers regularly. It may seem simple, but a lot of business accounts drop the ball on this.
Interacting with your audience shows them that you care about what they have to say, and that makes them more likely to stick around. If someone uploads a photo and tags your account, like and comment on it. Reply to comments on your posts. You don’t have to reply to everything, but your customers will notice the effort. This makes your brand feel more personable, and therefore easier for people to engage with.
At the end of the day, Instagram is an incredible marketing tool. It’s important to build a following, but following means nothing if your audience isn’t taking action.
Bots and unengaged followers may look good on the surface, but customers who are interacting with and buying your products are what grow your business.
4. Establish a Story Strategy
Instagram Stories can drive engagement and value, and are a great way to connect with your audience daily. You can use stories to grow brand awareness, increase traffic to blogs or newsletters outside of Instagram, and share sponsored content.
One-third of the most viewed Instagram Stories are from businesses, so make sure you aren’t neglecting this engagement tool. Try posting about industry news and using engagement tactics like polls or questions. Just like your feed, your Stories should consist of a good mix of promotional content and lighthearted, entertaining content.
When establishing your Instagram Stories strategy, you should look back at your brand and social media goals. This will help you focus on the right content to post.
Because of the ephemeral nature of Stories, there isn’t any danger in posting a few every day. Your completion rate may start to dwindle after seven to eight frames, though. And unlike feed posts, there isn’t an optimal time for you to be posting. Stories are a great way to get creative and stay current.
To increase the discoverability of your stories, be sure to add a location tag and hashtags. Users have the ability to search for Stories by hashtag and location, and if your engagement is high you might end up on the Explore page — which will bring new users to your content.
While using an Instagress alternative is an easy option for quick Instagram growth, there’s no better way to ensure your audience is engaged than targeting and attracting them yourself. Ultimately, if you’re not managing your own brand voice and engaging with followers directly, you aren’t going to be able to turn those followers into long-term customers.

Everything You Need to Know About Writing Meta Descriptions
Meta descriptions — sounds complicated, right? If someone asked me about a meta description two years ago, I would’ve assumed they were trying to talk nerdy to me. It sounds like code, and way over a marketer’s head.
I’m happy to report that’s not the case.
Meta descriptions, despite their reputation, can be broken down in a fairly simple way. The more content you create and the further you dig into inbound marketing, the more you’ll discover how important meta descriptions are to the traffic and leads you expect your content to generate.
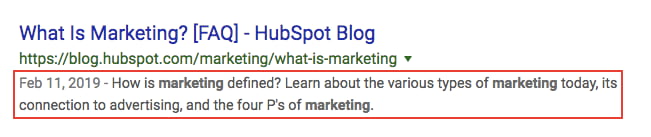
A meta description is basically what helps the searcher decide whether or not to click the link to an article or webpage. A meta description helps convince or persuade readers to choose your site. Oh, and the bolded words within a meta description — as shown in the screenshot below — indicate which words match those in the search query. Nothing too complicated, right?
Do I Really Need a Meta Description?
Now that we’re on the same page and you know what a meta description is, let’s answer another common question: Do you really need one? The short answer is yes. Here’s why:
1. Increases Clickthrough Rates & Visits from Organic Search
There might be 10 blue links per search engine results page (SERP), but they don’t all get clicked by an equal number of people. The higher up the result ranks, the more people who will see it and, in turn, click on it. To get your result to rank well, however, you need people to start clicking on it. Meta descriptions are your opportunity to entice people to click on your link instead of someone else’s.
2. Give the Right People the Right Information at the Right Time
Although meta descriptions do not directly influence your website’s rank on Google, they can benefit you when people conduct an Advanced Search. These types of searches allow searchers to enter more criteria for what words they want the results that follow to include. These criteria are known to affect your meta description, and can therefore determine if your webpage shows up at all.
3. Increase Visits from Social
Google isn’t the only website that displays your meta description when you publish a piece of content. Social networks like Facebook use what’s called an “open graph” to present the most important data on your webpage when you share it with your followers. This open graph includes a meta description. In other words, your meta description doesn’t just drive search engine traffic (also known as organic traffic) — it drives social media traffic, too.
Meta Description Length
The ideal length of your meta descriptions is, well, not so lengthy: no more than 160 characters, including spaces. But that ideal length has also changed somewhat in the last few years.
In December of 2017, SEO experts all over the world noticed something different about how much meta text Google’s search results were producing on each results page. Results were increasingly showing upwards of 300-character meta descriptions. Marketers took notice and began to adapt, but not before Google’s Danny Sullivan confirmed a retraction from the change it originally made:
Our search snippets are now shorter on average than in recent weeks, though slightly longer than before a change we made last December. There is no fixed length for snippets. Length varies based on what our systems deem to be most useful.
— Danny Sullivan (@dannysullivan)
May 14, 2018
To echo Sullivan’s insight, above, there is no perfect length to meta descriptions because the length displayed depends on how “useful” Google considers each description. However, staying within 155-160 characters will ensure your meta description isn’t cut off with a mysterious ellipsis (learn more about that in the following section).
Meta Description Examples
Just as there isn’t a perfect length for meta descriptions, there isn’t a perfect meta description, either. What you write in your meta description depends entirely on the topic of your article, blog post, or webpage.
Of course, just because there isn’t such a thing as a perfect meta description doesn’t mean there aren’t good models for how to write your own. Here are a few meta description examples — the good and the bad.
Good Meta Descriptions
1. The entire keyword is included in the meta description.
Keyword: “how to plant a tree”

Meta descriptions are not an official ranking factor in Google search results, which means what you put here doesn’t directly affect your ranking. However, they do affect how many clicks you get, which does affect your ranking. Including your entire keyword in the meta description can tell people right away that your webpage answers their question.
2. The meta description teases the answer to a question.
Keyword: “best time to plant a tree”

While some good meta descriptions incorporate the entire keyword to get people’s attention, others can do so by adding an element of mystery to entice their audience to learn more. In the example above, readers know the answer is related to seasons, but they don’t yet know which season is best for planting.
Bad Meta Descriptions
1. The meta description is too hard to follow.
Keyword: “how to plant a tree”

Meta descriptions like the one above simply don’t use time wisely — the short time they have to convince a reader to click on their content. In the example above, the text opens with an “old axiom,” but it’s hard to immediately understand the connection it’s making with how to plant a tree.
2. The meta description is too long to appear in full.
Keyword: “best time to plant a tree”

This is one of the most common misfortunes in SEO, and many times it’s out of our control. If your meta description is deemed too long for Google’s liking, it may get cut off, and the tail end of a sentence can get replaced with an ellipsis (“…”) that can cost you a searcher’s interest in clicking through. Remember, 155-160 characters (including spaces) or less is best.
Picking an SEO-Friendly Meta Description
For every blog, webpage, and piece of copy we write, we follow the best practice of creating a corresponding meta description. Now that you know why you should write a meta description, here’s the how.
1. Write compelling content.
Write a short sentence previewing the content or telling the searcher why they should read your post. Give them a clear benefit of clicking through and reading your post, if necessary. This is your chance to sell them on what you have to offer: informative, valuable content.
2. Use one or two keywords in your meta description.
You might already include keywords in a webpage’s body copy and title. But the meta description should also include keywords that help describe the content of the webpage. Focus on one or two unique keywords in the meta description of each webpage you publish. Don’t stuff these keywords anywhere you can — make sure they fit naturally and help explain what people can expect to see if they click on your link.
3. Aim for 155-160 characters.
I know I said the number of characters that make up your meta description is important, and it is. But when actually displaying this meta data, Google doesn’t measure by characters — it measures by pixels. That is, it’ll cut off a meta description after a certain width. The reason we say 155-160 characters is to give marketers a benchmark to abide by.
4. Eliminate “non-alphanumeric” characters.
Ampersands (&), plus signs (+), em-dashes (—), and other special characters might appear just fine on your computer screen, but search engines can’t read these symbols as easily. These are known as “non-alphanumeric” characters, and you should avoid using them in your meta descriptions. Some of them don’t appear in search results the way you intend for them to. Others can ruin the entire snippet: Any time double quotation marks are used in a meta description, for instance, Google removes it from the search result.
To sum up the makings of a truly powerful meta descriptions, I’ll leave the final words to Google:
“Use quality descriptions … make sure your descriptions are truly descriptive. Because the meta descriptions aren’t displayed in the pages the user sees, it’s easy to let this content slide. But high-quality descriptions can be displayed in Google’s search results, and can go a long way to improving the quality and quantity of your search traffic.” – Google
The Exception
As I get older — and wiser, hopefully — I find there is an exception to every rule. Meta descriptions are no different. As I’ve noted above, conventional logic agrees it’s wise to write a good meta description for any given page.
But for webpages that are targeting three or more major keywords, according to Moz, your best bet might be to let Google’s artificial intelligence extract the text it thinks is most relevant for a meta description. After all, you can’t address all three keywords in the same meta description, and there is always some risk that Google doesn’t care what you put in your content management system‘s meta description box.
If you have a page that lists several articles (think a blog or newsletter archive, or something like “your cart” if you’re ecommerce), it might be okay to forego the meta description. When in doubt, spend time writing an engaging sentence or two, and feel confident the right people will find the right information from you, at the right time.

The Ultimate List of Marketing Tips
Googling “marketing tips” is like looking up a #MondayMotivation quote to post on Instagram … there are so many, and they all think they’re the very best.
If you think about it, though, finding the “best” marketing tip is relative — to your audience, resources, and marketing goals. What works for one business might not work for another. The same thing goes for #MondayMotivation quotes … and that’s why there are so many to choose from. We’re all different, and we’re all motivated by different things. And that’s a good thing.
But, how do you, as a marketer, consolidate those differences and find a new practice or process that works for you, your audience, and your product or service? Well, you experiment. You try new things. You learn from the experts and those who’ve come before us.
That’s why we’ve compiled this “ultimate list.”
We reached out to a bunch of INBOUND18 breakout speakers and asked them to share their very best marketing tip. Some responses have to do with their personal work, others are relevant to the company of which they’re apart, and a few are just really cool and new perspectives on tried and true marketing practices.
The best part about this list? It’s diverse — in terms of the answers and the people who gave them. There’s lots of great stuff in the responses below, so take your time combing through and take a few notes along the way. You never know what you’ll learn from your peers in the field.
The Ultimate List of Marketing Tips (From Marketers Just Like You)
On prioritizing your target audience …
“The best way to make sure things resonate is to put the audience at the center. The things we want to tell our audience, and the way we want to reach them, may not be the same as the things they need to know and the way they want to be reached. If we start with our audience’s needs, preferences and questions first, and build our marketing plans around that, we’ll likely be met with much greater success and we’ll see better results!”
— Melanie Deziel, Keynote Speaker and Founder of StoryFuel
On personal branding on LinkedIn …
“Stop writing in the third person when it comes to your (or your business’s) LinkedIn summary. Your summary is not a boring bio; it’s your introduction to the person viewing your profile, it’s a handshake. Make it warm, personal, and don’t be afraid to sprinkle your personality into it. It’s your first impression — make it a lasting one!”
— Michaela Alexis, Espresso-Fueled Expert on LinkedIn Personal Branding, Michaela Alexis
On the value of customer trust …
“I define sales as a meaningful transaction between two human beings, so before asking for anything, a customer’s trust must be earned. Brands need to build narratives that align with their organization’s values and then communicate those values to their customers. This leads to increased trust which then translates to brand advocates. Look at the passion of Beyoncé fans or Harley Davidson riders — those brands have created an identity that makes people feel like they’ve added value.”
— Amanda Slavin, CEO & Founder of CatalystCreativ
On creating memorable marketing messages …
“Lots of marketers aspire to create memorable messages. Making something distinct increases the likelihood that it will be better remembered. If you have cereal in your kitchen on most mornings, pizza served in bed will be distinct. To create distinct, memorable messages, first detect pockets of similarity in your industry. You need some similarity in order for the brain to detect distinctiveness. Second, ensure that your distinct message fits within known mental models and then play off of them. Returning to the breakfast example, “having a snake for breakfast” would be too provocative and wouldn’t fit within existing mental models. Change the question of “How do I create a distinct message?” to “How do I twist an existing mental model?” to increase the chances of becoming memorable.”
— Carmen Simon, Cognitive Neuroscientist, Author, and Founder of Memzy
On using events to set your business apart …
“In 2019, businesses will utilize event strategies more than ever before as human experiences will be how companies choose to differentiate themselves, especially those that can’t do so through technologies. The key to any great event strategy is very simple — identify the memory you want attendees to walk away with and work backwards. “
— Kenny Nguyen, CEO of ThreeSixtyEight
On creating a dual content strategy …
“All content consumption is driven by two things: active search and passive discovery. Search takes place on channels like Google, YouTube, and voice. Discovery is driven by word-of-mouth, social algorithms, and media coverage. Consider splitting your content strategy into two — developing one strategy that optimizes for all search algorithms (not just Google) and one geared toward social algorithms and influence-driven channels. Youtube is a fascinating channel in that it is both the world’s second biggest search engine and a leader in passive discovery-mode viewing. When tackling YouTube, consider crafting your content to solve for one of those roles. Create highly findable, how-to content for your area of expertise or a truly engaging editorial series of videos, perhaps on two separate channels.”
— Meghan Anderson, VP of Marketing at HubSpot
On investing in paid social …
“Everything has gone paid on social media. Gone are the days of brands organically growing audiences. Facebook and Google want your money, so give it to them. Never before has data and targeting been so deep and effective. Brands that nail paid social take control of their future.”
— Travis Chambers, Chief Media Hacker and Founder of Chamber Media
On customer experience before the purchase …
“In 2019, customer experience initiatives will become inseparable from marketing strategy. Today’s customer wants a consistent, multichannel experience with a brand, and as marketers, we have to make sure we’re meeting customers where they are. By making valuable connections throughout the buyer’s journey, we build a positive long-term relationship. Customer experience is no longer something that happens after the sale: it’s an integral part of the buyer’s journey.”
— Patrika Alis, Customer Experience Marketing Manager at Hanzo
On the importance of consistency …
“SELF is a nearly 40-year-old brand competing in the buzzy and crowded health and wellness space. In order to stand out, we had to lean in to what really makes us special. That meant clearly honing our mission and values: We help people make the best choices for their personal health and wellbeing. And we do that by adhering to the values of inclusivity, accuracy, empathy, and autonomy. From there, it’s all about making sure that everything we do ladders up to that greater vision. That consistency is key to our success.”
— Carolyn Kylstra, Editor in Chief at SELF
On repurposing content …
“As both content marketing as a standard practice and your own content marketing program mature, it becomes more and more detrimental to ignore your old content. Having tons of old, outdated, and unoptimized content on your site is like forgetting to untag the most embarrassing pictures from college on your Facebook profile. Even though may not think about them anymore, they’re still there, and people can find them and use them in creating their first impression of you. The more content you have, the more time you need to be spending monitoring, updating, and repurposing old content instead of creating new stuff.”
— Brittany Berger, B2B Content Marketing Strategist at BrittanyBerger.com
On using data to connect the dots …
“Identifying, precipitating and connecting metrics that have a real business impact are arguably the most important things a data-driven marketer can do. It’s critical to step back and ask, “Are we closing the loop between marketing activities and actual sales data?” What further separates the great marketers from the good ones is the ability to connect the dots in time to maximize customer impact. If you take too long to apply what your data is telling you, your customer will likely move on to a competitor. As marketers, we’re lucky to be swimming in a sea of data and technology solutions, but make sure that your technology solutions allow you to quickly link your marketing efforts with results you can take to the bank!”
— Sahil Jain, Co-founder & CEO of Adstage
On building a story around your product …
“As a product marketer, stories have become a crucial part of my day-to-day. Twenty years ago, a company could launch a product with simple messaging, and advertising. Over time, buyers have been exposed to so many messages they now filter out overly promotional ones. So, as you consider launching a new product, or an update to an existing product think about these two tips. First, it’s not about your company. Your team built that product for a reason that matters to consumers, so ensure your messaging is squarely focused on them. Second, look at changes happening in the broader world. Tie your product message into a story with that overall narrative and show them how they can lean-in to that change to find success. It’s a formula we’ve used at HubSpot, and our team continues to use for product launches.”
— Jeffery Vocell, Senior Product Marketing Manager at HubSpot
On how to properly analyze events …
“Treat your live event portfolio just like you would any other marketing channel, rather than just something you manage for your sales team. Events need to be assessed with hard metrics, rather than just ‘gut-feel’ opinions and feedback forms to rate the coffee. Measure attendee engagement, rather than simply counting who registered and who showed up, as this is a great proxy for the effectiveness of the event. Finally, integrate this data into your CRM, so marketing is driving event follow up (and keeping those sales teams happy at the same time!)”
— Mike Piddock, Founder of Glisser
On telling visual brand stories …
“Attention is at the heart of marketing — getting it and keeping it. Arresting, powerful visuals are your key to capturing people’s attention, and storytelling is going to keep and help you turn that attention into something you can use. There isn’t a brand flourishing now without beautiful visual language and a compelling story. Google, Apple, Dropbox, Slack, Nike … you name it. As for Prezi, we wouldn’t even exist without both of these factors being absolutely vital in any brand’s success.”
— David Hooker, Head of Creative Services and Evangelism at Prezi
Over to You
Did you learn something new from our ultimate list? How about a new perspective on an old methodology? We compiled such a diverse list in hopes of providing a piece of advice for everyone. Now, go forth and use these marketing tips to grow your business in 2019 and beyond.

Do Image Carousels Kill Conversions?
There’s a common misconception about attention that most marketers love to reference nowadays: the average human has a shorter attention span than the average goldfish. But if you really think about this claim, it can’t possibly be true. People watch two and half hour long movies and binge entire seasons of TV shows every day. If the human attention span is shorter than eight seconds, the Marvel Cinematic Universe wouldn’t exist and Netflix would be out of business.
However, in regard to dwindling human attention, there is something that’s actually shrinking: our ability to concentrate on given tasks. With all the dopamine hits that social media, email, and Slack notifications provide, we crave instant gratification more than ever before. And as our world becomes more digitally connected, these distractions will only worsen, ravaging our ability to concentrate.
In the conversion rate optimization community, image carousels, which are auto-rotating banners that sit above the fold on a website’s homepage, are a controversial topic because of our withering capacity to focus. Oftentimes, they distract users from the task at hand since their movement continuously draws attention — and this could plummet your website’s conversion rate.
So in an age where people’s ability to concentrate is lower than ever before, why do brands still use image carousels despite their potential to distract visitors? Well, according to Rebecca Hinton, a Website CRO Strategist and Copywriter at HubSpot, brands sometimes implement image carousels on their website because they can’t agree on a hero image, which is the single, featured image on a website’s homepage.
“Image carousels can result from stakeholders disagreeing on what they should feature in the hero image,” she says. “For example, a stakeholder who has to achieve a certain goal will argue to feature their specific slide as the hero image while another stakeholder will argues for hers. As a result, they’ll split the difference by including both slides in a carousel.”
If your website’s image carousel resulted from this exact predicament, it can feel frustrating. However, there’s no need to fret. You might need keep an image carousel on your website, but there are still plenty of ways you can optimize the space for maximum impact.
“If you have an auto-rotating carousel on your website, my advice is to turn off the auto-rotation. Once you do that, determine how you can optimize that space on your website. Generally speaking, leading with a single message is better than using a carousel, but you should always run tests before changing your website,” Hinton says. “I’d recommend running a series of A/B tests to answer the following questions: what’s the best carousel ordering? Could we replace the carousel with a single image? What copy, image, or CTA performs the best? Additionally, don’t forget about personalization. Consider how you could alter your carousel or hero image for different groups of people, like new users, returning users, different device types, regions, past purchasing behavior, etc.”
In our world, people crave instant gratification and get distracted more easily than ever before, so image carousels might not seem ideal for converting visitors on your website. But, sometimes, you need to keep an image carousel on your website because of a compromise between stakeholders. And the only way to prevent your conversion rate from plummeting is getting creative and A/B testing and personalizing your carousel.

How to Successfully Negotiate Your Salary (Script Included)
You’ve done it — after countless informational interviews, phone calls, and in-person interviews, you’ve finally landed your dream job.
But as you peruse the contract, you find yourself a little hesitant about what they’re willing to offer you.
You’re torn. You know you’re going to love this job. Shouldn’t you just accept their first offer?
Unfortunately, your inability to negotiate now won’t just affect the next year or two of your life — instead, it will create a snowball effect that could result in major losses down the road. In fact, you could lose anywhere from $1 million to $1.5 million over the course of your lifetime if you don’t negotiate early.
For instance, let’s say your employer offers you 55K for a role. You were hoping for 60K, particularly since you’re currently making 55K, but you accept. Then, after a year, your manager puts together a promotion package for you — with a 10% raise.
10% out of 55K is $5,500, but 10% out of 60K is $6,000. This means, year two, you could be making $60,500 or $66,000 — see why negotiating matters?
However, negotiation can feel awkward and intimidating, particularly if you’ve never done it before. Here, we’re going to explore the best way to negotiate a salary to ensure you receive what you deserve.
How to Negotiate Salary in Person or Over the Phone
It’s important to note, whether you need to negotiate your salary in person or over the phone, the following tips will be largely applicable to either situation.
However, if at all possible, avoid negotiating over email. Olivia Chin, a HubSpot Tech recruiter, told me, “I usually strongly prefer phone or in person over email/writing because there’s a benefit to on-the-fly adjustments and questions — it makes for a more fluid conversation.”
Take a look at the following five tips, as well as the sample script, to learn how to negotiate your salary.
1. Do your research ahead of time.
If you need to negotiate your salary in person, it’s critical you come to the meeting prepared with various business-related reasons you’re worth a certain amount. First, you’ll want to research the salary range for the type of role you’re offered.
Additionally, it’s critical you ensure you’re researching salary in the correct industry. A social media manager for a non-profit will have a different salary range than a social media manager at a major software company, so it’s important you focus on the salary range for roles in the correct industry.
Finally, it’s important you seriously weigh the worth of the skills and experiences you bring to the table.
For instance, let’s say you’ve received an offer letter for the social media manager role at a software company, which offers the same starting salary as your current role. However, in your current position, you’ve significantly exceeded expectations — rather than increasing the company’s Instagram traffic by 50%, you increased it by 125%. This is important information for proving you’re worth the additional investment to your new employer.
2. Come to the meeting with a collaborative attitude.
A negotiation is not an argument, or a chance to offer an ultimatum.
Instead, a negotiation is an opportunity to have a productive, collaborative conversation to reach a compensation package that feels fair to both you and your employer.
For this reason, come prepared with your non-negotiables, but remain flexible on the final result. For instance, perhaps you decide if the company can’t match your highest-range salary, you’ll accept additional vacation days or 100 more units of Restricted Stock allotment.
3. Come prepared with evidence based on research and market value.
When you arrive at the meeting, you should come prepared with notes on the research you’ve conducted — if you’re nervous, this can help you stay on-track. Additionally, you might forget numbers in the moment, so it’s important you have them written down.
You’ll want to make sure you know how much you can earn on the job market, and you want to convey to your employer that your data is grounded in reality. Begin the statement by saying, “Based on my research … ” so the employer knows you’re not just asking for a higher salary for the sake of it.
Additionally, include any information you might have regarding the value you’re providing your new employer. If you earned your last company an additional $50,000 through a new campaign you spearheaded, your new employer might see the necessity of offering you an additional 5% on top of your current offer.
4. Don’t say “I need” or “I want”. Say “I would be more comfortable with X. Is that number flexible at all?”
It’s a turn-off to employers if you begin the negotiation with a phrase like, “I need 5K more.” It’s critical you handle the conversation with tact. An employer will be much more open to the phrase, “I would be more comfortable with an additional 5K.”
To further demonstrate a level of empathy for your employer, add, “Is that number flexible at all?” This phrase provides the employer with an opportunity to tell you how much more they can offer, or alternative benefits they might increase, while maintaining a sense of collaboration, which is key.
5. Say “If you can offer X, then I’m on board.”
Your employer doesn’t want an endless negotiation, and neither do you. Using the phrase “then I’m on board” signifies to your employer that if they offer you something, you’re willing to accept the role, and negotiations can come to an end.
Of course, you want to be fair to your employer. If they tell you they can’t offer you 60K, you don’t want to say, “Offer me 60K, and then I’m on board.” Instead, you might say, “I understand the best you can do is $55,000. If you can do $55,000 and an extra week of paid vacation each year, then I’m on board.”
Here’s a full script to get you started:
Thank you so much for the offer. I’m very excited about this opportunity. Over the phone, you offered $50,000. Based on my research, I’ve seen the salary range for this type of role in the industry is typically between $55,000 and $65,000. Additionally, I feel I’m able to offer unique value to your company — in my prior position, I earned my company an additional $10,000 with a campaign I launched.
For these reasons, I would be more comfortable if we could settle on $60,000. I feel my qualifications and experience reflect this salary.
If you’re able to move the pay to $60,000, I’d be eager to accept.”
Remember — if you offer a range, you want to start at the higher end of the range, but you also should expect the employer to try to meet you more in-the-middle. In response to the script above, an employer might say, “Okay, how about $55,000?”
If they counter with a little less than what you’re asking for, you might respond with the following statement, based on an employee benefit or perk you feel is important to you:
“I understand the best you can do is $55,000. If you can do $55,000 and increase the Restricted Stock Unit allotment to 100 units, then I’m on board.”
Lastly, if you’re not sure whether you want to accept the offer, it’s acceptable to say — “Great. Do you mind if I take 24-hours to think it over?”
Regardless of how the conversation ends, it’s critical you thank your employer for taking the time to negotiate with you. This conveys a level of professionalism and shows the employer you respect them and their time — which is more likely to get you what you want, along with being the right thing to do.
Remember Your Worth — Regardless of Gender
In a study at The University of Texas, men and women were asked to negotiate a starting salary for themselves, and then for someone else. When women negotiated for themselves, they asked for an average $7,000 less than the men — but when they negotiated on behalf of someone else, they asked for the same amount of money as the men.
This concept is known as “communal orientation”. Essentially, women succeeded in negotiations when they felt it wasn’t about them — it was about helping someone else. Succeeding in negotiations, then, might be easier if you can reframe the very concept of negotiation.
For instance, perhaps it helps when you’re negotiating to consider how you are an asset to the company. If you focus on reminding the company how you’ll support the organization and help them, you can make the conversation feel less about you.
Oh, and one last thing — with job offers, 90% of employers have never, ever reneged because someone tried to negotiate. So what do you really have to lose?
How to negotiate salary
- Remember it’s common to make a counter-offer, so be prepared to do it. Know what you expect to receive before you even receive the offer letter.
- Do your best to avoid verbally committing to a set salary during interview conversations. Instead, if you’re asked directly, say you’re open based on the range.
- Research the salary range for similar roles in the industry. It’s critical you know how much your skills and experience are worth — this will help you answer the question, “Why do you deserve this salary?”
- Keep it professional. Don’t use personal financial needs like student loans as your reason for negotiating. Instead, use your resume to exemplify why you deserve a certain amount.
- You can negotiate more than salary — consider which employee benefits and perks might be negotiable, if salary isn’t.
- Take your time. It’s okay to ask for 24-hours to think it over.
Take a look at 6 Negotiation Strategies Every Marketer Should Know to further strengthen your negotiation skills.

27 Instagram Hacks, Tips, & Features Everyone Should Know About
Instagram has become the favorite social network of many — and not just for teens and Millennials. In fact, according to the Pew Research Center, 35% of online adults use Instagram — up 3% from 2016. Compare that, for example, to 24% on Twitter.
Plus, folks don’t just use Instagram casually, as 38% of them use it several times each day.
But for those who have never used the platform before, or those who just want to take their usage to the next level, Instagram has some lesser-known tricks, settings, hacks, search options, and comment features you should know about. That’s why we set out to find them and list them all in one place.
Whether you’re a recruiter looking to showcase your company’s culture, a marketer in the ecommerce industry, or an individual who’s just looking to use Instagram in the best ways possible, there are tips and features here for you.
And for a quick overview of these hacks, check out this rundown from HubSpot Content Marketing Strategist Megan Conley.
Note: Before getting started, make sure you’re operating on the latest version of Instagram. At the time of publishing this guide, the latest version is 84.0 on iOS and 83.0 on Android. Please also note that although this article might demonstrate each tip below using an iPhone or Android device, all items on this list are available for both operating systems and can be enjoyed using the same step-by-step instructions.
27 Hidden Instagram Hacks, Tips, and Features
1. Get notifications when your favorite people post.
Never want to miss an Instagram post from your favorite influencers again? You can choose to get a notification every time a specific user posts a new photo. All you have to do is turn on notifications for each user individually.
To turn on these notifications, visit a user’s profile, click the three dots in the upper right-hand corner of the post, and choose “Turn on Post Notifications” from the menu that appears.
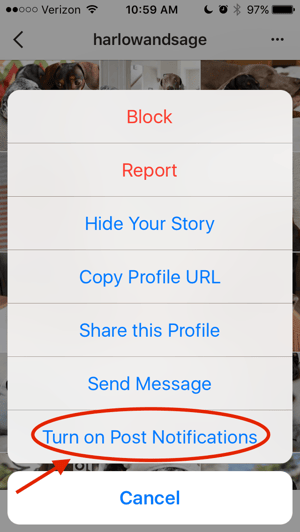
Want to turn post notifications off? Just follow the same steps. It’s important to note that you must enable notifications from the Instagram app in your phone’s settings — here’s how.
- To allow notifications on iPhone/iPad: Go to “Settings,” then “Notifications.” Choose “Instagram” and then turn on the setting to “Allow Notifications.”
- To allow notifications on Android: Go to “Settings,” then choose “Apps,” then “Instagram.” Select the option to show notifications.
2. Add special fonts to your bio.
Here’s an Instagram bio hack that can truly make your profile stand out. You can already add emojis to the bio beneath your profile photo, but your keyboard limits your creativity right there.
Using a couple of basic third-party websites, you can copy over some more special fonts not often found in the Instagram community. Here’s how.
To Add a Special Font to Your Bio via Mobile:
Add a new font to your Instagram bio via your mobile device using a website like LingoJam. Open the site on your phone, type your desired bio text in the lefthand text box, and you’ll see the same bio text in different typefaces appear on the right.
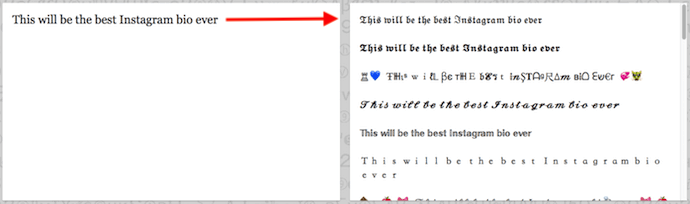
Carry your chosen font over to your Instagram bio by tapping it and selecting “Copy.” Then, open your Instagram app, navigate to your profile, select “Edit Profile,” tap the “Bio” section and paste your chosen font into the empty field.
To Add a Special Font to Your Bio on Desktop:
If you’re editing your Instagram profile on your laptop or desktop, Font Space has a library of fonts you can download and copy into your bio in seconds. To do so, Find a font you like and select “Download” beneath the font’s sample image, as shown below.
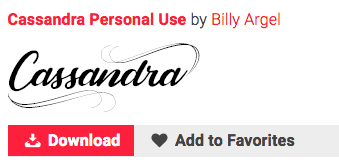
Downloading this font will open a folder on your desktop where you can pull a “.ttf” file that carries the various versions of this font. The file will look something like the screenshot below.
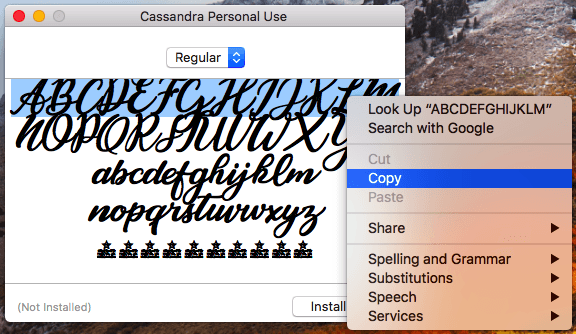
Once you have this font copied to your computer’s clipboard, open your internet browser and log onto Instagram.com. Select “Edit Profile” and paste your downloaded font into your bio field. You can then edit the sample text that came with your font to write your new bio as you see fit.
3. Add special characters to your bio.
Not only can you customize your bio with a special font, but you can also add atypical characters that distinguish you or your brand — but that you wouldn’t find on your smartphone’s normal keyboard. These include §, †, or even ™ if your Instagram name features a trademarked product name.
To Add Special Characters From Mobile
Using your mobile device, install a free mobile app like Character Pad, which catalogs nearly every character and symbol you might need but won’t find in the 26-letter English alphabet.
Open the app and find the character you want to add to your Instagram bio. In Character Pad, you’ll simply double-tap the picture of your chosen symbol to paste it into a text box, as shown below. Then, copy this character to your phone’s clipboard.
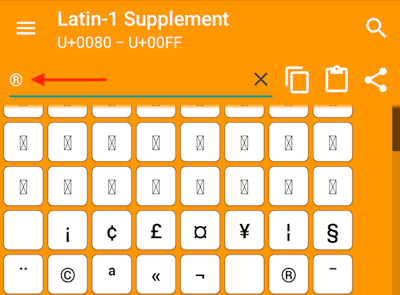
Once you have your symbol copied to your clipboard, open Instagram, navigate to your bio, and tap “Edit Profile.”

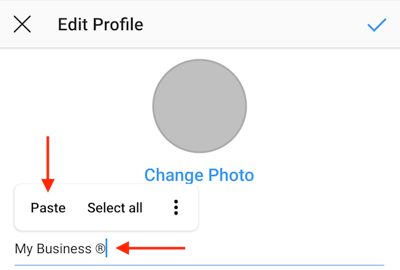
Hold down your finger on the field of your bio you want to insert your special character until “Paste” appears as an option, as shown below. Tap “Paste” and you’ll be all set.
To Add Special Characters From a PC
You can also insert special characters and symbols through Instagram’s web client on a desktop or laptop computer. The easiest way is to use Microsoft Word’s “Symbol” insertion icon, as shown below.

Select your desired symbol or character and copy it to your computer’s clipboard. Then, navigate to Instagram.com and follow the steps above to paste your character into a particular part of your bio.
You might be tempted to simply Google search the special character you want, and at times it might work just as well as the steps above. But keep in mind not all special characters you copy from the internet are “clean” when you paste them into Instagram — some of them might become corrupted or not show up correctly.
4. Search Instagram users without an account.
As much as Instagram would like to see you ultimately create an account for yourself or your business, you can peruse the beautiful brands, people, and dogs that are waiting for you without an account to see if it’s worth signing up.
There are two ways to search for people on Instagram without logging in:
Entering a Username at the End of the Instagram URL
The first way to search users without an account is by using an Instagram username you already know, and adding it to the end of “www.instagram.com/.”
For example, if you were to start with our Instagram username — which is simply “HubSpot” — you can enter the following into your browser’s address bar: www.instagram.com/hubspot. This will bring you to our Instagram profile as well as the elusive search bar at the top of the page:
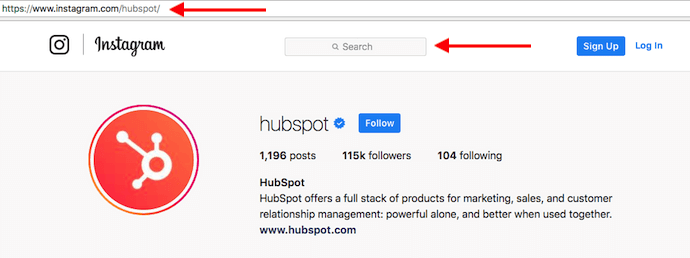
Once you’ve reached this page, you can use the search bar to the left of the “Sign Up” button to browse users who are already active on the platform.
Googling Them in an Instagram Site Search
A slightly “hackier” way of looking up users without an Instagram account of your own is to simply search their name in a Google site search. This means telling Google to only look up search terms on a website of your choice (in this case, Instagram).
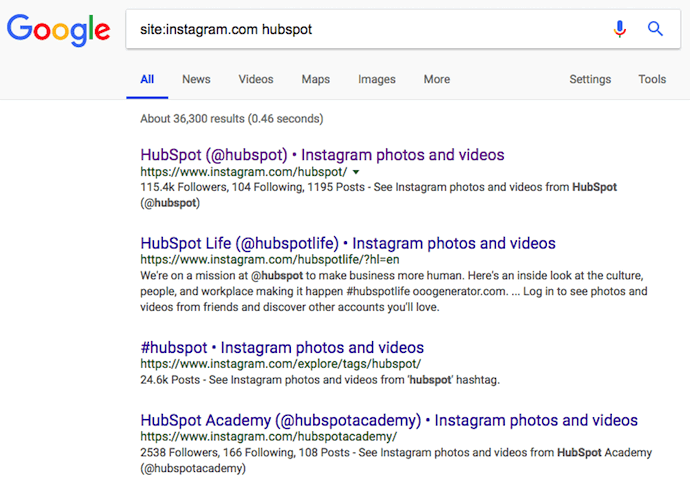
To site search a user, open a Google search and type the following: “site:instagram.com [name of user].”
By keeping all the text prior to the brackets in your search bar, you can shuffle through names of people and businesses and Google will produce results that live only on Instagram. Here’s what a site search looks like for HubSpot, below. As you can see, Google produces our main profile, our culture-focused HubSpot Life profile, Instagram posts that include the #hubspot hashtag, and our HubSpot Academy Page.
5. See all the posts you’ve liked.
Ever wanted to see the posts you’ve Liked, all in one place? All you have to do is go to your own profile and click the “Options” button — a gear icon on iPhone/iPad, and three dots on Android — then, click “Posts You’ve Liked.”
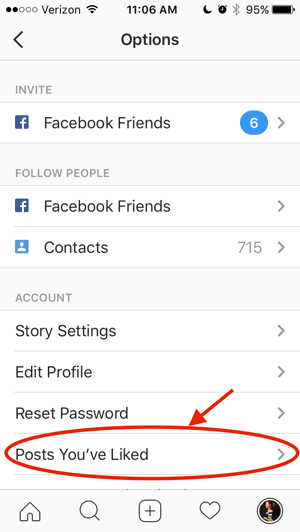
To un-Like any of the posts you’ve Liked, simply go to the post and deselect the “heart” icon below it. Don’t worry — the user won’t be notified that you’ve un-Liked the post.
6. Add and manage multiple accounts from the same device.
Have a separate account for your dog? Don’t be embarrassed; stand by your puppy profile. In fact, whether it’s a pet account or a business account, you can add and manage this one right alongside your personal account. Here’s how:
- From your profile, tap the gear icon. To find this icon on an Android device, you’ll first need to tap the three horizontal lines to the top right of your screen.
- Scroll to the very bottom and tap “Add Account.”
- Add your other account by username and password, and you’re all set.
To toggle between both profiles, hold down your profile picture in the navigation bar to view all connected accounts. You can also switch to a different account through the Settings page mentioned earlier. See what this screen looks like in the next Instagram feature, below.
7. Schedule posts in advance.
Instagram being a mobile app, you’re probably in a routine of taking photos and posting them to your Instagram Story on the fly. But, you can also pre-post them from your computer for a set day and time in the future.
This feature is available with a social media scheduling tool, as well as HubSpot if you have an Instagram business account. If you have this business profile, switch to it via the Instagram mobile app and follow the prompts to connect it to Facebook.
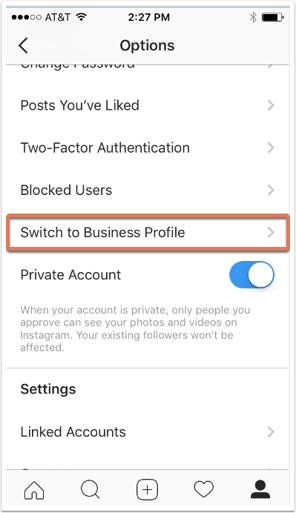
Depending on the social scheduling tool you use, you might not include this step. Once you’ve toggled to the right account, however, you’ll launch your scheduling tool, navigate to your current connected profiles, and see Instagram as an available integration.
8. Optimize your Instagram bio to appear in the Explore tab.
Your friends, family, and coworkers might be your first group of Instagram followers, but growing your audience takes more than the people who already know you. One key way to do this is to get your profile to appear in Instagram’s Explore page.
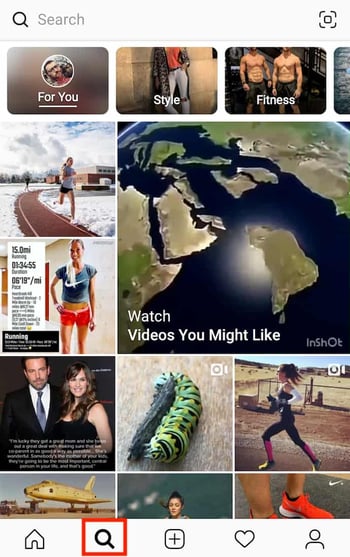
The Explore page, accessible using the magnifying glass icon shown above, is a browsing page that sorts the entire Instagram community by topic and keyword. These include “Fitness,” “Style,” “Science,” and more.
Hashtagging your posts with these words can expose your content to the people browsing these topics, but you can also use them in your Instagram name and bio to promote your profile. If Jane Doe is a marketing consultant, for example, she might want to make her Instagram name “Jane Doe Marketing,” rather than simply “Jane Doe.” Then, in her bio, she can include all of her specialties, such as “SEO,” “blogging,” “email marketing,” etc.
9. Create a collection of saved posts.
In addition to being able to view all of the posts you’ve liked, Instagram also has an option to save or bookmark certain posts in collections that you create.
Start by going to your profile, and tapping the bookmark icon on the top-right menu above your photos.
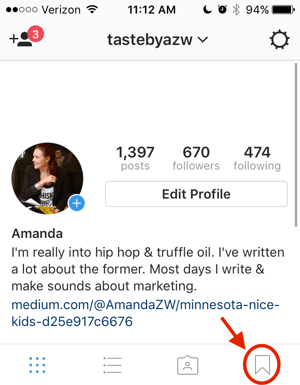
Select the “Collections” tab, and tap “Create Collection.” Below, I’ve created one for food-related posts I particularly like.
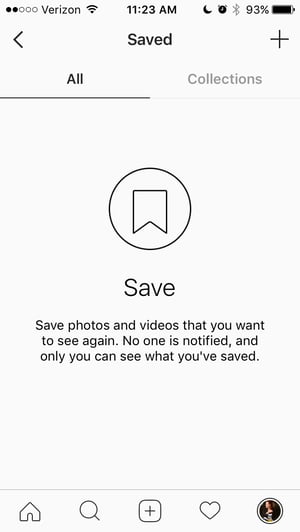
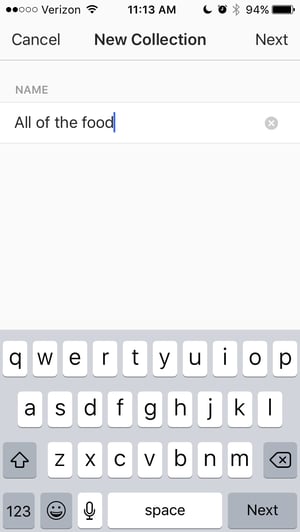
Hit “done,” and you can start adding photos to your collection. To do so, tap the bookmark icon below the post you want to add.
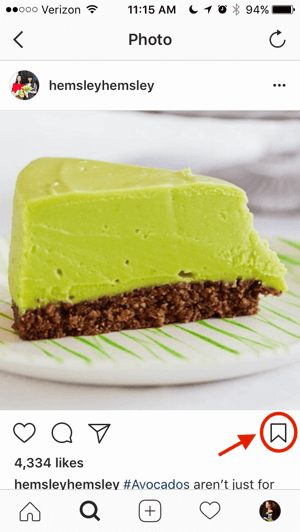
Then, go back to your saved photos by following the previous steps. You’ll see the photos you’ve saved — to add them to your collection, select the collection you want to add to, and tap “Add to Collection.” From there, you can add any of your saved photos.
10. Use ‘Type Mode’ to enhance your Instagram Stories.
Instagram Stories is a feature of Instagram that allows you to post ephemeral photos that show up separately from your profile and only last 24 hours. It’s a great function for helping like-minded users discover your profile on Instagram’s homepage.
But since its beginning, Stories have become quite creative, and it takes more than a pretty filter to stand out to your audience. Enter “Type Mode,” an option similar to Snapchat that gives you the power to caption Stories that need extra context to resonate with someone. Here’s how to use it:
Open Instagram Stories by swiping right from your Instagram feed. This will launch your smartphone camera. Then, take a photo or video and press the “A” icon to the top-right of your screen, as shown below:
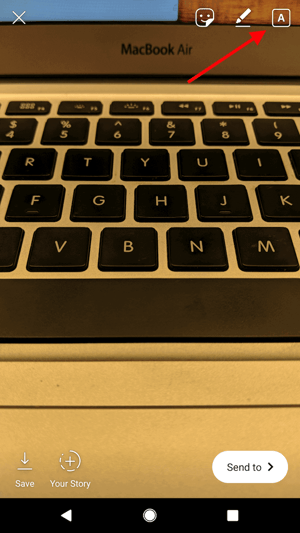
This “A” icon will open Type Mode, where you have five fonts to choose from: Modern, Neon, Typewriter, Strong, and Classic. Here’s what a sample Story looks like with Modern font:
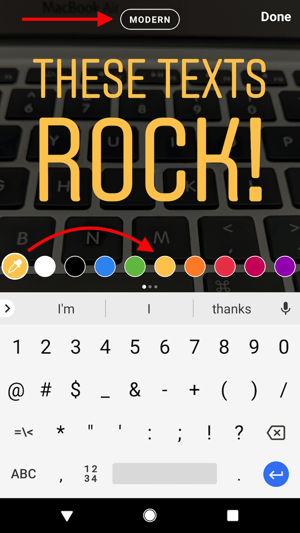

11. Create Stories Highlights to show Stories for longer than a day.
Like in Snapchat, posts to your story only stick around for your followers to see for 24 hours. But sometimes, you have a story that deserves more daylight to be told.
That’s where Stories Highlights comes in, a feature by Instagram that allows you to save stories together in the same space on your profile page. If you ever wondered what that “New” button with the “+” icon was below your profile image, this explains it.
To make a Stories Highlight, tap this New option and select any number of past stories in your album:
Image via
Instagram
Then, give it a cover photo and a name to display as its own Instagram Story on your profile page. You can remove Stories Highlights at any time by tapping and holding down this story.
12. Post content from other users to your Instagram Story.
Although Instagram Stories are a great way to give your content exposure on your followers’ homepages, you might not always have something Story-worthy. In those times, you can share an inspiring post from someone else through your Instagram Stories. Here’s how:
Find a post you want to share in your Instagram Stories and tap the paper airplane icon, as shown below.
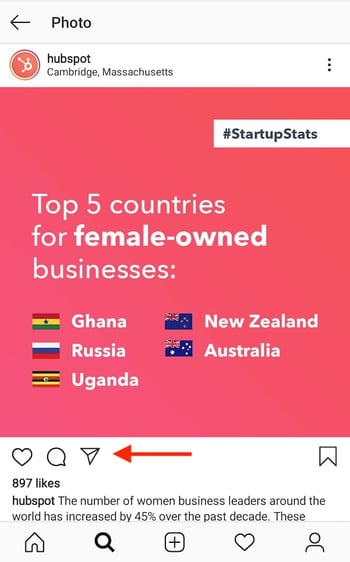
This icon will open a screen allowing you to send this post to specific followers, or add to your Story. Tap the latter option, as shown below.
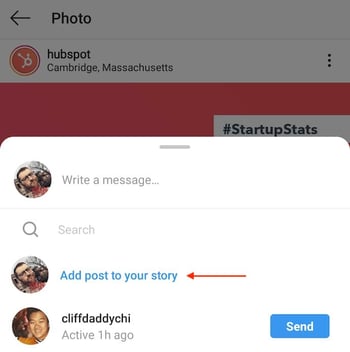 Tapping this option will automatically turn the post into an Instagram Story, which you can edit and design to your liking the same way you would any other Instagram Story.
13. Upload and browse video content on IGTV.
IGTV is one of the biggest new features by Instagram to date. This acronym, as you might assume, stands for “Instagram TV,” and it’s basically an Explore page just for users’ video content. The main benefits of IGTV? You can upload videos more than 60 seconds long, and you can create your own channel with, perhaps, a video series that can be broadcast across other video platforms like YouTube.

Navigate to IGTV by tapping the icon shown above. A page will appear featuring topics and videos by some of the most prolific IGTV video creators on the platform today. As you view more videos, the topics you see on the IGTV homepage will begin to adapt to your interests and serve you more content around those interests. And, naturally, the same goes for your target audience.
Create an IGTV channel by tapping the circular icon to the right of your screen, as shown below.
With an IGTV channel created, you can then upload videos directly from your smartphone’s camera roll to your channel.
14. See the posts your friends recently liked or commented on.
When you’re looking to discover new people to follow on Instagram, there’s nothing like asking your friends. There’s a quick way to do that — by viewing the recent liking and commenting activity of the people you follow.
To do that, click the heart icon at the bottom of the home screen — the first thing that should appear is a list of likes and comments on your photos. Choose the tab near the top that says “Following,” and you can see the activity of users you follow.
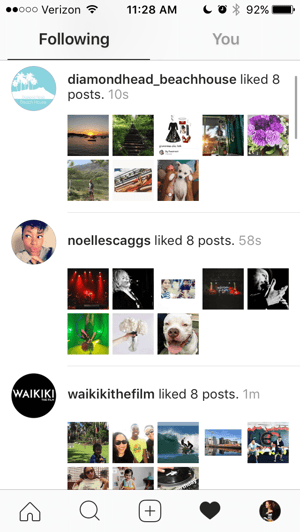
15. Look through pictures without accidentally liking them.
It’s pretty easy to learn how to like something on Instagram — so easy, in fact, that people do it accidentally: It’s just a quick double tap of the photo once you’ve entered its full view.
The thing is, it’s so easy to do quickly by mistake. So, here’s a quick Instagram cheat for you: To look through someone’s photos without “double-tap paranoia,” scroll through Instagram feeds with your phone set to airplane mode. Without internet access, you won’t be able to Like a photo, even if you accidentally double-tap it.
The pictures won’t load in the first place if you start on airplane mode, though. You’ll have to go to the feed first to load the posts, then turn on airplane mode, then start scrolling. When you reach the end of the first rows of posts and want to load more, simply turn airplane mode off, let more load, and then turn it on again. Cumbersome? Maybe a little, but it could be worth the paranoia mitigation.
- To turn on airplane mode on an iPhone/iPad: Swipe up from the bottom of the screen and click the airplane icon. Or, go to “Settings” and then “Wi-Fi,” and switch “Airplane Mode” on.
- To turn on airplane mode on an Android device: Swipe down from the top of the screen. Then, swipe from right to left until you see “Settings,” and then touch it. Touch “Airplane Mode” to turn it on.
16. Hide, delete, or disable comments on your posts.
Twitter may carry a more “anything goes” culture of commentary, but your Instagram is your domain — and it’s much easier to control who says what on your content. This is especially important if you manage a business account.
To Filter Comments by Keyword:
In the Instagram mobile app, navigate to “Options” and select “Comments.” From here, you can toggle on “Hide Inappropriate Comments” and even enter specific keywords you’d like the app to police within each comment.
To Delete Comments:
Tap the speech bubble icon below the comment you’d like to delete, and swipe lightly to the left over this text. Select the garbage can icon that appears to delete this post. You can also do this to your own comments.
To Disable Comments Entirely:
To clarify, you can’t turn off comments across your entire profile; you can only disable them for individual posts.
To do so, start posting an image on which you’d like nobody to comment. When you reach the page to add a caption, tags, and location, tap “Advanced Settings” at the very bottom. This will open a screen where you can easily switch on an option labeled “Turn Off Commenting.”
17. Clear your Instagram search history.
We swear — this blog post isn’t all about how to convince people you’re not an Instagram creeper. But many of us can relate to the desire to clear our online search history everywhere, including on this particular social channel. Luckily, you can.
To clear your Instagram search history, go to your own profile and click the “Options” button (a gear icon on iPhone/iPad and three dots on Android). Scroll down and click “Clear Search History.” When prompted, click “Yes, I’m sure.”
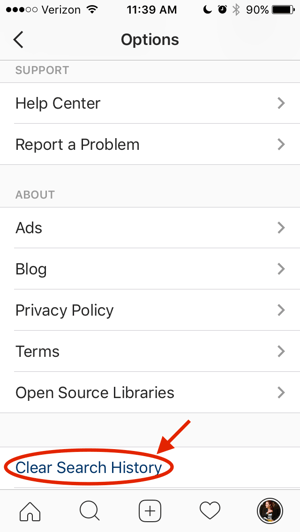
18. Reorder filters and hide the ones you don’t use.
If you use Instagram a lot, chances are, you have a few favorite go-to filters, and others you never touch. To make editing photos easier, you can reorder the filters in your editing window, and hide the ones you never use.
To reorder or hide filters, add a new post and begin editing it. When you get to the filters page, scroll to the very far right of your filters options and click “Manage.”
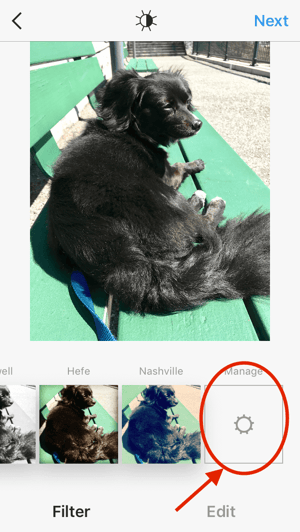
To reorder filters, hold your finger down on the three grey lines on the far right of the filter you’d like to move, and drag it to reorder. To hide them, deselect the checkmark to the right.
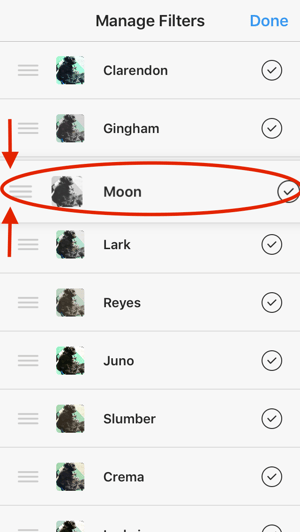
19. Use Instagram as a photo editor (without having to post anything).
Perhaps you love Instagram’s filters and editing capabilities, but aren’t quite ready to post the photo to your account — right now, or ever. To use Instagram as a photo editor without posting anything, all you need to do is publish a picture while your phone is on airplane mode.
First, be sure you have “Save Original Photo” turned on in your Instagram settings.
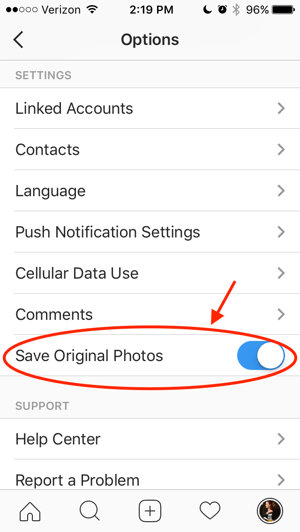
Then, turn on airplane mode — see instructions in #5.
Next, follow the normal steps to post a photo to Instagram: Upload the photo, edit it, and press “Share.” An error message will appear saying the upload failed, but you’ll be able to find the edited image in your phone’s photo gallery.
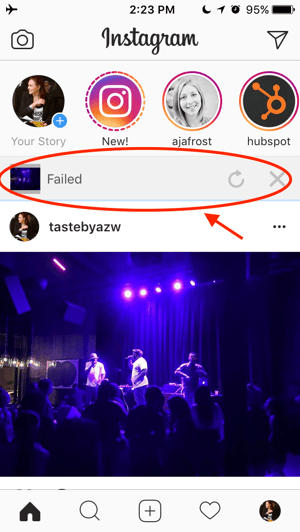
20. Insert line breaks into your bio and captions.
When you write a caption in Instagram, you’ll see the keyboard doesn’t give you an option to press “Enter” or “Return.” The same is true for your bio. So how do all those people put line breaks in there?
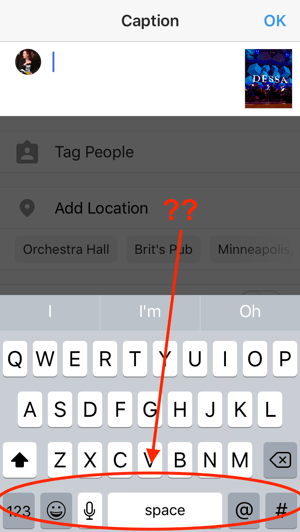
It turns out that all you have to do is press the “123” key in the bottom lefthand corner of the keyboard, and the “Return” key will appear on the bottom right.
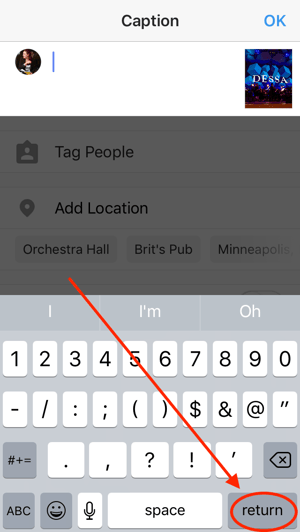
I know this tip sounds simple, but a lot of people miss it — myself included, until a colleague clued me in. We’ve seen some elaborate solutions out there for hacking through this problem, like writing the caption copy in another app, then copying and pasting it into Instagram. Thankfully, it’s much simpler than that.
21. Hide Photos You’ve Been Tagged In
When someone tags you in a photo or video on Instagram, it’s automatically added to your profile under “Photos of You,” unless you opt to add tagged photos manually (see the next tip).
To see the posts you’ve been tagged in, go to your own profile and click the person icon below your bio.
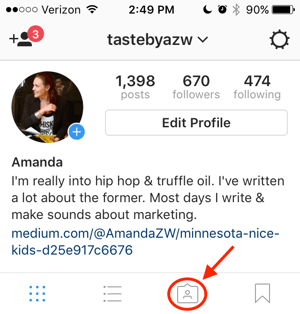
Then, to hide the posts you’ve been tagged in from other users, click the three dots in the top right of your screen and choose “Hide Photos.” Select the posts you’d like to remove from your profile, and when you’re done, tap “Hide Photos” at the bottom of your screen. When prompted, tap “Hide From Profile.”
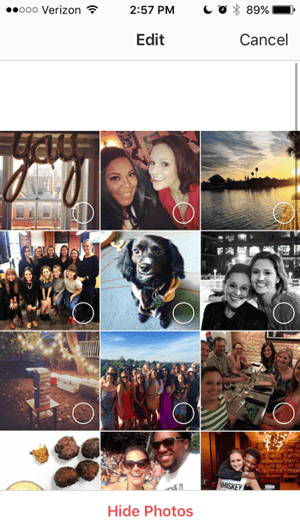
This won’t remove the posts themselves from Instagram, but it will remove them from your profile, so you and others can’t access them.
22. Adjust your settings to approve tagged photos before they show up in your profile.
As we mentioned in the previous step, when someone tags a photo or video of you on Instagram, it’s usually added to your profile automatically. But, you can change your Instagram settings to enable manually selecting which photos you’re tagged in that show up on your profile.
To add tags manually, follow the same steps above to get to the photos in which you’ve been tagged, and click the three dots in the top right of your screen. Tap “Tagging Options,” and select “Add Manually.”
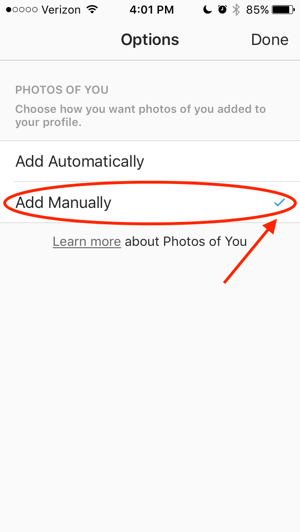
You’ll still be notified when someone tags you in a photo. Once that happens, to manually add a tagged photo to your profile, tap the photo you were tagged in, then tap your username and select “Show on My Profile.” And if you’d rather it not be visible, choose “Hide from My Profile” instead.
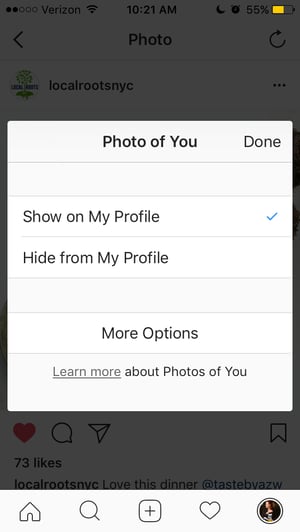
23. Browse posts from certain locations.
One fun thing you can do on Instagram is browse photos and videos from a specific location, or taken near your current location. I like to do that when I’m planning a trip somewhere, or want to check out a new restaurant and scroll through the pictures taken there.
Here’s how to do both of these things.
To Browse Posts From at a Specific Location:
You can either search for a specific place, or you can click into a geotag on an existing photo.
To search for a specific place: Tap the magnifying glass icon at the bottom of your home screen, which will bring you to the general search page. When you click into the search bar at the top, four tabs will appear. Choose “Places,” and type in the name of a place. When you press “Search,” it’ll show you all the top and recent posts that were geotagged with that location.
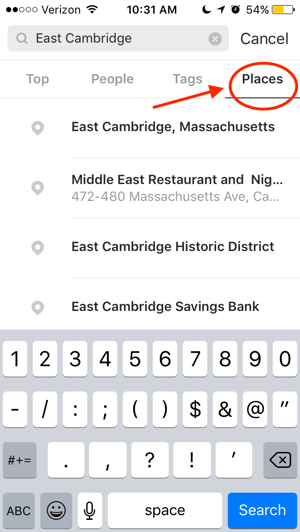
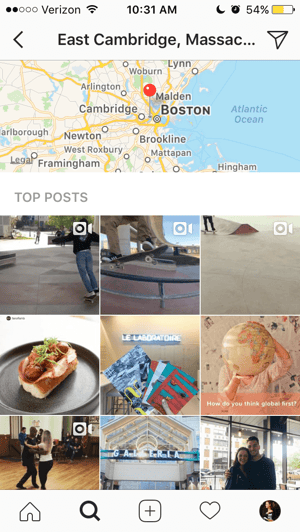
To look at posts with a certain geotag: Go to the photo that’s geotagged with that location, and click the geotag. It’ll show you all the top and recent posts that were geotagged with that location.
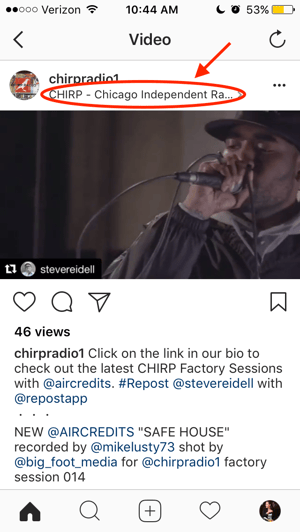
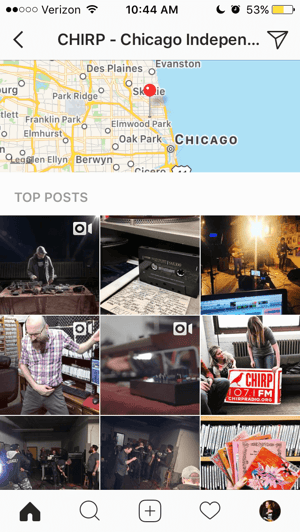
Browse Posts Near Your Current Location:
Follow the same instructions above to get to “Places.” Tap the search bar, and select “Near Current Location.”
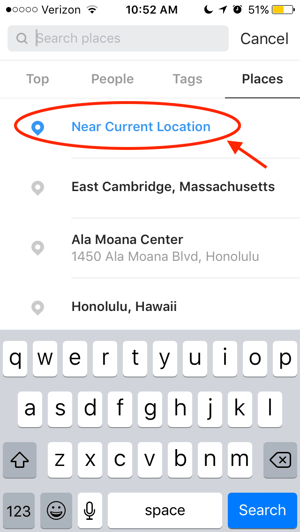
Choose which geotag you’d like to browse from the options that appear. Let’s say I chose to browse posts with the Museum of Science geotag. When I click “Museum of Science, Boston” on the menu, I’ll see the top and recent posts that were geotagged at that location.
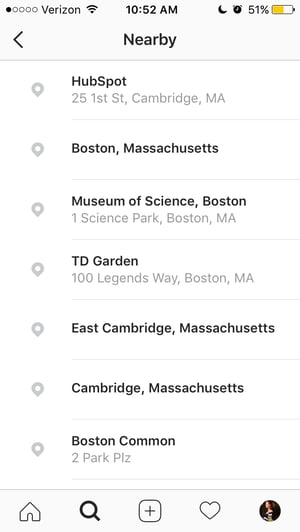
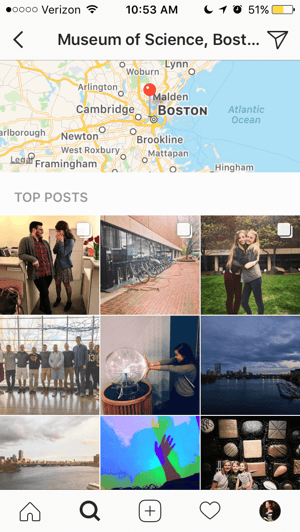
24. Drive traffic to an external website.
One of the biggest frustrations people have with marketing on Instagram is that clickable URLs aren’t allowed anywhere except the single “website” box in your bio. If you put a URL in a photo caption it’ll appear as plain text, meaning users would have to painstakingly copy the URL, open a web browser, and paste or type it in there.
One sneaky way to get people to visit your Instagram profile, which is where that one clickable URL is allowed, is to use your photo captions to encourage people to visit your profile for a link. Then, update that URL frequently to point to your latest blog content, YouTube video, product, or offer.
Check out the example from food magazine Bon Appétit below. This photo’s caption provides a text call-to-action to visit the user’s profile so you can click the link related to the post.
Then, in Bon Appétit‘s profile, you’ll see the link itself. Update this link frequently to point to your latest content or offer.
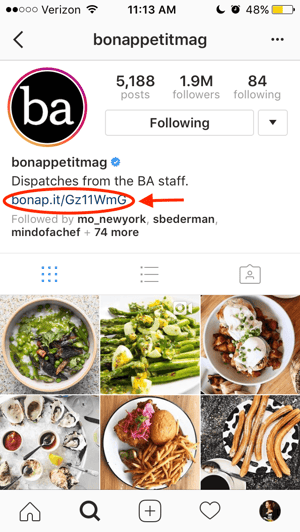
Plus, if you have a verified Instagram account, you can also add links to your Story. Read more about this feature here.
25. Sell products from Instagram using Shoppable Posts.
You might already know you can tag people in your Instagram posts as (or after) you post new content. Now, you can tag products — and direct your viewers to a product page to buy what they saw.
To Add an Instagram Business Account
You’ll need an Instagram Business account to publish shoppable posts. You can get one by selecting “Edit Profile” on your Instagram profile and tapping “Try Instagram Business Tools,” as shown below.
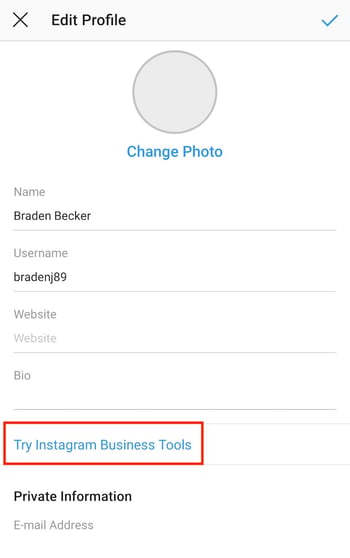
To Tag a Post With Products
Once you’ve launched an Instagram Business account, you’ll need to enable product tags to use them on a post that depicts a product. Navigate to your settings using the gear icon from your profile page, and select “Products.” Tap “Continue” and follow the prompts to connect a “product catalog” to your business profile.
With product tags enabled on your Instagram Business account, you can now upload new posts and tag your photo with products you find from your product catalog. Here’s what a shoppable post can look like:
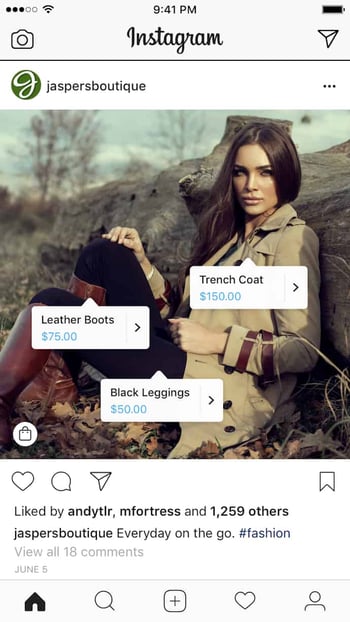 Image via Instagram
26. Pin your Instagram post to Pinterest.
Instagram doesn’t have a natural integration with many social networks (except Facebook, its parent company) for publishing Instagram posts to other social accounts.
But with respect to Pinterest, image-loving platforms stick together. Here’s a backdoor way to Pin your latest Instagram Story to Pinterest:
On the Instagram mobile app, tap a post to view it in full, then tap the three dots to the top-right of the image. Select “Copy Share URL” to attach the picture’s link to your clipboard.
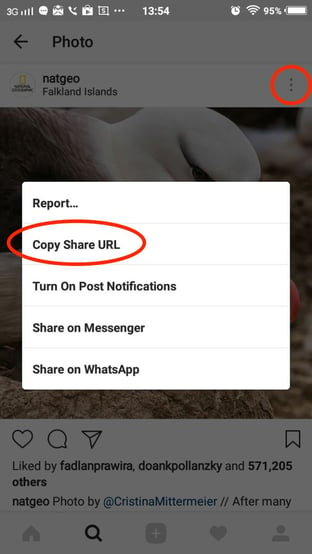
Image via Boleh.com
Open the Pinterest mobile app — or download it; you’ll need it for this step — and navigate to your profile page. If you have the latest version of Pinterest downloaded, it might ask you as soon as you open the app if you’d like to produce the image from your clipboard.
If not, select the “+” icon to the top right to add a new pin, and you’ll see a menu of options where you can add your “Copied Link” to a new Pin or board on your profile.
27. Hide ads you don’t find relevant.
Instagram tries to show you ads that are interesting and relevant to you. You might see ads based on people you follow and things you Like on Instagram, or the third-party websites and apps you visit.
If you see sponsored posts you don’t find relevant, though, you can let Instagram know and slowly teach its algorithm what you like and don’t like to see.
To hide ads on Instagram, tap on the three dots to the right of a post labeled “Sponsored,” and choose “Hide This.”
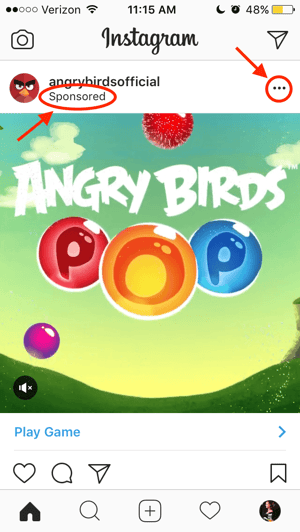

From there, it’ll ask you to share why you don’t want to see the ad anymore.
You can also opt out of seeing ads based on sites and apps off of Instagram and Facebook from your device’s settings. Note that even if you choose to opt out of seeing these types of ads, you’ll still see ads based on your Instagram and Facebook activity.
- To limit ad tracking on an iPhone/iPad: Go to “Settings” and choose “Privacy,” then “Advertising.” From there, choose the option to “Limit Ad Tracking”
- To turn off interest-based ads on Android: Go to “Google Settings,” then “Ads.” From there, choose the option to “Turn off interest-based ads.”
28. Send photos privately to your friends.
Posting photos with all of your followers or with the public isn’t the only way to share content on Instagram. You can also share them with individual or multiple users, kind of like a Facebook message or group text message.
You can either send a new photo to friends, or send a photo that you or someone else has already posted.
To send a new photo privately, upload a photo and begin editing it, as you would when editing a new post. When you get to the “Share” page, tap the top where it automatically says “New Post,” but when prompted, select “Direct Message.” From there, you can pick and choose whom you’d like to send the photo to.
You can access your direct messages at any time by clicking the mailbox icon at the top right of your homepage.
To send an existing photo privately, start by opening the post you want to share — it can be your own or someone else’s, as long as the latter has a public account. Next, click the paper-airplane-like icon below the post, then select who you want to receive it when the “Send to” box appears.

Insta-Hacks
I might be biased, but Instagram is one of the most fun (and visually appealing) social apps around. And now, with these tricks, you can use it to an even fuller extent.
Plus, many of these features can help to enhance your brand’s presence on Instagram. Now, you know how to use the app more efficiently, to make sure you’re only tagged in photos you want to appear on your profile, and have even more ways to engage with the people by whom you’d like to be discovered.

10 Compelling Above the Fold Content Examples to Inspire Your Own
In copywriting, there’s an old adage that states the purpose of your first line of copy is to compel people to read your second line of copy. In web design, the same principle applies. But instead of crafting a compelling first line of copy, you need to design gripping website content that sits above the fold.
Above the fold content is what your visitors see right when they land on your website. If it’s clear, engaging, and persuasive, it can convince them to explore the rest of your website. If it’s jumbled and uninspiring, however, they’ll bounce off your website faster than they’d exit out of a pop-up ad.
With only 15 seconds to engage the average website visitor, designing compelling above the fold content is crucial for making a great first impression, lowering your bounce rate, and retaining attention. Below, we’ll show you some of the best above the fold content examples to get your creative juices flowing, so read on to get inspired.
Above The Fold
Above the fold content is what your visitors see right when they land on your website, and it’s arguably the most important part of your homepage. By clearly conveying what your organization does and its associated benefits, above the fold content can inspire your visitors to explore the rest of your website.
10 Compelling Above the Fold Content Examples to Inspire Your Own
1. Wistia

As one of the most creative brands in the MarTech industry, the fact that Wistia’s above the fold content is a video of a woman dancing around with a pink video camera in her hand shouldn’t be a surprise to anyone.
This makes their homepage feel casual and inviting, and coupled with a simple line of copy that encourages visitors to watch their company overview video, their homepage’s low-pressure vibes most likely convinces more people to watch their video than some of the best homepages could.
2. Airbnb

By featuring a vivid photo of one of their more adventurous bookings in their above the fold content design, Airbnb gives their website visitors a sneak peek at a possible experience they could take part in if they book one of their homes. And by planting this image in their visitors’ mind, searching for accommodation on their website is a natural next step.
3. Velocity Partners

Unlike most above the fold content design, Velocity Partners, a B2B marketing agency, doesn’t try to persuade their website visitors to watch their company overview video or try out their product. Instead, they encourage them to engage with a fascinating interactive slideshow that explains why innovative marketers need to leverage new content formats to tell more refreshing stories.
By sparking their website visitors’ curiosity with thought-provoking copy and capturing their attention with a graphic that looks like it belongs in Tron, Velocity Partners can convince them to find out why innovators need innovative storytelling, and, in turn, Velocity Partners’ services.
4. VeryGoodCopy

VeryGoodCopy is a creative agency that crafts articles, landing pages, web pages, and emails for brands, but their homepage doesn’t harp on their services, like most companies do.
Instead, they immediately offer the opportunity to learn how to persuade — a skill every marketer wants to master — by leveraging ample white space, an enticing headline, a brief description of their content topics, social proof, and a vivid call-to-action. This simple and engaging above the fold design ensnares their visitors’ attention and convinces them to check out their micro-articles.
5. Shopify

Since humans can process visual information four times faster than the blink of an eye, Shopify decided to rely more on visuals than copy when crafting their above the fold content. To do this, they included artistic images and an alluring video that could instantly capture their website visitors’ attention. But even though they sparingly use any copy on their homepage, their tagline is packed full of purpose and can compel visitors to get started with their software.
6. Ann Handley

By highlighting her impressive accomplishments of being a Wall Street Journal best-selling author and a partner at MarketingProfs, Ann Handley instantly conveys her impressive marketing prowess to her website visitors. She also leverages white space, a welcoming picture of herself, a catchy tagline, compelling copy, and a vibrant call-to-action to persuade her visitors to consider working with her.
7. Mint

Mint’s simple and professional above the fold content design can effectively attract its target user — people who meticulously manage their money. They also include a photo of their app in action and contrast bright colors, like orange and green, to catch their website visitors’ attention. Additionally, their copy is clear and concise and conveys the tool’s main benefit — effortless money management.
8. Drift

Drift’s above the fold content design features captivating images of their product in action, a refreshing picture of a real person, and attention-grabbing copy that injects excitement into their website visitors. By blending all three of these elements into their homepage while still leveraging a ton of white space, Drift can hold their website visitors’ attention and convince them to sign up for a free account.
9. InVision

One of the more sleek above the fold content designs, InVision’s homepage overlays sharp copy on top of dynamic, professional grade footage of their company overview video. This gives their website visitors a glimpse of the video and entices them to watch it. They also include a vibrant CTA that conveys they offer a freemium version of their software, which is an easy first step to take with the company.
10. Animalz

Similar to VeryGoodCopy, Animalz is a content marketing agency that doesn’t bombard their website visitors with messaging about their services in their above the fold content design. Instead, they offer visitors the opportunity to learn about some of top SaaS brands’ marketing strategies. They also leverage white space, feature visual appealing images, craft a simple yet potent tagline, and include a convincing customer testimonial to encourage their visitors to subscribe to their newsletter.
