
What the Heck Does HTTP Error 503 (Service Unavailable) Mean & How Can You Fix It?
Imagine someone searches for a topic and finds your website on page one of Google. When they click through to your website, though, their eyes land on a bland webpage that says “Service Unavailable”.
What do you think they’ll do when they find your website on Google again? Odds are, they’ll skip over it and click on the next link. If visitors are looking for answers and you’re promising them those answers, but you can’t deliver because something’s wrong with your website, they’ll lose trust in your brand.
Unfortunately, if your website experiences a 503 Service Unavailable Error, there’s no silver bullet solution. You have to investigate what’s actually causing the issue, because even though these types of errors indicate what happened to your website, they don’t tell you why it happened.
To help you fix your 503 Service Unavailable Error and avoid losing potential customers, check out our guide on what exactly the issue is and its most common solutions.
What does HTTP Error 503 mean?
A 503 Service Unavailable Error is an HTTP response status code that indicates your web server operates properly, but it can’t handle a request at the moment. Since it’s just a generic error message, it’s difficult to pinpoint the issue’s exact cause. When your website is experiencing a 503 Service Unavailable Error, your site’s visitors will land on an error page, like the photo below.

Image Credit: Stack Overflow
Fortunately, there are five common solutions for troubleshooting most 503 Service Unavailable Errors.
How to Fix an HTTP Error 503
- Reboot your server.
- Check to see if your web server is going through maintenance.
- Fix faulty firewall configurations.
- Sift through your server-side logs.
- Comb through your website’s code to find bugs.
1. Restart your server.
Sometimes, there will be congestion in the server chain that hosts your website. One of the most effective ways to open up and refresh it is to simply restart your web server. If your website is hosted on multiple servers, make sure you restart all of them to get it running again.
2. Check to see if your web server is going through maintenance.
Most web servers shut down when they’re going through maintenance. If you can access your server’s administration settings, check the configuration options to see when automatic maintenance sessions are scheduled. If you’d rather have complete control over your server’s maintenance, you can disable these automatic updates in the configuration options, too.
3. Fix faulty firewall configurations.
Your firewall is your website’s gatekeeper, protecting your site from malicious visitors or distributed denial-of-service (DDoS) attacks. Sometimes, a faulty firewall configuration will cause your firewall to deem requests from a content delivery network as an attack on your server and reject them, resulting in a 503 Service Unavailable Error. Check your firewall configuration to pinpoint and fix the issue.
4. Sift through your server-side logs.
There are two types of server-side logs — applications logs and server logs. Application logs recount your website’s entire history, letting you see the web pages requested by visitors and the servers it connected to. Server logs provide information about the hardware running your server, revealing details about its health and status. Sift through both types of server-side logs to uncover any alarming information about your server or website.
5. Comb through your website’s code to find bugs.
If there’s a mistake in your website’s code, your web server might not be able to correctly answer requests from a content delivery network. Comb through your code to find bugs or copy your code into a development machine. It’ll perform a thorough debug process that will simulate the exact situation your 503 Service Unavailable Error occurred in and allow you to find the exact moment things went wrong.

The Beginner’s Guide to Conversion Rate Optimization (CRO)
Today, most marketing teams are structured to drive traffic toward websites, which then converts into leads for the sales team to close. Once this process starts to deliver results, marketers then seek to generate even more traffic, and hopefully even more success.
It might be an oversimplification, but that’s the standard marketing playbook. Few marketing teams focus on getting more from existing traffic. That’s where conversion rate optimization (CRO) comes in.
In this blog post, we’ll teach you all about CRO — what it achieves, why you should do it, and how your team can execute it.

We’ll explain how you can drive more results from your existing traffic so your content can work smarter, and not harder, for you.
What is conversion rate optimization (CRO)?
Conversion rate optimization (CRO) is the process of enabling people to take an action when they visit a website. By designing and modifying certain elements of a webpage, a business can increase the chances that site visitors will “convert” into a lead or customer before they leave.
Many websites are designed to convert website visitors into customers. These conversions occur all over the website — on the homepage, pricing page, blog, and landing pages — and all of these can be optimized for a higher number of conversions. The process of optimizing those conversions is exactly what CRO entails.
Here’s a little more detail on how the above website elements can benefit from CRO.
Homepage
Homepages are prime candidates for CRO. In addition to making a first impression on visitors, the homepage is also an opportunity to retain those visitors and guide them further into your website. You can do this by emphasizing links to product information, offering a free signup button, or even incorporating a chatbot that solicits questions from visitors at any point during their browsing experience.
Pricing Page
A website’s pricing page can be the make-or-break point for many website visitors. CRO can help a pricing page convert visitors into customers by modifying the pricing intervals (e.g. price per year vs. price per month), describing the product features associated with each price, and including a phone number for visitors to call for a price quote.
Blog
The blog is a massive conversion opportunity for a business’s website. In addition to publishing thoughtful and helpful content about your industry, a blog can use CRO to convert readers into leads. This process often includes adding calls-to-action (CTA) throughout an article, inviting readers to learn more about a topic by submitting their email address in exchange for a ebook or industry report.
Landing Pages
Landing pages are inherently designed for people to take an action. An event landing page, for example, can be optimized with a video of last-year’s event to encourage visitors to register for this year’s. A landing page for a free resource can be optimized with preview content from that resource to encourage users to download it.
Conversion rate optimization is a huge, often untapped opportunity for marketing teams, and you might be surprised by the oversized impact you could deliver by fine-tuning your website for conversions.
When is conversation rate optimization (CRO) right for your business?
Once your sales and marketing engine consistently attracts website visitors — and at progressively high amounts — you should start thinking about CRO to convert those visitors into leads for your sales team.
Businesses typically have a finite demand for products and services, so it’s imperative that you make the most out of your existing website traffic. Tools like Google’s Global Market Finder can show you online search volume to give you an idea of your potential customer demand.
How to Calculate Conversion Rate
You can calculate your conversion rate by dividing the number of conversions a webpage generated by the number of people who visited that page. Marketers can find the conversion rate of ad clicks, blog posts, websites, and landing pages.
Once you determine the threshold of your customer demand, it’s time to nail down how to get more out of your existing website traffic. But setting a conversion goal isn’t as easy as, “this page converted 50 people this month, so we want 100 next month.”
To improve your business’s conversion potential, you need to look back at the term we defined at the beginning of this article: conversion rate optimization. You don’t just want 50 more conversions from a webpage — you want 50 more conversions for every X amount of people who visit it. This is your conversion rate — it’s the percentage of people who convert on your website based on how many people have touched it.
Below are three formulas to help you figure out how to tackle CRO at your company, and what goals to set:
- New revenue goal ÷ average sales price = # of new customers
- # of new customers ÷ lead-to-customer close rate % = lead goal
- Leads generated ÷ website traffic X100 = % conversion rate
To help you understand the impact CRO could have on your business, here’s an example of the formulas in action:
If your website has 10,000 visitors per month that generate 100 leads — and subsequently, 10 customers each month — the website visitor to lead conversion rate would be 1%.
What if you wanted to generate 20 customers each month? You could try to get 20,000 visitors to your website and hope that the quality of traffic doesn’t decrease. Or, you could get more leads from your existing traffic by optimizing your conversion rate.
If you increased the conversion rate from 1% to 2%, you’d double your leads and your customers.
The table below shows the impact of increasing your website’s conversion rate:
| Company A | Company B | Company C | |
| Monthly website traffic | 10,000 | 10,000 | 10,000 |
| % conversion rate | 1% | 2% | 3% |
| Leads generated | 100 | 200 | 300 |
| # of new customers | 10 | 20 | 30 |
The key point here? Trying to generate more website traffic isn’t necessarily the right approach. Think of it like a leaky bucket. Pouring more water into a leaky bucket won’t fix the root cause — you’ll just end up with a lot of waste. Conversion rate optimization is about getting more from what you get and making it work even better for you.
Ready to take the first steps toward CRO at your company? Check out the strategies below, and start testing.
CRO Marketing Strategies to Try
1. Create text-based CTAs within blog posts.
While it’s good practice to include a call-to-action (CTA) in your blog post, these sometimes fail to entice people to take the desired course of action. Banner blindness is a very real phenomenon as people become accustomed to ignoring banner-like information on websites. This lack of attention, coupled with the fact that website visitors don’t always read to the bottom of a blog post as they “snack” on content, means a new approach is required.
That’s where the text-based CTA comes in handy. Here at HubSpot, we ran a test with text-based CTAs — a standalone line of text linked to a landing page and styled as an H3 or an H4 — to see if they would convert more traffic into leads than regular CTAs at the bottom of a web page. Here’s one of ours below:
In HubSpot’s limited test of 10 blog posts, regular end-of-post banner CTAs contributed an average of just 6% of leads that the blog posts generated, whereas up to 93% of a post’s leads came from the anchor text CTA alone.
2. Include lead flows on your blog.
Another test you should consider is including lead flows on your blog. Essentially, these are high-converting pop-ups designed to attract attention and offer value. You can select from a slide-in box, drop-down banner or pop-up box, depending on your offer. We experimented with the slide-in box on the HubSpot blog, and it achieved a 192% higher clickthrough rate, and 27% more submissions than a regular CTA at the bottom of a blog post.
Head over to the HubSpot Academy to learn how to add lead flows to your blog posts. They can dramatically increase conversions on your website.
3. Run tests on your landing pages.
Landing pages are an important part of the modern marketer’s toolkit. A landing page is where a website visitor becomes a lead, or an existing lead engages more deeply with your brand. These pages play an important role on your website, so you should run A/B tests to get the most from them.
But what should you A/B test? We know that a high performing landing page can have a tremendous impact on a business, so at HubSpot, we make it easy to test variants and eke out more conversions. You can quickly and easily test website copy, content offer, image, form questions, and page design. Check out these tips for effective A/B testing and our A/B testing calculator.
4. Help leads to immediately become a marketing-qualified lead (MQL).
Sometimes, your website visitors want to get straight down to business and speak with a sales rep, rather than be nurtured by marketing offers. You can make it easy for them to take this action (and immediately become a marketing qualified lead) with a combination of thoughtful design and smart CTAs.
Compelling, clear copy has the ability to drive action and increase conversions for your business. But which actions do you want to encourage so visitors can become MQLs?
Here at HubSpot, we discovered that visitors who sign up for product demos convert at higher rates than visitors who sign up for free product trials, so we optimized our website and conversion paths for people booking a demo or a meeting with a sales rep. Admittedly, this depends on your product and sales process, but our best advice is to run a series of tests to find out what generates the most customers. Then, optimize for that process.
The key takeaway is to look for ways to remove friction from the sales process. That being said, if you make it easy for people to book a meeting with sales reps, we do recommend further qualification before the call takes place, so the sales rep can tailor the conversation.
5. Build workflows to enable your sales team.
There are a number of automated workflows you can create that your colleagues in sales will thank you for. For instance, did you know it’s possible to send emails on behalf of sales reps, so leads can book a meeting with them at the click of a button? Or that sales reps can receive an email notification when a lead takes a high intent action, such as viewing the pricing page on your website? And if you work in ecommerce, you can send an email to people who abandon their shopping cart.
All of this is possible with marketing automation. Want to learn more? Master marketing automation with our helpful guide.
6. Add messages to high-converting web pages.
With HubSpot’s messages tool, it’s now possible to chat with website visitors in real-time. To increase conversions, you should add messaging capabilities to high-performing web pages, such as pricing or product pages, so leads convert rather than leave.
You can also make chatting action-based. For example, if someone has spent more than a minute on the page, you may want to automatically offer to help and answer any questions they may have (HubSpot’s live chat tool, now available, makes this easy).
7. Optimize high-performing blog posts.
If you’ve been blogging for more than a year, it’s likely you’ll have some blog posts that outperform others.
The same is true at HubSpot — in fact, the majority of our monthly blog views and leads come from posts published more than a month ago. Blog posts are a big opportunity for conversion rate optimization.
To get started, identify the blog posts with high levels of web traffic, but low conversion rates. It may be that the content offer you’re promoting isn’t aligned with the blog post’s content, or your CTA could be unclear.
In one instance, we added a press release content offer to a blog post about press releases and saw conversions for that post increase by 240%.
Additionally, you should look at blog posts with high conversion rates. You want to drive more qualified website traffic to those posts, and you can do that by optimizing the content for search engines or updating the content to ensure that it’s fresh and relevant. If you’re a HubSpot customer, you can drive traffic to these pages from LinkedIn and Facebook using the ads add-on.
8. Leverage retargeting to re-engage website visitors.
It doesn’t matter what your key conversion metric is: The cold, hard truth is that most people on your website don’t take the action you want them to. By leveraging retargeting (sometimes known as remarketing), you can re-engage people who’ve left your website.
Retargeting works by tracking visitors to your website and serving them online ads as they visit other sites around the web. This is particularly impactful when you retarget people who visit high-converting web pages.
The normal inbound rules still apply — you need well-crafted copy, an engaging image and a compelling offer for retargeting to work. If you’re a HubSpot customer, you should take a look at how the AdRoll integration can improve your conversion efforts.
How to Get Started with Conversion Rate Optimization (CRO)
We’ve shared a ton of information in this post, and at this point, you may be thinking, “where should I start?”
Here’s where the PIE framework comes in. Before starting a CRO project, we recommend prioritizing through the lens of PIE — rank each project based on its potential, importance, and ease. We used this framework at HubSpot with great results.
You should use this framework to answer the following questions for every strategy outlined in the previous section. Assign to each strategy a score between one and 10 (with one being the lowest and 10 being the highest):
- How much total improvement can this project offer?
- How valuable will this improvement be?
- How complicated or difficult will it be to implement this improvement?
Once you’ve assigned a score for each strategy, add up the numbers and then divide it by three — this gives a score which shows what project will have the greatest impact. Then, work on the projects with the highest scores first. The framework isn’t perfect, but it’s easy to understand, systematic, and a great way to communicate to the rest of your colleagues which CRO projects are being selected and why.
Want to learn more about the PIE framework? Take a look at this explanation from WiderFunnel.
What’s next?
There are a lot of “best practices” out there, but ultimately, you need to find out what your customers respond to, and what drives results for your business. Here are three follow-up actions to get started with CRO today:
- Use the three formulas to start the CRO conversation.
- Leverage the PIE framework to help prioritize your strategy.
- Make CRO someone’s responsibility.
What CRO strategies does your business leverage? Share with us in the comments below.



Workflow Automation Explained, and 5 of the Best Workflow Automation Software For 2019
Manual data entry might be one of the most tedious and inefficient tasks in the working world. Not only does it put you to sleep, but it also wastes precious time and resources, slashing your productivity to bits. In fact, data entry wastes over 10 hours per week for certain sales teams.
Fortunately, there’s technology that can automate these mind-numbing tasks, eliminating human error and letting you focus on the work that actually matters — workflow automation.

Workflow Automation
Workflow automation is technology that uses rule-based logic to automate manual work, like data entry and lead nurturing. By leveraging self-operating processes that run manual tasks, workflow automation can help your business save time and money, diminish errors, and boost productivity.
Almost every department in your business can benefit from workflow automation. Whether it’s marketing, human resources, or finance, here’s how the technology can help you work smarter, not harder.
Marketing
Some of Marketing’s most repetitive tasks, such as sending emails and posting social media updates, can be automated with workflow automation. With marketing automation software, you can set up workflows that nurture certain types of prospects with email offers, and schedule your entire social media calendar.
Human Resources
Instead of having to manually enter all your new hires’ personal information, like addresses, social security numbers, and other employee information into payroll, expense, and insurance systems, HR automation software can do it for you in minutes.
Finance
By allowing you to build forms, design workflows, and track processes, finance process automation software can streamline all your travel requests, reimbursements, and budget approvals.
5 of the Best Workflow Automation Software for 2019
1. Nintex
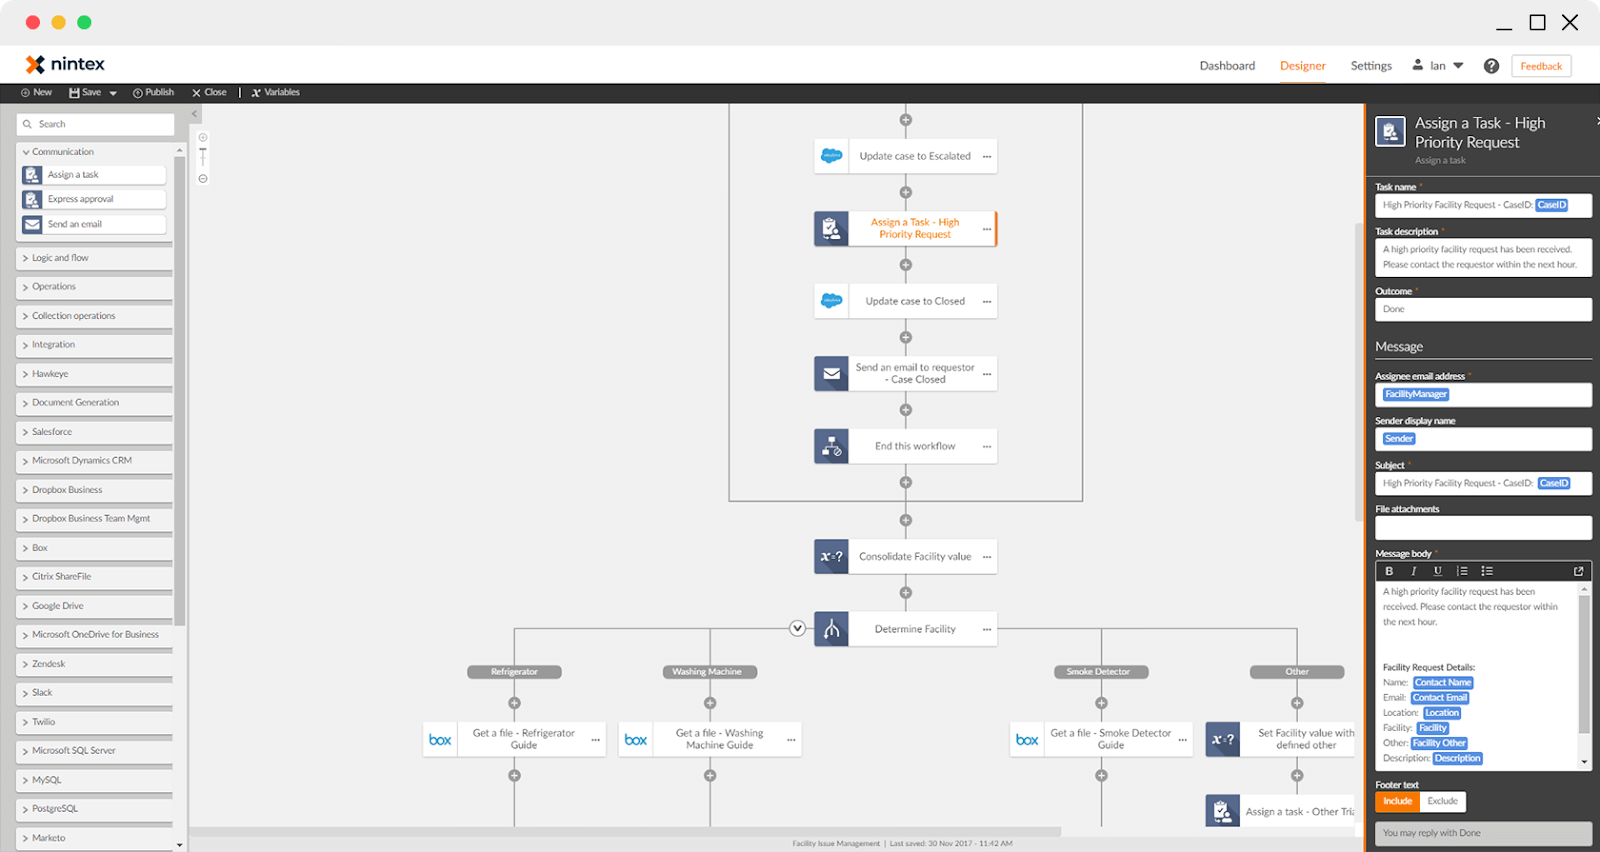
Image Credit: Nintex
With over 3 million workflow applications operating on their platform right now, Nintex helps more than 8,000 enterprise customers manage, automate, and optimize their business processes, with no coding experience required.
By offering a multitude of workflow automation tools — like process mapping, advanced workflows, and process intelligence — your business is able to map out each of your processes, execute them, and monitor their performance.
2. KiSSFLOW
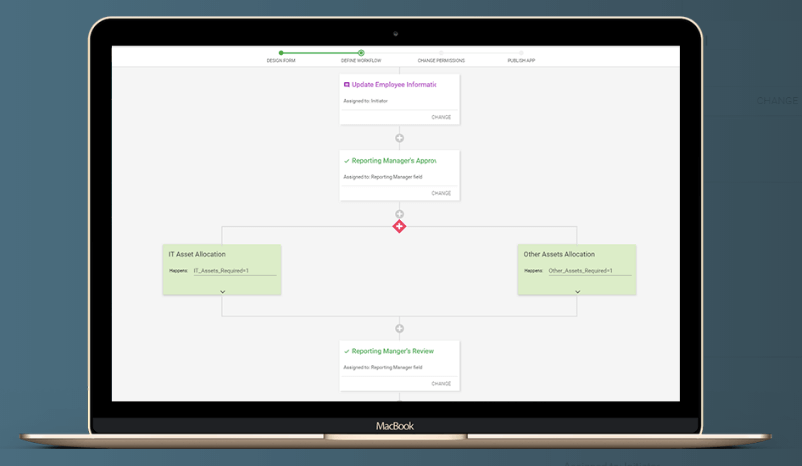
Trusted by over 10,000 companies, including Domino’s, Michelin, and Pepsi, KiSSFLOW offers an all-in-one workflow automation software that lets your business create workflows that automate tasks in your human resources, sales, finance, administration & facilities, marketing, and purchase departments.
With over 50 pre-installed business process management apps, such as expensing and sales orders, the ability to customize your workflow with conditions and triggers, and a reporting dashboard for your workflows, KiSSFLOW can streamline almost all your business processes.
3. Integrify

Image Credit: Integrify
Integrify is a workflow automation software that lets you build workflows in a drag-and-drop builder and run parallel or sequential flows. By being able to collaborate on tasks and requests, test your processes, and set up reminders, you can easily streamline your business processes and automate manual tasks.
Integrify also offers workflow examples and a user knowledge base, a rest-based open API that allows you to integrate with external databases, and the ability to import and export data from Excel and even PDFs.
4. Zapier
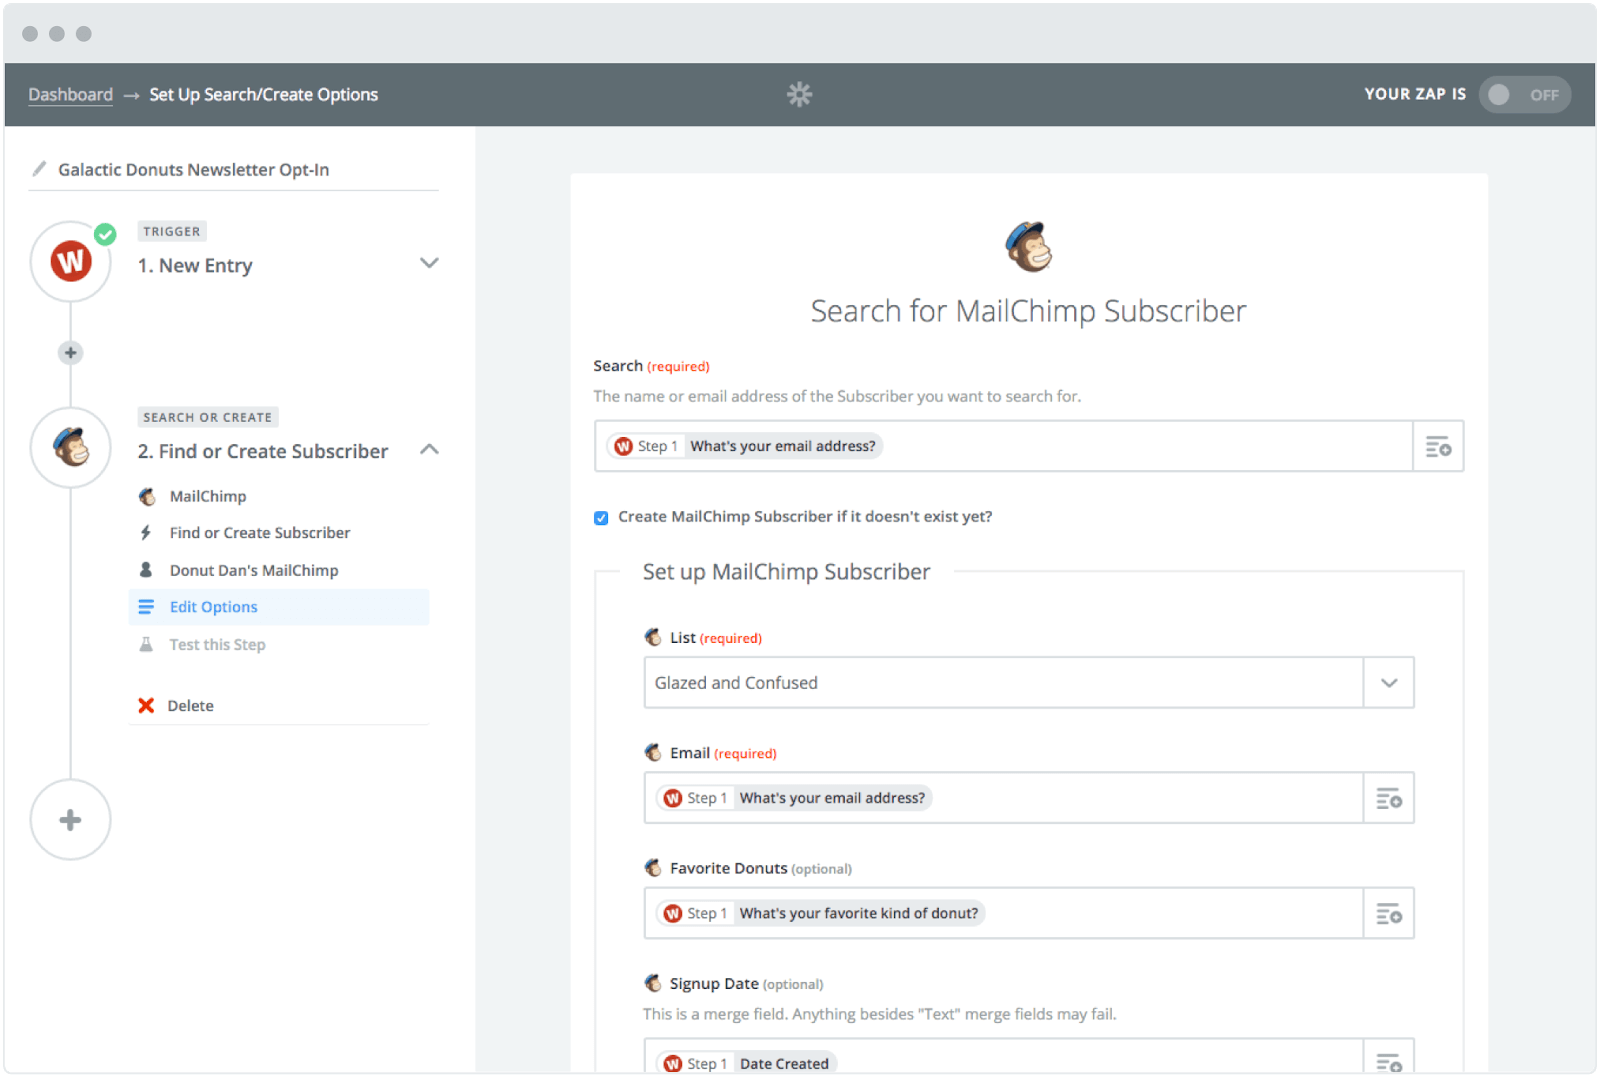
Image Credit: Zapier
With the ability to connect to and share data with over 1,000 web apps, like Facebook, QuickBooks, and Google Drive, Zapier can automate almost any type of business process. All you have to do is build a workflow in their editor, pick the apps you want to include in your workflow, and design it.
For example, if you want to be able to save all your attachments in Dropbox, you can design a workflow that automatically copies any attachment from your Gmail inbox to Dropbox and then sends you a Slack message about the download.
5. Flokzu
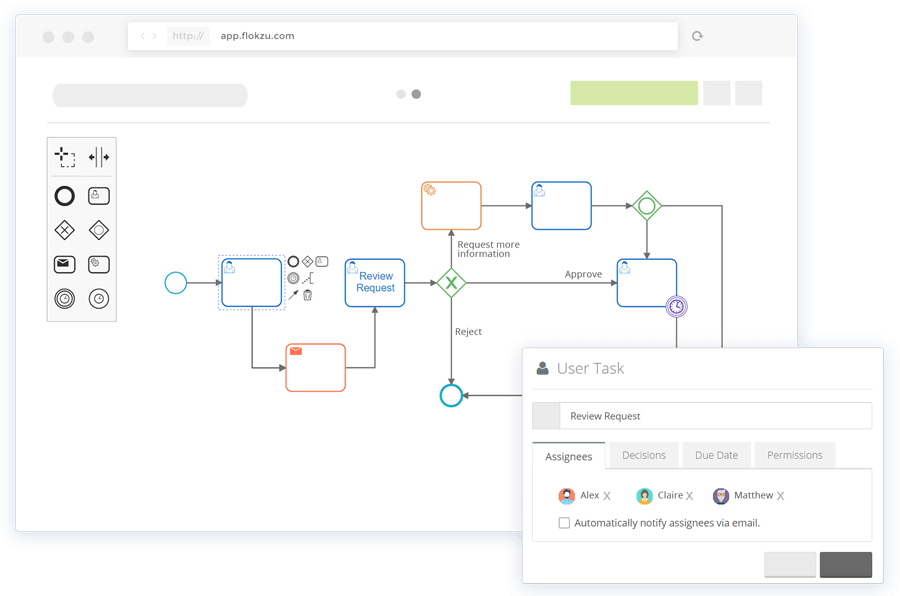
Image Credit: Flokzu
Without writing any code, Flokzu allows you to create tasks, deadlines, business rules, and notifications. Their software also sends pending tasks to each of your project’s assignees’ inboxes, and as each stage of a workflow is complete, it’ll automatically assign each new task to a user or role.
Additionally, Flozku offers a reporting dashboard that displays your business processes’ performance and metrics, like the amount of currently delayed tasks there are, tasks assigned to each user and role, tasks completed, and the time each task took, which will give you the necessary data to refine and optimize your future workflows.

How to Run an Effective Vetting Process for Candidates in 2019
According to Glassdoor, the average company in the U.S. spends about $4,000 to hire a new employee, and takes up to 52 days to fill a position.
Undoubtedly, recruiting and hiring candidates is an expensive and time-consuming process. Additionally, it can be tricky to figure out which candidates are most qualified to succeed at your company for the long haul.
To ensure your recruitment strategy is inclusive, fair, and efficient, it’s critical you focus your efforts on creating a good vetting process.

Vetting process for employment
Companies use a vetting process to evaluate a candidate’s background and qualifications, and eliminate unqualified candidates from the pool of applicants. A vetting process allows companies to save both time and money by ensuring they minimize the amount of in-person interviews they conduct. A vetting process can include conducting background checks, sending applicants follow-up questions to answer, a brief phone screen, an initial video interview, or other assessments to test an applicant’s qualifications.
A vetting process will depend on the size of your company and the type of role for which you’re hiring, but it should include a few critical elements. Here, we’ll cover how you can run an effective vetting process to ensure your strategy is as efficient and unbiased as possible.
How to Run a Candidate Vetting Process
1. Write an accurate job description.
Your vetting process will be easier start-to-finish if you take the time to write an accurate and compelling job description.
I spoke to Claire McCarthy, a HubSpot Sales Recruiter, who told me the job description can help both you and the candidate ensure a mutually beneficial fit from the start — “We have pretty comprehensive job descriptions,” McCarthy told me, “And we want candidates to take the time to read them and ensure the role is a good match for their background and skill set, as well as their long-term goals. In the job description, we focus on attributes — for instance, for a Sales role, we might list, ‘customer-first mentality’ as a requirement.”
It’s equally important to ensure your description is crafted to attract a wide pool of diverse applicants, since diverse teams perform better, and come up with more innovative ideas.
If you think your diversity and inclusion initiative doesn’t start with your job description, think again — a Hewlett Packard internal report found the majority of women won’t apply for a job unless they meet all the qualifications, while most men will apply if they meet only 60% of them.
To ensure their job descriptions attracted a diverse range of talent, the Atlassian rewrote their job advertisements using a tool called Textio, which allowed them to detect patterns for how job posts perform. Textio also recommended specific language to best attract a wide pool of applicants.
Ultimately, it’s critical you ensure your job description allows you to correctly identify qualified candidates from the start, while enabling you to attract the widest pool of applicants possible.
Take a look at 12 Marketing Job Descriptions to Recruit and Hire an All-Star Team [Free Templates] if you need help getting started.
2. Review the candidate’s application materials using software.
A vetting process should allow you to filter out candidates who don’t have the skills necessary to succeed in the role. To do this, you’ll want to start by vetting the applicant’s resume, cover letter, and other application materials they’ve submitted for review.
Additionally, a vetting process can support your diversity and inclusion initiative by ensuring your HR team remains fair and unbiased when evaluating potential candidates. For instance, you might implement a blind search system in which resumes are scanned by software, such as ADP Recruiting Management’s Visual Search.
By ensuring your resumes are automatically sorted based on skill, you’re circumventing some of the unintentional biases that might lead your HR employees to make unfair judgments.
3. Use video interviews prior to phone calls.
McCarthy told me HubSpot uses video interviews — which prompt candidates with questions, and record candidates’ responses to each question — to vet candidates before moving onto a phone interview.
McCarthy said, “Candidates are required to answer the questions in one minute. We do this for high volume roles, and use the video interview as a qualifier for whether or not the candidate moves forward with a phone interview.”
Ultimately, there are certain questions you can ask to decipher whether or not a candidate has the correct skills for the role. You don’t want your recruiters spending valuable time on phone calls, when you can just as easily collect that information another way. Consider using video interviews to limit the amount of phone calls your HR team needs to make each day.
4. Evaluate with other assessment tools.
To evaluate whether your candidate will succeed in the role, consider offering initial assessments. As a HubSpot writer, I was asked to write a blog post from scratch using one of HubSpot’s prompt topics before being invited for an interview. This makes sense — why waste your time, and your candidate’s time, if your candidate doesn’t have the skills you’re looking for?
You might consider offering role plays for customer facing positions, case studies for functional roles, or coding assessments for engineering positions.
5. Stick to a process.
You’ll want to remain consistent in every step of your process, from background checks to assessment tools. For instance, it’s important your team uses the same background check for each potential employee, and doesn’t require any additional information that does not apply to the job.
Ultimately, a vetting process is only effective if it’s consistent and replicable. As McCarthy told me, “A vetting process is about establishing a process at the beginning and sticking to it — additionally, it’s important to use a vetting process to operationalize how we review candidates and decide which ones are most qualified to move forward to next steps.”
Using these five tactics, or any alternative options you feel will help you determine a mutual fit for your candidates and teams, will mitigate the time and money your HR team spends on recruitment in 2019, while ensuring you hire the best applicants — a win, win.


25 of the Best WordPress Plugins for Marketers
Did you know there are over 56,000 WordPress plugins available today?
WordPress plugins allow you to enhance your website’s functionality by adding features and capabilities that don’t come standard with the system.
From writing tools to SEO tips to analytics, WordPress plugins will help you arrive at any solution you’re seeking, all while keeping your website as speedy as possible and saving you time along the way, too.
But with so many options available, it’s tough to figure out the best ones to use.
That’s why we’ve done the work for you. Below you’ll find a list of the 25 best WordPress plugins (not in any specific order) that every marketer should explore.
Best WordPress Plugins for Marketers
These 25 plugins have been reviewed by some of the top marketers in the industry. They’ll also keep both you and your WordPress website running efficiently and effectively. If you want more, check out the official WordPress plugin page.
1. Jetpack
Source: WordPress
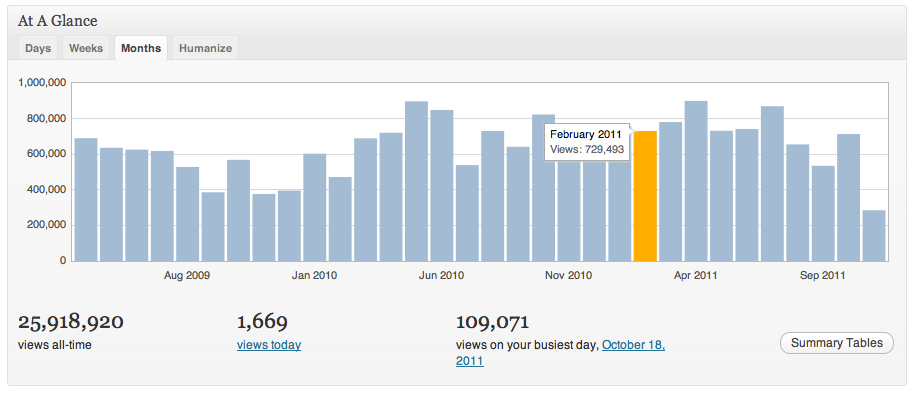
Jetpack is an all-in-one WordPress plugin that offers advanced features such content tools, mobile themes, and more. You can take advantage of all of Jetpack’s features to enhance your website, or pick and choose just what you want to activate based on your unique needs. Some of these features include automated social media posting, site statistics and analytics, and different SEO tools to help you measure and promote your website success.
2. The SEO Framework
Source: WordPress
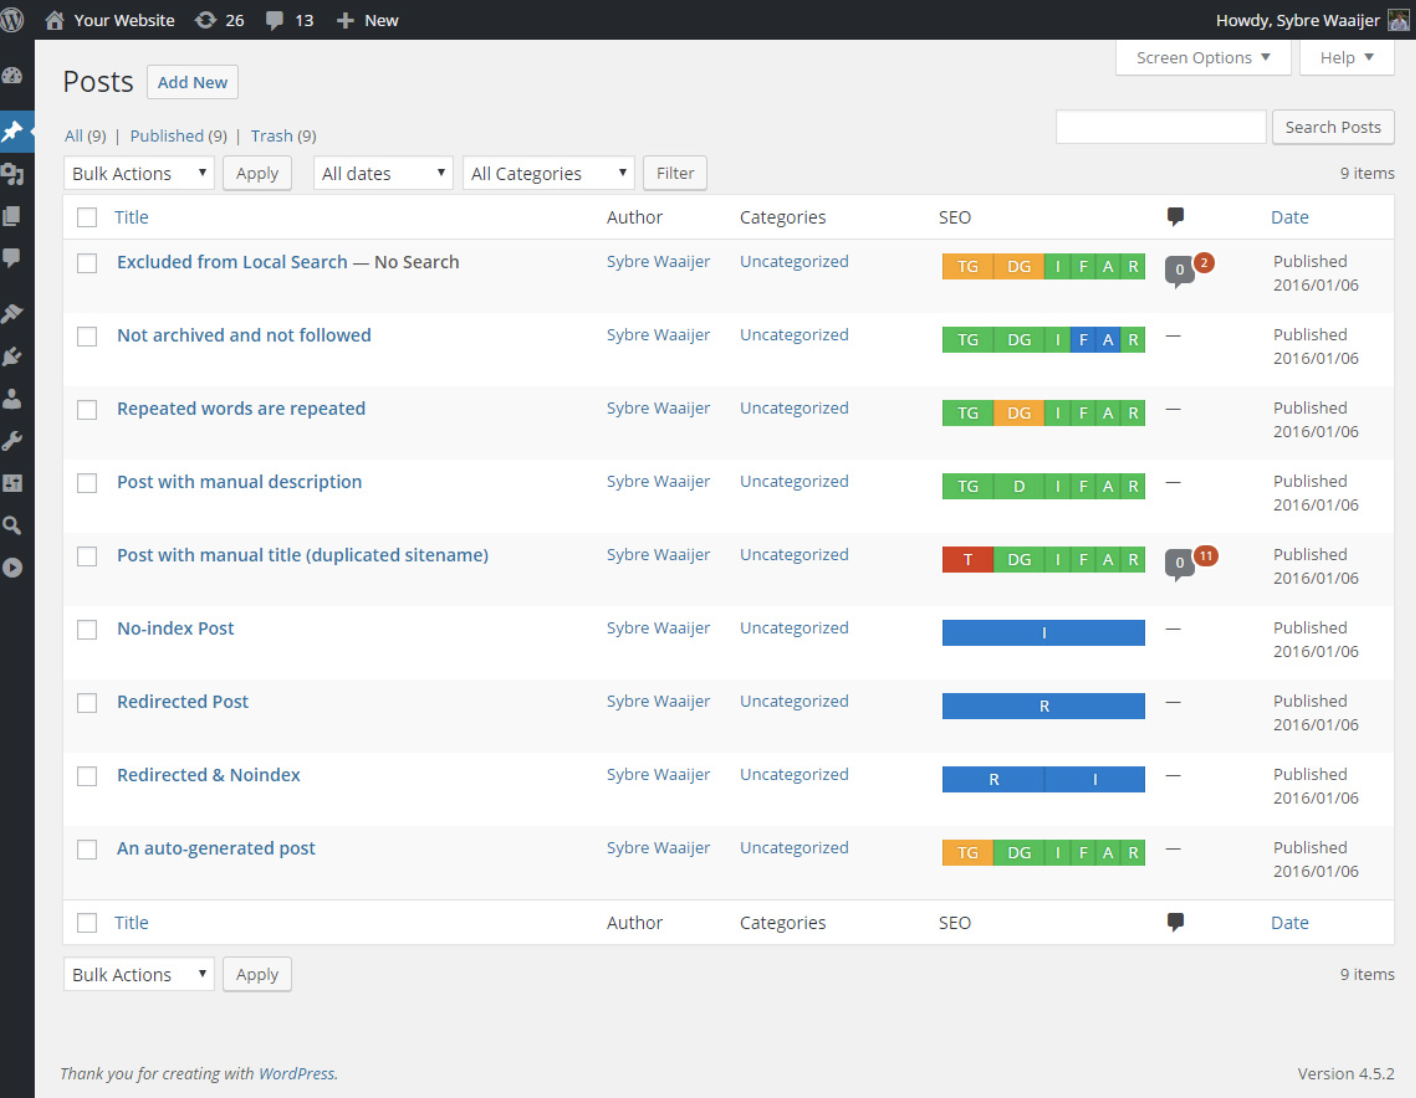
With The SEO Framework, your website’s search rankings will improve drastically with the help of the plugin’s numerous, automatic optimization features. These features have the ability to optimize every page, post, and term on your website so it is not only easier to find on the internet, but it is also more searchable on all social sites such as Facebook and Twitter. No matter if you’re new to SEO or an expert in API, The SEO Framework will help you optimize your website.
3. HubSpot Contact Form Builder and Conversion Tools
Source: WordPress
HubSpot’s drag and drop form builder allows you to easily build contact forms to use on your WordPress website. The plugin also includes a pop-up creator, live chat widget, contact database, and previously-written code for you to simply copy and paste into WordPress.
HubSpot’s Contact Form Builder plug-in is unique because it’s an all in one plugin — it helps you stay efficient by keeping all of its features in a single location. Christine Kilbride of Majux Marketing says having a large number of “plugins can slow down your site.” But because HubSpot provides everything in one plugin, the tool keeps your site fast and responsive.
4. Just Writing

Source: Just Writing
Just Writing takes WordPress’ Distraction-Free Writing Mode (DFWM) to a whole new level. This plugin introduces important features like spellcheck and paragraph styling to help you focus on your words without having to constantly drop out of DFWM to implement basic formatting.
5. Pretty Link
Source: Pretty Link
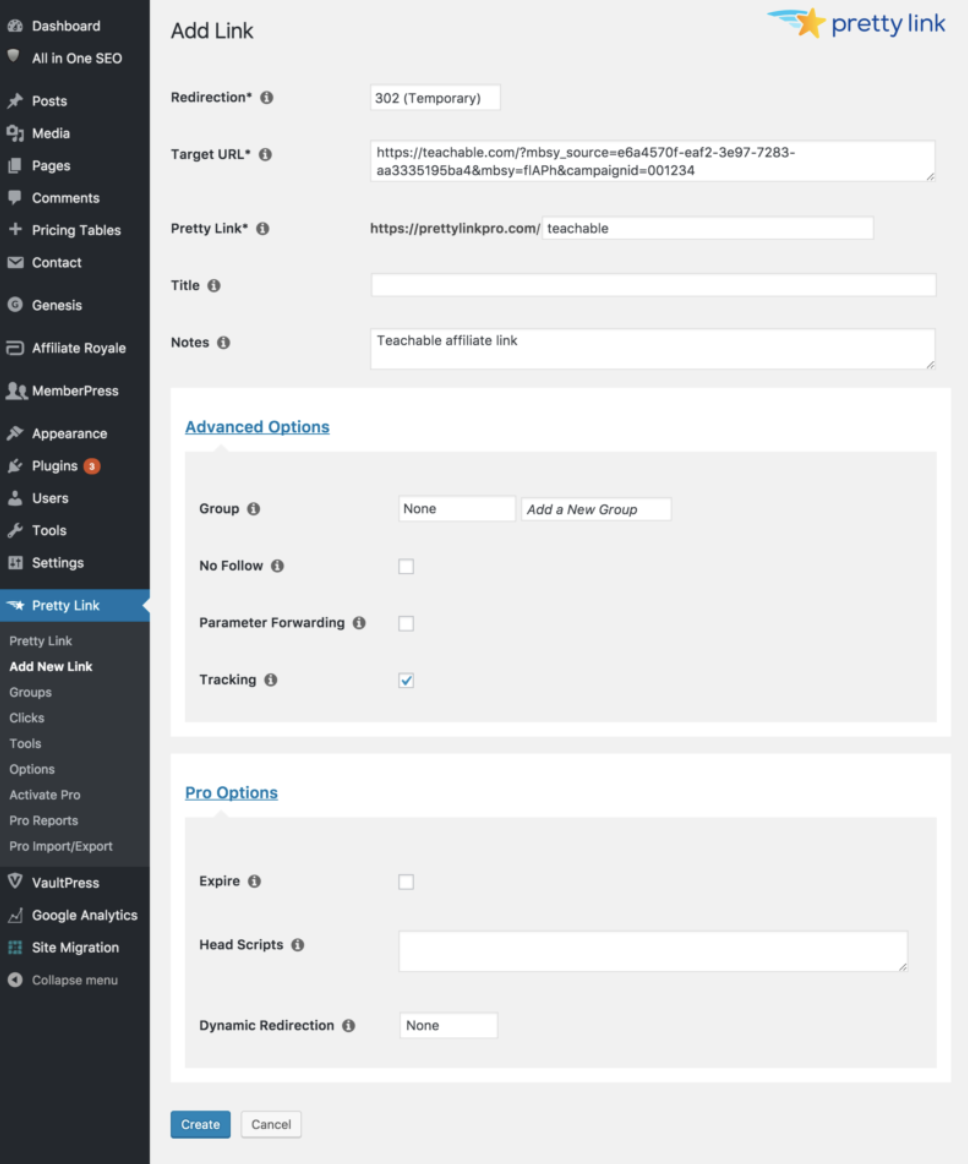
Pretty Link makes it easy to manage and track your internal website links. You can shorten links (the way you would on a site like bit.ly), track the number of hits to a link, discover traffic sources, and find out the browser and host provider of your site visitors. You can also use the plugin to easily create redirects (301, 302, and 307s).
6. Google XML Sitemaps
Source: WordPress
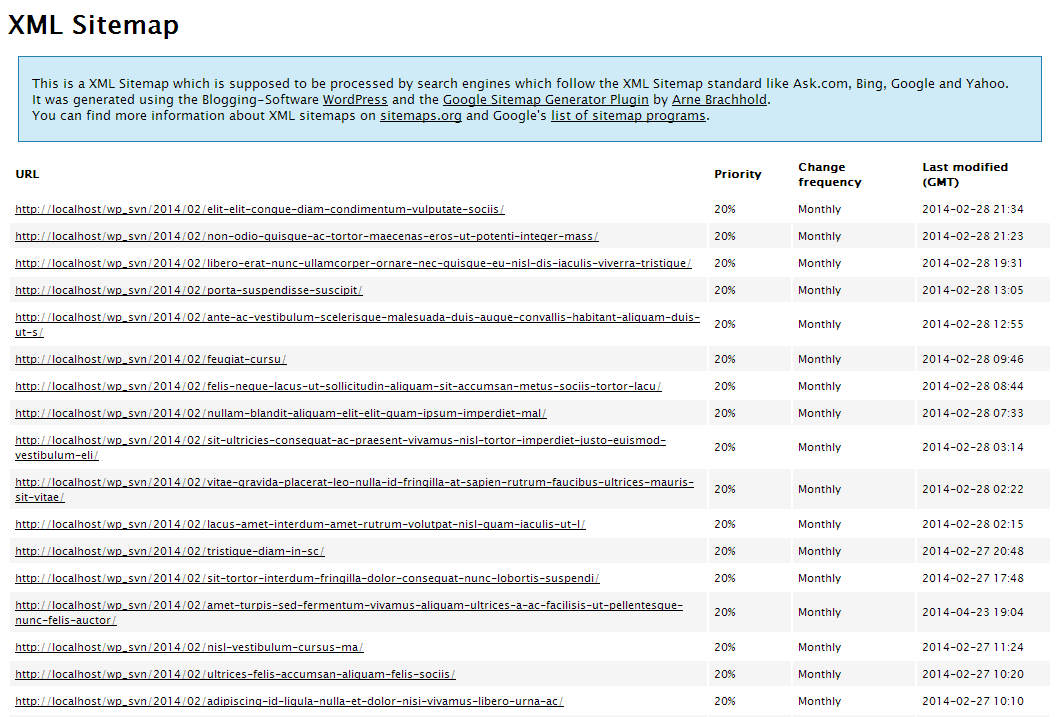
The Google XML Sitemap plugin makes it easier for search engines, like Google and Yahoo, to crawl your site and retrieve information. It will also notify search engines when you create new content so you don’t have to manually submit changes to search engines.
7. Pixel Caffeine
Source: WordPress

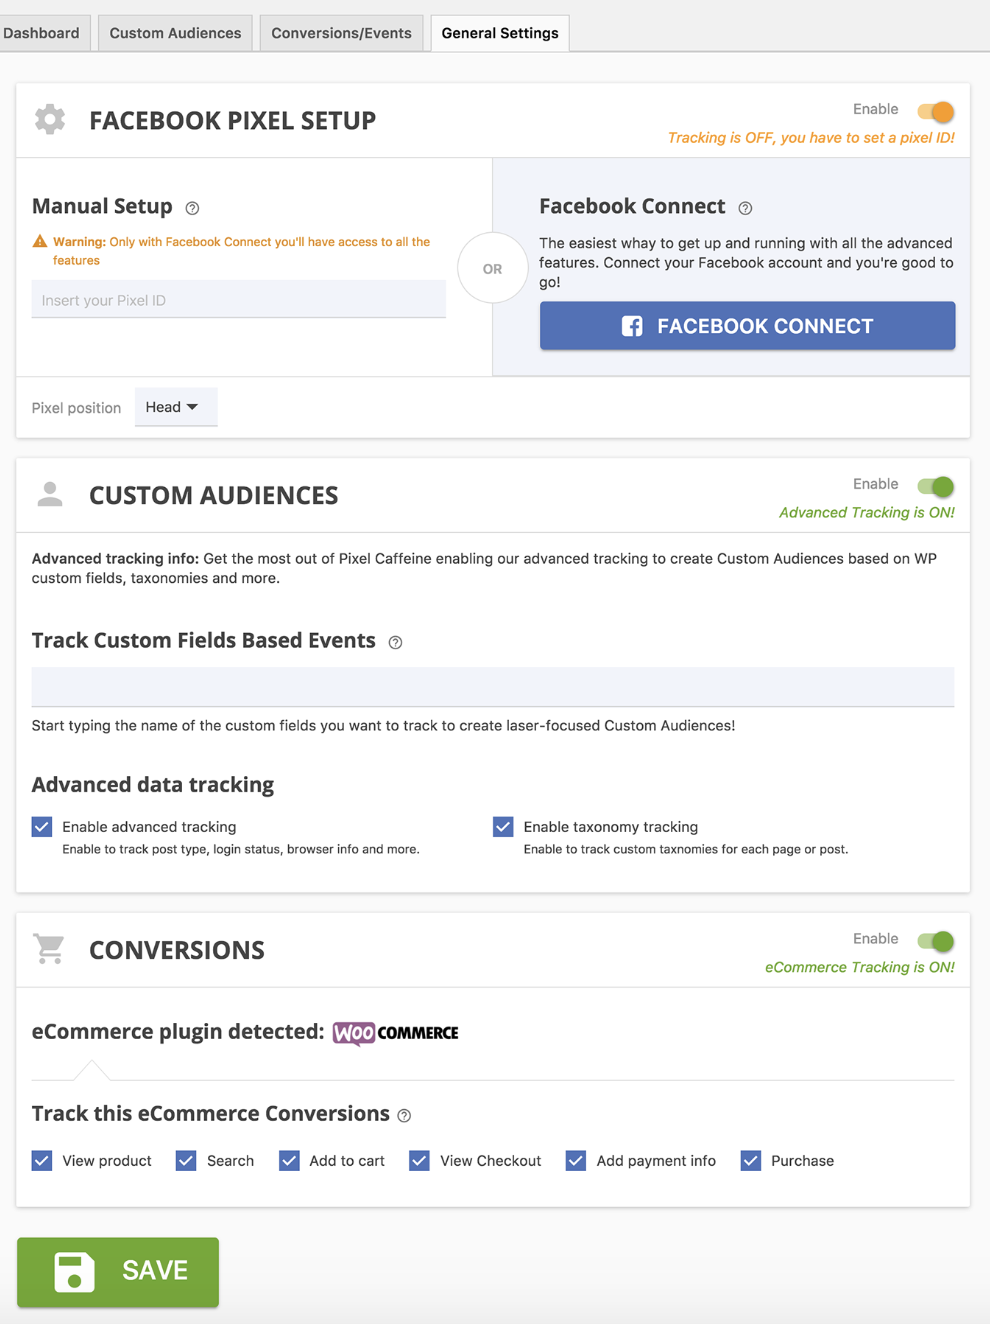
Pixel Caffeine allows you to manage Facebook Pixel and Facebook Product Catalog all within the plugin. Tony Capetola of Sales Orders says Pixel Caffeine is a great plugin because “marketers can make use of some more advanced features like the ability to track Facebook Ad conversions within WordPress’s dashboard, the ability to create custom audiences based on last visit time (retention window), WordPress taxonomies (categories, tags, etc.), and previous customers behavior (works with WooCommerce), etc.”
Added bonus: Pixel Caffeine automatically keeps up with Facebook’s latest updates so you don’t have to.
8. Broken Link Checker
Source: WordPress
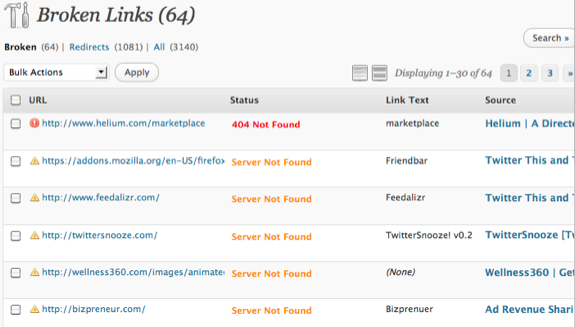
Want to prevent Google from following broken links on your website? Broken Link Checker parses your posts to identify broken links and notify you when they surface. To save you time, the plugin makes it easy for you to edit a broken link from the plugin page, eliminating the need to manually go into each post to make changes.
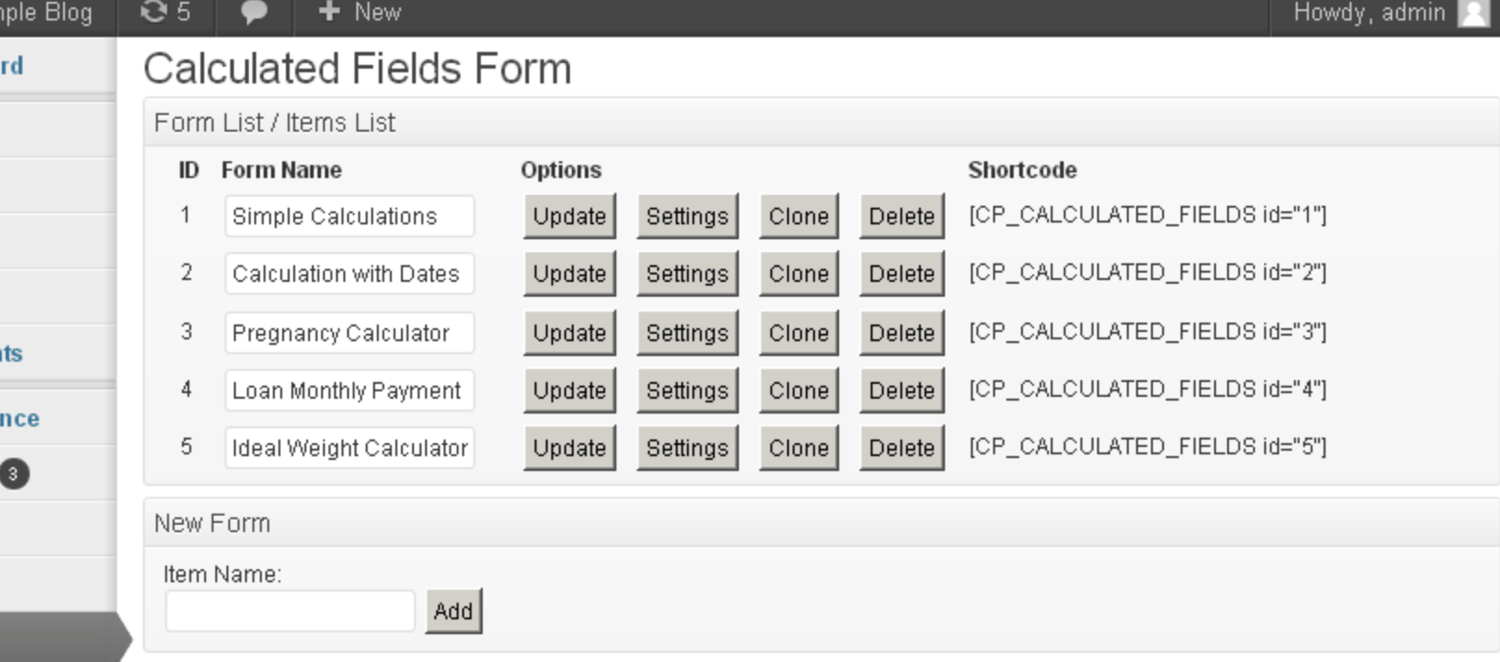
9. Calculated Fields Form
Source: WordPress
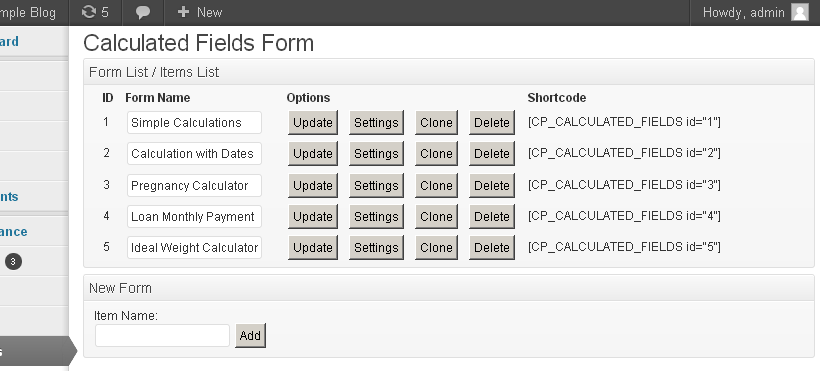
“[Calculated Fields Form] allows you to create simple calculators for your WordPress site. You can easily build finance calculators, quote calculators, booking cost calculators, health/ fitness calculators, and other link-worthy tools,” says Roy Harmon of Advertoscope.
With this plugin, you can also create forms with automatically calculated fields and use predefined form templates that will save you time and ensure accuracy.
10. Akismet
Source: Spider My Web
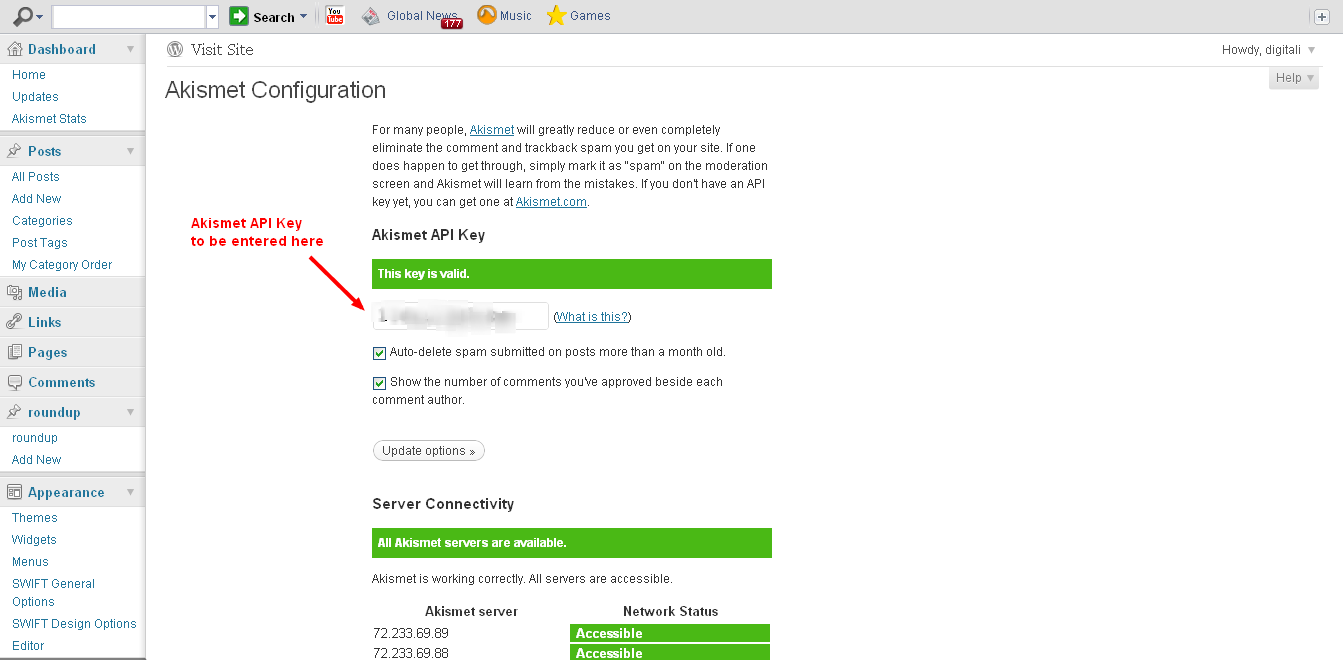
Akismet helps you avoid (and eliminate) spammy comments on your blog. The plugin automatically reviews and filters comments when it detects any signs of spam. You can easily keep tabs on which comments are caught or filtered to maintain control over what’s being displayed on your site.
11. All in One SEO Pack
Source: WordPress

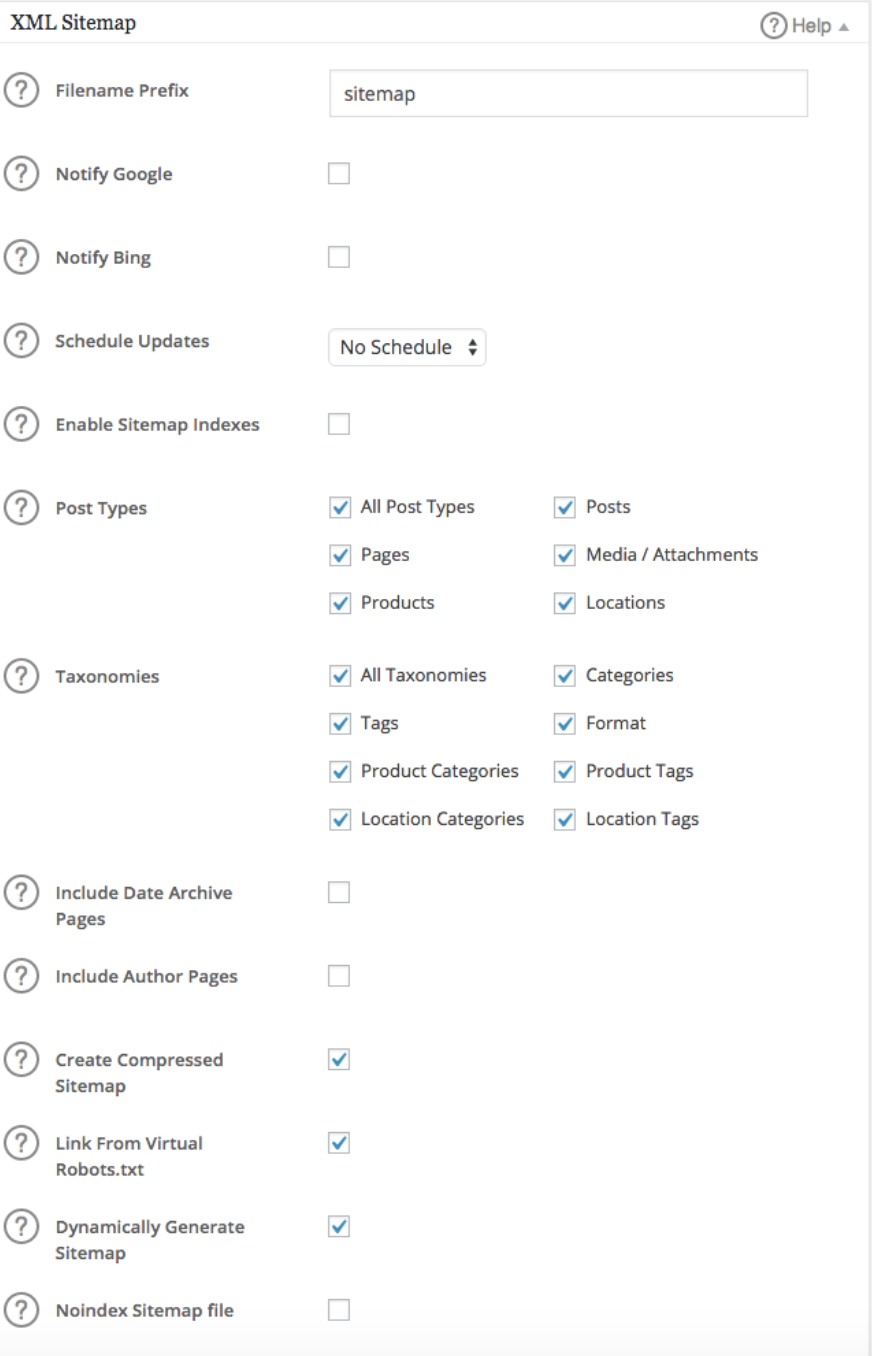
All in One SEO Pack helps you optimize your WordPress website for organic search. The plugin works for people with varying levels of SEO experience, from the non-technical to the coders.
Kim Smith of GoodFirms says, “The plugin supports content as well as image XML sitemap while providing advanced canonical URLs. It supports key Google SEO tools such as AMP and Analytics and notifies search engines about the updates and changes”.
The plugin has XML sitemap and image XML sitemap support (which is what informs Google about the URLs on your website that are available for crawling), and it also provides you with support in other areas including Google Analytics and custom post types, which is helpful for marketers who are working to measure the success of their campaigns or SEO work and goals.
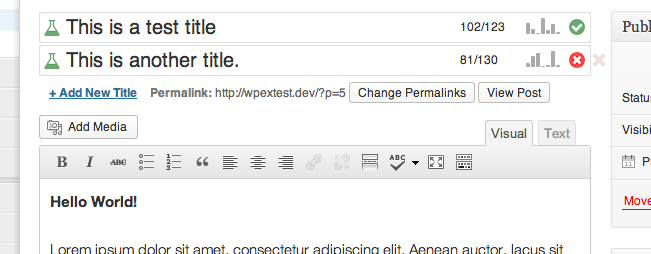
12) Title Experiments
Source: WordPress
The title of a blog post has a direct impact on click-through rates (CTR). Title Experiments makes it easy for you to A/B test one title against another so you can track what converts best and increase your CTR.
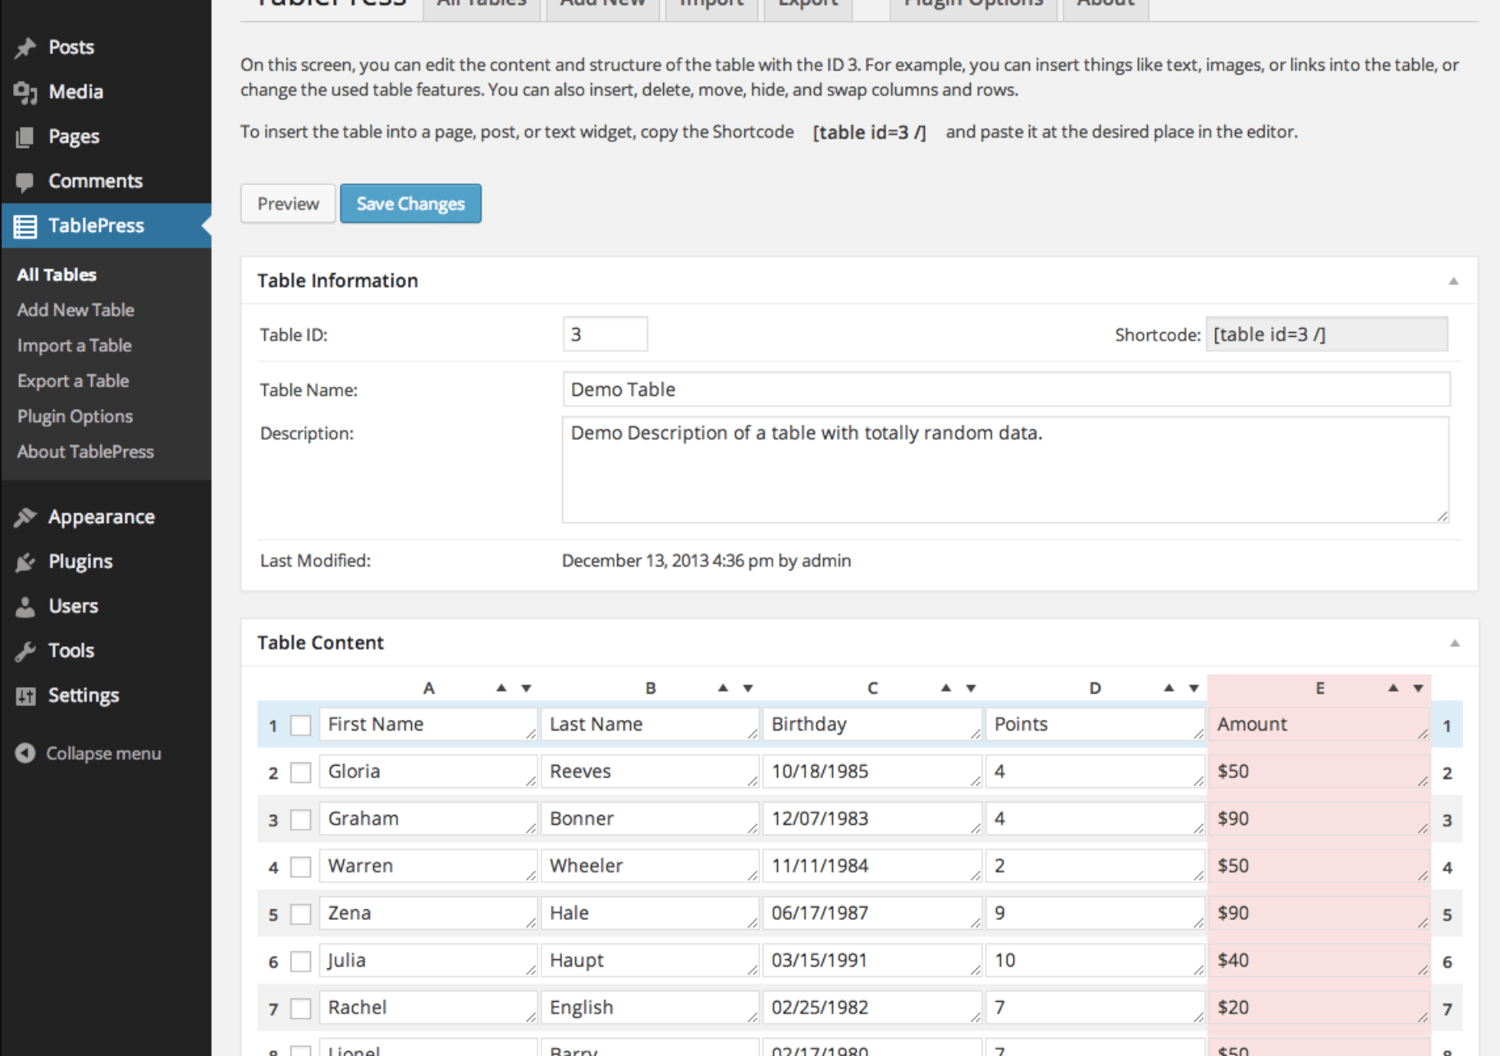
13. TablePress
Source: WordPress

TablePress is a plugin that helps you create, customize, and embed beautiful and unique tables on your WordPress site. Your tables can include all types of data and be placed anywhere on your website. Swadhin Agrawa of DigitalGYD.com says, “TablePress makes it insanely easy for anyone to create a customizable and responsive table on their blogs.”
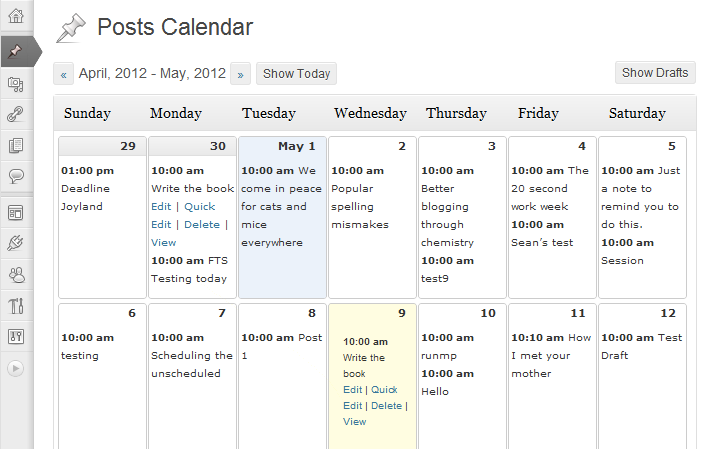
14. Editorial Calendar
Source: WordPress
Keep your blog organized with the help of this plugin. Editorial Calendar uses a drag-and-drop functionality to simplify the way you schedule and manage your blog content. You can also manage posts from multiple authors, quickly edit titles and publishing times, and manage drafts within the plugin.
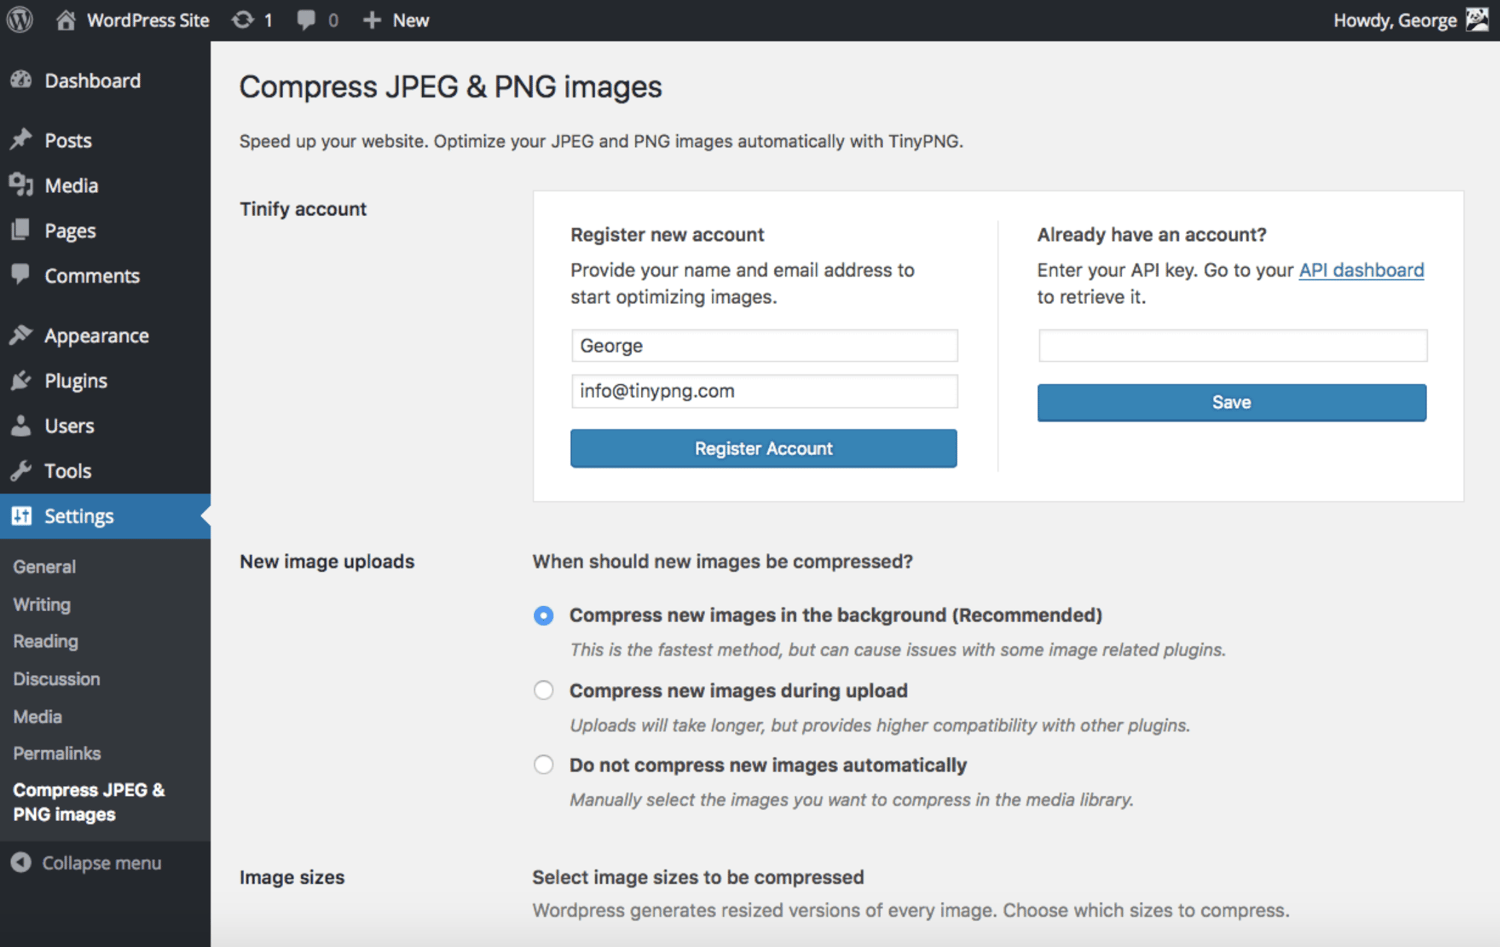
15. TinyPNG
Source: TinyPNG
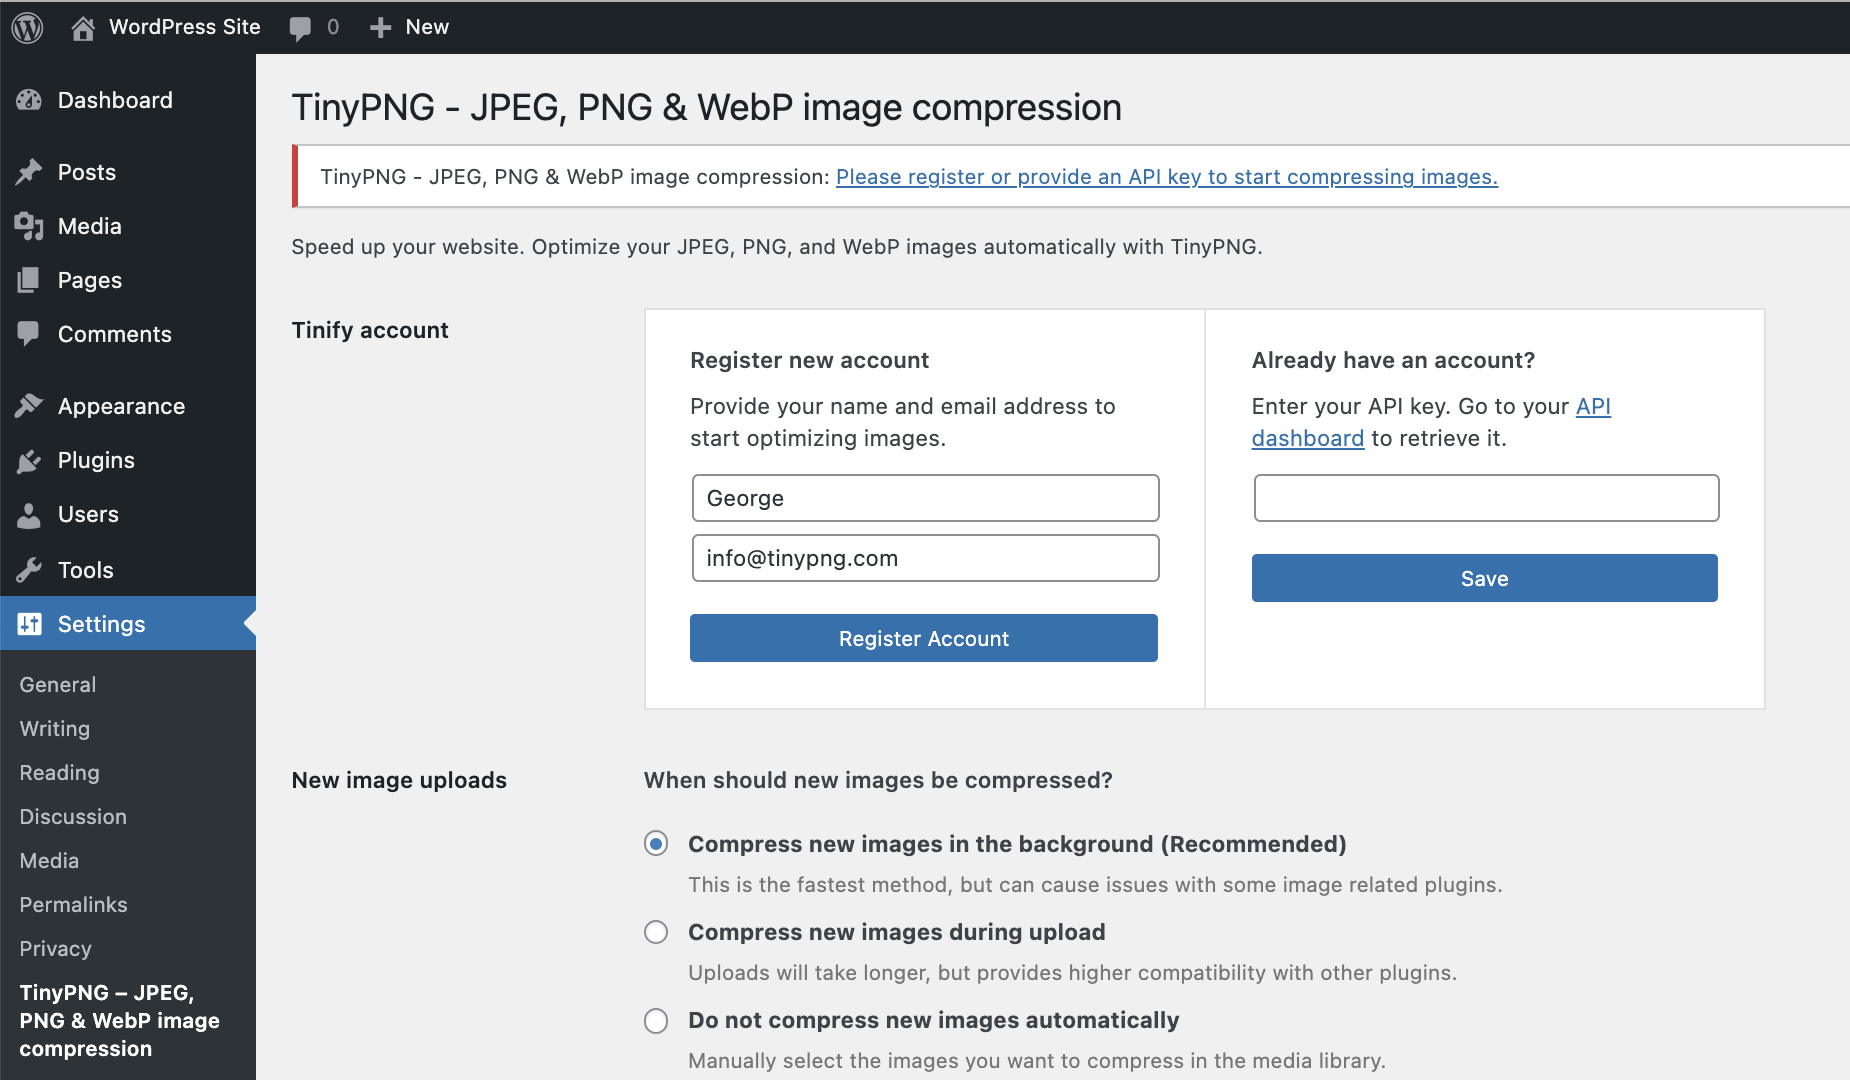
“This free plugin allows you to quickly compress images so they load faster. This is important for SEO value and ensuring people don’t bounce off your pages due to slow load times,” says Todd Kunsman of EveryoneSocial.
TinyPNG will make your website faster by automatically optimizing your JPEG and PNG images upon upload, renaming them to TinyPNG and TinyJPEG. Images are analyzed, and then the plugin compresses them appropriately. Once this happens, the image is then sent back to your WP website to replace the original image. The plugin will make your website load faster while saving you storage space.
16. Smush
Source: WordPress
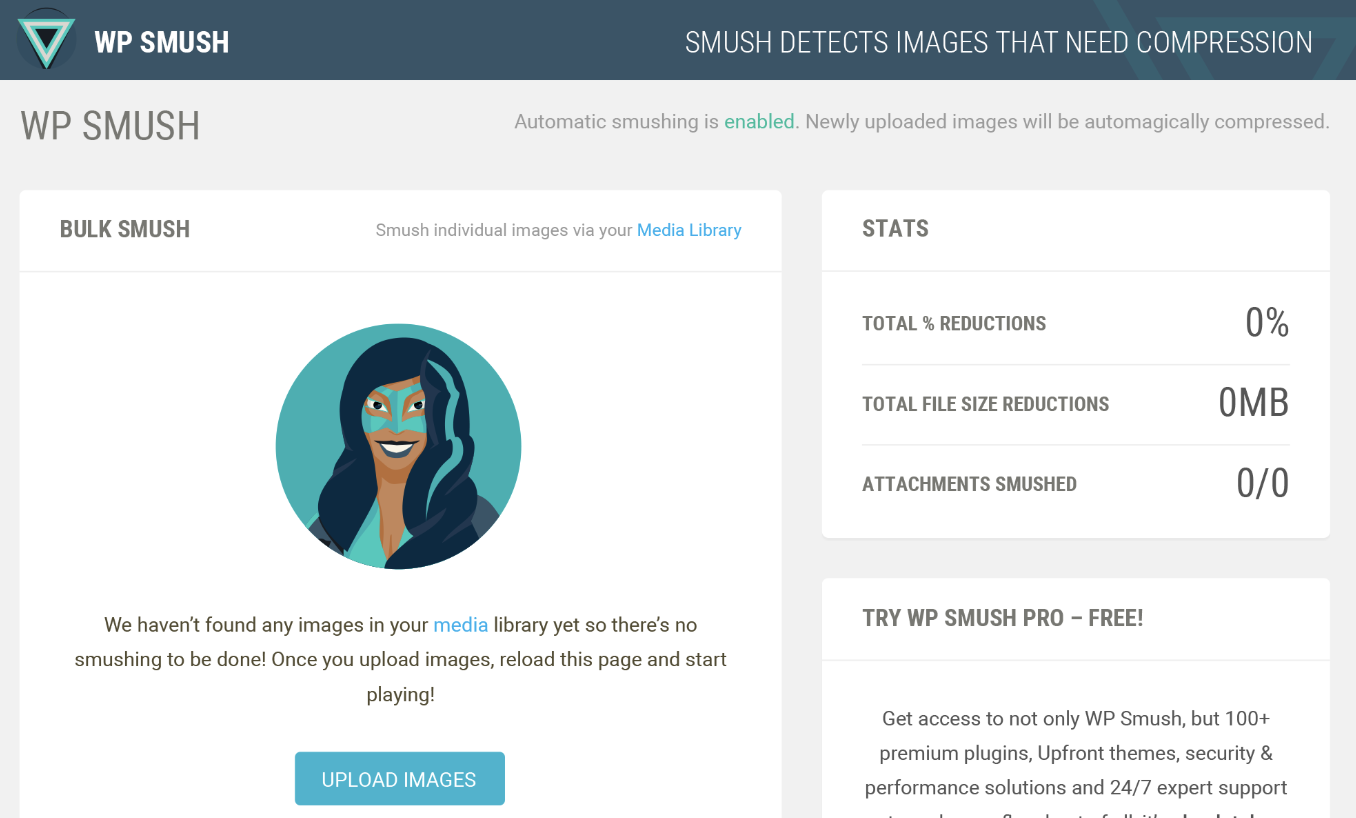
“Smush quickly compresses and optimizes images in bulk, letting you focus on other things,” says Izaak Crook of AppInstitute. Smush servers do all of the work for you, meaning your images will remain high-quality while reducing their file size. This frees up space on your server so your website will be significantly faster.
17. W3 Total Cache
Source: WordPress
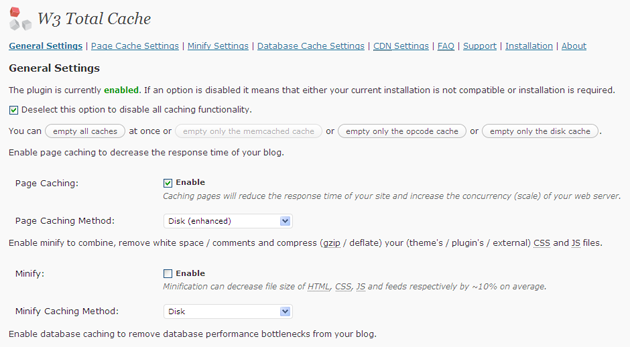
Looking to improve the performance of your website? This optimization plugin helps all marketers deliver a better user experience by increasing server performance, reducing load times, and providing CDN integration (which increases your website’s performance and decreases loading time to enhance user experience).
18. Imsanity
Source: Imsanity
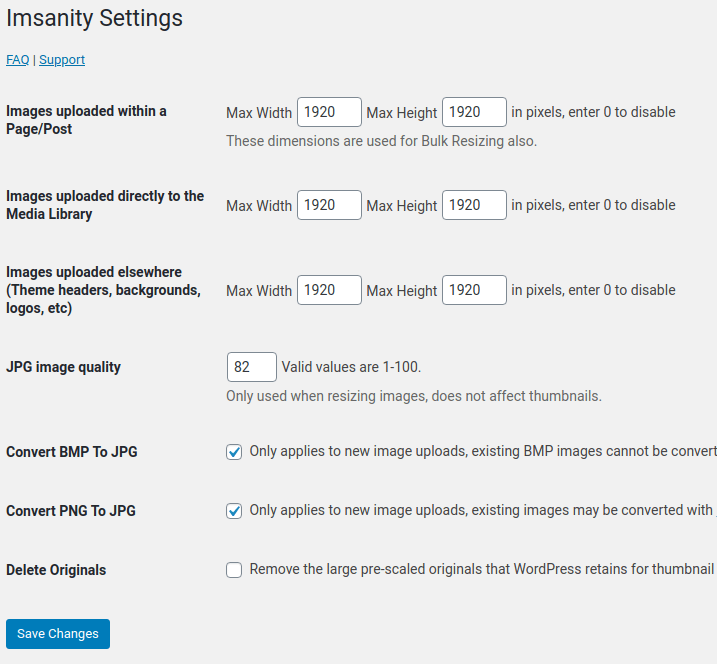
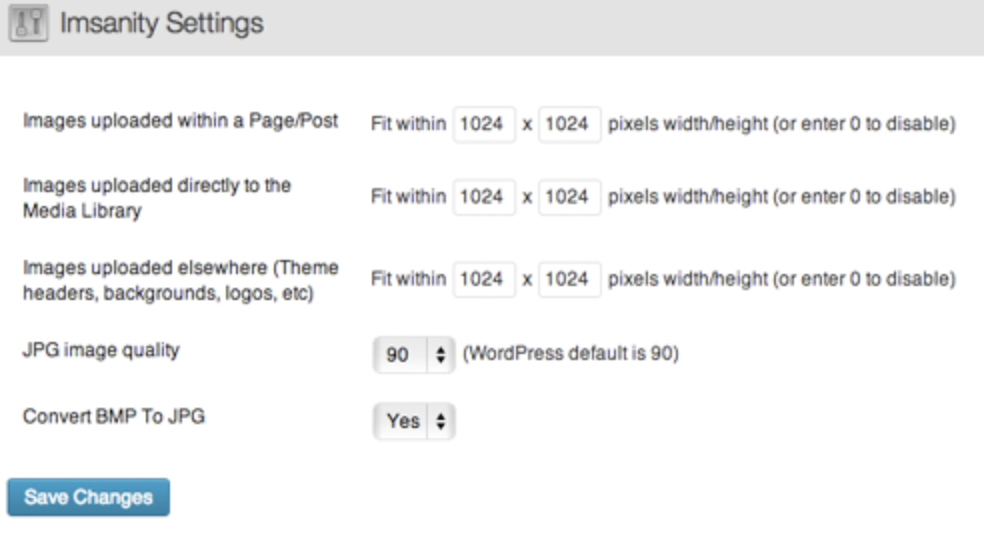
“Imsanity is a popular, free WP plugin for managing image file size. It automatically resizes images without loss of quality and saves you from having to manually scale them before upload,” says Marina Dolcic of MorningScore.
The Imsanity plugin matches the size of your images with the display in a browser. It resizes previously uploaded images by automatically scaling them down and replacing the original images with the new versions, which saves you time as all of the work is done for you.
19. OptinMonster
Source: WordPress
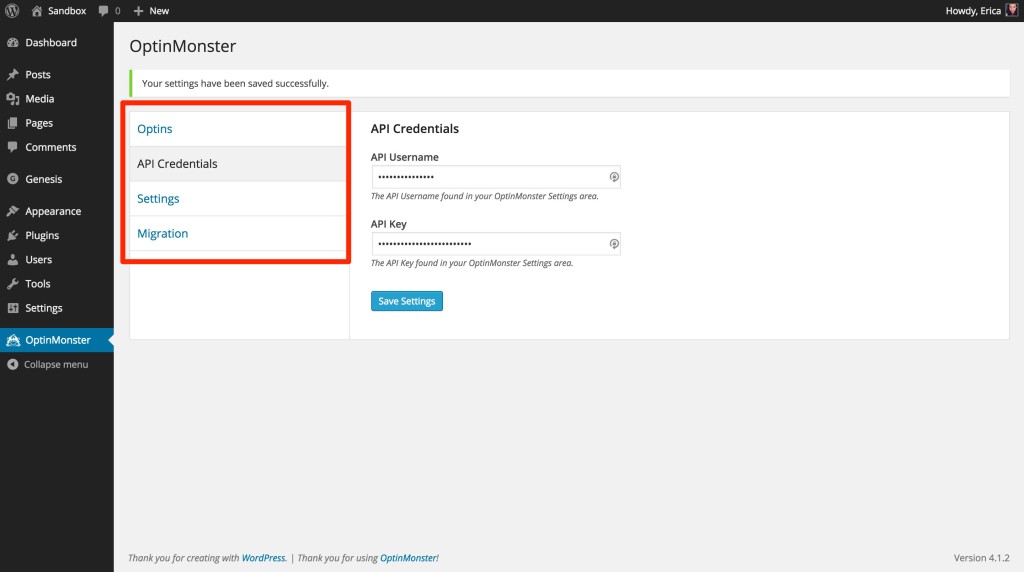
Looking to grow your email list? This plugin comes with an easy-to-use form builder to help you create opportunities for your visitors to convert. From popups to slide-ins to sidebar forms, OptinMonster offers a variety of different templates for lead generation forms. The plugin also integrates with several email marketing providers, such as MailChimp, HubSpot, AWeber, Infusionsoft, Constant Contact, and Campaign Monitor.
20. Revive Old Post
Source: WordPress
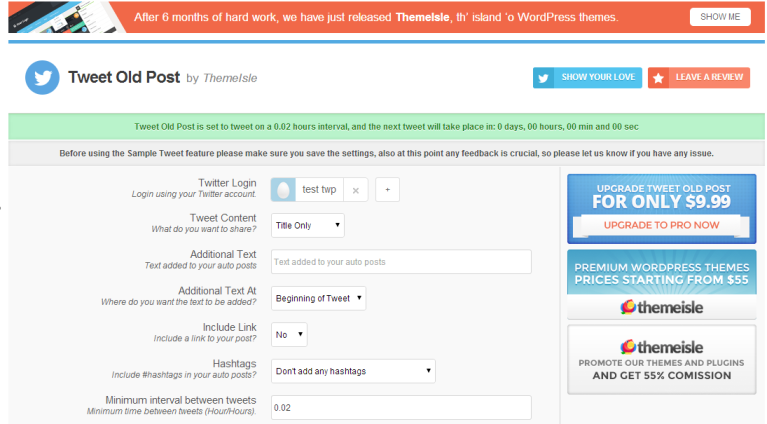
Formerly known as Tweet Old Post, this plugin helps marketers extend the life of their old social posts by automatically re-sharing them to social networks, including Twitter, Facebook, and LinkedIn. You have the ability to schedule posts and manage multiple accounts so you can easily drive more traffic to your content.
21. Head, Footer and Post Injections
Source: WordPress
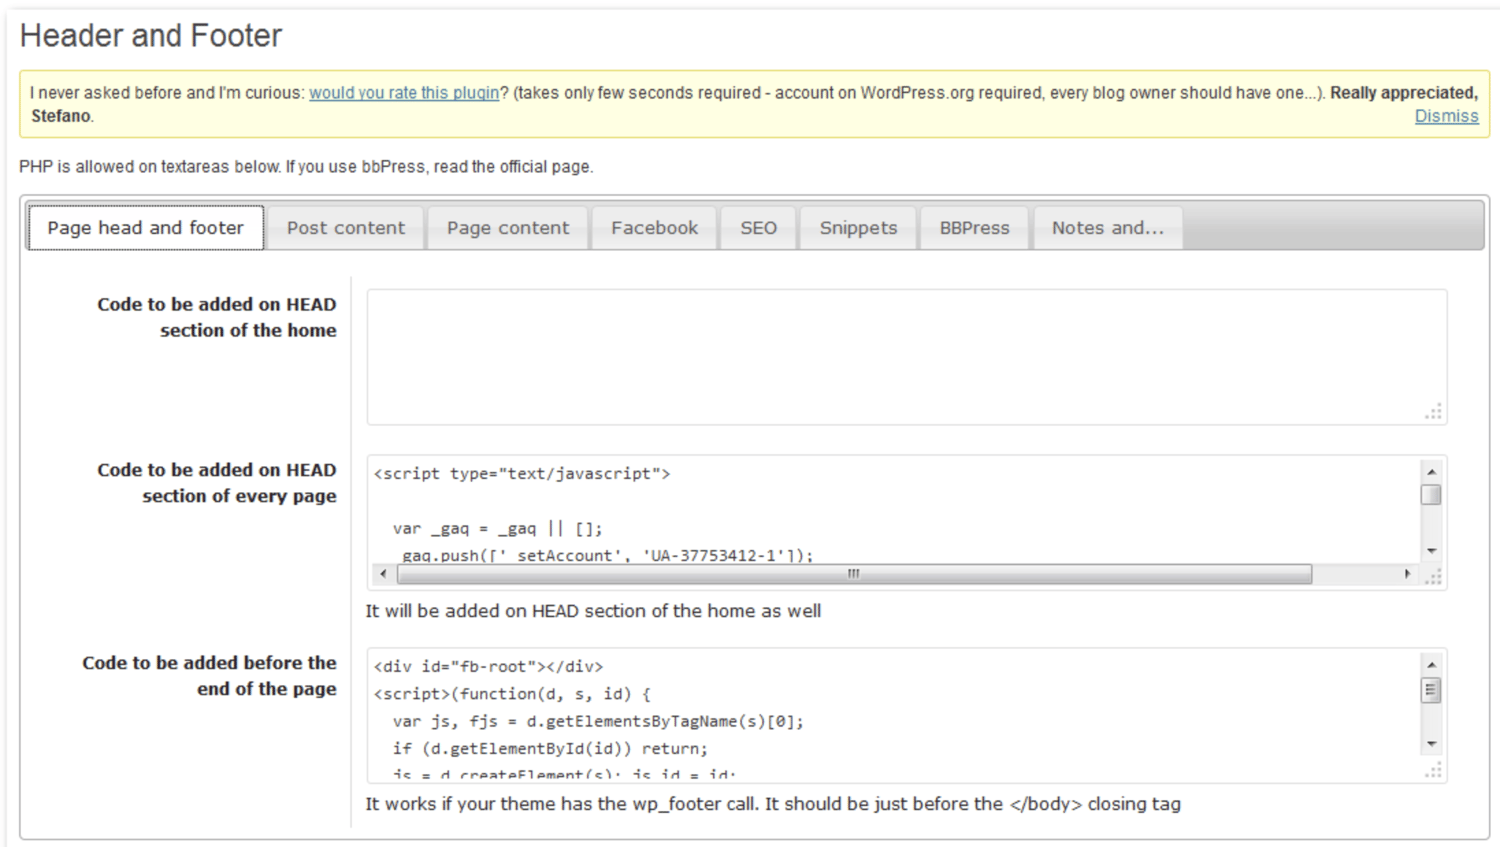
Most WordPress users end up needing to use several plugins — some people even use dozens. Head, Footer and Post Injections is a plugin that allows you to copy any unique code that you use for other plugins, keep it in a centralized and organized location, and easily insert it wherever needed. The plugin is theme-independent, meaning you’ll never lose your data (no matter how many times you change your website theme).
22. Google Analytics by Monster Insights
Source: WordPress
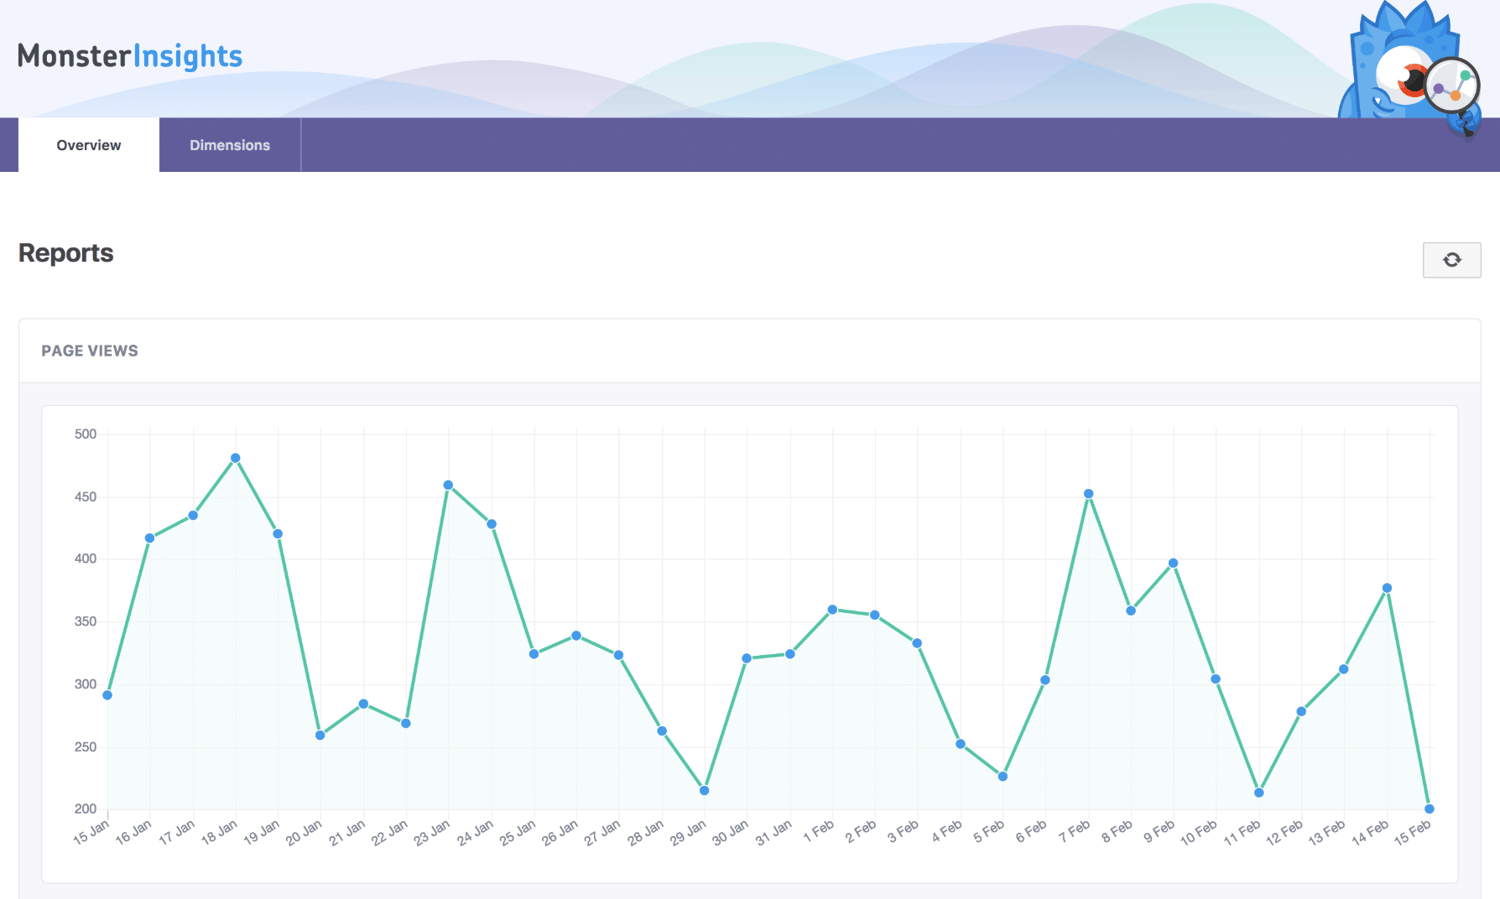
This plugin uses an API with Google Analytics that makes it easy for you to track the performance of your blog directly from your WordPress account. With added data for search result pages and error pages, Google Analytics by MonsterInsights makes performance reporting easy.
23. Redirection
Source : Redirection
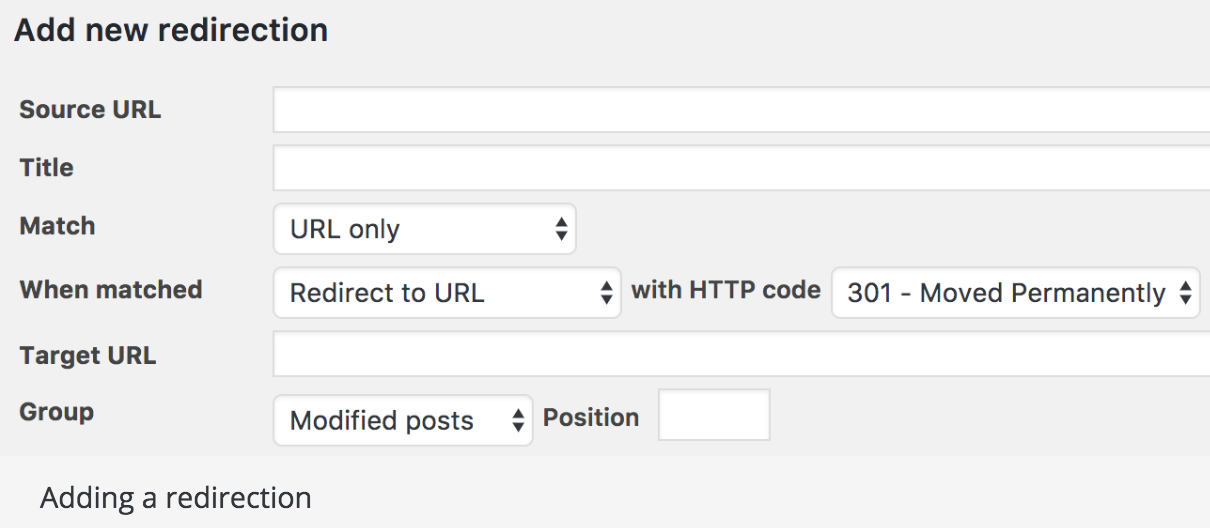
Redirection is a free redirect manager that allows you to set up your 301 redirects and manage 404 errors. There is a logging feature so you can see all of the redirects on your site as well as information about each visitor that is redirected.
24. Yoast SEO
Source: Yoast
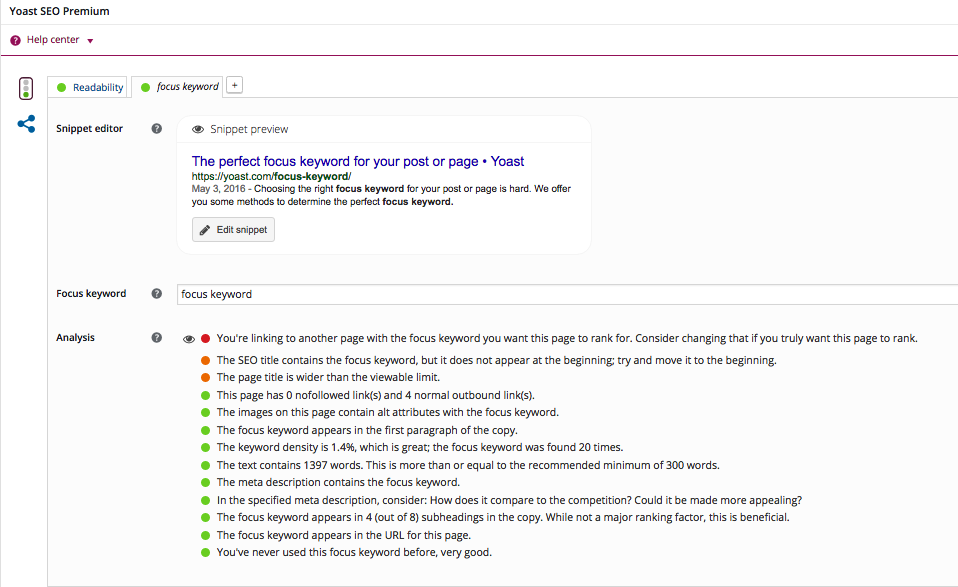
Yoast is your all in one SEO plugin.
“This highly effective WordPress plugin makes the process of delivering SEO improvements on a site much easier,” says Sean Flannigan of coolblueweb.
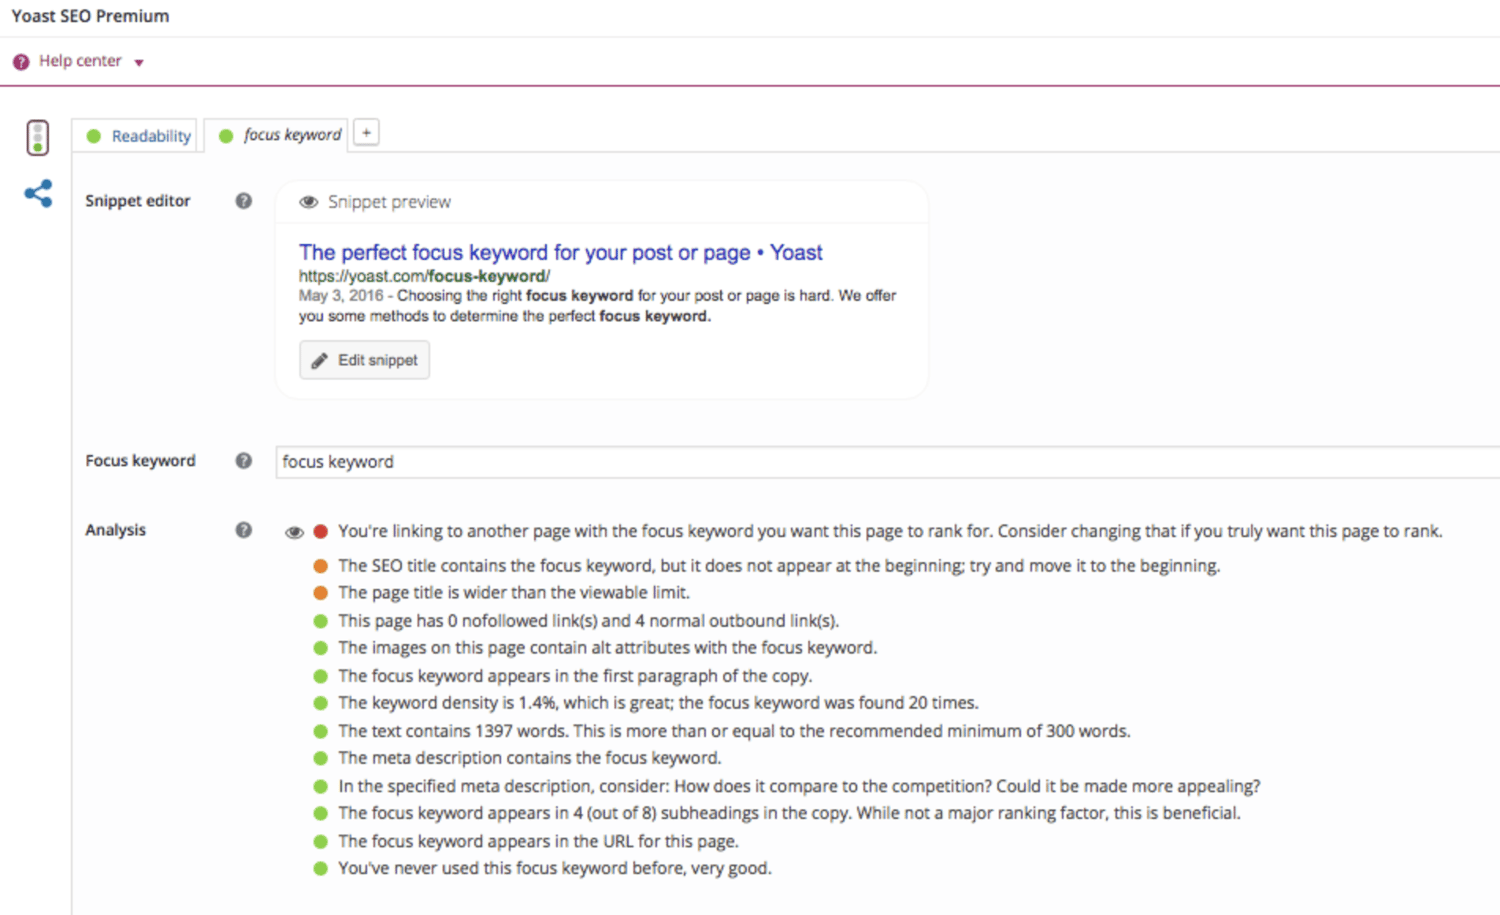
Yoast helps you get the most out of your website SEO with straightforward XML Sitemaps, breadcrumb navigation control, content analysis, snippet previews, and several integrations that show you how your website performs in different search engines. Nicolas Straut of Fundera, says, “This plugin identifies and suggests solutions for potential SEO problems in your content, identifies what you’ve done well and helps you easily edit your snippet, keywords, and other post details.”
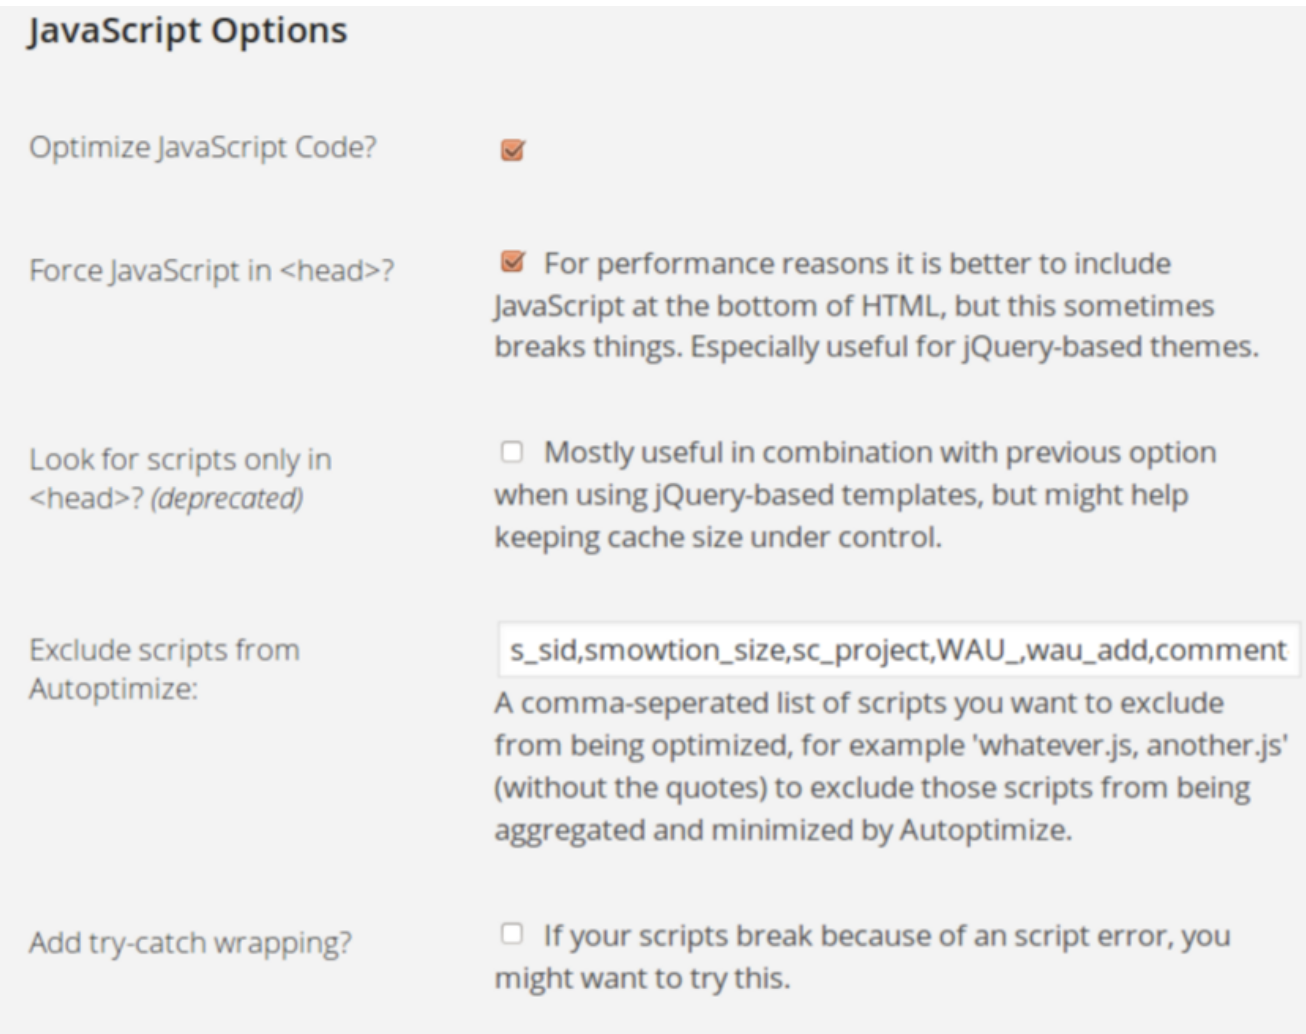
25. Autoptimize
Source: StackPath
“[Autoptimize] makes it easy for non-technical marketers to make their sites lightning fast. We all know how important it is to have a fast website — without it, our Google rankings suffer and potential customers will go somewhere else,” says Jon Nastor of Hack the Entrepreneur.
This plugin aggregates and caches (a.k.a. stores) scripts and styles, which enhance your site’s overall performance. Autoptimize also has extensive API available so you can tailor the plugin to your website’s needs.
These are only 25 of the thousands of WordPress plugins available to marketers. WordPress plugins can help you improve your site, whether it’s speeding up your page load time, improving your site’s functionality, or tracking metrics. These powerful tools are often free, have features tailored to individuals and businesses of all sizes, and are fairly easy to use. Give a plugin or two a try and see how much it enhances your day-to-day WordPress experience — and your business.

I Don’t Mind Paying, But I Do Mind Being Played [The Customer Code Series]

This post is part 9 of 11 in a series on HubSpot’s Customer Code.
Here’s a secret — I wanted to launch the first version of The Customer Code at INBOUND 2017. I was excited about the idea, and wanted to start talking about it.
But our leadership team pushed back on me. They said there was no way we could ask other companies to step up and embrace their customer-first ideals when we still had so far to go ourselves. Of particular concern was the communication around our pricing and how customers got billed.
We had to be the change.

The way our pricing works varies quite a bit throughout our product lines, for customers at the Starter level, it tends to be extremely simple, but as our customers’ businesses gets more sophisticated, pricing tends to get more sophisticated as well. And feedback made it clear that, when it came to pricing, our most unhappy customer segment were customers at the Marketing Hub Professional and Enterprise levels — so that’s where we dug in.
Like many SaaS companies, we lock-in pricing for customers during their billing period so what they’re paying won’t increase even if their number of contacts does increase. It’s a way to show value before we extract value. But of course:
- Customers often wouldn’t remember pricing was locked in for the billing period (they’re busy)
- During the year, usage would increase
(If you want to get into the weeds, you can read our Terms of Service here, but that’s the high-level gist.)
So year two renewal would roll around, and a lot can change in a year — a customer’s business may have grown, people forget about the details of a contract they signed 12 months ago, or perhaps the person who originally signed the contract is no longer with the company and a new person is now managing the account — and suddenly customers were getting a bill that was noticeably higher than the prior billing period with little context on why. Yes, many were very (and rightfully!) unhappy about this.
The change needed on our end was actually quite simple–we simply changed the communication approach in our renewal process. First, we adjusted the timing of our communication about the new bill and made a change to our Terms of Service which reduced the number of days notice we needed to honor a non-renewal request – dropping it from 45 days to 10 days. Second, we now go out of our way to inform customers about growth in their contact database before the notice of non-renewal window closes. These changes give our customers far more time to evaluate the product, the value delivered over the past year, and decide if HubSpot still made sense for them. But most importantly, we can feel confident that we’re not surprising customers with an unexpectedly large bill.
And with those simple changes in place…no more upset customers.
Because our customers don’t mind paying, but they do mind feeling played.
The same is true for your customers.
No one should be surprised by an unexpected bill.
No one should need a math degree to figure out what they’ll pay you.
No one should need to jump through hoops to figure out what it might cost to do business with you.
If we had gone live with The Customer Code in 2017, I would have given HubSpot a 5 on Tenet #8: I don’t mind paying, but I do mind being played. Today, I give us a 6. We’ve been doing some things right for awhile – our pricing is transparent and available on our website – and we’ve made substantial improvements on improving communication around renewals, but we’re not done yet.
We recently asked our customer-facing teams how we’re doing when it comes to pricing transparency. Our support and success teams care deeply about the customer, but also understand the needs of the business, and we wanted to know how they think we’re doing when it comes to pricing.
The vast majority of our customer-facing team members feel that our pricing, discounting, and cancellation process are all fair. But when we asked them what one thing they would change for our customers today if they had a magic wand the #1 request was simplifying pricing, packaging, and renewals.
Fair isn’t enough to create a great customer experience.
Transparent doesn’t always equate to simple.
We’re being honest, transparent, and fair; but our customers don’t always feel that way.
We can do better, and we’re going to. We have two plays kicking off that pair VP-level executives with our Voice of the Customer team to improve the billing and contract experience.
Confusing pricing is a negative force on the flywheel of every business. Sixty-nine percent of people said that confusing pricing keeps them from making a purchase.

After seeing this data at INBOUND one HubSpot customers, WashCard, went back to work and decided it was time to give transparent pricing a try. While the industry standard is to require a conversation with a salesperson before giving pricing, WashCard saw this as creating friction in their flywheel so they pulled back the curtain–boldly displaying pricing on their website for all to see.
Amy Olson, the Director of Marketing at WashCard said, “A month into this, we’re getting more leads out of our pricing page than any other page on the website, they make up two thirds of our online conversions. Our sales staff can see that a prospect has looked at the pricing page, and it totally changes the conversation when contacting new potential customers. Game. Changer.”
Customers don’t mind paying, but they do mind being played, they mind unexpectedly big bills, and they mind jumping through hoops to figure out how to budget for your product or services.
If you want to grow, you have to charge for your services. But companies that are open and honest about their pricing, while making it simple to understand – grow better.
This post is part 9 of 11 in a series on HubSpot’s Customer Code. You can find more info on The Customer Code and how we score ourselves here, and watch my INBOUND talk on this topic here:


The 2-Step Process for Answering “What Motivates You?” During Interviews
Out of all the questions a hiring manager might throw your way during an interview, “What motivates you” might be the most crucial one to nail.
One of the most important — and common — traits hiring managers typically vet for in candidates is their intrinsic motivation. Research suggests intrinsically motivated employees produce a higher quality of work than extrinsically motivated employees. So proving that you’re a craft-driven professional, and not just someone who is enamored by the company’s lucrative stock options, can be the difference between landing the job and receiving a “thank u, next” email.
To help you answer the “What motivates you?” question in a way that clearly communicates your intrinsic motivation and boosts your odds of landing your next job, check out this two-step process we developed.

How to Answer “What motivates you?”
- Describe why you love your craft
- Explain how your passion for your craft will benefit your potential employer.
1. Describe why you love your craft.
If you do something solely because you love doing it, your motivations are in the right place, and they’ll allow you to consistently perform past your potential employer’s expectations. For instance, if you genuinely love writing and helping people, you’ll be able to pour passion into your work and create content for the sake of creating content, helping you produce better work than if you only created content because your boss told you to do it.
To effectively convey your passion for your craft when a hiring manager asks you what motivates you, lead off with something like this:
“As I approach my three-year anniversary working in the content marketing space, I’ve learned a lot about myself. More specifically, I’ve realized I feel the most fulfilled when I can craft gripping stories that actually help and inspire people. Ultimately, my passion for storytelling stems from making others feel positive emotions, especially toward brands, which is a huge challenge today.”
2. Explain how your passion for your craft will benefit your potential employer.
In 2015, Tim Cook, Apple’s CEO, spoke at Goldman Sach’s Technology and Internet Conference in San Francisco. When asked what were some of Apple’s biggest accomplishments from the past year, he responded, “We’re not focused on the numbers, we’re focused on the things that produce the numbers.”
In content marketing, one of the most influential things that produce the numbers is a passion for your craft. But, sometimes, we can get so obsessed with optimizing for results that we forget what actually generates the views and leads we so desperately desire — compelling content.
To clarify this insight to your employer, explain why focusing on your craft — and not the results — will benefit them over the long haul, like the example below:
“Today, we both work in an industry where countless brands fight for a limited amount of attention, saturating our space with mediocre content. It’s never been harder to cut through the noise. But one of the most effective ways to capture people’s attention amidst all this clutter is storytelling. The human brain is wired to respond to well-crafted narrative. Neuroscience proves that storytelling is the best way to capture people’s attention, bake information into their memories, and forge close, personal bonds. We’re programmed to crave and seek out great stories — that’ll never change. So if you want to move people and sear yourself into their memories, you must tell compelling stories.
”What motivates you?” Sample Answer
Altogether, a strong answer to the “What motivates you” question would look like this:
As I approach my three-year anniversary working in the content marketing space, I’ve learned a lot about myself. More specifically, I’ve realized I feel the most fulfilled when I can craft gripping stories that actually help and inspire people. Ultimately, my passion for storytelling stems from making others feel positive emotions, especially toward brands, which is a huge challenge today.
Today, we both work in an industry where countless brands fight for a limited amount of attention, saturating our space with mediocre content. It’s never been harder to cut through the noise. But one of the most effective ways to capture people’s attention amidst all this clutter is storytelling. The human brain is wired to respond to well-crafted narrative. Neuroscience proves that storytelling is the best way to capture people’s attention, bake information into their memories, and forge close, personal bonds. We’re programmed to crave and seek out great stories — that’ll never change. So if you want to move people and sear yourself into their memories, you must tell compelling stories.
Intrinsic motivation is the best type of motivation.
“What motivates you?” might be one of the most challenging questions to answer during an interview. But if you can clearly convey that you’re intrinsically motivated and structure your answer the way we did above, you’ll be able to nail the “What motivates you?” question and significantly boost your odds of landing the job.

How to Post on Instagram: a Step-by-Step Guide
With over 800 million active users, Instagram is undoubtedly one of the most far-reaching social media networks you can use for marketing purposes.
Instagram has proven a viable advertising option for businesses today, and shows no signs of slowing down — in fact, eMarketer estimates worldwide Instagram ad revenues will exceed $10 billion by 2019, an exponential increase from 1.86 billion in 2016.
If you’re not already using Instagram for your business, you’re missing out on a ton of opportunity to grow brand awareness and reach a wide audience. Fortunately, adopting an Instagram strategy can be relatively easy with enough time and effort.
However, if you’ve never used the app, you might be daunted by the first question likely to cross your mind — How can I post my first image?
If you’re ready to post an image to Instagram, we’ve got you covered. Here, we’ve cultivated a quick-and-easy guide to posting on Instagram, to ensure you can begin attracting some of those 800 million users today.

How to Post on Instagram
1. Open the Instagram app. Click the “+” icon at the bottom of your screen.

2. Instagram will show you the photos already saved to your phone. Choose one of those to post. Alternatively, you can click “Photo” or “Video” in the bottom to take a photo or video within the Instagram app itself, if you don’t already have an image you want to use.
Once you choose an image, click “Next” in the top right.

3. Instagram offers 25 filters — scroll to the right to peruse your options, and click on one to preview how it will look on your photo. (Take a look at our Ultimate Guide to Instagram Filters to learn more). You can click “Edit” at the bottom right to adjust contrast, brightness, etc.
When you’re ready, click “Next” in the top right.

4. In the text box at the top, type your caption. Additionally, you can click “Tag People” to tag other Instagram accounts in your post, and “Add Location” to put a location on your image (which makes it easier for people to find your post).
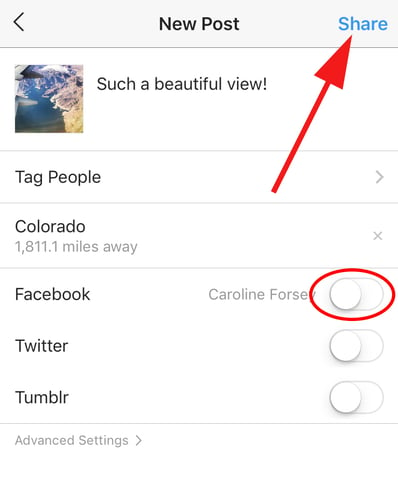
Finally, if you want to share your content on your other, connected social media sites (like Facebook or Twitter), simply slide the bar from the left to the right.
When you’re ready to post, click “Share” in the top right.

How to Use Instagram: A Beginner’s Guide.


The Straightforward Guide to Twitter Analytics
When it launched in 2014, Twitter Analytics marked a solid (if long overdue) move toward greater transparency and measurement abilities for all its users.
Since then, Twitter has continued to make upgrades to the tool, having created a standalone analytics app called Engage in 2016 and launching analytics for Twitter Moments.
Though users now have more insight into their Twitter account metrics, you might not be using this data to its full potential.
Perhaps you’ve poked around the Twitter Analytics homepage and figured out you can track impressions and metrics by promoted or organic activity … and that’s about it. The good news is there’s much more you can discover in your Tweet activity dashboard — you’ve just need to know where to look.

Beyond the basic metrics, here are some incredibly important things you can discover about your Twitter account and audience using Tweet Analytics. Then, take a look at some of the free third-party analytics tools that give you a deeper dive into the Twitter performance metrics you want more information on.
How to Use Twitter Analytics
You can access Twitter Analytics by tapping your profile and selecting “Analytics” from the dropdown menu:
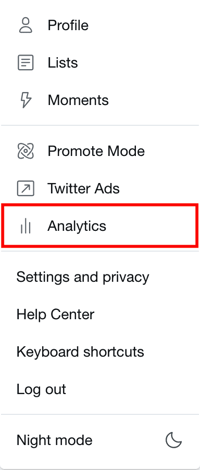
Now, find out how to use every element of your Twitter Analytics by jumping to each section listed below:
- Twitter Engagement Rate
- What are Twitter Impressions?
- Tweet Activity
- Track Twitter Followers
- Twitter Ads (Worth the Money?)
- Free Twitter Analytics Tools
Twitter Engagement Rate
Twitter engagement refers to the retweets, follows, replies, favorites, and click-throughs your tweets get — including the hashtags and links those tweets include. Your Twitter Engagement Rate is equal to your tweets’ engagement divided by the number of impressions those tweets have made.
Understanding which types of content and topics your audience members most enjoy can help drive your social marketing and content strategy. What’s the point in sharing content no one cares about or enjoys?
On the “Tweets” tab, you can see Impressions, Engagements and Engagement Rate (Engagements divided by Impressions) for each tweet — both for paid and organic posts. As stated above, Engagement includes all activity on the tweet: retweets, follows, replies, favorites, and all clicks from within the tweet.
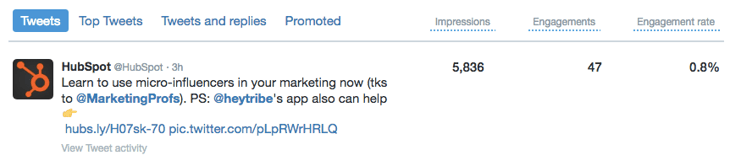
In the example above, we see a tweet from HubSpot received an engagement rate of 0.8% — or 47 engagements divided by 5,836 impressions. We found that to be particularly high: According to 2018 industry benchmarks by Rival IQ, the median Twitter engagement rate across every industry is .046%. Use this as a point of comparison when managing your own Twitter Analytics to determine how your tweets are performing.
For a more granular view of the volume of each type of engagement, you can click on the specific tweet:
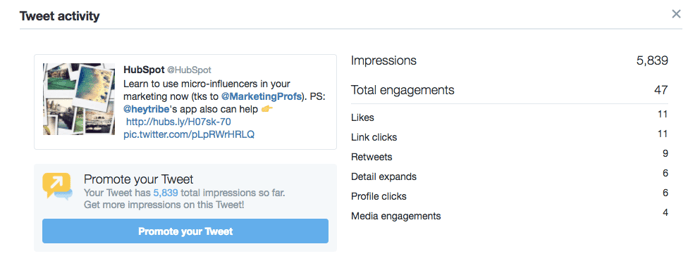
Understanding which content items get the most engagement on Twitter is huge. If you can even commit 10 minutes a week to recording your top five or 10 tweets by engagement so you can start seeing trends over time — and then applying those insights to future tweets — you’ll be able to better connect with your audience.
What are Twitter Impressions?
Twitter Impressions are the number of times a tweet appears on a user’s timeline. A tweet’s impressions are not limited to users who follow you, but this number also doesn’t filter based on who has interacted with the tweet. Impressions are not to be confused with reach.
In the previous section, I mentioned that a tweet’s engagement rate is equal to its total likes, replies, clicks, follows, and retweets divided by impressions. Your Twitter Analytics dashboard lists each tweet’s total impressions, but what are impressions, exactly?
As stated above, a new impression is counted on a tweet every time that tweet shows up on a user’s Twitter feed (also known as their “timeline”). So, if 30 of your followers logged on Twitter and saw your tweet, that tweet has made 30 impressions.
The impressions metric doesn’t consider how, or if, those users interacted with your tweet. Therefore, impressions alone should not be a key performance indicator (KPI) for your social media activity. But, because they are divided into the number of engagements your tweets have gotten, impressions are still an important number to know when examining your Twitter Analytics.
Impressions vs. Reach
“Reach” is a term you might hear when analyzing your Facebook Page’s performance. Well, you can also measure reach on Twitter, and it has an interesting relationship with impressions.
While Twitter impressions tell you how many times a tweet has actually appeared on someone’s timeline, “reach” tells you how many people, in total, have the potential to see it. This includes those users who don’t follow you but follow someone who follows you. Reach is typically a higher number than impressions. Here are two examples:
- If you have 300 followers, but only 190 of them saw your tweet, your impressions will be at 190 while your reach sits at 300. Why? Although you made 190 actual impressions on your followers, your tweets have have the potential to reach as many people as follow you — in this case, 300.
- Here’s a tougher one — let’s say you have 300 followers, 190 of them saw your tweet, one of those people retweeted you to 50 of their own followers, and 10 of those followers saw the retweet. Drumroll please … Your impressions will be at 200 while your reach sits at 350. Why? You got 190 impressions from the original tweet, as well as 10 more people who don’t follow you but saw your follower’s retweet (190 + 10 = 200). However, your tweet had the potential to reach your own 300 followers as well as the 50 people who follow the user who retweeted you (300 + 50 = 350).
Based on the examples above, you can probably tell that reach indicates potential, whereas impressions indicate actual performance. Does that mean a tweet’s reach is less important than impressions? Not necessarily. Sure, you might not see your reach displayed on your Twitter Analytics dashboard, but knowing how much exposure your Twitter account is capable of can help you draft accurate goals for the year and adjust your social media strategy to, well, “reach” them.
Tweet Activity
Tweet Activity is a section of your Twitter Analytics dashboard that allows you to see various metrics related to your tweets’ performance in chart form. You can see Tweet Activity for all of your tweets over a set time period, or for a specific tweet since it was published.
This is a really common question among social media marketers and brands: What made my tweet take off?
Some tools can analyze your Twitter followers and recommend the best day of the week for you to tweet. There’s also research out there showing when people are most likely to be active on Twitter. But of course, the best way to get to know your own audience is from your own account data.
You can analyze tweet activity two different ways: in groups of tweets during a set date range, or by specific tweets since their creation. Here’s more information on each method.
Tweet Activity Based on Date Range
In the Tweets tab of your Twitter Analytics, you can customize the date range you want to analyze to see when you published your highest-performing tweets:
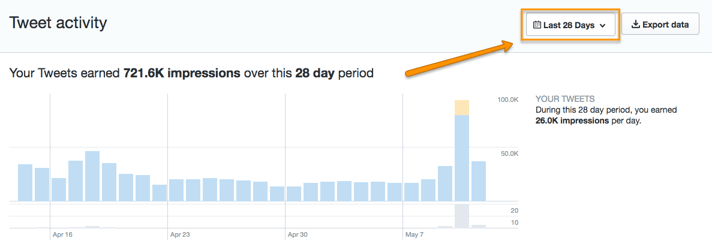
Then, to the right of the graph shown above, you’ll see how your engagement rate, total link clicks, and total retweets progressed over the that time period. These three graphs are shown below.
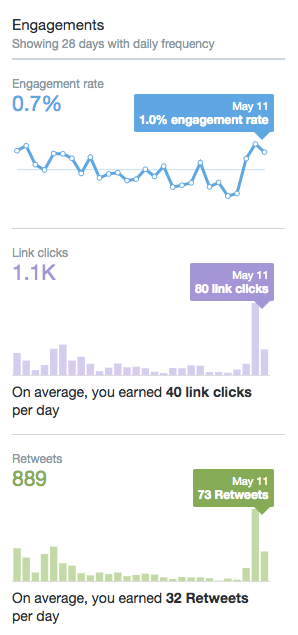
In the charts above, each bar or point on the graph considers the total from each day. Consider the green Retweets graph directly above this paragraph. If that Twitter account received 73 retweets total on May 11, it’s considering every tweet posted that day. Perhaps three tweets were posted — the morning tweet earned 10 retweets, the afternoon tweet earned 37, and the evening tweet earned 26. This makes the 73 retweets listed at the end of that graph.
Because these graphs consider daily totals, it’s important to tweet at a consistent volume every day, or your tweet activity might become misleading. For example, if you tweet three times a day for the first two weeks of the month, and only twice a day for the last two weeks, your activity graphs might show a steady decline in impressions and link clicks because you’ve had less output in the latter half of the month. (This is why engagement rate is so helpful — getting a percentage of engagement adjusts automatically for changes in tweet volume that might occur over the course of a month.)
Twitter used to allow you to view a tweet’s engagement over the course of a day, and I personally think it was a mistake to remove that feature. I hope they bring it back in an update soon so users can analyze the best time of day to tweet from their account.
Tweet Activity Based on Specific Tweet
Nonetheless, you can also visualize the activity of just a specific tweet. To access this data, click the small bar graph icon in the bottom-righthand corner of the tweet you want to analyze, as shown in the screenshot below.
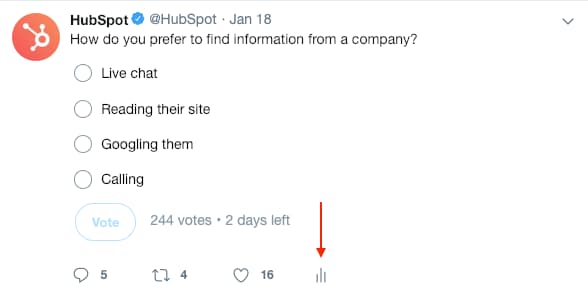
Clicking this icon will open a window showing you this single tweet’s total impressions, engagements, likes, link clicks, and more since the tweet was first posted.
This data might just be for one tweet, but don’t underestimate its importance. Examining these individual results, tweet by tweet, can give you insight into which types of tweets work and which don’t. For example, if you find tweets that promote videos from your YouTube account tend to get more impressions than others, you can invest more into video content as a result.
Track Twitter Followers
Twitter’s audience data in the “Followers” tab contains a ton of valuable and useful insights. This is where you can really get to know the people who follow you.
You’ll find answers to questions like: Are your audience members more likely to be male or female? Which countries and cities are the majority from? What are their top interests? You can also see who your followers follow as well as your follower’s top five most unique interests. Answering these questions can help you better identify what content to create and share on Twitter — and when to share it.
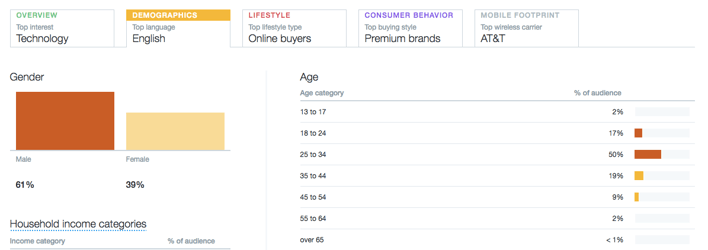
You can also compare your Twitter followers to different segments — for example, to all Twitter users total:
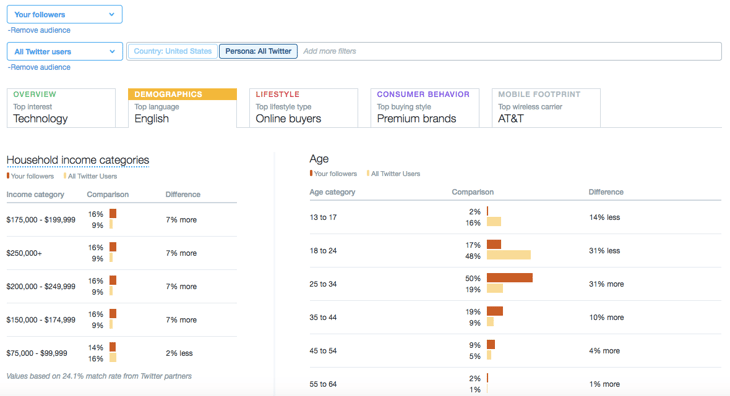
See Whether Your Follower Base Is Growing (or Shrinking)
I’d call myself a Twitter power user now, but it wasn’t always so. For several years, I slowly grew my following up to about 8,000 followers. In the past few years that I’ve really focused on my Twitter presence, I’ve picked up another 704,000.
Now, Twitter allows you to track your follower growth. Twitter Analytics shows you how many followers you had on any given day with the interactive timeline pictured below. Hovering over various points on the timeline will show you the exact follow count on that day. It dates back to the day your account was started.
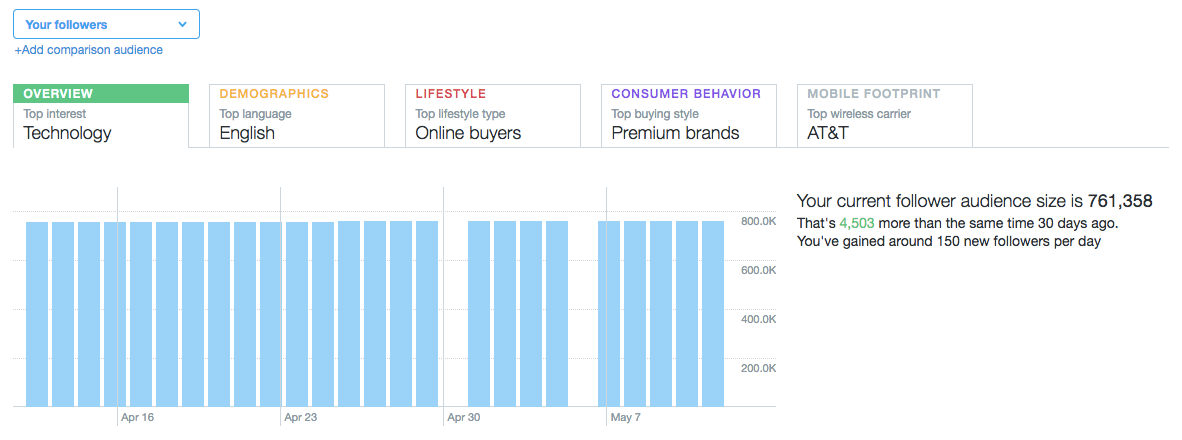
If you’re seeing blips in your follower count over time, it’s important to revisit your activity in those periods and see if you can learn from it. How often were you posting then — and what were you posting about? Were you taking the time to reply to folks, too? Answering questions like these can help you explain these blips — and avoid the same mistakes in the future.
Twitter Ads (Worth the Money?)
I’ve been experimenting recently with paid promotions on Twitter. After reviewing my own data in Twitter Analytics, I realized my ads weren’t as effective as I thought they would be.
In the Tweets tab, right at the top, there’s a chart that gives an overview of your paid and organic tweet performance. Like other Twitter Analytics charts, this one is interactive, so hovering over specific parts will show you more precise numbers, as in the example below. Keep in mind that the data only goes back 91 days, so take advantage of the ability to export it regularly. You can make comparisons over longer periods of time in another program.
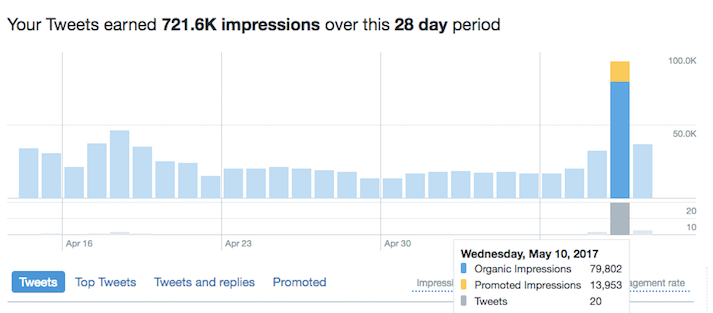
I’m not spending a ton on paid promotions — around $100 a day when I use them — but at a glance, I can see that compared to organic posts, they’re not having a huge effect. If I were running specific promotions, I’d be interested in the Conversions information available in Twitter Analytics. But for getting more impressions on my content, it doesn’t seem worth it because I could get that exposure for free by just tweeting a few extra times per day.
Obviously, this will vary for every user, but this panel in Twitter Analytics is a pretty simple way to see what you need to make that decision.
Just below that chart, you can click “Promoted” to see all of your paid promotions in chronological order. This shows you how many engagements and impressions each one earned, helping you pinpoint which paid promotions are working (and which ones aren’t).
Free Twitter Analytics Tools
- TweetReach
- Klear
- Keyhole
- Twitonomy
- Tweet Binder
- RiteTag
- Mentionmapp
- Hashtagify
Still other third-party analytics tools can help you do a deeper dive into content properties that Twitter Analytics won’t give you as much data on. Want specifics on hashtag performance? Maybe you want more information on the most influential Twitter handles in your industry. These are the metrics you’ll need outside help to find.
Below are some of the most widely used Twitter analytics apps and the types of data they’re best for reporting on. Although most of them have paid plans that afford you multiple features, each of these tools offer free services that can give your Twitter game a boost of intelligence.
TweetReach
User, Keyword, and Hashtag Analytics
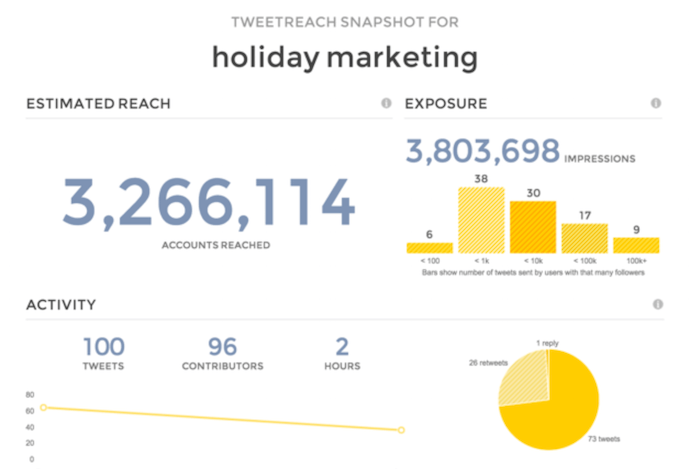
TweetReach is a free reporting tool that allows you to see how far your tweets and hashtags have traveled and who’s engaged with them. You can also get “snapshot” reports of any user, hashtag, or tweets with certain keywords in them so you can understand what’s being talked about in your industry in real time.
Klear
Influencer Analytics
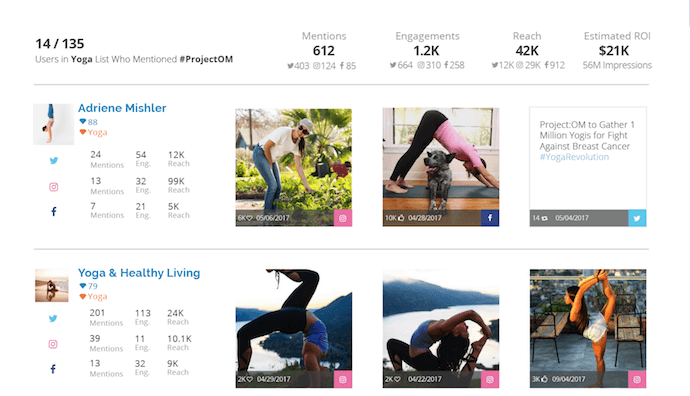
Klear focuses specifically on influencer marketing, tracking Twitter’s most influential users and helping you determine who’s making the most noise and greatest impact on certain topics of conversation. Compatible with Instagram, YouTube, and Twitter, the tool makes it easy to find, analyze, and manage your relationships with the people you want your brand to be associated with on social media.
Keyhole
Hashtag Analytics
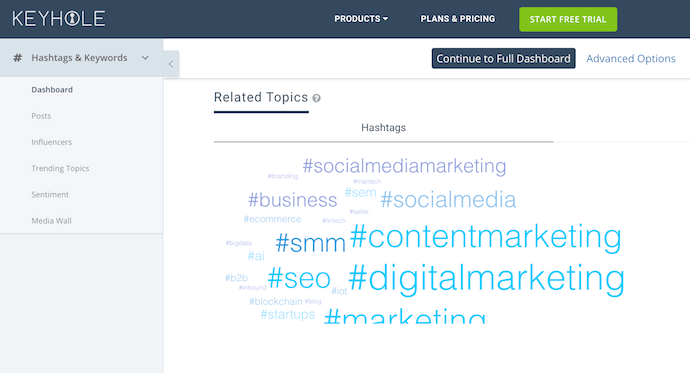
Keyhole takes Twitter users on a deep dive into the hashtags and topics they might like to create entire social media campaigns around. Start by performing free searches for hashtags, accounts, and topics you want to track. Then, for a paid subscription, use these insights to set up monitoring programs so you can find out who’s saying what about you, your event, or your market.
Twitonomy
User, Keyword, and Hashtag Analytics
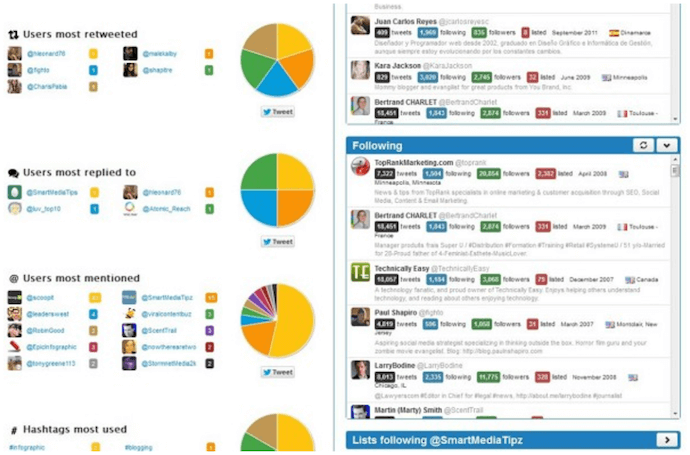
Twitonomy offers a full portfolio of data about the content you tweet and the users you follow. Most of this data is completely free, and you have multiple ways to visualize and report on this information. You can track posts from specific users, get smarter insights about your own followers, and more by signing into Twitonomy through Twitter directly.
Tweet Binder
Campaign Analytics
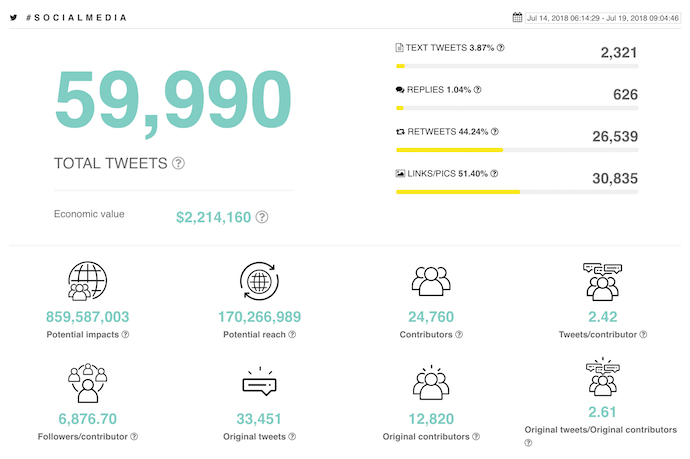
Tweet Binder is a campaign-focused analytics tool that allows you to view activity behind any hashtag, user, or keyword for free. Under its paid plans, the product gives you both Twitter and Instagram “walls” where you can see the impact of your own campaigns, making you a smarter promoter and event marketer over time. Tweet Binder’s free hashtag report, shown above, gives you an idea of just how easy it is to see the data behind various Twitter trends.
RiteTag
Hashtag Analytics
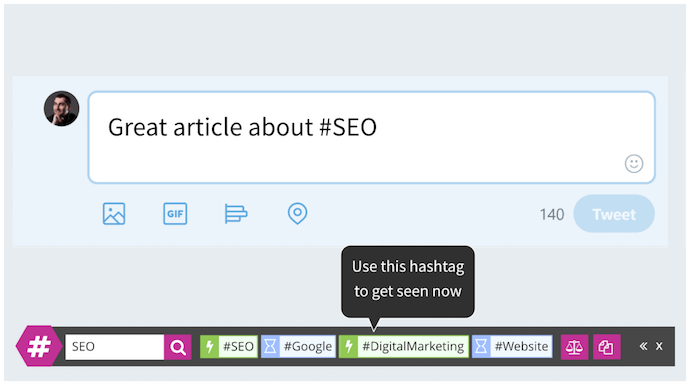
RiteTag doesn’t just give you engagement metrics behind a hashtag — it uses that data to give you real-time suggestions for which hashtag to use in each tweet you create. The platform integrates with a variety of marketing tools and social networks, allows you to create “tag sets” to refer back to, and recommends hashtags based on both text and visual media you want to post.
Mentionmapp
User, Mention, and Hashtag Analytics
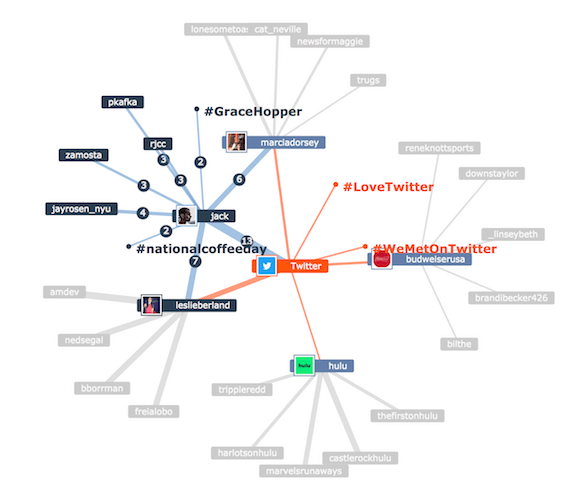
Mentionmapp is one of few Twitter analytics tools that presents conversation data in “map” form. Most of the tool is free to use under the “Seeker” platform, showing you not just who’s talking to whom, but who’s expanding on which topics and where a topic began. The map you create stays updated to Twitter trends as they happen.
Hashtagify
Hashtag Analytics
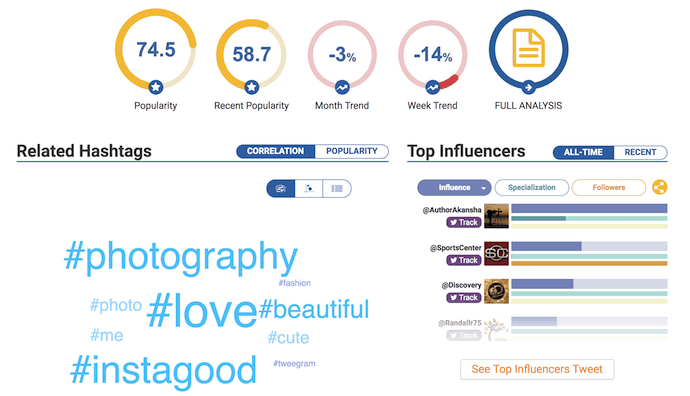
Hashtagify, as you might’ve guessed from its name alone, is a hashtag analytics tool that serves up a dashboard of information related to any hashtag you search. The product works for both Twitter and Instagram, organizing its data into various visual categories so you can properly decide with hashtags and topics you should get in on. As with each tool on this list, the free version of Hashtagify offers the dashboard above and a lightweight version of the full suite of analytics — which is available through paid plans.
Exporting Data: How to Discover Even More Trends in Twitter Analytics
No matter where you track your social media performance, marketers now have access to increasingly granular data about their Twitter account. The most useful feature I’ve found in Twitter Analytics is the ability to export data from the Twitter API as a CSV file.
Even power users with a ton of account activity can fairly quickly export their Analytics data right from their Twitter account.
To export your data from Twitter, select the timeframe you’d like to use, and click the “Export Data” button in the top right corner of your Twitter Analytics Dashboard.
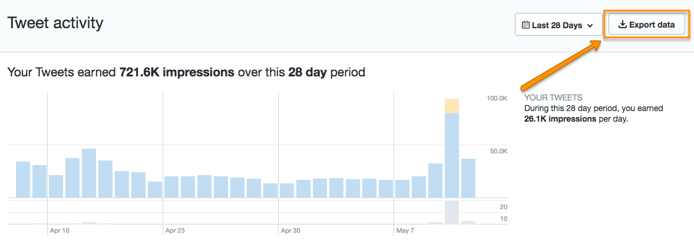
You can then sort through your exported data using Excel in ways not possible within the platform itself. For example, I extracted the time of day of my last 2500 tweets and plotted the tweet engagement rate vs. time of day, as shown here:
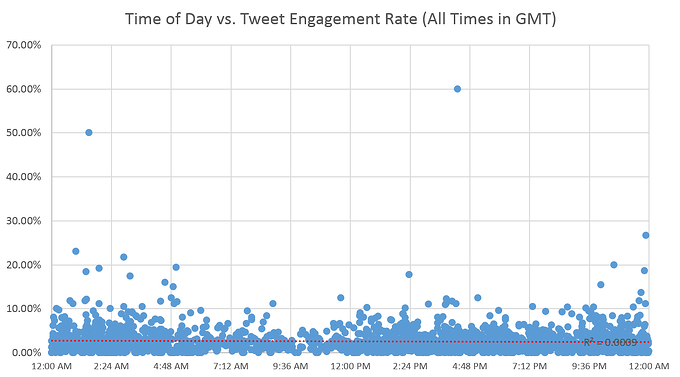
What I found was that the engagement rate (i.e. the # of engagements/impressions) held steady (on average) regardless of the time of day — possibly because I have a ton of international followers. It got me thinking that I really ought to be scheduling my content for all hours of the day, not just during business hours in my local time zone. Sure, fewer people will see my updates at 2 a.m. local time, but those who do are just as likely to engage with the content as those who see it during business hours.
There are so many other columns of data in the CSV export, including the number of favorites, retweets, link clicks, replies, URL clicks, follows, etc. So you can do this kind of customized analysis on whatever metrics you care most about.
Ultimately, the best data is your own, so make time to check out Twitter Analytics and see what you can learn and do with it. Figure out which tweets resonate and why. Then, work those insights into your social media marketing strategy for a more successful way forward.
For more ideas, download HubSpot’s guide to getting more Twitter followers.

3 Habits to Boost Creativity & Become a More Prolific Marketer
Maya Angelou once said, “You can’t use up creativity. The more you use, the more you have.”
Oftentimes, this couldn’t feel further from the truth. Imagine, for instance, the moment you finish your quarterly marketing campaign. You’re ecstatic — the campaign launched without a hitch, and you’ve already seen impressive conversion results.
But you’re also exhausted. You feel you’ve used up so much of your creative energy already — how will you ever come up with a new idea for the next quarter?
In these instances, it can feel like creativity is finite, and maybe even rare. But as marketers, we’re tasked with both the burden and the joy of using creativity to succeed in our roles every day.
Fortunately, there are tactics you can employ to begin building the right habits to become more prolific in your role. Henneke Duistermaat, writer and creator of Enchanting Marketing, created the following hand-drawn infographic to help boost creativity, improve focus, and minimize self-doubt to become a better, more creative marketer. Take a look.

