
5 Infographics to Teach You How to Easily Make Infographics in PowerPoint [Free Templates]
Despite the spattering of headlines that have popped up over the past several years proclaiming “infographics are dead,” infographics are, in fact, alive and well.
Infographics aren’t just alive and well — they remain a staple in many business’s content strategies. And while there are a lot of them, marketers who spend the time aligning the topic, content, and style of their infographics with the needs and preferences of their target audiences are still finding success among their audience.(And by “success” I mean driving traffic — and potential leads — to their websites and generating social buzz through people sharing and commenting.)
As of 2018, the use of infographics among B2B marketers has increased the most of any marketer in the last four years, now at 65%. And according to John Medina, a developmental biology expert, adding an image to written content can increase one’s ability to retain that information by 55% (wow).
Download 10 free infographic templates here to help you create professional-looking infographics without a designer.
But how can those who don’t necessarily have a design background — or the budget to commission an agency, hire a dedicated in-house designer, or purchase expensive design software — create professional-looking infographics that are able to captivate their audiences?
Here’s a little secret: You can do it using the software you probably already have installed on your computer. That’s right — PowerPoint can be your best friend when it comes to visual content creation.
To help you get started, we’ve created 10 fabulous infographic templates you can download and use for free right within PowerPoint. Don’t be shy … download them here.
And in this post, we’ll highlight five of the infographic templates from the download and teach you some PowerPoint infographic creation basics along the way. Just be sure to download the PowerPoint templates for yourself so you can easily customize the designs you see below!
5 Infographics That Teach You How to Create an Infographic in PowerPoint
1. How to Create an Infographic Filled With Data
Infographics and data visualization are the peanut butter and jelly of the visual content world.
When you have new data to reveal to the world, you can use an infographic to display that data as part of a cohesive, visual narrative. And that’s exactly what the “Data Geek” template is for.

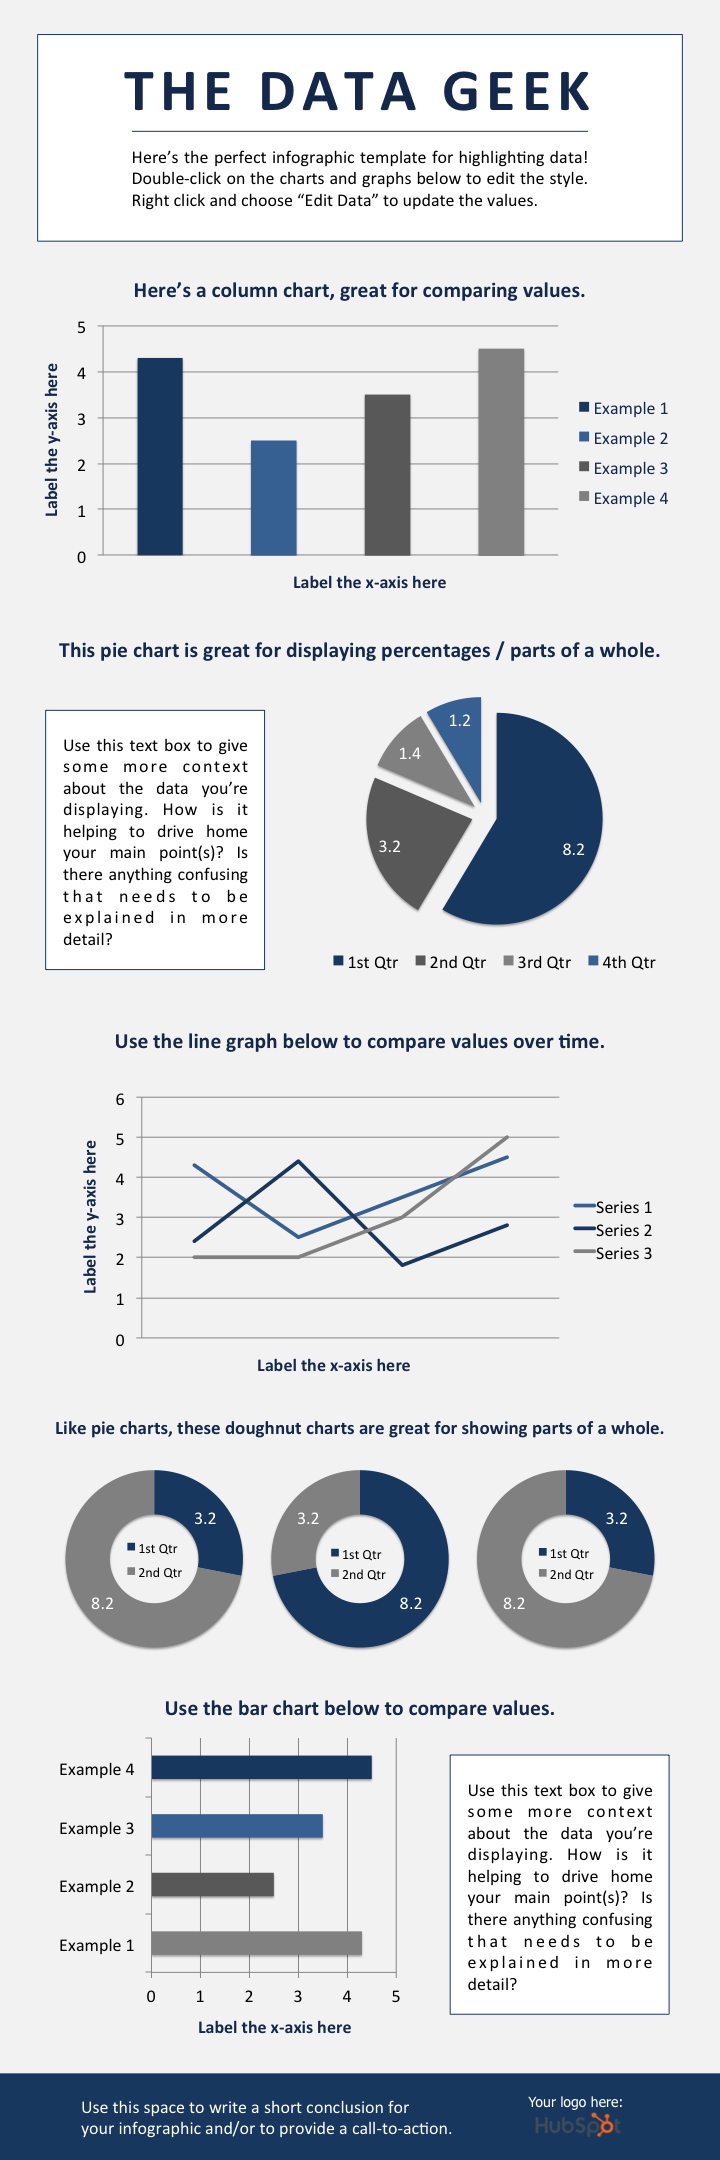
We’ve loaded this template with a variety of different charts and graphs, which you can easily update with your own data. (Just right click on a graph, choose “Edit Data,” and you’ll be able to customize the values in an Excel spreadsheet.)
Not sure which types of graphs to use for your different data sets? Here are some best practices to keep in mind:
- Column chart: Use for comparing different categories or for showing changes over time (from left to right).
- Pie chart: Use for making part-to-whole comparisons. (Note: They work best with small data sets.)
- Line graph: Use for showing data that changes continuously over time. Ideal for displaying volatility, trends, acceleration, or deceleration.
- Doughnut chart: Use like a pie chart. This stylistic variation allows you to put a number, graphic, or other visual in the center of the chart.
- Bar chart: Use like a column chart. (The horizontal bars make it easier to display long category names.)
2. How to Make a Timeline Infographic
Telling the history of a particular industry, product, brand, trend, or tactic can be a great topic for an infographic. And while there are a variety of different ways that you can visualize time — including in a circle, which is what we did with our Google algorithm updates infographic — the timeline is by far the most common and easiest design method to use.
Before we describe how to create a timeline via our timeline infographic template, find out below how to design a timeline from scratch using PowerPoint.
How to Make a Timeline in PowerPoint
- Select “SmartArt” from the PowerPoint navigation bar.
- Find a graphic that fits your data from the Process menu.
- Or, select “Alternating Picture Circles” from the Picture menu.
- Add or remove timestamps from your timeline graphic.
- Insert your data into the graphic.
- Edit the text and imagery of your SmartArt graphic.
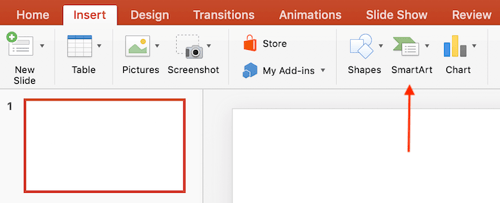
1. Select “SmartArt” from the PowerPoint navigation bar.
To make a timeline graphic in PowerPoint, suitable for any infographic, open PowerPoint and click “Insert” from the top navigation bar, as shown below. Then, select the SmartArt icon beneath the navigation bar, where you’ll find several categories of graphics to choose from.
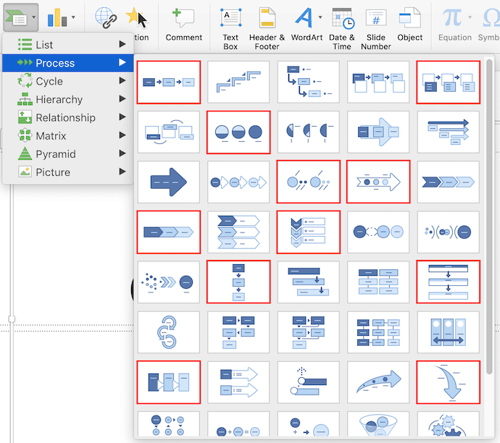
2. Find a graphic that fits your data from the Process menu.
There are two categories of graphics that make effective timelines. The first is the Process category. Click this option to expand the graphics menu shown below. To make your selection easier, we’ve highlighted in red a few of the most fitting timeline-related graphics.
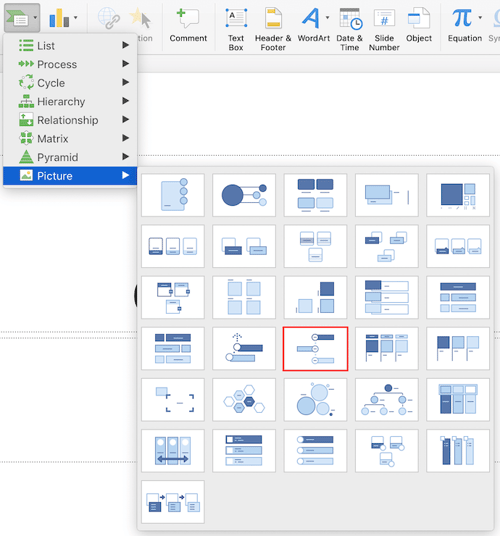
3. Or, select “Alternating Picture Circles” from the Picture menu.
Aside from the Process menu of graphics, you’ll also find a viable timeline graphic in the Picture category. Select this category and you’ll find the “Alternating Picture Circles” option near the center of the graphics menu. We’ve highlighted it in red, below.
4. Add or remove timestamps from your timeline graphic.
For the sake of these instructions, we’ll use the “Alternating Picture Circles” graphic from the Picture menu. Once you’ve inserted this graphic into your first PowerPoint slide, you can add or remove circular icons to match how many dates or periods of time your data covers.

5. Insert your data into the graphic.
At this point, the size of your timeline graphic should match the amount of data you have. Begin to fill your timeline with the information you plan to report on using this timeline.
6. Edit the text and imagery of your SmartArt graphic.
As with the other graphics available in PowerPoint’s SmartArt, you can edit the text and the images associated with your timeline to your liking. As you can see below, we’ve edited the years and the images to better represent what happened at each point in time.
To insert images into your timeline graphic, simply right-click the square landscape icon, select a graphic “From File,” and upload an image from your computer onto your PowerPoint slide.
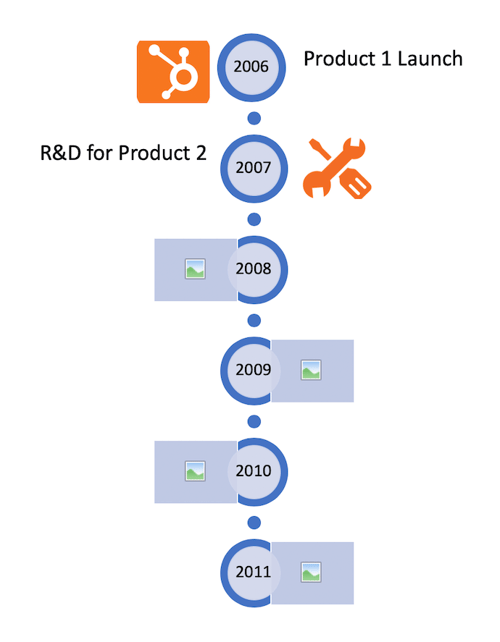
Of course, if you’re willing to give up a tiny bit of creative freedom for a ton of convenience, you can download the timeline infographic template below — which opens directly in PowerPoint.
To tell your story with our timeline infographic template below, update the time periods in the center circles, replace the placeholder text, and adjust the visuals and colors to your liking. For those latter adjustments, you can choose “Insert” > “Shape in PowerPoint” to add in different visuals, and use the paint bucket (a.k.a. “color fill”) icon to change the colors of different elements.

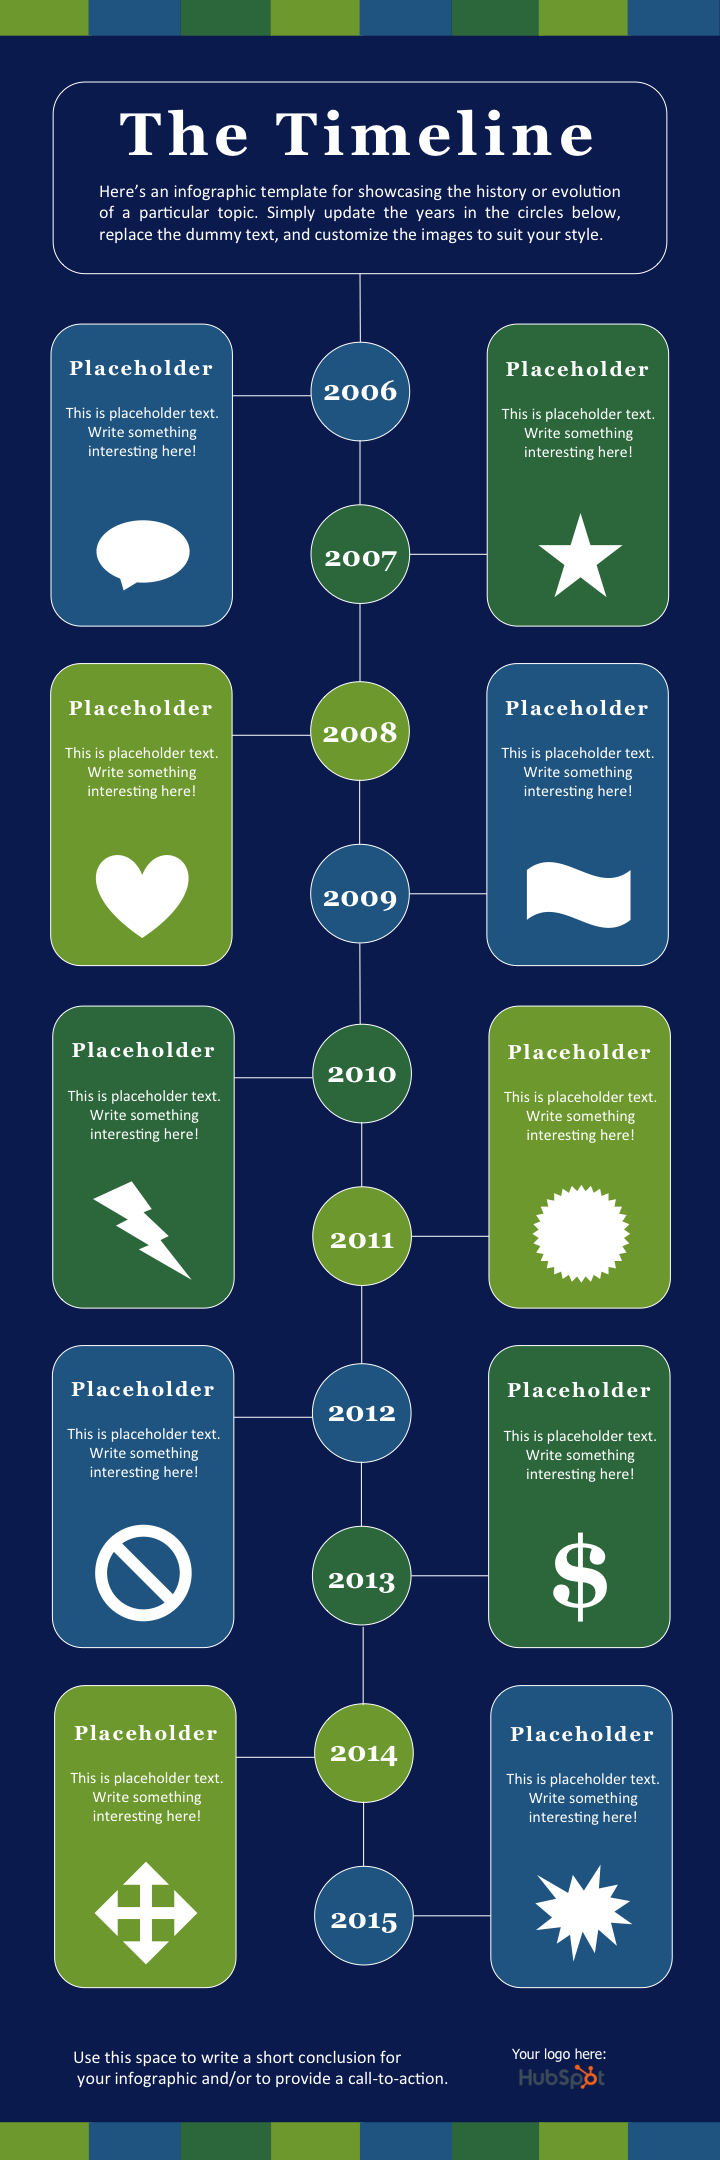
Want to make sure your timeline infographic hits all the right notes? Here are some tips to consider:
- Research. Research. Research. The best timeline infographics aren’t just beautifully designed — they also tell a great story based on extensive research. So before you start the design phase of your infographic, put in the time to surface the best information possible.
- Narrow the scope: Timelines that cover hundreds or thousands of years can certainly be interesting, but they can also require weeks or months of research. To keep your sanity, stick with shorter time periods.
- Keep your copy concise: Infographics are supposed to be visual. If you find yourself writing 100+ words for each date on your timeline, a blog post may be the better content format.
3. How to Design a Totally Hip Infographic
Ok, so “hipness” is definitely in the eye of the beholder. But for this infographic template we wanted to do something that reflected modern design trends, including using banners and arrows.
In terms of content, we provided plenty of space for both stats and copy. There’s also a column chart at the bottom. But remember, you can always add different charts and graphs to the template wherever you see fit. Just select “Insert” > “Chart …” and you’ll have several options to choose from.

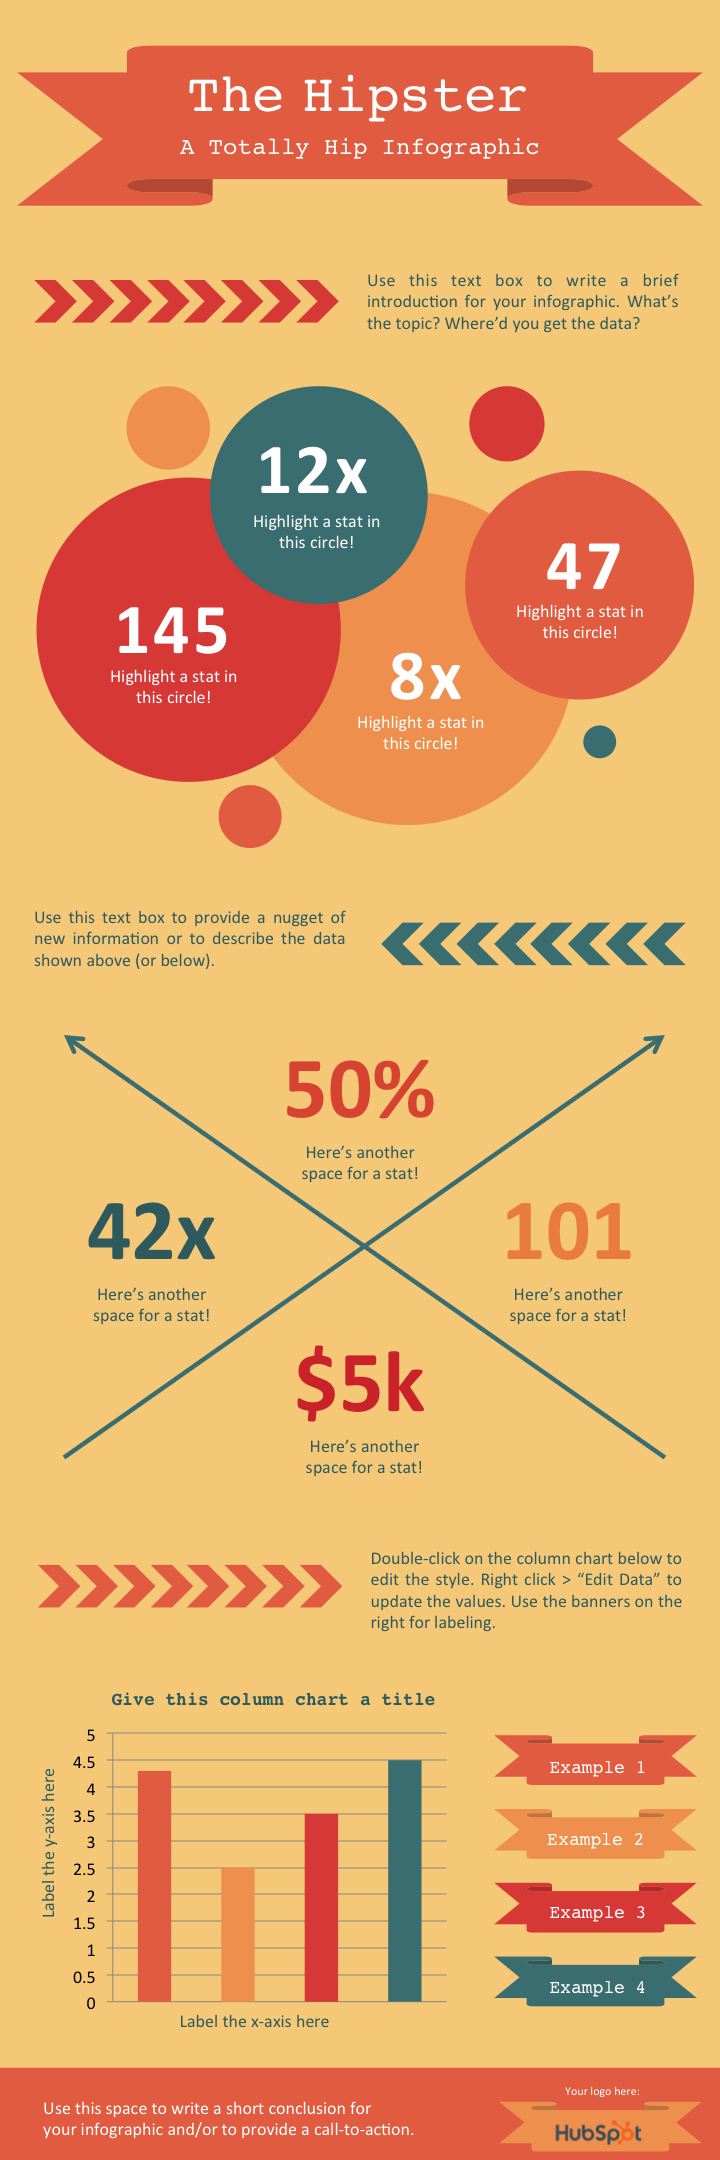
To make sure your end result is as hip as possible, here are some design tips to follow:
- Experiment with new color palettes. There are tons of free color palettes online. Don’t believe me? Do a Google image search of “color palette.” When you find a palette you like, drag the image directly into your PowerPoint presentation. Next, select the “color fill” bucket, choose “More Colors …” and click on the eyedropper icon. With the eyedropper tool, you can select colors from your palette and use them for elements in your infographic.
- Take the time to manipulate shapes. PowerPoint has an extensive library of shapes — including banners, ribbons, and arrows — that you can use in your infographic design. By clicking and dragging on the little yellow diamonds that appear on these shapes, you can customize them. For example, you can make the pointy ends of a ribbon longer or shorter, or make the body of an arrow thinner or thicker.
4. How to Create a Flowchart Infographic
Warning: Creating a flowchart-style infographic is not for the faint of heart.
While on the surface a flowchart infographic may appear simple and fun, a lot of thought and planning need to go into making sure the different sections flow into each other in a logical way.
In our flowchart PowerPoint template, we created a basic flowchart structure, with positive responses guiding viewers to a conclusion at the bottom left of the infographic and negative responses guiding viewers to a separate conclusion at the bottom right of the infographic.

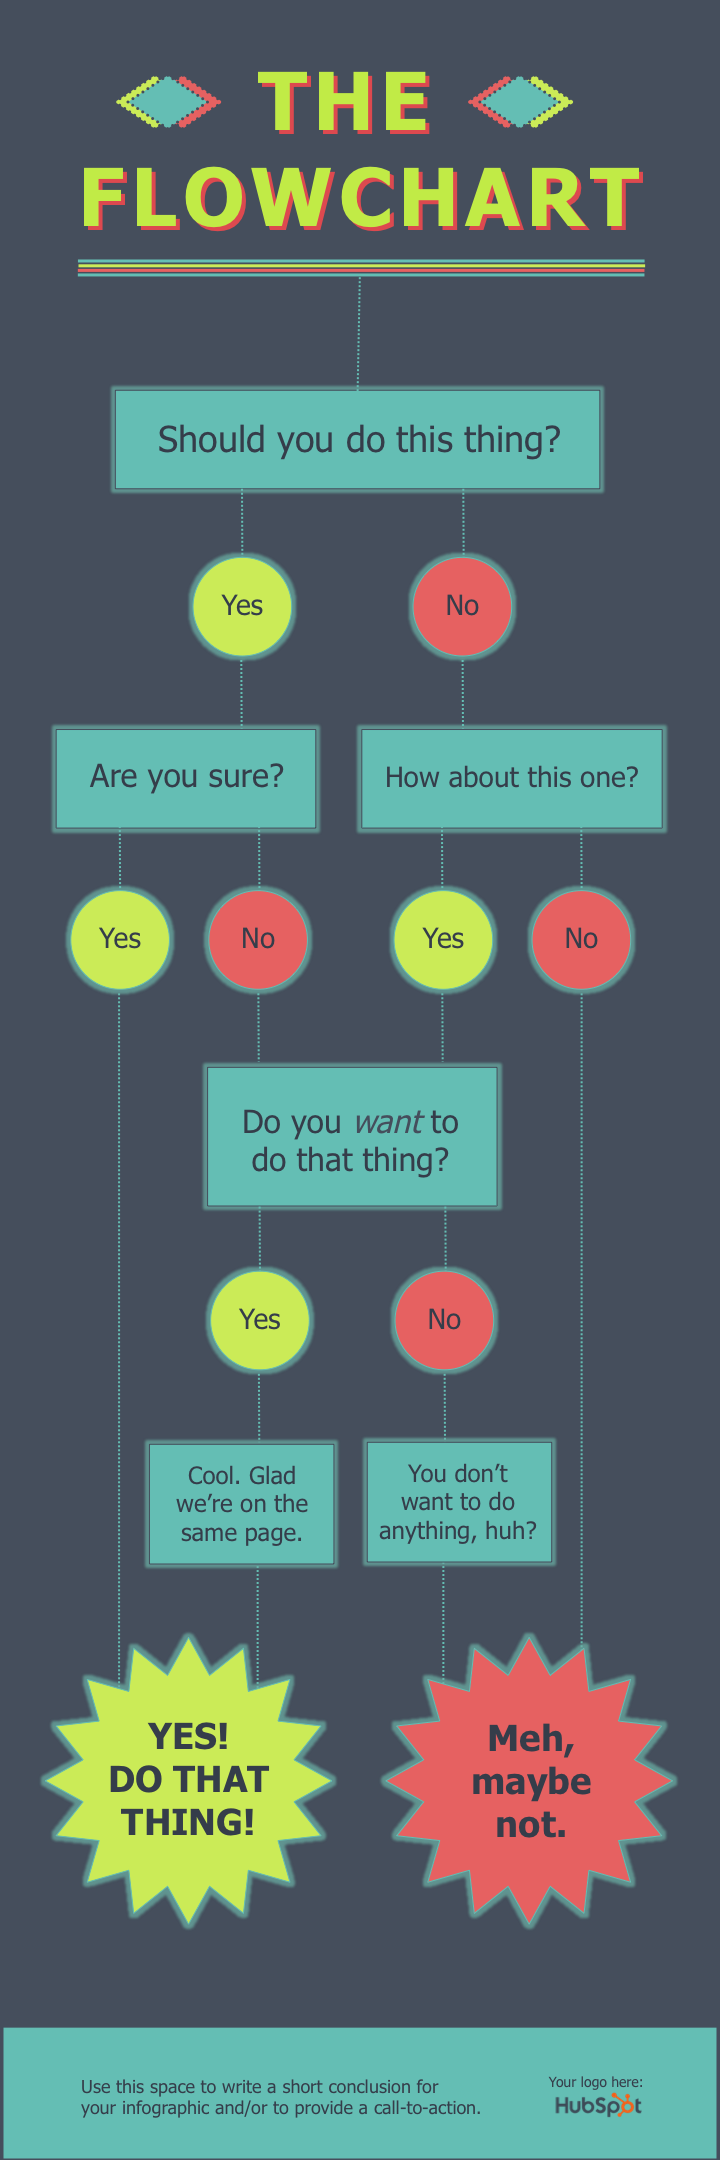
To ensure your flowchart infographic makes sense and is easy for viewers to navigate, follow these tips:
- Draw out the branches beforehand. Before you dive into PowerPoint, get out a pen and paper and do a rough outline of your flowchart. Test for weaknesses in your logic by answering questions in every possible combination and seeing where you end up. For best results, have a friend or coworker run through the flowchart too.
- The smaller the scope, the easier the execution. The more questions or stages you add to your flowchart, the more difficult it will be to create (and the harder it will likely be for viewers to understand). So try to narrow the focus of your flowchart.
5. How to Design an Image-Heavy Infographic
So far, the infographic templates we’ve looked at have relied primarily on illustrations that you can create within PowerPoint. But of course, there’s no reason why you can’t bring external photos and other images into your infographic design.
We’ve created this image-heavy infographic template for that exact purpose. It’s great for comparing different categories, ideas, or results, and since you don’t need to create or customize a lot of shapes, it’s a lot less work.

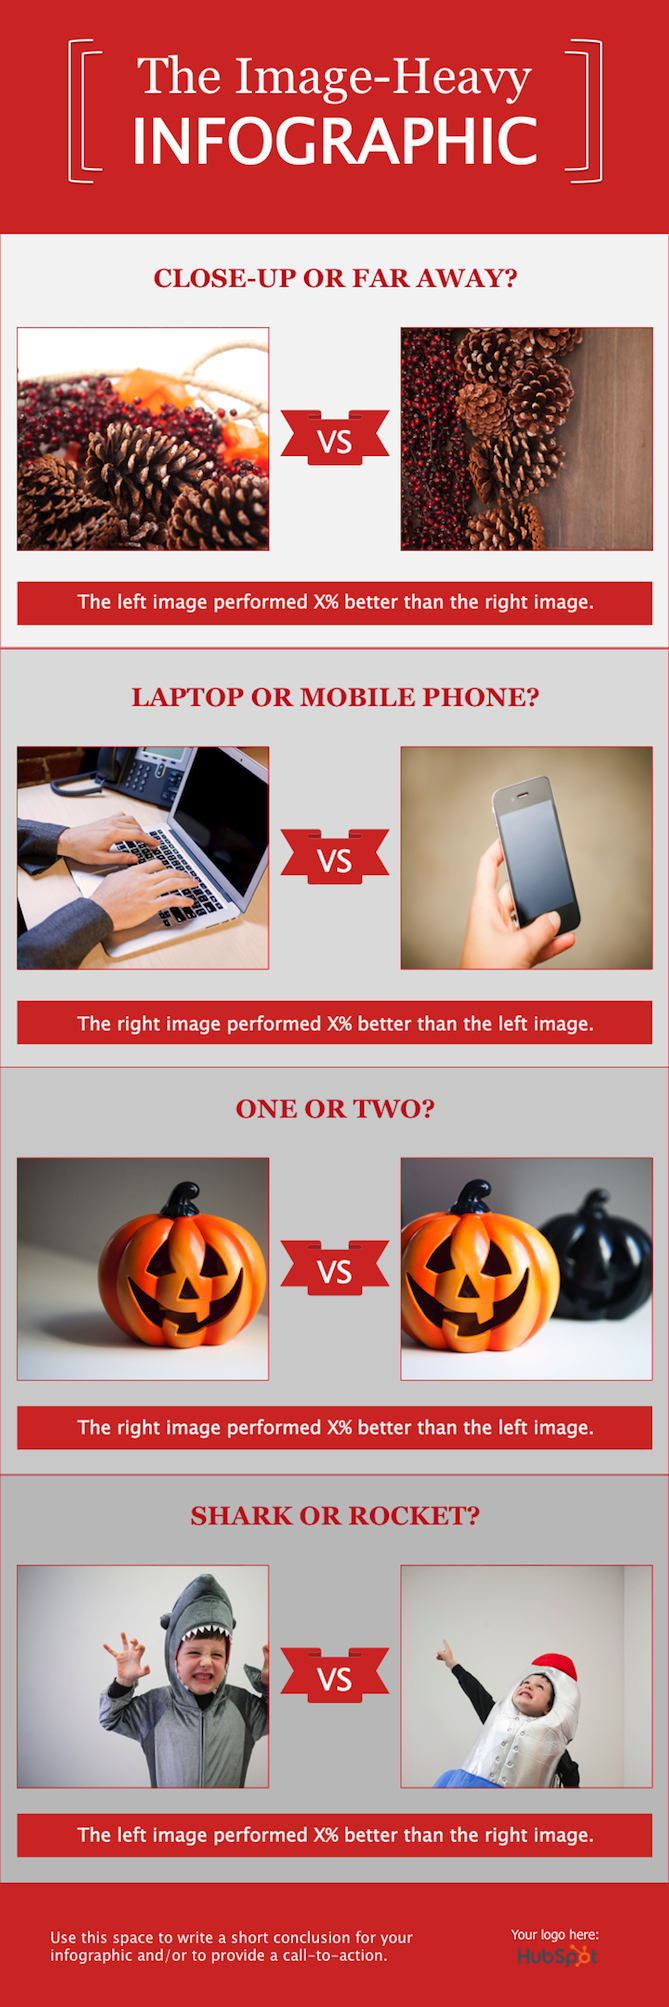
Here are some suggestions for ensuring your image-heavy infographic is easy on the eyes:
- Use high-quality images. It’s better to scale down a big image (e.g. 2,000 pixels by 2,000 pixels) than to scale up a small image (e.g. 20 pixels by 20 pixels) in order to fit a particular space. The latter approach will result in images appearing pixelated and grainy.
- Use borders. Adding borders to your images will help make them feel like their part of a cohesive design. In PowerPoint, you can control the size, style, and color of borders under the “Format Picture” tab.
- Save your infographic as a PNG file. This is a best practice for all infographics, but is particularly relevant when publishing an infographic that contains photographs. The PNG extension offers better quality than other options. To save your finished infographic as a PNG file, you simply need to choose “File” > “Save As …” and select PNG from the dropdown.
What are you waiting for? Grab your free infographic templates so you can start customizing fantastic-looking infographics of your own!
Want to learn more about infographics? Check out 10 Traits of Amazingly Awesome Infographics.

9 Important Elements to Include in Your Employee Handbook
An employee handbook is a critical document for setting clear expectations for new employees, providing policies for all employees to follow, and making it easier for you know how to deal with problems with your employees when they arise.
Among other things, your employee handbook should cover everything from dress code and vacation days to your code of conduct and nondiscrimination policies.
Additionally, it should set the tone for what it’s like to work at your company — your employee handbook isn’t just a list of “what not to do”. It’s also a chance to express your company mission statement, and workplace culture.
For instance, maybe you want to allow for casual dress Friday’s, to provide your employees the opportunity to feel more comfortable before the weekend. This is an exciting employee benefit, and one you should clearly outline.
Here, we’ll cover the nine elements you must include in your employee handbook in an employee handbook template, and provide a sample employee handbook for further inspiration.
Employee Handbook Template
To know what to include in your employee handbook, take a look at our template.
Employee Handbook for [Company Name]
Introduction to company & values.
Here, you’ll want to describe your company’s history, including when you were founded, by whom, and why. Additionally, you’ll want to briefly include your company mission statement, and add some insight into your company culture. What do you prioritize in the workplace? Autonomy, continuous education? Include that here. Essentially, give your new employee the elevator speech of why your company matters, and why they should be excited to be apart of it.
Code of conduct
In this section, you need to give your employees a general overview of information regarding ethics and compliance. Ultimately, a code of conduct allows you to emphasize your company’s values, and the desired behavior you wish to foster in your leaders and employees. These rules can allow you to fairly regulate and assess an individual’s behavior.
You’ll want to include as many specific details as possible — for instance, let employees know your definition of excessive tardiness, and how tardiness will be disciplined. Alternatively, you might include specific dress code requirements in this section.
Additionally, your code of conduct section will be a reference point for employees when they’re dealing with difficult ethical dilemmas in their day-to-day. It’s a section that tells them what your company values and considers right from wrong, along with resources for employees when they encounter ethical predicaments.
Equal employment and nondiscrimination policy
The U.S. Department of Labor requires many businesses to include an equal employment and nondiscrimination policy in their employee handbook. Plus, you want each employee to know that discrimination or harassment of any kind won’t be tolerated in your workplace. Even just one instance of discrimination can create toxicity for an entire company’s culture.
Computers and technology policy
You’ll need to make clear what your employees can and can’t do with the technology you provide them. Among other things, let employees know whether you have the right to see emails they send on company computers, whether you expect them to avoid social media while on their work computer, and how much privacy they should expect while using company property.
Additionally, you’ll want to inform your employees whether certain actions on company technology are fireable offenses.
Compensation and benefits policy
Simply put, your employees want to know about their benefits regarding health care, dental, vision, life insurance, stocks, etc. In this section you can also let them know about benefits such as tuition reimbursement, commuter benefits, parking, employee referral bonuses, and 401(k) plans.
You’ll also want to include critical information regarding salary, payroll deductions, and compensation increases for specific job descriptions to convey how each employee can advance their income. Additionally, you’ll want to document the payment schedule for each employee (weekly or bi-monthly).
New hire and separation policy
Let your new employees know whether they need to wait to receive their benefits (and how long), what steps need to be taken if an employee wants to quit, and information regarding your progressive discipline policy. By outlining the steps you take for discipline, you’re ensuring a level of fairness and establishing prohibited behavior.
You’ll also want to outline what an employee is entitled to if they are terminated, and for how long they can expect certain benefits.
Leave policy
It’s critical you outline how much paid and unpaid vacation time each employee gets, as well as how much time they get for medical leave and paid family leave, as well as sick time. Some of these policies, such as family medical leave, are enforced by the U.S. Department of Labor, so you’ll often need to comply by the same standards as other businesses in your state.
Non-disclosure Agreement and Confidentiality policy
To ensure your employees don’t misuse confidential information either regarding your internal operations or your clients, it’s critical you outline what you constitute as confidential information. Your business is bound by law to protect certain information, and you’ll want to make a list and ensure your employees are aware of what information they can and can’t share. Among other things, this likely includes your company’s internal business plan, your client’s information, and employees’ financial account information.
Signature page
A signature page is important for two reasons — first, it confirms the employee received the handbook, and incentivizes each employee to read it through before signing. Second, if you’re ever dealing with a wrongful termination lawsuit, it could help with your defense.
Sample Employee Handbook
While your employee handbook will be undoubtedly unique and particular to your culture and company values, we’ve created a sample employee handbook to help get you started.
However, many of these sections are too personal and legally sensitive to include in a sample. For instance, when writing a non-disclosure agreement, you’ll need to review state and federal laws and will need the guidance of a lawyer.
Employee Handbook for Healthy Tea & Co.
Introduction to company & values.
Welcome to Healthy Tea & Co.!
Started in 2011, Healthy Tea & Co. aims to create healthy, organic tea and drink products and market them to people who want to live healthier lives. Founded by Hannah Jones and Mark Pluto, we pride ourselves on being a workplace that focuses on employee happiness and autonomy, diversity and inclusion, and helps our customers find products on the shelves that are both delicious and nutritious.
What is important to know when joining our team at Healthy Tea & Co.?
We value independence and autonomy, and for that reason, we allow our employees to work either in-office or remotely.
We like to have fun, which is why we have casual-dress Friday’s, ping pong tables, and monthly team outings.
We encourage continuous learning and want our employees to seek out growth opportunities, so we offer employee-taught trainings on a variety of topics, tuition reimbursement, and a free book program.
Ultimately, as an employee at Healthy Tea & Co., we expect you to remain honest and trustworthy with your team, willing to think outside the box, and excited to experiment and ask questions about our products and our systems, because we as a company value growth and innovation.
[Code of conduct would go here]
Compensation and benefits policy
The amount of compensation you will receive is provided in your offer letter.
In addition, Healthy Tea & Co. must deduct specific amounts from your paycheck. These mandatory deductions (required by federal law) include:
● Social security (pre-tax)
● Medicare (pre-tax)
● Federal withholding taxes (pre-tax)
● State withholding taxes (pre-tax)
Health & Wellness Benefits include:
[Medical, Dental, and Vision Insurance would go here, as well as Life Insurance, Dependent care, Healthcare Spending Account, Accident Insurance, etc.]
Leave policy
At Healthy Tea & Co., our vacation policy for PTO entails the following:
0-2 years tenure = 15 days
2-5 years tenure = 20 days
6+ years tenure = 30 days
Additionally, in compliance with state laws, we offer 5 sick days, which can be used for personal illness or to take care of a sick family member.
In the U.S., we observe the following holidays:
- New Year’s Day
- Martin Luther King Jr. Day
- Presidents Day
- Patriots Day
- Labor Day
- Thanksgiving Day
- Christmas Day
[Financial benefits, such as 401(k) or employee referral bonus, would go here]
[Equal employment and nondiscrimination policy would go here]
[Computers and technology policy]
[Anti-discrimination policy would go here]
I have read all of the provisions of this agreement and I understand, and agree to, each of such provisions, effective as of the date first entered above.
________________ (sign here)
________________ (date)
Code of Conduct Samples
To ensure you have all the inspiration you need to create your own code of conduct section in your employee handbook, take a look at some of these inspiring company code of conducts’:
- Google’s Code of Conduct
- Coca-Cola’s Code of Conduct
- Starbucks’ Code of Conduct
- Facebook’s Code of Conduct
- Toyota’s Code of Conduct

Turnover Rate: What It Is & How to Calculate It
Seeing your employees leave for new opportunities can be a bittersweet experience. At first, you’re sad to see them go, especially if you’ve developed a close bond with them. But you also know that they’re moving onto bigger and better things — and you’re excited for them
However, if employee departure starts to become a regular occurrence at your company, the feeling should become more bitter than sweet, and eventually turn into concern.
Having a high turnover rate means your culture might be toxic, or your employees don’t feel fulfilled working at your company. Constantly replacing employees can also skyrocket costs and plummet productivity — if your company is a revolving door, you not only have to spend money recruiting and interviewing candidates, but you also have to train new hires who need a significant amount of time to be able to tackle a full workload.
Fortunately, there’s a way to determine if your turnover rate and, in turn, your company culture is healthy. Read on to learn how to do it.
How to Calculate Turnover Rate
- Pick a period of time that you want to measure your employee turnover rate over.
- Add the number of your employees at the beginning of the time period to the number of your employees at the end of the time period. Then, divide that number by two. This quotient will be your average number of employees.
- Divide the number of employees who left during this time period by your average number of employees.
- Multiply this quotient by 100 to calculate your turnover rate.
To help you calculate your own turnover rate, let’s run through a quick example.
Employees at beginning of the year: 500
Employees at the end of the year: 600
Average number of employees: (500+600)/2 = 550
Number of employees who left this year: 40
Turnover rate: 40/550 = 7.27%
What is a high turnover rate?
A “high” turnover rate is a completely subjective measure. Turnover rates vary wildly across different industries, so it’s impossible to use a one-size-fits-all percentage to determine if your company has a high turnover rate. To accurately gauge the severity of your turnover rate, compare your percentage to companies within your industry.
If you want to see the average turnover rate of your industry, LinkedIn analyzed their network of 500 million professionals to compile a report of the industries with the highest turnover rate in 2017. Below, we listed the 10 industries that experienced the highest turnover last year.
Average Turnover Rate By Industry
| Technology (Software) | 13.4% |
| Retail & Consumer Products | 13.0% |
| Media & Entertainment | 11.4% |
| Professional Services | 11.4% |
| Government/Education/Non-Profit | 11.2% |
| Financial Services & Insurance | 10.8% |
| Telecommunications | 10.8% |
| Oil & Energy | 9.7% |
| Aero/Auto/Transport | 9.6% |
| Healthcare & Pharmaceutical | 9.4% |
Remember, the severity of your company’s turnover rate completely depends on your industry. So to accurately gauge the health of your company’s turnover rate and culture, make sure to reference this blog post or keep an eye out for LinkedIn’s industry turnover analysis each year.

The Ultimate Guide to Cryptocurrency
When I first heard of cryptocurrency, I thought it was similar to PayPal or Venmo … a simple, digital exchange of money. You can imagine my surprise when I learned that cryptocurrency wasn’t only a digital exchange, but an exchange of a completely new currency.
I could hardly wrap my mind around it. I was this emoji personified: 🤯.
How could a brand new (albeit invisible) currency work? What could you buy? Did people actually accept it? What stopped people from not believing in it?
I had lots of questions … and I still do. Cryptocurrency is a complex, ever-changing topic that affects consumers, investors, and business owners alike. Below, we tackle some of those questions and highlight the most important aspects of cryptocurrency. By the end, you should have enough of an understanding to chime into those dinner party conversations with a fact or two.
Bitcoin was the first cryptocurrency. Since its conception in 2009, which occurred in response to the banking crisis and housing market crash, hundreds of other cryptocurrencies have been created … and have failed.
Your Cryptocurrency Dictionary
Before we dive into the world of cryptocurrency, let’s review a few key terms frequently used in this guide and when discussing the concept.
Altcoins
Altcoins is slang for “alternative coins.” Altcoins refer to every other cryptocurrency besides Bitcoin.
Blockchain
All cryptocurrency transactions are recorded on the blockchain, a public record used to verify digital currency transactions and prevent scams. Transactions are recorded on blocks, and a new block is added to the chain roughly every 10 minutes. We explain blockchain further in the video below.
Cryptography
Cryptography refers to the act of writing in or deciphering a code. Cryptography (where we get the “crypto” in cryptocurrency) is a type of mathematics that creates secure transactions and online environments, i.e. “encrypted” accounts or currency.
Fiat
Fiat currency is paper money like the US dollar or Euro.
Mining
Cryptocurrency mining is a proof-of-work (PoW) system where miners solve math problems to validate every cryptocurrency transaction. These minters get cryptocurrency in exchange for their time and resources. These complicated mathematical calculations also increase the security, transparency, and value of cryptocurrency. Mining is only one way — the hardest way — to obtain cryptocurrency. The reward for solving these math problems varies per currency but is more profitable than any other method (besides an outright purchase).
Nodes
Nodes are computers that are part of the global cryptocurrency blockchain network. They serve to verify transactions recorded on the blockchain. Even if one node attempted to validate an incorrect transaction, the transaction wouldn’t go through as they require multiple validations (and that node would be disconnected) … making cryptocurrency a virtually incorruptible network.
Private Key
A private key is a secure “password” that gives cryptocurrency owners access to their wallets. Each wallet has its own private key, and without it, users couldn’t access their coins.
Public Address
A public address is similar to an email or physical house address. (It looks like this: 1GV5Vye4LCfpkM9V5oFSQsZk8kq2vBxvCK.) To send cryptocurrency, you simply need the recipient’s public address. It’s the only public-facing piece of data on the blockchain, and each transaction uses a unique address.
Benefits and Drawbacks of Cryptocurrency by Feature
Both support and speculation exist in the world of cryptocurrency. Some hate it, some love it, and most are confused by it. It’s a brand new concept that sparks a whole barrage of questions and concerns.
Below, we explain the core features of cryptocurrency and the positive and negative perspective of each.
Feature |
Benefits |
Drawbacks
|
| Security | Cryptocurrency transactions are secure and private, creating valuable anonymity despite their very public (yet non-identifying) validation method on the blockchain. | Security, privacy, and anonymity make it easy to use cryptocurrency for less-than-legal purposes. |
| Affordability | Cryptocurrency has low transaction costs and in-between fees you might find at banks or payment gateways. | Cryptocurrency isn’t accepted by everyone, which could cancel out its affordability altogether. |
| Volatility | The volatility of cryptocurrency can yield a high-reward (high-risk) investment. | Due to its volatility, cryptocurrency turns many people off from investing … which could lower its value over time. |
| Decentralization | Cryptocurrency isn’t regulated or valued by a financial institution or central government, which eliminates the middleman, a penchant for corruption, and creates a truly global currency. It’s monitored by a peer-to-peer internet protocol. | Many people relate cryptocurrency to the Silk Road … such a decentralized, deregulated asset couldbe used for both legal and illegal purposes. There’s also no way to recover lost coin. |
| Digitalization | Cryptocurrency doesn’t deal in physical coin or paper money, leaving little room for loss, theft, or misuse. | Cryptocurrency is purely digital, and you can’t recover lost coin or repeal validated transactions. The “invisibility” of cryptocurrency can also make it hard to trust. |
| Inflation |
Cryptocurrency isn’t inflationary — there’s a set amount that can be mined and circulated. |
Cryptocurrency will likely never become a central currency because of its non-inflationary, inflexible elements. |
| Creation | Cryptocurrency is released through mining, which anyone can do with the proper resources — a computer and internet. | Cryptocurrency mining consumes a ton of energy and resources.. (In fact, miners are on track to use more energy than Argentina.) |
How is Cryptocurrency Created?
Cryptocurrency is released into the economy through the process of mining, as we defined above. But how do these digital coins become a legitimate currency in the first place?
Cryptocurrency creation depends on three main things:
- A community of people who believe in the purpose of the coin and network … and who will eventually mine and evangelize it
- A code to create and encrypt the software and blockchain network on which the currency will operate (which is relatively easy as most cryptocurrencies are based on the open source code of Bitcoin available on Github)
- The confidence of merchants to value and do business with the currency, further building trust among consumers, investors, and the general public
There’s obviously a lot more that goes into creating a cryptocurrency, but these are the main three elements that lead to its legitimacy and acceptance. Third parties like WalletBuilders also offer to create cryptocurrency for you.
Creating Your Own Cryptocurrency
Nowadays, a lot of businesses are creating their own cryptocurrencies — through a crowdfunding process known as an initial coin offering (ICO). ICOs are when startups raise money by creating their own digital token that can be spent on current or future products or services.
Companies who participate in ICOs exchange their token for established cryptocurrencies like Bitcoin. Some ICO investors keep their tokens for future use or trade them on cryptocurrency exchanges as they would stock.
To learn more about creating or investing in an IPO, check out our guide here.
Types of Cryptocurrency
As of today, there are over 2,500 active cryptocurrencies, most of which serve as more than a simple payment system. Below we’ll review a four of the most popular, listed from oldest to newest.
1. Bitcoin
Bitcoin (BTC) is the first and most famous cryptocurrency. It’s been around for almost 10 years and has been hailed as the “digital gold” of the industry.
Today, 1 BTC is equal to $4,087.63 USD. There are currently 17,433,962 BTC in circulation, and the max supply is 21 million BTC.
Psst. Read more about Bitcoin in our ultimate guide here.
2. Litecoin
Created in 2011, Litecoin (LTC) was introduced as the “silver” to Bitcoin’s “gold.” It was intended to be used as a lighter, more nimble currency for everyday transactions. Litecoin is a replica of Bitcoin, just on a much smaller scale — it’s faster to mine, holds a smaller value, has a greater market cap, and operates on a much more flexible algorithm.
Today, 1 LTC is equal to $32.42 USD. There are currently 59,665,588 LTC in circulation, and the max supply is 84 million LTC.
3. XRP by Ripple
XRP is the cryptocurrency released by Ripple. Founded in 2012, Ripple was formed to expedite and improve cross-border payment transfers and the global payments system as a whole. The company itself is more of a network to process IOUs, and XRP serves as a currency transfer tool and token against spam — the currency itself holds no real value ( meaning you can’t buy anything with it).
Ripple designed XRP to function on a unique blockchain that validates its transactions over 200 times faster than Bitcoin. XRP also requires no mining — the only way to attain the currency is to purchase it on a cryptocurrency exchange.
Today, 1 XRP is equal to $0.370595 USD. There are currently 40,762,365,544 XRP in circulation, and the max supply is 100 billion XRP.
4. Ether by Ethereum
The Ethereum network hosts both a decentralized computer system and payment system, through its main token, Ether (ETH), along with a handful of others. Ether can be traded as a cryptocurrency, but it’s more commonly used to pay for transaction fees and services on the Ethereum network.
Launched in 2015, Ethereum uses blockchain to replace centralized computing systems (like Google, Apple, and Amazon) that regulate, censor, and control user data on their applications. A decentralized network gives power back to the users and removes the security risk of a centralized system. Along with payment transactions, Ethereum also processes and validates programs and contracts, such as insurance payouts. Ethereum’s average block mining time is 12 seconds.
Today, 1 ETH is equal to $117.59 USD. There are currently 103,925,546 ETH in circulation, with no set limit on its total coin supply.
Other top cryptocurrencies include Bitcoin Cash (price: $207.34 USD), EOS (price: $2.66 USD), Stellar (price: $0.124446 USD), and Tether (price: $1.02 USD).
How to Get and Store Cryptocurrency
Cryptocurrency can either be earned or purchased. You can earn cryptocurrency, by mining it or completing tasks in exchange for it.
You can purchase cryptocurrency in a few different ways. For one, you can invest in an ICO (as we explained above). You can also purchase cryptocurrency from another individual through sites like LocalBitcoins.
The easiest (and arguably most secure) way to buy cryptocurrency, though, is on an exchange like Coinbase or GDAX. Cryptocurrency exchanges simply require fiat money to make the purchase, typically from a debit card. You can also seek out a Bitcoin ATM, which operates just like your typical bank ATM.
So, what do you do with your cryptocurrency after you earn or purchase it?
Well, all cryptocurrency technically lives on the blockchain. But individual owners keep track of and manage their cryptocurrency through wallets.
Your wallet stores your private key and public address. Without your private key, you cannot access or verify purchase of your cryptocurrency, so it’s essentially the most valuable piece of your cryptocurrency ownership.
The most popular type of wallet is a software wallet like Coinspace (which also serves as an exchange). You could also use a desktop or paper wallet, which we explain further in our guide to Bitcoin here.
Note: Cryptocurrency is a largely unregulated and tumultuous market, and it’s notorious for scams. That being said, we highly recommend doing plenty of research before investing in any cryptocurrencies.
Cryptocurrency Resources
This guide simply scratches the surface of the cryptocurrency world. If you want to learn more about mining, purchasing, or investing in cryptocurrency, check out the resources below:
- Coindesk, a trusted news outlet on cryptocurrencies
- Coinmarketcap, a live ledger of the current market value of cryptocurrencies
- The Cryptocurrency Reddit, an online forum discussing cryptocurrency news, trends, and analysis
- Online Cryptocurrency courses on Udemy and Coursera
Over to You
Between mining, blockchain, and wallets, there’s a lot that goes into cryptocurrency. It’s well-established in our economy, but it sure hasn’t triumphed every marketplace and merchant.
If anything, cryptocurrency is a sign of how advanced and open-minded our economy is. We’re willing to take new risks and try new things in order to businesses, bank accounts, and futures secure. Is cryptocurrency guaranteed? Absolutely not. But it might be something worth exploring you’re looking to spice up your portfolio or try something new.

The Social Media Content Calendar Template Every Marketer Needs [Free Template]
“We have a 9 a.m. meeting? Hold on — let me just click around the internet like a maniac to find something for the morning tweet.”
Sound familiar? Scrambling for social content is nothing new. We have meetings. We run late. Things come up. And it’s really hard to get any meaningful amount of work done when you have the next social media update looming over your head every 30, 60, or 90 minutes. It all moves so fast that you might periodically feel a case of the vapors coming on, which is why pre-scheduled social media content should be your new best friend.
To make social media content easier for companies to plan and schedule across the accounts they manage, we created a social media content calendar template. And recently, we updated to be better, faster, stronger, and just generally prettier.
You can fill it in at the same day and time every single week to prep for the following week’s social media content. That means when you burst through the office doors at 9 a.m., you won’t be in panic mode looking for something to push out to your Facebook fans — you already took care of that last week.
This blog post will walk you through exactly how to use the template to stay on top of your social media content planning for Facebook, Twitter, LinkedIn, Instagram, Pinterest, and Google+.
Note: HubSpot customers can also schedule content through Social Inbox, or use this spreadsheet to organize their content and subsequently upload it to Social Inbox. Detailed instructions for doing this exist in the cover sheet of the template.
How to Use the Social Media Calendar Template to Plan Your Content Schedule
When you open up the social media content calendar template, you’ll notice the bottom of the Excel spreadsheet has several different tabs, most of which are dedicated to a specific social network.

The reason you’ll want a different worksheet for every social network is simply that every social network is a little bit different. You can’t just craft one, single social media update and use it across LinkedIn, Facebook, Twitter, Instagram, Pinterest, and Google+. You can certainly promote the same piece of content across all six of those networks, but that doesn’t mean you’ll craft your update in the same way for every single one of them. (In fact, you may even want to add additional tabs if you’re active on other networks, like Quora or YouTube.)
This following sub-sections will walk you through how to fill out each of the four tabs you see in this template — the updates for Twitter, Facebook, LinkedIn, Instagram, Pinterest, and Google+. But before we get to that, let’s just walk through the “Monthly Planning Calendar” so you know what that’s for.
Monthly Social Media Schedule
The tab “Monthly Planning Calendar” provides an overall snapshot of your monthly social media campaigns. It’ll help you coordinate better with other stakeholders, not to mention keep all the moving parts straight in your own mind. Here’s what it looks like:
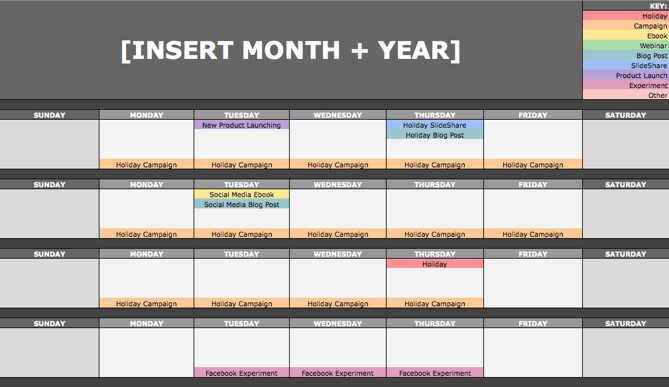
There are three sections to take note of when you edit this template for your own purposes. First, the color-coding key: These are the types of content or campaigns around which you might coordinate, like ebooks, webinars, blog posts, product launches, and so on. Though only some of these might be relevant to you, they’re there to indicate what you may want to put in there — so be sure to edit these categories to align with your own campaigns.
The other two sections you’ll need to edit are the Month and Year at the top of the calendar (duh), as well as the cells below each day of the week. In those cells, you should enter the type of content you’ll be promoting that day and color-code it to align with the campaign it’s supporting.
Instead of deleting all the content in this spreadsheet each month, I recommend copying this worksheet twelve times over, and creating a separate sheet for each month. (If that gets to be too overwhelming, you can always save those tabs as a separate file.)
Planning Your Twitter Content Calendar
Alright, now let’s get to the social media content. This section will be the lengthiest, because all subsequent sections will draw on the instructions we go through here. So if you read one section in this whole post, make it this one.
Let’s say you want to add some tweets to your scheduling template. Skip over to the “Twitter Updates” tab, where you’ll see this:
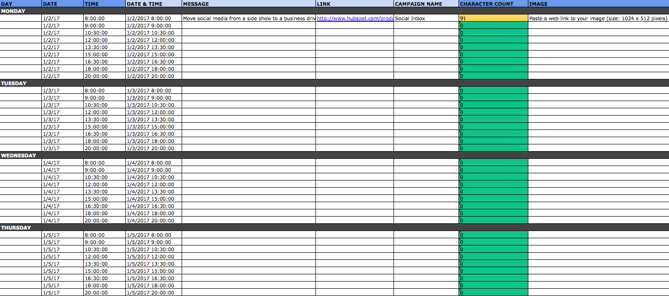
The first four columns, “Day,” “Date,” “Time,” and “Date & Time” are there for your convenience, and if you choose to use a third-party app for pre-scheduling your tweets (like HubSpot’s Social Inbox), then these columns will be useful. For now, just fill in the date on which you’d like your updates to publish to Twitter, and the time at which you’d like them to go out. The “Date & Time” column will automatically change based on what you input in the previous two columns.
Now, let’s move over to the “Message” column. Here, input the copy you’d like to appear in your tweet, bearing in mind you should cap it at 116 characters to allow enough room for a link, and at 115 characters to allow room for an image. (Read this blog post for a full character count guide.) This spreadsheet will auto-calculate the number of characters you’ve entered to keep you on-point, turning yellow when you’ve reached 95 characters, and red when you’ve reached 116 characters.
After you’ve composed your tweet, paste the URL you’d like to include in your tweet in the “Link” column. Be sure to include UTM parameters so you’ll know whether all of these tweets are actually driving traffic, leads, and customers. This is an important step to remember if you’d like to be able to demonstrate ROI from social. You can also use the “Campaign” column to add an associated campaign, which helps which more robust tracking and reporting.
Finally, in the “Image” column, attach the tweet’s image (if you have one). For Twitter, we recommend images that are 1024 x 512 pixels. (Click here for a full cheat sheet of social media image sizes.) If you’re having trouble attaching your image to the spreadsheet, follow these steps:
Step 1: Right-click the cell in which you’d like your image.
Step 2: Click “Hyperlink,” then click the “Document” button, and finally, click “Select” to choose your image.
Step 3: In the “Choose a File” window, select the image from your computer and click “Open.”
Step 4: You’ll now see the image attached to the “Insert Hyperlink” screen. Feel free to edit the “Display” text to change the file name, then click “OK.”
Note: This process is simply for organizational purposes. If you decide to upload the spreadsheet to your social media publishing software, it will not attach — you’ll have to do that with your marketing software. If you’re a HubSpot customer, details for how to bulk upload your Twitter content to Social Inbox can be found within the downloaded template.
Planning Your Facebook Content Calendar
Now, let’s talk about how to plan your Facebook marketing in advance with the template. Navigate on over to the tab in your template labeled “Facebook Updates.”
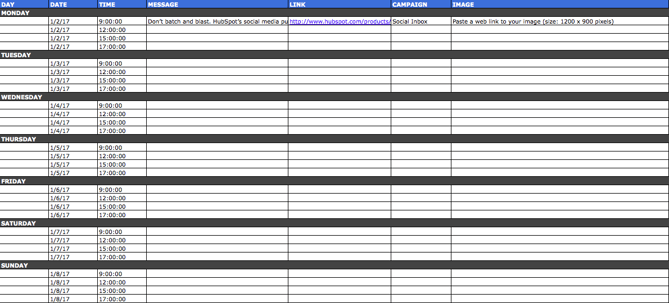
Facebook updates work similarly to Twitter updates, with the exception being bulk uploading your content is not possible in Social Inbox.
The first three columns, “Day,” “Date,” and “Time” are there for your convenience. Head on over to the column labeled “Message” and input the copy you’d like to appear in your status update, corresponding to the days and times you’d like those updates to run. Then, move to the “Link” column and input the link you’ll be, you know, linking to in the update. (Don’t forget that tracking token.) If you’d like the update to be tagged to a certain campaign, include this in the “Campaigns” column. Finally, attach an image just like you did with your Twitter updates — if you’re using one, we suggest you edit it to be 1200 x 900 pixels. (Click here for a full cheat sheet of social media image sizes.)
Planning Your LinkedIn Content Calendar
LinkedIn updates are the most unique, because you have both Company Pages and Groups to consider. To demonstrate the difference between Company Page updates and Group updates, let’s navigate over to the column labeled “Title (For Group Discussions Only).”
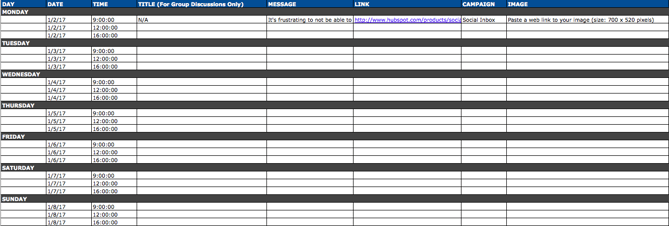
LinkedIn Groups let you post a few kinds of updates, one of which is called a “Discussion.” You will only fill out the “Title (For Group Discussions Only)” column if you’re looking to post a Discussion to your LinkedIn Group — because Discussions are the only update you’ll be posting that requires a title. If you’re not posting a Discussion to a LinkedIn Group, you don’t need to fill out this field, because your update will not have a title.
You’ll fill out the next column, “Message,” for every type of update you post, whether it’s for a Company Page or a Group. Simply input your copy into this column, and then navigate to the next two columns, “Link” and “Campaign” to input the URL to which you’re directing readers with the tracking token you’ll use to track activity, and the associated campaign if one exists. If you’d like to use an image for an update, attach it per the instructions laid out in the “Twitter” section. We recommend editing the image to 700 x 520 pixels.
Planning Your Instagram Posting Calendar
Now, let’s move on to how to set up your Instagram photos and videos in advance with the template. Navigate on over to the tab in your template labeled “Instagram Updates.”
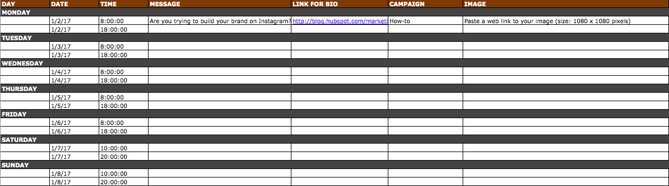
Instagram updates work similarly to Facebook updates, in that content can’t be uploaded in bulk to Social Inbox like it can with Twitter.
The first three columns, “Day,” “Date,” and “Time” are there for your convenience. Head on over to the column labeled “Message,” and input the copy you’d like to appear in your post’s caption, corresponding to the days and times you’d like those updates to run. Keep in mind that although Instagram captions can be up to 2,200 characters long, they cut off in users’ feeds after three lines of text. The exact length of these three lines depends on the length of your Instagram handle. (Read this blog post for a full character count guide.)
Next, move to the “Link for Bio” column and input whichever link you plan to put in the bio when you publish the accompanying Instagram post. (The reason you’d put a link in your bio and not the photo caption itself is because clickable URLs aren’t allowed anywhere except the single “website” box in your bio. See #13 in this blog post for more on how that works.) Oh, and don’t forget that tracking token.
If you’d like the update to be tagged to a certain campaign, include this in the “Campaigns” column. Finally, attach an image just like you did with your other social media updates — we suggest you edit it to be 1080 pixels x 1080 pixels. (Click here for a full cheat sheet of social media image sizes.)
Planning Your Pinterest Content Calendar
Alright, now let’s go over how to set up your Pinterest pins in advance with the template. Navigate on over to the tab in your template labeled “Pinterest Updates.”
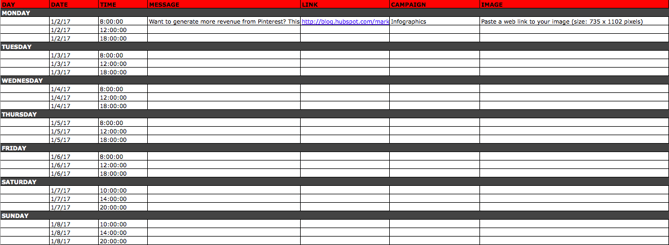
Pinterest updates work similarly to Facebook and Instagram updates, in that content can’t be uploaded in bulk to Social Inbox like it can with Twitter.
The first three columns, “Day,” “Date,” and “Time” are there for your convenience. Go to the column labeled “Message,” and input the copy you’d like to appear in your pin’s description, corresponding to the days and times you’d like those updates to run. Then, move to the “Link” column and input the link you’ll be, you know, linking to in the update. (Don’t forget that tracking token.)
If you’d like the update to be tagged to a certain campaign, include this in the “Campaigns” column. Finally, attach an image like you did with your other social media updates — we suggest you edit it to be 735 pixels x 1102 pixels.
Planning Your Google+ Posting Calendar
Finally, we come to Google+.
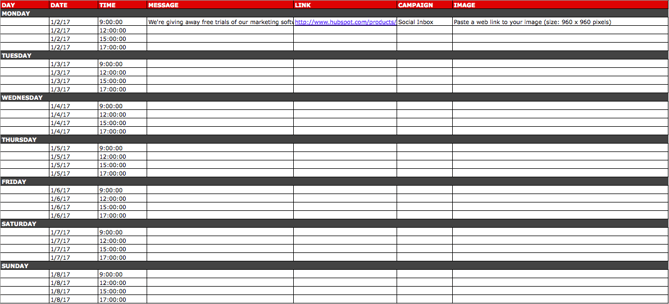
Update: Google recently announced it is shutting down its Google+ platform. Please consider using the template and instructions below for any potential social networking platform Google launches in the future, and check back with us for an updated template that reflects this rollout.
Start in the “Message” column, and input your status update. Then move over to “Link” column, where you’ll input the link to which you’re directing readers. If you’d like the update to be tagged to a certain campaign, include this in the “Campaigns” column. If you’re attaching an image, you could use multiple different sizes, but 960 pixels x 960 pixels works best. (Click here for a full cheat sheet of social media image sizes.)
Content Repository (Or, Where to Source Social Media Content)
This template also provides you with a tab called “Content Repository,” which should help you keep track of all your content and maintain a healthy backlog of fodder to make sourcing social media content easier.
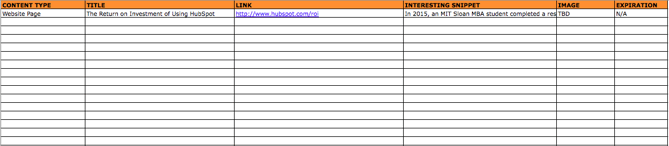
As you create more assets, you’ll likely want to resurface and re-promote those pieces down the line, too. To ensure you don’t lose track of all of that content, record it on this tab so you’re never at a loss for what to publish on social. If the content you’re promoting isn’t evergreen, be sure to include an expiration date in the column marked “Expiration” so you don’t promote it when it’s jumped the shark.
This tab will also help you maintain a healthy balance of content: A mix of your own content and others’, a mix of content formats and types, and mix of lead generation content vs. MQL-generating content vs. traffic-friendly content.
Don’t Forget to Interact With Your Followers
Whether you use this spreadsheet to plan your content out in advance or upload to a third-party app, you’ll still need to supplement these updates with one the fly content. Breaking news hits? Whip up a quick update to share it with your network. Someone in your network tweets something interesting? Give it a retweet with some commentary. Got a fascinating comment on one of your updates? Respond with a “thank you” for their interaction or an additional follow-up comment.
Coming up with and scheduling your social media content in advance is a huge time-saver, but it should go without saying that you still need to monitor and add to your social presence throughout the day.
Finally, we encourage you to experiment with your social media publishing. This template provides publishing dates and times for each social network, but you may find those are way too many updates for you to fill, or perhaps too infrequent for your booming social presence. You should adjust your social media publishing frequency as needed.


Mobile Form Design: A Beginners Guide to Converting Mobile Users
Think about a time when you were on the train, walking to work, sitting in the airport, or simply laying on the couch, and you had to complete an online form of some kind (an order form, shipping form, survey, etc.) on your smartphone or tablet. Did you have a positive or negative experience? Did the mobile form you completed function properly? Was it easy to read and submit on your mobile screen?
Due to their convenience, as well as the fact that most of us are almost always carrying a device, mobile forms may be something you complete frequently. If the online form you’re completing has a mobile-friendly design, then this process really is a convenient one. However, if the form you’re trying to complete is not mobile friendly, you might quickly become frustrated, angry, or ditch the site completely.
In this guide, we’ll review the most effective ways to design your business’s mobile form to help you boost conversions and create a great user experience. There are a variety of ways to achieve this, including obvious action buttons, clear form fields, minimal form fields, automated actions, a beautiful design and layout, and more.
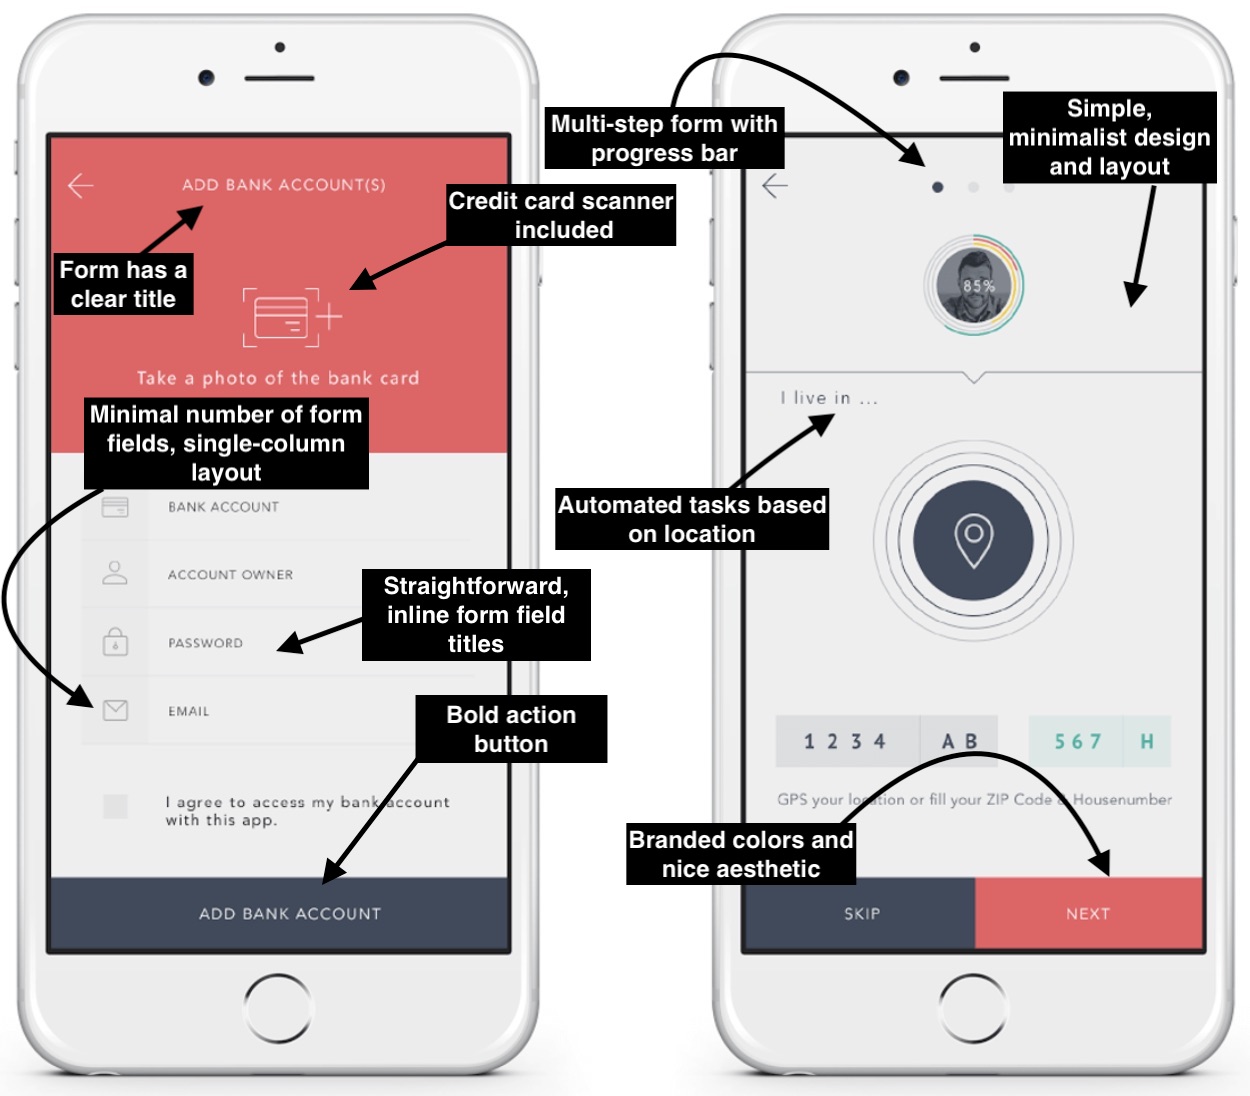
But before diving into all of those details, let’s first define mobile form design to better understand the concepts and guidelines we’re about to review.
Mobile vs. Desktop Form Design
Today, your website visitors aren’t just browsing your site, viewing your content, and completing your forms from their desktop computers — they’re also completing these tasks from their mobile devices. That means it’s absolutely critical for your form to be simple to review, complete, and submit via a mobile device.
Why Is Mobile Form Design Important?
Great mobile form design allows for a positive user experience which ensures a happy website visitor who’s more likely to convert to a customer and become a returning user.
The design, layout, and functionality of your mobile forms play a large part in your website’s overall user experience due to the number of people who browse items, make purchases, and shop via their mobile devices every day. If your forms aren’t mobile-friendly, you may experience fewer conversions, a loss in mobile site traffic, and an increase in unhappy and frustrated customers. And who wants that?
Why Should Mobile Form Design Differ From Desktop Design?
Think about the difference in the display or screen size between a mobile device, such as an Apple iPhone, which typically ranges from 4.7” to 6.1” in size, and an iMac desktop computer, which typically ranges from 21” to 27” in size. Clearly, it’s safe to assume a form that fits an iPhone screen wouldn’t fit a desktop screen perfectly.
If your mobile visitors cannot easily read, complete, and submit your form, you may lose their business. So creating a mobile-friendly form that fits the screen of any mobile device is crucial to creating a great user experience in order to leave a lasting impression on your visitors and help you boost conversions.
What Is Responsive Web Design?
If you want to take mobile form design a step further and ensure your entire website is functional on all types of devices, you can implement a responsive website design.
Responsive web design takes the user’s screen size, platform, orientation, and environment into consideration. This is a simple and effective way to create a great user experience since so many people are constantly visiting and browsing different websites on a variety of devices.
There are a number of ways you can make sure your site has a responsive design. For example, if you’re a WordPress user, there are several responsive WordPress themes that you can install and use to design your site. Additionally, if you’re building, or have built, your site with software such as Squarespace, your site may automatically come with responsive web design.
Today, responsive web design is a popular choice for businesses due to the sheer number of people visiting websites via a variety of different mobile devices. But for now, let’s get back to discussing mobile form design.
Mobile Form Design: 10 UX Guidelines
When creating a mobile-friendly form, there are some steps you’ll want to take to provide the best user experience possible for your visitors. Let’s review 10 of these UX guidelines that you can begin implementing in your own forms today.
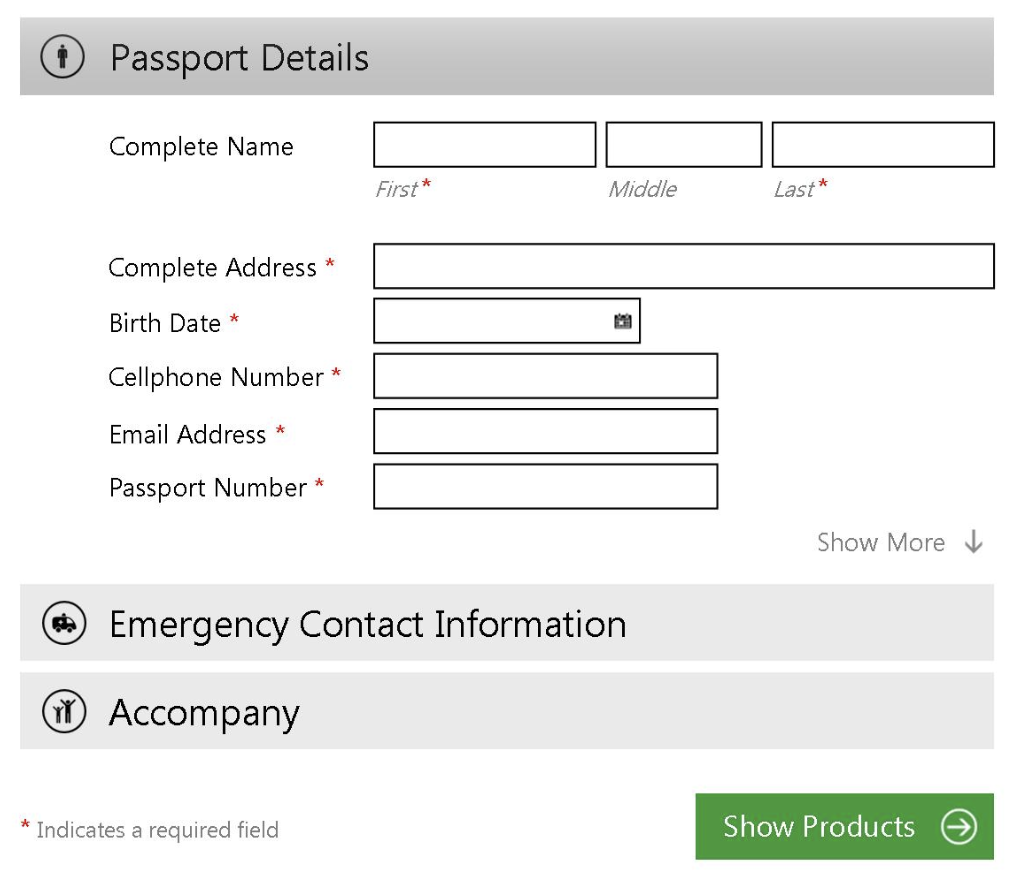
1. Minimize the Number of Form Fields
Ever heard the saying, “less is more”? Well, that’s exactly what you should be thinking while creating your mobile form.
Between the size of a mobile device’s screen, the amount of content you need to place in your form, and the number of form fields (form fields are the boxes in which your visitors add their responses), it’s easy to accidentally make your form feel cluttered. Remember to remove all unnecessary fluff and only keep the form fields for information that you absolutely need.
In addition to narrowing down your number of form fields to only the necessary, you’ll also want to make sure your form fields are labeled clearly with the fewest words possible. You should also mark the optional form fields as “optional” or include an asterisk next to the required form fields to streamline the process.
2. Automate Actions When Possible
If you accidentally mistype your street address and the form corrects the spelling for you, the form autocorrects your response.
If you begin typing your shipping address and a box pops up with the rest of your address asking you if you want to “autofill” the rest of the form fields with your saved address, then your form is autocompleting your response for you.
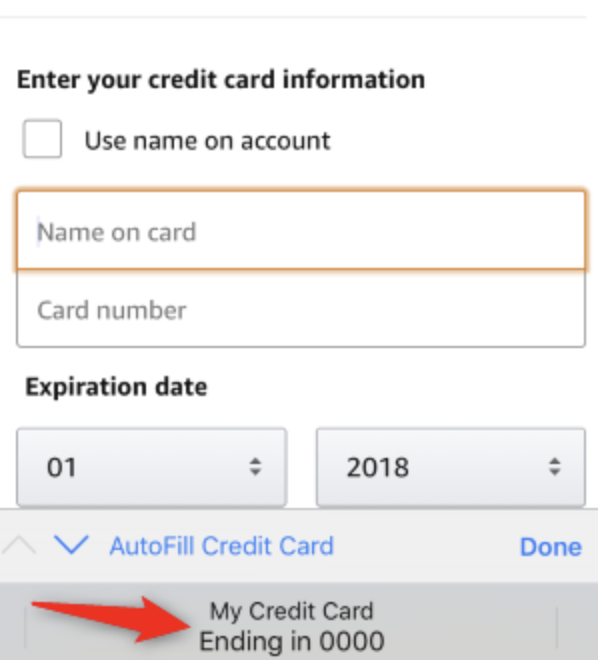
By implementing autocorrect and autofill features on your mobile forms, you’ll improve user experience through a quick, efficient, and straightforward process.
3. Use a Single-Column Layout
When you’re completing a long or multi-step form, list all of your content in a single-column layout.

This is true for forms on both desktop and mobile devices for a few reasons — single-column form layouts are:
a. Easier to read
Placing all of your form fields in a single-column format allows your visitors to focus on only one item at a time, making your form easier to read.
b. Less daunting
If you look at a form, especially in a tight space as you would on a mobile device, and see a large amount of content smushed together, you may feel overwhelmed. That’s why separating your content by rows and placing your form fields in a single-column format make your content look and feel less daunting.
c. Quicker to complete
When you place your multi-step form in a single column, leads are able to complete it more quickly than they would a multi-column form. That’s because the format makes the form easier to read and work through step-by-step.
4. Use Input Constraints for Form Fields
If your mobile form includes short or long responses, you should enable input constraints. Input constraints place a limit on the number of words or characters a person can type into your form field.
Writing long responses on a mobile device isn’t always easy due to the size of the keyboard and screen. And if a visitor is unsure about the amount of detail required for a response, they may over-explain, which could end up being a time-consuming process for you and your visitor.
An input constraint will typically say something like, “You’ve exceeded your maximum of ___ characters”.
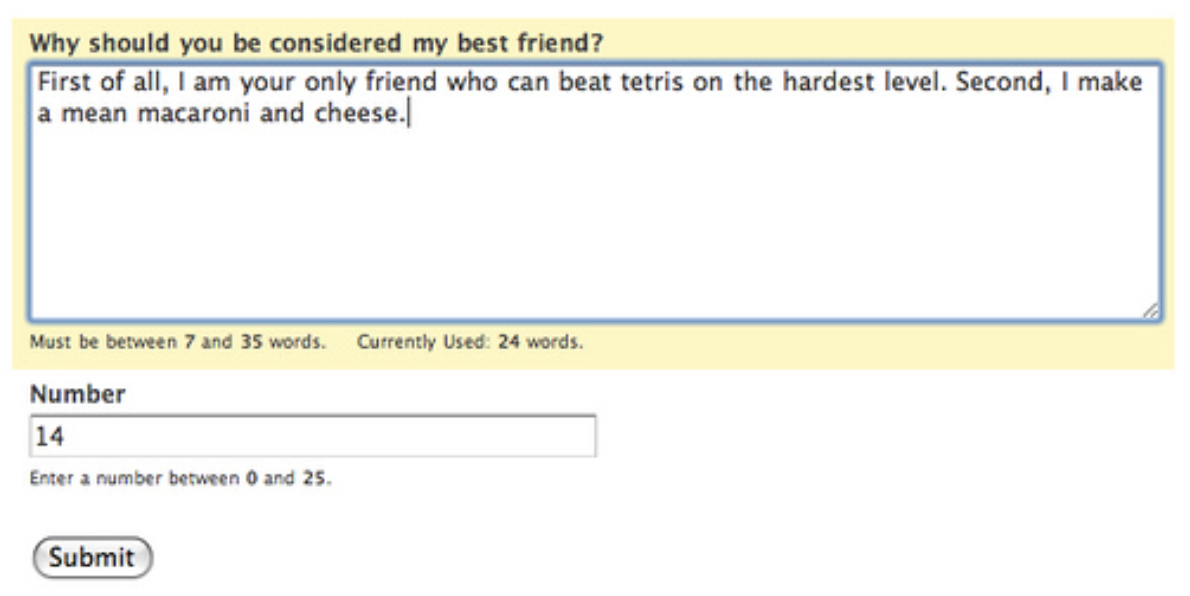
There are other types of input constraints that limit input options, like dates on your forms. For example, if someone was trying to make a reservation for a table at your restaurant and accidentally selected a date in the past, your constraint would prevent them from actually being able to select and confirm that date. By setting input constraints, you’ll save your lead time while completing your form fields, and you’ll also prevent yourself from having to review a long-winded or invalid answer.
5. Create Clear Action Buttons
After taking the time to complete a mobile form, it’s likely that a lead will want to make sure their form is submitted properly to ensure you and your team are able to receive and review their information.
By using large, bold, and visible buttons labeled with clear actions on them, such as “Submit”, “Next”, or “Complete”, your lead will feel confident about their form submission. These action buttons help you streamline the form completion and submission processes for your leads to avoid any unnecessary confusion or concern.
6. Provide Scanners For Payments
Have you ever tried entering your credit card details in a form via your smartphone? Typing a bunch of numbers on such a small screen with a small keyboard can be a tedious process.
Card scanning apps, such as BlinkID and card.io, have become increasingly popular for that exact reason. When making a purchase, your visitors can click a button that takes them to a screen where they can use their mobile device’s camera to take a secure photo of the front and back of their card, whether that be their license or credit card.

With just a couple of pictures, your leads will be finished with one of the most time-consuming parts of your mobile form completion process. These card scanning apps keep your visitors efficient as well as frustration and error-free.
7. Explain Need For Specific Information
While completing a simple email signup or a registration form, have you ever been asked to provide personal information that has nothing to do with the signup form itself?
This is a common phenomenon in all types of forms (not just mobile). Asking someone for personal or other sensitive information without explaining your need for it can be a bit sketchy.
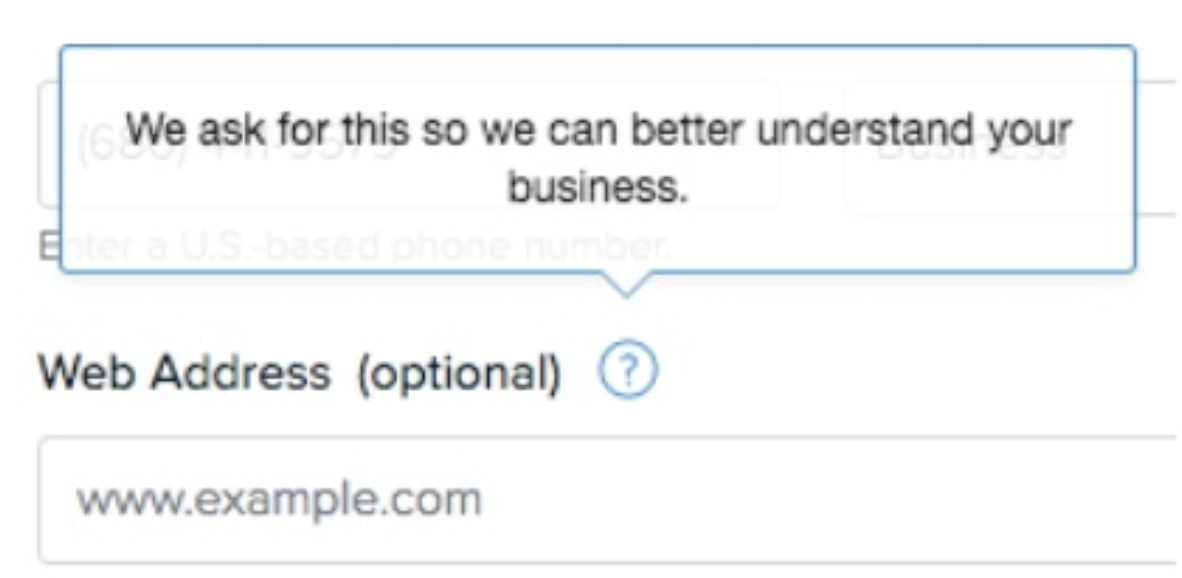
If you’re asking a question that doesn’t necessarily relate directly to the reason your visitor is filling out the form (whether the field is required or optional), then you should create some type of summary box or notification that they can click on to read a short description of the reason why you’re asking for this information. This way, your form will feel professional and thoughtful.
8. Provide State of Success or Completion
No matter what type of mobile forms you have on your website, you should provide your visitors and leads with their current state of progress, success, or completion while they work through them.
If you have a long, multi-step form, you should include a progress bar at the top of your form so your visitors are aware of how much longer they’re going to be working through the form.

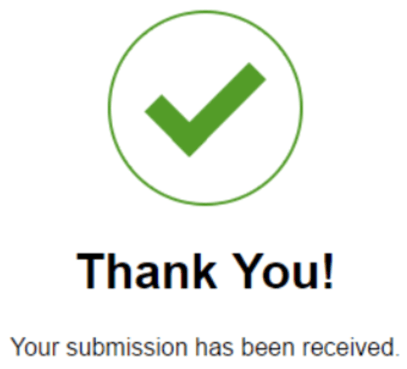
Additionally, once your leads submit their forms, you should direct them to another screen or page that says something like, “Success!” or “Thank you for submitting the form!” so they know their submission worked.
9. Include Error Messages
While completing your mobile forms, your visitors are bound to make a mistake here or there. Your mobile forms should flag these errors in real-time so your leads can remain efficient and accurate.
For example, if someone adds the incorrect zip code alongside their street address, make sure your mobile form flags that error so there is no time wasted and your business is sure to receive accurate information.

In your message, give your lead applicable, easy-to-understand information that clearly shows the exact location of the error as well as how they can fix it.
10. Consider the Form’s Appearance
Appearance and first impressions in business always matter. That goes for your mobile forms, too, because nobody wants to complete a dark, difficult to read, cluttered, and unattractive form.
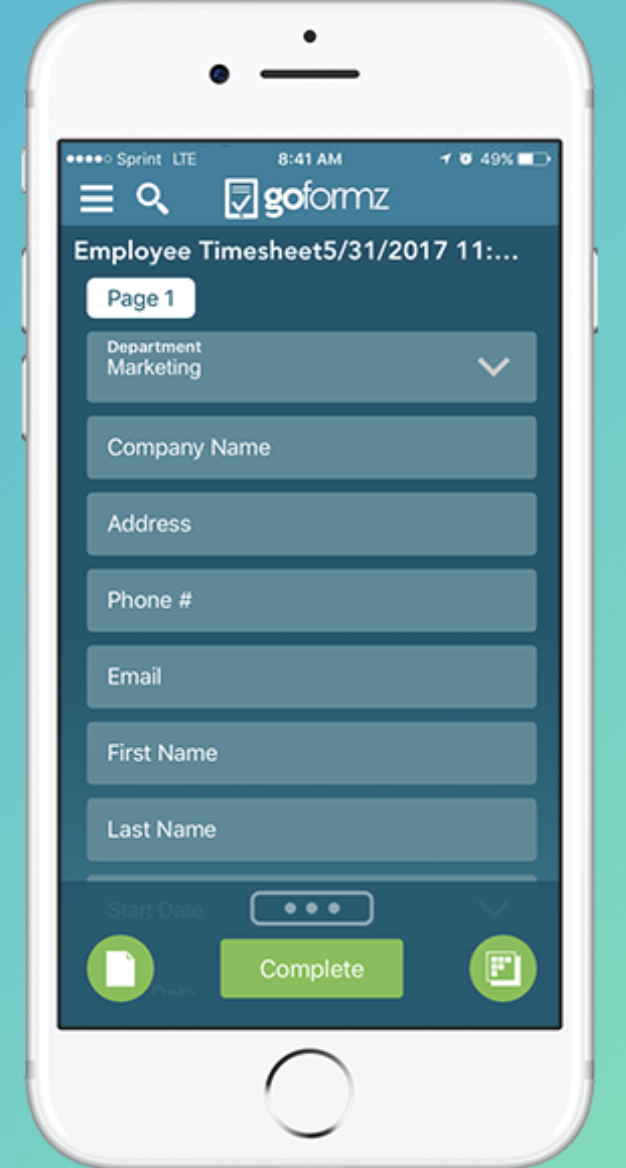
You want your mobile form to be highly functional as well as aesthetically pleasing. You can create a professional-looking form by branding it with your logo and colors. Your mobile form’s appearance should contribute to its readability and positive user experience.
To achieve this look, use:
- Simple, easy-to-read typography
- Minimal form fields
- Bright and bold action buttons
- Single-column layout
- A color palette that doesn’t feel overwhelming
Back To You
It’s no secret that, today, your website visitors are completing and submitting your web forms via their mobile devices. That’s because it’s convenient and efficient, as most people carry some type of mobile device with them everywhere, making it crucial for your forms to be mobile-friendly. Otherwise, your forms will be difficult to read, complete, and submit, which may frustrate your leads or cause you to lose their business completely. By considering your mobile form design and implementing these guidelines, you’ll enhance your mobile form user experience, build positive relationships with your leads and customers, and boost your conversions.

13 Influencer Marketing Campaigns to Inspire and Get You Started With Your Own
You can’t go anywhere these days without hearing about the elusive, purportedly mystical powers of influencer marketing.
But is this buzzword-laden tactic actually worth your time and energy?
According to a recent study comprised of marketers from a variety of industries, 94% said influencer marketing was an effective campaign strategy. That’s great news for marketers — right?
Not so fast. Even though a majority of marketers believe influencer marketing is a viable tactic, it’s still incredibly challenging to report accurately on influencer campaign ROI. In fact, 78% of marketers said that determining the success of influencer marketing campaigns would be a top challenge this year.
So even though the tangible benefits of influencer marketing — follower engagement, driving traffic, and creating more authentic content — seem clear-cut, there’s still a lot of progress to be made in making this form of campaign measurable for agencies and marketers.
Influencer Marketing
Influencer marketing is designed to tap into an existing community of engaged followers on social media. Influencers are specialists in their niches. These individuals have influence over an audience you might be trying to reach, and can be helpful marketing to those buyers.
Let’s back up for a minute. How exactly do you perform influencer marketing, and how does it differ from the traditional celebrity spokesperson advertising model?
There is some overlap between celebrity endorsements and influencer marketing campaigns. But fans of influencers trust that their endorsement of a product or brand comes from a well-researched, more holistic place, rather than something as simple as a signed contract between a brand and a person of influence.
And while there is often a formal agreement in place between both parties, influencers tend to be more selective about their affiliations, choosing to partner with brands that reflect their unique personal brands and won’t alienate their followers.
With that in mind, here are four things you need to keep in mind when launching an influencer marketing campaign:
- Expertise: Would the content of your campaign be appropriate coming from this influencer, given what he or she is famous for?
- Reach: Can this influencer engage your audience? Does she specifically have reach on the social media channels where your audience spends its time?
- Demographic: Is this person’s following similar to your company’s buyer persona? Does he or she affect the same people?
- Notoriety: Is this influencer well liked? Is his/her fame split between admiration and condemnation, or are they a person of mass appeal? (The latter is what you want, so as to not alienate potential customers.)
In other words, celebrity product endorsements are less about engagement and more about attaching a person’s fame and name recognition to a particular brand — regardless of who specifically follows their career. For brands, this type of campaign is much more about grabbing the attention of a wide audience than tapping into a very specific niche.
To give you an idea of how brands — both big and small — are leveraging the power of influencers in their marketing efforts, we’ve put together a list of ten influencer-driven campaigns. Check them out below and decide for yourself: Is influencer marketing worth the hype?
Influencer Marketing Examples
- Sprint: #LiveUnlimited
- Old Navy: Boys & Girls Club of America
- Fiji Water: “Bodyworewhat”
- Kaikatsu Club: NETCafe VR
- H&M: Fall Studio Collection
- Sperry: Boat Shoes on Instagram
- Samsung: Note 7 Launch
- Diageo: My Tales of Whiskey
- GAP: Styld.by
- Stride Gum: Mad Intense Gum
- Naked Juice: Sponsored Instagram Posts
- Loeffler Randall: LR Ambassadors
- Glossier: Regular Women
1. Sprint: #LiveUnlimited
Influencers: Lele Pons, Gerard Adams, Prince Royce, Bradley Martyn, Rachel Cook
Not only did Sprint cause Verizon’s famous “can you hear me now?” guy to switch to Sprint, but the company has collaborated with musicians, entrepreneurs, and actors to gain the attention of a massive young audience.
Its latest influencer campaign uses the hashtag #LiveUnlimited, and features people who have massive social media presences. The best part is these people naturally embody the appearance and lifestyle of #LiveUnlimited. Elite Daily founder Gerard Adams and internet personality Lele Pons are just two of them.
Sprint introduces all five influencers (listed above) in this video ad:
2. Old Navy: Boys & Girls Club of America
Influencer: Alex Rodriguez
Old Navy is a veteran of influencer marketing, having partnered with fashion and lifestyle bloggers all over Instagram to promote various lines of Old Navy clothing. For Black Friday, the company doubled down on this strategy by partnering with New York Yankee retiree Alex Rodriguez to raise money for the Boys & Girls Club of America (BGCA). Being an alumnus of the BGCA, Rodriguez’s promotion helped Old Navy raise $1 million as part of sales during Black Friday alone.
3. Fiji Water: Bodyworewhat
Influencer: Danielle Bernstein
You know the water brand, Fiji, but you might know its campaign partner better by the Instagram name, weworewhat.
Danielle Bernstein’s fashion blog, We Wore What, recently joined Fiji Water to create Bodyworewhat, an influencer marketing campaign offering eight-minute workout videos with Bernstein and personal trainer Eric Johnson.
This campaign was meant to demonstrate Fiji’s commitment to hydrating those who want to look and feel as fit as Bernstein, while helping her fans get there with all the right motivators.
4. Kaikatsu Club: NETCafe VR
Influencer: Enakorin
Not all influencers are based in sports, fashion, or entertainment — not in Asia, anyway. The cafe chain, Kaikatsu Club, recently launched a virtual reality feature across its Japan locations, where customers can play various VR video games while enjoying a drink or a meal. And who better to help spread the word than Japan’s popular TV personality and cosplayer, Enakorin.
Enakorin is well known by fans of anime, a Japanese artform responsible for many comics and TV shows across the country. Enakorin is also known for her love of video games, making her a perfect choice to represent Kaikatsu’s new VR entertainment platform. Both of them teamed up with TimeLine Japan on YouTube to talk about it.
5. H&M: Fall Studio Collection
Influencers: Julie Sariñana, Ela Velden
H&M has one of the largest Instagram followings of any fashion brand on social media today, due in large part to its influencer campaign with women who reflect H&M’s style all by themselves.
Fashion blogger Julie Sariñana and model Ela Velden are two influencers with whom H&M partnered for its fall 2017 catalogue. Sariñana loved the clothing so much, she promoted it from her own Instagram account:
6. Sperry: Boat Shoes on Instagram
Influencers: Sperry Enthusiasts
Toward the end of 2016, the boat shoe brand, Sperry, began working with more than 100 micro-influencers on Instagram to create engaging content for its followers. Sperry identified fans of the brand on Instagram who were already sharing high-quality photos of its products, and started inviting these users to develop visual content for its official Instagram account.
7. Samsung: Note 7 Launch
Influencer: CyreneQ
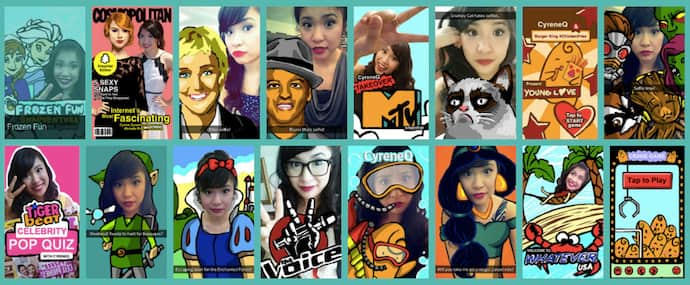
New smartphones are unveiled everyday. So, when Samsung released its Note 7 in 2016, it set out to make sure people knew about it. The company partnered with CyreneQ, a professional Snapchat artist and designer with a huge subscriber base, to broadcast its launch to a mobile audience that it wanted buying its new product.
Cyrene used her Snapchat account to document her journey to the event and ultimately give her audience a sneak peak of the new device. Using Snapchat’s 10-second video format, she posted clips showing her followers some of the device’s new features. See how CyreneQ’s Snapchat designs look for the brands she’s worked with here.
8. Diageo: My Tales of Whisky
Influencer: Nick Offerman
Diageo, the parent company of Scottish whiskey brands Lagavulin and Oban, was awarded a Shorty Award for Best Influencer Marketing Campaign for this yule log video starring Parks and Recreation’s Nick Offerman.
The 44-minute video shows Offerman sitting by a crackling fireplace, staring broodingly into the camera, and occasionally savoring a sip of his drink. Thanks to the simple seasonal premise and Offerman’s unique brand, the video was a viral hit.
9. GAP: Styld.by
Influencers: Refinery29, Celebrity Blogs
GAP’s successful Styld.by campaign featured a number of influential social media personalities from blogging giants like Refinery29 and WhoWhatWhere, showing how they incorporate GAP clothing into their personal wardrobes. Users viewing the influencers’ posts on social media were given options to “Shop this Look” conveniently in the caption of photos.
Thanks to the involvement of multiple influencers from different niches, GAP’s campaign had enormous reach.

10. Stride Gum: Mad Intense Gum
Influencer: DJ Khaled
If anyone has figured out how to gain a loyal following on Snapchat, it’s hip-hop artist and producer DJ Khaled. Once a minor figure in the music world, Khaled has enjoyed an unprecedented level of success on the ephemeral photo-sharing app, with each of his snaps garnering over 3 million views on average.
“DJ Khaled has completely cracked the platform,” said Emmanuel Seuge, senior vice president for content at Coca-Cola, one of Snapchat’s major advertisers. “He’s the king of Snapchat.”
His “King of Snapchat” status means Khaled is in high-demand for influencer campaigns with brands. He regularly takes part in “Snapchat takeovers,” where a brand hands over the reigns of their corporate Snapchat to Khaled for a brief period of largely unfiltered antics.
Working with W+K London, Stride Gum launched a Snapchat takeover campaign with Khaled last year to promote its “Mad Intense Gum” campaign. The brand called the takeover “an unpredictable, fun day for all his followers.”

Source:
W+K London
11. Naked Juice: Sponsored Instagram Posts
Influencer: Kate La Vie
This bottled smoothie brand is edging its way into the beauty, fashion, and health scene on Instagram with help from key influencers in the space. Lifestyle bloggers like Kate La Vie (below) share sponsored posts featuring snapshots of their daily outfits and beauty essentials — including a strategically placed Naked Juice in the mix.
12. Loeffler Randall: LR Ambassadors
Influencers: Creative Businesswomen
High-end accessory and footwear brand Loeffler Randall has become a favorite among artists, bloggers, and fashion insiders, thanks in big part to the company’s commitment to involving social media influencers in its marketing campaigns.
The brand’s “LR Ambassadors” include a diverse group of writers, painters, florists and other creative businesswomen “leading dynamic lives.” In the brand’s own words, their LR Ambassadors are “cool girls doing cool things.”
In addition to profiling its LR Ambassadors on the company blog, Loeffler Randall shares pictures of its ambassadors wearing LR shoes and accessories on Instagram, using the hashtag #LRambassador.
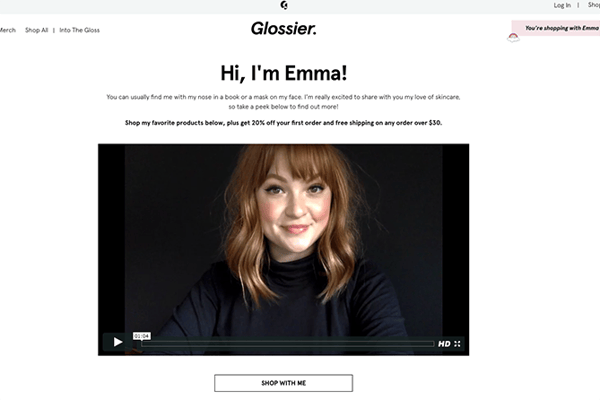
13. Glossier: Regular Women
Influencers: All Women
This Manhattan-based beauty startup (which was recently named one of Fast Company’s Most Innovative Companies of 2017) owes much of their seemingly overnight cult status to their ever-expanding network of super fans and micro-influencers — those people who may have high influence, but low individual reach.
Instead of paying a few big names to promote their minimal skincare and cosmetics, the brand relies on “regular women” to spread the word.
“What’s very motivating to us is this idea of every single woman being an influencer,” Glossier CEO Emily Weiss told Quartz. Glossier recently introduced a referral program to enable its more influential followers to offer product discounts and other incentives to their unique networks.



The 5 Best Ways to Send Large Files
We all know the frustrating feeling — maybe you’ve finally finished the script for your next marketing video, or you’ve collected all the images you need for your next campaign. But when you go to press “Send” you’re told, “Sorry. File too large.”
Unfortunately, our email accounts can’t carry as much storage as you might think. Gmail, for instance, can only hold files up to 25 MB.
Additionally, large files can eat at your storage space, even if it’s just sitting in your Sent folder.
If you’ve got a file you can’t send the traditional way, don’t worry — we’ve got five easy and cheap alternatives, to ensure the largest of files can be sent to whoever, within minutes.
Best ways to share big files
- Upload your files to a cloud storage service, like Google Drive, Dropbox, or OneDrive, and share them or email them to others
- Use file compression software, like 7-Zip
- Purchase a USB flash drive
- Use a free online service, like Jumpshare or Securely Send
- Use a VPN
1. Upload your files to a cloud storage space.
Using a cloud storage space like Google Drive, Dropbox, or OneDrive is one of the easiest and most popular methods for sending large files. Depending on your email provider, you’ll likely be able to use a corresponding cloud storage — like Google Drive for Gmail, or OneDrive for Outlook.com. If you’re sending an attachment within a provider like Gmail, you’ll see the Google Drive button already integrated. Simply press it, choose your file, and then send it like a regular attachment.
Alternatively, Dropbox allows you to upload large files and then send a web link via email or text to your recipient. With Dropbox’s free tier, you’ll receive 2 GB of storage space. For $9.99 per month, you can increase your storage to 1 TB.
2. Use file compression software, like 7-Zip.
If you have multiple files, you might consider using a free compression software like 7-Zip, which can compress an entire folder of files at once. Zip files in general support lossless data compression, and are good for saving time and space while ensuring your files remain intact. Most operating systems can extract Zip files easily, without additional software.
7-Zip is available for Windows, Mac and Linux. You can also provide a password for your files with 7-Zip, to ensure they’re safe to send online.
3. Purchase a USB flash drive.
If you want to collaborate on a project or video with a large storage size, you might consider uploading it to a USB flash drive, which can range in size from 2 GB to 1 TB. This might allow you to pass your files more easily between coworkers, or back your files up for additional protection. Best of all, if you use a USB you can take some strain off your computer, extending its data storage.
4. Use a free online service, like Jumpshare or Securely Send.
There are plenty of free online services that make uploading and sending large files both easy and incredibly quick. Jumpshare, for instance, lets you send up to 250 MB worth of files with a free account — simply upload a file or folder, and Jumpshare provides you with a link to share the files. Plus, you can download the Jumpshare icon to your desktop. When you drag and drop files onto it, a link will be copied to your clipboard, which you can send to anyone, even if they don’t have their own Jumpshare account.
Securely Send is another fantastic option. You can send your files to an email recipient within Securely Send’s platform — simply input an email, upload your file, and click “Send It”. Securely Send lets you send 2 GB worth of files for free, and even lets you track deliverability, so you know when your files have been received and reviewed.
5. Use a VPN
A VPN, or Virtual Private Network, is a service that protects your data and provides you with more privacy when you’re online by routing your internet connection through a server. A VPN can protect you from hackers, or even online ads, and is a secure option, particularly if you’re often using public wi-fi.
Some internet service providers (ISP) use broadband traffic management to moderate upload bandwidth — if this is the case for your ISP, you can use a VPN, which will prevent your ISP from recognizing how large your files are, enabling you to send them.
However, this isn’t the best option in our list for two reasons — one, the large file could slow down your VPN connection, and two, your files aren’t guaranteed to be intact upon delivery. To ensure a high-quality delivery, you might want to try an alternative option, like a Zip compression.
How to send large files via email
- Store your files in a cloud storage service, like Google Drive, Dropbox, or OneDrive.
- When you want to send the file, simply share the file with someone, and then notify them via email that you have done so.
- If you use Gmail or Outlook.com, you’ll find a Google Drive or OneDrive integration. When attaching your file to an email, you can click the Google Drive or OneDrive button to share the file.
- When the recipient receives your email, they can download your file to their computer, or open it online through the cloud storage service you used to send it.

How to Print Your Screen in 3 Easy Steps
If you’re a new adopter of a Mac or Windows 10 and need to print your screen, we’ve got you covered. Whether you need to include a picture of your computer screen in a blog post or a powerpoint presentation, here’s an easy three-step guide for printing your screen on a Mac or Windows 10.
How to Print Your Screen on a Mac
- Take a screenshot of your entire screen by holding the “Command”, “Shift”, and “3” buttons on your keyboard all at the same time.
- Double-click your screenshot, which can be found on your desktop. It’ll open in Preview.
- Press “File” and then you’ll see the “Print” option at the bottom of the menu.

How to Print Your Screen on Windows 10
- Take a screenshot of your entire screen by holding the “Windows” and “PrtScn” button on your keyboard at the same time.
- Open the “Pictures/Screenshots” folder in your user profile and double-click your screenshot.
- Press “File” and then “Print”.


The Short & Sweet Guide to Google Keep
I have a confession to make: organization does not come naturally to me.
To give you a better idea of what exactly we’re talking about here, this is what my phone home screen looks like on any given day:

Not too pretty.
In fact, the above screenshot gave a few of my more inbox-zero-inclined, Evernote-addicted co-workers a good fright (Sorry, Braden!).
I love the idea of being a person who can take joy in meticulously structuring and optimizing my day via an elaborate bullet journal system, but realistically, I’ll never be. I just go where my Google Calendar tells me to go. I send myself one-off reminders via cryptic email and Slack messages (“email that person you talked to in hall”). I keep track of meeting notes in a series of disconnected spreadsheets. I bookmark Gmail conversations I need to respond to. And when all else fails, I write stuff on my arm.
This (reckless) combination of messages and documents has served me (surprisingly) well, but there’s always room for improvement.
To see if I could structure my work life with a bit more intention, I recently started using Google Keep, Google’s free note-taking app.
: What is Google Keep?
Google Keep is a free note-taking application developed by Google. Launched in early 2013, the service can be used to create, manage, and share text-based memos, lists, images, and voice notes across multiple devices. Currently, Google Keep is available on the web and as a mobile application on both Android and iOS operating systems.
The biggest draw of Google Keep compared to other popular note-taking apps is its simplicity. The interface is minimal and intuitive, enabling you to start taking and organizing notes with little (if any) learning curve.
While more robust applications like Evernote offer third-party integrations and additional features for curating advanced databases of notes, Google Keep’s clean, straightforward system is ideal for someone looking to simply keep track of their daily tasks and collaborate with small teams. For users interested in building out a serious archive of content across a larger organization, Google Keep’s capabilities will likely be too limited for anything beyond personal use.
If you’re interested in giving Google Keep a whirl, this guide will walk you through getting started, along with some helpful tips to get the most out of the app.
Getting Started With Google Keep
First things first: you can access Google Keep right here (just make sure you’re logged into your Google account).
Once you log in, you’ll see an area to create notes:
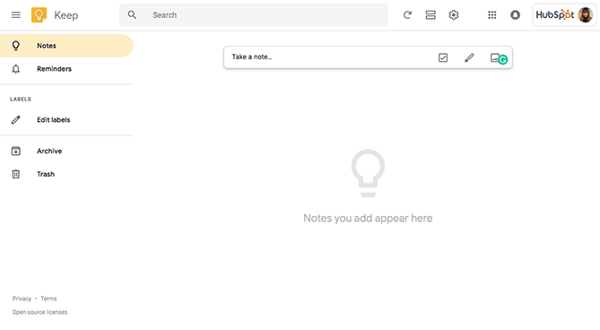
To add a new note, let’s take a look at the “Take a note…” bar at the top of your screen.

Clicking into the box will automatically start a text note. The paintbrush icon on the left will start a drawing note, and the image icon will start an image-based note.
Once you decide on the type of note you want to create, at the bottom of the note-taking area you’ll see options to:
- Set a reminder for a specific time or place
- Add a collaborator
- Change the color of the note
- Add an image to the note
- Archive the note
- “More” = add a label, add checkboxes, add a drawing
- Undo
- Redo
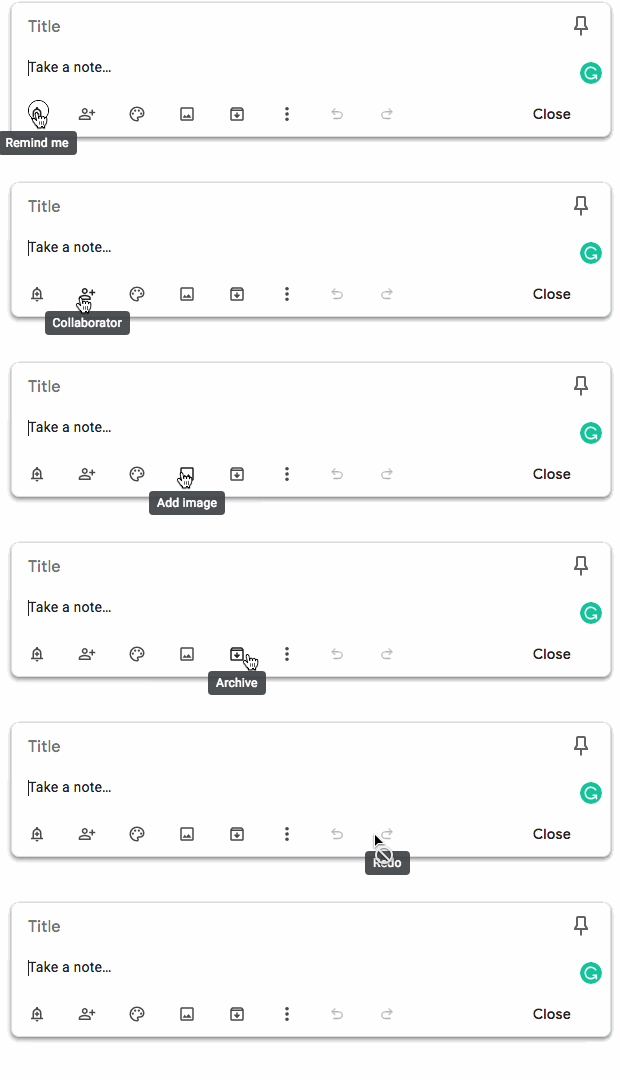
Pretty simple, right? Once you click out of the note-taking area, your note will be automatically added to the Google Keep screen and synced across any devices where you’re using the same Google account and logged into Google Keep.
Although these features are fairly bare-bones compared to other applications, they enable you to curate a wide variety of different tasks, to-dos, and reminders.
You can edit any type of note at any time simply by clicking into it.
Let’s take a deeper look at how these features can be used to organize your tasks and improve your overall efficiency.
Google Keep Tips
- Pin your notes to prioritize your most important tasks.
- Break up smaller tasks into larger tasks.
- Share notes with team members to keep everyone in the loop.
- Add annotations to images. Great for creative teams.
- Use date-based reminders to keep yourself on track and structure your day.
- Set location-based reminders.
1. Pin to prioritize.
When it seems like you have a million things on your to-do list, tackling each task in the order you added them to the list isn’t usually the most effective approach. Some tasks are simply more pressing or time-sensitive than others, and your to-do list should reflect this.
With Google Keep, you can keep your tasks prioritized using the “pin” feature. Hover over any note, and click the pin icon that appears in the upper right hand corner of the note.
This will add the note to a separate “Pinned” section above the rest of your notes. Pinned notes will remain in this section until you delete or unpin them. It’s certainly a humble organization feature, but I’ve found that pinning my most important tasks at the beginning of each day has helped me prioritize my time more effectively.
2. Break up larger tasks into smaller tasks.
Got a particularly big, complicated, or just plain tedious task you need to tackle? Break it up into little parts.
This is one of my absolute favorite ways to make it through my more complex to-do list items or group related tasks together in one bucket. Using Google Keep’s list feature, I create a new “list” note card, which creates a little checklist inside a single note. To create a hierarchy of checklist items, you can drag items to nest them under other items.
3. Share notes with team members to keep them updated.
Google Keep has a useful collaboration feature that allows you to share a note directly with another Google user. I’ve found this tool to be particularly helpful when you need to keep a colleague up to date on your progress or send someone a friendly reminder.
To add a colleague to a note, just click on the “+” person icon at the bottom of any note. Collaborators have the ability to make changes once you add them to the note.
If your team is already using other Google tools, the collaborate feature in Google Keep can be easily integrated into other areas of your team’s processes without having to adopt a new tool to stay connected.
4. Add annotations to images.
Google Keep allows you to add annotations directly to images — a valuable time-saver if you work on a creative team that regularly deals with visual content. This can save time when you need to make a comment about a particular aspect of an image, since you don’t need to describe it — you can draw directly on the area you want to highlight.
To add an annotation to an image, click on your image note in Google Keep to expand. In the upper right corner of your screen, you’ll see a pen icon (right next to the printer icon):
This will take you to a separate screen where you can select a pen width and color, and draw directly on the screen.
5. Use date-based reminders to keep yourself on track and structure your day.
Need to keep track of a big deadline? Or maybe you just need some little reminders to keep you on track throughout the day? I use Google Keep’s date and time-based reminders as a helpful nudge when I need it — for both larger projects, and smaller things I need to remember to get done.
To set one up, click on the alarm bell icon at the bottom of any note, and you’ll get a menu to select a time and date to get reminded.
6. Set a location-based reminder.
If you move from place to place throughout your day and want reminders when you get to a specific location, you can set that up in Google Keep. Just from the same menu in the previous step, just select “Pick Place” and select the location you want to get a reminder at.
I’ve found this feature is useful for a wide variety of errands — like reminders to buy something when you get to the grocery store, or a reminder to check up on an outstanding work task when you get into the office the next day. Just remember to have your Google-connected device with you, and location settings turned on to receive these reminders.
