
The 19 Best WordPress Hosting Providers in 2018
If you’re making a WordPress website, you’ll first have to choose a hosting provider. Just one problem: there are hundreds of hosting providers to choose from. And the provider you choose really matters. That’s because it impacts your website’s health, speed, reliability, security, and more.
We have compiled a list of what we believe are 19 of the best WordPress hosting providers available today, complete with a few key takeaways from each for you to review.
Important note: Each of these hosting providers offers several plans that include a variety of different features respectively and, therefore, range drastically in price. Due to this, we recommend you click the link to the website of any provider you are interested in and review their pricing details and plans prior to making any decisions about what will work for you and your website.
Let’s get started.
The 19 Best WordPress Hosting Providers in 2018
1. WP Engine

Source: WP Engine
WP Engine is unique because it is a managed WordPress hosting provider so it is tailored to certain business’ specific needs and has a variety of advanced services available for those businesses. That means WP Engine is a pre-configured and pre-optimized hosting provider that can save you time and work when installing and creating your website. WP Engine also offers server upgrades, advanced protection to keep your website secure, and troubleshooting.
Key takeaways:
- Managed WP hosting provider
- Constant updates and server upgrades
- Reliable expert support
2. Kinsta
Source: Kinsta
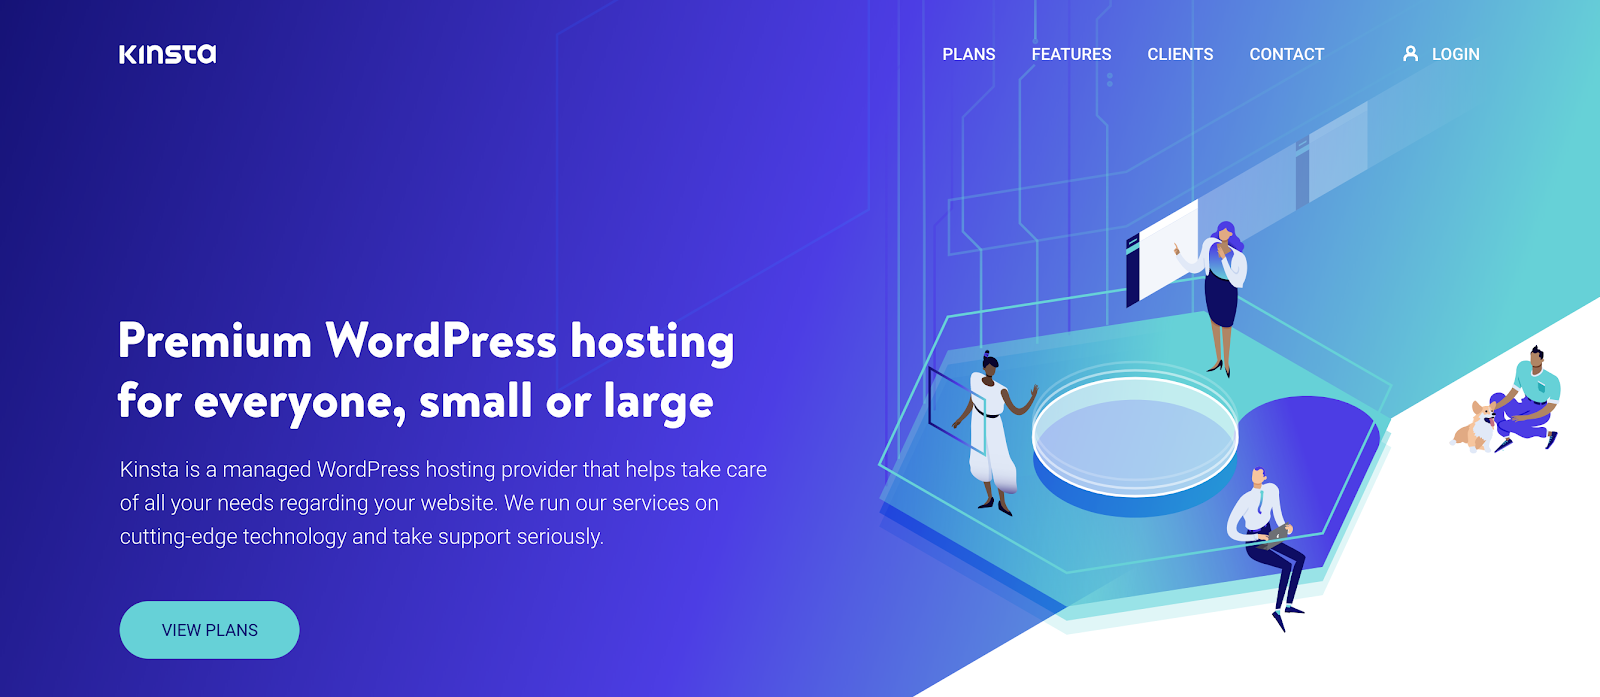
Kinsta is a WordPress hosting provider suitable for anyone due to its free migrations, daily backups, and strong security. Kinsta has a unique dashboard that serves as a control center so you can easily review all of your sites, look at a wide range of analytics, and manage your users with all levels of access.
Key takeaways:
- Free migrations
- Daily backups
- Dashboard to manage your sites, analytics, and users
3. Flywheel
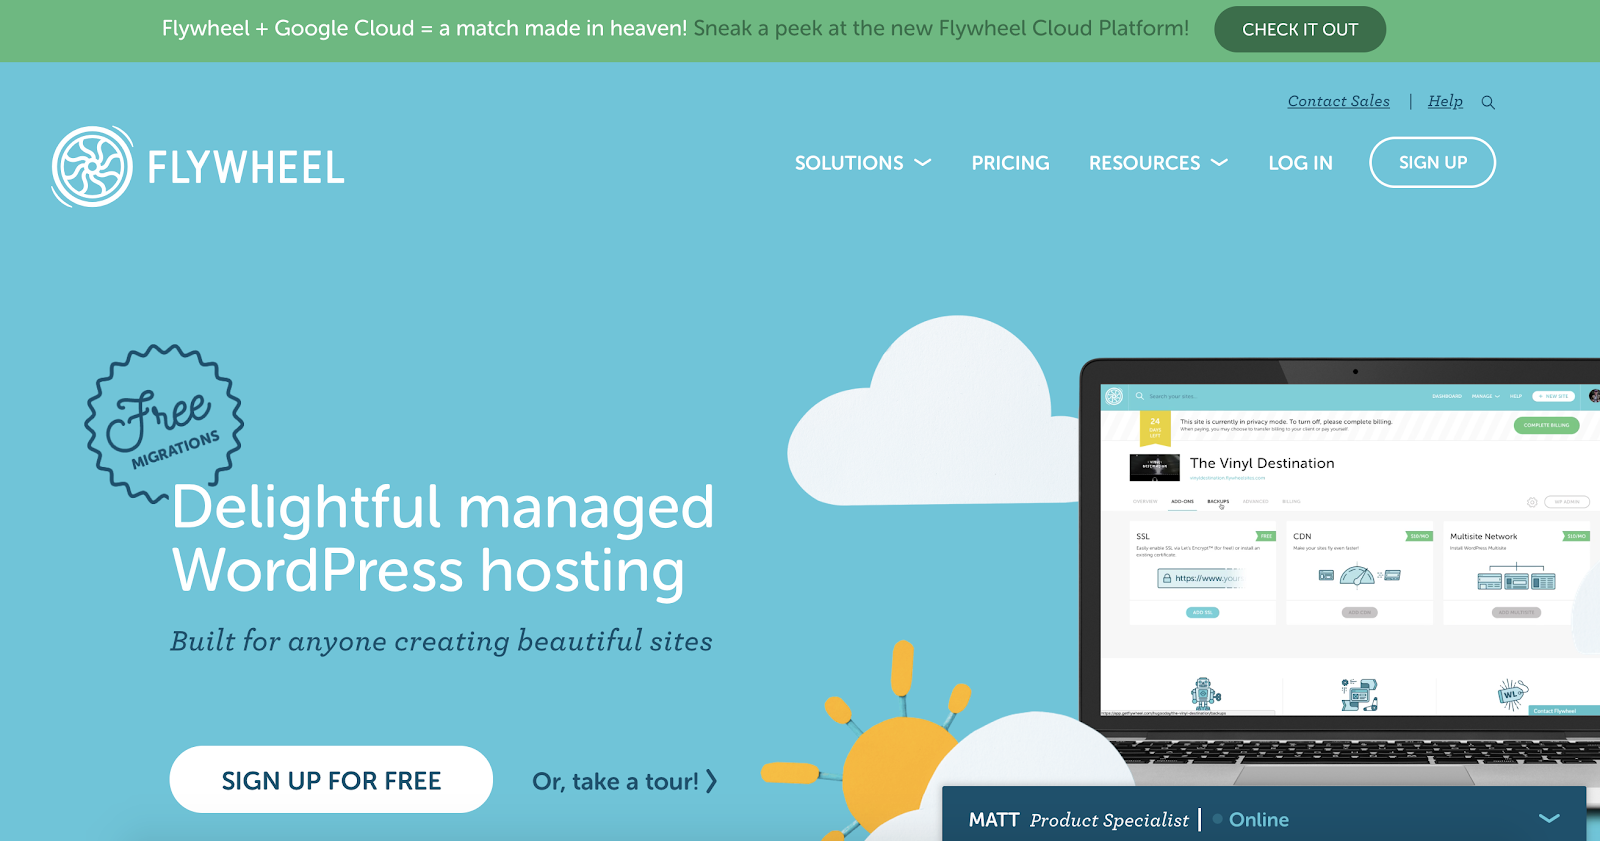
Flywheel is a hosting provider created specifically for WordPress so it allows you to easily build, manage, and launch your WordPress website. What does that mean for you? It is highly effective on the system and allows for fast loading times. There are also nightly backups, so you can rest easy knowing your site will always be protected and you’ll never lose any of your content.
Key takeaways:
- WP hosting provider and workflow solution
- Quick loading times
- Nightly backups
4. Plesk
Source: Plesk
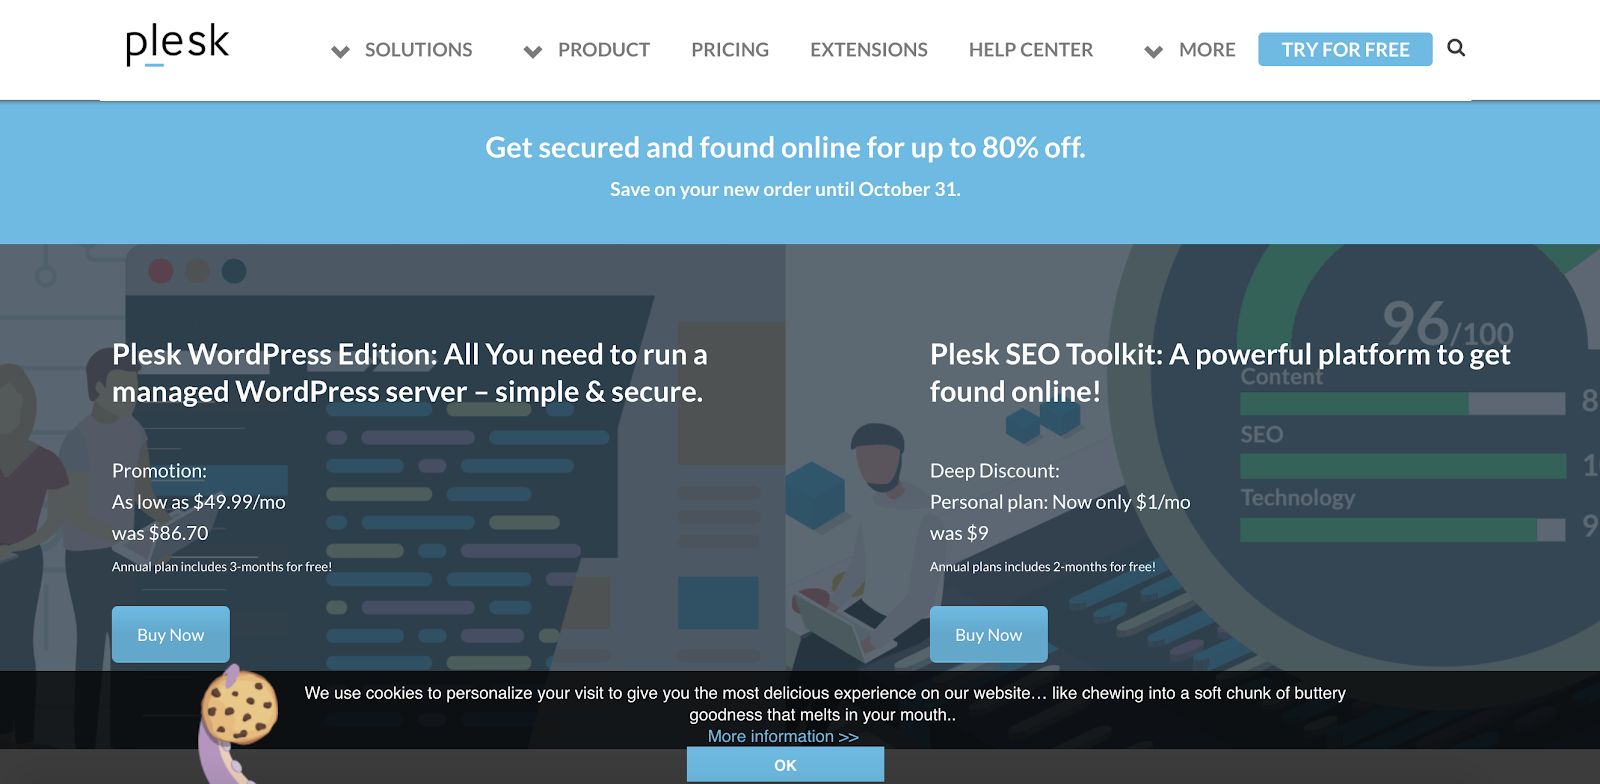
Plesk is unique because it is a WP hosting provider and web operations platform so it offers technical, security, and automation tools that allow you to run all of your websites from a single platform. Plesk is also unique because it is certified to run on major virtualization, cloud, and container platforms, so you get maximum compatibility out of the provider.
Key takeaways:
- WP hosting and web ops combination
- Ability to run multiple websites from one hosting platform
- Certified to run on virtualization, cloud, and container platforms
5. DreamHost

Source: DreamHost
DreamHost provides you with an organized control panel that you can customize to easily manage all of your website hosting features in a way that makes the most sense to you. Not all providers give you access to assistance day and night, but DreamHost does — with 24/7 support available, you can get the expert help you need no matter what time you’re working. The provider also offers backups and server caching so both your site’s performance and storage are maximized.
Key takeaways:
- Organized control panel
- 24/7 expert support
- Daily backups and server caching
6. BlueHost

Source: BlueHost
BlueHost works for everyone, from entrepreneurs to growing businesses to large companies and online stores because of its free domain registration, SSL certificate, reliable support from experts, and automatic WordPress installation.
BlueHost also offers reliable 99% uptime because their servers are in their own data centers — this sets the provider apart from many competitors who may rent out their data centers. If you’re unsure about whether or not BlueHost is a good option for you, don’t sweat it — they have a 30-day money back guarantee.
Key takeaways:
- Works for businesses of all sizes
- Free domain registration
- 30-day money back guarantee
7. InMotion Hosting
Source: InMotion Hosting
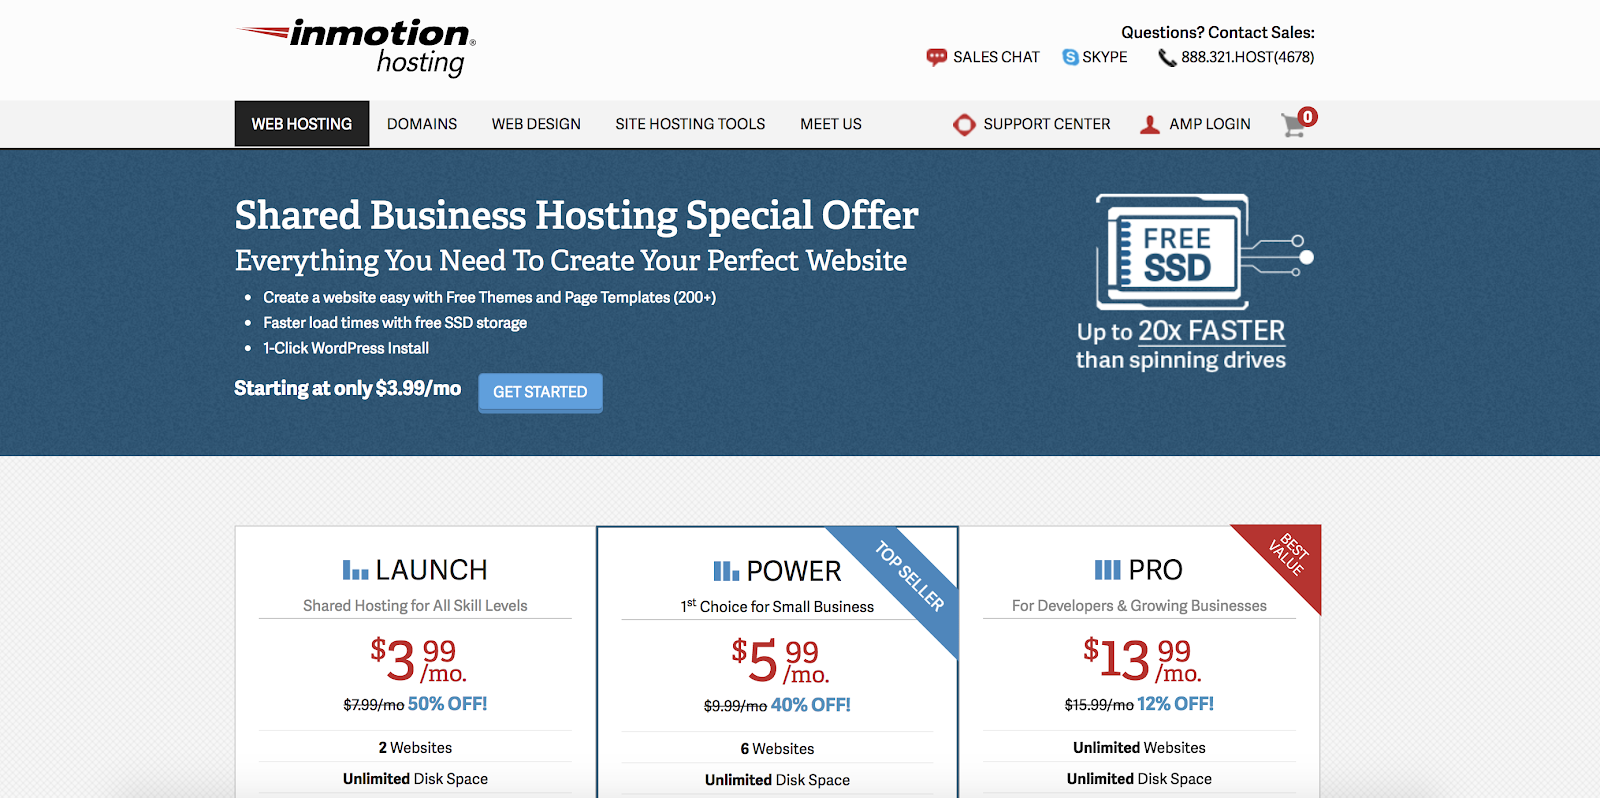
With InMotion Hosting, you can complete your WordPress installation with just one click. The provider is known for having fast load times and free SSD storage, or solid-state drive storage, which is a feature unique to some providers. InMotion also offers free website migration which saves you time, as well as malware and hack protection so you won’t ever need to worry about your site’s security.
Key takeaways:
- One-click installation
- Free website migrations
- Advanced security
8. HostGator
Source: HostGator
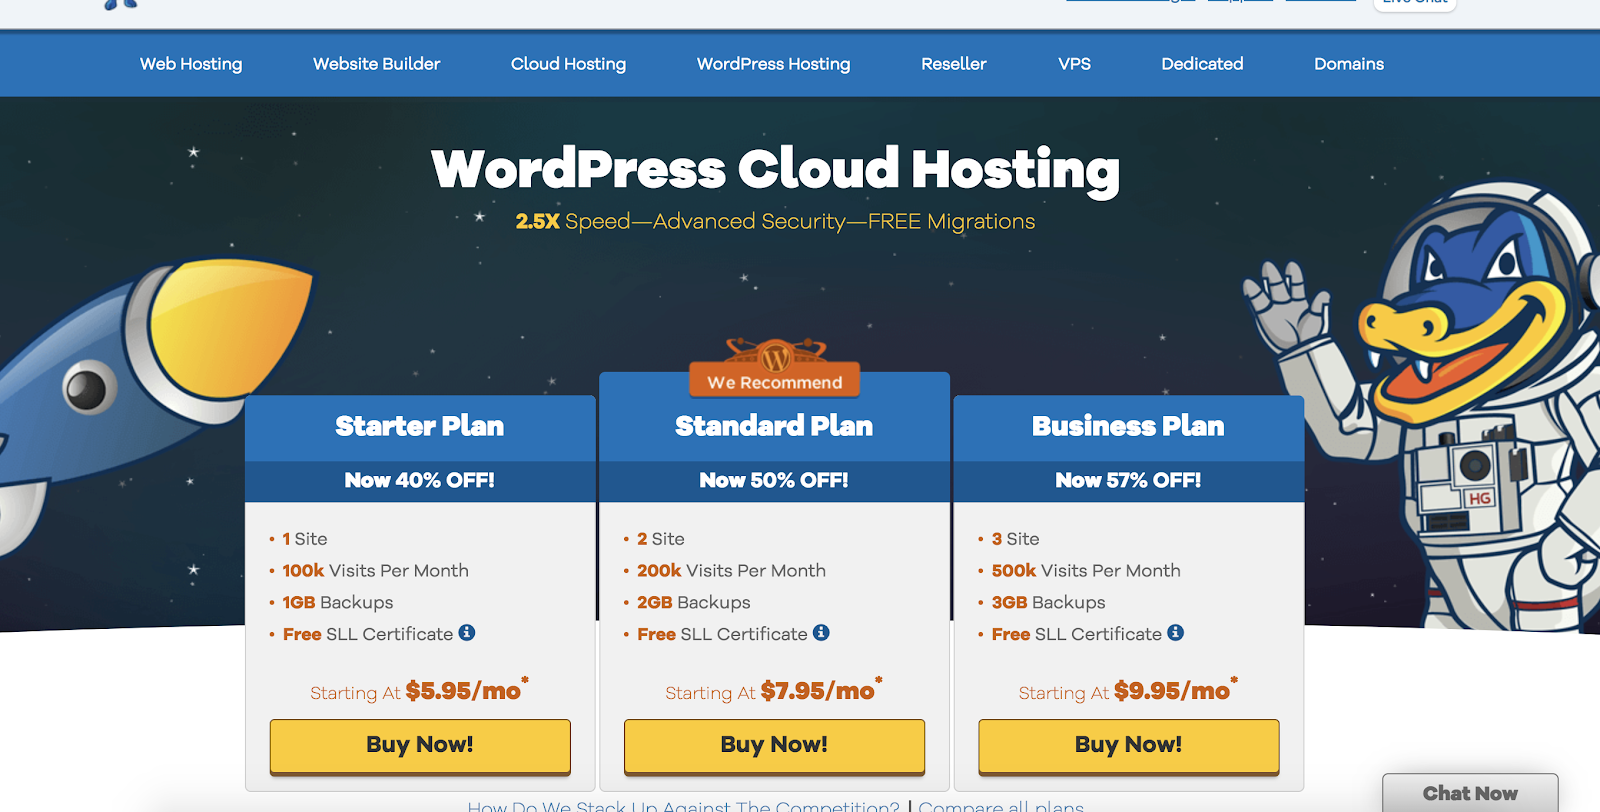
HostGator is unique because it is a cloud-based WordPress hosting provider which means it has fast load times. According to the vendor, their sites load about 2.5x the pace of sites using other providers. It also has other features including free migrations, advanced security, and a clean control panel so you can easily access all of your accounts and other hosting details.
Key takeaways:
- Cloud-hosting provider
- Fast load times
- Free migrations
9. SiteGround

Source: SiteGround
SiteGround is a managed WordPress hosting solution in which you can maintain several different websites at the same time. With SiteGround, you will receive free migrations, auto updates, and three levels of caching — setting it apart from many other providers — to ensure your website is as fast as possible. You also have access to 24/7 expert support to help you through any challenge you may experience.
Key takeaways:
- Managed hosting
- Auto updates
- Three levels of caching
10. A2 Hosting

Source: A2 Hosting
A2 is a unique provider because it allows you to choose between shared and managed hosting for your website. Shared hosting is suitable for a wide range of business types and, therefore, typically comes at a lower price — that’s because it meets the needs of a wider variety of businesses than managed website hosting does.
Managed hosting, as discussed earlier, is more tailored to certain business’ specific needs and includes advanced services. The good news is whether you choose shared or managed hosting, you will still have fast loading speeds, auto-setup, free SSL, and global servers included with A2.
Key takeaways:
- Shared hosting available for general usage
- Managed hosting available with more advanced services
- Fast loading speeds and auto-setup come standard
11. iPage
Source: iPage
iPage is a provider that takes care of your technical SEO for you so your site has a larger chance of ranking on Google. Other advanced features such as engagement and security plugins are included to help you optimize your site. As for security, iPage and SiteLock teamed up to offer you a custom firewall so you’ll never have to worry about your website’s level of protection.
Key takeaways:
- Search engine-friendly
- Engagement and security plugins
- Custom firewall
12. GreenGeeks

Source: GreenGeeks
GreenGeeks is a green energy web hosting provider (yes, there is an environmentally-friendly provider). With GreenGeeks you will receive automatic updates, one-click WordPress installation, security, and 24/7 expert support. Your account will also automatically be backed up every 24 hours so you’ll never need to worry about losing any of your content.
Key takeaways:
- Green energy web hosting
- One-click WP installation
- Automatic backups every 24 hours
13. Site5 Hosting
Source: Site5 Hosting
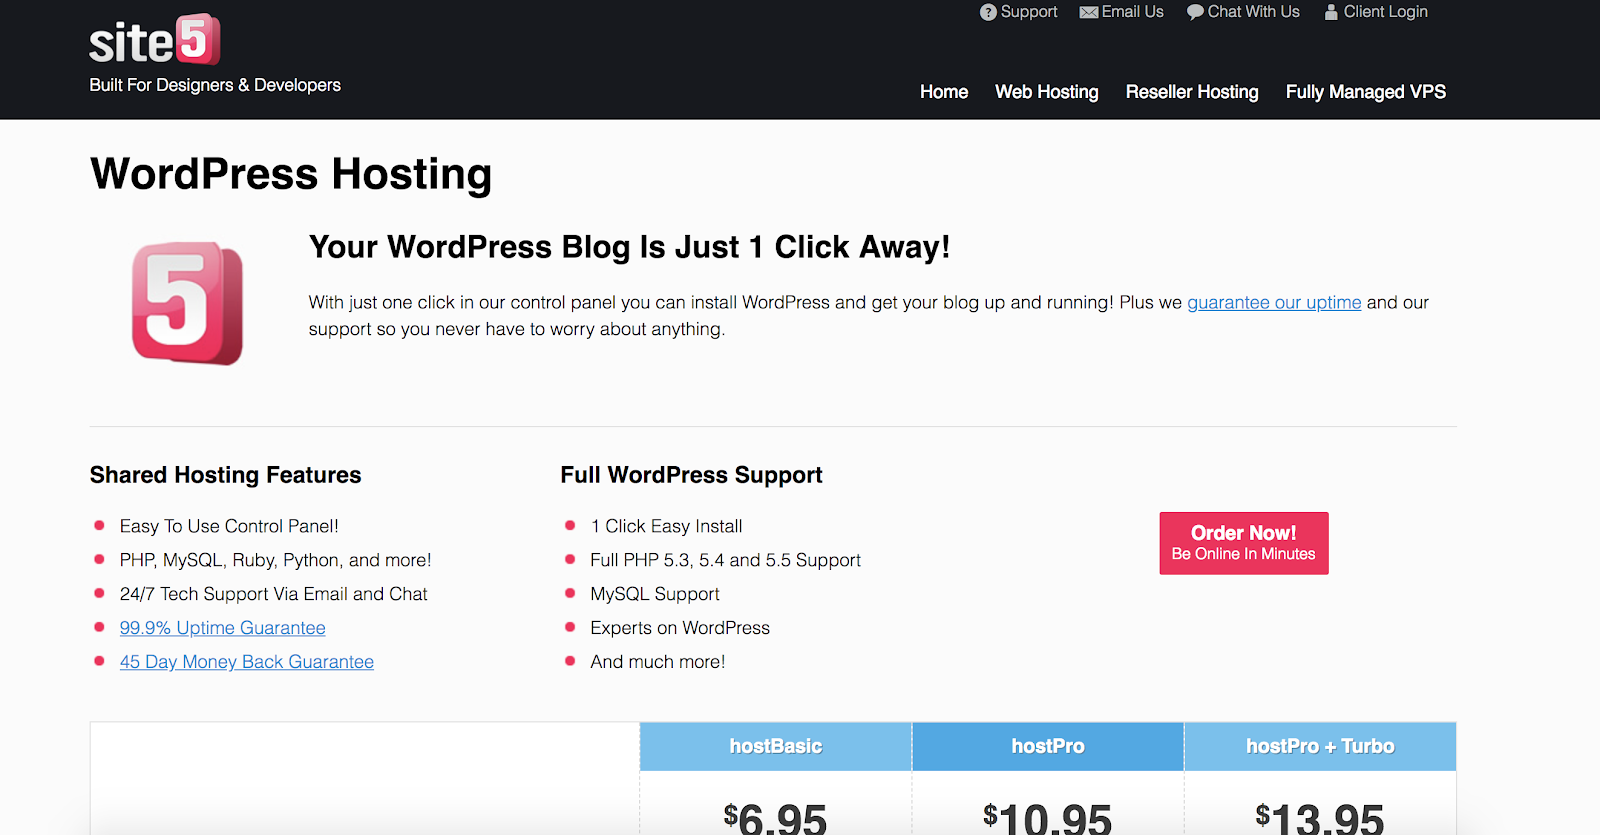
Site5 Hosting offers one-click WP installation, a control panel where you can manage your website and hosting features, a 45-day money back guarantee, and a 99% uptime guarantee (“uptime” refers to the amount of time, in a given period of time, a server takes to stay up and running … when it comes to your provider, you want that percentage to be as close to 100% as possible).
Site5 provides unique support as experts are available via email and chat so you can work through any issues by the mode of contact that is preferable to you.
Key takeaways:
- Contact support through email and chat
- 45-day money back guarantee
- 99% uptime guarantee
14. Arvixe
Source: Arvixe
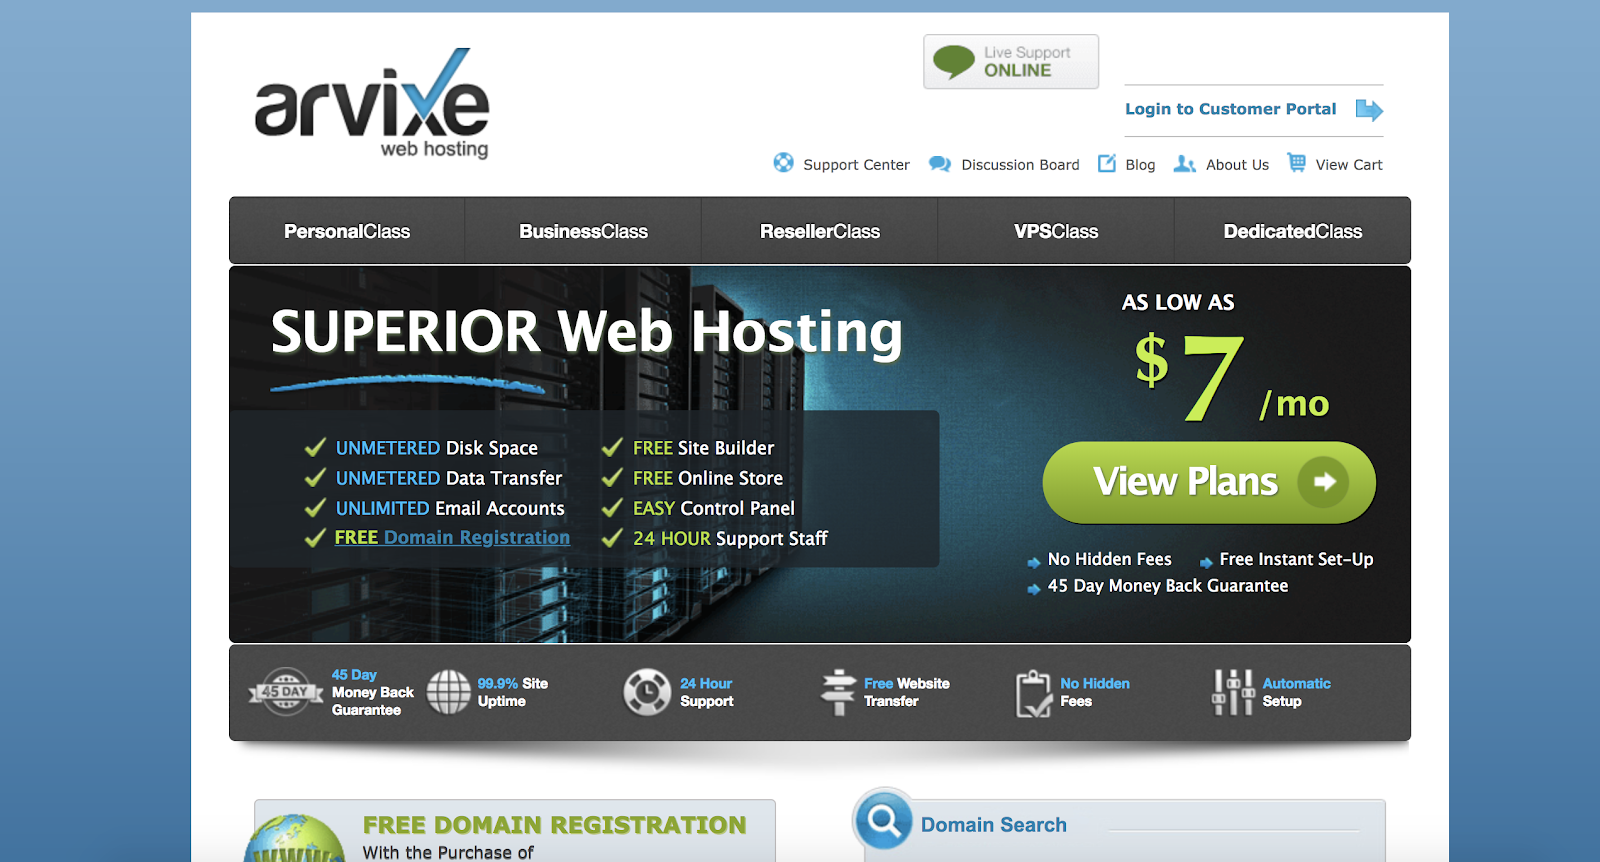
With Arvixe you’ll receive free domain registration, access to 24-hour expert support, free website transfer, and automatic setup. Arvixe also offers a 45-day money back guarantee. Arvixe takes their security measures to the next level by implementing over five different types of protection in addition to their daily backups and firewall.
Key takeaways:
- Free domain registration
- 45-day money back guarantee
- Advanced security measures
15. GoDaddy
Source:GoDaddy
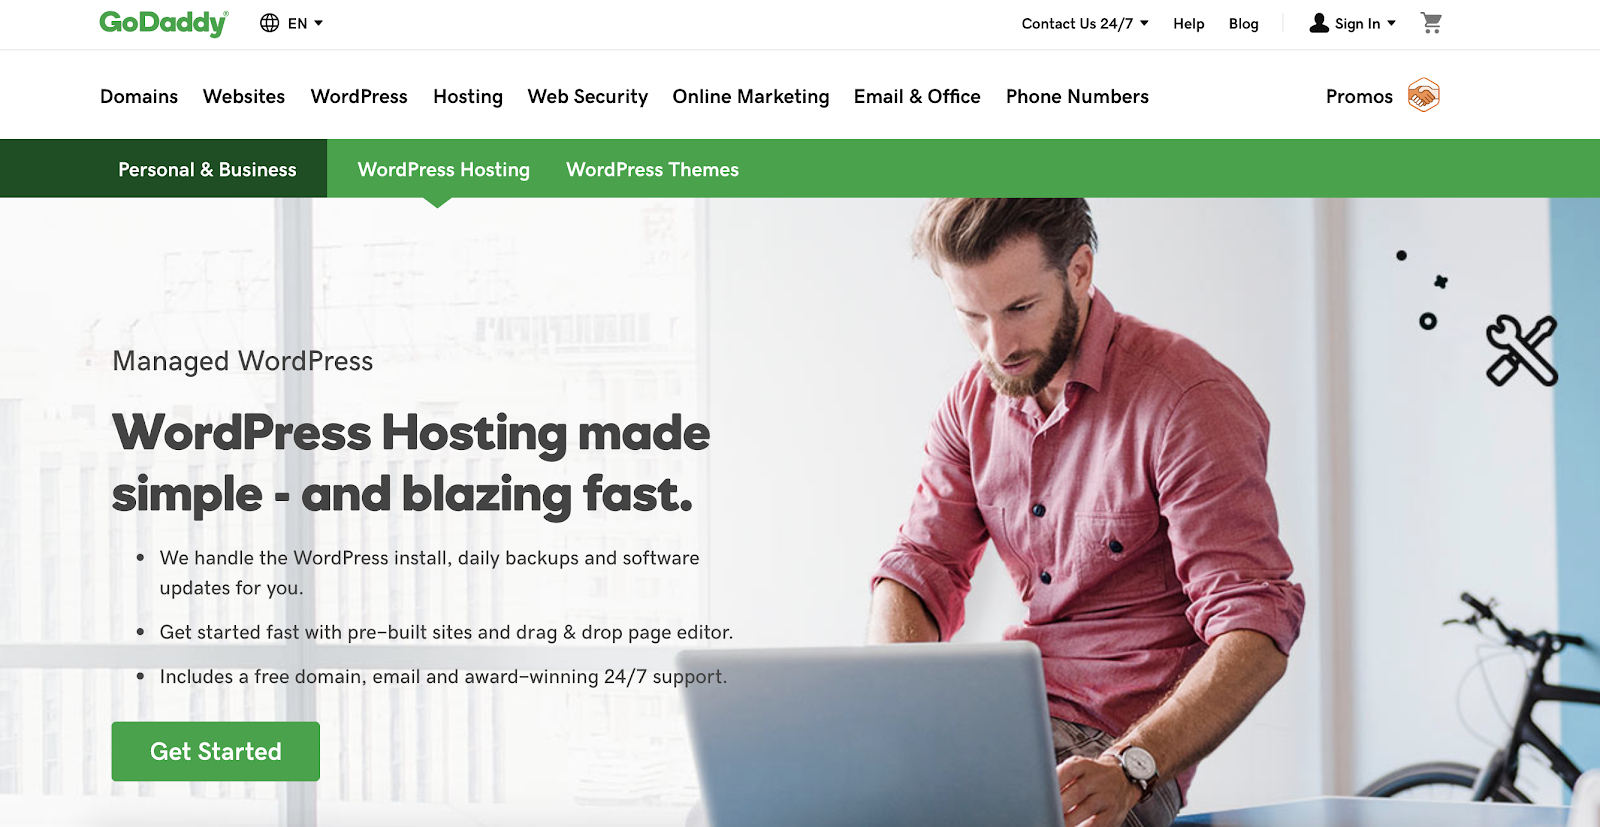
GoDaddy is unique because the provider offers a free domain and email for your WordPress website. They also handle your installation, daily backups, and software updates. GoDaddy’s compatibility with all of WordPress’ add-ons (such as their themes and plugins) makes customizing your site quick and easy.
Key takeaways:
- Free domain and email
- Daily backups
- Compatible with WordPress add ons
16. TMDHosting
Source: TMD Hosting
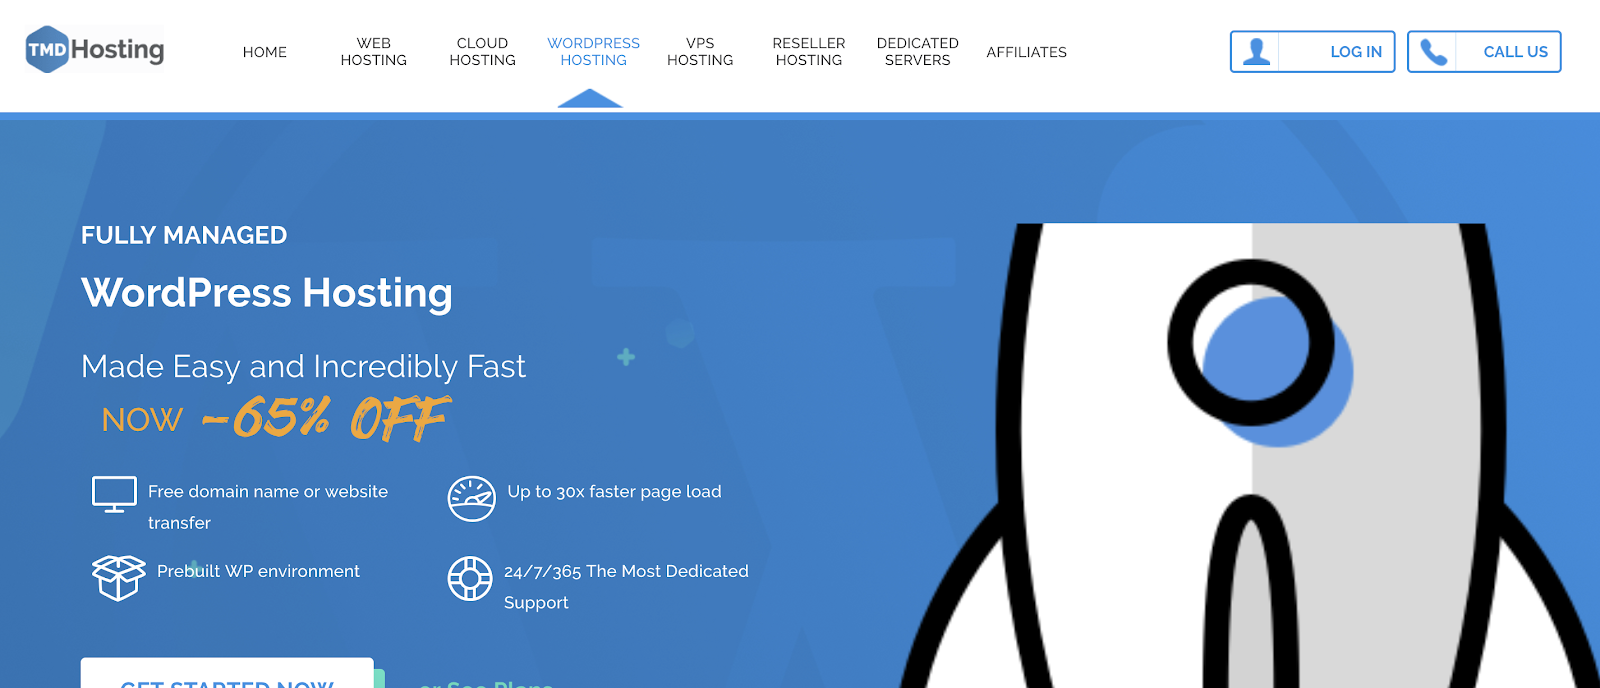
TMDHosting comes with a pre-built WP environment, so there is no work required upon installation. TMD’s three layers of cache and SSD software mean your site will load quickly. You’ll also never have to worry about security — the provider uses a unique firewall created by BitNinja which is updated daily by system administrators to ensure maximum protection.
Key takeaways:
- Pre-built WP environment
- Fast loading times
- BitNinja firewall
17. 1&1 Hosting

Source: 1&1 Hosting
1&1 Hosting is a managed provider that helps you easily and completely customize your website with the help of WordPress-compatible plugins, add-ons, and themes. 1&1 introduced their very own WP Assistant which guides you through your WordPress installation and initial setup, and provides you with user guidance so all your questions are answered efficiently.
Key takeaways:
- Managed hosting provider
- Completely customizable
- 1&1 WP Assistant
18. Liquid Web
Source: Liquid Web
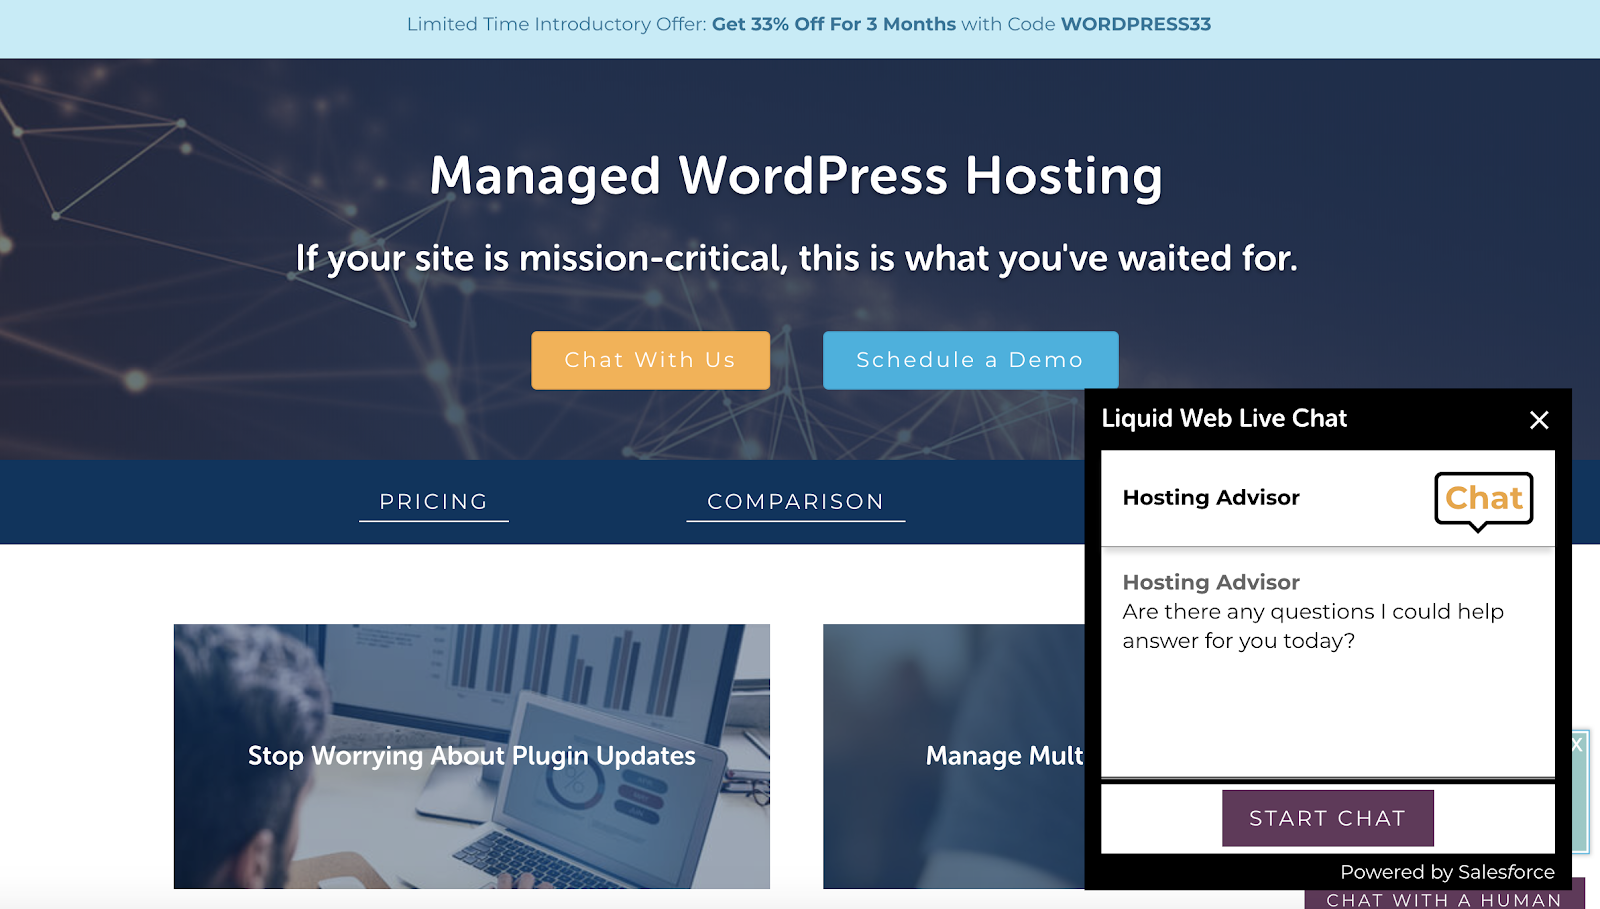
With Liquid Web’s managed WordPress website hosting, you can oversee multiple sites at once. The provider’s automatic updates differ from that of other providers because they happen in a separate environment which prevents any conflict between them and your site (which could significantly slow down your site). Liquid Web automatically compresses all of your images, which is a feature unique to the provider, to keep your site efficient.
Key takeaways:
- Managed WordPress website hosting
- Automatic updates for your plugins
- Compresses all of your images
19. Pagely

Source: Pagely
Pagely is a managed WordPress provider equipped with a modern hosting stack and SSL acceleration, both of which make your site faster. Pagely is backed by expert support that is available to you 24/7 so you’ll never feel lost or confused.
Pagely is also unique because it backs your website with AWS, or Amazon Web Services, which provides your site with scalability and redundancy, so there is automatic back up and replacement in the case of any website system failure.
Key takeaways:
- Modern hosting stack and SSL acceleration
- 24/7 customer support
- Backed by AWS
Back To You
Whether you’re looking for speedy loading times, 24/7 support, managed or shared hosting, or daily backups, there is a WordPress hosting provider that will fit your needs. The good news is several of the options mentioned above have free trial periods and money back guarantees that will allow you to determine which option is the best fit for you and your business. Get started by picking your hosting provider so you can begin creating your dream website today.

How to Use WordPress: Ultimate Guide to Building a WordPress Website
The thought of creating your own website may seem overwhelming.
You might even think this task would be impossible for anyone but a developer or a person with a background in web design.
Well, I have good news for you — there’s a software out there that’s so easy to use, virtually anyone can successfully create a unique and professional-looking website for their business, blog, portfolio, and more. It’s called WordPress.
But how?
This ultimate guide will cover a basic step-by-step process of creating your own WordPress website as well as a list of tips and tricks to remember while working with WordPress.
But first, let’s answer the question most people have when they begin thinking about their new WordPress website: What is the difference between WordPress.org and WordPress.com?
WordPress.org vs.WordPress.com
The difference between WordPress.org and WordPress.com has to do with who is actually hosting your website.
You host your own website or blog on WordPress.org, through a third-party hosting provider. You also have to download your WordPress software, buy a domain name on a third-party site, and manage your server. It’s a much more hands-on experience than with WordPress.com. Also, your URL with a WordPress.org site will look like this: www.mywebsite.com.
WordPress.com offers to host your website for you. You also don’t need to download any software or manage a server. If you choose WordPress.com, your website’s URL will look like this: https://ift.tt/1Pt8449. However, you have the option to also upgrade your WordPress.com account and buy a custom domain from a third-party provider (meaning your URL will look like this: www.mywebsite.com).
How to Choose Between WordPress.org or WordPress.com
You may be wondering whether WordPress.org or WordPress.com would be a better fit for you. Let’s review a few more of the pros and cons that come with both options so you can make an informed decision.
WordPress.org is ideal if you want full power over customizing and controlling your website. However, there is a lot more responsibility that comes with managing a WordPress.org website site. You have to purchase and set up your own domain name, upload and install all of your custom plugins and themes, edit your website’s code, and manage your website’s security. WordPress.org is free to use, but you have to pay for everything else that goes into having a website (including but not limited to everything I’ve just listed).
WordPress.com is preferable if you’re looking for an option that has most of the hard work done for you. You’ll never need to manage your server, pay for your hosting, or buy a domain. There are also a number of customization options that come with a WordPress.com plan to help you make your website look the way you want it to.
WordPress.com has a free and paid version. If you stick with the free version, you can’t upload any custom themes or plugins, and you will have a WordPress subdomain. However, there is always the option to pay for premium upgrades and other plans that provide you with even more features and control, as well as the option to buy a custom domain through a third-party site.
WordPress for Beginners: How to Use WordPress
There are a number of ways for you to create your dream website with WordPress. Users generally find the software easy to use, but getting started can be understandably intimidating if you’re completely new to the process.
That’s why we have built this “WordPress for beginners” guide. Below, we will cover how to start creating your website.
How To Create A WordPress Website
WordPress is one of the most popular CMS options available today according to TechRadar. Its ease of use and versatility enable the majority of users and business owners to create a website that works for their needs with the software. Here’s how you can do the same.
1. Pick a WordPress plan
To begin creating your website, pick a WordPress plan. As stated earlier, with WordPress.org, you only have one (free) plan option — but it requires you to buy your domain, hosting provider, plugins, themes, and everything else related to your WordPress site.
When it comes to WordPress.com, you’ll have to choose between the four plans they offer.
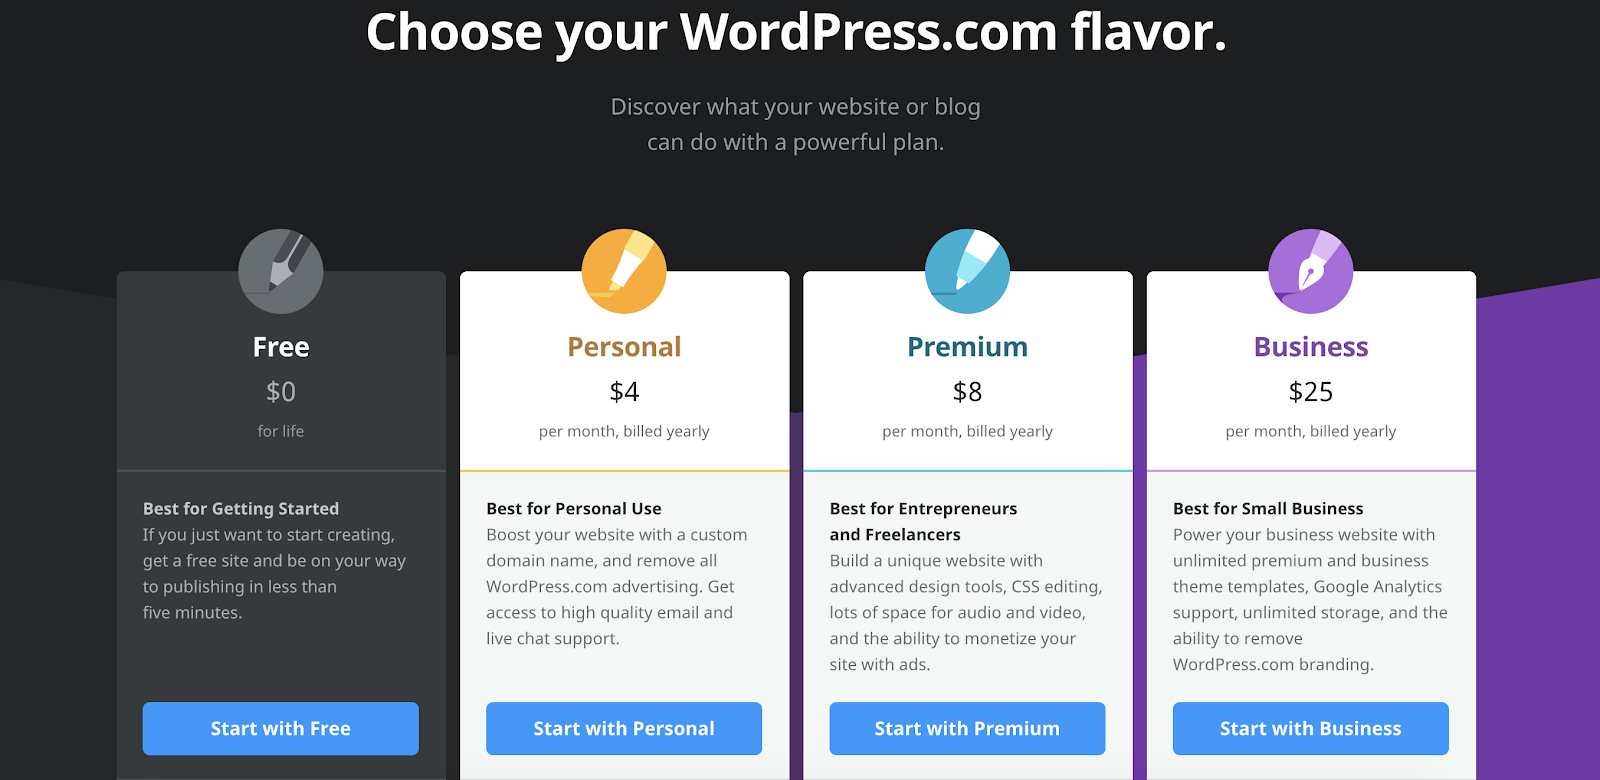
The main differences between the four plans include the monthly fee, your ability to create a custom domain, and their number of features.
2. Set up your domain name and hosting provider
Setting up your domain name and choosing your hosting provider typically happen around the same time in the website creation process.
Before we talk about how to complete those tasks, let’s cover the difference between your domain name and hosting provider.
Think about your domain name as your home address — it’s how your visitors are able to locate your website on the internet. Your hosting provider is where your website is actually stored. Without a hosting provider, your site wouldn’t have space on a server to “live”.
To put it in simpler terms: Imagine your domain name is your home address and your hosting provider is your house. Your data files, which make up your website, are the furniture in your house.
Your domain name will look something like this: www.example.com. An example of a popular hosting provider is WP Engine, which you can learn more about here.
Source: WP Engine
How to pick domain and hosting providers
Again, WordPress.org requires you to create your own domain and find a third-party hosting provider for your website. WordPress.com allows you to decide whether or not you want a custom domain depending on the plan you choose, but you will still have to find a third-party hosting provider.
There are hundreds of third-party hosting services, such as GoDaddy or Bluehost, that provide you with the ability to create custom domain names. (Again, this is why so many people pick their domain and hosting provider at the same time in the website creation process.) Your hosting provider is important — not just because it’s how you host your site — but because it impacts your website’s speed, security, reliability, and more.
There are hundreds of hosting providers to choose from, but the good news for you is we put together a list of 19 of the best WordPress hosting providers to help you decide what will work best for your own website. All 19 of these providers meet WordPress’ three hosting requirements (listed below). If you still have an interest in looking at other hosting providers for your site, make sure they meet the following criteria:
- PHP version 7.2 or greater
- MySQL version 5.6 or greater OR MariaDB version 10.0 or greater
- HTTPS support
Side note: If you are new to WordPress.com but have already purchased and created a domain name elsewhere, no problem — you’ll have the option to transfer or map it to your WordPress website.
For the sake of this guide, let’s assume you do not have a domain or hosting provider at this point. Here’s how to start creating your website on a third-party hosting site like Bluehost.
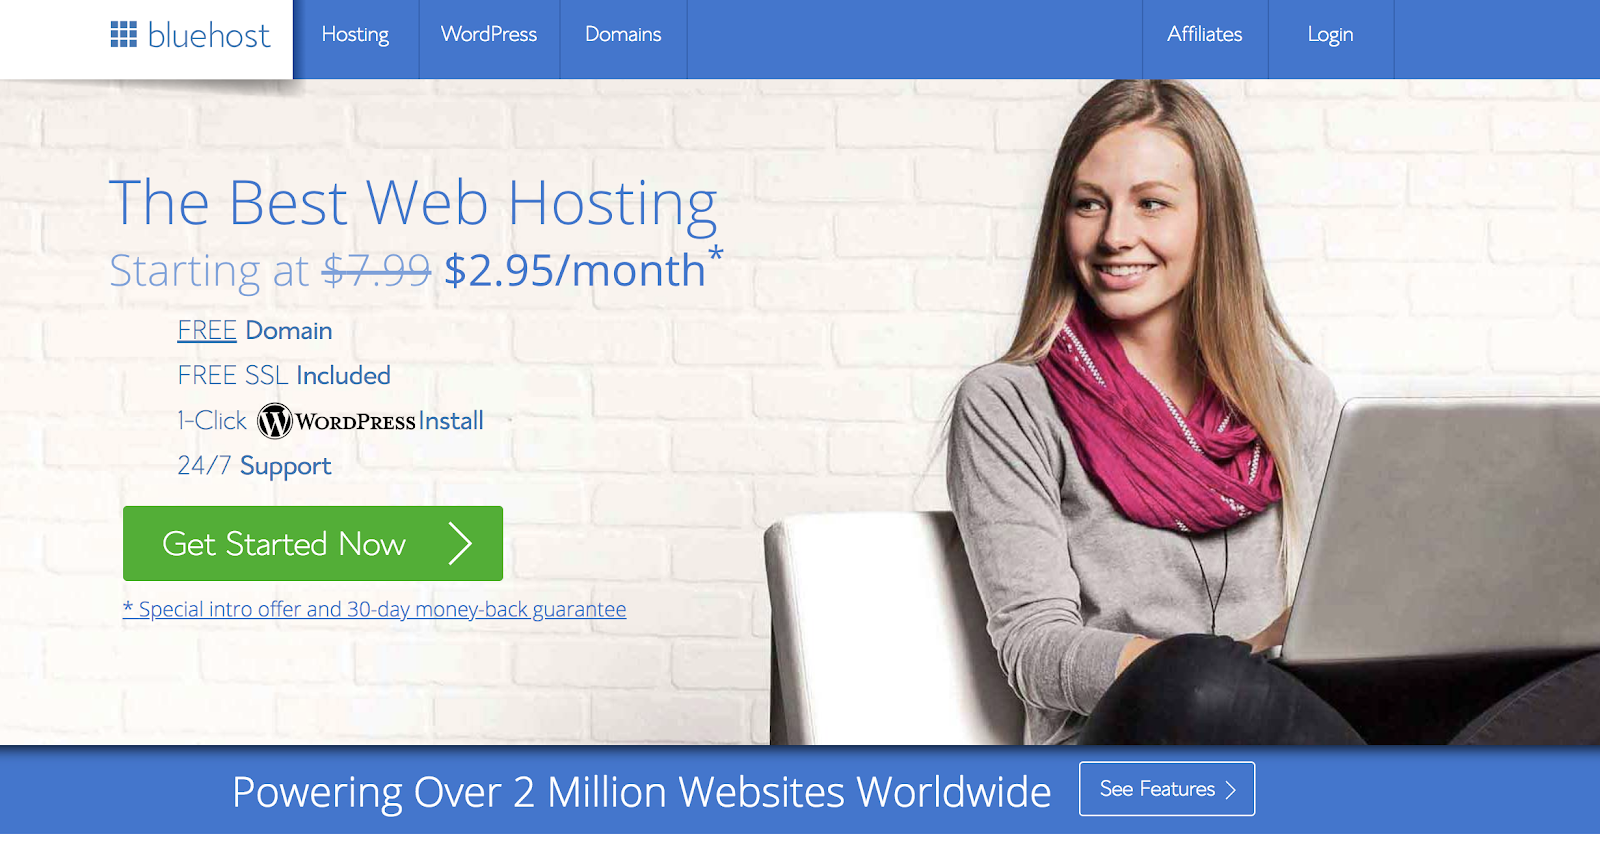
First, head to Bluehost’s website and click “Get Started”.
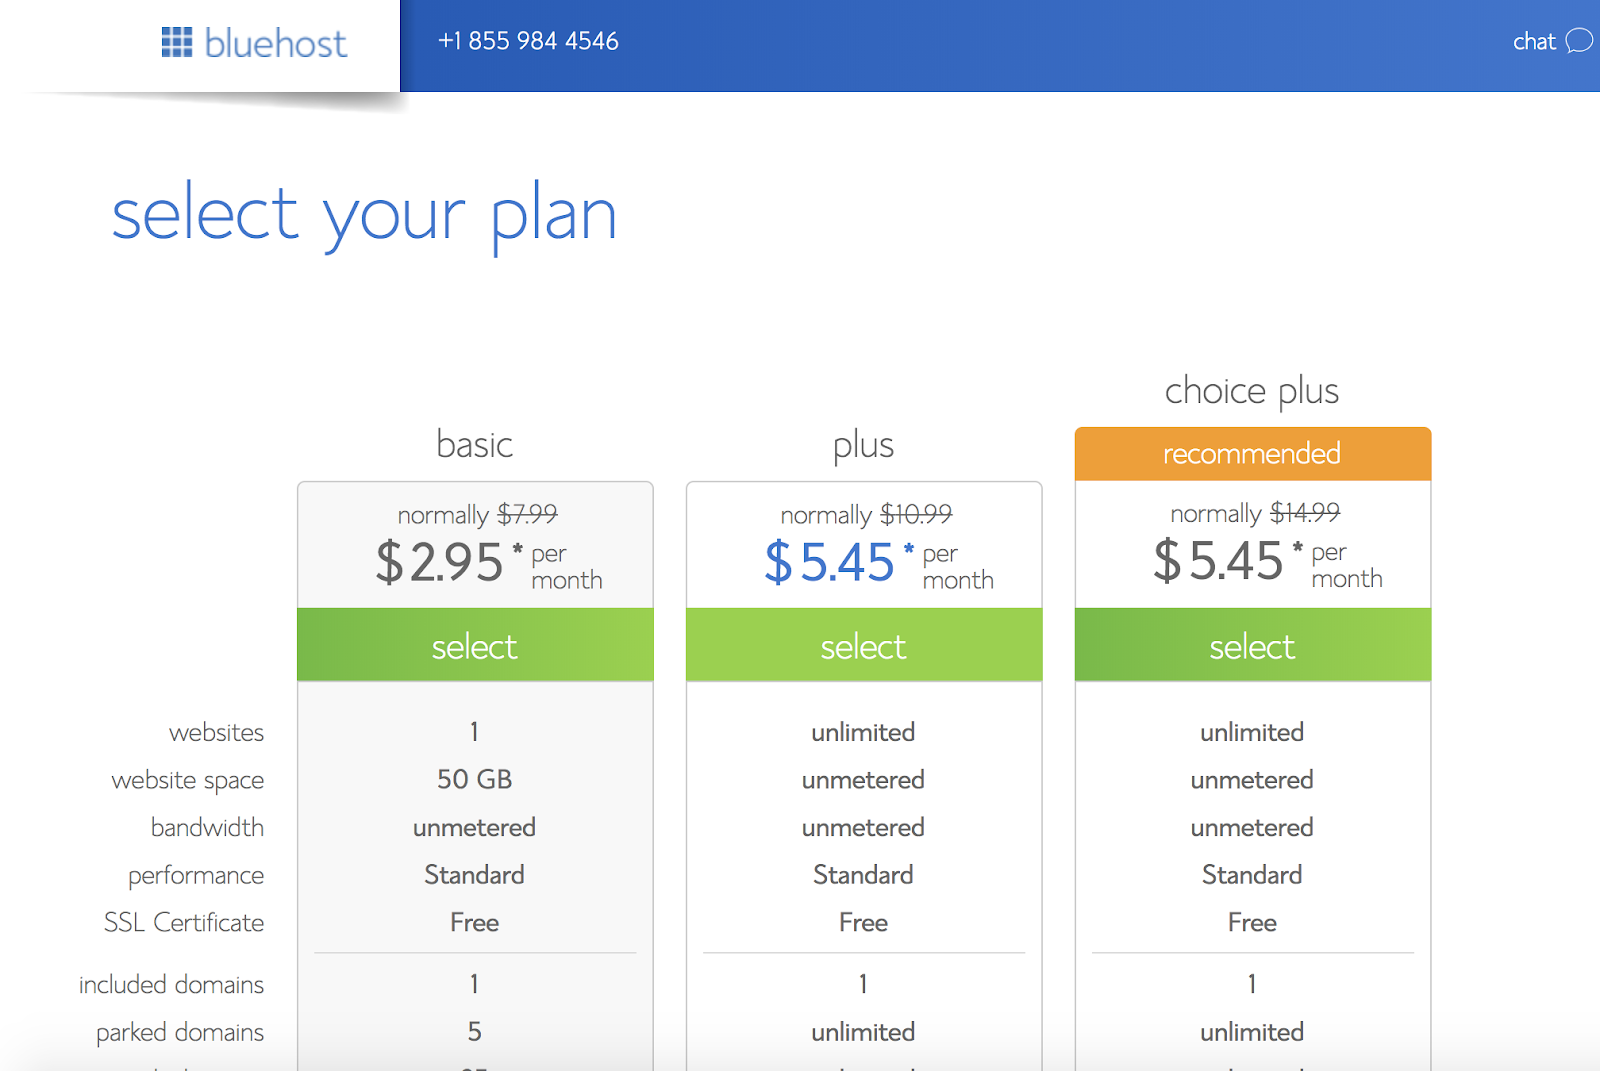
From here, you’ll be taken to Bluehost’s pricing page to choose from three different plans.
Source: Bluehost
Once you choose your plan and click “Select”, you’ll be taken to another page to sign up with a domain name.

Source: Bluehost
Once you select your domain name, you’ll be brought to a page to complete your account and billing information for your purchase.

After confirming your account and purchasing your domain, you will gain access to your hosting dashboard where you’ll be able to install WordPress.
3. Install WordPress
If you are using a hosting provider outside of WordPress, you’ll need to install the CMS to connect your new domain to your website.
This time, let’s use GoDaddy as an example. (Don’t worry, no matter the hosting provider you choose, this process looks exceptionally similar.)
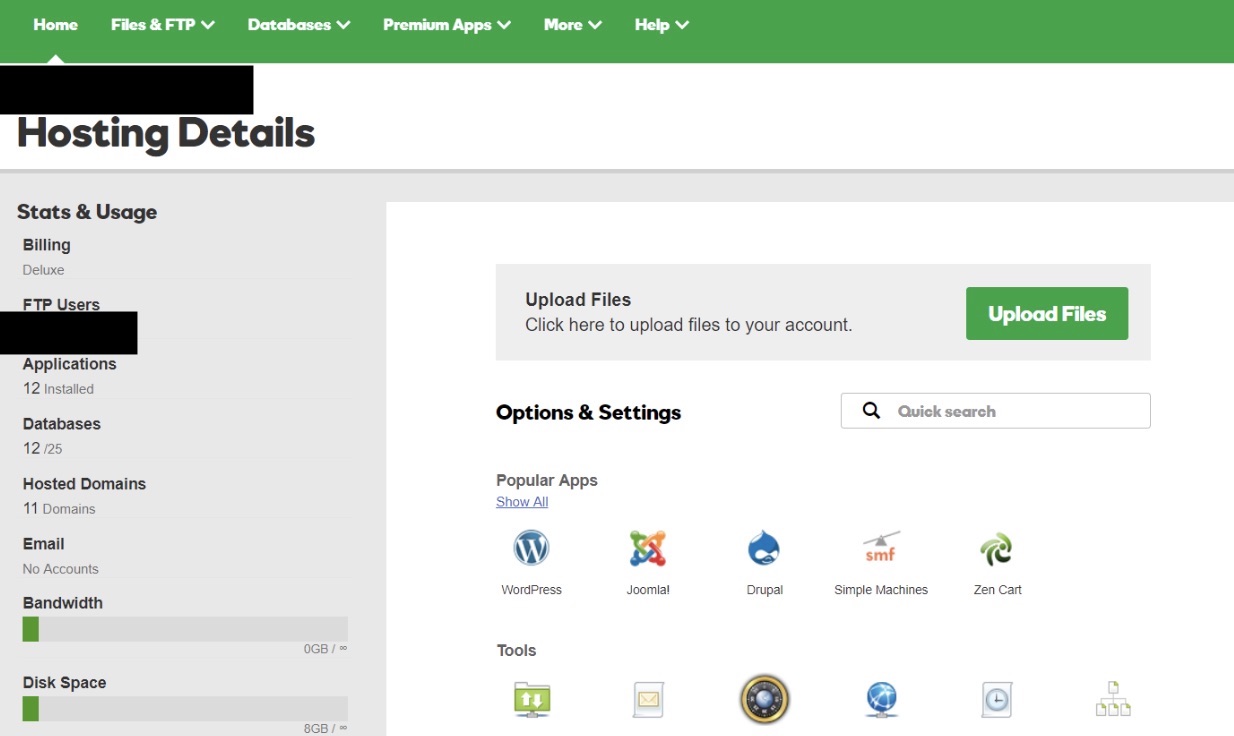
To start, log into your GoDaddy account, click “Web Hosting”, and then “Manage”. You will be brought to a screen with your account details.
Source: GoDaddy
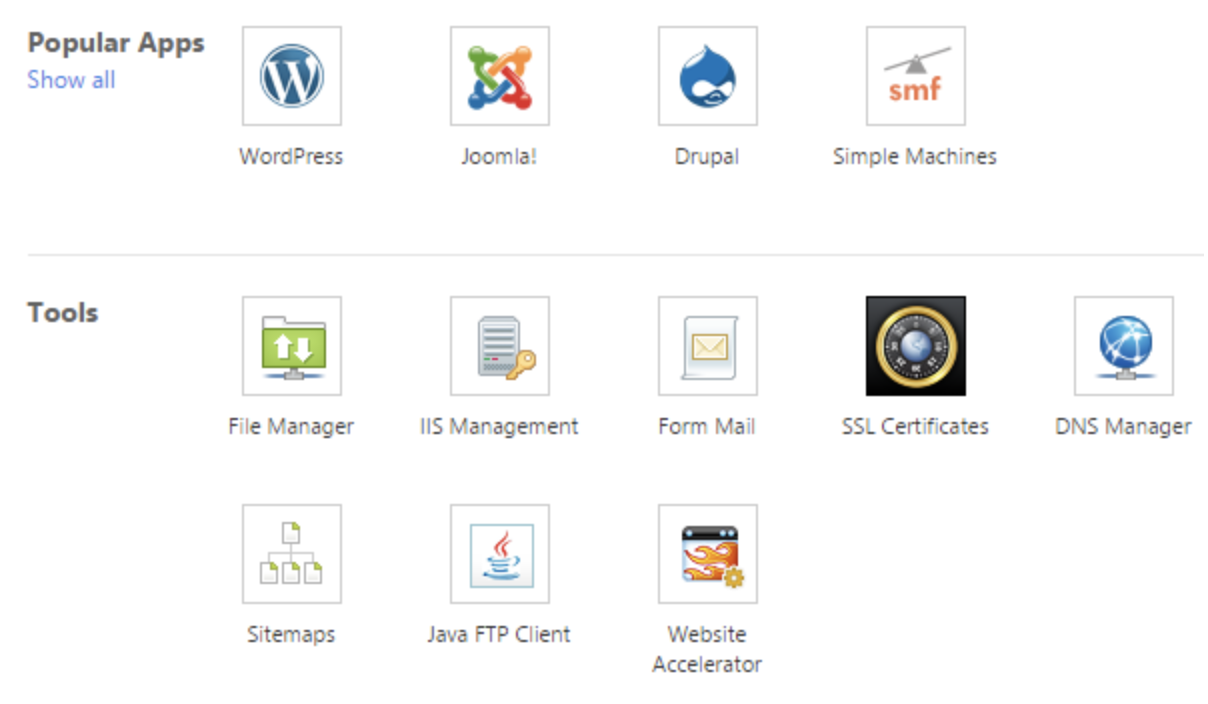
Scroll down and under “Options & Settings”, you will see an area titled “Popular Apps”. Click on the WordPress app to begin the installation.
Source: GoDaddy
After installing WordPress, there will be a few questions to answer related to the domain you want to use, the directory where you want to install WordPress, and your admin information.
After about 24 hours, your website will be installed to your hosting account, and GoDaddy will send you an email confirmation.
Now that you have your domain set up and WordPress installed, we need to set up your “Primary Domain” within WordPress so your visitors are actually sent to your website when they search your URL.
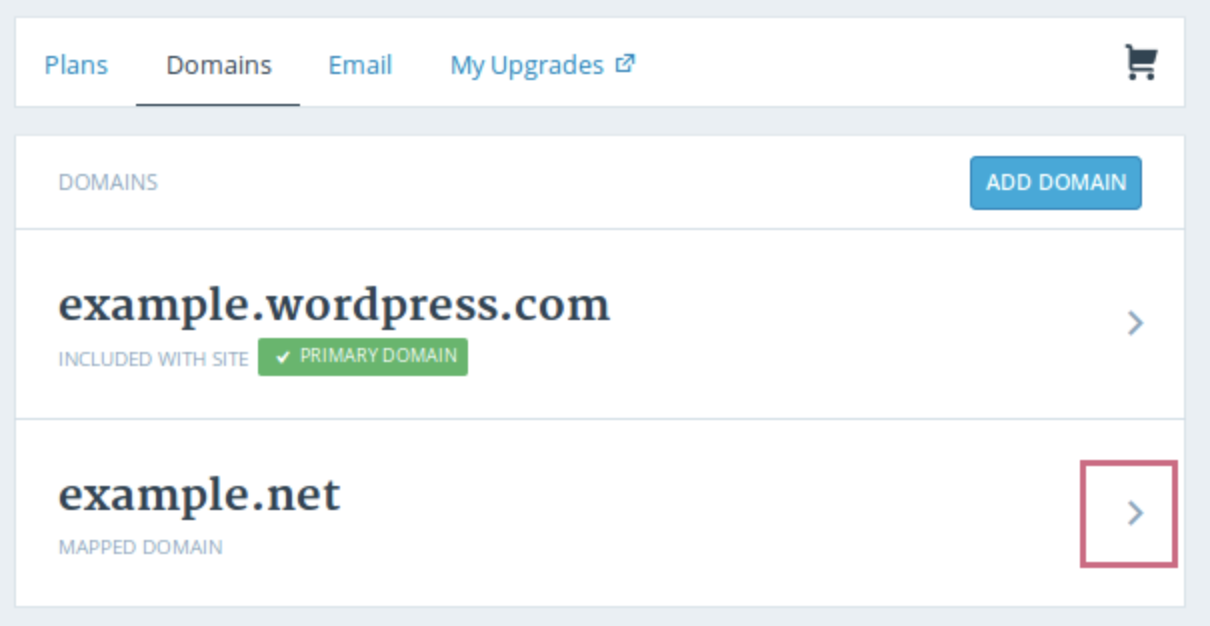
In WordPress, go to “My Site” and click “Domains”. Select the custom domain you want to make primary.
Source: WordPress
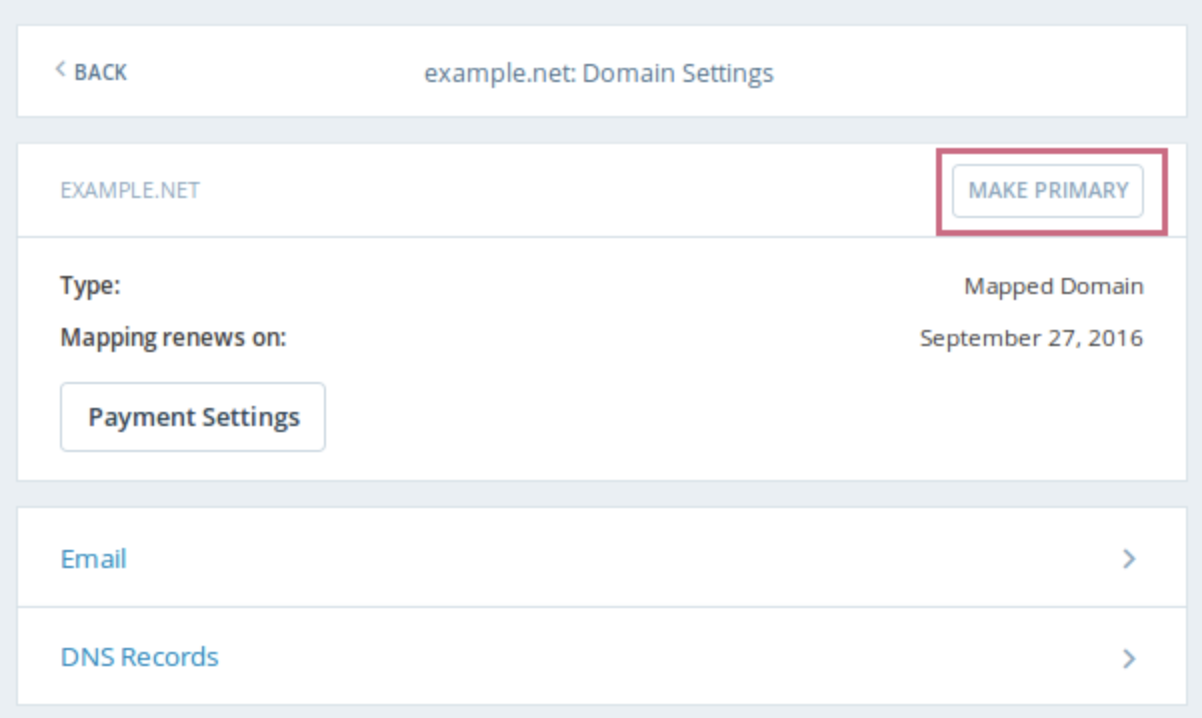
Then, click “Make Primary”.
Source: WordPress
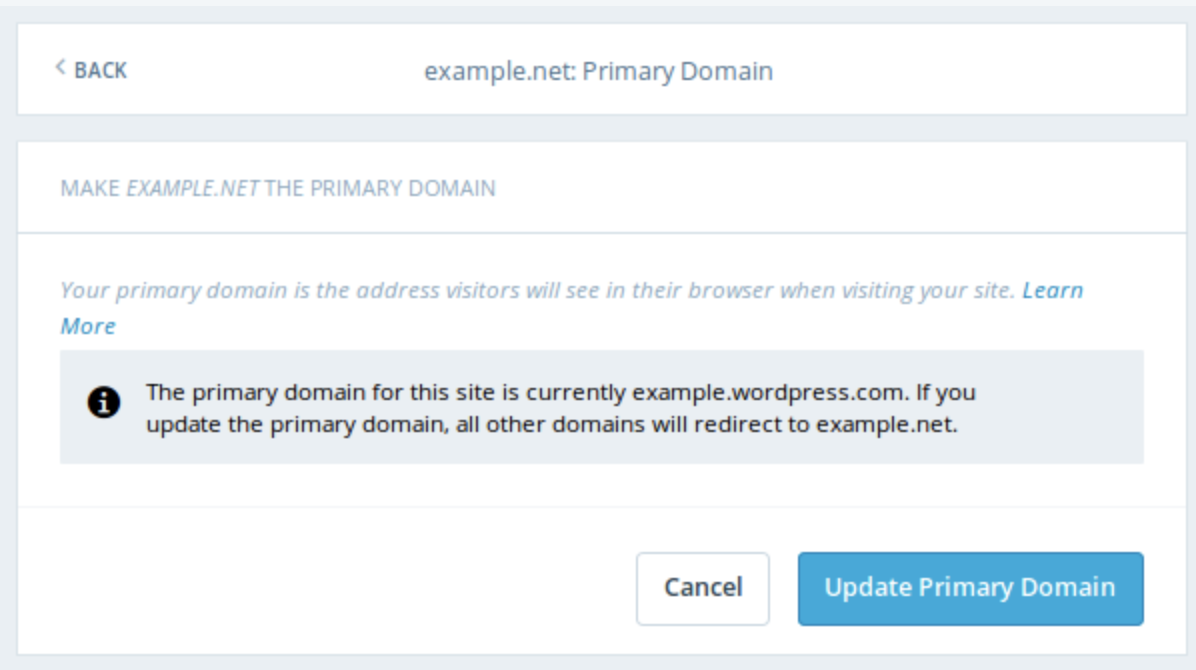
Confirm you meant to make this change by clicking “Update Primary Domain”.
Source: WordPress
Verify the update was successful by looking for a green box with a checkmark that says “Primary Domain”.
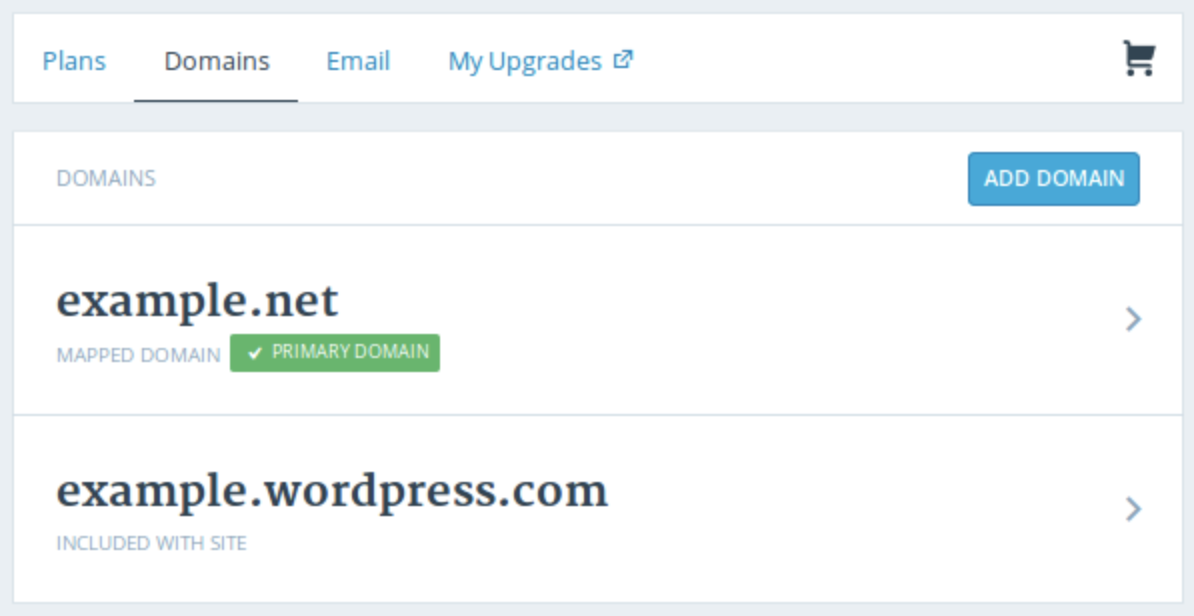
Source: WordPress
Onto step four — making your website look nice.
4. Choose Your Theme
You can customize your website using WordPress’ themes and templates, which contain a multitude of layouts, formatting styles, colors, fonts, and other visual options.
WordPress automatically provides you with a default theme that looks rather plain. Sure, you can keep it … but your website visitors may not be so impressed. A custom WordPress theme, whether it’s paid or free, will make your website appealing to your buyer personas as well as ensure it looks professional.
Similar to the wide range of hosting providers available, there are also hundreds of themes and templates to choose from. That’s why we’ve put together a guide to 19 of our favorite themes and templates and categorized them by purpose. Whether you’re looking for a theme versatile enough for multiple different business types, or one suitable for your ecommerce site, portfolio, blog, or niche business, there’s a theme that will work for your specific needs.
To find a theme that works best for you, head to your WordPress admin dashboard. Click “Appearance” and then “Themes”.
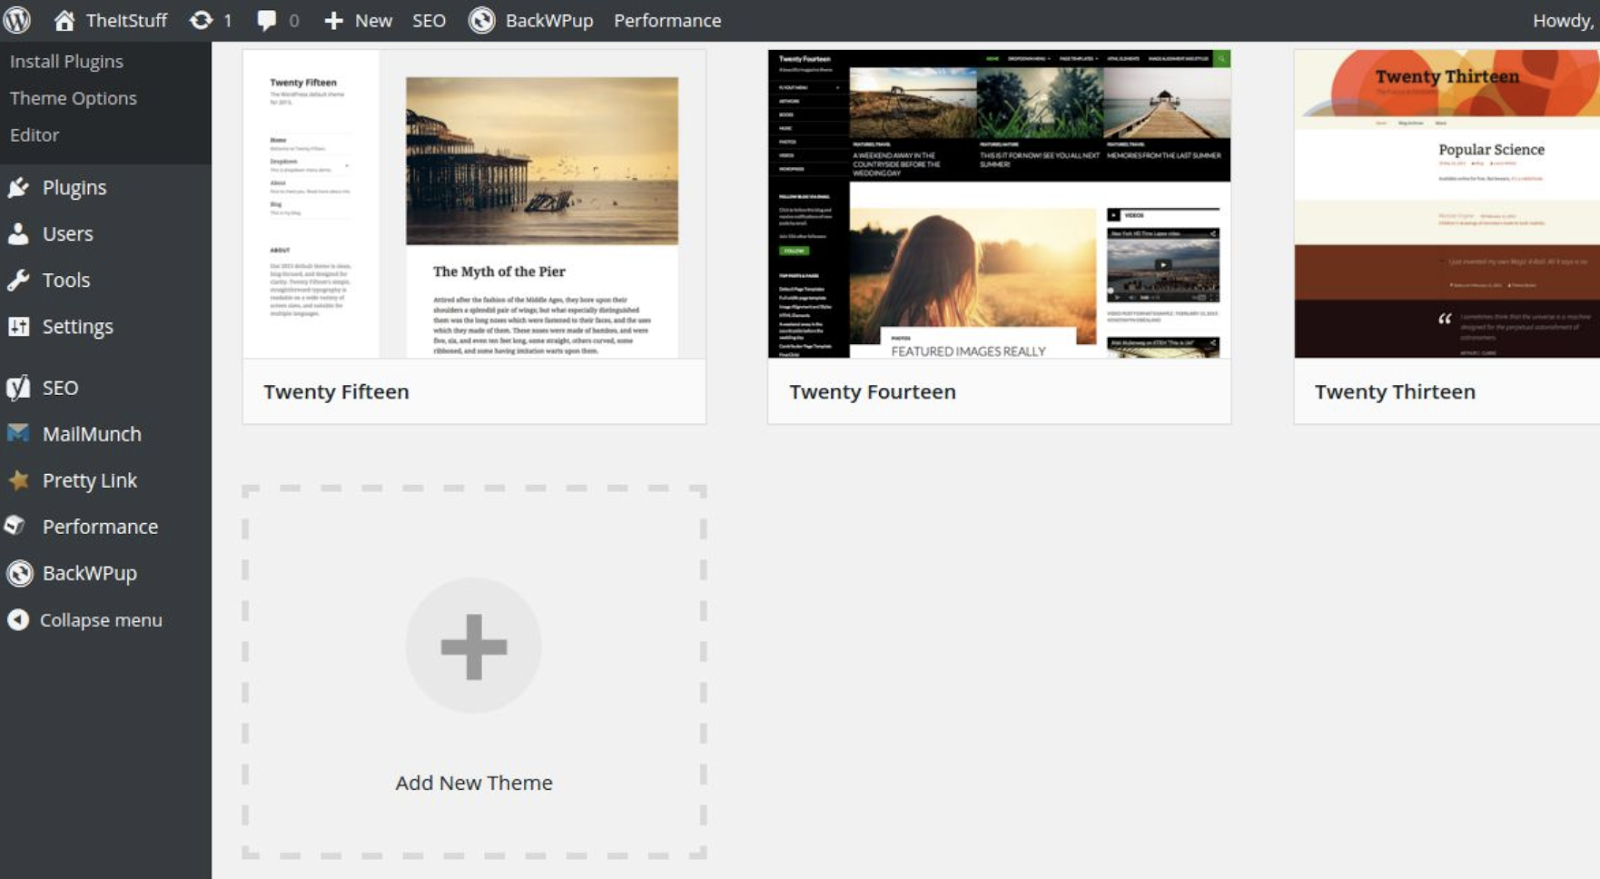
You will then be brought to another screen to browse all available themes or search for a specific one you have in mind.
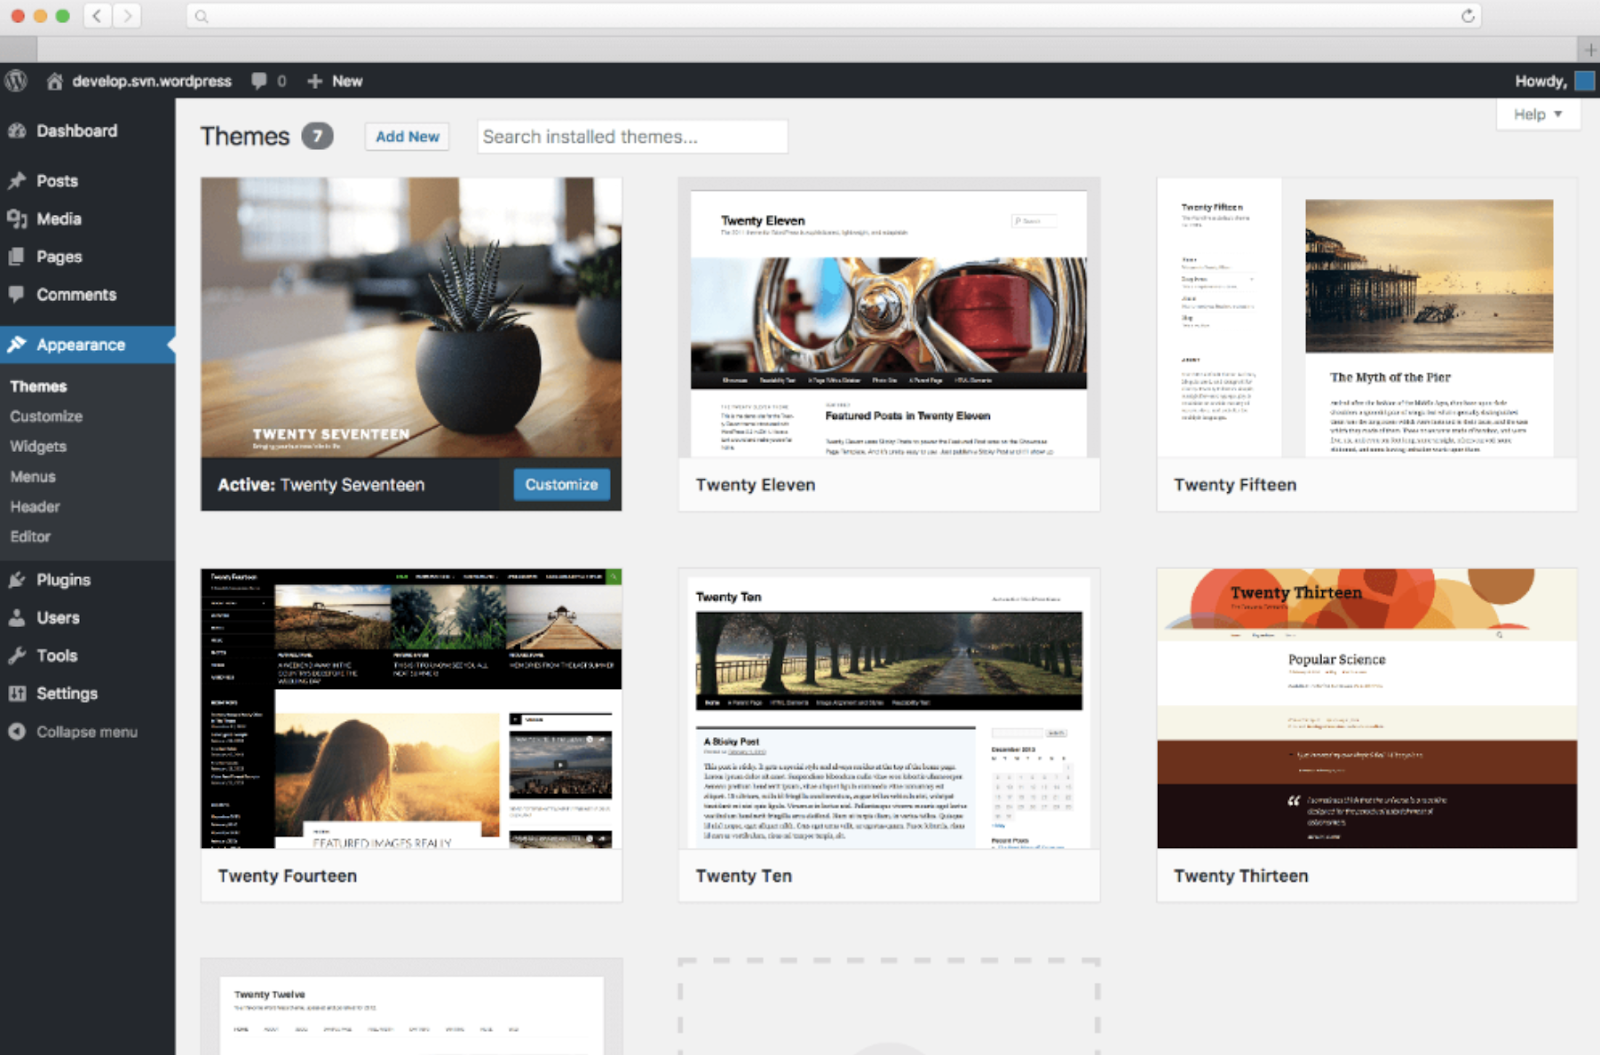
Once you discover the perfect theme, simply “Install” it to begin customizing it and adding your own content, posts, and pages. Each theme has different steps required of you during the customization process, so be sure to follow them closely. Each theme’s website (which are often accessible through the WordPress theme and template library) has helpful information as you work through the customization process.
5. Add Posts and Pages to Your Website
When you add content to your WordPress website, it’s displayed in the form of posts and pages.
Posts (or “dynamic pages”) are typically used for blogs and portfolios because they automatically place your newest website content at the top. Pages are static which is why they often appeal to business owners — the added content always remains in the same place.
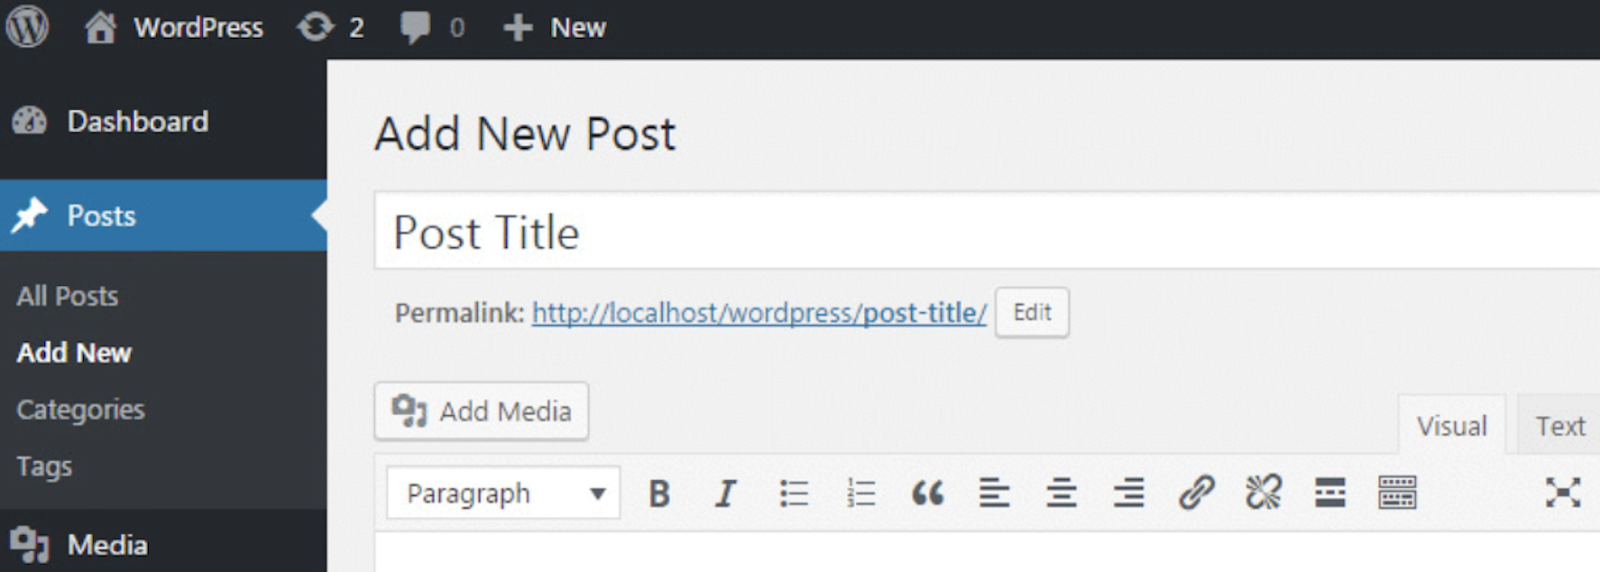
Start by deciding whether you want a post or page to serve as the homepage (or any page) of your website. To add a post to your website, go to the admin page, click “Posts” and then “Add New”. From this screen, add a title for your post, insert photos, change the format, and more.
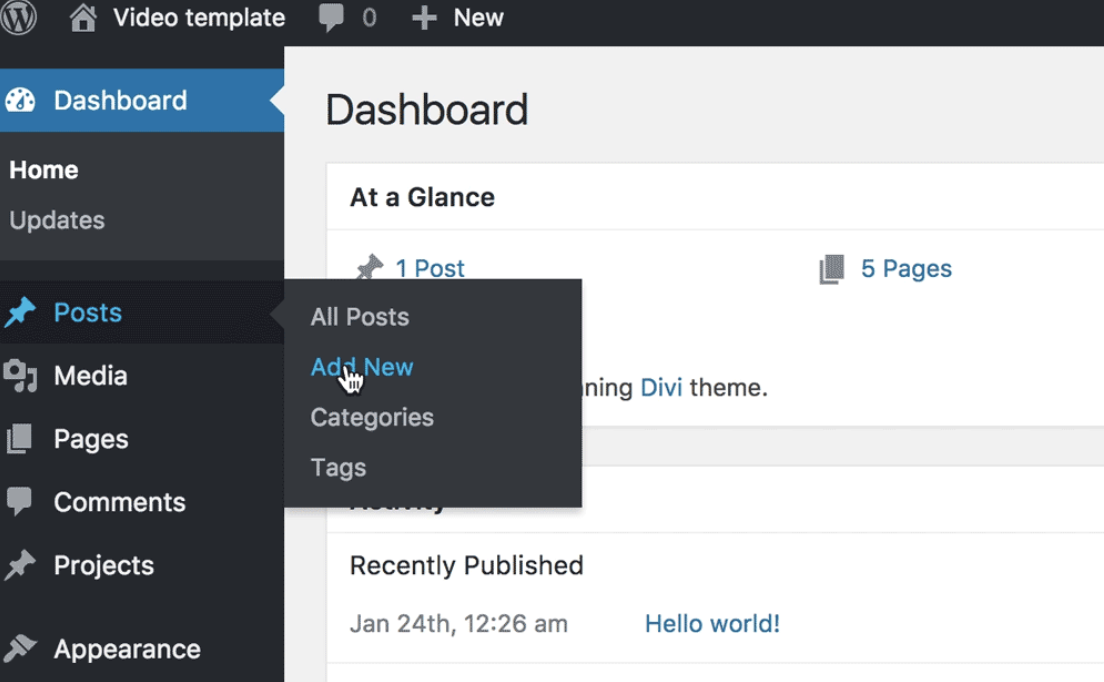
Source: First Site Guide
Click “Save” to save your changes as a draft or “Publish” so the post immediately goes live.
If you’re looking to add a page to your website, you’ll work through a very similar process. In your admin area, click “Pages” and then “Add New”.
First, add a title to your page. Next, insert photos, embed videos, add written content and links, and more.
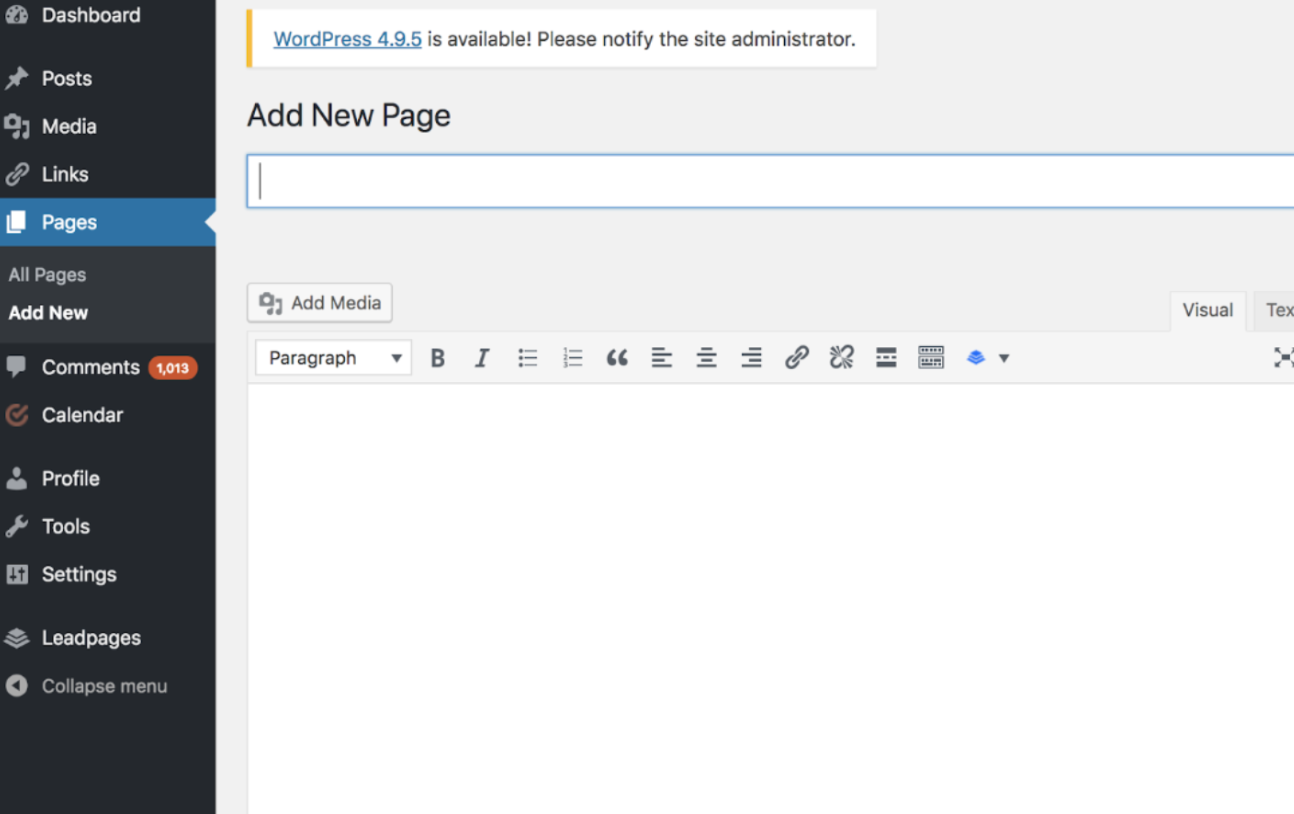 Source: The Hard Refresh
Follow the same steps to create multiple pages for your website if you choose.

Source: The Hard Refresh
Click “Save” to save your changes as a draft or “Publish” so the page immediately goes live.
6. Customize Your Website
There are a number of ways to further customize your website. Let’s review a few of the more common customization options.
First, create static or dynamic pages under the “Settings” tab in your WordPress admin page.
Consider using a static page if you’re a business owner who prefers having content remain in one place on your website. For example, it wouldn’t make sense for your “About Us” page to contain content that moves around — you’d want that content to remain in one location for consistency. Consider using a dynamic page if you’re a blogger who prefers having your newest content appear at the top of your pages. This way your visitors can easily find your latest posts.
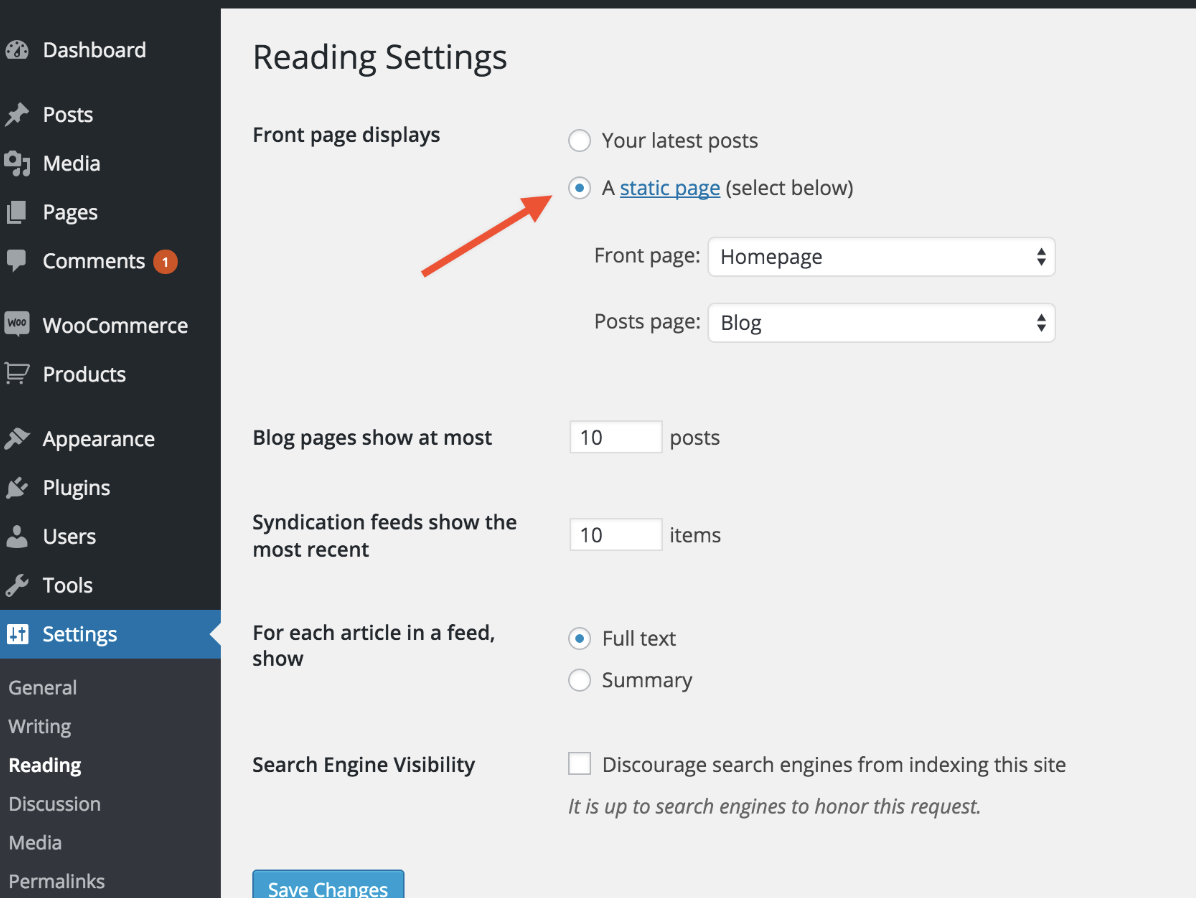
Source: WooCommerce
Titles can also be customized — to do this, head to your admin page. Under the “General” section in “Settings”, add a website title and tagline.
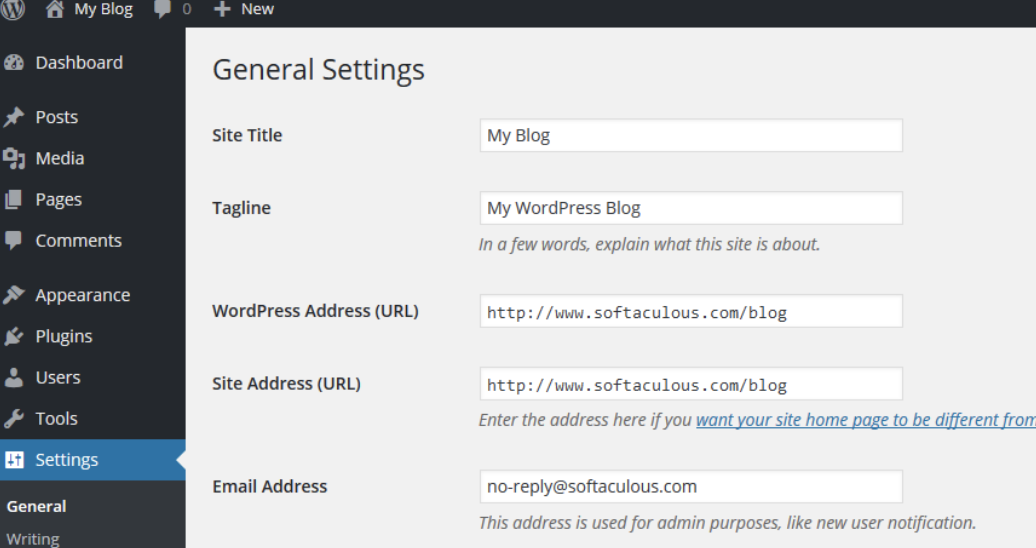
Source: Softaculous
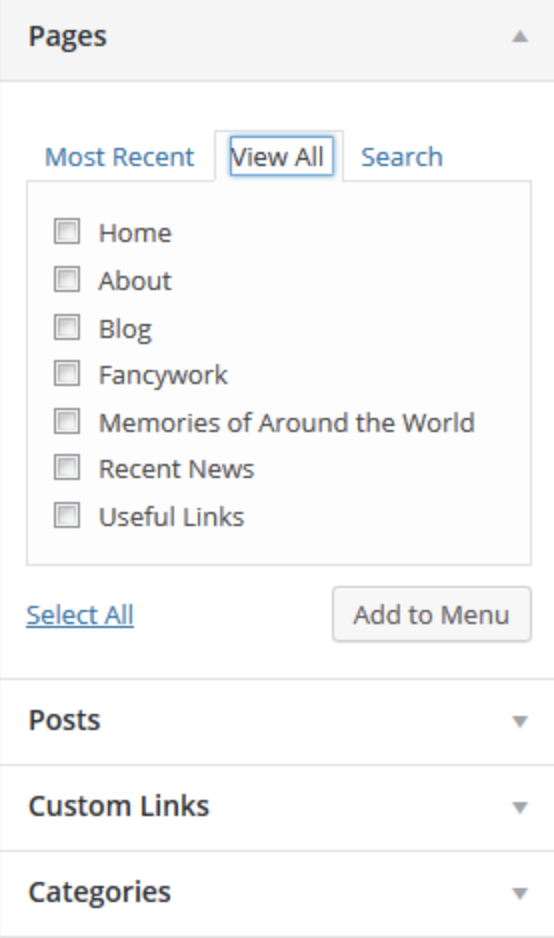
One particularly handy customization feature is a navigation bar. This enables your visitors to easily move around your website and find whatever they need.
You can add a navigation bar by going to your admin page, clicking “Appearance” and then “Menus”.

Source: WordPress
From here, you can determine how you want your bar to look, how many pages you want to include, what you want to title those pages, what order you want them to be listed in, and more.
Click here for more information on your WordPress site settings and customization options.
7. Install Your Plugins
Plugins are how you choose options and themes. They also enhance user experience with the help of features that your WordPress website doesn’t automatically include. With over 56,000 available plugins, there are options for most every type of website and user. Some of the most popular plugins available include WordPress Contact Form, Yoast SEO, TablePress, The SEO Framework, HubSpot Conversion Tools, and Pixel Caffeine.
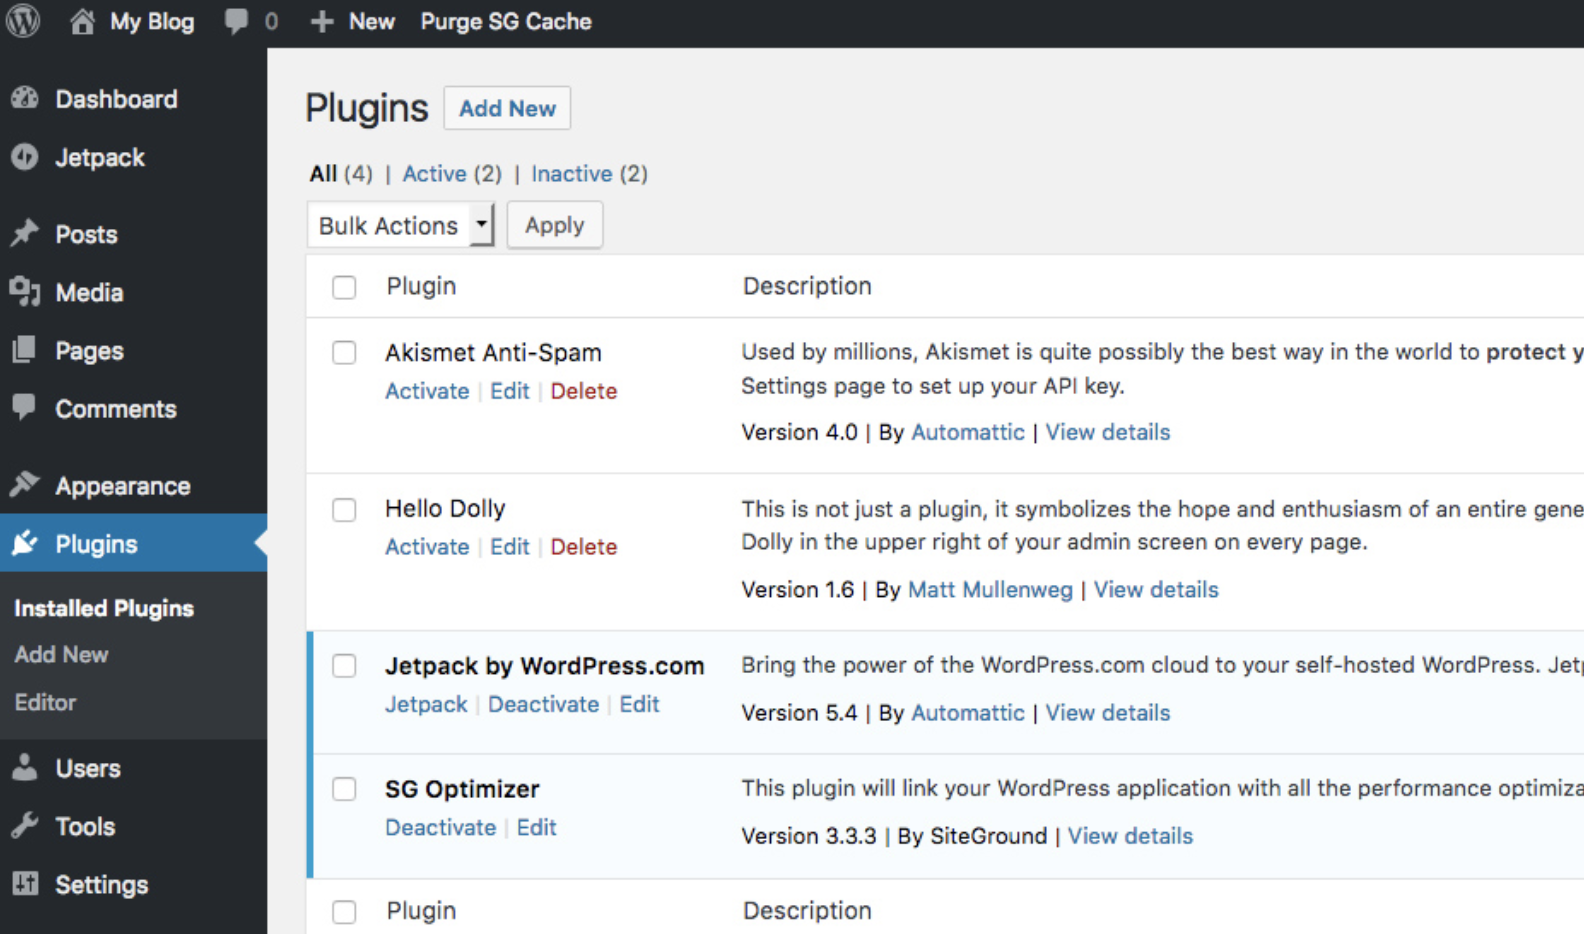
To begin installation, head to the “Plugins” button in your admin area.
Source: SiteGround
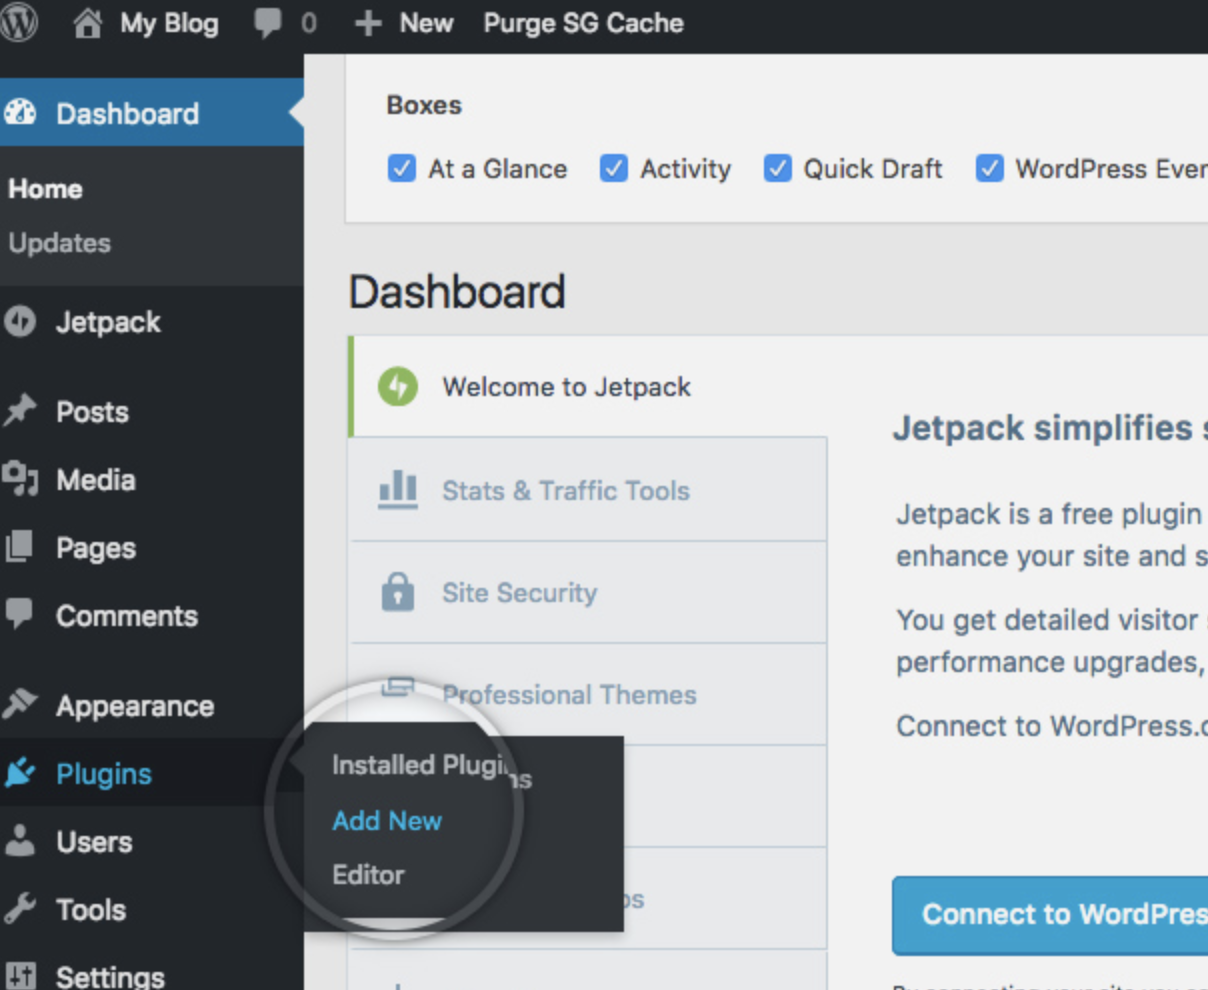
Click “Add New”.
Source: SiteGround
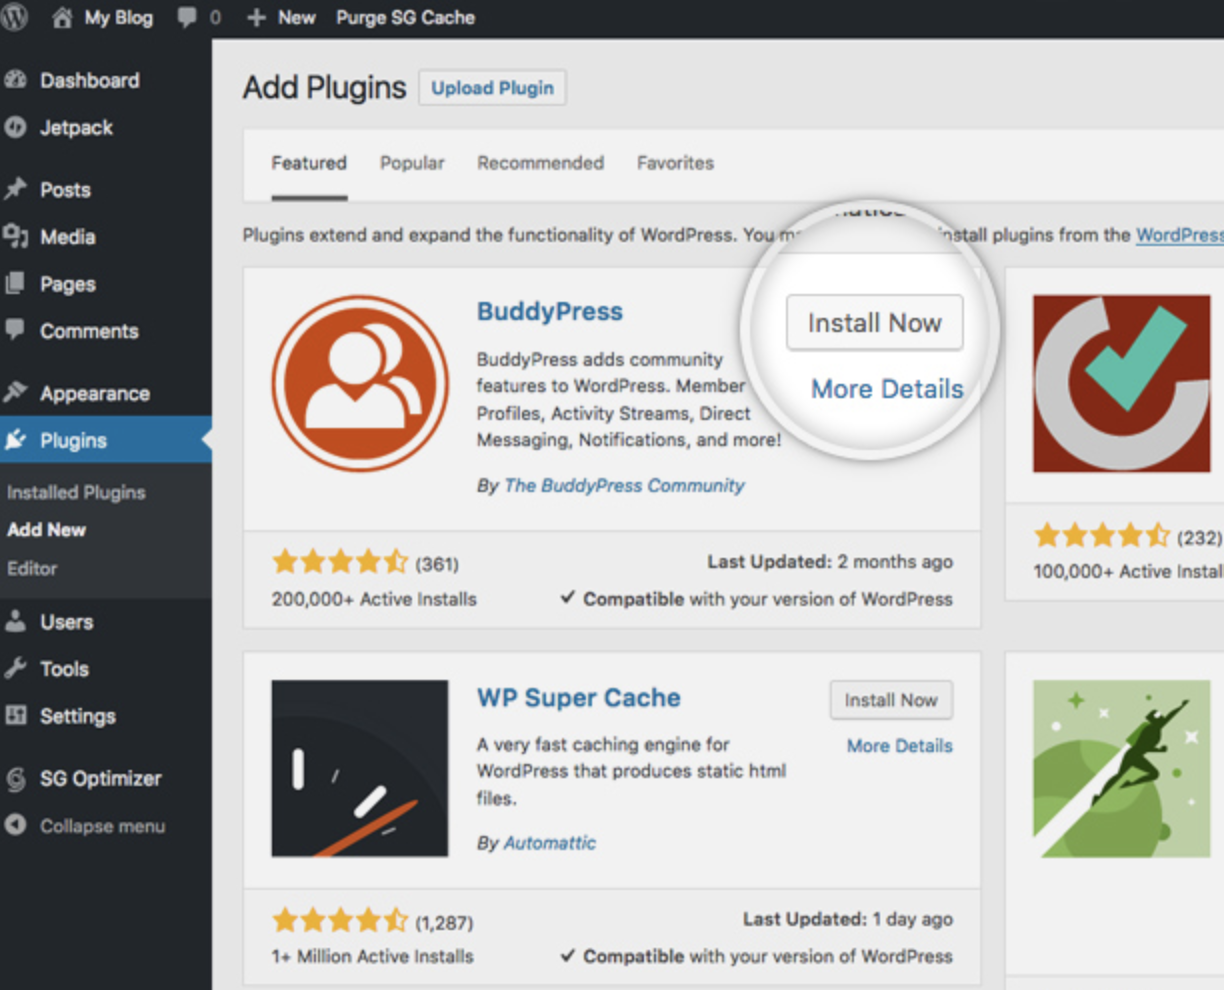
Browse or search for your desired plugin and then click “Install Now”.
Source: SiteGround
You should now have access to your new plugin.
WordPress Website Tips and Tricks
There are a number of WordPress tips and tricks to make your website as impactful and user-friendly as possible — we’ve listed 20 of them below to help you do just that.
1. Focus on the basics and create a great user experience with a WordPress theme that complements your business and website content.
2. Use dashes and not underscores when naming your files in WordPress. Google looks as underscores as joiners, meaning your file will look like one big word. That won’t help you with your SEO. Use dashes to make it obvious there are separate words. (For example, use https://ift.tt/2CWyE97, not https://ift.tt/2P8AhYz).
3. Use WordPress’ online support for any questions or concerns you may have while creating or using your website. There are a number of forums and ways to reach out to WordPress experts listed on their website.
4. Use Image Alt Text to your advantage. Image Alt Text can be used to improve your SEO and Google rankings when used appropriately.
5. Keep your sidebar as organized as possible. Stick to the essentials and think about what your website visitors and buyer personas really need quick and easy access to.
6. Back up your website regularly so if you ever lose access or have technological difficulties, you have everything you need to completely restore your content. There are a number of plugins, such as Backup Buddy, made specifically for backing up your WordPress content.
7. Learn and understand SEO basics to ensure your website is completely optimized so you can boost your conversions.
8. Create a custom homepage. As mentioned earlier, WordPress will provide you with a default homepage. Take the time to create your own with a theme that works for your business — remember, this is your visitor’s first impression of your business, blog, or portfolio.
9. Keep an eye on your website’s performance and know what is and isn’t working for your visitors. There are a number of useful WordPress plugins to help with this.
10. Include an “About Us” page on your websiteto show your visitors you’re a trustworthy person and/or business. “About Us” pages are known to be the second most-visited pages on websites (after homepages) — so introducing yourself is important
11. Make sure your site is secure to ensure there are no hackers gaining entry. Again, there are plenty of plugins to help you with this.
12. Create custom permalinks. Permalinks are the permanent URLs that you plan to keep static for the foreseeable future. They’re important because they improve user experience and enhance your SEO.
13. Create a custom navigation bar (as we reviewed earlier) to make your site easy to use for your visitors.
14. Include excerpts and a click-through on your blog posts so people don’t land on your blog page and see your entire piece at once. By only including excerpts on your blog page, you make room to list all of your blogs in one location. Visitors can then read the excerpts and click-through to read the posts they are most interested in.
15. Structure your website in a way that makes sense for your business, visitors, and buyer personas. For example, use posts if you’re a blogger and use pages if you’re a business owner.
16. Remove “Comment” and “Share” buttons from specific pages of your website. You don’t need (or want) a “Comment” or “Share” button on your “About Us” page, or any of your service pages for that matter.
17. Consider what your website looks like on mobile. It’s no secret people are searching the internet while on their phones, tablets, and other mobile devices these days. Consider using a plugin to help you achieve a responsive, mobile WordPress design.
18. Use visuals and video content when possible to break up the text on your website pages.
19. Update your WordPress site and your plugins regularly. WordPress will tell you when updates are released. This will keep your website looking fresh and working efficiently.
20. Use social proof to show your new website visitors how many other people have already subscribed to your site and content. There are plugins to help you do this in a matter of minutes.
Conclusion
Having a great website matters. It’s how you connect with your visitors and leads, create a positive first impression with new users, and boost conversions. The good news is creating your own website doesn’t have to be a daunting process … at least not with WordPress.
The easy-to-use CMS offers completely customizable plans suitable for all needs. With no prior knowledge necessary, you can start building your own site for your business, blog, portfolio, or online store immediately.

The SEO’s Guide to Google’s Disavow Links Tool
If you’re an SEO, you probably know that backlinks are Google’s number one ranking factor. According to the search engine’s website, backlinks are a heavy indicator of a quality site. But to boost your website’s domain authority and rankings, acquiring an influx of backlinks isn’t enough. Pleasing Google’s algorithm will never be that straightforward.
Google generally prefers your website’s link profile, which is a list of all your site’s backlinks, to consist of links from a high variety of sites and high-authority sites — they consider this a marker of an authoritative and trustworthy website.
That said, poor or undesirable links from low-authority sites can penalize your website and plummet your rankings just as much as high-quality links can boost them.
Fortunately, Google’s Disavow Links Tool lets you tell the search engine to ignore specific backlinks when it crawls your website. This allows you to nix spammy, irrelevant, and low-quality domains from your site and strengthen your link profile.
Before you start scrapping links from your website, though, you should know disavowing links that don’t pass the eye test could actually hurt your domain authority and rankings. Sites that seem spammy, irrelevant, or low-quality might not always be a threat to your site — they might even boost your domain authority and rankings.
With this in mind, you must be absolutely sure the links you plan to disavow are harmful. But this begs the question: how do you objectively separate the good links from the bad? Read on to find out how.
How to Disavow Links
- Audit your link profile with SEMrush’s free Backlink Audit Tool to identify your site’s most harmful links.
- Upload these harmful links as a text file into Google’s Disavow Links Tool to remove them from your website.
1. Audit your link profile to identify your site’s most harmful links.
The first step to pinpointing your site’s most harmful links is examining all of your backlinks. This is impossible to do manually, no matter how big your site is, but, fortunately, you can analyze all your backlinks with SEMrush’s Backlink Audit Tool.
To use their Backlink Audit Tool, you first need to sign up for a free SEMrush account. After you do that, click on “Projects”, which is in SEMrush’s left sidebar.

Then, choose your domain and press “Set up” under “Backlink Audit”.

Next, select “www & non-www version” and click “Start Backlink Audit”. SEMrush will audit your website’s backlinks and give you a diagnosis in less than 10 minutes.

Once SEMrush completes your audit, they’ll show you a dashboard that displays the number of non-toxic, potentially toxic, and toxic domains that link to your site.

To add more backlinks or your website’s most recent backlinks to your audit, you can connect your Google Search Console account to the tool.

Finally, in the “Domains by Toxic Score” section, click on the red percentage or the toxic domains. You’ll land on a page that lists all your website’s referring domains that SEMrush deems harmful.

To find out why a domain is considered toxic, click on the domain’s toxic score and SEMrush will list its domain score, trust score, and toxic indicators.

You can also filter these toxic domains by their link network, spam in communities, harmful environment, manipulative links, irrelevant source domains, and other complementary options. All you have to do is press “Advanced Filters” and choose your toxic markers.

In SEMrush, you can actually upload these links into Google’s Disavow Links Tool, but if you feel more comfortable uploading them by yourself, export them into an Excel file and follow the next step.
2. Upload harmful links as a text file into Google’s Disavow Links Tool to disavow them.
After you’ve exported the toxic links into an Excel file, copy and paste them into TextEdit, if you use a Mac, or Notepad, if you use a PC. This will allow you to upload them as a text file into Google’s Disavow Links Tool.
Next, visit the Disavow Links Tool’s website, select your website, choose the text file, and then click submit. Google will process your request and disavow the links within a few days.
To boost your search rankings, you must prune your backlinks.
If you’re dedicated to crafting compelling content, your website can earn a ton of high-quality backlinks. But the attention your content attracts can also appeal to some low-authority sites who could attach undesirable backlinks to your website. And Google will penalize you for them.
Fortunately, if you proactively prune your backlinks with SEMrush’ Backlink Audit Tool and Google’s Disavow Links Tool, you can maintain your link profile’s health, boost your website’s domain authority, and watch your rankings soar to the top of SERPs.

Making Your Own Font Is Way Easier Than You’d Expect
If you’re attempting to personalize branding materials or impress a client with a unique design, you might want to consider creating your own font.
It’s easier than it sounds. I have limited (read: none) design talent, and I was able to create a font in ten minutes using Prototypo.io, a Typedesign software. There are plenty of alternative tools you could also consider, such as Fontself, Yourfonts, and Metaflop.
To quickly learn how to create your own font, follow these ten easy steps.
Disclaimer: With Prototypo.io, you cannot export your font to use on marketing design materials or documents unless you pay for Prototypo’s Pro subscription. However, if you want to create your own fonts to use for personalized branding purposes, it might be worth the money. The Pro account is only $8.25 a month, and if you sign up for one year, you get four months free.
How to Make Your Own Font
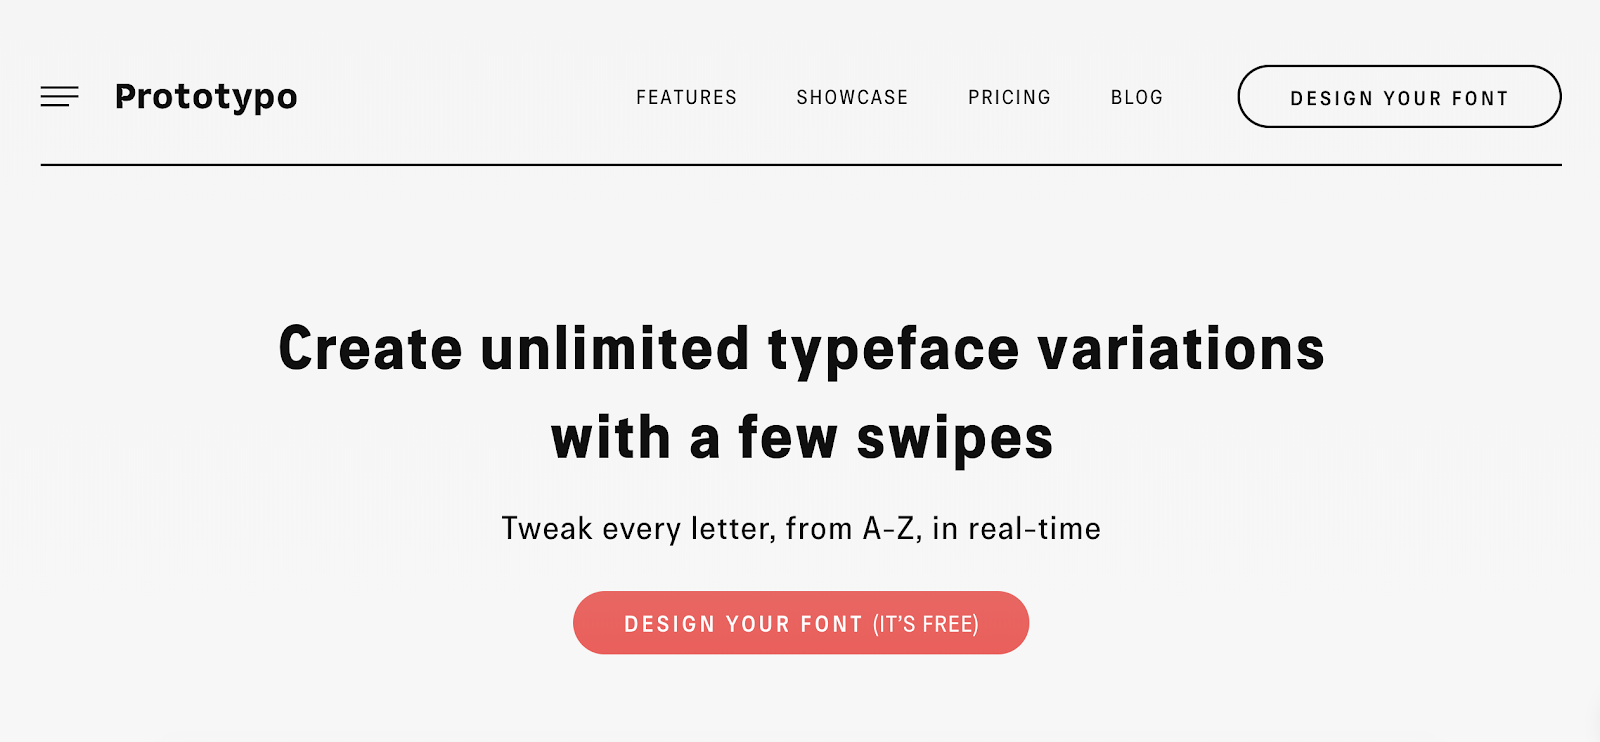
1. Go to Prototypo.io, and click the “Design Your Font” button.
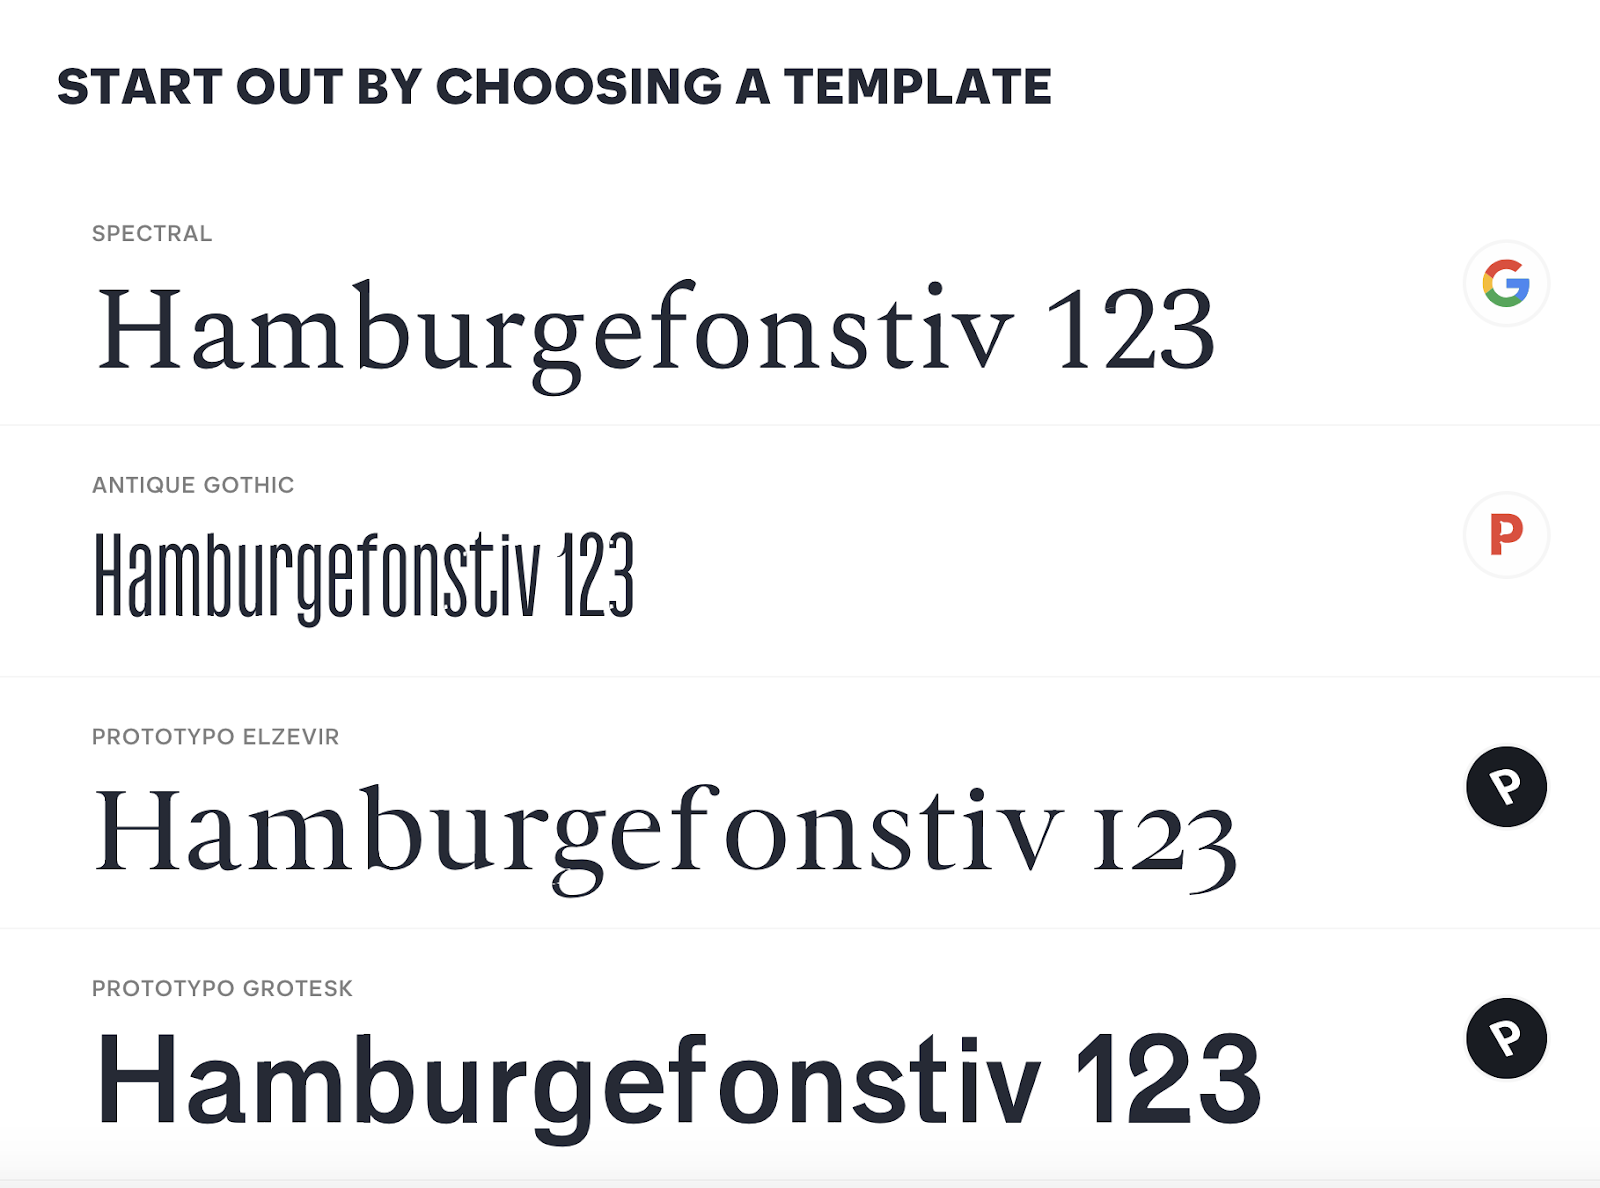
2. Once you fill out the sign-up form (You can sign up with your Facebook, Google, or Twitter accounts), you must choose a pre-made template. For my purposes, I chose “Prototypo Elzevir”.
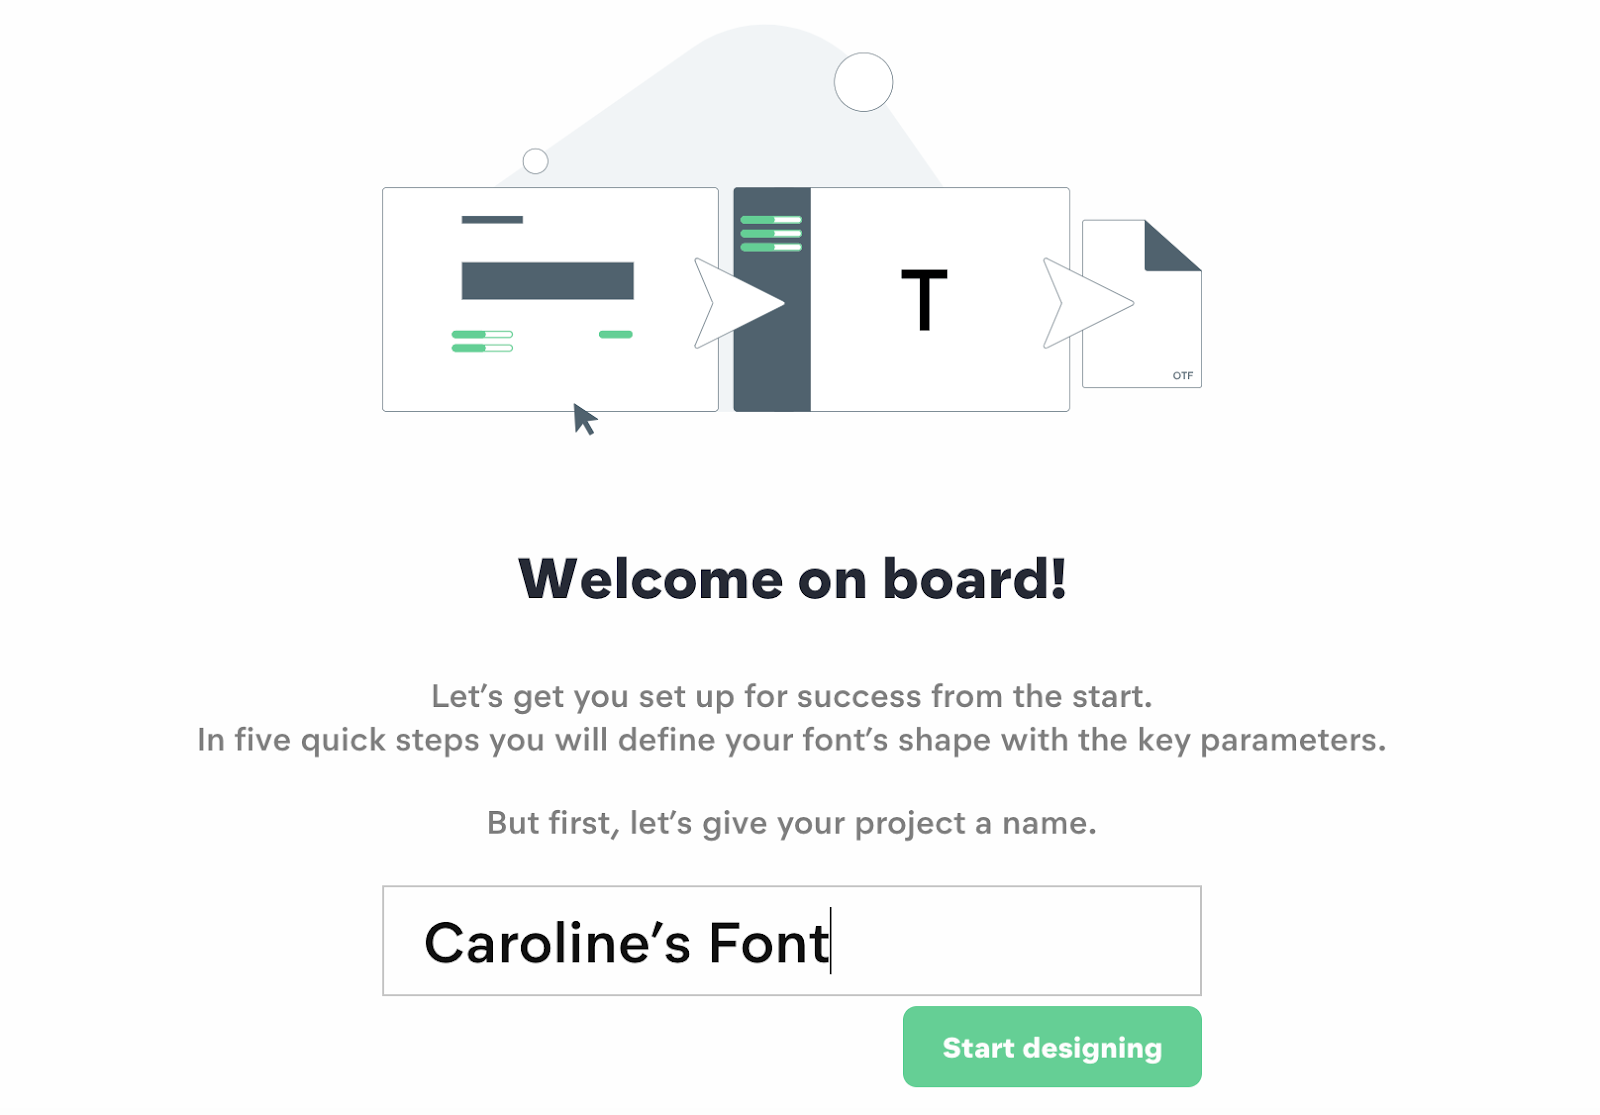
3. Next, name your project. Then click “Start designing”.
4. You’re now instructed to change height and width dimensions of your font by moving the green bar to the left or right. When you’re happy with the proportions, click “Next”.

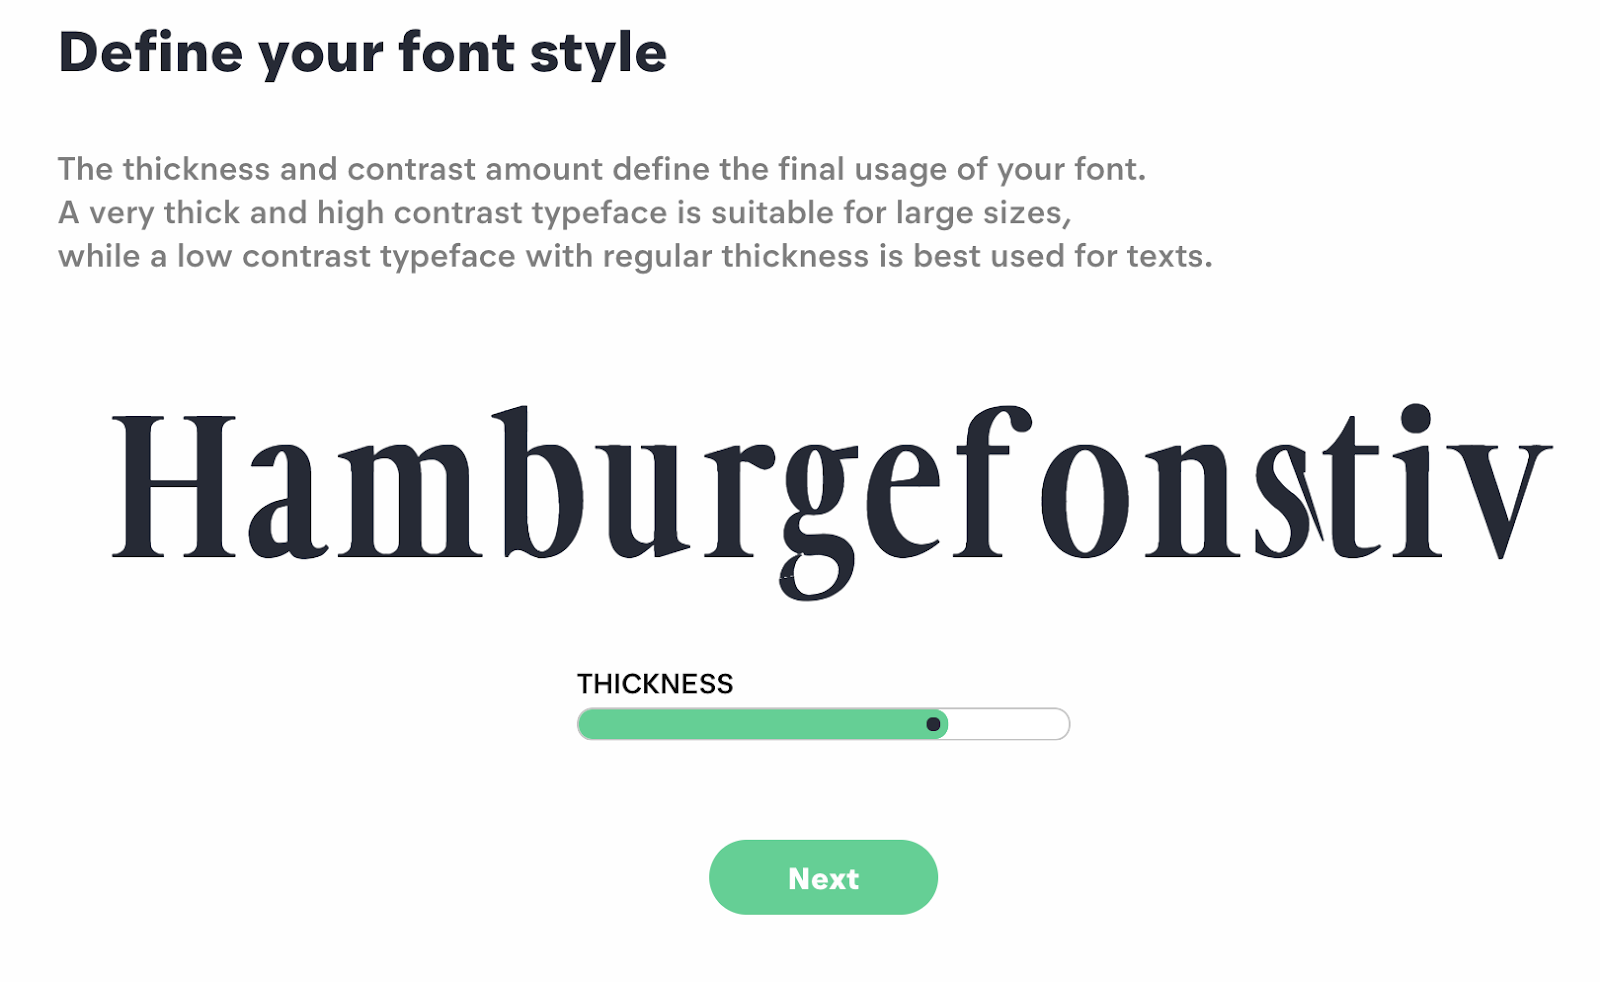
5. Now, adjust your font’s thickness. When you’re satisfied, click “Next”.
6. Move the green bar to the right or left to adjust “Ascender” and “Descender” of your font. When you’re happy with it, click “Next”.

7. Now, choose one option in each row you prefer to solidify your font’s uniqueness. For instance, I chose the “Raging” font on the right, the “Caracas” font on the left, and the “Swirly ~” font on the right to change how the “R” “A” and “~” will look in my font alphabet. When you’re done, click “Next”.
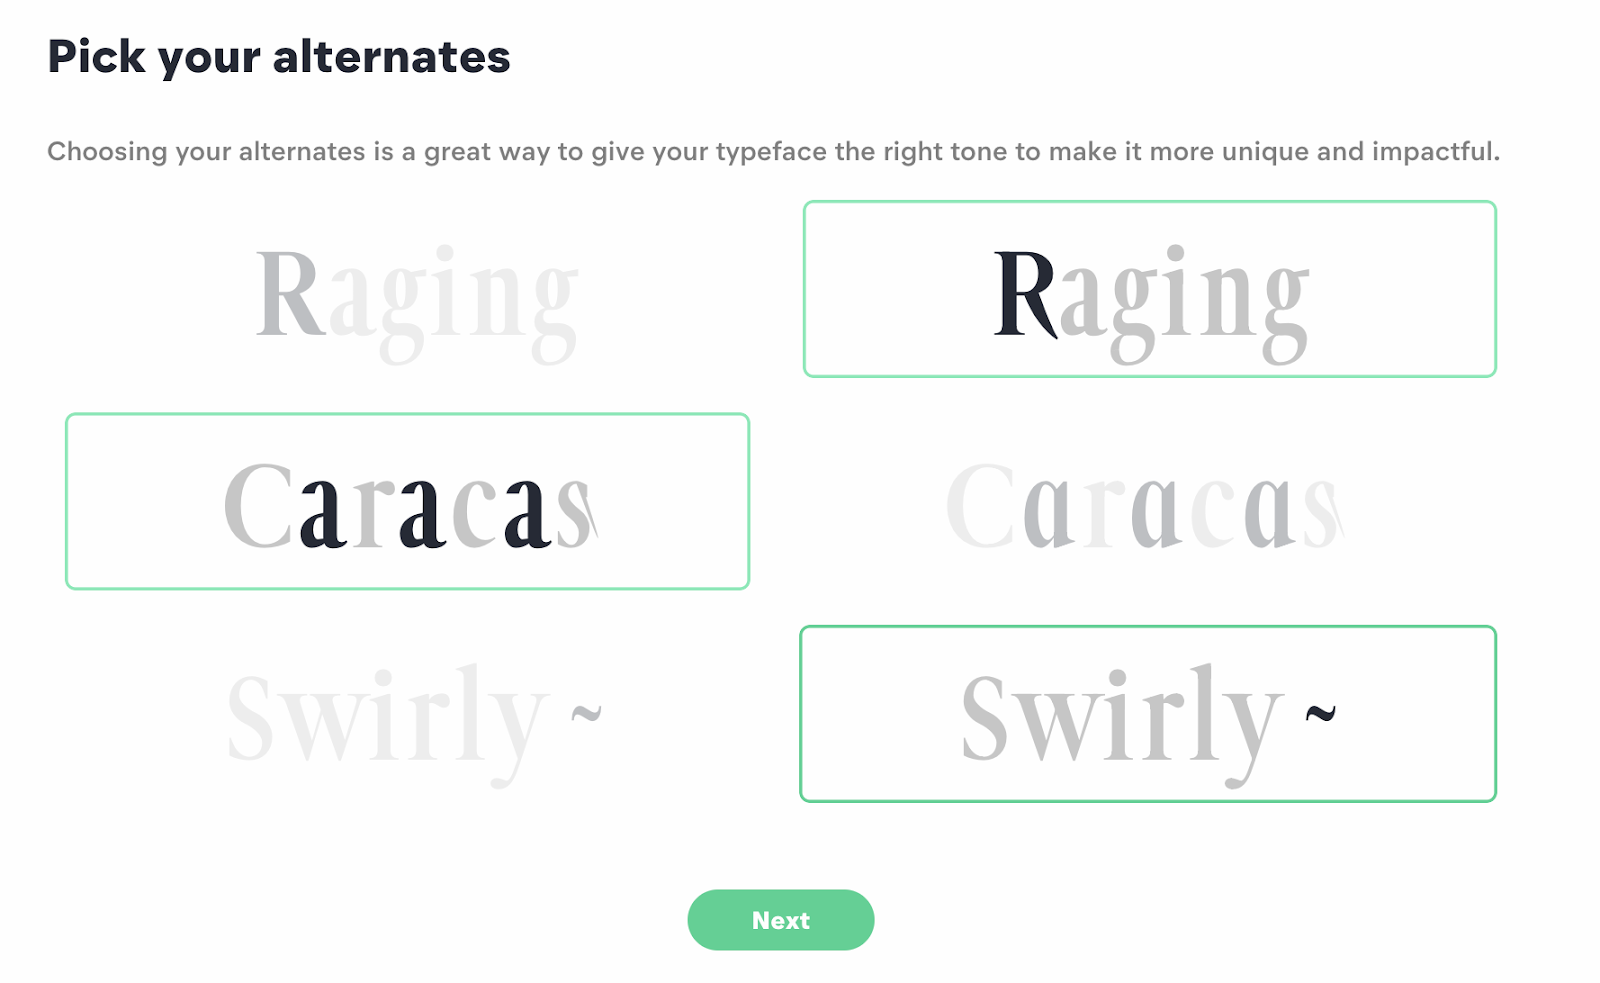
8. Move the green bar from left to right or vice versa to adjust your Serif height, width, and median. You’ll see your font change on the screen, and when you’re happy with how it looks, click “Next”.

9. Now, you’ll see the final result of your font. Click “Finish”. You’ll be given the option to watch a tutorial next, but you can skip the tutorial if you’d like to go straight to your dashboard.
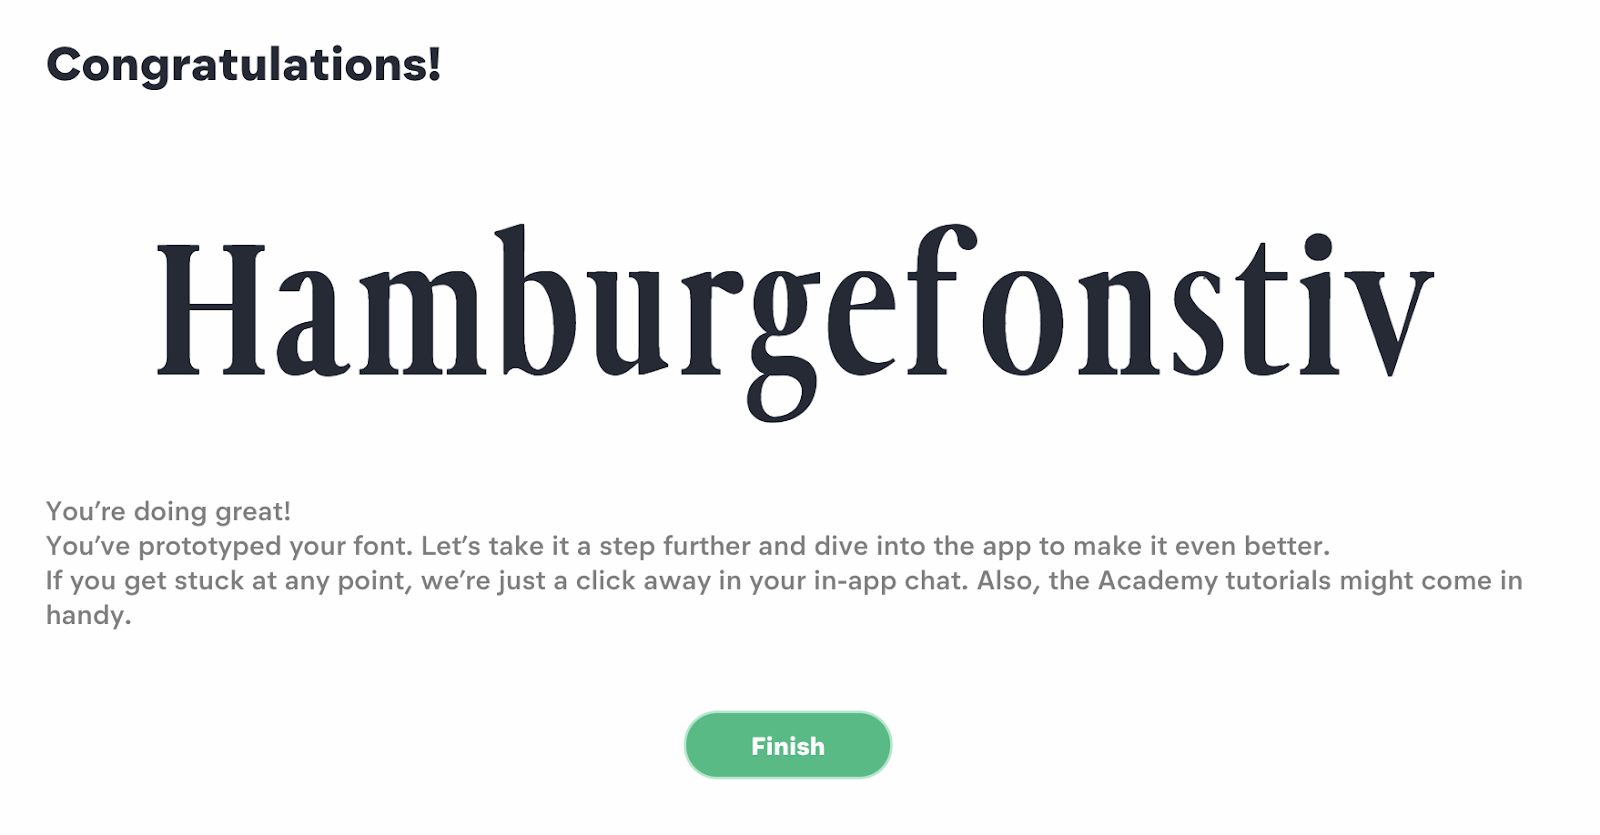
10. Here’s your account dashboard. You’ll see all the choices you selected for your font on the left, such as capital height, width, and spacing. You can still adjust if need be. Additionally, there’s a text box on the right, where I typed “Caroline Forsey’s Font”. You can type a paragraph to see if you like how your font looks.

11. If you pay for a Pro subscription, you can click “File” –> “Export font” to use anywhere you’d like.

Phone Photography 101: How to Take Good Pictures With Your Mobile Device
Before the days of smartphones — if you can remember such a time — taking a great photo was a labor-intensive process. You’d have buy a fancy camera and editing software for your desktop computer, and invest some serious time and energy into learning how to use them.
But, thanks to our mobile devices and the editing apps that come with them, we can now take high-quality photos and edit them without too many bells and whistles — all from the same device that we use to make calls.
Brands are catching on, too — the kinds of visuals remain important to marketing. But make no mistake: Taking a great photo on your smartphone is not as simple as pointing and shooting. There are plenty of bad smartphone photos out there — I’m sure you’ve seen at least a few.
What’s the secret to taking great pictures with your smartphone, then? As it turns out, there are a few of them. Check out these tips below to improve your smartphone photography game. (And once you have the photo-taking part down, check out some of the best photo editing apps for mobile.)

How to Take Good Photos With Your Phone: 25 Tips & Tricks
1. Use gridlines to balance your shot.
One of the easiest and best ways to improve your mobile photos is to turn on the camera’s gridlines. That superimposes a series of lines on the screen of your smartphone’s camera that are based on the “rule of thirds” — a photographic composition principle that says an image should be broken down into thirds, both horizontally and vertically, so you have nine parts in total.
According to this theory, if you place points of interest in these intersections or along the lines, your photo will be more balanced, level, and allow viewers to interact with it more naturally.

Source: Digital Photography School
To switch the grid on …
- iPhone: Go to “Settings,” choose “Photos & Camera,” and switch “Grid” on.
- Samsung Galaxy: Launch the camera app, go to “Settings,” scroll down and switch the “grid lines” option to “on.”

Source: Lynda.com
2. Set your camera’s focus.
Today’s phone cameras automatically focus on the foreground of your frame, but not every picture you take on your phone has an obvious subject. To adjust where you want your camera lens to focus, open your camera app and tap the screen where you want to sharpen the view.
If you’re taking a photo of something in motion, for example, it can be difficult for your camera to follow this subject and refocus as needed. Tap the screen to correct your phone camera’s focus just before snapping the picture to ensure the moving subject has as much focus as possible. A square or circular icon should then appear on your camera screen, shifting the focus of your shot to all of the content inside that icon.
3. Focus on one subject.
Many of the best photos include just one, interesting subject. So when taking a picture of one, spend some extra time setting up the shot. Some professional photographers say that the subject shouldn’t fill the entire frame, and that two-thirds of the photo should be negative space — that helps the subject stand out even more.
But be sure you tap the screen of your smartphone to focus the camera on your subject — that’ll help to ensure that it’s focused and the lighting is optimized.
Pro Tip: Once you’ve taken your photo, you can use filters and apps to make the subject even more vivid, or to crop it to frame the subject correctly. The brightness, contrast, and saturation of the photo can also be adjusted accordingly — all from your phone.


Source: Patrick Janelle
4. Embrace negative space.
“Negative space” simply refers to the areas around and between the subjects of an image –and it can take a photo from “good” to “great.”
When you include a lot of empty space in a photo, your subject will stand out more and evoke a stronger reaction from your viewer. And what does negative space looks like? It’s often a large expanse of open sky, water, an empty field, or a large wall, as in the examples below.


Source: Eric Christian
5. Find different perspectives.
Taking photos from a unique, unexpected angle can make them more memorable — it tends to create an illusion of depth or height with the subjects. It also makes the image stand out, since most mobile photos are taken either straight -on or from a bird’s eye view.
Try taking a photo directly upward and playing with the sky as negative space, like in the first photo below. Or, you can try taking it at a slight downward angle.
Pro Tip: If you take a photo and find the perspective is a little askew or tilted, use the SKRWT photo editing app to make the lines look clean and square.


Source: iPhone Photography School; Paul Octavious
6. Play with reflections.
There’s something so idyllic about seeing the sky reflected in a body of water. There’s a reason why we love seeing that — our eyes are drawn to reflections. So look for opportunities to play with them in photos.
There are plenty of out-of-the-box places to find reflections — puddles, larger bodies of water, mirrors, sunglasses, drinking glasses, and metallic surfaces are just a few.


Source: Joshua Lott; Carlos Copertone
7. Use leading lines.
In some photos, there’s a line that draws the viewer’s eye toward a certain part of the frame. Those are called leading lines. They can be straight or circulinear — think staircases, building facades, train tracks, roads, or even a path through the woods.
Leading lines are great for creating a sense of depth in an image, and can make your photo look purposefully designed — even if you just happened to come upon a really cool shape by accident.


Source: Carlos Copertone; Paul Octavious
8. Look for symmetry.
Symmetry can be defined as “a vague sense of harmonious and beautiful proportion and balance.” And pictures that contain symmetry can be incredibly pleasing to the eye — it’s also one of the simplest and most compelling ways to compose a photo.
In photography, symmetry usually means creating an image that can be divided into two equal parts that are mirror images of each other. That’s a bit different than reflections — symmetry can be found “in the wild,” as per the staircase picture, or you can set up your photo accordingly, like photographer Eric Christian did in the first photo below.
And remember — use those gridlines from tip #1 to line everything up perfectly.


Source: Eric Christian; Carlos Copertone
9. Keep an eye out for repetitive patterns.
Repetitive patterns are very pleasing to the eye — they appear whenever strong graphic elements are repeated over and over again, like lines, geometric shapes, forms, and colors. These patterns can make a strong visual impact, and photographing something like a beautiful, tiled floor can be enough to create a striking image. Other times, it’s more fun to keep an eye out for where they appear naturally or unintentionally, like with the congruent fire escapes on the left.


Source: Patrick Janelle
10. Play around with color blocking.
Isn’t it cool when an entire photo is black and white, except for a single object? It turns out that yes, indeed, there are apps for that. One of our favorites is Touch Color — an app that automatically converts a picture to grayscale and lets you fill in the parts you want to colorize.
Color blocking can help to highlight the elements of a photo that you want to stand out, like a plant or something else with a bold hue. It achieves a similar goal as negative space, in that it can help a single subject stand out — but with color blocking, the photo’s other elements remain intact for a cohesive image.

Source: Coloring Pages
11. Avoid zooming in.
When you take a photo from a distance, it’s tempting to zoom in on something specific you’re trying to capture. But it’s actually better not to zoom in — doing so can make the photo appear grainy, blurry, or pixelated.
Instead, try to get closer to your subject — unless it’s a wild animal, in which case we would advise keeping your distance — or take the photo from a default distance, and crop it later on. That way, you won’t compromise quality, and it’s easier to play around or optimize a larger image.

Source: Obama Pacman
12. Capture small details.
You may have heard the phrase, “It’s the little things.” Sometimes, that also applies to photos. Close-up images that capture small, intricate, and delicate details can make for really compelling visual content. Keep an eye out for textures and patterns like peeling paint, a gravel road, or a tile tabletop.
Pro Tip: Use the “sharpen” tool in your favorite photo editing app to (conservatively) sharpen the details of your photo. You might also download the Camera+ app and use its Clarity filter, which is what The Wall Street Journal‘s Kevin Sintumuang calls the app’s “secret sauce — it adds pro-camera crispness to almost any shot.”


Source: Paul Octavious; Eric Christian
13. Use natural light.
It’s hard to find a great smartphone photo that was taken with a flash. Most of the time, they make a photo look overexposed, negatively altering colors and making human subjects look washed out. In fact, even the iPhone 7’s flash is rumored to have some flaws.
Take advantage of the sources of natural light you can find, even after dark. This gives you a chance to play with shadows, like in the second image below, or create a silhouette with other ambient sources of light, like traffic and surrounding buildings.
Once you’ve taken the photo, play with the “Exposure” tool in your favorite photo editing app to see if you can make the image slightly brighter, without making it too grainy.


Source: Patrick Janelle; Paul Octavious
14. If you use flash, only do so during the day.
Sometimes, using your camera’s flash can improve a photo — but rarely does it do so at night. Because dark shots reveal a much sharper contrast against your phone’s flash, it can make any flash look look invasive and uneven
In already well-lit spaces, however, a flash can help to soften some dark shadows behind or beneath your main subject.
When framing your next shot, look on the ground or against vertical surfaces for any dark shadows you might want to remove. If you see any, flip on the flash manually in your camera app. Setting your phone’s camera flash to “auto” won’t guarantee that your phone will notice the shadows you want to get rid of. Just remember to turn the flash off again when you’re done.
Check out the difference in the two mobile photos of a metal figurine, below. You can see the desk shadow is considerably softer in the flash-based photo on the right. The flash even brings out more details in the body of the subject. Consider this difference next time you’re shooting product photography.


15. Consider buying a mobile tripod.
Although mobile devices make it easy to snap any photo on the go, there’s never been an easy way to ensure the shot stays level and balanced when you shoot — especially if you want to be in the picture and not just take a typical selfie with your extended arm.

Source: Joby
Mobile tripods give you the freedom to mount your smartphone for quick hands-free shots without lugging any heavy equipment with you. Most mobile tripods are barely bigger than your mobile device, and can bend to any angle. Check out one of them from Joby, above, and learn how these miniature tripods can help enhance your mobile video experience below.
16. Set your camera app’s exposure manually.
Another mobile camera feature you’ll want to set manually is your exposure. Tapping your screen when your phone’s camera is on doesn’t just refocus the lens on a new subject — it also automatically adjusts how much light the camera lets in. This, too, won’t always look just right. It’s best to adjust it by hand.
To change your mobile camera’s exposure by hand, open your camera app and tap the screen. When you see the lens refocus, you’ll see a very small sun icon and a vertical scale. Slowly swipe your finger up and down this scale to adjust the light level.
17. Create abstracts.
Abstract photos are meant to capture the essence of an object, or a series of them, without revealing the entire landscape as a whole. In other words, they serve the purpose of creating unique, surprising images from ordinary subjects.
This look can be accomplished by cropping an abstract portion of an otherwise normal photo, or by taking close-up shots of objects that leave the viewer wondering — in admiration, of course — what the subject might be. And subjects with patterns or repetition are great candidates for abstract photography, like in the photo of sliced figs below.


Source: iPhone Photography School; Patrick Janelle
18. Take candids.
Posed photos can be great for the sake of memories — happy moments with friends, family, or the occasional run-in with a celebrity. But sometimes, candid shots of people doing things, or people with people, can be far more interesting.
That’s because candid photos are better able to effectively capture the emotion and essence of a moment. One of the best ways to capture this kind of shot is to just take as many photos as possible. You’ll have more to choose from, and the best photos often happen when the “stars align,” so to speak, in a single moment — everyone’s eyes are open, one person is tilting their head just so, and you finally got a shot of your chronically closed-lip friend smiling with his teeth.


Source: Patrick Janelle
19. Be non-conventional.
Composition is a huge part of what makes a photo great, but so is the photo’s subject. Some of the most delightful and remarkable photos come out of cool, unique ideas. Images are more effective than text at evoking emotion from your viewers — that often means getting your photos to say something.
Try thinking outside of the box when it comes to what you’re capturing — your viewers could be pleasantly surprised by a cool or unexpected subject.


Source: Paul Octavious
20. Make ’em laugh.
Speaking of evoking emotion, sometimes the most memorable photos are the ones that make us giggle. The image below of an older woman wearing a brightly-colored shirt stating “Hi hater” is funny because it’s unexpected — and there’s a part of us that admires her, too. The second image of the dog toy on a dinner plate pokes fun at classic Instagram food shots, but it’s from a dog’s perspective. If you can make your audience laugh, they’re likely to enjoy your photo.


Source: Baddie Winkle; Jeremy Veach
21. Clean your phone’s lens.
A smartphone camera might be more convenient to carry around than a full-fledged photojournalist’s camera, but it comes at the cost of protection.
Your phone is usually in your pocket or your bag when you’re out of the house. All the while, the device’s camera lens is collecting all kinds of dust and lint. Be sure to clean this lens with a soft handkerchief before taking a photo. You might not be able to tell just how dirty the lens was until you start editing your picture, and making sure the lens is crystal clear before taking a shot can keep you from starting from scratch.
22. Attach an external lens.
Want to get really fancy? External lenses are for you. There are actually several out there that can be attached to the top of your smartphone’s native camera lens — from fish-eye to wide-angle lenses, these add-ons can bring an entirely new quality and perspective to your photos.
According to Wirecutter, the best camera lenses for iPhone photography are made by Moment, a manufacturer of mobile lenses. Start there, or do some research to find the lens add-ons that fit your smartphone photography needs.

Source: MobileFun.co.uk
23. Don’t be afraid to edit.
Composing and taking your smartphone photo is just the first step to making it visually compelling. Editing your photos is the next step — and a very critical one, at that. Filters can be a valuable photographic tool, particularly when it comes to two goals: 1) Removing blemishes from a picture, and 2) making food look even more delicious.
For the first, InStyle magazine compiled a fun list of “The Best Instagram Filters for Every Beauty Complaint” — and now, the iPhone photos app offers many similar filters. There are also apps like Pho.to, which can automatically retouch facial photos without a lot of work. And when it comes to those photos of your daily meals? One of the latest apps available is Foodie, which comes with its own set of filters optimized for different types of food.
But there are many other great photo and video editing apps out there for mobile devices — check out this post to see some of the best ones out there.

Source: LINE Corp.
Want more tips on creating visual content? Check out these examples of explainer videos.

How to Write a Business Letter That Won’t Get Ignored
Nowadays, writing a letter can seem completely archaic. I mean, do people even send mail anymore or do they only communicate through email and messaging?
In the business world, letters are actually still crucial for collaboration. To convince someone to offer you a job, you need to write them a compelling cover letter. And to persuade someone to speak at your company’s event, you need to write a gripping pitch.
A lot of professionals overlook the importance of writing high-quality business letters because they seem outdated. As a result, most people don’t actually know how to write one.
Fortunately, if you’re in the same boat, we’ve got you covered. Below, we’ll teach you how to craft a persuasive business letter for any purpose and situation.
How to Format a Business Letter
- Write the date and your recipient’s name, company, and address.
- Choose a professional greeting, like “Dear,”.
- Craft a compelling introduction.
- State your intent in the letter’s body text.
- End your letter with a strong call-to-action.
- Choose a professional closing, like “Sincerely,”.
- Physically sign the letter with your signature.
- Type your name, address, phone number, and email address.
To teach you how to write a business letter in more detail than the snippet above, let’s take a look at a letter I wrote to Dharmesh Shah, HubSpot’s CTO, when I was a wide-eyed college student trying to convince him to speak at my school.
I’ll analyze the most important parts of my letter — the introduction, body text, and call-to-action — and explain how and why they can strengthen your own business letters.
Business Letter Example
October 1, 2016
Dharmesh Shah
HubSpot
25 First Street,
Cambridge, MA 02141
Dear Mr. Shah,
When my freshman year of college ended, I was fortunate enough to work as a digital marketing intern at a startup called SlideBatch. They were introducing a new content marketing tool to the market, and my job was to apply that tool to their clients’ social media marketing campaigns and prove that SlideBatch was an effective marketing solution. I was so excited to get to work, but I had one small problem. I didn’t know what content marketing was. So, I did some research on the Internet and discovered HubSpot’s Marketing blog.
Fast forward a year and half, and I’m still reading HubSpot’s Marketing blog and leveraging its insights at my third digital marketing internship. Reading your blogs changed my life. I entered college believing financial advising was my destiny. But, after learning about HubSpot’s inbound marketing philosophy — how helping people is the ultimate way to increase brand trust and engagement — I was hooked. Shortly after my internship with SlideBatch ended, I decided to pursue digital marketing instead of financial advising. I’ve haven’t looked back since.
HubSpot’s influence on my life is the reason I’m writing to you today. I’m certain if you spoke at my school, DePauw University, about your life, HubSpot, and the inbound marketing philosophy, there would be hundreds of undecided students who start pursuing digital marketing. I know this because DePauw’s McDermond Speaker Series is one of the best platforms for business leaders to showcase their passion for their industry, company, and work. Brad Stevens of the Boston Celtics, Angie Hicks of Angie’s List, and Bill Rasmussen of ESPN have all successfully used the McDermond Speaker Series to inspire the world’s next generation of business leaders, and I know you could, too.
We would be honored if you spoke at our school. Thank you for your time and consideration, and we look forward to hearing from you!
Sincerely,
Clifford Chi
313 South Locust St.
Greencastle, IN 46136
555-555-5555
cliffordchi@aim.com
Introduction (first and second paragraphs)
To instantly grab Dharmesh’s attention and entice him to read the rest of my letter, you’ll notice I didn’t lead with the standard “I’m writing to you today because…” introduction. Instead, I engaged him with a story about how I discovered HubSpot and how his company changed my life. I thought this would strongly resonate with him because I assumed, as a co-founder of HubSpot, he would love to see how his life’s work has benefited others.
In your own business letters, you don’t necessarily need to tell a story to immediately hook your reader and persuade her to read on. But you should definitely describe how she’s made an impact on your life. This is what will truly grab and hold her attention.
Body text (third paragraph)
After my introduction, I swiftly segued into why I was writing to Dharmesh — to ask him to speak at my school. Personal anecdotes are an effective way to engage readers, but I’d lose Dharmesh’s attention if I didn’t cut to the chase.
Once I stated my letter’s intent, I quickly pitched the benefits of speaking at my school and bolstered the reputation of my school’s speaker series. By emphasizing how speaking at my school could inspire hundreds of students to pursue digital marketing and highlighting the group of impressive speakers Dharmesh could join, I focused on the dividends he would reap from being a McDermond Series Speaker, rather than how my school would benefit from his guest appearance.
So whether you’re trying to convince someone to hire you or speak at your school, you must first persuade your reader that doing what you ask of them will ultimately benefit them and be in their best interest.
Call-to-action (fourth paragraph)
In my last paragraph, I politely ask Dharmesh to speak at my school again. Even though I already asked him this earlier, it’s important I end my letter with a clear next step. It packs more of a punch and crystalizes the desired action in his mind.
Strong call-to-actions are a crucial element of a persuasive business letter. Because if you don’t tell your reader what to do next, you might as well have never written your letter in the first place.

4 Talent Acquisition Strategies to Find the Best Employees
In 2018, almost 75% of employers struggled to fill positions with the right candidates.
Unfortunately, this talent shortage is only worsening — research by Korn Ferry predicts by 2020, the technology, media, and telecommunications industries alone could be short over one million skilled workers globally.
To succeed long-term, it’s critical your business is able to hire and retain the best, most talented employees. But it’s a daunting task, which is why you need a talent acquisition strategy.
Talent acquisition vs. recruitment
Recruitment is used to fill a specific role with a qualified candidate, and is typically a short-term strategy to fill a vacancy. Talent acquisition, on the other hand, is a long-term HR strategy meant to attract the best, most qualified people and convince them to bring their unique skills to your company. Talent acquisition aims to attract talent regardless of specific vacancies.
Your pursuit of top talent shouldn’t solely rely on traditional, short-term recruitment strategies like sending LinkedIn messages or attending Job Fairs. To ensure top talent acquisition and retention, you’ll need to devise a strategic long-term plan.
Here, we’ve cultivated four critical talent acquisition strategies to ensure you’re finding the best people.
Talent acquisition
Talent acquisition is a long-term HR strategy that aims to fulfill organizational needs by finding top talent, and convincing them to bring their unique skills to your company. To succeed long-term, it’s critical you attract and retain talented employees regardless of vacant roles. Talent acquisition can help you do this, while solving for long-term organizational needs.
1. Align with your business goals.
Consider your business goals for the next one to five years, and use those objectives to tailor your acquisition strategy to meet those needs. While recruitment tends to focus on filling vacancies within departments, talent acquisition is more about considering how your company is going to expand long-term, and then finding employees who can help take you there.
For instance, are you planning on expanding into Latin America? If so, perhaps your HR department should focus on attracting candidates with international or regional experience. Or, maybe you’re planning on creating a new product, in which case, your HR efforts should focus on attracting talented software developers and coders.
Certain roles might not even exist yet, but you’ll want to consider what type of talent you’ll need to hit your business’s long-term goals. Remember, investing in the right candidates will pay off for your company, long-term.
2. Use data and marketing to create better acquisition material.
You wouldn’t create a marketing campaign without data, so why should you recruit without it?
Talent acquisition should be treated with just as much importance as any of your marketing campaigns. Convincing people to join your company is just as necessary as incentivizing people to buy your products.
There are plenty of different opportunities to use data to strengthen your talent acquisition strategy. For instance, you might use data to figure out where your top talent came from, and use that information to focus your talent acquisition efforts on certain academic programs or professional networking sites.
Additionally, your HR team should partner with your marketing department to refine job descriptions, career pages, emails, and more.
Using data, you can figure out if certain questions are deterring candidates from filling out job applications, and eliminate those questions. Alternatively, perhaps you’ll find adding images or videos to highlight company culture incentivizes more candidates to fill out job forms. Or, maybe more candidates apply for a job with description A over description B.
By using analytics and data, you’re able to ensure your job descriptions and career pages aren’t deterring qualified people from applying.
3. Expand outreach strategies.
To find better talent, you’ll need to expand your sourcing strategies. Different skill sets require different methods of outreach. You’ll find your best marketers in a different place than your best programmers, so you’ll want to diversify your sourcing approach.
Rather than spending all your time on LinkedIn, consider other specialized job boards, academic programs, or networking events where you might find a specific group of talented professionals. For instance, to attract talented coders, Deloitte’s recruiters attended a hackathon and found prospective candidates.
It’s critical you identify where you can find the vast majority of your top talent, whether that be professional events, conferences, online forums, or social networks. Then, focus on strengthening relationships and networking with the right people — not only will you grow your pool of potential hires, but you’ll also grow brand awareness for your company, which will help you attract talent in the future, as well.
4. Focus on better employer branding.
Employer branding is critical for creating a successful talent acquisition strategy — in fact, 62% of professionals across 26 countries rank employer brand as the deciding factor when applying for a job.
When talented candidates are comparing companies, they’re going to choose the one with the best values, culture, and work-life balance. By cultivating an impressive employer brand, you’ll attract better talent and find more long-term success.
To succeed with talent acquisition, you’ll need to be able to answer the question, “Why your company, over all the others?” This is why employer branding is a critical strategy for finding the best employees.
Consider how you can reframe your branding to focus on the best aspects of your company’s values and culture. It isn’t just about mentioning health benefits or compensation — you’ll also want to convey your impressive company culture, in which employees collaborate efficiently and enjoy spending time with one another. You might mention your flexible remote policy and other work-life balance perks, or your company’s emphasis on growth opportunities.
It’s important you broadcast these unique attributes through employee review sites like Glassdoor, as well as your “About Us” page on your company website. When highly qualified people are contemplating your company over your competitors, it just might be those reviews that end up convincing them.

7 Digital Marketing Strategies and How to Plan Your Own Campaign [Template]
There’s no question that, in the modern landscape, a big part of your marketing strategy is digital. Consumers and businesses alike are almost always online — and you want to be able to reach them and observe their behavior where they spend the most time.
But when you’re growing a business, it seems like this ever-evolving landscape can quickly become overwhelming. There’s already enough to do — how are you also supposed to create, fine-tune, and maintain an agile digital marketing strategy?

We’ve compiled a list of seven digital marketing strategies that marketers can adapt to help their teams and businesses grow, as well as a crash course on the meaning of digital strategy and marketing campaigns. Then, grab your free collection of digital content marketing templates at the end of this post.
What is digital marketing strategy?
Your digital marketing strategy is the series of actions that help you achieve your company goals through carefully selected online marketing channels. These channels include paid, earned, and owned media, and can all support a common campaign around a particular line of business.
The term “strategy” might seem intimidating, but building an effective digital strategy doesn’t need to be difficult.
In simple terms, a strategy is just a plan of action to achieve a desired goal, or multiple goals. For example, your overarching goal might be to generate 25% more leads via your website this year than you drove last year.
Depending on the scale of your business, your digital marketing strategy might involve multiple digital strategies — each with different goals — and a lot of moving parts. But coming back to this simple way of thinking about strategy can help you stay focused on meeting those objectives.
Despite our simplification of the term “strategy,” there’s no doubt it can be difficult to get started actually building one. Let’s see what a digital marketing campaign looks like, and then, we’ll jump into those seven building blocks to help you create an effective digital marketing strategy to set up your business for online success.
What Is a Digital Marketing Campaign?
It’s easy to confuse your digital strategy with your digital marketing campaigns, but here’s how to distinguish the two.
As we’ve already outlined, your digital strategy is the series of actions you take to help you achieve your overarching marketing goal. Your digital marketing campaigns are the building blocks or actions within your strategy that move you toward meeting that goal.
For example, you might decide to run a campaign sharing some of your best-performing gated content on Twitter, to generate more leads through that channel. That campaign is part of your strategy to generate more leads.
Here a few other well-known examples of digital marketing campaigns and the strategies they employ.
Digital Marketing Campaign Examples
- GoPro
- Delta Airlines
- Geico
- Wayfair
- Mastercard
- ETF Securities
- Red Bull
1. GoPro
Digital strategy: Earned media, user-made video
GoPro is famous for its incredible point-of-view style action footage, all taken from the company’s classic fisheye lens. What you might not know is that so much of the video content you see on its YouTube channel wasn’t made by GoPro, but rather by its most loyal users.
By populating its YouTube channel with user-made video content, GoPro has encouraged an entire fanbase of outdoorspeople to take amazing footage of their adventures and post it online — often with credit back to GoPro. This ongoing digital marketing campaign has championed the use of video to spread the word about the GoPro product line — and a lot of the content is created by the customers themselves.
Check out the video below, which GoPro republished, awarding the video’s original shooter with being one of the best videos in its category.
2. Delta Air lines
Digital strategy: Owned media, Twitter stories
You wouldn’t think of an airline as a leader in creative digital marketing, but don’t underestimate the stories they can tell on social media (emphasis on “stories”).
Delta Air Lines is a prolific user of social media, specifically on its Twitter handle. The brand uses this account to engage potential passengers in a variety of ways that are both timely and emotionally stimulating. Last month, in honor of Breast Cancer Awareness Month, the company began sharing personal stories from Delta employees directly through the company’s Twitter feed. Here’s the beginning of one story’s thread, below.
In honor of Breast Cancer Awareness Month, we’re sharing the stories of the survivors and fighters of our Delta family.
Amanda Ross, a Customer Care Supervisor, has been a Delta employee for 13 years and is actively fighting breast cancer. Read about her battle below. pic.twitter.com/WSp6ZyBw36
— Delta (@Delta)
October 19, 2018
3. Geico
Digital strategy: Paid media, YouTube Preroll ads
All you need to hear is the word “Geico” to remember you can save 15% or more on your car insurance. But even a company with such a memorable tagline can risk annoying its buyers if its marketing campaign is too longwinded.
That’s why Geico launched a series of preroll ads on YouTube that admit to the ad’s brevity in the videos themselves.
Preroll ads are a form of paid content on YouTube wherein you pay YouTube to roll 15- to 20-second ads ahead of videos that have the same audience as the advertiser. While some companies try to squeeze as much messaging as they can into that short slot, Geico has taken the opportunity to make fun of itself for taking up your time in the first place. In this way, its YouTube preroll commercials are actually entertaining. Check out one of them below.
4. Wayfair
Digital strategy: Owned media, Instagram tags
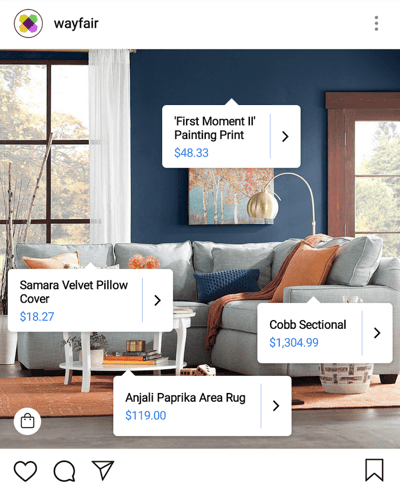
Wayfair, a home furnishings and decor merchant, has a truly innovative Instagram strategy. Let’s just say its photos aren’t just photos.
Instagram gives companies an opportunity to show their followers a more intimate side of the brand, lifting the curtain on the business to show off the employees and events that make the organization what it is. For Wayfair, however, Instagram isn’t just a culture play — it’s a purchase page.
Using Instagram’s product tags, Wayfair has taken some of its prettiest home interior shots on Instagram, and tagged them with product and price labels. It’s a digital marketing campaign that shows people exactly how much each item in the photo costs, helping Wayfair generate buyers right from its Instagram account. Check out an example, below.
5. Mastercard
Digital strategy: Owned media, Travel blog
Mastercard bases its brand on the stories and adventures that cardholders go on. But what good is a travel-based brand without a travel-based digital marketing campaign to go with it?
Priceless Cities, Mastercard’s travel blog, gives readers a travel resource to go along with the credit cards that help pay for these readers’ destinations. It’s a pretty good idea, as it allows the company to better align itself not just with the things its customers buy, but with the places its customers go. Check out the blog here.
6. ETF Securities
Digital strategy: Paid media, LinkedIn Sponsored Content
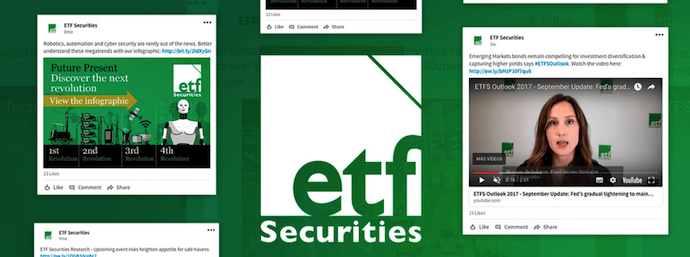
ETF Securities is a small, asset management service based in Australia catering to wealth managers and investors in Europe. Because the service they provide is so complex, the company found where its customers hung out the most — LinkedIn — and sponsored paid content on this platform that drives more interest in investments and helps customers make smarter financial decisions.
With this digital campaign, ETF Securities saw 95% year-over-year growth in its LinkedIn followers.
7. Red Bull
Digital strategy: Owned media, Lifestyle news
Red Bull has become more well known for its sponsorship of extreme sports than the energy drink it sells. It’s a natural fit for the types of people the drink appeals to. But instead of creating digital content on the energy drink industry, Red Bull captures its audience with articles and videos all about the latest happenings in the extreme sports community.
In this digital marketing campaign, Red Bull teaches us that what you sell isn’t always the ideal content strategy. Rather, it’s the lifestyle that your customers live. Check out the company’s website here.

It’s important to note that even if a campaign runs over the course of a couple of years, it doesn’t make it a strategy — it’s a tactic that sits alongside other campaigns to support a larger marketing strategy. For example, ETF Securities (cited above) hosted a campaign to increase its followers on LinkedIn, using the digital strategy of sponsored content (a form of paid media). This one strategic campaign might be one small part of a larger digital marketing strategy that serves to generate more leads for one of its products or business lines.
Now that we’ve gotten to grips with the basics of digital strategy and digital marketing campaigns, let’s dig into how to build your strategy.
How to Create a Digital Marketing Strategy
- Build your buyer personas.
- Identify your goals and the digital marketing tools you’ll need.
- Evaluate your existing digital channels and assets.
- Audit and plan your owned media campaigns.
- Audit and plan your earned media campaigns.
- Audit and plan your paid media campaigns.
- Bring it all together.
1. Build your buyer personas.
For any marketing strategy — offline or online — you need to know who you’re marketing to. The best digital marketing strategies are built upon detailed buyer personas, and your first step is to create them. (Need help? Start here with our free buyer persona kit.)
Buyer personas represent your ideal customer(s) and can be created by researching, surveying, and interviewing your business’s target audience. It’s important to note that this information should be based upon real data wherever possible, as making assumptions about your audience can cause your marketing strategy to take the wrong direction.
To get a rounded picture of your persona, your research pool should include a mixture of customers, prospects, and people outside your contacts database who align with your target audience.
But what kind of information should you gather for your own buyer persona(s) to inform your digital marketing strategy? That depends on your businesses, and is likely to vary depending on whether you’re B2B or B2C, or whether your product is high cost or low cost. Here are some starting points, but you’ll want to fine-tune them, depending on your particular business.
Quantitative (or Demographic) Information
- Location. You can use web analytics tools like Google Analytics to easily identify what location your website traffic is coming from.
- Age. Depending on your business, this may or may not be relevant. It’s best to gather this data by identifying trends in your existing prospect and customer database.
- Income. It’s best to gather sensitive information like personal income in persona research interviews, as people might be unwilling to share it via online forms.
- Job Title. This is something you can get a rough idea of from your existing customer base, and is most relevant for B2B companies.
Qualitative (or Psychographic) Information
- Goals. Depending on the need your product or service was created to serve, you might already have a good idea of what goals your persona is looking to achieve. However, it’s best to cement your assumptions by speaking to customers, as well as internal sales and customer service representatives.
- Challenges. Again, speak to customers, sales and customer service representatives to get an idea of the common problems your audience faces.
- Hobbies and interests. Speak to customers and people who align with your target audience. If you’re a fashion brand, for example, it’s helpful to know if large segments of your audience are also interested in fitness and well-being, as that can help inform your future content creation and partnerships.
- Priorities. Speak to customers and people who align with your target audience to find out what’s most important to them in relation to your business. For example, if you’re a B2B software company, knowing that your audience values customer support over a competitive price point is very valuable information.
Take this information and create one or more rounded personas, like Marketing Molly below, and ensure they’re at the core of your digital marketing strategy.
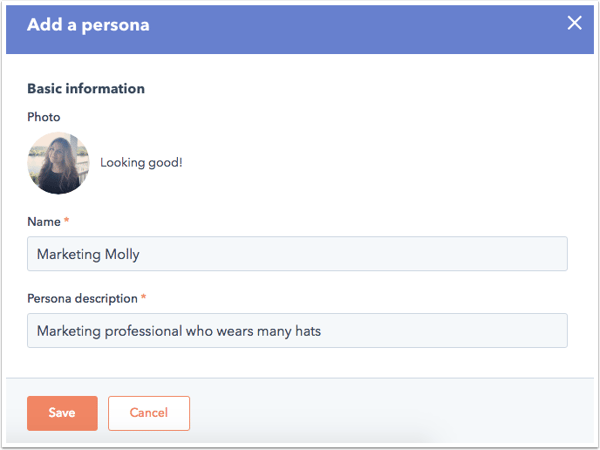
2. Identify your goals and the digital marketing tools you’ll need.
Your marketing goals should always be tied back to the fundamental goals of the business. For example, if your business’s goal is to increase online revenue by 20%, your goal as a marketer might be to generate 50% more leads via the website than you did last year to contribute towards that success.
Whatever your overarching goal is, you need to know how to measure it, and more important, actually be able to measure it (e.g., have the right digital marketing tools in place to do so). How you measure the effectiveness of your digital strategy will be different for each business and dependent on your goal(s), but it’s vital to ensure you’re able to do so, as it’s these metrics which will help you adjust your strategy in the future.
If you’re a HubSpot customer, the Reporting add-on in your HubSpot software brings all of your marketing and sales data into one place, so you can quickly determine what works and what doesn’t.

3. Evaluate your existing digital channels and assets.
When considering your available digital marketing channels or assets to incorporate into your strategy, it’s helpful to first consider the bigger picture to avoid getting overwhelmed. The owned, earned, and paid media framework helps to categorize the digital ‘vehicles’, assets, or channels that you’re already using.
Owned Media
This refers to the digital assets that your brand or company owns — whether that’s your website, social media profiles, blog content, or imagery, owned channels are the things your business has complete control over. This can include some off-site content that you own, but isn’t hosted on your website, like a blog that you publish on Medium, for example.
Earned Media
Quite simply, earned media refers to the exposure you’ve earned through word-of-mouth. Whether that’s content you’ve distributed on other websites (e.g., guest posts), PR work you’ve been doing, or the customer experience you’ve delivered, earned media is the recognition you receive as a result. You can earn media by getting press mentions, positive reviews, and by other people sharing your content on social media, for instance.
Paid Media
Paid media is a bit self-explanatory in what its name suggests — and refers to any vehicle or channel that you spend money on to catch the attention of your buyer personas. This includes things like Google AdWords, paid social media posts, native advertising (like sponsored posts on other websites), and any other medium for which you directly pay in exchange for visibility.
Gather what you have, and categorize each vehicle or asset in a spreadsheet, so you have a clear picture of your existing owned, earned, and paid media.
Your digital marketing strategy might incorporate elements of all three channels, all working together to help you reach your goal. For example, you might have an owned piece of content on a landing page on your website that’s been created to help you generate leads. To amplify the number of leads that content generates, you might have made a real effort to make it shareable, meaning others are distributing it via their personal social media profiles, increasing traffic to the landing page. That’s the earned media component. To support the content’s success, you might have posted about the content to your Facebook page and have paid to have it seen by more people in your target audience.
That’s exactly how the three can work together to help you meet your goal. Of course, it’s not compulsory to use all three. If your owned and earned media are both successful, you might not need to invest in paid. It’s all about evaluating the best solution to meet your goal, and then incorporating the channels that work best for your business into your digital marketing strategy.
Now you know what’s already being used, you can start to think about what to keep and what to cut.
4. Audit and plan your owned media campaigns.
At the heart of digital marketing is your owned media, which pretty much always takes the form of content. Every message your brand broadcasts can generally be classified as content, whether it’s your ‘About Us’ page, your product descriptions, blog posts, ebooks, infographics, or social media posts.
Content helps convert your website visitors into leads and customers, and helps to raise your brand’s profile online — and when it’s optimized, it can also boost any efforts you have around search/organic traffic. Whatever your goal, you’re going to need to use owned content to form your digital marketing strategy.
To build your digital marketing strategy, you need to decide what content is going to help you reach your goals. If your goal is to generate 50% more leads via the website than you did last year, it’s unlikely that your ‘About Us’ page is going to be included in your strategy — unless that page has somehow been a lead generation machine in the past.
It might more likely that an ebook gated by a form on your website drives far more leads, and as a result, that might be something you want to do more of. Here’s a brief process to follow to work out what owned content you need to meet your digital marketing goals:
Audit your existing content.
Make a list of your existing owned content, and rank each item according to what has previously performed best in relation to your current goals. If your goal is lead generation, for example, rank them according to which generated the most leads in the last year. That might be a particular blog post, an ebook, or even a specific page on your website that’s converting well.
The idea here is to figure out what’s currently working, and what’s not, so that you can set yourself up for success when planning future content.
Identify gaps in your existing content.
Based on your buyer personas, identify any gaps in the content you have. If you’re a math tutoring company and have discovered in your audience research that one of your persona’s biggest challenges is finding interesting ways to study, but you don’t have any content that speaks to that concern, then you might look to create some.
By looking at your content audit, you might discover that ebooks hosted on a certain type of landing page convert really well for you (much better than webinars, for example). In the case of this math tutoring company, you might make the decision to add an ebook about ‘how to make studying more interesting’ to your content creation plans.
Create a content creation plan.
Based on your findings and the gaps you’ve identified, make a content creation plan outlining the content that’s necessary to help you hit your goals. This should include:
- Title
- Format
- Goal
- Promotional channels
- Why you’re creating it (e.g., “Marketing Molly struggles to find time to plan her blog content, so we’re creating a template editorial calendar”)
- Priority level (to help you decide what’s going to give you the most “bang for your buck”)
This can be a simple spreadsheet, and should also include budget information if you’re planning to outsource the content creation, or a time estimate if you’re producing it yourself.
5. Audit and plan your earned media campaigns.
Evaluating your previous earned media against your current goals can help you get an idea of where to focus your time. Look at where your traffic and leads are coming from (if that’s your goal) and rank each earned media source from most effective to least effective.
You can get this information from tools like Google Analytics, or the Sources Reports in your HubSpot software.
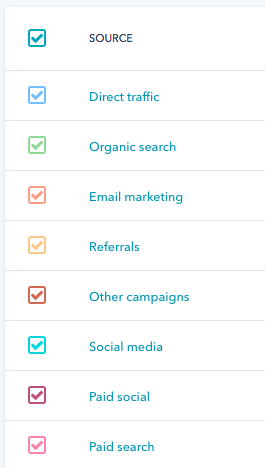
You might find that a particular article you contributed to the industry press drove a lot of qualified traffic to your website, which in turn converted really well. Or, you might discover that LinkedIn is where you see most people sharing your content, which in turn drives a lot of traffic.
The idea here is to build up a picture of what earned media will help you reach your goals, and what won’t, based on historical data. However, if there’s something new you want to try, don’t rule that out just because it’s not yet tried and tested.
6. Audit and plan your paid media campaigns.
This process involves much of the same process: You need to evaluate your existing paid media across each platform (e.g., Google AdWords, Facebook, Twitter, etc.) to figure out what’s likely to help you meet your current goals.
If you’ve been spending a lot of money on AdWords and haven’t seen the results you’d hoped for, maybe it’s time to refine your approach, or scrap it altogether and focus on another platform that seems to be yielding better results. (Check out this free AdWords guide for more on how to leverage it for business.)
By the end of the process, you should have a clear idea of which paid media platforms you want to continue using, and which (if any) you’d like to remove from your strategy.
7. Bring it all together.
You’ve done the planning and the research, and you now have a solid vision of the elements that are going to make up your digital marketing strategy. Here’s what you should have so far:
- Clear profile(s) of your buyer persona(s)
- One or more marketing-specific goals
- An inventory of your existing owned, earned, and paid media
- An audit of your existing owned, earned, and paid media
- An owned content creation plan or wish list
Now, it’s time to bring all of it together to form a cohesive strategy document. Let’s revisit what digital strategy means: the series of actions that are going to help you achieve your goal(s) using online marketing.
By that definition, your strategy document should map out the series of actions you’re going to take to achieve your goals, based on your research to this point. A spreadsheet is an efficient format — and for the sake of consistency, you might find it easiest to map out according to the owned, earned, and paid media framework we’ve used so far.
You’ll also need to plan your strategy for a longer-term period — typically, something like 12 months is a good starting point, depending on how your business is set up. That way, you can overlay when you’ll be executing each action. For example:
- In January, you might start a blog which will be continually updated once a week, for the entire year.
- In March, you might launch a new ebook, accompanied by paid promotion.
- In July, you might be preparing for your biggest business month — what do you hope to have observed at this point that will influence the content you produce to support it?
- In September, you might plan to focus on earned media in the form of PR to drive additional traffic during the run-up.
By taking this approach, you’re also creating a structured timeline for your activity, which will help communicate your plans to your colleagues — not to mention, maybe even help keep you sane.
Your Path to Digital Marketing Strategy Success
Your strategy document will be very individual to your business, which is why it’s almost impossible for us to create a one-size-fits-all digital marketing strategy template. Remember, the purpose of your strategy document is to map out the actions you’re going to take to achieve your goal over a period of time — as long as it communicates that, then you’ve nailed the basics of creating a digital strategy.
If you’re eager to build a truly effective strategy to help grow your business, check out our free collection of content marketing templates below.



What You Missed Last Month in Google
Welcome one, welcome all to November 1st — and to another recap of the month’s top Google news items.
What You Missed Last Month in Google
1. New Measures for User Data Control
Until recently, Google users would have to visit a separate account settings page to clear their search history. Now, the company says, that data can be accessed directly from the search page, via a hamburger menu that appears above the query bar.
Source: Google
After tapping on this menu option, users can view recent search activity, and choose what to delete — their searches over the past hour, or all search activity. On this same page, users can also access privacy settings for voice search, as well as those pertaining to ad personalization.
Next year, Google says, these easy-to-access data controls will roll out to Maps and other Google products. Read more >>
2. “No Robocalls, Please”
Google made waves in May when it announced Duplex: its new Assistant that’s (artificially) intelligent enough to make phone calls on a user’s behalf to book appointments, make reservations, and more.
After some controversy, Google could be adding an option for business owners to indicate that they do not want to receive phone calls from Assistant. The alleged option was discovered by a search strategist who saw the option while creating a Google business listing for a client. Read more >>
@GoogleMyBiz dashboard is now asking if your business is okay with accepting Google Assistant Calls @mblumenthal @localseoguide pic.twitter.com/H8RVcxDO7S
3. Search Console Stats Take Center Stage
Several users have reported seeing Search Console statistics displayed directly within Google’s search engine results page (SERP), according to SEO Roundtable.
These stats have appeared in a “brief dashboard” for certain users who are verified owners of a site that appears in the SERP. Read more >>
Not seen this before – Google displaying keyword performance data from Search Console (when logged in) directly in search results. @Marie_Haynes @rustybrick ? Only appears to invoke for queries relating to GSC properties verified under subdirectory, E.g. https://t.co/7qmeNkJo1a pic.twitter.com/LgqwKuhy3C
— Andrew Gloyns (@gloyns)
October 4, 2018
4. The Google+ Data Breach
In October, a bug discovered in March may have granted access to the private data of nearly half a million users of Google+: the search engine giant Google’s social network, which since its 2011 inception was often the butt of jokes for being a largely unused attempt to copy Facebook. Here’s what happened. Read more >>
5. How Marketers Can Take Advantage of Google Assistant’s New Tools
Last month, Google gave its Assistant a “makeover.” But did you know that it came with new tools for marketers? Here’s a rundown of what they are, and how to make the most of them. Read more >>
6. Google Wants to Take Over Your Home (And the Rest of Your Life)
Google is standing at your front door, asking, “Can I come in?” But that might not be a bad thing. Here’s how that came up at October’s Made By Google event. Read more >>
7. New Rules for Gmail App Developers
Google announced last week that Gmail app developers will have to abide by a strict set of new rules — in the name of user privacy. What can marketers learn from these changes, and how should they prepare? Read more >>
Until Next Month
As always, we’re watching all things Google. We’ll continue to pick out top news items, algorithm updates, and trends.
See you next month.
Featured image credit: Google

Unriddled: Messenger’s New Look, Apple’s Latest Products, and More Tech News You Need
“Unriddled” is HubSpot’s weekly digest of the tech headlines you need to know. We give you the top tech stories in a quick, scannable way and break it all down. It’s tech news: explained.
Unriddled: The Tech News You Need
1. Messenger Has a New Look
Facebook announced last week that it will soon roll out Messenger 4: the latest edition of its instant messaging platform that, among other new features, will be more personalized and easier to navigate.

Source: Facebook
Instead of its current nine tabs, Messenger 4 will only have three: chats, people, and discover. Plus, the company says, it’s added new personalization features to group chats (like customizable dialogue bubble colors), while also keeping features like bill-splitting and games.
Messenger says the changes will roll out incrementally. Read full announcement >>
2. Apple’s New iPad Pro and MacBook
In addition to releasing iOS 12.1 yesterday, Apple held a special event to debut the the latest editions in its line of iPad Pro and MacBook products. Among them: a new retina MacBook Air (the design of which hadn’t been updated since 2010), as well as a bring-your-own-monitor-style Mac Mini.

Source: Apple
Also unveiled today were the two latest additions to Apple’s line of iPad Pro devices, available in 11-inch and 12.9-inch models — which are the first iPads to come with FaceID technology. Emily Bary of MarketWatch has more. Read full story >>
3. Walmart-Owned Sam’s Club Will Open a Cashierless Store
In what could be interpreted as an attempt to keep up with ecommerce rival Amazon, Walmart announced that it will open a somewhat cashierless store, Sam’s Club Now, in Dallas next week.
The store is largely serving as a test-run for some of the emerging, tech-driven concepts Walmart hopes to use, including augmented reality, and what Sarah Perez of TechCrunch describes as “artificial intelligence-infused shopping.”
Rather than traditional cashiers, the stores will feature “Member Concierges,” who could serve similar roles to those staffing Amazon Go stores to help shoppers understand the concept. Read full story >>
4. Facebook Removes 82 Pages, Groups, and Accounts in (Another) Coordinated Misinformation Campaign
Facebook said last week that it uncovered evidence of another coordinated misinformation campaign from its site, and removed over 80 pages, groups, and accounts in response.
The campaign appears to have originated in Iran, and largely involved the distribution of politically-oriented content on both Facebook and Instagram. Over one million users were following one or more of the Pages removed to take down the campaign. Tony Romm and Craig Timberg of the Washington Post share more details. Read full story >>
5. Oculus Rolls Out Options for Reporting Abuse
Oculus, the Facebook-owned maker of virtual reality (VR) hardware, announced last week that it’s implementing new ways for users to report abuse — in the form of content or other user behaviors — from within any of its apps or games.

Source: Oculus
By allowing users to report directly from a VR experience, video is captured that provides reviewers with more detail around what, exactly, happened. Adi Robertson of The Verge has more. Red full story >>
6. Want to Know What Amazon’s Cashierless Stores Are Like? We Went to One.
Haven’t made it to one of Amazon’s cashierless Go stores yet? We checked out the newest one. Read full story >>
7. In a Land of Automated Milk and Honey, Marketers Are Presented With an Opportunity
In what might be the tech capital of the U.S., robots are checking us out of supermarkets and making our lattes. But while this growing technology leaves many starry-eyed, it leaves others wondering about the road it paves. Read full story >>
8. 25% of People Think All Searches Will Be Done by Voice in the Next 5 Years
When it comes to voice search overtaking text in the future, many internet users seem bullish. But today, that doesn’t necessarily line up with search preferences. Read full story >>
