How to Create and Execute a Successful Lead Gen Strategy
Your audience no longer wants their attention bought — they want it earned.
This means lead generation strategies need to be revamped across the industry to better meet the needs of target markets.
The first step in this evolution is to create compelling content, and the second is to use that content to convert visitors into leads. Of course, this is easier said than done.

To highlight the importance of a powerful lead generation strategy, we are going to backtrack a little bit first. Are you familiar with the analogy of the professor who presented his class with the challenge of trying to fit rocks, pebbles, sand, and water into a jar as efficiently as possible?
By prioritizing the biggest items and placing them in the jar first, he was able to optimize the amount of space used. Your business should take a similar mindset when implementing lead generation tactics into your inbound marketing strategy.
The Rocks, Pebbles, and Sand of Inbound Marketing
Like the professor who challenged his class to neatly fit rocks, pebbles, and sand into a jar, your inbound marketing strategy consists of rocks, pebbles, and sand. Here’s what I mean by this.
What are the large rocks that are the most essential to your strategy? What are the pebbles that serve as secondary, supportive tools for your business? What small stuff or distractions are the “sand” of your business? Most businesses would argue that their customers are their “rocks.”
While it is indisputable to say that customers are essential to any business, I want you to instead think of them as the water that was used to finally fill the jar. The water was poured in only after everything else was firmly compacted in the jar. Your business can benefit from taking this same mindset in your inbound marketing strategy.
The 4 L’s of a Lead Generation Strategy
Your content is your rocks. Compelling content plays a huge role in generating leads. This includes the tools used to generate traffic, such as your blog, SEO, PPC, and social platforms.
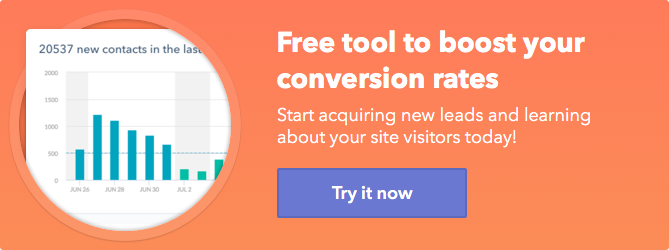
Approximately 96% of business-to-business customers want content from industry thought leaders to inform their buying decisions. Creating compelling content is your key to establishing yourself as that go-to, educational leader in your industry.
You know what they say: you can catch a lot of flies with honey, but you can catch more honeys being fly. Try that cliche in a bar and it might end with a drink thrown in your face, but adapting that mindset in your inbound marketing strategy could not only improve lead generation rates, but also increase the number of qualified leads your business attracts.
This article will focus primarily on the step that comes after your rocks are in place -– your pebbles, or the best practices for generating leads using your content. You will quickly understand how companies that are hopping aboard the content train are generating 67% more leads per month than those who don’t.
1. Lead Capture
Odds are that about half of your visitors will never return to your site if you do not adequately capture some bit of information from them. A working email address is the best thing a marketer can ask for here, but visitors are not always willing to give this kind of personal information up. Call-to-action buttons like “Sign up here” have practically become synonymous with “We are going to spam you,” which is why marketers need to find new ways to obtain this information.
Nicholas Kusmich, a Strategic Marketing Consultant and Facebook Ads Specialist, suggests a new rule of thumb for obtaining visitors’ information. Kusmich suggests 2 golden rules be taken into account:
- We must give before we ask.
- Every step of the marketing process (advertisements and promotions) must be valuable in and of itself.
Kusmich goes more in-depth with these concepts in his article, “2 Golden Rules for The New Era of Marketing,” but for now let’s focus on that first rule.
Can you believe there was once a time, many years ago, where the opt-in email box was practically a luxury? It meant all the information you wanted would be delivered right to the comfort of your home. “What a time to be alive,” we all thought. That day is now long gone. We now find ourselves fending off information from all angles.
Somewhere between installing pop-up blockers and dumping our spam folders, we made an oath to never “Sign up here” again. It is time marketers start gradually breaking down those walls that potential buyers have put up, by using new, mutually-beneficial opt-in methods to acquire their information. The best marketing method for this technique of “giving before we ask” includes using lead magnets.
2. Lead Magnets
A successful client lifecycle requires optimizing the process for converting visitors into leads. Unfortunately, a hole exists between the traffic generation phase and the lead generation phase that often results in one-time visitors who neglect your attempts to capture their information and never hear from you again.
You can seal up that hole with lead magnets. Lead magnets are tools that provide value for your visitors in exchange for their contact information. Businesses use lead magnets such as email opt-ins, subscriptions, and social media follows to fish for some sign of interest from their site’s visitors.
The goal of this is to receive permission from visitors to follow up. Some examples of lead magnets include free:
- Training video series
- Free trial
- Webinars
- ebooks
- White papers
- A set of bonus tips
- An interview with an expert on a relevant topic
These free-of-charge educational tools will confide your visitors in your offering, allowing you to both obtain their email address and educate them on your business.
3. Landing Page Conversion Techniques
Another huge asset to your business when trying to convert visitors into leads are landing pages. This can be any page that someone lands on after clicking on an advertisement or other online marketing elements. It is also important to note that landing pages exist separately from your company’s website, and typically are used as a tool for a single marketing campaign.
A free, basic course on creating successful landing pages can be found on thelandingpagecourse.com. You can also learn lots of landing page tips and best practices from HubSpot’s existing blog posts on landing pages. We will go over some of the basics of effective landing page design right now, but definitely check out those resources later on for a more in-depth breakdown of the different components involved.
Landing pages serve the dual purpose of capturing leads and warming up potential customers. Both of these are essential stepping-stones before moving a customer further down your sales funnel. Additionally, there are two types of landing pages:
Lead generation landing pages are used to capture a user/company’s information in exchange for something. This relates back to the concept discussed earlier, of “giving before we ask.”
Click-through landing pages are used to attract the visitor to the specific product or service that you are trying to sell. The goal is to educate your visitor with enough information that they proceed to make a purchase.
Landing pages have one call-to-action in mind. Instead of overwhelming visitors with information regarding your business and all the products and services you offer, it is essential that you narrow the focus down to one specific goal in mind. Be sure to cut out any excess information that isn’t essential to the campaign, and be sure to include only one form or call-to-action link for them to utilize.
The most important element of your landing page is that it delivers the promise that your ad source made. If your ad says “Get 50% off computers here,” you need to reassure the visitor as soon as possible on your landing page that you will deliver that.
One way to do this is to make the call-to-action on your ad source the headline on your landing page. Another way is to make sure the font, coloring, and images used in your ad are duplicated on your landing page to some degree.
4. Lead Scoring
Lead scoring is a component of marketing automation software that helps prioritize your leads according to their levels of engagement with your inbound marketing content and ultimately help you figure out who is ready to buy. It can also help you identify what they are interested in if setup correctly.
This technique is used to quantify interactions that prospects have with your content by assigning points for different types of engagement. An example of the different types of engagements and their point values might look like this:
- Download an ebook – Add 5 points
- Watch a product overview video – Add 7 points
- Job role not a good match – Deduct 10 points
- Fill out opt-in form – Add 7 points
- Unsubscribe from a list – Deduct 7 points
Surprisingly enough, 79% of B2B marketers have not established a lead scoring strategy. Lead scoring provides your company with real-time feedback on how responsive your leads are to your marketing efforts. It can also indicate people who are ready to buy from you, but haven’t yet been in contact with you.
This point-based approach to recognizing and analyzing a company’s hottest leads will save your business time and money when reaching your target market and capitalizing on sales opportunities. With your hottest leads identified, your business can communicate with these leads confidently knowing that they are already aware of and interested in your business.
Lead generation plays a role in every business’s marketing strategy. Think about how many business’s sites you have visited since the dawn of the internet that you will never return to again. Not only did those businesses fail to capture your attention at that given time, but they failed to reconnect with you in the future.
This is a result of neglecting the lesson discussed in the jar analogy –– prioritizing the different elements of your marketing strategy so that a foundation is in place for you to build an efficient and effective approach around.
With your content in place, your business can begin using lead magnets, lead capture, effective landing page design, and lead scoring to optimize lead generation rates and create an overall better performing inbound marketing strategy.

12 Huge Announcements from the 2018 Google I/O Keynote
“Make good things together.”
That’s the phrase that flashed across the screen at the start of Google I/O 2018, the company’s annual conference for developers. Many experts predicted a focus on “responsibility” in light of the recent shrapnel from Facebook’s data-sharing and privacy scandal.
But, if there was one theme over the nearly two-hour keynote in front of 7000+ people at Google’s Mountain View amphitheater, it was machine learning and the need for the keepers and developers of tech to navigate its waters “carefully and deliberately.” Here are 12 of the biggest unveilings from the event.
The 12 Biggest Announcements from Google I/O 2018
1. Updates to Gmail
Many of us have already experienced subtle changes to our Gmail inboxes over the past few weeks, but there’s more to come. This flagship product is being redesigned with artificial intelligence (AI), giving consumers tools like Smart Compose, which uses machine learning to suggest phrases in real time as you’re composing email messages.
Type a subject line about Taco Tuesday? Smart Compose will suggest body text like, “How about we meet for tacos,” and “Does next Tuesday work for you?” These updates will roll out to consumers over the next few weeks, with G Suite users waiting a few months.
2. A more conversational Google Assistant
Noted as “The biggest thing we’re tackling with AI,” Google Assistant is getting a voice-lift, so to speak. The system’s current voice, Holly, will be joined by six new voices (available today), each of which is more conversational.
Google used WaveNet technology to underline raw audio, allowing its voices to understand the human voice, syntax, and natural pauses to develop an assistant that’s more natural and comfortable to speak with. Oh, and John Legend’s voice will be available later this year … ?
3. Hey Google, what’s Multiple Actions?
If you’re tired of saying, “Hey Google” before each request you make, you’re in luck. Multiple Actions allows Google Assistant users to ask multiple questions at once. For example, you could say, “Hey Google, who was the governor of California when Kevin Durant was drafted and what team drafted him?” and Google would answer both of your questions without flinching.
4. Smart Home
Voice search paired with a visual experience was a big theme for Smart Home this I/O. When you pull up a recipe, for example, you’ll be greeted by text directions for the recipe and a video that audibly walks you through each step. Simple voice searches such as, “Who is Camilla Cabello” will also now turn up visual as well as audio results, giving users a more immersive experience Android devices this summer and iOS later this year.
5. Kiss phone calls goodbye
The wishes of collective America have come true and we’re one step closer to never having to call another human being on the phone gain. Need to make an appointment for a haircut on Tuesday morning between 10:00 a.m. and 12:00 p.m.? Google Assistant will take that information and actually make the call for you, schedule it, and share the details.
It even works if calls don’t go as expected. During one live demo, a Google Assistant called to make a reservation for four at a restaurant that required five or more for a reservation. The assistant uses deep learning to handle these situations “gracefully.” In the case of the dining reservation, the assistant knew to ask how long the wait would be without a reservation.
6. Android Dashboard
Another big theme of the I/O keynote was giving users time back as part of a digital well-being initiative. With Android P’s Dashboard, customers can see a user-friendly breakdown of how they’ve spent their day on their device and desktop.
YouTube will suggest you exit your cat video wormhole and take a break, and you can set an App Timer to limit time spent on apps. Once you’ve reached your limit, Google will grey out the app and suggest you exit. The idea is this will encourage users to put their phones down and actually interact with the world around them — because it’s come to that, folks. We actually need our devices to tell us when to put them down.
An updated Do Not Disturb mode will also silence your phone when you put it face down, and Wind Down Mode allows you to tell your assistant when you’d like to go to bed, at which point, your phone will turn to grayscale, which helps your brain wind down. Android P Beta is now available on seven flagship devices.
7. Full Coverage
Perhaps the strongest “stance” taken during this year’s keynote was that of all people having access to “the full story.” Google News’ Full Coverage feature gives readers a complete look at how a single story is being covered on a variety of news outlets — all in real time. To combat fake news or “tunnel vision,” everyone using this feature will see the same news at the same time, thereby giving us all the information we need to engage in a responsible and lively debate. Here’s hoping, Google.
8. Smart batteries
Android P also offers “adaptive battery” which uses on-device machine learning to discover which apps you’ll use now, later, and probably not today. Then, it spends precious battery life fueling only the apps you use giving you a longer battery life.
9. Google knows you don’t know which way South is
We’ve all been there. You pull up Maps, enter your directions, watch the arrow populate, and walk in a random direction until you figure out which way you should actually be going. No more! Maps now combines your camera, street view, and directions to provide augmented reality walking directions. Plus, they’re playing with fun avatars that may soon be bounding out in front of you and showing you the way themselves.
10. Watch out, Yelp
Now, everytime you rate a restaurant or shop on Google, Google will use that information, in conjunction with its own knowledge of your surrounding area to give local haunts a score based entirely on your preferences. So, if you’ve rated two nearby Ethiopian restaurants highly and given two Pho restaurants and a burger joint pretty low marks, Google might give that new Eritrean restaurant a high match score for you.
Coming soon, we’re adding a new tab to @googlemaps called “For you.” Designed to tell you what you need to know about the neighborhoods you care about, see new places that are opening or whats trending, personal recommendations and more. #io18 pic.twitter.com/CtqQsWFyot
— Google (@Google)
May 8, 2018
11. Google Lens knows what everything is
The new Lens is integrated with your camera and allows you to point your phone at virtually anything to find out what it is or where you can buy similar items. Want to know what that building to your right is? Point your lens at it and Google will tell you. Like that outfit in the window? Lens will break down each piece and tell you where you can find it. Just like the general style of that lamp? Style Match will surface results that are different from the original but still in a similar style.
12. Self-driving cars are not going away
Proving you can’t keep an autonomous vehicle down, Waymo CEO John Krafcik ignored last Friday’s crash involving a car that hit a Waymo van and focused on the future. Much of the time was spent discussing measures to increase pedestrian safety, a common concern after one of Uber’s self-driving cars killed a Phoenix pedestrian in March of 2018.
Pedestrian safety is something Waymo claims they’ve increased by 100x, demonstrating their cars’ ability to identify pedestrians in blow-up dinosaur costumes, partially hidden behind planks of wood, and poking out of manhole covers. They also showed a Waymo van avoiding a collision with a car running a red light — something that might have come in handy during last week’s crash. Waymo also announced plans to launch its self-driving car service to all Phoenix consumers later this year.
Did we miss any of your favorite announcements? Were you surprised there was virtually no mention of security or information sharing? Sound off on Twitter!
*Header image source: CGM

Facebook Will Require Issue-Based Ads to Be Labeled
For the past several months, Facebook has been on a seemingly endless campaign to associate its name with greater transparency: of its terms, its privacy policies, and how it approaches and ranks the content shared on its site.
Today, Axios reports that the latest suite of changes is coming: this time, in the form of required labels for issue-based ads.
Much of that began last fall, when it was revealed that the social network had been weaponized by foreign actors to spread false and divisive information in hopes of influencing the 2016 U.S. presidential election.
That scrutiny was only heightened in March, when revelations were made about the (now-shuttered) consulting firm Cambridge Analytica improperly obtaining and leveraging personal user data.
It was addressed in several ways, including CEO Mark Zuckerberg testifying before Congress for two days of back-to-back hearings. And in the days leading up to that testimony, Facebook unveiled a number of reactive changes, including updates to its ad verification and labeling policies.
A Look at Facebook’s Changing Ad Policies
Where the Recent Changes Began
In October, Facebook said that only verified advertisers — those who submitted a government-issued ID and provided a physical mailing address to the company — would be permitted to run electoral ads, like those for a specific candidate running for office.
In April, it said that those ads would also come with a “Political Ad” label, specifying such details as who paid for it.
That same month, Facebook announced that this verification process would also apply to ads pertaining to issues that are often the greatest sources of debate during elections. But the announcement didn’t indicate that those ads would require labels –not yet, anyway.
New Labels for Issue-Based Ads
But as Axios reports, Facebook now plans to roll out such a requirement for ads that are based on hotly-contested issues, especially during election seasons.
And while the verification of advertisers behind this promoted content was a strong first step, the labeling of it could become even more imperative, as many credit issue-based content as having played the biggest role in the aforementioned efforts to influence U.S. elections.
When this verification was first announced last month, Facebook said it would partner with third parties to comprehensively determine what those issues are — a list that Axios says includes topics like gun control, immigration policies, and “values.”
Transparency Loves Company
The report comes on the heels of an announcement from Google last week that it, too, would roll out new policies for U.S. election ads. That would begin with a verification process similar to Facebook’s, as well as the future release of a Transparency Report that will delve deeper into who’s funding election ads on Google, and how much these individuals or groups are spending on them.
The transparency efforts will also include what Google calls “a searchable library for election ads,” which looks to be similar to the Political Ad Archive Facebook announced in April. That archive, Facebook says, will store the full text and imagery of any and all ads with the “Political Ad” label, as well as the number of impressions it received and demographic information about the audience it reached.
It’s important to note that Facebook was not the only online platform said to be weaponized for the spread of misinformation — Google, too, has faced its fair share of criticism for the same thing, which could be one motivation behind these latest ad transparency initiatives.
YouTube — which is owned by Google — has experienced its own challenges with the spread of divisive content, which CEO Susan Wojcicki addressed at SXSW in March.
And Twitter, which has come under fire for serving as a network rife with contention-spreading bots and bullying, has said that it’s undergoing efforts to address, measure, and improve the health of its platform.
Transparency and ethics are reverberating themes throughout the tech industry as of late. In light of the fallout experienced by Facebook from these various items — like misinformation and data privacy — it, along with many of its peers in the sector, has been going out of their way to make bold statements on ethics.
At F8 — Facebook’s annual developer conference held last week — ethics took center stage when discussing certain topics, like how the growth of artificial intelligence is forcing developers to address the bias of machine learning, for example.
And at Microsoft Build yesterday, CEO Satya Nadella set the tone for the opening keynote by proclaiming early on, “Privacy is a human right.”
Many expect similar themes to echo throughout Google’s own annual developer conference, I/O, which kicks off today with an opening keynote at 1:00 PM EST.
We’ll be covering the keynote later today, so stay tuned for those developments — and others that emerge along this undercurrent of tech responsibility.

It’s Time to Put SMS Out of Its Misery
Surprize 🙂 Get it here:
That was an actual SMS I received earlier this week.
Unidentified number? There’s the first red flag. Followed up by a bit.ly link? Red flag number two.
I still have no idea who it was from, what lies beyond that link, or what I did to deserve this.
Now, that message has been banished the land of deleted SMS along with thousands of other shipping alerts, thinly-veiled scams, and local service providers shouting at me about LAST MINUTE DEALS.
None among them have invited, or inspired, me to engage. In fact, I now almost flinch instinctually at the arrival of a message from an unknown number.
It feels invasive. It is wholly impersonal. It does quite the opposite of connecting with or engage me.
On a messaging platform that invites two-way communication, things could have been different. I could have discovered it was just my friendly, neighborhood Mr. Smiley’s inviting me to use their chatbot to order buy-one-get-one-free burgers today. I could have responded to Amazon’s shipping alert to change my one-time order to a monthly subscription.
What were once built-to-be-ignored SMS messages could have been opportunities to upsell me, retain me, or even just collect more data on me.
With a chatbot on a popular messaging app, these marketing messages could have been contenders.

SMS messages simply can’t contend with chatbots. Their high interaction metrics continue to be a red herring that tells nothing of actual engagement.
Modern marketers who understand that consumers demand valuable and immediate one-on-one engagements are choosing chatbots over SMS for several reasons.
SMS is costly in comparison to, well, everything.

For all intents and purposes, communicating with customers via a chatbot is free.
Sure, there may be a cost associated with developing and maybe manning the bot. But for the chunk of the world that is connected to the internet, the act of sending and receiving messages via chatbot is free.
SMS is not.
Consider spending a cent, which is at the low end for SMS, every time you send a message. Doesn’t sound all that bad, does it?
It doesn’t — until you consider the size of your contact list and how often you want to reach out to them.
Grew your list to 100,000 subscribers? Awesome! That’ll be $1,000 every single time you want to send them a 160-character message.
500,000 subscribers? Now we’re talking $5,000 per mass message.
You get the point.
If you were to share a promotion even every other week, you’d be spending well over $100,000 a year to send a couple dozen sentences to your list.
Many singular chat sessions can get up to that length — and you could have a million of them for free.
The paradox here is that while you want to grow your contact list, the expense of actually communicating with your subscribers via SMS will quickly become prohibitive.

SMS is not the ubiquitous marketing channel it was once believed to be.
Affordable tech and widespread, low-cost internet connectivity draw millions of active users to messaging apps every single month.
SMS is no longer the most far-reaching communication channel that marketers can tap into. Nor was it ever really as ubiquitous as we once believed.
Yes, almost all mobile devices come with some kind of SMS app preloaded. But have you tried shooting a quick text from California to your friend in Germany lately?
“If you’re a brand that wants to message people in US, Canada, Mexico and the UK. That means 4 different SMS setups, 4 different cost structures …
If you launch on FB Messenger in the same four countries, it’s one launch and of course 1 cost structure (free) and the build is to a single API.
SMS suppliers are fragmented by location. Costs are all over the place and marketers will have to set up completely new campaigns according to the regulations of SMS suppliers in every country in which they wish to advertise.
Now that sounds like a great way to spend a week leading up to an exciting new launch.
By contrast, most messaging apps are not fragmented by location. While some apps are certainly more popular than others in different countries, a marketer can set up a single messaging campaign that will function perfectly for any user in that app — regardless of their country of origin or the one they’re in at the time.
Facebook Messenger specifically has the weight of a billion monthly active users all over the globe. The power to piggyback on one of the world’s largest messaging apps is something SMS will never be able to tap into, yet it’s something more and more chatbots do every day.
Yes, SMS interaction is high …
According to the 2016 E-mail Marketing Metrics Benchmark Study, the world average open rate of emails was 21.8 percent. Click-through rate? A dismal 3.3 percent.
On the other hand we have SMS, which Salesforce’s mobile product manager Greg Murphy says has an open rate of 98 percent and a conversion rate of 45 percent.
Way better.
And chatbots are right up there with it.
Email-marketing evangelist Neil Patel has seen chatbots garner 88 percent open rates and a 56 percent click-through rates.
The custom bot-builders at Olyo observed amazing results after sending the same content to users via email and chatbot:
“The results obtained with the chatbot were extraordinary: the CTR (click-through rate) was 12 times higher than the one obtained by e-mail…”
We don’t have to assume that message-based communication like chatbots and SMS are more effective than email marketing. It’s in the numbers.
While SMS and chatbots are neck-and-neck when it comes to opens and CTRs, the engagement taking place on either platform couldn’t be more different.
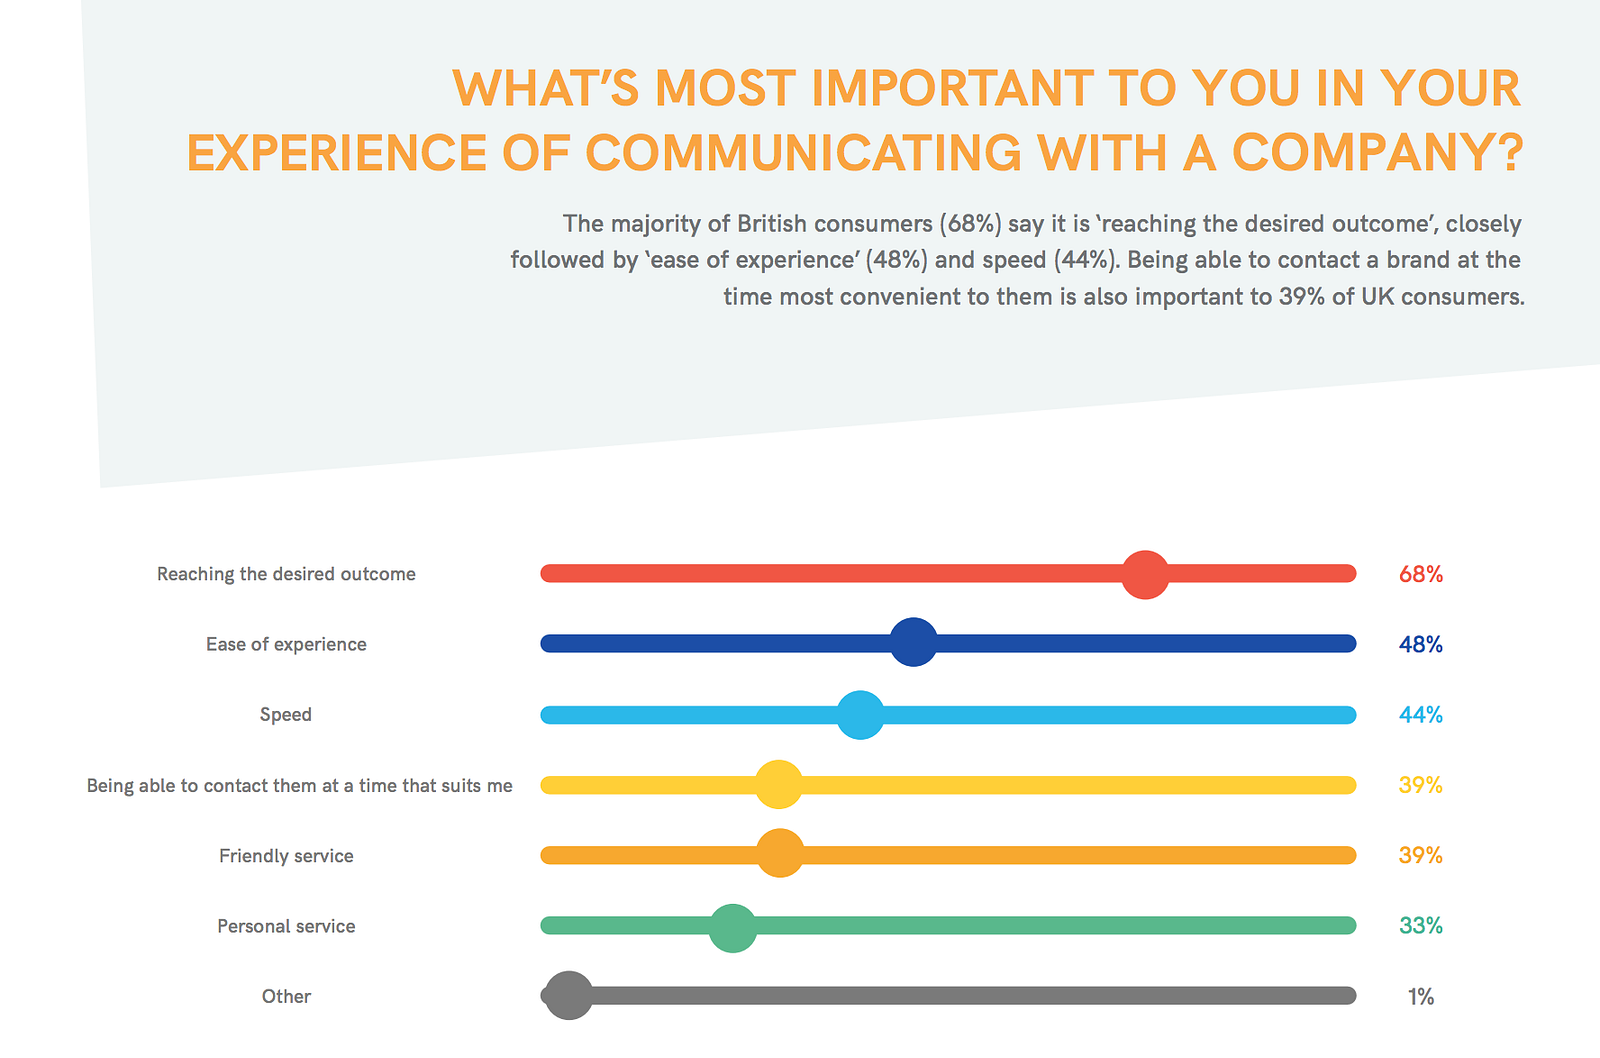
… but what about actual engagement?
“Consumers no longer want to talk to a business by phone or email; they’ve moved to social media and messaging in their personal lives, why not when they’re dealing with a business?
Convenience is winning. People do not want to wait or search for an answer, they want the answer to come to them.”
In 1989, CompuServe made it possible for internet users to send emails back and forth.
Since then, we’ve measured engagement in metrics like opens and clicks. Conversation wasn’t measured because technology didn’t support the exchange of information in real time.
It isn’t the 80s anymore. What if what we’ve been calling “engagement” has really just been “interaction” all along?
Because I don’t know a better word than “engagement” for what people are doing with chatbots today.
Amit Sharma, CEO of post-purchase customer service tool Narvar, found that less than 1 percent of customers engage with the millions of SMS messages his company sends to follow up on transactions.
With chatbots, that couldn’t be further from the truth.
“Narvar’s chatbots see almost 100% response rates from customers, 65% of whom treat the bot the same way they would treat a human, saying things like ‘Thanks’ or sending emojis and thumbs-ups.”
It’s obvious a shift is happening.
People view chatbots as an opportunity for conversation with a brand; SMS as information being pushed at them from a brand.
And people are interacting with SMS at a high rate, but it’s all in the delivery.
Who among us isn’t quick to respond to a notification in an app where we regularly communicate with friends and family? It’s the exact same reason why bots work, as well.
The interaction rates are very similar, but the engagement is all different.

Engagement is a two-way street.
Bots are able to cross it. SMS waits on the corner. Yeah, a ton of people see him standing there waving his sign and shouting about discounts, but how many slow down and engage?
After years of lead response research, InsideSales.com deduced that if you engage with a lead within five minutes of them indicating interest in your offer, you’re 100 times more likely to actually speak with them than if you wait even 30 minutes.
The odds of qualifying that lead are also 21 times higher.
Despite the facts, Drift found uncovered that way too many companies are ignoring this five-minute rule.
“…we found that 93% of companies are ignoring the 5-minute rule. Just 7% of companies responded to sales inquiries in 5 minutes or less, while a whopping 55% of companies took longer than 5 days to respond.”
This just goes to show that immediacy matters.
A chatbot’s engagement time is less than seconds. SMS’s engagement time is…what engagement?
Businesses have unfortunately taught consumers that engaging via many common sales and marketing channels (forms, SMS, emails) is about as effective as leaving a voicemail — don’t even bother.
“I don’t know anyone who likes calling a business. And no one wants to have to install a new app for every business or service that they interact with. We think you should be able to message a business, in the same way you would message a friend.” — Mark Zuckerberg at F8 in 2016.
But chatbots have a way of collecting data in a way that most people don’t even register as marketing.
Sharing some info with a business you’re interested in over Facebook Messenger feels natural. You don’t have to change your habits nor do you go into the conversation half expecting to never hear back.
It’s a win-win situation.
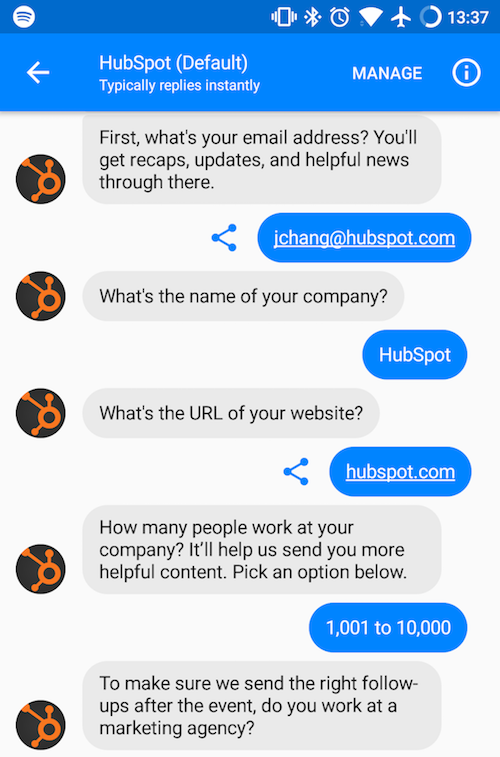
SMS is not scalable.
As I’ve explained in “Why chatbots will change marketing as we know it”:
“Messaging is the new frontier of marketing. Bots give us the opportunity to tap into it by creating scalable, one-on-one interactions directly with consumers.”
Not only is SMS cost prohibitive on a large scale, you’ll rarely leave people thinking “I feel more connected to this brand now.”
But that feeling of connection and value at scale is exactly what we’re doing with our bot builder tool, to help people in sales, marketing, and customer success connect with people at scale.
By using conversational messaging platforms like Facebook & Website Live Chat to help people communicate with their prospects & help their customers better, we’re trying to make life easier and give them back precious chunks of time.
People click on links sent to them via SMS. It capitalizes on a learned behavior. But one click does equal engagement, much less a transaction.
People engage in valuable, one-on-one exchanges with chatbots, all inside apps they’re already using, to get shit done.
In Narvar’s case, responses to follow-up notifications increased from 1 percent to nearly 100 percent. The only difference? A shift from SMS to chatbot.
We’re now poised to see that shift happen on a large scale.
Consumers want useful information, not blasts. And they want it in real time. They’ll go where they need to, including your competitors, to get it.
Remember the trusted adage “The customer is always right.”

STAR Interview Method: The Ultimate Guide [2018]
A resume tells you that a candidate has the required skills and background for the open role, and a cover letter confirms their interest in the position.
An interview, then, is a critical step for evaluating a candidate’s critical thinking, decision-making, and interpersonal skills — essentially, it’s an opportunity to dive deeper.
To evaluate each candidate you interview fairly, you’ll want to ask questions to understand how they’ll perform in the role. The STAR method (which stands for “Situation, Task, Action, Results”) is a behavioral interviewing technique that can be used to gain those insights. Interview questions using the STAR method urge candidates to tell a linear story, focusing on a specific situation and providing details regarding tasks and results. For instance, rather than asking, “What is your greatest weakness?”, a good STAR question might be, “Give an example of a goal you didn’t meet and how you handled it.”
Essentially, the STAR method requires a candidate to explain a prior work situation anecdotally, provide details regarding the tasks required, what actions the candidate took to achieve those tasks, and the results of the situation.
When used properly, the STAR method is extremely effective. Here, we’ve created a comprehensive guide on how to use the STAR method, so you can learn how to prepare to interview a candidate, and check out examples of questions to identify your best candidate.
Here’s a list of ten popular STAR interview questions. Ideally, you’ll tailor them for the specific role and candidate, but you can use these for initial inspiration.
STAR Interview Questions
- Tell me about a difficult decision you’ve made in the last year
- Describe a decision you made that was unpopular and how you handled implementing it
- Describe a stressful situation at work and how you handled it
- You indicated on your resume that leadership is one of your strengths. Please describe an experience in which you used your leadership abilities
- Describe a time when you set your sights too high (or too low)
- Tell me about a time when you delegated a project effectively
- Tell me about a time you were able to successfully deal with another person even when that individual may not have personally liked you (or vice versa)
- Give me an example of when you showed initiative and took the lead
- Tell me about a recent situation in which you had to deal with a very upset customer or coworker
- Give me an example of a time when you tried to accomplish something and failed
How to Successfully Prepare for a STAR Interview
To successfully incorporate STAR questions into your interview strategy, there are four steps you’ll need to take.
1. Make a List of Role-Specific STAR Questions
Start by making a list of questions applicable to the specific candidate’s prior experiences, skills, and characteristics. The list of questions above can serve as general starting points, but to really delve into a candidate’s specific background in relation to the role, you’ll want to tailor your questions appropriately.
For instance, “Tell me about a time when you delegated a project effectively” is vague, and could lead the candidate to describing a work situation from five years ago, when really, you wanted to hear about a data-related marketing project from her last position alone. Make yourself clear, and reference a specific resume item: “I’d like to hear more about your experience as a Sr. Digital Marketing Manager at Company X. Could you tell me specifically about a time in that role when you delegated a project effectively?”
STAR Method Interview Examples
If you’re using the STAR interview method, ask questions that require situation-specific answers. For instance, if you want to know about a candidate’s flexibility, you might ask, “Describe a time when you put your needs aside to help a co-worker understand a task. How did you assist them?”
2. Tell Candidates What You’re Looking for in Their Answers
Not everyone agrees this step is necessary: some recruiters prefer not to explain that they’re looking for situation-specific answers, to see how the candidate deals with answering the question however she wants. Some hiring managers see the benefit of being vague — at the very least, you’ll likely get a candid answer from your candidate.
But other experts, like Todd Lombardi, a college relations specialist at Kulicke & Soffa Industries Inc., believes it’s important to explain what he’s looking for before asking a candidate any behavioral interview questions.
When Lombardi starts a behavioral interview, he details the process, telling the candidate he’s looking for specific examples, names of people, dates, and outcomes.
Lombardi speaks with candidates about projects they’ve worked on, how their role has evolved, how they’ve handled deadlines or unexpected situations, and how they’ve coped with adversity. He asks these questions because, “Everyone’s got that kind of experience.”
If you don’t explain what you’re looking for upfront, you risk receiving an incomplete answer or confusing the candidate. If the candidate answers insufficiently, perhaps you want to offer her an opportunity to modify her answer. Say: “I’m looking for details about a specific example — you’ve explained the situation and tasks required, but I’d still like to know what steps you took to complete the tasks, and what results you got from the project.”
3. Know What You’re Looking For
STAR interview questions are particularly helpful for determining major characteristics in your candidate, or receiving more context for potential issues you see with their resume.
For instance, let’s say you ask, “Give me a specific example of a time when you sold your supervisor or professor on an idea or concept. How did you convince them? What was the result?”
When you ask STAR questions, you should know what you’re looking for in a candidate’s answer. In the question above, it shouldn’t matter too much what the candidate’s idea was — instead, you’re looking for the candidate to display a high level of assertiveness, confidence, and good decision-making skills.
Regardless of how the candidate answers, take note of how the candidate demonstrated — or didn’t demonstrate — those characteristics. They’re more important than how the situation played out.
If you’re not sure what you’re looking for when you ask a candidate STAR questions, consider what’s missing from the candidate’s resume. If the candidate’s resume reflects skills tied to analytics, but you’re fearful the candidate lacks the creativity necessary for the role, ask a question regarding innovation. When the candidate answers, take note of whether she mentions original ideas she offered. Essentially, work backward — consider what information you want from the candidate, and then figure out how to phrase it in an appropriate behavioral interview question.
Sara DeBrule, our Global Marketing Recruitment Team Lead at HubSpot, recommends working to identify “the candidates who have taken the time to understand the business challenge, and are able to position themselves as the solution.”
DeBrule explains, “It’s obvious when a candidate has read up on the STAR interviewing technique because they are able to tell a linear story about the ways they are able to successfully impact [the company] in the desired way for the role.”
Even if a candidate hasn’t had the exact experience necessary for the role, the applicant should still be able to draw parallels between past experiences and how those experiences would translate to future success in the role. Ultimately, DeBrule says she aims to uncover whether a candidate focuses on results, seeks out industry knowledge and trends, has influence over her coworkers in order to work as a team player, and pursues new opportunities for growth.
If you’re stuck on what constitutes a good answer to a behavioral interview question, check out our behavioral interview article to get some ideas.
4. Remain Open-Minded
Each candidate has completely different life and work experiences, all of which contribute to unique and sometimes unexpected answers to STAR behavioral interview questions.
It’s important to remain open-minded. You want to build a team with diverse employees, each of whom bring new and different ideas and past experiences to the table — if a candidate answers differently than you’d expected them to, it doesn’t mean they’ve answered wrong.
“At the end of the day, I’m trying to understand a candidate’s ability to tell their story of impact — how they’ve impacted businesses in the past, and how they’re going to impact [our company] in the future,” Sara DeBrule explains.
Remember, these STAR interview method questions should be used sparingly and wisely — asking ten in a row will only confuse you and your candidate. Instead, you should mix behavioral interview questions with more standard interview questions, especially during a first-round interview. Allow a candidate to warm up with a few standard questions, before diving into any STAR behavioral ones.
Use some of these STAR interview questions in your next interview to ensure you’re providing as many opportunities as possible for the candidate to demonstrate how she can help your company succeed. Hopefully, behavioral interview tactics will help you create candid, insightful, and useful conversations with job applicants.

19 Google Doc Features You Didn’t Know Existed (But Totally Should)
A few years ago, as I was scrolling mindlessly through my Facebook News Feed, I found an article that told me I was using paper ketchup cups all wrong.
It turns out you’re supposed to fan out the sides of the cup to increase ketchup capacity, like this. Who knew? Well, I recently applied that sense of adventure to another thing I love — Google Docs. And what I found was just as life-changing.
Sure, you may have been using Google Docs for years, but just as I found, there are likely several useful features you have yet to uncover. For example, did you know you can look at a document’s entire revision history to figure out what was changed and when?

Here are 19 sweet features Google Docs has to offer that aren’t on many people’s radar.
19 Hidden Google Doc Features
1. Add Fonts
When you create a new document, Google Docs starts you off with nearly two dozen native fonts you can choose from using the dropdown list on your top editing toolbar. But, there are dozens more fonts and typefaces available to you in that same dropdown.
To add additional Google Doc fonts, open your document and click the fonts dropdown third box from the left on your editing toolbar. Your default font should be Arial, as shown in the screenshot below.
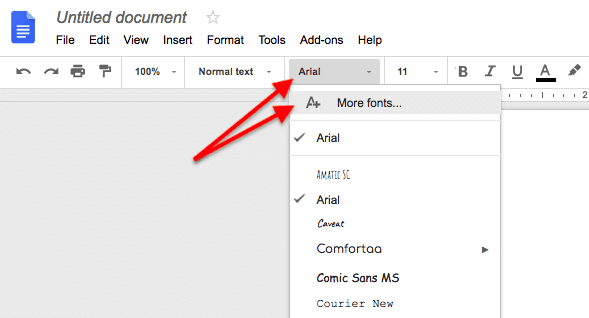
When your starting font list appears, click the “More fonts…” option — the first option down, as shown in the screenshot above. This will open a window of additional fonts, as shown below.
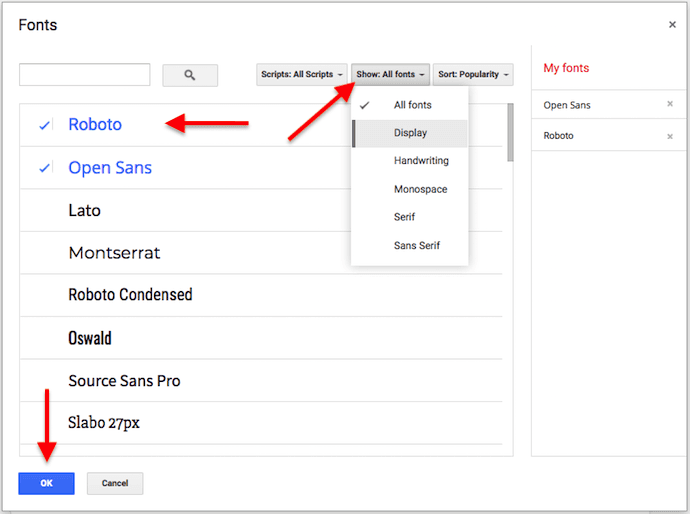
From the window that appears, shown above, check off the fonts you want to add to your starting dropdown list of fonts. Then select “OK” at the bottom. You can even explore new fonts by their general theme and appearance using the “Show” dropdown.
When you return to your document view, you should see your selected fonts included in the fonts dropdown.
2. Templates
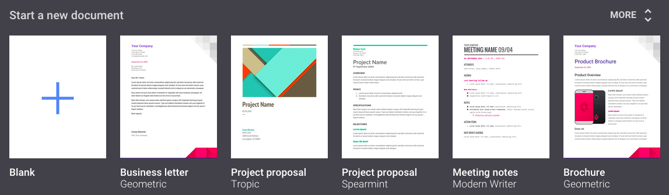
Why start from scratch when you could use a template? Whether you’re using Google Docs to write your resume, draft a project proposal, craft a business letter, formalize meeting notes, or design a brochure, you can bet there’s a template for that. In fact, there are templates for almost all your business needs. And for every category, you’ll find multiple templates to choose from.
This feature isn’t exactly hidden, but it’s often overlooked. You’ll find all these templates at the top of your Google Doc homepage. Click More at the top right to browse through all the options.
3. Table of Contents
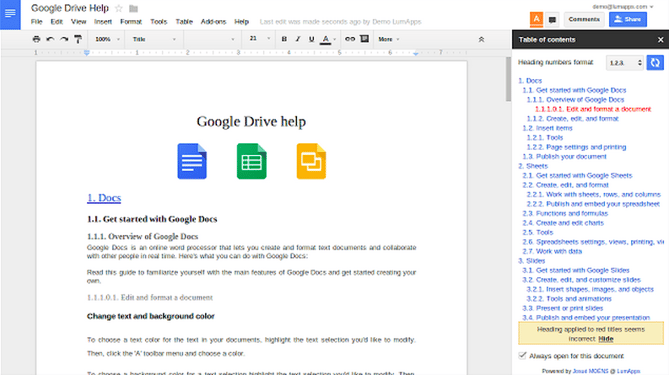
Writing a long document with a lot of subsections that readers may want to jump to? The handy “Table of Contents” add-on automatically creates a navigation sidebar. Simply click through the headers and subheaders in the sidebar to easily jump from place to place in your document. It can be a little slow if your document’s really long, but it does the trick — and it’s still better than scrolling.
To find the add-on, click here or open your document and click Add-ons from the menu at the top of the page. Choose Get add-ons… and search for “Table of Contents.”
4. Create or Remove Header
Headers and footers are particularly useful when creating a Google Doc that has many pages. You can create a header that includes the document title, each page number, or both on every page all at once.
To Create a Header
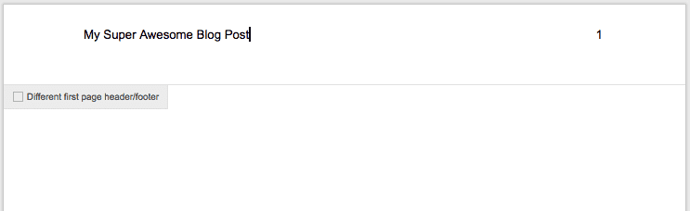
To create a header on Google Docs, double-click on the very top of one of your pages and begin typing your header text. You can also select “Insert” from the top navigation toolbar, then hover your cursor over “Header & page number” for a slide-out option that allows you to order your pages by increasing numerals.
Using either process, you’ll create a header that looks like the screenshot below. This will appear on every page.
To Remove a Header
But removing this header once you’ve created it isn’t as obvious of an option. To remove a header from Google Docs, simply remove the text included in the header, then click out of the header space and back into the document’s body text.
To Change the Header Size
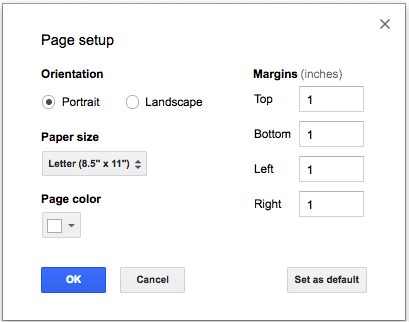
To shrink the size of a header from a Google Doc and use this space for more body text, change the margins of the page. To do so, click “File” in your top navigation bar, then “page setup…”
From here, you can narrow the page margins to a custom size, or using a preset “Paper size” from the options shown in the screenshot below. This will enable you to pull in or push out the header margins to your liking.
5. Clear Formatting
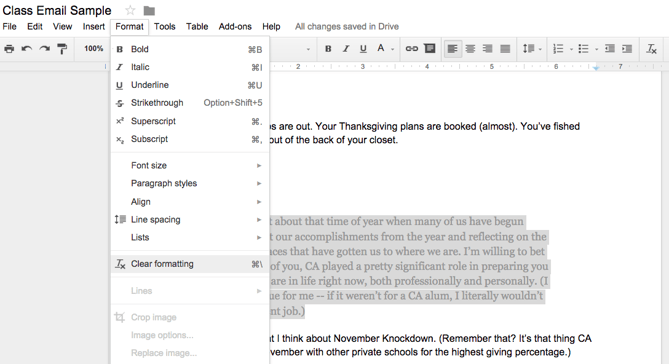
If you’ve ever pasted text into a Google Doc from another location, you’ve probably encountered formatting issues. It can happen for a variety of other reasons, too. Instead of editing that text manually to fit into the correct formatting, you can simply highlight the offending text and go to Format > Clear Formatting right in the toolbar. Boom: It’ll format the foreign text to fit with the rest of your document.
6. Create a Folder
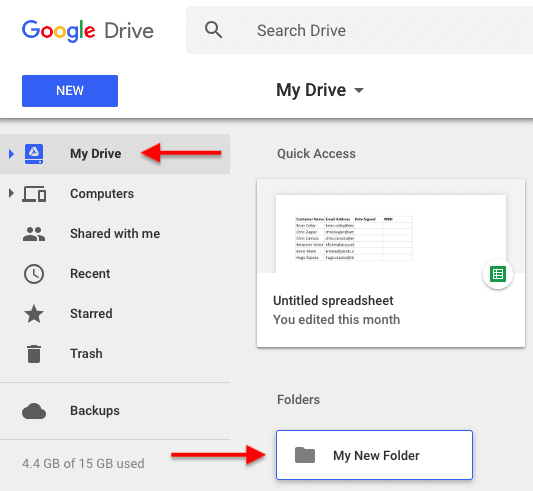
Because Google Drive stores your documents on the cloud, multiple people often use the same Drive account for sharing files with one another. Over time, this can make it difficult to organize your own documents. To store them all in a neat, safe place, make a Google Docs folder just for you or your team.
To create a new folder for your Google Docs, select the blue “New” button on the top left of your Drive account. This is also where you go to create a Google Doc, as shown below.
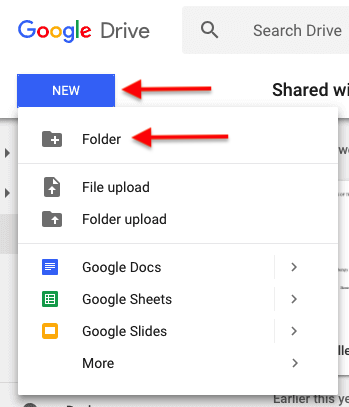
From the options that appear, select “Folder” and title your folder with a label you’ll remember. This folder will then appear under the “Folders” section of “My Drive,” as shown below.
7. The Research Tool
The Research tool is a godsend for anyone writing something in Google Docs that requires online research. Why? It allows you to research and refer to information and images online without every having to leave the document. That means no more clicking back and forth endlessly between tabs.
You can open the Research tool on a computer in one of three ways:
- Open your document and open the Tools menu at the top of your screen, then click Research from the dropdown menu.
- Right-click on a specific word and select Research.
- Use the keyboard shortcut Ctrl + Cmd + Shift + I (Mac) or Ctrl + Alt + Shift + I (PC).
Here’s what it looks like when I right-click the phrase “Welsh corgi” in my document:
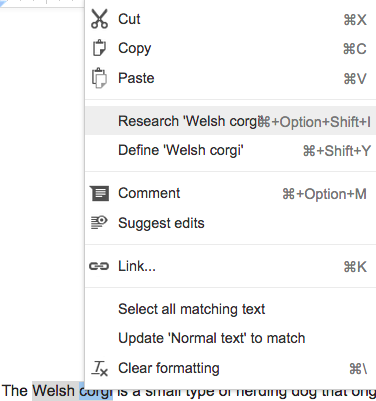
When I choose “Research ‘Welsh Corgi,'” the Research tool appears on the right-hand side of my document. It looks like this:

When you first open the Research tool, it might show you topics related to what it thinks you’re working on based on what you’ve written already. You can either research those suggested topics by clicking on them, or you can type in your own search terms in the search bar.
You can also choose what type of content you want the tool to spit back when you search a term. Use the dropdown menu next to the search bar to see the different types of information for that topic.

Here’s what each type means, according to Google Support:
- Everything: Text and images related to your topic from any source.
- Images: Images related to your topic found on the web.
- Scholar: Educational information related to your topic that you can read, add to your file, or cite in a footnote.
- Quotes: Quotes related to your topic that you can add to your file.
- Dictionary: Definitions, synonyms, and antonyms related to your topic.
- Personal: Results from your personal documents, spreadsheets, presentations, and photos that you can open, cite, or link to from your file.
- Tables: Data presented in tables related to your topic that you can open, cite, or export.
Right now, the Research tool is only available on computers and Android mobile devices. (Learn how to use the tool on Android devices here.)
8. Suggesting Mode
While the capability to edit and make changes in a document is great, there are times when you only want to suggest changes — without actually making any. That’s where “Suggesting” mode in Google Docs comes in handy.
It works a lot like Comments in Microsoft Word. First, switch from “Editing” mode to “Suggesting” mode by clicking the pencil icon at the top right of an open document, and then choosing “Suggesting.”
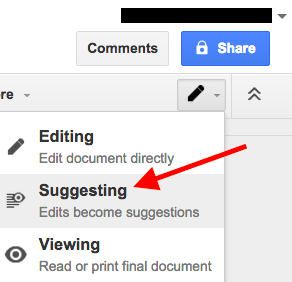
From there, anything you add, delete, or otherwise change will show up as colored marks in the document, accompanied by details on the righthand side such as the name of the suggestor and a timestamp.
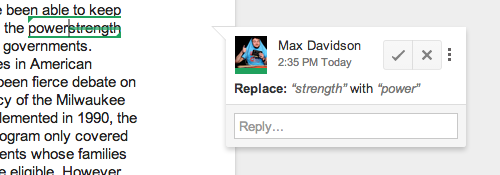
Image Credit: Google Support
9. Comments
If you want to ask questions about, make notes in, or highlight changes you’ve made in a Google Doc you’re working on, you can leave comments directly in the document. The comments can act as a conversation thread, as people can reply to them and carry on a conversation. You can close the comment thread when it’s done. You can also edit or delete your comments at any time, or others’ comments if you own the document.
To add a comment, highlight the text or image you’d like to comment on. Then, choose Insert from the menu at the top of your screen, and choose Comment from the dropdown menu.
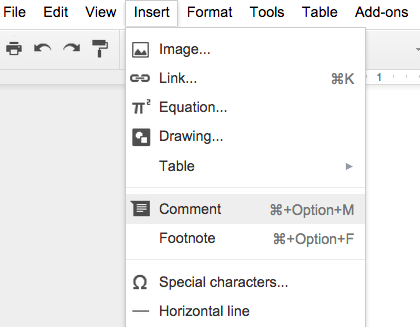
From there, a blank comment will appear on the right-hand side of your screen.
Tag People in Comments
Want to comment on a document and get a specific person’s attention? You can do that by tagging them in your comment. All you have to do is add an @ or a + sign, and then begin typing their name or email address. Google Docs will give you a couple options based on your Gmail contacts, and once you’ve submitted the comment, it’ll notify that person you mentioned by sending them an email.
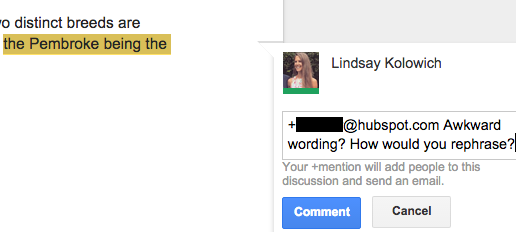
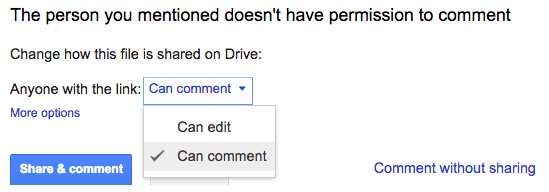
If that person doesn’t already have access to the document, you’ll be asked to choose permission levels for them.
10. Footnotes
Footnotes are quick and easy things to add to your Google Docs, but not many people know about them. To add a footnote, put the cursor in the part of the document you want the footnote to appear, and go to Insert > Footnote. From there, simply type in to your footnote whatever you’d like, and click onto the document to save it.
11. Find and Replace
Did you ever want to locate multiple instances of an error in a text document and correct them all at the same time? Google has heeded your call with this nifty shortcut.
If you’ve ever used “Find and Replace” in Microsoft Word, you’re in luck: Google Docs makes it just as easy.
To find something specific in your document, select “Edit” in your top navigation bar and click “Find and replace” at the bottom of the dropdown menu. You can also type Command + F on an Apple keyboard (or Ctrl + F on a Windows keyboard), then click the “…” icon in the box that appears to the top right of your Google Doc.
Either process will call up the window shown below, where you can type in the text you’d like to find and replace it with corrected text. If the error appears more than once, click “Replace all.”

12. Revision History
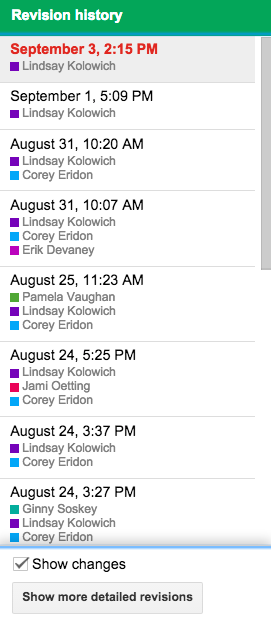
Speaking of revising content … have you ever wanted to see all of the changes you (or someone else) made in a Google Doc? Better yet, have you ever wanted to go back in time and revert to an earlier version of your document? Thanks to the Revision History feature, you can. And it’s awesome.
All you have to do is open the document and go to File > View Revision History. A panel will appear on the right-hand side of your screen showing an overview of who made changes and when. For a more in-depth view of the changes that were made, click the detailed revisions button below the overview list.
13. Voice Typing
Have Google Chrome as your browser? Have a working microphone either built in to your device or connected externally? Then you can “type” in a Google Doc using just your voice. To indicate a punctuation mark, simply say the name of it out loud, like “period,” “comma,” “exclamation point,” or “question mark.” To begin a new line or a new paragraph, say “new line” or “new paragraph” out loud.
To get to voice typing, open a document and click Tools from the menu at the top of the page. Choose Voice typing… from the dropdown menu. When you’re ready to speak your text, click the microphone or press Cmd + Shift + S (on a Mac) or Ctrl + Shift + S (on a PC) to begin recording.

Want to voice type in Google Docs on your phone? Voice typing only works for computers, but many iOS and Android mobile devices have built-in microphones you can use with a document.
14. Keyboard Shortcuts
There’s something so satisfying about knowing the keyboard shortcuts for whatever application you’re using, and Google Docs has a ton of them to choose from. A lot of them are the same as in other applications, such as Cmd + C (Mac) or Ctrl + C (PC) to paste, or Cmd + B (Mac) or Ctrl + B (PC) to bold something. But it has a few unique ones, too. Here are a few of my favorites:
- Shift + T = Create a new document.
- Ctrl + Alt + M = Insert a comment.
- Alt + I (in Google Chrome) or Alt + Shift + I (in other browsers) = Open the “Insert” menu.
- Hold Ctrl + Alt, press N then H = Move to the next heading.
To display the list of commonly used shortcuts while you’re working in a document, press Cmd + / on a Mac, and Shift + / or Ctrl + / on Chrome OS or Windows. You can also just click the gear icon in the upper left hand corner of your screen and choose “Keyboard Shortcuts” from the dropdown menu.
15. Create Your Own Shortcuts
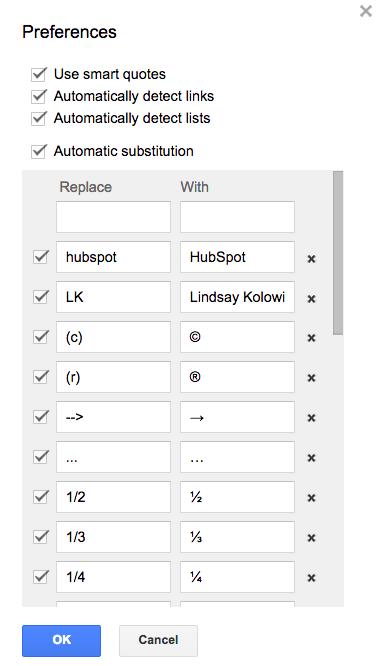
Google Docs may have a lot of shortcuts available to us, but what if we want to make a few of our very own? To create custom shortcuts, go to Tools > Preferences > Automatic Substition. You might find there are a few in there already (like changing 1/2 to ½), but feel free to add in some of your own.
16. Conference Calls
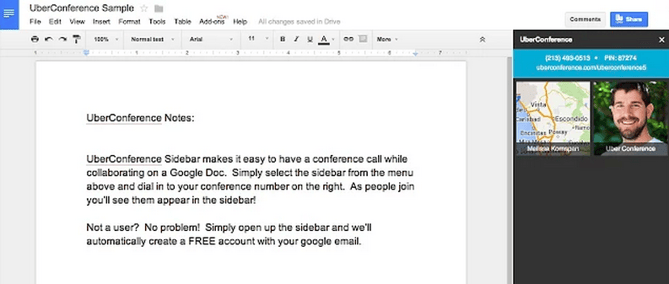
Google Docs is a collaborative platform — and the “UberConference” add-on makes it even more collaborative by letting you conduct an audio conference call right from the document. All you have to do is turn on the add-on and invite your friends or colleagues. When they accept, everyone will be able to view and edit the document while participating in a conference call.
To find the add-on, click here or open your document and click Add-ons from the menu at the top of the page. Choose Get add-ons… and search for “UberConference.”
17. Image Editing
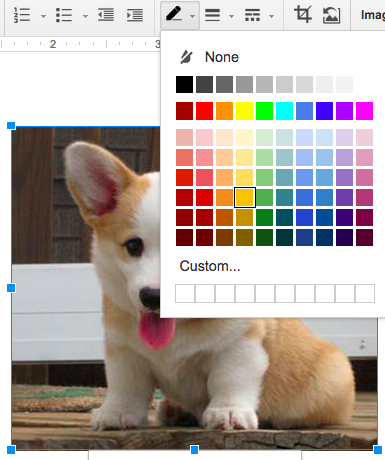
Once you’ve inserted an image into your document, you can still edit it within the document. Click the image in your document, and the toolbar at the top will change to all the tools you can use to edit your image. Crop it, mask it, add borders to it … there are a lot of possibilities in there.
Below are two examples of great image editing tricks: cropping and adding a border. (And if you ever want to reset an image back to its original form, simply select the image and click the “Reset Image” icon in your toolbar.)
Cropping Tool
Select an image in your document and click the crop icon in your toolbar. From there, drag and drop the blue handles until you’ve cropped the image to your liking. To save it, click “Enter” on your keyboard or just click back into your document.

Borders
To add a black or colored border to any image, select the image and click the line color icon in your toolbar (which looks like a pencil). Select the color you want the border to be, and voilà! To save it, simply click off of the image.

18. Dictionary
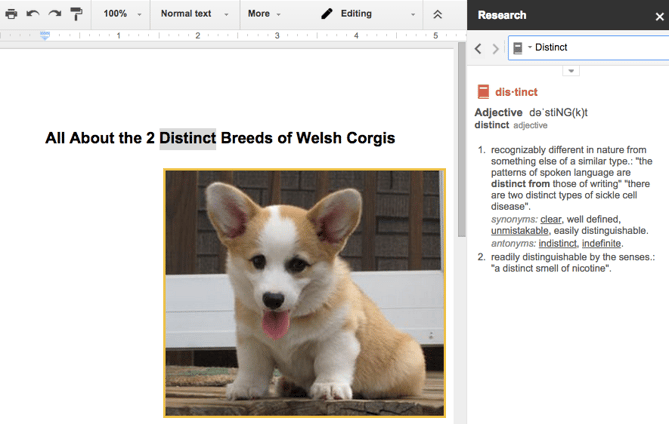
Ever written a word and wanted to double-check you’re using it correctly? What about writing a word that you want to find a synonym for? Instead of opening up a new browser window, you can look up the definition for that word right inside your document — as well as get synonym suggestions.
All you have to do is highlight the word, right-click on it, and choose Define. The Research tool will look up the word on the internet for you, and its definition will appear on the right-hand side of your screen.
19. Language Accent Buttons
Gone are the days of memorizing accent shortcuts (and getting them wrong), opening up international keyboards and clicking keys manually, and copy/pasting from other documents. If you ever find yourself writing in a language other than English, the “Easy Accents” add-on could save you a lot of time. It lets you insert accents for 20 different languages directly from a sidebar in your document.
To find the add-on, click here or open your document and click Add-ons from the menu at the top of the page. Choose Get add-ons… and search for “Easy Accents.”
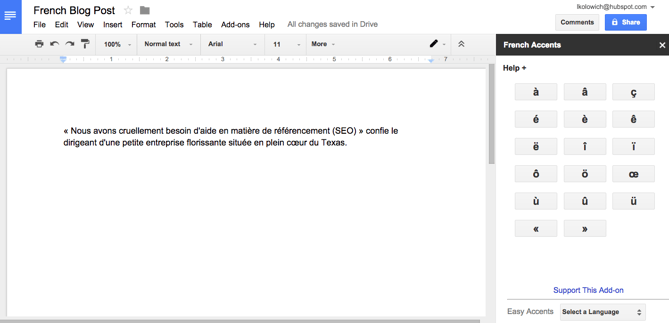
I’ll bet you didn’t know at least a handful of these … Now that you do, put them to good use in your next Google Doc. Want more ways to use Google to create an effective marketing campaign? Download the free guide below.


How to Start a Blog: A Step-by-Step Guide [+ Free Blog Post Templates]
You’ve probably heard how paramount blogging is to the success of your marketing. But it’s important that you learn how to start a blog and write blog posts for it so that each article supports your business.
Without a blog, your SEO can tank, you’ll have nothing to promote in social media, you’ll have no clout with your leads and customers, and you’ll have fewer pages to put those valuable calls-to-action that generate inbound leads.
So why, oh why, does almost every marketer I talk to have a laundry list of excuses for why they can’t consistently blog?
Maybe because, unless you’re one of the few people who actually like writing, business blogging kind of stinks. You have to find words, string them together into sentences … ugh, where do you even start?

Well my friend, the time for excuses is over.
What Is a Blog?
A blog is literally short for “web log.” Blogs began in the early 1990s as an online journal for individuals to publish thoughts and stories on their own website. Bloggers then share their blog posts with other internet users. Blog posts used to be much more personal to the writer or group of writers than they are today.
Today, people and organizations of all walks of life manage blogs to share analyses, instruction, criticisms, and other observations of an industry in which they are a rising expert.
After you read this post, there will be absolutely no reason you can’t blog every single day — and do it quickly. Not only am I about to provide you with a simple blogging formula to follow, but I’m also going to give you free templates for creating five different types of blog posts:
- The How-To Post
- The List-Based Post
- The Curated Collection Post
- The SlideShare Presentation Post
- The Newsjacking Post
With all this blogging how-to, literally anyone can blog as long as they truly know the subject matter they’re writing about. And since you’re an expert in your industry, there’s no longer any reason you can’t sit down every day and hammer out an excellent blog post.
Want to learn how to apply blogging and other forms of content marketing to your business? Check out HubSpot Academy’s free content marketing training resource page.

How to Start a Blog: From Choosing a Domain to Writing Your First Blog Post
Step 1: Understand your audience.
Before you start to write, have a clear understanding of your target audience. What do they want to know about? What will resonate with them? This is where creating your buyer personas comes in handy. Consider what you know about your buyer personas and their interests while you’re coming up with a topic for your blog post.
For instance, if your readers are millennials looking to start their own business, you probably don’t need to provide them with information about getting started in social media — most of them already have that down. You might, however, want to give them information about how to adjust their approach to social media from a more casual, personal one to a more business-savvy, networking-focused approach. That kind of tweak is what separates you from blogging about generic stuff to the stuff your audience really wants (and needs) to hear.
Don’t have buyer personas in place for your business? Here are a few resources to help you get started:
- Create Buyer Personas for Your Business [Free Template]
- Blog Post: How to Create Detailed Buyer Personas for Your Business
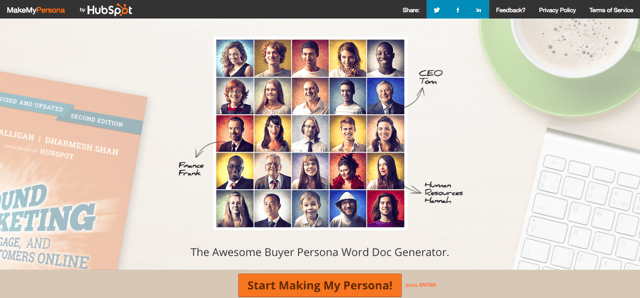
- MakeMyPersona.com [Free Tool]
Step 2: Create your blog domain
Next, you’ll need a place to host this and every other blog post you write. This requires choosing a content management system (CMS) and a website domain hosting service.
Sign Up With a Content Management System
A CMS helps you create a website domain where you’ll actually publish your blog. The CMS platforms available for you to sign up for can manage domains, where you create your own website; and subdomains, where you create a webpage that connects with an existing website.
HubSpot customers host their website content through HubSpot’s content management system. Whether they create a domain or a subdomain to start their blog, they’ll need to choose a web domain hosting service after choosing their CMS.
This is true for every blogger seeking to start their own blog on their own website.
Register a Domain or Subdomain With a Website Host
Your own blog domain will look like this: www.yourblog.com. The name between the two periods is up to you, as long as this domain name doesn’t yet exist on the internet.
Want to create a subdomain for your blog? If you already own a cooking business at www.yourcompany.com, you might create a blog that looks like this: blog.yourcompany.com. In other words, your blog’s subdomain will live in its own section of yourcompany.com.
Some CMSs offer subdomains as a free service, where you’re blog lives on the CMS, rather than your business’s website. For example, it might look like “yourblog.contentmanagementsystem.com.” However, in order to create a subdomain that belongs to a company website, you’ll need to register this subdomain with a website host.
Most website hosting services charge very little to host an original domain — in fact, websites can be as little as $3 per month. Here are five popular web hosting services to choose from:
Step 3: Customize your blog’s theme
Once you have your blog domain set up, customize the appearance of your blog to reflect the theme of the content you plan on creating.
Are you writing about sustainability and the environment? Green might be a color to keep in mind when designing the look and feel of your blog, as green is often associated with sustainability.
If you already manage a website, and are writing your first blog post for that website, it’s important that your blog is consistent with this existing website, both in appearance and subject matter. Two things to include right away are:
- Logo. This can be your name or your business’s logo, either one helping to remind your readers who/what is publishing this content. How heavily you want to brand this blog, in relation to your main brand, is up to you.
- “About” page. You might already have an “About” blurb describing yourself or your business. Your blog’s “About” section is an extension of this higher-level statement. Think of it as your blog’s mission statement, which serves to support your company’s goals.
Step 4: Identify your first blog post’s topic.
Before you even write anything, you need to pick a topic for your blog post. The topic can be pretty general to start with. For example, if you’re a plumber, you might start out thinking you want to write about leaky faucets.
Then, as you do your research, you can expand the topic to discuss how to fix a leaky faucet based on the various causes of a faucet leak.
You might not want to jump right into a “how-to” article for your first blog post, though, and that’s okay. Perhaps you’d like to write about modern types of faucet setups, or tell one particular success story you had rescuing a faucet before it flooded someone’s house.
If a plumber’s first how-to article is about how to fix a leaky faucet, for example, here are four other types of sample blog post ideas a plumber might start with, based on the five free blog templates we’ve offered to you:
- List-based Post: 5 ways to fix a leaky faucet
- Curated Collection Post: 10 faucet and sink brands you should look into today
- SlideShare Presentation: 5 types of faucets that should replace your old one (with pictures)
- News post: New study shows X% of people don’t replace their faucet on time
If you’re having trouble coming up with topic ideas, check out this blog post from my colleague Ginny Soskey. In this post, Soskey walks through a helpful process for turning one idea into many. Similar to the “leaky faucet” examples above, she suggests that you “iterate off old topics to come up with unique and compelling new topics.” This can be done by:
- Changing the topic scope
- Adjusting the time frame
- Choosing a new audience
- Taking a positive/negative approach
- Introducing a new format
Step 5: Come up with a working title.
Then you might come up with a few different working titles — in other words, iterations or different ways of approaching that topic to help you focus your writing. For example, you might decide to narrow your topic to “Tools for Fixing Leaky Faucets” or “Common Causes of Leaky Faucets.” A working title is specific and will guide your post so you can start writing.
Let’s take a real post as an example: “How to Choose a Solid Topic for Your Next Blog Post.” Appropriate, right? The topic, in this case, was probably simply “blogging.” Then the working title may have been something like, “The Process for Selecting a Blog Post Topic.” And the final title ended up being “How to Choose a Solid Topic for Your Next Blog Post.”
See that evolution from topic, to working title, to final title? Even though the working title may not end up being the final title (more on that in a moment), it still provides enough information so you can focus your blog post on something more specific than a generic, overwhelming topic.
Step 6: Write an intro (and make it captivating).
We’ve written more specifically about writing captivating introductions in the post, “How to Write an Introduction,” but let’s review, shall we?
First, grab the reader’s attention. If you lose the reader in the first few paragraphs — or even sentences — of the introduction, they will stop reading even before they’ve given your post a fair shake. You can do this in a number of ways: tell a story or a joke, be empathetic, or grip the reader with an interesting fact or statistic.
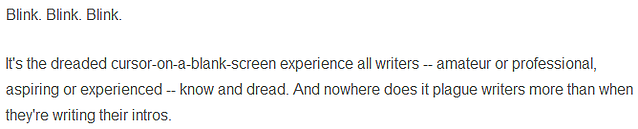
Then describe the purpose of the post and explain how it will address a problem the reader may be having. This will give the reader a reason to keep reading and give them a connection to how it will help them improve their work/lives. Here’s an example of a post that we think does a good job of attracting a reader’s attention right away:
Step 7: Organize your content in an outline.
Sometimes, blog posts can have an overwhelming amount of information — for the reader and the writer. The trick is to organize the info so readers are not intimidated by the length or amount of content. The organization can take multiple forms — sections, lists, tips, whatever’s most appropriate. But it must be organized!
Let’s take a look at the post, “How to Use Snapchat: A Detailed Look Into HubSpot’s Snapchat Strategy.” There is a lot of content in this post, so we broke it into a few different sections using the following headers: How to Setup Your Snapchat Account, Snaps vs. Stories: What’s the Difference?, and How to Use Snapchat for Business. These sections are then separated into sub-sections that to go into more detail and also make the content easier to read.
To complete this step, all you really need to do is outline your post. That way, before you start writing, you know which points you want to cover, and the best order in which to do it. To make things even easier, you can also download and use our free blog post templates, which are pre-organized for five of the most common blog post types. Just fill in the blanks!
Step 8: Write your blog post!
The next step — but not the last — is actually writing the content. We couldn’t forget about that, of course.
Now that you have your outline/template, you’re ready to fill in the blanks. Use your outline as a guide and be sure to expand on all of your points as needed. Write about what you already know, and if necessary, do additional research to gather more information, examples, and data to back up your points, providing proper attribution when incorporating external sources. Need help finding accurate and compelling data to use in your post? Check out this roundup of sources — from Pew Research to Google Trends.
If you find you’re having trouble stringing sentences together, you’re not alone. Finding your “flow” can be really challenging for a lot of folks. Luckily, there are a ton of tools you can lean on to help you improve your writing. Here are a few to get you started:
- Power Thesaurus: Stuck on a word? Power Thesaurus is a crowdsourced tool that provides users with a ton of alternative word choices from a community of writers.
- ZenPen: If you’re having trouble staying focused, check out this distraction-free writing tool. ZenPen creates a minimalist “writing zone” that’s designed to help you get words down without having to fuss with formatting right away.
- Cliché Finder: Feeling like your writing might be coming off a little cheesy? Identify instances where you can be more specific using this handy cliché tool.
For a complete list of tools for improving your writing skills, check out this post. And if you’re looking for more direction, the following resources are chock-full of valuable writing advice:
- The Marketer’s Pocket Guide to Writing Well [Free Ebook]
- How to Write Compelling Copy: 7 Tips for Writing Content That Converts
- How to Write With Clarity: 9 Tips for Simplifying Your Message
- Your Blog Posts Are Boring: 9 Tips for Making Your Writing More Interesting
- Your Blog Posts Are Boring: 9 Tips for Making Your Writing More Interesting
Step 9: Edit/proofread your post, and fix your formatting.
You’re not quite done yet, but you’re close! The editing process is an important part of blogging — don’t overlook it. Ask a grammar-conscious co-worker to copy, edit, and proofread your post, and consider enlisting the help of The Ultimate Editing Checklist (or try using a free grammar checker, like the one developed by Grammarly). And if you’re looking to brush up on your own self-editing skills, turn to these helpful posts for some tips and tricks to get you started:
- Confessions of a HubSpot Editor: 11 Editing Tips From the Trenches
- How to Become a More Efficient Editor: 12 Ways to Speed Up the Editorial Process
- 10 Simple Edits That’ll Instantly Improve Any Piece of Writing
When you’re ready to check your formatting, keep the following advice in mind …
Featured Image

Make sure you choose a visually appealing and relevant image for your post. As social networks treat content with images more prominently, visuals are now more responsible than ever for the success of your blog content in social media. In fact, it’s been shown that content with relevant images receives 94% more views than content without relevant images.
For help selecting an image for your post, read “How to Select the Perfect Image for Your Next Blog Post” — and pay close attention to the section about copyright law.
Visual Appearance
No one likes an ugly blog post. And it’s not just pictures that make a post visually appealing — it’s the formatting and organization of the post, too.
In a properly formatted and visually appealing blog post, you’ll notice that header and sub-headers are used to break up large blocks of text — and those headers are styled consistently. Here’s an example of what that looks like:
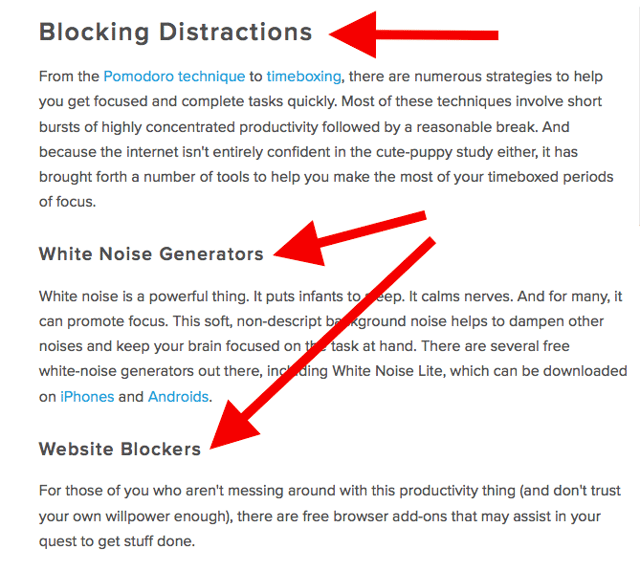
Also, screenshots should always have a similar, defined border (see screenshot above for example) so they don’t appear as if they’re floating in space. And that style should stay consistent from post to post.
Maintaining this consistency makes your content (and your brand) look more professional, and makes it easier on the eyes.
Topics/Tags
Tags are specific, public-facing keywords that describe a post. They also allow readers to browse for more content in the same category on your blog. Refrain from adding a laundry list of tags to each post. Instead, put some thought into a tagging strategy. Think of tags as “topics” or “categories,” and choose 10-20 tags that represent all the main topics you want to cover on your blog. Then stick to those.
Step 10: Insert a call-to-action (CTA) at the end.
At the end of every blog post, you should have a CTA that indicates what you want the reader to do next — subscribe to your blog, download an ebook, register for a webinar or event, read a related article, etc. Typically, you think about the CTA being beneficial for the marketer. Your visitors read your blog post, they click on the CTA, and eventually you generate a lead. But the CTA is also a valuable resource for the person reading your content — use your CTAs to offer more content similar to the subject of the post they just finished reading.
In the blog post, “What to Post on Instagram: 18 Photo & Video Ideas to Spark Inspiration,” for instance, readers are given actionable ideas for creating valuable Instagram content. At the end of the post is a CTA referring readers to download a comprehensive guide on how to use Instagram for business:
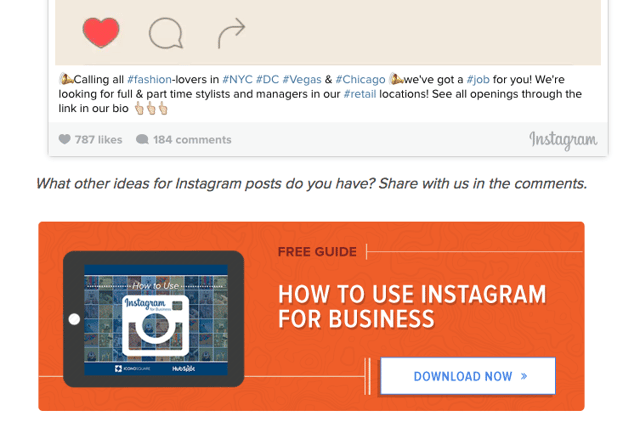
See how that’s a win-win for everyone? Readers who want to learn more have the opportunity to do so, and the business receives a lead they can nurture … who may even become a customer! Learn more about how to choose the right CTA for every blog post in this article. And check out this collection of clever CTAs to inspire your own efforts.
Step 11: Optimize for on-page SEO.
After you finish writing, go back and optimize your post for search.
Don’t obsess over how many keywords to include. If there are opportunities to incorporate keywords you’re targeting, and it won’t impact reader experience, do it. If you can make your URL shorter and more keyword-friendly, go for it. But don’t cram keywords or shoot for some arbitrary keyword density — Google’s smarter than that!
Here’s a little reminder of what you can and should look for:
Meta Description
Meta descriptions are the descriptions below the post’s page title on Google’s search results pages. They provide searchers with a short summary of the post before clicking into it. They are ideally between 150-160 characters and start with a verb, such as “Learn,” “Read,” or “Discover.” While meta descriptions no longer factor into Google’s keyword ranking algorithm, they do give searchers a snapshot of what they will get by reading the post and can help improve your clickthrough rate from search.
Page Title and Headers
Most blogging software uses your post title as your page title, which is the most important on-page SEO element at your disposal. But if you’ve followed our formula so far, you should already have a working title that will naturally include keywords/phrases your target audience is interested in. Don’t over-complicate your title by trying to fit keywords where they don’t naturally belong. That said, if there are clear opportunities to add keywords you’re targeting to your post title and headers, feel free to take them. Also, try to keep your headlines short — ideally, under 65 characters — so they don’t get truncated in search engine results.
Anchor Text
Anchor text is the word or words that link to another page — either on your website or on another website. Carefully select which keywords you want to link to other pages on your site, because search engines take that into consideration when ranking your page for certain keywords.
It’s also important to consider which pages you link to. Consider linking to pages that you want to rank well for that keyword. You could end up getting it to rank on Google’s first page of results instead of its second page, and that ain’t small potatoes.
Mobile Optimization
With mobile devices now accounting for nearly 2 out of every 3 minutes spent online, having a website that is responsive or designed for mobile has become more and more critical. In addition to making sure your website’s visitors (including your blog’s visitors) have the best experience possible, optimizing for mobile will score your website some SEO points.
Back in 2015, Google made a change to its algorithm that now penalizes sites that aren’t mobile optimized. This month (May 2016), Google rolled out their second version of the mobile-friendly algorithm update — creating a sense of urgency for the folks that have yet to update their websites. To make sure your site is getting the maximum SEO benefit possible, check out this free guide: How to Make a Mobile-Friendly Website: SEO Tips for a Post-“Mobilegeddon” World.
Step 12: Pick a catchy title.
Last but not least, it’s time to spruce up that working title of yours. Luckily, we have a simple formula for writing catchy titles that will grab the attention of your reader. Here’s what to consider:
- Start with your working title.
- As you start to edit your title, keep in mind that it’s important to keep the title accurate and clear.
- Then, work on making your title sexy — whether it’s through strong language, alliteration, or another literary tactic.
- If you can, optimize for SEO by sneaking some keywords in there (only if it’s natural, though!).
- Finally, see if you can shorten it at all. No one likes a long, overwhelming title — and remember, Google prefers 65 characters or fewer before it truncates it on its search engine results pages.
If you’ve mastered the steps above, learn about some way to take your blog posts to the next level in this post. What other steps do you take to refine your blog posts? Don’t forget to download your five free blog post templates right here.
Editor’s Note: This post was originally published in October 2013 and has been updated for freshness, accuracy, and comprehensiveness.



How to Use Photoshop: The Bookmarkable Photoshop Tutorial for Beginners
When you open Adobe Photoshop for the first time, it’s easy to click around in confusion for a minute and then reach for your freelancer’s phone number instead. Trust us, you’re not alone in this.
It’s an incredibly powerful design software with a lot going on, including a wealth of tools that can seem overwhelming at times. But Photoshop isn’t just for the professionals.
With a little help, you can easily teach yourself how to use it to create beautiful, compelling graphics. All it takes is an introduction to core elements — in plain English.
To get you started, we’ve picked 12 of the most useful tools in Photoshop and explained what they do, where to find them, how to use them, and a few tips and tricks for getting the most out of them. We’ve also included some great resources in there in case you’d like to learn about a tool in more depth.
How to Use Photoshop
- The Layer Tool
- The Color & Swatches Tool
- Custom Fonts & The Text Tool
- Custom Brushes & The Brush Tool
- The Select Tool
- The Move Tool
- The Zoom Tool
- The Eraser
- The Crop Tool
- The Fill Tool
- The Eyedropper Tool
- Blending Options
1. The Layer Tool
What It Does: A layer can be used for an image, text, brush strokes, background colors, patterns, and filters.
I like to think of layers as sheets of glass stacked on top of one another that you’ll use to create a final product. Each sheet can be modified individually without affecting the project as a whole, which can save you tons of time when making edits to individual elements of your graphic.
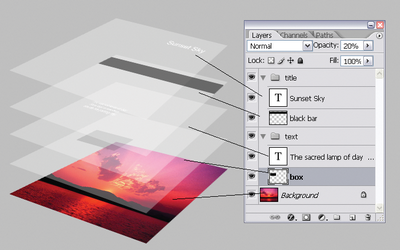
Image Credit: StackExchange
Layers are by far the most important element of Photoshop — and, in my opinion, they’re one of the reasons many people throw their arms up in frustration. But once you understand how they work, I promise they’ll make your life much easier.
Where It’s Located: It has its own module on the bottom right-hand corner of your Photoshop screen, by default. You can also access it by clicking “Layer” in the top menu bar.
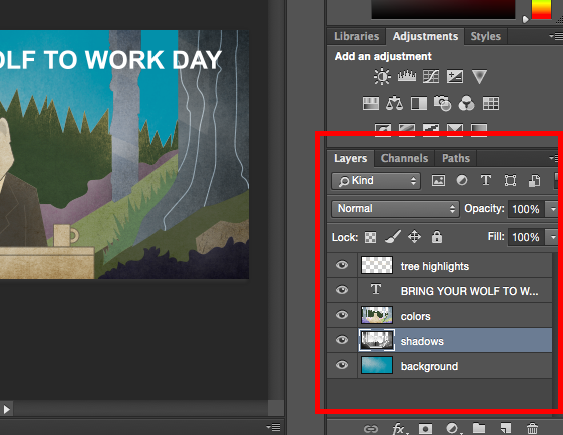
Pro Tip: Always name your layers. Keeping them organized will help keep you sane, especially if you find yourself working on a project with a large number of layers.
To add or delete a layer:
From the top menu bar, choose Layer > New > Layer…
To select a layer:
The selected layer is highlighted in blue. To edit a specific part of your image, you’ll need to select that specific layer.
You’ll also notice there’s an “eye” symbol next to each layer: Click that symbol to turn the eye on and off, thereby toggling the visibility of that layer as you work.
To duplicate a layer:
First, select a layer or group in the Layers panel. Next, either drag the layer or group to the Create a New Layer button, or right-click the layer to choose “Duplicate Layer” or “Duplicate Group.” Enter a name for the layer or group, and click OK.
Pro Tip: You can do all sorts of cool things with layers — and believe it or not, making animated GIFs is one of them. Check out our step-by-step tutorial here.
To learn more about adding, deleting, and duplicating layers in Photoshop, check out this video tutorial.
2. The Color & Swatches Tool
What It Does: The Color and Swatches tool lets you use, modify, copy, and save custom colors for your content. While this may seem like a pretty self-explanatory element, it actually has powerful features that will keep your visual content vibrant and unify your color schemes.
Where It’s Located: It has its own module on the top right-hand corner of your Photoshop screen, by default.
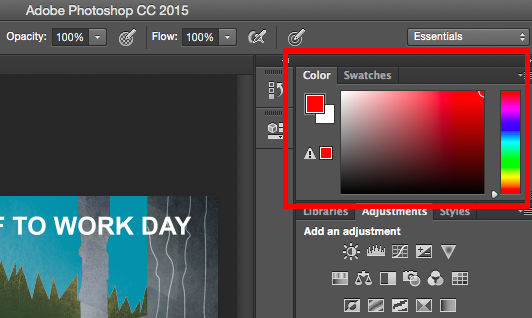
Another place to find the Color tool is at the bottom of the toolbar on the left, indicated by two overlapping boxes:
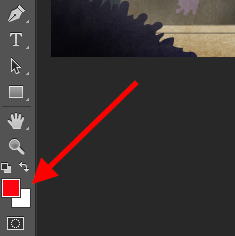
To create your own custom color:
Open the Color Picker by double-clicking on the top box either in the Color module, or in that menu on the left.
From there, you’ll see a vertical spectrum of color with a slider on it, which you can adjust to create your own custom color. Alternatively, if you already have a specific color of which you know the hex value (i.e. #1fb1ee), then enter it in the appropriate box to find that color automatically. You can also select your color swatch based on RGB or CMYK values.
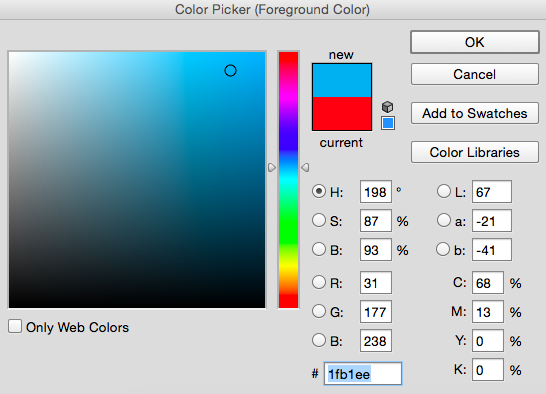
Any colors you create can be added to your “Swatches” if you click “Add To Swatches.”
Pro Tip: Take your company colors and save them as “Swatches” so that you can reference and reuse them whenever you’re designing your visual content.
3. Custom Fonts & The Text Tool
What It Does: The Text tool lets you add custom fonts to your database, and it gives you access to advanced font settings that give your text some serious style.
Where It’s Located: The toolbar on your left, near the bottom.
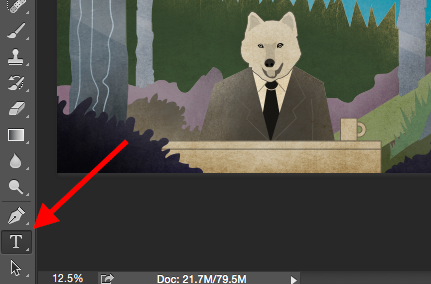
Once you click the Text tool icon, all of the settings and font options will pop up at the top of your screen. These settings let you change the font, font size, and spacing between characters, height, width, color, and style. Be sure to select the layer of your desired text to edit it.
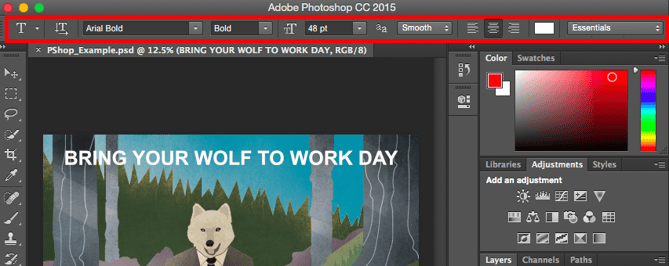
To add text to your graphic:
The text tool works like any other text tool you’ve used. Click the “T” icon on the left side bar, drag the text box over any particular area you want text to appear, and you’re set to go.
Whenever you create a text box, Photoshop will generate a layer for it. You can choose the color, size, stroke, font style, and a variety of other options to switch things up.
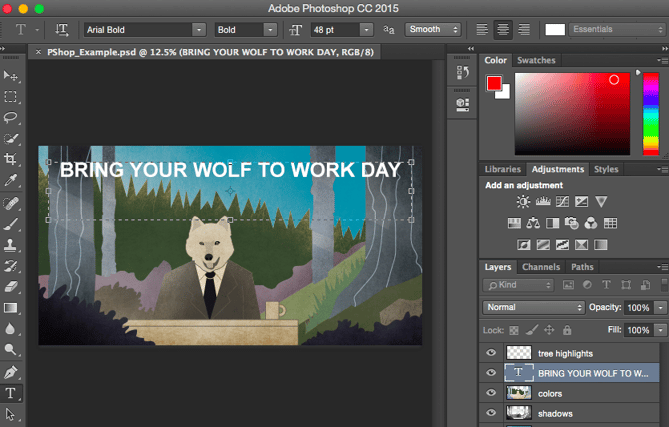
Pro Tip: While Photoshop offers a wide variety of fonts, you can also install your own fonts. Read this blog post for a list of 35 beautiful fonts you can download for free, and then read this post to learn how to install your new fonts in Photoshop so you can get to using ’em.
To learn more about fonts and the Text tool, check out this video tutorial.
4. Custom Brushes & The Brush Tool
What It Does: Just as with fonts, you can add your own, royalty-free, custom brush tips. With the brush settings, you can change the size, shape, and transparency of your brush strokes to achieve a number of different visual effects.
Brushes are a great way to add some visual accents to your content. Photoshop starts you off with a nice selection of brush tips that you can use to clean up your graphics and create some basic visual effects.
Where It’s Located: The toolbar on the left.
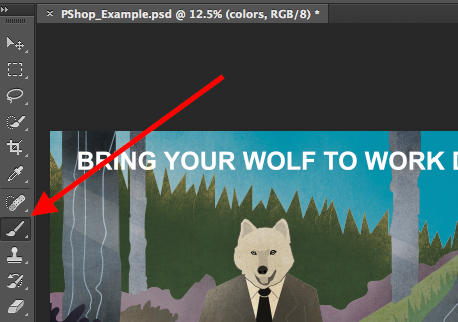
Once you click the Brush tool icon, all of the settings and brush options will pop up at the top of your screen. These settings let you change the brush size, opacity, flow, and so on. You’ll find a variety of pre-installed brush tips, as well as any custom brush tips you install to Photoshop. (You can find royalty-free brushes at www.brusheezy.com if you want to get really creative.)
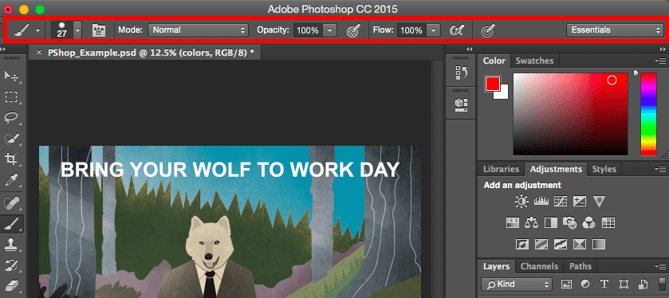
To use the brush tool:
The brush tool is perfect for adding design accents to your content content. When using the brush tool, I always suggest adding a new layer to work with so you don’t paint over any of your other elements. You can choose colors from your library of swatches, or use a custom color.
Changing the brush settings can give your brush a drastically different look and style. Don’t be afraid to play around a bit with all of your custom brushes.
5. The Select Tool
What It Is: When used correctly, this tool will let you select individual elements, entire graphics, and determines what is copied, cut, and pasted into your graphics.
Where It’s Located: The toolbar on the left.
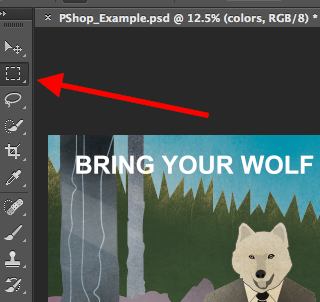
The Select tool is known as one of the most basic, yet frustrating tools to use in Photoshop. The first thing you should know is that it’ll only work if a layer is highlighted. So, if I want to cut or copy a piece of Layer 4, Layer 4 must be highlighted in my Layer’s tool bar. Highlighted areas are indicated by a flashing dotted line.
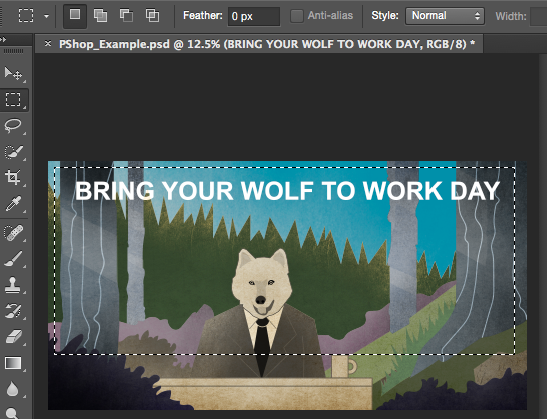
Once you remember to pay attention to which layer you are working with, the Select tool becomes much easier to use.
First, highlight your area of choice. Then, simply right-click and decide what you’d like to do from the pull-out menu. For example, you can cut out objects from a current layer and create a layer of your own.
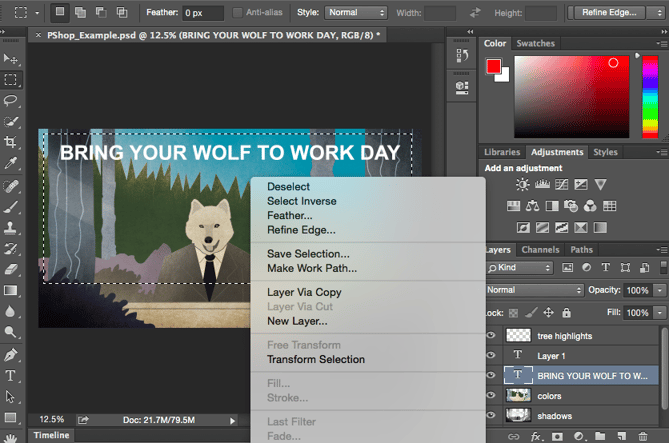
How to select an image to insert into your graphic:
Open the image you’d like to use in Photoshop, and use the Select Tool to determine how much of the image you want to copy. Once you’ve selected the area of the image, simply copy the area.
Next, open the tab for your current project and paste it in as a new layer. Highlight the layer of the object(s) you’d like to select. You can move multiple objects at once by highlighting multiple layers.
Then, right-click your selection, and then you have a few options, including:
A) Choosing “Layer via Copy” to copy the object(s) from this layer and create a layer of its own.
Pro Tip: To select your entire graphic and include all layers, highlight all layers and then use the Select tool. Once you’ve determined the area to copy, use the menu bar at the top and click “Edit” > “Copy Merged.” This will copy the entire graphic so you can paste it as its own layer.
B) Choosing “Free Transform” to scale, rotate, move, and flip your selections. (Refer to the Move tool in the next section of this post if you need more help on this.)
Pro Tip: One really nifty trick you can do with “Free Transform” is to overlay screenshots of a PDF to make a 3D-looking image, like the one below for our introductory Pinterest ebook. You can find a visual overview of the steps below, but read this blog post for the step-by-step tutorial.
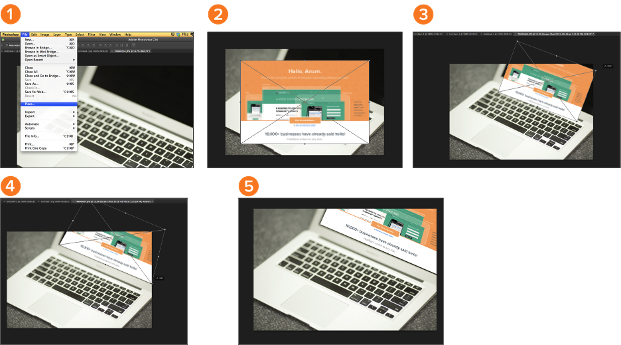
To learn more about all the Selection tools available in Photoshop, check out this video tutorial.
6. The Move Tool
What It Does: This is a fairly basic tool that allows you to move individual elements of your graphic.
The Move tool works on individual layers, and on the graphic as a whole — if (remember how to do this?) you highlight all of your layers. It comes in handy when you’re trying to reposition images, text, and other design elements.
Where It’s Located: The toolbar on the left, at the top.
To use the Move tool:
Click the Move Icon from the left hand menu bar and simply drag the object(s) you would like to move. To move all objects in one layer, simply highlight the layer and use the Move tool. You can also right click the object for additional options.
To scale, rotate, move, and flip things:
The Free Transform tool lets you scale, rotate, move, and flip any element in your select layer or layers. Use the shortcut CTRL + T or Command + T (for Macs) to initiate Free Transform, and check out the options that pop up at the top of your screen. Hold the SHIFT key while transforming to maintain the proportions of your elements.
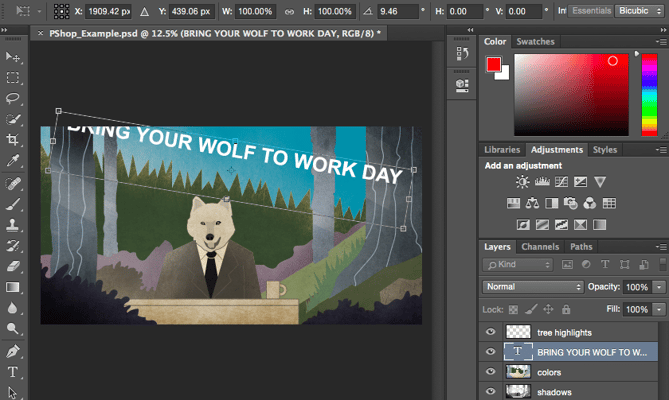
7. The Zoom Tool
What It Does: The Zoom tool lets you zoom in close to certain areas of an image, and zoom out to get more of a bird’s eye view of what’s happening.
Where It’s Located: In the top menu bar, choose View > Zoom In or View > Zoom Out.
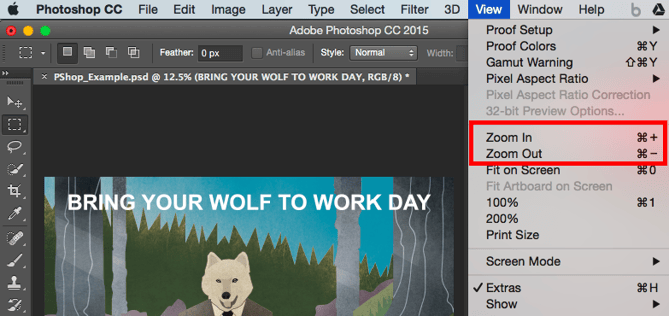
To use the Zoom tool:
Either select the zoom options from the “View” menu (as shown above). To use the keyboard shortcut, hold ALT (PC) or Command (Mac) and press + to zoom in, and ALT (PC) or Command (Mac) and press – to zoom out.
8. The Eraser
What It Does: The Basic Eraser functions a lot like the brush tool. You can change the size and hardness of the eraser tip to achieve a variety of effects, like blending and fades. The Background Eraser uses differences in color to help you erase unwanted background areas from your images.
The eraser is one of the most useful tools in Photoshop. Yes, I understand it’s technically just an eraser, but you’ve never used an eraser like this.
Where It’s Located: The toolbar on the left.
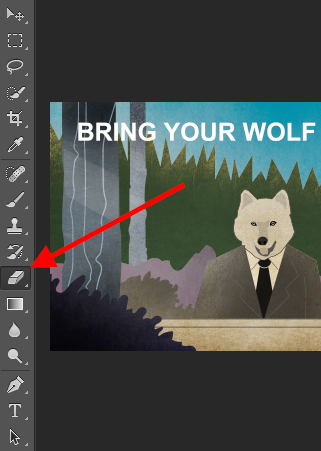
To use the Basic Eraser:
Once you click the Eraser icon, all of the settings will pop up at the top of your screen. These settings let you change the eraser size, hardness, and other aspects of the tool.
Like most tools in Photoshop, the eraser works only on a specifically selected layer. Make sure you’ve got the layer you want selected before you start erasing.
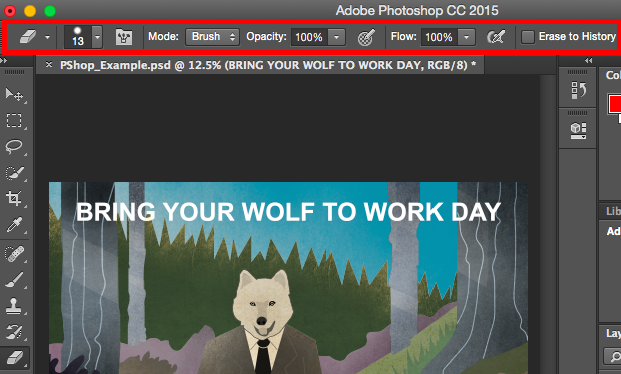
To use the Background Eraser:
This tool is a time-saving wonder. You can see how easily it eliminates background colors from images. This is especially helpful if you need an object with a transparent background.
To use the Background Eraser, click and hold the eraser icon until the slide out menu appears. Choose “Background Eraser.”
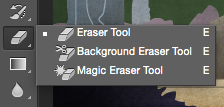
Now you’re ready to do some serious erasing. Adjust the size of the Background Eraser, and simply click the color you would like deleted from the selected layer. Remember to select the layer you want to erase on.
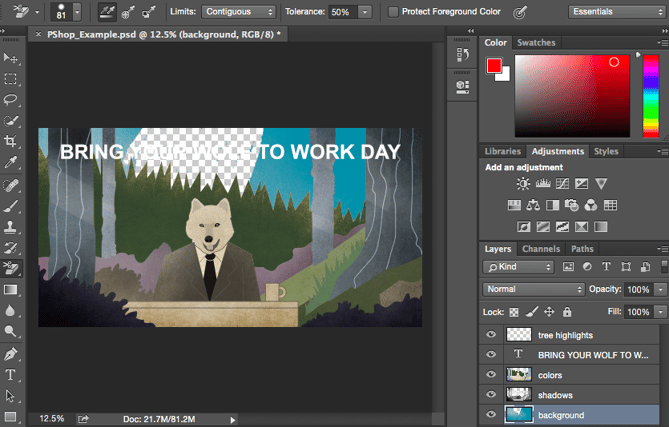
Pro Tip: Don’t be afraid to use an oversized eraser tip for the Background Eraser. Since it works by removing particular colors from the image, it won’t erase colors that aren’t selected.
To learn more about how to remove the background of a photo in Photoshop or PowerPoint, check out this step-by-step tutorial.
9. The Crop Tool
What It Does: The Crop tool lets you crop an image. It works like any crop tool you’ve ever encountered: Simply choose your area and crop it out.
I know this is a basic tool, but you’ll find yourself using this just as often as any other tool in Photoshop, especially when you’ve completed your graphic and need to clean up some of the free space around the edges.
Where It’s Located: The toolbar on the left.
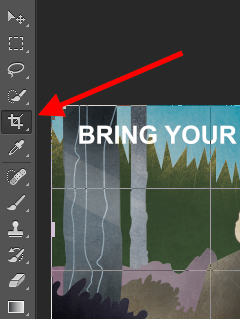
To use the Crop tool:
Select the icon indicated in the screenshot from the side menu bar, and drag the box over the area you would like to crop. To adjust the crop box, simply click and drag the small anchor boxes on the sides and corners of the crop box.
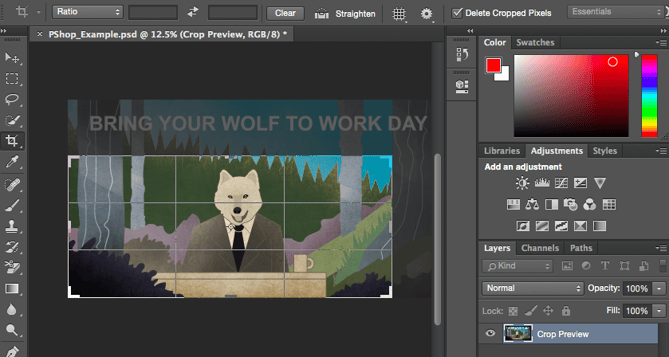
Pro Tip: You can make your canvas size larger than it needs to be so that you can give yourself more room to move your design elements, and crop it down to the proper size afterwards.
Read this blog post to learn how to crop images in Photoshop to a specific ratio. If you want to learn some cropping tricks — like how to rotate an image using the Crop tool — then check out this article from Digital Photography School.
10. The Fill Tool
What It Does: The Fill tool, formerly the Paint Bucket tool, fills any solid area with the color of your choice. It’s great for solid backgrounds or coloring large areas. It can also be used to apply patterns to your images. The Gradient tool within the Fill tool lets you create a nice, faded background effect of the color of your choice.
Where It’s Located: On the top menu bar, choose Layer > New Fill Layer. From there, you have the option to choose “Solid Color,” “Gradient,” or “Pattern.”
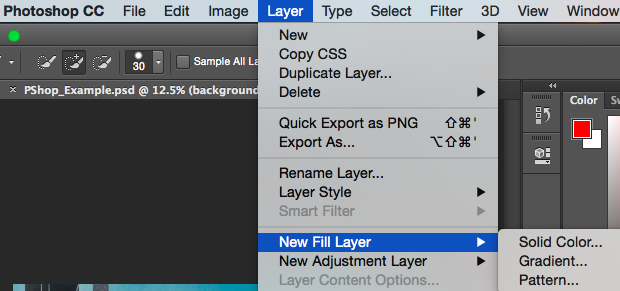
To fill a solid area with a color:
First, select the layer you’d like to fill with a solid color. Then, from the top menu bar, choose Layer > New Fill Layer > Solid Color… From there, a “New Layer” window will pop up and prompt you to name the new color fill layer. Don’t worry about choosing the color you want right then and there — simply name the layer and press “OK.”
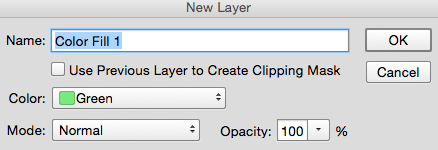
Next, the Color Picker window will pop up. Here, you can choose which solid color you’d like to fill. Since I’d selected my background layer to fill in (i.e. the color of the sky in my graphic), the color I select in the Color Picker dictates the color of the sky:
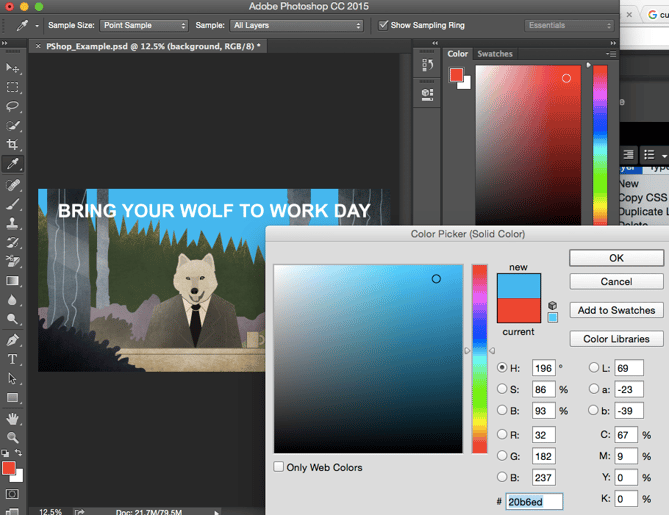
To apply patterns to your images:
These patterns can be manually created if you have the time and patience, or you can find a variety of royalty-free patterns available for download through a basic Google search.
To apply a pattern, first select the layer you’d like to fill with a pattern. Then, from the top menu bar, choose Layer > New Fill Layer > Pattern... From there, a “New Layer” window will pop up and prompt you to name the new color fill layer. Don’t worry about choosing the color you want right then and there — simply name the layer and press “OK.”
Next, you’ll see the “Pattern Fill” window pop up. From there, you can choose the pattern and its scale. Since I’d selected my background layer to fill in (i.e. the color of the sky in my graphic), the pattern I select in the Pattern Fill changes the sky:
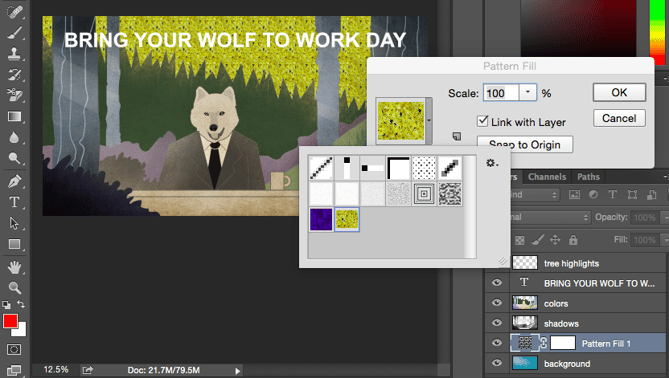
To use the Gradient tool:
To apply a gradient, first select the layer you’d like to fill with a pattern. Then, from the top menu bar, choose Layer > New Fill Layer > Gradient... From there, a “New Layer” window will pop up and prompt you to name the new color fill layer. Don’t worry about choosing the color you want right then and there — simply name the layer and press “OK.”
Next, a “Gradient Fill” window will pop up. Play around with these options, including the style, angle, and scale. To choose a different gradient than the one offered by default, click the arrow on the right-hand side of the default gradient to open the Gradient Editor, shown below:
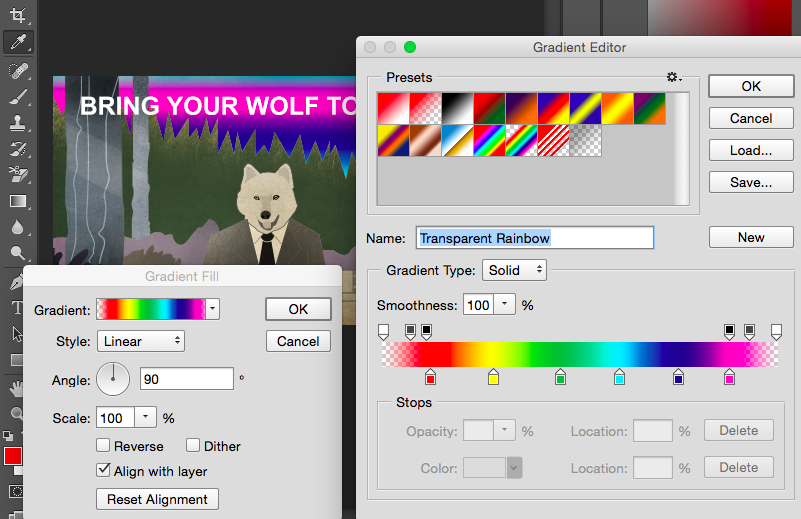
11. The Eyedropper
What It Does: This handy little tool lets you extract and use any color from any image in Photoshop.
Where It’s Located: The toolbar on the left.
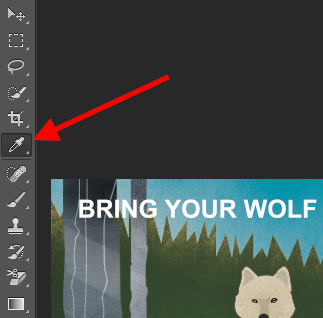
To use the Eyedropper tool:
Select the icon from the sidebar. Next, locate that color you would like to extract, and simply click that area to clone the color.
Once you’ve extracted the color, you’ll see it indicated both in the Color module at the top right of your screen, as well as the bottom of the left sidebar. You can double-click that color box to bring up the advanced color picker, where you can then adjust and save the color to a swatch for future use.
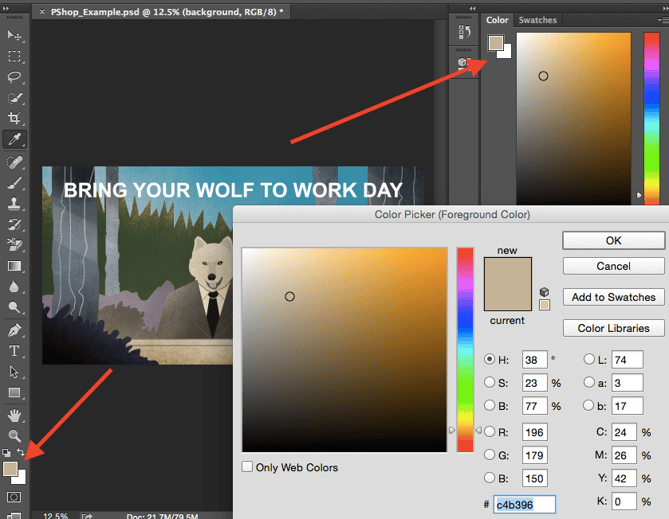
12. Blending Options
What It Does: Blending options include quite a number of features to enhance the look or your graphic. For example, you can use the “Outer Glow” effect to make letters appear like they’re glowing. Or you can use the “Drop Shadow” effect to add a shadow to your letters. Take some time to play around with all the layer effects and find out which ones tickle your fancy.
Where It’s Located: From the top menu bar, choose Layer > Layer Style > Blending Options… You can also double-click any layer to bring up the options for that particular layer.
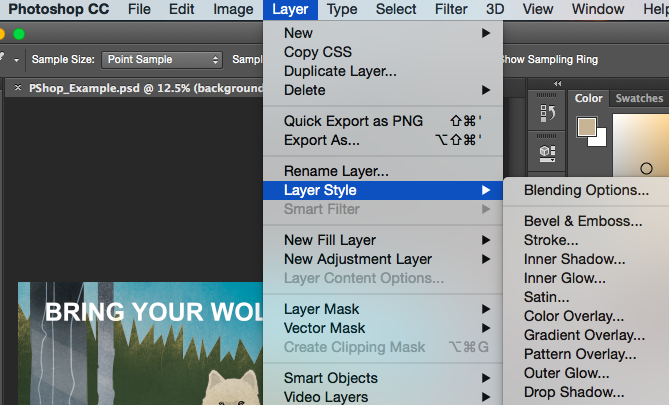
To use Blending Options:
First, select the layer you want to apply your blending options and effects to. Then, open up your blending options and choose the one you’d like to apply. With the variety of options available, you can achieve a number of great effects to finalize your graphics. Have fun with these and experiment on different layers, images, and texts. Here’s a look at what’s offered:
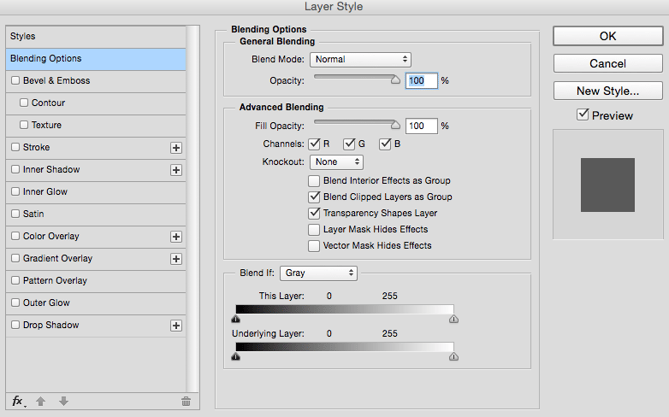
For example, in the image below, I selected my text layer and chose “Bevel & Emboss.” Looks pretty cool, eh?

Before we send you on your way, it’s worth noting that if you’re working with a limited budget and a tight schedule, you can save yourself tons of time and money by using free, royalty-free stock photos. Here’s a list of 17 of the best free stock photo sites you can look through.
Also, Photoshop offers a number of really helpful keyboard shortcuts for things like zooming in and out, changing canvas size, creating a new layer, and so on. Check out this blog post for a full list, including shortcuts for some of the tools mentioned above.
Now, it wouldn’t be realistic to guarantee that you’d be a Photoshop wiz at this point — but that isn’t what this guide designed to do. We hope we’ve provided you with the understanding you’ll need to use the powerful tools in Photoshop in a timely, efficient, non-hair-pulling manner, so that you can elevate your visual content game, like, today.
Happy Photoshopping!

10 of the Best Public Relations Examples to Inspire Your Next Campaign
Sometimes, a press release about your company’s new product launch, significant hire, or acquisition fails to pick up the coverage you were expecting. Journalists crave juicy stories and viral marketing campaigns, but standing out in a sea of conventional pitches is one of the biggest challenges for any public relations professional.
When you need a dose of inspiration, blogs like PR Examples are a great place to find the most compelling PR plays. To save you some time, we curated a list of the absolute best of the best to get the creativity flowing for your next campaign.
Read on to get inspired by some of the best minds in public relations.
The 12 Best Public Relations Examples to Inspire Your Next Campaign
1. Lyft & Netflix: Strange Mode
With over 360,000 people who binge watched Stranger Things 2 within a day of its release, it’s clear the show successfully created unprecedented amounts of hype leading up to its premiere date. One of the stunts that built up this hype was Lyft and Netflix’s Strange Mode prank. By immersing Lyft customers in an environment that was as terrifyingly strange and eerily similar to Hawkins, Indiana, they made Stranger Things fans feel like they were actually in the Upside Down.
2. HostelWorld: Even Divas are Believers
Traveling the world can give you some of the best experiences of your life, but it can also thrust you into situations that you’ll want to scrub from your memory, like staying the night in a hostel. There are countless hostel horror stories online and hundreds of videos that mock their hospitality scattered throughout social media — so needless to say, they don’t have the best reputation.
But HostelWorld, a hostel booking website, decided to team up with Mariah Carey to freshen up their image and showcase the pleasant reality of staying in a modern day hostel. Together, they blasted through affordable accommodation stereotypes by spotlighting the lesser known luxuries of hostels like having access to the same facilities as more expensive accommodations, but at a cheaper price, and being able to connect with other fellow travelers.
HostelWorld’s message is simple: if hostels are nice enough for divas like Mariah Carey, then they’re nice enough for everyone..
3. Lawyer.com: Choosing Lindsay Lohan to Be their Spokesperson
Picking Lindsay Lohan to be your company’s official spokesperson could spark a lot of backlash. But when you connect people with lawyers, the move can produce loads of smiles, publicity, and customers. Lawyer.com’s brilliant marketing play resonated with audiences because Lohan’s troubled past and her frequent brushes with the law makes people who might’ve gotten in a little trouble feel like they’re not alone. It also makes them feel better about themselves. If a high-status celebrity needed a lawyer — multiple times — then maybe it’s not so bad if you need one too — right?
— Lindsay Lohan (@lindsaylohan)
March 31, 2018
4. Logitech: BS Detection Spoof
Hours after April Fools Day, almost every marketing publication rounds up the best spoofs, pranks, and stunts that distracted everyone at work that day. One of the funniest spoofs that earned a spot in all the major roundups this year was Logitech’s fake Business Speak Detection product video. By giving their product a punny, yet subtly accurate name, the video pokes fun at most businesses’ obsession and overuse of buzzwords. But it also has the feel of a real product overview, which makes it even more hilarious.
5. Old Spice: Paper Blazer Ad

Photo Credit: PR Examples
When Fragrance brands advertise in magazines, they usually show off their aromas by drenching an ad with their latest cologne or perfume. But Old Spice realized people usually don’t enjoy unexpectedly pungent scents violating their nostrils when they’re flipping through their favorite magazine. So in typical Old Spice fashion, they gently ribbed other fragrance brands by inserting a paper blazer doused in their new cologne, Captain, in their print ad in GQ magazine. Then they wrote about how these paper blazers can help men attract attention not only with trendy style, but also with masculine smell. The only drawback of the blazer is that it’ll turn into papier-mâché on you in the rain.
Humor and cleverness is one of the best ways to appeal to your audience and gain earned media attention, and it seems like Old Spice can leverage them both on any marketing channel.

Photo Credit: PR Examples
6. Star Wars: Passing the Box-Office Baton to The Avengers
Congratulations, @MarvelStudios and @Avengers: #InfinityWar. pic.twitter.com/PnHfaouOlP
— Star Wars (@starwars)
May 1, 2018
Avengers: Infinity War just shattered Star Wars: The Force Awakens’ record for the biggest opening weekend ever by grossing over $250 million. LucasFilm, the studio that created and produced Star Wars, wasn’t bitter though. Instead, they were proud of their friends over at Marvel Studios, and sent them a heartwarming congratulatory tweet. By applauding them for their incredible accomplishment, and not sulking about their broken record, Star Wars earned the respect of movie lovers everywhere — not to mention some media coverage for the gesture.
7. Johnnie Walker: Jane Walker

Photo Credit: PR Examples
To promote gender equality and honor the many achievements of women throughout history, Johnnie Walker launched a female version of its whisky on International Women’s Day called Jane Walker. The limited-edition bottle featured a woman on their iconic logo, instead of a man, which connected the brand to individuals who also support their commitment to social progress.
In March 2018, Johnnie Walker released 250,000 bottles of Jane Walker, and for every bottle sold, they donated $1 to organizations that empower women. This tangible impact helped their campaign gain even more support and publicity.
8. AirBnB & BBC Earth: Night at Blue Planet II
Blue Planet II is considered the greatest nature series of all time, with its first episode attracting over 14 million viewers and earning the title of Britain’s highest rated TV show in 2017. Watching the show can almost place you into the habitat they’re filming, but BBC Earth wanted to take things to the next level for their biggest fans: they offered them a chance to experience what it’s like to be a researcher and filmmaker for Blue Planet II.
To do so, they teamed up with AirBnB to run a contest for their members, and two lucky winners got to spend three days and two nights in the Bahamas on the research and exploration vessel used in the show’s filming. During their expedition, they lived with and discussed work with researchers and dove deep into the Atlantic Ocean in a submarine with filmmakers to observe some of nature’s most unique underwater wildlife. By offering a once in a lifetime opportunity, BBC Earth could get more people to watch their hit show, and AirBnB could build their brand affinity.

Photo Credit: PR Examples
9. SpaceX & Tesla: SpaceX Sends a Tesla into Outer Space
View from SpaceX Launch Control. Apparently, there is a car in orbit around Earth. pic.twitter.com/QljN2VnL1O
— Elon Musk (@elonmusk)
February 6, 2018
Everyone knows Elon Musk wants to send humans to Mars. So when SpaceX launched their newest rocket, Falcon Heavy, into space, it made some headlines. But when the Falcon Heavy suddenly shot a cherry-red Tesla Roadster blasting David Bowie’s 1971 hit “Life on Mars?” into orbit, it was being called the greatest automotive PR stunt in history.
The car will now float between Earth and Mars for millions of years, and serve as reminder for current and future generations to always reach for the stars. The success of both launches also improved SpaceX and Falcon Heavy’s reputation. Falcon Heavy is now the most powerful rocket on earth, so it’s realistic to say it can launch heavy satellites and future space stations into orbit, shuttle cargo to Mars, and even transport humans to the moon. And that’s exactly what Elon Musk needs the public to think if he wants to accomplish his ambitious goals.
10. BBC Scotland: Scotland From the Sky: Glen Coe

In 2017, Rough Guides, a renowned travel guidebook, named Scotland the most beautiful country in the world. And a big reason why it’s such a spectacle is because Glen Coe, a Scottish valley that cuts through the ruins of an ancient super-volcano, is one of the most striking landscapes in the world.
BBC Scotland’s immersive, 360 degree video of Glen Coe grips viewers because they’re able able to experience the landscape from an intimate point of view at every possible angle, which makes them feel like they’re actually there. Publicity of this video benefits both Scotland’s tourist industry and BBC Scotland because it compels people to travel to Scotland and consume more of BBC Scotland’s content.

13 Free Personality Tests You Can Take Online Today
Personality tests are a great way to explore different aspects of who you are, and uncover layers you perhaps hadn’t recognized about yourself before. Being truly self-aware is hard — while they might not be always 100% accurate, personality tests work well as a starting point for self-discovery by providing results you might not have concluded on your own.
There are hundreds of personality tests out there — some label you with a general personality type, while others delve into your best potential career paths. Some challenge you to look at ink blots, while others ask you detailed multiple choice questions.
While many of these tests are unreliable and don’t offer any real scientific validation, others can provide potentially astute, psychologically-based insight into your behaviors, ambitions, and temperament in times of conflict.
In fact, some online personality tests are thought-provoking indicators into why you make decisions, who you work well with, and how to modify your attitude towards people whose personalities clash with yours. In both your work and personal life, this information can be invaluable.
When you’ve got some downtime and want to explore aspects of who you are, or get some guidance on potential career paths, take a look at the best free online personality tests we’ve compiled. Whether you’re interested in general information about your personality, or emotional intelligence-related insight, you’re bound to learn something.
Free Myers-Brigg Personality Tests
Myers-Briggs is a widely respected and popular personality assessment tool — first used in the 1940s, the test was developed by Katharine Cook Briggs and her daughter, Isabel Briggs Myers. Initially inspired by Jung’s personality theory, the Myers-Briggs test conveniently separates people into 16 categories of personalities, providing each person with a four-letter acronym.
The following four tests are broad-stroke indicators of who you are, using inspiration from Myers-Briggs. Among other things, the tests cover your communication styles, your strengths and weaknesses, your desires and ambitions, how you see the world, and how people perceive you.
If you’ve never taken a test based off Carl Gustav Jung’s psychological traits, or Myers-Briggs’ 16 categories of personalities, I’d suggest you take at least one of these. You’ll be surprised by the accuracy of some of the statements, and more importantly, you could gain insight into how your behavior is perceived by others, helping you improve both professional and personal relationships.
1. 16 Personalities
16 Personalities covers five broad personality aspects: mind, energy, nature, tactics and identity. The test is based on Carl Gustav Jung’s study of psychological traits (e.g. extroversion vs. introversion) and the Myers-Briggs test, two popular personality theories meant to determine an extensive overview of who you are. Among other things, the test will cover how you communicate and relate to others — both professionally and personally — what you value and strive for, and how you make decisions. 16 Personalities has been taken over 126 million times, and is available in 30 languages.
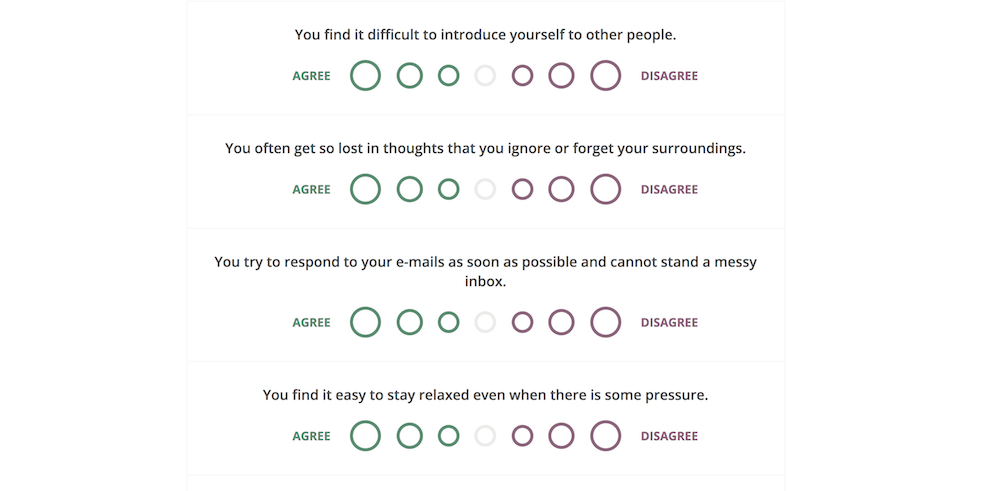
2. Personality Perfect
Similar to 16 Personalities, Personality Perfect is also based on Jung’s and Myers-Briggs’ personality theories, and uses four broad categories — extraversion vs. introversion, sensing and intuition, thinking and feeling, and judging and perceiving — to compile a four-letter abbreviation of your personality type (e.g. “INFP”). The test provides a broad overview of how you connect with others, how you behave, and, perhaps most surprising, how you’re likely seen by others.
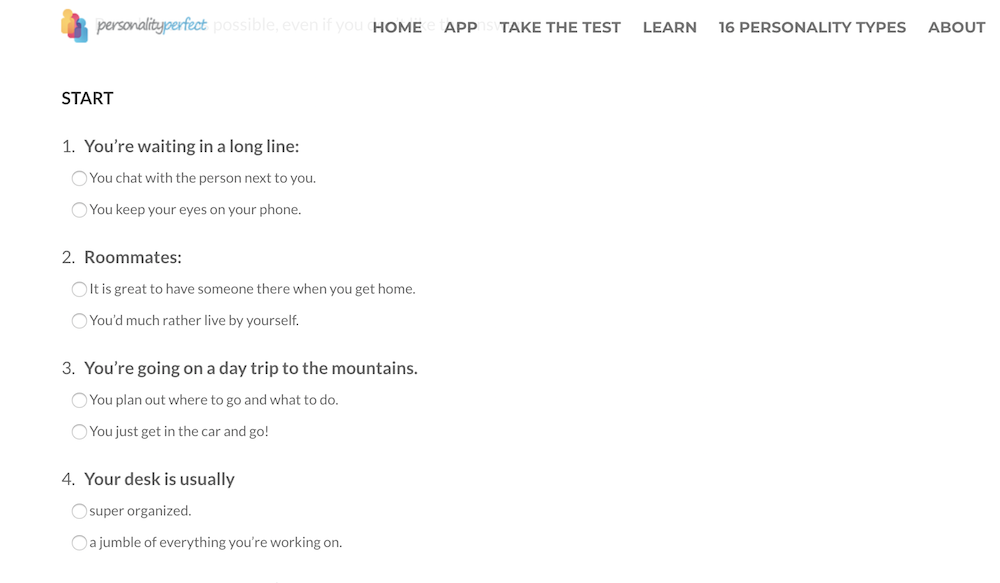
3. Human Metrics
If you’ve ever wondered which famous personalities share your personality type, you’re in luck — Human Metrics shows you that information, along with your four-letter personality type (again, based off Jung and Myers-Briggs theories). With this test, you’ll get information about which career paths are most suitable for your personality type. If you’re having trouble choosing a career path or doubting the one you’ve chosen, maybe this test can help you figure it out.
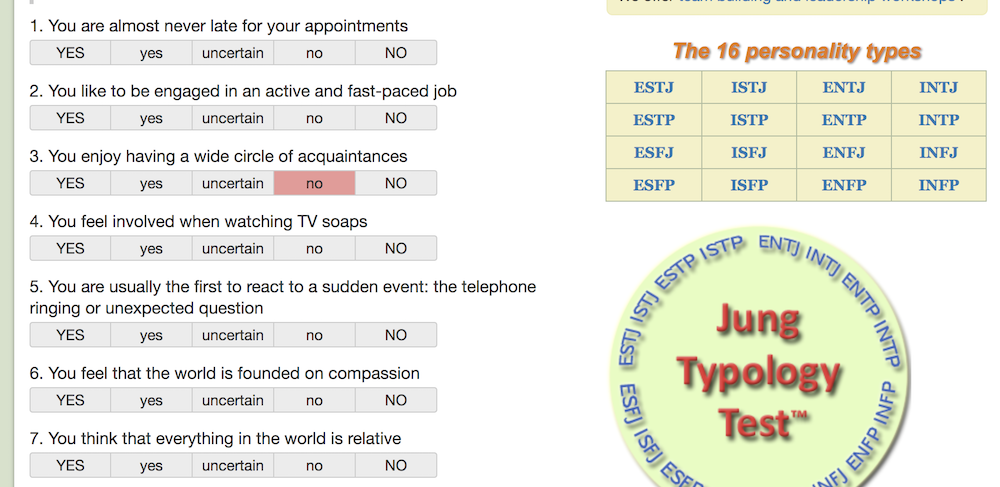
4. TestColor
Test Color, a test validated by a team of clinical psychologists, psychoanalysts and mathematicians, asks you just two questions: “Click on the colors you like most,” and “Click on the colors you like least.” Test Color tells you about your emotional intelligence, your creativity and imagination, your social skills, and your work style, including organization and management styles. I found it to be surprisingly accurate: in two questions, it nailed how I communicate with others and how I act in group settings.
Free Disc Personality Tests
The DISC assessment determines where you lie on four DISC factors: dominance, influence, steadiness, and compliance. DISC is one of the most popular and authoritative career assessments out there, and many companies encourage their employees to take it.
Undoubtedly, personality affects our career ambitions, as well as how we perform in different workplace environments. If you’re particularly extraverted, maybe you’ve chosen a career path that enables you to work daily with large groups of people. If you have certain communication styles that rely on passivity and emotion, perhaps your boss’s direct statements sometimes offend you.
Arming yourself with a sense of self-awareness could help you find your optimal career path, foster better work relationships, and mitigate work conflict more effectively. Here are four career-focused tests to help you achieve higher work satisfaction.
1. 123 Test
123 Test provides a free DISC assessment. The results, in both graph and text form, tell you how your personality fits into your work environment, who you work well with, who you might have conflict with, how you perceive other’s behaviors, and how other’s perceive yours. The test helps you understand how your own personality biases you towards certain colleagues (i.e. your personality might take another coworker’s comments offensively, while the coworker just believes in being direct), which could strengthen your work relationships.
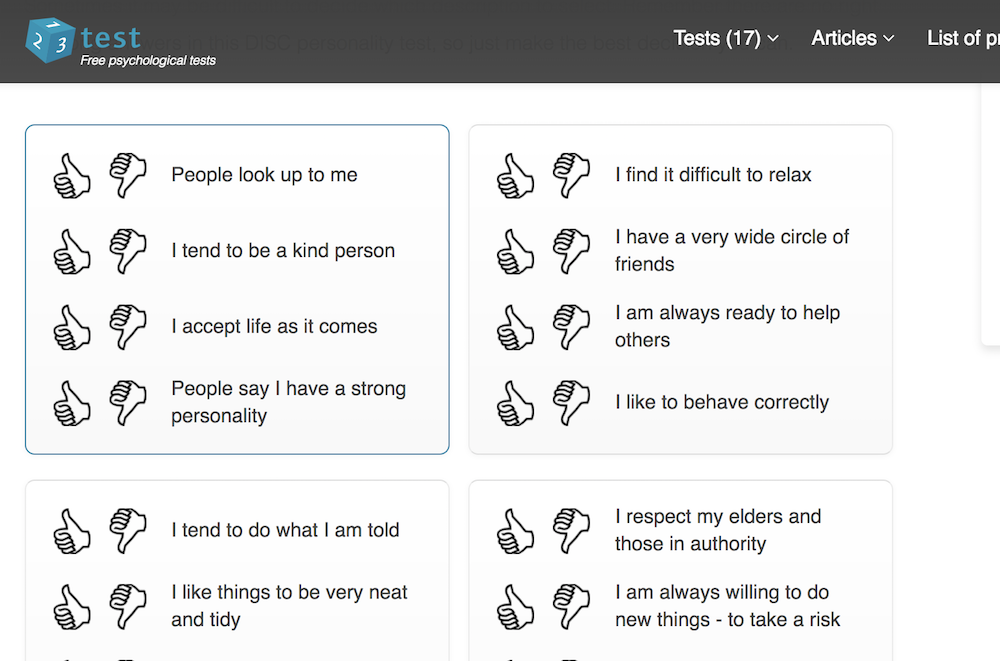
2. TestQ.com
This tests asks 38 multiple-choice questions to analyze your skills, working style, and even your ideal employer. TestQ, developed by top PhDs, offers you insight into your strengths and weaknesses, and even suggests careers best suited for your personality. If you’re happy with your current career track, the test provides suggestions for specific skills you could learn to get ahead in your career.
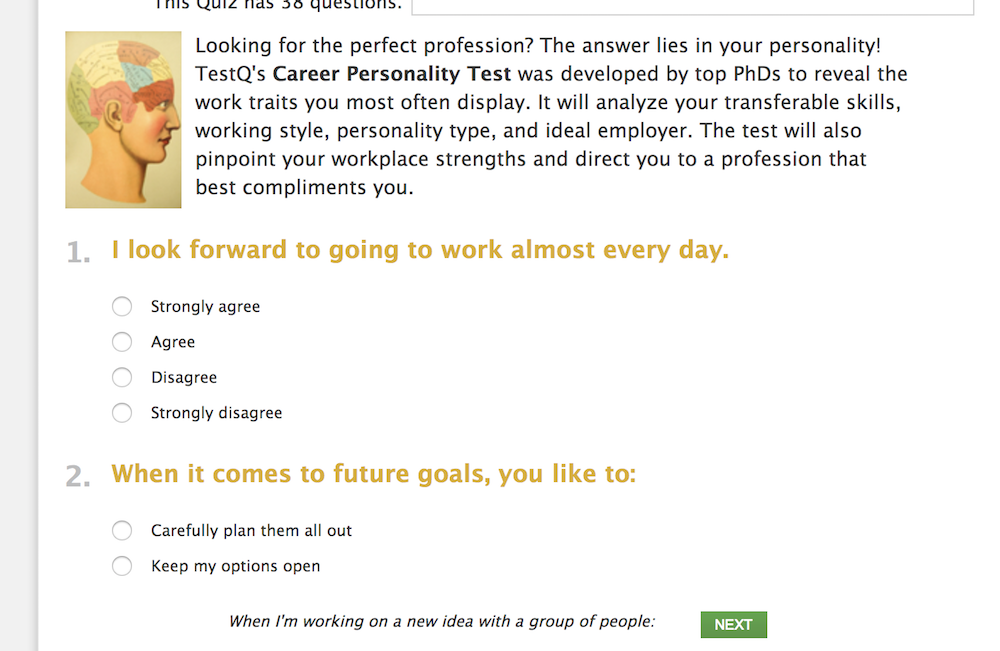
3. Interpersonal Skills assessment
Having well-developed interpersonal skills is critical to forming deep and meaningful personal and professional relationships. Interpersonal Skills assesses your listening skills, verbal communication skills, ability to work in teams, and emotional intelligence. Better yet, the test identifies areas of weakness and provides tactical advice on how to improve those skills.
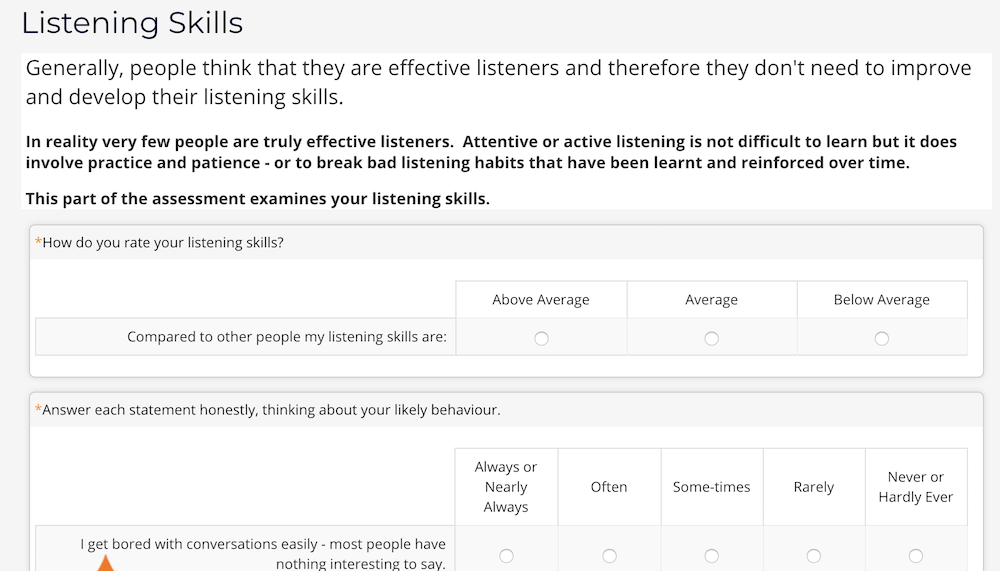
4. Sokanu
Major companies including General Assembly, NYU, and Redfin use Sokanu, a career assessment tool that tests you on your personality, background, interests, and goals to determine an ideal career path. After you take the test, it provides you multiple matches, which you can sort through to explore different careers and workplaces before choosing an ideal match.
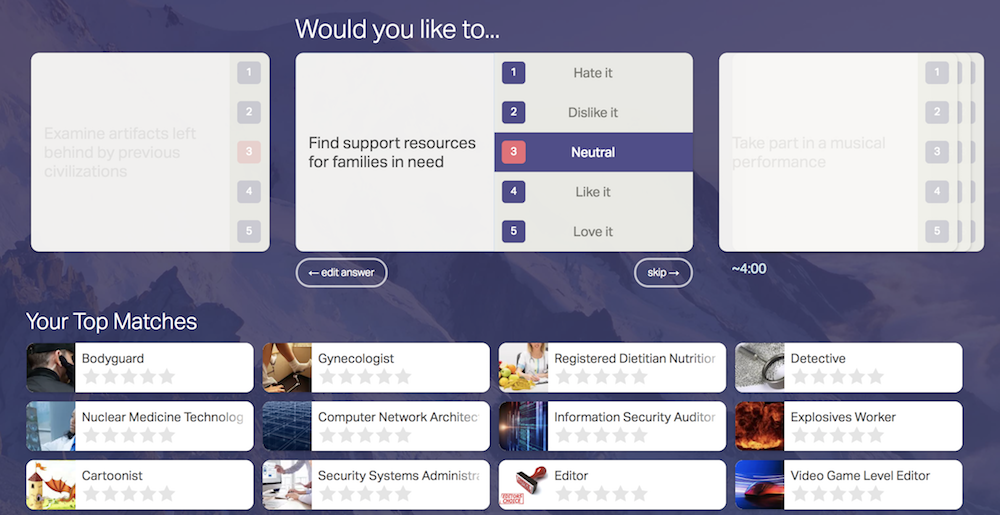
Free Emotional Intelligence Tests
Psychology Today defines emotional intelligence as, “the ability to identify and manage your own emotions and the emotions of others.” Arguably, having emotional intelligence is the most important factor in dealing with conflict and communicating with others.
It’s undeniable that emotional intelligence is important — in fact, research has shown success is 80-90% attributable to emotional intelligence (EI), and only 10-20% to your IQ.
In the workplace, whether you’re around coworkers in the midst of a stressful project, or dealing with a tough performance review from your boss, it’s critical you know how to both identify and handle your own emotions; it’s equally important you know how to read other people’s emotions, and manage them appropriately.
So let’s dive in. Below are four emotional intelligence tests to help you recognize your level of emotional intelligence, and also how to improve it.
1. Berkeley Emotional Intelligence
This test, designed by Berkeley, shows you 20 pictures and asks you to recognize the facial expression on each person’s face. It’s easy, quick, and fun, and an informative way to learn how well you read other people’s emotions — which is a critical skill for assessing and mitigating conflict.
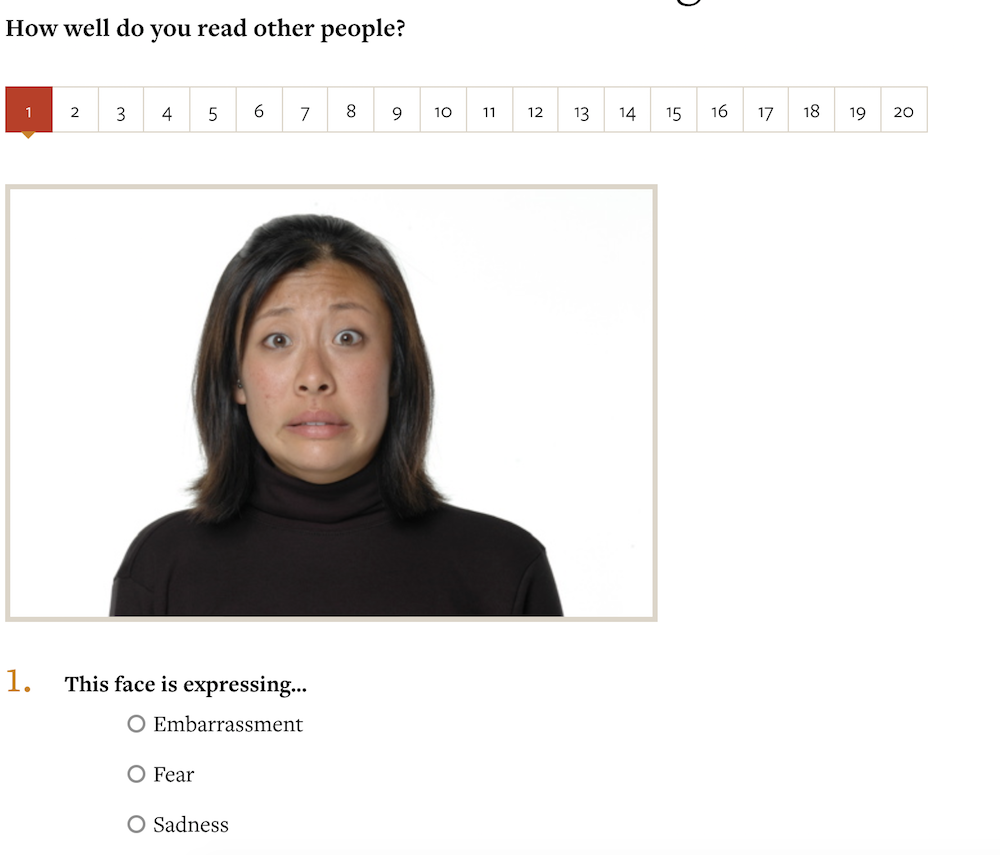
2. VeryWellMind
If you don’t have the time for anything more in-depth, this test only asks you 10 quick questions before delivering your results. It’s admittedly not medical or scientific by any means, but does offer other articles depending on your scor: if you score low, for example, VeryWellMind.com includes a link to another one of their articles, “Emotions and Types of Emotional Responses.”
3. Empathy Quotient
Unlike the tests above, this one is designed to clinically assess you — the test was developed by Simon Baron-Cohen at the Autism Research Center at the University of Cambridge, and uses the same emotional measurements mental health professionals use to diagnose social impairment. It’s a 60-item questionnaire and is suitable to measure “temperamental empathy” in adults.