How to Use Facebook Live: The Ultimate Guide
Since its debut in 2016, live streaming video has exploded in popularity. In fact, 82% of people would prefer a live video over reading a social post. It offers the opportunity to forge a more authentic and valuable connection with audiences.
It’s no secret that livestreaming has taken off in a major way. In fact, the total number of hours watched on major streaming platforms grew 99% from 2019 to 2020. Facebook users have eagerly been taking advantage of the popularity of live streaming. Now, one in every five videos on Facebook is live.

In this post, we’ll walk through:
- How to broadcast on Facebook Live via your mobile device
- How to go live on Facebook from a desktop
- How to analyze your live video’s performance
- Tips and tricks for getting the most out of the platform
Facebook Live is a feature of Facebook that lets users livestream directly to the social network platform. Viewers can react, share, and comment during the stream. A recording of the video is also published to the page or profile so it can be watched again later.
Why are marketers getting so excited about Facebook Live? Because it’s a fun and fairly simple way for them to use the power of video to communicate their brand stories and build authentic relationships with fans and followers — in real-time.
However, for such a simple concept, Facebook Live has a lot of little nuances that marketers will need to learn if they want to get the most out of the platform. This guide will help you learn the best tricks that can make a big difference in how many people see your live broadcast, how they engage with it, and how it performs.
Facebook Live started as a mobile-only broadcasting feature, but now, Facebook Pages can broadcast from either mobile devices or desktop computers. We’ll go over how to broadcast from mobile and desktop devices in the sections below.
How to Use Facebook Live
Facebook Live videos are public, so viewers can watch on any device where they have access to Facebook but don’t need an account. Users can go live on Facebook from a profile, a Page, a group, or an event. Starting a livestream from the app versus a web browser will be a little different, check out the instructions for each below.
How to Go Live on Facebook From the Facebook App
Step 1: Go to the profile, Page, group, or event where you want to go live.
Step 2: Click What’s on your mind? if you’re on a profile and Create a post if you’re on a page. This should open the post options.
Step 3: Click Live video in the post options.
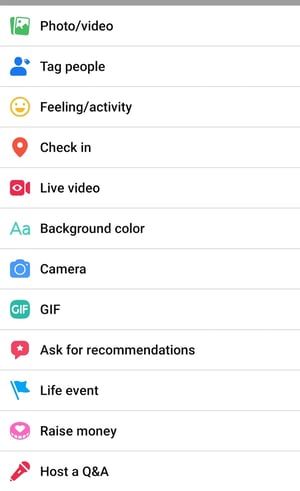
Step 4: Tap where it says Tap to add a description to add information about the video.
Step 5: Use the buttons on the bottom to configure the settings and any features or tools you want to use during the stream.
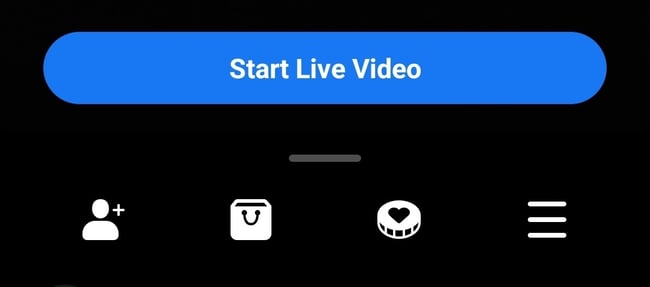
Step 6: Tap Start Live Video when you are ready.
How to Go Live on Facebook From a Web Browser
Step 1: On your Facebook homepage, you should see a Live or Live Video option. If you are on a profile, it will be under What’s on your mind? If you are on anything else, it will be under Create Post. The icon will look like one of these below.


Step 2: Choose to simply Go live or to Create live video event.
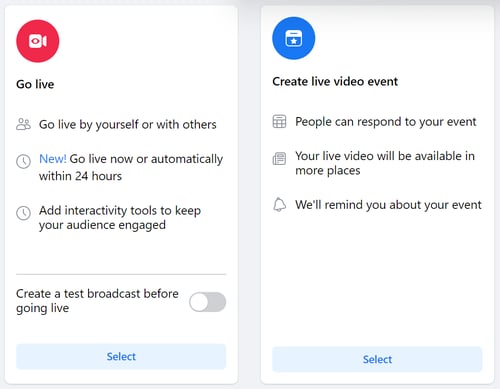
Step 3: Then, choose details for your video. These include a start time, a title and description, who to invite as a co-host, and various audio and video controls.
Step 4: Click Go Live in the bottom left corner when you are ready.
Facebook Live Tools
Facebook offers a lot of features for you to further connect with your audience during your broadcast. Utilizing these tools will help boost engagement and create the best possible experience for your viewers. You can mix and match them to serve your stream in the best way for your business.
- Live Polls: You can create a live poll beforehand to share when you go live. Then, you can see your audience’s responses in real-time during the stream.
- Featured Links: Adding one or multiple featured links to the stream to promote your website or other sources.
- Live in Stories: These allow you to share your streams directly to Facebook Stories to reach more of your audience.
- Live Comment Moderation: Manage the conversation that happens in the comments of your livestream. You can limit who is allowed to comment and how frequently with this feature. And, you can even choose a specific viewer to also moderate comments on your behalf.
- Front Row: This feature allows you to highlight your top fans in a special section of your stream. You can give them a special shoutout to show appreciation for them while you’re live.
- Badges: These are a measure of how much your fans are engaging with your content. Fans can earn badges by interacting with your content, whether it’s sending “Stars” or tuning in to your Facebook Live videos.
- Donations: Qualified pages in certain locations can add a “Donate” button to their live video. Nonprofits using Facebook’s payment platform don’t have to pay a fee, so they get 100% of the donations.
- Live With: This is a co-broadcasting feature that allows you to host your Facebook Live video with multiple guests.
- Live Shopping: If you have products for sale on Facebook, this feature allows you to add product listings to feature during your livestream.
For more help with going live on Facebook, check out this video! And don’t forget that a recording of the livestream is also published to the platform where you went live. Having that content is great because you can download and repurpose it for further use.
How to Analyze Your Live Video’s Performance
How to Access Video Analytics on a Facebook Business Page
Step 1: To get started analyzing your Facebook Live broadcasts, head to the Insights tab in the left-hand column of your brand’s Facebook page: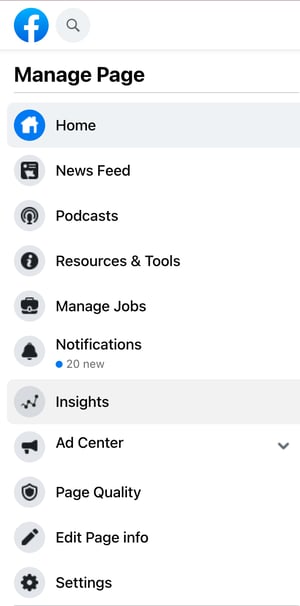
Step 2: Select the Videos section of your analytics.
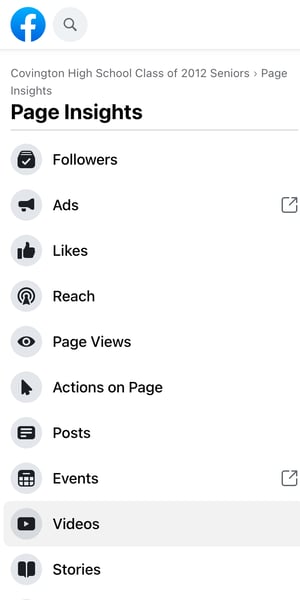
Step 3: From there, scroll down to the Top Videos section and choose a video from that menu to look into. (Note: We didn’t have any videos posted to the page we used in this example. If you do have videos, you’ll see them appear here.)
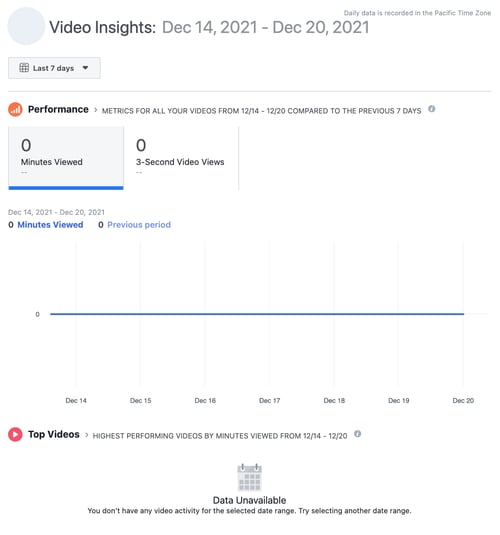
Now, let’s dive into the nitty-gritty.
The performance analytics available for Facebook Live videos are similar to those of normal videos on Facebook, with some neat additions.
- For Pre-recorded videos: Facebook lets you analyze minutes viewed, unique viewers, video views, 10-second views, average % completion, and a breakdown of reactions, comments, and shares.
- For Facebook Live videos: Facebook lets you analyze all the metrics listed above, plus peak live viewers, total views, average watch time, people reached, and the demographics of who watched your video.
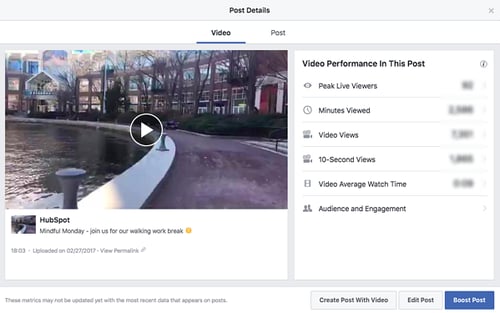
In addition to all of these static numbers, you can click into each metric to see how it changed over time when the video was live. For example, if we click into Peak Live Viewers, we’ll see this interactive graph of video viewers over time:
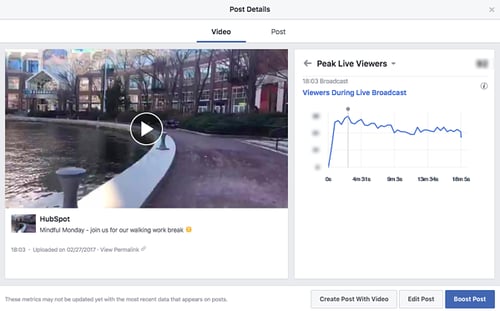
You can even see who your typical viewer was during your broadcast, based on their Facebook profile information:
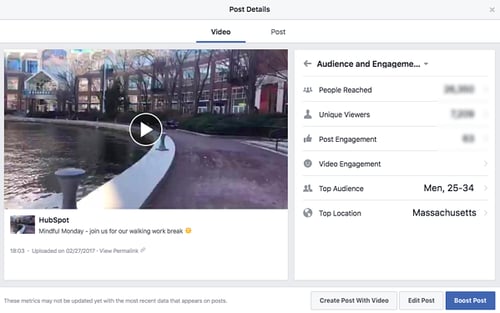
Now that you’ve got the steps down, let’s get into some tips and tricks.
The last thing you’d want is to start a live video and then be lost. It’s live, so there are no do-overs or chances to start over. So, prepare yourself or your host as much as possible. Outline what the video will entail and follow the rest of the tips below. Also, check out these great examples of Facebook Live videos from various companies.
There are a lot of little things you can do to squeeze the most out of your Facebook Live videos.
1. Brush up on Facebook Live best practices.
Marketers have so much opportunity to reach a wider audience on Facebook Live, so it’s worth committing to learning how to run a Live effectively.
In our detailed Marketer’s Guide to Facebook Live, we cover essential best practices on how to plan, run, and analyze the results of a business-run Facebook Live. Download the ebook to brush up on these best practices.
2. Test out live video using the “Only me” privacy setting.
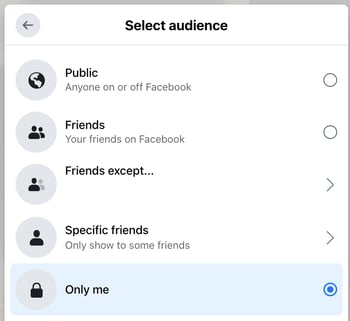
If you want to play around with live broadcasting without actually sharing it with anyone else, you can change the privacy setting so you’re the only one who can see it — just like with any other Facebook post.
To switch to Only me, look for the privacy settings. Then, you should see the options and be able to select Only me from this list below.
3. Space out live videos with other Facebook posts.
The art of the organic reach on Facebook has changed over time, but you can still take advantage of it. A big way to accomplish this is to maintain a mixture of regular Facebook posts and Facebook Live videos. The live videos are the major pull, as they tend to garner more engagement. So, spacing them out will maximize the organic reach of all of your posts.
4. Keep reintroducing yourself.
When you first start the video, take a minute to introduce yourself and what the video’s about. But keep in mind that when you first start live streaming, you may have zero people watching. Even a few seconds in, you could only have a handful of viewers. As people find your video on their News Feeds, they’ll join in — but that means you’ll want to reintroduce yourself a second, third, and even a fourth time to catch people up.
5. Make the video visually engaging.
You have to be visually engaging — not just at the very beginning of your broadcast (although that’ll be important for when folks view the video later), but throughout the video as more and more people join in.
The more visually engaging you can be, the more you can entice people to stick around. That means keeping the camera moving and not just sitting in one place.
Not only will you get more viewers this way, but you’ll also get your broadcast ranked higher in other people’s News Feeds. Facebook started monitoring signals of video engagement — like turning on the audio, switching to full-screen mode, or enabling high definition — interpreting that as users enjoying the video. As a result, they’ve tweaked the algorithm so videos that people engage with in these ways will appear higher up on the feed.
6. Make it spontaneous.
What makes a live video special? The spontaneous, interactive nature of it. People love the ability to interact, and they love the novelty of viewing someone in a live moment when anything could happen. In many ways, it’s the new reality TV.
These moments are what make live video special, and they’re exactly what differentiates it from scripted, edited, or otherwise pre-recorded videos. Embrace the platform. Banter is always, always good.
7. Don’t worry about mistakes or stutters.
Spontaneity works — even if your Facebook Live doesn’t go according to plan.
Let’s face it, we’re all human. And when humans and technology mix, there can sometimes be technical difficulties.
If you’re recording a live video, things might go wrong — your equipment could malfunction, you could lose your train of thought, or you could get photobombed by a random passerby. You can’t call “cut” if things happen — you have to roll with them and keep filming and talking.
The good news? These things help keep your broadcast human and real. If you wobble your phone while filming, laugh and call it out. If you forget what you were saying, make a joke. The key is to keep the broadcast like a fun conversation, so if mistakes happen, keep it light and keep the lines of communication open with your viewers.
For example, if you make a mistake during your Facebook Live, ask viewers to write in the comments if they’ve made the same mistake, too.
8. Encourage viewers to Like and share the video.
One of the primary ways Facebook’s algorithm ranks a post is by how many people Like and share it. The more people who Like and share your live broadcast, the more it’ll show up in people’s News Feeds.
But when people are watching a video, they may be more distracted from Liking and sharing it than they would a text or photo post. (That’s something the folks at Facebook noticed about video content early on, which is why they began monitoring other video engagement signals as well, like turning on the volume.)
9. Engage with commenters, and mention them by name.
The number of comments on your broadcast is another way to get Facebook to give it a higher relevancy score, making it more likely to show up on people’s News Feeds. So encourage your viewers to comment, and engage with people who are commenting by answering their questions and calling them out by name. Not only will it get more people to comment, but it’s also a fun way to include your viewers in the live experience, which could make them stick around longer.
Plus, your audience will be thrilled to hear you mention their name and answer their questions when you are live.
10. Have someone else watching and responding to comments from a desktop computer.
When you’re the one holding the camera for a Facebook Live video, it’s really hard to see the comments popping up on the mobile screen. If the comments are coming in fast, it’s especially easy to lose sight of them as they disappear below the fold. Plus, you’re probably occupied by recording and entertaining viewers.
Because of this, it’s always a good idea to have an additional person logged into the primary account to monitor the comments on a desktop computer. That way, they can take care of responding so the person recording the video can concentrate on creating a great experience.
11. Subtitle your broadcast in the comments section.
Your viewers may be tuning in and out to watch your video during the work day, or they might simply be watching your video without sound. Either way, periodically subtitling the video in the comments section is a great way to keep people engaged. This also allows people who are tuning in late to catch up on what’s going on.
12. Ask viewers to subscribe to Facebook Live notifications.
In addition to asking for Likes, shares, and comments, ask viewers to subscribe to live notifications. To do that, all viewers have to do is click the small, downward-facing arrow in the top right-hand corner of the live video post, and choose “Turn On Notifications.”
You can also ask them to Like your brand on Facebook, which will make it more likely that they’ll be notified of your next live broadcast.
13. Broadcast for at least 10 minutes.
As soon as you begin recording your live video, you’ll start slowly but surely showing up in people’s News Feeds. The longer you broadcast — especially as Likes, comments, and shares start coming in — the more likely people are to discover your video and share it with their friends.
Because timing is such an important factor for engagement in these live videos, we recommend that you go live for at least 10 minutes, although you can stay live for up to 90 minutes for a given video.
14. Say goodbye before ending your video.
Before you end your live broadcast, be sure to finish with a closing line, like “Thanks for watching” or “I’ll be going live again soon.”
15. Add a link to the description later.
Once you’ve finished the live broadcast, you can always go back and edit the description, change the privacy settings, or delete the video, just like you would any other post.
You can add a trackable link to the description in the post, which can direct future viewers to your live video series page, the site of whatever campaign you’re using the video to promote, or somewhere else.
We hope this has been a helpful guide. We’ll keep you posted with any new developments and tips for connecting with your audience in more cool ways.
Use Facebook Live to Its Full Potential
Social media may have been invented for fun, but it’s grown into an essential business tool. Facebook as a social network is especially valuable for the ways it lets you connect to an audience, and Facebook Live is a great extension of that. Use it to the benefit of your business as a way to promote your product, build brand awareness, or grow your audience.
Editor’s note: This post was originally published in May 2020 and has been updated for comprehensiveness.


How to Create a Pivot Table in Excel: A Step-by-Step Tutorial
The pivot table is one of Microsoft Excel’s most powerful — and intimidating — functions. Powerful because it can help you summarize and make sense of large data sets. Intimidating because you’re not exactly an Excel expert, and pivot tables have always had a reputation for being complicated.
The good news: Learning how to create a pivot table in Excel is much easier than you might’ve been led to believe.

But before we walk you through the process of creating one, let’s take a step back and make sure you understand exactly what a pivot table is, and why you might need to use one.
In other words, pivot tables extract meaning from that seemingly endless jumble of numbers on your screen. And more specifically, it lets you group your data in different ways so you can draw helpful conclusions more easily.
The “pivot” part of a pivot table stems from the fact that you can rotate (or pivot) the data in the table to view it from a different perspective. To be clear, you’re not adding to, subtracting from, or otherwise changing your data when you make a pivot. Instead, you’re simply reorganizing the data so you can reveal useful information from it.
What are pivot tables used for?
If you’re still feeling a bit confused about what pivot tables actually do, don’t worry. This is one of those technologies that are much easier to understand once you’ve seen it in action.
The purpose of pivot tables is to offer user-friendly ways to quickly summarize large amounts of data. They can be used to better understand, display, and analyze numerical data in detail — and can help identify and answer unanticipated questions surrounding it.
Here are seven hypothetical scenarios where a pivot table could be a solution:
1. Comparing sales totals of different products.
Say you have a worksheet that contains monthly sales data for three different products — product 1, product 2, and product 3 — and you want to figure out which of the three has been bringing in the most bucks. You could, of course, look through the worksheet and manually add the corresponding sales figure to a running total every time product 1 appears. You could then do the same for product 2, and product 3 until you have totals for all of them. Piece of cake, right?
Now, imagine your monthly sales worksheet has thousands and thousands of rows. Manually sorting through them all could take a lifetime. Using a pivot table, you can automatically aggregate all of the sales figures for product 1, product 2, and product 3 — and calculate their respective sums — in less than a minute.
2. Showing product sales as percentages of total sales.
Pivot tables naturally show the totals of each row or column when you create them. But that’s not the only figure you can automatically produce.
Let’s say you entered quarterly sales numbers for three separate products into an Excel sheet and turned this data into a pivot table. The table would automatically give you three totals at the bottom of each column — having added up each product’s quarterly sales. But what if you wanted to find the percentage these product sales contributed to all company sales, rather than just those products’ sales totals?
With a pivot table, you can configure each column to give you the column’s percentage of all three column totals, instead of just the column total. If three product sales totaled $200,000 in sales, for example, and the first product made $45,000, you can edit a pivot table to instead say this product contributed 22.5% of all company sales.
To show product sales as percentages of total sales in a pivot table, simply right-click the cell carrying a sales total and select Show Values As > % of Grand Total.
3. Combining duplicate data.
In this scenario, you’ve just completed a blog redesign and had to update a bunch of URLs. Unfortunately, your blog reporting software didn’t handle it very well and ended up splitting the “view” metrics for single posts between two different URLs. So in your spreadsheet, you have two separate instances of each individual blog post. To get accurate data, you need to combine the view totals for each of these duplicates.
That’s where the pivot table comes into play. Instead of having to manually search for and combine all the metrics from the duplicates, you can summarize your data (via pivot table) by blog post title, and voilà: the view metrics from those duplicate posts will be aggregated automatically.
4. Getting an employee headcount for separate departments.
Pivot tables are helpful for automatically calculating things that you can’t easily find in a basic Excel table. One of those things is counting rows that all have something in common.
If you have a list of employees in an Excel sheet, for instance, and next to the employees’ names are the respective departments they belong to, you can create a pivot table from this data that shows you each department name and the number of employees that belong to those departments. The pivot table effectively eliminates your task of sorting the Excel sheet by department name and counting each row manually.
5. Adding default values to empty cells.
Not every dataset you enter into Excel will populate every cell. If you’re waiting for new data to come in before entering it into Excel, you might have lots of empty cells that look confusing or need further explanation when showing this data to your manager. That’s where pivot tables come in.
You can easily customize a pivot table to fill empty cells with a default value, such as $0, or TBD (for “to be determined”). For large tables of data, being able to tag these cells quickly is a useful feature when many people are reviewing the same sheet.
To automatically format the empty cells of your pivot table, right-click your table and click PivotTable Options. In the window that appears, check the box labeled Empty Cells As and enter what you’d like displayed when a cell has no other value.
How to Create a Pivot Table
- Enter your data into a range of rows and columns.
- Sort your data by a specific attribute.
- Highlight your cells to create your pivot table.
- Drag and drop a field into the “Row Labels” area.
- Drag and drop a field into the “Values” area.
- Fine-tune your calculations.
Now that you have a better sense of what pivot tables can be used for, let’s get into the nitty-gritty of how to actually create one.
Step 1. Enter your data into a range of rows and columns.
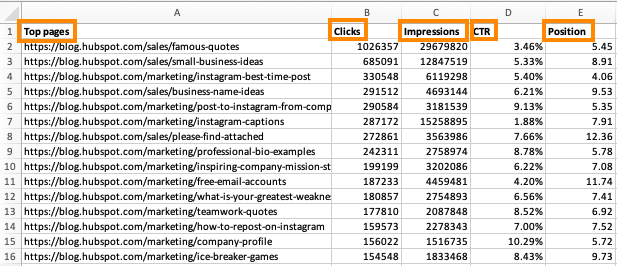
Every pivot table in Excel starts with a basic Excel table, where all your data is housed. To create this table, simply enter your values into a specific set of rows and columns. Use the topmost row or the topmost column to categorize your values by what they represent.
For example, to create an Excel table of blog post performance data, you might have a column listing each “Top Pages,” a column listing each URL’s “Clicks,” a column listing each post’s “Impressions,” and so on. (We’ll be using that example in the steps that follow.)
Step 2. Sort your data by a specific attribute.
When you have all the data you want entered into your Excel sheet, you’ll want to sort this data in some way so it’s easier to manage once you turn it into a pivot table.
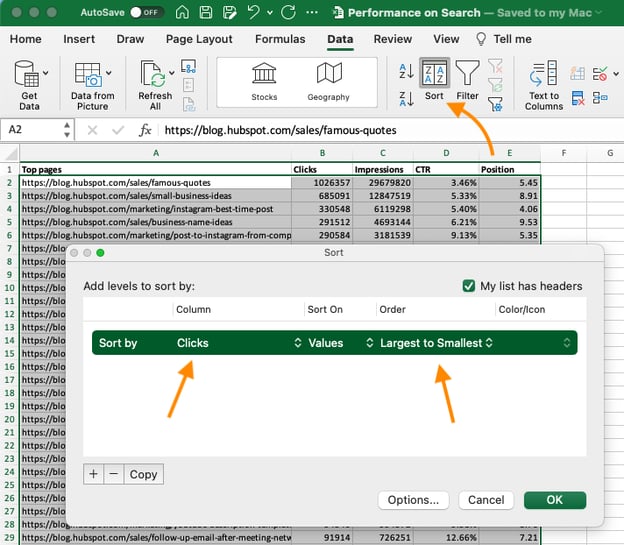
To sort your data, click the Data tab in the top navigation bar and select the Sort icon underneath it. In the window that appears, you can opt to sort your data by any column you want and in any order.
For example, to sort your Excel sheet by “Views to Date,” select this column title under Column and then select whether you want to order your posts from smallest to largest, or from largest to smallest.
Select OK on the bottom-right of the Sort window, and you’ll successfully reorder each row of your Excel sheet by the number of views each blog post has received.
Step 3. Highlight your cells to create your pivot table.
Once you’ve entered data into your Excel worksheet, and sorted it to your liking, highlight the cells you’d like to summarize in a pivot table. Click Insert along the top navigation, and select the PivotTable icon. You can also click anywhere in your worksheet, select “PivotTable,” and manually enter the range of cells you’d like included in the PivotTable.
This will open an option box where, in addition to setting your cell range, you can select whether or not to launch this pivot table in a new worksheet or keep it in the existing worksheet. If you open a new sheet, you can navigate to and away from it at the bottom of your Excel workbook. Once you’ve chosen, click OK.
Alternatively, you can highlight your cells, select Recommended PivotTables to the right of the PivotTable icon, and open a pivot table with pre-set suggestions for how to organize each row and column.
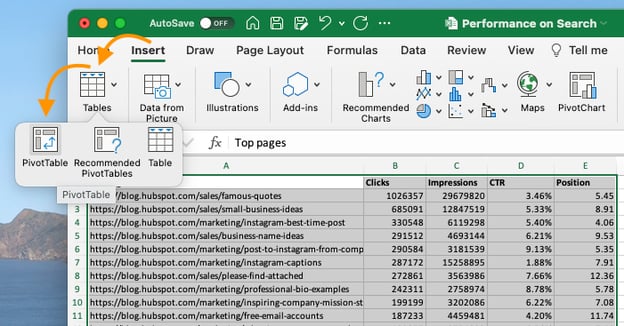
Note: If you’re using an earlier version of Excel, “PivotTables” may be under Tables or Data along the top navigation, rather than “Insert.” In Google Sheets, you can create pivot tables from the Data dropdown along the top navigation.
Step 4. Drag and drop a field into the “Row Labels” area.
After you’ve completed Step 3, Excel will create a blank pivot table for you. Your next step is to drag and drop a field — labeled according to the names of the columns in your spreadsheet — into the Row Labels area. This will determine what unique identifier — blog post title, product name, and so on — the pivot table will organize your data by.
For example, let’s say you want to organize a bunch of blogging data by post title. To do that, you’d simply click and drag the “Top pages” field to the “Row Labels” area.
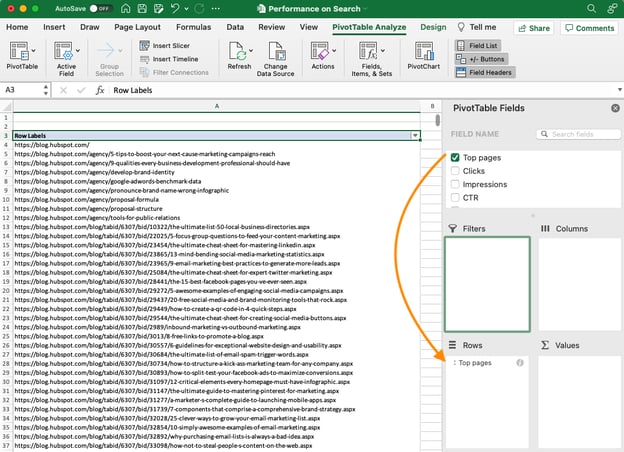
Note: Your pivot table may look different depending on which version of Excel you’re working with. However, the general principles remain the same.
Step 5. Drag and drop a field into the “Values” area.
Once you’ve established what you’re going to organize your data by, your next step is to add in some values by dragging a field into the Values area.
Sticking with the blogging data example, let’s say you want to summarize blog post views by title. To do this, you’d simply drag the “Views” field into the Values area.
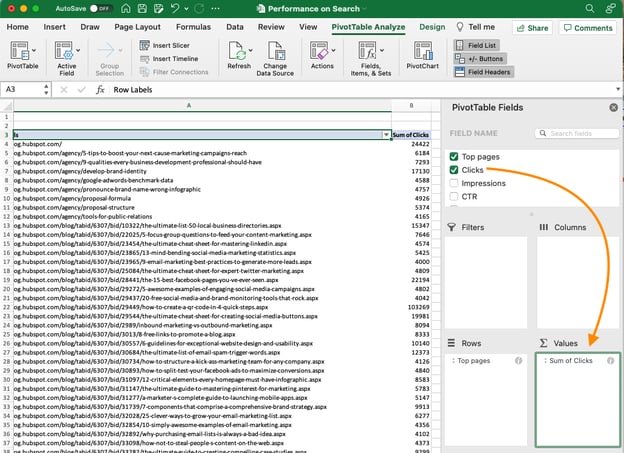
Step 6. Fine-tune your calculations.
The sum of a particular value will be calculated by default, but you can easily change this to something like average, maximum, or minimum depending on what you want to calculate.
On a Mac, you can do this by clicking on the small i next to a value in the “Values” area, selecting the option you want, and clicking “OK.” Once you’ve made your selection, your pivot table will be updated accordingly.
If you’re using a PC, you’ll need to click on the small upside-down triangle next to your value and select Value Field Settings to access the menu.
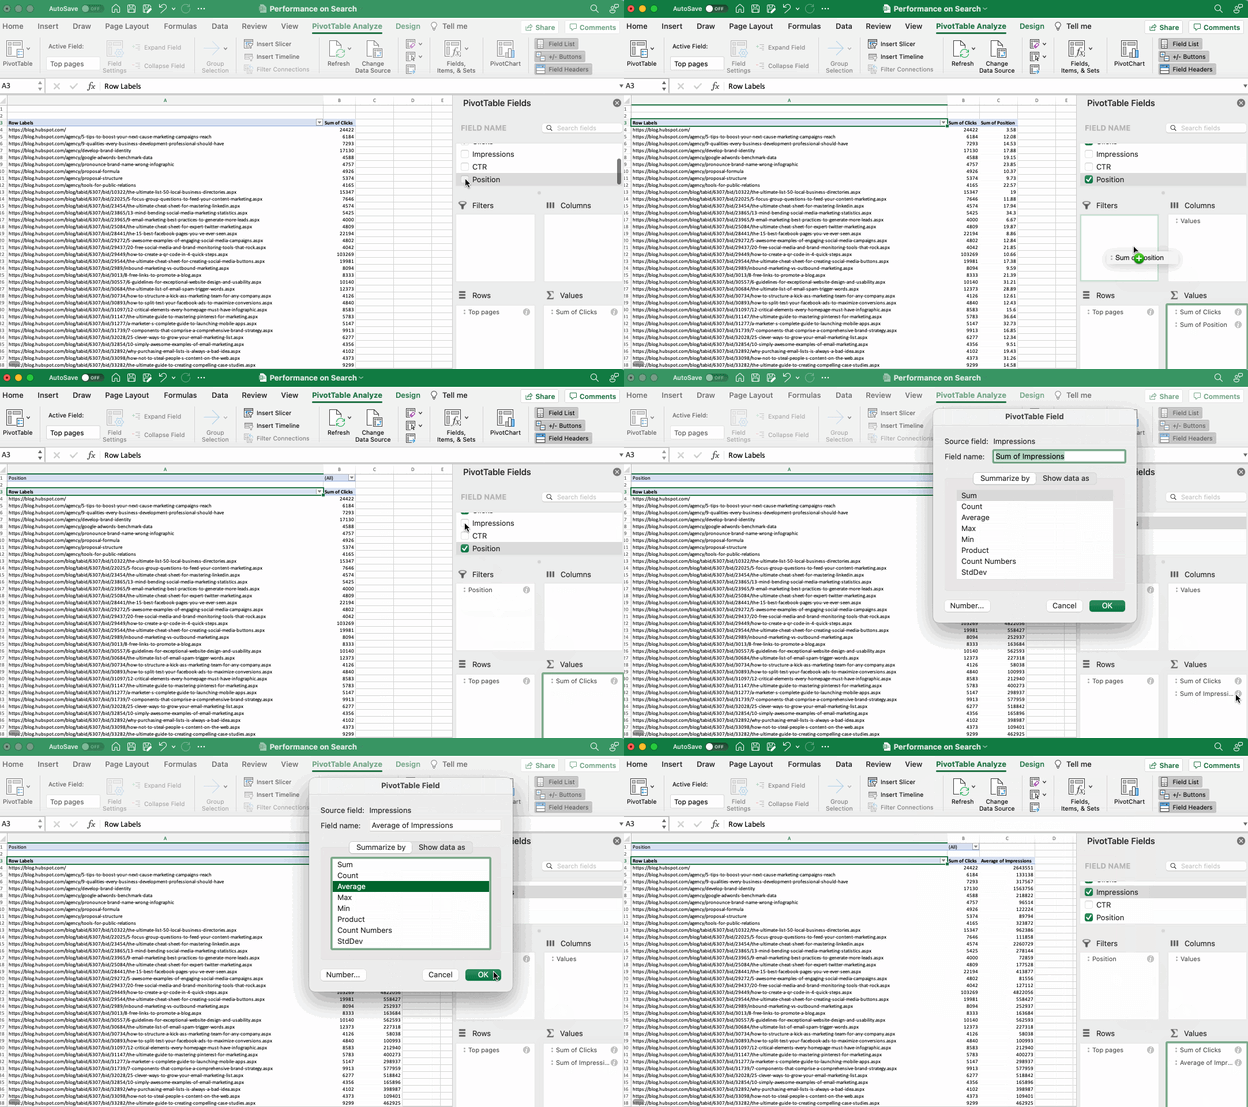
When you’ve categorized your data to your liking, save your work and use it as you please.
Digging Deeper With Pivot Tables
You’ve now learned the basics of pivot table creation in Excel. With this understanding, you can figure out what you need from your pivot table and find the solutions you’re looking for.
For example, you may notice that the data in your pivot table isn’t sorted the way you’d like. If this is the case, Excel’s Sort function can help you out. Alternatively, you may need to incorporate data from another source into your reporting, in which case the VLOOKUP function could come in handy.
Editor’s note: This post was originally published in December 2018 and has been updated for comprehensiveness.

12 Unique Ways to Generate Leads With QR Codes
If you’re like a lot of people, you may be wondering how to use mobile marketing to generate leads for your business. For HubSpot users, the good news is that you have a head start — the HubSpot platform automatically creates a mobile version of your site for you.
But what should you do next? After you’ve got a mobile website, what mobile tools should you use to attract new customers to your business? QR codes are one of the easiest tools to get started with. You’re probably already familiar with QR codes, but if not, they’re the square barcodes like the one on this post that are being used by companies to drive prospects to their websites.

In doing research for our new book Go Mobile, Jeanne Hopkins and I took a deep dive into the most important mobile tools for small- to mid-sized businesses. There are plenty to choose from, but we’re going to focus on the most effective QR code uses to grow your business.
Who uses QR codes?
The short answer is anyone with a mobile phone. In addition to our keys and wallet, our phone is one of the few things we can’t leave the house without. Businesses have picked up on this and are constantly finding new ways to use QR codes to get us to engage with them, or make their processes smoother.
Uses of QR Codes in Everyday Life
While the concept of when to implement QR codes may be new, you’ve probably already gotten familiar with their use in local businesses you’ve visited. Here’s some instances where you’ve most likely encountered them:
- Public wifi network access
- Restaurant menus
- Instruction manuals
- Cashless payments
- Web promotions during live events
- Contact information and Linktrees
Later in this article, we’ll discuss the many other ways to use QR codes.But first, we’ll dig into how you can create your own QR codes.
How to Create Your Own QR Code Promotion
On the Go Mobile website, we used QR codes to provide clues for a nationwide scavenger hunt for four iPads hidden across the country. Visitors to the site could scan the QR codes to download the clues. To ensure that we captured leads from the promotion, we also provided the clues via email for anyone who filled out the form on the site. That way, we capture the lead information so we can re-market to that audience in the future.
Creating a QR code promotion is actually pretty simple. Here are the steps we followed when we created the promotion for our iPad nationwide scavenger hunt.
1. Create a Landing Page
First and foremost, you’ll need to create a mobile-optimized landing page. That means a landing page that is designed to be viewed on a smartphone screen. Keep things simple – for example, on a mobile landing page, forms should be kept to a few fields only. Most people don’t have the patience to fill out lengthy forms from a smartphone.
2. Create Your QR Code
Once you’ve created your landing page, copy the URL into a QR code generator. There are
plenty of QR code generators on the web, so just do a search for one. Paste your landing page URL into the QR code generator and, like magic, your QR code will be generated on the spot. This QR code is unique to you, so nobody in the world has another one just like it.
3. Add Your QR Code to Your Promotional Materials
Grab your QR code from the generator. On a PC, that means right-clicking it and saving it to your computer. (On a Mac, you can drag and drop.) Now that you have the QR code handy, add it to your promotional materials. That includes any printed materials or websites that are going to be part of the promotion.
4. Get the Word Out
There’s no point in launching a QR Code promotion if you’re not going to let the world know about it. So broadcast your message using your blog, Twitter, LinkedIn, Facebook, or any of the other social media tools at your disposal. The key part at this stage of the game is to let as many people know about the promotion as possible.
5. Stretch Out the Promotion
For our iPad Scavenger Hunt, we wanted as many people as possible to participate, so we’d upload a new QR code each day for several weeks. That way, our audience builds, and we’re able to create as much buzz around the promotion as possible.
How to Put QR Codes to Work for Your Business
There are a variety of ways you can use QR codes for your business, and new ones are cropping up every day. Here are some great ideas you can use below.
Common Uses of QR Codes
- Websites: Add a QR code to the ‘Contact Us’ page on your website so visitors can download your contact information to their smartphones.
- Business Cards: Add a QR code to the front or back of your business card so people can instantly download your contact information.
- Webinars: Ready to make your webinars more engaging and fun? Then simply include a QR code as part of your presentation. It’s a terrific way to keep the audience engaged and involved.
- LinkedIn and Facebook Pages: Want another way to stand out from everyone else? Add a QR code to your LinkedIn and Facebook pages to pull people into your website. It’s one of the best ways you can position yourself as a forward, innovative thinker.
- In-Store Posters With Coupons: Want to provide instant coupons to people while they’re shopping? Then add a QR code that drives them through to a special discount that can be scanned at the register.
- Dial a Phone Number: Want to encourage people to dial your number so they can order your product? Then give them a QR code to scan. If it’s set up properly, it will instantly dial your number on their phone and connect them with your sales center.
Creative Uses for QR Codes
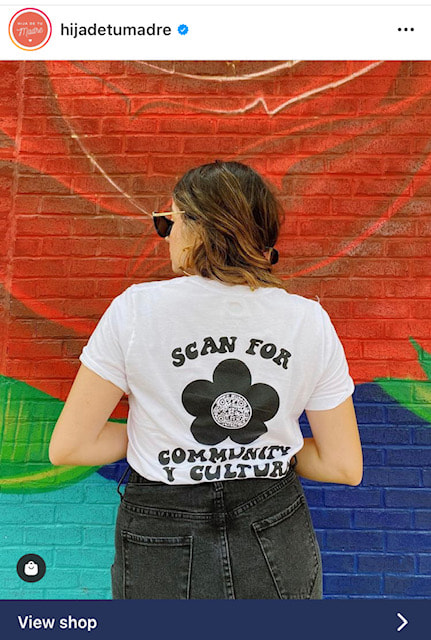
- Clothing and Merchandise: Ready to promote your product or service in an innovative way? Then add a QR code to a T-shirt that you give away to customers and prospects. Hija De Tu Madre (pictured above), a Latina fashion and accessories brand, cleverly placed a QR code on one of their shirt designs. It encourages viewers to “Scan for community y cultura,” enabling people to learn more about the brand and eventually convert them into new customers.
- “Hello, My Name Is” Tags: You know those big red and white tags people wear at events with their names on them? If you put a QR code in place of your name, you’ll engage people and easily be able to strike up conversations.
- Event Posters: Advertising an event? Upgrade your posters and fliers with a QR code passersby can easily scan. Have the code take them to your event page where they can view all pertinent details and buy tickets.
- Outdoor Billboards:Be one of the first businesses in your market to run a giant QR code on a billboard for your business. In the example above, Cygames enlisted the help of 1,500 drones to form a giant QR code in the sky to celebrate the anniversary of one of their games.
- Galleries and Museums: Make it easy for viewers to find out more about your work and upcoming projects. Putting a QR code next to artwork in place of text is a wonderful alternative to the standard description. Guests won’t have to crowd each other to read it, and they can take the information with them. If you’re selling at a gallery, it may also be worth it to enable payment through the QR code as well.
- Product Packaging: If you sell a physical product, adding a QR code that tells the buyer more about your brand or the product itself can build connections and trust. If you sell food, consider using a QR code for the ingredient list, or maybe easy recipes to use the item in. For cosmetics, have QR codes that give more information on how the products were made, tested, and where ingredients were sourced.
Using QR Codes to Grow Your Business
There’s no real mystery to using QR codes to grow your business. All you have to do is generate the code, and drop it into your promotion. Be sure you test the campaign before you go public with it – people who scan your code expect things to work relatively smoothly the first time out of the gate. But other than that, running a QR code promotion is a snap.
A key point to remember about QR codes is that they’re simply a mechanism to engage prospects and customers. In other words, they’re not the end-game, so it’s up to you to figure out how to use them to capture the visitors you drive to your website as leads using landing pages.
Once your strategy is in place, using QR codes to grow your business is relatively simple. All you have to do is generate the code, and drop it into your promotion. Be sure you test the campaign before you go public with it — people who scan your code expect things to work relatively smoothly the first time out of the gate. Give them an experience that delights them and keeps them coming back for more.
This is a guest blog post written by Jamie Turner, founder and chief content officer of the 60 Second Marketer. In addition, Jamie is the co-author of the book Go Mobile, written with Jeanne Hopkins, VP of marketing @HubSpot. He is a regular guest on CNN and HLN on the topic of digital marketing and is a popular mobile marketing speaker at events and corporations around the globe.
This article was originally published in January 2012 and has been updated for comprehensiveness.

How to Post on Instagram: A Step-by-Step Guide
With over 1 billion active users, Instagram is one of the best social media networks to advertise your business, reach new audiences, and grow brand awareness. So even if you aren’t active on the website yet, it’s never too late to adopt an Instagram strategy in your marketing plan.
If you’re ready to start sharing content through this channel, we’ve got you covered. Here, we’ve cultivated a quick-and-easy guide to posting on Instagram, to ensure you can begin attracting the attention of your audience with Instagram marketing.

Posting to Instagram consistently can help businesses find resonance with their audience and grow better, but doing it right is just as important. Here’s how to post to your Instagram account step-by-step.
Step 1. Tap the + icon at the top of your screen.
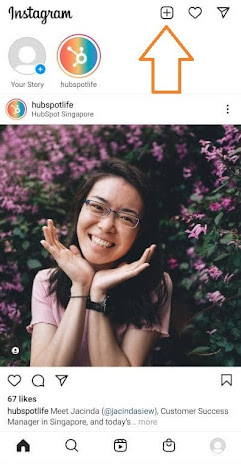
See that plus sign [+] in the image above? That’s your starting point. See that post from our culture account? That’s your endpoint. Click that plus sign and you’ll be ready for the next step, below.
Step 2. Choose a photo or video from your library or shoot one in the app.
Instagram will show you the photos already saved to your phone. Choose one of those to post. Alternatively, you can click on the camera icon to take a photo or video within the Instagram app itself, if you don’t already have an image you want to use.
Once you select and crop an image (or carousel of multiple images), click the arrow button in the top right corner of the app.
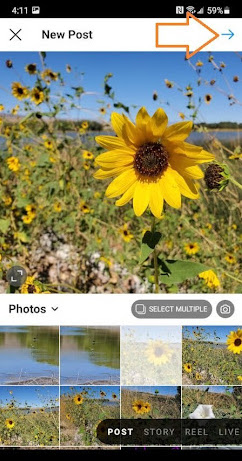
Step 3. Post multiple images on Instagram.
Do you have multiple photos and want to highlight them all? Instagram allows you to do this with its carousel feature.

As you go to tap a photo or video, first tap the icon just above your photos to the right that looks like stacked squares. Once you tap this, you’ll see a number on the corner of every image or video you tap. This number notes where the content will show up in the carousel.
Step 4. Crop the image.
You aren’t limited to just a square image on Instagram. You can actually share horizontal or vertical images as well. To get more of your image seen, pinch the screen of the photo you’ve selected on the Library screen.

However, while Instagram does allow vertical and horizontal options, the images still need to fit into some specific dimensions. So, you might still need to crop a tiny bit of your photo to get it to fit.
Step 5. Pick a filter.
Instagram offers 24 filters — scroll to the right to peruse your options, and click on one to preview how it will look on your photo.
By default, the filter will be applied by full strength. However, if you want to scale back the intensity of the filter, double click the filter tile once it’s been applied, and a scale selector will appear, allowing you to downplay the effect.
You can also tap the magic wand at the top of the screen to adjust the photo further.

(Take a look at our Ultimate Guide to Instagram Filters to learn more).
Step 6. Edit your photo.
You can also click “Edit” at the bottom right to adjust the image to your specifications.

Here are the editing options that come built into Instagram for you:
- Adjust – This helps subtly rotate the image along the center plane, giving it a tilt either to the left or right according to the linear scale at the bottom of the screen.
- Brightness – This helps lighten or darken the image. All you have to do is pull the selector to the left to darken or to the right to lighten.
- Contrast – This helps to increase or decrease the intensity of the image’s colors. Pull the selector to the left for less contrast (a dulling effect) or to the right for more contrast (a higher intensity effect).
- Structure – This helps to add an HD-like effect to the image, bringing out specific details in your photo. Drag the selector to the right to help the image “pop.”
- Warmth – This helps you adjust the temperature of the photo. Drag the selector to the left to increase cool tones in the image, or drag the selector to the right to increase the warm tones in the image.
- Saturation – This helps you adjust the saturation of the colors in your image. Drag the selector to the left to desaturate the image (all the way to the left if you want a monochrome look), or drag the selector to the right for extremely saturated colors.
- Color – This gives you a number of color options to overlay over your image for interesting color effects. Simply select your color choice and see how it changes the image in the preview box.
- Fade – This softens the intensity of the blacks in your image to create an “aged” photo effect. Simply drag the selector to the right for a higher degree of fade.
- Highlights – This helps you control the intensity of the highlights in your image. Dragging the selector to the left will darken the highlights in your image while dragging the selector to the right will lighten the highlights in your image.
- Shadows – This helps you control the intensity of the shadows in your image. Dragging the selector to the left will darken the shadows in your image while dragging the selector to the right will lighten the shadows in your image.
- Vignette – This darkens the corners of the image, leaving a circle shape in the center. Drag the selector all the way to the right for the most dramatic vignette.
- Tilt Shift – This helps blur the edges of the image in a radial or linear way, drawing focus to the details in the center of the image.
- Sharpen – This helps sharpen certain details of the image, bringing a more dramatic look to subtler elements in the photo.
Step 7. Type your caption.
Get creative and write a nice, interesting caption to go with your photo. Since text can help optimize your post in Instagram’s search, writing something can only benefit you.

Step 8. Use hashtags for post optimization.
With Instagram’s search feature, users can search by hashtags. So, you should make sure to write relevant hashtags in your caption. If someone does a search of a hashtag you placed in your caption, they might find your post as well as others that included the same one.
Step 9. Tag friends.
Want your friend or their followers to see a photo that you posted of the two of you? Tag them!
On the new post page, you can click “Tag People” to tag other Instagram accounts in your post. Alternatively, you can include their handle (or their username beginning with an @ symbol) in your caption.
Step 10. Add your location.
If you’re on a fun vacation or at a neat event and you don’t feel like including that information in your caption, you can mark where you are in another way. On the new post page, tap “Add Location” to put a location on your image (which makes it easier for people to find your post).
When you post an image or video with a location, it will show up between your name and the block of content on the feed.
Step 11. Play with emojis.
Emojis are fun and can make your caption more eye-catching. If you know of a few relevant emojis that could fit with your post, stick them in the caption area. For example, if you’re posting a vacation photo, you could include a palm tree 🌴 or a plane ✈️ to show you flew somewhere.
Here are the top Instagram emojis you can use:
- ❤️
- 😍
- 😘
- 😂
- 😊
- 😎
- 💕
- 😉
- 💋
- 👍
However, keep in mind that there’s a multitude of choices to add flair to your posts, from keeping it real 💯 to the cringe face 😬.
Be sure not to go overboard and post emojis just for the sake of posting them. If you post a bowling emoji along with a photo of a beach, that obviously won’t make sense to people. Similarly, if you post 20 emojis that loosely relate to a post, you might just annoy your followers or come off as desperate.
Step 12. Share the post on other social media platforms.
Finally, if you want to share your content on your other, connected social media sites (like Facebook or Twitter), simply slide the bar from the left to the right.

When you’re ready to post, click “Share” in the top right.
Instagram Saved Drafts
If you’re not ready to post right away, you can also save it to your Instagram Saved Drafts. Simply go back to the filtering and editing step, tap the back arrow in the top left, and select “Save Draft.”
Step 13. Edit the post.
Typos happen to everyone! If you just posted something and notice a glaring spelling error, don’t panic. Simply tap the three dots that appear on the right across from your name, then tap “Edit.”

Make the adjustments you see fit and save them so it reflects on your Instagram. Otherwise, your post is complete and live for everyone to see.
Grow Your Audience on Instagram Today
Now that you know how to post to Instagram, you can begin creating content for the platform and connecting with your audience. If you’re a business or brand, you’ll want a solid strategy for earning engagement and awareness.
Editor’s note: This post was originally published in November 2019 and has been updated for comprehensiveness.

Conversion Rate Optimization (CRO): 8 Ways To Get Started
Today, most marketing teams are focused on driving traffic toward websites in hopes that this traffic then converts into qualified leads for sales reps to close. But that’s only half the battle.
Getting more out of existing traffic and leads (versus entirely new traffic) can propel companies toward long-term, sustainable growth. That’s where conversion rate optimization (CRO) comes in. In this guide, you’ll learn about the power of CRO, why your business should focus on improving your conversion rate, and how to get started.

What is a conversion rate?
A conversion rate is the percentage of visitors who complete a desired action, like completing a web form, signing up for a service, or purchasing a product.
A high conversion rate means your website is well-designed, formatted effectively, and appealing to your target audience. A low conversion rate could be the result of a variety of factors related to either website performance or design. Slow load times, a broken form, or copy that doesn’t convey the value of the offer are common reasons for a poor conversion rate.
What is a good conversion rate?
A “good” conversion rate depends on your industry, niche, goals, traffic channel, and audience demographics, among other factors. For example, the average conversion rate of ecommerce sites globally was 2.17% in the third quarter of 2020, which was down from 2.37% the previous year. The ecommerce conversion rate in the US was higher, however, at 2.57%.
The average not only differs by year and by country — it also differs by niche. For example, the average conversion rate of ecommerce sites in the food and beverage sector is 5.5% whereas the average in the hair care sector is 3.5%.
If your conversion rate is lower than you’d like — maybe it’s below average in your industry, or lower than your top competitors, or simply underperforming against your own goals — then it’s time to optimize.
Conversions can happen all over your website: on your homepage, pricing page, blog, landing pages, and more. To maximize the potential of converting website visitors into paying customers, you should optimize each location.
Before we take a look at the benefits of CRO, let’s walk through how to calculate your site’s conversion rate. That way, you’ll have a better understanding of how much time and resources to invest in a CRO strategy.
How to Calculate Conversion Rate
Conversion rate is calculated by dividing the number of conversions by the number of visitors and multiplying that number by 100 to get a percentage.

As long as you know how you’re defining a conversion, then calculating your conversion rate is easy. You just plug in two values and multiply by 100.
Let’s say you’re defining a conversion as a newsletter opt-in, and you have an opt-in form on every single page of your website. In that case, you’d divide the total number of newsletter form submissions by the total number of website visitors and multiply it by 100. So if you had 500 submissions and 20,000 visitors last quarter, then your conversion rate would be 2.5%.
You can repeat this process for every conversion opportunity on your site. Just make sure to only count the number of visitors on the webpages where the offer is listed. For example, if you want to calculate the conversion rate of your ebook offer, then you’d divide the total number of downloads by the number of people who visited webpages where the ebook offer is listed.
Alternatively, you can calculate your website’s overall conversion rate by dividing the total number of conversions for every conversion opportunity on your site by the total number of visitors on your site.
Where to Implement a CRO Strategy
Here are four areas of your website that have the potential to largely benefit from conversion rate optimization.
1. Homepage
Homepages are prime candidates for CRO. In addition to making a first impression on visitors, the homepage is also an opportunity to retain those visitors and guide them further into your website.
You can do this by emphasizing links to product information, offering a free signup button, or even incorporating a chatbot that solicits questions from visitors at any point during their browsing experience.
2. Pricing Page
A website’s pricing page can be the make-or-break point for many website visitors. CRO can help a pricing page convert visitors into customers by modifying the pricing intervals (e.g. price-per-year vs. price-per-month), describing the product features associated with each price, including a phone number for visitors to call for a price quote, or adding a simple pop-up form.
Hotjar, for example, added a simple email opt-in popup form on its pricing page and got over 400 new leads in just three weeks.

3. Blog
A blog is a massive conversion opportunity for a website. In addition to publishing thoughtful and helpful content about your industry, a blog can use CRO to convert readers into leads.
This process often includes adding calls-to-action (CTA) throughout an article or inviting readers to learn more about a topic by submitting their email address in exchange for an ebook or industry report.
4. Landing Pages
Since landing pages are inherently designed for people to take an action, it makes sense that they have the highest average conversion rate of all signup forms at 24%. An event landing page, for example, can be optimized with a video of last year’s event to encourage visitors to register this year. A landing page that’s offering a free resource can be optimized with preview content from that resource to encourage visitors to download it.
Now that you know where you can optimize for conversions, you may be wondering how you know when your business is ready to start the process.
CRO Formulas
The short answer: CRO is important for any business online. That’s because, no matter how established or large your company is, you want to convert your website visitors into qualified leads, customers, and brand advocates — and you want to do so in the most effective, impactful, and reliable way.
With conversion rate optimization, you’ll get more out of your existing website traffic while ensuring you’re targeting qualified leads.
Although this is a straightforward concept, setting a conversion goal isn’t as easy as saying, “This page converted 50 people this month, so we want to convert 100 people next month.”
Featured resource: 8-Week Conversion Rate Optimization Planner

You don’t just want 50 more conversions from a webpage. Instead, you want 50 more conversions for every X amount of people who visit it. (This is your conversion rate — the percentage of people who convert on your website based on how many people have touched it).
To provide a better understanding of where you stand at any point in time in regards to conversion rate, here are three commonly-used formulas your business can use to understand, analyze, and improve.
CRO Calculation 1: Conversion Rate
As we mentioned earlier, to calculate conversion rate, you must divide your number of conversions (or leads generated) by your number of visitors (or web traffic), and then multiply that number by 100 to get the percentage.
Leads Generated ÷ Website Traffic x 100 = Conversion Rate %
CRO Calculation 2: Number of Net New Customers
To calculate your number of net new customers, you’ll want to divide your net revenue goal by your average sales price.
New Revenue Goal ÷ Average Sales Price = Number of New Customers
CRO Calculation 3: Lead Goal
And lastly, to calculate your lead goal, take your number of new customers and divide it by your lead-to-customer close rate (which is your total number of leads divided by total number of customers) percentage.
Number of New Customers ÷ Lead-to-Customer Close Rate % = Lead Goal
Here’s an example of these formulas in action:
If your website has 10,000 visitors per month that generate 100 leads — and subsequently, 10 customers each month — the website visitor-to-lead conversion rate would be 1%.
What if you wanted to generate 20 customers each month?
You could try to get 20,000 visitors to your website and hope that the quality of your traffic doesn’t decrease — although, that’s a risk you’ll likely want to avoid. Rather, you could obtain more leads from your existing traffic by optimizing your conversion rate. This is less risky and is more likely to produce better results for your bottom line.
For instance, if you increase your conversion rate from 1% to 2%, you’d double your leads and your customers. The following table is proof of this — you can see the positive impact that results from increasing your website’s conversion rate:
|
COMPANY |
A |
B |
C |
|
Monthly Site Traffic |
10,000 |
10,000 |
10,000 |
|
Conversion Rate |
1% |
2% |
3% |
|
Leads Generated |
100 |
200 |
300 |
|
New Customers |
10 |
20 |
30 |
Notice the drastic increases in the number of leads generated and net new customers when you boost your conversion rate.
Not only that, but it’s clear that generating more website traffic isn’t necessarily the right approach when trying to improve your conversion rate — in fact, this chart shows you that you can grow your business substantially without increasing traffic at all.
Hard to believe? Think about this way: Pretend you were trying to fill up a leaky bucket. If you pour more water into the bucket, you won’t fix the root cause of the issue — instead, you’ll end up with a lot of water that’s wasted (not to mention, a bucket that will never fill up all the way).
Are you ready to take the first steps toward CRO at your company? Review the strategies below and start experimenting.
Conversion Rate Optimization Strategies
Here are some applicable conversion rate optimization marketing strategies to test and implement at your company.
1. Create text-based CTAs within blog posts.
While it’s considered a best practice to include CTAs in a blog post, they sometimes fail to entice visitors to take your desired course of action. Why?
Banner blindness is a real phenomenon related to people becoming accustomed to ignoring banner-like information on websites. This lack of attention coupled with the fact site visitors don’t always read all the way to the bottom of a blog post (rather, they “snack” on content), means a different approach is required.
That’s where the text-based CTA comes in handy. Here at HubSpot, we ran a test with text-based CTAs — a standalone line of text linked to a landing page and styled as an H3 or an H4 — to see if they would convert more traffic into leads than regular CTAs located at the bottom of a web page.
In HubSpot’s limited test of 10 blog posts, regular end-of-post banner CTAs contributed an average of just 6% of leads that the blog posts generated, whereas up to 93% of a post’s leads came from the anchor-text CTA alone.
2. Add lead flows on your blog.
A lead flow is another conversion rate optimization element you can include on your site. Lead flows are high-converting pop-ups designed to attract attention and offer value.
You can select from a slide-in box, drop-down banner, or pop-up box, depending on your offer. We experimented with the slide-in box on the HubSpot Blog back in 2016 and it achieved a 192% higher clickthrough rate and 27% more submissions than a regular CTA at the bottom of a blog post.
3. Run tests on your landing pages.
Landing pages are an important part of the modern marketer’s toolkit and, as mentioned earlier, integral to conversion rate optimization.
That’s because a landing page is where a website visitor becomes a lead or an existing lead engages more deeply with your brand. To optimize a landing page, run A/B tests to identify your best design and content features for audience members.
For instance, with A/B testing you can quickly and easily test different versions of your website copy, content offers, images, form questions, and web pages to determine what your target audience and leads respond to best.
Thanks to A/B testing, China Expat Health was able to increase their lead conversion rate by 79%. One of the most impactful changes was swapping out the headline “Health Insurance in China” for “Save Up to 32% on Your Health Insurance in China,” which immediately conveyed a value proposition to visitors. This proposition was then supported by customer testimonials.
Get everything you need to start effectively A/B Testing your website today.
4. Help leads to immediately become a marketing-qualified lead.
Sometimes visitors want to get right down to business, skip parts of the typical buyer’s journey, and immediately speak with a sales rep (rather than be nurtured).
There are specific actions you should encourage these high-intent visitors to complete so they can easily become marketing qualified leads (MQLs) — and they can take action through a combination of thoughtfully designed web pages, compelling and clear copy, and smart CTAs.
For instance, at HubSpot, we discovered that visitors who sign up for product demos convert at higher rates than visitors who sign up for free product trials. So, we optimized our website and conversion paths for people booking demos or meetings with a sales rep.
Admittedly, this depends on your product and sales process, but our best advice is to run a series of tests to find out what generates the most customers. Then, optimize for that process. The key here is to look for ways to remove friction from your sales process.
5. Build workflows to enable your team.
There are a number of automated workflows you can create to enable your team with the help of marketing automation software.
For example, with marketing automation, it’s possible to send automatic emails with workflows. Then, leads can book meetings with reps in one click. Meanwhile, reps receive notifications when leads take high-intent actions such as view the pricing page on your website.
Or, if you work in ecommerce, you can send an email to people who abandon their shopping cart as a reminder. According to research from Moosend, abandoned cart emails can be very effective. They have a high open rate of 45%. Of the emails that are opened, 21% are clicked. Half of the people who clicked make a purchase.
Here’s an example of an abandoned cart email by the Dollar Shave Club.

6. Add messages to high-converting web pages.
Use live chat software to chat with your website visitors in real-time and offer support and guidance as needed. To increase conversions, add these messaging features to your high-performing web pages — such as your pricing and product pages — so leads get the information they want in real-time.
You can also make your messaging and chat bots action-based. For example, if someone has spent more than a minute on the page, you may want to automatically offer to help and answer any questions they may have (again, a live chat tool, like HubSpot, makes this easy).
7. Optimize high-performing blog posts.
Again, publishing blog articles opens the door to a big opportunity for conversions. Even more so if you already have existing blog content on your site — in fact, at HubSpot, the majority of our monthly blog views and leads come from posts published over a month ago.
To get started optimizing your blog content, identify your posts with the highest levels of web traffic but low conversion rates. (Possible causes of this issue may be related to SEO, the content offer you are promoting, or your CTA.)
In one instance, we at HubSpot added an inbound press release template offer to a blog post about press releases — as a result, we saw conversions for that post increase by 240%.
Additionally, look at your blog posts with high conversion rates. You want to drive more qualified website traffic to those posts and you can do so by optimizing the content for the search engine results page (SERP) or updating it as needed to ensure it’s fresh and relevant.
8. Leverage retargeting to re-engage website visitors.
It doesn’t matter what your key conversion metric is: The cold, hard truth is that most people on your website don’t take the action you want them to. By leveraging retargeting on Facebook and other platforms, you can re-engage people who left your website.
Retargeting works by tracking visitors to your website and serving them online ads as they visit other sites around the web. This is particularly impactful when you retarget people who visited your highest-converting web pages.
The normal inbound rules still apply here — you need well-crafted copy, engaging visuals, and a compelling offer for retargeting to work.
Take United’s retargeting campaign for example. Using insights from previous ad campaigns, United focused on reaching people who had viewed their ads and were already considering booking a vacation. To this select audience, they promoted a 15-second video ending in a call-to-action.
If viewers felt inspired enough to book their vacation, all they had to do was click on the CTA to be taken straight to the United website. This proved to be a huge success. In just one month, 52% of conversions attributed to YouTube were click-through conversions directly from the ad.
(If you’re a HubSpot customer, take a look at how the AdRoll integration can improve your conversion efforts.)
Now, let’s talk about how you can get started with CRO at your company.
How to Get Started with Conversion Rate Optimization (CRO)
Maybe you’re wondering, “Where do I start with CRO?”
Enter: PIE framework. Before starting a CRO project, prioritize your efforts by ranking each element on Potential, Importance, and Ease.
Use the PIE framework to answer the following questions for every strategy outlined in the previous section. Then, assign a score between one and 10 (one being the lowest and 10 being the highest) to each strategy.
- How much total improvement can this project offer?
- How valuable will this improvement be?
- How complicated or difficult will it be to implement this improvement?
Once you’ve assigned a score for each strategy, add up the numbers and divide the total by three — this gives a score that shows what project will have the greatest impact. Then, work on the projects with the highest scores first.
The PIE framework isn’t perfect, but it’s easy to understand, systematic, and offers a starting point for CRO collaboration and communication among colleagues.
We’ve covered a lot about conversion rate optimization, but not everything. If you still have questions, then check out the answers to some of the most frequently asked questions below.
What is the purpose of a conversion rate optimization?
The purpose of conversion rate optimization (CRO) is to improve the likelihood of visitors taking a desired action on a webpage.
What is a CRO strategy?
A CRO strategy is designed to convert more of your visitors into paying customers. While each CRO strategy will vary company by company, the general steps will not. You have to identify key metrics and your target audience. Then you have to collect user feedback and other data to decide what you’re going to test. Finally, you’ll run A/B tests to improve different pages and parts of your site for conversion.
What are CRO tools?
CRO tools are designed to simplify or automate the process of optimizing your conversion rate. They might help with lead capture, research, analytics, mouse tracking and heat maps, feedback, or running experiments.
What is a CRO test?
A CRO test involves adding, re-arranging, and redesigning elements on your website in order to maximize your conversions. Different CRO tests might focus on optimizing the copy, design, or placement of your CTAs, or the length of your headlines, among other elements.
Begin Using CRO
There are many best practices out there when it comes to CRO but, ultimately, you need to find out what your customers respond to, and what drives results for your business.
Keep these three follow-up actions in mind when getting started with CRO today:
- Use the three formulas to start the CRO conversation.
- Experiment with CRO strategies to discover what works for your business.
- Leverage the PIE framework to help prioritize your strategy.
Editor’s note: This post was originally published in January 2019 and has been updated for comprehensiveness.

Features vs. Benefits: A Crash Course on Proper Messaging
Great marketing copy doesn’t just sell a product, it builds a connection with the audience. The beauty of proper messaging is that by communicating either the benefits or features of your product or service, you can tell customers what they need to know in a clever, concise way.
Without knowing when you should use benefits versus features in your content (and the difference between the two), you could run into poor, or ineffective messaging. We’ll dig into when it’s best to use each of these options below.

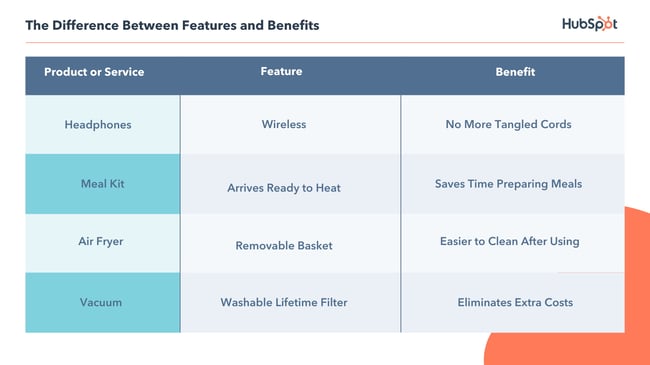
Both terms are useful and give customers important information they’ll need during their buyer’s journey, such as design, price, and real-world relevance. Ultimately, the benefits of having a product or service are what make consumers purchase, which means it is often best to highlight benefits over features when writing marketing copy. This paints a picture of what life will look like after the customer purchases the product or service. If you do decide to highlight features, you’ll want to make sure consumers understand how they’ll benefit from those features.
Take this ad from Qordoba, an IT company that utilizes AI to help organizations manage communication.
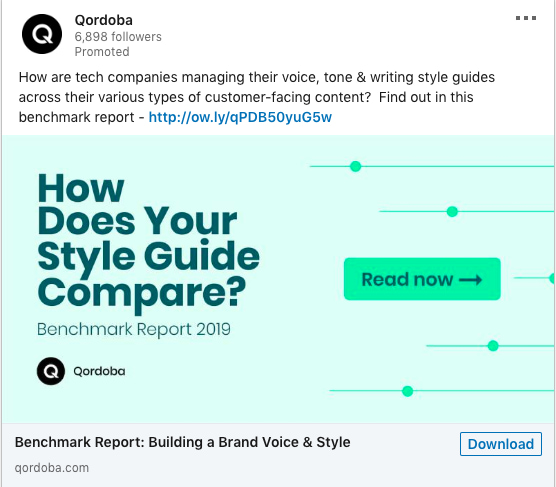
The company’s ad caught my eye by communicating the benefits reading the report will have when it comes to customer-facing content, which does interest me.
‘How are tech companies managing their voice, tone, & writing style guides across their various types of customer-facing content?’
After reading this caption, I knew exactly what I would gain from this product, and why it was worth my time.
Let’s look at another example of features and benefits at work. This is a marketing email I got this morning from Marriott hotels:
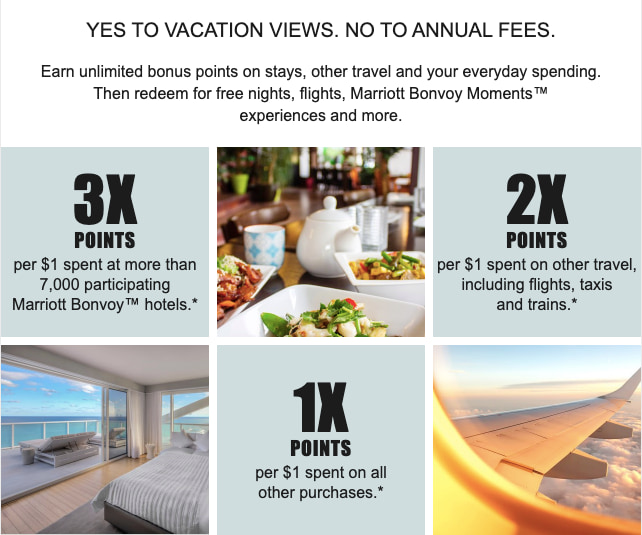
This ad starts with the benefits of becoming a Marriott member — ‘yes to vacation views’ — while the rest of it explains the features of the program, including ‘no annual fees’ and ‘3X points per $1 spent at more than 7,000 Marriott locations.
Emphasizing that Marriott members enjoy free perks, then expanding on how this is done (by earning rewards points), is a really effective way to explain the benefits and features of the rewards membership.
This is relatively straightforward — but what if you have multiple products being sold at once?
If you’re working with more than one campaign, the answer to whether you should use features versus benefits ” can change depending on the product or service being marketed.
How to Tell When it’s Best to Use Features or Benefits
If you’re unsure whether you should list features or benefits for a given product, consider this — features are an optimal choice in a saturated market. For instance, a small business making a meal-delivery kit would have some competition (such as HelloFresh or Home Chef), meaning they would have to communicate their service’s competitive advantage by naming one-of-a-kind features. This would include price, dietary restrictions, menu configuration, etc.
Benefits, on the other hand, are the way to go if your brand exists within a niche market or a “drier” topic. You’ll want to answer the following questions with your benefits:
- How does it work?
- How does it make a consumer’s life easier?
To resonate well with an audience who perhaps haven’t heard of your product or service before, try to include benefits in your demos, ebooks, and other marketing content.
Now that we’re more clear on features vs. benefits, let’s explore some examples to see both in-action.
Examples of Features and Benefits
For the visual learners like myself, below are some real-world examples of how to work features or benefits into ads, product pages, email, or any other marketing materials:
1. Calm (features)
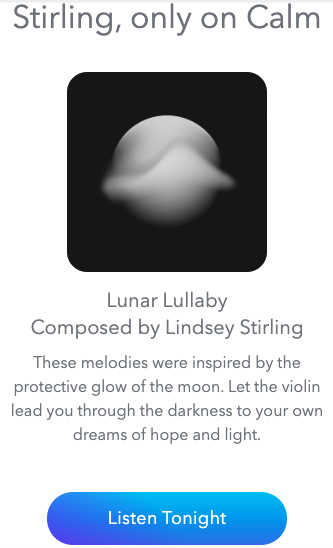
Why This Is a Feature: Calm used singer Lindsey Stirling’s material as an exclusive offer only available to app users. It’s a unique attribute the audience can’t get anywhere else.
This email about an exclusive deal made me excited, which is another way highlighting features in your marketing material can be beneficial — to build excitement. Here’s how sleep meditation company Calm did it:
Framing singer/songwriter Lindsey Stirling‘s work as an exclusive feature improves customer relationships and makes them feel special. Opening this email made me think about how glad I am to be an email subscriber (especially since I grew up watching Stirling on YouTube) because of cool offers like this.
If you’re running a promotion or want to improve customer relationships, consider sending them an offer that reminds customers of your product or service’s unique features.
2. HubSpot Academy (benefits)
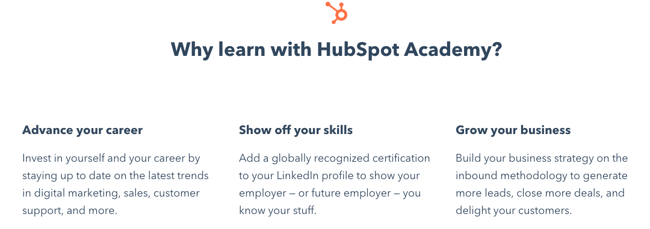
Why these are benefits: HubSpot Academy gives customers the opportunity to invest in themselves by learning new skills and getting certifications they can display on LinkedIn – all things that will help them grow their business and individual careers.
In this product page for HubSpot Academy’s social media course, three benefits are listed at the bottom, so prospects can see how completing this course will be worth their time.
Benefits don’t always have to be short phrases – in fact, on product pages, more is often better. On web pages, it’s critical you give your customers the helpful information they need — including cost, structure, time required to complete, and a description on how your products or services’ benefits outweigh the benefits of competitors’.
3. OrganiGrowHairCo (benefits)
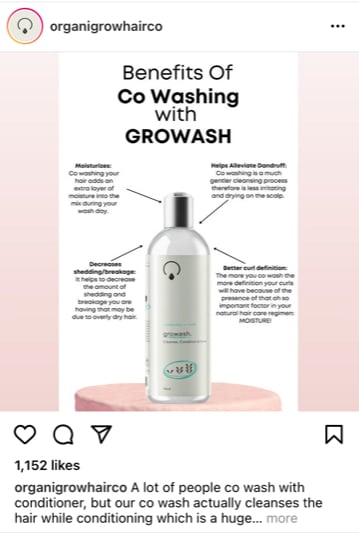
Why these are benefits: This ad effectively communicates the reasons why OrganiGro’s co-wash product is better than typical conditioners. It alleviates dandruff, decreases breakage, and cleanses – all things that will aid a buyer’s hair health.
If you’re team natural hair, you’ve more than likely stumbled upon the heaps of content stressing the benefits of co-washing (using conditioner only) as a way to avoid overwashing your hair with regular shampoo. Since shampoo often strips the hair as it cleanses, co-washing is seen as a method to replenish moisture between washes.
In the Instagram ad above, OrganiGrow clearly makes the case for why its co-wash formula is superior to the competition as it’s designed to cleanse while moisturizing, aiding the customer’s overall hair health.
4. Arcadia (benefits)
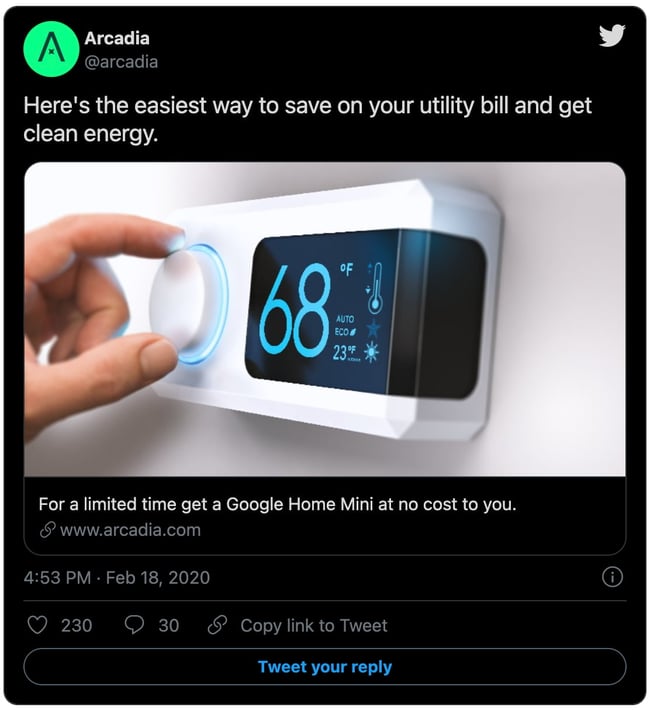
Why this is a benefit: The ad draws the audience in immediately with the potential to save on their utility bill. Who doesn’t want to save money? The promotion also throws in a Google Home mini, which further incentivizes the customer to buy.
Can you spot the benefits energy company Arcadia used in this promoted tweet?
If you chose the entire tweet, you’re right!
Almost every word helps describe to the reader why they should open the linked website. As a consumer, I would think, “Well, what is the easiest way to save on my energy bill at no cost? That thing is sky high!”
Words that help the consumer are going to resonate with those who are just mindlessly scrolling and not necessarily looking to buy anything. To build interest in their promotion, Arcadia’s use of benefits to entice prospective customers was a good choice on Twitter.
Impress a scroller by using benefits in marketing messages. You have just a few seconds to leave a mark.
5. Airtable (features)
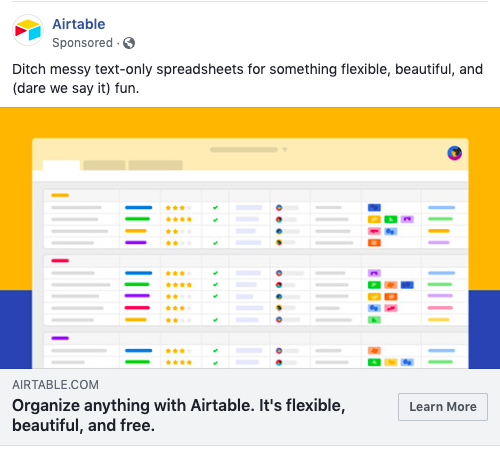
Why this is a feature: By playing up its fun colors and project management attributes, Airtable entices viewers to switch from boring spreadsheets. All of its sleek features are on full display in this Facebook ad. How is it better than traditional spreadsheets? It’s ‘flexible, beautiful, and fun.’
Beautiful, descriptive features in this Facebook ad told me exactly what Airtable is and what their software does, despite having no previous knowledge. In less than thirty words, I know that Airtable must be a product or service that makes dull spreadsheets a thing of the past — for free.
6. KeVita (benefits)
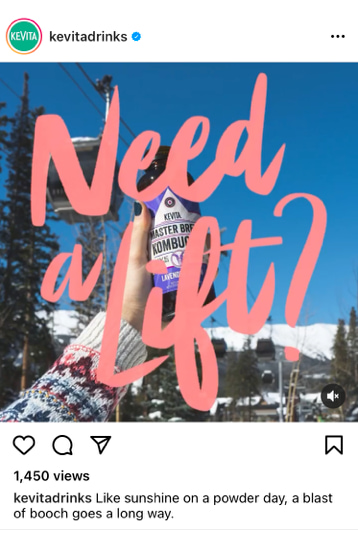
Why this is a benefit: This scenario-based ad positions KeVita kombucha as the perfect natural energy drink, giving customers a boost for whatever activity they partake in, no matter the location.
Kombucha is a fermented tea drink with probiotics, which aid in helping digestion and improving energy levels. So, when marketing their kombucha on Instagram, the KeVita brand wanted to show that kombucha isn’t just a summer drink, contrary to popular belief.
Aesthetically pleasing, benefit-enforcing GIFs like this make visual platforms like Instagram a perfect canvas for an ad that displays benefits.
Animation often stops scrollers — especially animation paired with bright pink text. The backdrop, a ski lift covered in fresh snow, (“powder” to skiers), shows the accessibility of the drink, while the caption alludes to kombucha-fueled energy to get through a long ski trip.
Two benefits that instantly stuck out to me about this post are accessibility and energy. On snowy mountains, those two functions are going to be essential when thinking about snacks. Consider a scenario-based ad if your product is like KeVita, commonly perceived as a summer drink.
7. Dyson (benefits)
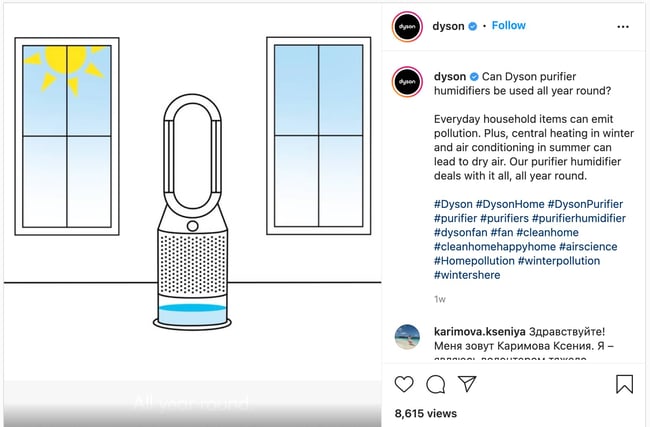 Why this is a benefit: This animated ad focuses on how Dyson’s humidifier removes pollutants from your home to improve air quality. It’s an all-in-one solution for customers combining the perks of a humidifier, air purifier, and fan.
Our homes are full of contaminants, or at least that is what this ad will have you believe. With this ad for its air purification system, Dyson really drives home the “why” for customers using some pretty convincing animation. Microscopic pollutants like dust, pet dander, and others are in our home, wreaking havoc on sensitive respiratory systems. This device will remove them, enabling customers to breathe better. It addresses the problem and clearly explains how their product is a solution to that problem.
Applying Benefits and Features to Your Marketing Strategy
From phones to shampoo, the features or benefits marketing method can be applied to almost anything. When creating copy:
- Determine what you want to say, and which messaging method will be best for that.
- Ask “Does this ad convey features or benefits?”
It’s important to know the distinction between the two so the audience receives clear messaging that explains why they should choose your product or service over the rest.
This article was originally published February 27, 2020 and has been updated for comprehensiveness.

How to Make a QR Code in 7 Easy Steps
Floors. Ceilings. Bathroom stall doors. These are just a few of the places you’ll find QR codes. In fact, they’ve become so ever-present that 45% of shoppers used marketing-related QR codes in 2021.
There’s no denying the popularity and convenience of the QR code. But, what exactly is it? Why is it so popular? How can you create one for your next marketing campaign?
Keep reading to learn the magic behind QR codes and how to create your own.
QR codes typically look like this:
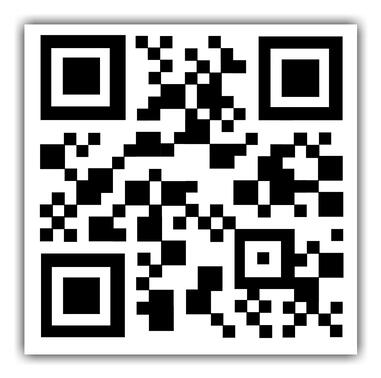
Not every QR code is shaped like a perfect square. Sometimes they have unique patterns, colors, and logos displayed inside. You’ll find them in non-digital spaces like direct mail, signage, billboards, and even TV shows where you can scan the code on the screen using your phone.
Both barcodes and QR codes can be scanned using a laser or a smartphone as long as the tool being used has the correct capabilities of reading vertical and horizontal data. Although most smartphones scan QR codes automatically, many won’t scan barcodes so easily — you’ll need a special app for that.
Does the rise of QR codes mean traditional barcodes are a thing of the past? Of course not. Traditional barcodes are still a common way for businesses to identify consumer packaged goods (CPGs) and manage their product inventory.

However, there are several differences between barcodes and QR codes — both in their uses and their characteristics. Below are three important differences.
QR Codes Are Shaped Differently
Barcodes are typically rectangular, which requires scanning devices to read the barcode’s data horizontally. QR codes are often square-shaped, displaying their data vertically and horizontally.
QR Codes Hold Different Data
QR codes are often used differently than barcodes. Barcodes hold key product information at the point of sale, such as the price and name of the manufacturer. QR codes offer more passive and intangible information, such as location data and URLs to promotions and product landing pages.
QR Codes Hold More Data
Due to a QR code’s square shape, it can hold much more data compared to a barcode. QR codes can hold hundreds of times more encrypted characters than a barcode can.
We learned a little bit about how barcodes and QR codes differ, but how exactly do QR codes work?
Let’s say a consumer sees a QR code. They can take out their mobile device, download a free QR code scanning app, or simply use their phone’s camera, and scan the QR code to gain more information about what they saw.
If you wanted to create, say, a bus stop advertisement promoting your podcast, you could display a QR code on that printed ad that brings people right to your iTunes page when they scan it with their phones. Pretty simple, right?
The QR code creation process is pretty straightforward. Here’s how to get started.
Step 1: Choose the type of content you’re promoting.
First, you’ll need to choose your favorite QR code generator. If you need some ideas, check out our list. For this example, we’re going to use qr-code-generator.com.
Select what type of content you want your QR code to show the user after they scan it. You can choose from one of 10 content types, as shown in the screenshot below.
We’re going to promote a URL that directs users to our podcast.

Step 2: Enter your data in the form that appears.
Once you select the type of content you’re promoting with this QR code, a field or form will appear where you can enter the information that corresponds with your campaign.
If you want your QR code to save contact information, for example, you’ll see a set of fields where you can enter your email address, subject line, and associated message.
To save a link to our podcast, we’ll simply enter the URL in the field that appears, like so:
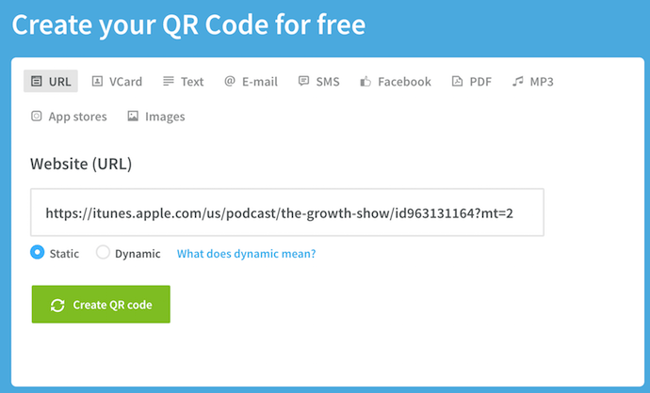
Step 3: Consider downloading a dynamic QR code.
See the option below for “dynamic”? One significant pitfall to making a QR code is that you can’t edit the data it contains once you print it. But with dynamic QR codes, you can edit this data.

With a free membership to QR code generators like qr-code-generator.com, you can print a dynamic QR code, scan it, and pull up an editable form where you can modify the data your visitors will receive when they scan the QR code themselves.
Step 4. Customize your QR code.
The fun part of creating QR codes is customizing the design of the codes to fit your brand. Want your code to look like your logo? Go for it. Want it to reflect your website’s design scheme? No problem.
Using qr-code-generator.com, we can customize our QR code by clicking the button to the top-right, as shown in the screenshot below. Keep in mind not every QR code maker offers this design option — depending on the QR code you’re looking to generate, you might find some tools limited in their functionality.
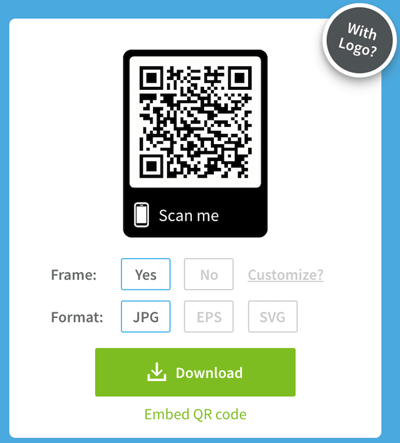
Of course, you can customize your QR code further — adjusting the colors, adding a logo, creating social options, and more.
Keep in mind, however, that some customizations can make it more difficult for QR code scanning apps and smartphone cameras to properly read the code. To cover your bases, it’s a good idea to generate two versions of your QR code — one plain version and another with your preferred design.
Speaking of this…
Step 5: Test the QR code to make sure it scans.
Don’t forget to check to see if the QR code reads correctly, and be sure to try more than one QR code reader. A good place to start is the free tool Google Goggles, which takes a picture and then tells you what link or item it “reads to.”
Another great free tool is the app QR Code Reader, which automatically takes you to whatever it “reads.” Most smartphones these days include a built-in QR code reader, so you should test to make sure your code is readable there, as well.
Step 6: Share and distribute the QR code.
A QR code won’t be able to do its job unless people see it. So make sure you come up with a distribution plan for sharing the code. This could include displaying it in print ads, on clothing, or in physical locations where people can take out their phones to scan it.
Scroll down for more tips on properly displaying a QR code.
Step 7: Track and analyze performance.
Just like any marketing campaign, you should follow up on any collateral or campaigns using QR codes to see whether they’re actually working. How much traffic comes from each specific code? Are people scanning your code but not redeeming their offer once they get to the landing page? Or are they not even compelled enough to scan your QR code in the first place?
Knowing the answers to these questions will help you troubleshoot and adjust poorly performing QR codes to more closely mirror those that work well.
I recommend you include a UTM tracking code on your URL so you can better measure performance— this is particularly important if you use closed-loop marketing analytics or if you perform more in-depth reporting on your campaigns.
How to Use QR Codes (And How Not to)
Now that you see how simple the QR code creation process can be, let’s talk about some best practices that’ll increase the likelihood that your QR code actually gets used.
Display your QR code where it’s convenient for people to scan.
Put QR codes in places where scanning them is easy and there’s enough time for the consumer to scan the code. While you may often see QR codes on billboards and TV commercials, they’re not exactly the most user-friendly locations. It’s a safety hazard to entice people to pull out their phones while driving to scan a code, and a 30-second commercial might not be enough time for someone to find their phone and scan the TV.
Instead, think of places where consumers have the time and ability to scan the code. Places with a strong Wi-Fi connection will help, too.
Optimize the QR’s destination page for mobile devices.
Mobile-optimize the page to which you’re sending people. Consumers will be using their phones when scanning the QR code, so they should arrive at a page with a positive mobile experience.
Include a CTA that prompts people to scan your QR code.
Offer a call-to-action (CTA) with the code — that is to say, tell people what they’re supposed to do when they see the code, and what they’ll receive if they scan it. Not everyone knows exactly what a QR code is, and those that do won’t be motivated to scan it unless they’re sure there’s something worthwhile on the other side.
Don’t limit your QR code to one mobile scanner.
Don’t require a special QR code scanner. Your QR code should be app-agnostic so anyone can scan your code with any reader. A lower barrier to entry makes success more likely for you and the user.
Use your QR code to make someone’s life easier.
Don’t use a QR code just for the sake of using one. For instance, it’s common for marketers to think, “How can I bridge the offline experience with the online experience? Uhhh … QR code!” That’s not wrong, but it’s not always right, either.
If you have content that makes sense to deliver to a mobile user, and you have an appropriate channel to do it (see use #1 at the beginning of this section), it’s more likely your QR code will drive results.
Earlier, we showed you an example of how to create your own QR code, but you don’t have to create it from scratch. A QR code generator can speed up the process (and take a lot of math out of it, too.)
There are tons of QR code generators out there. The best ones give you many customizable options for using your QR code, and compatibility with just about all mobile QR code reader apps.
Other things to look for when choosing a QR code generator are whether you can track and analyze performance in real-time and design a code that’s unique to your brand.
Below are some of our favorite QR code generators that make custom QR codes quick and easy to create.
1. Kaywa
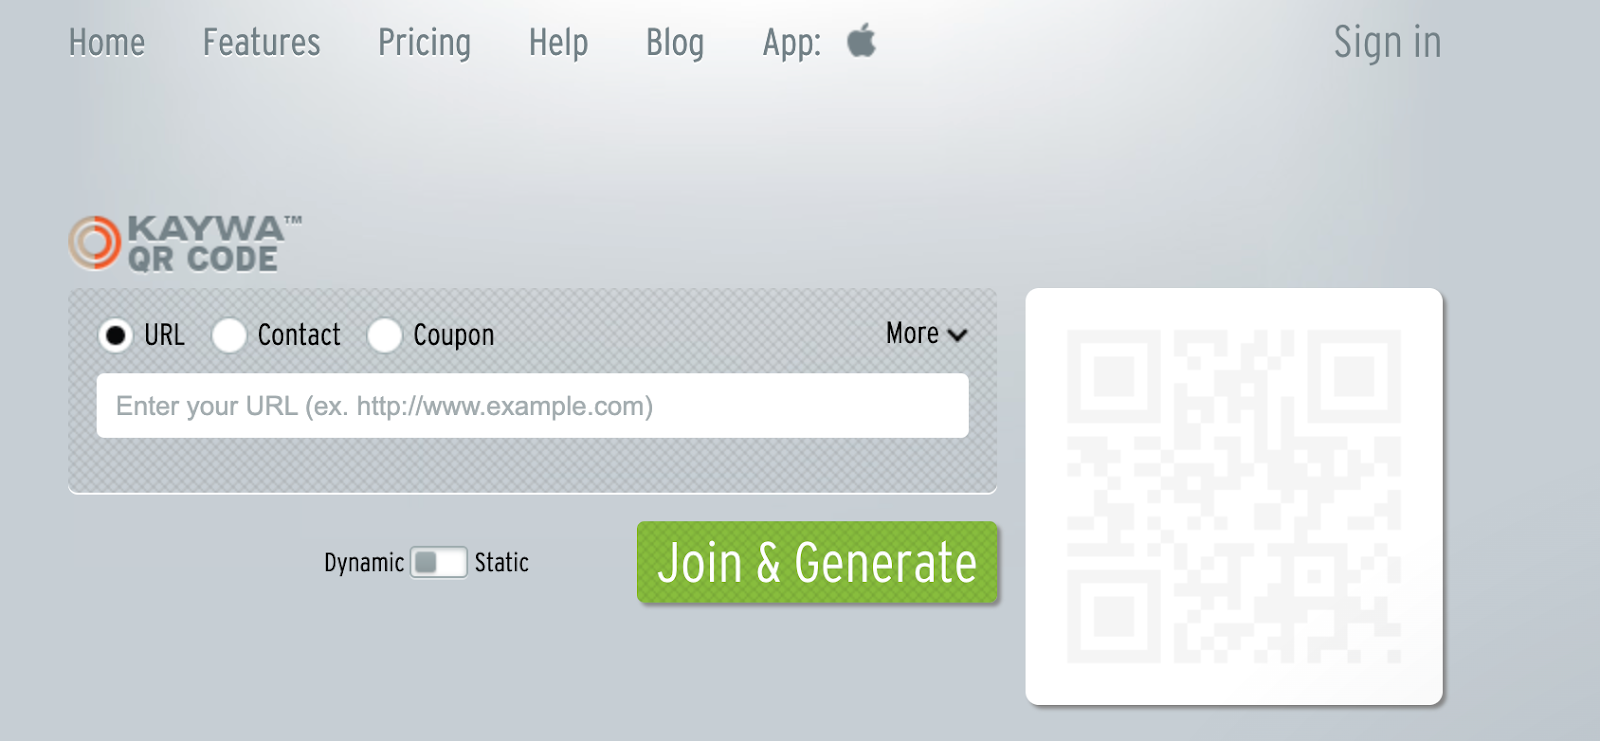
Kaywa is a simple, no-fuss QR code generator that creates basic codes for coupons, URLs, and contact information. Simply enter your information, choose whether you want a dynamic or static code, and generate it.
Why we like it:
If you’re using your QR code as part of a marketing campaign, you can track analytics through Kaywa when you create an account. That way, you’ll have the latest data on who engaged with your code, where they engaged, and when.
2. GOQR.me
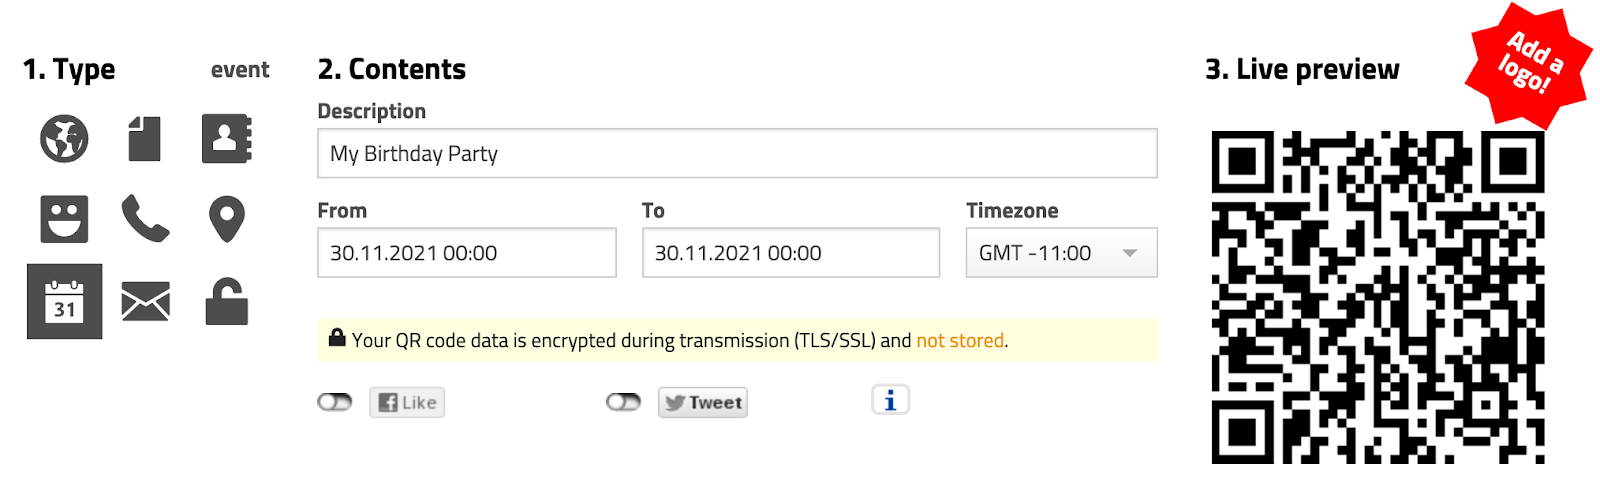
GOQR.me is a simple QR code generator that works best with short URLs, but it can be used to store text, geolocation, and event data. Simply click on the icon that corresponds to your data and fill in the fields.
Why we like it:
You’ll get a live preview of your QR code in real-time which speeds things up if you’re adding finishing touches to your marketing campaign. For an additional fee, you can also have your logo added to your QR code by a GOQR.me-affiliated designer for a custom look.
3. Free QR Code Generator by Shopify
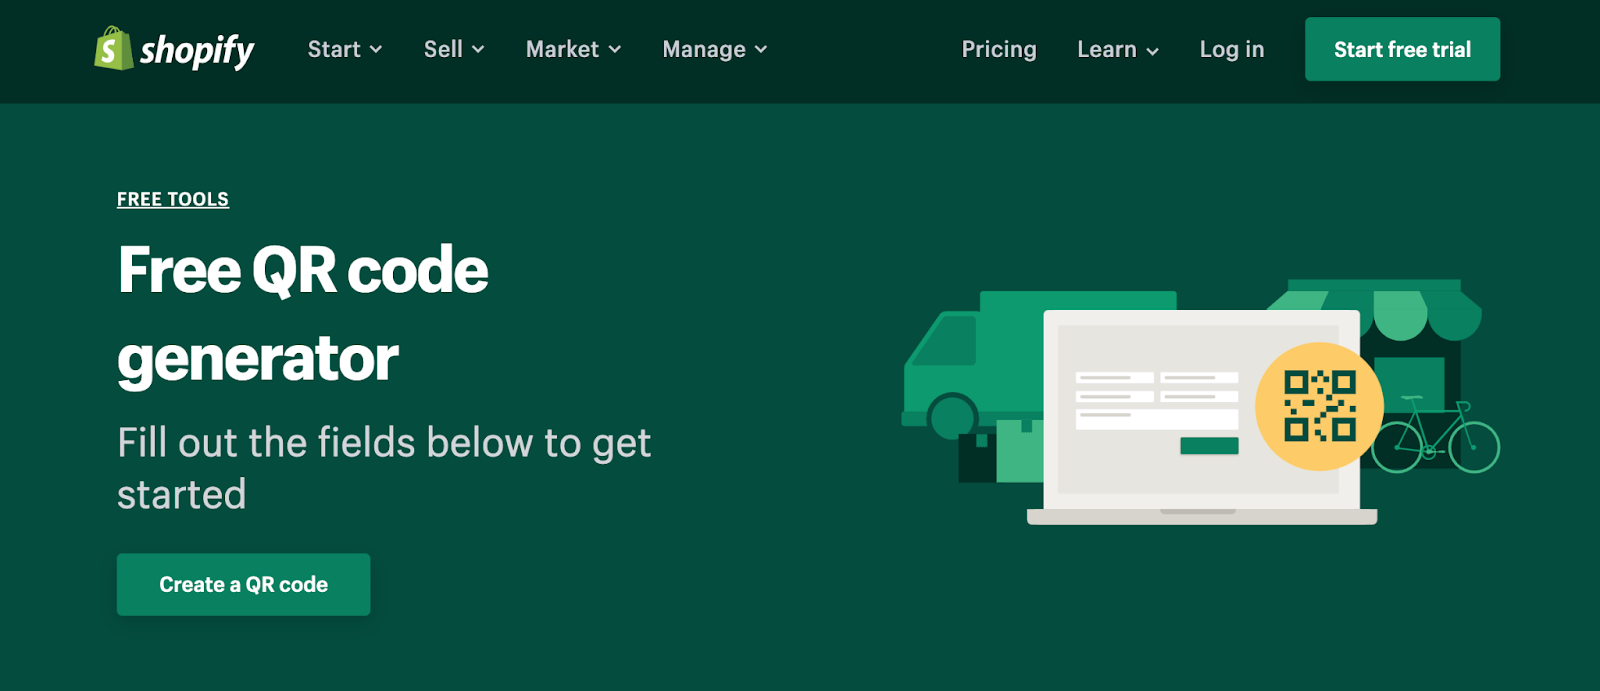
QR codes work best when you have something to offer the people who scan them. And chances are, you’re probably selling to people who buy products online with their phones every day.
Why we like it:
Shopify makes it easy to create a QR code in just one click. The best part is that you don’t have to own a Shopify store to use this free tool.
4. Visualead
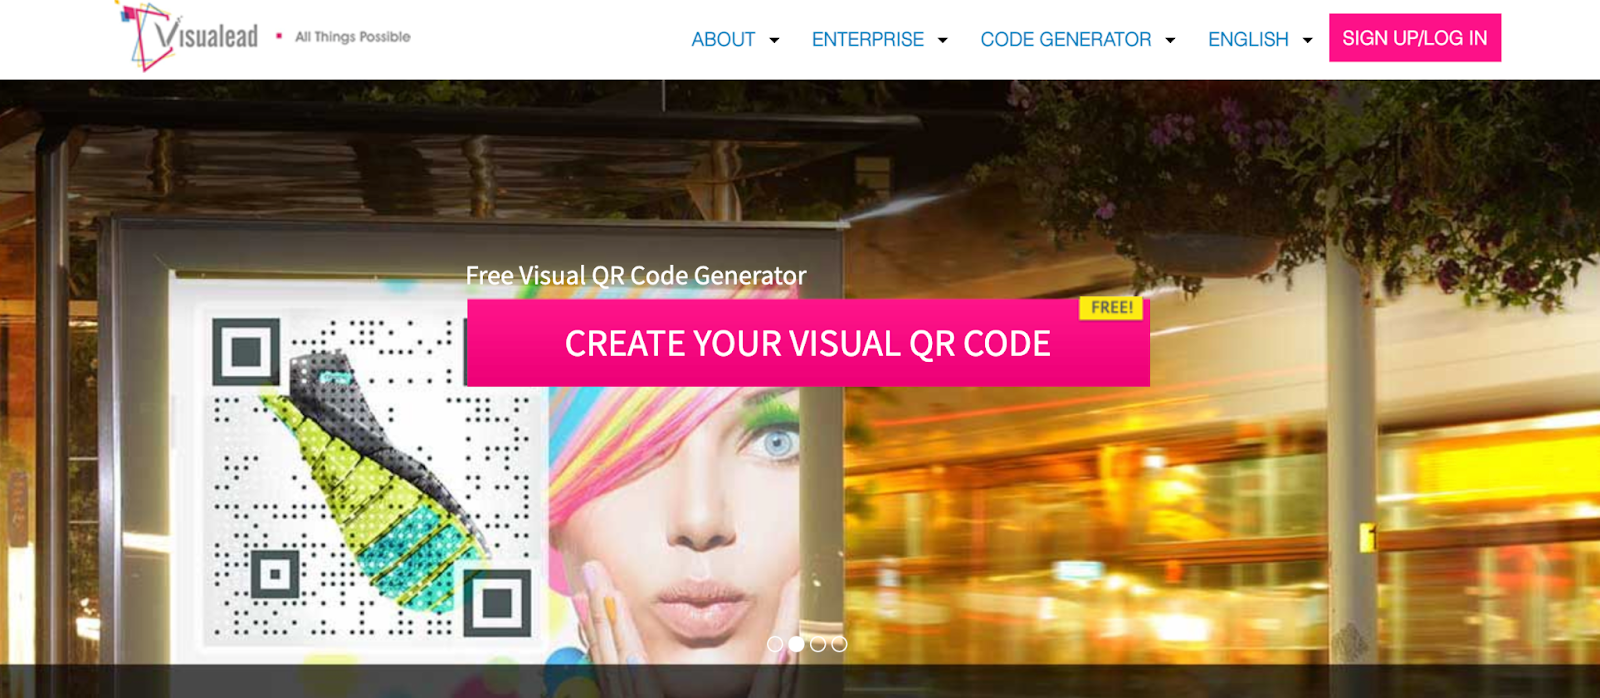
Looking for a one-of-a-kind QR code that suits your brand to a “T”? Visualead is the tool we recommend for the job.
Why we like it:
Visual QR codes are popular and can generate more interest in your users than a typical black and white code can. That means you could see more scans and engagement on this type of QR code.
5. The-qrcode-generator.com
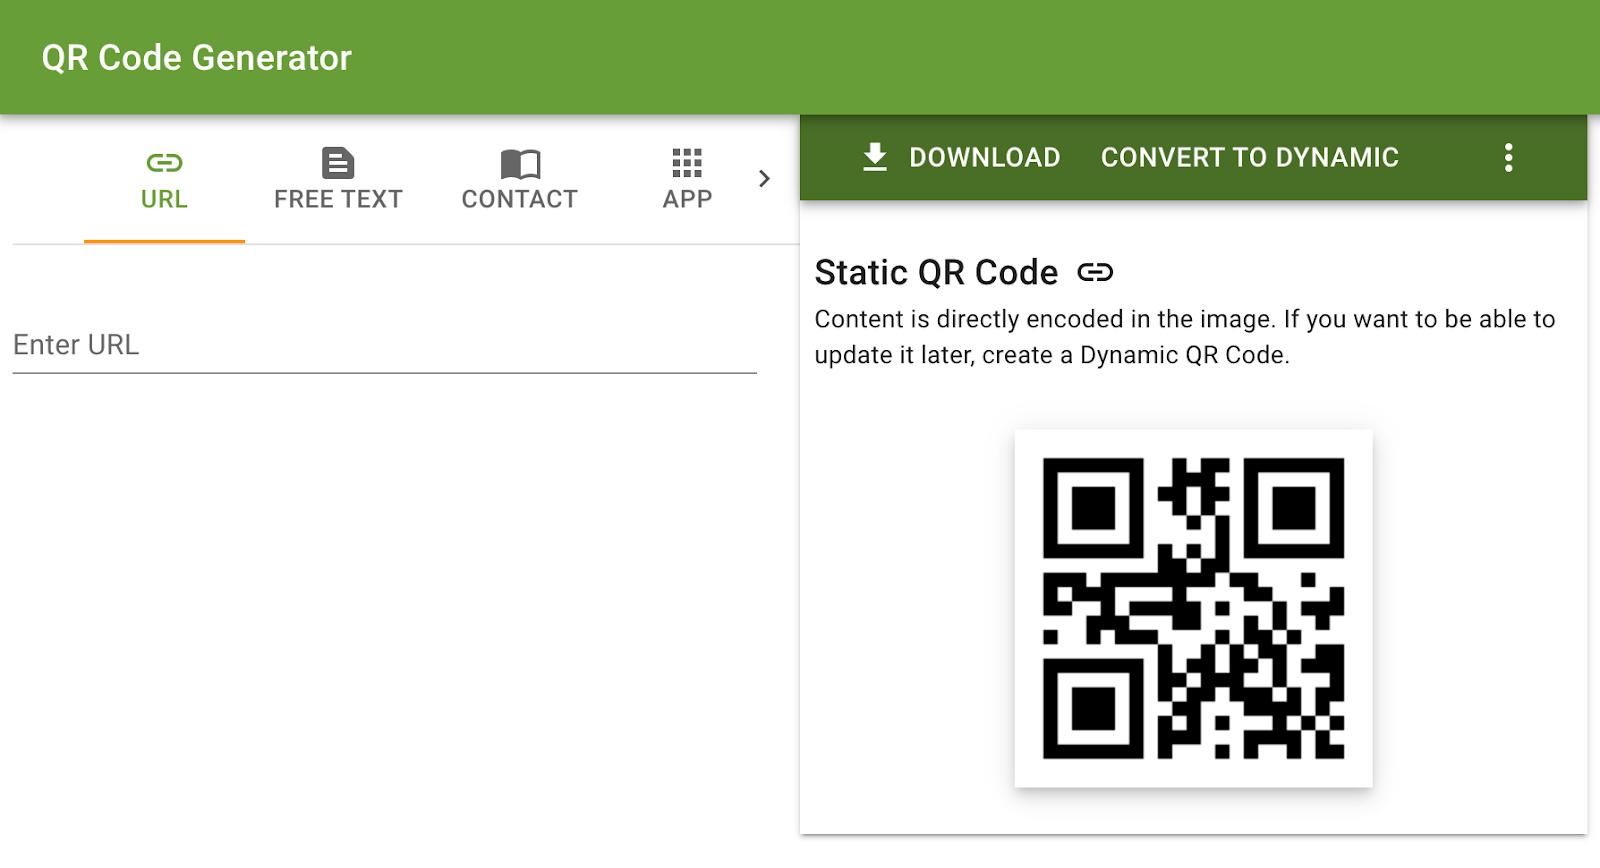
The-qrcode-generator.com features a simple UI that lets you create a unique QR code in minutes. Simply add your URL or the information you want to share and your QR code appears instantly.
Why we like it:
If you’re creating several QR codes at once, you might find it worthwhile to download the Google Chrome extension for a faster workflow.
6. QR Stuff
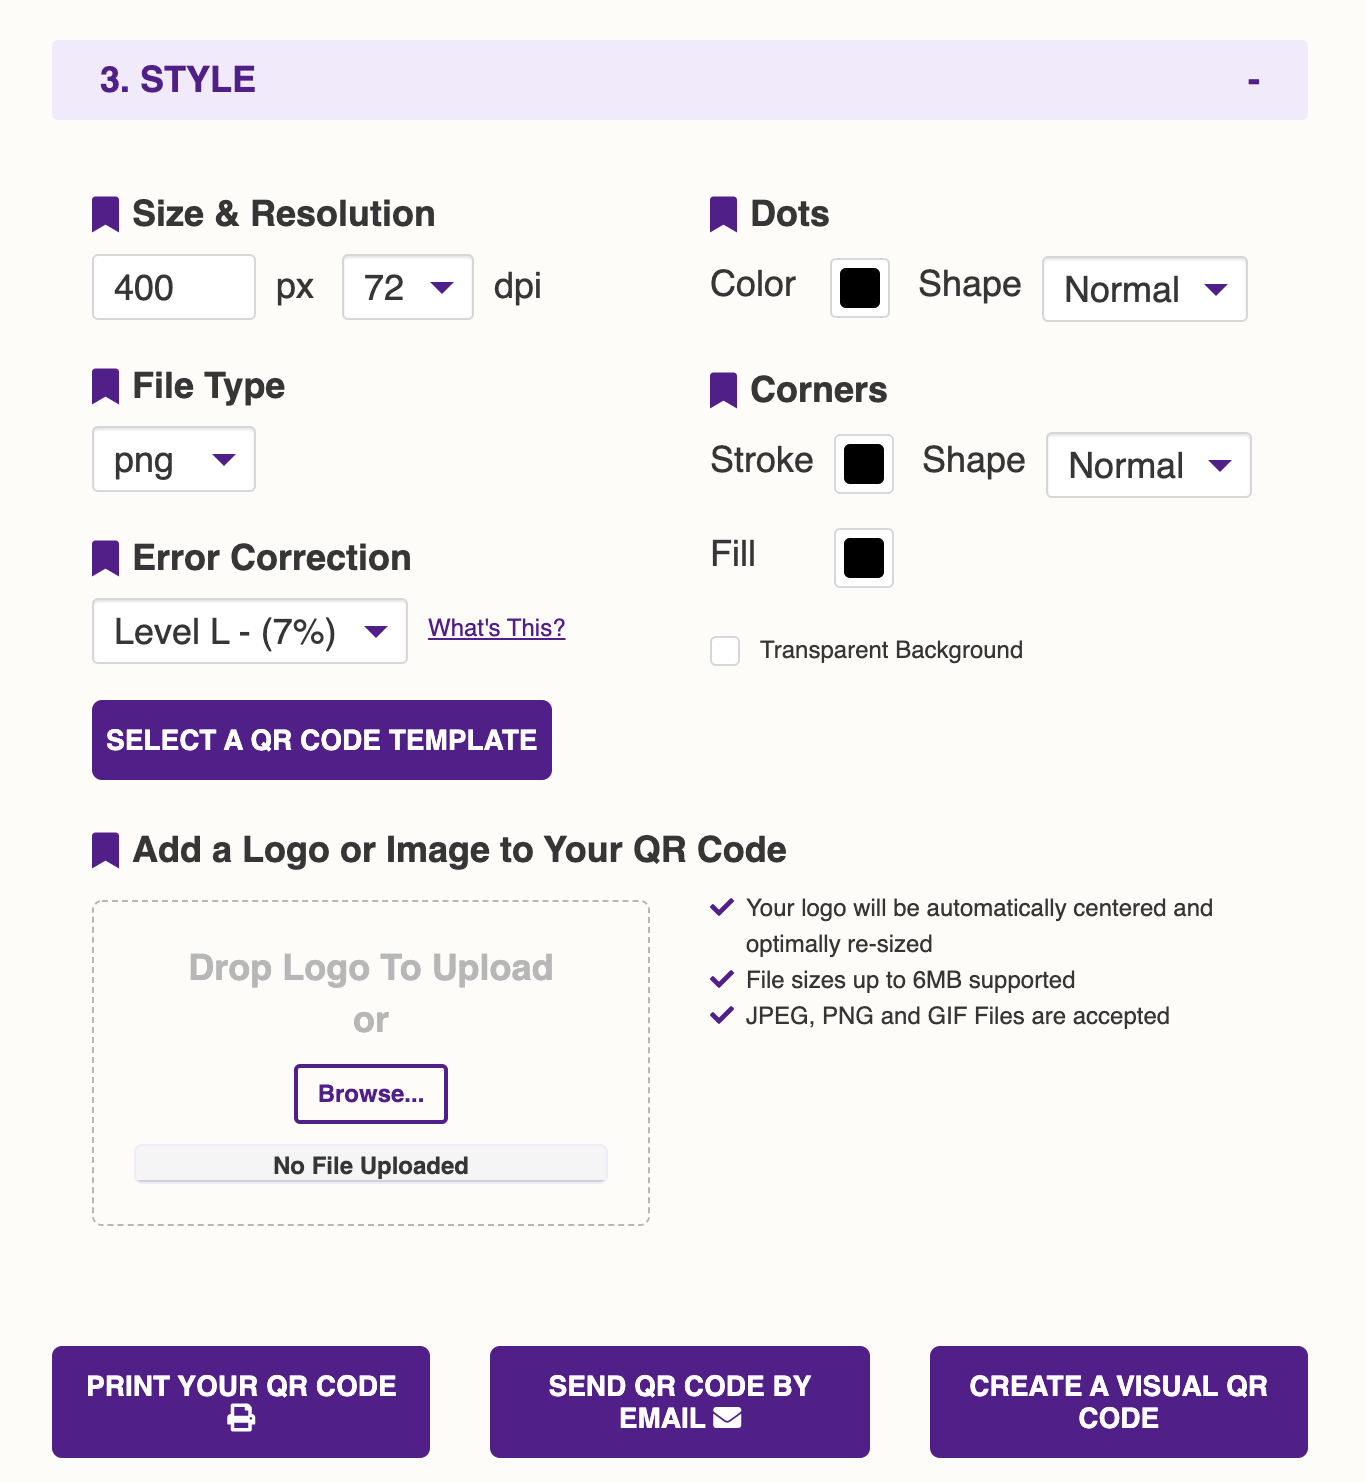
As one of the more robust QR code generators, QR Stuff can create codes for just about any type of data you want to share with the world. YouTube videos, Zoom meeting invitations, and even bitcoin information are supported through this tool.
Why we like it:
In just three steps, you’ll have a free, customizable QR code that will function properly and look great. Plus, there’s no limit to the number of codes you can create.
7. Qr-code-generator.com
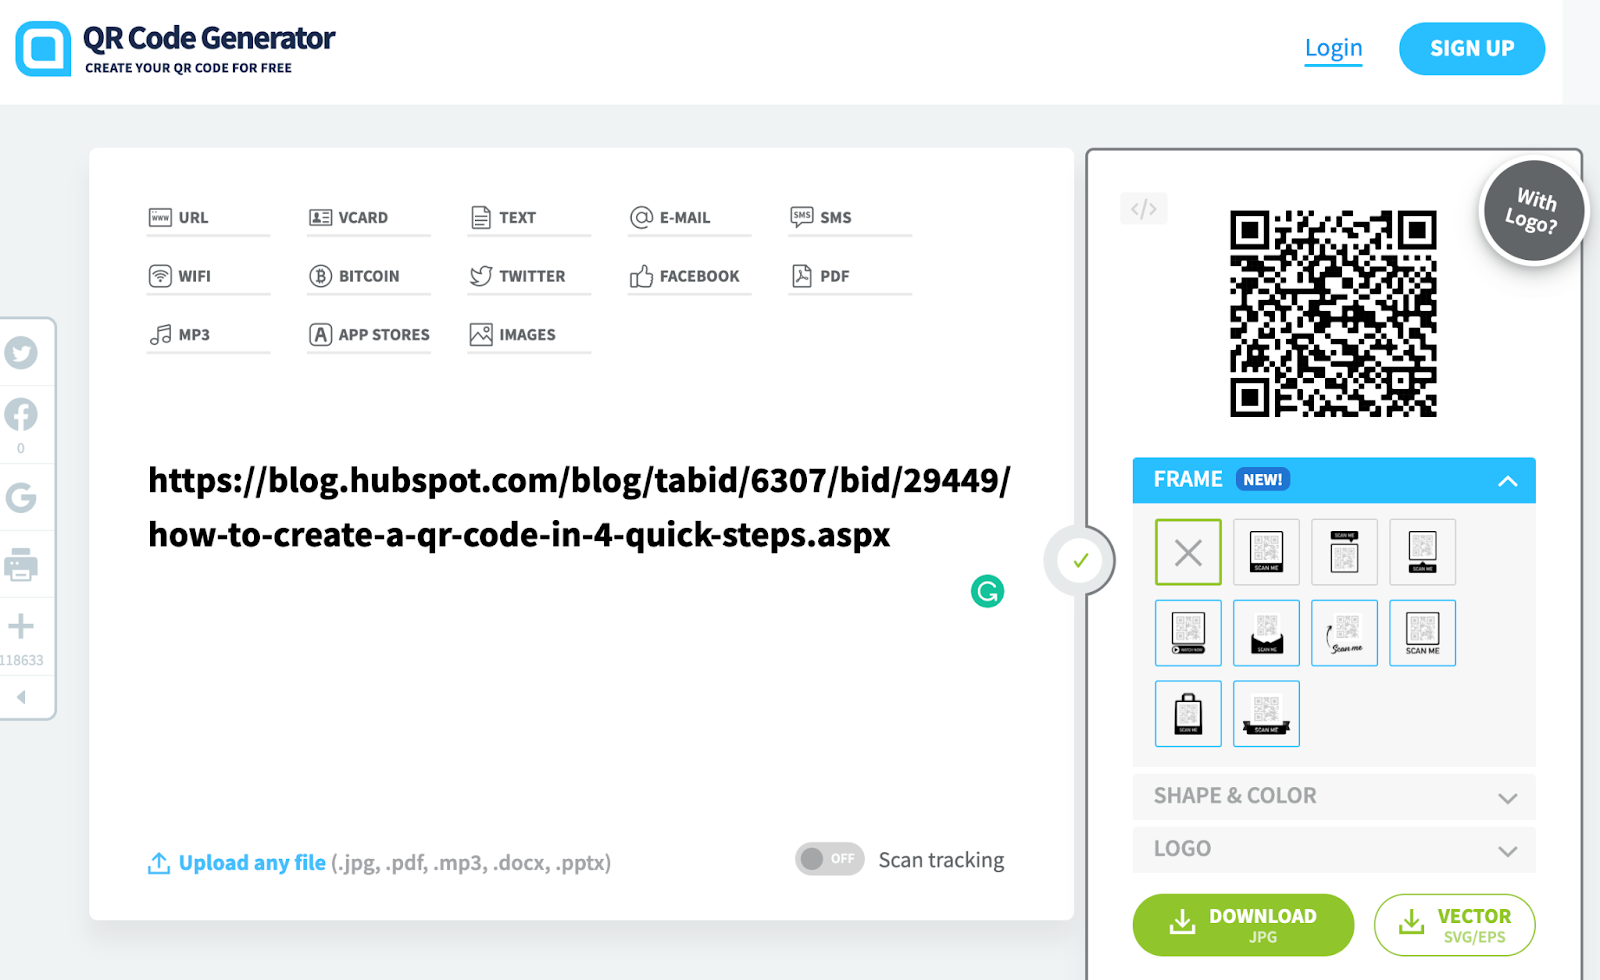
We used this QR code generator in our how-to guide above, and for good reason. Qr-code-generator.com is a simple tool that’s user-friendly for even the least tech-savvy of us. Simply drop your link into the box, and let the generator do all the work.
Why we like it:
QR-code-generator.com is intuitive. It’ll automatically detect the type of URL you’ve added and produce a QR code in seconds.
8. QR Code Monkey
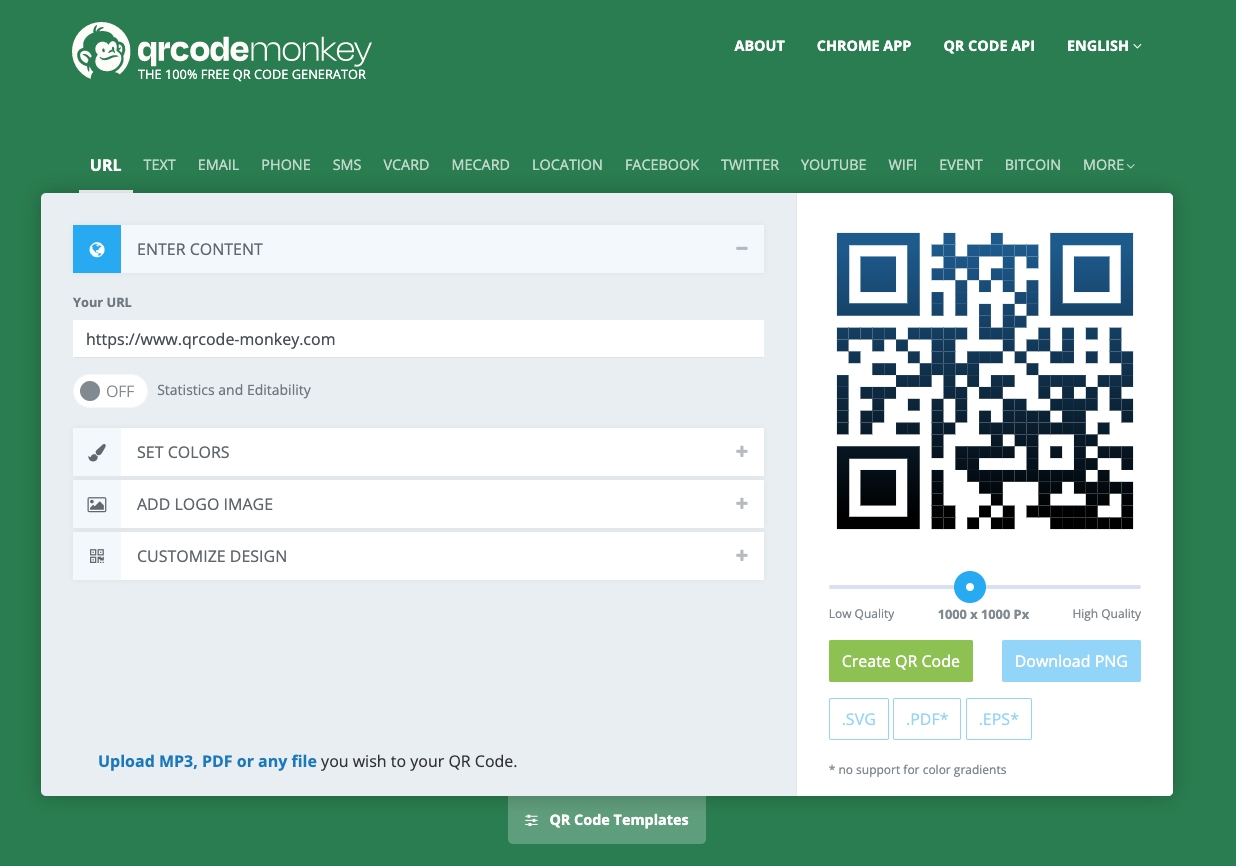
If the way your QR code looks is important to you, but you don’t want to pay extra for a custom design, try QR Code Monkey. Once you add your URL, you can change the color, add a logo, and further customize the pixels in your code at no cost.
Why we like it:
With QR Code Monkey, the design possibilities are virtually limitless. All you need to create a branded QR code is a creative eye and a little patience.
Create Your QR Code Today
Now it’s your turn! You’ve spent enough time scanning QR codes, why not make your own? Follow the steps in this article and use one of the free QR code generators we’ve recommended to put your business, project, or event out there in the real world.
Editor’s note: This post was originally published in January 2021 and has been updated for comprehensiveness.

5 Tips to Create a Linktree for Instagram in No Time
If you use Instagram, you might have seen the phrase “link in bio” before.
This means that someone is directing people to go to their Instagram profile page and click the URL that’s in their bio. Driving people to these links often helps Instagram users generate traffic on different websites, like a YouTube channel or website landing page.
But the native linking option only allows businesses and creators to share one link in an Instagram bio, which can prove challenging if you want to share multiple links with your audience.
In this post, learn how Linktree is a solution to help you share multiple high-quality links with your followers and discover high-quality examples from brands already using the tool.
What is Linktree on Instagram?
On Instagram, a Linktree is a simple link in your bio that leads to a landing page containing multiple links to content relevant to your business, like your website, a video, or even an affiliate discount link.
You may be wondering why using this tool can make a difference on Instagram, and we’ll discuss this below.
Should you use Linktree for marketing on Instagram?
Linktree is helpful for marketing on Instagram because it helps you direct users to multiple different content offerings. So instead of only sharing, say, a link to your website, you can also link to your various social channels, your newest YouTube video, or a recent partnership you launched.
Another common use case on Instagram is if you run multiple campaigns on the platform at once, as your Linktree can contain links relevant to each of the different buyer personas you target.
When considering leveraging Linktree on Instagram, the main factor to consider is that it helps you drive additional traffic to other high-impact sources. If you don’t use a Linktree, you’ll likely be updating your bio every time you want to direct users to a new piece of content, or you link to a website page where users can take additional action.
If driving traffic from Instagram is not a top priority for in-platform marketing, Linktree likely isn’t for you as it does require upkeep to ensure you don’t share so many links that users get overwhelmed by their choices.
If you want to leverage the tool in your Instagram strategy, let’s discuss how you can create one.
How to Create a Linktree for Instagram
1. Navigate to linktr.ee/, select the purple button that says Get Started For Free, and fill out the required contact information to create your account.
2. Follow the on-screen prompts and enter the desired name for your Linktree and a business category that relates to what you offer.
3. Select your preferred business plan, Free or Pro.
The image below shows the differences between the tiers, the most significant being cost (free vs. $6 per month). The pro version also comes with additional customization options and advanced analytics for understanding how users interact with your links.
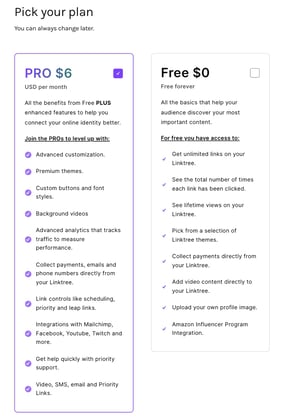
4. After selecting your plan, you should land on the Links page, where there is a purple Add New Links button and a black Explore Links button.
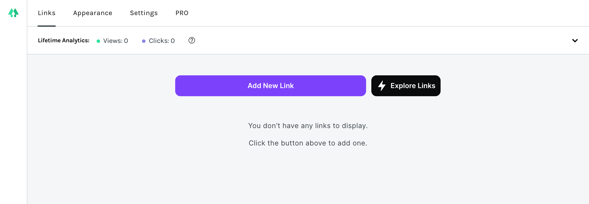
5. To begin adding links to your Linktree, you have two options:
Select Add New Link to add your first new link, and a card (as shown in the image below) will appear where you fill in the relevant Title and URL.
Or, select Explore Link to view various link options that you can add depending on their content, such as music or video links.
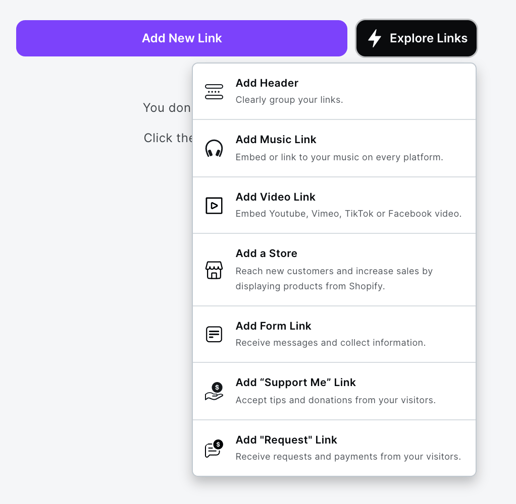
Regardless of the method you choose, your completed link should look similar to the image below.
6. Once you’ve added all of your links, the icons at the bottom of the tiles allow you to make card-specific edits.
If you have a free account, you can upload your own tile thumbnail, gate the link for specific audiences, and view the number of times your tile has been clicked.
With a pro account, you can take all of the free actions, in addition to highlighting specific links as priority links, scheduling when certain links go live, and accessing more in-depth analytics.
7. Add all the relevant links you’re hoping to include in your Linktree. Note that the creation tool shows live previews so you can see what your final product will look like as you work in the phone icon on the right-hand side of your screen, as shown in the image below.
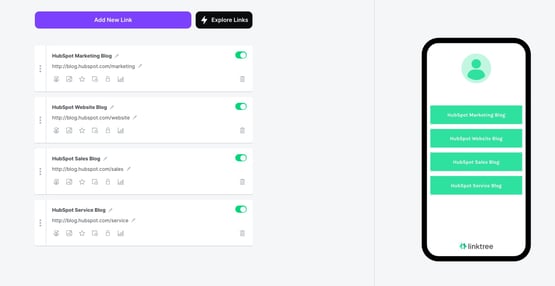
Once you’ve added all your links, you can begin customizations.
8. Select the Appearance tab on your screen’s top left-hand corner.
9. In the profile window, insert relevant information to the links you’re offering, including Profile Title, a brief bio, and a business-relevant image.
10. In the themes window, select a Linktree theme that meets your preferences. The image below is an example of a customized Linktree.
If you have a pro account, you can design your own theme, edit background colors, choose button shapes, and change fonts.
11. Under the settings tab on the top left header, you can further edit your Linktree and add support banners, ecommerce integrations, and social media icons to link to your other social profiles.
If you have a pro account, you can do everything previously mentioned in addition to adding mailing list integrations for email or SMS.
12. Once you’re satisfied with your Linktree and how it looks it’s time to put the link in your Instagram profile.
How to Add Linktree to Instagram
There are multiple ways to add your Linktree link to your Instagram profile. The first way is to:
1. Within Linktree, select the Add Linktree to your socials button in the Share dropdown menu and click Instagram, as shown in the image below.
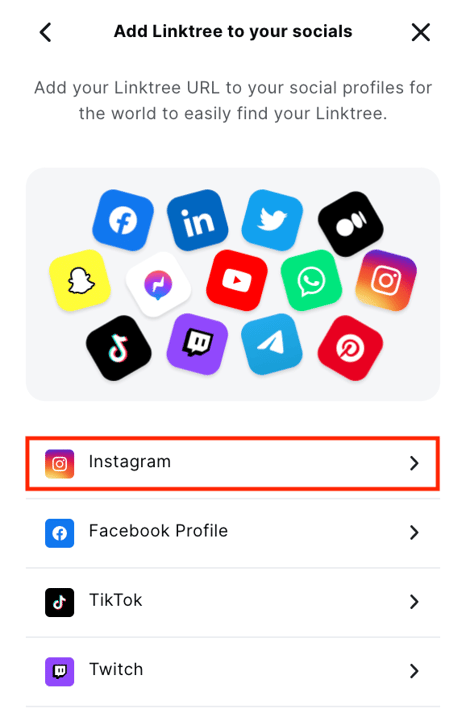
2. You can simply select the Copy button and choose your URL, navigate to Instagram and click Edit Profile, and paste the link into the Website field in your Instagram profile. Or,
3. Click the Go to my Instagram button to be immediately taken to your profile and insert the link there.
Now that you know how to create your Linktree and add it to your Instagram profile let’s go over some examples from brands that already use Linktree on Instagram to meet their business needs.
Instagram Linktree Tips
- Choose relevant names for your links: You want to use a Linktree to easily send your customers to different sites, so ensuring you name each link in a way that clearly says what it’s linking to increases effectiveness.
- Use descriptions wisely: If you use descriptions in your Linktree, ensure that you use them wisely so users can clearly understand your links. Ensure that descriptions aren’t too long either, or you may lose audience attention.
- Only include the most relevant links: While it may be tempting to have as many links as possible, it’s best to only place the most relevant links in your Linktree, so users aren’t overwhelmed with options. For example, if you’re running a new campaign, consider only linking to that one and removing links from older campaigns.
- Use branded tools: if you have a Linktree pro account, use the custom branded tools that will help your users content your Linktree to your brand assets that they already know and recognize, like custom icons and color schemes.
- Continuously monitor your Linktree: Continuously monitor your Linktree to ensure it’s up to date with your current business offerings. This means removing irrelevant links that will distract from what you’re hoping to center and monitoring analytics to see if you need to make any changes to your Linktree strategy.
Instagram Linktree Examples
Black Owned Everything
Black Owned Everything is an online marketplace that champions Black-owned businesses and the products and services they sell. It uses a Linktree on its Instagram profile to call attention to its different offerings, as shown in the image below.
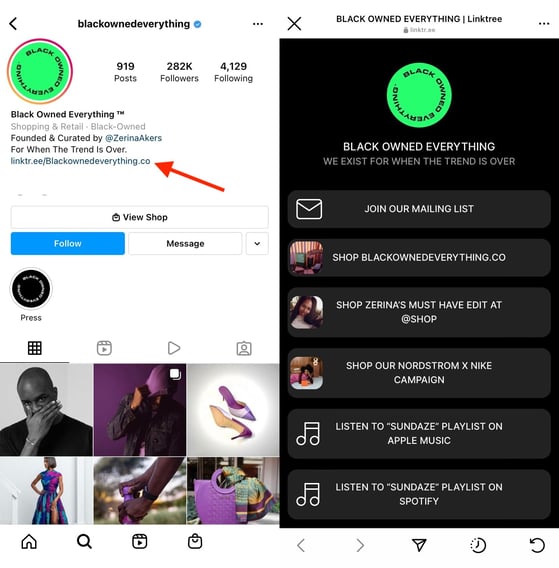
Why We Like This:
Black Owned Everything’s Linktree is successful because it includes links that are clearly labeled for users to understand and find what they are looking for, and there are also very few links. As a result, viewers likely aren’t experiencing decision paralysis as they don’t need to put in additional effort to find what they are looking for.
Patsy’s
Patsy’s is a dessert business based out of Brooklyn, NY. It sells Caribbean rum cakes made from scratch and uses a Linktree to help profile browsers order their cakes and view recent collaborations.
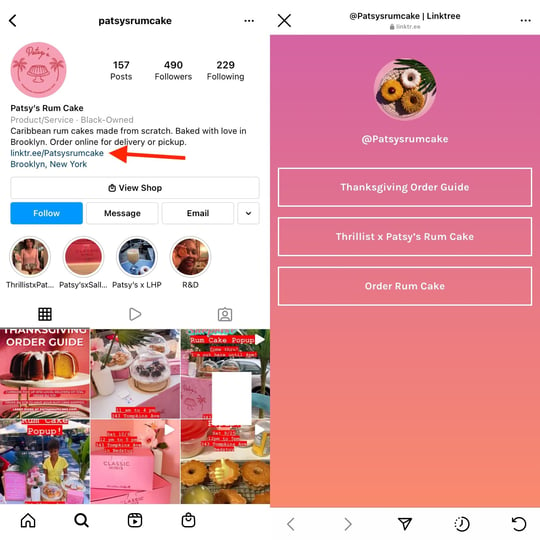
Why We Like This:
Patsy’s uses Linktree as a unique way to call user attention to a holiday ordering guide that walks users through the process of placing an order. While it could simply share this information in an Instagram post, users may not want to read a lengthy caption. Instead, Patsy’s can direct users to the link in its bio to quickly navigate to the ordering landing page.
Sean Garette
Sean Garette is an esthetician that uses Instagram to share helpful content with their audience. They also have a branded Linktree in their bio where they share links to recent collaborations and partnership discount links.
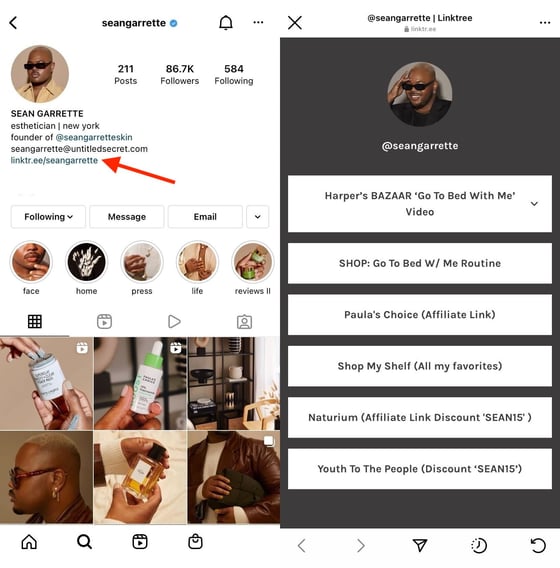
Why We Like This:
Sean Garrette shows us the value of using a Linktree to plug partnerships with other businesses.
You can always post about the partnerships you have on Instagram, but if they’re long-standing, people might forget they exist. You can place affiliate links in your Linktree to remind users that your partnerships are still running and, if you successfully drive users to your Linktree, all of your traffic will come across these links.
Golde
Golde is a business that sells superfood and wellness products. It uses Instagram to provide educational content and product photos and has a branded Linktree in its Instagram bio.
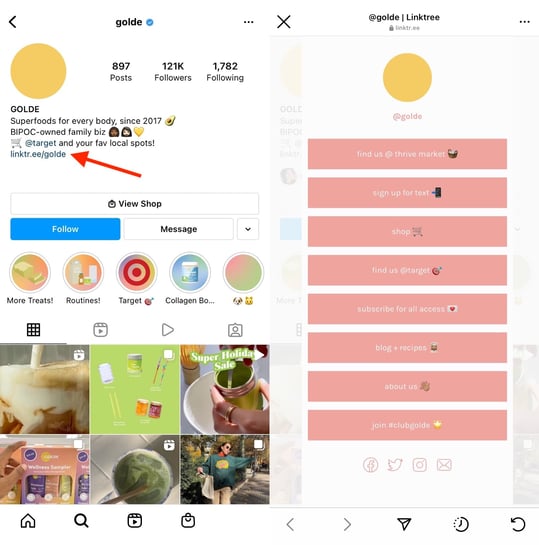
Why We Like This:
While Golde does have more links in its Linktree, users aren’t overwhelmed by choices because each link clearly states what it is, and the emojis provide additional explanations. If you have multiple links that you want to share with your users without overwhelming them, use Golde’s Linktree as inspiration.
TikTok
TikTok uses Instagram to call attention to trends, updates, and high-performing videos on the app. In addition, it has a branded Linktree in bio, which is pictured below.
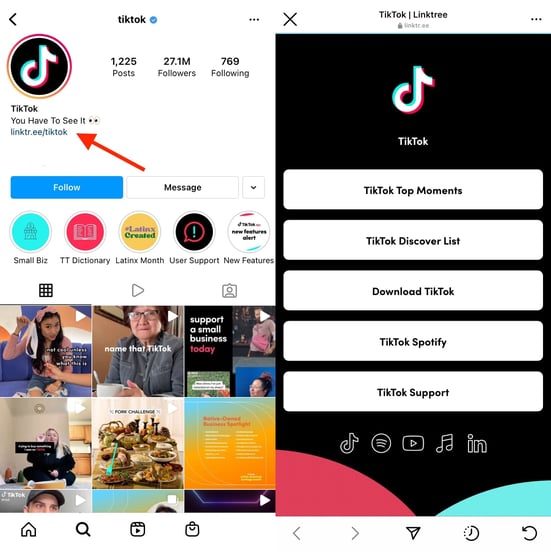
Why We Like This:
TikTok’s Linktree is a great inspiration because it drives users to critical actions related to the app: downloading the app, understanding trending moments and sounds, and contacting customer support. It also contains branded links in the footer of the Linktree that users can navigate to and easily understand where clicking will land them.
Should you choose to use Linktree, you’ll be able to share multiple high-impact links with your audience all at once, giving them more ways to interact with your business and become engaged in what you have to offer.

9 Product Category Marketing Examples to Inspire Your Own
Imagine shopping at a grocery store that doesn’t have any signs pointing you in the right direction. Odds are you’d spend a lot of time wandering the aisles until you found what you needed.
People want a sense of direction when they’re shopping, and they want to see their options grouped together — whether that’s kitchen tools, breakfast cereals, or winter coats. One way to do this is with product categories.
Product category marketing helps your brand stand out among related items, so your company’s products wind up in the shopping cart — whether real or virtual.
Let’s explore product categories, how it differs from product classification, and see some examples in action.
Your distinct offerings and customer personas should guide the organization and grouping of your product categories.
For example, Dick’s Sporting Goods offers a variety of outdoor gear. To guide customers, they group products into interest-based categories, such as fishing, running, and climbing. For cosmetic brands, it also makes sense to organize categories by product type, such as makeup tools, eyeshadow pallets, and foundation.
Product category marketing amplifies why a company is the best choice within that group of products. Why should customers opt for your offering rather than your direct competitors?
Gaining brand recognition and appreciation across a product category means greater returns for your marketing efforts. When consumers have positive experiences with a specific product category it also builds brand trust, which often expands to other categories through the halo effect.
Product categories are sometimes confused with product classification. Both are organizational strategies and both help guide marketing decisions, but classifications are much broader (think convenience goods, shopping goods, and specialty goods).
Let’s take a look at nine product category marketing examples to inspire your own.
9 Product Category Marketing Examples
1. Fenty Beauty
Product category: High-end foundation makeup
Admittedly, it helps to have singer and business powerhouse Rihanna at the helm. But Fenty Beauty innovated the idea of foundation makeup “for all,” and its commitment to inclusivity made the brand an instant hit.
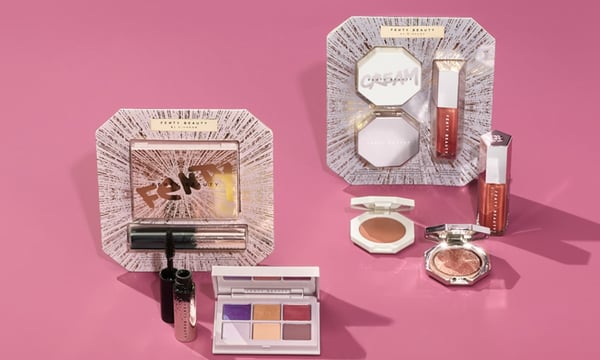
Beyond foundation, the Fenty Beauty Face products include bronzer, highlighter, powder, and concealer in shades that work for everyone. The launch was an industry transformer, with established brands expanding their foundation color lineup in response.
Why it works: Fenty’s success underlines a simple truth about today’s consumers: they are belief-driven. Increasingly, consumers want to see brands improve the world along with making a profit. Fenty aligns with this shift by keeping diversity and inclusion top of mind with its product offerings — and by featuring models across a spectrum of skin tones.
2. Orvis
Product category: Dog beds
This Vermont-based retailer has been a big name in fly-fishing and outdoor gear since 1856. But they’ve also carved out a product niche with dog gear — and dog beds in particular. The brand draws people who want comfortable dog beds for their furry pals in styles that enhance their home decor.

The marketing images of dogs sleeping or lounging on Orvis beds is enough to inspire a nap. And its social feeds are chock full of irresistible images and videos of dogs, including puppies in a hammock.
Why it works: The company has built a loyal following with the fundamental belief that pets are significant members of the family. Orvis has made its site a resource for dog health and behavior topics, and they boast a variety of dog beds for dogs of all sizes, ages, and health issues.
3. Ikea
Product category: Bedding
Putting together their furniture may be a tough task, but at least Ikea supports your relaxation too. The marketing of their bedding shows off playful sheets and prints for the kids and a mix of bold designs and neutrals for adults. The bed linens product category is grouped under ‘home textiles’ together with curtains, quilts, pillows, and towels.
A playful Ikea ad campaign in the UK even featured bottled bedding and pillows, connecting the dots between a restful night’s sleep and health. In the current pandemic, the company marketed the idea that comfortable bedding was essential — especially when your bed is doubling as your office.
Why it works: By grouping a variety of products under one roof — Home Textiles — Ikea presents an opportunity to up-sell. After all, if you buy a new mattress, you may also need new bed sheets, pillows, and blankets.
4. Swarovski
Product category: Jewelry
For more than a century, Swarovski has put the sparkle in gowns, tiaras, jewelry, sculptures, and even luxury cars. For its jewelry product category, Swarovski puts luxury within reach with a mix of modern and classic crystal necklaces, earrings, bracelets, and watches.

It sustains brand awareness with seasonal collections, collaborations with designers and celebrities, such as Karl Lagerfield and Penelope Cruz, and social media campaigns with influencers.
Why it works: Swarovski has taken its medium, crystal, to new heights with creative partnerships and continued innovation. It’s these efforts that keep the brand — and its products — fresh and exciting even after 125 years in business.
5. Target
Product category: Grocery essentials
Target is known for its positioning across product categories, including affordable fashion, electronics, and cleaning supplies. Though they’re grocery section is smaller than most supermarkets, they cover all of the ‘must-haves’ on any shopping list — from milk to salads to pasta.

In 2019, Target added its own brand of grocery essentials with their Good & Gather line, which includes frozen berries, cereals, snack foods, and eggs. Their Instagram Stories showcase easy snack and meal ideas, and feature foodie influencers like TikTok and Instagram sensations Tabitha Browne and Lisa Lin.
Why it works: Target uses private labels and exclusive brands to its advantage. If you get hooked on a Target-exclusive product — like an item from their Good & Gather line — you can’t go anywhere else to buy it.
6. Dove
Product category: Skin care
Launched in 2004, Dove’s ‘Real Beauty’ campaign was far ahead of other brands in promoting body positivity and self-acceptance. Their ad campaigns for body lotions and soap have long featured women with a wide variety of body types and skin colors.
Rolls, wrinkles, cellulite, and stretch marks are all on proud and beautiful display across its social channels. Today, its skin care brand identity is synonymous with self-confidence, and Dove body lotions and soaps are frequent flyers on “best of” lists for affordable skin care.

Why it works: In an industry that typically profits from consumers feeling unhappy with their appearance, Dove stands out with a marketing strategy that centers around self-confidence. Dove energizes its brand with a higher purpose that most women — their target audience — can get behind.
7. Michaels
Product category: Holiday and seasonal decor
The company known for DIY is also a go-to spot for holiday and seasonal decorating. Michaels stores transform every month or two with festive decor for spring, summer, Halloween, Thanksgiving, Hanukkah, Christmas, July Fourth, Mardi Gras, and Pride Month.

Michael’s also does an exceptional job engaging with the creative community. Most stores offer free classes, demos, and events that anyone can attend. During the pandemic, these classes went virtual, offering both adults and kids a creative outlet to explore at home.
Why it works: Michael’s continues to find new ways to engage with new and existing customers — from festive in-store displays to free classes and demos. It positions itself as more than a supply store, but rather a source of fun and inspiration.
8. Patagonia
Product category: Eco-friendly outerwear
Patagonia’s tagline is “We’re in business to save our home planet” and the company’s marketing efforts lead with its commitment to sustainability across product lines. Its website urges consumers to “Buy Less” and prominently features a section of “Used Gear.”

When you visit its Facebook or Instagram pages, you have to hunt a bit to find posts highlighting particular products. Instead, the feeds focus on pressing issues, such as environmental stewardship and fair labor practices.
Why it works: Patagonia effectively weaves its core values into its marketing messages. When you do need to purchase a new (or used) piece of outerwear, consumers know they are supporting a company actively minimizing its negative impacts.
9. Grove Collaborative
Product category: Green household cleaning supplies
Grove Collaborative is another company focused on sustainability. Its goal is to make it simple and affordable for people to choose green household products that are non-toxic, sustainable, and cruelty free.

The company offers eco-friendly cleaning supplies, including concentrated soap and detergent refills and reusable glass bottles, which it sends out in recurring monthly shipments.
The company also shares ideas for holiday meals and decorating, and releases a monthly “Sustainability Snapshot” of their environmental impact, such as the number of single-use plastic bottles they keep out of land-fills.
Why it works: The company’s marketing reflects its minimalist ethos. Grove also uses social media, namely Instagram Stories, to attract new customers with product images, cleaning tips, and even humorous videos.
Each of these brands has clarified where their products fit in larger retail categories. This helps them market their distinct value to target customers and, ultimately, earn a greater market share within these product categories.

26 Companies With Really Catchy Slogans & Brand Taglines
Keep it simple, stupid.
We don’t mean to offend you — this is just an example of a great slogan that also bears the truth of the power of succinctness in advertising. It’s incredibly difficult to be succinct, and it’s especially difficult to express a complex emotional concept in just a couple of words — which is exactly what slogans and taglines do.

That’s why we have a lot of respect for the brands that have done it right. These are the companies that have figured out how to convey their value propositions to their buyer personas in just one, short sentence — and a quippy one, at that.
So if you’re looking to get a little slogan inspiration of your own, take a look at some of our favorite company slogans and taglines from both past and present. But before we get into specific examples, let’s quickly go over what a slogan is, how it differs from a tagline, and what makes these branded one-liners stand out.
What Is a Slogan?
In business, a slogan is “a catchphrase or small group of words that are combined in a special way to identify a product or company,” according to Entrepreneur.com’s small business encyclopedia.
In many ways, they’re like mini-mission statements.
Companies have slogans for the same reason they have logos: advertising. While logos are visual representations of a brand, slogans are audible representations of a brand. Both formats grab consumers’ attention more readily than a company’s name or product might. Plus, they’re simpler to understand and remember.
The goal? To leave a key brand message in consumers’ minds so that, if they remember nothing else from an advertisement, they’ll remember the slogan.
What Makes a Great Slogan?
According to
HowStuffWorks, a great slogan has most, or all, of the following characteristics:
1. It’s memorable.
Is the slogan quickly recognizable? Will people only have to spend a second or two thinking about it? A brief but strong few words can go a long way in advertisements, videos, posters, business cards, swag, and other places.
2. It includes a key benefit.
Ever heard the marketing advice, “Sell the sizzle, not the steak”? It means sell the benefits, not the features — which applies perfectly to slogans. A great slogan makes a company or product’s benefits clear to the audience.
3. It differentiates the brand.
Does your light beer have the fullest flavor? Or maybe the fewest calories? What is it about your product or brand that sets it apart from competitors? (
Check out our essential branding guide here.)
4. It imparts positive feelings about the brand.
The best taglines use words that are upbeat. For example, Reese’s Peanut Butter Cups’ slogan, “Two great tastes that taste great together,” gives the audience good feelings about Reese’s, whereas a slogan like Lea & Perrins’, “Steak sauce only a cow could hate,” uses negative words. We could argue that the former leaves a better impression on the audience.
Slogan vs. Tagline
Although both “slogan” and “tagline” tend to be used interchangeably, they actually serve two different purposes.
As we mentioned in Entrepreneur.com’s definition above, a slogan identifies a product or company. So does a tagline, for that matter. Where these terms differ is in how they position a company in its industry.
- A slogan encompasses a company’s mission, what it stands for, and even how it’s helping customers in the individual campaigns the company might run. Slogans can therefore be longer than taglines, as you’ll see in the list below.
- A tagline is a catchy quip that evokes an image of your brand in the minds of your customers. Taglines enable people to make lighthearted associations with your business: “When I see [tagline], I think [company].”
Featured Resource: 60 Slogan Writing Tips & Examples
Taglines are more often next to the company’s logo on official advertisements and are dedicated more specifically to brand awareness than slogans. Slogans carry a brand’s values and promises as the company grows and evolves, and can be promoted under an overarching company tagline.
Your organization doesn’t have to develop both a slogan and a tagline — it might succeed with just a solid, recognizable tagline. But as you develop new products and identify new types of customers, you might find your brand launching a campaign that is primed for its own slogan.
Now that we’ve covered what a slogan is and what makes one great, here are examples of some of the best brand slogans of all time.
When you want a brand slogan you want to make sure they are memorable and that they bring your brand to life. The right slogan will have key words that encapsulate what your brand is so that consumers will always have it in the back of their heads. Below we have listed some business slogans that range from fast food, cars, essential items, pet essentials, etc. to show that a good slogan encapsulates being concise, catchy, and classic.
1. Dollar Shave Club: “Shave Time. Shave Money.”
The folks at Dollar Shave Club have made their way onto quite a few of our lists here on the blog, and it’s safe to say that when it comes to marketing and advertising, this brand’s team knows what it’s doing. And its slogan — “Shave Time. Shave Money.” — is an excellent reflection of their expertise.
This little quip cleverly incorporates two of the service’s benefits: cost and convenience. It’s punny, to the point, and it perfectly represents the overall tone of the brand.
2. MasterCard: “There are some things money can’t buy. For everything else, there’s MasterCard.”
MasterCard’s two-sentence slogan was created in 1997 as a part of an award-winning advertising campaign that ran in 98 countries and 46 languages. The very first iteration of the campaign was a TV commercial that aired in 1997: “A dad takes his son to a baseball game and pays for a hot dog and a drink, but the conversation between the two is priceless,”
writes Avi Dan for
Forbes.
“In a sense, ‘Priceless’ became a viral, social campaign years before there was a social media,” Dan writes. Today, “Priceless” is widely considered MasterCard’s tagline — borne out of the longer mission-focused slogan stated above.
One key to this campaign’s success? Each commercial elicits an emotional response from the audience. That first TV commercial might remind you of sports games you went to with your dad, for example. Each advertisement attempted to trigger a different memory or feeling. “You have to create a cultural phenomenon and then constantly nurture it to keep it fresh,” MasterCard CMO Raja Rajamannar told Dan. And nostalgia marketing like that can be a powerful tool.
3. M&M: “Melts in Your Mouth, Not in Your Hands”
Here’s one brand that didn’t need much time before realizing its core value proposition. At the end of the day, chocolate is chocolate. How can one piece of chocolate truly stand out from another? By bringing in the convenience factor, of course.
This particular example highlights the importance of finding something that makes your brand different from the others — in this case, the hard shell that keeps chocolate from melting all over you.


Diamonds aren’t worth much inherently. In fact, a diamond is worth at least 50% less than you paid for it the moment you left the jewelry store. So how did they become the symbol of wealth, power, and romance they are in America today? It was all because of a brilliant, multifaceted marketing strategy designed and executed by ad agency N.W. Ayer in the early 1900s for their client, De Beers.
The four, iconic words “A Diamond is Forever” have appeared in every single De Beers advertisement since 1948, and AdAge named it the
best slogan of the century in 1999. It perfectly captures the sentiment De Beers was going for: that a diamond, like your relationship, is eternal. It also helped discourage people from ever reselling their diamonds. (Mass reselling would disrupt the market and reveal the alarmingly low intrinsic value of the stones themselves.) Brilliant.

5. Meow Mix: “Tastes So Good, Cats Ask for It by Name”
Meow meow meow meow … who remembers this catchy tune sung by cats, for cats, in Meow Mix’s television commercials? The brand released a simple but telling slogan: “Tastes So Good, Cats Ask For It By Name.”
This slogan plays off the fact that every time a cat meows, s/he is actually asking for Meow Mix. It was not only clever, but it also successfully planted Meow Mix as a standout brand in a cluttered market.
6. Verizon: “We Can Hear You Now.”
Here’s another brand that took its time coming up with something that truly resonated with its audience. Verizon’s previous slogan “Can you hear me now” slogan was created in 2002 under the umbrella of the tagline, “We never stop working for you.” Now with Verizon switching up their classic slogan to answer the question “We can hear you,” was perfect because it shows this company keeps up with its consumers while moving forward.
While Verizon was founded in 1983, it continued to battle against various phone companies like AT&T and T-Mobile, still two of its strongest competitors. But what makes Verizon stand out? No matter where you are, you have service. You may not have the greatest texting options, or the best cell phone options, but you will always have service.
7. The U.S. Marine Corps: “Semper Fi”
Semper Fi, short for “Semper Fidelis,” is Latin for “always faithful” or “always loyal.” The saying has long been the official motto of the U.S. Marine Corps and is used to represent them in public appearances and the Marines’ official seal.
What makes “Semper Fi” a great slogan for the Marines? It reveals the Marines’ defining characteristics in the armed forces — faithfulness and loyalty. It’s also a memorable proverb that explains why this organization can be counted on by the public.
8. Ronseal: “It Does Exactly What It Says on the Tin.”
Ronseal is a wood stain and dye manufacturer from the United Kingdom, and its 20-year-old slogan is perfect for the humble message the company is known for.
Ronseal’s slogan doesn’t go above and beyond. It doesn’t make lofty promises to its customers. It simply endorses a functional product. So why is this slogan so catchy? Because its lack of volume actually speaks volumes to its audience. Too many companies try to break through the noise of their competitors by being so loud and ambitious, they forget what they stood for in the first place. Ronseal saw true value in basic reliability and founded a slogan that allowed the company to stay right where its customers like it.
9. The Mosaic Company: “We Help the World Grow the Food It Needs”
The Mosaic Company’s slogan also happens to be
its mission statement, which guarantees that this fertilizer maker’s brand strategy aligns with the company’s main interests.
Something all slogans should strive to do is look past the needs of the company, or even its users, and describe how the product or service helps the community. In this way, “We Help the World Grow the Food It Needs” is a heavy slogan that expresses not just what The Mosaic Company wants for its customers, but also what it wants for the public.
10. Pitney Bowes: “We Power Transactions That Drive Commerce”
Pitney Bowes, the mailing and shipping software provider, has a slogan that follows a similar theme as The Mosaic Company in the section above: It’s focused not on the end user, but on the industry.
Pitney Bowes’ slogan shows us that its products don’t just help businesses track and deliver merchandise — it makes the entire ecommerce community more efficient. It’s a good strategy, considering the alternative. How lame would the company’s slogan be if it were “We Power Transactions That Serve Our Clients’ Bottom Line”?
Taglines
When creating your brand tagline you want to have a tagline that explains the essence of the value you provide to your customer using one to two sentences. A tagline is a great way to understand what your business does for your customers. The right tagline will be concise yet brings out the essence of what the business is. Below we have listed some business taglines that encapsulate being concise while telling the value of the business.
11. Nike: “Just Do It.”
Now, for the more well-known Nike message. “Just Do It” hovers over every product and event Nike creates or sponsors, and that’s exactly what makes it the company’s official tagline.
It didn’t take long for Nike’s message to resonate. The brand became more than just athletic apparel — it began to embody a state of mind. It encourages you to think that you don’t have to be an athlete to be in shape or tackle an obstacle. If you want to do it, just do it. That’s all it takes.
But it’s unlikely Kennedy + Weiden, the agency behind this tagline, knew from the start that Nike would brand itself in this way. In fact, Nike’s product used to cater almost exclusively to marathon runners, which are among the most hardcore athletes out there. The “Just Do It” campaign widened the funnel, and it’s proof positive that some brands need to take their time coming up with a tagline that reflects their message and resonates with their target audience
12. Apple: “Think Different.”
This tagline was first released in the Apple commercial called “Here’s to the Crazy Ones, Think Different” — a tribute to all the time-honored visionaries who challenged the status quo and changed the world. The phrase itself is a bold nod to IBM’s campaign “Think IBM,” which was used at the time to advertise its ThinkPad.
Soon after, the tagline “Think Different” accompanied Apple advertisements all over the place, even though Apple hadn’t released any significant new products at the time. All of a sudden, people began to realize that Apple wasn’t just any old computer; it was so powerful and so simple to use that it made the average computer user feel innovative and tech-savvy.
According to
Forbes, Apple’s stock price tripled within a year of the commercial’s release. Although the tagline has been since retired, many Apple users still feel a sense of entitlement for being among those who “think different.”
13. L’Oréal: “Because You’re Worth It.”
Who doesn’t want to feel like they’re worth it? The folks at L’Oréal worked with the theory that
women wear makeup in order to make themselves appear “beautiful” so they feel desirable, wanted, and worth it. The tagline isn’t about the product — it’s about the image the product can get you. This message allowed L’Oréal to push its brand further than just utility so as to give the entire concept of makeup a much more powerful message.
14. California Milk Processor Board: “Got Milk?”
While most people are familiar with the “Got Milk?” campaign, not everyone remembers that it was launched by the California Milk Processor Board (CMPB). What’s interesting about this campaign is that it was initially launched to combat the rapid increase in fast food and soft beverages: The CMPB wanted people to revert to milk as their drink of choice in order to sustain a healthier life. The campaign was meant to bring some life to a “boring” product,
ad executives told
TIME Magazine.
The simple words “Got Milk?” scribbled above celebrities, animals, and children with milk mustaches, which ran from 2003 until 2014 — making this campaign one of the longest-lasting ever. The CMPB wasn’t determined to make its brand known with this one — it was determined to infiltrate the idea of drinking milk across the nation. And these two simple words sure as heck did.
15. BMW: “Designed for Driving Pleasure.”
BMW sells cars all over the world, but in North America, it was known for a long time by its tagline, “The Ultimate Driving Machine.” This phrase was created in the 1970s by a relatively unknown ad agency named Ammirati & Puris and was,
according to BMW’s blog, directed at Baby Boomers who were “out of college, making money and ready to spend their hard-earned dollars. What better way to reflect your success than on a premium automobile?”
The newer tagline, “Designed for Driving Pleasure,” is intended to reinforce the message that its cars’ biggest selling point is that they are performance vehicles that are thrilling to drive. That message is an emotional one and one that consumers can buy into to pay the high price point.

16. Tesco: “Every Little Helps.”
“Every little helps” is the kind of catchy tagline that can make sense in many different contexts — and it’s flexible enough to fit in with any one of Tesco’s messages. It can refer to value, quality, service, and even environmental responsibility — which the company practices
by addressing the impacts of their operations and supply chain.
It’s also, as Naresh Ramchandani wrote for The Guardian, “perhaps the most ingeniously modest” slogan or tagline ever written. Tesco markets itself as a brand for the people, and a flexible, modest far-reaching slogan like this one reflects that beautifully.
17. Bounty: “The Quicker Picker Upper.”
Bounty paper towels, made by Procter & Gamble, has used its catchy tagline “The Quicker Picker Upper” for almost 50 years now. If it sounds like one of those sing-songy play on words you learned as a kid, that’s because it is one: The tagline uses what’s called consonance — a poetic device characterized by the repetition of the same consonant two or more times in short succession (think: “pitter patter”).
Over the years, Bounty has moved away from this tagline in full, replacing “Quicker” with other adjectives, depending on the brand’s current marketing campaign — like “The Quilted Picker Upper” and “The Clean Picker Upper.” At the same time, the brand’s main web address went from quickerpickerupper.com to bountytowels.com. But although the brand is branching out into other campaigns, they’ve kept the theme of their original, catchy tagline.
18. Lay’s: “Betcha Can’t Eat Just One.”
Seriously, who here has ever had just one chip? While this tagline might stand true for other snack companies, Lay’s was clever to pick up on it straight away. The company tapped into our truly human incapability to ignore crispy, salty goodness when it’s staring us in the face. Carbs, what a tangled web you weave.
But seriously, notice how the emphasis isn’t on the taste of the product. There are plenty of other delicious chips out there. But what Lay’s was able to bring forth with its tagline is that totally human, uncontrollable nature of snacking until the cows come home.
19. Audi: “Vorsprung durch technik” (“Advancement Through Technology”)
“Vorsprung durch technik” has been Audi’s main German tagline everywhere in the world since 1971 (except for the United States, where the slogan is “Truth in Engineering”). While the phrase has been translated in several ways, the
online dictionary LEO translates “Vorsprung” as “advance” or “lead” as in “distance, amount by which someone is ahead in a competition.”
Audi roughly translates it as: “Advancement through technology.”
The first-generation Audio 80 (B1 series) was launched a year after the tagline in 1972, and the new car was a brilliant reflection of that tagline with many impressive new technical features. It was throughout the 1970s that the Audi brand established itself as an innovative car manufacturer, such as with the five-cylinder engine (1976), turbocharging (1979), and the quattro four-wheel drive (1980). This is still reflective of the Audi brand today.

20. Dunkin’: “America Runs on Dunkin”
In April 2006, Dunkin’ Donuts launched the most significant repositioning effort in the company’s history by unveiling a brand new, multi-million dollar advertising campaign under the tagline “America Runs on Dunkin.” The campaign revolves around Dunkin’ Donuts coffee keeping busy Americans fueled while they are on the go.
“The new campaign is a fun and often quirky celebration of life, showing Americans embracing their work, their play and everything in between — accompanied every step of the way by Dunkin’ Donuts,” read the official press release from the campaign’s official launch.
Ten years later, what the folks at Dunkin Donuts’ realized they were missing was their celebration of and honoring their actual customers. That’s why, in 2016, they launched the “Keep On” campaign, which they call their modern interpretation of the ten-year tagline.
“It’s the idea that we’re your partner in crime, or we’re like your wingman, your buddy in your daily struggle and we give you the positive energy through both food and beverage but also emotionally, we believe in you and we believe in the consumer,” said Chris D’Amico, SVP and Group Creative Director at Hill Holiday.
Fun fact: Dunkin’ Donuts rebranded itself — and named itself Dunkin’ in 2018 while releasing new packaging in 2019.
One store in Pasadena, California will be called, simply, Dunkin’.
21. McDonald’s: “I’m Lovin’ It.”
The “I’m Lovin’ It” campaign was launched way back in 2003 and still stands strong today. This is a great example of a tagline that resonates with the brand’s target audience. McDonald’s food might not be your healthiest choice, but being healthy isn’t the benefit McDonald’s is promising — it’s that you’ll love the taste and the convenience.
Fun fact: The jingle’s infamous hook — “ba da ba ba ba” — was originally sung by Justin Timberlake.
22. The New York Times: “All the News That’s Fit to Print.”
This one is my personal favorite. The tagline was created in the late 1890s as a movement of opposition against other news publications printing lurid journalism. The New York Times didn’t stand for sensationalism. Instead, it focused on important facts and stories that would educate its audience. It literally deemed its content all the real “news fit to print.”
This helped the paper become more than just a news outlet, but a company that paved the way for credible news. The company didn’t force a tagline upon people when it first was founded, but rather, it created one in a time where it was needed most.

23. General Electric: “Imagination at Work.”
You may remember General Electric’s former tagline, “We Bring Good Things to Life,” which was initiated in 1979. Although this tagline was well-known and well-received, the new tagline — “Imagination at Work” — shows how a company’s internal culture can revolutionize how they see their own brand.
“‘Imagination at Work’ began as an internal theme at GE,” recalled Tim McCleary, GE’s manager of corporate identity. When Jeff Immelt became CEO of GE in 2001, he announced that his goal was to reconnect with GE’s roots as a company defined by innovation.
This culture and theme resulted in a rebranding with the new tagline “Imagination at Work,” which embodies the idea that imagination inspires the human initiative to thrive at what we do.
24. State Farm: “Like a Good Neighbor, State Farm is There.”
The insurance company State Farm has a number of taglines, including “Get to a better State” and “No one serves you better than State Farm.” Recently, the company updated its tagline to “We’re here to help life go right.”
But State Farm’s most famous tagline is the jingle, “Like a good neighbor, State Farm is there,” which you’re likely familiar with if you live in the United States and watch television.
These words emphasize State Farm’s “community-first” value proposition — which sets it apart from the huge, bureaucratic feel of most insurance companies. And it quickly establishes a close relationship with the consumer.
Often, customers need insurance when they least expect it — and in those situations, State Farm is responding in friendly, neighborly language.
25. Maybelline: “Maybe she’s born with it. Maybe it’s Maybelline.”
Can you sing this jingle in your head? Maybelline’s former tagline, created in the 1990s, is one of the most famous in the world. It makes you think of glossy magazine pages featuring strong, beautiful women with long lashes staring straight down the lens. It’s that confidence that Maybelline’s makeup brand is all about — specifically, the transformation into a confident woman through makeup.
Maybelline changed its tagline to “Make IT Happen” in February 2016, inspiring women to “express their beauty in their own way.” Despite this change, the former tagline remains powerful and ubiquitous, especially among the many generations that grew up with it.
26. The U.S. Marine Corps: “The Few. The Proud. The Marines.”
While “Semper Fi” is one the U.S. Marine Corps’ most coveted slogans (or, more officially, mottos), it has had a handful of top-notch recruiting taglines over the decades as well. These include “First to fight” starting in World War I, to “We’re looking for a few good men” from the 1980s.
However, we’d argue that “The Few. The Proud. The Marines.” is among the best organization taglines out there.
This tagline “underscores the high caliber of those who join and serve their country as Marines,”
said Maj. Gen. Richard T. Tryon, former commanding general of Marine Corps Recruiting Command. In 2007, it even
earned a spot on Madison Avenue’s Advertising Walk of Fame.
A catchy slogan and tagline will make a difference in your business.
Now that you have delved into some classic and catchy slogans and taglines, it’s time to set your business up for success. Remember a slogan and a tagline are similar but a slogan is used to sell an item whereas a tagline brings awareness to the item while being concise, catchy, and classic. Both are essential when making sure your business will remain in the minds of consumers.
Editor’s note: This post was originally published in July 2020 and has been updated for comprehensiveness.