10 Facebook Cover Photo Size & Design Best Practices [Templates]
When people arrive on your Facebook page, where do you think they’ll look first? It takes up almost a quarter of the screen on most desktop browsers. That’s right — it’s your Facebook cover photo.

The cover photo for your Facebook business page sets the tone for visitors. In this post, you’ll learn Facebook cover photo best practices with real-world examples of each tip we recommend.
To get started, let’s dive into Facebook cover photo dimensions.
The right image can signal that your page is an inviting community, not just a boring string of updates. Knowing how to create your Facebook cover photo is essential to the success of your page.
Sometimes called your Facebook banner, this graphic is one of the most noticeable parts of your page. You’ll want a crystal-clear image that accurately reflects the goals of your business. Having the correct dimensions makes all the difference.

Facebook sets specific dimensions for cover photos to create a standard look across all pages, no matter what device they’re viewed on. You’ll want to follow Facebook cover photo best practices and optimize for the correct dimensions.
Considering the Facebook cover photo dimensions above, balancing creativity with the platform’s requirements can be tough. Mobile and desktop screens have different requirements. These devices will display the same cover photo differently.
Here’s what to look for when optimizing your cover photo for mobile and desktop devices.
How do Facebook cover photos appear on mobile vs. desktop screens?
Mobile devices display a smaller version of the cover photo than a desktop screen. As you can see, there’s a lot of space around the perimeter of the photo that could be cut off when a visitor is viewing your photo on a mobile screen.
You’ll want to make sure that the most important part of your images isn’t cropped on mobile. Take this into consideration when you create your design.

Therefore, it’s best to place the important parts of your content in the green space. Doing this will ensure everyone can see your cover photo properly regardless of the device they use.
Here’s an example from HubSpot’s own Facebook cover photo. This is what our cover photo looks like on desktop:
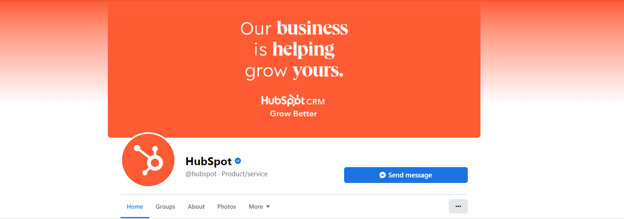
And this is what the cover photo looks like on mobile:

Notice how the alignment and viewing area are different, but all the content is displayed in both.
Need help getting started? Below, you’ll find Facebook cover photo templates and best practices to guide you when designing your brand’s cover photo artwork.
1. Abide by Facebook’s cover photo guidelines.
It seems like a no-brainer, but following Facebook’s cover photo guidelines is the first step to keeping your page visible on the platform. I’d suggest reading through the full Page Guidelines, but here are a few important things to keep in mind for your Facebook cover photo:
- Your cover photo is public.
- Cover photos can’t be deceptive, misleading, or infringe on anyone else’s copyright.
- You can’t encourage people to upload your cover photo to their personal timelines.
If caught violating the above terms, Facebook could take action against your page. Your social presence is important. You’ll want to avoid any cover photo infractions at all costs.

Pro tip: Use images that you’ve taken of your products, opt for all text, or use stock photos you’ve licensed to avoid copyright infringement.
2. Make sure your Facebook cover photo is the right size.
As I mentioned earlier, the Facebook cover photo size is 851 pixels wide by 315 pixels tall for desktop screens, and 640 pixels wide by 360 pixels tall on mobile screens.
If you upload an image smaller than those dimensions, Facebook will stretch it to fit the space. If the image is larger, Facebook will have to cut it down and may only display a third of the image you designed.
Designing the perfect cover photo takes time. The last thing you want is for your hard work to be truncated or distorted.
If you want a no-hassle way to make sure your cover photos are the right size, download our pre-sized template for Facebook cover photos.
Download Facebook Cover Templates
3. Don’t worry about the “20% text” rule.
Back in 2013, Facebook removed all references to the 20% rule on text in cover photos, but that doesn’t mean you should use a lot of text in your design.
The previous rule stated that only 20% of a cover photo could display text. Although this rule might sound restrictive, its sentiment has merit — you want your visitors engaged with visuals, not a wall of text.
If you use text in your cover photo, keep it concise and let the imagery speak for itself. You can see how we struck this balance on HubSpot’s Facebook page below.
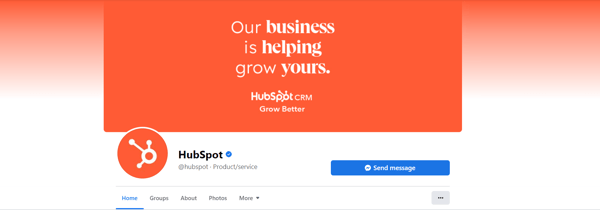
For more cover photo inspiration, check out our Facebook page.
4. Give your cover image a focal point.
Think of your cover photo as the portion of your page that’s “above the fold.” If it’s distracting or confusing, people will be more likely to click off the page.
Many of the best Facebook cover photos include a focal point and a color scheme that aligns with the rest of the brand. Remember, your social media accounts are extensions of your business, and they should make a good first impression on visitors.
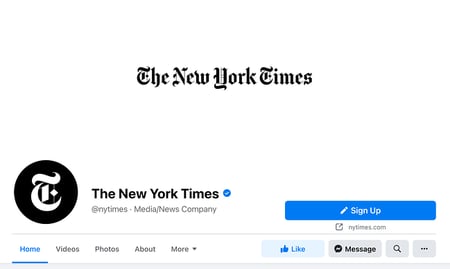
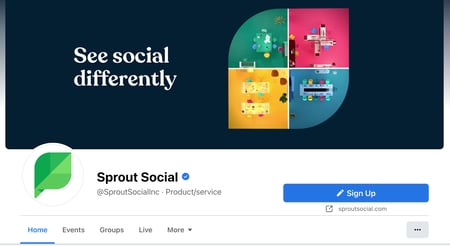
Great Facebook cover photos also have ample negative space to make the subject, the copy, and the elements unique to Facebook (like the call-to-action [CTA] button on Facebook business pages) stand out even more.
Here’s an example of good use of negative space from The New York Times:
And here’s another example from social media management platform Sprout Social.
5. Make sure your profile picture compliments your cover photo.
For businesses, profile pictures are completely separate from the cover photo. These two images will not overlap.
Keep this in mind when making your design. These images should have similar color schemes or contrasting patterns, while still following your brand’s guidelines.
Take a look at the Anthropology Facebook page below. The yellow in the profile picture stands out from the cover photo while complementing the overall color scheme.

6. Draw attention to the action buttons on the bottom right.
In a few of the cover photo examples above, you may have noticed that the primary CTA buttons were different. HubSpot’s CTA button says “Send Message,” while Sprout Social’s says “Sign Up.”
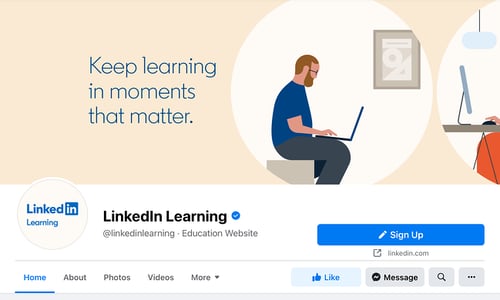
Depending on your business, you can launch a page on Facebook with a unique CTA button to the bottom right of your cover photo. Take the placement of this button into consideration when designing your cover photo.
LinkedIn Learning does this in a subtle way below, placing the graphic of a person on a laptop over the “Sign Up” button, drawing your eye to that blue CTA.
Note: While it might seem like a good idea to add directional cues like an arrow to get people to click on the CTA buttons, note that those CTA buttons don’t appear the same way on the mobile app. Instead opt for more subtle ways to highlight that button, like on the page above.
7. Right-align the objects in your cover photo.
Since your profile picture is on the left, you want to add some balance to your Facebook cover photo design by placing the focus of the image on the right.
Take a look at these cover photos. Which one looks more aesthetically pleasing?
Right-aligned focus.

Left-aligned focus.

Doesn’t the right-aligned cover photo look a lot better? In Samsung’s new cover photo, the biggest design elements (the profile picture, the text, and the two phones) are evenly spaced.
In Samsung’s old cover photo, your attention immediately goes to the left side of the Facebook page, causing you to miss the product’s name on the upper-right side.
Adding balance to a layout is a crucial element of design. This technique allows your cover photos to be more visually effective on mobile.
8. Keep mobile users in mind.
Statista reports that 98.5% of Facebook’s user base accesses the social network from mobile devices like smartphones and tablets. That’s exactly why it’s so important to keep mobile users top-of-mind when designing your Facebook cover photo.
On mobile, a much smaller portion of the cover photo is visible. The right side is typically cut out entirely.
Let’s take a look at what Cisco’s Facebook page looks like on a desktop browser versus Facebook’s mobile app.
Desktop:

Mobile:
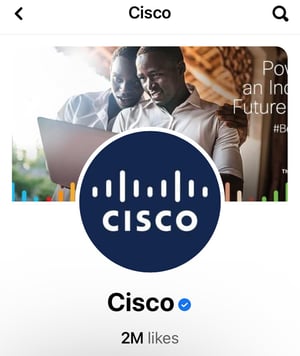
It’s important to note that the text in Cisco’s cover photo doesn’t appear in the mobile version. While right-aligned visual elements look great, be careful not to put important content so far to the right that it gets cut off when viewed on a mobile device.
9. Include a shortened link in your cover photo description that aligns with your page CTA.
If you want to use your cover photo to support a page CTA, ensure your cover photo description includes a text CTA and links to the same offer. This way, whenever people view your cover photo by itself, they can still access the link.
Here’s this practice in action on the Adobe Creative Cloud Facebook page.

Pro tip: Shorten your links and add UTM codes to track the visitors who click the link in the description. Shortening and tracking features are available in HubSpot’s Marketing Hub and with tools like Bitly.
(If you want to learn more about how to write effective call-to-action copy for your cover photo description, download our free ebook on creating compelling CTAs.)
10. Pin a related post right below your Facebook cover image.
Pinning a post allows you to highlight a typical Facebook post at the top of your Timeline. It’s signified by a PINNED POST title on the top right of the post, like on Behance’s page below.
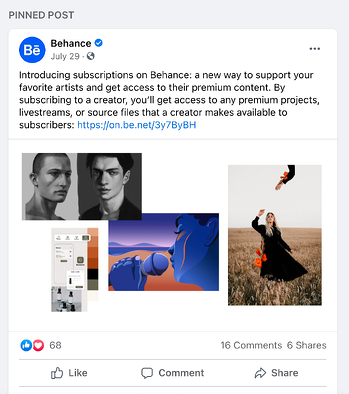
You’ve already spent time aligning your Facebook page CTA, your cover photo design, and your cover photo description copy. You should also make sure to post about the same thing in your timeline and pin that post to reinforce the message.
That way, your visitors have one very clear call to action when they land on your page (albeit in several different locations) — which will give them more opportunities to convert.
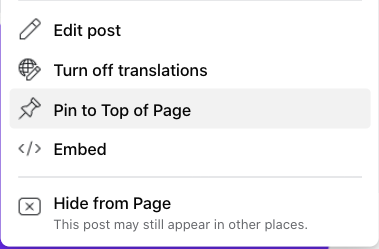
Here’s how to pin a Facebook post:
- Publish the post to Facebook.
- Click the three dots on the top right corner of the post.
- Choose “Pin to Top of Page.”
Facebook Cover Photo Sizes that Work for Your Business
While creating a cover photo may feel simple, the image you choose has a huge image on prospects visiting your page. You want to put your best foot forward on Facebook, and your cover photo is the first thing visitors see.
An ill-fitting cover photo or video can look unprofessional and give the wrong impression about the quality of your offerings.
With the tips in this article, you have the information you need to create a Facebook cover photo that embodies your brand and engages users on the platform.
Editor’s note: This post was originally published in July 2020 and has been updated for comprehensiveness.

The 29 Dominating Web Design Trends for 2023
Web design is an important part of any marketer’s 2023 plan. Your website houses the information your customers need to learn about your product and make a purchase. Regularly updating your website with cutting-edge web design trends can help your business stand out in crowded cyberspace.

Experimental navigation, scrolling effects, and kinetic typography are just a few ways you can level up your website. Check out the full list of trends that will dominate websites in 2023.
One major theme amongst these 2023 website design trends is motion, from scrolling effects to micro-animation. Check out this video which details some popular website design trends in 2023, and see for yourself what micro-animation and parallax scrolling look like.
1. Experimental Navigation
When we discuss experimental navigation, we’re talking about the navigation patterns that subvert the traditional, which is all-caps navigation on the top of the screen in a sans serif font.) Instead, experimental patterns move in a more creative direction, generating visual interest and guiding users to navigate the site in a specific manner.
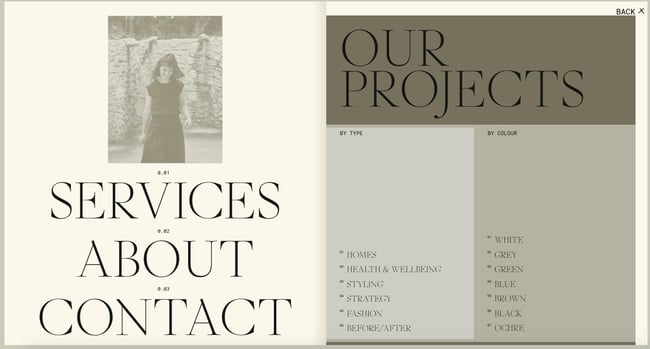
Take Kim Kneipp’s portfolio site, for example. When you click the Menu button in the right corner of the homepage, a menu slides in from the bottom of the screen that looks like the table of contents in a book. Each page is numbered to suggest an order of reading. On the right side of your screen, the projects are numbered and categorized by type and color.
What we like: In 2023, you’re invited to turn your navigation into an extension of your website’s unique branding thanks to experimental navigation.
2. Scrolling Effects
Scrolling effects — animations triggered by scroll action — create more dynamic web experiences, which is why they’re arguably one of the most popular trending web design elements this year. These are increasingly used on interactive websites to intrigue readers to keep scrolling, signify a break in content, and create a three-dimensional experience.
Engineered Floors does just that, combining horizontal and vertical scrolling.
For example, when the user lands on the homepage, they see an image of what appears to be a chair on the right. As the user scrolls, this image zooms out to reveal a living room, which is gradually covered in carpet. This 3D experience is delightful and informative.
What we like: Scrolling effects can stimulate visitors and encourage them to continue scrolling even below the fold.

3. Kinetic Typography
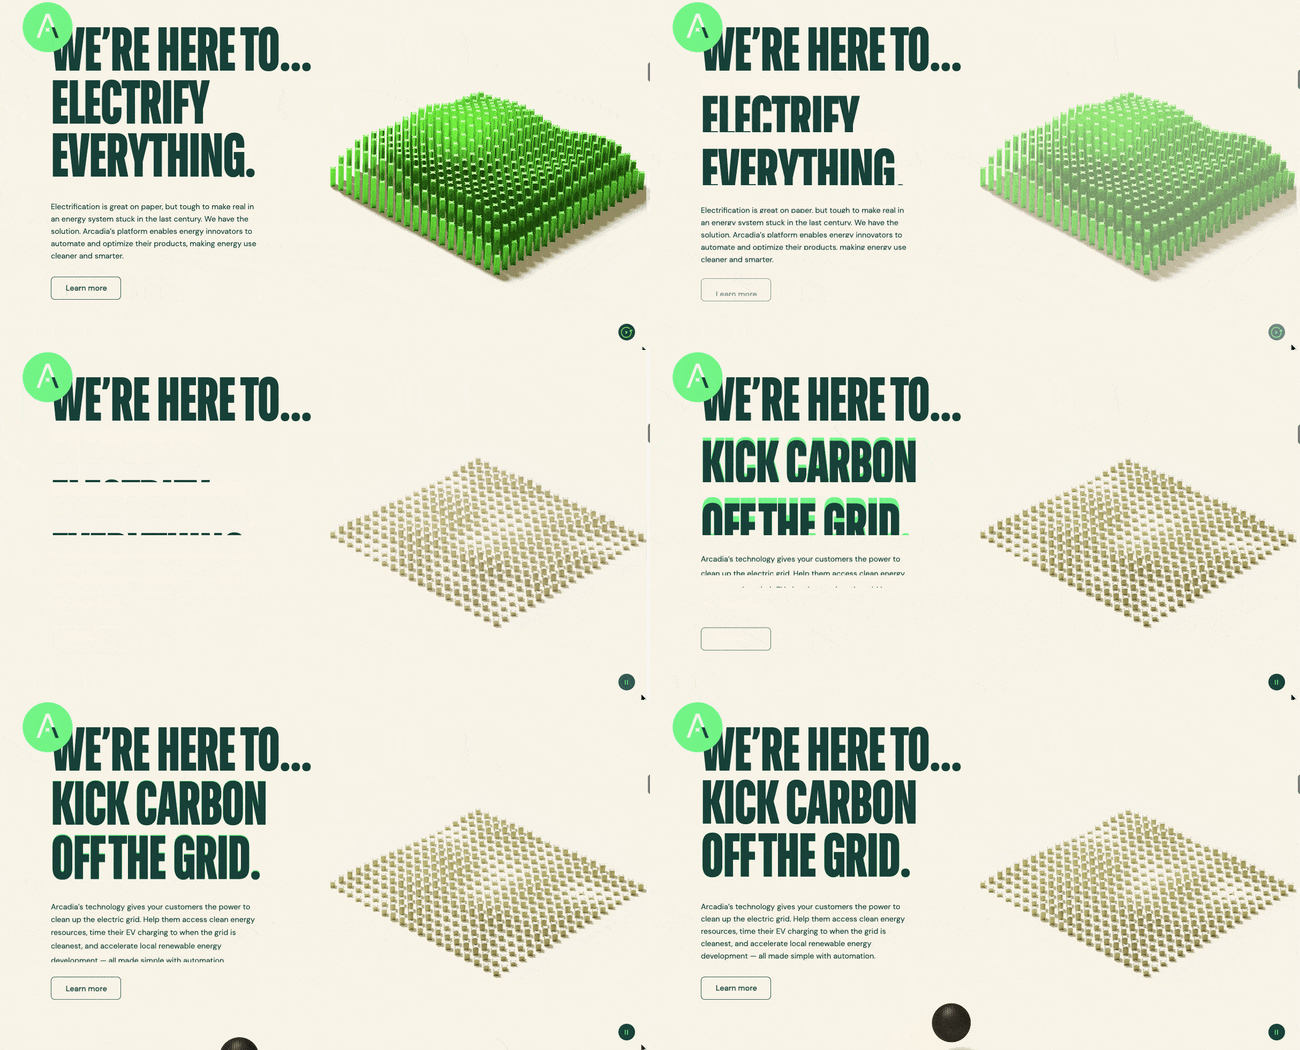
Kinetic typography — or moving text — is an animation technique that gained momentum in the 60s when feature films began using animated opening titles. You can use it for a similar purpose in website design to immediately grab the visitor’s attention once they land on the homepage.
You can also harness the power of kinetic typography to highlight important sections, guide the visitor as they scroll, and gradually reveal information, like on Arcadia.
What we like: Kinetic typography can delight visitors and help them digest your content. Plus, it’s visually attractive and engaging.
4. Drag Interaction
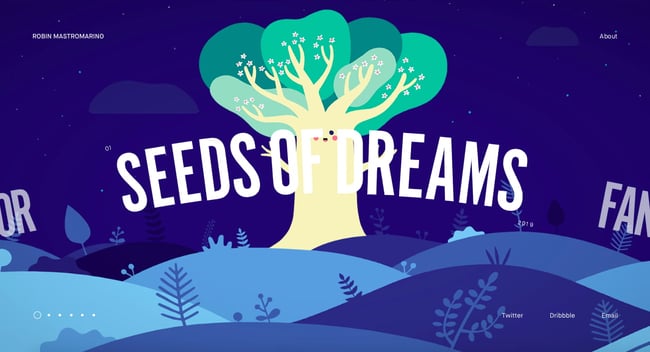
Gone are the days when users don’t have control over their experience on your website. Because drag interactions are designed to mimic an actual, physical action, they essentially allow visitors to pick up and move objects on the screen. This type of gesture interaction is gaining momentum with more websites. It’s an especially popular option if you have an ecommerce or portfolio site.
Take Robin Mastromarino’s portfolio site as an example. In addition to clicking on the controls of the homepage slider, you can drag and drop the different slides to browse his featured projects. The page transitions and animations are based on drag speed to give users a sense of control over these effects.
What we like: Drag interaction offers visitors a sense of customization and control over their experience on your site.
5. Structured Typography
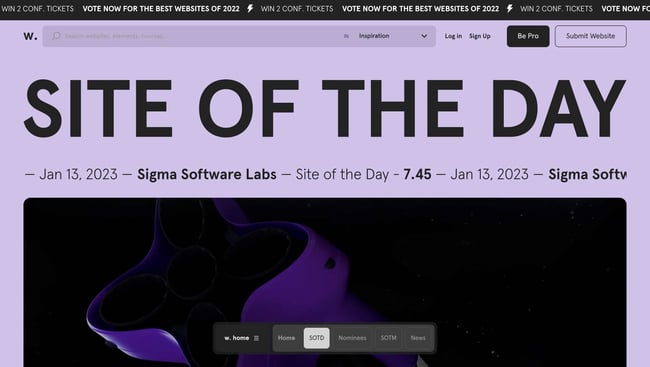
More and more companies are using structured typography to headline their home pages. In a post-pandemic world, consumers crave structure and stability — both of which structured typography is reminiscent of. (Think: All capital letters and strong, solid shapes.)
Here’s an excellent example of how structured typography could look on your website. The Awwwards homepage reveals how much of an impression structured fonts can make.
What we like: Structured typography tells the visitors’ eyes precisely what they should be looking at.
6. Cinemagraphs
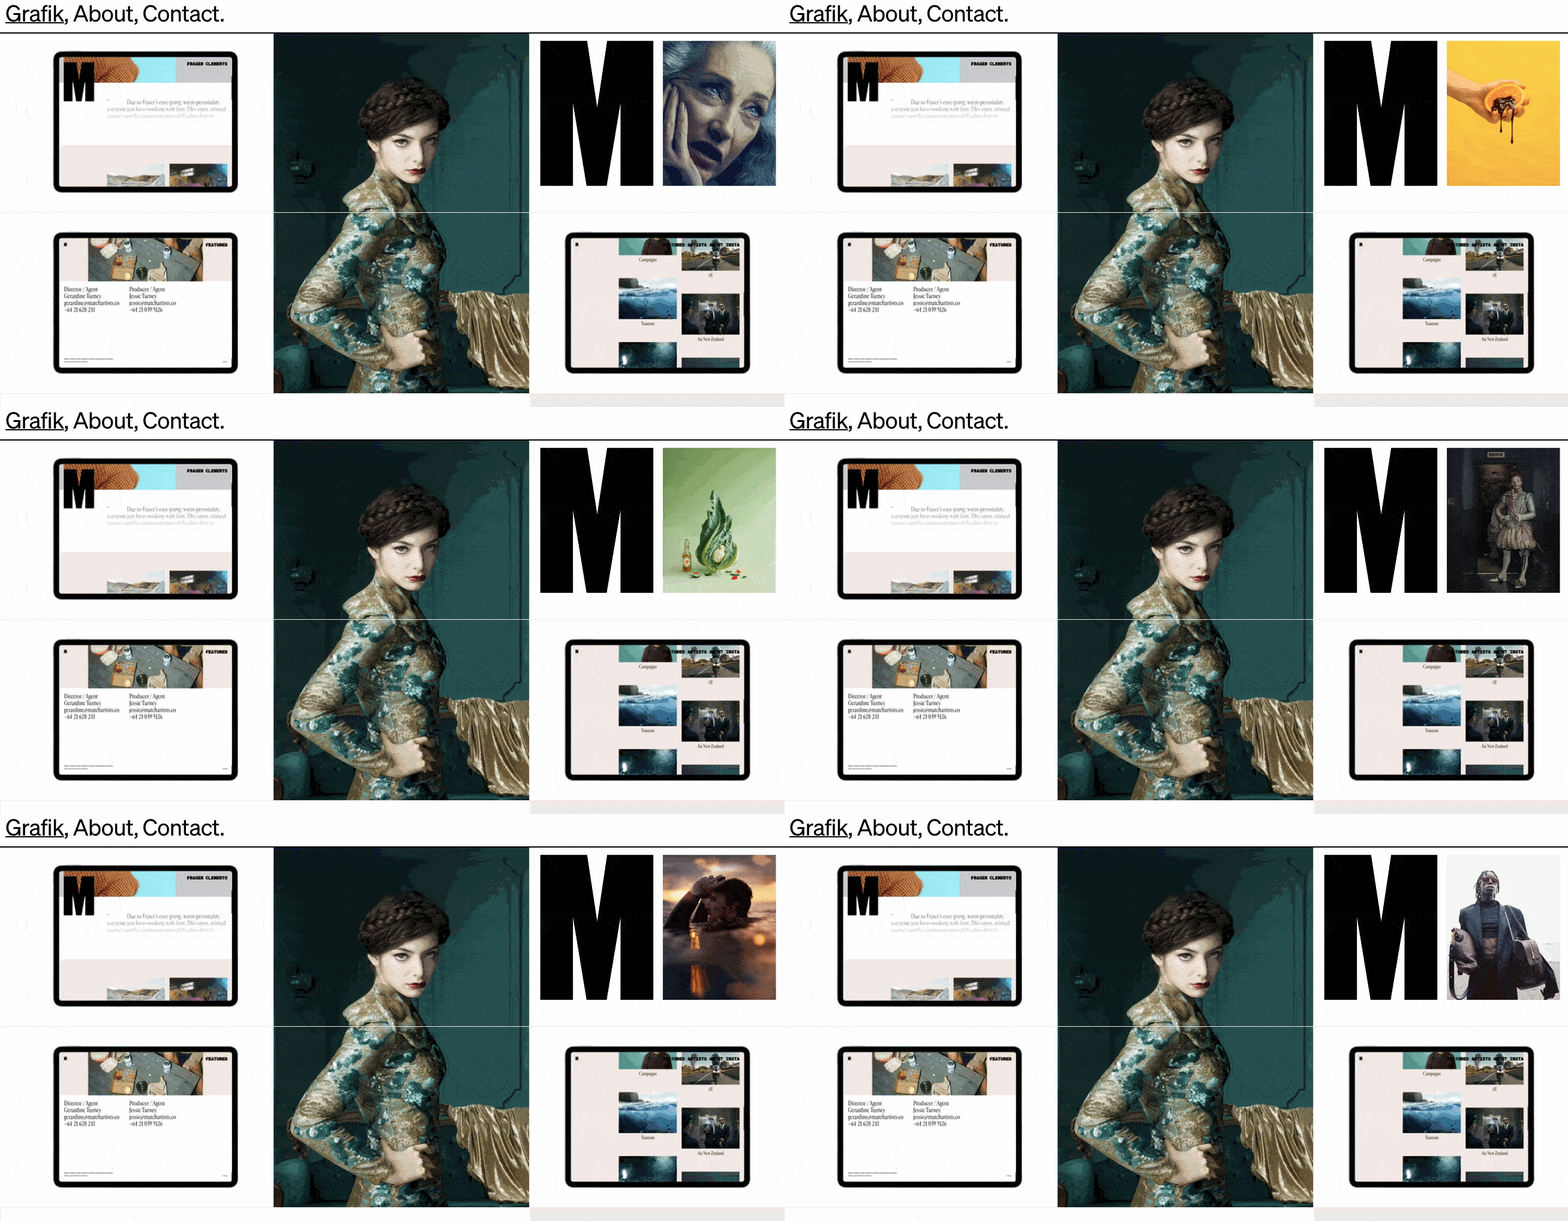
Motion is the name of the game in web design trends in 2023 — and cinemagraphics are no exception. Cinemagraphs, high-quality videos or GIFs that run on a smooth, continuous loop, have become popular to add movement and visual interest to otherwise static pages.
While full-screen loops were more popular in the past, this year you’ll see smaller animations sprinkled throughout complex layouts. The addition of these cinemagraphics draws the eye and helps your readers keep scrolling, like in this example from the design and technology studio Grafik.
What we like: Cinemagraphs can help draw the visitor’s eye around the page, even in the most complex layouts.
7. Brutalism
Some designers opt for more eclectic, convention-defying structures to stand out in a sea of tidy, organized websites. While it can seem jarring at first, many popular brands are now incorporating brutalist elements.
Brutalism emerged as a reaction to the increasing standardization of web design and is often characterized by stark, asymmetrical, nonconformist visuals, and a distinct lack of hierarchy and order. In other words, it’s hard to describe, but you know it when you see it — like the below example from Chrissie Abbott.
What we like: Brutalism prioritizes simplicity and functionality — pillars of the user experience.

8. Colorful Gradients
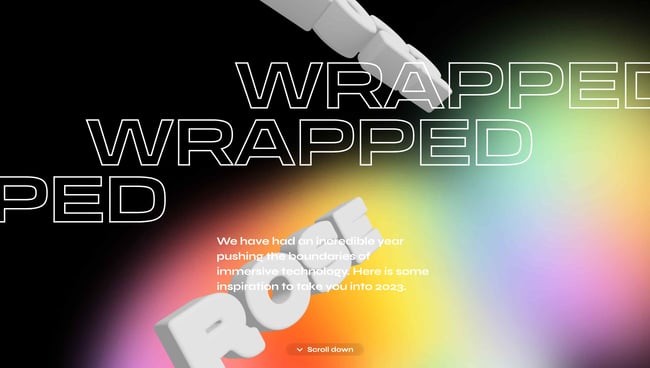
From Instagram to websites to advertisements and beyond, chances are you’ve seen your fair share of gradients in the last few years. Gradients have been all the rage lately, and 2023 is no exception. Last year, gradients were largely monochromatic. This year, they’re getting a makeover: Multi-colored gradients are in.
Check out this gorgeous and visually appealing example by ROSE Wrapped for gradient design inspiration. It pairs a colorful gradient with kinetic typography for the ultimate visual impact.
What we like: Gradients are visually exciting and, when used properly, not distracting.
9. Layering
Layering images, colors, shapes, animations, and other elements add depth and texture to a site that doesn’t have a lot of text. Below is a stylish example from the singer-songwriter SIRUP.
What we like: Layering can help add depth to a site and tell the brand’s story.

10. Text-Only
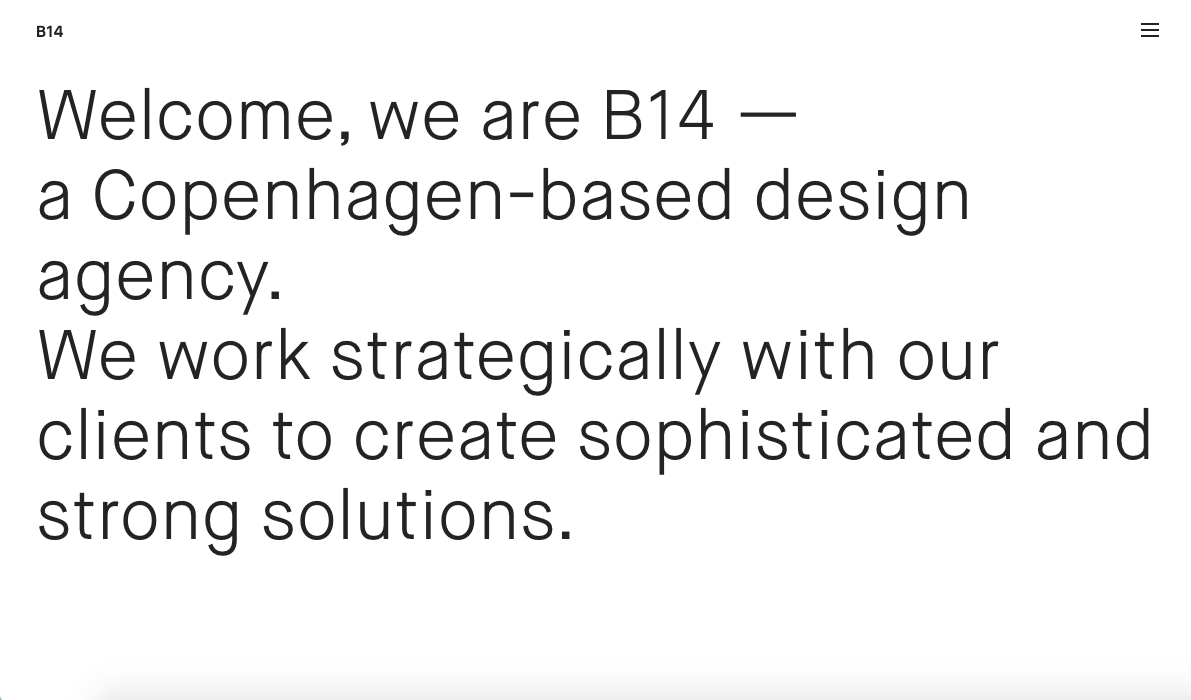
In 2023, web designers will be embracing minimalist design. Some are experimenting with cutting out images and prominent navigation sections altogether, relying on a few choice lines of straightforward text to inform visitors about their company.
Danish agency B14 uses the hero section of its homepage to describe its mission statement simply.
It’s a modern, uncluttered approach to presenting information that provides a stark contrast to its portfolio section, which uses cinemagraphs, hover animations, and an animated cursor effect.
What we like: This minimalist approach ensures visitors only get the most essential information.
11. Animated Illustrations
More companies are turning to illustrators and graphic artists to create bespoke illustrations for their websites because it’s one of the latest web design trends. “Illustration works well to convey more complex ideas that lifestyle photos aren’t always able to capture,” Kendra Pembroke, a Visual Designer at Red Ventures said.
These illustrations are often animated to add interactivity. For example, if you hover over one of the illustrations on the NewActon site (designed by Australian digital agency ED), the illustration and those in the surrounding area will wiggle. Then, only the illustration you’re hovering over will continue to move in a small circle. This design is also functional: each illustration represents one of the categories from the navigation menu on the right.
What we like: Animated illustrations help convey complex ideas and add some personality to a site.

12. Ultra-minimalism
Taking classic minimalism to the extreme, some designers defy conventions of what a website needs to look like, displaying just the bare necessities. This trend, known as “ultra-minimalism,” can be great for the user experience and load times.
The site from designer Mathieu Boulet is centered around a few choice links to their social profiles and information.
What we like: Ultra-minimalism can positively impact the user experience and website performance.

13. Mixing Horizontal and Vertical Text
Freeing text from its usual horizontal alignment and placing it vertically on a page adds some refreshing dimension. Take this example from action sports video producers Prime Park Sessions, which combines horizontal and vertical text alignments on a minimal page.
What we like: Mixing horizontal and vertical text defies convention and can therefore delight and intrigue some users.
14. Geometric Shapes and Patterns
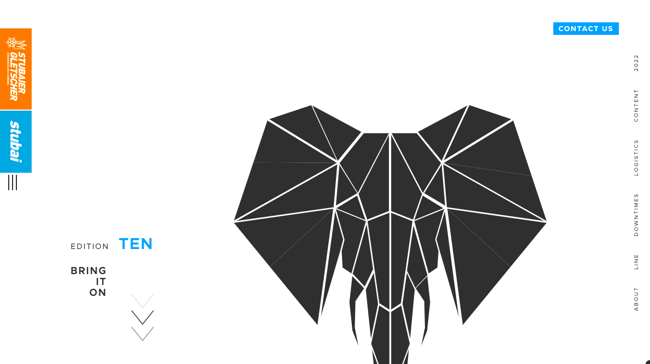
Whimsical patterns and shapes are popping up more frequently on websites, adding some flair to a landscape otherwise ruled by flat and material design. Canadian design studio MSDS uses daring, patterned letters on their homepage.
What we like: Geometric shapes and patterns can direct visitors’ attention to certain products or CTAs.

15. 3D Design
This year, website design is huge on creating an immersive experience for the site visitor. That’s why 3D artwork is gaining momentum.
The latest product from Adobe (3D Modeler) makes it easy for anyone to explore 3D design. The most industry-popular 3D modeler is Maya, but this takes some more expertise. Blender is also a great option as it is a free 3D design software tool.
If you want to include a 3D design on your website but are overwhelmed by the scope of the project, there are lots of freelance 3D modelers on Fiverr and UpWork. Just check out some of the examples on Dribbble.
This style has hints of Japanese Kawaii, a culture of cuteness that focuses on childlike objects and pastel coloring.
What we like: Cute and playful, this design is both interesting to look at and will keep your customers on your page longer as their eyes explore all the elements.

16. Overlapping Text and Images
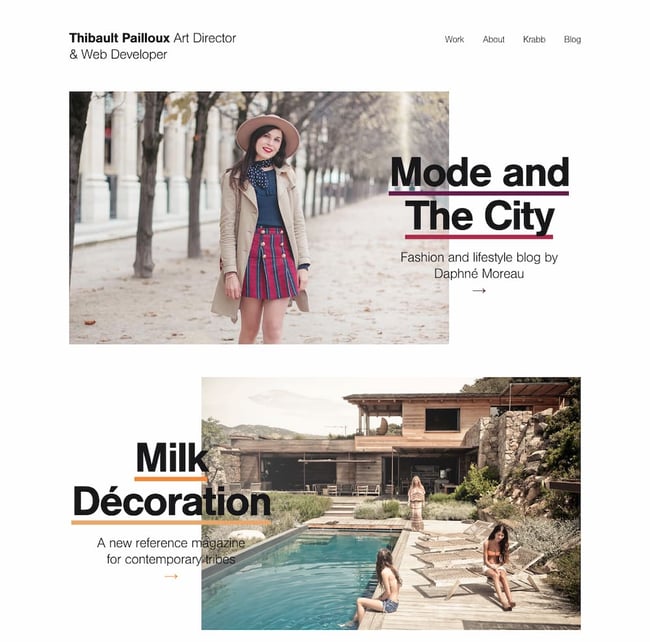
Text that slightly overlaps accompanying images has become a popular effect for blogs and portfolios. Freelance art director and front-end developer Thibault Pailloux demonstrates how by placing overlapping text with a colorful underline beneath each title.
What we like: Overlapping text and images maximize space on the page.
17. Broken Grids
While grids are arguably the most efficient way to display text and images, broken grids continue to make their way into mainstream sites and offer a change-up from the norm. Check out the website for HealHaus, for example. Its homepage features images and text blocks that overlap.
What we like: This convention-defying technique can make standard website pages or sections more interesting.

18. Organic Shapes
Sharp edges are out, and curved lines are in. Organic shapes are set to dominate web design in 2023. “Organic shapes can help add some playfulness without affecting the way the information is displayed,” Pembroke said.
In the example below from Spring Invest, the organic shapes in the hero section are decorative and functional. The yellow dots act like a cursor, drawing the teardrops that form the company’s logo. These shapes add a moment of delight and help reinforce the brand’s identity and value proposition to “shape the future of commerce.”
What we like: Organic shapes add personality without distracting from the content.

19. Web Textures
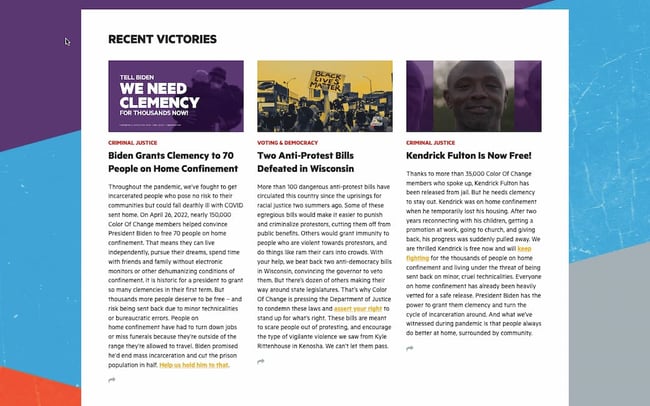
Web textures are background images that visually resemble a three-dimensional surface. When you use them right, you can use web textures to immerse visitors in your website by engaging tactile sense. Need proof? Just check out this example from the Color Of Change website — the background evokes a duct-tape-like texture.
What we like: Web textures draw attention to a particular section on a website.
20. Grid Lines
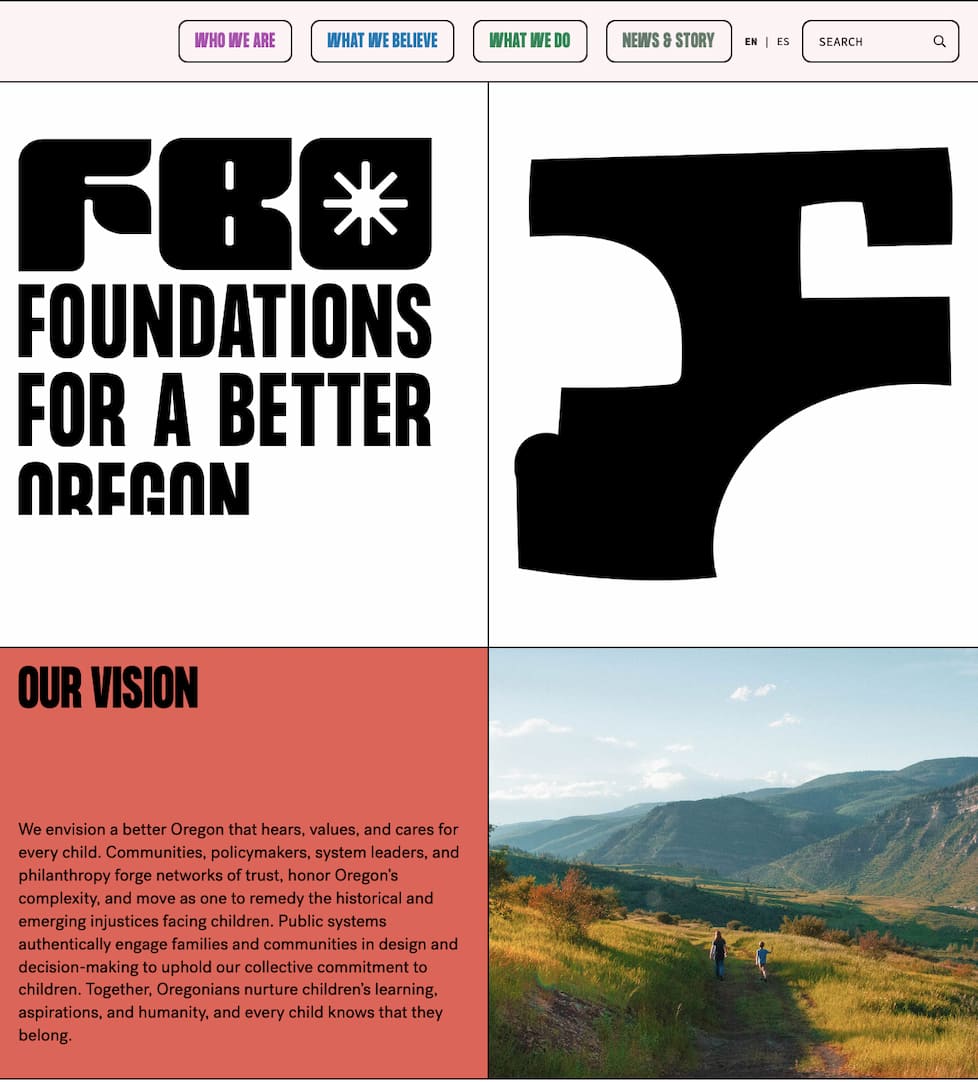
Grid lines began cropping up in 2022, and with good reason — they give site visitors a feeling of order and simplicity. Adding grid lines makes your website easier to digest while adding a modern, visually interesting aesthetic. On the Foundations for a Better Oregon website, grid lines are used to create a clear layout that looks futuristic.
What we like: This trend isn’t just visually engaging — it also gives your site a valuable sense of organization.
21. Y2K Inspired Design
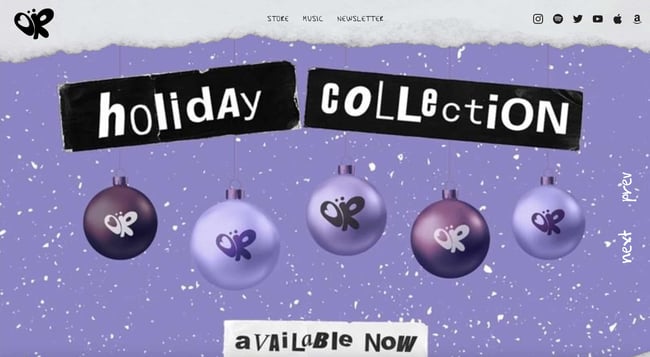
The resurgence of the Y2K aesthetic that started in 2020 is here to stay for at least a bit longer. In 2023, you will see websites adding nods to the coveted Y2K style to evoke a sense of nostalgia. Even celebrities channel the aesthetic on their artist websites — look at singer and actress Olivia Rodrigo’s site for a healthy dose of inspiration.
What we like: This playful aesthetic doesn’t take itself too seriously.
 22. Scrapbook Aesthetic
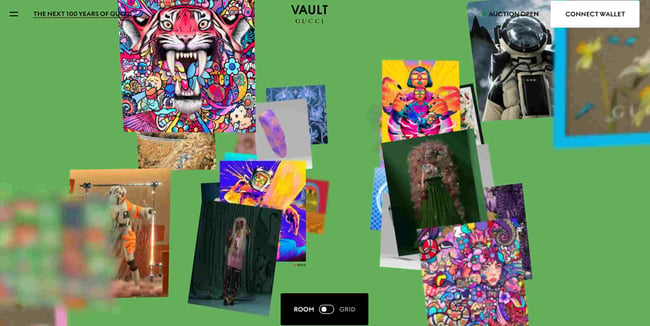
If you need more proof that website visitors are leaning into nostalgia, consider that the scrapbook aesthetic is coming back in 2023. But this isn’t the same scrapbook aesthetic we saw popular in the early 2010s when this web design trend emerged. Today’s scrapbook aesthetic is an updated, buzzy version. In some cases, like this Gucci website, it’s interactive.
What we like: You can now bring your scrapbook-style site to life.
23. Gamified Design
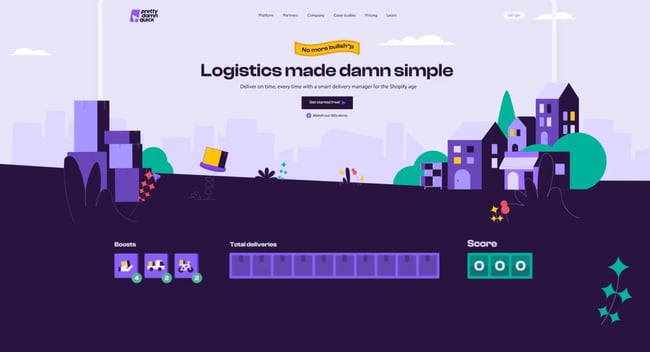
Gamified design is everywhere in 2023, making it one of the most prevalent website design trends this year. Gamification is an excellent idea because it adds an element of human emotion for visitors. For instance, when they arrive on your site, they have the experience of engaging with your content in a unique, memorable manner. This example by PrettyDamnQuick demonstrates exactly what we mean.
What we like: This playful trend is more than fun — it’s genius from a user engagement standpoint.
 24. Emphasis on Product Photography
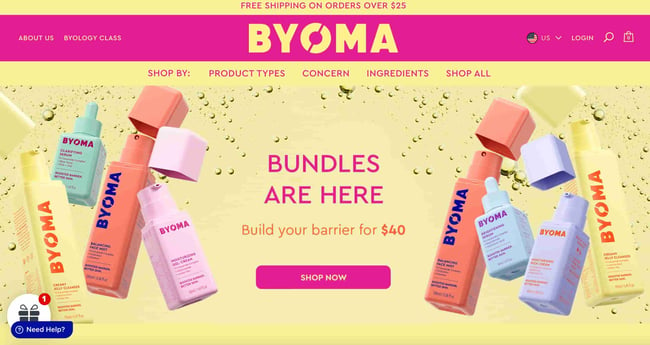
2023 is the year of product photography reigning supreme for ecommerce websites. From beauty companies to clothing brands and beyond, product photography will be front and center in 2023. This example from skincare brand BYOMA shows how impactful keeping your brand’s products centerstage can be.
What we like: Visitors don’t have to hunt down images of what you’re selling — they’re immersed in it from the moment they arrive on your website.
 25. Pastel Colors
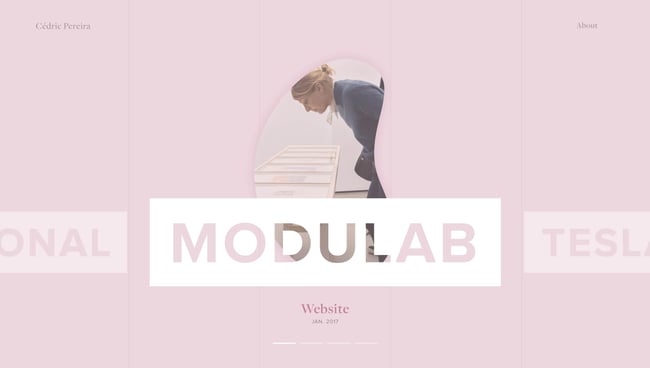
It is predicted that pastel colors will dominate 2023 website design. Pastels are bright, warm, and whimsical — a powerful reprieve from the bleakness of the early 2020s. This portfolio created by Cédric Pereira reveals exactly how visually impactful pastel colors can be.
What we like: Pastels add an element of levity to your website.
26. Minimal Vintage
In their report, InDesign Skills claims that minimal vintage will be an important graphic design element in 2023. Similar to minimalist styling in print design, minimal vintage focuses on a retro color palette and type style.
Minimal vintage might not instantly look old-school. Rather, it subtly nods to different decades of yesteryear, such as this design from Deco Hause.
What we like: This trend invokes the nostalgic feeling of past advertisements.

27. Goofy Sans Serif Typography
Goofy sans serif typography is ideal for brands that want to show they are fun-loving and not too serious. This optimistic typeface is cartoon inspired with a touch of retro fun.
When including Goofy sans serif typography in your content or on your website, be sure to let it be front and center, so it doesn’t have to compete with other elements. Gumroad’s font is bold and fun.
What we like: This font is a whimsical approach to clean lines and simplicity.

28. Sci-Fi Inspired Design
With movies coming out this year such as Dune: Part Two, Rebel Moon, and Transformers: Rise of the Beast, there’s no doubt that sci-fi is going to have a moment in 2023. Sci-fi design is a nod to futurism, which is what we anticipate will happen.
This is a trend that can both catch your viewer’s attention while also positioning your brand as firmly modern. Sci-fi-inspired design is especially useful for tech brands, as technology and science are key elements of this trend.
Bright colors and metal tones can help you achieve this look, but don’t be afraid to add a hint of 80s retro to really seal the deal. Matt Romo’s design for the MROM bot hits the nail on the head.
What we like: Sci-fi-inspired web and brand designs are not afraid of color and tech-related elements.

29. Natural and Organic Textures
Natural textures make a great background for a fun but simple font. Choose natural textures that relate to your industry and help your viewer envision your products. Just take Horizontal Design as an example.
Natural textures can also position your company as eco-friendly or a business that cares about natural resources.
What we like: Organic textures infuse your design with vivid tactile-ness and new life.

Design Trends You Can Use on Your Website
Of course, you don’t need to incorporate all of these trends to build one of the best website designs in 2023— we doubt that’s even possible anyways. However, even adding a couple as prominent components or subtler details can improve your site’s UX significantly, leading to higher engagement, more CTA clicks, and a better outcome for your online business.
Editor’s note: This post was originally published in January 2018 and has been updated for comprehensiveness.

Which Social Media Metrics Are Marketers Tracking? [New Research]
Social media metrics are imperative to social strategy. They give you an inside look at your channels’ performance and how your target audience perceives you. They can also provide you with ways to improve upon your strategy.
But what metrics should marketers track to ensure success or boost their strategy? To keep you from getting bogged down by all the numbers, we’ve made a list of the essential social media metrics to track.
These metrics will give you insight into customers, how to track ROI, improve your brand presence online, and walk away with happier customers.

Marketers can set their brand’s strategy up for growth and improvement by tracking and measuring social media metrics.
How to Measure Social Media Marketing Performance
There are several ways marketers can measure the performance of their social media marketing strategy. The most common methods are analyzing web traffic, impressions, engagement, and lead generation.
Let’s explore these different aspects of performance and more metrics marketers should track to ensure the success of their social media marketing efforts.
1. Web Traffic
Increasing traffic to your website should be a top priority depending on the nature of your business and the social media platforms your company focuses on. 27% of marketers surveyed by the HubSpot Blog listed traffic to their website as a high-priority metric for measuring the success of organic social media campaigns.
30% said the same for paid social media campaigns. If your company relies on web traffic as part of its business strategy, you’ll want to measure how many of your page views come directly from social media.
Key platforms for this focus include Facebook, Twitter, and Pinterest. You can use a web traffic tool such as Google Analytics to measure how much your traffic comes from organic social media.
2. Social Media Impressions
Social media impressions measure how many users were exposed to your content, and it’s a metric worth tracking.
Understanding your social media impressions is important because this data can provide valuable insight into how far your ad spend can go and can help inform future paid ad spending so you can maximize your budget.
However, even if paid ads aren’t a part of your strategy, you may still want to look into how many impressions your social media content is gathering over time. This data can tell you how different types of content resonate with your audience across platforms.
It’s also worth noting that each social media platform measures impressions differently. For example, on Twitter, each user that sees a tweet is considered an impression.
On Facebook, each time a paid ad is seen on screen, it is considered an impression. Instagram counts an impression each time a user views a piece of content (such as a static post, story, or Reel)).
On TikTok, no “impressions” measurement is in the app’s analytics section; however, you could consider each video view an impression for your own data.
3. Lead Generation
Lead generation means attracting prospects to your business and increasing their interest through nurturing, all with the end goal of converting them into customers. Marketers can generate leads through social media by creating compelling content that attracts and delights audiences.
To measure your social media’s success in generating leads, measure other metrics like web traffic, lead quality, and conversion rates from your social media channels.
For example, a significant amount of website traffic from Twitter can indicate your Twitter is a good source for lead generation.
4. Likes/Comments
Having a large following isn’t helpful if the audience isn’t regularly interacting with your content. Hence, measuring how often audiences like and comment on your social media is essential. Almost a quarter of the marketers we surveyed listed likes/comments as a crucial social media metric to track.
Likes show your audience viewed and enjoyed your content, while comments give insight into your audience’s reaction. Do they like your social media content? Do they have questions? What about your content resonated with them?
Likes and comments also fall under your brand’s overall social media engagement.
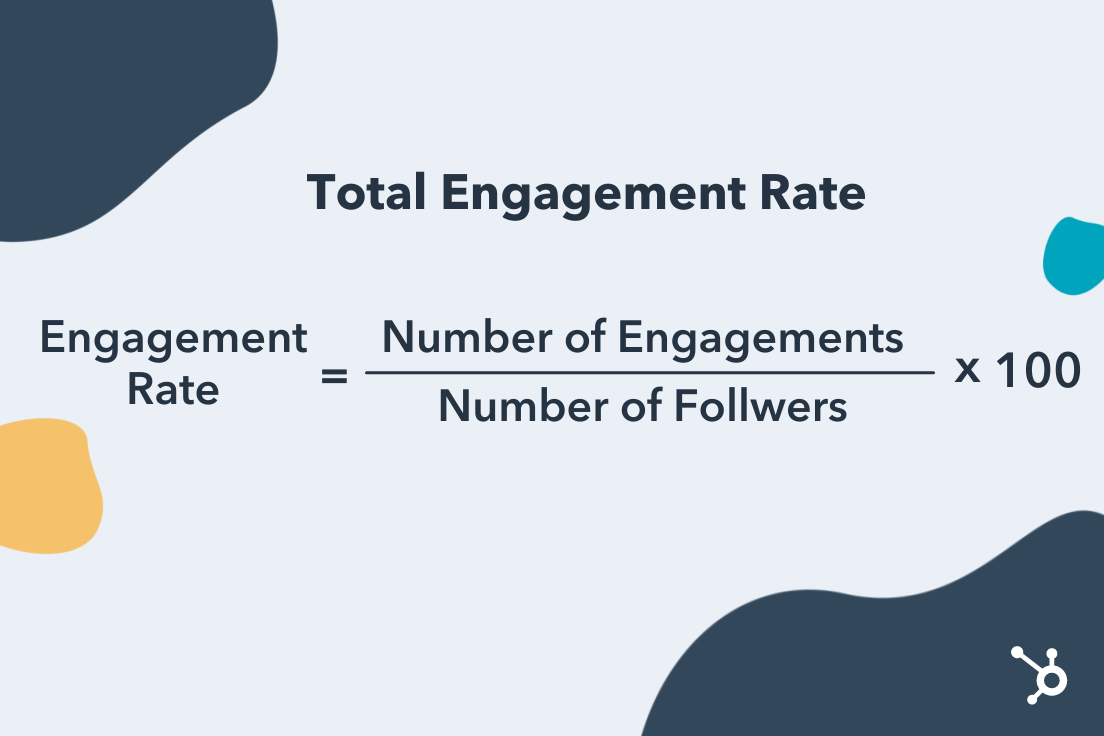
To measure the overall engagement rate of a social media account, you can use the following formula:
5. Overall Sales/Revenue
Is your social media campaign directly resulting in revenue and sales? What has your ROI been? Overall sales and revenue metrics are important in measuring the success of your campaign.
Many Social media platforms that offer monetization are transparent in how much marketers and creators can earn from their platforms, making it easy to track how your activity correlates to sales and revenue.
Now that you know what metrics marketers are tracking according to our survey — here are some tools you can use to make tracking easier.
1. Google Analytics
Price: Free
Why it’s great: Tracks web traffic analytics and provides business insights
The latest edition of Google Analytics collects website and app data to better understand the customer journey. The tool also includes privacy controls such as cookieless measurement as well as behavioral and conversion modeling.
2. HubSpot
Price: Start for Free, $800 – $3,600/mo for the Marketing Hub
Why it’s great: Monitors social media bran mentions and web traffic
HubSpot’s analytics software and dashboard tracks the complete customer lifecycle. We also help marketers monitor brand mentions, track engagements automatically, and make scheduling social posts a breeze.
3. NetBase Quid
Price: $300-$1,000/month
Why it’s great: Global insights and tracking
NetBase Quid provides analytics on conversations happening with your brand worldwide. They provide real-time analytics and give you insights that’ll help you track ROI. NetBase Quid provides data about how your campaigns carry weight with customers.
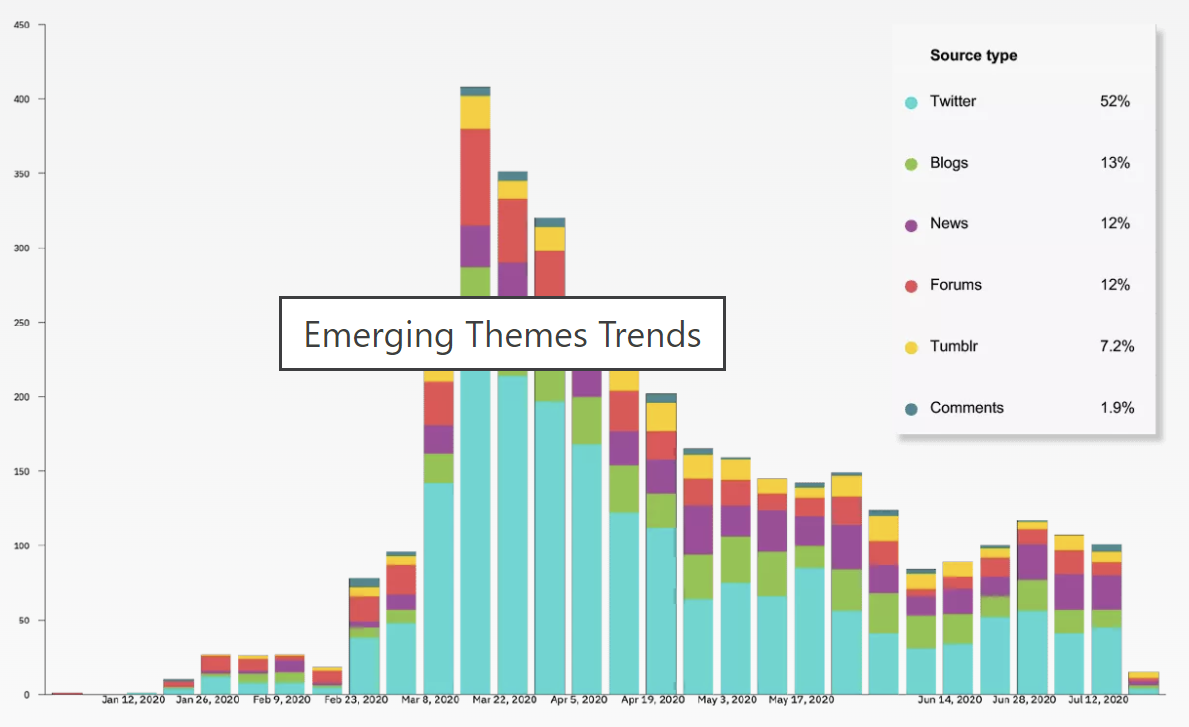
Users can also identify emerging trends to inform decisions and scope out the main drivers of conversation on social media.
4. quintly
Price: $345/mo
Why it’s great: See competitor performance
When using quintly, you can not only track your social media performance but gain insight into the performance of your competitors. This will help you see what you can do to improve your campaigns and what your competitors are doing that works. This photo is an example of the insights the software provides.

Quintly is also great for agencies with multiple clients. They can use it to manage their clients’ accounts and track their social media pages. Quintly also has reporting and benchmark data to measure campaigns.
There are so many numbers to keep track of when monitoring the success of your campaign, but getting bogged down by the wrong numbers can result in wasted time. Now that you know the metrics marketers are tracking, you can cut through the clutter and focus on the numbers that matter.


What is a CRO Test? [+ the 5 Steps to Perform Them Yourself]
Looking for a way to supercharge your marketing campaigns and boost conversions? Well, then it’s time to start running a conversion rate optimization test.

It’s an incredibly powerful toolset that can help marketers unlock valuable insights from user behavior – and significantly optimize their campaigns in the process.
In this blog post, we’ll explain what a CRO test is and the steps to run them for maximum impact.
CRO tests involve adding, re-arranging, and redesigning elements on your website. They can focus on optimizing the copy, design, or placement of your CTAs, or the length of your headlines, among other elements.
When done right, a CRO test will help you identify where to make improvements and maximize the return on your investment.
At worst, this test will serve as a gut check to ensure your current path is optimized and at the best, it will unlock new opportunities.
How to Perform CRO Tests
1. Research.
One step marketers often miss before running a CRO test is research, jumping straight from the idea to the test itself.
Once you have an idea for a test, you’ll first need to validate it through research. This can be both internal – reviewing past experiments, user research data, and analytics insights – and external by reviewing your competitors’ strategies.
The goal is to discover what has resonated with your audience in the past and if your suggested test aligns with that.
2. Design your experiment.
While you’re in the planning stage, it’s helpful to write an experiment doc.
It should include:
- Your objective – What do you aim to achieve with this CRO test?
- Your hypothesis – What do you anticipate will happen with this test? Be as specific as possible by stating the current state, what you want to test, the metric you’re measuring, and your anticipated outcome.
- Your design – This is where all the details of your experiment will live, such as:
- The type of test it is (E.g. A/B, A/B/n, multivariate)
- The pages on which the test will run
- The control and variant groups
- Duration Estimation
- Primary and secondary metrics
- Predicted impact
- Special considerations.
- Results – Once your test is complete, you can drop details of its performance in the document.
This document will serve as your source of truth for your CRO test and keep stakeholders in the know. Plus, you can reference it for future CRO tests.
3. Design your variants and build the test.
Now that you have all your ducks in a row, you can get started with building your experiment.
This step will likely take the most time as it will likely require cross-collaboration between your team, designers, and developers.
Timeline-wise, it can look something like this:
- Work with designers to develop the look and feel of the test.
- Develop copy, if necessary.
- Create tickets and assign them to team members.
- Work with developers, if applicable, to determine dev work and timeline.
- Set up the experiment in your testing tool (like HotJar or Convert) and the analytics to track results.
- Perform quality assurance (QA) tests to ensure it’s working as expected.
Once these steps are complete, you’re ready for launch.
4. Launch your test.
Once your experiment is live, the first thing you’ll want to do is QA it to ensure it’s still working as expected.
Even if you did this pre-launch, it’s not uncommon to catch bugs once the test is live. You’ll also want to check your analytics page to ensure your tracking is set up correctly.
Once that’s done, alert your stakeholders. Your test may impact other teams and their metrics so it’s important to let them know.
This also gives you an extra set of eyes who can report any issues they spot.
5. Review results.
Once your test has reached statistical significance, you can confidently review the results.
How were your metrics impacted? Was your hypothesis satisfied? What insights did you learn?
If your variation won, you can then work on implementing it. If it didn’t, there’s still opportunity there.
Even if your test produced negative results – i.e. your conversion rate decreased – you’re still gaining valuable insights about your audience.
Now that we’ve covered the steps to running a CRO test, see below a few brand examples.
CRO Test Examples
HubSpot’s Content Offer Form Design
The purpose of this experiment was to see if altering the submission form design affects users.
The hypothesis was that by redesigning forms, the user experience will improve and increase user clarity. In turn, form submission CVR would increase. The primary metric measured was form submission CVR.
The test featured four different variations of sign-up forms, which is an A/B/C/D/E design. The image below is the control variant.
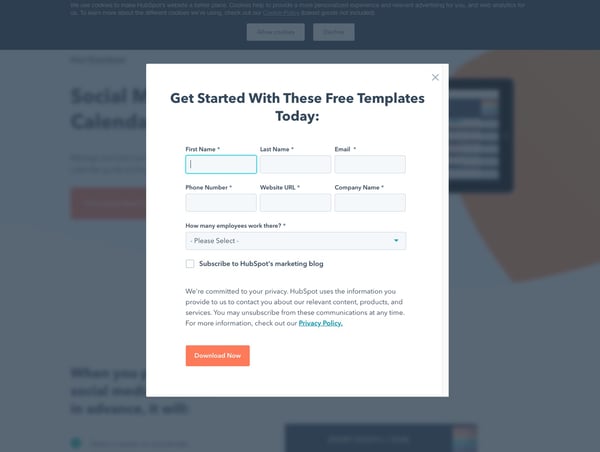
Results were significant as variations B and D outperformed the control variables at 96% and 100% confidence, respectively.
The image below shows variation B on the left and variation D on the right.
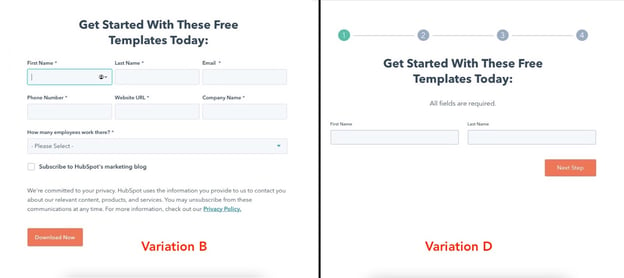
This demonstrates that, in the future, conversions on the blog could increase if winning form submission designs were applied to blog posts.
Optimizely’s Landing Page Headline
Optimizely was running a few PPC ads with several different types of messaging on one landing page. The landing page did not use the same terminology as the ad – instead, it read “Try it Out for Free.
So Optimizely decided to test the following theory: Aligning the copy on the landing page to the ad will result in more leads (AKA higher conversion).
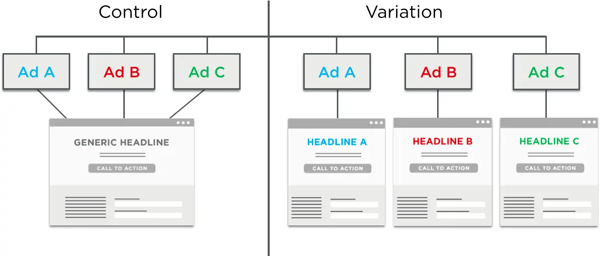
It worked! While the control had a 12% conversion rate, the variation led to a 39.1% increase in conversions.
HubSpot Blog’s Slide-In CTAs
Most successful blogs include a call-to-action at the end of their blog posts. It’s usually full-width – large enough for people to notice the offer and hopefully convert on it.
But are people noticing that CTA, or are they learning to tune them out?
Here at HubSpot, we were curious if our readers were developing static CTA blindness. So, we decided to run a test to see if we could increase our CTA clickthrough and conversion rates.
To accomplish this goal, we tested slide-in CTAs that would appear halfway to three-quarters of the way through a blog post.
Here’s an example of the slide-in:
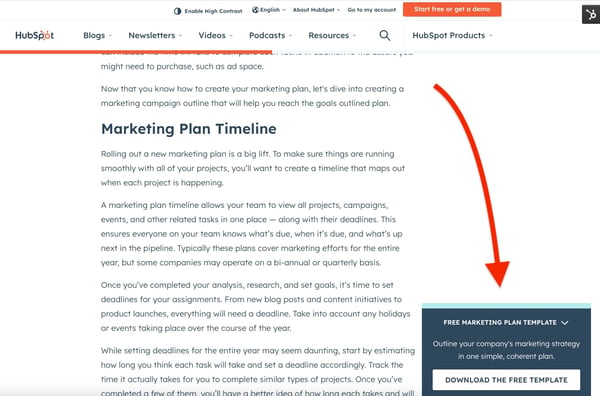
To test this out, we added slide-in CTAs to 10 of HubSpot’s highest-traffic blog posts. After reaching statistically significant results, we looked at the following stats for the slide-in CTA and the static CTA at the end of the post:
- Clickthrough rate (CTR) – What percentage of visitors clicked each CTA?
- Conversion rate (CVR) – What percentage of those visitors who clicked ultimately converted on the landing page form?
- Submissions – How many total leads did each CTA ultimately generate?
In this test, the slide-in CTA had a 192% higher CTR and generated 27% more submissions – mission accomplished.
Sidekick’s Landing Page Design
This test was done many moons ago when HubSpot Sales was still Sidekick but the value’s still there.
Back then, Sidekick was a chrome extension and the original landing page included a list of all the features from the software:
- See Who Opens & Clicks on Your Emails
- Schedule Emails to be Sent Later
- Access Valuable Information About Your Contacts
But the team was curious to know if those details actually mattered. For a product as low-touch as a Chrome extension, do consumers need a laundry list of features to convert?
To answer this question, the experiment involved replacing the feature list with user testimonials.
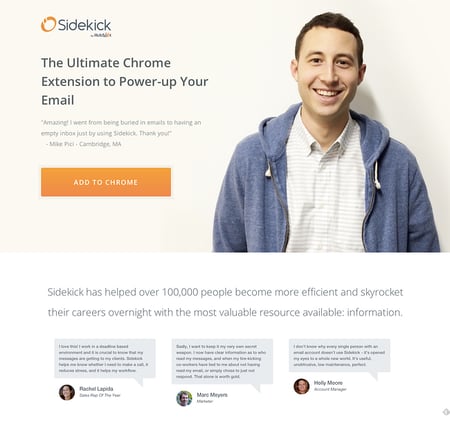
The testimonial beat out the feature list by 28%.
Their theory on why this change took place? The former didn’t make people curious enough to click through to the Chrome Extension installation page.
Another theory is that consumers wanted more social proof before downloading a new tool into their browser.
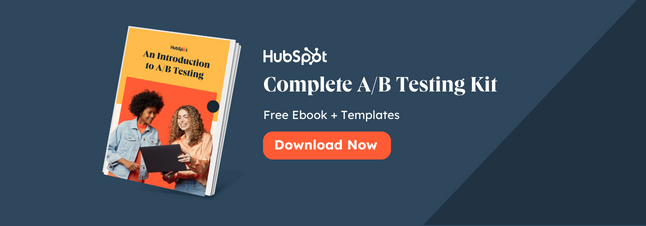
There you have it – a rundown of all things CRO testing. If you want more details on how to run a test of your own, check out our A/B test kit below.

How to Write a Blog Post: A Step-by-Step Guide [+ Free Blog Post Templates]
If you’ve ever read a blog post, you’ve consumed content from a thought leader that is an expert in their industry. Chances are if the blog post was written effectively, you came away with helpful knowledge and a positive opinion about the writer or brand that produced the content.
Anyone can connect with their audience through blogging and enjoy the myriad benefits that blogging provides: organic traffic from search engines, promotional content for social media, and recognition from a new audience you haven’t tapped into yet.
If you’ve heard about blogging but are a beginner and don’t know where to start, the time for excuses is over. Not only can you create an SEO-friendly blog, but we’ll cover how to write and manage your business’s blog as well as provide helpful templates to simplify your blogging efforts.
Let’s get started with an important question.
Blogging may mean different things depending on your niche — so let’s begin with this definition.
Blog posts allow you and your business to publish insights, thoughts, and stories on your website about any topic. They can help you boost brand awareness, credibility, conversions, and revenue. Most importantly, they can help you drive traffic to your website.
But in order to begin making posts for a blog — you have to learn how to start one, first. Let’s dive in.
1. Understand your audience.
Before you start writing your blog post, make sure you have a clear understanding of your target audience. To do so, take the following steps.
Ask yourself exploratory questions.
To discover your audience, ask questions like: Who are they? Are they like me, or do I know someone like them? What do they want to know about? What will resonate with them?
Jot down your notes in a notepad or a document. This is the time to brainstorm audience attributes from scratch, no matter how out of left field they may feel. You should also think about your audience’s age, background, goals, and challenges at this stage.
Carry out market research.
Doing market research sounds like a big task, but in truth, it can be as simple as accessing a social media platform and browsing user and blog profiles that match with your potential audience.
Use market research tools to begin uncovering more specific information about your audience — or to confirm a hunch or a piece of information you already knew. For instance, if you wanted to create a blog about work-from-home hacks, you can make the reasonable assumption that your audience will be mostly Gen Zers and Millennials. But it’s important to confirm this information through research.
Create formal buyer personas.
Once you’ve brainstormed and carried out market research, it’s time to create formal buyer personas. It’s important because what you know about your buyer personas and their interests will inform the brainstorming process for blog posts.
For instance, if your readers are Millennials looking to start a business, you probably don’t need to provide them with information about getting started on social media — most of them already have that down.
You might, however, want to give them information about how to adjust their social media approach (for example — from what may be a casual, personal approach to a more business-savvy, networking-focused approach). That kind of tweak is what helps you publish content about the topics your audience really wants and needs.
Don’t have buyer personas in place for your business? Here are a few resources to help you get started:
- Create Buyer Personas for Your Business [Free Template]
- Guide: How to Create Detailed Buyer Personas for Your Business
- [Free Tool] Make My Persona: Buyer Persona Generator
2. Check out your competition.
What better way to draw inspiration than to look at your well-established competition?
It’s worth taking a look at popular, highly reviewed blogs because their strategy and execution is what got them to grow in credibility. The purpose of doing this isn’t to copy these elements, but to gain better insight into what readers appreciate in a quality blog.
When you find a competitor’s blog, take the following steps:
Determine whether they’re actually a direct competitor.
A blog’s audience, niche, and specific slant determine whether they’re actually your competitor. But the most important of these is their audience. If they serve a completely different public than you, then they’re likely not a competitor. That is why it’s important to define your buyer personas before taking other steps in the blog creation process.
Look at the blog’s branding, color palette, and theme.
Once you determine that they’re your competitor, it’s time to take note of their techniques so that you can capture a similar readership. Colors and themes play a huge role in whether you seem like part of a niche — for instance, a blog about eco-friendly products should likely use earthy tones instead of bright, unnatural colors such as neon yellow or pink.
Analyze the tone and writing style of the competition.
Take note of your competition’s copywriting. Is it something you feel like you can successfully emulate? Does it ring true to the type of blog you’d like to create? What do readers most respond to? For most, creating a tech blog might be an excellent idea, but if journalistic, review-based writing doesn’t work for you, then that might not be a good fit. Be aware of what you can feasibly execute or hire freelance writers.
3. Determine what topics you’ll cover.
Before you write anything, pick a topic you’d like to write about. The topic can be pretty general to start as you find your desired niche in blogging.
Here are some ways to choose topics to cover.
Find out which topics your competitors often cover.
One easy way to choose topics for your blog is to simply learn what other blogs are writing about. After you determine your competitors, go through their archive and category pages, and try to find out which topics they most often publish content about. From there, you can create a tentative list to explore further. You might find, for instance, that a competitor only covers surface-level information about a subject. In your blog, you can dive more deeply and offer more value to readers.
Choose topics you understand well.
No matter what type of blog you start, you want to ensure you know the topic well enough to write authoritatively about it. Rather than choosing a topic you’ll need to research as you write, think about those that come most naturally to you. What has your professional experience been like so far? What are your hobbies? What did you study in college? These can all give rise to potential topics you can cover in depth.
Ensure the topics are relevant to your readership.
You may find that you hold deep expertise in various topics, but how relevant are they to the audience you understood back in step one? If you’re not serving their needs, then you’d be shouting into a void — or, worse, attracting the wrong readership. For that reason, after identifying the topics you can feasibly write about, ask yourself whether those are subjects your audience would like to explore.
Do preliminary keyword research.
Keyword research is the process of searching for topics using a keyword research tool, then determining whether there is demand by looking at each topic’s (or keyword’s) search volume. If you found the perfect topics that are the perfect cross between your expertise and your reader’s needs, you’ve struck gold — but the gold will have no value unless people are searching for those terms. Only then can you capture the audience that is waiting out there.
4. Identify your unique angle.
What perspective do you bring that makes you stand out from the crowd? This is key to determining the trajectory of your blog’s future, and there are many avenues to choose in the process.
Here’s how you can find your unique selling proposition in crowded blogging niches:
Write a professional and personal bio.
Knowing your own history and experience is essential to determine your unique slant. To get started, write a professional bio that explains, at length, who you are and which experiences most inform your blogging efforts. While I could write a lengthy exposition about my childhood, that history isn’t essential unless I’m launching a blog about raising children.
What unique experience makes you a trusted expert or thought leader on the topic? You can use your answers to that question to find your angle. Use this information to populate your “About me” page on your blog and share more about yourself.
Determine the special problem you will solve for readers.
Your readers won’t trust you or return to you unless you actively help them solve a problem. As you try to find your angle, think about ways you can help your audience surmount challenges typically associated with the topics you’ve chosen for your blog. For instance, if you’re creating a blog about sustainability, then you might help readers learn how they can compost organic materials in their home.
Choose an editorial approach.
Will you share your opinions on trending debates? Teach your readers how to do something? Compare or share original research? The editorial approach you choose will in part be informed by the topics you cover on your blog and the problems you’re helping your readers solve. If your blog is about marketing trends and your goal is to keep marketers up-to-date on the latest changes, then your editorial approach should be journalistic in nature. This is only one example of how to choose a technique.
5. Name your blog.
This is your opportunity to get creative and make a name that gives readers an idea of what to expect from your blog. Some tips on how to choose your blog name include:
Keep your blog name easy to say and spell.
No need to get complicated at all with your name, though it might be tempting, since there are so many blogs out there. While choosing a unique name is essential, it’s also important to choose one that is easy to memorize for readers. It should also be simple to remember as an URL (which will come into play in the next step).
Link your blog name to your brand message.
The more related your blog’s name is to the topics you cover, the better. For instance, DIY MFA is all about writers doing their own Master of Fine Arts in writing at home. The brand’s message is all about delving deep into one’s writing practice without needing a formal degree. Try to do something similar for your own blog name: Alluding to your blog’s message, value proposition, and covered topics in one sweep.
Consider what your target audience is looking for.
Your blog name should tie directly into what your readers want to achieve, learn, or solve. DIY MFA is about writers who don’t have the money for graduate school, but who still want to develop their writing skills. The HubSpot Marketing blog is — you guessed it — about marketing trends and tips.
It’s okay if your blog name feels “too straightforward.” Straightforward names accurately communicate what you’re about and effectively attract the right audience.
If you still need more assistance, try using a blog name generator. One last tip: Make sure the name you come up with isn’t already taken, as it could lessen your visibility and confuse readers looking for your content.
6. Create your blog domain.
A domain is a part of the web address nomenclature someone would use to find your website or a page of your website online.
Your blog’s domain will look like this: www.yourblog.com. The name between the two periods is up to you, as long as this domain name doesn’t yet exist on the internet.
Want to create a subdomain for your blog? If you already own a cooking business at www.yourcompany.com, you might create a blog that looks like this: blog.yourcompany.com. In other words, your blog’s subdomain will live in its own section of yourcompany.com.
Some CMS platforms offer subdomains as a free service, where your blog lives on the CMS, rather than your business’s website. For example, it might look like this: yourblog.contentmanagementsystem.com. However, to create a subdomain that belongs to your company website, register the subdomain with a website host.
Most website hosting services charge very little to host an original domain — in fact, website costs can be as inexpensive as $3 per month when you commit to a 36-month term.
Pro Tip: You can connect your custom domain to free hosting with HubSpot’s free CMS or in premium editions of CMS Hub. This includes access to built-in security features and a content delivery network.
Here are five other popular web hosting services to choose from:
7. Choose a CMS and set up your blog.
A CMS (content management system) is a software application that allows users to build and maintain a website without having to code it from scratch. CMS platforms can manage domains (where you create your website) and subdomains (where you create a webpage that connects to an existing website).
HubSpot customers host web content via CMS Hub. Another popular option is a self-hosted WordPress website on a hosting site such as WP Engine. Whether you create a domain or a subdomain to start your blog, you’ll need to choose a web hosting service after you pick a CMS.
Pro Tip: You can get started for free with HubSpot’s free blog maker. Our free CMS offers everything you need to get started– including hosting, a visual editor, and hundreds of free and paid themes to choose from.
8. Customize the look of your blog.
Once you have your domain name set up, customize the appearance of your blog to reflect the theme of the content you plan on creating and your brand.
For example, if you’re writing about sustainability and the environment, green might be a color to keep in mind while designing your blog.
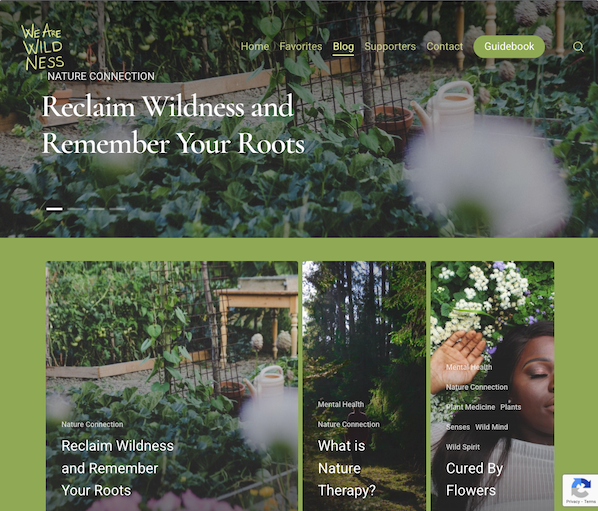
If you already manage a website and are writing the first post for that existing website, ensure the article is consistent with the website in appearance and subject matter. Two ways to do this are including your:
- Logo: This can be your business’s name and logo — it will remind blog readers of who’s publishing the content. (How heavily you want to brand your blog, however, is up to you.)
- “About” Page: You might already have an “About” blurb describing yourself or your business. Your blog’s “About” section is an extension of this higher-level statement. Think of it as your blog’s mission statement, which serves to support your company’s goals.
9. Write your first blog post.
Once you have your blog set up, the only thing missing is the content. While the design and layout are fun and functionally necessary, it’s the content that will draw your readers in and keep them coming back. So how do you actually go about writing one of these engaging and informational pieces?
Writing Your First Blog Post
You’ve got the technical and practical tidbits down — now it’s time to write your very first blog post. And nope, this isn’t the space to introduce yourself and your new blog (i.e. “Welcome to my blog! This is the topic I’ll be covering. Here are my social media handles. Will you please follow?”).
Start with “low-hanging fruit,” writing about a highly specific topic that serves a small segment of your target audience.
That seems unintuitive, right? If more people are searching for a term or a topic, that should mean more readers for you.
But that’s not true. If you choose a general and highly searched topic that’s been covered by major competitors or more established brands, it’s unlikely that your post will rank on the first page of search engine results pages (SERPs). Give your newly born blog a chance by choosing a topic that few bloggers have written about.
Let’s walk through this process.
1. Choose a topic you’re passionate and knowledgeable about.
Before you write anything, pick a topic for your blog post. The topic can be pretty general to start. For example, if you’re a company that sells a CRM for small-to-enterprise businesses, your post might be about the importance of using a single software to keep your marketing, sales, and service teams aligned.
Pro tip: You may not want to jump into a “how-to” article for your first blog post.
Why?
Your credibility hasn’t been established yet. Before teaching others how to do something, you’ll first want to show that you’re a leader in your field and an authoritative source.
For instance, if you’re a plumber writing your first post, you won’t yet write a post titled “How to Replace the Piping System in your Bathroom.” First, you’d write about modern faucet setups, or tell a particular success story you had rescuing a faucet before it flooded a customer’s house.
Here are four other types of blog posts you could start with:
- List (“Listicle”): 5 ways to fix a leaky faucet
- Curated Collection: 10 faucet and sink brands to consider today
- SlideShare Presentation: 5 types of faucets to replace your old one (with pictures)
- News Piece: New study shows X% of people don’t replace their faucet frequently enough
If you’re having trouble coming up with topic ideas, a good topic brainstorming session should help. In the post I’ve linked, my colleague walks you through a helpful process for turning one idea into many. Similar to the “leaky faucet” examples above, you would “iterate off old topics to come up with unique and compelling new topics.”
This can be done by:
- Changing the topic scope
- Adjusting your time frame
- Choosing a new audience
- Taking a positive/negative approach
- Introducing a new format
And if you’re still stuck, let’s take a look at some first blog post idea examples.
First Blog Post Ideas
The Difference Between [Niche Topic] and [Niche Topic], Explained by a [Niche Expert]
- The Difference Between SEM and SEO, Explained by a Marketing Expert
- The Difference Between Sedans and Coupes, Explained by a Car Mechanic
- The Difference Between Baking and Broiling, Explained by a Professional Baker
The 10 Best and Worst [Niche Tools] for [Niche Activity]
- The 10 Best and Worst Writing Software for Fiction Writing
- The 10 Best and Worst CRMs for Nurturing Prospects
- The 10 Best and Worst Family Cars for Cross-Country Roadtrips
8 [Niche Activity] Common Mistakes (+ Ways to Fix Them)
- 8 Non-Fiction Writing Common Mistakes (+ Ways to Fix Them)
- 8 Salmon Broiling Common Mistakes (+ Ways to Fix Them)
- 8 Car Maintenance Common Mistakes (+ Ways to Fix Them)
9 Proven Tips for [Niche Activity]
- 9 Proven Tips for Checking Plumbing Problems under Your Kitchen Sink
- 9 Proven Tips for Writing a Non-Fiction Bestseller
- 9 Proven Tips for Doing DIY Car Maintenance
Why We/I Switched from [Niche Tool] to [Niche Tool] (Comparison)
- Why We Switched from Pipedrive to HubSpot (Comparison)
- Why I Switched from Microsoft Word to Scrivener (Comparison)
- Why We Switched from iMacs to Surface Studio (Comparison)
[Niche Tool] vs [Niche Tool]: Which [Tool] is Best for You?
- Zendesk vs Freshcaller: Which Call Software is Best for You?
- Air Fryer vs Convection Oven: Which One is Best for You?
- Mazda Miata vs Toyota Supra: Which Sports Car is Best for You?
The Ultimate Roundup of [Niche Activity] Tips and Tricks
- The Ultimate Roundup of Novel Writing Tips and Tricks
- The Ultimate Roundup of Macaroon Baking Tips and Tricks
- The Ultimate Roundup of Solo Traveling Tips and Tricks
Want some real examples of blog posts? See what your first blog post can look like based on the topic you choose and the audience you’re targeting.
2. Target a low-volume keyword to optimize around.
Finding a keyword with low searches in Google (we recommend sticking to about 10 to 150 monthly searches). These topics offer less competition and should therefore allow your new blog post to rank more easily.
To choose a topic, you can either do a traditional brainstorming session or carry out keyword research. We suggest the latter because you can actually see how many people are looking for that topic.
Now, don’t be intimidated by the term “keyword research.” It’s not just for marketers, but for new bloggers, too. And it’s really easy to do.
To jumpstart your keyword research, first begin by identifying the general topic of your blog.
Say you’re a plumber. Your general, high-level topic might be “plumbing” (67K monthly searches).
Next, put this term into a keyword research tool such as:
When you run this term through the tool, a list of related keywords will appear. Scan the list and choose one with a lower search volume. For this example, we’ll use “under sink plumbing” (1.4K monthly searches).
Run that keyword in the keyword research tool again. Look at the related keywords. Find one with a lower search volume. Do that again.
For this example, we’ll settle on “plumbing problems under kitchen sink” (10 monthly searches). That’s the topic for our first post.
TLDR; Choose a low-volume, low-competition keyword that will ensure your first post ranks.
For more help on keyword research, here are more resources you can use:
- How to Do Keyword Research for SEO: A Beginner’s Guide
- How to Perform Keyword Research and Rank
- Top Tools For Finding Long-Tail Keywords
3. Google the term to understand your audience’s search intent.
You’ve got your topic — now, you need to check that the user’s search intent would be fulfilled by a blog post.
What does that mean?
If someone is looking for “plumbing problems under a kitchen sink,” they might be looking for a tutorial, a diagram, an article, or a product that can fix the issue. If they’re looking for the first three, you’re good — that can be covered in a blog post. A product, however, is different, and your blog post won’t rank.
How do you double-check search intent?
Google the term and look at the results. If other articles and blog posts rank for that term, you’re good to go. If you only find product pages or listicles from major publications, then find a new topic to cover in your first post.
Consider the term “under sink plumbing bathroom” (30 monthly searches). It seemed like a perfect fit because it had low monthly searches.
Upon Googling the term, we found product carousels, product pages from Home Depot and Lowes, and guides written by major publications. (You’ll also want to avoid topics that have been covered by major publications, at least for now.)
TLDR; Before writing your first blog post about a low-volume topic, double-check the user intent by Googling the keyword. Also, don’t forget to take a look at who’s written about that topic so far. If you see a major brand, consider writing about another topic.
4. Find questions and terms related to that topic.
You’ve got a highly unique topic that’s been covered by just a few people so far. It’s time to flesh it out by covering related or adjacent topics.
Use the following tools:
- Answer the Public: When you place your keyword into this tool, it will give you a list of questions related to that term.
- Google: Google is your best friend. Search for the term and look under “People also ask” and “People also search for.” Be sure to touch upon those topics in the post.
You can also use these keyword research tools we mentioned above in step one.
5. Come up with a working title.
You might come up with a few different working titles — in other words, iterations of approaching that topic to help you focus your writing.
For example, you may decide to narrow your topic to “Tools for Fixing Leaky Faucets” or “Common Causes of Leaky Faucets.” A working title is specific and will guide your post so you can start writing.
Let’s take a real post as an example: “How to Choose a Solid Topic for Your Next Blog Post.”
Appropriate, right? The topic, in this case, was probably “blogging.” Then the working title may have been something like, “The Process for Selecting a Blog Post Topic.” And the final title ended up being “How to Choose a Solid Topic for Your Next Blog Post.”
See that evolution from topic, to working title, to final title? Even though the working title may not end up being the final title (more on that in a moment), it still provides enough information so you can focus your blog post on something more specific than a generic, overwhelming topic.
6. Create an outline.
Sometimes, blog posts can have an overwhelming amount of information — for the reader and the writer. The trick is to organize the info in a way so readers aren’t intimidated by length or amount of content. This organization can take multiple forms — sections, lists, tips — whatever’s most appropriate. But it must be organized!
Featured Resource: 6 Free Blog Post Templates
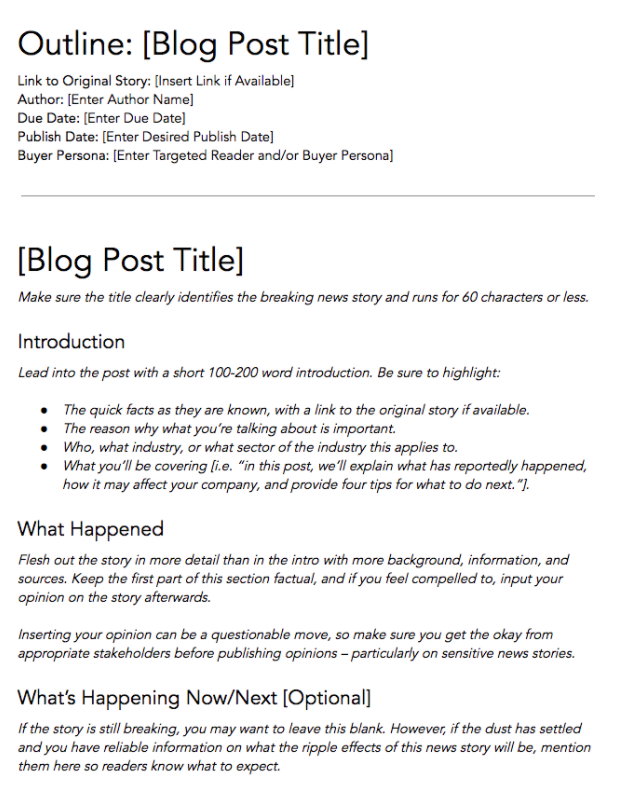
Download These Templates for Free
Let’s take a look at the post, “How to Use Snapchat: A Detailed Look Into HubSpot’s Snapchat Strategy.” There’s a lot of content in the piece, so it’s broken up into a few sections using descriptive headers. The major sections are separated into subsections that go into more detail, making the content easier to read.
To complete this step, all you really need to do is outline your post. This way, before you start writing, you’ll know which points you want to cover and the best order to do so. And to make things even easier, you can download and use our free blog post templates, which are pre-organized for six of the most common blogs. Just fill in the blanks!
7. Write an intro (and make it captivating).
We’ve written more specifically about writing captivating introductions in the post “How to Write an Introduction,” but let’s review, shall we?
First, grab the reader’s attention. If you lose the reader in the first few paragraphs — or even sentences — of the introduction, they’ll stop reading (even before they’ve given your post a fair shake). You can do this in a number of ways: tell a story or a joke, be empathetic, or grip the reader with an interesting fact or statistic.
Then, describe the purpose of your post and explain how it will address a problem the reader may be experiencing. This will give the reader a reason to continue reading and show them how the post will help them improve their work or lives.
Here’s an example of an intro we think does a good job of attracting a reader’s attention right away:
“Blink. Blink. Blink. It’s the dreaded cursor-on-a-blank-screen experience that all writers — amateur or professional, aspiring or experienced — know and dread. And of all times for it to occur, it seems to plague us the most when trying to write an introduction.”
8. Build out each section of your outline.
The next step — but not the last — is actually writing the content. We can’t forget about that, of course.
Now that you have your outline or template, you’re ready to fill in the blanks. Use your outline as a guide and expand on all points as needed. Write about what you already know, and if necessary, conduct additional research to gather more information, examples, and data to back up your points, while providing proper attribution when incorporating external sources. When you do, always try to find accurate and compelling data to use in your post.
If you’re having trouble stringing sentences together, you’re not alone. Finding your “flow” can be challenging for a lot of folks. Luckily, there are a ton of tools you can lean on to help you improve your writing. Here are a few to get you started:
- Power Thesaurus: Stuck on a word? Power Thesaurus is a crowdsourced tool that provides users with a number of alternative word choices from a community of writers.
- ZenPen: If you’re having trouble staying focused, check out this distraction-free writing tool. ZenPen creates a minimalist “writing zone” designed to help you get words down without having to fuss with formatting right away.
- Cliché Finder: Feeling like your writing might be coming off a little cheesy? Identify instances where you can be more specific using this handy cliché tool.
You can also refer to our complete list of tools for improving your writing skills. And if you’re looking for more direction, the following resources are chock-full of valuable writing advice:
- Copywriting 101: 6 Traits of Excellent Copy Readers Will Remember
- How to Write Compelling Copy: 7 Tips for Writing Content That Converts
- How to Write With Clarity: 9 Tips for Simplifying Your Message
- The Kurt Vonnegut Guide to Great Copywriting: 8 Rules That Apply to Anyone
- Your Blog Posts Are Boring: 9 Tips for Making Your Writing More Interesting
9. Publish and promote your first post any way you can.
As a new blogger, you likely don’t have a social media following yet. Thankfully, you don’t need a huge following before you can create a promotion strategy.
A promotion strategy is your master plan for how you create, post, and engage with your social media content. It helps you take advantage of social and digital technologies to share your business, or in this case, your content. Having a solid promotional strategy offers your audience from different marketing channels more ways to find your blog posts.
Here are more blog post promotion resources:
- 12 Tried-and-True Ways to Promote Your Blog Posts
- 10 Sites You Can Use for Free Blog Promotion
- 9 Link Building Email Outreach Templates That Actually Work
- Inbound Link Building 101: 34 Ways to Build Backlinks for SEO
- 11 Creative (But 100% White Hat!) Ways to Earn Backlinks
What makes a good blog post?
Before you write a blog, make sure you know the answers to questions like, “Why would someone keep reading this entire blog post?” and “What makes our audience come back for more?”
To start, a good blog post is interesting and educational. Blogs should answer questions and help readers resolve a challenge they’re experiencing — and you have to do so in an interesting way.
It’s not enough just to answer someone’s questions — you also have to provide actionable steps while being engaging. For instance, your introduction should hook the reader and make them want to continue reading your post. Then, use examples to keep your readers interested in what you have to say.
Remember, a good blog post is interesting to read and provides educational content to audience members.
(Want to learn how to apply blogging and other forms of content marketing to your business?
Check out HubSpot Academy’s free content marketing course.)
Quick Blog Writing Tips
- Conduct research if necessary to convey your point.
- Make your content skimmable; break it into digestible chunks.
- Include interesting quotes or facts for emphasis on the subject.
- Paint a full picture with images, graphics or video.
- Use Grammarly to catch mistakes.
- If you don’t know where to start, start by telling a story.
- Reference social media posts.
- Each sentence should convey a single idea.
While you have several tools and tips already, we wanted to provide you with some formatting guidelines to use before you publish your own.
1. Include H2s to arrange ideas.
When you begin typing your blog content, it’s important that you divide paragraphs into sections that make it easier for the reader to find what they need.
If you’re just starting out, then focus on the overarching H2s you want to talk about, and you’ll be able to branch off into subheaders and more naturally as you continue.
2. Center your images.
This is a simple practice that can help your content look more professional with little effort. Centering your images keeps the reader’s attention drawn to the subject — not searching for elsewhere.
Centering also looks better when translating from PC to mobile devices. As formatting transitions to small screens or windows, a centered image will remain the focal point.
3. Add alt text.
So those images you centered earlier, make sure you have descriptive alt text for them, too.
Image alt text allows search engines, like Google, to crawl and rank your blog post better than pages lacking the element. It also leads readers to your blog post if the keywords included are what they searched for in the first place.
Besides SERP features, image alt text is beneficial to readers by providing more accessibility. Image alt text allows people to better visualize images when they can’t see them, and with assistive technology, can be auditorially read aloud for people to enjoy.
4. Keep your sentences short and concise.
When you begin working on the body of your blog post, make sure readers can clearly understand what you’re trying to accomplish.
You shouldn’t feel pressure to elongate your post with unnecessary details, and chances are that if you keep it concise, readers will derive more value from your work.
5. Use media with a purpose.
Break up the monotony of your blog post with some multimedia content where seen fit.
Your reader will enjoy visiting a blog page with images, videos, polls, audio or slideshows as opposed to a page of black and white text.
It also makes it more interactive and improves your on-page search engine optimization (SEO).
Now, do you want some real examples of blog posts? See what your first blog post can look like based on the topic you choose and the audience you’re targeting.
1. List-Based Blog Post
List-Based Post Example: 17 Blogging Mistakes to Avoid in 2021, According to HubSpot Bloggers

List-based posts are sometimes called “listicles,” a mix of the words “list” and “article.” These are articles that deliver information in the form of a list. A listicle uses sub-headers to break down the blog post into individual pieces, helping readers skim and digest your content more easily.
As you can see in the example from our blog, listicles can offer various tips and methods for solving a problem.
2. Thought Leadership Post
Example: How HubSpot’s Customers Are Shaping the Next Normal
Thought leadership posts allow you to share your expertise on a particular subject matter and share firsthand knowledge with your readers.
These pieces — which can be written in the first person, like the post shown above — help you build trust with your audience so people take your blog seriously as you continue to write for it.
3. Curated Collection Post
Example: 8 Examples of Evolution in Action
Curated collections are a special type of listicle blog post. Rather than sharing tips or methods for doing something, this type of blog post shares a list of real examples that all have something in common in order to prove a larger point.
In the example post above, Listverse shares eight real examples of evolution in action among eight different animals — starting with the peppered moth.
4. Slide Presentation
Example: The HubSpot Culture Code
HubSpot Slides is a presentation tool that helps publishers package a lot of information into easily shareable slides. Think of it like a PowerPoint, but for the web. With this in mind, SlideShare blog posts help you promote your SlideShare so that it can generate a steady stream of visitors.
Unlike blogs, slide decks don’t often rank well on search engines, so they need a platform for getting their message out there to the people who are looking for it. By embedding and summarizing your SlideShare on a blog post, you can share a great deal of information and give it a chance to rank on Google at the same time.
Need some slideshow ideas? In the example above, we turned our company’s “Culture Code” into a slides presentation that anyone can look through and take lessons from, and then promoted it in a blog post.
5. Newsjacking Post
Example: Ivy Goes Mobile With New App for Designers

“Newsjacking” is a nickname for “hijacking” your blog to break important news related to your industry. Therefore, the newsjack post is a type of article whose sole purpose is to garner consumers’ attention and, while offering them timeless professional advice, prove your blog is a trusted resource for learning about the big things that happen in your industry.
The newsjack example above was published by Houzz, a home decor merchant and interior design resource, about a new mobile app that was launched just for interior designers. Houzz didn’t launch the app, but the news of its launching is no less important to Houzz’s audience.
6. Infographic Post
Example: The Key Benefits of Studying Online [Infographic]
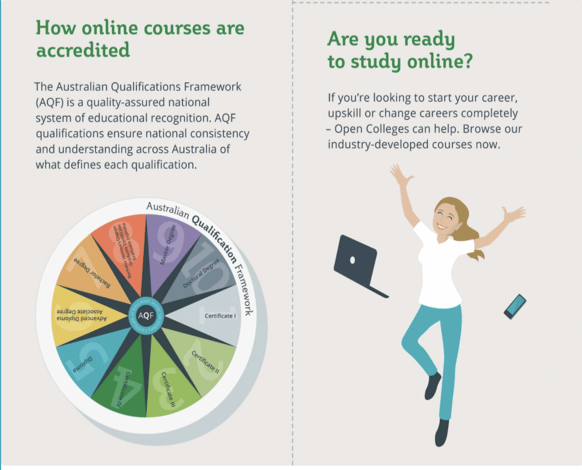 The infographic post serves a similar purpose as the SlideShare post — the fourth example, explained above — in that it conveys information for which plain blog copy might not be the best format.
For example, when you’re looking to share a lot of statistical information (without boring or confusing your readers), building this data into a well-designed, even engaging infographic can keep your readers engaged with your content. It also helps readers remember the information long after they leave your website.
7. How-to Post
Example: How to Write a Blog Post: A Step-by-Step Guide
For this example, you need not look any further than the blog post you’re reading right now! How-to guides like this one help solve a problem for your readers. They’re like a cookbook for your industry, walking your audience through a project step by step to improve their literacy on the subject.
The more posts like this you create, the more equipped your readers will be to work with you and invest in the services you offer.
8. Guest Post
Example: Your Bookmarkable Guide to Social Media Image Sizes in 2021 [Infographic]
 Guest posts are a type of blog post that you can use to include other voices on your blog. For example, if you want to get an outside expert’s opinion on a topic, a guest post is perfect for that.
Additionally, these posts give your blog variety in topic and viewpoint. If your customer has a problem you can’t solve, a guest post is a great solution.
If you begin accepting guest posts, set up editorial guidelines to ensure they’re up to the same standards as your posts.
So we’ve gone through the different types of blog posts you can make, but how do you consistently make quality blog posts that your viewers will enjoy?
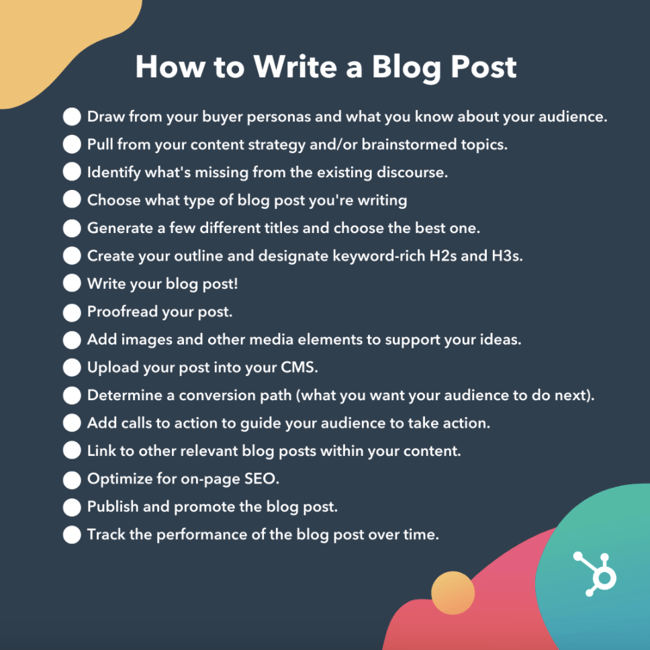
1. Draw from your buyer personas and what you know about your audience.
Before you start writing your blog post, make sure you have a clear understanding of your target audience.
Ask questions like: What do they want to know about? What will resonate with them?
This is where the process of creating buyer personas comes in handy. Consider what you know about your buyer personas and their interests while you’re coming up with a topic for your blog post.
For instance, if your readers are millennials looking to start a business, you probably don’t need to provide them with information about getting started in social media — most of them already have that down.
You might, however, want to give them information about how to adjust their social media approach (for example — from what may be a casual, personal approach to a more business-savvy, networking-focused approach). That kind of tweak is what helps you publish content about the topics your audience really wants and needs.
Don’t have buyer personas in place for your business? Here are a few resources to help you get started:
- Create Buyer Personas for Your Business [Free Template]
- Guide: How to Create Detailed Buyer Personas for Your Business
- [Free Tool] Make My Persona: Buyer Persona Generator
2. Pull from your content strategy and/or brainstormed topics.
If you already have a pre-existing portfolio to look back on, it would benefit you to pull from those brainstormed post ideas or previous content strategy.
3. Identify what’s missing from the existing discourse.
Fill in the gaps of the existing discourse in the topic of your choosing.
You want to meet a need that hasn’t already been met in your topic cluster. Otherwise, you run the risk of writing content for topics that are already over-saturated. It’s hard to beat saturated search queries when you’re trying to rank against high authority publications — but not impossible if your content is answering the queries the competition hasn’t.
4. Choose what type of blog post you’re writing.
There are several types of blog posts you can create, and they each have different formats to follow.
Six of the most common formats include:
- The List-Based Post
- The “What Is” Post
- The Pillar Page Post (“Ultimate Guide”)
- The Newsjacking Post
- The Infographic Post
- The “How-To” Post
Save time and download six blog post templates for free.
5. Generate a few different titles and choose the best one.
Your blog title should tell readers what to expect, yet it should leave them wanting to know more — confusing, right?
This is why when you’re coming up with a blog post title that you should brainstorm multiple ones instead of just one.
6. Create your outline and designate keyword-rich H2s and H3s.
When outlining, you need to center your main ideas with keyword-rich H2s and H3s. These are going to be your headers and subheaders that readers typically search for, and the information that Google crawls when indexing and ranking content.
7. Write your blog post!
We already told you how to build out your outline earlier in the post, so we’ll quickly go over the main points once more.
You’ve already outlined your main headings and subheadings, so now’s the time to add the body.
Write about what you already know, and if necessary, conduct additional research to gather more information, examples, and data to back up your points, while providing proper attribution when incorporating external sources. When you do, always try to find accurate and compelling data to use in your post.
This is also your opportunity to show personality in your writing. Blog posts don’t have to be strictly informational, they can be filled with interesting anecdotes and even humor if it serves a purpose in expressing your ideas. It also factors into creating and maintaining your blog’s brand voice.
Don’t be discouraged if you’re having trouble stringing sentences together, you’re not alone. Finding your “flow” can be challenging, but there are many tools to ease the process.
8. Proofread your post.
The editing process is an important part of blogging — don’t overlook it.
Ask a grammar-conscious co-worker to copy edit and proofread your post. You may also consider enlisting the help of The Ultimate Editing Checklist or using a free grammar checker like Grammarly.
If you’re looking to brush up on your self-editing skills, turn to these helpful posts for some tips and tricks to get you started:
- How to Become a (Better) Editor: 13 Editorial Tips
- How to Become a More Efficient Editor: 12 Ways to Speed Up the Editorial Process
- 10 Simple Edits That’ll Instantly Improve Any Piece of Writing
9. Add images and other media elements to support your ideas.
When you’re finished checking for grammar, shift your focus to adding other elements to the blog post than text. There’s much more to making a good blog post than copy, here’s some following elements to add in support of your ideas:
Featured Image
Choose a visually appealing and relevant image for your post. As social networks treat content with images more prominently, visuals are more responsible than ever for the success of your blog content.

For help selecting an image for your post, read “How to Select the Perfect Image for Your Next Blog Post” and pay close attention to the section about copyright law.
Visual Appearance
No one likes an unattractive blog post. And it’s not just pictures that make a post visually appealing — it’s the formatting and organization of the post, too.
In a well-formatted and visually-appealing blog post, you’ll notice that header and sub-headers are used to break up large blocks of text — and those headers are styled consistently.
Here’s an example of what that looks like:
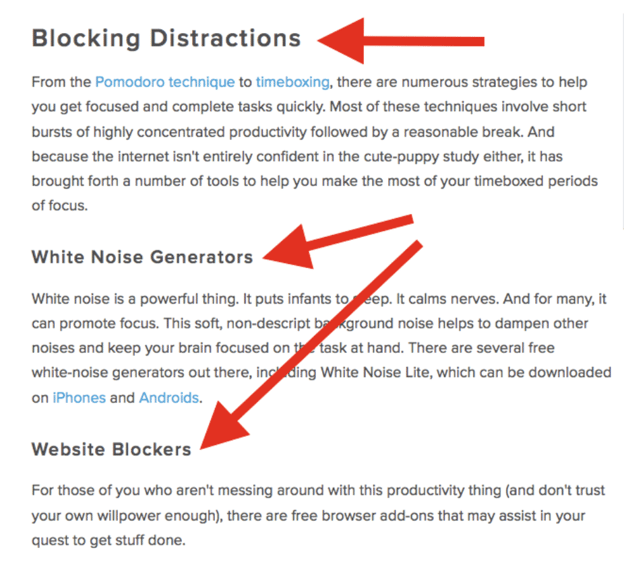
Screenshots should always have a similar, defined border so they don’t appear as if they’re floating in space — that style should stay consistent from post to post.
Maintaining this consistency makes your content look more professional and easier on the eyes.
Topics and Tags
Tags are specific, public-facing keywords that describe a post. They also allow readers to browse for more content in the same category on your blog. Refrain from adding a laundry list of tags to each post. Instead, put some thought into a blog tagging strategy.
Think of tags as “topics” or “categories,” and choose 10-20 tags that represent all the main topics you want to cover on your blog. Then stick to those.
10. Upload your post into your CMS.
You filled out your blog post with all the optimized content you can, now is the time to publish it in your content management system.
You can opt to post your content immediately, save it as a draft, or schedule when you want it to be posted live in case you adhere to a posting schedule.
11. Determine a conversion path (what you want your audience to do next).
A conversion path is a process by which an anonymous website visitor becomes a known lead. It sounds simple enough, but creating an effective conversion path requires a clear understanding of your target audience and their needs.
Having a conversion path is important because when you share your content on the web, you should have an idea of what your audience should do next, or in other words, provide them with a path forward.
The HubSpot Flywheel model is a great example of this as it shows how our organization gains and maintains leads.
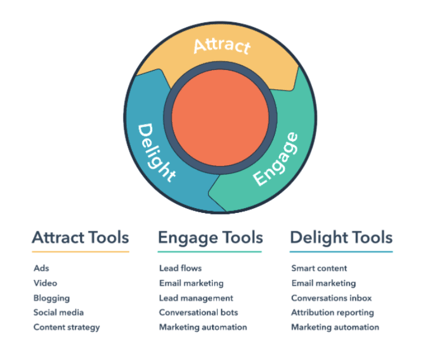
12. Add calls to action to guide your audience to take action.
Call to action (CTA) are a part of a webpage, advertisement, or piece of content that encourages the audience to do something. You can add them to your blog post to guide your reader with “next steps” or a conversion path.
Different types of call to actions include asking readers to:
- Subscribe to your newsletter to see when you publish more content.
- Join an online community in your blog domain.
- Learn more about a topic with downloadable content.
- Try something for free or discount to convert readers to customers.
To get a better idea of how to make a CTA that readers want to click, we have a whole list of effective call to action examples for you to check out.
13. Link to other relevant blog posts within your content.
When you’re completing your blog post, you should link relevant content throughout it. An effective way to do this is to link within the same content cluster.
Keeping relevant content throughout your post can provide your readers with more helpful information, and potentially boost search engine rankings with corresponding longtail keywords.
But we’ll talk more about how to improve your ranking in the next step.
14. Optimize for on-page SEO.
After you finish writing, go back and optimize the on-page elements of your post.
Don’t obsess over how many keywords to include. If there are opportunities to incorporate keywords you’re targeting, and it won’t impact reader experience, do it. If you can make your URL shorter and more keyword-friendly, go for it. But don’t cram keywords or shoot for some arbitrary keyword density — Google’s smarter than that!
Here’s a little blog SEO reminder about what you should review and optimize:
-
Write your meta description.
Meta descriptions are the descriptions below the post’s page title on Google’s search results pages. They provide searchers with a short summary of the post before clicking into it. They are ideally between 150-160 characters and start with a verb, such as “Learn,” “Read,” or “Discover.”
While meta descriptions no longer factor into Google’s keyword ranking algorithm, they give searchers a snapshot of what they’ll get from reading the post and help improve your clickthrough rate from search.
-
Optimize your page title and headers.
Most blogging software uses your post title as your page title, which is the most important on-page SEO element at your disposal. But if you’ve followed our formula so far, you should already have a working title that will naturally include keywords or phrases your target audience is interested in.
Don’t over-complicate your title by trying to fit in keywords where they don’t naturally belong. With that said, if there are clear opportunities to add keywords you’re targeting to your post title and headers, feel free to take them. Also, try to keep your headlines short — ideally, under 65 characters — so they don’t get truncated in the search engine results.
-
Consider anchor text best practices as you interlink to other pages.
Anchor text is the word or words that link to another page — either on your website or on another website. Carefully select which keywords you want to link to other pages on your site because search engines take that into consideration when ranking your page for certain keywords.
It’s also important to consider which pages you link to. Consider linking pages that you want to rank for a specific keyword. You could end up getting it to rank on Google’s first page of results instead of its second page — and that isn’t small potatoes!
-
Write alt text for all of your images.
Alt text conveys the “why” of an image as it relates to the content of your blog post to Google. By adding alt text correlating to the topic clusters and keywords of the post, Google can better direct users’ searches to you.
-
Check that all images are compressed for page speed.
When Google crawls different websites, a page’s load speed holds weight in page ranking. Make sure the images you include throughout the page aren’t unnecessarily large to shorten the duration it takes to load.
Use apps like Squoosh to minimize the size of your images without losing the quality.
-
Ensure that your blog post is mobile friendly.
More than 60% of organic visits are carried out on a mobile device. As such, having a website with a responsive design is critical. In addition to making sure your website’s visitors (including your blog’s visitors) have the best experience possible, optimizing for mobile will score your website some SEO points.
15. Publish and promote the blog post.
Share your post across all the marketing channels in your repertoire. The further the reach, the more of a possibility that readers will find it.
Channels to expand your blog post promotion strategy include:
- Social Media Marketing: Sharing your content on the most popular social media networks like Twitter, Instagram, TikTok, etc.
- Email Marketing: Sharing the newest post with your email subscribers to find.
- Boosted Posts or Paid Ads: Allocating budget toward advertisement on search engines inorganically.
- Word of Mouth Marketing: Actively influencing people to read your content organically.
16. Track the performance of the blog post over time.
Your post is published for the world to see, make sure you’re keeping an eye on its performance over time so you can see if your blog post strategy is working well enough for your goals.
There’s a plethora of website traffic analysis tools that you can take advantage of to better understand your audience’s behavior on your blog posts.
Ready to blog?
Blogging can help you build brand awareness, become a thought-leader and expert in your industry, attract qualified leads, and boost conversions. Follow the steps and tips we covered above to begin publishing and enhancing your blog today.
Editor’s note: This post was originally published in October 2013 and has been updated for comprehensiveness.
 Bl

40+ Resume Objective Examples to Help You Craft Your Own
With only six seconds to grab a recruiter’s attention, conventional wisdom might tell you to cut right to the chase when you write your resume. A lot of people say a resume objective just wastes precious space. But if you craft it in a way that highlights your qualifications, skills, and fit for a role, an objective can actually enhance your resume by giving recruiters a sneak peek of your background that prompts them to keep reading.

In this post we’ll teach you how to leverage a resume objective to your advantage as well as share some examples to help you craft your own.
Skip to:
- What’s a resume objective?
- When to use a resume objective
- Writing a resume objective
- Good resume objective examples
When to Use a Resume Objective
Including a resume objective, sometimes called a professional summary, in your resume gives the prospective employer a snapshot of your background and talent. They’re the perfect place to specify what you bring to the table for the role you are applying for. As a general rule, you should use a resume objective when you are targeting a specific position or are early in your career with little work experience.
Adding a resume objective is also especially helpful if you are changing careers or industries. It can give context to your transition and how your transferable skills are the perfect fit for the company, despite being new to the industry.
How to Write a Resume Objective
When recruiters read your resume, they want to know three things about you:
- Are you qualified for this job?
- Have you made an impact on your company in your current or previous roles?
- How will you make an impact on our company in this specific role?
If you can give them a clear and concise preview of these three answers within the first few lines of your resume, they’ll start thinking about your potential as an employee at their company. This’ll also give them a positive first impression of you and make them read the rest of your resume to confirm that you’re their best-fit candidate.
Pro tips:
- Keep it short: Objectives should be 1-3 sentences max.
- Be specific: Get specific about the role you are applying for, your skills, and how those skills and what impact those skills will have on the organization.
- Tailor it: Your resume objective should be tailored to fit the role or company you are applying to.
To show you how to craft a compelling resume objective at any stage of your career, we’ve provided some resume objective examples that anyone from a recent graduate to a proven professional can use. We’ll also break down the structure of each resume objective to give you a more concrete understanding of writing a gripping resume objective.
Good Resume Objective Examples
1. The Recent Graduate
Recent double major in English and Economics from Pomona College who has completed four content marketing internships in the MarTech space. Used creative and analytical skills to craft compelling content and refine content marketing strategies. Seeking a position as a Junior Growth Marketer to help HubSpot scale freemium marketing efforts and boost free product signups.
Structure:
Are you qualified for this job?
“Recent double major in English and Economics from Pomona College who has completed four content marketing internships in the MarTech space.”
How have you made an impact during your current or previous roles?
“Used creative and analytical skills to craft compelling content and refine content marketing strategies.”
How will you make an impact on our company in this specific role?
“Seeking a position as a Junior Growth Marketer to help HubSpot scale freemium marketing efforts and boost free product signups.”
2. The Ambitious Entry-Level Worker
Ambitious associate marketing manager with two years of experience strategizing and executing lead generation campaigns. Spearhead Sigstr’s co-marketing program and drove a 25% increase in program leads last year. Seeking a position as Marketing Manager of the Lead Optimization team at HubSpot to optimize blog lead generation strategy.
Structure:
Are you qualified for this job?
“Ambitious associate marketing manager with two years of experience strategizing and executing lead generation campaigns.”
How have you made an impact during your current or previous roles?
“Spearhead Sigstr’s co-marketing program and drove a 25% increase in program leads last year.”
How will you make an impact on our company in this specific role?
“Seeking a position as Marketing Manager of the Lead Optimization team at HubSpot to optimize blog lead generation strategy.”
3. The Career Switcher
Experienced journalist considering a career switch to content marketing. Spent five years digging up and breaking stories about business and technology for The Boston Globe. Hoping to apply my grasp of journalism and storytelling as a Staff Writer to strengthen HubSpot’s thought leadership in the MarTech space.
Structure:
Are you qualified for this job?
“Experienced journalist set on making a career switch to content marketing.”
How have you made an impact during your current or previous roles?
“Spent five years digging up and breaking stories about business and technology for The Boston Globe.”
How will you make an impact on our company in this specific role?
“Hoping to apply my grasp of journalism and storytelling as a Staff Writer to strengthen HubSpot’s thought leadership in the MarTech space.”
4. The Middle Manager Who Wants to Make it to the Top
Savvy marketing manager with five years of experience crafting social media videos, developing social video strategy, and optimizing social media advertising strategy. Lead Sprout Social’s social analytics team and doubled video views and cut CPM costs by 40% this year. Looking to join HubSpot as Director of Buzz to develop an overarching social media strategy that boosts views, engagement, and cuts costs.
Structure:
Are you qualified for this job?
“Savvy marketing manager with seven years of experience crafting social media videos, developing social video strategy, and optimizing social media advertising strategy.”
How have you made an impact during your current or previous roles?
“Lead Sprout Social’s social analytics team and doubled video views and cut CPM costs by 40% this year.
How will you make an impact on our company in this specific role?
“Looking to join HubSpot as Director of Buzz to develop an overarching social media strategy that boosts views, engagement, and cuts costs.”
5. The Proven Professional
Seasoned business operations and analytics veteran with an MBA and ten years of experience leading high-performing sales operations, marketing analytics, and business intelligence teams at Salesforce, Adobe, and Domo. Seeking to utilize my proven analytical, technical, and professional expertise to leverage data and drive crucial business decisions at HubSpot as Vice President of Business Intelligence.
Structure:
Are you qualified for this job?/How have you made an impact during your current or previous roles?
“Seasoned business operations and analytics veteran with an MBA and ten years of experience leading high-performing sales operations, marketing analytics, and business intelligence teams at Salesforce, Adobe, and Domo.”
How will you make an impact on our company in this specific role?
“Seeking to utilize my proven analytical, technical, and professional expertise to leverage data and drive crucial business decisions at HubSpot as Vice President of Business Intelligence.
General Resume Objective Examples
We’ve rounded up some of the best resume examples available to give you a bit of inspiration to get started writing your own. If you like more resume help, check out the best resume templates and grab the attention of recruiters.
Beginner Resume Objectives
1. Resume Lab
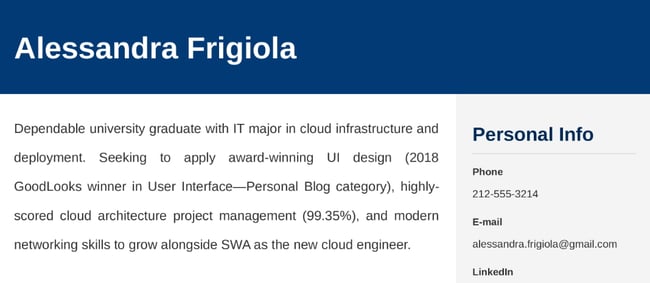
In this sample objective from Resume Lab, the writer chooses to play up her academic achievements to account for a lack in work experience.
What we like:
The writer makes specific reference to awards she’s won and skills related to the role she is seeking. She then makes the connection to how those skills will transfer to the new role.
2. Live Career
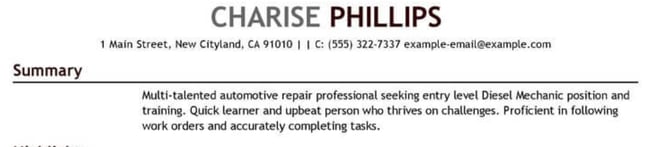
This mechanic objective is short and to the point, while still giving recruiters a bit of insight to their personality and skills (“Quick learner who thrives on challenges”).
What we like:
Since the author is relatively new to the field, they opted to shoot for an entry-level position, setting clear expectations for the recruiter.
3. Naukri
A certified Digital Marketer with a 6-month internship experience with XYZ agency. Excellent understanding of online marketing and an ability to help businesses boost their organic traffic as well as generate high quality leads through SEM Marketing. Looking for a relevant role.
This entry-level career objective from career advice blog Naukri uses past agency intership experience to demonstrate they can handle the new challenges of a full time role.
What we like:
Despite having a short work history (internship experience only), this applicant emphasizes their transferrable digital marketing skills. They also play up the contributions she made to the agency while interning.
4. Resume Builder
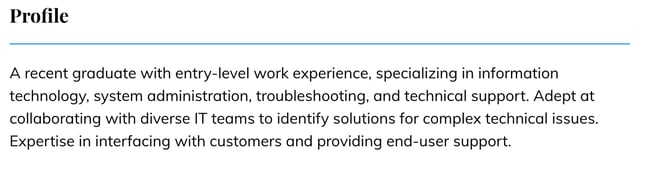
While this is a profile and not a resume objective, it does a good job of hilighting this recent grad’s skills. You can take this format and adjust it to create a persuasive resume objective.
What we like:
While the applicant is new to the workforce, we like that the first sentence highlights that they already has some entry-level IT experience. The profile then goes on to list their transferrable skills.
5. Resume Example
A 4.0 GPA digital marketing graduate looking for an entry-level marketing position at a top agency like Speedex Marketing. Hardworking and motivated to gain experience in social media and content marketing. Currently managing my personal Instagram with 10k+ followers and increased Terny Jewelry’s Facebook page followers by 20% after working with them for three months.
This objective taken from a Resume Example template shows how to showcase work you’ve done on personal projects to make the case for why you should be hired.
What we like:
This recent grad does an excellent job of highlighting their marketing talents running their own brand, complete with data to back it up.
6. Hloom
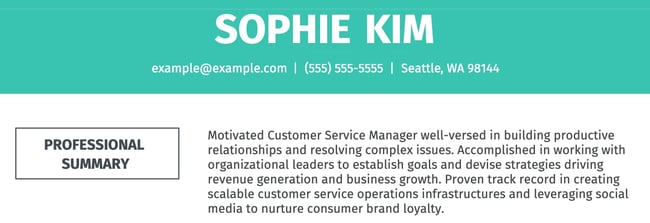
While this entry-level professional summary from Hloom isn’t an objective, it provides a good base to tailor it to the specific role you are applying for.
What we like:
This summary is really good at showing how their skills and actions in previous roles impacted the company. You can adopt this technique when writing your objective, getting specific about the results you delivered in previous roles and how you plan to deliver in the next.
7. Live Career
Looking to secure an entry-level Web UI Developer position with (company name) that will allow for the use of excellent user experience, technical and communication skills.
This short and sweet template from Live Career can easily be modified to craft yoru own objective. Just get more specific about what you bring to the table for the company you are applying to.
What we like:
A good resume objective doesn’t have to be wordy. If you can communicate your talents and intentions in one to two sentences, do it.
8. Resume Genius
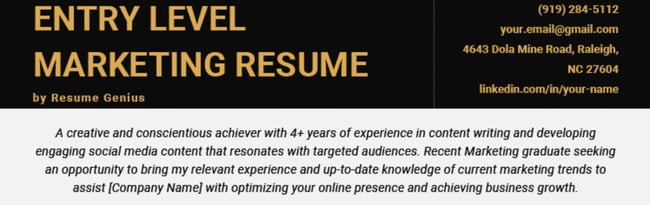
This objective from Resume Genius is a great teamplate for those pursuing a marketing role. you’ll just need to tailor it to your specific talents.
What we like:
Like previous examples, this objective is specific about the appliant’s experience and qualifications. It also focuses on outomes, which is a great way to demonstrate your qualifications for a role.
9. Springboard
As the daughter of small business owners, I’m really excited about the prospect of using my full-stack Python experience to further the Stripe mission of making payments accessible for companies of all sizes across the globe. I’ve built several projects in Django to scratch my own itch and I’d love to use that skill-set to start my software engineering career at Stripe.
This entry-level objective from Springboard demonstrates the effectiveness of adding a personal touch when relevant to the company you are applying to.
What we like:
This resume objective is so effective because it doesn’t just show off the applicant’s skills, but also her “why”. She’s passionate about helping small businesses succeed because her parents were small business owners — establishing a personal connection to Stripe’s mission.
10. Career Cloud
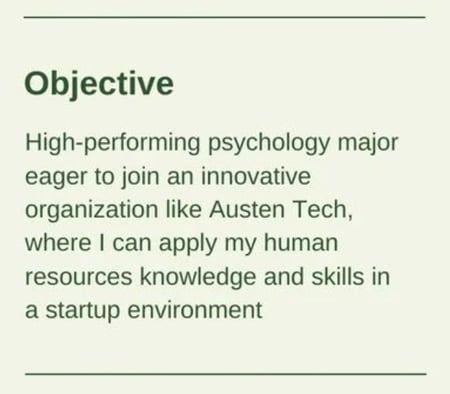
While this objective from Career Cloud is only one sentence, it quickly sums up the applicant’s background and the role they are applying for.
What we like:
This is a good-one sentence template for how to format a brief resume objective for new grads. If possible, take it a step further and describe how your skills will benefit the company.
11. Resume.com
Recent major in Marketing and Advertising from Blue University where I completed two internships at Global United Agency. Able to use critical thinking and communication skills to attract customers and implement new strategies. Seeking employment as a marketing associate to help Aerial Agency’s overall marketing efforts.
This entry-level marketng resume objective from Resume.com provides a good foundation for those looking to play up their internship experience.
What we like:
This objectibe is specific, showcasing not one, but two internships with relevant experience while also not making the whole paragraph about themselves. It brings everything back to the company with the last sentence “to help Aerial Agency’s overall marketing efforts.”
Professional Resume Objectives
12. Beam Jobs
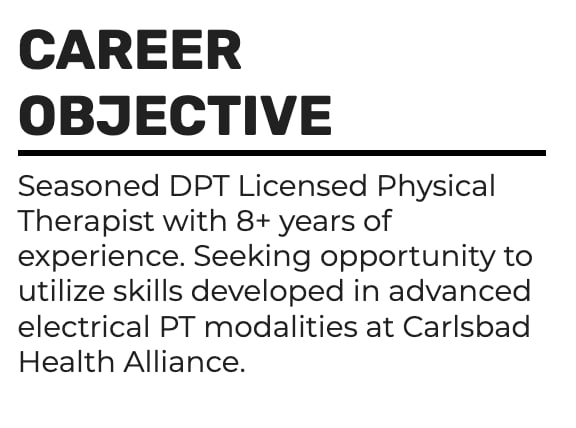
This objective is clear and to the point, quickly outlining their experience and what skills they intend to apply to the new position.
What we like:
This objective is succint and shows that you can craft one that is both concise and effective.
13. Zippia
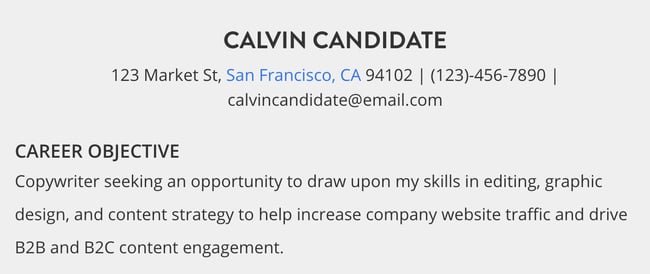
This objective manages to list the applicant’s skills and how they’ll be applied in just one sentence.
What we like:
Like the brief resume objective example above, this one gets the job done in one sentence while stating specifically what they intend to complish in the role (increasing traffic and driving engagement).
14. Resume.io
Motivated human resources professional with a drive for serving as a dedicated support specialist and energetic team member. Adept in assisting with the recruitment of employees, as well as the management of existing employees. Experienced in managing employee and community outreach programs, and dedicated to working towards the mission of a company.
The customizable career objective above is written for a human resources professional, but can be adapted to suit your industry. Simply swap out the role and your skills to craft your own.
What we like:
While this example clearly calls out the applicant’s recruiting skills and experience creating programming, it also ties the focus back to the company mission. If using this as a template, you can easily replace the company’s mission statement and tie it back to your own skills.
15. Resume Companion
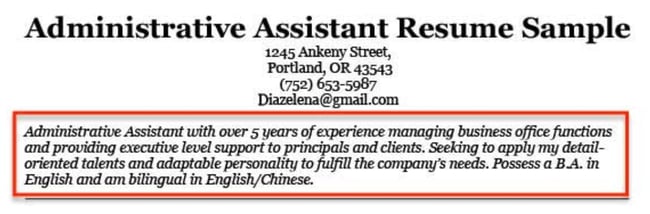
This resume objective has a heavy focus on the applicant’s professional experience and how their skills will apply to the new role they are applying for.
What we like:
While we wouldn’t normally suggest adding degree information in your objective unless you’re a recent grad, in this case it works to emphasize the candidate is fluent in multiple languages.
16. Beam Jobs

This resume objective does a great job of highlighting specifically what the applicant brings to the role in a concise way.
What we like:
While this is for a teaching role, you can apply the same level of specificity to your objective, emphasizing why you want the role and who benefits. In this case it’s cultivating student’s passion for a particular subject, but it can be applied to any industry you’re excited about making an impact in.
Sales Resume Objectives
17. Zety
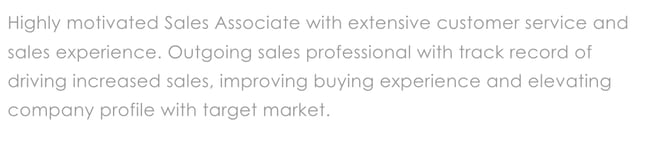
While the wording of this resume objective is a bit clunky, it can still serve as a template for your own with a few adjustments to tailor it to your industry.
What we like:
This resume objective places an emphasis on outcomes, which is great for any industry, but especially in sales. If you have a proven record of driving sales or similar impact, be sure to include it.
18. Resumeway
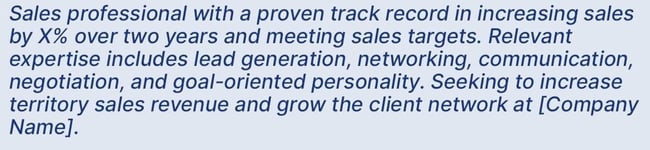
If you’re stuck gettng started, use this template from Resumeway to make writing an objective a little easier. Be sure to have the data points you’d like to include ready beforehand.
What we like:
As we’ve mentioned previously, anytime you can provide data to back up your claims, do so.
19. Resume Genius
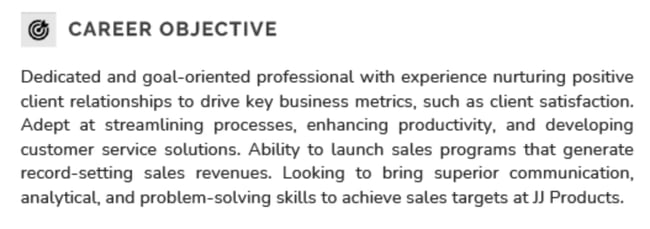
Coming in longer than most on this list, this objective is all about skills and the positive outcomes they spearheaded.
Management Resume Objectives
This objective focuses on what the candidate can do for the company, rather than just being a list of accomplishments.
20. The Ladders
Seeking a data analytics supervisor position where I can apply my 7+ years of data science and business analytics skills and experience. I’m eager to improve business intelligence for Company XYZ in a leadership role.
This objective from the Ladders demonstrates how you can leverage your individual contributor experinece to make the case for a management position. The applicant isn’t shy to display enthusiam for the potential new role.
What we like:
This objective is quick to point out years of relevant experience at the start to build the foundation for why they are the right fit for the role. Then they drive the point home by disclosing what they intend to do once hired.
21. Interview Kickstart
With years of proven excellence, I’m looking for the challenging position of a director to be an active initiator of organizational success at MNO Inc. Prolonged experience in full-cycle project management, 6years of experience at multiple clients handling business operation management is ideal for the post in a mutually benefitting work culture to achieve company missions.
This is another quick-start template you can use to save time writing your objective. Simply swap out the default information for your own.
What we like:
This template is easily customizeable while providing a solid format to help you create a resume objective that clearly defines your potential impact if hired.
22. Top Resume
Editor with extensive writing and management experience looking to fill the position ofSenior Editorwith [company name], utilizing my time-management skills to ensure all projects meet deadlines and supervisory experience to effectively manage a team of writers and editors.
This template from Top Resume is perfect for editors or those applying for a similar role.
What we like:
This objective plays to the applicant’s strengths as well as honing in on qualities needed for the position (time management, meeting tight deadlines).
23. Resume Lab
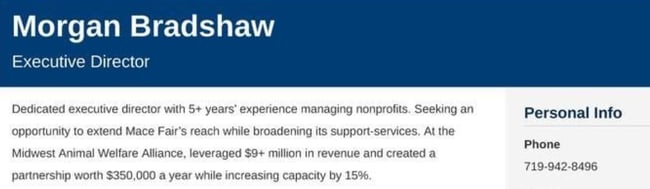
As we’ve previously discussed, getting specific about what you’ve accomplished and how you intend to help the company achieve its goals is key, especially when applying for a management position. This example shows the effectveness of providing data to back up your skills and accomplishments.
What we like:
We love the focus on tangible data and stats in this resume objective example. Use them whenever possible to make your case.
24. Tough Nickel
A highly recognized hotel management professional offering over ten years of enhancing organizations’ bottom lines through a customer-centric approach and excellent leadership and interpersonal skills. Seeking a challenging position as(specific role)in order to help grow(company)’s reputation as it continues to expand.
This template from Tough Nickel…will get your objective written in no time. It’s adaptable to any industry.
What we like:
This template emphasizes how you accomplished a particular goal, its impact, and what you intend to apply those skills in your next role.
Marketing Resume Objectives
25. Resume Companion
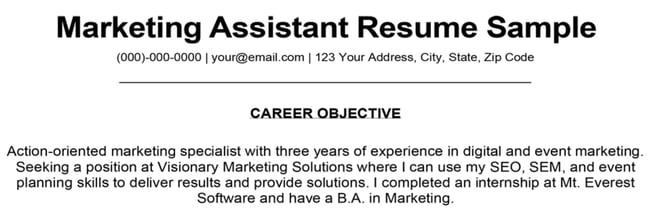
If you’re early in your marketing career, with a few years of experience, you can use this resume objective for a bit of inspiration. If you have enough work experience to fill the page, you may want to omit the degree info in your draft.
What we like:
We like how this objective highlights two different sectors within the marketing umbrella — event and digital marketing. If you have similar dual, but relavent talents that would be beneficial in your new role, highlight them.
26. Naukri
A resourceful individual with a proven track record in implementing successful marketing strategies, boosting organic traffic, and improving search rankings seeks a position of Marketing Associate at ABC company to maximize brand awareness and revenue through integrated marketing communications.
This objective from career advice blog Naukri provides a good starting point for those applying for marketing associate or assistant roles.
What we like:
While this obective is vague enough to be tailored to your needs, the format with specifics about your skills and how you would apply them provide a good outline for how you should structure your own.
IT & Developer Resume Objectives
27. Interview Guys

This brief but effective objective quickly highlights the applican’t most relevant skils and the impact they could potentially have in their new role.
What we like:
It’s easy to make a resume objective one-sided and all about yourself, but this one demonstrates that you can demonstrate your value to potential employers in a clear and concise way.
28. Resume Companion
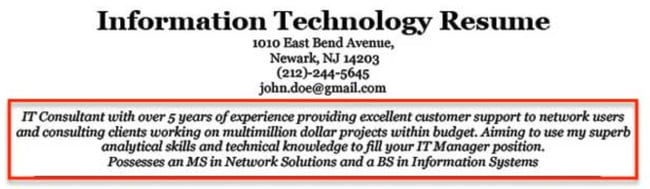
This is another resume objective example that demonstrates the power getting specific about your contributions and using numbers where appropriate to add context.
What we like:
In just a few sentences, this objective clearly conveys that this IT candidate has ample experience working on projects with large budgets. A recruiter would see this as a plus, if they are hiring for a large account as this person has already shown they are capable.
29. Evolution Coaching
Energetic, technical-minded professional seeking aposition as a (Software Engineer) at (Company Name) where knowledge of software development life cycles, a high technical aptitude, and unyielding commitment to work can effectively be utilized to contribute to the successful and profitable operation of the company.
This plug and play template from Evolution Coaching makes it easy for you to pop in your own accomplisments and contributions.
What we like:
Like other templates on this list, this one highlights the importance of including how your skills and attributes will benefit the company you are applying to. Always align yourself with the company’s goals.
30. Resume Giants
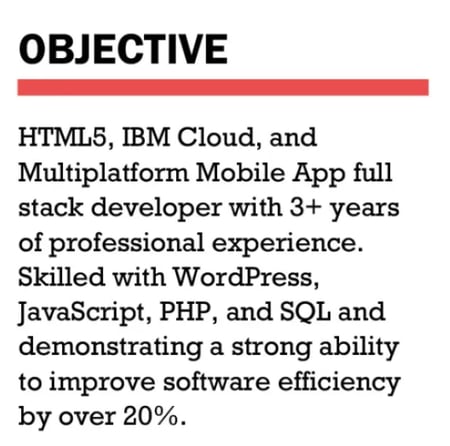
This objective quickly hones in on the software and skills needed for the role, making it easy for recruiters to skim and want to know more details about your experience.
What we like:
This objective likely used keywords from the job description, a good strategy for signaling to recruiters that you have the skills they’re looking for.
Career Change Resume Objectives
31. Resume.io
Leading Fintech marketing professional, seeking to make a move up to Marketing Director after eight years of award-winning campaigns. MBA-educated social marketeer, who will deliver triple-digit audience growth and double-digit sales increases.
This objective from Resume.io conveys confidence. While everyone may not be able to pull this one off, if you can back up your claims, go for it.
What we like:
This objective is bold and gets very specific about the value the applicant can provide to the company. The employer can read it and know exactly the value can provide once hired.
32. University of Pennsylvania

This objective makes the case for an inustry change by playing up the applicant’s transferrable skills.
What we like:
This objective is to the point and doesn’t try to disguise the industry swap with vague jargon. Instead it clearly states what the writer’s experience is and how they’ll apply it to their new pfrofession.
33. Career Contessa
Results-driven technology sales representative, seeking to use pipeline building and negotiation skills to increase revenue at XYZ healthcare company. Drove $2 million in sales revenue during FY20 and eager to increase the bottomline at XYZ company.
This career objective from Career Contessa is a great template to use if you’re applying for a similar role, but in a completely different field. In this case, it’s a sales position, but could be applied to any industry.
What we like:
Since the roles are similar, the writer was keen to play up their relevant experience and data-backed accomplishments. From there she succinctly expressed how she intends to increase revenue for the new company.
34. Federal Resume Guide

Teachers have a bunch of transferrable skills they may not even know they have. From time managment and public speaking to dealing with the public, to conveying ideas and concepts clearly, they have so much to offer when those skills are applied to other industries.
What we like:
This objective was able to connect the applicant’s 15-year experience teaching history to why they’re a great candidate to be a museum curator. They can easily draw on their existing knowlege and people skills to be succcesful in the role.
35. Sweet CV
Successful engineer aiming to change professions and move into business management. Seeking a chance to use project management and leadership skills in a fresh context and use my eye for detail to drive growth in a technology start-up.
This objective from Sweet CV showcases an engineer making the case for a business managment position at a start-up, highlighting their most relevant skills.
What we like:
Again, it’s important to play up any related skills or background that will give you an advantage when switching to a new career. Since the applicant already has engineering experience and is seeking to work for a technology startup, their backround is a bonus.
36. Jobscan
Passionate sales representative with over 5 years of experience working with customers and selling software. Looking to leverage my proven skills in seeing our customers’ pain points and providing solutions to whatever I write as an aspiring Content Manager.
This example from Jobscan shows how you could structure an objective if you are trying to move positions within the same company. Working in customer service gives the applicant useful insight into their audience’s needs.
What we like:
This resume objective plays to the applicant’s strength (insider customer knowledge) to demonstrate why she’s the perfect candidate to write for them. This could greatly improve the company’s content since they will have a better understanding of their audience and how to solve for them.
Write a Resume Objective That Gets Noticed
Now that you know how and when to write a resume objective and checked out a few examples, it’s time to craft your own. Use the tested strategies above to make sure your resume stands out among the crowd.
Editor’s note: This article was originally published in December 2018 and has been updated for comprehensiveness.

80+ Instagram Stats You Need to Know in 2023
It feels like Instagram, more than any other social media platform, is evolving at a dizzying pace. As it continues to roll out new features, updates, and algorithm changes, it can be hard to keep up.
That’s where the Instagram stats comes in. There’s a whole lot of research out there about Instagram — everything from the demographics of its users and its reach, to how negative space affects the performance of your posts (hint, hint: #68).
Read on to uncover more social media stats that’ll help you get ideas and improve your own Instagram posting strategy.

80+ Instagram Stats
Click on a category below to jump to the stats for that category:
- Instagram’s Growth
- Audience & Demographics
- Brand Adoption
- Instagram Post Content
- Instagram Posting Strategy
Instagram’s Growth & Usage
1. Instagram is expected to reach 1.44 billion users by 2025. (Source)
2. The Instagram app has over 78 million monthly active users. (Source)
3. 22% of marketers say Instagram has the most growth potential in 2023 than any other platform. (Source)
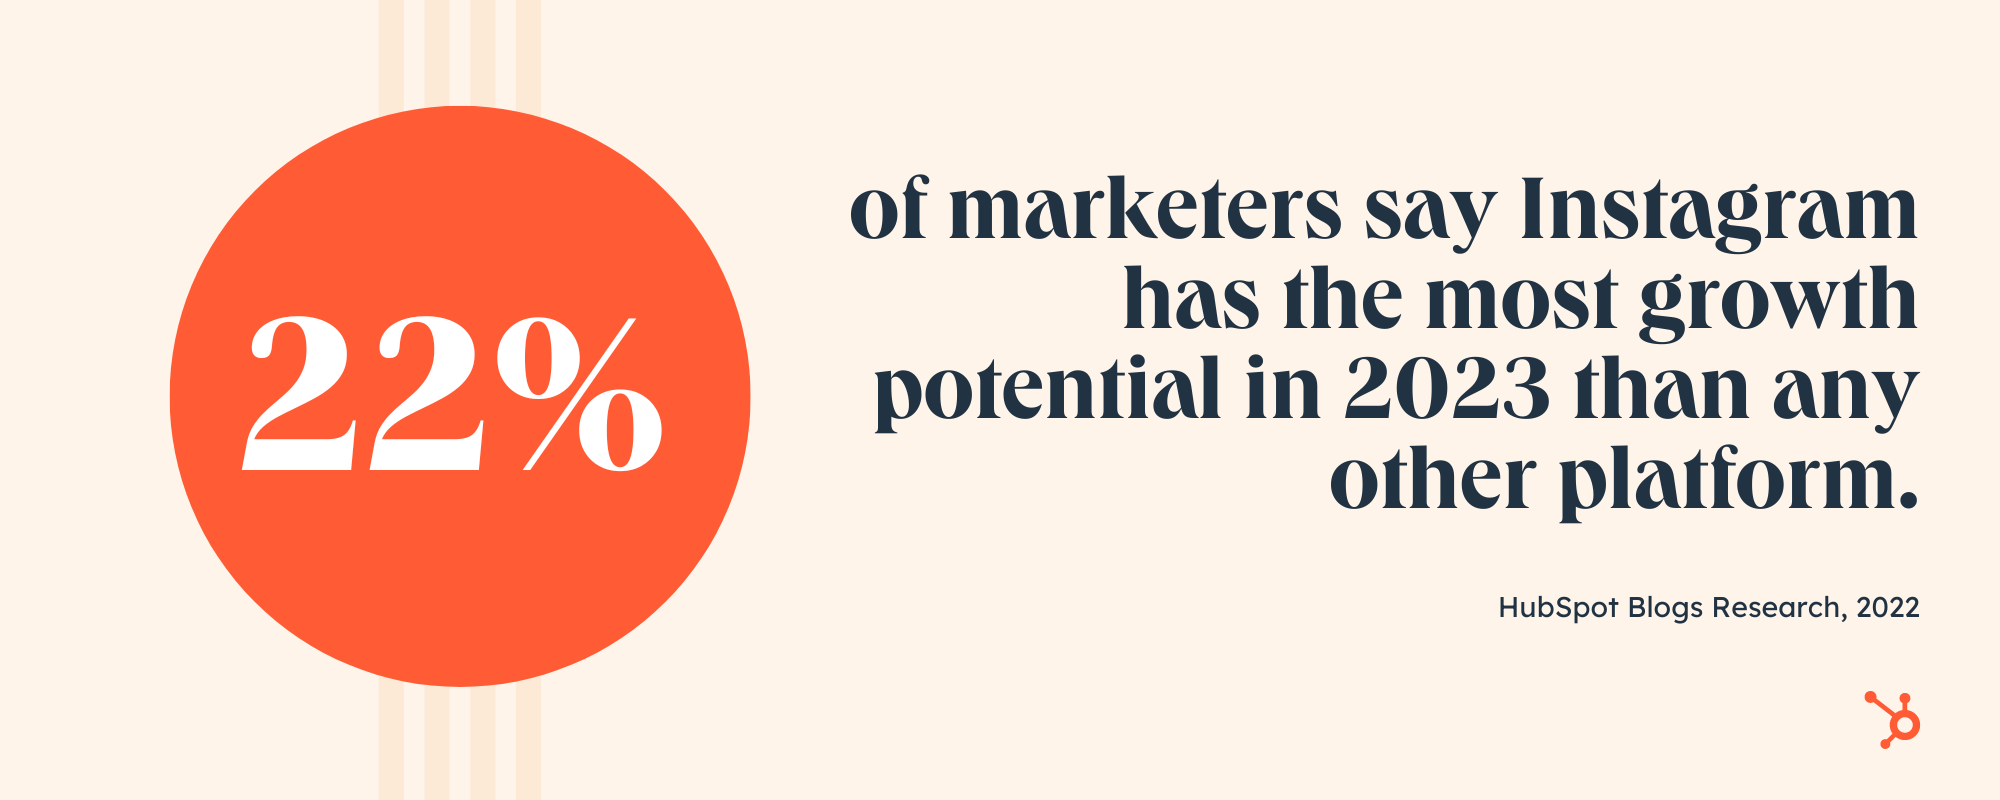
4. Instagram saw a 48% increase in ad reach from January 2020 to January 2022. (Source)
5. Almost a quarter of marketers (23%) predict that Instagram will offer brands the biggest potential to grow their audience in 2023. (Source)
6. Instagram is the most-used platform for influencer marketing in the U.S. (Source)
7. Marketers say Instagram is the social media platform they know how to use best. (Source)
8. There are an estimated 143 million Instagram users in the United States in 2023. (Source)
9. As of January 2023, India has a total of 229 million Instagram users, the largest Instagram audience in the world. (Source)
10. As of January 2022, Instagram was the fourth most popular social media platform in the world in terms of user numbers. YouTube and WhatsApp ranked in second and third place. (Source)
11. On average, U.S. adults spend 30.1 minutes a day on Instagram in 2022. (Source)

12. As of February 2023, the most-liked post on Instagram is a carousel of Argentine footballer Lionel Messi and his teammates celebrating the 2022 FIFA World Cup win. (Source)
13. Between January and June 2022, the fastest-growing content creator on Instagram was influencer Jorge Gomez, with 573% growth in six months. (Source)
14. Other than Instagram’s own account, the most-followed Instagram account as of January 2023 is professional soccer player Cristiano Ronaldo. (Source)
15. As of May 2022, Instagram’s own account has 504.37 million followers. (Source)
Audience & Demographics
16. More than half of the global Instagram population is 34 years of age or younger. (Source)
17. As of January 2023, almost 17% of global active Instagram users were men between the ages of 18 and 24 years. (Source)
18. Millennials ranked Instagram as their favorite social media app in 2022. (Source)

19. Gen Z-ers also ranked Instagram as their favorite social media app in 2022. (Source)
20. TikTok and Instagram are the most used social media apps among Gen Z women. (Source)
21. In December 2022, 55% of Instagram users in the United States were women and 44% percent were men. (Source)
22. Only 7% of Instagram users in the U.S. belong to the 13 to 17 year age group. (Source)
23. Only 4.7% of Instagram users in the U.S. are 65 plus. (Source)
24. As of 2022, 82% of Instagram users also use Facebook. (Source)
25. 47% of U.S. Instagram users make more than 75,000 per year. (Source)
26. Instagram users worldwide spend an average of 11 hours per month on the Instagram app on Android phones. This number drops to 7 hours for U.S. users. (Source)
27. 72% of teens use Instagram, and 57 million U.S. teenagers say Instagram is their preferred social media platform. (Source)
28. 500 million+ accounts use Instagram Stories every day. (Source)
29. 35% of music listeners in the U.S. who follow artists on Facebook and Instagram do so to connect with other fans or feel like part of a community. (Source)

30. The average Instagram user spends 30 minutes a day on the app. (Source)
31. 45% of Instagram users live in urban areas. (Source)
Brand Adoption
32. 72% of marketers work with influencers/creators on Instagram. (Source)
33. 29% of marketers plan to invest the most in Instagram out of any social media platform in 2023. (Source)
34. In terms of brand safety, 86% of marketers feel comfortable advertising on Instagram. (Source)
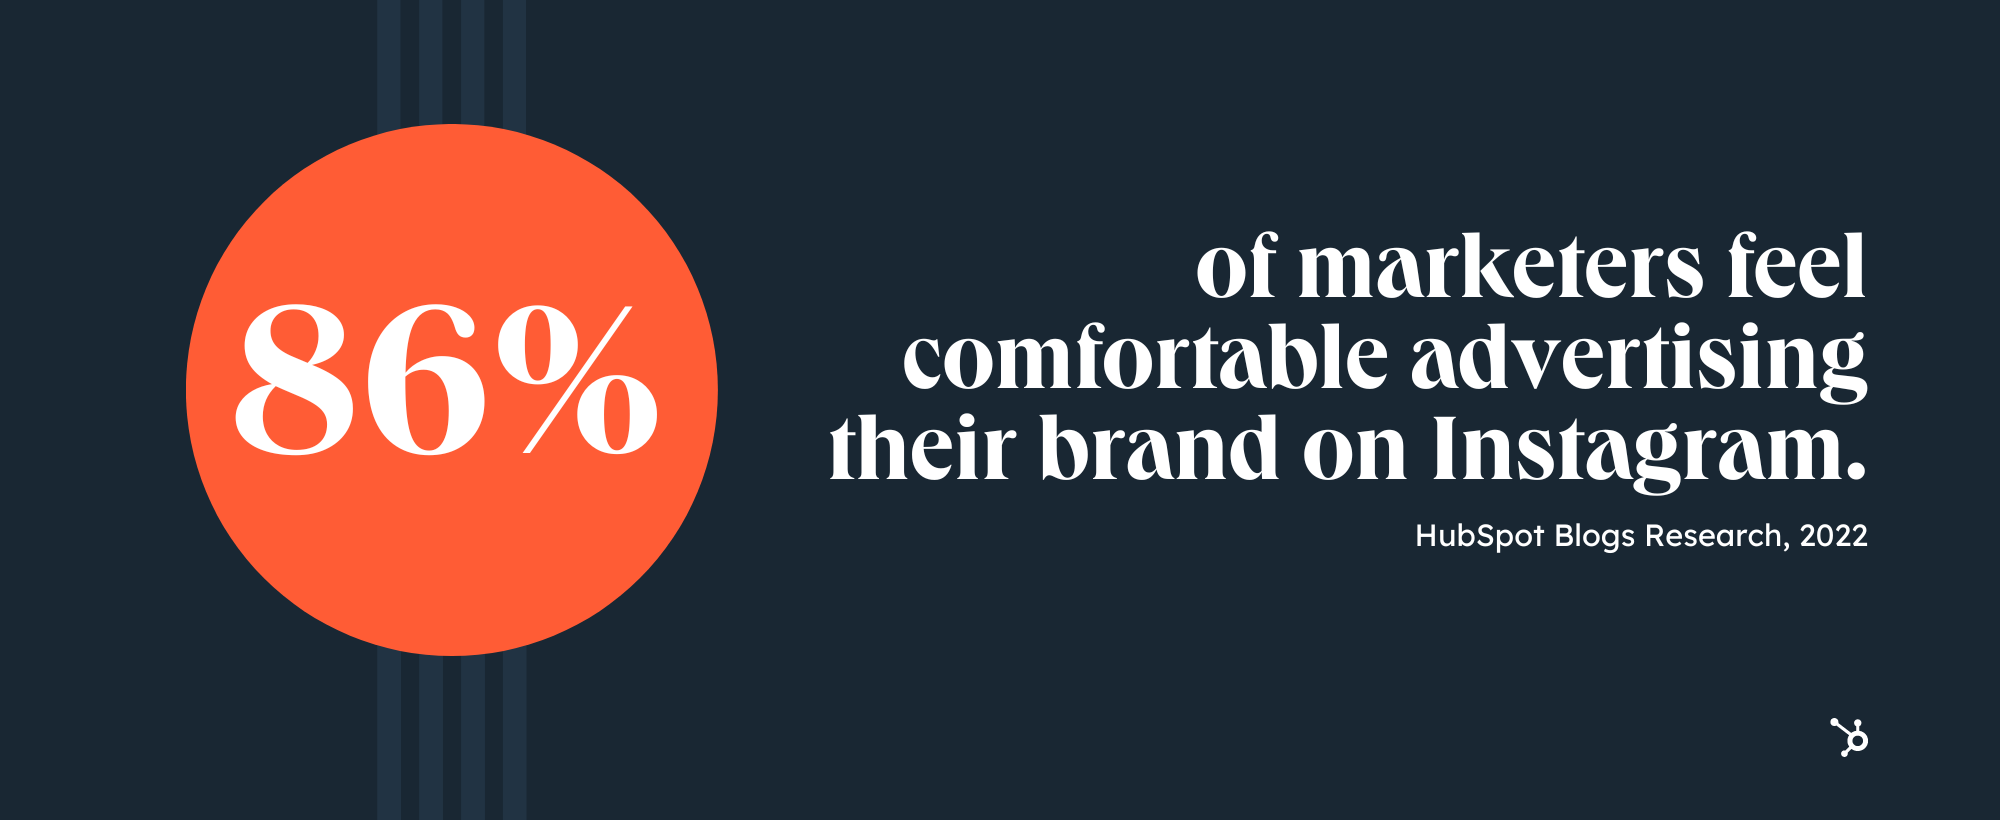
35. 53% of marketers say Instagram has high ROI. Only 7% of marketers say Instagram has low ROI. (Source)
36. 70% of shopping enthusiasts turn to Instagram for product discovery. (Source)
37. Marketers saw the highest engagement rates on Instagram out of any other platform in 2022. (Source)
38. 32% of marketers say Instagram is the easiest platform for working with influencers and creators. (Source)
39. 1 in 4 marketers say Instagram has resulted in the highest ROI out of any platform in 2022. (Source)
40. 27% of marketers plan to use Instagram the most for working creators and influencers in 2023. (Source)
41. More than half of marketers plan to increase their investment in Instagram in 2023. (Source)

42. In 2022, marketers saw the highest engagement rates on Instagram for user generated content. (Source)
43. Only 8% of marketers plan to decrease their investment in Instagram in 2023. (Source)
44. 36% of marketers plan to leverage Instagram for the first time in 2023. (Source)
45. 90% of people on Instagram follow at least one business. (Source)
46. 50% of Instagram users are more interested in a brand when they see ads for it on Instagram. (Source)
47. When it comes to posting organic content, 27% of marketers say Instagram offers the highest ROI for this type of content. (Source)
48. 1 in 4 marketers say Instagram provides the highest quality leads out of any social media platform. (Source)

49. Nearly a quarter of marketers (23%) say Instagram is the most effective platform for brands looking to build a social media strategy for the first time in 2023. (Source)
50. 46% of marketers leverage Instagram Shops. Of the marketers who leverage Instagram Shops, 50% report high ROI. (Source)
51. 41% of marketers leverage Instagram Live Shopping. Of the marketers who leverage Instagram Live Shopping, 51% report high ROI. (Source)
52. In a 2021 report, the higher education industry currently has the highest engagement rate of any other industry per post on Instagram, at 3.19%. Second was sports teams at 1.79%, and third was influencers at 1.42%. (Source)
53. 67% of users surveyed have ‘swiped up’ on the links of branded Stories. (Source)
54. 130 million Instagram accounts tap on a shopping post to learn more about products every month. (Source)
Instagram Post Content
55. Engagement for static photos has decreased by 44% since 2019, around the time Reels made its debut. (Source)
56. The average engagement rate for photo posts is 1.18%. (Source)
57. The average engagement rate for carousel posts is 3.15% (Source)
58. As of January 2022, #love is the most popular hashtag on Instagram. Over two billion posts use this hashtag. (Source)
59. Marketers rank Instagram as the platform with the best in-app search capabilities. (Source)
60. The most popular Instagram Reel has 289+ million views. (Source)
61. Marketers rank Instagram as the platform with the most accurate algorithm, followed by Facebook. (Source)

62. A third of marketers say Instagram offers the biggest ROI when selling products directly within the app. (Source)
63. As of 2021, 9 out of 10 users watch Instagram videos weekly. (Source)
64. A third of marketers say Instagram offers the best tools for selling products directly within the app. (Source)
65. 995 photos are uploaded on Instagram every second. (Source)
66. The median posting cadence across all industries is 4 posts per week. The median posting frequency declined by just 8% this year compared to last. (Source)
67. On Instagram, photos showing faces get 38% more Likes than photos not showing faces. (Source)
68. On Instagram, images with a high amount of negative space generate 29% more Likes than those with minimal negative space. (Source)
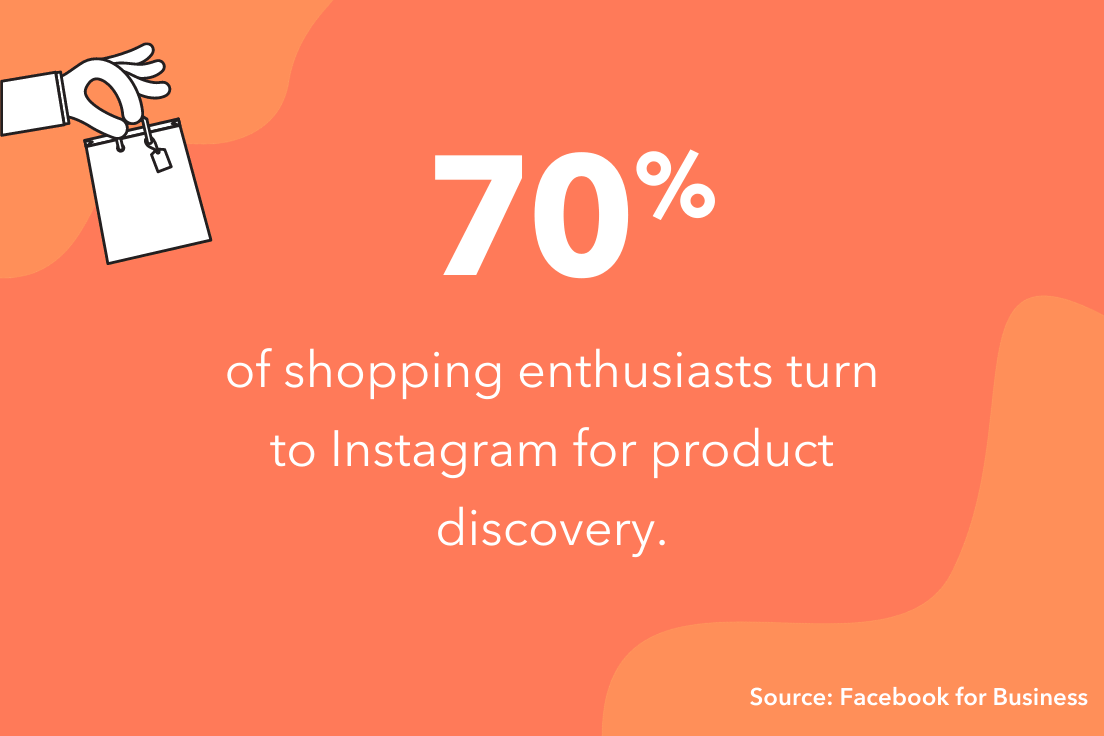
69. On Instagram, images featuring blue as the dominant color generate 24% more Likes than images that are predominantly red. (Source)
70. This is so much so that the latest Instagram statistics show that an average Instagram post contains as many as 10.7 hashtags. (Source)
71. Image posts received 27.55% more likes than permanent video posts. (Source)
72. An average image on Instagram gets 23% more engagement than one published on Facebook. (Source)
73. The most geo-tagged city in the world is Los Angeles, California and the tagged location with the highest engagement is Coachella, California. (Source)
Instagram Posting Strategy
74. The best time to post on Instagram is Friday between 6 p.m. and 9 p.m. in your respective time zone. (Source)

75. Posts with a tagged location result in 79% higher engagement than posts without a tagged location. (Source)
76. 20% of users surveyed post to Instagram Stories on their business account more than once a week. (Source)
77. 44% of users surveyed use Instagram Stories to promote products or services. (Source)
78. One-third of the most viewed Stories come from businesses. (Source)
79. More than 25 million businesses now use Instagram to reach and engage with audiences. (Source)
80. 69% of US marketers plan to spend most of their influencer budget on Instagram. (Source)
81. The industry that had the highest cooperation efficiency with Instagram influencers was Health Care, where influencer posts were 4.2x more efficient than brand posts. (Source)
82. Instagram is now the most popular social platform for following brands. (Source)


25 Slack Tips to Make You and Your Team More Effective
Slack changed workplace communication. It can be a helpful tool or an amusing diversion — and this makes Slack tips essential to cut through the noise.
Slack is capable of so much that it’s hard to uncover what features you really should be using. To help, we put together some of the best Slack tips and tricks below.

From creating to-do lists to customizing your theme, these pro tips are worth showing off to your team. Scan the full list of Slack tricks or jump to the section you’re looking for:
- Why You Need Tips for Using Slack
- Handy Slack Tips and Tricks
- Best Slack Tips for Productivity
- More Slack Tips and Tricks
Why You Need Tips for Using Slack
Any tool can make your workday more effective and productive. That’s the goal. But it doesn’t always work out that way.
In 2020, offices around the world went through a series of seismic changes. Many teams went remote for the first time. And workplace leaders found themselves looking for digital solutions that could help workers:
- Build and keep social bonds
- Answer quick questions
- Check in on each other
- Hold social workplace events
- Send quick thank yous
- Share updates
Slack was an answer to these questions and more.
This platform organizes chat conversations into channels. It makes it easy to have informal conversations or organized group conversations. This helps in-office and remote teams trade ideas and make decisions together. It can also give teams at-a-glance knowledge of office status, connect docs from different tools, and offer helpful reminders.
Slack is a great way to connect and collaborate. But it can take time to learn the most helpful features. A beginner’s guide to Slack is the best place to start.
Once you have the basics down, the tips below can help you advance your Slack game for more productivity, fun, and connection.
Best Slack Tips for Productivity
1. Sort Slack channels for easy scanning.
The larger your organization is, the more channels your team will have. This seems fine at first, and it lets teams create distinct conversations for work and play. But as channel notifications grow, so will the possibility of Slack overwhelm.
Businesses using Pro, Business+, or Enterprise Grid plans on Slack can add channels, direct messages, and apps to custom sections in the sidebar. Custom sections are just for you, and won’t impact anyone else on your team, so you can organize them in a way that works best for you.
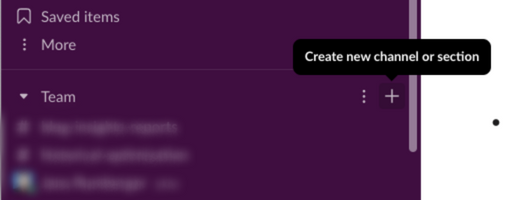
To create a custom section, click the + at the top right of your top channel in the left navigation menu. Then select “Create a new channel” or “Create a new section.” You can select from the current options or add a unique emoji and name for a custom section.
Note: You can only create custom sections on a desktop computer. But once you’ve added them you’ll be able to use them on both desktop and mobile.
2. Pause notifications for focused work time.
Different work cultures have different expectations for availability on Slack. But there are times when employees need some uninterrupted work time. So, instead of closing a door or hanging a “Do Not Disturb” sign, pause your notifications.
This gives a simple signal to your team so you can get the focused time you need. To pause your notifications, click on your profile. Then, scroll to “Pause notifications” and choose the amount of time that’s best for you.
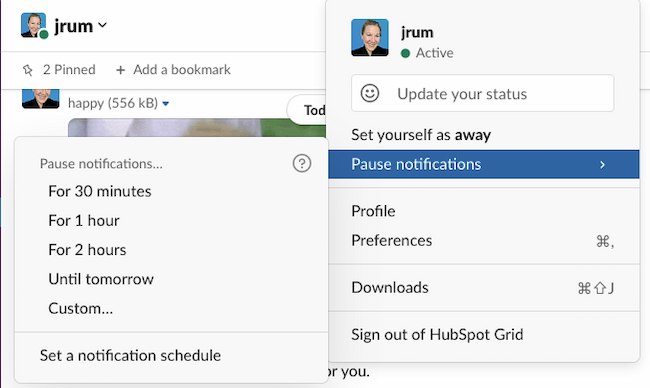
You can also set a notification schedule. This is extra helpful for teams that work across different time zones. It helps everyone understand when you’re available to respond quickly, and when getting a response may take more time.
3. Pin messages and links for easy recall.
Slack can also be the digital bulletin board at the center of your office. When you “pin” a message, you’re saving it for the full team in that conversation or channel. This makes it easy for everyone to revisit important learning, documents, and comments.
To pin a message, hover over the message, then click on the three dots in the top right-hand corner. Then, scroll down to “Pin to channel.” The selected message background will change color, and display a message at the top that says “Pinned by [your name].” You can also use the top bar to search for pinned posts.
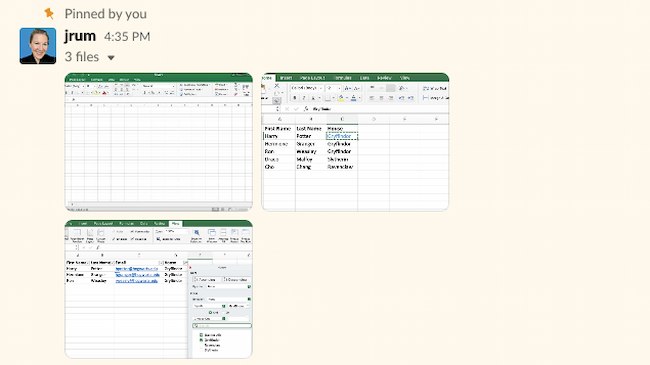
4. Adjust your sidebar to show unread channels only.
As the number of channels you subscribe to grows, you may be looking for strategies to cut down on overwhelm. Some choose to mute channels, but that can mean missing important communication. Others make an update to the “Channels” section to highlight what they haven’t read yet.
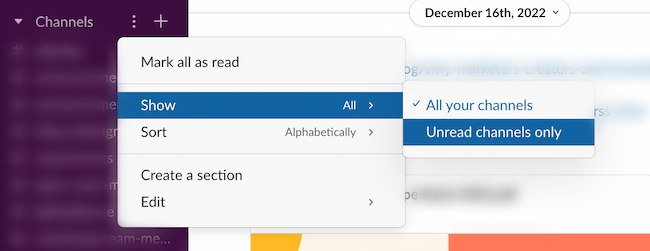
To make this update, head to the “Channels” section in your left-hand sidebar. Hover over Channels, click the three dots to the right, then scroll to “Show” > “Unread channels only.”
5. Connect your tools to Slack.
Another feature of Slack that helps you ramp up productivity is its connectivity. Whether you’re sharing sensitive documents or running a fun icebreaker with your team, there are over 2000 Slack integrations you can use.
For example, many teams are already using Google Drive to create and store files online, so why not get the best of both worlds? When you connect your Google Drive with Slack, you have the ability to read and index imported files, and quickly search for them whenever you need them.
There are two ways to connect your Google Drive to Slack:
If you have a Google Drive link you want to share, simply paste it into a message box. This will prompt Slackbot to deliver the following message:

Click “Yes” to grant Google Drive permission to read the file.
If you don’t have a file you’re ready to share, but want to connect Google Drive for future use, visit the Google Drive app page. From here, click “Configure” next to your team name, then click “Authenticate your Google Drive Account” > “Allow.”
HubSpot customers: If you want to integrate Slack even deeper into your office processes, check out this article that shows you how to make the most of your Slack integration.
6. Use the /remind commands to create a to-do list.
Set a Slackbot reminder to help you keep track of what you need to get done. To get started, simply enter /remind into the text box, followed by your task. (Note: Only you will be able to see the command and the reminder.)
You can schedule a reminder for a specific time or set a date using the MM/DD/YYYY format. Slack recommends this structure for a reminder: /remind [@someone or #channel] “[what]” [when].
If you want to review your list of reminders, simply use the command /remind list. From there, you can mark certain tasks as complete or delete the ones you no longer need.
7. Quickly send a private message using the /msg command.
Sometimes we find ourselves with questions that call for the attention of everyone in a specific channel. You know, important things such as, “Does anyone have a stapler?” or “Who’s free for lunch?”
After you ask a question, avoid any further disruption by following up with people with a private message. For example, once you know Steve is free to grab a bite to eat, use the following command to quickly open up a private message to hash out the details: /msg @user [your message].
8. Jump to recent conversations in seconds.
If you’ve got a really big team, it’s likely that you’re involved with quite a few Slack channels. To quickly and easily switch from a channel to a private message back to a different channel, hit ⌘ + K (Mac) or Ctrl + K (Windows and Linux).
A pop-up will appear where you can begin typing a person or channel and select the correct option to open the conversation.
9. Create a to-do list using Saved Items.
Saved items on Slack are a way to mark a task as important, like pinned messages. But only you can see your saved items, so they can be useful for personal reminders.
To save an item, simply move your mouse to a message or file and select the flag outline to make it turn red. Then, to view your saved items, click Saved items at the top of the left navigation menu.
Saving requests and files that you need to work on makes it easy for you to create a to-do list on the fly.
10. Conduct advanced searches.
One of the great things about Slack is that messages and files are easily searchable. Because channels move so fast, you can use these advanced search commands to pull up exactly what you’re looking for without wasting any time.
Channels and Direct Messages
- in:channelname – Searches only the messages and/or files in a specific channel.
- in:name – Searches your direct messages with a specific user.
Messages or Files From a Specific Person
- from:username – Limits your search to messages from a specific person in any channel or direct message.
- from:me – Searches only messages you’ve sent, anywhere in Slack.
Links, Saved Items, and Emoji Reactions
You can narrow your search to messages that contain a URL, messages you’ve saved, or messages that contain a specific emoji using search results filters.
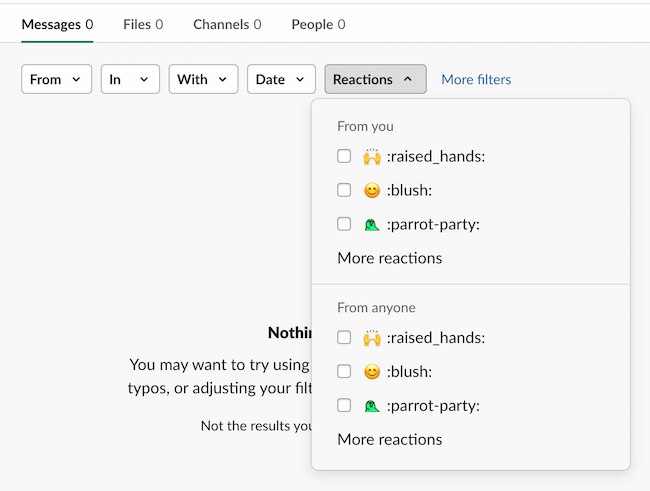
Dates and Times
- before: Use the pop-up to search for messages sent at a specific time.
- after: Use words like “week,” “month,” or “year.”
- on: or during: Use specific dates and range keywords, such as “Monday,” “February,” or “2023.”
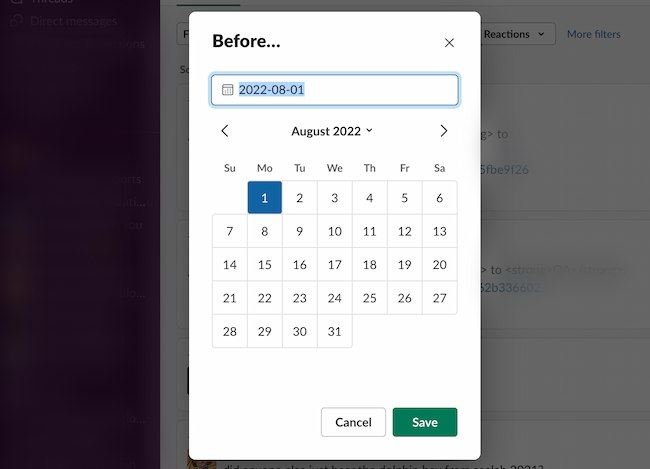
Pro tip: To use specific dates, use the MM/DD/YYYY (United States) or YYYY/MM/DD (International) format.
11. Add notifications for keywords and phrases.
Managing a specific project? Trying to keep tabs on a department or activity? Adjusting your settings to enable custom notifications can be a huge time saver.
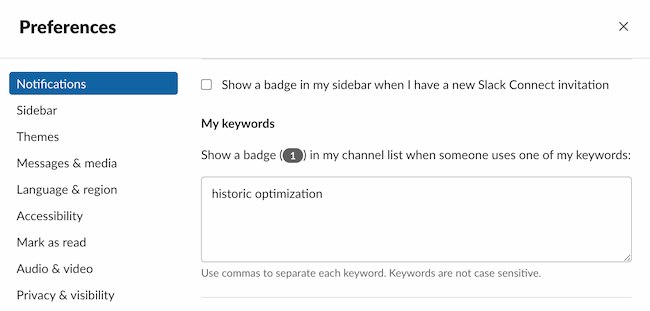
To get notified when a specific word or phrase is mentioned, start by selecting your name from the top left corner. Then, click “Preferences” from the drop-down menu. From there, select “Notifications” and scroll down to “My keywords.” In the text box, add words or phrases that you’d like to be notified about (making sure to separate them by commas).
12. Create naming conventions for channels.
Naming your channels in a way that’s simple and consistent helps you engage more users. No more sending an email, texts, AND Slack for every message. Instead, you’ll be able to trust that people on your team are seeing the content you need them to see.
To make this happen, make sure channel names are consistent with what your team already knows. Clever names and inside jokes can seem fun at first, but over time they can create confusion.
Instead, name channels for major departments and topics. Then, use Slack’s default prefixes as a guide when it’s time to add channels for new and more specific channels and sections.
For more productivity tips, check out this guide to being more productive.
More Slack Tips and Tricks
13. Toggle between statuses using /away or /active commands.
If you have to step away from your computer or head to a meeting, make it clear by adjusting your status. To quickly toggle between “away” and “active,” use the /away command.
For more quick commands, type /shortcuts to open the keyboard shortcuts panel.
14. React with a GIF.
Let’s face it: We all love GIFs. And thanks to the Giphy integration, you can share hilarious GIFs with your coworkers using the /giphy [emotion, word, or phrase] command.
To set up the Giphy app, visit this page. From here, all you’ll have to do is click “Install” next to your team name, then click “Add Giphy Integration.”
Note: Giphy can be a hit or miss. Sometimes the GIFs are NSFW or not quite right for the situation. But, if you don’t mind gambling with the results, this hack is easy to set up.
15. Create quick polls with emoji reactions.
Words are hard. Sometimes it’s a lot easier to let our coworkers know how we feel by reacting with an emoji. And on Slack, it’s easy. Simply hover over a message and select the smiley face icon with the plus sign to select an emoji.
Want to take things a step further? Reaction emojis make it really easy to quickly poll your team. Here’s a fun example:
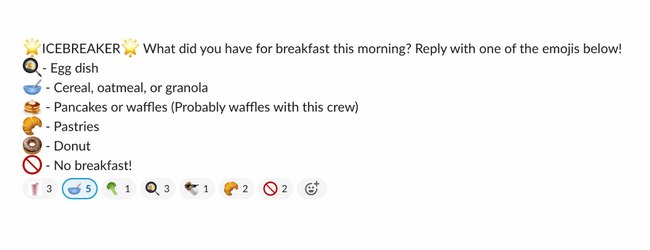
16. Add text and link formatting to your Slack messages.
Want to call out text, make edits, display a link, or share code? Reference the following syntax:
- Slack link formatting: To share a link with a preview image, just send a URL in a message. Slack will automatically create a preview unless a user has their preview settings turned off.
- Emphasis: To create bold text, surround your word or phrase with *asterisks.* To italicize text, place _underscores_ around a section.
- Strikethrough: To strike out certain words, use ~tilde~ to surround the text.
- Lists: To create lists, select “Shift” + “Enter” to add a new line. To add bullet points, select Opt+8 (Mac) or Alt+0149 (PC).
- Insert a paragraph break: If you want to break up words without using a list, use a soft return. Instead of hitting enter at the end of a sentence, which will send the message, hold shift and tap the enter key to start a new line.
- Blockquotes: To add angle brackets at the start of your message for indents and quotes, type “>” to indent a single line.
17. Edit messages you’ve already sent.
We’ve all said things we wish we could take back. And with Slack, you can — kinda. To quickly edit a message you’ve sent in a conversation, press the ↑ arrow key, edit your message, then press “Enter.”
This feature is especially useful when you do something terribly embarrassing, like use the wrong form of “their”:
18. Customize your Slack theme.
Whether you use Slack for different groups and want to stay organized, or you just want to personalize the look and feel of your account, you can adjust your theme by selecting your name in the top left corner.
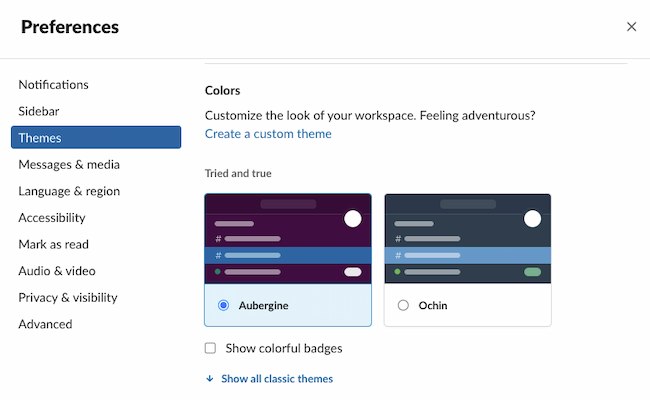
From the drop-down menu next to your name, select “Preferences” > “Themes.” From here, you can explore and select themes or scroll down to “Custom Theme” to put in your own HTML color values.
19. Create your own emoji.
To get started, click the emoji icon in any Slack chat window. Then, click the “Add Emoji” button on the bottom left-hand side.
Fill out the form to create your custom emoji. First, you’ll need to upload an emoji image. Then, provide a name for the icon — this is what you will enter to display the emoji.
Slack asks that you use a square image no larger than 128px in width or height, with a file size smaller than 64K. To remove the background from the image (as seen in the Ryan Gosling example below), check out this tutorial.

20. Pull swatches using HTML color codes.
Collaborating with another team member on a design project? Make quick color suggestions using HTML color codes. When you type out a code — #F7761F, for example — you’ll see a tiny swatch appear, like this:

21. Shake it off with a shruggie.
Don’t know the answer? Made a little mistake? Need to signal to your coworker that you actually have no idea what’s going on at this meeting? Send ’em a shruggie.

Serving as the “default Internet feeling,” a shruggie will say everything you need to say without saying anything at all. To pull it up, enter the /shrug command.
22. Update your profile to show when you’re OOO.
Whether you’re OOO on vacation or out on parental leave, you can signal this to your coworkers by adjusting your status on Slack.
To edit your status, click your profile in the top right corner. Then, click the “Set a Status” button to choose a status option or create a unique status with the “What’s your status?” box at the top. Select your status, then click “Save.” This will open a second pop-up window where you can set the timing for your status. Click “Save” again, and you’re all set.
23. Use the /collapse and /expand commands to open and close files.
Weeding your way through a sea of GIFs to get to the comment you’re looking for? You can collapse all inline images and video by using the /collapse command.
When you need to reference the visuals again, simply enter /expand to make them reappear.

24. Try /mute to limit distractions.
Maybe you’re new and want to learn about a department, but don’t need to participate. Maybe you’re curious about a new channel, but aren’t sure how much time you’ll have to join the conversation. To update your channels so you have easy access but don’t get distracted by constant notifications, mute the channel.
To mute, click on the channel name. Then, click on the “Get Notifications” button in the center at the top of the pop-up. Scroll down and select “Mute channel.” You can also type /mute to silence a channel or DM, or type /unmute to activate it again.
25. Play games on Slack for remote team building.
Games and icebreakers are a way to bring members of a team together. They can help people loosen up, preparing them for creativity and collaboration. You can use apps like Polly to create trivia games or other apps to play chess, rock-paper-scissors, and more.
Want to learn more about Slack?
When the HubSpot team first made the switch to Slack, it was hard to get used to. But once we got more comfortable with the platform, we started to realize just how powerful it really is.
The more we used Slack, the better our discoveries got — GIFs, reminders, files — they were all just a click or two away.
We hope the 25 handy Slack tips above help you make your conversations more productive, efficient, and fun too.
Editor’s note: This post was originally published in February 2016 and has been updated for comprehensiveness.

A/B Testing on Facebook: How to Do It Right
Facebook offers many ways to test the performance of your Facebook ads before they go live.
One of the most popular tools Facebook offers is A/B testing, which allows you to find out which imagery and copy resonates most with your audience.
Here, let’s dive into how you can A/B test your marketing ads on Facebook step-by-step. Even if you’re a beginner, don’t fear — split testing on Facebook is easy, and the boost in ROI can be exponential. Let’s get started.
A/B Testing Facebook Ads
A/B testing, or split testing, is a term used to describe the process of running marketing experiments to see which version connects better with your audience. Usually, they’re tested simultaneously, and the variables can be anything from layout to copy to multimedia.
A/B testing on Facebook is popular because it gives marketers an idea of what types of ads earn the highest conversion rates. Essentially, if you run a split test on Facebook, you can identify patterns in your highest performing ads and posts. This allows you to publish better and better ads, boosting your ROI.
On Facebook, you can create A/B tests in multiple ways. This is dependent on your preferred workflow; the results are virtually the same.
First, you can create an A/B test within the Ads Manager Toolbar. The Toolbar will let you use an ad campaign you’ve already created as a jumping-off point for your new test. Alternatively, you can manually duplicate a campaign or use the Experiments tool.
First, let’s go over the Toolbar method.
The simplest way to split test Facebook ads is by using the Toolbar on your Ads Manager dashboard. Here’s how.
1. Go to Facebook Ads Manager.
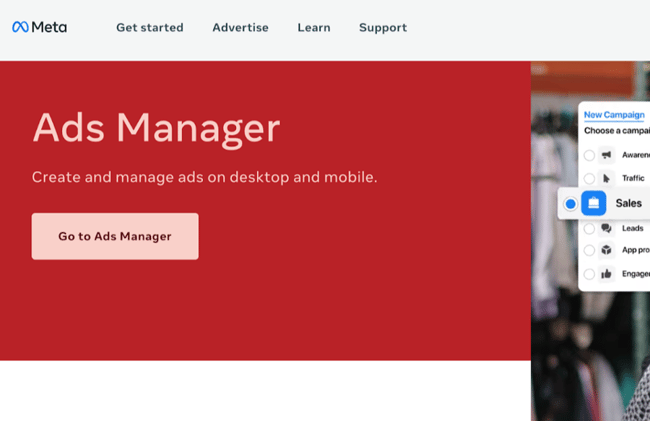
Ensure you’re logged into your Facebook account when you access the web page. Then, click on “Go to Ads Manager.” You’ll arrive at your dashboard, which has several tabs: Campaigns, Ad sets, and Ads. Today, we’ll work exclusively in the Campaigns tab.
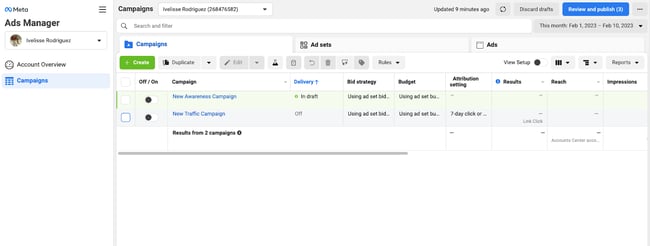
2. Select the campaign you’d like to A/B test.
To complete A/B tests, you’ll need to have an existing campaign. However, you can set up an A/B test as you create an ad, too. In the second screen of the ad creation process, toggle the “Create A/B test” button under “Campaign details.”
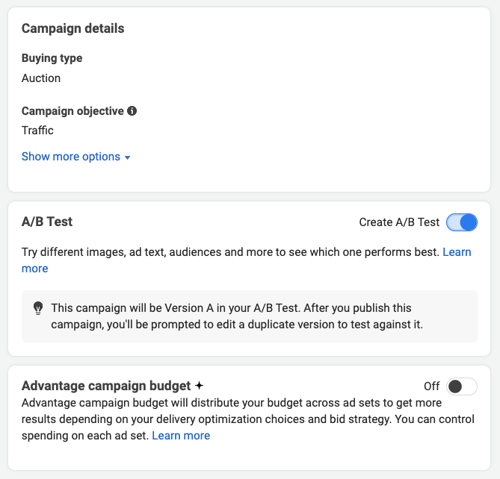
Otherwise, if you’re not creating a new ad, select the existing campaign you’d like to optimize from the list in the Campaigns tab.
3. On the toolbar, click “A/B Test.”
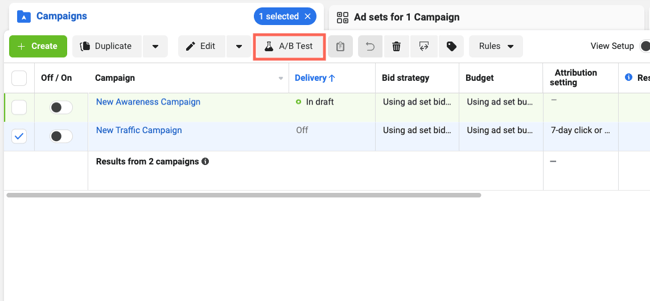
Once you’ve selected your campaign, you can begin creating your A/B test. At the top of your list of campaigns is a toolbar. Click the “A/B Test” button or beaker symbol, as shown below.
Alternatively, depending on your screen size, tap the button that reads “More”, then click “A/B Test” in the drop-down menu.
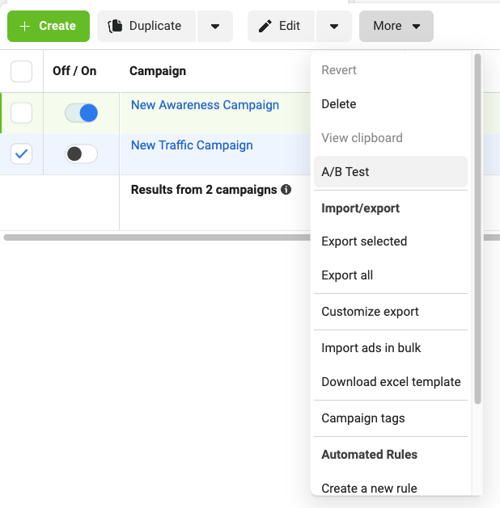
4. In the A/B test workflow, tap “Get Started.”
A pop-up will appear. Tap the blue “Get Started” button to begin. You’ll immediately be able to either make a copy of your ad to edit, or pick an existing ad you’ve already made.
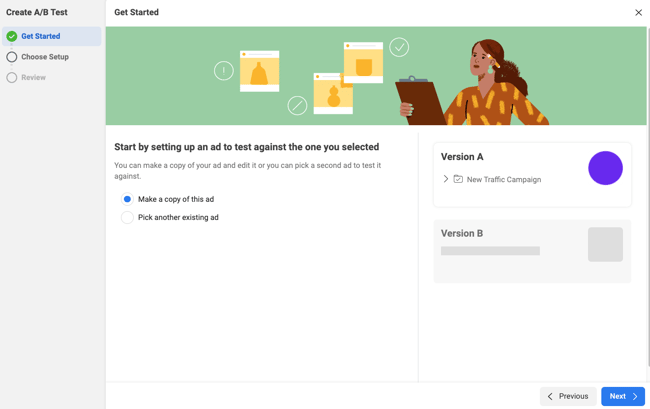
For this tutorial, we’ve chosen “Make a copy of this ad.” After you choose your preferred option, click “Next.”
5. Choose a variable to test.
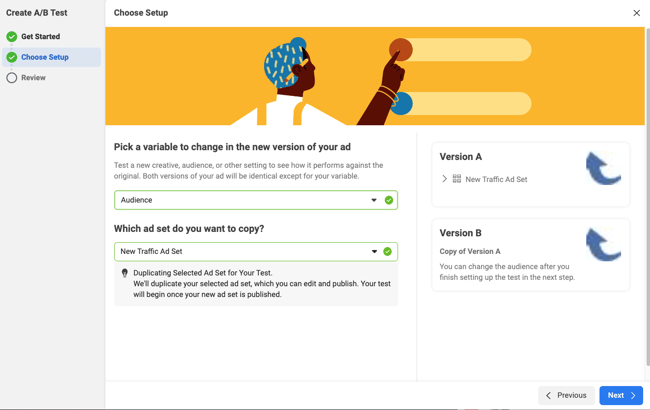
There are several different options for variable testing, and they’re categorized based on the goals of your campaign.
The variables are as follows:
-
Audience: This variable will look at the effectiveness of your ads based on the audiences you aim to reach. For instance, you can test different audiences based on region.
-
Creative: Creative A/B tests will focus on the visual assets of your ad. So if you want to test different images, videos, or carousels, you will choose the “Creative” option.
-
Placements: If you want to test where on Facebook your ad will be most effective, you’ll want to pick “Placements.” This option allows you to test automatic placements.
6. Name your test and determine the winning criteria.
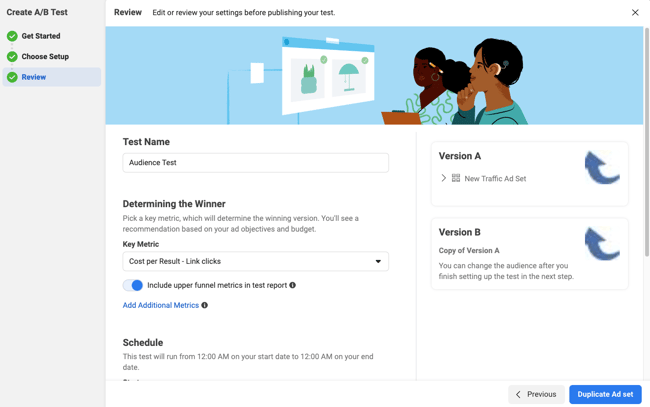
Name your test and choose the metrics you’ll use to determine the winner. You can also choose the time frame for how long your ad will run. After you’re done, tap “Duplicate Ad set.”
7. Edit and publish the alternate version of your ad.
In the next screen, you’ll be able to change your duplicate ad as desired. We recommend changing one variable, such as a single line of copy, an image, or another parameter. After you’re finished, click “Publish” in the bottom right-hand corner.
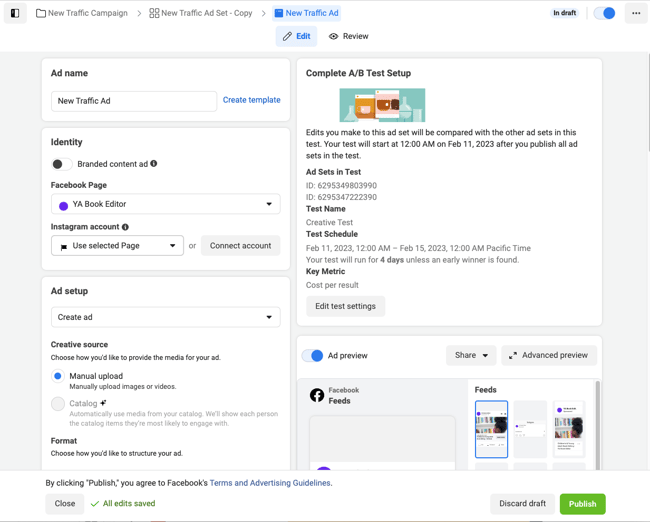
All done! You’re ready to perform your test. You can check the status of your test in Ads Manager.
If you find that you want to go with a different route for your A/B test, there are also options to set them up differently. For instance, let’s talk about duplication next.
Alternative Methods for Split Testing Facebook Ads
Method 1: Use Duplication to Create Facebook A/B Tests
When you choose this option, you can easily create a test by changing one variable in a nearly identical campaign or ad set. Note: This is for ads or campaigns that have already been created.
1. Access Ads Manager.
When you go to Ads Manager, go to your “Campaigns” tab. Here, you’ll see a list of your campaigns that are currently running. You’ll also see your drafted campaigns. You can choose either for duplication.
2. In the toolbar, select “Duplicate.”
After you’ve decided which campaign or ad set you want to test, click the “Duplicate” button in the toolbar.
3. Click “New A/B test.”
In the pop-up, select the “New A/B test” option. Remember, this option will let you choose a variable to change to analyze performance, so choose a campaign that fits that criteria.
4. In the A/B test workflow, choose a variable to test.
From here, the steps are the same as in the previous method. If you’re choosing an ad set to duplicate, Facebook will provide suggestions of which variable to change for you, and you can pick from there.
5. Name your test and determine the winning criteria.
Give a name to your A/B test and choose how you’ll determine the winner. Then, click “Duplicate Ad set.”
6. Edit and publish the alternate version of your ad.
After choosing your variable, you’ll see your tests next to each other in a preview. After making any necessary changes in this stage, click “Publish.”
When you publish your test, audiences will be able to interact with them, so make sure you’ve ironed out all the details before finalizing. However, you’ll be able to check back on your test in Ads Manager to access the most current insights.
Next, we’ll cover how to create an A/B test using the Experiments tool.
Method 2: Use Experiments to Create Facebook A/B Tests
The Experiments tool lets you create or duplicate ad campaigns to test. The difference between using Experiments is minor — the results are the same. Only use this option if it feels more user-friendly.
First, create the campaigns you’d like to test by clicking the green “Create” button and going through the steps. Duplicate the first campaign, change a single variable, and then head over to Experiments. Here’s how:
1. Go to Experiments.
In your Ads Manager dashboard, tap the three vertical lines of the menu, which will show you the “All tools” pane. Then, tap “Experiments.”
You can also search “Experiments” in Ads Manager’s built-in search tool.
2. Click “Get started” on the A/B Test card.
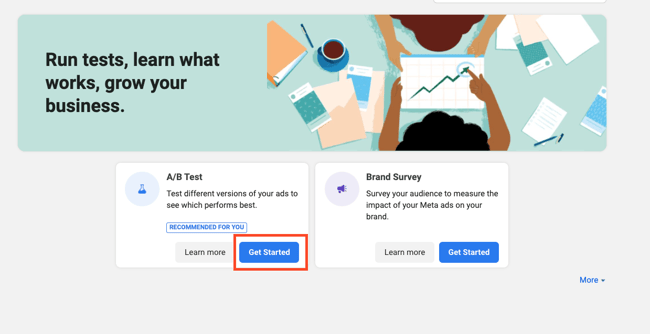
Click “Get Started.” When you do this, you’ll be taken to a page that lets you fill in the ad details.
3. Select your A/B test options.
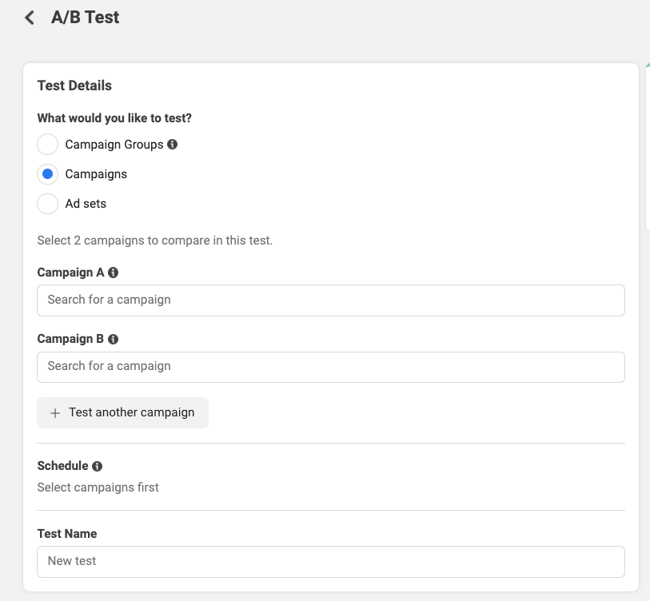
Choose the campaigns you’d like to test. It’s important to have created the campaigns you’d like to test beforehand, or they won’t appear in the list. You can also schedule the run time of your test and fill in the test name.
4. Determine the winning criteria.
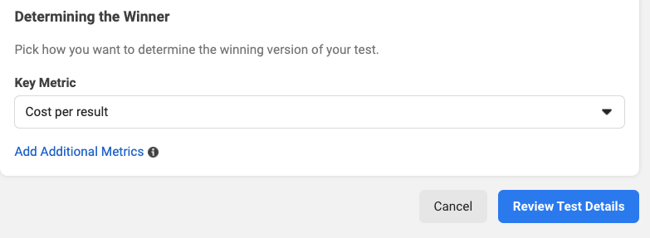
Choose which metrics Facebook should use to pick the winner. After you’re done, click “Review Test Details.”
5. Review your test and tap “Create Test.”
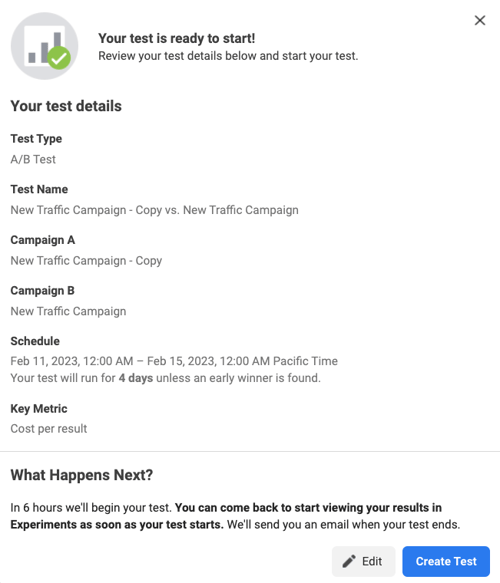
In the next screen, you’ll have an opportunity to see a summary of your test. If you’re happy with the results, click “Create Test.” If not, click “Edit” and make any necessary changes.
6. View all your experiments.
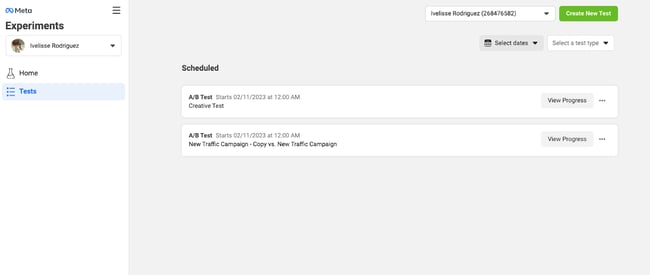
In the Experiments homepage, you can see all of your scheduled and running A/B tests. These include any you’ve created using the Experiments tool or through the Toolbar in the Campaigns dashboard.
Facebook uses the same base technology to run your A/B tests. The different versions of tests you can run help you make the best choices to optimize ad performance.
Next, let’s go over some best practices for running your A/B test on Facebook.
Facebook A/B Test Best Practices
Keep these best practices in mind before you begin your split test — they’ll help you run tests that are valuable and applicable to your next campaign.
1. Stay organized with tracking spreadsheets.
Because A/B tests can influence the future of your Facebook advertising strategy, it’s important to approach the process methodically and have clear goals and tracking in place. Utilizing an A/B test tracking spreadsheet ensures you can collect and analyze your data to make the most insightful, metrics-backed decisions.
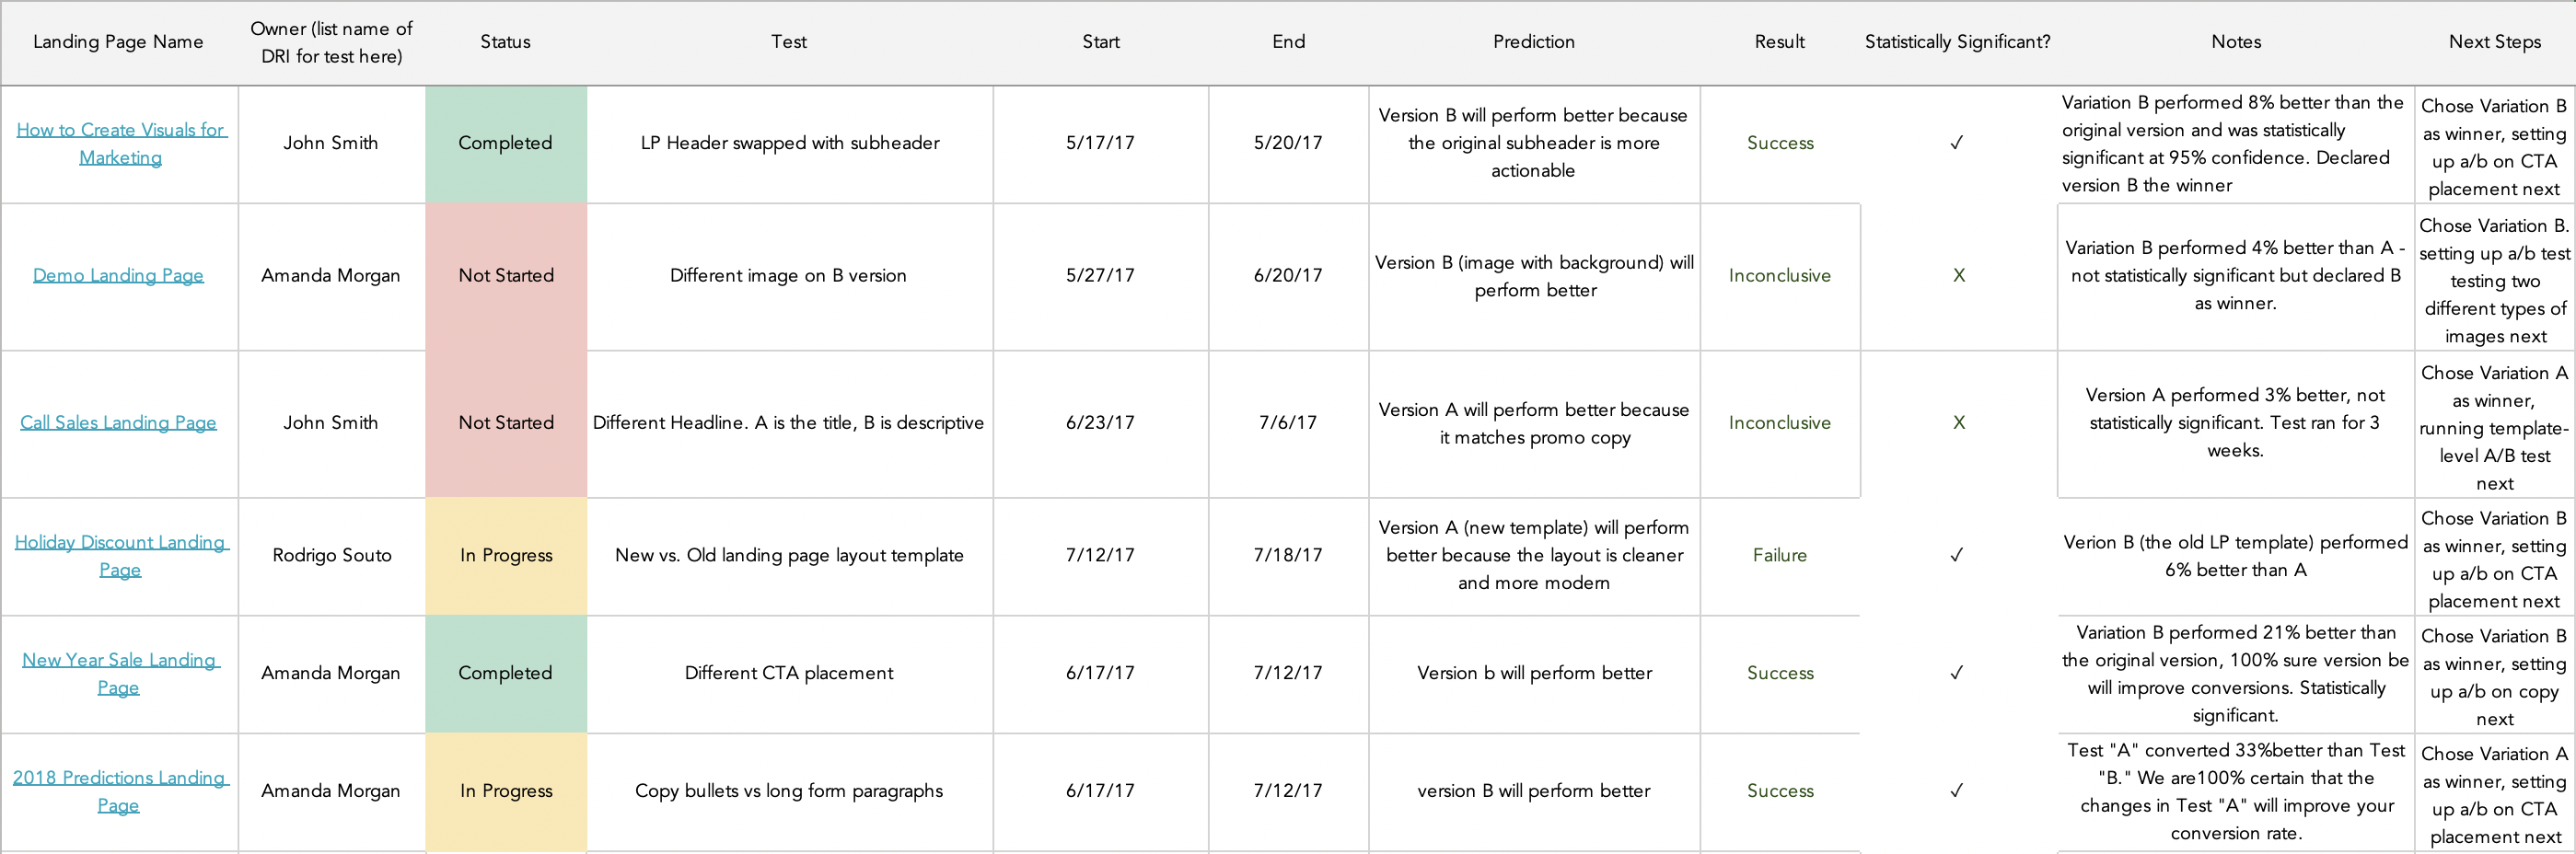
2. Choose one variable that’ll help you reach your goals.
When you A/B test on Facebook, make sure you’re only choosing one variable to test. There’s a separate multivariate test that you can run, but for A/B, one variable is key. Your test results will be more conclusive with only one variable.
3. Pick audiences that you want to reach with ads.
Choose a new audience for your test. They should be large enough to provide measurable results, but shouldn’t be the exact same audience as a campaign you’re already running. If they’re the same as a drafted campaign, that’s okay because they’re not published.
However, if you choose the exact same audience as a campaign you’re already running, Facebook’s system might mix up your ads and provide contaminated results.
4. Use hypotheses that are measurable and valuable.
In order to analyze your test results so they’re the most valuable to you, make sure your hypothesis is measurable. To put it another way: Make sure your hypothesis is clear, easy to understand, and able to be determined with an A/B test.
Your hypothesis can be as simple as, “Which method of delivery do my audience members respond the best to?” This question can be answered by using the Delivery Optimization A/B test on Facebook.
5. Make time frames that are ideal.
Recall that when you set up your A/B test, you can choose a time frame. You can choose to run your test for up to 30 days. Facebook’s Business Center suggests at least four days, which is enough time for the technology to produce accurate results.
6. Choose a budget that works for your business.
Facebook can provide an ideal budget for you based on your test details, or you can choose an ideal budget for yourself when you’re filling in test details. Setting an ideal budget will help you determine a winning strategy — it factors in Ad Spend into the success of your test.
According to one of HubSpot’s Paid Ads specialists, Nicole Ondracek, “A big value of split testing is being able to prevent audience overlap so you know that the same audience is not seeing multiple variants which could affect the results. That way, you can confidently say which one is the clear winner.”
A/B testing gives you a better understanding of audience behavior. Performing them on Facebook streamlines the process and gives you more comfortability with Facebook’s ad system.
Additionally, Ondracek mentions that depending on split testing results, advertisers can begin to shape what type of creative they need to use for the future.
This post was originally published in March 2013 and has been updated for comprehensiveness.

What is a Lead Magnet? 20 Lead Magnet Ideas and Examples [+ Step-by-Step]
Lead magnets, in marketing, are an effective technique for gaining a prospect’s contact information.
The problem is these magnets can take a lot of time and energy to produce. Podcasts, e-learning courses, video series, and contests all sound great – but who has time to create them all?

In this article, we’ll explain what a lead magnet is, as well as provide lead magnet ideas you can create today by repurposing content you already have.
Before I share lead magnet examples, let’s quickly review the conversion path that turns website visitors into leads – and the role email marketing plays in this process:
- Call to Action (CTA): This is the button that website visitors click to access the resource you’re offering.
- Landing Page: This is where your lead magnet captures information provided by the visitor. Once visitors click on the CTA, they’re brought to a landing page where they fill out a form with their name, email address, and any other relevant information you’ve deemed important.
- Thank-You Page: The visitor-turned-lead now lands on a thank-you page with information on where to access their resource and is added to your mailing list.
- Kickback Email: The kickback email is your follow-up message to the lead a short time after the exchange takes place. This email marketing campaign starts a conversation with the lead to keep them engaged with your business.
Every blog post in your archive has the potential to generate new leads for your company, so let’s make sure that your blog is a lead-generating machine.
What is a good lead magnet?
Not all lead magnets are created equal. Sure, you could quickly throw a checklist or reading materials together, but you may not get the payoff you were expecting. Taking your time to create something truly useful to your audience is key. A good lead magnet should:
1. Be relevant to your audience.
First and foremost, you’ll want to make sure the materials you’re offering are relevant to your audience or industry. Picking a broader topic may get you more contacts, but those contacts may not be quality leads interested in your product or service.
It’s important that your lead magnet is tailored toward your brand’s target audience or a specific segment of that audience.
2. Provide value to your audience.
Once you’ve nailed down who you’re marketing to, it’s time to craft a lead magnet that offers potential customers enough value that is worth trading their contact information for.
Provide your audience with information they can’t easily get elsewhere. Offer unique industry insights in an ebook or report. Perhaps you have a solution to help your audience perform a task quicker or solve common industry pain points. Whatever you choose to offer, it should be useful to your audience.
3. Be trustworthy.
Lead magnets like industry reports, studies, and ebooks help position your brand as an authority on a particular topic. However, your audience shouldn’t just take your word for it. Demonstrate your expertise by backing up your information with data and research whenever possible.
Additionally, make sure these are well-written and free of typos. While typos may seem minor, they can undermine your credibility. If readers suspect the materials haven’t been proofread, they may wonder what other steps you are skipping behind the scenes.
Paying attention to these details will boost your credibility and position your brand as an industry expert.
4. Make your audience want more.
Striking the right balance between giving your audience what they want, but also not giving away too much for free is difficult. You don’t want to lure them with a bait and switch, but you also don’t want to resolve their needs completely to the point they no longer have use for your product or service.
For example, you may offer a free tool as a lead magnet, but if users want access to all the features, they’ll need to sign up for a paid version. Look at what you can offer to strike the right balance.
5. Be shareable content.
Your lead magnet should be easily shareable so you can get more leads. If someone enjoys your offer and shares it, you just created a great word-of-mouth promotion.
In addition to having its own landing page, consider having a space on your brand’s social media accounts where users can easily access and share the offer. Like this course from Her First $100K.

It lives in a highlight on the brand’s Instagram where users can access the course and easily share it with their networks through the stories feature.
1. Figure out who you’re targeting and what they want.
The goal of a lead magnet is to offer something your audience wants in exchange for their contact information.
To do this, you have to know what user persona you’re targeting and what offer would entice them.
You may have one to three personas with different needs and pain points. That means one lead magnet likely won’t appeal to all three personas.
For instance, let’s say you are an influencer marketing agency. You may have two personas, each facing these issues:
- Influencer #1 doesn’t fully understand the inner workings of an influencer-brand relationship. They don’t have all the tools to brand themselves and foster relationships.
- Influencer #2 is overrun with brand partnerships and has reached a point in their success where they are so busy with managing administrative tasks that they have limited time to create content.
Knowing this, the agency could create knowledge-based lead magnets for influencer #1, focusing on ebooks and knowledge libraries. For influencer #2, the agency may offer resource-based magnets, such as templates and tools.
During this process, you can also get some ideas from your competitors. What offers are they creating? What are they including in their offers? Use that as your starting point.
In addition, look at your current content library. What has your audience responded most to? Are they asking questions on a particular topic? Are they more engaged in videos or blog posts? This can be a big indicator of what they’ll want in a content offer.
2. Create, design, and name your lead magnet.
Now that you know what your offer will be, it’s production time. You have to create and design your lead magnet.
If you don’t have an in-house designer, you can utilize a platform like Canva. Their platform offers hundreds of templates that you can customize to build your lead magnet, everything from books and presentation slides to worksheets and reports.
You can also outsource the work using an independent contractor with the skills to produce a high-quality offer.
Once the design work is done, name your lead magnet.
Think of something catchy that will pull in your audience and highlight its benefits, like “The Ultimate Worksheet Every Influencer Needs,” and “101 Ways to Monetize Your Brand.”
3. Build your conversion path.
The next step is building your conversion path, which must include your landing page, thank-you page, form, and email sequence.
Starting with your landing page, there are a few best practices to improve conversions:
- Have a dedicated landing page that doesn’t include a navigation bar. This will keep users’ focus on your offer and not the other pages on your website.
- Write a clear call to action. Your CTA should be clear, short, and to the point. It should also use words that will appeal most to your audience.
- Consider eye scanning patterns. Users in Western cultures typically follow F- and Z- reading patterns, which is why most landing pages are designed with key elements placed in those zones.
- Add social proof. Adding reviews and testimonials to your landing pages adds credibility to your offer and can increase your conversion rate.
For your form, the two pieces of information you’ll want to include are name and email. Everything else is optional. However, keep in mind that the more fields you include, the higher the chance a user may abandon the form.
Next up, your email sequence: Once you’ve acquired your lead, you can add them to a nurturing sequence that will lead them further down the funnel. This can include additional resources, such as webinars and newsletters.
Lastly, make sure to set up tracking on your conversion path to see how users are behaving on it and identify optimization opportunities.
4. Set a schedule to update regularly.
Depending on the type of lead magnet you create, you may need to update it every six months to a year.
For instance, let’s say you created a report on 2021 data science salaries. As you get closer to 2022, you’ll need to update the information on the report to reflect current data. Otherwise, your offer may no longer be valuable to your audience.
In addition, if you conduct feedback surveys on your offers, sift through your leads’ comments. Their comments could give you ideas on how to improve your current offer.
Lead Magnet Examples
1. The Sales Evangelist
The Sales Evangelist is a sales coaching and training business designed to help sales managers and their teams thrive.
The company offers a free ebook titled “How to Transform Your Small Business Sales,” which offers insights on how to generate more sales.
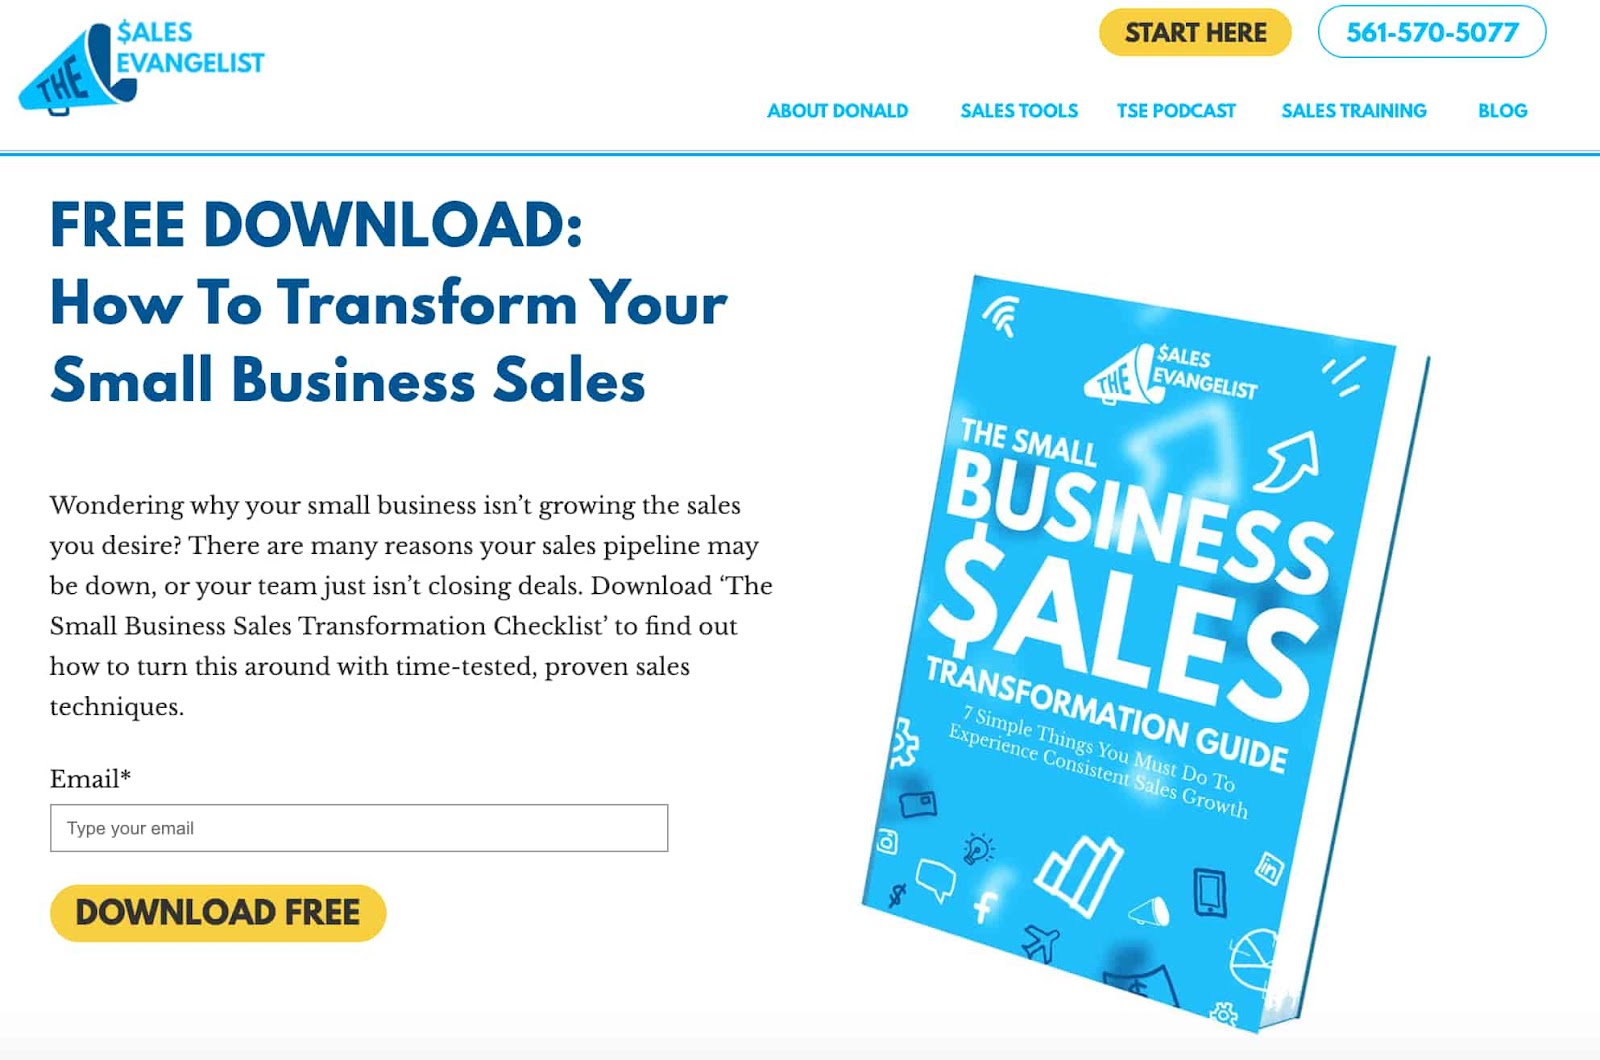
What’s clear is that this particular offer targets small business owners who may not have the proper sales process in place to make sales consistently.
What we like:
The copy addresses the user’s pain point, provides the potential reasons, and leads into why this offer will help resolve it – a classic and effective formula for landing page copy.
2. Her First $100K
Another lead magnet option is to offer a free course. In some cases, you may be able to repurpose video or written content you already have available.
Tori Dunlap, founder of Her First $100K offers an entire “freebie” page as a lead magnet where visitors can access a variety of courses and tools. One of the course options is a webinar aimed at helping people curb their emotional spending.
What we like:
Using a webinar or video format allows your audience to access the materials at their leisure and doesn’t require you to be available to host or teach. While this method may require more work upfront, the pay off is worth it.
3. Karmen Kendrick Creative
When you think of a lead magnet, you probably think of an ebook.
But here’s another quick and easy lead magnet you can develop that will only take you a few hours (at most): a quiz.
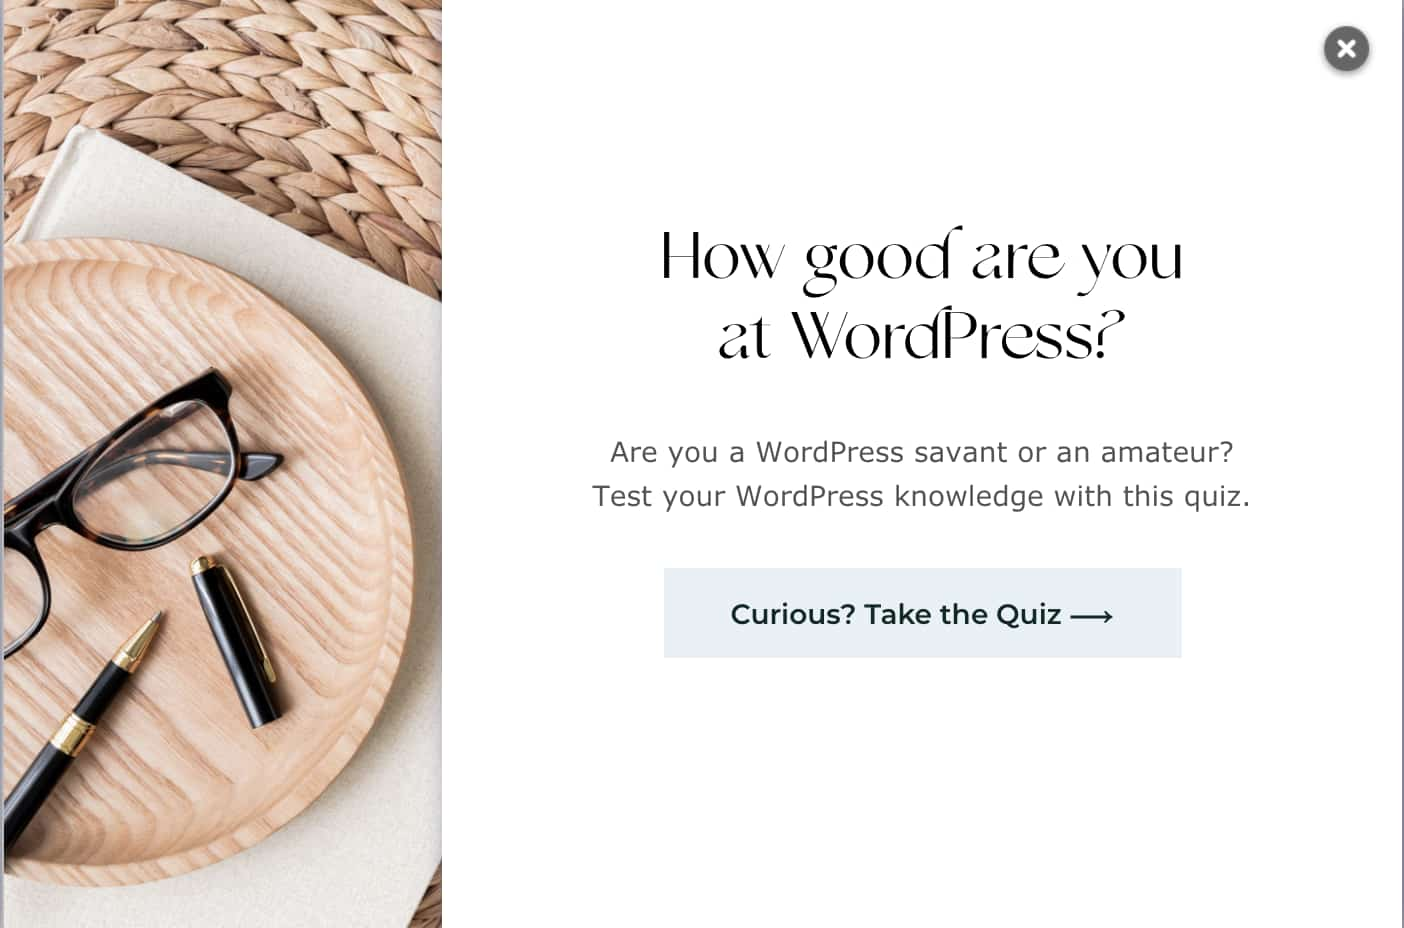
In this example, this brand, which offers WordPress maintenance services, tests its audience with their WordPress knowledge.
After answering a few questions, they must enter their email address to view the full results. Then, you land on a landing page with your knowledge level and the option to share your results on social media.
As a maintenance service, this is a great lead magnet strategy. It can serve as a signal to users who are considering outsourcing this service that they may not have the knowledge to manage their site on their own. And it’s interactive, which is already a win.
What we like:
This quiz will require little to no maintenance, as all the questions are based on historical facts – making it a simple but effective lead magnet.
3. HubSpot
Another interactive lead magnet you can consider is a grader or calculator.
HubSpot offers a website grader, which takes seconds to scan your website and provides a score based on performance, mobile experience, SEO, and security.
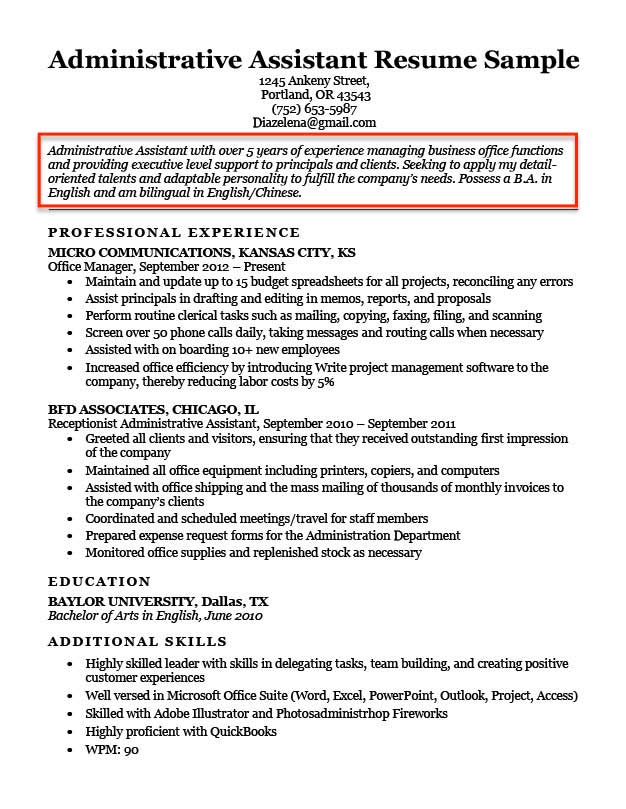
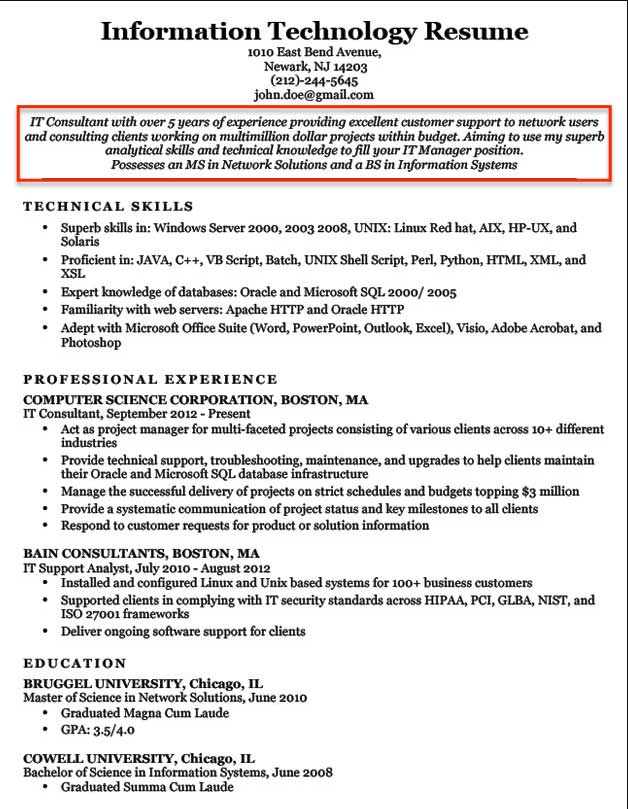
After providing your email and website, you get a detailed report about your website’s performance along with a corresponding course based on your results.
What we like:
The grader helps you identify potential issues with your website and offers a solution to resolve them.
4. Clever Girl Finance
Clever Girl Finance is a personal finance platform that empowers women to take charge of their finances.
Among the host of free resources on their site, this one, in particular, stands out.
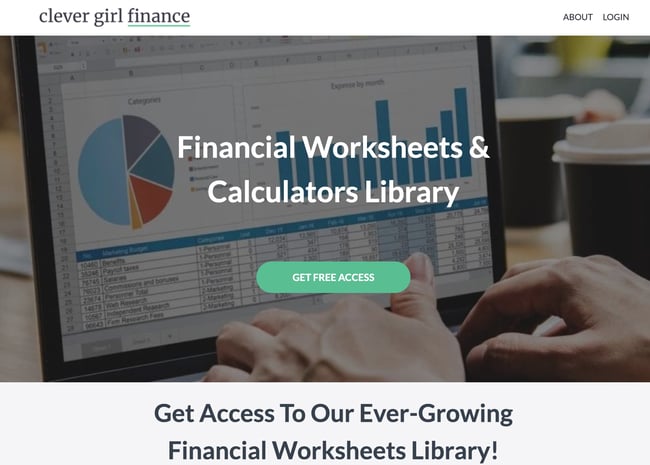
It’s a video library filled with recordings from personal finance coaching calls and when users sign up, they gain access to past and future recordings.
What’s great about this tactic is it answers a need.
Clever Girl Finance’s target audience likely wants a community in which to discuss financial topics, get their questions answered, and hear directly from experts. This lead magnet does just that.
What we like:
This is also one of those one-and-done magnets that require little maintenance beyond uploading new recordings. The team can then repurpose the content of those recordings for future blogs, video snippets, and more.
15 Additional Lead Magnet Ideas to Try
1. Ebooks
The ebook is perfect when you have a series of blog posts about a related subject.
For example, if you were running an online pet store, you might pick out the following five posts from your blog to combine into an ebook:
- “The 5 Pieces of Equipment That Every Puppy Needs”
- “The Ultimate Guide To Housetraining a Puppy”
- “The First 6 Months: What You Can Expect From Your New Puppy”
- “The Puppy Nutrition Guide: What Your Dog Should and Shouldn’t Eat”
- “The 7 Things You Should Never Do When Training a Puppy”
These posts could be logically compiled into an ebook entitled: “The Puppy Planner: Everything You Need To Know To Prepare for Your First Puppy.”
This type of ebook is effective because you’re making the lives of your website visitors easier – which should be the goal of any lead magnet you create. Rather than asking them to find all this content one article at a time, you’re packing it up into a convenient bundle that they can keep and refer back to.
The most successful lead magnets offer an irresistible and instant reward to your visitors, and the ebook checks off that box.
Featured Resource: 18 Free Ebook Templates
2. Guides
If you’re in an industry that is already well established, it can be hard to come up with original content.
Sometimes other people have covered a subject in such detail that it’s almost impossible to add extra value. In this situation, I’d recommend producing an ultimate guide.
An ultimate guide is a comprehensive collection of the best articles about a particular subject. The main difference between this and an ebook? You’re not recycling posts from your blog; you’re linking directly to other sites.
It’s important that you don’t copy and paste someone else’s content into your guide, but rather include a link back to the original article.
In the example below, Brian Dean from Backlinko.com produced “Link Building: The Definitive Guide.”
Link building is a complicated and broad subject. Dean’s definitive guide saves his audience a lot of time looking for this content.
And because so many other experts have written fantastic content about link building, Dean also saved himself the time of competing with content that already exists.
Rather than just listing the links, Dean adds extra value to his audience by categorizing them and including a brief introduction for each category.
This guide has also been well designed, reiterating that this is a valuable resource that should be kept and referred back to.
Do you work in an industry that is already bursting with quality content? Think about making your own ultimate guide.
Do you work in an industry that is already bursting with quality content? Think about making your own Ultimate Guide.
3. Bonus Packs
Offering additional content that is not included in the original blog post is the perfect way to reward readers who opt-in.
If you have an article titled, “The 5 Pieces of Equipment That Every Puppy Needs,” you could offer readers an exclusive PDF with a few more pieces of equipment that may have come on the market since the original post was published.

In his article, “SellMore Courses With This Online Course Sales Page Template and Guide,“blogger Bryan Harris took this one step further and combined a PDF version of the article along with five links that weren’t in the original post – people only received these bonuses when they subscribed.
4. Resource Libraries
If you’ve already written a strategic blog post, consider offering a resource library or guide as a lead magnet.
A resource library is a collection of tools that help people achieve results.
David Dean from Backlinko used this strategy in his post, “SEO Tools: The Complete List.” He offered a free download that detailed the 153 tools featured in his post – the perfect resource for a reader to keep and refer to whenever they need.
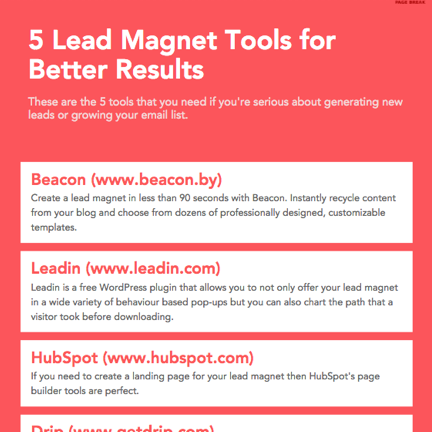
This library could be as simple as a list of five books or apps that you recommend.
What resources could you recommend to a potential customer that would help them to achieve better results?
5. Checklists
Instructional blog posts are just waiting to be turned into checklists – and they couldn’t be easier to create.
Just take your blog post and simplify it into a series of bullet points. Next, remove any points that don’t contain actionable advice. Split the list into several numbered steps to make the outcome more achievable.
Bonus points if you offer the checklist in a printable format so people can physically tick off each item on the list as they complete it. This sense of achievement is a great feeling that people will attribute back to your business.
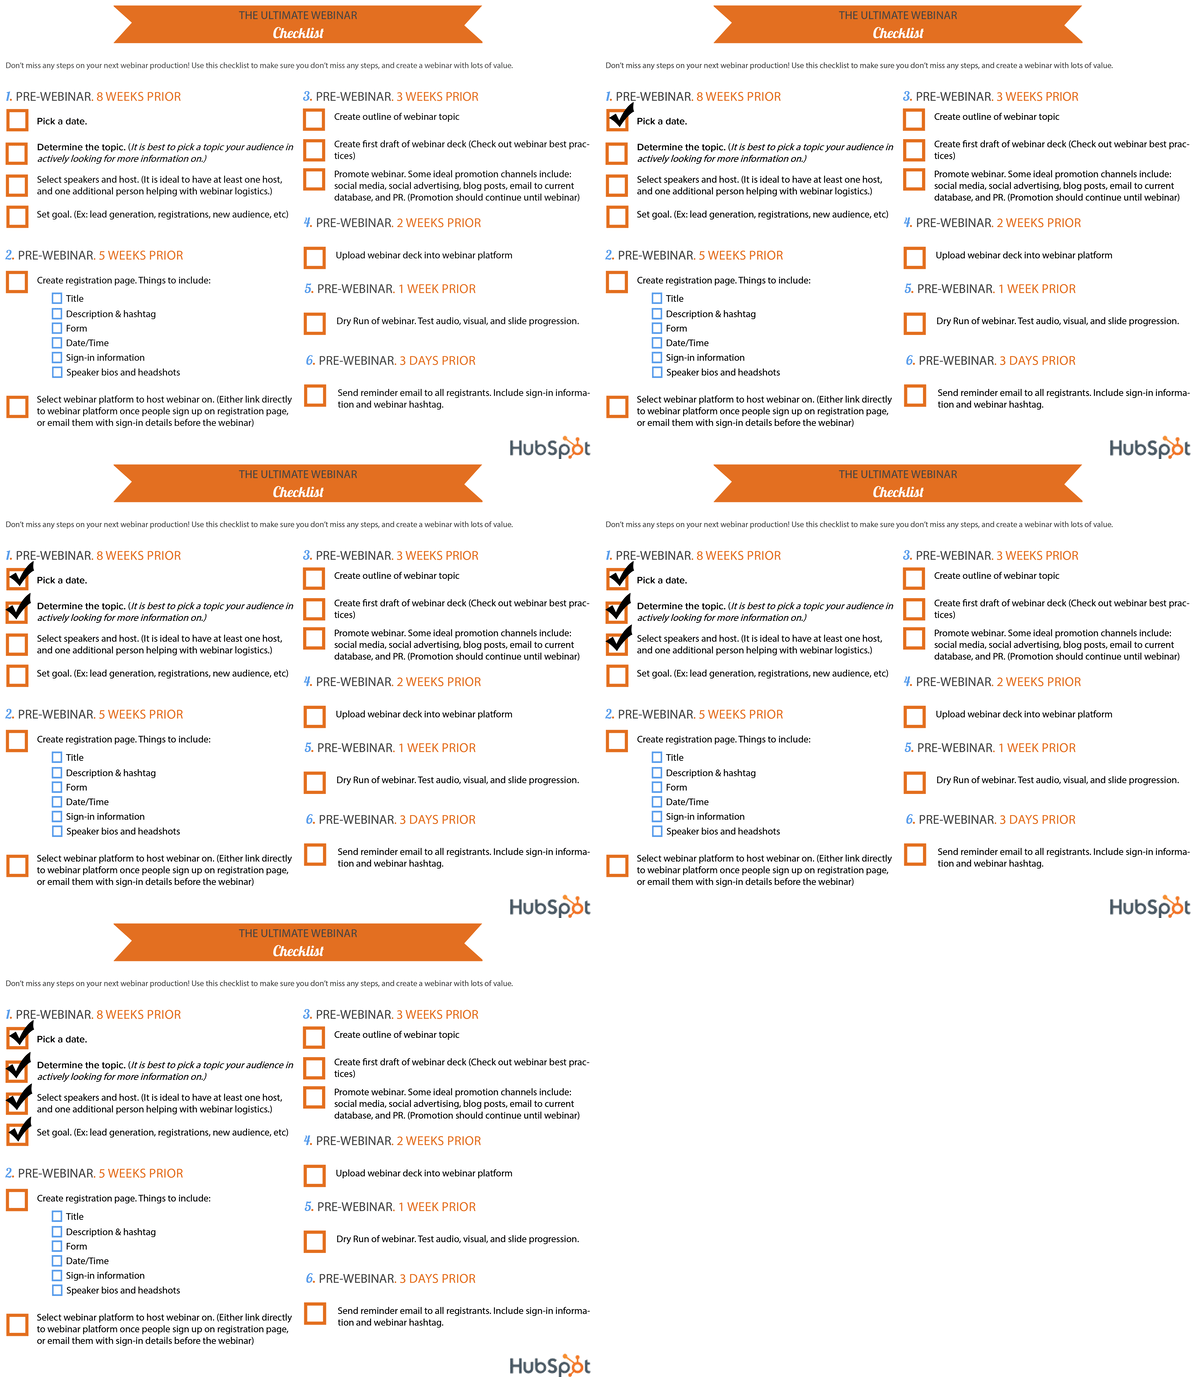
The “Ultimate Webinar Checklist” from HubSpot above is a valuable lead magnet because of how practical it is.
Hosting a webinar involves balancing a lot of different tasks coming together at the same time. This checklist informs you about everything you need to watch out for, from pre- to post-webinar.
6. Workbooks
In its simplest form, a workbook is a download-and-complete resource that helps people to apply the principles of your blog post to their own business.
The goal of a workbook is to have the participant learn by doing. As the teacher in this scenario, you’re positioning your business as an expert on the subject matter at hand.
With that in mind, you’ll want to choose the exercises included in your workbook carefully. Tease information out of the participant gradually, so that at the end of the workbook they can combine their short answers into a comprehensive piece of work.
A workbook is the perfect stepping stone to your premium products or services, so be sure to include a strong call to action at the end that tells the participant how you can help them to apply their newfound knowledge.
Is there a particular subject that you could help your audience understand more clearly with a workbook?
7. Case Studies
Case studies depend on very specific types of content, but the successes they reveal can entice a site visitor to take action.
If you have a blog post or interview clip that spotlights a real customer you’ve worked with, package this content into a written case study that expands on the need the client came in with and the metrics of their success.
Then, gate this case study behind a form that website visitors can fill out with their name and email address to access.
Keep in mind that you’ll need permission and approval from the client on which you’d like to create a case study.
Once you receive this approval, however, it’s a perfect lead magnet to host content that tells your readers about a customer success story.
Featured Resource: 3 Free Case Study Templates
8. Webinars
Webinars don’t have to be long, collaborative presentations with multiple colleagues or partners.
If you’ve got a blog post that merely touches on a subject you’re an expert in, use this blog post as a springboard into a live talk hosted by you and a coworker.
If you’ve written an article about the latest IOS cookie restrictions, for example, convert this article into a slide presentation and present it through a live conferencing platform, using helpful visuals.
You should also provide insight that listeners wouldn’t have gotten from just the blog post.
As a bonus, you can use the webinar recording as an additional offer.
9. Cheatsheets
If your blog post covers a complicated topic, it might be a good idea to offer readers a one-page sheet that they can refer back to when they need to refresh their memory. This could be a glossary of terms or just a summary of some key points.
This type of download-and-keep resource takes the pressure off readers so they don’t have to memorize or implement your strategy immediately. It does compel readers to opt-in to your list though, which is the ultimate goal.
In addition, the compact format means that people can quickly glance at it while they are going through the editing process. It’s a complementary tool for an existing process.
10. Guestbooks
Guest blogging is a terrific backlink strategy, but those who use it typically agree to not republish that particular post on their own blog.
This is fairly common, as Google punishes sites that duplicate content onto two publications – it’s in nobody’s interest to do so.
What you can do, though, is compile all these guest posts into a book format.
Since the content will be gated behind a lead capture form, there is no risk of Google flagging it as duplicate content and you get to squeeze a little bit of extra value from that content you worked so hard on.
11. Whitepapers
Have an interesting survey that your team recently ran? Or perhaps you know your audience is looking for specific information to inform their future strategy?
If so, leverage this knowledge to create downloadable reports based on your team’s research.
You may have talked about these findings in a blog post or a recent webinar. Repurpose that content for a detailed report.
This will position you as a credible resource in your industry and bring you that much closer to converting your target audience.
12. Templates
Templates are some of the most popular lead magnets out there.
Why? Because they help users streamline their processes and save time. But at the core of it, it solves the problem many of us have: creating and designing from scratch.
You can create templates for just about anything:
- Emails
- Social media
- Spreadsheets
- Graphic designs
It’s all about tapping into what your audience needs the most and creating that for them. Plus, it’s another low-maintenance magnet.
13. Email Course
Companies offer online courses all the time, but they’re not the only place to launch a course.
A Statista survey found that most people (over 80%) check their emails every few hours including outside of normal business hours.
We also know that email newsletters are very popular, with just about every company sending its top insights to your inbox every day.
With this in mind, starting an email course is a great lead magnet option.
An email course is a series of emails that can be anywhere from three to 10+ emails that cover a topic in depth.
The benefit for you? It’s a format most users are familiar with and it’s quick to launch.
In addition, you have multiple opportunities to nurture your audience and guide them down the buyer’s journey, compared to a one-and-done ebook that a user may or may not read.
14. Access to a Private Group
As a business, community management is a key aspect in gaining brand loyalists. It can also be an effective way to generate leads.
Platforms like Slack, Facebook Group, and LinkedIn allow you to do both.
For many businesses, their target audiences value community and want a space to discuss topics relating to their needs, goals, and challenges.
Creating that space will help you generate leads and get to know your audience better.
15. Behind-The-Scenes or “Secret” Insights
One of the best lead magnets I’ve ever seen was produced by Tim Soulo. It was so effective that I immediately opted-in without thinking twice. Suolo had written a blog post about sending an outreach email to well-known SEO expert Rand Fishkin. His call-to-action was the following:

This call-to-action was pitch perfect because it got me curious. I just had to know what the email subject was.
I also knew that it would be a relatively short read so I wouldn’t have to commit to a lengthy ebook – lazy, I know, but that’s human nature sometimes.
Suolo’s lead magnet is just one page and was made using a standard word processor. There was no point in spending time or money on the design in this case because the secret is the only thing that matters.
I blurred out the tell-tale image and text in the above screenshot – if you want to know Suolo’s secret, you’ll just have to download the lead magnet!
Do you have any behind-the-scenes insights to a blog post that are compelling enough to offer as a downloadable secret?
Add Lead Magnets to Your Marketing Strategy
There you have it, ways to recycle your existing content into lead-generating assets. You already have the blog content – all you have to do is implement lead magnets and an email campaign that gets them into your contact database.
Editor’s note: This piece was originally published in May 2018 and has been updated for comprehensiveness.