
Welcome to My Blog
How to Do a SWOT Analysis [With Template & Examples]
As your business grows, you face more obstacles, challenges, opportunities, and projects in general. It’s a good and natural part of scaling an organization, but how do you determine your priorities? Which initiatives should you execute on first, and which challenges should you address right away?
Enter the SWOT analysis, a framework that can help you develop a roadmap for moving forward with your business, maximizing opportunities and minimizing roadblocks along the way.
While it may seems simple on the surface, a SWOT analysis allows you to make unbiased evaluations on:
- Your business or brand
- Market positioning
- A new project or initiative
- A specific campaign or channel
Practically anything that requires strategic planning, internal or external, can have the SWOT framework applied to it, helping you avoid unnecessary errors down the road from lack of insight.
Importance of SWOT Analysis
You’ve noticed by now that SWOT stands for Strengths, Weaknesses, Opportunities, and Threads. The framework seems simple enough that you’d be tempted to forego doing using it at all, relying instead on your intuition to take these things into account.
But you shouldn’t. Doing a SWOT analysis is important because:
- It gives you the chance to worry and to dream. Adding the SWOT analysis as an important step in your strategic process, you’re giving yourself the space to dream, evaluate, and worry before taking action. Your insights in this regard then turn into assets as you create the roadmap for your project or initiative.
- It forces you to define your variables. Instead of diving head first into the planning and execution, you’re taking inventory of all your assets and roadblocks. These can help you create a more specific and effective roadmap.
- It allows you to think more critically and account for mitigating factors. As you identify weaknesses and threats, you’re better enabled to account for them in your roadmap, improving your chances for success.
- It helps you keep a written account. As your organization grows and changes, you’ll be able to strike things off your old SWOTs and add new things as the industry changes. It can be illuminating to look back to where you started as you look ahead at what’s to come.
Here, we’ll tackle how to best do a SWOT analysis, provide you with a SWOT analysis template, and conduct SWOT analyses on major brands Apple and Starbucks. When you’re done reading, you’ll have all the inspiration and tactical advice you need to tackle a SWOT analysis for yourself.
How Do You Write a Good SWOT Analysis?
There are several steps you’ll want to take when evaluating your business and conducting a strategic SWOT analysis.
1. Download HubSpot’s SWOT Analysis Template.
There’s no need to start from scratch for your analysis. Here, I’ve created a sample using a free, editable template — feel free to use the model yourself, or create your own as it suits your needs.
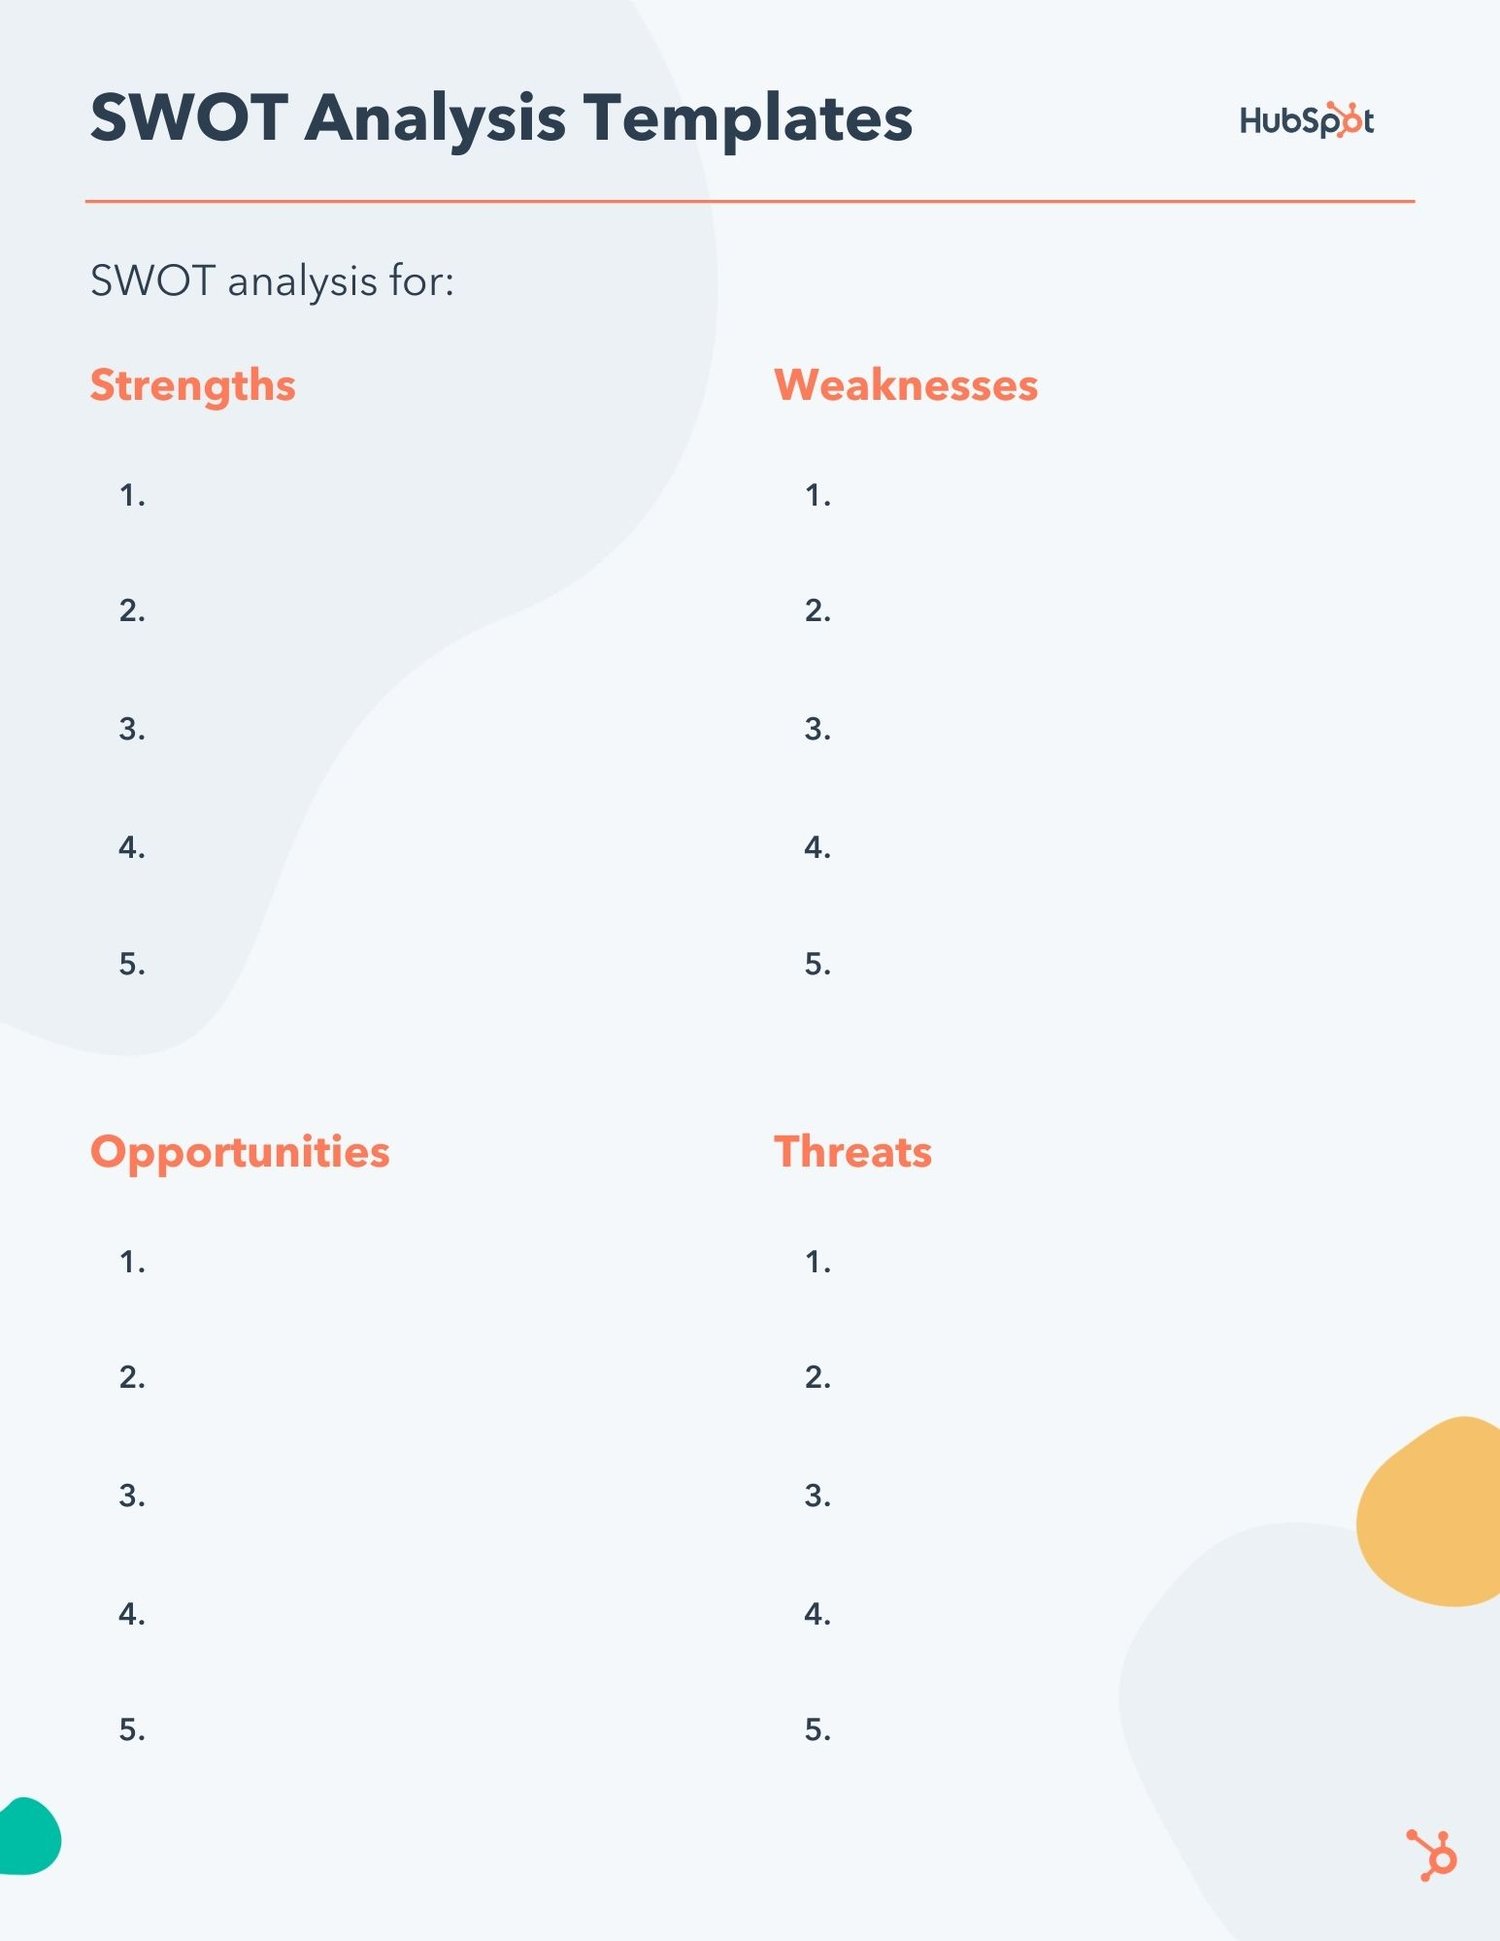
Download a free, editable SWOT analysis template.
2. Arrange each section into a table with four quadrants.
Whether you use the template above as a model or create your own to suit your needs, it can be helpful to start in table format to visualize your SWOT analysis. This can be done by arranging each of the four sections into separate quadrants.
3. Identify your objective.
Before you start writing things down, you’ll need to figure out what you’re evaluating with your SWOT analysis. Be specific with what you want to analyze. Otherwise, your SWOT analysis may end up being too broad, and you’ll get analysis paralysis as you are making your evaluations.
If you’re creating a social media program, you’ll want to conduct an analysis to inform your content creation strategy. If you’re launching a new product, you’ll want to understand its potential positioning in the space. If you’re considering a brand re-design, you’ll want to consider existing and future brand conceptions.
All of these are examples of good reasons to conduct a SWOT analysis. By identifying your objective, you’ll be able tailor your evaluation to get more actionable insights.
3. Identify your strengths.
“Strengths” refers to what you are currently doing well. Think about the factors that are going in your favor as well as the things you offer that your competitors just can’t beat.
For example, let’s say you want to use a SWOT analysis to evaluate your new social media strategy.
If you’re looking at a new social media program, perhaps you want to evaluate how your brand is perceived by the public — is it easily recognizable and well-known? Even if it’s not popular with a widespread group, is it well-received by a specific audience in particular?
Next, think about your process: is it effective or innovative? Is there good communication between your marketing and sales to ensure both departments use similar vocabulary when discussing your product?
Finally, evaluate your social media message, and in particular, how it differs from the rest of the industry. I’m willing to bet you can make a lengthy list of some major strengths of your social media strategy over your competitors, so try to dive into your strengths from there.
4. Identify your weaknesses.
Similarly to your strengths, what are the roadblocks hindering you from reaching your goals? What do your competitors offer that continue to be a thorn in your side. This section isn’t about being a Negative Nancy. Rather, it’s critical to foresee any potential obstacles that could mitigate your success.
When identifying weaknesses, consider what areas of your business are the least profitable, where you lack certain resources, or what costs you the most time and money. Take input from employees in different departments, as they’ll likely see weaknesses you hadn’t considered.
If you’re examining a new social media strategy, you might start by asking yourself these questions: First, if I were a consumer, what would prevent me from buying this product, or engaging with this business? What would make me click away from the screen?
Second, what do I foresee as the biggest hinderance to my employees’ productivity, or their ability to get the job done efficiently? What derails their social media efforts?
5. Consider your opportunities.
This is your chance to dream big. What are some opportunities for your social media strategy you hope, but don’t necessarily expect, to reach?
For instance, maybe you’re hoping your Facebook ads will attract a new, larger demographic. Maybe you’re hoping your YouTube video gets 10,000 views, and increases sales by 10%.
Whatever the case, it’s important to include potential opportunities in your SWOT analysis. Ask yourself these questions: What technologies do I want my business to use to make it more effective? What new target audience do I want to reach? How can the business stand out more in the current industry? Is there something our customers complain about that we could fix with our social media strategy?
The opportunities category goes hand-in-hand with the weaknesses category. Once you’ve made a list of weaknesses, it should be easy to create a list of potential opportunities that could arise if you eliminate your weaknesses.
6. Contemplate your threats.
It’s likely, especially if you’re prone to worrying, you already have a good list of threats in your head.
If not, gather your employees and brainstorm: What obstacles might prevent us from reaching our social media goals? What’s going on in the industry, or with our competitors, that might mitigate our success? Is there new technology out there that could conflict with our product?
Writing down your threats helps you evaluate them objectively. For instance, maybe you list your threats in terms of least and most likely to occur, and divide and conquer each. If one of your biggest threats is your competitor’s popular Instagram account, you could work with your marketing department to create content that showcases your product’s unique features.
SWOT Analysis Examples
The template above helps get you started on your own SWOT analysis.
But, if you’re anything like me, it’s not enough to see a template. To fully understand a concept, you need to see how it plays out in the real world.
These SWOT examples are not exhaustive, and I’m sure you could add some yourself, but hopefully, it’s enough to inspire you as you do your own SWOT analysis.
Apple’s SWOT analysis
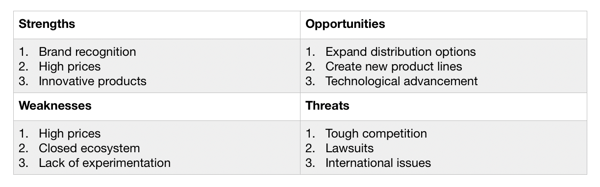
Here’s how we’d conduct a SWOT analysis on Apple.
Strengths
First off, strengths. While Apple has many strengths, let’s identify the top three:
- Brand recognition
- High prices
- Innovative products
Apple’s brand is undeniably valuable, and their business is considered the most valuable in the world. Since it’s easily recognized, Apple can produce new products and almost ensure a certain degree of success by virtue of the brand name itself.
This degree of recognition lends itself to Apple’s ability to sell products. For instance, in 2019, Apple sold 72.9 million iPhones compared to 70 million Galaxy phones by Samsung. This is despite the price disparity between the two (the flagship Galaxy phone is $100 cheaper). Often, people don’t care about price as much as they care about brand recognition.
Lastly, their innovative products: Apple didn’t earn its reputation for nothing. They create highly innovative products, which are often at the forefront of the industry.
Weaknesses
Next, let’s look at three of Apple’s weaknesses.
- High prices
- Closed ecosystem
- Lack of experimentation
While the high prices don’t deter Apple’s middle and high class customer-base, they do hinder Apple’s ability to reach a lower-class demographic.
Apple also suffers from its own exclusivity. Apple controls all its services and products in-house, and while many customers become loyal brand advocates for this reason, it means all burdens fall on Apple employees.
Ultimately, Apple’s tight control over who distributes their products limit their market reach.
Lastly, Apple is held to a high standard when it comes to creating and distributing products. Apple’s brand carries a high level of prestige, but that level of recognition inhibits Apple from taking risks and experimenting freely with new products that could fail.
Opportunities
Now, let’s take a look at opportunities for Apple.
It’s easy to recognize opportunities for improvement, once you consider Apple’s weaknesses. Here’s a list of three we came up with:
- Expand distribution options
- Create new product lines
- Technological advancement
One of Apple’s biggest weaknesses is its distribution network, which, in the name of exclusivity, remains relatively small. If Apple expanded its network and enabled third-party businesses to sell its products, it could reach more people globally, while alleviating some of the stress currently put on in-house employees.
There are also plenty of opportunities for Apple to create new products. Apple could consider creating more affordable products to reach a larger demographic, or spreading out into new industries — Apple self-driving cars, perhaps?
Finally, Apple could continue advancing its products’ technology. Apple can take existing products and refine them, ensuring each product offers as many unique features as possible.
Threats
Finally, let’s look at threats to Apple.
Believe it or not, they do exist.
Here are three of Apple’s biggest threats:
- Tough competition
- Lawsuits
- International issues
Apple isn’t the only innovative tech company out there, and it continues to face tough competition from Samsung, Google, and other major forces. Many of Apple’s weaknesses hinder Apple’s ability to compete with the tech corporations that have more freedom to experiment, or that don’t operate in a closed ecosystem.
A second threat to Apple is lawsuits. Apple has faced a bunch of lawsuits, particularly between Apple and Samsung, and so far it has only won one case. These lawsuits interfere with Apple’s reputable image, and could steer some customers to purchasing elsewhere.
Finally, Apple needs to improve its reach internationally. It isn’t number one in China, and doesn’t have a very positive relationship with the Chinese government. Then, in India, which has one of the largest consumer markets in the world, Apple’s market share is low, and the company has trouble bringing stores to India’s market.
If Apple can’t compete globally the way Samsung or Google can, it risks falling behind in the industry.
Starbucks SWOT Analysis
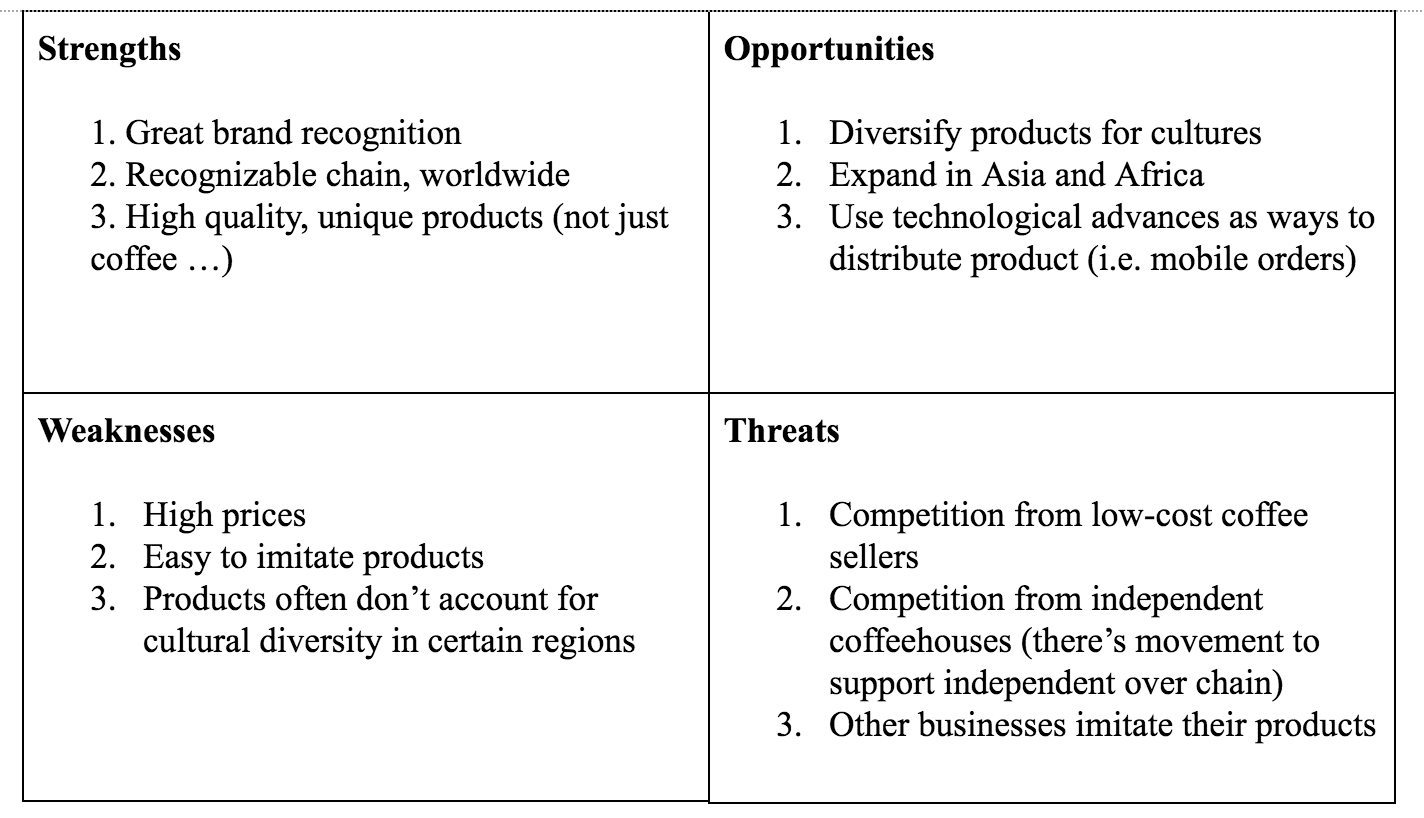
Now that we’ve explored the nuances involved with a SWOT analysis, let’s fill out a SWOT template using Starbucks as an example.
Here’s how we’d fill out a SWOT template, if we were Starbucks:
Dine-In Thai Restaurant SWOT Analysis
Some small-business marketers may have difficulty relating to the SWOT’s of big brands like Apple and Starbucks, so here’s an example of how a restaurant might visualize each element:
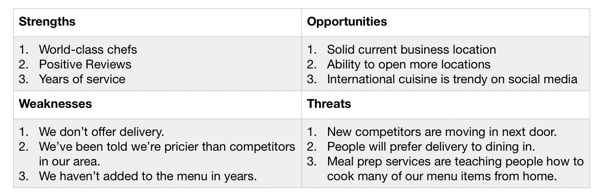
While a Thai or any other restaurant might not be as worried about high-level lawsuits like Apple, the small business might be more worried about competitors or disruptors that might enter the playing field.
Local Boutique SWOT Analysis
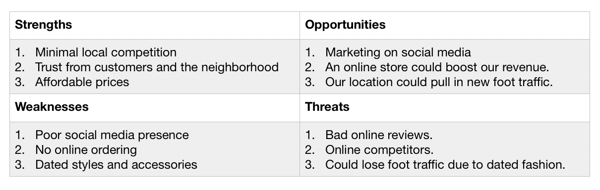
In another small-business example, a local boutique might be well known in its neighborhood, but it also might take time to build an online presence or get its products in an online store. Because of this, some of its strengths and opportunities might relate to physical factors while weaknesses and threats might relate to online situations.
When to Use a SWOT Analysis
Ultimately, a SWOT analysis can measure and tackle both big and small challenges, and opportunities, and both big and little strengths and weaknesses.
While the examples above focus on businesses in general, you can also use a SWOT analysis to evaluate and predict how a singular product will play out in the market.
Hopefully, our SWOT template will supplement your market research and business analysis, and provide fair insights into how to optimize your products for bigger payoffs, and less hurdles.
Editor’s note: This post was originally published in May, 2018 and has been updated for comprehensiveness.

Why You Might Want to Be More Negative in Your Marketing
Ever wake up on the wrong side of the bed?
Of course you have. We all have.
Ever wake up on the wrong side of the bed, and then have to be cheery? Like, interact in social media? Write an engaging blog post? Put together a lovable email marketing campaign?
Ugh. Those are the times you wish you could shut out the world, or at least channel a little of your inner snark. Well, the good news is you can do that once in a while, and your marketing results may even thank you for it! Sometimes, it’s good to embrace a little bit of the negative. (Trust me — this will all make sense in a second.)
So, here we go … if you ever wake up wanting to shut out the world, here’s how you can take it out (positively!) in your marketing.
Keep in mind, however, that negative marketing shouldn’t be deployed simply because you want to be cranky. Instead, it should be implemented strategically with one (or more) of these goals in mind:
- Empathizing with customer struggles
- Differentiating your brand with that of competitors, especially those who may not be willing to take a stand or acknowledge certain truths in the industry
- Cutting through the noise of “neutral” messaging that might not be resonating
If you’re successful, the end result causes you to stick in your audience’s mind, which gives you the bandwidth to prove your brand as a superior alternative.
How to Be Negative in Your Marketing
So how do you implement this tactic successfully? Here are some opportunities to be “more negative” in your marketing.
1. Create negative, or exclusionary, personas.
Let’s start with something a little bit easier to swallow than just being a total grumpy pants: exclusionary personas. Exclusionary personas, sometimes also referred to as negative personas, are kind of like the opposite of buyer personas — they’re the personas of the people you do not want to target in your marketing.
This is about more than just recognizing that not everyone in the world is a potential future customer — it’s about recognizing that your marketing attracts certain types of people who totally clog up your funnel, waste your sales team’s time, and will never become customers.
Why won’t they ever become a customer? Could be a lot of things — they don’t have the budget, or they’re just fans of your content or social media presence. Or maybe they do become customers, but they cost you a ton of money; for instance, they could have a high acquisition cost or a high propensity to churn.
In this case, it behooves you to identify who these folks are so you can ensure you either 1) stop creating content that draws in the wrong people, or 2) let them keep reading and engaging with your content to help you spread your reach, but keep them from getting rotated to sales reps using methods like assigning them a low lead score.
2. Leverage a little exclusivity.
This is the VIP, red-carpet tactic we all know and love (or love to hate). When you tell someone they can’t have something or what they want is scarce, it often makes them want it more. You know, the whole “playing hard to get” thing.
This just so happens to be a common sales tactic, but marketers can use it, too. Tell prospects they can have an offer … but only for a limited time. Or only for the first 10 that respond in social media. Heck, you don’t even always have to tell them what it is.
This tactic is particularly popular with savvy ecommerce shops, too — ModCloth, for instance, frequently sends me emails letting me know that an item I like is so popular, it’s almost out of stock. “Oh no! Everyone else is snagging it! I have to get it before I’m left out!”
The moral of the story? Leave people out once in a while. If everyone gets something, it’s not as special. And when you go VIP, the ones who do get it feel uber-special. (There… we just turned a negative into a positive. See?)
3. Craft “negative” headlines and titles.
I don’t know what this says about human nature, but there’s an undeniable correlation between page views and negativity. Consider some of these titles you might find on a news site like CNN:
- What you get wrong about BBQ
- Could our favorite flavorings be damaging our DNA?
- Beware the parental overshare
These are about clicks. No question about it. We all know the news has gone the negative route for years, and — for better or worse — they do it because it is effective at grabbing attention.
Now, you absolutely shouldn’t throw out some inflammatory headline just to get clicks — if you’re going to get negative with your titles, you have to back it up with some solid content that actually merits that title of yours. Here are a few examples that worked out extremely well for us:
- 15 Things People Absolutely Hate About Your Website
- 10 Cliché Marketing Taglines We Should All Stop Using
- 13 Hilarious Examples of Truly Awful Stock Photography
- 17 Sales Closing Mistakes That’ll Stop a Deal in Its Tracks
4. Create a bond over a shared negative experience — but don’t dwell.
Alright, now we’re getting warmed up! So you’re throwing out some negative titles, but have you considered drawing that negativity into your content? When you draw on a negative situation in your content — particularly right in the beginning — it can actually help reader retention and engagement. Some marketers are afraid to stir up negative feelings in their reader, but it can actually create a shared experience and tap into a level of emotion that some may not expect to get while reading marketing content, particularly if you’re a B2B marketer.
I mean, that’s why I started this post the way I did — getting up on the wrong side of the bed is an experience everyone I know can relate to. And sometimes, it’s easier to form a bond with someone over a shared negative experience than something warm and fuzzy.
But be forewarned — once you have a bond with the reader based on a shared negative experience, it’s crucial to shift the mood to something more positive and solution-oriented. People like to know they’re not alone (misery loves company), but most don’t like to dwell on the negativity.
5. Cast some villains.
Just like we can all bond over a shared negative experience, so too can we bond over a common enemy. Casting a villain has been a common marketing tactic for years, and I’m not just talking about the Hamburglar. Villains can take more subtle forms, playing on common tropes — the jerk boss, the slob roommate, bureaucratic drone.
These take common experiences and personify them in order to elicit a feeling in the consumer, and help tell the story you’re trying to tell. A great example of this is Genesis’s “Going Away Party” commercial where they use the “stuffy” party trope and the “villains” within it to demonstrate that luxury doesn’t have to be stuffy.
6. Take a stand for something you believe in, even if it’s controversial.
If you feel confident about your brand, your PR team, and your position on an issue, you can take a controversial stance on a popular topic. Controversial marketing is a risky play because, in many cases, your brand could be seen as capitalizing on an issue just to peddle your products. However, when done well, your brand could be seen as socially responsible.
Controversial marketing can also do a few other things for your marketing:
- Position you as a thought leader (only if your thought was a good one — so try to make sure it is)
- Help you define your brand in the eyes of consumers and what it stands for
- Drive natural publicity
- Elicit strong emotions from audiences, both positive and negative
That last one is what I want you to pay the most attention to. When you take a staunch position on a polarizing issue, you will have people who like you less for it. You will also generate some seriously ardent supporters. If you’re going to play the controversy game, be prepared to deal with both, because while some results could be really exciting for your brand, some backlash will inevitably come with it.
7. Use data to build a case study around why something stinks.
Let’s start off with an example: [New Research] It’s Official — Lots of Salespeople Hate Their CRM. It gets props off the bat for its grabby negative headline, but it’s also full of interesting statistics like this one:
50% of sales leaders say that their CRM is difficult to use, and 18% say this has caused them to lose opportunities or revenue.
You build a case around why one thing stinks (traditional CRMs) so you can show why something else is awesome (the new HubSpot Sales Hub Enterprise).
This can be made even more compelling if you have two data points that demonstrate a stark contrast; the juxtaposition of positive and negative paints a pretty dramatic picture in readers’ minds, and the succinct data points make it easy to quickly demonstrate the bad versus the good.
8. Poke some fun at your competitors.
This is perhaps what most people think of when negative marketing is discussed, but it’s rarely executed because of how delicate the situation can be. On one hand, a little healthy competition can be a good thing, especially if you want to position yourself as a better option. However, if done poorly, your audience may actually think less of your brand for “playing dirty” or being too low-brow. In addition, if you leverage false claims, you could be asking for legal trouble.
There are two types of negative marketing with regard to your competitors:
- Attack: Focuses on the negative sides of your competition’s offerings.
- Contrast: Focuses on the positive sides of your offerings and establishes the gap. This is more subtle but still highlights what your competition may lack.
Typically, it’s easier for larger brands to engage in negative marketing with their competition because they’re already well-known, so the reward can be greater than the risk to highlight value propositions.
Pepsi has a famous “attack” ad in which a child dispenses two Coca-Cola cans from a vending machine and stands on them in order to reach the Pepsi button.
Bud Light uses the more subtle “contrast” approach in their “Special Delivery Corn Syrup” ad:
This ad works because it’s a light narrative and doesn’t engage in serious mud-slinging (it merely highlights a differentiator).
Nonetheless, controversy brewed even in this case as the company was sued for potentially misleading consumers by not acknowledging the difference between corn syrup and high-fructose corn syrup, which demonstrates exactly why this tactic is risky.
If your brand isn’t a household name, it may be better to highlight value propositions and differentiators in less risky ways.
For example, some brands engage in competitor criticism without mentioning any names. Doing this ensures you’re not giving your competition free airtime while you capitalize on ideas your consumers know to be true. For example, Domino’s does this in their “Designed to Be Delivered” ad, which doesn’t mention a single competitor (but does imply them):
9. Make fun of yourself.
Another less risky way would be to turn that negativity inward. A little self-deprecation can be fun for others, makes you seem more human, and actually might make you feel better about your slip-ups. After all, we all have them, and it’s important to learn how to make light of your mistakes. Speaking of Domino’s, one of the best examples of recent self-deprecating advertising is when Domino’s admitted their pizza tasted like cardboard and what they’re doing about it:
When Negativity Backfires
All this being said, it’s important to always consider whether your negativity is going to backfire. Are you being an unadulterated jerkface? Is this negativity going to be lost on your audience? Does your buyer persona really hate this kind of stuff?
For instance, something that almost always comes off as totally petty and unnecessarily negative is bickering with competitors. I mean, think about how annoying political ads are; you certainly don’t want to come off like that. I think one piece of advice from my childhood can sum up how you should approach bickering with competitors:
“If you don’t have anything nice to say, don’t say anything at all.”
Yes, even if they started it.
It’s also important to remember that any negativity you draw on needs to be tempered with some positivity.
Finally, I think striving to be inspirational should always be an aspiration for marketers. There’s no question that marketers capable of inspiring people see unbelievable success from their efforts. In fact, I think if you’re able to inspire people in your marketing, the effects last much longer and are much stronger than any of these negative tactics.
Editor’s note: This post was originally published in April 2013 and has been updated for comprehensiveness.

How to Run Marketing Team Meetings That Don’t Suck
Meetings suck. They’re time for people to avoid doing actual work, stare blankly at each other, throw in generic comments to look like they’re paying attention, and if you’re lucky, maybe come out with some wicked notebook doodles.
Is that how people perceive your marketing meetings? I hope not, because they don’t actually have to be that way.
Turn your marketing meetings into something useful by — you guessed it — creating compelling content! (Oh my gosh, inbound marketing concepts work in real life, too!)
As your team grows, it’s important for everyone to get in a room together and talk about what they’ve been working on in their corner of the world. So to ensure those marketing meetings aren’t blocks of time your team dreads, make note of these tips for how to make marketing team meetings truly useful for your employees.
How to Run an Effective Meeting
While this post will primarily focus on marketing meetings, I want to address a team-agnostic section about effective meetings as a whole.
As I said above, meetings can be a grandiose waste of time. It’s tempting to run your work by others, gather feedback or affirmation, or simply avoid the tough stuff by calling meetings.
I’m here to tell you — don’t do it. The first step to running effective meetings is to only schedule meetings when absolutely necessary.
Quarterly meetings to report on company progress and important news? Of course. Monthly meetings to touch base on KPIs and recruit help for projects? Sounds great. Weekly meetings to report on current responsibilities and asks? I’m torn on whether this one is necessary, but for large teams or teams with new employees, this could be a good move.
Every moment in a meeting is time away from heads-down work, the work that arguably moves your business forward. Are meetings necessary to take a break, touch base, and rally with your team? Of course.
Secondly, to understand the effectiveness and efficiency of a meeting, ask your team. Ask, “is [meeting] helpful for you? If so, what are its top two benefits for you?” This can help you understand what percentage of your teams finds value in your meetings and what components or agenda items may be able to be removed to save time.
Speaking of agendas, let’s discuss next what your marketing meeting agendas should resemble.
Marketing Meeting Agenda
Whether your marketing team meeting is weekly monthly, this section will explain the content you should every single time. We also recommend creating a slide deck that you project for your team in each meeting so you can all follow along with each agenda item.
Marketing Meeting Agenda Example
For every meeting, you should have a dedicated agenda slide that lays out three things:
- What will be discussed in today’s meeting
- Who will be leading each discussion
- How much time is allotted for each discussion
Take a look at one of our recent marketing team meeting agenda slides:
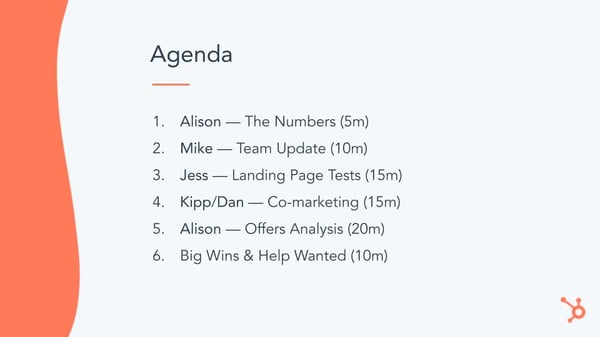
Outlining who is talking, what they’re covering, and how much time they have to discuss it will help prevent the meeting from getting derailed. It will also prevent people from delving into unproductive conversations that are best had at another time and place.
As for what components should be on your marketing meeting agenda, let’s discuss what to cover during your marketing meeting.
Review Important Metrics
Do a quick review of your most important marketing metrics. These shouldn’t be niche metrics, like email unsubscribe rate, social media reach, or blog subscriber growth; save those for your monthly meetings where you review month-over-month progress.
These should be the metrics your marketing team is measured on. In other words, at the end of the month, what metrics will tell you whether the marketing team succeeded?
While every business will likely review something different depending on their business model, here are some ideas for you:
- Leads waterfall
- Sales waterfall
- Volume of marketing qualified leads(MQLs)
- Paid vs. organic leads breakdown
- Website traffic
It’s important to review your team’s important metrics because these are how you’re measured onas an overall marketing team. And if you don’t all know how you’re faring as the month progresses, individual contributors can’t do anything to step up and help your team’s numbers improve.
A Bit of Education
Marketing meetings should be a healthy mix of state-of-the-union content and educational content. Each week, have a couple team members present briefly about interesting projects they’ve been working on. This serves two purposes: it lets people know what their team members do all day, and they get to learn something new!
Think about it … wouldn’t it be interesting for a blogger to learn a little bit about a PPC experiment? Or for a social media intern to learn about the results of the latest email A/B test?
Sharing lessons from projects helps everyone expand their knowledge base, sidestep landmines if a project backfired, and implement effective new techniques that they never knew worked.
Boom — everyone leaves your weekly meeting a smarter, better marketer!
The Nitty Gritty Retrospective
Your meeting should also contain a review of the projects each employee (or if you’re a larger marketing department, each team) worked on last month/quarter/year, plus the results they’ve seen.
This is good for a few reasons. First, it keeps everyone accountable knowing that each meeting they need to stand up in front of their colleagues and explain just what they do all day. Second, everyone gets to learn from what everyone else worked on and become generally better marketers. Third, it helps everyone identify how individual teams are faring, and what projects they’re doing to improve their own metrics.
For example, if you have a social media team, this is their opportunity to report on the success of every single social network they manage. How is their reach faring? How much traffic are those networks sending to your site? How many leads are being generated? Why are some networks more successful than others?
While your weekly meetings (if you have them) may focus on more high-level, team-based metrics, a monthly or quarterly meeting is a good opportunity to do a deep dive into the channels and metrics that enable the entire team to meet its goals.
How You’ll Meet This Month’s Goals
After the retrospective, each employee or team should also present on their individual goals for the month or quarter, and how exactly they will meet those goals. This is not the time to be generic.
Teams should explain, point by point, everything they’ll be doing during the time period to meet the metrics they’re measured by.
For example, let’s say the email marketing team is responsible for driving more reconversions this month. What exactly will they do to, well, do that? Well, that slide might have some initiatives like A/B test email copy with and without a P.S., anoffers analysis to determine which offers convert at the highest rate, list segmentation experiments, tailoring lead generation offers to align more closely with personas to improve CTR … the list could, and should, go on.
This is also a critical time in your meeting for feedback. Build in time during every presentation — at least 5 minutes, more if you find you need it after a few meetings — for each team to solicit feedback on their proposed projects. This will help individual teams from getting derailed on projects that might not help them meet their goals, or perhaps other members of the marketing team have fantastic ideas that the teams hadn’t even thought of yet!
Big Wins
A little bit of recognition is a good thing. Set aside a couple of minutes — come on, you can’t find 5 minutes? — to showcase some of the amazing things your team members or department as a whole have accomplished.
This could be anything from press coverage, speaking engagements, engaging with power players on social media, a smash hit blog post, an email that received unprecedented click-through rates … you get the point. It’s easy to harp on where you’re falling behind, but a little cheerleading can help rally your team and remind them just how successful they can be when they put their mind to it.
Solicit Help
Everyone should have the opportunity to solicit help from team members during your marketing team meetings. The larger your team gets, the easier it is to work in silos — but everyone has their own little super powers that sometimes go unnoticed.
If there is a platform during every meeting for employees to share (if they need it) something they need a little help with, you may find others pipe up with a simple solution or resource that solves the problem.
There should also be a few minutes built into each presentation for a little feedback. If someone is presenting on the progress of an ongoing project, part of “soliciting help” may be getting feedback on what steps to take next. For example:
- Is this project still worth pursuing?
- How should we measure the success of this project?
- Does anyone have a solution to a major roadblock?
So while there should be a few minutes at the end of each meeting dedicated solely to giving employees the floor to solicit help, time for feedback should be built into presentations if the presenter needs it.
You know what content to include in your marketing team meetings. Now, let’s discuss how to make those meetings run smoothly. These tips, despite helpful content, can make or break the usefulness of any marketing meeting.
1. Stay on time.
Start on time, you end on time, and honor the budgeted time set for individual presentations. I know it’s hard, especially when there’s a good discussion going on, but delegate a timekeeper who lets presenters know when they’re coming up to the end of their allotted time.
If you’re vigilant about this, people will start to self-edit their presentation, and meeting-goers will self-censor their comments, only contributing what truly needs to be said.
2. Don’t allow computers …
… said the internet marketing company. Seriously though, only the meeting coordinator should have a computer to pull up the agenda and presentations.
If others bring their laptops, you’ll find people can’t help but check their emails, get little bits of work done, and chat online, no matter how riveting the presentations are.
3. Build in time for a break.
Your weekly meeting may only be 30 or 60 minutes, but your monthly meeting could take a lot longer. In that case, build in time for people to get up, stretch their legs, go to the bathroom, get coffee, whatever.
You’ll start losing people’s attention otherwise.
4. End every meeting with action items.
Whatever you talked about during your meeting should be revisited briefly at the end of the meeting, preferably by the meeting coordinator. If you spend 20 minutes talking about how to solve your lead shortage problem at the beginning of your 90-minute meeting, there’s a good chance some of the to-dos and initiatives trickled out of people’s minds.
Make sure there’s someone taking notes throughout the meeting, and allot five minutes at the end of every meeting to review what people should start doing once they walk out of that meeting room.
5. Consider your remote folks.
Whether your entire team or just a few members are remote, it’s important to consider the remote meeting experience. As a remote worker myself, dialing into meetings as one of the few remote attendees takes a bit to get used to.
Research helpful technology to mitigate the gap between in-office and remote workers. Zoom is obviously a great choice, but other technology like The Meeting Owl by Owl Labs may be a good fit for your team. At the start of each meeting, test your connectivity and walk through your slides to be sure the message is clear for folks at home.

Source: Getty Images
Most importantly, gather separate feedback from your remote team members to understand their struggles and accommodate their requests.
6. Review metrics and celebrate wins.
You know those marketing metrics you decided to measure and review in the first section? The ones that noted your team’s progress throughout the month?
Now’s the time to see whether you hit your goals or not! If you hit your goals, do two things: celebrate, and explain exactly why you hit those goals. That second one is critical. Someone should explain what marketing activities strongly contributed to you hitting, say, your leads goal. That way you can repeat those activities this month!
Meetings Don’t Have to Suck
Meetings are a necessary part of work. They’re a time to celebrate wins, ask for feedback or help, and get aligned with your team and company.
Sit down with your colleagues to audit your meeting schedule and see where you can trim time or cut meetings altogether. Effective and efficient meetings are much more important than meetings for the sake of it. Your team will thank you.
Editor’s note: This post was originally published in July 2012 and has been updated for comprehensiveness.

How to Leverage Sensory Language in Your Blog Posts [Data + Expert Tips]
Check this out:
“You’re sitting in the creaky, mesh-backed, black ergonomic desk chair you bought at a discount off Amazon — hunched over, eyes reluctantly wide open, staring intently at a dimly lit laptop screen bearing a blank document.
It’s 4:45 PM. For most of the day, you’ve heard hardly anything except for the occasional click-clack of keys to commit some fruitless inspiration to your blog post and the intermittent spells of grating silence that came after deleting everything you jotted down.
The lasting taste of the coffee you drank about two hours earlier has gone sour but still coats your tongue and the roof of your mouth. And you can feel the effects of the caffeine slowly waning. Subtle muscle fatigue is setting in. Your eyelids are heavy and it’s a struggle in and of itself to keep them from covering your aching, weary eyes.
Your mind has gone stagnant — trapped in the clutches of what’s most commonly known as writer’s block.”
Now, I like to think that passage was vivid and immersive, and that’s mostly a credit to the kind of language I used and the personal sensations I played on — specifically how it described the sensory experiences of the subject matter.
That language is most commonly known as sensory language, and it’s a powerful resource for any writer to understand and apply. Here, we’ll cover what sensory language is, review some of the data surrounding it, and go over how you can use it in your blog posts.
Sensory language is used to describe the five primary senses — touch, sight, sound, smell, and taste. They’re most commonly used to convey the specific details of scenes or add a more imaginative element to concept descriptions.
Sensory language is most commonly associated with literature. It’s a central component of most fiction and poetry, but that doesn’t mean this kind of vocabulary is exclusively artistic in its application. Marketers stand to gain a lot from understanding how to leverage it as well.
Let’s take a look at some of the data on sensory language to get a better picture of why it’s effective and how to apply it.
What Data Says About Sensory Language
Our day-to-day experiences are multisensory, but that’s hard to capture linguistically.
A 2012 study from Charles Spence, published in Science Direct, established that “most of our everyday experiences are multisensory.” Very rarely — if ever at all — are our senses siloed when we perceive the world around us.
That said, the English language is limited in its ability to capture that phenomenon and general sensory overlap. In his book Sensory Linguistics: Language, Perception, and Metaphor, linguist Bodo Winter, explains those limitations by describing the experience of eating Kimchi.
He says, “The experience involves the salty and spicy mélange of pepper and garlic notes that excite the taste buds, on top of the fermented smell, the tingly mouthfeel, and the crunchy chewing sound.”
Though his description is vivid and engaging, he notes that “conveying this experience forces the use of decoupled sensory adjectives such as salty and crunchy. The compression inherent in these words, each one singling out one aspect of the experience, means that the simultaneity of the multisensory taste experience cannot be conveyed.”
This passage helps illustrate what might be the main challenge that comes with using sensory language. Ultimately, the goal is to capture a seamless multisensory experience, but the language you have at your disposal is mostly categorized by individual senses.
Taste and smell are the most difficult senses to describe.
The five senses are essentially tiered when it comes to expressing them linguistically. Certain senses are more ineffable — or difficult to put into words — than others.
A 2014 study from Stephen Levinson and Asifa Majid, published in the journal Mind and Language, found that “in English, at least, it seems generally easier to linguistically code colors than (non-musical) sounds, sounds than tastes, tastes than smells.”
Everyone’s sensory perceptions are different, but how we individually experience taste and smell — also known as “the chemical senses” — is particularly unique.
A landmark 1990 study in the journal Physiology and Behavior found that the number of taste buds humans have on their tongues can vary radically from person to person. It’s also been found taste and smell vary as a function of factors like age, gender, and culture.
In short, it’s tough to capture the essence of senses so personal and, in turn, ineffable. And the English language’s limited vocabulary for the senses doesn’t exactly make things easier.
As Winter puts it, “Detailed descriptive characteristics of smells are not encoded in the English lexicon.” Instead, smell is often described in terms of perceived pleasantness through words like aromatic and pungent.
It might seem like taste and smell have less practical application in marketing — especially when it comes to elements like blog copy — but don’t count them out. You can get a lot of mileage out of those senses if you can convey them articulately and compellingly.
The perception of taste and smell is more emotional than other senses.
Though these senses are harder to capture, it’s in your best interest to try when appropriate. Sensory language is used to invoke meaningful images and feelings. And research indicates that language describing taste and smell bear more emotional weight than other kinds of sensory language.
As Winter puts it, “Taste and smell [as senses] are more emotional in perception, and the associated words are more emotional as well, compared to words from the other senses…There is, by now, a wealth of converging evidence for the emotionality of taste and smell language “
This point can mean a lot in the context of certain schools of marketing. If you can believe it, emotionally charged and compelling language can be an asset to a company’s emotional marketing efforts.
And if you’re interested in using sensory language in your copy in the interest of that cause, it’s worth having a pulse on which aspects of the concept are the most emotionally evocative.
Multisensory language makes for better marketing.
As I mentioned, our perception of the world around us is always multisensory, so it’s intuitive to assume that we’re naturally more receptive to marketing that reflects those kinds of experiences. And the data on the subject is consistent with that notion.
A 2009 study published in The Journal of Consumer Research focused on how multisensory advertising impacted subjects’ perceptions of taste. It found that multisensory ads result in higher taste perception than ads focusing on taste alone.
And while the study focused primarily on multisensory advertising’s impact on a single sense, other researchers have extrapolated upon its findings and assumed it applies to the other senses as well.
What does this tell us? Well, this means that multisensory marketing — supported by tactful use of sensory language — is more engaging and enriching than marketing that focuses solely on conventionally touched-on senses like sight or sound. It shows that there’s tremendous value to using a robust sensory vocabulary in your copy.
How to Use Sensory Language in Your Blog Posts
Understand when it’s appropriate to use.
First and foremost, you need to understand that sensory language can seem awkward and jarring when you force it in certain contexts that don’t necessarily warrant it.
For instance, if you’re writing a matter-of-fact, professional post about a business concept, you probably wouldn’t want to use sensory language while defining it.
Take this definition from a HubSpot blog about strategy consulting:
“Strategy consulting is when businesspeople — generally executives, boards, or management — bring in a third party to offer an outside, expert perspective on their business challenges. Strategy consultants usually have considerable industry knowledge and are expected to assess high-level business issues objectively. They take a holistic look at specific problems companies are dealing with and give advice on how they should approach them.”
It’s more appropriate to keep that aspect of the article more straightforward and professional. Overloading it with sensory language might undermine your ability to clearly establish what the concept is. That said, there are ways you could incorporate sensory language to bring that dry concept to life and make it engaging.
Add a narrative element to the post.
Even though sensory language might not be the best way to convey the more rigid, objective aspects of your post, you can still use it to qualify and illustrate certain concepts. One of the best ways to do that is by giving your piece some narrative flair.
This method gives you some space to use sensory language and make concepts more engaging and entertaining. Here’s an example of how you could do that when covering the concept of strategy consulting I just described above:
“Picture this: A CEO sits, poised in a high-backed pleather chair at the head of an engineered wood conference table, eyes shut tight with a cast of stuffy, sharply suited board members flanking the table’s sides. They look on intently — expressions caught somewhere between frustration and desperation.
The smell of stale coffee and the special kind of silence that only comes after an hour or so of beratement hang in the air. Day has turned to night out the floor to ceiling windows without any resolution about how to amend the company’s recent marketing campaign — the one that’s been trending on social media for all the wrong reasons.
The CEO finally opens their eyes, and in a tone that’s equal parts stern and exhausted, they say it: ‘We need to bring someone in.’
Enter the strategy consultant.”
With that kind of description, I was able to set the stage, capture reader attention, and pave the way for a more thorough description of what a strategy consultant does.
Use metaphors or similes.
This point ties into the one above — to a certain extent. Sometimes the subject matter you’re writing about is too dry to pull a narrative from without coming across as desperate to force sensory language on a concept that it doesn’t naturally gel with.
In those cases, it can help to use metaphors or similes — rife with sensory language and vivid description — to simultaneously engage and inform the reader. For instance, let’s imagine you’re writing a piece about quote graphics. You might want to incorporate something like this:
“Think of your quote as the entree to a Michelin star meal — an immaculate cut of filet mignon that tastes like heaven and cuts like butter.
It’s the centerpiece of the dish, and it’s delicious in its own right, but some side dishes and ‘eye-eats-first’ presentation would take it to another level. By filling out the plate with crispy, golden-roast potatoes and perfectly charred, still-sizzling Brussel sprouts, you can take the dish from ‘intriguingly a la carte’ to ‘bonafide five-star.’
That’s the fundamental principle behind quote graphics. The engaging backdrop, distinctive font, and other engrossing visual elements you use can elevate your content and make it compellingly complete.”
Though it might not always be obvious, you can often find ways to incorporate sensory language into your blog content. And when done tastefully and effectively, it can pay off in spades. So if you’re interested in finding ways to add some oomph to your blog copy, consider taking some time to better understand sensory language.

How HubSpot’s Report-Based Acquisition Campaign Hit 150% of Our Lead Goal in 30 Days
This post is a part of Made @ HubSpot, an internal thought leadership series through which we extract lessons from experiments conducted by our very own HubSpotters.
Acquisition marketing campaigns are critical to bring in new customers and revenue. At HubSpot, we run these campaigns quarterly.
Despite the rapid cadence, every quarter we work to create new, remarkable ways of reaching, informing, and converting our audience.
I wrote this post to share with you how we crafted our latest acquisition campaign to hit and exceed our acquisition targets.
Establishing the Campaign
The beginning of our Q1 2020 Acquisition Campaign started with a blinking cursor. As we brainstormed how to start our research, we had a few inputs to work with.
First, we knew our target audience consisted of marketing managers, as we were re-launching our Marketing Hub Enterprise product that month.
We knew that reports were a content type that worked well for us in the past. We saw our 2019 Instagram Engagement Report and a 2020 Social Media Report successfully attract new audiences.
At the very least, it was a motion that our audience was familiar with, which meant there was less of a barrier to show the value.
Additionally, seasonality played a large role in our planning. We wanted to build content to support marketers planning their strategies for the upcoming year.
With the combination of 1) a target audience, 2) an understanding of high-performing content types, 3) timing, and 4) our additional user research, we wanted to create a remarkable go-to resource for marketing managers building their strategies for the year.
Thus, the idea for “Not Another State of Marketing Report” was born.
In this article, I’ll talk through the report surveys and content, the web experience, the promotion, and the results. Hopefully, it gives you a peek behind the curtain and some inspiration for future campaigns.
Running the Surveys and Creating the Report Content
The first and most important thing about the content of this report was to start collecting survey data for analysis and visualization.
Working with our team at HubSpot Research, we ran our first survey in November/December of 2019 that went out to 3,400 global marketers.
After we sent out the survey, we talked about what might differentiate this content from other reports we had released in the past. While the data was valuable, we knew that data can be dull without human context or insights.
So, we brought in the humans.
Our first criterion for selecting our experts was their subject matter expertise. We had come up with a list of topics we wanted the report to cover (from SEO strategy to content marketing strategy and more) and wanted our experts to have deep and specific knowledge about the topic we chose them to represent.
Our second criterion was seniority. We were crafting a report for higher-level marketing managers, directors, and VPs, so we wanted our experts to have a similar level of seniority.
We are fortunate enough to work with a lot of brilliant marketers at HubSpot, so eight of our experts were internal. The other two, Cynthia Price (VP of Marketing at Litmus) and Ellie Mirman (CMO at Crayon) were generous enough to offer their time when we asked them to share their expertise with us.
We interviewed each of our experts for about an hour, took detailed notes, and recorded the interview. We also shared the survey data with them to gather their commentary about the data points. Finally, we worked with the experts to craft detailed articles with their advice for the upcoming year.
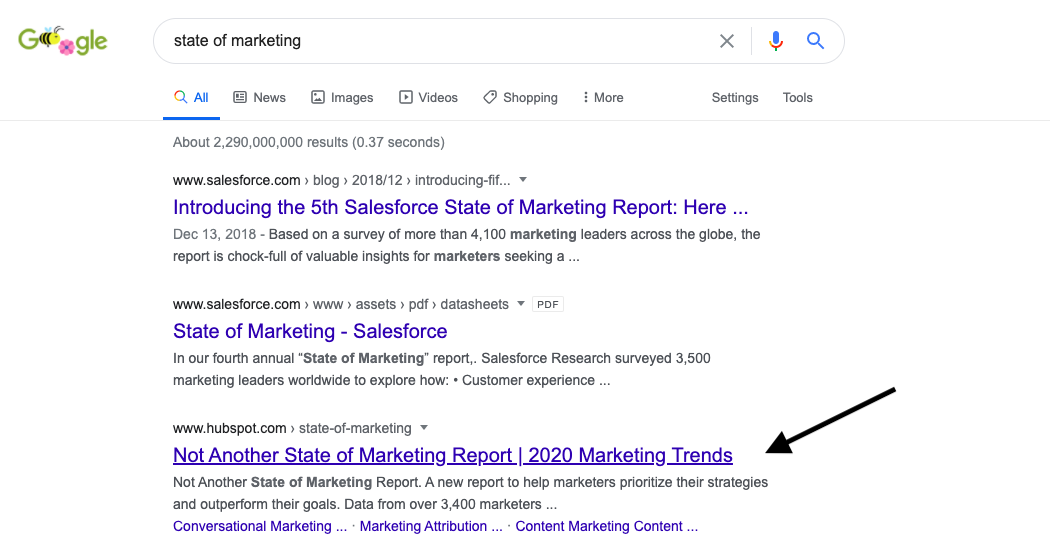
We decided to leave these articles ungated on the web experience, so we optimized them for organic search with extensive keyword research. We’ve seen some exciting results from that play — generating over 15,000 backlinks in the first two months and taking the number three result for the search term “state of marketing”.
When we received the initial survey data, we were thrilled by the results — but knew we needed to take it one step further. So, we ran an additional survey in January to a North American database of marketers.
At this point, with the additional survey data and expert commentary, we sourced some quotes from experts across the industry. We ended up with a great group of contributors from Dropbox, Twilio, and more.
When all was said and done, we had 19,000 words worth of insights and 70+ data points.
Designing and Developing the Web Experience
Differentiating this campaign didn’t stop at the expert insights. We wanted to create an immersive web experience to pair with the report PDF.
The result was a fully custom web experience with a homepage, nine child pages for each article, and custom interactive form that follows the user in a non-intrusive banner. It was designed by an incredible lead designer, and built from the ground up by three developers. (It’s better seen than described, so I’ll leave you with this.)
We were curious about what kind of conversion rates this custom web experience could drive.
To date, the homepage of the report is converting at around 35%. This metric is calculated as the ratio of views vs. submission and is measured in HubSpot’s own HubSpot portal.
We’re really excited about that conversion rate, but we’ve noticed that it doesn’t stay as high throughout each page of the web experience.
For example, on a sample article page, we noticed the conversion rate was about 5%. The leading theory right now is that people are downloading the offer when they land on the homepage, and then they explore the rest of the experience after downloading, so they aren’t converting on the offer pages.
Overall, though, we’re very proud of how the web experience turned out and think it’s a strong differentiator. After all, 38% of people will stop engaging with a website if the content doesn’t look pretty on the page.
How We Promoted the Campaign
When it came time for promotion, we had to decide on three things: the story we wanted to tell, our creative promotional assets, and the channels we wanted to pursue.
1. The Story
The literal offer that we were marketing was a report. However, the emotion that we wanted to portray was confidence. This was the story we wanted to report and campaign to tell.
For some marketing managers, feeling confident about a strategy can prove difficult. Are other people in the industry doing this? How will I know if it will work?
Data can help ease those concerns, as can long-form articles from deep subject matter experts.
So, we wrote 20 headlines around that concept. This was a good exercise because, although most of them ended up unused, we found this process sharpened our writing “muscle”.
One of the early headlines we landed on was, “A report for marketers who use data to outperform their goals.”
2. Our Creative Assets
The design of this campaign was important to us. We wanted it to feel cohesive across the web experience, the PDF offer itself, and our promotional efforts.
So, under the guidance of our lead designer, we put together a detailed brief for a freelancer, and he came up with some beautiful stuff.
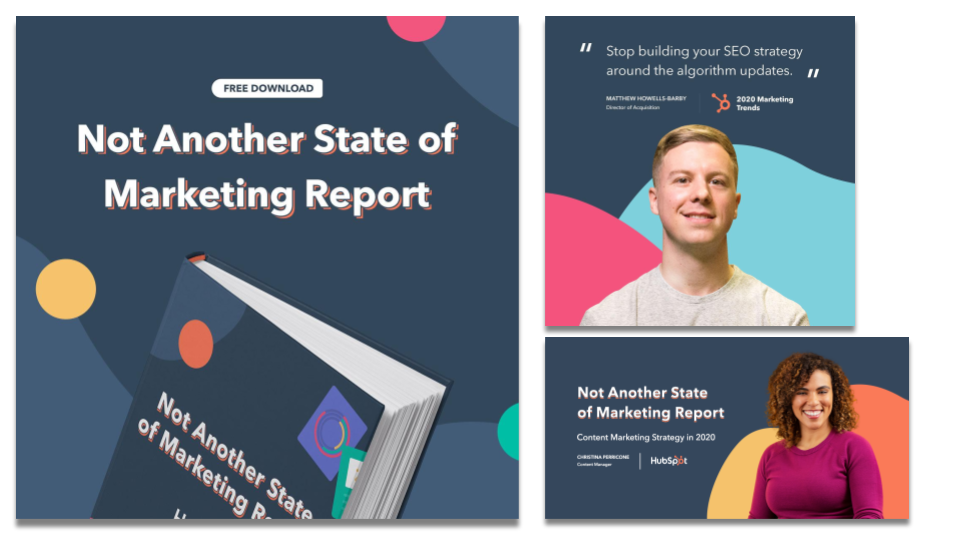
Our learning here is that cohesive design across all campaign assets makes the campaign feel larger than life.
3. Promotional Channels
On the Global Campaigns Team here, we like to bucket our promotion into three categories:
- Paid : What channels can we activate that we have to put direct dollars into?
- Owned: What organic channels and established HubSpot audiences can we leverage?
- Earned: What are some additional free promotion and placements (e.g. organic SEO) can we leverage?
For our paid channels, we chose to focus on Facebook Ads (historically the lowest CPL for us) and LinkedIn Ads (typically more expensive but more effective targeting for the audience we wanted to attract). For this channel, we built a more standard landing page to drive conversions.
For our owned channels, we activated our brand channels (social media, email, etc.), our solutions partner channels, our customer channels, our HubSpot Academy Channels, and Sales Channels (our BDRs used the report as a conversation starter). We also asked our authors to promote it on their personal social networks, and we gave them personalized assets to make that promotion remarkable.
For our earned channels, we focused heavily on the organic SEO value of our ungated articles, the promotion from our partners in the report (Litmus and Crayon), and media placement in marketing publications.
Tracking and Analyzing the Results
This campaign was quickly successful: We hit 100% of our net new lead goal in 16 days and 150% of the goal in just over one month.
As of April 21st, there are 15,800 backlinks to the report. We are ranking for over 350 organic keywords and secured the #1 result for the search term “state of marketing.”
The custom homepage is converting at over 30%, and the paid landing page is converting at 25%.
About 50% (48%) of the net new leads for the campaign came from paid social media. We are hoping to see that percentage decrease as organic traffic continues to gain traction.
There were a lot of factors to our success, but we’ve identified the following as the main ones:
- Spend time in the strategic planning process. It’s tempting to rush a campaign out the door, but a well thought out strategy goes a long way. Use qualitative, quantitative, and search data to inform the direction you choose.
- Think about how you can contribute to a conversation that’s already being had in a new way. There are a lot of State of Marketing Reports out there. We focused on providing that same value but took it a step further.
- Help your creative team by giving them strong creative guidelines. This makes the design more cohesive and powerful in the end.
- Identify at least three channels you can activate for promotion. You should prioritize the ones that will most help you with your goal. Since we were looking to attract a new audience, our paid channels made the most sense to invest in.
- Double down on the details of your content. If someone is willing to give their information for your content, you better make sure it delivers on value.
Best of luck with your future campaigns!

How Do Your Pins Perform? A Beginner’s Guide to Pinterest Analytics
Social media is an instrumental component of any business’s marketing strategy. But for users, scrolling through the mass amount of branded content across every social media platform can be exhausting.
However, there’s one social media site where users actually embrace branded content — Pinterest.
Pinterest can be an incredibly useful tool for attracting consumers to your products. In fact, 66% of Pinterest users make a purchase after seeing a brand’s Pins.
Because of Pinterest’s power to influence purchases, it makes sense to develop and maintain a strong Pinterest presence. And, whether your business’s social media goals align with improving brand recognition or increasing traffic, keeping an eye on analytics is critical for ensuring your content strategy is successful.
Additionally, JD Prater, an Ads Evangelist at Quora, told me, “Keep in mind Pinterest is all about discovery. Understand the Pinner’s journey and how it’s influencing future purchases — and not necessarily today’s.”
To ensure you’re able to achieve your Pinterest goals and see success on the platform, we’re going to explore what Pinterest Analytics is, and show you the seven most important metrics you should be tracking.
What is Pinterest Analytics?
Pinterest Analytics is Pinterest’s completely free, native tool that you can use to help measure your performance on Pinterest. Pinterest Analytics lets you collect traffic insights — including impressions and link clicks — so you can modify your strategy to better meet your users’ needs.
To access Pinterest Analytics, you’ll need a business account, which will also unlock the ability for you to create advertisements and promote Pins.
Why Use Pinterest Analytics
Pinterest Analytics offers the ability to sort your data from any time period, so whether you’re doing a monthly or yearly report, you’re covered. Data can also be sorted by device, which can be helpful when figuring out how you should optimize for mobile versus desktop.
You can also export your stats in a CSV file, which will come in handy for your next report or audit.
Now that we know a little more about Pinterest Analytics, let’s see what tools we can use to get the most insight.
Pinterest Analytics Tools
1. Pinterest Analytics
Of course, the main tool we’ve discussed so far is Pinterest Analytics.
When you go into Pinterest Analytics, you’ll see the dashboard divided into three major sections — Profile, Audience, and Website analytics.
Pinterest Analytics is also split into four sections — Impressions, Saves, Link clicks, and All-time. Let’s explore those four sections now.
1. Impressions
Impressions are the number of times your Pin has been viewed. This could be through a user’s home feed, category feed, or search.
2. Saves
Saves are the number of times someone has saved one of your Pins to a board. This is how new people discover your content on Pinterest.
3. Link clicks
Link clicks are what drive your users to a destination — whether that be your website, blog post, or another Pin.
4. All-time
Your All-time metrics include an assortment of things dating back to the very beginning of your Pinterest history. Here, you’ll be able to see your most popular Pins, and the content ranked highest in search.
Lastly, it’s important to note — analytics should be used only once you fully understand the Pinterest user.
For instance, as Prater notes,”Before you start analyzing the data and drawing insights, it’s important to understand the Pinner journey. There’s no one way to pin. People’s pinning habits are diverse and are centered on what they care most about (their interests).”
2. Tailwind
Another great tool you can use to analyze your Pinterest metrics is Tailwind. Tailwind is a social media scheduling tool for Pinterest and Instagram that includes analytics as a part of its features.
The tool goes beyond vanity metrics and tracks followers, engagement, and even virality. You can even track your ROI by looking at visits, transactions, and revenue down to the specific pin.
Additionally, there are powerful filtering tools so you can uncover insights by board, interest heatmaps to verify that you’re focusing on the right content, and trending reports to see what’s trending right now even if it was pinned months ago.
If you’re looking for a detailed tool with a lot of insight, Tailwind might be worth exploring.
3. ViralWoot
ViralWoot is a social media scheduling and analytics tool that can help you get your bearings on your Pinterest analytics.
This tool includes an influence score, which will help you understand what you need to do to boost your Pinterest presence.
Besides the influence score, all the important metrics are available to track with this analytics tool. A great feature of the ViralWoot is the straightforward explanations that can help you actually understand your analytics. You can learn what the best days and times to pin are, how to increase your search impressions, and discover trending keywords on Pinterest.
4. Olapic
Olapic is an all-in-one user generated, influencer, short-form video enterprise content platform that helps brands drive engagement.
With its scheduling and analytics tool, you can track ROI, influencer interactions, and engagement.
Pinterest Metrics to Track
There are seven metrics you’ll want to track on your Pinterest account to assess how well your content is performing. Of course, depending on your team’s unique goals, you might want to focus more heavily on a few of these metrics, rather than all of them.
1. Impressions
As with any other social media network, impressions measure the number of times your content is displayed. Pinterest impressions include the number of times your content appears in a user’s feed, search results, or a different category feed.
To get a sense of what your audience is searching for, look for patterns within your content to see which categories and keywords gain the most impressions. For instance, if you notice your “Quotes from impressive marketing leaders” post performs exceptionally well, you might want to lean more heavily into thought leadership content on Pinterest.
2. Repins
Repins are the number of times someone saves your pin to one of their own boards.
Repins are like a retweet on Twitter. It means that the user found your post both interesting and shareable. This action is more valuable than an impression because it counts as actual engagement.
The more people that engage with your content, the more likely it is to show up in people’s search.
3. Clicks
Clicks are the metric that determines whether or not your content is driving your audience to your website. This metric is extremely important if your goal is to increase traffic with your Pinterest presence.
The number of clicks and visits to your website from Pinterest can be found at the bottom of the ‘Site Metrics’ tab in Pinterest Analytics. Clicks indicate the action of a click, while Visitors signal the number of unique users visiting your site.
4. Top Pins
Pinterest content has a long lifespan. This means that your content can accumulate metrics over a longer period of time than they do on other platforms.
Your Top Pins will be useful in determining your best content over time. If you launched an extremely popular campaign that resonated with your audience a year ago, you’ll be able to go back and see the actions taken on that content. You can use that information to inform the strategy of your next campaign.
5. All-time stats
To see what content formats have worked for your account in the past, look at your data dating back to your account’s inception. This data includes your most repinned pins, pins that performed best in search, and the pins most engaged with your most engaged with pins of all time.
Like your Top Pins, you can use your best-performing pins to optimize new content and provide your audience with what they want to see.
6. Audience affinities
In this section, you will see a breakdown of the categories your followers engage with and the top boards to which your content is pinned. This will help you understand your audience and what attracts them to your content.
7. Saves
A save means that people like your content and are saving it for later on one of their boards while, simultaneously, recommending it to their followers.
Saves increase the reach of your post on Pinterest and may indicate that the user plans on further engaging with the content later.
This metric is key to understanding which content your audience is identifying with, which will enable you to build deeper relationships with customers over time.
There are plenty of other metrics that Pinterest provides that will be helpful for your business. Remember, what works for one business’s Pinterest strategy may not work for your company’s unique voice and positioning. Using Analytics can allow you to test different content formats, which will ultimately add value to your customers’ overall experience with your brand.
Take a look at The Ultimate Guide to Pinterest Marketing to learn more about how to use Pinterest for your business.
Editor’s note: This post was originally published in April 2019 and has been updated for comprehensiveness.

7 Best Event Registration Tools
When it comes to event marketing, there are many tasks that need to be completed prior to (as well as during and after) your event. This can become overwhelming, especially if you’re on a small team.
The good news is that there are a variety of event marketing tools available to help with all aspects of your event, including event registration. In this blog post, we’ll cover seven of the best event registration tools on the market today.
For the sake of simplicity, the free event registration section includes one option that is always free for event registration. The second section includes event registration tools that are either always paid, or offer free and paid plans.
Free Event Registration Tools
1. HubSpot Free Online Form Builder
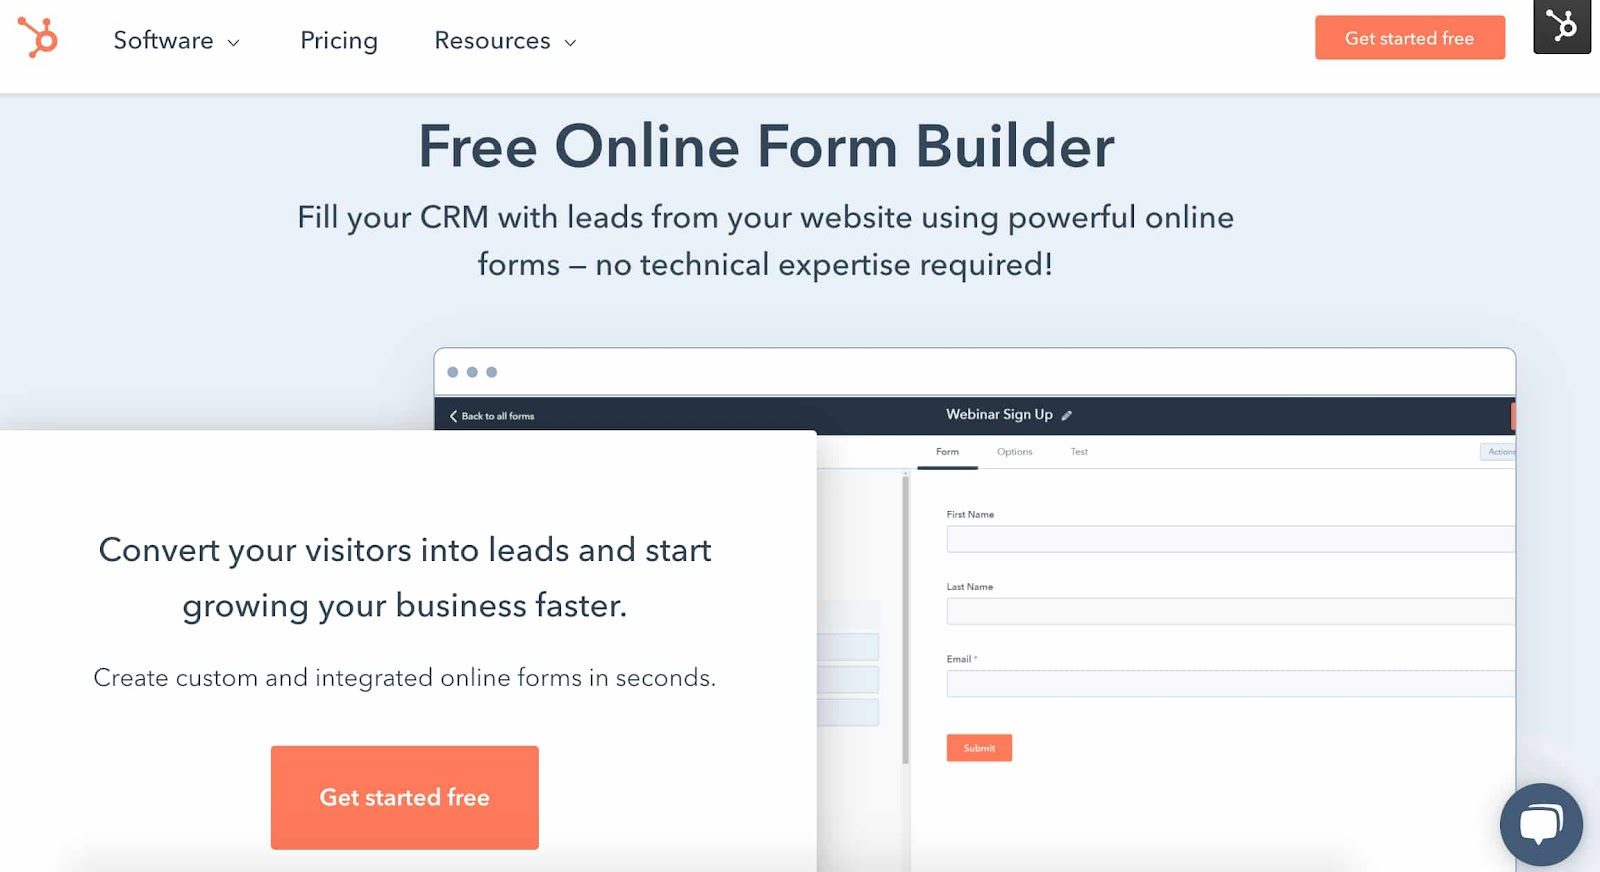
HubSpot’s Free Online Form Builder makes it easy to create, integrate, and share forms with your audience. The drag-and-drop builder makes the process of designing your registration forms simple — then, all attendee contact information obtained is automatically stored in your CRM.
Share your event registration form on an event website or web page. There are over 1,000 form fields and over 12 field types you can use to customize your event’s registration form. Then, decide if you want to trigger notifications when an attendee signs up for your event by completing and submitting your form.
Are you a WordPress user? Well HubSpot still applies to you thanks to the HubSpot WordPress Plugin.
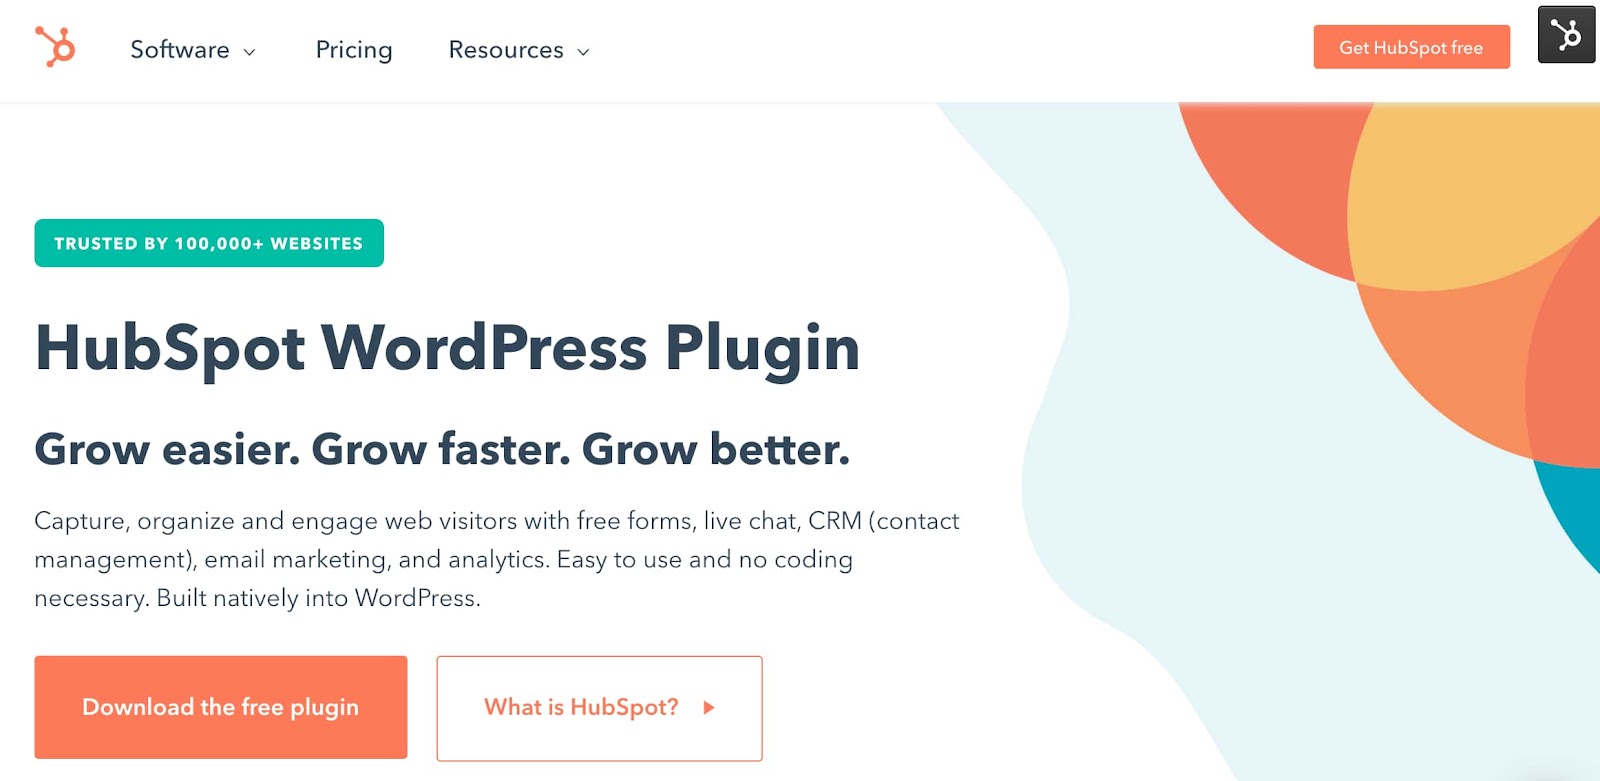
When it comes to using HubSpot as your event registration tool (or as your CMS, CRM, Marketing Software, Sales Software, or Service Software, for that matter), you have a lot of flexibility — even if your website is built on WordPress. In fact, HubSpot’s free WordPress plugin, which is built natively in WordPress, helps capture, organize, and engage visitors with free forms (as well as live chat, contact management, email marketing, and analytics).
Select to receive notifications once an attendee completes registration, as well as automate event-related follow-up emails. Use the drag-and-drop form builder for your event registration or stick to the WordPress builders you already use (this is made possible by the many integrations HubSpot offers, like Gravity Forms). Lastly, built-in analytics and reporting dashboards allow you to keep track of your attendees and their contact data with ease.
Next, let’s look at some more event registration tools.
Best Online Registration Tools
2. Google Forms
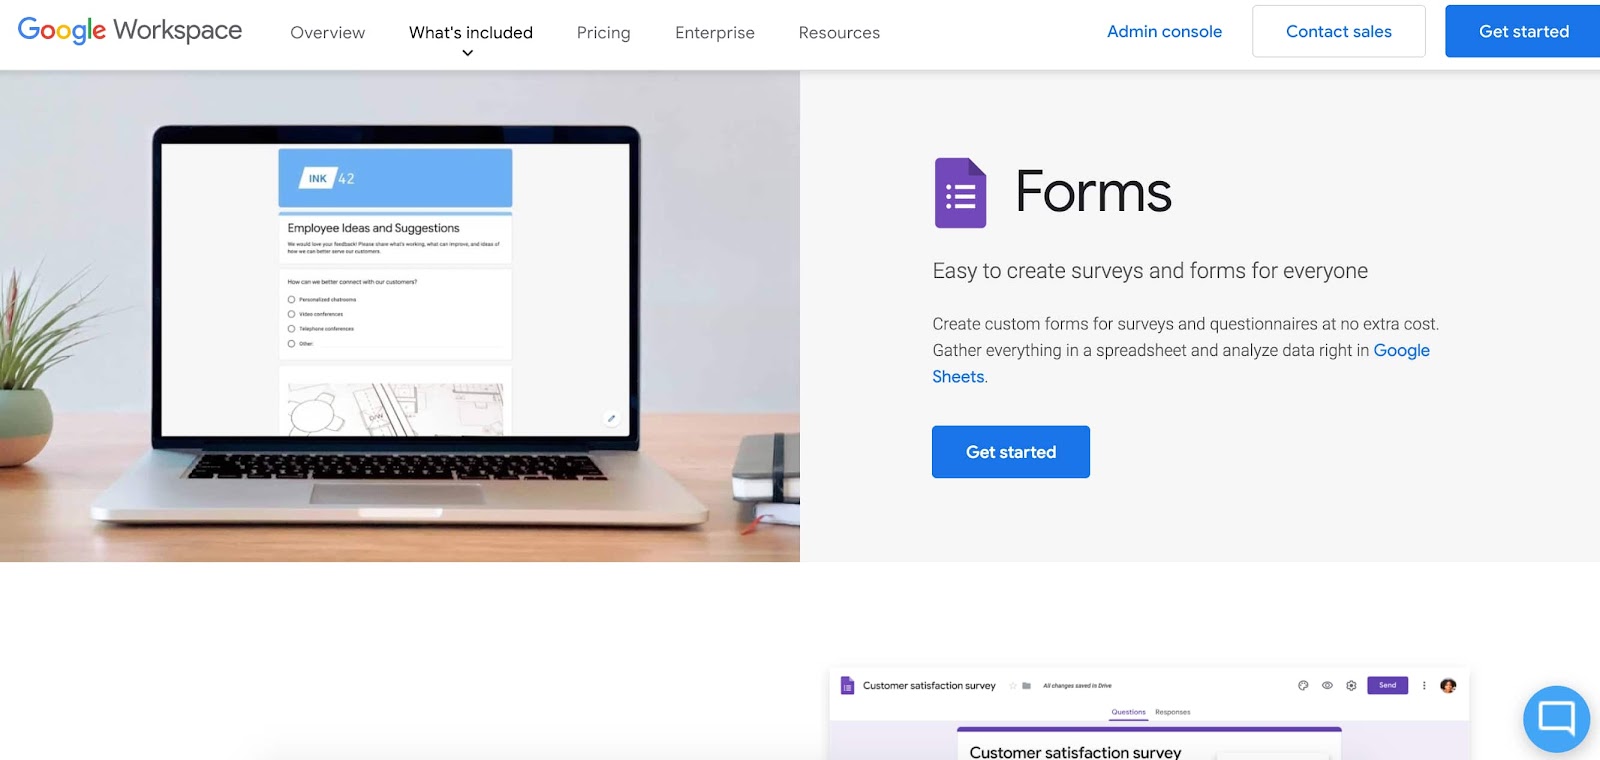
Google has a variety of tools you may find yourself using every day (I know I do) — Google Docs, Google Sheets, and Google Slides are just a few examples. So what about a Google Event Registration Tool? Well, Google Forms offers the necessary features for just that. Similar to other Google products, Google Forms offers a plan for personal use (that’s free) and a plan for your team (that’s paid and comes with greater security and control).
With this paid Google Business plan, you can create event registration forms for attendees, students, or patients and track all sign-ups. To create your event’s registration forms, simply open a new form and begin customizing the form fields. Drag and drop these form fields so they’re positioned accordingly, and add images, videos, and custom logic as you see fit.
Then, send registration forms directly to your audience members’ email addresses and view data about submitted forms within the built-in analytics dashboard.
Price
Google Forms Workspace requires a Google Business Plan. You’ll gain access to Google’s other products in addition to Froms with a paid plan. Plans range in price from $6 per month to $18 per month. If you’re looking to use the product at the enterprise level, contact a rep for a quote.
3. Splash
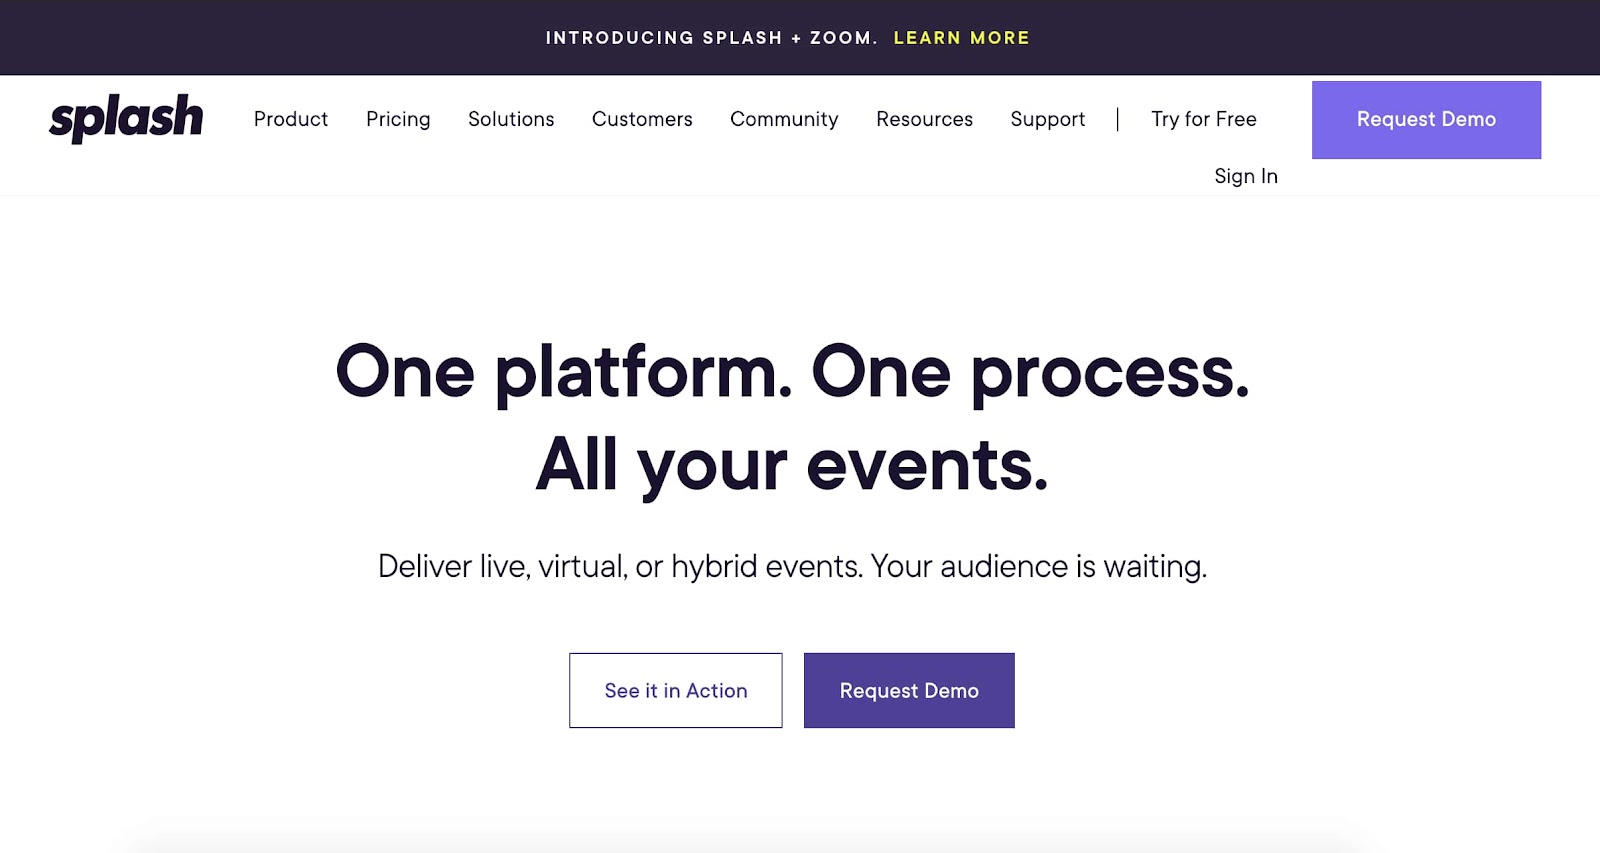
Splash is an event marketing program for online, in-person, and hybrid events. This tool allows you to design and customize responsive web pages and emails for your event. As for attendee sign up, choose to share registration forms and RSVPs that your audience can then send back to you with ease. Smart guest lists, targeting, and email marketing features exist to optimize and streamline event registration and promotion.
Splash also provides the necessary tools to check-in attendees, share event-related surveys, and run sweepstakes and contests. Integrate Splash with your marketing automation platform and CRM, and analyze event data via the tool’s reporting dashboard.
Price
Try Splash for free, request a demo, or speak with a sales rep to learn about the right plan for your team.
4. Eventbrite
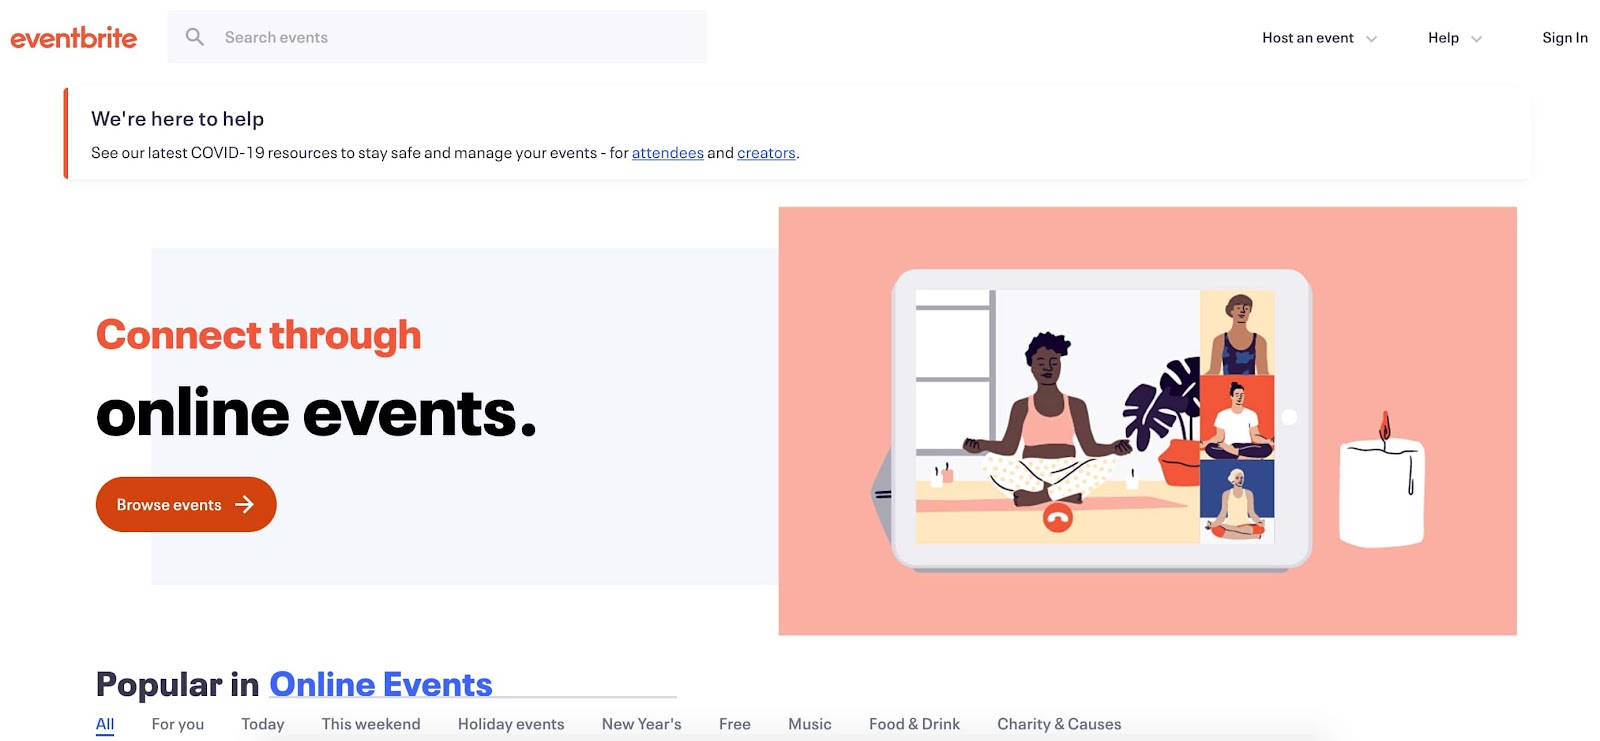
Eventbrite is an event technology platform ideal for supporting and managing any event you host. The tool’s event registration feature is so easy to use that it only requires you to work through three steps.
Start by entering your event details. This is when you’ll finalize your event’s who, what, where, when, and why.
Then, create your tickets — select whether or not your tickets will be free as well as which type of tickets you’ll offer (e.g. single vs. multi-day pass). This is also when you’ll determine whether you want to offer a discount or promo code for early-bird and group purchases.
Lastly, open registration to your audience via web page or social media. Specifially, Eventbrite makes it easy to share registration via Facebook and Instagram.
Price
Eventbrite offers both free and paid plans. The Essentials and Professional plans are free if you host a free event. Eventbrite will only charge you when you sell a paid ticket.
If you are hosting a free event, you have access to all features offered in the Essentials plan, and you have access to all features offered in the Professional plan except for phone, chat, and email support. There’s also a third plan option, Premium, which offers the greatest amount of flexibility and customization at the highest price.
5. Whova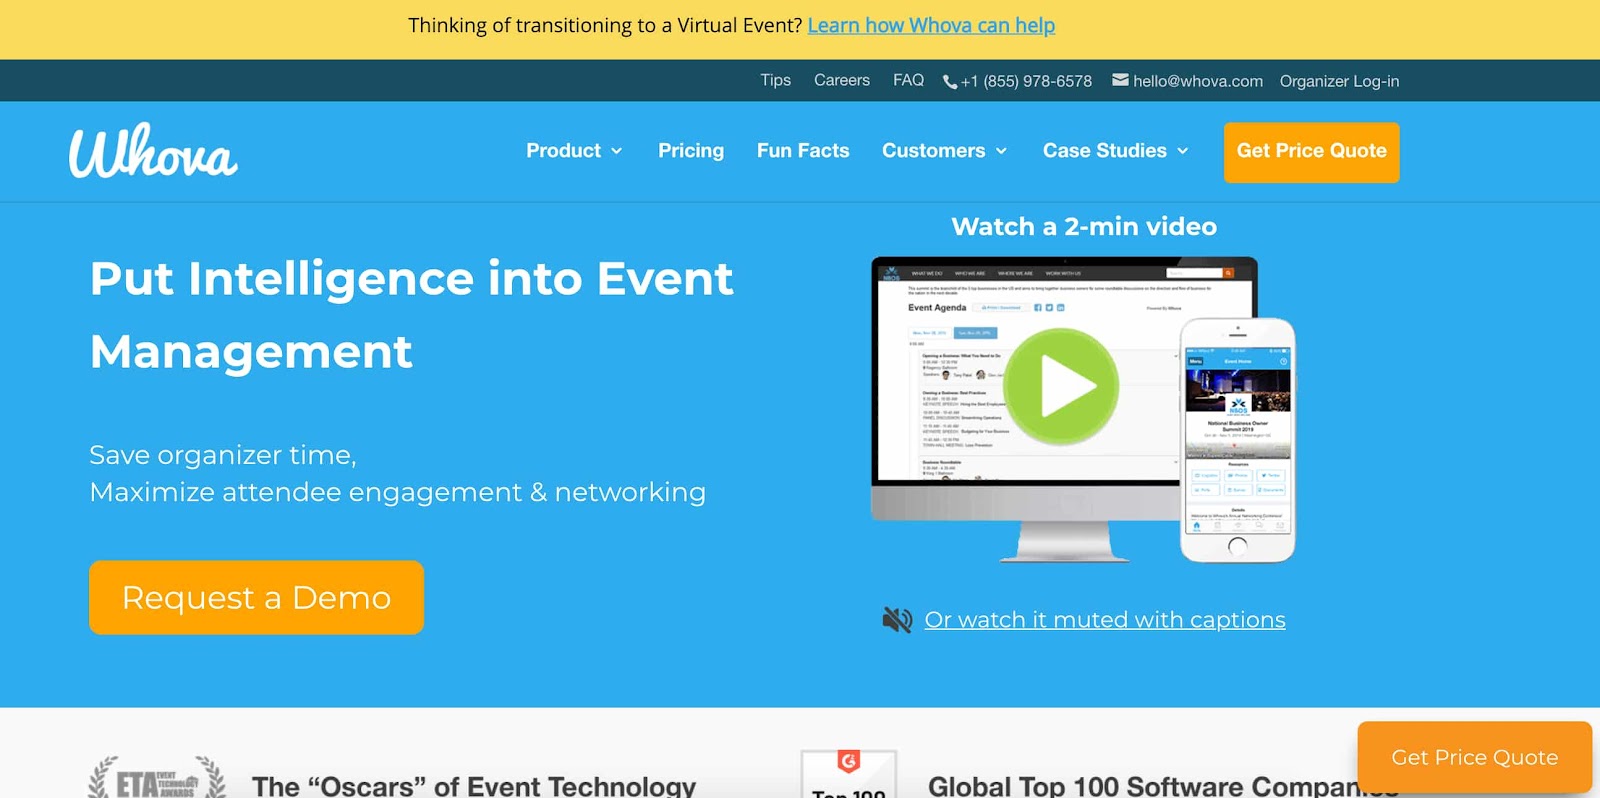
Whova is an event management tool that comes with an online registration feature. Create tickets within minutes and customize registration in a number of ways. Offer discount pricing (for early-bird or group ticket purchases), offer different types of tickets (e.g. single vs. multi-day pass), and ask attendees questions about your event when they’re registering (e.g. what made them want to attend your event or what they’re most excited for).
You can also create a registration web page and embeddable widgets to link to your registration as well as use the real-time reporting dashboard to track sales and attendance.
Price
Contact Whova directly for a quote via their pricing page.
6. Wild Apricot

Wild Apricot is a membership and event management software with an online event registration feature. The tool makes it easy to create an online event listing that attracts your target audience as well as includes images and your online event registration form. Any event you create with Wild Apricot is added to the tool’s calendar and/or your website so your audience can learn about and sign up for the event from anywhere.
Share early-bird discounts or coupon codes, offer add-ons at checkout, and schedule automatic confirmation emails to be sent to attendees. Wild Apricot also automates your event’s promotion, accepts online payment, and manages event check-in. The tool even allows attendees to connect and network with each other via the mobile app.
Price
Wild Apricot has eight different plans that range from free to $600 per month. Each plan offers different features and capabilities as well as a free trial so you can test out the tool before committing to it.
7. Bizzabo
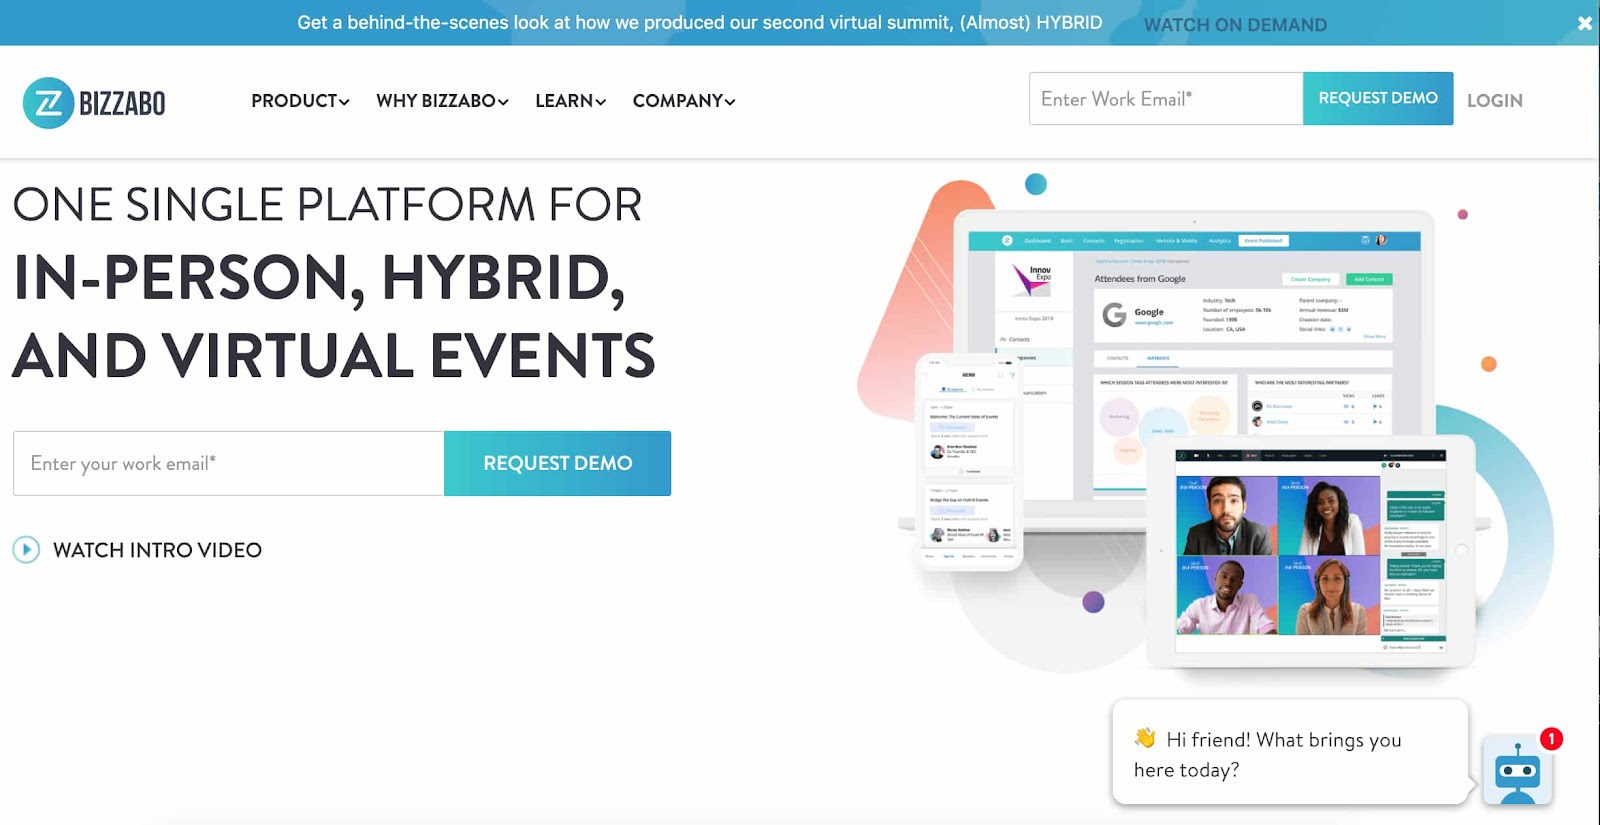
Bizzabo is an event management platform for all events including those that are online, in-person, and hybrid. The software offers an event registration tool that’s customizable and embeddable so attendees can register without ever leaving the event website. You can also brand your event’s registration form so its design complements the event.
Customize your event registration form’s fields to ensure you get all of the information you need from attendees — then, view these details in Bizzabo’s contact management dashboard. Bizzabo also integrates with a few social media platforms so you can promote your event and share content that your attendees post with ease.
Price
Reach out to the Bizzabo team for your free demo and a quote.
Think about the various features you need out of a registration tool for your event and get started sharing event registration with your audience members. Then, sit back and watch attendee sign-ups start flowing in.

13 Tips on How To Nail a Presentation To the Board of Directors
In college, I always made it a point to listen intently to presentations. I knew how stressful and nerve-wracking it was to present in a room of peers and authority figures.
I would nod feverishly to let presenters know I was invested in their presentation. And they knew it too. They often zeroed in on me as I became their focus point and silent motivator. The fixation felt awkward at times, but that felt like one of my small contributions to society. That, and an endless supply of cat videos.
Back then, the stakes were relatively low. But when you’re tasked with putting together a presentation to a board of directors, the pressure’s on.
But with a few tricks in your arsenal, you won’t need a sympathetic audience member to gauge how well you’re doing.
Let’s walk through some tips to prepare for your presentation and review some things to avoid.
1. Know your audience.
Knowing your listeners is as important as the content of your presentation. When you understand their priorities, you can put together a presentation that speaks directly to them.
If you don’t know the board well, do some research and get answers to these questions:
What does the board care about?
This will help you see from what lens they look at things. For instance, a board keen on community impact may not be drawn to a presentation focused on return on investment (ROI).
There are a few ways to find this out. You can start by looking into each board member’s professional background. If most members have a finance background, for instance, you’ll want to make sure you cover any financials as it relates to your presentation. This could be cost, expected ROI, or operating margins.
You can also get some insight into what the board cares about by looking back at your interactions with its members. Think about the conversations you’ve had: What comes up most often? Is it company culture, profit, philanthropy, innovation, or something else?
What are their main concerns?
A board of directors is responsible for making decisions that will ensure the growth and sustainability of a company. So naturally, they will be looking out for anything that may impede that process.
Common concerns a board may have are:
- Costs: How much time and money will it require?
- Timeline: How long will this project take and is that timeline feasible?
- Risks: How risky is your proposal and what is the risk-to-return ratio?
You may find that each board member has a different focus, which means your presentation should be well-rounded to tackle these issues.
Once you know this answer, you can subtly handle each concern throughout your presentation. Getting those answers will help you create a presentation that not only interests your audience but also aligns with their goals. This, in turn, will bring you much closer to accomplishing the plans laid out in your presentation.
2. Plan ahead.
The next step in delivering a great presentation is making a plan. This means figuring out the focus of your presentation, what you’ll cover, and what you’ll leave out.
A presentation should follow the structure of any good movie, with a beginning, middle, and an end. Here’s an example outline for a presentation where the head of the marketing team is proposing course offerings as a new lead generation channel.
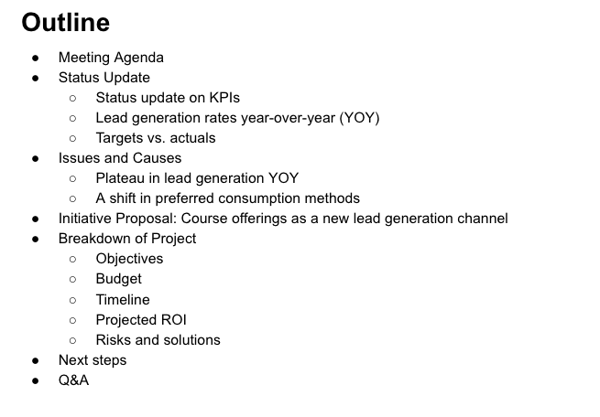 In the beginning, you should set expectations for what you will cover. This is also an opportunity to set the baseline and explain the current state of affairs. This may look like discussing KPIs or reviewing goals and outcomes.
The middle is the meat and potatoes of your presentation. You’ll likely spend time providing data, contextualizing it, and explaining your approach.
Your ending should bring together your key points and leave your audience with actionable steps. Because what good is providing the information if you have no plan for what to do moving forward?
3. Structure your presentation based on the board’s process.
Not every board of directors operates in the same way. Sure, there are standard guidelines for every meeting. However, the approach may vary for presentations.
Some may operate more like a town hall, pausing periodically to discuss the points as they come up. In this case, leave room after each section of your presentation to discuss what was covered.
Others may follow the more standard approach: presentation followed by a discussion. Studies show that humans remember best the beginning and end of what they read, hear, and see. What’s in the middle tends to get lost. With that in mind, consider sharing your most pertinent information toward the beginning and end of your presentation.
4. Keep it concise.
One thing board members aren’t known for is open availability. That said, you want to make the most of your time with them. How do you do that? Stick to the scope of the presentation.
While it’s great to incorporate storytelling, avoid getting sidetracked and wasting time. Be clear and keep it simple.
If you’re showing data, only share one highlight per data graph. There are several reasons for this:
- Data itself doesn’t tell a story. You, as the presenter, do. As such, you have to explain what it means and why it matters. Let’s say lead generation at your company has plateaued in the past year across all channels. That’s all the data says. But during your research, you realize it’s due to a shift in how your audience is consuming information. Your role is to present the data and explain the “why” behind the plateau along with a solution.
- You want to prevent information overload. Share the piece of data that best supports your points and has the most impact. For instance, if a new lead generation channel is the focus of your presentation, diving into the specifics of another channel may not be worth your time.
If you leave it to your audience to make sense of the data, they might reach a conclusion that doesn’t align with your message.
5. Set up early.
There’s nothing more awkward than silence during a technical difficulty.
Everyone’s looking at you while you’re figuring out why technology has forsaken you. The more time the issue takes to resolve, the more panicked you get. We’ve all been there.
To avoid this, set up early and do a run-through before your scheduled presentation time. It’ll give you time to get familiar with the space and any technology you’ll need to run during your presentation.
6. Incorporate visuals into your presentation.
When choosing between words and media, pick the latter.
Visuals help us make sense of information at a much quicker pace than words do. We’re also better at remembering what we see versus what we hear by 55% – it’s called pictorial superiority.
It’s also beneficial to keep your visuals simple. If you have too much going on, your audience will be confused. But if it’s too bare, it will take too many visuals to paint the picture. So, pull your most significant data and use data visualization tools to design intuitive graphics.
7. Focus on results.
A board of directors typically focuses on big-picture decisions that will have a long-term impact on the company.
In this vein, every piece of your presentation should get you closer to answering these questions:
- “Why does this matter? “
- “What is the long-term impact? “
- “How does this bring the company closer to its goals? “
- “Any potential roadblocks? How will you address them? “
Incorporating these answers into your presentation will set you up for a smoother Q&A session.
8. Send materials beforehand.
Depending on what you’ll be covering in your presentation, it may be helpful to send the board materials to review in advance. This should only be supplemental information that would be too time-consuming or distracting to cover in a presentation, like reports and demos. This way, the focus during the presentation will be on the “why” and not the “how.”
The one material you don’t want to send is your presentation, as you want to be the one to contextualize it. Otherwise, the board might form an opinion based on limited information.
A week before the meeting is a good rule of thumb, leaving room for you to respond to initial comments or feedback.
Think of this process as an advantage. You get insight into what the board members may bring up during the meeting and more context to prep. Secondly, it ensures everyone is on the same page ahead of the meeting. That way, you can dive straight into key points during your presentation without covering minute details.
9. Build confidence with your power outfit.
Building confidence is one of the less concrete tips on the list to implement. But the good news is, there are research-backed techniques you can use to achieve it. One of them is right within your reach: clothing.
Many of us can relate to the feeling of trying on clothes in a fitting room and feeling like a million bucks. It tends to put us in a better mood and shift our perspective.
Well, turns out there’s a reason for this. In 2012, two researchers coined the term “enclothed cognition” to refer to the impact clothes can have on the psyche. They found that the clothes we wear can shift our perspective.
In that spirit, put on your best blazer or suit the day of your presentation. That outfit may be just the boost you need.
10. Rehearse your script.
During a presentation with a board of directors, you want to avoid the Michael Scott approach at all costs.
Instead, go the exact opposite route: practice. Practice is the cure to presentation jitters and the formula for seamless delivery. The more familiar you become with your content, the better the presentation will be.
If it’s been a while since your last presentation, start by practicing in the mirror. You’ll immediately notice any mannerisms that may be distracting to your audience. Recording yourself also works great.
Then, practice in front of an audience. And, unfortunately, your dog won’t cut it for this one. Practice with family or friends who can give you feedback on how to improve.
And remember: You’re the only one who knows your speech and presentation. So, if you mess up or forget to mention something, you’re likely the only one who noticed.
11. Don’t fall into the PowerPoint trap.
You’ll likely use a tool like PowerPoint to guide you during your presentation. Yet, it’s important that you don’t overly depend on it.
For instance, packing your slides with heavy text or bullet points is a surefire way to lose your audience. In fact, 40% of respondents in a 2018 study by Prezi said it caused disengagement and made it harder to retain information.
So, stick to one key point on each slide. It’s easier for your audience to remember and prevents information overload.
12. Read the room.
Even if you follow every tip listed above, you might hit a point in your presentation where there’s a disconnect between you and your audience. You might notice confused looks or a shift in body language. If that happens, that’s your cue to pivot.
If your audience seems confused, dive in a little bit deeper on your point. If you sense disagreement, tackle those concerns head-on.
Let’s say you’re proposing a new initiative for the company, and you sense some pushback on the timeline.
You can address it by saying something along the lines of, “You may have some concern regarding the timeline and whether it’s feasible given our current projects. While the timeline may seem tight, we have factored in X, Y, and Z, and, given our past initiatives, we believe this timeline will account for A, B, and C.”
A response like this can mitigate the situation while still keeping you on track.
13. Include time for questions.
As a foodie, dinner for me isn’t complete without a good piece of chocolate. Whether it’s a KitKat or a chocolate cake, having chocolate after dinner feels like the perfect ending. Q&A sessions are kind of like that. It’s the audience’s chance to ask questions and discuss the presentation.
Be ready for questions regarding the data and solutions you presented. The length of the Q&A session will vary depending on the length of your presentation, the size of the board, and other factors.
Additionally, it’s your opportunity to address any looming concerns and re-emphasize your key points. Not sure what to do if you don’t have an answer to something? Here are a few responses:
- “That’s a great question. I don’t have an answer for you at the moment, but I will follow up over email by end of day.”
- “I don’t have much experience in that X [topic/department/]. However, I will reach out to X and get back to you within a week.”
- “We haven’t explored that yet, but what I can tell you is …”
- “That’s a great point we hadn’t considered before. My team and I will reconvene and strategize on the best way to approach this.”
When the stakes are so high, a presentation to the board can seem daunting. By incorporating these tips into your strategy, you can remove the stress and focus instead on your delivery.

How to Create a Successful Blog Strategy: A Step-by-Step Guide
Did you know that 55% of marketers say blogging is their top inbound marketing priority?
Did you also know that these marketers are 13x more likely to see positive ROI than marketers who don’t invest in blogging?
Over the last decade or so, businesses have increased revenue, improved brand awareness, and boosted conversions with valuable written content published for their target audience and customers. The key here is that their blog content is valuable — it isn’t enough to simply have a blog; there has to be a purpose or reason for its existence.
So, how can you create and maintain a successful blog that provides your target audience worthwhile, high-quality content — all while building your business’s reputation as an industry thought-leader and expert?
The answer is with a blog marketing strategy.
Before we review the steps to your blog marketing strategy, let’s take a look at how to start a successful blog. We’ll also include examples of successful blog sites to illustrate some of these steps.
1. Choose your blog topic and purpose.
The first part of developing your blogging strategy is to clearly define your blog’s topic and purpose.
Your blog topic should be broad enough so you can write hundreds of articles about it but also specific enough to relate to your business niche and area(s) of expertise.
When thinking about your blog’s purpose, ask yourself, “Why does this blog exist?”
You should be able to answer that question in one, straightforward, defining statement. (Document your blog’s purpose to you can refer to it as you grow and your business evolves.)
If you need help defining your blog’s purpose, take a moment to ask yourself these questions:
- What is the greater purpose your company is trying to fulfill?
- What story supports this purpose?
- Who shares your passion for this purpose?
- Is your team aligned with the meaning of this purpose?
Example
HubSpot has four blog properties: Marketing, Sales, Service and Website. Each blog focuses on its respective industry and relates the content back to the appropriate HubSpot product.
2. Register and host your blog
This step is two-fold. First, let’s talk about your blog’s URL structure.
A domain name, also known as the root domain, is the text in a URL that identifies your website — and, therefore, your business — for a web browser. For example, HubSpot’s domain name is hubspot.com.
Subdomains are part of your root domain — they appear before the domain in your URL like this: blog.hubspot.com. “Blog” is the subdomain. Subdomains are helpful for organizing a lot of content, including multiple content types. If you have a large blog operation, this structure can help you over time. However, it does pass less authority from your root domain in the short-term.
Subdirectories are divisions of your domain that live on your website, but represent specific pages on your website. For example, a subdirectory that’d take visitors to a specific blog post on a website would look something like this: hubspot.com/blog/article-name. Subdirectories often pass more authority from your root domain and subdomain. However, they can make it hard to scale your content strategy over time since you need more subdirectories to organize your content properly and protect your user experience (UX).
Subdirectories can also represent certain types of content within a subdomain. For example, blog.hubspot.com/marketing/article-name takes visitors to a marketing article on blog.hubspot.com.
The option you choose for your blog has the potential to impact your organic ranking, which is why it’s important to choose wisely.
Next, you’ll need to pick a host for your business’s blog. The simplest way to host your blog is through the same software on which your website is run.
For example, HubSpot users can employ HubSpot CMS and access their website creation and management tools alongside their blogging tools — all from a central location.
Another common way to host your business’s blog is through WordPress — compare HubSpot vs. WordPress here. Other popular options include Wix, Bluehost, and Squarespace.
3. Design your blog.
Design your blog in a way that entices your readers to regularly read (and hopefully, share) your content.
Your blog should be inviting and on-brand. It should be well-organized, clean, and easy to navigate. Within seconds of visiting your blog, readers should know it’s published by your company.
To do this, choose a theme that’s consistent across your blog properties and articles. Depending on the host you choose for your blog, you’ll likely have several theme options that are both free and paid.
For example, HubSpot offers a marketplace of free and paid blog template options. Templates help you easily customize and edit your blog template to tailor it to your business.
The Help Scout blog is a wonderful example of beautiful blog design. Its minimalist design limits the use of copy and embraces negative space by promoting the latest posts with gorgeous feature images. The blog is aligned with the Help Scout brand and promotes readability and easy navigation.
4. Decide who will write and manage your blog.
Now it’s time to think about who’s writing, running, and managing your blog. Ask yourself (or your team): Who’s accountable for each role within your blog strategy?
There are lots of moving parts when it comes to your blog — if you don’t create ownership around each component, it’ll be difficult to reap the benefits of a successful blog operation.
We’ve put together a list of some examples of the roles you need to fill to effectively implement a blogging strategy.
- Blog article topic ideation
- Search engine optimization (SEO) and keyword research
- Statistics, examples, personal stories, and thought leadership
- Editing
- Strategy and editorial calendar governance
- Promotion
- Repurposing, updating, and historical optimization
Depending on your resources and the size of your marketing team, you may find one person holds responsibility for multiple roles.
5. Determine how frequently you’ll share blog posts.
How many blog posts can you commit to writing and publishing? How often are you planning on producing blog content for your audience?
Consistency is the key to keeping your audience engaged and interested. This will also allow you to maintain your status as an active thought-leader and expert in your industry. Use a content calendar to consistently manage and schedule your blog posts.
Plan and optimize your marketing content with these free calendar templates.
The beauty of creating this type of blogging rhythm and sharing that information via an editorial calendar is that it creates a sense of accountability among your team of bloggers. It ensures all writers and contributors have optimized for keywords, added CTAs, and edited their pieces by a certain time and date. This way, you’ll have a consistent stream of content your readers can get in sync with.
If you’re a HubSpot CRM user, you already benefit from an editorial calendar built right into the COS.
6. Write compelling and valuable content.
It’s important to reiterate just how critical it is for your blog content to be both compelling and valuable to your readers. This plays a large part in how you’re viewed by your target audience, customers, competitors, and other industry leaders. It’s also how you’re going to keep readers engaged and loyal to your blog — and hopefully converting to customers, too.
Remember, it takes more time and energy to obtain new subscribers than to maintain current readers. Plus, your current readers have the potential of becoming your brand advocates faster than new subscribers do. So, focus on consistently producing content that captivates your audience all while providing them with useful and worthwhile information so they stick around for the long run.
Patagonia’s blog, The Cleanest Line, is a fascinating publication. It’s not a generic brand blog that discusses Patagonia products or customers; it tells compelling stories written by some of the best writers on the web — yet it still resonates with Patagonia’s target audience and those who share its core values. I’ve personally spent hours reading the articles on The Cleanest Line, and it’s endeared me to Patagonia in the process.
7. Include CTAs.
Are any of the reasons you’re developing your business’s blog to drive organic traffic to your website, improve conversions, and boost sales?
That’s great news — but to accomplish these goals, you’ll need to include relevant calls-to-action (CTAs) throughout your blog posts.
CTAs can be paid or free for your audience members. Either way, effective CTAs provide readers with a level of value that they simply cannot pass up.
A CTA might share in-depth content and information with your audience on a specific topic. Or maybe it includes a discount code or special deal on your product or service. A CTA could also provide further training related to the subject of your blog article.
Check out this blog post if you’re looking for some examples of clickable CTAs to insert in your content.
If you’re a HubSpot user, the CRM offers a CTA creation tool to help you develop relevant — and even personalized — offers to drive traffic to your landing pages and convert more leads.
For example, the Omniscient Digital blog naturally weaves CTAs into its posts, making the linked items part of the broader story or takeaway. The goal of CTAs should be to encourage readers to take action without deviating too far from the purpose of the post.
8. Launch your blog.
Now it’s time to launch your blog!
This is the exciting part — you finally get to share the content you’ve been working so hard to develop. Put your blog content on it’s corresponding landing page on your website and send your email list of recipients their blog article(s). Share it via social media and send it to members of your network as you see fit.
9. Track and analyze your blog’s success.
Remember to track and analyze the success of your blog over time. To do this, decide which metrics matter most to you and your business. Once you understand how a specific metric contributes to a positive outcome, then you’ll be able to make your blogging strategy more targeted. Examples of blogging metrics you might track include:
- Number of readers and subscribers
- Number of page views per post
- Number of conversions
- Number of backlinks
- Number of referrals
- Overall traffic
When applying these metrics to the goals you’re looking to set, consider the following questions to provide concrete targets that make sense for your business.
- Does this goal help you achieve your purpose, or is there something more relevant we can aspire to?
- Is this goal aligned with the initiatives of other parts of our business?
- Which metrics track the progress towards this goal? Are these metrics complementary or counterintuitive?
Once you determine which metrics you’re going to use, start by setting goals for a 60-day period. This gives you enough time to see whether your strategy is working and then you can adapt your goals based on the results you see.
Next, let’s dive into your blog strategy.
Blog Marketing Strategy
Your blog is an important component of your business marketing strategy and will hopefully market your products and services, but in order for it do this, you must market the blog itself.
A blog marketing strategy is how you share and promote the content on your blog. Unfortunately, “build it and they will come” doesn’t apply to blogging as well as it does in Field of Dreams.
For your blog to do its intended job — drive traffic, convert visitors, increase revenue, and/or promote your brand as a thought-leader or expert — it must have a marketing strategy in itself. How will people locate your blog? What type of content will keep them reading? How can you use your other promotional channels to elevate your blog content?
Follow these blogging best practices to promote and market your blog content to your target audience.
Always keep your buyer personas top of mind.
When writing, managing, and scheduling your blog — or working on anything related to your blog, really — keep your buyer personas in mind.
Ask yourself, “Who are our ideal customers?” and “Why do they need our product or service?” Once you can answer these questions in detail, you’ll be nail down your buyer persona(s).
Use this free template to create your business’s buyer personas.
Once you create your buyer personas, document a detailed description of who this person is so you can reference it has your business and blog grow. You should be able to refer to this description every time you write a new blog post.
This way, you’ll be able to create content specifically suited to your target customers’ wants, needs, challenges, and/ or pain points. This will also help you turn your blog into a powerful lead conversion tool for your business (i.e. your blog will show your readers and target audience why they need your product or service).
To get a deeper understanding of the actions your buyer personas are likely going to take, research the behaviors of your target audience so you can adapt and tailor your blog content to meet their needs in a way that pushes them to convert in some way. To conduct this type of customer research, you can use:
- Q&A forums (Quora, Yahoo! Answers, or Fluther)
- Social media (LinkedIn Groups, Twitter Advanced Search, and Google+ Communities)
- Content creation tools within your industry or niche (BuzzSumo or Topsy)
- Other blogs (comments and interactions on blogs similar to yours; your competitors’ blogs)
Keep an eye on your competition.
Speaking of your competitor’s blogs, it’s important to keep an eye on these other thought-leaders in your industry. Your competitors provide insight into what’s working (or not working) in terms of blog content among your target audience.
It also tells you a little bit about what they’re experimenting with and what you’ll need to accomplish to stand out and provide your readers with valuable content they can’t get anywhere else — something unique to your business and your business only.
Create a list of 5-10 of your closest competitors with blogs you could conduct a content audit on. Make conclusions about the type of content they share, unique techniques they’ve implemented in their blog, and how they’re doing in terms of ranking for the keywords you hope to rank for.
Then, look for gaps in their content so you can capitalize on them. To help you do this, use tools like QuickSprout, Open Site Explorer by Moz, and SEMRush Competitor Research.
Perform SEO and keyword research.
When one of your customers searches a phrase on Google (or any search engine), you want them to find your blog (or web page), not a competitor’s. To make this happen, dedicate some time to researching which keywords and phrases your target audience is typing into search engines so you can include them in your blog posts where they naturally fit.
In other words, you’ll significantly improve your chances of ranking on the search engine results page (SERP) by performing appropriate search engine optimization (SEO) and keyword research prior to writing your blog post, and then incorporating those findings in your content.
Start by creating a list of 5-10 keyword groups you want to rank for, along with their associated long-tail keywords, in the SERP.
Remember, Google’s algorithms are constantly changing to become more intuitive — meaning, old tactics like keyword stuffing will hurt your ranking in the SERP. Instead, you’re better off writing copy that engages audience members first and search engines second.
Note: HubSpot customers have access to a built-in keyword and SEO tool to help with this.
Focus on your blog’s SEO and keyword research with HubSpot CRM’s Content Strategy tool.
Decide where you’ll distribute your blog content.
Strategically determine where you’ll distribute your blog content. You chose a host for your blog already, meaning your content is likely already easily shareable on your website.
For example, if you use the HubSpot CRM and blogging software to host and manage your website and blog, it’s simple to add your articles to their corresponding landing page on your site.
Other ways and platforms through which you might distribute your content include social media, such as Facebook or LinkedIn, and online publishing platforms, such as Medium. You might also work with industry leaders, experts, and influencers to share your content on their websites and social profiles.
Promote your blog content.
It’s probably safe to assume you want your blog content to be as discoverable as possible. In terms of your blogging strategy, this refers to your ability to get your content out there so members of your target audience find, read, and (hopefully) share it.
There are many inbound tactics you can use to promote your blog. We touched on a few options above, but another common form of effective blog promotion involves an influencer marketing strategy.
Get started promoting your content with the help of a free influencer marketing guide.
To begin, identify the key influencers in your niche or industry you want to contact and work with. These should be people your current customers and target audience perceive as credible, trustworthy… and, yes, influential.
As you begin making and managing your influencer connections, remain in regular contact with the ones who are promoting your blog content. Be sure you know what they’re doing to support, share, and promote your blog content and that their tactics meet your business’s standards — you want to ensure they’re representing your brand accurately. After all, you’re likely paying them to promote your content among their audience members.
You can make your relationship with your influencers even stronger by interacting with their content regularly to show your support. For example, if you’re working with an influencer who also has a blog, then go to their blog and read, comment on, and share it (even when the content they’re publishing isn’t necessarily related to your business).
How to Maintain a Blog
Creating and marketing your blog is merely half the battle. As we mentioned above, consistency is key to a successful blog — which means maintenance is most of the hard work.
Creating blog content can be time-consuming, especially when you aim to command authority in your niche with researched, thoughtful, and planned posts.
This is why updating, repurposing, and republishing your existing blog content is so valuable — it saves you time and energy but it also allows you to efficiently achieve the results you’re looking for.
What do I mean by this? Well, ranking in the SERP with a net new post takes significantly more time (I’m talking months) than an updated post. Meaning, you’ll see a positive impact sooner if you start repurposing existing posts rather than solely creating new content.
Audit your existing blog posts to determine what you can repurpose and update. Outdated content to remove and/ or replace might include statistics, examples, infographics, quotes, product or service details, research, and irrelevant ideas. You can also add keywords you’ve determined are missing through your research.
(Check out this post if you’re looking for more ideas on how you can effectively repurpose your blog content.)
The process of updating content also allows you to reinvigorate the brand new content you’ve worked so hard on. Updating allows you to maintain the quality and relevance of your blog without having to recreate blog posts from scratch.
Grow Better With An Effective Blogging Strategy
Growing an influential blog in your niche is a surefire way to nurture your potential customers. By creating regular content that solves the challenges of your readers and fulfills their biggest curiosities, you’ll start to build a vault of trust and advocacy. This will inevitably contribute to the overall success of your business. Start with your purpose — the big why — and slowly unpack the individual levers that will contribute to your blog marketing performance through the steps and strategy we’ve reviewed above.
Editor’s note: This post was originally published in December 2014 and has been updated for comprehensiveness.

The Ultimate Guide to Design Templates
If someone asked you to create an infographic, where would you start?
Surely not with a blank Google Doc or sheet of paper. No, you’d likely search for an infographic design template to use as a starting point — or at least draw ideas from.
Design templates are incredibly helpful tools for today’s marketers. They provide guidance and inspiration for almost all types of content and save precious time and energy.
We created this guide to help you make the most of design templates for your business. Keep reading to get started or use the chapter links below to jump ahead.
Benefits of Design Templates
Good design is valuable, but not everyone can afford to hire a freelance designer or in-house design team.
Design templates remove any complicated design steps and equip even the most novice graphic designer to create gorgeous visuals.
Here are some other reasons to use design templates.
Design templates are convenient and fast.
Design templates save marketers (or business owners or even designers) the energy it takes to recreate the same design time and time again. They provide a shortcut so you only have to spend time filling in the critical details.
Design templates also save you time. Facing a deadline for print ads or postcards? Preparing for a restaurant launch and need a new menu? Grab a design template, fill in the necessary text, and send it on its way.
Design templates are systematized.
Design templates, when downloaded from reputable sites, are created to meet whatever specs and specifications are required for their intended purposes.
If you’re downloading a design template for your Etsy shop cover photo, it’s likely already set to the proper width and length as designated by the site. The same goes for other social media and print design templates like postcards, business cards, email headers, and Facebook ads.
Design templates also help to preserve brand guidelines and consistency. When a company defines a brand, creating design templates for all major visual, written, and print components can help maintain consistency across the organization, regardless of who’s creating the ad or marketing asset.
Design templates are optimized.
Bad design hurts SEO. When people visit your site and can’t easily navigate a content offer or web page, they’re likely to leave … or “bounce” out of your site to find another. This tells search engines that your website isn’t a good answer to search queries.
Design templates help you avoid this. By providing great design and user experience, you won’t get dinged by search engines — and left in the dust by visitors.
Design templates are inexpensive.
Most design templates are free, especially when provided as content offers by brands. Other places you can find free or inexpensive design templates include Canva, Creative Market, and Adobe.
You can also create your own design templates for free in programs like Microsoft Word, Google Docs, and Canva.
How to Use Design Templates
Design templates can be used for most types of content, whether print, digital, written, or visual.
Below are a few key places where design templates may come in handy — and where to find them.
Visual Content
Visual content is important in marketing. What’s even more important is gorgeous, consistent visual content.
Whether you’re building an infographic to illustrate a new report, placing icons throughout a PowerPoint presentation, or creating a new graphic for a web page, design templates can help keep your visual marketing content consistent and on-brand.
Recommended Resource:
Digital Content
Digital content can be hard to create without help. Website design templates give marketers and business owners a starting point when building a homepage, blog, landing page, and other digital content.
Site builders like Squarespace, Wix, and HubSpot typically provide web design templates that fit their specific sites. WordPress also provides templates — otherwise known as WordPress themes — that allow you to simply input content and publish your site.
Recommended Resource:

Written Content
Design templates created for written content are some of the most popular among marketers. Why? Because design templates allow content marketers to focus on what they do best (content) while taking care of the rest (gorgeous design and convenient use).
Let’s say you’re creating an e-book and need a beautiful template. Working with a design template helps you focus on the writing aspect and gives you direction on how to organize your content.
Don’t forget informational content like press releases. Design templates can help put a creative spin on the traditional public relations approach.
The same goes for email campaigns. Most email marketing tools (like HubSpot!) provide pre-designed email templates into which you simply have to input your information.
Lastly, design templates can be beneficial for internal use, too. Need help organizing your content marketing efforts? How about developing an editorial calendar for your team? Design templates can help you get started creating those documents and systems.
Recommended Resources:



Promotional/Print Content
Any public-facing content should be consistent with your brand, especially promotional content. Design templates can help standardize this.
Whether you’re designing a series of promotional graphics for social media, creating a PPC ad, building an online presentation, developing a new call-to-action button for a landing page, or even building a new menu for your restaurant or catering business, consider using design templates to maximize impact among consumers.
Some templates can be found on sites like Canva or AdEspresso, and others can simply be recreated using software like PowerPoint.
Recommended Resources:


Ready, Set, Design
Design templates save time, standardize your brand, and help your SEO. Whether you need ideas for a new social media ad campaign or are looking to create consistency among your web content, design templates can help you.
Consider bookmarking some mentioned above or creating your own for future use.

How to Eliminate Render-Blocking Resources From Your WordPress Website
Have you ever finished creating a WordPress website and loved everything about it? Then, promptly began to hate it after realizing it takes forever to load?
Not only are slow loading speeds a nuisance for you and your visitors, but they can also cost you significantly when it comes to SEO. Since 2010, Google algorithms have accounted for loading speed in ranking decisions, so slow pages appear lower on results pages.
You might be familiar with the common culprits of poor page performance — excessive content, uncompressed image files, insufficient hosting, and lack of caching to name a few. But, there’s another often-overlooked perpetrator in play: render-blocking resources.
Don’t get me wrong — CSS and JavaScript are great. Without CSS, websites would be walls of plain text. Without JavaScript, we wouldn’t be able to add dynamic, interactive, engaging elements to our websites. But, if executed at the wrong time, both CSS and JavaScript can put a dent in your website performance.
Here’s why: When a web browser first loads a web page, it parses all the page’s HTML before displaying it onscreen to a visitor. When the browser encounters a link to a CSS file, a JavaScript file, or an inline script (i.e., JavaScript code in the HTML document itself), it pauses the HTML parsing to fetch and execute the code, which slows everything down.
If you’ve optimized your page performance in WordPress and are still experiencing problems, render-blocking resources may be the culprit. Sometimes this code is important to run on the first load, but much of the time it can be removed or pushed until the very end of the queue.
In this post, we’ll show you how to eliminate this pesky code from your WordPress website and give your performance a boost.
1. Identify the render-blocking resources.
Before making any changes, you first need to locate the render-blocking resources. The best way to do this is with a free online speed test like Google’s PageSpeed Insights tool. Paste in your site’s URL and click Analyze.
When the scan is complete, Google assigns your website an aggregate speed score, from 0 (slowest) to 100 (fastest). A score in the 50 to 80 range is average, so you’ll want to land in the upper part of this range or above it.
To identify render-blocking files that are slowing your page, scroll down to Opportunities, then open the Eliminate render-blocking resources accordion.
-3.png?width=1500&name=eliminate%20render-blocking%20resources%20wordpress%20(update)-3.png)
You’ll see a list of files slowing the “first paint” of your page — these files affect the loading time of all content that appears in the browser window on the initial page load. This is also called “above-the-fold” content.
Take note of any files ending with the extensions .css and .js, as these are the ones you’ll want to focus on.
2. Eliminate the render-blocking resources manually or with a plugin.
Now that you’ve identified the issue, there are two ways to go about fixing it in WordPress: manually, or with a plugin. We’ll cover the plugin solution first.
Several WordPress plugins can reduce the effect of render-blocking resources on WordPress websites. I’ll be covering two popular solutions, Autoptimize and W3 Total Cache.
How To Eliminate Render-Blocking Resources With the Autoptimize Plugin
Autoptimize is a free plugin that modifies your website files to deliver faster pages. Autoptimize works by aggregating files, minifying code (i.e., reducing file size by deleting redundant or unnecessary characters), and delaying the loading of render-blocking resources.
Since you’re modifying the backend of your site, remember to use caution with this plugin or any similar plugin. To eliminate render-blocking resources with Autoptimize:
1. Install and activate the Autoptimize plugin.
2. From your WordPress dashboard, select, Settings > Autoptimize.
3. Under JavaScript Options, check the box next to Optimize JavaScript code?.
4. If the box next to Aggregate JS-files? is checked, uncheck it.
-Jan-11-2021-05-00-17-29-PM.png?width=1500&name=eliminate%20render-blocking%20resources%20wordpress%20(update)-Jan-11-2021-05-00-17-29-PM.png)
5. Under CSS Options, check the box next to Optimize CSS Code?.
6. If the box next to Aggregate CSS-files? is checked, uncheck it.
-Jan-11-2021-05-00-17-59-PM.png?width=1500&name=eliminate%20render-blocking%20resources%20wordpress%20(update)-Jan-11-2021-05-00-17-59-PM.png)
7. At the bottom of the page, click Save Changes and Empty Cache.
8. Scan your website with PageSpeed Insights and check for an improvement.
9. If PageSpeed Insights still reports render-blocking JavaScript files, return to Settings > Autoptimize and check the boxes next to Aggregate JS-files? and Aggregate CSS-files?. Then, click Save Changes and Empty Cache and scan again.
How To Eliminate Render-Blocking Resources With the W3 Total Cache Plugin
W3 Total Cache is a widely-used caching plugin that helps address laggy code. To eliminate render-blocking JavaScript with W3 Total Cache:
1. Install and activate the W3 Total Cache plugin.
2. A new Performance option will be added to your WordPress dashboard menu. Select Performance > General Settings.
3. In the Minify section, check the box next to Minify, then set Minify mode to Manual.
-Jan-11-2021-05-00-17-89-PM.png?width=1500&name=eliminate%20render-blocking%20resources%20wordpress%20(update)-Jan-11-2021-05-00-17-89-PM.png)
4. Click Save all settings at the bottom of the Minify section.
5. In the dashboard menu, select Performance > Minify.
6. In the JS section next to JS minify settings, make sure the Enable box is checked. Then, under Operations in areas, open the first Embed type dropdown and choose Non-blocking using “defer”.
-Jan-11-2021-05-00-17-70-PM.png?width=1500&name=eliminate%20render-blocking%20resources%20wordpress%20(update)-Jan-11-2021-05-00-17-70-PM.png)
7. Under JS file management, choose your active theme from the Theme dropdown.
8. Refer back to your PageSpeed Insights results from your earlier scan. For each item under Eliminate render-blocking resources ending in .js, click Add a script. Then, copy the full URL of the JavaScript resource from PageSpeed Insights and paste it into the File URI field.
-4.png?width=1500&name=eliminate%20render-blocking%20resources%20wordpress%20(update)-4.png)
9. Once you’ve pasted in all render-blocking JavaScript resources reported by PageSpeed Insights, click Save Settings & Purge Caches at the bottom of the JS section.
10. In the CSS section next to CSS minify settings, check the box next to CSS minify settings and make sure the Minify method is set to Combine & Minify.
-Jan-11-2021-05-00-17-47-PM.png?width=1500&name=eliminate%20render-blocking%20resources%20wordpress%20(update)-Jan-11-2021-05-00-17-47-PM.png)
11. Under CSS file management, choose your active theme from the Theme dropdown.
12. For each item under Eliminate render-blocking resources ending in .css in your PageSpeed Insights scan results, click Add a style sheet. Then, copy the full URL of the CSS resource from PageSpeed Insights and paste it into the File URI field.
-2.png?width=1500&name=eliminate%20render-blocking%20resources%20wordpress%20(update)-2.png)
13. Once you’ve pasted in all render-blocking CSS resources reported by PageSpeed Insights, click Save Settings & Purge Caches at the bottom of the CSS section.
14. Scan your website with PageSpeed Insights and check for an improvement.
How to Eliminate Render-Blocking JavaScript Manually
Plugins can handle the backend work for you. Then again, plugins themselves are just more files added to your web server. If you want to limit these extra files, or if you’d just rather handle the programming yourself, you can address the render-blocking JavaScript manually.
To do this, locate the <script> tags in your website files for the resources identified in your PageSpeed Insights scan. They will look something like this:
<script> tags tell the browser to load and execute the script identified by the src (source) attribute. The problem with this process is that this loading and executing delays the browser’s parsing of the web page, which impacts the overall load time:
-1.png?width=1500&name=eliminate%20render-blocking%20resources%20wordpress%20(update)-1.png)
To resolve this, you can add either the async (asynchronous) or the defer attribute to the script tags for render-blocking resources. async and defer are placed like so:
While they have similar effects on load times, these attributes tell the browser to do different things.
The async attribute signals the browser to load the JavaScript resource while parsing the rest of the page and executes this script immediately after it has been loaded. Executing the script pauses HTML parsing:
.png?width=1500&name=eliminate%20render-blocking%20resources%20wordpress%20(update).png)
Scripts with the defer attribute are also loaded while the page is parsed, but these scripts are delayed from loading until after the first render or until after the more essential portions have loaded:
-Jan-11-2021-05-00-17-20-PM.png?width=1500&name=eliminate%20render-blocking%20resources%20wordpress%20(update)-Jan-11-2021-05-00-17-20-PM.png)
The defer and async attributes should not be used together on the same resource, but one may be better suited for a particular resource than the other. Generally, if a non-essential script relies on a script to run before it, use defer. The defer attribute ensures that the script will run after the preceding necessary script. Otherwise, use async.
3. Re-run a site scan.
After making your changes, conduct one final scan of your website through PageSpeed Insights and see what impact your changes had on your score.
Hopefully, there’s a noticeable improvement, but don’t worry if not. Many factors can inhibit page performance, and you may have to do some more digging to find the source of poor performance.
4. Check your website for bugs.
In addition to a rescan, check your pages to make sure your site works. Does the page load correctly? Are all elements showing up? If something is broken or fails to load properly, undo your changes and troubleshoot the issue.
If you’ve reached a point where you’ve repeatedly tried various measures with minimal speed gains, it might be best to consider other ways to speed up your pages, rather than risk breaking your site.
Optimizing Your WordPress Site for Performance
Many factors contribute to your users’ experience on your website, but few are more important than load time. Whenever you make big changes to content or appearance on your WordPress site, you should always consider how such changes affect performance.
Now that you’ve eliminated the render-blocking resources, you should continue to optimize your website’s speed by analyzing other features that are known to slow down performance. Try to incorporate regular speed testing into your site maintenance schedule — staying ahead of any potential issues will be critical to your success.

How to Choose a Blog Name That’ll Grow With Your Brand
Clothes, food, habits — outgrowing things is a natural part of life. That’s true for brands as well. When brands decide they’ve outgrown their current way of doing things, this might call for a rebrand.
Outgrowing a brand, or at least a brand name, is common. Marketing platform Mailchimp used their rebranding to help the company transition to a more “grownup” brand that would allow them to serve more small businesses. Many blogs I read, like “Liv’s Healthy Life,” (Now known as just “Liv B,”) quickly rebrand when they realize their old blog name just doesn’t make sense anymore.
While rebranding a business can be a smart and necessary step to growing a long-lasting business, renaming your blog or business doesn’t have to be. To combat outgrowing a blog name too quickly, let’s go over some strategies to use when naming a blog.
How to Choose a Blog Name
1. Identify your niche.
What are you doing? What will your blog be about? Will it be an extension of your business or its own project? Identifying what your blog will be about is key to defining a name that’ll expand with you.
The blog name will represent your unique point of view in your industry or niche. It should match the aesthetic of your blog and define the mood you want to give your readers when they visit your blog’s homepage. It should also be descriptive of the type of content you’ll publish.

For example, I love the blog name “Hot for Food.” The blog is a companion to creator Lauren Toyota’s YouTube channel of the same name. It’s a great example of a name that goes well with its cooking niche.
The name is also broad enough that Toyota can grow her brand outward. If she wanted to release a cookware line down the road, “Hot for Food” would still make sense, and have about a million available puns at the ready. How fun would a saucepan labeled “Hot with Sauce” be?
2. Do your research.
Look at what prominent blogs in your industry are doing. Take note of what you like and don’t like, and use their blogs as a springboard for what readers in your industry like to see. Look for how these blogs are branding, the names of their blogs, and the responses their content receives.
For example, if you’re starting a blog about technology, look at TechCrunch, a massive blog about startups and technology. Their name is short, memorable, and professes their content strategy all in one: to dissect and disseminate the latest tech news for their readers.
It’s also a good idea to think about how your blog will stand out from others. This is also a good time to find out if any of the blog names you were thinking of are already being used.
Start with a simple Google search and then get a bit more technical by checking LLCs in your state. Once you’ve found a name that’s free, make sure that the domain is also available, and consider registering your chosen name to protect it. That way, you can refine how you want your brand to be perceived, and how you want it to grow within the market you choose.
3. Think about your message.
What do you want to communicate? Consider your message now and in the future. When looking over your five-year plan, does your message expand as your company does, and will your blog name still reflect that?
For example, to say media giant Buzzfeed has grown exponentially over the past decade would be an understatement. Buzzfeed’s YouTube channels alone each have billions of views and millions of subscribers. As the company has grown, it diversified and expanded its YouTube content.
Buzzfeed YouTube channels were originally named after colors, for example, Buzzfeed Blue, Buzzfeed Ultraviolet, and Buzzfeed Yellow. Recently, those names have been stripped.
Buzzfeed rebranded their content to grow with their company. Yellow rebranded into Boldly, and later, when Boldly outgrew their name, rebranded into As/Is.
According to founder Jonah Peretti, the rebrand of channel names was to reflect “design and product features that reinforce their unique identities and better serve their many fans.”
4. Use a blog name generator.
When you’re brainstorming name ideas by thinking of your niche and message, write down key words and phrases. Then, you can input those in a blog name generator to help you get started with a few ideas.
For example, you can use Themeisle’s Blog Name Generator, Domain Wheel, Zyro, or Panabee.
These can be used as a starting off point to help you brainstorm even more ideas and get the creative juices flowing.
5. Consider your target audience.
One of the first things you need to think about is “Who is reading my blog?” Will your target audience change over time or do you want people to grow with your brand?
For example, The Children’s Place store is always going to be targeting parents of young kids. While those kids will grow up one day, their target audience will always be parents of young children. On the other hand, with a personal brand like Kaitlyn Bristowe’s, while she started off targeting young women who watched The Bachelor, as she gets older, her demographic could grow with her and change to young moms (if she ever decides to have kids and be a blogger).
Those are just two examples, but it’s important to keep in mind that your target audience might change with you, so you want your name to have a timelessness to it.
6. Keep your brand in mind.
In a similar vein, your blog name should be linked to your brand. Whether you use the same font, colors, or use a play on words, you want people to know that it’s your blog.
Additionally, the overall brand messaging should be consistent across your blog, main homepage, social media, etc.
7. Make sure it’s easy to say and spell.
Don’t let wordiness or design get the best of you when you’re choosing a blog name. Ultimately, you want your name to be catchy, easy to remember, and easy to say and spell. You might be thinking, “Why does that matter?”
Well, let’s imagine that a user comes across your blog on Google. They want to come back to your site, but forget the name because it was too long. Or maybe they try to type in the name but misspell it because your blog name used a pun or play on words. This can lead to confusion and lost readers.
Keep it simple and easy to remember so users can come back again and again.
Blog Name Examples
1. LADbible
LADbible, an entertainment company, originally had a blog of the same name. Over time, their messages expanded and required different funnels for them. LADbible now has multiple blogs in tandem with the original: SPORTbible and Pretty52.
2. Contently
Similarly, Contently’s blog has a name that’s separate from the company: The Content Strategist. This name suggests that the blog is named after their target audience, a clever way reach the readers they serve.
3. Whole Foods
Rather than name their blog “Whole Foods Blog,” the organic food company went with Whole Story. The name connects to its company but also has its own option for diverse content, telling stories of where their products come from and the customers it satisfies. Whole Foods also kept the keyword in the title, so SEO would be a breeze.
4. Target
‘A Bullseye View’ is Target’s all-encompassing blog name. Twisting in the logo was Target’s route, which reflects their branding. With a name like that, the opportunities are endless as to what Target can put on their blog as it grows, something the company keeps in mind with categories such as “Lifestyle,” “Team,” and “Company.”

5. Pottery Barn
Pottery Barn wants you to know their company, ‘Inside and Out’ with this fun, immersive blog name. The name gives interior decorating buffs a nod, hinting that content will provide deeper information about the people behind the design, as well as the homes Pottery Barn caters to.

6. Plan A Day Out
Plan a Day Out is a local Orange County parenting blog. The reason I love the name of this blog is that it’s super catchy, easy to remember, and communicates its mission. Talk about a blog name that does it all.
7. Backlinko
Backlinko is an excellent blog name by SEO expert Brian Dean. This is a great example of a blog name that is catchy, unique, but also easy to remember. Additionally, the niche and messaging is clearly communicated through its name. Anyone in Brian Dean’s target audience will understand the blog name, since backlinks are a common SEO strategy.
8. Thrillist
Another great example of a blog name is Thrillist. This blog name is honestly just fun and easy to remember. It doesn’t necessarily correlate to the blog’s message, but that’s okay. Sometimes a fun, catchy blog name will work just as well.

9. Marketing Brew
Marketing Brew might be my favorite example of a blog name because it comes from the Morning Brew newsletter. Whoever is running Morning Brew came up with a blog name that was perfect for growth. From Morning Brew, you have Marketing Brew, a blog clearly directed toward marketers. Then, you have Emerging Tech Brew, a blog targeting users interested in emerging technology.
The opportunities are endless for the Morning Brew crew. If they want to start a blog about parenting, it could be called Parenting Brew. The overall concept had growth in mind when it was born.
10. Rob Has a Podcast
I know this is a podcast, but I think the name is a great example of a simple blog name that you won’t forget. This is a personal fan favorite of mine since Rob Has a Podcast is a reality TV podcast from a former reality TV contestant (is my nerd showing?).
This is a great example of just using a simple formula that people will remember. Every blog name doesn’t need to be this creative phrase. Sometimes it can just be your own name.
Once you’ve finished brainstorming your blog name, it’s time to dive in and learn everything you can about business blogging. In HubSpot Academy’s business blogging course, you’ll learn how to craft a blogging strategy that drives business growth, create quality blog content, and build a guest blogging strategy powered by SEO.
Creating a blog is an important business strategy, and you want to make sure your blog name and content will resonate with your target audience for years.
Editor’s note: This post was originally published in April 2014 and has been updated for comprehensiveness.

What Is a CMS and Why Should You Care?
There are a lot of acronyms in the business world to keep straight. SEO, CRM, SERP, CDN, and CMS are just a few important ones.
CMS is particularly important, considering that more than half of all websites are built with one. So what is it?
CMS stands for content management system. It also may be the solution you’re looking for to quickly make a website with limited technical knowledge and resources.
In this post, we’ll define what a CMS is and how it works. Then we’ll look at how you can use a CMS to handle the infrastructure of your site so you can focus on creating exciting, delightful content that results in more conversions and leads.
We’ll wrap up by looking at some of the most popular CMS platforms on the market. Let’s get started.
With a CMS, you can create, manage, modify, and publish content in a user-friendly interface. You can customize the design and functionality of your site by downloading or purchasing templates and extensions, rather than coding. You can have multiple users working in the back-end of the same tool — and much more.
You might be wondering how one piece of software does all of this. To answer that question, let’s take a closer look at how a CMS works.
How a CMS Works
To understand how a CMS works, you first have to understand what it’s like to build a site from scratch.
You’d start with HTML to add text, images, navigation bars, and other building blocks of a site. Then you’d add CSS to style those elements to match the unique look and feel of your brand.
You’d finish up by writing some JavaScript to add more advanced functionality to your site, like slide-in CTAs. Then you’d have to upload this HTML file to your server to be filed away in your database.
Whenever you want to make changes — even simple ones like updating content — you have to download files from the server, open them, and change the HTML code by hand. Then you’ll have to make sure you didn’t break any links or something else before uploading the files back to the server.
Sounds complicated, yes? For developers and other advanced users with experience in website development, building a site from scratch might be ideal. But for those who don’t have the coding skills or time and resources to build a site from scratch and maintain it, they can use a CMS. Let’s talk about how.
How to Use a CMS
A CMS is made up of two core parts: a content management application (CMA) and content delivery application (CDA). Combined, these applications essentially handle all the code, database queries, and infrastructure in the back end so you can focus on the front end of your site.
Rather than start with a blank HTML page, for example, you’ll open up the content editor and be able bold text, add links and CTAs, and insert images and tables by dragging and dropping some modules or clicking a few buttons rather than writing out HTML, CSS, and JavaScript.
To make other changes on your site, like changing the permalink structure or installing extensions, just navigate to the appropriate section in your admin panel. This is the CMA in action: all these changes are made in an intuitive interface that hides the code from you, the end user.
When you’re done making changes, the CDA will take the content you entered into the CMA, assemble the code, display it to your front-end visitors, and store it. That means when you want to publish a new blog post, for example, you just have to hit the Publish button instead of manually uploading a page to your server.
Now that we understand what a CMS is, how it works, and how to use it, let’s explore the benefits of using one over building a site from scratch or using another website building tool.
Why do you need a CMS?
We’ve already alluded to some benefits of using a CMS, but let’s look at some specific ways it can impact your set-up process, team’s productivity, and visibility online.
1. No Coding Knowledge Required
By enabling non-developers and other users to build websites without coding, CMS systems have helped revolutionize web design. Gone are the days of relying on web developers and designers to establish an online presence for your business.
You can create and manage content, customize the design of your site, and install extensions to add functionality to your site — all without coding. (It’s important to note that most platforms do allow you to add custom code for more granular control over your site, too.)
As a result, users with limited technical resources and time can still build a powerful website for their business.
2. Easy Collaboration
Multiple users can access and work in the back end of a CMS at the same time. That means on any given day, your marketers can be producing content, your IT professionals implementing security protocols, and your developers adding custom code to your theme. In fact, they could all be working on the same landing page.
In short, a CMS can help improve workflows and productivity across your team.
3. SEO Features and Extensions
CMS platforms offer built-in features as well as add-ons to help you optimize your site for search engines.
Using built-in or third party tools, you can:
- Customize page titles and meta descriptions
- Choose SEO-friendly URL structures
- Create XML sitemaps
- Add image alt text
- Create 301 Redirects
- Include breadcrumb navigation
- Optimize page load times
Implementing these best practices will help improve your chances of ranking on Google and other major search engines.
4. Predesigned Templates
Most CMS platforms like CMS Hub come with a selection of predesigned templates you can use to quickly customize the appearance of your site. They can also affect the behavior of your site.
Choosing a responsive template, for example, will ensure your site looks good on any device, without requiring you to write a bunch of code. Not only do templates save you design time before launching your site, they can also make a website redesign much faster and simpler down the road.
5. Simple Updates
As discussed above, a CMS enables you to make changes on your site faster and easier — from major updates, like a website redesign, to minor updates, like changing the image on your home page. Rather than hiring a freelance developer or trying to edit the code yourself, you can go into the dashboard of your CMS to update and edit the content of your website. This allows you to keep your content dynamic and relevant.
If your site is growing, you may need to upgrade to a CMS to meet your needs. You can start your search by checking out a few of the best CMS systems below.
Let’s unpack seven popular CMS platform examples to discover which might be the best fit for your website needs.
1. CMS Hub
With CMS Hub, you can build websites that are secure, powerful, and optimized for search engines.
Using this all-on-one connected platform, you can create personalized content for visitors based on data from your HubSpot CRM, create custom templates and styles, run A/B tests on multi-language content, safely redesign and relaunch web pages, view performance analytics, and much more.
By combining ease of use and flexibility, this proprietary CMS is ideal for businesses with diverse teams of marketers, developers, and IT professionals that are looking to grow over time.
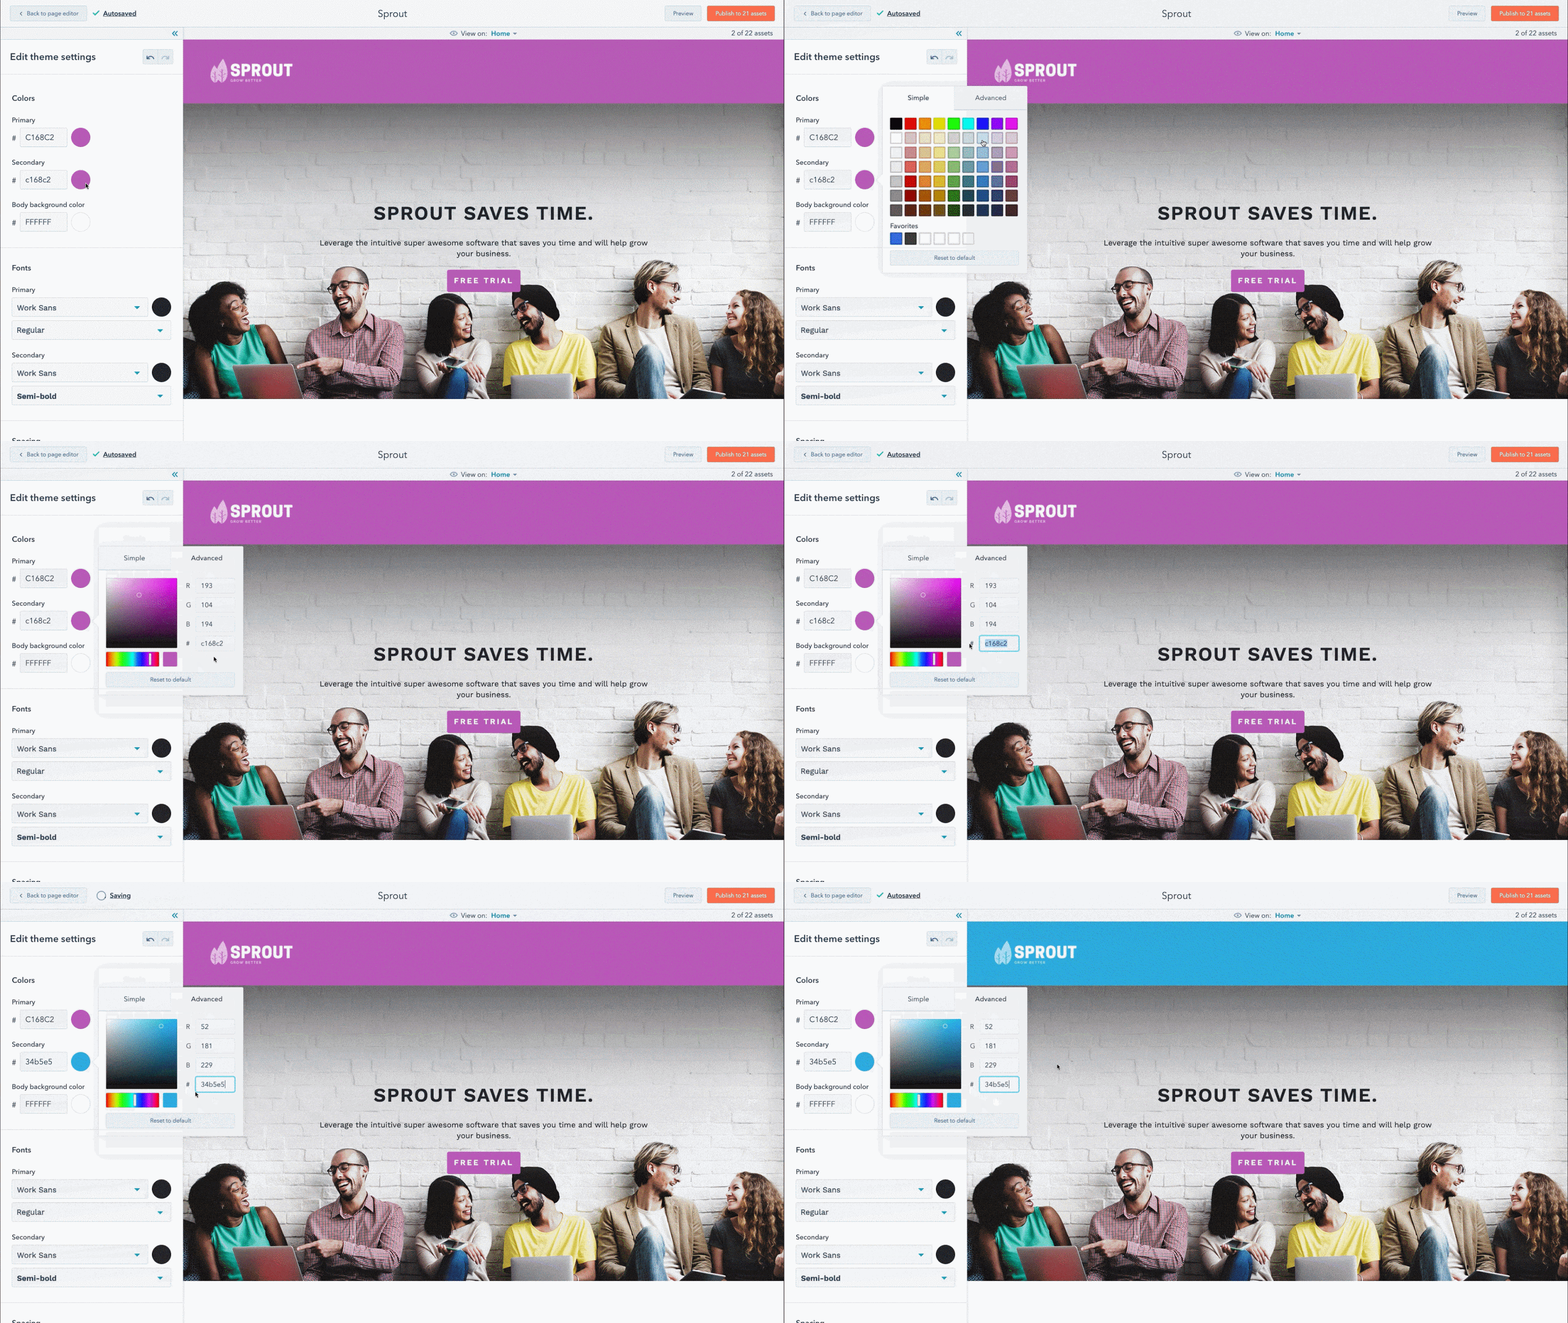
2. WordPress
WordPress is a self-hosted platform that powers millions of sites. You can easily and quickly build a WordPress site using the Gutenberg editor and then customize it with any of the thousands of plugins and themes available in the official WordPress directory or other third-party sites.
Want to add forms and live chat to your site? Want a theme that comes with a built-in visual builder and split testing? Leveraging WordPress plugins and themes like these, you can create a unique experience specific to your brand.
3. Joomla
Site owners looking for more functionality built right into the platform may try a WordPress alternative like Joomla.
Like WordPress, Joomla is an open-source CMS. What sets Joomla apart is its built-in multilingual support and advanced user and content management options, which make it ideal for membership, community, and social networking sites. UIDAI, for example, is a multilingual website powered by Joomla.

4. Drupal
Drupal is a highly flexible CMS favored by large corporations and government agencies like NASA. While you will need web development experience to fully leverage the power of this platform, you won’t have to start from scratch.
In addition to its out-of-the-box features, you can choose among 44,000 modules available in its directory and thousands of free themes in its theme repository to build a complex site that handles large volumes of data and heavy traffic, like Rush University Medical Center’s website.
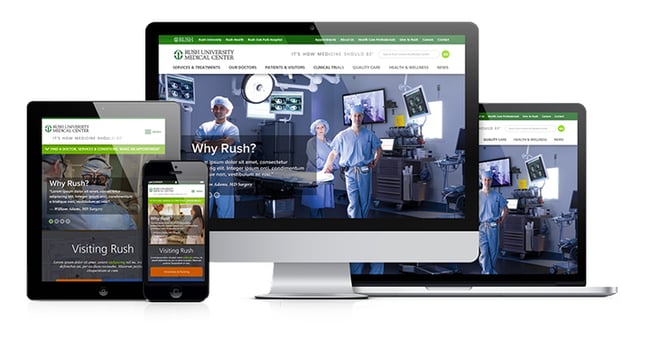
5. Magento
The self-hosted version of Magento, known as Magento OpenSource, is like the Drupal of the ecommerce world. It’s highly flexible and secure, but difficult to learn and take advantage of all its built-in functionality and extensions.
With Magento, you can manage multiple stores, use several worldwide shipping providers, and transact in different countries, languages, and currencies — all within the same dashboard.
So, if you have the time and resources to invest in set-up and maintenance, you’ll be able to build an online store with a huge product inventory and global reach.
6. Webflow
Webflow is a “visual” content management system designed to fill a market gap for web designers who want to focus on creating and customizing sites without worrying about hosting, security, or performance.
With Webflow, you can start with one of the hundreds of pre-built templates or start from scratch using the Webflow Designer shown below.

You can also extend the functionality of your site through third-party integrations or embedding HTML code. Since it requires at least some knowledge of HTML, CSS, and web design, Webflow is best suited for freelancer designers or agencies.
7. Ghost
If you’re looking for a more simple and lightweight CMS dedicated to blogging, Ghost is a great option. Ghost is a headless CMS, which means that its body (the content repository) is separated from its head (the presentation layer).
Basically, this allows you to create and manage content and then deliver that content via their Node.js APIs (or another front-end tool you prefer) to any platform and channel, from smartwatches to virtuality reality headsets.
With an intuitive editor and built-in SEO tools, Ghost appeals to bloggers and beginner who want a basic site that’s simple to create and manage.
Use a CMS to Build Your Site
Using a content management system to build and manage your site can help you grow over time. Not only will a CMS store all of your web content in one place, it will also support collaboration across teams, allow for quick and easy updates, and offer templates and extensions to customize your site.
Editor’s note: This post was originally published in December 2010 and has been updated for comprehensiveness.

8 Inclusive Advertising Tips for 2021, According to Microsoft’s Head of Inclusive Marketing
Advertising can help create a direct connection between consumers and your brand, and is a critical component of marketing.
And inclusive advertising can yield dramatic results and increase brand trust, loyalty, and better overall brand perception. In fact, 64% of people said they are more trusting of brands that represent diversity in ads, and 85% of consumers said they will only consider a brand they trust.
Advertising that works hard for your company has never been more important as we come off the heels of a challenging year affecting all businesses. However, there is one concept that rang true for us all that can inform our approach in advertising for 2021 and beyond – that is, we are all interconnected and interdependent, both as consumers and as advertisers.
In this post, we’ll provide eight tips curated from Microsoft’s Marketing with Purpose Playbook to help you create more inclusive advertising, reach more customers, and grow your business.
1. Showcase human diversity in your campaigns.
Inclusive advertising means having diversity authentically represented in your ads and promotions, while aligning it to your local market’s composition of diversity. It also means considering the many dimensions of human diversity, including (but not limited to) age, gender, ethnicity, sexual orientation, location, language preference and gender expression.
Additionally, you’ll be able to expand your ability to connect and tailor ad creative and promotions with your audience when you consider experiential diversity like ability, parental status, marital status, military status, affinities, and job function.
Ultimately, inclusive advertising is understanding with empathy who your customers are, representing them accurately, and more importantly, recognizing who you’re excluding in your marketing materials.
2. Perform a landing page and website audit for audience diversity.
Inclusive advertising doesn’t end with the ad. In fact, half of the customer experience with your advertising resides where you send them after they click — which means it’s critical you demonstrate diversity in your landing pages or website, as well.
Considering 64% people are more likely to consider or purchase a product after seeing diversity or inclusion in advertising, it’s critical you ensure your landing pages and website represent true diversity.
Does your website’s collection of photos and images match the audience representation you created across your entire ad campaign? Does each inclusive advertisement point the customer after the click to the landing page that matches the inclusive spirit of the image creative? If not, it should.
However, while it’s relatively easy to spot-check a landing page with the corresponding ad creative, how can you collectively evaluate your entire website for the right amount and variety of diversity?
For an easy way to review what images are across your site’s web pages, simply use Bing.com and type in the search bar the command, “site:” and then add your website’s URL after the colon.
For example, let’s search Bing for the clothing brand Tommy Hilfiger, which looks like this in the search bar: “Site:https://usa.tommyhilfiger.com“. Then, hit “Enter”. Bing will produce a search engine results page indexing all your web pages:
Then click on the “images” in the search engine results page for your “site:” search in the navigation bar:
This will produce all the images found on the website. You can quickly scroll through to get a sense of the diversity — or lack of diversity — in the collection of images on your website.
Your audit can be used as a general website check, or a search for specific dimensions of diversity that you feel are underrepresented in your upcoming advertising campaign.
3. Align your advertising messaging to the nine feelings of inclusion.
Emotions are becoming increasingly linked with brand outcomes. As Maya Angelou once said, “I’ve learned that people will forget what you said, people will forget what you did, but people will never forget how you made them feel.”
Feeling included so that a person feels that this brand is for me is at the heart of
brand trust, love, and loyalty.
There are actual identified feelings of inclusion in advertising, which can create connection and drive trust. Inclusive advertising can conjure two major feelings: joy, and trust. As a marketer, it’s critical you look for brand connection points in product or features that can create these two main feelings.
However, there is more to it than that – there are actually nine feelings that make up joy and trust, which is great news for advertising. If you can find a genuine and authentic way that your product creates any one of these feelings, this can convey inclusion, which – you guessed it, builds trust, brand love, and loyalty.
This product marketing approach facilitates connections with people, making them feel like part of a community. Here are some marketing ideas to evoke feelings of joy and trust:
- Celebration: Of people, their successes, honoring of holidays, etc. How does your product celebrate them?
- Zest: For life (for ours, theirs, and that of the planet). Convey enthusiasm and energy. How does your product create a zest for life?
- Hope: Bringing hope to conquer challenges and/or societal issues. How does your product give your consumers’ hope?
- Relaxation:Instead of portraying the need to be on guard, remove tension or anxiety for your customers. How does your product produce relaxation?
- Relief: From concern or worry, removing something distressing or oppressive. How does your product bring relief?
- Safety: Create experiences or highlight how your brand extends safety to all people. How does your brand experience make someone feel safe?
- Confidence: Instill a sense of confidence—the belief that we strive to act in the right way. How does your product give your consumers’ confidence?
- Acceptance: Of others’ differences, typically to be included as part of the group. How does your product make someone feel accepted or demonstrate you are accepting of others?
- Clarity: Bring a sense of certainty, clarity, and transparency in ambiguity. How does your product bring clarity to a confusing situation?
4. Incorporate three metaphors of inclusion.
Another customer touchpoint that can help your brand emotionally connect with people in your advertising is language cues and context, which evoke positive feelings.
Discovered in our research, The Psychology of Inclusion and the Effects in Advertising at Microsoft Advertising, we uncovered the following fifty language-based cues that signal inclusion, as well as three metaphors of inclusion which are inextricably tied to emotions.
If used in context and in a genuine and authentic way in your ad copy, website, or digital content marketing, these metaphors can help convey inclusion and drive brand performance.
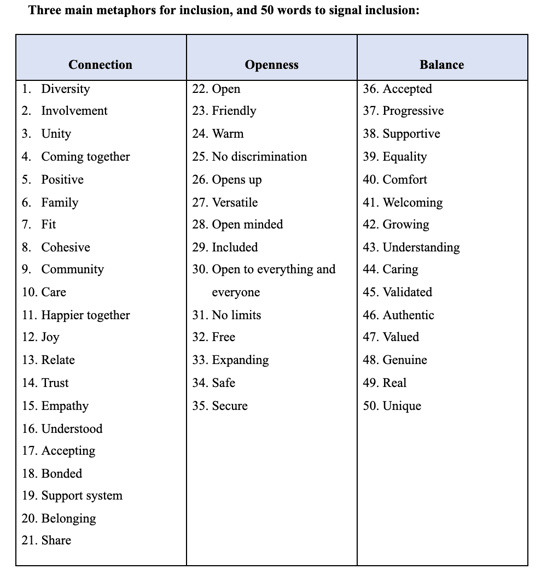
5. Practice inclusive and authentic image selection.
Authentic representation in advertising is important. It drives trust and brand support — so the images you choose matter. It is worth noting that from the Microsoft Advertising research around trust, we found that there is a strong tie between trust, love, and loyalty.
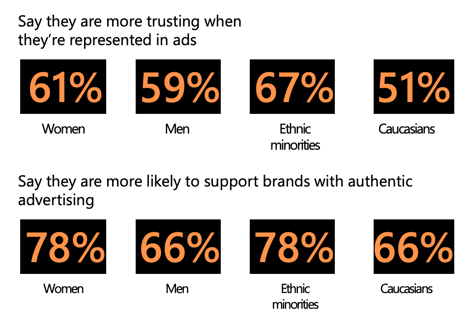
Once trust is established as the baseline, a brand can begin to build love and loyalty. To do this, brands must go the extra mile to make someone feel understood through inclusion, and that means authentic imagery, too. Inclusion was found to be a key brand attribute that creates loyalty.
The same story threads are woven through our inclusive advertising research. Our research uncovered that authentic representation in advertising builds trust and brand support, with 72% of people saying they’re more likely to support brands with authentic advertising.
Choosing imagery is an important part of the process in constructing a meaningful and inclusive customer experience. Inclusive advertising isn’t just about representing everyone — it’s also about making everyone feel your products or services are for them.
Here are some tips to help identify and select inclusive imagery:
Tips to illustrate “Connection”:
- Have more than one person in an image
- Include realistic diversity: use authentic and genuine imagery, which is best conveyed using real people being themselves, that reflect everyday life, not actors hired to play a part
- Create a visible relationship between people that is positive
- Include people in photos rather than featuring the product only
Tips to illustrate “Openness”:
- Include people with disabilities
- Feature non-traditional dimensions of diversity like people with larger bodies
- Include unique subsets of diverse populations
- Include multiple people of color
- Have people with intersectionality in diversity
Tips to illustrate “Balance”:
- Everyone is featured with the same prominence
- Equity is conveyed
- Ensure multiple dimensions of diversity are represented in an image
- Within your campaign, have the creative represent the spectrum of people that your potential customer base could be
Lastly, it’s good practice to include a diverse representation of people in the review of your creative to uncover blind spots, such as non-obvious negative connotations, stereotypes, cultural inaccuracies, or negative associations.
6. Perform an accessibility audit on your ads, content, and landing pages.
Would you want to turn away one in four people from buying your product simply because your ad or website was not in the right format for them?
Conversely, wouldn’t you want to increase your reach by 25%? I hear you saying, “Yes, of course!”
Without accessible advertising, no matter how perfect your product or offer is for someone, one in four people in Europe or the United States might not get your message. This is the ratio of people with disabilities to the general population. According to the United Nations, more than one billion people globally live with disabilities.
Digital inclusion is important because it provides access to services, products, data, information, and education for everyone. We, as advertisers, can recognize these exclusions, solve for them, and make a difference for the one in four people — and also in our business performance.
- Download the plug-in for your browser https://accessibilityinsights.io/ and begin to learn how to make your landing pages for your campaigns accessible. This free open-source tool by Microsoft will highlight what accessibility issues are present and how to fix them. It could not be more turn-key, it’s free.
- Use the Accessibility Checker in Microsoft 365 to make any media or content more accessible.
- Learn the ten accessibility principles to building accessibility into your advertising from the start.
7. Develop an inclusive keyword library.
Nothing replaces the value of first-hand customer experience as you develop an inclusive keyword library for your brand. Begin with customer focus groups with the audience you are trying to reach, and you’ll be surprised what you uncover. You can even start by sourcing this information from your internal Employee Resource Groups.
To develop an inclusive keyword library, you’ll want to consider the consumer decision journey for the product or service you offer. Next, layer on the journey for the consumer with a physical disability, cognitive difference, military status, age consideration, gender expression, or other dimensions of diversity.
Include their lived experience and map the unique keywords that they might use to seek out your product. By understanding the consumer decision journey from their perspective, you will develop your own inclusive keyword strategy for your business.
One simple example is understanding gender differences. In Microsoft Advertising‘s Inclusive Automotive Marketing webcast, we shared the difference between men and women in the consumer decision journey when shopping for a car. An inclusive keyword strategy can inform not only your search engine marketing (SEM) but could shape you content marketing, as well.
As suggested earlier, don’t stop at the usual dimensions of diversity — go further and see what you can uncover to help you connect and give people the feeling that you’re “a brand for someone like me.”
8. Root out bias in your ads and your data.
Contending with and working towards eliminating bias applies to all of us. As marketers, our job is to understand and identify potential bias that can live within our datasets and our marketing models. Bias in data produces biased models, which can be discriminatory and harmful. Bias can lead to missed opportunities in marketing, or even damage your brand’s reputation.
There is a long list of bias types, and it’s good to become familiar with many of these. A great resource is the Harvard Implicit Bias Tests, which you can use to explore and learn about the variety of biases.
For instance, a marketer might conclude that a luxury accessories brand should target women, because gender appears to correlate with a higher purchase probability. You might assume that only women buy luxury handbags. However, gender may just be a red herring. Income could correlate to a much higher degree with conversion.
The resulting bias of only targeting women, then, would limit your opportunity. I invite you to have deliberate curiosity about long-held beliefs, because you might be accidentally leaving out other buyer personas.
Additionally, it’s critical you’re cognizant of gender-neutral pronouns in your marketing materials. Refer to “they” or “them” when writing about people (rather than “he” or “she”), and ensure you offer at least a third option when asking for gender in customer profile forms.
As we start 2021 and work to find new ways to drive business impact while making a positive impact in the world, we hope these eight tips for inclusive advertising help get you there. Let’s work together to build a more inclusive world today.

How the HubSpot Blog Generates Leads [+ How Yours Can, Too]
It’s hard to believe that if the HubSpot Blog were a person, it would currently be in high school.
That’s right – for well over a decade, content has been published on the HubSpot Blog to help hundreds of millions of readers discover best practices in the areas of marketing, sales, customer service, website development, agency work, and general business best practices.
Behind the scenes, our team also thinks about how we can convince as many readers as possible to become leads and access more information, tools, and resources from HubSpot – and anyone who has worked on lead generation knows that accomplishing this task is much easier said than done.
Effective blog lead generation requires both creative and analytical skills. It’s about knowing what numbers to crunch, how to analyze your existing data, and how to make projections based off of traffic, monthly search volume, and conversion potential.
Additionally, any good marketer needs to understand the human aspect behind this process and not lose sight of the people reading your blog and the problems your business can help them solve.
Over the years, the team at HubSpot has landed on a process that continuously generates leads day-after-day, with a reliable blog view-to-lead conversion rate and a steady flow of traffic.
Here are the steps my team at HubSpot takes to generate leads from our blog.
1. Audit existing blog metrics.
To develop a process for growing our blog lead number, we first needed an understanding of how well we were performing.
To capture the current state of blog lead generation, we looked for the overall traffic number and number of leads generated from the blog. These two numbers gave us a baseline conversion rate (in this case, number of leads generated, divided by the total views to the HubSpot Blog in a given time period) from which we knew the team could only go up.
While the number of leads was the ultimate goal for our team, we wanted to take a deeper look at the overall conversion rate and how it changed month-over-month – this number would let us know for sure if we were growing traffic to posts and topics that were most likely to convert their intended audiences.
The big-picture conversion rate gave us an important directional view, but if we ever saw a major shift in that conversion rate, we needed to know where that shift was happening. For example, if we saw a surge in traffic to a low-converting post, that would hinder the overall conversion rate for the blog.
To drill down further, we also looked at all of our post-level data – that is, each post’s traffic number, number of leads generated, and CVR. By exporting and tracking this data monthly, we were able to see which posts were dragging down our CVR, which posts were keeping it strong, and which posts were prime candidates for a better CVR.
How to complete this step:
- Choose a time period (last quarter, last month, etc.) for which you want to know your conversion metrics.
- Determine your overall data for traffic and leads generated in this time and calculate overall blog CVR.
- Export your traffic and lead numbers for individual blog posts for this time period. Depending on your analytics tool, this may require you to export data from two different sources and combine metrics using a VLOOKUP on Excel or Google Sheets.
- For each post, divide the number of leads it generated by its traffic number to get post-level conversion metrics.
2. Group common posts together.
Over the years, HubSpot has published thousands of blog posts – and while this was immensely helpful for growing HubSpot’s email subscription base and ranking for countless keywords, it made the process of organizing and analyzing conversion metrics extremely difficult.
Luckily, the blog and SEO teams developed a model to group posts with similar search intent with the pillar-cluster model. In a nutshell, this model was the result of a massive audit to better organize our blog, reduce redundancy on the blog, and help search engines understand which pieces of content we wanted to be considered the most authoritative on a given subject.
As a result of this project, all of our blog posts were given a relevant “topic tag” – or the cluster for which each post belonged. For instance, any Instagram post is assigned an “Instagram Marketing” tag, and links back to our Instagram Marketing pillar page.
This process ensures effectiveness when analyzing metrics. For instance, when exporting blog metrics, we can analyze blog posts by tag (i.e. all “Instagram Marketing” posts), of which we have a few hundred — rather than analyzing each individual URL, of which we have over 10,000.
How to complete this step:
- Export all of your blog posts from your CMS or website analytics tool onto a spreadsheet.
- Categorize each of your keywords into a topic cluster. These topic clusters should be high in search volume, anchored by a long and high-trafficked post, and related to each other when it comes to search intent. For example, rather than put all of our posts on social media in one giant “Social Media” cluster, we created more niche clusters for Facebook, Twitter, LinkedIn, and Instagram to help us categorize with more specificity.
- With each post properly categorized, organize your data with a pivot table to look at the numbers generated by each cluster rather than each URL. Your pivot table should include the number of posts in each cluster, the views generated, and the leads generated. From there, you can calculate the cluster’s CVR by dividing total leads by total views.
3. Determine the best content offer opportunities.
One of the major benefits of grouping your posts together is identifying a content offer opportunity that can be effectively promoted on multiple blog posts, as opposed to an individual post.
As acquisition marketers, it’s tempting for us to attempt optimizing the conversion paths for high-traffic posts. However, these high-traffic posts are oftentimes too general and unrelated to what it is we’re trying to market.
This mismatch results in misplaced efforts and unmet lead goals, as we’re quick to ignore blog posts which – on their own – may have lower traffic numbers, but together have a substantial traffic number.
Ask yourself – which of these two options is a better pursuit for lead generation?
- A blog post that has little or nothing to do with your products or services, but is viewed 100,000 times a year.
- 10 individual blog posts that have a clear connection to your company’s core competencies, but on average generate only 10,000 views each per year.
In either scenario, you’d be optimizing the conversion path for 100,000 readers – it’s only by grouping these posts together that you’d realize option #2 is a much better option for lead generation.
To address this issue, we organized all of our blog topics by the potential number of leads they could generate, but readily discounted any topic cluster of which we doubted the conversion potential. This crucial step ensured we only considered ideas that we believed would be worth our time and resources to create.
Along with dedicated CTAs for each blog post we create, we also create featured resources for certain topics we believe have high conversion potential. For instance, in this Ebook Format blog post, we created a special featured resource, 18 Free Ebook Formatting & Creation Templates:
How to complete this step:
- Calculate how many leads each topic cluster could be generating. At HubSpot, we do this by subtracting each cluster’s actual CVR from its target CVR, and multiplying that difference by the traffic number for the desired time period.
- Organize data by each cluster’s lead generation opportunity – looking first at the highest opportunity and at the lowest opportunity last.
- Work through your list of high-opportunity clusters and remove any low-intent clusters from your consideration, ensuring you’re only left with topic clusters that have a direct connection to your products/services.
- Select one (or many) topic clusters which you want to support with a lead-generating content offer.
4. Create lead-generating content.
By this point, you’ve identified topic clusters which you feel would benefit from a new, dedicated piece of lead generating content. Now, it’s time to create that piece of content.
Understanding what kind of content to create comes from knowledge of your industry, your market, and your buyer personas. In our experience, we discovered HubSpot’s Blog audience responds to actionable, personalized, and customizable content in the form of templates, tools, and kits.
However, this is not the case for all organizations – so figure out which content format works best for your audience by auditing the performance of your current library or testing out different formats to see what resonates with your blog readers.
With the knowledge of what formats work best for our readership, we got to work on creating templates for our most-read but lowest-converting clusters, so that readers would see our content as an actionable next step for them to apply the knowledge they gained in the blog post. Below are a few examples of how we mapped an offer to a topic cluster.
|
Blog Topic Cluster |
Content Offer |
|
Customer Experience |
|
|
Sales Training |
|
|
Product Marketing |
|
|
Pricing Strategy |
|
|
Facebook Advertising |
The most important thing to remember during this step is to not overcomplicate your content. Remember, to secure a conversion, you need to convince a reader of your content’s quality and relevance. If you’re struggling to make the connection between your blog content and your offer’s content yourself, how well do you think a reader skimming your blog posts will make that connection?
How to complete this step:
- Look through the posts in the topic cluster you want to optimize with new content and think about what a natural next step would be for the reader.
- Cement an idea for a piece of content you can create that aids your readers in that next step.
- Create the content in your desired format (PDF for ebooks, Google Sheets or Microsoft Word for templates, etc.) and launch it behind a lead-generating form on your website.
5. Promote content with CTAs.
To facilitate a blog conversion, you’ll need to let blog readers know about the new lead-generating piece of content on the same page as your blog content.
Blog CTAs can take a variety of formats. Two of the most popular are:
- Anchor Text CTAs – Hyperlinked text to the landing page of the offer you’re promoting. Remember to keep anchor text direct and clear so readers know what they’re clicking – action words like “download” and “access” are useful here.
- Image CTAs – Hyperlinked images to your offer’s landing page. These CTAs might look like a banner ad and contain an image of the offer alongside copy explaining the value of it. These image CTAs could also be an image of the offer itself, which makes sense if promoting a template or a tool.
At HubSpot, the majority of our posts contain at least three CTAs – one anchor text, and two image. Depending on the intent we expect readers have on a specific post, we may include several more. However, all of these decisions are based on years of data collection and A/B testing – which we encourage you to rely on as well to ensure a non-intrusive CTA experience on your blog posts.
How to complete this step:
- Determine the CTA types you want to include for the blog posts you’re optimizing.
- If necessary, create CTA imagery with a design tool like Adobe or Canva.
- Add CTAs to each post, either by utilizing a CTA tool or hyperlinking each image or line of text you add into your blog posts. We recommend the former.
6. Analyze your results.
We gained confidence that this approach worked best for us when the results confirmed so.
After 30 days of launching a new content offer on a series of blog posts, we always answer two questions:
- How many leads did each blog generate before we optimized it with the new content offer?
- How many leads did each blog generate after we optimized it with the new content offer?
Far more often than not, these clusters see a notable increase in CVR, with some increasing by more than 1,000%.
However, there have been times where we missed the mark and the offer did not perform as expected. When that was the case, we reverted the changes and went back to the drawing board – equipped with the knowledge of what didn’t work, which helped us determine what would help us generate more leads in the future.
How to complete this step:
- Calculate the traffic, lead, and CVR numbers for each blog post optimized with the new offer before swapping out the CTA.
- Calculate the same for a set time period after the CTAs were swapped.
- Calculate the difference in leads and in CVR for each post.
- If the post did not increase in CVR as expected, consider reverting your changes and creating a new content offer.
7. Align with SEO.
When we discovered that this process was helping us hit our goals, our immediate thought was protection. HubSpot writers and SEOs work hard to ensure our blog posts continuously rank on the first page for the search results of their intended keywords — and we don’t want to lose that hard-fought real estate.
However, like all teams, SEO needs to prioritize which blog posts are most in need of protection from losing their SERP rankings and traffic – so it became our job to ensure HubSpot’s SEO team knew which posts were most important when it came to generating leads.
We’re fortunate here at HubSpot to work with expert SEOs who are able to quickly and effectively prioritize the right content.
As my colleague Braden Becker – HubSpot Senior SEO Strategist – said when we spoke about this topic at INBOUND 2020, “Traffic doesn’t pay the bills.”
Once we were all on-board regarding prioritization, our teams came to an agreement on how to best manage an SEO strategy for high lead-drivers while respecting the importance of maintaining high traffic numbers for posts across the HubSpot Blog.
The team takes the following steps to ensure lead generation goals are met:
- Protect the traffic to high-traffic, high-converting blog posts by regularly checking performance and making as-needed updates to the content of these posts. By frequently optimizing these posts, we let search engines know we’re quick to add the most relevant information onto these pages.
- Grow the traffic to low-traffic, high-converting blog posts – or ensure that these posts have maxed out their organic traffic potential.
- Create posts for keywords that we have not written articles for – but align with related content offers or clusters – as these posts could generate substantial lead numbers for us. This step requires keyword research to ensure these new posts generate traffic.
- Stop protecting traffic to high-traffic, low-converting posts. While strong traffic numbers are great, we came to the conclusion that a lower traffic number is acceptable if it means redirecting our historical optimization efforts away from posts that might not generate as much traffic, but will generate significantly more leads than other posts.
How to complete this step:
- Come up with a list of blog content that you’d like to see an increase or decrease of traffic to for lead-generation purposes.
- Present this list to your colleague(s) in SEO to determine what work can be done to redirect traffic growth efforts to the right posts. Note: it’s important to set expectations here, as an SEO cannot wave a magic wand and increase demand for a low-ranking keyword. Sometimes, a post is ranking as well as it can be – but that doesn’t mean you shouldn’t double check to see if there’s opportunity to grow traffic where possible.
- Present a list of high-traffic, high-converting blog content to see if there are similar keywords which could be written about in a new (or updated) blog post, in addition to potential keywords that could be the basis for net new posts.
- Come with data. SEOs aren’t in the business of risk-taking, so explain how a sacrifice of traffic in some areas could result in a stronger CVR and higher lead number from your company’s blog.
8. Repeat the cycle!
HubSpot’s bloggers are always creating new blog posts and historically optimizing existing ones. In other words, my team is always presented with opportunities to create new lead-generating content and ensure the content we’ve already made still holds up and is of value to our leads.
Whenever we create a piece of gated content, we always follow the seven steps above, and we’re consistently rewarded with an increase in leads from our blog.

11 Social Media Calendars, Tools, & Templates to Plan Your Content
What do cross-country road trips, wedding speeches, and social media marketing have in common? Planning.
You could improvise all three, but it’s better to have a plan for what direction you’re heading — especially when developing your social media content strategy.
By now, most marketers recognize that social media plays an integral role in an effective inbound marketing strategy. And with so many social networks to manage and publish on, it’s important to stay organized and have a plan for when and what you’re going to share on these platforms.
The Benefits of Using a Social Media Content Calendar
We’re all busy. And when we’re busy without a plan in place for the tasks we have to get done, things inevitably slip through the cracks. Social media content is no exception.
Just like with blogging, a successful social media strategy requires regular publishing and engaging with followers to see positive results — whether that be in terms of SEO, brand recognition, lead generation, or all three.
So, if you’re not already using a social media content calendar, hear me out:
- Calendars help you get organized to avoid the dreaded scramble when things come up. With a social media calendar, marketers can plan out posts for entire weeks or months in advance, which frees up working hours to strategize for the future — and to dash off any posts about breaking news in your industry. Otherwise, you’ll spend valuable time each day searching the internet for that day’s content to share, which is a known productivity killer.
- A calendar helps you plan for each social network to customize posts instead of spamming all platforms with the same message. Social media marketers should take the time to craft custom messages for each network, and doing this in advance will save time throughout the week and ensure you’re being thoughtful and intentional when you do post.
- Calendars can help you track performance and plan for future posts. Without a calendar, social media marketers are publishing content into the void and are unable to track big-picture and past performance. With a calendar, marketers can look back and analyze which content performed best so they can adjust their strategy accordingly.
- With the help of a calendar, marketers can plan for holidays and observance days, such as National Cat Day, when they can tailor their content and engage with a wider audience.
Now that you understand the merits of having a social media content calendar in place, check out our list of top tools to stay organized and on top of your game.
Social Media Content Calendar Tools to Plan Your Messaging
1. HubSpot’s Downloadable Template for Excel
Content Calendar
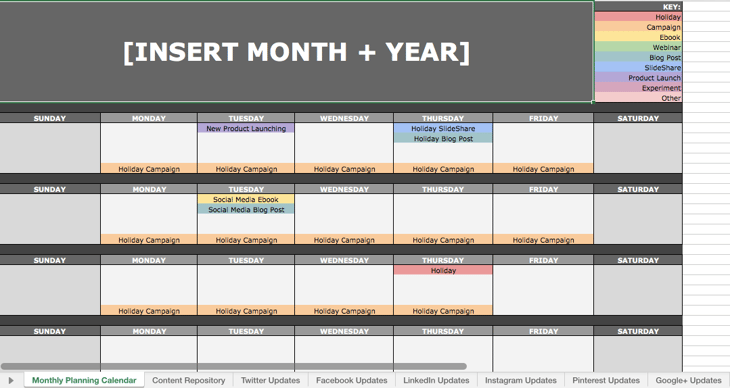
Marketers might already use Excel for different types of reports and data analysis in their roles, but it’s a highly useful tool for social media content calendar organization, too. Excel can be customized according to whatever priorities or metrics a team is focused on, so it’s a great tool for planning ahead.
The good news? We’ve already done the heavy lifting for you by creating a free, downloadable social media content calendar template using Microsoft Excel. Marketers can use this template to easily plan out individual social media posts — monthly or annually — while keeping an eye on bigger picture events, holidays, publications, and partnerships.
- Use the Monthly Planning Calendar Tab above to get a bird’s-eye view of what’s coming down their content pipeline in a given month.
- In the Content Repository tab, users can record the content they’re publishing on this tab to keep track of which pieces have been promoted and to easily recall older content that can be re-promoted on social media.
- On the Social Network Update tabs, users can draft and plan out social media posts in advance. These tabs are for organizational purposes, and the content of the posts themselves must be uploaded into a social media publisher.
For more on how to use the templates, check out this in-depth guide from my colleague Lindsay Kolowich.
This free resource can be used to draft social media posts, or it can be bulk-uploaded into a publishing app to maximize efficiency. (HubSpot customers: You can use this spreadsheet to organize content and upload it directly into Social Inbox. For instructions on how to do so, check out the template’s cover sheet here.)
2. Google Drive
Content Calendar and Asset Organization
Google Drive has several helpful features that make it easy for social media marketers to build out an effective content calendar.
Here’s an example of how a team might use Google Calendar to track both their editorial and social media calendars to make sure they’re aligning posts with new blog content. These calendars can be easily shared with multiple teams to avoid scheduling conflicts and ensure that campaigns are aligned.
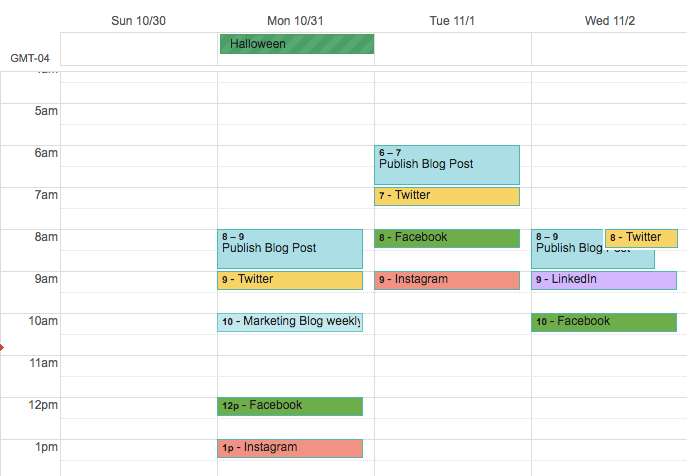
Marketers can also use shared Google Sheets to schedule posts on social media, track the status of different pieces of content, and assign tasks to team members — all on the same platform as their calendar.
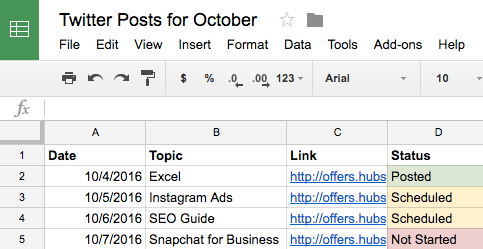
With the help of Google Docs, users can keep comments all in one place and can collaborate on different projects without emailing back-and-forth or having to schedule a meeting. This is a particularly useful feature when editing content for social media, which may need to be drafted and approved quickly.
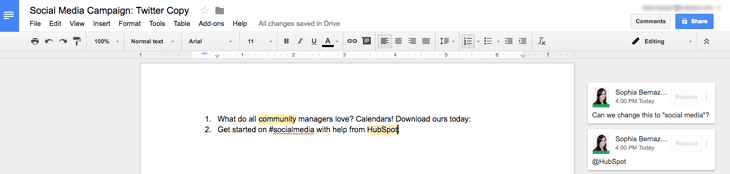
(HubSpot customers: You can link your Google Drive account to your HubSpot portal to easily upload files from Drive into your HubSpot software.)
3. Loomly
Content Planning, Creation, Publishing, and Calendar
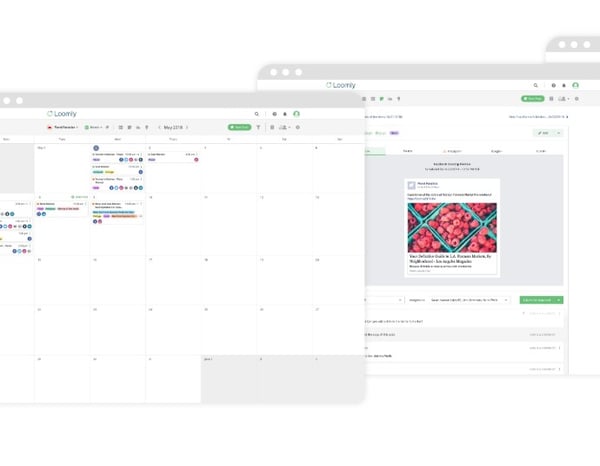
If you want more mileage out of a content calendar than publishing dates, you can turn to an all-in-one content planning and publishing platform such as Loomly.
Loomly offers tools beyond the management of content, going even so far as to provide post inspiration and ideas to help you create content. It also allows you to manage your content assets, schedule posts, manage them in both a list view and a calendar view, and analyze what’s working.
Their most robust feature set, though, includes a collaboration and approval environment so that teams can submit mockups, provide comments, see version logs, and flag for approval. This can help you streamline for efficiency when it may otherwise seem as though there are “too many cooks in the kitchen” on a particular project.
4. Trello
Task Management and Content Calendar
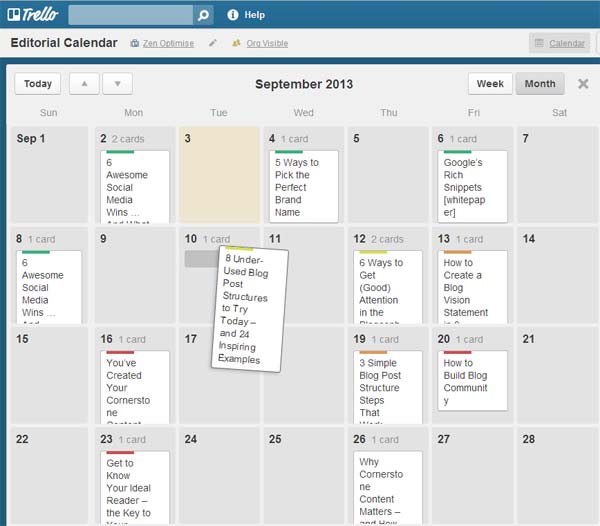
Trello is another organizational tool that’s highly effective for team collaboration. Trello also offers a full calendar view (shown above) which makes it easy to visualize what content is going out, and when. More specifically, social media managers can use Trello’s flexible assignment “cards” and customizable “boards” and “lists” to map out to-do lists, manage a content calendar, plan a campaign, and house ideas from a brainstorm.
But you’re not limited to just one structure: Users can customize boards according to their needs. For example, a team could create a board to organize social media posts for a given week, on a specific platform, or post ideas around a topic, such as a campaign or awareness day.
Trello cards allow for a ton of customization as well. You can track progress toward completing a checklist, which could be useful for social media marketers looking to track campaign progress.
Additionally, Trello cards can be assigned to different team members, marked with due dates, and commented on. Users can even customize labels with different publication statuses so the entire team can see the progress of their social media posts and when they’re due on the calendar. The labels could also indicate different social networks that content is being published on.
5. SproutSocial
Social Publishing and Content Calendar
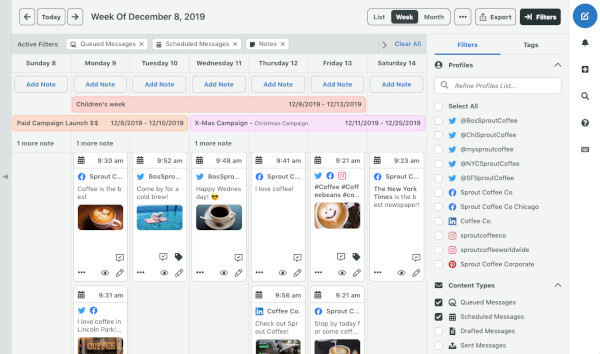
Sprout Social’s social media calendar and publishing tool makes it easy for teams or individuals to plan and schedule all of their social posts. You can schedule content to automatically post to Twitter, Facebook, Instagram, LinkedIn, Pinterest and more.
You can also tag each social post and add notes to better track and report on your posting strategy and campaigns. Additionally, their publishing suite includes a tool called Optimal Send Times which analyzes your social media data and automatically publishes at a time your audience is most engaged.
6. Evernote
Content Calendar, Task Management, and Asset Organization
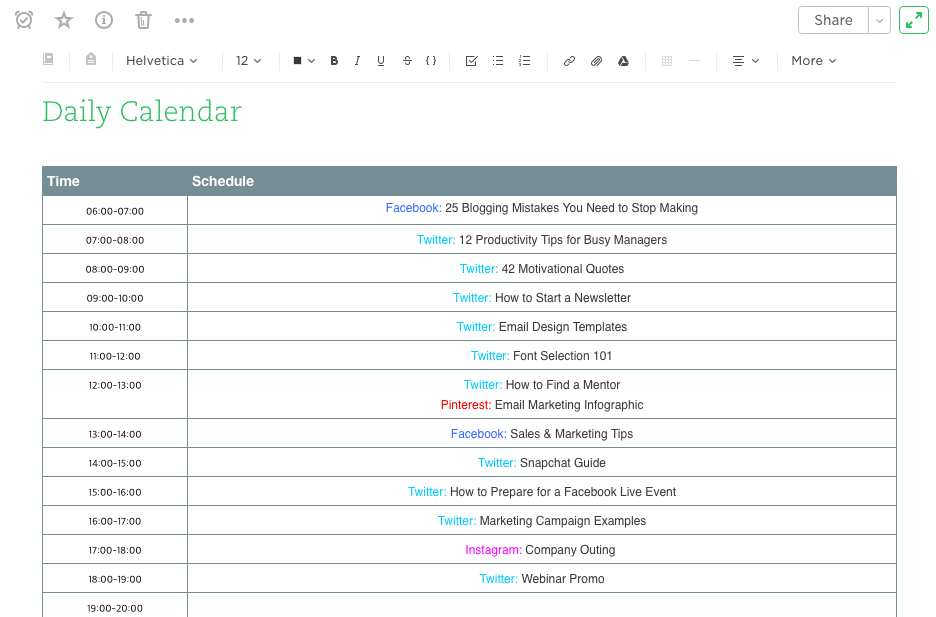
Evernote is a note-taking app that marketers can use to keep track of all the moving parts that comprise a social media campaign.
The tool also features yearly, monthly, weekly, and hourly logs, which make it easy to keep track of when you’re publishing content on social media, when you’re producing blog content, and other team-wide priorities. (Evernote offers customizable templates for each of these that can be downloaded into the app.)
Another useful feature? Evernote’s Web Clipper extension for Chrome. Marketers can use this tool to easily save links to their Evernote Notebook for sharing later on.
The Evernote mobile app also boasts some interesting features to help marketers keep their social content ideas straight. For example, you can easily snap a photo and save it to your Evernote files for review later.
This feature is of particular valuable for social content creators looking to maintain a backlog of photos to publish on Instagram.
7. Hootsuite
Social Publishing and Content Calendar

Hootsuite offers a built-in Planner tool to help you create campaigns, identify publishing gaps, and collaborate with your content creation team. Its primary features are in social publishing so that you can release content to your networks in advance, but it also has rich features for collaboration and post approvals. You can even curate content from other sources without logging into your account. Once your content is created, you can preview it with the Composer tool, which displays according to each social network’s unique format.
8. Agorapulse
Social Publishing and Content Calendar
Similar to Hootsuite, Agorapulse offers social publishing tools and a content calendar so that you can manage your social media accounts with ease. This includes scheduling (or rescheduling), queuing, and bulk uploading posts, which is incredibly helpful for those who do quarterly or monthly content plans. What makes Agorapulse different, though, is its social inbox that allows you to manage all the interactions from various platforms in a single place. After all, content isn’t just a one-and-done activity; it’s about building awareness and engagement with your readers as well.
9. StoryChief
Content Planning and Distribution
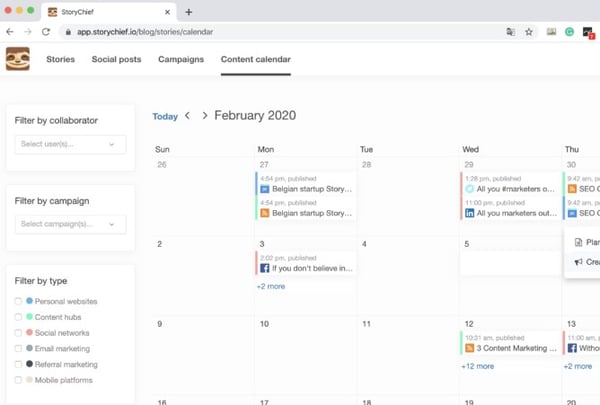
If you want more from your content calendar than simply knowing when posts go live, StoryChief is a good option. With StoryChief’s smart calendar, you can better strategize and plan your content strategy across channels. It not only displays your timetable; it also allows you to assign collaborators to tasks and filter by campaign. StoryChief self-describes their tool as a “content distribution platform” that unifies analytics and publishing across multiple channels for a more simplified approach to content creation. Best of all, it syncs with your favorite calendar apps as well as HubSpot.
10. ClearVoice
Content Creation and Management
So what about content planning and creation? ClearVoice offers content creation tools to fit into your workflow. While their big claim to fame is their Talent Network Search which allows you to find and connect to content creators to work on your projects, ClearVoice also has features for task management for internal and external collaborators. You can create, edit, and approve projects in an interface that makes editorial management easy. They also have a dashboard and dynamic editorial calendar with plenty of interactive functionality, and there’s integrations with other popular software.
11. Zerys
Content Creation and Management
Zerys is another platform that matches you with your ideal content creation freelancers. However, it markets itself as a platform dedicated to content success, offering features for content planning, production, publishing, promotion, conversion, and analytics. You can manage unlimited content projects, plan keywords and titles for blog content, hire writers, and view all deadlines on an integrated calendar. Your in-house writers can use the platform, too, with the project management features that Zerys offers. It also integrates with HubSpot so that publishing is a breeze.
Social Media Templates
HubSpot’s Social Media Calendar Template
If you’re new to setting up social media calendars, HubSpot offers a pre-made, free, and downloadable template that you can use to schedule out full weeks of posts.
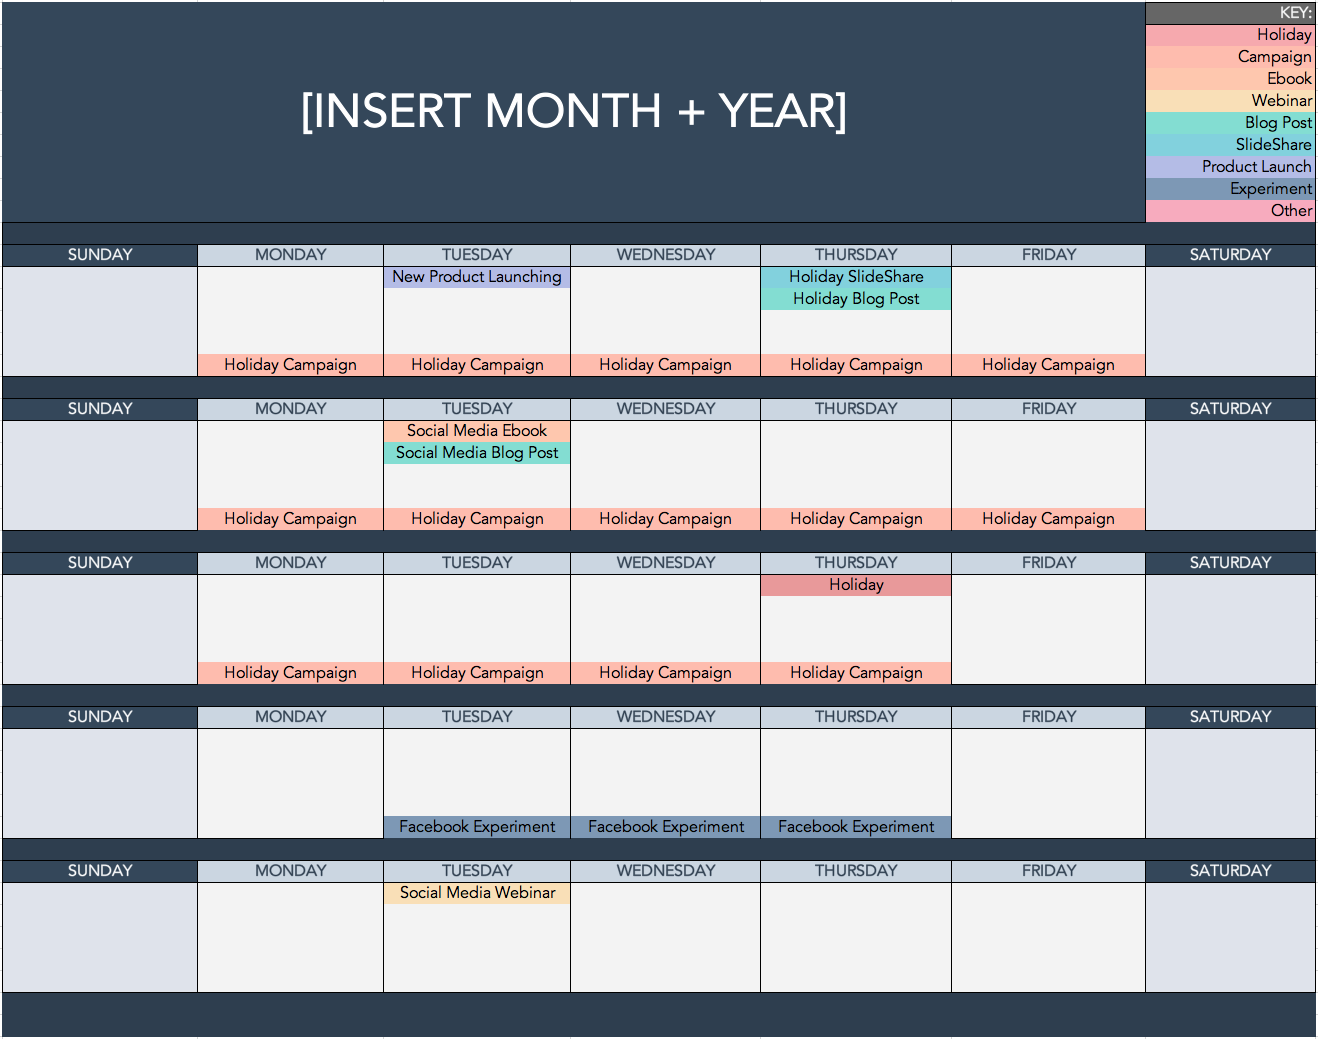
HubSpot’s Social Media Content Calendar Template for Startups
This template is very similar to the one seen above but also has tabs that work as a repository for content ideas. The template also includes helpful tips for posting on specific social media networks.
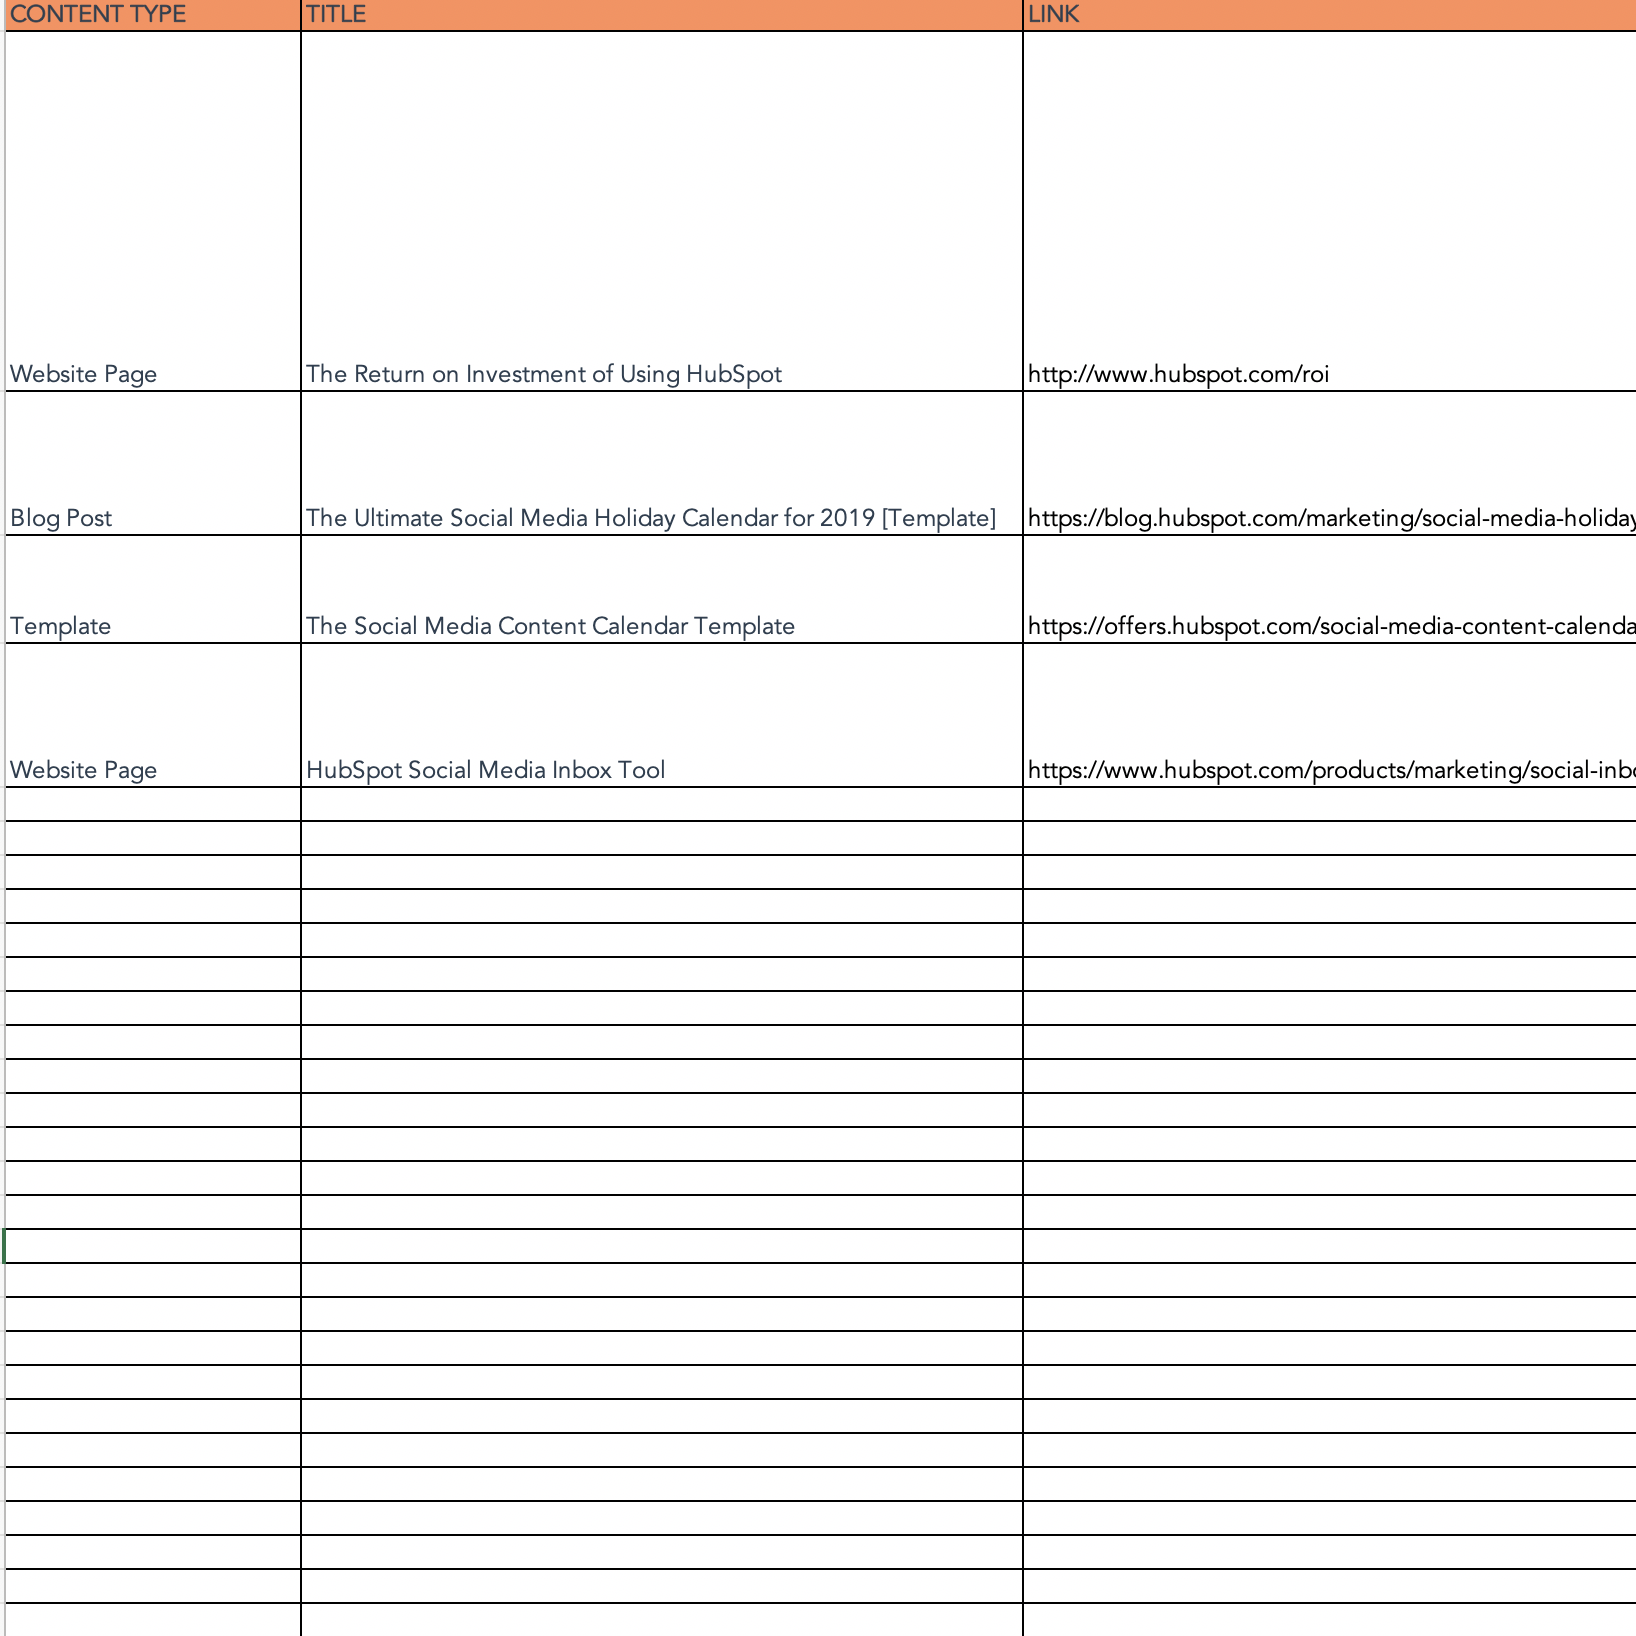
If you’re aiming to get all of your ideas down in order to develop a big-picture plan for your social assets, we recommend starting with this template.
Getting Started on Your Social Media Schedule
Now that we’ve reviewed a few helpful tools to kick your social media strategy into high gear, experiment with them. Every social media team is different, and it could be a combination of these tools that helps you execute your strategy efficiently to drive ROI.
Editor’s note: This post was originally published in 2017 and has been updated for comprehensiveness.

How to Design a Process Infographic (And Where to Find Templates)
Have you ever wished you could just use a picture to explain a process instead of words (or your hands)?
A process infographic could be just what you need to show your audience how to do something or how a process works. A well-designed one can establish you as an authority on whatever subject you choose to cover — whether you’re trying to show how your business’s coffee is sourced or train the new hire remotely.
Even better, they’re easy to create using a template or from scratch, meaning you can get started on one today.
What is a process infographic?
A process infographic simplifies and explains the steps of a process in primarily visual terms. Generally, it illustrates what happens during each step or phase with an intuitive layout that’s easy for the viewer to follow from start to finish. A well-designed process infographic makes the concept you want to share more accessible and saves you and the audience time.
Chances are, you encounter process infographics in some form pretty regularly in your daily life. Just imagine how much (more) complicated it would be to build your new Ikea desk if the instructions only included words and no visuals. Pretty daunting, huh?
Process infographics allow us to visualize how a process works more quickly and with more clarity. This makes them excellent training and educational tools — but also a smart marketing strategy.
Here’s an example of a process infographic that explains mechanical recycling:
Image Source: bluevision
For marketers — particularly those of us who are trying to market products or services that require a bit of explanation — process infographics are extremely helpful for connecting with potential leads and communicating your company’s value. Explaining how your company’s offerings can provide value to customers with visuals can make your marketing materials more memorable and impactful than using copy alone.
Where to Find Process Infographic Templates
If you want to create your own process infographic with a template, here are a few offerings for every budget.
Venngage
Venngage has a wide variety of process-specific infographic templates for a number of different purposes. If you’re looking to essentially plug your process into a finalized design and go, you’ll likely find what you want on Venngage. Monthly and annual subscriptions are available that give you full access to their template library and the ability to create and download your own process infographics.
Template available on Venngage
Canva
Canva has ready-made infographic process templates ideal for fun activities, recipes, and the occasional life hack. You can also create a blank infographic process template on the site if you can’t find one that fits your project. Canva has a free and paid version depending on your needs.
Template available on Canva
Visme
Visme’s library of process-specific templates includes an extensive variety of different options, including more flowchart-style process templates than other infographic builder sites. If you’re looking to translate a particularly complex process into a visual medium, Visme is a smart place to start your search for the perfect template. You can set up an account for free or get access to the full library as a premium member.
Template available on Visme
HubSpot
We would be remiss if we didn’t mention that HubSpot offers free infographic templates, including a number of process-specific templates that are easy to customize. All of our templates are free to use and compatible with PowerPoint, so you don’t need to download any new programs or apps to use them.
Template available from HubSpot
DesignCap
DesignCap is an online graphic design tool with a curated selection of process infographic templates available to customize to your needs. While their selection is technically smaller than other template tools on this list, every template was created by a professional designer. They offer many templates for free and have paid plans starting at $4.99/month.
How to Create a Process Infographic Without a Template
If you can’t find a process infographic template that fits the process you want to visualize, you can always create your own from scratch.
For the mechanics of conceptualizing, structuring, and creating a cohesive design for your infographic, you can check out our step-by-step blog post here to develop your own infographic design in PowerPoint. Below, we’ll chat through a few tips specific to process infographics you can apply to any design.
Pick one process to explain.
Process infographics are good at breaking down complex subjects, but you still want to limit the scope of your design to one single topic that can be explained in a linear way — i.e., things that have a start and an end. Trying to explain too much in one visual can make your design confusing. Stick to one central idea per infographic.
Speak to your audience, not yourself.
This applies to most marketing strategies, but it’s always important to remember that you are — more often than not — not your target audience. Chances are, you know a lot more about the subject of your infographic than your audience, so it’s easy to fall back on that knowledge as you plan your design.
Because your audience knows less than you do about this subject, it’s important to approach any complexity from their perspective, taking the time to explain more elements than you would need yourself.
Map out each step with a clear start and end.
As you start outlining your infographic, identify where your audience will start (what they likely know about the process before reading the infographic) and where you want them to end (what you want them to know by the end). With those specifics in mind, map out the steps of
Experiment with the layout.
What’s the best way to structure the information of your process infographic? This will ultimately depend on the “shape” of your information.
For example, a supply chain infographic will likely benefit from a straightforward, linear way of displaying information, but a process like how your company recommends specific products for different needs would need more of a flowchart style design. Experiment with different ways to lay out each step of the process you’re describing until you find one that makes sense.
Edit for clarity.
Once you have a draft of your process infographic completed, give it a re-read and check for areas that might be unclear or confusing. Or even better, ask someone else to review your work with a fresh pair of eyes.
Don’t skip this final review — the goal of your infographic is to make something complex more accessible, and not everyone learns new information in the same way. Having someone else take a quick look can help you refine your infographic so it suits a wider audience.
Visuals succeed where words can fail.
We’ve avoided using this particularly relevant cliche for this entire article, but here it comes: a picture really is worth a thousand words. Using visuals to aid in your explanations of complex subjects or processes can help make your marketing materials more accessible and human.
The next time you’re tasked with breaking down a subject that seems to resist clear explanations, consider making a process infographic instead.

How to Find & Add Nofollow Links to Your Website [Step by Step]
Ever watch those game shows where contestants have to find the designer product in a sea of knockoffs?
Watching the contestants squint to examine the products is my favorite part. One, because I love game shows, but also because upon first glance, you really can’t tell the difference.
Well, nofollow links are kind of like that. You can’t tell them apart from regular links just by looking at them.
As Google continues to prioritize links in its ranking criteria, keeping track of them should be on your SEO to-do list.
So, how do you check for nofollow links and add them to your webpages? All those answers, and more, below.
This matters because links greatly impact your search engine ranking. And whether you’re linking internally or externally, doing so tells Google the destination page is valuable. This, in turn, may increase the page’s ranking — it’s called “link juice.”
The better your link building, the better your chances of ranking higher.
So, when you tell Google to ignore a link, the destination page will not get any link juice. For instance, let’s say a food blogger uploads a blog post. The blogger can add a nofollow attribute to the comment section to tell Google, “Hey, any link included here isn’t associated with me and I don’t vouch for it.”
With Google tightening up its linking requirements, it’s important that brands understand how they work.
How To Tell if a Link Is Nofollow
To find a nofollow link, you can follow one of two routes: Use a tool that will do it for you (jump to that section here) or check it yourself. For the DIY option, here are the steps:
1. While you’re on the page, right-click and select the “Inspect” option.
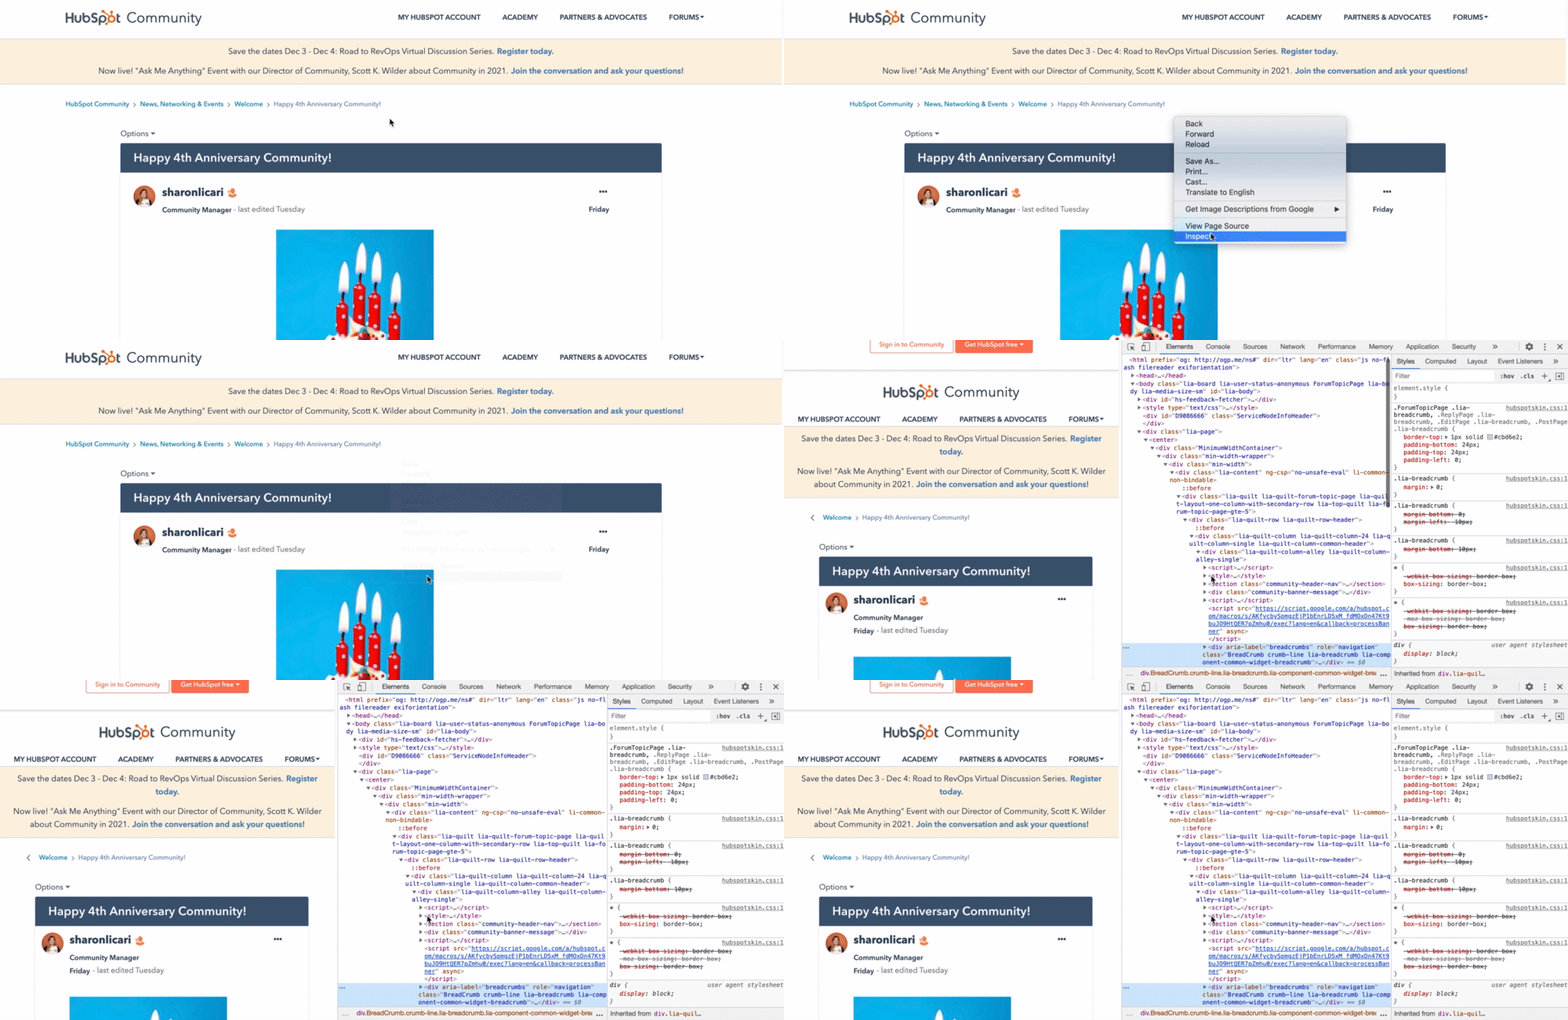
2. Hold Command + F or Ctrl + F to search for “nofollow” in the code.
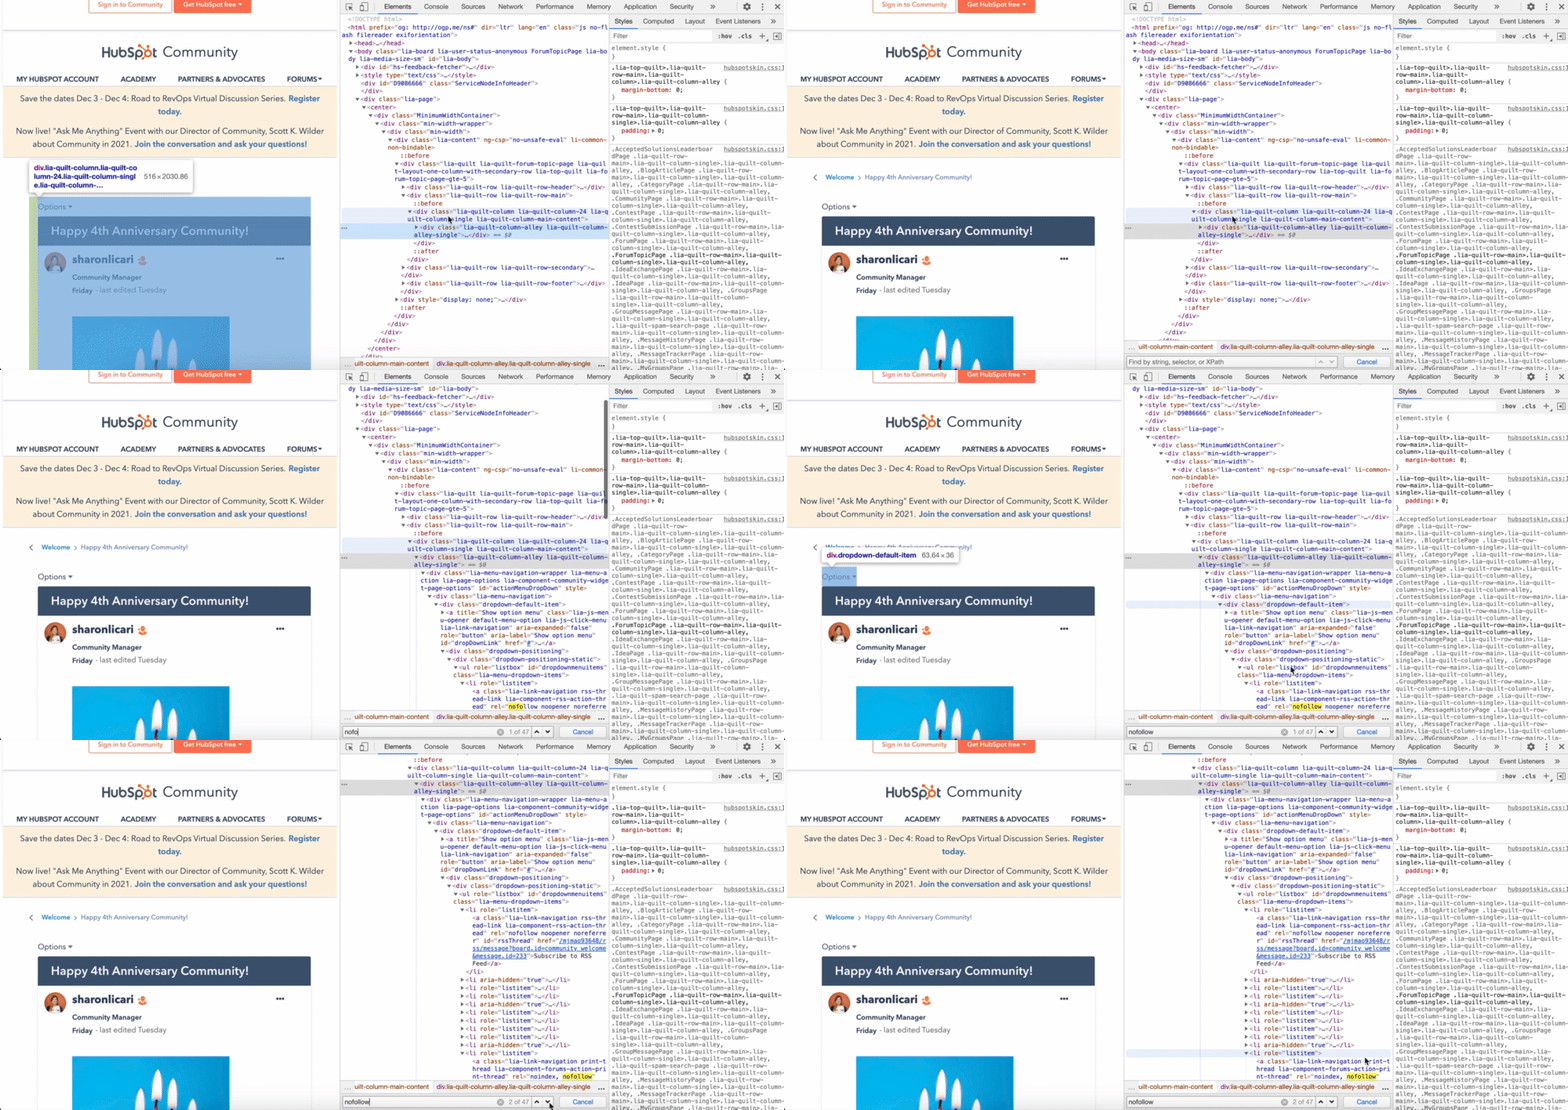
3. Scroll to find the highlighted nofollow attributes. It should look something like this:

How To Make a Nofollow Link
Making a nofollow link is as simple as adding rel=”nofollow” to the anchor tag within the HTML code. If that made no sense, no worries. Here’s the breakdown:
The code for a regular hyperlink looks like this:
When you’re adding a nofollow link attribute, the attribute will go between the destination URL and the linked text, like this:
Here’s an example using the HubSpot Blog:
Once you have the link, you can add it to the appropriate section of the source code on your content management system (CMS).
How To Make a Nofollow Link in WordPress
When making a nofollow link in WordPress, you have two options: manually inputting one into the HTML code or using a plugin. Find the steps for each below.
Making a Nofollow Link in WordPress Manually
1. Select the anchor text you want to add a link to.
2. Click the link symbol to add a link into the field.

Image Source
3. Click on the three dots and select “Edit HTML.”
4. Add the rel=”nofollow” attribute and you’re all set.
If you’re using an older version of WordPress, you may have to access the source code through the “Text” tab.
Then, manually add the nofollow attribute.
Once that’s done, go back to the “Virtual” tab and continue editing the post.
Making a Nofollow Link in WordPress With a Plugin
When making a nofollow link with a plugin, the steps will vary depending on the plugin you install. However, here’s an example of how it works using the “All in One SEO for WordPress” plugin.
1. Start by downloading the plugin and making it active.
2. Create or edit a post or page.
3. In your editing text box, select the anchor text and click on the link symbol.

4. Paste the destination link into the field.
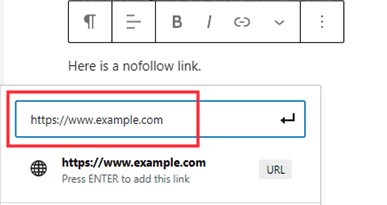
5. In the same box, you’ll also see additional options for the link, including the “Add ‘nofollow’ to link” option.
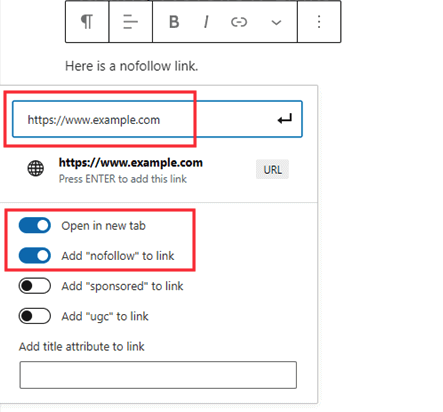
6. Make sure this option is selected, and you’re done.
Pro-tip: A lot of SEO plugins have the nofollow link feature included. So, if you’re looking to optimize your site, you can install a plugin with multiple SEO features.
1. MozBar
This free Google Chrome extension, created by the SEO software company Moz, highlights all of the nofollow links on a page in one click.
It also tracks followed, internal, and external links as well as keywords on the page. MozBar identifies each link type by color, making it easy to quickly scan the page and find what you’re looking for.
One thing to keep in mind while using the extension is that nofollow links under dropdown menus will not appear as you scroll down. You’ll have to click the menu to reveal the nofollow links. Confused? See the GIF below.
2. Varvy
With Varvy’s free nofollow tool, finding nofollow links is as simple as entering the page’s URL and clicking “Test.” It doesn’t offer a visual for where the nofollow links are located on the page, but it does tell you how many there are.
 This is one of the simplest ways to get an idea of how many nofollow links you have. From there, you’ll have to find other tools to accomplish your next steps.
3. NoFollow
NoFollow is a free extension available on Chrome and Firefox. Similar to MozBar, it identifies the nofollow links on the page and highlights them using a red dotted box.
As long as the extension is active, it will work on every page you visit without prompting. Just as with the MozBar, if a link under a dropdown menu has a nofollow attribute, you won’t see it until you click the dropdown menu.
So, think of yourself like a game show contestant. To win the SEO game, you have to take a closer look at your website links. This will keep you on Google’s good side and increase your odds of landing (and staying) on the first page of the SERP.
