Welcome to My Blog
Conversion Rate Optimization (CRO): 8 Ways To Get Started
Today, most marketing teams are focused on driving traffic toward websites in hopes that this traffic then converts into qualified leads for sale reps to close. But that’s only half the battle.
Getting more out of existing traffic and leads (versus entirely new traffic) can propel companies toward long-term, sustainable growth. That’s where conversion rate optimization (CRO) comes in. In this guide, you’ll learn about the power of CRO, why your business should focus on improving your conversion rate, and how to get get started.

What is a conversion rate?
A conversion rate is the percentage of visitors who complete a desired action, like completing a web form, signing up for a service, or purchasing a product.
A high conversion rate means your website is well-designed, formatted effectively, and appealing to your target audience. A low conversion rate could be the result of a variety of factors related to either website performance or design. Slow load times, a broken form, or copy that doesn’t convey the value of the offer are common reasons for a poor conversion rate.
What is a good conversion rate?
A “good” conversion rate depends on your industry, niche, goals, traffic channel, and audience demographics, among other factors. For example, the average conversion rate of ecommerce sites globally was 2.17% in the third quarter of 2020, which was down from 2.37% the previous year. The ecommerce conversion rate in the US was higher, however, at 2.57%.
The average not only differs by year and by country — it also differs by niche. For example, the average conversion rate of ecommerce sites in the food and beverage sector is 5.5% whereas the average in the haircare sector is 3.5%.
If your conversion rate is lower than you’d like — maybe it’s below average in your industry, or lower than your top competitors, or simply underperforming against your own goals — then it’s time to optimize.
What is CRO?
Conversion rate optimization, or CRO, is the process of enhancing your website and content to boost conversions.
The process of optimizing for conversions allows you to boost your number of highly-qualified leads, increase revenue, lower acquisition costs, obtain greater value from your current leads and customers, and, simply, grow better.
Conversions can happen all over your website: on your homepage, pricing page, blog, landing pages, and more. To maximize the potential of converting website visitors into paying customers, you should optimize each location.
Before we take a look at the benefits of CRO, let’s walk through how to calculate your site’s conversion rate. That way, you’ll have a better understanding of how much time and resources to invest in a CRO strategy.
How to Calculate Conversion Rate
Conversion rate is calculated by dividing the number of conversions by the number of visitors and multiplying that number by 100 to get a percentage.
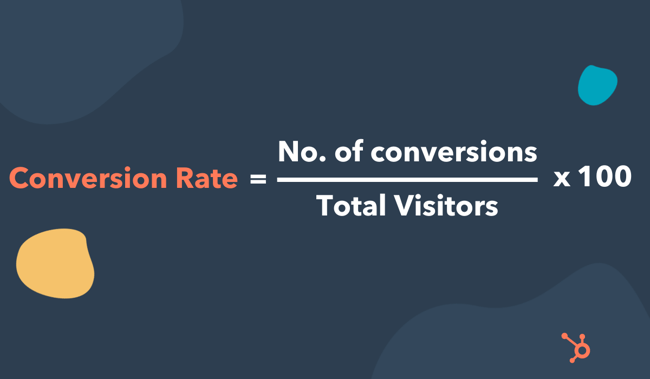
As long as you know how you’re defining a conversion, then calculating your conversion rate is easy. You just plug in two values and multiply by 100.
Let’s say you’re defining a conversion as a newsletter opt-in, and you have an opt-in form on every single page of your website. In that case, you’d divide the total number of newsletter form submissions by the total number of website visitors and multiply it by 100. So if you had 500 submissions and 20,000 visitors last quarter, then your conversion rate would be 2.5%.
You can repeat this process for every conversion opportunity on your site. Just make sure to only count the number of visitors on the webpages where the offer is listed. For example, if you want to calculate the conversion rate of your ebook offer, then you’d divide the total number of downloads by the number of people who visited webpages where the ebook offer is listed.
Alternatively, you can calculate your website’s overall conversion rate by dividing the total number of conversions for every conversion opportunity on your site by the total number of visitors on your site.
How Websites Benefit From CRO
Here are four areas of your website that have the potential to largely benefit from conversion rate optimization.
1. Homepage
Homepages are prime candidates for CRO. In addition to making a first impression on visitors, the homepage is also an opportunity to retain those visitors and guide them further into your website.
You can do this by emphasizing links to product information, offering a free signup button, or even incorporating a chatbot that solicits questions from visitors at any point during their browsing experience.
2. Pricing Page
A website’s pricing page can be the make-or-break point for many website visitors. CRO can help a pricing page convert visitors into customers by modifying the pricing intervals (e.g. price-per-year vs. price-per-month), describing the product features associated with each price, including a phone number for visitors to call for a price quote, or adding a simple pop-up form.
Hotjar, for example, added a simple email opt-in popup form on its pricing page and got over 400 new leads in just three weeks.

3. Blog
A blog is a massive conversion opportunity for a website. In addition to publishing thoughtful and helpful content about your industry, a blog can use CRO to convert readers into leads.
This process often includes adding calls-to-action (CTA) throughout an article or inviting readers to learn more about a topic by submitting their email address in exchange for an ebook or industry report.
4. Landing Pages
Since landing pages are inherently designed for people to take an action, it makes sense that they have the highest average conversion rate of all signup forms at 24%. An event landing page, for example, can be optimized with a video of last year’s event to encourage visitors to register this year. A landing page that’s offering a free resource can be optimized with preview content from that resource to encourage visitors to download it.
Now that you know where you can optimize for conversions, you may be wondering how you know when your business is ready to start the process.
When is CRO right for your business?
The short answer: CRO is important for any business online. That’s because, no matter how established or large your company is, you want to convert your website visitors into qualified leads, customers, and brand advocates — and you want to do so in the most effective, impactful, and reliable way.
With conversion rate optimization, you’ll get more out of your existing website traffic while ensuring you’re targeting qualified leads.
Although this is a straightforward concept, setting a conversion goal isn’t as easy as saying, “This page converted 50 people this month, so we want to convert 100 people next month.”
You don’t just want 50 more conversions from a webpage. Instead, you want 50 more conversions for every X amount of people who visit it. (This is your conversion rate — the percentage of people who convert on your website based on how many people have touched it).
To provide a better understanding of where you stand at any point in time in regards to conversion rate, here are three commonly-used formulas your business can use to understand, analyze, and improve.
CRO Calculation 1: Conversion Rate
As we mentioned earlier, to calculate conversion rate, you must divide your number of conversions (or leads generated) by your number of visitors (or web traffic), and then multiply that number by 100 to get the percentage.
Leads Generated ÷ Website Traffic x 100 = Conversion Rate %
CRO Calculation 2: Number of Net New Customers
To calculate your number of net new customers, you’ll want to divide your net revenue goal by your average sales price.
New Revenue Goal ÷ Average Sales Price = Number of New Customers
CRO Calculation 3: Lead Goal
And lastly, to calculate your lead goal, take your number of new customers and divide it by your lead-to-customer close rate (which is your total number of leads divided by total number of customers) percentage.
Number of New Customers ÷ Lead-to-Customer Close Rate % = Lead Goal
Here’s an example of these formulas in action:
If your website has 10,000 visitors per month that generate 100 leads — and subsequently, 10 customers each month — the website visitor-to-lead conversion rate would be 1%.
What if you wanted to generate 20 customers each month?
You could try to get 20,000 visitors to your website and hope that the quality of your traffic doesn’t decrease — although, that’s a risk you’ll likely want to avoid. Rather, you could obtain more leads from your existing traffic by optimizing your conversion rate. This is less risky and is more likely to produce better results for your bottom line.
For instance, if you increase your conversion rate from 1% to 2%, you’d double your leads and your customers. The following table is proof of this — you can see the positive impact that results from increasing your website’s conversion rate:
| Company | a | B | c |
| Monthly Site Traffic | 10,000 | 10,000 | 10,000 |
| Conversion Rate | 1% | 2% | 3% |
| Leads Generated | 100 | 200 | 300 |
| New Customers | 10 | 20 | 30 |
Notice the drastic increases in number of leads generated and net new customers when you boost your conversion rate.
Not only that, but it’s clear that generating more website traffic isn’t necessarily the right approach when trying to improve your conversion rate — in fact, this chart shows you that you can grow your business substantially without increasing traffic at all.
Hard to believe? Think about this way: Pretend you were trying to fill up a leaky bucket. If you pour more water into the bucket, you won’t fix the root cause of the issue — instead, you’ll end up with a lot of water that’s wasted (not to mention, a bucket that will never fill up all the way).
Are you ready to take the first steps toward CRO at your company? Review the strategies below and start experimenting.
CRO Marketing Strategies to Try
Here are some applicable conversion rate optimization marketing strategies to test and implement at your company.
1. Create text-based CTAs within blog posts.
While it’s considered a best practice to include CTAs in a blog post, they sometimes fail to entice visitors to take your desired course of action. Why?
Banner blindness is a real phenomenon related to people becoming accustomed to ignoring banner-like information on websites. This lack of attention coupled with the fact site visitors don’t always read all the way to the bottom of a blog post (rather, they “snack” on content), means a different approach is required.
That’s where the text-based CTA comes in handy. Here at HubSpot, we ran a test with text-based CTAs — a standalone line of text linked to a landing page and styled as an H3 or an H4 — to see if they would convert more traffic into leads than regular CTAs located at the bottom of a web page.
In HubSpot’s limited test of 10 blog posts, regular end-of-post banner CTAs contributed an average of just 6% of leads that the blog posts generated, whereas up to 93% of a post’s leads came from the anchor-text CTA alone.
2. Add lead flows on your blog.
A lead flow is another conversion rate optimization element you can include on your site. Lead flows are high-converting pop-ups designed to attract attention and offer value.
You can select from a slide-in box, drop-down banner, or pop-up box, depending on your offer. We experimented with the slide-in box on the HubSpot Blog back in 2016 and it achieved a 192% higher clickthrough rate and 27% more submissions than a regular CTA at the bottom of a blog post.
3. Run tests on your landing pages.
Landing pages are an important part of the modern marketer’s toolkit and, as mentioned earlier, integral to conversion rate optimization.
That’s because a landing page is where a website visitor becomes a lead or an existing lead engages more deeply with your brand. To optimize a landing page, run A/B tests to identify your best design and content features for audience members.
For instance, with A/B testing you can quickly and easily test different versions of your website copy, content offers, images, form questions, and web pages to determine what your target audience and leads respond to best.
Thanks to A/B testing, China Expat Health was able to increase their lead conversion rate by 79%. One of the most impactful changes was swapping out the headline “Health Insurance in China” for “Save Up to 32% on Your Health Insurance in China,” which immediately conveyed a value proposition to visitors. This proposition was then supported by customer testimonials.
Get everything you need to start effectively A/B Testing your website today.
4. Help leads to immediately become a marketing-qualified lead.
Sometimes visitors want to get right down to business, skip parts of the typical buyer’s journey, and immediately speak with a sales rep (rather than be nurtured).
There are specific actions you should encourage these high-intent visitors to complete so they can easily become marketing qualified leads (MQLs) — and they can take action through a combination of thoughtfully designed web pages, compelling and clear copy, and smart CTAs.
For instance, at HubSpot, we discovered that visitors who sign up for product demos convert at higher rates than visitors who sign up for free product trials. So, we optimized our website and conversion paths for people booking demos or meetings with a sales rep.
Admittedly, this depends on your product and sales process, but our best advice is to run a series of tests to find out what generates the most customers. Then, optimize for that process. The key here is to look for ways to remove friction from your sales process.
5. Build workflows to enable your team.
There are a number of automated workflows you can create to enable your team with the help of marketing automation software.
For example, with marketing automation, it’s possible to send automatic emails with workflows. Then, leads can book meetings with reps in one click. Meanwhile, reps receive notifications when leads take high-intent actions such as view the pricing page on your website.
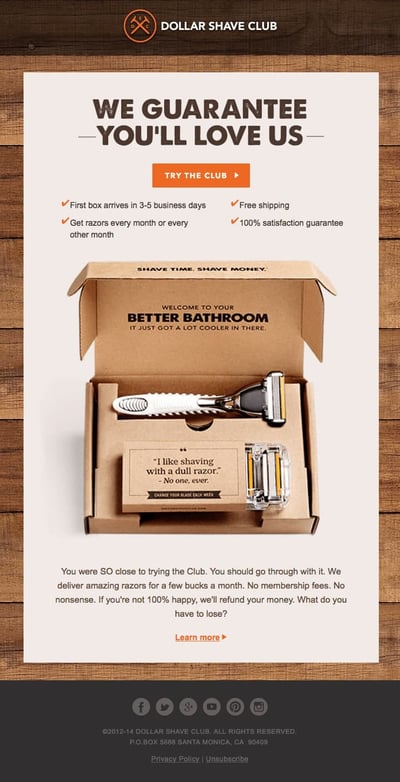
Or, if you work in ecommerce, you can send an email to people who abandon their shopping cart as a reminder. According to research from Moosend, abandoned cart emails can be very effective. They have a high open rate of 45%. Of the emails that are opened, 21% are clicked. Half of the people who clicked make a purchase.
Here’s an example of an abandoned cart email by the Dollar Shave Club.
6. Add messages to high-converting web pages.
Use live chat software to chat with your website visitors in real-time and offer support and guidance as needed. To increase conversions, add these messaging features to your high-performing web pages — such as your pricing and product pages — so leads get the information they want in real-time.
You can also make your messaging and chat bots action-based. For example, if someone has spent more than a minute on the page, you may want to automatically offer to help and answer any questions they may have (again, a live chat tool, like HubSpot, makes this easy).
7. Optimize high-performing blog posts.
Again, publishing blog articles opens the door to a big opportunity for conversions. Even more so if you already have existing blog content on your site — in fact, at HubSpot, the majority of our monthly blog views and leads come from posts published over a month ago.
To get started optimizing your blog content, identify your posts with the highest levels of web traffic but low conversion rates. (Possible causes of this issue may be related to SEO, the content offer you are promoting, or your CTA.)
In one instance, we at HubSpot added an inbound press release template offer to a blog post about press releases — as a result, we saw conversions for that post increase by 240%.
Additionally, look at your blog posts with high conversion rates. You want to drive more qualified website traffic to those posts and you can do so by optimizing the content for the search engine results page (SERP) or updating it as needed to ensure it’s fresh and relevant.
8. Leverage retargeting to re-engage website visitors.
It doesn’t matter what your key conversion metric is: The cold, hard truth is that most people on your website don’t take the action you want them to. By leveraging retargeting on Facebook and other platforms, you can re-engage people who left your website.
Retargeting works by tracking visitors to your website and serving them online ads as they visit other sites around the web. This is particularly impactful when you retarget people who visited your highest-converting web pages.
The normal inbound rules still apply here — you need well-crafted copy, engaging visuals, and a compelling offer for retargeting to work.
Take United’s retargeting campaign for example. Using insights from previous ad campaigns, United focused on reaching people who had viewed their ads and were already considering booking a vacation. To this select audience, they promoted a 15-second video ending in a call-to-action.
If viewers felt inspired enough to book their vacation, all they had to do was click on the CTA to be taken straight to the United website. This proved to be a huge success. In just one month, 52% of conversions attributed to YouTube were click-through conversions directly from the ad.
(If you’re a HubSpot customer, take a look at how the AdRoll integration can improve your conversion efforts.)
Now, let’s talk about how you can get started with CRO at your company.
How to Get Started with Conversion Rate Optimization (CRO)
Maybe you’re wondering, “Where do I start with CRO?”
Enter: PIE framework. Before starting a CRO project, prioritize your efforts by ranking each element on Potential, Importance, and Ease.
Use the PIE framework to answer the following questions for every strategy outlined in the previous section. Then, assign a score between one and 10 (one being the lowest and 10 being the highest) to each strategy.
- How much total improvement can this project offer?
- How valuable will this improvement be?
- How complicated or difficult will it be to implement this improvement?
Once you’ve assigned a score for each strategy, add up the numbers and divide the total by three — this gives a score that shows what project will have the greatest impact. Then, work on the projects with the highest scores first.
The PIE framework isn’t perfect, but it’s easy to understand, systematic, and offers a starting point for CRO collaboration and communication among colleagues.
Frequently Asked Questions About CRO
We’ve covered a lot about conversion rate optimization, but not everything. If you still have questions, then check out the answers to some of the most frequently asked questions below.
What is the purpose of a conversion rate optimization?
The purpose of conversion rate optimization (CRO) is to improve the likelihood of visitors taking a desired action on a webpage.
What is a CRO strategy?
A CRO strategy is designed to convert more of your visitors into paying customers. While each CRO strategy will vary company by company, the general steps will not. You have to identify key metrics and your target audience. Then you have to collect user feedback and other data to decide what you’re going to test. Finally, you’ll run A/B tests to improve different pages and parts of your site for conversion.
What are CRO tools?
CRO tools are designed to simplify or automate the process of optimizing your conversion rate. They might help with lead capture, research, analytics, mouse tracking and heat maps, feedback, or running experiments.
What is a CRO test?
A CRO test involves adding, re-arranging, and redesigning elements on your website in order to maximize your conversions. Different CRO tests might focus on optimizing the copy, design, or placement of your CTAs, or the length of your headlines, among other elements.
Begin Using CRO
There are many “best practices” out there when it comes to CRO but, ultimately, you need to find out what your customers respond to, and what drives results for your business.
Keep these three follow-up actions in mind when getting started with CRO today:
- Use the three formulas to start the CRO conversation.
- Experiment with CRO strategies to discover what works for your business.
- Leverage the PIE framework to help prioritize your strategy.
Editor’s note: This post was originally published in January, 2019 and has been updated for comprehensiveness.

How to Add HTML Embed Codes to Your Website [Quick Tip]
If you want to curate others’ content from social media or just make your own visual social media content work harder for your overall content strategy, you need to know how to embed HTML code onto your blog or website.![→ Click here to download our free guide to digital marketing fundamentals [Download Now].](https://no-cache.hubspot.com/cta/default/53/0a42501f-0096-4817-9fbc-923540fe37a6.png)
But wait a second … before we get into the nitty-gritty of this tip, what the heck does “embed” mean? And what is HTML? If you don’t know how to code at all, no worries — embedding external content is extremely easy. Let’s take a second to break down the basics.
What does embed mean?
Embed means to integrate external content into another website or page. You embed something when you place a block of code — called an embed code — into the HTML editor of another website. When you hit ‘Save’ or ‘Publish,’ the media then renders on the published page.
Embedded content is referenced with HTML. HTML is one of the most basic languages used on the web to design and lay out web pages.
You often see this code when you’re in the “back end” of your blog post. There’s where you’ll add your embed code.
Most social and multimedia websites have an option to generate an embed code right in each individual post. Here’s an example of an embed code for a HubSpot YouTube video:
And here’s the embedded result.
Want to do the same thing on your blog posts and pages? Let’s go over how you can generate an embed code for the top social sites.
Below, we cover these steps in more detail for each platform. In general, you’ll want to:
- Generate the embed code.
- Access your content management system and paste the embed code in your HTML viewer.
- Finished! You have embedded content into your website or blog.
Let’s dive into each step.
1. Generate the embed code.
Before embedding external content, you must first generate an embed code for the post or page you want to embed on your website.
We’ll go over how you can do that on most of the major social and content networks.
Embed a Facebook Post
To embed a Facebook post, do the following:
- Navigate to Facebook on your desktop browser and go to the post that you’d like to embed.
- Click on the three dots on the upper right-hand corner of the post.
- On the drop-down menu, click Embed.
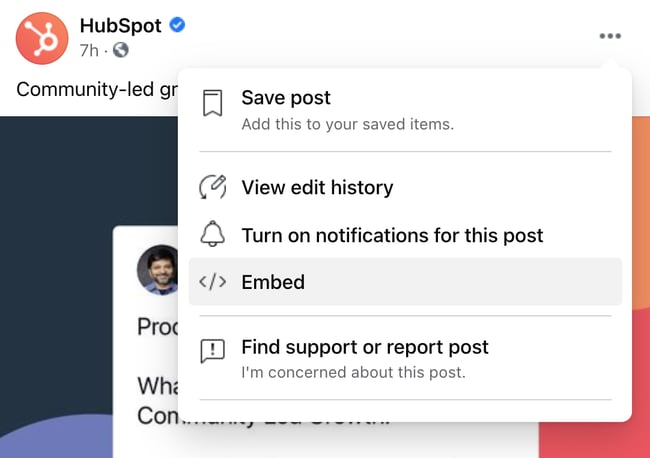
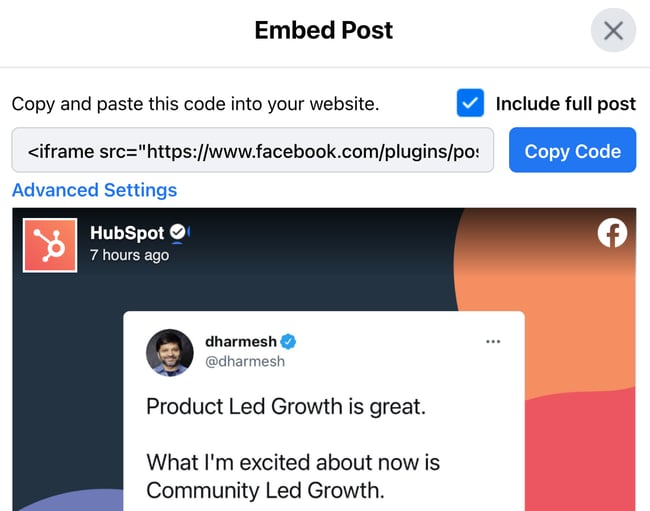
- A pop-up will appear, where you have the option to include the full post and access advanced settings. For beginners, we recommend leaving the options as they are and simply clicking Copy Code.
- Finished! You’ve got your embed code.
Embed an Instagram Post
Want to embed an Instagram post? The process is similar to Facebook’s. Note that you can only embed posts from the desktop version and not the mobile app.
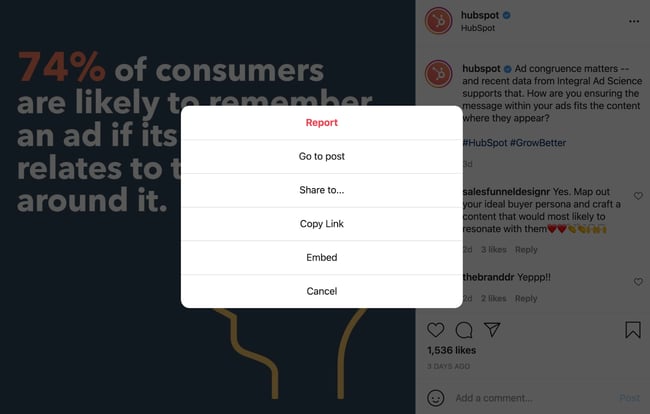
- Click the three dots in the upper right-hand corner of the post.
- A popup will come up with several options. Click Embed, the second-to-last option.
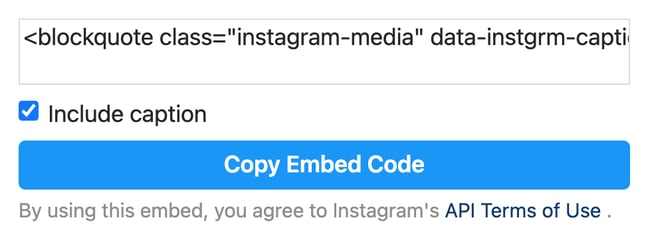
- A pop-up will come up with your embed code. You have the option of including or excluding the caption.
- After you’ve finished customizing your options, click Copy Embed Code.
- Complete! You’ve got your Instagram embed code.
Embed a YouTube Video
YouTube videos can take your blog posts to the next level, and the best part is that you can embed its wealth of content on your blog posts for free.
To do so, take the following steps:
- Navigate to the video that you’d like to embed on your website.
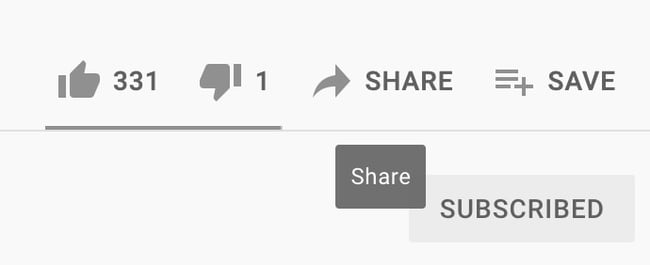
- Under the video, next to where the likes are located, click Share.
- A pop-up will come up with several options, including sharing the post to other social networks. Click Embed.
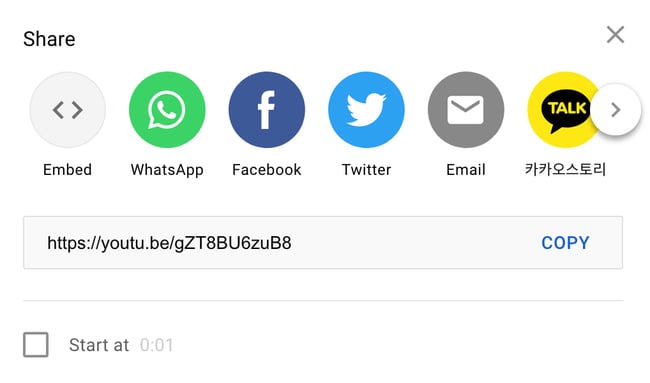
- YouTube will create an embed code, which you can customize. You can start the video at a certain point or hide the player controls.
- After choosing your options, click Copy on the lower right-hand corner of the pop-up.
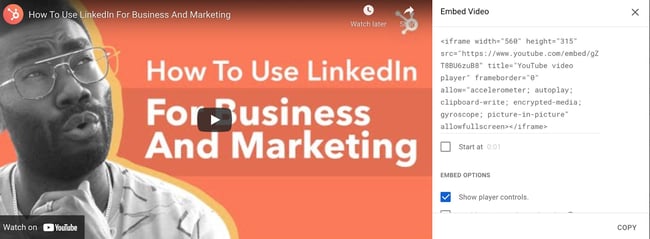
- Complete! Your YouTube video is ready to get embedded.
Embed a Tweet
If you embed a Tweet on your website pages or blog, you can generate engagement for your Twitter profile without relying on your Twitter followers. Website visitors can engage with your Twitter content, too.
To embed a Twitter post, do the following:
- On a desktop browser, navigate to the post that you’d like to embed.
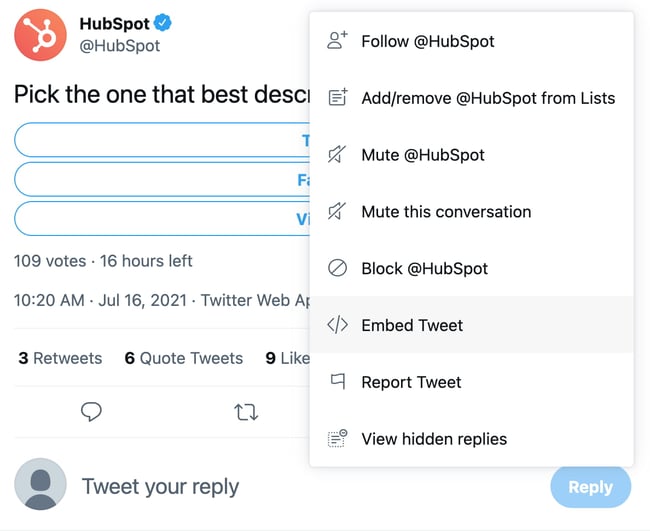
- Click on the three dots on the upper right-hand corner of the post.
- A drop-down menu will appear. Click Embed Tweet.
- Twitter will take you to an external page on publish.twitter.com, where you can then further customize the look of the Tweet before embedding it on your site. For instance, you can set it to dark mode and change the display language of the Tweet.
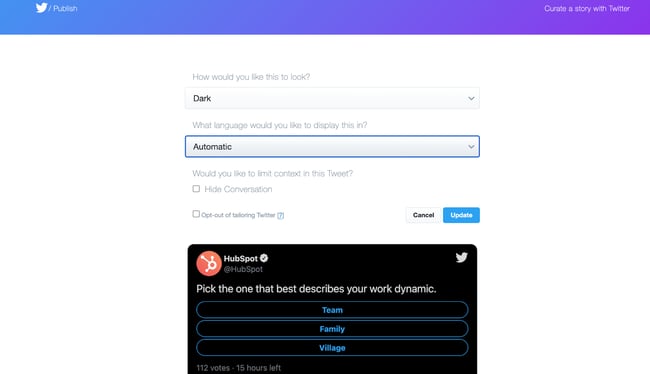
- Once you’ve customized it, click Update.
- Click Copy Code.
- Finished! The Tweet is ready to embed on your site.
There’s another way to generate an embed code for Twitter. Go to publish.twitter.com and insert the URL of the post that you’d like to embed. Twitter will then generate the embed code, and you can customize it using the same process as the last method.
Embed a Pinterest Post
Embedding a Pinterest post can lead website users back to your Pinterest profile and help you grow your Pinterest following. To get started, do the following:
- Navigate to the Pinterest post you’d like to embed.
- Click on the three dots right next to the image (or under the image, if you’re using the mobile website).
- On the drop-down menu, click Get Pin embed code.
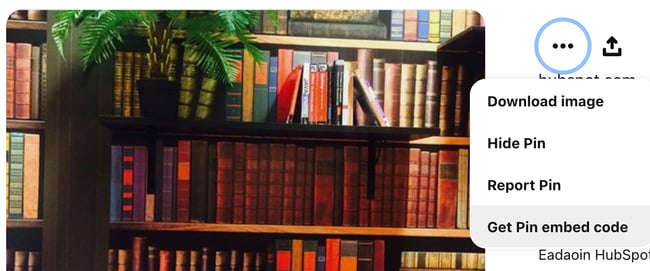
- A pop-up will appear with the embed code. You have the option of creating a small, medium, large, or extra-large embedded pin.
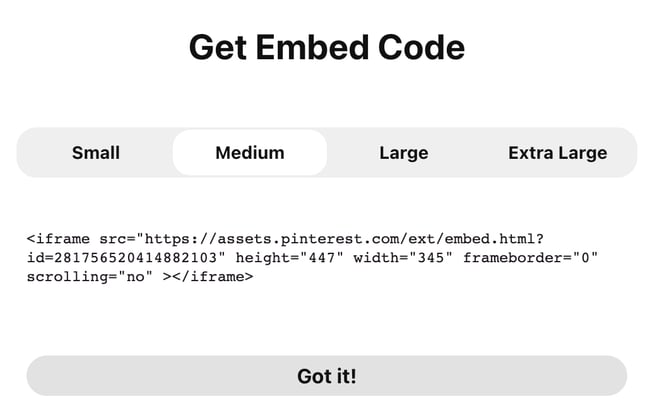
- Once you customize the size, highlight the code and click Command + C or CTRL + C.
- Finished! Your Pin is ready to get embedded.
Embed a SlideShare Presentation
While SlideShare presentations are not as popular these days, they can still be a handy multimedia tool for spicing up blog posts and pages. Here’s how to embed a SlideShare presentation:
- Go to the SlideShare presentation you’d like to embed.
- Click Share under the presentation.
- In the same window where the presentation appears, you’ll see the option to share it via social channels. The embed code will be underneath that.
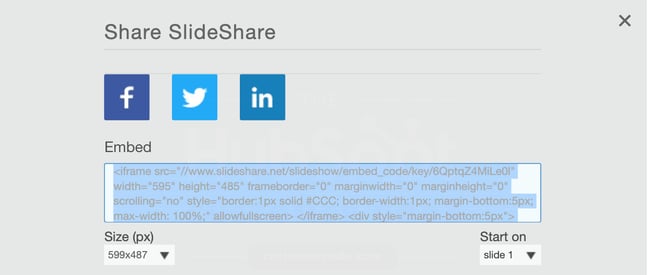
- Choose the size of the embed window and which slide you’d like the presentation to start on.
- Highlight the embed code and click Command + C or CTRL + C.
- Ready! You can now embed the SlideShare presentation in a web page or post.
Embed an External Webpage
Don’t want to embed a social post but rather a web page? You can embed an external web page using the iframe HTML tag.
All embed codes, including the ones for social sites, use iframe tags. This is what they look like:
You can use these same tags to embed an external webpage. Here’s how:
- Navigate to the webpage you’d like to embed into your site.
- Open up the notepad app on your computer. Paste the following code into it:
- Return to the webpage and copy the URL.
- Paste the entire URL where it says url in your iframe code. Don’t forget to include https:// at the beginning of your URL and to place the link inside the quote marks. Here’s what your code should look like:
- Change the width and height of the frame if desired.
- Copy the entire line of code. After, the webpage is ready to get embedded on your website.
2. Access your content management system and paste the embed code in your HTML viewer.
Although every CMS is different, you can probably find the HTML viewer with similar steps. We’ll go over how you can do it in CMS Hub and WordPress.
CMS Hub
In CMS Hub, you actually don’t need to add your embed content using the HTML editor (although you have the option to). Here’s how:
- In your HubSpot dashboard, navigate to Marketing > Website > Blog. If you’re planning to add the code to a website page, navigate to Marketing > Website > Website Pages.
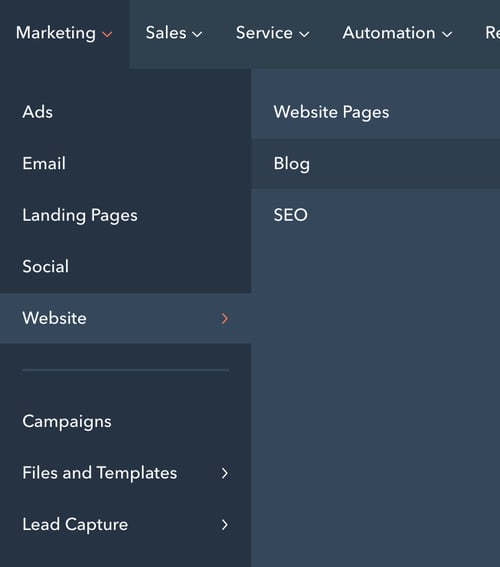
- Find the post or page that you’d like to add the embed code to. Hover over it, then click Edit.

- Click into the module where you’d like to add the embed code. An options bar will appear near the top of the screen. In the right-hand side, click Insert.
- Choose Embed from the drop-down menu.
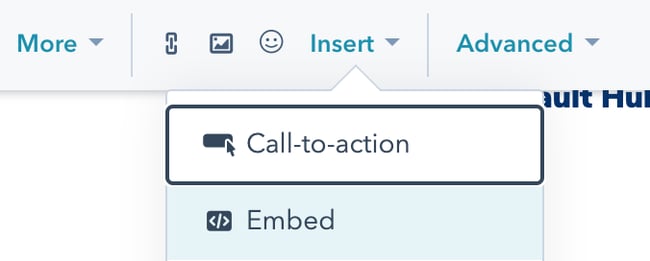
- A pop-up will appear. Paste the iframe code into the text bar.
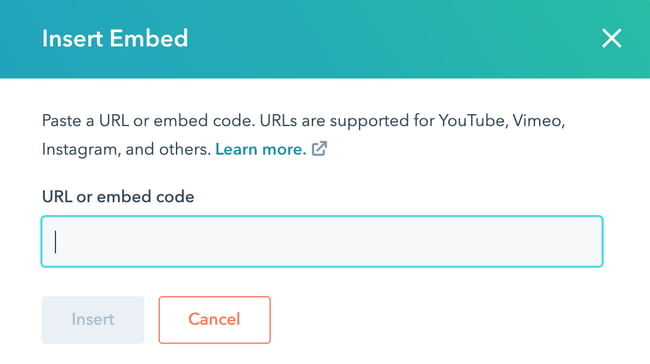
- Click Insert.
- Finished! You can edit the width and height of the embed content to customize it further.
To access the HTML editor, complete steps 1-3 above. On the top options bar, click Advanced > Source Code. You can then paste your embed code manually. Note that the end result is the same.
WordPress
To paste an embed code into your WordPress website, use the following steps:
- Access your admin area and go to either Pages or Posts.
- Click the title of the post that you want to add the embed code to. This action will take you to the post editor.
- Click the Text tab on the upper right-hand corner of the text editor.
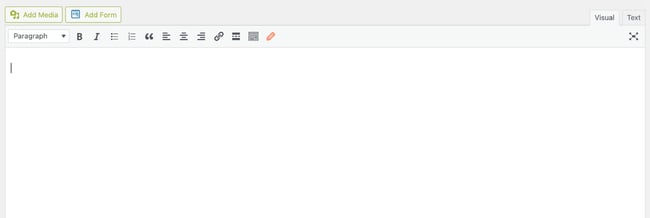
- Paste your embed code where you want the module to appear.
3. Finished! You have embedded content onto your website or blog.
Once you reload the page, your embedded social post will appear.
Add Embedded Content to Increase User Engagement
By embedding external content on your pages and posts, you can increase engagement on your website and get your site visitors to interact with the content you post on social media. The best part is that it’s easy to do — simply generate the embed code, paste it into your HTML editor, and watch your user engagement grow.
Editor’s note: This post was originally published in September 2013 and has been updated for comprehensiveness.

Facebook Text Overlay: How to Use the 20% Rule to Improve Your Ads
The best billboards demand your attention with bold fonts, in-your-face messages, and bright, eye-catching graphics. The best Facebook ads take the exact opposite approach.
If you want to reach and engage with potential customers on Facebook, you need to create ads that blend as seamlessly as possible into the rest of the content on their newsfeeds. This means focusing on simple, high-quality images, straightforward messages, and most importantly: minimal text.

Facebook has found that the best performing ads include images with little to no text. Formerly, they had a “20% rule,” which stated that in order to run an image-based ad on Facebook, your image must contain less than 20% text. It even created a text overlay tool to help advertisers determine whether their images had too many words.
The 20% rule is no longer a requirement, and the Facebook overlay tool is inactive. However, it’s still smart to follow the 20% rule and keep text to a minimum in your image-based ads.
It’s important to note that you should use the 20% rule only for the text contained within images in your ad. It does not include text on your ad outside of images, like the description copy or call-to-action button.
There are a few exceptions to the 20% rule, including images of book covers, album covers, event posters, video games, and some product images that contain text (e.g., a cereal box).
Text-based logos are not an exception to the 20% rule. You should count your logo when deciding how much text to include in your image.
So, why exactly did the Facebook 20% rule exist, and why is it still relevant today? It all comes down to what users want to see and engage with in their newsfeeds. Ads with less overlay text perform significantly better than images crowded with text, so sticking to the rule creates a better experience for both users and advertisers.
Facebook Text Overlay Tool
The Facebook text overlay tool is no longer active, but it’s still wise to carefully choose the text you’ll include in your images.
While you’re creating an ad, it can be tricky to evaluate the exact percentage of text covering your image. The following examples will show you some of the ways you can add text in a way that will naturally generate engagement.
Before designing your ad, be sure to review specs and sizes for your images and Facebook’s guidelines for image-based ads.
1. Ad With Acceptable Text Overlay
 Your best approach when creating a Facebook ad is to use little to no text.
In this example of an ad image, there’s only a small text-based logo and no other copy. This image contains 4% text.
An ad with a simple image like this will blend more easily into users’ news feeds and is much more likely to gain exposure and engagement among your target audience.
The best part is that it might strike curiosity because it doesn’t share much; instead, viewers will have to read the description to find out what the ad is about.
2. Ad With Minimal Text Overlay
 In this next example, there are two lines of text, bringing the text percentage to 12%. The logo has been removed from the corner.
It still works because the text doesn’t cover 20% of the image. The text also helps the viewer understand what the ad is about.
Nevertheless, consider adding the copy into the body of your ad instead of your image. Since the image and the description are visible at the same time, you can use the body only to describe your offering.
3. Ad With Excessive Text Overlay
 This final example is exactly what Facebook does not want to see. It contains a whopping 44% text-to-image ratio.
While the copy is well-written and the offering is clear, this ad contains too much text over the image. The information displayed here could easily be incorporated into the body copy of your ad, creating a much cleaner look in users’ news feeds.
It might be tempting to throw important information onto your images like this, but you risk alienating users who are turned off by busy copy.
Now that you have an idea of what a good ad looks like, how can you put it into practice in your own ad? Let’s take a look.
Facebook Text Overlay Best Practices
The best way to capture users’ attention on Facebook is to use an eye-catching image with no text.
The 20% rule isn’t just an arbitrary recommendation — it helps advertisers reach their target audiences more effectively, and prevents users’ news feeds from becoming overwhelmed with disruptive advertisements.
If you do want to add text to your image, you should use the following best practices for overlaying text over your Facebook ads.
1. Choose the right font size.
Believe it or not, font size is even more important than the amount of text you overlay over your image.
Smaller font sizes naturally won’t take up as much space, reducing your text-to-image ratio. Bigger font sizes will make you exceed the 20% rule straight away, even if you’re only including two or three words. That said, you don’t want to make the text too small; otherwise, viewers will have to squint to read what it says.
The font size you choose will depend on the size of your image and whether you’re adding a heading or a whole sentence. For headings, try to stay under 42 pixels; for sentences, try to stay around 24 pixels. Play around with font sizes to find what best works for the image.
2. Include only a heading or one line of text.
There’s no reason to include more than one line of text in your Facebook ad. You have the body of the ad to include enough context and information for the viewer to click your link.
If you add text, consider only adding a heading — such as an offer, a call-to-action, or a discount. That’ll maximize the impact of the text and ensure viewers see something that will compel them to click.
For instance, “Buy 1 Get 1 Free,” “Apply Now,” and “30% Off” are all eye-catching phrases that will warrant a second look and don’t take up too much space. That brings us to the next point: Choose only the best and most eye-catching text to add to your image.
3. Choose eye-catching, impactful text.
When adding overlay text to your Facebook ad, be sure to choose a line of text that will 1) Catch your target audience’s attention and 2) Hint at the value they’ll extract if they click through to your offer.
In the body of the ad, you can go into greater detail about your product or offer. But in your image, include only the text that will help someone decide whether they want to read more.
4. Use an alternative text overlay tool to see your text-to-image ratio.
While Facebook’s text overlay tool is no longer available, you can use an alternative that mimics Facebook’s original tool. We recommend trying these:
They’re virtually identical in functionality, so simply choose the one that’s most convenient for you and your browser.
To use them, upload your image and select the squares that have text. On the right-hand column, the tool will tell you whether you’re above or under the 20% text-to-image ratio. That way, you know for sure whether you’ve added too much text to the image.
5. Take advantage of a grid to align the text.
In a free tool such as Canva, you can typically overlay a grid over your design as you’re creating it. Simply go to Elements > Grid and scroll until you find a grid that best works for your design. (Be sure to lower the transparency of the grid so you can see your ad beyond it.)
Use the grid as a guiding tool for aligning your text and ensuring it doesn’t take up too many boxes. If your grid has nine boxes and one line of text takes three boxes horizontally, then you know that the text is too big. If it only takes up one box, it might be too small.
Without a grid, you might lean on gut feeling only — and while your gut feeling can be of great help, it’s best to approach text overlays with as much exactitude as possible.
The 20% Rule Will Help You Create Better Facebook Ads
While Facebook no longer requires advertisers to adhere to the 20% rule, it’s still a valuable guideline for adding text to your Facebook ads. Keep text to a minimum and you’ll ensure your Facebook ad packs as much impact as possible, significantly boosting your ROI and encouraging viewers to engage with your brand.
Editor’s note: This post was originally published in June 2019 and has been updated for comprehensiveness.

18 Impressive Product Demo Videos You’ll Want to Copy
In marketing these days, you can’t swing an enthusiastic micro-influencer without hitting someone who’s talking about video content. And it’s not without merit.
A recent Wyzowl study revealed that 69% of consumers prefer to watch a short video to learn more about a brand’s products or services.
With 84% of people saying they’ve been convinced to make a purchase based on a brand’s video, it’s clear video marketing is the future and product demo videos are a lucrative path forward.
![→ Download Now: Free Product Marketing Kit [Free Templates]](https://no-cache.hubspot.com/cta/default/53/08b5e1f4-5d26-405b-b986-29c99bd0cb14.png)
There are many different types of product demo videos, so I’m sharing a few of my favorites below, along with tips on how to get started on your own product demo video.
Want to skip straight to the videos? Click here.
1. Identify the goal.
Purchases? Subscriptions? Education? Brand awareness? Decide what your video is trying to achieve and what you want the viewer to walk away with.
What action do you hope the viewer takes after watching your video, and what business need does it fulfill? For example, “After watching our product demo video, we hope the viewer submits a demo request form.”
2. Determine your audience.
Has the audience for this video purchased with you before? Are you introducing a new product or feature to them? Or, is this video reaching people who have never heard of you? What will this audience be concerned with? How long will they want to watch? What buyer persona will you be gearing this video for?
All of these are important questions to answer.
For example, let’s say you’re introducing software that regulates the temperature of various areas in your office.
The audience for your video might be harried office managers who are constantly fielding requests to turn the temperature up or down.
They’re concerned with keeping their colleagues comfortable without breaking the bank on electricity costs.
3. Set a budget and a timeline.
Do you have $7,000 or $80,000 to make this product demo video?
Identify your budget so you know how to proceed. This is also the time to set expectations. If you have a $500 budget, you’re not going to come out with a video on par with Apple’s latest release – and that’s alright.
Oh, and don’t forget to outline when you need this video to be completed. Even the biggest budgets can run up against roadblocks if the timeline is too limited.
4. Decide between in-house or agency.
This decision will likely be dependent on your budget. If you have a lot to work with, interview agencies that can give you quotes and creative pitches for your project.
If you have a small budget, you can still create a great video with a smartphone that has a high-quality camera. You can also screen record your computer to use as B-roll as you navigate through your platform.
Work with what you have and be proud of whatever you create.
5. Structure your video.
Will you tell a story? Highlight pain points? Use text or visuals only? Decide how you want to communicate your goal and how you’ll bring it to life.
If you’re working with a creative agency or freelance videographer, they may help you define the structure. If you’re going it alone, use videos like the ones we’ve listed below to inspire you and define which format will work best for your product and goals.
Another factor to consider is length. How long should a product demo video be, you ask? Two minutes is the sweet spot. However, you can go up to five minutes, if your demo goes into detail about use cases and features.
6. Choose between animation and live-action.
Animation can sometimes be a little cheaper than a live-action video.
Work within your budget and skill level. In addition, narrow down which option best highlights your product and the scope your project requires.
7. Write a script.
The script is a crucial part of your video. It defines the tone, pace, and message.
Start with a project brief, move on to an outline, and navigate your script, section by section, making sure it speaks to the goals you’ve previously outlined.
Call out opportunities for B-roll throughout, and always conduct a verbal run-through before getting behind the camera. This will help you see if anything sounds unnatural and should be reworked.
For more tips and a video script template, check out this blog post and accompanying video on how to write a video script.
8. Create a marketing plan.
Once you’ve shot, edited, and finalized your video, it’s time to decide how you’ll share it with your audience. YouTube, your website or campaign landing pages, and special email campaigns are all great channels for distribution.
But don’t overlook less obvious opportunities, like including your video in your email signature, sharing it in partner blog posts, and incorporating it into your sales team’s pitches.
Product Demo Video Examples
1. The Lip Bar
In this demo, a model shows makeup users how to use one of the brand’s products: the “Caffeine Concealer.”
At just under five minutes, the model incorporates the product into their makeup routine and explains the application method as they go.
Here’s why this works: While the demo allows viewers to see what the product will look like in real life, it also helps show consumers just how easy it is to add it to their daily beauty routine.
2. Airtable
This classic product demo video uses animation to show how users can benefit from it.
What this video does well is demonstrate several different use cases, taking a broad, top-of-the-funnel approach that will attract the masses.
Airtable also do something else that’s incredibly smart. As the seconds tick by and viewers hypothetically click out of the video, the information shared gets more specific, with specific tactics and features.
Airtable knows if someone has stuck around over one minute into their demo video, this is likely a qualified lead who wants to learn more.
3. Zendesk Sunshine
Zendesk leads with pain points in their product demo video.
“Customer relationships are complicated … made up of fragmented pieces of what you know about your customers … it’s kind of all over the place,” a narrator explains. But Zendesk gets it: “What seems like chaos is actually everything you want.”
The viewer immediately feels like Zendesk understands them. It’s a full 50 seconds into the video before Zendesk even introduces a solution.
We never actually see the platform at work, but that’s not really the goal of this video. That’s what makes it an effective demo.
4. SurveyMonkey
At nearly two minutes long, this product demo packs a powerful punch with visuals of SurveyMonkey’s benefits and features as well as a walk-through of the product interface.
Why it works: Viewers see just how easy it is to send a survey using SurveyMonkey. They even see how it integrates with other platforms like Slack.
This is a workhorse of a demo video, but the viewer witnesses how SurveyMonkey can integrate into their daily workflow – and how easy the product is to use, from sign-in to send.
5. Headspace
Is there anything harder to sell on the internet than meditation? Headspace makes it seem easy with their modern, relatable animated product demo video.
They offer a “healthier, happier life” and show you how the app works for a variety of users with differing goals and times.
This demo works well because it’s an inclusive video that communicates a lot without overwhelming the viewer.
6. Esusu
Esusu, an app created by Forbes 30 Under 30 social entrepreneurs Abbey Wemimo and Samir Goel, aims to help people in marginalized locations with financial planning. The demo created by the company gives viewers a look inside Esusu’s platform and the tools it has to offer.
Specifically, this demo walks through how families can use the platform together to build each member’s credit, save funds together, or send funds to each other.
One great thing about the intro above is that it establishes a pain point by asking the audience if they’ve ever dealt with bad credit or poor savings. Then, it highlights exactly how Esusu can help them.
This demo is also a great example of how a quick and simple tour of an app can show potential users exactly what they need to know about navigating and using this type of financial planning app.
7. Apple
This glossy product video introduces the new iPhone 12 by showing what it can do. Simple text alerts the viewer to the features and capabilities through vivid visuals.
The goal of this product demo is to wow rather than educate, and that’s exactly what it does.
8. Slack
Slack uses this brightly hued video to break down a common misconception about their platform: that it’s only for sending private messages. They walk viewers through how teams can communicate using their interface.
“It’s way more than just a place to talk,” explains the actor, “we keep all of our files here too.”
The video is feature-heavy, but the actor chimes in with how those features translate into benefits as he walks viewers through a demonstration of Slack.
A simple “Get started with Slack, today” closes out this informative video with a clear call-to-action.
9. The Origins of Nike Free
This product demo tells the origin story of the Nike Free running shoes.
What works well here is the context the brand provides for the idea and vision behind the product.
The shoe creators share a bit about how the shoe was designed and call out benefits like, “more natural movement” and “nice, modern evolution.”
A simple tagline at the end reads, “Engineered for modern motion.”
10. Duolingo
Duolingo kicks things off with social proof from The Wall Street Journal: “Far and away the best free language-learning app.”
What follows is a description of how the platform works, backed with more data on how effective it really is.
If you want to prove that your product works, sometimes facts are more alluring than a demo of the product itself.
11. IKEA Place
There’s nothing wrong with stating your purpose upfront.
“Hey, IKEA would like everyone to know about Place, our new augmented reality app,” explains this demo video.
What follows is a demonstration of the app and a video montage of people struggling to design and furnish new spaces.
“We want to make it easier for people everywhere to imagine a better place,” the narrator explains.
Why this works: It addresses a pain point and explains why this product is here to solve it. Not every demo has to use this formula, but it is a great place to start.
12. NoseFrida
Your baby is cute until she’s not.
The narrator in this demo explains what happens to a baby’s nose when they’re sick – and why your baby gets fussy.
Immediately, he’s identified the viewer’s pain points and explained the problem with NoseFrida’s competitors.
The narrator begins to explain how to use the NoseFrida, a device that allows parents to physically suck snot out of their baby’s nose and effectively ruins your days of carefree milkshake sipping forever (take it from me).
It’s here that the company does something brilliant. They know their customer’s biggest purchasing block is the gross-out factor this product elicits, so they confront it head-on.
“Breathe easy, we know what you’re thinking,” the narrator says. They then explain how NoseFrida is designed to be hygienic and safe.
Know your product has a big red flag for customers? Try addressing it bravely, like NoseFrida does, instead of tip-toeing around the elephant in the room.
13. Craftsy
How do you get people to part with their most valuable asset: their free time? Online learning platform Craftsy, formerly known as Bluprint, has the right formula.
They first engage users by letting them know they have something for everyone. The narrator says, “Whether you’re just getting started with a craft or looking to advance your skills, our world-class instruction is here to help.”
The video then outlines the various lessons consumers can take, from baking to knitting, emphasizing the value of having seasoned instructors to guide them.
14. Sphero
Are you known for one product but want to introduce another? Sphero knows a little about that.
A few years ago, the brand created a robot called BB-8 for a little-known movie called Star Wars: The Force Awakens. Lucky for them, I hear that panned out.
In a Kickstarter video for their newest robot, they begin by featuring the iconic BB-8 robot that skyrocketed their success. Once the viewer knows who they are, they present their new robot: The Sphero RVR.
The rest of the video features the robot’s engineers speaking about what their new creation does and why it’s special. We believe them because they’ve tethered this new creation to their past authority.
What works well here is that Sphero establishes its credibility straight on by referencing past success then introduces their new product and its features.
15. Ring Door View Cam
This is another great example of showing viewers instead of telling them what your product can do.
The video shows everyday people using Ring’s Door View Cam in a variety of ways.
We see them use the mobile interface, benefit from the speaker, and avoid danger using the camera.
Many times, demos outline the benefits but what’s better than seeing it in action? That’s why use cases are great for demos.
16. Peloton
This product video begins with an origin story of the Peloton bicycle and quickly moves to the benefits (i.e., you can ride it in your bedroom without waking your partner).
Before you know it, the video is speaking to viewer pain points, “One of the challenges with boutique fitness is that it can be inconvenient.”
Their solution? Peloton.
Thousands of classes, experienced instructors, community, and ease of use.
Close-ups of the machine in use highlights certain features, but what this video demonstrates most is the experience you’ll have using Peloton.
“This is what I’ve been missing,” says one video participant.
I can’t help but think that’s the primary goal the makers of this video had for their viewers.
17. Zoom
This is a classic example of a product demo video. A solid, feature-heavy script that immediately jumps into how professionals can use and benefit from Zoom.
What works well here: The viewer sees the product being used as they listen to how it works, and they’re left with a clear picture of what Zoom can offer them.
18. Gusto
I’ve saved the most comprehensive product demo video for last. This example, from HR software provider Gusto, clocks in at an impressive five minutes and fifty-six seconds.
What follows is a careful walk-through of the product, its benefits, and how to pick the perfect plan.
Viewers who make it to the end likely signal to Gusto that they’re ready to speak with a salesperson. This video probably works best for buyers further along in the buyer’s journey.
Key takeaway: If your goal is to introduce your product/service to new audiences, stick with a shorter option that’s quick and easy to consume.
Using Product Demo Videos in Your Marketing Strategy
Product demo videos might take a bit of time and planning to create, but once they’re live, they can be an effective piece of your brand’s overall video marketing strategy.
As consumers seek out more video content while researching products, marketers are also finding that videos are their most effective asset. Like them, you’ll want to leverage video marketing and product demos to guide your prospect to the customer stage.
Want to create your own video? Check out our ultimate guide to video marketing.
Editor’s Note: This blog post was originally published in June 2019, but has been updated for comprehensiveness.

40 of the Best Email Subject Lines We’ve Ever Seen
I’d venture to guess you get tons of emails in your inbox every day.
From coupons to daily deal sites, from newsletters to your mother wanting to know when you plan to visit — it’s a lot to sift through, never mind actually open.

So what makes you want to take that extra step to actually open an email? Often, it’s the subject line. After all, it’s your very first impression of the email. From that first impression, you’ll do your best to judge the content inside.
If you’re an email marketer, or just someone who happens to send emails on behalf of your company, you don’t want to be one of those ignored (or deleted) emails in your subscribers’ inboxes. You’ve got to make sure your email subject lines are top-notch — and what better way to learn how to do that than by examining some great examples of subject lines?
Let’s take a look at a few examples that, old or new, we’re crazy about — plus what makes them so great.
(While you’re at it, check out our Out-of-Office Email Generator to make your email address even more delightful to your contacts.)
1. “Uh-oh, your prescription is expiring”
Sender: Warby Parker
Not too long ago, a HubSpot alum received this email two weeks before he needed to renew his prescription — talk about great timing. And when your eye prescription is expiring, it happens to be an excellent time to upgrade your glasses. By sending an email at the right time, Warby Parker increased its chances of this email getting opened.
But timing isn’t the sole reason we included this example. This subject line is brilliant because it appeared at the right time and with the right tone. Using conversational words like “uh-oh,” keeping the subject line sentence case, and leaving out the period at the end, the subject line comes across as helpful and friendly — not as a company trying to upsell you.
2. “Best of Groupon: The Deals That Make Us Proud (Unlike Our Nephew, Steve)”
Sender: Groupon
It’s hard to be funny in your marketing, but Groupon’s one of those brands that seems to nail it again and again. After all, who can forget this classic unsubscribe video?
This subject line is no exception. The quip, “(Unlike Our Nephew Steve),” actually had us
laughing out loud. Why? It’s completely unexpected. The first part of the subject line looks like a typical subject line you’d get from Groupon, highlighting a new deal. The parenthetical content? Not so much — making this one a delightful gem to find in your inbox.
3. “👗 Free (Cool!) Clothes Alert 👖”
Sender: Clover
First of all, we have a not-so-secret love for emojis in email subject lines. Personally, I’m partial to turquoise — so when I see an email implying that I might somehow be able to obtain free turquoise clothes, chances are, I’m clicking.
That’s part of what makes this subject line work. It draws the recipients’ eye by using visual content (emojis), and it hints at an offer of something free. That hints at an incentive to open the email: There’s something to gain inside.
4. “The timer’s going off on your cart!”
Sender: King Arthur Flour
Similar to Warby Parker, this subject line makes use of urgency. If I don’t take action on my King Arthur Flour shopping cart — like actually buying the items — it will be cleared, and I’ll have to start all over again.
Okay, so maybe this is a low-risk scenario. But when it comes to my baking goods, I personally don’t like to take any chances, or risk forgetting what I was going to buy. That’s where the personalization aspect of this subject line comes in: King Arthur Flour — especially its online shop — tends to attract both professional and home bakers who take all things culinary a bit more seriously than, say, someone who only buys flour on occasion from the supermarket. And wouldn’t you know? Those are the same bakers who probably don’t want to spend time building their shopping carts from scratch.
The moral of the story: Know your audience when you’re writing email subject lines. Is there something that they take seriously more than others? If so, incorporate that into your copy.
5. “What Did You Think? Write a Review.”
Sender: REI
I received an email with this subject line about a week after buying a portable stove at REI for a camping trip I was going on. I had just gotten back from that trip, too. It was perfect timing for them to ask me what I thought of it.
Companies ask satisfied customers to write reviews of their business all the time. But when you specifically send these requests to the people who just purchased something from you, you’re being smart with your mailing list and reaching recipients whose interest is still warm.
Another reason this subject line works? It’s not expecting a good review. REI is genuinely asking me what I thought of the stove I bought. Maybe I hated it (though I didn’t). The company just wanted me to speak up.
6. “Important Weather Advisory”
Sender: RCN
Any time we see a weather-related alert, our ears perk up. In RCN’s case, it isn’t just a way to lure recipients into opening an email. The subject line above is RCN’s way of updating its customers to potential power outages and driving attention to the brand that provides them with cable and Wi-Fi — even during inclement weather.
If you can hitch your email marketing campaign to an event you know people pay attention to, and have something helpful to offer in response, you’ll see your email open rate soar.
7. “1,750 points for you. Valentine’s flowers & more for them.”
Sender: JetBlue
It’s such a specific number … 1,750 … of course you’re going to open this.
Coming from an airline, an offering of “points” might as well be gold to someone who likes to travel. And if that recipient also has a significant other, sending this email leading up to Valentine’s Day is a home run.
The best part about the subject line above is how particular JetBlue was about the number of points available. Instead of, say, “20% your next return flight of 1,000 miles or more,” this subject line gives it to you straight: 1,750 points, and all you have to do is buy flowers for your loved one. You’re already wondering how far you can fly with 1,750 points, I can tell.
8. “Rock the color of the year”
Sender: Etsy
In six words, Etsy was able to promote a product solely by its color, and inform you that there is apparently a “color of the year.” The email is truly too intriguing not to open.
Etsy is an ecommerce website for user-created marketplaces, and the reason we were impressed by its subject line above was because of the way it uses mystery to drive value into a suite of products. This email isn’t an invitation to buy clothing or jewelry; it’s an invitation to find out what the color of the year is.
9. “*Don’t Open This Email*”
Sender: Manicube
Ever been told to not do something? Being asked to refrain from something can actually have the opposite effect — you now want to do that thing even more.
That’s the strategy behind Manicube’s subject line. It’s a simple but effective way to make people curious enough to open your email. (Just be sure that the contents of your email actually have something worthy of that subject line.)
10. “How to live at home 24/7”
Sender: Feather
If you’re anything like me, the COVID-19 pandemic had you wearing PJs from day to night, only changing when you had Zoom meetings at work. As a social distancing precaution, you likely used delivery services instead of going out and getting food on your own — which means that you were effectively living at home 24 hours per day, seven days a week.
This email from Feather, a furniture rental store, perfectly encapsulates a frustration many of us faced: How do you live at home 24/7 without feeling like you’re going crazy? With this subject line, Feather promises to help you find a solution by using furniture that makes it easier to stay at home for extended periods of time.
Try it: Use a “How To” subject line to tell recipients what they can achieve with your products. Then, in your email, include links to the products that will help them achieve those goals.
11. “What Can You Afford?”
Sender: Zillow
Imagine getting this subject line in your inbox from a website showing apartments for rent. It’s both exciting and encouraging (“Here are a bunch of apartments right in your budget. Yay!”), but also kind of competitive — pitting your cash against what the market offers. Would you click it? I certainly would.
Personalizing emails to cater to your audience’s emotions — for which there’s a broad spectrum, when it comes to real estate — is key to getting people to open your emails. You don’t have to be a psychologist to know how to take advantage of them, either. In addition to principles like urgency, crafting an email subject line that implies scarcity is another great way to increase your conversion rates.
12. “As You Wish”
Sender: UncommonGoods
When writing emails, you should also think about the recognizable names and references that make people tick. For example, take this subject line from UncommonGoods forwarded to us from HubSpot’s Content Director, Corey Wainwright, who happens to be a die-hard fan of The Princess Bride. Apparently, “As You Wish” is a pretty big reference to that movie, so when she saw this subject line in her inbox, she just HAD to click.
Even though she knew logically that the email was part of a larger-scale send, it almost seemed like it was tailored to be sent personally to her — after all, why else would it include a reference to Princess Bride in the title?
UncommonGoods knows its buyer persona like the back of its metaphorical hand. While it may not send emails to individual subscribers with references to their favorite movies in the title, it does have a general understanding of its subscribers and their interests.
13. “Where to Drink Beer Right Now”
Sender: Eater Boston
Okay, you caught me: I’m a beer lover. But that’s not what hooked me here. The subject line arrived in my inbox just at the time I needed it: at 6:45 on a Wednesday evening. Absolutely. Genius.
Think about it: You’re just over hump day and want to decompress with a few coworkers after work. Right as you’re about to head out, you get a notification on your phone that says, “Where to Drink Beer Right Now.” Perfect timing makes this subject line something you can’t help but click on.
For your own emails, think about how timing will affect how people perceive your emails. Even if you send an email in an off-peak hour, you could get higher engagement on your email — if you have the right subject line.
14. “Not Cool, Guys”
Sender: BuzzFeed
We love BuzzFeed. If nothing else, its staff knows how to write great copy — and that sentiment includes an exceptional email marketing team. Many of my colleagues have signed up for BuzzFeed’s daily emails, and pretty much any day of the week, they win for best subject line in their inboxes.
While there are a few of BuzzFeed’s subject lines here and there that aren’t anything to write home about, it’s the combination of subject lines and the preview text that is golden. They’re friendly, conversational, and, above all, snarky.
Here’s the text that followed the subject line above: “Okay, WHO left the passive-aggressive sticky note on my fridge. Honestly, who acts like this?” That conversational tone and snark pull us in over and over again — and it’s the preview text that completes the experience for me.
We’re not all equipped to be snarky writers, but most email platforms have the preview text easily available to edit. How can you use that little extra space to delight your customers (oh, and probably improve your email metrics)? Maybe you could use the subject line as a question, and the preview text area as the answer. Or maybe it’s a dialogue: The subject line is one person, and the preview text is another.
You get the idea. By using that space, you have more opportunities to attract new subscribers.
15. “DO NOT Commit These Instagram Atrocities”
Sender: Thrillist
No matter how humble people are, most don’t like to do things wrong … so why not play on that natural human tendency in an email subject line, especially if you’re in the business of helping clients (or prospective clients) succeed? Thrillist certainly does in the subject line above, and it makes the language even more vibrant by using do not — a great takeaway for B2B marketers.
Instead of using the typical contraction “don’t,” Thrillist spells it out and adds the all-caps for effect. That way, you’ll notice the subject line in your inbox, and then find it harder to resist clicking on it.
Think about how going negative in your marketing might be a good thing. For example, many of us have anxiety about looking silly and stupid, so figure out how you can play to those emotions in subject lines. Of course, it’s important to back up that subject line with encouraging, helpful content, so that you’re not just ranting at people all day.
Getting negative can get your subscribers’ attention — this subject line certainly caught mine.
16. “Everything you wanted to know about email copy but were too afraid to ask”
Sender: Copy Hackers
Here’s another great example of leveraging your audience’s full plate to your email marketing advantage. Who hasn’t refrained from asking a question out of fear of looking silly or out of the loop? Excuse me while I sheepishly raise my hand.
” … but were too afraid to ask” is one of those phrases that, to us, probably won’t go out of style for a long time. People seek insights from Copy Hackers — an organization dedicated to helping marketers and other professionals write better copy, as the name suggests — because, well, they have questions. They want to improve. And when that audience is too afraid to ask those questions, here’s Copy Hackers, ready to come to the rescue with answers.
What does your audience want to know, but might be too embarrassed to ask? Use that information to craft your content — including your email subject lines.
17. “🐶 Want a Custom Emoji of Tullamore & 6 Months FREE Walks? Book a Walk Today for Your Chance to Win!”
Sender: Wag!
For reference, Tullamore is the name of my colleague Amanda Zantal-Wiener‘s dog. And the subject line she received, written above, is another winning example of perfect emoji placement — especially when it’s a cute dog.
Here’s a great example of how personalization goes beyond the email recipient’s name. Wag!, an on-demand dog-walking app, includes the names of its customers’ pets in a portion of its email subject lines. But this type of personalization is more than just a first-name basis. If there’s anything my colleague Amanda loves more than free stuff and baking goods, it’s her pup. Wag! knows that, and by mentioning Tullamore by name in the subject line — in tandem with an offer, no less — it caught her attention and piqued her interest.
18. “Abra-cord-abra! Yeah, we said it.”
Sender: Quircky
This punny email subject line from Quirky is plain fun. We’re suckers for puns in the right situation.
What we like most about it is the second part: “Yeah, we said it.” The pun in the beginning is great and all — it refers to a new invention featured on Quirky’s site to help everyday consumers detangle their numerous plugs and cords — but the second sentence is conversational and self-referential. That’s exactly what many of us would say after making a really cheesy joke in real life.
Many brands could stand to be more conversational and goofy in their emails. While it may not be appropriate to go as far as Quirky’s subject line, being goofy might just be the way to delight your email recipients.
19. “🔥 Hot freebie alert! 15 free gifts, you pick 5.”
Sender: Shutterfly
Shutterfly, a company that allows you to print your photos on interesting products or other frames, gets visual with its subject lines by occasionally using an emoji. Due to the company’s nature and creative audience, the fire emoji in this subject line draws the eye without feeling desperate.
The email subject line also pops because it has a lot of buzzwords, including “hot,” “freebie,” “gifts,” and “alert.” In just one line, it is able to give the potential reader a good reason to open it, especially if they love using Shutterfly.
The content inside the email aligns perfectly with the subject line by announcing a freebie promotion. This strong alignment between the subject line and message keeps people from skimming the email.
20. “From chaos to calm ✨🏡”
Sender: Open Spaces
If you’ve ever had a cluttered home, you know how chaotic it can feel. Open Spaces takes advantage of that by suggesting how you’ll feel after you use the company’s products.
Its emoji choices also indicate how your home will look and feel: Sparkling clean. I’m not a huge fan of cleaning, but Open Spaces promises to make it easy in the simplicity of their subject line. The brand also proves that it knows its target customer exceedingly well — if you want to create “open spaces,” you likely won’t tolerate chaos in your home.
In the same way, try to allude to the feelings that your target customers want to feel, as well as their goals and inner desires. You can also let emojis speak for you. For instance, if Open Spaces had used the subject line “From chaos to calm: Get a sparkling clean home,” the focus would be off of the “from chaos to calm” piece, which is what readers most care about.
Now that we’ve covered the best subject lines in general, let’s dive into the best newsletter subject lines.
Newsletter Subject Lines
Newsletter subject lines must work harder to get the recipient’s attention, because they allude to information only. In contrast, a subject line offering a discount will automatically make the recipient want to click.
Newsletter subject lines must hook the reader and get them to click. The examples below do an excellent job at it.
1. “China Falls, Sleepy Unicorns, And The Deals Aren’t Bigger In Texas”
Sender: Crunchbase
The Crunchbase Insights email has an interesting way of wrapping details about all the stories it will present you in one subject line. This is eye-catching because it seems like an odd mashup of words, but gets to the point about three complicated stories at the same time.
When it comes to email, Crunchbase is known for their longer, text based emails. They all read like a more conversational letter to the email recipient and casually discuss and hyperlink Crunchbase’s top stories. While the subject lines feel interesting and eye-catching, the emails often report deeper business news that cut right to the chase.
This subject line shows how you can be punchy, but also fun and creative when trying to pull in your audience.
2. “Watch Out for This Amazon Phishing Scam.”
Sender: WIRED
In this subject line, WIRED includes Amazon, a large company name. Including the name of a big brand can be a great way to boost open rates because people who enjoy or use products from big brands might click into a subject line that discusses them.
Additionally, when a brand name is combined with negative words like “phishing” or “scam,” people might open the email much more urgently so they can learn how to avoid running into the issue being discussed.
WIRED also lists the story last in its newsletter. This is an interesting way to get your readers to scroll through the entire email and see the other stories before they get to the story that led them to click into it.
3. “Buffer has been hacked — here is what’s going on”
Sender: Buffer
Next is a subject line from Buffer. A few years ago, Buffer got hacked — every tech company’s worst nightmare. But Buffer handled it exceptionally well, especially on the email front.
What we admire about the subject line is that it’s concise and direct. In a crisis, it’s better to steer clear of puns, snarky comments, and emojis. People want to see that you’re taking the situation seriously and be reassured that the world isn’t ending.
Because of the way the subject line is worded and formatted, you feel like Buffer is calm and collected about the issue, and is taking your personal safety into consideration. That’s pretty hard to do in just a few words.
4. “Google sees smartphone heroics in Oreo. It’s The Daily Crunch.”
Sender: TechCrunch
If you’re subscribed to a newsletter from a publication like TechCrunch, chances are, you signed up because you’re either interested in or want to learn more about technology. To reflect that, the media outlet crafts its daily email roundups (“The Daily Crunch”) with a subject line that reflects one of the latest, most compelling news items in the industry.
Here’s the thing: Staying on the cutting edge is hard, especially with something that evolves as quickly as technology. So by writing email subject lines that reflect something that’s recent and relevant, TechCrunch is signaling to email recipients that opening the message will help them stay informed and up-to-date on the latest industry news.
Think about the things that your audience struggles to keep up with — then, craft an email roundup and matching subject line that reflects the latest news in that category.
5. “Black Friday shoppers are the worst customers”
Sender: LinkedIn
This subject line is likely the boldest of the Black Friday emails you’d see in your inbox in the days before Thanksgiving. Yes, it’s a bit judgmental, but it actually came in a LinkedIn Pulse newsletter, promoting an article one of its users wrote on the topic of holiday marketing.
And there’s no doubt the title resonates with how some people feel during the most hectic holiday shopping day of the year.
LinkedIn has nothing to sell on Black Friday, so the subject line above does little harm to its business. Nonetheless, commenting on a popular cultural observation can show your confidence and help you relate to your community.
6. “Tips to increase remote collaboration”
Sender: Asana
This simple subject line from Asana, a project management platform, gets straight to the point: If you open the email, you’ll find remote work tips beyond. The subject line also effectively capitalizes on an increasingly common trend that rose during and after the COVID-19 pandemic. Its simplicity and trendiness ensures that you’ll want to open the email.
And chances are that if you’re using Asana, you’re likely using it to collaborate with colleagues whom you might not see every day, even if you’re not fully remote. Asana effectively appeals to a wide range of potential users and buyers with this subject line.
7. “I got Botox — & THIS is what it looked like”
Sender: Refinery29
Okay, so maybe your business doesn’t involve Botox. But still — are you intrigued? I am, and despite my better judgment, I clicked.
That’s the power of leading your emails with a story: It sparks curiosity, which works in two ways. There are times when our natural curiosity can pique our interest without context, such as in the example above. But in this case, the subject line implies that there’s an intriguing story ahead. Why the heck did this person get Botox? And what did it look like? As the saying goes, “Inquiring minds want to know.”
Think of the stories behind your industry, and then, find ways to include them in email newsletters and frame them within the subject line in a way that piques your recipients’ collective curiosity.
8. “Improve Your Website from Concept to Code 💻”
Sender: Namecheap
Want people to open your newsletter? Tell them how they’ll benefit straight away like in this newsletter subject line by Namecheap. It used this subject line for Inspire, its monthly newsletter, and like in the WIRED example above, it left the subject line story last so that users scroll through the entire email.
Like many examples on this list, it uses an emoji to draw the eye and keeps the tone of the conversation more casual and fun. In contrast, the subject line “Improve Your Website from Concept to Code” feels much more wooden and unfriendly.
9. “The best options for grocery delivery”
Sender: Wirecutter
Simple, right? But effective. This newsletter subject line from Wirecutter gets straight to the point and solves one of the biggest challenges we faced during the pandemic: How to get groceries while social distancing. If you’d never used grocery delivery services up until that point, you’d likely be at a loss for what services to use.
Wirecutter realizes that and immediately invites you to open the email with a simple and actionable subject like.
10. “‘I didn’t realise architecture was so dangerous’”
Sender: Dezeen
Dezeen is an architecture and design publication whose newsletter subject lines always feature a comment from a user. Only one comment is chosen every week.
This approach is brilliant for various reasons: 1) It makes you wonder why the user made that comment and will make you click through, 2) It makes you want to comment on the publication’s posts to potentially get featured, and 3) It takes the work out of writing a subject line. Indeed, Dezeen doesn’t have to write a subject line at all, because its readers do it for them.
Here are a few comments that have been featured of late:
- “Absolute garbage”
- “The cardboard box aesthetic”
- “Meet The Flintstones”
- “Does it come with a smoke machine?”
If you have a publication that’s often commented upon, consider using one of the comments as your subject line.
HubSpot Email Marketers’ Favorite Subject Lines
Above are some of the best subject lines we’ve gathered, but we asked both former and current marketers on our team to give some additional favorites and what makes them so good:
1. “Show them what you’re made of”
Sender: Canva
“Using empowering, positive, and defiant language to leverage the use of Canva tools — love it.”
— Lucy Reddan
2. “Drooling over email designs 🤤”
Sender: Really Good Emails
“Emojis always catch my eye amongst the 100+ emails I receive on a daily basis. As an email geek myself, this subject line matched my interests and piqued my curiosity.”
— Ashley Riordan
3. “Can you help me name this dance, [First Name]?”
Sender: Marie Forleo
“It’s personalized and piques my interest because A) I’m being asked for input and B) I want to be in the know about this mysterious dance (#fomo).”
— Christina Perricone
4. “Who you gonna call?”
“If you can make a pun, include a social reference, or even just a familiar phrase, it’ll catch people’s attention.”
— Clint Fontanella
5. “Shoes You Can Wear All Damn Day”
Sender: Everlane
“Swearing is controversial in email marketing, but I think it worked really well in this email from Everlane. Not only was it a clever and concise way to introduce their new line of footwear called ‘The Day Collection,’ but it also aligned with the brand voice they use in other emails and across their website.”
— Anna Fitzgerald
6. “You were on point last week 🎯”
Sender: Grammarly
“Grammarly is so good about rewarding you and making you feel good about your writing.”
— Jordan Pritikin
7. “Hmm…No writing activity last week?”
Sender: Grammarly
“If or when you turn their plugin off, Grammarly’s retention strategy is great. They reach out with subject lines like these that immediately drive me to click through and turn their plugin back on. Very well done.”
— Jordan Pritikin
8. “‘Not intended for swimming’”
Sender: Dezeen
“I’m a sucker for architecture, and Dezeen’s weekly newsletter tells me the top new projects that come up, as well as their reader’s responses to them. My question is: What’s not intended for swimming? And if it’s not intended for swimming, why did the architect build it? Boom, you’ve got my interest. And my click.”
— Ivelisse Rodriguez
9. “Our #1 most asked question…”
Sender: Supergoop
“What an easy way to get me to click — by trailing off and leaving the rest of the content in the email. Nicely done, Supergoop.”
— Ivelisse Rodriguez
10. “[First Name]! You’re One of HubSpot’s Top Blog Readers 🎉”
Sender: HubSpot
“No one actually likes taking feedback surveys. Not unless you earn money, and not many of them offer that. When I received the above email from our very own HubSpot blog, I clicked straight through, and voila! There it was: A feedback request. Turns out, flattery does work.”
— Ivelisse Rodriguez
The Best Email Subject Lines are Simple and On-Brand
When writing subject lines for your emails, keep it engaging, simple, and on-brand. Don’t forget to appeal to the emotions and needs of your target buyers, and most importantly, have fun — include emojis, puns, or references to pop culture. Your emails will get opened, guaranteed.
Editor’s note: This post was originally published in November 2013 and has been updated for comprehensiveness.

What is a 301 Redirect, and When Should You Use One?
I moved five times in the last year. And every single time I moved, I forgot to sign up to have my mail forwarded to my new address.
Mail forwarding is an important step in any moving process, as it ensures you don’t lose any valuable information that’s sent to you.
And the same can be said for your website: If you’re moving a website from one URL to another, you need to take the necessary steps to ensure your visitors get sent to the right place. In the world of tech, this is called a 301 redirect.
Here, we’re going to discuss what a 301 redirect is and when you need to use one, as well as how to redirect a URL in HubSpot or WordPress. Additionally, we’ll explore the differences between a 301 and 302 redirect.

301 is one of many possible HTTP status codes, some of which you’ve probably heard of (including 404 – Not Found, 403 – Forbidden and, 500 – Server Error). When you visit a web page and the server sends the page normally, the status code it attaches to that page is 200 – OK.
You can think of a 301 redirect like a mail forwarder. Once you’ve moved a piece of content away from a specific URL, anyone who tries to visit it will receive a 404 – page not found message.
To improve their user journey, you can ask the server to forward visits from the old URL to a new location — the new home of your piece of content — using a 301 redirect.
Now, when you attempt to visit the old URL, the server will send back the 301 – Permanently Moved status code, and then move you on to the new location.
This happens so quickly that you’re usually not aware of it, and will simply find yourself on the piece of content for which you’d searched. You might notice that the URL is different from the one you clicked on or typed in. Or you might have a browser extension such as Ayima Redirect Path which lets you know when you’ve been redirected.
The other key role that a 301 redirect fulfills is with search engines. Having useful status codes that correctly signal where content has moved to allows search engines such as Google and Bing to keep their index up-to-date.
Essentially, a 301 redirect will let search engines know: “Hey, you know that piece of content that users enjoyed clicking on from the SERPs? Well, it now lives over here, so take all that visibility you associated with this page, and transfer it over to this new URL.”
This is why 301 redirects are important for SEO.
Now that we’ve covered that, let’s dive into how you can do a 301 redirect for yourself.
How to Do a 301 Redirect In a CMS
The actual process of implementing a 301 redirect varies from CMS to CMS and platform to platform. While we aren’t able to discuss the specifics of every CMS platform, we can take a close look at HubSpot and WordPress. Hopefully, these instructions should help you get started regardless of the CMS you use.
How to Redirect a URL in HubSpot
HubSpot makes it simple to add 301 permanent redirects inside the tool. To set up a redirect in HubSpot:
1. Click Settings (the cog in the top right corner).
2. In the left sidebar menu, navigate to Website > Domains and URLs.
3. Click the URL Redirects tab, then click Add URL redirect in the top right.
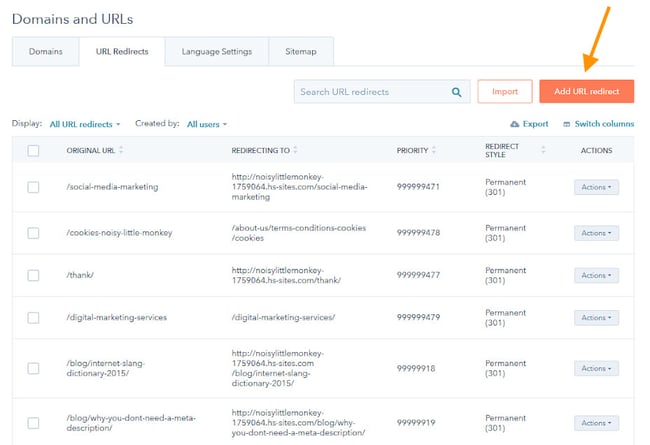
This reveals a right-side panel. We’ll go over some use cases later, but for now let’s look at the options in this panel.
Standard
In most cases, you will want to implement a single page-to-page redirect. In this case, choose Standard.
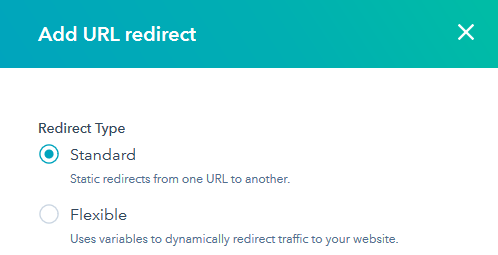
Next, you’ll want to add the Original URL and the Redirect to URL for your old and new URLs, respectively.
Click Add URL Redirect and the redirect will be added to HubSpot.
We also recommend testing your redirect. First, wait a few minutes for the change to apply to the server. Next, try visiting the original URL in an incognito browser window and check that it works as expected.
Flexible
In some cases, creating single page-to-page redirects is very inefficient. For example, if you have just moved an entire folder of content, you may have 15 pages within a subfolder that you now need to redirect. In such cases, it’s a better idea to use a Flexible redirect.
You can think of a flexible redirect as a formula or a rule. It will allow you to redirect everything within a certain folder to a different folder while keeping the rest of the URL the same.
When you select Flexible redirect, HubSpot will automatically provide you the link to the flexible URL pattern redirect help page, which will give you specific guidance on how to use the syntax for this feature.
More Options
Under More Options, HubSpot offers various advanced variations on these redirect types.
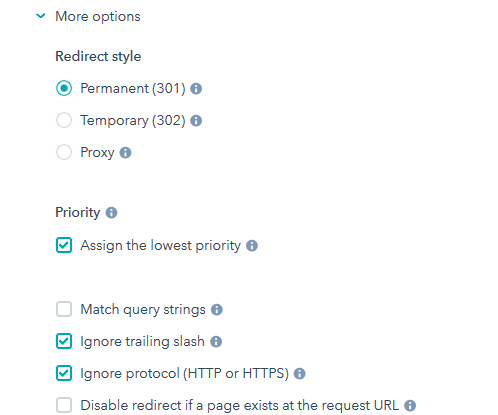
It will allow you to deliver a 302 Temporary Redirect or a proxy redirect (redirect the content of a live page without changing the URL shown in the visitor’s browser) instead, choose the order which HubSpot moves through the redirect rules when resolving a URL (which may change which valid rule is triggered), disable a redirect if content is present at the URL, preserve query strings, force HTTPS, and force trailing slashes on the end of all URLs.
How to Redirect a URL in WordPress
If you aren’t a HubSpot customer, then you will need to apply 301 redirects differently. WordPress is the most popular CMS in the world, so it makes sense for us to touch upon how one might go about looking at redirects in a WordPress context next.
However, it’s important to note that WordPress itself is very flexible. Installations of WordPress can vary wildly, and so there is no one-size-fits-all guide we can provide as was the case with the HubSpot CMS.
If in doubt, consult your web developer when it comes to adding URL redirects.
Apply a redirect via the server itself.
The best way to apply redirects from a speed and technical point of view is via the web server itself, rather than relying on WordPress. WordPress does not offer a facility to implement 301 redirects out-the-box, although there are plugins available that will give you access to this functionality.
The process of applying 301 redirects via the server itself will vary depending on the software stack your server is using. You might be using Apache, Nginx, IIS, or some other platform, each of which requires a different approach. This may also vary depending on your hosting provider.
If you do not know how to apply a redirect via the server itself, it’s not something we’d recommend fiddling with as it may lead to an interruption of service for your website — instead, we’d suggest consulting with your IT team, host, or web development partner.
Redirect a URL using a free WordPress plugin.
Sometimes in marketing, you must compromise that optimal solution for the solution you can actually achieve. This may be one of those cases. If you are not able to implement a redirect via your server, consider using a WordPress plugin. This is not the optimal method — plugins are slower, and you’ll have to rely on third-party code, so proceed at your own risk.
Each plugin interface will be different, so consult your chosen plugin’s documentation for specific guidance. Here, we’ll briefly walk through how to set up 301 redirects with the free Redirection plugin:
1. Install and activate the Redirection plugin.
2. Navigate to Settings > Redirection and follow the setup instructions.
3. At the end of setup, you’ll be taken to the plugin Options menu. To add a new redirect, choose Redirects from the top menu.

4. Under Redirects, you can view all of your active 301 redirects and add new ones. To add a new 301 redirect, under Add new redirection insert a Source URL (the old URL) and a Target URL (the new URL).
5. Click Add Redirect. You’ll now see the new redirect in your list of active redirects.
When to Use a 301 Redirect
Here are some specific cases where you will want to reach for the 301 redirect as a tool.
1. Changing a URL.
Maybe your original URL was poorly optimized, or you are re-organizing the folder structure of your website URLs.
Moving a piece of content in HubSpot CMS is very simple — just change the URL on the settings tab of the content’s edit page, and HubSpot will automatically add a URL redirect for you. Be sure to check that this is working before you move on.
2. Recreating a piece of content.
Sometimes, you might want to completely rebuild your old piece of content on an entirely new page — for instance, if you decide you want to use a different web page template.
In this case, you’ll want to make sure that you have implemented a simple 301 redirect from the old URL to your new one. Once this is in place, be sure to unpublish and archive the old page.
If doing a lot of these, we suggest using a flexible rule or, if a flexible rule is not appropriate, using a tool such as Screaming Frog SEO Spider in conjunction with Google Sheets or Microsoft Excel to map your redirects in bulk, and then import them into HubSpot.
You can do this on the URL Redirects page using the Import button:
HubSpot will provide you with a sample file to structure your redirects, and a link to the bulk upload redirects help page.
3. Consolidating several pieces of content.
If you have decided that you have multiple pieces of content that overlap, compete for the same keywords, or all cover the same topic, you might want to consolidate them. However, you will not want to throw away the search engine visibility that these old pages might have achieved.
Once you have created your new, consolidated resource, you should set up a simple 301 redirect from each of the old pages to the single new page.
4. Migrating content from one domain to another.
If you’re moving your website from one domain to another, it is vitally important that you implement page-to-page 301 redirects from your old content to your new content.
This is easy if the site is moving a domain, but remaining the same in terms of structure and layout. If the content is changing or being restructured, it is still important that you make sensible redirection choices that honor your users’ original intent, in order to pass the visibility of each of your old pages to their new counterparts.
When implementing page-to-page 301 redirects from one domain to another, you have a specific challenge to keep in mind: your redirects must be served from the original URL.
It is useless if, for instance, you’ve connected HubSpot to your new domain, but not your old domain, for you to then host the 301 redirects for your old domain onto HubSpot. You will need to work with your IT partner, web development partner, and/or HubSpot partner to ensure that serving redirects from your old domain has been accounted for. We recommend that these remain in place indefinitely.
5. Migrating a Website During a Phased Web Launch
You may be moving your website from one domain to another as outlined above, but due to project constraints, you are using a phased launch approach. This means that you’re launching the core website pages in phase one, then a second wave of pages in phase two, and so on.
In this case, we recommend creating a phased redirect map. All URLs from your old domain should be accounted for, and a redirect outlined for each phase.
For phase one, you will expect to implement 301 redirects for all the pages that will be accounted for on the new site. You will also add 302 redirects for all other pages, usually to the new website’s homepage. This will prevent users trying to visit your old domain from receiving a 404 error, without confusing search engines by having your pages suddenly redirect to seemingly irrelevant content.
As you launch each phase, you should update your redirects, replacing your 302s with 301s as the counterpart content becomes available.
Once again, these redirects must be implemented such that they are served from your old domain.
In general, you should expect to use 301 redirects on your website. However, there are a few cases when you might want to use a 302, instead, including:
- You might be using a phased website launch plan.
- You might be redirecting users as part of functionality where SEO does not apply, such as login gateways or e-commerce checkouts.
- You might be using a temporary holding page, and do not want to confuse search engines or damage your search engine rankings by signaling that you’re permanently redirecting your detailed, rich content to an empty holding page.
301 Redirect Mistakes to Avoid
Now that you understand the importance of the 301 redirect, we’ll review common steps in the process to make sure you don’t make a mistake that could adversely impact your site’s SEO.
1. Setting up a 302 redirect between versions of your domains.
301 redirects point the power of inbound links from one URL to another, and although it might not look like it, http://blog.hubspot.com and blog.hubspot.com are two different URLs. Make sure you set up a 301 redirect from all of the different iterations of your brand’s domain to boost your search engine results.
2. Setting up a 301 redirect after creating a new page.
Back in 2010, Toys ‘R Us purchased the toys.com domain without setting up a 301 redirect first, and their new site’s SEO results plummeted because it was re-crawled by Google as a brand-new domain without inbound links from the original Toys ‘R Us domain pointing to it. Be sure to set up the 301 redirect before migrating your website content so your site doesn’t lose traffic in the process.
3. Using a 302 redirect during content migration.
Unless you’re temporarily migrating your website’s content while updating or repairing your website, use a 301 redirect to maintain the inbound links and your search rankings while making changes to your domain.
4. Having redirects link to outdated content.
If you don’t set up redirects from the older internal links on your website (such as a link to your company blog on your homepage), you’ll create a bad user experience for site visitors who click on these older, not-directed links. The old internal link will eventually kick over to the new domain, but it might take several seconds or show a white screen in the meantime.
5. Redirect a page with a different intent than the destination page.
This will be a breeze with proper organization and record-keeping, but make sure that you’re redirecting to the correct pages. To illustrate, you wouldn’t want to redirect a user looking for your homepage to your blog page.
Keeping this transition smooth will contribute to SEO being accurate, and will lead to more happy visitors to your site.
Whether you’re thinking about overhauling all content in a site migration, or you’re just refurbishing some outdated web pages, 301 redirects help. If you’re planning out this new stage, think about incorporating them in your project; your SEO won’t take a dive and website visitors will continue to find the helpful content they’re looking for.
Other Types of Redirects
There are other types of redirect too, including:
1. 302 – Temporarily Moved
This functions almost identically to a 301 redirect. In this instance, however, we are acknowledging that the move is temporary. For a user, this makes no practical difference, but for a search engine the message is clear — don’t worry about ranking this new page, as it won’t be around for long. Stick to using the old one, it will be back.
2. Meta Refresh, or Javascript Redirects
This is different from the previous two approaches. The page will load normally with a 200 – OK status code. Then, a script runs on the page that moves the user onto another page.
There may be certain edge cases when this is the only practical option, but in general you should avoid this approach. It is not associated with SEO best practices and often can provide a confusing user experience.
Addressing Internal 404 Errors
Your SEO or web team might have identified some broken links on your website. In this case, it’s best practice to create a 301 redirect to forward users from the broken URL through to an appropriate resource — one that is fundamentally congruent with the piece of content they were expecting to find.
However, you should also look to update the offending hyperlinks to point to the new URL, as well. Having a website that relies on 301 redirects for internal navigation is not the best practice.
Addressing 404 Errors Reported in Google Search Console
Sometimes, you will see Google Search Console reporting 404 pages that you don’t even link to internally. So where do these come from?
Google Search Console populates its “Coverage” section from all kinds of sources. Sometimes the URLs are simply ones that it has seen before on a previous incarnation of your website, or it might have seen an external link on some other website.
Your mindset should be that if Google has seen this URL before, a user might have as well. They might have it saved as a bookmark, or have it written down in an email, or on a third-party website, and they may still click on it. That being the case, you want to make sure that those users receive the optimum user experience, so you should try to create 301 redirects to push these users to an appropriate piece of content that is fundamentally congruent with the piece of content they were expecting to find.
Don’t leave your old links hanging — use a 301.
301 redirects are vitally important for maintaining a healthy website. They serve a core function in signaling to both users and search engines when your website content moves and changes, and ensure that as your web presence evolves, your user journey remains clear and logical, and your visibility in search engines is preserved between iterations.
Be sure to familiarize yourself with implementing redirects in your current website environment. Then, test your website’s SEO strength — as well as speed, mobile-friendliness, and security — with our free Website Grader.
Editor’s Note: This post was originally published in December 2010 and has been updated for accuracy and comprehensiveness.


How Glow Recipe Pivoted From a Curation Site to a Beauty Product Brand
Did you know the current U.S. cosmetics market is worth over $95 billion?
With the fast growth of the cosmetics industry, it’s become competitive and saturated — especially for startups. This industry can be even more challenging to break through when you’re trying to sell a product that you’re audience might be less familiar with.
With this in mind, Glow Recipe, founded by Sarah Lee and Christine Chang, aims to bring U.S. awareness to Korean beauty (or K-beauty) trends, as well as its own lines of natural, fruit-based cosmetic products.
But, before Glow Recipe sold thousands of cosmetic products and built an audience of more than 1 million social media followers, it actually started as a simple product curation site aiming to highlight other K-beauty brands.
In a recent episode of The Shake Up, Alexis Gay and Brianne Kimmel sat down with Co-CEOs Sarah Lee and Chang to learn how they built a well-known beauty brand and positioned their products for the U.S. and other global markets.
Below are just a few great highlights from the episode, as well as an audio player so you can listen while you read.

Glow Recipe Highlights
How and Why Glow Recipe Began With Curation
[00:18:54] Gay: It seems to me like through the work of several companies, but particularly Glow Recipe, Americans are increasingly aware of K-beauty and the philosophy behind it. … I’m wondering if you could just tell us a little more. What are the actual key markers of K-beauty?
[00:19:17] Chang: The whole catalyst for us starting this was actually the realization that there was a burgeoning interest in Korean beauty at the time. This was all the way back into 2014. We were also seeing not only consumers but also global companies looking to Korean manufacturers and Korean labs for the latest innovations and skincare, ingredients, and technologies.
… We were also seeing that Korean beauty articles … were very focused on [K-beauty] as a 10 to 15-step regimen. … It would almost be a little — in terms of content — too clickbaity, versus really getting at the heart of the matter, which is that Korean beauty is about a philosophy. … It’s something that we ourselves learned at our mothers’ and grandmothers’ knees growing up.
We both have these amazing memories of … our grandmothers using watermelon rind and rubbing that on the skin to suit heat rash, or our mothers just marching over to the pantry. And I know Sarah’s mother — one of her favorite ingredients was cucumber slices. Or my mom would like to use greater potato and [00:20:30] just that holistic very easily, the accessible approach to natural ingredients, incorporating that into your self care routine. We would very often mask together with our moms while watching TV. And it wasn’t a chore. It wasn’t an arduous 15 step thing you had to get through.
[00:22:19] Kimmel: Can you tell us a little bit more about that evolution from becoming the trusted source in your friend group for K-beauty products to then curating this amazing new experience that turned into an amazing community in a very big market.
[00:22:45] Chang: We flew over in 2014 to Korea without so much as a website to get some brands on board. And we pounded the pavement to find these brands that many of which we’re still very close to today. … The commonality was that they were all helmed by really passionate brand founders that had unique products, really clear product formulation philosophies, and we felt like these were the brands … that needed to be introduced to the U.S. and other global markets — because of the sheer astounding innovation, beautiful textures, and ingredient stories we were seeing. … After a lot of convincing … We were able to get eight or nine brands on board.
… On that trip, we kicked off our site right away. … There were a lot of mishaps along the way. I cringe a little bit when I see the early iterations of our site, because at the time you were like, “Hey, it looks great.” … Now, looking back on it, there were some clear optimization opportunities, but it was so fun.
… Every day, we were making emails ourselves. We were cold calling journalists ourselves. We were figuring out the social media content. … It was a lot of scrappiness, but also we really enjoyed it because we knew each and every step we were taking was getting us closer to our goal of bringing K-beauty philosophy to the wider audience and the way that we thought was right.
… We knew that eventually, we would have to take that step ourselves because we ourselves had that formulation philosophy internally that we wanted to really materialize and manifest through, through our own brand and the right timing for that eventually came. So a couple of years after launching RSP as a curation site, we launched our own in-house food-for-skincare brand that you see today, and on the shelves at Sephora in mid-2017. … And that was … a very close partnership with the retailer to make sure that we were successful in launching the brand.
Why Glow Recipe Pivoted from Curation to Product Creation
[00:26:29] Lee: I think the first reason why we started as a curation business model was because we wanted to give the platform and the opportunity to these brilliant founders and brands to go global by providing the content and education and marketing.
… Once we were able to gain that credibility in the market, I think that’s when we needed to really think about what we wanted to do as founders.
… What we wanted to do was combine those [Korean beauty] tenants and create our own brand because we didn’t really think that all of the influx of Chinese and Korean beauty innovations were fully understood by the American consumer. We felt the urge to break down that barrier and create our own brands that are actually much simpler.
[00:28:12] Chang: With Glow Recipe Skincare, it just felt right. Our community could not get enough. People were DM-ing us, our brand, our, our personal Instagrams nonstop asking about … the next draw, product suggestions, ideas. There was just so much passion and buzz around this brand. And we knew that we had struck a chord with it because it was this balance of — yes — Korean beauty philosophy, but also results. …
Also, [one thing that drew audiences was] the fact that we were speaking about fun skincare. For the longest time, I think skincare had been really dominated by a lot of very clinical brands. … Of course, so many brands that are in that space are also really amazing. But I think that sense of sensory reality — that extra moment that touch that made your self-care routine that much more special — all of this was really, really appreciated and we felt like it was ours. [It was] lmost our dutie to the community to make sure that we were giving them what they wanted.
How Glow Recipe Maintained Brand Relationships
[00:29:45] Kimmel: How did you think about … the early community that you had built around curation. Were there specific ways that you were able to learn from those founders or continue to build a relationship with them once you made the transition from curation over to Glow Recipe?
[00:30:12] Lee: some of the founders from the curation brands are still our friends to this date. So there is a lot of synergy that comes from that because we can always pick up the phone, call them, and ask them for opinions about certain things.
… We’re both brand builders and creators, right? So we share so much in common. We terminated our curation business model, but the relationships and the friendships continued to this day. We still touch base with them once in a while, make sure that if they have any questions around navigating the U.S. market, we’re there for them because we want everyone to succeed at the same time.
… When we were transitioning to a creation business, we were not only giving them connections to the networks that we had with the retailers. But, we were asking our customers to not forget about these products or brands. We were giving them site links to those products to continue to shop them because we curated them for a reason.
Why Marketing Product Differentia is Key
[00:31:40] Gay: Did you ever have any doubts at that time that this was the right move, or were you 100% confident?
[00:31:53] Chang: I don’t think we had doubts per se, but then it’s really hard to gauge the level of success a brand will have. There are so many brands in the industry. We’ve had many conversations with many people in the industry about how saturated the market is. So each and every brand that comes into existence needs to have a real point of difference and a real reason. I think with Glow Recipe Skincare, we were able to really distill some of those personal experiences, those personal passion points into the brand.
… How do we provide products that are different and really add value to [the customer’s] routine when they buy it and make it part of their skincare wardrobe? That perspective, I think, has continued to serve us. And it goes back to those early days where we ourselves were answering every single customer email and writing notes to every single person who purchased from our site.
Balancing Community and Product Management
[00:33:32] Gay: I’m wondering how you balance keeping that customer-first, community-first mentality with some of the less glamorous aspects of creating a product.
[00:33:46] Lee: We’re first-time entrepreneurs. One of the things that we’ve learned, are still learning, is how do we balance everything when we have to oversee everything as founders and co-CEOs. I think the great benefit that we have today is that we have such an incredible, talented team. … I can say with confidence, that they just understand the social space. A lot of our team members are actually relatively young and very plugged into TikTok. So they just have their ears and eyes on the … social media landscape in realtime. Because of that, we’re able to not only react quickly, but proactively share what we have going on transparently with our community.
… That communication aspect, but also the decision making internally for the business has been really instrumental. … We think of every team member as a content creator. When we hire people, we always ask about their storytelling aspect, or photography skills.
… And we often have brainstorm sessions with our team members, just tasking people to think about a challenge that we’re facing, whether it’s a marketing initiative or a new campaign idea where we’re stuck and we want everyone to contribute,
Chang and Lee’s Top Leadership Challenges
[00:37:49] Alexis Gay: What keeps you up at night? What’s hard right now. What challenges you as co-CEOs?
[00:38:06] Lee: It’s a really timely question because there are some key challenges that we’re facing today where, as a company, we’re very rapidly growing. We’re very grateful for that, but that comes with a challenge around how we can make sure that everyone stays motivated and our culture is maintained.
… I think any entrepreneur can relate with something like this. Cause at any point of your entrepreneurial journey, your team pretty much makes up most of what makes a success or not. … I think people s everything. And so we’re trying to figure out how to, you know, hire because we do need to have at least 10 people more on our team and the next few months.
[00:38:52] Chang: We do have a lot of brainstorm sessions because the team is full of ideas and we love having those creative conversations and just really giving everyone an opportunity to voice their thoughts and opinions.
… Going forward, it’s really up in the air, right? Because is that day in the life going to take place at an office, is it going to continue to be worked from home? These are questions I think every founder, every company owner’s, grappling with as we move toward getting out of the 100% work from home time that we all had to be in.
To hear the full podcast, as well as other episodes, check out The Shake Up on the HubSpot Podcast Network.


Press Release Distribution: Top 10 Services + 4 Mistakes to Avoid
To thrive as a small business, you need press coverage. But, unfortunately, coverage doesn’t just come naturally – you need to work for it.
Enter: the press release.

Press releases are important for increasing your brand awareness and helping your public relations (PR). But if nobody sees your release, you won’t get very far. You need to distribute it effectively to get your story picked up by local and/or national newspapers, magazines, or blogs.
In this guide to press release distribution, we’ll cover the following to help you put together a plan of action that results in coverage:
- What is press release distribution?
- Why is press release distribution important?
- How to distribute your press release
- Distribution mistakes to avoid
- Should you use distribution services?
Keep reading to learn how you can properly create, pitch, and distribute a press release for optimal brand awareness.
What is press release distribution?
Before we dive any deeper, let’s iron out exactly what press release distribution is.
It’s the process of circulating or seeding out your press release to journalists, publishers, and members of the press.
Your press release normally provides updates on your company’s products and/or services, projects, partnerships, organization structure, and more. With distribution, you allow various publications to share your press release and thus, reach a wider audience.
Why should you submit a press release?
The purpose of distributing a press release is to land coverage in media publications, such as newspapers, radio, TV news bulletins, podcasts, and blogs. That way, you’re positioning your brand in front of a wider audience.
If you only post your press release on your website, most consumers won’t know about it – which defeats the entire purpose behind writing your press release.
Gaining press coverage helps to get your business or brand name into the public forum. That helps build brand awareness – especially when 71% of journalists consider press releases to be their favorite type of content to receive from brands.
Distributing a press release also has these benefits:
1. Press releases can boost your SEO.
Over three billion Google searches are made every day.
Implementing SEO tactics into your overall marketing strategy will help you rank high for your target audience’s search queries. This means that you’re that much closer to reaching potential customers as they search online for information related to your company, industry, product, or service.
Gaining backlinks to your site from high-authority websites is a huge ranking factor for SEO, as explained in a 2021 study by Backlinko:
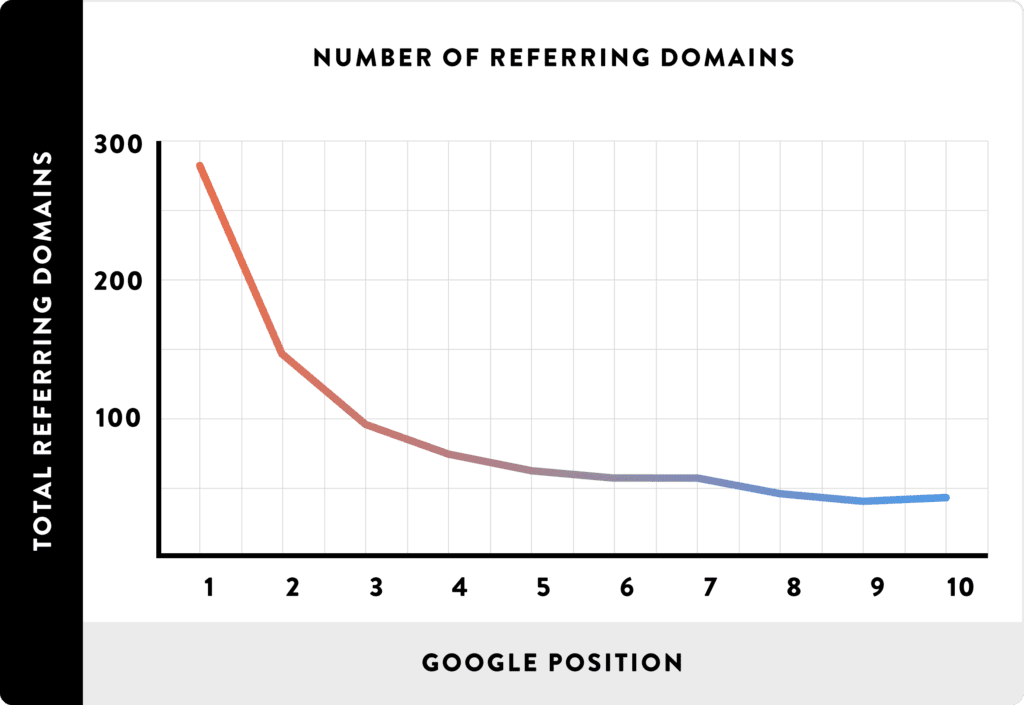
Distributing press releases can help you land coverage on huge publications. Additionally, there’s a chance those websites will link to yours, which can help to boost your search engine visibility.
But what happens if you land awesome coverage without a backlink?
Don’t panic – In the past, Both Google and Bing have suggested that positive brand mentions can play a role in how they rank your site, meaning positive PR coverage can aid your SEO efforts even without a link.
2. A press release can drive local foot traffic to your store.
If your business is a brick-and-mortar shop, press release distributions can help to get people through the door.
Whether you’re running an event or simply launching an eye-catching sale, measuring foot traffic into your store after distributing a press release is a simple way to gauge how successful your release has been.
3. A press release can generate more sales.
If you’re launching a new product or an exclusive line, a targeted press release can have a significant impact on your bottom line. Why? Because it helps drum up interest if it’s innovative and sets you apart from competitors.
Busy shopping days can be a great way to get your products in front of potential customers.
For instance, if you’re offering discounts on Black Friday or Cyber Monday, why not reach out to retail journalists to highlight your offers?
Should you use press release distribution services?
Distributing a press release sounds time-consuming, doesn’t it? If only there was a way to get yours seeded out quickly, at scale.
Fortunately, there is.
If you’re on a tight schedule and don’t have time to manually reach out to local or national publishers, a press release distribution service is the perfect solution.
These services allow you to send out your release to relevant journalists without doing any of the manual work yourself.
While it does cost to use these services, they can save you hours of work. By letting the experts distribute your news story, you can spend time focusing on other tasks.
So, if you fancy taking distribution off your plate, check out these 10 services.
1. Newswire
Newswire is one of the top distribution service providers available in the market. When using the top-rate company, your press release can reach major news outlets, such as NBC, MarketWatch, and NBC.
Newswire also offers multitarget layering for you to reach your desired audience at the local, state, and regional levels.
Furthermore, the service provider follows a strict editorial process to ensure your press release is error-free when it reaches consumers.
Pricing: Starts at $199 per release and goes up to five figures based on the number of press releases you want and the industries you’re targeting.
2. eReleases
With a media database of over 1.7 million contacts, eRelease is a distribution service you should consider.
The brand has nurtured relationships with publishers, including influencers and reporters, for over 20 years and promises to include curated emails that will increase engagement.
In addition, eReleases optimizes your press release using white hat SEO practices to increase its chances of ranking on search engines. Furthermore, you can expert a detailed report after distribution with metrics on engagement, audience, and traffic.
Pricing: Starts at $299 and goes up to $599, excluding certain add-ons.
3. EIN Presswire
EIN Presswire is a leading distribution service with affordable pricing.
With one of the quickest reviewal processes, EIN Presswire only takes about an hour to approve your release during the normal weekday hours. Once your release is distributed, you will gain access to a dashboard that will start populating after two hours.
In addition, EIN Presswire is a high authority website through which you can earn backlinks and reap the benefits on search engines.
Pricing: Starts at $49.95 per release and goes up to $999 for bundles.
4. PR Distribution
PR Distribution provides distribution services in both the U.S. and the U.K.
Their starter press release package offers a guarantee of 25 placements, ensuring your story will be seen by your target audience.
Every other package offers an unlimited word count, a multi-tiered editing process, and access to ABC, NBC, and other news outlets.
Pricing: Starts at $99 and reaches up to $1,300 for bundle packages.
5. PR Newswire
Whether you’re looking for print or online distribution, PR Newswire is a great option.
PR Newswire helps connect you to leading publishers in a wide range of industries.
If you’re looking for accurate data on your release’s performance, this provider’s got you covered. You can monitor and measure the impact of your story, and gain insights for future releases.
Furthermore, PR Newswire has a network of over 4,000 websites and 20,000 email subscribers. With a host of distribution channels, it’s up to you to decide which one will work best for your brand.
Pricing: Not published on their website.
6. 24-7 Press Release
Using a cloud-based platform, 24-7 Press Release distributes your news to traditional and digital outlets.
24-7 Press Release follows a strict reviewal process to ensure your press release is ready to be distributed and follows their guidelines.
With a two-day turnaround time, their starter pack allows you to include up to five industry categories, four images, or documents and be sent to over 50 premium news sites.
The more advanced packages come with next-day turnaround, which is helpful if you have a tight deadline.
In addition, you’ll receive a report that tells you if and where your story was picked up.
Pricing: Starts at $19 per release and goes up to $389 depending on the distribution package you select.
7. PR Web
PR Web is a tool owned by Cision, a PR and earned media software company.
Their press release distribution service allows you to upload your press release (along with rich media like images and videos), then distribute the story to journalists and publications in your selected categories.
PR Web also provides you with a comprehensive analytics dashboard, so you can monitor the impact of your campaign and calculate important metrics, such as ROI.
Pricing: $99 to $389 depending on the distribution package you select.
8. Response Source Press Release Wire
Response Source is a UK-based distribution service connecting brands with top UK publishers and journalists. With over 20 years of experience, the company has built a thriving network of journalists and publications, so you can benefit from having your news distributed by email to useful contacts.
In a few simple steps, you can upload your release, set the date for publication, attach your media, select the categories, and choose your distribution channels.
You’ll also get your own “newsroom,” along with access to analytics, such as the number of views your press release received and email open rates.
Pricing: Starts at £85 per press release for ad hoc users and goes up to £1050 for bundles.
9. Presswire
Presswire has a live global database, allowing you to send your press release directly to the journalists who are most likely to pick up your story.
One standout feature from Presswire is the ability to translate your press release into any language and leverage geo-targeting to deliver it to the appropriate regions.
This distribution service also offers an advanced analytics platform, providing insight on:
- Who opened your press release.
- Whether your release was forwarded.
- How many times it was read.
- How long people spent reading it.
These insights can help you refine your approach for future press releases.
Pricing: Starts at £150 and goes up based on the distribution package and add-on services you select.
10. PR Fire
PR Fire syndicates your release to newswires and journalists in the US and UK in your chosen industry categories – all within four business hours after receiving your content.
The press release is also published on the platform’s social media pages and site.
Additionally, two weeks after your press release is distributed, you receive a report detailing its performance.
PR Fire also offers a copy-editing service, in which a professional edits or rewrites your press release.
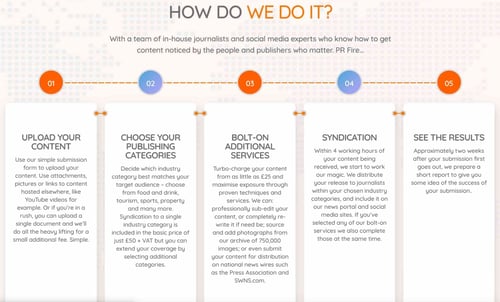
PR Fire has landed its customers press coverage in a range of top-tier publications, including BuzzFeed, Metro, The Huffington Post, and The Times, so it’s worth checking out.
Pricing: £50 to £150 per press release depending on the distribution package you select.
You know how important PR is, and you’ve crafted a succinct, yet powerful, story. All that’s left to do is share it with the world.
But journalists have to write up to seven stories per day. So how do you ensure your press release is one of those stories? And just as importantly, how can you make your distribution email stand out in a crowded inbox?
Follow this five-step guide to learn how.
1. Find journalists who might be interested in your press release.
When have news to share, I’ll bet you’re tempted to tell as many people as possible. You want everyone to hear about it, right?
However, that’s not always the best strategy.
After crafting a great press release, you can identify journalists who may be interesting in creating a larger story surrounding your news.
You can do that by searching for journalists and publishers who’ve already written about your topic or industry.
For instance, let’s say you run a car parts business. You’ve conducted some research around potholes, gathered some interesting data, and turned it into a killer press release. But mailing every journalist under the sun is probably going to be a waste of time.
Instead, it’s worth seeking out publishers who cover the automotive industry and journalists who’ve covered similar topics before.
To do this, fire up Google, type in your topic (potholes), and navigate to the News tab:
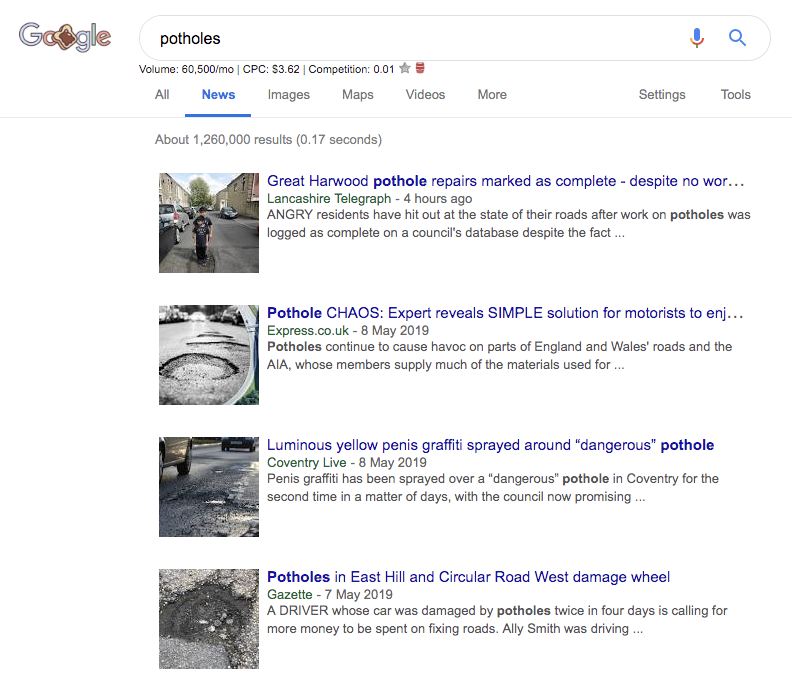
As you can see, there are plenty of recent articles on this topic, meaning journalists are more than likely interested enough to cover it.
Next, read some of the articles on Google News and make a note of the journalists’ names.
A simple spreadsheet with the journalist’s name and the publication they write for is a good way to keep a log of your distribution plan:

If you have the budget, you can also use a media database, such as Cision or Muckrack to find relevant journalists and reporters.
This method is much more likely to get you responses because you’re only pitching the release to journalists who’ve demonstrated an interest in your topic.
2. Get the journalists’ contact details.
Next, it’s time to find some contact information for the people on your press release distribution list.
This could be as simple as clicking on an author’s bio on their publication’s site.
… and making a note of their email address:

But, just like anything else in the world of PR, it’s not always that easy.
You’ll often have to do a little digging to find the contact details – starting with a simple Google search such as “[Journalist’s name] email]”.
If that doesn’t do the trick, you could also use a media database like Muckrack:
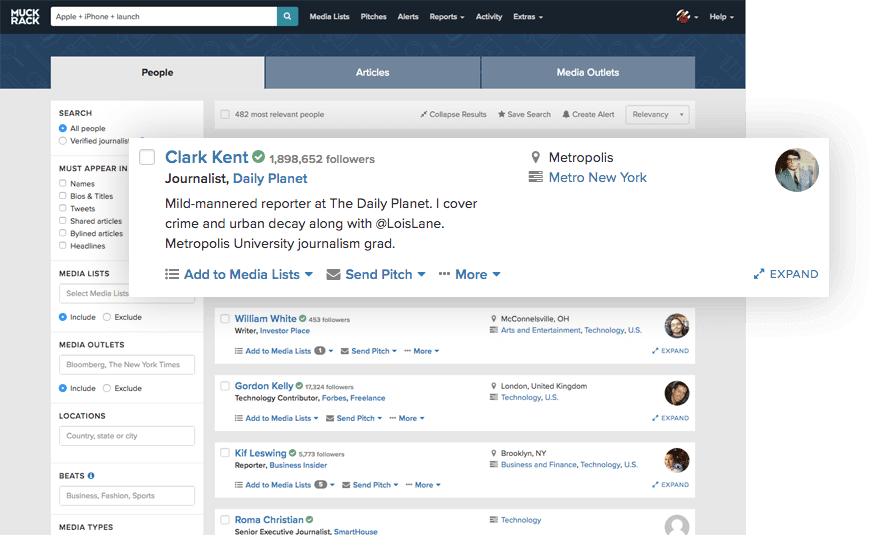
Don’t have the budget for paid databases? Harness the power of social media.
LinkedIn is an excellent place to discover contact information for professional contacts (AKA, your journalists). Simply search for “journalist” and filter the results by selecting your target publication as “company,” then plug their name into Hunter to find their email address:
Twitter can also be a quick and easy way to get in touch with your target journalists, too.
3. Craft a killer pitch.
Email is the most effective way to send your press release quickly.
However, there’s another obstacle you’ll need to overcome here: Journalists can receive up to hundreds of pitches a day.
So here’s what you should do to stand out: First, keep it brief.
Don’t waste the journalist’s time with a long-winded, self-absorbed introduction to yourself or your business. They probably don’t care.
Instead, get straight into the purpose of your email: The story, and why they should cover it in their publication.
Journalists are time-poor, so they’ll appreciate a nice, succinct message that sells your story in a few words – like this:
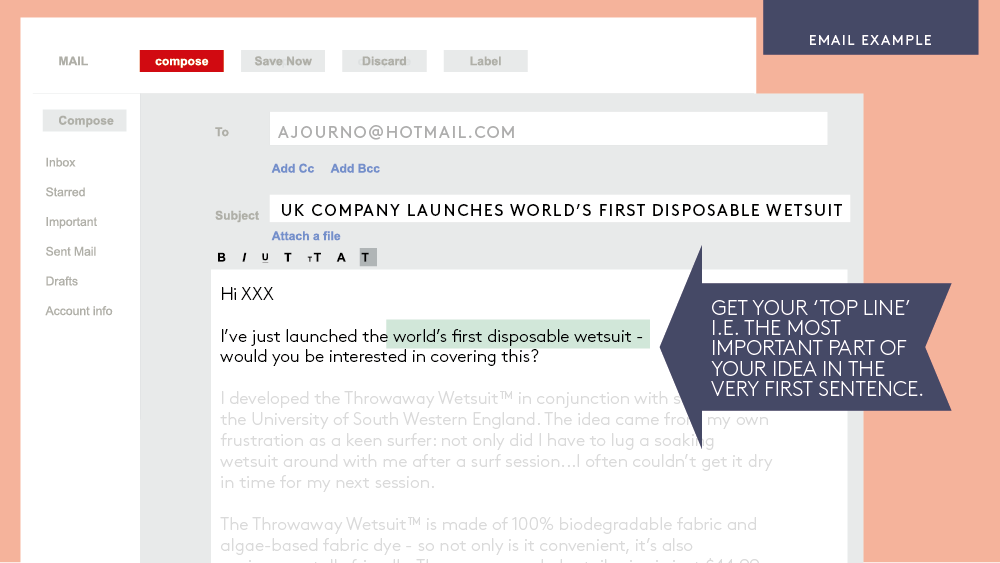
As you can see in the example above, the entire story is sold in the first sentence, with a direct question asking if the journalist is interested – rather than just assuming so.
Follow this up with a couple more sentences to give the journalist some additional context, before adding a line spacer and pasting your full press release.
Note: Avoid adding your press releases as attachments. Journalists don’t like opening attachments in fear of viruses or malware, so eliminate that problem by pasting the body of your press release below your pitch.
Second, you must personalize your pitch.
Show some interest in the journalist’s previous work by indicating that you know they’re a good fit based on the topics they cover.
Try to build a relationship with the journalists first, rather than hitting them with a release and expecting instant coverage.
Sometimes, it’s worth playing the long game by getting to know your desired publisher ahead of your pitch. Engage with them on LinkedIn, respond to their tweets, and generally work yourself into their notifications – and their radar.
3. Make your subject line irresistible.
What’s the first thing you look at before you open an email? The subject line, right? In many cases, it plays a big role in the email open rate.
So, how can you make sure yours gets opened? Try these tips:
- Keep it short and sweet: Ideally, 10 or fewer words.
- Ensure it’s unique: A powerful subject line should be disruptive, innovative, or offer a human-interest angle.
- Be specific: Your subject line should be descriptive enough to let the reader know what to expect when they open the email.
- Provide exclusivity: If you’ve got some unique data or research, mention that. Exclusivity can help you grab a journalist’s attention.
… And one thing to avoid? Clickbait. It’s that simple.
4. Send your press release pitch (at the right time).
Press release? Check. Pitch email? Check. Contact details? Check.
… But that doesn’t mean you’re ready to distribute your press release.
You’ll need to think about the day (and time) you hit the “send” button because certain days and times have better success rates than others.
For instance, some journalists may prefer to sift through pitches in the morning. While others may prefer mid-day or late afternoon.
It’s often a trial-and-error process that you should keep note of.
Additionally, it’s important to consider the day of the week. While modern-day businesses are often active seven days a week, there’s still a traditional lull in pick-up rates when it comes to press release distribution.
So, consider the day you send your release — it might land more coverage if you pitch it midweek, as opposed to sending it first thing on Monday morning.
5. Follow-up on your release.
An age-old question: Should you follow up on your pitch if it doesn’t get traction?
It depends on who you’re asking, but generally, the consensus seems evenly split. Some people believe following up to be a big no-no, while others indicate that it can be fruitful.
If you have a release you’re particularly proud of, it won’t hurt to follow up if you’re struggling to land coverage – provided you’re tactful.
Don’t spam the journalist’s inbox with the same press release and the same pitch. That can get annoying, and ruin your chances of getting your story picked up.
Instead, try tweaking the angle of your pitch to something that highlights why they should care about this story.
How to Submit Local Press Releases
Local press releases are great for small, brick-and-mortar businesses who want to reach consumers who are in their area.
That’s why it’s beneficial to send out your press release to local newspapers, publishers, and journalists.
Many of the guidelines outlined above still apply. What’s different here is that you can take a more personal approach to your pitches as well as distribution channels. For instance, you can target local radio and TV stations that may be interested in mentioning your story.
Press Release Distribution Mistakes
All set to send your next press release? Hang on a second.
Here are some common mistakes people make, and how you can avoid them when you distribute your press release.
1. Your press release is too long.
Your story needs to be short and succinct.
The easiest way to get your press release read is to cut the fluff. Remove any sentences that won’t add value to the reader.
Your press release needs four main sections:
- Paragraph to introduce the news.
- About two to three paragraphs to dive into the “what” and “why” of the news.
- About and contact information.
Remember: Every sentence counts.
2. You’re targeting the wrong people or publications.
If you work for a small business looking to get some coverage, you’re going to get the most success from contacting local publications.
A local business story is rarely important enough to make national news.
You should also double-check that your target journalists are a good fit. Many tend to specialize in one or two interests – emailing a sports reporter about a press release related to health isn’t likely to result in coverage.
3. Your story isn’t newsworthy enough.
Before hitting send and distributing your release, take a moment and ask yourself: “Is this story actually newsworthy?”
If your release is too self-promotional, it may not interest your target audience.
Ensure it’s got a relevant angle and includes information and/or data pertinent to the story.
Accompanying quotes are also great, as they bring the story to life, rather than over-selling your own company. For instance, say you’re partnering with another brand, consider including a quote from the other brand’s CEO, which explains their interest in wanting to partner with you.
4. You didn’t include your contact info.
Imagine crafting that story, pitching it, and finding an interested reporter who wants to contact you for a larger story. But the journalist hits a dead end and is unable to contact you.
Unfortunately, if you don’t include your contact information in the press release, you risk losing out on the chance for increased exposure.
You need to make it easy for journalists to contact you by leaving a phone number and email address in your press release distribution email.
Remember to Keep the Relationship Alive
When you need to create a press release, follow the distribution steps in this guide to boost your chances of landing coverage.
Keep tweaking and refining your approach until you see success. Your first piece of coverage could well be the domino that starts the run. A story picked up by one news outlet can soon snowball from publication to publication.
Plus, if your story does get picked up, don’t forget to thank the journalist. It can facilitate a relationship that you can then nurture and facilitate easier coverage down the line.
Ultimately, you can never have too much good press!
Editor’s note: This post was originally published in November 2019 and has been updated for comprehensiveness.

How to Do A/B Testing: 15 Steps for the Perfect Split Test
When marketers like us create landing pages, write email copy, or design call-to-action buttons, it can be tempting to use our intuition to predict what will make people click and convert.
But basing marketing decisions off of a “feeling” can be pretty detrimental to results. Rather than relying on guesses or assumptions to make these decisions, you’re much better off running an A/B test — sometimes called a split test.

A/B testing can be valuable because different audiences behave, well, differently. Something that works for one company may not necessarily work for another. In fact, conversion rate optimization (CRO) experts hate the term “best practices” because it may not actually be the best practice for you.
But A/B tests can also be complex. If you’re not careful, you could make incorrect assumptions about what people like and what makes them click — decisions that could easily misinform other parts of your strategy.
Keep reading to learn how to do A/B testing before, during, and after data collection so you can make the best decisions from your results.
To run an A/B test, you need to create two different versions of one piece of content, with changes to a single variable. Then, you’ll show these two versions to two similarly sized audiences and analyze which one performed better over a specific period of time (long enough to make accurate conclusions about your results).
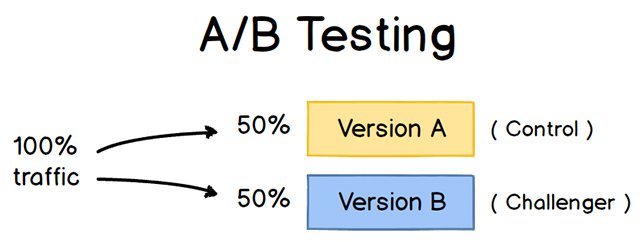
A/B testing helps marketers observe how one version of a piece of marketing content performs alongside another. Here are two types of A/B tests you might conduct in an effort to increase your website’s conversion rate:
Example 1: User Experience Test
Perhaps you want to see if moving a certain call-to-action (CTA) button to the top of your homepage instead of keeping it in the sidebar will improve its click-through rate.
To A/B test this theory, you’d create another, alternative web page that uses the new CTA placement. The existing design with the sidebar CTA — or the “control” — is Version A. Version B with the CTA at the top is the “challenger.” Then, you’d test these two versions by showing each of them to a predetermined percentage of site visitors. Ideally, the percentage of visitors seeing either version is the same.
Learn how to easily A/B test a component of your website with HubSpot’s Marketing Hub.
Example 2: Design Test
Perhaps you want to find out if changing the color of your call-to-action (CTA) button can increase its click-through rate.
To A/B test this theory, you’d design an alternative CTA button with a different button color that leads to the same landing page as the control. If you usually use a red call-to-action button in your marketing content, and the green variation receives more clicks after your A/B test, this could merit changing the default color of your call-to-action buttons to green from now on.
To learn more about A/B testing, download our free introductory guide here.
A/B Testing in Marketing
A/B testing has a multitude of benefits to a marketing team, depending on what it is you decide to test. Above all, though, these tests are valuable to a business because they’re low in cost but high in reward.
Let’s say you employ a content creator with a salary of $50,000/year. This content creator publishes five articles per week for the company blog, totaling 260 articles per year. If the average post on the company’s blog generates 10 leads, you could say it costs just over $192 to generate 10 leads for the business ($50,000 salary ÷ 260 articles = $192 per article). That’s a solid chunk of change.
Now, if you ask this content creator to spend two days developing an A/B test on one article, instead of writing two articles in that time period, you might burn $192 because you’re publishing one fewer article. But if that A/B test finds you can increase each article’s conversion rate from 10 to 20 leads, you just spent $192 to potentially double the number of customers your business gets from your blog.
If the test fails, of course, you lost $192 — but now you can make your next A/B test even more educated. If that second test succeeds in doubling your blog’s conversion rate, you ultimately spent $284 to potentially double your company’s revenue. No matter how many times your A/B test fails, its eventual success will almost always outweigh the cost to conduct it.
There are many types of split tests you can run to make the experiment worth it in the end. Here are some common goals marketers have for their business when A/B testing:
- Increased Website Traffic: Testing different blog post titles or webpage titles can change the number of people who click on that hyperlinked title to get to your website. This can increase website traffic as a result.
- Higher Conversion Rate: Testing different locations, colors, or even anchor text on your CTAs can change the number of people who click these CTAs to get to a landing page. This can increase the number of people who fill out forms on your website, submit their contact info to you, and “convert” into a lead.
- Lower Bounce Rate: If your website visitors leave (or “bounce”) quickly after visiting your website, testing different blog post introductions, fonts, or featured images can reduce this bounce rate and retain more visitors.
- Lower Cart Abandonment: Ecommerce businesses see an average of 70% of customers leave their website with items in their shopping cart. This is known as “shopping cart abandonment” and is, of course, detrimental to any online store. Testing different product photos, check-out page designs, and even where shipping costs are displayed can lower this abandonment rate.
Now, let’s walk through the checklist for setting up, running, and measuring an A/B test.
How to Conduct A/B Testing
Follow along with our free A/B testing kit with everything you need to run A/B testing including a test tracking template, a how-to guide for instruction and inspiration, and a statistical significance calculator to see if your tests were wins, losses, or inconclusive.
Before the A/B Test
Let’s cover the steps to take before you start your A/B test.
1. Pick one variable to test.
As you optimize your web pages and emails, you might find there are a number of variables you want to test. But to evaluate how effective a change is, you’ll want to isolate one “independent variable” and measure its performance. Otherwise, you can’t be sure which variable was responsible for changes in performance.
You can test more than one variable for a single web page or email — just be sure you’re testing them one at a time.
To determine your variable, look at the elements in your marketing resources and their possible alternatives for design, wording, and layout. Other things you might test include email subject lines, sender names, and different ways to personalize your emails.
Keep in mind that even simple changes, like changing the image in your email or the words on your call-to-action button, can drive big improvements. In fact, these sorts of changes are usually easier to measure than the bigger ones.
Note: There are some times when it makes more sense to test multiple variables rather than a single variable. This is a process called multivariate testing. If you’re wondering whether you should run an A/B test versus a multivariate test, here’s a helpful article from Optimizely that compares the two processes.
2. Identify your goal.
Although you’ll measure several metrics during any one test, choose a primary metric to focus on before you run the test. In fact, do it before you even set up the second variation. This is your “dependent variable,” which changes based on how you manipulate the independent variable.
Think about where you want this dependent variable to be at the end of the split test. You might even state an official hypothesis and examine your results based on this prediction.
If you wait until afterward to think about which metrics are important to you, what your goals are, and how the changes you’re proposing might affect user behavior, then you might not set up the test in the most effective way.
3. Create a ‘control’ and a ‘challenger.’
You now have your independent variable, your dependent variable, and your desired outcome. Use this information to set up the unaltered version of whatever you’re testing as your control scenario. If you’re testing a web page, this is the unaltered page as it exists already. If you’re testing a landing page, this would be the landing page design and copy you would normally use.
From there, build a challenger — the altered website, landing page, or email that you’ll test against your control. For example, if you’re wondering whether adding a testimonial to a landing page would make a difference in conversions, set up your control page with no testimonials. Then, create your challenger with a testimonial.
4. Split your sample groups equally and randomly.
For tests where you have more control over the audience — like with emails — you need to test with two or more audiences that are equal in order to have conclusive results.
How you do this will vary depending on the A/B testing tool you use. If you’re a HubSpot Enterprise customer conducting an A/B test on an email, for example, HubSpot will automatically split traffic to your variations so that each variation gets a random sampling of visitors.
5. Determine your sample size (if applicable).
How you determine your sample size will also vary depending on your A/B testing tool, as well as the type of A/B test you’re running.
If you’re A/B testing an email, you’ll probably want to send an A/B test to a subset of your list that is large enough to achieve statistically significant results. Eventually, you’ll pick a winner and send the winning variation on to the rest of the list. (See “The Science of Split Testing” ebook at the end of this article for more on calculating your sample size.)
If you’re a HubSpot Enterprise customer, you’ll have some help determining the size of your sample group using a slider. It’ll let you do a 50/50 A/B test of any sample size — although all other sample splits require a list of at least 1,000 recipients.
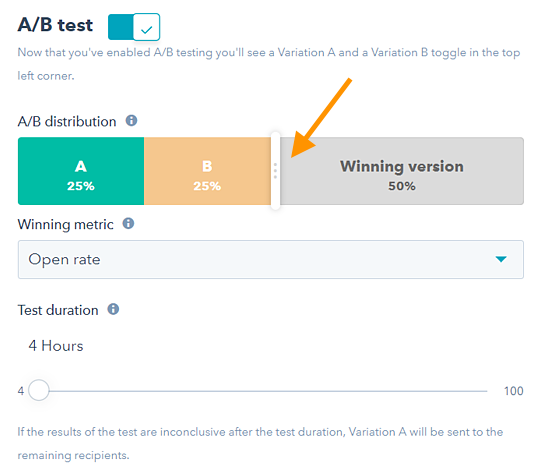
If you’re testing something that doesn’t have a finite audience, like a web page, then how long you keep your test running will directly affect your sample size. You’ll need to let your test run long enough to obtain a substantial number of views. Otherwise, it will be hard to tell whether there was a statistically significant difference between variations.
6. Decide how significant your results need to be.
Once you’ve picked your goal metric, think about how significant your results need to be to justify choosing one variation over another. Statistical significance is a super important part of the A/B testing process that’s often misunderstood. If you need a refresher, I recommend reading this blog post on statistical significance from a marketing standpoint.
The higher the percentage of your confidence level, the more sure you can be about your results. In most cases, you’ll want a confidence level of 95% minimum — preferably even 98% — especially if it was a time-intensive experiment to set up. However, sometimes it makes sense to use a lower confidence rate if you don’t need the test to be as stringent.
Matt Rheault, a senior software engineer at HubSpot, likes to think of statistical significance like placing a bet. What odds are you comfortable placing a bet on? Saying “I’m 80% sure this is the right design and I’m willing to bet everything on it” is similar to running an A/B test to 80% significance and then declaring a winner.
Rheault also says you’ll likely want a higher confidence threshold when testing for something that only slightly improves conversion rate. Why? Because random variance is more likely to play a bigger role.
“An example where we could feel safer lowering our confidence threshold is an experiment that will likely improve conversion rate by 10% or more, such as a redesigned hero section,” he explained.
“The takeaway here is that the more radical the change, the less scientific we need to be process-wise. The more specific the change (button color, microcopy, etc.), the more scientific we should be because the change is less likely to have a large and noticeable impact on conversion rate.”
7. Make sure you’re only running one test at a time on any campaign.
Testing more than one thing for a single campaign — even if it’s not on the same exact asset — can complicate results. For example, if you A/B test an email campaign that directs to a landing page at the same time that you’re A/B testing that landing page, how can you know which change caused the increase in leads?
During the A/B Test
Let’s cover the steps to take during your A/B test.
8. Use an A/B testing tool.
To do an A/B test on your website or in an email, you’ll need to use an A/B testing tool. If you’re a HubSpot Enterprise customer, the HubSpot software has features that let you A/B test emails (learn how here), calls-to-action (learn how here), and landing pages (learn how here).
For non-HubSpot Enterprise customers, other options include Google Analytics, which lets you A/B test up to 10 full versions of a single web page and compare their performance using a random sample of users.
9. Test both variations simultaneously.
Timing plays a significant role in your marketing campaign’s results, whether it’s time of day, day of the week, or month of the year. If you were to run Version A during one month and Version B a month later, how would you know whether the performance change was caused by the different design or the different month?
When you run A/B tests, you’ll need to run the two variations at the same time, otherwise you may be left second-guessing your results.
The only exception here is if you’re testing timing itself, like finding the optimal times for sending out emails. This is a great thing to test because depending on what your business offers and who your subscribers are, the optimal time for subscriber engagement can vary significantly by industry and target market.
10. Give the A/B test enough time to produce useful data.
Again, you’ll want to make sure that you let your test run long enough to obtain a substantial sample size. Otherwise, it’ll be hard to tell whether there was a statistically significant difference between the two variations.
How long is long enough? Depending on your company and how you execute the A/B test, getting statistically significant results could happen in hours … or days … or weeks. A big part of how long it takes to get statistically significant results is how much traffic you get — so if your business doesn’t get a lot of traffic to your website, it’ll take much longer for you to run an A/B test.
Read this blog post to learn more about sample size and timing.
11. Ask for feedback from real users.
A/B testing has a lot to do with quantitative data … but that won’t necessarily help you understand why people take certain actions over others. While you’re running your A/B test, why not collect qualitative feedback from real users?
One of the best ways to ask people for their opinions is through a survey or poll. You might add an exit survey on your site that asks visitors why they didn’t click on a certain CTA, or one on your thank-you pages that asks visitors why they clicked a button or filled out a form.
You might find, for example, that a lot of people clicked on a call-to-action leading them to an ebook, but once they saw the price, they didn’t convert. That kind of information will give you a lot of insight into why your users are behaving in certain ways.
After the A/B Test
Finally, let’s cover the steps to take after your A/B test.
12. Focus on your goal metric.
Again, although you’ll be measuring multiple metrics, keep your focus on that primary goal metric when you do your analysis.
For example, if you tested two variations of an email and chose leads as your primary metric, don’t get caught up on open rate or click-through rate. You might see a high click-through rate and poor conversion rates, in which case you might end up choosing the variation that had a lower click-through rate in the end.
13. Measure the significance of your results using our A/B testing calculator.
Now that you’ve determined which variation performs the best, it’s time to determine whether your results are statistically significant. In other words, are they enough to justify a change?
To find out, you’ll need to conduct a test of statistical significance. You could do that manually … or you could just plug in the results from your experiment to our free A/B testing calculator.
For each variation you tested, you’ll be prompted to input the total number of tries, like emails sent or impressions seen. Then, enter the number of goals it completed — generally you’ll look at clicks, but this could also be other types of conversions.

The calculator will spit out the confidence level your data produces for the winning variation. Then, measure that number against the value you chose to determine statistical significance.
14. Take action based on your results.
If one variation is statistically better than the other, you have a winner. Complete your test by disabling the losing variation in your A/B testing tool.
If neither variation is statistically better, you’ve just learned that the variable you tested didn’t impact results, and you’ll have to mark the test as inconclusive. In this case, stick with the original variation, or run another test. You can use the failed data to help you figure out a new iteration on your new test.
While A/B tests help you impact results on a case-by-case basis, you can also apply the lessons you learn from each test and apply it to future efforts.
For example, if you’ve conducted A/B tests in your email marketing and have repeatedly found that using numbers in email subject lines generates better clickthrough rates, you might want to consider using that tactic in more of your emails.
15. Plan your next A/B test.
The A/B test you just finished may have helped you discover a new way to make your marketing content more effective — but don’t stop there. There’s always room for more optimization.
You can even try conducting an A/B test on another feature of the same web page or email you just did a test on. For example, if you just tested a headline on a landing page, why not do a new test on body copy? Or a color scheme? Or images? Always keep an eye out for opportunities to increase conversion rates and leads.
A/B Testing Examples
We’ve discussed how A/B tests are used in marketing and how to conduct one — but how do they actually look in practice?
As you might guess, we run many A/B tests to increase engagement and drive conversions across our platform. Here are five examples of A/B tests to inspire your own experiments.
1. Site Search
Site search bars help users quickly find what they’re after on a particular website. HubSpot found from previous analysis that visitors who interacted with its site search bar were more likely to convert on a blog post. So, we ran an A/B test in an attempt to increase engagement with the search bar.
In this test, search bar functionality was the independent variable and views on the content offer thank you page was the dependent variable. We used one control condition and three challenger conditions in the experiment.
In the control condition (variant A), the search bar remained unchanged.
In variant B, the search bar was made larger and more visually prominent, and the placeholder text was set to “search by topic.”

Variant C appeared identical to variant B, but only searched the HubSpot Blog rather than the entire website.
In variant D, the search bar was made larger but the placeholder text was set to “search the blog.” This variant also searched only the HubSpot Blog

We found variant D to be the most effective: It increased conversions by 3.4% over the control and increased the percentage of users who used the search bar by 6.5%.
2. Mobile CTAs
HubSpot uses several CTAs for content offers in our blog posts, including ones in the body of posts as well as at the bottom of the page. We test these CTAs extensively for optimize their performance.
For our mobile users, we ran an A/B test to see which type of bottom-of-page CTA converted best. For our independent variable, we altered the design of the CTA bar. Specifically, we used one control and three challengers in our test. For our dependent variables, we used pageviews on the CTA thank you page and CTA clicks.
The control condition included our normal placement of CTAs at the bottom of posts. In variant B, the CTA had no close or minimize option.
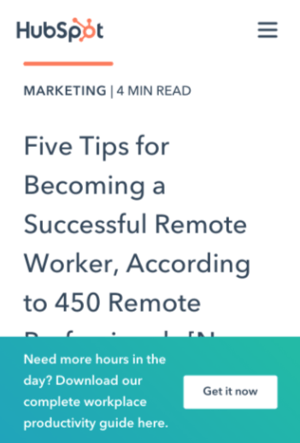 In variant C, mobile readers could close the CTA by tapping an X icon. Once it was closed out, it wouldn’t reappear.
In variant D, we included an option to minimize the CTA with an up/down caret.
Our tests found all variants to be successful. Variant D was the most successful, with a 14.6% increase in conversions over the control. This was followed by variant C with an 11.4% increase and variant B with a 7.9% increase.
3. Author CTAs
In another CTA experiment, HubSpot tested whether adding the word “free” and other descriptive language to author CTAs at the top of blog posts would increase content leads. Past research suggested that using “free” in CTA text would drive more conversions and that text specifying the type of content offered would be helpful for SEO and accessibility.
In the test, the independent variable was CTA text and the main dependent variable was conversion rate on the content offer form.
In the control condition, author CTA text was unchanged (see the orange button in the image below).

In variant B, the word “free” was added to the CTA text.
In variant C, descriptive wording was added to the CTA text in addition to “free.”
Interestingly, variant B saw a loss in form submissions, down by 14% compared to the control. This was unexpected, since including “free” in content offer text is widely considered a best practice.
Meanwhile, form submissions in variant C outperformed the control by 4%. It was concluded that adding descriptive text to the author CTA helped users understand the offer and thus made them more likely to download.
4. Blog Table of Contents
To help users better navigate the blog, HubSpot tested a new Table of Contents (TOC) module. The goal was to improve user experience by presenting readers with their desired content more quickly. We also tested whether adding a CTA to this TOC module would increase conversions.
The independent variable of this A/B test was the inclusion and type of TOC module in blog posts, and the dependent variables were conversion rate on content offer form submissions and clicks on the CTA inside the TOC module.
The control condition did not include the new TOC module — control posts either had no table of contents, or a simple bulleted list of anchor links within the body of the post near the top of the article (pictured below).
In variant B, the new TOC module was added to blog posts. This module was sticky, meaning it remained onscreen as users scrolled down the page. Variant B also included a content offer CTA at the bottom of the module.
Variant C included an identical module to variant B but with the CTA removed.
Both variants B and C did not increase the conversion rate on blog posts. The control condition outperformed variant B by 7% and performed equally with variant C. Also, few users interacted with the new TOC module or the CTA inside the module.
5. Review Notifications
To determine the best way of gathering customer reviews, we ran a split test of email notifications versus in-app notifications. Here, the independent variable was the type of notification and the dependent variable was the percentage of those who left a review out of all those who opened the notification.
In the control, HubSpot sent a plain text email notification asking users to leave a review. In variant B, HubSpot sent an email with a certificate image including the user’s name.
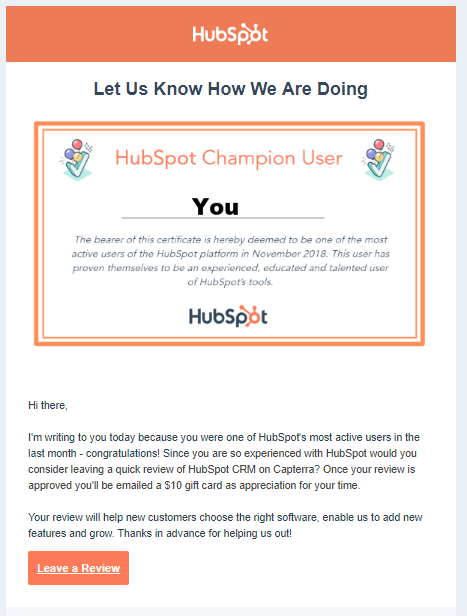
For variant C, HubSpot sent users an in app-notification.
Ultimately, both emails performed similarly and outperformed the in-app notifications. About 25% of users who opened an email left a review versus the 10.3% who opened in-app notifications. Emails were also more often opened by users.
Start A/B Testing Today
A/B testing allows you to get to the truth of what content and marketing your audience wants to see. Learn how to best carry out some of the steps above using the free e-book below.
Editor’s note: This post was originally published in May 2016 and has been updated for comprehensiveness.

How to Launch a Product, According to HubSpot’s Product Marketers
Like a tree falling in the woods, if you launch a product without spreading the word — will anyone use it? Will anyone even want it?
Probably not. Whether you’re launching something huge, something small, or you’re updating a current offering, you’ll want to start your preparation well in advance of the launch date.
This includes nailing down your positioning and messaging, sharing that with key teams and stakeholders, listing out all the launch activities, creating assets and content, prepping everyone involved in the launch, and so on.
Because there are so many moving parts in this process, bringing your product to market can be intimidating and tricky.
To help you, we’ve come up with a step-by-step checklist for a successful product launch and gathered the best product launch tips from a HubSpot Product Marketer.
Plus, we’ll review how to know when to delay a product launch.
1. Learn about your customer.
Whether you call it “market research,” or “customer development” it’s key to learn about what drives your customer. Identifying their goals, motivations, and pain points could lead you to developing and marketing a valuable solution.
You don’t need to perform years of intense research to learn about your customer. In fact, we suggest just talking to 12 to 15 current or prospective customers.
When speaking to them, pay extra attention when they start sentences with “I wish a product did this function…” or “Why can’t products do this?” When they give these statements, respond with questions that go deeper, like “Can you get more specific about that?” If they don’t bring up any pain points, ask them a few specific questions that will encourage them to give deeper answers.
These conversations will give you a solid idea of what their biggest pain points are and how you can market a solution to them. Once you learn these key details about your customers, you can develop a buyer persona that your team can focus on serving.
2. Write a positioning statement.
Write out a statement that can clearly and concisely answer these three questions:
- Who is the product for?
- What does the product do?
- Why is it different from other products out there?
If you’d like to go even deeper, create a statement that answers the following questions:
- What is your target audience?
- What segment of the target audience is most likely to buy the product?
- What brand name will you give your product or service?
- What product or service category does your product lie in?
- How is it different from competitors in the same category?
- What evidence or proof do you have to prove that your product is different?
Still need more guidance on how to write a positioning statement? Check out this template.
3. Pitch your positioning to stakeholders.
Once you’ve established your position statement, present it to stakeholders in your company so they are all on the same page.
If your employees have a hard time buying into the product, your customers might as well. If your team loves it, that might be a great sign that the product launch will go well.
4. Plan your go-to-market strategy.
This is the strategy that you will use to launch and promote your product. While some businesses prefer to build a funnel strategy, others prefer the flywheel approach.
Regardless of which method you choose, this process contains many moving parts. To create an organized strategy for launching your product, it can be helpful to use a template, like this one.
As you create the strategy, also start considering which type of content you’ll use to attract a prospective customer’s attention during the awareness, consideration, and purchase decision stage. You’ll need to produce this content in the next step.
5. Set a goal for the launch.
Before you get started on the implementing your strategy, make sure you write down your goals for the launch.
Alex Girard, a Product Marketing Manager at HubSpot, says, “Create specific goals for the launch’s success. Keeping these goals in mind will help you focus your efforts on launch tactics that will help you achieve those goals.”
For example, the goals of your product launch could be to effectively establish a new product name, build awareness, or create sales opportunities.
One of the best ways to set goals for your launch team is to write them out like SMART goals. A SMART goal is Specific, Measurable, Attainable, Relevant, and Time-bound.
6. Create promotional content.
After planning out your go-to-market strategy and writing your SMART goals, start producing content that will support and align with those promotional efforts. This can include blog posts related to your product or industry, demos and tutorials, and landing pages.
Our go-to-market template will also help you determine which content you should create for each phase of your prospective customer’s buyer’s journey.
7. Prepare your team.
Be sure that your company and key stakeholders are ready for you to launch and begin marketing the product. Communicate with the company through internal presentations, Slack, or email to keep your company in-the-know of your launch plan.
8. Launch the product
Once you’ve completed all the above steps, you can launch the product.
9. See how well you did achieving your goals.
After you launch your product, track how the go-to-market strategy is performing. Be prepared to pivot or adjust aspects of your plan if they aren’t going smoothly.
Additionally, don’t forget about the goals you set before the launch. See how well you did achieving those goals. If the launch didn’t meet expectations, you can rethink your go-to-market strategy and adjust from there.
The cost of launching a new product varies significantly. For instance, an entrepreneur will see vastly different costs for launching a product on Amazon than an enterprise company might see for launching a product in a million dollar market.
Let’s consider two examples to explore this more closely.
In the first example, let’s say you’re an entrepreneur who has invented a design app you’re hoping to sell online. You might conduct market research to determine which marketing strategies work best for your goals, which messaging resonates best with your audience, and which design elements appeal to your desired prospects. If you use a few focus groups to determine these answers, you might expect to spend roughly $5,000.
When you’re bringing a new app to the market, you’ll need to choose the best go-to marketing strategy for your needs. Regardless of the strategy you choose, they all cost money. For instance, product branding could cost roughly $1,000 if you’re paying a designer to help you out, and website design could cost anywhere from $500-$3,000 if you’re paying a web designer a one-off fee.
These fees don’t include the cost you need to pay yourself and any employees if this is a full-time job. It also doesn’t include the costs of hiring an engineer to update the app’s features and ensure the app is running smoothly.
With this simplified example, you’re looking at roughly $8,000. Of course, you can cut some costs if you choose to do any of these tasks yourself, but you might risk creating a subpar customer experience.
On the other end of the spectrum, let’s consider a large enterprise company that is launching a new product. Here, you’ll likely pay upwards of $30,000 – $50,000 for market research.
Perhaps you’ll spend $15,000 on brand positioning and the marketing materials necessary to differentiate yourself against competitors, and you might pay upwards of $30,000 for all the product design and brand packaging. Finally, your marketing team could need a budget of roughly $20,000 for SEO, paid advertising, social, content creation, etc.
All said and done, launching a product against other enterprise competitors’ could cost roughly $125,000. Again, that doesn’t include the costs you’ll pay your marketing, product development, and engineering teams.
How to Launch a Product Online
To launch your product online, you’ll want to ensure you’ve followed the steps above. However, there are a few additional steps you’ll want to follow to gain traction primarily online.
1. Figure out the story you want to tell regarding your product’s bigger purpose.
What story do you want to tell across social platforms, landing pages, and email? This is similar to your positioning statement, but needs to be geared entirely towards your target audience. Ask questions like, Why should they purchase your product? And How will your product or service make their lives better?
Communicating cross-functionally ensures the communication materials you use across various online channels align — which is key when it comes to establishing a new product in the marketplace.
Consider, for instance, how Living Proof announced its new product, Advanced Clean Dry Shampoo, on its Instagram page. The story revolves around a simple nuisance common with most other dry shampoos — How consumers still want that just-washed feeling, even when using a dry shampoo.
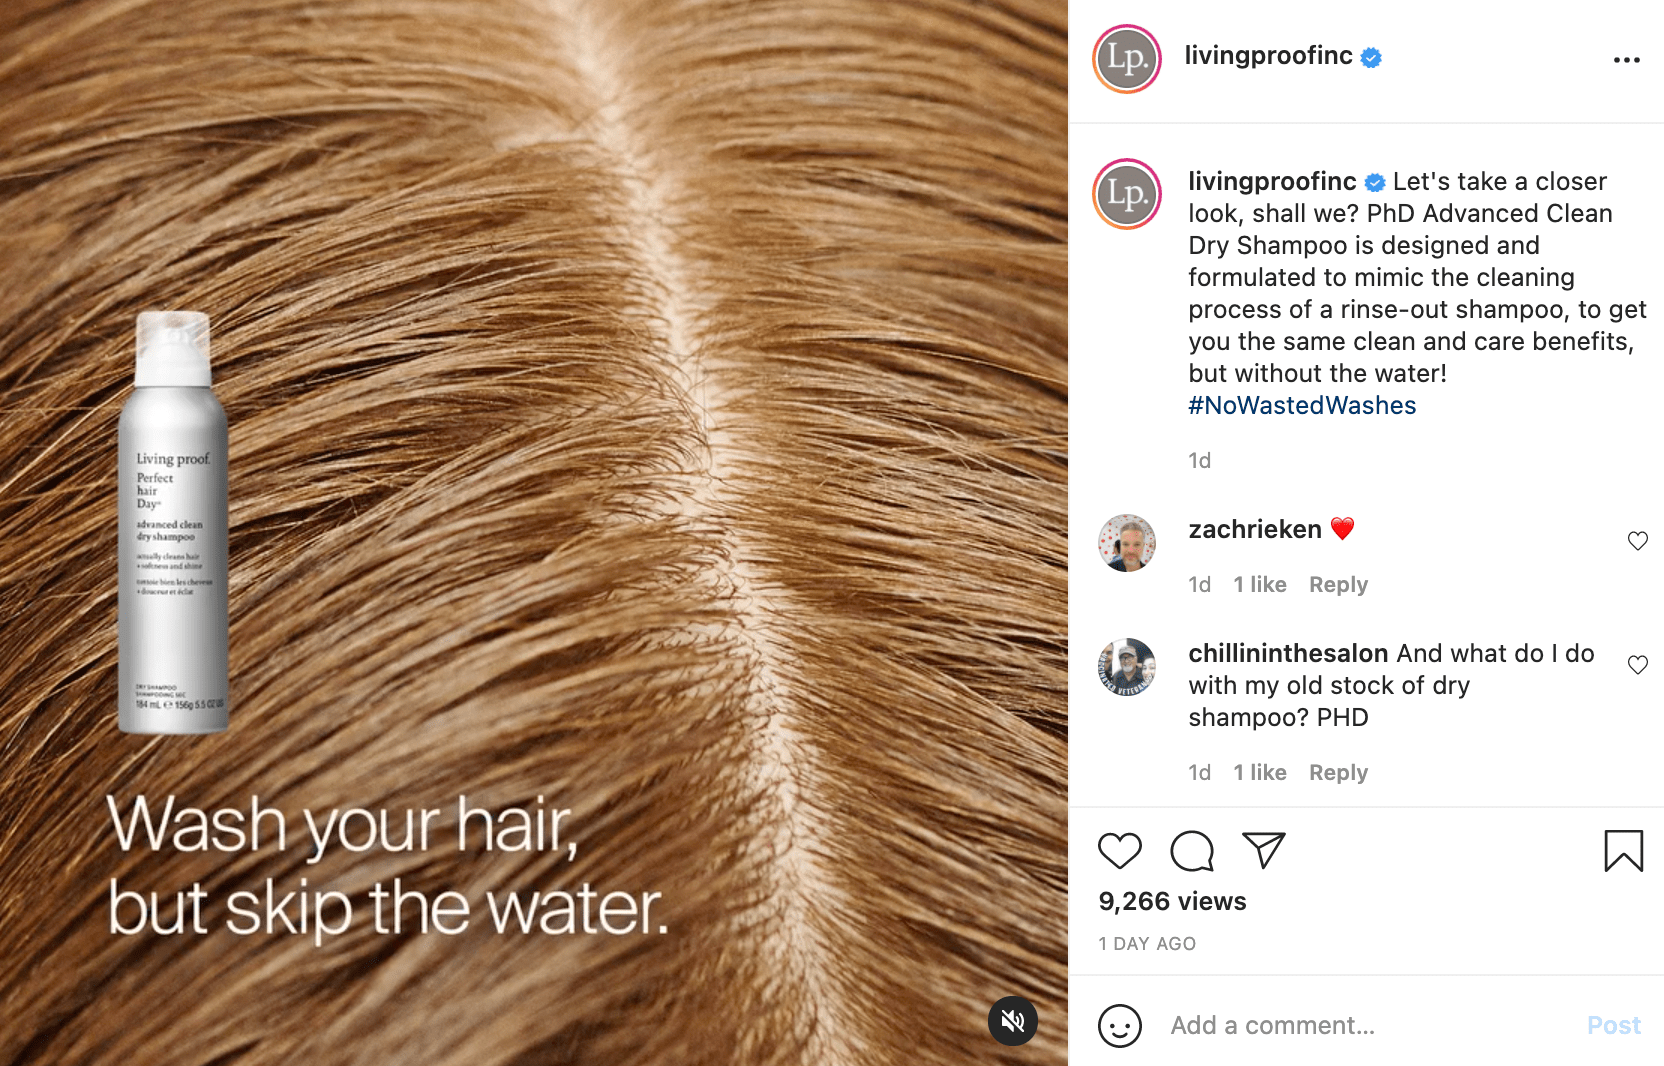
By focusing on how the product will benefit consumers through storytelling, and using a new hashtag #NoWastedWashes, Living Proof builds excitement and demand for its new product.
2. Display customer testimonials, case studies, and other social evidence to positively frame your new product.
Consumers want to see that other consumers have already taken the risk and purchased your new product before doing it themselves. This is where social proof comes into play.
In the weeks leading up to a product launch, or shortly after its launched, begin posting customer testimonials, reviews, and case studies to showcase how your new product has already helped other people. Take this a step further and employ influencers to share the word about your product as well, if it’s a good fit for your brand.
Consumers are smart enough to know they shouldn’t trust every advertisement they see — but they can trust fellow consumers. So leverage that trust through social proof methods.
3. Create a social and email campaign.
Create a full, comprehensive social media campaign to increase interest and awareness in your new product.
Use paid advertising to reach new audiences, create full product explainer videos to use across your social channels, and use email to reach existing customers and provide an exclusive, first look at your new product’s features.
Additionally, you might consider hosting a live stream to connect directly with prospects and existing customers, and invite experts from your product development team to explain the new features of your product.
It’s important to note — in this stage, you’ll want to pay attention to how consumers are interacting with the communication materials regarding your new product. Share concerns and feedback with the product development team — it’s important to trust your consumers and use their feedback to strengthen your product.
4. Have a pre-order option.
If a consumer is excited to purchase your new product, don’t make them wait — provide an option to pre-order the product or service before it’s even available. This helps spread out demand, while enabling consumers to purchase the product whenever they’re feeling most inclined to do so.
Product Launch Best Practices by Industry
1. How to Launch a Digital Product
When launching a digital product, you’ll want to begin building anticipation with a strong content marketing strategy. Use blog posts, email marketing, social media, and other channels of distribution to increase interest and demand for your digital product.
You’ll also want to ensure you’re leveraging lead generation strategies to reach existing customers and prospects.
For instance, let’s say you’re launching an online course on SEO. In the weeks leading up to launch, you might create SEO-related blog content to send to your email subscribers with an option to join the SEO course’s waitlist. This helps you gauge the effectiveness of your marketing materials while reaching an audience that has already demonstrated interest in your brand.
How to Launch a Product on Amazon
Anyone who’s ever shopped on Amazon knows the importance of a good product listing. In the week’s leading up to launch, take the time to create a strong, high-converting product listing — including taking high-resolution photos of your product, writing a description that outlines your product’s differentiating features, and using keywords to help your product rank on Amazon.
Additionally, product reviews are incredibly important on Amazon, so you’ll want to ensure you have reviews ready-to-go before you even launch your product on Amazon. To do this, ensure you’ve either launched your product on your own website first (which gives you time to earn reviews before launching on Amazon), or send your product to a select group of interested buyers ahead of the full launch, and collect reviews from them.
Finally, ensure you’re ready for an Amazon product launch by checking inventory. You never know how quickly your product might gain traction on the ecommerce super-store, so make sure you have enough product to fulfill Amazon orders quickly.
Take a look at HubSpot’s The Ultimate Guide to Selling on Amazon in 2021 for more information related to Amazon.
How to Launch a SaaS Product
To launch a SaaS product, you’ll want to start by researching competitors and understanding the marketplace at-large. There’s plenty of demand for SaaS products, since more than 38% of companies work almost entirely on SaaS. However, the SaaS industry is also well-saturated, so before launching a SaaS product, you’ll want to determine how your product differs from all the others in the industry.
To create a successful product launch, you’ll want to conduct market research and focus groups to determine the true benefits and differentiators of your product.
Next, you’ll want to employ a strong content marketing strategy to increase your website’s visibility on search engines, and to ensure your business is appearing in search results for topics related to your product.
Since you aren’t launching a physical product, your marketing efforts need to convince businesses that your product can solve for their needs. For instance, take a look at how HubSpot positioned the new Operations Hub product in this introductory video:
Additionally, you might want to offer free trials or a freemium option for smaller businesses on lower budgets to test out your offerings before committing.
For a full SaaS rundown, take a look at HubSpot’s Ultimate Guide to Software as a Service (SaaS).
How to Launch a Food Product
To launch a food product, you’ll first need to ensure you’re prepared for the costs required to do so — including how much it costs to package and store the product (including packaging, warehousing, and distribution), and how much it costs to sell the product (including branding and digital marketing).
Next, you’ll want to follow federal and state food regulations. For instance, you need to ensure you’re following health department rules for food preparation surfaces, refrigeration, and sanitation.
You’ll also need to make sure the labeling you use on your product’s packaging is accurate, which requires you to send your food product to a lab for analysis, and check with your state commerce to see what it requires when it comes to nutrition labels.
When launching a food product, you’ll likely want to hire a food broker. A food broker can foster relationships with national or local grocery stores, and will create a promotional plan to help increase sales as soon as your food hits the shelves.
Typically, a supermarket will test out your product for a few months before determining if there’s enough consumer interest to keep it stocked — which is why a food broker can be incredibly useful for using business intelligence and industry knowledge to ensure a successful food product launch.
Product Launch Tips
To learn the best practices for a successful product launch, I talked to Alex Girard again.
The HubSpot Product Marketing Manager said he had three main tips for a successful product launch:
- Your product positioning should reflect a shift you’re seeing in the world, and how your product helps your customers take advantage of that shift.
- Create a recurring schedule for you and the core stakeholders for the launch to check in and ensure you’re all on the same page.
- Make sure you keep the product team in the loop on your marketing plans. The product team could have insights that inform your overall marketing campaign.
However, sometimes, external factors might impact your ability to launch a product. When that happens, you might need to delay your launch.
How to Know When to Delay a Product Launch
To understand when, and why, you might hold off on a product launch, Girard told me there are three key reasons why you might want to delay a product launch, including:
- When your product itself isn’t ready, and you need to change your timeline to create the best customer experience possible.
- If a situation occurs where your current customers are having a less than optimal experience with one of your current products. Before launching and promoting a new product, you should make sure your current customers are satisfied with your existing product offering.
- If something occurs on an international, national, state, or local level that requires your audience to readjust their priorities and shift focus away from your company and its product launch. Make sure that when the time comes to launch, your target audience is ready to learn about your new product.
If you’re looking for templates to coordinate your team efforts and align your company around your new product’s messaging, download our free product marketing kit below.
Editor’s note: This post was originally published in November 2015 and has been updated for comprehensiveness.


6 Steps to Reduce Your Bounce Rate [+ Platform-Specific Tips]
Your website’s bounce rate is a metric that indicates the percentage of people who land on one of your web pages and then leave without clicking anywhere else on your website – in other words, single-page visitors.
How sticky is your website? If visitors bounce, it suggests they either didn’t find what they were looking for, or the page wasn’t user-friendly. A high bounce rate also means visitors aren’t looking for more content on your site, clicking on your calls-to-action, or converting into contacts.
![Free Resource: Website Optimization Checklist [Download Now]](https://no-cache.hubspot.com/cta/default/53/00d9cc96-eff7-4cea-8ff3-583374c3dcd5.png)
For inbound marketers whose primary goal is to attract and convert website visitors into highly qualified leads for their sales teams, it’s scary stuff. So, let’s get into how to decrease your bounce rates.
Improving Your Bounce Rate Infographic
Fortunately, QuickSprout has created an awesome infographic that explains why bounce rate is so important, highlights benchmark industry averages for bounce rate, and identifies a variety of changes you can make to help reduce your website’s bounce rate. Check it out!
And if you want help converting visitors who are about to bounce from your site, try using HubSpot’s free lead capture tool Lead Flows to create a call-to-action with a relevant offer triggered by exit intent.

Bounce Rate Benchmarks
Having a benchmark is so valuable when trying to understand where you stand against competitors in your industry.
Find below some 2021 key statistics on bounce rates.
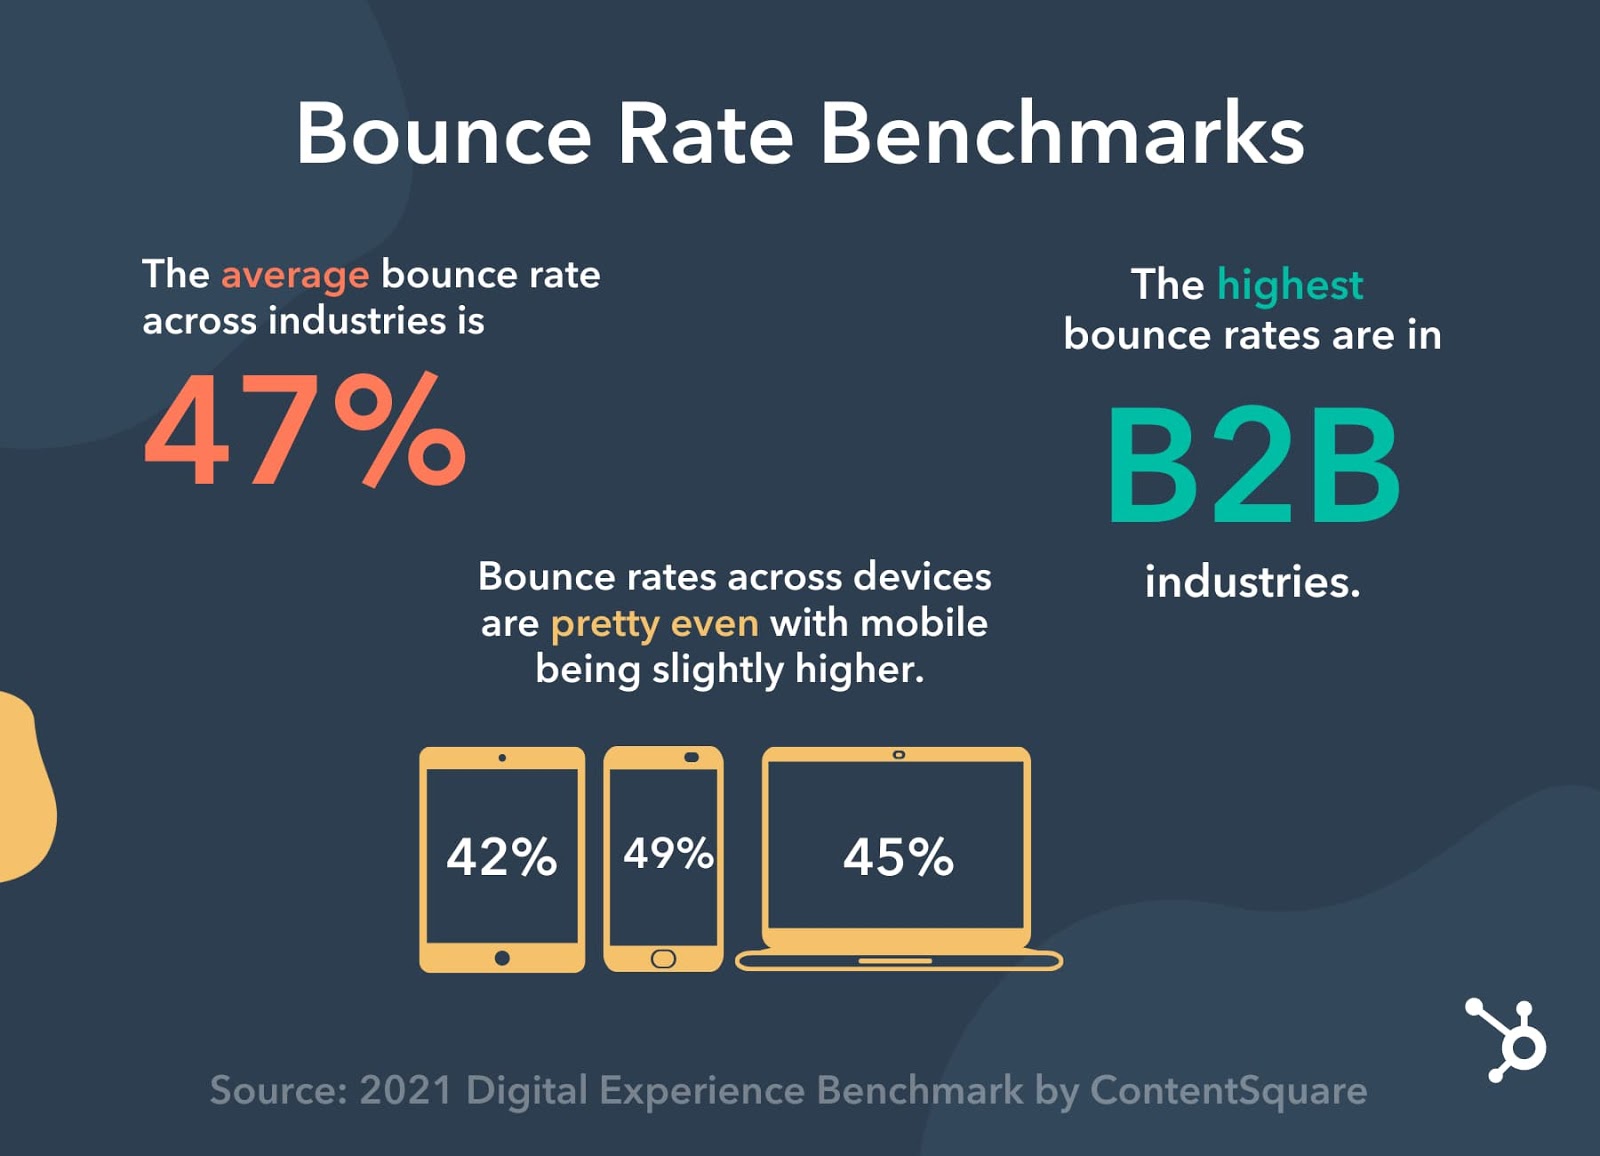
1. Set realistic expectations.
When it comes to your bounce rate, it’s important to set the right expectations. As mentioned in the infographic, look at your historical data as a baseline for how your website has performed in the past.
Then, compare it to the average for your industry and platform.
Let’s say your company is a B2B brand with an average bounce rate of 56%. As seen in the previous section, the average bounce rate across industries is 47%, so you might say yours is really high.
However, the data also shows that bounce rates are much higher for B2B industries, at 75%. So, at 56%, your company is actually doing quite well. While this doesn’t mean you should stop your efforts at reducing the bounce rate, it’s important to know how you stack up against benchmarks.
In this case, where you’re only in competition with yourself, it’s time to rely on historical data to guide your strategy.
2. Attract the right visitors.
Picture yourself in a grocery store. You’re looking for a particular item and you go down an aisle. You look around and you can’t find it. So, what do you do? Leave the aisle and ask for help, or just try the next one.
Think of your website as an aisle at the store. If your content doesn’t match the visitors you’re attracting, they’ll quickly leave.
So, how do you make sure you’re attracting the right visitors?
- Create multiple landing pages with unique content and keywords for your different buyer personas.
- Maintain top rankings for branded terms.
- Write attractive, useful meta descriptions for search engine users.
- Improve targeting of online advertising campaigns.
3. Prioritize the user experience.
In this day and age, no one has the patience to navigate through a difficult website. You only have a few seconds to make a good impression and present a website that users enjoy being on.
To do so, follow these steps:
- Make your text readable through sensible organization and the use of larger fonts, bulleted lists, white space, good color contrast, and large headlines.
- Use well-organized, responsive layouts that allow for quick and easy navigation on all platforms and browsers.
- Don’t let ads distract from your content: Place static ads to sides, and avoid pop-ups and self-loading multimedia ads.
4. Speed up your page load time.
Page speed is one of the main reasons website visitors leave a website. In fact, Google reported in 2017 that when a page load time goes up to 10 seconds, the bounce rate on mobile goes up 123%.
Think about it: When was the last time you waited over a minute for a page to load? Most users’ first instinct is to exit and find another website to meet their needs.
Several factors can contribute to a slow website:
- Image size
- Self-loading multimedia content.
- Site server
The ideal page load time is two seconds or less. Make sure you test your page speed regularly to ensure it falls within that timeframe.
5. Produce high-quality content.
Content can make or break your website visitor’s experience.
Your content should be:
- Engaging – Does your content make your visitors want to keep reading?
- Clear – Is your content easy to understand and digest?
- Relevant – Does it answer the question your website visitors are asking? Or is it clickbait (a big no-no)?
If you’re not sure how to answer these questions, have an objective third-party review your content. You should also consider hiring a copywriter who is an expert at producing high-quality content.
6. Monitor, test, and optimize.
Every change you make to your website can have an impact on your bounce rate. From the placement of an ad to the content on the page.
With this in mind, you must monitor your website closely to assess traffic changes. If you notice a rise in your bounce rate and a drop in visitors, run A/B tests to determine what page elements could be affecting your traffic.
Once you identify the issue(s), optimize your page.
When it comes to bounce rate, there’s always room for improvement. Use optimization tools (more on that in the next section) to identify opportunities to lower your bounce.
Want to start optimizing? Use this checklist to maximize your website’s performance.
How to Decrease your Bounce Rate on Shopify
When you run an ecommerce business, monitoring your bounce rate is a priority, as an increase can drastically impact revenue.
To first thing you can do to decrease your bounce rate on your Shopify website is to make sure your search campaign is aligned with your landing page. This means ensuring the keywords you’re targeting align with what you’re offering on your landing page.
In addition, your landing page should be optimized for conversion by following best practices (e.g. clear CTA, no navigation bar).
The next step is to add credibility to your page. You can do so by displaying customer reviews and testimonials as social proof. You can also add trust badges on your website to indicate you’re a reputable company.
To further improve your page’s performance, add a live chat feature to assist website visitors as they shop. You may learn valuable insights from these interactions that help you optimize your page.
Lastly, invest in tools like Optimizely, Hotjar, Unbounce, and Crazy Egg to better understand your visitors’ behavior on your site and identify areas for improvement.
How to Decrease Bounce Rate of Your Blog
Reducing your blog’s bounce rate is all about following tried-and-true formulas:
- Have a clear structure and page hierarchy – Using headers and subheaders help visitors (and search engines) understand what information is on the page and how it is organized.
- Use high-quality media – Photos, gifs, illustrations, and videos are great for breaking up long sections of text as well as diversifying your information delivery method.
- Make your content error-free – When users see a page riddled with mistakes, it can make them question the brand’s credibility and lead them to exit out of the page.
- Include a clear call-to-action – Having a clear next step for your website visitor will help guide them in the direction you want them to go. Want them to read other articles? Hyperlink them in your post. Want them to download an offer? Include the CTA in the post.
How to Decrease Email Bounce Rates
Email bounce rates are defined differently than bounce rates on other channels.
An email bounce rate refers to the number of emails that are not delivered to a subscriber list. There are two types of bounce rates: hard and soft. The former refers to a permanent reason why the email cannot deliver while the latter refers to a temporary issue.
For instance, say you have 100 email subscribers. You send an email blast and 98% of them receive your email. Your email bounce rate, in this case, would be 2%.
The average bounce rate is 0.7%, according to Campaign Monitor. However, this number can vary slightly by provider.
A bounce rate ranging between 0 and 2% is normal. Anything beyond that and you’ll want to look deeper.
Here are some ways to reduce your email bounce rate:
- Use double opt-ins – Sending a confirmation email to a recipient with a CTA to subscribe will ensure the submitted email is correct and working properly.
- Clean out your subscriber list regularly – Removing inactive subscribers is another way to verify that your email addresses on file work are healthy and active.
- Invest in a reputable email provider – Free sender platforms will not cut it when it comes to email marketing. This means leaving your Gmail, Hotmail, or Yahoo accounts for personal use and looking into HubSpot, MailChimp, SendinBlue, and more.
Designing a Website with a Low Bounce Rate
Having a website with a bounce rate requires constant monitoring and maintenance.
By making sure your content is aligned with your visitors’ needs, your content is easy to navigate, and your conversion elements are clear, you can keep a low bounce rate.
Ready to start optimizing your website? Use this checklist as your guide. It includes everything you’ll need to improve your website performance, including SEO and security.
Editor’s Note: This post was originally published in July 2014 and has been updated for comprehensiveness.

18 Compelling Above the Fold Content Examples to Inspire Your Own
The human attention span is short. This means that your website’s content has to inspire, delight, and engage your target audience in mere seconds.
Maybe your content is performing well on social media. It’s resonating with audiences and earning engagement. But it’s possible that when you look at website metrics, there’s a different story being told.
If your session time is low and your bounce rate is high, then your above-the-fold content may be to blame. Not to worry: We’ll go over everything you need to know about above-the-fold content, including best practices and examples that will inspire you.
Your above-the-fold website content directly impacts your engagement metrics, because it can inspire users to explore the rest of the website and its offerings. If it’s not properly optimized, you’ll likely see a boost in bounce rate and a decrease in conversions.
A web page that is slow to load, congested with information, and hard to use will probably not draw the reader in the same way a page with the opposite design would. This can hurt your website’s lead generation potential.
Let’s say you’ve been losing traffic. It’s possible the content website visitors see when they first visit your page isn’t interesting enough to keep them there. Your page might be compelling by the time visitors start scrolling, but if the content isn’t dazzling and user-friendly right off the bat, visitors can easily click away.
This means that your content above the fold could probably be re-done to engage visitors.
If your website has compelling above-the-fold content, you’ll likely see higher conversion rates and lower bounce rates. If you’re unsure, try to self-test by looking at your website from a new perspective — if you were a new viewer, would you stay on your site at first glance?
Let’s talk about some ways you can ensure your above-the-fold content engages web users.
Above the Fold Website Design Best Practices
When you design your webpage, keep these practices in mind. They’ll keep visitors’ attention and encourage them to explore the rest of your website.
1. Keep your design simple.
Above-the-fold content shouldn’t be extremely busy — if it is, readers might not know where to look first and click away from the page. Alternatively, if they’re not able to find the answer to their challenge quickly, they’ll likely choose another website.
To keep your page looking professional, organized, and user-friendly, try adding one featured image or multimedia, such as a GIF or video, to the content above the fold. Then, add a short headline that introduces your webpage, and a sentence below it that describes your page in more detail.
2. Make the content engaging.
Simple web pages are one way to keep a user’s attention. But when they get there, take opportunities to delight them. For example, when you write your headlines and body text, they should echo your brand voice.
You don’t have to make huge changes to delight the visitor. For example, if there’s a CTA button on your page, you could try “Ready to get started?” instead of “Learn more.”
If the featured photo on your webpage is static, see if you can deliver the same message with a GIF instead. Additionally, if all of your copy is one color, try adding one or two more — a good rule of thumb is to incorporate your brand colors for professionalism and consistency with the rest of your website.
3. Design your content for usability.
Above all else, your content should be easy to interact with. For instance, if you’re working on the above-the-fold content for a product page, make sure your above-the-fold content is functioning as it should.
Let’s say your product page’s above-the-fold content is a video. Does it load correctly, include captions, and offer sound options?
Additionally, think about the experience of the user. If your above-the-fold content features a video that autoplays, will it interrupt the user’s interaction with the page? To combat this issue, make sure the video plays on silent and includes subtitles, if needed. Make sure to incorporate other web accessibility standards as well.
4. Solve challenges for the reader.
Your content above the fold should answer the challenge of the user. To illustrate, let’s say you work for an email marketing service provider, and a user searches “email marketing software” and lands on your homepage.
Your content, then, should include a few, if not all, of the keywords “automated email marketing software” in some form. For example, your headline could read “Email Automation for Marketers,” and expand on that in the supporting text.
Those are a few guidelines to keep in mind when designing your content. Next, we’re going to look at above-the-fold website examples that will inspire you.
Above the Fold Content Examples to Inspire Your Own
1. Wistia
 Wistia lets its users create dynamic videos for marketing campaigns. The above-the-fold content introduces Wistia’s services using a mix of multimedia: GIFs, videos, and short copy, to show off the capabilities of the service.
Wistia’s homepage feels casual, welcoming, and professional at the same time. The homepage video stops visitors in their tracks. They’ll likely spend more time watching the talk-show-inspired clip that explains Wistia’s services. As a consumer, when I see real people on a webpage, it’s inviting and compels me to explore further. After the video, users will have an idea of the software’s offerings, straight from expert marketers.
2. Velocity Partners
 Velocity Partners, a B2B marketing agency, doesn’t have a company overview video for their above-the-fold content. Instead, the homepage has a fascinating 3D animated video and a paragraph of content that explains why innovative marketers should leverage new content formats to tell more refreshing stories.
The phrase “Great marketing moves” describes what the business is all about, and is short, simple, and to the point, letting the summary do the heavy lifting when it comes to attracting visitors. Velocity Partners’ above-the-fold messaging sparks curiosity, and in turn, the incentive to keep scrolling.
It’s important to note, however, that if you want to use above-the-fold content similar to Velocity Partners’, make sure the first few seconds of your collateral, as well as your copy, are the most engaging. If they aren’t, the visitor probably won’t feel inclined to stay on the site past reading the headline.
3. VeryGoodCopy
 VeryGoodCopy is a creative agency that crafts articles, landing pages, web pages, and emails for brands. Above the fold, the website lets the copy describe what the company can provide for users.
The headline conveys the opportunity for marketers to learn how to persuade by leveraging ample white space and social proof. It also includes an enticing headline, a brief description of their content topics, and a vivid call-to-action. This simple and engaging above-the-fold design ensnares their visitors’ attention and convinces them to check out their micro-articles.
4. Shopify
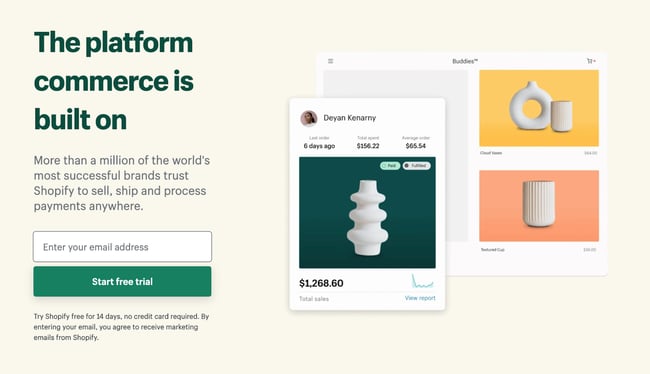 Shopify’s above-the-fold content leverages images to invite the reader to explore. Shopify allows entrepreneurs to begin their own ecommerce business. The above-the-fold content uses images of products sold on Shopify to show how the software is used.
The homepage includes artistic images to make a lasting impression on the user. And, even though copy is sparse, the tagline is packed with purpose and compels visitors to click that green CTA to start a trial.
5. Ann Handley
Ann Handley, a Wall Street Journal best-selling author and partner at MarketingProfs, uses the homepage on her website to impress users by highlighting her marketing prowess. Hyperlinking and linking are heroes here — linking to other pages on a website can earn more clicks on various pages on a site.
She also leverages white space, a welcoming picture of herself, a catchy tagline, compelling copy, and a vibrant call-to-action to persuade her visitors to consider working with her. From this homepage, the visitor knows what Handley looks like, what she has done, and how to contact her. As far as above-the-fold content goes, it’s a home run.
6. Mint
 Above-the-fold content can maximize on simplicity, like it does for Mint, a budget tracking and planning software. The simple, yet professional, homepage effectively conveys the company and how they can help customers.
Notice the copy in the headline — it emotionally connects to the reader in two sentences, opening the door for them to explore the app of a company that knows them.
Mint also has a video of their app in action to catch their website visitors’ attention. This helps the visitor visualize how the app will look if they decide to sign up.
7. InVision
 How do you show customer stories dynamically above the fold? Let’s take a look at InVision’s sleek example.
InVision is a digital product design company that helps users easily build sleek impressive websites, so the design team at the company knew the homepage had to impress visitors. It does, auto playing a silent version of the company’s overview video, complete with testimonials from decision-makers at companies such as Uber and Twitter.
The copy that’s layered above the video does a great job of concisely explaining what the company does for users, and the “Get Started Free” CTA even entices me, a marketer who isn’t looking to design a website, to learn more about the company’s offerings. It also doesn’t hide the titles of those decision-makers from the video — “Dantley Davis, Netflix Design Director” is large enough that it can catch users’ eyes when they aren’t looking.
8. Animalz
Similar to VeryGoodCopy, Animalz is a content marketing agency whose website doesn’t bombard visitors with messaging about their services in the above-the-fold design. Instead, visitors are greeted with the headline, “The world’s best content marketing happens here,” which entices a marketer like me to read further.
The CTA copy is different from run-of-the-mill CTA buttons. “Let’s talk,” rather than, “Click here to learn more!”, implies that when visitors click on the CTA, they will be taken to a real person who can offer them more information about the service.
The website also leverages white space, and uses simple, hand-drawn images to entice the reader to scroll down. The purple squiggle runs down the webpage to introduce Animalz’s top customers, and leads to a form to get in touch with the company.
9. Ahrefs
 Maybe you work for a company that wants a no-nonsense homepage that conveys the benefits of the product without congesting the page with an overload of information. If that description fits you, take a look at Ahref’s above-the-fold approach.
The headline describes what the service does: It helps users improve their SEO without necessarily being an SEO expert. The CTA seals the deal by communicating pricing information.
Satisfied customers are listed at the bottom, right before the fold, to give a rounded-out overview of how Ahrefs can be a benefit to successful companies. If you want your homepage to use more copy, rather than visuals, try presenting it in a simple way that doesn’t use more than 30 words, like Ahrefs did.
10. Twitch
 After typing in Twitch.tv into your browser, you’re immediately immersed into what the website offers: live streams for gamers. This is because as soon as your browser accesses the website, a featured live stream begins autoplaying.
While it can be a bit jarring to suddenly hear voices coming from your browser, Twitch’s above-the-fold design doesn’t use any copy to describe their services. Instead, users can jump right in and demo the content themselves, browsing streams without having to make an account or read anything. They can keep scrolling to see popular streams, click one, and explore the site’s capabilities from there.
Because of how the site works altogether, this above-the-fold approach works. Twitch offers visitors to trial their services without doing any reading. Visual platforms similar to Twitch can benefit from this method, pulling in visual learners and non-visual learners alike.
11. Skillshare
 Skillshare uses video to explain the bulk of their services above the fold. Because the software offers online classes in a variety of subjects, the video displays an overview of what Skillshare can help you accomplish, learn, and feel.
The video highlights confident-looking adults diving into their passions, which is what Skillshare helps users with. The sign-up box inspires visitors to explore their creativity with the software — and get started for free.
12. Flock
 The messaging app Flock doesn’t waste any time: It right away includes an email capture form above the fold. The key to including an email capture form is to design it so it doesn’t interrupt the experience of a first-time visitor to your website.
The supporting images illustrate how Flock works, and the CTA text displays a little personality (“Get Flocking”). Using a form to spice up your homepage can be simple and effective when you include a clickable button and an image to display an overview of your company to visitors.
13. King Arthur Flour
The above-the-fold content of this Boston-based baking ingredient supplier, King Arthur Flour, is top notch. It gives visitors the choice to watch a video tutorial on how to make sourdough bread, right away inviting them to engage.
I could get a feel for the company’s offerings: a Facebook Page (which houses the business’ baking show), recipes, a baking FAQ, products for purchase, and even a “Baker’s Hotline”, which works as a Contact Us page.
The slideshow features, equipped with a glossy photo and their own CTA, gave me a complete overview of everything the company can do for aspiring bakers. It goes outside of just the business’s products, and instead, offers helpful information for bakers in general, which is welcoming to someone who may be intimidated about bread baking.
14. Clarkisha Kent
Are you a freelancer wondering how to make your above-the-fold content stand out among your competition? If so, when you design your homepage, make sure it accomplishes two things: displaying personality and offering easy navigation options.
This is because, while your work has to precede you, so does your personality, especially as a freelancer. If you’re a writer, like Clarkisha Kent, your copy has to sell it, like her website does.
The inclusion of a headshot and interesting headline quickly displays more of who Kent is as a writer, and the angle she is likely to take as a contributor to websites. Her navigation bar includes links to viral tweets she’s made and clippings from other publications, so her homepage doesn’t have to.
Instead, her homepage serves as an introduction, which can precede her before the rest of her website. When users are drawn in by a minimalistic web page with cliffhanger text, they’re likely going to be interested in exploring the website to fill in that gap. For instance, when I read, “Chaos bringer,” I instantly wanted to know how, which prompted me to look at her past work.
15. Good Witch Kitchen
 This is another example of how to convey the personality of your brand if you’re a freelancer or small business owner. Good Witch Kitchen is the name of Kristen Ciccolini’s holistic nutrition business. The website’s above-the-fold content contains an introduction of who she is and why she does what she does.
Ciccolini’s logo and copy accurately provide a quick view of the services Good Witch Kitchen provides: A non-diet approach to nutrition management from an expert.
16. Aya Paper Co
 This stationery brand makes good use of the area above the fold by including a slideshow that prompts visitors to shop for birthday cards, explore new products, and build a gift box for someone. This works exceedingly well because it gives users a chance to find what they need from the slideshow alone.
The website then includes a series of customer testimonials to sway visitors into becoming customers. From the above-the-fold content alone, you get a sense of the brand’s aesthetic, ethos, and commitment to environmental sustainability.
17. BREAD Beauty Supply
 For those who’d like to keep their brand imagery strong above the fold, BREAD Beauty Supply’s example will be sure to offer some inspiration. The brand includes a video of customers showing off their curly hair — which is what their products are used for — with a large version of its logo placed over the video.
The brand then seals the deal by including a “Shop All” button at the bottom. You can still make a “splash” with your above-the-fold website content; you’ll only need to include a CTA.
18. Ceremonia
 Ceremonia is another haircare brand that, like BREAD Beauty Supply, uses a video to catch visitors’ attention. It also includes a CTA button at the bottom that invites visitors to “Shop All.”
This above-the-fold website example is effective because it conveys the brand’s mission and aesthetic while still fully using the available real estate. The video inspires one to take care of one’s hair using the products. It shows people being carefree and enjoying the environment. The brand’s products are made from naturally derived ingredients, and the video hints at that without using text.
In the same way, you can hint at your products’ background using strong imagery in a video.
The Benefits of Above the Fold Optimization
Above-the-fold optimization is critical to ensure your website visitors don’t bounce off the page. That way, you can increase the chances of visitors becoming customers. By optimizing the content above the fold, you can:
- Increase user engagement by right away inviting users to shop or reach out to you.
- Greet users with on-brand messaging.
- Establish the value of using your product or service.
- Show the results your website visitors can see if they choose to purchase from you.
Now that you have some inspiration about how to keep your customers engaged on your landing pages, which strategy are you going to use for yours? I can’t wait to see what you come up with.
Editor’s note: This post was originally published in March 2019 and has been updated for comprehensiveness.

How to Build a Detailed Business Plan That Stands Out [Free Template]
Nowadays, it seems like a new company is starting every hour.
While starting a company may seem easier now than ever before, entrepreneurs have an uphill battle from the moment they start a business. On average, a new business competes with 25 competitors to stand out and thrive in its industry.
Aspiring business owners who go in blind without a clear, actionable plan for marketing, hiring, finances, and operations are destined to face significant challenges. This is why crafting a business plan is an essential step in the entrepreneurial process.
In this post, we’ll walk you through the process of filling out your business plan template, like this free, editable version:
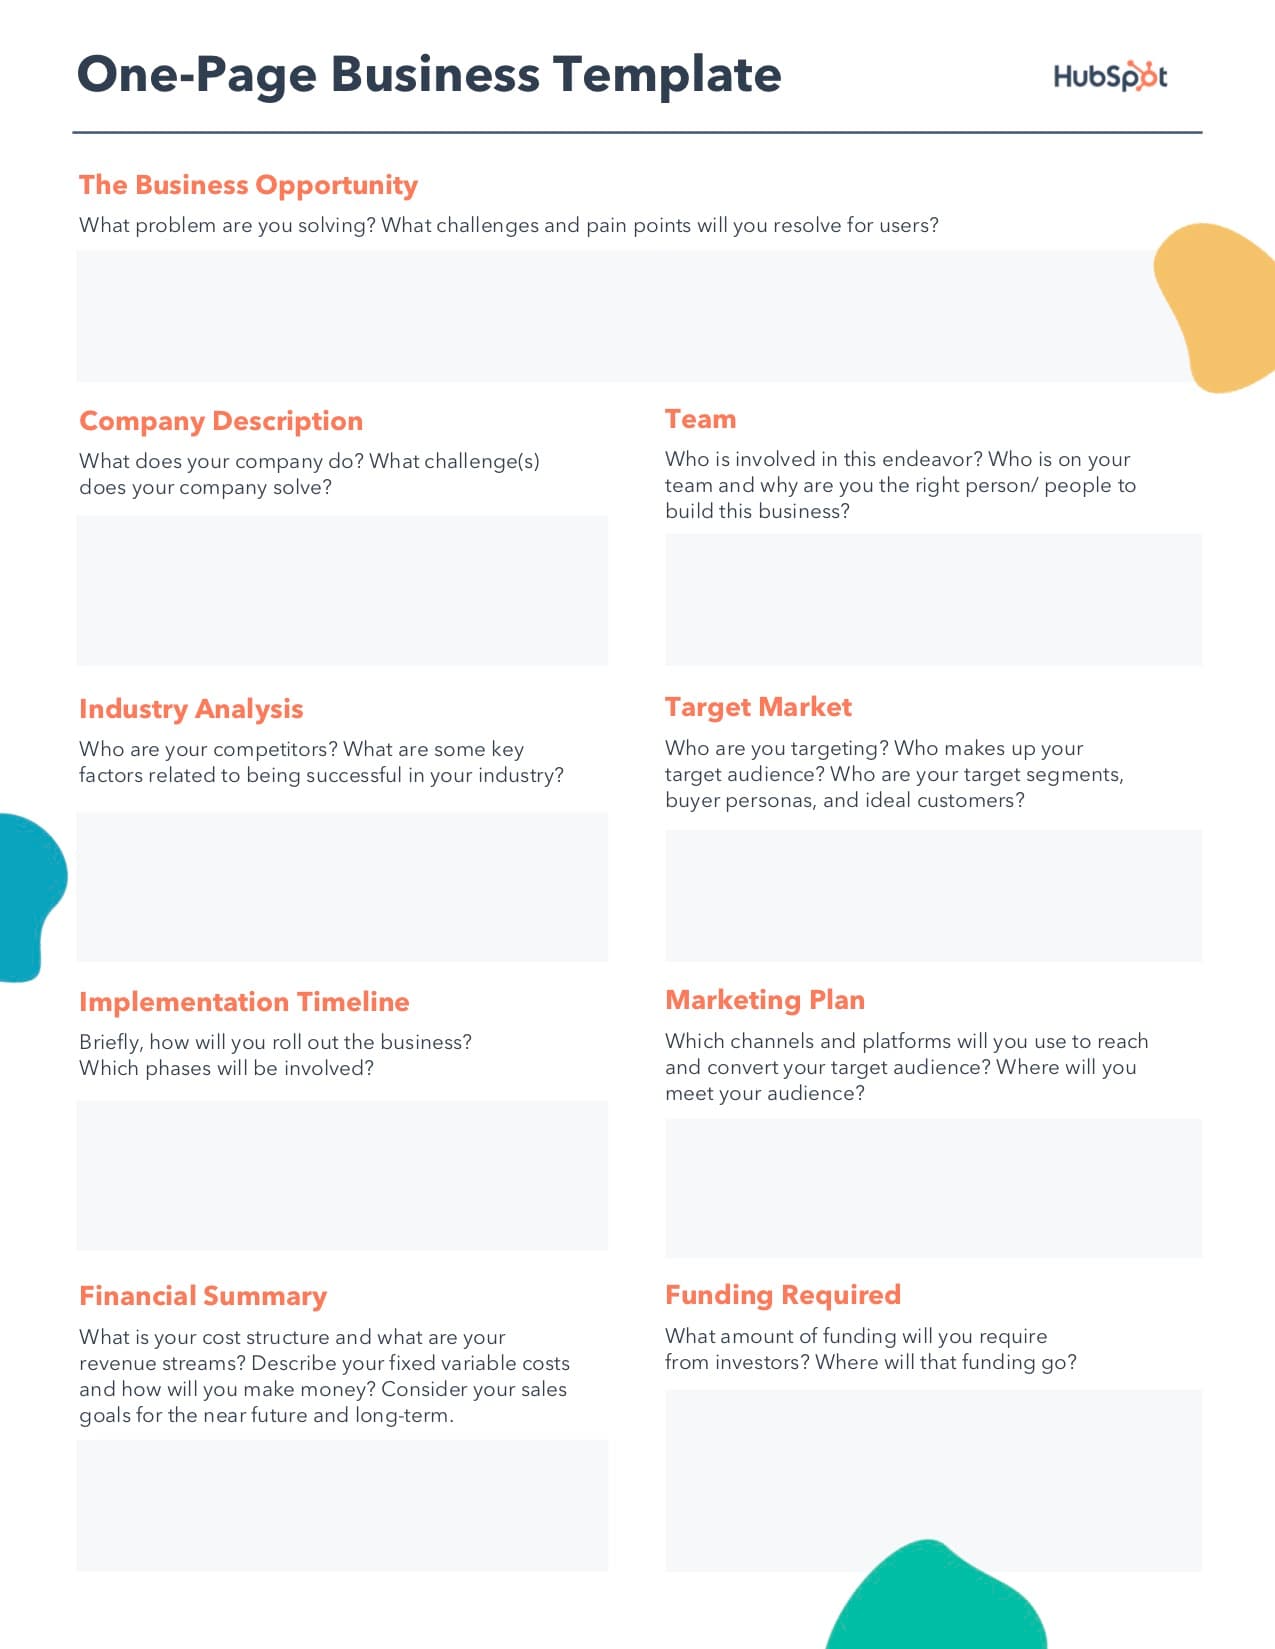
Download a free, editable one-page business plan template.
We know that when looking at a blank page on a laptop screen, the idea of writing your business plan can seem impossible. However, it’s a mandatory step to take if you want to turn your business dreams into a reality.
That’s why we’ve crafted a business plan template for you to download and use to build your new company. You can download it here for free. It contains prompts for all of the essential parts of a business plan, all of which are elaborated on, below.
This way, you’ll be able to show them how organized and well-thought-out your business idea is, and provide them with answers to whatever questions they may have.
Featured Resource: Free Business Plan Template
Building a Successful Business Plan
In the next section, we’ll cover the components that make up a business plan, such as an executive summary and company description. But before we get to that, let’s talk about key elements that should serve as building blocks for your plan.
At the core, your business plan should answer two questions: why your business and why now?
Investors want to know why your business is entering the market, i.e. what problem it’s solving and how it’s different from what’s currently out there. They also want to know why now is the right time for your type of product or service.
Too often, business plans are too idealistic and not realistic enough. While having a vision is important, your plan needs to be rooted in research and data.
So back to the question of why and why now – consider three things:
- Your industry – How does your product or service fit within your industry? Are you targeting a specific niche? Where do you see the industry going in the next five to 10 years?
- Your target audience – Who are you targeting? What challenges are they facing? How will your product or service help them in their daily lives?
- Your unique selling proposition (USP) – What sets you apart from your competitors? Is it your product/service features? Your company values? Price?
Once you know the answers to these questions, you’ll be equipped to answer the question: why your business and why now.
Featured Resource: Free Business Plan Template
1. Cover Page
Your business plan should be prefaced with an eye-catching cover page. This means including a high-resolution image of your company logo, followed by your company’s name, address, and phone number.
Since this business plan will likely change hands and be seen by multiple investors, you should also provide your own name, role in the business, and email address on the cover page.
At the bottom of this page, you can also add a confidentiality statement to protect against the disclosure of your business details. The statement can read as follows: “This document contains confidential and proprietary information created by [your company name]. When receiving this document, you agree to keep its content confidential and may only reproduce and/or share it with express written permission of [your company name].”
2. Executive Summary
The executive summary of your business plan provides a one- to two-page overview of your business and highlights the most crucial pieces of your plan, such as your short-term and long-term goals.
The executive summary is essentially a boiled-down version of your entire business plan, so remember to keep this section to the point and filled only with essential information.
Typically, this brief section includes:
- A mission statement.
- The company’s history and leadership model.
- An overview of competitive advantage(s).
- Financial projections.
- Company goals.
- An ask from potential investors.
3. Company & Business Description
In this section, provide a more thorough description of what your company is and why it exists.
The bulk of the writing in this section should be about your company’s purpose – covering what the business will be selling, identifying the target market, and laying out a path to success.
In this portion of your business plan, you can also elaborate on your company’s:
- Mission statement
- Core values
- Team and organizational structure
3. Product & Services Line
Here’s where you’ll cover the makeup of your business’s product and/or services line. You should provide each product or service’s name, its purpose, and a description of how it works (if appropriate).
Next, add some color to your sales strategy by outlining your pricing model and mark-up amounts.
If you’re selling tangible products, you should also explain production and costs, and how you expect these factors to change as you scale.
4. Market Analysis
The market analysis section is where you’ll provide details about the audience to which you’re marketing your business. This should encompass the size of your total addressable market, your market’s demographics and psychographics, and location analysis for your business’ operating space.
It helps to reference your market research documentation in this section, like a Porter’s Five Forces Analysis or a SWOT Analysis (templates for those are available here). You can also include them in your appendix.
If your company already has buyer personas, you should include them here as well. If not, you can create them right now using the Make My Persona Tool.
5. Marketing Plan
Unlike the market analysis section, your marketing plan section should be an explanation of the tactical approach to reaching your aforementioned target audience. List your advertising channels, organic marketing methods, messaging, budget, and any relevant promotional tactics.
If your company has a fully fleshed-out marketing plan, you can attach it in the appendix of your business plan. If not, download this free marketing plan template to outline your strategy.

6. Sales Plan
It doesn’t matter if your sales department is an office full of business development representatives (BDR) or a dozen stores with your products on their shelves.
The point is: All sales plans are different, so you should clearly outline yours here. Common talking points include your:
- Sales team structure, and why this structure was chosen.
- Sales channels.
- Sales tools, software, and resources.
- Prospecting strategy.
- Sales goals and budget.
Like with your marketing plan, it might make sense to attach your completed sales plan to the appendix of your business plan. You can download a template for building your sales plan here.
7. Legal Notes
Your investors may want to know the legal structure of your business, as that could directly impact the risk of their investments. For example, if you’re looking for business partners to engage in a non-corporation or LLC partnership, this means they could be on the line for more than their actual investment.
Because this clarification is often needed, explain if you are and/or plan to become a sole proprietor, partnership, corporation, LLC, or other.
You should also outline the steps you have taken (or will need to take) to operate legally. This includes licenses, permits, registrations, and insurance.
The last thing your investor wants to hear after they’ve sent you a big chunk of change is that you’re operating without proper approval from the local, state, or federal government.
8. Financial Considerations
Ultimately, investors want to know two things:
- When they will earn their money back.
- When they will start seeing returns on their initial investment.
That said, be clear, calculated, and convincing in this section. It should cover:
- Startup costs.
- Sales forecasts for the next several months/quarters.
- Break-even analysis for time and dollars.
- Projected profit and loss (P&L) statement.
Facts and figures are key here, so be as specific as possible with each line item and projection. In addition, explain the “why” behind each of these sections.
However, keep in mind that information overload is a risk, especially when it comes to data. So, if you have pages upon pages of charts and spreadsheets for this section, distill them into a page or two and include the rest of the sheets in the appendix. This section should only focus on key data points.
9. Appendix
A detailed and well-developed business plan can range anywhere from 20 to 50 pages, with some even reaching upward of 80.
In many cases, the appendix is the longest section. Why? Because it includes the supportive materials mentioned in previous sections. To avoid disrupting the flow of the business plan with visuals, charts, and spreadsheets, business owners usually add them in the last section, i.e. the appendix.
Aside from what we’ve already mentioned – marketing plan, sales plan, department budgets, financial documents – you may also want to attach the following in the appendix:
- Marketing materials
- Market research data
- Licensing documentation
- Branding assets
- Floor plans for your location
- Mockups of your product
- Renderings of your office space or location design
Adding these pieces to the appendix enriches the reader’s understanding of your business and proves you’ve put the work into your business plan without distracting from the main points throughout the plan.
Use a Business Plan Template to Get Started
Writing a business plan shouldn’t be an insurmountable roadblock to starting a business. Unfortunately, for all too many, it is.
That’s why we recommend using our free business plan template. Pre-filled with detailed section prompts for all of the topics in this blog post, we’re confident this template will get your business plan started in the right direction.
Editor’s note: This post was originally published in June 2017 and has been updated for comprehensiveness.

Want to Learn Graphic Design? 9 Tips & Tricks for Beginners
We see graphic design at work every day.
Everything from logos, posters, magazines, product packaging, ads, and more.
It’s an industry that’s always in demand. Why? Because brands always need designers, whether it’s to create branding assets or design an upcoming event flyer.

If it’s an industry you’re interested in, discover the steps you can take today to learn graphic design and find out what you need to keep in mind as you start your career.
1. Learn key design principles.
Graphic design is a visual communication tool that combines the use of graphics, typography, color, and illustration to communicate a message.
And while there are endless ways to communicate a message (that’s where the creative part comes into play), there are key principles that every graphic designer must follow:
- Hierarchy
- Alignment
- Contrast
- Space
- Color
- Proximity
- Repetition
- Balance
These fundamental concepts ensure that a design is cohesive, impactful, and clear.
In addition to these principles, there are other elements that come into play, such as typography and color theory.
The former relates to the way in which your copy (i.e. text) is arranged while the former refers to how people perceive color and how it impacts messaging.
Once you understand these concepts, you can then dive a little deeper. More on that in the next section.
2. Find a course.
Contrary to popular belief, having an eye for design isn’t an innate trait – it’s a learned skill.
Once you have a broad overview of graphic design, it’s time to dive in with an in-depth course.
A course will teach you about the history of graphic design, the various subdivisions within the discipline, the psychology behind design principles, and the tools you’ll need.
Here are the top online resources for graphic design courses:
- General Assembly
- Skillshare
- LinkedIn Learning (formerly Lynda.com)
- Udemy
- Coursera
Then, of course, there’s always YouTube University. The best thing about this university is that it’s 100% free.
The downside here is that you likely won’t find the same depth in the material on YouTube and you won’t have the support of a professor.
Plus, you’ll likely be tasked with finding your own homework to practice what you’ve learned. However, it can be a good place to start if you’re on a budget.
3. Master design programs.
It’s hard to think of graphic design without immediately thinking of the tools they use.
So much of graphic design work relies on the use of tools like Adobe Illustrator, Adobe InDesign, Adobe Photoshop, and Sketch.
These are all powerful software that allow you to create everything from logos and illustrations to website designs.
While they aren’t free to use, consider them investments in your career, as you will likely use them for every project you take on.
4. Network with fellow designers.
In addition to the knowledge you’ll gain from your courses, it’s important to speak with designers who are currently working in the field.
This will help you get a 360-view of what it’s like working as a graphic designer and what it takes to succeed in your role.
Start on social networks like Facebook and LinkedIn. You’ll find plenty of design communities and groups that share information and opportunities.
You can also use sites like MeetUp to find designers in your area who are interested in meeting up as well as Eventbrite to find fun events you can join.
Networking across is as important as networking up. Make sure you lean on your community for support and advice as you develop your skills as a graphic designer.
5. Practice, then practice some more.
Now that you’ve learned everything you need to know, it’s time to put that knowledge into action.
When learning anything new, practicing is key. It’s not enough for you to take in the knowledge, you have to use it and learn how it works in real time.
So, now that you understand design principles and have learned from the experts, it’s time for you to gain your own experience. You can start by searching for graphic design exercises online.
For instance, Type Connection and KernType allow you to test your typography skills. You can also use sites like Sharpen to find design prompts to work on. They have prompts in various categories, from branding to marketing and user experience (UX).
Once you feel confident in your ability, consider taking on a design project of your own. It could be a passion project you give yourself or one you seek out.
This will help you get real-world experience in what it takes to start a project from start to finish and all of the non-design implications you must consider.
9 Tips for Learning Graphic Design
1. Always keep an ear to the ground.
As marketers, we already know how much there is to learn from influencers.
They are highly knowledgeable in their niche and are often willing to share the secrets to their success in their content.
If you seek out their content regularly, you’ll become more familiar with the graphic design world, discover more tips from industry leaders, become comfortable with relevant terminology, and stay on top of trends.
Wondering how to engage? Turn to YouTube, Twitter, and Instagram.
And don’t be afraid to reach out to them. You never know who might respond to your questions – and any positive connection you make will only help you move further along in your journey.
What to Do Right Now
- Build a Twitter List of influential designers on Twitter, so you can follow their daily insights without having to pick out their tweets from a sea of friends, coworkers, and news sources on your timeline.
- Have a mix of well-known designers who personally inspire you and those whose work you do not enjoy. That last point may seem counterintuitive, but consistently observing the work of that group can help you understand why you don’t like it, which is a key part of understanding design.
2. Collect inspirational work.
Once you decide to learn design, start building a catalog of work you think is successful.
That can be as simple as bookmarking images in your web browser, making a Pinterest board, or saving items to a folder on your computer.
Sifting through a catalog of inspiring work will help you to identify trends – both past and present – and can inform your own personal style.
What to Do Right Now
- Get acquainted with leading designer portfolio sites like Dribbble and Behance. These platforms showcase an abundance of high-quality work from leading designers across the spectrum – everyone from web and UX designers, to graphic designers and typographers.
- Set aside time in your day to review these sites and use apps like Panda to make the collection process easier.
3. Dissect the process.
One of the most pivotal moments in my design journey was when I recognized that every single illustration, infographic, and icon I had ever ogled over was the product of someone mastering how to combine shapes and lines.
Analyzing the process behind a design will allow you to understand the steps required to produce a piece of work.
Depending on your current skill level, you may have a leg up in knowing which tools were used, or which aspect was created first. But if you’re a beginner, don’t let that stop you – examining the construction of a design will let you flex your creative muscle.
Educated guesses will do far more to teach you than doing nothing at all. Plus, you’ll likely find that:
- You know more than you think you do.
- When you identify holes in that knowledge, you’ll know what techniques or concepts you need to explore to narrow the gap.
- There’s more than one way to achieve the desired result.
What to Do Right Now
- Download a free vector or PSD design resource, and dig through the layers to see how the designer constructed the object. You can find a number of those files here.
- Once you pick your file, open it in Photoshop, then open the Layers Panel (which you can learn to use here) and un-collapse some of the folders, so that you can see the layers contained within them.
By simply changing the visibility of the layers, you can begin to see how the designer used each shape to build upon one another. You can also begin to understand how to use Photoshop Effects, like drop shadows and strokes.
4. Get specific with your online search queries.
As you begin creating your own designs, you’ll likely hit an obstacle where you think to yourself, “Hmm, how the heck do I do that? “
Chances are, others have wondered the same thing.
Like many self-taught disciplines these days, the majority of my own technical design knowledge was gained by watching a YouTube tutorial while I actively followed along.
The key is to be really specific with your searches, so you can find a highly relevant tutorial.
Searching for something like “How to Create an Icon” might deliver really broad search results. Instead, type in exactly what you want to learn, like, “How to Create a Flat Icon with a Long Shadow.” Boom.
What to Do Right Now
Browse a design terminology glossary to find the specific terms for techniques you’re trying to learn.
That can help you find what you’re looking for online much more easily, in addition to helping you familiarize yourself with the language.
5. Reproduce your favorite work.
Let me be clear: Under no circumstances should you infringe on anyone’s copyrighted work. Never reproduce someone else’s work and try to pass it off as your own.
That said, re-creating a design you like, without advertising it as your own work, is helpful in gaining a deeper understanding of design techniques.
You’ll have to get creative with the method you choose to recreate the design. Don’t get frustrated if you can’t duplicate a design exactly – remember, the process is more important than the result.
What to Do Right Now
- Find a design piece you think is successful, which should be easy if you’ve created an inspiration catalog.
- Open up your go-to design software to recreate it.
- Start dissecting the design and recreating it using your own process.
- If you get stuck, use specific search queries and lean on your design community.
6. Embrace negative space.
The proper use of negative space is often overlooked by beginner and advanced designers alike.
What is negative space, or white space? It’s the space in your design that’s not occupied by any visual or written element. A design piece that doesn’t incorporate enough negative space is like a sentence with no spaces: itisdifficulttocomprehend.
What to Do Right Now
Learning to effectively use white space won’t happen overnight. You’ll have to try out different options to find what works for each design.
- Read some of the articles on this list, compiled by David Kadavy, author of Design for Hackers: Reverse Engineering Beauty. Then, try to put some of these theories into action.
Remember, there’s no hard-and-fast rule to using white space. It takes practice. Eventually, you’ll find that exercises in resizing elements of your composition and changing the layout will lead to a natural understanding of the amount of breathing room required.
7. Don’t be afraid to get feedback.
On some level, everyone is afraid of criticism. We’re afraid our ideas will get shot down and we’ll be sent back to square one.
Learning to accept constructive criticism is no easy task, but it’s key to becoming a better designer.
Paul Arden, who was the creative force behind Saatchi & Saatchi at a pinnacle of its success, wrote this in his best-selling book, It’s Not How Good You Are, It’s How Good You Want to Be:
“If, instead of seeking approval, you ask, ‘What’s wrong with it? How can I make it better?’ you are more likely to get a truthful, critical answer. You may even get an improvement on your idea. And you are still in a position to reject the criticism if you think it is wrong. Can you find fault with this?”
The takeaway: Design critics allow us to incorporate others’ viewpoints into our work and improve upon our ideas. You always have the option to reject the feedback but considering it in the first place is what’s important.
Design is subjective in nature, and just because someone else has a different opinion doesn’t mean you’re wrong.
In fact, trusting your intuition is equally important. Just make sure you have the means to back up your design decisions.
What to Do Right Now
- Have a one-on-one conversation with an experienced designer. If you don’t know anyone in the design world, join an online community of designers.
- Post on Reddit’s Design Critiques.
- Publish your work on social media and ask for feedback from fellow designers.
8. Pick a passion project.
If you only listen to one piece of advice from this post, let it be this one.
In your career, you’ll likely be involved in design projects you aren’t passionate about. And that’s OK.
So, in the beginning, give yourself the room to work on projects you can’t wait to get into. This is the time when you need the motivation to get you through those tough early days of learning something new.
When you get frustrated, a passion project can fuel you to push through.
It’ll also provide direction. Time and time again, the hardest part of learning design is not knowing what to design. Be decisive and choose something you can work on for an extended period of time.
What to Do Right Now
- Align your interests or current situation with your projects. If you’re a blogger, try creating the header image for your next post. V
- Voice your willingness to work on an offer with your content team.
- Looking for a job? Redesign your resume and try to further your personal brand by creating a logo.
There are a number of ways to work design into your day, but it’s up to you to pick something that matters to you.
9. Just start.
t’s easy to be intimidated by the sheer amount of learning associated with graphic design, but remind yourself that even the most talented designers were newbies once, too.
What makes the creative field so special is that everyone’s journey is unique – there’s no one way to approach DIY design. You’ll find your own means to discern what you want and need to learn.
Furthermore, design is an iterative process, so keep reworking your ideas and projects.
As you progress, you’ll develop your own workflow, and one day, that design that took you all day will only take you an hour.
Trust me, I’m living proof.
Editor’s Note: This post was originally published in June of 2017 and has been updated for comprehensiveness.


A Guide to the Trait Theory of Leadership
Ask “What makes a great leader?” and you’ll get a different answer every time.
For me, a great leader is empathetic, adaptable, and inspiring. For others, a great leader should be decisive, intelligent, and relatable.
That meaning continues to evolve over time.
One concept that has long been debated is whether leadership is innate or learned.
![→ Click here to download leadership lessons from HubSpot founder, Dharmesh Shah [Free Guide].](https://no-cache.hubspot.com/cta/default/53/4e634041-e1ce-4a85-8e65-aea12fc10b84.png)
Some see leadership as a black and white concept: Either you’ve got it or you don’t. But is that really true?
In this article, we’ll explore the trait theory of leadership and what critics say about it.
This idea, first introduced in the mid-1800s, looks at certain traits as inherited, such as:
- Intelligence
- Confidence
- Creativity
- Competency
- People/communication skills
- Trustworthiness
- Decisiveness
For a long time, this was the agreed-upon idea in society. You either had what it took to be a leader, or you didn’t.
The trait theory and approach have served as a benchmark for how we look at our leaders. It puts the emphasis on the person, rather than the followers or environment – which can be helpful in understanding why people gravitate toward particular leaders.
Then, about a century later in the 1940s, the narrative expanded.
Researcher Ralph Stogdill discovered that some people were leaders in some situations, and not in others. This contradicted the trait theory idea and introduced leadership as something that was influenced by the environment.
Think back to your group projects in college or high school.
Where did you fall in the roles? Were you the leader, the supportive but quiet contributor, the I’ll-do-everything-myself, the absent last-minute helper?
You might have been all four depending on the situation. Perhaps you only feel comfortable stepping up as a leader if no one else wants to.
With this in mind, there are several additional leadership theories:
- Situational leadership theories argue that leaders emerge based on need. If a situation requires it, one person will emerge as the leader. However, that same person may not rise to the occasion in another environment.
- Behavioral leadership theories suggest that leadership is a learned behavior that anyone can study.
Now that we know which theories are out there, let’s talk about what critics say about the trait theory.
Criticisms of the Trait Theory of Leadership
Many leaders today strongly disagree with the trait theory of leadership.
They believe that anyone can learn and build the skills needed to succeed as a leader. A small survey sample of U.S. consumers echoed this sentiment.
And there is some research to support this.
A 2008 study on heritability and human development found that 70% of leadership capacity is not inherited genetically, but rather learned through experience.
Additional research studies suggest that few traits differentiate leaders from followers. When comparing leaders with their followers, there are little differences in the traits they possess or have the potential to possess.
Another criticism of the trait theory is that it overlooks socio-economic inequities.
How do you determine who has the potential for leadership if your population doesn’t begin at the same starting line?
For instance, marginalized groups who grow up in underfunded and undersupported communities may not have the same opportunities to showcase their leadership abilities. Their abilities to develop this potential may also be limited.
With this in mind, some view the idea that leadership is inherited as flawed, as it does not factor in all variables.
Trait vs. Process Leadership
These two concepts fall on opposite sides.
The former argues leadership is innate, while the latter maintains that it builds over time as a result of the interactions between the leader and follower(s).
As a process leader, you are responsible for nurturing relationships with others and offering support. Through time, the theory states, you will gain the role of a leader and create an environment in which your followers can succeed.
When examining both theories, both theories can be true.
Leadership is nuanced, and as such, can operate within various models and environments.
For the trait side, everyone is born with personality traits, talents, and gifts, which make us more likely to succeed in particular environments and roles.
For instance, an extrovert can exhibit the qualities of a leader. They have little trouble in social settings and they communicate with confidence. With this in mind, they likely won’t have to work as hard as an introvert to engage with their peers, colleagues, and leaders.
However, an introvert can build those same skills through exposure and experience. On that same note, an introvert may rise to the occasion in more intimate settings.
What’s more, leadership is a constantly evolving concept. While the trait theory was initially the most popular way of viewing leadership, more theories have evolved that expand our understanding of it.
For instance, conversations surrounding psychological safety have only recently gained traction in the workplace. Leaders are now trained on creating an environment in which employees feel safe to share ideas, concerns, and mistakes.
As our understanding of what works best to motivate teams, leadership styles also evolve. As such, there will always be an educational component to being a leader.
There isn’t a right or wrong theory when it comes to leadership. All theories provide some insight into what it takes to be successful as a leader.
While the trait theory offers a rubric for the qualities of a leader, the process theory focuses on how to nurture relationships. The situational leadership model views leadership as a flexible concept that is heavily based on the environment.
If you’re working toward a leadership role, consider these models and use them as building blocks to find your own style.

What Is Instagram Creator Studio? [+ How Marketers Can Use It]
As a brand, influencer, or creator on Instagram, you know how convenient it is to manage your profile within the app and on a device that sits in your pocket. However, if you ever wanted to view it on a larger screen, like your desktop, you probably had to use an external third-party tool.
Enter Instagram Creator Studio, where you can manage accounts using the familiar in-app tools but on your desktop. Plus, a bonus: the ability to schedule posts. In this post, discover how to use Instagram Creator Studio to manage your profile, from scheduling content to understanding your analytics to monetizing your content.

Specifically, marketers can use Creator Studio to:
- View all of your account’s content (IGTV, photos, Stories, etc.) on a desktop.
- Schedule all of your Instagram content to post at a later date so you can be consistently active in your feed.
- Understand insights for your profile and posts, like performance metrics, follower data, and engagement type, to ensure you’re creating content that your audience enjoys.
- Eligible accounts with over 10,000 followers can monetize content and manage brand collaborations.
Below we’ll outline everything you need to know to begin using Instagram Creator Studio to manage your profile.
How To Connect Instagram To Creator Studio
It’s important to note that you need to have a Business or Creator account to use Creator Studio and connect your account to a relevant Facebook page. Once you’ve done all of those things, here’s how to connect your Instagram account to Creator Studio:
1. Go to the Creator Studio website.
2. Select the Instagram icon on the top of the screen (as shown in the image below).
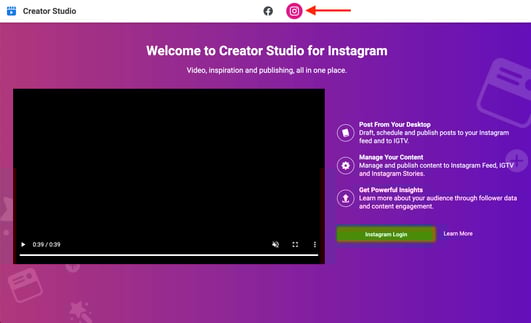
3. Click the green Instagram Login button and follow the instructions in the pop-up window to log in to your account.
4. As mentioned above, you’ll need to connect your account to a relevant Facebook page. If you haven’t done so already, follow the on-screen instructions to connect one to your account.
Once you’ve successfully linked your account, it’s time to start using the platform.
How To Use Instagram Creator Studio
You can use Instagram Creator Studio to post content, schedule content, and get insights for your account. Below we’ll explain how to do all of those things.
When you first connect your account, you’ll land on the Creator Studio dashboard (as shown in the image below), where you’ll see an initial overview of your profile content library, including video, photo, carousel, Stories, and IGTV content. You can click on specific tabs to view each content type individually.
Please note that your page should show all of your posts and content; this is merely an example.
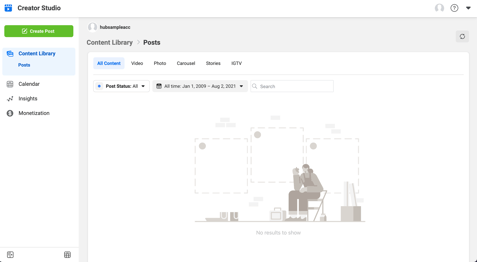
The menu on the left-hand side of the screen (as shown in the image below) has the following options: Content Library, Calendar, Insights (discussed further below), and Monetization.
Under the Calendar tab, you’ll see an overview of the posts you’ve scheduled for the future. Further below, we’ll discuss how to schedule posts so they’ll appear on the calendar.
Under the Monetization tab, you’ll be able to manage your brand collaborations. To have access to this feature, you’ll need an active, public account, 10,000 followers, consistent engagement over the past month, and no history of content violations.
The other tab on the Creator Studio dashboard is the Create Post button, and we’ll discuss how to use it below.
How To Post on Instagram Creator Studio
1. Click the green Create Post button on the top left-hand corner of the Creator Studio menu, as shown in the image below, and select the type of post you’re making: Instagram Feed or IGTV.
2. If you select Instagram Feed, you should see the pop-up window displayed in the image below. Upload the photo you want to post, and add a description to your image.
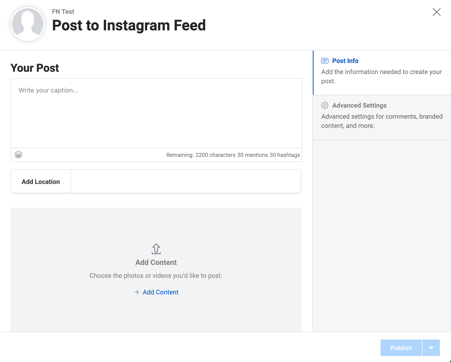
3. If you want to turn off comments on your post, select the Advanced Settings option on the right-hand side of your screen and toggle the Turn Off Commenting button into the on position.
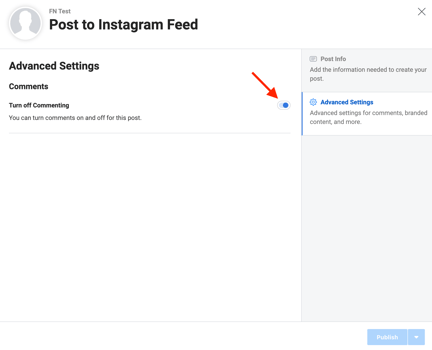
Add Alt Text on Instagram Creator Studio
The accessibility features within the Instagram app are also available in Creator Studio. To add alt text to your content, follow the steps above for uploading your preferred content type.
Before publishing or scheduling a post to your Instagram feed, navigate to the Accessibility section in the Advanced Settings tab, as highlighted in the image below, and add your alt text.
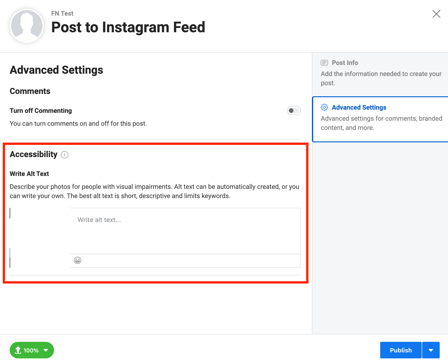
4. When you’re satisfied with your upload, select the blue Publish button on the bottom right of the pop-up window.
To upload an IGTV video on Creator Studio, follow these steps:
1. Click the green Create Post button on the top left-hand corner of the Creator Studio dashboard and select IGTV from the drop-down menu. You should see the pop-up window displayed in the image below with an upload, title, and description box.
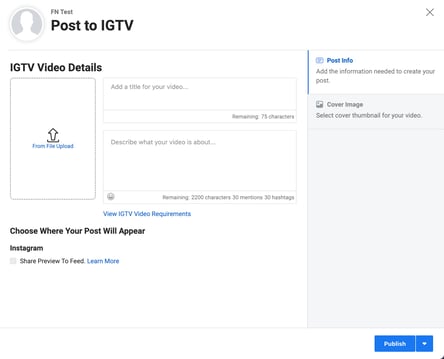
2. Upload your preferred video, and add a title and description.
3. If you want to share the IGTV video to your feed, check the box that says Share Preview To Feed underneath the Choose Where Your Post Will Appear Title.
4. Select the Cover Image tab on the right-hand side of your screen, and choose whether you want Instagram to create an auto-generated image, upload your custom frame, or use a video frame preview.
6. When you’re satisfied with all of your selections, click the blue Publish button on the bottom right-hand side of your screen to share your post on Instagram.
The steps outlined above will help you share a post to Instagram immediately after you upload it. Below we’ll go over how to upload content and schedule it to be posted for later on Creator Studio.
How to Schedule Posts on Instagram Creator Studio
To schedule a post on Instagram Creator Studio, follow the same steps you would as if you were going to upload content to your Instagram Feed or an IGTV video. Then,
1. Navigate to the blue Publish button on the bottom right-hand side of the screen and select the down arrow.
2. In the popup window, follow the on-screen instructions and select the date and time you want your post to be posted.
3. After you’re satisfied, click the blue Schedule button and schedule your post. You should then see a list of your scheduled posts in your content library, as shown in the image below.
After you’ve shared your content, you’ll want to understand the success of your content through your insights. Below we’ll explain the insights you can get and how to access them.
How To Get Insights From Instagram Creator Studio
The Creator Studio Insights tab gives you more information about your audience and how they interact with your posts. Here are the specific metrics you’ll get:
- Audience: Information about your followers and their gender, age range, and location (top countries and cities). You’ll also be shown when they’re most active, so you can schedule your posts when they’re most active on the platform.
- Activity: Information about how people engage with your account. This includes the reach your posts have, the number of impressions they get, and the actions people have taken (website clicks, taps to get directions, etc.).
1. Select the Insights tab on the right-hand side of the Creator Studio dashboard, as shown in the image below.
2. Select either Activity or Audience from the drop-down menu.
3. Navigate through either tab to learn more about the engagement on activity on your profile.
For example, if you select Activity, you should see the number of actions taken on your account over seven days, including website visits, profile visits, emails, accounts reached, and total impressions. The image below is an example of a Creator Studio activity insights page.
If you select Audience, you’ll see a bar graph displaying your followers’ age and gender breakdown, when they’re active on the app, and two location breakdowns.
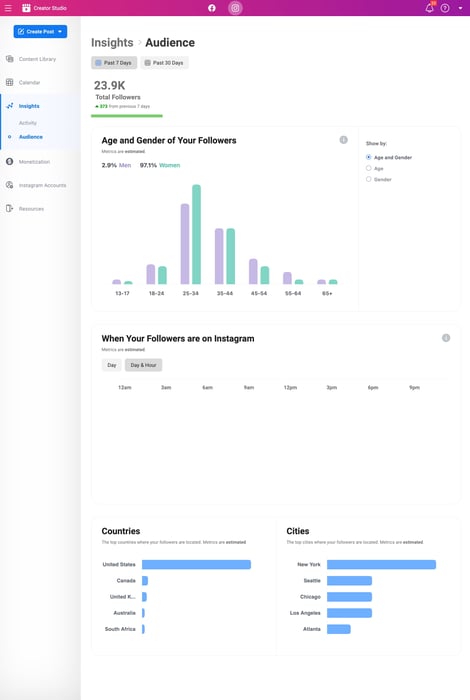
Instagram Creator Studio boasts a unique feature not offered within the mobile app: scheduling posts. If you’re hoping to make the switch from managing on only your mobile device to a desktop, leverage the tips on this list to begin using the tool.

Brainstorming Techniques: 15 Creative Activities to Do Solo or as a Team
We’re all familiar with traditional brainstorming as a way to produce new ideas. You sit in a room with a whiteboard and work with whatever comes to mind. Maybe you play a few rounds of word association to strengthen your ideas, or pull up Google and use research to flesh them out.
But there are many alternative exercises for tackling problems and developing new ideas, both individually and in a group setting.

Ranging from structured to silly, here are the best creative brainstorming exercises and techniques to help you get your problem-solving juices flowing. This list is a modified excerpt from my guide Creative Ideation for Digital Marketers: Theory to Practice.
1. Storyboarding

If you’re trying to design a process, storyboarding can help you see where your collective understanding of a problem supports or conflicts with a proposed solution, and where more thought/research is needed. By developing a visual story to explore the problem as a narrative, your team will be able to see how ideas interact and connect to form a solution.
Sticky notes are your friend. Take a few minutes to write out your ideas as individual notes. These don’t have to be complete thoughts — physically pinning up quotes, pictures, user info, and the like can help you see new relationships between different components.
Once you have a group of sticky notes to work from, start arranging them on the board as a progression: first this, then that. Organizing your ideas as a continuous series will help you see new connections and eliminate extraneous material that doesn’t support your end goal.
Why This Brainstorming Technique Works
- Storyboarding allows you to see your ideas in a sequential pattern.
- You’ll be able to see an overarching overview of a new or current process — without digging too deeply into the details.
- You can start from anywhere — the beginning, middle, or end — then fill in the blanks.
How to Use It in Marketing
Storyboarding is particularly useful for marketers. With it, you can:
- Outline the sequential process of a marketing campaign from beginning to completion.
- Improve an internal process such as backlink-building by drafting specific steps.
- Storyboard a marketing video from beginning to end.
2. Mind Mapping
Mind mapping is a fairly common term nowadays — in fact, many types of software provide automated mind-mapping templates so you can better organize your data. Well, it also happens to be a great way to organize your ideas.
- To create a mind map for creativity purposes, write down the task or problem you’re trying to solve at the center of your idea sheet (feel free to do this on your computer, but whiteboards are ideal).
- Then, expand on this problem by surrounding it with terms that better describe what you need. If your problem is low website traffic, for example, some terms to write around this phrase might be “organic traffic,” “trusted content,” “SEO,” and “video strategy.”
- Once your mind map has this first layer, add a second layer to each of your needs describing how you might be able to solve for these individual challenges. Around “SEO,” you might write “topic clusters,” “dedicated SEO strategist,” and “video marketing course.”
Keep adding to your mind map using the steps above until you’ve sufficiently broken down your problem into manageable parts. It’s a fantastic problem-solving technique that fosters creative answers to subjects that might otherwise seem uninspiring.
Why This Brainstorming Technique Works
- Mind mapping allows you to start from any point and create clusters of potential processes.
- You don’t need to have an order in mind; you can prioritize later.
- You can add a myriad of topically relevant ideas as you go; with mind mapping, you never feel boxed-in.
How to Use It in Marketing
In marketing, you can use mind mapping to solve problems, like in the example above. You can also use it to:
- Draft content maps for your entire blog or website. You can begin with an overarching topic, then begin creating branches for each subtopic.
- Come up with marketing campaign ideas divided by major topics and subtopics.
- Create Yes/No scenarios for placing different lead segments into specific drip campaigns.
3. Word Banking
If you assume “work banking” is a fancy term for “word association,” well, you’re right. But in a word banking session, what you do with the words you come up with is much more sophisticated.
While word associations often focus on pairs of words, word banking asks you to form big groups of terms that all describe just a few themes or topics. Creating word banks in a business setting can help you dismantle a project into manageable parts — kind of like a mind map.
Then, when your work bank is complete, you can retroactively form connections between the terms you came up with, and use those connections to craft ideas that are guaranteed to include all of your most important characteristics.
Why This Brainstorming Technique Works
- Word association is a relatively natural, low-effort task — simply begin with a big idea, then begin jotting down anything that comes up for you.
- It doesn’t require you to know the when, why, or how of an idea.
- Word banking will surface gasps in your knowledge. If you find yourself stuck, it’s time to complete additional research.
How to Use It in Marketing
Word banking is ideal for content projects and can be a precursor for more in-depth keyword research. Use word banking to:
- Surface everything you know about a topic you’re thinking of tackling in your blog or website.
- “Word vomit” blog post ideas without feeling boxed into a formal keyword research process.
- Uncover where you and your teammates may need additional training. For instance, if you choose to start a word bank for “conversion rate optimization” and the term “A/B testing” never comes up, it may be time to sign everyone up for a CRO course.
4. S.C.A.M.P.E.R.

S.C.A.M.P.E.R. is essentially a process for expanding and improving upon ideas by testing and questioning them from different angles. For each letter of the mnemonic, ask yourself a related question about your project or the problem at hand:
- Substitute: What would happen to the project if we swapped X for Y?
- Combine: What would happen to the project if we combined X and Y?
- Adapt: What changes would need to be made to adapt this project to a different context?
- Modify: What could we modify to create more value on this project?
- Put to another use: What other uses or applications might this project have?
- Eliminate: What could we remove from the project to simplify it?
- Reverse: How could we reorganize this project to make it more effective?
This method forces you to approach your project or problem in unexpected ways. Each question asks you to dig a little deeper into the issue and consider new possibilities.
Why This Brainstorming Technique Works
- S.C.A.M.P.E.R. will get you to think beyond predefined assumptions about your product or project.
- The series of “would” and “could” questions let your mind run free with minimal commitment to any actual change or alteration.
- It allows you to improve a process even if you believe the process has reached its optimal form.
How to Use It in Marketing
While S.C.A.M.P.E.R. might seem like a brainstorming activity for product development teams, it can serve marketing teams just as well. Use it to:
- Improve a current process — such as keyword research or market research — by substituting, combining, and adapting tasks.
- Optimize the copy of a blog post or campaign by crafting hypothetical changes that could improve the piece. These changes could make it easier to “template” the piece.
- Build a drip campaign that effectively gets leads to convert by modifying and substituting certain email messages.
5. S.W.O.T. Analysis
Entrepreneurs and business leaders know exactly what a SWOT analysis is. Well, it also happens to be a helpful brainstorming exercise.
S.W.O.T. stands for Strengths, Weaknesses, Opportunities, and Threats. When launching a company, it’s your textbook starting point (literally — there isn’t a single business school textbook in the world that doesn’t have a version of it).
But while a company’s founder might use a SWOT analysis to create his or her business model, brainstormers can use the same diagram to better organize their ideas.
Your SWOT analysis doesn’t have to be all that complicated when brainstorming. In fact, it can simply be four columns on a whiteboard during your average “shout it out” ideas meeting. When thinking of a new logo design, for instance, ask yourself what you like most about your current logo (strengths). What do you dislike about it (weaknesses)? What should it have more of (opportunities)? What other company logos should you be mindful of (threats)?
Why This Brainstorming Technique Works
- A S.W.O.T analysis will effectively put you in problem-solving mode before problems ever arise.
- It takes into account competitive advantages and disadvantages — a consideration that often comes long after brainstorming.
- You’ll get a much more detailed and comprehensive overview of what can be improved.
How to Use It in Marketing
S.W.O.T analyses are typically used in business and entrepreneurship, but marketers can use it to:
- Improve a social or search engine campaign before launch and find out where you may have opportunities or be facing threats.
- Create a much better project plan for clients by analyzing the project’s strengths, weaknesses, opportunities, and threats.
- Audit an existing process within the team, such as handoffs to sales or content creation.
6. Zero Draft
The Zero Draft is an ideation technique often used by writers and is essentially a form of focused free-writing. For marketers and agency professionals, it can help focus the first stages of a new project by establishing what you currently know and getting your initial ideas out of your brain and onto paper.
Taking your central theme or topic:
- Write down everything you currently know about the subject.
- Write down what you need or want to know about the subject, but don’t currently know.
- Reflect on why the subject is important.
- Add anything else that takes your fancy — this is a chance to get whatever’s floating around in your head out into the world.
The Zero Draft method is all about getting everything you can think of relating to your topic down on paper, so don’t be concerned if it looks messy and unfocused. The goal is just to get past the initial block that often plagues creative professionals in the early stages of a new project.
Why This Brainstorming Technique Works
- The Zero Draft method has minimal constraints while allowing you to make sense of your ideas in coherent sentences.
- It’s especially a good fit for those who like to write their ideas down.
- As opposed to a whiteboard session, Zero Drafting allows you to document your thoughts in a more permanent format.
How to Use It in Marketing
Zero Drafting has ample uses in marketing. Use it to:
- Draft a blog post, article, or page from start to finish without stopping.
- Create a preliminary outline for a marketing video or video advertisement.
- Map the sequence of a new client project or internal project.
7. Reverse Brainstorming
In certain corporations and government entities, data security is the highest priority. So high, in fact, that these organizations have been known to hire hackers — many of whom have committed internet crimes — to hack their systems and find out where the weaknesses are.
This “reverse” approach to security, wherein you hack your own company, is considered one of the best ways to secure a server from intrusion. And for us, it’s the inspiration behind this fourth brainstorming technique.
When you reverse brainstorm, you essentially work to create problems rather than solutions. “Why on Earth would you want to do that?” you might ask. Creating problems teaches you what not to do so you’re more intuitive to the needs of your project. Think of it like hacking your company to find out where the weaknesses are.
Say, for example, you want to drive awareness to a new product. As a marketer, you have many promotional channels at your disposal, but you don’t know how to use them or where to start. In a reverse brainstorming session, you might come up with the following:
- Avoid hyperlinks to the product’s purchase page
- Don’t tweet about the product
- Criticize the features of your product
Obviously, these are all horrible ideas if your goal is to promote the product. But, take the reverse of these ideas, and you’ve effectively created three excellent starting points for a supportive campaign: Link to the product in a series of blog posts, develop a Twitter campaign around the product, and identify specific features of the product that prospects would be most interested in reading or hearing about.
Why This Brainstorming Technique Works
- Reverse brainstorming tells you what to avoid from the get-go.
- It’s easier to start with what to not to do rather than what to do — the latter of which can make us feel stuck.
- It helps you avoid decision fatigue early on in the ideation process.
How to Use It in Marketing
As referenced above, you can use reverse brainstorming to come up with actions for promoting a new product. You can also use it to:
- Come up with the top worst clients you could attract to your company, which would tell you the types of leads you should pursue.
- Create the worst verbiage you could use in your ads, which would tell you the type of tone and wording you should use in your campaigns.
- Outline what failure looks like for your team, which you could then use to come up with new goals and objectives.
Are you brainstorming with your group or team? While all of the activities above could be used in a group setting, there are a few exercises that are made specifically for groups. Let’s take a look at the ones you could use below.
Group Brainstorming Techniques
1. Group Sketching

You don’t have to be an artist or a designer to benefit from sketching. Visual thinking can help to trigger and develop ideas that discussion and writing might otherwise leave unturned. Similar to brain-writing, group sketching involves participants building on each other’s ideas.
Each member of your team will sketch an image related in a central way to a concept, idea, or topic you want to explore further. Each sketch is then passed to someone else, who sketches another related image on the same piece of paper. This is repeated multiple times around the group. The final images are then reviewed and discussed with the aim of discovering connections that individuals hadn’t spotted on their own.
2. Brain Netting
Creative exercises and ideas meetings always go better the more people you have in the room. Unfortunately, that means remote employees might not be solicited for their input as much as they should be. Brain netting is the act of connecting with folks electronically to make sure everyone can offer their input and feedback on a project.
Brain netting doesn’t just have to be a group phone call, though. Company messaging platforms like Slack are the perfect way to get everyone into a chatroom to spill their ideas. As ideas are submitted, each chatroom member can vote for their favorites and combine the best qualities of multiple concepts.
3. Questioning Assumptions

We all carry assumptions with us — assumptions about what’s possible, what isn’t possible, what people want, what will work, and what won’t. This exercise forces us to challenge these assumptions and put everything on the table.
Draw up a list of all the assumptions you can think of about your current project — true or not — and discuss the list as a group, questioning each one. Doing this at various stages in your campaign development can spark fresh ideas, as well as identify knowledge gaps.
4. Wishing

This technique encourages your team to let imaginations run wild. Ask participants to dream up the most unattainable, extreme, and impractical solutions they can think of to a given problem. Create a list of a few dozen wishes pertaining to the task at hand.
Focusing on a selection of wishes, consider and discuss the ideas in detail, with the aim of triggering new but more realistic concepts to pursue. What makes them so impossible? How can that idea be scaled down? Which features of that wish could we integrate into this other approach? You might be surprised to discover applicable, real-world solutions among your team’s wildest wishes.
5. Alter-Egos / Heroes

This is a fun exercise where small groups imagine how they would go about solving a given problem if their team were led by a famous character, fictional or real. How would Cat Woman go about positioning your brand as a thought leader in virtual reality? What would Steve Jobs do to improve your latest communications package? How would Don Draper get your core messages across to millennials?
You can either choose someone you think embodies the right qualities for the job to help develop your vision, or someone at the opposite end of that scale, to explore less conventional ideas.
6. Six Thinking Hats
There’s a whole host of problem-solving exercises and tools that help participants to put themselves into the shoes of another. This particular tool was invented by Edward de Bono, a psychologist, author, and consultant who pioneered the technique in his 1985 book Six Thinking Hats. The method involves breaking down ideas into six areas of thought:
- Logic: The facts.
- Optimism: The value and the benefits.
- Devil’s Advocate: The difficulties and the dangers.
- Emotion: Feelings and intuitions.
- Creativity: Possibilities and new ideas.
- Management: Making sure that the rules of the hat are observed.
When approaching a new problem or project, have each member of your team put on one of these different “hats” for the discussion. Each “hat” represents a unique set of priorities and perspectives that will help focus your discussion and consider the project from a wide variety of angles.
For example, if you’re wearing the “Devil’s Advocate” hat, it’s your job to consider the project’s limitations and challenges. It may feel uncomfortable at first to temporarily adopt a very narrow form of thinking, but the extremes can help teams fully explore a project.
7. Forced Connections

This exercise involves bringing together ideas that serve very different needs or interests to form a new concept. You see this sort of thinking all the time in products like the Apple Watch, the Swiss Army knife, smartphones, or even sofa beds.
To put this method into practice, bring a bag of random items to your next meeting, or draw up two lists of unrelated items on the board. Ask team members to pick two or more items and explore different ways they can be connected. This technique can produce some silly results, but it’s ultimately a helpful way of getting your team out of a creative rut.
8. Brain-Writing

In this exercise, participants simply write down a few rough ideas for solving a particular problem on a piece of paper. Each piece of paper is then passed on to someone else, who reads it silently and adds their own ideas to the page. This process is repeated until everyone has had a chance to add to each original piece of paper. The notes can then be gathered, ready for discussion.
The big advantage of brain-writing is that it makes sure everybody is given the opportunity to have their thoughts and ideas thoroughly considered by the group. This avoids the loudest or most extroverted people unintentionally dominating the sessions.
For some teams, brainstorming might come easily — they might even have a process in place. For other teams, it’s not as easy, even if they have a handful of activities they know they’d like to use. Below, I’ll cover how you can get the most out of your brainstorming session.
1. Focus on quantity over quality.
Brainstorming is all about “vomiting” any and all ideas you have — no matter how silly they may seem. (And trust me, there are no silly ideas in a brainstorming session.) For that reason, don’t worry about coming up with quality ideas and instead focus on quantity.
Write down anything that you or your team have come up with. What may seem implausible now may be what your team chooses to pursue later.
2. Selectively apply constraints to keep the session focused.
While you should come up with as many ideas as possible, you shouldn’t run all over the place, crossing topics that are irrelevant or that are unattainable for various reasons. Consider creating budgetary constraints, establishing a timeline, and putting up guardrails that will keep your brainstorming session in line with your goals.
For instance, if your budget for a new marketing campaign is $2,000, but you know you don’t want to spend it on pay-per-click ads, you can spend your brainstorming power on other avenues.
3. Don’t prune ideas as you brainstorm.
Resist the urge to prune ideas as you come up with them. Even if you think you’ve got a much better idea at hand, let that old idea sit there — you might use it later on another project, or even in the second phase of your current project. Ideas that seem obsolete can also act as guardrails later on.
4. Never finalize or commit during the brainstorming session.
When you get an excellent idea during your brainstorming session, you might feel tempted to commit to it and set it aside, then continue brainstorming other ideas. The problem with that approach is that it limits you considerably, because now you’re brainstorming around that one idea rather than brainstorming freely. Without knowing it, you’ll anchor your brainstorming on that idea to make it come to fruition.
The goal of brainstorming, of course, is to finalize one final concept. But until you’ve tackled the concept from all possible angles, don’t commit to a certain idea until you’ve laid out all of the routes you could take.
5. Look to other sources for inspiration.
When you get stuck, it’s imperative to look at the competition to get inspiration — especially in marketing. What are they doing that you could imitate? Which ideas could you bounce off of? Even the most productive brainstorming sessions will come to a halt at one point, and inspiration will go a long way in jumpstarting your session again.
You might even print out certain images, articles, and campaigns to keep your team inspired as you work.
6. Use a whiteboard (and take pictures of each whiteboarding session).
Using a whiteboard might seem like the stereotypical brainstorming route, but it has its merits: It allows your team to get any and all ideas out in a seemingly impermanent way. No idea is too silly to write on a whiteboard because you can easily erase it.
Of course, I wouldn’t suggest erasing your sessions; take photos of your finished whiteboards to keep all of your ideas on record. Remember to pair whiteboarding with a creative brainstorming exercise. Instead of writing “[Topic] Brainstorming Session” up top and letting anyone chime in, create a chart for a S.W.O.T analysis, or list different alter-egos to detail how they’d promote your product.
7. Take breaks.
If you want to stay productive during your brainstorming session, it’s imperative to take breaks. Let your team take a walk, scroll through social media, or go out for a bite. Do brainstorming in short bursts, or do it in long blocks. Whatever you do, schedule breaks for your team to ensure everyone’s minds are as clear as possible during the process.
Use Creative Brainstorming Techniques to Ideate Better
Traditional brainstorming is dead. Your team no longer has to sit in a circle in silence while you try to write ideas on an empty whiteboard. Use the above exercises to come up with powerful marketing projects, advertisements, and campaigns that empower your team and your company to grow better.
Editor’s note: This post was originally published in November 2016 and has been updated for comprehensiveness.

How to Discover Your Long-term Career Goals, According to Experts
“Where do you see yourself in five to ten years?”
Of all the job interview questions out there, this has always been one of the most difficult.
These days, the next steps in your career aren’t always linear. The age-old corporate ladder model of putting in a few years as an associate contributor, becoming a manager of a small team, and climbing your way to the senior management or director level is not right for everyone.
And considering you’ll spend roughly one-third of your life at work, it’s critical you take the time to reflect and choose the best career path for you.
To help you figure out your short and long term career goals, I spoke with four career coaches. Here, we’ll explore how you can determine your own career goals for long-term professional fulfillment. Let’s dive in.
What are career goals?
Career goals are any short or long term milestones you hope to achieve throughout your career to get you where you want to be. While your personal goals might include starting a family or buying a house, your career goals are entirely focused on the trajectory of your professional life.
Your long term career goals are the adult answer to the question, “What do you want to be when you grow up?” Perhaps you hope to become CFO, business owner, or VP of Marketing. Alternatively, maybe you want to become a lecturer at a college, open your own private practice, write a novel, or own a yoga studio.
Once you’ve identified your long term goals, you’ll want to create a strategic vision for how to get there, which is comprised of lots of short term goals. For instance, maybe in your short term plan, you’d like to get your MBA, speak at conferences, take a writing course, or get your yoga certificate. All your short term decisions should be made, at least in part, with your long term career goal in-mind.
Let’s dive into the difference between short and long term career goals, now.
Short Term Career Goals
A short term career goal is any professional goal that will take you a few months or few years to achieve. Your short term goals should fit into the roadmap you need to follow to eventually reach your long-term goals.
Short term goals can relate to education, professional development, personal development, or leadership. For instance, a few short term goals might include:
- Taking an Excel course to become more proficient in data analysis
- Signing up for your company’s professional development workshop to master new skills related to management
- Enrolling in a Toastmasters class to become a more confident public speaker
- Increasing your monthly sales by 30%
- Collaborating more efficiently across departments
From these examples, you can begin to see that short term goals are not the end-all, be-all of your professional development — they’re just a starting point. It’s often easiest to determine your short term goals by first discovering your long term goals, and then working backwards.
For instance, if your long term goal is to become the VP of Marketing, you’ll want to identify an appropriate leadership roadmap and start with relevant short term goals, like taking a public speaking course, strengthening your leadership skills, or networking within the industry to find appropriate mentors.
When devising your short term goals, you’ll want to ensure you’re following the SMART framework: Specific, measurable, attainable, relevant, and time-bound.
The SMART framework can help you create more specific goals that are typically easier to achieve — for instance, you might modify your short term goal, “I want to create a stronger team culture” to “I will improve our team’s culture by implementing weekly team lunches and facilitating various ice breakers or games during these lunches. At the end of the quarter, I’ll send out a survey to team members to measure employees’ satisfaction levels with team culture.”
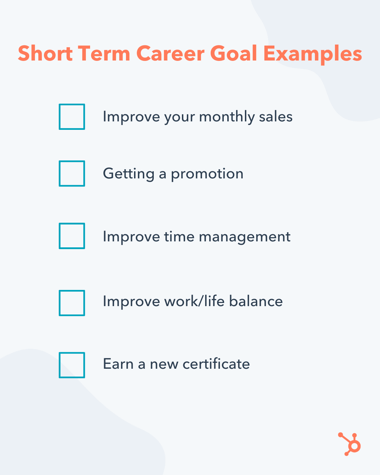
Long Term Career Goals
A long term career goal is your long-term vision that drives your career and professional development decisions, and typically takes years to achieve.
Oftentimes, your long term career goals can be the motivating factors in your day-to-day. For instance, perhaps you don’t love your current role as a content marketer — but it’s necessary for you to learn the ins and outs of marketing, since your long term goal is to become a VP of Marketing.
A long term goal should drive your professional decisions and career conversations with your manager, since long term goals are only achievable once you’ve crossed off a series of short term steps. Of course, you’ll want to ensure the long term goals you articulate with your manager are possible at your current company.
For instance, if you’re in a marketing-related role, it’s appropriate to communicate to your manager that your long term goal is to become a VP of Marketing. It’s less appropriate to tell her that your long term goal is to write a science fiction book, since that demonstrates to your manager that you don’t plan on staying at your current company for the long haul.
A few examples of long term goals include:
- Become an executive at a company
- Lead the financial team at a start-up
- Become a thought leader in the SEO space
- Start your own company
- Take courses to switch career paths and become a product manager
- Build a consulting business
Ultimately, your long term goal is the desired end result of many strategic, short-term decisions.
If your long term goal is to become a product manager, some short-term decisions might include taking a college course on product management, conducting informational interviews with product managers to learn more about necessary skills for the role, and taking a few courses related to the core requirements.
If your long term goal doesn’t relate to your current role, consider how you might level up outside of work to break into a new industry. For instance, if a long term goal is to become a novelist, perhaps you take some fiction workshops outside of work. Alternatively, if your long term goal is to start your own business, maybe you create your business plan on the weekends.
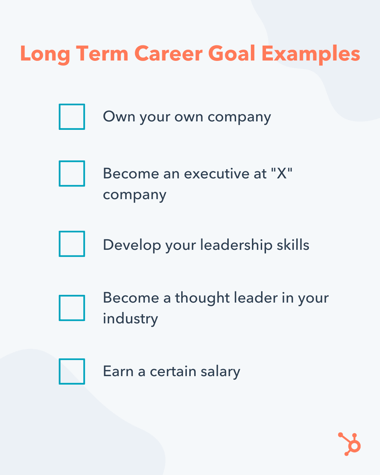
How do you know what your career goals are?
It’s the million dollar question, isn’t it? Many of us hope to know what our career goals are as soon as we graduate college — but, as we try out certain roles and uncover our professional strengths and weaknesses, these goals likely change over time.
To get some insight here, I spoke with Nicole Palidwor, a certified career coach and resumé specialist at Ama La Vida.
Palidwor told me she typically urges her clients to focus on the following five areas when considering a career change:
- Values: What do I care about? What is important to me?
- Interests: What topics do I find fascinating or intriguing?
- Work Environment: What industry and/or company type interests me?
- Status: What is my desired professional recognition and achievement?
- Compensation: What is my long-term desired income?
Palidwor says, “Different priorities will lead you down different paths. For example, if interests rank highest, you’ll look for careers that allow you to explore your passions or reflect your training. If overall compensation is your motivator, you’ll pursue titles and qualifications that move the salary needle.”
She adds, “It’s also important to recognize potential tradeoffs. High compensation doesn’t necessarily align with working for social causes. Ideal work environments may not always provide the status you’re looking for. Non-profit work, tech startups, Fortune 500s, engineering firms, and executive opportunities all await you, but they may not all make sense.”
Senior Director of Student Affairs for Penn State University and career development strategist for Mentor Me Ashley A. Adams, PhD, agrees that figuring out your values is a critical step in choosing a career path.
Adams told me, “The first step in determining career goals is to focus on your values. Values serve as a compass and should guide your decision-making in all things, but particularly in your career.”
“For instance,” She adds, “if you value family, identify industries that have structured or predictable work schedules that allow you to plan appropriate family time. Alternatively, if you value wealth, find organizations that have lucrative benefits, high % matching 401K, and above-average salaries. Once you’ve identified your values, then you can focus on your strengths and weaknesses.”
Once you’ve made a list of your values and interests, you can begin to identify your most powerful professional skills. You’ll then want to determine a career that aligns all three of these areas.
Additionally, Sho Dewan, who was listed one of the top career coaches globally on LinkedIn’s Top Voices list and is CEO of Workhap, recommends breaking down your goals into three parts:
- What is the result I want? (Example: “I want to earn a promotion in six months.”)
- What is the action I have to take every day or week to achieve that goal? (Example: “I will arrange feedback meetings with my manager, learn new skills, organize team-building events, etc.”)
- What is the thought I need to remind myself to achieve that goal? (Example: “I am skilled at what I do, my manager wants to see me succeed, and I am a valuable asset to the team.”)
Dewan says, “If you can think these thoughts consistently, then you will be motivated to take the required action — which will lead to you getting your desired results.”
Heidi Siegal Kogon, Founder and Career Coach at Kogon Coaching, also encourages her clients to understand their core values and innate strengths. She says you can do this by asking those closest to you, leveraging personality or strength assessment tools, or thinking about what you most enjoy doing.
She adds, “You’ll want to take the time to figure out what you truly want — not what someone else wants for you, or what you think you ‘should‘ do. Many people live their lives based on what other people think they should do. Those people may think they have your best interest at heart, but it still may not be the best decision for you.”
If you currently work at a company, or you’re interviewing for a new position, follow these tips to decide what your career goals are:
- Look at the organizational structure
- Know the company’s hierarchical lingo
- Ask what a typical career trajectory might look like in your role
- Consider long term goals such as becoming an executive or owning your own business
- Think about what motivates you
This means that you’ll want to think about what motivates you and then consider what the next step would be at the company you’re working for. You should know how the organization structures its hierarchy and the lingo that’s used.
Then, you can lay out a basic plan for a career trajectory from one role to the next. Once you have an idea of the roles you want, then you can focus on deciding what skills and education you might need to get there.
5 Career Goal Examples
Now that we’ve explored what career goals are, let’s put this into practice. Here are six examples of career goals to get you started writing your own.
Alternatively, here’s how you might want to answer the question, “Where do you see yourself in five to ten years?” during a job interview.
Example One: A Leadership Career Goal
“Over the next couple of years, I’d like to enroll at a university to earn my MBA in finance. I hope to one day become CFO at a company, and I believe my MBA will help me achieve that goal. I have always been interested in a career in finance, and I also have strong leadership skills. Becoming an executive for a financial department would combine these interests well.”
Short Term Goal: Get an MBA in finance
Long Term Goal: Become CFO at a corporation
Use Case: Interview or performance review

Example Two: An Independent Career Goal
“My ultimate dream has always been to write a book and become a novelist. To help myself achieve this goal, I am going to sign up for a local writer’s fiction workshop so I can receive feedback on my writing from my peers.”
Short Term Goal: Take a fiction workshop
Long Term Goal: Write a book
Use Case: Personal
Example Three: A Skill-based Career Goal
“Over the next five years, I’d like to gain enough experience to transition into a role on the SEO team. During my conversations with SEO strategists, I’ve learned one weakness I have is minimal knowledge of Excel, so I’d like to take an Excel course to strengthen my skills. This excel course, along with seeking out collaborative projects with the SEO team, should help me achieve my goal.”
Short Term Goal: Learn Excel
Long Term Goal: Become an SEO consultant
Use Case: Performance review
Example Four: An Outside-of-Work Career Goal
“Within the next five years, I want to open a yoga studio. To accomplish this, I am going to start by getting my yoga teacher’s certification. This will enable me to break into the yoga industry, and after a few years working at a yoga studio, I can learn the ins and outs to better equip myself to open my own studio.”
Short Term Goal: Get my yoga certificate
Long Term Goal: Open a yoga studio
Use Case: Personal
Example Five: A Business Owner Career Goal
“I’ve always dreamed of one day opening my own public relations firm. This goal influenced my decision to attend X University and get a degree in Public Relations with a minor in Management. In the short term, I’d like to join your team as a public relations associate and work my way up the ladder. Experience at your company would be invaluable to me as I begin my career.”
Short Term Goal: Get a job as a public relations associate
Long Term Goal: Open my own public relations firm
Use Case: Interview
How to Write Career Goals
Once you’ve determined what your career goals are, you’ll want to write them down. Perhaps you’ll mention them on your resumé if your goals align with the role for which you’re interviewing.
Alternatively, maybe you write your career goals down before a performance review with your manager for a more constructive, guided conversation.
Finally, even if your goals don’t align with your current role, you’ll still want to write them down for personal reflection.
Here are four steps you can follow when writing your career goals:
1. Consider where you want to improve your career.
2. Use SMART goals formatting.
3. Write short term and long term goals.
4. Be detailed with your plan.
1. Consider where you want to improve your career.
Before you write your goals, think about the areas you want to advance. There are four main categories that I like to think about:
- Improving work performance.
- Developing skills that will help you become a leader/manager.
- Self-improvement focused goals.
- Learning about something new and different in your field.
When you write out your career goals, think about each of these areas.
How can you improve your work performance? What kind of skills do you need to develop to get where you want to go? How can you improve yourself and grow? What can you learn about that’s new in your industry?
Thinking about these questions will help you begin brainstorming if you’re not necessarily sure where you want to end up.
2. Use SMART goals formatting.
An easy way to write out your career goals is to format it like a SMART goal, like mentioned above. Your goals should be specific, measurable, attainable, relevant, and timely.
Being as specific and relevant as possible is important for you to communicate with your manager or a potential employer.
3. Write short term and long term goals.
When you’re writing out your goals, write out a few short term and long term goals. It’s important to consider what type of goals you want to achieve in the next few years, as well as goals for the distant future.
You can come up with a career trajectory, and then write out short term goals that will help you get there. Additionally, when writing out your long term goals, consider why you want to become an executive or own a company. Thinking about what motivates you can help you maintain focus.
4. Be detailed with your plan.
Writing out your goals doesn’t just mean writing out a wish list. You should also come up with a plan of action for how you’re going to achieve your goals. This plan will consist of a basic trajectory, and the short term goals you need to achieve to get there.
I asked Nicole Palidwor about the “do’s” and “don’ts” when it comes to writing career goals.
Palidwor told me, “You’ll want to write career goals that make sense for your current lifestyle, available bandwidth, and the urgency of a professional change. People often get ambitious, but come to realize sending out 50 applications a week isn’t realistic.”
“Instead, create action steps that reflect what you can and want to do by establishing smaller, but still relevant, achievable, and appropriately ranked goals.”
Palidwor adds, “Don’t make too large or ambiguous goals. Break them down. Additionally, I’d quantify your expected results to hold yourself accountable, and give yourself deadlines so that you stay on track to achieving your goals. The more you break down and organize your goals, the easier they seem (and are!) to accomplish.”
When writing career goals for a resume, however, you’ll also want to ensure you make it clear how you plan on helping the company hit its own business goals — not just your own.
As Marcy Williams, Founder and Career Coach at Coach Marcy Life Coaching Services, tells me, “When writing out my career goals for a performance review or for a resumé, I make talking points of what I contribute to the role within the organization first. I discuss how I love working as a team to improve processes and the experience for all versus speaking of just myself.”
Williams adds, “Do not talk about yourself first when jotting down career goals because it will give the employer the feeling that you are only in it for yourself and not for the betterment of the organization.”
And there you have it! You’re well on your way towards creating more actionable, tactical career goals to get you where you want to be. Keep these tips in-mind, and don’t be afraid to iterate over time as you learn more about what you like — and don’t like — about your current career path.