Welcome to My Blog
YouTube Ads for Beginners: How to Launch & Optimize a YouTube Video Advertising Campaign
You’ve spent months perfecting the script, storyboarding, finding the right talent, shooting, and editing. The end result? A blockbuster video that’s sure to rake in hundreds—maybe thousands—of views.
With all that time invested, you can’t stop at just embedding the video on the homepage of your website or sharing it on social media and hoping someone watches. Running YouTube ads on your videos is one way to make sure more of your target audience finds the content you’ve produced. And with new formats and tracking capabilities, you can also use this information to report on its ROI.

In this post, we’ll guide you through YouTube ads—how they work, how you get paid, and best practices for growing revenue from your YouTube channel through advertising. By the end of this guide, you’ll be ready to launch advertisements across your YouTube channel as part of your overall YouTube marketing strategy. Let’s get started.
What’s New With YouTube Advertising
Advertising on YouTube is very different from running a PPC or paid social media campaign. There are specific creative constraints and a ton of options for this platform, and you need basic knowledge before you even scope out your next video project to make the most of the paid possibilities.
In recent years, Google has rolled out a series of changes that makes YouTube advertising an extremely worthwhile investment. Let’s take a look.
More Rigorous Brand Safety Efforts
In the past, the platform has made major efforts to protect viewers and advertisers from harmful content, and those efforts have persisted as of November 2022. The latest updates include “clearer language” and “specific guidelines” around ads not being placed on adult content, violence, harmful or dangerous acts, sensitive events, videos with inappropriate language, and drug-related content.
Targeting Based on Users’ Search History
A few years ago, Google announced it would allow advertisers to reach more viewers on YouTube — especially across mobile devices, where 50% of YouTube views take place. Among the changes it rolled out, possibly the biggest announcement was that advertisers would be able to target viewers based on their Google search history, in addition to their viewing behaviors YouTube was already targeting.
Marketers can now target ads at people who recently searched for a certain product or service. If the content of a video ad is closely related to a search the viewer has been researching, they might be more likely to watch the entire ad or click through the ad to the website.
Audio Ads
Audio has grown lately — you needn’t look further than podcasts and the new social media app Clubhouse. To keep up with the changes, Google is now allowing YouTube advertisers to create audio-only ads. While we’d recommend starting with a video ad first, you can later consider using audio once you’ve perfected your brand voice and learned what your audience likes to engage with the most.
Upgraded Data Attribution Models
Google has also upgraded YouTube’s data attribution model so you can better measure how users engage with your ads. You can also determine cost-per-conversion and see your YouTube ads’ performance alongside your Search and Shopping ads’ attribution reports.
Keywords are relatively less expensive to target on YouTube than in traditional Google Search, where the average cost per click is estimated to be between $1-2.
While great content is bound to be found, it’s important to be proactive about gaining the attention of prospects and educating those who are unfamiliar with your brand. YouTube ads allow you to do just that. It’s a cost-effective way to target your audience with a more engaging form of content — video or audio.
The Types of YouTube Video Ads
There are several key types of video ads in which you can invest on YouTube. Google outlines the basic formats here. Below, we go into more detail.
1. In-Feed Video Ads
In-feed video ads show up on the YouTube homepage, search results pages, and as related videos on YouTube video watch pages.
This ad appeared after performing a YouTube search:
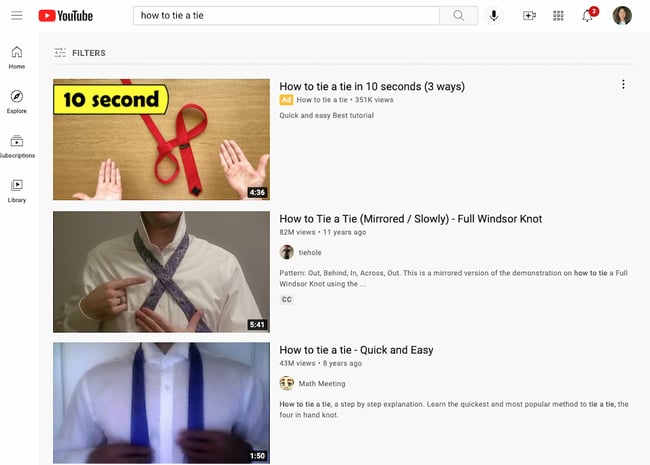 Once a user clicks on the ad, the destination video page features a spot on the right-hand column where a companion banner display ad will appear.
2. Skippable In-Stream Ads
Skippable in-stream ads are the standard video ad type on YouTube. Advertisers only pay for these ads when a user watches the ad for at least 30 seconds, until the end of the video, or if the viewer takes an action, such as clicking on a call-to-action. YouTube requires that skippable ads be between 12 seconds and 6 minutes in length.
You’ll see these ads play before someone watches the video they’ve selected on YouTube. Viewers sometimes have the option to skip the ad after watching it for five seconds. You can also have them play anywhere in the Google Display Network (GDN) — or sites that purchased Google video ad space.
In-stream ads also let marketers customize video ads with different CTAs and overlay text, as highlighted in the skippable in-stream ad example below from Grammarly.
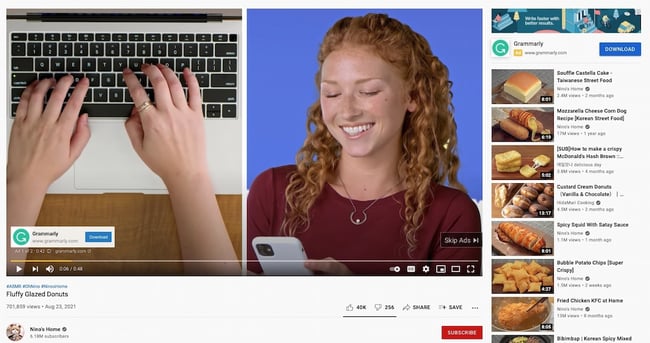
Notice that there’s another CTA from Grammarly on top of the right-hand suggested video columns.
What Skippable In-Stream Ad Videos Can Include
Skippable ad campaigns can include videos with people, dialogue, and music that was retrieved with permission — or is considered royalty-free. However, it’s best not to run a standard promotional commercial. Because these videos can be skipped, you need to give your audience a reason to keep watching, and product plugs historically don’t get the views you might expect.
Instead, tell a story with the time you have in this video. People love seeing case studies of those who faced a struggle that they can empathize with. It’s a source of entertainment that makes your brand memorable and less tempting to skip.
With skippable in-stream ads, advertisers can gain a ton of information about the performance of their ads for optimization and testing purposes.
Using their Google Ads account, YouTube account managers can collect data on an ad’s completed views, partial views, channel subscriptions, clickthrough rates on CTAs, views sourced from a user sharing the content, and views on the brand’s other content that can be attributed to a person initially viewing a video ad.
These actions help advertisers better understand the full value of their video ad spend and where to allocate budget to increase results.
3. Non-Skippable In-Stream Ads
Non-skippable ads can play before, mid-roll, or after the main video. They can be 15 to 20 seconds in duration. Here’s an example:

Non-skippable mid-roll video ads appear midway through a YouTube video that’s 10 minutes or longer. On the desktop, viewers will see a five-second countdown, and on the app, they’ll see yellow markers where the ads are placed.
What Non-Skippable Videos Can Include
Non-skippable ads give you just as much freedom as skippable ads in their allotted content. You can include people, dialogue, audio, and more elements that you find best represent your brand in 15 to 20 seconds.
Because non-skippable ads can’t be skipped, these videos are best created with a call-to-action (CTA) so you can optimize the attention you do have from the viewer. In other words, encourage viewers to click on your ad and receive something in return. Perhaps you’ve released a new product or are promoting a major event this season — use non-skippable ads to get those clicks.
4. Bumper Ads
Bumper ads are the shortest type of YouTube video ad available to you. At just six seconds per bumper, these ad spots play before a viewer’s chosen video. It’s also non-skippable.
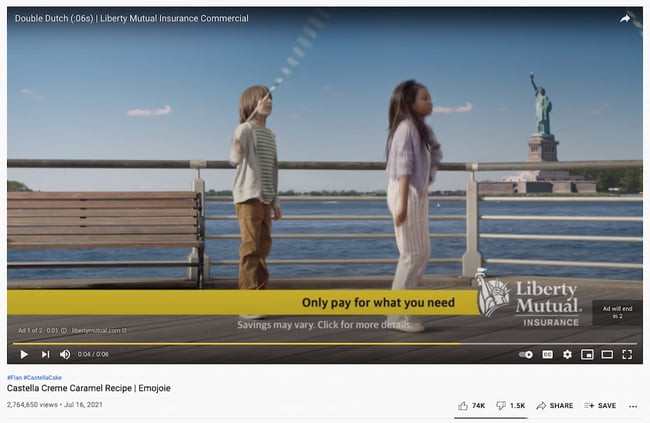 Bumper video ads obviously can’t tell a good-enough story in just six seconds, but they make terrific complements to larger video campaigns on a new product launch or event. Just be sure to use the six seconds wisely, and include only the components of your brand you want your audience to remember.
5. Overlay Ads
Overlay ads are a type of banner ad that hovers at the bottom of the video, as shown below. This type of ad is ideal to supplement your other in-stream video campaigns. A banner ad helps to avoid advertising your product in an intrusive way while still reaching your target audience.
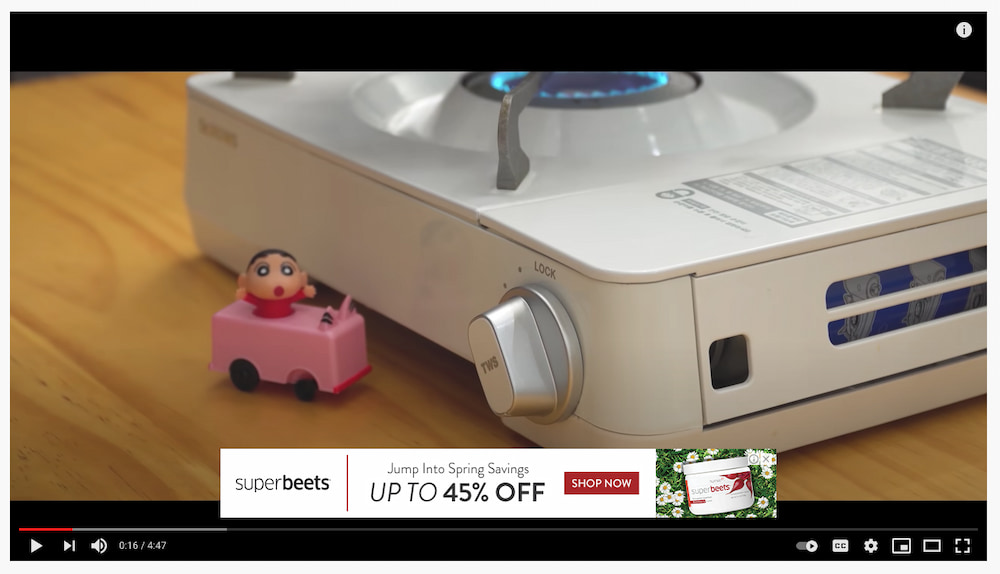
Now that you’re familiar with the types of ads you can run within the YouTube platform, let’s cover the nuts and bolts of launching a YouTube ad campaign.
How to Advertise on YouTube: Launch an Ad Campaign
Once you’ve created a marketing video you want to advertise on YouTube, it’s time to create your video ad campaign.
If you haven’t made a video yet, here’s how to get started with Animoto or Wistia, along with a few great examples of YouTube ads.
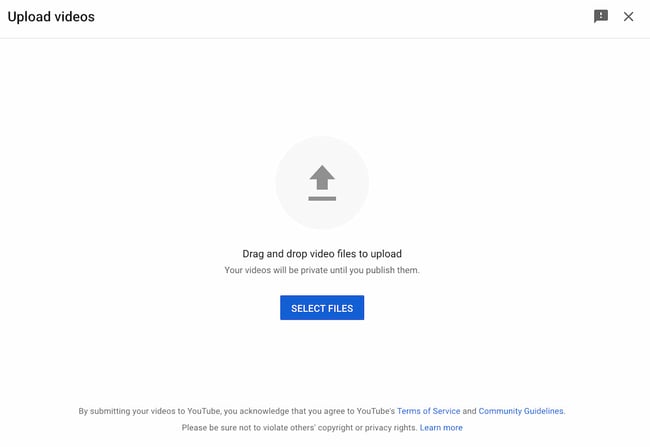
Step 1: Upload your video to YouTube.
 Step 2: Login to or Setup your Google Ads account.
Now, you’re ready to set up your advertising campaign. First, go to your Google Ads account. If you haven’t made one already, you can sign up with a Google Workspace email (either personal or business).
When you first sign up, the screen might prompt you to start creating a campaign right away. Look for an option that says “Are you a professional marketer?” or “Set up without creating a campaign” and click. That way, you can get to your brand new Google Ads dashboard.
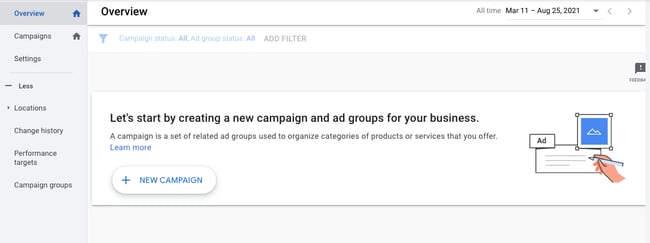
Step 3: Create a new campaign.
When you access the dashboard, click the button that says “+ New Campaign”.
Step 4: Choose the goal and campaign type.
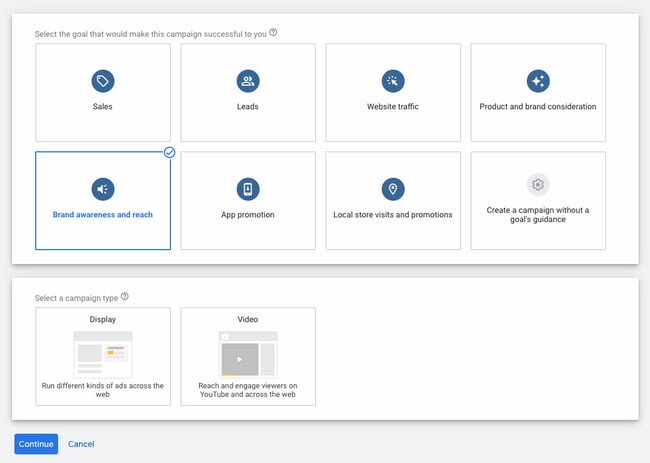
You’ll be prompted to select a goal, then a campaign type. Choose whatever goal you’d prefer. Under campaign type, select “Video.”
Step 5: Choose the campaign subtype and strategy.
You’ll be prompted to select a campaign subtype: Video reach campaign, outstream, or ad sequence. Choose “Video reach campaign.”
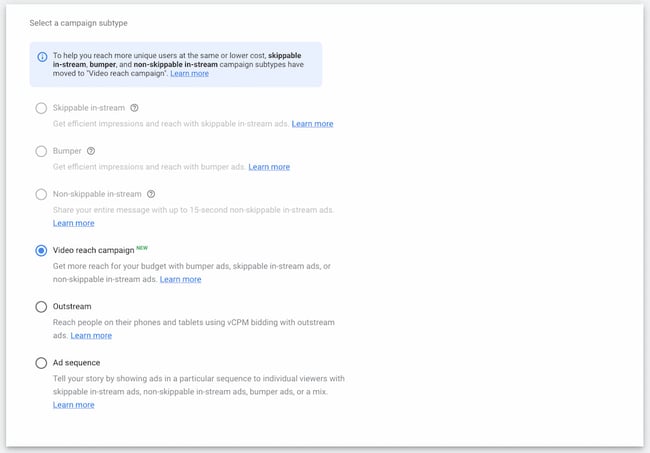
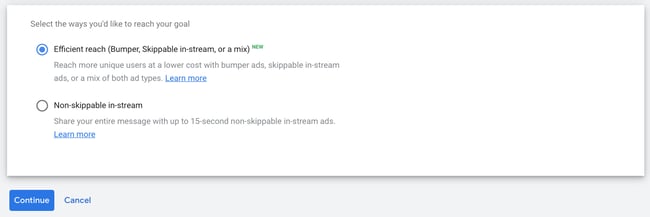
In the same screen, select your method for reaching your goal: Either “Efficient reach (Bumper, Skippable in-stream, or a mix)” or “Non-skippable in-stream.”
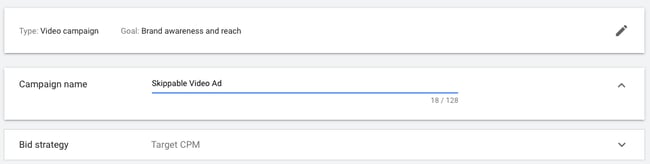
Step 6: Enter a campaign name.
Next, enter a name for your campaign. Leave the bid strategy as is.
Step 7: Enter a budget.
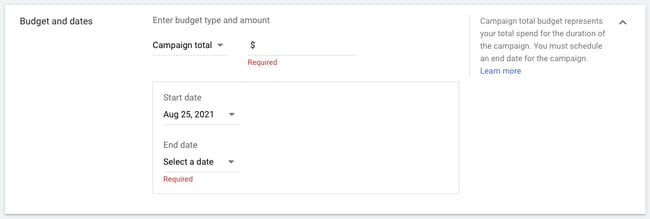
Set your budget per day or for the entire campaign. Setting a daily budget can help you keep daily costs low while ensuring you don’t run out of money too quickly. Setting a campaign total budget can help you establish a fixed investment amount that Google won’t go over.
After that, choose a start and end date.
Step 8: Choose networks, locations, and languages.
Decide where you want your ad to appear.
- YouTube search results: Your video ad will appear in results for searches and will appear on the YouTube homepage, channel pages, and video pages.
- YouTube videos: This runs skippable in-stream ads that appear pre- or mid-roll during a YouTube video.
- Video partners on the Display Network: With this option, you can choose for your video ad to appear before or around videos across the Google Display Network.
You should create separate campaigns for YouTube search results and YouTube videos, as this will help you to better track performance metrics. These ads are served to people performing very different activities and require a different amount of commitment from the viewer, so it’s best to monitor performance separately.
Next, define the location of users whom you want the ad to be shown to. You can also exclude certain locations.
Last, choose the languages that your target audience speaks.
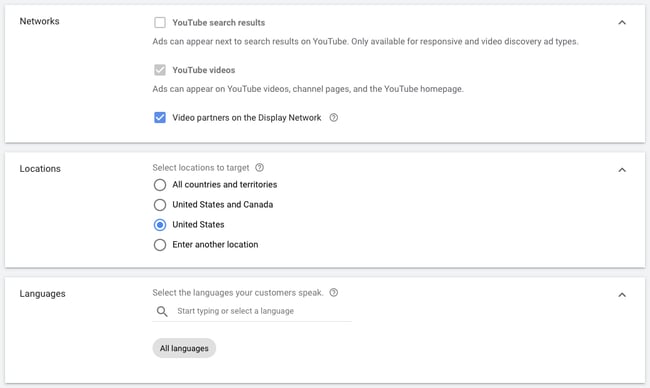
Step 9: Set up content exclusions and excluded types and labels.
These options are for those who wouldn’t like to advertise their brands on videos that have profanity or sexual content.
Choose between “Expanded inventory” (excludes videos that have excessive profanity and graphic content), “Standard inventory” (excludes videos with strong profanity and graphic content), and “Limited inventory” (excludes videos with moderate profanity and graphic content).
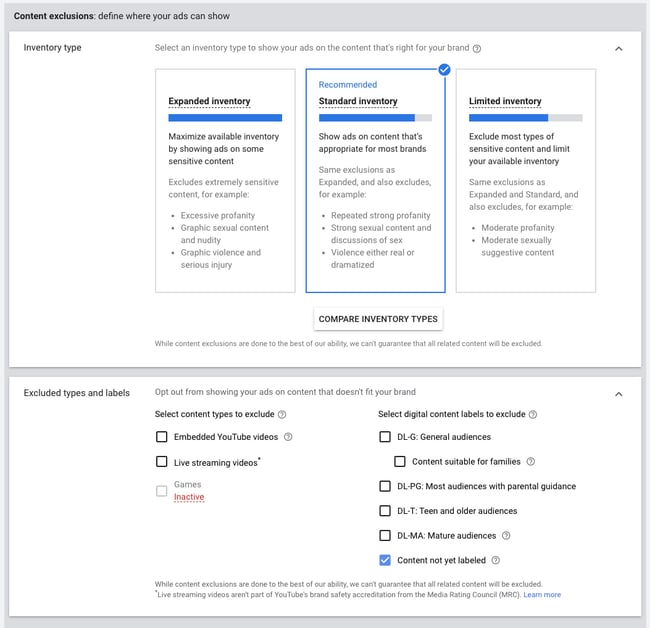
Under “Excluded types and labels,” you can also prevent your ads from showing up in embedded YouTube videos and live-streaming videos. In addition, you can exclude content based on their content labels (G, PG, MA, and so on).
Step 10: Choose related videos.
You have the option of adding related videos to appear below your ad. You can add up to five.

Step 11: Configure advanced settings.
In the advanced options, you can specify the operating system, device, and carrier for more granular targeting. This is especially useful for mobile app ads, and there’s an option to increase or decrease your bid based on if the video ad is shown to someone on a mobile device.
You can set beginning and ending dates for your campaign, create a custom schedule for when your video ad should be shown, and limit the daily impressions and views for users. This all helps you to get the most return for your ad spend.
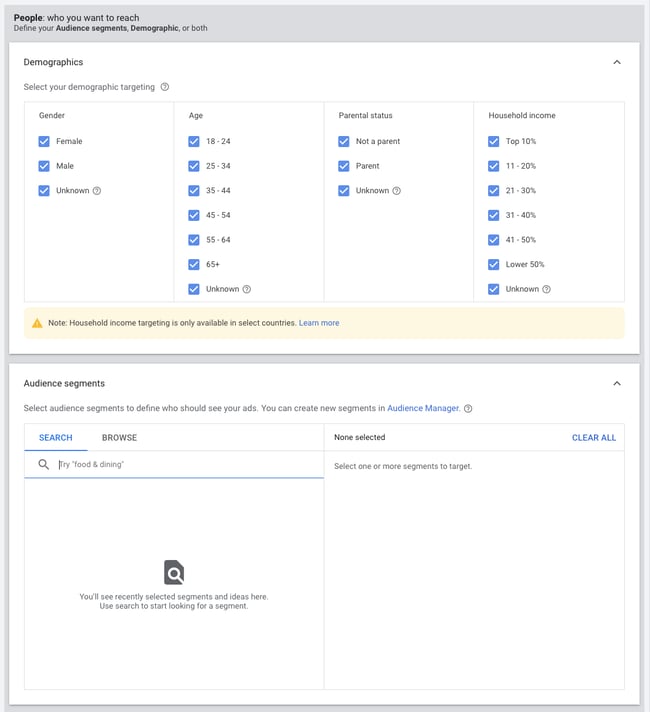
Step 12: Set up demographics and audience segments.
Next, define the audience you would like the video to be shown to — options include gender, age, parental status, and household income. You can also target individuals by their interests, such as beauty mavens, cooking enthusiasts, horror movie fans, etc.
Try running multiple campaigns to target different groups of users to discover who is most engaged, rather than including everyone you want to target in one campaign.
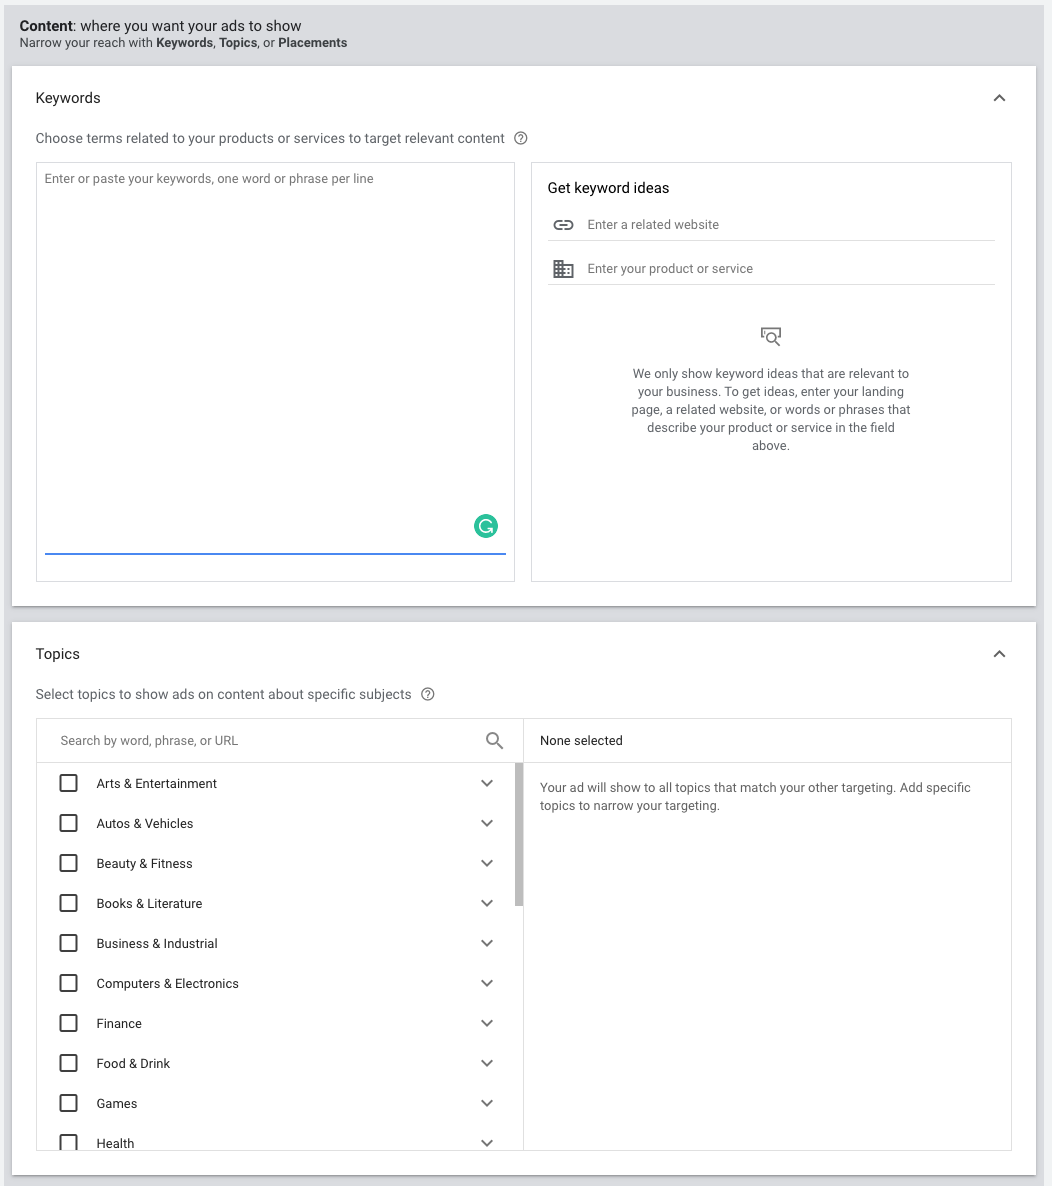
Step 13: Select target keywords, topics, and placements.
You can also target individuals by keywords, topics, or placements where you would like your video ad to appear. Keyword targeting with in-display ads can be a powerful tool for finding individuals who are looking for a visual answer to a question. Be sure to do your research, and try testing out different groups of keywords to see which leads to more views, clicks, or conversions.
Additionally, you can use video ads to remarket to people who have been in contact with your brand already. This can help you to re-engage those who are already familiar with your brand.
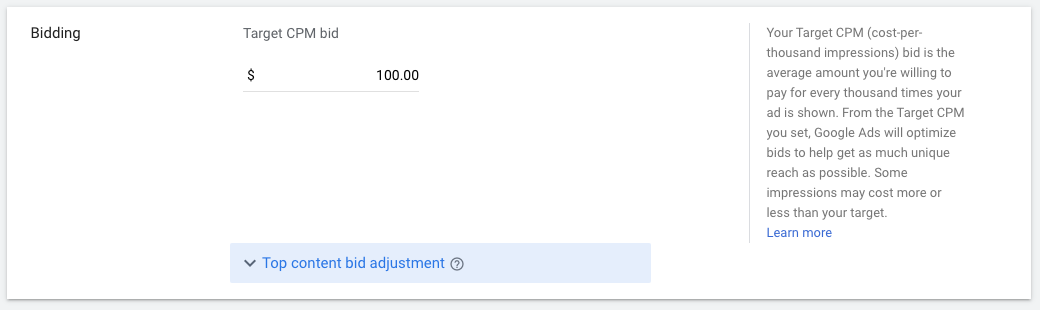
Step 14: Start bidding.
Next, determine the max price you will pay for each view, which you can adjust to increase the number of projected views your video may receive.
Step 15: Create the video ad assets.
Last, insert the YouTube link for the video you would like to run the ad for. You will then choose whether you want this to run as an in-stream ad or an in-display ad.
For in-display, you’ll need to include a title and short description, which is entered on two separate lines. Note: Titles are limited to 25 characters, and the description lines are limited to 35 characters each.
In-stream ads provide you with the option to overlap a display URL on top of the video. You should use a vanity URL that directs to another final URL to make it more memorable. You can include advanced URL tracking options. In addition, a companion banner made from images from your video will appear on the right side of the video ad.
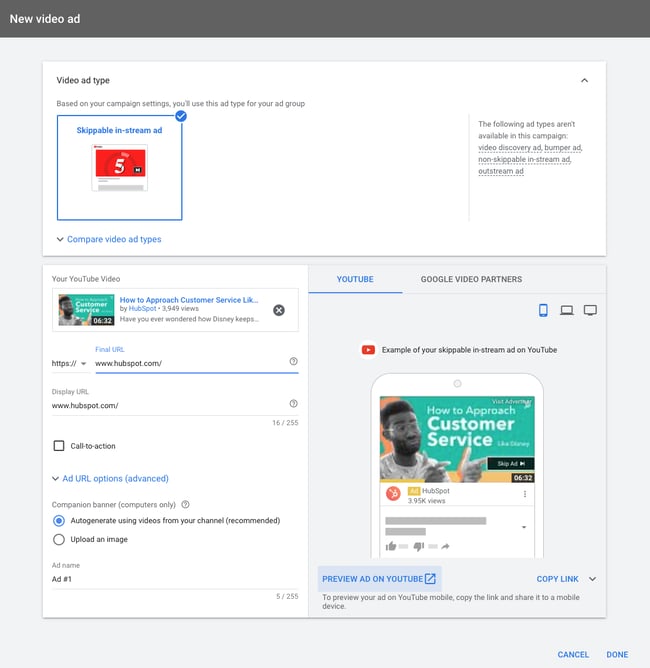
Click Done, then click Create Campaign.
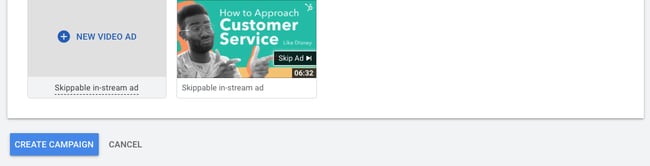
Finished! Google will then prompt you to put in your credit card information (if they don’t have it already) so they can begin running your ad.
Step 16: Link your Google Ads account.
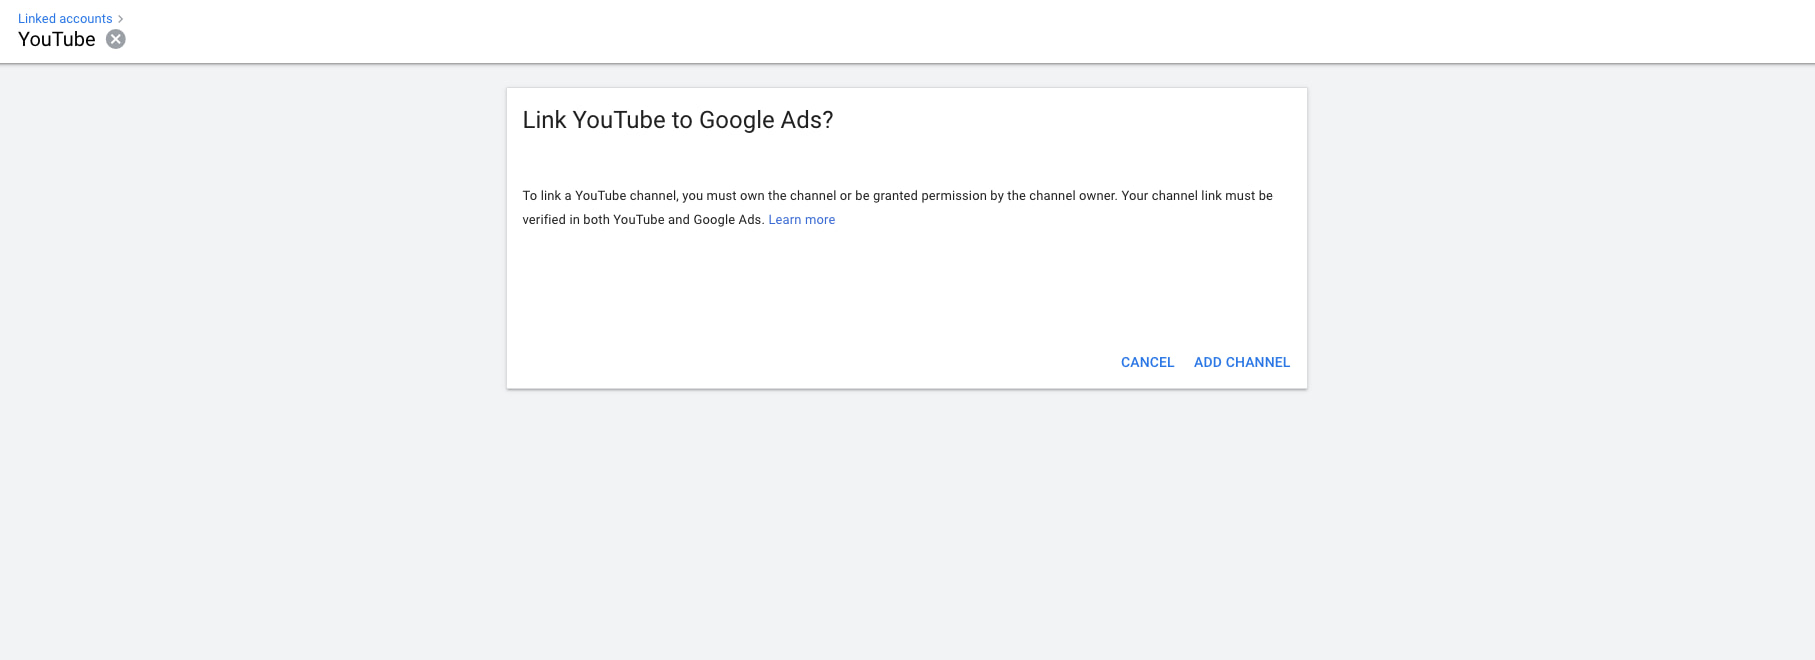
You should link your Google Ads account to the YouTube channel where the video is hosted if you haven’t already. On the top navigation bar, click “Tools & Settings.” Under “Set Up,” go to “Linked accounts.”
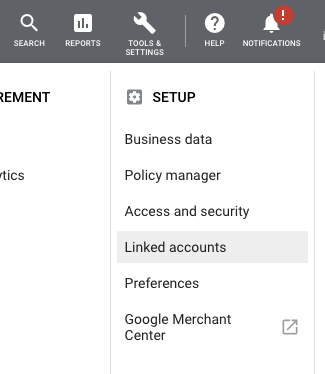
Choose YouTube from the screen, and you’ll be prompted to add a channel.
10 Tips for Optimizing Your Video Ads
Launching a video ad campaign is a great step, but there are some things you should set up prior to starting to pay for views. That way, you make the most of your budget and see the highest return on investment.
1. Define your metrics and goals.
When analyzing the results, there are four main categories of metrics you can track for each video.
Views and Impressions
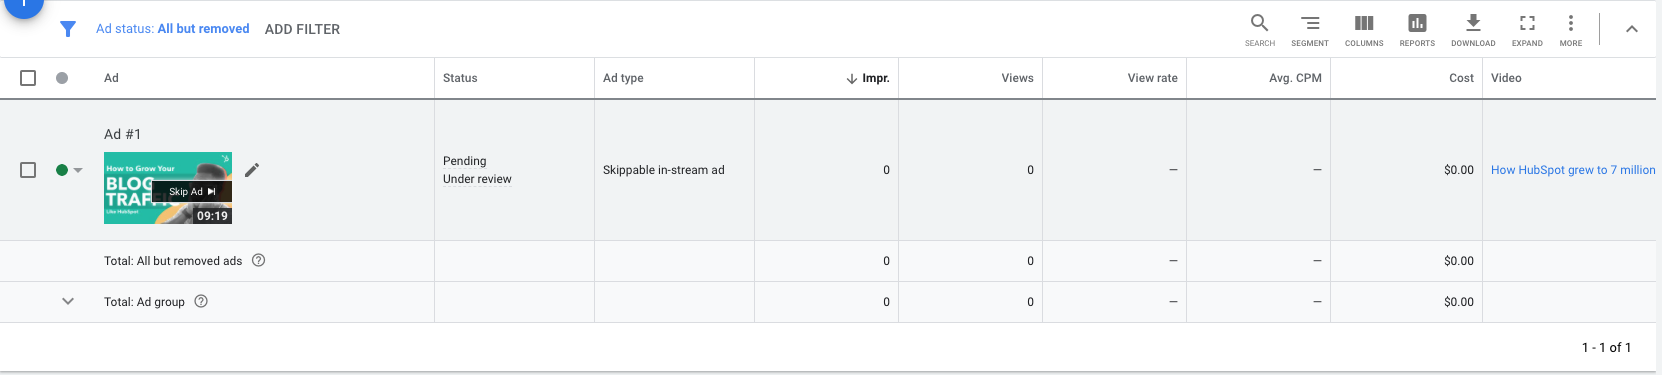
Under the “views” category, you can better understand what percentage of the ad people viewed and understand how the ad drove earned views. You can also see how it increased views on your brand’s other videos.
Audience
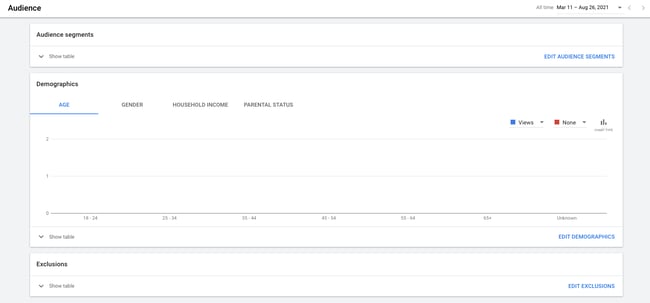
This category can be used to track engagement metrics split up based on age, gender, household income, and parental status.
View Rate
The view rate could signal if the creative and message are interesting or entertaining enough for people to watch the ad. By increasing your view-through rate (VTR), you will lower your cost per view.
Conversions
Conversions will help you better understand if your ad is driving leads and returning a high ROI for your brand.
Depending on the goals for the brand, you should determine a few goals based on these metrics and formalize a plan for optimizing creative and trying different targeting criteria to improve results. Your goals should also determine the type of content you will feature in the ad — some metrics are better for branding goals and others will drive leads and conversions.
2. Track low performing placements.
If you’re running in-display ads that will appear across the Google Display Network, you can review where the ad has appeared in by navigating to Video Targeting > Placements > Where ads were shown > Display network from your Google Ads Campaigns dashboard. Review this list to see if any particular sites are contributing to poor performance for your desired metrics. Exclude these sites from your ad campaign moving forward to increase your average CPV.
3. Use a custom thumbnail image.
Design or use a high-quality still image from the video to entice a viewer to click on your video. Remember, this image needs to be legible by users on different devices, including mobile. If your image contains a person, make sure they’re looking into the camera. If you are featuring a product, make sure the background isn’t distracting.
4. Drive people to buy with cards.
A YouTube card is teased with a small “i” symbol, which the viewer can click to expand. You can time this appearance so only users who engaged with the video and content will see the notification.
With cards, you can feature a product related to or featured in the video to drive product purchases. You can also use cards to drive fundraising donations, traffic to a URL, or traffic to other videos as shown in the example below from our YouTube channel. Each format will allow you to customize the card with text, images, and other options.

5. Create calls-to-action.
When promoting a video on YouTube, you can include call-to-action overlays that link to a URL. You could link to a landing page, product page, information page, career page … whatever you’d like. You could also send people to a favorable report or interview featuring the brand.
6. Create a YouTube end slate.
Create an end screen to drive subscribers to your channel, promote your social networks, or increase interest in your brand. If someone has watched a video until the end, it’s a good sign they enjoy your content and might be interested in subscribing to your channel for future updates.
This end slate by HubSpot increases subscribers and social media fans while also highlighting other interesting topics its host has featured. Once you build the image, you will be able to annotate the end screen in YouTube’s video editor.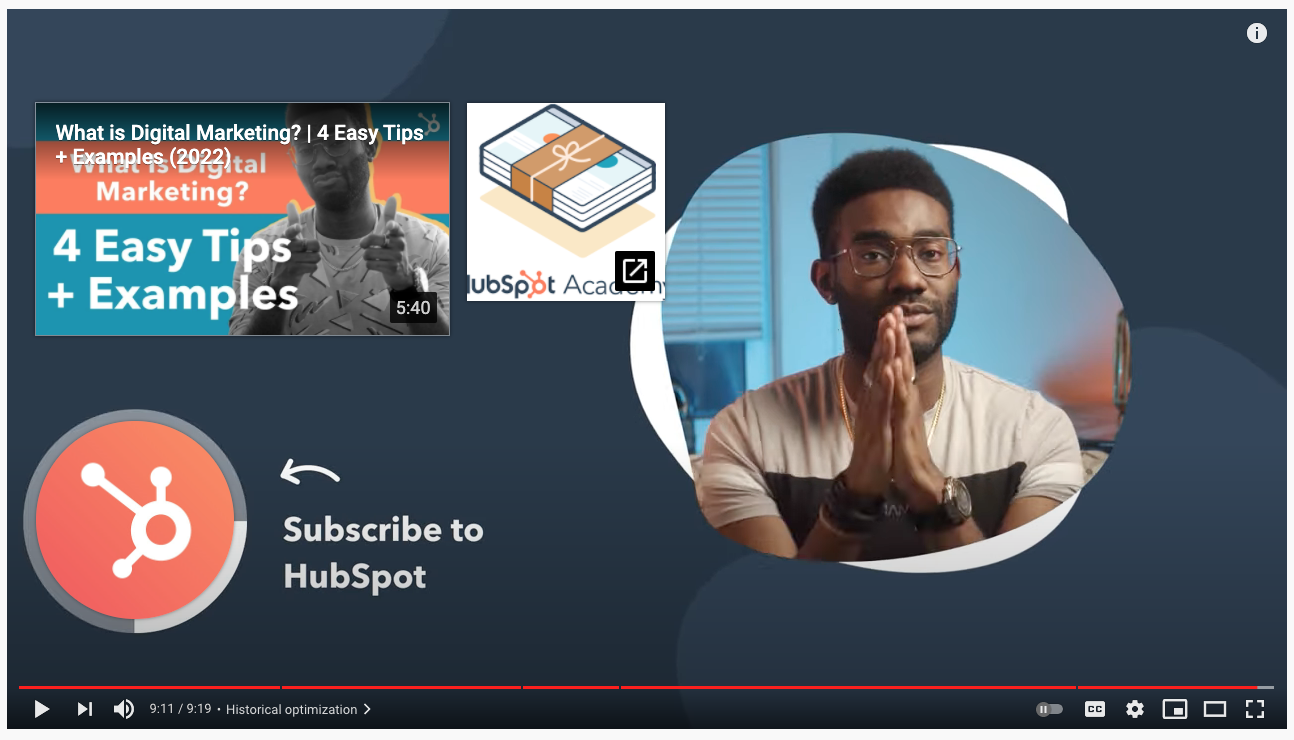
7. Use negative remarketing.
If you are running a campaign for a longer period of time and want to only attract new users to a brand, consider creating a list of people who your ad will not be shown to.
You can stretch your campaign budget and target only unique users by excluding those who have previously viewed the specific video, who have visited your YouTube channel, or who have shared, liked, or commented on any of your videos.
8. Use close captioning to cater to viewers’ needs and wants.
This tip applies to all YouTube videos — but it’s a general best practice that’s not followed by many brands. Include a quality video transcription you’ve generated and approved. Only user-uploaded transcriptions are indexed by Google because YouTube’s automatic captioning can be less than reliable. Depending on your target audience, you may also want to include transcriptions in various other languages. You can also offer users the option to download or visit a site page with the full transcription in your video description.
9. Qualify viewers.
Sometimes, your ad will be seen by people who have no interest in your product. Encourage them to skip the ad if the content isn’t relevant so you don’t have to pay for the view and they don’t waste their time watching irrelevant advertising.
10. Consider making your ad longer.
When it comes to skippable in-stream ads, if the ad is under 30 seconds, you’ll pay only if a viewer watches until the end. If the ad is longer than 30 seconds, you pay if the viewer watches it for at least 30 seconds. In both cases, you pay if the viewer interacts with your ad before it’s over. Consider this when you are coming up with ideas for content for the ad. You may want to put messaging at a certain point so uninterested viewers can skip the ad, or you might provide special offers towards the end of the video.
The Future of Video is Bright
Video content is a must-have part of your content strategy. This is even more relevant now that YouTube lets marketers target users based on their search histories. YouTube advertising is more targeted than ever, and it’s less competitive real estate than the world of Google Search. Try your hand at creating a YouTube ad campaign of your own and see the results for yourself.
Editor’s note: This post was originally published in February 2017 and has been updated for comprehensiveness.


5 Marketing Trends That Might Not Survive in 2023 [HubSpot Research]
Few marketing trends last forever. In reality, they come and go at rapid speed — and marketers must adapt.
Because marketing is always evolving, your marketing playbook should, too. But if your strategy looks the same as years prior, it’s time to do some housekeeping.
![Download Now: Free State of Marketing Report [Updated for 2022]](https://no-cache.hubspot.com/cta/default/53/b0f73a5e-16e4-41fd-9511-8564efc560a7.png)
Here, we’ll cover five marketing trends that are losing steam and how marketers can respond.
1. Celebrity endorsements on social media.
Have you ever seen a sponsored post from a celebrity on social media and thought, “Do they really use that?”
For example, Beyond Meat’s collaboration with media personality Kim Kardashian became a viral moment in 2022, but not for the right reasons. After releasing a promotional video of Kardashian sampling its vegan products, viewers were quick to accuse Kardashian of “fake chewing,” leading many to question the authenticity of her endorsement.
While celebrities offer more exposure, consumers need to trust the celebrity and believe the endorsement is authentic. But building that trust is getting harder.
Research shows that trust in celebrity endorsements is decreasing. Only 44% of Gen Z-ers trust endorsements from a celebrity or athlete. This number drops to 38% for Millennials.
Unsurprisingly, the same study found that influencers are more trusted as brand spokespeople. We predict social media influencers – specifically micro-influencers — will start dominating this space.
Micro-influencers have a smaller following than traditional celebrities, but their audience is highly engaged. On top of that, they are seen as “everyday” people, so their audience is more likely to trust their recommendations.
Brands seem to be catching on: more than 56% of marketers who invest in influencer marketing work with micro-influencers.
2. The heavily filtered Instagram aesthetic.
If you’ve scrolled through Instagram recently, you may notice the aesthetic is changing.
Gone are the days of heavily filtered photos and perfect Instagram feeds. Nowadays, influencers, brands, and everyday users are pivoting towards a more unedited, imperfect look.
What’s the reason for this pivot? Many users feel a sense of fatigue over the highly processed aesthetic that has dominated the platform. The Gen Z crowd, in particular, values authenticity over appearing too polished online. It’s no wonder they gravitate to TikTok, where raw and unfiltered content is the norm.
Brands are starting to take notice of this shift, including Glossier. These days, the brand plays into the “anti-aesthetic” movement by sharing candid shots, unedited photos, and even cute animal photos.
.png?width=700&height=400&name=Glossier%20Instagram%20(1).png) Although this is just a shift in aesthetics, it points to a bigger trend with young consumers: they crave authenticity from brands. In other words, snapshots of avocado toast and heavily filtered selfies won’t cut it. Instead, brands must explore how to appear more accessible and relatable online.
Although this is just a shift in aesthetics, it points to a bigger trend with young consumers: they crave authenticity from brands. In other words, snapshots of avocado toast and heavily filtered selfies won’t cut it. Instead, brands must explore how to appear more accessible and relatable online.
3. Audio chat rooms.
Audio chat rooms — like Clubhouse and Twitter Spaces — surged in popularity during the start of the pandemic, when many people were seeking opportunities to connect with others.
Fast forward to today, and more than a quarter (29%) of marketers are planning to stop investing in audio chat rooms in 2023.
From a marketing perspective, the biggest problem with audio chat rooms is that users prefer to speak with people — not brands. In fact, only 7% of Gen Z consumers prefer audio chat rooms for discovering new products.
Audio chat rooms are also losing popularity with younger audiences. Only 14% of Gen Z consumers have visited Twitter in the past three months, and a slim 13% have visited Clubhouse. If your audience skews younger, it’s worth exploring other strategies.
4. Long-form videos for social media.
It’s no secret that short-form video has dominated the social media landscape this year, and it will continue to pick up steam in 2023.
In fact, short-form video will see the most growth of any trend in 2023, according to HubSpot’s 2023 Marketing Strategy & Trends Report. On top of that, a staggering 96% of marketers agree that the optimal length of a marketing video is under 10 minutes.
.png?width=1100&height=500&name=Marketing%20Trends%202023%20(1).png)
Of course, this isn’t to suggest long-form video doesn’t have its place — or that it’s going extinct. Longer videos can offer more information about a topic, product, service, or brand.
However, the challenge is keeping your videos engaging enough to hold the audience’s attention. Shorter videos, on the other hand, work well on social media because they align with the fast-paced attention spans of online audiences.
5. Marketing in the metaverse.
Marketing is all about experimentation, and the metaverse became a new playground for marketers to explore. However, this initial excitement seems to be fizzling out.
29% of marketers plan to stop marketing in the metaverse (e.g. Horizon Worlds and Roblox) in 2023. In addition, more than a quarter (27%) plan to stop leveraging VR and AR.
Although the metaverse is intriguing, it’s proving difficult to execute. The equipment is expensive, the hardware is uncomfortable, and adoption is slow.
That said, the metaverse is still in its infancy. As it continues to evolve, things could turn around.
Back to You
Marketing is always evolving, so your marketing playbook should, too. As we inch closer to 2023, it’s essential to take stock of which trends you want to leverage, and which ones are better left behind.


Nonprofit Email Marketing: The Ultimate Guide To A Successful NPO Email Strategy
Effective email and newsletter marketing is crucial for a nonprofit organization’s (NPO) success. With scarce resources, limited staffing, and divided leadership attention, investing in marketing efforts can often take a backseat to more urgent matters.
Luckily, email marketing is both cost-effective and less time-consuming than other NPO marketing strategies. Regularly sent out, well-crafted newsletters can give your nonprofit authority while also helping you stay at the forefront of your donors’ minds.
![Download Now: Nonprofit Marketing & Fundraising Trends for 2022 [Free Report]](https://no-cache.hubspot.com/cta/default/53/6193b715-2ba9-4c6d-add0-681edfcae689.png)
By reading this post, you will discover how your nonprofit can stay connected with donors and attract exciting new prospects through personalized and meaningful email marketing.
Table of Contents
- Why does email work for nonprofits?
- Email Marketing Best Practices For Nonprofits
- How to Write an Amazing Nonprofit Newsletter
- Examples of Nonprofit Fundraising Emails
- Free Email Marketing Software for Nonprofits
Why does email work for nonprofits?
Studies show that email continues to offer the highest return on investment (ROI) of any outreach strategy. TruConversion reports that an email marketing campaign can deliver a return of $40 for every $1 spent. This makes email the channel with the highest ROI that nonprofits can use to reach prospective donors.
Additionally, 91% of all US consumers still use email daily. Email can therefore enable NPOs to reach audiences that might not otherwise engage with their marketing efforts on social media.
Pro tip: Before starting a new email campaign, make sure it aligns with your nonprofit marketing plan and helps you reach your organization’s goals.
Email Marketing Best Practices for Nonprofits
1. Commit to regular sends.
Nonprofits are often stretched for resources, and it’s easy to set marketing aside for matters that seem more pressing. However, regular email marketing is one of the most effective ways to grow your organization. A content schedule for your emails can keep you organized you can frequently engage with and steadily grow your donor base.
Making email sends an “always on” part of your marketing strategy will play a big role in your success on the channel. “Always on” doesn’t mean that you’re bombarding your email list with constant messages — it means that you’re committed to consistency in how often you send your emails.
Send informative emails on a predictable schedule, instead of only when you’re actively running a campaign or seeking donations. This will help nurture your audience towards deeper forms of engagement (like donating or attending an event) in the future. Remember: the goal is building long-term relationships.
Setting the right cadence for your emails is important to keep the members of your list engaged with your organization. When you’re first starting out, this requires a careful balancing act. You don’t want to send too few emails, but you also don’t want to veer into potential spam territory. More on that in the next section.
Pro tip: Double-check that your email offers value to your readers before sending. Value could include the latest information about your nonprofit, ways to get involved, upcoming events, or recent projects your organization has completed.
2. Be wary of spam folders.
If your audience is only used to hearing from you on a one-off basis, you’ll need to gradually shift to sending more emails. A sudden switch could trigger some users’ email clients to send you to the spam folder.
Email deliverability can be a complex subject, but here are a few important things to remember if you’re transitioning to more frequent email marketing.
- Don’t directly embed forms or include attachments in your emails. Linking out to web pages with forms is a better practice.
- Send your emails from a recognizable address. If you can, avoid sending from a noreply@yourwebsite.com address. Use a name your readers will recognize.
- Lead with informative subject lines instead of direct calls for donations. Check out our blog post on picking great email subject lines.
- If you’re emailing a list that isn’t used to frequent sends, let them know what’s going on. Tell your readers that you plan to start sending more informative emails, and most importantly, allow them to opt out. It might seem counterintuitive in the short term, but cleaning disengaged folks off your email list is important to the long-term health of your email program.
Pro Tip: Assign a staff member to send your monthly newsletter using their name. This increases your chance of avoiding donors’ spam folders.
For more tips on improving your email deliverability, check out our blog post on the subject here.
3. Leverage personal connections with your audience.
Personalizing your emails is a simple — but powerful — step that you can take to create a personal connection with readers.
First, make sure you’re using an email tool that enables personalization. It might be an investment upfront, but having access to personalization features will greatly improve the value your audience gets out of your email sends.
Worried about coming off as creepy or not sure where to start? Focus on personalizing emails based on actions your email recipients have taken on your website, advises Rachel Leist, a VP of marketing, automation, and demand generation at HubSpot. Instead of using personal data in your contact management system, perhaps thank them for a donation or downloading a report.
“If a person receives an email that refers to an action they took on your website, they will not be as nervous as they would if you were personalizing around specific personal information you happen to have on them,” Leist explains.
Pro tip: Personalize your emails by using first names and interesting taglines. Emails with personalized subject lines generate six times higher transaction rates.
4. Segment your database.
A segmented email list can help you ensure that the right person receives the right email at the right time. While everyone on your email list believes in your organization, you don’t need to send every email to everyone. Each person in your database is at a different stage on their journey with your organization, and the emails they receive should reflect that.
For example, someone who has donated $5 to your organization in the last year is probably not as engaged as someone who has donated $1,000 to your organization in the last month.
Factors like donation amount, events attended, and actions taken on your website or social media channels can all be important indicators of engagement level, and shouldn’t be ignored when you’re sending out emails.
More engaged audience members will likely respond more positively to more frequent emails, while folks with fewer touch points should receive fewer emails giving them more basic information about your NPO.
Pro tip: When people download your content or subscribe to your newsletter, make sure you enter them into a specific drip campaign that sends them automated emails relevant to the topics they are interested in.
5. Test, analyze, and adapt accordingly.
Finally, running an email program is not a “one-and-done” marketing strategy. You’ll need to note key performance indicators and make changes to your approach based on real-world data.
If you’re just getting started, industry benchmarks can be a useful point of comparison. But remember, not all NPOs are the same, and not all NPO audiences are going to respond the same way to emails.
To start, keep track of a few key email metrics, measure them with each email send, and look for trends over time. Our article on email marketing metrics for beginners offers a helpful starting place if you’re not sure what to track.
Pro tip: Regularly monitor your email open rate using the Hubspot email health tool.
How to Write an Amazing Nonprofit Newsletter
1. Write an eye-catching subject line.
Subject lines can be tricky. You’re looking for a short phrase that communicates your intent while retaining your non-profit’s unique voice. An interesting subject line should include the following elements.
- Urgency. You want recipients to feel the urgency to both open emails from your NPO and take action.
- Specificity. If you have an interesting statistic or data point to share, be sure to put it in the subject line.
- Upcoming events. To increase engagement, your newsletter should let people know what upcoming events they can attend or volunteer at.
- Name recognition. Pique your audience’s interest by including their name in the subject line (when appropriate).
- Relevancy. If current events or politics influence your nonprofit’s goal(s), referencing those events can make your newsletter more relevant and timely.
Pro tip: 46% of email opens take place on mobile, so be sure to make your subject lines 50 characters or less so mobile viewers can read the entire message.
Explore this blog for more subject line best practices.
2. Give compelling updates.
An amazing nonprofit newsletter should include the latest and greatest from your organization. Inform your recipients of recent goals reached, heartwarming stories of those you help, life updates of staff and volunteers, and anything else of note.
Pro tip: To make your emails visually interesting, take pictures during events to include in your newsletters. With permission, include the names of the volunteers pictured and describe what activities took place.
3. Have an attitude of gratitude.
Your cause is near and dear to those who subscribe to your newsletter. Their time spent volunteering and money donated should always be received with a spirit of gratitude.
Let email recipients know the immediate impact of their donations with interesting data points. For example, “Your donation helped x number of families” or “Your volunteer efforts fed x number of children.”
Pro tip: Some of your newsletter recipients will be more involved than others. Consider opening the line of communication with these donors by sending a personalized, non-automated email that references their specific efforts to the cause.
4. Include a Call-to-Action
A call-to-action (CTA) is an invitation to your audience to do something. In an email or newsletter, your CTA should be a button that links to the action you want recipients to take next.
Examples of CTAs for your nonprofit email could be “Subscribe to the newsletter,” “Donate now,” “Refer a friend,” or more. Don’t be afraid to get creative with your CTAs, and be sure to measure your conversion rate.
Pro tip: There are lots of CTA tools you can use to make linking to the next step easier. Explore common options here.
Examples of Nonprofit Fundraising Emails
Want to put together an effective fundraising email? Check out some examples to get a sense of what your newsletter can look like.
Alzheimer’s Association
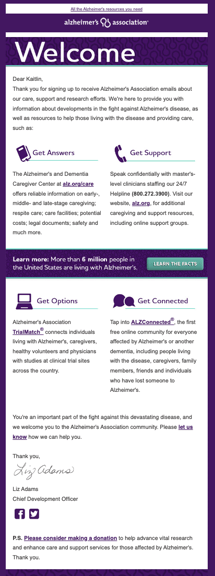
This Welcome email from the Alzheimer’s Association doesn’t lead with a request for a donation. Instead, the team connects recipients to the cause by providing them with resources to learn about the disease.
The main CTA urges readers to “learn the facts.” By gaining a greater understanding of Alzheimer’s email recipients are encouraged to act — either by advocating for the group, volunteering, or donating.
What we love: There are several resources shown in this email, targeting different groups affected by Alzheimer’s disease. A loved one could access a support group. A family looking for care solutions can explore their options. Most importantly, people living with Alzheimer’s are given autonomy and can get matched with a care team.
Black Girls Code
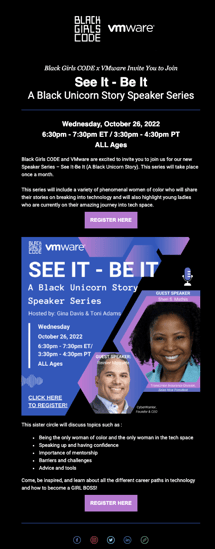
This email from Black Girls Code focuses on one webinar that is open to all. By including events and participation opportunities, the nonprofit demonstrates value to those on its email list. As a subscriber, you’ll make sure you never miss an event.
What we love: This email utilizes design to strategically focus readers’ attention. The graphic that includes the panel’s speaker information and time are beautifully designed with eye-catching colors that pop over a black background. The only other colorful elements? Two bold registration CTAs in lavender.
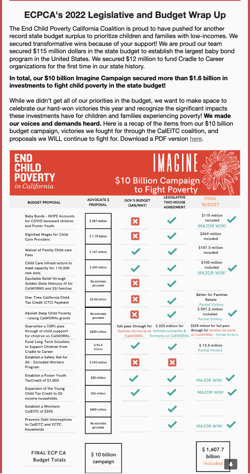
The End Child Poverty California Coalition (ECPC)
ECPC’s email demonstrates the importance of keeping your donors and volunteers informed. This section of the group’s newsletter explains how much the coalition’s Imagine Campaign secured and where funds were used. An infographic makes understanding the complexities of state budgeting easy.
What we love: ECPC has mastered transparency. The group acknowledges that not all of its priorities were included in the state budget. After, the coalition celebrates wins they were able to achieve. The use of honesty makes the nonprofit feel trustworthy and garners even more support.
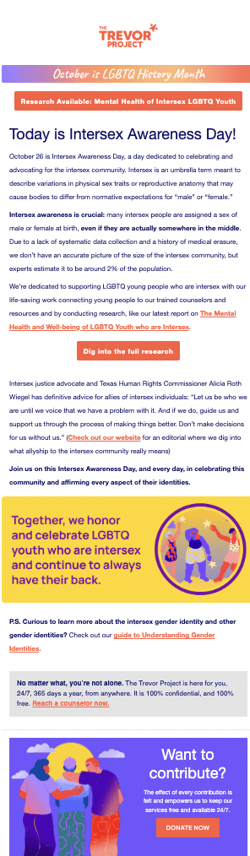
The Trevor Project
Awareness days, holidays, and important anniversaries offer special opportunities to engage your audience. This is especially true when you can tie the event to your nonprofit’s mission or research.
The Trevor Project sent a dedicated email on Intersex Awareness Day. In the email, the organization explains what it means to be intersex and the importance of acknowledging this community. Then, it links to a report where people can learn more about the well-being of intersex youth.
What we love: Not only does this email highlight Intersex Awareness Day, it also reminds recipients that October is LGBTQ History Month. Readers who didn’t have their calendars marked are now informed and will be more likely to engage with other Trevor Project research.
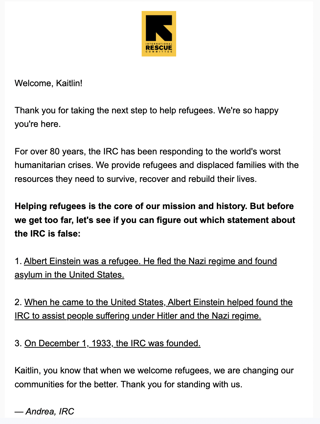
The International Rescue Committee
The International Rescue Committee (IRC) faces the urgent task of assisting people in conflict zones and disaster areas. This email both explains what the organization does and its historical impact.
What we love: Highlighting articles and the organization’s history increases the subscriber’s emotional investment. Readers will also have a better understanding of the IRC’s values.
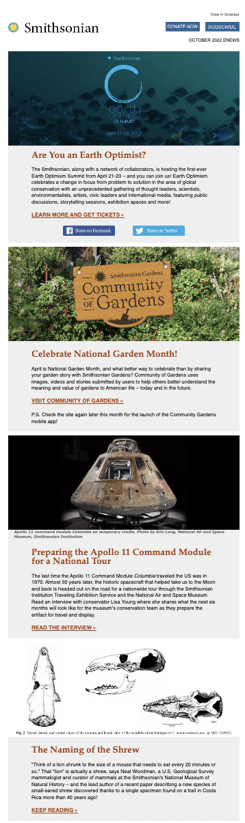
The Smithsonian Institution
The Smithsonian Institution is one of the largest museum and research networks in the world. Keeping up with each museum and department would be exhausting. Luckily, the nonprofit’s marketing team has gathered the highlights into one, easy-to-read newsletter.
What we love: When we go to museums, we marvel at the artifacts and objects on display. The Smithsonian newsletter uses photographs to replicate this experience on any device.
Save The Children
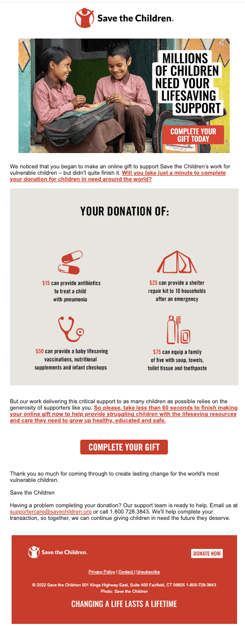
When folks first sign up for your emails, it’s a good indicator that they’re feeling engaged with your mission. Check out this automatic welcome email from Save the Children introduces the organization to a new subscriber and requests a donation at the end. Your audience wants to help — don’t make them wait!
What we love: Save the Children created a simple infographic to show how a small donation can make a big impact. This can encourage supporters to contribute.
Citizens’ Climate Lobby
Citizens’ Climate Lobby (CCL) demonstrates in the email below how to update subscribers on important current events. By referencing recent policy changes that were helpful to their cause, CCL can both thank their email subscribers for their hard work while getting them excited about future progress.
What we love: This email does a good job of providing relevance and timeliness to the nonprofit’s conversation. 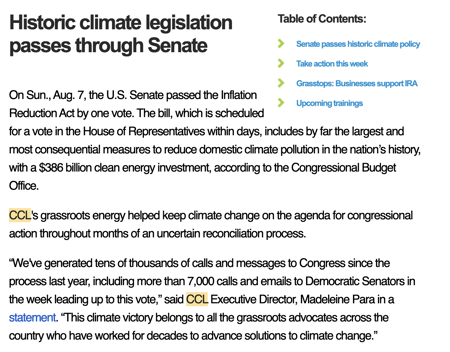
826 Boston
826 Boston is a writing, tutoring, and publishing nonprofit that works with students and community members. As a local nonprofit, community events offer an opportunity for Boston residents to get involved and learn more about the organization. This email highlights Books for Breakfast, including critical information about where the event is held and when.
Pro tip: If your organization relies on donations from corporate sponsors, email offers an opportunity to showcase your partnership. This creates added value for the businesses you work with.

Wikimedia
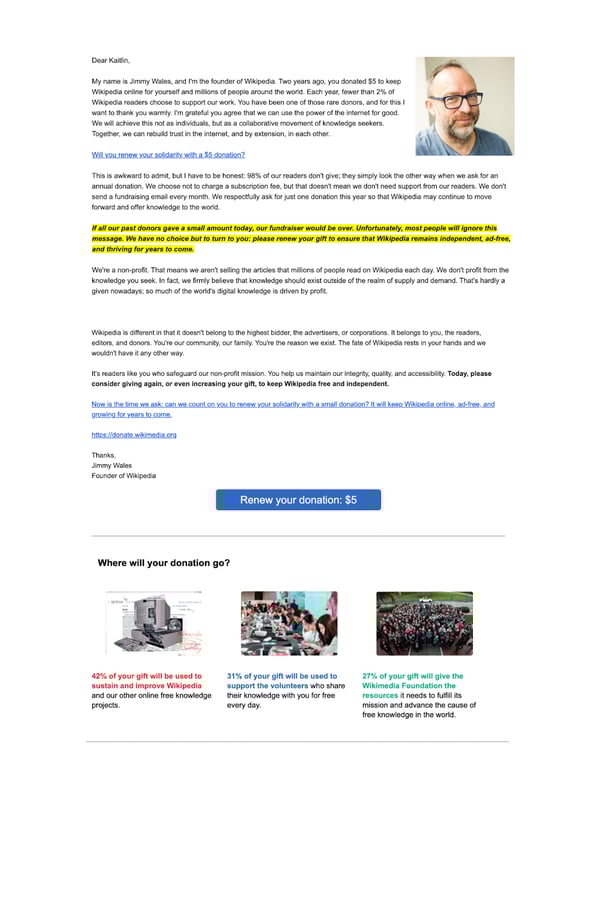
Not every donor or subscriber should be emailed every day. Wikimedia is sparing with its calls for donations, making their infrequent sends more impactful. By highlighting a past action and demonstrating urgency for a repeat donation, recipients will be more likely to give.
This type of email works best for past donors and less active members of your email list. Even though they don’t visit your website daily, they may be willing to donate on occasion.
What we love: This email from Wikimedia shows what percentage of your donation goes to which parts of the organization. This creates transparency and makes donors feel good about their contributions.
Free Email Marketing Software for Nonprofits
Want to use professional email software for your nonprofit without breaking the bank? There are several free versions of professional marketing software that you can use. Check out what some of the most popular programs offer. Then, decide which option works best for you.
1. HubSpot Email Marketing Software
HubSpot offers a free version of its paid email marketing software that integrates with its free CRM software. Users can run a sophisticated marketing campaign and get access to forms, landing pages, and Facebook, Instagram, Google, and LinkedIn ads, as well as templates.
HubSpot also has access to contact management and live chat capabilities. These tools allow you to optimize the experience for each subscriber. There are also traffic and conversion analytics capabilities for campaign optimization.
2. Sender
Want to reach lots of people with beautiful, personalized emails? Sender could be just right for you. This program has extensive HTML editing and personalization capabilities. Sender also has impressive analytics capabilities that allow you to track the delivery and opening of individual emails. You’ll also be able to build individual recipient profiles to further optimize your strategy.
3. Sendinblue
If you’re looking for variety in your emails, Sendinblue has you covered. This program includes over 70 responsive templates for emails that can be designed for any screen. The free version gives you the ability to send 300 emails a day.
You also have the ability to use A/B testing to find email content that works and segmenting options to make sure the right person receives your message.
4. SendGrid
SendGrid specializes in email campaigns that are tailored to individual preferences. Its free version gives you access to a wide range of personalization tools, including APIs, Webhooks, and STMP Relay.
You’ll also have granular control over who receives your emails with a wide range of delivery optimization tools. Plus, you can access sophisticated email editing and analytics tools that allow you to optimize sends for your target audience.
Start Today
You don’t need to be a professional marketer to get professional results from email marketing. However, you do need to set some time aside to get started.
Remember, email marketing when done thoughtfully, can have a big payoff. Get started today if you haven’t already, and you could generate more buzz for your organization than ever before!


How to Make a QR Code in 5 Easy Steps
From restaurant menus to bathroom stall doors, you can find QR codes just about anywhere these days. In fact, they’ve become so ever-present that 45% of shoppers used marketing-related QR codes in 2021.
There’s no denying the popularity and convenience of the QR code. But, what exactly is it and how can you create one for your next marketing campaign?

Keep reading to learn the magic behind QR codes and how to create your own.
QR codes typically look like this:
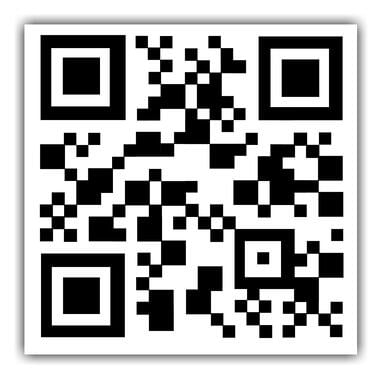
Not every QR code is shaped like a perfect square. Sometimes they have unique patterns, colors, and logos displayed inside. You’ll find them in non-digital spaces like direct mail, signage, billboards, and even TV shows where you can scan the code on the screen using your phone.
Both barcodes and QR codes can be scanned using a laser or a smartphone as long as the tool being used has the correct capabilities of reading vertical and horizontal data. Although most smartphones scan QR codes automatically, many won’t scan barcodes so easily — you’ll need a special app for that.
Does the rise of QR codes mean traditional barcodes are a thing of the past? Of course not. Traditional barcodes are still a common way for businesses to identify consumer packaged goods (CPGs) and manage their product inventory.


However, there are several differences between barcodes and QR codes — both in their uses and their characteristics. Below are three important differences.
QR Codes Are Shaped Differently
Barcodes are typically rectangular, which requires scanning devices to read the barcode’s data horizontally. QR codes are often square-shaped, displaying their data vertically and horizontally.
QR Codes Hold Different Data
QR codes are often used differently than barcodes. Barcodes hold key product information at the point of sale, such as the price and name of the manufacturer. QR codes offer more passive and intangible information, such as location data and URLs to promotions and product landing pages.
QR Codes Hold More Data
Due to a QR code’s square shape, it can hold much more data compared to a barcode. QR codes can hold hundreds of times more encrypted characters than a barcode can.
We learned a little bit about how barcodes and QR codes differ, but how exactly do QR codes work?
Let’s say a consumer sees a QR code. They can take out their mobile device, download a free QR code scanning app, or simply use their phone’s camera, and scan the QR code to gain more information about what they saw.
If you wanted to create, say, a bus stop advertisement promoting your podcast, you could display a QR code on that printed ad that brings people right to your iTunes page when they scan it with their phones. Pretty simple, right?
The QR code creation process is pretty straightforward, regardless of the device you’re using. Here’s how to get started.
How to Create a QR Code on Any Device
Step 1: Head to qr-code-generator.com.
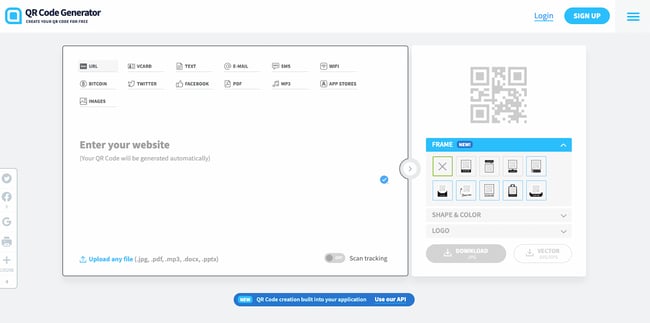
Using any browser on any operating system, head to qr-code-generator.com. Keep in mind that you don’t necessarily need to use this tool; you can choose any web-based QR code generator. If you need some ideas, check out our list.
Step 2: Enter your URL.
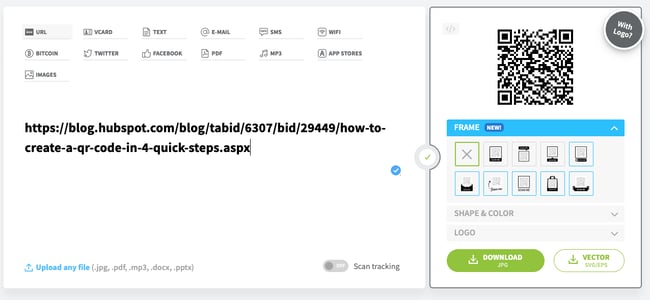
For most QR codes, you’ll want to redirect users to a URL. In that case, enter the URL in the tool. You can also choose from other content types, including contact cards, PDFs, and MP3s. At the bottom, you also have the option of creating QR codes for Microsoft Word and PowerPoint files. The exact content options will vary by tool.
After you select the content type, a field or form will appear where you can enter the information that corresponds with your campaign. For instance, if you want your QR code to save contact information, you’ll see a set of fields where you can enter your email address, subject line, and associated message.
Once you enter your URL or upload your file, it will immediately create a QR code that’s ready for download. However, we recommend customizing it to strengthen your brand identity.
Step 3: Customize your QR code’s frame, shape, and color.
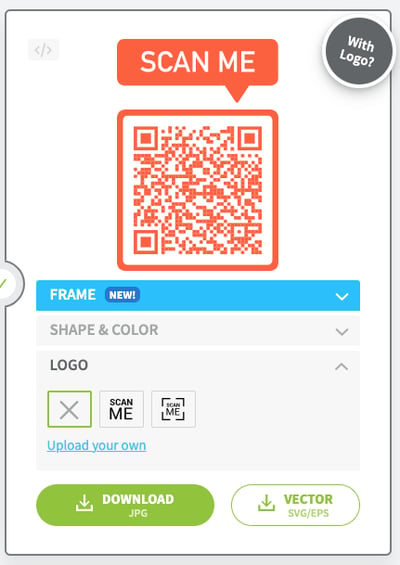
The fun part of creating QR codes is customizing the design of the codes to fit your brand. Want your code to contain your logo? Go for it. Want it to reflect your website’s design scheme? No problem.
The front-end generator on qr-code-generator.com offers limited frame, shape, and color options that allow you to customize your QR code. If you want more options, we highly encourage you to sign up on the website and edit your QR code through the tool’s creator portal.
Here’s one example of how you can customize your QR code once you sign up for a QR Code Generator account:
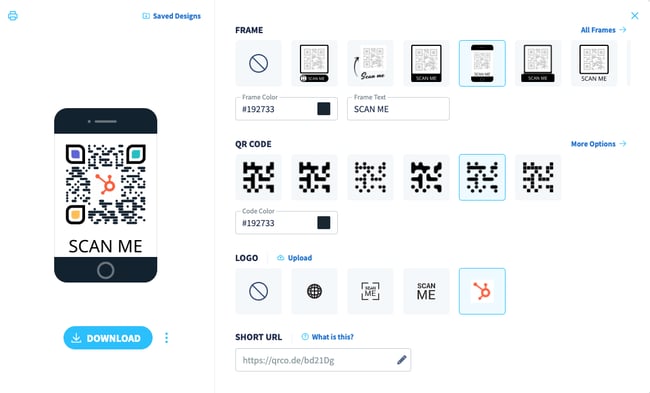
Keep in mind that not every QR code maker offers these design options either before or after signing up. Depending on the QR code you’re looking to generate, you might find some tools limited in their functionality.
Step 4: Click “Download” and save the file to your computer.
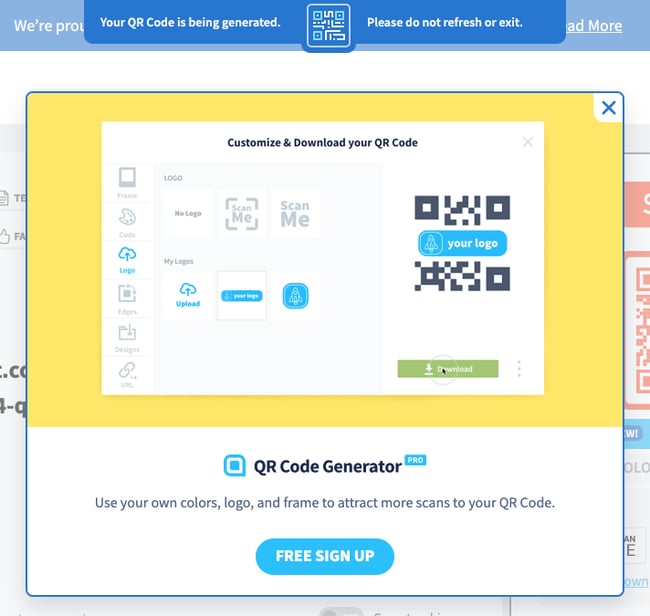 If you’re just trying to quickly create a QR code, don’t worry about signing up. Instead, click the Download button.
Your download will start immediately, but the website will try to trick you into signing up. Ignore this message unless you truly want to sign up. At the top, you’ll see a message that says your QR code is getting created and that you shouldn’t refresh the window. A pop-up download window will come up within 2 minutes.
Step 5: Add the QR code to print collateral.
A QR code won’t be able to do its job unless people see it. So make sure you add the code to any materials that will help you market your business. This could include displaying it in print ads, on clothing, or in physical locations where people can take out their phones to scan it. Scroll down for more tips on properly displaying a QR code.
As for how you’ll add the JPG or vector file to print collateral, you can do so with a variety of tools, including:
- Canva: Canva is an online design tool that lets you import JPG files and add them to your design. It offers flier and brochure templates for easy creation.
- BeFunky: BeFunky is a similar tool to Canva and also allows you to add JPG files to a design. It also offers templates for you to choose from.
- Adobe Illustrator and InDesign: If you’re a more advanced user, you can use a dedicated graphic design tool to add your QR code to pamphlets and brochures. Illustrator is a good fit for one-page designs; InDesign is a better fit for multi-page brochures.
If you’re on a mobile device, good news: You can easily create a QR code that you can share with colleagues and prospects on-the-go. You’ll need the Google Chrome app to do so.
How to Create a QR Code on Android
Creating a QR code on an Android device is simple with the Chrome app. You can only make QR codes for URLs, but this is a handy tool for when you need to quickly share product pages or blog posts with someone.
Here are the steps:
- Download the Google Chrome app from the Google Play Store.
- Navigate to the URL you want to share.
- Click the three vertical dots (⋮) on the top toolbar.
- Tap Share.
- On the pop-up, select QR Code.
- Either click Download at the bottom or hold your phone up for someone to scan the code.
How to Create a QR Code on iOS
Just like in Android, you can easily make QR Codes on any iPhone or iPad. Here’s how:
- Download the Google Chrome app from the App Store. Note: You can’t create QR Codes from the Google search app, only the Chrome app.
- Navigate to the URL you want to share.
- Tap the Share button on the upper right-hand corner.

- Select Create QR Code.
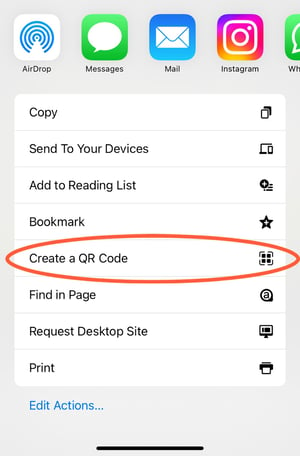
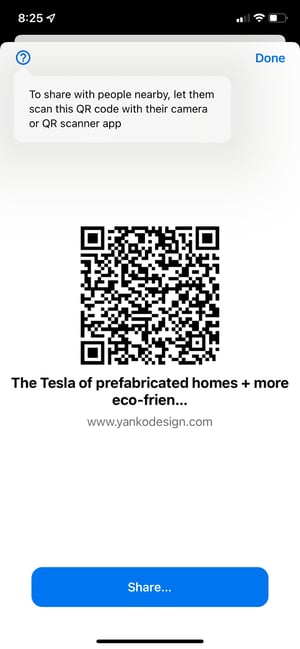
- Either hold it up for someone to scan or tap Share. This option will allow you to print your QR code, save the image to your camera roll, or save it to your files.
How to Create a QR Code for Desktop Using Chrome
Creating a QR code with Chrome on desktop is just as easy as it is on Android and iOS. Here’s how to do it:
- Open Chrome on your desktop.
- Go to the URL you want to share.
- For Linux, Windows, and Mac computer users, navigate to the right-hand side of the address bar, click Share, and select QR code.
- For Chromebook users, navigate to the address bar and then QR code.
- Either copy the QR link, click download to download the QR code, or scan the QR code with a camera on another device.
How to Use QR Codes (And How Not to)
Now that you see how simple the QR code creation process can be, let’s talk about some best practices that’ll increase the likelihood that your QR code actually gets used.
Display your QR code where it’s convenient for people to scan.
Put QR codes in places where scanning them is easy and there’s enough time for the consumer to scan the code. While you may often see QR codes on billboards and TV commercials, they’re not exactly the most user-friendly locations. It’s a safety hazard to entice people to pull out their phones while driving to scan a code, and a 30-second commercial might not be enough time for someone to find their phone and scan the TV.
Instead, think of places where consumers have the time and ability to scan the code. Places with a strong Wi-Fi connection will help, too.
Optimize the QR’s destination page for mobile devices.
Mobile-optimize the page to which you’re sending people. Consumers will be using their phones when scanning the QR code, so they should arrive at a page with a positive mobile experience.
Include a CTA that prompts people to scan your QR code.
Offer a call-to-action (CTA) with the code — that is to say, tell people what they’re supposed to do when they see the code, and what they’ll receive if they scan it. Not everyone knows exactly what a QR code is, and those that do won’t be motivated to scan it unless they’re sure there’s something worthwhile on the other side.
Don’t limit your QR code to one mobile scanner.
Don’t require a special QR code scanner. Your QR code should be app-agnostic so anyone can scan your code with any reader. A lower barrier to entry makes success more likely for you and the user.
Use your QR code to make someone’s life easier.
Don’t use a QR code just for the sake of using one. For instance, it’s common for marketers to think, “How can I bridge the offline experience with the online experience? Uhhh … QR code!” That’s not wrong, but it’s not always right, either.
If you have content that makes sense to deliver to a mobile user, and you have an appropriate channel to do it (see use #1 at the beginning of this section), it’s more likely your QR code will drive results.
Earlier, we showed you an example of how to create your own QR code, but you don’t have to create it from scratch. A QR code generator can speed up the process (and take a lot of math out of it, too.)
There are tons of QR code generators out there. The best ones give you many customizable options for using your QR code, and compatibility with just about all mobile QR code reader apps.
Other things to look for when choosing a QR code generator are whether you can track and analyze performance in real-time and design a code that’s unique to your brand.
Below are some of our favorite QR code generators that make custom QR codes quick and easy to create.
1. Kaywa
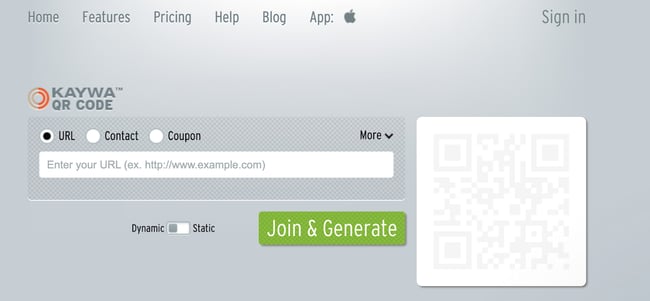
Kaywa is a simple, no-fuss QR code generator that creates basic codes for coupons, URLs, and contact information. Simply enter your information, choose whether you want a dynamic or static code, and generate it.
Why we like it:
If you’re using your QR code as part of a marketing campaign, you can track analytics through Kaywa when you create an account. That way, you’ll have the latest data on who engaged with your code, where they engaged, and when.
2. GOQR.me
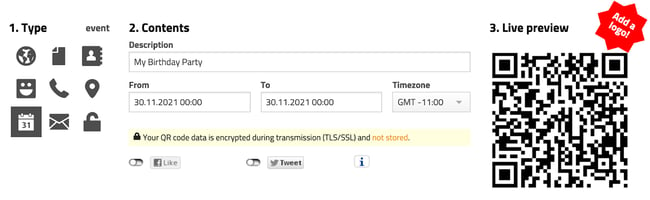
GOQR.me is a simple QR code generator that works best with short URLs, but it can be used to store text, geolocation, and event data. Simply click on the icon that corresponds to your data and fill in the fields.
Why we like it:
You’ll get a live preview of your QR code in real-time which speeds things up if you’re adding finishing touches to your marketing campaign. For an additional fee, you can also have your logo added to your QR code by a GOQR.me-affiliated designer for a custom look.
3. Free QR Code Generator by Shopify
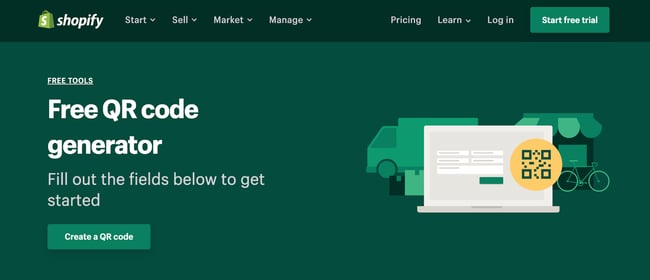
QR codes work best when you have something to offer the people who scan them. And chances are, you’re probably selling to people who buy products online with their phones every day.
Why we like it:
Shopify makes it easy to create a QR code in just one click. The best part is that you don’t have to own a Shopify store to use this free tool.
4. Visualead
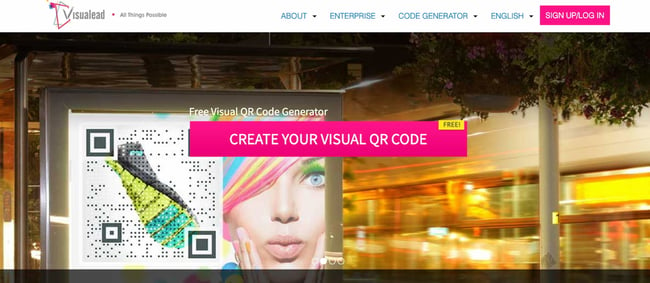
Looking for a one-of-a-kind QR code that suits your brand to a “T”? Visualead is the tool we recommend for the job.
Why we like it:
Visual QR codes are popular and can generate more interest in your users than a typical black and white code can. That means you could see more scans and engagement on this type of QR code.
5. The-qrcode-generator.com
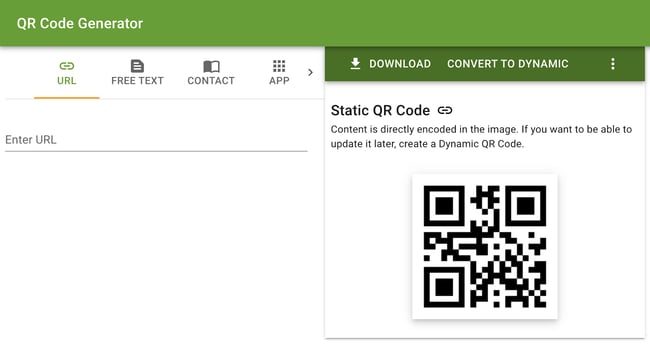
The-qrcode-generator.com features a simple UI that lets you create a unique QR code in minutes. Simply add your URL or the information you want to share and your QR code appears instantly.
Why we like it:
If you’re creating several QR codes at once, you might find it worthwhile to download the Google Chrome extension for a faster workflow.
6. QR Stuff
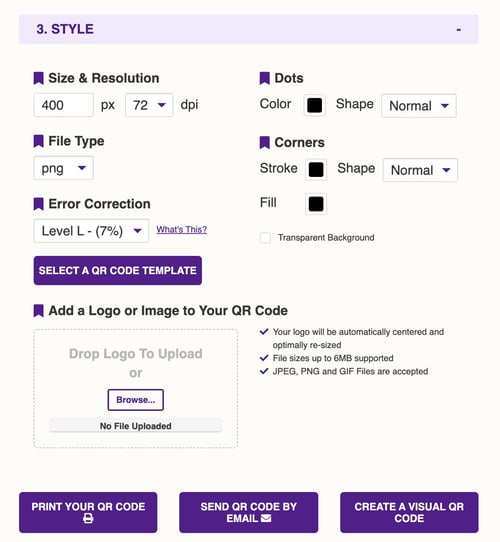
As one of the more robust QR code generators, QR Stuff can create codes for just about any type of data you want to share with the world. YouTube videos, Zoom meeting invitations, and even bitcoin information are supported through this tool.
Why we like it:
In just three steps, you’ll have a free, customizable QR code that will function properly and look great. Plus, there’s no limit to the number of codes you can create.
7. Qr-code-generator.com
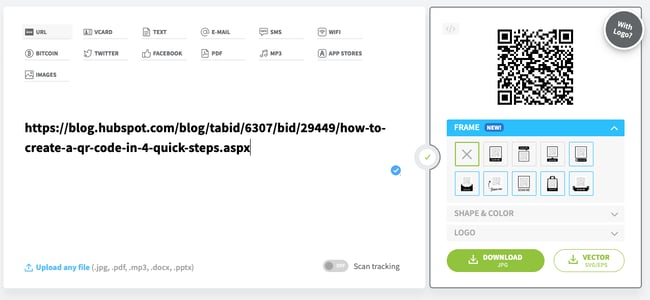
We used this QR code generator in our how-to guide above, and for good reason. Qr-code-generator.com is a simple tool that’s user-friendly for even the least tech-savvy of us. Simply drop your link into the box, and let the generator do all the work.
Why we like it:
QR-code-generator.com is intuitive. It’ll automatically detect the type of URL you’ve added and produce a QR code in seconds.
8. QR Code Monkey
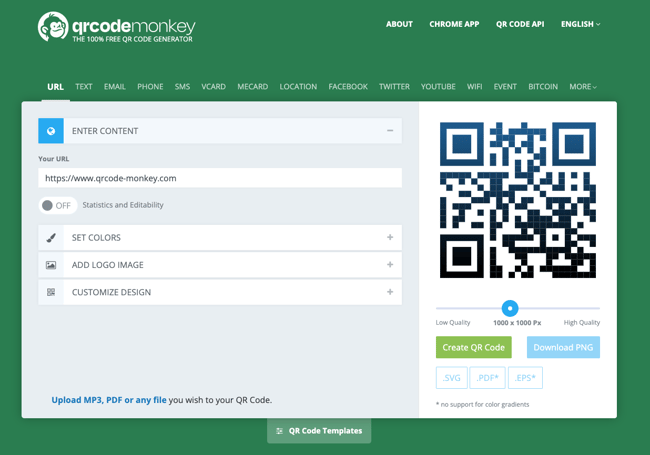
If the way your QR code looks is important to you, but you don’t want to pay extra for a custom design, try QR Code Monkey. Once you add your URL, you can change the color, add a logo, and further customize the pixels in your code at no cost.
Why we like it:
With QR Code Monkey, the design possibilities are virtually limitless. All you need to create a branded QR code is a creative eye and a little patience.
QR Code Best Practices
1. Sign up for an account on a QR code generator website.
One significant pitfall to making a QR code is that you can’t edit the data it contains once you print it. But by signing up for an account, you can edit this data. This is especially important if you expect to use a lot of QR codes in your marketing strategy.
With a free membership to QR code generators like qr-code-generator.com, you can print a dynamic QR code, scan it, and pull up an editable form where you can modify the data your visitors will receive when they scan the QR code themselves. You can also track performance analytics, which we’ll cover below, and create a new customized version of your code.
2. Customize your QR code.
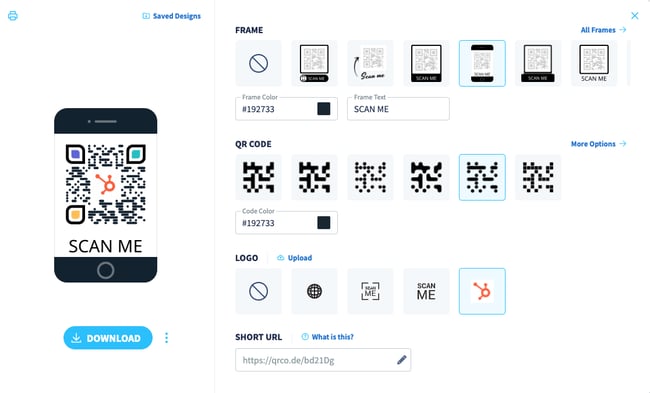
QR codes can be boring to look at, but not if you customize them as much as possible. If you sign up for an account on a QR code generator website, you can customize your QR code further — adjusting the colors, adding a logo, creating social options, and more.
Keep in mind, however, that some customizations can make it more difficult for QR code scanning apps and smartphone cameras to properly read the code. To cover your bases, it’s a good idea to generate two versions of your QR code — one plain version and another with your preferred design.
Speaking of this…
3. Test the QR code to make sure it scans.
Don’t forget to check to see if the QR code reads correctly, and be sure to try more than one QR code reader. A good place to start is the free tool Google Lens, which takes a picture and then tells you what link or item it “reads to.”
Another great free tool is the app QR Code Reader, which automatically takes you to whatever it “reads.” Most smartphones these days include a built-in QR code reader, so you should test to make sure your code is readable there, as well.
4. Track and analyze performance.
Just like any marketing campaign, you should follow up on any collateral or campaigns using QR codes to see whether they’re actually working. How much traffic comes from each specific code? Are people scanning your code but not redeeming their offer once they get to the landing page? Or are they not even compelled enough to scan your QR code in the first place?
Knowing the answers to these questions will help you troubleshoot and adjust poorly performing QR codes to more closely mirror those that work well.
I recommend you include a UTM tracking code on your URL so you can better measure performance. This is particularly important if you use closed-loop marketing analytics or if you perform more in-depth reporting on your campaigns.
Create Your QR Code Today
Now it’s your turn! You’ve spent enough time scanning QR codes, why not make your own? Follow the steps in this article and use one of the free QR code generators we’ve recommended to put your business, project, or event out there in the real world.
Editor’s note: This post was originally published in January 2021 and has been updated for comprehensiveness.

What is Productivity: Your Complete Guide
Productivity is on the minds of almost every marketer, but what is productivity? How do you know if your idea of productivity aligns with that of your company or teams? Why is it necessary, and what can you do to be more productive?
In this article, we’re going to explore productivity, what it means, and why you should care.
![Download Now: How to Be More Productive at Work [Free Guide + Templates]](https://no-cache.hubspot.com/cta/default/53/be08853d-7ccb-4ab6-ba13-ef66a1d9b4ff.png)
What is productivity?
Dictionary.com defines productivity as “the quality, state, or fact of being able to generate, create, enhance, or bring forth goods and services.” In an economic context, the meaning is similar — it’s essentially a measure of the output of goods and services available for monetary exchange.
However, productivity can mean something different when applied to our personal and professional lives. According to Friday.app, a productivity management tool, productivity is how efficiently you can consistently complete tasks that are important to you.
For many people, productivity can mean checking off everything on their daily to-do list. For others, productivity can be about getting more done in shrinking amounts of time. No matter your goals, you want to avoid “toxic productivity.” Toxic productivity is the desire to be constantly productive, no matter the cost.
Fortunately, it’s possible to strike a healthy balance and be productive without overdoing it.
How to be More Productive
If you’re struggling to complete your tasks or you want to become more efficient, here are some ways to be more productive both inside and outside the office.
Stop multitasking.
It’s a common misconception that multitasking can boost productivity because it entails working on multiple tasks simultaneously. However, according to most recent studies, only a tiny percentage of people can multitask effectively because the human brain can only focus on one task at a time, according to studies.
Multitasking causes our brains to divide attention between different tasks, which can lead to more mistakes being made and a lower-quality performance. Instead, try grouping similar tasks together and completing them one by one.
Schedule breaks.
There have been times when I’ve gotten so engrossed in a project that I accidentally skipped lunch or worked exceptionally late into the evening. While putting in more hours or skipping meals may create more time for productivity, the reality is that your body needs fuel and time to recharge.
Schedule breaks during or between tasks, and use that time to eat lunch, walk, stretch, meditate, or rest.
Set boundaries.
You must be comfortable saying ‘no’ to boost and maintain productivity. It’s great to be helpful whenever possible, but you should say ‘no’ to last-minute requests, impromptu phone calls, or any plans to set you back on your progress.
Otherwise, you can slow your workflow by taking on too many responsibilities from others.
Design your workspace to optimize productivity
Whether you work from home or at an office, your workspace needs to be designed for productivity. This can be as simple as designating your workspace as a “no-phone zone” or quiet room. You want your work area to be comfortable, free of distractions, and equipped with the materials you need to complete your tasks — such as a computer, desk, comfy chair, pens, paper, etc.
Why Productivity is Important
At a company level, productivity leads to growth and high profits — making the organization more competitive in the marketplace. At an individual level, it boosts morale because it feels good to check everything off your to-do list. Knowing you’ve completed all your tasks early with time to spare for leisure is nice.
Productivity Examples
Here are some examples of how you can be productive:
Break larger projects into smaller tasks.
Trying to complete a massive project all at once can be daunting, and the intimidation of it can stop you in your tracks and slow production. Instead, look at the project’s different components and find ways to break it down into smaller tasks you can complete over time.
Develop healthy habits.
Healthy habits are a great way to be productive because they foster consistency. For example, working out and eating a nutritious breakfast every morning will ensure you consistently have the energy to tackle your daily tasks.
Create a daily to-do list prioritizing the most important tasks
Before starting your day, create a to-do list with your most essential duties posted at the top. If you are at a loss for what to do during your day or are unsure what to do next, look to your to-do list.
Productivity is different for everyone, so check in with your team to ensure everyone’s productivity goals align. And if you struggle to complete your tasks, you know how to keep yourself on track.
Editor’s Note: This blog post was originally published in January 2017, but was updated in July 2020 for comprehensiveness and freshness.


How Marketers are Navigating Q4: Traffic, Lead & Email Data from 150K+ Brands
If you’re a marketer, it’s likely been a very – odd – Q4!
On top of racing to the finish with end-of-year reports, campaigns, and project memos, you’re also in the thick of annual planning for the new year.
And, to add one more complicated layer to the mix, many marketing teams are waiting in the balance to see how our uncertain economy and the continuance of unprecedented global events will impact their work.
While we don’t have a crystal ball, our final analytics report of the year aims to give you an insightful glimpse of how industries are performing in Q4, and help you make the most informed decisions for your brand as 2023 begins.
Without further adieu, let’s dive in.
About this Data: These insights are based on data aggregated from 158,000+ HubSpot customers globally between November 2021 and November 2022. Because the data is aggregated from HubSpot customers’ businesses, please keep in mind that the performance of individual businesses, including HubSpot’s, might differ based on their markets, customer base, industry, geography, stage, and/or other factors.
Mid-Q4 Marketing Themes
Overall Themes
With seasonality – which we began to see in our last recap – in full swing, industries linking to retail, travel, and leisure are seeing unsurprising month-to-month upticks in conversions, leads, and even traffic. Meanwhile, industries like construction – which are often less active during the end of the year and in uncertain financial times – are seeing some MoM and YoY decreases.
Overall, year-over-year leads and conversions are trending up, which could be a positive sign for marketers who want to show that their work does impact their brand’s bottom line.
Below, we’ll dig into a few specific marketing themes.
Website Performance Continues to See Seasonality
Website Traffic
Compared to October, websites across industries saw a significant traffic decrease in November, with Construction and Financial Activities seeing the greatest dips. Only Leisure and Hospitality saw a significant MoM gain, which makes sense due to holiday-related travel and annual vacation planning on the rise.
Luckily, many industries are seeing year-over-year traffic boosts.
Manufacturing as well as Trade, Transportation & Utilities (which includes the retail industry) lead the pack with 6.3% and 6.2% increases respectively. The only industry which didn’t see a boost was Construction, which saw a slight dip of 2.6%.
As we mentioned in previous reports, the construction industry’s performance could be due in part to the season as well as current macroeconomic conditions.
Website Conversion Rates
Month-over-month, website conversions were relatively flat across industries. This can happen due to seasonality.
One big exception to the MoM data was Leisure and Hospitality which saw a significant 9.5% increase. Not super surprising during the end-of-year holiday and shopping season.
Year-over-year, we saw the biggest conversion increases from Education & Health Services followed by Leisure and Hospitality. In previous posts, we’ve highlighted that Leisure and Hospitality brands are likely seeing growth due in part to global regions and key travel cities reopening due to fewer COVID-19 restrictions.
|
Industry |
MoM |
YoY |
Sample size |
|
All |
-1.3% |
+9.2% |
127169 |
|
Construction |
-2.5% |
+2.3% |
1177 |
|
Education and Health Services |
+2.0% |
+17.6 |
3374 |
|
Financial Activities |
+0.8 |
+1.7% |
3628 |
|
Leisure and Hospitality |
+9.5% |
+13.4% |
972 |
|
Manufacturing |
-0.7% |
-0.7% |
3606 |
|
Professional and Business Services |
-3.0% |
+10.2% |
11,708 |
|
Technology, Information and Media |
+2.2% |
+3.4% |
14,208 |
|
Trade, Transportation and Utilities |
+3.69% |
-2.8 |
3,087 |
Inbound Leads See Positive Movement
Despite lower or flat traffic and conversions, both YoY and MoM lead trends are actually ticking up across most industries: a positive theme for marketers who are hyper-focused on their business’s bottom line.
Trade, Transportation & Utilities (which includes the bustling retail industry), and Leisure and Hospitality saw the largest MoM gains.
Year over year, Leisure and Hospitality also saw a huge YoY gain along with Education & Health Services. And, as a consistent theme, only Construction saw annual and monthly decreases.
Email Opens Hold Steady Despite More Sends
While most email marketers expect to see email engagement drop as the holidays begin in November, there was only a 1.3% open rate decrease, despite a large 13% increase in sends (likely due to end-of-year campaigns and last-minute pushes to hit numbers). Additionally, more subscribers were likely opening and potentially engaging with emails this month as all industries saw a 10.3% open increase.
Despite positive movements in November, marketing email is still dealing with some long-term challenges as opens and open rates have decreased by 14.5% and 10.1% respectively – even with more companies embracing a slightly more modest number of email sends.
|
Metric |
MoM |
YoY |
Sample size |
|
Email sends |
+13.9% |
-3.9% |
144,733 |
|
Email opens |
+10.3% |
-14.5% |
144,733 |
|
Email open rate |
-1.3% |
-10.1% |
144,796 |
Starting the Year with a Full View
While these November numbers show some industries working their way back from slower growth in 2022 – and a few still continuing to keep up numbers in seasonality and current macro-economic times – it’s important for marketers to look at all possible data when planning out their strategies for January and the new year ahead. That’s why, on top of reports like these, it’s important to look at:
- Your annual and MoM website traffic and conversion data
- Your leads, sales, and revenue, especially as compared to direct competitors
- The direct and indirect ROI of your inbound campaigns, such as marketing newsletters.
To keep you informed as you kick your new marketing plans off next year, we’ll be launching a series of posts across the HubSpot Blogs in January to give you an overall look at how businesses performed throughout 2022, as well as insights on how business heads, marketers, sales teams, and other departments can adapt in 2023. Stay tuned!
In the meantime, read through our previous reports below:
- Are Seasonality & the Economy Impacting Marketers in Q4? [Traffic & Conversion Data from 150K+ Companies]
- The Top Traffic, Conversion & Lead Trends in Q3: Data & Takeaways from 120,000+ Businesses
- Your Guide to Summer Web Traffic, Conversion & Lead Performance Across Industries [Data from 150,000+ Businesses
Or, download our free State of Marketing Report below to dive deeper into what marketers focused on this year.

23 of the Best Website Homepage Design Examples
When creating a company site, few things are more important than website homepage designs. The homepage is your brand’s virtual front door. If a new visitor doesn’t like what they see, their knee-jerk reaction is to hit the “back” button.
What makes a website’s homepage design brilliant instead of bland? It has to look good — but it also has to work even better. That’s why the most brilliant homepages on this list don’t just score high in beauty but also in brains and creativity.
Before we dive into the examples, let’s go over best practices. You’ll notice the best website homepage designs we look at take these principles and implement them for optimal results.

What Makes a Good Website?
A good website clearly answers “Who I am,” “What I do,” and/or “What can you (the visitor) do here.” It also resonates with your audience, has a value proposition, calls visitors to action, is optimized for multiple devices, and is always changing to adapt to new design trends.
All of the homepage designs shown here use a combination of the following elements.
Not every page is perfect, but the best homepage designs get many of these right.
1. The design clearly answers “Who I am,” “What I do,” and/or “What can you (the visitor) do here.”
If you’re a well-known brand or company (i.e., Coca-Cola) you may be able to get away with not having to describe who you are and what you do; but the reality is, most businesses still need to answer these questions so that each visitor knows they are in the “right place.”
Steven Krugg sums it up best in his best-selling book, Don’t Make Me Think: If visitors can’t identify what it is you do within seconds, they won’t stick around long.
2. The design resonates with the target audience.
A homepage needs to be narrowly focused — speaking to the right people in their language. The best homepages avoid “corporate gobbledygook,” and eliminate the fluff.
3. The design communicates a compelling value proposition.
When a visitor arrives on your homepage, it needs to compel them to stick around. The homepage is the best place to nail your value proposition so that prospects choose to stay on your website and not navigate to your competitors’.
4. The design is optimized for multiple devices.
All the homepages listed here are highly usable, meaning they are easy to navigate and there aren’t “flashy” objects that get in the way of browsing, such as flash banners, animations, pop-ups, or overly-complicated and unnecessary elements. Many are also mobile-optimized, which is an incredibly important must-have in today’s mobile world.
5. The design includes calls-to-action (CTAs).
Every homepage listed here effectively uses primary and secondary calls-to-action to direct visitors to the next logical step. Examples include “Free Trial,” “Schedule a Demo,” “Buy Now,” or “Learn More.”
Remember, the goal of the homepage is to compel visitors to dig deeper into your website and move them further down the funnel. CTAs tell them what to do next so they don’t get overwhelmed or lost. More importantly, CTAs turn your homepage into a sales or lead-generation engine, and not just brochure-wear.
6. The design is always changing.
The best homepages aren’t always static. Some of them are constantly changing to reflect the needs, problems, and questions of their visitors. Some homepages also change from A/B testing or dynamic content.
7. The design is effective.
A well-designed page is essential to build trust, communicate value, and navigate visitors to the next step. As such, these homepages effectively use layout, CTA placement, whitespace, colors, fonts, and other supporting elements.
Now, let’s dive into 23 examples demonstrating what excellent website homepage designs can do for real businesses.
Homepage Examples
- FreshBooks
- Airbnb
- Pixelgrade
- Mint
- Dropbox (Business)
- 4 Rivers Smokehouse
- Cobb Pediatric Therapy Services
- Melyssa Griffin
- Jill Konrath
- Evernote
- Telerik by Progress
- eWedding
- Basecamp
- charity: water
- TechValidate
- Chipotle
- Medium
- Digiday
- KIND Snacks
- Ahrefs
- A24 Films
- Ellevest
- HubSpot
1. FreshBooks

Why It’s Brilliant
- It’s easy to consume. There is much debate on whether short or long homepages work better. If you choose to do the latter, you need to make it easy to scroll and read — and that’s exactly what this site does. It almost acts like a story.
- There’s great use of contrast and positioning with the primary calls-to-action — it’s clear what the company wants you to convert on when you arrive.
- The copy used in the calls-to-action “Buy Now & Save” is compelling.
- FreshBooks uses customer testimonials on the homepage to tell real-world stories of why to use the product.
2. Airbnb
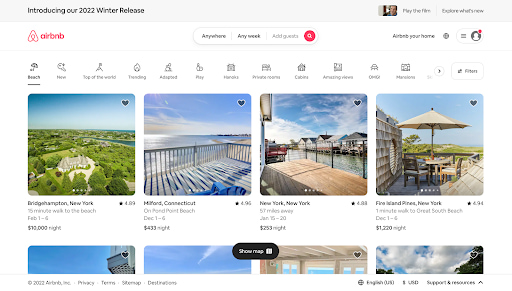
Why It’s Brilliant
- It includes the destination and date search form that most visitors come looking for, right up front, guiding visitors to the logical next step.
- The search form is “smart,” meaning it’ll auto-fill the user’s last search if they’re logged in.
- The primary call-to-action (“Search”) contrasts with the background and stands out; but the secondary call-to-action for hosts is visible above the fold, too.
- It offers suggestions for excursions and getaways Airbnb users can book on the same site as their lodgings to get visitors more excited about booking their trip on the site. It also shows which of these offerings are most popular among other users.
3. Pixelgrade
Why It’s Brilliant
- You know right off the bat what this company is all about: WordPress Themes. The big title, followed by a descriptive subtitle, lets visitors know what to expect.
- The design is simple, and the color combination does a great job of making the call to action stand out.
- The right side provides a glimpse into what the company’s WordPress themes look like without having to scroll or dig deeper.
4. Mint
Why It’s Brilliant
- It’s a simple design with a strong, no-jargon headline and sub-headline.
- The homepage gives off a secure but easy-going vibe, which is important for a product that handles financial information.
- It also contains a simple, direct, and compelling call-to-action copy: “Sign up free.” The CTA design is also brilliant — the secured lock icon hits home the safety message once again.
5. Dropbox (Business)
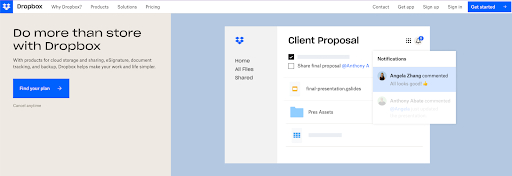
Why It’s Brilliant
- Dropbox carries over its simple design and branding. It includes everything important: A big, bold, call-to-action button “Find your plan” along with a sample image to show you everything that Dropbox is capable of
- Dropbox’s homepage and website is the ultimate example of simplicity. It limits its use of copy and visuals and embraces whitespace.
- Its headline is simple yet powerful: “Do more than store with Dropbox” It leaves a little bit to the imagination of the reader of the endless possibilities
6. 4 Rivers Smokehouse
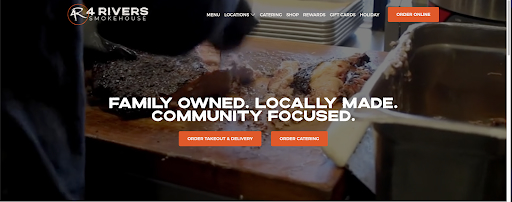
Why It’s Brilliant
- The emphasis on family, community and locally made food gives you every reason to want to support this business. And that’s before you get to the video playback, showing the exquisite food here.
- The bright orange buttons for ordering direct your attention to the meat of the page. If you want a great meal, you are just one click away.
7. The Stepping Stone Group

Why It’s Brilliant
- This website is beautiful in its simplicity. The backdrop shows real families who have worked with the Stepping Stones Group and seen results. The headline appeals to the visitors’ emotional side: “Transforming Lives Together.” This subtle messaging is effective because it includes the visitor in this process.
- There are several pathways visitors can take when they arrive on the page, but the calls-to-action are positioned well, worded, and in contrast with the rest of the page.
8. Melyssa Griffin

Why It’s Brilliant
- Melyssa immediately demonstrates value to the visitor with a quick and fun quiz. This is a clear call to action.
- She adds a face to her brand. This isn’t just a random website; she makes it clear she’s a human with a personality whom people can connect to.
- The page uses bright colors without being overwhelming and makes it easy to understand what Melyssa’s central business offerings are.
9. Jill Konrath
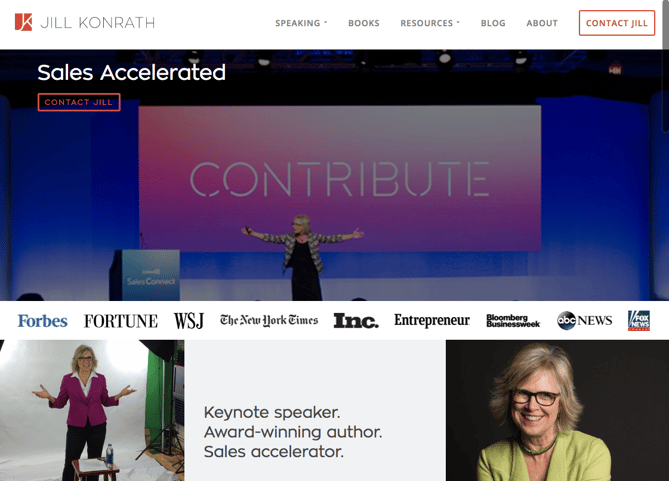
Why It’s Brilliant
- It’s simple and gets straight to the point. From the headline and sub-headline, it’s clear exactly what Jill Konrath does (and how she can help your business).
- It also gives easy access to Jill’s thought leadership materials, which is important to establishing her credibility as a keynote speaker.
- It’s easy to subscribe to the newsletter and get in touch — two of her primary calls to action.
- The pop-up subscription CTA uses social proof to get you to join her thousands of other fans.
- It includes news outlet logos and testimonials as social proof.
10. Evernote
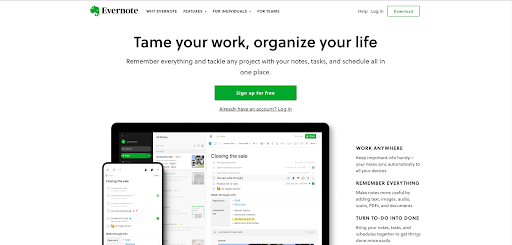
Why It’s Brilliant
- Over the years, Evernote has turned from a simple note-saving app into a suite of business products. This isn’t always easy to convey on a homepage, but Evernote does a nice job of packaging many potential messages into a few key benefits.
- This homepage uses a combination of white space and its signature bright green and white highlights to make conversion paths stand out.
- Following a simple headline (“Remember Everything”), the eye path then leads you to its call to action, “Sign Up For Free.”
- Evernote also offers a one-click signup process through Google to help visitors save even more time.
11. Telerik and Kendo UI
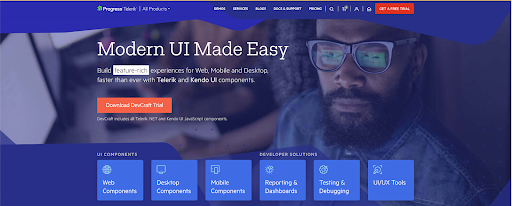
Why It’s Brilliant
- “Stuffy enterprise” isn’t the feeling you get when you arrive at Telerik’s website. For a company that offers many technology products, its bold colors, fun designs, and videography give off an elegant and modern vibe. Just one important aspect of making visitors feel welcome and letting them know they’re dealing with real people.
- The simple, high-level overview of its six product offers is a very clear way of communicating what the company does and how people can learn more.
- The copy is lightweight and easy to read. It speaks the language of its customers.
12. eWedding
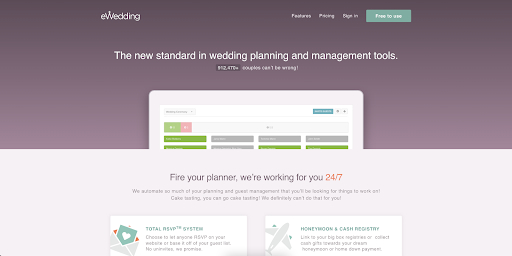
Why It’s Brilliant
- For those love birds planning their big day, eWedding is a great destination for building a custom wedding website. The homepage isn’t cluttered and only includes the necessary elements to get people to start building their websites.
- The sub-headline “912,470 couples can’t be wrong!” is great social proof of the company’s effectiveness.
- The headline is straightforward, and the site includes a call-to-action that reduces friction with the copy, “Start Now.”
13. Basecamp
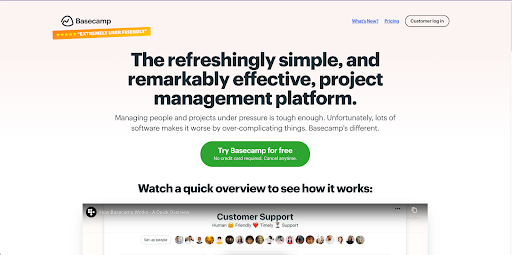
Why It’s Brilliant
- For a long time, Basecamp has had brilliant homepages, and here you can see why. It often features awesome headlines and clever cartoons.
- The call-to-action is bold and above the fold.
- In this example, the company chose a more blog-like homepage (or single page site approach), which provides much more information on the product.
- The customer quote is a bold and emphatic testimonial speaking to the benefits and results of using the product.
14. charity: water
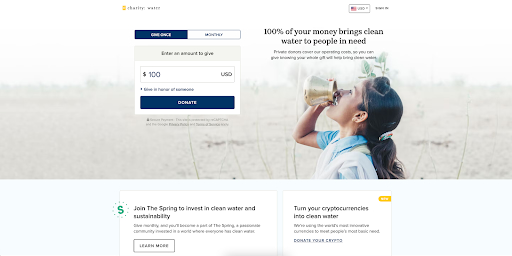
Why It’s Brilliant
- This isn’t your typical non-profit website. Lots of visuals, creative copy, and the use of interactive web design make this stand out.
- The donation box is a great way to capture attention and allow visitors to donate frictionlessly.
- It employs great uses of video and photography, particularly in capturing emotion that causes action.
15. TechValidate by SurveyMonkey
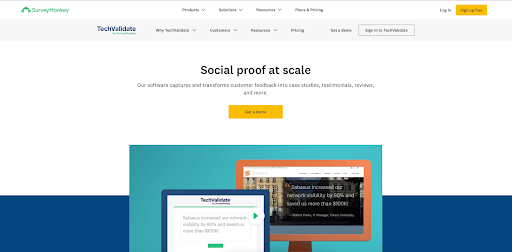
Why It’s Brilliant
- This homepage is beautifully designed. The use of whitespace, contrasting colors, and customer-centric design are particularly noteworthy.
- The headline is clear and compelling, as are the calls to action.
- There’s also a great information hierarchy, making it easy to scan and understand the page quickly.
16. Chipotle
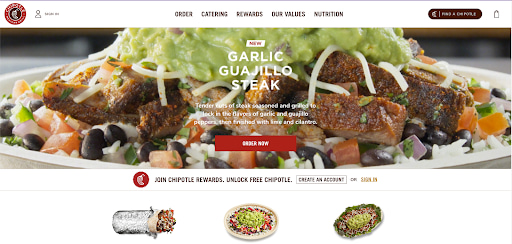
Why It’s Brilliant
- The homepage is a great example of agility and constant change. Chipotle’s current homepage is all about the food, which it uses as a unique value proposition to get you to start clicking through your site.
- The food photography is detailed and mouthwateringly beautiful. Now that’s an effective use of visuals.
17. Medium
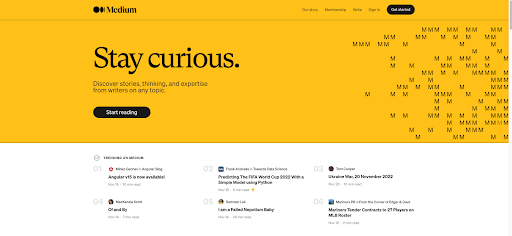
Why It’s Brilliant
- The subtle use of whitespace allows Medium to highlight some of their trending articles to get visitors interested and give an idea of what they can expect to find.
- The headline “Stay curious” immediately tells users what the website is about. Medium makes it easy to sign up — click “Get Started.”
- The homepage uses social proof to get visitors to start clicking around: The “Popular on Medium” and “Staff Picks” sections let me know where to find high-quality content.
18. Digiday
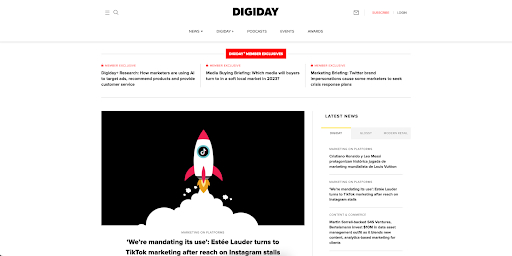
Why It’s Brilliant
- Unlike other online news publications that inundate homepages with as many headlines and images as possible, Digiday’s homepage highlights one article. Its featured image is eye-catching, and the headline asks to be clicked now that the visitor knows what they’re going to read.
- The top of the homepage shows off each of the different resources on Digiday’s website, letting you see all they offer.
- The use of whitespace is a great way to highlight the different trending topics and articles available on Digiday’s website.
19. KIND Snacks
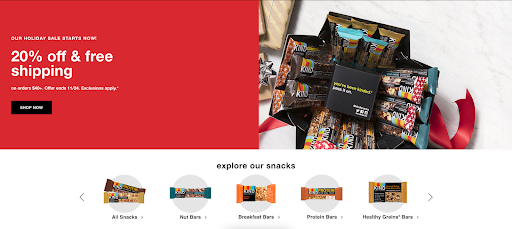
Why It’s Brilliant
- The bold colors produce contrast, making the words and images stand out on the page.
- “Explore our snacks” at the bottom of the page is a great way to let visitors visualize what is available for purchase.
- KIND also makes great use of the holiday season, creating a good CTA for their holiday sale.
20. Ahrefs
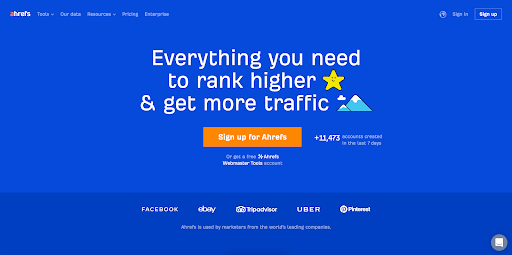
Why It’s Brilliant
- The color contrast between the blue, white, and orange colors is eye-catching and makes the headline and CTA pop.
- The sub-headline and CTA are a compelling pair: To start tracking and outranking competitors for free is a great offer.
- The homepage presents many options for the visitor, but it isn’t cluttered, thanks to the solid background and simple typography.
21. A24 Films
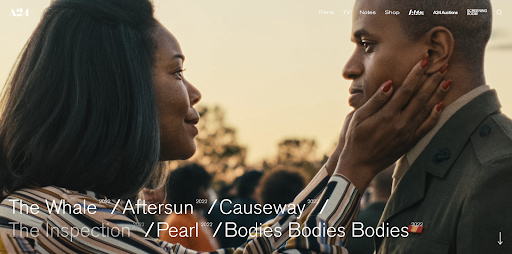
Why It’s Brilliant
- The film company’s homepage is made up of only trailers for its new films. We know video content is format audiences want to see more of, and this is a great strategy to showcase A24’s work in a highly engaging way.
- At the top of the homepage, A24 offers a clean and concise menu that directs customers to all the most important parts of its website.
22. Ellevest
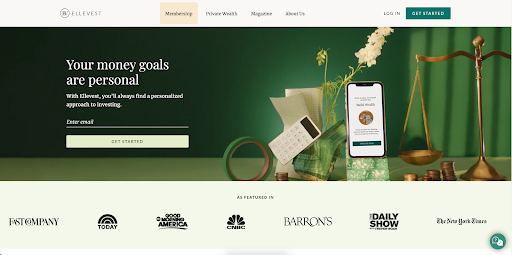
Why It’s Brilliant
- The images show, rather than tell, one of the company’s value propositions: a desktop site and mobile app that move with you.
- “Get Started” is a great CTA — in fact, we use it ourselves here at HubSpot. When clicked, it takes visitors through a few simple steps to set up a profile and start investing.
- The “As Featured In” section is great social proof and features several prominent brands that users are familiar with.
23. HubSpot
Why It’s Brilliant (If We Do Say So Ourselves)
- “Powerful, not overpowering” is a perfect descriptor, paired with a simple image of the CRM to prove our belief in this tagline. Note how white space is used at the top to bring visitors’ attention to the different features offered.
- Throughout the homepage, our bright blue and orange themes keep returning to draw your eye to links and CTAs.
Getting Started With Homepage Designs
Finding the perfect homepage design is a tall task, but keep an eye out for the common themes in the designs we curated here. Look for ways to get across cohesive branding imagery without being overbearing.
Most important of all, make sure your company’s strengths shine through in your webpage design.
Looking for more inspiration? Check out these incredible About Us pages or a Theme Marketplace.

How to Run a Successful Virtual Event in 2023, Plus Best Practices According to Eventbrite’s CMO
As a result of the pandemic, there’s been a shift in recent years to virtual conferences.
But a virtual conference strategy can’t be a copy-and-paste of a physical one. Virtual conferences come with unique challenges, and require a new perspective to succeed.
Here, let’s explore the benefits of virtual conferences, take a look at some examples of successful virtual conferences to inspire you, and check out a few tools that can help you plan your own.
Plus, hear from Tamara Mendelsohn, CMO of Eventbrite, on her best practices for hosting a successful virtual event in 2023 and beyond.

Skip ahead:
- Virtual Conference Benefits
- 6 Virtual Event Best Practices, According to Eventbrite’s CMO
- Virtual Conferencing Tools
- Examples of Virtual Conferences
Virtual Conference Benefits
There are plenty of major benefits to hosting a virtual conference.
For one, it can lower the price of admission, enabling smaller businesses with limited budgets to purchase tickets to your conference and offer their own unique insights.
It also lowers the cost your business would have to pay for conference space, on-hand staff, catering, security, and much more.
Additionally, it allows people from across the globe to interact with each other without needing to spend exorbitant amounts on flights and hotels. Imagine how much easier it is for marketers from India, Ireland, Australia, and the U.S. to collaborate virtually, rather than trying to gather in-person.
It also may help you attract high-demand speakers who don’t have the time to commit to an in-person conference, but are happy to share industry takeaways via a quick video call or pre-recorded presentation.
Additionally, an online conference enables you to create a product — recordings from your conference — that you can continue to share and use as a lead generation tool for months and years after the initial live launch.
And, finally, there’s the obvious: sometimes unforeseen circumstances, like a global pandemic, can make in-person conferences in certain locations simply impossible.
Emily Raleigh, HubSpot’s Marketing Manager of Brand and Strategic Partnerships, provides some advice if you suddenly find yourself shifting your in-person event to a virtual one: “If you are shifting from a live event, try to add extra value to the viewers who are now tuning in online. Do an extra session. Offer more Q&A time. Give an extra special offer. Find creative ways to add extra delight moments.”
Additionally, Raleigh mentions, “Virtual events can easily lose one of the best benefits of live events: human connection. To mitigate that, keep the event engaging and get the audience involved.”
Now that we’ve explored a few benefits, let’s dive into Mendelsohn’s tips for making your next virtual event a success.
6 Virtual Event Best Practices, According to Eventbrite’s CMO
1. Identify your audience.
As you sit down with your team to organize a virtual event, you first need to decide who the event is for — also known as your target audience. Your target audience will impact almost every aspect of your event, such as the speakers you select, the topics you cover, and even the time you host the event.
Mendelsohn told me, “Dig into who you want to attend your event, and understand their challenges and goals. What’s going to inspire them to register? What value are you providing? How can you best deliver on that in a virtual environment?”
She adds, “Remember that virtual events can broaden your audience beyond the physical restrictions of in-person, so this is an opportunity to connect with new audiences — potentially even globally.”
This is one of the major benefits of virtual events: The opportunity to reach a wider audience than you otherwise could. Of course, when defining your target audience, you’ll want to consider which regions make the most sense for your event.
For instance, is your topic broad enough to be global, or is it better to host one session for your North American participants, and another for specific regions in South America or Europe? Alternatively, perhaps it’s better to start with a small group in one city, and expand from there.
2. Craft your event strategy.
During the global pandemic, many marketers rushed to repackage in-person events into virtual ones. But in reality, virtual events require a completely different strategy. After all, the medium is different, the technology is different, and the way attendees interact is — you guessed it — different.
A well-rounded strategy should outline your goals, budget, and action plan for the big day, according to Mendelsohn.
A good place to start is answering the “why”, or purpose of your event. On the business side, what do you hope to achieve? For example, maybe you want to build brand awareness, drive revenue, or grow memberships. It’s also important to consider what your attendees want from your event. This could be networking, education, entertainment, or a mix of all three.
Mendelsohn gave an example of one of Eventbrite’s creators, custom glass studio UrbanGlass, which hosted an instructor-led training on crafting glass. After attendance was lower than expected, they revisited their strategy to understand why. They realized attendees were seeking community and opportunities to work together.
By experimenting with their virtual group classes to ensure they offered a better sense of community and collaboration, UrbanGlass ultimately found much more success.
3. Make it easy for your audience to interact and network.
It’s already tough to get people engaged in person, but once you shift the event online, you have to compete against unwanted distractions.
That said, you don’t have to settle for low engagement. In fact, 47% of people are more likely to ask a question at a virtual event, and 37% are more likely to speak to someone in a virtual booth than a real one. The key is finding opportunities for people to interact.
“Build in opportunities for audience participation. This could be a poll or pulse check at the start of an event, a brainstorm in the middle, or a Q&A session at the end,” Mendelsohn told me.
She continues, “If it’s appropriate for your event, send participants into breakout rooms. People are more likely to participate in smaller groups.”
If your event has a physical component — such as a yoga session or cooking class — it’ll be easier to engage the audience. But if there isn’t, Mendelsohn recommends thinking outside the box: “Encouraging your audience to get up, move around, or participate in a group activity can be really fun and powerful.”
4. Promote your event before, during, and after.
Whether your event is in-person or virtual, you still need attendees — and that means event promotion. According to Mendelsohn, this should happen before, during, and after your event.
She says, “This could entail paid or partner promotion, live social media posts during the event, and ‘thank you’ emails after. Make sure to tap into your network and ask others to spread the word.”
Event branding is another important aspect of promotion. This can be anything from your logo and tagline, to your website and promotional materials. For Mendelsohn, it’s all about creating strong branding and keeping it consistent across your program.
5. Schedule tech rehearsals.
Virtual events rely on technology — but technology isn’t always reliable. This is why Mendelsohn recommends tech rehearsals.
She advises, “Host practice sessions with your speakers and crew — and have a fallback plan in case the unexpected happens.”
Another mistake with technology is assuming your attendees are all tech-savvy. In reality, people have varying comfort levels when it comes to technology.
Mendelsohn underlines this point: “For people who don’t frequent online events, even finding the Zoom link or knowing to enter a passcode can be tricky.”
To combat this challenge, consider conducting a test run of the event from the attendee’s perspective. Click on any links, send a message in the chat, and launch different sessions.
Additionally, you might test out using various platforms to increase accessibility based on people’s platform preferences.
For instance, Mendelsohn told me, “One of Eventbrite’s creators, Eastwind Books of Berkeley, saw this challenge when they introduced virtual programming. Their solution? Streaming on multiple platforms, such as Facebook Live, and then archiving events on YouTube, so people could attend via their preferred technology and revisit later.”
6. Show humility, and have fun with the process.
Finally — have fun, and be willing to show humility if something doesn’t go as planned.
Mendelsohn says, “At our RECONVENE summit last year, the Lincoln Park Zoo’s Victoria Luisi said something that’s stuck with me: ‘Virtual is now our playground to try things we would have never been able to try before.’ This approach can expand our thinking about virtual events as a whole, and it’s especially instructive for engaging virtual audiences.”
She adds, “We’re all in this evolving virtual/hybrid world together. Embrace those moments of levity when things don’t go as planned and use them as a way to further humanize yourself on camera and establish rapport with your audience.”
Now that we’ve explored a few best practices, let’s dive into tools that can help you create your own virtual conference.
Virtual Conferencing Tools
1. Hopin
Hopin is an all-in-one platform for planning online conferences, offering everything from a virtual reception to breakout sessions, a mainstage, and networking events.
The networking tool is particularly helpful, with a timer you can set for each attendee to mingle with another for just a couple minutes before moving onto the next conversation (and, if the conversation goes exceptionally well, they can click “Connect” to receive contact information of the other attendee to follow-up later).
Your event can include both webinars and live-streams, and a Live Chat function enables attendees to ask questions in real-time. Additionally, attendees can use virtual booths to promote their products or services, and offer discounts as well.
2. Whova
The Whova Event App has been a leader in attendee engagement and networking since 2014. For four years in a row, Whova has received both the Best Event App award and the People’s Choice Award from the Event Technology Awards.
Event organizers can use Whova to help make online events highly interactive, fun, and productive before, during, and after the event. The tool directly integrates with live streaming and video hosting tools such as Zoom, Google Hangout, YouTube, Vimeo, etc. It also provides live Q&A, attendee networking, a discussion board, meeting-matches, a virtual exhibitor hall, and even virtual meet-ups.
Many organizers provide access to the Whova app prior to their events to let attendees virtually socialize and discuss various topics, one-on-one or in virtual groups, making everyone feel more connected by the time the event comes around. Every attendee has a professional profile, allowing them to find others with whom they have common interests. The ice breaker and in-app chat, in particular, make it fun for strangers to get to know one another on a personal level and communicate with both new and old friends.
3. Accelevents
Accelevents is a customizable and flexible event platform for running virtual, hybrid, and in-person conferences. It is a robust platform offering powerful registration, true white labeling, integrated live streaming, in-depth analytics, and numerous exhibitor and sponsor opportunities. Although the platform is intuitive, they still take support seriously with an average response time of fewer than 30 seconds.
They are known for their suite of networking tools which provide powerful attendee engagement. Among the networking tools are lounges, workshops, 1:1 attendee video, automated speed networking, and live attendee chat.
In addition, exhibitors and sponsors have the ability to customize their own booth and engage in video chat with their prospects that visit their booth. The build-in gamification and push notification tools are a great way to drive further engagement throughout the event. They can also advertise on banners displayed throughout the platform and have easy access to lead management and insightful exhibitor analytics.
Examples of Virtual Conferences
Game Developers Conference
The 2022 Game Developers Conference (GDC) switched its in-person conferences to streaming recorded versions on the GDC Twitch channel. The conference will still have ceremonies for The Independent Games Festival (IGF) and Game Developers Choice Awards (GDCA), and will stream session content starting 9 AM PT daily, March 16-20.
The GDC has a well-organized itinerary posted on their website, with breakout sessions led by influencers and experts in the Gaming industry.
Additionally, you’re able to pause Live sessions if you’re interested in watching at a later time, and the GDC has included “Recommended Channels” with headcounts on the left side of the screen. With some sessions evoking over 30,000 viewers, it’s safe to say the GDC has successfully launched a virtual version of their initially in-person event.
2. HubSpot’s Partner Day
On April 7-8, 2020, HubSpot launched its own virtual Partner Day. The Partner team used Zoom, a popular video conferencing tool, and sent each presenter a “video kit” with a mic, camera, lighting, and backdrop, so that participants could experience an optimal viewing experience from each of the day’s virtual speakers. Additionally, attendees used Zoom to network with other partners.
I spoke with Arden Brust, a Manager on HubSpot’s Partner Marketing team, to learn about some challenges you might experience when planning a virtual experience of your own.
Brust told me: “When planning an online event, it’s critical you remain flexible and open-minded. With a virtual event, you run the risk of technology issues, as well as scheduling issues you might not have considered if you had everyone in-person (including timezone issues). To combat this, continue to iterate with your team and plan on pivoting — don’t get too attached to plan A that you don’t consider how plan B might work out better.”
3. How I Built This, by Women In Product
With the help of the Run The World virtual conferencing tool, the non-profit organization Women In Product launched an entirely virtual event March 7-8, 2020. The Women In Product conference included participants from China, India, Canada, and Silicon Valley.
The conference featured 10 speakers who’ve built successful products — including the Director of Product at GoDaddy, a PayPal Product Lead, and a Senior Product Manager at Ebay. The virtual event included fireside chats, keynote speakers, and networking events that enabled women to hear about the challenges and successes of product launches in different markets.
4. Webinar Mastery Summit
Jon Schumacher had hosted webinars online for a while with minimal results when he launched the Webinar Mastery Summit, a virtual conference for people who wanted to advance their webinar skills.
His first virtual summit featured 25 experts, and generated 7,000 new email subscribers and over $55,000 in revenue with his All-Access Pass sales. With All-Access, his participants receive lifetime access to 17 expert video sessions, full MP3 recordings of all sessions, three months of course creation software, and access to a private community for additional networking.
Ultimately, with virtual conferences, you’re able to create recorded packaged content for future lead generation and sales even after the initial live launch — something in-person conferences, for all its networking benefits, is unable to do.
5. HubSpot User Groups (HUGs)
Meghann Keogh, a HubSpot Marketing Manager in charge of HubSpot User Groups and Events, has experienced circumstances in which she found it necessary to cancel in-person events and create virtual ones, instead. Keogh told me she’s hosted virtual HUGs events for San Francisco, NYC, Berlin, London, Helsinki, Paris, Bogota & Mexico City.
Additionally, she’s created virtual fireside chats, including an upcoming one with CEO & Co-Founder Brian Halligan & Christian Kinnear, VP of Sales & Managing Director EMEA.
When asked how to run a successful virtual event, Keogh told me — “Whether in-person or virtually, people are hungry to connect. The feedback we have received so far has been extremely positive. It’s not just cities that are connecting, it’s countries.”
“What’s made our virtual events a success so far? Our amazing speakers who inspire, educate, and innovate our HUG communities.”
Keogh adds, “We’re committed to bringing relevant content to our HUGs, whether that’s in-person or virtually. We want to make sure our communities still have that chance to engage with one another, and we’re devoted to making that happen.”

20 Great Examples of PowerPoint Presentation Design [+ Templates]
When it comes to PowerPoint presentation design, there’s no shortage of avenues you can take.
While all that choice — colors, formats, visuals, fonts — can feel liberating, it’s important that you’re careful in your selection as not all design combinations add up to success. We’re not saying there’s one right way to design your next PowerPoint presentation, but we are saying there are some designs that make more sense than others.
In this blog post, you’ll learn how to create an awesome PowerPoint deck and then see real presentations that nail it in exactly their own way.
![→ Free Download: 10 PowerPoint Presentation Templates [Access Now]](https://no-cache.hubspot.com/cta/default/53/2d0b5298-2daa-4812-b2d4-fa65cd354a8e.png)
What makes a good PowerPoint presentation?
A great PowerPoint presentation gets the point across succinctly while using a design that builds upon the point, and doesn’t detract from it. The following aspects make for a great PowerPoint presentation:
1. Minimal Animations and Transitions
Believe it or not, animations and transitions can take away from your PowerPoint presentation. Why? Well, they distract from the design you worked so hard on — and from your content, too.
A good PowerPoint presentation keeps the focus on your argument by keeping animations and transitions to a minimum. That said, you don’t have to eliminate them all. You can use them tastefully and sparingly to emphasize a point or bring attention to a certain part of an image.
2. Cohesive Color Palette
It’s worth reviewing color theory when creating your next PowerPoint presentation. A cohesive color palette uses complementary and analogous colors to draw the audience’s attention, emphasize certain aspects, and deemphasize bits of information that the audience might not need at a certain point in time.
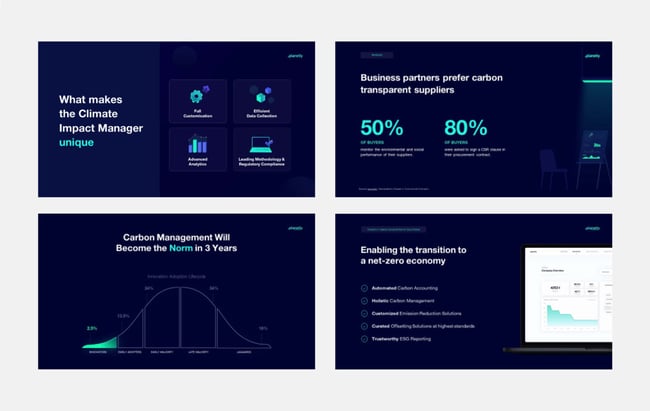
3. Contextualized Visuals
An image does speak more than words. And it’s been proven that the human brain is wired to process visuals much faster than words. Take advantage of that by including graphs, photos, and illustrations that can help you build upon your point while keeping your audience’s interest.
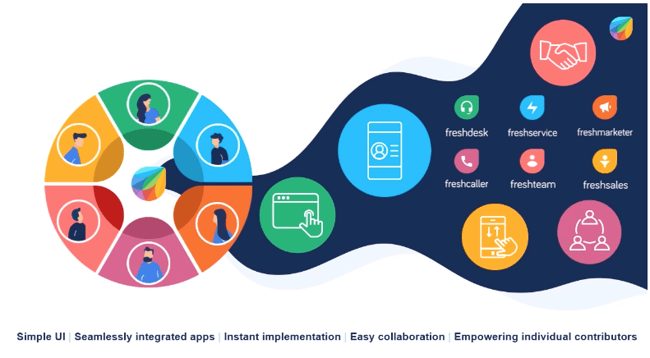
Make sure you contextualize those visuals by explaining verbally why that image is there. Otherwise, it’ll be distracting to the audience and may potentially cause more questions than answers.
PowerPoint Design Ideas
It’s impossible for us to tell you which design ideas you should go after in your next PowerPoint, because, well, we don’t know what the goal of your presentation is. Luckily, new versions of PowerPoint actually suggest ideas for you based on the content you’re presenting. This can help you keep up with the latest trends in presentation design.
In PowerPoint 2016 and later, PowerPoint is filled with interesting boilerplate designs you can start with. To find these suggestions, open PowerPoint and click the “Design” tab in your top navigation bar. Then, on the far right side, you’ll see the following options:
Click the “Design Ideas” option under this Design tab, as shown in the screenshot above. This icon will reveal a vertical list of interesting slide layouts based on what your slides already have on them.
Don’t have any content on your slides yet? You can easily shuffle this vertical list of slide design ideas by clicking various themes inside the color carousel to the far left of the Design Ideas icon, as shown below:
 As you browse and select from the themes shown above, the Design Ideas pane to the right will interpret them and come up with layouts. Below, we’ve included some of our favorite ones.
In case you’re curious, we’ve used Avenir as the font in the following PowerPoint design ideas.
Atlas (Theme)
 Covering a more creative subject for a younger or more energetic audience? On behalf of PowerPoint, might we suggest the cover slide design above? Its vibrant red background and fun lines will appeal to your audience.
Madison (Theme)
 This design doesn’t have the intensity of the first slide on this list, but it maintains a sense of informality that all PowerPoint presentations benefit from.
Parcel (Theme)
 The color-blocked look in the design above sets a fun but relaxing tone for the audience.
Crop (Theme)
 This PowerPoint design idea uses graphic elements such as lines and bars to give structure, contrast, and modern flair to your slides.
Badge (Theme)
 We’re particularly fond of this PowerPoint design style. By using lines and contrasting elements — like a burst, as shown above — you add depth to your slides. This can help your content capture and hold your audience’s attention more easily.
If you’re not fond of the built-in PowerPoint design themes, you can always download a free PowerPoint template and input your content onto pre-made slide styles.
Let’s take a look at the best ones you can download below.
Creative PowerPoint (Template)
This presentation template uses bright colors and plenty of white space to convey a modern but fun design. Organic shapes and geometric lines and patterns provide an extra visual element to the slides, achieving depth and personality. Get it here.
Download These Templates for Free
Professional Style PowerPoint (Template)
These PowerPoint slides use more neutral colors and fonts to create a calm and elegant vibe. It also pushes the presentation creator to use quality images to convey their points. Get it here.
Download These Templates for Free
Data PowerPoint (Template)
This template uses a rounded font to draw sharp contrast with the lines and graphs that will populate the presentation. If you want to offer engaging visuals with number-crunching content, the slide design ideas in this template are a great choice. Get it here.
Download These Templates for Free
Simple PowerPoint (Template)
By pairing vibrant colors with pale ones, this PowerPoint gives an understated feel, which can draw attention to the content while still being visually engaging. Get it here.
Download These Templates for Free
Instead of a presentation, you can also create an infographic in PowerPoint to effectively capture your audience’s attention.
Good Examples of PowerPoint Presentation Design
To see some examples of the best PowerPoint presentation designs, check out the following decks.
1. “The Search for Meaning in B2B Marketing,” Velocity Partners
We’ve said it once, and we’ll say it again: We love this presentation from Velocity Partner’s Co-Founder Doug Kessler. Not only is the content remarkable, but the design is also quite clever. While each slide employs the same background visual, the copy in the notebook unfolds brilliantly through a series of colorful doodles and bold text. This gives the presentation a personal feel, which aligns with the self-reflective nature of the concept.
2. “You Don’t Suck at PowerPoint,” Jesse Desjardins
If the contrast used throughout this PowerPoint presentation design were a human, we’d marry it. This skillful presentation from Jesse Desjardins employs the perfect color palette: balancing black and white photos with pops of fluorescent pink, yellow, and blue. The cheeky vintage photos work to reinforce the copy on each slide, making the presentation both interesting and visually appealing.
3. “Accelerating Innovation in Energy,” Accenture
Balancing visual backgrounds with text isn’t easy. More often than not, the text is formatted in a way that winds up getting lost in the image. This presentation from Accenture combated this issue by combining shapes and graphics to create contrast between the text and the background. Well done.
4. “Visual Design with Data,” Seth Familian
When you’re tasked with presenting a lot of information in a little bit of time, things can get sort of messy. To simplify this type of presentation, it’s a good idea to use a visual agenda like the one shown above. This index clearly signifies the start and finish of each section to make it easier for the viewer to follow along and keep track of the information. The presenter takes it further by including an additional agenda for each exercise, so that the audience knows what they’re supposed to do.
5. “How to Craft Your Company’s Storytelling Voice,” MarketingProfs
Do you love these hand-drawn illustrations or do you love these hand-drawn illustrations? I mean, c’mon, this is amazing. Certainly, it would have been easier to generate these designs online, but this approach highlights MarketingProf’s commitment to investing the time and thought it takes to create an out-of-the-box piece of content. And as a result, this presentation stands out in the best way possible.
6. “Blitzscaling: Book Trailer,” Reid Hoffman
If you’re going to go the minimalistic route, take note of this PowerPoint presentation example from Reid Hoffman. This clean design adheres to a simple, consistent color scheme with clean graphics peppered throughout to make the slides more visually interesting. Overall there are no frills or unnecessary additions, which allows the informative content to take priority.
7. “Healthcare Napkins,” Dan Roam
This presentation dates back to 2009, but the design is still as good as ever. The colorful, quirky doodles help tell the story while also serving as an interesting way to illustrate data (see slides 20 and 21). For visual learners, this approach is much more inviting than a series of slides riddled with text-heavy bullet points.
8. “One Can Be Diverse: An Essay on Diversity,” With Company
This presentation employs both powerful images and modern typography to illustrate the point. While many of the slides contain long quotes, they are broken up in a way that makes them easily digestible. Not to mention all of the text is crisp, clean, and concise.
9. “10 Things your Audience Hates About your Presentation,” Stinson
his simplistic presentation example employs several different colors and font weights, but instead of coming off as disconnected, the varied colors work with one another to create contrast and call out specific concepts. Also, the big, bold numbers help set the reader’s expectations, as they clearly signify how far along the viewer is in the list of tips.
10. “Pixar’s 22 Rules to Phenomenal Storytelling,” Gavin McMahon
This presentation by Gavin McMahon features color in all the right places. While each of the background images boasts a bright, spotlight-like design, all the characters are intentionally blacked out. This helps keep the focus on the tips, while still incorporating visuals. Not to mention, it’s still easy for the viewer to identify each character without the details. (I found you on slide eight, Nemo.)
11. “Facebook Engagement and Activity Report,” We Are Social
Here’s another great example of data visualization in the wild. Rather than displaying numbers and statistics straight up, this presentation calls upon interesting, colorful graphs, and charts to present the information in a way that just makes sense.
12. “The GaryVee Content Model,” Gary Vaynerchuk
This wouldn’t be a true Gary Vaynerchuk presentation if it wasn’t a little loud, am I right? Aside from the fact that we love the eye-catching, bright yellow background, Vaynerchuk does a great job of incorporating screenshots on each slide to create a visual tutorial that coincides with the tips. He also does a great job including a visual table of contents that shows your progress as you go through the presentation (and aligns with the steps of content marketing, too).
13. “20 Tweetable Quotes to Inspire Marketing & Design Creative Genius,” IMPACT Branding & Design
We’ve all seen our fair share of quote-chronicling presentations but that isn’t to say they were all done well. Often times the background images are poor quality, the text is too small, or there isn’t enough contrast. Well, this professional PowerPoint presentation from IMPACT Branding & Design suffers from none of said challenges. The colorful filters over each background image create just enough contrast for the quotes to stand out.
14. “The Great State of Design,” Stacy Kvernmo
This presentation offers up a lot of information in a way that doesn’t feel overwhelming. The contrasting colors create visual interest and “pop,” and the comic images (slides 6 through 12) are used to make the information seem less buttoned-up. Once the presentation gets to the CSS section, it takes users slowly through the information so that they’re not overwhelmed.
15. “Clickbait: A Guide To Writing Un-Ignorable Headlines,” Ethos3
Not going to lie, it was the title that convinced me to click through to this presentation but the awesome design kept me there once I arrived. This simple design adheres to a consistent color pattern and leverages bullet points and varied fonts to break up the text nicely.
16. “Digital Transformation in 50 Soundbites,” Julie Dodd
This design highlights a great alternative to the “text-over-image” display we’ve grown used to seeing. By leveraging a split-screen approach to each presentation slide, Julie Dodd was able to serve up a clean, legible quote without sacrificing the power of a strong visual.
17. “Fix Your Really Bad PowerPoint,” Slide Comet
When you’re creating a PowerPoint about how everyone’s PowerPoints stink, yours had better be terrific. The one above, based on the ebook by Seth Godin, keeps it simple without boring its audience. Its clever combinations of fonts, together with consistent color across each slide, ensure you’re neither overwhelmed nor unengaged.
18. “How Google Works,” Eric Schmidt
Simple, clever doodles tell the story of Google in a fun and creative way. This presentation reads almost like a storybook, making it easy to move from one slide to the next. This uncluttered approach provides viewers with an easy-to-understand explanation of a complicated topic.
19. “What Really Differentiates the Best Content Marketers From The Rest,” Ross Simmonds
Let’s be honest: These graphics are hard not to love. Rather than employing the same old stock photos we’ve seen time and time again, this unique design serves as a refreshing way to present information that’s both valuable and fun. We especially appreciate the author’s cartoonified self-portrait that closes out the presentation. Well played, Ross Simmonds.
20. “Be A Great Product Leader,” Adam Nash
This presentation by Adam Nash immediately draws attention by putting the company’s logo first — a great move if your company is well known. He uses popular images, such as ones of Megatron and Pinocchio, to drive his points home. In the same way, you can take advantage of popular images and media to keep the audience’s attention and deepen your arguments.
PowerPoint Presentation Examples for the Best Slide Presentation
Mastering a PowerPoint presentation begins with the design itself. Use the ideas above to create a presentation that engages your audience, builds upon your point, and helps you generate leads for your brand.
Editor’s note: This post was originally published in March 2013 and has been updated for comprehensiveness.
![Blog - Beautiful PowerPoint Presentation Template [List-Based]](https://no-cache.hubspot.com/cta/default/53/013286c0-2cc2-45f8-a6db-c71dad0835b8.png)

How to Manage Your Entire Marketing Budget [Free Budget Planner Templates]
The words “marketing budget” might strike fear into the heart of any marketing leader, but it’s a non-negotiable when creating and executing a marketing strategy for your company. Without the right funds, you won’t be able to capitalize on emerging marketing trends or create high-quality content that your audience will love enough to eventually make a purchase.
In this post, we’ll discuss how to manage your entire marketing budget from start to finish, then share eight templates to help you get started.
Marketing Budget for Small Business
Marketing budgets are especially important for small businesses. Small business owners may lack the experience drawing up budgets; moreover, it’s critical that these companies keep costs as low and lean as possible as they scale.
Ironically, you need marketing to scale. Without it, it’s hard to sell your products and services. In addition to the budgeting templates provided below, check out some of our free offers and courses to mitigate your company’s marketing costs.
Yet marketing budgets can be difficult to establish for companies of all sizes.
How much should a company spend on marketing?
Well, digital media makes up more than half of both U.S. and global advertising spend. This includes initiatives that cater to audiences on desktop computers, search engines, video streaming platforms, social media, and mobile devices.
Given the success marketers have seen in it, you might consider planning to spend at least half of your marketing budget on some of these digital channels.
Let’s talk about other ways to allocate your marketing budget.
As you build a budget, there are a few items you’ll want to keep in mind when planning your marketing budget allocation.
Marketing Cost Examples
1. Software
When it comes to digital and even print media, you may need software to create your marketing campaigns or handle your daily processes. There’s a marketing tool for just about any task you can think of, but they are generally broken down into the following categories:
- Customer relationship management (CRM)
- Online advertising
- Social media
- Content creation and design
- Event marketing
- Lead capture and lead generation
- Marketing automation
- Data reporting and analytics
- Digital asset management
- Team collaboration
The costs of these tools can quickly add up, so it’s worth it to try out the free options until you’re ready to commit to a tool your team loves.
2. Freelancers
If you have a temporary campaign or want to test out a new marketing strategy, you might want to hire a short-term freelancer before bringing on a full-timer.
Reach out to your network for recommendations or consider using a site like UpWork. Freelancers typically charge an hourly rate, so be sure to examine your budget before hiring.
3. New Personnel
When you do hire full-time employees, you’ll want to budget costs including their computer, technology, benefits, and onboarding-related needs. According to research from Zippia, the average cost of hiring a new employee is $4,425.
4. Advertising
Budget how much money you’ll spend on paid opportunities such as physical ads, native ads, sponsored content, search engine ads, and social media promotions.
Most businesses will benefit from some form of online advertising whether via social media platforms, search engine, or native ads. Statista estimates there were an estimated 4.9 billion internet users worldwide as of 2021. If you’re not advertising online, you’re missing out.
5. Content Creation
When you create content such as videos, photos, or even blog posts, you’ll need to put paid time into it.
Content marketing brings in 3X as many leads as traditional options, so it’s worth dedicating funds to this area. Budget how much money will go into creating this content so you can adjust accordingly based on its return on investment.
Now that you know more about what to include in your budget, let’s look at how to those funds are spent.
![Download Now: 150+ Content Creation Templates [Free Kit]](https://no-cache.hubspot.com/cta/default/53/5478fa12-4cc3-4140-ba96-bc103eeb873e.png)
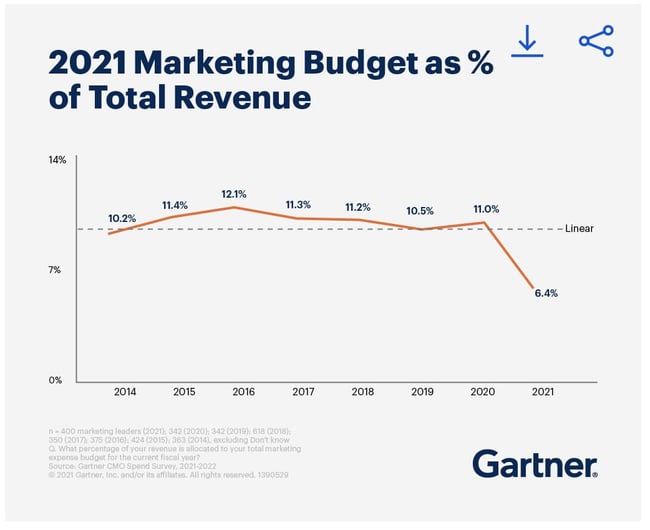
If you’re not sure where to start with budget allocation, a good guideline to follow is the 70-20-10 rule. Using this as a benchmark:
- 70% of your budget is allocated toward strategies you know work well
- 20% of your budget is allocated toward new strategies aimed at helping you grow
- 10% of your budget is allocated toward experimental strategies
Marketing Cost Example
Let’s say your business has a marketing budget of $10,000. The budget allocation may look like this:
- $7,000 towards a CRM or other software you love, successful paid search campaigns, social media marketing
- $2,000 towards marketing a new product, feature, or service you’re testing
- $1,000 towards testing sponsored content
Allocation by Channel
How you allocate your budget per channel depends on your company’s particular goals, so there is no hard and fast rule. However, the chart below from Statista can give you a ballpark idea as it illustrates the share of marketing budgets from large companies across North America, the UK, Germany, and France.
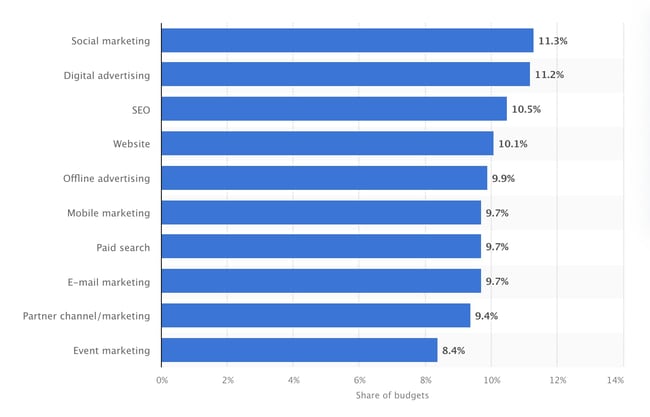
Organized by channel, you can see that the top spots belong to social marketing, digital advertising, and search engine optimization (SEO).
By 2023, it’s estimated that marketers will spend more than $52 billion on ads across websites or apps that are mainly eCommerce-focused. Let’s look at some examples of how these digital marketing costs apply to your budget.
Paid Search Advertising
You’re probably familiar with the ads at the top of a Google results page that show up above the list of search results. Those are a form of paid advertising called pay-per-click (PPC). You can create and run ads on Google, and each time someone clicks, you pay. The cost-per-click (CPC) can range anywhere from a few cents to a few dollars. You can use Google’s keyword planner to help estimate costs.
With this method, you only pay for clicks you receive. So even if you’ve set aside a budget of $2,000, your campaign may only generate $1,500 worth of clicks.
Social Media
Like Google Ads, social media platforms have advertising programs based on the PPC model, but also charge by impressions. The CPC of running a paid social campaign varies depending on the platform of choice, but ranges from a few cents to a several dollars.
Some companies may opt to hire an agency to run their campaigns and to create a social media strategy. Outsourcing this function is more expensive and can cost anywhere from $2,000 to $20,000 per month.
Content Marketing
Having a brand blog is a great way to get into content marketing, especially if you have in-house staff tasked with keeping it updated. Instead of a blog, you may be more interested in creating case studies, eBooks, videos or guides. They’re all designed to promote your brand and attract new customers.
Content marketing costs vary widely based on what your goals are and area of focus. Hiring outside consultants or agencies to handle content marketing for you can range from $2,000 to $10,000 per month for small to medium-sized businesses. While it isn’t cheap, paying an agency to handle this task will free up your team’s time to work on other projects and may yield better results than going solo.
Email Marketing
Email marketing is a must-have for businesses, especially online retailers. With a customer acquisition rate 40X more effective than Facebook and Twitter combined, it’s no surprise why this tried and true method is a staple in most marketing budgets. Email marketing also provides higher ROI as you’re connecting with people already interested in your brand.
Email marketing costs depend on the size of your business, your goals, and chosen software or platform. Hiring an outside firm to handle these efforts will cost significantly more than doing it yourself.
Search Engine Optimization
SEO aids marketing efforts by improving your webpages so that they show up in search engines like Google. The more often your website comes up in search, the more potential customers will see it and hopefully visit your website.
If you don’t have staff to handle your SEO needs in-house you may need to work with an agency. Depending on what your business needs are, this can cost thousands per month.
While the marketing channel choices can seem endless, don’t feel pressured to use all of them. Every business is different and you should prioritize putting funds toward the methods that best suit your needs.
Spreadsheet knowledge alone won’t help you understand how you’ll spend your marketing money this year. Creating a sound marketing budget starts with knowing what purpose this budget will serve and which marketing teams it will represent.
1. Know your buyer’s journey.
Your buyer’s journey is the steps your audience takes as they ‘journey’ from prospect to paying customer. Knowing your buyer’s journey allows you to understand how your audience interacts with your marketing — and where to set your goals and budget to better reach your customers.
Ask yourself these questions as you define your buyer’s journey:
- How do your leads and customers typically discover your products?
- What do they need to know before they make a purchase?
- How many site visits do you see per month?
- How many leads are you generating per month, and how many of these convert to paying customers?
- What is the cost of generating new leads and then converting them to customers?
- What’s the typical value/revenue of each lead?
This process should point out what marketing tactics are (and aren’t working), where you should alter your marketing goals, and where you can focus your marketing budget.
2. Align your budget with your marketing goals.
What you spend and where you spend it will depend on what you’re trying to accomplish.
So, when starting to create your marketing budget, make sure you’re only spending money on the things required by your current marketing goals — goals set based on your audience and their journey from prospect to customer. These could include:
- Display ads to promote a new product you’re launching this year.
- Sponsored social media posts to generate followers on your new Facebook page.
- Paid search engine ads to drive traffic (and purchases) to a specific product page.
- Contract bloggers to get more organic search traffic to your company’s website.
Former Demand Generation Marketer at HubSpot and current Head of Marketing at Tailscale, Jessica Webb Kennedy, says this about how your costs can change when focusing on lead generation vs. lead conversion: “The majority of the money you spend on paid efforts is usually calculated based on the volume of clicks or impressions. Because of this, you’ll often want to put more budget toward campaigns with higher-volume offers and audiences.”
“For example, a tweet or Facebook ad promoting a lead generation offer that leans more top of the funnel will likely receive more clicks than something that falls more toward the middle or bottom of the funnel,” she explains.
Your paid advertising costs will also change depending on how wide of an audience you are attempting to reach.
“You can look at Twitter advertising as an example,” Webb says. “You have to option to target your campaigns based on users’ interests or keywords searched for. Interests are a much broader category, whereas smaller pockets of users are searching for any given keyword, therefore your interests-based audience is going to be much larger and require a larger budget.”
3. Beware of hidden marketing costs.
One of the great advantages to having and maintaining a budget spreadsheet is that it helps you avoid those end-of-the-quarter or end-of-the-year freak-outs when you realize, “Whoa … what did I spend all that money on?”
In many cases, unanticipated costs can force marketers to fork over cash that they didn’t plan on spending. Product marketing offers a perfect example. According to former HubSpot VP of Marketing and current CMO at The Wanderlust Group, Meghan Keaney Anderson, it’s easy to forget that successfully marketing your products and services requires more than just promotion.
“When people allocate budget for product marketing, they tend to think in terms of product launches and promotional activities,” Anderson explains.
“That’s certainly an important part of it, but another area of focus to remember is setting aside resources to conduct research and message testing long before the product ever goes to market. Having conversations with customers about the pain points your product will ultimately address is critical to shaping the messaging and having a successful launch.”
4. Remember where your priorities lie.
Marketing is overflowing with add-ons and extras, upsells, and “premium” versions. One of the best ways to assess what’s nice to have versus what’s absolutely necessary is to (you guessed it) organize all of your expenses.
By keeping tabs on where your budget is being allocated, and cross-checking that spending with the results you’re getting, it will be much easier to figure out what should keep getting budget and what should get kicked to the curb.
For example, let’s look to the world of public relations. In PR, there are countless tools to which you can allocate budget, which could leave you overspending where it doesn’t matter — and underspending where it does.
“Tools abound to help PR practitioners not only create and distribute great content and find and target key stakeholders, but to ultimately measure reach and effectiveness,” says Nathaniel Eberle, HubSpot’s former Director of PR & Brand and GoTo’s current VP of Global Brand & Creative Management.
“The key is making sure you’re laser-focused on who you’re setting out to reach and influence, then ensuring that your budget supports how they’ll most likely want to receive (and share) your key messages.
“As the media and digital landscape evolves at breakneck speed, continually reassessing the tools, services, and programs you’re employing is a great way to determine real-time ROI of your overall spend. Today’s measurement tool may be worthless to you tomorrow.”
5. Spend your budget smartly.
When you open up these budget templates and check out all the various expenses detailed in them, don’t fret if you can’t tick every box. I’m not advocating for an “always spend more” approach to marketing.
I’m advocating for an “always spend smart” approach. The expenses listed out aren’t mandatory — they’re just meant to guide your thinking and to help ensure that you haven’t overlooked any hidden costs.
6. Prepare to measure ROI.
When you put a certain amount of money into a certain area, you’ll want to determine if your budgeting helped you or hurt you as you plan out future budgets. The best way to do this is by measuring ROI — or return on investment.
If the money you spend on one item results in your company making more in return, you may want to increase budget in the next year. If your money went nowhere, you should examine your budget.
Marketing Budget Templates
Using a marketing budget template can be useful when you’re not sure how to split or track your marketing costs. For instance, let’s say your company decided to invest in a website redesign to improve lead generation, and you’re responsible for managing the project. Naturally, one of the first questions you ask is, “How much is this website redesign going to cost?”
The answer, of course, is “it depends.” Are you simply switching to a new template and adding some new CTAs, or are you migrating your entire website to a new platform?
If only there were a way to organize your answers to all of these questions — a place where you could enter in estimated costs for all of your line items, and then compare your projected marketing budget to what you actually end up spending. Good news: Marketing budget templates can help.
Included in our eight marketing budget templates bundle is a template to manage your website redesign … as well as templates for both Excel and Google Sheets to help you track your content budget, paid advertising budget, event budget, and more.
With these templates, you’ll be able to manage all of the moving pieces of your budget at a monthly and quarterly level.
Use the Excel version of the templates to keep all of your budgets in one place. When you download the zip file, you’ll find a separate file for each marketing team, as well as a Master Budget Template to maintain a high-level view of your overall expenses.
Interested in sharing your marketing budget across a larger team? Try the Google Sheets version of our templates to share access with other Gmail users. For the Google Sheets templates, each team budget is found in a separate tab of the same Google Sheet.
No matter which version you choose, each budget is optimized with the same line items, tips, and graphs. Read on to learn how to use each budget template.
1. Master Marketing Budget Template
Download the Master Marketing Budget Template here.
While it’s helpful to have individual budget templates for specific marketing departments and activities, it’s also nice to be able to take a step back and see the bigger picture.
The Master Marketing Budget Template lets you do just that: It’s the place where you can collect the totals from the other seven templates in the bundle and see all of your expenses in one place.
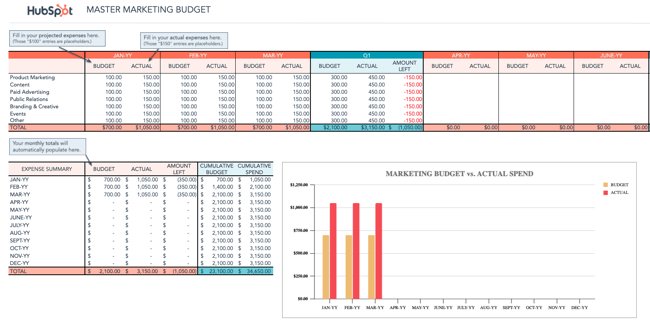
Tour
Budget Overview from All Departments: In the first table, you get to see both your budget and actual spending from all marketing departments, including product marketing, content marketing, paid advertising, PR, branding and creative, and events.
Month-Over-Month Expense Summary: For a more bird’s eye view of all expenses, look at this table, where you can see the aggregated budget and actual spending for all marketing activities.
Marketing Budget vs. Actual Spend Chart: This chart allows you to pinpoint trends in spending and budgeting — where you came under and where you over-spent.
2. Product Marketing Budget Template
Download the Product Marketing Budget Template here.
This template will guide you step-by-step through the process of budgeting for a product launch. From determining product/market fit, to running user testing sessions, to promoting your finished product, our Product Marketing Budget Template will help ensure you don’t overlook any important expenses.
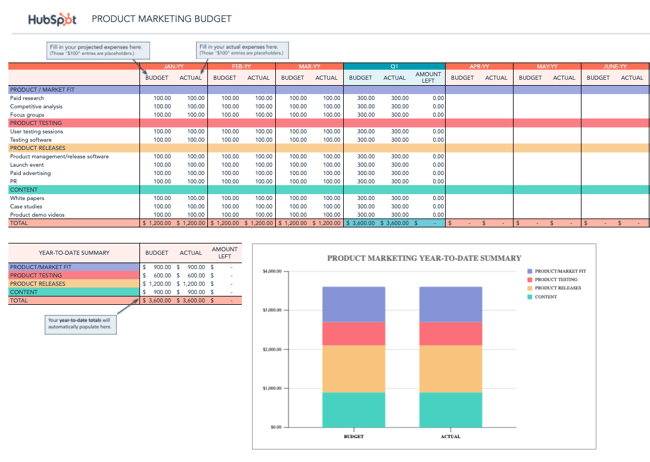
Tour
Budget & Spend per Product Marketing Activity: This table allows you to set a budget and track your spending for product marketing activities such as carrying out focus groups, hosting launch events, and creating white papers.
Year-to-Date Summary of Categorical Expenses: Here, you can see an aggregated summary of all expenses divided by category, such as product release spending and product testing. It will also automatically calculate the amount of money you have left.
Year-to-Date Summary Chart: This chart allows you to see a visual breakdown of where most of your funds are going, which is immensely helpful for figuring out where to scale back and where to invest more.
3. Content Budget Template
Download the Content Budget Template here.
The budget required for creating and promoting content can vary greatly from organization to organization. For example, while some organizations keep most of their content operations in-house, others rely more heavily on freelancers and contractors. And while some use many different software products, publishing tools, and services, others take a much simpler approach.
Our Content Budget Template is designed to cover as many content-related bases as possible. So, if you see any expenses listed that don’t apply to your organization, go ahead and delete them. (That’s the beauty of Excel spreadsheets: You can customize them to your specific needs.)
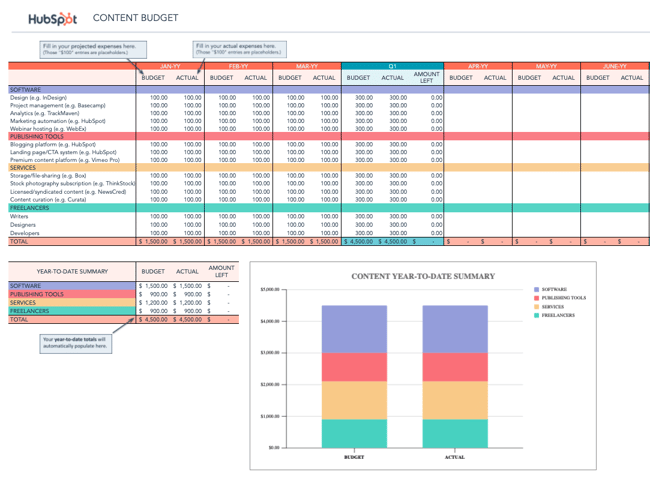
Tour
Budget & Spend per Content Marketing Activity: This table allows you to set a budget and track spending for content marketing activities, such as purchasing design software, creating landing pages, and hiring freelance writers.
Year-to-Date Summary of Categorical Expenses: Here, you can see an aggregated summary of all expenses divided by category, such as software purchases and freelancer costs. It will also automatically calculate the amount of money you have left.
Year-to-Date Summary Chart: This chart allows you to see a visual breakdown of where most of your funds are going, which is immensely helpful for figuring out where to scale back and where to invest more.
4. Paid Advertising Budget Template
Download the Paid Advertising Budget Template here.
Paid advertising: Does it really qualify as an inbound marketing tactic/channel? That is a loaded question, my friends, and one that I don’t have room to answer in-depth in this post.
What I can tell you for sure is that you can do paid advertising in an “inboundy” way — i.e. by targeting specific buyer personas and using paid advertising as a supplement to your organic efforts to help drive awareness and conversion opportunities.
Measuring the effectiveness of your paid advertising campaigns is also paramount to doing things the inbound way. Using our Paid Advertising Budget Template, you can keep tabs on your monthly (and quarterly) ad spending, and then cross-reference the amounts with your lead-generation metrics to determine your cost-per-lead.
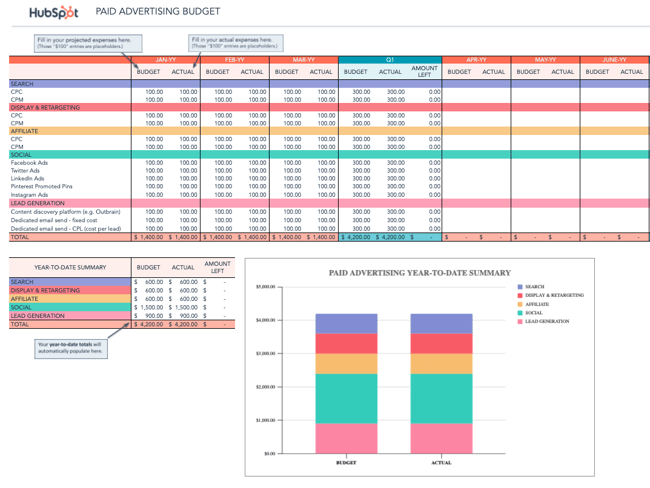
Tour
Budget & Spend per Paid Advertising Activity: This table allows you to set a budget and track spending for paid advertising activities, such as launching CPC campaigns, creating social media ads, and investing in a content discovery platform.
Year-to-Date Summary of Categorical Expenses: Here, you can see an aggregated summary of all expenses divided by category, such as search advertising and lead generation. It will also automatically calculate the amount of money you have left.
Year-to-Date Summary Chart: This chart allows you to see a visual breakdown of where most of your funds are going, which is immensely helpful for figuring out where to scale back and where to invest more.
5. Public Relations Budget Template
Download the Public Relations Budget Template here.
Public relations expenses amount to more than just paying for press releases. From reputation monitoring software, to traveling (e.g., to events and trade shows), to applying for awards, there are many PR costs that can be all too easy to overlook.
To ensure you’re accounting for all of your organization’s PR-related expenses, check out our Public Relations Budget Template.
Tour
Budget & Spend per Public Relations Activity: This table allows you to set a budget and track spending for PR activities, such as purchasing a press release service subscription, creating PR content, and hosting PR dinners.
Year-to-Date Summary of Categorical Expenses: Here, you can see an aggregated summary of all expenses divided by category, such as subscriptions, content, tradeshows, and media relations. It will also automatically calculate the amount of money you have left.
Year-to-Date Summary Chart: This chart allows you to see a visual breakdown of where most of your funds are going, which is immensely helpful for figuring out where to scale back and where to invest more.
6. Branding & Creative Budget Template
Download the Creative Budget Template here.
In order to produce high-quality, innovative graphics, videos, and other content, the branding and creative teams of today need more than just Photoshop … a lot more. One of the largest — and often most overlooked — expenses is storage.
If your organization is producing a lot of video, storage is especially important. Because as it turns out, when budgeting for video storage, you shouldn’t be thinking on a megabyte (MB) or even a gigabyte (GB) scale, but on a terabyte (TB) scale. FYI: 1 terabyte = 1 trillion bytes. You can keep track of all your storage costs (and other branding and creative costs) using our free template.
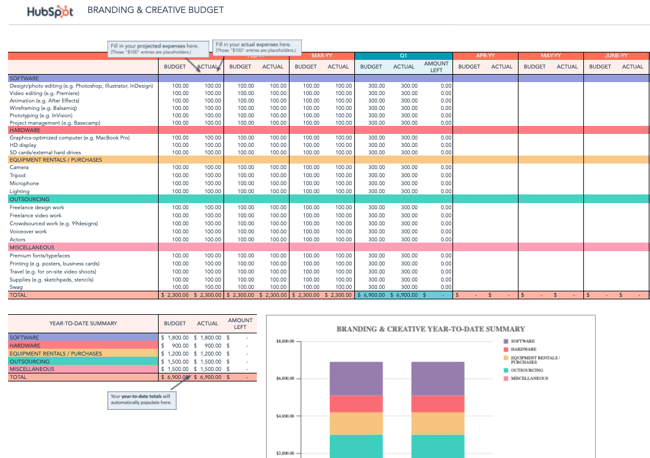
Tour
Budget & Spend per Branding & Creative Activity: This table allows you to set a budget and track spending for branding and creative activities, such as purchasing creative software, investing in hardware, and renting equipment.
Year-to-Date Summary of Categorical Expenses: Here, you can see an aggregated summary of all expenses divided by category, such as software subscriptions, equipment rentals, and outsourcing costs. It will also automatically calculate the amount of money you have left.
Year-to-Date Summary Chart: This chart allows you to see a visual breakdown of where most of your funds are going, which is immensely helpful for figuring out where to scale back and where to invest more.
7. Website Redesign Budget Template
Download the Website Redesign Budget Template here.
Budgeting for a website redesign can be seriously tricky. With so many moving pieces to consider, there is a lot of room for underestimating or miscalculating costs. We created our Website Redesign Budget Template so you can keep all of your redesign-related expenses in one convenient location.
Unsure if your current website is right for a redesign? Grade your website using this tool.
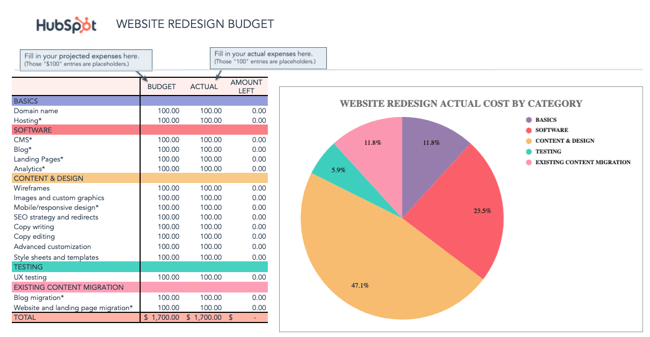
Tour
Budget & Spend per Website Redesign Activity: This table allows you to set a budget and track spending for website redesign activities, such as purchasing a domain name, investing in CMS software, and creating wireframes.
Year-to-Date Summary of Categorical Expenses: Here, you can see an aggregated summary of all expenses divided by category, such as software, content and design, and content migration. It will also automatically calculate the amount of money you have left.
Website Redesign “Actual Cost by Category” Pie Chart: This chart allows you to see a percentage breakdown of where most of your funds are going, which is immensely helpful for figuring out where to scale back and where to invest more.
8. Event Budget Template
Download the Event Budget Template here.
When planning an event, the associated costs can seem obvious at first. There’s the venue to consider, of course. And the P.A. system and microphones. And then the costs associated with booking and bringing in presenters/performers. That’s pretty much it, right?
Wrong.
For example, does the venue come with tables/chairs, or will you have to rent those separately? Do you want your attendees to wear name tags, and if so, will you be printing out the name tags ahead of time or will attendees be writing their own names on blank tags?
If the latter, have you factored in the pens or markers you’ll need to accommodate that? As you can see, planning for an event can lead you down many rabbit holes.
Use our Event Budget Template to stay organized.
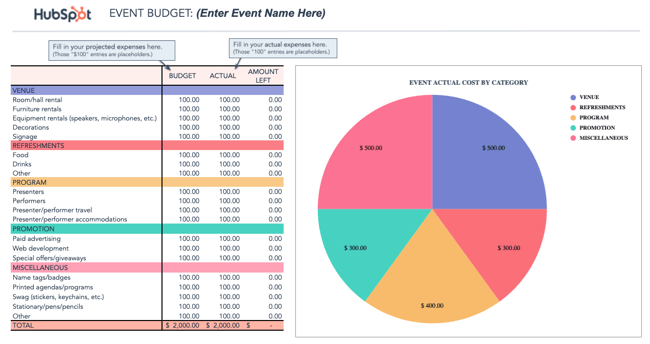
Tour
Budget & Spend per Event Hosting Activity: This table allows you to set a budget and track spending for event hosting activities, such as renting an event hall, purchasing food and drinks, and hiring presenters.
Year-to-Date Summary of Categorical Expenses: Here, you can see an aggregated summary of all expenses divided by category, such as revenue, refreshments, and promotion. It will also automatically calculate the amount of money you have left.
Event “Actual Cost by Category” Pie Chart: This chart allows you to see a percentage breakdown of where most of your funds are going, which is immensely helpful for figuring out where to scale back and where to invest more.
Sample Marketing Budget
With your chosen template downloaded, it’s time to consider which digital channels to allot a budget for. Hint: There’s no right answer — it’ll depend on the market research you do to figure out where your specific audience spends most of its time.
If you find your buyer prefers learning and consuming content in the form of video, for example, you might invest more of your money in YouTube advertising.
Advertising Budget Example
Here’s a small sample budget for a quarter’s worth of expenses by a hypothetical company that has decided to invest heavily in video marketing. This template was created using the Master Budget Template, the first template listed in the section above.
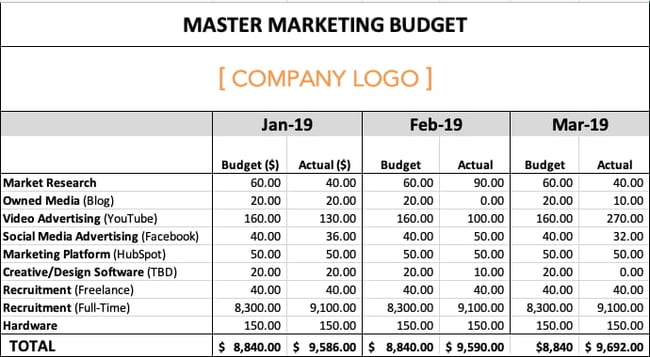
Based on the figures above, video advertising’s total expenses for the quarter exceeded budget by $20, while full-time recruitment’s total expenses exceeded budget by $2,400. This means the company is trending over budget for the first three months of the year.
Why might this happen? Perhaps a pay-per-click (PPC) campaign on YouTube received more clicks by viewers than expected, and a sharp video-savvy job candidate negotiated a higher salary.
Based on the difference between this company’s planned spend and actual spend, their budget template produced the following graph: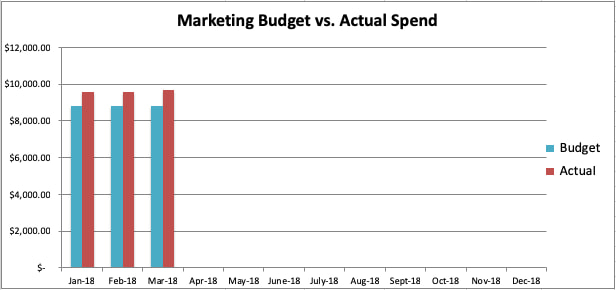
Create a Marketing Budget That Prioritizes Your Goals
A well-thought out marketing budget serves as roadmap to your team’s success. Revisit the buyer’s journey, flesh out your goals, and stay away from tempting add-ons that are not in line with your marketing priorities.
Go now, and plan wisely — your marketing staff is counting on you.
Editor’s Note: This blog post was originally published in December 2015 and has been updated for comprehensiveness.


101 Blog Post Ideas to Refresh Your Content Marketing Strategy
When you have an active website, consistently coming up with blog ideas can be a challenge. So, what do you do when it feels like you’ve written about everything under the sun?

Even the most seasoned marketers could use an occasional brainstorming boost. If you need inspiration, here are 101 of the best blog post ideas for your content marketing strategy.
Table of Contents
- Multimedia Blog Post Ideas
- Data-Driven Blog Post Ideas
- Community Engagement Blog Post Ideas
- Instructional (Guides and How-to) Blog Post Ideas
- Multichannel Integration Blog Post Ideas
- Thought Leadership Blog Post Ideas
- Content Marketing Blog Post Ideas
- Miscellaneous/Fun Blog Post Ideas
Blog Post Ideas
Multimedia Blog Post Ideas
Multimedia blog posts focus on using a piece of media — whether that’s a video, a podcast, or a graphic — to tell a story or share information.
The key to success with this type of blog post is to make it shareable. Whichever multimedia element you choose to include, make sure it’s original and branded so that when it gets shared, people will connect it back to your company.
1. Write a listicle blog post using GIFs that your readers can relate to.
2. Create an interactive quiz, such as “Which type of marketer are you?” or “How well do you know [insert topic]?”
3. Recap your latest company event with photos and/or videos.
4. Share a video product demo.
5. Create a branded graphic that demonstrates your process or strategy.
6. Make a video that highlights your industry and write a post about it.
7. Start a podcast and transcribe each episode into blog posts.
8. Record an interview with a customer and conduct a corresponding write-up.
9. Upload a photo diary of how your company celebrates culture.
10. Create an infographic about industry best practices or trends.
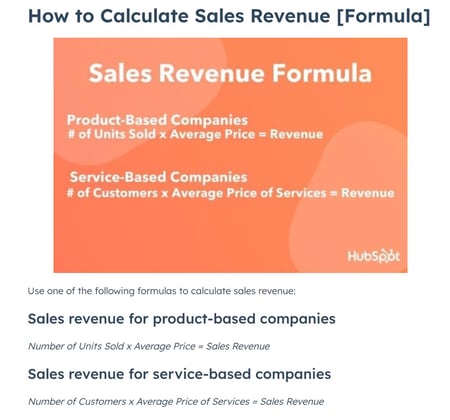
Data-Driven Blog Post Ideas
Data-driven blog posts rely on data and industry insights to make a point. While this information can be sourced from other brands or industry reports, using original data to demonstrate your company’s role in the space can result in more unique blog posts.
11. “We Asked X Experts About [insert topic]; Here Are Their Best Tips.”
12. Survey industry professionals to gather data on their challenges/processes/tools/best practices, and share the results in a blog post.
13. Make an infographic about your analytics and break down the pros and cons of each.
14. Research the most important statistics for your industry and compile a comprehensive list.
15. Break down your blog traffic and explain how you generated it for each channel.
16. Share the best apps your team uses to get work done.
17. Make a list of the best tools for your industry.
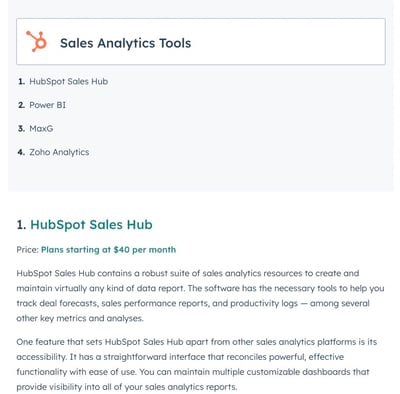
18. Explain your company’s knowledge base and why it matters.
19. Do an in-depth case study about your customers and examine the results.
20. Research your customers’ favorite products and share the results.
21. “Here Are X Stats Every [Role] Should Know.”
Community Engagement Blog Post Ideas
If you are part of a niche or local community, then these blog ideas are for you. Community engagement topics are a way to spotlight key players doing great things in an effort to boost company culture, brand loyalty, or employee morale.
22. Spotlight local leaders or companies in your field.
23. Interview a local business owner.
24. Create a survey about your area’s business ecosystem and share the key findings.
25. Highlight user-generated content.
26. Spotlight a client and share a story about their business.
27. Share real-life examples of your product use cases.
28. Spotlight employee stories to inspire your audience.

29. Ask for guest posts from community members.
30. Run a product or service giveaway for readers.
31. Throw a community-based event and recap it on the blog.
Instructional (Guides and How-to) Blog Post Ideas
A common blog post category for B2B and B2C companies that want to improve their SEO is how-to posts. These types of blog posts explain how to do something or answer a question readers are searching for.
To get more insight into what questions or topics your customers are searching for online, look up a search term relevant to your blog and look at the “People Also Ask” section of the search results. You can then use these questions to help guide your blog strategy.
32. A list of “musts” for a career in your field.
33. Interview an industry heavy-hitter about their tips for businesses.
34. Post a series on how to land a job in [your industry].

35. Write a roundup about “X Things I Wish I Knew When I First Started.”
36. How to gain the right skill set to advance in your career.
37. The hardest part of your job — and how you tackle that.
38. Tips to handle burnout.
39. Write an ultimate guide.
40. Create pillar pages, or topic pages that link to a variety of other articles on the same subject.
41. Bust common myths about your field.
42. Demo how to use a specific social media channel.
43. Write about how to properly research and collect data for reports.
44. Recommend the best tools for completing daily tasks related to your product or industry.
45. Share the benefits of a current trend your company has mastered.
46. Answer the top questions people have about your industry.
47. Break down how to write a blog post using your own blog as an example.
Multichannel Integration Blog Post Ideas
Your company’s blog is just one channel for your marketing strategy. For blog ideas that focus on multichannel integration, the key is to share the marketing methods you use on your other channels like email and social media.
48. Discuss top social media trends.
49. Explain how your most recent Instagram Live session engaged your audience.
50. Rank the top-performing social media channels for your brand.
51. Dive into a social network’s latest update.
52. Explain how you use Instagram Reels to grow your engagement.
53. Spotlight a brand killing it among multiple social channels.
54. Share the best Twitter threads you’ve seen about your industry.
55. Share a breakdown of your best-performing email campaign and why it worked.
56. Discuss how your brand uses LinkedIn to connect with your community.
57. Share your top social media analytics services and explain why they’re great.
58. Break down the most important email marketing metrics using examples from your own email campaigns.
59. Explain how video channels like YouTube or TikTok can be an asset to your business.
60. Take a stance on a recent blog post from your favorite news-sharing site.
61. Round up recent news in your industry.
62. Share snippets from your company’s ebook in a roundup.
Thought Leadership Blog Post Ideas
Thought leadership content is used to demonstrate your company’s expertise in a certain topic or industry. These types of blog posts should establish credibility and position your brand as a trusted resource with a unique perspective.
63. Describe what your mission statement means to you.
64. Dive into how a company boosted its blog traffic exponentially.
65. Break down what an ideal company culture would look like.
66. Write about ways your company is focusing on diversity and inclusion.
67. Based on trends from the past year, what are your predictions for the industry’s future?
68. Come up with a list of company outings for remote teams/employees.
69. Describe how your team combats burnout and provide helpful tips to avoid it.
70. Create a list of industry trends to keep an eye on.
71. Compare and contrast different topics about marketing, business, or your industry, such as different types of advertising.
72. Post a recap of breaking industry news.
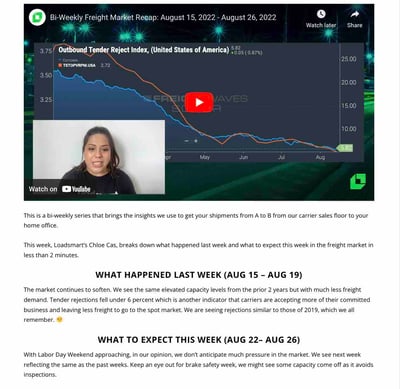
Content Marketing Blog Post Ideas
While almost everything on your blog is considered content marketing, these specific types of blog posts help market your company by giving readers a glimpse into your product, processes, and team.
73. Develop a blog post series dedicated to your company’s FAQs.
74. Invite an industry leader to contribute their expertise as a guest blogger.
75. Curate an office playlist and share the tracklist.
76. Profile a team member to showcase the company culture.
77. Interview a customer and share their results.
78. Repurpose a case study into a blog post.
79. Repurpose a white paper or guide into a blog post series.
80. Write about your day-to-day workflow.
81. Have your team share their favorite ways to use your product.
82. Share key takeaways from a recent industry conference you or your team attended.
83. Explain the ways content marketing has helped your company meet its business goals.
84. Post a “Year-in-Review” about lessons learned throughout the year and how to apply them to the year ahead.
85. A roundup of your most popular blog posts.
86. A roundup of ways your team conducts successful content marketing.
Miscellaneous/Fun Blog Post Ideas
Who says your blog has to be buttoned up all the time? Show off your brand’s personality with these fun blog post ideas.
87. Share photos or videos from your team’s recent travels.
88. Curate a list of quotes.
89. Give an office tour.
90. List of books that inspire professionals in your industry.
91. “What has changed about our workflow habits over the years?”
92. Compile a list of weekly/monthly aspirations.
93. Break down your favorite historic moment in your industry.
94. Embrace popular holidays and make a themed post about them.
95. Explain common acronyms in your workplace or industry.
96. Start a series where remote team members share their daily work routines.
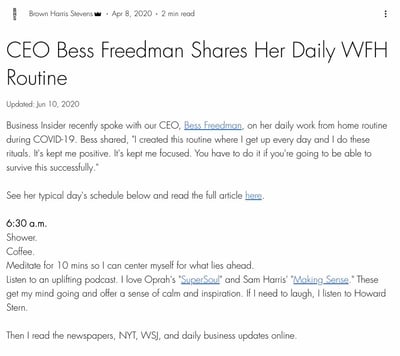
97. Give a short history of your company.
98. A peer-curated list of hobbies outside of work.
99. Share highlights from a recent industry conference you or your team attended.
100. Examine a recent movie trailer and how its marketing should be noted.
101. Come up with a staff bonding event and recap how it went.
It’s easy to get wrapped up in the day-to-day of your industry, which means it’s also easy to run into the same types of blog posts. Blogs are important for SEO and lead generation, so picking the “right” topics is a crucial step in marketing planning.
Editor’s note: This post was originally published prior to 2017 and has been updated for comprehensiveness.

The Top Marketing Channels, And How They’ll Change in 2023 [+Data]
The movie Field of Dreams famously claims, “If you build it, they will come.” Unfortunately, this passive approach is just not true for content marketing. The marketing channels you use to distribute content are just as important as the content itself.
Marketing channels are the different tools or platforms you use to reach your target audience. By understanding the different values of specific marketing channels, you will be able to form a content distribution plan that fits your audience.
The Hubspot Blog surveyed more than 1,000 global marketing professionals in the B2B and B2C space to discover which marketing channels are being used by businesses today.
Read more to see how you can amplify your reach and increase revenue, while also prioritizing your current customers.
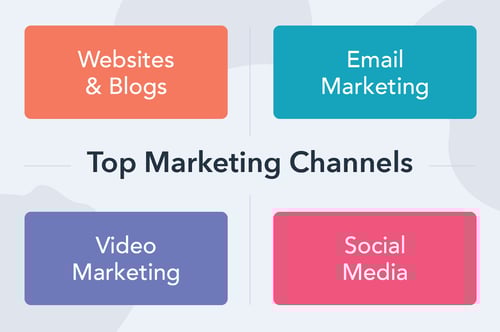
Top B2B Marketing Channels
The landscape of B2B marketing is changing. If your team is using old data, you’re already falling behind.
In a 2022 HubSpot survey of over 1,200 marketers, more than 80% said that marketing has changed more in the last three years than in the last 50 years.
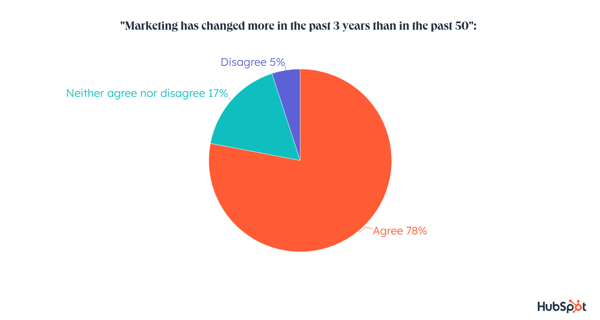
In 2023, the top channels used by B2B marketers will be social media, websites, blogs, and email marketing.
Short-form videos and influencer marketing are top marketing channels that businesses plan to invest more time and resources into in 2023.
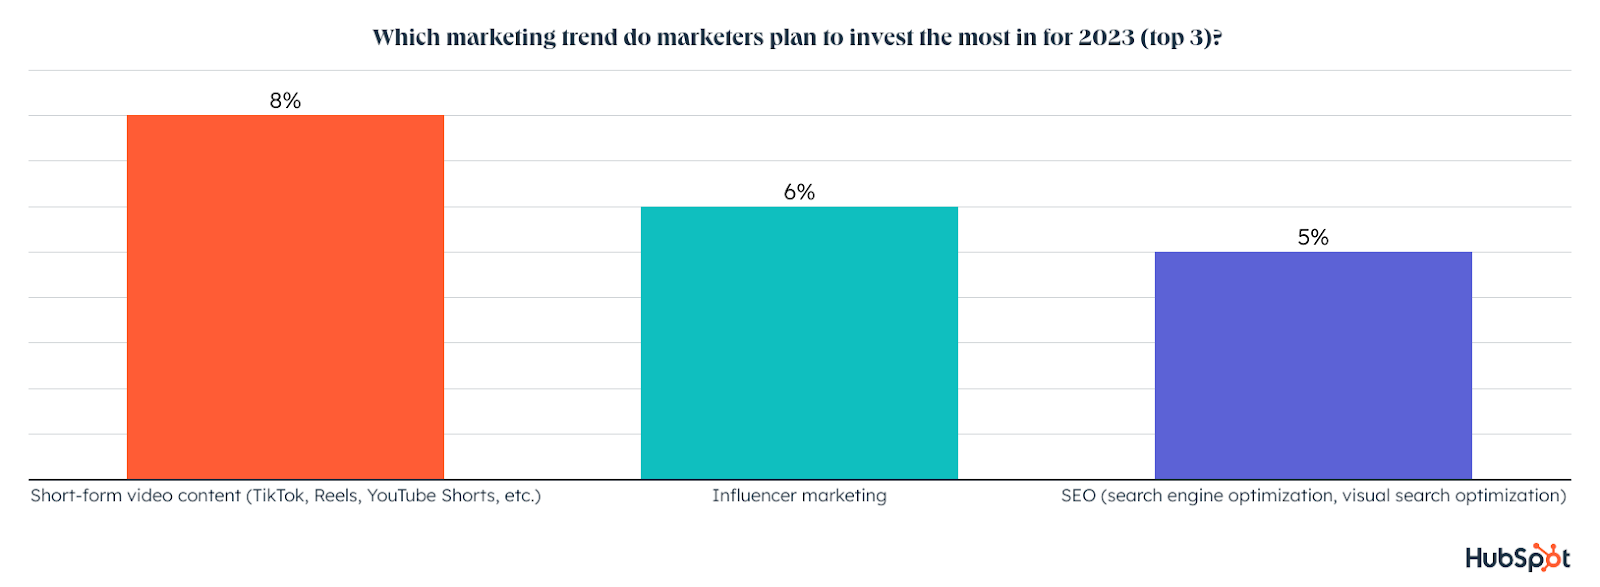
Social media is likely a top digital marketing channel because of LinkedIn. In the B2B landscape, LinkedIn offers a great platform for interacting with business-minded people. LinkedIn is also fifth as the most effective platform to use, with a 14% ROI.
Of the B2B marketers surveyed, 41% predict that their budgets will increase in 2023, giving more wiggle room for investing in new channels.
B2B marketers will likely focus significant effort on website and blogging channels because buyers often rely on websites before making purchasing decisions.
Websites also offer vital content sources for prospects, and SEO is how B2B marketers plan to attract their ideal customers.
Keyword strategy can be time-consuming but also relatively low-cost when creating organic content. People make nearly 97,105 searches on Google per second, meaning SEO has significant implications for advertising.
Email or newsletters are a powerful channel for B2B marketers to leverage. Email marketing helps brands share educational information with customers.
This strategy has also proven effective. In 2023, 32% of marketers reported that they will leverage email marketing to engage potential customers.
A targeted email campaign can also be automated, letting marketers focus their energy elsewhere. When sending emails, subscriber segmentation and message personalization are the most effective strategies.
In 2023, you can expect B2B marketers to continue their investments in blogs and email marketing while also increasing investments in social media platforms.
Top B2C Marketing Channels
B2C marketers invest in top channels as B2B marketers, but the order is different: social media and email marketing come first, then websites and blogs.
B2C marketing is usually focused on offering enjoyable content and quick wins, while B2B marketing focuses on long-lasting relationships with customers. 51% of B2C marketers expect their budget to grow in 2023, a jump from 44% last year.
Focusing on social media makes sense. As of 2022, there were roughly 4.74 billion social media users around the world, according to analysis from Kepios. That equates to 59.3% of the total global population.
So, B2C customers are most likely to engage on social media. For 2023, Facebook, Instagram, and YouTube are among the highest social media investments for B2C brands.
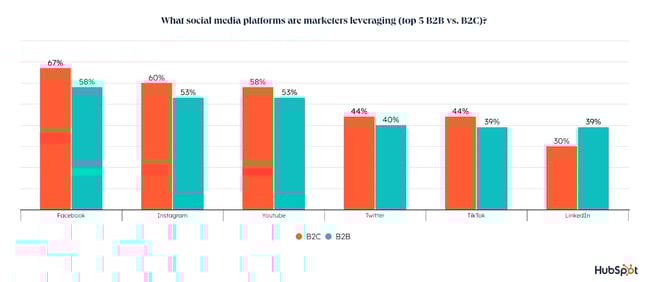
Email marketing may just mean newsletters, but it can also be used for B2C content such as personalized communication, time-sensitive notifications (like product launches or sales), and cart abandonment email reminders.
Email is also an owned media channel, meaning nobody is dictating when, how, and why you can contact your prospects. However, keep in mind that customers will unsubscribe from oversaturation.
Blogging and websites can be used together to generate brand awareness, drive traffic, convert leads, and, most importantly, establish your authority.
Of the B2C marketers surveyed, 36% already use websites and blogs to connect with customers, and that is likely to increase in the coming year.
When you create your blogs with SEO tactics in mind, you’re even more likely to meet your marketing needs, as you’ll surface in SERPs when customers make queries related to your business content.
SEO ranked third as the most effective marketing channel to leverage in 2023.
Omni-Channel Marketing
Leveraging a single marketing channel with one strategy no longer works. In fact, HubSpot research shows that 92% of marketers leverage more than one channel. In 2022, 81% leverage more than three.
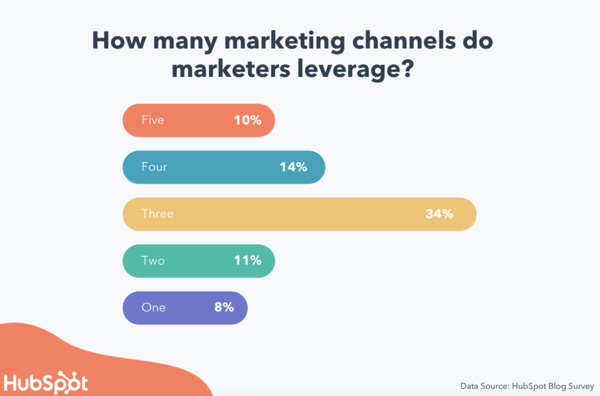
“100% of the companies we worked with that grew focused on omnichannel marketing and continually expanded,” writes Neil Patel, CMO and co-founder of NP Digital. This diversified approach helps teams stay agile and pivot when certain platforms become oversaturated.
A common omni-channel approach that B2C companies leverage is content repurposing. HubSpot found that 82% of social media marketers repurpose content across various social channels.
This creates continuity with brand messaging while also reducing the amount of work content creators will need to engage on many different marketing channels.
Video Marketing
If you’ve yet to get started in video marketing, now is the time. Video can boost conversions, improve ROI, reach new audiences, and help you build relationships with current customers. Video is the top media format marketers leverage for their strategies.
When creating video, short-form content takes the cake for both B2B and B2C marketers. In the age of TikTok, many social media brands are rewarding content creators who make short-form video content that encourages viewers to stay on the app longer.
Marketers plan to increase investments in the strategy for 2023, with 29% of marketers planning to leverage this strategy for the first time.
Influencer Marketing
Influencer marketing is when businesses partner with a relevant, popular creator in their industry to put out advertisements or specific pieces of content.
Influencers can generate brand awareness by providing a familiar face, personality, as well as social proof.
Consumers trust marketers less and less, shying away from lead-generating content.
Influencers can combat this mistrust by being personable and sharing common interests. In the tech age, influencers might even be the closest thing to word-of-mouth marketing.
One study from TopRank Marketing found that 86% of B2B brands are successful with influencer marketing. A nice bonus is a return on investment (ROI) for influencer marketing, with every dollar spent totaling $5.78 ROI in 2021.
Influencer marketing will see significant growth in 2023, HubSpot found, with 17% of marketers planning to invest in it for the first time. Of marketers already using this tactic, 89% of marketers using it will increase or maintain their investment next year.
Search Engine Optimization
Successful optimization can bring in traffic and increase conversions by positioning you as an authority.
All your web content needs search engine optimization. That includes your YouTube channels, Google business profile, and even podcast episodes should be optimized using target keywords.
To build a thriving organic presence online, consider implementing the pillar-cluster model into your blog (35% of B2B and 59% of B2C marketers report it as an effective strategy).
By doing this, you’ll create a single pillar page that provides a high-level overview of a topic and hyperlinks to cluster pages that delve into the topic’s subtopics, signaling to Google that your pillar page is an authority on the topic.
Additional SEO tactics that marketers effectively use include search insights reports, optimizing photos or videos for visual search engines, and optimizing load speed.
Podcast Marketing
As of 2020, 55% of the U.S. population aged 12 and above listens to podcasts, and 37% listened in the last month for an average of six hours per week. Audio content is in demand, so it’s worth considering as a platform to reach your audience.
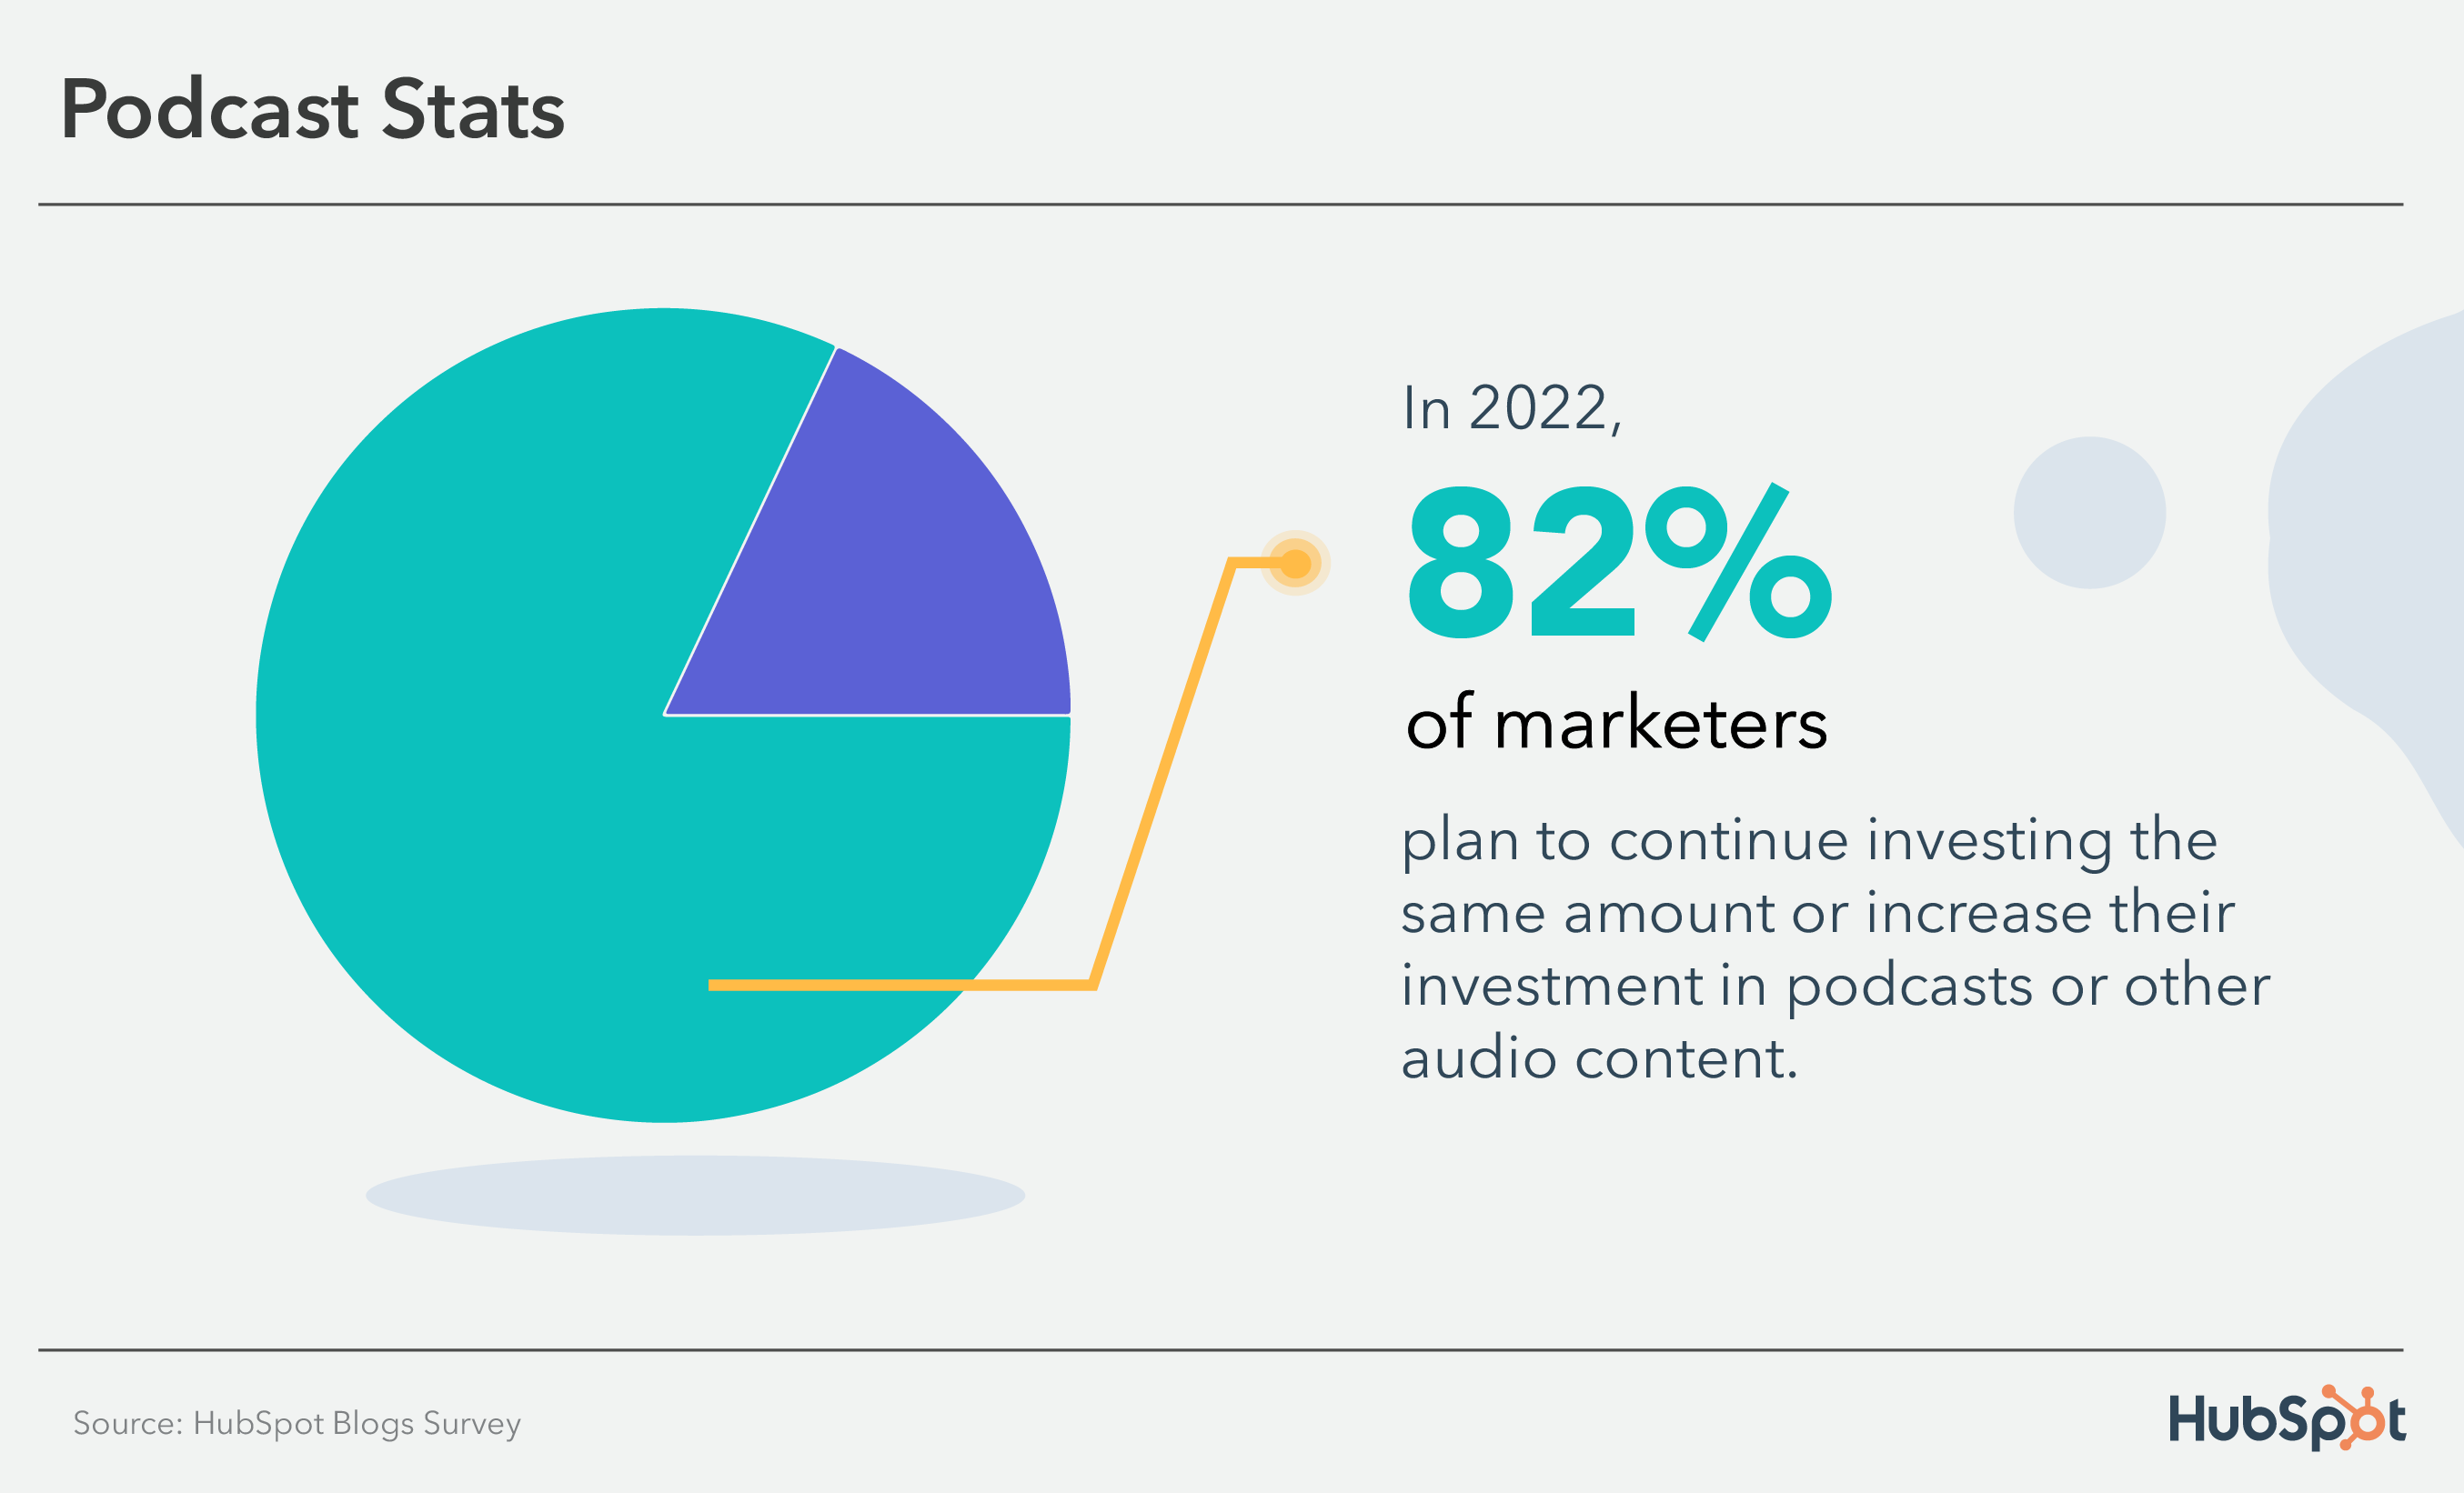
Podcast hosts can also serve as your brand-specific influencer, demonstrating the human side of your business.
The passive listening of a podcast makes it an ideal platform for reaching people during their morning commute, while walking their dog, or cleaning the house.
Featured Resource: How To Start a Podcast For Your Business
Storytelling is an excellent way to capture your audience’s attention while also making your brand more personable.
The human brain is programmed to crave, seek out, and respond to a well-crafted narrative — that’ll never change. Check out this blog on how to include more storytelling in your content.
Only 1 in 3 marketers reported leveraging podcasts or other audio content in their strategies, but 53% of those that do say that it is the most effective media format they use.
In 2023, podcasts will see the 2nd highest investment, second only to video. In fact, 10% of marketers said they would invest more in audio content than any other media format.
Word-of-Mouth Marketing
Trusting a brand is more important than ever. As of 2020, 70% of consumers say it influences their purchase decisions. Consequently, paid content is trusted less and less as online content becomes oversaturated.
Marketers need to earn the trust of consumers by relying on customer recommendations and word-of-mouth marketing.
Actual consumers are more effective in earning trust than marketers who obviously have agendas. Customers will typically only rave about a product or service if it actually benefits them.
People trust other consumers over marketers because marketers always have their eyes on the bottom line.
Word-of-mouth marketing is more than just face-to-face conversations. For example, satisfied customers will post about your brand online, tell their roommates they like your service, and leave positive reviews on your product pages.
Only one of those examples involves an actual, in-person conversation, but they all include consumers vouching for your brand’s credibility.
Word-of-mouth marketing, at its core, requires you to create a truly magical and converting customer experience. Focus on offering top-notch customer service and going above and beyond for your customers to leverage this channel.
What Now?
Now that you know the stats behind different marketing channels, consider how you might reach your audience in a new way or perhaps even reach a new audience.
Different marketing channels bring various benefits, but most businesses can find a way to use different channels in their marketing strategies to meet business goals.
Using different channels creates multiple points of contact, nurturing your leads and increasing conversions. Remember that a customer likely came into contact with your brand at least seven times before taking action.
By contacting them on different channels, you can expedite this process and reach your 2023 marketing goals.
Editor’s Note: This post was originally published in Dec. 2021 and has been updated for comprehensiveness.

5 Things Gen Z Will Spend Money On & Why Marketers Need to Care
With a purchasing power of more than $340 billion, Gen Z is expected to shake up the retail industry.
Although many in Gen Z are earning their first paychecks, entering college, or just joining the workforce, studies show that the generation shops and spends money much differently than its millennial predecessor.
![→ Download Now: Free Product Marketing Kit [Free Templates]](https://no-cache.hubspot.com/cta/default/53/08b5e1f4-5d26-405b-b986-29c99bd0cb14.png)
While millennials and past generations were more loyal to brands, Gen Z is more interested in buying products that will give them the best value based on their price. Gen Zers also admit to being more impulsive in their shopping habits than older generations.
A Breakdown of Generation Z’s Spending Habits
When it comes to the total share of spending, Gen Z accounts for an estimated five percent in the U.S., according to Afterpay’s 2021 Next Gen Index. However, that number is expected to grow by 10% by 2030, as most will enter the workforce.
With every age group, generation Z’s spending habits declined at the onset of the COVID-19 outbreak. However, the Afterpay report reveals that Gen Z recovered faster than older generations.
So what are they doing right now? Well, they’re shopping more online — and we’ve got the data to prove it.
To learn more about the latest purchasing habits between generations, download our free 2022 U.S. Consumer Trends Report
Online shopping allows Gen Z to discover products from new or small companies they wouldn’t find in person.
Gen Z is leading the trend, with 74% of those 18-24 choosing mobile first for shopping. The number one place Gen Z lives online is YouTube. It’s where they spend their time but also where nearly half (47%) research products they’re interested in purchasing, according to the report. Instagram comes next, followed by Snapchat, then TikTok.
Additionally, this generation is most passionate about buying products from brands that align with their values. We found that 45% of Gen Z have boycotted a business, and 36% enjoy buying products that display their social and political beliefs. Gen Z has the most affirmative opinion on the matter: 51% agree with companies taking a stance. A recent Forbes interview by Jeff Fromm and Arizona University students perfectly captured this sentiment.
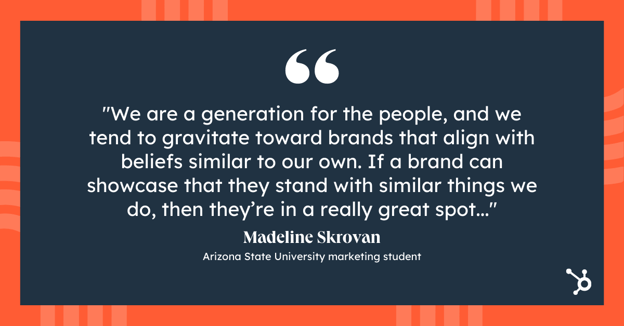
Another thing we can expect from Gen Z is their reliance on influencers to recommend products.
According to our data, influencer recommendations win out for Gen Z, with 55% of that generation surveyed saying recommendations from influencers are one of the most important factors in their purchase decision. Across generations, only 30% consider influencer recommendations as one of the most critical factors in their purchase decisions.
To help brands market to Gen Z when they reach full purchasing power, here’s what we expect them to invest in over the next year.
5 Things Gen Z Will Spend Money On
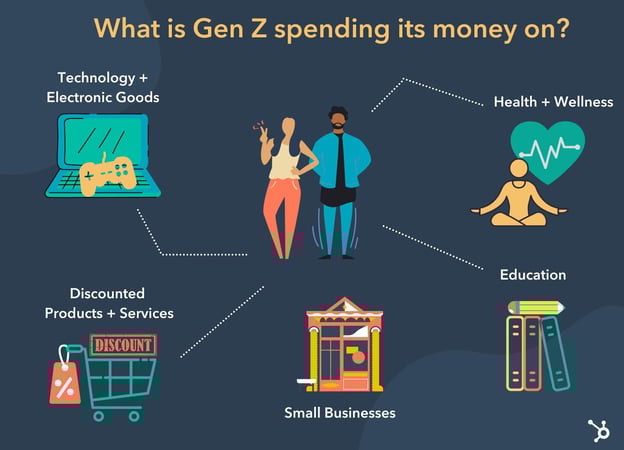
According to a 2021 Consumer Culture Report by 5WPR, Gen Z is prioritizing electronics, technology, health, and wellness.
Conversely, Millennials and those from older generations prioritize travel and experiences, home goods, and furniture.
Based on additional research, we also found that Gen Z pays special attention to small businesses. They are also willing to wait for a good discount before purchasing and take advantage of buy-now-pay-later purchasing options.
Let’s dive into each category below.
1. Electronics and Technology
Gen Z occasionally splurges on technological experiences, such as video games, that help them have fun. In fact, Newzoo reports there will be 2.95 billion gamers worldwide by the end of 2022 — with a steady growth average of 5.6% year-on-year (YoY) increase.
While you might worry that Gen Z isn’t worth marketing to because they won’t splurge on your products, this age group certainly can be persuaded to make larger purchases that offer fun experiences or improve their daily lives.
But, even though they will invest in higher-priced products, Gen Z will still need thorough convincing before pulling out their wallets. It’s vital for brands targeting Gen Z to create content demonstrating why the age group needs their product, how the product could solve daily boredom or woes, and why it’s better than a competitor’s.
For example, although some consumers might consider Fitbit fitness trackers frivolous, this brand does a great job explaining why its product can be a necessary tool to use within a fitness routine.

On social media, Fitbit gives facts about why walking and cardio – two activities the bracelet can track – are important to health. And in a November blog post, Fitbit more deeply connected its product to health needs by discussing how its reporting software could help people communicate better with their doctors.
While Fitbit doesn’t claim its product is necessary for health, the brand shows audiences how the product can help them track their fitness needs and progress.
When a pessimistic or budget-conscious Gen-Z member researches Fitbit, they might find its content informative and helpful. From there, if they’re interested in a healthier lifestyle, they might realize that Fitbit is a credible brand that could help them with their fitness needs.
2. Discounted Goods
Eighty percent of Gen Z surveyed in 5WPR’s report say they will wait for an item to go on sale before buying it.
Why is Gen Z so conscientious about their spending habits? Mounting research suggests that the age groups’ thoughts on money link directly to the economic era they were raised in.
While millennials grew up in more stable financial times, most of Gen Z’s earliest memories took place during the U.S. recession. Much of this generation grew up in highly budgeted households or saw how economic troubles impacted their families.
Meanwhile, a large percentage of millennials and those in other age groups can recollect times when their economy was booming.
Organizations, including the Pew Research Center, say these eras have psychologically molded how each generation thinks differently about money. While researchers believe millennials and Gen Z are money conscious, with the goal of avoiding financial instability, millennials are considered to be “more optimistic” about future finances.
As Gen Z ages, studies and purchasing behaviors hint that they haven’t been able to shake their financial instability concerns. Research shows that the offering needs to be so valuable to them that they can justify purchasing and investing in a product or service.
A recent Business Insider report revealed that a logo regarding clothing doesn’t easily persuade Gen Z. In fact, unlike other generations, brand loyalty is one of the last things they think about when making a purchasing decision. What the generation does focus on is price and value.
In the report, a 20-year-old named Amanda Chermin explained, “I can’t afford nicer brands of clothes – I like to save and would rather have money in the bank than be broke.”
Instead of splurging on the hottest brand from New York Fashion Week, the age group is more likely to purchase cheaper clothing that’s either not from a name brand, on clearance, or re-sold.
Or they’ll buy now and pay later (BNPL).
Millennials are the leaders of the BNPL model but Gen Z is growing the fastest, accounting for 14% of users on Afterpay in the U.S.
80% of Gen Zers who use the software spend it on fashion. However, wellness, beauty, and recreation are other top categories.
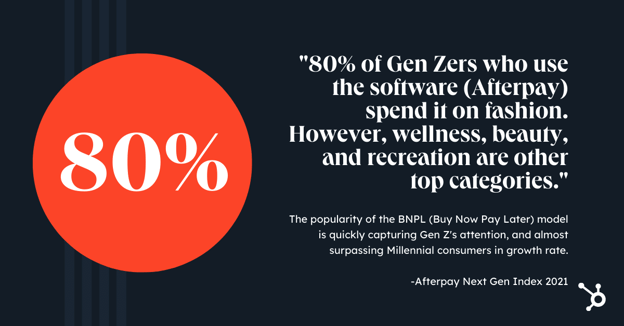
Although they aren’t loyal to the same stores and brands millennials zoned in on, Gen Z still feels pressure to buy and wear clothing that’s considered good quality or fashionable. Aside from purchasing affordable clothing, the need to look their best has also led to many in Gen Z to invest in clothing rental services or try-before-you-buy shopping experiences.
Although Gen Z is expected to spend less money on clothing than other generations, researchers believe they still feel pressure to look good in front of their peers. These pressures, which might stem from social media, school, work, or social environments, will still drive the age group to clothing stores or ecommerce sites. While retail marketers should expect shifts in spending behaviors from this generation, Gen Z will still buy clothing that looks good on them, is good quality, and is affordable.
The themes related to clothing purchases are important to remember — even if you aren’t marketing clothing products. As we’ve established, Gen Zers are always looking for a good bargain and won’t use just a brand name to justify a purchase.
Regardless of how popular or well-known your brand is, you’ll still need to highlight why your products are better than cheaper versions from competitors.
Although your logo might not persuade Gen Z to buy your product, you can still use authentic brand trust and popularity to your advantage. Although Gen Z is budget-conscious, they also care about what their peers think of them. This means they might still need to splurge on a product, such as a clothing item if they know that people in their age group have it.
If you’re marketing to Gen Z, consider asking popular influencers or happy young adult customers to discuss your product on social media. An authentic product review will not only build a sense of brand trust, but will also show Gen Z audiences that the product is popular and used by people they follow.
From there, a Gen Z member might research or purchase a product simply because it’s more popular or has better reviews than a cheaper alternative.
3. Health and Wellness
Gen Z mental health is an increasingly popular topic because the mental wellness of younger populations will inform healthcare trends, workforce needs, and future generations’ well-being.
Health and wellness is the second-highest category Gen Z spends on, according to 5WPR’s 2021 consumer report mentioned earlier.
This group seems to be the leader in the wellness movement building over the past few years, which promotes awareness surrounding mental health, ethical food sourcing, and other related wellness issues.
For instance, WSL reported that Gen Zers are more likely to use natural remedies than traditional medications, seven points higher than Millennials. They’re also less likely to eat fast food.
The article also highlights how Gen Z invests more (5% to be exact) in wellness than Millennials, a data point reflected in 5WPR’s 2021 Consumer Culture Report.
4. Small Businesses
According to the 2021 Afterpay Next Gen Index, small business spending has increased more than 260% for Gen Z on Afterpay, 80% higher than Millennials.
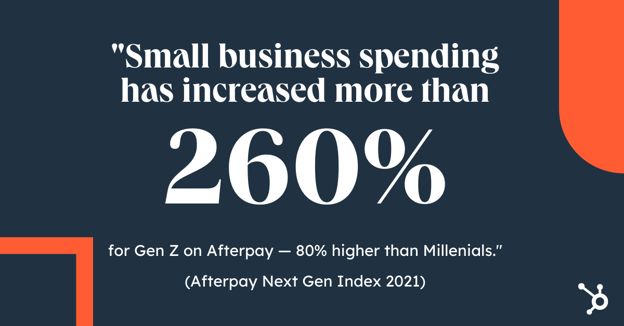
This conscious effort likely stems partly from the recent pandemic, as many small businesses struggled to survive. Just look at the growth of Small Business Saturday as an example.
According to our State of Consumer Report, 60% of Gen Zers chose a product based on it being made by a small business in the past three months.
Most were driven by the ability to build a strong bond between consumers and contribute to the local economy.
Another interesting reveal is that consumers are more willing to share their data with small businesses in exchange for discounts and deals. Another caveat is that brands must share how the information will be used.
This is great news for small businesses figuring out how to reach Gen Z consumers. It’s an invitation to be more transparent about your business and not be afraid to show what’s happening behind the scenes.
5. Education
Another key component of generation Z’s spending habits is education.
While millennials are among the most highly educated age groups, Gen Z is on track to have the highest level of education.
In 2020, the Pew Research Center reported that college enrollment is more likely in Gen Zers than Millennials and Gen Xers at a comparable age. They’re also more likely to have a college-educated parent.
At this point, Gen Z’s shown themselves to start saving for college at a much younger age than millennials.
As members of the generation enroll in college or begin to spend their own money, news outlets have predicted and reported bursts in school-related purchases fueled by Gen Z shoppers.
Aside from purchasing supplies, Gen Z is also likely to invest in courses or educational programs to advance their future earnings.
From 2019 to 2020, Gen Z learners watched 50% more hours of educational content on LinkedIn. They spend 12% more time honing hard skills on LinkedIn Learning than the average learner on the platform.
Many researchers believe that Gen Z’s interest in academia is rooted in their need for financial stability. Many in the age group believe that a good education will lead to a great job with high pay.
As a marketer, it’s important to keep Gen Z’s budgeting and educational goals in mind. This generation wants to learn new things, is saving for college, and prioritizes investments that better their future. You’ll need to convince them that your product is worth buying – even when they’re putting most of their money into a college fund.
As you create your product promotions or campaigns, consider how your product could help or benefit the experiences of someone planning for college, college students, or young professionals.
If your product isn’t specifically geared toward education, your campaigns could zone in on how it could improve a college or work-life experience.
For example, if you’re marketing furniture, you could create a promotion highlighting products that fit in an apartment or dorm room. Or, if you market a clothing company, you could highlight clothing items that could be worn in a job interview in a blog post on your website.
Aside from creating content that links your product to career interests or academics, you can also lean into Gen Z’s need to learn new things by developing educational content that teaches audiences about your industry.
After viewing your educational content, audiences might want to learn more about your product and develop a stronger trust in your brand. Later, if they’re interested in buying a product related to your brand’s industry, they might consider your brand first.
If you want to leverage educational content, keep the age range of your audience in mind. While younger members of Gen Z might be primarily interested in B2C brand content due to their college or high-school age, Gen Zers entering internships or the workforce might value educational B2B content that can show them how to get ahead in their industry.
How to Market to Gen Z Based on their Spending Habits
Based on the research noted above, Gen Z is less likely to splurge on frivolous products or brand names. As a marketer, hearing about these mounting studies might make you nervous.
But, in the long run, the consumer trend of putting value first shouldn’t scare or shock you. It should motivate you to ask, “How can I provide better value to my customers?“
Although Gen Z might seem more budget-conscious, this doesn’t mean they won’t buy anything from you. Many of your most frugal prospects will still buy, invest in, or splurge on your brand’s offerings if they seem valuable, help them solve pain points, or provide a positive, memorable experience.
Ultimately, bettering your brand, focusing on the customer experience, and promoting positive company reviews will go a long way with Gen Z and all other audiences.
Editor’s Note: This post was originally published in July 2020 and has been updated for comprehensiveness.

Blog SEO: How to Search Engine Optimize Your Blog Content
56% of surveyed consumers have made a purchase from a company after reading their blog and 10% of marketers who use blogging say it generates the biggest return on investment. If you’re writing a blog for a business, those stats make blog SEO a pretty big deal.
Even if you’re blogging just for fun, SEO can help you boost your message and connect with more engaged readers.
![Download Now: How to Start a Successful Blog [Free Guide]](https://no-cache.hubspot.com/cta/default/53/79c9c1d7-e329-46a2-9095-7ebf693a17f9.png)
But what is blog SEO? And how can you optimize your blog for search engines? Get ready for an in-depth exploration into the world of keywords, backlinks, and content optimization.
Start reading, or click a topic below to jump to the section you’re looking for:
What is blog SEO?
Blog SEO is the practice of creating and updating a blog to improve search engine rankings. This approach usually includes keyword research, link building, image optimization, and content writing.
When you optimize your web pages — including your blog posts — you’re making your website more visible to people who are using search engines (like Google) to find your product or service. But does your blog content really help your business organically rank on search engines?
Why does blogging improve search engine optimization?
Google and other search engines use ranking factors to figure out what results come up for each search query. It also decides how to rank those results. Blogging can help you optimize your site for important Google ranking factors like:
Organic Click-Through Rate
Blogging helps you create relevant content for more keywords than other kinds of pages do, which can improve your organic clicks.
For example, a person who clicks on a landing page usually has transactional intent. This means that person is clicking because they’re ready to convert.
But people search online for many different reasons. And a blog has the potential to answer navigational, informational, and transactional search queries. Creating content for more types of search can increase clicks to your pages, which can improve your SEO.
Index Coverage
Google can’t rank a page that it hasn’t indexed. Indexing means a search engine finds content and adds it to its index. Later, the page can be retrieved and displayed in the SERP when a user searches for keywords related to the indexed page.
So, it’s important to create relevant and link-worthy content to encourage Google to crawl your site pages. One way to do this is to constantly add fresh content to your site. A blog gives you a reason to post new content to your site on a regular basis, which encourages more frequent indexing.
Backlinks
When other websites link to pages on your website it shows search engines that your content is useful and authoritative. Backlinks are a sort of peer review system online. If your blog gets backlinks from respected sites, it’s more likely that your website will rank in search results.
Because blog posts are likely to educate or inform users, they tend to attract more quality backlinks.
Internal Links
When you link from one page on your site to another, you’re creating a clear path for users to follow. Internal links can also make it easier for people to find the content on your site they’re looking for. These links also help search engine crawlers figure out the organization of your site.
A blog creates more site pages that you can link to internally. It also gives you a chance to direct site traffic to other pages that can help your users.
For example, say you run a lawn maintenance company and offer lawn mowing services. Someone searching for a lawn mower wouldn’t find your services online because that’s not what they’re looking for (yet).
But say you write blogs about the best lawnmowers, lawn mowing challenges, or pest control for lawns. Those posts make your website easier to find. And if someone looking for lawn mowers decides they want an easier option, they could be a good candidate for your services. You can help them visit other pages on your site through internal links.
These are just a few of the many reasons that blogging is good for SEO. Blogging lets you share useful information with your audience. It can draw new customers and engage current customers. Creating a blog can help you build trust, boost sales and leads, and improve your search engine optimization.
What is blog SEO strategy?
Blog SEO strategy is a comprehensive plan to improve organic search results. This plan might include competitive research, keyword lists, or an optimization proposal.
Search engines make frequent updates. Business goals can change quickly too. But it can take an average of three to six months for a post to rank on Google. Without a strategy, you might find yourself investing in your blog but not seeing a boost in SEO.
A strategy can help you measure whether your ideas and efforts are effective. It can also help you make the most of your team’s time and resources. This post can help you develop your SEO strategy if you’re not sure where to start.
Blog SEO Best Practices
1. Identify the target audience for your blog.
No matter what industry your blog targets, you’ll want to find and speak to the primary audience that will be reading your content. Understanding who your audience is and what you want them to do when they click on your article will help guide your blog strategy.
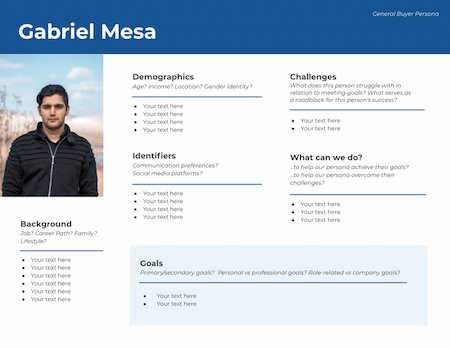
Buyer personas are an effective way to target readers using their buying behaviors, demographics, and psychographics. Without this insight, you could be producing grammatically correct and accurate content that few people will click on because it doesn’t speak to them on a personal level.
2. Conduct keyword research.
Now that you’ve selected your target audience and prepared a buyer persona, it’s time to find out what content your readers want to consume. Keyword research can be a heavy task to take on if you don’t begin with a strategy. Therefore, I recommend starting with the topics your blog will cover, then expand or contract your scope from there. For an in-depth tutorial, check out our how-to guide on keyword research.
3. Add visuals.
Search engines like Google value visuals for certain keywords. Images and videos are among the most common visual elements that appear on the search engine results page.
In order to achieve a coveted spot in an image pack or a video snippet, you’ll want to design creative graphics, use original photos and videos, and add descriptive alt text to every visual element within your blog post.
Alt text is a major factor that determines whether or not your image or video appears in the SERP and how highly it appears. Alt text is also important for screen readers so that visually impaired individuals have a positive experience consuming content on your blog site.
4. Write a catchy title.
The title of your blog post is the first element a reader will see when they come across your article, and it heavily influences whether they’ll click or keep scrolling. A catchy title uses data, asks a question, or leads with curiosity to pique the reader’s interest.
According to Coscheduler’s Headline Analyzer, the elements of a catchy title include power, emotional, uncommon, and common words. In the right proportions, these types of words in a blog title will grab your readers’ attention and keep them on the page.
Here’s an example of a catchy title with a Coschedule Headline Analyzer Score of 87:
The Perfect Dress Has 3 Elements According to This Popular Fashion Expert
- Highlighted in yellow are common words. They’re familiar to the reader and don’t stray too far from other titles that may appear in the SERP.
- “Expert” is an emotional word, according to Coschedule. In this example, the word expert builds trust with the reader and tells them that this article has an authoritative point of view.
- Purple words are power words — this means they capture the readers’ attention and get them curious about the topic.
- Another element in this title is the number three. This signals to the reader that they’ll learn a specific amount of facts about the perfect dress.
5. Include an enticing CTA.
What’s a blog post without a call to action? The purpose of a CTA is to lead your reader to the next step in their journey through your blog. The key to a great CTA is that it’s relevant to the topic of your existing blog post and flows naturally with the rest of the content. Whether you’re selling a product, offering a newsletter subscription, or wanting the reader to consume more of your content, you’ll need an enticing CTA on every blog post you publish.
CTAs come in all types of formats, so get creative and experiment with them. Buttons, hyperlinks, and widgets are some of the most common CTAs, and they all have different purposes. For instance, you should add a bold, visible CTA like a button if you want the reader to make a purchase. On the other hand, you can easily get a reader to check out another blog post by providing a hyperlink to it at the conclusion of the current article.
6. Focus on the reader’s experience.
Any great writer or SEO will tell you that the reader experience is the most important part of a blog post. The reader experience includes several factors like readability, formatting, and page speed. That means you’ll want to write content that’s clear, comprehensive of your topic, and accurate according to the latest data and trends.
Organizing the content using headings and subheadings is important as well because it helps the reader scan the content quickly to find the information they need. Finally, on-page elements like images and videos have an impact on page speed. Keep image file sizes low (250 KB is a good starting point) and limit the number of videos you embed on a single page.
By focusing on what the reader wants to know and organizing the post to achieve that goal, you’ll be on your way to publishing an article optimized for the search engine.
Factors That Affect Blog SEO
Although it’s clear blog content does contribute to your SEO, Google’s many algorithm updates can make publishing the right kind of blog content tricky if you don’t know where to start. Some blog ranking factors have stood the test of time while others are considered “old-school.” Here are a few of the top-ranking factors that can, directly and indirectly, affect blog SEO.
1. Dwell Time
Although dwell time is an indirect ranking factor for Google, it’s a critical factor in the user experience — and we know that user experience is king when it comes to SEO.
Dwell time is the length of time a reader spends on a page on your blog site. From the moment a visitor clicks on your site in the SERP, to the moment they exit the page is considered dwell time.
This metric indirectly tells search engines like Google how valuable your content is to the reader. It makes sense that the longer they spend on the page, the more relevant it is to them.
However, there’s a reason this metric is an indirect indicator for SEO — it’s completely subjective. The search engine algorithms don’t know your content strategy.
Your blog could be focused on short-form content that takes just a minute or two to read. You might also include pertinent information at the beginning of your blog posts to give the best reader experience, which means less time spent on the page.
So yes, dwell time can affect SEO, but don’t manipulate your content to change this metric if it doesn’t make sense for your content strategy. HubSpot allows you to publish quality content with a free blog maker that widens your brand’s reach and grows your audience.
2. Page Speed
We mentioned earlier that visual elements on your blog can affect page speed, but that isn’t the only thing that can move this needle. Unnecessary code and overuse of plugins can also contribute to a sluggish blog site.
Removing junk code can help your pages load faster, thus improving page speed. If you’re not sure how to find and remove junk code, check out HTML-Cleaner. It’s an easy-to-use tool that doesn’t require coding knowledge. It simply shows you the unnecessary code and lets you remove it with the click of a button.
I also recommend taking an inventory of your blog site plugins. Decide which ones you need to keep your blog running day-to-day and which ones were installed as a fix for a temporary issue. Plugins that affect the front end of your site are a threat to page speed, and odds are, you can uninstall more of these plugins than you think to increase your overall site speed.
3. Mobile Responsiveness
More than half of Google’s search traffic in the United States comes from mobile devices. On an individual level, your blog site might follow that same trend. There’s no way around it — optimizing your blog site for mobile is a factor that will affect your SEO metrics.
But what exactly does it mean to optimize a website for mobile? The industry rule of thumb is to keep things simple. Most pre-made site themes these days are already mobile-friendly, so all you’ll need to do is tweak a CTA button here and enlarge a font size there.
Then, keep an eye on how your site is performing on mobile by taking a look at your Google Analytics dashboard and running a mobile site speed test regularly.
4. Index Date
Search engines aim to provide the most relevant and accurate information available. A factor search engines use when determining what’s relevant and accurate is the date a search engine indexes the content.
You might be wondering: Is the date the content was indexed the same as the date it was published?
The answer: yes and no. If a blog post is published for the first time, it’s likely that a Google crawler will index that post the same day you publish it. But content can be backdated for several legitimate reasons, too, like archiving information or updating a sentence or two.
One way to positively affect this SEO factor is to implement a historical optimization strategy. This strategy works well on blogs that have been established for a few years and have a fair amount of content already.
By updating these older posts with new perspectives and data, you’ll be able to significantly impact your blog SEO without creating a lot of net new content. Site crawlers will reindex the page — taking into account the updated content — and give it another opportunity to compete in the SERP. It’s truly a win-win.
5. Recent Data
Recent data, another indirect ranking factor of SEO, should be included in blog posts. Recent data gives visitors relevant and accurate information which makes for a positive reader experience.
When you include a link to a credible site that has original, up-to-date data, you’re telling the search engine that this site is helpful and relevant to your readers (which is a plus for that other site). You’re also telling the search engine that this type of data is in some way related to the content you publish. Over time, your readers will come to appreciate the content which can be confirmed using other metrics like increased time on page or lower bounce rate.
Pro tip: As a rule of thumb, take time to understand what each of these factors does, but don’t try to implement them all at once. They each serve a specific purpose and should be used to meet a specific SEO goal for your blog. Listen to HubSpot’s Matt Barby and Victor Pan take on this topic in this podcast episode.
1. Choose blog topics with keyword research.
Your blog topics should start with your customers’ most important questions and concerns. But if you want those customers to find your content, you need to use the same keywords that they use to find answers. You can find these words with keyword research.
Keyword research can also help you find new topics to write about and grab the interest of new audiences.
As you search for the right keywords for your blog, think about search intent. While some people are searching for your products to use right away, others may be at a different point in the buyer journey. So, it’s a good idea to have a mix of focus keywords.
Keyword tools can help you find and narrow down your list of keywords so that you’re writing the right blogs for your target audience.
2. Write a compelling blog post title.
Writing titles is tough. Many blog writers spend time writing a blog post then quickly add a title when they’re done and hope for the best. But blog titles have a bigger impact than you might think.
First, titles tell your audience what to expect from your post. If your blog title is a smart and catchy question that your post doesn’t answer, you’ll have a lot of unhappy readers.
Next, your blog title is what makes searchers want to read your post. It doesn’t matter how well-written and researched a blog post is if the title doesn’t spark interest.
Title Tag
Finally, titles are essential for blog SEO. This is a place to feature your keywords in an authentic way. Google calls this the “title tag” in a search result.
Be sure to include your keyword within the first 60 characters of your title, which is just about where Google cuts titles off on the SERP. Technically, Google measures by pixel width, not character count. It recently increased the pixel width for organic search results from approximately 500 pixels to 600 pixels, which translates to around 60 characters.
Long title tag? When you have a lengthy headline, it’s a good idea to get your keyword in the beginning since it might get cut off in SERPs toward the end, which can take a toll on your post’s perceived relevance.
In the example below, we had a long title that went over 65 characters, so we placed the keyword near the front.
It’s also important to look at the SERP results for your keyword when you’re writing your post titles. This research will help you understand the most popular results for your keywords. It will also give you a better sense of what searchers are hoping to find when they click on your post.
As you write your blog titles, use words that have emotional appeal. You might want to add numbers or statistics to emphasize a point. Avoid salesy language or your post might seem like spam. These title tips offer more advice for creating great blog titles.
3. Outline your blog post with SEO in mind.
If you’re used to writing blog posts from your imagination with a free flow of ideas, blog SEO might sound like a challenge. But anyone can create great SEO writing with a strong outline.
An outline can help you organize your ideas around your target keywords. It can also give you a space to figure out the best spot to include the features that make a blog post great like:
- Videos
- Statistics
- Quotes
- Internal and external links
The outline is an important creative step where you decide the angle and goal of your blog post. You already have a great post title, so your next step is to outline how your post will cover the topic. You can create a detailed outline or a quick overview, whichever is best for you.
That said, an outline is a great space to write each of your headers. Writing these during your outline can make the process of drafting your blog go more smoothly.
4. Use keywords strategically throughout the blog post.
Now it’s time to incorporate your keywords into your blog post. But where is the best place to include these terms so you rank high in search results?
There are two more essential places where you should try to include your keywords: headers & body and URL.
Headers & Body
Mention your keyword at a normal cadence throughout the body of your post and in the headers. That means including your keywords in your copy, but only in a natural, reader-friendly way. Don’t go overboard at the risk of being penalized for keyword stuffing.
Before you start writing a new blog post, you’ll think about how to incorporate your keywords into your headers and post. That’s a smart idea, but it shouldn’t be your only focus, nor even your primary focus.
Whenever you create content, your primary focus should be on what matters to your audience, not how many times you can include a keyword or keyword phrase in that content.
Focus on being helpful and answering whatever question your customer might’ve asked to arrive on your post. Do that, and you’ll naturally optimize for important keywords, anyway.
URL
Search engines also look at your URL to figure out what your post is about, and it’s one of the first things it’ll crawl on a page.
You have a huge opportunity to optimize your URLs on every post you publish, as every post lives on its unique URL — so make sure you include your one to two keywords in it.
In the example below, we created the URL using the keyword “positioning-statement” because we want to rank for it.
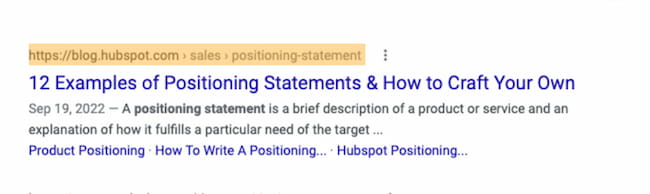
As you write, keep in mind that your copy matters a great deal for click-through rates. This is because it should satisfy your readers’ intent — the more engaging, the better.
5. Make sure your blog post covers your topic completely.
Blog SEO is more than including focus and supporting keywords in your post. You’ll want to make each post as comprehensive as possible to make sure it answers your readers’ questions.
But what does comprehensive mean? For some, it’s a matter of word count. According to HubSpot research, a blog post should be about 2,100-2,400 words long for SEO.
It’s easier for longer content to rank, but not every post needs to be 2000+ words. What’s most important is meeting your users’ needs and expectations with your post.
A few ways to create the best blogs for your audience include:
- Checking out your buyer personas
- Research your topic on and offline
- Talk to customers and experts about your topic
- Stick to your topic as you write
- Write in a consistent voice
- Double-check facts and statistics
This article is a great place to start if you want more tips on how to write a great blog post.
6. Add SEO-optimized images and videos.
Blog posts shouldn’t only contain text — they should also include images and other media that help explain and support your content.
Images make your blog posts more exciting and easy to understand. They help your readers engage, improve recall of important facts, and make your site more accessible. Videos and GIFs are other interesting and useful additions to your blog posts. They make your content more visual, interactive, and memorable.
To use images and other media with SEO in mind, there are a few important things to remember.
File size matters. Too-large images and GIFs can slow down your page speed, which can impact ranking. It’s also important that your image dimensions are consistent for a professional look.
Choose the right kind of content for your brand voice. Funny GIFs are a great choice for some blogs, but if they don’t feel right to your audience they can have a negative impact.
Ideally, your images should make it easier to understand difficult topics or new information. This will boost your SEO and create a better on-page experience. Check out this post for more image SEO tips.
7. Include image alt text.
Search engines don’t simply look for images. Rather, they look for images with image alt text.
You may be wondering why this is. Since search engines can’t “see” images the same way humans can, an image’s alt text tells the search engine what an image is about. This ultimately helps those images rank on the search engine’s images results page.
Image alt text also makes for a better user experience (UX). It displays inside the image container when an image can’t be found or displayed. Technically, alt text is an attribute that can be added to an image tag in HTML.
Here’s what a complete image tag might look like:
<img class="wt-blog__normal-image" src="image.jpg" alt="image-description" title="image tooltip">
When you incorporate image alt text, an image’s name in your blog may go from something like, “IMG23940” to something accurate and descriptive such as “puppies playing in a basket.”

Image alt text should be descriptive in a helpful way — meaning, it should provide the search engine with context to index the image if it’s in a blog article related to a similar topic.
To provide more context, here’s a list of things to be sure you keep in mind when creating alt text for your blog’s images:
- Describe the image
- Leave out “image of… “— start with the image description instead
- Be specific in your description
- Keep it under 125 characters
- Use your keywords (but avoid keyword stuffing)
Pro tip: Think about adding a Chrome extension like Arel=”noopener” target=”_blank” hrefs that allows you to quickly review alt text data for existing images. HubSpot customers can use the SEO Panel. It will recognize whether or not you have optimized your images.
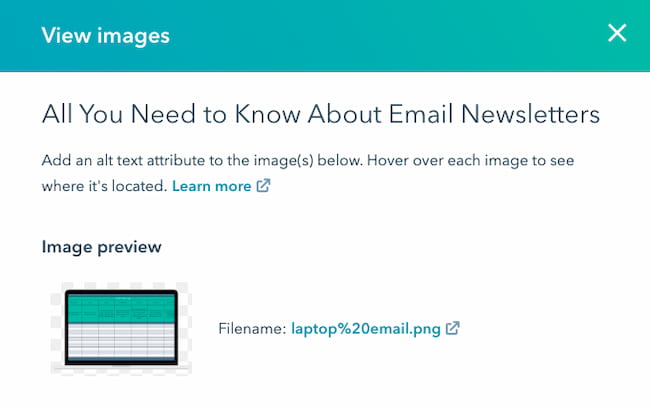
8. Link to related blog posts.
You may have heard that backlinks influence how high your blog site can rank in the SERP, and that’s true — backlinks show how trustworthy your site is based on how many other relevant sites link back to yours. But backlinks aren’t the end-all-be-all to link building. Linking to and from your own blog posts can have a positive impact on how well your blog site ranks, too.
Inbound links to your content help show search engines the validity or relevancy of your content. The same goes for linking internally to other pages on your website. If you’ve written about a topic that’s mentioned in your blog post on another blog post, ebook, or web page, it’s a best practice to link to that page.
(You might’ve noticed that I’ve been doing that from time to time throughout this blog post when I think it’s helpful for our readers.) Not only will internal linking help keep visitors on your website, but it also surfaces your other relevant and authoritative pages to search engines.
For example, if your blog is about fashion, you might cover fabrics as a topic. Adding a hyperlink from a blog post about cotton to a post about the proper way to mix fabrics can help both of those posts become more visible to readers who search these keywords.
The search engines will also have one more entry point to the post about cotton when you hyperlink it in the post about mixing fabrics. This means the post about cotton fabric, and any updates you make to it will be recognized by site crawlers faster. It could even see a boost in the SERP as a result.
HubSpot customers: The SEO Panel automatically suggests linking to other internal resources on your website.
You can think of this as solving for your SEO while also helping your visitors get more information from your content.
9. Optimize the meta description.
A meta description is additional text that appears in SERPs that lets readers know what the link is about. The meta description gives searchers the information they need to determine whether or not your content is what they’re looking for and ultimately helps them decide if they’ll click or not.
The maximum length of this meta description is greater than it once was — now around 300 characters — suggesting it wants to give readers more insight into what each result will give them.
So, in addition to being reader-friendly (compelling and relevant), your meta description should include the long-tail keyword for which you are trying to rank.
In the following example, I searched for “email newsletter examples.”
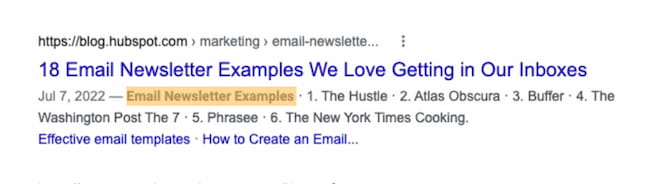
The term is bolded in the meta description, helping readers make the connection between the intent of their search term and this result.
In this example I searched for the term “HTML space.”
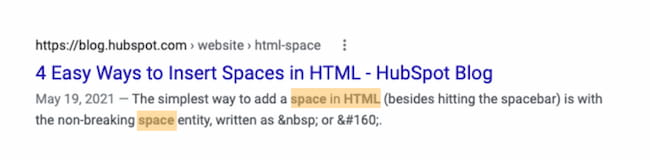
You see the terms “space” and “HTML” bolded, indicating that Google knows there’s a semantic connection between “HTML space” and the words “space” and “HTML” in the meta description.
Note: Nowadays, it’s not guaranteed that your meta description is always pulled into SERPs as it once was. As you can see in the above image, Google pulls in other parts of your blog post that includes the keywords searched, presumably to give searchers optimal context around how the result matches their specific query.
Let me show you another example. Below are two different search queries delivering two different snippets of text on Google SERPs. The first is a result of the query “no index no follow,” and it pulls in an explanation of the term “noindex.”:
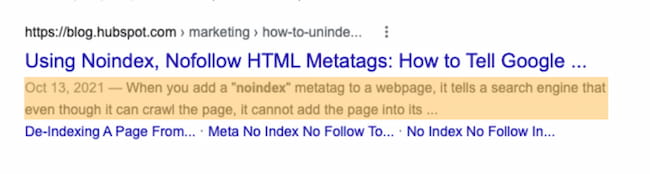
The second is a result of the query “noindex nofollow,” and pulls in the first instance of these specific keywords coming up in the body of the blog post:
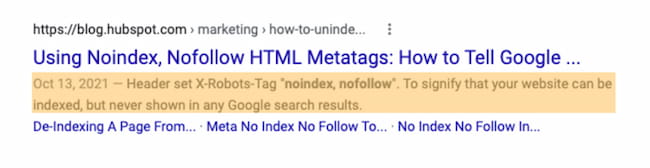
While there’s not much you can do to influence what text gets pulled in, you should continue to optimize this metadata, as well as your post, so search engines display the best content from the article. By creating reader-friendly content with natural keyword inclusion, you’ll make it easier for Google to prove your post’s relevancy in SERPs for you.
10. Review metrics regularly.
Google’s free Search Console contains reports that help you understand how users search for and discover your content. These reports help you analyze clicks from Google Search — it’s useful to determine which keywords people are using to find your blog content.
You can learn how to use Google Search Console by checking out Google’s performance reports page.
If you’re interested in optimizing your best-performing older blog posts for traffic and leads like we’ve been doing since 2015, this tool can help you find low-hanging fruit.
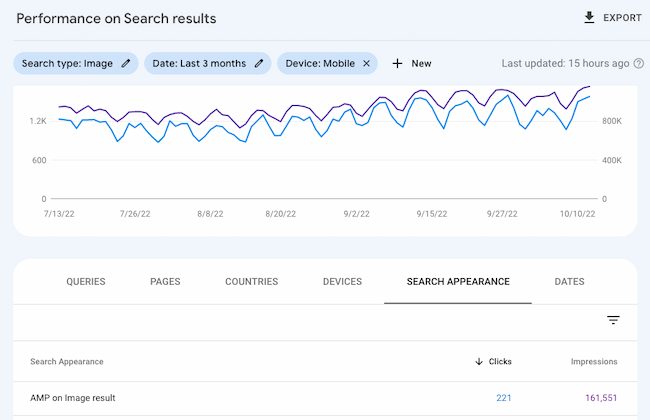
Remember, many content marketers struggle with optimizing their blog posts for search. The truth is, your blog posts won’t start ranking immediately. It takes time to build up search authority.
But, when you publish blog posts frequently and consistently optimize them for search while maintaining an intent-based reader experience, you’ll reap the rewards in the form of traffic and leads long-term.
Now, let’s take a look at these blog SEO tips that you can take advantage of to enhance your content’s searchability.
Note: This list doesn’t cover every SEO rule under the sun. Rather, the following tips are the on-page factors to get you started with an SEO strategy for your blog.
1. Use 1–2 long-tail keywords.
Optimizing your blog posts for keywords isn’t about incorporating as many keywords into your posts as possible. Nowadays, this actually hurts your SEO because search engines consider this keyword stuffing (as in, including keywords as much as possible with the sole purpose of ranking highly in organic search).
It also doesn’t make for a good reader experience — a ranking factor that search engines now prioritize to ensure you’re answering the intent of your visitors. Therefore, you should use keywords in your content in a way that doesn’t feel unnatural or forced.
A good rule of thumb is to focus on one or two long-tail keywords per blog post. While you can use more than one keyword in a single post, keep the focus of the post narrow enough to allow you to spend time optimizing for just one or two keywords.
You may be wondering: Why long-tail keywords?
These longer, often question-based keywords keep your post focused on the specific goals of your audience. For example, the long-tail keyword “how to write a blog post” is much more impactful in terms of SEO than the short keyword “blog post”.
Website visitors searching long-tail keywords are more likely to read the whole post and then seek more information from you. In other words, they’ll help you generate the right type of traffic — visitors who convert.
2. Create SEO personas.
Most businesses have buyer personas, but you can make your blog even more searchable and relevant with SEO personas.
This strategy isn’t just for boosting SEO visibility. It can help you focus your time and resources on the traffic that can boost your business. This is a data-driven strategy that can help you understand the keyword themes and search habits of your target audience.
Once you understand these details, it will be easier to choose which topics to prioritize in your blog SEO strategy. As you create your SEO personas, you’ll want to answer questions like:
- How does your target audience use social media?
- How do your ideal users respond to paid advertising?
- Do they take part in groups, forums, or message boards online?
These details can help you understand how your users search and what types of content they’ll respond to online. This can help you boost traffic, leads, and conversions while also optimizing for SEO.
This presentation from Rory Hope at INBOUND 22 shares how you can use your social media data to create SEO personas for your blog.
3. Consider mobile devices.
We learned earlier that more people use search engines from their mobile phones than from a computer. According to HubSpot Research, 64% of SEO marketers say that mobile optimization is an effective investment.
And for all those valuable queries on mobile devices, Google displays the mobile-friendly results first. This is yet another example of Google heavily favoring mobile-friendly websites — which has been true ever since the company updated its algorithm in April 2015.
(HubSpot customers: Breathe easy. All content created on HubSpot’s platform is automatically responsive to mobile devices.)
So, how do you keep your blog mobile-friendly? By using responsive design. Websites that are responsive to mobile allow blog pages to have just one URL instead of two — one for desktop and one for mobile, respectively. This helps your post’s SEO because any inbound links that come back to your site won’t be divided between the separate URLs.
As a result, you’ll centralize the SEO power you gain from these links, helping Google more easily recognize your post’s value and rank it accordingly.
Pro tip: What search engines value is constantly changing. Be sure you’re keeping on top of these changes by subscribing to Google’s official blog.
4. Make the most of the SEO tools and features in your CMS.
The right CMS can help you improve blog SEO. Whether you’re building a new blog post or updating site pages, the more built-in features you have the easier it will be to optimize for SEO.
SEO is complex, so the features you’ll need will depend on your level of expertise and how often you post to your blog.
For example, the HubSpot CMS has robust SEO features that can help you build or optimize your blog. If your site already has a lot of blog posts, a tool that can scan live pages for recommendations is a must-have. If you’re just starting to blog, alt text popup prompts could be more useful for you.
Another challenge bloggers struggle with is finding post topics. The HubSpot SEO tool can give you suggestions with competition, popularity, and relevance in mind. It also gives you access to monthly search keyword data. This can help you understand how specific topics can increase your organic traffic. This tool offers detailed reports so you can track your results and update your SEO strategy quickly.
CMS integrations are also important. For example, HubSpot’s page publishing tools connect to Google Search Console. This makes it easy for you to see your top search queries, impressions, click-through rate, and more for every page on your site.
5. Focus on readability.
One of the most common beginner blog mistakes is assuming that the people who land on your blog will read it thoroughly. Instead, most readers are looking for a quick answer to a question. When they find your post, their goal is to find what they’re looking for.
Readable content is easy to consume and quick to skim. It’s also a delight to read — offering clear answers and a logical path from question to answer. Readability improves the chances that your readers will engage with your content. It helps you make sure that they’ll look to your blog as an authority in your industry.
Besides improving the user experience on your blog, readability impacts SEO by making it easier for Google to crawl your posts. It also increases the potential that users will find your blog with voice searches.
There are many ways that you can improve readability. Vocabulary choices, sentence and paragraph length, and the structure of your blog posts can all make your posts more readable. A few strategies to improve readability include:
- Use short and simple words
- Write short sentences
- Limit jargon, adjectives, and adverbs
Tools like Hemingway Editor offer a score that can help you understand how easy your copy is to read and how to improve it.
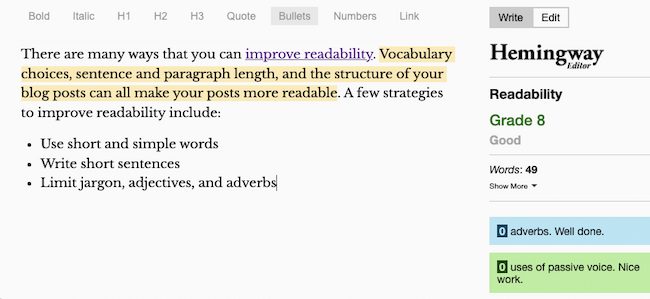
You can also make your blogs easier to consume by adding useful images and videos or choosing colors and fonts that are easy on the eyes.
6. Limit topic tags.
Topic tags can help organize your blog content, but if you overuse them, they can actually be harmful. If you have too many similar tags, you may get penalized by search engines for having duplicate content.
Think of it this way, when you create a topic tag (which is simple if you’re a HubSpot user, as seen here), you also create a new site page where the content from those topic tags will appear.
If you use too many similar tags for the same content, it appears to search engines as if you’re showing the content multiple times throughout your website. For example, topic tags like “blogging,” “blog,” and “blog posts” are too similar to one another to be used on the same post.
If you’re worried that your current blog posts have too many similar tags, take some time to clean them up. Choose about 15–25 topic tags that you think are important to your blog and that aren’t too similar to one another. Then only tag your posts with those keywords. That way, you won’t have to worry about duplicate content.
Here at HubSpot, we use a Search Insights Report to map specific MSV-driven keyword ideas to a content topic each quarter. The process helps us target a handful of posts in a set number of topics throughout the year for a systematic approach to SEO and content creation.
7. Create user-friendly URLs.
Before you publish your blog post, take a careful look at its URL structure. Is it long, filled with stop-words, or unrelated to the post’s topic? If so, you might want to rewrite it before it goes live.
The URL structure of your web pages (which are different from the specific URLs of your posts) should make it easy for your visitors to understand the structure of your website and the content they’re about to see. Search engines favor web page URLs that make it easier for them and website visitors to understand the content on the page.
This differentiation is baked into the HubSpot blogs’ respective URL structures. If I decided to go to the Marketing section from this main page, I would be taken to the URL http://blog.hubspot.com/marketing.
If we want to read the Sales section, all we have to do is change where it says “marketing” in the URL to “sales”:
http://blog.hubspot.com/sales.
This URL structure helps me understand that “/marketing” and “/sales” are smaller sections — called subdirectories — within the larger blog.
What if there’s a specific article we want to read, such as “How to Do Keyword Research: A Beginner’s Guide”?
Its URL structure — http://blog.hubspot.com/marketing/how-to-do-keyword-research-ht — denotes that it’s an article from the Marketing section of the blog.
In this way, URL structure acts as a categorization system for readers, letting them know where they are on the website and how to access new site pages. Search engines appreciate this, as it makes it easier for them to identify exactly what information searchers will access on different parts of your blog or website.
Pro tip: Don’t change your blog post URL after it’s been published — that’s the easiest way to press the metaphorical “reset” button on your SEO efforts for that post. If your URL is less descriptive than you’d like or it no longer follows your brand or style guidelines, your best bet is to leave it as is. Instead, change the title of the post using the guidelines we covered earlier.
8. Organize by topic cluster.
The way most blogs are currently structured (including our own blogs, until very recently), bloggers and SEOs have worked to create individual blog posts that rank for specific keywords.
This makes things unorganized and difficult for blog visitors to find the exact information they need. It also results in your URLs competing against one another in search engine rankings when you produce multiple blog posts about similar topics.
Here’s what our blog architecture used to look like using this old playbook:
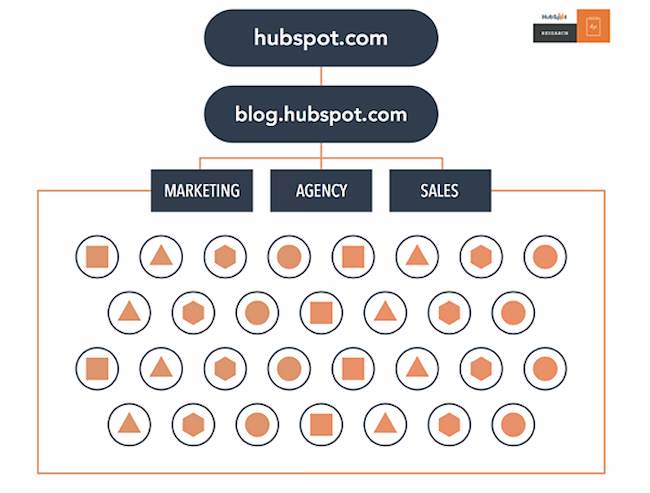
Now, to rank in search and best answer the new types of queries searchers are submitting, the solution is the topic cluster model.
For this model to work, choose the broad topics for which you want to rank. Then, create content based on specific keywords related to that topic that all link to each other to establish broader search engine authority.
This is what our blog infrastructure looks like now, with the topic cluster model. Specific topics are surrounded by blog posts related to the greater topic, connected to other URLs in the cluster with hyperlinks:
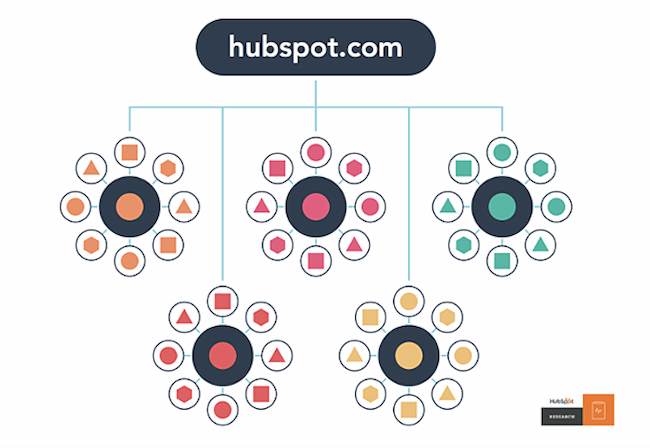
This model uses a more deliberate site architecture to organize and link URLs together to help more pages on your site rank in Google — and to help searchers find information on your site more easily. This architecture consists of three components — pillar content, cluster content, and hyperlinks:
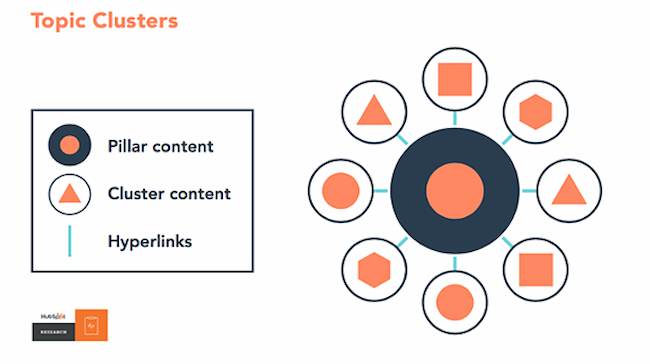
We know this is a fairly new concept, so for more details, check out our research on the topic or take our SEO training.
9. Optimize for SERP features.
There are more than just organic page results on Google. Instead, each search engine results page (SERP) includes a range of different features to help users find what they’re looking for. For example, the People also ask feature highlights questions that relate to the users’ initial search request, like in the example below:
There are many different types of SERP features. Other popular SERP features include:
- Featured snippets: These often appear at the top of search results pages. They usually highlight a section from within a blog post to answer a specific search request.
- Image packs: This is a group of images from blog posts or websites that match a search request.
- Local pack: These highlight local answers to search requests.
- Things to know: This feature usually appears on broad searches. It highlights other information that could help the user refine their search.
- Review snippets: This rich snippet is an excerpt of a specific review, and may include information from a range of reviewers.
- Recipe snippets: This is a group of recipes from blog posts or websites that match a search request.
There are a few ways that you can improve your chances of getting SERP features to improve SEO for your blog.
First, write clear, well-structured, and useful content that responds to keywords in your niche. Be sure to answer specific questions within each post that relate to your blog topic.
Next, take a look at competitor examples for tips and ideas. It’s also a good idea to optimize your images and videos with alt text to improve their chances of appearing for relevant searches.
Finally, learn about structured data and apply it to the formatting of your blog posts. For example, these instructions from Google outline how to format a recipe with structured data.
This HubSpot Academy lesson can help you with rich SERP results. Or listen to this podcast to learn how to win featured snippets:
10. Publish evergreen content.
When planning and writing your blog articles, make sure it’s evergreen content. Meaning, the content is about topics that will remain relevant and valuable over a long period of time (with only minor changes or updates). Let’s look at a few reasons why evergreen content is so important:
- It’ll help you rank over time, not just in the near future.
- It contributes to steady amounts of traffic coming to your blog (and website) long after it’s been published.
- It’ll help you generate leads over time as a result of the traffic it continually generates.
All blog content — whether it’s a long-form article, how-to guide, FAQ, tutorial, and so on — should be evergreen. Even the images you use in these posts should be evergreen. Check out this blog post for some examples of and ideas for evergreen content on your blog.
11. Update existing content.
To improve your SEO, you may assume you need to create new blog content. Although that’s partially true, you should also focus a great deal of your time and energy on your existing blog content. Specifically, repurposing and updating your current content, as well as removing your outdated content.
This is because it takes a lot longer for a completely new piece of content to settle on the search engine results page (SERP) and gain authority, whereas you could update a piece of content and reap the benefits fairly immediately in comparison.
Not only will your updated content rank on the SERP faster, improving your number of visitors and leads, it also takes a lot less time and fewer resources to update an existing piece of content rather than create a brand new article.
Additionally, updating and repurposing some of your most successful pieces of content extends its lifespan so you can achieve the best results over a longer period of time (especially if it’s evergreen content).
The final step entails removing outdated content that’s no longer relevant to your audience. Although your goal is to ensure your content is evergreen, some of it is bound to become outdated over time. This includes statistics, product information (if you have any listed in your blogs — as your products and business evolve), or information that changes across your industry over time.
If you want even more SEO tips, check out these resources:
Create Blog Content Your Readers (and Search Engines) Will Love
We don’t expect you to incorporate each of these SEO best practices into your content strategy right away. But, as your website grows, so should your goals on search engines. Once you figure out the goals and intent of your ideal readers, you’ll be on track to deliver relevant content that will climb the ranks of the SERP.
Editor’s note: This post was originally published in September 2019 and has been updated for comprehensiveness.

The Ultimate List: 49 Online Local Business Directories
Promoting a local business isn’t easy these days. Whether it’s because of oversaturation or complicated search engine algorithms, it’s all too easy to feel like no one will find your business in the local search results.
Luckily, using business directory websites is an easy way to improve your local SEO. All you have to do is list your business in online business directories such as Yellow Pages, Manta, and more. This is called building citations, and it’s a critical piece of a local marketing strategy.
![→ Download Now: SEO Starter Pack [Free Kit]](https://no-cache.hubspot.com/cta/default/53/1d7211ac-7b1b-4405-b940-54b8acedb26e.png)
Today, Google is inserting itself between consumer and local business websites much more often. For proof, you need to look no further than Google My Business, Accelerated Mobile Pages (AMP), featured snippets, and most importantly, local packs.
By building citations, you can make sure that you appear in these local packs when people look for businesses like yours in their area. Business directories may seem like a thing of the past, but they’re a great way to grow your presence online.
You can improve visibility by listing your local business’ NAP (Name, Address, Phone Number) on directories, online business listing sites, and citation sites. Aside from improving your local SEO, these can also improve your rankings on search engines because the listings usually link back to your site.
Make sure your company listing has the following information once you add it to a directory:
- Consistent NAP. If you add or update your business on multiple business listing sites, make sure you’re providing the same company information across each directory.
- A link to your website. Backlinks — also known as inbound links — are crucial to your company website’s Domain Rating. Consider adding a tracking link at the end of this URL as well, so you can see how much traffic your website specifically gets from the business directories that are linking to it.
- A company description. Make sure you have a detailed description of your business that reflects your organization’s mission, culture, and values.
- Multimedia. Give company searchers a visual taste of your business with a picture or video of your office, your employees, or your daily business operations.
There are plenty of location-specific and industry-specific business listing sites where you can submit your data. To start promoting your local business, however, you should start with the big sites and work your way toward the more niche directories.
First, let’s go over the top free business directories.
Online Directories for Local Businesses
When it comes to listing your business online, you aren’t limited to just using the free sites above. We’ve compiled the best directories on the web to list your business.
- Google My Business (Domain Rating = 98)
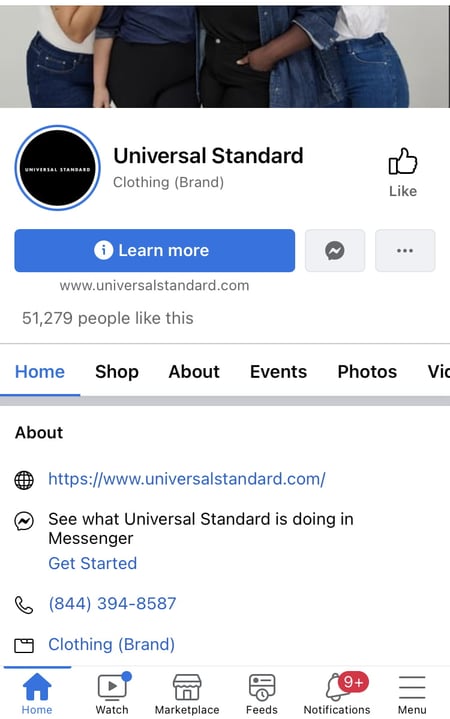
- Facebook Pages (Domain Rating = 100)
- Instagram for Business (Domain Rating = 99)
- LinkedIn Company Directory (Domain Rating = 98)
- Apple Maps (Domain Rating = 97)
- Yelp (Domain Rating = 95)
- Bing (Domain Rating = 93)
- HubSpot’s Solutions Directory (Domain Rating = 93)
- Better Business Bureau (Domain Rating = 93)
- MapQuest (Domain Rating = 91)
- Foursquare (Domain Rating = 91)
- Angi, FKA Angie’s List ( Domain Rating = 91)
- Thumbtack (Domain Rating = 90)
- Yellow Pages (Domain Rating = 90)
- Nextdoor (Domain Rating = 89)
- Manta (Domain Rating = 87)
- Merchant Circle (Domain Rating = 85)
- YellowBook.com (Domain Rating = 81)
- ChamberofCommerce.com (Domain Rating = 81)
- Dun & Bradstreet Business Directory (Domain Rating = 79)
- Brownbook.net (Domain Rating = 79)
- Local.com (Domain Rating = 78)
- Turbify (Domain Rating = 78)
- EZlocal (Domain Rating = 77)
- eLocal.com (Domain Rating = 77)
- EBusinessPages (Domain Rating = 76)
- City Squares (Domain Rating = 75)
- BOTW (Domain Rating = 74)
- iBegin (Domain Rating = 73)
- Neustar Localeze (Domain Rating = 73)
- Spoke (Domain Rating = 73)
- GoLocal247 (Domain Rating = 73)
- Call Up Contact (Domain Rating = 73)
- n49.com (Domain Rating = 73)
- Cybo (Domain Rating = 73)
- Just Landed (Domain Rating = 72)
- Tuugo.us (Domain Rating = 72)
- Lacartes (Domain Rating = 72)
- City Local Pro (Domain Rating = 72)
- Yellow.Place (Domain Rating – 72)
- Hub.biz (Domain Rating = 72)
- Cylex US (Domain Rating = 72)
- Fyple.com (Domain Rating = 68)
- Opendi.us (Domain Rating = 67)
- ExpressBusinessDirectory.com (Domain Rating = 66)
- My Huckleberry (Domain Rating = 65)
- Bizhwy.com (Domain Rating = 65)
- USdirectory.com (Domain Rating = 58)
- Finduslocal.com (Domain Rating = 56)
Methodology
We used a few parameters to decide which directories would make it onto the list.
Domain Rating
Domain rating is a score that’s given to websites to reflect how well they rank on Google based on their backlink profile. The minimum score is 0 and the maximum score is 100. Domain rating is similar, but not the same as, domain authority.
Our minimum required domain rating for the directories on this list was 50. We gathered the data from Ahrefs in November 2022.
Category
We compiled this list for use by any business. Regardless of your industry or target market, you can submit your business to all of the above directories.
To make it onto this list, the directory had to be categorized as General. The only exception is HubSpot’s solution directory, which is categorized as Marketing/Advertising.
Add Your Local Business to Online Directories
Making sure that you have a presence where your potential customers might find you is critical to any local marketing plan. It’s critical to build citations not only for the added visibility but for the SEO benefits, too. Add your local business to some of these business listings and directories today — and watch your business and customer base grow.
Editor’s note: This post was originally published in March 2013 and has been updated for comprehensiveness.


Product Launch Checklist: How to Launch a Product, According to HubSpot’s Experts
Like a tree falling in the woods, if you plan a product launch without spreading the word — will anyone use it? Will anyone even want it?
Probably not. Whether you’re launching something huge, something small, or you’re updating a current offering, you’ll want to start your preparation well in advance of the launch date with a product launch checklist.
Because there are so many moving parts in this process, bringing your product to market can be intimidating and tricky. To help you, we’ve come up with a step-by-step checklist for a successful product launch and gathered the best product launch tips from a HubSpot Product Marketer.
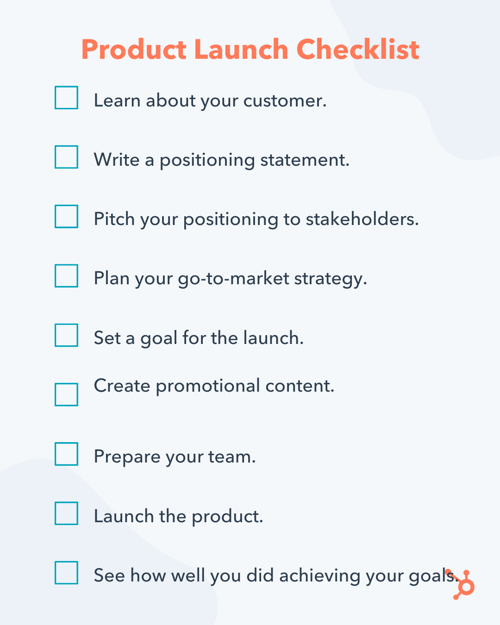
1. Learn about your customer.
Whether you call it “market research,” or “customer development” it’s key to learn about what drives your customer. Identifying their goals, motivations, and pain points could lead you to developing and marketing a valuable solution.
You don’t need to perform years of intense research to learn about your customer. In fact, we suggest just talking to 12 to 15 current or prospective customers.
When speaking to them, pay extra attention when they start sentences with “I wish a product did this function…” or “Why can’t products do this?” When they give these statements, respond with questions that go deeper, like “Can you get more specific about that?” If they don’t bring up any pain points, ask them a few specific questions that will encourage them to give deeper answers.
These conversations will give you a solid idea of what their biggest pain points are and how you can market a solution to them. Once you learn these key details about your customers, you can develop a buyer persona that your team can focus on serving.
2. Write a positioning statement.
Write out a statement that can clearly and concisely answer these three questions:
- Who is the product for?
- What does the product do?
- Why is it different from other products out there?
If you’d like to go even deeper, create a statement that answers the following questions:
- What is your target audience?
- What segment of the target audience is most likely to buy the product?
- What brand name will you give your product or service?
- What product or service category does your product lie in?
- How is it different from competitors in the same category?
- What evidence or proof do you have to prove that your product is different?
Still need more guidance on how to write a positioning statement? Check out this template.
3. Pitch your positioning to stakeholders.
Once you’ve established your position statement, present it to stakeholders in your company so they are all on the same page.
If your employees have a hard time buying into the product, your customers might as well. If your team loves it, that might be a great sign that the product launch will go well.
4. Plan your go-to-market strategy.
This is the strategy that you will use to launch and promote your product. While some businesses prefer to build a funnel strategy, others prefer the flywheel approach.
Regardless of which method you choose, this process contains many moving parts. To create an organized strategy for launching your product, it can be helpful to use a template, like this one.
As you create the strategy, also start considering which type of content you’ll use to attract a prospective customer’s attention during the awareness, consideration, and purchase decision stage. You’ll need to produce this content in the next step.
5. Set a goal for the launch.
Before you get started on implementing your strategy, make sure you write down your goals for the launch.
Alex Girard, a Product Marketing Manager at HubSpot, says, “Create specific goals for the launch’s success. Keeping these goals in mind will help you focus your efforts on launch tactics that will help you achieve those goals.”
For example, the goals of your product launch could be to effectively establish a new product name, build awareness, or create sales opportunities.
One of the best ways to set goals for your launch team is to write them out like SMART goals. A SMART goal is Specific, Measurable, Attainable, Relevant, and Time-bound.
6. Create promotional content.
After planning out your go-to-market strategy and writing your SMART goals, start producing content that will support and align with those promotional efforts. This can include blog posts related to your product or industry, demos and tutorials, and landing pages.
Our go-to-market template will also help you determine which content you should create for each phase of your prospective customer’s buyer’s journey.
7. Prepare your team.
Be sure that your company and key stakeholders are ready for you to launch and begin marketing the product. Communicate with the company through internal presentations, Slack, or email to keep your company updated on your launch plan.
8. Launch the product
Once you’ve completed all the above steps, you can launch the product.
9. See how well you did in achieving your goals.
After you launch your product, track how the go-to-market strategy is performing. Be prepared to pivot or adjust aspects of your plan if they aren’t going smoothly.
Additionally, don’t forget about the goals you set before the launch. See how well you did in achieving those goals. If the launch didn’t meet expectations, you can rethink your go-to-market strategy and adjust from there.
The cost of launching a new product varies significantly. For instance, an entrepreneur will see vastly different costs for launching a product on Amazon than an enterprise company might see for launching a product in a million-dollar market.
Let’s consider two examples to explore this more closely.
In the first example, let’s say you’re an entrepreneur who has invented a design app you’re hoping to sell online. You might conduct market research to determine which marketing strategies work best for your goals, which messaging resonates best with your audience, and which design elements appeal to your desired prospects. If you use a few focus groups to determine these answers, you might expect to spend roughly $5,000.
When you’re bringing a new app to the market, you’ll need to choose the best go-to marketing strategy for your needs. Regardless of the strategy you choose, they all cost money. For instance, product branding could cost roughly $1,000 if you’re paying a designer to help you out, and website design could cost anywhere from $500-$3,000 if you’re paying a web designer a one-off fee.
These fees don’t include the cost you need to pay yourself and any employees if this is a full-time job. It also doesn’t include the costs of hiring an engineer to update the app’s features and ensure the app is running smoothly.
With this simplified example, you’re looking at roughly $8,000. Of course, you can cut some costs if you choose to do any of these tasks yourself, but you might risk creating a subpar customer experience.
On the other end of the spectrum, let’s consider a large enterprise company that is launching a new product. Here, you’ll likely pay upwards of $30,000 – $50,000 for market research.
Perhaps you’ll spend $15,000 on brand positioning and the marketing materials necessary to differentiate yourself against competitors, and you might pay upwards of $30,000 for all the product design and brand packaging. Finally, your marketing team could need a budget of roughly $20,000 for SEO, paid advertising, social, content creation, etc.
All said and done, launching a product against other enterprise competitors’ could cost roughly $125,000. Again, that doesn’t include the costs you’ll pay your marketing, product development, and engineering teams.
How to Launch a Product Online
To launch your product online, you’ll want to ensure you’ve followed the steps above. However, there are a few additional steps you’ll want to follow to gain traction primarily online.
1. Figure out the story you want to tell regarding your product’s bigger purpose.
What story do you want to tell across social platforms, landing pages, and email? This is similar to your positioning statement but needs to be geared entirely toward your target audience. Ask questions like, Why should they purchase your product? And How will your product or service make their lives better?
Communicating cross-functionally ensures the communication materials you use across various online channels align — which is key when it comes to establishing a new product in the marketplace.
Consider, for instance, how Living Proof announced its new product, Advanced Clean Dry Shampoo, on its Instagram page. The story revolves around a simple nuisance common with most other dry shampoos — How consumers still want that just-washed feeling, even when using a dry shampoo.
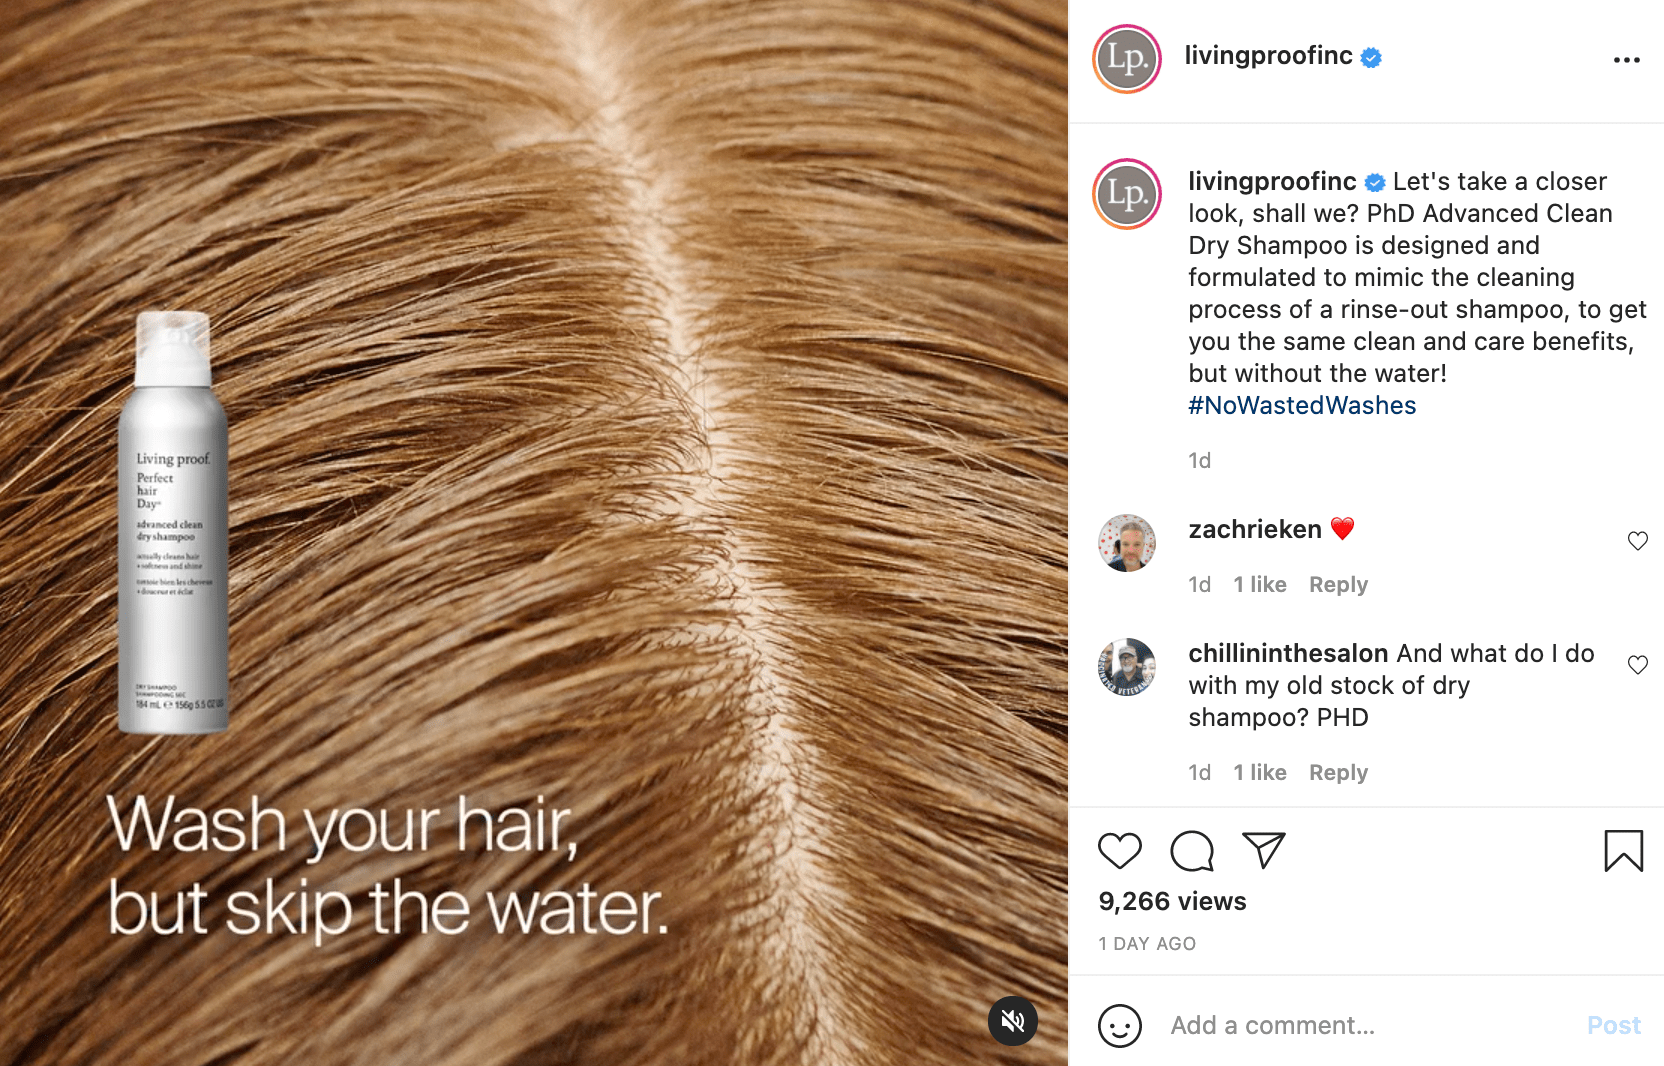
By focusing on how the product will benefit consumers through storytelling, and using a new hashtag #NoWastedWashes, Living Proof builds excitement and demand for its new product.
2. Display customer testimonials, case studies, and other social evidence to positively frame your new product.
Consumers want to see that other consumers have already taken the risk and purchased your new product before doing it themselves. This is where social proof comes into play.
In the weeks leading up to a product launch, or shortly after it’s launch, begin posting customer testimonials, reviews, and case studies to showcase how your new product has already helped other people. Take this a step further and employ influencers to share the word about your product as well, if it’s a good fit for your brand.
Consumers are smart enough to know they shouldn’t trust every advertisement they see — but they can trust fellow consumers. So leverage that trust through social proof methods.
3. Create a social and email campaign.
Create a full, comprehensive social media campaign to increase interest and awareness of your new product.
Use paid advertising to reach new audiences, create full product explainer videos to use across your social channels, and use email to reach existing customers and provide an exclusive, first look at your new product’s features.
Additionally, you might consider hosting a live stream to connect directly with prospects and existing customers and invite experts from your product development team to explain the new features of your product.
It’s important to note — in this stage, you’ll want to pay attention to how consumers are interacting with the communication materials regarding your new product. Share concerns and feedback with the product development team — it’s important to trust your consumers and use their feedback to strengthen your product.
4. Have a pre-order option.
If a consumer is excited to purchase your new product, don’t make them wait — provide an option to pre-order the product or service before it’s even available. This helps spread out demand while enabling consumers to purchase the product whenever they’re feeling most inclined to do so.
Product Launch Best Practices by Industry
1. How to Launch a Digital Product
When launching a digital product, you’ll want to begin building anticipation with a strong content marketing strategy. Use blog posts, email marketing, social media, and other channels of distribution to increase interest and demand for your digital product.
You’ll also want to ensure you’re leveraging lead generation strategies to reach existing customers and prospects.
For instance, let’s say you’re launching an online course on SEO. In the weeks leading up to the launch, you might create SEO-related blog content to send to your email subscribers with an option to join the SEO course’s waitlist. This helps you gauge the effectiveness of your marketing materials while reaching an audience that has already demonstrated interest in your brand.
How to Launch a Product on Amazon
Anyone who’s ever shopped on Amazon knows the importance of a good product listing. In the weeks leading up to launch, take the time to create a strong, high-converting product listing — including taking high-resolution photos of your product, writing a description that outlines your product’s differentiating features, and using keywords to help your product rank on Amazon.
Additionally, product reviews are incredibly important on Amazon, so you’ll want to ensure you have reviews ready to go before you even launch your product on Amazon. To do this, ensure you’ve either launched your product on your own website first (which gives you time to earn reviews before launching on Amazon), or send your product to a select group of interested buyers ahead of the full launch, and collect reviews from them.
Finally, ensure you’re ready for an Amazon product launch by checking inventory. You never know how quickly your product might gain traction on the eCommerce superstore, so make sure you have enough products to fulfill Amazon orders quickly.
Take a look at HubSpot’s The Ultimate Guide to Selling on Amazon for more information related to Amazon.
How to Launch a SaaS Product
To launch a SaaS product, you’ll want to start by researching competitors and understanding the marketplace at large. There’s plenty of demand for SaaS products, as the industry is expected to grow by more than 16% by 2026. However, the SaaS industry is also well-saturated, so before launching a SaaS product, you’ll want to determine how your product differs from all the others in the industry.
To create a successful product launch, you’ll want to conduct market research and focus groups to determine the true benefits and differentiators of your product.
Next, you’ll want to employ a strong content marketing strategy to increase your website’s visibility on search engines and to ensure your business is appearing in search results for topics related to your product.
Since you aren’t launching a physical product, your marketing efforts need to convince businesses that your product can solve their needs. For instance, take a look at how HubSpot positioned the new Operations Hub product.
Additionally, you might want to offer free trials or a freemium option for smaller businesses on lower budgets to test out your offerings before committing.
For a full SaaS rundown, take a look at HubSpot’s Ultimate Guide to Software as a Service (SaaS).
How to Launch a Food Product
To launch a food product, you’ll first need to ensure you’re prepared for the costs required to do so — including how much it costs to package and store the product (including packaging, warehousing, and distribution), and how much it costs to sell the product (including branding and digital marketing).
Next, you’ll want to follow federal and state food regulations. For instance, you need to ensure you’re following health department rules for food preparation surfaces, refrigeration, and sanitation.
You’ll also need to make sure the labeling you use on your product’s packaging is accurate, which requires you to send your food product to a lab for analysis and check with your state commerce to see what it requires when it comes to nutrition labels.
When launching a food product, you’ll likely want to hire a food broker. A food broker can foster relationships with national or local grocery stores and will create a promotional plan to help increase sales as soon as your food hits the shelves.
Typically, a supermarket will test out your product for a few months before determining if there’s enough consumer interest to keep it stocked — which is why a food broker can be incredibly useful for using business intelligence and industry knowledge to ensure a successful food product launch.
Product Launch Tips
To learn the best practices for a successful product launch, I talked to Alex Girard again.
The HubSpot Product Marketing Manager said he had three main tips for a successful product launch:
- Your product positioning should reflect a shift you’re seeing in the world, and how your product helps your customers take advantage of that shift.
- Create a recurring schedule for you and the core stakeholders for the launch to check in and ensure you’re all on the same page.
- Make sure you keep the product team in the loop on your marketing plans. The product team could have insights that inform your overall marketing campaign.
However, sometimes, external factors might impact your ability to launch a product. When that happens, you might need to delay your launch.
How to Know When to Delay a Product Launch
To understand when, and why, you might hold off on a product launch, Girard told me there are three key reasons why you might want to delay a product launch, including:
- When your product itself isn’t ready and you need to change your timeline to create the best customer experience possible.
- If a situation occurs where your current customers are having a less-than-optimal experience with one of your current products. Before launching and promoting a new product, you should make sure your current customers are satisfied with your existing product offering.
- If something occurs on an international, national, state, or local level that requires your audience to readjust their priorities and shift focus away from your company and its product launch. Make sure that when the time comes to launch, your target audience is ready to learn about your new product.
If you’re looking for templates to coordinate your team efforts and align your company around your new product’s messaging, download our free product marketing kit below.
Editor’s note: This post was originally published in November 2015 and has been updated for comprehensiveness.

15 Productivity Hacks for a Successful 2023
One of my biggest challenges with working from home is staying focused and completing every task on time. After all, home is where my TV, phone, kitchen, and cats are — it’s not exactly set up with productivity in mind. However, that doesn’t mean it’s impossible to get things done. Fortunately, there are many practical, productive tips to help anyone reach their goals, whether they work from home or in an office.
Here are 15 productivity hacks to keep you focused so you can achieve your goals.
- Eat breakfast every day.
- Exercise in the morning.
- Take time to free-write.
- Plan the day ahead of time.
- Take regular breaks.
- Set a single goal for the day.
- Don’t be afraid to say ‘No.’
- Wake up early.
- Schedule some self-care.
- Create deadlines.
- Work in short bursts.
- Have a dedicated workspace.
- Avoid multitasking.
- Work near natural light.

Best Productivity Hacks for a Successful Day
Here are some great productivity hacks that will set your day up for success.
1. Eat breakfast every day.
Breakfast gives your body the energy it needs to stay alert and focused. Skipping breakfast can result in feeling sluggish in the morning, and you will likely have difficulty concentrating. According to the Harvard Business Review, food (or lack thereof) affects our cognitive performance and decision-making.
“Just about everything we eat is converted by our body into glucose, which provides the energy our brains need to stay alert,” psychologist Ron Friedman said. “When we’re running low on glucose, we have a tough time staying focused, and our attention drifts. This explains why it’s hard to concentrate on an empty stomach.”
Pro-Tip: Try meal-prepping your breakfast the night before. Overnight oats and yogurt parfaits are easy to make ahead and grab when you’re on the go.
2. Exercise in the morning.
Thirty minutes of regular exercise can boost one’s overall energy, so it makes sense you’ll be more productive during the day after a morning workout. According to Healthline, exercise helps oxygen and nutrients travel to your heart and lungs, which improves your cardiovascular system, stamina, and endurance.
Pro-Tip: Don’t overwork yourself. Too much exercise can result in injury, fatigue, depression, and anxiety, according to Everyday Health. Stick to 30 minutes of exercise a day, five days a week, to be safe.
3. Take time to free-write.
You don’t have to be a skilled writer to reap the benefits of free writing. Free writing in the morning or before bed can help organize your thoughts, boost creativity, and relieve stress. Writing can also improve your communication skills, making you a more effective leader.
Pro-Tip: Dedicate about 30 minutes to an hour of free writing every morning or every evening. And remember, no one needs to see what you write. So, don’t stress about the quality.
4. Plan the day ahead of time.
Write down a detailed plan of your day either the night before or in the morning. Include all your tasks for the day, the order in which you’ll complete them, and the time you’ll need on each assignment. Having a schedule will keep you on track and lessen the chance of drifting away from your duties or wasting time — because you’ll know what you need to do and when you’ll need to do it.
Pro-Tip: Get in the habit of keeping and updating a daily planner or calendar. Or make a daily to-do list in the notes app of your phone.
5. Take regular breaks.
It’s easy to get so invested in work that you skip lunch or focus to the point of exhaustion. Make sure to schedule moments to step away from your tasks and unwind. Permitting yourself to relax will help clear your mind and return to work with a more precise focus.
Pro-Tip: During those breaks, you can eat lunch, walk, stretch, read a book, meditate, or chat with friends. Make sure your activities leave you feeling refreshed and ready to work when the break is over.
6. Set a single goal for the day.
Think of one goal you want or need to accomplish for the day, and break that goal down into multiple tasks. Allot a certain amount of time to each task. Doing so will help you stay focused and ensure your tasks align with your vision.
Pro-Tip: Always ensure your goal is specific, measurable, attainable, relevant, and timely. In other words — establish SMART goals.
7. Don’t be afraid to say ‘No.’
Setting boundaries is a major key to productivity. Understandably, you may want to be helpful whenever you can, but you won’t be able to get things done if you’re constantly taking on requests from others. So learn to say ‘no’ to last-minute requests, impromptu phone calls, and inconvenient plans so you can stay on track.
Pro-Tip: If you have a shareable digital calendar, like Google Calendar, mark off specific days and times you’re unavailable for meetings or requests and share it with your colleagues.
8. Wake up early.
You can achieve a lot by simply waking up early in the morning. An early start will give you time to eat a good breakfast, work out, shower, and gear up for the day ahead. You may even complete your tasks earlier, allowing more free time in the evening.
Pro-Tip: If you’re not used to waking up early, try easing yourself into the habit. Try going to bed and waking up 20 minutes earlier each day until you’ve reached your goal time. For example, if you usually wake up at 8:30 a.m. but want to start waking up at 6:30 a.m.— set your alarm for 8:10 a.m. on the first day, then 7:50 a.m. the next morning. Keep setting your alarm earlier and earlier each day until you reach 6:30 a.m.
9. Schedule some self-care.
One of the biggest enemies of productivity is burnout, and the best way to avoid burnout is to make time for self-care. Examples of self-care include:
- Reading your favorite book
- Creating a relaxing nighttime routine before bed
- Journaling
- Exercising
- Going for a walk
- Meditating
Pro-Tip: Try to fit self-care activities into your daily routine so that you’ll always have something to look forward to.
10. Create deadlines.
You never want to spend too much time on a task, so it’s essential to give yourself a specific amount of time to complete something and a day and time it needs to be done. Doing so will provide a healthy sense of urgency and help you properly manage your time.
Pro-Tip: Audit your time to see how long specific tasks take to complete so that you can create realistic and manageable deadlines.
Productivity Hacks at Work
These hacks will help you stay focused at work.
11. Work in short bursts.
It’s hard to stay focused on the same thing for a long time, so make things easier on yourself by working in short bursts. For example, the Pomodoro method is a popular technique for boosting productivity. The Pomodoro method consists of working in 25-minute increments with 5-minute breaks in between each session.
Pro-Tip: If the Pomodoro method doesn’t seem to work for you, try adjusting the time increments and breaks to something you’re comfortable with.
12. Have a dedicated workspace.
This hack is especially useful if you’re working from home or remotely. Create a space that has all the tools you need to be productive and is only used for work. So, avoid having your dedicated workspace in your bedroom or an area used for recreation. You’ll need a space that you can leave once you’re done with work for the day.
Pro-Tip: Some homes are filled with too many distractions for workspace, so don’t be afraid to find areas outside the house to work, such as your local library, shared office space, or coffee shop.
13. Avoid multitasking.
There’s a misconception that multitasking is a great way to finish multiple tasks quickly because you’re working on various things at once. But in reality, only 2.5% of people can multitask effectively. That’s because the human brain can most focus on one task at a time, according to most recent studies.
When we try to multitask, our brains are just bouncing back and forth between different tasks, which can slow performance and result in more mistakes.
Pro-Tip: Group similar tasks together and complete them one-by-one, instead of simultaneously. By grouping similar duties, your mind can quickly shift its focus to the next job on your list.
14. Work near natural light.
Most recent studies show that natural light is key to boosting productivity. One study found that workers in office environments with optimized natural lights reported an 84% drop in symptoms like eyestrain, headaches, and blurred vision. These symptoms are common with prolonged usage of a computer or devices at work — which can hinder productivity.
In other words, natural sunlight contributes to a more comfortable environment. And when you feel better, you’ll likely work better, too.
Pro-Tip: Try setting up your workspace near a window or sunny area.
15. Forget about perfectionism.
Focus on getting the job done right rather than perfectly because nothing is ever truly perfect. I’ll never forget when I was a journalist and spent too much time writing an article for work. I spent so much time trying to make it “perfect” that I missed my deadline. You should always take pride in your work, but you should also know when to move on to the next thing.
Pro-Tip: Create a short list of things a task must have to be considered complete. Once you check off everything on the list, move on to the next task — even if the first one isn’t perfect but still checks every box.
When all else fails, the most significant hack to productivity is patience. There will be days when things don’t go as planned, and you don’t achieve everything on your to-do list. On those days, be patient with yourself and remember that tomorrow is another opportunity to do better.

Color Theory 101: A Complete Guide to Color Wheels & Color Schemes
While text-based content is always important when seeking answers to a question, creating visuals such as infographics, charts, graphs, animated GIFs, and other shareable images can do wonders for catching your readers’ attention and enhancing your article or report. Knowing color theory and design can help you make content stand out.
I know what you might be thinking: “I don’t know how to design awesome visuals. I’m not creative.” Neither am I, yet I found a strength in data visualization at HubSpot, where I’ve spent most of my days creating infographics and other visuals for blog posts.
Consider this your introductory course to color theory, types of color schemes, and the use of palettes. We’ll be covering the following topics:
- What Is Color Theory?
- Why Is Color Theory Important in Web Design?
- Color Theory 101
- Additive & Subtractive Color Theory
- The Meaning of Color
- The Seven Color Schemes
- How to Choose a Color Scheme
- Color Tools
What is color theory?
Color theory is the basis for the primary rules and guidelines that surround color and its use in creating aesthetically pleasing visuals. By understanding color theory basics, you can begin to parse the logical structure of color for yourself to create and use color palettes more strategically. The result means evoking a particular emotion, vibe, or aesthetic.
While there are many tools out there to help even the most inartistic of us to create compelling visuals, graphic design tasks require a little more background knowledge on design principles.
Take selecting the right color combination, for instance. It’s something that might seem easy at first but when you’re staring down a color wheel, you’re going to wish you had some information on what you’re looking at. In fact, brands of all sizes use color psychology to learn how color influences decision-making and affects design.
Understanding how colors work together, the impact they can have on mood and emotion, and how they change the look and feel of your website is critical to help you stand out from the crowd — for the right reasons.
From effective CTAs to sales conversions and marketing efforts, the right color choice can highlight specific sections of your website, make it easier for users to navigate, or give them a sense of familiarity from the first moment they click through.
But it’s not enough to simply select colors and hope for the best — from color theory to moods and schemes, finding the right HTML color codes, and identifying web-accessible colors for products and websites, the more you know about using color, the better your chances are for success.
Read on for our designer’s guide to color theory, color wheels, and color schemes for your site.
Color Theory 101
Let’s first go back to high school art class to discuss the basics of color.
Remember hearing about primary, secondary, and tertiary colors? They’re pretty important if you want to understand, well, everything else about color.

Primary Colors
Primary colors are those you can’t create by combining two or more other colors together. They’re a lot like prime numbers, which can’t be created by multiplying two other numbers together.
There are three primary colors:
- Red
- Yellow
- Blue
Think of primary colors as your parent colors, anchoring your design in a general color scheme. Any one or combination of these colors can give your brand guardrails when you move to explore other shades, tones, and tints (we’ll talk about those in just a minute).
When designing or even painting with primary colors, don’t feel restricted to just the three primary colors listed above. Orange isn’t a primary color, for example, but brands can certainly use orange as their dominant color (as we at HubSpot know this quite well).
Knowing which primary colors create orange is your ticket to identifying colors that might go well with orange — given the right shade, tone, or tint. This brings us to our next type of color …
Secondary Colors
Secondary colors are the colors that are formed by combining any two of the three primary colors listed above. Check out the color theory model above — see how each secondary color is supported by two of the three primary colors?
There are three secondary colors: orange, purple, and green. You can create each one using two of the three primary colors. Here are the general rules of secondary color creation:
- Red + Yellow = Orange
- Blue + Red = Purple
- Yellow + Blue = Green
Keep in mind that the color mixtures above only work if you use the purest form of each primary color. This pure form is known as a color’s hue, and you’ll see how these hues compare to the variants underneath each color in the color wheel below.
Tertiary Colors
Tertiary colors are created when you mix a primary color with a secondary color.
From here, color gets a little more complicated, and if you want to learn how the experts choose color in their design, you’ve got to first understand all the other components of color.
The most important component of tertiary colors is that not every primary color can match with a secondary color to create a tertiary color. For example, red can’t mix in harmony with green, and blue can’t mix in harmony with orange — both mixtures would result in a slightly brown color (unless of course, that’s what you’re looking for).
Instead, tertiary colors are created when a primary color mixes with a secondary color that comes next to it on the color wheel below. There are six tertiary colors that fit this requirement:
- Red + Purple = Red-Purple (magenta)
- Red + Orange = Red-Orange (vermillion)
- Blue + Purple = Blue-Purple (violet)
- Blue + Green = Blue-Green (teal)
- Yellow + Orange = Yellow-Orange (amber)
- Yellow + Green = Yellow-Green (chartreuse)
The Color Theory Wheel
Okay, great. So now you know what the “main” colors are, but you and I both know that choosing color combinations, especially on a computer, involves a much wider range than 12 basic colors.
This is the impetus behind the color wheel, a circle graph that charts each primary, secondary, and tertiary color — as well as their respective hues, tints, tones, and shades. Visualizing colors in this way helps you choose color schemes by showing you how each color relates to the color that comes next to it on a rainbow color scale. (As you probably know, the colors of a rainbow, in order, are red, orange, yellow, green, blue, indigo, and violet.)
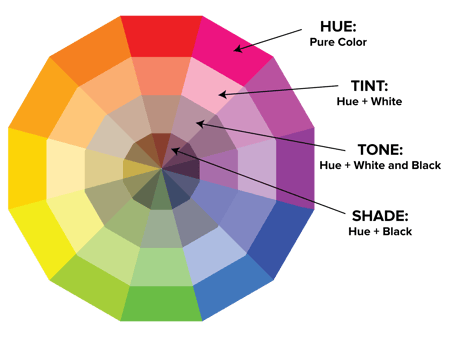
When choosing colors for a color scheme, the color wheel gives you opportunities to create brighter, lighter, softer, and darker colors by mixing white, black, and gray with the original colors. These mixes create the color variants described below:
Hue
Hue is pretty much synonymous with what we actually mean when we said the word “color.” All of the primary and secondary colors, for instance, are “hues.”
Hues are important to remember when combining two primary colors to create a secondary color. If you don’t use the hues of the two primary colors you’re mixing together, you won’t generate the hue of the secondary color. This is because a hue has the fewest other colors inside it. By mixing two primary colors that carry other tints, tones, and shades inside them, you’re technically adding more than two colors to the mixture — making your final color dependent on the compatibility of more than two colors.
If you were to mix the hues of red and blue together, for instance, you’d get purple, right? But mix a tint of red with the hue of blue, and you’ll get a slightly tinted purple in return.
Shade
You may recognize the term “shade” because it’s used quite often to refer to light and dark versions of the same hue. But actually, a shade is technically the color that you get when you add black to any given hue. The various “shades” just refer to how much black you’re adding.
Tint
A tint is the opposite of a shade, but people don’t often distinguish between a color’s shade and a color’s tint. You get a different tint when you add white to a color. So, a color can have a range of both shades and tints.
Tone (or Saturation)
You can also add both white and black to a color to create a tone. Tone and saturation essentially mean the same thing, but most people will use saturation if they’re talking about colors being created for digital images. Tone will be used more often for painting.
With the basics covered, let’s dive into something a little more complicated — like additive and subtractive color theory.
Additive & Subtractive Color Theory
If you’ve ever played around with color on any computer program, you’ve probably seen a module that listed RGB or CMYK colors with some numbers next to the letters.
Ever wondered what those letters mean?
CMYK
CMYK stands for Cyan, Magenta, Yellow, Key (Black). Those also happen to be the colors listed on your ink cartridges for your printer. That’s no coincidence.
CMYK is the subtractive color model. It’s called that because you have to subtract colors to get to white. That means the opposite is true — the more colors you add, the closer you get to black. Confusing, right?
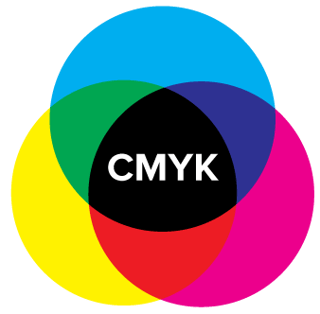
Think about printing on a piece of paper. When you first put a sheet in the printer, you’re typically printing on a white piece of paper. By adding color, you’re blocking the white wavelengths from getting through.
Then, let’s say you were to put that printed piece of paper back into the printer, and print something on it again. You’ll notice the areas that have been printed on twice will have colors closer to black.
I find it easier to think about CMYK in terms of its corresponding numbers. CMYK works on a scale of 0 to 100. If C=100, M=100, Y=100, and K=100, you end up with black. But, if all four colors equal 0, you end up with true white.
RGB
RGB color models, on the other hand, are designed for electronic displays, including computers.
RGB stands for Red, Green, Blue, and is based on the additive color model of light waves. This means, the more color you add, the closer you get to white. For computers, RGB is created using scales from 0 to 255. So, black would be R=0, G=0, and B=0. White would be R=255, G=255, and B=255.

When you’re creating color on a computer, your color module will usually list both RGB and CMYK numbers. In practice, you can use either one to find colors, and the other color model will adjust accordingly.
However, many web programs will only give you the RGB values or a HEX code (the code assigned to color for CSS and HTML). So, if you’re designing digital images or for web design, RGB is probably your best bet for choosing colors.
You can always convert the design to CMYK and make adjustments should you ever need it for printed materials.
The Meaning of Color
Along with varying visual impact, different colors also carry different emotional symbolism.
- Red — typically associated with power, passion, or energy, and can help encourage action on your site
- Orange — joy and enthusiasm, making it a good choice for positive messaging
- Yellow — happiness and intellect, but be wary of overuse
- Green — often connected to growth or ambition, green can help give the sense that your brand is on the rise
- Blue — tranquility and confidence, depending on the shade — lighter shades provide a sense of peace, darker colors are more confident
- Purple — luxury or creativity, especially when used deliberately and sparingly on your site
- Black — power and mystery, and using this color can help create necessary negative space
- White — safety and innocence, making it a great choice to help streamline your site
Worth noting? Different audiences may perceive colors differently. The meanings listed above are common for North American audiences, but if your brand moves into other parts of the world, it’s a good idea to research how users will perceive particular colors. For example, while red typically symbolizes passion or power in the United States, it’s considered a color of mourning in South Africa.
While it’s possible to create your website using a combination of every color under the rainbow, chances are the final product won’t look great. Thankfully, color experts and designers have identified seven common color schemes to help jumpstart your creative process.
Let’s examine each type of color scheme in more detail.
1. Monochromatic
Monochromatic color schemes use a single color with varying shades and tints to produce a consistent look and feel. Although it lacks color contrast, it often ends up looking very clean and polished. It also allows you to easily change the darkness and lightness of your colors.

Monochromatic color schemes are often used for charts and graphs when creating high contrast isn’t necessary.
Check out all the monochromatic colors that fall under the red hue, a primary color.

2. Analogous
Analogous color schemes are formed by pairing one main color with the two colors directly next to it on the color wheel. You can also add two additional colors (which are found next to the two outside colors) if you want to use a five-color scheme instead of just three colors.

Analogous structures do not create themes with high contrasting colors, so they’re typically used to create a softer, less contrasting design. For example, you could use an analogous structure to create a color scheme with autumn or spring colors.
This color scheme is great for creating warmer (red, oranges, and yellows) or cooler (purples, blues, and greens) color palettes like the one below.

Analogous schemes are often used to design images rather than infographics or bar charts as all of the elements blend together nicely.
3. Complementary
You may have guessed it, but a complementary color scheme is based on the use of two colors directly across from each other on the color wheel and relevant tints of those colors.

The complementary color scheme provides the greatest amount of color contrast. Because of this, you should be careful about how you use the complementary colors in a scheme.
It’s best to use one color predominantly and use the second color as accents in your design. The complementary color scheme is also great for charts and graphs. High contrast helps you highlight important points and takeaways.

4. Split Complementary
A split complementary scheme includes one dominant color and the two colors directly adjacent to the dominant color’s complement. This creates a more nuanced color palette than a complementary color scheme while still retaining the benefits of contrasting colors.

The split complementary color scheme can be difficult to balance because unlike analogous or monochromatic color schemes, the colors used all provide contrast (similar to the complementary scheme).
The positive and negative aspect of the split complementary color model is that you can use any two colors in the scheme and get great contrast … but that also means it can also be tricky to find the right balance between the colors. As a result, you may end up playing around with this one a bit more to find the right combination of contrast.

5. Triadic
Triadic color schemes offer high contrasting color schemes while retaining the same tone. Triadic color schemes are created by choosing three colors that are equally placed in lines around the color wheel.

Triad color schemes are useful for creating high contrast between each color in a design, but they can also seem overpowering if all of your colors are chosen on the same point in a line around the color wheel.
To subdue some of your colors in a triadic scheme, you can choose one dominant color and use the others sparingly, or simply subdue the other two colors by choosing a softer tint.
The triadic color scheme looks great in graphics like bar or pie charts because it offers the contrast you need to create comparisons.

6. Square
The square color scheme uses four colors equidistant from each other on the color wheel to create a square or diamond shape. While this evenly-spaced color scheme provides substantial contrast to your design, it’s a good idea to select one dominant color rather than trying to balance all four.
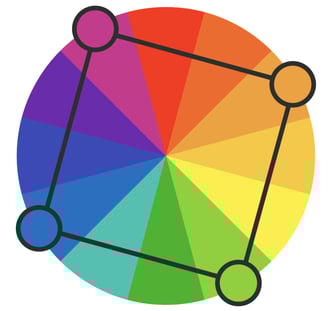
Square color schemes are great for creating interest across your web designs. Not sure where to start? Pick your favorite color and work from there to see if this scheme suits your brand or website. It’s also a good idea to try square schemes against both black and white backgrounds to find the best fit.

7. Rectangle
Also called the tetradic color scheme, the rectangle approach is similar to its square counterpart but offers a more subtle approach to color selection.

As you can see in the diagram above, while the blue and red shades are quite bold, the green and orange on the other side of the rectangle are more muted, in turn helping the bolder shades stand out.

No matter which color scheme you choose, keep in mind what your graphic needs. If you need to create contrast, then choose a color scheme that gives you that. On the other hand, if you just need to find the best “versions” of certain colors, then play around with the monochromatic color scheme to find the perfect shades and tints.
Remember, if you build a color scheme with five colors, that doesn’t mean you have to use all five. Sometimes just choosing two colors from a color scheme looks much better than cramming all five colors together in one graphic.
Examples of Color Schemes
Now that you are familiar with color scheme types, let’s take a look at some in the wild.
1. Canva
Type: Monochromatic
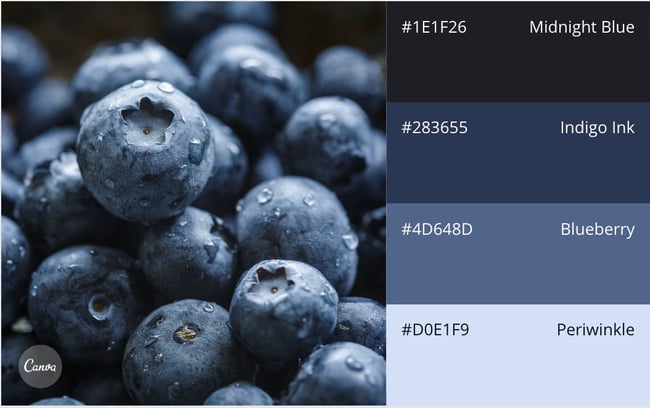
The use of blues and purples really make this monochromatic blueberry-inspired template stand out. Each shade builds on the next and provides ample contrast despite remaining within the same color family.
2. Newfoundland and Labrador Tourism
Type: Triadic

As we mentioned earlier, nature is a great way to get inspiration for your color palette. Why? Because mother nature already has it figured out. Newfoundland and Labrador Tourism took advantage of these triadic shades to showcase the region’s natural beauty.
3. Daye
Type: Analogous
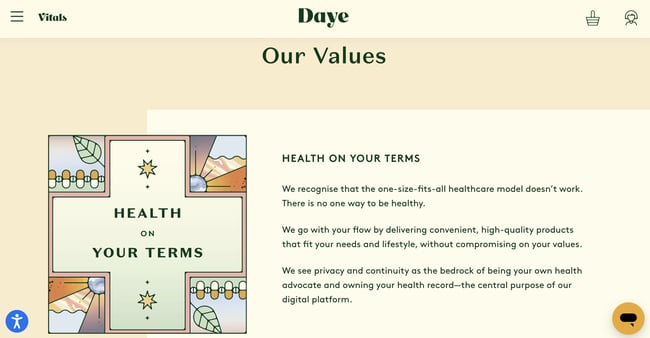
Eco-friendly Women’s health company Your Daye uses a blend of pastels and earthy tones for its analogous color scheme. The effect is soothing and pleasing to the eye.
1. Leverage natural inspiration.
Once your site operations are solid, it’s time to start selecting colors.
Not sure what looks good? Take a look outside. Nature is the best example of colors that complement each other — from the green stems and bright blooms of flowering plants to azure skies and white clouds, you can’t go wrong pulling context from natural colors and combinations.
2. Set a mood for your color scheme.
With a few color choices in mind, consider the mood you want your color scheme to set. If passion and energy are your priorities, lean more toward red or brighter yellows. If you’re looking to create a feeling of peace or tranquility, trend toward lighter blues and greens.
It’s also worth thinking negatively. This is because negative space — in either black or white — can help keep your design from feeling too cluttered with color.
3. Consider color context.
It’s also worth considering how colors are perceived in contrast.
In the image below, the middle of each of the circles is the same size, shape, and color. The only thing that changes is the background color.
Yet, the middle circles appear softer or brighter depending on the contrasting color behind it. You may even notice movement or depth changes just based on one color change.
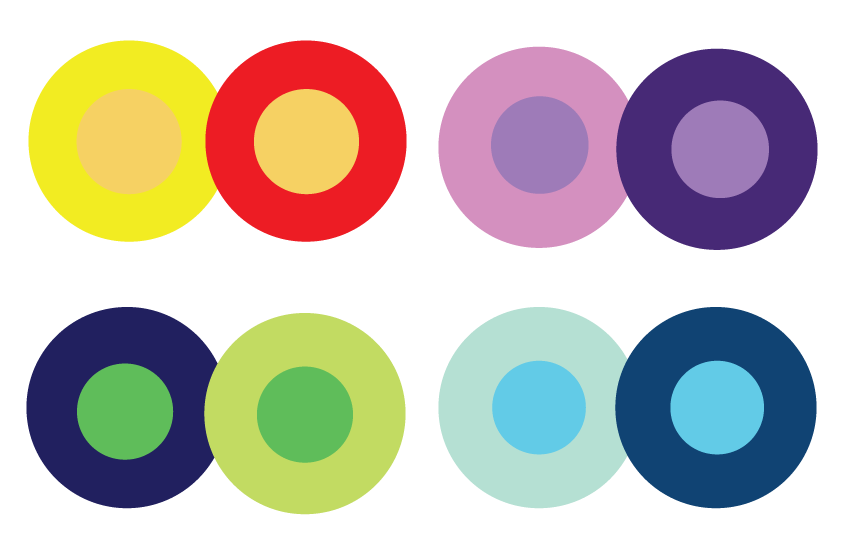

.png)
This is because the way in which we use two colors together changes how we perceive it. So, when you’re choosing colors for your graphic designs, think about how much contrast you want throughout the design.
For instance, if you were creating a simple bar chart, would you want a dark background with dark bars? Probably not. You’d most likely want to create a contrast between your bars and the background itself since you want your viewers to focus on the bars, not the background.
4. Refer to your color wheel.
Next, consider your color wheel and the schemes mentioned above. Select a few different color combinations using schemes such as monochrome, complementary, and triad to see what stands out.
Here, the goal isn’t to find exactly the right colors on the first try and create the perfect design, but rather to get a sense of which scheme naturally resonates with your personal perception and the look of your site.
You may also find that schemes you select that look good in theory don’t work with your site design. This is part of the process — trial and error will help you find the color palette that both highlights your content and improves the user experience.
5. Draft multiple designs.
Draft and apply multiple color designs to your website and see which one(s) stand out. Then, take a step back, wait a few days and check again to see if your favorites have changed.
Here’s why: While many designers go in with a vision of what they want to see and what looks good, the finished product often differs on digital screens that physical color wheels — what seemed like a perfect complement or an ideal color pop may end up looking drab or dated.
Don’t be afraid to draft, review, draft again and throw out what doesn’t work — color, like website creation, is a constantly-evolving art form.
How to Use Color Palettes
While color schemes provide a framework for working with different colors, you’ll still need to use a color palette — the colors you will select to use for your project. If you’re stumped about what colors to use, consider using a palette generator to get your creativity flowing.
Here are some best practices to make the most out of your color palette:
1. Work in grayscale.
This may sound counter-intuitive but starting with black and white can help you see exactly how much contrast exists in your design. Before getting started with color, it’s important to lay out all the elements like text, CTAs, illustrations, photos, and any other design features. The way your design looks in grayscale will determine how well it looks in color. Without enough light and dark contrast, your design will be hard to view, leaving your audience with a less than satisfactory user experience. Low contrast designs also make them inaccessible for those with a vision impairment.
2. Use the 60-30-10 rule.
Often used in home design, the 60-30-10 rule is also useful for website or app design.<
- 60%: primary or main color
- 30%: secondary colors
- 10%: accent colors
While you’re certainly not limited to using just three colors, this framework will provide balance and ensure your colors work together seamlessly.
3. Experiment with your palette.
Once you’ve made your color selection, experiment to discover which work better together. Consider how copy or type looks on top of your designated main color (60% is typically used as the background color).
Try not to use your main colors for buttons since you’re already using it everywhere else. Consider one of your accent colors instead.
4. Get feedback or conduct A/B testing.
So you’ve finished your draft. Now it’s time to test it. Before sending your design to market, you’ll want to test how users interact with it. What may look good to you, may be difficult to read for others. Some things to consider when asking for feedback:
- Are the CTAs generating attention?
- Are the colors you chose distracting?
- Is there enough color contrast?
- Is the copy legible?
Getting another set of eyes on your design will help you spot errors or inconsistencies you may have missed in the creation process. Take their feedback in stride and make adjustments where needed.
Put simply? Practice makes perfect. The more you play with color and practice design, the better you get. No one creates their masterpiece the first time around.
Color Tools
There’s been a lot of theory and practical information for actually understanding which colors go best together and why. But when it comes down to the actual task of choosing colors while you’re designing, it’s always a great idea to have tools to help you actually do the work quickly and easily.
Luckily, there are a number of tools to help you find and choose colors for your designs.
Adobe Color
One of my favorite color tools to use while I’m designing anything — whether it’s an infographic or just a pie chart — is Adobe Color (previously Adobe Kuler).
This free online tool allows you to quickly build color schemes based on the color structures that were explained earlier in this post. Once you’ve chosen the colors in the scheme you’d like, you can copy and paste the HEX or RGB codes into whatever program you’re using.
It also features hundreds of premade color schemes for you to explore and use in your own designs. If you’re an Adobe user, you can easily save your themes to your account.
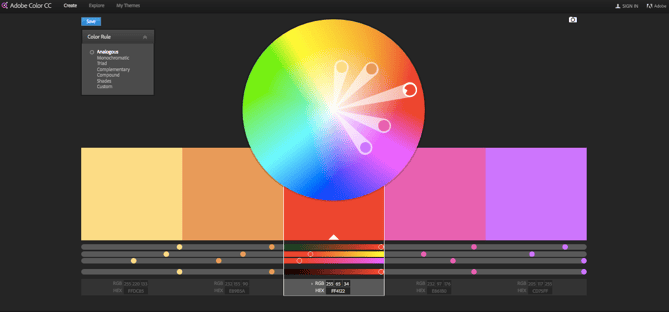
Illustrator Color Guide
I spend a lot of time in Adobe Illustrator, and one of my most-used features is the color guide. The color guide allows you to choose one color, and it will automatically generate a five-color scheme for you. It will also give you a range of tints and shades for each color in the scheme.
If you switch your main color, the color guide will switch the corresponding colors in that scheme. So if you’ve chosen a complementary color scheme with the main color of blue, once you switch your main color to red, the complementary color will also switch from orange to green.
Like Adobe Color, the color guide has a number of preset modes to choose the kind of color scheme you want. This helps you pick the right color scheme style within the program you’re already using.
After you’ve created the color scheme that you want, you can save that scheme in the “Color Themes” module for you to use throughout your project or in the future.
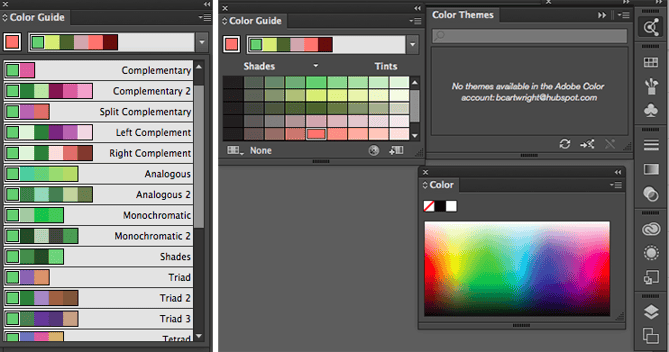
Preset Color Guides
If you’re not an Adobe user, you’ve probably used Microsoft Office products at least once. All of the Office products have preset colors that you can use and play around with to create color schemes. PowerPoint also has a number of color scheme presets that you can use to draw inspiration for your designs.
Where the color schemes are located in PowerPoint will depend on which version you use, but once you find the color “themes” of your document, you can open up the preferences and locate the RGB and HEX codes for the colors used.
You can then copy and paste those codes to be used in whatever program you’re using to do your design work.
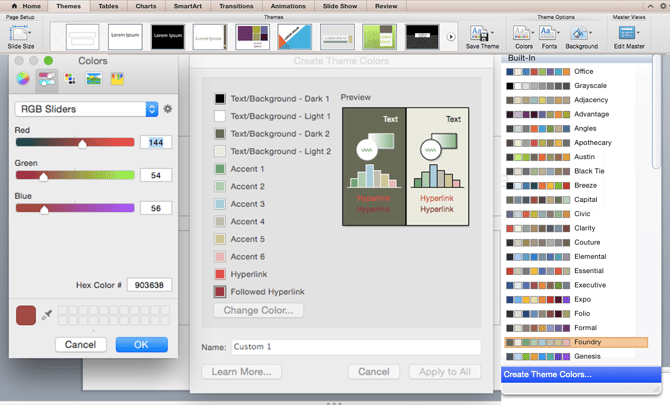
Finding the Right Color Scheme
There’s a lot of theory in this post, I know. But when it comes to choosing colors, understanding the theory behind color can do wonders for how you actually use color. This can make creating branded visuals easy, especially when using design templates where you can customize colors.
Editor’s note: This article was originally published in June 2021 and has been updated for comprehensiveness.