Welcome to My Blog
Variable Cost Explained in 200 Words (& How to Calculate It)
There’s a frustrating truth that every business deals with early into its growth: More money, more problems.
It seems counterintuitive — if sales and revenue are up, isn’t that a good thing? How are bigger profits a potential problem?
Put simply, it all comes down to the fact that the more you sell, the more money you need to spend. This includes marketing and sales campaigns to reach more customers, the production costs of more goods, and the time and money required for new product development.
Known as variable cost, this sales/spend ratio is something every business owner should understand, but online advice listicles and action plans often assume readers have an intrinsic knowledge of this concept rather than providing a working definition.
In this piece, we’ll clear up variable cost confusion: Here’s what you need to know about variable costs, how to calculate them, and why they matter.

Let’s examine each of these components in more detail.
Variable Cost Per Unit
The variable cost per unit is the amount of labor, materials, and other resources required to produce your product. For example, if your company sells sets of kitchen knives for $300 but each set requires $200 to create, test, package, and market, your variable cost per unit is $200.
Number of Units Produced
The number of units produced is exactly what you might expect — it’s the total number of items produced by your company. So in our knife example above,if you’ve made and sold 100 knife sets your total number of units produced is 100, each of which carries a $200 variable cost and a $100 potential profit.
Variable costs earn the name because they can increase and decrease as you make more or less of your product. The more units you sell, the more money you’ll make, but some of this money will need to pay for the production of more units. So, you’ll need to produce more units to actually turn a profit.
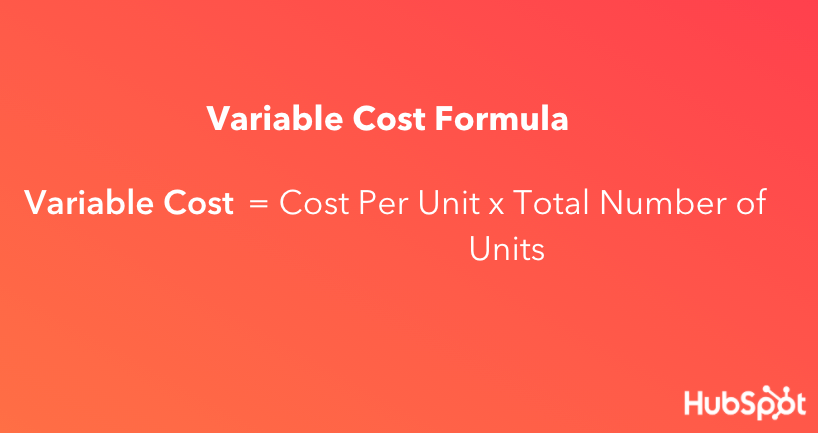
And, because each unit requires a certain amount of resources, a higher number of units will raise the variable costs needed to produce them.
Variable costs aren’t a “problem,” though — they’re more of a necessary evil. They play a role in several bookkeeping tasks, and both your total variable cost and average variable cost are calculated separately.
Total Variable Cost
Your total variable cost is the sum of all variable costs associated with each individual product you’ve developed. Calculate total variable cost by multiplying the cost to make one unit of your product by the number of products you’ve developed.

For example, if it costs $60 to make one unit of your product and you’ve made 20 units, your total variable cost is $60 x 20, or $1,200.
Average Variable Cost
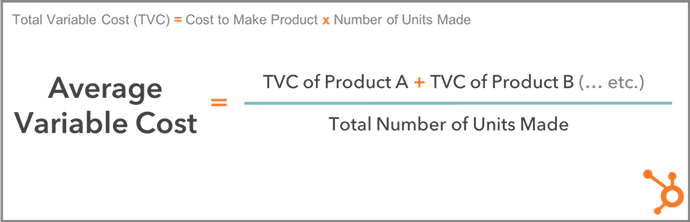
Your average variable cost uses your total variable cost to determine how much, on average, it costs to produce one unit of your product. You can calculate it with the formula below.
Total Variable Cost vs. Average Variable Cost
If the average variable cost of one unit is found using your total variable cost, don’t you already know how much one unit of your product costs to develop? Can’t you work backward, and simply divide your total variable cost by the number of units you have? Not necessarily.
While total variable cost shows how much you’re paying to develop every unit of your product, you might also have to account for products that have different variable costs per unit. That’s where average variable cost comes in.
For example, if you have 10 units of Product A at a variable cost of $60/unit, and 15 units of Product B at a variable cost of $30/unit, you have two different variable costs — $60 and $30. Your average variable cost crunches these two variable costs down to one manageable figure.
In the above example, you can find your average variable cost by adding the total variable cost of Product A ($60 x 10 units, or $600) and the total variable cost of Product B ($30 x 15 units, or $450), then dividing this sum by the total number of units produced (10 + 15, or 25).
Your average variable cost is ($600 + $450) ÷ 25, or $42 per unit.
Variable vs. Fixed Cost
The opposite of variable cost? Fixed cost. Fixed costs are costs that don’t change in response to the number of products you’re producing.
Some common fixed costs include renting or leasing a building, utility bills, website hosting, business loan repayments, and property taxes.
Worth noting? These costs aren’t static — meaning, your rent may increase year over year. Instead, they remain fixed only in reference to product production.
To calculate the average fixed cost, use this formula:
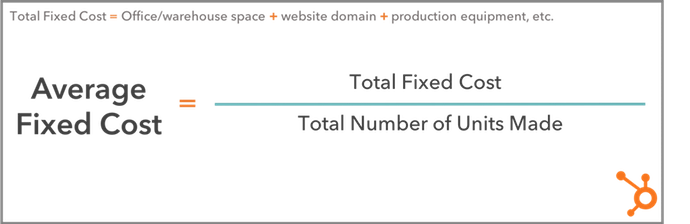
Both variable and fixed costs are essential to getting a complete picture of how much it costs to produce an item — and how much profit remains after each sale.
To calculate variable cost ratio, use this formula:

Let’s put it into practice. If you’re selling an item for $200 (Net Sales) but it costs $20 to produce (Variable Costs), you divide $20 by $200 to get 0.1. Multiply by 100 and your variable cost ratio is 10%. This means that for every sale of an item you’re getting a 90% return with 10% going toward variable costs.
Combining variable and fixed costs, meanwhile, can help you calculate your break-even point — the point at which producing and selling goods is zeroed out by the combination of variable and fixed costs.
Consider our example above again. If your variable costs are $20 on a $200 item and your fixed costs account for $100, your total costs now account for 60% of the item’s sale value, leaving you with 40%.
Put simply? The higher your total cost ratio, the lower your potential profit. If this number becomes negative, you’ve passed the break-even point and will start losing money on every sale.
So, what’s considered a variable cost to the business?
Some of the most common variable costs include physical materials, production equipment, sales commissions, staff wages, credit card fees, online payment partners, and packaging/shipping costs.
Let’s examine each in more detail.
Physical Materials
These can include parts, cloth, and even food ingredients required to make your final product.
Production Equipment
If you automate certain parts of your product’s development, you might need to invest in more automation equipment or software as your product line gets bigger.
Sales Commissions
The more products your company sells, the more you might pay in commission to your salespeople as they win customers.
Staff Wages
The more products you create, the more employees you might need, which means a bigger payroll, too.
Credit Card Fees
Businesses that receive credit card payments from their customers will incur higher transaction fees as they deliver more services.
Online Payment Partners
Apps like PayPal typically charge businesses per transaction so customers can check out purchases through the app. The more orders you receive, the more you’ll pay to the app.
Packaging and Shipping Costs
You might pay to package and ship your product by the unit, and therefore more or fewer shipped units will cause these costs to vary.
Expect the Unexpected
While variable costs, total variable costs, average variable costs, and the variable cost ratio often seem complicated on the surface, these terms are simply ways to represent the changing nature of costs to produce new items as your business grows.
By understanding the nature of these costs and how they impact your current and projected revenue, it’s possible to better prepare for evolving market forces and reduce the impact of variable costs on your bottom line.

SEO vs. PPC: When to Optimize and When to Pay for Traffic
Imagine you’ve just created an excellent new product, and you’re excited to share your business with the world.
Unfortunately, you have no idea how to share this revolutionary product with as many of your target users as possible.
You’re not alone. Like you, many businesses face a similar problem regarding how to get their products in front of potential customers.

Most of the time, the solution to your problem boils down to choosing between two marketing strategies: search engine optimization (SEO) or pay-per-click (PPC) campaigns.
But which method is suitable for you? Is it better to pursue an organic-first approach and find consumers through search engine rankings, or is it better to invest in an advertisement at the top of a keyword results page?
In this article, we’ve explored what you can expect to achieve from each of these two acquisition strategies. We’ve also provided some pros and cons of SEO and PPC along with descriptive statistics and real-life examples to help you decide whether your business is best suited for SEO or PPC — or both.
What is SEO?
Search engine optimization is the process of enhancing your website’s visibility to make it rank and gain organic traffic from search engines.
Just as you turn to your favorite search engines, such as Google or Bing, to look up a new marketing acronym or where to get good pizza, so do your consumers. When you invest in SEO, you’re increasing the likelihood of your target audience finding you when they make a Google search for keywords related to your product or service.
For example, here’s Hubspot appearing at the top of Google’s organic results page for the term “inbound marketing,” thanks to the SEO strategy we have in place.
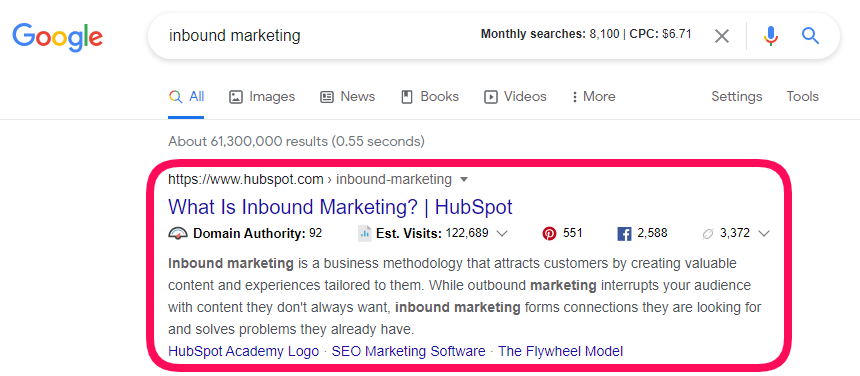
Most SEO strategies center around Google because it holds 92.24% of the search engine market share. As such, you’ll need to learn about Google’s 200 ranking factors, technical SEO, link building, content creation, and so much more if you want to appear higher up on the search engine results page.
Pros of SEO
Here are some advantages of SEO:
1. SEO is cheaper in the long run.
Although SEO might cost time and money —to pay freelancers or agencies, and for SEO tools — it’s still cheaper than PPC in the long run.
When you create content that ranks and drives traffic to your website, you no longer have to keep spending money to make your target customers see it. And when these customers decide to click on your link, it comes at zero cost, unlike a PPC campaign where you pay per click.
In the following image, you see that according to Ahrefs, Hubspot’s traffic value is a little over $22 million. Imagine we had to pay for every click we get.

Organic traffic is also very scalable and cost-effective.
2. You can target different funnel stages with SEO.
Not all of your audience is at the same stage of the sales funnel.
Some are just getting to know your brand at the top of the funnel. And others are already at the bottom of the funnel, ready to pull out their wallets.
With SEO, you can create different content types (blog posts, guides, case studies) that meet each segment of your audience exactly where they are in the sales funnel.
3. Search traffic is more stable.
Once you rank on Google, you can be sure of free traffic to your website or web pages as long as you keep optimizing them.
There’s also no off-and-on switch with SEO, unlike PPC marketing, where your website stops appearing on search results once your marketing budget dries up.
4. Organic listings build brand authority.
Appearing consistently on search results for keywords related to your products and services helps build trust and brand authority with your target audience.
It also signifies to Google that you’re an expert on that topic or subject.
Cons of SEO
Here are some reasons why you might not love SEO:
1. Search engine algorithms change.
Search engines, especially Google, have changed their algorithm many times over the years. These changes mean that you’ll have to keep a close eye on your marketing strategy and organic results.
2. You’ll need to optimize your website regularly.
Your job doesn’t end when you get your website to rank for target keywords. Over time, you’ll have to regularly optimize your content and web pages so that it continues to rank.
Optimization might include refreshing old articles and removing old/expired links.
3. SEO takes time to show results.
If your website or domain is new, it’s unlikely that you’ll enjoy immediate results from SEO. The reason is that many factors affect how Google ranks websites.
2. It requires high-level skills and expertise.
If you’re not hiring a professional, you’ll need to be an excellent writer and SEO expert to optimize your site for search engines properly.
It’s undoubtedly time-consuming and overwhelming to run a business while taking technical SEO, writing, and link-building classes.
What is PPC?
PPC, or pay-per-click, is a form of search engine marketing (SEM) where an advertiser pays a publisher (such as Google or Facebook) every time someone clicks on the ad. This model allows advertisers to pay only when consumers interact with their ads — meaning you attract people interested in your offer and ready to make a purchase.
This method is mainly associated with search engines as advertisers bid on search keywords relevant to their target markets. You may have noticed that the top search results are tagged with an “Ad” marker.

The cost of PPC ads usually depends on your industry and the search volume of the keyword you’re targeting.
PPC advertising can help your business stay competitive in a crowded market and quickly get in front of their target consumers if you don’t have the domain authority to get your site ranking organically on search engines.
Pros of PPC
1. PPC offers quick results.
While it can take months to see results from your SEO strategy, it can take a few hours to see results from your PPC campaign.
2. PPC ads appear above organic rankings.
When you run a PPC campaign for your target keyword, your website would appear first on the search engine result page. This ranking makes your audience notice you first before scrolling to see other results.
3. PPC allows you to pinpoint your target audience.
While setting up a PPC campaign, you get to choose who you want to target with your ads.
Do you want people from a specific geographic area? Or people of a particular age? Marital status? Or interest? If so, then you should use PPC.
3. You can quickly run A/B tests on a PPC ad.
With a PPC campaign, you can run two different ads simultaneously to measure the one that converts better.
All you’ll have to do is change some ad elements like the ad copy and allow them to run for a period. Depending on the performance, you can decide to either “kill” the Google ads or continue optimization to improve your results.
Cons of PPC
1. PPC ads are expensive.
Without money, you cannot run a PPC campaign.
You have to pay for every link that your audience clicks, meaning once your budget dries up, so does your traffic.
Also, a PPC ad can get even more expensive (as high as $40) when you’re in a competitive industry like legal or insurance.
2. Lower profit margins.
While a PPC campaign might bring short-term wins, it’ll usually result in lower profit margins. Because PPC is a “pay to play” system, your customer acquisition costs (CAC) would continue to get higher without a significant increase in the prices of your products and services.
3. PPC ads become stale after a while.
You have limited control over your paid ad because of the rule set by ad platforms like Google. As such, your copy might have similar wording to your competitors, which makes it easy for your audience to pass over quickly.
SEO vs. PPC
Search engine optimization (SEO) can help your content rank high on search engines, making it more likely that your audience would click and trust your content.
SEO is also more effective for local searches and can grow your online presence for longer. Pay-per-click (PPC), on the other hand, is an acquisition strategy that requires you to spend ad money to get your content in front of an audience when they search for specific keywords online.
SEO vs. PPC: Which is better?
Asking which is better between SEO and PPC is like asking whether it’s better to eat with a fork or spoon — it depends.
Serving pasta? Sure, I’d love a fork. Soup? I’d rather have a spoon.
In the same way, different situations exist where SEO is better than PPC and vice versa.
Let’s now look at some of these situations.
Use SEO if…
- Your marketing budget is low.
- You want to build your brand authority.
- You’re looking to maximize your long-term return-on-investment (ROI).
- You want to create content that reaches your audience at different stages of the sales funnel.
Use PPC if…
You’d get better results with PPC in situations where:
- You want quick results.
- Your product is novel or first-of-its-kind.
- You’re promoting a time-sensitive offer, like a holiday sale.
- You want to direct your audience to a sales or landing page.
How to Make SEO and PPC Work For You
Instead of choosing between SEO or PPC, why not combine the two strategies and make them work for you?
Here’s how you can get the best of both worlds.
1. Create retargeting ads.
Did someone visit your site, probably the pricing or check-out page, without buying?
You can easily use a retargeting ad to prompt these visitors, even after they’ve left your site, to come back and make a purchase.
2. Promote website content with social media ads.
While you want your content to rank organically, you can give it a quick boost by promoting it on social media.
Not only do these kinds of ads help with content distribution, but they could potentially help you acquire essential backlinks that’d boost your rankings.
Also, it’s going to be a shame not to promote your latest blog post, guide, report, or case study after spending hours creating it.
3. Collect data From ads to improve your SEO strategy.
PPC campaigns grant you access to a lot of data — keyword search volumes, keywords your competitors are bidding for, highest converting calls-to-action, and so on.
Aimed with all of this data, you’d be able to create better SEO strategies with less effort.
SEO vs. PPC Statistics
SEO
- Google is responsible for over 92% of global web traffic.
- 90.63% of online content get zero traffic from Google, with only 0.21% getting over 1000 visits per month.
- 46.40% of browser-based Google searches resulted in an organic link click.
- 99.2% of website pages have less than 100 backlinks.
- Google processes over 7 billion searches per day (or 2.5 trillion searches per year.)
- SEO drives almost 100% more traffic than paid traffic.
- 60% of smartphone users have contacted a business directly using the search results (e.g., “click to call” option).
- 64% of marketers actively invest in SEO.
- 76% of B2B search traffic is trackable.
- 18% of local smartphone searches led to a purchase within a day, whereas only 7% of non-local searches led to a sale.
PPC
- 390 out of 506 surveyed by Clutch say they recognize a paid search ad when they see it.
- The Google Display Network reaches 90% of Internet users worldwide.
- Search advertising spend is expected to exceed $170 billion in 2021.
- More than 763 million devices use Adblock. As a consumer, Adblock is amazing. It stops all those eerily targeted ads from popping up on your Facebook feed. However, as a marketer, it can be frustrating to invest in PPC if vast numbers of your target consumers will never see your ad. Additionally, ad blocking has increased 15-30% in the last four years.
- PPC Ads can boost awareness by 80%. Despite ad blockers, PPC is still effective in increasing your brand’s reach and awareness.
- The highest average monthly cost-per-click (CPC) in Google Ads search advertising is in the insurance industry at $18.57 per click.
- The cheapest CPC in Google Ads search advertising is in the electronics industry at 83 cents per click.
- The average Facebook Ads Click-Through Rate across all industries is 0.89%. The Pets and Animals industry has the highest CTR while the lowest rates come from the Science industry.
- The average Facebook Ads cost-per-click (CPC) is $1.68 across industry. Advertisers in the Finance industry have the highest average CPC ($3.89), while Food and Drinks have the lowest average CPC ($0.42)
- Google’s algorithm updates don’t affect PPC. While not a stat per se, a significant benefit of PPC is that it’s immune to Google’s changing SERP ranking algorithm. In 2018, Google reported that they had updated their algorithm 3,234 times! If you’re using the SEO method, you have to adjust your content optimization to rank better according to the updated algorithm requirements.
- 75% of marketers from Clutch’s survey say it’s easier to find what they’re looking for from paid ads. The first page of search engine results — especially the few hits — gets the vast majority of clicks due to the combination of ease of use and finding what the searcher is looking for. Bidding on target keywords through PPC accomplishes both of these needs: the paid ads are easy to find at the top of the SERP, and they answer the searcher’s question.
Final Thoughts
Whether you choose to go with SEO or PPC ultimately depends on your business situation. So take your time to evaluate the pro and cons of both SEO and PPC to see which is the right fit for you. And if possible, integrate the two strategies to see even more outstanding results for your business.
Editor’s note: This post was originally published in July 2019 and has been updated for comprehensiveness.

How to Set & Achieve Marketing Objectives in 2021
In the marketing industry, setting objectives can be a double-edged sword. On the one hand, constantly raising the bar can incentivize your team to sustain your growth rate over long periods. On the other hand, it can incentivize your team to prioritize your company’s needs over your customers’ needs.

Contrary to popular belief, solely focusing on the results doesn’t actually produce results. Focusing on serving your customers is what produces results. Tim Cook, Apple’s CEO, is famous for sparking this customer-centric movement.
In 2015, he spoke at Goldman Sach’s Technology and Internet Conference in San Francisco, and a reporter asked him what some of Apple’s biggest accomplishments from the past year were. He responded, “We’re not focused on the numbers. We’re focused on the things that produce the numbers.”
In this blog post, we’ll show you how to set realistic marketing objectives that will help you craft audience-centric content, prioritize your customers’ needs, and hit your numbers, all at the same time.
Read on to learn how to identify your marketing objectives’ purpose and process and why it’s just as important as the numbers you aim to hit.
In his insightful blog post about setting goals, Jay Acunzo, the founder of Unthinkable Media, reveals a subtle yet potent problem that has pervaded the content marketing industry over the years — traditional goal-setting lets you measure what you do, but it doesn’t lend itself to gauging how you do it or why which is what ultimately gives your work meaning and resonates with prospects.
In marketing, you obviously need to aim for concrete targets. But, as we said earlier, only focusing on the results can sometimes incentivize you to take a course of action that prioritizes your organization’s needs over your customers’ needs.
To help you focus more on your purpose and process instead of just your results, Acunzo recommends considering two additional factors when setting a marketing objective — your hunger and your aspirational anchor.
Your hunger is your current dissatisfaction with your work today or why you want to achieve your goal. Your aspirational anchor is your vision of your work in the future or how you’ll achieve your goal.
These two factors drive your motivation and keep you on track to create work that better serves your customers. When you add your numerical goal to the equation, you’ll be able to simultaneously produce customer-centric work and create business impact.
How to Set Realistic Marketing Objectives
The first thing to understand is the subtle difference between a goal and an objective. A general goal is going to be your broader vision while your marketing objective is that more concrete specification of how that vision is achieved. In order to craft your marketing objective, you must start with vision first by defining three main things:
- Hunger – What is the driving force — or the “why” — behind what you want to achieve? What pain or problem has led you to this point, and why must it be solved?
- Aspirational Anchor – What does success look like — or “how” does the end vision solve that problem?
- Goal – What steps must be taken — or the “what” — for that aspiration to come to fruition?
Now that we understand the “why” and the “how” behind setting marketing objectives, let’s go over how you can root the “what” in reality with the SMART goal framework.
SMART goals are realistic, quantifiable, and focused targets that you can easily aim for. If you’re wondering what SMART means, it’s an acronym that helps you clearly define your goals.
Specific
In terms of marketing, you should choose the particular metric you want to improve upon, like visitors, leads, or customers. You should also determine what each team member will work on, the resources they’ll have, and their plan of action.
Measurable
If you want to gauge your team’s progress, you need to quantify your goals, like achieving an X% increase in visitors, leads, or customers.
Attainable
Make sure that X% increase is achievable in your specific situation. If your blog traffic increased by 5% last month, try to increase it by 8-10% this month, not 30%. It’s crucial to base your goals on your own analytics, not industry benchmarks, or else you might bite off more than you can chew.
Relevant
Your goal needs to relate to your company’s overall goal and account for current trends in your industry. For instance, will growing your Facebook following lead to more revenue? And is it actually possible for you to significantly boost your organic reach on Facebook after their most recent algorithm change? If you’re aware of these factors, you’ll be more likely to set goals that are realistic, achievable, and beneficial to your company.
Time-bound
Attaching deadlines to your goals puts pressure on your team to accomplish them. And this helps you make consistent and significant progress in the long term. If you don’t give yourself a deadline, you can very easily fall into the trap of procrastinating on action items, leading to a slower rate of success.
For example, which would you prefer: Increasing leads by 5% every month, leading to a 30-35% increase in half a year, or trying to increase leads by 15% with no deadline and achieving that goal in a year?
By analyzing two different goal-setting frameworks, we’ve learned how to identify the “why,” “how,” and “what” behind your marketing objectives. Now, we can blend the two frameworks to set a realistic goal that fulfills your customers’ needs and helps you hit your numbers at the same time. Check out the examples below for more detail.
Now that you know how to write a marketing objective, you can get ideas from some metaphorical samples. Below, we’ll start with one long example breaking out the above methodology step-by-step, and then we’ll provide other examples to fuel your inspiration.
1. Increase blog subscribers.
In this example, we’ll set a target of increasing blog subscribers by 25% month-over-month this year — it’s a substantive increase, but possible with the SMART framework.
- Hunger (Why) – Our blog educates our audience well but it doesn’t resonate emotionally with them enough.
- Aspirational Anchor (How) – Run a blog that consistently resonates with our audience and that people look forward to reading every time they receive our email digest.
- Goal (What) – Increase blog subscribers as an indication of our success.
With this goal-setting framework, you can see how the “why” and “how” behind a goal incentivizes behavior that better serves customers and hits numbers at the same time.
For instance, in the example above, this blog team refuses to just do whatever it takes to boost their blog subscription. They want to craft emotionally resonant stories that their audience actually values or content that’s worth subscribing to, and this is what will lead to their growth in subscribers and create long-term value for their business.
If this blog team didn’t identify their hunger or set an aspirational anchor, however, the only thing that would guide them toward the finish line is the finish line itself. And that could incentivize short-sighted behavior that helps them achieve their goal at the expense of prioritizing their audience’s needs over their own.
Once the aspirational vision and the general goal has been defined, now it’s time to pivot to a concrete objective using the SMART goal framework:
Specific
Our blog educates our audience well, but it doesn’t resonate emotionally with them enough. Let’s start running a blog that can consistently provide value, that people look forward to reading every time they receive our email digest, and that can attract more subscribers.
Measurable
Increase month-over-month blog subscribers by 25% this year.
Attainable
Last year, we increased month-over-month blog subscribers by 15%, so we know this is doable.
Relevant
If we can craft emotionally resonant stories that our audience actually values, we can build deeper relationships with them, attract more subscribers with whom we can also build deep relationships, and hopefully do business in the future.
Time-Bound
Monthly over the course of a year.
2. Reach more visitors with organic search traffic.
Let’s say our organization’s goal is to grow its online organic presence to attract more leads and reach 35,000 visitors via organic search monthly by the end of the year. These are Hunger and Aspirational anchors, so they must be translated into a SMART goal if we want to take steps to achieve it:
- Specific – Increase website visitors from organic search.
- Measurable – Reach 35,000 visitors monthly.
- Attainable – Must be sure that the number is reachable by increasing or improving variables within our control.
- Relevant – Must be the right traffic since the ultimate goal is to increase leads.
- Time-bound – By the end of the year.
3. Improve the mobile traffic conversion rate site-wide.
Traffic alone is not enough to generate leads and, ultimately, revenue. We need mechanisms in place to convert the traffic we’re already getting.
Let’s say we notice that our site converts a lot better on desktop than mobile. This means we could be losing a ton of lead opportunities who arrived at our site on a mobile device. That’s why we decide to enhance the mobile experience and set a goal of improving mobile traffic conversion rates site-wide from 2.3% to 5% by Q3 Here’s how we turn that goal into an objective:
- Specific – Improve mobile traffic conversion rate.
- Measurable – From 2.3% to 5%.
- Attainable – Must identify roadblocks to conversion and how we plan to remove them.
- Relevant – Must actually have enough mobile traffic to justify the effort.
- Time-bound – By Q3.
4. Increase MQL conversions.
With inbound marketing, it’s easy to get swept up in blogging, offer creation, and lead conversions. At the same time, if we don’t have mechanisms in place to move those leads closer to a purchasing decision, these efforts don’t pay off the way they could. Part of our jobs as marketers is to foster relationships with our leads while qualifying them so that the sales team focuses on prospects who are ready to buy.
Let’s say we have a top-of-the-funnel lead generation engine where website visitors convert on eBooks and guides. Our goal is now to bridge the gap between where they’re at in their journey vs. where we want them to go and so we aim to convert 500 leads to MQLs by the end of the year. We decide to do that through an ongoing educational email drip sequence, and we start with our objective:
- Specific – Convert Leads to MQLs.
- Measurable – From the existing number to 500.
- Attainable – Must ensure we already have a large enough pool to extract those MQLs from (or a fast-enough lead generation engine to supply them).
- Relevant – Must have a clear definition of what constitutes an MQL and a plan to obtain those parameters.
- Time-bound – By the year’s end.
5. Boost the average monthly open rate.
In order for us to effectively nurture leads, we want people to be reading our content… which they won’t do if they don’t get past the subject line of the email. Here’s how we position this concept into the concrete objective of increasing the monthly open rate from 25% to 40% in one quarter:
- Specific – Increase average monthly open rate.
- Measurable – From 25% to 40%.
- Attainable – Must analyze existing email tactics to identify gaps.
- Relevant – Must only include the most relevant marketing emails in the metrics to avoid skewing data.
- Time-bound – In one quarter
6. Increase our MQL to SQL conversion rate.
Never forget the primary goal of marketing, which is to promote an organization’s goods or services in the effort of generating more sales. At the same time, fewer than half of marketers consider their departments aligned with sales.
A relevant goal might be to improve the effectiveness of our marketing efforts by solidifying the marketing to sales hand-off. Specifically, we’re aiming to increase MQL to SQL conversion rate from 25% to 35% by Q2. Our concrete objective might break down like this:
- Specific – Increase the MQL to SQL conversion rate.
- Measurable – From 25% to 35%.
- Attainable – Must ensure we already have a large enough pool to extract those SQLs from (or a fast-enough lead generation engine to supply them).
- Relevant – Must have a clear agreement between the marketing and sales departments for what constitutes an SQL.
- Time-bound – By Q2.
7. Improve overall NPS score.
Marketing doesn’t end once the prospect becomes a customer, and that means also working on ways to fuel the flywheel i.e. turning customers into brand advocates who purchase from us and tell their friends to do the same.
NPS is a solid measurement of customer happiness, so improving that score — from 31 to 35 within 6 month — is a solid place to start building our objective:
- Specific – Improve the NPS score.
- Measurable – From 31 to 35.
- Attainable – Must analyze existing NPS roadblocks to identify gaps.
- Relevant – Must ensure there’s a mechanism for collecting and analyzing NPS input.
- Time-bound – In 6 months.
8. Enhance Facebook engagement.
One of the best ways to grow a brand’s marketing efforts exponentially is by investing in its community of customers and prospects. The goal might be to stay top of mind and energize the community by raising the bar on each social media platform. For example, we might look to improve Facebook engagement by 30% month-over-month:
- Specific – Improve engagement on Facebook.
- Measurable – By 30%.
- Attainable – Must identify the content that’s engaging our existing user base and see if 30% is a reasonable number to strive for.
- Relevant – Must ensure that there’s a solid definition of what metrics are being counted as engagement.
- Time-bound – On a monthly rolling basis.
9. Increase total market share.
As digital markets become more crowded, it’s critical for companies to claim as much market share as possible — pulling even a few percentage points away from the competition can have significant benefits for your bottom line.
Let’s set a reasonable goal: Increasing total market share a 5% by the end of the year:
- Specific – Improve total market share
- Measurable – By 5%
- Attainable – Must identify areas of potential loss, such as customer churn, and areas of gain such as targeted advertising
- Relevant – Must ensure there’s a reliable way to regularly measure market share
- Time-bound – By the end of the year
10. Evaluate ad impact.
Advertisements help your brand get noticed — but are your ads doing their job? Here, our marketing objective is to compare the cost-per-click and conversion rate of two different ads using A/B testing on social media over the period of a month to determine which one drives better ROI:
- Specific – Determine the highest ad impact
- Measurable – Evaluated using cost-per-click
- Attainable – Must assess the impact of each ad and how many click-throughs it generates
- Relevant – Must ensure the same metrics are used for each ad to ensure an accurate comparison
- Time-bound – In one month
- Marketing Objectives: Metrics and KPIs
Once marketing objectives have been established, companies must identify and track specific metrics and key performance indicators (KPIs) to provide both immediate insights and set the stage for long-term strategic planning. Some of the most common metrics and KPIs include:
Sales Growth
Sales growth is measured using total revenue volume, number of units sold, or both. Increasing numbers mean growing sales — for best effect, monitor sales growth as a baseline and then during new marketing campaigns to evaluate your impact.
Profit Variance
Profit — also called return on investment (ROI) — isn’t simply a factor of sales and revenue. Instead, it depends on the amount of money your brand makes after material costs, marketing expenses, and other spending is subtracted. If material costs increase but sales remain steady, for example, profit will decrease. Monitoring profit variance helps ensure product prices drive ROI.
Total Market Share
The bigger your market share, the better. To calculate this metric, you need the market size of your local industry and its approximate total revenue.
Multiple your brand’s revenue by 100 and divide by the market’s total revenue to get a percentage market share. Recalculate this regularly to see if your share has improved.
New Customer Volumes
More customers mean more sales and more revenue. Along with measuring the total number of new customers over a specific time frame, it’s also worth evaluating customer increases in comparison to other time frames — such as when you’re running a sales or marketing event — along with considering the cost per customer, which is the total amount of money spent to acquire a new customer.
Lifetime Customer Value
Higher lifetime customer values mean more reliable revenue streams. To calculate this metric, multiply the average number of purchases made by return customers over a specific period with the average total value of these purchases. This provides an approximation of lifetime customer value to help inform ongoing marketing strategy.
Conversion Rates
Conversion rates measure the percentage of people who take action when presented with the choice to opt-in for sales notifications, email newsletters, free trials, or who ultimately decide to make a purchase. It’s worth tracking conversion rates across all aspects of your website to see which marketing tools are delivering reliable results.
SEO Impact
Search engine optimization (SEO) helps your brand rank higher with popular engines such as Google, in turn making it easier for customers to find your site.
Tools such as Google’s Keyword Planner can help you identify ways to improve your SEO, and you can quickly test how you stack up by searching for your brand’s target keyword and seeing where you show up in current search rankings.
Social Media Performance
Social media marketing is now critical to generate organic engagement and customer referrals. As a result, it’s worth tracking metrics such as the increase in follower numbers on a certain platform over a specific period, the number of comments left on your posts, and the number of times your posts are shared.
Tools to Track Marketing Objectives
You’ve got the model. You’ve identified the objectives, and you’ve defined the metrics. Now you need the right tools to track marketing objective success across your organization.
1. HubSpot Marketing Hub
The HubSpot Marketing Hub offers all the marketing tools and data you need, and all under one roof. From SEO strategy tools to ad tracking, social media management and live chat support, and a robust content creation platform, HubSpot can help your brand reach more people more quickly and boost total ROI.
2. Real-time Dashboards
Real-time dashboard tools provide right-now, single-pane-of-glass analysis of current sales performance, KPI progress, and other key metrics. Often hosted in the cloud, real-time dashboards make it possible for everyone in the organization to view current marketing goals and ensure business operations are aligned with specific outcomes.
3. Spreadsheets
While spreadsheets are often considered relatively low-tech and legacy deployments when compared to more robust marketing tools, they nonetheless offer actionable value. Tools such as Google Sheets and Excel are easy to use, easy to view, and offer an understanding of specific metric performance at a glance that can help inform current marketing efforts.
4. Website Analytics Trackers
Tools such as Webtrends and Google Analytics provide in-depth statistics about the number and type of users that visit your web page, along with key data such as how long they stayed, what they clicked on, and which actions (if any) were taken.
While website analytics alone aren’t enough to inform marketing efforts, they’re essential to help marketing teams refine overall strategy for maximum effect.
Starting SMART
Once you understand the importance of vision, identifying broad goals, and using the SMART goal framework to make concrete marketing objectives for those goals, it’s time to identify the gaps in your marketing and begin outlining your objectives.
Once you do, it’s important to write those objectives down and commit to creating a solid plan of action to achieving them.
Editor’s note: This post was originally published in [Insert original publish date] and has been updated for comprehensiveness.

Facebook Analytics is Going Away: Should Marketers Really Worry?
As marketers, we crave data.
Each day, our analytics platforms help us define who our audience is, measure how well we’re tracking them, and determine what strategies we should take on next.
And, if an analytics platform is free or affordable to use, that’s an even bigger bonus to teams in SMBs or startups.
That’s why many marketers were caught off-guard when Facebook announced that it will be sunsetting its free Facebook Analytics tool on June 30th.
But, while Facebook’s announcement might seem a bit scary, it might only impact a small number of businesses.
“Even though this tool is going away, we continue to invest in measurement products that provide insights and data analysis capabilities,” the short Facebook announcement said.
Below, we’ll explain why Facebook’s removing its Analytics feature, why you might not need to panic, and alternatives you can use to get similar data about your audiences.

Why Facebook is Sunsetting Analytics
Facebook Analytics launched in 2018 as a free alternative to platforms like Google Analytics (GA). On top of tracking all your Facebook Business Page data in one place, users could also create and embed Facebook tracking pixels on their websites to see how audiences behaved and what their customer journey looked like.

Facebook Analytics could also give brands a look at your Facebook page’s details and audience demographics to help brands better inform their strategies.
Because much of the information shown on Facebook Analytics can now be found through other competitive and affordable data platforms — as well as Facebook’s Insights, Business Suite, Ads Manager, and Events Manager — Facebook decided to discontinue Analytics in an effort to consolidate its tools.
While Facebook hasn’t said if online privacy trends were a factor in its decision, the pivot comes at a time when Google and Apple have already begun to limit data tracking through the planned phase-out of third-party cookies and Apple’s recent IOS 14.5 opt-in requirements for mobile app tracking.
Because of the ongoing moves towards data privacy, it seems that Facebook could also prevent future data concerns with the streamlining of nearly extraneous Analytics tools.
How Marketers Can Prepare
Until June 30, brands can still access Facebook Analytics and download reports of all the data they might need.
To export data into a CSV file from Facebook Analytics on your desktop, click the [share icon] in the top-right corner of each chart or table,” Facebook advises.
Aside from downloading data, brands that used the tool should also consider alternatives that can highlight similar data. Although Facebook Analytics was a helpful tool for some businesses looking for free or cheap platforms, there are affordable alternatives that can help you track your customer’s journey from social media to on-site conversion.
Below is just a quick list of Facebook Analytics alternatives to consider.
Facebook Analytics Alternatives
Free Tools
Facebook Business Suite
Once Facebook Analytics is no more, Facebook will encourage Business Page admins to use its Business Suite, which allows users to connect and track multiple Instagram and Facebook Business Pages at once.
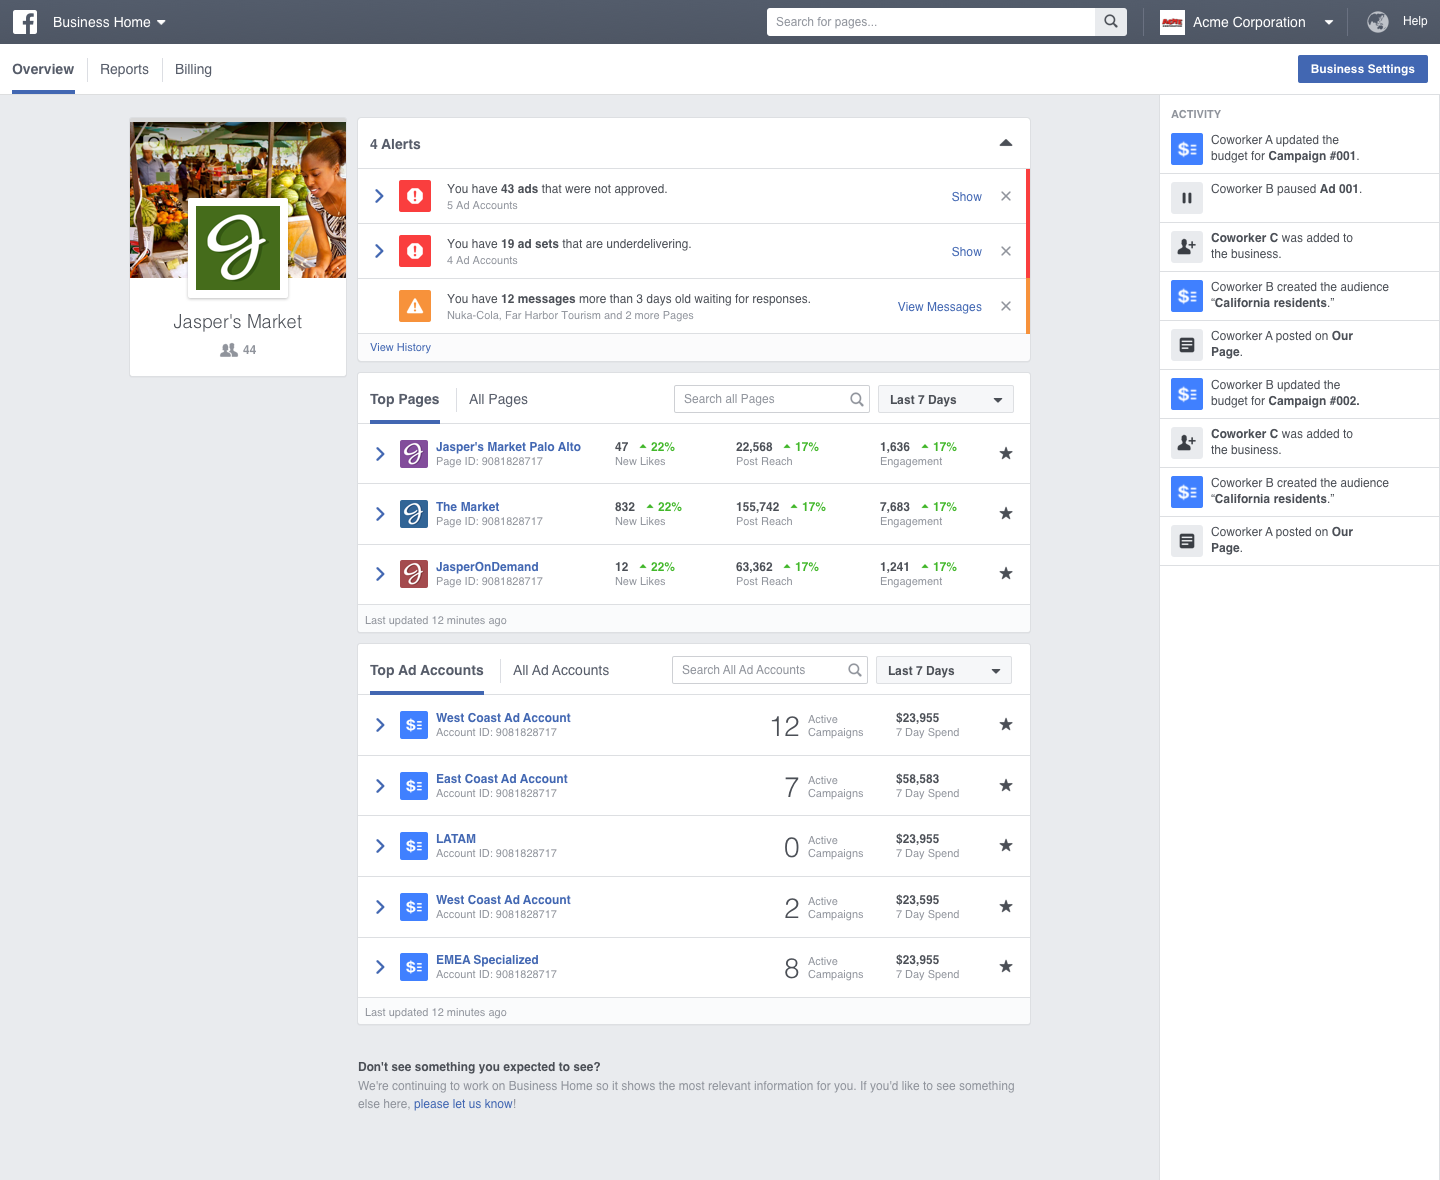
At the moment, Facebook Business Suite is still rolling out and might not be available for some admins just yet. However, the tools below can help you fill your data gaps as you wait.
Facebook Insights
Facebook Insights is an analytics dashboard where you can track business page user behavior and post performance. You can also see insights like page views, post reach for paid and organic posts, and competitor page data.
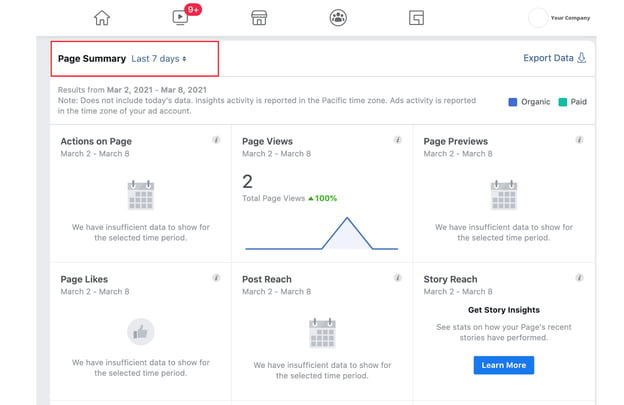
If you have a Facebook Business Page, you’ve probably used Facebook Insights to gather data that can fuel your social media tactics. Luckily, Facebook says Insights won’t be impacted by the removal of Facebook Analytics.
To learn more about Facebook Insights if you’ve never used it before, check out this blog post.
Facebook Ads and Events Managers
Facebook Ads Manager and Facebook Events Manager help you launch and track ads and website conversion events attached to your Facebook Business Page.
While Ads Manager lets you view, edit, and track your Facebook campaigns, ads, and ad sets, Events Manager lets you use Facebook’s pixel and Conversions API to track and report on actions visitors take on your website, app, or even in your physical store. To use Events Manager, you’ll need to add the Facebook Pixel code to your website to make it trackable. Instructions for this can be found on Facebook’s business knowledge base.
Paid Tools
HubSpot
HubSpot’s Social Media Management Software not only enables you to link and share posts on your Facebook account, but you can also track conversions and other engagements.
HubSpot’s social media tools can help you understand which of your marketing tactics are working best among your audience, determine how your marketing efforts are impacting your bottom line, see if your campaigns result in more paid or organic social media sessions, and learn about your search engine optimization (SEO)-related ROI.
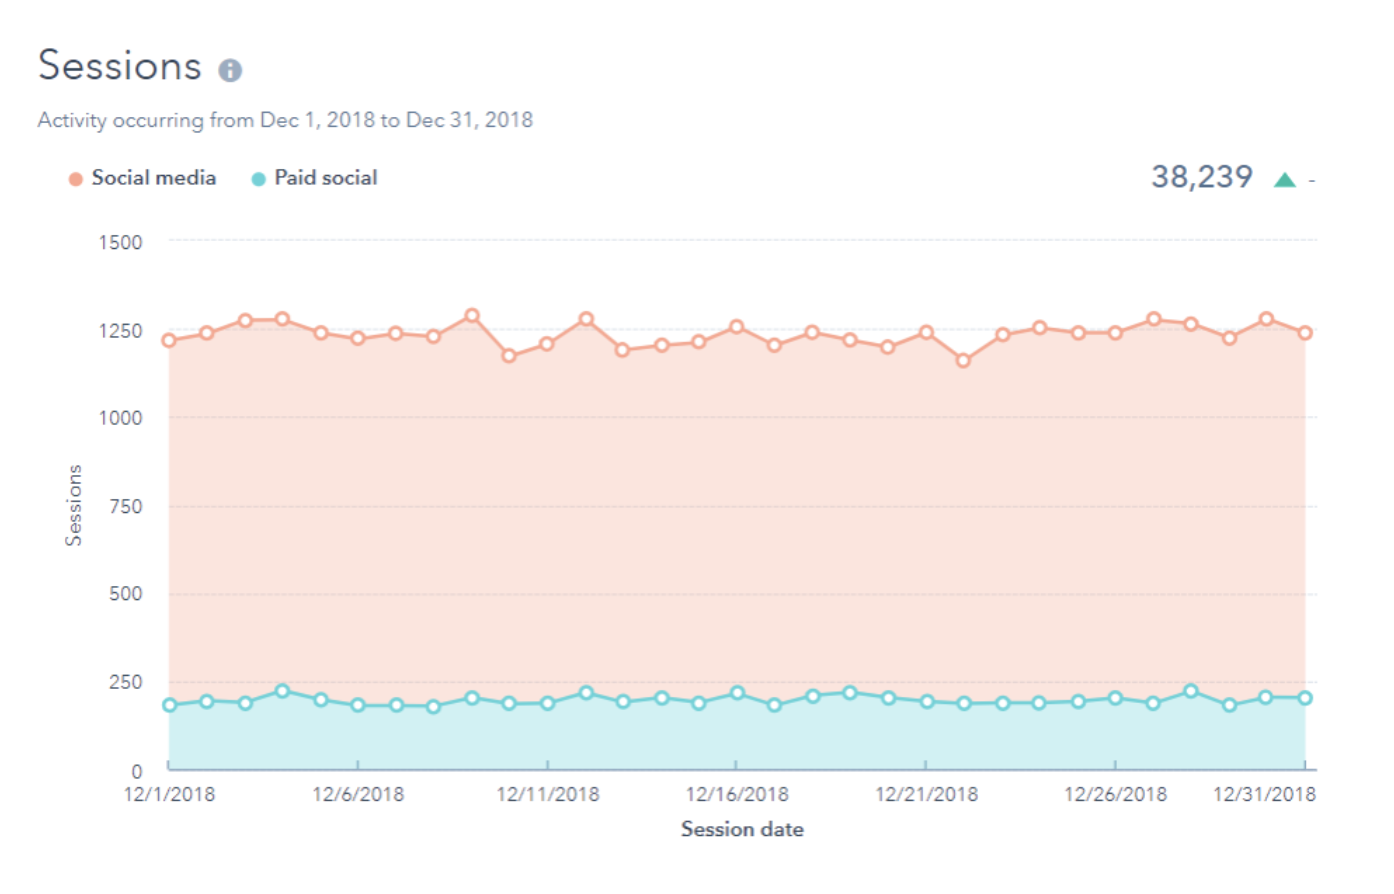
Additionally, if your website is built on HubSpot’s CMS or has a HubSpot tracking code installed, you can track site conversions, traffic, and traffic sources to learn more about where your audiences are coming from and what they engage with.
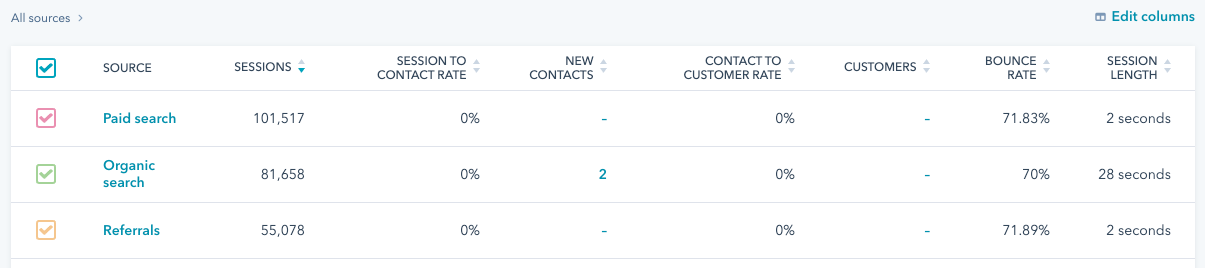
Google Analytics
While Google Analytics is often seen as a high-end analytics tool, it certainly has a lot of great features that have helped marketers around the globe to transform their strategy.
While it will likely take a bit of onboarding and training for your team GA allows you to see traffic patterns, traffic sources, visitor demographics, and visitor behavior among a plethora of other helpful insights.
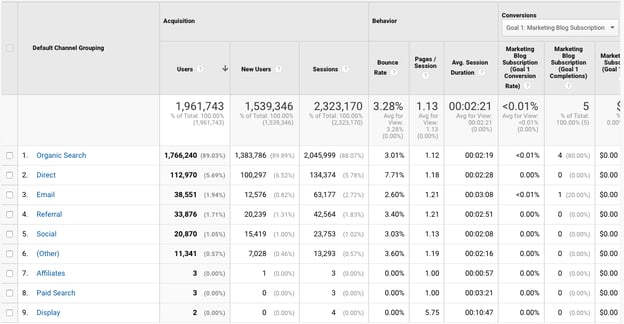
For a crash course on Google Analytics with photos, check out this Ultimate Guide.
Navigating Data Software Shifts
As the world evolves towards more online privacy and streamlined technology, Facebook probably isn’t the only platform that will change or evolve in years to come.
As a modern marketer, it’s important to know when to invest in new analytics platforms, alternatives, or workarounds if the tools you use are no longer relevant.
For tips on developing effective data-driven strategies, download the free resource below.

39 Simple Ways to Grow Your Email List
I have some bad news — your email marketing contact database degrades over time.
Your contacts’ email addresses change as they move from one company to another, opt-out of your email communication, or abandon an address they only used to fill out forms on websites.
As a marketer, it’s your job to make sure you’re constantly adding fresh contacts to your email lists so you can continue generating growth. While purchasing emails is an option, it’s not always the best way to go about this.
In this post, discover high-quality strategies to help you grow your email list to ensure that you have a large audience of subscribers eager to hear what you have to say and likely to make purchases and contribute to your business growth.
![→ Download Now: The Beginner's Guide to Email Marketing [Free Ebook]](https://no-cache.hubspot.com/cta/default/53/53e8428a-29a5-4225-a6ea-bca8ef991c19.png)
Sometimes called subscriber lists, email lists can get smaller if members unsubscribe and grow as you continue to collect more and more addresses through lead generation.
If you’re not working on building your email list already, or you’ve run out of ideas on how to do so, here are 39 simple ways to grow your email list. Please note that, with these methods, it’s essential to allow people to opt-in to receiving additional emails from your company, as some may not be interested.
39 Creative List Building Techniques
How To Grow Your Email List Using Email
1. Create unique email content.
Want to retain your current subscribers and have them help you grow your list? Create unique email content. If your emails are entertaining, informative, and valuable, recipients will always look forward to receiving them and will be more likely to forward them to their networks. This helps you gain exposure and obtain additional subscribers.
2. Encourage subscribers to share and forward your emails.
Include social sharing buttons and an “Email to a Friend” button on your marketing emails. By doing this, you’ll gain access to recipients’ friends, colleagues, and networks to expand your contact list. At the bottom of your emails, include a “Subscribe” CTA as a simple text-based link so that the people receiving the forwarded emails can easily opt-in too.
3. Segment your email lists by buyer persona.
Email recipients are more likely to click through emails that cater to their specific interests, so using varying types of email subscriptions to send targeted content to different segments of your audience is worth considering.
If you create multiple targeted subscriber types, you’ll increase the chance that visitors will subscribe to one of them. In fact, marketers who used segmented campaigns noted as much as a 760% increase in revenue.
4. Reinvigorate a stale email list with an opt-in campaign.
Do you have an older list that you suspect is mostly decayed? Create an engaging opt-in message and send it to your old list and encourage contacts to re-opt in if they’d like to, but also promising to remove all contacts who don’t respond.
Though it may seem counterintuitive to remove folks from your email list to grow them, emailing contacts that you know are engaged can improve your deliverability and increase the odds of your email being shared with those outside your current database.
5. Add an opt-in link to your employees’ signatures.
Hyperlinked email signatures can lead people to a landing page where they can sign up for your mailing list. Plus, if you’re already in a natural email conversation with them, subscribing to more emails can be a natural next step.
How To Grow Your Email List With New Content
6. Create a new lead-generation offer.
Create a new gated lead-generation offer, like a free ebook, and host it on a landing page that asks visitors to provide their email to download it.
7. Create a free online tool or resource that requires sign-up.
Free online tools make your users’ lives easier, especially if all they have to do is sign up with their email address. For example, we’ve created quite a few free tools, like Website Grader, to gather email addresses.
8. Create additional bonus content.
Not all gated content is worth it to a website visitor. Sometimes, to gain their interest, you need to give them free content first. You can begin with a blog post that offers beginner advice on a subject, then offer additional bonus content with more advanced tips that they can access by submitting their email address via a landing page.
How To Grow Your Email List Using Social Media
9. Promote an online contest.
Use your social media accounts to host a free giveaway that requires contact information to enter. You can encourage your followers to click through to your website and sign up using their email addresses.
10. Promote a lead gen offer on Twitter.
Create a Twitter campaign to promote an ebook or free resource to your followers that requires using an email address to redeem.
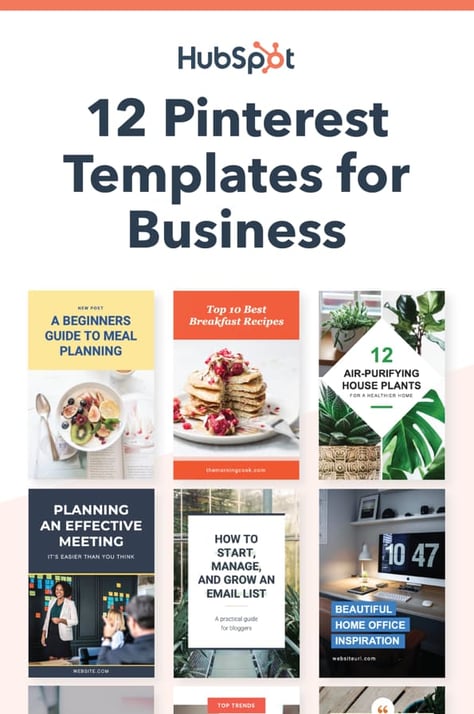
11. Use Pinterest to promote gated visual content.
Pinterest plays host to visual content that encourages visitors to sign up to see more content. Use this to your advantage, and promote your gated visual content on the platform, so users are eager to learn more from you and submit their email to get more high-quality information.
Featured Resource: 12 Pinterest Templates for Business
Download These Templates for Free
How To Grow Your Email List Using Facebook
12. Make your email newsletter the theme of your profile cover photo.
Your Facebook profile cover photos are a great place to call attention to something specific, especially your email newsletter. If you create a high-quality graphic that highlights and calls attention to its value, you can entice users to submit their email to gain further benefit from the content you offer.
Featured Resource: Five Free Facebook Cover Photo Templates
 Get These Customizable Templates
If you do this, you should also consider leveraging our next tip, making it easy for users to seamlessly submit their emails once you’ve attracted their attention.
13. Add a call-to-action button to the top of your Business’s Facebook page.
The value of this list-building technique is in the destination: add a CTA button to your Facebook page that links users to your sign-up landing page or a gated featured resource that requires email access. We added CTAs to our HubSpot Academy Facebook page, as displayed in the image below.
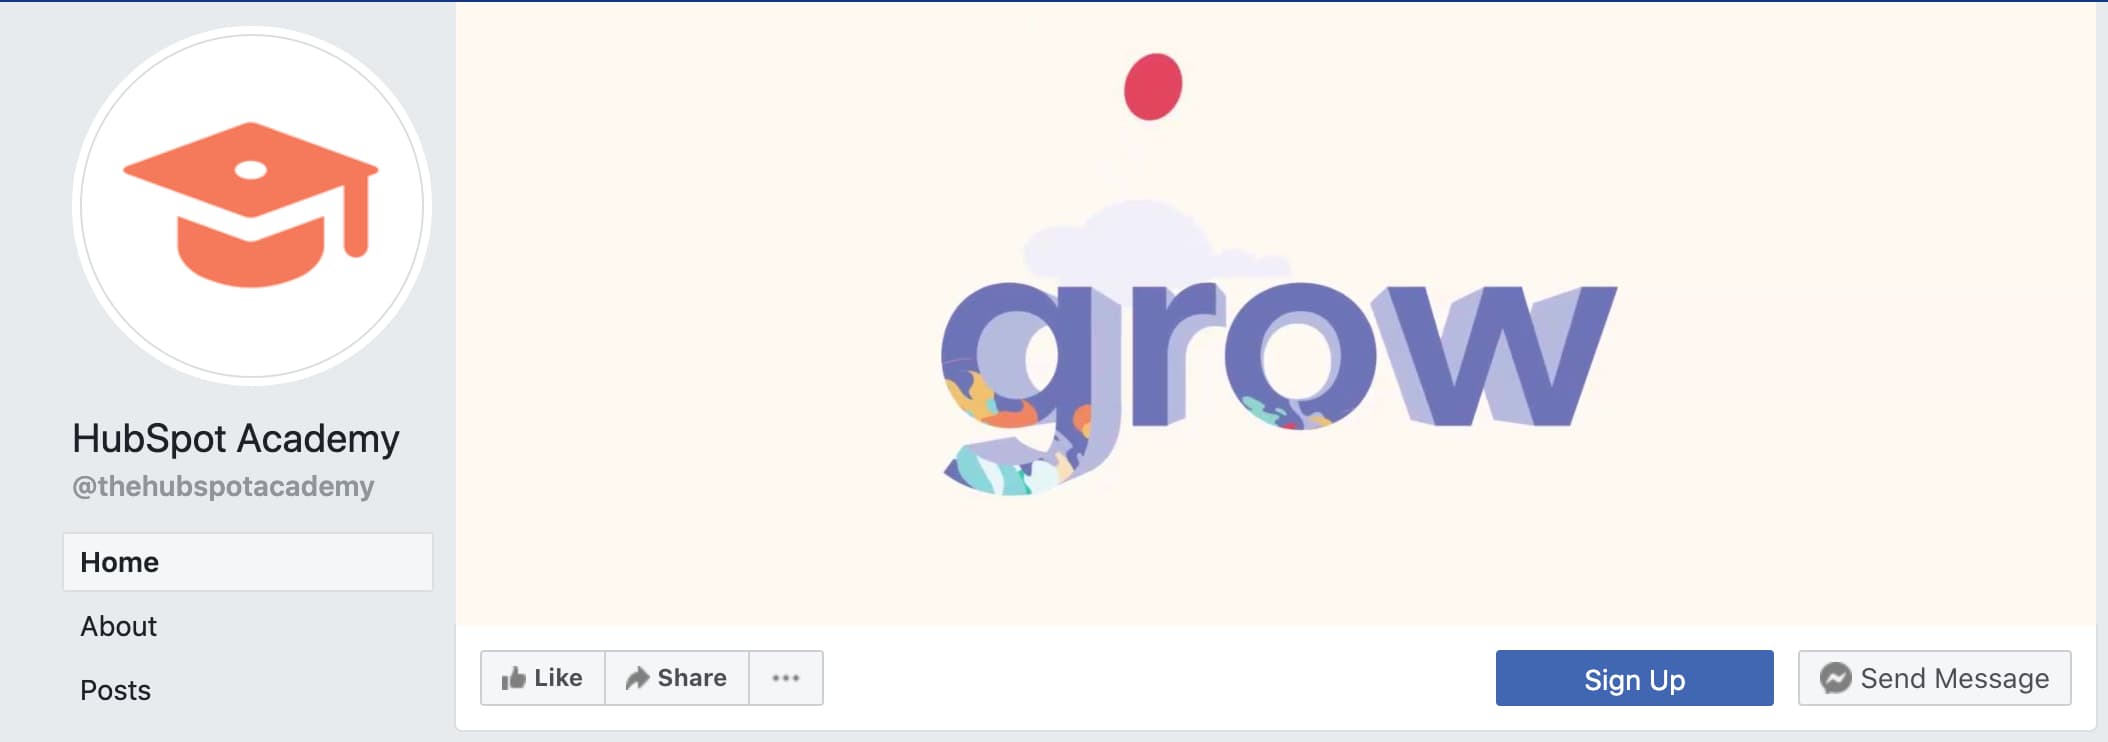
In addition, placing a sign-up CTA button within your profile makes it easier for users, as they won’t need to leave Facebook and go to your site — they simply click the link, and you take them there.
Here’s a guide from Facebook on how to add one to your profile.
14. Share newsletter previews on your profile.
Creating a Facebook post that showcases a snippet of your email newsletter is a great way to attract your audiences and entice them to join your email list. They’ll get a preview of what you have to offer, become eager to learn more, and sign up to continue generating value from your business. Within this post, you can include a link to your sign-up page for easy and quick sign-up.
15. Promote content through Facebook that requires an email address to access.
Promote content in your Facebook posts that encourage email submission to access. This content can be something like a gated ebook, joining a giveaway or contest, or even saying that email subscribers get early access to new products.
Be sure to add social sharing buttons to your landing and thank-you pages to encourage your leads to share within their networks.
How To Grow Your Email List Using YouTube
16. Add engagement features to your YouTube videos.
End screens, also called video outros, are a tool that YouTube offers creators to direct viewers to take additional action after finishing a video, like clicking on a link to your website or watching another video on your channel. As they are used to generate further engagement from your viewers, it’s worth considering adding hyperlinks to your sign-up landing page in your end cards to grow your email list.
This tip is beneficial if you have created an informative video with mostly surface-level content. A more advanced view is provided in a gated offer or your email newsletter.
17. Use your header and images to promote your email newsletter.
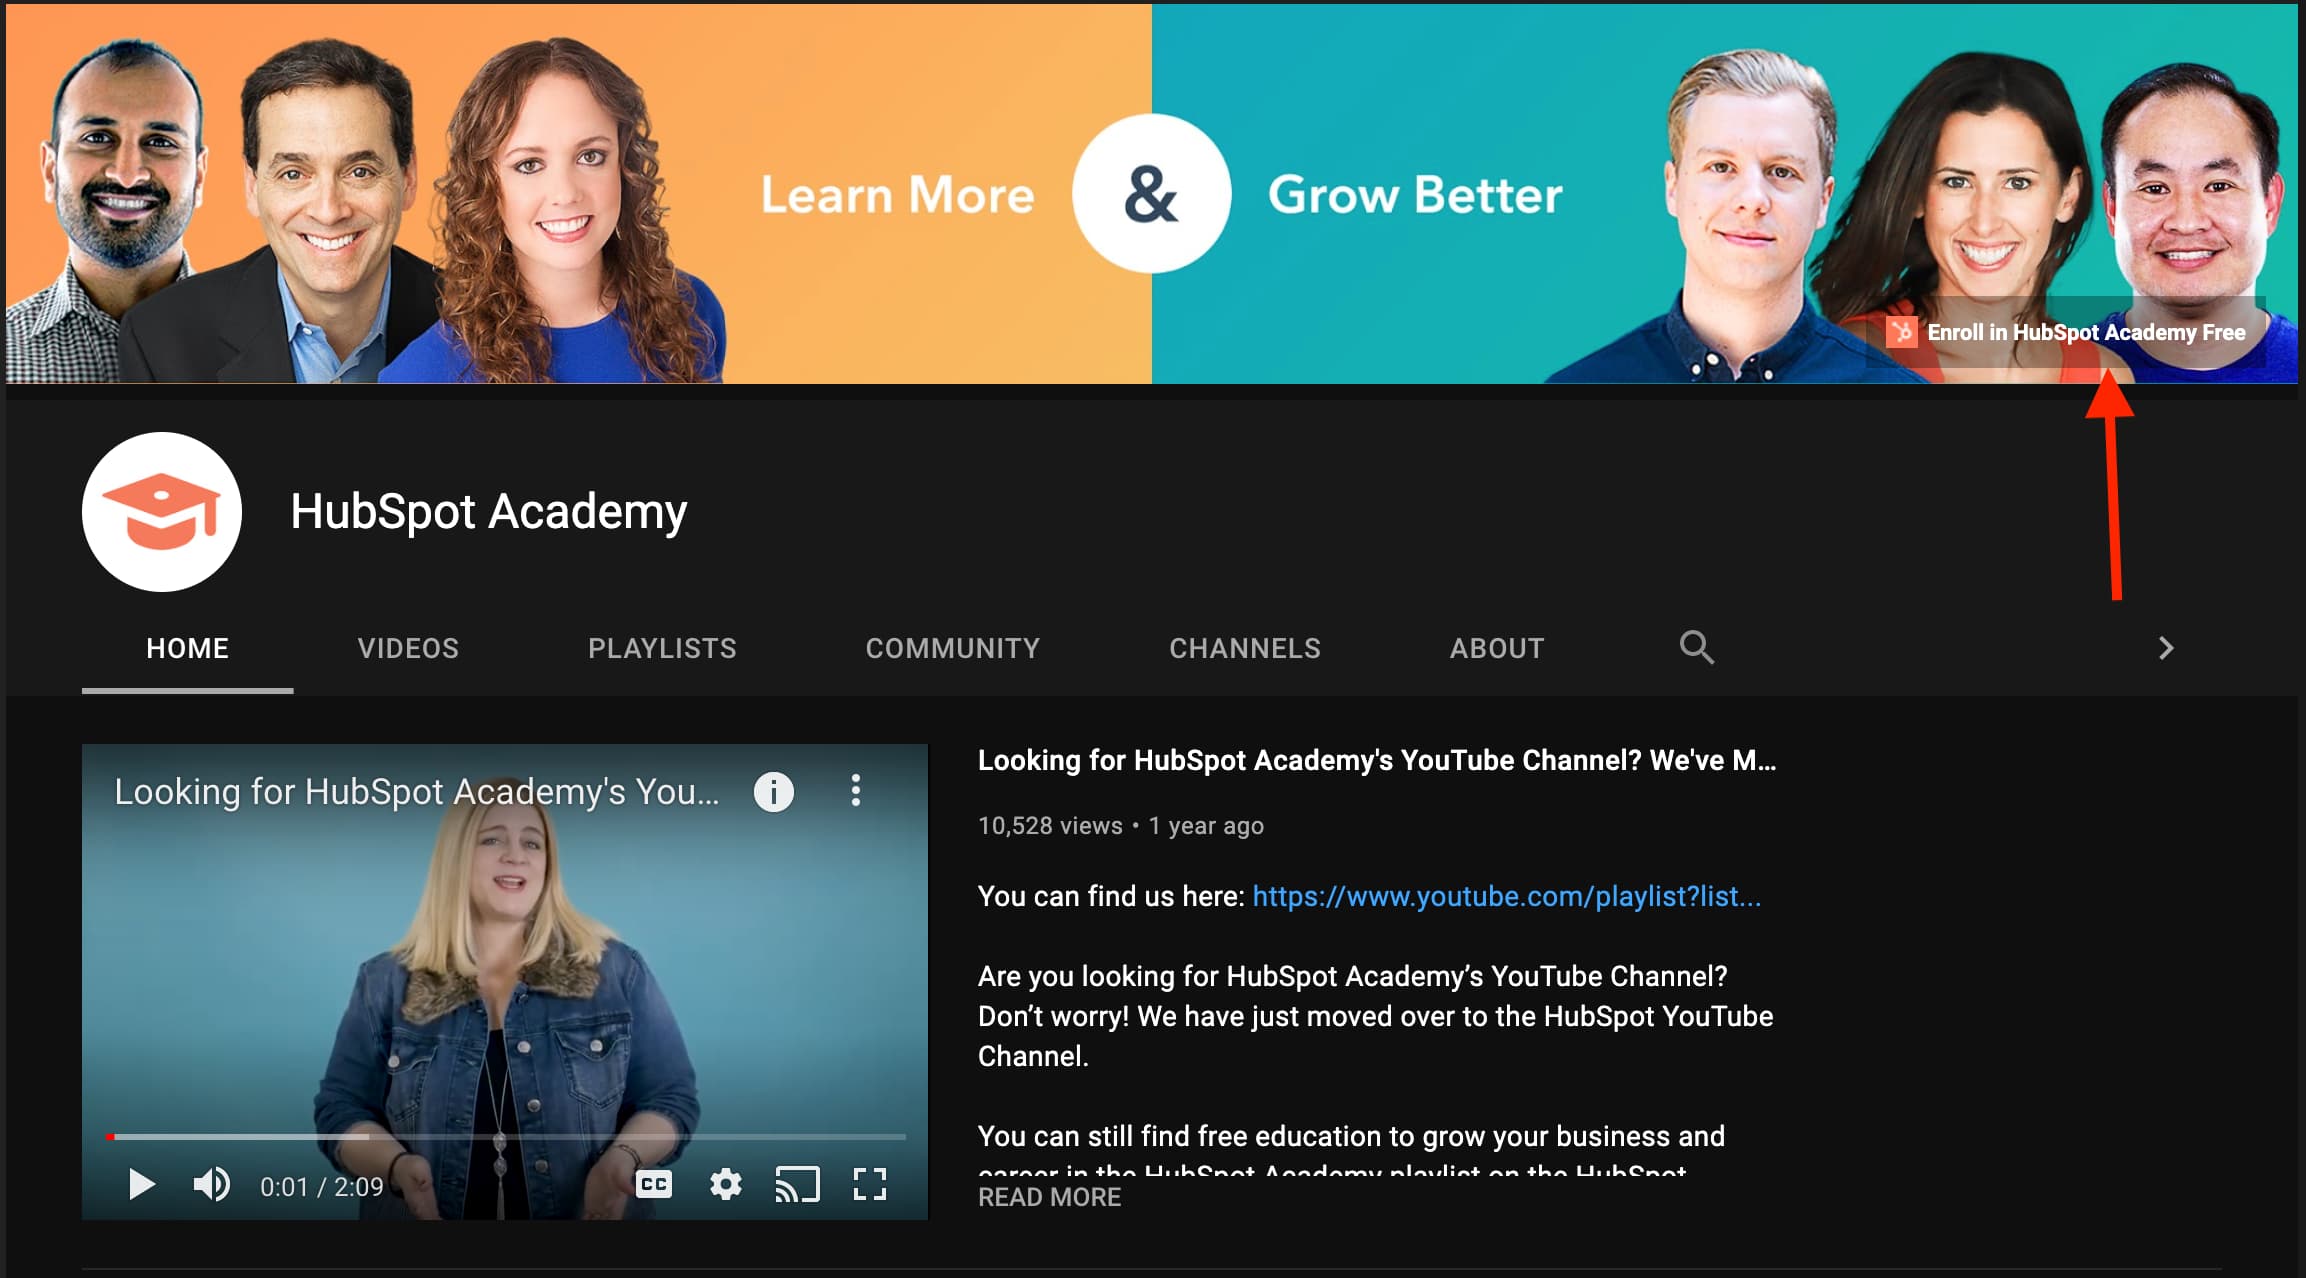
Capture leads by placing a link to your sign-up landing page in your channel header. This image is front and center on your profile, and if your banner is eye-catching, well designed, and calls attention to your content offer, users will be drawn to it, which places the CTA link in their direct line of sight.
The red arrow in the image below points to a CTA on the HubSpot Academy YouTube page that leads users to a course enrollment offer that requires an email to sign up.
18. Promote your emails in your video descriptions.
Your YouTube video descriptions talk about the content within your videos, so viewers know what they’re about to watch. Each of your descriptions will likely contain unique elements, but it’s worth plugging your email sign-up landing page link within each of them.
This tip can be especially useful if you create how-to style videos, and you can entice users to sign up for more informative content and instruction by clicking the link in your description.
Featured Resource: 7 YouTube Description Templates [Free Prompts]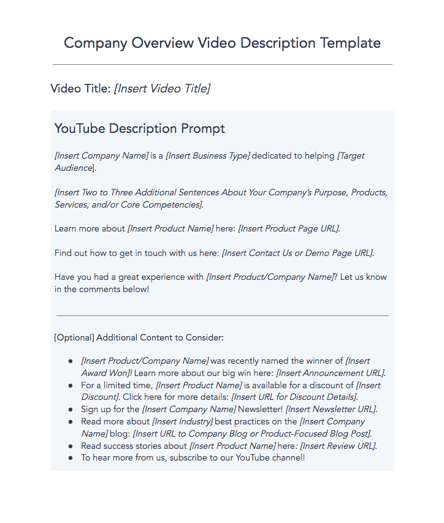
Download These Customizable Prompts
How To Grow Your Email List Using Instagram
19. Add a call to action to your Instagram bio.
Your Instagram bio is a great place to share information with your audience, like a CTA that calls attention to your email list and a link to your sign-up form.
Your CTA text should entice users by explaining the benefit they get from signing up, like obtaining bonus info, access to exclusive offers, or a general business newsletter. Placing the link directly in your bio also reduces customer effort, as they can simply click and sign up in a pop-up window within the app.
20. Share posts that lead users to click the call-to-action email link in your bio.
While you may not share posts that outright say “Give us your email,” you can certainly see success from sharing posts that entice users to share their contact info.
For example, you can advertise a giveaway and let users know that they can enter by clicking the link in your bio and submitting their email addresses. In another case, if you post an informative video about how to use your products, you can entice users to sign up because your emails will offer more informational content about how to use your products.
21. Use the swipe-up feature to share your landing page.
If you have an Instagram Business profile and more than 10k followers, you can add a clickable link to your Stories that users can access by swiping up on the story.
This feature is an excellent opportunity to share a link to your sign-up page or another offer on your site that collects email addresses in exchange for value, like a free trial. You can also use this feature to link to something like an informative blog post with a lead generation offer that your audience will be excited to sign up for.
Featured Resource: 8 Instagram Story Templates
22. Add an email button to your business profile.
A more direct way to get user emails is to add an email button to your business page. This tool is primarily used for service needs so that customers can reach out to you for support inquiries. Still, it gives you the opportunity for further lead nurturing by asking if customers want to opt-in to receiving more emails.
Here’s a guide on how to add one to your profile.
How To Grow Your Email List Using LinkedIn
23. Send readers to a landing page for email sign-up.
After having conversations on LinkedIn, you can share links to your sign-up pages. You’re allowing users to continue the interaction you’ve just had, as your email will provide them with further high-quality information and content related to your business.
You can send these links in InMail messages, comment threads, and personal 1:1 direct messages.
24. Post about your email newsletter.
If you have an email newsletter, you can post snippets of its content on LinkedIn and let users know that, if they sign up, they’ll get access to the entire piece and every newsletter from there on out.
25. Publish links to gated offers.
When you share a post on LinkedIn that contains high-quality information your audience can benefit from, round it out by encouraging users to sign up for your email list. If what you’ve said has resonated with them, they’ll recognize that receiving emails from you will give them additional access to the high-quality content you offer.
You can also do this in appropriate and relevant LinkedIn group discussions — just be mindful of the topic being discussed to ensure your offer is a welcome addition to the conversation.
How To Grow Your Email List On Your Website
26. Ask website visitors for feedback
People enjoy offering feedback on information that pertains to them. On your site pages, include a form that asks visitors what questions they might have about your business, and collect email addresses to follow up with them.
27. Shorten the length of your lead-capturing forms
It’s tempting to collect as much information on a user as possible right away, but adding too many fields to your landing pages and lead-capturing forms can drive people away. Reduce the length of your forms to just two to three fields — you can collect more information from them once you start a conversation.
28. Link to offers across your website that capture email signups
Create CTAs that link to your offers across your website that captures email sign-ups. Some key places to consider include your website’s homepage, your ‘About Us’ page, and your ‘Contact Us’ page.
29. A/B test different campaign copy
You might be doing all the right things to generate leads — landing pages, gated content, contests, and more, but not seeing the success you’re looking for. The problem may be that the design or copy itself isn’t driving the engagement you need.
A/B test different aspects of your list-building campaigns with different versions of the same content. This includes the call-to-action text, the color of the gated offer, and even where these sign-up forms are placed on your website. Sometimes a small change can drive hundreds more conversions.
Featured Resource: The Complete A/B Testing Kit
30. Create a blog that readers can subscribe to.
If you don’t already blog, you should. Blog posts help you increase your ranking on search engines and generate blog subscribers to upgrade to more actionable email campaigns over time.
31. Guest blog for other websites and share a call-to-action.
There are many websites and publishers out there that cater to your audience — and larger portions of it. Guest blogging for these websites helps you expand your contact list through exposure to a new audience.
When you create guest blogging content, include a CTA for readers to subscribe to your sites’ blog or email newsletter.
32. Include customer reviews on your sign-up landing pages.
It’s one thing for you to tell people to sign up for a campaign, but it’s another thing for your happiest customers to say it too. Customer reviews are the social proof that encourages people to join in on something, and you should publish these reviews on your website, especially landing pages with sign-up forms. Including reviews will add genuine value to your content when people are on the fence about submitting contact information.
How To Grow Your Email List With a Partner
33. Run a promotion on a partner website or email newsletter.
Similar to guest blogging, partner websites can help you target a new audience. Use this partner source to direct visitors to your website, where you’re already sharing sign-up forms.
34. Host a co-marketing offer with a partner.
Creating an ebook or webinar with a partner can split up the work of content creation and allow you to share the audience of a similar business. After you release your content, split the leads you generate with your partner.
Creating an ebook or webinar with a partner can split up the work of content creation and allow you to share the audience of a similar business. If the content is gated, you’ll collect email addresses from a new audience for nurturing.
How To Grow Your Email List With Traditional Marketing
35. Collect email addresses at a trade show.
Offline events like trade shows are highly anticipated growth opportunities for professionals in your industry. Demo your latest product at an appropriate conference and collect signups in person.
Once you’re back at the office, import these signups into your contact database, and be sure to send a welcome email that confirms their opt-in to your list.
36. Host your own offline, in-person events.
Meetups, seminars, hackathons, educational panels, and your conferences place you front and center of a networking event. Those who attend are often more qualified to be contacted because they came to your event. Take the opportunity to collect email addresses from attendees, and send a welcome email and encourage opt-in.
37. Host an online webinar.
Webinars are the perfect opportunity to talk about your industry and access the audience of thought leaders that you may want to present with. The best part? Webinars are normally registered for via email, so you have audience emails to add to your list for further nurturing upon registration.
38. Add QR codes to your display ad.
Incorporate a QR code into your print marketing collateral that people can scan for more information on the printer content. You can set it so that your codes require email addresses to access additional content so that you can grow your list.
39. Collect emails in-store.
If you have a brick-and-mortar store where you interact with customers face-to-face, launch a store membership that they can sign up for via email at the register. You can create an email campaign designated to walk-in customers, which can help you keep in touch and reward loyalty to your product.
The examples above are all things you can do to increase your business’s email list. The best way to do so is to leverage multiple strategies on this list, helping you reach your audiences from a wide variety of angles and increase the chances of growing your list.
As you grow your email list with fresh, opt-in contacts, you’ll be able to nurture them with middle-of-the-funnel offers that allow you to convert early-stage leads into sales-ready leads.

Color Theory 101: A Complete Guide to Color Wheels & Color Schemes
When you’re sifting through your News Feed, what tends to catch your attention? More likely than not, it’s YouTube videos, pictures, animated GIFs, and other visual content, right?
While text-based content is always important when seeking answers to a question, creating visuals such as infographics, charts, graphs, animated GIFs, and other shareable images can do wonders for catching your readers’ attention and enhancing your article or report.
I know what you might be thinking: “I don’t know how to design awesome visuals. I’m not creative.”
Hi. I’m Bethany, and I will be the first to tell you that I’m not naturally artistic. And yet, I found a strength in data visualization at HubSpot, where I’ve spent most of my days creating infographics and other visuals for blog posts.
So, while I wouldn’t say I’m naturally artistic, I have learned how to create compelling visual content. So can you.

And you can do this by learning color theory. Consider this your introductory course, and we’ll be covering the following topics:
- What Is Color Theory?
- Why Is Color Theory Important in Web Design?
- Color Theory 101
- Additive & Subtractive Color Theory
- The Meaning of Color
- The Seven Color Schemes
- How to Choose a Color Scheme
- Color Tools
What is color theory?
Color theory is the basis for the primary rules and guidelines that surround color and its use in creating aesthetically pleasing visuals. By understanding color theory basics, you can begin to parse the logical structure of color for yourself to create and use color palettes more strategically. The result means evoking a particular emotion, vibe, or aesthetic.
While there are many tools out there to help even the most inartistic of us to create compelling visuals, graphic design tasks require a little more background knowledge on design principles.
Take selecting the right color combination, for instance. It’s something that might seem easy at first but when you’re staring down a color wheel, you’re going to wish you had some information on what you’re looking at. Understanding how colors work together, the impact they can have on mood and emotion, and how they change the look and feel of your website is critical to help you stand out from the crowd — for the right reasons.
From effective CTAs to sales conversions and marketing efforts, the right color choice can highlight specific sections of your website, make it easier for users to navigate, or give them a sense of familiarity from the first moment they click through.
But it’s not enough to simply select colors and hope for the best — from color theory to moods and schemes, finding the right HTML color codes, and identifying web-accessible colors for products and websites, the more you know about using color, the better your chances are for success.
Read on for our designer’s guide to color theory, color wheels, and color schemes for your site.
Color Theory 101
Let’s first go back to high school art class to discuss the basics of color.
Remember hearing about primary, secondary, and tertiary colors? They’re pretty important if you want to understand, well, everything else about color.

Primary Colors
Primary colors are those you can’t create by combining two or more other colors together. They’re a lot like prime numbers, which can’t be created by multiplying two other numbers together.
There are three primary colors:
- Red
- Yellow
- Blue
Think of primary colors as your parent colors, anchoring your design in a general color scheme. Any one or combination of these colors can give your brand guardrails when you move to explore other shades, tones, and tints (we’ll talk about those in just a minute).
When designing or even painting with primary colors, don’t feel restricted to just the three primary colors listed above. Orange isn’t a primary color, for example, but brands can certainly use orange as their dominant color (as we at HubSpot know this quite well).
Knowing which primary colors create orange is your ticket to identifying colors that might go well with orange — given the right shade, tone, or tint. This brings us to our next type of color …
Secondary Colors
Secondary colors are the colors that are formed by combining any two of the three primary colors listed above. Check out the color theory model above — see how each secondary color is supported by two of the three primary colors?
There are three secondary colors: orange, purple, and green. You can create each one using two of the three primary colors. Here are the general rules of secondary color creation:
- Red + Yellow = Orange
- Blue + Red = Purple
- Yellow + Blue = Green
Keep in mind that the color mixtures above only work if you use the purest form of each primary color. This pure form is known as a color’s hue, and you’ll see how these hues compare to the variants underneath each color in the color wheel below.
Tertiary Colors
Tertiary colors are created when you mix a primary color with a secondary color.
From here, color gets a little more complicated, and if you want to learn how the experts choose color in their design, you’ve got to first understand all the other components of color.
The most important component of tertiary colors is that not every primary color can match with a secondary color to create a tertiary color. For example, red can’t mix in harmony with green, and blue can’t mix in harmony with orange — both mixtures would result in a slightly brown color (unless of course, that’s what you’re looking for).
Instead, tertiary colors are created when a primary color mixes with a secondary color that comes next to it on the color wheel below. There are six tertiary colors that fit this requirement:
- Red + Purple = Red-Purple (magenta)
- Red + Orange = Red-Orange (vermillion)
- Blue + Purple = Blue-Purple (violet)
- Blue + Green = Blue-Green (teal)
- Yellow + Orange = Yellow-Orange (amber)
- Yellow + Green = Yellow-Green (chartreuse)
The Color Theory Wheel
Okay, great. So now you know what the “main” colors are, but you and I both know that choosing color combinations, especially on a computer, involves a much wider range than 12 basic colors.
This is the impetus behind the color wheel, a circle graph that charts each primary, secondary, and tertiary color — as well as their respective hues, tints, tones, and shades. Visualizing colors in this way helps you choose color schemes by showing you how each color relates to the color that comes next to it on a rainbow color scale. (As you probably know, the colors of a rainbow, in order, are red, orange, yellow, green, blue, indigo, and violet.)

When choosing colors for a color scheme, the color wheel gives you opportunities to create brighter, lighter, softer, and darker colors by mixing white, black, and gray with the original colors. These mixes create the color variants described below:
Hue
Hue is pretty much synonymous with what we actually mean when we said the word “color.” All of the primary and secondary colors, for instance, are “hues.”
Hues are important to remember when combining two primary colors to create a secondary color. If you don’t use the hues of the two primary colors you’re mixing together, you won’t generate the hue of the secondary color. This is because a hue has the fewest other colors inside it. By mixing two primary colors that carry other tints, tones, and shades inside them, you’re technically adding more than two colors to the mixture — making your final color dependent on the compatibility of more than two colors.
If you were to mix the hues of red and blue together, for instance, you’d get purple, right? But mix a tint of red with the hue of blue, and you’ll get a slightly tinted purple in return.
Shade
You may recognize the term “shade” because it’s used quite often to refer to light and dark versions of the same hue. But actually, a shade is technically the color that you get when you add black to any given hue. The various “shades” just refer to how much black you’re adding.
Tint
A tint is the opposite of a shade, but people don’t often distinguish between a color’s shade and a color’s tint. You get a different tint when you add white to a color. So, a color can have a range of both shades and tints.
Tone (or Saturation)
You can also add both white and black to a color to create a tone. Tone and saturation essentially mean the same thing, but most people will use saturation if they’re talking about colors being created for digital images. Tone will be used more often for painting.
With the basics covered, let’s dive into something a little more complicated — like additive and subtractive color theory.
Additive & Subtractive Color Theory
If you’ve ever played around with color on any computer program, you’ve probably seen a module that listed RGB or CMYK colors with some numbers next to the letters.
Ever wondered what those letters mean?
CMYK
CMYK stands for Cyan, Magenta, Yellow, Key (Black). Those also happen to be the colors listed on your ink cartridges for your printer. That’s no coincidence.
CMYK is the subtractive color model. It’s called that because you have to subtract colors to get to white. That means the opposite is true — the more colors you add, the closer you get to black. Confusing, right?

Think about printing on a piece of paper. When you first put a sheet in the printer, you’re typically printing on a white piece of paper. By adding color, you’re blocking the white wavelengths from getting through.
Then, let’s say you were to put that printed piece of paper back into the printer, and print something on it again. You’ll notice the areas that have been printed on twice will have colors closer to black.
I find it easier to think about CMYK in terms of its corresponding numbers. CMYK works on a scale of 0 to 100. If C=100, M=100, Y=100, and K=100, you end up with black. But, if all four colors equal 0, you end up with true white.
RGB
RGB color models, on the other hand, are designed for electronic displays, including computers.
RGB stands for Red, Green, Blue, and is based on the additive color model of light waves. This means, the more color you add, the closer you get to white. For computers, RGB is created using scales from 0 to 255. So, black would be R=0, G=0, and B=0. White would be R=255, G=255, and B=255.

When you’re creating color on a computer, your color module will usually list both RGB and CMYK numbers. In practice, you can use either one to find colors, and the other color model will adjust accordingly.
However, many web programs will only give you the RGB values or a HEX code (the code assigned to color for CSS and HTML). So, if you’re designing digital images or for web design, RGB is probably your best bet for choosing colors.
You can always convert the design to CMYK and make adjustments should you ever need it for printed materials.
The Meaning of Color
Along with varying visual impact, different colors also carry different emotional symbolism.
- Red — typically associated with power, passion, or energy, and can help encourage action on your site
- Orange — joy and enthusiasm, making it a good choice for positive messaging
- Yellow — happiness and intellect, but be wary of overuse
- Green — often connected to growth or ambition, green can help give the sense that your brand is on the rise
- Blue — tranquility and confidence, depending on the shade — lighter shades provide a sense of peace, darker colors are more confident
- Purple — luxury or creativity, especially when used deliberately and sparingly on your site
- Black — power and mystery, and using this color can help create necessary negative space
- White — safety and innocence, making it a great choice to help streamline your site
Worth noting? Different audiences may perceive colors differently. The meanings listed above are common for North American audiences, but if your brand moves into other parts of the world, it’s a good idea to research how users will perceive particular colors. For example, while red typically symbolizes passion or power in the United States, it’s considered a color of mourning in South Africa.
While it’s possible to create your website using a combination of every color under the rainbow, chances are the final product won’t look great. Thankfully, color experts and designers have identified seven common color schemes to help jumpstart your creative process.
Let’s examine each in more detail.
1. Monochromatic
Monochromatic color schemes use a single color with varying shades and tints to produce a consistent look and feel. Although it lacks color contrast, it often ends up looking very clean and polished. It also allows you to easily change the darkness and lightness of your colors.

Monochromatic color schemes are often used for charts and graphs when creating high contrast isn’t necessary.
Check out all the monochromatic colors that fall under the red hue, a primary color.

2. Analogous
Analogous color schemes are formed by pairing one main color with the two colors directly next to it on the color wheel. You can also add two additional colors (which are found next to the two outside colors) if you want to use a five-color scheme instead of just three colors.

Analogous structures do not create themes with high contrasting colors, so they’re typically used to create a softer, less contrasting design. For example, you could use an analogous structure to create a color scheme with autumn or spring colors.
This color scheme is great for creating warmer (red, oranges, and yellows) or cooler (purples, blues, and greens) color palettes like the one below.

Analogous schemes are often used to design images rather than infographics or bar charts as all of the elements blend together nicely.
3. Complementary
You may have guessed it, but a complementary color scheme is based on the use of two colors directly across from each other on the color wheel and relevant tints of those colors.

The complementary color scheme provides the greatest amount of color contrast. Because of this, you should be careful about how you use the complementary colors in a scheme.
It’s best to use one color predominantly and use the second color as accents in your design. The complementary color scheme is also great for charts and graphs. High contrast helps you highlight important points and takeaways.

4. Split Complementary
A split complementary scheme includes one dominant color and the two colors directly adjacent to the dominant color’s complement. This creates a more nuanced color palette than a complementary color scheme while still retaining the benefits of contrasting colors.

The split complementary color scheme can be difficult to balance because unlike analogous or monochromatic color schemes, the colors used all provide contrast (similar to the complementary scheme).
The positive and negative aspect of the split complementary color model is that you can use any two colors in the scheme and get great contrast … but that also means it can also be tricky to find the right balance between the colors. As a result, you may end up playing around with this one a bit more to find the right combination of contrast.

5. Triadic
Triadic color schemes offer high contrasting color schemes while retaining the same tone. Triadic color schemes are created by choosing three colors that are equally placed in lines around the color wheel.

Triad color schemes are useful for creating high contrast between each color in a design, but they can also seem overpowering if all of your colors are chosen on the same point in a line around the color wheel.
To subdue some of your colors in a triadic scheme, you can choose one dominant color and use the others sparingly, or simply subdue the other two colors by choosing a softer tint.
The triadic color scheme looks great in graphics like bar or pie charts because it offers the contrast you need to create comparisons.

6. Square
The square color scheme uses four colors equidistant from each other on the color wheel to create a square or diamond shape. While this evenly-spaced color scheme provides substantial contrast to your design, it’s a good idea to select one dominant color rather than trying to balance all four.

Square color schemes are great for creating interest across your web designs. Not sure where to start? Pick your favorite color and work from there to see if this scheme suits your brand or website. It’s also a good idea to try square schemes against both black and white backgrounds to find the best fit.

7. Rectangle
Also called the tetradic color scheme, the rectangle approach is similar to its square counterpart but offers a more subtle approach to color selection.

As you can see in the diagram above, while the blue and red shades are quite bold, the green and orange on the other side of the rectangle are more muted, in turn helping the bolder shades stand out.

No matter which color scheme you choose, keep in mind what your graphic needs. If you need to create contrast, then choose a color scheme that gives you that. On the other hand, if you just need to find the best “versions” of certain colors, then play around with the monochromatic color scheme to find the perfect shades and tints.
Remember, if you build a color scheme with five colors, that doesn’t mean you have to use all five. Sometimes just choosing two colors from a color scheme looks much better than cramming all five colors together in one graphic.
1. Prioritize the user experience, first.
Before you add color to your website, app, product, or packaging, get the basic design downpat in greyscale.
This lets you focus on what matters most: User experience. Instead of focusing on the color scheme of your overall site or the hue of specific buttons or links, make sure everything works like it’s supposed to. Make sure links aren’t broken, product pages are up-to-date and email opt-ins are ready to go.
Here’s why: Even the best-looking website or product with perfect color selection won’t be enough to keep visitors if they can’t find what they’re looking for.
2. Leverage natural inspiration.
Once your site operations are solid, it’s time to start selecting colors.
Not sure what looks good? Take a look outside. Nature is the best example of colors that complement each other — from the green stems and bright blooms of flowering plants to azure skies and white clouds, you can’t go wrong pulling context from natural colors and combinations.
3. Set a mood for your color scheme.
With a few color choices in mind, consider the mood you want your color scheme to set. If passion and energy are your priorities, lean more toward red or brighter yellows. If you’re looking to create a feeling of peace or tranquility, trend toward lighter blues and greens.
It’s also worth thinking negatively. This is because negative space — in either black or white — can help keep your design from feeling too cluttered with color.
4. Consider color context.
It’s also worth considering how colors are perceived in contrast.
In the image below, the middle of each of the circles is the same size, shape, and color. The only thing that changes is the background color.
Yet, the middle circles appear softer or brighter depending on the contrasting color behind it. You may even notice movement or depth changes just based on one color change.

This is because the way in which we use two colors together changes how we perceive it. So, when you’re choosing colors for your graphic designs, think about how much contrast you want throughout the design.
For instance, if you were creating a simple bar chart, would you want a dark background with dark bars? Probably not. You’d most likely want to create a contrast between your bars and the background itself since you want your viewers to focus on the bars, not the background.
5. Refer to your color wheel.
Next, consider your color wheel and the schemes mentioned above. Select a few different color combinations using schemes such as monochrome, complementary, and triad to see what stands out.
Here, the goal isn’t to find exactly the right colors on the first try and create the perfect design, but rather to get a sense of which scheme naturally resonates with your personal perception and the look of your site.
You may also find that schemes you select that look good in theory don’t work with your site design. This is part of the process — trial and error will help you find the color palette that both highlights your content and improves the user experience.
6. Use the 60-30-10 rule.
Often used in home design, the 60-30-10 rule is also useful for website or app design. The idea here is to use three colors: A main color for 60% of your design, a secondary color for 30% of your design and an accent color for the last 10%.
While these aren’t hard-and-fast numbers, they help give a sense of proportion and balance to your site by providing a primary color with secondary and accent colors that all work together.
7. Draft multiple designs.
Draft and apply multiple color designs to your website and see which one(s) stand out. Then, take a step back, wait a few days and check again to see if your favorites have changed.
Here’s why: While many designers go in with a vision of what they want to see and what looks good, the finished product often differs on digital screens that physical color wheels — what seemed like a perfect complement or an ideal color pop may end up looking drab or dated.
Don’t be afraid to draft, review, draft again and throw out what doesn’t work — color, like website creation, is a constantly-evolving art form.
Put simply? Practice makes perfect. The more you play with color and practice design, the better you get. No one creates their masterpiece the first time around.
Color Tools
There’s been a lot of theory and practical information for actually understanding which colors go best together and why. But when it comes down to the actual task of choosing colors while you’re designing, it’s always a great idea to have tools to help you actually do the work quickly and easily.
Luckily, there are a number of tools to help you find and choose colors for your designs.
Adobe Color
One of my favorite color tools to use while I’m designing anything — whether it’s an infographic or just a pie chart — is Adobe Color (previously Adobe Kuler).
This free online tool allows you to quickly build color schemes based on the color structures that were explained earlier in this post. Once you’ve chosen the colors in the scheme you’d like, you can copy and paste the HEX or RGB codes into whatever program you’re using.
It also features hundreds of premade color schemes for you to explore and use in your own designs. If you’re an Adobe user, you can easily save your themes to your account.
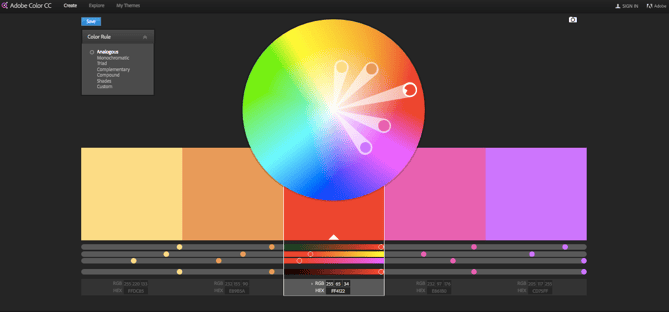
Illustrator Color Guide
I spend a lot of time in Adobe Illustrator, and one of my most-used features is the color guide. The color guide allows you to choose one color, and it will automatically generate a five-color scheme for you. It will also give you a range of tints and shades for each color in the scheme.
If you switch your main color, the color guide will switch the corresponding colors in that scheme. So if you’ve chosen a complementary color scheme with the main color of blue, once you switch your main color to red, the complementary color will also switch from orange to green.
Like Adobe Color, the color guide has a number of preset modes to choose the kind of color scheme you want. This helps you pick the right color scheme style within the program you’re already using.
After you’ve created the color scheme that you want, you can save that scheme in the “Color Themes” module for you to use throughout your project or in the future.
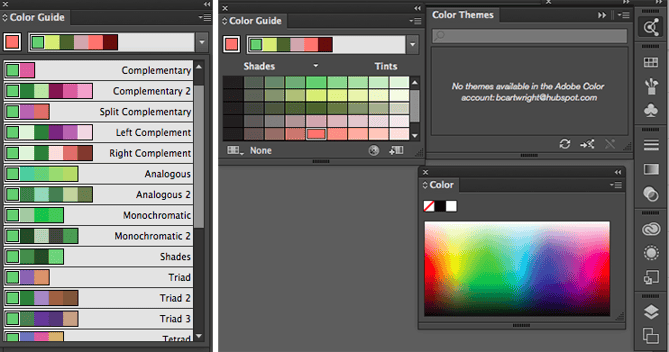
Preset Color Guides
If you’re not an Adobe user, you’ve probably used Microsoft Office products at least once. All of the Office products have preset colors that you can use and play around with to create color schemes. PowerPoint also has a number of color scheme presets that you can use to draw inspiration for your designs.
Where the color schemes are located in PowerPoint will depend on which version you use, but once you find the color “themes” of your document, you can open up the preferences and locate the RGB and HEX codes for the colors used.
You can then copy and paste those codes to be used in whatever program you’re using to do your design work.
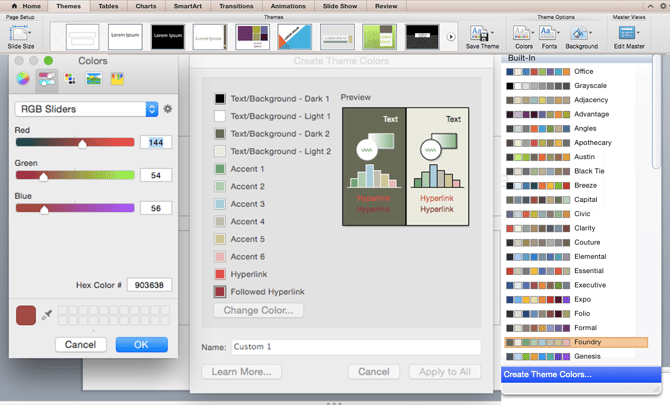
Finding the Right Color Scheme
There’s a lot of theory in this post, I know. But when it comes to choosing colors, understanding the theory behind color can do wonders for how you actually use color. This can make creating branded visuals easy, especially when using design templates where you can customize colors.

Editor’s note: This post was originally published in October 2018 and has been updated for comprehensiveness.


How to Be a Good Manager [Data + Expert Tips]
Why do people really quit their jobs?
Before you say “salary,” “benefits,” or “workload,” take a second to think about the worst boss you’ve ever had.
Were they bad at giving feedback, not helpful, or just plain mean? Did they have you feeling unmotivated, too nervous to offer ideas, or fearing that you’d lose your job with the slightest miss-step?
Once you let those memories sink in, you probably won’t second guess the statement: “People quit their managers, not their jobs.”
Over the years, this fact hasn’t changed. Study after study has emphasized that companies need good managers to retain good employees.
But what makes for a good manager? And what skills or strategies can you develop to ensure you’re considered a good one?
To explore this issue, we polled people and asked them to check off all the qualities they felt were most important for a great manager.
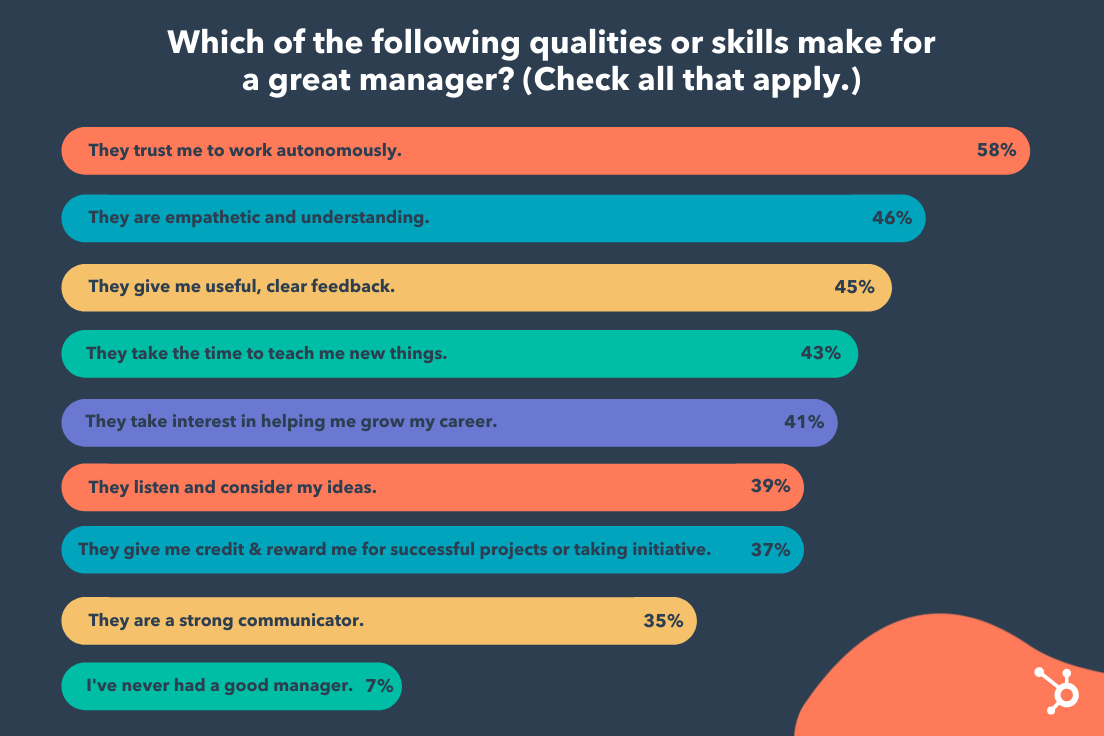 Recipients listed “they trust me to work autonomously”, “They are empathetic and understanding”, and “They give me useful, clear feedback”, as the three most important qualities a good manager needs to have.
Along with this data, I consulted my colleagues to get their thoughts on what makes a people manager effective. Regardless of whether you’re interested in managing a team, or just want to know if a prospective boss is actually a good manager, here are 7 crucial qualities of a great team leader.
![→ Click here to download leadership lessons from HubSpot founder, Dharmesh Shah [Free Guide].](https://no-cache.hubspot.com/cta/default/53/4e634041-e1ce-4a85-8e65-aea12fc10b84.png)
7 Skills People Managers Must Master, According to HubSpot Employees
1. Good managers help employees navigate change.
Consider the last time you experienced change within your organization. Maybe a beloved leader retired, or perhaps your team experienced a reorg. Maybe you even acquired a new company.
Whatever the reason, I’m willing to bet the change felt daunting at times. Fortunately, good managers can mitigate the negative or ambivalent emotions that arise from change.
For instance, Christine McLaughlin, a Senior Project Manager on HubSpot’s Sales Leadership Enablement team, told me: “The strongest managers are ones who can help their teams navigate change in a very personal way. I’m a firm believer that every challenge presents an opportunity. But, because we’re human, we can’t always see the opportunity from the start.”
McLaughlin adds, “Our personal life, mental health, physical health, the last meeting we had, the next meeting we’re preparing for, all play a role in influencing how we perceive change. Do we view it as a challenge? An opportunity? A setback? A relief?”
“Strong managers can translate change for each individual on their team. They meet their teammate where they’re at and help to answer their questions and concerns to bring them to where they need to go.”
So … how can you do this? Start by fostering psychological safety, so your employees feel comfortable mentioning how they feel about a certain business change. Then, listen carefully to their concerns and work on providing solutions for those issues.
For instance, let’s say your team has experienced a reorg and one of your direct reports is concerned her role is going to change as a result.
To mitigate those concerns, consider creating a document that outlines which (if any) of her responsibilities might change as a result of the reorg — along with some new opportunities she can pursue to continue developing her professional skills.
2. Good managers are open and transparent.
Trust and transparency are undeniably critical components of good leaders — and, post-pandemic, this is continuing to rise in importance. In fact, Edelman’s most recent 2021 benchmark barometer on trust in leaders found employees ranked “good employee communication” 44 points higher than in the previous year.
Keri Polmonari, HubSpot’s Manager of Customer Success on the SMB team, believes transparency to be one of the most important attributes a good leader can possess.
She says, “Being transparent and forthcoming with your team creates an open and honest dialogue and ensures everyone is on the same page. Business changes — like changes in department goals, processes, or personnel — can be difficult and overwhelming. [But] when everyone understands the why behind these business changes, they are more open and understanding of implications this could have on their jobs, both positive and negative.”
Polmonari says,”Transparency builds trust, fosters relationships, and creates organizational alignment, all key components of a company’s, department’s, and individual’s success.”
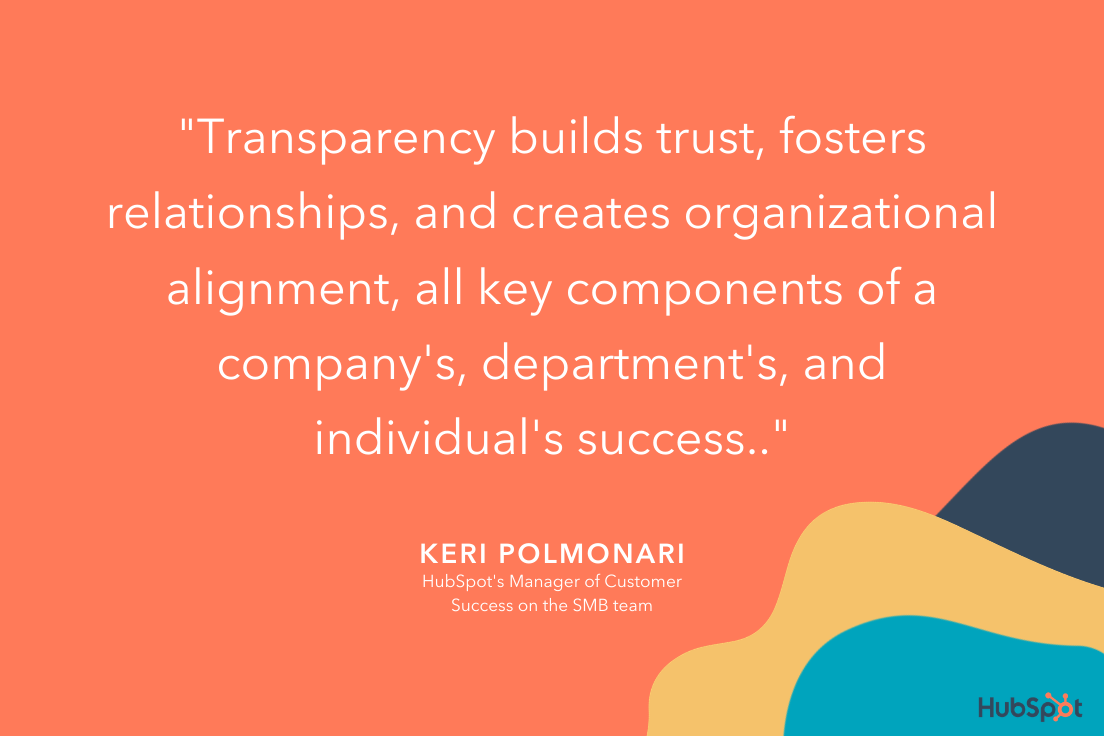
3. Good managers encourage vulnerability.
Consider the last time your manager started your 1:1 with a slightly more personal question, like, “How was your birthday this past weekend?” or “Read any good books lately?”
These questions ultimately help encourage vulnerability by creating space for you to share information about your life outside of work — and they can go a long way towards creating stronger bonds.
As Jill Callan, VP of Marketing at Trusted Health, told me, “Whenever I start a new role or inherit a new team, I begin by enabling and encouraging vulnerability. This helps me forge strong bonds with my direct reports and allows them to be comfortable to share ideas and admit weaknesses.”
Callan adds, “I’m also very intentional about getting to know my team as individuals, and learn about their lives outside of work. Taking the time upfront to build a strong, authentic relationship with my direct reports helps us tackle inevitable tough challenges down the line.”
To encourage vulnerability, consider how you might increase your own openness with your team. For instance, perhaps you admit when you’re feeling overwhelmed with childcare duties, mention a Netflix show you’ve been binging, or simply chat about the gardening hobby you’ve picked up.
And embrace vulnerability by admitting when you’ve made a mistake or you’re feeling overwhelmed — it will help your employees feel comfortable admitting the same.
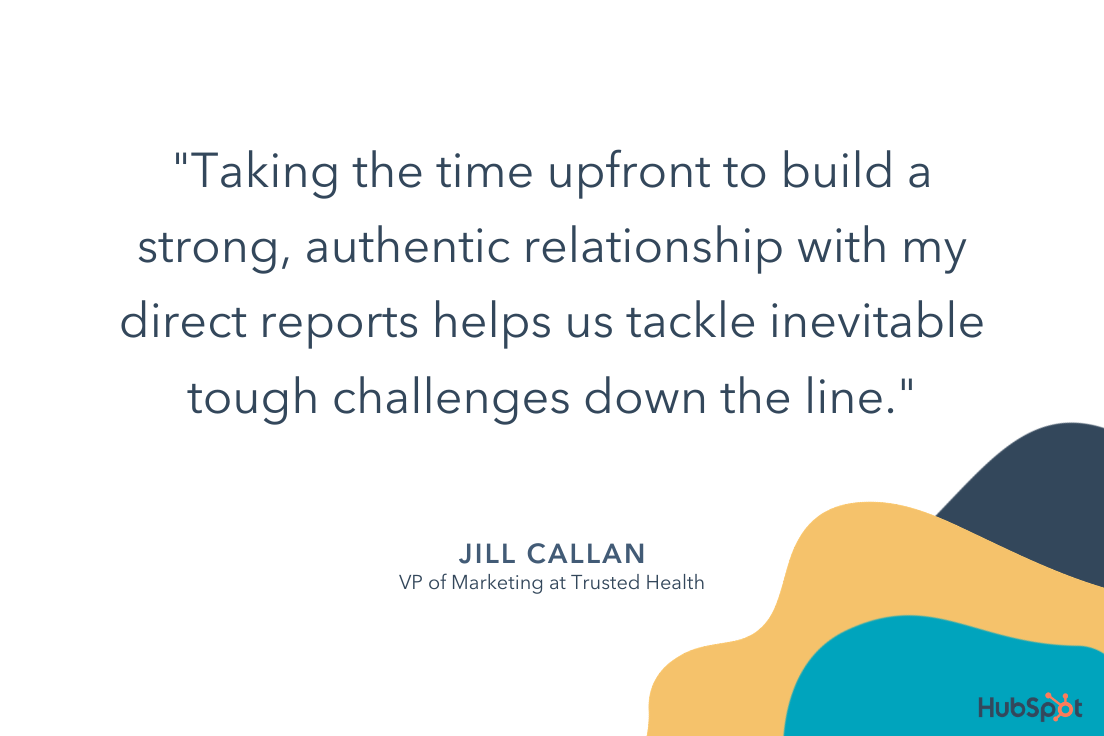
4. Good managers find ways to supplement their team member’s weaknesses.
I once had a manager who repeatedly sought out learning and development opportunities for the areas we’d determined as weaknesses of mine. She would often email me public speaking courses, or data & analytics workshops.
As a result, I continued to grow professionally, and I felt challenged. This is what a good manager does: Continues to keep a direct report’s weaknesses in-mind, and provides guidance to help that employee improve.
HubSpot Senior Manager Christina Perricone concurs, telling me, “Good managers find ways to supplement their team member’s weaknesses. Each of us has skills that come naturally to us, as well as skills we’re not so great at.”
“An attuned manager can identify an individual’s weak areas and will surface resources or offer guidance to assist in those areas.”
Consider how you might similarly foster growth by taking stock of your team’s weaknesses, and actively pursuing resources that can help your team develop their weaker skills.
Additionally, use the hiring process to create a more well-rounded team by identifying strengths and weaknesses of existing employees.
As Perricone says, “Good managers are skilled at balancing out their teams by recruiting talent that can fill in the skill and experience gaps, thereby creating a more well-rounded unit.”
5. Good managers work for their employees — not above them.
You might be thinking, “Managers work for their employees? Isn’t it the other way around?”
Actually, a manager, like an employee, is more effective when they’re an active team player.
But, while an employee’s job is to fulfill tasks within a job description, a manager’s job is to make his or her team successful. To do this, a manager shouldn’t be afraid to chime in during meetings, assist on projects, or help their team grow or succeed in other ways.
For instance, consider asking your direct reports during a 1:1, “Is there anything you need me to do?”
This question can be translated in multiple positive ways, including, “Are there any blockers I can remove for you?”, “Are you waiting on a decision from me on anything?”, “Are you working on an idea that you want to share with me?” or even, “Is there something going on in your world outside of work that’s competing for your time and attention?”
Ultimately, a good manager considers it her primary job to make her employees successful in their projects and careers.
6. Good managers are always aiming to improve their emotional intelligence.
Emotional intelligence — or the skill that requires you to understand your own emotions, learn how to manage them, and know how to respond to the emotions of others on your team — is a vital component of good leadership.
Emotional intelligence can help you ensure you’re giving clear directions, and allows you to be empathetic to the needs of others. In short, it can help you foster stronger professional relationships and communicate effectively.
Most importantly, emotional intelligence enables you to stay calm during high-stress or unexpected situations — which can prevent you from making rash decisions as a leader, or stressing your team out unnecessarily.
7. Good managers can establish and promote psychologically-safe environments.
The ability to cultivate psychological safety is a critical asset that Jennifer Stefancik, a HubSpot Academy Marketing Manager, values in her own people manager.
“Feeling supported, heard, and understood is the foundation I need to be able to come to work every day with the right mindset to do good work,” Stefancik says.
Stefancik adds, “Genuine empathy and psychological safety are hard to fake, and it’s something that I think everyone should master before they consider the people management path.”
Psychological safety fosters innovative thinking and the ability to adapt well to change — and yet, according to a 2020 McKinsey Global Survey, only a handful of business leaders often demonstrate the behaviors associated with psychological safety.
If you’re a manager or hoping to be a better leader, it’s important you take time to identify aspects of your management style or overall office culture that could benefit from psychological safety.
For example, rather than using language that makes your team members feel scared of missing deadlines or goals, keep an open and supportive dialogue with them so they can confidently come to you with successes, learnings from failure, or concerns while they’re working on high-pressure projects.
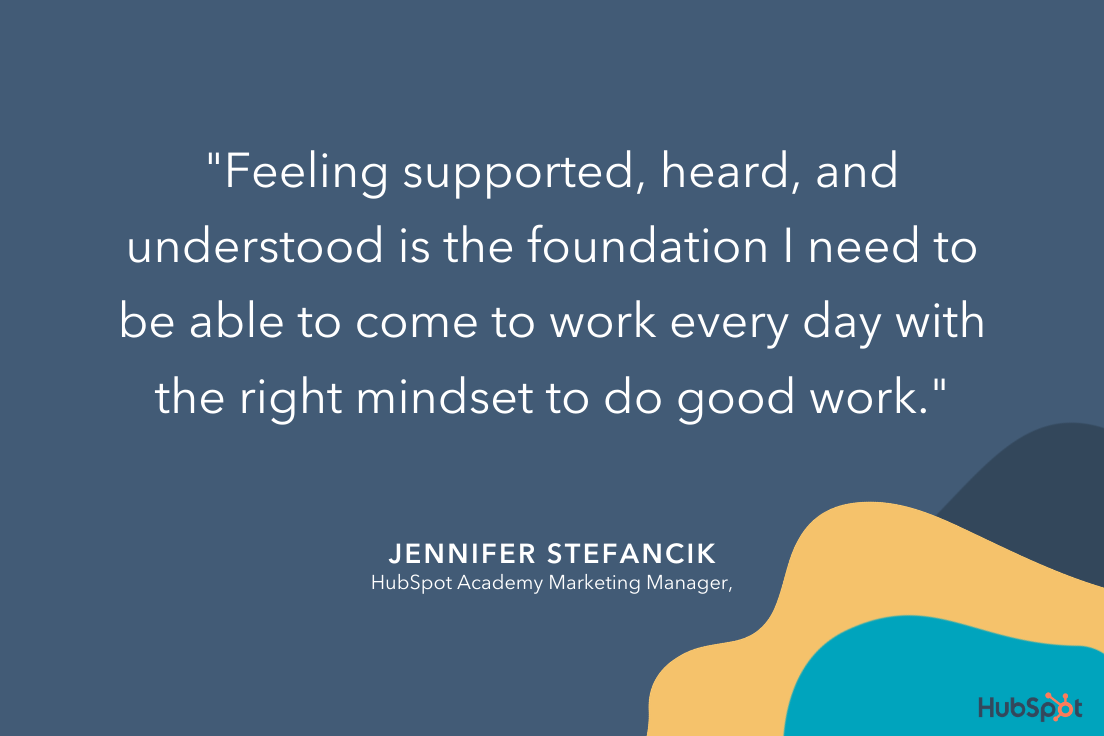
Alternatively, if a team member is having trouble with a project, you should offer advice or assistance to help them remove blockers, rather than telling them to just get it done.
Supportive communication with team members allows them to learn from mistakes and grow as employees, rather than work tirelessly on projects because they fear that they’ll lose their jobs.
How to Be a Good Manager
As outlined in the data above, there are a few key traits required of any good manager. These include:
- Providing coaching and mentoring when necessary, but enabling your team to work autonomously and trusting them to get the job done.
- Showing empathy towards your direct reports as people with lives outside of work, and creating a sense of psychological safety for your employees to feel comfortable admitting when they’re struggling or need help.
- Being clear and direct with feedback.
- Taking the time to go the extra mile to help foster your employees’ professional growth through trainings, learning & development opportunities, or 1:1 sessions in which you coach them on certain skills.
However, a good manager looks different depending on the department or role — a good sales manager, for instance, requires different skills than that of a good marketing manager. Let’s dive into those, now.
How to Be a Good Sales Manager
Being a good sales manager requires a few unique skills outside of those listed above.
Along with setting clear expectations, communicating effectively, and inspiring your sales reps to perform at their best, a good sales manager needs to demonstrate a positive mindset, build team unity, and learn how to best support each sales rep in the unique way that will serve him or her best.
A few other notes on being a good sales manager:
- Use a dashboard or task management tool to easily track metrics for each sales rep. This enables you to avoid taking up too much time in your meetings discussing metrics — instead, you can now use that time to identify how you can best help, support, and coach your reps.
- Plan team outings or events that allow your team to build relationships with one another. Sales can be high-pressure and stressful, so it’s important you provide dedicated time to enable your sales reps to connect with one another and feel that they’re part of a support system.
- Look for trainings and development opportunities so your sales reps can continue to improve. In 1:1 meetings, focus on how you can help them achieve their goals; in team meetings, figure out what types of trainings can help the entire team perform better.
- Motivate your team by focusing on the ‘bigger purpose’ to ensure they feel intrinsically motivated. Sales isn’t just about hitting quota and making money — it’s also (oftentimes) about selling a product or service that can help people in large or small ways. Remind your team of your company’s bigger purpose to ensure they feel fulfilled and motivated.
Looking for more sales manager tips? Take a look at Here’s What Sales Leaders Should Prioritize in 2021 According to a Sandler Expert or 10 Things I Wish I Knew Before Becoming a Sales Manager.
How to Be a Good Marketing Manager
Marketing managers are often in-charge of leading a team, but they’re typically also responsible for a content property or program, which means their tasks can vary greatly.
Here are a few skills of a good marketing manager:
- The ability to think big-picture; using metrics and data to create a strong long-term strategy, and knowing when to pivot when an existing strategy isn’t working out as expected.
- Communicating effectively with various stakeholders — this includes inspiring and motivating your direct reports, communicating team goals cross-functionally and to leadership, and creating clear external communications, as well.
- Delegating and organizing tasks effectively. Learn about your direct report’s strengths, interests, and areas for growth, and facilitate that growth by giving them projects when they align with their interests. This doesn’t mean handing off any unwanted tasks from your to-do list — if you find a project that aligns with your direct report’s interests and you feel it’s mutually beneficial with team goals, then you’ll want to shuffle some of their existing tasks to ensure you don’t burn your team out.
To learn more about managing a marketing team, take a look at What Is a Marketing Manager?
How to Be a Good Project Manager
To be a good project manager, you need a few additional technical skills compared to the other managers in this list. Project managers need a deep technical understanding of the project at-hand in order to understand which tasks need to be assigned to whom, and to keep the process running smoothly.
A few other project manager skills and responsibilities include:
- Being able to set realistic goals, and understanding what resources are required. A project manager needs to be able to set timelines on certain aspects of a project, and she also needs to understand what resources — including employees, external consultants, tools, or budgeting — are required to make it happen.
- Having good organization and communication skills. A good project manager needs to remain organized and detail-oriented in order to effectively delegate tasks to the right teams, and stay on-top of identifying what needs to happen next for the project to go smoothly. A good project manager also needs to be able to clearly articulate the full scope of a project to various stakeholders to ensure each team is aligned on bigger-picture strategy.
- Analyzing and determining potential risks. A good project manager needs to be able to foresee potential roadblocks in any given project, and analyze either internal metrics or industry data to determine the best way to mitigate those risks.
A good project manager also uses the best tools at his or her disposal to create a streamlined process, keep track of responsibilities and timeline, and delegate effectively. Take a look at 16 Free Project Management Software Options to Keep Your Team On Track to choose the best tool for your needs.
And that’s it! You’re well on your way to become a better manager yourself. Remember, like any other role, becoming a good manager requires time, patience, dedication, and a consistent desire for feedback from your direct reports to iterate and grow over time.


Which Social Media Channels Do Consumers Spend the Most Time On? [New Data]
Every day there’s something new on social media.
Recently, Twitter introduced Twitter Blue, a premium subscription-based version of its platform.
![Download Now: Social Media Trends in 2021 [Free Report]](https://no-cache.hubspot.com/cta/default/53/3dc1dfd9-2cb4-4498-8c57-19dbb5671820.png)
TikTok took the social media world by storm back in 2020 and still remains the most downloaded app of 2021, according to Social Media Today. Instagram is regularly adding new features to its platform, recently testing a new affiliate tool for influencers.
The question is, how are these changes impacting how consumers behave online? Are users moving away from Facebook?
Let’s see what the data says and what it means for brands.
We surveyed 301 people and asked, “Which social media platform do you spend the most time on each week?” The response was kind of surprising.
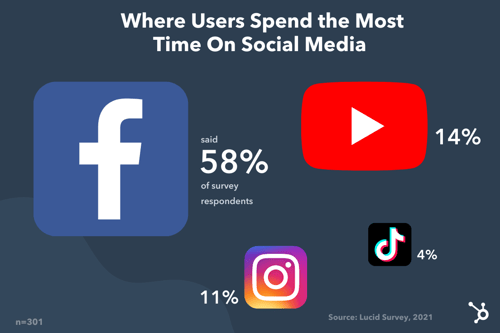
Despite YouTube’s steady growth over the past year and the rise of TikTok and Clubhouse, Facebook remains the top social media platform. YouTube follows, with the gap between the platform and Facebook much smaller in larger surveys.
So, what does this information really mean?
Well, in a broad sense, it means you should consider having a presence on these platforms. However, don’t delete your Instagram account just yet – better yet, don’t delete it at all.
I’ll explain why in the next section.
Should brands limit their efforts to the most popular platforms?
There’s no single, clear-cut answer to this… but typically, no.
While most consumers may spend most of their time on Facebook and YouTube, that doesn’t mean you should dedicate all your efforts entirely to those platforms.
Why? That may not be where your audience lives.
Generality is the enemy of marketing. Imagine running a social media ad that targets everyone. Or having a target audience comprising all of Gen Z.
This sort of one-size-fits-all isn’t conducive to your brand’s growth. In fact, it is likely keeping you from making progress, as you waste time and resources on broad strategies that may not work for your specific market.
It’s like going to a party and only getting an address for the neighborhood. Sure, you could drive around and knock on every door until you find the right one, but by that point, you might be tired, hungry, and out of gas.
When you zero in on a specific audience and strategy, you can gain more valuable insights and get a higher return on investment.
Data, just like the one above, should be used as a general guide to understand consumer behavior. However, it shouldn’t dictate your entire strategy. Your own consumer data and user persona(s) should.
For instance, let’s say you’ve discovered through market research that your audience enjoys consuming information mostly through blogs and podcasts. That’s a good indicator of where you should focus your efforts. In a few years, that data may change, in which case, your team should be flexible and move to where your audience is going.
Here’s what you should consider when determining where to direct your efforts:
- Where your audience lives
- The type of content you’ll be creating
- The channel that converts the best
There are a few ways to figure out where your audience “hangs out” online. First, you can check the demographics by platform – this will give you a general idea of the audience.
For instance, TikTok mostly caters to a younger audience between 10 to 29 years old while most Instagram users are between 18 to 34 years old.
You can also reach out to your target audience directly through polls and survey to find out where they spend their time. In addition, look to your competitors.
See where they’re focusing their efforts and if they are successful, that may be a good indication of where you should be. Like when you’re not sure you went to the right place but see someone you know parking and you can let out a sigh of relief.
Next is the type of content you’ll be creating.
Say your audience enjoys video content the most (think webinars, lives, video tutorials). In this case, your audience would be well suited for YouTube, Instagram, and TikTok, all of which have video editing and publishing features. You can then repurpose your content for each platform.
Another factor to consider is how each channel is contributing to your goals. This is where the importance of data comes in.
You may be posting every day on TikTok and find that the rare times you post on Facebook, you get much higher engagement and conversion rates. While there could be several reasons for this, you may want to redirect your attention to Facebook as it is providing the best return on investment.
Next, we’ll cover what software can help you keep track of your social media data.
Top Social Media Analytics Software
1. HubSpot
With HubSpot’s social media management software, you can track your social strategy from beginning to end.
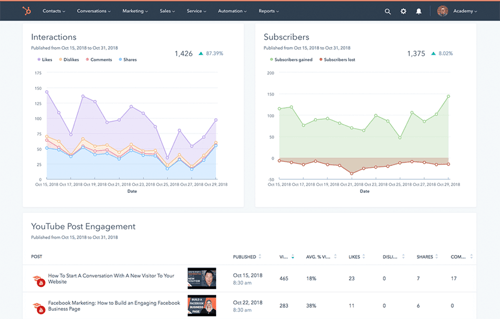
With a user-friendly dashboard, you can see exactly how your published posts are performing, which channels are bringing traffic to your website and generating leads, and more.
You can also filter your reports by campaign, account, and date range so you can narrow down the exact information you’re looking for.
In addition, HubSpot’s social media software allows you to:
- Schedule posts.
- See how your competitors measure up.
- Track and monitor conversations surrounding your brand on every platform.
- Export and analyze relevant reports.
The social media tool is available within HubSpot’s all-in-one CRM platform for mid- to large-size businesses.
2. HootSuite
HootSuite empowers your team to make decisions quickly with real-time data on your social strategy.
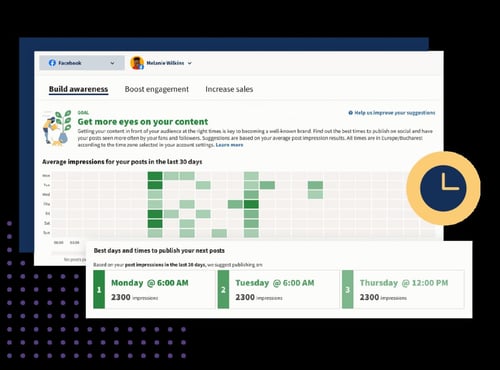
The social media software takes some of the guesswork out so that you can focus on the most important insights. With customizable dashboards, you can also get a quick overview of your key metrics and identify what’s driving traffic and sales.
Ranging from $49/month to custom pricing for enterprise-level businesses, you can find a plan that meets your needs and is scalable.
3. Sprout Social
If you have multiple social channels running at full speed and you’re overwhelmed with the data, Sprout Social can help.
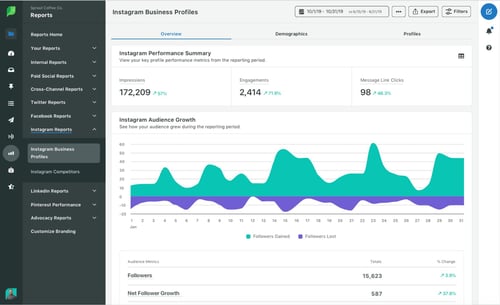
The platform helps you manage your data and create ready-to-go reports to share with stakeholders.
In addition, you can use competitive intelligence to benchmark your performance and make informed decisions that will promote your brand’s growth.
Sprout Social’s pricing is based on a subscription model and ranges from $99 to $249 a month.
Now that you know where consumers spend their time online, the real work begins. Experiment with various strategies to see what resonates best with your audience, always using data and your user personas to inform your decisions.


The Ultimate Guide to Instagram Stories Ads in 2021 [+ New Data]
Ah, Instagram Stories — the one-stop-shop to find short, engaging content from high school friends, celebrities, and major brands alike.
With over 500 million daily active users, Instagram Stories is an undeniably powerful opportunity to connect with new audiences.
And, if you’re not using Instagram Stories as a marketing tool, you should be. In fact, Instagram reports that of the 500 million accounts using Instagram Stories, one-third of the most viewed stories come from businesses.
I can personally attest to the power of Instagram Stories to incentivize purchasing decisions. For instance, the other day I was mindlessly scrolling through Stories when I came across an ad for Crest 3D whitestrips — with a $50 off coupon attached. I swiped up to purchase without ever leaving the app itself.
Here, let’s dive into what Instagram Story ads are, and how you can run Instagram Story ads for your own business. Plus, we’ll explore examples of Instagram Story ads and best practices to ensure your ads are as powerful as they can be.
![→ Download Now: How to Advertise on Instagram [Free Guide]](https://no-cache.hubspot.com/cta/default/53/4ecf258d-99a6-4eba-a07e-2303e54678ce.png)
What are Instagram Story ads?
Instagram Story ads are vertical ads you can run on Instagram’s Stories feature. (To recap, Instagram Stories are photos and videos visible to an Instagram account’s audience for 24-hours, and is published separately from the content found on your Instagram profile.)
Instagram allows you to target your ads by reach, video views, traffic, conversions, app installs, and brand awareness. Additionally, unlike an organic Instagram Story, an Instagram Story ad doesn’t disappear after 24-hours — instead, you can choose the length of the campaign and frequency of ads on Facebook’s ad platform, like any other ad created for Instagram or Facebook.
An Instagram Story ad is immersed seamlessly into a user’s Stories viewing experience. Additionally, a user doesn’t have to follow your account to see an ad from your brand. For instance, I don’t follow Crest on Instagram, but I was still shown a Crest ad.
You have a few different options for ad formatting, including video, photo, or carousel. A video ad plays for up to 15 seconds, an image ad will play for five seconds, and a carousel ad lets brands play three separate pieces of content (video, photos, or both) within one ad.
If you aren’t sold on running ads on Instagram Stories yet, consider these facts:
- Instagram users have high disposable income. In fact, 42% of U.S. Instagram users make more than 75k per year.
- Instagram is the social channel with the second-highest ROI among marketers.
- Videos on Instagram get 21.2% more interactions compared to images and 18.6% more interactions compared to carousels.
- 71% of U.S. businesses use Instagram. It surpassed Twitter in business users in 2017.
- 500 million Instagram users use the app daily.
If you’re convinced Instagram ads could be a good platform for you, let’s dive into how you can run your own Instagram Story ads, next.
For the full rundown on all things Instagram advertising, make sure to check out our guide below:
How to Run Instagram Story Ads
1. Go to your Ads Manager, and click “Create”, which will bring you to “Quick Creation”. If you’d prefer, you can switch to “Guided Creation”, instead.
2. Next, select a marketing objective — your options for Instagram Stories include “Brand Awareness”, “Reach”, “Video views”, “Conversions”, “App installs”, “Lead Generation”, or “Traffic”.
3. In the Placements section, you’ll want to select “Automatic Placements”, where Instagram Stories is selected by default. However, if you choose “Manual Placements”, check the box for “Stories” under Instagram.
4. Next, set your ad’s budget and schedule.
5. Next, you’ll want to choose “Single Image or Video” or “Carousel” as your ad’s format.
6. Add videos or images to your ad, and finish including any other details, including headline and description. If you’d prefer, you can use Stories Templates, which will transform your image into an ad automatically, and add movement to grab a viewer’s attention.
7. Once you’re happy with your ad, select “Confirm” to finish the process.
Instagram Story Ads: Cost, Specs, & Length
There are three separate areas you can place an ad on Instagram: Stories, Feed, and Explore.
For the purposes of this post, we’ll focus on the cost, specs, and length of an Instagram Stories ad.
First, all feed photo and video dimensions are supported in Stories (anywhere from 1:91 to 4:5). However, 9:16 ratio is encouraged to fit the full-screen, vertical format of Stories.
Additionally, .mp4 or .mov is recommended for video ads, and .jpg or .png file type is recommended for photo ads.
If you’re creating a video ad, 4GB file size is encouraged — and, for a photo, 30MG file size is suggested.
If you’re creating a video ad, the length can’t surpass 120 seconds. For a photo ad, five seconds is the default for how long the image will be shown.
Finally, the recommended resolution is 1080 x 1920, with a minimum dimension of 600 x 1067.
 Instagram ads, including Instagram Story ads, cost between $0.70 to $1.00 per-click on average — although cost varies depending on industry, days of the week, time of year, targeted ages and sexes, ad placement, and plenty of other factors. In some cases, Instagram ads can exceed $5.00 per-click.
Fortunately, you have plenty of control over how much your ads cost by setting a pre-determined budget. You can choose your budget based on how much your company is willing to spend daily, or the total cost you’re willing to spend over a campaign’s lifecycle.
What Consumers Want to See in Instagram Story Ads [New Data]
It’s important to note — if you’re planning your own Instagram advertising campaign, you’ll want to consider the type(s) of ads that perform best on the platform.
For instance, in a recent survey HubSpot conducted, we found 50% of Instagram users prefer image-based ads that show product shots and light text — which is followed by 31% who prefer video-based ads that showcase real customers.
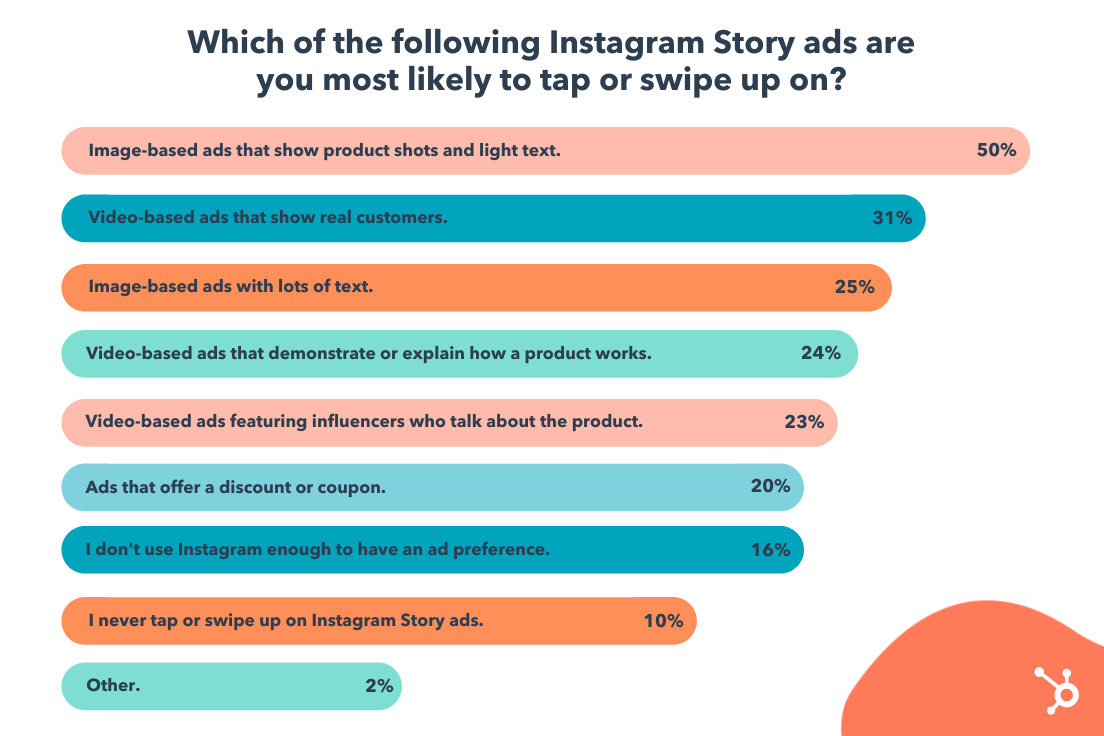
Perhaps most intriguing, the majority of people (80%) don’t necessarily care if an ad includes a discount or coupon. This suggests that Instagram users are more interested in appealing, engaging content that highlight a product’s benefits.
User preferences will vary depending on your audience, industry, and message, but consider keeping this data in-mind when preparing your own Story ad. When in doubt, try A/B testing to figure out which types of ads your own audience prefers.
Let’s dive into some other best practices, now.
Instagram Story Ads Best Practices
With four million active advertisers on Stories as of January 2020, it’s going to take a lot to ensure you’re able to stand out and drive results.
Here, let’s dive into a few best practices to follow when designing your own Instagram Story ad.
1. Pay attention to speed.
Facebook reports that Instagram Stories are consumed faster “than any other mobile format”. People’s attention is severely limited when perusing Stories, especially since the content has a 24-hour time limit before disappearing forever.
For that reason, you’ll want to ensure you get straight to the point and capture a viewer’s attention from the first frame. Unlike other forms of content, suspense isn’t usually effective here, especially since images can’t surpass five seconds, and videos have a 120-second limit. You’ll want to jump the viewer right into the message you’re hoping to deliver.
2. Include motion in your ad.
Facebook reports that “ads that use motion perform better.” Motion captivates the viewers’ attention and can help you tell a story faster than you could with a static image. Even if you’re using animation, consider how you might add motion to create more engaging content.
3. Ensure you’re using sound in your ad.
60% of Stories are viewed with the sound on, so you’ll want to ensure you use sound in your ad to provide optimal value to your audience. Consider how you might use music, sound effects, or voice-over to capture viewers’ attention in a new way. If you’re unsure which types of sound work best in your ad, try A/B testing to conclude what your audience prefers.
4. Create your ad for Stories first — rather than attempting to repurpose an existing ad made for another vertical.
It can be tempting to simply copy-and-paste the ad you’ve already created for Facebook or Instagram news feed, but that could result in a less-than-ideal experience for those viewing your ad in Instagram Stories. For one, your ad might not follow Instagram Story sizing best practices, resulting in key parts of your ad being cropped out. Additionally, you’ll want to play around with features exclusive to Stories to ensure your ad is as effective as possible.
5. Use your call-to-action wisely.
Ultimately, your Instagram Stories ad won’t be effective if you don’t include a clear call-to-action you want viewers to follow. You might use language like “Learn More”, “Shop Now”, or “Swipe Up” to encourage viewers to take action, depending on your goal — for instance, if your goal is brand awareness, “Learn More” tells viewers you simply want to educate them about your brand’s offerings, which is a very different CTA from “Shop Now”.
Take a look at the examples, mentioned above, for more CTA inspiration.
6. Include text to emphasize key message.
Including text is a best practice for accessibility in general, as it helps viewers’ who are hard-of-hearing decipher your ad’s message. Additionally, text can help emphasize your key points — for instance, Aveeno’s “Get Healthy Looking Skin Every Day” text illustrated their main point, and convinced me to purchase.
7. Test out mobile shots.
Facebook reports, “Mobile shots outperform studio shots for ad recall and intent, while studio shots tend to drive higher brand awareness.” For this reason, consider forgoing fancy studio equipment for video shot and edited straight from a mobile phone.
The majority of users consume Instagram’s content from their own smartphones, so you might as well try creating content on the same device. And, when in doubt, don’t be afraid to A/B test this theory for your own brand, as well.
For more best practices related to advertising in general, take a look at The Ultimate Guide to Mastering the Basics of Effective Social Media Advertising.
Examples of Instagram Story Ads
Below, I’ve collected a few impressive examples I found on my own Instagram Story feed. While most of these examples are bigger brand names, there are plenty of small-to-medium sized businesses using Instagram
1. Aveeno
Aveeno’s Instagram ads are clean and simple, with neutral colors — apart from the brand’s signature green — drawing attention to the brand’s daily moisturizer. The ad features a short clip of a hand pointing to a shopping cart, with a “Shop Now” swipe-up link. The ad focuses on the brand’s product and doesn’t distract with people, making it effective for anyone scrolling who’s in the mood to refill their moisturizer.

2. Miller Lite
This is an example of an ad that felt tailored towards me, a 27-year-old female in the Boston area. First, the ad features a call-out to the Boston Celtics, immediately capturing my attention. Once I’m intrigued, the ad segues into a picture of their Lite drink, with the text, “Great taste, only 96 calories, 3.2G carbs”. In this example, the ad does a good job drawing my attention to the things I care about most: namely, low-calorie alternatives to beer (and Celtics).
3. Trunk Club
This engaging, fast-moving ad shows a few different outfit options on the screen with the text, “Keep what you love, send the rest back”. The ad shows a few different outfits, ranging from dresses and cardigans to dress pants and heels, to capture the attention of a wider range of people than it could if it featured only one style. With the plain white background and easy-to-read black text, it’s simple, clean, and hard to miss.

4. Febreze
I mean, come on … who doesn’t love a puppy? This fun, clever Febreze ad shows an adorable puppy on a couch with the text, “Refresh wherever they roam”, with their Febreze product at the bottom of the screen. While most of the other ads in this list featured subdued, plain colors, Febreze goes all out with light blues, greens, and purples, inviting a sense of playfulness and fun into the user’s feed.

5. Tractor Beverage Co.
What I love most about Tractor Beverage Co.’s Instagram video is the end, which features a different call-to-action from most of the others in this list. Rather than “Shop Now,” this ad reads, “Now Available at Chipotle” with a “Learn More” swipe-up function. As a lesser-known brand, Tractor Beverage Co. wisely aims to use their ad space to increase brand awareness, so that next time you’re at your favorite nearby Chipotle, you might give their drink a try.

6. Crest
If you have the means, it makes a lot of sense to include a coupon or discount in your Instagram Story ad, like Crest does in its 3D Whitestrips ad. The $50 off encourages viewers to purchase immediately so they don’t miss out on the deal, and the fun, bright colors effectively capture viewers attention. With the limited time allotted in an Instagram Story, it makes sense for these brands to get straight to the point.

7. Kayak
Kayak, a travel search engine, created this impressive, engaging Instagram Story video ad to demonstrate how easy it is for Kayak users to filter flights depending on airline, price, cabin seating, and destination. Kayak served the ads to lookalike audiences based on the characteristics of its current website customers, and saw 5X increase in sales conversions, as well as a 50% increase in overall ROI, with combined ad placements on Instagram Stories, Instagram’s news feed, and Facebook’s news feed.

And there you have it! You’re all ready to begin creating an inspiring Instagram Story ad of your own. Just remember — you know your brand, and your audience, better than anyone. Use these best practices and examples as inspiration, but feel free to A/B test to figure out what works best for your unique business goals and social media objectives. Good luck!


Infographic Resumes: 6 Hiring Managers Weigh In
The modern job search is incredibly competitive, and technology has made it easier for your resume and job application to be overlooked and discarded before you even make it to the interview.
Luckily, technology is also here to help. There’s no longer a template for how to apply for a job — you can use social media, websites, and even interactive campaigns to get your name noticed by a recruiter.
One resume format you may not have considered? Infographics. A highly engaging and visually appealing infographic that explains your skills and qualifications might help you stand out in the crowd and serve as a work sample when applying for a job.
It’s important to note that an infographic resume won’t be appropriate for all job applications. If you submit a resume in this format through an automated system, you could disqualify yourself if the technology can’t read visual information, so it’s best to stick to the format prescribed by the job posting.
Additionally, while an infographic resume might be a good idea for a more design-related role, it’s likely not a good idea for most non-design roles. Here, we’ll explore what six hiring managers have to say about infographic resumes — plus, how to make one for yourself.
How to Make an Infographic Resume
1. Start with a good structure.
You’ll want to start by figuring out which tool you’re going to use to create your infographic. You might choose to create one in Powerpoint, or use pre-made infographic resume templates on a design website like Canva or Venngage.
Once you choose your tool, you’ll want to identify a good structure. Do you want your name and a brief opening description at the top? Would you prefer to put the Education section at the beginning, or end? Are you going to include previous positions, or focus on just the current one?
Additionally, you might want to figure out whether you’re going to focus more on icons and images, or data.
For instance, take a look at the differences between these two Venngage infographic resume templates:
In the first Kyle Fisher example, you’ll see he’s structured it so there’s plenty of white space; he’s also highlighted creative and software skills, and left space for hobbies.
In the second Linda Jackson example, on the other hand, you’ll see technical skills and educational training take up the majority of the space on the resume, along with work experience at the bottom.
When comparing these two infographic resumes, you’ll see the structure is vastly different. Similarly, consider the role for which you’re applying and which information is critical to demonstrate on your resume as it relates to the role — and which you can skip.
2. Take note of everything you want to include in your infographic resume.
Once you’ve chosen a structure, pull up an existing resume and take note of everything you want to transfer over to the infographic resume.
For instance, if you want your infographic resume to be data-heavy, write down a few key metrics related to your current role, such as “43% YoY growth” or “12% increase in MRR”. It’s easier to design your infographic resume once you know what you’ll need to include.
3. Choose a good color scheme.
A cohesive color scheme is a critical component of any good design, and this is no exception. Consider using clean, complementary colors — like white, black, and orange, or yellow and teal — to help your resume stand out without becoming too distracting.
4. Have a strong opener.
This is a best practice for any resume, but particularly for an infographic, you’ll want to start with a good, powerful opener. In the examples below, for instance, I put: “Passionate, creative, and driven Elon graduate with leadership experience and strong communication skills.”
Ultimately, your opener is your value proposition — what will you bring to the role that the hiring manager can’t find elsewhere?
5. Use good design principles.
Finally, an infographic resume should use the same design principles as anything else.
These include:
- Creating balance, using either symmetrical or asymmetrical designs.
- Leveraging contrast to highlight certain elements.
- Using movement to create a narrative and provide a high-quality user experience.
- Ensure there’s unity in your design — i.e. your composition’s elements are in agreement.
Take a look at Everything You Need to Know About the Principles and Types of Design for additional information regarding design principles.
6 Hiring Managers’ Opinions on the Infographic Resume
To explore when — if ever — infographic resumes are a good idea, I reached out to a few HubSpot recruiters to get their take.
Kenny Nestle, a HubSpot G&A Recruiter, told me: “I personally love infographic resumes. It’s different and stands out from your typical resume, and it’s easy on the eyes.”
Nestle adds, “I’ve had candidate share graphics on the types of roles they’ve supported, as well as metrics related to their current role.”
Devon Brown, an Executive Recruiting Manager at HubSpot, echoes Nestle’s perspective, telling me, “I love when candidates use infographics as an opportunity to highlight their creative or design abilities.”
However, she urges candidates to ensure their design is clean and easily digestible. “It has to be formatted in a way that makes it just as easy to read as a typical resume,” Brown advises. “The flow of information, and how it’s presented, is critically important if a candidate chooses to go this route.”
Not every recruiter feels that infographics are a good idea. Technical Recruiter Sarah Magner, for instance, says, “I could see why people applying for design, marketing, or branding roles might use an infographic to set themselves apart, but I’ve always found them to be a bit distracting. Plus, the graphics can take away from the actual content on the resume.”
“I’d prefer an easy-to-read resume over a pretty one,” Magner adds.
Tríona O’Sullivan, HubSpot’s Global Marketing Recruiter, agrees with Magner that infographic resumes are typically not a good idea. She told me, “It can be great to see the creative side, but sometimes a candidate can spend so much time designing the template that they miss out on key information, details aren’t aligned, or there are really obvious spelling and grammar issues in the mix.”
O’Sullivan adds, “Given how competitive and busy the job market is today, it’s more important to ensure your resume is easy to review, and states your experience and achievements clearly and quickly, since that’s what someone is going to look for first when reviewing.”
Amelia Towle, HubSpot’s Head of Brand Infrastructure & Design Team Manager, spoke with her Design team on the potential merits of an infographic resume, but agrees that it’s typically not a good idea. Towle told me, “If I think about the purpose of a resume, it’s a document that your intended audience typically wants to scan as quickly as possible to glean information in an efficient way. If you drastically alter the format, you are perhaps forcing extra cognitive load on a busy recruiter who is just trying to narrow down a potentially vast pool of applicants.”
Additionally, Towle told me that if a big company is using software to scan resumes, changing the layout might result in the resume being impossible for the scanner to interpret.
Ultimately, she believes infographics are typically unwise, unless it fits the business for which you’re applying: “If it’s a huge HubSpot-sized organization, you might be shooting yourself in the foot by altering format beyond what is expected. But if it’s a tiny agency that is solely design-focused, it might be helpful to stand out.”
Towle adds, “Infographics-for-the-sake-of-infographics has arguably had its day, so in that case, you might want to conceive of something new.”
Finally, there are some recruiters who don’t necessarily care one way or the other. As HubSpot Marketing Recruiter Erica Matos told me, “I don’t really care about what a resume looks like — instead, I look at the content and make sure they have experience that aligns with what I’m looking for. I’d always love something visually appealing, but if I can’t clearly gauge the candidate’s actual experience, it’s not going to help them get the job.”
You’ll only want to create an infographic resume if it makes sense for the role. If the role is design-related, then an infographic resume can help you display some of your skills.
However, even if the role is design-related, there are some risks associated with infographic resumes — including difficulty downloading or viewing across devices, and the design elements detracting from the resume itself.
For this reason, you might consider alternative methods to showcase your skills.
For instance, O’Sullivan told me, “While I don’t love super creative infographic style resumes, I love when someone hyperlinks to their portfolio or website, etc. That’s an amazing way to showcase both their experience and their thought process when it comes to applying for roles. If I see a hyperlink for one, 99% of the time, I will go and check that out.”
If you do choose to create an infographic resume, take a look at a few of these examples for inspiration.
Infographic Resume Examples
1. The colorful, graphic-heavy infographic resume.
The resume I created below uses plenty of visuals and numbers to highlight relevant information. For instance, there’s a graph to showcase the blog posts I’ve written that have earned a spot on the first page of Google; there’s a large “12” to highlight the years of content creation under my belt; and there’s even an image of 10 stick figures to demonstrate my individuality.
 Consider how you might use one font, and a complementary color palette, to create a similar infographic. I designed this one using one of HubSpot’s free infographic templates, so feel free to create the same one using the templates, as well.
2. The data-heavy infographic resume.
In the following infographic resume (also created using HubSpot’s templates), you’ll see I’ve highlighted most of my accomplishments using data — such as the 45% YoY growth, 1,400 additional subscribers, or 24,000 hours managing deadlines.
I also used icons of a smiley-face, pencil, and painter to demonstrate some of my skills in more visual form.
What do you think? Ready to take your resume to the next level? Grab some starter templates below.


Everything You Need to Know About Marketing Operations in One Place
One of my favorite movies is “School of Rock,” which also happens to be one of 2003’s best films. In the movie, Jack Black poses as a substitute teacher at a private school, and, after noticing the students are musically talented, he turns the 10-year-olds into a fully-fledged rock band.
When assigning roles to the students, he approaches the class president and deems her band manager because she had the organizational skills needed to help the band run smoothly. “Summer,” he says, “You’re in charge of the whole thing.”
When I think about marketing operations, I think of this quote — without a team, businesses that depend on technology would have a less-than-seamless experience carrying out their duties. In this post, learn more about marketing operations and why these teams are essential to a business.

What is marketing operations?
Marketing ops enable the greater marketing team to run efficiently. They also can scale their operations as the company grows larger.
The people involved in marketing operations align and optimize all processes, from data reporting to strategy implementation, to build a foundation that reinforces and supports marketing efforts, and makes it easier to achieve goals by implementing systems to ensure marketers are best equipped to succeed at their jobs.
Marketing ops can be considered a crucial element of your business, and below we’ll discuss why.
Why is marketing operations important?
Without marketing operations, it would be tough for marketing teams to complete essential activities effectively.
For example, as technology is necessary to carry out most marketing tasks, a team to manage the complexity of that technology and ensure it works as it should is also necessary — which is exactly what marketing ops is.
Here are some examples of situations that can be rectified by having a marketing operations team:
- Your investments in marketing technology don’t provide the solutions you thought they would.
- You want to streamline data reporting and metrics tracking to understand ROI.
- Strategy execution is a timely process, and you want to lower the amount of time it takes from start to finish.
At HubSpot, the marketing ops team is responsible for supporting the systems and processes that enable the marketing team to perform optimally in their roles. This includes everything from permissions, conversational marketing, user data, forms, and email operations.
An essential function of how well a marketing ops team works is proper management. So, in the next section, we’re going to talk about marketing ops management and what it entails.
Marketing Operations Management
Marketing operations management creates the framework for how marketing ops and teams do their jobs. This management will make strategic decisions on marketing activities and develop an optimized strategy that dictates beginning to end systems that will contribute to success.
As a point of reference, marketing operations is the process of strategizing and optimizing, while marketing ops management defines how that strategizing and optimizing will happen.
Since marketing operations management aims to increase efficiency, ops teams often have a hand in content planning and campaign analysis. Now that we understand what marketing ops is and what they do let’s talk about the details of a marketing ops strategy.
Marketing Operations Strategy
Marketing ops team members need to have an expansive skill set. Some of the typical activities this department deals with are email operations, systems analysis, customer data and marketing, user operations, and lead rotation.
All of these roles come together to align the process and platforms needed to carry out marketing tasks for the greater marketing team.
When thinking about a marketing ops strategy, think about the problems the marketing ops team needs to solve. For instance, it’s common for marketing operations strategies to solve the needs of customers, stakeholders, and the employees of your company.
Below we’ll go over how to create a marketing operations strategy for your own business.
To understand what a marketing operations strategy is, we’ll start with an example: Let’s say a marketing ops team wanted to make email marketing a more valuable process for both parties involved (customers and marketers).
1. Identify what you want your operations strategy to accomplish for stakeholders.
The first step in defining a marketing ops strategy is outlining significant goals. For instance, your marketing ops team might decide to send email marketing messages, enabling sales to source quality leads, and identifying key marketers to execute that process are three goals they have for quarter one.
When you identify those major goals, make sure you also determine which stakeholders you are targeting. You might be targeting one group or many, but being clear about who you’re planning for will make sure your plan is actionable and valuable.
2. Determine actionable steps in your plan that will help you reach your goals.
Then, the team would look at how these tasks would help them complete their goals. For instance, the team would ask themselves, “How will enabling teams to effectively send email marketing help us reach our goals?” and estimate with an answer such as, “We should see a decrease in email churn rate.”
Determining these steps will help your marketing ops team stay organized as they work through their tasks. Additionally, by outlining these steps, your team can figure out what needs to be done and the resources required to see success.
3. Figure out a measurable metric to determine the success of your strategy.
The next step in strategizing is to identify how the team would measure the success of the project. In this example, the team might conclude, “We will calculate churn by dividing the number of contacts who unsubscribed from emails in a month by the number of unique email recipients in a month.”
When you figure out a measurable metric, you’ll be able to keep track of the strategy’s success as your team works through the plan. The metric will remind your team of the goal you want to accomplish and what stakeholders want to see as a result of your plan.
4. If needed, communicate how colleagues can take part in refining your strategy.
With the goal and measuring metric identified, your next step is to outline what this change would mean for affected colleagues, such as the team members who create and distribute email marketing messages.
The team might conclude that “Marketers can expect an easier email guideline process, a more effective format and to receive a form to offer input about how to make that happen.”
5. Assign team members to specific tasks that will contribute to the completion of your goals.
Having that set in place, what’s next for the marketing ops team is to assign team members specific tasks to help them achieve their goals. For instance, one team member might be in charge of redefining email marketing contact lists. Another might be in charge of auditing the current workflows in place for email marketing.
As team members complete these tasks, they would check them off in a centralized space so the entire team can stay updated on the project’s status.
Marketing operations teams are equally effective with their strategies and management capabilities as Summer’s character in “School of Rock.” With her processes, the group was able to obtain their own rehearsal space and offer music classes.
Marketing ops can come up with ways to increase customer satisfaction and ease the job of marketers. Their strategies make marketing activities and duties accessible to all, and because of that, are an essential part of a business.

Permalinks: What They Are & How to Structure Them for Max SEO Value
What comes to mind when you think of SEO?
“Permalink” probably isn’t the first or second thing, maybe not even the 10th thing.
![→ Download Now: SEO Starter Pack [Free Kit]](https://no-cache.hubspot.com/cta/default/53/1d7211ac-7b1b-4405-b940-54b8acedb26e.png)
The truth is, though, permalinks and SEO have a lot more in common than you may realize, and — when done correctly — can play an important role in improving your website’s ranking. Luckily, they are also simple to master.
Let’s get into how permalinks work, how to create them, and set them on WordPress.
Let’s break down this post’s permalink.
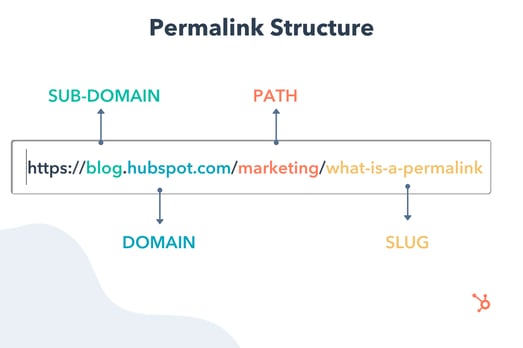
You first have your domain (and subdomain in some cases) which is where your website lives. It’s followed by the path, which indicates the location of the page. In this example, the article is located under the “Marketing” category.
The last part of your URL is the slug – an essential part of your permalink and vital for SEO because it tells search engines how to index your site.
Each component creates a permanent link leading to a specific page on your website that is unlikely to change, hence the name “permanent.”
When you don’t customize your URLs using permalinks, you get a randomized ID. The problem is that this isn’t attractive to site visitors and isn’t optimized for search engines.
Let’s say you’re blogging about sponsored tweets and their value. Would you rather have the URL look like this:
yourdomain.com/sponsored-tweets-guide
Or like this:
yourdomain.com/post-id?=5726fjwenfkd
Probably the first one, right?
Great slugs should include the keywords targeted in the post. Take our example above: “sponsored-tweets-guide.”
From this permalink, the reader (and Google) know the page houses a guide to sponsored tweets and is targeting the keyword “sponsored tweets.” This makes it easier for readers to find and share your content.
In addition, using keywords with high monthly search volume (MSV) in your slug can help you increase your ranking.
That’s why when using a content management system (CMS) like CMS Hub or WordPress, you want to think about your permalink structure early on in your web development process.
What’s the difference between a permalink and a URL?
A URL is a web address that directs a web browser to the location of a page or file. It can include a domain name only, or also include the path, slug, and other information depending on the page you are accessing.
A permalink, on the other hand, refers to a specific URL structure, a tool made popular by bloggers for sharing and SEO purposes. While every permalink is a URL, not every URL is a permalink.
The Best Permalink Structures
With several permalink structures to choose from, think about your content and your audience to determine what format will work best.
For instance, a news site can greatly benefit from having a slug that includes a date and title. This lets readers know quickly by scanning what the post is about and when it was written.
On the flip side, if you manage a blog that prioritizes evergreen content and has pages that get constantly updated, you’ll likely want to avoid having any dates in your titles.
That can signal to readers that your content is old and therefore, irrelevant. Instead, have a simple slug that only includes your article title.
It’s all about using a structure that will benefit you (and your users) in the long run. Once you decide on a permalink structure, you can set it up in your CMS.
How to Make a Permalink
To make a permalink, all you need is:
- Your domain name
- Your slug
- Your path (if you have several topic categories and want to organize your content)
Then, there are a few best practices to keep in mind when deciding on your permalink structure:
- Keep it short – Avoid articles like “the,” “a,” “an” and create a slug that’s a shorter version of your title. E.g.: If your article is titled, “How to Create an Instagram Story,” your slug can simply be /Instagram-story.
- Include your main keywords – Optimize your slug by including your keywords. Make sure the keyword you use directly relates to the content on the page.
Now, in terms of where you go to create your permalink, that’s typically on your CMS. The ideal time to set your permalink structure is shortly after developing your site but before any posts go live. However, you can also do this at any point.
If you decide to change old URLs to reflect your new structure, be sure to update all backlinks or set up redirects for those pages.
So, you’re probably wondering how to optimize a permalink for WordPress. We’ll cover that next.
Using Permalinks with WordPress
When you create a post in WordPress, the permalink will not be optimized unless you have already set the structure. Otherwise, it will look like a random ID.
You can find the permalink on the page post while you’re editing, as seen in the example below.
Changing permalinks is a fairly simple process, and you won’t need to install plugins to do so. You can select from a few structures or customize your own.
More on this in the next section.
1. Open “Settings” and click on ‘Permalinks.”
The first step in structuring your permalink is to open the “Settings” section of your WordPress dashboard. This should bring you to a list of options with various subheadings.
Once you click on this option, you’ll be taken to a screen with a variety of options to choose from. Depending on your preference of how you want your post to be archived and searched, you can pick the one that most aligns with your goal.
2. Choose a permalink structure option.
Here are the different choices you’ll have and what they mean:
- Default — Avoid this default option if you’re looking for maximum SEO value. It’s the post identification number, with no other information.
- Day and name — This option sets up the slug to be the day the post went live and the name of your post. A good reason to use this is if you have multiple posts of the same name but want the differentiator to be the date it was posted.
- Month and name — The same as the previous option, this time with the month being displayed. If you have a monthly column, such as a “Favorites” or “Best Of”, this is a great option.
- Numeric — Numeric is another choice that’s safe to ignore, as this structure is all numbers and provides little SEO value. If you’re archiving posts numerically, as a way to look back and see previous posts, numeric is the choice for you.
- Post name — Choosing this route is an okay method for SEO, but not the best, as Google likes to focus strictly on keywords when ranking posts.
Learn more about that “custom structure” option next.
3. Consider creating a custom permalink structure.
If you’re not too excited about the structures WordPress offers, you can create your own permalink structure in minutes.
You’ll create a formula for your permalink structure, and every time a post goes live, it will follow that formula.
For example, let’s say you have a lifestyle blog and a travel category (i.e., path) under which you post about your latest vacations.
If you wanted to set the structure to be the category followed by the year and post name, here’s what you would put in the box:
/%category%/%year%postname%/
Each custom structure is separated by a backslash, and each tag starts with the percent sign.
You can find all of the structure tag options available to you on WordPress here.
When creating permalinks, the main thing to keep in mind is focusing on SEO (i.e., keywords) and user experience. They’re the virtual key (pun intended) to making sure your content is found by the people you want to reach.
Editor’s Note: This post was originally published in October of 2019 and has been updated for comprehensiveness.

6 Steps to Build a Single Customer View & Improve Customer Experience
Ever see those cool 360-degree cameras on red carpets at award shows?
Someone famous will stand in the middle and several cameras positioned all around will simultaneously capture pictures of the star, creating a spectacular image that gives you a 360 view of the person.
Now, imagine if you could do that with your target audience? Capture them from all angles as they interact with your brand. With a single customer view, you can.
The issue is, many businesses struggle to know where to start.
At the end of this article, you’ll understand what a single customer view is and how to create one for your brand.
A single customer view combines data from a consumer’s behavior on web and email, social media activity, demographics, interactions with customer service, and purchase history.
Let’s go through an example of an interaction between a consumer and a brand.
A consumer, let’s call her Jazmyn, discovers a brand on Instagram. Jazmyn visits the brand’s website through Instagram and downloads a free offer. Said brand adds Jazmyn to an email list and she starts receiving nurturing emails.
After months of no interactions, Jazmyn rediscovers the brand and makes a purchase. A month after that, she calls customer service regarding an issue with her product.
In just a few months, Jazmyn has interacted with at least three departments within the company: marketing, sales, and customer service. In many businesses, every department tracks data using its own system.
For instance, sales teams often use customer relationship management (CRM) software to track their interactions with clients and prospects while marketing teams use marketing platforms and automation tools to generate leads.
This creates huge data gaps, making it difficult to understand how a user is behaving over an extended period of time beyond a single vertical. It can also lead to duplicate information, leading to dirty data.
For instance, Jazmyn might receive ads for products she’s already purchased. Or she may get a call from customer service asking about a product she’s already reviewed via email.
Having a single customer view allows organizations to build personalized interactions with consumers, based on their current stage in the customer lifecycle. This creates a better customer experience, stronger brand loyalty, and better retention rates.
When you know where your target audience is, you can make enticing offers based on their current needs. It’s personalization at its best.
Benefits of a Single Customer View
When you invest in a platform with a single customer view, you:
- Have cleaner data – With an integrated system, you remove information silos, which often cause data duplication.
- Gather better insights – When you have an accurate map of the customer journey, you can better understand how your campaigns are performing and identify areas of improvement.
- Assign proper credit to the right channels – Proper attribution is a major issue when it comes to audience tracking. With an SCV, you can identify the best and worst-performing channels for future campaigns.
1. Align your data owners and your KPIs.
The first step in creating an SCV is aligning all your data owners across your organization.
It’s important to align your teams early on key targets and key progress indicators. This keeps everyone on the same page and striving toward the same goal.
So, although everyone will be working on different sections, they’ll all be contributing to the same objective. This is key in keeping everyone in the same mindset and easing the transition to a data-driven approach.
Your data owners will serve as liaisons between IT and your team, enforcing governance standards and supplying IT with the access they need.
During this process, your IT team will be instrumental, as they will need to consolidate data from multiple systems and sources.
2. Find the right tech.
The next step is finding a platform with the capabilities to support your company’s needs.
Key features to consider when searching for a platform include:
- Usability and accessibility of software
- CRM Integration
- Data quality tools
- Automation
You’ll also want to consider the size of your company and the scalability of the software. all-in-one CRM platform like HubSpot, which combines sales, marketing, customer service data to support a holistic customer experience.
3. Hire data managers.
Depending on your company size, you may want to onboard roles dedicated to data, such as data miners, data analysts, and data migration specialists.
The process of migrating data is a costly and time-consuming one that you may not be equipped for. Instead, hire experts with the knowledge and experience to do it right.
They will be essential not only during the initial building phase but also as you grow your customer base.
4. Sort and integrate all data from your legacy systems.
If you’re an established brand with a ton of scattered data, you’ll need to sort through your systems.
Start by conducting an audit of your data quality. From there, clean your data so you can start integrating it with your other systems, including:
- Your data warehouse
- Your point-of-sale systems
- Your marketing automation systems
- Your call center systems
5. Set your data governance strategy.
As you’re in the process of cleaning out old data, you’ll need a new system for new, incoming data.
This is where your data governance standards come into play. They serve as operating guidelines for retrieving, storing, and processing data.
You may wonder, what’s the difference between a data management strategy and a data governance strategy? The former refers to the actions you take to fulfill the guidelines outlined in your governance strategy.
To learn about how to develop a governance strategy, click here.
6. Test your processes.
The last step in this process is testing your new centralized system.
To ensure that your new environment works (i.e., that the data linkage is complete), some test data will need to be used to ensure the data is gathered, stored, and reported correctly on your platform.
This will likely be an ongoing process as your business scales and you implement new touchpoints.
The earlier your team can implement a single customer view framework, the better equipped you will be to serve your target audience. While the process can be expensive and time-consuming, it’s a worthwhile investment that will be instrumental in making strategic business decisions.

9 Breadcrumb Tips to Make Your Site Easier to Navigate [+ Examples]
In the fairy tale Hansel and Gretel, two children drop breadcrumbs in the woods to find their way home. Nowadays, you probably don’t experience too many lost-in-the-wood experiences, but I’m willing to bet you’ve felt disoriented on a poorly designed website.
In web design, breadcrumb navigation is a way to show your users their location and how they got there. Like Hansel’s breadcrumbs, it helps users retrace their path and see where they are in the greater scheme of your site.

While you can style breadcrumbs however you’d like, they tend to look the same across websites that use them. Here’s a simple example of breadcrumbs from the HubSpot Knowledge Base:
Jakob Nielsen, co-founder of the acclaimed Nielsen Norman Group, has been recommending breadcrumb navigation since 1995, and makes a strong point for their usefulness and efficiency: “All that breadcrumbs do is make it easier for users to move around the site, assuming its content and overall structure make sense. That’s sufficient contribution for something that takes up only one line in the design.”
If your business’s website is multi-layered, you might consider implementing breadcrumb navigation to make your site easier to navigate. However, like any design element, there’s a right and wrong way of doing it. Here, we’ll explore nine tips and examples to ensure you’re creating the most effective breadcrumb navigation for your users.
Breadcrumb Navigation Tips and Examples
1. Only use breadcrumb navigation if it makes sense for your site’s structure.
Breadcrumb navigation has a linear structure, so you only want to use it if it makes sense with your website’s hierarchy. If you have lower-level pages that are accessible from different landing pages, using breadcrumb navigation will only confuse readers who keep accessing the same pages from different starting points. Additionally, if your site is relatively simple, with only a few pages, you probably don’t need breadcrumb navigation.
2. Don’t make your breadcrumb navigation too large.
Your breadcrumb navigation is a secondary tool to your primary navigation bar, so it shouldn’t be too large or prominent on the page. For instance, on DHL’s website, their primary navigation bar is large and recognizable, with columns like “Express” “Parcel & eCommerce” “Logistics”, etc. Their breadcrumb navigation is the smaller section below that reads, “DHL Global | > Logistics | > Freight Transportation”. You don’t want your users to mistake your breadcrumb navigation as the primary navigation bar.
3. Include the full navigational path in your breadcrumb navigation.
I Googled “Elon University Non-Degree Students” to reach this landing page, but Elon is smart to include the full navigational path, including “Home” and “Admissions”. If you leave out certain levels, you’ll confuse users and the breadcrumb path won’t feel as helpful. Even if users didn’t begin on the homepage, you want to give them an easy way to explore your site from the beginning.
4. Progress from highest level to lowest.
It’s important your breadcrumb navigation reads left to right, with the closest link to the left being your homepage, and the closest link to the right being the user’s current page. A study by Nielsen Norman Group found users spend 80% of their time viewing the left half of a page and 20% viewing the right half, making a strong case for left-to-right design. Plus, the link closest to the left will appear as the beginning of the chain, so you want it to be your highest-level page.
5. Keep your breadcrumb titles consistent with your page titles.
To avoid confusion, you’ll want to remain consistent with your page and breadcrumb titles, particularly if you’re targeting certain keywords in those titles. You also want to clearly link your breadcrumb titles to the page. If the breadcrumb title doesn’t have a link, make it clear. Nestle effectively labels its breadcrumb titles to match the page titles. “Areas of impact & commitment”, for instance, reads the same in the breadcrumb navigation as it does on the page.
Nestle also does a good job differentiating links from non-links with different colors — the links are blue, while the non-links remain gray.
6. Get creative with design.
The traditional breadcrumb navigation looks like this: Home > About Us > Careers. However, you don’t need to follow the traditional path if you feel a different design could appeal more to your audience, or look better on your site.
For instance, Target uses breadcrumb navigation in their product pages (because who wouldn’t get lost in the virtual shoe section?), but uses “/” symbols and simple black and grey text. In this case, the subtle design variation makes sense for their site’s aesthetic.
7. Keep it clean and uncluttered.
Your breadcrumb navigation is simply an aid for the user, and ideally shouldn’t be noticed unless the user is looking for it. For this reason, you don’t want to clutter your breadcrumb navigation with unnecessary text.
Eionet, for instance, could do without their “You are here” text. While meant to be helpful, the text clutters the page. With the right design, a breadcrumb navigation should be noticeable enough without an introduction.
8. Consider which type of breadcrumb navigation makes the most sense for your site.
There are a few different types of breadcrumbs you might use — location-based, attribute-based, and history-based. Location-based breadcrumbs show the user where they are in the site’s hierarchy. Attribute-based breadcrumbs show users which category their page falls into. Finally, history-based breadcrumbs show users the specific path they took to arrive at the current page.
Bed Bath & Beyond uses attribute-based breadcrumb navigation to show users which category their product page falls under, so users can click back to “Kitchen” or “Small Appliances” to peruse similar items. This type of breadcrumb navigation is most effective for Bed Bath & Beyond customers. When you’re creating a breadcrumb navigation, consider what’s most useful for your site’s visitors.
9. Know your audience.
Best practices in breadcrumb navigation urge web designers to place the navigation at the top of the page — but Apple, one of the most valuable companies of all time, defies this logic by putting their breadcrumb navigation at the bottom of their site. Ultimately, it’s critical you know your audience. Apple’s customers are typically tech-savvy, and would likely find the navigation if they needed it. Consider your customers’ needs, and implement A/B testing if you’re unsure.
Breadcrumb Navigation in HTML and CSS
Not only are breadcrumbs useful — they’re also easy to add to your website with a bit of HTML and CSS code.
Let’s start with the HTML, which we’ll use to make the links themselves. The easiest way to do this is to organize your links in an unordered list (<ul>) element, with each list item (<li>) comprising a link in the breadcrumb series until the final item, which denotes the current page.
Here’s an HTML template for breadcrumbs that you can use:
Notice how I’ve also enclosed the unordered list in an HTML <nav> (navigation) element, and added a class and an ARIA label to its opening tag. This is optional, but helps make your page more accessible to screen readers and search engines.
Of course, this HTML alone isn’t enough — right now, we just have a bulleted list of links. By adding CSS, we can achieve the breadcrumb look that we’re looking for. Apply the following CSS to the HTML above:
Together, this code generates a basic breadcrumb navigation area that can be used on any site — see the final result below. I’ve also added some additional styling for a cleaner look. To see how the breadcrumbs look without this styling, comment out the code at the bottom of the CSS tab.
See the Pen Breadcrumbs in HTML and CSS by Christina Perricone (@hubspot) on CodePen.
Breadcrumb Navigation in Bootstrap CSS
Bootstrap CSS also offers a way to create breadcrumbs without needing to add custom CSS. To do this, use the Breadcrumb component like so. Here’s an example from the Bootstrap 5 documentation:
See the Pen Breadcrumbs in Bootstrap CSS by Christina Perricone (@hubspot) on CodePen.
This is just the basics of breadcrumb navigation in Bootstrap — see the Bootstrap breadcrumb documentation to learn all the details.
Design to Help Users Navigate Your Site
Ultimately, breadcrumb navigation is an effective tool to make your site easier to navigate, but you want to follow design best practices to ensure you’re leveraging the tool’s helpfulness. For additional UX advice, check out our Ultimate Guide to UX Design.
Editor’s note: This post was originally published in September 2018 and has been updated for comprehensiveness.


How to Build a Marketing Technology (Martech) Stack That’ll Grow With You
What will your marketing team look like six months from now? Or a year from now? How many people will you add? What new tools, systems, and data will you need?
There are a lot of potential questions you can ask about the future of your business, but there is one certainty: you’ll deal with more data, more people, more processes, and more complex problems as you grow.
But how do you deal with that in your marketing team? That’s where marketing technology, or martech, comes in. By automating tasks and removing obstacles from your team’s workflows, marketing tech empowers your team to waste less time on menial tasks, allowing your business to grow more efficiently.

When you put it all together, you get a marketing technology stack: a collection of tools that your team uses to do their best work every day.
As your team and business scales, it’s important to create a martech stack that streamlines your day-to-day processes. In this post, we’ll go over everything you need to know about martech and how to build a marketing tech stack that will stay with you as you grow your business.
Marketing technology can be used by any type of marketer — even non-digital marketers. One martech tool is typically used for a different marketing discipline.
Here are a few examples of disciplines and a martech tool that can be used for them.
- Search Engine Optimization (SEO): A keyword research tool such as Moz is an example of a martech tool for SEO.
- Content marketing: A content management platform such as CMS Hub can be used for content creation.
- Social media marketing: A social management platform such as HootSuite is an example of a martech tool for social media marketing.
- Search Engine Marketing (SEM): Google Ads is an example of a martech tool for SEM.
- Event marketing: A lead collection software like the one included in Marketing Hub can be used for lead capture during an event.
- Advertising: A programmatic ad platform such as mediasmart is an example of a martech tool for advertising.
Instead of adopting a plethora of different tools, some marketers choose to adopt an all-in-one solution such as Marketing Hub.
How is technology used in marketing?
Technology is used by marketers to execute their marketing campaigns. Marketers use software to automate marketing tasks and collect data so they can get insights related to campaign activity and their impact on customers.
For example, say that your team spends a significant amount of time emailing customers. The action feels repetitive, and it’s keeping people away from more pressing assignments. You may choose to use an email automation software, so less time is spent sending emails.
You also want the software you use to track data related to those emails, so you gain an understanding of how your users interact with them.
In brief, marketers use technology to make their jobs easier and understand their levels of success. The technology that marketers use in their campaigns is known as their marketing tech stack.
Let’s say that you primarily focus on SEO and paid ads on social media. You would add the following tools to your marketing tech stack: Moz for SEO and HootSuite for social media management.
Alternatively, you can adopt an all-in-one solution such as Marketing Hub to take care of both your SEO and social media marketing strategies.
For instance, Marketing Hub’s SEO tool will assist you in optimizing your site with its built-in keyword research tools, as well as as-you-type optimization advice while you’re creating content.
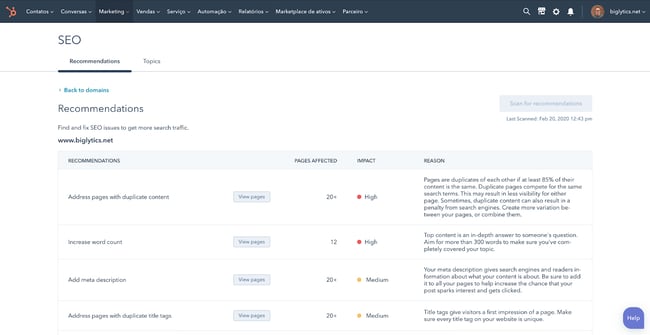
Its social media management tool will take care of everything related to social media — including post creation and audience engagement analytics. You can even reply directly to comments from the tool.
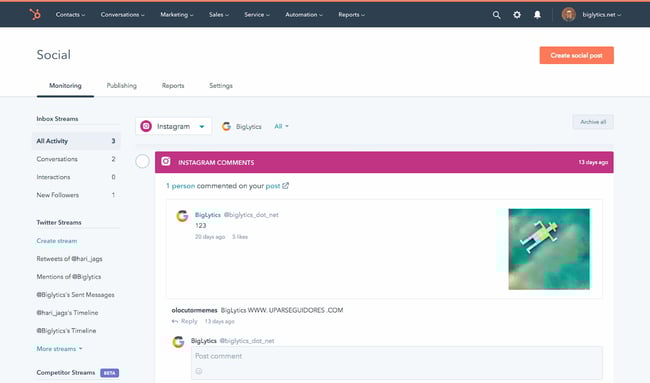
Overall, the technology you choose will help you execute your campaigns from start to finish.
But with so many to choose from, it can be difficult to build a martech stack that works for your team. Let’s go over how you can build an effective stack.
How to Build a Marketing Tech Stack
There is no out-of-the-box method for building your martech stack. Your company is unique, and your perfect marketing stack is not going to look exactly like anyone else’s.
This is the time for choosing the right tech tools for your team and setting them up in a way that your future team can use and understand. To do so, take the following steps.
1. Identify your primary marketing strategies and goals.
Before ever choosing a martech tool, you’ll need to outline your marketing strategies. It doesn’t have to be complicated, either: you simply need to have an idea of the basic strategies that you want to implement.
If you already have an established marketing team, take a look at the strategies that are currently in place. This will help you gauge, from the get-go, the types of tools you need.
Here’s an example. Let’s say that you want to increase organic traffic to your website. The strategy for that would be SEO. Next, you want to capture leads. So you would invest in a website redesign strategy that highlights your calls-to-actions more efficiently.
Jot these strategies down in a document, then include ideas for possible tools you can use to implement the strategies. If you don’t know which tools you use, simply write that you’ll list them after further research.
Example 1
- Goal: Increase organic traffic
- Strategy: SEO
- Tools: To be determined
Example 2
- Goal: Get more visitors to convert
- Strategy: Redesign the website
- Tools: To be determined
2. Survey your team to find out their challenges.
Next, sit down with your team and find out the challenges they encounter when trying to execute their day-to-day duties.
What adds more time to their workflow? What makes their job harder?
While the conversation should be open-ended, try to connect their challenges to your marketing goals. For instance, if you want to increase organic traffic, ask what specifically your team finds challenging when trying to optimize the website. If they say keyword research takes too much time, then you’d know that you’ll need a keyword research tool specifically.
Jot these challenges down in the same document you’ve already started. Keep it simple — just a sentence or a few bullet points will do.
Example 1
- Goal: Increase organic traffic
- Strategy: SEO
- Challenges: Keyword research takes too much time
- Tools: Keyword research tool that quickens the process
Example 2
- Goal: Get more visitors to convert
- Strategy: Redesigned website
- Challenges: Unable to add CTAs because of the outdated backend system
- Tools: A new content management system that allows the team to add CTAs to any page
3. Establish an estimated budget.
Building your dream martech stack means nothing if you can’t afford it. As you begin to determine the types of tools you’ll need, think about the funds you’ll allot for them.
You can go several ways about this. You can determine a budget per tool or per strategy. Alternatively, you can choose a budget overall for the entire team in a yearly, quarterly, or monthly basis.
Choosing a monthly budget is the best choice for small businesses without a dedicated finance team. Most tools are available on a monthly subscription basis, which makes it easier to drop one if it doesn’t work for the team.
You can also choose a budget per strategy. For instance, you can decide you’ll invest $200 a month in SEO tools.
Be sure to take into account the amount of seats you’ll need for the tool, or ensure the team is open to sharing one subscription. Most times, sharing a single subscription will work without a problem, and you can save a significant amount of money.
4. Research the tools you’ll consider for your martech stack.
Now that you have your strategies, your tool ideas, and your budget, it’s time to research the actual products you’ll add to your martech stack. If you’re a marketing leader, you can leave this task to individual team members, because they’ll be the ones using the tools.
It’s helpful to look at product curation posts to get a general idea of the offerings that are out there. For the keyword research challenges in your team, for example, you can look at a list of keyword research tools. If you’re looking for a new CMS, you should look at a list of the best CMS systems.
From there, you can investigate pricing, product reviews, and general fit for your team.
Make a list of the tech tools in a spreadsheet and include pricing and a general description of the product. From there, refine the list until you’ve decided on the tools you want to try out, and be sure to specify whether the tool needs a monthly or yearly subscription.
5. Consider non-marketing tools to add to your tech stack.
When we talk about the martech stack, we’re often caught up in marketing-specific tools. But there are a wide range of “general” tools that are useful for a marketing team.
Project management tools, collaboration platforms, and data sync software solutions are just a few of the products you can consider. Anything that cuts time from a complicated workflow is worth exploring. Google Drive would be an example, and so would Asana.
Add these products to your martech list, including the pricing and a brief description.
6. Compile the data that you’ll transfer into the tools.
After you’ve purchased the tools, it’s time to transfer the data. Already have a list of leads? How about Microsoft Word documents you’d like to import into Google Drive for collaborative editing?
Compile all of them in folders. Assign a type of data to each team member. For instance, one team member can compile the contacts from a conference. Another team member can compile the current templates you use for your social media posts. Another can compile all of the copy from the website for the website redesign.
When it’s time to sign up for the tools and adopt them, you can transfer these files and data and more easily pick up where you left off.
7. Assign one team member to create a workflow per tool.
Now that it’s time to adopt the martech tools, you don’t want to throw it out to your team without a workflow. That’s an easy way to end up with a subscription that no one is using.
Assign one team member to explore one specific tool. This team member will jot down workflow steps for using the tool effectively and write a step-by-step tutorial with screenshots. After, schedule a meeting for the team member to carry out a live tutorial.
Why? You can establish the best way to use the tool without a lot of guesswork. The process will be scattered and haphazard if everyone starts using the tool at once. By having a single uniform process, you can guarantee that every team member is using the tool to its fullest extent.
8. Analyze the tools’ success and switch solutions if necessary.
You don’t want to end up with an unused martech stack. Always audit your tools for their success — whether they effectively streamline workflows, automate tasks, and help your team do their work in a better way.
If not, there’s no shame in cancelling your subscription and going for another solution. Take a look at product curation posts, or research individual tools you may have heard of from other marketing leaders.
Let’s go over a few tips you should apply when building your martech stack.
Martech Stack Tips
As you build your marketing tech stack, you’ll be pulled in all sorts of different directions. When your business is growing, you’ll be tempted to add more complexity to address urgent gaps.
We’ve been there. HubSpot’s marketing operations team is all too familiar with the challenge of dealing with more and more as our team grows.
We’ve learned a lot along the way — so we gathered insights from HubSpot’s resident operations experts to ask what they wish they would have known when growing HubSpot’s own marketing tech stack.
1. Strategy first, technology second.
As companies grow, it can be tempting to rely on technology to support processes that are still evolving. Usually, this happens when a team adopts powerful tools that have a lot of potential, and they try to mold their systems around it.
HubSpot’s marketing operations team has made this mistake, too, and with an important takeaway: What sets apart truly powerful tech stacks isn’t just about the technology.
“The tools themselves won’t make you successful but rather how you use them,” explains Kerri Harrington, Marketing Ops Analyst here at HubSpot.
Harrington has worked closely with HubSpot Partners, consulting many who were in the midst of building their tech stacks. She taught them to think about their tech stack not as the powerhouse behind their systems, but a vehicle to efficiently and effectively execute their strategy.
If you are still developing your strategy, she says, try drawing out and visualizing your tech stack. This gives you an opportunity to think critically about each tool, the purpose it serves, and where there is any overlap or duplication in your tools.
2. Keep systems simple.
Have you heard of the “keep it simple, silly” (KISS) principle? The term, originally coined by an aeronautical engineer in the US Navy, states that simplicity guarantees the greatest levels of user acceptance and interaction.
The term is used often in software design, for example, where function and instruction creep can make products unmanageable over time.
How do you prevent this happening in your own company as it continues to grow? Put your current strategy down on paper, and review the value of every stage of your process with your leadership team. Consider what processes could be done more efficiently, and what could be eliminated altogether.
“The #1 driver of complex business systems is complex business rules,” says Mark Metcoff, Director of Marketing Technology at HubSpot. “If you can simplify your go-to-market strategy as much as possible, then regardless of how you structure your systems, you’ll be heading in the right direction.”
3. Aim for medium-term solutions.
In an ideal world, every decision you make about your tech stack today will work seamlessly for your team for years to come.
In reality, though, you are probably going to change systems a dozen times over the next few years if you continue to scale. You shouldn’t worry about picking your forever tech, but do not settle for a tool that will become obsolete in 6 months, either.
“Aim for the medium-term,” Metcoff suggests. “The costs of switching systems has never been lower, thanks to the emergence of more persistent datastores like customer data platforms that can underlie front-office facing systems, and iPaaS solutions that allow you to integrate front-office providers for easy data transfer.”
4. Document everything, and document it well.
Imagine opening your spice cabinet, ready to cook up a chicken curry, to find that nothing in the cabinet is labeled. Every spice and herb is in the same colored jar, with no ingredient label or expiration date.
Unless you have a noteworthy sense of smell, this project would not be very easy or enjoyable.
This is what it’s like to step into a new role only to realize that your new team’s processes and database have not been properly documented. This is common among growing companies, because as your database grows and your systems evolve, it’s easy to end up with a lot of clutter, data integrity issues, and confusion.
Many will skip right over this — who likes to document? Who has the time to ‘waste’ a day of innovation to do seemingly admin work? We get it — But for the sake of your future team, make sure you take the time to lay down the right foundation for data architecture.
“I can’t tell you how many times we have to review the history of a change or ‘walk through’ the last couple of years on a topic,” says Maggie Butler, Builder Marketing Team Manager at HubSpot. “It gets really, really hard if no one has documented anything.”
One incredibly valuable resource HubSpot had during one of its growth spurts, she says, was the documentation built by our engineers that detailed in simple language how the logic and code worked. Aim for this level of documentation to be comprehensive across all applications, and easily accessible for everyone on your team.
In terms of marketing tools, our Lead Management tool embodies the ‘document everything’ mantra. The tool can be used to create a database of all customer information, where you can view chronological timelines of every interaction customers have had with you.
5. Choose point solutions that serve a single purpose.
A point solution is a product or service that addresses one very specific need in a marketing organization. Sometimes, you just need a piece of software to do a specific thing really, really well. There’s no shame in it.
The data sync software included in Operations Hub is a great example of this. If you use multiple different apps to execute your marketing strategy, keeping track of customer data from each app can be a tedious process. The data sync tool can integrate with your CRM to streamline this process by syncing customer data from your favorite apps into one up-to-date database.
But keep in mind that every piece you do add to your infrastructure comes with its own compliance risks, technical challenges, maintenance and upkeep, and general administration.
“Also look closely at whether or not it needs to be integrated into your tech stack,” explains Metcoff. “Sometimes point solutions work just fine in a silo.”
If you have any point solutions in your current stack, think about how it fits into the bigger picture: how does it interact with the rest of your technologies, and what do you need to do to keep it running?
6. Aim for ease of use, but don’t sacrifice the necessities.
There are a lot of options out there — so don’t settle for less than what you need. At the end of the day, you need to choose a system that’s easy for your team to pick up and use, but still has the power and flexibility you need to get things done.
The challenge with today’s marketing automation tools is that they offer either enterprise-grade power or consumer-grade ease-of-use, but never both. As a result, many still go with the safe bet — overpriced, overly complicated, and under-utilized tools — which translates to spending more time on systems than on your customers.
Best Marketing Tech Stack
The best marketing tech stack for your business is entirely tailored to your needs, but there are a few tools we recommend — especially if you’re just building out your marketing team.
Let’s take a look at a martech stack for general use, attracting site visitors, converting site visitors, and engaging leads. These martech tools are essential for running a high-performing marketing team.
Collaboration: Google Drive
Google Drive allows your team to collaborate on documents, spreadsheets, and folders — all on the cloud. There’s no need for anyone to download any software on their laptop. The best part is that losing work is nearly impossible with Google Drive.
Pricing: Free
Alternatives: OneDrive, Dropbox
Communication: Slack
Slack is an instant messaging platform that’s specifically designed for work (and not leisure chatting). This tool makes it easy for your marketing team to share quick updates, send files, and communicate live if necessary. With Slack, there’s no need to send emails that can be covered in a quick conversation.
Pricing: Free; $6.67/user/month (Pro); $12.50/user/month (Business +); Custom (Enterprise Grid)
Alternatives: Google Chat, Microsoft Teams
Project Management: Asana
Project management is the heart and soul of marketing. Whether your team is scheduling campaigns, managing complicated workflows, or working on a project-to-project basis, you don’t want anything to fall through the cracks. Asana makes it easy by providing a collaborative space for your team to check off tasks and share project updates.
Pricing: Free; $10.99/user/month (Premium); $24.99/user/month (Business)
Alternatives: Trello, Freedcamp, Project.co
Asset Creation: Canva
Canva offers a wide range of helpful templates to help your marketing team create assets for anything. Social media posts, Facebook banners, posters, infographics, presentations, flyers, and brochures can all be created with Canva. The best part is that you can start for free, and there’s virtually no learning curve. You can sign up and start using it right away.
Pricing: Free; $199.99/year (Pro); $30/user/month (Enterprise)
Alternatives: Visme, Snappa, Adobe Creative Cloud (recommended for advanced users)
Stock Images: Unsplash
Stock images are used in any type of marketing material, such as blog posts, banners, flyers, and brochures. It’s illegal to use images you find online unless they’re under a Creative Commons license. Some of these images are also not of professional quality. Unsplash is a great option for getting access to and downloading high-quality stock photos for free.
Pricing: Free
Alternatives: Pexels, Shutterstock (Paid), Getty Images (Paid), iStock Photos (Paid)
Image Optimization: Toolur
After you download stock images, it’s important to compress them so that they don’t slow down your website. There are many image compression tools out there, but Toolur is one of the best. You can upload up to 25 images at a time, choose different compression methods, set image quality, and resize them all to a preset width. Competitors only allow you to upload an image at a time or try to upsell you by restricting compression options.
If you’re optimizing GIFs, we recommend Ezgif.com.
Pricing: Free
Alternatives: Squoosh.app, TinyJPG
Grammar Checker: Grammarly
Publishing error-free copy is paramount to presenting your business professionally online. With Grammarly, you can take all the manual work out of copy-editing your work. Although it’s still recommended to give your pieces one final read-through before publication, Grammarly will catch most errors.
Pricing: Free; $12/month (Premium); $12.50/user/month (Business)
Alternatives: ProWritingAid, Hemingway App
Content Management and Blogging: CMS Hub
If you don’t yet have a website or blog and need to create one, you’ll need a scalable CMS system to power your website. If you already have a website but the CMS is clunky and hard-to-use, you’ll also need to seek a replacement that makes it easier to publish and update content.
CMS Hub is one of the best options in the business. You can build landing pages, create forms, add pop-up CTAs, publish blog posts, and see all of your performance metrics in one easy-to-use platform. It’s integrated with Marketing Hub, allowing you to seamlessly connect your other marketing initiatives to your website. Because it’s an all-in-one solution, there’s no need to pay for plugins and add-ons that slow down your site.
Pricing: $270/month (Professional); $900/month (Enterprise)
Alternatives: WordPress, Joomla, Drupal
Website Visitor Analytics: Google Analytics
Knowing who’s visiting your site, when they’re visiting, where they’re visiting from, and whether they bounce off is critical to understanding and improving your overall website performance. Google Analytics also helps you measure your organic traffic, see top landing pages, and see top exit pages.
Pricing: Free
Alternatives: StatCounter (Paid), Simple Analytics (Paid)
Web Page Analytics: Google Search Console
While Google Analytics is an excellent way to measure overall website performance, Google Search Console takes it a step further by providing analytics page-by-page. You can use it to see your top queries for either the whole site or a specific page, compare time periods, and compare two or more URLs on your site.
Pricing: Free
Alternatives: Ahrefs (Paid), Moz (Paid)
Website Analytics Dashboard: Google Data Studio
You’d create a dashboard for nearly anything in marketing: email marketing performance, landing page performance, user acquisition stats, and more. For those, you’d be better off with a dedicated reporting dashboard software.
For creating dashboards on website analytics, however, Google Data Studio is a budget-friendly tool that automatically imports data from Google Analytics. This makes it an easy choice for current Google Analytics users. Simply choose the data you want to show and configure it using the drag-and-drop dashboard editor.
Pricing: Free
Alternatives: HubSpot’s Dashboard and Reporting Software (included in Marketing Hub), Databox (Paid)
Email Marketing: Marketing Hub’s Email Marketing Tool
Marketing Hub’s free email marketing tool allows you to create rich HTML emails without writing a single line of code. You can also personalize the emails using smart rules and A/B test campaigns to increase click-through-rates. The tool is integrated with all of Marketing Hub’s features — so a lead from any form on your website automatically turns into a subscriber.
Pricing: Free
Alternatives: Constant Contact (Paid), MailChimp (Paid)
Marketing Automation: Marketing Hub
Marketing automation allows you to nurture leads with drip campaigns that are triggered based on a lead’s specific action. Marketing Hub allows you to automate campaigns and personalize workflows with segmentation logic. You can also score leads, send leads to sales, and trigger internal notifications.
The workflows feature is included in the Professional and Enterprise subscription tiers.
Pricing: $800/month (Professional); $3,200/month (Enterprise)
Alternatives: Marketo
SEO: Ahrefs
SEO has many facets: keyword research, backlink-building, competitive research, and rank tracking. But you don’t want to pay for different tools to do each one of those things. Ahrefs has a keyword explorer, rack tracker, and site explorer where you can audit the inbound links pointing to your competitors.
Pricing: $99/month (Lite); $179/month (Standard); $399/month (Advanced); $999/month (Agency)
Alternatives: Moz, SEMRush
Technical SEO: Screaming Frog
A robust technical infrastructure can take your website from serviceable to outstanding. Screaming Frog is an essential tool for finding 404 errors, identifying broken links, generating sitemaps, finding duplicate content (which can greatly harm your rankings), and analyzing your pages’ metadata.
Pricing: Free; $211 USD/year
Alternatives: DeepCrawl, Ahrefs, Moz
SEM (Paid Ads): Google Ads
When considering an SEM tool to add to your martech stack, there’s no better option than Google Ads. This tool allows you to place sponsored results on the search engine results pages (SERPs), and also allows you to display ads on Google’s display partners.
Pricing: Varies (Pay-Per-Click)
Alternatives: Media.net, AdRoll
Social Media Marketing: Marketing Hub’s Social Inbox
Social media marketing is critical for growing your follower base and increasing lead generation. It’s important to use a tool that allows you to post, comment, and manage your brand across multiple platforms.
Marketing Hub’s social media tool empowers your team to do all of this and more. You can schedule posts up to three years in advance, analyze your performance on social platforms, monitor brand mentions, and participate in the conversations that most matter to you. It’s included in the Professional and Enterprise subscription tiers.
Pricing: $800/month (Professional); $3,200/month (Enterprise)
Alternatives: HootSuite, SproutSocial
Video Marketing: Wyzowl
If your team does any video marketing, you’ll need a video marketing tool to help you create engaging videos that increase brand awareness and effectively explain your product. Wyzowl makes it easy because you don’t have to hire a videographer, animator, script writer, and voiceover actor to create polished, shareable videos.
Pricing: Available upon request
Alternatives: Testimonial Hero, Content Beta
Webinars: ON24
Webinars are an important tool for B2B marketers and an effective way to generate leads. If your team runs webinars or is planning to, ON24 is a top option for creating engaging webinars, gauging your event’s performance, and identifying potential leads.
Pricing: Available on request
Alternatives: GoToWebinar, Zoho Meeting
Conversion Rate Optimization: Optimizely
A conversion rate optimization tool will help your team ensure that your CTAs are designed to drive conversions. The Optimizely Digital Experience Platform allows you to experiment with colors, placement, and design of your CTAs. You can also test your website’s personalization options and deliver highly tailored recommendations to your website users.
Pricing: Available on request
Alternatives: Google Optimize, Crazy Egg
Build a Martech Stack that Helps You Grow Better
With all of the tools available these days, there is no need to use clunky, complex, and time-consuming legacy software. We believe you shouldn’t have to sacrifice productivity to get power, because the best tools combine both power and ease-of-use. When you focus on delighting your customers and creating great experiences instead of managing your software, you will grow better.
Editor’s note: This post was originally published in December 2019 and has been updated for comprehensiveness.


The Ultimate Guide to Writing a Cover Letter
Nowadays, companies have a computerized system that puts resumes through an online scanner which will automatically reject some applicants and push other applicants through depending on their qualifications.
So, What does this mean for you as a job seeker? Well, the cover letter attached to your application is more important than ever.
Have you been asked to attach a cover letter to your job application? Perhaps you’re struggling to write one that lands an interview or have no clue what one is at all.
Whichever situation you’re in, we’ve crafted this ultimate guide to cover letters. You’ll find out how to write one that gets read, what to include, and browse tons of templates to gain inspiration.
Are you ready to land the job of your dreams through a perfectly crafted cover letter?
Awesome!
You can dive straight in, or jump to the section you’d like to read.
![→ Click here to access 5 free cover letter templates [Free Download]](https://no-cache.hubspot.com/cta/default/53/3f347702-d7e9-4e59-9fe4-be4cd7bad191.png)
How Long Should a Cover Letter Be?
Okay, so you’re all fired up and ready to craft the cover letter of the hiring manager’s dream. That’s great! But how do you manage the fine balance between in-depth and overwhelming?
A good cover letter is long enough to communicate why the recruiter should pick you … but not long enough to bore them to the point where they’ll need a strong coffee.
One page is usually enough to cover everything you’ll need to include, without losing the recruiter’s attention and having your cover letter tossed into the trash.
Let’s go into those items in more detail:
Your Name and Address
Kick off your cover letter by adding your name and address to the document.
This step is pretty self-explanatory, but it allows the recruiter to easily connect your cover letter to your resume (especially if they’re being printed).
Your name and address also make it easier for the recruiter to get in touch with a job offer. And that’s the aim of our letter, right?
Their Name and Address
Similarly, you should add the name and address of the company or person you’re writing to.
This shows you’ve done your research and allows the hiring manager to receive your letter if it’s sent to a generic company email address.
The Date of Writing
Make it easier for the hiring manager to file your application by including the date on your cover letter.
Even if you’re not successful this time around, the company might store your letter and refer back to it when they’re hiring for another position!
Why You’re Writing the Letter
We know that the aim of a cover letter is to persuade the hiring manager you’re the best fit for their job. But, be sure to open your letter strongly, with 1-2 sentences that’ll grab their attention and quickly make them realize they’re reading a cover letter.
Something like this will usually do the trick:
“I’m writing to discuss the content strategist role at HubSpot.”
Why You’re a Perfect Fit for the Job
The next section of a cover letter structure is the fun part — it’s where you’ll convince the hiring manager they should hire you — and not the person whose resume is behind yours.
In this section, answer these questions:
- Why should this company hire you?
- What skills do you have that will help complete the job better than anyone else?
- What makes you a good employee?
- What extra qualifications do you have that are relevant to the role?
Once you’ve answered these, the recruiter will have a solid understanding of who you are, and (hopefully) be convinced to hire you!
What You Can Offer the Company
Have you ever heard the advice to “always sell yourself in a job application”? That concept can be applied to cover letters, but remember that recruitment isn’t all about you.
Businesses measure success in terms of results. The company looking for a new employee will want to know what they bring to the table and how they’ll shape their business’ future. New candidates are rarely brought on board solely for the soft skills listed in their resume.
That’s why this part of your cover letter structure is arguably the most important.
In less than two paragraphs, show the business what you can do — and prove you’ve done it before (preferably with examples).
Not only does this give you the opportunity to show off your skills, but the company can picture the success you’ll bring to their business by hiring you.
Your Availability
In the marketing world, we’re always told the importance a call-to-action can make. But, don’t leave them to your blog posts: Explain your availability to the person reading your cover letter for the best chances of a follow-up call.
Great cover letters end with a brief section on the candidate’s earliest start date. You could also include your availability for an interview and tell them you’re happy to answer any questions they may have.
How to Address a Cover Letter
Earlier, we mentioned the importance of addressing the hiring manager by their name and address. This proves you’ve done your research and ensures the cover letter lands in the right place.
Personalized content does 42% better than non-personalized, so including the first name of the recruiter can go a long way.
But in a world where privacy is held close to our chest, you might need to do a bit of digging before revealing the name your letter should be addressed to.
Luckily, you can use the power of the internet to do this. To find their:
Name
Head over to LinkedIn and find the company’s profile page. You can do this by entering their name into the search bar or searching for a link to their LinkedIn page on the company’s website.
Then, click the number of employees to see all employees who are on LinkedIn:
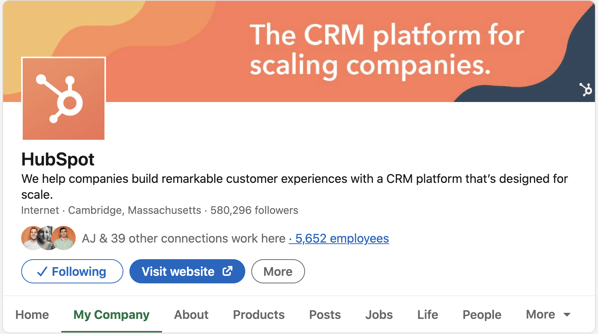
You’ll then be greeted with a list of all people (with a LinkedIn profile) that work for your target company. Simply work your way through this list to find the most relevant contact, or search
- Hiring manager
- HR manager
- Recruitment manager
… to find the most suitable name to address in your cover letter.
Address
You can find the address of the company you’re looking to submit a job application to by finding the About or Contact page on their website.
This should be in their navigation bar, but can also be found by Googling their URL and “contact”.
On this page, you should find an address for the company. If not, don’t worry. Simply call one of the numbers listed or send an email to their support team. Ask for the company’s general careers email address, and use this on your cover letter.
Opening a Cover Letter
Great job! You’ve done all of the digging you’ll need to write a cover letter. It’s easy from here.
After you’ve addressed the cover letter to the most relevant person, we’ll need to open the letter with something relevant.
“Dear Ms. H.Spot” (using your own initials, of course) will keep it professional.
But, if you’ve struggled to unveil the hiring manager’s name, stick with “Dear Sir/Madam” or “Dear Hiring Manager”.
How to Close a Cover Letter
Once you’ve followed the above cover letter structure and explained your availability, it’s time to wrap it up.
If you’ve addressed the letter personally, end with “Thanks”.
If you haven’t, opt for “Sincerely”.
Then, sign the cover letter with your full name.
Should You Include Salary Requirements?
Talking about money is a tricky subject. Some feel uncomfortable discussing wages in the first interaction with a company, so it’s best to avoid discussing salary requirements in your cover letter unless it’s stated as a requirement.
Including salary requirements in your cover letter could set a bad tone. Instead, allow your letter to show off your skills and make a convincing argument as to why they should hire you.
Save the money talk until your interview!
Are Cover Letters Necessary?
Cover letters are often a required field for online job applications. But do you really need to include one if it’s optional, you’re sending your resume through email, or applying in-person?
While a few years ago the answer wasn’t clear cut, in today’s age cover letters are more important than ever.
In 2017, just 26% of recruiters considered cover letters important in their decision to hire an applicant. That means they were influential in hiring decisions, but not essential.
However, according to 2021 research, 83% of recruiters agree that, although not strictly necessary, a well-written cover letter gives you the opportunity to demonstrate that you are a great fit for the company you are applying for. Additionally, in a separate question, 83% of respondents claimed that a great cover letter can secure you an interview even if your resume isn’t good enough.
If those stats aren’t enough to convince you of its importance, 74% of recruitment decision-makers prefer to receive job applications that include cover letters apart from resumes. And even if submitting a cover letter is optional, 77% of recruiters will give preference to candidates who did send a cover letter.
Plus, since 69% of surveyed workers believe getting a job in 2021 will be much harder or somewhat harder than in previous years, adding a cover letter to your application is a great way to stand out.
Especially since only 35% of candidates attach a cover letter to their application when it’s optional and only 38% of candidates submit a cover letter when it’s required.
Writing a cover letter will allow you the chance to communicate with the hiring manager. You’re given more space to tell them why you’re the perfect fit for their job, meaning you don’t have to rely on bullet-pointed lists in your resume.
Cover letters also help to build your personal brand. By going the extra mile (even when it’s not required), you’re proving key skills like being a hard worker, having good communication, and taking initiative.
In short: Cover letters aren’t absolutely necessary, but they do have stark advantages. If there’s an option to upload one when applying for any job, do it — even if it’s not required!
How to Write a Cover Letter
Writing a cover letter can be tricky. Even the best writers can struggle with communicating their skills in the right manner, but these tips will help you create a job-winning document.
The structure of your cover letter is arguably the most important thing about writing one.
Not only does a good structure help you to organize your points effectively, but it can help a hiring manager to quickly review the details you’re sharing.
7 Tips for Writing Great Cover Letters
So, you’ve crafted a cover letter and you’re almost ready to hit send.
Now, wait a minute …
Before attaching to your resume and hoping for the best, use these seven tips to make sure your cover letter is as great as can be:
1. Don’t babble.
Earlier, we mentioned how the best cover letters strike the perfect balance in their length.
Our best tip for writing cover letters is to avoid any babble. Don’t add fluff that fails to add anything of value. Not only are you wasting your time by writing it, but you’re wasting the hiring manager’s time, too.
You want to keep the recruiter’s attention, which can be easily lost through babbling. Cut the jargon and corporate-speak that hiring managers have heard before. (Like “leverage” and “thinking outside the box”.)
Yes, professionalism is important, but be harsh and critical when editing your cover letter. If a sentence doesn’t add value, get rid of it!
2. Tailor it for the company and position you’re applying for.
The one-size-fits-all approach doesn’t fit well with cover letters.
You’re applying for different roles at various companies, but don’t let a change in name and address be the only amendments you make.
Remember that a cover letter should explain why you should be hired for a specific role instead of anyone else. It’s highly unlikely that multiple companies will hire for exactly the same position, so take some time to personalize your cover letter for every position you’re applying for.
3. Add more value than your resume.
Although cover letters are used in partnership with resumes, be wary of falling into the trap of making them carbon copies of one another.
Cover letters that regurgitate everything already explained on a resume are useless. Instead, use the documents to compliment each other by:
- Including new skills.
- Elaborating on how your qualifications would help you in the role.
- Sharing how specific experience gives you an advantage over other candidates.
If you need to include the same thing in both documents, add “as listed in my resume …” rather than copy and pasting the same content.
Put yourself in your recruiter’s shoes: Reading the same thing multiple times would be annoying, right? (Remember, we don’t want to bore them!)
4. Include data-backed examples.
When referencing experience from your resume, use your cover letter as an opportunity to explain in detail — with examples.
Examples allow the company to picture the success you could bring if they hired you, rather than the person next in their resume pile. But, data-backed examples give an extra edge.
Let’s use an example. Which of these options is more impressive?
- I increased leads for the company.
- I increased leads by 35% in one month through a single blog post, which became the company’s biggest revenue source.
It’s option B, right?
5. Tell a story.
Following on from the previous step, you could elaborate on your data-backed examples by telling a story.
Storytelling helps with relatability and gives a hint of your personality in a cover letter. It also makes the recruiter remember your cover letter amongst a sea of other one-page documents in their review pile.
However, this cover letter tip comes with a warning: Don’t overdo it, and make it relevant. Remember what we said about babbling?
Including a story about how you adopted your pet cat is unlikely to influence someone into hiring you. On the other hand, a story on how you created a company’s blogging strategy to achieve your data-backed results is.
6. Get a second pair of eyes on it.
Even the best writers make occasional mistakes, but some hiring managers can be strict with grammatical errors — even if you’re not applying for a role where writing features heavily in your daily to-do’s.
That’s why our sixth cover letter tip is to get a second pair of eyes on it.
Email it to a friend or ask a family member to glance over it before you hit “send”. Ask them to highlight any spelling mistakes or suggestions to improve how you’re communicating with the person reading it.
You never get a second chance to make a first impression. Seeing as though a cover letter is one of the first documents a recruiter sees, try to make it perfect!
7. Be unique.
Finally, make your cover letter unique.
If you’re applying for a creative role, experiment with colors, subheadings, and layouts.
If you’re applying for more of a traditional role, be wary. Not everyone is a fan of bright, bold cover letters, but you can scope your limits by getting a feel of their company culture.
Are they strict and professional, or does the company like to have fun? (You can usually get a feel of this from their website or social media profiles.)
Testing the level of uniqueness can be a case of trial and error. If you’re not getting great reactions from your cover letter, revise and try again.
Cover Letter Examples
We understand that inspiration can go a long way. That’s why we’ve created a one-stop-shop for cover letter examples, which are available to view here.
You’re also free to browse our collection of cover letter samples for extra inspiration on formatting your cover letter and learning from those who’ve helped to land dream jobs.
Conclusion
Congratulations! You’ve now got a fantastic cover letter!
Don’t forget to send it with your resume for each job you apply for.
You’ll soon be flooded with responses to your application — including compliments on the contents of your cover letter, job offers, or invites to interview!
Editor’s note: This post was originally published in September 2018 and has been updated for comprehensiveness.

YouTube vs. Vimeo: Which Video Platform is Best for Your Business? [Data]
By 2022, online video content is predicted to command more than 82% of all web traffic (15 times higher than it was in 2017). If you haven’t started thinking about how video fits into your long-term marketing strategy, now’s the time to start taking it seriously.
Before you dive into creating videos, it’s important to figure out where you’re going to host them. YouTube is obviously the largest video hosting platform on the web, but it might not be the best choice for every business.
To help you find the best fit for your company’s unique needs, we compared YouTube directly against the smaller, more niche platform Vimeo across a number of factors. Read on to see the results, and decide for yourself.
![→ Free Templates: How to Use YouTube for Business [Download Now]](https://no-cache.hubspot.com/cta/default/53/b33cfd44-133a-49e3-a943-086c5679d485.png)
Number of Users
Winner: YouTube
There’s no real competition here. YouTube commands an audience of over two billion monthly users — almost half of the entire internet-using population. Vimeo’s 240 million monthly viewers and 90 million registered users seem insignificant in contrast. For maximum reach, choose YouTube.
Search Optimization
Winner: YouTube
YouTube leaves Vimeo in the dust here. YouTube is the second largest search engine on the internet, right after parent company Google. If you’re planning to create a video tailored to a specific search query, (e.g., how to pick a font for your website), your video belongs on YouTube. Not only will it appear in search results directly on YouTube, but Google also seems to favor videos from YouTube over those posted on other platforms.
Mobile
Winner: YouTube
70% of all YouTube views come from mobile, and the YouTube mobile app is absolutely dominating the mobile streaming space — outranking even formidable competitors like Netflix, Hulu, and Twitch.
Videos uploaded to Vimeo and YouTube are both optimized automatically for mobile, but YouTube offers more opportunities for mobile discovery and reach.
Cost
Winner: YouTube
YouTube is free — even for businesses. But you might be wondering if Vimeo is as well.
Is Vimeo free to use?
Vimeo operates on a tiered pricing model, ranging from a free basic plan to a $50/month package aimed at businesses.
Vimeo Pro vs YouTube
While Vimeo does have a free basic plan, it limits you to 500MB maximum storage per week.
If you’re okay with paying some money, you can get a Vimeo Pro plan. In Vimeo Pro, you’ll have access to support, advanced analytics, and professional privacy.
On the other hand, you can have unlimited storage for free on YouTube.
Support
Winner: Vimeo
With their paid packages, Vimeo offers several levels of technical support that could be a game-changer for businesses without much video expertise. YouTube offers plenty of free help documentation and access to a (rather crowded) support community, but if you’re seeking higher-touch, personalized support on-demand, a paid Vimeo account is the better option.
Storage
Winner: YouTube
YouTube offers unlimited, free storage for all accounts, while Vimeo charges for storage on a tiered basis. The basic, free Vimeo account option gives you 500MB of storage per week. With their highest level, $50/month package, you can store 5TB total with no weekly limits.
No Pre-Roll Ads
Winner: Vimeo
If you upload your videos to YouTube, there’s a good chance a pre-roll ad will play before it, which has the potential to deter some viewers from sticking around. Vimeo currently doesn’t allow ads, and it doesn’t look like they’ll be changing this policy anytime soon.
Running Ad Campaigns
Winner: YouTube
If you’re thinking of running your own ads on a video platform, you can’t beat YouTube (You also can’t purchase ad space on Vimeo, even if you wanted to, because they don’t allow it.)
YouTube offers an advanced, user-friendly ads platform, as well as personalized support from a “YouTube Advertising Expert” when you spend $10 a day on ads.
Community
Winner: Vimeo
User numbers don’t tell the entire story. With such a massive audience on YouTube, the environment is naturally more competitive. It’s easier for your video to get drowned out by thousands of others if you aren’t planning to feature it somewhere off YouTube. Vimeo’s smaller, more community-driven platform might be a better option if you’re hoping to tap into an existing creative niche, or get featured on their hand-curated staff picks page.
Advanced Privacy Options
Winner: Vimeo
Both YouTube and Vimeo give you the option to set videos to private or public (the default setting on YouTube is public), but Vimeo offers a handful of more nuanced, specific privacy options if that serves your interests. You can add a password protection option to videos, share a video only with people who follow your account, or even hide it from the Vimeo community — which could be useful if you plan on embedding the video on your website and want it to be viewable in only one place.
Customizable Player
Winner: Vimeo
Vimeo’s sleek embedded player offers a number of useful customization options that YouTube can’t match, including hex color customization and the ability to include a custom player logo (on Business and PRO accounts). Plus, when you change the default customization options on your account, all previously embedded videos will update to reflect the changes automatically, with no need to go back and tinker with any code.
Analytics
Winner: YouTube
YouTube takes the win here because all their analytics — ranging from basic statistics like views to more advanced options — are completely free. Vimeo does also offer powerful analytics tools to evaluate performance, but you’ll have to pay to access everything but basic stats.
Video Quality
Winner: Vimeo
When it comes to video quality, Vimeo beats out YouTube. In a test done by Medium, Vimeo’s video quality was crisp, clean, and easier to read. On the other hand, the same video on YouTube was blurry, making it much harder to follow.
Audio Quality
Winner: Vimeo
Again, when it comes to quality, Vimeo comes out on top. Sound quality is higher on Vimeo because the platform supports 320Kbps. However, to enjoy higher-quality videos and audio, you’ll need to be subscribed to one of the paid plans.
Live Streaming
Winner: YouTube
Both Vimeo and YouTube have live streaming options, however, YouTube is the clear winner here because it’s free. Vimeo offers live streaming with a paid plan. However, with Vimeo, you can upload new versions of the video and keep on using the same URL and upload higher quality recorded versions of a live stream, which you can edit before posting.
So which one should you choose?
It depends largely on what exactly you want to accomplish with your videos. If you’re looking for a creative community where you can connect with other video creators and gain some exposure in a specific niche, Vimeo is a better place to start sharing your content. If you have business goals that revolve heavily around search optimization and ads, YouTube is your best bet.

The 4 Most Important Pages on Your Website (& How to Optimize Them)
When you’re knee-deep into the design of your website, it’s hard to admit this fact: Some of the pages on your website are more important than others.
Okay, many of you probably find that fairly obvious — but I’m surprised how rarely content managers and web designers actually apply this knowledge to their websites to improve conversions.
I’m all about low-hanging fruit and taking on the easiest tasks that will have the biggest results. What I’m about to describe in this article has the potential to improve your site dramatically with just a few, critical changes.
![Free Resource: Website Optimization Checklist [Download Now]](https://no-cache.hubspot.com/cta/default/53/00d9cc96-eff7-4cea-8ff3-583374c3dcd5.png)
In this post, I’ll explain how to optimize each one of these pages. And if your most-visited pages are different from the ones listed above, you’ll still learn a framework for optimizing any of the important pages on your website.
What is website optimization?
You’ve probably heard the word “optimize” most commonly used in phrases like “search engine optimization” (SEO) and “conversion rate optimization” (CRO). I’m actually referring to something broader here, but the advice that I’m delivering will help to enhance both of those.
The optimization I’m going to explain will create user optimized pages. In the pursuit of SEO and CRO, it’s easy to overlook the broader, big-picture idea. First and foremost, a site must be optimized for the user. The best place to see big results quickly is to start optimizing the most visited pages of your site.
Let’s get right into it. Every website is different, but generally speaking, here are the four most important (and often most-visited) pages on a website:
Home Page
The home page is the first impression of your business to potential customers. And although your time limit on making an amazing impression is several times longer online than it is in real life (62 seconds on average is spent by people viewing a website) you’ll want to make every second count.
It’s tempting to put every remotely relevant fact about the business on the home page, but resist the urge. Remember, your home page is the first step of the journey — not the final destination. The copy, design, and visuals should guide the visitor to their next step, or the call-to-action.
About Page
Customers, investors, candidates for hire, and even competitors might all use your about page to learn more information about your company. An about page typically includes a brief company history, mission or vision statement, executive leadership bios, and a few impactful client testimonials.
Blog Page
It’s no secret that blogging is a tried-and-true method to optimize a website for keywords related to a business. Rather than loading up several product pages for each individual keyword you want to rank for, a blog can serve as a more efficient way to weave storytelling, product mentions, and sign up links together in order to answer potential customer inquiries, solve problems, and pose your product or service as the preferred solution.
Contact Us Page
For many small businesses and freelancers, the contact us page serves as the lead-driver of a website. This is usually their bread-and-butter and how these businesses make money. Whether your business includes a contact form, a calendar scheduler, an appointment booking app, a phone number, or an email address, this is where future customers make the decision to get a hold of a representative of the business to learn more about the products and services.
How to Optimize A Web Page
The broad framework for optimizing your site for conversions is the same across your home page, About page, blog, and Contact Us page. There are two simple goals for every page, and the specifics of optimizing those pages will flow from these goals.
The first goal is all about the user, and the second is all about you. Here we go:
Provide information the user is looking for.
Remember, we’re focusing on the user. Why are they on the page to begin with? To answer this question effectively, let’s dive deeper into some facts we’ll want to know first:
- Where did they come from? The idea here is to understand how the user got to your site, so you can deliver relevant content.
- Did they come from a search engine? (If so, what did they search to find you?)
- An email? (What kind of email? Who sent it?)
- A referral on another website? (What site was it? How long has it been referring to your URL?)
- What do they need to know? A single page can deliver a limited amount of information, so you need to determine what that information is going to be. You want them to know something so that they will do something (which is addressed in the next question). Remember: Less is more on a web page. The more information you load up on your main pages, the less likely the user is to remember any of it. Give them less, and they’re more likely to remember — and do — what you want them to.
Pro Tip: Use visuals such as explainer videos, diagrams, hero shots, and so on to help condense a lot of information to a single page. To get the most out of your visuals, make sure you correctly optimize your images and videos.
Once you answer the question of what the user’s looking for, you’re halfway there. That brings us to question two.
Identify a goal for the user once they find the information.
Now, you need to ask the user to do something. This is where most pages fall short. One of the critical components of a web page is its call-to-action (CTA), and many website owners don’t realize that every single page of a website should contain at least one CTA.
The point of a home page or product page isn’t for the user to visit and leave. The point of content marketing isn’t for user intake, but rather, for user marketing. If you retain only one thing from this article, let it be that every web page needs a CTA.
Why am I so insistent on this? Because every bit of knowledge you share on your website demands some response. So, what is it that you want the user to do? Visit another page on your site? Watch a video? Complete a form? Sign up for a free trial? Any or all of these can become your goal for the user, just make sure to give them one or two options per page that are clearly and starkly defined.
Web Page Optimization Examples
Example of an Optimized Website Home Page
HubSpot’s home page is well laid out and hosts a clear CTA, front and center. A user is on the HubSpot home page for a reason, and perhaps that reason is to grow their business. The headline speaks to the question “what am I looking for?” and the CTA buttons tell me, the user, what I’m supposed to do next.
-3.png?width=650&name=The%204%20Most%20Important%20Pages%20on%20Your%20Website%20(%26%20How%20to%20Optimize%20Them)-3.png)
Now, let’s see what HubSpot has going on on the About page.
Example of an Optimized Website About Page
A user might click on the About page for a variety of reasons. A few might be:
- They want to figure out what exactly the business does.
- They want to work for the business.
- They want to make sure the business is legitimate.
- They want to see if the business serves a specific niche or location.
- They want to analyze the business’s success.
I could go on and on. There are a ton of reasons that could bring a user here, but they all boil down to the desire for information. Let’s see what HubSpot does. Here is the company’s About page:
-1.gif?width=650&name=The%204%20Most%20Important%20Pages%20on%20Your%20Website%20(%26%20How%20to%20Optimize%20Them)-1.gif)
The user likely wants to know the information about the company, and in response, they can scroll the page to learn more about the mission, history, and products.
Along the way, the user will want more detailed information which means the CTAs will need to become more specific to help guide them to that info. The more granular and detailed the information, the more correspondingly detailed the CTA becomes. Halfway down the page, I see a video about the HubSpot story featuring CEO Brian Halligan.
There’s more. There’s a block of content about each HubSpot product including the CRM, each Hub, and integrations. I can click any of these to learn more about the ones that can help grow my business.
Finally, no matter how far I scroll down the page, the sticky header menu includes an orange CTA for me to Get HubSpot for free.
-1.png?width=650&name=The%204%20Most%20Important%20Pages%20on%20Your%20Website%20(%26%20How%20to%20Optimize%20Them)-1.png)
This is an example of an About page optimized to drive engagement, increase conversions, and enhance the brand. The page is as much about the user as it is about the company itself because along the way, the user is receiving value.
Example of an Optimized Website Blog Page
Even though the HubSpot blog is one of the most popular digital publications, there are still some practical applications you can use to optimize your own blog page if you have a smaller following. Although there are several articles a visitor can choose from across a variety of topics, you’ll notice specific CTAs that invite users to sign up for the blog newsletter, download a report, explore more topics, and finally, subscribe to their blog of interest.
.gif?width=650&name=The%204%20Most%20Important%20Pages%20on%20Your%20Website%20(%26%20How%20to%20Optimize%20Them).gif)
Sprinkle the CTAs throughout your blog home page for a more natural approach. As readers scroll, you don’t want them to be bombarded with next steps, but you don’t want to leave them wondering what they should do next. Balance the user experience on your blog with a sticky header CTA and one or two primary CTAs.
Example of an Optimized Website Contact Us Page
Granted, HubSpot uses its contact page a bit differently than you might use yours. Whereas a contact page might be the end goal you want for your visitors, HubSpot optimizes product and landing pages to draw in leads and sign-ups for specific products it offers.
There’s still an opportunity for a potential customer to get into the sales pipeline from the contact page though. HubSpot includes a sales line, customer support, and a chatbot to get users to the best point of contact.
-2.png?width=650&name=The%204%20Most%20Important%20Pages%20on%20Your%20Website%20(%26%20How%20to%20Optimize%20Them)-2.png)
For customers, new employees, or candidates interviewing with the company, they can find the addresses and phone numbers of the global offices. Similar to the other three pages, the stick header menu includes a CTA to sign up for HubSpot for free.
Tips for Optimizing Each Page
Now that you have a framework for optimizing your pages and a couple of examples, here are a few, more specific tips to help you optimize each of the four most important pages.
1. Home Page
- Use a big headline and place the most important information front and center. A home page may allow for several different CTAs — make it easy for the user to choose by making CTA buttons large and easy to click.
- Provide flow. Make it obvious where the user is supposed to go and what they are supposed to do next.
- Make the Navigation Menu Clear. Oftentimes, a visitor uses the home page as a way of finding where on the site she wants to go. For this reason, you should make the navigation menu very clear.
2. About Page
- Deliver the most important and relevant information above the fold. The user is on your About page for a reason — answer their question(s) without making them scroll.
- Include at least one CTA. Remember, most people aren’t just looking for more information, they’re seeking a deeper level of engagement.
3. Blog
- Organize information on your blog clearly, and make sure that information satisfies the reasons users might be on your blog. Most users will want to read the most recent articles, so provide these. You may also want to organize categories on the blog home page, such as “most recent,” “most popular,” or other forms of categorization.
- Include CTAs that make it easy for the user to subscribe to the blog, download a free resource, and so on. Even though the user came to get information, you want them to get engaged and connected. (Click here for 8 types of CTAs you can try on your blog.)
- Provide CTAs in the core design of your blog so they appear on each individual blog post. In my experience, most blog visitors land on individual blog articles through organic search, instead of landing on your blog’s “home” page. To get these users engaged, put CTAs on the sidebars, in the footer, and in other places. (Learn how to pick the perfect CTA for each blog post here.)
4. Contact Us Page
- Put the information the user is looking for above the fold — an email address, phone number, contact form, map, mailing address, and so on. Of all four of these web pages, the Contact Us page implies the most detailed level of intent on the part of the user.
- Use CTAs that allow the user to contact you easily (since, presumably, that’s why they came to your Contact Us page). Make the CTA really obvious, and engage them by gratifying their intent instantly, using CTA copy like ”Chat now” or “Email now”.
Ask the User to Act On Your Content
As a website owner, you’re in the business of not just disseminating information, but soliciting a response, too. To engage your visitors and boost conversions on your site, here’s how to optimize pages like a pro: Look at your most visited pages, understand the reason users are there, provide valuable information, and ask them for an action in return. Regardless of your most-visited pages or even the nature of your website, you can create more engaged users with this optimization framework. Try it out — use the checklist below to get started.
Editor’s note: This post was originally published in December 2014 and has been updated for comprehensiveness.