
Welcome to My Blog
The 7 Best Free Resume Builders We’ve Ever Discovered
A couple of weeks ago, my brother Max sent me his resume in a text message and asked me to “spruce it up a bit” for him. Undoubtedly, I needed to do more than copy-and-paste the text into a Word document. To truly stand out, I knew the resume needed to demonstrate a level of professionalism and effort — something content alone can’t always convey.
Fortunately, with the help of Zety, I was able to input Max’s resume information, choose a template, and have Zety design the piece for me within 20 minutes:
![→ Download Now: 12 Resume Templates [Free Download]](https://no-cache.hubspot.com/cta/default/53/4ec95757-585e-40cf-9189-6b3885074e98.png)
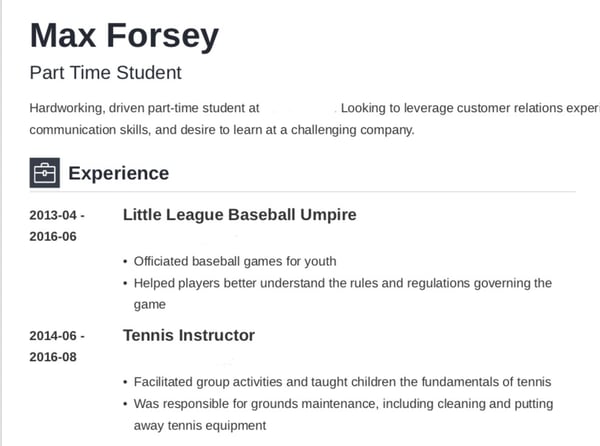
Looks a little better than a text message, doesn’t it?
Resume builders are incredibly helpful when creating a resume and can help you showcase your unique personality. Here, we’ve compiled a list of the best free resume builders we’ve discovered. Keep reading, and then get to work designing your own — trust me, with these tools, it’s almost as easy as sending a text.
Featured Resource: HubSpot Resume Templates
.png?width=411&name=Growth%20Strategy%20Template%20(11).png)
Download these free templates and plug in your experience and information for a custom, well-crafted resume.
1. Resume Genius – for easy and fast resume creation.
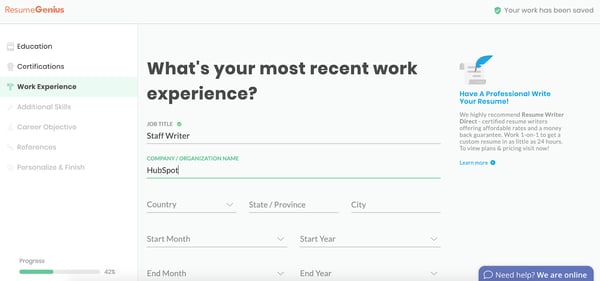
Resume Genius is undoubtedly one of the easiest and fastest resume tools you have at your disposal. With a clean and easy-to-use interface, the tool walks you (speedily) through categories including education, work experience, and references. It offers different templates varying from ‘Taj Mahal’ to ‘Classic.’ Resume Genius provides you with easy fill-in-the-blank sections so that you can have an impressive, comprehensive resume in no time.
| pros | Cons |
| Easy to use interface | Free download is a .txt file, you must pay for a 14-day trial to download as a PDF or different format |
| URL for sharing and performance tracking | There is no option to upload an existing resume, so you must start from scratch each time, making it difficult to make updates. |
| Can search for positions and choose from 50,000+ job description bullet points that relate to what you’re applying for. |
2. My Perfect Resume – for guided resume creation help.
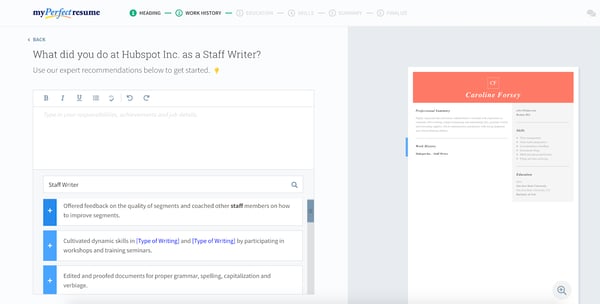
My Perfect Resume allows you to either start from scratch and input information into a blank template or upload a pre-existing resume if you already have one. Additionally, the tool provides you with expert recommendations as you move throughout the process, including suggested phrases you can include for specific roles.
My Perfect Resume also enables you to include optional sections like certifications, accomplishments, and affiliations, which is vital, particularly if you’re just starting out, or switching industries. This tool is particularly useful if you’re applying for a creative role and want to add color or a unique design to your resume.
To use My Perfect Resume for free, click “Download” on the left toolbar once you reach the final step of the builder — instead of selecting “Save and next.” Then, choose “Plain Text (.txt)” to download your resume for free.
Best for:
My Perfect Resume is excellent for those looking for guided help when creating their resumes. The tool recommends templates based on your experience level and provides expert recommendations for skills to include based on your job titles. Compared to other tools on the list, there are fewer customization options, and there are only nine templates to choose from.
3. Standard Resume – for active LinkedIn users.
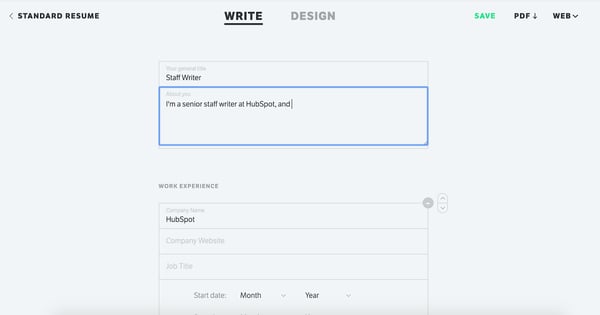
Standard Resume allows you to import your information straight from LinkedIn, making it an ideal time-saver if your LinkedIn profile is up-to-date.
Plus, the white background and minimalist features enable you to focus on what really matters — your content. You can switch back and forth between “Write” and “Design” to see how your resume looks as you go along and download it as a PDF when you’re finished. Best of all, the tool also makes your resume mobile-responsive so that you can view it on your smartphone.
| Pros | Cons |
| Free | Minimalist templates, not many customization options or design-focused tools |
| Easy import from existing LinkedIn profile | |
| Minimalist, helping you focus on your experience and achievements. |
4. Canva – for design creativity and expression.
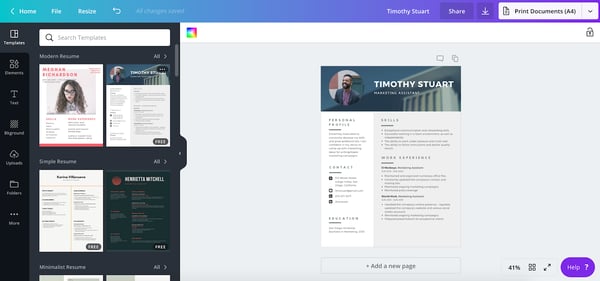
If you’re applying for a creative role or want a resume that truly lets you stand out, you might consider using one of Canva’s hundreds of free, designer-made templates. Canva’s selections are incredibly varied and unique, so you’ll undoubtedly find one you like, and inputting resume sections can be as easy as copy-and-paste. Additionally, the templates are separated into categories, such as ‘Graphic Design,’ ‘Corporate,’ and ‘Creative,’ making it easier to choose based on your preferred industry.
Best for:
Canva is best for those looking for design creativity and expression in their resumes. Although not specifically designed for resume building, the tool overs a wide variety of templates, layouts, and designs to choose from when creating your resume, and there are multiple download formats to ensure that your resumes can be viewed and picked up by ATS.
5. Indeed – for in-platform job seekers.
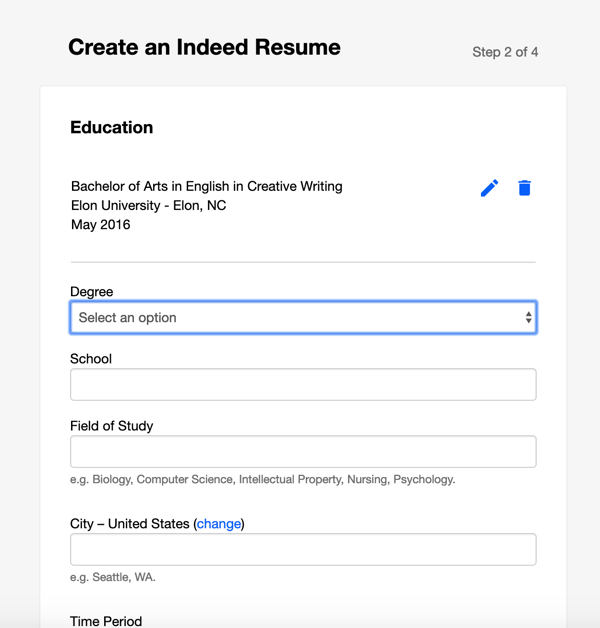
Creating an Indeed resume is an incredibly quick process, and best of all, the site allows you to automatically share your resume with employers on Indeed as soon as you’re finished. If you’ve already completed a resume, it’s still a good idea to upload it to the site for exposure to potential employers. While it admittedly doesn’t offer as many options for creativity as some of the others in this list, Indeed is an impressive option if you want to create a more traditional resume and start sharing it immediately.
| Pros | cons |
| Free | Only eight templates |
| Includes expert tips and advice | Limited design and customization options |
| Templates compatible with Applicant Tracking Systems (ATS) | Unable to import or upload an existing resume or LinkedIn profile |
| You can automatically share your completed resume on the site for employers and recruiters to see |
6. Zety – for expert resume creation tips.
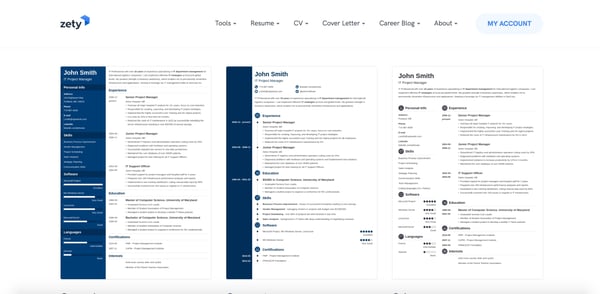
Zety is an excellent online resume builder because of the state-of-the-art templates. You can quickly start from scratch and input your information. My favorite element of this tool is that the site will walk you through the process. All you need to do is fill out the information, and then voila — you have a resume. While this tool is free, you will need to make an online account.
To use Zety for free, click “Download” on the left toolbar once you reach the final step of the builder — instead of selecting “Save and next.” Then, choose “Plain Text (.txt)” to download your resume for free.
Best for:
Zety is best for those looking for expert help in creating their resumes. The tool provides tips and prompts to help you create the content for your resume, and there are a variety of customization options to ensure your resume is unique to your needs. While you can download a .txt file for free, it costs $2.70 for a different file format, and some templates used graphics and color that interfere with ATS.
7. Resume.com – for minimalist resume creation.
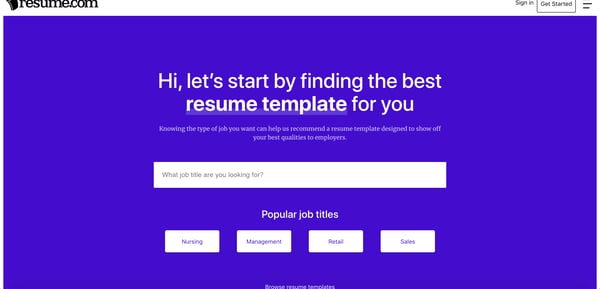
With Resume.com, you can build a beautiful resume in minutes. This tool is an excellent option if you’re looking for recommendations on what to include in your resume. Additionally, the site has popular templates for various job categories to help you stand out from the competition.
To use this for free, when you’re at the last stage, you’ll see a pop-up that says to create an account — instead, just click “Skip for now.” Then, in the top right-hand corner, you can click the download button.
| pros | cons |
| Completely free | Limited options for design and customization |
| LinkedIn importing | No pre-written content |
| Share, print, and download in multiple formats | Minimal guidance for resume creation |
Building a resume can feel like you’re staring at a blank canvas. But with an online resume builder, you can get recommendations and build a beautiful document that will stand out without needing a graphic design degree.
Editor’s note: This post was originally published in March 2019 and was updated in May 2021 for comprehensiveness.

How to Work From Home: 24 Tips From People Who Do It Successfully
Working from home is awesome, right up until the cat throws up on your computer. And your neighbor, who you can only assume is building a time machine, starts firing up all sorts of power tools and noisy machinery across the street.
COVID-19 has caused remote work to become a necessity instead of a luxury for many professionals. But which environment allows us to be more productive: the home office or the office office?
In the office office, your colleagues often pose the greatest threat to keeping you from getting some real, heads-down work done. They drop by your desk, engage you in conversation, and invite you to lunch — or so I hear. The social benefits are nice to have, but they can become a challenge if you’re easily distracted.
However, at the home office, while family members can be a distraction, I find that it’s easy for you to become your own worst enemy. Because without coworkers around, you’re free to drop those pesky inhibitions. At the home office, no one’s watching. You don’t necessarily feel that same peer pressure or communal obligation to get stuff done. (Also, you don’t have to wear pants.)
![Download Now: How to Be More Productive at Work [Free Guide + Templates]](https://no-cache.hubspot.com/cta/default/53/5ab914ce-204e-40ef-acfe-d7bfec642e1a.png)
Below, I’ve compiled many great work-at-home tips and tricks from some of my awesome coworkers.
1. Communicate expectations with anyone who will be home with you.
Of course, you might be working from home but still have “company.” Make sure any roommates, family members, and dogs (well, maybe not dogs) respect your space during work hours. Just because you’re working from home doesn’t mean you’re home.
If you share space with another work-from-home adult, you may have to lay ground rules about meeting times, shared desks and chairs, and quiet times.
CEO Sam Mallikarjunan tells how he manages to get work done even when people are around.
“If anyone else is going to be at home when you’re working, they just have to be clear that when you’re in your ‘office’ (in my case, my signal to the family is having headphones on), you’re working — even if it looks like and feels like you’re hanging out at home.”
He continues, “It’s easy to get distracted by the many things that have to be done around the house during the day.”
2. Take clear breaks.
It can be so easy to get distracted as a telecommuter that you avoid breaks altogether. Don’t let the guilt of working in the building you sleep in prevent you from taking five minutes to relax.
However rather than just opening YouTube and watching some comfort clips, use your breaks to get away from your desk. Go for a walk, enjoy fresh air, or spend time with others who might also be in the house.
Take Ginny Mineo‘s advice. “Breaks, like making and eating lunch, can recharge you to do better work. Don’t assume you need to be working 100% of the time while you’re home to be more productive.”
3. Interact with other humans.
When your office starts working from home, you’ll likely miss the casual social interactions with colleagues you’re used to throughout the day. When working from home, you don’t have the small talk and other activities that make each day at the office unique.
So what can you do? Communicate.
Fight boredom and loneliness by frequent communication with other employees. Reach out to them through video chat via apps like Zoom and Slack or however else your company communicates.
Remember: You’re working from home, not the moon. Interacting with other people during the day is allowed, even if they’re not your colleagues. It’s a good idea to see another face during the day when most of your workday is solitary. So, use your breaks to interact with others.
“Go outside and find a human to interact with — ordering your coffee, running an errand, whatever. It keeps you sane.”
4. Prepare meals the night before.
When you’re in your own home, it can be tempting to spend time preparing a nice breakfast and lunch for yourself, chopping and cooking included. Don’t use precious minutes making your food the day of work — cook it the night before.
Preparing food ahead of time ensures you can use your meal times to eat and that you aren’t performing non-work tasks that spend energy better used at your desk.
Digital marketing strategist, Lindsay Kolowich, adds, “Cooking at home is time you wouldn’t have spent meal prepping if you’d been in the office that day, and I find the minutes can add up in the end. To mitigate that, I try to cook and prep my meals the night before, just like I would for a day at the office.“
5. Pick a definitive finishing time.
You might be under the impression that working from home establishes more work-life balance, but be careful with that assumption.
Working from home can also feel like being at a casino — you can get so caught up in your activity, in a relaxing environment, that you lose complete track of time.
“If you work from home full-time (or regularly), it’s really easy to let your work life bleed into your personal life,” says Tyler Littwin.
He continues, “Maintaining a boundary is important for both halves of the equation.”
In lieu of coworkers, whose packing up and leaving the office reminds you to do the same, set an alarm at the end of the day to indicate your normal workday is coming to an end. You don’t have to stop at exactly that time, but knowing the workday is technically over can help you start the process of saving your work and calling it quits for the evening.
6. Eat and sleep.
What is the biggest perk to working from home? One of the biggest benefits for some people (me), is complete access to the kitchen.
As soon as I take a break, I automatically drift towards the kitchen for some snacks.
An unhealthy diet can affect productivity and drain energy. When I switched to a healthier diet, it made me function better and get the most from my routine.
So eat well when working from home.
It’s also vital that you keep to a proper sleep schedule. Save binge-watching your favorite shows for the weekend. With the right food to keep energy levels high and sound sleep to refresh your body and mind, you can make a success of working from home.
7. Talk to your employer.
If you like your current job and don’t want to change it, the obvious step is to find a way to pivot the position.
One of the tips for doing this is folding the possibility of going remote into your next promotion cycle. Talk to your boss often about your intention to pivot.
And, if you’re not sure your employer will agree to working completely remotely, talk about the option of working remotely one or two days a week. When you use the work from home tips we’ve provided above, and your boss sees how productive you are, they could allow you more days to work from home.
8. Join a remote-friendly company.
If your work can be done remotely, but your current boss or organization doesn’t allow you to work from home, you might need to get a new job.
When looking for a work-from-home job, you can use the same methods you used in finding your regular office job. This includes channels like job sites, local job ads, and social media platforms.
Job sites that list work from home ads include:
Some remote-friendly firms include:
Check out these firms to see whether you meet the requirements to start working remotely for them.
9. Start a career as a freelancer.
If your current job isn’t remote work-friendly, you can go remote by starting your own business as a freelancer or a consultant.
Depending on the nature of your current job, you may start your own freelance business while still being employed.
The benefit of starting your freelance business while still employed is that it reduces the financial strain experienced by any new business.
10. Start a home business.
Starting a home business is one way to enjoy remote work.
Unlike other fields, certifications and education are not usually prerequisites. Instead, researching, having a smart business plan, and choosing the right business is more essential to the success of your business.
You can find more work-from-home tips in the books listed in this best remote work books article.
1. Get started early.
When working in an office, your morning commute can help you wake up and feel ready to work by the time you get to your desk. At home, however, the transition from your pillow to your computer can be much more jarring.
Believe it or not, one way to work from home productively is to dive into your to-do list as soon as you wake up. Simply getting a project started first thing in the morning can be the key to making progress on it gradually throughout the day. Otherwise, you’ll prolong breakfast and let the morning sluggishness wear away your motivation.
Lindsay Kolowich says, “When I work from home, I wake up, put on a pot of coffee, and start working immediately — much earlier than normal working hours. I only start making breakfast once I’ve hit a wall or need a break. I’m a morning person and find I can get a ton done in the early morning hours, so this works really well for me.”
2. Pretend like you are going into the office.
The mental association you make between work and an office can make you more productive, and there’s no reason that feeling should be lost when working remotely.
I know that you love working in your pajamas (I do, too), but the mere act of changing clothes to something more serious will give you a signal to get work done throughout the day.
When you dress up, you give your brain a reason for dressing up, and it can keep you pumped throughout your work hours.
So when working from home, do all the things you’d do to prepare for an office role: Set your alarm, make (or get) coffee, and wear nice clothes.
Internet browsers like Google Chrome even allow you to set up multiple accounts with different toolbars on the top — for example, a toolbar for home and a separate toolbar for work.
Take to heart the words of HubSpot graphic designer, Anna Faber-Hammond, who says, “Get fully ready for the day and pretend you’re actually going to work. Otherwise, you might find yourself back in bed.”
3. Structure your day like you would in the office.
When working from home, you’re your own personal manager and can choose your working hours.
However, without things like an in-person meeting schedule to break up your day, you can easily lose focus or burn out.
To stay on schedule, segment what you’ll do and when for the day. If you have an online calendar, create personal events and reminders that tell you when to shift gears and start on new tasks. Google Calendar makes this easy.
Structuring your day as you would in the office also saves you from work creep. With this structure in place, working from home will not cause your work to invade your personal life.
“Are mornings for writing while you’re in the office? Use the same schedule at home. This structure will help keep you focused and productive.” – Ginny Mineo
4. Choose a dedicated workspace.
Just because you’re not working at an office doesn’t mean you can’t, well, have an office. Rather than cooping yourself up in your room or on the couch in the living room — spaces associated with leisure time — dedicate a specific room or surface in your home to working remotely.
No matter the space or location, have an area of the home to work and stay committed to throughout the day. And, after choosing your dedicated workspace, make the most of it by making it quiet.
CEO, Sam Mallikarjunan says, “Have a place you go specifically to work. It could be a certain table, chair, local coffee shop — some place that’s consistently your ‘workspace.’ It helps you get into the right frame of mind.”
5. Don’t stay at home.
Is your home office just not getting it done for you? Take your work-from-home life a step further and get out of the house. Coffee shops, libraries, public lounges, and similar Wi-Fi-enabled spaces can help you simulate the energy of an office so you can stay productive even when you don’t sit in an official workplace.
Content marketer, Corey Wainwright, comments, “I get out of my home to work and go to an establishment with actual tables, chairs, and people. It helps simulate the work environment and removes the distractions I typically have at home, like the urge to finally clean my room, do laundry, or watch TV. “
6. Make it harder to use social media.
Social media is designed to make it easy for us to open and browse quickly. As remote workers, though, this convenience can be the detriment of our productivity.
To counteract your social networks’ ease of use during work hours, remove them from your browser shortcuts and log out of every account on your phone or computer.
You might even consider working primarily in a private (or, if you’re using Chrome, an “Incognito”) browser window. This ensures you stay signed out of all your accounts, and each web search doesn’t autocomplete the word you’re typing. It’s a guarantee that you won’t be tempted into taking too many social breaks during the day.
Also, many have found it helpful to shut off social media notifications during the hours they work from home.
Alec Biedrzycki, product marketer at AirTable, says, “I remove all social networks from my toolbar bookmarks… you can get sucked in without knowing it, so eliminating the gateway to those networks keeps me on track.”
7. Commit to doing more.
Projects always take longer than you initially think they will. For that reason, you’ll frequently get done less than you set out to do.
So, just as you’re encouraged to overestimate how much work hours you’ll spend doing one thing, you should also overestimate how many things you’ll do during the day.
Even if you come up short of your goal, you’ll still come out of that day with a solid list of tasks filed under ‘complete.’
“On days I’m working from home, I tend to slightly overcommit on what I’ll deliver that day. So even if I get the urge to go do something else, I know I’ve already committed a certain amount of work to my team.”- Corey Wainwright
8. Work when you’re at your most productive.
Nobody sprints through their work from morning to evening — your motivation will naturally ebb and flow throughout the day. However, when you’re working from home, it’s all the more important to know when those ebbs and flows will take place and plan your schedule around it.
To capitalize on your most productive periods, save your more challenging tasks for when you know you’ll be in the right headspace for them. Use slower points of the day to knock out the easier logistical tasks on your plate.
Verily Magazine calls these tasks “small acts of success,” and they can help build your momentum for the heavier projects that are waiting for you later on.
Product designer, Brittany Leaning, says about her routine, “For me, the most productive times of the day are usually early in the morning or late at night. I recognize this and try to plan my day accordingly. Also, music that pumps me up doesn’t hurt.”
The responsibility is on you to know when you are most productive and build your work schedule around the periods of maximum productivity.
9. Save calls for the afternoon.
Sometimes, I’m so tired in the morning, that I don’t even want to hear my voice — let alone talk to others with it.
You shouldn’t have to give yourself too much time to become productive in the morning, but you can give yourself some extra time before working directly with others.
If you’re struggling to develop a reasonable work schedule for yourself as a telecommuter, start with the solitary tasks in the morning.
Save your phone calls, meetings, Google hangouts meetings, video call, and other collaborative work for when you’ve officially “woken up.”
Senior Marketing Director, James Gilbert, advises that you “Take advantage of morning hours to crank through meaty projects without distractions, and save any calls or virtual meetings for the afternoon.”
10. Focus on one distraction.
There’s an expression out there that says, “if you want something done, ask a busy person.”
The bizarre but true rule of productivity is that the busier you are, the more you’ll do.
It’s like Newton’s law of inertia: If you’re in motion, you’ll stay in motion. If you’re at rest, you’ll stay at rest. And busy people are in fast-enough motion that they have the momentum to complete anything that comes across their desk.
Unfortunately, it’s hard to find things to help you reach that level of busyness when you’re at home — your motivation can just swing so easily. HubSpot’s principal marketing manager, Pam Vaughan, suggests focusing on something that maintains your rhythm (in her case, it’s her daughter).
She says, “When I work from home, my 20-month-old daughter is home with me, too. It seems counterintuitive, but because I have to manage taking care of her and keeping her happy and entertained while still getting my work done, the pressure helps to keep me focused. When she’s napping or entertaining herself, I go into super-productive work mode.
The ‘distraction’ of my daughter (I mean that in the most loving way possible) means I can’t possibly succumb to some of the other common distractions of home.”
11. Plan out what you’ll be working on ahead of time.
Spending time figuring out what you’ll do today can take away from actually doing those things. And, you’ll have planned your task list so recently that you can be tempted to change your schedule on the fly.
It’s important to let your agenda change if you need it to, but it’s equally important to commit to a schedule that outlines every assignment before you begin.
Try solidifying your schedule the day before, making it feel more official when you wake up the next day to get started on it.
“Plan out your week in advance to optimize for the environments you’ll be in.”- Niti Shah
12. Use technology to stay connected.
Working from home might make you feel cut off from the larger operation happening in your company.
Instant messaging and videoconferencing tools like Slack and Zoom can make it easy to check in with other remote employees and remind you how your work contributes to the big picture.
It’s also vital to invest in the right technology. For instance, a bad-performance router can take the steam right off your enthusiasm to work, so it’s better to invest in a high-performance router.
CMO and former HubSpot employee, Meghan Keaney Anderson, remarks, “At HubSpot, we use Slack to keep conversations going remotely, Trello to keep us organized around priorities, and Google Hangouts plus Webex to make remote meetings more productive. Getting the right stack of support tools to fit your work style makes a big difference.”
13. Match your music to the task at hand.
During the week, music is the soundtrack to your career (cheesy, but admit it, it’s true). And at work, the best playlists are diverse playlists — you can listen to music that matches the energy of the project you’re working on to boost your productivity.
Video game soundtracks are excellent at doing this. In the video game, the lyric-free music is designed to help you focus; it only makes sense that it would help you focus on your work.
Want some other genres to spice up your routine and make you feel focused? Take them from startup marketer, Ginny Mineo, who offers her work music preferences below.
“When I’m powering through my inbox, I need some intense and catchy rap/R&B (like Nicki Minaj or Miley Cyrus) blasting through my headphones, but when I’m writing, Tom Petty is the trick. Finding what music motivates and focuses me for different tasks (and then sticking to those playlists for those tasks) has completely changed my WFH productivity.”
14. Use laundry as a work timer.
You might have heard that listening to just two or three songs in the shower can help you save water. And it’s true; hearing a few of your favorite songs start and end, one after another, can remind you how long you’ve been in the bathroom and shorten your wash time.
Why bring this up? Because the same general principle can help you stay on task when working from home. But instead of three songs off your music playlist, run your laundry instead.
Doing your laundry is a built-in timer for your home. So, use the time to start and finish something from your to-do list before changing the load.
Committing to one assignment during the wash cycle and another during the dry process can train you to work smarter on tasks that you might technically have all day to tinker with. And when you know there’s a timer, it makes it hard for distractions to derail your work.
People ops manager, Emma Brudner, notes, “I also usually do laundry when I work from home, and I set mini-deadlines for myself corresponding to when I have to go downstairs to switch loads. If I’m working on an article, I tell myself I’ll get to a certain point before the wash cycle ends. Then I set another goal for the dryer.”
Staying Productive While Working From Home
While you might miss the office, working full time from home can be good for you.
For one, you don’t have to worry about commuting every day and you can better care for your loved ones by being around more often.
The work from home tips that we have provided can help you make the most of your new routine. Try out a few and you might find that you’re just as productive working from home as you are in the office.

How to Grow Your YouTube Channel [New Data]
Did you know that YouTube currently has 2 billion active users a month and is projected to grow to almost 3 billion active users by 2025?
It’s one of the fastest-growing and most popular social networks today. Plus, it helps people grow their businesses.
In fact, the number of channels earning six figures per year on YouTube grew more than 40% y/y, the number of channels earning five figures per year on YouTube grew more than 50% y/y, and the number of channels with more than one million subscribers grew by more than 65% y/y.
Now, all that being said, you might be wondering, “How do I grow my YouTube channel so I can drive more traffic to my website and revenue to my business?”
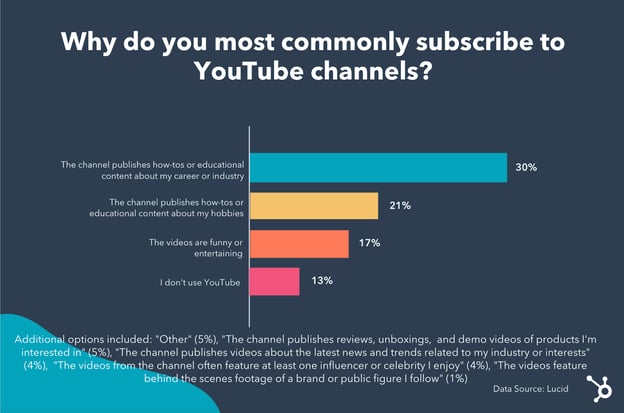
To help marketers and business owners answer this question, we asked 300 consumers why they most commonly subscribe to YouTube channels.
After looking into the data, we’ll dive into our findings to help you better design effective strategies toward connecting with your audience on YouTube.
Let’s get started.
![→ Free Templates: How to Use YouTube for Business [Download Now]](https://no-cache.hubspot.com/cta/default/53/b33cfd44-133a-49e3-a943-086c5679d485.png)
Why Do Consumers Subscribe to YouTube Channels
30% of respondents said they most commonly subscribe to YouTube channels because the channel publishes how-tos or educational content about their career or industry.
21% of respondents subscribe to channels because the channel publishes how-tos or educational content about their hobbies.
And 17% of respondents said they subscribe to YouTube channels because they post funny or entertaining videos.
To review the rest of the answers, see the graphic below:
So, now that we know why people are subscribing to YouTube channels, let’s dive into how you can use this information to grow your channel.
1. Create educational content about your audience’s career.
As the survey said, the main reason that consumers subscribe to YouTube channels is that they post educational content about their careers.
Think about it. The reason people go online is to find an answer to a question they want (or to be entertained, but we’ll get to that later).
So, a great way to grow your channel is to publish the topics that your audience wants to see. For example, at HubSpot, we publish educational videos on YouTube about marketing, sales, service, and general business content.
All these videos help our audience learn and develop in their careers. Of course, we’d like people to use our software to do that, but you’ll get value out of the video whether you’re a HubSpot customer or not.
2. Publish educational content about your audience’s hobbies.
Now, let’s say that your business isn’t exactly geared toward your audience’s career. What do you post then?
Well, according to the survey, you can post content about your audience’s hobbies. Let’s say that you’re a landscaping company. On your website, you could post content about gardening and really target people who garden as a hobby. Then, there’s a clear conversion path to using your services.
However, while you’d like people to convert and become customers, your videos should give value away for free and educate your audience. The more they see you as an expert in the industry and the go-to people, the more likely they will be to convert later on.
3. Create interesting, dynamic, interactive videos.
The third most popular reason that people subscribed to YouTube channels was because the videos were entertaining or funny.
If you’re a creator who wants to post fun, interesting, entertaining videos, you can grow your YouTube channel by thinking about an audience who enjoys watching certain entertainment.
For example, let’s say you have a creator channel and you mostly post lifestyle videos. To make those interesting and entertaining, you need to know what your audience likes and dislikes. That brings me to the next strategy.
4. Know your audience.
The best way to grow your YouTube channel is to know what your audience likes and wants to see. Do they want to see educational content about their career? Or perhaps they’re just looking to unwind and watch people clean houses because it’s satisfying and entertaining.
Regardless, think about the reasons from our survey that will resonate with your audience the most, and then lean into those ideas.
5. Reformat well-performing content.
A great way to focus on growing your YouTube channel is to reformat content that has already performed well for you. That might mean turning your most popular blog post into a video.
You’ll need to rework the information and film a video about that topic, but you’re already starting out ahead. You know that your audience likes that content and wants to see it.
Think about your best-performing content from any content marketing channel and reformat it to video.
6. Optimize your content.
Now, of course, we can’t get through a content marketing discussion without talking about SEO. But, how do you optimize your YouTube videos?
To do this, you’ll want to include your target keywords in your titles and descriptions. Then, make sure you mention those keywords in your video.
The YouTube algorithm will use those context clues to understand what your video is about. And then if you get engagement, it will rank higher in the search results.
You might be wondering, “How do I grow my YouTube channel fast? And how long will it take to grow my YouTube channel?”
According to data, it takes an average of 22 months for a channel to reach 1,000 subscribers. Yet, if you don’t optimize your videos and have less than 1,000 subscribers, then you’ll get less than 10% of the total views on YouTube. That’s why it’s so important to grow your channel and subscriber list.
7. Find untapped keywords.
Another strategy you might use to grow your YouTube channel quickly is to find untapped keywords. You can look at related searches of a topic on YouTube or Google, and then look at those related searches in a keyword tool.
Which keywords get a lot of searches, but have low competition? Those are the keywords you’ll want to target.
8. Optimize for watch time.
Just like with any search engine, YouTube wants people on YouTube. So one of the main factors the site considers for ranking is watch time.
Whenever you post videos, it’s important to analyze how long people are watching your videos. According to research from Backlinko, longer videos tend to outrank short videos. And it makes sense. The longer your videos, the longer your watch time can be.
But, how can you make sure people get past the first few seconds of your video? A great way to do this is to cut extraneous content from your intro. In the first few seconds, a viewer should know what they’ll learn and what they’ll get out of watching your video.
If you’ve properly targeted your audience with the right content, that means they’ll end up watching your long videos because you’ve captured their attention.
Growing your audience on YouTube is a great way to attract audiences to your company. And having more than 1,000 subscribers is imperative for ranking higher in search results. So, that means you need to post content that your audience wants to see and is optimized so it shows up in the search results.

Fewer Women Than Men Asked For Raises During COVID-19, Especially in Marketing [New Research]
Asking for a raise or promotion can be scary, especially when your company is going through shifts related to world events.
In early 2021, Fishbowl conducted a survey that shed some light on the gender wage gap, which continued if not grew in 2020.
The survey of nearly 17,000 professionals revealed that 63% of respondents have avoided asking for a raise following “changes related to the pandemic.”
When splitting the whopping number of respondents by gender, 42.4% of them were women, while just 31.79% were men.
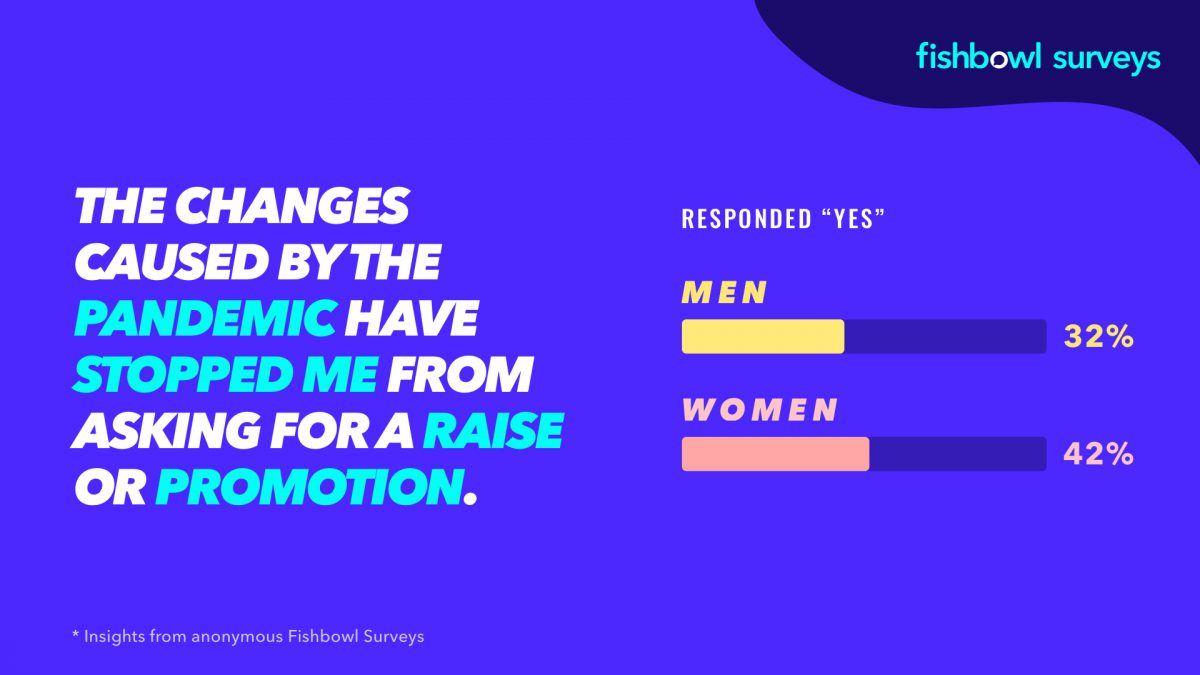
When diving into the industries that saw the least raise or promotion requests, marketing was at the top of the list. About 54.5% of marketing professionals did not ask for a raise or promotion in the last year due to the pandemic.
While some might be shocked by this data, many aren’t. After all, marketing departments have been known to get the least budget, smaller headcounts, and less overall investments.
Meanwhile, women have been seen to negotiate less and apply for lower-level roles than men with the same experience. In a recent LinkedIn post, Femme Pallette CEO Lucy Nuemanova shed more light on why women generally don’t negotiate as often as men.
“Many women avoid having these conversations because they don’t want to be perceived as ungrateful, or greedy, or needy by management, and therefore many times women tend to wait to be rewarded,” Nuemanova explained.
If you’re a woman in the marketing world — or any industry for that matter, this data and insight from other female professionals might have you wondering, “When is it appropriate to ask for a raise or promotion?”
Below, I’ve listed a few times people commonly ask for or consider asking for a raise or promotion.
![Free Guide: How to Thrive in a New Job [Download Now]](https://no-cache.hubspot.com/cta/default/53/4bf50646-f87d-4724-896f-cbcb6b809cfc.png)
When You Should Ask for a Raise or Promotion
1. When the scope of your role grows or shifts.
In the early days of holding a role, your work might closely mirror the tasks listed on the job posting you applied to. But, as you gain credibility and visibility at your company, you might also gain more responsibilities that greatly expand on your original day-to-day role.
“Many people are wearing more hats now and having to learn new skills. All of these are valid grounds for asking for a raise and should form the basis of your argument when you make your pitch,” career advisor Gaurav Sharma said in a recent interview.
For example, while being asked to report on your marketing projects might be a natural progression of your role and not worthy of asking for a raise, taking on direct reports when your original role didn’t involve management, or being asked to run a new, time-consuming marketing initiative for your company could signify a significant shift in your duties and work-life that merits a change in title or compensation.
2. When you spend a lot more time at work than anticipated.
As you gain more responsibilities or expectations, you might find yourself working longer hours or getting asked to do more time-consuming things — like regular business trips. If this was not part of your initial role or was not explained to you when you accepted a role that involved these requirements, it might be worth considering a raise or promotion request.
3. When you complete a pricey course or degree that will benefit your company.
Usually, a course or certification costs time and money. But, sometimes, employers cover the cost knowing that your growing skills will benefit them in the long term. If your company doesn’t compensate for education in any way, but you get an additional degree that boosts your ability to work, you should consider asking for a raise.
However, if you expect to receive a raise after finishing a degree or taking a course Abby Kohu, an author and HR professional, says you should do so ahead of receiving the degree or certificate
“Ideally, you should ask about the raise before you get the degree to set the expectations,” said Kohut said in an interview with Bryant & Stratton College. “The best time to hold the conversation is during the normal performance review cycle. Begin the conversation by discussing your work performance and accomplishments on the job. Then, explain how the degree has given you the additional information that will help you produce even more.”
4. When you consistently hit all of your goals.
At some point in your role, you might find that everything comes naturally to you. You rarely run into challenges or feedback and aren’t exactly sure how to level up further with the work you’re already doing well. Because of this, you might start feeling bored or too complacent in your role.
When you’re regularly crushing your goals or receiving great performance reviews, it’s a good sign you’re ready to take on new challenges or more responsibilities with a raise or promotion attached.
5. If you haven’t received a wage increase in a while.
While you might not want to ask for a raise within the first few months, or even the first year, of your role, it’s important to track the time you’ve been working with no increase in wages. Even if you haven’t dramatically changed the scope of your role, you still could justify requesting a raise if you have a solid history of good performance but haven’t received a wage boost yet.
Even if you think your company will know to automatically give you a raise or promotion eventually, it’s worth inquiring about if you haven’t had a wage increase recently or ever.
In a recent LinkedIn post, career coach and entrepreneur Jasmine Escalara wrote, “If you aren’t telling your boss, supervisor, or anyone what you want, what makes you think they will give it to you?”
“If you are looking for a step-up, promotion, or pay raise, then you have to SPEAK-UP, or else it will never happen,” Escalera advised.
<iframe src=”https://ift.tt/3xa49FJ” height=”1013″ width=”504″ frameborder=”0″ allowfullscreen=”” title=”Embedded post”></iframe>
6. When the cost of living increases.
While many companies will give annual raises or offer salaries that build in the estimated cost of living increases, keep how much it costs to live in your area in mind if your employer does not use this strategy. If you’re working full-time, you always want to make sure your company is paying you enough to afford decent rent prices, food, utilities, and other necessities.
Is There a Best Time to Ask for a Raise?
If you identify with one or more of the items on the list above, it might be time to start thinking about a promotion or raise. But, while you should discuss the raise you deserve with your manager eventually, there are certain times that could increase your chances of actually getting a pay increase.
Many companies manage their budgets, headcount, and raise-related budgets at specific times of the year. So, some career sites, like Indeed, suggest:
- Just before a new year when companies are planning their budget and headcount.
- During the summer when some companies do bi-annual planning.
- After your company releases good quarterly or monthly earnings, traffic, or goal accomplishments.
- Just after a positive performance review or another major accomplishment.
Inversely, there also are poor times to ask for a raise, such as after a bad earnings report, iffy performance review, or another time where your manager or boss might not be in the best mood. As you plan to have this conversation with management, take note of times where they’ll be more empathetic and responsive to your request rather than frustrated or annoyed by it.
If you’re very unclear of when to ask for a raise or promotion at your company specifically, career consultant Todd Henry suggests paying attention to your office’s financial or promotion “rhythms” and making your request during times of the year when you hear about the most promotions.
If you’re excelling in your role and feel you need a raise or promotion in the next year to stay at your company, you shouldn’t let the pandemic permanently hold you back from having a transparent, but friendly discussion with your boss about the career or salary growth you’d like to achieve soon.
Having the Wage Discussion
it’s important to remember that managers expect to have a salary conversation with employees eventually. In fact, many companies separately budget annual funds just for raises and promotions. So, asking to meet with your boss about your salary or future shouldn’t come as a major shock to them, especially if you’re doing well in your role.
Additionally, if you have a good manager, they’ll likely respond to career growth conversations in a respectful, thoughtful, and transparent way by explaining why you can or can’t get a wage increase and what you’ll need to do to get there.
“No matter how well-timed your ask is and how deserving you are, there are any number of reasons your manager might reject your request for a raise — and some of them might have nothing to do with you or your performance,” writes Henry.
“The best response to being turned down is: “What will it take for me to earn a pay raise?” Henry explains. “Know what the expectations are, so that the next time you ask, you are backed by data that aligns with your manager’s threshold for a raise.”
Ultimately, when you start the wage conversation with your manager, they’ll learn you’re looking for upward motion, understand your professional growth needs, and will know what they need to do to retain you as a talented employee. Similarly, if your company can’t give you a promotion or raise right when you ask, you’ll know why, what you need to do to get to the next level, and if your company will be the right place for attaining long-term career goals.
Want to get more tips for success in your marketing role? Download the resource below.

80 Things to Check Before, During, and After Launching a Website
Admit it: Launching a new website is stressful — even for the most seasoned digital marketers.
Websites are complex. There are so many things that are easily overlooked, like a broken link or a misspelled word.
And of course, a handful of things could go very, very wrong. Like what if you forget to test an important data capture form and then lose out on generating a bunch of new leads? Or worse, what if you forget to properly set up site redirects, and those valuable search engine visitors get a page not found message?
Instead of worrying about the what ifs, wouldn’t it be much easier to have a comprehensive website checklist to run down before every site launch? One that you could use for enterprise websites, microsites, landing pages, and everything in between?
Fortunately, we’ve created just that. Keep reading to learn everything you need to do before, during, and after launching a website.
![Free Resource: Website Optimization Checklist [Download Now]](https://no-cache.hubspot.com/cta/default/53/00d9cc96-eff7-4cea-8ff3-583374c3dcd5.png)
What You Should Do Before Beginning Your Site Design
Whether this is your first website that is being built from scratch or you are doing a website redesign, there are a few steps that you should take before hiring a web designer or diving in yourself.
1. Analyze your previous website (if applicable).
In order to make good decisions, you must first understand where you’ve been. That starts with your existing website if you have one. Ask yourself:
- What is the purpose of a new design or overhaul?
- What haven’t hasn’t been accomplished with this existing site?
- How will a new design serve the new organization?
The answers to these questions can help you identify your gaps, which can then inform goal setting for the new site.
2. Crawl your old site (if applicable) and document its structure.
You can get an idea of your site’s existing structure, pages, and assets by using a crawling tool such as Screaming Frog. This is a necessary step in creating your website development plan because you’ll have a more concrete view of what pages existed before, what redirects are in place, and what the meta data currently looks like.
3. Obtain benchmark data from your previous website (if applicable), and confirm testing procedures.
Not only will you want to compare how your new site performs compared to the old, but you’ll also want to continue identifying gaps that will provide data-driven insights to aid your new strategy.
Additionally, you’ll want to confirm testing procedures. Soon, you’ll begin testing your website to make sure all the different components are working, everything flows, and there’s a system for tracking bugs and enhancements.
Use a form (like Google Forms) instead of asking people to email their thoughts so the feedback-gathering process is more streamlined. Then, put one person in charge of choosing which bugs to prioritize, and filtering all the creative feedback you receive through the form.
4. Identify your goals for the new design, how you’ll achieve them, and how you’ll measure success.
Once the gaps are fully fleshed out, you can begin crafting your goals for the design. You may come to conclusions such as:
- The current site is unwieldy, and we need ease of use.
- The current site no longer looks trendy, so we need a visual refresh.
- The current site doesn’t perform, so we need a more SEO-friendly structure with a better UX.
Whatever your goals, you’ll want to understand exactly how a new site will help you achieve them so that you can craft its implementation accordingly.
5. List out action items, roles, and responsibilities.
Make a project management checklist for the website. What content needs to be written? What calls-to-action need to be created?
Make a master list of the things you need for your website and deadlines for when they should be completed.
Then, assign each action item to an individual or team. It usually takes a lot of people to launch a website: You have marketers writing the content; designers choosing images and laying out the overall look and feel; a technical team doing all the back-end development. To ensure everyone’s on the same page and there’s no role confusion, you’ll want to lay out a comprehensive plan for what each team or person is responsible for.
One great way to do this is by using the DARCI model, which stands for Decision Maker(s), Accountable, Responsible, Consulted, Informed. It’s a powerful tool that’ll help everyone understand which individual is responsible for completing which action items, which individual(s) or group(s) need to be consulted before any final decisions are made, and who needs to be consulted once a final decision has been made or an action has been taken.
6. Prepare for worst-case scenarios.
Poll everyone involved in your website launch on their concerns about what could go wrong, and then devise a few backup plans for what to do when — not if — some of these things go wrong.
7. Choose a Solid CMS.
If you’ve never launched a site before, the long list below might intimidate you. However, it actually shouldn’t take too long to run through most of the aspects on this list — especially if you built your website with a solid CMS.
A CMS, or content management system, often allows you to design a website from a pre-created template, optimize your content for SEO, and edit content after it’s published. If you’ve already built your website, you might have already gained experience with using a CMS.
But, if you’re still building a website, one way to make going through this checklist less time consuming is by building your pages on a CMS that already does a lot of the work for you.
For example, HubSpot’s CMS that allows you to create and edit content including landing pages and blog posts. It’s features also allow you to organize your content, schedule it, track analytics, and optimize it for SEO.
Alternatively, you can also test out CMS platforms like WordPress, Wix, or even Drupal.
8. Develop a consistent brand.
Decide on a consistent brand message and tone, one that you’re committed to presenting consistently across. This will make you look more legitimate, credible, and memorable.
- Understand your value proposition.
- Choose a mission statement, vision statement, and tagline that represents that value as well as your brand identity.
- Choose colors and fonts that convey that identity well.
- Decide on the type of imagery that you’ll use to further convey your messaging.
9. Create your technical SEO strategy.
Take some time to ensure that your website has been given a solid foundation for SEO success. From site architecture and content hierarchy to metadata and XML sitemaps, do not leave any stone unturned.
- Perform keyword research and decide what you want to rank for.
- Create a content strategy that satisfies those keywords.
- Understand how your existing pages (if applicable) can be adjusted and which pages will need to be created new.
- Figure out which pages are no longer necessary.
- Map out where unnecessary pages can be redirected to (using a 301 redirect).
10. Strategize your conversion paths.
Once you have an understanding of the primary pages that will exist on your site, you’ll need to figure out exactly what actions you want users to take and how you’ll capture their information. This includes thinking through:
- What premium top-of-the-funnel offers are needed
- What bottom-of-the-funnel action will be presented on main pages
- What forms need to be created
- What landing pages and thank you pages need to be created
- How conversions will be tracked
- What actions will happen after a website visitor converts (email responder, etc.)
11. Set up analytics software.
- Choose which analytics platforms you will be using on the new site.
- Decide if any previous Analytics tracking scripts will be used or if new accounts/scripts are needed.
- Set up new accounts (if applicable).
12. Set a launch date.
Once you have an idea of what needs to get done before the launch, pick a launch date. Give yourself at least a month. Most agencies plan for two-to-three months of research, design, and development.
What to Check Once You’ve Built Your Site
Once you’ve chosen a CMS and built a site that you’re ready to launch, here’s a list of 80 things to check before, during, and after going live. Feel free to copy, edit, and make your own based on the software you’re using to launch and host your website.
Don’t have time to check all 80? Here’s a list of the most important highlights from each section:
Website Launch Checklist
- Make sure text is accurate and error free.
- Replace all placeholder images with final images and designs.
- Ensure copy aligns with the new brand.
- Check that all styling preferences have been implemented.
- Ensure your design is aesthetically pleasing.
- Ensure that rights to images, fonts, and other content have been properly licensed or cited.
- Test the site for User Experience (UX).
- Check that the conversion paths have been implemented properly.
- Create your site backup strategy.
- Store passwords and credentials in a secure place.
- Audit the technical SEO implementation for errors.
- Test the site for user experience again.
- Test your conversion path’s functionality.
- Check that integrations with third-party tools are running smoothly.
- Make a copy of the final website for backup purposes.
- Ensure that backups are running properly.
- Make sure your site is secure.
- Comply with all applicable laws.
- Crawl the site to ensure no errors happened on launch.
- Check the technical SEO components for errors.
- Optimize your metadata.
- Set up analytics.
- Build anticipation with teasers before the site is live.
- Create a social media strategy for the announcement.
- Identify exciting ways to promote engagement for the new site.
- Send an email to your existing database.
- Continue to promote the launch for a month.
We’ve grouped items based on pre-launch and post-launch, making sure to touch on page content, design, functionality, SEO, branding, analytics, security, and compliance. Keep on reading to make sure you don’t forget a thing before your next launch.
Website Pre-Launch Checklist
Before you launch, it’s important to review all of the content on your website with a fine-tooth comb. Of course, that means page content, but don’t forget about your premium content, too. From data-driven content and downloadable documents to rich media such as videos and images, you want to make sure everything is in place, working properly, and looking beautiful.
It’s important to note — you’ll want to set up a staging site to prepare your new website before going live. Staging sites are exact copies of your website on a private server that are used to prepare and proof content and code changes before they go live. The staging site is a place to edit and play around with updates in an environment that’s almost identical to the one that will be live. This is so you don’t have to worry about crashing your site or screwing something up when you make a change.
Later, you’ll sync content and templates between the staging environment and your live website via your content management system (CMS). If you’re a HubSpot customer with the website platform, you’ll find there’s a staging environment built right into the software. It allows you to generate a preview URL of the entire site, so you can click around and test things in context.
1. Make sure text is accurate and error-free.
- Site content has been proofread for spelling and grammar.
- Company contact details are accurate throughout the website.
- Generic content, such as lorem ipsum, has been properly removed and replaced.
- All premium content, such as case studies, ebooks, and whitepapers, have been proofread. Spelling and grammar are correct.
- Copyright date (perhaps in the footer) includes the current year.
2. Replace all placeholder images with final images and designs.
On occasion, a website designer may use a placeholder image if they didn’t have the correct asset at the time of the page’s creation. It’s up to you to make sure each page is picture-perfect.
3. Ensure copy aligns with the new brand.
- The text has been copy-edited to ensure consistent brand voice and style.
- All company tag lines and mission statements are up-to-date.
4. Check that all styling preferences have been implemented.
- Paragraphs, headers, lists, and other formatting are correct.
- Brand colors have been implemented correctly, including link and button colors.
5. Ensure your design is aesthetically pleasing.
- Scripts are optimized across web pages.
- Images are optimized across web pages.
- CSS is optimized across web pages.
6. Ensure that rights to images, fonts, and other content have been properly licensed or cited.
Even if you outsourced the design to a web designer/developer, the responsibility falls on you to ensure there are no copyright licensing issues. Otherwise, you could end up with a hefty infringement settlement on your hands.
7. Test the site for User Experience (UX).
- Website pages are compatible across browsers.
- Website pages are compatible across devices.
- Images, videos, and audio files are in the correct places, formatted and working on all devices.
- All premium content, such as case studies, ebooks, and whitepapers, are stored in their proper libraries/databases and work properly.
- Internal links across web pages are working properly.
- Social media share icons are associated with the correct accounts.
- Company logo is linked to the homepage.
8. Check that the conversion paths have been implemented properly.
- All necessary forms are present.
- Landing pages and thank you pages have been implemented.
- The correct buttons and calls-to-action (CTAs) are present in the proper locations.
- Everything is linked together appropriately.
9. Create your site backup strategy.
You can prevent loss of data and protect against malware and other damages by properly setting up site security and regular backups. Check that:
- Backup schedule has been created.
- Backup location has been identified.
- A plan for implementation is set to be put in motion after launch.
10. Store passwords and credentials in a secure place.
Many individuals have likely been involved in the website launch up until this point, so ensure that passwords are reset when the time comes and proper password etiquette is followed.
11. Audit the technical SEO implementation for errors.
- Pages have unique page titles.
- Pages have unique meta descriptions.
- Each page has a specific purpose, and pages meant to rank organically are optimized around a single keyword or set of keywords.
12. Conduct a stress test.
In a typical website redesign, it may not be 100% necessary to do a stress test because the traffic spike may not overrun your server’s capacity. But a stress test (also called a load test) is a must for any company that plans for a large influx of visitors during specific times — such as the holidays or after a major press event. It’ll help you figure out how much simultaneous traffic your website can handle by simulating up to tens of thousands of simultaneous virtual users from different locations around the world.
While stress tests simulate virtual users, the test won’t be totally replicating a real-life scenario — so you’ll want to find a test that brings you as close to reality as possible. Ask a developer which load tests they recommend. Here at HubSpot, many of our developers use JMeter by Apache, but this is a pretty technical tool that’s not ideal for someone who’s new to the concept.
Be sure to notify your host or provider that you want to perform a stress test before you actually do one. Otherwise, your test might look like a DDoS (Distributed Denial of Service) attack on your provider. Many providers (including HubSpot) consider an unauthorized load test a violation of terms of service.
User experience is a key aspect of how they view your company, so testing your website before it goes live will bring more confidence that visitors will not be immediately displeased with your offerings.
Website Post-Launch Checklist
Let’s say you’ve done it. The button has been pushed, the domain is pointing to the new site, and you’re about ready to tell the world…
But wait just one second because you still have things to check for now that your site is officially live.
13. Test the site for user experience again.
Just in case there was an issue with the implementation, you’ll want to ensure the experience is consistent with what you reviewed before it went live.
- Ensure your design is rendering as you expected it to across browsers.
- Ensure your design is rendering as you expected it to across devices.
- Ensure CSS/HTML is properly validated.
- CSS styling is rendering properly.
- Favicon is in place and rendering properly.
- Internal links across web pages are working properly.
- External links across web pages are working properly, and open in a new tab.
- Social media share icons are working properly.
- Feeds are working properly (RSS, news, social media).
- Company logo is linked to the homepage.
- 404 Redirect pages are in place (page-not-found.aspx).
14. Test your conversion path’s functionality.
Take some time to test and validate all of the different features on your website. Lead generation forms, CRM integration, and any other technology should work flawlessly across your website.
- Forms are submitting data properly.
- Thank you message or page displays after form is submitted.
- Form data is being emailed to a recipient and/or stored in a company database.
- Auto-responders are working properly (if applicable).
15. Check that integrations with third-party tools are running smoothly.
Integrations such as your CRM, e-commerce software, and/or marketing platform link to your site and help you run your business. If there is a potential issue that can cause data loss, you don’t want to find out way after the fact.
16. Make a copy of the final website for backup purposes.
Now that everything is in place and finalized, you want to have a pristine copy of it should you experience data corruption or loss.
17. Ensure that backups are running properly.
Now is the time to check the implementation of your backup strategy. Check that ongoing copies of the website are being created and stored on a regular basis.
18. Make sure your site is secure.
- 24/7 monitoring scripts are installed.
- There’s a plan in place for updating plugins (if applicable).
- Ensure that all applicable parties are aware of your organization’s password etiquette policies.
- Purchase an SSL certificate if need-be. An SSL certificate takes up to two weeks to purchase and set up, so ensure you have it prior to launch. (An SSL certificate will ensure your website is encrypted so hackers can’t intercept any of your data. Not only will this put your website visitors at ease, but it’ll also boost your website’s SEO since SSL is now part of Google’s search ranking algorithm.)
19. Comply with all applicable laws.
Make sure your website complies with any applicable laws and regulations. Internet law can be sticky, and each industry has its own set of rules to follow. So it’s best to consult with your legal counsel to make sure you aren’t missing anything — this post is not legal guidance. Here are a few you might need to know about:
- Web pages offer accessibility for users with disabilities (WAI-ARIA).
- Web pages announce if the website uses cookies (required in some countries).
- Website is compliant with usage rights for purchased or borrowed code, images, and fonts.
- Terms and privacy policies are visible to website visitors.
- Website is PCI compliant (if you’re storing and processing credit cards).
20. Crawl the site to ensure no errors happened on launch.
Compare the crawl to the previous crawl and see if you find any inconsistencies that were not intentional. You’ll also want to ensure that all pages have the proper search engine indexing settings.
Additionally, you’ll want to check for formatting consistency. Sometimes, font codes get dropped into a page accidentally, so you’ll want to scour your site for any of these weird formatting errors. Make sure all your formatting is consistent and there are no weird blips in your copy.
21. Check the technical SEO components for errors.
- Page titles, meta descriptions, and URLs are all present and match the original technical SEO strategy.
- Load time for site pages is optimized.
- A dynamic XML sitemap has been created.
- The XML sitemap has been submitted to search engines.
- Page URLs consistently reflect site information architecture.
- 301 redirects are in place for all old URLs (redirecting old to new pages).
- rel=”nofollow” tags are in place on applicable links and pages.
- Images on the website are properly compressed (which helps with load time).
22. Optimize your metadata.
- Metadata is properly in place for any content in an RSS feed.
- Metadata is properly in place for any social media sharing content.
- Spelling and grammar are correct in all metadata.
- Alt tags have been added to every image.
23. Set up analytics.
Make sure your website is set up to capture web data and analytics. This valuable information will allow you to continually improve your website going forward, so you don’t want to forget this stuff.
- Your website analytics codes and tracking scripts have been inserted on website.
- Relevant IP addresses have been excluded from analytics tracking.
- Funnels and goals have been properly created in your analytics software (if applicable).
- Google Webmaster and Google Analytics accounts have been properly synced.
- Google Ads accounts have been properly synced (if applicable).
24. Start a post-launch enhancement list.
The website you launch should be functional, well-designed, and well-positioned. But it probably won’t be everything you hoped and dreamed on the first go — and you certainly don’t want to spend months of effort designing a site that people may not react well to. What if your client doesn’t like it? What if conversion rates plummet? That could add up to lost money and effort.
Instead, it’s best to publish a solid website, and then test and build on top of it — a website creation approach known as growth-driven design. Create a document that lists out all the things you can’t get done for the launch itself but want to add in the future, and add features and elements to it as you discover more about how users interact with the site. This you can do by using one of these user testing tools.
How Do You Announce a New Website Launch?
This (hopefully) wasn’t a vanity project; you did all of this work so far for the benefit of your website visitors, prospects, and existing customers. Your next step is to tell the world about your new site design. Here’s how:
25. Build anticipation with teasers before the site is live.
A launch of a new product, a launch of a new movie, and — yes — a new site launch all require marketing before the actual release. Think of the last movie you watched in the theater. Did you see the trailer before you decided to buy those movie tickets and popcorn?
Teasers for your website launch can only help to build anticipation and get users wondering what the new experience will be like. This can build buzz and interest once you finally break the news.
26. Create a social media strategy for the announcement.
Decide what channels you want to promote the news on, how you will make the announcement, and how long the promotion will last.
As you craft your messaging, remember to focus on new features and how they benefit your audience.
27. Identify exciting ways to promote engagement for the new site.
For users who aren’t as involved in your brand, a new site launch might not seem like a big deal. Your goal, then, is to make it one. Provide an exclusive offer for the first users who visit the site. Or, create a contest that promotes engaging with the site’s new features. Whatever you choose, make sure you make it fun and interesting.
28. Send an email to your existing database.
You may want to give existing leads and customers a head’s up about the new design, especially if it will cause any confusion when they next visit. You can break the news as a matter of courtesy but also sneak in ways to underscore the value you’re providing.
You can also alert all stakeholders of the redesign and ask them to spread the word of the new website.
29. Continue to promote the launch for a month.
Just because you post about your new website once on social media does not mean that your audience will drop everything to visit the site in droves. Make your launch a big deal, and keep the new functionality top of mind so that your audience is prompted multiple times to check it out.
(Once your website is launched, remember to resubmit your XML sitemap to all major search engines once you’re done, too.)
Resources for Launching Your First Website
Launching a new website can be a tedious task, but you can alleviate some of the stress by using this comprehensive website launch checklist.
If you’re just getting started on your first website, here are a few tools that can help you streamline your process
- CMS: As mentioned above, a CMS can help you design your website, optimize and publish content, and track your analytics once it’s launched. If you’re looking to test out a few CMS options, start by checking out our 14-day free CMS trial.
- Blogging Guides: If you’re interested in using your website to publish a blog that could help you boost brand awareness, it can be helpful to start brainstorming topics. Here’s a great guide to how to be a better blogger with tips from our team.
- Landing Page Templates: A landing page is a great way to highlight a product or resource that your brand is offering. It’s important to know what elements lead to a landing page that will convert. Here’s a guide with examples. Additionally, when using a CMS like HubSpot’s, you can create landing pages from pre-designed templates.
Editor’s Note: This blog post was originally published in August 2014, but was updated for comprehensiveness and freshness in June 2021.

5 Steps to Run a Project Post-Mortem Meeting [+ Key Questions to Ask]
No project is an unmitigated success or failure.
Even when it seems like a project couldn’t have possibly gone better (or worse), there are always lessons to be learned.
Thus, the project post-mortem.
A post-mortem meeting isn’t an investigation. It’s an inquiry to uncover all the lessons for the future – not a chance to assign blame or put people on the spot.

It’s the opportunity to ask: What exactly did we accomplish? And even more importantly: what could we do better next time?
To help your team get the most out of your project post-mortem meetings, we’ve shared some basic guidelines. Check them out below and make your next post-mortem your most productive one yet.
A productive post-mortem meeting is a chance to fully unpack a project’s trajectory and dig deeper into why things unfolded the way they did.
The core benefit is improved efficiency. If done right, you’ll identify bottlenecks in your processes and improve your workflows.
Beyond that, a post-mortem meeting will improve:
- Morale – Celebrating your wins in a post-mortem meeting can help bring your team together and create a sense of camaraderie.
- Communication – As you’re unpacking what went right and what went wrong, you’ll hopefully identify communication gaps that may be hindering the project.
- Transparency – A post-mortem meeting invites everyone to share their perspective on the project overall. This creates a transparent environment in which you can get to the core of the issues.
Post-Mortem Meeting Documentation
To prepare for your post-mortem meeting, there are three key pieces of documentation you’ll need:
- A pre-meeting questionnaire – A questionnaire gives your team time to assess the project as a whole. On your end, you’ll be able to review the questionnaire to identify patterns and talking points for the meeting. More on that here.
- A meeting agenda – Having an agenda is vital to ensure your meeting runs smoothly. Without one, you may not have time to address your most important issues. For details on how to organize your agenda, jump to this section.
- A meeting worksheet – A worksheet will be helpful during the meeting to organize your team’s feedback into the right categories. For instance, your worksheet should include a section for successes, failures, obstacles, and solutions.
- A recap document – Once the meeting is over, draft a document that covers the main points discussed and actionable steps for the future. More on that here.
How to Run a Productive Project Post-Mortem Meeting
1. Make post-mortems a standard part of your team’s process.
Post-mortem meetings should be an essential part of your team’s process – for the big projects and the smaller ones. Most teams run them for larger projects with definitive start and end dates, but they can be equally useful for smaller-scale or even ongoing projects.
Even though “post-mortem” quite literally means after death, your team doesn’t have to wait for the end of a huge, long-term project to get value from a retrospective evaluation.
As you’re fleshing out a project’s schedule during the kickoff phase, insert mini post-mortems at key milestones. These pulse-checks will give your team the chance to better understand how a project is progressing – and hopefully identify potential issues before they cause permanent damage.
Once the project has officially wrapped, don’t wait too long to schedule the final post-mortem, or people will have mentally moved on. In fact, you should schedule the post-mortem when you build out the full project plan, so everyone knows it’s an expected part of the project wrap-up.
2. Send out a post-mortem questionnaire before the actual meeting.
The meeting itself shouldn’t be scheduled for more than an hour. Not everyone will have a chance to speak up, and some smaller (but still important) issues may not get a lot of discussion time. And frankly, not everyone is comfortable speaking up in this kind of forum.
Using a pre-meeting questionnaire means everyone on your team has an equal opportunity to share their thoughts, and no stray detail flies under the radar.
The questionnaire also provides an opportunity for people to get themselves organized before the meeting. People can dig into why certain things happened (or didn’t happen), so they can bring causes and potential solutions to the meeting – not just missteps or hastily formulated theories.
For example, if a project required the creatives on your team to work around the clock to get their deliverables done on time, why did this happen? Was the project timeline set up badly? Were inexperienced people assigned to the wrong tasks?
The responses from the questionnaire should inform the post-mortem meeting’s agenda, focusing the discussion on issues that had the biggest impact. Yet the questionnaire also means the “smaller” stuff doesn’t get overlooked in the full post-mortem process.
3. Select a moderator to keep the meeting on track.
The goal of a project post-mortem is to constructively evaluate what the project’s team accomplished, and what could have been done better.
For this discussion to be productive, someone needs to keep the conversation civil, focused, and moving forward. This is where the meeting moderator comes in.
Establish a moderator before the in-person meeting who can stick to the agenda and lead the discussion in case it gets out of hand. The moderator doesn’t have to be the project manager or a member of your leadership team, they just need to be comfortable taking charge.
4. Set a clear agenda.
With so many details to cover in such a short time, it’s easy for post-mortem meetings to veer off track. Help keep the discussion in check by building a clear meeting agenda in advance:
Start with a recap of the project’s core objectives, briefly going over the goals and metrics established at the kickoff. This portion shouldn’t be longer than five minutes and should act as a quick refresher on what your team set out to do.
Briefly review the results. Once you’ve gone over the primary goals and objectives, take a few minutes to review the project’s final results. This should be a straightforward evaluation of whether or not the project met your team’s metrics for success. Did you hit the targets you set out to meet?
Delve into the why or why not. Now is the time to dig into why the project ended up the way it did, and how team members are feeling about it. This discussion should take up the bulk of the meeting. We’ve explained how to structure your examination in this section [jump to last section].
5. Make sure to close the loop.
The post-mortem meeting is just one step of the post-mortem process.
The end result of the questionnaire and meeting should be a post-mortem document outlining conclusions of the inquiry and actionable takeaways for the future.
And this inquiry isn’t just about what went well or badly, but what’s going to change for the future, and how? What led to great success here that we can bottle and use on other projects?
Circulate the post-mortem roundup document to participants to get their sign-off. Then circulate the department-wide takeaways for future projects to everyone.
So what exactly should a post-mortem examine? There are a few different cross-sections to frame your inquiry. Basic categories of inquiry are planning, execution, results, and communication.
Within each category, you should ask quantitative, qualitative, and subjective questions:
Quantitative Questions to Assess the Project Execution.
These are your standard yes or no questions.
- Were deadlines met or missed?
- Did we provide all deliverables outlined in the project scope?
- Were pre-defined success metrics achieved?
- Were outline workflows and processes followed?
- Was there a budget overrun?
As you look into the project from this perspective, a key underlying question is always: Was the plan good? Did we follow the plan? Was the plan bad? Why?
All the quantitative questions you ask should eventually lead back to this overarching theme.
Qualitative Questions to Go Beyond the Data.
These open-ended questions should evaluate the project beyond the hard data and planning.
- Did we deliver work at the high standards we and our client expect?
- Does the client agree?
- Did people feel like they had the resources, information, and support they needed to get their own tasks done?
- Was campaign criteria or task expectations poorly defined or communicated?
In both the quantitative and qualitative inquiries, get specific about what worked well and what didn’t.
For instance, did you have a delivery date for the client to share their personas, but no review time built-in? Perhaps the client sent them in on time (as per the project plan), but they were inadequate for the project’s needs.
Or, did a lack of oversight by an account manager result in a new PPC campaign manager overspending against the client’s ad budget?
Getting into the details will help identify the root of the issues.
Subjective Questions to Understand Employee Perspective
Subjective questions help assess how your team members are feeling and can help leadership identify troubling signs of burnout and fatigue early on.
These questions also let leadership know what processes worked best with their team, helping them plan future projects.
- What did people enjoy most and least about this project?
- How was working with the client?
- What changes would they make to this type of project in the future?
- How could the work run more smoothly with this client or among certain departments in the future?
- Do you want to work on a similar type of project again? If not, why not?
A post-mortem meeting will help your team continuously improve on your process. Keep in mind, a post-mortem that doesn’t impact future action is a waste of time. With this in mind, make sure to follow through on your insights to generate greater results on subsequent projects.
Editor’s Note: This post was originally published in May 2016 and has been updated for comprehensiveness.

3 Ways to Leverage Brand Champions for Your Business
In our personal lives, we all want people who champion us.
If we’re lucky, that will start with our family and extend to our friends and significant others. In an ideal work environment, our managers will also champion us and help us climb the ladder.
There’s nothing better than having people cheering for you on the sidelines and advocating for you in the rooms you’re not in.

As a business owner, you also want that level of support for your brand.
That’s where a brand champion comes in as someone who promotes your business and helps grow your loyalty base.
Let’s dive into why you need a brand champion, how to get one, and how to incorporate it into your marketing strategy.
Depending on the size of your business, you may have one or several champions. Sometimes, that role is embedded in your staff’s responsibilities.
For instance, an employer brand specialist is responsible for promoting a company’s culture and benefits to outside candidates. That, in itself, is a type of brand champion, as their role is centered around campaigning for your brand.
You can say the same for brand ambassadors who partner with businesses to promote them and generate leads.
A key difference to note here is that there is typically a contractual obligation for ambassadors to promote your brand. Champions may be incentivized to do so, but they’re not required to celebrate your brand.
In a small company, the business owner can be the brand champion, motivating employees internally and networking externally to gain more customers.
The key takeaway is that anyone can be a brand champion, and the more champions your brand has, the stronger it will be.
How to Be (and Gain) a Brand Champion
To be a brand champion, there are a few key characteristics and traits you must have. A brand champion should:
- Be passionate about the company.
- Know the company’s vision, mission, and values.
- Be invested in the brand’s long-term success and growth.
- Have the skills to lead growth initiatives.
- Stay updated on the most effective strategies to build brand loyalty with employees and consumers.
One place where you might want to start looking for brand champions is with your employees.
Studies show that how businesses treat their employees plays a big role in how trustworthy they seem. Especially in times of crisis, consumers look at how brands treat their own.
Encouraging your employees to become brand champions will require some structural implementations within your organization.
You want an environment that creates happy employees because happy employees make great champions who will boost your brand without you even asking.
It’s like when you love a product you’ve just bought. You’ll find any opportunity to tell people how much you love it – even if you don’t have a 10% referral discount code.
Start by conducting regular employee net promoter score (eNPS) surveys. This will tell you how satisfied your employees are and let you know how you can better support them. Once you identify opportunities for improvement, be sure to follow through with action to let your employees know their voices are heard and taken seriously.
If your company is publicly traded, consider offering your employees restricted stock units (RSUs). RSUs are stocks given to employees as a form of compensation with a vesting schedule that can span anywhere from one to a few years after the employee’s start date.
Giving your employees an equity stake in your company can build their loyalty to your company and have them invested in its growth.
Other ways to turn your employees into brand champions include:
- Providing professional development opportunities.
- Investing in diversity and inclusion initiatives, such as employee resource groups (ERGs).
- Creating psychological safety.
How to Leverage Brand Champion Marketing
1. Invest in employer branding.
Employer branding is a form of marketing in which the target audience is candidates interested in joining your company. However, it can create a very positive perception of your brand to consumers.
We’ve mentioned how important employees are to building brand trust. If consumers think you are mistreating your employees or playing profit over people, this can tarnish your brand image.
Your employer branding specialist is the person behind the strategies to showcase your internal brand champions.
At HubSpot, we have @HubSpotLife on Instagram, where we post employee takeovers, our Culture Code, and more.
It’s an opportunity for our employees to tell the world about what they love about working at HubSpot and share their personal experiences.
Employer branding is all about giving people an inside look at the benefits of working at your business.
2. Amplify your brand evangelists’ voices.
Whether you’re a small or large business, you probably know who your biggest customer supporters are.
You may know them by name or through data you’ve collected (like NPS surveys). These customers and loyalists are a gold mine when it comes to championing your business.
Odds are, they’re doing it already through word of mouth. Why not amplify their voices to maximize their impact?
One way to do so is by asking your evangelists to leave you reviews on sites like Google My Business, Yelp, and Facebook.
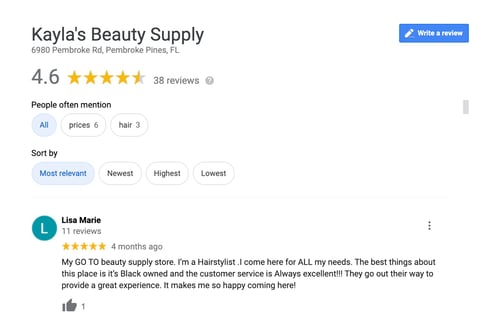 If you’re running a campaign and want to include testimonials, reach out to your top supporters and ask them to participate. You could repurpose those same testimonials for your website, landing pages, and more.
Another way to amplify your champions’ voice is by offering them custom referral codes. When your champion refers someone to your brand, they and the recipient get a discount on their next purchase. And you gain a new customer – it’s a win-win-win.
3. Engage your brand champions on social media.
Think of your social media followers as brand champions in training.
.jpg?width=550&name=brand-champions-social-media-engagement%20(1).jpg)
They already like your brand, that’s why they’re following you. The more you nurture your relationship with them and build a community, the more loyal they’ll become. Eventually, they’ll turn into your brand champions.
There are countless ways to engage your community on social media, including:
- Responding to comments
- Creating private groups
- Creating polls and surveys
- Conducting Q&As
- Going live with your followers
- Reposting user-generated content
Brand champions do wonders for your public image, as they advocate for your brand in a way that doesn’t feel like an advertisement. So, nurture those champions and leverage them to further your brand’s growth.


These Big Social Media Platforms are Taking on Clubhouse: What Marketers Need to Know
If you’ve read the news or surfed through social media recently, you’ve probably heard about the new social media audio app called Clubhouse.
In the last few months, Clubhouse, which allows users to drop in on audio calls as listeners or speakers, has received a $100 million valuation and grown to more than 10 million active users. Now, tech giants like Twitter, Instagram, Facebook, and LinkedIn are unsurprisingly building similar features to get in on the chat-streaming action.
If you’re feeling deja vu following the competition around Snapchat Stories, and TikTok’s musical overlay features, you’re not alone.
When a new social media app goes viral, you can almost guarantee that at least one of the social tech giants will test a similar, competitive feature. And, each time this happens, marketers wonder, “Which of these social media channels should I use in my strategy? And, is this trend even worth investing in?”
The good news? Strong competition around a social media trend, like chat streaming, signals that it’s not going away anytime soon and might be worth investing in. So, the only thing you’ll need to figure out is where to experiment with the trend.
Below, I’ll give you a breakdown of Clubhouse’s four biggest potential competitors, as well as some marketing takeaways to help you determine which platform is right for your brand.
Need to brush up on your Clubhouse knowledge before diving in? Check out this post for a recap of what Clubhouse is and why competitors are trying to get in on the action.
![Download Now: Social Media Trends in 2021 [Free Report]](https://no-cache.hubspot.com/cta/default/53/3dc1dfd9-2cb4-4498-8c57-19dbb5671820.png)
What We Know About Twitter Spaces
Twitter Spaces was softly rolled out to a small group of beta testers in late December and fully launched in May of 2021. The feature, which closely resembles Clubhouse Rooms, allows users with over 600 followers to host a space — or audio chatroom that anyone on Twitter or just a few pre-selected followers can be invited to.
The Spaces experiment was announced late last year following the success of audio apps like Clubhouse. At that time, Twitter Product Lead, Kayvon Beykpour told TechCrunch, “We think that audio is definitely having a resurgence right now across many digital spaces. … It’ll be fascinating to see how other platforms explore the area as well, but we think it’s a critical one for us, too.”
How Twitter Spaces Works
Although Twitter Spaces is still evolving and will roll out more features in the coming months, those who have access to the full feature already can create a Space by holding the post button of their Twitter app and choosing the new Spaces icon, or by tapping their Fleets icon and choosing to create a Space instead of a Fleet.
At the moment, when a Space is launched, it’s public and can be seen in your followers’ Fleets bar, as shown below. In the near future, Twitter says it plans to enable scheduling and room ticket capabilities that allow people to preschedule chats or sell tickets to a private space.
At the moment, those who launch a Space can invite up to 10 hand-picked speakers. From there, they can adjust who speaks based on who raises their hand and which speakers need to leave early. At the moment, it does not seem like there’s a cap on the number of people who can tune in and potentially request to speak. In the future, Twitter plans to expand the feature and allow co-hosting privileges which will allow two users to host and run a space.
When entering the Space, the UX is similar to Clubhouse in that you can see who’s speaking and who created the Space before seeing a list of other listeners. You’ll also see a down arrow at the top that allows you to minimize, but continue listening to the chat, as well as a “Leave,” request to speak, share, and heart icon — allowing you to signal that you enjoy the discussion.
Like Clubhouse, users will be muted as they enter the room and will need to get speaking privileges from the Space moderator if they’d like to say something.
Takeaways for Marketers
Spaces is still evolving with new users gaining access each day. However, this feature could be a good fit for brands that are looking for a broad audience and completely public platform.
While Twitter’s audience exceeds 330 million monthly active users, its app is also available to all smartphone users. Meanwhile, Clubhouse is still invite-only and can’t be accessed by Android users despite its fast growth.
For Twitter and brands aiming to build a community of followers on the platform, Spaces could also be a natural transition. At this point, people are already using Twitter to respond to text-based threads and tweets related to their interests, industry, beliefs, and passions. Now, they can vocally share their thoughts in Spaces without worrying about character limits. This could further engage Twitter’s community-centered audience while also helping brands take community marketing to the next level.
What we Know About Instagram Live Rooms
Shortly after Facebook’s CEO and Co-Founder Mark Zuckerberg spoke in a Clubhouse room, the social media company was reportedly experimenting with a similar audio feature. While we’re still not certain if and when Facebook will launch a competing feature yet, its company, Instagram, is expanding its Live feature to add chat rooms.
What makes Instagram Live Rooms significantly different from Clubhouse or Spaces is that it streams full video chats rather than audio discussions.
Before March, Instagram Live allowed two Instagram users (one broadcaster and one guest) to stream their video call for public audiences or followers. For viewers, this experience was like watching two people video call without being able to participate. Now, Instagram has upped the guest capacity of these rooms from one to three. Here’s what the format looks like today:
A March 1 announcement from Instagram explained, “In the past year, special moments have happened on Live, including informational talks about science and COVID-19 guidelines, interviews with celebrities and record-breaking rap battles. Creators of all kinds — from fitness instructors to musicians, beauty bloggers, chefs and activists, all relied on Live to create moments and bring people together to reach their communities in creative ways. We can’t wait to see what more creativity comes from this highly-requested update.”
“We hope that doubling up on Live will open up more creative opportunities — start a talk show, host a jam session or co-create with other artists, host more engaging Q&As or tutorials with your following, or just hang out with more of your friends,” the Instagram statement added.
How to Instagram Live Rooms Will Work
At the moment, the Live Rooms feature is still rolling out, but it will soon be available to global Instagram users.
When Live Rooms is fully implemented, any user can tap their Stories icon, swipe left to the Live setting, choose a title or foundation to promote in their stream. Then, they can tap the “Rooms” icon and pick guests to be in their broadcast. Viewers will also be able to request to join rooms that are already in progress, as shown below:
Takeaways for Marketers
While Live Rooms could be an interesting prospect for brands that already have a following there, they do seem to have some limitations. For example, while Twitter Spaces and Clubhouse allow more than five guests — aside from the moderator, Live Rooms only allows three additional guests. This might make it harder to take questions or comments from audience members who’d like to add to the conversation.
Another factor that could be a pro or con depending on the brand considering it is the visual nature of Live Rooms. Because speakers must appear on camera, some brands will have more opportunities to show products or visuals. Meanwhile, other brands looking for a more open dialogue will need to find only speakers comfortable with appearing on video.
One solid feature that could make Instagram Live Rooms more competitive for brands is Instagram Shopping. In 2020, Instagram added new shopping features that allow brands to share links to products in live streams that can be purchased directly on Instagram. According to Instagram’s announcement, these features will be available in Live Rooms so brands could begin to monetize their live chats.
Facebook and LinkedIn’s Clubhouse Rivals
At this point, Facebook’s Clubhouse alternative is still in the very early stages of development while LinkedIn’s was confirmed in late March. At this point, there aren’t many details on what LinkedIn or Facebook’s final audio platforms could look like when they launch. However, reports hint that they’ll both have a very similar audio-only user experience to Clubhouse.
For example, here’s a look at the audio chat UX LinkedIn is testing, as reported by TechCrunch:
Suzi Owens, a LinkedIn spokesperson, confirmed that LinkedIn is testing a new audio feature with the UX shown above.
“We’re doing some early tests to create a unique audio experience connected to your professional identity,” Owens said. “And, we’re looking at how we can bring audio to other parts of LinkedIn such as events and groups, to give our members even more ways to connect to their community.”
When it comes to Facebook, not much has been publicly announced about its feature. However, TechCrunch reports that the feature could be part of the Facebook Messenger app. Here’s a very early mockup of the feature, which was recently leaked on Twitter:
While Facebook confirms that the mockup above was part of its “exploratory” process, the tech company told TechCrunch that the image doesn’t accurately depict the finalized version of the feature.
Takeaways for Marketers
At this point, marketers should keep these options on their radar and be ready to consider these alternatives if they do launch. While Clubhouse users that love to network and discuss their industry might transition well to LinkedIn’s version, Facebook’s pure size could mean that their in-app audio chat experiences could get more listeners than you’d find on Clubhouse.
Which Audio Social Media Platform Should Marketers Use
Like we saw with Stories and short-form music video features, every social media platform wants to take advantage of audio social media trends. Because each version is pretty similar to all the others, you might be wondering which channel you should invest in.
At the moment, the jury is still out on which platform will be the most successful for the longest, especially since Twitter and Instagram’s features aren’t fully launched yet. However, when all the social media competitors implement their new features, you’ll want to consider a few factors to determine which is right for you, such as:
- Potential reach: While Twitter and Instagram have the biggest audiences by far, Clubhouse is quickly growing. If this app were to launch an Android version soon, it could potentially burst in growth due to its current buzz and popularity.
- Your following: Do you already have a large following on one platform that has a chat streaming feature? If so, you might want to start there before investing time into another app where you have no audience.
- Media formats: Clubhouse and Twitter’s chat streams are designed to be audio-only, while Instagram Live Rooms will show video. If you prefer staying off-camera, you might want to avoid one of the apps that requires your camera.
- Miscellaneous features: While Clubhouse enables users to make clubs — or groups of users with similar interests, Instagram enables brands to place Instagram Shopping CTAs in their Live streams. While you’re exploring each platform, take note of the smaller features that differentiate them in case one of these tools could help your brand.
Want to learn more about the latest social media trends and expert insights? Download HubSpot’s 2021 Social Media Trends Report for free below.

The Top 3 Reasons Consumers Read Blogs & How to Attract Them in 2021 [New Data]
In 2021, there’s no question that blogging is beneficial to any marketing strategy.
But, while blogging has been known to help brands boost leads, SEO, and credibility, many busy marketers might still worry that blogging’s effectiveness could be losing steam.
Fears that “blogging is dead” haven’t been eased by research. Recently, when we polled over 300 people to ask them how often they read blogs, roughly 40% said “never.” This followed HubSpot’s Not Another State of Marketing Report, which revealed that blogging fell from the first to third-most-common content strategy between 2018 and 2020.
But, before you get wrapped up in all the negative data, it’s important to remember that blogging is still incredibly valuable to marketers — but the way you approach blogging matters more than ever. And, while our past survey found that 40% of people never read blogs, it conversely revealed that 60% of consumers read this content regularly.
The truth is, blogging is alive and well. You’ll just need to work a tiny bit harder to persuade people to read your content than you have in the past.
So, what’s one way to get into a consumer’s head and figure out how to motivate them to read your blog? Performing another survey.
Rather than asking more than 300 people, “Do you read blogs?”, I recently launched a follow-up Lucid survey that asked, “Why do you most commonly read blog posts?”
In the survey, which asked participants to select the most common reason that they consume blog content, answer options included, “To learn how to do something new,” “To be entertained,” “To learn more about products or brands,” and “To learn about news and trends in my job industry.”
With the number of leads that business blogs are known to generate, you might assume that a large chunk of people read blogs to learn about brands or products. But, actually, you might be surprised — and a little concerned — by the highest and lowest-ranking reasons for blog readership:
In fact, only four percent of consumers say they read blogs to learn about brands or products.
According to the results of the survey, more people are actually driven to read blogs that teach them how to do something new. While 33% selected this reasoning, 20% said they read blogs to be entertained, while 12% read blogs to learn about news or trends in their job industry.
Additionally, 9% said they’re driven to read blogs for all of the reasons given.
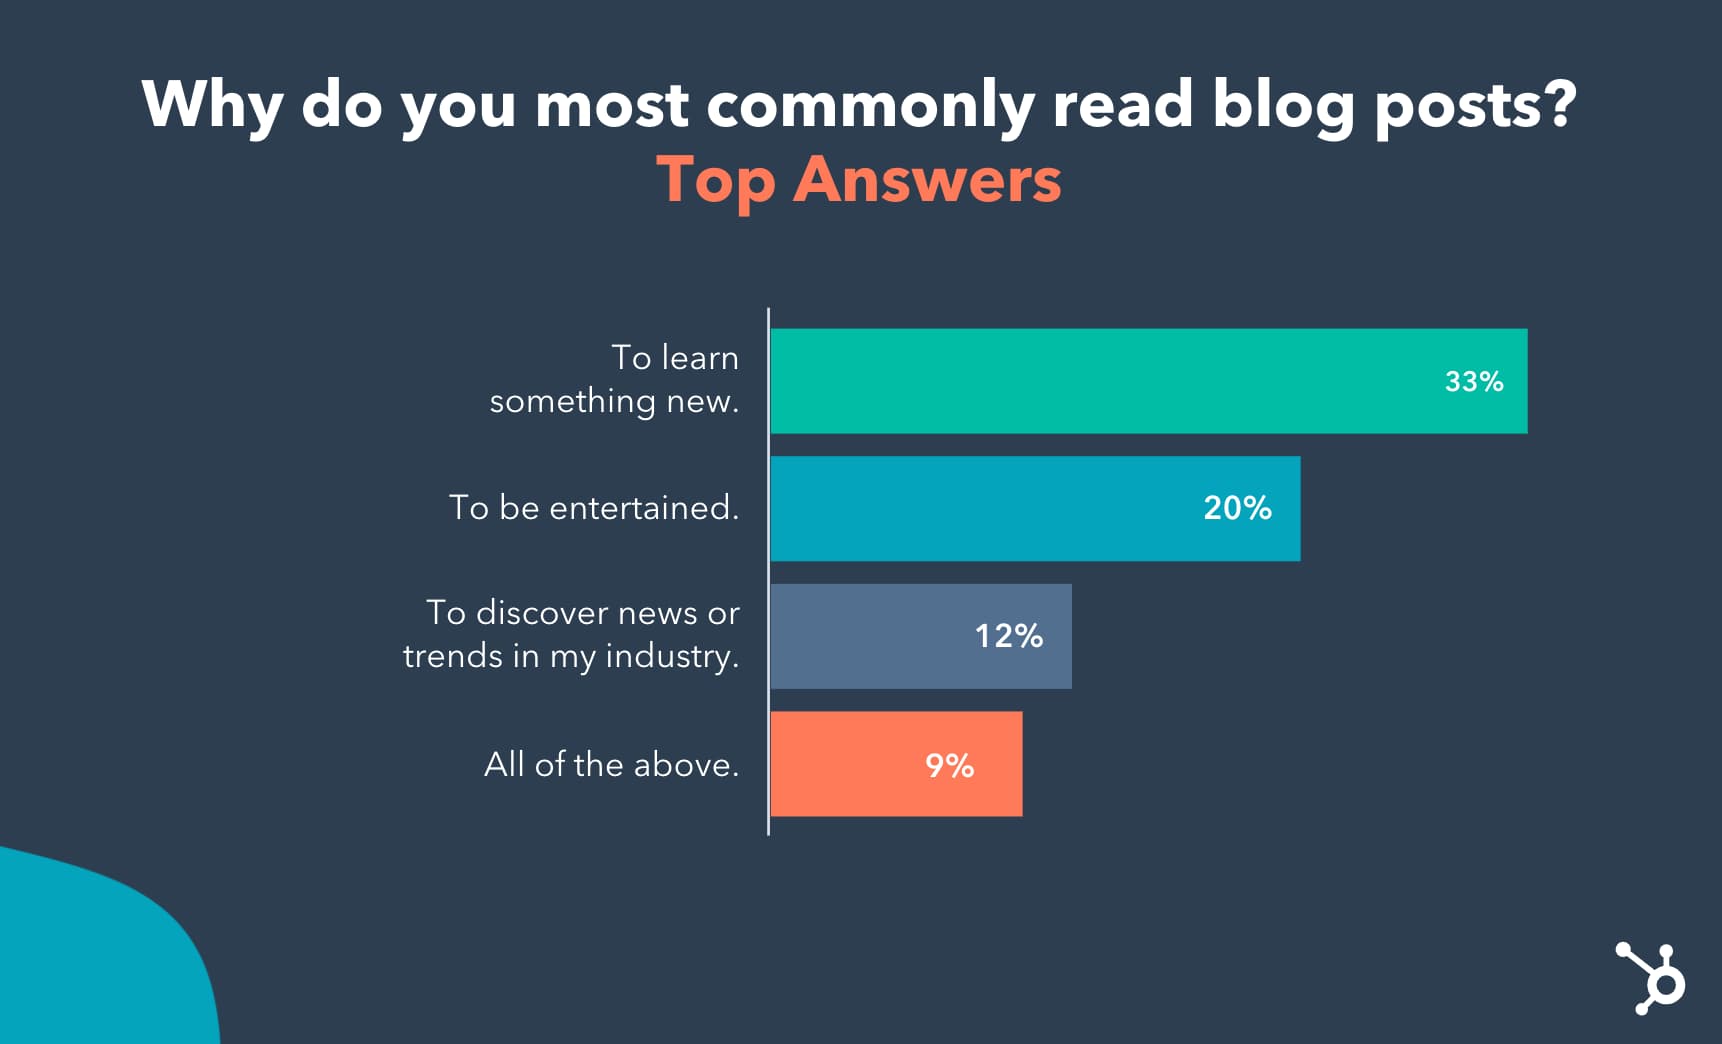
What exactly do the results above mean?
To win over blog readers, you’ll need to create content that provides some type of informative value or entertainment, rather than purely using your blog to discuss your brand or product.
In this blog post, I’ll walk you through the top three reasons why the general consumer population is driven to read blogs. I’ll also show you how to create blog content that fulfills your reader’s needs while still subtly spreading brand awareness.

3 Reasons People Read Blogs
1. People read blogs to learn something new.
By far, the most common reason that people will read a blog post is to learn something new. This result doesn’t surprise me at all.
Why? Posts that include guides, step-by-step processes, tutorial videos, or fast-facts often gain a large amount of search traffic. This is because people are looking up instructions for how to do things on Google every day.
Even when posts aren’t informing people of how to do something on a granular level, blogs that discuss complex topics such as studies, trends, or topics people are less familiar with can pique a person’s curiosity.
Psychologically, researchers have reported that humans crave valuable information similarly to how they crave food and financial wealth. As a blogger, you can harness this to create content that both piques curiosity, while discussing topics related to your brand, service, or products.
For example, on the Marketing Blog, we might show our readers how to use a new social media network, like Clubhouse. By doing this, marketers or social media users who want to learn how to do this could find our content in search or on social media and read it to learn how to create this content.
On a broader scope, our blog might create multiple pieces of content that discuss a trend from multiple angles. For example, when the app TikTok emerged, we wrote a few blog posts to answer common marketer questions like, “What is TikTok?”, “How do brands market themselves on TikTok?”, or “How do you leverage influencer marketing on TikTok?”
Aside from helping our readers, guide or trend-related blogs allow us to highlight the level of research and knowledge we’ve gained as marketers. This could also demonstrate to a prospect that HubSpot is a credible company that sells quality products within the marketing industry.
2. People read blogs to be entertained.
While people crave knowledge, they also like to be entertained. Each day, people might read blogs that tell interesting stories, make them laugh, or intrigue them in some other way.
This lines up well with 2020 research noting that more consumers were watching videos and consuming online content for the sake of fun and escapism.
But, as a business blogger, You might be asking yourself, “How can I entertain my readers while still keeping my blog professional?”
The truth is, when you think creatively, there are a number of ways you can entertain your audience while still staying on brand.
For example, you could create a fun infographic or photo post about a viral trend in your industry, While your readers might not be willing to invest in this viral trend, the imagery and information about the trend might entertain them. In one of our posts, we highlighted funny memes that marketers used in their actual campaigns.
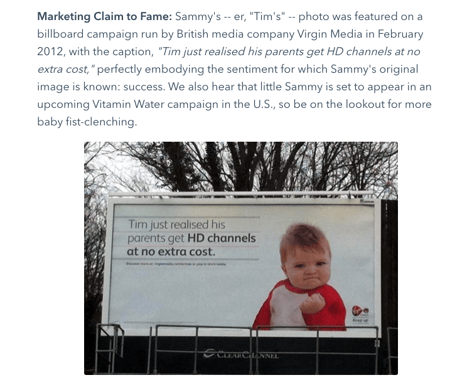 Alternatively, you could also create a fun, but informative, video or podcast to go with your blog post. With this added layer of content, you could dive deeper into discussing a viral marketing trend, or interview an industry expert that people in your field follow. While this might not be “entertaining” for people outside of your industry, it might be more interesting than the average blogs people in your field might be reading.
Here’s an example of a blog post that combines text and video for a better reader experience:
3. People read blogs to learn about trends related to their job industry.
While people might not be interested in reading blogs that specifically discuss your product or brand, they could be more intrigued by a blog that discusses an industry your product is affiliated with.
While the poll result noted in the introduction came from general consumers with mixed professional backgrounds, it’s likely that those in the workforce will read a blog if it educates them or provides them with valuable information about their industry.
When looking at the HubSpot Blog readership and data, it’s clear that our audiences enjoying reading content related to trends in the marketing, sales, service, or website industries. And, when we get tips from experts or data on how to navigate these trends, our readers are even more engaged.
For example, our industry recently started buzzing about the social media audio app, Clubhouse. While HubSpot had been watching this trend while the app was still primarily used by celebrities, we started to churn out content about it once every-day users and brands began to get invited to join the app.
On top of just explaining what Clubhouse was and why the app was going viral, we also added to the post by including quotes and opinions from social media marketers about the social platform’s brand potential.
Here’s an example of one of the posts we wrote that discussed the viral new trend and app.
here’s another post where we discussed how a third-party cookie phaseout could impact marketers.
Creating Content That Fulfills Reader Needs in 2021
So, how do you create engaging content that pulls in audiences with all different reading motivations while still spreading brand awareness about your product or service? Consider publishing blog posts that combine industry trends, how-tos, and entertainment. After all, nine percent of the survey recipients polled above said they read blogs for all of the reasons on the list I gave.
Here are two examples of how you can create content that fulfills the interests of multiple groups of blog readers.
Teach your readers how to do something in your industry.
At the HubSpot Blog, each of our posts teaches readers about something specific. For example, the post you’re currently reading highlights the research we’ve done about how people read blogs and shows you how to leverage these results.
In other posts, we’ll also inform marketers by giving them a step-by-step guide to a marketing tactic or examples of how brands leverage promotional trends. Regardless of what we write about, we’re always trying to teach readers something valuable.
When you create content that educates people about strategies related to your industry, it’s also easier to subtly discuss your product in a way that doesn’t seem shameless of over promotional.
For example, when we’re discussing a strategy that HubSpot can help with, we might subtly link readers to a tool or resource we offer that can help them. Here’s an example of a HubSpot mention in a post about form building tools:
We also like to include free offers related to our content at the end of each blog post. When we do this, a reader can learn more about the topic we’ve just taught them about. And, when they fill out a simple form requesting the free resource, they can choose whether or not they’d like to be contacted about one of our products. This allows the reader to feel like they are receiving valuable information without being forced to learn about our products.
Even when you don’t specifically acknowledge a product, an industry blog focused on informing readers can show off your company’s level of expertise. When your brand is seen as highly knowledgeable about your industry, readers might think that your products were also created by your staff of industry experts.
Entertain industry readers while still informing them.
Even though an industry blog will likely target company employees or leaders, this doesn’t mean your content can’t be informative and entertaining. For example, you can use videos, GIFs, imagery, or interactive blog assets to add to your content while keeping it interesting for the reader.
For example, you could consider embedding a trivia or personality quiz related to your industry, as we did in this blog post:
On occasion, you could also create a fun, suitable for work posts that your industry readers can relate to. For example, here’s a Service Blog post where we highlight GIFs related to working on a customer service floor:
Entertaining blog content on an industry blog can similarly show off your expertise. But, importantly, this content also allows your reader to relate to your brand on a more human level.
Building an Effective 2021 Blog Strategy
While it can be great to run with one successful content type, the blogs with the most credibility and quickest growth often have a mix of content that entertains or informs readers, makes them aware of brands or products, or teaches them something new. And, with 9% of consumers in the poll above saying that they’ll read blogs for “all” reasons listed, there’s a good chance that a mix will intrigue and fulfill the reading needs of multiple different groups.
To learn more about how to drive internet users to your blog, check out this post. For tips on how to be a blogger, check out this post with advice from our own blog team.
Editor’s Note: This blog post was originally published in May 2020 but was recently updated for comprehensiveness and freshness.

How to Find and Remove Duplicates in Excel
“I’ve never been a natural, all I do is try, try, try.”
These Taylor Swift lyrics, in the song “mirrorball“, perfectly explain my relationship with numbers, math, and anything concerning data analytics.
However, as a marketer, data analysis is one of the most important aspects of my job. But like most marketers, who prefer strategy and creativity, numbers and Excel reports don’t come naturally to me.
That’s why it’s important to know how to work in Excel and find shortcuts to help make the process easier.
Today, we’ll dive into one of those processes — how to find and remove duplicates in Excel.
![Download 9 Excel Templates for Marketers [Free Kit]](https://no-cache.hubspot.com/cta/default/53/9ff7a4fe-5293-496c-acca-566bc6e73f42.png)
1. Find and highlight duplicates in Excel through conditional formatting.
The first step of removing duplicates will be to find them. An easy way to do this is through conditional formatting.
You can do that by following these steps:
- Make sure you’re on the Home tab.
- Select the entire table by hitting the button on the top left.
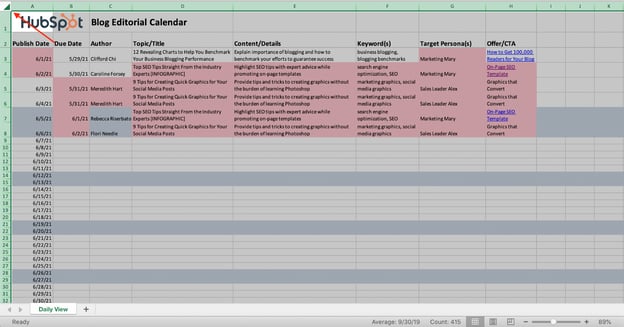
- Click Conditional Formatting → Highlight Cells Rules → Duplicate Values.
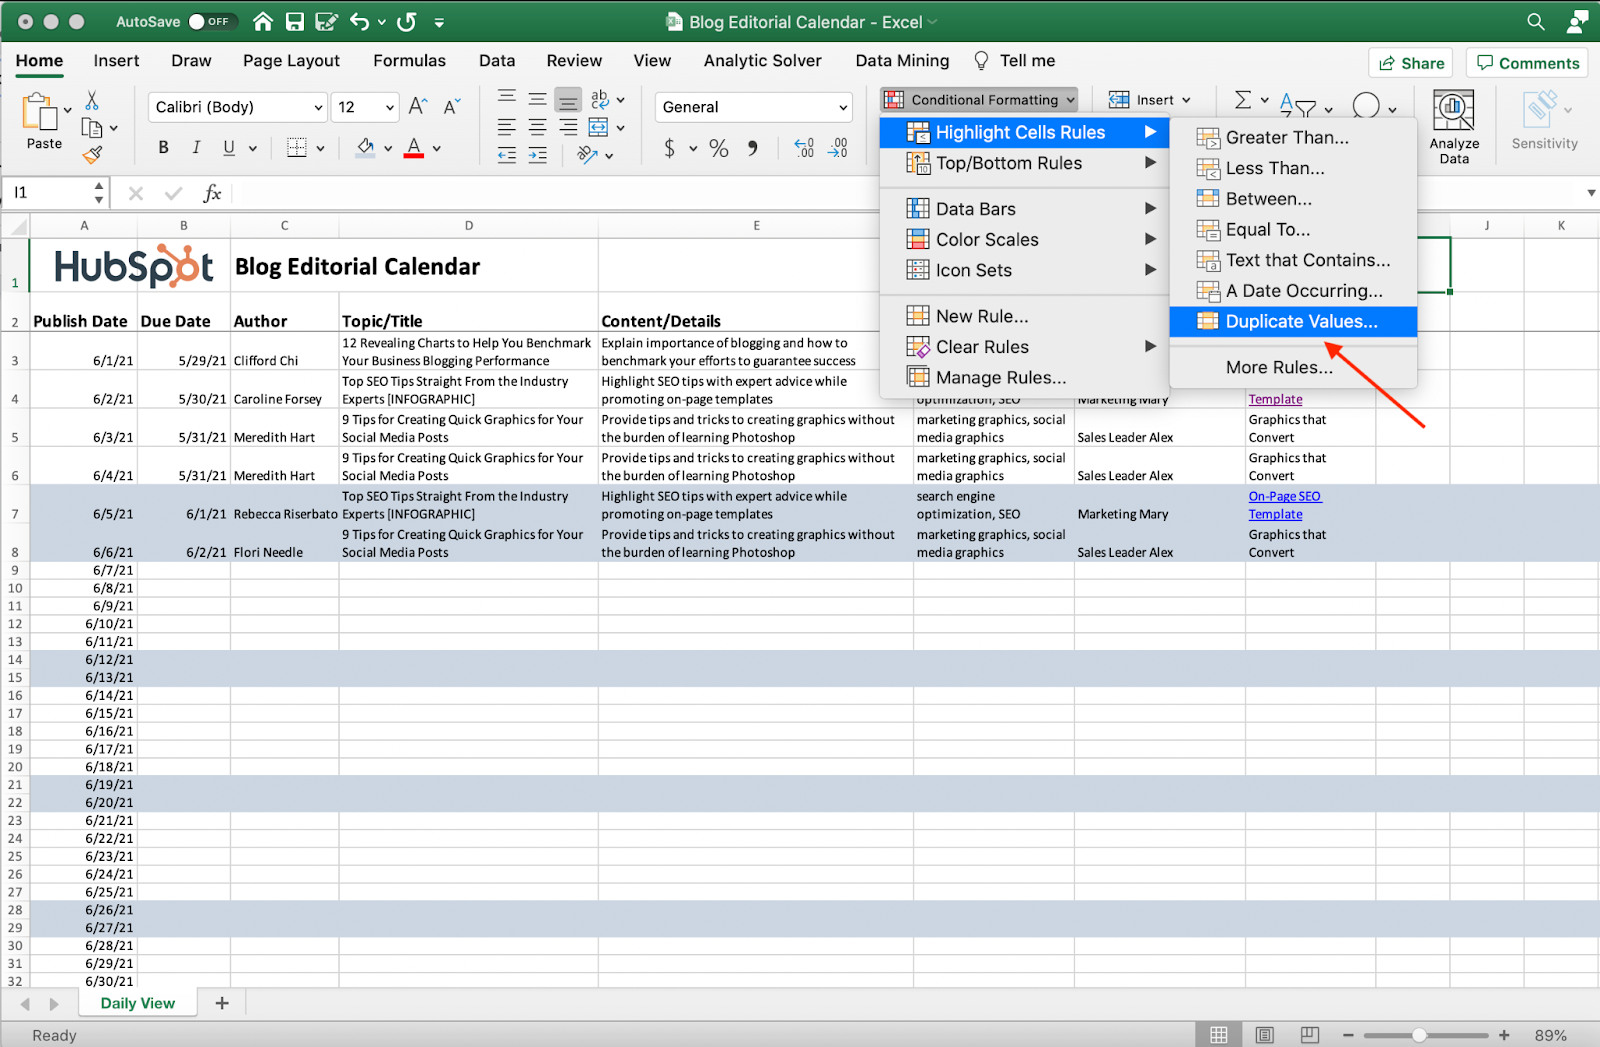
- In the area titled “Format With”, change how you want duplicates to be highlighted. You can choose highlighting, bolding text, changing the color of text, etc.

And voila. Your duplicates are now highlighted. It should look something like this:
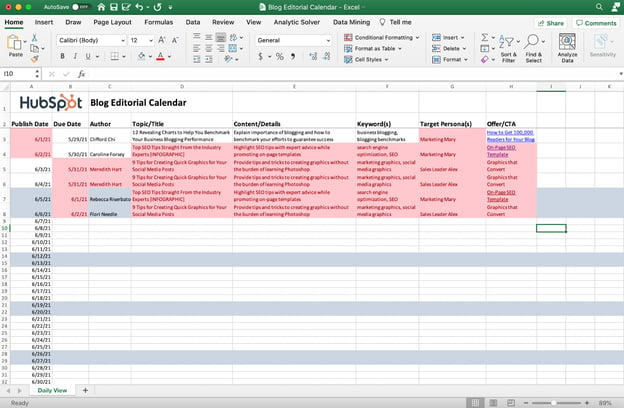
2. Count duplicates in Excel.
Now that you’ve found your duplicates, you might want to count them and see how many there are, especially if you have a large dataset.
To do this, you can use this formula =COUNTIF(A:A, A2). The formula means that Excel is going to count how many times a certain value is used in a certain place.
The column A:A stands for the data table you’re looking at. This will probably be a different value on your Excel sheet. Then, A2 references the value you want to count the frequency of.
To do this, follow these steps:
- Create a new sheet in your Excel doc.
I found that the easiest way to count duplicates in Excel is to create a new sheet in your Excel workbook.
Then, copy and paste the column that you want to count duplicates in. In the example below, I copied and pasted the blog titles from the editorial calendar to see if there were any duplicate titles.
Then, create another column for “occurrences.” This is where we’ll put the formula. Your new sheet should look something like this:
- Insert the formula.
Now, you can insert the formula in the first cell under occurrences. You’ll type in or copy and paste the formula. Then highlight A:A (we’re going to replace this with your dataset), and click on the sheet in your Excel doc that has the data. Now, you can click on the top left to select the entire sheet, or you can just highlight the column or rows with your data.
For the second value, you’ll want to go back to your second sheet, highlight the A2, and choose the value next to it on the left. In most cases, this will stay A2, A3, A4, etc.
See what this looks like in action here:
3. Remove duplicates with the remove duplicates feature.
Now it’s time to remove the duplicates from your dataset.
Before you do this, I’d recommend duplicating/copying your dataset into another sheet or a whole other workbook altogether. You always want to keep your original data intact, even though you can use Excel to remove and filter the data you want. You don’t want to lose data because of a wrong click.
Once you’ve made a copy of your data, it’s time to remove the duplicates.
To remove duplicates, follow these steps:
- Select the worksheet that has duplicate values that you want to remove. Click Data → Table Tools → Remove Duplicates.
- Choose the columns where you want to remove the duplicates.
In this case, I only want to remove duplicate blog titles. So I’ll choose column D. I kept “My list has headers” checked because there are two rows of headers before the data starts on this sheet.
Remember that Excel will remove the entire row where the duplicate value is.
- Review data.
Excel will now show you have many duplicate values were found, removed, and how many unique values remain.
Now you can review your data. Comparing my first dataset to this dataset, you can see that all the rows containing the same blog title were deleted.
This is what the sheet used to look like:
And this is what it looks like now:
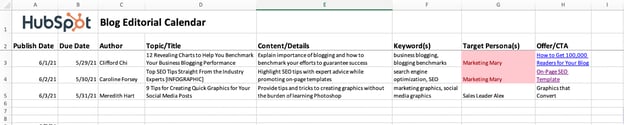
When you remove duplicates from Excel, it’s important to note which column you want to remove duplicates from and remember that Excel is removing duplicates within a selected table range. You can highlight the whole workbook or you can just highlight the rows that have data in it.
Excel will automatically keep the first occurrence of the value.
Working on marketing reports or any marketing Excel sheet can leave you frustrated and banging your head against the wall (is it just me?). That’s why using Excel templates and following these simple instructions on formulas can help you level up your game.

The 12 Best Free Graphic Design Software for Marketers and Beginners
When it comes to website success, what you see is what you get. While compelling text, blog, and social media content can help set your brand apart from the competition, the visual appeal of your site is the first thing users see when they follow backlinks or click through search engine results.
Recent research found that it takes just 2.6 seconds for users’ eyes to focus on a specific area of your website. What’s more, it takes just 0.05 seconds for visitors to form a general first impression of your site — meaning you’ve got just one opportunity to change their minds or reinforce this impression, and it happens in the first three seconds of arrival.
As a result, it’s critical to create webpages that are both aesthetically appealing and contextually relevant. For larger businesses, this often means hiring dedicated graphic designers to develop eye-catching designs and deploy them consistently across web pages, but SMB budgets may not support this type of spending.

What is the Best Free Graphic Design Software?
If your research turns up a problem — your images aren’t compelling, your text is hard to read and your color scheme hurts the eyes — you need a simple solution.
Free graphic design software offers the ability to customize the look and feel of your site without breaking the bank. But with a host of options on the market, which is the best fit for your business?
Two broad factors impact this outcome: Your current graphical ability and your potential use case. For example, if you have no experience with graphic tools, look for a solution that’s simple, streamlined, and does most of the work behind-the-scenes. If you have a graphic design background or natural inclination, tools with more robust customization and control may be a better fit.
If you’re planning to revamp your entire site with new colors, images, logos, and menus, you’ll need an in-depth solution that provides this level of control. If you’re starting small with minor changes to your color scheme or image quality, this kind of granular adjustment isn’t necessary.
So which software tool is the best fit for your business? Here’s a look at some of the best free graphic design tools and some pros and cons for each.
The Best Free Graphic Design Software for Marketers and Beginners
1. DesignWizard
Platform: Windows
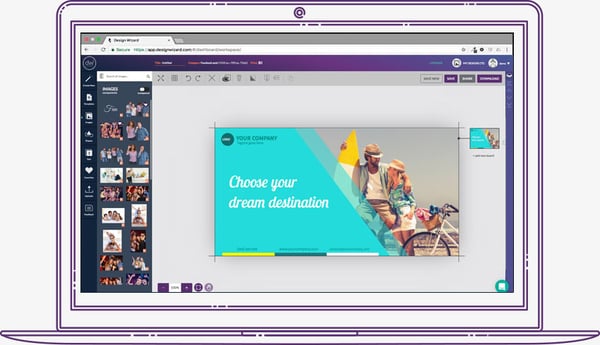
DesignWizard ranks among the best free graphic design software for beginners. The tool offers a large database of images along with a host of free templates (over 10,000), plus a simple, easy-to-use interface. While you can also quickly create custom templates, DesignWizard excels as a front-line, free graphic design tool for beginners.
Despite an easy-to-use interface and no upfront costs, it’s worth noting that most of the more powerful options in DesignWizard are only available in its for-pay version.
2. Setka Editor
Platforms: Windows, Mac
Setka bills itself as “everything you need to create content that converts.” This graphic design software is primarily focused on delivering enhanced content branding across your website, ad campaigns, and social media posts — and works from within your current CMS or in the cloud.
The caveat? Although the Setka Editor is free to try for two weeks, companies will need to select a plan — Starter, Pro, or Enterprise — to unlock the full feature set and keep using Setka.
3. Canva
Platforms: Windows, Mac, Android, iOS
Whether you’re looking to create an ebook, infographic, business card, or email header, Canva has a template to simplify your process. The free web design tool, developed by non-designers, offers professional, easy-to-customize templates for just about any design need you can think of.
The drawback? You might need to invest in the paid version or try one of the more advanced free graphic design softwares as you skill up. While Canva’s free version is great for new designers working with templates, you can access more complex tools and features — such as team sharing — in the paid version.
4. Adobe Spark
Platforms: Windows, Mac, Android, iOS
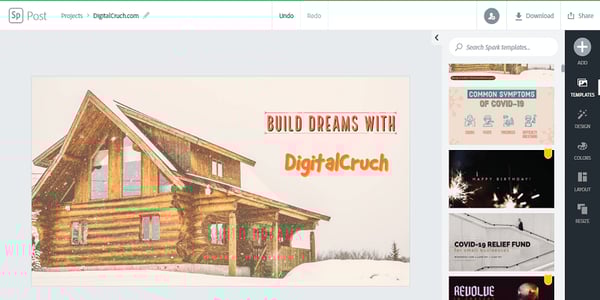
Adobe Spark is a free alternative to the company’s popular, for-pay Adobe Illustrator. While it’s not nearly as full-featured, it does support integration with other Adobe products. It’s easy to use and it comes with a host of free templates. If you’re looking to quickly create posters or videos for ad campaigns, Spark is a great choice.
The potential drawback? A limited feature set makes this a great starting point for beginners but less useful for more in-depth projects or experienced designers. The good news is that Spark is available for both web and mobile, meaning you can design anywhere, anytime.
5. Krita
Platforms: Windows, Mac, Android, Linux
Krita is a free, open-source painting program made by artists, for artists. Ongoing development of this tool depends on donations and is driven by the needs of the designer community at large. It’s no surprise, then, that Krita includes a customizable user interface, feature-rich toolset, and a comprehensive resource manager.
For businesses looking to boost their graphic design impact, Krita is a great tool — if they have the help of an experienced designer. For companies in need of simple, streamlined solutions, other software on this list offers a better fit for beginners.
6. Gravit
Platforms: PC, Mac, Chrome OS, Linux

Gravit is a vector design application created by the makers of Corel Draw. With a host of tools for creating vector art and a self-adjusting interface, Gravit earns its place among the best free graphic design software for Mac and Windows — the tool is also available for ChromeOS and Linux.
Worth noting? When you sign up for a free trial of Gravit you automatically get access to “Pro” features, including the ability to work offline and see version history. However, you lose these features when your trial is up unless you’re willing to pay for a subscription.
7. Blender
Platforms: Windows, Mac, Linux
Blender is an open-source, 3D creation suite that makes it possible for graphic designers to create everything from rigging to animation to rendering and motion tracking. It also provides support for 2D animation and has an active community of users committed to helping Blender improve.
While Blender is a powerful tool, it’s not ideal for beginners — complex menus and a massive amount of design options mean you need to know your way around graphic design basics to make the best use of this tool.
8. Inkscape
Platforms: Windows, Mac, Linux
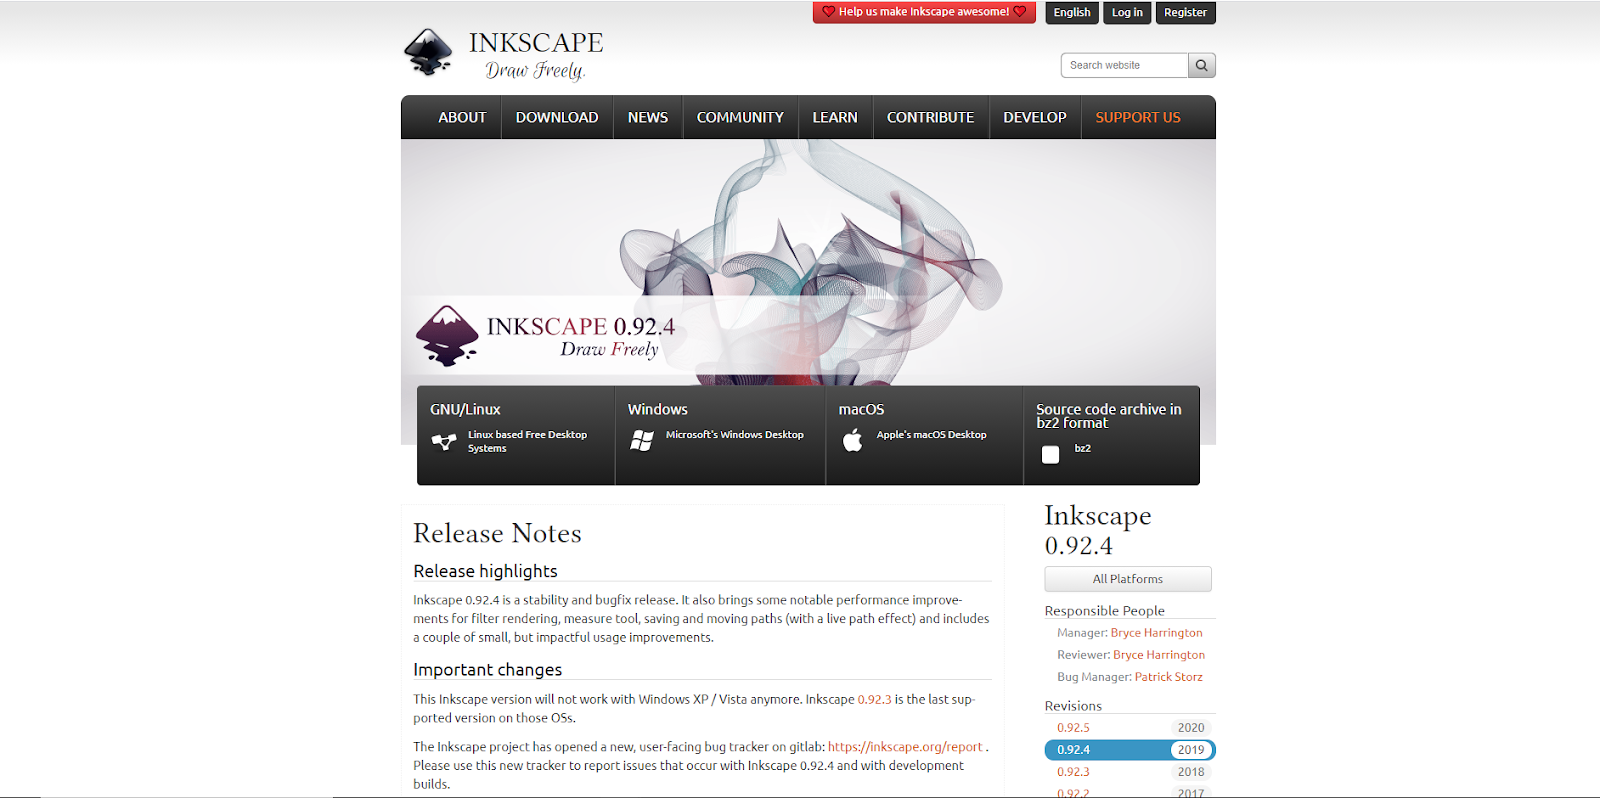
Its tagline is “draw freely” and Inkscape lives up to that mantra — there’s no cost for this graphic design tool and it packs a host of features for both beginners and experienced marketers.
In addition to cross-platform support and an active community, Inkscape is known for superior vector art options and wide format compatibility. One drawback is that the sluggish controls can frustrate some users if they’re looking to quickly create and publish designs.
9. SketchUp
Platforms: Windows, Mac
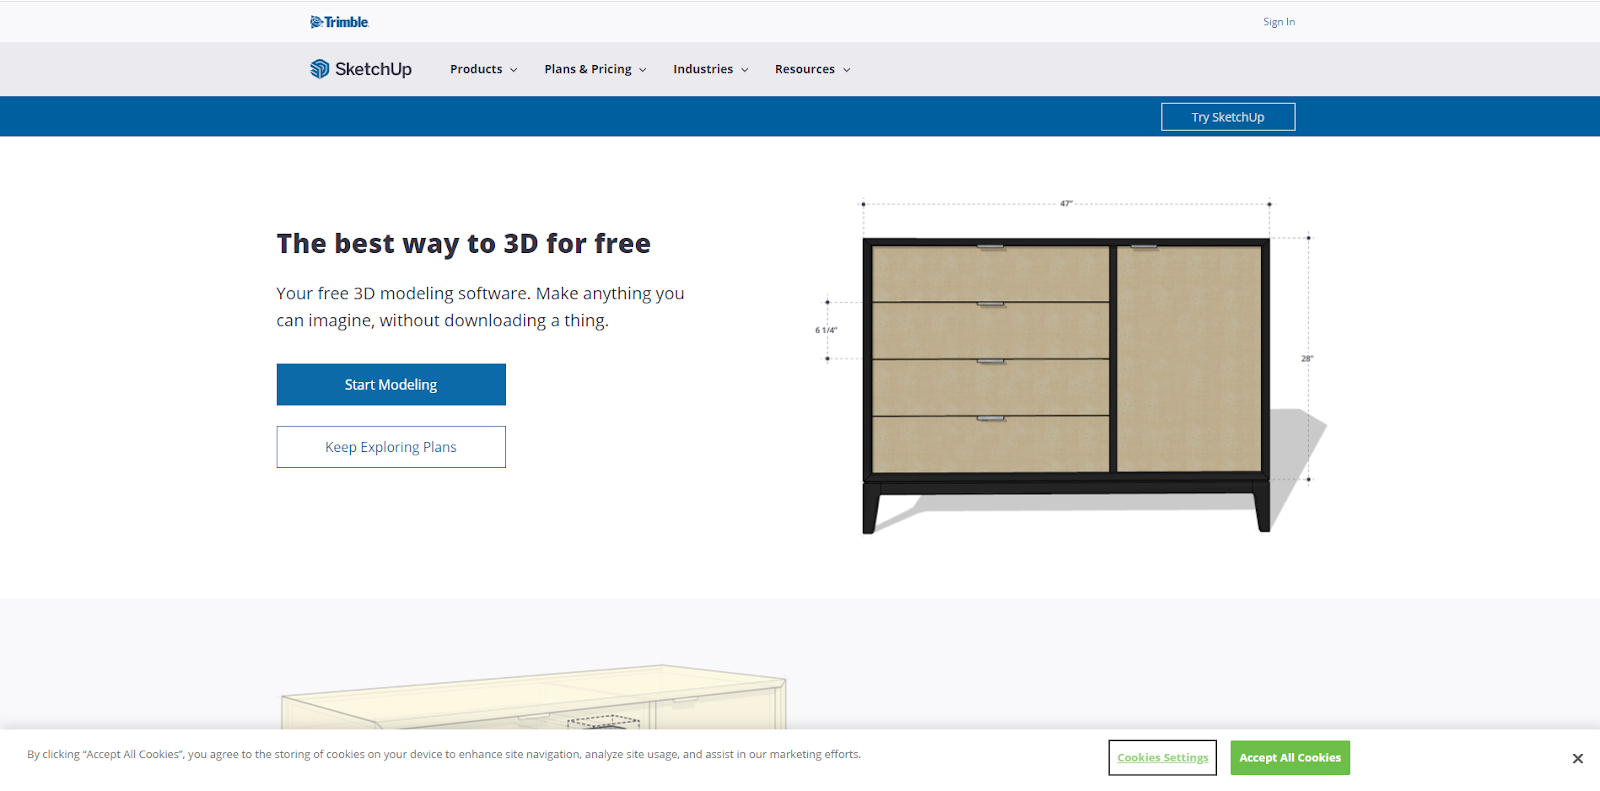
SketchUp offers both free and paid design plans, with its no-cost version still offering substantial advantages for designers. A robust modeling platform, it’s a great tool for creating 2D or 3D designs for furniture or other complex objects.
With an easy-to-use interface and great support, SketchUp is a great tool if you’re looking to create product pages that feature in-depth images and dimensions. Potential drawbacks include limited storage space for free plans and no mobile support.
10. Gimp
Platforms: Windows, Mac, Linux
One of the most popular open-source design tools, Gimp is often compared to its closest for-pay competitor, Photoshop, with users on both sides making passionate arguments for one platform over the other.
Gimp gets high praise as a free design tool for its support of all file formats, ease of digital retouching, and ability to quickly create new designs from scratch. In addition, Gimp features a customizable interface that allows more experienced designers to make use of the tool’s capabilities. Worth noting? Gimp does not support any Photoshop plugins.
11. Genially
Platform: Windows
Genially makes design easy with a user-friendly interface and robust options that allow designers to create their own artwork from scratch. With this software, you can leverage pre-built templates or add interactive features such as buttons, layers, and hidden text. The free version of Genially has no limits on the number of projects you can create and there are now more than 12,000,000 users worldwide designing with Genially and supporting the community.
There is a caveat, however. While the free version is substantive, some features — such as offline viewing and brand personalization — are reserved for paid plans only.
12. Paint 3D
Platform: Windows
The classic Microsoft design tool is back, free, and updated to deliver more functionality. While it can’t compete with some of the more robust design tools on our list, Paint 3D comes with realistic textures, 2D cutout creation, and a host of 3D tools and effects.
If you’re a beginner looking for an easy bar to entry for straightforward graphic design, Paint 3D is a great place to start. There’s virtually no learning curve and since it’s made by Microsoft, the tool naturally works well on all Windows 10 devices.
Picking the Right Platform for Graphic Design
Most of the tools on this list are available on multiple platforms — including PC, Mac, and mobile — but is there a distinct advantage to selecting one platform over the other?
The short answer: Not really. These tools offer the same functionality regardless of which platform you choose.
The not-so-short answer? For beginners, opting for PC or mobile is probably your best choice. While Macs remain a powerhouse for graphic design, their user interface (UI) is less intuitive than their PC and mobile counterparts. This presents a learning curve you likely don’t need if you’re just getting started with graphic design.
For graphic design professionals and marketing experts, Mac-based solutions may be preferable for their focus on function over form.
Creating a Great First Impression
The first thing users see when they land on your website significantly impacts their perception of your brand — and their likelihood to become paying customers. The right graphic design software ensures your site delivers visual value from first impressions to eventual purchases and streamlines the process of ongoing aesthetic adjustment.
This post was originally published in Dec 2020 and has been updated for comprehensiveness.


The 9 Best Ways to Send Large Files
We all know the frustrating feeling — maybe you’ve finally finished the script for your next marketing video, or you’ve collected all the images you need for your next campaign. But when you go to press “Send” you’re told, “Sorry. File too large.”
Unfortunately, our email accounts can’t carry as much storage as you might think. Gmail, for instance, can only hold files up to 25 MB.
Additionally, large files can eat at your storage space, even if it’s just sitting in your Sent folder.
If you’ve got a file you can’t send the traditional way, don’t worry — we’ve got nine easy and cheap alternatives, to ensure the largest of files can be sent to whoever, within minutes.
1. Upload your files to a cloud storage space, and share them or email them to others.
Using a cloud storage space like Google Drive, Dropbox, or OneDrive is one of the easiest and most popular methods for sending large files. Depending on your email provider, you’ll likely be able to use a corresponding cloud storage — like Google Drive for Gmail, or OneDrive for Outlook.com.
If you’re sending an attachment within a provider like Gmail, you’ll see the Google Drive button already integrated. Simply press it, choose your file, and then send it like a regular attachment.
Alternatively, Dropbox allows you to upload large files and then send a web link via email or text to your recipient. With Dropbox’s free tier, you’ll receive 2 GB of storage space. For $9.99 per month, you can increase your storage to 1 TB.
Specific Use Case: Ease-of-use when sending attachments through your email provider. Most likely to use when sharing files internally with colleagues.
2. Use file compression software, like 7-Zip.
If you have multiple files, you might consider using a free compression software like 7-Zip, which can compress an entire folder of files at once. Zip files in general support lossless data compression, and are good for saving time and space while ensuring your files remain intact. Most operating systems can extract Zip files easily, without additional software.
7-Zip is available for Windows, Mac and Linux. You can also provide a password for your files with 7-Zip, to ensure they’re safe to send online.
Specific Use Case: Sending a folder full of files at once to a recipient.
3. Purchase a USB flash drive.
If you want to collaborate on a project or video with a large storage size, you might consider uploading it to a USB flash drive, which can range in size from 2 GB to 1 TB. This might allow you to pass your files more easily between coworkers, or back your files up for additional protection.
Best of all, if you use a USB you can take some strain off your computer, extending its data storage.
Specific Use Case: If you’re interacting with your team in-person, a USB flash drive is a good option for physically handing files to team members, and takes some of the storage strain off your devices. Alternatively, a USB flash drive is safe to use as a back-up, so if your computer crashes you don’t lose access to your files or folders.
4. Use Jumpshare, a free online service.
There are plenty of free online services that make uploading and sending large files both easy and incredibly quick. Jumpshare, for instance, lets you send up to 250 MB worth of files with a free account — simply upload a file or folder, and Jumpshare provides you with a link to share the files.
Plus, you can download the Jumpshare icon to your desktop. When you drag-and-drop files onto it, a link will be copied to your clipboard, which you can send to anyone, even if they don’t have their own Jumpshare account.
Specific Use Case: Easily, and quickly, sending files via links to colleagues. Best used for files or folders for which there isn’t too many privacy concerns, since the link is shareable with anyone.
5. Try Sendy PRO.
Sendy PRO, the paid version of Send Anywhere, provides 1 TB of cloud storage and unlimited Cloud storage to transfer large files. What sets this tool apart from the rest is the ability to send your files using a 6-digit key with recipients, so you can share files without needing access to everyone’s email addresses.
Alternatively, you can send a link through email or a company messenger, like Slack, when you don’t need to transfer the files in real-time.
Sendy PRO enables you to attach big files using Chrome Extension, Outlook add-ins, and Send Anywhere’s website. It’s $7.99/month for the PRO version — or you can try the free version if you don’t need the PRO features.
Specific Use Case: The 6-digit key enables you to quickly message or send files to anyone, without needing an email address. This might be good for quickly Slacking files to colleagues, or texting a file to a friend.
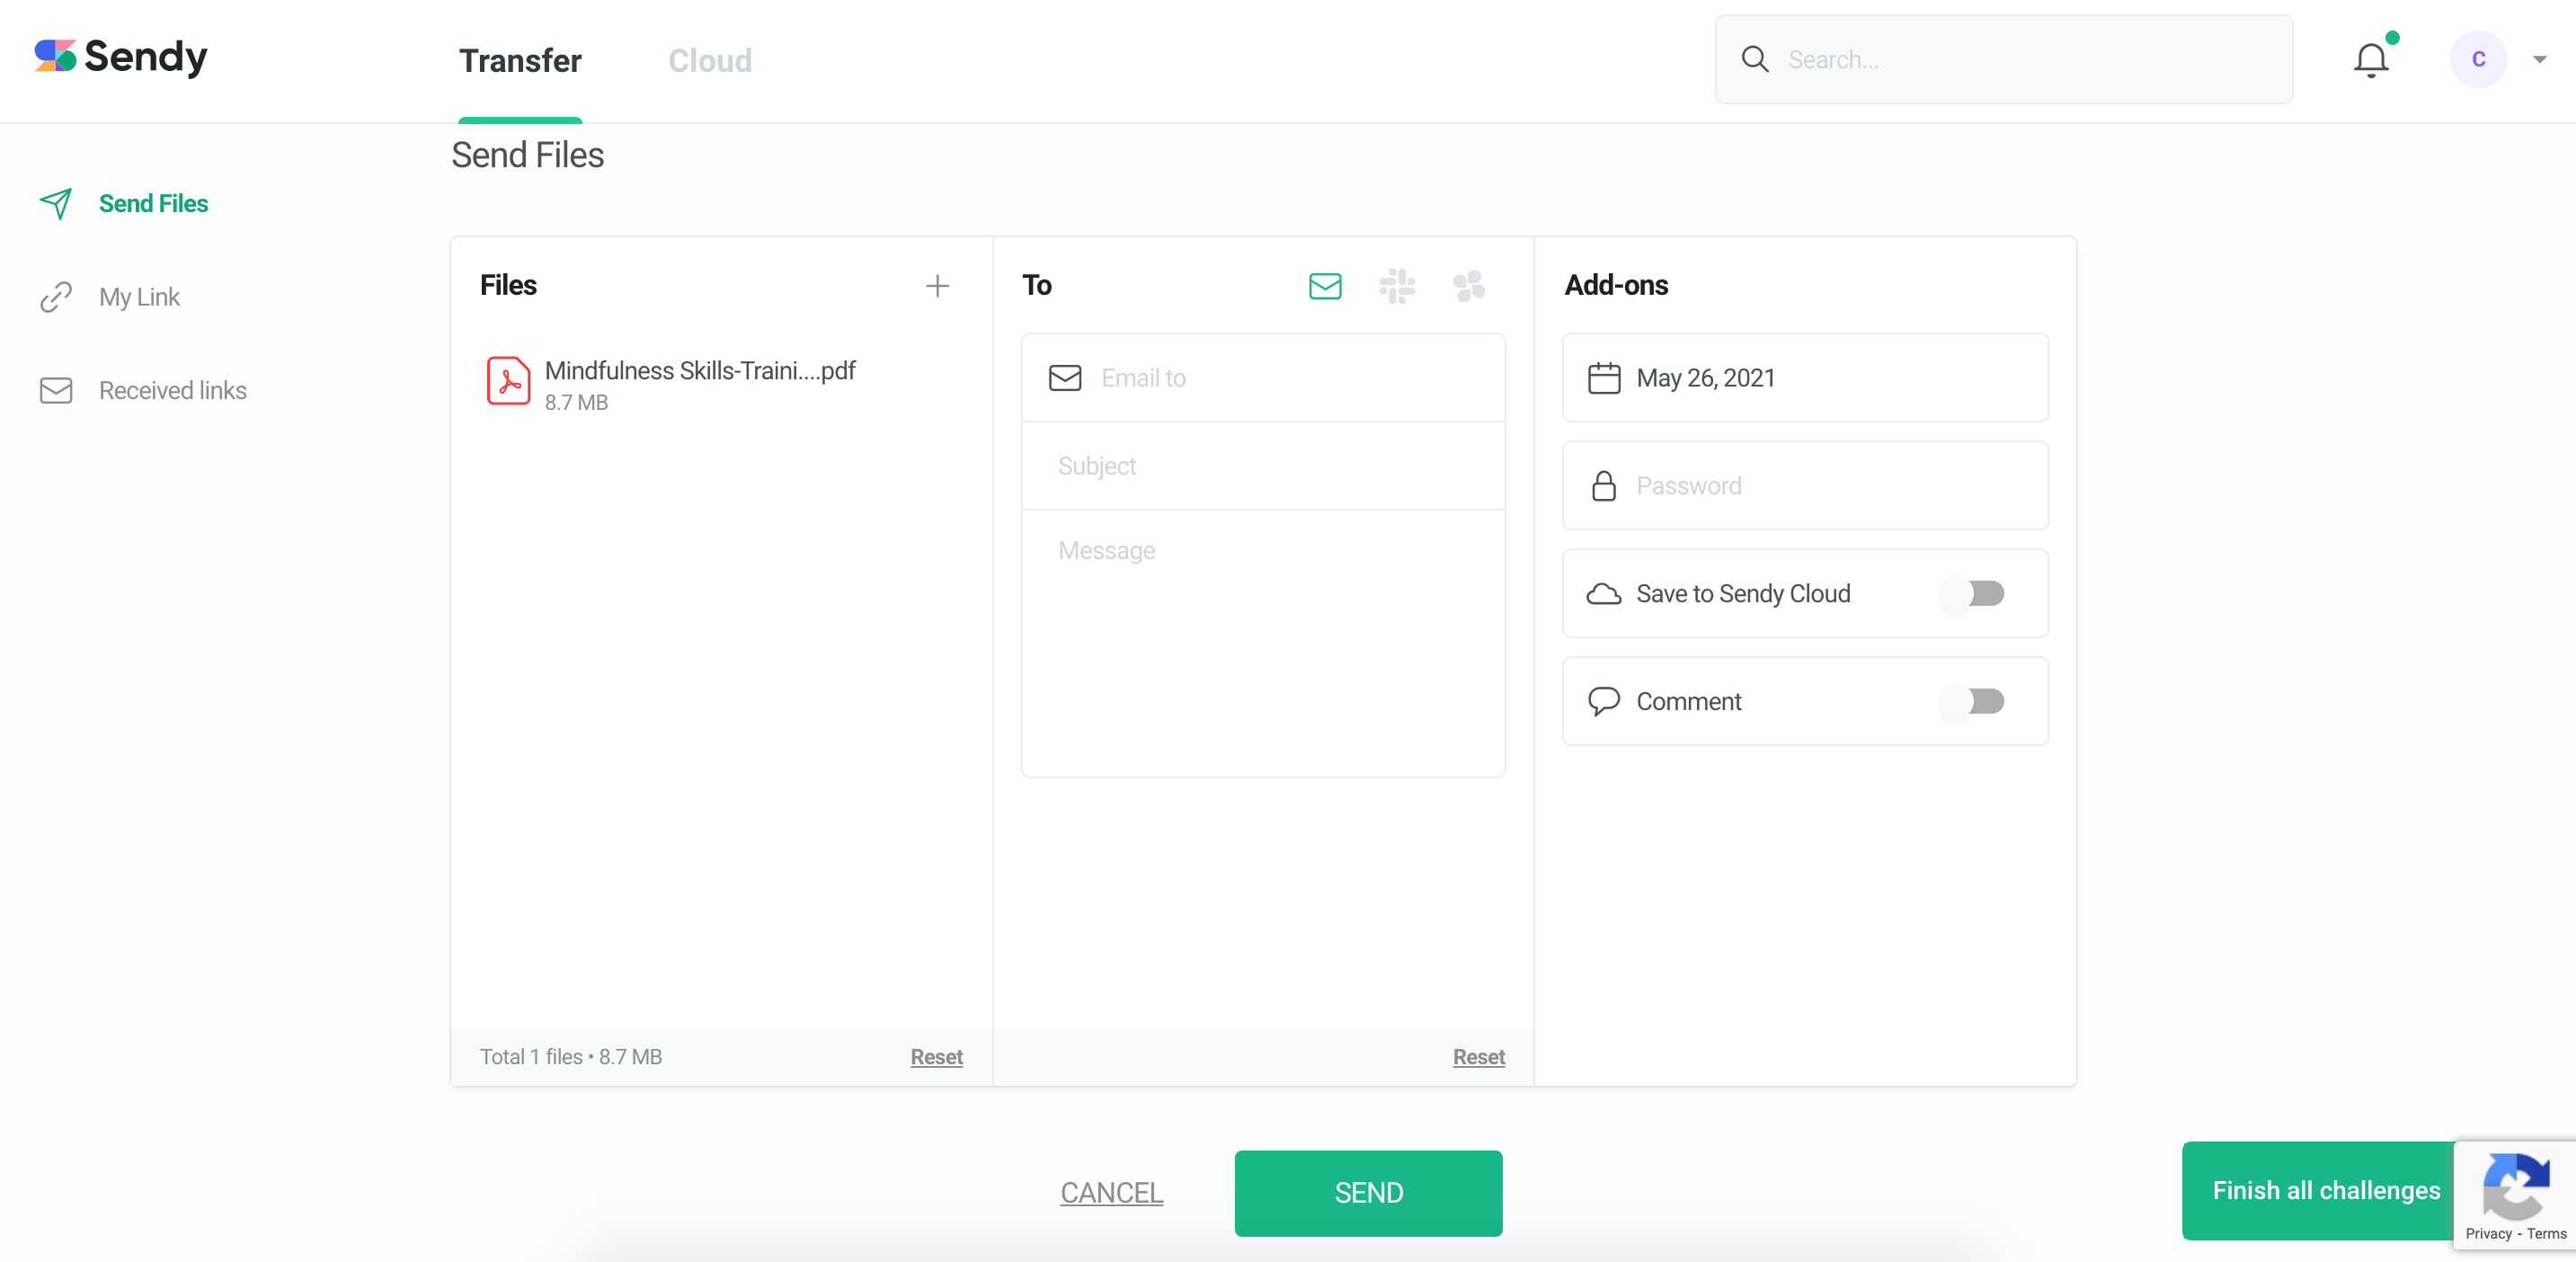
6. Use a VPN.
A VPN, or Virtual Private Network, is a service that protects your data and provides you with more privacy when you’re online by routing your internet connection through a server. A VPN can protect you from hackers, or even online ads, and is a secure option, particularly if you’re often using public wi-fi.
Some internet service providers (ISP) use broadband traffic management to moderate upload bandwidth — if this is the case for your ISP, you can use a VPN, which will prevent your ISP from recognizing how large your files are, enabling you to send them.
However, this isn’t the best option in our list for two reasons — one, the large file could slow down your VPN connection, and two, your files aren’t guaranteed to be intact upon delivery. To ensure a high-quality delivery, you might want to try an alternative option, like a Zip compression.
Specific Use Case: If you’re using public wifi and you’re sending private documents, this is a good option for increasing security measures. However, this may not be the best option if you need to ensure high-quality delivery.
7. Transfer files using SFTP.
FTP, or File Transfer Protocol, is an option for transferring files online by uploading a file to your hosting server. However, the disadvantage of FTP is that it isn’t that secure — which is where SFTP comes in.
SFTP — or Secure File Transfer Protocol — is a protocol that works in a similar way to FTP, except it uses secure shell for encryption. This is a good option for limiting accessibility to those outside your recipient list. Some of the other options in this list, including file transfer options that rely on email, are likely less secure than an SFTP.
Specific Use Case: A more secure option than traditional online file-sharing, to be used when sending highly classified files to colleagues or clients.
8. Upload the file and generate a link to share via MyAirBridge.
MyAirBridge is a free tool that enables you to upload and share up to 20 GB through an email, shared link, or downloaded to your own storage space. You can use your own mobile device to upload files. For larger files the uploading takes a while, and it may not be the cleanest interface on the receiving end (the link your recipient receives takes them to direct download), but it gets the job done for personal or small team use.
MyAirBridge also offers plans ranging from Basic ($2.99/month) to Enterprise ($65.99/month). With the Enterprise option, users have access to 15 TB of storage, unlimited uploads of up to 100 GB, and the option to password-protect files for extra security.
MyAirBridge is a good option if you want to download various files (including music or video files, game applications, or documents) to your own storage space. For instance, you might use the tool to download music from your mobile device to your computer.
Specific Use Case: Download files to your own storage device, or use when downloading music, gaming, or video files.
9. Share a collection of assets to your team via Brandfolder.
Consider sharing brand assets, or a collection of assets, with your team, partners, or customers using Brandfolder. Brandfolder lets you use tiered access to share files with intended individuals, and even measure performance of each asset using Brandfolder’s Brand Intelligence feature.
Used by major brands including Slack, Bumble, and Hotels.com, Brandfolder enables you to store all brand-related assets in one place. Brandfolder is cloud-based, and uses user-level permissioning to ensure employees and clients only have access to the appropriate files and folders.
Brandfolder offers Premium and Enterprise options. Request a quote to learn how much it would cost for your team to implement.
Specific Use Case: A more professional-looking option when sharing brand-related assets with clients or agencies, and a good long-term solution for storing all major files in one place for your team to access easily.

What Are the 4 Ps of Marketing? The Marketing Mix Explained [Example]
If you’ve been a marketing professional for years now, learning about the four Ps of marketing might seem like a throwback to you.
However, for those of us who work in the industry but didn’t study marketing in college, it’s entirely possible you haven’t heard of the marketing mix.
Below, let’s learn about the four Ps of marketing and how they’re still relevant in today’s marketing landscape.
![→ Free Resource: 4 Marketing Mix Templates [Access Now]](https://no-cache.hubspot.com/cta/default/53/c79f682e-61ec-4234-80b3-0b1f3833ee30.png)
The four Ps are meant to help marketers consider everything about a product or service when they’re deciding how to market it for their business. Framing your marketing around the four Ps will help you learn what the competition is doing and what customers want from you.
You can use the four Ps to answer questions about the product, price, place, and promotion of your product or service.
For example, you can ask yourself:
- Product: How does your product meet your customer’s needs?
- Price: What is the value of your product?
- Place: Where are customers looking for your product?
- Promotion: How can you differentiate your product from competitors?
Thinking about your marketing in terms of the four Ps will help you strategize how to reach your customers. The four Ps of marketing are also known as the marketing mix.
To develop a marketing mix, you’ll need to think about how you can uniquely position your brand amongst the competition. The most important part of thinking about the marketing mix — or the four Ps of marketing — is to understand the customer, the competition, and your company. You’ll evaluate your product and how to promote it.
But getting started isn’t easy. That’s why we’ve created the ultimate collection of marketing mix templates you can use to visualize your marketing mix and share it with your employees or investors. Use the templates to organize your initiatives and activities by the right section.
Featured Resource: Marketing Mix Templates
Click here to download the templates for free.
Use the template to follow along with the 4 Ps of marketing below.
The 4 Ps of Marketing (Example)
1. The First P of Marketing: Product
When you think about your product, consider exactly what you’re selling. Is it a specific product? Or is it a service? Your product can be a physical product, an online app, or a service such as house cleaning. Really, anything that you’re selling is the product.
Then, think of your brand messaging, the services you offer, and even packaging. When you define your product, think about what problem your product solves for your customers. Consider how your product is different from competing products. What features are unique to your product?
It’s important to know your product intimately so you can market it.
Product Example
We’ll use Marketing Hub as an example.
What is it? “Marketing automation software to help you attract the right audience, convert more visitors into customers, and run complete inbound marketing campaigns at scale — all on one powerful, easy-to-use platform.”
Who is it for? Modern marketers who juggle too much data and who are stuck with impossible-to-use software solutions that make their job harder, not easier.
Which features does it have? Marketing Hub offers blogging, SEO, social media management, email marketing, and ad tracking tools in a single, intuitive platform.
What problem does it solve? Marketing Hub simplifies the marketing automation process for busy marketers by bringing all data and tools under one roof.
2. The Second P of Marketing: Price
When it comes to price, you have to consider how much you’re going to charge customers for your products or services. Of course, you need to make a profit.
When coming up with your pricing strategy, you also need to think about what competitors are charging for the same product or service and how much customers are willing to pay. You can also think about what discounts or offers you can use in your marketing.
When you decide on a price, you want to think about perception. Do you want to be known as a cost-effective option in your industry? Or perhaps you’re a luxury brand and the price is slightly higher than competition on the market. Keep in mind that pricing SaaS products is a little different than pricing physical products.
Either way, the language you use to market your product will be greatly impacted by the price of your product.
Download a sales pricing calculator for free.
Price Example
Marketing Hub is priced to grow with you as you grow.
We offer the following subscription tiers:
- $0/month (Free)
- $45/month (Starter)
- $800/month (Professional)
- $3,200/month (Enterprise)
3. The Third P of Marketing: Place
When it comes to place, this might mean the physical location of your company, but it could also be defined as anywhere you sell your product, which might be online.
The place is where you market and distribute your product.
Remember that not every place makes sense for every product. For example, if your target market is seniors, then it won’t make sense to market on TikTok. It’s important to choose the right places to market your product and meet your customers where they’re at.
Think about possible distribution channels and outlets you could use to sell your product. Be sure to take into account whether your business is B2B or B2C.
At this point, you’ll need to think about how to market your product on all the various channels that make sense for your company.
Place Example
As a provider of a SaaS product, we offer Marketing Hub directly on our website.
Marketers can sign up for Marketing Hub by creating an account directly on our platform. We’ve created a convenient sign-up page for free subscriptions — or they can request a demo from our friendly sales team.
4. The Fourth P of Marketing: Promotion
Promotion is the bread and butter of marketing. This is when you’ll think about how to publicize and advertise your product.
Additionally, you’ll discuss brand messaging, brand awareness, and lead generation strategies.
When it comes to promotion, keeping communication in mind is of the utmost importance. What messages will resonate with your target market? How can you best promote your product to them?
Think about where, when, and how you’ll promote your brand.
Promotion Example
We want to be where marketers are. Most importantly, we want to help them grow in their careers — as well as grow their businesses.
Our inbound marketing strategy will focus primarily on organic acquisition. We’ll promote Marketing Hub over the following channels:
Use the 4 Ps of Marketing to Create a Winning Marketing Strategy
Even though marketing has changed since the four Ps were developed, the foundational elements of the industry haven’t. You can apply the concepts of the marketing mix to create winning marketing strategies that help you profitably launch and promote your company’s products.
Editor’s note: This post was originally published in October 2020 and has been updated for comprehensiveness.

How to Write a Letter of Interest in 2021 [Examples + Template]
It’s one of the worst feelings in the world.
You’ve spent weeks perfecting your resume and crafting the perfect cover letter, and you’re finally ready to submit your application for your dream job.
But when you scan the company’s careers page, panic starts pouring over you. The job you wanted to apply for is no longer open. It’s gone. And as you stare at your laptop screen in shock, you can’t help but think you’ll never be able to join your dream company.![→ Click here to access 5 free cover letter templates [Free Download]](https://no-cache.hubspot.com/cta/default/53/3f347702-d7e9-4e59-9fe4-be4cd7bad191.png)
What should you do in this situation? You can’t just put your job search on pause until the company opens the position again. How do you express interest in joining a company when the position you want isn’t currently available?
One of the most effective ways to grab a hiring manager’s attention and get your foot in the door is by writing a letter of interest to the company.
What is a letter of interest?
A letter of interest lets a company know that you want to work for them in a role for which they’re currently not hiring, or haven’t actively posted about on a careers page.
In hopes that the company will contact you when they do open this position or another relevant position, your letter of interest focuses on how your skills can benefit the company, not how the company can benefit you. You can send a letter of interest at any time, regardless of whether the company is actively hiring.
Sending a letter of interest is a great way to introduce yourself to a company, and it shows them you’re willing to take the initiative to proactively reach out.
This can keep you top-of-mind when the company starts recruiting for the job you inquired about. If hiring managers are particularly impressed, they might even create a position just for you.
Other times, sending a letter of interest can lead to a coffee chat or an informational interview with the hiring manager of the team for which you want to work.
Writing a letter of interest sounds like an easy way to get your foot in the door at any company, but it’ll only pique a hiring manager’s interest and elicit a response if it actually resonates with her.
To do so, we recommend following a formula called problem-agitate-solve. It’s modeled after an old copywriting framework and has helped one job seeker skyrocket her cover letter response rate from 0% to 55%. We’ll flesh it out below.
How to Write a Letter of Interest
To compel a hiring manager to read your letter, respond to it, and consider you for a job, there are four crucial elements you need to include in your letter of interest.
Featured Resource: 5 Professional Cover Letter Templates
 Download These Templates for Free
1. Hook the hiring manager with proof that you understand her problem.
Hiring managers don’t hire people just to be nice. They hire people to help them run their team better. To immediately grab a hiring manager’s attention, you should show how you understand the problems she’s trying to solve, like the hook below:
“As a two-year blogging veteran in the marketing technology industry at companies like Return Path and SlideBatch, I know how hard it is to write well. I also know how challenging it is to get found on Google.”
By describing a similar experience you’ve had at your current or prior job, you can relate to her on a deep level, which will engage and prompt her to read the rest of the letter.
The hardest part of this step is discovering the hiring manager’s problems. One way to figure it out is by listing off the job’s responsibilities and asking yourself why these tasks are important to her team. If you keep analyzing until you reach a dead end, you’ll usually find her needs there.
2. Highlight the problem to remind the hiring manager she needs a solution.
How do you make a hiring manager realize how valuable a solution could be? You remind her just how painful her problems are. And to make her visualize her dreaded problem as vividly as possible, you need to be specific, just like the example below:
“According to HubSpot’s careers page, you’re not currently hiring, but, in the future, if you’re looking for someone who can not only engage an audience with clear, concise, and compelling blog posts, but also optimize them for search engines, while hitting every deadline, you can count on me.”
When she realizes how much pain she’s actually in, she’ll have more of a sense of urgency to resolve it. And this’ll push her to respond to you because you might be her fastest route to a solution.
3. Prove that you’re the solution with an example of your skills and experience.
If you’re really the solution to her problems, you must prove to the hiring manager how you’ve used your skills to solve similar paint points in previous experiences. Then, you should describe how you’ll be able to use those learnings to help solve her current problems. Check out the example below:
“Last year, at Return Path, I was the top performing blogger, writing weekly posts that averaged 7,500 views, 1,000 social shares, and 35 new blog subscribers gained. The year before, at SlideBatch, I devised and implemented a new keyword strategy that increased organic page views for our Visual Marketing 101 blog series by 15%.
I’ve read HubSpot’s blog every day since I started my content marketing career, and I’m inbound, content, and email marketing certified, so I strongly believe I’ll be able to hit the ground running if I were to work on HubSpot’s blog team one day.”
By quantifying your accomplishments and researching the company’s pain points, you’re proving your worth. But if you just list your skills and work experience, you’re only proving to the hiring manager that you’ve failed to make an impact.
4. Confidently request to move on to the next step.
At the end of your letter, you should express your interest in exploring upcoming opportunities or ask her to keep you top of mind when an opportunity opens up, like the call to action below:
“I’d love to learn about any upcoming roles on your team or be considered for a position later down the road. My resume is attached, and my contact details are listed in my email signature below. Thank you for your time! It was a pleasure connecting.”
These call-to-actions are crucial because they tell her how to get the ball rolling. If you don’t tell the hiring manager what to do next, then nothing will happen.
Letter of Interest Samples
All together, a successful letter of interest might look like this:
Letter of Interest Template
Hi [Hiring Manager’s First Name],
As a [X]-year [Your Profession] veteran in the [Space You Work In] industry at [Most Prominent Companies You’ve Worked For], I know how hard it is to [Pain Point #1]. I also know how challenging it is to [Pain Point #2].
According to [Company] careers page, you’re currently not hiring, but, in the future, if you’re looking for someone who can not only [Solution for Pain Point #1], but also [Solution for Pain Point #2], you can count on me.
Last [Specific Timeframe], at [Current or Old Company], I was the best performing [Your Profession], [List Your Responsibilities and Describe the Impact You Made]. The [Specific Timeframe] before, at [Current or Old Company], I [List Your Responsibilities and Describe the Impact You Made].
[Show Hiring Manager that You’re a Voracious Learner and You Regularly Keep Up with Company News], so I strongly believe I’ll be able to hit the ground running if I were to work on [Company] team one day.
Whether I’d be [What the Team is Working on Now], I’m confident my skills and experience can help your team crush their goals.
I’d love to learn about any upcoming roles on your team or be considered for a role later down the road. My resume is attached, and my contact details are listed in my email signature below. Thank you for your time. It was a pleasure connecting!
Sincerely,
[Your Name]
Steps to Take Before You Send Your Letter of Interest
After you finish writing your letter of interest, you need to make sure the company will actually open it. So before you send your letter, it’d be ideal if someone on the team personally knows who you are.
To do so, ask your connections or alumni that work at the company to introduce you to the team’s hiring manager. If you can’t do that, you could add the hiring manager on LinkedIn, tell her why you want to connect, and send her your letter of interest.
Getting your foot in the door will ultimately help you stand out from the crowd of job seekers who are all sending the same “hire me” pitch to her.
Editor’s Note: This post was originally published in May 2018 and has been updated for accuracy and comprehensiveness.


What Domain Authority Is (and Isn’t), and How to Increase It
Some companies and brands use Domain Authority (DA) to study and evaluate the results of their digital strategies.
But what does this metric really mean? Should we really strive to improve it? Will a high domain authority help us rank better on Google?
Domain authority can be a very useful metric to know the status of a website in relation to similar competitors, but we must emphasize that it is not a ranking factor for Google.
In this post, we’re going to define what domain authority is — and what it isn’t — and what you’ll want to take into account to optimize it.
![→ Download Now: SEO Starter Pack [Free Kit]](https://no-cache.hubspot.com/cta/default/53/1d7211ac-7b1b-4405-b940-54b8acedb26e.png)
What is domain authority?
It is really important to define what domain authority is and what isn’t in order to point your digital strategy in the right direction.
Domain Authority (DA) is a metric first developed by Moz that predicts how likely a domain is to appear in the SERPs compared to its competitors:
 It’s important to highlight that Google doesn’t use Domain Authority as a ranking factor to decide how to rank websites. So it isn’t a metric that will improve your ranking in the search engine results page (SERPs). However, domain authority is a good indicator that will help you assess the performance of your website in relation to competitors.
Nowadays, this metric is not only used by Moz. Different SEO tools such as SEMrush have developed their own Authority metric — which is an algorithm that uses data from backlinks, referring domains, or search traffic, among others, to decide the Authority score. So, although it isn’t an official ranking factor used by Google, it’s a useful metric to know your site health in relation to your competitors.
What’s a good domain authority score?
Moz’s Domain Authority search engine ranking score ranks from 1 to 100, with the higher numbers meaning probability of better results in the SERPs. To define this metric, the SEO tool takes into account both the quantity and quality of links that a webpage receives.
If a page has backlinks from pages with a high authority — such as Google, Wikipedia, governmental pages, renowned newspapers or magazines — it will have a higher probability of having a better score.
Depending on the type of industry or the characteristics of the website, it will be more likely — and more useful — to get some backlinks over others.
For instance, a training center may seek links from national newspapers, universities, and academic articles or government sites. A local business website, on the other hand, likely prefers being linked to by regional newspapers or industry magazines, since those backlinks are more valuable to the business’ target audience, even if they don’t have the highest domain authorities.
Determining good domain authority, then, is different for each business. Ultimately, it’s important you analyze your top competitors and draw conclusions tailored to your own website, based on your ranking as well as the rankings of your competitors.
How can I check my Domain Authority?
On Moz, you can check your website’s Domain Authority for free through Link Explorer. You just need to enter your domain’s root URL (like HubSpot.com) and your webpage’s Domain Authority score will appear automatically.
The digital tool provides other features, as well — such as the number of unique external linking domains (Linking Domains), the number of unique pages linking to a page (Inbound Links), and the total number of keywords for which this website is ranking within the top 50 positions on Google (Ranking Keywords), among other metrics.
Domain Authority vs. Page Authority
While Domain Authority measures the probability of an entire web domain to rank in the SERPs, Page Authority focuses specifically on the probability of ranking each of the pages of the website individually.
This enables you to determine the performance of individual pages — such as blog posts or product pages — to analyze which ones might need some fine-tuning to obtain a higher score.
The Page Authority indicator can help you prioritize and define the next actions to develop within your digital strategy based on the pages with the most scope for improvement.
How to Build Domain Authority
Now, let’s take this into practice: how can you build domain authority and rank better than your competitors?
As Google points out, It isn’t just about the total number of links to your site or the total number of domain links, but the quality of those links, the ones that are relevant to understand what your website is about.
To build Domain Authority, here are a few tips to keep in-mind:
- Quality, before quantity. Prioritize relevant backlinks, before thousands that aren’t significant.
- Analyze your backlinks, and make sure that all the interesting sites with backlinks have a do-follow.
- Create quality content, which makes it easier for you to get natural backlinks.
- Generate content focused on your core audience, which can be attractive to them and go viral.
- Update your older content. Go through those pages with unindexed content or with a low page authority score and add new information of interest for the user.
- Identify your competitors and compare yourself to them. Analyze things that you do and don’t do that can help you increase your website’s visibility.
- Study where your main competitors get the backlinks from. Can you get similar ones, too?
- Spread your web content, in an original and unique way, through other channels such as social media or newsletter.
Building your Domain Authority is a long-term strategy — it takes time and you don’t see immediate results. However, following these practices will help you increase your website visibility on SERPs with the aim of increasing traffic to your site.
Work on these actions to focus on increasing the quality and quantity of leads rather than just your Domain Authority score.


Ultimate Guide to Hero Images [Best Practices + Examples]
Whether or not you realize it, you judge every website by its visual appeal. And it only takes about 0.05 seconds to form an opinion. That means the hero image (the first photo, graphic, or video people see) has to be eye-catching enough to keep people scrolling the site.
High-quality hero images are the key to a great first impression. If done well, they represent the essence of your brand identity and the overall theme of your web page.
Yes, it’s a lot of weight for one piece of visual content. That’s why it’s the most heroic of all.
This guide will explain how to level up your website with the perfect hero image, from choosing a graphic inspired by the latest design trends to ensuring your image is the optimal size. We’ll also walk through hero image examples to spark ideas for your own website. Get ready for some design eye candy.
Hero Image In Web Design
If engaging visuals are the sprinkles on top of every great design system, a hero image is the shiny, red cherry. It draws your eye in and makes you want more.
In web design, a hero image is the first photo, graphic, illustration, or video people see on a web page. It typically incorporates both an image and text in order to convey a company’s core message. Hero images sit above the fold and often feature a call to action (CTA) that encourages people to dive deeper into the website. The goal of this image is to add energy and excitement to a page. You want it to show off your brand’s style, share the purpose of your site, and make people excited to explore.
A good hero image can elevate your traffic and conversions by making people want to interact with your site. Animation, carousels, and scroll-triggered effects are ways to flex your creativity beyond typical stock photography. But a bad image can bring down an otherwise great design. Off-brand visuals, large files that slow loading speed, and meaningless copy can ruin the user experience.
One common mistake when designing a hero image is getting the right file size. Too large, your loading speed plummets. Too small, everything looks pixelated. Let’s walk through the different hero image sizes so you can create a stunning image every time.
Hero Image Dimensions
Finding the right aspect ratio and cropping can get confusing when sizing a hero image. Banner hero images aren’t the same as full-screen images, and every image has to scale to fit the space. You also have to consider that no one browses in exactly the same way. Personally, my screen is usually zoomed in to 120%, but others may have dozens of tabs open that are all different sizes.
Some image cropping is bound to occur as your hero image scales to fit a variety of screens, so it’s best to think of the following dimensions as guidelines, not rigid rules.
1. Full-Screen and Banner Image Dimensions
The ideal size for a full-screen hero image is 1,200 pixels wide with a 16:9 aspect ratio. For a banner hero image, the ideal size is 1600 x 500 pixels.
If you need crystal-clear images, or your target audience browses on large screens, you may have to size up to 1,800 pixels. Keep in mind this can result in a large file size that slows down your site.
You can check your loading speed for desktop and mobile with Google’s PageSpeed Insights. It gives a comprehensive look at which site content loads first and where there’s room for improvement. Aim for a page load time of one to two seconds because you’ll likely lose people if it’s over five seconds.
2. Mobile Hero Image Dimensions
The ideal size for a mobile hero image is 800 x 1,200 pixels.
While it’s important to consider how your hero image looks on a desktop, you can’t ignore the mobile experience. Nearly 55% of global website traffic in 2021 is generated on a mobile phone.
Your hero image design must be responsive and fit a vertical (phone) and horizontal (tablet) orientation. Dynamic hero images, like videos, do well on a desktop, but they often have to be swapped out for a static image for mobile. Videos take more time to load, and no one wants to take a massive hit to their data plan just to see your site.
3. Hero Image Compression
You want to compress your hero image if you have a large file size (anything over 1MB is too big). You can use sites like TinyJPG, Compress JPG, or Adobe’s Photoshop Compressor to decrease the size without reducing quality. Just make sure to get the dimensions right beforehand or the image may appear blurred or stretched.
When sizing a hero image, check your Google analytics to see the typical screen resolution of your website visitors. Then, design with that target audience in mind. Just remember to test out your hero image on multiple browsers, screens, and phones to see how it scales. Once you have the dimensions right, it’s time to work it into your web page using HTML and CSS.
Hero Image HTML
HTML is a coding language made up of elements used to give structure to a web page. It creates order and lets you embed content (like hero images) into a site.
Creating a hero image with HTML ensures your visual appears on a web page, while CSS makes it look good on a screen. Both require coding skills, so you may need to brush up on your HTML and CSS knowledge or enlist the help of a developer.
The main things to keep in mind are:
- The hero image needs to be centered.
- The text needs to be easy to read.
- It has to look great on all screen sizes.
- The image should cover the entire viewport.
Follow these steps to set up an eye-catching hero image. Note: The examples below include HTML elements and CSS rules, but I’ll explain the difference between the two later on.
1. Create the structure.
Set up two containers for your hero image using the coding conventions of your website. For instance, the first example below uses .hero for the structure and .hero-content for the image, text, and button, while the second uses .image-container and .inner-container.
2. Add your content.
Once the structure is in place, it’s time to personalize your image. Add an image, choose a custom font, craft a header and subheader, and create a button with an enticing CTA. If you want to add a filter to your background image (without applying it to the text), DeveloperDrive recommends including the filter before your .hero-content code.
Notice how the width and height under the .hero section are set to 100vw and 100vh. This ensures the image fits the entire viewport, both vertically and horizontally, so it spans the whole screen.
No hero image is complete without a button that drives people to take action. Incorporate one into your image with the <button> element. Just make sure to include the font-family since the text doesn’t automatically translate from the .hero-content element.
3. Center the content.
Not all hero images have centered text, but most have a centered image. To align your background image, you can make a flex container by incorporating display, justify-content and align-items under your .hero element.

For centered text, include a .text-align: center rule under your core content element. In the following example, the text is nested under the .hero-content code.

4. Make it responsive.
You want your hero image to look good no matter the screen size. Setting media queries allows you to create parameters so your image is responsive at a particular screen width.

5. Test the view.
Congratulations, your HTML structure is set! Test out how the image, text, button, margins, padding, and centering look on different screen sizes. If something seems off, comb through your code to see if you can find issues. For detailed instructions on creating and troubleshooting with HTML, check out this article from DeveloperDrive. All look good? It’s time to add style with CSS.
Hero Image CSS
While HTML creates order, CSS (Cascading Style Sheets) adds flair. It’s a rule-based language that complements the HTML elements by applying stylistic effects. For example, CSS lets you turn the text in a hero image header bright yellow so it pops against the purple background.
If you don’t include CSS within your hero image, the HTML elements default to the basic browser properties like the example below.
That’s not the most attractive web page, right?
By including CSS rules, you can develop an image that draws in visitors instead of scaring them away. The above HTML examples include CSS rules, but let’s walk through a basic design so you can work it into your own image.
The following template outlines the basic HTML and CSS needed to create a full-screen hero image. You can adjust the style by changing the rules under the .hero or .hero-text elements, like font-family, color, border, or padding-top.
For more information and inspiration on ways to use CSS for images, look to the hero-image forum on GitHub. Now, it’s time to check out what good hero image coding can do for a company’s web page.
Hero Image Examples
Like all creative mediums, hero images are influenced by trends. Remember when clipart was cool? How about when every news site hit you with a splash page?
To create a relevant hero image today, look to these design trends.
1. Parallax and Scrolling Animation
We experience parallax every day when watching cars pass by or walking down the street. It’s the optical illusion that makes objects close to us appear to move faster than objects farther away. In web design, parallax uses foreground and background to recreate this effect. The result seems like magic. Just make sure not to overwhelm visitors by incorporating too many moving elements. Simplicity is key here.
Scrolling animation makes participation the goal. A good scrolling animation encourages people to keep scrolling before offering up a unique, engaging experience. Scrolling animations come in a variety of packages and work well across a number of industries, like retail, creative services, news publications, education, and more.
2. Abstract Compositions
Circles, triangles, stripes, and color blocks are back in vogue. Instead of restricting space and making sure everything is in its place, abstract hero images evoke a sense of freedom and creativity. You can find this trend taking over tech companies and startups, like this example from Zendesk that incorporates video within an abstract semi-circle to keep the design playful.
3. Soft Color Schemes
The average adult spends nearly eight hours per day with digital media — and that can lead to a lot of eye strain. Web designers have taken note and are starting to lean toward hero images with neutral, pleasing color palettes. This trend is popping up on retail, wellness, and medical websites to offer a more comfortable experience that’s easy on the eyes.
4. Products as Design Elements
Products are the star of the show when it comes to hero images. Companies want to show their offerings and entice visitors to learn more about the features. For hero images, it’s common to see products being used as graphic elements or deconstructed so visitors can dig into the details. Tech and retail companies often use this type of hero image, but it can work for any brand looking to put its product at the forefront.
5. Lifelike Color
So long flat colors, hello fine 3-D shading. This trend in hero image web design is all about making people feel like they’re inside the screen. Designers create these realistic experiences using gradients, shadows, and blended colors. While this trend will likely stay in tech and apps, it’s great for pulling people into the world of your website.

6. Videos
Research by Wyzowl found that 84% of people have been convinced to buy a product or service by watching a brand’s video. This makes video the perfect visual content for an attention-grabbing hero image. If you decide to use a video, it’s best to keep it under 30 seconds long and on a loop. As mentioned above, you’ll want to switch out the video for a static hero image for your mobile site so it doesn’t eat up data or take long to load.
Hero Image Best Practices
Trends are only one part of creating a great hero image. The rest of the magic relies on tried-and-true design standards. Even if you’re not a trained designer, you can follow these best practices for a hero image that hits home with your audience.
1. Size
We already talked about the best dimensions for hero images above (1,200 pixels and a 16:9 aspect ratio), so consider this a reminder of how important it is to have the right size. You don’t want the browsers to resize an image for you or you might wind up with a funky, stretched visual that puts off visitors.
Pro tip: Experiment with PNG and JPG files to figure out which results in a faster page loading speed.
2. Harmony
People are instantly distracted by bad design and will click off your site if your hero image doesn’t harmonize with the rest of your layout. Keep your aesthetic in sync by carefully selecting the fonts, sizes, colors, navigation, visuals, and copy.
It’s helpful to reference your brand identity and guidelines when coming up with a hero image concept. You don’t want people to lose interest before getting to the good stuff.
3. Organization
Part of creating a harmonious design is having excellent organization. Your hero image content should have a logical hierarchy and flow, so every piece builds on what came before. This is incredibly important for pairing images with copy.
When a relevant image is paired with information, people can remember 65% of the information three days later. But only 10% is remembered from information alone. Make sure your message is clear and connects with your visuals. It’s helpful to set up a simple wireframe for how your hero image will be organized on the page.
4. Originality
Stock photos are a core part of content marketing, but they may be hurting more than helping when it comes to hero images. While 40% of content marketers said original graphics helped them reach their marketing goals, only 13% of content marketers said the same thing about stock photos.
You can flex your creativity by creating original hero images with Canva or get inspiration from Behance. Lacking quality photos? Browse Unsplash or Pexels for a variety of high-quality photos that can be used for commercial and non-commercial purposes.
5. Consistency
The biggest struggle to create engaging visuals? 43% of marketers say it’s producing them consistently. To get on a set schedule, set aside the time and resources you need to create visuals — even add it to your marketing budget.
If you’re crunched for time, consider revamping your old graphics. It’s a smart way to save time, and 51% of companies have found it’s efficient and effective.
There’s nothing worse than landing on a web page that looks like it was made in the dotcom bubble. It looks sketchy, and you’re afraid to click on anything in case it redirects you to some kind of virus. On the other hand, being greeted by a beautiful hero image makes you want to stay and explore the page.
As the first touchpoint people have with your brand, hero images have a major impact on your brand perception, website traffic, and conversion. So it’s time to put your newfound knowledge into practice and design one that draws people in from the first look.

Where Will People Shop When Businesses Fully Reopen? [New Data]
For the last year and a half, many of us have gotten used to doing everything — including shopping — from home.
Now, it seems full reopenings are closer than ever in the U.S. as the CDC now says that fully vaccinated Americans no longer need to wear masks or social distance unless there is a federal, state, local, workplace, or tribal mandate requiring them to.
But as cities, offices, stores, and restaurants reopen to full capacity, many of us are beginning to think about how life will be after the global pandemic ends.
As an individual, a post-pandemic world might be quite exciting to think about. But, as a marketer, entrepreneur, or manager, you might be wondering, “Will shopping go back to normal after reopenings?”
To help brands in the U.S. navigate and plan for reopenings, we used Lucid to ask more than 300 North American consumers, “Which best describes how you’ll shop once businesses fully reopen after COVID-19 shutdowns?”
The results might or might not surprise you.
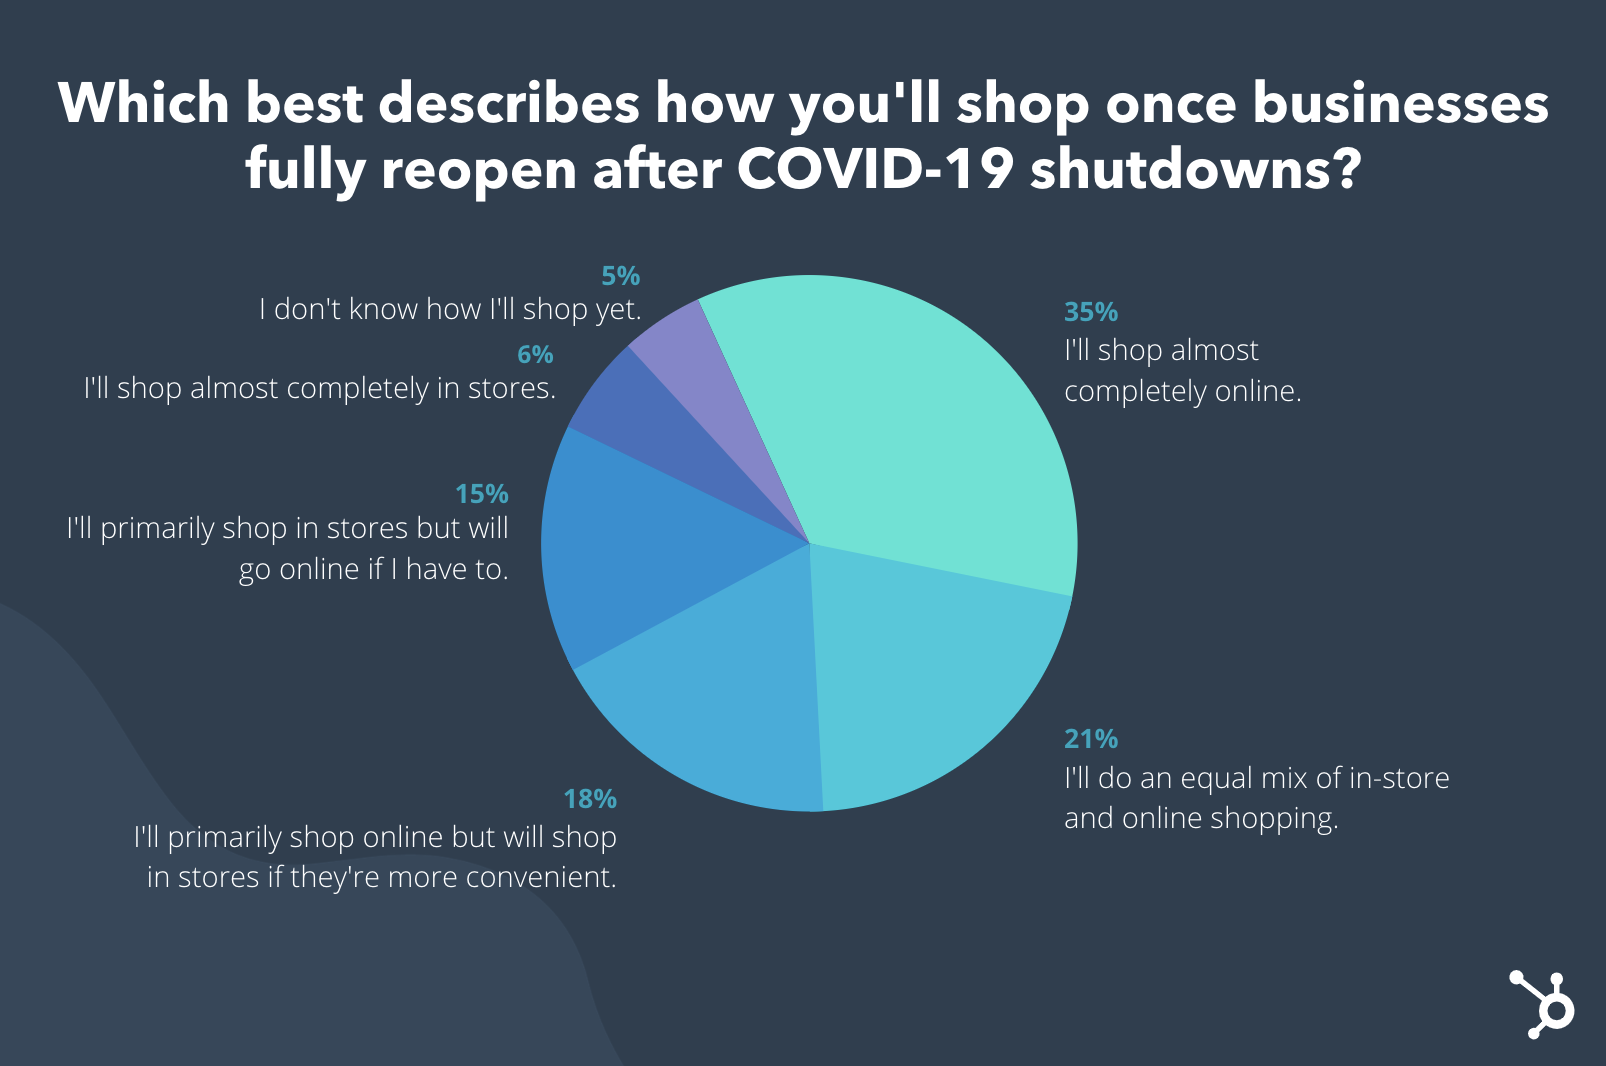
Just over one-third, or 35% of respondents say they’ll “shop almost completely online.” Meanwhile, 21% predict they’ll do an even mix of online and in-store shopping, while 18% will primarily shop online but go to stores when they’re convenient.
If you’ve built a strong brick-and-mortar brand, don’t panic. First of all, this is just one general consumer survey with a small pool of respondents. Additionally, aside from the respondents who plan to do a mix of online and in-store shopping, 21% of respondents plan to shop primarily or completely in physical stores after economies fully reopen. Had we asked about specific products or polled people in another country, the results might have been different.
While this is just one data point to think about, it’s worth noting because it shows that there will likely be a strong interest in online shopping — even when every physical store re-opens to full capacity.
So, how can you navigate changing future shopping behaviors? Whether you run or work for an online or physical business, here are a few tactics to embrace.

How to Reach Shoppers After Reopenings
1. Launch or expand on your website.
Even if you can’t launch a robust online store yet, a basic website can allow potential customers to discover you online, learn more about your business, and find your contact information.
Once you have a basic website that explains what your brand does, how they can reach you, and where you’re located, you can continue to optimize it for audiences by adding:
- Pricing pages that explain the price range for each of your services or higher-priced products.
- Images or videos of your team providing a service, your store, new products people can find there, or customers who consent to be featured on your site.
- A few blog posts that give more information about your brand, topics related to your brand, or tips related to your industry. For example, if you sell construction products, your blogs could give people tips for simple fixes they can make at home without needing to hire a professional.
- A landing page or contact form where people can contact you for more information, a product demo, or to schedule a service.
For more about what audiences look for when they visit a business’s website, check out this data-filled blog post.
2. Consider adding online shopping or ordering options.
Not a tech-savvy web expert who can create their own online store quickly? That’s okay, If you’d like to explore selling products online, there are still tools that can help you,
During COVID-19, many online shopping platforms emerged to help brands sell products or services online. While many restaurants began to leverage delivery or pick-up order apps, small stores and boutiques could build stores with tools like Shopify, Facebook Shops, and Instagram Shops.
But, although having an online store might be a great idea, it does pose its challenges. For example, you’ll want to make sure your shipping and delivery strategy is ready for online orders so you don’t sell out if a product or service is very popular. You’ll also still need to spend some time putting product shots, descriptions, and your store’s basic design together.
If you’re not ready for an online store or service just yet and want to continue to vet the idea, you can keep reading for other tips that don’t require a full ecommerce experience. If you’re ready to launch your first online store, check out our Ultimate Guide to Ecommerce.
3. Embrace online marketing.
Even if you don’t have an online store, you should still consider leveraging social media, review sites, and email marketing to spread the word about your business online.
If you’re completely new to the world of web marketing, a great place to start is by setting up a free Google My Business profile. This will allow your business’s name, address, details, website, and reviews to show up when people are looking for products or services you sell in your area.
 From there, you can also consider venturing on to review sites like Yelp, while encouraging happy customers to give you reviews there.
If you’ve already taken the steps above, the next places to embrace will likely be social media and email marketing. Through these channels, you can let customers know about sales or new offerings, send them helpful content related to your brand, or share happy customer stories. This way, even if you don’t have an online store, people will be able to gain awareness for your brand on the web.
4. Immerse your audience in virtual experiences.
During the early days of shutdowns, we saw a handful of physical brands come up with ways to bring virtual experiences or product offerings to their audiences and customers.
For example, Planet Fitness offered gym members videos from personal trainers, hair studios guided customers as they gave themselves haircuts over video calls, and petting zoo patrons could pay for animals to attend their conference calls.
There are plenty of creative ways to bring virtual experiences to your audiences. And, while you can’t always charge for them, they could certainly grow your online awareness and help more prospective customers learn about your brand and physical store.
5. Prepare your physical business for new shopping behaviors.
Although we’d love to imagine the world going completely “back to normal” overnight, this will still take time. People will likely continue to remain cautious even if they’re vaccinated and their state is loosening regulations.
For example, vaccinated Americans will soon be able to take off masks inside and outside establishments, customers will likely still want to see that businesses are making efforts to keep them safe. In 2020, a 2020 McKinsey Report suggests just this as many consumers said they are more likely to buy from companies that show care for their customers.
With data like McKinsey’s, you’ll still want to take some precautions by keeping your physical location clean and following the most updated CDC guidelines — which can be found here.
Aside from getting your business ready for health-conscious customers, you’ll also want to zone into strategies you can use to make it convenient for customers.
As we saw in our consumer poll above, 18% — or almost one-fifth of our survey pool — said “I’ll primarily shop online but will shop in stores if they’re more convenient.” This means that if you have products or services that aren’t easily accessible or often sold out online, you might earn customers that would have otherwise shopped on the web.
The data above could be good to think about as you determine which services, products, or sales you’ll market when you fully reopen. If there’s something shoppers can get in-store that they couldn’t get online — like a product, in-person testing, or another interesting experience, be sure to tell your audiences that.
Diving into Digital Transformation
Because the global pandemic has accelerated many digital transformations that were already underway, it’s essential to embrace at least some digital strategies when running or marketing a brand — even if it is brick-and-mortar.
Luckily, because so many businesses are pivoting to digital tactics, there are plenty of free or affordable tools that can help you embrace online marketing.
Aside from tools, HubSpot also offers a handful of free downloadable templates and resources for marketers or entrepreneurs at every level, like the one featured below.
\

How to Write a Cover Letter for an Internship [Examples & Template]
Writing a cover letter can feel like a daunting task, particularly if you don’t have a lot of real-world experience. Fortunately, a cover letter is actually a chance to explain how your extracurriculars and classes have taught you exceptional leadership and time management skills.
To really stand out, it’s important to personalize your cover letter for each internship application you plan to submit. Your cover letter isn’t an opportunity to reiterate your whole resume, though. This is your chance to pick out a few accomplishments from the position description and dive into examples showing how you’ve exhibited these skills.
We’ve created an internship cover letter template to provide some initial structure and inspiration, but we don’t expect this template to be one-size-fits-all. Ideally, you’ll supplement our template with your own creativity and flair.
There are different formats you can use when writing internship cover letters, but you can’t go wrong with the traditional business letter format. Business professionals use this template style to apply for full-time roles, so your cover letter will stand out above the rest. Remember to proofread, use formal terms such as “Dear” and “Sincerely,” and lean towards a professional tone in your body copy.
1. Include your name, date, location, and contact information.
Although some companies are firmly against using applicant tracking systems, chances are many of the companies you apply to will screen your resume and cover letter using one. That means you’ll need to stand out to both an automated system and human recruiters.
Have you ever heard the myth that you’d get credit for writing your name on the SAT exam? The same applies to adding contact information to your cover letter, but it’s 100% true. Make it easy for the recruiter to get in touch with you by providing an up-to-date phone number and email address.
In the past, it was common for job and internship seekers to include their exact address on their cover letter as they’d mail them directly to the hiring managers. In today’s digital world, most hiring teams won’t need to know your exact home address to extend an internship offer, so feel free to leave it off. Simply include your city and state to give the team an idea of your proximity to the office.
Your Name
Your Address
Your City, State, Zip Code
Cell: 555-555-5555
Email: name@email.com
Date
2. Include the company, department, and company address.
If you’re writing a cover letter for several internship opportunities, you’ll find it helpful to search the full name, department, and headquarters address of each company. Doing this as a separate step will help you copy the information accurately in your cover letter. Remember, you don’t want any typos or mistakes in your cover letter, especially when it comes to information that can be easily found on the internet.
Finding the department name may not be as simple, so you can leave that out if you’re unsure. If your company has several campuses or operates in different cities, use the address of the location where the internship will be performed or the office location where your hiring manager works. If your internship will be remote, use the company’s general headquarters address.
Department
Company
Street
City, State Zip
3. Address the hiring manager.
As a student looking for an internship, you’ll definitely set yourself apart from other applicants by being resourceful. You can show your resourcefulness by searching for the hiring manager’s name to properly address them in your cover letter. Occasionally, their title is stated in the role description. You can then search for the role on LinkedIn to identify their name. If you can’t find a name, you can instead address them by title only. Other times, though, finding the name of the hiring manager could be more difficult. If a Google search doesn’t return a first and last name, your best bet is to leave the name out. Sacrificing a bit of personalization is much better than addressing the wrong person in your cover letter.
Dear X, (try to find the hiring manager’s name… if you can’t, you can put “Dear [Company A] Hiring Committee”)
4. Set the context for your application.
In the first paragraph, explain how you heard about the company or position, and if you know anyone at the company, mention them here. Next, express your own interest in the company or position and explain briefly how it relates to your own passions. Don’t forget to introduce yourself in this paragraph, writing your name, your education level, your major, and your interests.
You may opt for a creative first line to capture the reader’s attention. One that worked for me early in my career went something like this:
“Can I tell you a secret? I’ve been telling stories since I was five years old. No, not fibbing — real storytelling…”
This is where you’ll benefit from researching the company’s culture. While this opening statement worked well for startups and more laid-back companies, a big accounting firm might find it culturally off-beat.
5. Sell your experience.
Scan the internship position description and pick out a few qualities you think apply to you — just don’t choose all the descriptors mentioned as it could appear disingenuous and make your cover letter too long. For instance, if I see a company is looking for someone who’s “outgoing, organized, hardworking, and willing to take criticism,” I would pick those that describe me best and focus on providing examples in the body of my cover letter.
Mentioning the traits directly in your cover letter shows you’ve read the position description, and makes your cover letter more scannable. If the hiring manager is looking for someone with content skills, she might scan your cover letter looking for the words that indicate experience with content.
Finally, brainstorm a few compelling examples to show how you embody the most important characteristics. Don’t just write, “I have excellent customer service skills.” You want to prove it. Support your claim by writing something like,
“Last summer, I worked as an orientation leader at my college, serving as a resource for incoming students and their parents. This experience strengthened my customer service skills.”
Even if you don’t have a lot of (or any) job experience, think about highlighting skills you’ve gained from extracurriculars, volunteer experience, or even passion projects:
“My passion for dance led me to become a volunteer dance teacher which helped me develop as a leader.”
6. Close the letter with grace and a call to action.
If the internship application does not explicitly state “please do not contact,” you might choose to conclude by specifying how you will follow up, such as, “I will call next week to see if my qualifications are a match,” or, “I am eager to meet with you to discuss this opportunity, and am available for an interview at a mutually convenient time.” Conclude by thanking the hiring manager for taking the time to consider you, and end on a positive, confident note, such as, “I look forward to speaking with you soon.”
You may even go a step further and give the hiring manager a call to action. Include a link to your online portfolio, a website, or even a YouTube channel where you display your work and personality. To see how often hiring managers are viewing these additional items, include tracking to your link using a URL tracker like Bitly to capture that data.
Sample Internship Cover Letter
Featured Resource: 5 Free Cover Letter Templates
Event Planning Internship Cover Letter
Your Name
1 Hireme Road
Boston, MA, 20813
Cell: 555-555-5555
Email: yourname@hireme.com
May 20, 2021
Event Planning Department — Internship Program
Company A
35 Recruiting St.
Boston, MA, 29174
Dear Internship Coordinator,
At the suggestion of John Smith, a senior marketer at Company A, I am submitting my resume for the Event Coordinator internship position. I am a junior at Elon University, pursuing a bachelor’s degree in Sport and Event Management, and am passionate about event planning. I am thrilled to hear about Company A’s Event Coordinator internship program and feel my experiences and skills would be an excellent match for your organization.
As an executive member of the Student Union Board at Elon, I am in charge of organizing, promoting, and implementing multiple school-related social activities per week, while being challenged to design new events. I work cohesively with a diverse team made up of students and faculty, and I also foster relationships with novelty companies.
My experience as an Orientation Leader has further prepared me for this internship. It was essential that I remain positive, outgoing, and energized during move-in day and act as a liaison between new students, families, and faculty in a fast-paced and demanding environment. I was expected to maintain a highly professional customer service ethic while interacting with families and new students.
My Elon University experiences, executive board membership, and orientation leadership role have prepared me to be successful in the Event Coordinator internship program. Thank you for your time and consideration. I look forward to the opportunity to discuss how I can add value to Company A.
Sincerely,
(handwritten signature)
Your Name
Marketing Internship Cover Letter Template
Your Name
1 Hireme Road
Boston, MA, 20813
Cell: 555-555-5555
Email: yourname@hireme.com
May 20, 2021
Marketing Department — Internship Program
Company A
35 Recruiting St.
Boston, MA, 29174
Dear Internship Coordinator,
I am a passionate, creative, and driven Elon University student with leadership and event planning experience, as well as strong communication skills. I am seeking opportunities to showcase my writing abilities in a challenging and stimulating environment. My skills and experiences will enable me to deliver successful results as a digital marketing intern for Company B.
Please allow me to highlight my key skills:
- Prior experience writing blog posts and press releases for marketing objectives
- Strong communication skills and ability to adopt voice for diverse audiences and varying purposes
- Efficient in managing multiple projects with fast-moving deadlines through organization and time-management skills
- A firm understanding of grammar rules and how to write effectively
- Experience in leadership positions, both as Student Union Board executive leader and as an Elon Orientation Leader
- Proven ability to form positive relationships with people from around the globe, exhibited by my internship experience in China last summer
- Experience organizing, promoting, and implementing social events
- Proficient in Microsoft Office, Adobe Creative Suite (InDesign, Photoshop, and Premiere), and social media platforms
In closing, I look forward to the opportunity to discuss how I can be an asset to Company B. I will call next week to see if you agree that my qualifications are a match for the position. Thank you for your time and consideration.
Sincerely,
(handwritten signature)
Your Name
Internship Cover Letter Templates
Standard Internship Cover Letter Template
Use this cover letter template as a foundation for your cover letter. You can customize it to fit your experience and the companies you’ll be applying to.
Download this cover letter template
Data-Driven Internship Cover Letter Template
If your major is data-driven like STEM, marketing, or accounting, this is the internship cover letter template for you. With this template, you can include the data highlights of your class projects and assignments to show the hiring manager that you can support your experience with credible facts.
Download this cover letter template
Entry-level Cover Letter Template
As you approach your senior year of college, you may be looking for entry-level roles rather than internships. Cover letters are just as important for full-time roles as they are for internships, so use this template to make the transition in your job search.
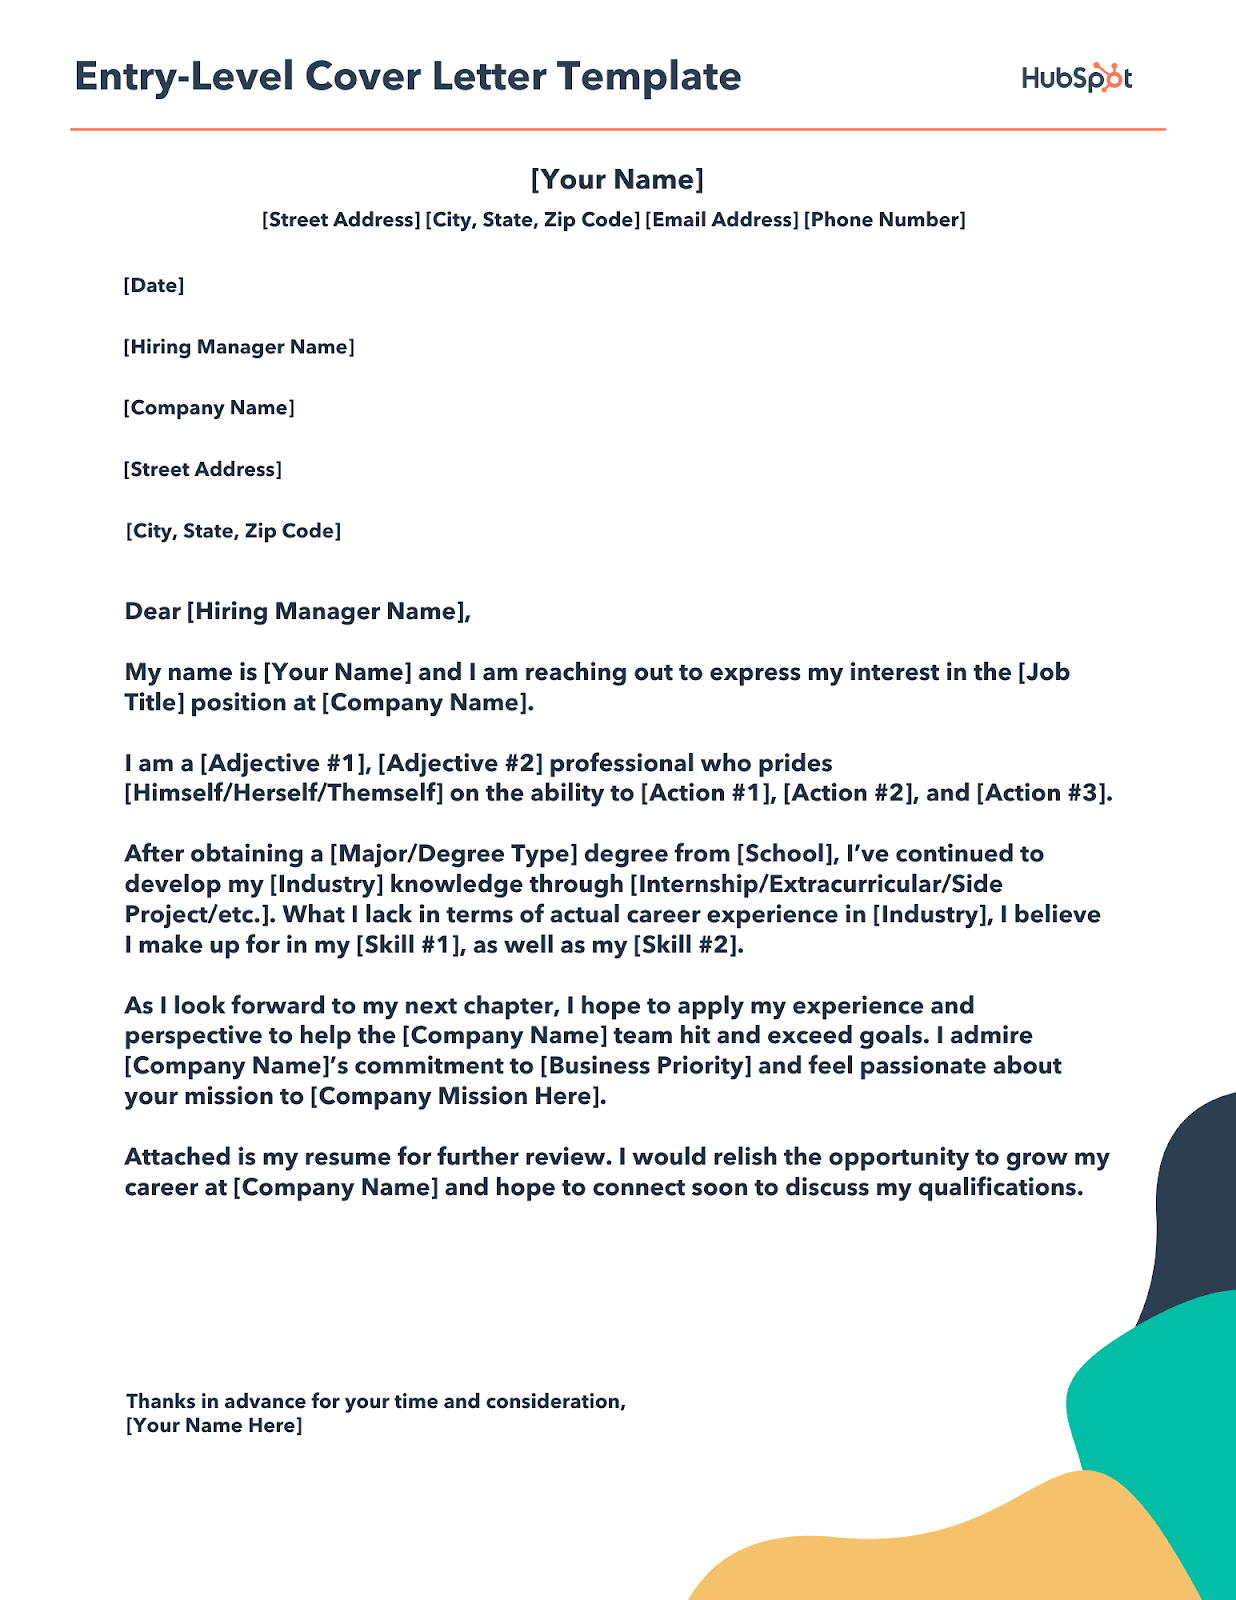
Download this cover letter template
Wrapping Up Your Letter of Recommendation
A resume isn’t always enough to make an impression. Including a cover letter in your internship application is the first step to setting yourself apart from other applicants. Study and apply the six steps for writing a professional internship cover letter and use one of these samples or templates to customize it. Your resume gives the highlights of your time in college while your cover letter tells the story of how those experiences will serve you as an intern with your future employer. Use it to your advantage to land the first role in your career as you navigate college and beyond.
Editor’s note: This post was originally published in April 2018 and has been updated for comprehensiveness.
