
Welcome to My Blog
How Does the Instagram Algorithm Work? [+Changes Brands Should Know in 2021]
Instagram has been around for 11 years.
While the app was initially meant for still images, content creators and everyday users can now share photos and videos in various forms, like Story posts, Instagram Reels, and longer-form videos on IGTV.
Although there are many content types to post on the app, simply leveraging one of the options isn’t enough to find marketing success on the platform. This is because, no matter how high-quality the content you share, the Instagram algorithm determines what succeeds on the app and what doesn’t.
While Instagram doesn’t disclose all the factors that the algorithm uses to assess content, they have released general information about what the algorithm looks for. In this post, we’ll explain everything you need to know about the algorithm to succeed on the app, from the factors that play into it and tips and tricks to use to make sure your content doesn’t go unnoticed.
![New Data: Instagram Engagement Report [2021 Version]](https://no-cache.hubspot.com/cta/default/53/9294dd33-9827-4b39-8fc2-b7fbece7fdb9.png)
As a business, unless you’re entirely reliant on paid ads, it’s essential to understand how the algorithm works and what you need to do to ensure that it favors your content and shows your posts to your target audience.
Below we’ll explain how the Instagram algorithm works and the factors it assesses when surfacing your content in news feeds.
How does the Instagram algorithm work?
If you’re a frequent Instagram user, you may have heard people say something like “Bring back reverse chronological order!” when talking about the algorithm. What they’re referring to is when Instagram showed the most recent posts at the top of someone’s feed and older ones at the bottom.
It was great for creators and Instagram users because, at some point, your post would be at the top of all of your followers’ feeds, so they would be guaranteed to see it.
However, in March 2016, the algorithm changed. Instagram said, “People miss, on average, 70 percent of their feeds. As Instagram has grown, it has become harder to keep up with all the photos and videos people share. This means you often don’t see the posts you might care about the most.”
It’s no longer a question of when you post, but a variety of factors that we’ll discuss below: relationship, timing, frequency, following, usage, interest.
Instagram Algorithm Factors
Relationship
Perceived relationships are the most important ranking factor.
The algorithm prioritizes sharing content with you based on the relationships you have with the accounts you follow. The more you comment, like, and interact with an account on Instagram, the more likely you will see their content, and see it often.
The algorithm also notes people you direct message, accounts you search for, and photos you’re tagged in.
The relationship factor applies to brands as well. If a consumer regularly likes your content and interacts with it, repeat engagement will make your posts shown to them more often and closer to the top of their feed. This means that it’s essential for you to inspire engagement in your content, which we’ll discuss further below.
Timing
Although feeds aren’t chronological, the algorithm still wants users to see the most recent and relevant posts, especially from accounts that you have a stronger, established relationship with.
Timing just means that you’re not as likely to see a post from three weeks ago as you were before 2016.
You can leverage this factor to your advantage by using your profile analytics to discover the best time to post on Instagram, helping you meet your followers when they’re most active on the app and more likely to engage.
Frequency
Frequency refers to how often a user opens the Instagram app.
Frequent users will see a more chronological feed, but those who seldom open the app will see posts most relevant to their interests and relationships since last opening the app.
Following
Following many people means that the algorithm has more content to choose from when surfacing posts in a feed. When this happens, they prioritize relationships, engagement, and perceived interests.
Again, this factor emphasizes the importance of generating a relationship with your audience, encouraging engagement, and posting at the right times.
Usage
The usage factor is similar to frequency, as it relates to how much time is spent on the app.
Those who do quick browsing sessions will see what the algorithm determines to be the day’s highlights based on the factors mentioned above, while those who spend more time on the app will see a more significant number of posts.
Frequent browsers may even run out of content to see, at which point the algorithm will suggest new posts and accounts based on your interactions and engagement history.
Interest
Instagram makes many content recommendations, so a portion of the content users see is based on the app’s understanding of their interest in specific topics.
If it detects that you always like, comment, and interact with posts around similar topics, you’ll see those posts first. Users who engage with content similar to what you post are also more likely to be shown your posts, and vice versa.
While not a direct factor that Instagram has noted as an algorithm factor in 2016, engagement does play a significant role in the algorithms process.
How Instagram’s Algorithm Uses Engagement
In addition to all of the above factors, engagement plays a significant role in how the Instagram algorithm prioritizes and surfaces content to users. The most important engagement metrics are comments, likes, shares, and video views.
Here is a breakdown of how engagement factors into the algorithm:
1. When you first post a photo, it’s shown to a small percentage of your audience.
2. Instagram measures how quickly that photo is interacted with, i.e., comments and likes.
3. Instagram compares the engagement that your post gets to other content you’ve shared at similar times and days. For example, is your post from today at 10 am getting more or less traffic than your post from last Monday at 10 am? The app compares to similar times to ensure accuracy when evaluating your engagement metrics, especially since certain times bring better results.
4. If your photo attracts a lot of engagement, Instagram will show it to a higher percentage of your audience and maybe even share it on explore pages.
5. If your post continues to attract engagement, your photo will stay at the top of your audience’s news feeds and reach more people. If it doesn’t attract a lot of initial attention, less of your audience will see your post.
Instagram Algorithm Update 2021
The 2016 algorithm update was almost a complete overhaul to how the algorithm works, so it is the most notable, publicized, and confirmed by Instagram.
Unfortunately, since then, Instagram doesn’t always make it public when they’ve changed the algorithm. So, if you notice changes to your engagement and reach, it is most likely not the result of an algorithm change but most likely due to the app’s growth.
There are so many accounts on the platform, and as people follow more and more users, competition on the app grows. It becomes more difficult to quickly generate a significant amount of engagement, which in turn impacts how, where, and when your posts are shown in your audience’s feed. This is one of the many reasons why it’s important to monitor your Instagram analytics.
Instagram Algorithm Recent Changes
That being said, the most recent update to the algorithm as of 2021 is the removal of like counts on people’s photos.
The update hasn’t yet been made available to all Instagram users, but it would effectively remove a total like count from a user’s photo and instead display only the usernames of people that have liked the post. Users who post a photo still have the option to see the number of likes a photo has received, though.
Instagram is making this update because they believe it will do numbers to diminish bullying on the app and protect users from being influenced by social pressure that says they need to get a certain amount of likes on their posts.
How to Get Your Posts Shown Higher on Instagram
Although there is not much you can do to beat the algorithm, or so to speak, there are ways to get your posts shown higher on Instagram.
Post when you know your audience is most active.
Like all social media platforms, one of the easiest ways to generate immediate engagement is to post content when you know your followers are most active, as they’re already browsing the app and ready to see what you have to offer.
To get this information, you can use the native Instagram Analytics tool available to all users with business accounts or another option like Marketing Hub.
If you’re new to the app, it will be challenging to get this information right away, so come back to this tip after you’ve spent enough time on the app to get valuable, actionable analytics.
Post content you know your audience likes.
Again, use your analytics. Understand the content that your audience engages with the most, whether it’s high-quality product photos, behind-the-scenes content, or Instagram Reels. Use this to your advantage, and continue creating content that they enjoy as they’re more likely to interact with something they like.
Use business-relevant hashtags.
Hashtags are a great way to signal to the algorithm about your content, which can help surface your profile to audience members interested in the hashtags you use.
Don’t overload your hashtag use, but aim to use them in all of the content you share on Instagram, from Stories to IGTV to photo captions.
Encourage engagement and interaction.
Interaction on your profile will come naturally, but encouraging engagement and interaction with the content you share can be valuable in getting the algorithm to work for you.
Create engaging captions that entice users to comment on your posts, ask for likes and shares, and be in conversation with those who interact to inspire loyalty and entice them to return.
You can also place interactive elements in your Instagram Stories, like polls, stickers, and emojis. The benefits of this are twofold, as your customers will be interacting with your content, and you’ll also learn more about their interests and desires based on the responses they give.
Stay consistent.
One of the most important things to do to take control over the algorithm is to stay consistent on the app. Develop an Instagram-specific posting schedule, and stick to it.
It’ll help you stay continuously active on the platform, which allows your followers to continuously engage with your content, which helps the algorithm learn more and more about your account. The more information they have, and the more engagement they see, the higher you will be on your followers’ feeds.
Instagram Story Algorithm
Instagram Stories appear at the top of a user’s feed.
The Stories algorithm prioritizes timeliness, and you’re most likely to see the most recent stories from the accounts you engage and interact with the most. The accounts that the algorithm thinks you have the strongest relationships with will always have their Stories shown before all other stories.
For businesses, this means that it’s essential to maintain an active presence on Instagram Stories and to encourage engagement within your Stories, like polls and asking questions.
Instagram Explore Algorithm
The feed algorithm and Explore page algorithm are relatively similar, as they both show content that Instagram thinks you’ll be most interested in based on your previous app activity. The main difference is that feed content features accounts you’re familiar with and following, while the Explore page is content from new accounts.
You can think of it like this: if one of your favorite things to do on Instagram is watch food videos, your feed will display content from the accounts with food videos that you interact with the most. Your explore page would also contain food videos since the algorithm knows you like them, but you won’t follow those accounts already.
The explore page is based entirely on interests, so, as a business, it’s important to share content related to your brand and utilize elements that would tell the algorithm who to show your content to, like relevant hashtags.
Succeeding on Instagram is not just about posting content regularly. You also need to understand how the algorithm works and leverage its makeup to your advantage. While changes to the algorithm will always happen, staying on top of the trends will help you ensure that you’re prepared for them when they do.

Why Blog? The Benefits of Blogging for Business and Marketing
With almost 4 billion people worldwide currently connected to the internet, there has never been a better time for businesses to include blogging in their marketing strategy.
Not only does blogging drive website traffic and promote your products and services, but it also helps you build trust with your potential customers.
In this post, we’re going to highlight the many benefits of blogging for business and how you can get started with creating relevant content that drives inbound links and traffic to your site.
Let’s get started.

The Benefits of Blogging for Business
One question many people ask after starting a business is whether blogging is worth it in 2021.
Short answer: Yes! And here the reasons why we say so.
1. It helps drive traffic to your website.
Raise your hand if you want more website visitors. Yeah, me too.
Now think about the ways people find your website:
- They could type your name right into their browser, but that’s for an audience you already have. They know who you are, you’re on their radar, and that doesn’t help you get more traffic on top of what you’re already getting.
- You could pay for traffic by buying an email list (don’t you dare!), blasting them, and hoping some people open and click through on the emails. But that’s expensive and, you know, illegal.
- You could pay for traffic by placing tons of paid ads, which isn’t illegal but still quite expensive. And the second you run out of money, your traffic stops coming, too.
So, how can you attract new traffic or readers to your site? You can through blogging and optimizing your site for search engines.
Here’s how it works.
Think about how many pages there are on your website. Probably not a ton, right? And think about how often you update those pages. Probably not that often, right?
Well, blogging is a great way to solve both of those problems.
Every time you create and publish a blog post, it’s one more indexed page on your website, which means one more opportunity for you to show up on the search engine results page (SERP) and drive traffic to your website in organic search.
We’ll get into more of the benefits of blogging on your SEO a bit later, but it’s also one more cue to Google and other search engines that your website is active, and they should be checking in frequently to see what new content to surface.
2. You can repurpose blog content for social media.
Blogging for your business also helps you get discovered via social media. Every time you create a new article, you’re creating content that people can share on social networks — Twitter, LinkedIn, Facebook, Pinterest — which helps expose your business to a new audience that may not know you yet.
Blog content also helps keep your social media presence going.
Instead of asking your social media manager always to create brand new content for social media (or creating that content yourself), your blog can serve as that repository of content.
You’re strengthening your social reach with blog content and driving new website visitors to your blog via your social channels. Quite a symbiotic relationship, I must say.
3. It helps convert traffic into leads.
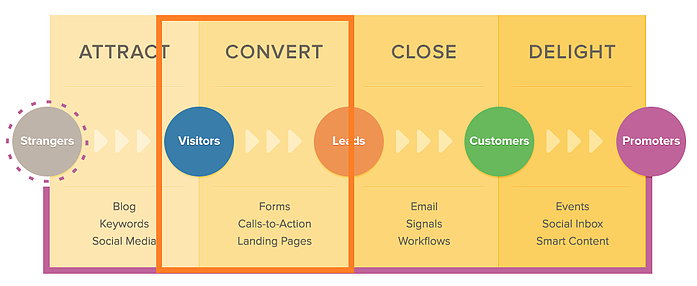
Now that you have some traffic coming to your site through your blog, you have an opportunity to convert that website traffic into leads.
Like every blog post you write is another indexed page, each post is a new opportunity to generate new leads.
The way this works is straightforward: Just add a lead-generating call-to-action to every blog post.
Often, these calls-to-action lead to things like free ebooks, whitepapers, fact sheets, webinars, trials, or basically, any content asset for which someone would be willing to exchange their information.
To be super clear for anyone unfamiliar with how traffic-to-lead conversions work, it’s as simple as this:
- Visitor comes to website
- Visitor sees call-to-action for a free offer
- Visitor clicks call-to-action and gets to a landing page, which contains a form for them to fill in with their information
- Visitor fills out the form, submits information, and receives the free offer
If you scroll down in this blog post, you’ll see a call-to-action button.
In fact, 99.9% of the blog posts we publish have call-to-action buttons, and yours should, too. That is how you turn your website traffic into leads for your sales team.
Note: Not all blog readers will become leads, and that’s okay. No one converts 100% of the people who read their blog into leads. Just get blogging, put calls-to-action on every blog post, set a visitor-to-lead conversion rate benchmark for yourself, and strive to improve the benchmark each month.
4. It drives long-term results.
The best business blogs answer common questions their readers and customers have.
If you consistently create valuable content or articles for your target audience, it’ll establish you as an industry leader or authority in their eyes.
Can you imagine the impact of sending an educational blog post you wrote to clear things up for a confused customer? Or how many more deals a salesperson could close if their leads discovered blog content written by their salesperson?
“Establishing authority” is not a vanity metric as concrete as traffic and leads, but it’s pretty powerful stuff. You can use it to measure sales enablement.
Because at the end of the day, that’s what many of your blog posts are.
Think about it:
- Suppose prospects find answers to their everyday questions via blog posts written by people at your company. In that case, they’re much more likely to come into the sales funnel trusting what you have to say because you’ve helped them in the past — even before they were interested in purchasing anything from you.
- Prospects that have been reading your blog posts will typically enter the sales funnel with more knowledge of your products and services, your place in the market, and your industry. That makes for a far more productive sales conversation than one held between two relative strangers.
- Salespeople who encounter specific questions that require in-depth explanation or a documented answer can pull from an archive of blog posts. Not only do these articles help move the sales process along faster than if a sales rep had to create the assets from scratch, but they position the salesperson as a helpful resource to their prospect — thus helping to build trust.
5. Blogging helps with link building.
Inbound links or backlinks are among the 200 factors the Google algorithm considers when ranking a site on its search engine result page. Many experts and small business owners also believe backlinks to be the 3rd most crucial factor in search engine optimization.
Although generating inbound links is essential, 41% of SEO experts say link building is the most challenging part of search optimization.
When you create articles that are not only valuable to your potential customers but also to other companies that your audience sees as industry leaders, it’d be easier to gain relevant links.
Links for authoritative websites serve as a vote of confidence or recommendation from other websites. And it signals to Google that you’re trustworthy and an expert in your industry.
Another benefit of backlinks is that they help you build your domain authority, which helps improve your overall discoverability in search engines.
6. It drives long-term results.
It would be fantastic if you could take a trip to Hawaii, go to the gym, and sleep for as many hours as you want, and still be able to drive traffic to your site.
Good news, though! That’s what blogging does — primarily through search engines.
Here’s what I mean:
Imagine you sit down for an hour on Sunday to write and publish a blog post. Let’s say that blog post gets you 100 views and ten leads on Monday. You get another 50 views and five leads on Tuesday as a few more people find it on social media, and some of your subscribers get caught up on their email and RSS. But after a couple of days, most of the fanfare from that post dies down, and you’ve netted 150 views and 15 leads.
It’s not over.
Since that post is now ranking, it means that for days, weeks, months, and years to come, you can continue to get traffic from that blog post. So while it may feel like day one or bust, in reality, blogging acts more like this:
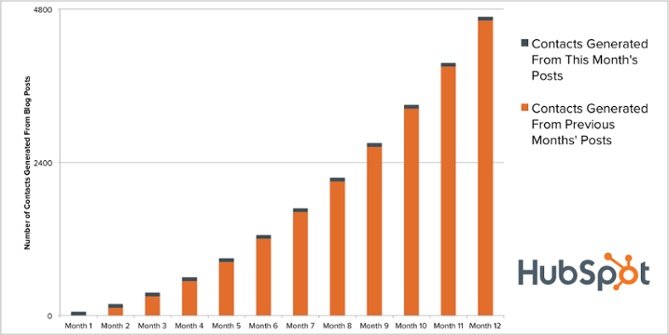
So while you’re hitting your snooze alarm, surfing in Hawaii, and pumping iron, you’re also driving traffic and leads. The effort you put in yesterday can turn into hundreds of thousands of views and leads in the future.
What’s more, you can monetize your blog content in many creative ways. Business models such as affiliate marketing mean you can generate an income from blogging on just about any topic — from makeup and beauty to camping and motorcycles.
There’s a wide variety of affiliate programs out there where you can generate an income from referring people to relevant products and services.
When it comes to blogging, most of your sales will likely come from your older articles.
More than half of the traffic generated each month on the Hubspot blog comes from posts published in previous months. They come from old posts.
The same goes for the leads generated in a current month — about 90% of the leads we generate every month come from blog posts published in previous months. Sometimes years ago.
We call these types of blog posts “compounding” posts. Not every blog post will fit into this category, but the more evergreen blog posts you write, the more likely it is that you’ll land on one of those compounding blog posts.
In our research, we’ve found that about 1 in every ten blog posts end up being compounding blog posts.
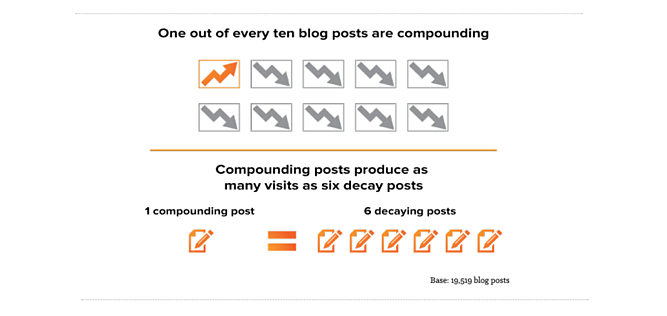
To me (and hopefully to you), this demonstrates the scalability of business blogging.
While you might not see immediate results, over time, you’ll be able to count on a predictable amount of traffic and leads for your business without any additional resource investment — the work to generate that traffic and those leads are already done.
If you’d like to learn more about the long-term impact of blogging and how to reap even more benefits from the blog posts that are ranking in organic search for your business, check out this article, “The Blogging Tactic No One Is Talking About: Optimizing the Past.”
7. It helps you share company news.
Another benefit blogging affords every big, and small business is a medium to share their company news and stories.
Blogs can contain not only articles but also news that highlight what a company is up to.
Have you hired a new content marketing manager? Share it on your blog.
Interviewed online marketing and industry experts? Post it on your blog.
Have a brilliant case study that showcases how your products and services help customers? Tell your audience about it on your blog.
Are you hosting a local fair or trade show? Drum up attention for the even through your blog.
Not only does sharing company news on your blog humanize your brand, but it also helps your audience see that you’re not always about selling.
Secondary Benefits of Business Blogging
There are other reasons businesses might want to blog, but I think they’re smaller and stray from the core benefits of blogging.
For example, I love to use our blog to test out extensive campaigns on the cheap before investing a lot of money and time into their creation. I also love to use our blog to help understand our persona better.
And while this shouldn’t be their primary use, these are all significant usefulness of a business blog, but they’re secondary benefits to me.
How to Start Blogging for your Business
You’ve seen the benefits your business blog can get you — more traffic, leads, authority, and a better relationship with your audience. And you’re undoubtedly itching to get started.
But how?
Our guide on how to start a successful blog has everything you need.
Editor’s Note: This post was originally published in November 2020 and has been updated for freshness, accuracy, and comprehensiveness.


16 Benefits of Branding & Co-Branding
In more ways than one, branding is a pillar of success.
It helps you develop a set of features unique to your business, like a logo and brand name, which allows customers to come to know your brand and associate it with what you have to offer.
Branding is impactful in and of itself, but co-branding brings additional opportunities and benefits to businesses that engage in it. In this post, discover the advantages that come from generating brand individuality for your business, and the added benefits that come from co-branding with a partner.

1. Branding is often the deciding factor for consumers making purchasing decisions.
Branding is often the deciding factor for consumers when making a purchase decision. In fact, consumers report being more likely to buy from brands that they know or know and already have a positive experience with.
This is especially true for social media, as 89% of consumers say they’ll buy from a brand they already follow and recognize over a competitor. Given this, having a recognizable and unique brand gives you a leg up with customers, as they would feel safer buying from a business they already know.
2. Branding gives your business an identity.
Branding gives your business an identity beyond just the products and services you sell. You become more than just a name, especially if you develop a brand mission separate from your products.
For example, if your brand is committed to social responsibility, you’ll become associated with those interests in addition to your products. Your business develops a personality outside of your sales, which consumers appreciate.
3. Branding sets you apart from competitors in a saturated market.
There’s no way to quantify how many brands there are globally, but there are certainly a lot. Given this, branding helps you stand out from the crowd and gain an edge in an increasingly competitive market.
Your brand identity differentiates you from your competitors, especially in industries where it’s not easy to stand out because you offer similar products. If you have a unique identity, you can still offer those similar products, but your unique brand personality and reputation are what seals the deal.
4. Branding makes your business memorable.
Strong branding makes your business memorable and recognizable to consumers.
They’ll be able to quickly discern that content you create belongs to you, especially if they see it on channels you don’t own, because it looks like and is in line with the content and content style they know you create.
Being memorable is also helpful when it comes to ad spend. A memorable brand can devote more resources to product promotion and less to brand awareness because consumers already know who you are. For example, Coca-Cola doesn’t need to get the word out that they exist because their brand already has universal awareness. Instead, they can focus marketing efforts on advertising a new drink.
5. Branding supports your marketing efforts and promotes consistency.
When you have consistent branding, future business efforts always have a clear path to follow. You’ll spend less time coming up with ways to present yourself and more time ensuring that you’re consistently delivering high-quality content, products, and experiences that customers desire.
Here are some stats that support the benefits of branding consistency:
- Uniformly presented brands are 3.5x more visible to customers.
- Consistent brand presentation has been seen to increase revenue by 33%.
- Inconsistent branding damages a company’s reputation and credibility.
Consistency also helps build trust with your audience, which we’ll discuss further below.
6. Branding builds credibility and trust.
Inconsistency confuses, but strong branding does the opposite.
Customers don’t have to guess how or why your content and products relate to your business because it’s clear. This helps build credibility because you show consumers that you stick to your word and don’t engage in practices that seem misaligned with what you stand for.
When you build credibility, you also increase trust in your business, which influences consumers making purchasing decisions. As mentioned above, a customer is more likely to do business with a company they recognize and trust because they already know who you are and what you stand for.
7. Branding inspires customer loyalty and retention.
Branding increases trust, and trust is a pillar of customer loyalty.
Your identity attracts customers because they can tell what you stand for, which helps them feel connected to you. When customers feel connected to a business, they’re more likely to be loyal. Loyal customers, in turn, drive revenue, as they’re more likely to make repeat purchases and draw in new clients to your business.
8. Branding encourages word-of-mouth marketing.
Having consistent branding makes customers loyal, which makes them more likely to practice word-of-mouth marketing.
Word-of-mouth marketing is when consumers promote you to their friends, family, and even strangers online. This is highly beneficial for all businesses, as people trust other consumers more than marketers because they believe they have an agenda. Consider these statistics:
- 39% of consumers build trust in a brand from peer-to-peer conversations compared to 23% from a brand’s paid ads.
- Consumers report that a person like themselves (another consumer) is 14% more credible than a brand employee.
When you build a following of loyal customers, they provide your business with free marketing to draw in new clients and increase revenue.
9. Branding helps you share your values.
Customers are more interested than ever before in buying from companies that share their same values, so having a consistent message to share is critical. In fact, if customers believe you’re making a positive impact on the world, they would pay 31 to 50% more for products and services.
Branding helps you appeal to this new consumer interest, as it goes beyond just a recognizable logo — it enables you to communicate your brand mission and values.
10. Branding builds internal employee morale and pride.
Branding is beneficial for outward conceptions, but it also impacts internal employee retention, morale, and hiring processes. Consider these statistics from LinkedIn Business on the impacts of strong employer branding on hiring and retention:
- Well-regarded brands can bring down training expenses by as much as 50%.
- 72% of recruiting leaders worldwide say that the employer brand has a significant impact on hiring.
- 50% of employers report more qualified applicants.
- Strong branding is associated with a 28% reduction in organizational turnover.
- Inconsistent branding has been found to embarrass employees and lower morale.
The statistics show us that branding helps you position yourself as a reputable source, making employees feel like they’re working for something big and authentic. They’re proud of representing your brand and business, ensuring that everyone is continually working to satisfy your customers.
11. Branding helps you easily introduce new products.
Branding helps you easily introduce new products to market and drive sales for those products.
Firstly, you already have consistent branding, so it doesn’t take much legwork to market a product, so it aligns with your existing products and brand message. You don’t have to sit at a table and figure out how everything will fit in or rebrand your business; there is already a path for you to follow.
When you launch these new products, customers already loyal, familiar with, and appreciative of your quality of service will be eager to try what you have to offer, generating sales and driving revenue.
12. Branding brings a high return on investment and increased profits.
Being profitable is the ultimate goal as it allows you to keep your business running, continuously innovate, and provide the delightful experiences that customers expect and desire.
As branding is a significant factor in achieving high ROI, it makes sense to invest in the practice.
The benefits discussed above are relevant to all businesses, regardless of size or maturity. Co-branding can bring about additional advantages, which we’ll discuss further below.
Benefits of Co-Branding
Co-branding is a partnership between two businesses where one company’s success contributes to the success of the other. Co-branding partnerships are most impactful when they involve two similar companies working together, as audience members obtain unique value from their relationship. An example of co-branding that you may already be familiar with is a sports company partnering with an athlete.
1. Co-branding is exciting for consumers.
When two businesses work together, the partnership is exciting for consumers. They may have never expected your collaboration, so they’re eager to see what’s to come.
Co-branding attracts interest and increased attention, as it is not a common practice. You may have customers refreshing your social media feeds or checking your websites on launch days because they’re incredibly excited about what’s to come.
2. Co-branding brings exposure to new audiences
Although you may operate in the same industry, you and your partner likely target different audience segments. When you work together on a co-branding campaign, you gain exposure to their audience, they gain exposure to yours, helping both of you increase brand awareness, draw in new clients, and grow your overall reach.
3. Co-branding helps you generate trust with new audiences.
When you’re advertising alone and emerging into new markets, it is your responsibility to build trust with your audience. However, a benefit to co-branding is that your partners vouch for your credibility.
Your new audiences may not trust you 100% off the bat, but the trust that they have in your partner tells them that they wouldn’t expose them to a brand that they disagree with or don’t find credible. Essentially, your partners are telling their audience that they can trust you because they trust you.
4. Co-branding is cost-effective
When you work with another brand, you’re both committing to sharing resources and putting money into your advertising efforts. This means that you can save money and spend more than you may have had access to with your individual budget.
For example, if you and your partners agree to share ad costs, you can use double the money to access resources to create your campaigns. If you’re a small brand, this can be highly beneficial, as you have the opportunity to branch out in ways you couldn’t do alone.
At the end of the day, your business’ branding, regardless of whether you’re working with a partner, is the first thing consumers will see about your business. If you take the time to prioritize strong branding for your individual business, you’ll find sales growth, and retain new audiences when your co-branding campaigns go live.


How to Get Started with Agile Marketing [+ Examples]
In 2019, DoorDash was losing money on the average order and reported an operating loss of $616 million on $885 million in revenue. By the end of 2020, their revenue jumped to $2.89 billion — a 226% gain.
Why the sudden success?
For one, the global pandemic spiked the demand for food delivery. But DoorDash also responded to customers’ needs right from the start. They delivered COVID test kits and launched the #OpenforDelivery campaign to support restaurants by the end of March, made it easier to filter customer ratings in April, and released a Gifting feature to send loved ones food over the holidays.
Simply put, they figured out what customers desired and rapidly delivered.
Now more than ever, customers expect brands to understand and respond to their needs. In a survey of global consumers, 58% of people remembered a brand that quickly pivoted and 82% ended up doing more business with that company as a result.
But a lightning-fast response only happens if your team can handle abrupt change.
Agile marketing is a strategic approach that focuses on quickly executing projects by working in short sprints. It makes room for marketers to shift their focus, adapt to customer needs, and change priorities alongside expectations.
With Agile, what once took months to deliver can take weeks.
Adopting this approach takes work, but this post shares how to get started with Agile marketing by explaining the process, sharing examples, and showing you how to automate your efforts.
What is Agile Marketing?
Agile marketing is a strategic marketing approach that prioritizes creating high-value deliverables, working in short, intense bursts to achieve goals, and rapidly iterating.
By the end of each burst — often called a ‘sprint’ or an ‘iteration’ — teams complete their outlined deliverables and begin testing so they know how to improve during the next iteration. Data collection and analytics allow teams to incrementally refine and improve the results over time.
Agile marketing embraces failure. It also requires teams to learn from their mistakes and make adjustments to continuously get better. This mindset isn’t always easy for teams to instantly adopt. That’s why it’s important to understand the core values outlined in the Agile Marketing Manifesto before switching to this approach.
- Validated learning over opinions and conventions.
- Customer-focused collaboration over silos and hierarchy.
- Adaptive and iterative campaigns over Big-Bang campaigns.
- The process of customer discovery over static prediction.
- Responding to change over following a plan.
- Many small experiments over a few large bets.
When these values play out in real-world projects, the impact can be massive.
Research by McKinsey found that digital marketing organizations using Agile have seen a 20-40% increase in revenue. Agile has also cut down the time it takes for companies to turn an idea into an offer — from multiple months or weeks to less than two weeks.
You may think this acceleration leads to sloppy deliverables and disappointment. It’s the opposite. Agile marketing can improve performance and quality by creating space for clear goals, frequent feedback, continual testing and iteration, on-time deliverables, and inevitable impact.
To get those results, you have to dive into the nitty-gritty details.
Agile Marketing Process
No marketing team follows the exact same Agile approach. Some stick to the traditional frameworks while others pick and choose which parts work for them to create a hybrid method.
The method you choose can depend on the goals you want to accomplish. While its roots are in web and software development, 77% of companies using Agile rely on it for creative services, content creation, and operations.
The main methodologies for Agile marketing teams are Scrum and Kanban.
Scrum
The Scrum framework revolves around sprints. Each sprint lasts for two to six weeks and is organized by the team doing the work. Depending on the size of your project, you may need to break it up into multiple smaller sprints to tackle it bit by bit.
The goal of each sprint is to rapidly deliver small projects that can be combined into a larger project over time. Once a sprint is set, the team shouldn’t change its goals or reprioritize until the sprint is complete.
To make sure your sprints stay on track, you need to establish a few key roles and meetings.
Roles
1. Scrum Master
This person is responsible for keeping the team on task. They know the Scrum framework and use it to facilitate meetings, remove roadblocks, help team members use the framework, and make sure everyone on the Scrum team is collaborating and communicating.
2. Product Owner
This person understands the reason for the work and makes sure the process is being done at the right time. They understand the customers better than anyone else, and they collaborate with the stakeholders and team to ensure the deliverables provide value to the business and to customers.
3. Developer
Everyone else on the team falls under the Developer role. Ideally, the people in this role are cross-functional and contribute a unique set of skills needed to accomplish the sprint. You want to choose at least one person from each department that your project touches.
Meeting
1. Planning
A planning meeting kicks off every sprint to decide what the team can achieve. Everyone looks at the priorities the Product Owner has put together and agrees on which to include in the sprint.
The project(s) are divided into tasks, given deadlines, and assigned to individual team members so people know exactly what to work on when they leave the meeting. These meetings take time, so dedicate at least one hour per week of the total sprint time (i.e., a three-hour meeting for a three-week sprint).
At your first planning meeting, emphasize that Agile is a new way of working and the typical rules don’t apply. Reiterate the need to focus on the customer above all else and highlight the need for speed, collaboration, data, and accountability.
2. Stand-up
The daily stand-up gets your team together for a brief (15 minutes or less) check-in. The aim is to make it very clear where everyone is on progress, roadblocks, and tasks. Everyone on the team answers:
- What they accomplished yesterday
- What they plan to do today
- Any blocks in their way
3. Review
The review is the time to show off what your team has achieved during the sprint. It’s open to anyone interested in the results and is a good time to show off campaign materials, demo content, or share early testing data.
Make note of feedback and add or adjust your priority list as needed, but don’t get wrapped up in additional approvals or new ideas. The point is to share insight into what your team is working on and highlight the impact.
4. Retrospective
Headed by the Scrum Master, this meeting is a chance for the Scrum team to reflect on work from the latest sprint. Everyone shares what went well, what didn’t, what can be improved, and lessons learned. Make sure people don’t point fingers in the meetings, and assign action items as a way to continually improve before the next retrospective.
Kanban
If your marketing team is full of visual learners or does work that won’t fit well into a predetermined sprint timeline, Kanban may be the Agile framework for you.
Kanban is made up of three main components: visualizing workflow, setting WIP limits, and meeting cadences.
1. Visualizing workflow
Unlike Scrum, Kanban uses visual cues to track progress. A Kanban board is how people track the progress of user stories (i.e., tasks) to be accomplished. The board is divided into columns, each their own stage in a workflow.
The simplest boards have To-Do, Doing, and Done columns, but the more complex your workflow, the more columns you may need. (One of my favorite tools for building boards and tracking progress is Miro).
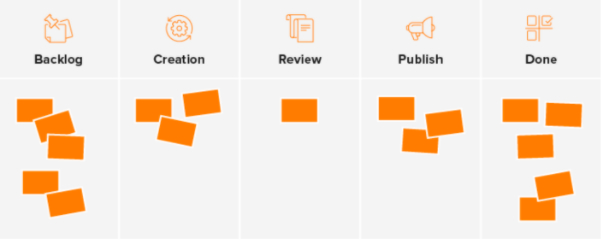
Each card on the board represents a task to be completed. For example, if you’re planning a social calendar for the upcoming quarter, you would list each task that needs to be accomplished on its own card (i.e., choose topics, assign copy, write copy, schedule posts, and so on).
As the task is being completed, you move the card into the corresponding column. A quick glance at the board and everyone on your team knows how the project is progressing and what still needs to be done.
2. Setting WIP limits
When people have too much on their plates, nothing gets accomplished. This is why Kanban uses WIP limits — boundaries that outline how people will work on the tasks within each column on the Kanban board.
Placing limits on how many tasks can be in one column or how much time people have to accomplish a task. Let’s say you want your social coordinator to schedule the posts for each month before they begin reviewing posts for the following month. That rule means they can’t move the “Review posts” task into the “Doing” column before the “Schedule posts” are in the “Done” column.
Setting ground rules helps people focus on finishing a specific goal or task before starting another one. In a world of context switching and mental burnout, limitations are a way to achieve your goals without juggling too many tasks at once.
3. Meeting cadences
Similar to Scrum, Kanban is designed to help teams work better and accomplish their goals. It incorporates planning meetings, daily stand-ups, and retrospectives to make sure a project is on task and continually refined.
The one meeting that’s different from Scrum is the delivery meeting, a time to plan when to release the content or project. Since Kanban works on longer timelines than Scrum, the delivery meeting is the place to bring in other groups that may need to help get the work out.
While a small team may own a project, a successful Agile marketing strategy relies on everyone. It’s helpful to bring in outside team members to collaborate on timelines, share feedback, and assist in launching the work your team accomplishes.
Agile Marketing Examples
Most Agile marketing efforts break down into a few simple steps.
- The team makes a list of priority projects to work on.
- The steps to tackle a project are planned out in a sprint.
- The team checks in every day in a stand-up meeting.
- Everyone accomplishes their specific tasks and testing begins.
- Data from the testing is collected and used to improve the project.
Let’s look at how this process can play out in real-world Agile marketing examples.
1. Scrum Example
The United Kingdom-based Santander bank struggled to produce efficient marketing campaigns due to long production lead times and expensive creative costs. In an effort to increase efficiency, they adopted an Agile marketing method for their “Unlock you London” campaign. The bank’s goal was to convince customers to download and use their mobile app.
They “put everyone together around shared objectives, shared KPIs, and a budget in the middle of the table” and agreed to tweak the campaign on a weekly basis. Instead of dedicating a massive spend working with a creative agency that would take months to develop everything needed for the campaign, they began spending a few thousand pounds at a time. This swap allowed them to make changes quickly and test an idea on customers.
If something resonated, they’d keep it. If not, they’d make a small change and test again.
The new Agile approach produced incredible results. By the end of the campaign, the bank saw a 12% increase in loyalty, a 10% increase in account satisfaction, the highest Net Promoter Score in 17 years, and the highest positive sentiment (90%) among customers.
2. Kanban Method Example
A technology startup recently revamped its brand and wants to update essential marketing materials. The creative team puts together a small Agile team to revamp the website and create new marketing materials.
They include a designer, copywriter, sales rep, creative director, product lead, content coordinator, and a member of the legal team. The team chooses tasks to be completed, decides on a six-week timeline, and lays out the work in a Kanban board.
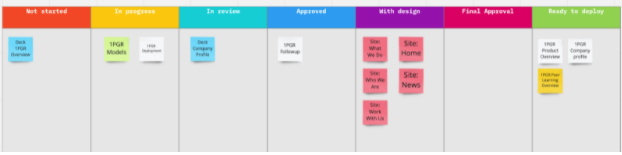
The team lays out the individual tasks associated with each task in a project management tool and tracks the progress of each project in a Kanban board.
Six weeks later, the Agile team has designed five new web pages, six one-pagers, and two decks. While more complex projects like the website will need another sprint or two in order to build out simpler materials — like the one-pagers — for the sales team to use. What once took an entire quarter to complete has been condensed into several weeks.
Agile Marketing Automation
Having the right type of technology for Agile marketing automation is crucial for collecting data and conducting analytics.
A well-designed CRM platform can help you collect, organize, test, and manage data about your customers and sprint iterations. It can automate campaign delivery and send messages to customers, feeding tracking and performance metrics back to you.
Above all, automation improves your ability to react to customer requests. In a survey of C-suite executives, 41% said they hoped to implement more digital technology in order to respond quickly to customer needs. So if you need to convince your boss that automation technology is worth the investment, explain how it’s essential to collect data that allows you to share the most relevant messages and offers.
Let’s say you decide to turn an idea for an email campaign into reality using your newly established Agile marketing team. You gather a copywriter, designer, analyst, developer, operations lead, and email lead. Before starting the sprint, you’ll want to make sure you have the following tools to automate your efforts.
- A collaboration tool
- A tool to review copy, design, and development
- A way to collect feedback
- An email marketing tool
- A way to gather data and analyze it
Look into the following Agile marketing automation tools to see which one works for your team. Evaluate the features, user interface, customer support, integrations, resources, reviews, and pricing.
Once you have the technology you need to automate your Agile efforts, you can focus on the tasks at hand and make sure every sprint or board stays on track.
Switching from a traditional project management approach to Agile marketing may seem intimidating. But the switch will be simple if you keep a few rules in mind. Start with what you want to accomplish (your goals), get buy-in from the senior marketing leaders who can advocate for you with the rest of the team, bring together a small group of people, and explain this new way of working to them. Finally, set up the technology you need to collaborate, collect feedback, and analyze data.
Soon, you’ll be finished with your first project — and gaining momentum that lets your Agile marketing efforts stay focused, grow faster, and get better results than ever before.

A Non-Designer’s Guide to Visual Hierarchy [Best Practices + Examples]
Ever click on a website, take one look and say “Hm, that’s going to be a no” while you look for the exit button?
For me, it’s usually because of three reasons: the site looks outdated, crowded, or hard to navigate.
Bad design can keep your target audience from gaining any interest in your brand.

That’s why it’s important to understand the key design principles that will help you draw your audience in, keep them on the page, and generate conversions.
Here’s an easy guide on a specific design principle: visual hierarchy. We’ll cover all the elements that contribute to visual hierarchy and look at good and bad examples.
Visual hierarchy affects what you look at and focus on in a design, whether it’s an image, graphic design, or web design. It’s a key player in ct (i.e., how information is organized and displayed for easy understanding and navigation) and can greatly impact the user experience (UX).
When thinking about visual hierarchy, you want to ask yourself a few questions:
- What do we want to draw attention to?
- What actions do we want our users to take?
- Where does the eye naturally go to and where do they land?
Asking these questions will help you use the principles outlined below to create a clear visual hierarchy.
What constitutes bad visual hierarchy?
When it comes to visual hierarchy, there’s a golden rule: If every element appears important, nothing will seem important.
Visual hierarchy serves as a way to rank the information you’re consuming. If there is no way to differentiate between the elements, that is considered poor hierarchy.
Take this example:
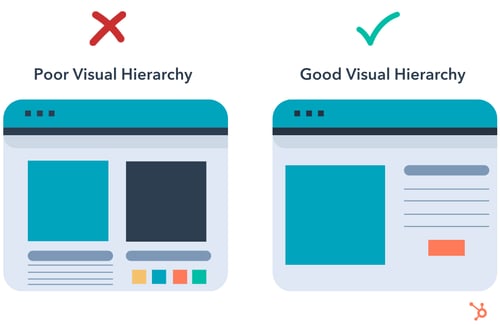
On the left, there’s a lot much going on. The two main elements are the same size, there are many different colors. It makes it hard to know where to look. Your eyes glaze over everything, creating some uneasiness and lack of direction.
On the right, your eye is automatically drawn to the main blue box on the left, then naturally goes to the elements on the right before landing on the orange call to action (CTA).
A poor visual hierarchy:
- Confuses the user.
- Makes it unclear where to look.
- Creates a bland design.
Instead, create a visual structure that facilitates understanding and guides the user.
1. Consider reading patterns.
When designing, you want to note your target audience’s natural eye patterns.
Across all cultures, we read top to bottom. However, there is some variation in how we read horizontally. Western cultures tend to read from left to right, while some Semitic and Indo-Aryan languages, such as Arabic, Hebrew, and Urdu are read right to left.
With this in mind, it impacts how we scan and understand designs. For instance, Western users usually follow an F or Z reading pattern.
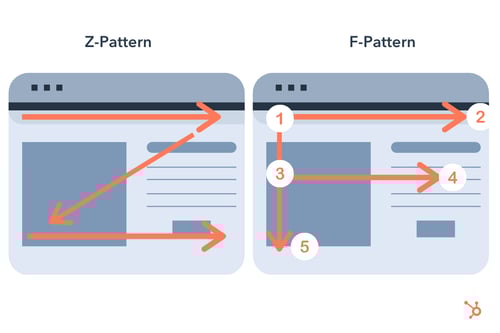
Knowing this information will help you design projects that convert, particularly in landing pages.
2. Users notice bigger elements more easily.
Size plays an important role in visual hierarchy. It’s one of the main ways to rank elements in a design.
Take this example from Netflix.
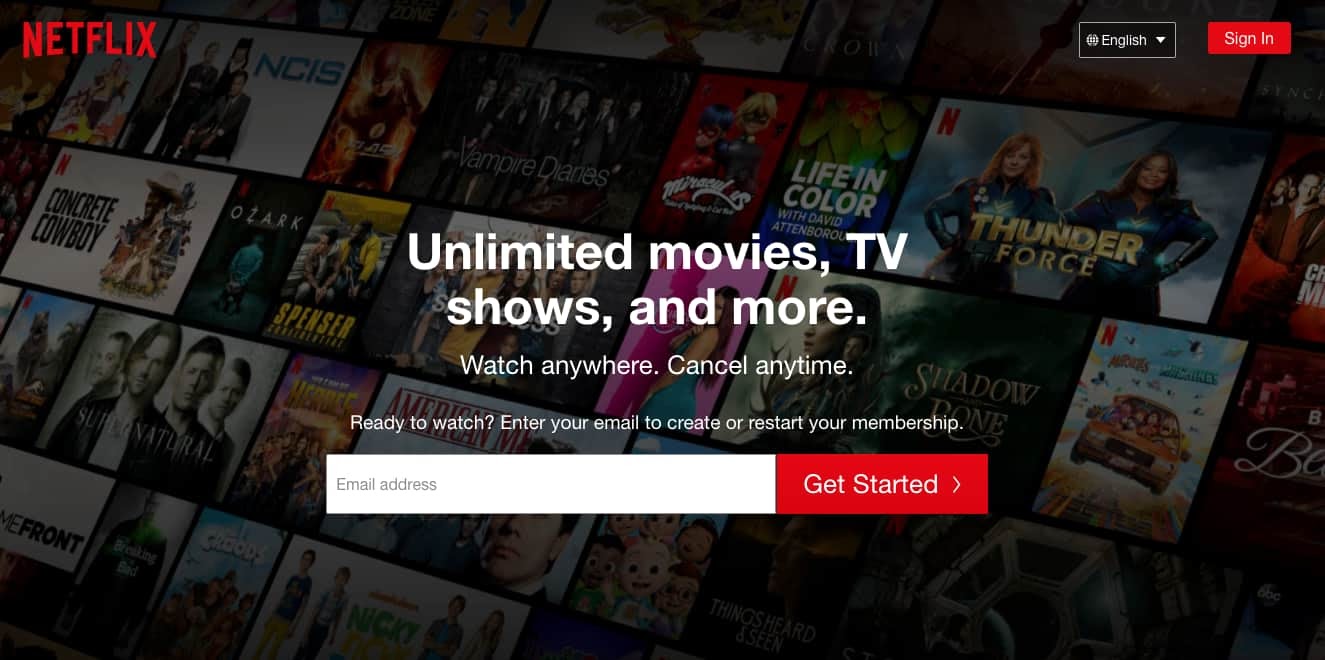
The first thing you’ll read when looking at this image is “Unlimited movies, TV shows, and more.“
Then you’ll read the next line, and then the next before you explore the other elements on the page.
Size signifies importance. The bigger an element is, the more attention it draws, and then more likely you’ll look at it first.
As you design your webpage, consider what you want your audience to look at first and use that to guide your strategy.
3. Color and contrast draw the eye.
The second principle to keep in mind is color.
We know that color can evoke emotion and can have certain cultural and social connotations. Just look at logos by industry, and you’ll notice a trend. Food brands tend to have reds and yellows, while financial institutions tend to be in blue.
In design, color is great at drawing attention.

In the example above, you’ll see that the elements that stand out the most are in orange. It’s only after looking at them that you’ll scan the other elements on the page.
On a website, you can use this to draw focus to your CTAs.
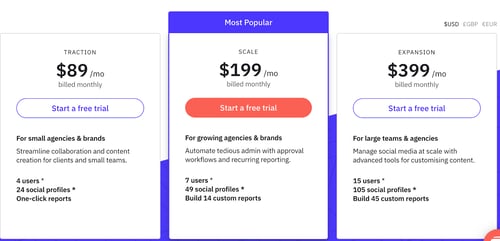
In the example below, the CTA that stands out the most is in the middle. The brand likely wants users to choose this option. The other CTAs are still visible but muted compared to the orange.
To create the most visual impact with color, use it sparingly. That will make the elements stand out more, as seen in the above example.
4. White space creates emphasis.
White space refers to the empty space within a design.
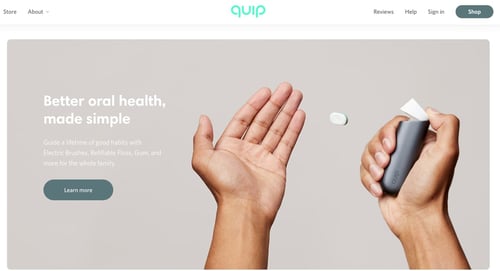
Sometimes, there is a desire to fill the space with as many elements as possible. However, this goes back to the concept of importance: If they all seem equally important, none of them are perceived as important.
This is why adding white space to your web design is key in pulling in your visitors.
Apple is also well known for its use of white space.
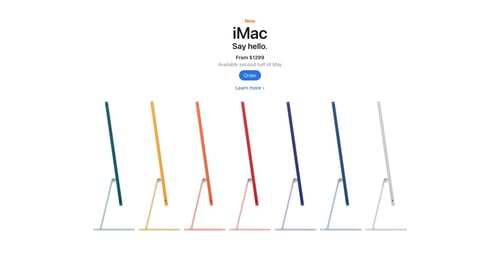
The brand offers a simple user interface, which creates more emphasis on the elements on the page. Apple’s use of white space also reflects a brand’s identity.
5. Proximity and repetition create unity.
When you put several elements together, it tells the user the concepts are related.
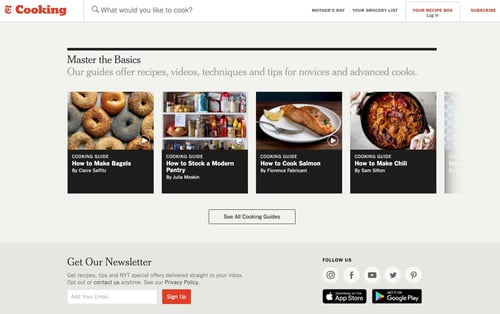
This design offers many examples of proximity.
Take the elements under “Master The Basics.” By having these boxes all grouped closely together, the visitor can understand they fall within the same category.
The same goes for the icons under “Follow Us.” If the icons were all spread out randomly on the page, it would be difficult for users to understand their purpose.
If you’re not sure how to group certain elements, you can employ certain UX research strategies, such as card sorting, to group elements based on your audience’s expectations.
Examples of Good Visual Hierarchy
1. Visme.co

Visme.co has a striking pop-up that encourages users to sign up for their newsletter.
The brand successfully uses white space, color, size, and contrast to make key elements stand out. You’ll also notice that the elements are designed following the Z-pattern, making it more likely that users will convert.
2. Studio 8AD
In designing their website, this brand leverages white space to focus users’ attention on three key elements: the image and the two CTAs located on the bottom left.

3. Predominantly Black
This brand offers a great example of proximity to create visual hierarchy. 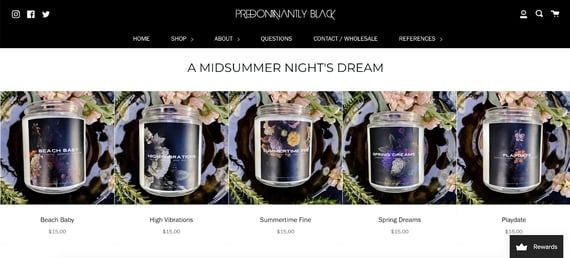
By organizing all products under the main title and leaving little space in between, visitors quickly understand that these products fall within the same category.
Visual hierarchy is all about ranking your elements by order of importance. Once you narrow down what you want to focus on and consider your audience’s needs, you can create designs that produce the desired impact.

The Ultimate List: 50 Online Local Business Directories
Promoting a local business isn’t easy these days.
Whether it’s because of oversaturation or complicated search engine algorithms, it’s all too easy to feel like no one will find your business in the local search results.
Luckily, there’s an easy way to improve your local SEO. All you have to do is list your business in online business directories such as Yellow Pages, Manta, and more. This is called building citations, and it’s a critical piece of a local marketing strategy.
![→ Download Now: SEO Starter Pack [Free Kit]](https://no-cache.hubspot.com/cta/default/53/1d7211ac-7b1b-4405-b940-54b8acedb26e.png)
Today, Google is inserting itself between consumer and local business websites much more often. For proof, you need to look no further than Google My Business, Accelerated Mobile Pages (AMP), featured snippets, and most importantly, local packs.
By building citations, you can make sure that you appear in these local packs when people look for businesses like yours in their area. Business directories may seem like a thing of the past, but they’re a great way to grow your presence online.
You can improve visibility by listing your local business’ NAP (Name, Address, Phone Number) on directories, online business listing sites, and citation sites. Aside from improving your local SEO, these can also improve your rankings on search engines because the listings usually link back to your site.
Make sure your company listing has the following information once you add it to a directory:
- Consistent NAP. If you add or update your business on multiple business listing sites, make sure you’re providing the same company information across each directory.
- A link to your website. Backlinks — also known as inbound links — are crucial to your company website’s Domain Rating. Consider adding a tracking link at the end of this URL as well, so you can see how much traffic your website specifically gets from the business directories that are linking to it.
- A company description. Make sure you have a detailed description of your business that reflects your organization’s mission, culture, and values.
- Multimedia. Give company searchers a visual taste of your business with a picture or video of your office, your employees, or your daily business operations.
There are plenty of location-specific and industry-specific business listing sites where you can submit your data. To start promoting your local business, however, you should start with the big sites and work your way toward the more niche directories.
First, let’s go over the top free business directories.
Online Directories for Local Businesses
- Facebook Pages (Domain Rating = 100)
- Instagram for Business (Domain Rating = 99)
- Google My Business (Domain Rating = 98)
- LinkedIn Company Directory (Domain Rating = 98)
- Apple Maps (Domain Rating = 97)
- Yelp (Domain Rating = 94)
- Bing (Domain Rating = 93)
- HubSpot’s Solutions Directory (Domain Rating = 93)
- Better Business Bureau (Domain Rating = 93)
- MapQuest (Domain Rating = 92)
- Foursquare (Domain Rating = 91)
- Yahoo! Local (Domain Rating = 91)
- Thumbtack (Domain Rating = 90)
- Yellow Pages (Domain Rating = 90)
- Angi, FKA Angie’s List ( Domain Rating = 91)
- Nextdoor (Domain Rating = 87)
- Manta (Domain Rating = 87)
- Merchant Circle (Domain Rating = 85)
- YellowBook.com (Domain Rating = 82)
- Dun & Bradstreet Business Directory (Domain Rating = 80)
- Local.com (Domain Rating = 79)
- Hotfrog (Domain Rating = 79)
- ChamberofCommerce.com (Domain Rating = 79)
- 2FindLocal (Domain Rating = 46)
- EZlocal (Domain Rating = 78)
- Brownbook.net (Domain Rating = 77)
- eLocal.com (Domain Rating = 77)
- City Squares (Domain Rating = 76)
- iBegin (Domain Rating = 75)
- EBusinessPages (Domain Rating = 75)
- BOTW (Domain Rating = 74)
- Neustar Localeze (Domain Rating = 73)
- Spoke (Domain Rating = 72)
- GoLocal247 (Domain Rating = 72)
- Call Up Contact (Domain Rating = 71)
- n49.com (Domain Rating = 71)
- Just Landed (Domain Rating = 71)
- Tuugo.us (Domain Rating = 71)
- Lacartes (Domain Rating = 71)
- Hub.biz (Domain Rating = 70)
- Cylex US (Domain Rating = 70)
- Cybo (Domain Rating = 70)
- Fyple.com (Domain Rating = 65)
- Opendi.us (Domain Rating = 65)
- Yellow.Place (Domain Rating – 64)
- My Huckleberry (Domain Rating = 62)
- ExpressBusinessDirectory.com (Domain Rating = 62)
- Bizhwy.com (Domain Rating = 61)
- USdirectory.com (Domain Rating = 56)
- Finduslocal.com (Domain Rating = 50)
Methodology
We used a few parameters to decide which directories would make it onto the list.
Domain Rating
Domain rating is a score that’s given to websites to reflect how well they rank on Google based on their backlink profile. The minimum score is 0 and the maximum score is 100. Domain rating is similar, but not the same as, domain authority.
Our minimum required domain rating for the directories on this list was 50. We gathered the data from Ahrefs in May 2021.
Category
We compiled this list for use by any business. Regardless of your industry or target market, you can submit your business to all of the above directories.
To make it onto this list, the directory had to be categorized as General. The only exception is HubSpot’s solution directory, which is categorized as Marketing/Advertising.
Add Your Local Business to Online Directories
Making sure that you have a presence where your potential customers might find you is critical to any local marketing plan. It’s critical to build citations not only for the added visibility, but for the SEO benefits, too. Add your local business to some of these business listings and directories today — and watch your business and customer base grow.
Editor’s note: This post was originally published in March 2013 and has been updated for comprehensiveness.


Anchor Text: What It Is, Why It’s Important & How to Optimize It
By now, many people are familiar with links.
Links make up the web’s infrastructure, and make it possible to jump from one webpage to another.
While links are sometimes included in the text as is (e.g. https://blog.hubspot.com), they are usually inserted with an “anchor” to make the user’s reading experience more pleasant.
Let’s dive into what anchor text is, and why it matters. Plus, how to optimize your anchor text for SEO.
What is anchor text?
Anchor text is the clickable text which links two webpages together. Ideally, the target URL references relevant information about the topic being discussed on the source page.
Anchor text is also known as a link title, link text, or link label.
Why is anchor text important?
Simply put, anchor text provides context to both users and search engines. The link label indicates what a user will see on the linked page if she decides to click on it. On the other hand, search engines use the anchor text to index and rank webpages.
Here is where relevancy comes into play. If the referenced content is not relevant to the topic at-hand, this may cost your website visitors because it accounts for bad user experience. And when it comes to search engines, your website will be pushed down because the linked content doesn’t add value for the user.
Mindful use of anchor text can increase the trust your readers have in your brand, as well as the content you share on your website. Additionally, it boosts your SEO efforts by giving all the right signals to search engine crawlers.
How do I create anchor text?
Let’s examine the building blocks of a hyperlink and see where the anchor text fits in.
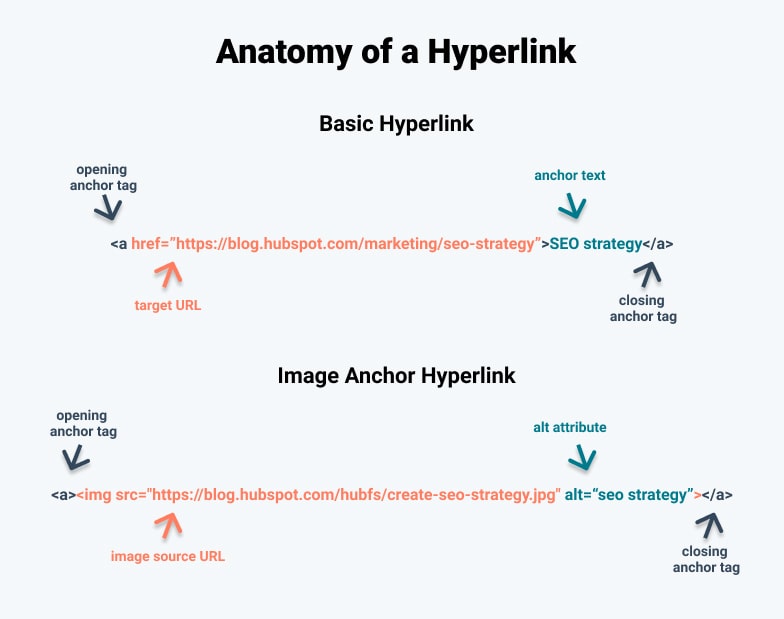 A basic hyperlink consists of three parts — the anchor element tags, an rel=” noopener” target=”_blank” href attribute and the anchor text (see image above). In order to include a hyperlink with a link label in your content, start with an opening anchor tag: <a>.
Next, introduce the target URL with an rel=” noopener” target=”_blank” href attribute (rel=” noopener” target=”_blank” href=””) by placing it inside the opening anchor element. Then, insert your target webpage between the quotation marks.
Finally, the anchor text goes between the opening and closing anchor tags.
Depending on the content you are linking to, you may want it to open in a new window. The option is usually reserved for when you want to link to a useful resource, located on another domain, but still retain the attention of your readers. To do this, simply add the target attribute and set it to “_blank”:
<a rel=” noopener” target=”_blank” href=”https://ift.tt/1RRlBUM” target=”_blank”>Your Anchor Text Goes Here</a>
Images can also function as anchors. Keep in mind that the syntax of the html code is slightly different. Instead of adding the source of your image inside the opening anchor tag, add the <img> tag in between the opening and closing anchor tags. All you need to do afterwards is add the src=”” attribute and paste the source URL of your image inside the quotation marks.
You may have noticed a second alt attribute. Visually-impaired people who use screen-readers, and web crawlers, need text-based information to understand what is being shown on the image. So it’s good practice to provide a description to your images by filling in the alt attribute.
Types of Anchor Text (with Examples)
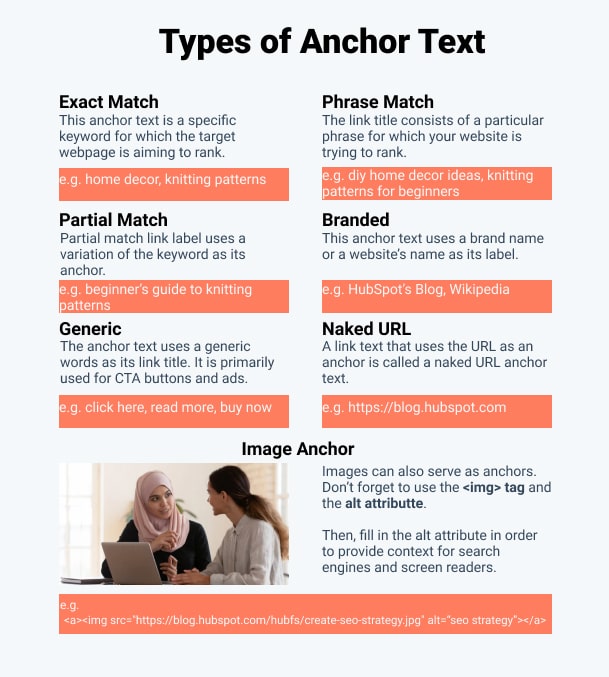
Before we delve into how to best utilize anchor text for SEO purposes, let’s see what kinds of link labels exist.
 Exact Match
As the name suggests, the exact match anchor text is a specific keyword for which the target webpage is aiming to rank. Let’s assume you’re the webmaster of a knitting supplies shop and you wish to rank higher for the keyword “knitting patterns”.
One way to approach this is for a relevant domain to link to your knitting patterns webpage by using the keyword of the same name. But use these sparingly. Otherwise, you may set off the Google spam filter and get penalized for spammy behavior.
Phrase Match
Similarly, the phrase match link title consists of a particular phrase for which your website is trying to rank. Going back to the knitting patterns example, those who are not very skilled in knitting may be searching for an easier pattern. As a result, they may be searching for “knitting patterns for beginners”.
Partial Match
This type of anchor text is similar to the phrase match label text. The only difference is that instead of using the exact phrasing of the keyword, a variation is used. Such as:
“knitting patterns for beginners” = “beginner’s guide to knitting patterns”
Branded
Website names and branded anchor texts are fairly common. For instance, I can use HubSpot’s Blog as my link label if I wanted to refer to this blog’s homepage. See what I did there?
Generic
Easily one of the most recognizable anchor texts. These are usually used for ads and CTA buttons. Typical generic anchor text includes phrases like “click here”, “read more”, or “buy now”.
Naked URL
Remember how I linked to HubSpot’s Blog by pasting “https://blog.hubspot.com” at the beginning of the article? A link text that uses the URL as an anchor is called a naked URL anchor text.
Image Anchor/No Text
As the saying goes, sometimes a picture is worth a thousand words. Fortunately, it can also be used as an anchor. Don’t forget to include a descriptive text to your image because search engines use it to understand what the image is about.
How to Optimize Your Anchor Text
Merely getting familiar with the different types of anchor text won’t guarantee you higher SERP rankings. Here are some best practices for optimizing your anchor text to get you started.
1. Make clear the anchor text is distinguishable.
Many platforms offer various webpage customizations. Some of these blend the anchor with the surrounding text. Make sure users know the anchor is clearly marked and it’s clickable.
2. Don’t mislead your readers.
Always keep your promise when linking to other webpages and provide the agreed content.
3. Preserve the natural flow of your writing.
While most try to approach this task strategically and concentrate on exact and phrase matches, natural language does not work this way.
4. Maintain the relevancy of your links.
If you provide time-sensitive content, remember to review your links and keep them up to date.
5. Always account for search intent.
Remember to consider the reader’s search intent and confirm it matches the context of your content.
6. Avoid keyword stuffing.
It goes without saying that keyword stuffing will incur the wrath of the Penguin update, which penalizes over-optimized anchor texts and low-quality hyperlinks.
7. Diversify your anchor text profile.
A natural link profile has variety. Excessive link label manipulation will get your webpage penalized.
8. Link text should be succinct.
Although Google looks at both the anchor and the surrounding text, don’t anchor large chunks of text.
9. Clean up URLs when using naked anchors.
No one likes long winding URL strings. Keep it short and simple.
10. Maintain an inventory of your links and anchors.
Having a library of all your links and labels not only helps during the optimization process, but also when doing site audits.
So, what now? The best way forward is to create an optimization strategy which makes sense for both your customers and your business.


The 15 Best WordPress Themes for Podcasters in 2021
The number of podcast listeners in the United States is expected to reach 100 million by 2024. (For context, there are 82.7 million listeners in 2021.)
Podcasts provide a source of convenient and intimate entertainment that’s only continuing to grow in popularity. While today’s
most popular podcasts
might vary significantly in terms of their content and hosts (
among other things
), they all share at least one thing in common — they each have their own website where fans can check out their latest episodes and seasons, info about live shows, biographies about the podcast’s hosts, and more details.
If you’re a host or producer, chances are you’re busy managing your podcast — and building your own WordPress website may sound like a daunting task. However, creating your site can be quite simple with a WordPress podcasting theme that allows you to share your episodes, seasons, host bios, and any other content you want to provide your visitors and fans.

We’ve curated this list of our favorite podcasting themes to help you share your content on your site and make lasting connections with your fans. To determine which theme best suits your needs, review these 15 options, their unique features, and our key takeaways. Afterward, check out the WordPress Theme Directory if you’d like to explore more podcasting themes.
1. Viseo
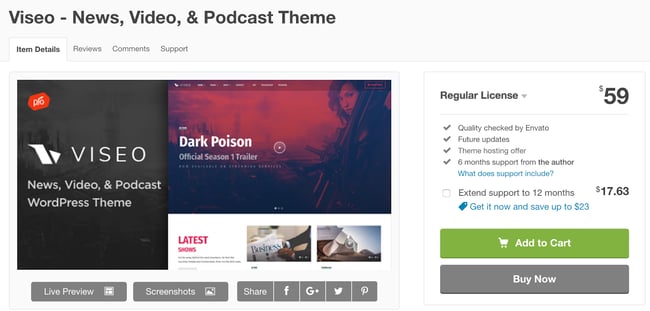
Viseo is a podcast theme with a “latest show” section for your site pages so your fans can quickly locate and listen to your newest content. You can also easily upload and add high-quality videos to the theme’s Locally Hosted Video Player feature. Customizing your site pages and sections requires no coding knowledge due to the theme’s drag and drop builder.
Key Takeaways:
- Visitors can browse the “Latest show” section for new content
- Share high-quality video content with the locally hosted video player feature
- Customize your site with the built-in drag-and-drop page builder
2. Audonic
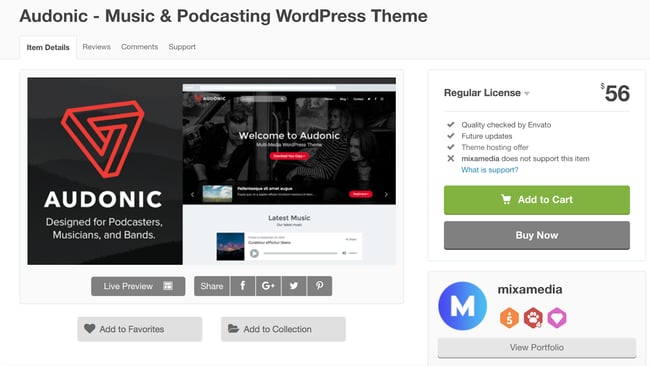
Audonic supports several commonly-used audio players so importing your podcasts is a hassle-free process. The theme offers dark and light-colored layouts and audio players to help you achieve your desired look. Your visitors can also check out your site while on the go since the theme is mobile-friendly.
Key Takeaways:
- Upload several audio players to showcase your podcasts
- Customize dark and light layout and audio player designs
- Experience better responsiveness with the mobile-friendly layouts
3. Podcaster

Podcaster is specifically made for broadcasting and managing podcasts — it has an unlimited number of podcast episode archive pages so you can maintain your shows and seasons over long periods of time. The theme’s homepage contains an audio and video player feature that allows visitors to experience your latest content the moment they enter your site. There are also a variety of color palettes to customize your site with to match your branding.
Key Takeaways:
- Add unlimited podcast episode archive pages
- Utilize an audio and video player feature on the site’s homepage
- Access a variety of color palettes to customize pages
4. Tusant
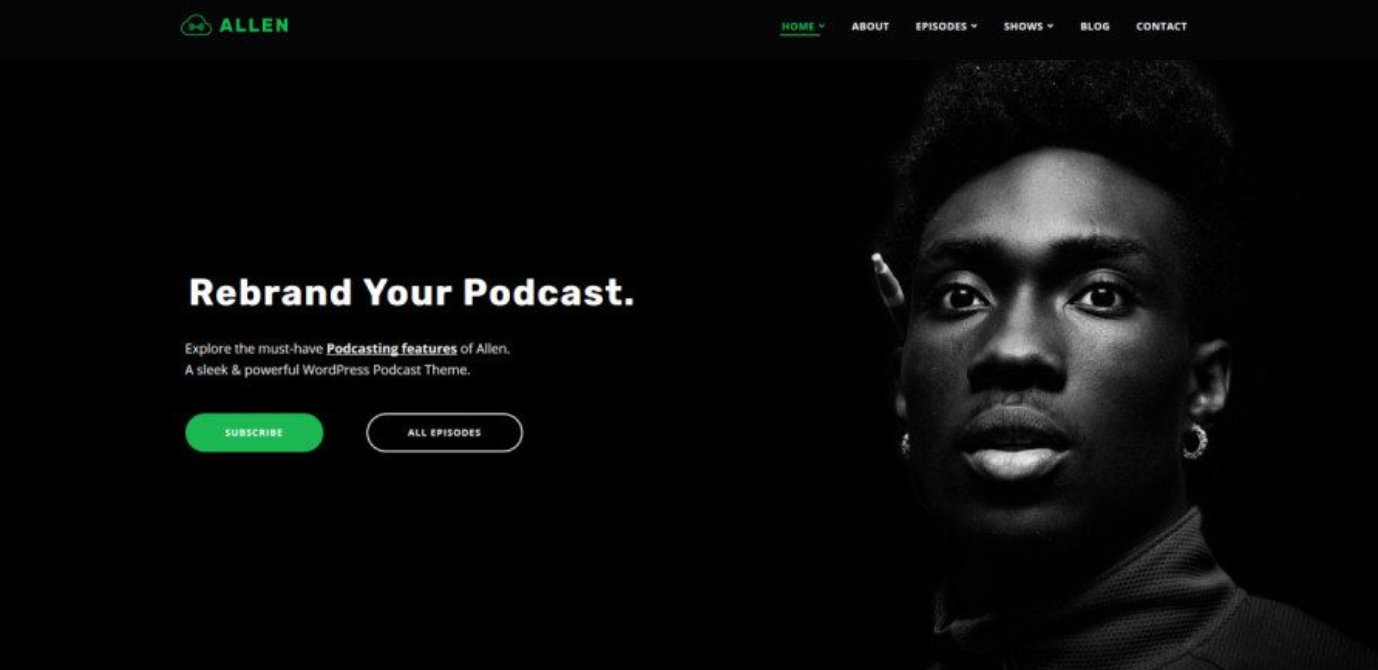
Tusant is compatible with all major podcast plugins to make managing and designing your podcast’s site as straightforward as possible with increased functionality based on your specific needs. The theme is compatible with the Elementor plugin which allows you to edit and update your site pages and review the changes in real-time prior to publishing them.
Key Takeaways:
- Integrate your favorite major podcast plugins
- Design your pages with the Elemntor plugin
- Display content in multiple layouts
5. Promenade
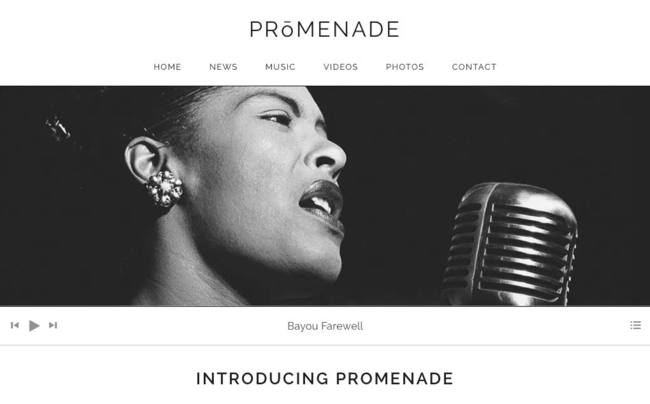
Promenade’s homepage offers two types of formats: a static web page where the same content remains in one place unless you manually change it and a dynamic web page in which your latest content is moved to the top of the page so your visitors automatically see your latest posts. The theme has grid layouts for your audio and videos to keep your content organized.
Key Takeaways:
- Format your pages with two homepage format options — static or dynamic
- Organize your audio and video using the grid layouts
- Arrange your site with custom navigation and menus
6. Life Coach
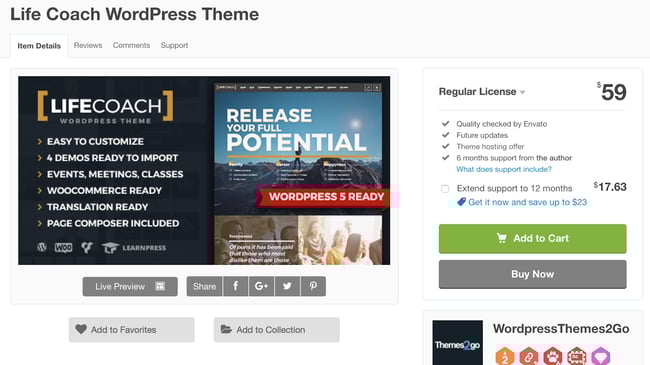
Life Coach is a podcast theme with an ecommerce store where you can sell your merchandise — the theme has WooCommerce integration to make managing your store simple. It includes an events calendar feature where you can highlight the dates for your latest episode releases, live shows, and more. Life Coach also offers MP3 (coding format for digital audio) support so you can easily import and manage your podcasts.
Key Takeaways:
- Integrate your podcast site with WooCommerce
- Notify visitors of upcoming events with the calendar feature
- Leverage MP3 support for your audio files
7. Vice
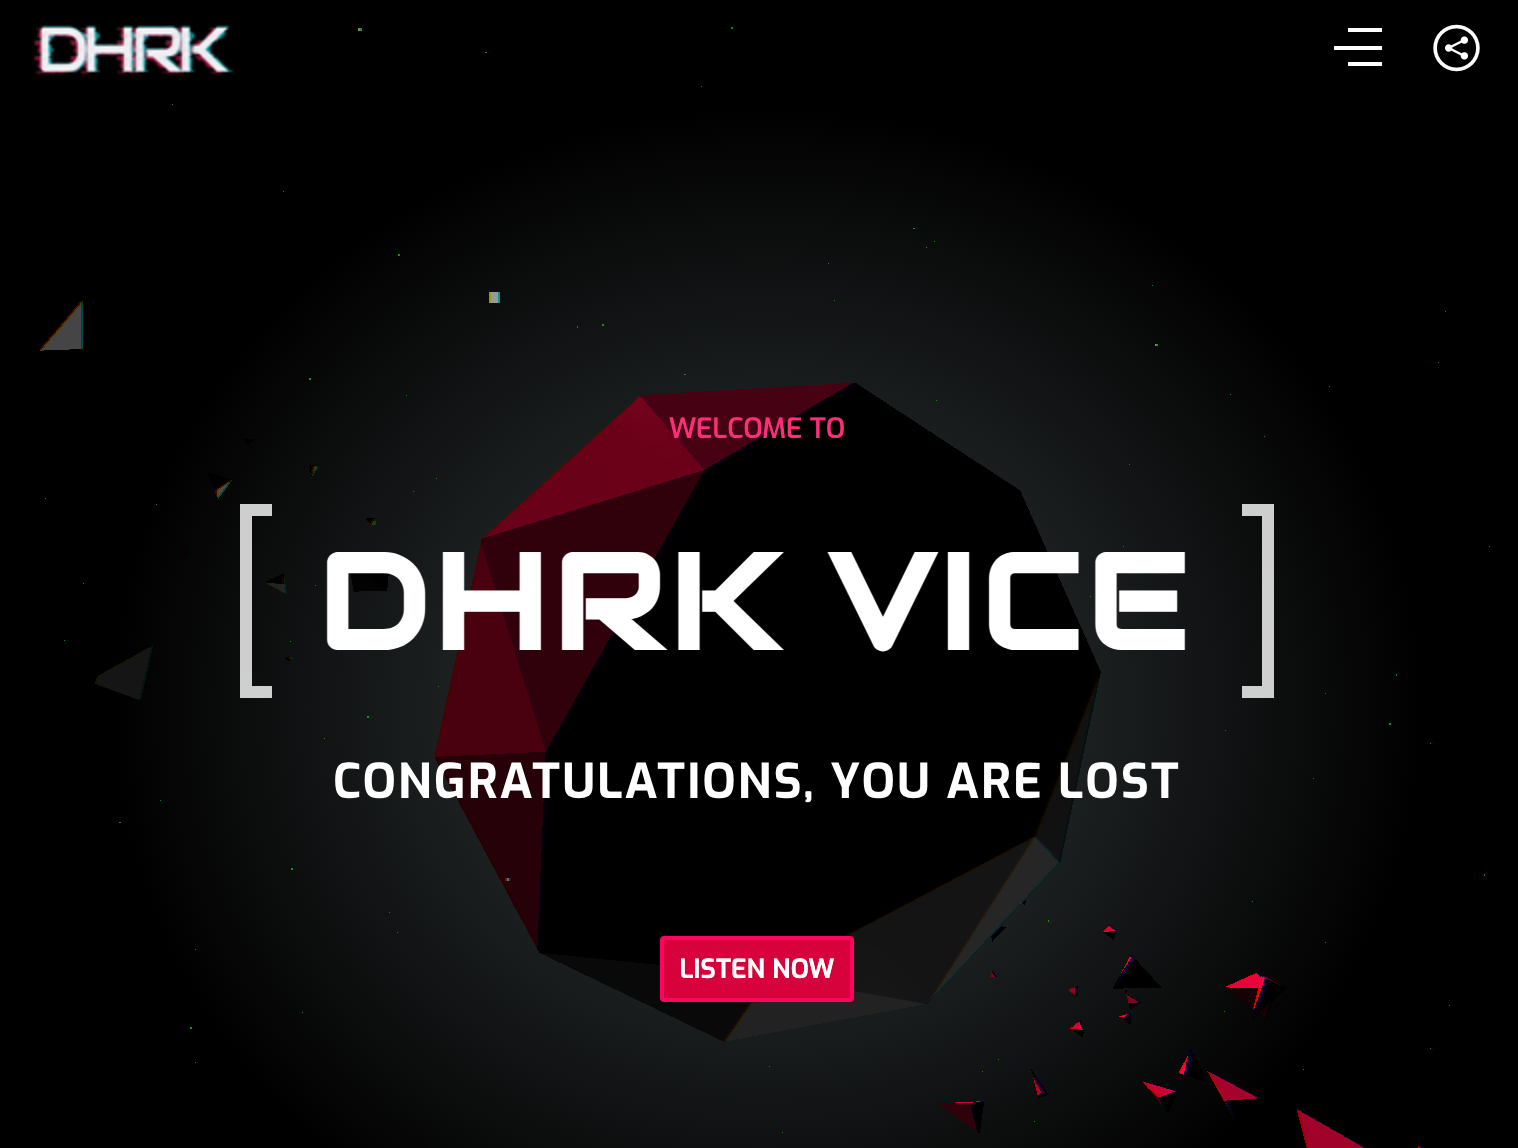
Vice gives you the ability to incorporate video backgrounds on your web pages to create an interactive and fun experience for your visitors. The theme’s responsive design automatically changes your site’s format to fit the screen it’s being viewed on, whether that’s desktop, mobile, or tablet. Vice also has pre-made podcast page templates with players that support Soundcloud, MP3, and Mixcloud audio so you can import and share your podcast in a matter of seconds without having to change its format.
Key Takeaways:
- Incorporate video backgrounds on site pages
- Change your site’s format depending on the device it’s being viewed on
- Make changes quickly with podcast page templates that support audio players
8. GeneratePress
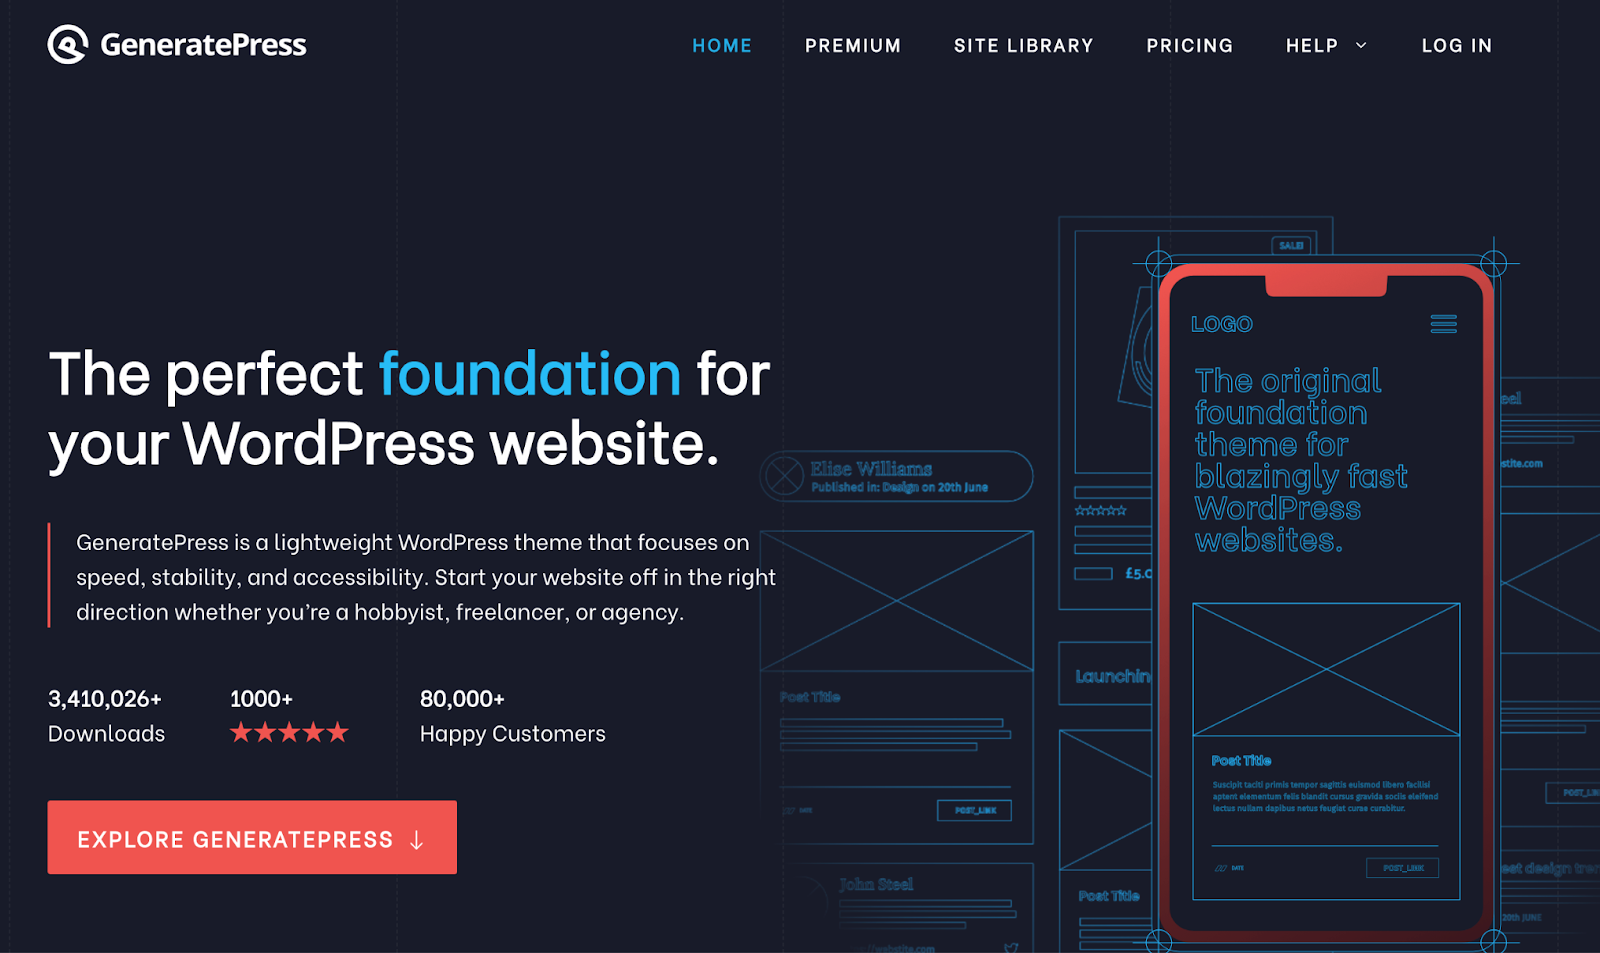
GeneratePress is a free and open-source theme — speed, usability, and accessibility are the features that set it apart. There is an unlimited number of custom color combination options to achieve any look you desire on your website. Performance and design aren’t mutually exclusive with this theme, GeneratePress prides itself on providing podcasters with both to bring an immersive experience to their listeners.
Key Takeaways:
- Get started easily with an open source theme
- Customize your site pages with unlimited custom color options
- Integrate this theme with the top audio plugins
9. Satchmo
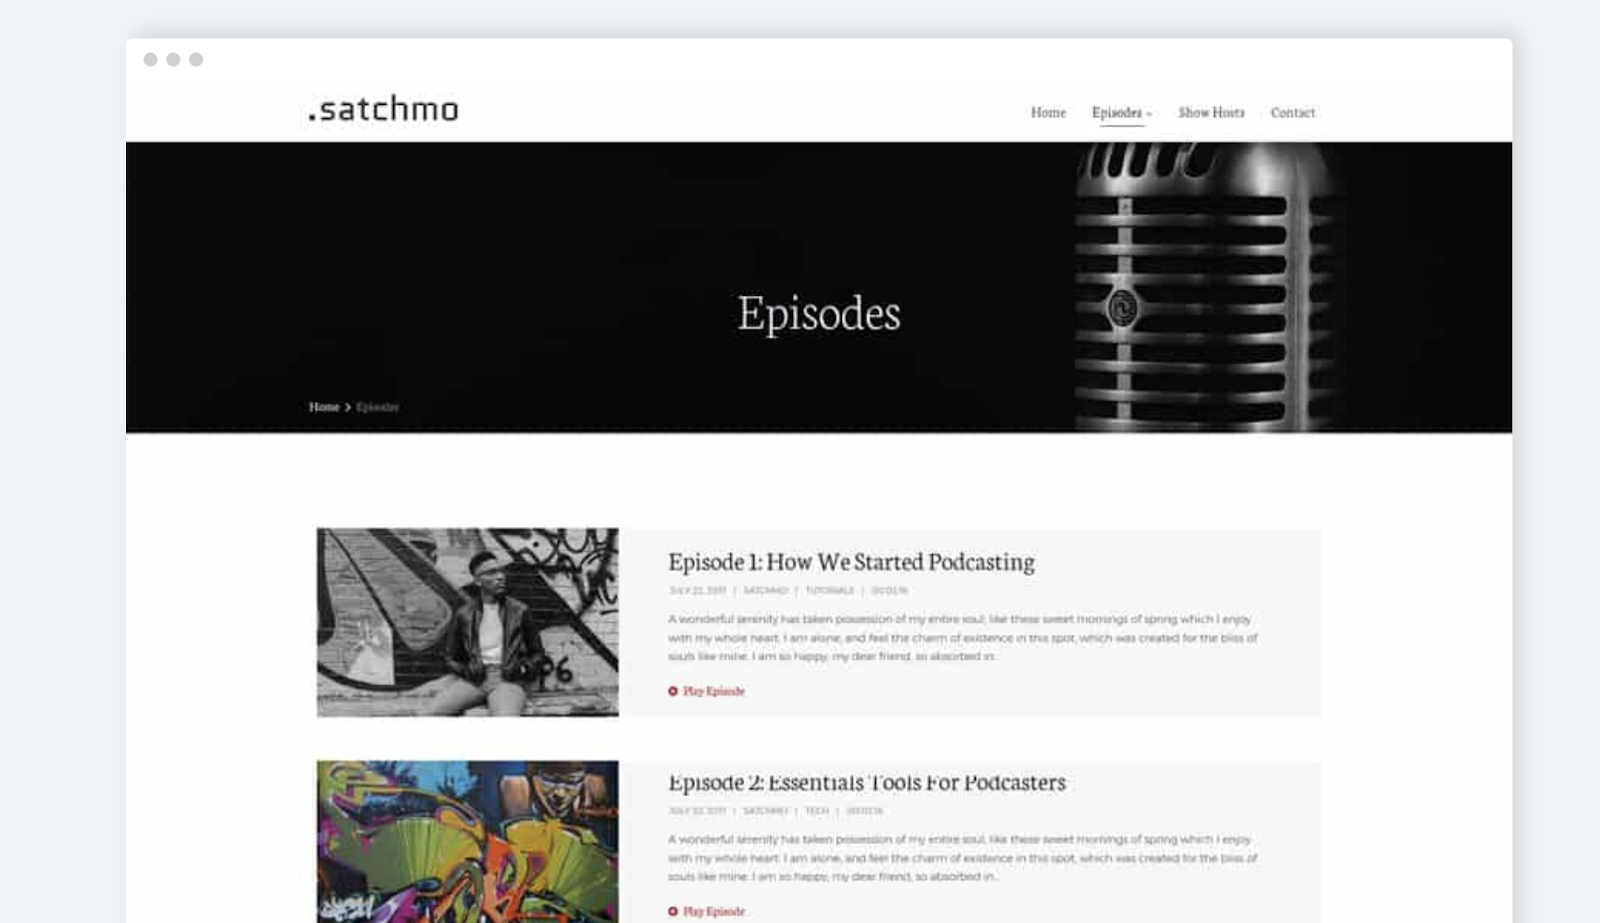
Satchmo is ideal if you’re looking for a podcasting theme where you can also share blog content in addition to your audio. Whether you’re an experienced blogger or someone who simply wants to share information about your podcast in a personal and accessible way, then Satchmo’s blog template pages will come in handy.
You can add icons in your headers and footers that direct your visitors to your social media accounts to promote your content and increase your follower base. There are also over 700 different Google Font options for you to choose from and customize the typography on your pages.
Key Takeaways:
- Choose a podcast or blog theme for your site
- Attract more followers with the social media account icons in headers and footers
- Customize your typography with 700+ Google Font options
10. Castilo
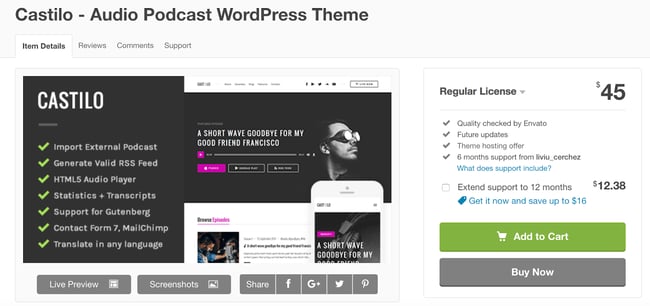
Castilo has a contact form template that you can add to a site page so your visitors can easily get in touch with you. The theme offers a podcast stats feature to help you determine the short and long-term success and popularity of each of the podcasts on your site as well as monitor who’s listening to your podcasts. Your custom logo will also be placed in the header and footer of your pages to make for a professional and branded look and feel.
Key Takeaways:
- Add a contact form to capture visitor data using the available template
- Capture podcast data with the statistics feature
- Add your custom logo in the header and footer of your site
11. Sonus
Sonus has a customizable audio player that you can design to include buttons that fast-forward and rewind episodes, skip episodes, share episodes, change episode speed, or skip to a specific time in an episode. The theme’s pages are all formatted in a grid to keep your audio and written content organized. Sonus has responsive audio players that automatically change formats to match any screen and device.
Key Takeaways:
- Include customizable audio players
- Design site pages with a grid format
- Add a responsive audio player that changes its format to work for any device
12. Castpod
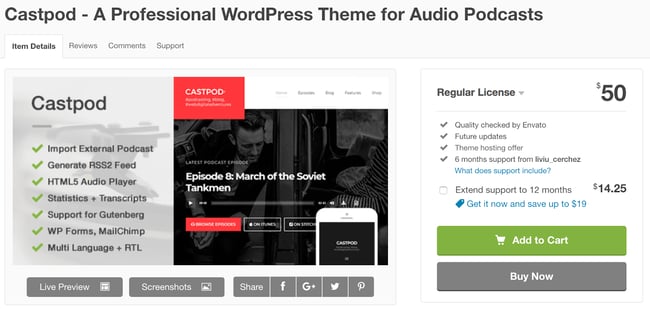
Castpod includes a MailChimp integration so you can manage all of your email-related content for your fans and subscribers in an organized fashion. With Castpod you can submit your podcast to an external service such as iTunes or Google Play with the click of a button. The theme’s Retina-ready design ensures all of your images are high-definition and look professional.
Key Takeaways:
- Integrate MailChimp on your site to manage emails
- Submit your podcast to external services like iTunes and Google Play with one click
- Get a high-definition and professional look with the Retina-ready design
13. Onair2
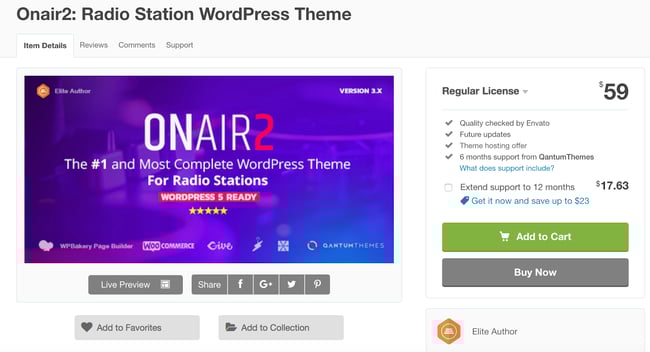
Onair2 is a podcast and music theme with an ecommerce store feature where you can sell your merchandise to fans. Managing your online store is also straightforward due to the theme’s WooCommerce integration. There is a customizable podcast page template that you can implement on your pages with an audio player that’s integrated with YouTube, Mixcloud, Soundcloud, and more. Social sharing icons are customizable and give your visitors the ability to find and follow your accounts in a matter of seconds.
Key Takeaways:
- Use the podcast and music theme with ecommerce store feature
- Design your podcast page template with YouTube, Mixcloud, and Soundcloud integration
- Increase your social media presence with social sharing icons
14. Audioatro
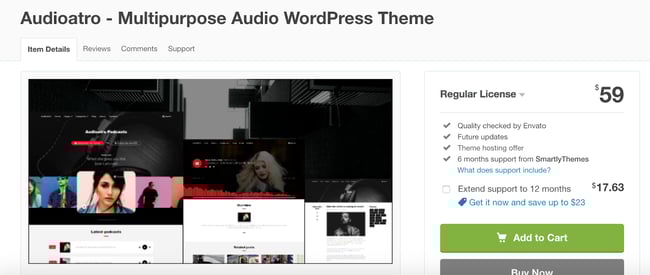
Audioatro has a unique, full-width audio player, called the “Audio Visualizer,” that’s placed on top of a full-width, background image on your page. The audio player includes a bunch of 3D bars that run across the bottom of your page to show listeners their timestamp in the podcast. These bars also rise and fall with the podcast’s volume levels to add another entertaining and interactive visual element. Audioatro also has two podcast-specific templates to choose from and expert customer support in case you run into a challenge that you need help troubleshooting.
Key Takeaways:
- Incorporate the unique, 3D, video-like audio player
- Choose from two podcast themes
15. Megaphone
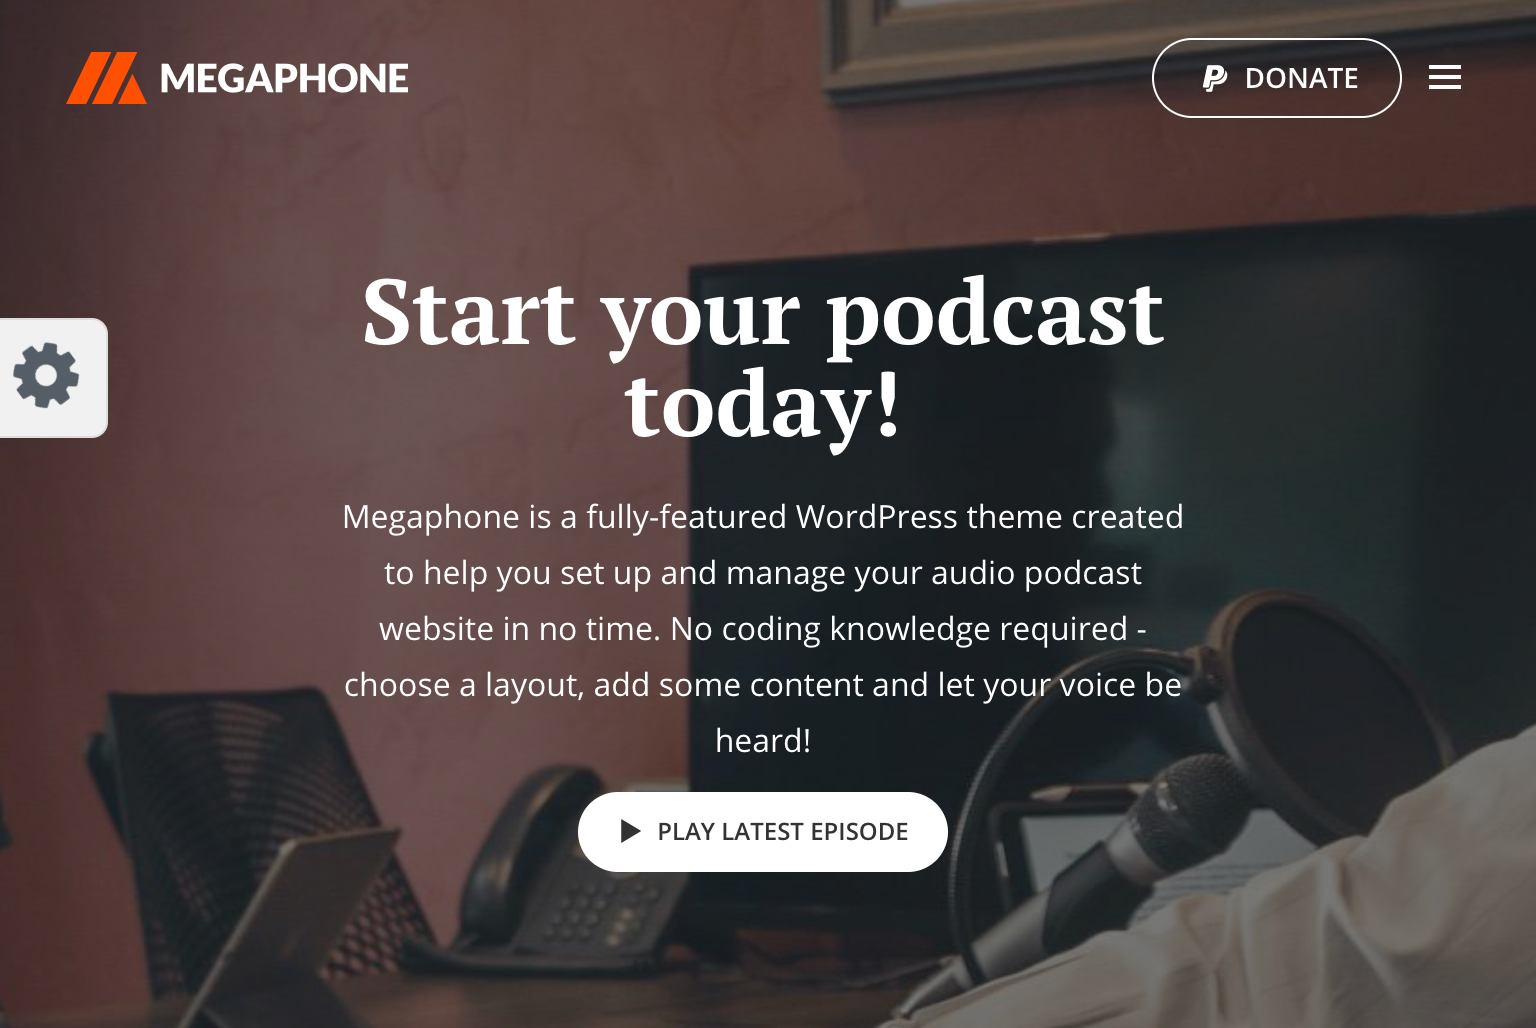
Megaphone supports multiple shows, episodes, seasons, as well as videos and music content. The theme requires no coding knowledge so you can quickly and simply design your sections in any way you want. To give your visitors the full listening experience before they download your podcast, Megaphone includes a sticky audio player that follows them as they browse the site.
Key Takeaways:
- Upload multiple shows as well as videos and music content
- Build faster and easier without coding
- Keep the visitor listening to a podcast preview with a sticky audio player
Back To You
WordPress podcast themes will help you share your hard work on a website that you’re proud of. These themes make it easy to manage your seasons and shows, include descriptions about your hosts, stay in contact with fans, and share the latest information about live shows and events all in one location.
With a wide variety of features, layouts, and customization options, you can achieve virtually any look and design you want with podcasting themes on your WordPress website no matter your level of web development knowledge. Download and install a podcasting theme today so you can begin sharing your content and building lasting relationships with your fans.
Editor’s note: This post was originally published in December 2018 and has been updated for comprehensiveness.


The 10 Best Storyboarding Software of 2021 for Any Budget
Today, video can help marketers do a lot of things — it can help you explain your product or service, it can increase traffic to your website, and it can even convince people to purchase a product.
94% of people watch explainer videos to learn about a product or service. Even if you have a powerful written content strategy, if you don’t use video, you’re losing traffic to more video-heavy competitors.
Your business is probably already using video marketing, but are you planning your videos for optimal success using storyboarding software? Or are you drawing shots by hands or writing a script and winging the rest?
In this post, we’ll go over what storyboarding is and cover some of the best storyboarding tools you can use to make better marketing videos.
![→ Access Now: Video Marketing Starter Pack [Free Kit]](https://no-cache.hubspot.com/cta/default/53/8f27c677-d952-4663-8787-bf65c6a1ecf2.png)
Storyboarding isn’t just for filmmakers and animators. Marketers can leverage storyboards to craft engaging marketing campaigns and advertisements.
The best part is that you don’t have to do it manually. A storyboarding software tool typically provides premade images and characters for you to bring your idea to life.
Whether you use video for training, sales, or demo purposes, storyboarding can alleviate the time-consuming nature of video preparation, while also increasing your video’s overall quality and decreasing production errors.
If you’re looking for a tool to take your video production process to the next level, take a look at our list of the best storyboarding software out there — no matter your budget.
Best Storyboard Software
1. Storyboarder by Wonder Unit

Storyboarder is open source and free, making it one of your best options if you’re working with a smaller budget. The program has a clean interface with all the necessary tools at your disposal, so it’s easy to quickly draw shapes and characters. You can also write dialogue, and enter timing information and shot type.
Storyboarder works collaboratively with Photoshop, which means you can edit your board in Photoshop for more precision, and it will automatically update in Storyboarder. This software lets you export to Premiere, Final Cut, Avid, PDF, or Animated GIF.
Pricing: Free
2. Plot
Adrian Thompson made animated videos for seven years, and “came to despise how tedious it was to edit a basic storyboard template.” His frustration led him to create Plot, a free and fast storyboard creator with impressive users such as Vistaprint and Workday.
Each feature aims to make your process as quick and efficient as possible. You can add and delete scenes without copying and pasting text, incorporate images from anywhere on the web to visualize scenes faster, and collaborate with coworkers from within the software. Plot is a solid option if your team often works under tight deadlines and needs software to create storyboards quickly.
Pricing: $10/month
3. FrameForge Storyboard Studio
 With impressive users including HBO, Netflix, and BBC, FrameForge is the real deal, but your team can still benefit even if you don’t have animation, drawing, or highly technical computer skills.
FrameForge offers Core and Professional versions of their product. The Professional option allows you to plan where you’ll place dollies and cranes (down to the inch). The software lets you import a script from any scriptwriting program. Plus, the storyboards include movement arrows, framing notations, angle of view, focal length, and more, so everyone on your video team, from preparation to production, is on the same page.
It works on any mobile device, and the export functions make it possible to download the final product as a PowerPoint presentation. FrameForge is a good option for teams that aim to create more full-fledged and lengthy videos for entertainment purposes.
Pricing: $498.95 one-time fee or $12.99/month (Core Edition); $799 one-time fee or $24.99/month (Professional Edition)
4. Studiobinder
Studiobinder lets you customize every aspect of your visualization, and offers tools to filter columns, adjust the order of your scenes, upload images, change aspect ratios, color code shots, add notes, and more. Studiobinder also makes collaboration easy, with project management features to assign tasks and add comments.
Plus, if you want to preview your project from within the platform to show your team, there’s a nifty presentation mode. It touts impressive clients including BuzzFeed, ESPN, and CBS Interactive. This option is good for teams who need to collaborate on various stages of the video production process, and prefer customizable tools.
Pricing: $29/month (Indie); $49/month (Professional); $99/month (Studio)
5. Boords Storyboard Creator
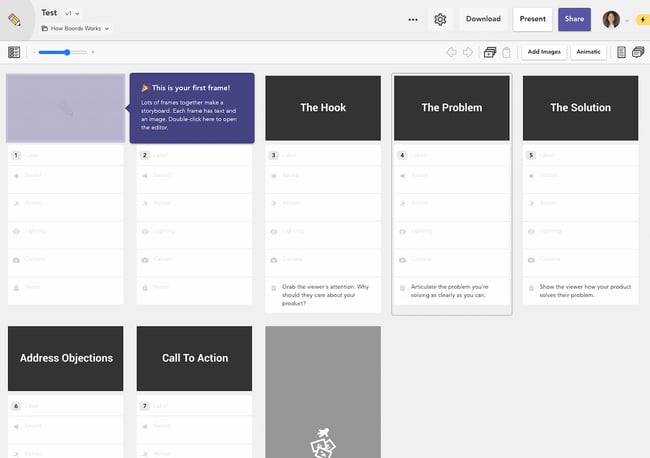
This online storyboarding software allows you to easily collaborate with your team in a user-friendly web app. You can add images to each storyboard card and jot down quick notes for each progressive step of your video. Specify sound, action, lighting, and camera details — all without any advanced technical knowledge.
The power of this tool lies in its ease of use. While Storyboarder and FrameForge have a slight learning curve, Boords is one of those tools that you can simply access and start using straightaway.
What we love most about this tool is its notes at the bottom for each card. If you ever forget what you’re supposed to achieve scene-by-scene, Boords gives you a brief and helpful tip on what you should achieve in the shot. It also offers a unique Animatic Tool, and when you’re ready to share your animatic, you can share it online for feedback or export to Boords’ After Effects plugin. Plus, you can share your storyboard with coworkers or clients and let them comment within the platform.
Pricing: $36/month (Studio); $60/month (Company); $120/month (Company Plus)
6. makeStoryboard
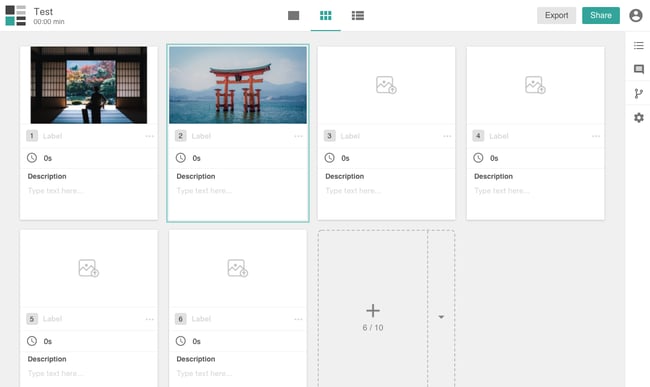
If you’re not necessarily interested in the fancier movie-making options in the list, makeStoryboard is a simple, user-friendly interface for quickly uploading camera shots, drawing stick figures in its built-in drawing tool, and incorporating text for scene details. The marker, pencil, and pen tools respond to any drawing tablet.
You can also add custom text fields for any additional details that are unique to your team and use case. When you’re happy with your storyboard, you can export it as a PDF to pitch your idea. Alternatively, you can send a private link so that stakeholders can review it without needing an account. Best of all, it offers a free subscription tier, making it a fantastic option for teams working with a smaller budget.
Pricing: Free; $12/month (Professional); $36/month (Team)
7. PowerProduction Software

PowerProduction offers a variety of tools for storyboarding, varying from simple to more robust and all-inclusive. StoryBoard Quick, for instance, offers a library of artwork for characters, props, and locations, and allows you to design and share your ideas easily. StoryBoard Artist, on the other hand, offers a full-featured timeline, frame transitions, and 3D characters, and is more appropriate for animated video presentations.
PowerProduction also provides iPhone and Android app versions of their products, so you can visualize and create from anywhere. These products are used by big brands, including Disney, Universal, and 20th Century Fox, so if you choose this software, you’re in good company. If your team is interested in creating lengthy, high-quality, and even animated videos, this could be a good option.
Pricing: $129.99/year (StoryBoard Quick); $169.99/year (StoryBoard Quick Studio); $269.99/year (StoryBoard Artist); $399.99/year (StoryBoard Artist Studio)
8. Canva
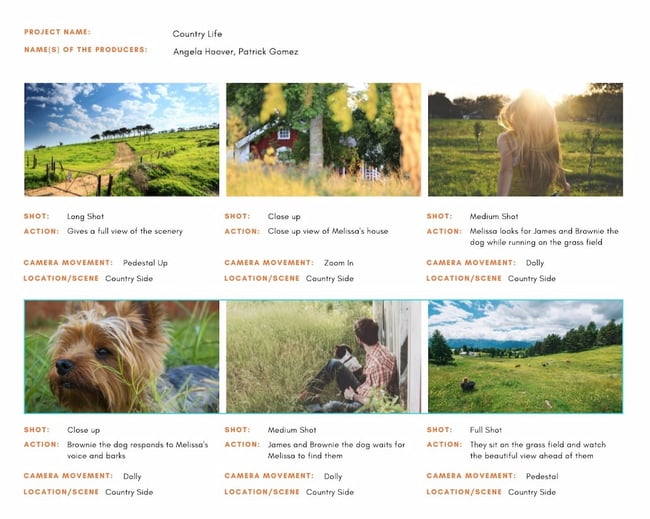 Creating a storyboard doesn’t have to stress you out, and Canva makes it especially easy, with a library of templates to choose from, one million stock images (or the option to upload your own), and grids and frames to organize your scenes. You can choose font types, customize colors, and include headers and subheaders.
If you’re working with someone else on the script or design, you can grant access for collaboration, and when you’re finished, you can share the design with your team through email or as a PDF file. If your team needs a simple and easy tool for simpler projects or to get your feet wet with the process of storyboarding, this is a good option.
Pricing: Free
9. PanelForge
 PanelForge offers an all-in-one pre-production storyboarding software, with drag-and-drop tools and flexible frames. With both a free public beta and a suite of paid plans, there’s no reason not to try it if you’re interested in using storyboarding for animatics and more complicated projects.
With PanelForge, you can create both 2D drawings and 3D layouts. It also allows you to create an animatic, and you can export and import files from Adobe Premiere and Final Cut Pro. PanelForge is ideal for experienced storyboarders and marketers who know their way around complex visualization tools.
Pricing: Free (Public Beta); $7.31/month (Pro); $1,411/year (Studio)
10. StoryboardThat
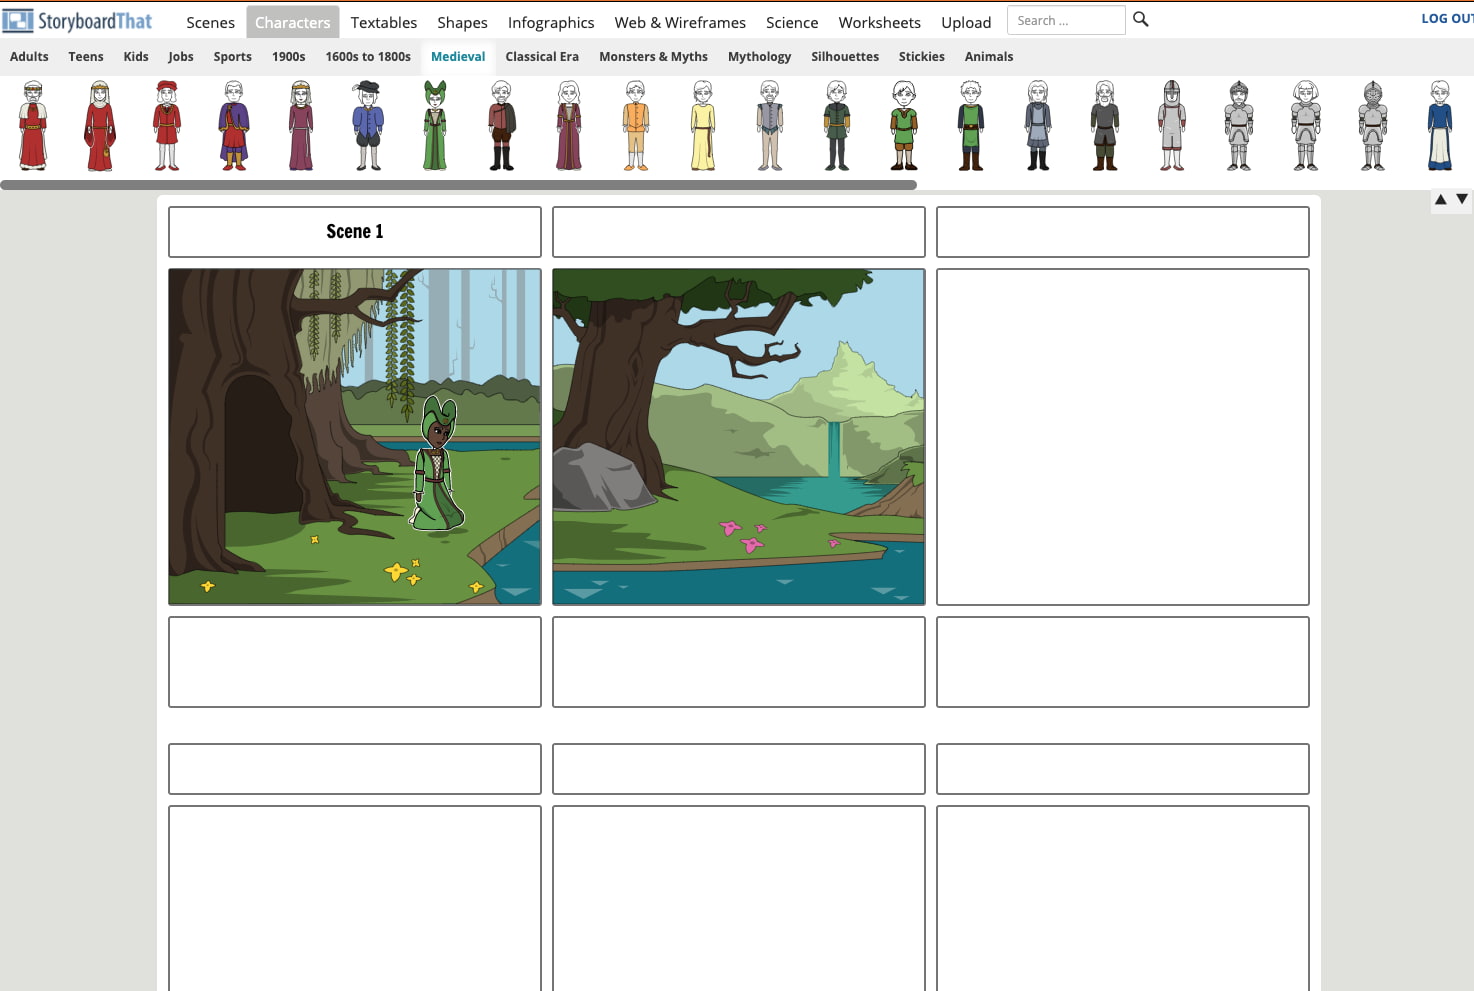 StoryboardThat is an intuitive, easy-to-use tool for creators who’d rather not draw (or who don’t know how to). The tool comes with hundreds of backgrounds and characters for you to build your storyboard.
On the free version, you can create two storyboards per week and choose between three- or six-cells storyboards. When you upgrade to the paid versions, you’ll be able to create unlimited storyboards, access hundreds of different layouts, and record audio.
Pricing: Free; $9.99/month (For Fun); $8.99/month (For Teachers); $14.99/month (For Work)
Use a Storyboarding Tool to Make Better Marketing Videos
A storyboarding tool can help you plan every shot and scene of your marketing video before you invest in production. The best part is that you can get started for free — and many times, you don’t have to draw anything at all. Using a storyboarding tool can improve your marketing videos exponentially, increasing the ROI from your video marketing strategy.
Editor’s note: This post was originally published in June 2018 and has been updated for comprehensiveness.

How to Post to Instagram From Your Computer [7 Easy Steps]
Instagram is a popular social media network for sharing photos, commonly accessed through a mobile app. Unlike other social networks, however, it does not have a desktop version.
This poses a problem for a lot of users who want to access features from their desktop computer. For example, let’s say you’re a social media manager for a prominent brand. The last thing you want to do is have an absentminded mishap where you accidentally post brand content to your personal Instagram account (or, worse, vice versa) simply because you’re logged into both on your phone.

Alternatively, it might be easier to upload company posts and videos via your desktop, rather than having your smartphone open at work.
Plus, your company’s files might be more easily accessible via desktop than mobile. For instance, if you use Photoshop to edit company photos, it’s likely easier to click “Upload” from your desktop when you’re done editing, rather than sending that same photo or video to your personal phone.
Perhaps you simply prefer the larger screen of desktop. Or, maybe you don’t have access to a smartphone so you can’t download the app on your phone.
For all of these reasons, you might be wondering, “Can I post to Instagram from my computer?” We have some good news — there’s a solution for you. Let’s dive into that, next.
In other words — Yes, you can post to Instagram from your PC or Mac desktop instead of on your mobile device’s app or browser. In this post, we’ll explore how you can post images and videos from your desktop computer.
How do I post to Instagram from my computer? [PC and Mac]
Whether you’re on a Mac or a PC, you can use workarounds to post from your desktop computer. Depending on the browser you use, the instructions will vary. Below, we’ll discuss how to do it on:
Once we discuss these workarounds for posting photos, we’ll also discuss how to upload a video to Instagram from your desktop.
1. Navigate to Instagram’s website in your Chrome browser.
The first thing you’ll want to do is open up Google Chrome and navigate to https://www.instagram.com/ by typing it into the navigation bar.
2. Open the “Settings” menu by clicking the three dots in the top right corner of the browser.
Instagram Account Credit: @Goodtomicha
Up in the top menu on the far right side, you’ll find three verticle dots. Once you click these, a drop-down menu will open up.
3. Scroll down to “More Tools” in the drop-down menu, and then click “Developer Tools”.
Developer Tools gives you access to a menu that opens up in a panel on the right side of your window. This will give you advanced control over how your browser displays content, helping you post to Instagram from desktop using Chrome.
4. Click the “Toggle Device Toolbar” mobile button.
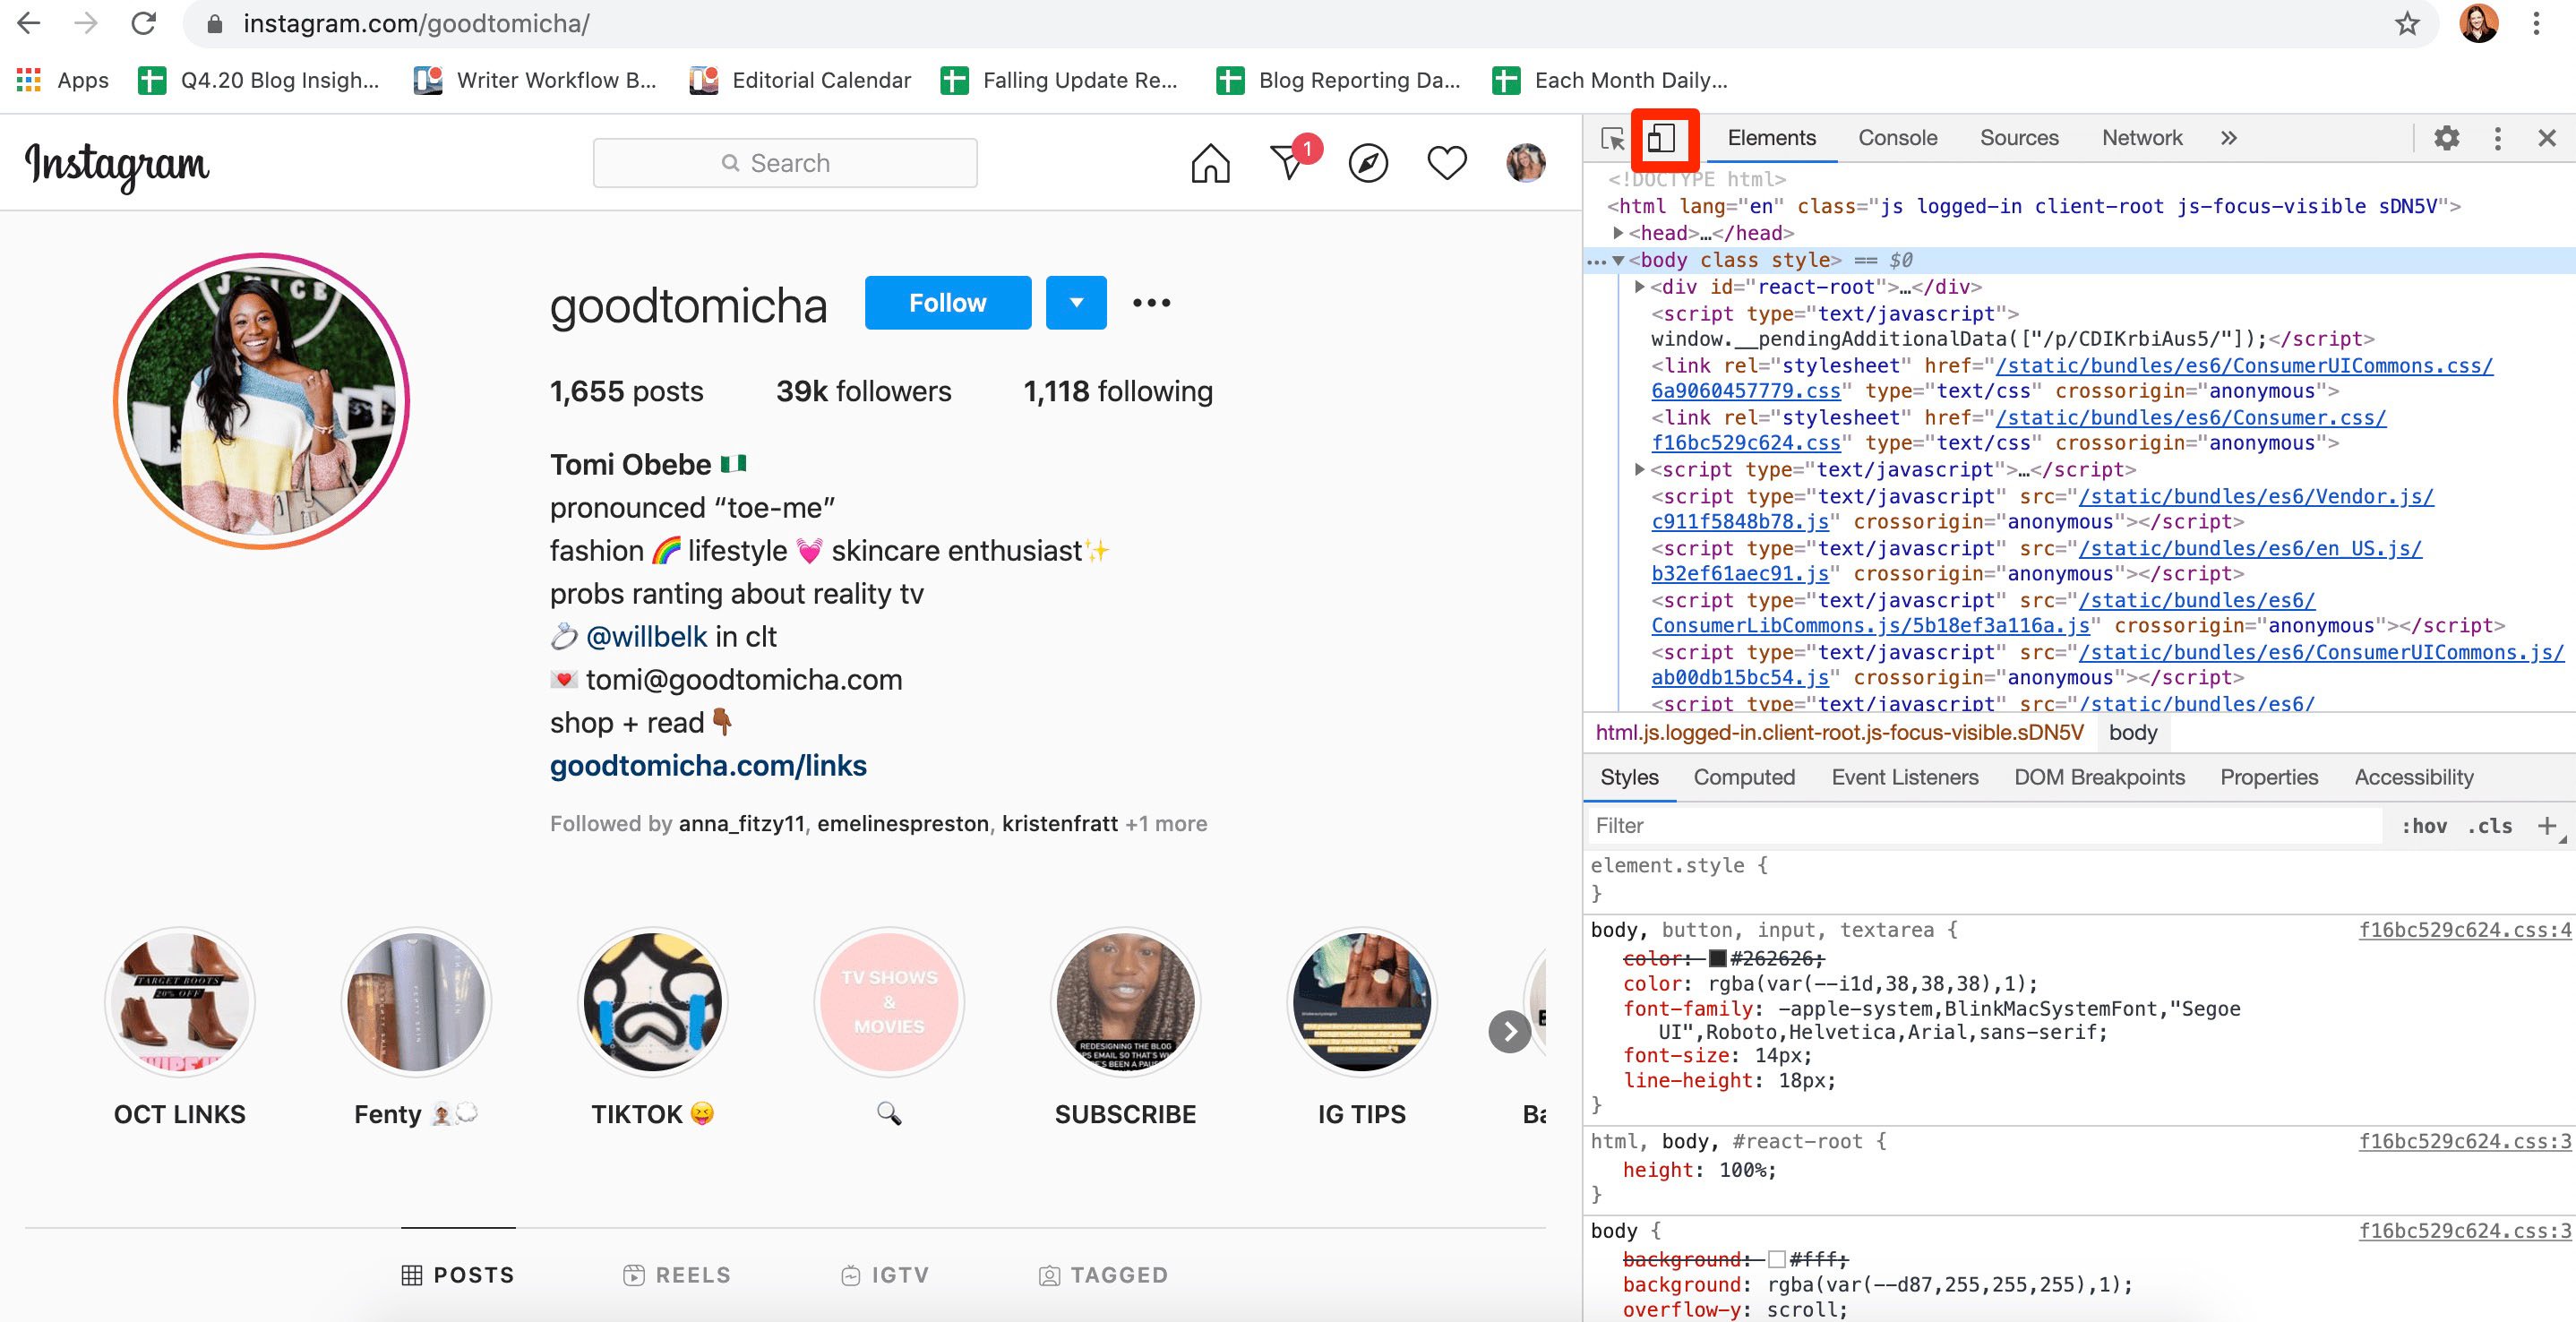
On the top left corner of the new panel, you’ll see an icon with two squares that represent a tablet and a mobile device. Clicking it will reveal the Device Toolbar that gives you advanced control over your browser.
5. Choose which mobile device you’d like from the drop-down menu.
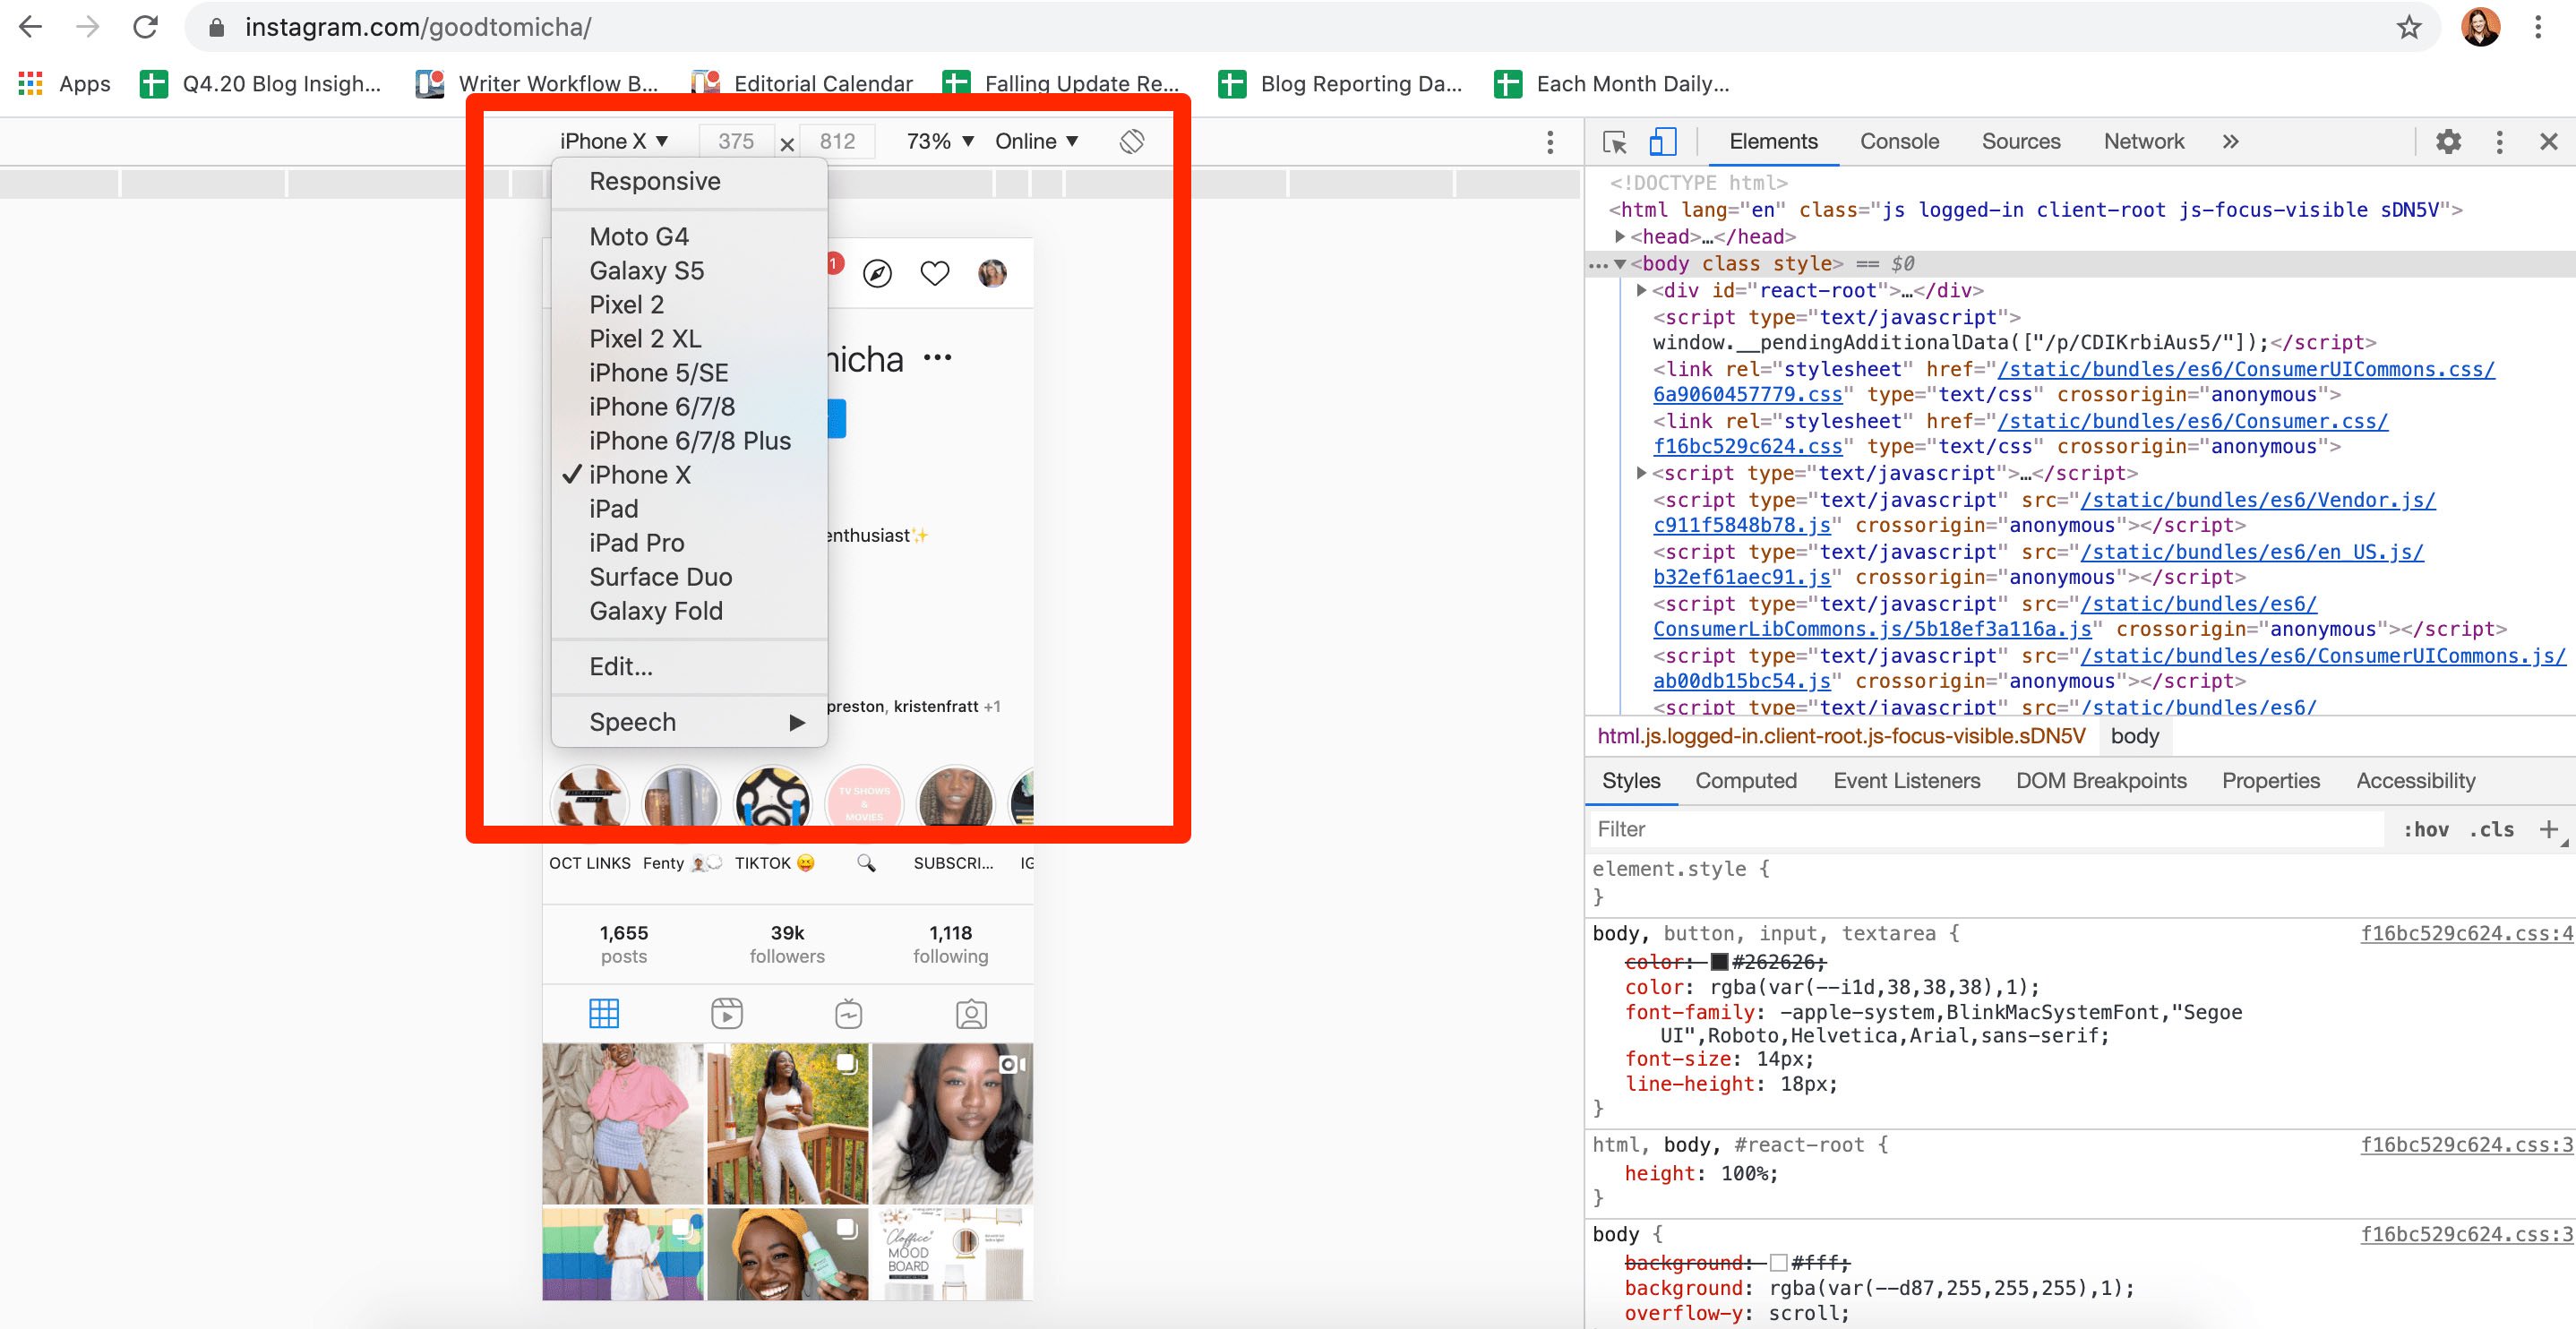
In the Device Toolbar, you’ll see another drop-down menu with a list of mobile devices. Selecting one will tell the browser to emulate how a website looks on that particular device you selected.
Choose which mobile device you’d like on the drop-down menu, as well as how zoomed in you want to be.
6. Refresh the page to see the mobile interface of Instagram from your browser.
You should then be able to able to use Instagram straight from the emulation or even close the panel on the right side while retaining this “mobile view.”
7. Upload an Instagram post the same way you would via mobile.
You can upload a Instagram post the same way you would via mobile:
1. Click the “+” button.
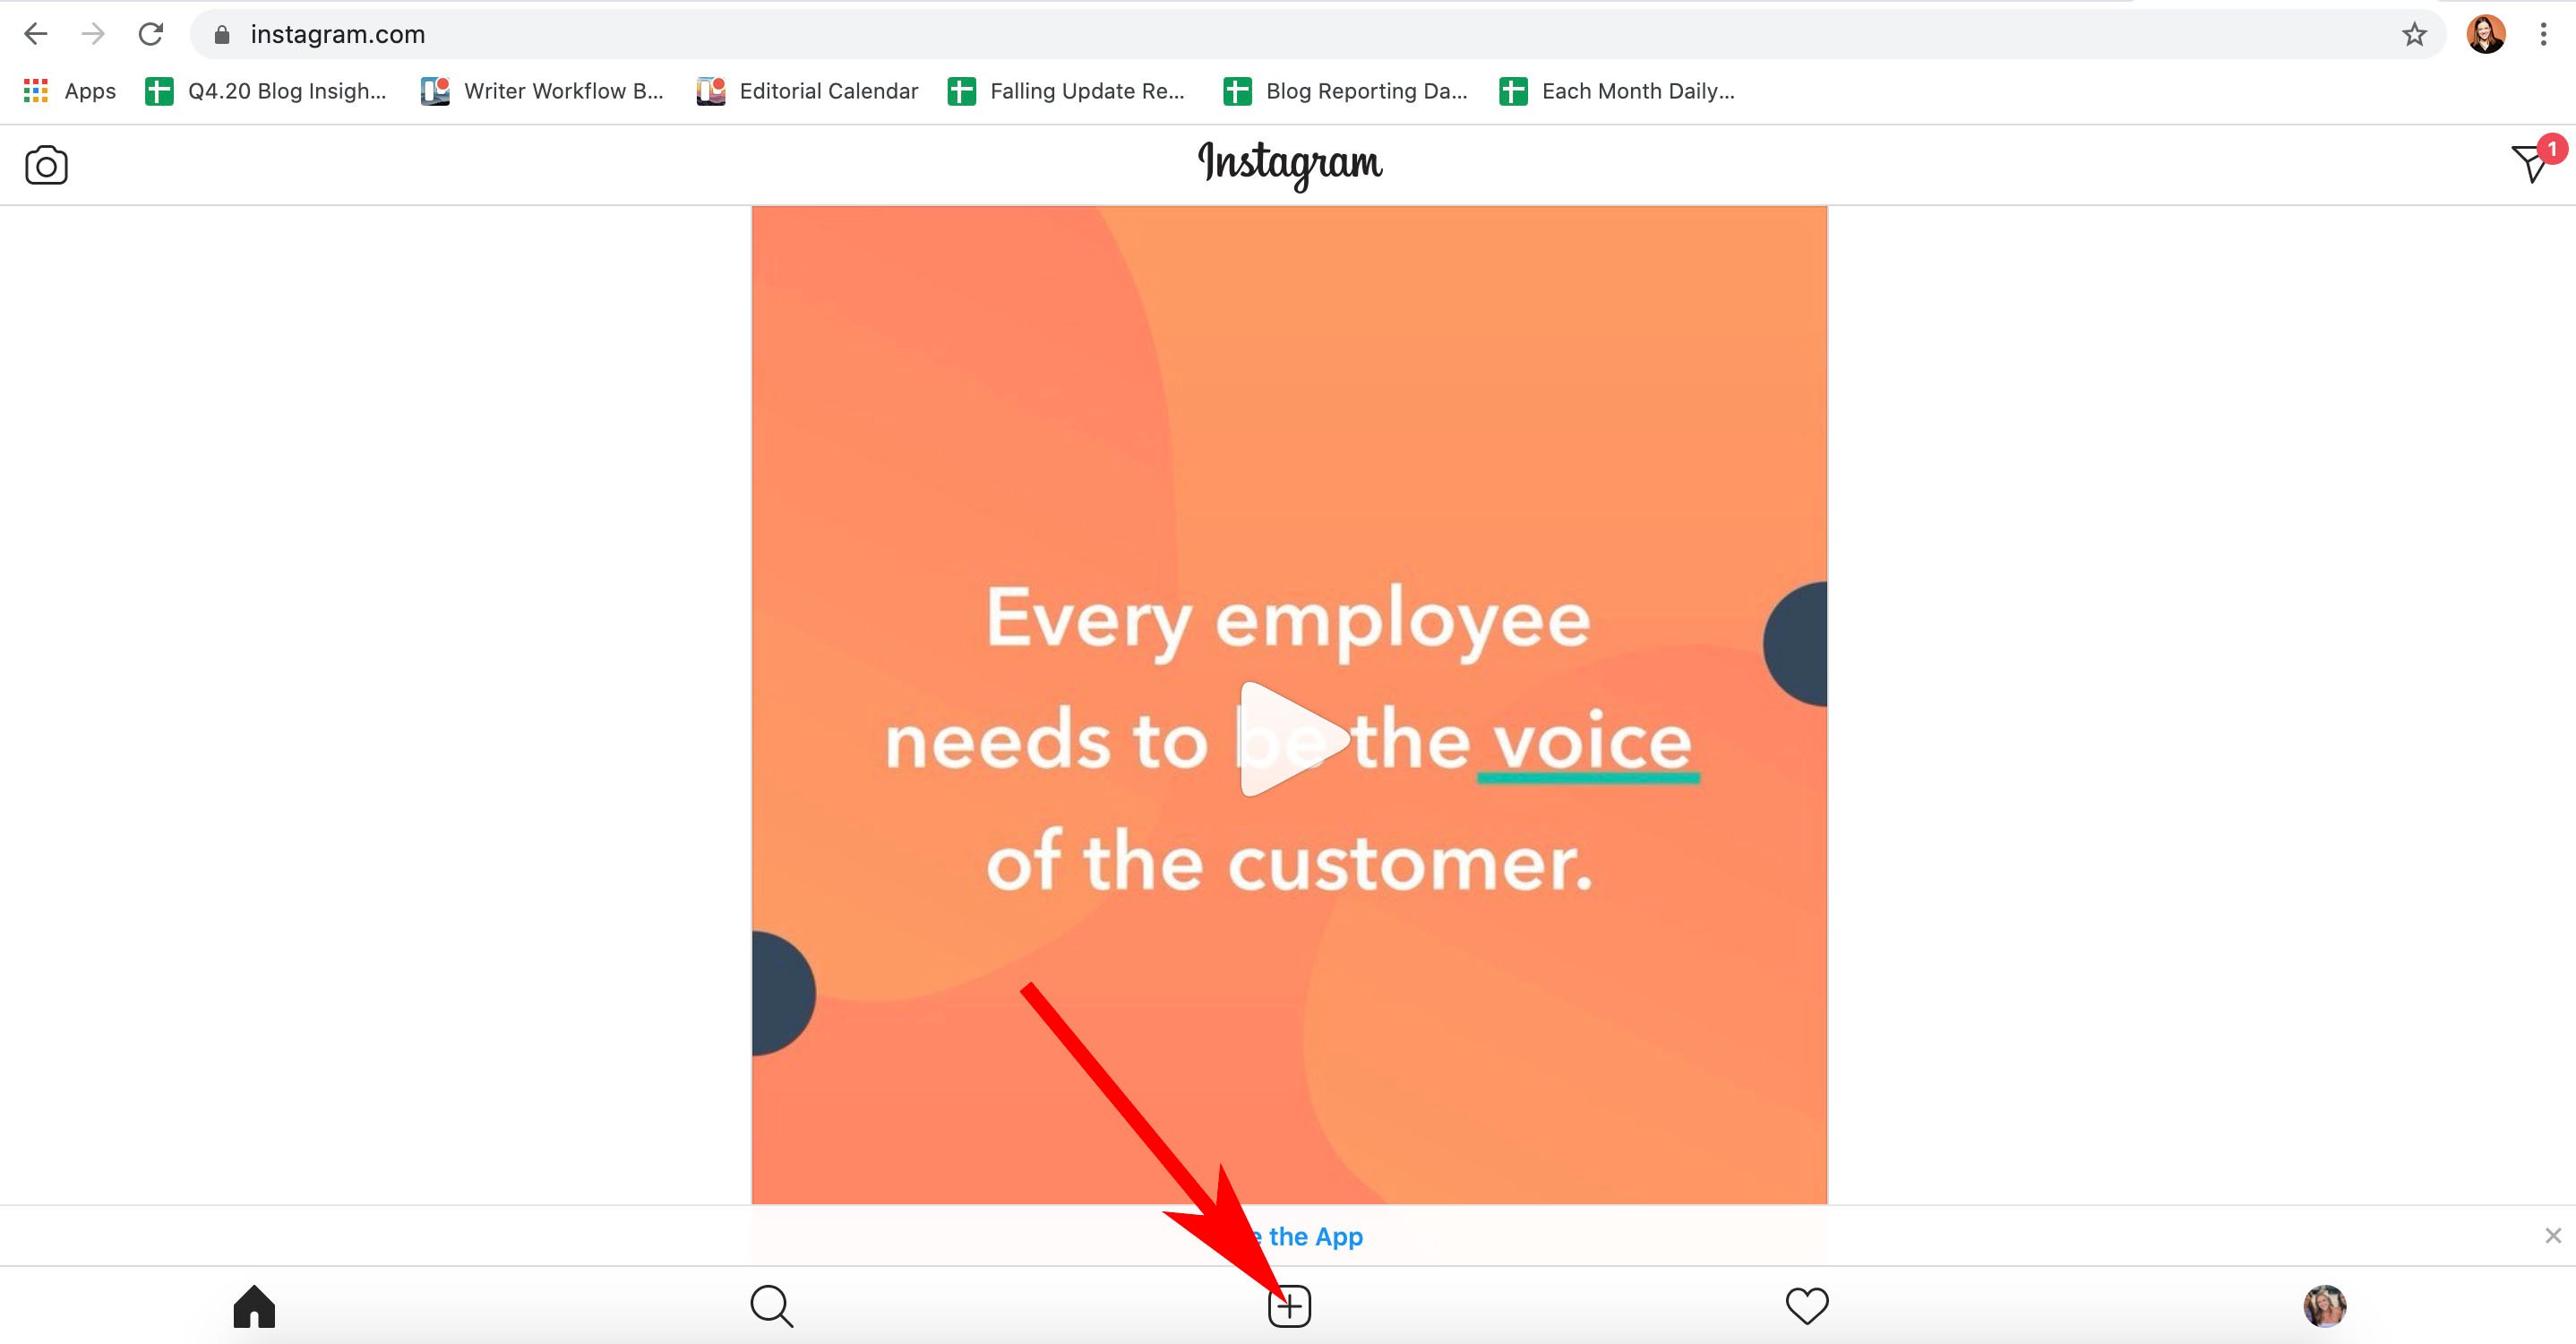
2. Add filters.
Choose filters or other editing features like you would normally, then click Next in the top right of your screen:
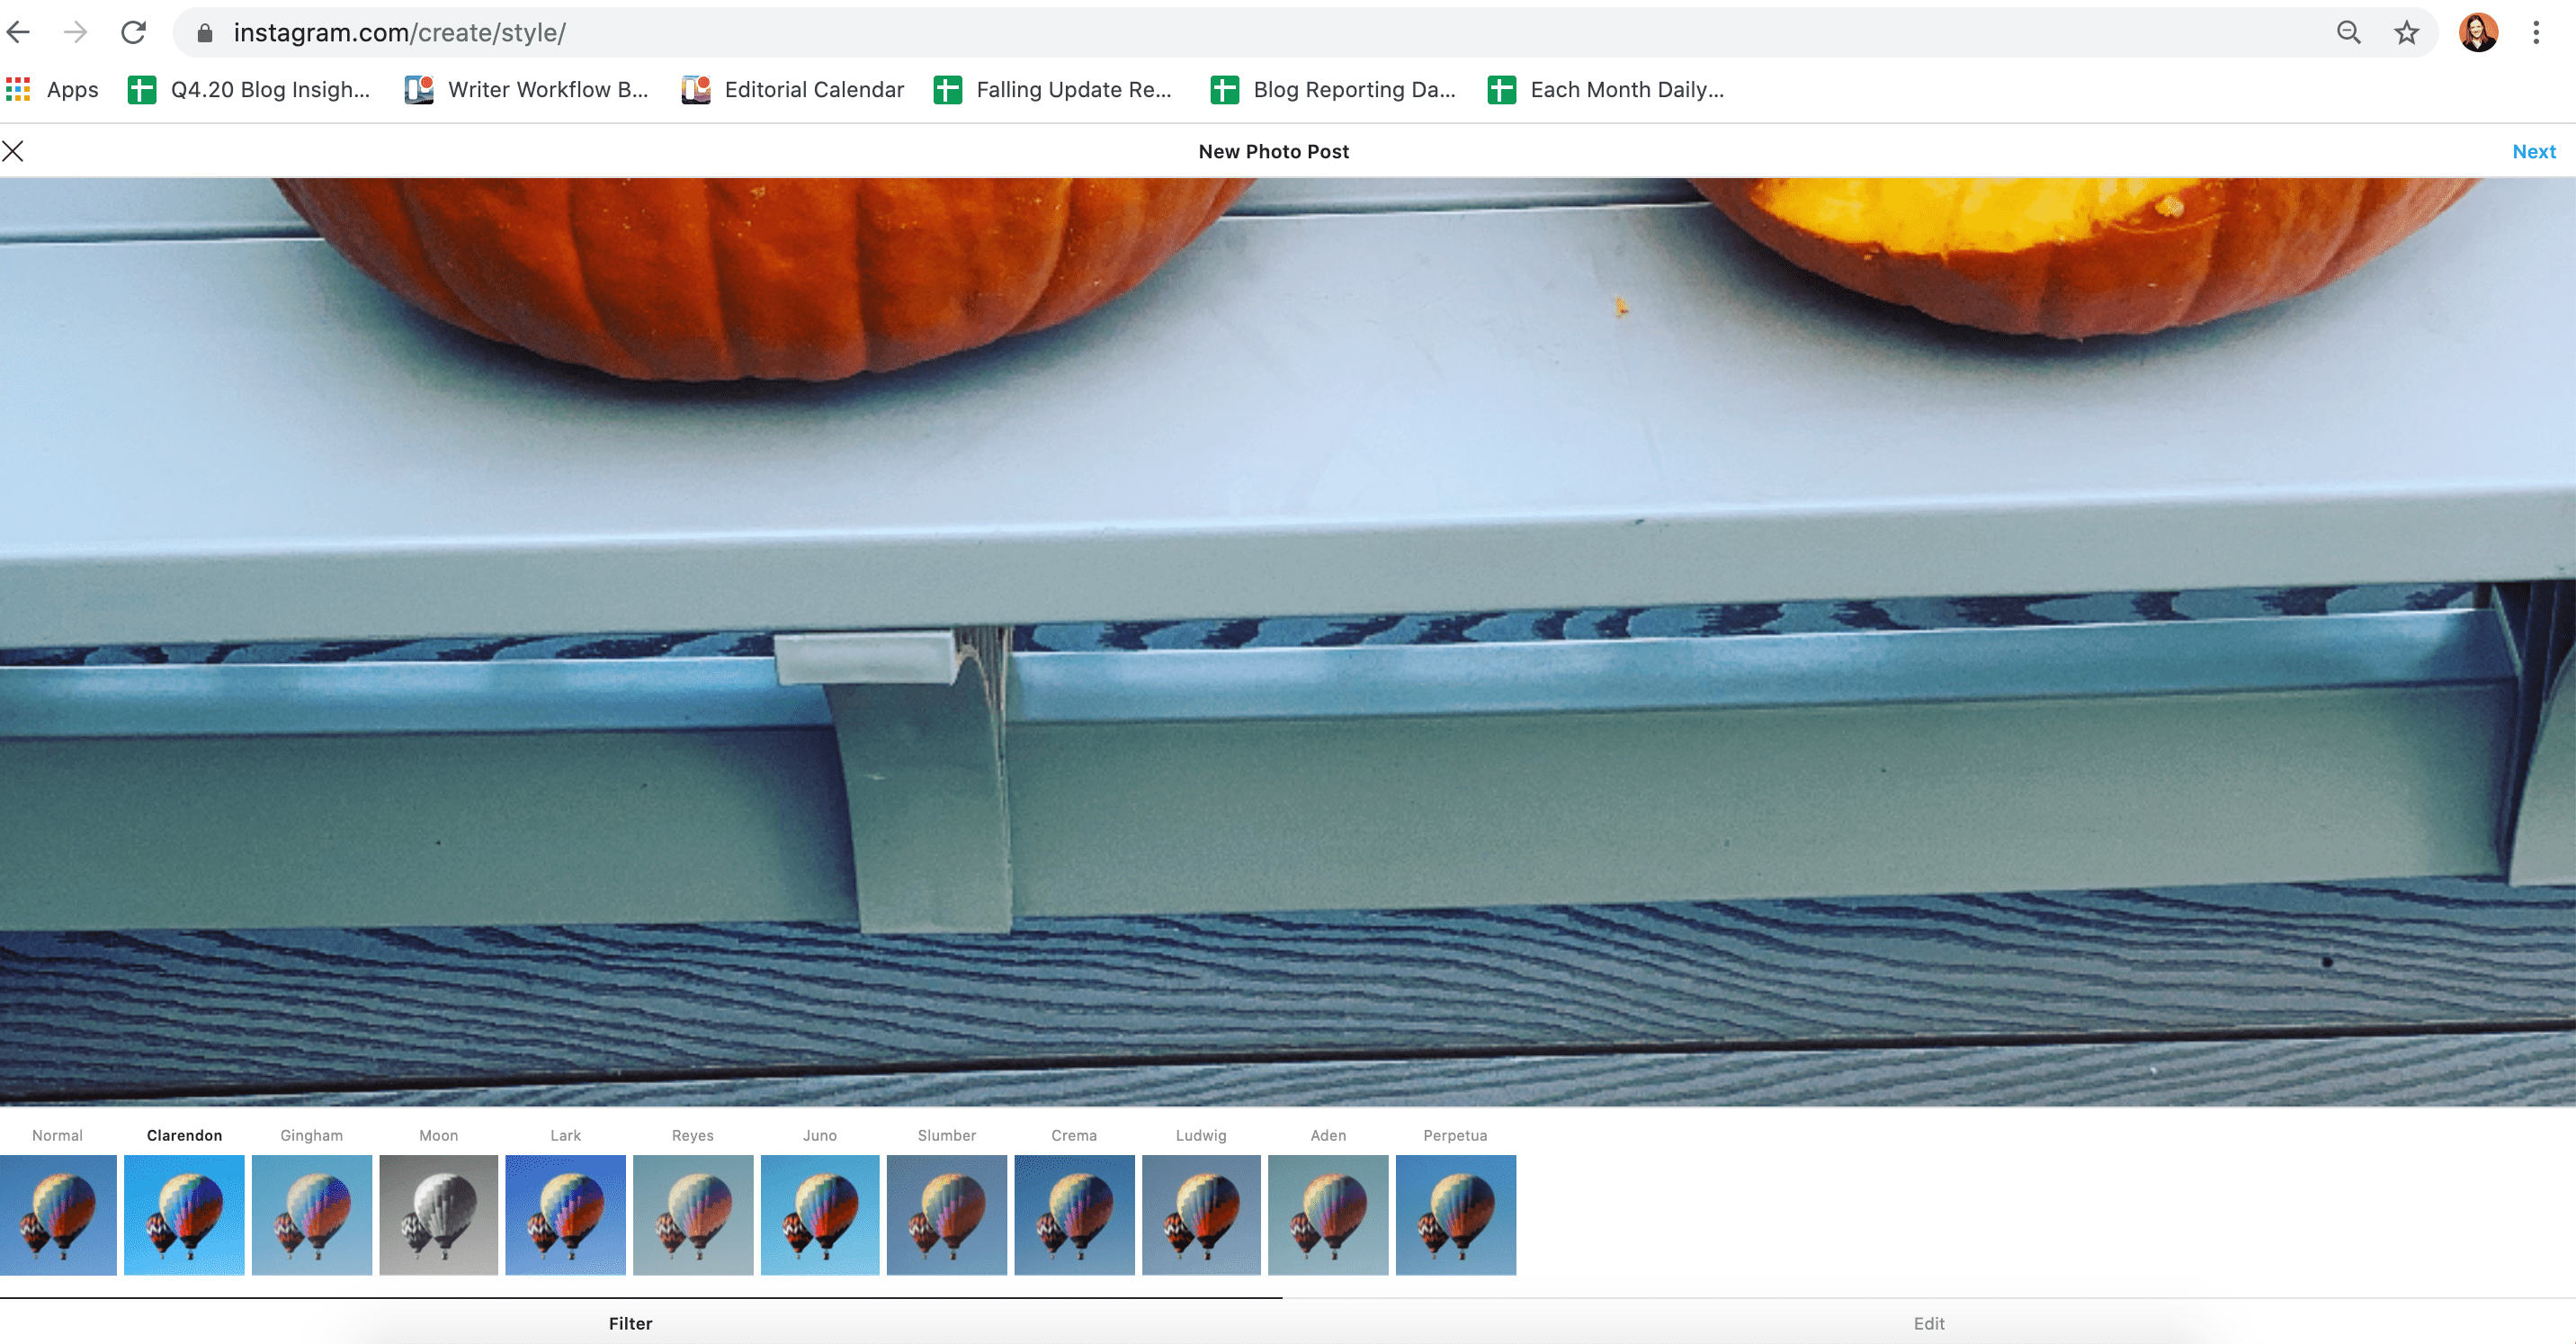
4. Add captions, locations, and tags.
On the next screen, you’ll be able to add a caption, location, or tag people. When you’re ready, click Share in the top right of your screen.
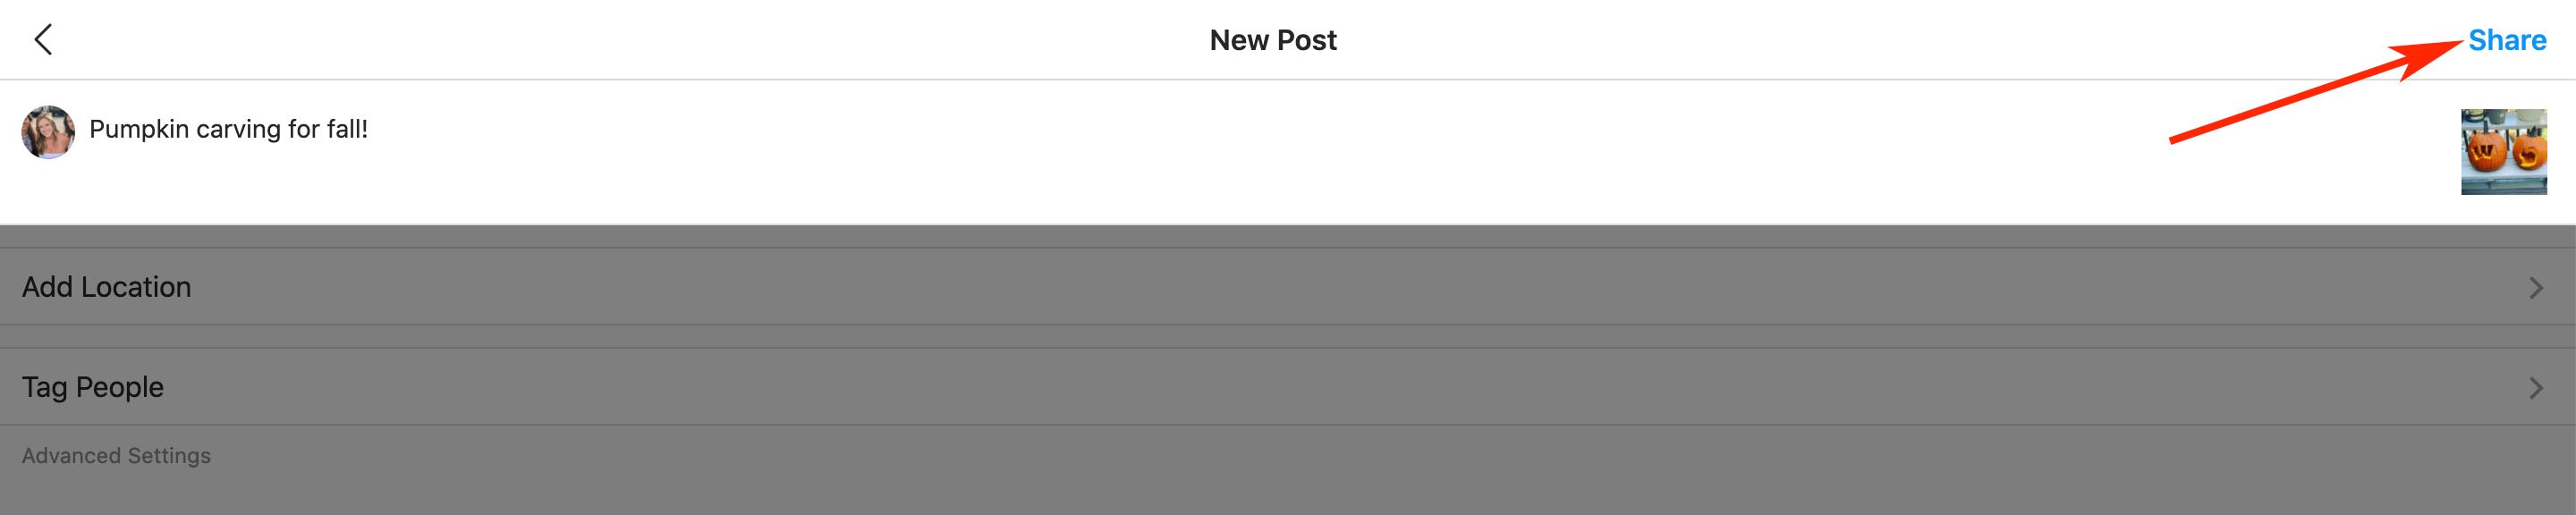
1. Navigate to Instagram’s website in your Safari browser.
The first thing you’ll want to do is open up Safari and navigate to https://www.instagram.com/ by typing it into the navigation bar.
2. Click “Safari” and then select “Preferences” in the menu bar.
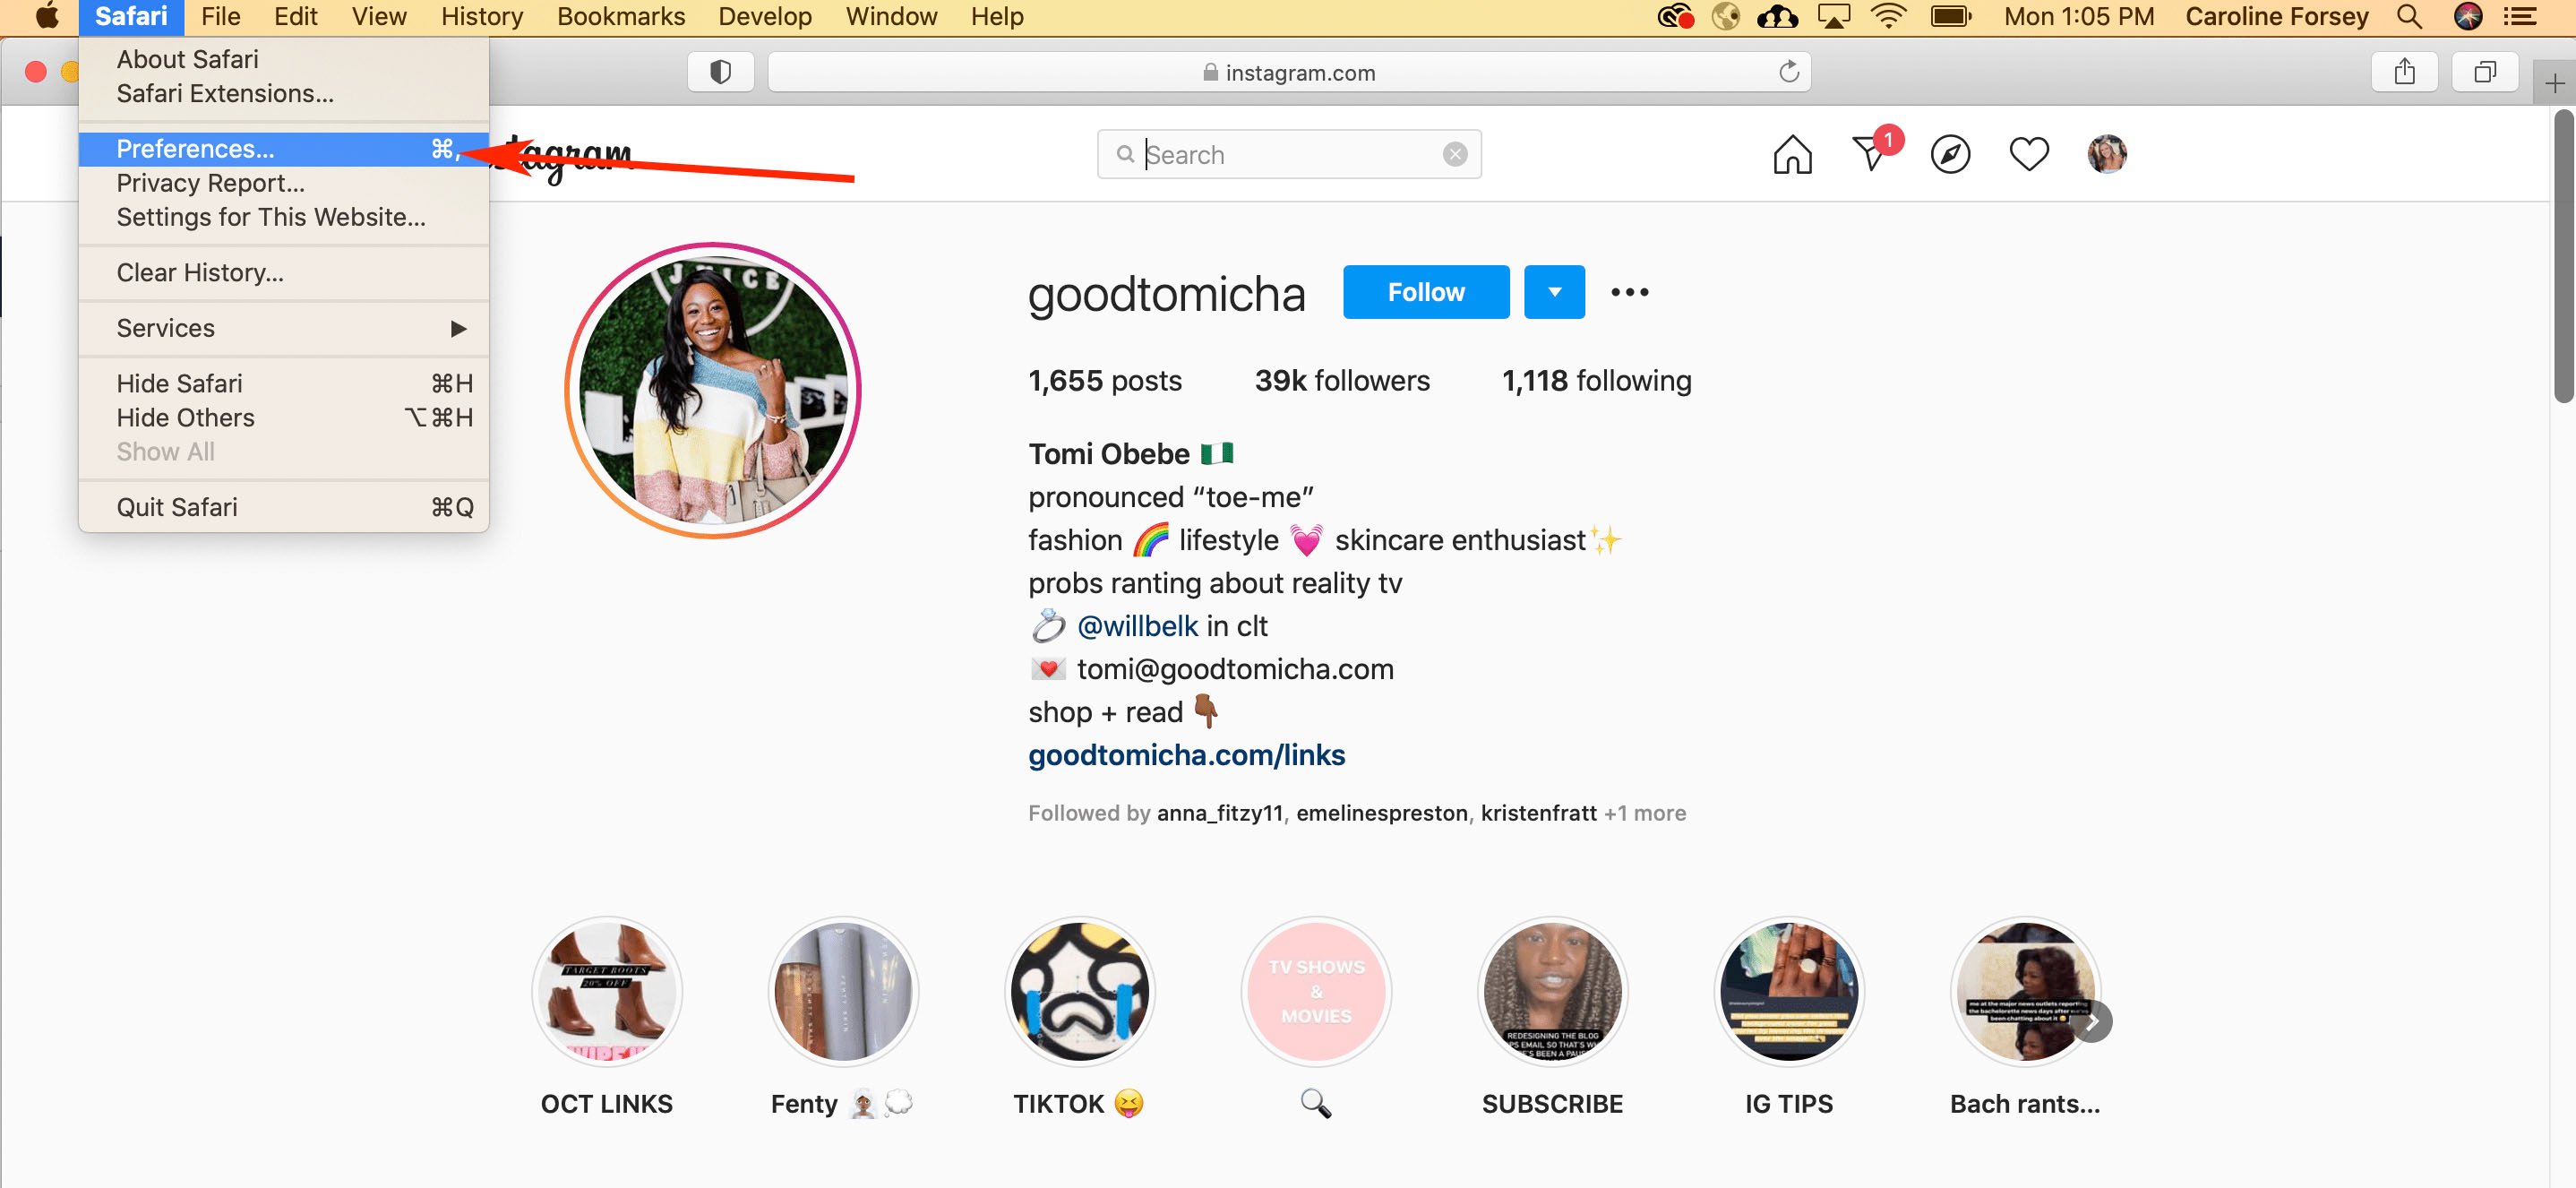
Up in the top menu, click Safari. This is where you’ll find your browser’s “Preferences” settings in the drop-down menu.
3. Click “Advanced” and check the box that reads “Show develop menu in menu bar”.
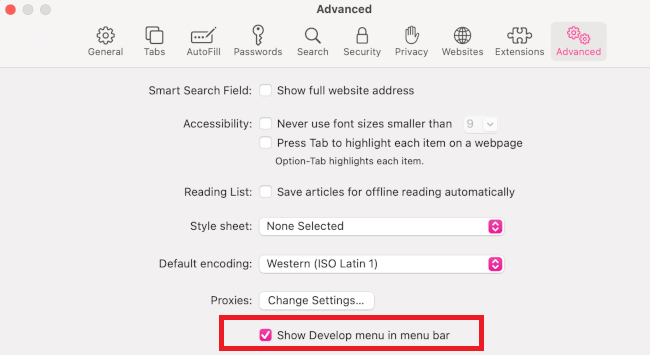
Under “Advanced,” you’ll have the options to show the Develop menu in the menu bar. By checking this box, you’ll get access to a menu that will give you advanced control over how your browser displays content. This will help you post to Instagram from desktop using Safari.
4. Click “Develop” in your menu bar and then scroll to “User Agent”.
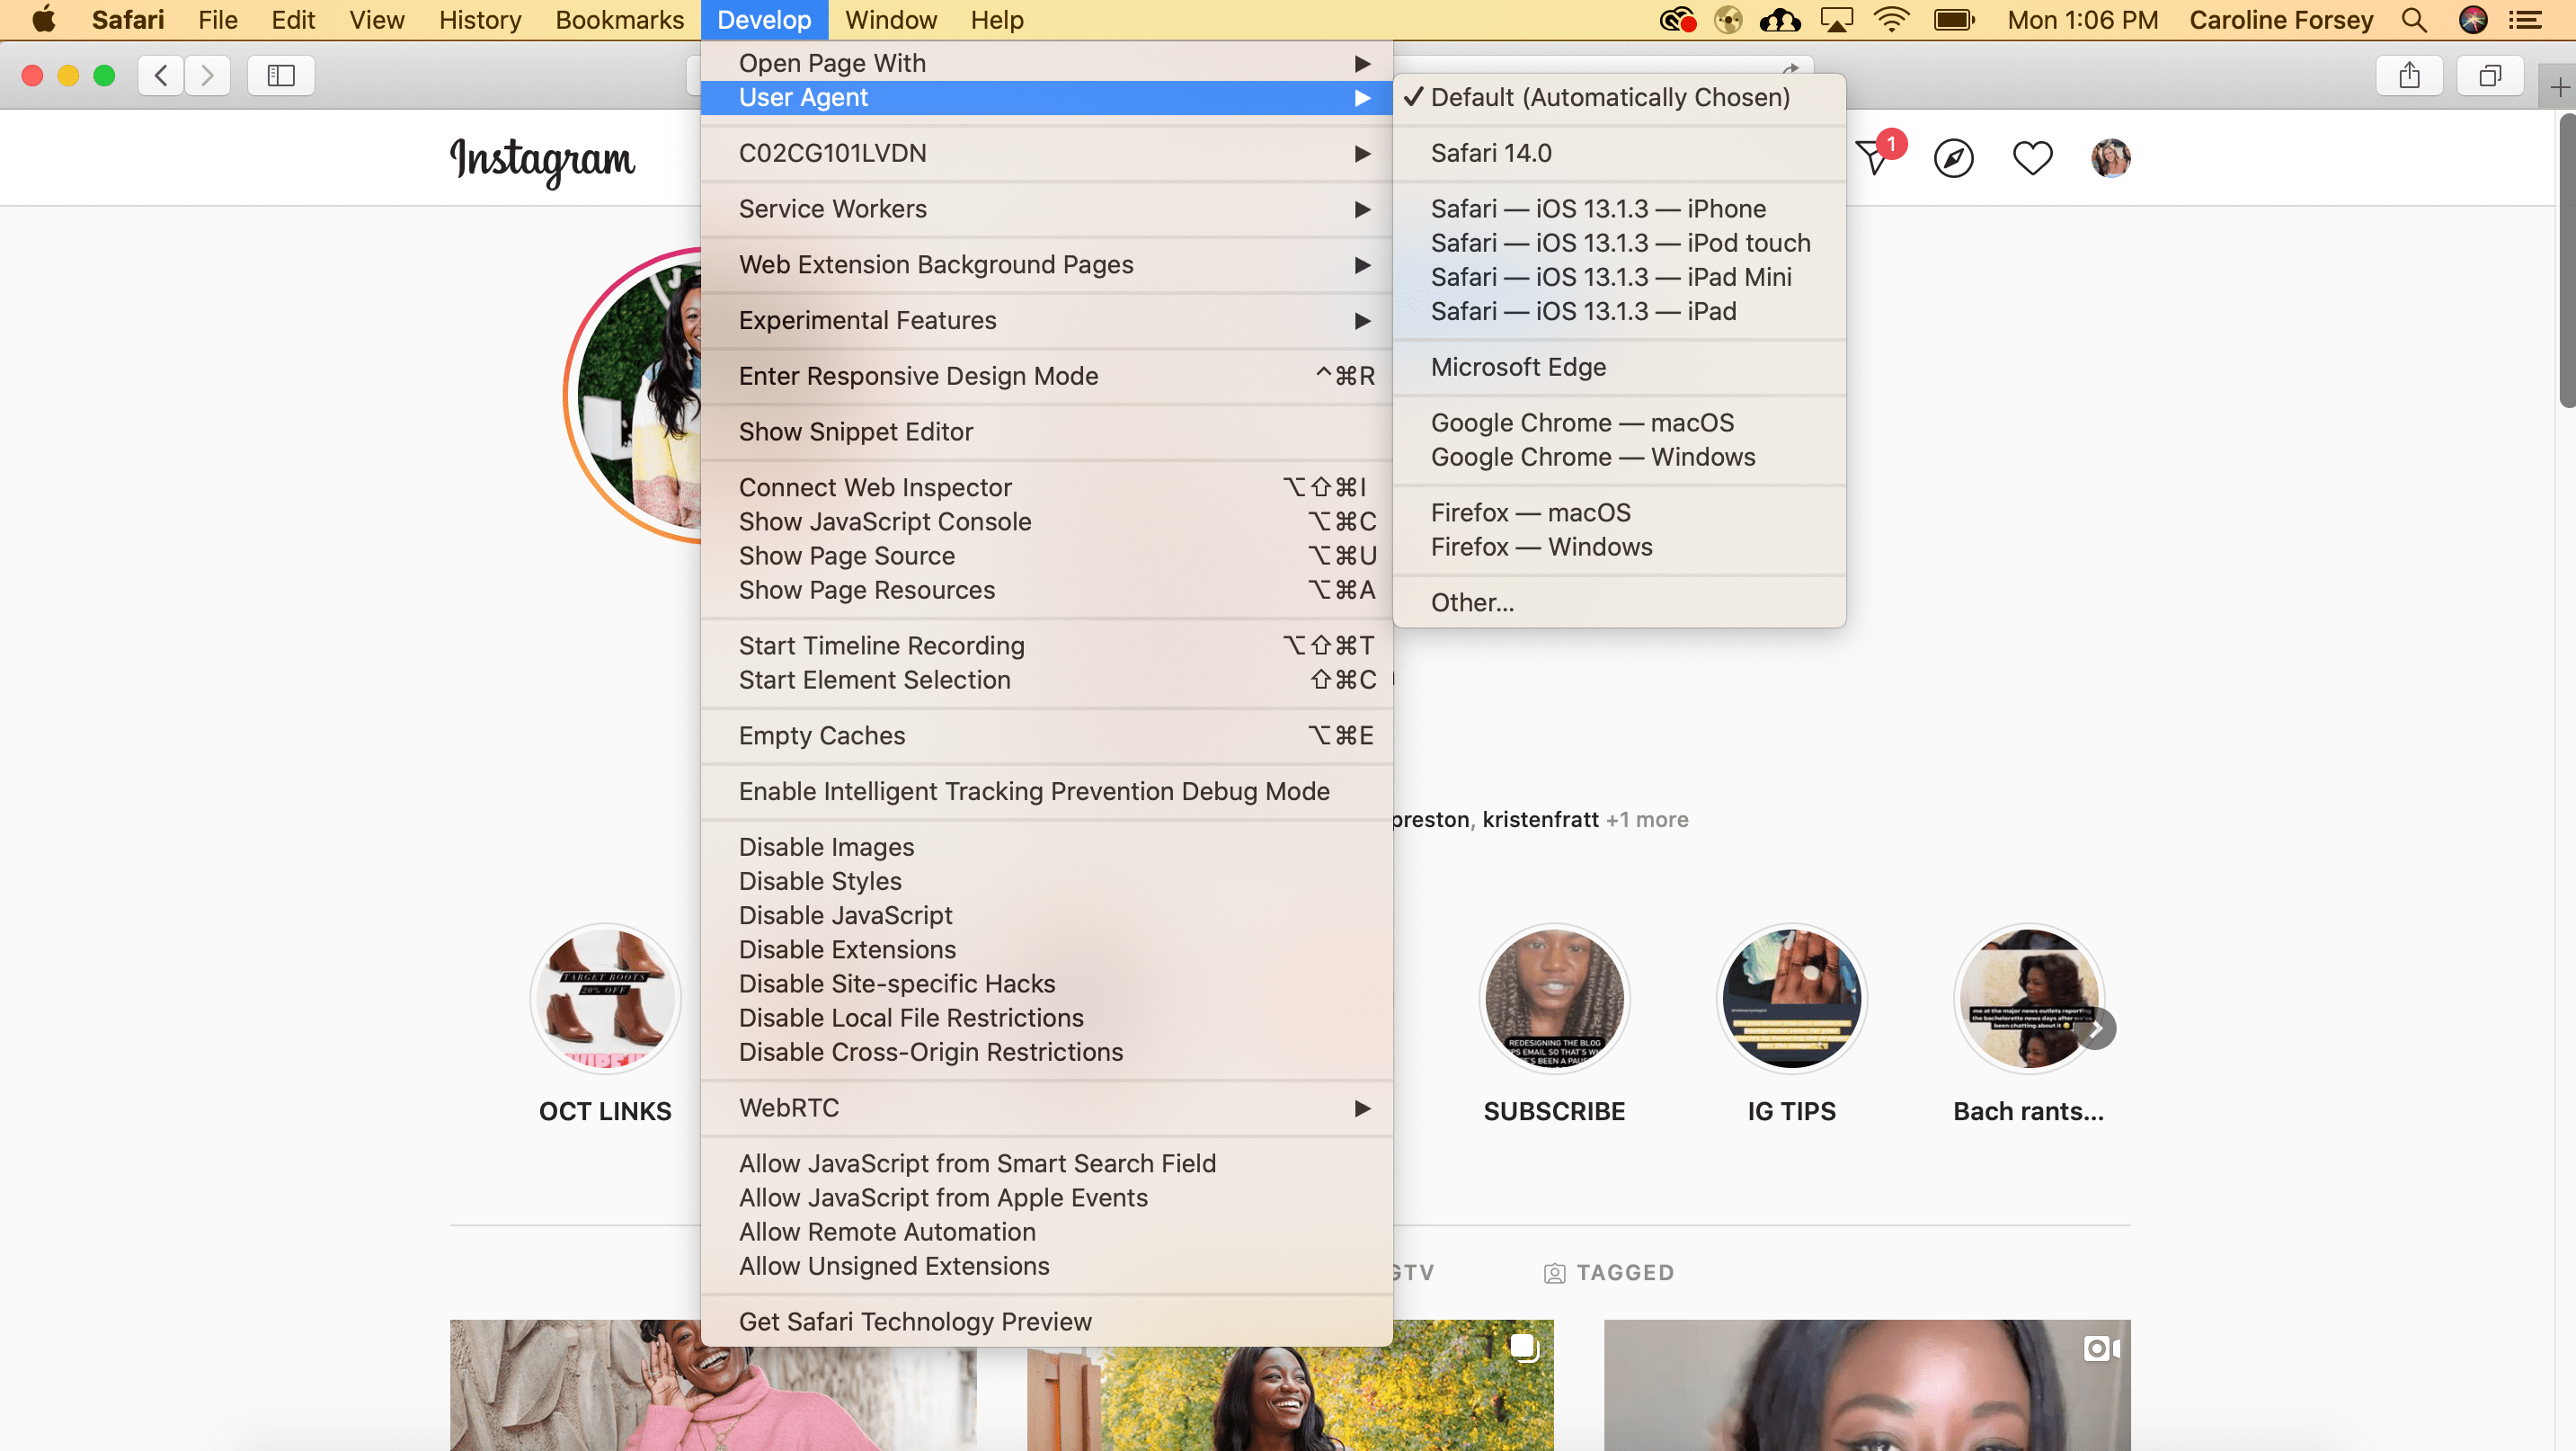
Once you click out of the previous screen and return to Safari, you’ll see that new Develop option in the top menu bar. Clicking it will reveal the features that give you advanced control over your browser.
5. Choose which mobile device you’d like on the drop-down menu.
When you select User Agentfrom the Develop menu, you’ll see another drop-down menu with a list of mobile devices. Selecting one will tell the browser to emulate how a website looks on that particular device you selected.
Choose which mobile device you’d like on the drop-down menu.
6. Refresh the page to see the mobile interface of Instagram from your browser.
You should then be able to able to use Instagram straight from the emulation while retaining this “mobile view.”
7. Upload an Instagram post the same way you would via mobile.
Once you are able to view Instagram from your Safari browser, you can upload an Instagram post the same way you would via mobile — by clicking the “+” button, adding a filter or editing the photo, adding a location and caption, and clicking “Share” when you’re ready for your post to go live.
(The instructions for posting an image to Instagram are the same as they are for the Chrome browser instructions, listed above.)
How to Post a Video to Instagram Using a Desktop Computer
To upload a video to Instagram from your desktop, you’ll need to use a third-party service that offers social media scheduling software.
There are a few you might try, including the Flume App for Mac or Lately Social ($14 per user per month for Agency plan).
For our purposes, I used Lately Social’s free personal plan to upload and post a video directly to my Instagram:
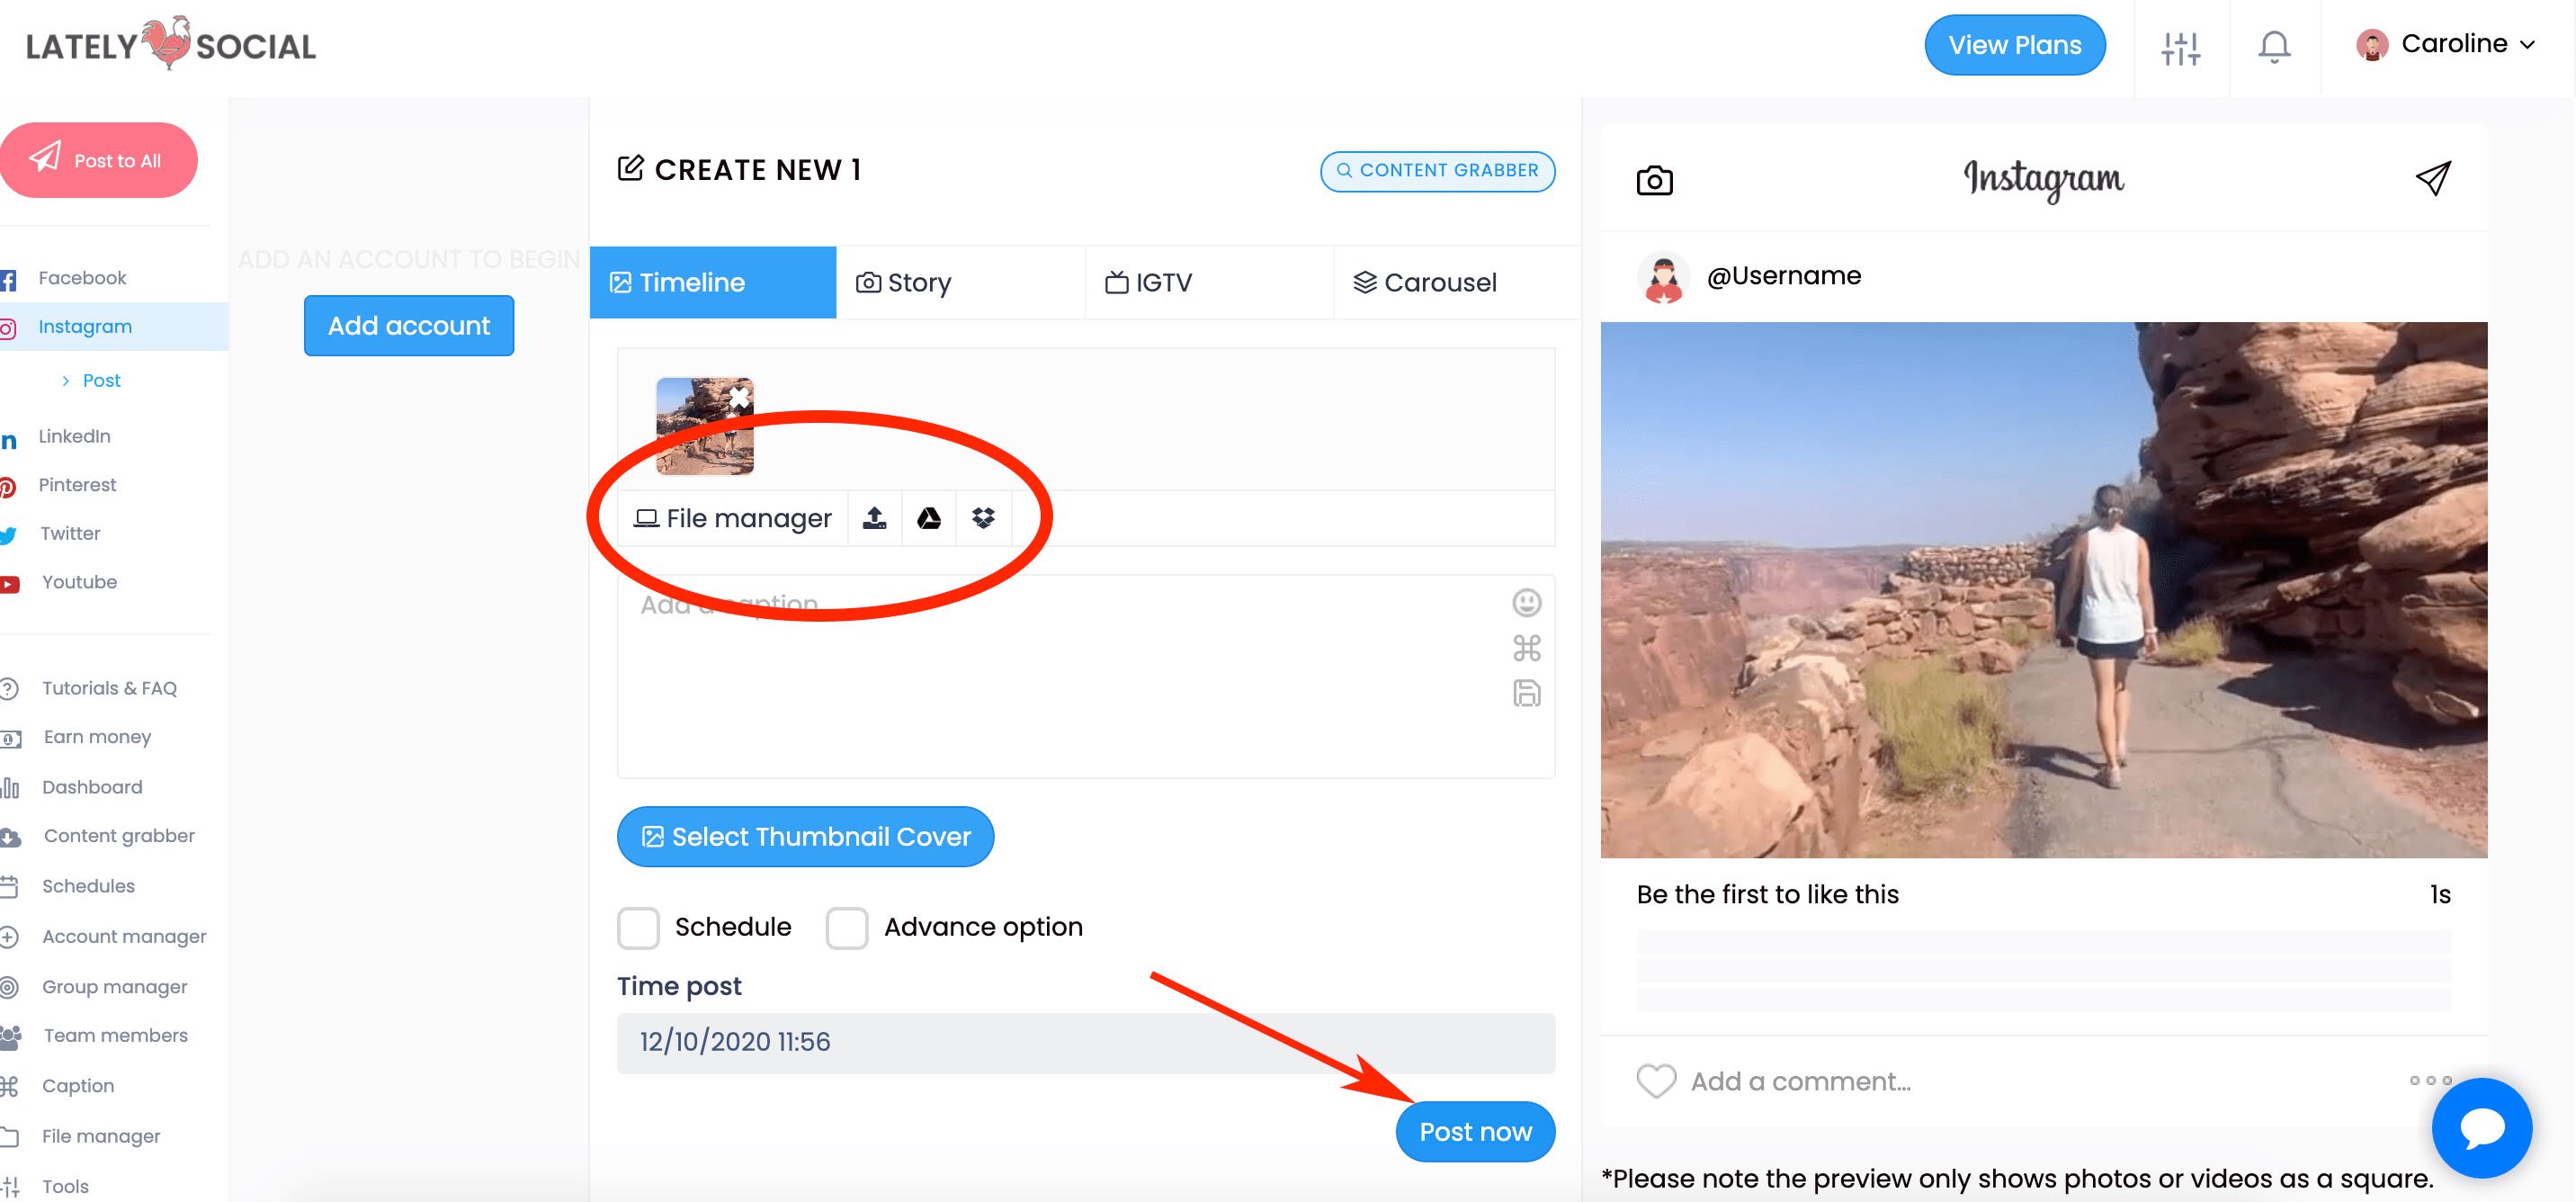
Of course, if you’re doing this regularly it might be worthwhile to explore all the social media scheduling tools at your disposal to choose the one best-suited for your business’ needs.
Using Instagram Like the Pro You Are
Now that you don’t have to worry about transferring photos to your mobile device or juggling your work’s social media account on your own device, you’ll be able to grow on Instagram efficiently and effectively. From there, the sky is the limit for creating posts and growing your audience in a scalable way.
Editor’s note: This post was originally published in October 2020 and has been updated for comprehensiveness.

HTTP Error 403 Forbidden Messages: What They Are & How to Fix Them
Imagine this – you’ve recently created a new website to host your content, and you’re excited to see it go live. You can’t wait to dive into SEO and begin ranking for keywords and attracting an audience to your brand.
But then a friend emails you and says, “Hey, is there a reason I see this when I click on your website? “
Undoubtedly, a “403 Forbidden” message is cause for immediate concern. How many potential viewers are you losing, as they come across your website to find this message?
Fortunately, there are a few quick-and-easy solutions to a 403 error. Here, we’ll explain the top three, so you can get your site up and running.
What you’ll typically see when you land on a page with a 403 forbidden error is something like this: “You don’t have authorization to view this page – HTTP Error 403.”
It can also have slightly different wording, like the example below.
Wondering about the difference between a 403 and 404 error? Here it is: A 404 error happens when you access a page that no longer exists or cannot be found. A 403 error, on the other hand, indicates that your access has been denied due to incorrect credentials.
An easy way to remember it: 403 says “access denied” while 404 says “We can’t find what you asked for.”
What causes a 403 error?
There are a few reasons why you may see a 403 forbidden error. Here are the most common:
- Permission or ownership error – Permissions are represented by codes, which indicate what each type of user can do. If you have the incorrect code associated with a file or directory then your users may run into a 403 error.
- Wrong file or folder location – When uploading content to your site, you may have added it to the wrong directory, which is not accessible to your end-users.
- No index page – If your homepage doesn’t have an index page, it will not display correctly on a browser.
- Misconfigured WordPress plugin – A plugin may be blocking IP addresses to avoid malware, causing the 403 forbidden error.
Now that you know the causes, let’s address how to fix them.
How to Fix 403 Errors
1. Set the correct file permissions.
If you’ve configured your web server, you’ll want to add the server to the www-data group, and set ownership of /var/www to the www-data user and www-data group.
Then, make sure your directories are set to 755, your files are set to 644, and your dynamic content is set to 700. This determines which user types (owner, group, everyone) can read, write, and execute.
2. Make sure you have an index page.
Your website’s home page must be called index.html or index.php – if it’s not, you should rename the homepage to include one of those URL names.
Alternatively, you can upload an index page to your httpdocs directory and then set up a redirect on the index page to your real homepage.
3. Upload your website content to the correct directory on your server.
You might see a 403 forbidden message if you haven’t correctly uploaded your content to the directory on your server.
There are several different FTP clients you might’ve chosen to host your domain — let’s say you chose FileZilla, which is free and available for Windows, Mac, and Linux.
To publish your content online, you’ll need to put your files into the public/htdocs directory.
Note: If you’re using FileZilla, these instructions will vary if you use a different FTP client. Once you’ve dragged and dropped your files into the directory, you should search your website’s URL to double-check they now appear online.
If you’re in your FTP server and don’t see the httpdocs directory, you can create a file within the directory with this title, which could also solve the issue.
4. Deactivate and reactivate your plugins.
If you suspect one of your plugins is responsible for the 403 forbidden error, temporarily deactivate all of your plugins.
You may have noticed the error shortly after installing a plugin. If so, start with that one and work your way down from the most recent installation to the oldest.
Then, one by one, activate each plugin and refresh the page to determine which plugin is causing the error.
As you can see, 403 errors can typically be resolved in just a few easy steps. It’s just about knowing where to look.

Dwell Time is the SEO Metric You Need to Track
This morning, I made a quick Google search.
When the results page loaded, I spent time clicking through the first page of websites to find what I was looking for. When I didn’t find my answer, I clicked back to that results page to look at the next one.
This process took me through to the bottom of the page until I refined my search and started the process again.
I didn’t know it at the time, but I was actually contributing to a powerful metric — dwell time.

When we talk about metrics, we tend to focus on demographics. We ask questions like, Who’s looking at your site, where are they located, and what are their interests?. These interests help marketers make informed decisions about campaigns tailored to their customers’ interests.
Dwell time is the metric that runs through various search engine results pages (SERPs). It’s the time I spent reading those results pages before I went back to Google to take a look at other results.
Let’s explore more about what dwell time means, and its usefulness, below.
What is dwell time?
Remember that dwell time begins and ends with the SERP.
Simply put, dwell time is the amount of time a user takes analyzing a web page before clicking back to search results. If a web page has a low dwell time, it likely means the page didn’t match the user’s search intent.
It’s important to note, dwell time and bounce rate are two different things. Bounce rate is what happens when a user clicks on one page, and then almost immediately leaves the site.
For it to be considered dwell time, on the other hand, the user needs to click on a page from the SERP, stay a while, and then either click back to the SERP or otherwise exit the page.
If you use search engines, you rack up dwell time daily, without even thinking about it. I can already recall two separate instances in which I’ve contributed to dwell time today, all before lunch.
Essentially, dwell time metrics can show marketers if their web pages are capturing the attention and needs of browsers. It has the potential to tell you what to include on web pages, and what to exclude.
For instance, let’s say you write a blog article called “Social Media Tips and Tricks”. You notice the piece has a high click-through rate, but low dwell time.
Upon further inspection, you see the rest of the articles on the SERPs include comprehensive information regarding social media scheduling, how to create posts for social media, and which social media sites have the highest conversion rates.
More than likely, you thought your post was solving for a user’s search intent when it really wasn’t — which is why most readers jump back to the SERP to find an alternative source.
It can also lead to clues about improving UX. For instance, if you have a slow loading time on your web page, you may see that reflected in dwell time metrics, since a user might exit your page if it’s taking too long to load
This metric can lead to important decisions you make for your site, among other metrics.
Next, let’s explore how dwell time is calculated.
How is dwell time calculated?
In Google Analytics, you can determine your dwell time by looking at “Average Session Duration”, which tells you how long visitors are staying on a website on average. It’s measured by the total duration of all sessions, or visits, in seconds, divided by the total number of sessions.
A session begins when a user goes to a website. After 30 minutes of inactivity, or when the user leaves, the session ends. The inactivity cut-off exists so you can get an accurate report of your metrics without untrue inflation.
You can find this metric already calculated for you in Google Analytics, displayed in minutes and seconds. You can find it in two places in particular — first, when you log into your Google Analytics home, you’ll see “Average Session Duration” displayed on the homepage, which indicates the average dwell time on any of the accounts you’re tracking in Google Analytics:
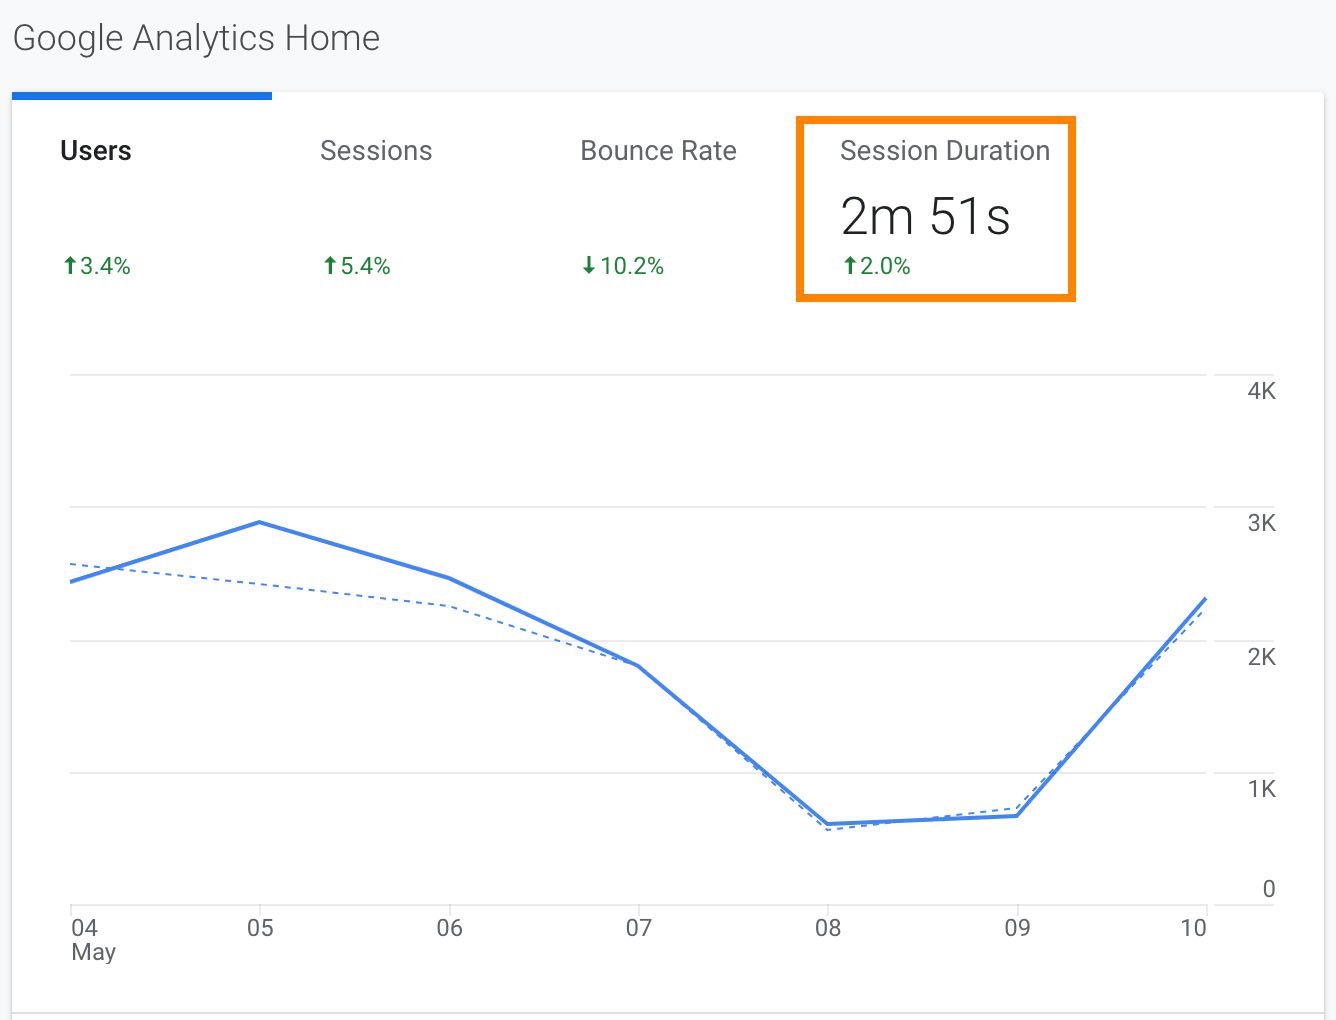 If you want to explore “Average Session Duration”, or dwell time, for individual landing pages or blog posts, you’ll want to click “Behavior” on the left side of the screen, and then “Site Content” > “Landing Pages”:
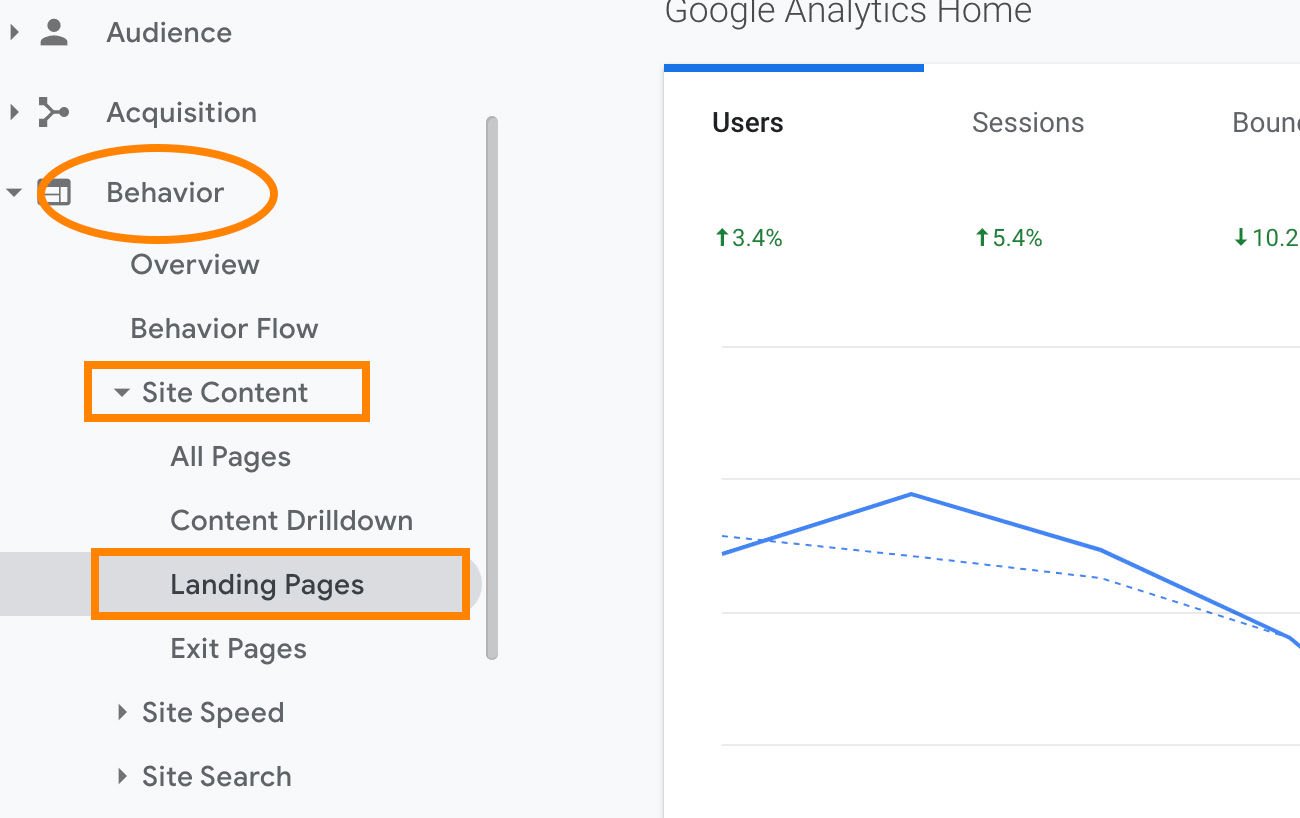
Here, you’ll see the dwell time displayed as “Average Session Duration” in the table.
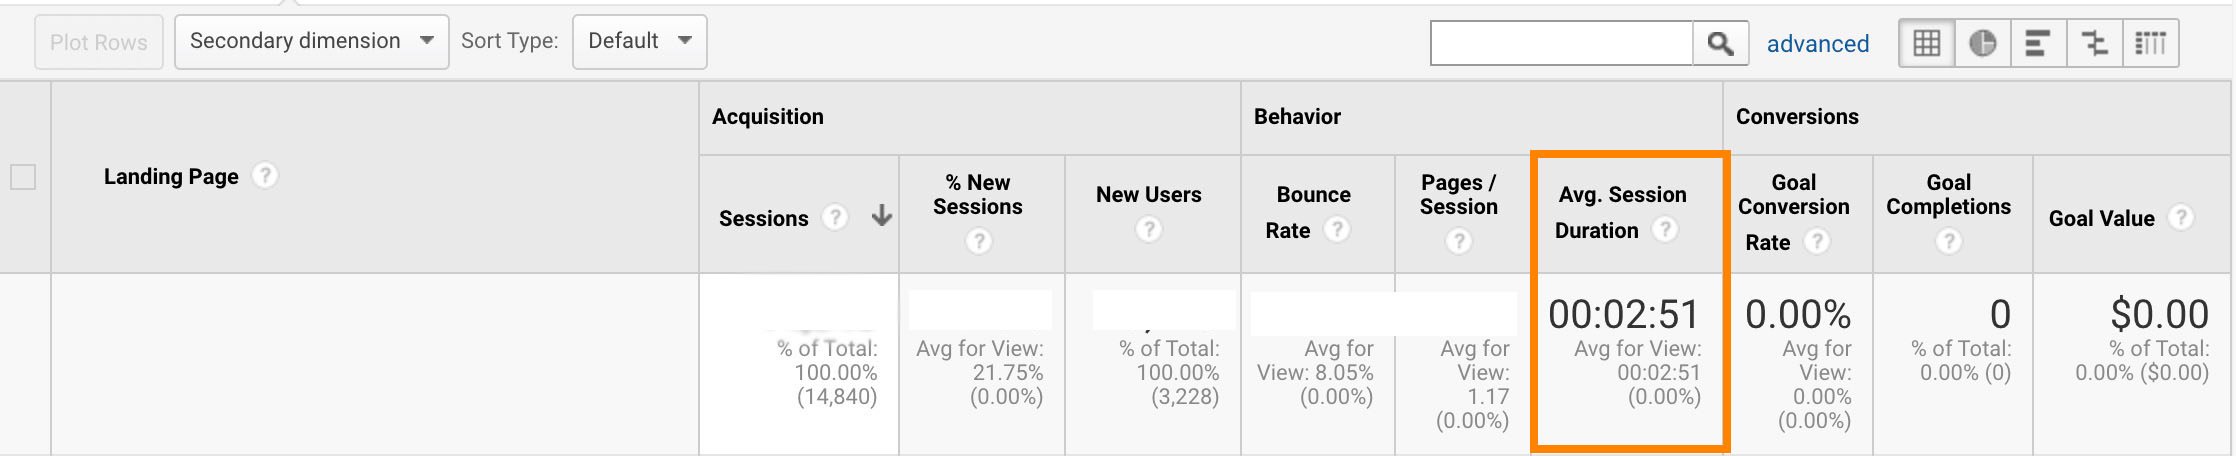 It’s important to note — “Average Session Duration” can depict dwell time, but the two aren’t the same. Dwell time can only come from the SERPs, whereas Average Session Duration might also measure someone’s time on-page after they’ve arrived from another landing page, social media page, or clicked on an email link.
Fortunately, you can account for this difference by simply adding a segment, “Organic Traffic”, to ensure you’re only seeing landing page metrics related to the SERPs.
“Average Session Duration” can help you analyze which landing pages are performing well in terms of dwell time, and which could be better.
But what’s a “good” average session? Let’s dive into that, next.
Average Dwell Time on Websites
The industry benchmark for average dwell time is considered somewhere between 2-4 minutes. It usually takes around this time to explore a website and get a feel for the design.
You’ll see this industry standard in Google Analytics when searching for benchmark metrics. To find these metrics, go to “Audiences” and then “Benchmarking” on the left-side of the screen:
Then, select whether you want to see industry standards across devices, channels, or locations.
For our purposes, let’s take a look at the industry standard for “Business & Industrial” across devices. As shown in the small numbers below the larger percentage, most businesses have an average session between 2-3 minutes (the second number depicted, i.e. 02:43):
 Most marketers agree that it’s rare to see average session duration times over 10 minutes or less than one minute, so if you’re looking for a goal, between 2-4 minutes is where the average typically lies.
When you’re looking at metrics, it’s a good idea to look at all of them to get a full scope of how your site is performing. If you’re ranking high on the SERP, that means that your SEO is great, but if your website isn’t providing useful information, your session duration might underperform.
To provide a holistic experience for customers, looking into the meaning behind session durations is important.
How to Improve Dwell Time
A low dwell time tells you that when a user searches a query on Google and then clicks on your site, she’s disappointed with what she finds there — for whatever reason, it didn’t match what she was looking for, or didn’t provide the full answer she needed.
There are plenty of options for combatting this.
1. Make sure your introduction matches the reader’s intent, and follows good UX practices.
First, take a look at your introduction our UX at the top of the page. Is it easy to navigate, and does the text outline what the reader will find on the rest of the page? Best of all, does it help the reader find what she’s looking for quickly — either with a table of contents, or by using short paragraphs and bullet points to make the content more digestible?
User experience could be a major component of a low dwell time, particularly at the top of the page — since readers who aren’t impressed with the above-the-fold UX won’t stick around long.
Content matters, too. You might find you have a low dwell time if your introduction is confusing or doesn’t get to the point quickly enough. Alternatively, perhaps your content isn’t matching the user’s intent.
Take a look at other high-ranking articles on the SERPs to get a better picture of why this reader is searching for this topic. Intent matters.
Consider the following example: You see you have a low dwell time for your article, “How to Delete a Theme in WordPress.” When you click into the article, you find that the introduction focuses on why WordPress might be a good web hosting solution, as well as statistics to support the claim.
Except … readers who’ve just searched “how can I delete my WordPress theme?” likely already have an account and don’t need to be convinced of the strengths of the tool — they just need to delete a theme.
If your article isn’t hitting a good note with readers from the get-go, that could be a major contributor to low dwell time.
2. Ensure the page is fast and clean.
Slow loading time is a major deterrent to high dwell time — if your page takes too long to load, readers likely won’t stick around long.
Additionally, once readers are scrolling your page, if they find the images aren’t loading properly, or it’s an unimpressive experience, they might choose to abandon the page.
This means that having clean code and following SEO best practices for a quick load time (including compressing your images and caching your web pages) is critical to increasing your dwell time.
Ensure the page loads quickly and efficiently across browsers and devices, too. A good mobile-experience is vital here, since a lower dwell time on mobile will contribute to a lower dwell time overall.
3. Have good internal linking.
Dwell time is ultimately the amount of time someone stays on a page before returning to the SERPs — so including links to your other blog posts or landing pages is a good opportunity for keeping them engaged on your site for longer.
Follow good link-building practices to create the right infrastructure for both the SERPs and user experience. The key is ensuring your links are relevant to the topic at-hand. A blog post about social media, for instance, should link to other posts about Instagram or YouTube — not website development.
4. Embed multimedia elements.
Many readers might get tired of reading too much text, so consider breaking up the page by embedding videos, podcasts, images, and other multimedia elements to keep your readers engaged.
Along with improving dwell time, embedding these elements on your page could increase traffic to your brand’s other types of content. For instance, embedding a YouTube video on your blog post (when relevant) could increase views to your YouTube channel. Alternatively, including a link to a podcast episode might increase listeners.
Ultimately, dwell time is a sign that the quality of your content or the page’s UX isn’t good enough to keep readers’ interested. Consider how you might refresh your content to better match the reader’s intent based on what else is on the SERPs, and follow other on-page best practices to increase dwell time and delight your website visitors.

The Beginner’s Guide to Editing YouTube Videos
As a video marketer, editing might be the most important part of post-production. If you can’t seamlessly weave your shots together or get your cut to hit the right frame, your video will seem unpolished and disengage your viewers.
That said, if you’re operating on a shoestring budget, you might not be able to afford video editing software. So what’s a video marketer to do without editing software? Fortunately, YouTube offers a web-based video editor that is entirely free and accessible through its platform.
In this post, learn how to use YouTube’s native video editing tools, as well as best practices to keep in mind when editing your videos to ensure you’re keeping your audience engaged and interested in watching more.
![→ Free Templates: How to Use YouTube for Business [Download Now]](https://no-cache.hubspot.com/cta/default/53/b33cfd44-133a-49e3-a943-086c5679d485.png)
How to Use YouTube’s Video Editor
1. Sign in to YouTube Studio
2. On the left sidebar, click Content.
3. In Uploads, click the thumbnail of the video you want to edit.
4. In the left sidebar, click Editor.
5. Trim the beginning or end of your video.
If you want to trim the beginning or end of your video, select Trim, which is next to your video’s timer and right above your timeline panel.
You should see a blue box around the sides of your video timeline panel. Drag them to chop off the parts of the beginning or end of your rough cut that you don’t want to include in your final published version. Click Preview to view the edit, and click Save on the top right-hand corner if you’re satisfied.
6. Trim clips out of the middle of your video.
If you want to trim a specific clip out of the middle of your video, select Trim. Next, in your timeline panel, click the beginning of the portion of the clip you’d like to remove and press Split.
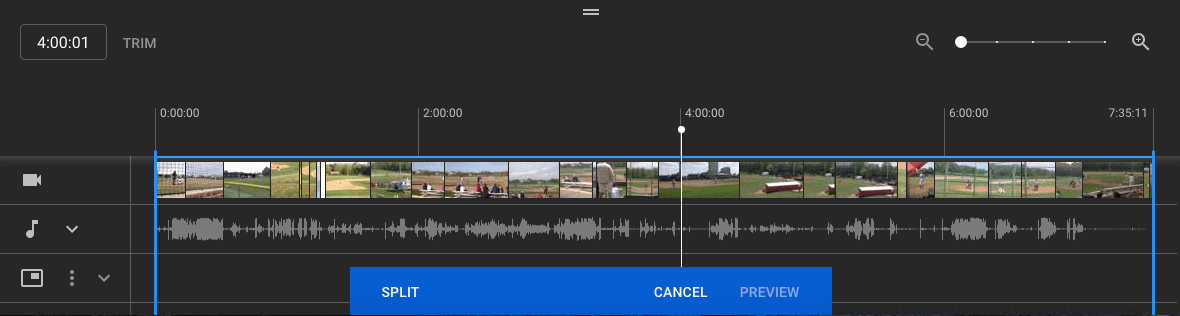
Next, in your timeline panel, click the end of the clip that you’d like to remove and press Split again.
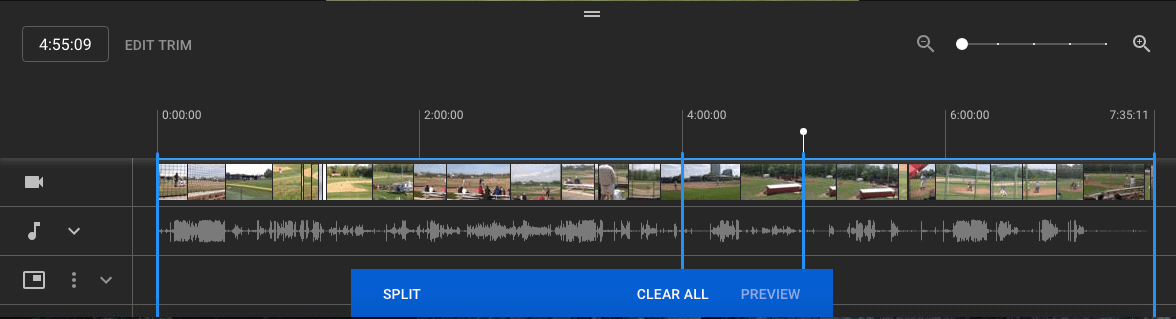
Finally, click on the blue line at either the beginning or end of your clip and drag it to the other side to trim it out of your video. Click Preview to view your edited video, and click Save if you’re satisfied.
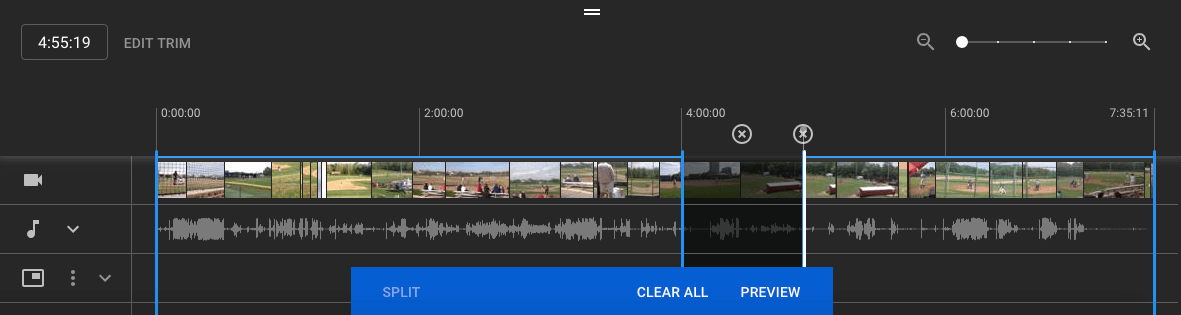
7. Add an end screen to your video.
If you want to give your viewers the option to watch one of your related videos, playlists, or subscribe to your channel, click the end screen icon shown at the bottom of your timeline panel. The image below displays the end screen icon outlined in red.
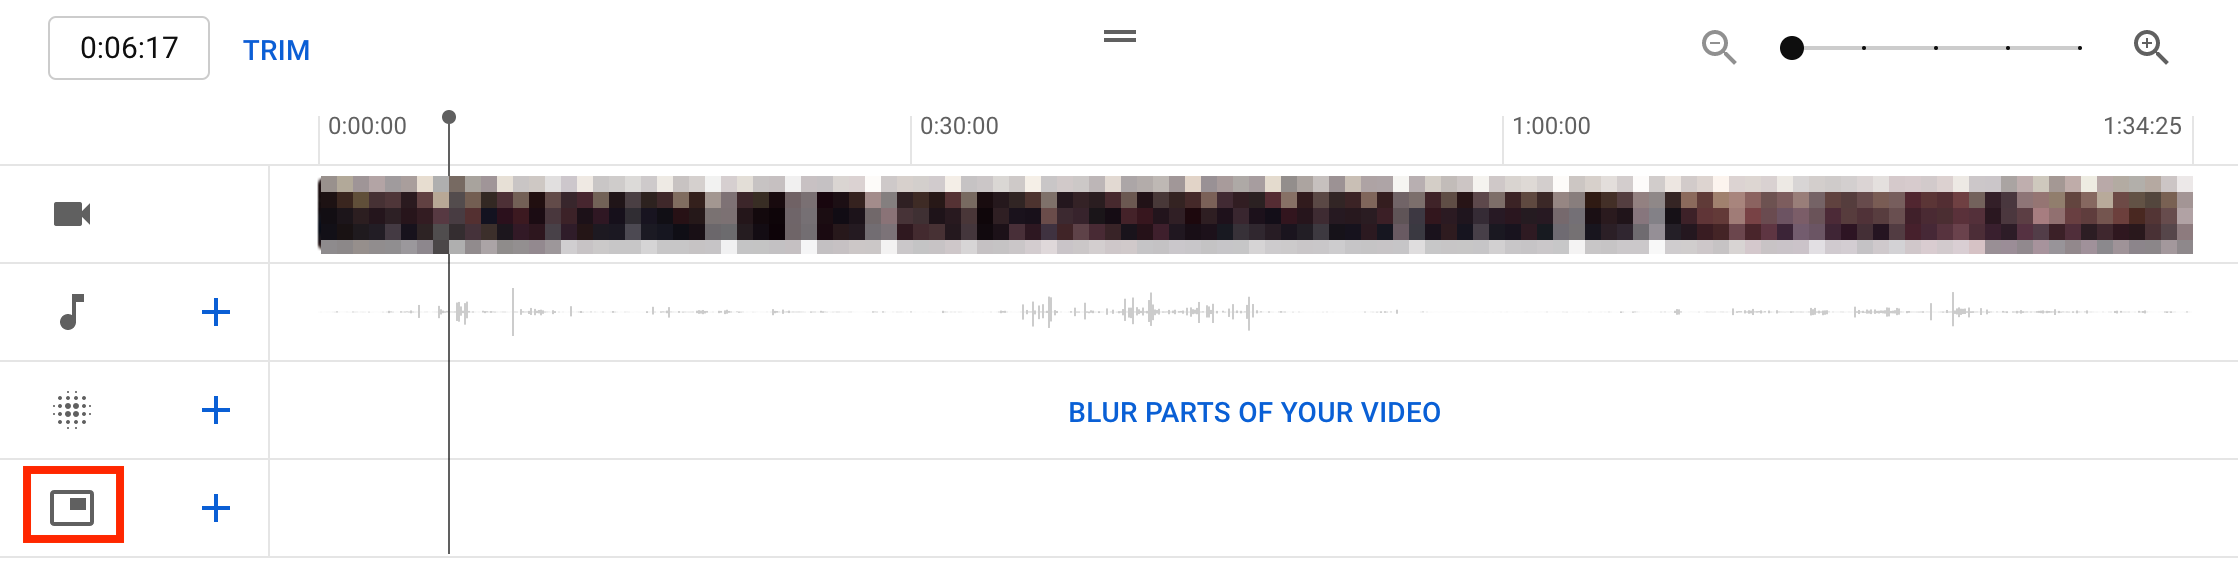
You can upload your existing end screen template by clicking Apply template in the pop-up menu (this is a helpful guide for creating your own) or choose from the editor’s native options: Video, Playlist, Subscribe, Channel, or Link.
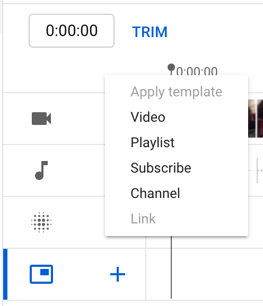
five of the best YouTube video editor alternatives.
How To Edit Videos For YouTube
While understanding how to edit your videos is essential, it’s also important to make sure you’re editing videos into a final product that users are interested in. Let’s discuss best practices to keep in mind when editing your videos during post-production.
Create engaging thumbnails for each video.
Thumbnails are the first thing your viewers see before watching your video, so they’re your first chance to capture attention and draw in your audience.
Your thumbnails can be screenshots of specific moments from your videos or even text-based titles, but they should be exciting and leave your audience intrigued and wanting to learn more.
Here is a helpful guide to creating YouTube thumbnails.
Tell a story.
Just as we do when we read a book, we want the videos we watch to tell a story. This means that your videos should have a flow and follow the fundamental elements of storytelling: having a beginning, middle, and end.
You’ll want your story to guide viewers through what you’re sharing with them, and they won’t be left confused and wondering how one clip is related to another. This post is a thorough explanation of the basics of storytelling and how you can apply its principles when editing your videos.
Use engaging elements in all your videos.
In addition to telling a story, adding engaging elements to your videos during editing is a great way to keep your audience engaged.
Engaging elements can be things like images, text and shapes, animations, music, and fun transitions. Be sure to choose an element that makes sense and complements your videos, as you don’t want to take the focus away from your high-quality content.
Create a baseline video editing style.
One of the best ways to streamline your editing process and keep your audience engaged is to develop a baseline editing style that you’ll use and apply to every video.
This means a consistent way of editing your videos, thumbnail style, music, transitions, and any other added elements that you’ll always use. You’ll spend less time finding new elements every time you sit down to edit, and your audience will come to recognize your consistent style.
For example, maybe you always give a snippet at the beginning of your videos of the most dramatic or exciting moment that will happen later on to draw in your audience. Keep up this consistent style with all your videos, as it will give you a consistent framework to work from and keep your audience engaged and wanting more.
Keep it simple.
Although it can be tempting to do as much as you can to draw in your audience, it’s also important to keep it simple and not overwhelm your viewers. Too many unnecessary transitions, loud music, images, and text can distract from your video content and have the opposite effect.
Aim to find a careful balance of original video content and supplemental elements.
Take time to step away and come back.
Editing video can be stressful, especially if you sit in front of a computer for hours at a time. It can become easy to second-guess your work, so it can be beneficial to step away for a while so you can come back fresh, energized, and ready to make a final cut.
You can think of it like this: if you’ve been sitting at a desk for six hours editing a video, you’ve been hyperfocused on that and nothing else. You may start to feel stuck or like you’ve hit a wall and that your video is bad. If you step away for a few hours or days, you can come back to it with a fresh pair of eyes to make final edits and realize that your video is good; you just needed to take a break and come back refreshed.
Whether you use YouTube’s native tools or third-party software, editing your videos should be fun. Take the time to understand what works for the content you produce, create a consistent editing strategy, and watch the views roll in.

The 6 Stages of the Product Life Cycle
When I was 12 years old, I used to look through my older cousin’s CD collection, a little confused.
I didn’t understand the need to have CDs when I could go on iTunes and listen to all my favorite songs. Then, when I was in middle school, I got my first hand-me-down iPod shuffle.
![→ Download Now: Free Product Marketing Kit [Free Templates]](https://no-cache.hubspot.com/cta/default/53/08b5e1f4-5d26-405b-b986-29c99bd0cb14.png)
This is a great example of the product life cycle (PLC) in action. CDs were in the decline stage while the iPod was in the growth stage. Now, you’ll rarely find a CD in anyone’s music collection unless they’re enthusiasts or want to feel nostalgic for their younger years.
No one wants their product to become “obsolete” and reach the end of its product life cycle. Still, it’s important to understand what stage your product is in so you can make better marketing and business decisions. You can mature and grow in the marketplace by agilely responding to changing customer needs, adding new offerings to your lineup, and adopting new tech that keeps you up-to-date in the marketplace.
Below, we’ll learn what the life cycle is, take a look at the life cycle stages, and go over a few real-life examples.
As marketers, it’s important to understand how your tactics and strategies change depending on the stage your product is in.
For example, a brand new product will be marketed differently than a well-established, mature product. For the first, the marketing campaigns will focus on raising awareness, while for the latter, they’ll focus on maintaining awareness.
Businesses also use to product life cycle to achieve the following:
- Establish competitive authority. If your product is new and recently introduced to the market, you can market it as a new and improved alternative to an existing product. If the product is established, you can vouch for its long history of use in your branding.
- Decide on a pricing strategy. Depending on the life cycle stage your product is in, you’ll choose how to price the product. A new product may be priced lower to entice more buyers, while a product in the growth stage can be priced higher.
- Create a marketing strategy. Your product life cycle stage will determine which strategy to pursue. Maturity and audience knowledgeability plays a big role in the type of content you publish on your site and social media profiles.
- Respond before the product begins its decline. There’s no worse feeling than watching your product slowly become obsolete or be displaced by a competing product. By keeping the life cycle stages in mind, you can create a strategy that keeps you ahead of the curve as you reach the saturation and decline stages.
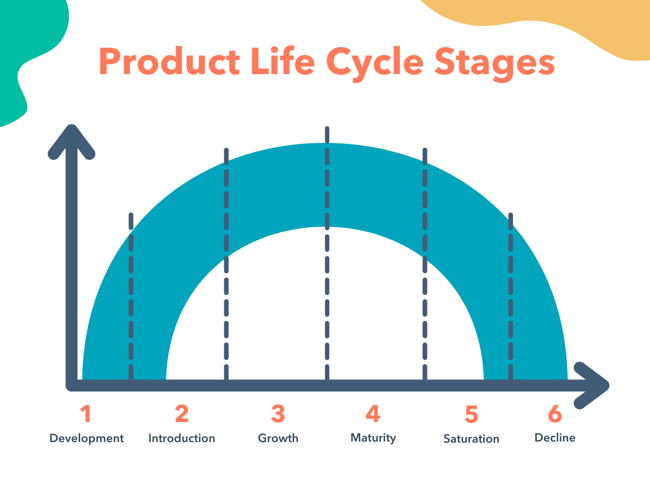
The product life cycle benefits businesses because they can shift their wording and positioning to best market the product at the stage it is in. If your product has recently been introduced and you try to market it as a long-established solution, consumers will see right through it and trust you less as a result.
Below, I’ll cover the product life cycle stages in more detail.
1. Development
The development stage of the product life cycle is the research phase before a product is introduced to the marketplace. This is when companies bring in investors, develop prototypes, test product effectiveness, and strategize their launch. Due to the nature of this stage, companies spend a lot of money without bringing in any revenue because the product isn’t being sold yet.
This stage can last for a long time, depending on the complexity of the product, how new it is, and the competition. For a completely new product, the development stage is hard because the first pioneer of a product is usually not as successful as later iterations.
Development Stage Marketing Strategy
While marketing typically begins in the introduction stage, you can begin to build “buzz” around your product by securing the endorsement of established voices in the industry. You can also publish early (and favorable) consumer research or testimonials. Your marketing goal during this stage is to build upon your brand awareness and establish yourself as an innovative company.
2. Introduction
The introduction stage is when a product is first launched in the marketplace. This is when marketing teams begin building product awareness and reaching out to potential customers. Typically, when a product is introduced, sales are low and demand builds slowly.
Usually, this phase is focused on advertising and marketing campaigns. Companies work on testing distribution channels and try to educate potential customers about the product.
Introduction Stage Marketing Strategy
This is where the fun begins. Now that the product is launched, you can actually promote the product using inbound marketing and content marketing. Education is highly important in this stage. Your target consumer must know what they’re buying before they buy it. If your marketing strategies are successful, the product goes into the next stage — growth.
3. Growth
During the growth stage, consumers have accepted the product in the market and customers are beginning to truly buy in. That means demand and profits are growing, hopefully at a steadily rapid pace.
The growth stage is when the market for the product is expanding and competition begins developing. Potential competitors will see your success and want in.
Growth Stage Marketing Strategy
During this phase, marketing campaigns often shift from getting customers’ buy-in to establishing a brand presence so consumers choose them over developing competitors. Additionally, as companies grow, they’ll begin to open new distributions channels and add more features and support services. In your strategy, you’ll advertise these as well.
4. Maturity
The maturity stage is when the sales begin to level off from the rapid growth period. At this point, companies begin to reduce their prices so they can stay competitive amongst growing competition.
This is the phase where a company begins to become more efficient and learns from the mistakes made in the introduction and growth stages. Marketing campaigns are typically focused on differentiation rather than awareness. This means that product features might be enhanced, prices might be lowered, and distribution becomes more intensive.
During the maturity stage, products begin to enter the most profitable stage. The cost of production declines while the sales are increasing.
Maturity Stage Marketing Strategy
When your product has become a mature offering, you may feel like you’re “sailing by” because sales are steady and the product has been established. But this is where it’s critical to establish yourself as a leader and differentiate your brand.
Continuously improve upon the product as adoption grows, and let consumers know in your marketing strategy that the product they love is better than it was before. This will protect you during the next stage — saturation.
5. Saturation
During the product saturation stage, competitors have begun to take a portion of the market and products will experience neither growth nor decline in sales.
Typically, this is the point when most consumers are using a product, but there are many competing companies. At this point, you want your product to become the brand preference so you don’t enter the decline stage.
Saturation Stage Marketing Strategy
When the market has become saturated, you’ll need to focus on differentiation in features, brand awareness, price, and customer service. Competition is highest at this stage, so it’s critical to leave no doubt regarding the superiority of your product.
If innovation at the product-level isn’t possible (because the product only needs minor tweaks at this point), then invest in your customer service and use customer testimonials in your marketing.
6. Decline
Unfortunately, if your product doesn’t become the preferred brand in a marketplace, you’ll typically experience a decline. Sales will decrease during the heightened competition, which is hard to overcome.
Additionally, new trends emerge as time goes on, just like the CD example I mentioned earlier. If a company is at this stage, they’ll either discontinue their product, sell their company, or innovate and iterate on their product in some way.
Decline Stage Marketing Strategy
While companies would want to avoid the decline stage, sometimes there’s no helping it — especially if the entire market reached a decline, and not just your product. In your marketing strategy, you can focus on nostalgia or emphasize the superiority of your solution to successfully get out of this stage.
To extend the product life cycle, successful companies can also implement new advertising strategies, reduce their price, add new features to increase their value proposition, explore new markets, or adjust brand packaging.
The best companies will usually have products at several points in the product life cycle at any given time. Some companies look to other countries to begin the cycle anew.
International Product Life Cycle
The international product life cycle (IPL) is the cycle a product goes through in international markets. As products begin to mature and companies want to avoid the decline stage, they’ll typically begin to explore new markets globally. When products reach mass production, manufacturing and production shifts to other countries as well.
The international product life cycle stages are identical to that of a normal product life cycle. The development stage looks differently, however, because local customs and regulations can affect how long it takes to bring the product to a new marketplace.
Beware: once you lay the groundwork in a new marketplace, your competitors will be sure to follow, and the life cycle stages will continue up until saturation and eventually decline. Your option is to either expand into another market or learn from prior mistakes and innovate before the decline stage rolls around.
Next, we’ll look at some examples of product life cycles.
Let’s follow the product life cycle of popular products that have since reached the decline stage.
1. The Typewriter
The typewriter was the first mechanical writing tool — a worthy successor to pen and paper. Ultimately, however, other technologies gained traction and replaced it.
- Development: Before the first commercial typewriter was introduced to the market, the overall idea had been developed for centuries, beginning in 1575.
- Introduction: In the late 1800s, the first commercial typewriters were introduced.
- Growth: The typewriter became a quickly indispensable tool for all forms of writing, becoming widely used in offices, businesses, and private homes.
- Maturity: Typewriters were in the maturity phase for nearly 80 years, because this was the preferred product for typing communications up until the 1980s.
- Saturation: During the saturation stage, typewriters began to face fierce competition with computers in the 1990s.
- Decline: Overall, the typewriter couldn’t withstand the competition of new emerging technologies and eventually the product was discontinued.
2. Vine
Skipping forward to the 21st century, we see the rise and fall of Vine, a short-form video sharing app that was the source for many a meme at its peak but eventually declined due to other platforms.
- Development: Vine was founded in June 2012 and mainly competed with Instagram.
- Introduction: The app was introduced to the public in 2013. Its differentiating factor was its short-form video format — users had only seven seconds to film something that was hilarious, absurd, or a mixture of both.
- Growth: Only two years after its release, Vine had over 200 million active users. Its popularity led to the advent of the phrase “Do it for the Vine.”
- Maturity: Because it was only in the market for a few years, Vine never reached the maturity stage. While adoption was high, it was still a fairly new app.
- Saturation: Vine competed in an already saturated market. Instagram, Snapchat, and YouTube were the preeminent names in its category, and Vine soon started to decline in use.
- Decline: When Musical.ly and, later, TikTok were introduced, Vine lost a large amount of its user base and shut down. It was succeeded by Byte, a similar short-form video sharing platform.
3. Cable TV
Remember the days of switching TV channels to find what to watch? I do — and they feel distinctly like something of the past. While cable TV is still around, it’s safe to say that it’s nearing the decline stage.
- Development: Cable TV was developed in the first half of the twentieth century. John Walson has been credited with its invention.
- Introduction: The first commercial television system was introduced in 1950, and by 1962, the technology saw the first hints of growth.
- Growth: After a decades-long freeze on cable TV’s development (due to regulatory restrictions), the technology began gaining traction, and by 1980, more than 15 million households had cable.
- Maturity: Cable TV matured at around the 1990s. Around seven in ten households had cable.
- Saturation: The start of the 21st century saw an oversaturation of this technology, and it also started to compete with other modern developments such as on-demand services and high-definition TV (HDTV). While the internet was still in its nascent stages, it would soon gain on cable TV as well.
- Decline: From 2015 onwards, cable TV experienced a marked decline. Online video streaming services such as Netflix and Hulu have taken precedence — and this trend is set to continue.
Not all products need to face the decline stage. Companies can extend the product life cycle with new iterations and stay afloat as long as they have several products at various points of the product life cycle.
Keep Your Product’s Life Cycle in Mind
Whether you’re developing a brand new product or working with a mature, well-established brand, you can use the product life cycle stages as a guide for your marketing campaigns. Each stage will dictate how you inform your audience about the product, how you position your brand in the marketplace, and how you decide to move forward after the decline stage. By keeping your product’s life cycle in mind, you can invest in better marketing campaigns that result in a higher ROI.
Editor’s note: This post was originally published in January 2020 and has been updated for comprehensiveness.

Google Posts: The Free and Simple Way for SMBs to Leverage Local Search
In 2019, nearly one-third of online consumers in the U.S. used the internet on a daily basis to search for local businesses. And as of 2021, Google had 86.6% of the market share of search engines — meaning, getting noticed on Google is an effective way to boost business volume and find new customers.
To help companies reach prospective consumers, Google introduced a feature called My Business Posts. It allows businesses to share relevant information that appears within Google Search and Maps results themselves, rather than taking users to a new webpage.
Despite their potential benefits, however, Google My Business Posts haven’t seen significant uptake from brands. Do a quick Google search and you’ll find a My Business Help page along with a host of questions like, “Do Google Posts work?” or “Do businesses really use Google Posts?”
In part, this lackluster uptake stems from the ubiquity of Google and our own familiarity with these posts — many businesses assume that Google’s algorithms will pick and place relevant data automatically. In actuality, companies need to create and schedule their own My Business Posts.
Here’s what you need to know about the best-kept secret of local SEO — and how to make My Business Posts work for your brand.
When crafting your Google Posts, you’ll have ample opportunity to grab your audience’s attention. You can describe your offer, product, or event in up to 300 words, upload an image, video, or GIF, and add call-to-actions to prompt product purchases, reservations, and newsletter signups. Your audience can share your Google Posts on social media too.
To make sure your business is constantly publishing fresh content on their search results, Google sets a seven-day life span on each of your Google Posts. The only posts that won’t expire after seven days are ones promoting events, but they’ll disappear once the events end.
Google Posts also has an analytics feature, which shows you how many impressions and clicks your posts get. This might seem like a limited amount of metrics, but they ultimately provide enough information to help you grasp which Google Posts resonated with your audience and which ones did not.
It’s also worth noting that Google My Business listings are free to create, schedule, and post.
While it’s logical to assume that Google would try to monetize the surging popularity of local search by selling ad space on company listings, the search giant decided to do the opposite — they gave every company with a Google My Business account access to a tool that lets them advertise on their business listings for free. Posts created with Google My Business will appear both in Search and Maps results, making it easy for users to find what they’re looking for without being redirected.
How to Use Google My Business Posts to Get Customers
Originally launched as “Candidate Cards” in 2016, Google Posts would only show up in relevant search queries for political candidates who wanted to promote their brand on the search engine.
A few months later, Google decided to roll them out to a select group of small businesses. And by July 2017, the search engine made Google Posts available to every business with a Google My Business account.
Giving every business the opportunity to use Google Posts levels the playing field in the digital marketing space. SMBs without much SEO expertise are now able to leverage the massive reach of local search to grow their business. Consider that for the first six months of 2020, calls to businesses driven by data on My Business Posts rose 61% as customers grappling with pandemic pressures looked to verify if companies were open, closed, or somewhere in between.
Ready to try making a Google My Business Post? Here’s how.
Let’s break down each step in more detail.
1. Log into Google My Business.
Start by signing into your Google My Business account on your desktop or mobile device. If you have more than one location, select the location you’re creating the post for and then select “Posts”.
Worth noting? You can also create a post directly from Google Search. First, make sure you’re logged into your Google My Business account, then search for and select your business profile. Click “Promote” to get started.

2. Choose the type of post you want to create.
Next, choose the type of post you want to create — Update, Event, Offer, or Product.
Now, you can add elements including photos, videos, texts or buttons. 2020 also saw the addition of COVID-19 Posts, which can be used to add temporary business hours, operating conditions, or safety and hygiene notices.
3. Craft the post.
If your content isn’t engaging, regardless of the strength of your marketing strategy, it won’t produce results. Crafting captivating content is the only way you’ll attract your audience’s attention and gain their trust. To effectively connect with people and inspire action using Google Posts, here are three copywriting tips you can follow.
1. Create headlines that appeal to people’s self-interest or give news.
With only 58 characters to spare in your title, you must get to the point of your offer. But to get people to click, you also need to clearly communicate your offer’s value, benefits, and relevance. How do you grab someone’s attention with such little room to work with?
- Headlines that appeal to the audiences’ self-interest
- Headlines that provide news
- Headlines with attention-grabbing words and phrases
- Headlines that are clear, easy-to-read, and fluff-free
2. Publish Google Posts that are clear, concise, and compelling.
Even though you technically have up to 1,500 characters to describe your offer, only the first 100 characters show up in Google’s knowledge panel.
To immediately hook people and persuade them to click on your offer or read the rest of your description, try sticking to one message per Google Post. Spotlighting your offer’s main benefit or feature, especially in the first 100 characters, will make it easy for your customers to understand its value and increase the likelihood of their click-through.
Another way to boost your Google Post click-through rate is by leveraging scarcity. People value objects and experiences that are rare — having something that most people want but can’t have, boosts our self-worth and sense of power.
And since each Google Post has a seven-day lifespan, you can also align your offer’s deadline with your post’s expiration date and use words and phrases that evoke a sense of urgency, like “Exclusive offer” or “Limited availability”. These psychology-backed tactics will skyrocket your offer’s perceived scarcity and, in turn, its consumer demand.
3. Use a large, high-quality visual to make your Google Post stand out.
On a website that’s dominated by text, vivid visuals are refreshing and eye-catching. But supplementing your copy with a standard stock photo or amateur iPhone picture won’t grab anyone’s attention. Vibrant photos will make your Google Post stand out and grab the attention of your audience. So, make sure you take photos or record videos with good framing, lighting, and a decent camera.
You also want your visual to take up most of the space on your post, so make sure your photos have the minimum image resolution of 720 pixels by 520 pixels.
4. Publish your post.
When you’re ready to go live, click Publish. If you’d prefer to see what your post will look like before publishing, select Preview. Don’t like it? Click Back, then Edit to refine your My Business Post. Once live, your post will be visible on both Google Search and Maps results.
5. Check your post status.
If your post isn’t coming up on search results, head back to your My Business account to check the status. “Live” means it should be visible on both Search and Maps results, while “Pending” means it may be in the uploading stage, the processing stage, or is being verified by Google.
If the post status says “Not Approved”, it won’t show up on Maps or Search, but the question mark icon next to the post will show which content policies the post currently violates.
Google My Business Post Examples
Let’s take a look at a few engaging My Business Post Examples
1. Kate McElwee Photography
When you search “Boston wedding photographers, you’re shown a list of photographers in a list on the left-hand side of the page and their locations on the right-hand side of the page on a Google Map.
2. Boston Yoga Union
When you Google “Boston Yoga Studio”, a number of options appear in a list on Google. You’ll see the results on the Google Map.

If you click on one of the photographers in the list, you’re shown their contact information, hours, rating, and samples of their photography, all without ever having to leave the Google Search results page.

3. Bostonia Public House
If you search “restaurants in Boston” on Google, you’ll be shown a long list of restaurants paired with a Google Map showing you where each restaurant is located.
If you click on a restaurant in the list, as I did with Bostonia Public House in the screenshot below, you’ll be able to “Reserve” your table without ever leaving Google. You also have access to the menu, reviews, images of the restaurant, and more all on this page.
Use Google My Business Posts to Maximize Local SEO Marketing
As a free and easy tool for connecting with customers, Google My Business Posts offers massive potential for local SEO marketing. The caveat? While your posts will appear on both Maps and Search results, generic content won’t get noticed in an increasingly competitive marketing landscape.
In effect, Google provides the tools you need to get the job done — but it’s up to your business to create compelling, context-aware content that captures consumer attention.
Editor’s note: This post was originally published in September 2018 and has been updated for comprehensiveness.

What Are Email Whitelists, & How Do You Get On Them?
A few weeks ago, I planned a trip to Charlotte. I booked my flights, and the day before I was supposed to leave, I tried to find my confirmation email.
I couldn’t find it anywhere. Panicking, I called the airline. “Ma’am, your payment was denied. We emailed you about this.”
Very quickly, I learned the importance of email whitelists.
Fortunately, I was able to book another flight. However, this didn’t save me from the stress or frustration I felt at the airline for being unable to contact me any other way.
At the end of the day, you don’t want a similar experience to happen to your customers. And, as a marketer, nothing is more frustrating than realizing your email marketing tactics, meant to engage and delight new prospects, aren’t working simply because they aren’t being delivered to your prospects’ inboxes.
Here, we’ll explain what email whitelists are, and how you can ensure your company is on the whitelists of your email recipients.
![→ Download Now: The Beginner's Guide to Email Marketing [Free Ebook]](https://no-cache.hubspot.com/cta/default/53/53e8428a-29a5-4225-a6ea-bca8ef991c19.png)
How To Get On Your Email Subscribers’ Whitelists
To get on your email subscribers’ whitelists, you can ask your subscribers to whitelist your email address. Consider using simple language that frames the extra step as a benefit to the recipient:
“To be sure our emails always make it to your inbox, please add us to your email whitelist.”
Ideally, you’d include this message in the first email you send new subscribers to improve email deliverability at the onset of a new relationship.
You might use your own flair and brand voice to craft a compelling email message. HubSpot Agency Partner Yokel Local does this well in their re-engagement campaign aimed at reconnecting with customers who may not be opening their emails:
 While the email above is serving a specific function in an email marketing campaign, you can also include a more general whitelist reminder in the footer of all your communications like so:
Keep in mind that not all of your recipients may know what a whitelist is, so you might also want to incorporate steps they need to take. To make the process simple, you can include links to the instructions for the most common web clients like this:
“To be sure our emails always make it to your inbox, please add us as a contact or put us on your whitelist. If you have a Gmail account, follow these instructions. Alternatively, if you use Outlook, click here.”
Just be sure that you accommodate the typical email clients your recipients use, which could even include Apple Mail, Yahoo, and more.
If you want to provide more specific instructions in your email, or if you ever have a need to walk someone through the process, here are the steps for whitelisting and email in the two most common email clients, Gmail and Outlook:
1. Click the gear icon in Gmail and select “See all settings” from the Quick settings menu.
In your Gmail inbox, there is a gear icon in the top right corner. When you select it, you’ll either get a “Quick settings” menu (see below) or a drop-down with several options to choose from.
If you get the “Quick settings” menu, you’ll select See all settings. Otherwise, navigate to the Settings option.
2. Navigate to “Filters and Blocked Addresses” in the top menu.
Once you’re in your expanded settings area, you’ll want to click Filters and Blocked Addresses in the top menu. You’ll end up on a page that looks like this:
3. Select “Create a new filter.”
In Gmail, whitelisting an email actually involves creating a filter.
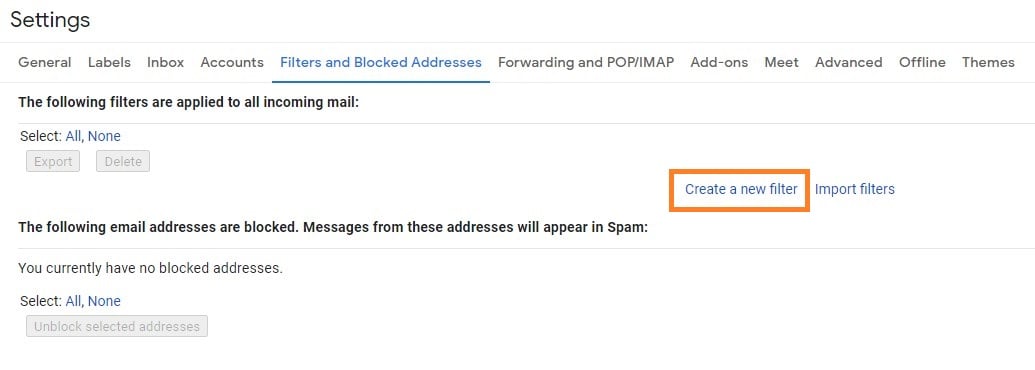
4. Add a specific email or a whole domain in the “From” field.
The “From” field is where you’ll specify what’s getting whitelisted. In Gmail, you can specify either a specific email address (e.g. hello@domain.com), or you can whitelist a whole domain by omitting everything before the at symbol (e.g. @domain.com). The former will whitelist one specific email address while the latter whitelists anyone who is sending email from that domain.
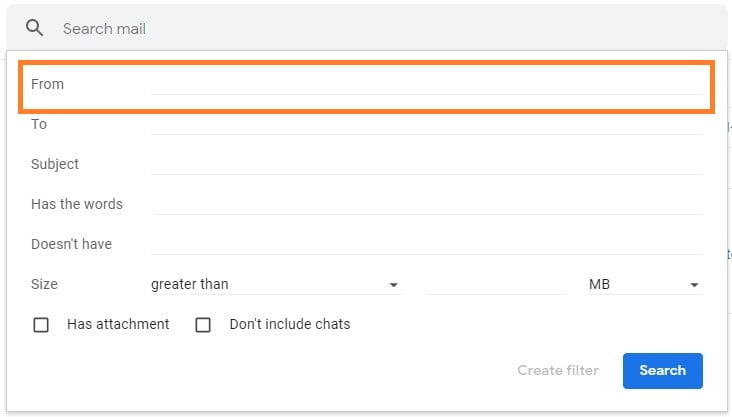
5. Click “Create filter.”
From there, you don’t need to input any additional information. Simply click the Create filter button at the bottom of the window (next to the blue Search button).
6. Check “Never send it to Spam” in the checkbox.
Clicking the button brings up a new window. Here’s where you’ll actually specify that what you’re doing is whitelisting. In Gmail, you do this by checking the Never send it to spam box. Doing so will ensure that emails that meet the criteria you specified never end up in Spam or Trash (unless you do so manually).
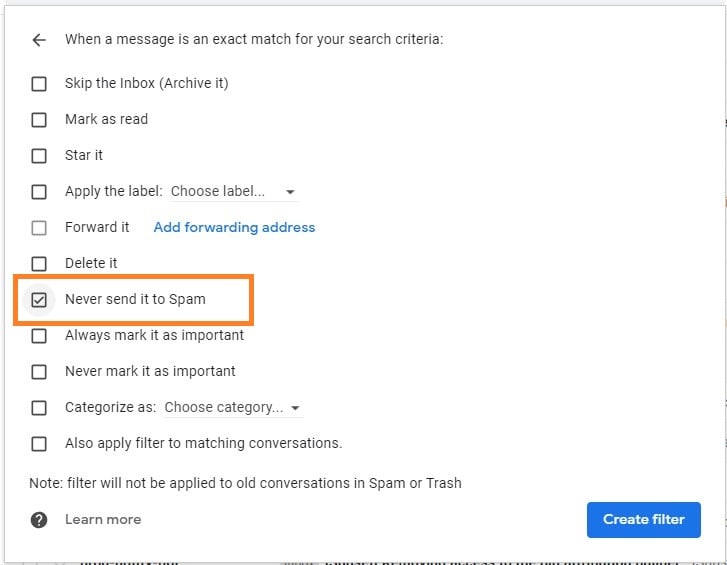
7. Click “Create filter.”
Once this information is specified, you click the “Create filter” button again, and this creates the whitelist within Gmail.
1. Click the gear icon in Outlook and select “View all Outlook settings.”
Sign in to the web version of Outlook. There will be a gear icon in the top-right corner.
 When you select it, a drop-down menu will appear. At the bottom of the drop-down menu, you’ll choose View all Outlook settings.
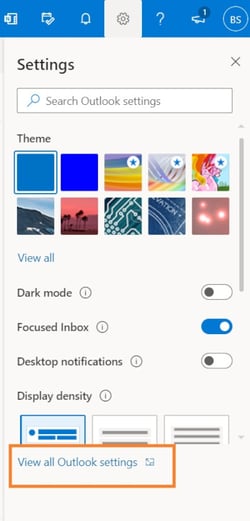
2. Select “Mail” from the settings menu.
Once you have the Settings page expanded, you’ll want to select Mail from the menu on the right-hand side of the page.
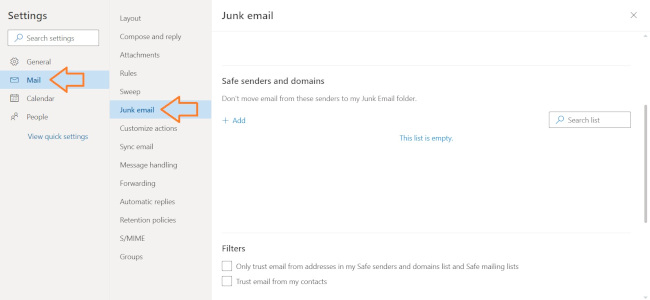
3. Choose “Junk email” from the submenu.
Clicking on Mail gives you access to an expanded submenu where you’ll have the option to click Junk email.
6. Click “Add” under “Safe senders and domains.”
In the “Junk email” window is an option for adding safe senders and domains. Underneath this heading is the word Add with a plus sign next to it. Click this.
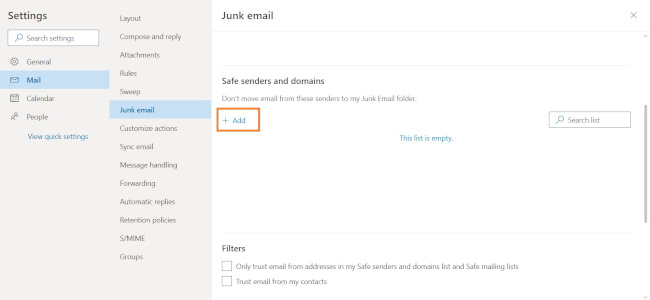
7. Enter the email address that you want whitelisted.
This is where you’ll specify what’s getting whitelisted.
8. Choose “Save.”
This will save your whitelist preferences and ensure that emails that fit the criteria don’t make it to your junk email folder in Outlook.
Whitelisting as a Best Practice
Encouraging your email recipients to whitelist your email or domain from the outset of the relationship is an email marketing best practice that can help you improve the deliverability of your messaging. After all, your prospects and customers will likely not take this action on their own unless they are reminded.
However, whitelisting is not the only factor that can help you increase deliverability. You can help mitigate the possibility that your recipients’ email providers mistake your emails as spam by following email marketing best practices, such as:
- Using inbound methods to populate your database rather than buying email lists and sending spam email
- Segmenting your email database to ensure you’re always sending the right email to the right recipients
- Keeping your contact information clean and removing defunct or nonresponsive emails
All of this is so important in ensuring that your message is heard by your prospects and customers so that you stay top of mind and grow your business.
Editor’s note: This post was originally published in April 2019 and has been updated for comprehensiveness.

7 Budget-Friendly Steps to Brand Your Business [w/ Expert Tips & Data]
In marketing, it seems like the word “brand” is used a lot — the leading brand, off-brand, personal brand … you get the picture.
But there’s often confusion around its meaning in business. What does it entail? Should you hire an expert? Most of all — branding is expensive, right? Not exactly.
As it turns out, there are some creative ways to brand your business effectively without a ton of cash. While it does require time, the ROI won’t go unnoticed — in some cases, it can actually help you save money, while also growing your business.
Building your brand is a crucial part of developing your business. It’s the foundation that will give your organization a voice, identity, value, and awareness among consumers.
Thanks to the plentiful number of resources, tools, and platforms available today, brand building might not be as burdensome (or costly) as you may think.
Read on to learn what makes up a brand and how to develop one on a budget.
How to Brand Your Business
A brand is made up of tangible and intangible elements. For instance, your logo is a visual representation of your company. It evokes emotion and speaks to your brand’s personality. Your identity, on the other hand, isn’t something concrete but it is integral to building a connection with your audience.
These elements work together to create consumers’ perception of your company. So, you must take time crafting each element to ensure your business resonates with your ideal customer.
Don’t know where to start? Alicia Collins, brands campaign manager and copywriter at HubSpot, has a few tips.
She recommends developing a brand playbook that includes:
- Your brand story and positioning
- Your company tagline
- Your company mission statement and key values
- Your target audience
- Information on the voice and tone you want to use when communicating with customers
- High-level copy your team can use in assets
“This playbook will help your team talk about your company clearly and consistently,” said Collins.
Once you know your identity, build strategic messaging to appeal to your audience. Your messaging should convey what makes your brand unique, what you offer, and why consumers should want your products or services. It should also reflect the attributes your target audience wants to see.
Take Oatly, the oat milk brand known for its witty, self-referential marketing campaigns.
The brand’s identity is rooted in ethical food production and sustainability without taking itself too seriously. Oatly reinforces these ideas in its product packaging, social media, and interactions with consumers.
Is this business advice from ‘The Richest man in the world’!? We’re oat’ver the moon to hear you drink so much oat drink, but not everyone wants to consume 2-3 litres within a 5 day window pal. And the last thing we want is to create food waste. Love, Oatly
— Oatly (@oatly)
April 23, 2021
Next up: your brand assets, such as your logo, typography, packaging, colors, visual designs, and content.
A 2019 survey by Promotique found that even if consumers hear positive things about a brand, three out of five won’t use the company if they think its brand image is terrible. The study also revealed that most consumers believe the look and feel of a logo can make or break the brand.
This shows just how important your assets are to brand perception.
“The aim is to use visuals that reflect your brand in a way that also tells your audience what you’re about,” said Harriet Van Tongeren, Canva’s Creative Lead for Nonprofits. “Having timeless but memorable brand livery helps retain awareness of your brand, and consistency helps to develop trust.”
So, don’t skimp on your creative assets. They are an investment that will contribute to the longevity and growth of your brand.
“A great way to ensure consistency on a budget is by developing Canva templates,” said Collins. “With Canva, your team can create beautiful graphics quickly using pre-approved layouts.”
She adds that your team should use the same Hex color codes in your designs, to ensure a consistent visual identity.
Lastly, build a photo library to have images ready to use for your marketing efforts. Once you edit them, use the same editing style to create a cohesive library.
A theme you may have noticed in this article by now is the importance of consistency.
Van Tongeren says forgetting about this key element is the biggest mistake brands can make.
“Everything that comes from your brand should be cohesive and feel like part of one family – the language, the tone, everything,” said Van Tongeren.
“The best way to think about this,” she adds, “is by asking whether your audience would be able to tell the material is coming from your brand, even if the logo was removed.”
According to a 2019 State of Brand Consistency study by Lucidpress, brands estimate that their revenue would increase by 33% if they maintained brand consistency across all platforms.
Having consistent branding helps consumers recognize and identify with your brand. Another way to solidify your brand is by building a community. This can look like:
- Setting up a platform where your audience can meet and interact with you and others in the community, such as a Facebook Group or Slack channel.
- Engaging your audience on social media, through comment sections, polls, and surveys.
- Organizing events, such as webinars and meet-ups.
- Involving your followers in your process behind the scenes.
And as you build your brand, remember that it’s not solely a marketing play.
“Brand extends beyond marketing,” said Collins, “so make sure your brand strategy style aligns with your product strategy, sales strategy, service strategy, and more.”
7 Steps to Market Your Brand on a Budget
You don’t have to break the bank to grow and maintain a brand. In fact, you can complete most of these tips without spending money.
Two things to always remember: Keep your customers in mind and deliver messages that support your company’s mission.
Below, let’s discuss a budget-friendly way to grow better on a budget.
1. Create a persona to understand your audience.
You’ve probably heard that knowing your audience is the key to creating marketing messages that appeal to them. A great way to get to know them? Create a buyer persona: a semi-fictionalized representation of your ideal customer’s values and characteristics.
“The job of the brand assets or ‘livery’ is to visually communicate what each brand wants to tell its audience,” said Van Tongeren. “Before you even think about the visual component, you need to know who your audience is and how you want to be perceived by them.”
Personas also outline your customer’s challenges and where your business fits into solving them.
Below is an example of a buyer persona, Marketing Macy. Notice how my persona lists demographics, like age and education, as well as tools needed for their day-to-day responsibilities, like a CRM.
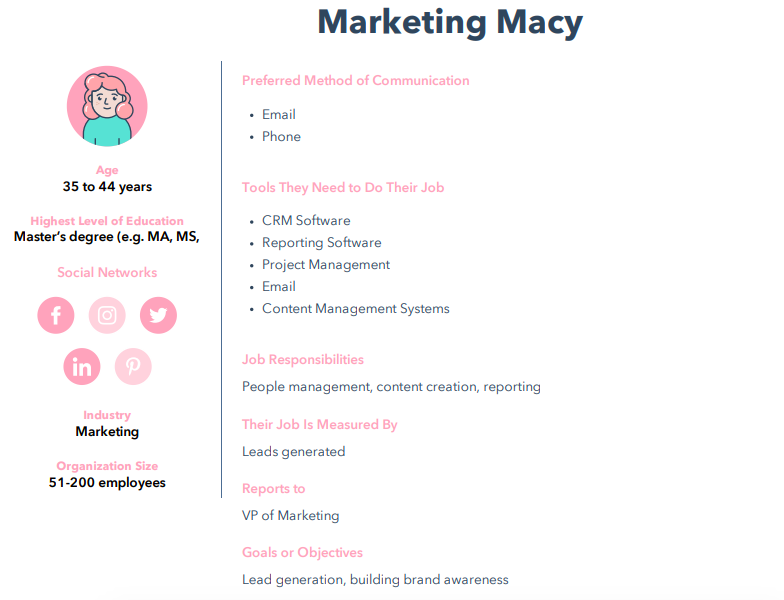
The needs, goals, and behavior of your potential customers dictate how you convey your product or service. So for Macy, I want to focus on a B2B strategy that caters to her goals of lead generation and brand building.
Understanding those goals helps you determine what kind of media your personas are consuming, what motivates them, and where they “live” online. With this information, you can also develop a compelling, effective brand that reaches the right people.
Make your own buyer persona with HubSpot’s free MakeMyPersona tool, which guides you through a series of questions about your ideal customer.
The tool is fun, interactive, and gets you thinking critically about who you want to reach with your brand and how you want to reach them.
2. Develop an identity and voice for your brand.
Once you’ve identified your buyer personas, your brand can start to take shape.
Create a brand identity — what makes your brand, your brand — and its voice, which is the tone you use in any marketing copy or public communication.
Developing a brand voice and identity is similar to constructing your personas.
But instead of answering questions about your target audience, you’re answering questions that are more introspective to your brand: What are your company’s values, what do they represent, and how do you want people to talk about you?
“The most important part of developing a brand is prework discovery,” said Van Tongeren. “If you’ve done the work and deep-dived into who you are as a brand, figured out what you want to be known for and what your brand personifies then you’re in a great spot to start.”
When you answer these questions, focus on creating content that supports them. Craft compelling emails, blogs, social posts, and multimedia that reflect your company’s mission, values, and how you want to appear to customers.
For example, if one of your values is to be accessible to customers, make your contact information available to users, engage them regularly, and answer their service questions in comment sections.
Developing your voice comes through in the copy of that content. Are you going to use conversational language that relates to customers? Or will it be more beneficial to reach your audience from a technical standpoint?
For example, a lifestyle company with a great understanding of brand identity is Fanm Djanm.
When you navigate to the brand’s website and social channels, what you’ll see is consistency in their branding. Warm and vibrant colors, powerful images of women, and copy that creates a sense of community.
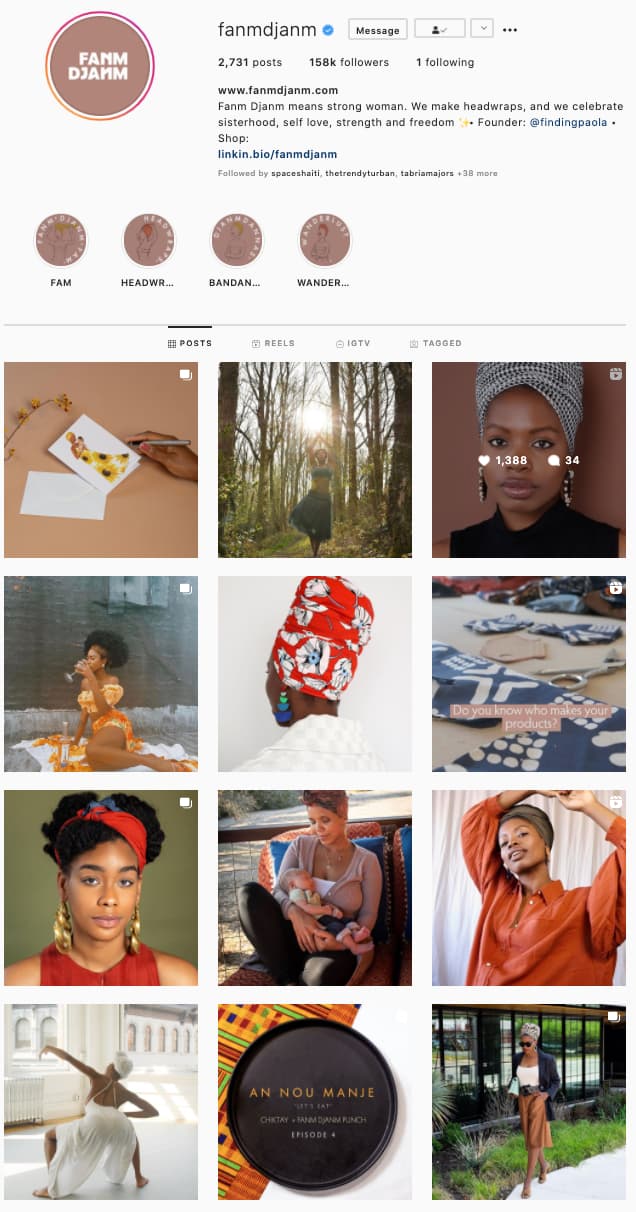
It’s a direct reflection of the brand name, which translates to “strong women” and its celebration of sisterhood and self-love.
Even if you’re not starting from scratch, establishing a strong(er) brand voice can be valuable.
Just take operating system software service Android, for instance. Their 2019 rebrand was a logo re-up, making the design cleaner and modern:

The logo came from a need to speak to a shift in audience. Initially, Android’s target audience was the developer, but instead, the company has become more consumer-facing. The change was bred from this analysis.
3. Map out a consistent social media presence.
So, we know who your personas are. And now, we have an idea of what and how to create messaging that connects with them. But where are they?
There’s a good chance you’ll find them on social media, and that’s an opportunity you don’t want to miss. We’ve talked about how effective it is to reach people where they’re already present, and that includes their online behavior.
A 2020 Sprout Social Index report found that 89% of consumers will purchase from the brands they follow on social media. The study also shows that social media users want to learn about brands’ new products and services. In fact, 57% of respondents said it’s the top reason they follow companies on social media.
Now that you have a clear picture of what your audience is interested in, the next step is figuring out where they’re spending the most time on social media.
Don’t worry, you don’t have to play Inspector Gadget to figure this out. Check out competitors — see where they’re most active (and how their language may or may not connect to audiences).
Additionally, look at each social platform’s demographic breakdown to better understand who you’re targeting and where.
For instance, the highest percentage of U.S. men and women who use Facebook are between the ages of 24 and 35. TikTok, on the other hand, tends to have a younger audience, with many users falling in the Gen Z population.
If you find the majority of your audience prioritizes one social network, you’ll have an idea of where to allocate your resources.
However, don’t ignore other sites. When you build a presence on multiple social media platforms, you’ll have an opportunity to diversify how you reach audiences.
Diversifying the methods and channels you use for obtaining new leads helps you to connect with as many potential customers as possible.
Maintaining a presence is just as important as building one — for example, have you ever gone to a brand’s Facebook page, only to find that nothing has been posted in the past three months? Chances are, it didn’t have a positive impact on your perception.
That can be avoided by planning and scheduling social media posts like you would with any marketing calendar. This free Social Media Content Calendar can help.
It’s also important to think ahead of time about the content you’ll be posting on social media and the interactions you want to have with your followers.
One of the top reasons why consumers unfollow brands on social media is irrelevant content and too many ads, according to the Sprout Social Index report.
If you’re wondering what they’re looking for, the survey respondents said it’s engagement first, followed by memorable content and compelling storytelling.
4. Start a company blog.
We’ve covered the importance of blogging before, and it can’t be emphasized enough. It’s a core part of the inbound marketing flywheel, especially the “attract” stage, which turns website browsers from strangers to visitors.
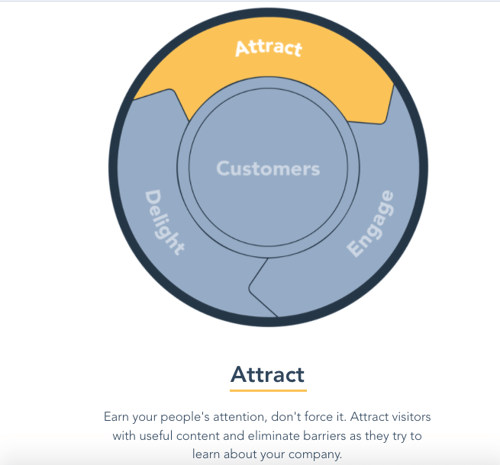
Starting a blog is a fundamental step of inbound marketing. It helps you reach qualified customers, like your personas, by creating content that matches what they’re searching for. That’s why it’s so important to make blog posts relevant to audiences (and optimize them for search engines — here’s how).
“HubSpot’s success has been a direct result of our blog. In fact, we had a blog before we even had a product,” said Lisa Toner, director of content at HubSpot.
“Dharmesh and Brian always had the belief that in order to build a remarkable brand, you have to create remarkable content, and we’ve done that consistently on our blog ever since we started out in 2006.”
Senior Team Manager of the HubSpot Blogs Karla Cook adds that our blog is a big discoverability point for our target audience.
“It’s the very first interaction many people have with our brand – even before they learn about our products – and it helps us start that relationship off in a positive way,” she said.
Customers are looking for the information you’re able to provide. Plus, that content can serve as material to populate your social media networks.
To find what your audience is searching for, conduct keyword research, which will tell you what the most important topics for your audience are via search engines.
While blogging can be inexpensive, it does take time.
The inbound marketing version of that question would ask, “Would you rather blog for one hour each day and promote content created by and for your company, or several hours a day sourcing content for your ideal customer from your competitors?”
An editorial calendar is also helpful in maintaining consistent timing and fresh content on your blog. That’s why we put together a free blog editorial calendar template, complete with instructions and content management tips.
5. Make customer service a priority.
When we hear the name “Zappos,” most of us immediately think, “Unparalleled customer service.” The online apparel retailer built this level of service into its core approach to doing business.
Why is that so important? For Zappos, making excellent customer service the cornerstone of its brand actually saved money on marketing and advertising. That’s because it created word-of-mouth among existing and potential customers.
This is called earned media: The recognition that your brand has earned, not paid for, from people talking about something you did that was remarkable.
For example, when I’m shopping on a new website, the first thing I do is read reviews. If I see reviews that mention speedy shipping, friendly customer service, and high-quality products, I’m more inclined to purchase.
And I’m not alone. A 2020 Zendesk Customer Experience Trends study found that customer service is a top consideration for consumers when deciding whether to purchase from a brand – more than the product or service itself and convenience.
It only takes one bad experience to potentially lose a customer, with the report revealing that about half of consumers will switch over to a competitor after just one negative experience.
This revisits the importance of your identity and voice. As you go through these brand-building steps, think about the values that you want your audience to experience, like excellent service. Those values are what shape the brand’s culture, and that influence the voice you project to an audience.
Wondering what actionable steps you can take? Here are research-backed ways to improve your customer experience:
- Resolve consumers’ issues quickly, offer 24/7 customer support, and have friendly agents.
- Be proactive in engaging customers with notifications.
- Respond to customer service questions and complaints on social media.
- Allow consumers to call in for customer support, as it is still consumers’ preferred support channel.
6. Take advantage of co-branding.
I’ll never forget what my colleague, Lisa Toner, says about negotiating co-branding agreements.
“Larger companies may have a large reach,” she explains, “But what do they not have?”
When you’re just starting to build a brand, you might not have the reach that Toner’s talking about. You can take the steps to build it, but that takes time. Until then, one way to get your name in front of a broader audience is to partner with a brand that does have that reach.
“Working with a co-marketing partner (an external brand) can be a really valuable way of growing your audience while building a beneficial relationship with a partner,” said Margot Mazur, principal marketing manager of strategic partnerships at HubSpot.
“You don’t have to have a huge budget,” she adds. “Working with a partner means that you can split up the marketing duties.”
Let’s say you’re working with a partner on a lead generation campaign, such as a gated e-book, Mazur explains that one partner can take on copywriting duties and the other can take on design, or vice-versa depending on your resources.
“This way, you can save money on any freelance costs by working together on a project. Ideally, both you and your partner distribute the content piece to your audiences, driving visibility to an audience you may not have had access to,” she said.
“That saves you advertising costs and exposes you to a new set of people interested in your content.”
But don’t just pick any brand for a partnership. Make sure it’s one that’s aligned with yours, so it makes sense in the minds of your audience. Here are the questions we recommend asking when seeking a co-branding partner:
- Will your partner’s audience be interested in your brand? Is this audience difficult for you to reach without this partnership?
- Will your audience trust your co-brand? That’s crucial to getting them to listen to you, so make sure your partner reaches the audience in a way that instills confidence.
- Do you have something to offer your co-brand? Just like Toner asks, “What do they not have?” The experience should be a win-win-win: For you, your co-brand, and the consumer. As an example, if you have an international audience that your partnering brand doesn’t, consider pointing to that when discussing the partnership.
Building a brand might seem like a huge undertaking, especially when resources are limited. However, there are plenty of economic ways to get started and continue the momentum.
A great starting point that’s both affordable and offers high ROI is video. Wondering how you can pull it off? Just use an iPhone or a smartphone with high camera capabilities and use free video editing software like iMovie.
Mazur explains that you can then script your video internally, share it on YouTube and promote it across all digital channels.
“Video marketing is incredibly effective – videos can go on your product pages, help pages, blog posts, social media posts, Product Hunt pages, etc.,” said Mazur.
She continues, “Work with your partner to split up the recording duties, as well as splitting distribution. You’ll get access to a whole new audience and have an engaging piece of content you can use across your channels.”
And don’t forget to have fun with the process.
Of course, there has to be a degree of strategy and logic involved — that’s why there are tools to help you determine the different pieces of your brand. But it’s a creative exercise, so keep that in mind if you get bogged down in technicalities.
7. Host a masterclass or webinar.
What are some of the talents the minds at your company display daily? Are they masters of email marketing? Do they excel at coding? Do you earn a “World’s Best Brand Strategist” superlative every year?
A fantastic way to grow your brand – and earn leads – is to leverage these talents into a masterclass or webinar, and promote them online.
By optimizing your class with hashtags and witty captions, you’ll find audiences who are interested in the talents for which you’re offering lessons. These masterclasses can be 45- to 60-minute sessions that provide an overview of your special expertise and showcase how to do it right.
For example, if I were to offer a webinar, it would highlight the art of using emojis for business, an experiment I’m passionate about. I would start by describing why engaging copy is important for attracting customers.
Then, I’d explain the pros and cons of emoji usage. Finally, I’d share the right and wrong times to include emojis in marketing messages.
After that, I would present an experiment and report on my findings. Whether the experiment supports or negates my thesis always leaves room for fruitful discussion — leading to the last portion, questions.
Voila – an outline for a masterclass that uses my talents to back up the credibility of a business that focuses on, let’s say, marketing or social media.
Running experiments doesn’t have to cost a dime, and hosting a webinar takes only about an hour of your day.
The result, however, is spreading the word about the value of a company, providing data that supports credibility, and promoting company values like delighting customers and giving helpful, educational content to your audience.
Branding on a budget? Absolutely possible. What counts, when you’re brainstorming ways to brand effectively, is how to use the resources you have to the best of your ability.
Keeping your audience in mind is the first step — after that, it’s about thinking of creative ways to engage those target customers.
Have fun building your brand. After all, this is a creative process and while every experiment may not work, you can always learn to improve. Good luck, and happy branding.

20 of the Best Professional Bio Examples We’ve Ever Seen [+ Templates]
Does your professional bio make a statement?
In this article, we have great professional bio examples you should compare yours to — and a series of free bio templates you can use to make it perfect.
If you’re anything like me, you probably don’t think about your professional bio until you’re suddenly asked to “shoot one over via email.” You have approximately one afternoon to come up with it, and that’s when you scramble, and the bio ends up reading like this:
“Rodney Erickson is a content marketing professional at HubSpot, an inbound marketing and sales platform that helps companies attract visitors, convert leads, and close customers. Previously, Rodney worked as a marketing manager for a tech software startup. He graduated with honors from Columbia University with a dual degree in Business Administration and Creative Writing.”
Woof, that was dull. Are you still with me? I swear, not even adding a tidbit about his cats would liven that bio up.
![→ Download Now: 80 Professional Bio Examples [Free Templates]](https://no-cache.hubspot.com/cta/default/53/4eb63650-d315-42e5-9ac7-8d0fcba29324.png)
To be fair, in certain contexts, your professional bio does need to be more formal, like Mr. Erickson’s up there. But in many cases, writing a readable bio — even conversational — is a really good thing. That means dropping that traditional format of listing your accomplishments like a robot and cramming as much professional-sounding jargon in there as you can.
Here, let’s dive into how you can create your own professional bio (with templates for both long and short bios). Then we’ll dive into the best professional bio examples we’ve ever seen.
Skip to one of these sections if you know what you’re looking for:
- Professional Bio Templates
- How to Write a Professional Bio
- Best Professional Bio Examples
- Short Bio Examples
- How to Write a Short Bio
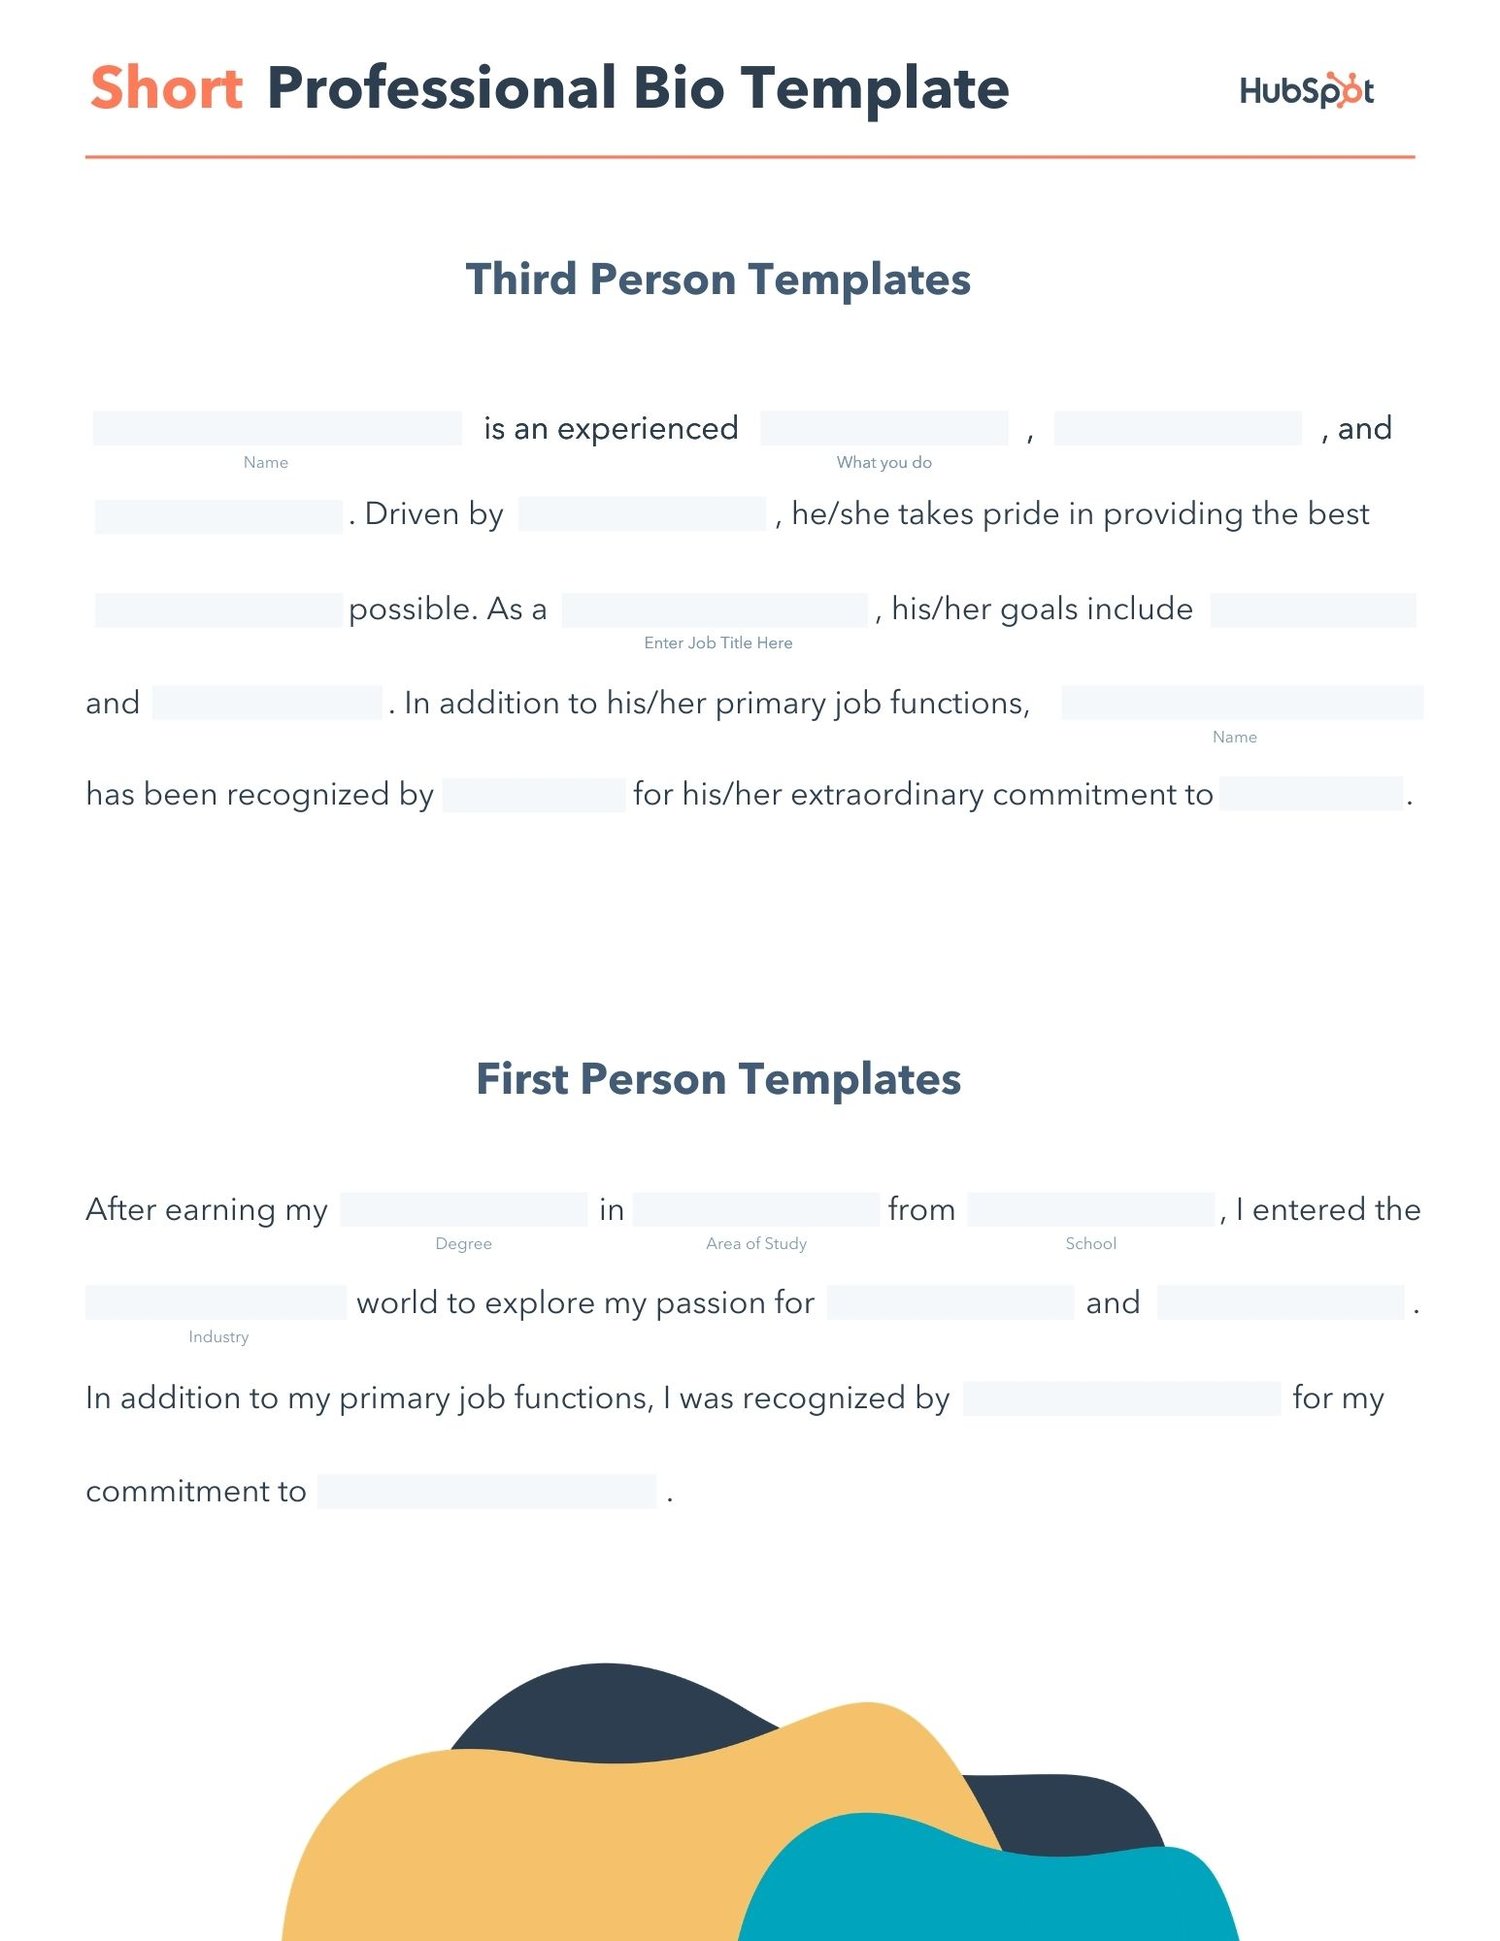
Download a free, editable short professional bio template.
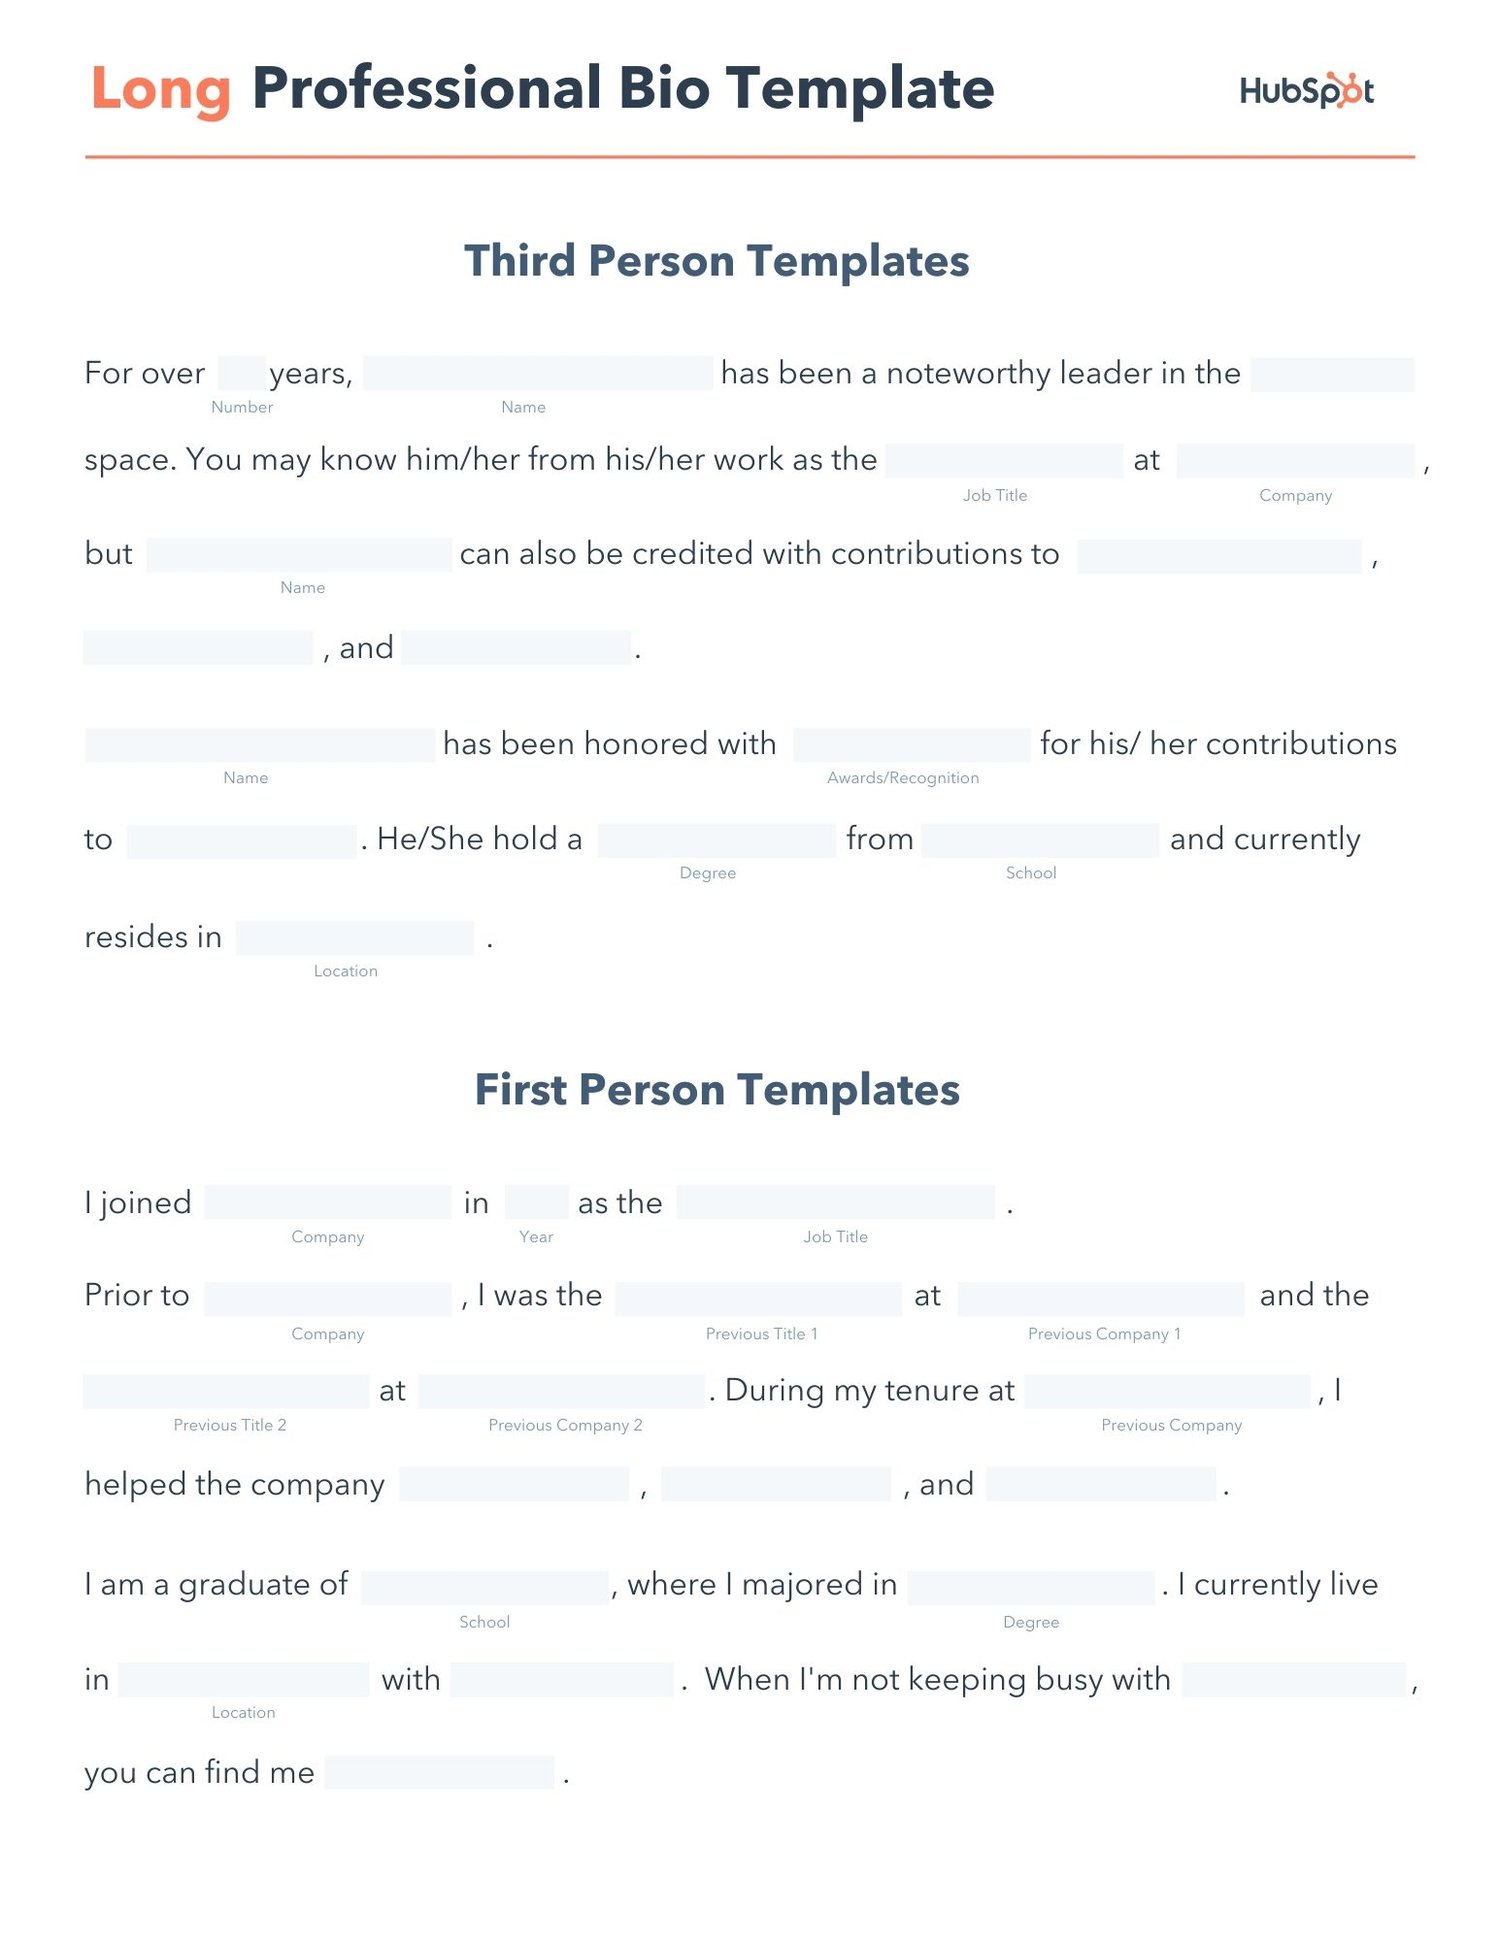
Download a free, editable long professional bio template.
Writing a professional bio that captures your brand and what you offer to your audience can help you grow better. But doing it right is just as important.
Here’s how to write a bio, step-by-step.
1. Create an ‘About’ page for your website or profile.
Before you can publish your professional bio, you need a living space for it. Here are a few to consider (some of these you might already have in place):
- Facebook Business page
- LinkedIn profile
- Instagram account
- Personal website
- Personal blog
- Industry website
- Industry blog byline
As you’ll see in the professional bio examples below, the length and tone of your bio will differ depending on which of the above platforms you choose to be on.
Instagram, for example, allows only 150 characters of bio space, whereas you can write virtually as much as you want on your personal website — or even your Facebook Business page. But once created, this bio should represent who you are in the eyes of your audience.
2. Begin writing your bio with your first and last name.
If your readers don’t remember anything else about your bio, make sure they remember your name. For that reason, it’s a good idea for your first and last name to be the first two words of your professional bio. Even if your name is printed above this bio (hint: it should), this is a rare moment where it’s okay to be redundant.
For example, if I were writing my own bio, I might start it like this:
Lindsay Kolowich
Lindsay Kolowich is a Senior Marketing Manager at HubSpot.
3. Mention any associated brand name you might use.
Will your professional bio represent yourself, or a business you work for? Make sure the brand you want to be associated with is mentioned in your bio. If you’re a freelancer, perhaps you have a personal business name or pseudonym you advertise to your clients. Here are a few examples:
- Lindsay Kolowich Marketing
- SEO Lindsay
- Kolowich Consulting
- Content by Kolowich (what do you think … too cheesy?)
Maybe you founded your own company, and you want its name to be separate from your real name. Don’t be afraid to keep it simple: “Lindsay Kolowich is the founder and CEO of Kolowich Consulting.”
4. State your current position and what you do.
Whether you’re the author of a novel or a mid-level specialist, use the next few lines of your bio to describe what you do in that position. Don’t assume your audience will naturally know what your job title entails.
Make your primary responsibilities known to the reader, helping them paint a picture of who you are during the day and what you have to offer the industry.
5. Include at least one professional accomplishment.
Just as a business touts its client successes in the form of case studies, your professional bio should let your own audience know what you’ve already achieved. What have you done for yourself — as well as for others — that makes you a valuable player in your industry?
6. Describe your values and how they inform your career.
Why do you do what you do? What might make your contribution to the market different than your colleagues?
Better yet, what values do you and your colleagues share that would make your business a worthwhile investment to others? Start to wrap up your professional bio by simply explaining what gets you up in the morning.
7. Briefly tell your readers who you are outside of work.
Transition from describing your values in work to describing who you are outside of work. This may include:
- Your family
- Your hometown
- Sports you play
- Hobbies and interests
- Favorite music and travel destinations
- Side hustles you’re working on
People like connecting with other people. The more transparent you are about who you are personally, the more likable you’ll be to the people reading about who you are professionally.
8. Consider adding humor or a personal story to add flavor to your professional bio.
End your professional bio on a good note — or, more specifically, a funny note. Leaving your audience with something quirky or uniquely you can ensure they’ll leave your website with a pleasant impression of you.
It’s important to follow the steps above when writing your bio, but don’t obsess over any one section. Remember, the people reading your bio are suffering from information fatigue. If you don’t hook ’em in the first line, you’ll lose them quickly.
(P.S. Want to give your professional brand a boost? Take one of HubSpot Academy’s free certification courses. In just one weekend, you can add a line to your resume and bio that’s coveted by over 60,000 marketers.)
Why Good Bios Are Important for a Professional
Alright, I know what you may be thinking … So what? It’s just a bio. I mean, how many people read professional bios, anyway?
The answer: A lot of people. More importantly, though, there’s no way to tell exactly who is reading it — and you always want it to be ready for when the right people come across it. And when they do, you want it to catch their eye. In a good way.
You see, while your resume is only useful for when you’re actively applying for specific positions, your professional bio is much more visible. It can live on your LinkedIn profile, your company’s website, your guest blog posts, your speaker profiles, your Twitter bio, and many other places.
And, most importantly, it’s the tool that you can leverage most when you’re networking.
Bottom line? People will read your professional bio. Whether they remember it, and whether it makes them care about you, is a matter of how well you present yourself to your intended audience.
So, what does a top-notch professional bio look like?
Below, we’ve curated some of the best real professional bio examples we’ve ever seen on Twitter, Instagram, Facebook, LinkedIn, and the various websites where you might describe yourself.
Check ’em out, and use them as inspiration when crafting your own.
The Best Professional Bio Examples We’ve Ever Seen
1. Chimamanda Ngozi Adichie
Bio Platform: Personal Website
Chimamanda Ngozi Adichie begins her professional bio with an invitation into her world. In just one sentence, she describes the depth and breadth of her body of work as it has been translated into thirty languages and several publications.
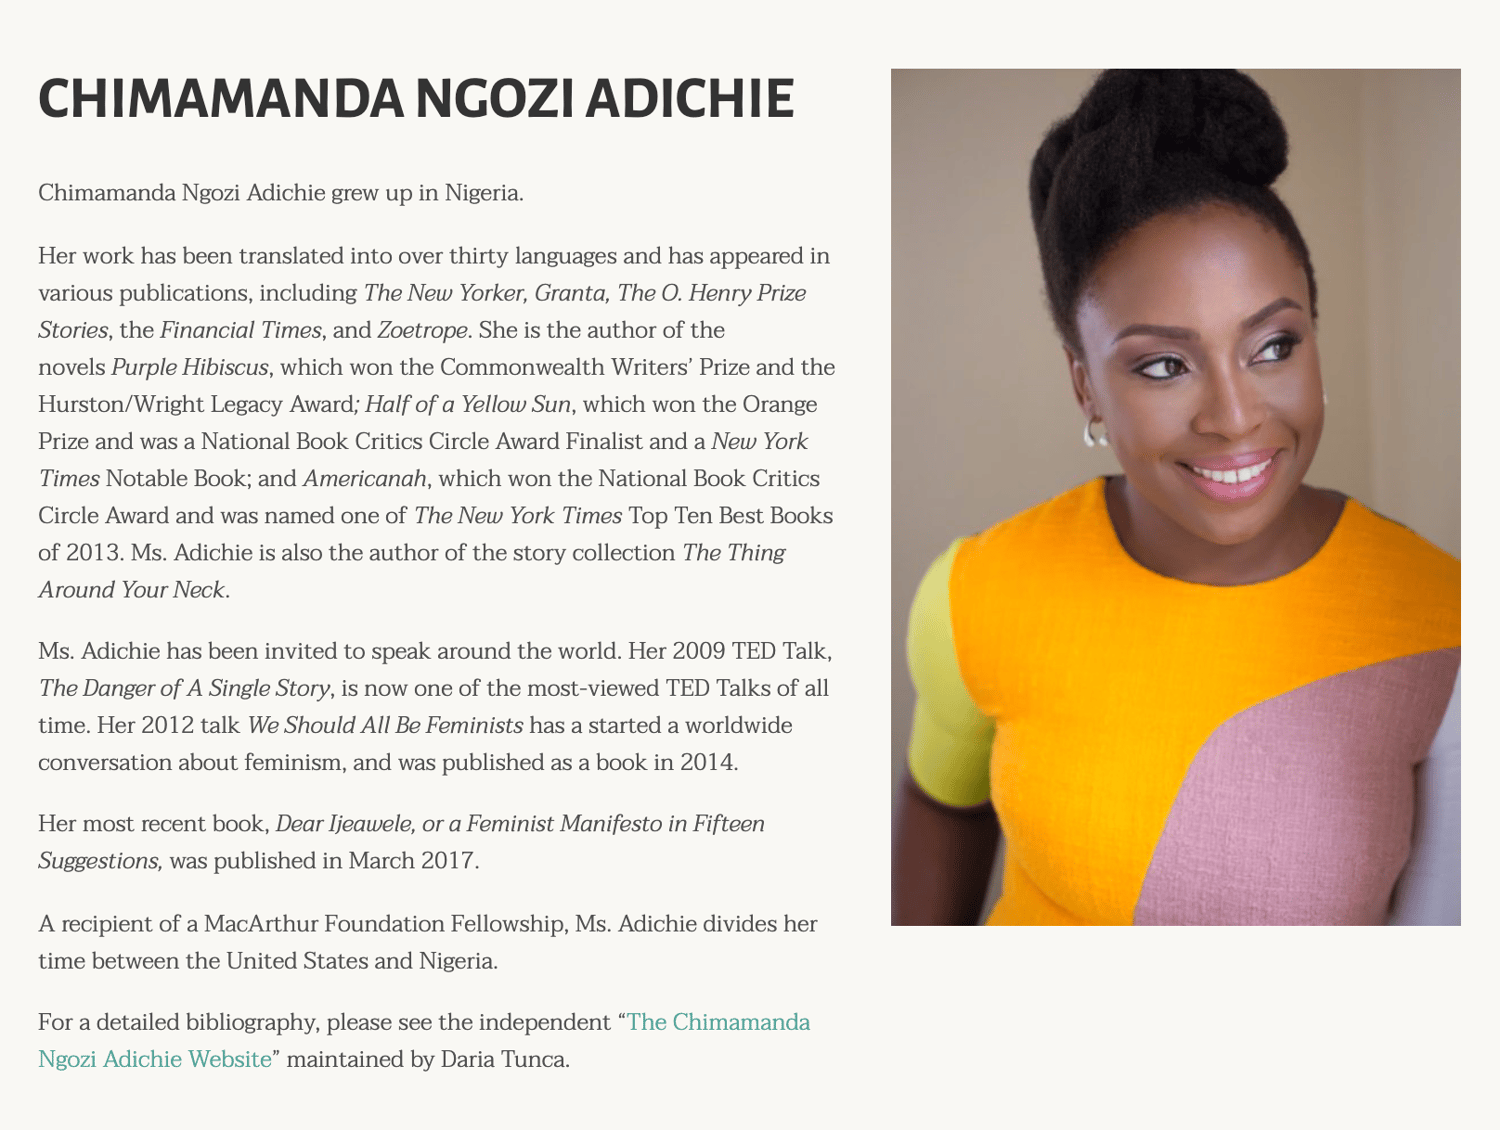
Along with her notable writing career, Chimamanda showcases her speaking career which introduces readers to a well-rounded view of who she is as a professional. From there, her bio seamlessly flows into her recent work and a glimpse into how and where she spends her personal time – the United States and Nigeria.
Finally, Chimamanda’s bio ends with a call-to-action to read a more detailed biography, giving the reader a choice to read the information available about her life and career.
2. Chime Mmeje
Bio Platform: LinkedIn
A bio with a hook is sure to keep you reading. Chima Mmeje is a freelance SEO copywriter who’s “extremely good at one thing”: helping companies rank for their target keywords.
By leading with a strong hook that aligns with her target audience’s marketing needs, she’s able to keep readers engaged.
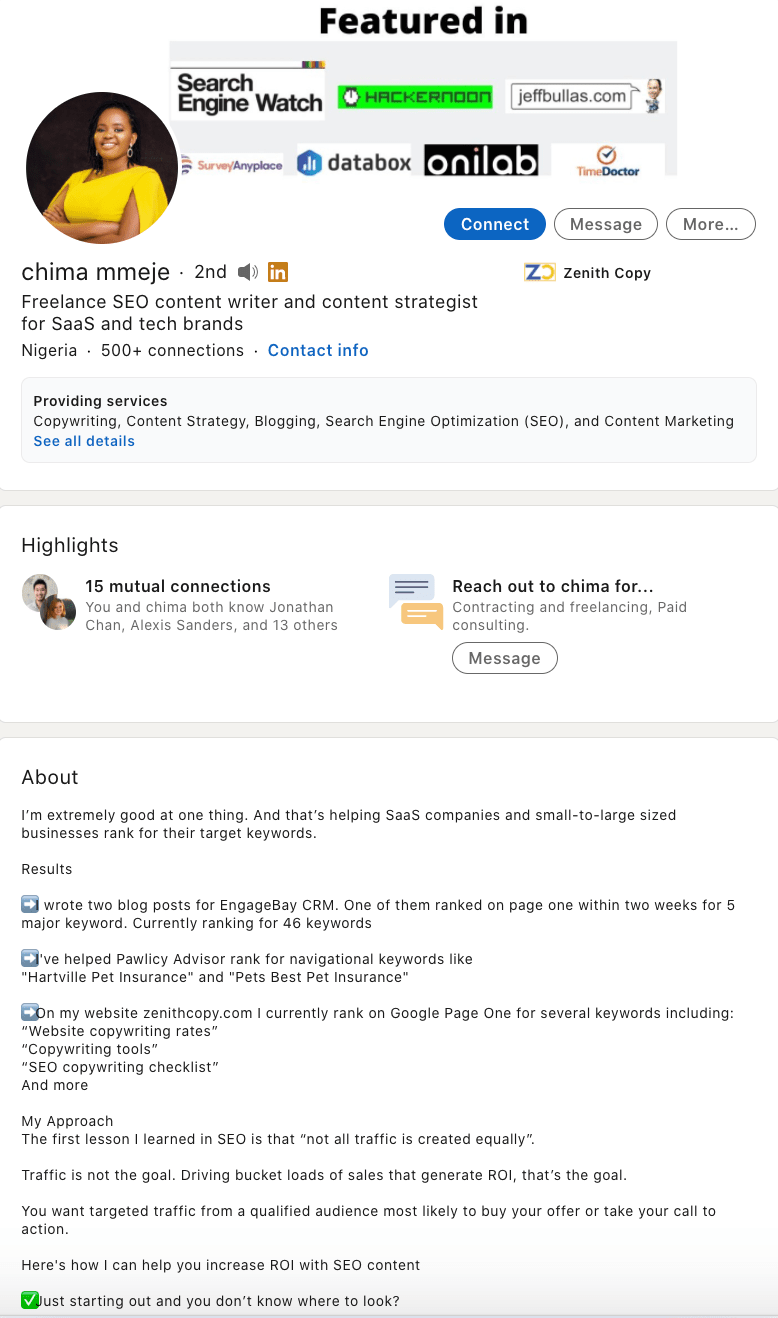 What comes next is a unique differentiator in a professional bio. Instead of listing accolades, Chima shares a few wins she’s secured for her clients. This nifty section does two things: it builds the readers’ confidence in her ability to deliver results and it’s a practical way to name-drop her clients in a professional bio.
In the body of her professional bio, Chima briefly lists her process at a high level, giving her potential clients a birds-eye view of what they can expect when they book her services.
The simple call to action “Drop a message” in her email inbox is a casual invitation to learn more about her services.
3. DJ Nexus
Bio Platform: Facebook
This New England-based DJ has single-handedly captured the Likes of more than 2,000 people in and beyond Boston, MA. And even if you don’t listen to the type of music he produces, it’s hard not to listen to his compelling Facebook bio.
For instance, consider his tagline, under “About” — “Quiet during the day. QUITE LOUD at night!” DJ Nexus tells you when he works in an awesome way. I got goosebumps just imagining a dance club he might play his music in.
 DJ Nexus’s bio brilliance doesn’t stop there.
DJ Nexus links his Facebook account to his personal website, where he has the space to tell the full story of his background. Here’s a preview, below:
 In this story, DJ Nexus describes both when he “became known as DJ Nexus” and a company he founded shortly afterward — all before going to college.
This is a terrific lesson for professional bios: Customers want to learn about you. Consider how you might also lead your Facebook visitors off your Facebook page and onto your personal website to learn more about who you are.
4. Lena Axelsson
Bio Platform: Industry Website
When it all comes down to it, your professional bio is no different than any other piece of persuasive copy — no matter where it lives. One of the most common mistakes people make is thinking of it as its own beast, separate from other pieces of writing. If you think about it that way, you’re far more likely to write something painfully uninteresting.
When you sit down to write your professional bio and you’re watching that cursor blinking on the screen, think about how you would introduce a blog post. You don’t just dive right into the meat of the thing, now, do you? No. You start with an introduction.
The best bios are often concise (around 200–300 words), so you don’t have a lot of room to play around. But a single sentence that tees your reader up and provides context for the accomplishments that follow could make the rest of your bio that much more persuasive.
Take Lena Axelsson’s bio, for instance. She’s a marriage and family therapist — a job where empathy and compassion are a big part of the job description. That’s why she chooses to open her bio with a great introductory sentence: “When human beings experience trauma or severe life stressors, it is not uncommon for their lives to unravel.”

Then, she goes into why she’s passionate about her job, how she helps her clients, and how she caters her approach to each individual patient. The necessary educational information is left for the end, after the reader has been hooked.
Your bio doesn’t have to be super serious, nor does it have to start with a joke. This bio shows how you can capture your reader’s attention by being empathetic and showing how that empathy shapes a valuable professional.
5. Mark Levy
Bio Platform: Personal Website
Mark Levy is a small business owner who’s taken a more traditional approach to the professional bio on his website — but in a way that takes care to speak to his intended audience.
What we love about his bio is the way he’s set it up: On his business’ “About” page, he’s listed two biographies, which he’s labeled “Mark Levy’s Biography #1” and “Mark Levy’s Biography #2.”
Click here to see the full version.
Like Ann, Mark’s given his readers two different options. The first biography is a “short version,” which includes a combination of bullet points listing his credentials and a few short paragraphs.
The second is the “long version,” which is actually even more interesting than the first one. Why? Because it reads like a story — a compelling one, at that. In fact, it gets really funny at parts.
The second sentence of the bio reads: “He was frightened of public school, loved playing baseball and football, ran home to watch ape films on the 4:30 Movie, listened to The Jam and The Buzzcocks, and read magic trick books.”
Here’s another excerpt from the middle:
Of course, the fantastic copywriting isn’t a surprise, given that this guy wrote several books. But the conversational tone and entertaining copy let his quirky personality (and great writing skills) shine.
6. Audra Simpson
Bio Platform: Personal Website
With a classic take on the professional bio, Audra Simpson crafts a brief overview of her career in just a couple of paragraphs. The “why” behind her work is emphasized in the first half of her bio before transitioning to the way she carries out that work in practice.

The second half of her bio combines her bodies of work and the awards she’s won for each from the year 2014 to 2020. This subtle timeline gives readers a picture of her experience in the field of political anthropology without listing her resume in detail.
Audra’s professional bio is an example for those of us with several years of experience to communicate, but a strict word-limit to write within.
7. Marie Mikhail
Bio Platform: LinkedIn
Marie Mikhail checks off nearly every box for what makes an excellent bio. A professional recruiter, she expresses her “passion for recruiting” upfront, in the first sentence, while using that sentence to hook her profile visitors into a brief story of her background.
But there are a lot of recruiters out there, and Marie knows that. So, to differentiate herself, she closes the first paragraph of her bio explaining that she likes “getting people excited about the things [she’s] excited about.” It’s a well-put value proposition that sets her apart from the rest of the HR industry.
Marie Mikhail finishes off her bio by including a smooth mixture of professional skills, such as her Spanish fluency; and personal interests, such as podcasting and Star Wars (she mentions the latter with just the right amount of humor).
8. Wonbo Woo
Bio Platform: Personal Website
Wonbo Woo is the executive producer of WIRED’s video content, and he has a number of impressive credits to his name. What does this mean for his professional bio? He has to prioritize. With this in mind, Wonbo opens his bio with the most eye-catching details first (if the image below is hard to read, click it to see the full copy).

Not only does Wonbo’s bio start strong, but he also takes readers on a suspenseful journey through some of his most harrowing assignments — where he was when news broke and how he responded. You can see this quality below.
 The accomplished journalist concludes his gripping bio as strong as it began, measuring his experience by the number of states, countries, and continents to which he’s traveled in his career. See how this looks above. All in all, it’s a fantastically concise bio for as much detail as it holds.
9. Chris Burkard
Bio Platform: LinkedIn
If you’re writing your bio but having trouble figuring out how to showcase your accomplishments without boasting, photographer Burkard’s LinkedIn bio is a great example for inspiration.
Written in third-person, his bio tells a fluid story, starting with his ultimate mission — “capture stories that inspire humans to consider their relationship with nature” — before diving into more tangible accolades (giving a TED talk, publishing books, etc.).
Best of all, rather than using his bio as an opportunity to brag, he instead ties his talents into how he hopes to help others, writing, “Through social media Chris strives to share his vision … and inspire [his followers] to explore for themselves.”
I wouldn’t necessarily be inclined to follow Chris if his bio had simply read “I post beautiful images” … but inspire me to travel? Now that’s something I can get behind.
Lastly, he ends on a humble, sweet note, writing “He is happiest with his wife Breanne raising their two sons”. Don’t be afraid to inject some personal information into your bio — it could help you seem more approachable as a result.
10. Lisa Quine
Bio Platform: Portfolio Website
Although a picture is worth 1,000 words, a portfolio is quite different from a professional bio. While this might present a challenge for creative professionals who specialize in visual art to tell their stories, Lisa Quine quantifies her creativity to give her professional bio balance.
Throughout her bio, you’ll notice the number of murals she’s completed and a brief timeline of her career thus far which helps paint the picture of who she is as a professional.

Lisa’s bio checks the box on nearly all of our recommendations for a great bio. She begins with her full name, her location, and what she does best. From there, she gets creative by appropriately mentioning the brands she’s worked with and highlights some of her favorite projects. With a third-person approach to the writing, this bio invites the reader behind a metaphorical door to meet Lisa as a professional, traveler, learner, wife, and mother.
11. Nancy Twine
Bio Platform: Company Website
As Founder and CEO of Briogeo — a popular natural hair care line that’s received rave reviews in publications such as Allure and InStyle — there are undoubtedly plenty of accolades Twine could boast about.
But she chooses to start her bio from a humbler place, stating: “Nancy Twine is no newcomer to the beauty-sphere — in fact, she made her first foray into the world of natural product formulation at the ripe age of five.”
The rest of her bio similarly focuses on Twine’s strengths as someone who’s able to take hair care “back to basics”. The bio focuses on why Twine made the decision she did to start her company, and what ultimately drives her.

Similarly, you might consider using your personal bio as an opportunity to highlight your bigger purpose or vision. As Twine demonstrates, sometimes it’s best to keep it simple, and let your message resonate with the right audiences.
12. Trinity Mouzon
Bio Platform: Personal Website
I gravitated towards Mouzon’s bio from the first sentence: “I’m obsessed with leveling the playing field.” Mouzon effectively grips the reader’s attention with this introduction, and then dives into some of her impressive accomplishments — including a brand that’s now sold at Urban Outfitters and Target.
The language used throughout Mouzon’s bio is authentic, real, and honest. Consider, for instance, the beginning of the second paragraph, where she admits, “While building a brand may have looked effortless from the outside, starting a business at age 23 with no resources or funding quickly forced me to realize that early-stage entrepreneurship was anything but transparent.”
Ultimately, this bio doesn’t just focus on Mouzon’s (impressive) background … it also highlights how she can help her readers start and scale their own businesses.
By focusing on the reader, Mouzon effectively demonstrates the real power of a good bio: the power to convert newcomers into leads and customers.
13. Alberto “Beto” Perez
Bio Platform: LinkedIn
As an avid Zumba fan, I was excited to include this one in the list. Perez styles his LinkedIn bio as a short story, starting with his background as a hard-working teen who held three jobs by age 14.
His bio tells the fun and fascinating origin story of Zumba, in which Perez, an aerobics teacher in Florida at the time, forgot his music for class and used a Latin music cassette tape instead … “And it was an instant hit!”
His bio continues, “Shortly after he was connected to Alberto Periman and Alberto Aghion and Zumba was officially created … what started as a dream now has 15 million people in more than 200,000 locations in 186 countries who take Zumba classes every week.”
What I like best about this bio is Perez’s decision to use the space to tell the story of his business, rather than list out his accomplishments. It provides a more real and colorful introduction to Perez, and immediately makes him feel both relatable and inspirational.
Let’s dive into a few more examples of short professional bios, next.
Short Bio Examples
14. Ann Handley
Bio Platform: Personal Website
If you’re a marketer, you’ve likely heard of Ann Handley. Her list of credentials is lengthy, and if she really wanted to, she could go on and on and on about her accomplishments.
But when people list out all their accomplishments in their bios, they risk sounding a little egotistical. Sure, you might impress a handful of people with all those laurels, but many people who read your bio will end up feeling either intimidated or annoyed. Think about it: Is that how you want the majority of your readers to feel when they read your bio?
To minimize the egoism that comes with talking about yourself, think about how you can list out your accomplishments without sounding like you’re bragging. Ann does this really well, choosing a tone in her bio that’s more approachable.
Best of all, Ann chooses to focus on her readers’ challenges and motivations, rather than her own. For instance, she writes, “Ann Handley writes and speaks about how businesses can escape marketing mediocrity to achieve tangible results. And she will inspire you to do work you’re proud of.“
Follow the link and you’ll be led to a page dedicated to a fuller bio, which she’s divided into two parts: a “short version” (literally a bulleted list of key facts) and a “long version,” which includes traditional paragraphs. There’s something in there for everyone.
15. Rebecca Bollwitt
Bio platform: Instagram
Instagram is a notoriously difficult platform on which to write a good bio. Similar to Twitter, you simply don’t have room for a professional bio that includes everything about you. And because Instagram is primarily a mobile app, many viewers are reading about you passively on their mobile device.
Instagram’s limited bio space requires you to highlight just your most important qualities, and blogging icon Rebecca Bollwitt does so in her own Instagram bio in an excellent way.
Rebecca’s brand name is Miss604, and cleverly uses emojis in her Instagram bio to tell visitors exactly what makes her a valuable content creator. Take a look in the screenshot below:
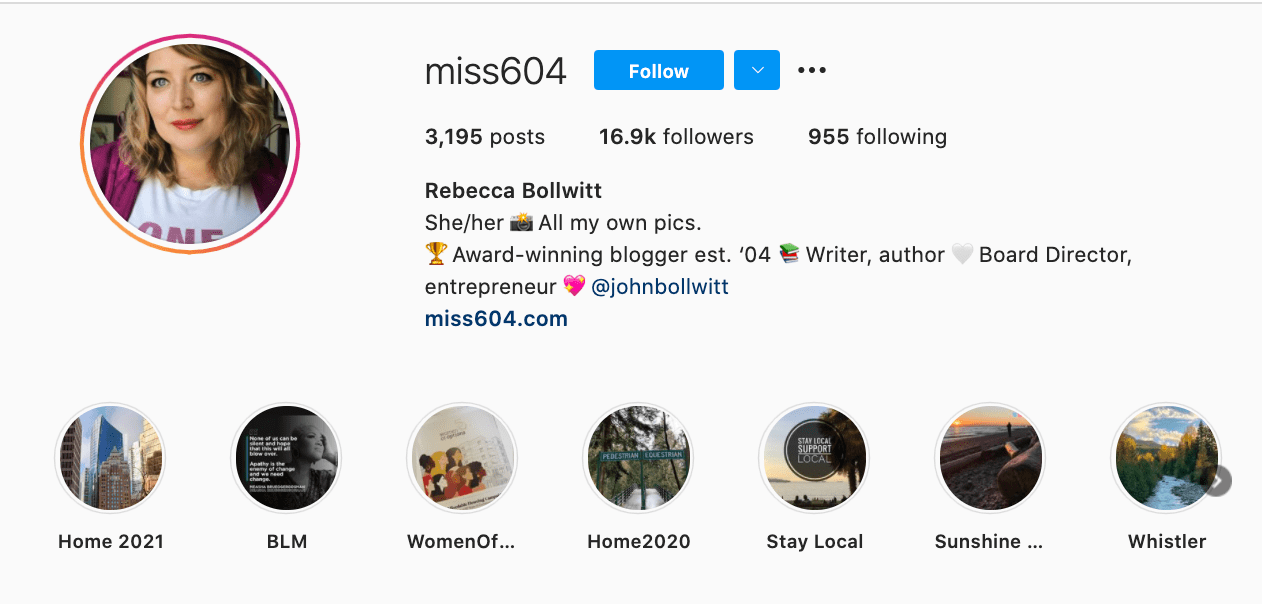
Starting with a trophy emoji, Miss604 says she’s an award-winning blogger. I haven’t even looked at her pictures yet and the introduction of her bio has already sucked me in.
The rest of her bio follows suit, breaking up the text with an appropriate emoji and a perfect collection of nouns to tell me who she is as a person. She even links out to her husband’s Instagram account after the heart emoji (an adorable addition), and assures her followers that all of her pictures are authentically hers.
Take a lesson from Miss604, and show your personal side. Just because you’re branding yourself as a professional doesn’t mean you have to take your human being hat off. Often your most personal attributes make for the best professional bio content.
16. Corey Wainwright
Bio Platform: Blog Byline
Corey Wainwright is a Principal Marketing Manager here
at HubSpot. She’s written content for HubSpot’s Marketing Blog for years, and her blog author bio has caught my eye since before I ever started working for HubSpot. (Back then, it started with, “Corey just took a cool vacation.”)
What I love most about Corey’s bio is that it’s a great example of how to deliver information about yourself without taking things too seriously. And in this context, that’s totally appropriate.
Despite having a number of impressive accomplishments under her belt, she simply doesn’t like displaying them publicly. So, she prefers making her author bio a little more “light.”
Her bio (pictured below) reads, “Corey is a Bruce Springsteen fan who does content marketing, in that order.”
 It works in this particular context because, at HubSpot, our blog authors often prefer to make themselves as friendly and approachable as possible — while letting the content speak for itself.
It helps that authors’ social media accounts are located right below our names and above our pictures. For folks who really do want a list of Corey’s credentials, they can click the LinkedIn button to go to her LinkedIn page. (You can read this blog post to learn how to create social media buttons and add them to your website.)
17. Megan Gilmore
Bio Platform: Instagram
Megan Gilmore is a best-selling cookbook author, and she often posts healthy recipes on her Instagram page to inspire followers’ to realize that you don’t have to sacrifice taste for the sake of health.
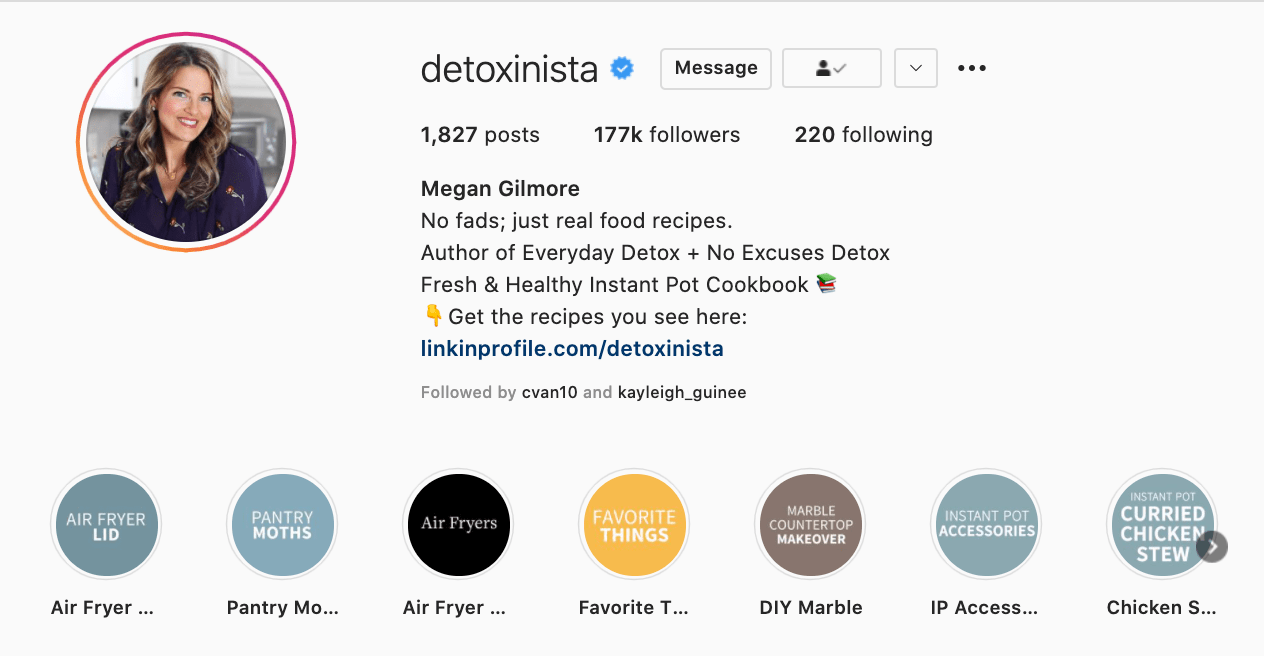 Fortunately, you glean most of this information immediately from her Instagram bio, which is short and to-the-point: “No fads; just real food recipes. Author of Everyday Detox + No Excuses Detox.” Her “no fads” call-out shows followers she aims to be helpful rather than gimmicky.
Plus, Gilmore includes a CTA link within her Instagram bio that leads followers to free, ready-to-use recipes. You might be thinking — Why would she do that, since it discourages people from buying her book? But that couldn’t be further from the truth.
By giving her followers the chance to try out her recipes, she’s slowly turning leads into customers. After I tried a few of her Instagram recipes and loved them, I decided to go ahead and buy her book, knowing I’d like more of what she had to offer.
18. Van Jones
Bio Platform: Twitter
Someone who’s known for a variety of talents and skills may find it difficult to capture who they are in a professional bio. When limited to just over 100 characters on Twitter, the feat is nearly impossible. But Van Jones effortlessly explains who he is and why it matters to everyone who visits his Twitter profile.
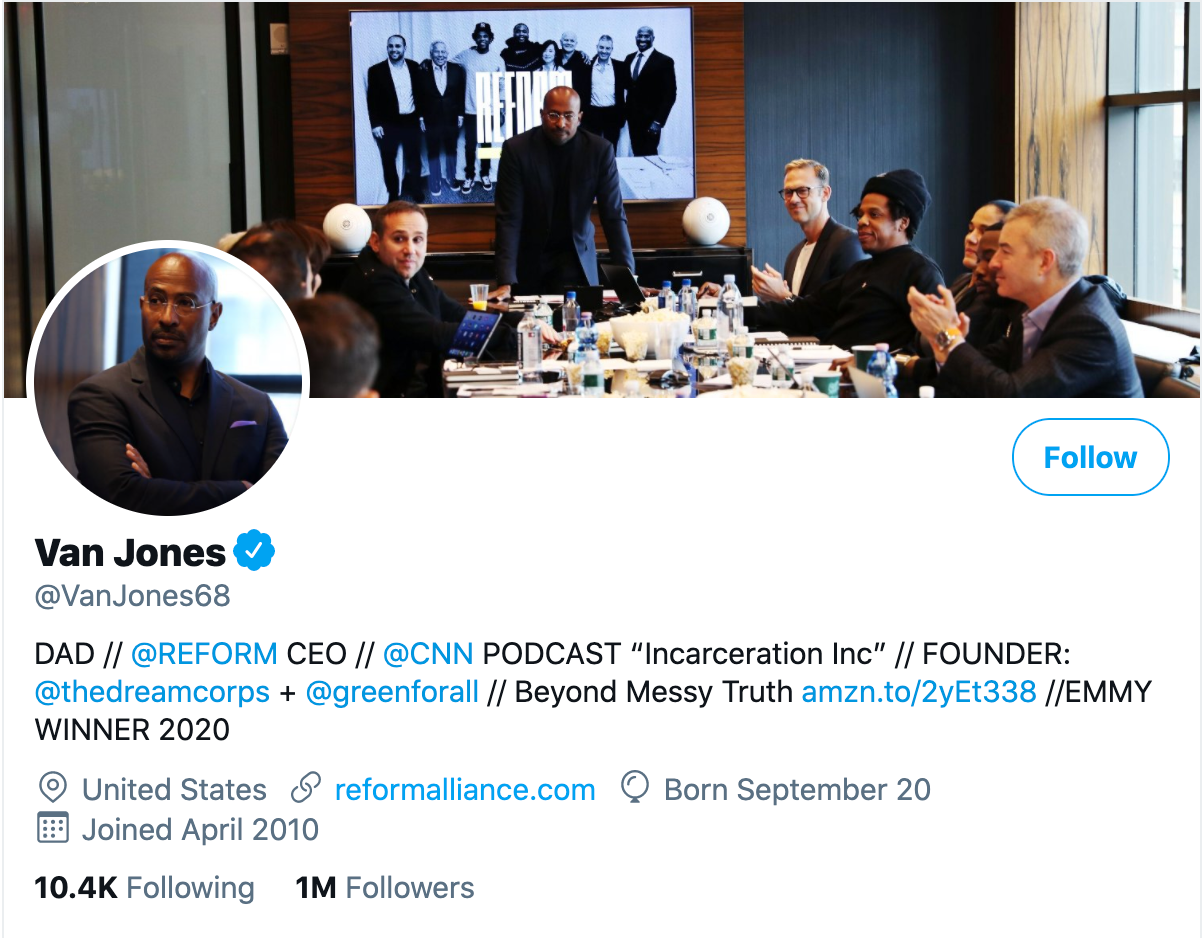
He starts his professional bio with a token of personalization and prioritization of his values. By mentioning that he is a dad first, we recognize what’s important to him in his long list of successes.
As we’ve seen in other bios, sharing who we are outside of work makes us more personable and should find its way into your bio, if possible. Van leaves plenty of room to share a variety of professional experiences in his bio including CEO of REFORM and his 2020 Emmy award.
What’s great about Van’s Twitter bio is his ability to link valuable offerings to his readers. He invites us to check out his latest book and has his website reformalliance.com linked at the top.
19. Sarah Haskins
Bio Platform: Twitter
When in doubt, a few words go a long way.
Consider, for instance, the funny and impactful bio of Sarah Haskins on her Twitter page, which reads: “writer. bad but enthusiastic dancer.”
What more do you need to know?
She doesn’t take her bio too seriously, and uses the space to highlight one serious accomplishment/skill (writer) and one not-so-impressive skill (bad dancer), to demonstrate her sense of humor and realness.
Particularly for a social media account that already restricts word count, consider how you might showcase your own uniqueness in just a few words.
20. Bea Dixon
Bio Platform: Instagram
Bea Dixon, Founder and CEO of The Honey Pot Company, efficiently uses her space on her Instagram profile to highlight who she is as a well-rounded human — not just a businesswoman.
For instance, while she highlights her Girl boss attitude with a tiara emoji, she equally calls attention to her fashion interests (Free People), her pets Boss and Sadie, and her love for ramen noodles.
Consider how you might also highlight your interests, hobbies, or passions outside of the 9-to-5. If people are reading your bio, they’re interested in getting to know the full you.
How to Write a Short Bio
If you’re posting a bio on a social media account or sending a quick blurb to a client, you want to keep it short and sweet — but you also want to ensure you’re including all necessary components to showcase your accomplishments.
To do this, when writing a short bio, you’ll want to include the following:
- Name
- Current job title
- Personal or professional goals, or a personal mission statement
- Skills or area of expertise
- 1-2 achievements
- Your personality! (Which might be best portrayed through a joke, a mention of a hobby, a fun fact, or a few emojis related to your interests)
Remember, you can always link out to your personal website and include a longer bio there. Your short bio is just a teaser of who you are, what you care about, and what you can do for others.
Additionally, if you’re sending it to a client or potential employer, try out a different iteration that highlights your skills as they pertain to your client or employers’ needs.
Create Your Own Professional Bio
Prim and proper, relaxed, or studded with accomplishments, your bio is a reflection of your best professional self. Your professional bio will often precede your physical presence. Before people meet you for the first time, they’ll probably read your bio.
Whether you’re creating an about page for your website or social media profile, one thing’s for sure, you’ll want to put your best foot forward with a top-notch professional bio.
Editor’s Note: This post was originally published in November 2019 and has been updated for accuracy and comprehensiveness.
