
Welcome to My Blog
How to Stop Procrastinating and Become a Joyful Writer [Infographic]
Whether you’re a full-time blogger or a social media marketer who’s occasionally tasked with writing social media copy, I’m willing to bet you’ve experienced the temptation to procrastinate in the middle of your writing process.
Maybe you type your introductory sentence and then open Pinterest. Perhaps you finish a section of your post and then, losing steam, decide to wash your dishes, instead.
Whatever it is, we’ve all been there. Writing is a tough and tedious process, and there are plenty of moments where procrastination is much more tempting than writing one more sentence.
But if you’re on a tight deadline, it’s critical you’re able to stay focused. Here, Henneke Duistermaat, founder of Enchanting Marketing, dives into strategies writers can use to avoid procrastination the next time they’re on a tight deadline and can’t afford to spend any more time refreshing their Pinterest feeds.
Let’s dive into the strategies you can use to stop procrastinating during your writing process — and how to become a more joyful writer, instead.


What is Twitter Spaces? [+Why Marketers Should Care]
Throughout the last few months, Twitter’s been experimenting with a new feature called Twitter Spaces.
And now, the highly-discussed feature is finally available to all account holders with more than 600 followers.
Spaces, which allows Twitter users to listen to and participate in public audio conversations, entered its beta test shortly after the launch and $100-million valuation of the app Clubhouse — which similarly offers an audio chat room experience.
Now, as Clubhouse’s user base continues to grow, and marketers begin to experiment there, many brands with solid Twitter followings are also beginning to pay more attention to the brand possibilities of Spaces.

Why Marketers Are Watching Twitter Spaces
As marketers gain access to Twitter Spaces, we’re learning that it could offer brand opportunities that Clubhouse hasn’t enabled yet. While both platforms are still evolving and you should keep both on your radar as they change and improve, here are just a few strengths Twitter Spaces already has over its competition:
1. Twitter has major audience reach.
Twitter has well over 330 million monthly active users. That user base includes audiences that fit into many different demographics all over the world. Because of this, brands can reach target audiences from all sorts of industries and backgrounds.
While Clubhouse’s user base is quickly growing, it doesn’t offer comparable reach to Twitter due to its somewhat exclusive nature. The audio social app was initially designed to be invite-only and started with a small user list of “elite” industry thought leaders, celebrities, and influencers. Only recently did every-day users start to get invited.
On top of Clubhouse’s invite-only exclusivity, the app is only available on IOS devices, while Twitter just announced that it would soon roll out Spaces to Android-based beta testers.
2. Twitter Spaces could provide a shorter learning curve.
Learning how to use and experiment with a completely new social media app — like Clubhouse — can be time-consuming. Not only do you need to learn how to navigate it, but you also have to study its top users, brands, and trends to learn how to reach audiences there.
With learning curves in mind, marketers who are experienced Twitter users might turn to Spaces over Clubhouse simply because they already have a following on Twitter and only need to learn how to use one additional feature, rather than an entirely new platform.
3. Twitter Spaces could be more inviting to brands.
While Clubhouse’s live audio platform has pulled in users looking for authentic interpersonal conversation rather than brand information, Twitter’s audience is accustomed to seeing content from brands, such as ads, marketing videos, and promotional Fleets. Because brand promotion feels more natural and common to Twitter users, these audiences might be more likely to accept or engage with brand-owned Space.
4. Twitter Spaces is visually interactive.
While Clubhouse and other audio apps show listeners just a listener list, Twitter has added features to make Spaces more visually appealing.
For example, Spaces listeners can use emojis to react to speaker comments.
“[The reaction feature]’s great because I see it as the perfect balance of being accessible for introverts and extroverts. If you’re not comfortable speaking, use an emoji,” says Krystal Wu, HubSpot’s social media community manager and a Spaces beta tester.
5. Spaces provides a more casual environment than other streaming platforms.
“The pressure is off when joining a Space. In all the discussions I’ve been part of people are much more laid back no matter how casual or important the topic is that’s being discussed,” Wu explains. “I enjoy this because it removes the feeling of being ‘on,’ like most of us have been on Zoom during this pandemic.”
Because of Spaces’ casual nature, marketers and audiences might not have to feel as intimidated when speaking in or launching Spaces, which could lead to engaging conversations between brands and their followers.
To learn how to use this feature and others within Spaces, keep reading for a quick how-to guide.
How to Use Twitter Spaces
Starting a Space
1. Go to your Twitter app and hold the “Post” button.
From your IOS or Android app, tap and hold the post button to see posting options. If Spaces is available to you, you’ll see an icon for it. Alternatively, you can also access Spaces by going to the top Fleets bar of your feed, tapping the Add icon with your profile picture, and tapping “Start Space.”
If you don’t see any Space buttons or icons in this process, you likely don’t have access to the feature yet and might need to wait to create your first Space. However, users who can’t create Spaces can still tune into them if they see any.
2. Start your Space.
When you tap the Spaces button via Fleets or your Post settings, you’ll be prompted to write a description for your Space. At this time, you can also invite up to 10 speakers. You can also choose to allow anyone to request to speak or speaking requests to followers or handpicked Twitter users.
At this point, Twitter notes that all Spaces are public. This is important to keep in mind as you plan your space and enable speaking privileges.
3. Look for speaker requests.
When someone requests to speak, you’ll get a notification and can choose to give them speaking privileges or ignore the request. If you unmute the listener, be sure to introduce them to the audience.
4. Remove or change speakers.
If you have more than 10 guests that would like to speak, you can tap one of your current speakers to remove their privileges. This will allow you to minimize the potential speakers or add more speakers. This can be especially helpful if you’re holding a longer chat and want multiple listeners to contribute to the discussion.
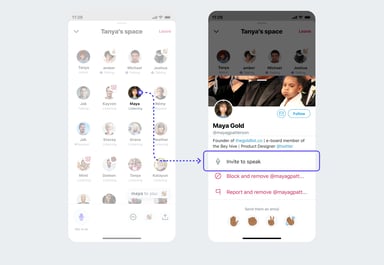
Additionally, if the conversation goes awry or someone says something unexpected, Twitter allows Space creators to report or block speakers if they say or do something inappropriate. This can help moderators create a safe and respectful environment for all listeners and participants.
5. End the Space.
Unlike Clubhouse, a Twitter Space can only be ended by the person who launched it. To end a Space you created, all you have to do is tap the End icon.
6, Download your Space’s data.
According to Twitter, the social media platform retains data about the Space including recordings and transcriptions for up to 30 days after the Space in case there are any reports of speakers not following Twitter terms.
Because Twitter does keep Space records, Space creators can download data Twitter has on it within 30 days of hosting, while speakers can download transcriptions for records of what they said. At this point, Twitter does not explain how to do this in-depth. However, more information can be found here.
Aside from Twitter’s record-keeping Spaces are ephemeral to non-speakers and conversations will disappear from the app as soon as they end.
Joining a Space
7. Attend a Space.
When someone you follow starts a Space, you’ll see it in the Fleets area of your Twitter feed. Instead of one small circle with their profile picture, you’ll see an oval shape that includes a Space creator’s profile picture, the number of attendees, and the creator’s name below it.

When you tap on it, you’ll be given more details about who is in the Space and see a “Join Space” button. If the Space creator allows anyone who joins to speak, you’ll be asked if you want to enter the Space with your microphone on or off, as shown in the image below.

For listeners, a space looks a bit like a Clubhouse room with speaker names and photos appearing at the top and audiences appearing towards the bottom. If the audience is too large, you’ll see the number of additional members rather than all the people in the chat.

8. Attempt to speak.
Some Spaces will allow any attendee to speak if less than 10 people are unmuted. Meanwhile, others will be more private and require you to request. You can tell the difference between each by looking at the microphone icon in the bottom left corner of a Space. This icon will either allow you to request to speak or will turn your mic on immediately when tapped.

If you see the word Request below the microphone, you can tap the icon to ask to speak. The Space’s host will be notified that you’d like to speak and can accept or ignore the request.
9. Share the Space.
From the bottom navigation of each Space, you can tap the icon showing two people to invite specific followers to join, or the share button to Tweet a link to the Space you’re in.

10. React to the conversation.
If you want to respond to something a speaker says in a Space, but don’t want to speak, you can tap the heart-shaped icon in the Space’s lower navigation to see a list of emojis that you can tap to show a visual reaction.

11. Share Tweet-based conversation starters.
Wu says one of her favorite things about Spaces is that attendees can share public tweets directly in a Space.
“Any [speaker] in the Space can share a tweet, which will appear at the top of the Space,” Wu explains. “We can use it as reference points while chatting so that people can be more interactive in the discussions.”
Below is a look at Twitter’s own “Space’s” space. During the chat, which enables Twitter users to give feedback on the Space feature, a speaker shared a tweet from someone about how Spaces prioritizes attendees in its visual format.
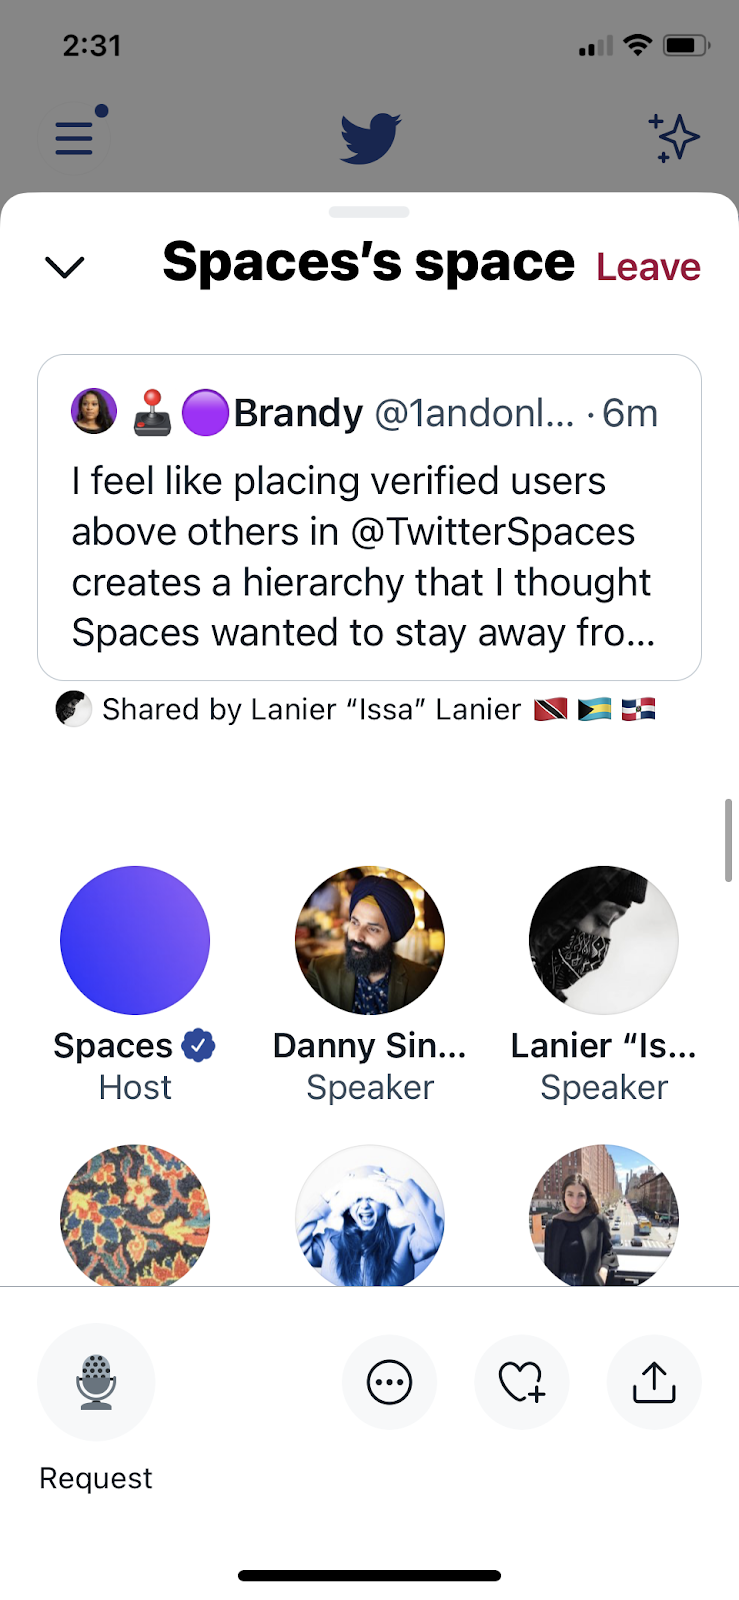
To share tweets in a space, Wu says you just need to minimize the space you’re in, find a public tweet, tap the Share button, and tap the Spaces option. From there, the tweet will appear at the top of your space until the space host removes it or another tweet is shared.
12. Leave or minimize a Space.
Not interested in a discussion you’re listening to? All you need to do to exit is tap the “Leave” button in the upper-right corner of the screen.
If you’d like to go back to your Twitter feed, but want to keep listening to the Space conversation, you can tap the down arrow in the upper-left corner to shrink it into a small player that allows you to see tweets without leaving the Space.
Navigating Audio Social Media
If you’re a community-centric marketer, Twitter Spaces or Clubhouse could be worth experimenting and a great way to reach your audience on a more conversational level.
While you’ll certainly want to consider testing out Twitter Spaces, you should also continue to follow Clubhouse. Although Twitter might have competitive advantages now, Clubhouse is still evolving, quickly growing its audience, and could continue to innovate in the audio-social space.
Ultimately, if you decide audio social media is right for your brand, you’ll want to look at each platform’s pros, cons, and audience to determine which fits your targets best.
To learn more about Clubhouse, which started the audio social media phenomenon, check out this post on the app’s growth. You can also check out this detailed how-to guide to see how Clubhouse’s features compare to Twitter Spaces.
More interested in growing your overall Twitter following and strategy? Click below to download a helpful free resource!


25 of the Best Free WordPress Themes for Bloggers in 2021
As a blogger, you want your website to reflect your unique voice and style. You also want visitors to have a positive experience navigating your site — that is, reading posts with ease, searching for topics of interest, and discovering other content that makes them excited to return.
A WordPress blogging theme can help you achieve the exact look, feel, design, and layout you envision, without the need for coding.
We’ve curated this list of our favorite free WordPress themes for bloggers like yourself — in no particular order — to consider using for your website.

1. Astra
Astra is a fast and lightweight theme that’s suitable for a variety of use cases. This flexible foundation makes Astra a quality option to consider when building a blog. The theme comes with several ready-to-use blog websites that can be imported, modified, and used out of the box.
Many bloggers get by just fine with the limited customization options for backgrounds, typography, and spacing within the free version of Astra. But for several advanced features like auto-loading previous posts, adding author sections, and removing featured image padding, you’d need to opt for the Pro or Agency plan.
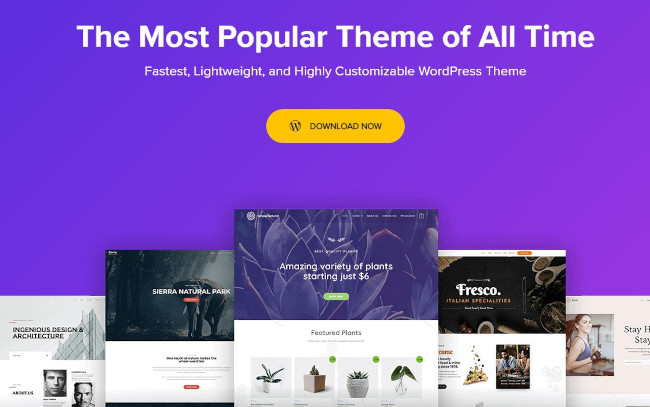
Astra is one of the fastest themes available, and its compatibility with all major page builders (such as Elementor, Beaver, and Brizy) make it a great option for bloggers.
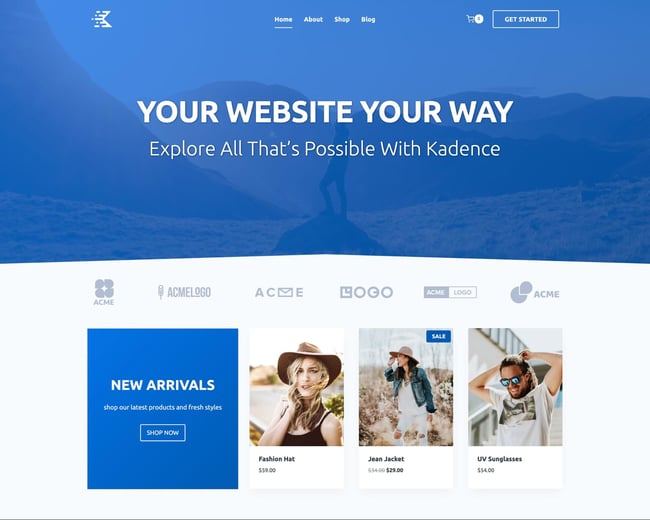
2. Kadence
Kadence is a lightweight and fully-featured WordPress theme that makes creating beautiful fast-loading and accessible websites a breeze. It features an easy-to-use, drag-and-drop header and footer builder to build any type of header in minutes.
For bloggers, Kadence stands out because of its clean blog styling, including featured image placements and sticky sidebar options. Additionally, Kadence has a deep integration with the core block editor, so your content will match what you see in the admin panel.
3. Blog Way
Blog Way is a simple and professional theme. It’s clean, well-coded, and has a modern layout. Blog Way is especially great for blogs, news sites, and travel sites. It has multiple customizable features and ensures high-quality performance to help boost your site traffic. Blog Way also comes with an option to change the color of your entire site and offers social links for you to connect your site with your social accounts.
-Jun-24-2020-09-46-30-50-PM.png?width=1500&name=The%2024%20Best%20Free%20WordPress%20Themes%20for%20Bloggers%20in%202020%20(Update)-Jun-24-2020-09-46-30-50-PM.png)
4. Simple
Simple is a free WordPress theme developed by Themify and built for, well, simplicity. Simple is designed so customers can buy items directly from your WordPress website without being redirected to Shopify, but you can run a regular blog on it as well. Creating your design or online store is easy with the drag and drop interface through Themify Builder, which comes with the theme.
-3.jpeg?width=1500&name=The%2024%20Best%20Free%20WordPress%20Themes%20for%20Bloggers%20in%202020%20(Update)-3.jpeg)
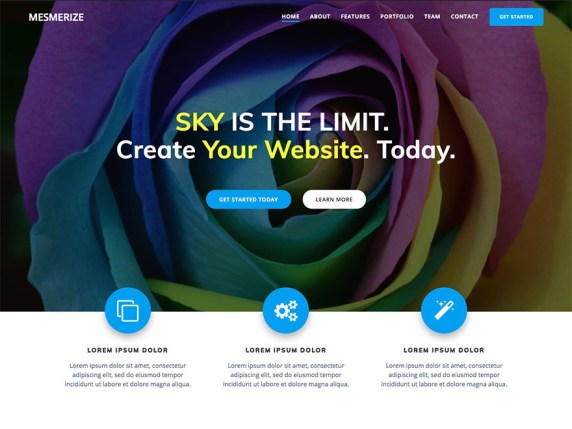
5. Mesmerize
Mesmerize is all about giving you customizability without the hassle. Start with a pre-built homepage and use the five header designs, slideshow capabilities, gradient overlays, and more to make the look and feel your own. In addition, there are 30 ready-to-use content sections for you to build pages quickly and easily… not to mention the helpful drag-and-drop features. It’s mobile-responsive, and it works well with WooCommerce should you ever need to set up a store.
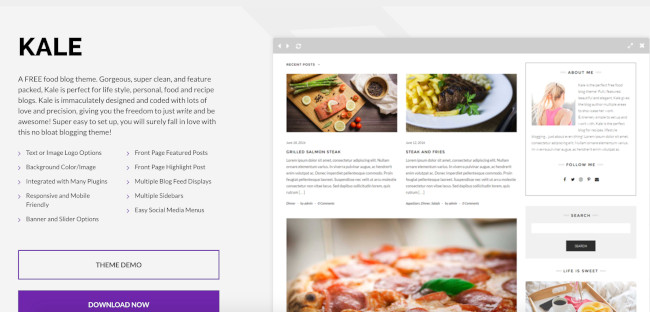
6. Kale
Kale is built for food bloggers. You can choose from a number of feed displays to organize your written content and images of the dishes you’re featuring. The built-in social media sidebar menus and icons make it easy for your visitors to locate, view, and follow your accounts.
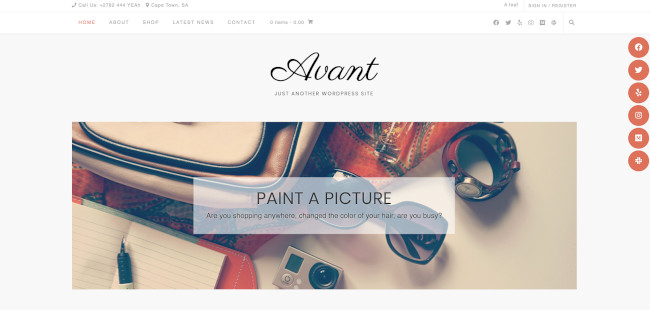
7. Avant
Avant comes with seven different header styles, three footer styles, five blog layout templates, full site color settings, and much more built neatly into the WordPress Customizer. Avant integrates seamlessly with WooCommerce and page builders like Elementor or SiteOrigin.
8. Blossom Feminine
Blossom Feminine is a free WordPress theme that you can use to create a fashion, lifestyle, journal, travel, beauty, or food blog. The theme is mobile-friendly, search engine optimized, and fast. In addition, the theme is WooCommerce compatible, translation ready, and comes with regular updates.
-Jun-24-2020-09-46-31-04-PM.jpeg?width=1500&name=The%2024%20Best%20Free%20WordPress%20Themes%20for%20Bloggers%20in%202020%20(Update)-Jun-24-2020-09-46-31-04-PM.jpeg)
9. Blossom Fashion
Blossom Fashion is perfect for building a stylish blog without spending a penny. While free, the theme offers premium features like WooCommerce compatibility, font choosing options, an advertisement widget, Instagram section, and more. The theme makes sure it is easy to use and comes with extensive documentation, and there’s always support if you need more help.
-Jun-24-2020-09-46-28-79-PM.jpeg?width=1500&name=The%2024%20Best%20Free%20WordPress%20Themes%20for%20Bloggers%20in%202020%20(Update)-Jun-24-2020-09-46-28-79-PM.jpeg)
10. Blossom Travel
Blossom Travel is a fast-loading and mobile-friendly WordPress theme for travel blogs. The theme blends accessible design with extensive features like social media integrations, theme color options, and lightbox image styling. Moreover, Blossom Travel has an Instagram section, email subscription section, and social media widgets so visitors can easily connect with you. Best of all is its HTML map section so that your visitors can visualize where you’ve traveled.
-1.jpeg?width=1500&name=The%2024%20Best%20Free%20WordPress%20Themes%20for%20Bloggers%20in%202020%20(Update)-1.jpeg)
11. Blossom Pin
The Blossom Pin theme features a Pinterest-style design, using a vibrant masonry layout with three posts/page layout options. Its infinite scroll lets visitors browse without distraction. The theme is SEO-optimized and easily customizable: Choose from many different colors and hundreds of Google fonts.
-Jun-24-2020-09-46-30-69-PM.jpeg?width=1500&name=The%2024%20Best%20Free%20WordPress%20Themes%20for%20Bloggers%20in%202020%20(Update)-Jun-24-2020-09-46-30-69-PM.jpeg)
12. Elegant Pink
Another dynamic Pinterest-like layout, Elegant Pink is a free and beautifully designed theme combining soft colors with a simple and clean layout to present your blog to the world. Elegant Pink also has a slider section above the masonry-design post on the homepage.
-Jun-24-2020-09-46-30-11-PM.jpeg?width=1500&name=The%2024%20Best%20Free%20WordPress%20Themes%20for%20Bloggers%20in%202020%20(Update)-Jun-24-2020-09-46-30-11-PM.jpeg)
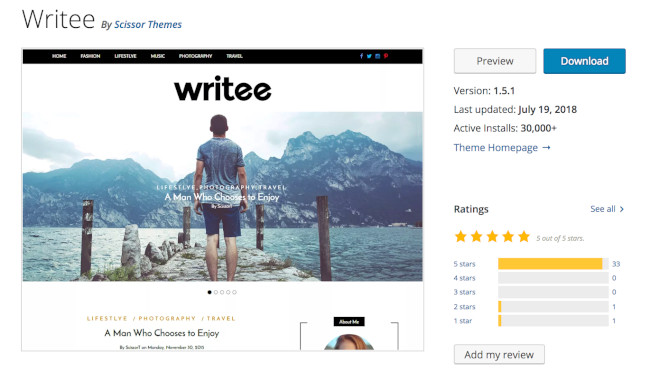
13. Writee
Writee is ideal for photography or image-heavy blogs — the theme has a slider hero image feature which allows you to include several full-width images. Writee also makes managing an online store simple with its WooCommerce integration.
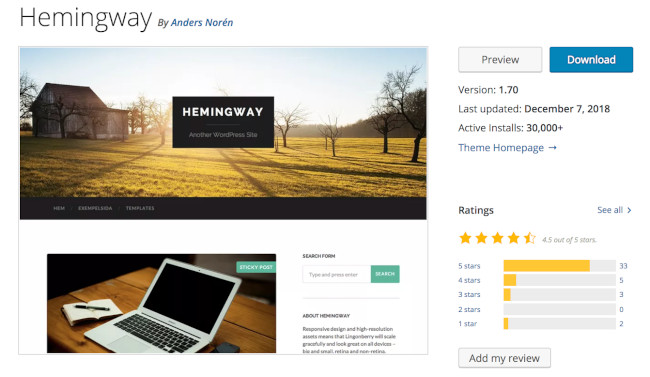
14. Hemingway
Hemingway is a simple two-column blogging theme that keeps your content organized and easy to read. It includes a parallax scrolling feature, which adds an interactive, video-like experience to your blog pages. Hemingway’s translation-ready feature comes with pre-made language files so your website can be automatically translated into a number of other languages with just a click.
15. Radiate
The Radiate blogging theme offers unique visuals, including a customizable, full-width hero image and primary color options so you can match your branding. If you have a WordPress.com Premium or Business account (that is, if you pay for WordPress), you can take advantage of custom Cascading Style Sheets.
-Jun-24-2020-09-46-29-93-PM.jpeg?width=1500&name=The%2024%20Best%20Free%20WordPress%20Themes%20for%20Bloggers%20in%202020%20(Update)-Jun-24-2020-09-46-29-93-PM.jpeg)
16. Neve
Neve is a powerful, free WordPress theme from ThemeIsle. It offers a fully responsive mobile-first design and extensive customization options to tailor your blog to your brand image. Neve frequently updates for security and new features, and its theme options panel will help you get started out-of-the-box.
-Jun-24-2020-09-46-28-61-PM.jpeg?width=1500&name=The%2024%20Best%20Free%20WordPress%20Themes%20for%20Bloggers%20in%202020%20(Update)-Jun-24-2020-09-46-28-61-PM.jpeg)
17. Bulan
Bulan offers multiple homepage layouts for your blog including full-width, boxed, narrow, and multi-column options. There are also a number of customizable sidebar and navigation configurations to enhance your blog-reading experience. Not to mention, you can install custom widgets to increase functionality.
-Jun-24-2020-09-46-30-86-PM.jpeg?width=1500&name=The%2024%20Best%20Free%20WordPress%20Themes%20for%20Bloggers%20in%202020%20(Update)-Jun-24-2020-09-46-30-86-PM.jpeg)
18. Total
Total is a blogging theme with a masonry-style layout, which places your latest three, six, or nine blog posts in a grid format. There’s also a portfolio section if you want to share some of your artistic work. Total is SEO-friendly, compatible with the most popular page builder plugins, and has a one-click demo import to get you up and running fast.
-Jun-24-2020-09-46-30-94-PM.jpeg?width=1500&name=The%2024%20Best%20Free%20WordPress%20Themes%20for%20Bloggers%20in%202020%20(Update)-Jun-24-2020-09-46-30-94-PM.jpeg)
19. Spacious
Spacious offers four page layouts, two templates, four blog layouts, and several custom widgets and widget areas to choose from. Building your site with Spacious is a painless process due to their downloadable demo sites that you can use for inspiration and support.
-Jun-24-2020-09-46-30-20-PM.jpeg?width=1500&name=The%2024%20Best%20Free%20WordPress%20Themes%20for%20Bloggers%20in%202020%20(Update)-Jun-24-2020-09-46-30-20-PM.jpeg)
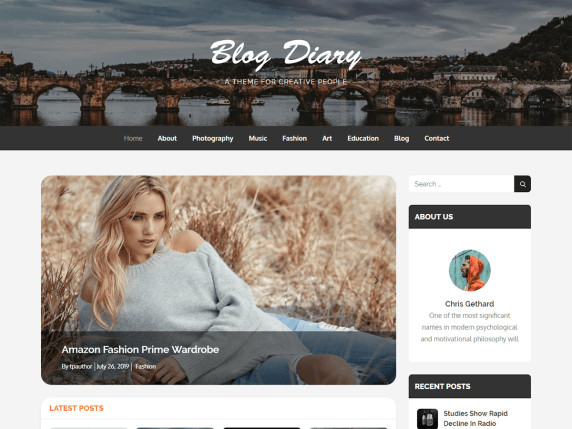
20. Blog Diary
Blog Diary is meant to be lightweight and minimalistic, perfect for trendy food or travel blogs. It comes with slider functionality and color picking options, and it is easy to get up and running on the fly. In addition, it’s mobile-responsive and compatible with the Gutenberg editor.
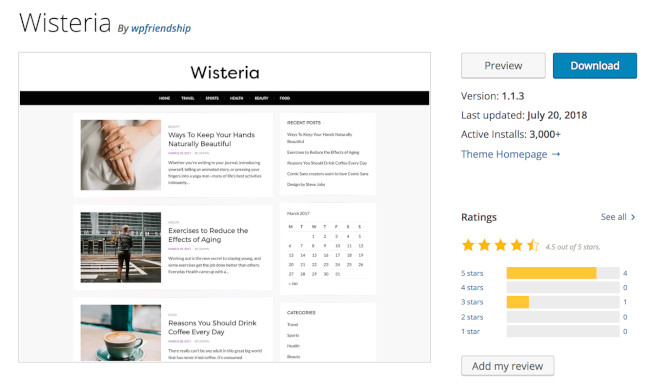
21. Wisteria
Wisteria is a blogging theme with a minimalist design. It includes layouts tailored to a variety of blogs including lifestyle, food, fashion, marketing, and more. Wisteria is retina-ready, meaning all of your images and content will be high-definition to ensure your site has a professional look.
22. Editorial
The Editorial blog theme is visually engaging, simple to use, and flexible enough to organize large amounts of editorial content in a way that won’t overwhelm readers. Editorial also comes with a variety of convenient widgets that let you easily customize your page sections, no coding needed.
.jpeg?width=1500&name=The%2024%20Best%20Free%20WordPress%20Themes%20for%20Bloggers%20in%202020%20(Update).jpeg)
23. Brilliant
Brilliant is a blog and online magazine theme that allows you to artistically pair your blog posts with photo or video content. You can add or edit your own custom logo on your homepage as well as easily customize your theme’s accent colors to match your branding. Brilliant is also translation-ready, so visitors can read your content in different languages.
-Jun-24-2020-09-46-29-77-PM.jpeg?width=1500&name=The%2024%20Best%20Free%20WordPress%20Themes%20for%20Bloggers%20in%202020%20(Update)-Jun-24-2020-09-46-29-77-PM.jpeg)
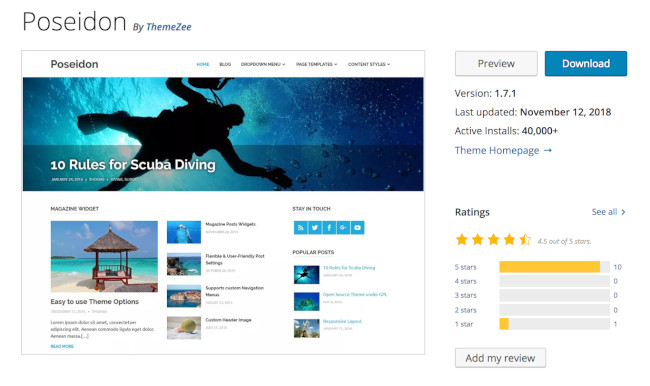
24. Poseidon
If you’re looking to include large, professional-looking photographs on your blog, Poseidon is the option for you — this theme offers a full-width image slideshow on the homepage. The layout is mainly white to create a spacious, organized look. Poseidon also includes completely customizable navigation bars to enhance user experience and improve your site’s configuration.
25. Author
Author is a straightforward theme suitable for all blog types from business to photography to ecommerce. Its minimalist look helps readers to easily focus on your content. What’s unique about this particular theme is that it was designed not just for readability but also accessibility.
-Jun-24-2020-09-46-29-61-PM.jpeg?width=1500&name=The%2024%20Best%20Free%20WordPress%20Themes%20for%20Bloggers%20in%202020%20(Update)-Jun-24-2020-09-46-29-61-PM.jpeg)
A free blogging WordPress theme will help you to create a unique, functional, and eye-catching place for your content. Each theme offers features, layouts, and styling that set them apart, so consider the overall design you’re going for on your blog to help you determine the ideal option for you.
Then, install your theme, begin to add content, and customize your site to create a great user experience that keeps readers returning for more.
Editor’s note: This post was originally published in December 2018 and has been updated for comprehensiveness.

Tired of Waiting for IT to Generate Your Reports? Try Ad Hoc Analysis
In midsize to large companies, it’s standard to have business intelligence (BI) analysts generate reports on behalf of employees.
Having a designated team is great, as it signifies you have the resources to process large volumes of data. However, it can be a roadblock to decision-making.
![→ Free Download: Free Marketing Reporting Templates [Access Now]](https://no-cache.hubspot.com/cta/default/53/0d883e85-c2e5-49bb-bef2-bfddb500d84b.png)
Generating a report can take several days and if your team is already receiving many requests, it can take their focus away from higher priority tasks.
This is where ad hoc analysis comes in handy – you can run your own queries as you need them.
Discover the benefits of generating your own reports and the tools that will help you do it.
Non-technical users – who may be unfamiliar with structured query language (SQL) – can use it to answer questions that require immediate answers.
With the ad hoc model, everyone is empowered to dig into the data and find exactly what they’re looking for, without having to go through someone else. Why is this helpful? It:
- Saves time – When everyone is able to run their own analysis, they don’t have to wait days or weeks for IT to get to it. It also allows your IT team to focus on top priorities without being distracted by one-off tasks.
- Speeds up the decision-making process – This also enables your team to make decisions quickly, as they can access data to support their decisions.
- Empowers your team – Democratizing access to data can help your team feel more invested in your projects and be equipped to share insights.
One potential downside of using ad hoc analysis is the risk of information silos, where team members are not sharing insights and making unilateral decisions.
When using the ad hoc model, it’s important to only focus on answering a specific question. You also want to use it for micro-level decisions, not large scale. Furthermore, share your insights with your team to get everyone on the same page.
Ad Hoc Example
You typically run ad hoc analysis as a response to an event.
For instance, let’s say your marketing team is wondering which channels to invest in for 2021. You could run a report to identify the channels that generate the most and least sales-qualified leads. You could also run a secondary report to identify where potential leads may be dropping off.
Ad hoc analysis is great when you want to:
- Validate a theory.
- Highlight specific data for an upcoming meeting.
- Make a decision quickly regarding an ongoing project.
Ad Hoc Reports
What is ad hoc reporting?
Ad hoc reporting is a one-time report that doesn’t require waiting for the standard analysis cycle. Typically, a report requires large volumes of data and follows specific templates to share with a large audience. With ad hoc reporting, you only pull a small segment of data for you or a small pool of users.
Wondering what’s the difference between ad hoc reporting and analysis? The former pulls the right data for the question you want to answer while the latter focuses on analyzing it for patterns, trends, and insights.
Standard (Canned) Reports vs. Ad Hoc Reports
Standard reports have limited customization options available, as they are usually created for large audiences and sent out on a regular schedule. They are created, managed, and distributed by technical IT users, with the end-user only being able to manipulate select data points.
Ad hoc reports, on the other hand, are much more flexible. Non-technical users can dig through data, pull out what they want and how they want to display it whenever they need it.
In addition, ad hoc reports can be more visual than standard reports, which tend to follow set templates for easy distribution.
Ad Hoc Reporting Tools
When searching for a business intelligence (BI) reporting tool, here are some key features you’ll want to look for:
- Data visualization
- Easy sharing options
- Access to multiple data sources
- Integrations
Here are some top ad hoc analysis and reporting tools available online today.
1. Grow
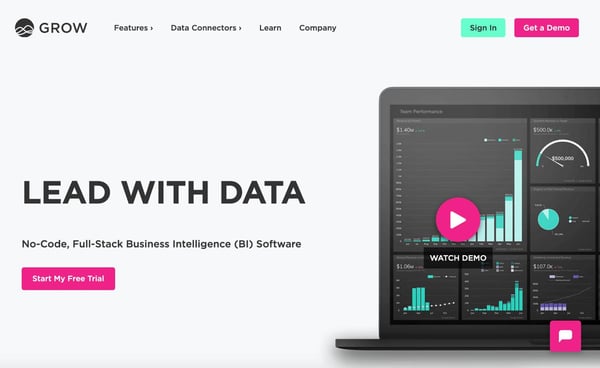
Grow is a business intelligence tool that centralizes your data and offers no-code solutions. No need to host your marketing data on one platform and your financial data on another. Grow’s powerful integration software removes the need for third-party data warehouses.
You can easily integrate your data from multiple sources, including:
- CRMs like HubSpot
- Social media platforms like Instagram and LinkedIn
- Ecommerce sites like Shopify
- Payment processors like Square and Stripe
- Ad platforms like AdRoll and Google Ads
- Financial institutions like Chase and Bank of America
The user-friendly dashboard and visualization capabilities, you can quickly get answers to your most pressing questions. For pricing information, contact the company.
2. Easy Insight
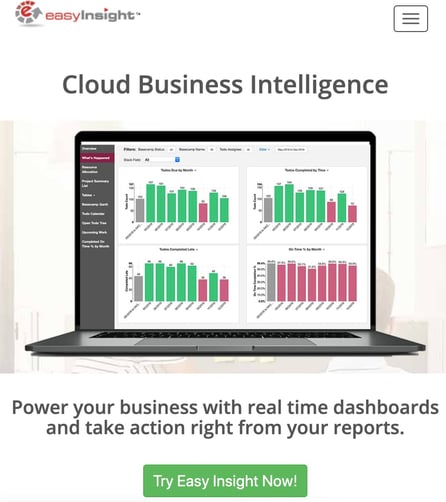
Easy Insight is another code-free business intelligence tool that enables non-technical users to run ad hoc reports in a few simple steps.
Whenever you need it, you can create custom reports using a range of filters and visualize them through tables, charts, and a host of other visualization tools.
The platform is highly customizable, allowing you to create your own data sources, import data from other databases, and combine your data for unified reporting. It also integrates with HubSpot to help you leverage your insights to make decisions.
Easy Insight offers six plans for small to large companies. Pricing ranges from $29/month to $1499/month.
3. Wicked Reports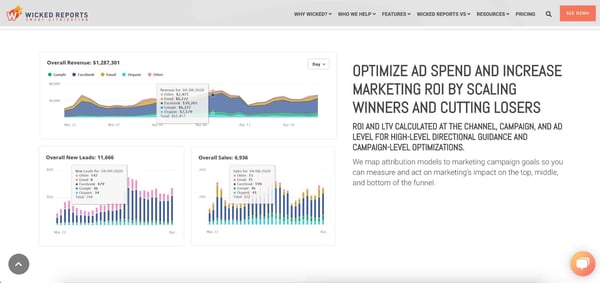
If your team is currently relying on several platforms to gather and analyze data, then consider Wicked Reports. This tool caters specifically to marketers looking to step up their data analytics game.
Wicked Reports helps teams track return on investment (ROI) on various campaigns and improve their customer lifetime value. With the easy-to-use dashboard, any user can run ad hoc reports to assess performance against goals and make quick decisions.
The best part? You don’t need IT to set it up or use it. The platform is accessible to non-technical users who want clean and accurate data.
Starting at $597/month, Wicked Reports is ideal for scaling businesses looking for a reliable analytics tool.
With ad hoc analysis, you can empower your team to easily access the data they need most, freeing up your IT staff in the process.

Running Into Issues in Shared Excel Sheets? Learn How to Lock Cells
Ever left something perfectly fine and came back to a total disaster? Any pet owner will probably say, “yes.”
At work, the same can happen when collaborating on a shared document. It’s usually an accidental keyboard stroke that does it. Unless it’s done by your cat, in which case, it’s not accidental – it’s definitely sabotage.
While a mistake like this is understandable, it can be frustrating and time-consuming to fix. When working on shared Excel sheets, you can prevent these mishaps altogether by locking cells and protecting your worksheets.
![Download 9 Excel Templates for Marketers [Free Kit]](https://no-cache.hubspot.com/cta/default/53/9ff7a4fe-5293-496c-acca-566bc6e73f42.png)
Whether you’re working on an upcoming report or planning out next quarter’s budget, learn how to prevent anyone from changing or deleting important information on an Excel document.
Can you lock cells in Excel?
Yes, you can lock cells on Excel by following a few simple steps. When you lock a cell in Excel, you restrict users from making changes to your sheets. It’s particularly helpful when working on a project that involves multiple team members.
For instance, let’s say you’re the marketing director and you’ve asked each channel lead (email, website, social) to report their quarterly numbers for an upcoming meeting.
You wouldn’t want someone accidentally deleting important information, or changing formulas or conditional formatting before consulting with key stakeholders. This process ensures that only pre-approved users can edit the cell, which will save you a headache in the future.
Another method is locking your formula cells so that the numbers populate correctly. Jump to that section here.
How to Lock Cells in Excel
1. Select the cell(s) you want to lock.
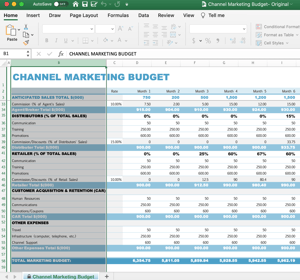
2. Click on the “Home” tab of your Excel sheet.
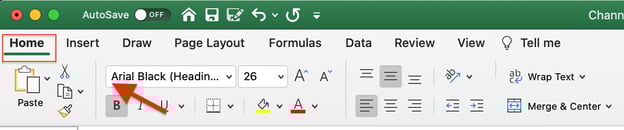
3. Click on “Format,” located on the right side of the screen.
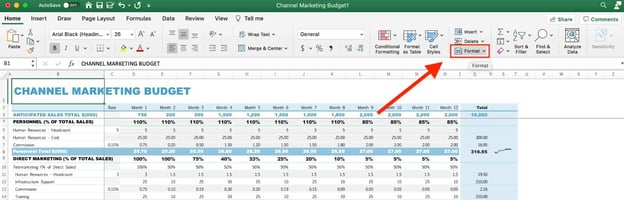
4. Scroll down and click on “Lock Cell.”
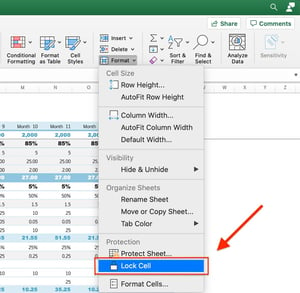
Once you complete these steps, your cells will be locked but can still be edited. To ensure the cells aren’t editable, you’ll also have to protect your worksheet. Find those steps in the next section.
How To Protect a Worksheet in Excel
1. Once you’ve locked your cells, click on the “Review” tab.

2. Click on “Protect Sheet.”

3. Select which permissions you’d like to allow on the sheet, then click “OK.” You can also add a password for additional protection.
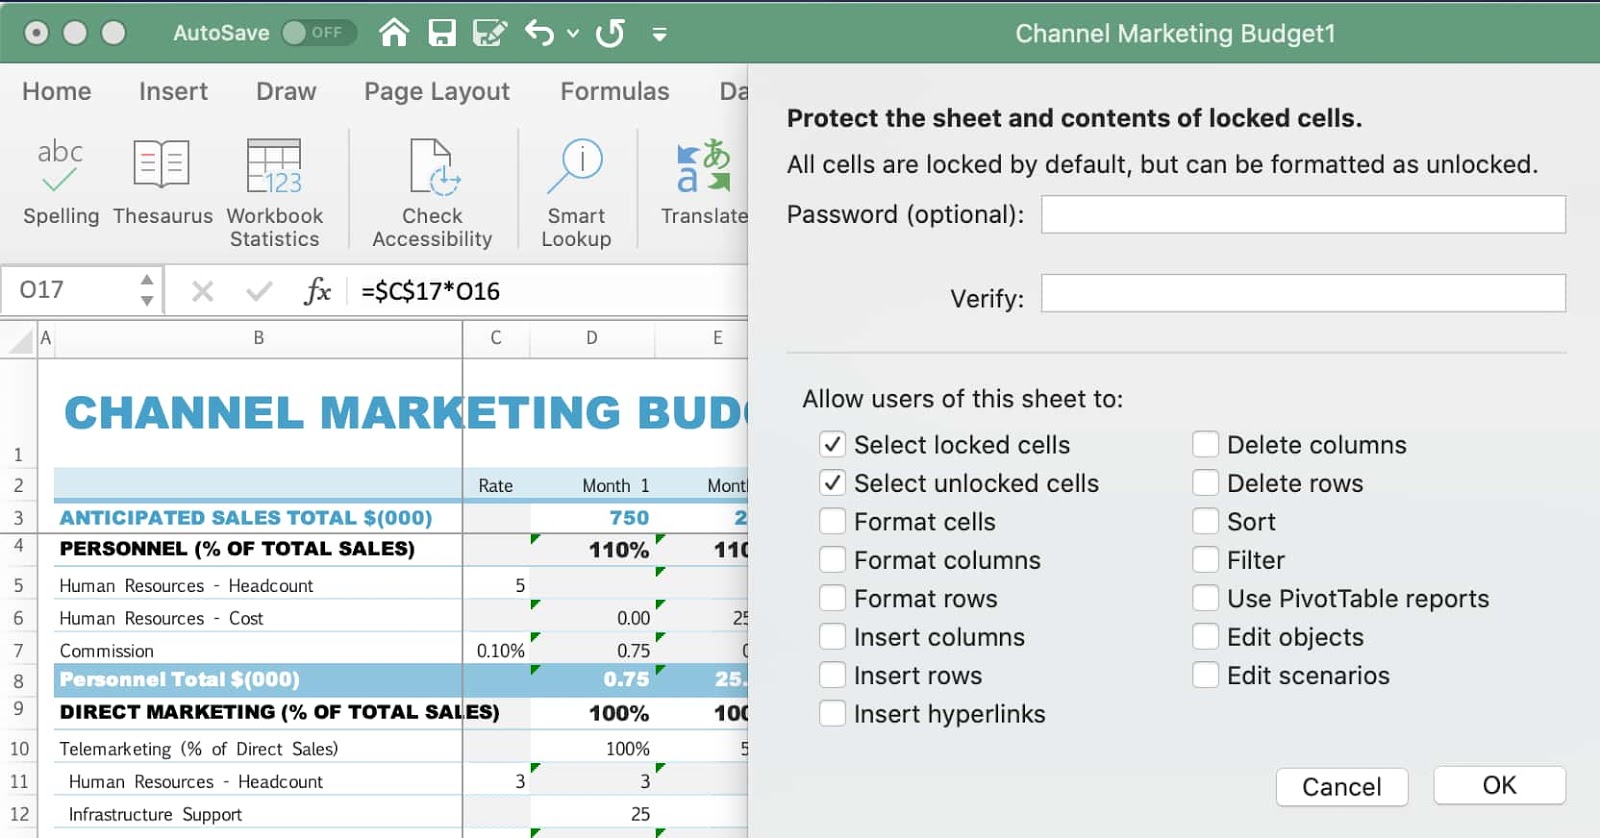
Note: If you don’t add a password, any user can click “Unprotect Sheet” to make changes to the sheet. When you add a password, only those with the code can do so.
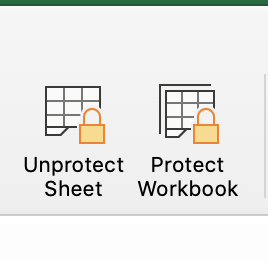
4. Confirm that your cells are locked by looking for the “Unprotect Sheet” icon in the toolbar.
You can also double-check that your worksheet is protected by attempting to write something in the locked cells. You should get this alert.
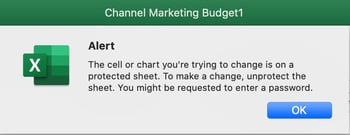
How to Protect Specific Cells in Excel (& Get a Shortcut to Lock Cells)
1. Select the cells you want to lock then press Ctrl+Shift+F (Windows) or Ctrl + 1 (Mac) to open up the “Format Cells” box. Then, click on the “Protection” tab.
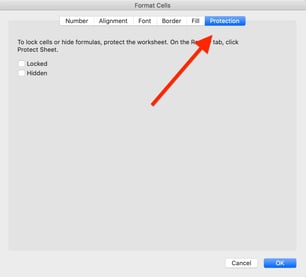
2. Select the “Locked” box and click “OK” on the bottom right to finish.
These simple steps offer both a shortcut to locking cells in bulk and a way to protect specific cells in Excel.
How to Protect Formulas in Excel
A green triangle indicates an error in your cell’s formula. The error sign will show up if your formula is unprotected.
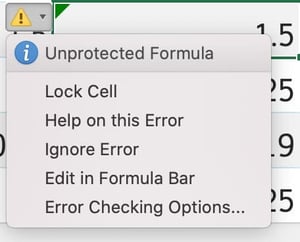
Any unauthorized or accidental changes to a formula can alter the integrity of the data reported in the sheet. As such, it’s important to always lock your formulas to prevent mistakes.
Here’s how you protect your formulas in Excel:
1. Click on the cell with the green triangle and look for the yellow triangle warning sign.
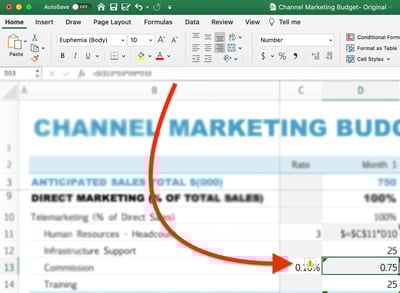
2. Click on the warning sign and select “Lock Cell.”
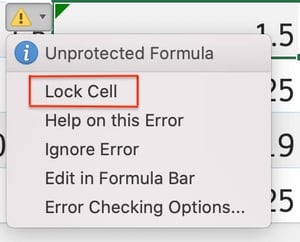
3. You must then protect your worksheet by clicking on “Protect Sheet” under the “Review” tab.
Another way to protect your formulas is by locking each formula cell individually as you build your worksheet (as outlined here) and protecting your sheet once all formulas have been locked.
Whether you’re the person fixing the mistake or the one who made it, following these steps will ensure it never happens again. And your cat will have to find something else to sabotage.

What Is Attribution Modeling and Why It’s So Important
As a marketer, you know how many avenues there are for your prospects and customers to interact with you throughout the buyer’s journey. These avenues refer to channels (e.g. PPC, your website, email campaigns, social media) and touchpoints (e.g. specific ads, blog posts, social media posts, emails). Marketing attribution modeling can help you determine the impact of all of those marketing efforts.

Attribution Modeling
In this blog post, we’ll talk about what attribution modeling is, why it’s important, the different types of attribution modeling, and some tools to help with the process. Let’s get started.
What’s the purpose of attribution modeling?
By assigning credit to your marketing channels and touchpoints, you can increase your chances of converting more prospects by 1) identifying areas of the buyer’s journey that you can improve, 2) determining the ROI for each channel or touchpoint, 3) surfacing the most effective ways to spend your marketing budget, and 4) tailoring your marketing campaigns and content to your unique personas.
Types of Attribution Modeling
There are a handful of common types of attribution modeling. Although all attribution models look at the channels and touchpoints involved in a customer’s decision to convert, each of them weighs those channels and touchpoints differently.
1. Multi-Touch Attribution Modeling
Multi-touch attribution modeling is powerful because it takes into account every channel and touchpoint that a customer interacted with throughout the buyer’s journey, up until they decided to convert. It tells you which of those channels and touchpoints were most influential as well as provides insight into how they worked together to influence a customer.
2. Cross-Channel Attribution Modeling
Cross-channel attribution modeling is often used interchangeably with multi-touch attribution. However, their definitions differ slightly. Cross-channel attribution designates value to each marketing channel (such as paid, organic, or social media) but doesn’t look at the specific touchpoints within those channels the way that multi-touch attribution does.
3. Linear Attribution Modeling
Linear attribution modeling is a type of multi-touch attribution that gives equal credit to all channels and touchpoints that a customer interacted with throughout the buyer’s journey.
4. First-Touch Attribution Modeling
First touch attribution modeling gives all the credit for the conversion to the first channel or touchpoint that was interacted with by the customer.
5. Last-Touch Attribution Modeling
Last-touch attribution modeling is the opposite of first-touch attribution modeling — it gives all the credit to the last touchpoint a lead interacted with before converting.
6. Time-Decay Attribution Modeling
Time-decay attribution modeling gives credit to all of the touchpoints that contributed to a conversion and also considers the time that each touchpoint occurred — the touchpoints that happened closest to the time of conversion are weighted most heavily.
7. U-Shaped Attribution Modeling
U-shaped modeling, also known as position-based attribution modeling, splits the credit for a conversion between the first and last touchpoints.
8. W-Shaped Attribution Modeling
W-shaped attribution modeling gives the most credit to the first touchpoint, last touchpoint, and mid-funnel touchpoint before a conversion — it then gives equal credit to the rest of the touchpoints.
Attribution Modeling Tools
There are a number of tools that have the ability to help with marketing attribution modeling — here are three options to help you get started.
1. CallRail

CallRail is a call tracking and marketing analytics platform. The tool has a number of reports so you can analyze your call data in different ways — one of these is attribution modeling, a report that lives within their cost-per-lead reporting category.
Why do you need attribution modeling for your calls? It offers an understanding of every marketing touchpoint that led to a phone conversation with a prospect. It tells you which sources are leading to the greatest number of phone calls, and therefore leads who are most likely to convert into paying customers.
Integrate your all-in-one HubSpot CRM platform with CallRail.
2. Wicked Reports
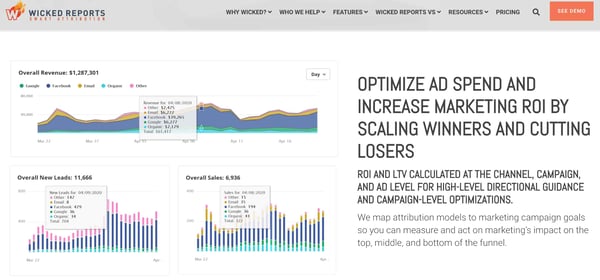
Wicked Reports is multi-channel attribution software for ecommerce marketers. The tool calculates ROI and LTV for every channel, campaign, and ad so you can understand the impact of each marketing touchpoint. Wicked Reports maps your attribution models to your unique campaign goals — this way, you can determine the impact of your campaigns throughout the buyer’s journey.
The tool provides in-depth and accurate data across all of your business platforms — including Google, CRMs like HubSpot, marketing software, ecommerce platforms, and Facebook — so you can combine and access your attribution data with ease.
Integrate your all-in-one HubSpot CRM platform with Wicked Reports.
3. Attribution
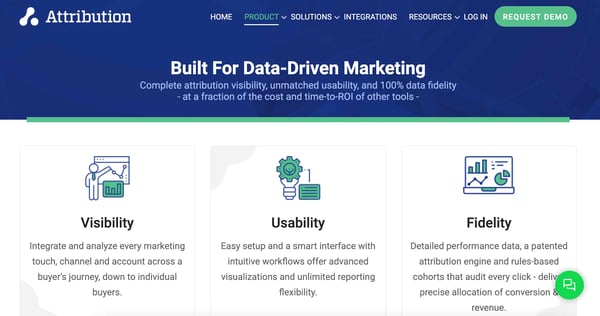
Attribution is an enterprise multi-touch attribution tool that gives you a clear understanding of the impact of each of your marketing touchpoints. It automates data collection using its many integrations with ad software, CRM platforms, marketing tools, and more. It also accounts for your offline marketing touchpoints as well as your budget.
The process of attribution modeling is also automated for you and you can segment your attribution results and reports by channel, marketing campaign, touchpoint, and more.
Integrate your all-in-one HubSpot CRM platform with Attribution.
Grow Better With Attribution Modeling
Attribution modeling allows you to hone in on the buyer’s journey and understand which parts of it are working best for your customers and what needs improvement. It also offers insight into how your marketing channels and touchpoints are working together to convert your target audience.
Determine which models will provide the information you care most about, identify the right tool for you, and get started with attribution modeling.

The Complete Guide to Lifecycle Marketing
Savvy marketers know it’s rare to reel in customers at the first encounter with a brand. Winning people over takes time, thoughtful touchpoints, and a whole lot of trust. Fortunately, there’s a strategy that includes all of these and more. It’s called lifecycle marketing, and it’s how companies attract and retain customers beyond that impulse purchase.
All businesses create their own unique lifecycle marketing strategy, but the purpose is the same: to engage customers, increase revenue, and grow a brand.
Different from the buyer’s journey or conversion funnel, lifecycle marketing considers a customer long after they make a purchase. The focus is to bring in buyers and turn them into loyal brand advocates.
But what does that look like for your company? In this guide, we’ll cover:
- What makes lifecycle marketing so effective
- Marketing strategies to attract customers and keep them coming back
- Considerations for engaging campaigns
- How to use email for every lifecycle stage
Let’s jump in.
A lifecycle can be short or long. Companies like Nespresso or Whole Foods Market have shorter cycles and need to attract people back almost immediately after they purchase.
But companies with lifecycles like Mercedes or Avocado Mattress play the long game of customer retention and advocacy to bring in more business. The ultimate goal is to always get customers and keep them coming back.
No matter the cycle length, there are various stages that make up any lifecycle marketing plan. Understanding these will help you target your audience’s specific needs at each stage, whether they’re coming in as a lead, first-time buyer, repeat customer, or lapsed customer. Take a look at the main lifecycle stages below.
1. Awareness
This is when potential customers first learn about your company. As the top of your conversion funnel, it’s your chance to capture people’s attention and reel them further into your funnel.
2. Engagement
People begin interacting with your brand in the engagement cycle. They’re interested and want to learn about your offerings, whether by subscribing to your email list, following you on social media, or scrolling your website.
3. Evaluation
The evaluation stage is all about decisions. This is the time to make it easy for people to choose your brand by providing them with the right information to compare features, pricing, and value.
4. Purchase
Congratulations! Anyone who makes it through this stage is a customer. Your job here isn’t to promote your brand but to make a purchase as seamless as possible, so it’s simple for people to click “Buy.”
5. Support
It’s important to make sure you meet customers’ needs post-purchase, since people tend to drop off after the first buy. That’s why the support stage is about following up to make sure people are satisfied and maximize the value of their purchase.
6. Loyalty
Customers reach this stage when they’re so happy, they let everyone know about your brand. You want to nurture that advocacy to retain their business and help bring in new buyers.
While the lifecycle stages seem like a linear buyer journey, it’s important to remember that this is a cycle that should continue repeating itself. You can’t simply forget about a customer once they’ve made a purchase. If you put effort into developing a thoughtful plan, it can be much easier to meet and exceed your marketing, sales, and company goals.
Lifecycle Marketing Strategy
Strategy is the core of successful lifecycle marketing. Without it, you will likely bring in the wrong leads and will waste your budget on people who won’t turn into brand advocates. With it, you can:
- Grow your customer base by offering a better buying experience.
- Improve sales by turning one-time buyers into repeat customers.
- Turn buyers into brand advocates who rave about your company.
- Improve your marketing ROI and lifetime customer value.
The best strategies account for how people interact with your brand at specific stages within the lifecycle. Here’s an example of how to use different marketing channels throughout the entire cycle.
Your company may do well with a simple strategy, or you may need to include more touchpoints and channels within each stage. For instance, a small art gallery may use social media, email, a website, and events to bring in artists and potential buyers.
But a major art museum like The Metropolitan Museum of Art will need a more complex marketing strategy to reach its thousands of visitors, attract donors, sell and retain memberships, draw in artists and exhibits, sell retail products, and host events.
No matter the size, all lifecycle marketing strategies are fueled by content. And with 70% of marketers actively investing in content marketing, you can miss out on potential buyers (and profit) if you don’t create relevant content for every stage.
Instead of blindly marketing to the masses, you must be strategic and tie your sales directly to your promotion efforts. Let’s walk through the strategies you can use at each stage.
1. Awareness
You want to attract as many people within your target audience as possible, so it’s time to create highly shareable, highly visible content. Awareness strategies include:
- Create targeted audiences for each buyer persona, so you know the people you bring in fit your buyer profile.
- Research and use keywords that can help people discover your brand when searching online.
- Write blog posts that answer key questions your audience may have about common problems.
- Share your offerings in an eye-catching paid or organic social ad.
- Put up a billboard or banner ad in the places your audience visits.
- Create a catchy ad on the podcasts you know potential buyers listen to.
- Collaborate with guests or influencers your audience follows to cross-promote content.
It’s important to bring people in, but remember not to focus all of your efforts on acquiring leads. Although 67% of companies use lead generation as the sole metric to determine content success, returning customers spend 67% more than new buyers on average.
2. Engagement
Your strategy for the engagement stage is to share information about your offerings so people can see why your brand is the best. Bring people to your website or channels, and keep them there.
These prospects are still relatively high in the sales funnel, so you have to answer their questions with succinct content that’s easy to understand. Some engagement strategies include:
- Design engaging landing pages that are simple to navigate.
- Video demos to showcase the features of your product or service.
- Blog posts, guides, or templates that provide solutions to common customer problems.
- Whitepapers covering insightful research or industry trends.
- Case studies that highlight the positives of doing business with your brand.
- Email campaigns to address sticking points before they happen.
Engaging with customers is increasingly about personalization and instant gratification. In fact, 83% of customers who contact a company expect immediate engagement.
That means you need to have your channels dialed in and ready to respond, likely with help from automation technology. If you do, prospects will funnel into the next lifestyle stage.
Save time with HubSpot’s Marketing Automation Software
3. Conversion
You’ve impressed a potential buyer, and the time has come to transition them from a prospect into a customer. To do that, make it as simple as possible for them to convert (aka, buy). Think about what people would need to see when comparing your brand to a competitor. Here are strategies for making sure they’re confident in their decision.
- Offer clear pricing and feature information on your site, so they can compare options.
- Share customer testimonials to build trust in the post-purchase experience.
- Create a demo or free trial to increase confidence in the full investment.
- Send an email that answers questions senior leaders may have to make pitching easier.
- Give a peek at your customer service experience for post-purchase support.
Just like the engagement stage, personalization is the key to conversion. Research shows that online retailers improve conversion rates by about 8% when personalizing the customer experience. So try to make a potential customer feel unique, instead of being another number that gets you closer to your revenue goals.
4. Retention
Unfortunately, not enough marketing dollars are spent on retaining customers. Lead generation may seem sexier, but 93% of customers are likely to make repeat purchases with companies who offer excellent customer service. If you can create a good experience and offer exceptional service right after people make a purchase, you can engage buyers and increase profits.
- Set up easy-to-use support options like live chat, messaging, FAQ pages, or troubleshooting forums. For simple service issues, 65% of customers prefer to help themselves.
- Onboarding materials that make set up and use simple and stress-free.
- Offer a discount code or perk for a future purchase.
- Announce a new product or offering with an engaging campaign — you can even offer exclusive first access to existing customers.
- Targeted ads with additional offerings that complement a first purchase (i.e., a sleeping bag and mat for someone who buys a tent).
- Emails to inform customers of updates or ways to improve their current purchase.
Don’t leave your customers to fend for themselves in this stage. Honing your retention marketing strategies means boosting your revenue and improving your overall customer experience.
5. Loyalty
The final stage in lifecycle marketing is all about loyalty. When customers become advocates, they can’t stop talking about your brand to anyone who will listen. They recognize your logo and will choose it over others without a second thought. They drive leads and sales and are repeat buyers. Strategies to cultivate this type of loyalty include:
- Exclusive in-app features or loyalty club membership.
- Incentives for sharing testimonials (i.e., discount codes or free products).
- Events or webinars with team members or industry experts.
- Referral programs for people who bring in new customers.
- Social media features to raise brand awareness for both companies.
- Reactivation campaigns for lapsed customers.
Customers who trust a brand are 95% more likely to remain loyal to it, so your job is to maintain peoples’ expectations and show them why their feedback is valued. A strong strategy here encourages customers to repeat the cycle and bring new prospects into the awareness stage.
Lifecycle Marketing Campaigns
Designing campaigns for each lifecycle stage may seem overwhelming. But a campaign doesn’t have to be complex to be effective.
Start by defining the purpose of your campaign. You can aim to attract new customers, retain current customers, build loyalty, engage lapsed customers, or increase customer lifetime value.
With a clear goal, you’ll have an easier time focusing on one particular stage or looking across the entire cycle to see how you can improve efforts at each stage.
Check out how REI, an outdoor retail company, uses lifecycle marketing to engage people at different stages on a variety of channels.
1. Awareness Campaign
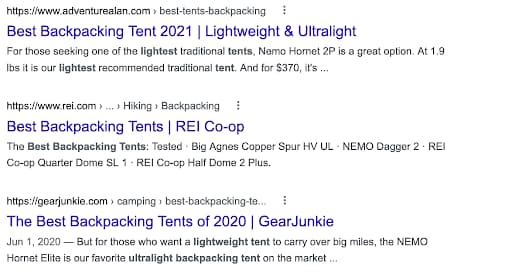
When I searched “best lightweight camping tents” on Google, REI popped up on the first page of results. The blog post is part of their “Expert Advice” column, which invites people to learn more about their product features, testing processes, and ratings. Of course, you can purchase each featured tent from REI in a few clicks.
2. Engagement Campaign
Say I’ve read a few blog posts from REI and am interested in the gear they sell. A website pop-up invites me to sign up for their email list, which I can’t resist. The subject line of one email I receive is “We see backpacking trips in your future.”
They know what I’m interested in and offer an email full of tips for planning a trip, including a gear list I’ll need before I go. Down the funnel I go.

3. Conversion Campaign
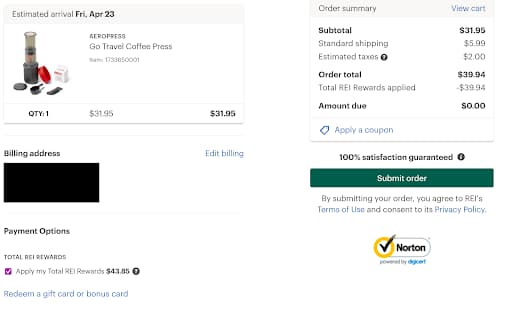
I scour the gear list to see what I need for my trip and discover I don’t have a way to make my essential morning coffee. So I read a review post and decide to buy a lightweight AeroPress. A single click takes me to the product page, and I add the coffeemaker to my cart.
After signing in to my account, I’m taken to a checkout page that has my member ID, billing, and shipping information saved. It takes seconds to review and hit “Submit order.”
4. Retention Campaign
My caffeine kick is taken care of, and I receive a confirmation email receipt for my purchase. It summarizes the order, outlines the return policy, and shares information about how I can donate used gear I may have laying around.
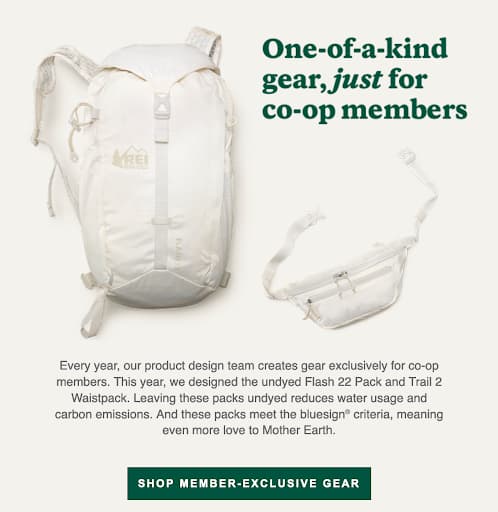
I’m a happy customer. A few days later, I get an email about the new gear line REI designed just for co-op members. It’s one-of-a-kind and available in limited quantities. As a backpack hoarder, I’m tempted.
5. Loyalty Campaign
As an REI Co-op member for seven years, I’m on the path to being a lifelong customer. It’s one of my first stops when I’m looking to buy anything for my outdoor adventures. And I’ve even encouraged some friends to become members.
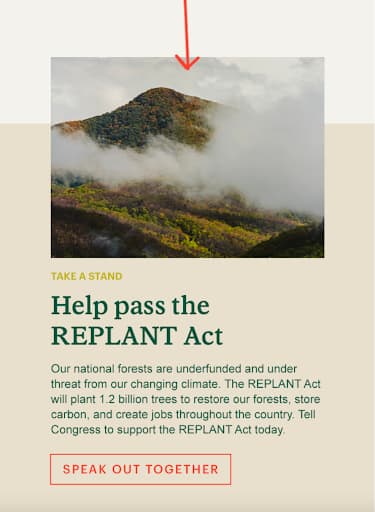
REI knows what matters to me and encourages me to participate in campaigns to protect wild areas, so they invite me to support the REPLANT Act in an email campaign.
By tapping into my values, I’m connected to the brand. And emotionally-connected customers spend about $699 per year with a company compared to regular customers who spend about $275.
Lifecycle Email Marketing
The examples above highlight a handful of ways to use lifecycle email marketing to engage customers. But sloppily sending emails isn’t enough. They need to come at just the right time, so they don’t get buried in someone’s inbox. And they must be enticing enough to open. The average email clickthrough rate (CTR) is 18%, which means a lot of messages go unopened and ignored.
The CTR varies by industry, so take a look at this breakdown to get an idea of your benchmark.
.jpg?width=512&name=lifecycle-email-marketing-industry-averages%20(1).jpg)
Don’t be disappointed if your rates are low at first. There are ways to spice up your campaigns and get people interested enough to click. You can:
- A/B test your subject lines for length, messaging, and context.
- Optimize the preheader text so people get a good preview.
- Test the cadence, day, and time of day (i.e., Monday evening versus Tuesday morning).
- Try personalizing the email with the recipient’s name.
- Send emails from a person at your company instead of the company name.
- Segment your email campaigns based on your audience segments (i.e., newsletter emails vs product emails).
- Consider your brand voice and tone for cohesive messaging.
- Make sure you have a clear CTA.
- Add eye-catching design, along with hero images, videos, or graphics.
Before you test emails, you need to design a campaign that anticipates the various touchpoints your customers require to move from the awareness stage to the loyalty stage. Let’s take a look at how companies use email for lifecycle marketing campaigns.
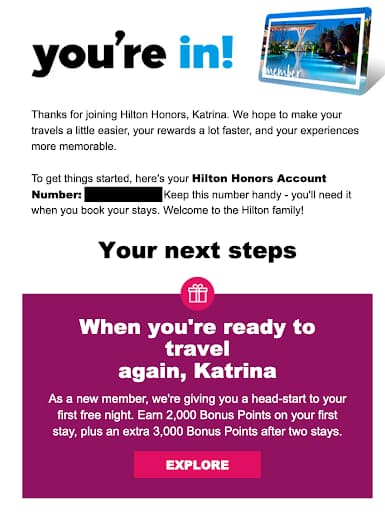
1. Hilton Honors
Welcome emails are expected when you sign up for a company’s email list or loyalty program. I’m actually nervous my request didn’t go through if I don’t receive a Welcome email.
Here, Hilton sends a straightforward email for joining Hilton Honors and shares tips for making the most of membership. It’s easy to scan and offers informative content to learn more about the company or the program.
Lifecycle Stage: Awareness
2. Outside Magazine
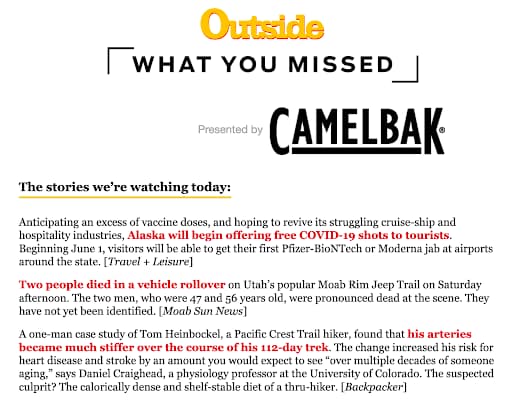
After signing up for Outside Magazine’s daily newsletter, I can look through the email to read recent stories that pique my interest. The publication shares articles and gear promotions through embedded links, making it simple to click on their site and read the full piece.
Informational emails help bring people to your site, where they’ll likely keep scrolling long past the initial article.
Lifecycle Stage: Engagement
3. Backcountry
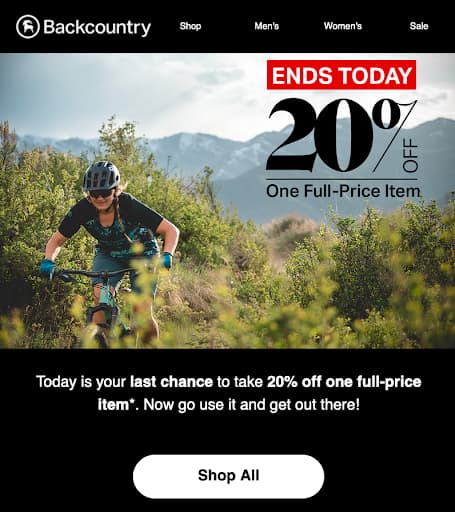
Let’s keep going on this outdoor theme with a promotional email from Backcountry. Touting the subject line “Final Hours: 20% Off One Full-Price Item,” it’s meant to grab people’s attention and get them to make an immediate purchase.
You can use this type of email for engaged customers who have already had multiple touch points with your brand. Maybe they’ve subscribed to your newsletter or have items sitting in their cart.
Lifecycle Stage: Convert
4. Sierra Club
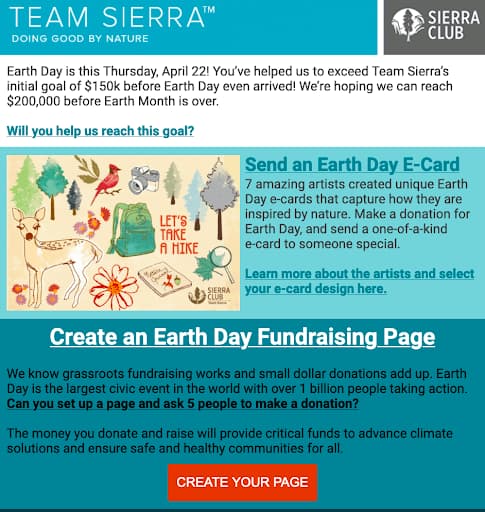
To remind donors about Earth Day and the various ways to give back, the Sierra Club sent this re-engagement email. It shares ideas to celebrate the holiday, explains how to raise money for the grassroots organization, and invites donors to free webinars from climate activists.
The on-brand combination of education and activism is a good way to remind supporters of their shared values and encourage donations.
Lifecycle Stage: Retention
5. Thirdlove
We touched on personalization more than once in this post, but there are so many perks of custom emails. Take this example from Thirdlove.
Their marketing team not only sends emails from a variety of accounts, like individual team member names, but they also personalize emails by sending a collection based on buying habits. It’s intriguing to see your name this way, and clicking makes you feel special — even if hundreds of other people receive the same product options.
Lifecycle Stage: Loyalty

Incorporate Lifecycle Marketing Into Your Strategy
You know the benefits, stages, and ways to incorporate lifecycle marketing into your company’s strategy. All that’s left is to start mapping the cycle for your customer segments and managing the people you bring in.
Once you’ve done the hard work, you can save time with marketing automation software that simplifies tasks like setting up email campaigns, tracking analytics, planning your SEO strategy, and more.
If you want to learn more about managing customers once they’re in the cycle, you can brush up on customer lifecycle management or see how to work with lifecycles in HubSpot.

Lead Source: What Is It and Why It’s Valuable To Your Team
The more you know about your buyer personas, leads, and customers, the easier it is to effectively target them. This entails identifying the channels and platforms in which they spend their time and understanding their needs and challenges.
It also means knowing how your leads find your business — how and by which method they come across your company. This is known as a lead source.
Lead Source
In this blog post, we’ll review the definition of a lead source, why lead sources are so important, common types, and best practices for managing and tracking them.
Why do lead sources matter?
By understanding and identifying lead sources, you’re able to gain context around why and how your audience members find you. As a result, you can improve the customer experience and buyer’s journey with targeted content, communications, interactions, and more.
This allows you to determine which lead sources are most valuable to your business so you can hone in on them as well as measure your success over time in attracting and converting leads.
Additionally, knowing which lead sources bring in the most qualified leads helps you focus your resources where they matter most and where you’ll get the greatest ROI.
Identifying and understanding your lead sources is also a major part of lead management, the process in which you manage — or nurture — your leads until they decide to convert.
These are all details you need to improve the buyer’s journey, effectively target your unique audience, and shorten the sales cycle.
Types of Lead Sources
There are several types of lead sources. Here are some common examples.
- Email marketing (email campaigns)
- Organic search (lead sources from the search engine results page/ SERP)
- Paid ads (PPC, display ads)
- Social media
- Direct mail
- Referrals or word-of-mouth
- Gated/ premium content offers
- Blog articles
- Events (in-person or virtual)
- Backlinks (link from a page on one website to another — if another website links to your website, you have a backlink from them)
- Traditional advertising (billboards, TV, radio)
Next, let’s talk about a handful of best practices when it comes to your lead sources. You should keep these in mind while identifying, analyzing, and improving your lead sources.
1. Identify and track your lead sources.
If you’re looking to identify, track, and measure your lead sources, you’ll likely use a lead tracking tool. These tools are often part of your CRM, marketing software, or sales software.
Lead Source Tools
Here are some examples of powerful tools that can help you with lead source tracking.
1. HubSpot
HubSpot is an all-in-one CRM platform for scaling businesses with powerful marketing, sales, service, and ops software and tools. There’s more than one way to use HubSpot to collect, track, manage, and measure leads and lead sources.
For instance, with HubSpot CRM Lead Management and Tracking Software, all contact records for your leads are logged automatically. That includes all of your interactions and communications with those leads as well as all related sales activity — this provides insight into how, where, and when interactions with leads happened.
With HubSpot’s Marketing Hub, your Lead Collection and Tracking Software focuses more on leads and lead management within the marketing org so leads and lead data are readily available for the sales team.
This tool makes it easy to keep an eye on your lead’s email opens, content downloads, page visits, social media interactions, and more so you can track lead source data with ease. It also helps you organize all of your lead and contact information and interactions in a single database. You can segment your leads and score them based on qualification.
2. MoData
MoData is a sales analytics and revenue acceleration tool with pipeline reporting features that come with lead source tracking capabilities.
Pair this tool with your HubSpot CRM (using the integration) to compare your lead sources as well as your sales reps so your data and team members are aligned and on a central source of truth. View, send, and share out-of-the-box reports, as well as customize pipeline dashboards with ease.
3. CallRail
CallRail is a call tracking and marketing analytics platform that offers reporting for lead attribution by source. This feature uses multi-touch attribution to provide you with reports for every lead source and interaction type that your team cares about in CallRail, throughout every stage of the buyer’s journey.
View all of the lead sources you’re tracking in the tool — your top five lead sources are displayed in a graph with more details about your other sources below. You can view raw leads versus qualified leads as well as filter by company, time frame, and report model.
2. Determine which sources bring in the most qualified leads.
After identifying your lead sources, determine which of those sources bring in the most qualified leads for your business.
Again, a tool like HubSpot can help with this — it assists with tracking your leads and the sources by which they come from and then segmenting those leads based on an assigned lead score (which tells you how qualified they are).
In fact, HubSpot automatically scores your leads for you based on the criteria that you choose (based on behavior or characteristic). This is not only helpful for your marketing team but it also helps sales reps prioritize their lead follow-up.
3. Then determine which of those sources are converting the most leads into customers.
Once you’ve determined which sources bring in the most qualified leads, identify the source that converts the greatest number of leads into customers.
In other words, which lead source do you see the most customers coming from? Maybe it’s the source that you see the most qualified leads coming from, but maybe not. So, take some time to determine which lead sources you see the greatest number of new customers coming from.
4. Experiment with different channels to bring in more qualified leads.
Just because you know which channels and sources are currently bringing in the greatest number of qualified leads, and where the most conversions are currently coming from, doesn’t mean you can sit back and relax. As your business grows, your audience grows, too — and that evolving audience may not spend time exactly where your initial audience did.
Experiment with different channels to see how many qualified leads and conversions you can bring in. This experimentation may be how you surface your most valuable lead source.
5. Measure and analyze the success of your lead sources.
Measure the success of your lead sources over time. This is something you’re already going to be doing throughout the previous steps (e.g. scoring leads, identifying the most effective lead sources, etc.) but it’s also important to spend time here. In doing so, you’ll be able to ensure you’re focusing your resources in the right places.
The data obtained from your lead source analysis will also help you more effectively target, reach, resonate with, and convert your audience on the channels they like to use and via the touchpoints they like to interact with most. Remember, this part of the lead source management process should be ongoing.
Tap Into Your Lead Sources to Improve the Buyer’s Journey
Begin identifying your lead sources to improve upon the buyer’s journey with highly-tailored content, interactions, and communications, all via the channels and sources your audience prefers. Remember, the more you know about your audience, leads, and customers, the more effectively you can target and reach them.

How to Conduct a Market Opportunity Analysis
I have most of my best ideas at 3:00 AM or in the shower. But turning those shower ideas into a business opportunity requires further investigation. That’s where market opportunity analysis comes in.
While you and your team may have many new business ideas you want to explore, you don’t have time to head down every path. Some of those paths may even end up being dead-ends.
How do you choose which ideas to pursue, and which ones to let go of? Market opportunity analysis can help you narrow down your options to the ones with the greatest potential.
![→ Download Now: Market Research Templates [Free Kit]](https://no-cache.hubspot.com/cta/default/53/6ba52ce7-bb69-4b63-965b-4ea21ba905da.png)
Who should conduct a market opportunity analysis?
That answer is, “everyone.” All sizes of organizations will benefit from better understanding the industry in which they’re operating or approaching. Whether you work in B2B, B2C, government, or non-profit organizations, defining and analyzing the market will help you make better decisions.
This kind of analysis can help you grow your existing business, pivot into new markets and opportunities, or expand into the periphery of your current market.
There are many reasons to take the time and examine the full range of options before forging ahead. Here are five important benefits you’ll get from market analysis.
1. Make better long-term strategic decisions.
Your business is impacted by many external factors. Without taking the time to examine the current market trends, you’ll be flying blind.
A market opportunity analysis can provide the insight you need to see into the future. What will the market look like in a year? Five years? 10 years? What forces are acting on the market today? How is the demographic of your target audience shifting?
2. Evaluate product or service demand.
You may have invented the next Google Glass: a great product with tough, niche demand. A market assessment will show the potential for selling your product or service. This analysis will help you evaluate if expanding into a potential new market is worthwhile for your company.
You may find that there is no existing market for your idea, leading to a “Blue Ocean Strategy.” “Blue oceans,” explain authors W. Chan Kim and Renee Mauborgne, “denote all the industries not in existence today — the unknown market space, untainted by competition. In blue oceans, demand is created rather than fought over. There is ample opportunity for growth that is both profitable and rapid.”
While that might be the case, you might also fail to create the market, or need to spend time and energy educating customers on the value of your new idea.
3. Identify potential marketing strategies.
The four P’s of your marketing mix are price, place, product, and promotion. Through the process of a market opportunity analysis, organizations can gain a deeper understanding of who their target customers are, what they want, and how they make their decisions.
After assessing the current market, you’ll be able to price your product effectively and know which promotion strategies will work best. Are there partnerships you should pursue? Will direct sales or inbound marketing work best?
4. Uncover areas for further research.
When you start to better understand the market, you may identify even more new opportunities to explore. As the saying goes, “You don’t know what you don’t know.” You may discover a new government initiative that encourages sustainable businesses.
A customer research project may identify a new pain point that you didn’t realize existed. The benefit of knowing your marketplace really deeply is that you’ll be ready to leverage any new opportunities that pop up.
5. Identify and navigate potential roadblocks.
A SWOT analysis looks at the strengths, weaknesses, opportunities, and threats of a potential strategy. Identifying the weaknesses and the threats to your market opportunity is key to your success. No business idea is perfect. But knowing where you might run into trouble before you even begin can help you plan ahead and mitigate those risks.
Examples of Market Opportunity Analysis
Before we get into the step-by-step instructions of how to do your own analysis, let’s look at the results of two very different case studies. The purpose of both of these research projects was to identify new opportunities, however, they were done in two different industries: elderly care options and the automotive industry.
1. Say Yeah! ElderCare Case Study
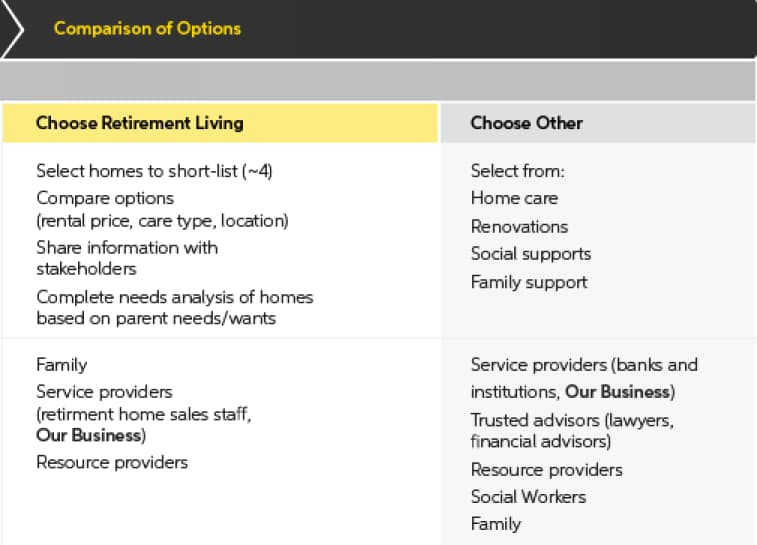
Consulting agency Say Yeah! conducted a market opportunity analysis for a company looking to expand its business model into the elderly care industry. They started by mapping the customer journey for an adult child caring for their elderly parent, along with all the decision points they encounter.
By examining market forces — such as government subsidies, the changing demographics, and all the options older adults have — Say Yeah! was able to uncover several different options by which ElderCare could increase their profits.
Notably, they recommended ElderCare expand its referral business to include retirement homes, in-home care, and other social services.
“Their initial business premise is validated: by shifting the industry to a subscription-based model, led by an online marketplace, this business could carve out a significant piece of profit in the elder care industry by providing far more value to retirement homes at less cost.”
2. Ipsos Business Consulting Automotive Case Study
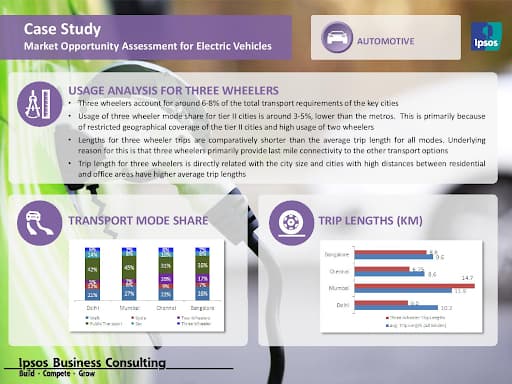
A global automotive conglomerate was interested in the growing electronic vehicle (EV) market, specifically three-wheelers in India. Ipsos conducted a study of the EV market through customer interviews, business model analysis, and government research. At the end of the study, they provided recommendations around charging station locations, leasing vs purchasing options, and other infrastructure requirements.

How To Conduct a Market Opportunity Assessment
1. Identify potential opportunities.
Your first step is to lay out the potential opportunities you want to investigate. What segment are you hoping to expand into? What type of customer are you hoping to attract? Are you looking to acquire or partner with another business? Have current events created a potential opportunity?
Knowing whether you want to expand, pivot, invest, create, or reposition your offerings will inform the next steps of your market research.
Once you’ve identified market opportunities, you’re ready to start researching their potential.
2. Understand the customer.
In every opportunity, the customer will inform your success. Does this product meet their needs? Do they have the purchasing power to make this idea profitable? How do they make their purchasing decisions? The second step in the analysis is to really, deeply understand your potential customers and their needs. This research may include any of the following tools:
- Customer interviews
- Customer journey map
- Surveys
- Demographic data
3. Research competitors.
Next, you’ll want to understand who all the players in the existing market are. Competitor research can help you understand how big the market share is, how existing products are positioned in the market, and how crowded the market is. Here are some questions you might want to ask:
- What is their value proposition?
- How is their product offering different from ours?
- Who are their partners?
- What do their reviews say about their product or service?
- Are there any gaps we could fill?
- How likely are new competitors?
4. Consider external factors.
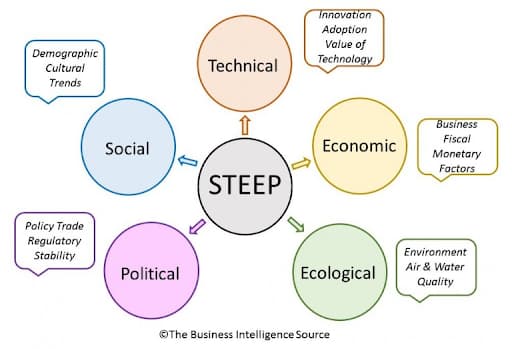
External factors are always shaping and changing the marketplace. The acronym “STEEP” can help us dive into the five main forces we need to be aware of.
Social
How is culture changing the market? For example, more employees working from home during the pandemic has opened up an entire sector of the market that didn’t exist before. Jumping on trends can be a lucrative strategy unless the trends disappear too quickly.
Technical
What new innovations have influenced the market? Can you apply this technology in other ways or in new industries?
Economic
What is the current economic climate like? Will you be able to get a loan if needed? Do your customers have disposable income? How does the market forecast look for the next year? Five years?
Ecological
What impact does this idea have on the environment? Can you improve the sustainability of the product or service?
Political
You may be pleasantly surprised to learn that your local government is offering grants, tax breaks, or other incentives for businesses in your industry. Alternatively, you may find that there are regulatory roadblocks in your way that you’ll need to account for in your analysis.
5. Be aware of internal forces.
Finally, dive into your own business’ capabilities. Do you have the skills, workforce, technology, and financial resources to invest in a new product? If you’re launching a very innovative product, are you going to be able to hire people with the necessary skills? What new departments or teams will you need to create to manage this new opportunity?
Make better decisions with market opportunity analysis.
Not every idea is worth pursuing — but many are. With market opportunity analysis, you’ll learn which business strategies will help you grow, along with their potential risks. Don’t launch your next product or service without doing your homework.

7 YouTube Features That Will Help You Get More Views
Did you know that YouTube is the second-largest global search engine and the biggest video platform of all time?
That’s right. Each day, millions of people around the globe visit the site to learn more about a topic, find YouTube content when Google-searching a question, or stream a YouTube video embedded on another brand’s website.
But, despite the YouTube’s ginormous audience, developing a strategy for the broad platform can be an absolute mystery to marketers.
One of the biggest hurdles brands and new creators often face is learning how to pull in solid views for each video. Despite the millions of people who use it regularly, unlocking solid viewership can feel daunting, impossible, or like a total waste of time.
According to many marketers who manage video successfully, this content is definitely worth your effort in 2020. Recently, our State of Marketing Report revealed that brands were prioritizing video over all other types of marketing content — including blogs.
And, as we’ve seen from a number of companies and influencers who pull in millions of views on YouTube each month, it certainly is possible to gain success on the platform. In fact, YouTube even offers a number of tools to help you create the content your fans are craving.
In this blog post, I’ll highlight seven of the most valuable YouTube features that can help you get more video views. Plus, we’ll dive into what YouTube browse features are — and how to rank on those, as well.
![Sign up for HubSpot Academy's YouTube for Marketers Course [Free Online Course]](https://no-cache.hubspot.com/cta/default/53/8c86a8cf-3857-41c3-b88d-f4d3b084b0cc.png)
Tools That Help Boost YouTube Views
YouTube Studio Features
The YouTube Studio is an all-in-one place where video creators can go to monitor, improve, and optimize there overall channel. Within the Studio, you’ll find a Channel Dashboard, Analytics, Insights, Comment Filters and other tools that can inform your strategy. Before we dive into some of the key YouTube Studio features you’ll want to use, here’s a quick demo of how the overall tool works:
1. Channel Dashboard
YouTube Studio is a dashboard that tracks the performance of your videos and channel. It also will inform you of trends, news, and comments that are buzzing on the YouTube platform. You can use this dashboard to learn which videos performed well, which didn’t, or how your channel is progressing. You can also use it to learn about trends or news topics that can inform your content strategy.
To get to your Studio, simply go to your channel, and click the blue YouTube Studio button.

Once you click this button, you’ll be sent directly to the Channel Dashboard. Here’s a look at what it looks like before you actually post videos:
2. Channel Analytics
The Analytics tab of the YouTube Studio offers data about how your videos and overall channel are performing. While looking at this data can’t directly get you views, you can use it to make informed decisions about which types of videos will gain more views.
For example, if you post a well-made explainer which gets high views and sees high average view times, and then post a product promotion that gets lower views, this might mean that your fans prefer to learn more about your brand through the explainer format rather than an over-promotional one.
The Analytics tab will show you a number of helpful data points including (but not limited to):
- Average view times for each video.
- Channel-specific views and subscribers.
- Drop-off points where many viewers exited the video.
- View numbers for each video.
- Demographic information about your audience and their interests.
Here’s a quick peek at what an Analytics tab on YouTube looks like:
Other Ways to Get More YouTube Views
3. Search Optimization Tools
YouTube might not have inherently created video descriptions, channel About pages, and video or playlist titles for the sake of SEO, but these areas are still incredibly important to optimize for the video search engine, and other sites like Google, Yahoo, and Bing. Aside from optimizing your content by filling in descriptions, you can also customize your video or channel by assigning keywords related to your niche or industry.
By filling out your descriptions concisely and informatively, you increase the chance of internet users finding you when they search for content related to your channel’s.
Aside from optimizing your channel on the platform itself, you can also use a number of handy and affordable tools to research search keywords you want to target with your content, similarly to how you would do SEO research for a blog post.
For a more in-depth guide to optimizing your YouTube channel, check out this great post. You can also watch this video walkthrough from our Senior SEO Strategist Braden Becker:
4. Featured Video or Playlist Autoplay
On your main YouTube channel, you can feature a video or playlist that can welcome new subscribers or intrigue viewers who might subscribe to your channel. At this point, YouTube even allows you to set a different video for new viewers and subscribers. This means you can create informative or introductory content to convince new visitors to subscribe while still featuring more in-depth content for your current followers who already know what your channel is about.
To update your featured content, simply click the Customize Channel button on your profile and you’ll land on a page which allows you to personalize your images and your featured content.
Aside from enabling you to create a more personalized experience for new and returning viewers, featured videos will also pull in views when watched. Once the featured video is selected, you can also set it to autoplay. This might also score you some additional views if a visitor does not pause the video too quickly.
5. Online “Share” Button
Next time you film or edit a YouTube video, consider encouraging viewers to share it on their social channels. They. can easily do this with YouTube’s built-in share function.
6. Cards (Formerly Video Annotations)
For almost a decade, YouTube has allows users to post links to other videos or approved websites within a video. This feature, which was formerly called “Annotations” was improved for mobile experience and renamed as “Cards” in 2017. The Card creator for each video can be found in the YouTube Studio.
Here’s a quick overview of how to set up these prompts:
Aside from pointing your audience back to your channel or other videos, Cards can be used to direct traffic to your site, or even add interactive features such as polls. This type of internal linking can also help with SEO rankings.
7. Links in Video Descriptions
When you’re writing a handful of blogs, odds are, you’ll link them to pages or other blog posts on your site so that way you get multiple views from a handful of visitors. This is no different with YouTube descriptions, which appear under your video.
By adding links to your channel or related videos, as well as a quick description of each title, you add to the viewer’s experience by handpicking content suggestions for them while also optimizing your video and channel for search engines.
This is a common strategy used by Lilly Singh, the host of A Little Late With Lilly, and a popular YouTube creator. Here’s a quick look at the description inserted in one of her most recent videos:

Another surefire opportunity to get more views is through YouTube’s browse features. Let’s dive into those, next.
YouTube Browse Features
When you go to YouTube’s homepage, you’re immediately served various videos related to your watch history, as well as high-performing videos for similar audience types.
If you don’t have a specific video in mind, you can get lost for hours scrolling through the videos shown on the homepage, as well as within your subscriptions, Watch Later, and Trending/Explore options.
Or, put another way — you can spend hours browsing.
These are all known as YouTube’s browse features. YouTube’s browse features include:
- The homepage
- Subscriptions
- Watch Later
- Trending/Explore
- Other browsing features
To attract new audiences with your videos, you’ll want to rank on YouTube’s browse features. Ranking on a browse feature enables you to reach new audiences and increase your channel’s views and subscriptions — which will ultimately expand your reach.
Let’s explore a few of these browse features in greater detail, as well as how to rank on them.
YouTube Home Screen
YouTube’s home screen uses a sophisticated algorithm to ensure each YouTube user is shown videos on her home screen that she’s most likely to watch.
Among other things, the algorithm takes into account:
- Users’ past viewing history, which helps YouTube assess what topics they’re most interested in viewing, which accounts they enjoys most, how long or short they prefers their videos, etc.
- The performance of videos on the home screen — This analyzes whether similar audiences click on the video from the home screen, how long people watch the video, etc. to determine how long the video should stay on the home screen of similar viewers’.
For this reason, the home screen is one of the most powerful opportunities to reach new, potentially high-converting audiences with your content.
To appear on the home screen, you’ll want to ensure you’re optimizing your YouTube videos for YouTube search.
Among other best practices, some YouTube SEO strategies include:
- Inserting your keyword naturally in the video title.
- Tagging your video with popular keywords related to your topic.
- Categorizing your video.
- Uploading a custom thumbnail image for your video’s result link.
- Including cards, transitions, text, and other graphics to keep the viewer engaged throughout your video.
Nelson Chacon, HubSpot’s Principal Content Strategist for YouTube, suggests using related, highly-specific tags (i.e. keywords) that can increase the chances of getting a spot on someone’s feed.
He says, “Basically, YouTube looks at what people have watched, liked, commented on, and saved in the ‘Watch Later’, to recommend videos that are likely a good fit for the user. So, if you watch a lot of Fortnite videos, you’ll probably get multiple recommendations on that topic.”
Chacon says, “Tagging your video with relevant tags is key for the long-term performance of the video.”
You’ll want to choose more long-tail keywords to have a greater chance of ranking for certain topics. For instance, it’s easier to rank for “marketing blogging tips for small businesses” than it is to rank for “marketing”.
Subscription Feed
The subscription feed shows users new videos that have been posted from accounts to which they’ve subscribed. The only way to appear in someone’s subscription feed, then, is to get users to subscribe to your videos.
To do this, ensure you’ve placed a CTA in a few places on your video. First, you’ll want to put a CTA at the beginning and end of the video itself, for easy access as the user is watching, like shown below:
You’ll also want to include a “Subscribe Here” CTA within the video’s description, and within the script of your video, so your on-screen actor can remind viewers to subscribe if they find the content useful.
To retain your subscribers for the long-haul, ensure you’re publishing videos on a regular cadence so viewers know when they can expect new content from your brand.
Additionally, keep track of your YouTube video’s performances to identify which topics perform best with your audience, and iterate over time to create a stronger, more effective strategy that appeals to your subscribers’ preferences.
Watch Later (Suggested Videos)
As you can see in the example above, Watch Later (otherwise known as Suggested Videos) have prime real estate on a video’s page.
These videos are meant to keep users engaged on YouTube, so the content is often similar to the topic they’re currently viewing. For instance, if you’re watching a video about cats, you’ll likely see more animal-related videos on the right side of the screen.
However, you’ll also see a few videos unrelated to the topic at-hand. These videos are curated based on your past viewing history, as well as videos that are popular with similar viewing audiences.
In the example above, my previous viewing history might’ve shown I enjoy inspirational content, which is why a video on “Denzel Washington’s Life Advice …” shows up even when I’m watching a video about blogging tips.
Similar to the homepage, the only way to appear on someone’s Watch Next list is with good YouTube SEO best practices. You’ll want to ensure you’re using highly-targeted keywords to ensure your content is served to viewers who are searching for similar topics.
A video with plenty of views, subscriptions, comments, and likes also has a higher chance of being shown here, so ensuring you’re engaging with your audience and using strategies to grow a YouTube community is critical for appearing on the Watch Later section.
Trending/Explore
YouTube offers an Explore page for browsers to find new videos based off certain topics they’re interested in, including “Music” “Gaming” and “Sports”. You’ll find trending videos across a variety of categories in this section.
This is a difficult, highly-competitive area to rank on, but ranking on a Trending section of YouTube starts with increasing views and engagement to your videos. To do this, consider how you might cross-promote your videos across other channels, including blogs, email newsletters, or other social accounts.
You might also create a YouTube contest and partner with other brands to quickly gain traction and reach new audiences with your content.
Other Browsing Features
There are a few other sections users can use on YouTube to browse for videos. One is called “Browse channels”, which separates trending channels based off different categories such as “Cooking & Health” and “Film & Entertainment”.
Like previously mentioned, to rank on any of YouTube’s browsing features, it’s vital you take the time to appropriately label and tag your videos so YouTube serves the video to users who are searching for similar topics.
But proper SEO isn’t the only strategy for appearing on a browsing feature — engagement is a big one, as well. If your viewers aren’t commenting or liking your videos, and if all your viewers are bouncing from your content quickly, then YouTube won’t let those videos appear in a browsing section.
This is where high-quality content becomes the single most important factor in determining whether your videos rank.
Increasing Your YouTube Views
Although YouTube has a list of helpful features, you’ll still want to create a strategy as well as engaging content to gain a solid following. Building a solid content strategy might include the following steps:
- SEO or Keyword Research: This will help you identify which topics or keywords are highly searchable and could inform a successful video’s angle.
- Content Promotion: Once your video is live, you’ll want to take steps to make sure it gets views outside of just search traffic. In the video, or in a social media post, encourage your viewers to watch and share with their networks.
- Tracking: As you launch your videos, be sure to look at everything from the Analytics tab to the video comments to learn what audiences like and don’t like about your videos. This will help you determine what to keep doing and what content might be worth pausing.
To learn more about how a YouTube strategy can benefit your brand awareness and conversion rates, check out our Ultimate Guide to YouTube Marketing.


How to Turn Off Instagram’s Activity Status Feature
Instagram scrollers beware: your favorite photo-sharing app has a feature that shows friends when you were last online.
Similar to the activity status found on Facebook Messenger and WhatsApp, Instagram’s “Activity Status” setting shows when you were last on the app. It’s now turned off by default in your account, but it’s better to be safe.
Let’s go over how it works — then take a look at how you can turn it off.
![New Data: Instagram Engagement Report [2021 Version]](https://no-cache.hubspot.com/cta/default/53/9294dd33-9827-4b39-8fc2-b7fbece7fdb9.png)
How does the activity status feature work on Instagram?
The activity status feature shows people you’ve direct messaged (DM’d) when you were last online and whether you’re currently active on Instagram.
Your status is only shown to people you follow. So if someone follows you but you don’t follow them back, they won’t be able to view your status. The same is true for your friends. You can see when they were last online if they follow you back.
Your friends’ status is visible when you navigate to your direct messages:
Remember: the feature only shows whether you’re online and when you last accessed the app. Your friends won’t see the posts you’ve liked or commented on.
On the fence about turning it off? Read on to find out whether you should keep activity status on or off.
Should you keep activity status on or off?
There are a few benefits to keeping it on. It allows you to keep tabs on your friends’ online status without feeling like you’re intruding. That way, if you want to send a funny meme at just the right moment, you can expect your friend to see it immediately or soon afterward.
Turning it off, however, offers the great benefit of being able to access Instagram without anyone knowing. That means that you can answer DMs at your leisure, and you don’t feel as if anyone is keeping tabs on when you’re using the app. The one drawback is that once you turn the feature off, you won’t be able to view anyone else’s activity status.
If you want to keep your late-night puppy picture scroll fests completely private, don’t fret. You can turn off Instagram’s activity status feature with the following quick steps.
Here’s the setting you’re looking for:
Once that setting is toggled off, you’re free to resume scrolling undetected. The best part? You can turn it on at any time if you change your mind.
Stay Private by Turning Off Your Activity Status
Staying private on social media is already difficult enough. To ensure that you’re not accidentally showing your activity status to those whom you’ve DM’d, turn it off in your settings. That way, you can enjoy privacy while you use the app.
Editor’s note: This post was originally published in January 2018 and has been updated for comprehensiveness.

How Conversion Funnels Create a Better Customer Journey + How to Optimize Yours
Conversion funnels are a fundamental concept in sales. Personally, I like to visualize the funnel as that big scary slide you wanted to try as a kid. You saw your friends whizzing down, which sparked your interest. You watched how much fun they were having, doing your research. And then the benefits of having fun outweighed your fear, so you climbed up and flew down.
Customers take a similar journey through your company’s conversion funnel when evaluating whether or not to buy from you. You have to pique their interest, build trust, and encourage them to take action.
While the customer journey is more complex than my slide analogy, understanding how conversion funnels work can improve this flow. It can help you optimize your funnel, attract more leads, convert them to customers, and boost your bottom line. But all that requires reducing as much friction as possible. (Think: sliding down with slippery clothes instead of bare skin).
In this post, I’ll explain what conversion funnels are and how they impact your customer journey. Then, you’ll learn how to optimize your funnel to increase the number of people who make it to your conversion point at the bottom.
All leads begin at the top of the funnel. As they learn more about your business, they move down and get closer to purchasing your product or service. This conversion process is called a funnel because companies often have more leads than they do customers, making the top of the funnel a larger pool of people than the bottom.
Understanding how people flow through your conversion funnel is essential to being an effective marketer or salesperson because it helps you engage leads, answer questions about your business, and address concerns. It also lets you organize leads into categories and create customer touchpoints that can entice each group to convert.
That’s why every funnel should be designed for how your customers buy, not how you sell. The focus is on providing such a great experience within the customer journey that you convince them to convert.
Before diving into the details of how to analyze and optimize your funnel, we need to talk about an important aspect of this process: the customer journey.
Customer Journey
The customer journey complements the conversion funnel, but it’s not the same thing. Unlike the generalized, linear conversion funnel, customer journey maps show the individual and circuitous paths people take from the moment they discover your brand to the time they make a purchase.
Let’s say you’re a food blogger who sells cookbooks. Here’s how your customers’ journeys can differ.
- Customer A sees and clicks on your banner ad, visits your blog, reads an article, signs up for your newsletter, gets a discount email, and purchases a cookbook.
- Customer B sees your cookbook in a bookshop, buys it, makes the recipes, visits your blog, and subscribes to your newsletter.
The outcomes for Customer A and B are essentially the same, but the journeys and touchpoints are different. So if you know the different ways people enter your funnel, you can optimize for those entry points. That way, you can meet potential buyers where they are and entice them to convert.
That said, most funnels have similar points that ultimately lead to conversion. So let’s look at an example to get a mental picture of this process.
Conversion Funnel Visualization
The top-middle-bottom funnel is a classic model used by sales teams, which focuses on sparking interest, informing potential customers, convincing them to purchase, and building loyalty so they become repeat buyers.
HubSpot has transitioned to thinking of the customer journey as less of a funnel and more of a flywheel — building more momentum as customers move through. Here’s a comparison of a tradition funnel next to a more updated flywheel approach to conversion:
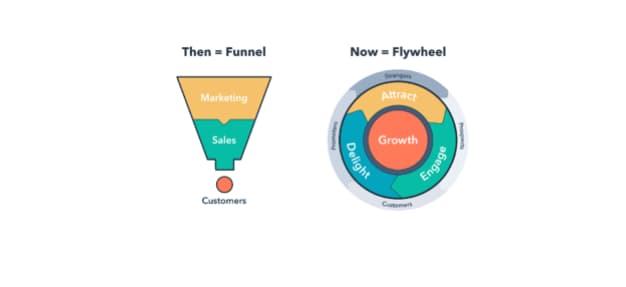
Need a bit more of an explanation? Check out this video introduction to the flywheel below:
But let’s get back to talking about tradition conversion funnels:
- Top of the funnel (TOFU): This is the awareness phase. A potential customer enters the TOFU when they engage with your brand, oftentimes through your website, an ad, an email, or social media.
- Middle of the funnel (MOFU): This is the consideration phase. The potential customer knows about your brand and engages with it in order to learn more. They may sign up for your email newsletter, follow you on social media, or download guides and templates.
- Bottom of the funnel (BOFU): This is the conversion phase. A prospect is here right before they purchase, which means you’ve given them good information and relevant touchpoints. Help them convert by making it easy to purchase, offering a trial, outlining pricing, or sending a discount for their abandoned shopping cart.
While some conversion funnels are simple, others can be incredibly complex. The detail of your funnel depends on your sales process — the longer your sales cycle, the more complex your funnel. If you have a short sales cycle, your funnel tends to be simpler.
Think about how long it takes to sell $2,000 B2B software versus a $20 t-shirt. The software purchase usually requires months of sales calls, marketing materials, FAQs, and demos. Each of those is a specific point in your conversion funnel. But potential buyers may only need five minutes to figure out that the t-shirt is the right color and fit before purchasing. The touchpoints required here are taking it off the rack and trying it on.
To figure out how complex your funnel is, you can look at the data and perform an analysis. This will help you flush out each part of your customer journey to create a unique visual representation of your funnel.
Conversion Funnel Analysis
Funnels are full of barriers and friction. Analyzing your funnel helps you visualize the flow of potential customers across each point.
You can see key traffic sources and high-exit pages to get a feel for how people end up in each stage of the funnel.
It’s also a way to notice barriers that cause people to leave a page before they convert. If you see a high drop-off rate on one page, for example, you’ll know to prioritize that as you work toward optimizing your funnel.
To understand your funnel, follow these steps for in-depth analysis:
1. Look for high-traffic pages with high drop-off and conversion rates.
High-traffic pages hold a plethora of useful information. Not only are these the pages people see the most, but they’re also where people decide to stay or go. Look at the pages where people drop off (aka leave) and where they convert (take your intended action). Some metrics to collect are:
- Cost Per Acquisition (CPA)
- Customer Lifetime Value (CLV)
- Drop-Off Rate
- Conversion Rate
- Number of Marketing Qualified Leads (MQLs)
- MQLs to Customer Conversion Rate
- Conversion Rate Per Channel (i.e., social, email, and paid search)
2. Discover where your best customers come from.
Not all leads are the same. Some people drop off near the top of the funnel while others make it all the way down. That’s why tracking leads is so important. When you know where your high-quality leads come from, you can analyze that touchpoint or channel to see what you’re doing right. Ask yourself:
- How is this touchpoint different from other touchpoints?
- What information is resonating with people?
- What are the barriers or friction (if any)?
- How many steps do people have to go through before converting?
Identifying what you’re doing right in your funnel is just as important as figuring out what you’re doing wrong. If you need help digging into the data, check out these sales funnel tools or look into heatmap and session recording tools for information on how people navigate your pages.
3. Create an optimization plan.
After you figure out where people are dropping off and converting, it’s time to make an optimization plan. This should include the goals you want to focus on (i.e., more leads, newsletter signups, demos, or software purchases).
Goals let you determine what you want from each touchpoint within your funnel so you can measure whether it’s working or not.
After your funnel analysis, you’ll have a list of priority touchpoints that need to be optimized. Make sure to focus on the areas with the biggest drop-off rates first.
Conversion Funnel Optimization
Every part of your conversion funnel can be optimized to increase the number of people who turn into customers. Think of conversation funnel optimization as finding out what motivates, blocks, and persuades people so you can give them the best experience possible on their unique journey.
To optimize effectively, you need to think about how to give each customer what they want at each phase of the funnel. Using the phases outlined above, here’s what to consider at each step along the customer journey.
1. TOFU: Awareness
Issues at the top of your funnel? Take a look at how you attract new leads. Compare every channel that brings in customers (i.e., social media, search engines, your blog, and paid ads) to see which attracts the most people.
If you’re unsure how customers found you, send out a survey to ask. Look for trends in how people find new brands and put more effort in your best channels. Just make sure you’re attracting the people in your target audience.
2. MOFU: Consideration
Potential customers made it to the middle of your funnel, but it’s your job to keep them moving toward the bottom.
If you’re having trouble with this phase, look at how people learn about your business and engage with your site. Is it easy for people to navigate your site? Or sign up for your email list? Do you have relevant, rich content? Do you offer pricing and product information? Is it easy to get questions answered?
Depending on your barriers, consider these ideas for improvement:
- Product videos and photos
- FAQ page
- Whitepapers, case studies, or blog posts
- Filters and search options
- Newsletter capture
- Discounts
- Check pages for loading speed and broken elements
3. BOFU: Conversion
As the final stop for potential buyers, this is the phase to turn them into customers. You should remove as much friction as possible and encourage people to take the final steps to convert.
Some ways to optimize this final part of your funnel is to make sure product or service pages are fully built out with interesting descriptions, videos, and photos. Consider your checkout process to see if people have issues with payments or abandoned carts. Make it simple for people to compare pricing and clearly outline all product features. You can also send specific BOFU emails or create ads to remind people of their desire to convert.
Think your job is done once a customer converts? Wrong. While you may have pulled a customer through your conversion funnel, there are plenty of opportunities to re-engage them. Not only is customer retention essential for growing your business, but it’s five to 25 times more expensive to acquire a new customer than to retain a current customer.
So, once your customers make it through the funnel, invite them to sign up for a new webinar series, download additional templates, send promotions, join a loyalty club, or follow you on social media.
Find what makes sense for your particular sales cycle and use your existing content and channels to stay in touch. Make sure they value your business and want to come back because you never know who they’ll introduce to the top of that funnel.

The Catchiest Webinar Titles We’ve Seen, Plus How to Make Your Own
Webinar titles are a lot like blog post titles – they have to catch your eye, yet provide enough context to make you click.
Titles can’t be too short or too long. And because webinars are meant to inform or educate viewers, it’s best to let people know what they’ll get from handing over an hour of their time.
With 42% of marketers planning to host or join a webinar this year, there’s no better time to work these online events into your marketing strategy. That’s because webinars are one of the most effective ways to engage with your audience. In 2020, a whopping 91% of webinar marketers said their events were a success.
While webinars may not be as sexy as social media campaigns or the latest members-only app, they’re key to marketing in an increasingly remote world. Some companies have no plans to return to the office. Others have begun to adopt a hybrid model that combines remote and office work.
Webinars are great for both models because updating knowledge and learning can be done remotely without losing productivity.
The downside: competition. Businesses replacing live events with virtual meetings and conferences are saturating the market. The digital hosting platform ON24 reported a 167% increase in webinar activities from April 219 to April 2020.
Coming up with an amazing webinar title is an important step in standing out, attracting leads, and engaging customers. So let’s walk through the steps to create catchy titles.
Your title is the first thing people see, so it needs to grab their attention. It’s your chance to draw in your target audience and turn people from passive viewers into engaged leads. Here’s a breakdown of each to inform your webinar titles.
1. Relevant Keywords
Keywords are terms you enter into search engines like Google to find information (i.e., how to cook pasta).
For webinar titles, aim to incorporate keywords that are relevant to your content and target audience. If you run a food blog and your webinar is about how to make classic Italian dishes, it may make sense to work “cook pasta” or “delicious pasta recipes” into your title.
Start by researching keywords if you’re unsure what terms your audience looks for. Having this list on hand will help inform your content strategy, improve SEO, and make it easier for people to find the webinar.
2. Descriptive Copy
A HubSpot survey found that people sign up for webinars to learn about a hobby or passion, to be entertained, and to understand something about their career or industry. Your attendees want to know what they can get out of your event. Share the goods with a succinct, descriptive title.
Truthfully, there’s no perfect title length. Some claim the best headlines are six to eight words, six to 13 words, or more than 14 words. The point is, research varies. Instead of worrying over one word, make your webinar titles informative, interesting, and ideal for your preferred channel.
- For organic and paid search, make sure your title falls in the 50-60 character range so it shows the entire headline in results.
- For email promotions, consider what subject lines work best for your brand. Somewhere around 50-60 characters are optimal for a good mobile experience.
- For social media, play around with fun, emotional, and engaging titles. CoSchedule recommends the following title character counts for popular platforms.
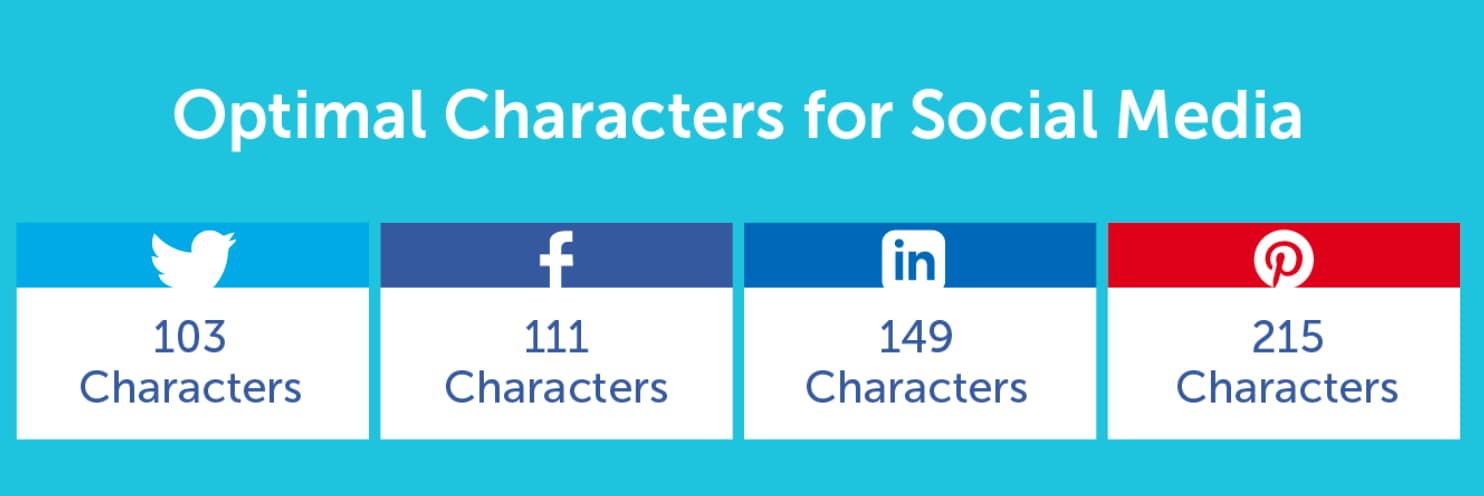
3. A challenge, problem, or goal
Research shows the most engaging webinar format is a presentation that teaches people how to do something specific. The key: specificity.
Look to your company’s value proposition to figure out what topics you should cover. Where do you provide the most value? What are you an expert on? How can you help your sales team convert potential buyers? If you’re great at bringing in prospects for small businesses, you could host a webinar like “Actionable Lead Generation Tips for Startups and Entrepreneurs.”
Once you know what you’re good at, work it into your webinar title. Addressing a specific goal or problem will also make it easier to choose the format, content, and speakers.
4. On-brand messaging
As a writer and brand consultant, I always preach the importance of maintaining cohesive brand messaging throughout every marketing touchpoint.
That’s because research shows a consistent brand presentation can boost revenue by as much as 23%, and nearly 74% of people become loyal to brands through content. If your webinar messaging is off-brand, people can get mixed messages about what your company stands for and your values.
Check out how these webinar titles stay true to the brand’s voice.
- An Educator’s Guide to Teaching over Zoom (Zoom)
- Managing the Trickiest Parts of a Family Business (Harvard Business Review)
- Product Go-To-Market Tips from Google Cloud Product Leader (Product School)
- Newsroom: 100 days of Biden’s presidency (The Guardian)
- Career Path Design | The Future of Work & How to Prepare (General Assembly)
- Everyday Instagram Hacks for any Business (HubSpot)
Now that you know what makes a good webinar title, try creating 3-5 solid working titles on your own. From there, workshop with other people on your team or get feedback from your customers to see which one resonates the most. If you’re still searching for inspiration, check out some of the best titles I could find below.
Catchy Webinar Titles
It’s tough for companies to convince people to pop in their contact information and sit down with their screen for an hour. But these catchy webinar titles capture attention (and likely attendees) at first glance.
- Breaking into Tech at any Age or Career Stage (WorkWell)
- Skill Up with IBM: Get the job you want (Open P-TECH)
- Ensuring a thriving ocean economy for everyone (Stockholm Resilience Centre)
- Making the Product Strategy Effective by Spotify Sr PM (Product School)
- The Art of Public Speaking: Increase Your Confidence and Build Your Skills (Podium Perfect)
- Making Innovation an Everyday Habit in Your Organization (Harvard Business Review)
- How to Turn Your Customers Into Your Best Marketing Channel (General Assembly)
- M&A Bootcamp: The Ultimate Guide to Mergers & Acquisitions for Start-Ups (Nasdaq Entrepreneurial Center)
- 2021 Battle of the Pitch Decks (VIATEC)
- How to Become a 10x PM Without Burning Out (Becca Camp Executive & Career Coaching)
- Six Strategies for Moving the Needle on Gender Equity (Harvard Business Review)
- Hitchcock’s Composer and the Sound of Suspense (Royal Borough of Kensington and Chelsea Libraries)
- The Fundamentals of Power Networking (Small Business Expo)
- Amaryllis to ZZ: Unearthing the Science of Houseplant Care (MIT Museum)
- How to Turn Your Ph.D. into a Netflix Series (The Center for Science and Society)
- Trash Cocktails for Conservation: Virtual Sustainable Mixology Class (Lincoln Park Zoo)
- The Bear Necessities with Nat Geo Explorer Dr. Rae Wynn-Grant (Cary Institute of Ecosystem Studies)
An eye-catching webinar title pulls people in for the next important step: signing up. Once you have a list of attendees, use the contact information they shared to send updates and instructions for joining the webinar.
After the event, nurture people down your conversion funnel by inviting them to learn more about your company, sign up for a future webinar, or join your email list. You’ve reeled them in with a catchy title – just remember to plan a great webinar and get them excited to learn more.


What Editors Want from Guest Contributors in 2021 [New Data]
Few industries escaped 2020 unchanged, and digital media was no different.
At Influence & Co., our proprietary content marketing software and our process of working with hundreds of contributors, editors, and journalists offered us courtside seats to watch the industry evolve — and we compiled our most relevant digital media research for marketers and content creators into our latest “State of Digital Media” report.
Wondering how to make guest posts stand out? Our third digital media survey combines the opinions of experts with our own exhaustive content analysis, and the result is a tool that can be used to hone your content in order to gain more success in 2021.
One of the biggest findings? Guest-contributed content isn’t going anywhere. In fact, 93% of editors see themselves publishing the same number of guest posts or even more this year.
An increase in guest-contributed content is good news for prospective contributors. But just because more guest post slots are becoming available doesn’t mean guest contributors can afford to send lackluster pitches.
Publication editors haven’t lowered their standards and aren’t likely to, so read on to find out what publications want so you can give your pitches the best shot at hitting the mark and achieving acceptance.
(Note: All of the following statistics are taken from our 2021 State of Digital Media report.)

How to Make Guest Posts Stand Out
The publication editors we surveyed receive pitches day in and day out. Although they might sometimes wish for one, there’s no “unsubscribe” button they can hit to pare down this deluge of requests. That constant barrage on publication editors’ inboxes is why it’s critical to make sure your content is worth reading.
For a guest post to break through the noise, it needs to check these four boxes:
1. A pitch that is on-topic and non-promotional.
Editors receive lots of pitches that are little more than subtle ads — or, in some cases, not so subtle — for an author’s product or service.
Other pitches avoid promotion, which is great, but they also fail to fit the scope of the publication. Or the pitch might offer an opinion or perspective that readers could get from a host of other outlets.
Perhaps the best thing you can do to get an editor’s attention is to write a balanced pitch that’s on-topic, non-promotional, and fresh. And be mindful of how many other pitches editors work through each day. The path to an editor’s heart is short, so keep your pitch brief.
“I‘m more likely to read a pitch on a strong topic that is pertinent to our audience and is not blatantly self-serving.“ — Paul Nolan, Editor at Sales & Marketing Management
“I‘m more likely to read a pitch if it‘s clear that the person knows what I cover, reads our publication, and has relevant and high-level executives who are willing to chat on record.“ — Allison Schiff, Senior Editor at AdExchanger
2. Multimedia content.
Given that 20% of editors are looking to publish podcasts in 2021, it could be worth pitching yourself as a potential podcast guest for publications that have podcasts. If you go this route, include any experience you might have that demonstrates your ability to hold up your end of a compelling and insightful conversation.
Another 20% of editors plan to publish infographics, so make sure you have that graphic designer on speed dial. And 33% will make space for videos, so start building a library of video assets that could help fulfill this need.
3. Expert opinions with fresh perspectives.
The articles you submit to publications need to push ahead of trends, and you should be able to speak with authority on cutting-edge insights in your industry. In terms of content, if a trend is already being covered by some media outlets, you’re probably too late to the party.
For your pitch about a much-discussed topic to have even a slim chance of acceptance, you’ll need to offer a unique opinion or insight that readers won’t find anywhere else.
“Guest posts must be ahead of the trends. By the time we get article offers on a hot topic, we have already known about that topic and published articles on it.“ — Jim Davis, Editor at HR Daily Advisor
4. A “Goldilocks” word count.
We analyzed thousands of pieces of content published during the second half of 2020 and found that the most-shared content was an average of 986 words long. This represents an increase from previous years.
It’s always imperative to follow the guidelines of the specific publication you’re targeting, but if there’s any wiggle room in terms of word count, landing in the 900- to 1,000-word range can help you create shareable content — which is a result all editors and contributors want.
Guest posting is an incredible opportunity to gain exposure, boost your credibility, and speak directly to your ideal audience, but editors are understandably protective of their publications when they’re handing the mic to a stranger.
To improve the likelihood that your pitch is accepted, you need to know how the digital media industry is changing, and what publishers want. Hopefully, the four steps identified above will help get you started.


5 Lessons We Learned from These Famous Rebrands
It can be difficult (if not impossible) to create a brand that remains fresh, relevant, and inspiring years — or even decades — post-creation.
Just consider Dunkin’ Donuts: the brand, first established in 1973, recently shifted its focus to coffee — and, to demonstrate the shift, dropped the ‘Donuts’ in the name.
The rebrand makes sense. Dunkin’s consumers’ preferences, tastes, and style have likely changed quite a bit in the roughly 50 years since the first Dunkin’ was introduced. Dunkin’ needed a rebrand to ensure its business could grow with its consumers, or risk falling behind.
A rebrand can successfully re-establish your brand in an industry, help expand your product offerings, or attract new consumers. But it’s not as simple as copying-and-pasting a fresh logo onto your homepage.
A good rebrand demands redefining your company’s vision and values, re-establishing your brand’s audience, and rebuilding your brand identity from the ground up.
Fortunately, if your business is considering a rebrand, you’re in luck. Here, we’ve compiled five successful examples of rebrands to help inspire your own efforts. Use these examples to kickstart your own rebrand in 2021.

Five Successful Examples of Rebrands
1. Petco
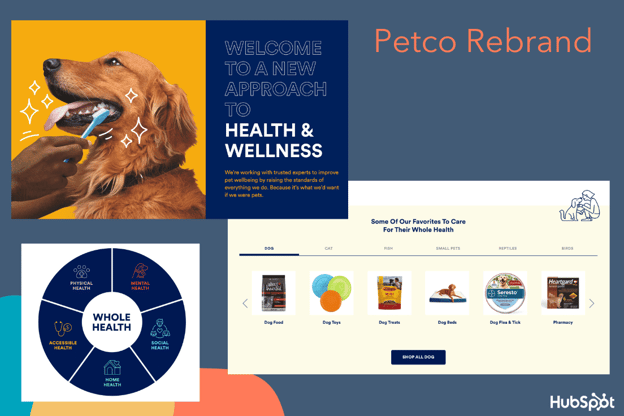
In October 2020, Petco released an announcement declaring it would no longer sell electronic “shock” collars. The announcement was used to highlight the company’s rebranding efforts — the pet store, which is over 50 years old, was officially rebranding itself as a health and wellness company for pets.
The pet store redesigned Petco’s homepage, as well as the Petco app, to focus on their new initiatives — including health and wellness resources for pet parents, a “Right Food Finder” tool to help parents identify the healthiest foods for their pets, and an extended range of pet healthcare and insurance offerings.
The company also redesigned their logo, opting for a simple blue-and-white design over their previously-signature red and blue cat and dog (to mixed reviews).
Nowadays, many American pet owners treat their animals as members of the family — so Petco’s rebranding makes a lot of sense. The company aims to use the new branding to re-establish itself as the leading health and wellness brand for animals.
The new design better reflects the brand’s more holistic approach to animal wellness — including a dedicated landing page that outlines how to take care of your pet’s mental, physical, and social health, with a tagline, “We’re working with trusted experts to improve pet wellbeing by raising the standards of everything we do. Because it’s what we’d want if we were pets.”
Overall, this was an extremely successful rebrand as it focused on a shift in consumers’ lifestyle and preferences, and ensured the company’s refreshed vision reflected those priorities.
2. Adobe Creative Cloud
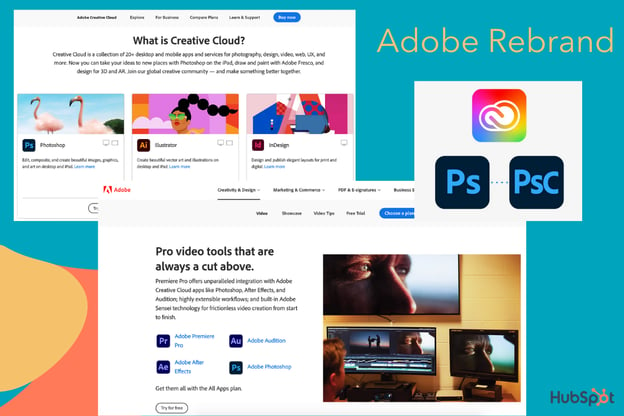
In May 2020, Adobe released a blog post titled, simply, “Evolving Our Brand Identity“. The article dives into the decisions behind Adobe Creative Cloud’s rebranding, and states, “We’re making these branding changes to ensure our portfolio continues to be easy for our customers to navigate and understand, as well as maintain a fresh look and feel.”
Among other things, Adobe Creative Cloud redesigned:
- Its company logo. The company redesigned the logo to an all-red logo with warmer hues.
- Its Creative Cloud logo. The new logo uses a colorful, rainbow-esque gradient to represent “the importance of creativity”. The colors in the logo are pulled together from various Adobe products, as well as the new Adobe red logo.
- Its product logos. The company is adding 3-letter mnemonics to help viewers determine product families — i.e. Adobe Photoshop (Ps) and Adobe Photoshop Camera (PsC). The designers also used colors to organize products into categories.
- The corners of all logos. The corners are now rounded to fit across a variety of devices and operating systems.
These redesigns successfully highlighted and organized the many product offerings of Adobe Creative Cloud. For instance, when you navigate to the “Video” product page on Adobe’s website, you’ll see all apps within the Video category are similar shades of blues and purples.
While some designers have expressed frustration over the new logo color similarities, it makes sense that the brand felt it necessary to organize their products better — with a catalog of over 50 products, it can feel overwhelming to choose the right ones for your needs. The updated logos should help make it easier to pick-and-choose.
3. Starbucks
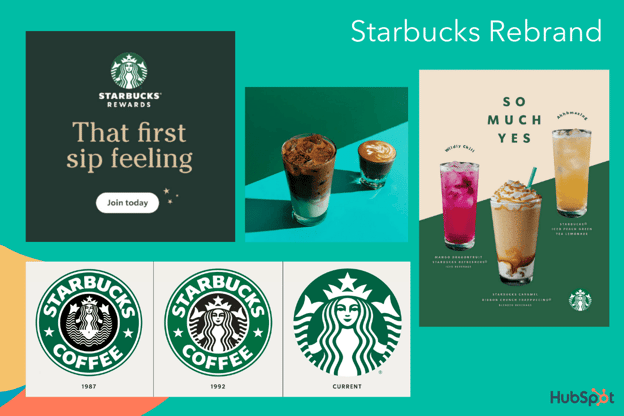
Over the years, Starbucks — one of the most valuable brands in the world — has proven the true power of a good brand. And one of the telltale signs of a good brand is the ability to consistently innovate and push the boundaries, rather than settling for what’s already working.
In 2020, Starbucks released its “Starbucks Creative Expression” brand expression guide. Among other things, the site focuses on Starbucks’ defined voice, typography, and logo in an effort to create consistency across channels and Starbucks locations.
In a few words, Starbucks aims to create a brand that is open, creative, carefree, and modern. On the Voice page, for instance, it reads, “We’re confidently turning down the volume of competing messages to elevate experience, removing obstacles in the way of people finding exactly what they seek at Starbucks.”
“By using both functional and expressive voices, we’ll create more space for brand relevance, connection and joy.”
The guideline adds, “When we have the space, we tell a passionate coffee story. But even with just a few words, our copy can make you smile.”
Similarly, Starbucks recently rebranded its logo to the simple Siren logo without the “Starbucks Coffee” wordmark wrapped around it. The company notes, “The preferred approach is to use the Siren logo by itself, unlocked from the wordmark. This allows flexibility to present the Siren with greater prominence while maintaining a considered, open and modern presentation.”
Ultimately, this most recent Starbucks rebrand is simple and effective. Rather than moving too far in the opposite direction of the brand’s roots, the company sticks to its fundamental company vision while making slight alterations to continue serving the needs and preferences of its consumers.
4. GoDaddy
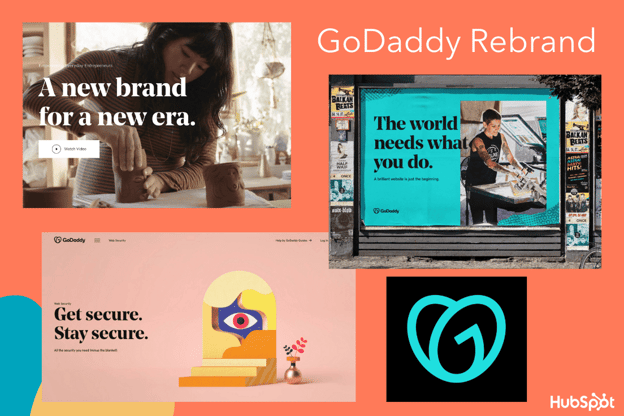
A web hosting service founded back in 1997, GoDaddy was in need of an upgrade. In early 2020, they did just that, creating a brand-new logo, refreshing their website design, and creating new marketing campaigns to match the new look. Their design page reads, “A new brand for a new era” and focuses on how GoDaddy’s users — the everyday entrepreneurs — inspired the new look.
One of GoDaddy’s most striking changes is the new logo, named the GO. GoDaddy believes the GO represents “the indomitable spirit of everyday entrepreneurs … joy that entrepreneurs everywhere experience … and [a] continuous, overlapping stroke [which] symbolizes the connection all entrepreneurs share.”
GoDaddy’s new design uses bold, colorful visuals, hand-drawn illustrations, and a bold, serif font evokes a sense of inspiration and joy. GoDaddy’s brand voice, depicted in recent campaigns, aims to be casual, human, and friendly.
While some brands might need less of a full makeover, GoDaddy’s older image felt outdated and less cohesive. Their rebranding reflects the modern tastes, personalities, and needs of the GoDaddy’s user in 2020.
5. Pottery Barn
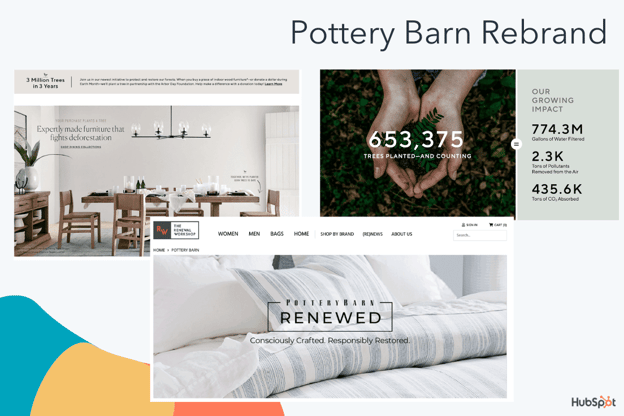
This last example is a subtler, more internal rebrand than the others in this list, but equally important. Pottery Barn, a roughly 70-year-old home furnishing company, has now put sustainability as the central focus of their brand, promising consumers that what they purchase will be worthwhile — both in terms of quality, and in terms of environmental impact.
Pottery Barn, named the most sustainable home furnishings retailer, has focused its efforts on sustainability with a dedicated landing page outlining its commitments.
Among other things, Pottery Barn promises to:
- Plant a tree (with the Arbor Day Foundation) every time a consumer purchases a piece of indoor wood furniture.
- Reach 100% responsibly-sourced cotton by the end of 2021.
- Keep products out of landfills by restoring items with a new Pottery Barn “Renewed” line.
- Contribute money for communities to invest in health clinics, water filtration systems, and more (the brand has currently contributed $3 million).
While this focus on sustainability isn’t brand-new for Pottery Barn, its recent efforts are more hyper-focused on it than ever. Consider, for instance, how this detailed Fast Company article about Pottery Barn’s style, published in 2003, doesn’t mention sustainability once.
The article also highlights how, more than 20 years ago, Pottery Barn used to purchase merchandise from outside vendors and assemble into a collection — this lack of ownership likely made it difficult to ensure sustainable products. Additionally, Pottery Barn announced its partnership with the Renewal Workshop in September 2020.
Ultimately, as your brand grows with your consumers, it’s important to take into account what matters to them today. Pottery Barn has done an excellent job identifying a sweet-spot in the furniture marketplace: Sustainability. As consumers continue to use this value as a guiding light in their purchasing decisions, it makes sense for Pottery Barn to ensure all their updated marketing materials reflects this mission.
Rebranding Takeaways for Marketers
When you take a look at the examples listed above, it can be easy to spot some similarities that made them all strong contenders for best rebrands.
If you’re considering a rebrand for your own business, here are a few takeaways:
- Keep your audience at the forefront of your plans. What tastes and preferences do they have? What inspires or excites them? How would they want your website designed?
- Use your consumers’ outside preferences to shape your rebranding. What passions do your consumers have beyond your products or services, and what do they care most about — can you weave those into your brand story, similar to how Petco focused on animal wellness and Pottery Barn focused on sustainability?
- A rebrand is more than just a logo change. To properly rebrand, you’ll want to conduct a content audit and analyze all your existing content to ensure each webpage, graphic, and advertisement is updated to fit your new image.
- A brand guideline page is critical for cohesion. Most examples in this list have a dedicated brand guideline page for ensuring each employee is empowered with the right tools to create content that fits the new look. Both GoDaddy and Starbucks, for instance, outline how the voice should sound, what fonts to use, and even what colors to include in any public-facing marketing materials.
Ultimately, a rebranding strategy can be an exciting and effective opportunity to delight existing customers while attracting new ones. Use the takeaways listed above, as well as inspiration from examples in this list, to get started with your own fresh look for 2021 and beyond.


How to Track Clicks on a Link in Google Analytics 4
If you’re a marketer, you’ve undoubtedly asked yourself, “How can I track clicks on a link in Google Analytics?”
Tracking clicks can help you understand where your audience is going from one page to another. It’ll also let you know what links they’re interested in, what CTAs they’re clicking, and more.
With the new Google Analytics 4, link click tracking happens automatically. This is great, because previous versions of Google Analytics haven’t been able to do it automatically. You used to have to set up custom event tracking, which can be confusing.
But we’re here to help. If you haven’t set up Google Analytics 4 yet and you aren’t sure how to get started with tracking clicks on a link, keep reading.
![→ Download Now: SEO Starter Pack [Free Kit]](https://no-cache.hubspot.com/cta/default/53/1d7211ac-7b1b-4405-b940-54b8acedb26e.png)
1. Add a Google Analytics 4 property to your site.
In Google Analytics 4, you can automatically track links. While GA4 rolled out in October 2020, your site won’t automatically switch to GA4. You need to set it up.
To do this, click “Admin” on the bottom left of your Google Analytics home page. Then, ensure the right account is selected, and in the “Property” column you’ll see a GA4 setup assistant. Go through the process (takes a minute or so), and then click “Create Property.”
You should be all done now and you’ll have GA4 set up.
2. Click “See your GA4 property.”
Once you’re done setting up GA4, you should be able to click “See your GA4 property.” This will give you all the information on your property that you need.
Before you continue, it’s a good idea to explore around and see what’s new in GA4.
3. Click “Data Streams.”
Now that you’ve explored and set up your GA4 property, you’ll want to click “Data Streams” in the left column.
This will give you detailed information about what GA4 is tracking for your site.
4. Click your site.
Lastly, you just need to click on your site, and you should see the enhanced measurement. It should automatically be toggled on.
This feature automatically tracks events such as page views, scrolls, outbound link clicks, site search, video engagement, and file downloads.
To see this information, your GA homepage should have an area now called “Events” where you can see outbound link clicks.
This is what it looks like when you see enhanced measurements:

5. Set up custom link clicks.
Now you’ve officially set up certain link tracking in the future. While this feature will help you track a number of events, you might want to track certain links clicks specifically. In this case, you’ll want to set up custom link clicks.
You can do this through Google Tags Manager. If you don’t already have an account, create an account for your site and connect to your GA4 property.
You can learn more about event editing in GA4 by watching this video:
Essentially, you’ll need to create a trigger to distinguish between the custom links you want to track and the page views and outbound clicks that the enhanced measurement feature is tracking.
Go to your Google Tags Manager and add a new trigger. Then, you’ll have to connect this trigger to your events tracking.
Watch this video to learn how to set up Google Tags Manager with your GA4 property.
While this is all great if you’re converting your current analytics account to GA4, it will only track these link clicks going forward. It’s not retroactive.
Now, let’s discuss how to track Google Analytics click events if you aren’t using GA4.
How to Track Clicks in Older Versions of Google Analytics
If you aren’t using GA4, then you’ll need to use Google Tags Manager. We have an in-depth guide to help you navigate the tags manager, because it can be confusing.
Without GA4, the process is the same as setting up custom events. Google Analytics didn’t have the capability to automatically track link clicks before GA4.
While it does now, you might not be using GA4, and still want to track those links.
That’s okay. You can read our in-depth guide, watch the videos in step 5, and review how to set up custom link click tracking through the Google Tags Manager.
While it might seem confusing to set up, there are numerous resources available from Google to help you set up custom event tracking. And it’s worth it. Knowing where your customers are clicking and being able to attribute a certain amount of clicks from one blog post to another is invaluable information.

How to Use the Rule of Thirds in Web Design [Quick Tip]
To understand the “rule of thirds” as it relates to web design, let’s start with an example.
Consider this image of a bull in a field:

Not too interesting, right? As the center of the image, the bull image feels a little bland and predictable. I’m willing to bet if you saw this image on a website, you wouldn’t dwell on it too long.
Now, consider what changes when we use the rule of thirds to place the bull away from the center:

A little more interesting, right?
The rule of thirds can help make your designs feel less predictable and more intriguing. And, ultimately, it has the power to capture the viewer’s attention for longer — which is critical when you’re trying to capture new audiences and convert those audiences into leads for your brand.
Of course, there are exceptions to every rule. Perhaps you’ll decide your designs are more compelling when they’re symmetrical. Still, you can only make the intentional decision for your own website after you’ve explored your options.
Here, we’ll learn how to use the rule of thirds in design and UI design to take your images to the next level.

How to Use the Rule of Thirds in Design
Simply put, the rule of thirds posits that designs are more interesting and visually appealing when you place the main object(s) of your design on one of the four intersections of a rule of thirds grid, or in one of the thirds sections.
It’s no secret that art is more than just guesswork. Dating back to Ancient Roman times, geometry has always had a place in significant artwork.
To understand the rule of thirds, let’s look at an example.
The rule of thirds draws two lines perpendicular to a page, and two lines horizontal to a page, to create a grid of nine boxes.
This divides your page into three one-third sections, regardless of whether you’re slicing the image horizontally or vertically:

Next, to use the rule of thirds in design, you’ll simply want to place your object(s) off-center by putting them into one of the thirds sections:

… Or on one of the intersecting points:

In the example shown above, the main focal point — the mountain top — is off to the left-side of the center of the image, in the first-third of the photo.
Fortunately, it’s easy enough to use the rule of thirds in your own images using a design tool like Photoshop, which offers a grid feature so you can ensure you’re accurately using the rule of thirds to create a more harmonious, interesting design.
Let’s dive into how you can create the rule of thirds grid in Photoshop in four quick steps, next.
How to Create Rule of Thirds in Photoshop
1. To use Photoshop’s rule of thirds tool, simply open a blank page in Photoshop and click “View” → “Show” → “Grid”:
guides, grid, and slices.” src=”https://ift.tt/2RglsF9″ style=”margin-left: auto; margin-right: auto; display: block;” title=””>
3. Next, choose the color of the grid lines, along with the solid line. Then, change “Gridline Every” to “100 Percent”, with Subdivisions of “3”. When you’re done, click “OK”.
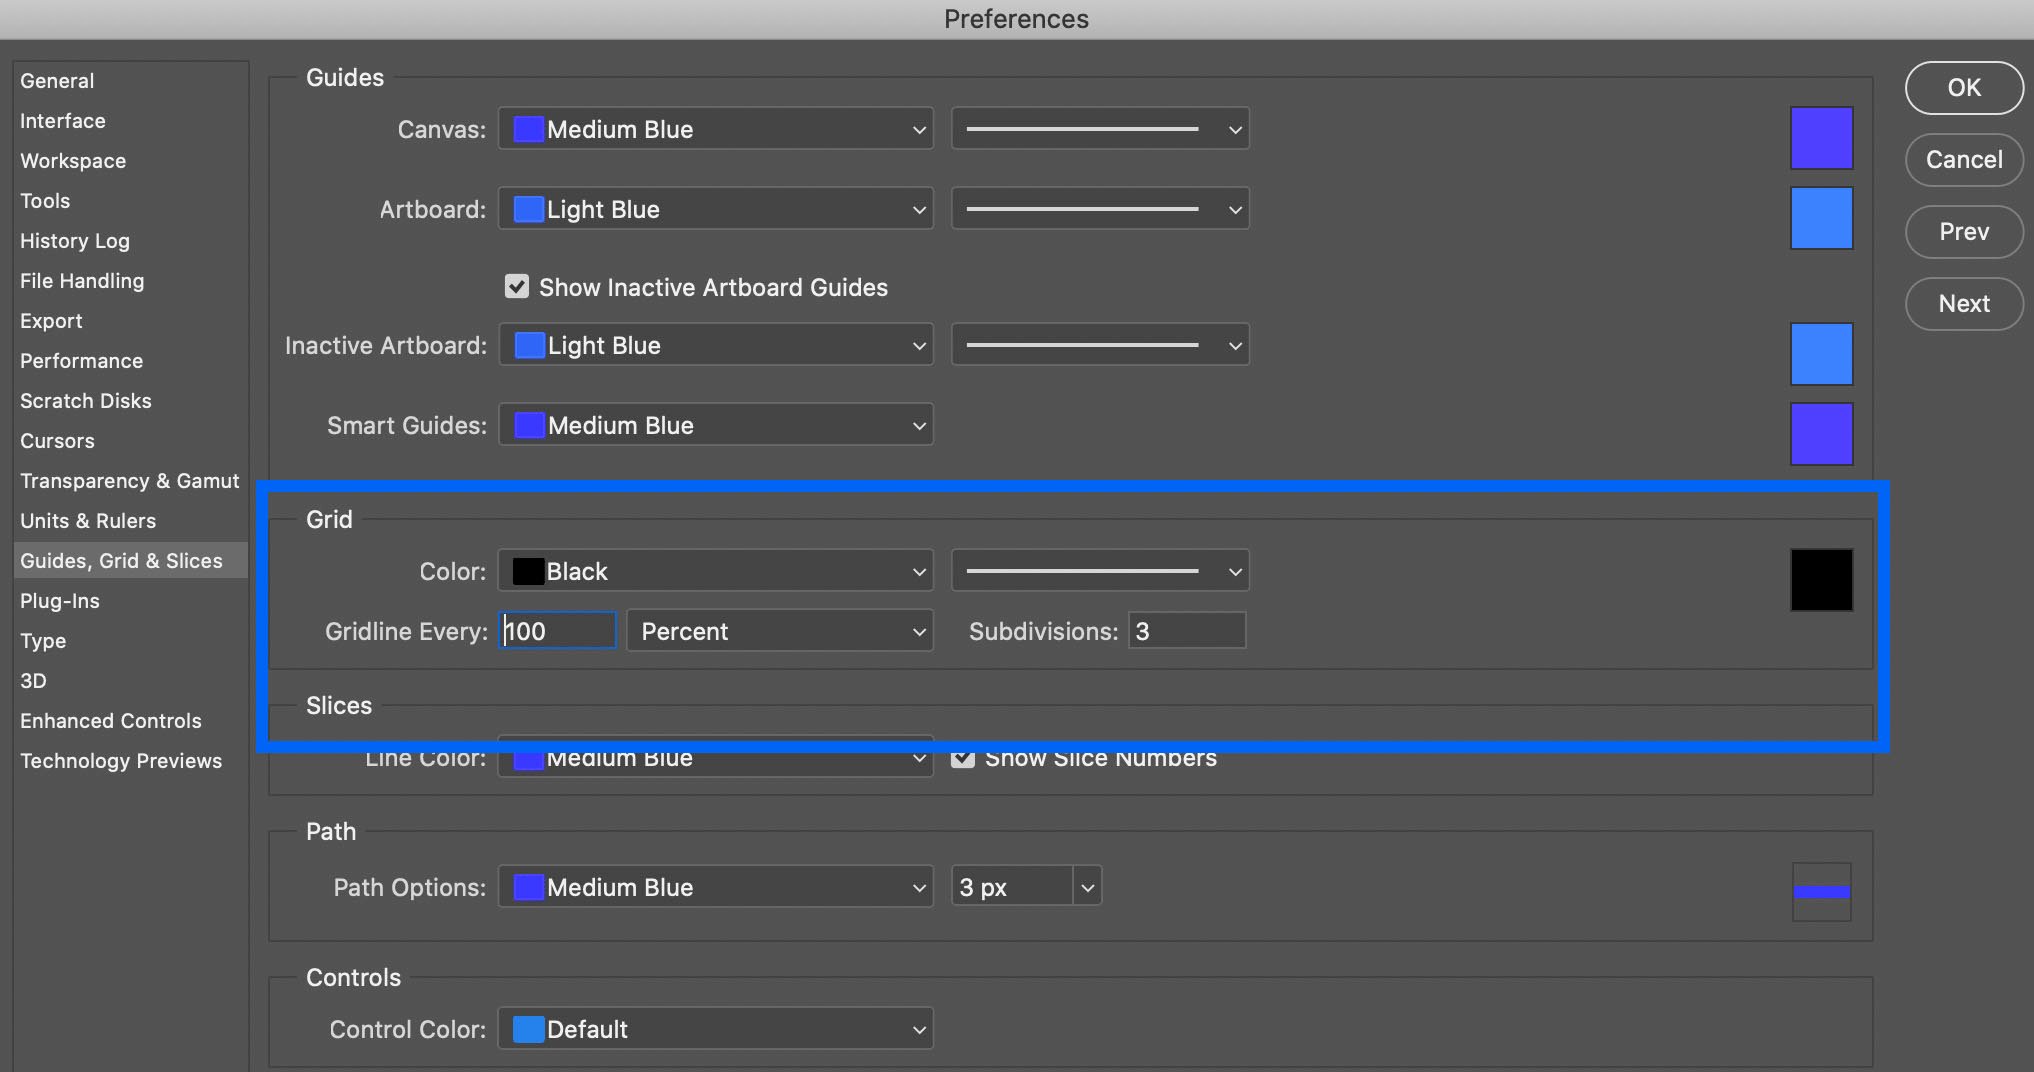 4. And there you have it! You now have a rule of thirds grid. To add your image, simply drag-and-drop the image onto the existing layered grid, expand it to fill the grid, and then move your focal object until it’s either in one of the thirds sections, or on one of the four intersecting points.
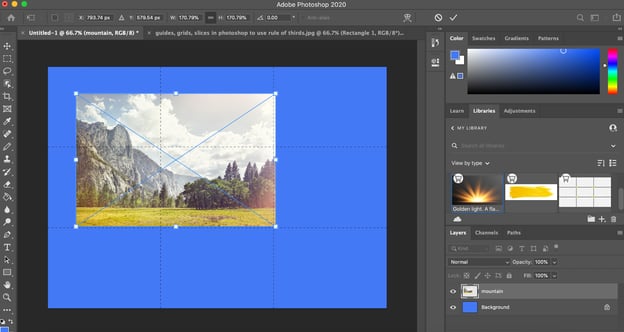
Examples of Rule of Thirds in UI Design
To consider the power of rule of thirds in user interface design, let’s take a look at some website examples, with a particular focus on which websites use the rule of thirds.
1. Soulful Vibes Co.
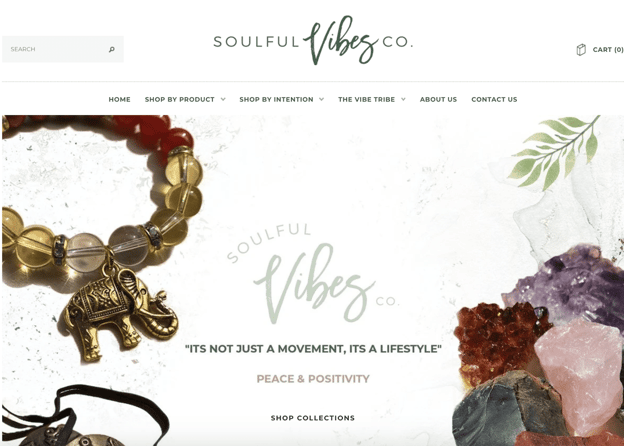
Here, the designer puts the main focus — on the crystal rocks, and the beaded bracelet with an elephant — on the left and right thirds sections, ensuring the visitor’s focus is on the center text itself: “It’s not just a movement, it’s a lifestyle.”
The designer uses the rule of thirds to create a peaceful, harmonious, casual aesthetic that looks more open and welcoming than it would if both objects were front-and-center on the page, which would likely feel more crowded and hectic.
2. HubSpot
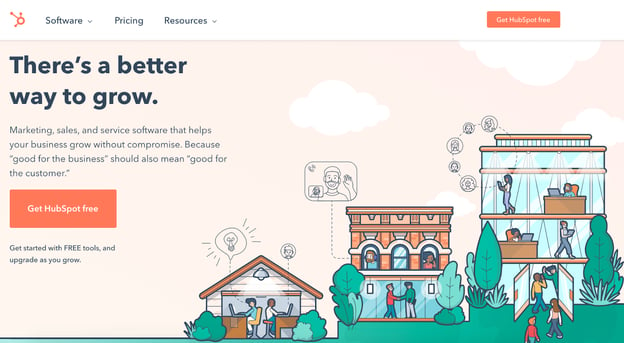
HubSpot uses rule of thirds to draw immediate attention to its slogan and “Get HubSpot free” CTA on the homepage, as most visitors’ attention will start on the left side of your website. Then, the cartoon images are placed on the right thirds section, to balance out the page. This helps create a user flow — from left to right — which would be more difficult to achieve with a symmetrical design.
3. Frans Hals Museum
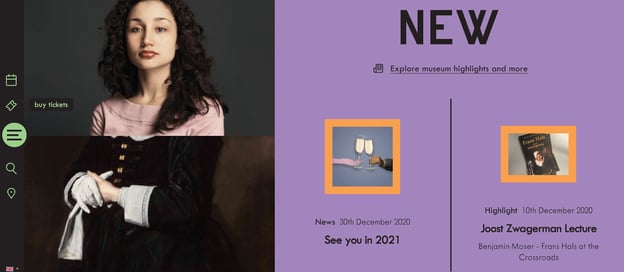
This Netherlands museum website uses the rule of thirds to draw attention to the photo of the woman, located in the left-thirds section. The page is unique, engaging, and cohesive, and uses counter-images to balance the asymmetrical structure of the page — for instance, while the larger image of the woman is towards the left of the screen, there’s texts and additional images to the right to balance it out.
When to Break the Rules (of Thirds)
It’s important to note — in design and art, there are no strict rules you need to follow, and there are exceptions to every design rule or trend.
Once you understand the rule of thirds and how it can impact a user’s experience, you can break that rule when you see fit.
For instance, you might find it’s more compelling to keep your images at the center of your screen, like shown on Tone Dermatology’s homepage:

Here, the center focus on the woman is compelling and bold, particularly since she’s looking towards the left of the screen, so it’s still an asymmetrical image (you only see her eyes and nose on the left, and you only see her hair on the right).
This design layout works well to draw the visitor’s attention in — and likely wouldn’t have been as powerful if the designer had used the rule of thirds to place the woman towards the left or right side of the screen.
Ultimately, you’ll want to choose design elements that work best for your own brand’s needs. When in doubt, experiment with both more symmetrical designs and rule of third designs, and consider A/B testing to figure out which performs best with your audience.

What Does HTTP Error 503 (Service Unavailable) Mean & How To Fix It?
Imagine someone searches for a topic and finds your website on page one of Google. When they click through to your website, though, their eyes land on a bland webpage that says “Service Unavailable”.
What do you think they’ll do when they find your website on Google again? Odds are, they’ll skip over it and click on the next link. If visitors are looking for answers and you’re promising them those answers, but you can’t deliver because something’s wrong with your website, they’ll lose trust in your brand.
Unfortunately, if your website experiences a 503 Service Unavailable Error, there’s no silver bullet solution. You have to investigate what’s actually causing the issue, because even though these types of errors indicate what happened to your website, they don’t tell you why it happened.
To help you fix your 503 Service Unavailable Error and avoid losing potential customers, check out our guide on what exactly the issue is and its most common solutions.
When your website is experiencing a 503 Service Unavailable Error, your site’s visitors will land on an error page. Fortunately, there are five common solutions for troubleshooting most 503 Service Unavailable Errors.
1. Restart your server.
Sometimes, there will be congestion in the server chain that hosts your website. One of the most effective ways to open up and refresh it is to simply restart your web server. If your website is hosted on multiple servers, make sure you restart all of them to get it running again.
2. Check to see if your web server is going through maintenance.
Most web servers shut down when they’re going through maintenance. If you can access your server’s administration settings, check the configuration options to see when automatic maintenance sessions are scheduled. If you’d rather have complete control over your server’s maintenance, you can disable these automatic updates in the configuration options, too.
3. Fix faulty firewall configurations.
Your firewall is your website’s gatekeeper, protecting your site from malicious visitors or distributed denial-of-service (DDoS) attacks. Sometimes, a faulty firewall configuration will cause your firewall to deem requests from a content delivery network as an attack on your server and reject them, resulting in a 503 Service Unavailable Error. Check your firewall configuration to pinpoint and fix the issue.
4. Sift through your server-side logs.
There are two types of server-side logs — applications logs and server logs. Application logs recount your website’s entire history, letting you see the web pages requested by visitors and the servers it connected to. Server logs provide information about the hardware running your server, revealing details about its health and status. Sift through both types of server-side logs to uncover any alarming information about your server or website.
5. Comb through your website’s code to find bugs.
If there’s a mistake in your website’s code, your web server might not be able to correctly answer requests from a content delivery network. Comb through your code to find bugs or copy your code into a development machine. It’ll perform a thorough debug process that will simulate the exact situation your 503 Service Unavailable Error occurred in and allow you to find the exact moment things went wrong.
Any time there’s an error on your site, it’s important to fix it as soon as you can. If customers get errors, they probably won’t come back to your page.
Editor’s note: This post was originally published in January 2019 and has been updated for comprehensiveness.
