
Welcome to My Blog
Arise RevOps, the New Orchestrators of Customer Experience
I care about customers. Whether they’re your customers, my customers, or my customers’ customers, I want every one of them to have a good experience every time they pick up the phone to call a business, open a marketing email, or visit a website.
It’s what gets me going every morning. That’s why I was thrilled in 2019 when I had the opportunity to launch HubSpot’s first-ever ‘voice of the customer’ team.
I assembled a group of passionate people, each more dedicated than the last to improving customer experience. We met weekly, talked about our customers, forensically analyzed feedback, and dug deep into the weeds to see where we could root out friction.
And then one day it hit us. The answers to most of our questions didn’t lie in more cross-functional meetings, increased headcount, or longer hours for support staff. The answers to our questions lay in operations.
Operations teams carry the responsibility for making sure that, well, everything works. If a marketer is having trouble segmenting a contact list, they reach out to operations. If a salesperson’s automated emails are misfiring, operations gets tagged in. If a service professional can’t access a customer’s communication history, it’s operations to the rescue again.
They’re the people who set every customer-facing team up for success. As such, they are the orchestrators of the customer experience. And yet, most companies view operations as a reactive function whose sole purpose is to frantically find fixes to issues as they arise.
It’s time for us as an industry to re-imagine operations and transform these teams from reactive fire-fighters into proactive friction-fighters. How can we do this? With revenue operations (RevOps).
It’s my firm belief that operations teams can only fulfill their potential when they work together under a unified RevOps strategy and are equipped with the right tools to execute that strategy.
Today, HubSpot is spearheading the onrushing RevOps revolution with the launch of Operations Hub — a new product specifically designed to empower operations teams to play an influential role in helping their companies delight customers at scale.
Because when a company scales, friction inevitably emerges, and customer experience is often the first thing to suffer.
Three Reasons Why Customer Experience Often Suffers When a Company Scales
There are few companies out there that impress me so much, I feel compelled to tweet about my experience, tell my friends, or write a positive review. These days, customers like me expect their interactions with every company to be quick, convenient, and contextual.
When a company scales and begins to achieve exponential growth, the challenge of keeping pace with customer expectations grows exponentially, too. There are three key reasons why:
1. More customers to support.
When a company is in startup mode, it will usually keep up with the growth of its customer base by increasing investments in staff. When customer growth starts to outpace the company’s ability to maintain a high standard of customer experience, it will likely raise capital and hire new employees to support the expanding demand. This works … for a while.
When that company is ready to scale – that is, to grow its business faster than its investments – it needs to support a growing customer base without simply hiring more employees and without letting the quality of the customer experience drop. To do this, it has to reinvent its approach to delighting customers or risk losing the trust of its user base – and its market share.
2. More tools to manage.
As a company grows, it will inevitably encounter new challenges. And in a world of over 8,000 martech solutions, there is no shortage of tools out there that could be brought in to help solve a problem quickly. So, it’s common for different teams to adopt different tools to help them solve different problems.
Over time, this approach results in a brutally bloated tech stack that takes so much time and energy to manage, there’s little left to dedicate to customers. What’s more, when tech stacks are unnecessarily complex, it becomes increasingly difficult for customer-facing teams to access reliable data, making it nearly impossible to deliver the type of contextual experience customers expect.
3. More touchpoints to maintain.
When a company is getting off the ground, it will tend to focus on a small number of high-impact channels. For example, its early social media marketing strategy may focus exclusively on, say, Facebook and Twitter, and it might only take customer queries over the phone.
As that company seeks to scale, however, it will add new channels to its marketing mix and offer its customers more ways to get in touch. Pretty soon, it’ll find itself interacting with its audience not only on Facebook, Twitter, and over the phone, but on Instagram, LinkedIn, YouTube, and via 24/7 web chat, too.
To manage this multitude of touchpoints, that company will need a new strategy to ensure it maintains the quality of experience it offered to customers when there were only a few channels in play.
These three issues are a by-product of scale. They are challenges a company wants to have … and solve. Yet, most businesses fall short. They naturally fall back on the methods that have helped them reach this critical moment in their journey — many continue to frantically hire staff long after it’s sustainable to do so, some rush to tack more tools onto their tech stacks without the infrastructure to make them all work together, and others simply leave certain touchpoints unattended, leaving customers unimpressed.
Operations professionals are uniquely positioned to help a company solve challenges like these. But historically, companies across our industry have failed to recognize the potential of their operations teams, leaving them stuck in silos and asking them to solve issues without the right tools or team structure to do so effectively.
Moving From Function-Out To Customer-In
Operations professionals are rarely among the first hires a company makes. They tend to be brought in only when systems start to creak and the friction between teams becomes unbearable. A company’s marketing leader might hire an operations professional onto their team to help improve its lead scoring system, while its head of sales brings in their own operations hire to work on reporting.
Before long, there are multiple operations teams working in different departmental silos, often out of different operating systems. In this setup, even if each operations team does an exceptionally good job at fighting friction within their department, friction can still be rife between their departments.
For example, the sales team might be having difficulty accessing and understanding the marketing team’s data, hurting their ability to personalize their outreach based on a prospect’s recent engagement.
With no team accountable for overseeing this critical cross-departmental touchpoint, prospects will continue to receive impersonal emails, the marketing team will continue to receive exasperated messages from their sales colleagues, and the sales team will continue to struggle to win over prospects.
I call this a “function-out” perspective, where each customer-facing team is only focused on the portion of the customer experience they’re directly responsible for, and each operations professional is tasked with supporting their designated function.
What companies need instead is a “customer-in” perspective, where all teams work in unison, informed by a holistic view of the customer, to deliver a unified experience. Operations professionals have a critical role to play in driving this shift in perspective. But to be successful, they too need to be unified.
How RevOps Helps Companies Scale Customer Experience
One of the most powerful things a company can do to scale its customer experience is to unify its functional operations professionals under one centralized revenue operations (RevOps) strategy.
When operations teams are unified, they are not serving their separate teams’ goals, they are serving the customer. They work with the same data, which gives them a single source of truth on what’s really going on with customers at a holistic level.
They collaborate on cross-functional processes that allow them to bridge the gaps between teams where friction frequently festers. And perhaps most importantly, they work together to proactively identify issues before they have a chance to hurt the customer experience.
Companies that don’t yet have a large number of operations professionals among their ranks don’t have to wait until they do to start adopting a “customer-in” perspective. If they haven’t hired an operations professional yet, they should consider bringing one in as a priority and giving them a meaningful say in how all customer-facing teams work together, not just one.
They should also examine the ways their internal teams are set up within their current operating model, assess whether the systems they’re using are contributing to silos, and begin to instill a culture of alignment around the customer.
After all, RevOps is not just the name of a team, it’s a philosophy by which to run a company — one that thrives when operations teams are equipped with the right tools.
Introducing Operations Hub
Today with the launch of Operations Hub, we are giving operations teams a suite of tools that allow them to assume their rightful place at the forefront of the customer experience and empower them to guide their companies through the customer experience challenges that come with scale.
With Operations Hub, teams can sync data across their business apps bi-directionally and in real-time, allowing them to manage a tech stack with ease, no matter how complex it is.
They can roll out workflows that automatically keep their database clean and up to date, helping them to maintain a reliable view of the customer, no matter how many touchpoints they manage. And they can design sophisticated custom automation actions to deliver a deeply personalized and contextual experience to customers, no matter how large their customer base grows.
Together, these tools free up operations teams to conduct bold ambitious experiments, test big innovative ideas, and launch ground-breaking new strategies, all in the name of delivering an exceptional customer experience. For too long our industry has put a limit on the potential of operations professionals. That changes today.
Back in 2019, I had the opportunity to launch HubSpot’s ‘voice of the customer’ team. That experience opened my eyes to the vital role operations teams have to play in scaling customer experience.
At the beginning of 2021, I had the opportunity to launch another team at HubSpot: the revenue operations team. With Operations Hub at our fingertips and our operations professionals unified as one, we are on a mission to elevate the role of operations teams not only at our company, but across the entire industry.
If you work in operations like me, you have a right to feel excited. Where you were once reactive, you can now be proactive. Where you were once siloed, you can now be in sync with your operations teammates. And where you were once an afterthought of the customer-facing teams you support, you can now be the orchestrator of your company’s customer experience strategy.

4 Content Types That Get Non-Organic Traffic, According to Content Strategists
Traffic is a low-impact word for most people but a high-impact word for marketers. Traffic can ultimately dictate success, whether it’s the number of leads that come to your website, visit your social channels, or watch your videos.
There are two different types of traffic you can have, organic and non-organic, that can come from all over: email, social media, organic searches, backlinks — the list goes on.
Non-organic traffic can be a bit harder to come by, which is why, when creating non-organic content, you want to ensure that it will drive results. However, it’s easier said than done when it comes to figuring out what works for your business. In this post, hear from HubSpot content strategists and marketers about the types of content that bring in the most non-organic traffic as inspiration for creating your own.

4 Content Types That Get Non-Organic Traffic, According to Content Strategists
Data-Driven Content
Pam Bump, Audience Growth Marketing Manager & Staff Writer for the HubSpot Blogs, says that she often sees solid non-organic traffic from email and social media to blog posts that feature statistics or recent industry figures. Bump says, “People love to share, link to, or read up on new data that impacts their career, industry, or lives in some way.
The data-driven content you share can be related to overall industry trends, stat roundup posts (like this one), and data comparison pieces, like this one about Millenials vs. Gen Z, written by Bump herself.
If you have the means, it’s worth considering running internal experiments and publishing your own original data. This can help you drive referrals and backlinks from other websites as non-organic leads and build your domain authority. When HubSpot does this, Bump says, “A credible website might include our data and say ‘according to Hubspot,’ and link to our original data post because it simply has information readers can’t get anywhere else.”
Content Featuring Quotes and Interviews
In the same vein as data-driven content, people want to learn something from what you have to offer, especially if they’re learning it from experienced industry leaders and professionals.
Bump gives a piece titled Marketing Trends to Watch in 2021, According to 21 Experts, as an example. It was written by MOZ CMO Christina Mautz, and she included quotes from reputable industry leaders. The piece was shared on HubSpot social channels and emails and has since received a significant amount of views from non-organic sources in just three months.
When you create content like this, the industry leaders you feature in the piece may share the posts with their audiences, helping you gain brand awareness and traffic from additional sources. Francesca McCaffrey, Tech Content Strategies, notes that leadership-type content brings in significant non-organic traffic for the HubSpot Product Blog, especially when shared on social media. She says, “Leadership thought pieces are also a significant source of non-organic traffic for us, as they tend to inspire lots of commentary and clicks on networking sites like LinkedIn.”
Emerging Trends
Making an effort to create content about emerging industry-related trends can do wonders in terms of attracting email, social media, and referral traffic.
Bump wrote a post about Clubhouse, a relatively new social platform that didn’t have high MSV search terms affiliated with it yet. Bump added headlines to the content that would gain traction when the app got bigger, like “What Is Clubhouse?” Since publication, the post has earned an impressive amount of non-organic views and, as expected, has picked up organic traffic as the app grows in popularity.
Covering emerging trends also helps you stay on top of new keywords that aren’t as competitive. If you’re one of the only sources creating content for the keywords, search engines will recognize you as a source of authority when the trend becomes more popular.
Technical Guides and How-Tos
McCaffrey says that technical guides and how-to type content from the Product Blog submitted to reputable industry sites perform especially well with non-organic traffic.
She gives this piece as an example that was submitted to Hacker News, a reputable cybersecurity publication. McCaffrey says, “Making it to the first or second page of a site like Hacker News can really boost non-organic traffic, and translate into organic traffic over time. The piece made it to the front page, driving thousands of viewers to that post in a day.”
Like pieces containing quotes and interviews, this type of content performs well because people can learn from it; they can take away actionable skills to apply to their own lives.
All in all, the content you choose to create should directly relate to your business, as you’ll find the most success if you’re creating content your audience is already looking for.
However, it’s worth considering purposely creating content that you know has the potential to bring in a significant amount of non-organic traffic. Leverage these tips from expert HubSpot content strategists, and begin creating content that drives traffic.


The Optimal Instagram Story Dimensions [+ Tips for Best Quality]
New social media sites continue to emerge, new features are added, and algorithms are always being updated, making it tough to keep up with social media best practices.
However, social media is here to stay. According to Instagram, there are more than one billion active users every month and more than 500 million active Stories every day. Even more, 90% of accounts follow a business on Instagram, making this platform a prime choice for all types of businesses.
Instagram Stories are a popular trend that isn’t going away. Pamela Bump, Audience Growth Writer at HubSpot, says, “Instagram Stories serves as an outlet for brands to creatively show their products, services, or happy customers in action. Branded Instagram Stories also enable audiences to learn more about topics related to your brand’s industry. Helpful and valuable content might also allow prospective buyers to trust your brand more.”

With this knowledge, you want your marketing team ready to develop a strategy for your Instagram Stories. To create this strategy, your team should decide what kind of images or videos they want to post.
How do you plan on taking those images? With phones or professional cameras?
Below, you’ll learn the Instagram Story dimensions and why they’re important to your Instagram marketing strategy.

If you shoot an Instagram Story video using your phone, the dimensions will likely be 1080 pixels by 1920 pixels, so you don’t have to resize it. If you’re using another camera or a custom setup, however, you’ll have to use a video editing app to make sure your video has the correct dimensions.
While this may seem like a lot of work, it’s exceedingly important for user experience and for ensuring maximum engagement on your Story.
Why are Instagram Story dimensions important?
Instagram has provided these dimensions and sizes to make sure that your Story is uploaded with as much quality as possible. These dimensions are also ideal for most mobile devices, guaranteeing that your video, image, or gif shows up properly across different operating systems and screen resolutions.
Using Instagram Story dimensions also:
- Helps your brand look more professional
- Ensures that the content looks high-quality
- Prevents unnecessary pixelation
If you don’t adhere to these dimensions, your images or videos will be cut off, and the content that you wanted to share won’t show up as intended. That’s why it’s best to pre-size your images and videos using an Instagram photo editing app.
Speaking of, let’s go over the ideal Instagram Story image size. Spoiler alert: it’s the same as the Instagram Story video dimensions, which makes it easy to remember.
Whether you upload a video, image, or a mixture of both to your Story, it’s critical to keep your content in a “safe zone” where it won’t be cut off or hidden.
The Instagram Story Size Safe Zone
The “safe zone” refers to the area in your Instagram Story where the content isn’t obstructed or at risk of getting cut off.
Instagram will automatically show blue lines if you try to move content out of the safe zone, especially if you’re adding stickers or GIFs. When I tried to move the timestamp to the edge of the screen, Instagram didn’t let me go toward the edge or let me cover my profile picture up top.

Instagram will also provide guides when you’re placing elements on your Story, allowing you to center them perfectly.
 On personal Instagram Stories, it’s common to post videos using the front camera of your cell phone. The frame can be tilted, and your face can be cut off; this is all good and well.
On an Instagram business account, however, you’ll want to make sure that all videos are shot professionally and that the item that you want to promote takes center stage on the screen. Most importantly, if you’re planning to add polls or stickers, leave enough space in the frame so you can place this content without obstructing something else.
Below, we’ll go over some additional tips for sizing your Instagram Story.
Instagram Story Size Tips
1. Ensure your content is high-quality before you upload.
Instagram will compress images during the upload process, so an already grainy or pixelated image will only get worse once it gets to the platform.
Check that your images are at least 72 ppi resolution before you add them to Instagram.
2. Upload the right size, shape, and aspect ratio.
Instagram is strict about adhering to its dimensions to ensure quality photos and videos. When you upload a vertical image or video from your phone, you most likely won’t have to think about these dimensions because Instagram will automatically format them.
However, if you have horizontal photos that don’t fit the dimensions, Instagram will crop your photos, zoom in on content, or zoom out (making your image look small and placing it on a background). This typically results in lower-quality images and videos. So, make sure you stick to the 9:16 aspect ratio.

3. Use photo editing apps.
Photo editing apps can help you control the quality of your Stories and ensure you’re always using the right dimensions. To edit your photos for Instagram, you can use the following tools:
Canva
This is the perfect option for creating images for your Instagram Stories. To get started, Canva has templates that are designed with the Instagram dimensions in mind. Canva offers free and paid plans.
Lumen5
This software makes it easy to produce videos for Instagram Stories. Once you get started creating a video, you can choose the right dimensions on the platform. Lumen5 offers both free and paid plans.
Easil
Easil has templates for Instagram Stories to help you create engaging content. They have templates for single images, and multi-card Stories as well. Easil offers free and paid versions.
Adobe Spark
Adobe Spark makes it easy to create images and video graphics for Instagram Stories. You can build your own Stories with their typography and imagery options. Adobe Spark has free and paid plans available.
Embed Social
Embed Social is a different kind of tool for Instagram Stories — with Embed Stories, you can make your Stories Shoppable by adding CTAs and creating embeddable code that you can add to your website. Embed Social offers free and paid plans.
With these tools, you can input the specifications, upload images and videos, and complete the editing process. These work well if you have higher-quality images taken with a professional camera or want to add graphics or text to your images or videos.
4. Upload vertical content.
While Instagram posts are more flexible in orientation and dimensions, Instagram Stories work best in a vertical format. Make sure your photos and videos are vertical before posting. If the content doesn’t lend itself to a vertical orientation, consider publishing it as a normal post instead.
5. Stay under 30 MB in file size.
Be mindful of your file size; Instagram will only accept up to 30 megabytes. This should give you plenty of wiggle room to upload high-quality photos and videos.
If the quality doesn’t look right, it’s time to troubleshoot.
How do I fix the quality of my Instagram Stories?
There might be instances in which your Stories don’t upload with the quality that you’d like. Let’s go over a few questions you might have about quality, plus some troubleshooting tips.
Why are my Instagram Stories blurry? Why does the picture quality change on my Instagram Story?
Your Instagram Story could be blurry for two reasons:
- Instagram compressed the video or image to a degree that makes it look blurry.
- The dimensions or aspect ratio is off.
To fix this, you’ll want to double-check the quality of the image or video you uploaded. What’s its file size? Is it at least 72 ppi? If the file size is too small or the ppi is too low, then Instagram’s compression process worsened it further. Consider creating a higher-quality version so that, when Instagram compresses it, it doesn’t look as pixelated.
Next, double-check the dimensions. To ensure the highest quality possible, try to use the full 1080 x 1920 size.
If those two check out and your Story is still blurry, follow the following tips to isolate the problem.
1. Check if the quality is better on other devices.
If your internet connection is poor, Instagram Stories will appear lower quality than they would on a faster connection.
Instagram does this to save resources for user experience as you interact with other areas of the site. Consider asking someone you know if the quality is low on their end as well. They — and your audience — may be viewing your Stories with no issues.
2. Turn off Data Saver.
Data Saver is a feature that prevents videos from loading in advance, which helps reduce your data usage.
If your connection is fine but you’re still having issues with quality, this feature may be lowering the quality of your feed on your end.
3. Test photos from different cameras.
As a last resort, test whether there’s a difference in quality between your phone’s integrated camera versus the Instagram camera. The photos you take with your phone’s camera versus the in-app camera (or vice versa) may weather Instagram’s compression settings better.
Instagram Story Sizes are Essential for an Instagram Strategy
All marketers should use Instagram Stories. While posting regularly on your feed is a great tactic, adding Stories into your strategy will result in a better ROI from your time and resources spent on the platform. Instagram Stories can improve your discoverability, increase brand reputation and awareness, and help you and your business grow better.
Editor’s note: This post was originally published in October 2019 and has been updated for comprehensiveness.

How Brands Creatively Hosted Virtual Offsite Meetings
As the world continues to move in a remote-first direction, it’s important to consider how to make your company’s in-person events remote-friendly.
Even if you don’t always do remote events, the remote option is great for anytime your team is spread around the world.
But, a virtual offsite meeting? Sounds oxymoronic. How can you have an offsite, that doesn’t feel like work, virtually?
In this post, we’ll take a deep dive into how these brands thought about virtual offsites in a creative way. And didn’t just ask everyone to be on Zoom for 8 hours.

1. Loom VR Virtual Offsite
At the end of 2020, Loom decided to host a virtual offsite. What made this different than attending an 8-hour Zoom meeting?
Well, first, the company sent VR headsets to their team to allow employees to feel like they were leaving their homes for a large company meeting they used to travel for.
We just announced our @loom offsite being done in VR and us shipping everyone an Oculus headset. The smiles. 🙂
— Vinay Hiremath (@vhmth)
December 10, 2020
According to Loom, “with virtual reality, we were able to send everyone an Oculus Quest 2 headset to bring the virtual world to them. Plus, we were able to limit Zoom content to only two hours per day to keep the content engaging.”
Once they got started with virtual reality, they had to find virtual reality apps to host their events. But they also included their employees in the planning process. The company sent a Google Form to employees to share any ideas for activities and sessions they could do during the virtual offsite.
Loom worked with a partner to create a virtual reality island where team members could go for watercooler conversations, ice breakers, and happy hour.
Interestingly, the virtual reality component was not mandatory. Any events that were VR exclusives were optional. And the VR island they created was also accessible via desktop, so everyone could participate.
It’s important to remember that when you’re creating a virtual offsite experience, you want everyone to be able to show up. Hopefully, the tools you use will be available on several devices or you can make those events not mandatory if it takes a special device.
The team also created unstructured time during their day so that people working from home could still do their normal work and activities.
2. First Round Review Interactive Virtual Offsite
Another company thinking about virtual offsites creatively is First Round Review.
First Round Review held a virtual offsite and had activities including group meals, cooking competitions, self-reflection exercises, group presentations, unconference events, and more.
The company knew that they wanted to use all different kinds of formats for their activities so that they could keep people’s attention.
Before they planned the event, they wrote down their objectives, breaking them into task- and team-focused outcomes. Then, they came up with ideas to achieve those outcomes.
Again, First Round Review knew they didn’t want to spend all day on Zoom. A few things they did to make their virtual offsite interactive and successful were:
- Send an interactive surprise: The team sent everyone a kit that they were instructed not to open beforehand. The kit included candy, a chalkboard to write on, coffee, and a kombucha starter kit. This was a fun way to kick off the virtual offsite.
- Get in costume: The team was all sent special hats and everyone showed up to the meeting wearing their merch.
- Cooking challenge: Groups were split into breakout rooms so each group could cook together live. Then, everyone presented their meals together and people voted on creativity and presentation.
- Unstructured time: This is huge. Don’t make people spend all day on the computer. Include unstructured time and breaks.
- Playtime: Include team bonding events such as trivia or virtual escape rooms. First Round Review even hired a magician to join them for a group dinner.
- Show gratitude: First Round Review spent an entire meeting having everyone write out gratitude for every team member and then emailed everyone their list of comments from their coworkers. For each teammate, they had everyone spend one minute answering by writing a line or two in response to the following questions: What’s something you admire about this individual? What’s something this person did recently that you appreciate? Why are you grateful to count this person as a teammate? Answers are anonymous. After they’re all in, the meeting owner will round up the lines for each individual and share them in a private email.
One of the biggest takeaways from this virtual offsite is that you can have several formats, different sessions, interactive and engaging content, and still get work done in strategy sessions.
3. Wikimedia Product Team Virtual Offsite
The Wikimedia Foundation Product team also had productive virtual strategy sessions and meaningful team bonding in a remote environment across various time zones.
To achieve this, a lot of planning went into it. The team first decided what story they wanted to tell during their offsite. To ensure this was discussed throughout the virtual offsite, they revisited their product roadmap to understand where the team had been and where they’re going. On the first day, they held a retrospective to accomplish this.
Ultimately, the creative way that the company thought about this offsite was in the agenda and planning.
If there was a presentation or low energy session, they wanted to make sure it was followed up by a high engagement interactive session.
Additionally, the timing was important. They decided that instead of having 8-hour Zoom meetings, they’d have four hours of virtual sessions a day, broken into 2-hour blocks with a break in between of about 1.5-2 hours.
The offsite included low energy sessions including a Q&A with the Chief Product Officer, where they prepared questions ahead of time and used a thirty-minute window to go through their questions. But followed up those sessions with interactive activities.
One session even had team members create a homepage for newcomers based on previous features built by the product team. This had the team actively working in the tool so they could see what features stand out.
They also had a session with a specialist that was a step-by-step process of the Wikipedia editing process so employees understand the user experience.
Other fun sessions included friendly games online.
When planning a virtual offsite, it’s important to consider the timing and energy levels of the event. Spending all day on a video conferencing tool isn’t going to be effective for most people.
Hosting a virtual offsite doesn’t need to be an overly complicated process. And it doesn’t need to be a boring, 8-hour long Zoom meeting. You can host interactive sessions, presentations, and truly engage with your employees.

5 SEO Success Stories to Inspire Your 2021 Strategy
Search engine optimization (SEO) may seem like a straightforward concept.
You pick keywords related to your business, create content with those keywords, and you’re set to watch your site grow — a simple three-step process, right? Nope.
While those are fundamental elements of SEO, it can actually be quite challenging to create a strategy that helps you drive traffic and enough of it to meet your overall business goals.
It can be difficult to get your feet off the ground. Thankfully, there are various tools specifically designed to help you with SEO, build domain authority, and achieve high ROI. In this post, we’ll hear inspiring stories from HubSpot clients that have used our SEO tools to achieve business success.
![→ Download Now: SEO Starter Pack [Free Kit]](https://no-cache.hubspot.com/cta/default/53/1d7211ac-7b1b-4405-b940-54b8acedb26e.png)
5 SEO Success Stories To Inspire Your 2021 Strategy
1. Ironpaper
Ironpaper is a digital marketing agency that helps their B2B clients grow. They worked with one of their clients, Goddard, to achieve significant success using HubSpot’s SEO tools.
Jonathan Franchell, CEO and Founder of Ironpaper, says, “While Goddard fills a real need for their customers by designing medical devices, historically they’ve struggled to find quality leads that could use their services. Instead, their website attracted a lot of spam and unqualified contacts.” Ironpaper began making critical SEO updates with HubSpot tools on Goddard’s site, focusing on internal linking, content strategy with business-relevant keywords, and technical SEO issues like broken links and meta tags.
Over an eight-month campaign, Ironpaper helped Goddard gain 2,361 Google positions across various keywords relevant to their offerings. Franchell says, “Because we created targeted content centered on strategic keywords, Goddard’s Google rankings increased even throughout a dip in traffic.”
The company also now ranks in the top 100 for 50 strategically targeted terms and can use HubSpot’s insights reports and dashboards to monitor their progress to ensure that their future marketing efforts are hyper-targeted for the audience they’ve worked hard to develop.
2. Apptega
Apptega is a cybersecurity and compliance platform. As they grew their business, they knew they would need an optimized website that generated leads. They also recognized that their existing WordPress site wouldn’t be enough for them to reach their goals.
Joelle Palmer, Apptega’s Digital Marketing Manager, says, “We had built a Frankenstein monster in WordPress. Our dev team would constantly have to drop what they were doing and fix our website.” Apptega then decided to migrate its existing site into CMS Hub.
Apptega saw almost immediate success with HubSpot’s SEO tools: “We saw one of our core pages move from a number100+ ranking on Google to position number three in two weeks. SEO usually takes three to six months to work…that was truly amazing for us as a company to experience.”
Some of the tools Apptega used within Marketing Hub to achieve their growth are the on-page SEO recommendations that direct users to pages that need attention and additional ways to optimize content.
3. Beacon Digital Marketing
Beacon Digital Marketing specializes in driving results for FinTech, SaaS, and B2B businesses.
As HubSpot Platinum Partners, they understand how to use and implement HubSpot tools to drive growth and success. While they typically assist other businesses, they took an internal look in August 2020 and decided to implement an SEO overhaul of a post on their blog that they believed could perform better than it already was.
They focused on a few critical areas for improvement: updating metadata, optimizing for a featured snippet, and re-targeting original keywords. The HubSpot content mapping tool helped them create a strategic pillar-cluster plan, and the on-page SEO recommendations provided them with helpful tips. After implementing their new strategy, they noticed an almost immediate 50% increase in page views: July 2020 showed 991 organic search traffic views, and August 2020 had 1,552.
Their optimization allowed them to draw more traffic to an existing blog post, and they have also seen an increase in organic traffic to additional pages on their website. This goes to show that a well-rounded SEO strategy can impact all areas of your business, as an increase in traffic leads to curious customers eager to learn more about what you have to offer.
4. Take Note
Take Note is a UK-based business that provides a range of audio and video transcription services, captions, and on-site note-taking. When demand for their business grew, they struggled with balancing disconnected tools to support their needs and obtain consistent growth. Thomas Carter, Director of Marketing at Take Note, said, “I think for us, SEO is the way to grow within such a competitive market.”
The business officially signed on to HubSpot in 2018 and has since increased its website traffic by 22%. At the same time, their customer base and revenue have grown by 16-22%. They’ve also seen an increase in leads. Carter adds, “Long term, we want to continue to focus on ensuring the quality of our services remains exceptionally high while using technology such as HubSpot to automate and optimize behind the scenes.”
5. Revenue River
Revenue River is a digital sales and marketing agency that helps companies scale and become competitive in their industry. One of their clients, Kofinas Fertility Group, saw their site traffic significantly impacted by COVID-19. Eric Pratt, the Managing Partner at Revenue River, says, “The site saw declines from mid-February all the way through May.”
The business got to work and conducted competitive analysis and keyword research to identify areas of opportunity for growth. They decided that the best course of action was to create pillar content and supporting content clusters, which would help them establish their domain as a source of authority in their industry.
Since implementing the new strategy in November of 2020, the site has nearly doubled its organic traffic. Between March and June of 2020, they saw 86K impressions, and January-March 2021 saw 1.1M.
Pratt says this success “Came about because of a combination of SEO strategy planning for research, topic clustering, and on-site/page optimization features to enrich the SEO appeal of the content we’re producing and publishing through HubSpot.”
Improving Your SEO Doesn’t Have To Be A Challenge.
The success stories we’ve highlighted in this post show that SEO doesn’t have to be a challenge, especially with the help of a high-powered SEO tool. Learn from these clients and create a strategy that works for your business.


Hulu Introduces New Ad Tool for SMBs: What Marketers Need to Know
Hulu gave us “The Handmaid’s Tale,” then gave us “Little Fires Everywhere.” So, personally, I don’t need another reason to love the streaming platform. But if I had a small business, I would have just gotten one.
In July 2020, Hulu announced Hulu Ad Manager, a self-service advertising platform designed for smaller advertisers with limited budgets.

Previously, Hulu ads were only accessible to top brands with the finances to fund large campaigns. Now, small- and mid-size businesses (SMBs) can reach the platform’s 92 million ad-supported viewers without dishing out thousands of dollars.
So, how exactly does the Ad Manager work? We’ll cover that and more below.
How to Use Hulu’s Ad Service
Currently, Hulu’s self-service solution is in the beta phase.
To access the platform as a beta user, you must first submit an RSVP form with information on your business.
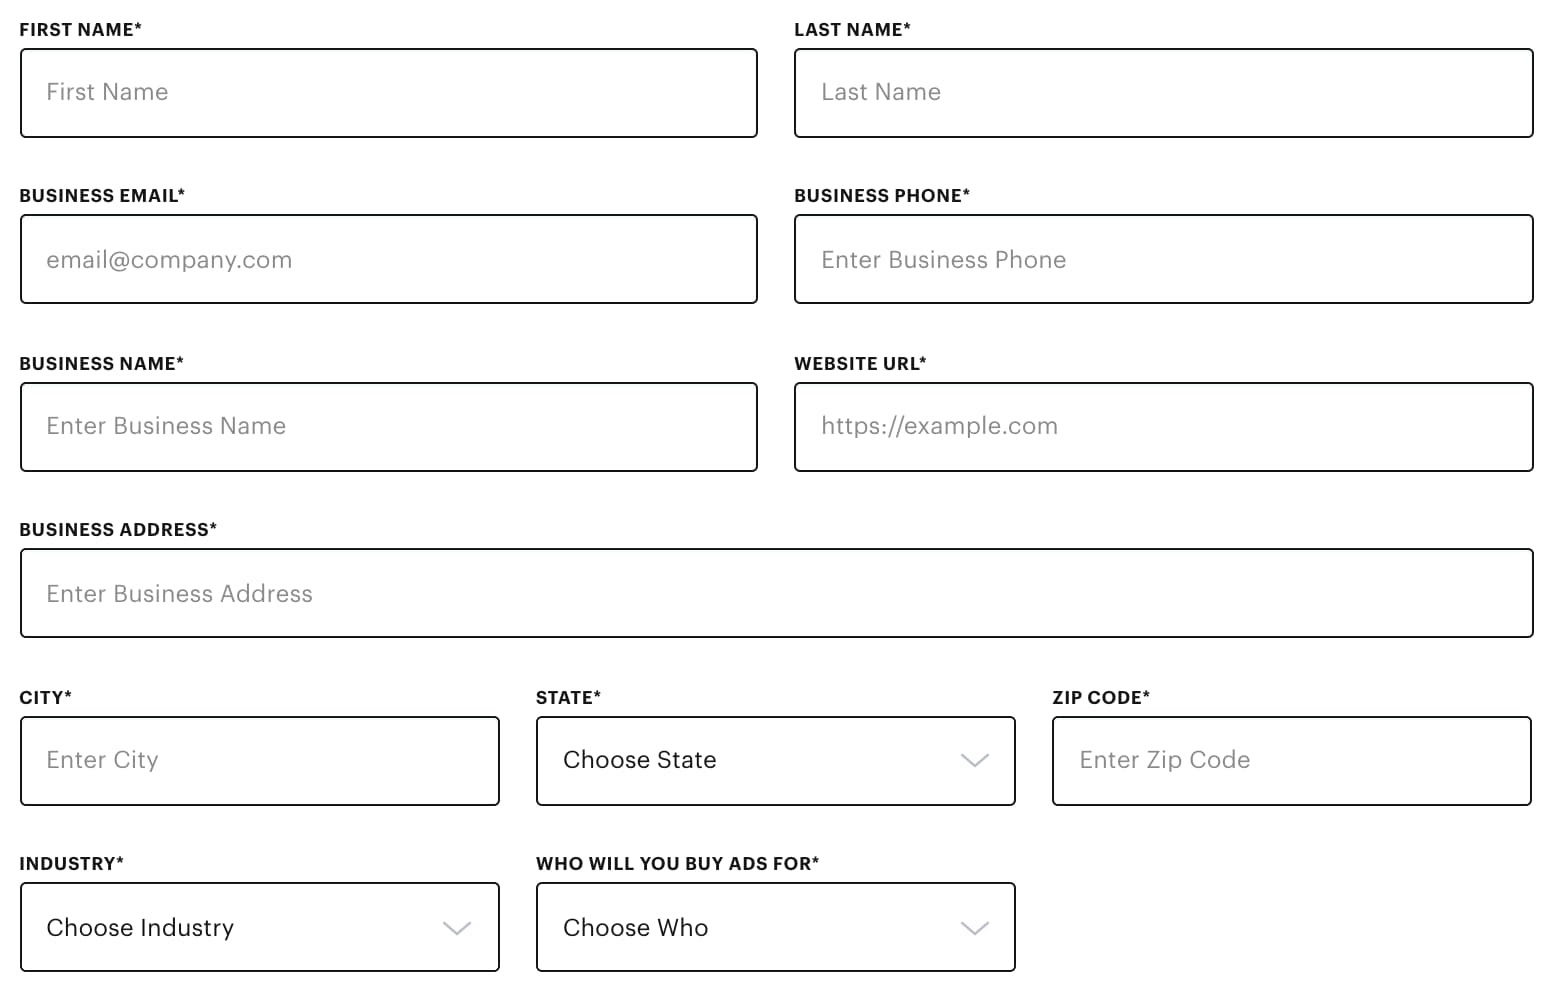
If accepted, setting up your ad is easy. Here are the steps.
1. Select the dates within which you want to run your ad campaign.
2. Build your audience.
On Hulu Ad Manager, you can target users by age, interest, gender, location, and of course show genre. When it comes to location, you can narrow it down by state, city, ZIP code, or a designated marketing area (DMA).
However, you cannot select which shows you want your ads to run on, only the genre. If you’re not sure what will align best with your brand, look through the current show selections to get an idea of what to expect.
3. Set your budget.
To run an ad on Hulu, you must have a minimum budget of $500 per campaign, which is considerably less than the usual cost of ads on streaming platforms. For comparison, Amazon’s self-service platform for video ads typically requires a minimum ad spend of $35,000.
4. Upload your video ad.
There are a few requirements your ad must meet to be approved:
- Be between 15 to 30 seconds long
- Formatted in MP4 or MOV
- Be in HD and have stereo sound
- Fit the tech specs outlined by Hulu
- Comply with Hulu’s advertising policies.
The approval process usually takes up to three business days.
5. Make a payment.
Currently, Hulu doesn’t accept business bank accounts or debit cards for payments. You must use a credit card. If you choose to pause or cancel your campaign, you will only pay for the delivered impressions.
6. Track your ad performance.
Once your ad is live, you can start tracking its performance in the Hulu Ad Manager.
Note that you will not be able to find out what times your ad aired and during which shows. However, you can expect to find standard metrics, such as impressions and clicks.
Hulu Advertising Options
In addition to Hulu’s most recent self-service option, the streaming service also offers two other advertising options:
- Premium Programmatic – This is ideal for brands who want to leverage lookalike audiences, audience CRM matching, and behavioral segmenting in their campaign.
- Action With Broad Appeal – With this option, you can integrate your brand with Hulu’s, create branded content collections, and deliver ads in innovative formats.
Each option caters to your brand’s specific goals and can be designed to fit your budget.
For instance, you can run brand lift studies, which are ads designed to measure consumer perception of your brand after a campaign.
Jillian Hope, senior marketing manager of brand advertising at HubSpot, explains that they can help brand advertisers understand the impact Hulu campaign exposure has on key brand KPIs.
Pros and Cons of Hulu Ads
Pro: Hulu has extensive targeting capabilities.
With any one of the three advertising options available on Hulu, you can use Hulu’s targeting features to reach your ideal viewers.
“[You have] the ability to define target audiences using Hulu’s first-party audience data or leverage lookalike audiences using your own first-party data,” said Hope.
The extent of the targeting parameters will depend on which option you are using. For instance, if you are using programmatic buying, you can use lookalike audiences to match the exact users you’re looking for with Hulu’s viewers.
However, on the current beta version of the self-service solution, you can only target users by demographic and show genre.
Despite this, Hope adds that targeting on a platform like Hulu is much more advanced than it would be with traditional, linear TV.
Pro: Innovative ad formats allow you to experiment.
On Hulu, you’re only limited to video commercials if you’re using the self-service option. The platform offers over 15 ad products to reach viewers.
“There are multiple ad formats available and lots of innovation happening,” said Hope. “For example, [there’s the] new QR code integration that is more desirable to direct response advertisers.”
It’s just a matter of figuring out which ad product best aligns with your goals.
For instance, there’s the cover story brand placement, which allows you to seamlessly integrate your branding on Hulu’s homepage.
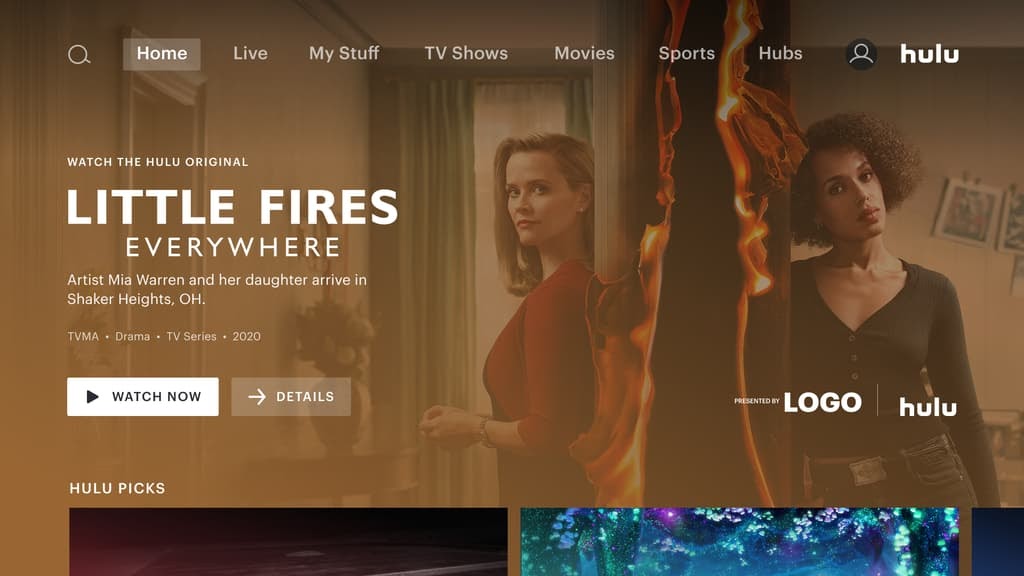
Then, there’s the ad selector, which puts the power back in the consumers hands by letting them select which ad they want to see.

These are just a few of the ad formats you can pick from, each one creating a different experience for the user. To see all the ad formats available on Hulu, visit Hulu’s ad product page.
Con: You can only accomplish so much with a limited budget.
One of the downsides of Hulu ads is that certain campaigns will require a bigger budget than you may have available.
“Some of the more premium ad placements, as well as brand lift studies, require budget minimums in order to reach statistical significance,” said Hope. “So, they are less attainable to smaller advertisers.”
In this case, Hulu may not be the best platform on which to run these types of campaigns. You may want to opt for another ad platform, like Facebook Ads, where you can reach more users who still fall within your target audience for less money.
How Hulu Ad Examples Can Inform Your Next Campaign
If you’re not ready to pull the trigger on a Hulu campaign, get inspiration in the meantime.
See how other brands – notably your competitors – are using the platform to reach their target audience. This means looking at their creative, reviewing case studies, and monitoring consumer sentiment via social media.
This competitive intelligence can help you devise a strategy during the ideation phase of your campaign.
Given that the Hulu Ad Manager is still in beta, the platform will likely include more features once it fully launches. In the meantime, SMBs can reach TV viewers for a fraction of what it used to cost.


Hulu Introduces New Ad Tool for SMBs: What Marketers Need to Know
Hulu gave us “The Handmaid’s Tale,” then gave us “Little Fires Everywhere.” So, personally, I don’t need another reason to love the streaming platform. But if I had a small business, I would have just gotten one.
In July 2020, Hulu announced Hulu Ad Manager, a self-service advertising platform designed for smaller advertisers with limited budgets.
Previously, Hulu ads were only accessible to top brands with the finances to fund large campaigns. Now, small- and mid-size businesses (SMBs) can reach the platform’s 92 million ad-supported viewers without dishing out thousands of dollars.
So, how exactly does the Ad Manager work? We’ll cover that and more below.
How to Use Hulu’s Ad Service
Currently, Hulu’s self-service solution is in the beta phase.
To access the platform as a beta user, you must first submit an RSVP form with information on your business.
If accepted, setting up your ad is easy. Here are the steps.
1. Select the dates within which you want to run your ad campaign.
2. Build your audience.
On Hulu Ad Manager, you can target users by age, interest, gender, location, and of course show genre. When it comes to location, you can narrow it down by state, city, ZIP code, or a designated marketing area (DMA).
However, you cannot select which shows you want your ads to run on, only the genre. If you’re not sure what will align best with your brand, look through the current show selections to get an idea of what to expect.
3. Set your budget.
To run an ad on Hulu, you must have a minimum budget of $500 per campaign, which is considerably less than the usual cost of ads on streaming platforms. For comparison, Amazon’s self-service platform for video ads typically requires a minimum ad spend of $35,000.
4. Upload your video ad.
There are a few requirements your ad must meet to be approved:
- Be between 15 to 30 seconds long
- Formatted in MP4 or MOV
- Be in HD and have stereo sound
- Fit the tech specs outlined by Hulu
- Comply with Hulu’s advertising policies.
The approval process usually takes up to three business days.
5. Make a payment.
Currently, Hulu doesn’t accept business bank accounts or debit cards for payments. You must use a credit card. If you choose to pause or cancel your campaign, you will only pay for the delivered impressions.
6. Track your ad performance.
Once your ad is live, you can start tracking its performance in the Hulu Ad Manager.
Note that you will not be able to find out what times your ad aired and during which shows. However, you can expect to find standard metrics, such as impressions and clicks.
Hulu Advertising Options
In addition to Hulu’s most recent self-service option, the streaming service also offers two other advertising options:
- Premium Programmatic – This is ideal for brands who want to leverage lookalike audiences, audience CRM matching, and behavioral segmenting in their campaign.
- Action With Broad Appeal – With this option, you can integrate your brand with Hulu’s, create branded content collections, and deliver ads in innovative formats.
Each option caters to your brand’s specific goals and can be designed to fit your budget.
For instance, you can run brand lift studies, which are ads designed to measure consumer perception of your brand after a campaign.
Jillian Hope, senior marketing manager of brand advertising at HubSpot, explains that they can help brand advertisers understand the impact Hulu campaign exposure has on key brand KPIs.
Pros and Cons of Hulu Ads
Pro: Hulu has extensive targeting capabilities.
With any one of the three advertising options available on Hulu, you can use Hulu’s targeting features to reach your ideal viewers.
“[You have] the ability to define target audiences using Hulu’s first-party audience data or leverage lookalike audiences using your own first-party data,” said Hope.
The extent of the targeting parameters will depend on which option you are using. For instance, if you are using programmatic buying, you can use lookalike audiences to match the exact users you’re looking for with Hulu’s viewers.
However, on the current beta version of the self-service solution, you can only target users by demographic and show genre.
Despite this, Hope adds that targeting on a platform like Hulu is much more advanced than it would be with traditional, linear TV.
Pro: Innovative ad formats allow you to experiment.
On Hulu, you’re only limited to video commercials if you’re using the self-service option. The platform offers over 15 ad products to reach viewers.
“There are multiple ad formats available and lots of innovation happening,” said Hope. “For example, [there’s the] new QR code integration that is more desirable to direct response advertisers.”
It’s just a matter of figuring out which ad product best aligns with your goals.
For instance, there’s the cover story brand placement, which allows you to seamlessly integrate your branding on Hulu’s homepage.
Then, there’s the ad selector, which puts the power back in the consumers hands by letting them select which ad they want to see.
These are just a few of the ad formats you can pick from, each one creating a different experience for the user. To see all the ad formats available on Hulu, visit Hulu’s ad product page.
Con: You can only accomplish so much with a limited budget.
One of the downsides of Hulu ads is that certain campaigns will require a bigger budget than you may have available.
“Some of the more premium ad placements, as well as brand lift studies, require budget minimums in order to reach statistical significance,” said Hope. “So, they are less attainable to smaller advertisers.”
In this case, Hulu may not be the best platform on which to run these types of campaigns. You may want to opt for another ad platform, like Facebook Ads, where you can reach more users who still fall within your target audience for less money.
How Hulu Ad Examples Can Inform Your Next Campaign
If you’re not ready to pull the trigger on a Hulu campaign, get inspiration in the meantime.
See how other brands – notably your competitors – are using the platform to reach their target audience. This means looking at their creative, reviewing case studies, and monitoring consumer sentiment via social media.
This competitive intelligence can help you devise a strategy during the ideation phase of your campaign.
Given that the Hulu Ad Manager is still in beta, the platform will likely include more features once it fully launches. In the meantime, SMBs can reach TV viewers for a fraction of what it used to cost.
6 Creative Strategies for Getting Traffic from Pinterest
Pinterest is an undeniably powerful opportunity to reach and convert new audiences.
If you don’t believe me, consider this: The platform has over 250 million users. And roughly 90% of those Pinterest users say they look at content on the network to make purchasing decisions.
However, excelling on Pinterest versus using Pinterest as a strong distribution channel are two different things.
If you’re starting to see an uptick in followers on your Pinterest account, you might want to consider how you can turn those followers into real leads and customers for your business.
Here, let’s explore some creative strategies for turning the followers you get on Pinterest into traffic for your website and social channels.

1. Create boards using relevant keywords.
A board — or an organized compilation of related pins, for easier discoverability — is a necessary component for a good user experience on Pinterest.
For instance, CoSchedule, which has almost 17,000 followers on Pinterest, has organized their pins into boards titled “Content Marketing”, “Social Media Marketing”, “Marketing Inspiration”, and more:
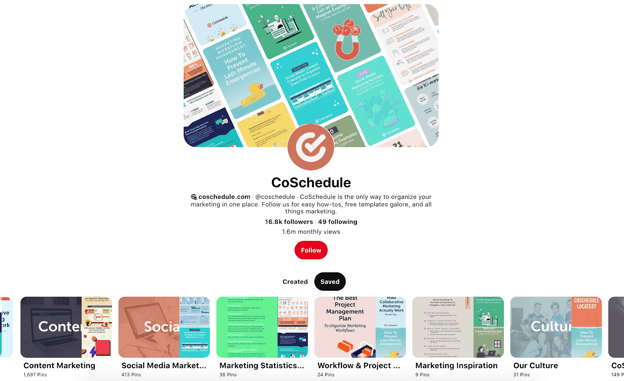
New followers can easily find the pins they’re looking for using these broader categories, which is why it makes sense to use popular keywords when creating your boards, as CoSchedule did.
Additionally, these keyword-optimized boards can help make your Pinterest content more discoverable on search engines when someone searches for related keywords — particularly on Google Image searches, since Pinterest is primarily a visual channel:
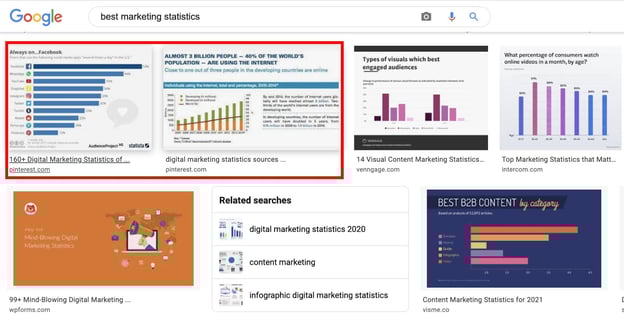
As shown above, two images from Pinterest arise on Google’s Images search page for the search term, “Best marketing statistics”. By creating boards with searchable keywords, you’re more likely to reach users both on, and off, Pinterest.
2. Leverage Rich pins to ensure your Pinterest content is up-to-date.
Simply put, Rich pins can sync with your website to ensure your content is up-to-date on Pinterest when you make any changes to those pages on your site.
There are a few reasons you might use Rich pins. If you post your products on Pinterest, Product Rich Pins can ensure availability and pricing are updated automatically as those factors change on your ecommerce site.
If you post recipes, alternatively, then Recipe Rich pins can add extra information to the recipes you pin to your site — including serving size, diet preference, and ratings — for increased discoverability.
Finally, Article Rich Pins will add headlines, titles, description, and author byline information of the article or blog post to your Pinterest site when you pin an article.
These small details go a long way towards ensuring your Pinterest content is always fresh as users find it. Particularly if you’re aiming to drive sales for products from Pinterest, it’s important to use Product Rich Pins so people aren’t frustrated when they find pricing or other information is different between Pinterest and your product pages.
3. Pin consistently, and often.
You can’t expect much traffic from Pinterest if you don’t regularly pin content on the platform. Pinterest, like any social network, requires dedicated, long-term work to see results.
You wouldn’t expect to write one blog post for your website and see a major, steady flow of traffic as a result — and the same goes for Pinterest.
Additionally, as your followers grow, you want to provide high-quality, interesting content to increase brand loyalty and keep those followers active on your page. By regularly pinning, you’re increasing your odds of converting those followers into fans of your brand — which will ultimately drive them off Pinterest, and onto your website or social pages.
4. Optimize your pins — and boards — for search.
At its core, Pinterest is essentially its own visual search engine. And, similar to other search engines, keyword-optimized content performs best on the network.
Additionally, keyword optimizing your Pinterest profile increases your chances to rank organically on other search engines, and drive traffic from search engines like Google to your Pinterest site.
To optimize your Pinterest page, consider inserting brand-related keywords into your bio and profile, pin descriptions, board titles, board descriptions, and even the image alt-text of content you post on Pinterest.
This can help your images appear on Google’s Image search results, as well as improve your chances of ranking on Pinterest for your intended keywords.
5. Create pin-worthy images, and use those images to link out to original content on your website or social pages.
One of the easiest ways to drive traffic back to your website is by creating unique, original content specifically for Pinterest, and then using that pin to link back to your website or blog post.
For instance, consider the infographic below, which I found when searching “best social media platforms” on Pinterest:
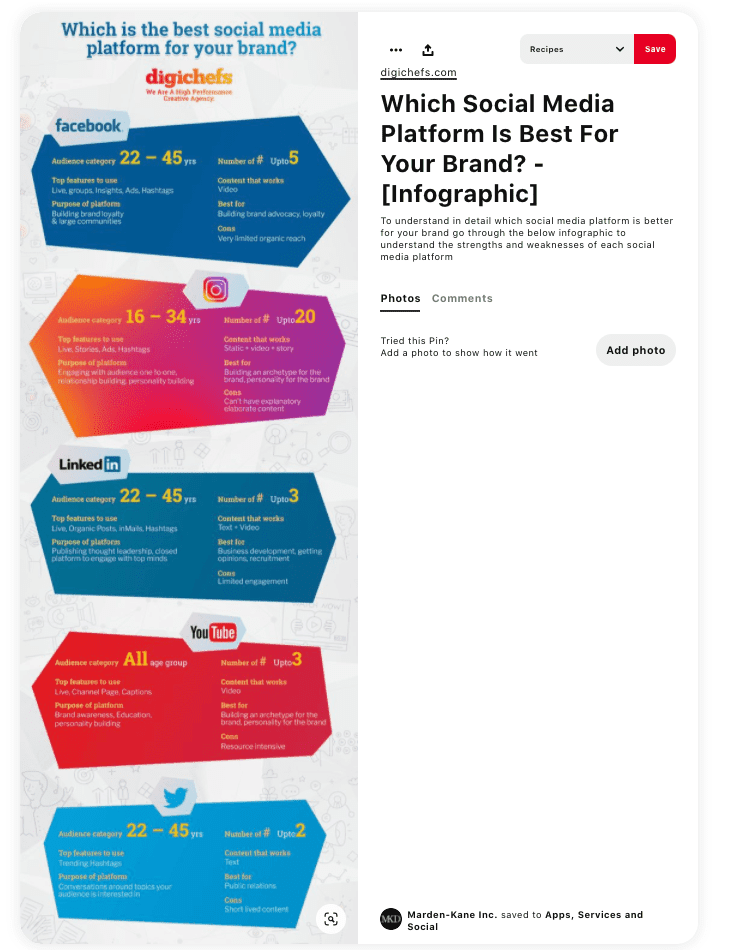
It’s a good idea to create unique, standalone value with your images for Pinterest. In this case, I can find my answer to “best social media platforms” by looking at the infographic itself without ever leaving Pinterest — which makes for a better user experience.
However, if I’ve found unique value in the content, I might want to click the brand’s website to learn more about their business or see additional content. When I click on the digichef URL, I’m taken to the original page for the infographic, on the business’ website:
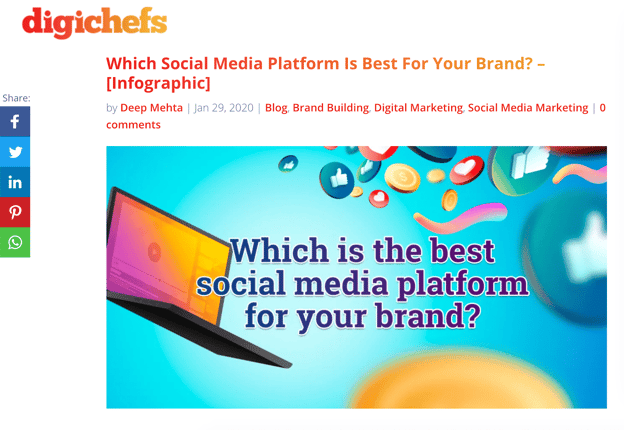
You might try a similar approach with your own Pinterest strategy. Consider how you can create unique, standalone content that will perform well on Pinterest. Alternatively, perhaps you can post infographics or other visual assets you’ve already created for your brand on Pinterest, with a link back to your site.
6. Follow similar brands for content inspiration, as well as opportunities to re-pin images that align with your brand.
With Pinterest, each pin you save doesn’t have to be original branded content. Instead, one easy opportunity to increase engagement is to re-pin images that align with your brand to share with your own followers.
Additionally, following other brands can increase traffic to your own Pinterest profile and, ultimately, your website. When you follow someone on Pinterest, Pinterest sends a notification letting them know they have a new follower. Some of those people may then follow you back in return, which is a good way to grow your audience.
Following similar brands can also help you identify popular or trending content on other profiles, as well as gaps in your own Pinterest content strategy.
If you work at a home decor ecommerce store, for instance, you might find that many competitors are posting ‘Easter Home Decor’ images:
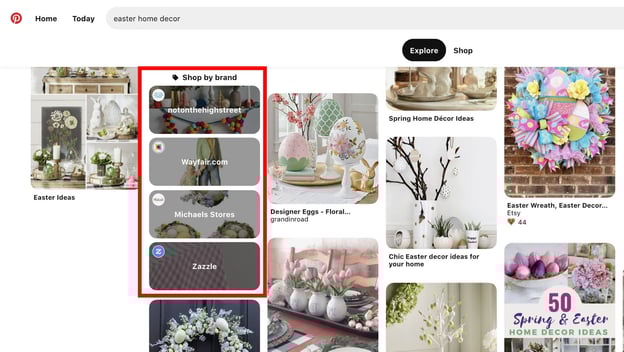
This might inspire your team to create your own version of Easter home decor content, as well as other seasonal pins and boards.
Finally, consider partnering with certain brands that have complementary products or services to your own. For example, Benefit Cosmetics partnered with Shutterfly to create the page, “Wedding Looks: benefit cosmetics x Wedding Paper Divas“:
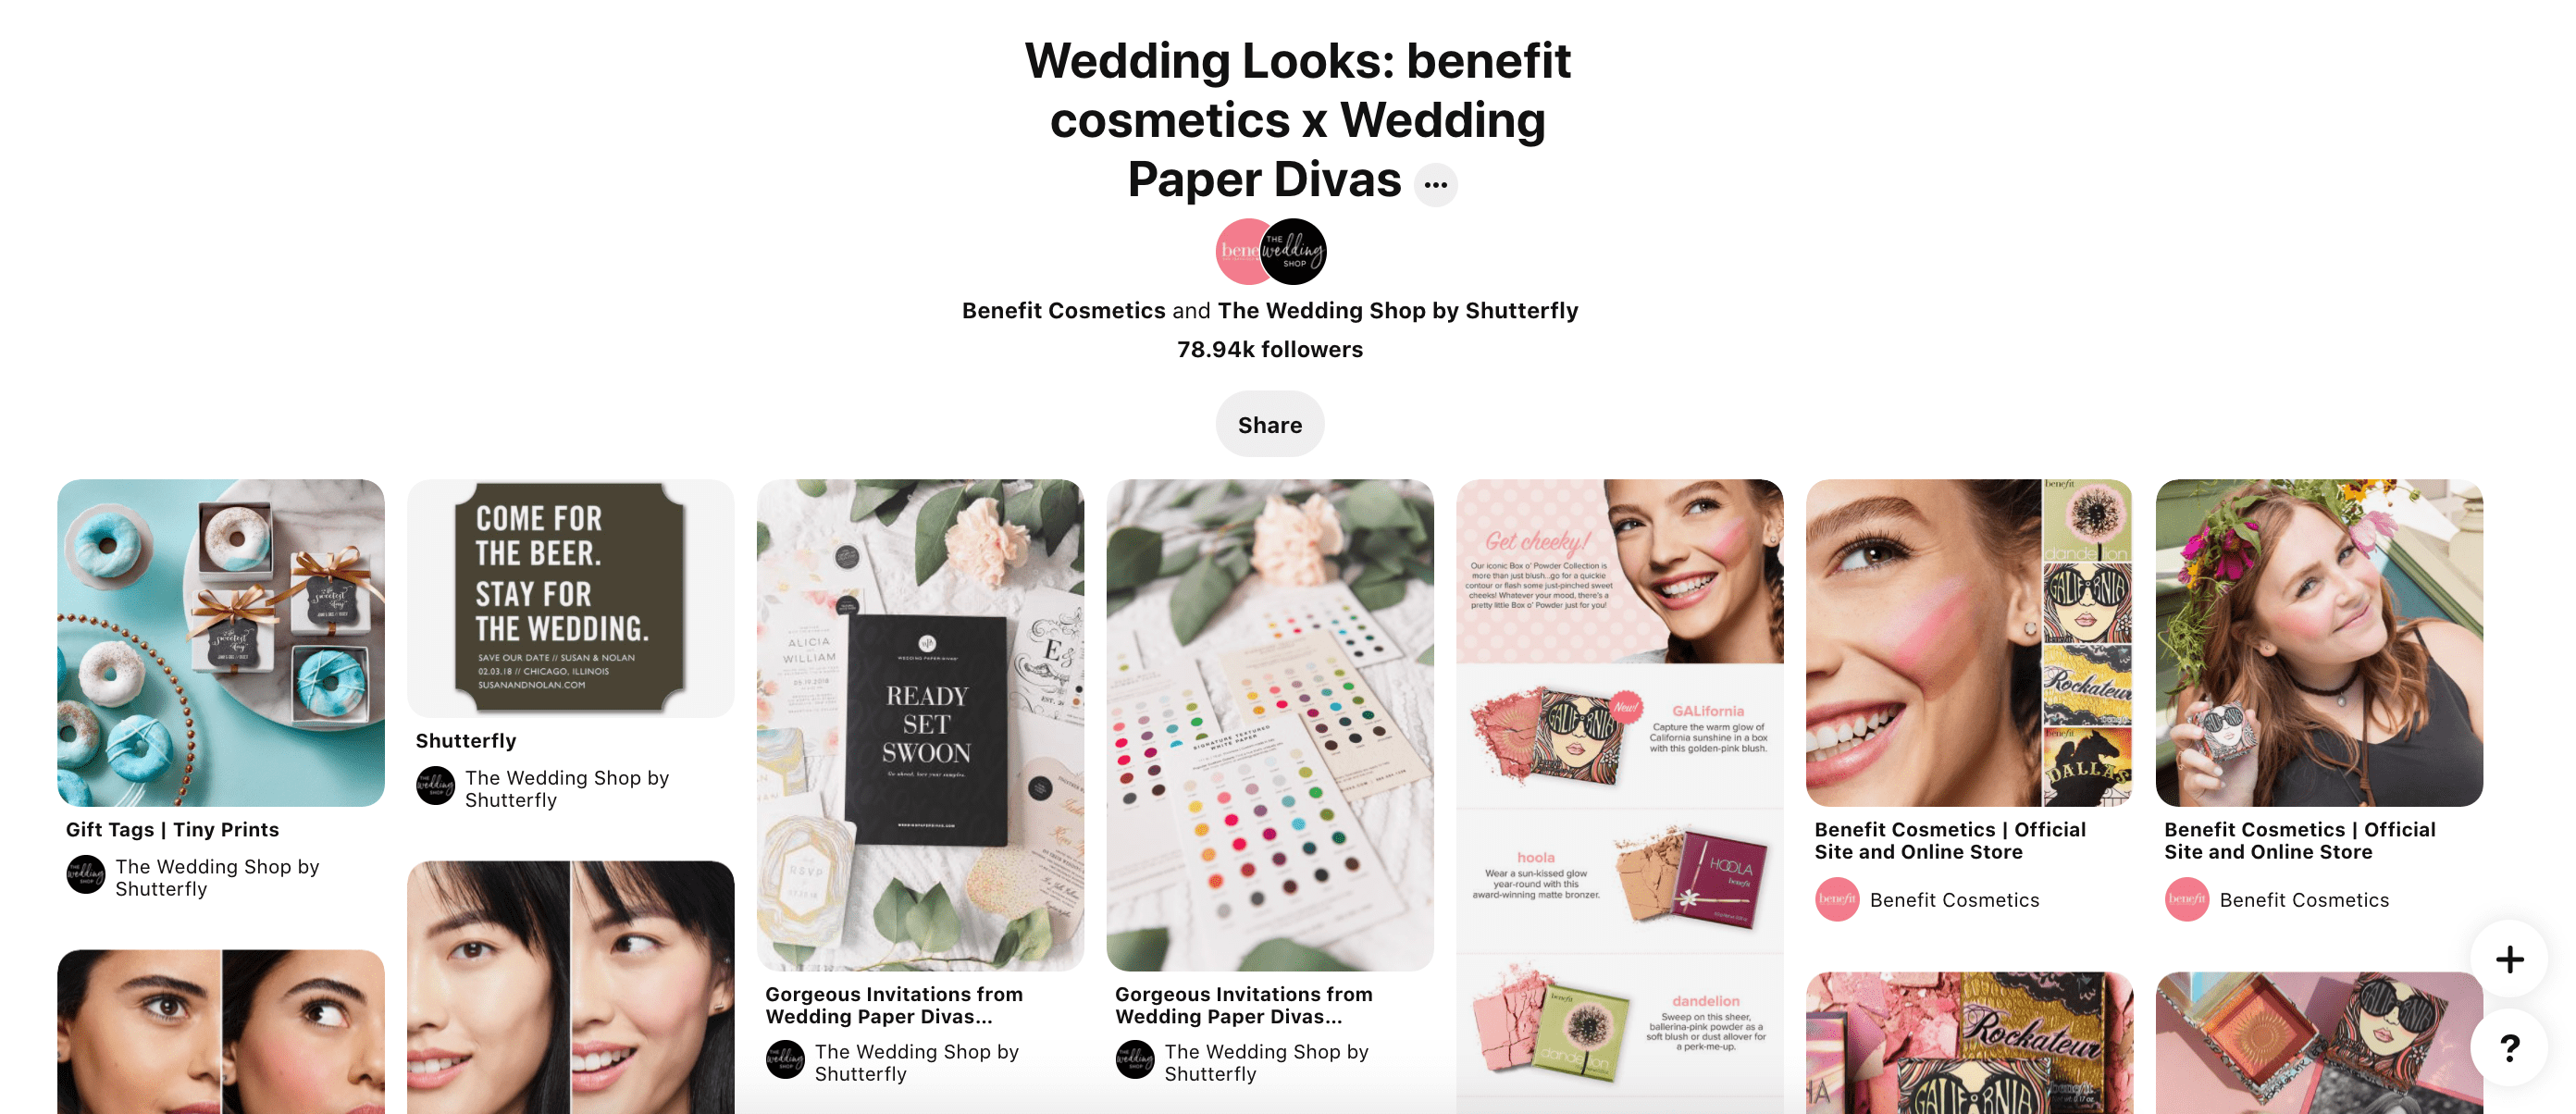
The page is filled with pins related to both makeup and stationary for the big day. For expanding your reach and increasing value for your followers, you might try partnering with other popular brands on Pinterest.
Ultimately, creating a successful Pinterest strategy takes work and dedication, but if you find Pinterest is a popular social platform with your target audience, it’s likely worth the time and effort it takes to grow your following, increase brand awareness, and ultimately drive sales.


How I Grew the HubSpot Podcast Skill Up Audience by 271% in Two Months
This post is a part of Made @ HubSpot, an internal thought leadership series through which we extract lessons from experiments conducted by our very own HubSpotters.
There are 72,000 new podcast episodes each day — which means there are five new podcasts made every six seconds.
And, as of March 2020, there are a reported 1.9 million total podcasts, and 47 million total episodes. Depending on when you read this article, these numbers could be drastically different.
Which is all to say: The podcast industry is rapidly growing.
In a world of fast-growing competition, how do we — as podcast marketers — compete for listeners’ attention, while also expanding reach and growing our audiences?
I wish that I could tell you that I have it all figured out. However, not having it figured out is what ultimately led to a 271% increase in downloads for season six of HubSpot’s podcast, Skill Up.
Here, I’ll share my lessons for how I achieved that growth.
Lesson 1: There are a lot of podcast listening platforms.
When you think of podcast platforms, Apple Podcasts, Spotify, and Google Podcasts are probably top of mind, right?
Well, there are many, many more listening platforms beyond those three.
I downloaded every podcast platform available through the App Store on my iPhone. This included Podcast Addict, Overcast, Castro, PlayerFM, Pandora, Pocket Casts, and about ten others.
I then cross-referenced the players I downloaded with the audience application report from Megaphone. If there was a small or nonexistent audience on a platform, I highlighted it.
The first recommendation I can make is to look at where people are listening to your podcasts using the reporting provided by your podcast host. Are the majority of your downloads coming from Apple or Spotify? If your answer is yes, then that’s good news. You have untapped audiences on other platforms, including PlayerFM and Podcast Addict.
Which brings me to my next recommendation …
Lesson 2: Paid ad placements on podcast platforms pay off.
After I had a list of podcast platforms that would allow me to expand the reach of my podcast, I opened each platform and took note of their ad placements. I looked for anything that said “Sponsored” or something along those lines. If I liked the ad placement, I included it in my list.
Next, I focused on gathering data on ad cost, estimated CPM, and estimated downloads for the placements I was interested in. This is relatively easy, since many of the platforms share both the ad placements available and estimated campaign results on their websites.
If they don’t have the information available on their website, you can email the podcast platforms’ advertising team, who will provide you with that information.
After gathering this data, I assessed the best ads forSkill Up. Fortunately, before I joined HubSpot, my manager had already run ads on podcast listening platforms — which meant I had data to reference to make more informed decisions.
If you haven’t run ads on a listening platform previously, I have good news for you: Ad placements range from $165 to $3,000, so even if you don’t have a large budget, you can likely still experiment with these types of ads.
Lesson 3: Episode-specific promotions are incredibly effective.
Within my marketing plan for the launch of season six, I focused on promotions that announced the upcoming season.
The season was comprised of five episodes that were released over the span of three weeks, so it made sense to drive awareness towards the new episodes. The podcast ad copy read something along the lines of, “A new season ofSkill Up is here!”
Towards the end of the season, however, it didn’t make sense to announce the season anymore. Instead, I created episode-specific promotions.
In comparison to the show promotions, the episode highlights resonated better with audiences and increased our conversions through distribution channels, such as email.
Here’s an example:
HubSpot’s Skill Up podcast presents … “How a Sales Manager at LinkedIn Builds a Buyer-first Selling Strategy”
What’s the best selling strategy in 2021? Kwesi Graves, Sales Manager at LinkedIn, champions the “buyer-first selling” methodology, which prioritizes quality over quantity, emphasizes the importance of the buyer’s context, and encourages his team of reps to spend more time researching than reaching out. If you’re a manager, sales leader, or rep looking to transform how you sell in 2021, this is a great place to start! Listen now:
Episode-specific advertisements also performed much better than season advertisements. Unfortunately, however, most podcast listening platforms don’t allow episode-specific advertisements.
There is one that does: PlayerFM. Our episode-specific ads on PlayerFM outperformed all our other ad campaigns. Hopefully, more podcast platforms will eventually offer the same.
While I wouldn’t say these initiatives are revolutionary, they were incredibly effective for us. Our team is on an exciting journey where experimentation and innovation are key to success.
For any podcast marketers in the industry — This is just the beginning.

The Most Annoying Advertisement Types & What to Do Instead [Research]
A 2019 Edelman study found that three out of four consumers avoid ads. In fact, 47% said they have changed their media habits to see fewer ads while others use ad blockers to prevent them altogether.
The reasons why vary.
Personally, I hate repetitive ads. For about a month straight, every time I would watch a YouTube video, I would see the same ad and it got more irritating every time. Mostly because I wasn’t interested in the brand or its services. But the incessant nature of the ad led to me develop a negative association with the company.
So, how can brands deliver ads that audiences want to see? To know that, let’s first look at what they definitely don’t like.
The Most Annoying Advertisement Types
We surveyed 302 people and asked them about what ads they are most annoyed by. Fifty-eight percent of respondents said pop-up ads that negatively impact the user experience.
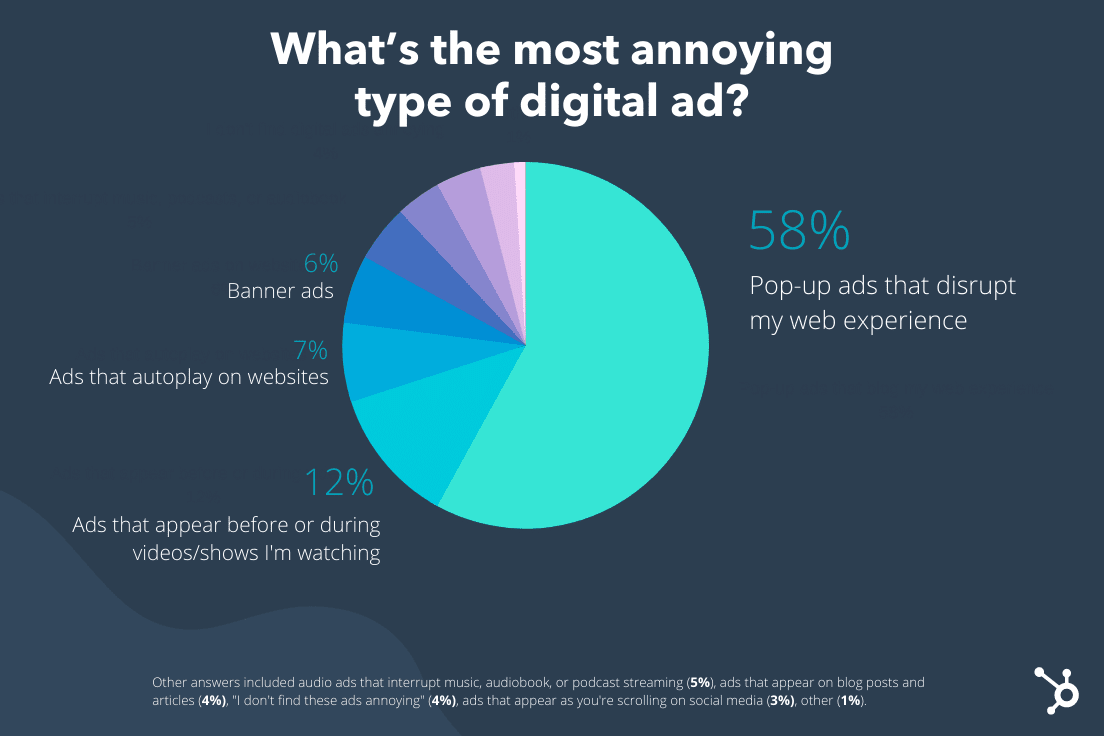
We’ve all gone through it. You land on a website and before you can even scroll, you’re hit with a big pop-up ad that takes up the whole screen. You close it, then get hit with another pop-up on the bottom of your screen, making it harder to navigate the site.
At this stage, many users just drop off.
This is an issue that affects both publishers and advertisers. The more visitors a publisher has, the higher the rate they will charge for their ad inventory. However, if a site is known to have incessant pop-up ads (looking right at you, recipe websites), visitors may be reluctant to visit that site again. This can lead to lower traffic and eventually less ad revenue.
This is equally impactful to advertisers who want users to convert on their ads. You know how they say journalists should never become the story? Well, ads should never be noticed for their placement instead of their content.
Let’s say your ads are displayed in ways that hinder the user experience. At worst, consumers will start to build a negative perception of your brand and at best, they’ll simply be too distracted by the placement or timing of the ad to care about the content. Either way, it’s a lose-lose situation.
When it comes to video ads, things get tricky.
Our study found that the second most annoying ad type is the one that plays before or during a video or show. In addition, a 2019 study by RevJet found that 100% of consumers will skip the ad whenever possible.
The solution here isn’t to stop producing video ads altogether. It’s to leverage the short time you have to capture your audience’s attention and encourage them to engage with your video.
This could be by addressing their pain points or using emotional appeal. Determining what works best for your audience will require a lot of experimentation. It may take time to figure out the right formula but once you do, you can create videos with confidence that your audience will be entertained.
Now that we know what annoys consumers, let’s talk about what consumers actually want to see.
What Consumers Want in Ads
Plan your ad with user experience in mind.
When deciding on your ad format, placement, and timing, it’s important to consider the user experience.
Take pop-up ads, they are inherently disruptive. In this case, you may want to display them once your user has exhibited a high-engagement behavior on the site. This can be spending X amount of minutes on a page or visiting other pages on the website.
With this tactic, your user may be less likely to dismiss your ad as they are already highly engaged with the page.
Find the right balance in ad frequency.
The RevJet study found that over 72% of consumers dislike brands with repetitive messaging in their ads.
While ad frequency can help you reach your goals, there is a point where it no longer yields positive results.
A 2020 Facebook IQ study found that for brand lift campaigns, more impressions do lead to better ad recall and action intent. However, after a certain number of impressions, the benefits plateau.
In 2019, Snapchat found that the sweet spot was one to two ads per week. However, this number can vary greatly depending on several factors.
The key takeaway is that more doesn’t always equal better when it comes to users.
Don’t get too invasive.
Yes, consumers like personalized ads. But there’s a difference between personal and creepy, and that’s the balance every brand has to strike.
We surveyed 300 people and asked them about which ads feel the most invasive. The top answer was ads based on their recent online searches.
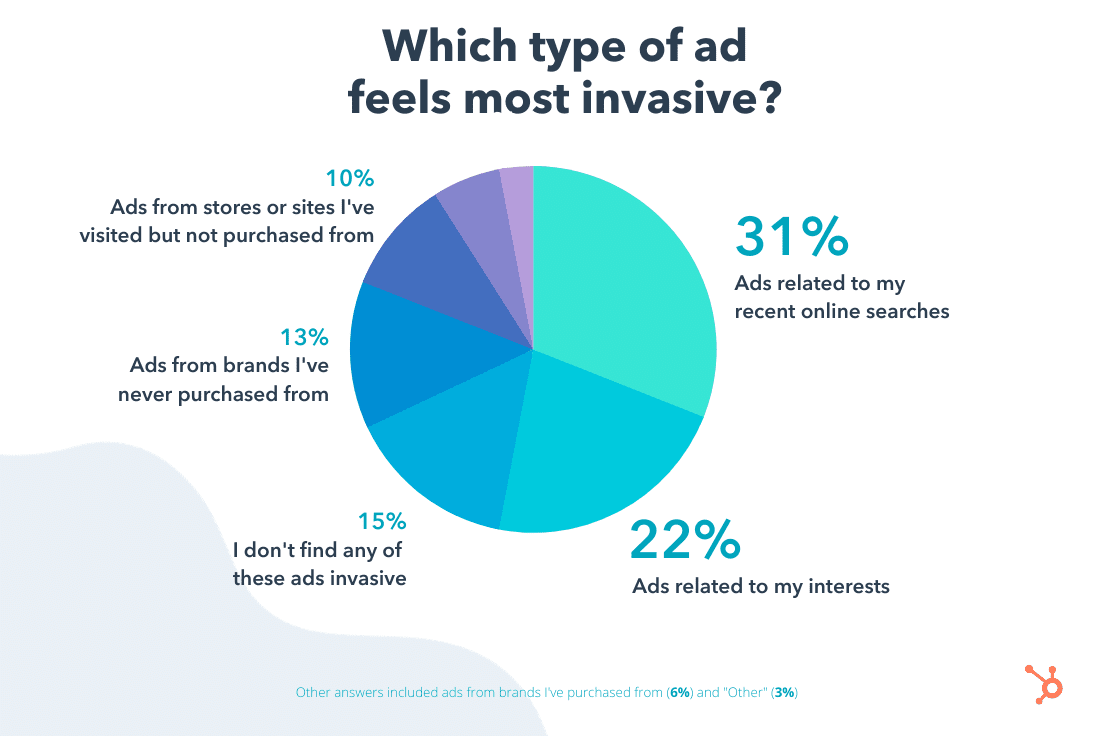
The RevJet survey echoed these results, with 60% of consumers stating they do not find retargeting ads helpful.
What consumers may prefer are contextual and demographical ads, according to a 2020 Innovid Study. For instance, seeing an ad for a blender as you’re looking up recipes or seeing an ad for a store located in your area.
There’s no hard-and-fast rule for determining what’s helpful or too invasive. Experiment and see what works for your brand, then use that data to inform your future ad strategy.
Keep it short and concise.
When it comes to video ads, most consumers are not willing to watch them to completion.
A key finding in the RevJet study was that users are willing to abandon their videos if it means sitting through a long ad.
Twenty-eight percent of consumers between the ages of 18 to 44 will drop off if the ad exceeds 10 seconds. That rate rises incrementally as video length increases.
That said, keep your ads short and to the point. If you do opt for a longer ad, have a strong opening that will encourage your audience to keep watching.
It’s important to note that these tips provide insights into consumer perception and can help steer you in the right direction. However, it’s only by experimenting that you will determine which strategies yield the best results to achieve your marketing goals.

4 Ways Brands Can Gain Awareness on Clubhouse [+Examples]
If you’ve been on social media, marketing news sites, or the HubSpot Blog lately, you might have heard about Clubhouse.
The nearly one-year-old social media platform which allows users to drop into audio-only chat rooms has grown from 600,000 to 10 million active users in just a few short months. Although the app is invite-only, more and more people are gaining access and tuning into discussions related to their industry, hobbies, and other interests each day.
Users also love Clubhouse for its entertainment factor. When surfing through Clubhouse, you might find celebrities, like Joe Rogan, chatting with fellow influencers; audio-only musical productions, comedy nights; or even standup comedy events.
But, when exploring Clubhouse’s vast and highly-creative audio rooms as a marketer, you might wonder if and how you can leverage it within your marketing strategy.
At this point, most Clubhouse content is still highly experimental. However, one major theme to note is that it’s users want to hear from people — not just brands.
Because Clubhouse’s users crave authentic human discussion, they’ll likely disengage from rooms that prioritize promotional content over a relatable conversation.
However, while building brand awareness on an ultra-personal app like Clubhouse takes time, energy, and lots of community management, we’re already starting to see brands begin to connect with the channel’s growing audience.
To help marketers who are just learning about Clubhouse, I spent the last few days surfing the app to learn how brands are reaching users. Below I’ll highlight four common brand awareness tactics and offer a few actual examples.
![Download Now: Social Media Trends in 2021 [Free Report]](https://no-cache.hubspot.com/cta/default/53/3dc1dfd9-2cb4-4498-8c57-19dbb5671820.png)
How Brands Leverage Clubhouse
1. Fireside Chats or Q&As
When I first heard about Clubhouse and explored the app, a lot of rooms I dropped into felt like audio-only video calls or webinars where only the hosts began with speaking privileges. To me, it’s not surprising that brand-affiliated room creators and moderators have begun to leverage Q&As, panels, and fireside-chat formats to create interactive — yet well-managed — discussions on the platform.
When watching a panel or interview affiliated with a brand, it’s often formatted in one of two ways:
- The moderator — who works for the brand coordinating the room — asks thought leaders or influencers affiliated with their industry questions. This moderator might also permit audience members to ask questions or come to the stage to the speaker as well.
- An employee or leader from a brand serves as an interviewee or panel member while an influencer that does not work for the brand asks questions or moderates questions from the audience.
Regardless of which role the brand member holds in the chat, these rooms have very similar formats. They usually begin with the moderator announcing who they are, who they’ll be talking to, and the topic of the room. From there, the moderator will either ask questions to the speakers or giving speaking privileges to other users who raise their hands.
Below I’ll highlight two examples of rooms I’ve seen. Because Clubhouse is still invite-only and positioned as a safe space for communities to discuss thoughts, topics, or ideas, I will only note key parts of the conversations and room formats. I also did not record these rooms.
Below are two recent fireside chat examples:
Coinbase
A recent Clubhouse room, shown below, featured an interview with Coinbase Co-Founder and CEO Brian Armstrong. During the room, Sriram Krishman, a moderator from the club Good Time, asked Armstrong questions about how he got started in bitcoin and grew his company. They also discussed the future of cyber currency. Krishman, also invited listeners to raise their hands and ask questions to Armstrong to create more discussion around the complex cyber topic.
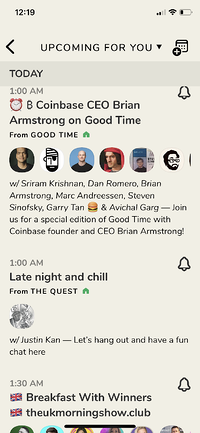
In rooms like the one above, users can learn more about a brand like Coinbase and ask its leader questions about the company or its industry. Through this experience, Coinbase and other brands could boost both company awareness and credibility with audiences who tune in to hear their canned, unedited discussion.
HubSpot
Recently, HubSpot also launched a fireside chat-styled room where our Chief Marketing Officer Kipp Bodnar, CTO and Co-Founder Dharmesh Shah, and Sr. VP of Marketing Kieran Flanagan invited prominent Clubhouse influencers including Bomani X to discuss “The Future of Marketing and Clubhouse.”
During the panel, Bodnar asked the Clubhouse influencers a few questions related to how they’ve grown their audiences on the platform; what they’ve done to optimize their profile, rooms, or clubs; and brand awareness etiquette. He also took similar questions or comments from a vast group of listeners including a weight-loss business founder, a scientist, and a Rubix cube enthusiast looking to build Clubhouse communities.
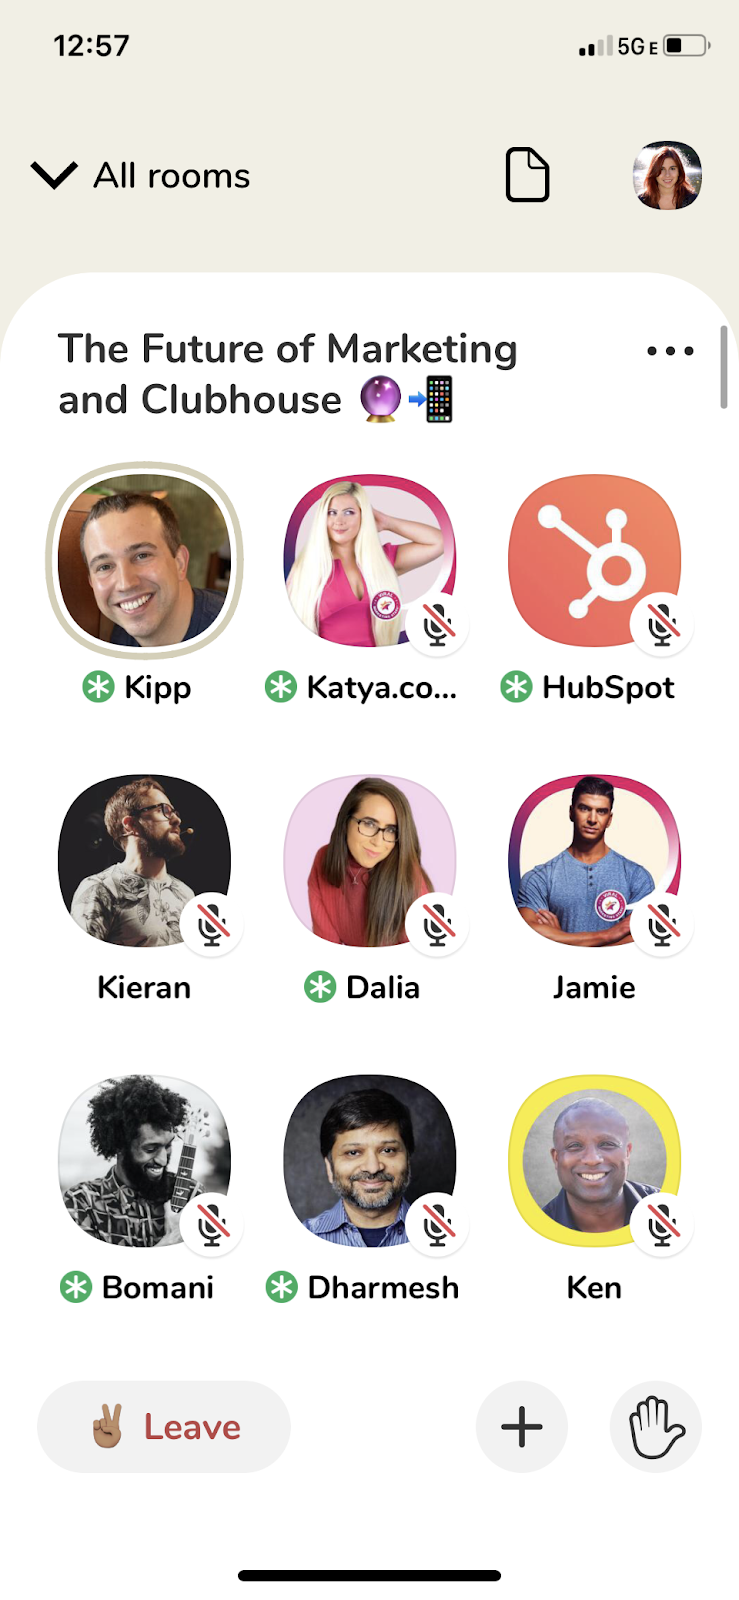
While HubSpot’s leaders haven’t claimed to be Clubhouse experts yet, they created a room to highlight what they know so far and connect listeners with some of Clubhouse’s high-profile early-adopters of the app with millions of followers. This is a great example of how the brand positions itself as a marketing thought leader even when they’re experimenting with a new, unique platform.
2. Sponsoring Room Events
While people might not want to join a room that discusses a product or brand positively the entire time, they might enter an interesting conversation or Clubhouse event that is sponsored by a brand.
When you drop into a sponsored room, you might not hear speakers from the brand speak much — or at all. However, when reintroducing the room, a speaker might mention that the room or Clubhouse audio experience is paid for or sponsored by the brand. You might also see a sponsor listed in the room’s title or description.
Below is one interesting example:
Yummy
Below is an example of a scheduled event sponsored by Yummy, a California-based grocery delivery app. During the room-based event — scheduled for June 5 — contestants will compete for a $100 Yummy gift card by performing an audio talent, such as singing or playing music.
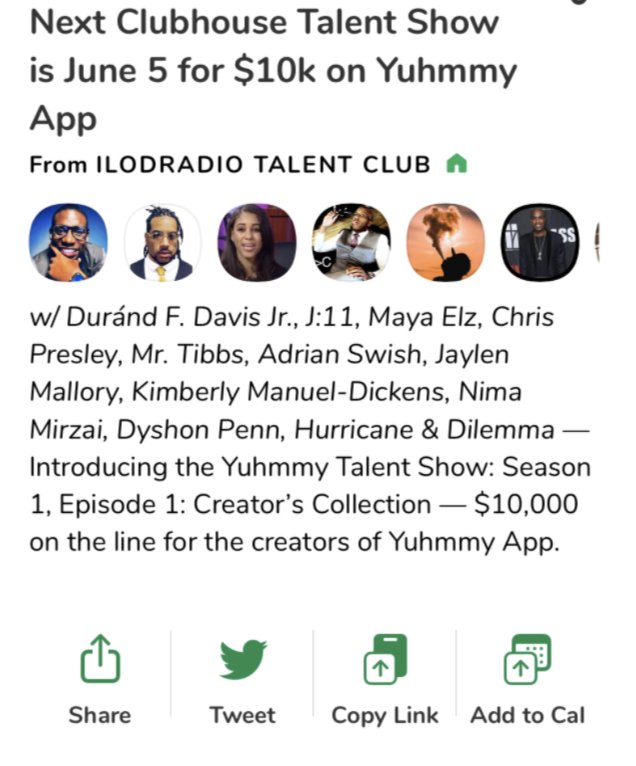
By sponsoring an experimental performance contest on Clubhouse, Yummy not only gets to see how creative Clubhouse content could benefit their brand, but they also promote their delivery service to a large pool of Clubhouse users who are interested in audio entertainment or music.
3. Having team members participate in rooms related to your industry.
Another way brands can grow awareness is by having chief officers, leaders, or even general employees raise their hands and actively participate by speaking in rooms with large audiences.
When speaking in a room, brand representatives don’t necessarily need to talk all about their company. However, by adding to a conversation, talking about tactics they’ve tried at their role, and showing off their expertise, audience members learn to trust them and their company. As company members gain a following and fanbase, their brand might also gain a new audience.
Below are two examples of brands that are embracing room participation.
Tax Nation LLC.
In a recent room titled “Marketing That Works in 2021 (so far)”, moderators asked listeners to raise their hands and offer their best marketing tips.
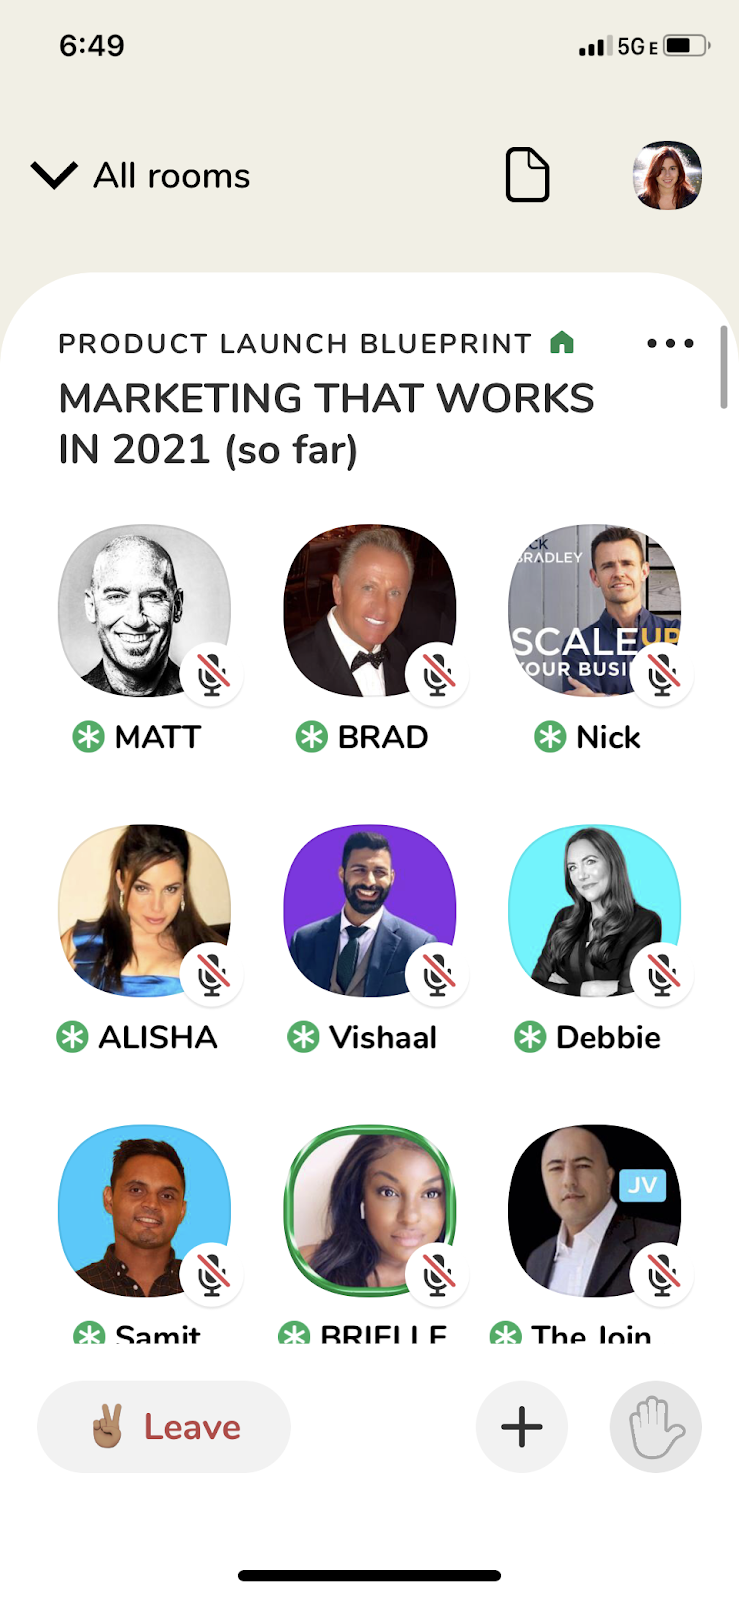
During the room, Cory Hughes, Vice President and Managing Partner of the tax preparation business, Tax Nation LLC, was chosen to speak. He mentioned his company by name and explained that they create marketing content based on “stories” and positive feedback from “happy customers.”
After Hughes made his point, a few other listeners chimed in to agree with how important his tip was.
Not only did Hughes offer valuable advice to participants, but he naturally mentioned his company and its happy customers without sounding like he was trying to plug his tax preparation product.
Start Scale Sail
In another room, titled “Scale Your Business With Digital Products,” entrepreneurs, marketers, and consultants shared tips for growing brands based on their experience,
For example, Natasha O’Banion, CEO of Start Scale Sail, a business automation and consulting firm, explained that she was a big fan of quiz content and added that her team’s successfully generated leads through interactive content.
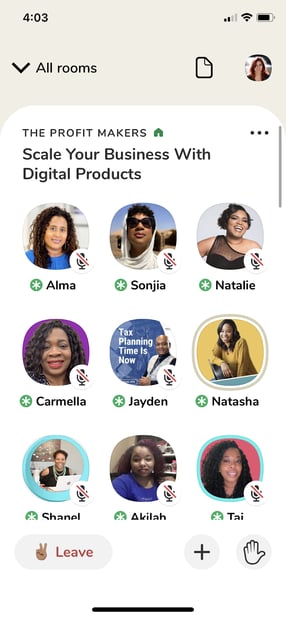
Although O’Banion didn’t plug her company by name, her explanation of how she’s used quizzes in her own strategy led to questions and more discussion from other attendees. Because she gave valuable input, listeners with similar interests in digital lead generation might be interested in following her or even learning more about her brand.
4. Hosting informal chats
Because Clubhouse is all about discussion and authenticity, many brands have also tried to show their human side and seem more accessible to audiences by hosting informal chats with no obvious goal or topic. This method is more casual, and potentially less intimidating, for listeners who might not raise their hand to speak in a fireside chat with a full agenda.
Below is one example:
DRK Beauty
One brand that hosts inviting, casual rooms is DRK Beauty, a website and commerce platform for people of color, which regularly publishes content around mental health, fashion, beauty, lifestyle, and culture.
At the end of each week, DRK’s team hosts “Weekly Wine Down” rooms aimed to feel like visiting a bar with colleagues or friends at the end of a long week.
While DRK rooms, often hosted by DRK Beauty CEO Wilma Mae Basta, don’t have a set topic or agenda, the team often introduces themselves as speakers, begins a casual conversation about whatever is on their minds, and allows other audience members to raise their hands and chime in at any time.

While DRK Beauty rooms aren’t usually aimed to promote the brand’s site, DRK still enables its audience and prospective web visitors to learn about the people behind the company in a casual, authentic setting. This makes the brand seem accessible, authentic, and trustworthy, three things social media users value when researching brands in 2021.
The key to Clubhouse? Be human.
It’s key to remember that Clubhouse is all about authentic human connection, not branding or self-promotion.
While Clubhouse began as a platform where users could only hear from industry “elites,” the app’s now open to a wide range of creatives and every-day people who want to communicate or interact with others. Because of this, learning about a brand is likely not the first thing a user wants to do when logging on to the app.
Regardless of which strategy you use on Clubhouse, remember to embrace the human side of the app. For example, rather than hosting a room where you explain your brand or products to audiences, consider hosting a fireside chat with a thought leader in your industry or participate in a room that allows you to discuss your industry with others in it.
While focusing on natural conversation and valuable room participation won’t enable you to outright market your product all the time, leaning into the platform’s conversational and personal nature could help you grow a following that trusts your expertise — and eventually — your brand.
Want to learn more about the latest social media marketing trends? Check out the free resource below.

YouTube Algorithm: The Constantly Updated Guide to YouTube’s Updates & Changes
Since marketers are at the mercy of algorithms on nearly every publishing channel, knowing how each of these unique algorithms work is crucial to attracting and maintaining an audience.
Luckily, while some channels are rather reserved about the secrets of their algorithms, YouTube, which boasts over 2 billion users, has been remarkably transparent. It launched a course for creators about getting discovered, walking them through the nitty-gritty details of increasing their visibility on the platform.
Naturally, we took the course to help you understand exactly how to boost your rankings on the video platform. Read on to learn what we discovered and how you can grow your audience on YouTube.
![→ Free Templates: How to Use YouTube for Business [Download Now]](https://no-cache.hubspot.com/cta/default/53/b33cfd44-133a-49e3-a943-086c5679d485.png)
How does the YouTube algorithm work?
YouTube’s algorithm serves the most relevant, personalized videos to their users on five different sections of their platform: Search, Home, Suggested Videos, Trending, Subscriptions, and Notifications.
By helping users find the videos they’re most likely to watch and enjoy, YouTube can keep viewers on the platform for as long as possible and get them to visit their site regularly.
To figure out which videos and channels users are most likely to enjoy watching, YouTube “follows” their audience, which means they track their users’ engagement with each video they watch. More specifically, they pay attention to which videos each user watches and doesn’t watch, how much time they spend watching each video, which videos they like and dislike, and which videos they’re not interested in based on the user’s feedback.
Since their algorithm rewards engagement instead of vanity metrics like views and clicks, YouTube incentivizes creators to produce videos that their audience actually enjoys watching, discouraging them from trying to game the system.
But YouTube’s algorithm also uses different signals and metrics to rank and recommend videos on each section of their platform. With this in mind, let’s go over how the algorithm serves content via YouTube’s six main user categories: Search, Home, Suggested Videos, Trending, Subscriptions, and Notifications.
Search
The two biggest factors that affect your videos’ search rankings are keyword relevance and engagement metrics. When ranking videos in search, YouTube will consider how well your titles, descriptions, and content match each user’s queries. They’ll also consider how many videos users have watched from your channel and the last time they watched other videos surrounding the same topic as your video.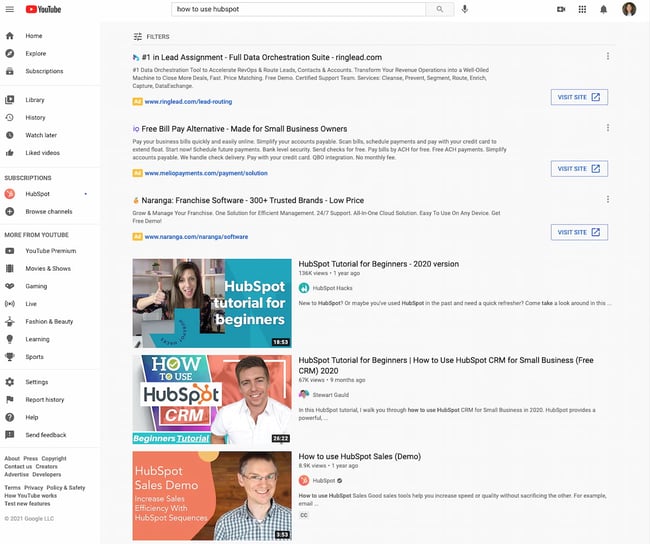
Although the user’s history is important, YouTube also looks at “which videos have driven the most engagement for a query.” The Search section also offers sponsored ads related to the query.
Home
When users access the home page, they first see videos from their subscriptions, then suggested videos based on their previous watch history and the videos’ performance. While you may be tempted to try to snag a coveted spot on the page, YouTube encourages creators to simply create good content that people want to watch and click on.
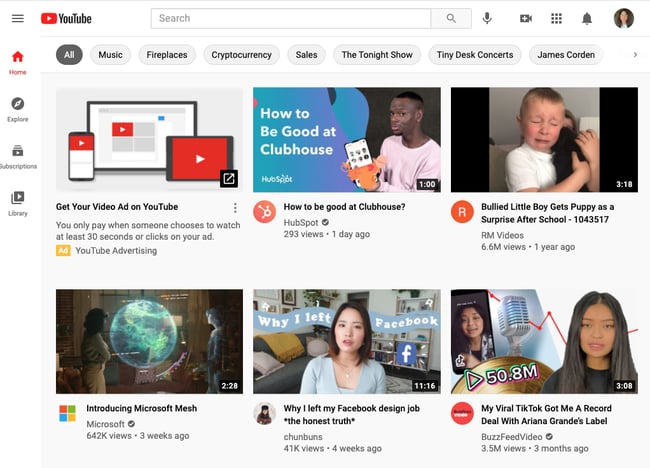
Suggested Videos
No two users will have the same experience on YouTube — they want to serve the most relevant, personalized recommendations to each of their viewers. To do this, they analyze users’ activity history and find hundreds of videos that could be relevant to them.
Then, they rank these videos based on 1) how well each video has engaged and satisfied similar users, 2) how often each viewer watches videos from each channel or other videos surrounding the same topic, and 3) how many times YouTube has already shown each video to users.
YouTube has also noticed users tend to watch more content when they receive recommendations from a variety of channels, so they like to diversify their suggested videos feed.
Trending
The trending page is a feed of new and popular videos in a user’s specific country. You’ll find it by heading to Explore on the sidebar, then clicking on Trending.
YouTube wants to balance popularity with novelty when they rank videos in this section, so they heavily consider view count and rate of view growth for each video they rank. They also split trending videos into four categories: “Now,” “Music,” “Gaming,” and “Movies.”
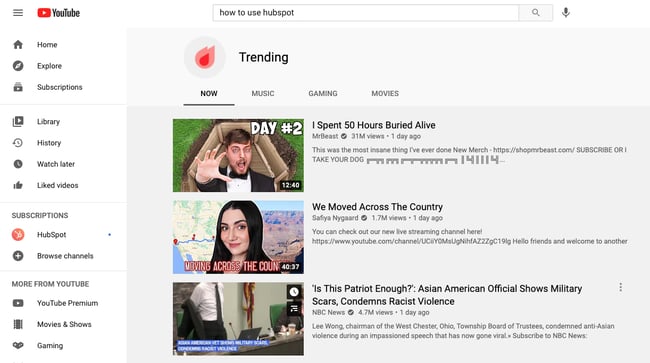
Subscriptions
YouTube has a subscriptions page where users can view all the recently uploaded videos from the channels they subscribe to. But this page isn’t the only benefit channels get when they acquire a ton of subscribers.
To determine rankings on their platform, YouTube uses a metric called view velocity, which measures the number of subscribers who watch your video right after it’s published. And the higher your video’s view velocity, the higher your videos will rank. YouTube also accounts for the number of active subscribers you have when they rank your videos.
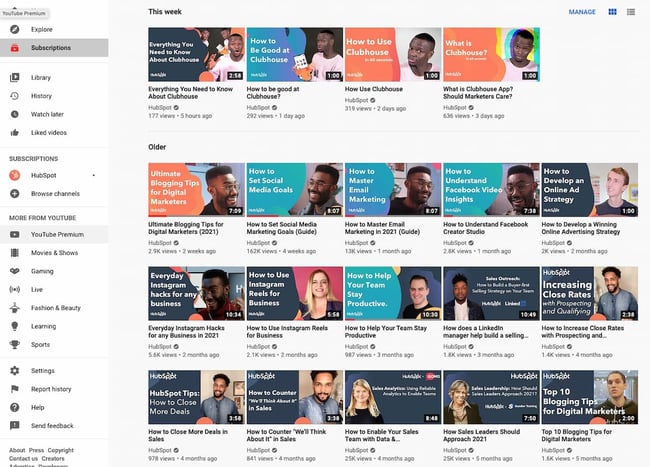
Notifications
YouTube also delivers tailored videos to users through notifications. Users can opt to either receive no notifications from a channel, receive some notifications, or receive all notifications.
The only way to optimize for showing up in users’ notifications is to ask your subscribers to tap the bell button next to the subscribe button.
But how can you ask anyone to do that if you don’t yet have enough viewers and subscribers? By optimizing your videos for YouTube’s algorithm, you can grow your audience. Remember: it all comes down to creating good content that people want to watch.
How to Optimize Your Videos for YouTube’s Algorithm
YouTube ranks videos based on two qualities: keyword relevance and engagement metrics (which are used to measure a video’s performance).
Let’s take a look at both of these in more detail.
1. Keyword Relevance
To rank on YouTube, the first thing to consider is optimizing your videos and channel for popular search queries. To do this, place relevant keywords in your videos’ titles, tags, descriptions, SRT files (which are transcriptions), video files, and thumbnail files.
You should also check out the most popular queries guiding viewers to your videos, which you can find in YouTube’s Search Report. If these queries are slightly different from your video’s topic, consider updating your video to fill these content gaps and add the keywords to your metadata. If there’s a stark difference, consider making new videos about these popular queries.
2. Engagement Metrics
The next thing to consider when ranking on YouTube is optimizing your videos and channel for engagement. The key metric to consider here is watch time, or the aggregate amount of time users spend watching your videos.
To get people to watch in the first place, you need to attract users’ attention. And one of the best ways to instantly grab users’ attention is by creating vibrant thumbnails for each of your videos.
Thumbnails — the small, clickable snapshots that viewers see when they search for videos on YouTube — are just as important as a video’s title. They provide a preview of your video and entice viewers to click through. This can help you differentiate yourself on a platform clogged with standard thumbnails all screaming for attention.
To create a striking thumbnail, consider including a talking head because people are naturally drawn to human faces. Additionally, consider contrasting the colors of your thumbnail’s foreground and background to really make it pop.
Once you’ve attracted users’ attention, you can engage them by creating a bingeable series or show. You can also create playlists about a certain topic that start off with the videos that have the highest audience retention rate. This will increase the odds that users will watch most of the videos in your playlists, boosting your channel and videos’ watch time.
Another way to refine your overall video strategy is by measuring your videos’ performance against other engagement metrics, like average watch percentage, average view duration, audience retention, and average session duration. If you can figure out which topics and videos generate the most engagement, and you solely focus on creating those types of content, you’ll be able to shoot up in YouTube’s search results page and suggested videos feed.
Now that we’ve covered how the YouTube algorithm works and how you can optimize your videos for it, let’s take a look at how the algorithm has changed over the years.
YouTube Algorithm Change
Like the Google algorithm, the YouTube algorithm has changed over the years — albeit less frequently and without a dedicated name to each update. Knowing how the algorithm has changed is key to understanding the platform and optimizing your videos to rank.
2005 – 2012: Views
Before there was ever a “formal” YouTube algorithm, YouTube ranked videos by view count. If a video had been watched hundreds of thousands of times, it’d be suggested to everyone, regardless of their interest in the topic or genre of the video.
This was an easy system to cheat. Constantly refreshing the page was one method creators used to up the view count. Others used clickbait titles to get more clicks.
2012 – 2015: Watch Time
While watch time is still highly relevant to YouTube’s algorithm, it’s not the central piece. But it was from 2012 to 2015.
YouTube wants users to stay on the platform. As such, videos with long watch times were favored over others and placed on the home page. It signaled to YouTube that the video was worth watching and that it was providing a positive experience to users.
Creators tried to optimize for this change by creating extra long videos — or really short videos that users would watch from beginning to end. In response, YouTube began to focus on overall viewer satisfaction, including “measuring likes, dislikes, surveys, and time well spent” on each video.
2016: “Deep Learning” for Recommendations
Since there are millions of videos on the platform, YouTube found it challenging to recommend the most relevant and watch-worthy videos to individual users. Using a practice called “deep learning,” YouTube started to take a close look at the user’s history to generate candidates and rank those videos based on the user’s activity.
The “video corpus” goes through two funnels: a “candidate generation” and “ranking” funnel. First, YouTube examines the user’s history to create a pool of candidates, which are then sent through the “ranking” funnel.
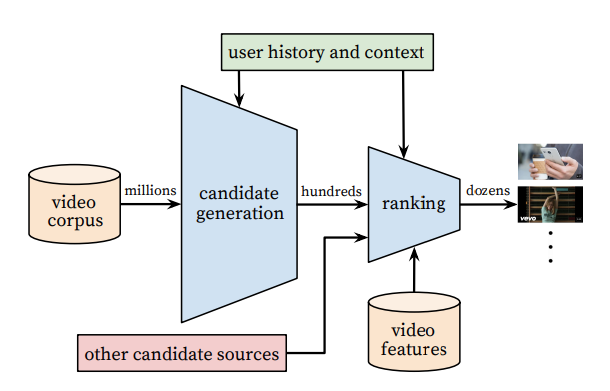
Once the videos reach the ranking funnel, they’re assigned a score and presented to the user from highest to lowest score. This is still a prominent part of the algorithm and likely the way we still get recommendations.
2017 – 2020: Removal of “Borderline Content”
On the How YouTube Works website, YouTube advertises the four Rs of the platform:
“We Remove content that violates our policies, Reduce the spread of harmful misinformation and borderline material, Raise up authoritative sources for news and information, and Reward trusted Creators.”
While the four Rs have been in place since 2015, they were only used to deprioritize junk comments and launch a dedicated platform for the news industry. The four Rs became a more prominent part of the algorithm in 2017 when the platform redirected users seeking extremist propaganda, then in 2019 when the platform started to systematically remove content that “borderline” violates its Community Guidelines.
YouTube launched over 30 changes to diminish the promotion of videos spreading false and harmful misinformation. It also uses external evaluators to gauge whether a video qualifies as “borderline content” by using Google’s public guidelines.
Present: More Deep Learning and Tighter Control on Misinformation
YouTube has yet to announce any new changes to its algorithm, but we can assume that it continues using deep learning to personalize the user experience and continues upholding the four Rs to control the spread of misinformation.
Keep Track of the YouTube Algorithm to Succeed on the Platform
As the YouTube algorithm evolves, it’s important to keep track of its changes so that you know what does and doesn’t get promoted on the platform. If you’re a business or individual creator trying to grow an audience on YouTube, be sure to optimize your videos for the algorithm so that your channel wins a loyal list of subscribers.
Editor’s note: This post was originally published in December 2018 and has been updated for comprehensiveness.

How to Write a Blog Post: A Step-by-Step Guide [+ Free Blog Post Templates]
Since you’re on this page, you probably already know how integral the process of blogging is to the success of your marketing efforts. Which is why it goes without saying that it’s exceptionally important to learn how to effectively start and manage a blog in a way that supports your business.
Without a blog, you’ll find yourself experiencing a number of problems such as poor search engine optimization (SEO), lack of promotional content for social, little clout with your leads and customers, and fewer pages that you can use to share lead-generating calls-to-action (CTAs).
So why, oh why, do so many marketers still have a laundry list of excuses for why they can’t maintain a blog?

Maybe because, unless you enjoy writing, business blogging might seem uninteresting, time consuming, and difficult.
Well, the time for excuses is over and this guide is here to help you understand why. We’ll cover how to write and manage your business’s blog as well as provide helpful templates to simplify your blogging efforts.
Let’s get started with an important question.
Blog posts allow you and your business to publish insights, thoughts, and stories on your website about any topic. They can help you boost brand awareness, credibility, conversions, and revenue. Most importantly, they can help you drive traffic to your website.
Today, people and organizations of all walks of life manage blogs to share analyses, instruction, criticisms, product information, industry findings, and more. There are many popular blog formats, but here are six of the most common:
- The “How-To” Post
- The List-Based Post
- The “What Is” Post
- The Pillar Page Post (“Ultimate Guide”)
- The Newsjacking Post
- The Infographic Post
Save time and download six blog post templates for free.
So, how do you ensure your blog post catches the eyes of your target audience, buyer personas, and customers?
What makes a good blog post?
Before you write a blog, make sure you know the answers to questions like, “Why would someone keep reading this entire blog post?” and “What makes our audience come back for more?”
To start, a good blog post is interesting and educational. Blogs should answer questions and help readers resolve a challenge they’re experiencing — and you have to do so in an interesting way.
It’s not enough just to answer someone’s questions — you also have to provide actionable steps while being engaging. For instance, your introduction should hook the reader and make them want to continue reading your post. Then, use examples to keep your readers interested in what you have to say.
Remember, a good blog post is interesting to read and provides educational content to audience members.
(Want to learn how to apply blogging and other forms of content marketing to your business? Check out HubSpot Academy’s free content marketing course.)
So, how do you actually go about writing one of these engaging and informational pieces?
How to Write a Blog Post
Here are the steps you’ll want to follow while writing a blog post.
1. Understand your audience.
Before you start writing your blog post, make sure you have a clear understanding of your target audience.
Ask questions like: What do they want to know about? What will resonate with them?
This is where the process of creating buyer personas comes in handy. Consider what you know about your buyer personas and their interests while you’re coming up with a topic for your blog post.
For instance, if your readers are millennials looking to start a business, you probably don’t need to provide them with information about getting started in social media — most of them already have that down.
You might, however, want to give them information about how to adjust their social media approach (for example — from what may be a casual, personal approach to a more business-savvy, networking-focused approach). That kind of tweak is what helps you publish content about the topics your audience really wants and needs.
Don’t have buyer personas in place for your business? Here are a few resources to help you get started:
- Create Buyer Personas for Your Business [Free Template]
- Guide: How to Create Detailed Buyer Personas for Your Business
- [Free Tool] Make My Persona: Buyer Persona Generator
2. Create your blog domain.
Next, you’ll need a place to host this post and every other blog post you write. This requires choosing a content management system (CMS) and a website domain hosting service.
Choose a CMS.
A CMS helps you create a website domain where you’ll actually publish your blog. CMS platforms can manage domains (where you create your website) and subdomains (where you create a webpage that connects to an existing website).
HubSpot customers host web content via CMS Hub. Another popular option is a self-hosted WordPress website on a hosting site such as WP Engine. Whether you create a domain or a subdomain to start your blog, you’ll need to choose a web hosting service after you pick a CMS.
Register a domain or subdomain with a website host.
Your blog’s domain will look like this: www.yourblog.com. The name between the two periods is up to you, as long as this domain name doesn’t yet exist on the internet.
Want to create a subdomain for your blog? If you already own a cooking business at www.yourcompany.com, you might create a blog that looks like this: blog.yourcompany.com. In other words, your blog’s subdomain will live in its own section of yourcompany.com.
Some CMS platforms offer subdomains as a free service, where your blog lives on the CMS, rather than your business’s website. For example, it might look like this: yourblog.contentmanagementsystem.com. However, to create a subdomain that belongs to your company website, register the subdomain with a website host.
Most website hosting services charge very little to host an original domain — in fact, website costs can be as inexpensive as $3 per month when you commit to a 36-month term.
Here are five popular web hosting services to choose from:
3. Customize your blog’s theme.
Once you have your domain name set up, customize the appearance of your blog to reflect the theme of the content you plan on creating and your brand.
For example, if you’re writing about sustainability and the environment, green might be a color to keep in mind while designing your blog.
If you already manage a website and are writing the first post for that existing website, ensure the article is consistent with the website in appearance and subject matter. Two ways to do this are including your:
- Logo: This can be your business’s name and logo — it will remind blog readers of who’s publishing the content. (How heavily you want to brand your blog, however, is up to you.)
- “About” Page: You might already have an “About” blurb describing yourself or your business. Your blog’s “About” section is an extension of this higher-level statement. Think of it as your blog’s mission statement, which serves to support your company’s goals.
4. Identify your first blog post’s topic.
Before you write anything, pick a topic for your blog post. The topic can be pretty general to start. For example, if you’re a company that sells a CRM for small-to-enterprise businesses, your post might be about the importance of using a single software to keep your marketing, sales, and service teams aligned.
Pro tip: You may not want to jump into a “how-to” article for your first blog post.
Why?
Your credibility hasn’t been established yet. Before teaching others how to do something, you’ll first want to show that you’re a leader in your field and an authoritative source.
For instance, if you’re a plumber writing your first post, you won’t yet write a post titled “How to Replace the Piping System in your Bathroom.” First, you’d write about modern faucet setups, or tell a particular success story you had rescuing a faucet before it flooded a customer’s house. Here are four other types of blog posts you could start with:
- List (“Listicle”): 5 ways to fix a leaky faucet
- Curated Collection: 10 faucet and sink brands to consider today
- SlideShare Presentation: 5 types of faucets to replace your old one (with pictures)
- News Piece: New study shows X% of people don’t replace their faucet frequently enough
If you’re having trouble coming up with topic ideas, a good topic brainstorming session should help. In the post I’ve linked, my colleague walks you through a helpful process for turning one idea into many. Similar to the “leaky faucet” examples above, you would “iterate off old topics to come up with unique and compelling new topics.”
This can be done by:
- Changing the topic scope
- Adjusting your time frame
- Choosing a new audience
- Taking a positive/negative approach
- Introducing a new format
5. Come up with a working title.
You might come up with a few different working titles — in other words, iterations of approaching that topic to help you focus your writing.
For example, you may decide to narrow your topic to “Tools for Fixing Leaky Faucets” or “Common Causes of Leaky Faucets.” A working title is specific and will guide your post so you can start writing.
Let’s take a real post as an example: “How to Choose a Solid Topic for Your Next Blog Post.”
Appropriate, right? The topic, in this case, was probably “blogging.” Then the working title may have been something like, “The Process for Selecting a Blog Post Topic.” And the final title ended up being “How to Choose a Solid Topic for Your Next Blog Post.”
See that evolution from topic, to working title, to final title? Even though the working title may not end up being the final title (more on that in a moment), it still provides enough information so you can focus your blog post on something more specific than a generic, overwhelming topic.
6. Write an intro (and make it captivating).
We’ve written more specifically about writing captivating introductions in the post “How to Write an Introduction,” but let’s review, shall we?
First, grab the reader’s attention. If you lose the reader in the first few paragraphs — or even sentences — of the introduction, they’ll stop reading (even before they’ve given your post a fair shake). You can do this in a number of ways: tell a story or a joke, be empathetic, or grip the reader with an interesting fact or statistic.
Then, describe the purpose of your post and explain how it will address a problem the reader may be experiencing. This will give the reader a reason to continue reading and show them how the post will help them improve their work or lives.
Here’s an example of an intro we think does a good job of attracting a reader’s attention right away:
“Blink. Blink. Blink. It’s the dreaded cursor-on-a-blank-screen experience that all writers — amateur or professional, aspiring or experienced — know and dread. And of all times for it to occur, it seems to plague us the most when trying to write an introduction.”
7. Organize your content in an outline.
Sometimes, blog posts can have an overwhelming amount of information — for the reader and the writer. The trick is to organize the info in a way so readers aren’t intimidated by length or amount of content. This organization can take multiple forms — sections, lists, tips — whatever’s most appropriate. But it must be organized!
Featured Resource: 6 Free Blog Post Templates
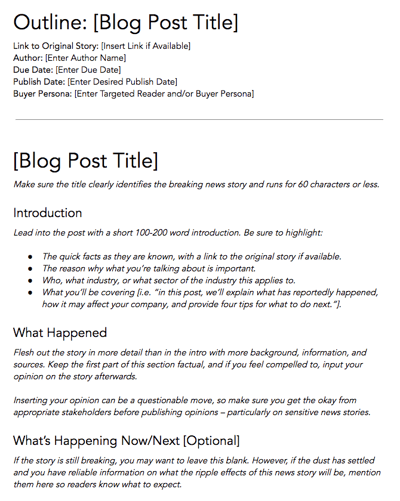
Download These Templates for Free
Let’s take a look at the post, “How to Use Snapchat: A Detailed Look Into HubSpot’s Snapchat Strategy.” There’s a lot of content in the piece, so it’s broken up into a few sections using descriptive headers. The major sections are separated into subsections that go into more detail, making the content easier to read.
To complete this step, all you really need to do is outline your post. This way, before you start writing, you’ll know which points you want to cover and the best order to do so in. And to make things even easier, you can download and use our free blog post templates, which are pre-organized for six of the most common blogs. Just fill in the blanks!
8. Write your blog post!
The next step — but not the last — is actually writing the content. We can’t forget about that, of course.
Now that you have your outline or template, you’re ready to fill in the blanks. Use your outline as a guide and expand on all points as needed. Write about what you already know, and if necessary, conduct additional research to gather more information, examples, and data to back up your points, while providing proper attribution when incorporating external sources. When you do, always try to find accurate and compelling data to use in your post.
If you’re having trouble stringing sentences together, you’re not alone. Finding your “flow” can be challenging for a lot of folks. Luckily, there are a ton of tools you can lean on to help you improve your writing. Here are a few to get you started:
- Power Thesaurus: Stuck on a word? Power Thesaurus is a crowdsourced tool that provides users with a number of alternative word choices from a community of writers.
- ZenPen: If you’re having trouble staying focused, check out this distraction-free writing tool. ZenPen creates a minimalist “writing zone” designed to help you get words down without having to fuss with formatting right away.
- Cliché Finder: Feeling like your writing might be coming off a little cheesy? Identify instances where you can be more specific using this handy cliché tool.
You can also refer to our complete list of tools for improving your writing skills. And if you’re looking for more direction, the following resources are chock-full of valuable writing advice:
- Copywriting 101: 6 Traits of Excellent Copy Readers Will Remember
- How to Write Compelling Copy: 7 Tips for Writing Content That Converts
- How to Write With Clarity: 9 Tips for Simplifying Your Message
- The Kurt Vonnegut Guide to Great Copywriting: 8 Rules That Apply to Anyone
- Your Blog Posts Are Boring: 9 Tips for Making Your Writing More Interesting
9. Proofread and edit your post.
You’re not quite done yet, but you’re close! The editing process is an important part of blogging — don’t overlook it.
Ask a grammar-conscious co-worker to copyedit and proofread your post. You may also consider enlisting the help of The Ultimate Editing Checklist or using a free grammar checker like Grammarly.
If you’re looking to brush up on your self-editing skills, turn to these helpful posts for some tips and tricks to get you started:
- How to Become a (Better) Editor: 13 Editorial Tips
- How to Become a More Efficient Editor: 12 Ways to Speed Up the Editorial Process
- 10 Simple Edits That’ll Instantly Improve Any Piece of Writing
When you’re ready to check your formatting, keep the blog elements in mind:
Featured Image
Choose a visually appealing and relevant image for your post. As social networks treat content with images more prominently, visuals are more responsible than ever for the success of your blog content.

For help selecting an image for your post, read “How to Select the Perfect Image for Your Next Blog Post” and pay close attention to the section about copyright law.
Visual Appearance
No one likes an unattractive blog post. And it’s not just pictures that make a post visually appealing — it’s the formatting and organization of the post, too.
In a well-formatted and visually-appealing blog post, you’ll notice that header and sub-headers are used to break up large blocks of text — and those headers are styled consistently.
Here’s an example of what that looks like:
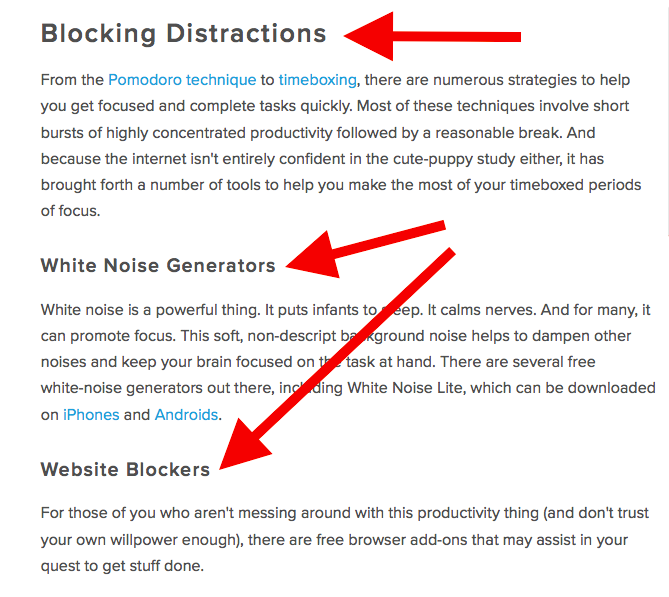
Screenshots should always have a similar, defined border so they don’t appear as if they’re floating in space — that style should stay consistent from post to post.
Maintaining this consistency makes your content look more professional and easier on the eyes.
Topics and Tags
Tags are specific, public-facing keywords that describe a post. They also allow readers to browse for more content in the same category on your blog. Refrain from adding a laundry list of tags to each post. Instead, put some thought into a blog tagging strategy.
Think of tags as “topics” or “categories,” and choose 10-20 tags that represent all the main topics you want to cover on your blog. Then stick to those.
10. Insert a CTA.
At the end of every blog post, insert a CTA that indicates what you want the reader to do next — subscribe to your blog, download an ebook, register for a webinar or event, read a related article, etc.
After your visitors read your blog post, they click on the CTA, and eventually you generate a lead. But the CTA is also a valuable resource for the person reading your content — use your CTAs to offer more content similar to the subject of the post they just finished reading. If you’re not sure how to get started, take a look at some CTA examples.
In the blog post “What to Post on Instagram: 18 Photo & Video Ideas to Spark Inspiration,” readers are given actionable ideas for creating valuable Instagram content. At the end of the post is a CTA prompting readers to take a social media certification course:
See how that’s a win-win for everyone? Readers who want to learn more have the opportunity to do so, and the business receives a lead they can nurture … who may even become a customer!
11. Optimize for on-page SEO.
After you finish writing, go back and optimize the on-page elements of your post.
Don’t obsess over how many keywords to include. If there are opportunities to incorporate keywords you’re targeting, and it won’t impact reader experience, do it. If you can make your URL shorter and more keyword-friendly, go for it. But don’t cram keywords or shoot for some arbitrary keyword density — Google’s smarter than that!
Here’s a little blog SEO reminder about what you should review and optimize:
Meta Description
Meta descriptions are the descriptions below the post’s page title on Google’s search results pages. They provide searchers with a short summary of the post before clicking into it. They are ideally between 150-160 characters and start with a verb, such as “Learn,” “Read,” or “Discover.”
While meta descriptions no longer factor into Google’s keyword ranking algorithm, they give searchers a snapshot of what they’ll get from reading the post and help improve your clickthrough rate from search.
Page Title and Headers
Most blogging software uses your post title as your page title, which is the most important on-page SEO element at your disposal. But if you’ve followed our formula so far, you should already have a working title that will naturally include keywords or phrases your target audience is interested in.
Don’t over-complicate your title by trying to fit in keywords where they don’t naturally belong. With that said, if there are clear opportunities to add keywords you’re targeting to your post title and headers, feel free to take them. Also, try to keep your headlines short — ideally, under 65 characters — so they don’t get truncated in the search engine results.
Anchor Text
Anchor text is the word or words that link to another page — either on your website or on another website. Carefully select which keywords you want to link to other pages on your site because search engines take that into consideration when ranking your page for certain keywords.
It’s also important to consider which pages you link to. Consider linking pages that you want to rank for a specific keyword. You could end up getting it to rank on Google’s first page of results instead of its second page — and that isn’t small potatoes!
Mobile Optimization
More than 60% of organic visits are carried out on a mobile device. As such, having a website with a responsive design is critical. In addition to making sure your website’s visitors (including your blog’s visitors) have the best experience possible, optimizing for mobile will score your website some SEO points.
12. Pick a catchy title.
Last but not least, it’s time to spruce up that working title of yours. Luckily, we have a simple formula for writing catchy titles that will grab the attention of your reader. Here’s what to consider:
- Start with your working title.
- As you start to edit your title, keep in mind that it’s important to keep the title accurate and clear.
- Then, work on making your title sexy — whether it’s through strong language, alliteration, or another literary tactic.
- If you can, optimize for SEO by sneaking some keywords in there (only if it’s natural, though!).
- Finally, see if you can shorten it at all. No one likes a long, overwhelming title — remember, Google prefers 65 characters or fewer before it truncates it on its search engine results pages.
Let’s summarize everything we’ve learned.
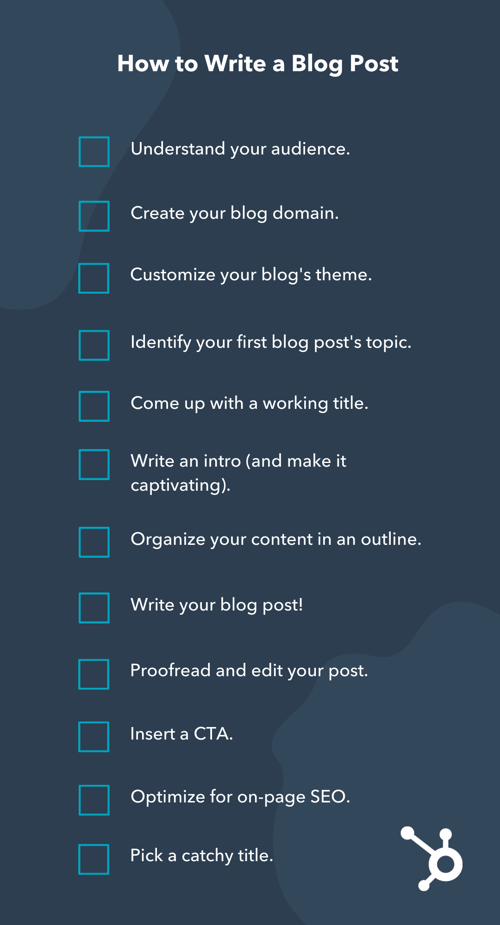
If you’ve mastered the steps above, learn about some ways to take your blog posts to the next level.
By now, you should know who you’re writing for, have a blog all set up, and understand the basics of writing a blog post. While it’s easy to understand the practicalities of writing a post, it’s difficult to get started on your very first article.
Let’s go through the process of writing your first blog post.
Your First Blog Post: Choosing a Topic, Writing the Post, and Actually Getting Hits
You’ve got the technical and practical tidbits down — now it’s time to write your very first blog post. And nope, this isn’t the space to introduce yourself and your new blog (i.e. “Welcome to my blog! This is the topic I’ll be covering. Here are my social media handles. Will you please follow?”).
We’ve briefly touched upon it in the previous section, but your first blog post shouldn’t be a how-to guide. Remember: you’ve yet to establish authority in the field. You should instead start with “low-hanging fruit,” writing about a highly specific topic that serves a small segment of your target audience.
That seems unintuitive, right? If more people are searching for a term or a topic, that should mean more readers for you.
But that’s not true. If you choose a general and highly searched topic that’s been covered by major competitors or more established brands, it’s unlikely that your post will rank on the first page of search engine results pages (SERPs). Give your newly born blog a chance by choosing a topic that few bloggers have written about.
TLDR; Your first post should cover a niche, low-volume topic. As you write more and more on your blog and establish topical authority, you can begin to cover more highly-searched keywords.
Let’s walk through this process.
1. Find a low-volume topic.
The first step is to find a topic with low searches in Google (we recommend sticking to about 10 to 150 monthly searches). These topics offer less competition and should therefore allow your new blog post to rank more easily.
To choose a topic, you can either do a traditional brainstorming session or carry out keyword research. We suggest the latter because you can actually see how many people are looking for that topic.
Now, don’t be intimidated by the term “keyword research.” It’s not just for marketers, but for new bloggers, too. And it’s really easy to do.
To jumpstart your keyword research, first begin by identifying the general topic of your blog.
Say you’re a plumber. Your general, high-level topic might be “plumbing” (67K monthly searches).
Next, put this term into a keyword research tool such as:
When you run this term through the tool, a list of related keywords will appear. Scan the list and choose one with a lower search volume. For this example, we’ll use “under sink plumbing” (1.4K monthly searches).
Run that keyword in the keyword research tool again. Look at the related keywords. Find one with a lower search volume. Do that again.
For this example, we’ll settle on “plumbing problems under kitchen sink” (10 monthly searches). That’s the topic for our first post.
TLDR; Choose a low-volume, low-competition keyword that will ensure your first post ranks.
For more help on keyword research, here are more resources you can use:
- How to Do Keyword Research for SEO: A Beginner’s Guide
- How to Perform Keyword Research and Rank
- Top Tools For Finding Long-Tail Keywords
2. Google the term to double-check search intent.
You’ve got your topic — now, double-check that the user’s search intent would be fulfilled by a blog post.
What does that mean?
If someone is looking for “plumbing problems under kitchen sink,” they might be looking for a tutorial, a diagram, an article, or a product that can fix the issue. If they’re looking for the first three, you’re good — that can be covered in a blog post. A product, however, is different, and your blog post won’t rank.
How do you double-check search intent?
Google the term and look at the results. If other articles and blog posts rank for that term, you’re good to go. If you only find product pages or listicles from major publications, then find a new topic to cover in your first post.
Consider the term “under sink plumbing bathroom” (30 monthly searches). It seemed like a perfect fit because it had low monthly searches.
Upon Googling the term, we found product carousels, product pages from Home Depot and Lowes, and guides written by major publications. (You’ll also want to avoid topics that have been covered by major publications, at least for now.)
TLDR; Before writing your first blog post about a low-volume topic, double-check the user intent by Googling the keyword. Also, don’t forget to take a look at who’s written about that topic so far. If you see a major brand, consider writing about another topic.
3. Find questions and terms related to that topic.
You’ve got a highly unique topic that’s been covered by just a few people so far. It’s time to flesh it out by covering related or adjacent topics.
Use the following tools:
- Answer the Public: When you place your keyword into this tool, it will give you a list of questions related to that term.
- Google: Google is your best friend. Search for the term and look under “People also ask” and “People also search for.” Be sure to touch upon those topics in the post.
You can also use these keyword research tools we mentioned above in step one.
5. Outline and write the post.
Now, it’s time to outline and write your first post!
With your niche topic and related questions as guideposts, you can now write a post that’s highly relevant to your niche and doesn’t have as much competition.
Use the how-to guide we shared in the previous section to help you write a great first post.
Don’t forget to:
- Hit at least 1,000 words. It’s been proven time and again that longer posts rank better.
- Put your target keyword in the title. Remember that niche topic we chose in step one? Try to work it into your title naturally.
- Include at least two H2s with related search terms. Remember those related topics we found in step three? Use them as H2s to build the topical authority of your piece.
6. Promote your first post via outreach.
As a new blogger, you likely don’t have a social media following yet. The solution? Build a few backlinks to the post to get it off the ground.
Backlinks are a major ranking factor, but you don’t want to use black-hat methods such as spamming the comment sections in other blogs. Instead, reach out to people and let them know this new resource exists so they can link to your post.
If you’re a plumber, for example, you might reach out to your local plumber’s association. Here are more blog post promotion resources:
- 12 Tried-and-True Ways to Promote Your Blog Posts
- 10 Sites You Can Use for Free Blog Promotion
- 9 Link Building Email Outreach Templates That Actually Work
- Inbound Link Building 101: 34 Ways to Build Backlinks for SEO
- 11 Creative (But 100% White Hat!) Ways to Earn Backlinks
First Blog Post Ideas
Stuck? Let’s take a look at some first blog post ideas.
The Difference Between [Niche Topic] and [Niche Topic], Explained by a [Niche Expert]
- The Difference Between SEM and SEO, Explained by a Marketing Expert
- The Difference Between Sedans and Coupes, Explained by a Car Mechanic
- The Difference Between Baking and Broiling, Explained by a Professional Baker
The 10 Best and Worst [Niche Tool] for [Niche Activity]
- The 10 Best and Worst Writing Software for Fiction Writing
- The 10 Best and Worst CRMs for Nurturing Prospects
- The 10 Best and Worst Family Cars for Cross-Country Roadtrips
8 [Niche Activity] Common Mistakes (+ Ways to Fix Them)
- 8 Non-Fiction Writing Common Mistakes (+ Ways to Fix Them)
- 8 Salmon Broiling Common Mistakes (+ Ways to Fix Them)
- 8 Car Maintenance Common Mistakes (+ Ways to Fix Them)
9 Proven Tips for [Niche Activity]
- 9 Proven Tips for Checking Plumbing Problems under Your Kitchen Sink
- 9 Proven Tips for Writing a Non-Fiction Bestseller
- 9 Proven Tips for Doing DIY Car Maintenance
Why We/I Switched from [Niche Tool] to [Niche Tool] (Comparison)
- Why We Switched from Pipedrive to HubSpot (Comparison)
- Why I Switched from Microsoft Word to Scrivener (Comparison)
- Why We Switched from iMacs to Surface Studio (Comparison)
[Niche Tool] vs [Niche Tool]: Which [Tool] is Best for You?
- Zendesk vs Freshcaller: Which Call Software is Best for You?
- Air Fryer vs Convection Oven: Which One is Best for You?
- Mazda Miata vs Toyota Supra: Which Sports Car is Best for You?
The Ultimate Roundup of [Niche Activity] Tips and Tricks
- The Ultimate Roundup of Novel Writing Tips and Tricks
- The Ultimate Roundup of Macaroon Baking Tips and Tricks
- The Ultimate Roundup of Solo Traveling Tips and Tricks
Want some real examples of blog posts? See what your first blog post can look like based on the topic you choose and the audience you’re targeting.
1. List-Based Blog Post
List-Based Post Example: 17 Blogging Mistakes to Avoid in 2021, According to HubSpot Bloggers

List-based posts are sometimes called “listicles,” a mix of the words “list” and “article.” These are articles that deliver information in the form of a list. A listicle uses sub-headers to break down the blog post into individual pieces, helping readers skim and digest your content more easily.
As you can see in the example from our blog, listicles can offer various tips and methods for solving a problem.
2. Thought Leadership Post
Example: How HubSpot’s Customers Are Shaping the Next Normal
Thought leadership posts allow you to share your expertise on a particular subject matter and share firsthand knowledge with your readers.
These pieces — which can be written in the first person, like the post shown above — help you build trust with your audience so people take your blog seriously as you continue to write for it.
3. Curated Collection Post
Example: 8 Examples of Evolution in Action
Curated collections are a special type of listicle blog post. Rather than sharing tips or methods for doing something, this type of blog post shares a list of real examples that all have something in common in order to prove a larger point.
In the example post above, Listverse shares eight real examples of evolution in action among eight different animals — starting with the peppered moth.
4. SlideShare Presentation
Example: The HubSpot Culture Code
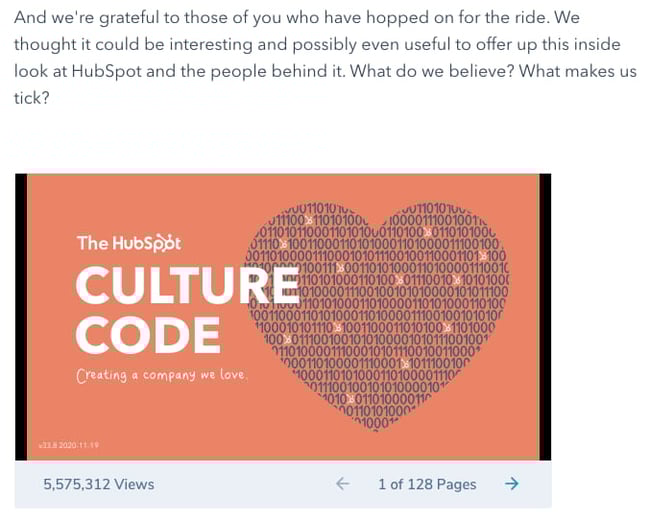
SlideShare is a presentation tool that helps publishers package a lot of information into easily shareable slides. Think of it like a PowerPoint, but for the web. With this in mind, SlideShare blog posts help you promote your SlideShare so that it can generate a steady stream of visitors.
Unlike blogs, SlideShare decks don’t often rank well on search engines, so they need a platform for getting their message out there to the people who are looking for it. By embedding and summarizing your SlideShare on a blog post, you can share a great deal of information and give it a chance to rank on Google at the same time.
Need some SlideShare ideas? In the example above, we turned our company’s “Culture Code” into a SlideShare presentation that anyone can look through and take lessons from, and then promoted it in a blog post.
5. Newsjacking Post
Example: Ivy Goes Mobile With New App for Designers

“Newsjacking” is a nickname for “hijacking” your blog to break important news related to your industry. Therefore, the newsjack post is a type of article whose sole purpose is to garner consumers’ attention and, while offering them timeless professional advice, prove your blog is a trusted resource for learning about the big things that happen in your industry.
The newsjack example above was published by Houzz, a home decor merchant and interior design resource, about a new mobile app that launched just for interior designers. Houzz didn’t launch the app, but the news of its launching is no less important to Houzz’s audience.
6. Infographic Post
Example: The Key Benefits of Studying Online [Infographic]
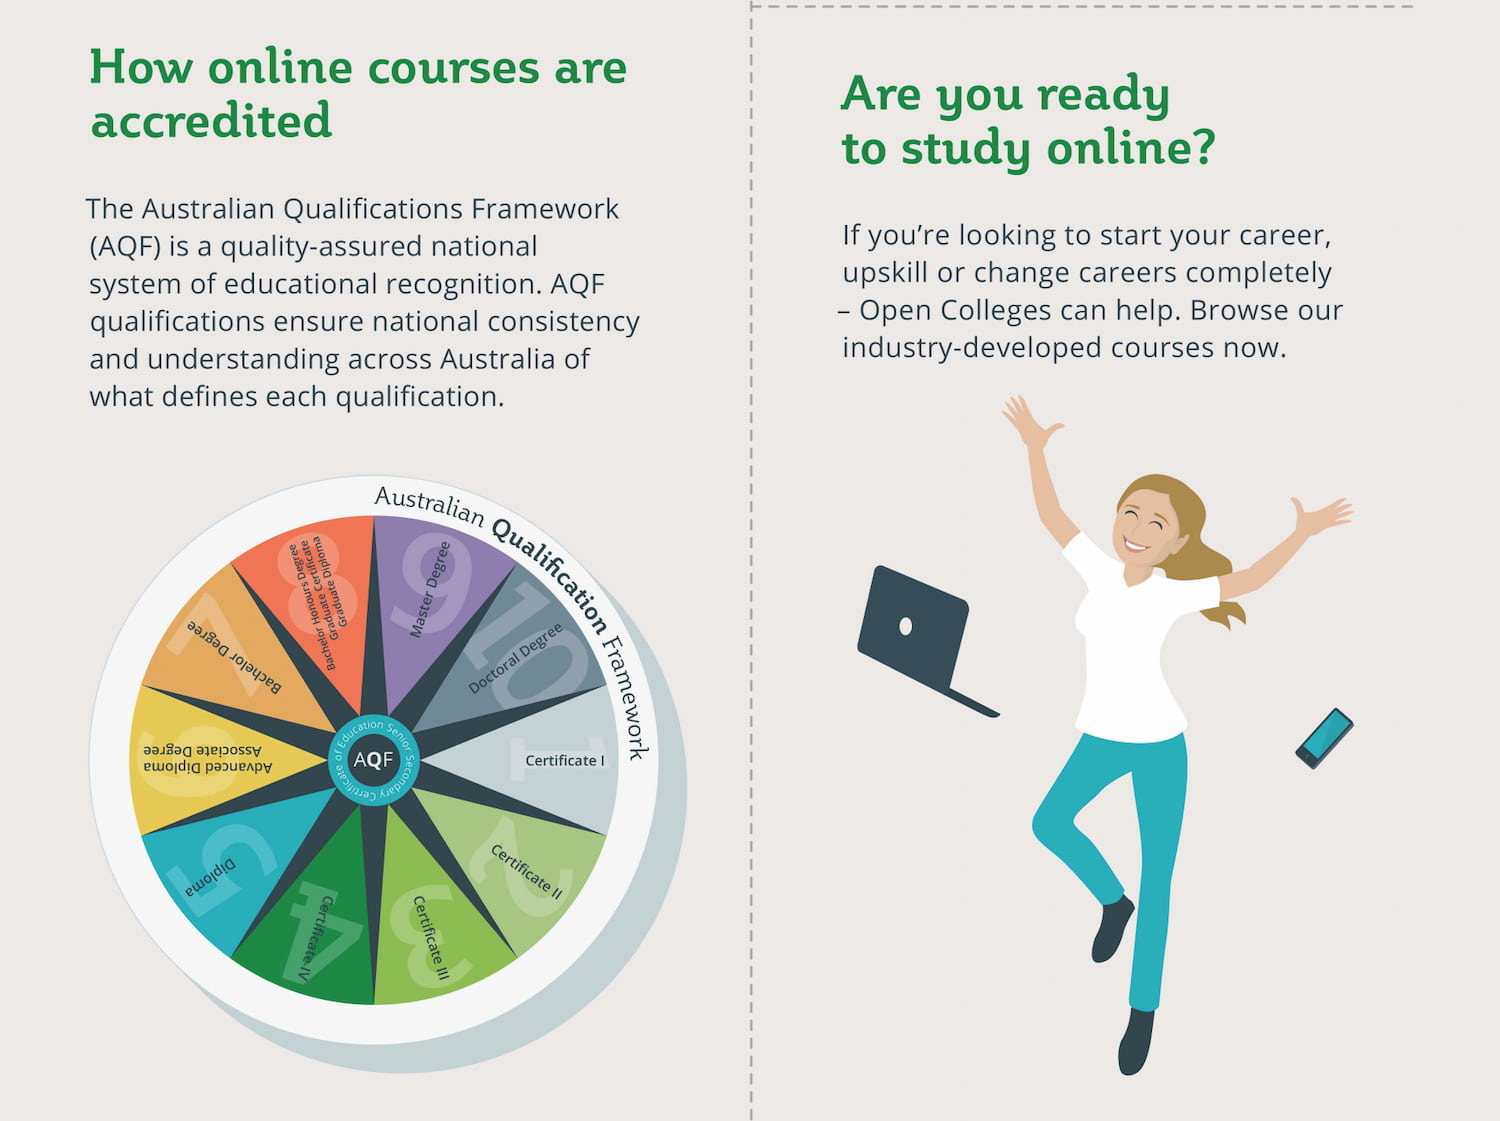 The infographic post serves a similar purpose as the SlideShare post — the fourth example, explained above — in that it conveys information for which plain blog copy might not be the best format.
For example, when you’re looking to share a lot of statistical information (without boring or confusing your readers), building this data into a well-designed, even engaging infographic can keep your readers engaged with your content. It also helps readers remember the information long after they leave your website.
7. How-to Post
Example: How to Write a Blog Post: A Step-by-Step Guide
For this example, you need not look any further than the blog post you’re reading right now! How-to guides like this one help solve a problem for your readers. They’re like a cookbook for your industry, walking your audience through a project step by step to improve their literacy on the subject.
The more posts like this you create, the more equipped your readers will be to work with you and invest in the services you offer.
8. Guest Post
Example: Your Bookmarkable Guide to Social Media Image Sizes in 2020 [Infographic]
 Guest posts are a type of blog post that you can use to include other voices on your blog. For example, if you want to get an outside expert’s opinion on a topic, a guest post is perfect for that.
Additionally, these posts give your blog variety in topic and viewpoint. If your customer has a problem you can’t solve, a guest post is a great solution.
If you begin accepting guest posts, set up editorial guidelines to ensure they’re up to the same standards as your posts.
Ready to blog?
Blogging can help you build brand awareness, become a thought-leader and expert in your industry, attract qualified leads, and boost conversions. Follow the steps and tips we covered above to begin publishing and enhancing your blog today.
Editor’s note: This post was originally published in October 2013 and has been updated for comprehensiveness.


19 Best Practices for Webinars or Webcasts
Webinars are a highly effective tool for moving prospects along the sales funnel.
After you’ve loaded them with product and industry knowledge, your prospects become warm leads who can then have fruitful conversations with your sales team. But here’s the thing: the content and execution of the webinar affect prospects’ experience and will impact the quality of the leads you generate.
If the information is misaligned with your prospects’ needs, you risk deterring them from doing further business with you. If the webinar is boring or too long, you may lose prospects before you deliver your final product pitch at the end.
If you don’t place the appropriate calls-to-action at the right time, you may not get enough attendees or fail to prove the ROI to your company’s leadership team.
When creating a webinar, the stakes are high. That’s why using a webinar planning list and following best practices is essential. Below, I go over the best practices for creating webinar invites and share top tips for hosting webcasts.

Webinar Invite Best Practices
In some ways, inviting people to come to your webinar is the toughest part.
Typically, you’ll send a formal invitation over email. You can promote the webinar via your company’s social media profiles, your LinkedIn, your website, and even your blog — but the webinar invite will be delivered over email.
With this email, you have one goal: to communicate your event’s value so that prospects have no choice but to sign up.
Let’s go over how you can do that.
1. Create a short sentence with your value proposition.
Before ever sitting down to write your webinar invitation email, you should sum up what your attendees will get out of your event in one short sentence. This will be your guidepost as you write the invitation.
2. Craft a subject line that shows the value of the event.
Next, it’s time to write a subject line that showcases the skills and tools attendees will walk away with. Don’t forget to include the word “webinar” in the subject line.
Here are some good examples:
- [Webinar] Grow Your Brand 3X with This Proven Method by [Industry Leader]
- [Webinar] Learn How to Close More Deals with [Industry Leader]
- [Webinar] Want Your Company to Become the Next Apple?
Here are some so-so webinar subject lines you should avoid using:
- You’re Invited to a Can’t-Miss Customer Service Webinar
- Come to Our Marketing Webinar on February 15
- Don’t Miss Our Next Webinar About Social Media Strategies
3. Include an engaging banner image.
Your banner image should include the title of the webinar and a clear call-to-action. You could also include the date and time, but that’s optional. Keep it light on text.
Here’s an excellent example from Elementor, a WordPress plugin.

This is a great example because it features high-contrast lettering and the word “webinar” in the upper right-hand corner. Most importantly, it has a call-to-action button that says “Save Your Seat.” Every webinar invite should include a CTA.
4. Include a header that makes your event’s value clear.
In an email, the header acts as a title that comes right after the banner. The header can be the title of your webinar or be the same as the subject line. Either way, it should communicate the value of the event. What will people learn? How will they grow?
Your invitees should immediately be able to tell based on the header alone.
Here are some great examples:
- Webinar: Learn How to Boost Sales with 5 Simple Tricks
- Want to Double Your Organic Traffic? Find Out How in This Webinar
- These Proven Strategies Will Triple Your Conversion Rates
Here are some so-so examples:
- Join Our SEO Webinar on May 15th
- Sales Training Seminar by [Company]
- Leadership Innovation Summit with [Industry Leader]
5. Include a brief description of the event.
Right after the header, include two to three sentences describing the event. The description should briefly outline a challenge and establish the insights and tips that will help attendees surmount those challenges. Alternatively, you can identify a goal, then tell attendees how the webinar will help them achieve those goals.
Remember: value is the name of the game here. People won’t spend an hour on just anything, so make it clear why your webinar is worth their while.
Here’s a great example from HubSpot:
“Creating an outstanding customer journey is a challenge felt by many marketing, sales, and customer service teams. A great experience is always the end goal, but the path to success isn’t always clear. On March 2nd, join CX Spotlight and learn how to better market, sell, and service your audience.”
This example is great because it tells attendees, in no uncertain terms, the insights they’ll walk away with.
Here’s a so-so example:
“Come to our exclusive webinar on February 5th, where we discuss everything in the industry, including email marketing, SEO, and social media. Your host, XYZ, is an industry veteran with 20 years of experience. The presentation will cover key topics and trends happening in marketing today. Don’t miss it.”
This is a poor example because of three reasons. First, it’s too general; second, it doesn’t identify a challenge or a goal (such as growing organic traffic or creating a great customer experience); and third, it doesn’t tell attendees the skills they’ll gain from the event.
6. Include a list of bullet points telling people what they’ll learn.
Now that you’ve provided an overview of the event, feel free to include more detail about what attendees will learn throughout the webinar.
Here’s a great example from HubSpot:
“In this webinar, we’re focusing on the data that really matters when it comes to business growth. Our panel will discuss:
- What info you should be gathering across your web, chat, and email assets
- How to stay organized with this new influx of data
- Best practices for personalizing the buying experience”
Notice how the bullet points address the attendee directly, telling them what they’ll learn and how they can apply it in their role.
7. Seal the deal with a call-to-action button.
All throughout the email, you’ve constantly communicated the value of your event. Now, it’s time to invite your prospects to sign up with a clear, high-contrast call-to-action button.
Consider using the following phrases:
- Save your seat
- Register now
- Register today
- Claim your spot
Now that you know the best practices for webinar invites, let’s go over best practices for running your webinar. Use this webinar planning kit to make sure you’re following all the steps.
Featured Resource: Webinar Planning Kit
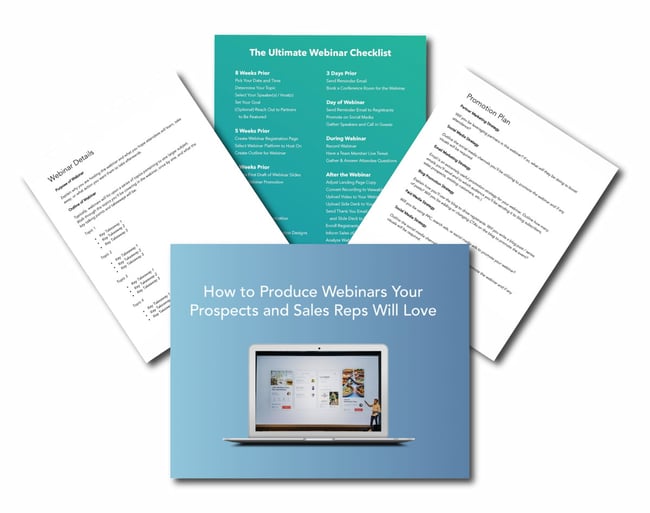
1. Schedule your webinar for 60 minutes.
How long should your webinar be? The answer is one hour. It’s a well-known fact that 60 minutes is the optimal length of a webinar, with the average viewing time being 56 minutes (ON24).
2. Host it on Wednesday or Thursday at 10 AM or 11 AM.
Both ON24 and GoToWebinar report that Wednesdays and Thursdays are the best days to deliver your event. As far as time, 10 AM and 11 AM have long been established as top performers in both attendee engagement and attendance rates.
3. Send reminder emails.
Leading up to the webinar, send a reminder email twice — one day before the event and one hour before the event. Your webinar platform should also offer the option to automatically send these reminders to those who’ve signed up.
4. Practice accessing the webinar with a teammate.
Two days before the webinar, have someone on your team access the event link to make sure it’s working for participants. Have this person send you a question, raise their hand, show you what the presentation looks like on the other end, and interact with the webinar interface.
5. Establish proceedings for the Q&A section.
Let the audience know in the introduction how you’ll be answering their questions — whether you’ll respond to select questions at the end or answer them as you go. Our recommendation is to schedule 15 minutes at the end for questions.
6. Move slowly through product demonstrations.
When doing a demo or showing software, try not to move too quickly or scroll up and down a web page too quickly. It might take 2 to 5 seconds every time you change your screen for everyone to see the change.
7. Create a clear stop to the presentation.
Have a definitive “stop” to the core material at around 50 to 55 minutes. It’s okay to extend beyond the end time as long as the “officially scheduled program” has a clean end, and those who need to leave can leave.
8. Keep your desktop and digital workspace clean.
Close all unnecessary applications, especially your email clients, file browser, and web browser. If possible, carry out the webinar on a separate desktop (both macOS and Windows OS allow you to create another desktop). You do not want any personal or confidential info displayed, and you just don’t want to interrupt the webinar with any notifications that pop up.
9. Start 2 minutes after the hour.
This gives people time to call in, but does not make those on time wait too long. It is tempting as a presenter to wait for more people to join, but the max you should wait is 2 minutes.
10. Enter the webinar room early.
Enter the event at least 15 minutes early. That will give you time to prepare, troubleshoot any issues, and double-check that your microphone and camera are working.
11. Use pre-webinar slides and announcements.
Put up a slide that introduces you and your company. Show links to your website, social media, and other pertinent sites.
12. Send out a recording and the slides to attendees (with a call-to-action).
Do this within 24 hours, and tell them during the webinar you will do this. A fast follow-up encourages attendees to continue engaging with your company (or convert) while the webinar is still on their mind. This follow-up should contain a clear call-to-action button.
Use Webinar Best Practices to Host a Great Webinar
Hosting a webinar is proven to be a great return on investment. By following the best practices we’ve shared in this post, you can make sure your event drives lead generation, establishes your brand as an authority, and grows your revenue.
Editor’s note: This post was originally published in November 2007 and has been updated for comprehensiveness.


How to (Easily) Make Perfect Content Calendars in Google Sheets
What do you use spreadsheets for?
If you’re anything like me, you likely use them to collect data, track campaign or blog post analytics, or keep track of weekly assignments.
But have you ever thought about using spreadsheets to make a calendar?
And, more specifically, have you ever thought about using Google Sheets to make a functional calendar?

If you often work on campaigns for a few different clients, creating individual calendars in Google Sheets could be uniquely useful for ensuring the client understands when certain content will go live. Alternatively, perhaps you need to create an internal Google Sheet calendar for your team to keep track of upcoming projects.
Making a calendar in a tool that’s commonly used for spreadsheets sounds a little intimidating, but don’t worry, the process is actually pretty intuitive. And with the help of some tips, you can easily make a functional calendar that you can sync your schedule with.
Below, we’ll go over how to make a calendar in Google Sheets and include some tips that’ll help you elevate the design. At the end, your calendar will look something like this:
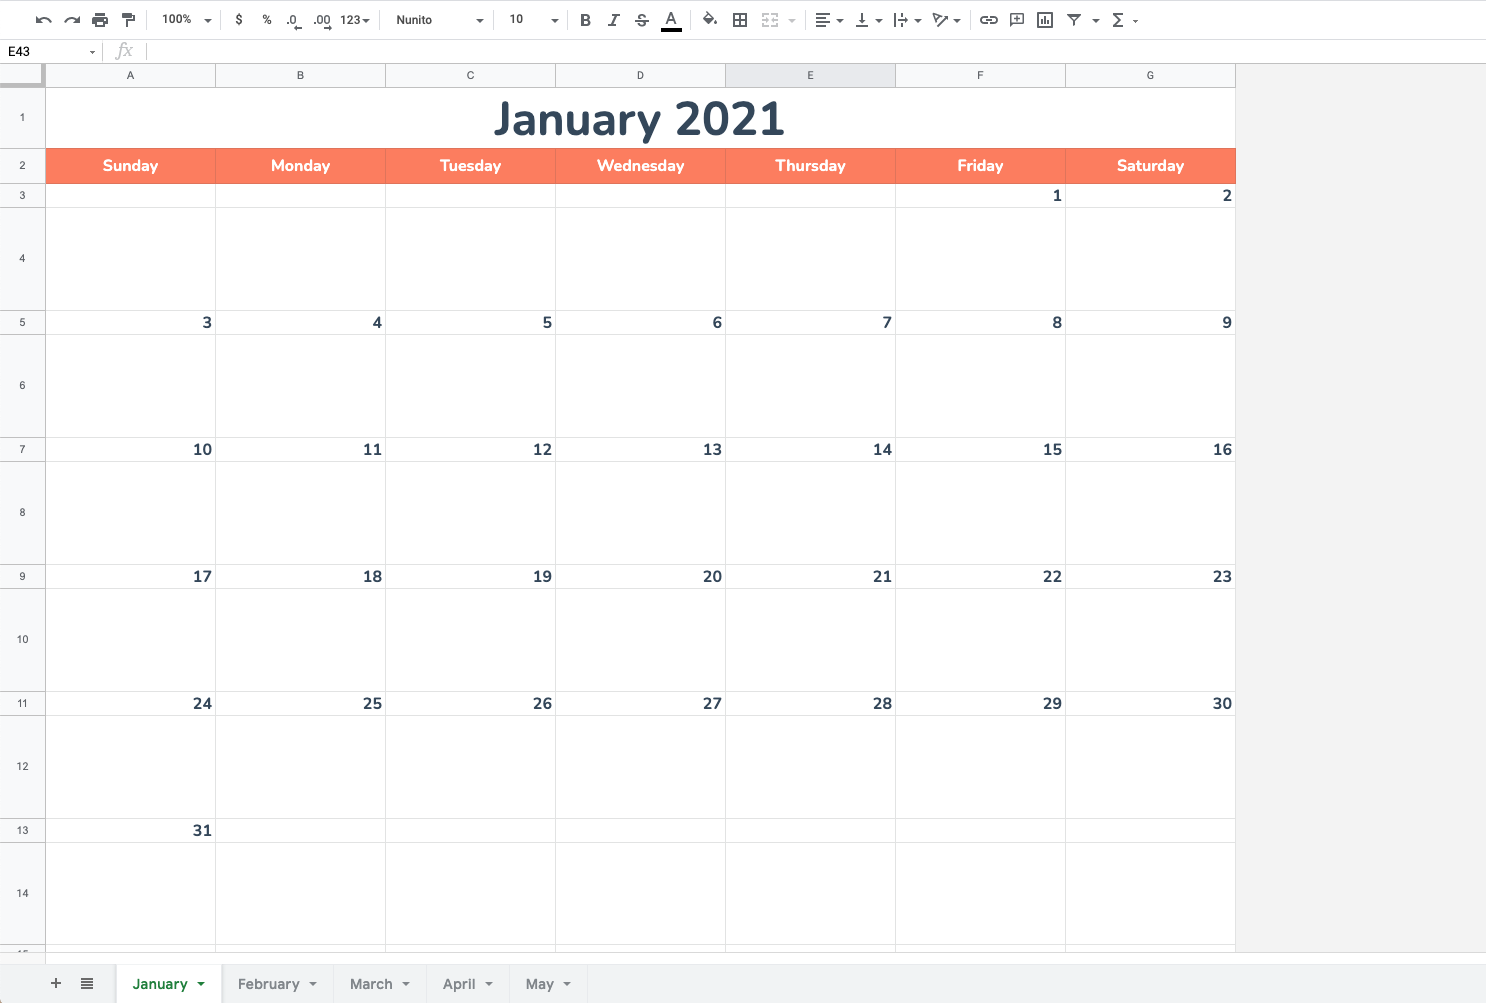
So start a new spreadsheet and get ready to create your very own calendar. 📅
1. Open a new spreadsheet and choose your month.
First, open a new spreadsheet. Then, delete columns H — Z. They won’t be needed.
Then, choose your month. For this example, I decided to do January 2021, so I filled that into the first cell. What’s great about Google Sheets is that it automatically recognizes dates, so typing in a month, followed by the year in YYYY format will tell Google that you’re going to be working with dates.
2. Begin to format your calendar.
Next, format your calendar. I selected the text, January 2021, in Column A, Row 1. I highlighted seven columns (A-G), and clicked Merge to make that cell span across the entire column. You can find this button to the right of the Fill tool.

Here, I also center-aligned my text using the tool next to Merge. Then, I increased the font size and bolded the month.
3. Use a formula to fill in the days of the week.
Next, fill in the days of the week in each column (A-G). You can do this manually but I decided to use a formula. Sheets has a function that lets you type in formulas to complete certain actions at once.
To fill in days of the week, in the cell where you want your first weekday to be, type: =TEXT(1, “DDDD”). What this tells Google is that your number will be replaced by a date or time and the format you’re using is weekdays.
Highlight the number 1 in the formula and replace it with: COLUMN(). Then, press enter and select your first day. You’re going to copy the formula in Sunday’s cell by dragging the selector to the end of your row, (A-G), and pressing enter again.

Pressing enter should automatically fill in the rest of the week. Remember, if this doesn’t work for you, you can always fill in the days manually.
Pressing enter should automatically fill in the rest of the week. Remember, if this doesn’t work for you, you can always fill in the days manually.
4. Fill in the numbers.
Excellent! You have your days of the week. Now we’re going to fill in the numerical values. Before this step, I took the time to add color to the days row and changed the font to one I liked a little more.
For the numerical values, we’ll simply identify the first day of the month and click and drag to fill in the rest.
How?
Place the number 1 on the box right underneath the first day of the month, the click and drag horizontally.
5. Fill in the rest of the numbers.
Note: In this step, I filled in the calendar numbers every other row to help with my formatting later.
Now that you’ve filled out your first row, it’s time to fill in the rest. Manually insert the next number under “Sunday,” then click and drag horizontally to fill in the rest.
Repeat the process for the next rows. You’ll insert the first number manually, the click and drag down the row. Here’s what that looks like for the next row in January.
Note: Make sure to end the month on the right number! For January, that would be the 31st.
6. Reformat your calendar if necessary.
Everything is starting to look like a calendar, right? At this stage, I reformatted things to clean up the look of my calendar a little.
Remember those extra rows in between the numbered rows? I expanded those rows to create boxes underneath the numbers. To do this, I simply dragged the rows down to make those cells bigger. 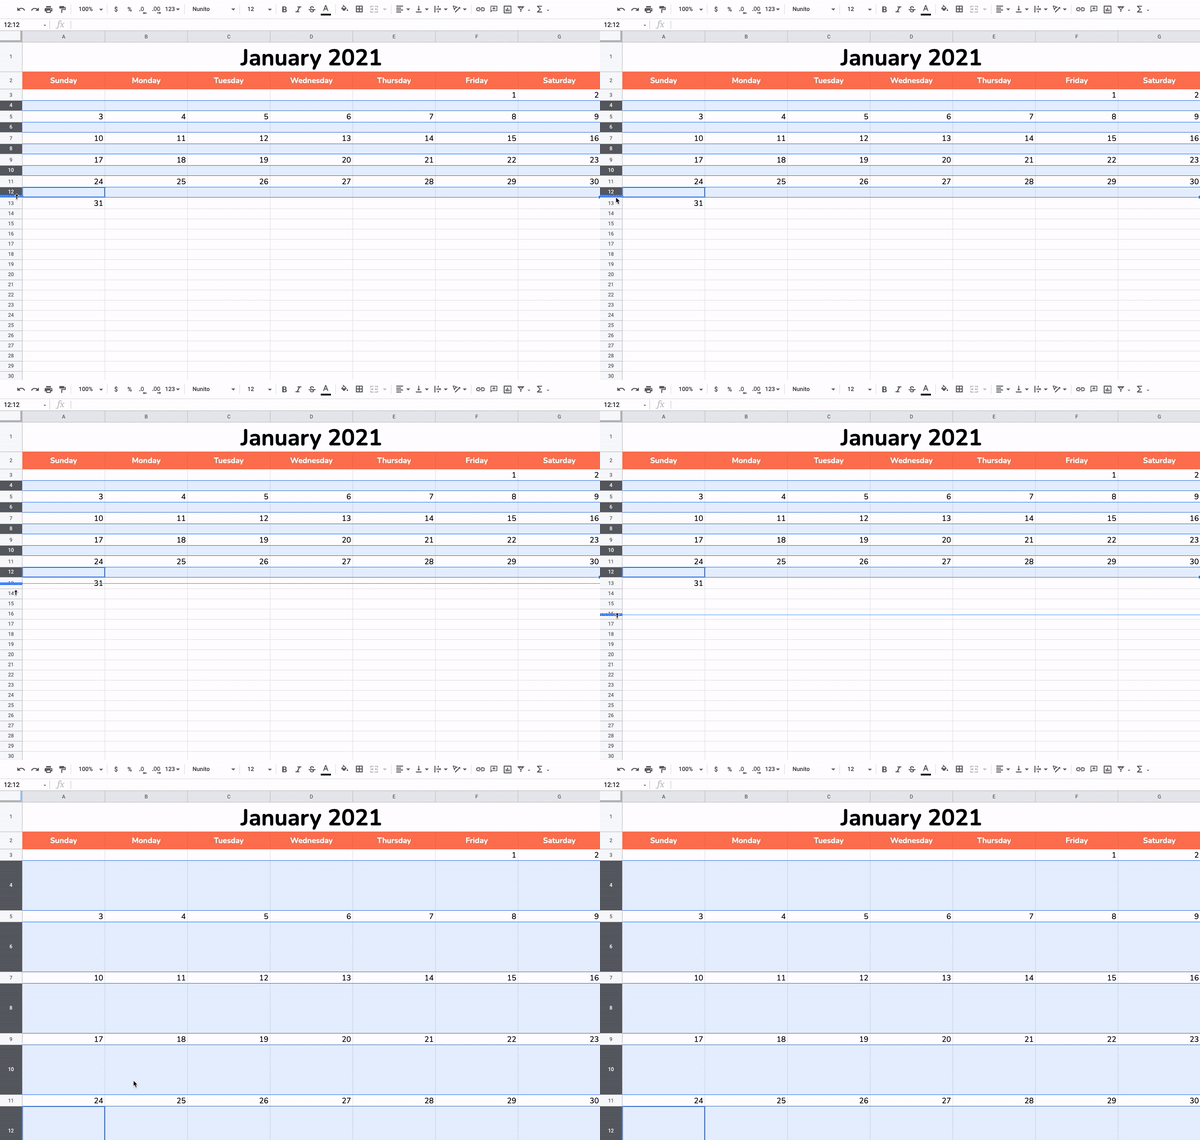
Here are some additional formatting tips:
- Select the empty rows underneath your numbers and center them using the center text alignment tool.
- Select your entire calendar and vertically align all elements so that they’re in the center of their cells. To do this, use the vertical alignment tool.
- Bold your day numbers.
- If desired, lightly shade your numbered rows.
- If desired, gray out the Saturday and Sunday columns so that your workdays stand out.
7. Add design elements to professionalize the look.
Finally, you can add in some fun design elements to personalize the look and feel of your calendar. If it’s for a client or upcoming project, you’ll want to incorporate necessary launch days here.
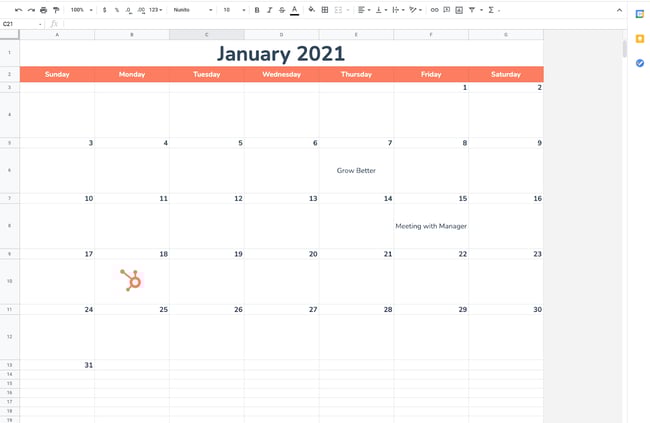
For this step, I added in a few fun images, included a few hypothetical calendar events, and played with font sizes.
8. Repeat the process from February to December.
It’s time to repeat for the month of February to December. Simply duplicate your January calendar once you’ve designed it how you want it to look. To do this, right click the sheet’s tab and select Duplicate from the menu.
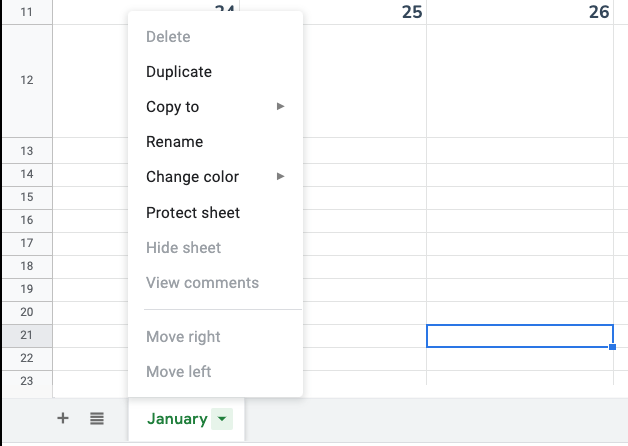 To fill in the numbers, you’ll only need to know the beginning day, then click and drag to fill in the rest of the rows. Here are the first days for every month for the year 2021:
- January: Friday
- February: Monday
- March: Monday
- April: Thursday
- May: Saturday
- June: Tuesday
- July: Thursday
- August: Sunday
- September: Wednesday
- October: Friday
- November: Monday
- December: Wednesday
Next, you’ll want to know how many days you’ll need to fill in. Here are the number of days you’ll need for each month:
- January: 31
- February: 28 or 29
- March: 31
- April: 30
- May: 31
- June: 30
- July: 31
- August: 31
- September: 30
- October: 31
- November: 30
- December: 31
And then, you’re done!
It’s handy to use Sheets because you can open your calendar right on your browser. You can also keep track of your schedule in a place that’s separate from your phone.
Alternatively, you can create important business documents such as social and editorial calendars. Below, I share a template that’s perfect for the task.
Google Sheets Calendar Template
Here’s an editorial calendar template for all of your editorial planning needs. This template helps you lay out a strong editorial strategy on a daily basis.
Featured Resource: Free Editorial Calendar Templates
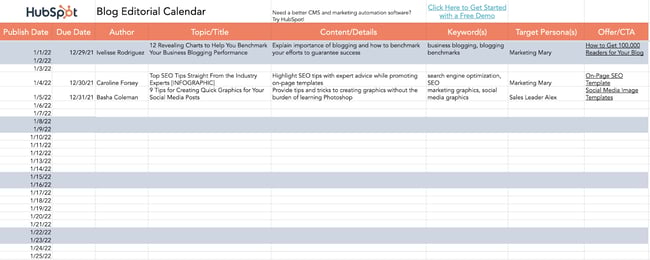
Use a Google Sheets Calendar to Organize Your Tasks
If you’re handy with Sheets and want to give it a shot, create a Google Sheets calendar. It’s a great option if you need to create a clean calendar to track an internal marketing campaign, organize a client’s upcoming projects, or share an event calendar with key stakeholders. But if you don’t want to create one from scratch, use our editorial calendar template to jumpstart your planning and organization efforts immediately.
Editor’s note: This post was originally published in May 2020 and has been updated for comprehensiveness.


The Ultimate Round-Up of Content Marketing Tips
There are nearly five billion active internet users and over four billion social media users worldwide — simply put, that’s a ton of opportunity for your brand to engage with an audience and achieve massive growth for your business.
One of the most effective methods for spreading brand awareness and attracting new customers is through content marketing.
Content marketing is a marketing strategy that focuses on creating, publishing, and distributing valuable and relevant content online with the purpose of reaching a targeted audience and incentivizing profitable customer action. Ultimately, content marketing is a critical component for long-term, sustainable growth.
And yet, despite its immense impact, many marketers don’t know how to implement a successful content marketing strategy.
To ensure you’re able to cultivate a truly valuable marketing strategy, we’ve created this round-up of content marketing tips. Keep reading to become a true content marketing expert.
1. Make sure your content has a clear, measurable business goal.
You might be overwhelmed by the sheer amount of content you can create for your business — anything from Instagram Stories, to blog posts and e-books, to podcasts.
However, as Karla Cook, Senior Manager of the HubSpot Blogs, notes, “[It’s critical] every single piece of content you’re creating has a clear, measurable business goal in mind — and simply ‘getting views’ isn’t a complete business goal. Take the time to think about how content can serve your overall marketing strategy, and create pieces that tie back to that.”
For instance, let’s say you decide you want to lean heavily into a blogging strategy. Simply crafting and publishing content isn’t enough — instead, it’s important you identify your target audience and decide how your content can best serve that group. Additionally, you’ll want to use analytics to ensure your content is able to reach the right people with the appropriate search intent.
Once you identify how to serve your audience, you’ll want to ask yourself, “How does this tie back to the business?” While it’s critical you write quality content to grow your audience, it won’t attract prospects if it doesn’t tie back to your business.
Take a look at the strategy that helped the HubSpot blog break a year-long traffic plateau to learn more about cultivating a business-focused strategy for content creation.
2. Know your audience.
Content marketing is all about attracting the right audience — that is, those who are most likely to engage with your brand and buy your products. But you can’t write content that attracts the right audience until you know your audience.
No need to go out and interview every customer who’s ever done business with you, although that could definitely be helpful. Sit down with your team and create a buyer persona, the ideal customer who’s best served by your products. You’ll want to take into account both psychographic and demographic information, and create a buyer persona document that your team can refer to.
Knowing your audience helps you create content that speaks to them as they go through the buyer’s journey.
3. Understand your buyer’s journey.
A good content marketer understands that their strategy needs to engage and delight readers at any stage of the buyer’s journey. While your content should initially attract new visitors to your business, it should also convince hesitant prospects to purchase, and encourage customer retention and long-term brand loyalty.
For instance, perhaps some customers are hesitant to purchase your product because they believe you need extensive video knowledge to succeed with it. To help mitigate concerns and aid your sales team, you might create a video campaign to show customers how to use video marketing.
If you’re feeling stumped, learn how to create content for every stage of the buyer’s journey.
4. Solve for the reader.
When you’re creating content, you have two primary goals: to educate and to help someone solve a problem. While the objective is to generate leads or drive readers toward a purchase, you also want to establish your brand as a trustworthy source of information first. Then, after they’ve come to trust you, readers can convert and turn into paying customers.
Every piece of content should solve for the reader by answering their questions, offering useful resources and tips, and getting them slowly acquainted with what you offer and how you can help.
For example, if your brand offers vacation rentals, your content should revolve around travel and provide important information that potential travelers need. You would write city-specific travel guides, lists of best places to visit, lists of best practices for traveling solo, and so forth. Once a reader continues to come to you as an authoritative source of information, they’ll trust you enough to make you their provider.
5. Adopt the pillar-cluster model.
If you want to create a better reading experience while improving your SEO, organize your content using the pillar-cluster model.
In this model, a pillar page covers an umbrella topic, then cluster pages support that topic. You then use internal linking to connect all the topics together and signal to Google that they’re related.
For example, if you’re a web design firm, your umbrella topic might be web design. You’d write a pillar page titled, “The Ultimate Guide to Web Design.” Then, you would write pages such as “UX Design 101” and “How to Use HTML & CSS” to support that umbrella topic.
6. Write in-depth content.
It’s been well-established that, on average, longer content performs better in search engines than shorter content. So, when writing content for your website, you should make it long — but not just for the sake of it.
As you seek to solve for the reader, you should include everything they need to know in one post about the specific topic they’re looking for. You shouldn’t write long content with paragraphs upon paragraphs of fluff. Rather, answer related questions and bring up any tips that will help them walk away with all the information they need.
To find out the types of questions people need answers to, look at the “People also ask” box when you search the keyword you’re targeting. This will tell you the types of queries Google has picked up on that are related to your search.
Keep in mind that each post or page should only cover one highly specific topic and only target one to two keywords. You’ll want to do this for various reasons:
- You’ll avoid self-cannibalization because you won’t be writing about general topics.
- You’ll strengthen topical authority by writing in-depth content on one specific keyword.
- With less keywords covered per page or post, you’ll have more keywords to target in other pages.
7. Rely on analytics to track your performance.
Quality content is important, but it doesn’t mean much for your business if your visitors and viewers don’t convert into customers. This is why analytics is so important — by carefully monitoring, tracking, watching, and reporting on the numbers, you’ll be able to gauge what’s working, what isn’t, and what could be working better.
Traffic is important, but it’s important you also focus on conversion rates. Perhaps your Instagram account has only 1,000 followers — alternatively, your blog has 7,000 readers. However, your Instagram page has a conversion rate of seven percent, and your blog only converts at about .01. This should tell you that, while your blog is important for an initial introduction to your business, your Instagram is critical for sales and shouldn’t be ignored.
Additionally, focusing on analytics will help you refine and improve your strategy for the future. For instance, let’s say you notice your blog readers are particularly interested in blog topics related to e-commerce. This can help direct your future strategy — you can choose to focus more heavily on e-commerce topics, which will increase traffic (signaling your readers are happy with your content), and ensure you’re spending time and effort where it matters.
8. Keep content consistent and up-to-date.
Victor Pan, Head of Technical SEO at HubSpot, urges content strategists to implement simple SEO tactics to ensure content remains up-to-date and relevant to search engines. He says, “You can tell if being up-to-date is important to your topic if ‘keyword+year’ shows up in the ‘related searches’ of a Google search result.”
To ensure your content remains relevant and updated, Pan recommends the following three tips:
- Exclude the year in the URL when you’re optimizing your content. Great URLs don’t change.
- Include the year in the title of your content.
- Schedule your editorial calendar to revisit this content every year so you can keep it up-to-date, which could include updating the title tag, meta description, and content itself.
It’s important to note that if you do implement an optimization strategy, it’s critical you don’t update the URL. The URL should remain the same to ensure you don’t need to re-earn backlinks. Additionally, you don’t want to create unnecessary redirects.
Overall, consistency is key. Publishing consistent content will help you rank in the SERPs, but it will also establish trust with your audience.
9. Adopt a historical optimization strategy.
A few years ago, the blogging team at HubSpot figured out the importance of adopting a historical optimization strategy. Through repurposing old (yet still high-quality) content, the team was able to double monthly leads, and increase monthly organic search views by an average of 106%.
Ultimately, you don’t want old content to go to waste. If a topic is particularly evergreen (like “how to create a blog”), it makes sense you’d put time and effort behind repurposing it.
10. Repurpose your content.
It takes time and talent to craft highly useful, engaging content — so, by finding ways to recycle existing content, you’re ensuring peak efficiency. Additionally, repurposing content allows you to reach new audiences. For instance, let’s say your podcast team published a high-performing episode. Why not turn that episode’s topic into a blog post?
Alternatively, maybe you created a blog post that performed significantly well — now, you might consider creating a YouTube video that covers a similar topic to reach an audience that prefers video over text.
Repurposing your content will also ensure your audience has more than one chance to see it. Your readers, viewers, and followers are busy. Consider simply implementing a new content promotional strategy on a piece of content that deserves to be resurfaced.
11. Ensure your brand voice remains steady across channels.
Whether you visit Spotify’s Twitter page, YouTube account, or stumble across one of its billboard advertisements, you can quickly get a sense for the brand’s funny, candid, youthful voice. This is what makes me feel connected to Spotify — its unwavering brand consistency, regardless of the channel on which I choose to engage.
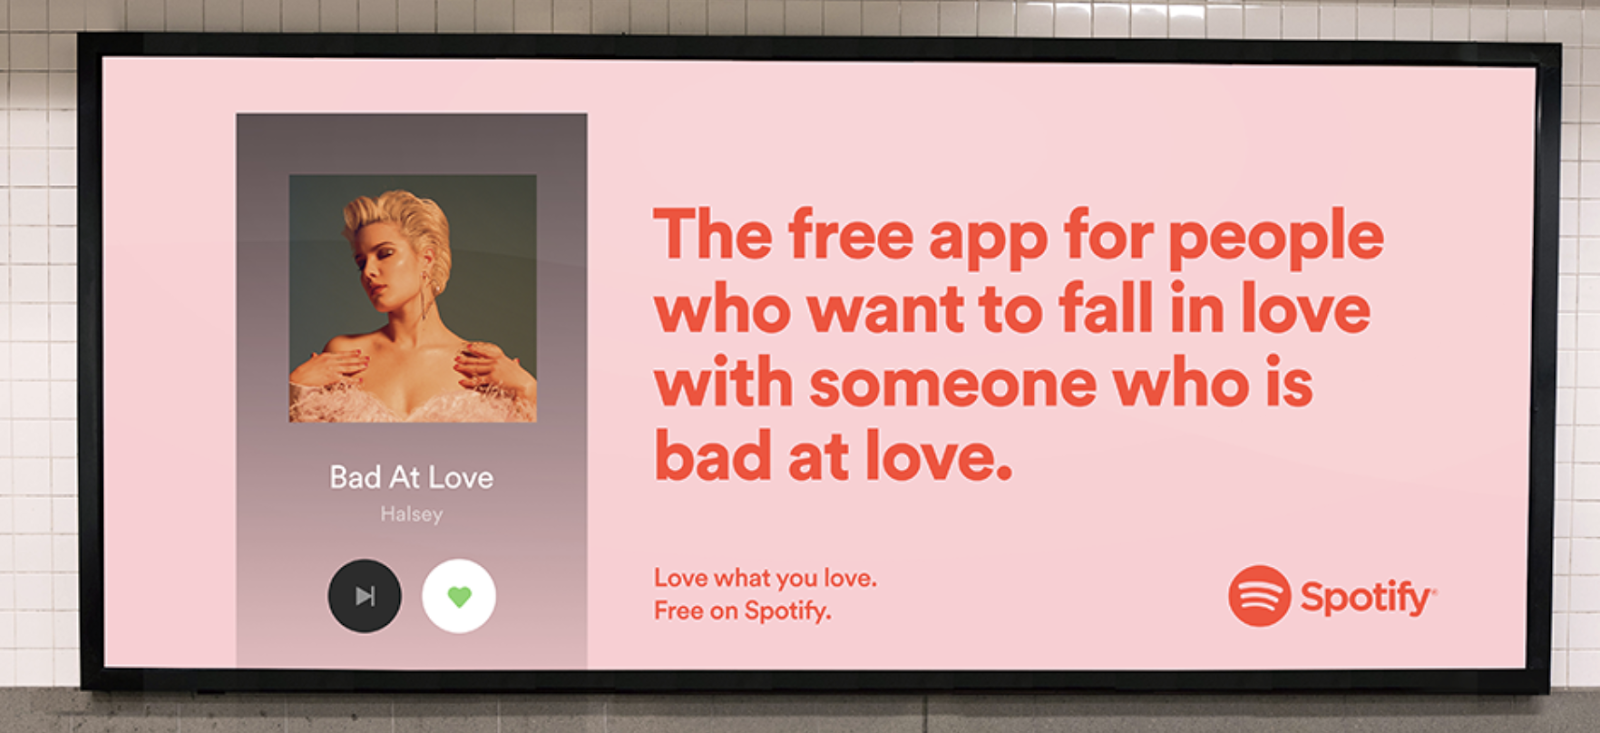
Even if you have a marketing team of 30, it’s critical to produce similar messaging that aligns with your brand’s voice and values across channels. A viewer should watch one of your YouTube videos and then click a link to a blog post and think, “Ah, yes — this is definitely the same company.”
If you need help crafting or refining a brand voice, check out How to Find Your Brand’s Voice.
12. Personalize your content.
Have you ever visited a website multiple times, and each time, the experience gets more and more tailored to your tastes? (Think Amazon.)
Personalizing your website content is crucial. Your business doesn’t own a social media site, meaning you can’t personalize content there based on your follower’s behaviors. That’s why personalizing your website’s content is so important. On your website, you have complete control over what certain users see based on the pages they’ve visited, their dwell time, their account activity, and so on. You can also personalize by device and buyer persona.
One way you can get started is by including a reorder button on a product page for users who’ve ordered that product before. You can also create a popup that contains a CTA to download a guide that helps them get the most out of the product. To better serve each prospect or customer, consider using content mapping, which will help you figure out which content serves which buyer persona at certain stages of the buyer’s journey.
You don’t have to implement personalization manually: you can use personalization software to trigger certain actions, show certain content, and send personalized emails.
13. Use data to strengthen your points.
83% of marketers don’t use data and statistics in their content marketing.
Just kidding — I made that up. But using data is a great way to highlight the importance of a piece and strengthen your points.
Using stats and data provides an irresistible hook and allows you to show why one should read the piece in the first place. For example, I opened this piece with stats on how many people are online, highlighting the fact that content marketing can help you reach a large segment of the population.
The great thing about data is that it can be used both on your website and on social media platforms. Whenever you use one, be sure to tie it into the value of your product or use it to validate your points. For instance, if you’re a water bottle brand, you can write a caption that reads: Did you know that people who don’t regularly drink water are 15X more likely to get dehydrated? Stay hydrated with your [water bottle brand].
I also made that statistic up, but you see my point: statistics and data can prove the value of the product or substantiate your arguments.
Whenever you use statistics, be sure to cite recent research (two years at the latest) whenever possible. More importantly, make sure to use factual, accurate data from reputable sources. Data integrity is critical — especially if your blog is widely read.
14. Publish original research.
Publishing original research can help you look more authoritative and knowledgeable, spurring brand trust and giving your content an edge over your competitors’.
While you often see Fortune 500 companies undertaking this task, it doesn’t have to be left to big names in the industry. You can publish original data, too, by carrying out surveys of your customers or prompting your followers on social media to take a questionnaire. You can survey them on a variety of product-, service-, or industry-related topics.
For instance, if you’re a content marketer at a travel agency, you can conduct a survey about the ways people grappled with the lack of traveling opportunities during the pandemic. You can then cite this original research in a blog post about restarting travel plans after the pandemic becomes a thing of the past.
15. Go beyond written formats.
The rise of video is not about to stop — and with rich video and image packs taking precedence in SERPs, you’d be remiss to not include video in your content marketing strategy.
Content marketers have long heralded infographics as one of the best multimedia formats to include in blog posts. Indeed, infographics have the advantage of being pinnable and easy to scan. And, while they’re still important, it’s time to diversify.
Creating a YouTube video is one of the easiest answers, but you don’t necessarily have to go down that route, especially if you’re not sure how to create a video marketing strategy. You can also include other formats such as interactive photos, editable code modules, interactive charts and graphs, and more.
16. Prioritize the user experience.
User experience is king. You can have the most well-written, well-researched piece of content, but if your website’s user experience is buggy, you’ll lose readers and have them bounce off the page — which is a highly negative ranking factor. Most importantly, those are leads that you won’t convert.
Make sure your site loads quickly, is mobile optimized, and has navigability features such as a table of contents and back-to-top button. Your content should be easy to read on all devices, with a series of clear, consistent headings and a sans-serif typeface.
Be sure to also optimize for accessibility website standards. You should provide alt text for all images, include captions in videos, offer a high-contrast setting for the website, and ensure that your content can be read out loud by a software.
17. Remarket your content.
When you repurpose your content, you take a previously-covered topic and turn it into a new format. When you remarket your content, you take the content that already existed and try to re-engage users who interacted with that content but didn’t convert.
There are so many variables that aren’t on our side. A visitor may not be looking for your product right at that moment; it may not be their pay day; it may not be the right day. By intentionally remarketing your content to those who’ve already shown an interest, you increase your chances of capturing their interest at just the right time. And that’s what content marketing is all about.
Content Marketing Tips for the Modern Marketer
Content marketing is here to stay. While it evolves every day, its essence never changes: content marketing is all about the reader, not about the brand. In your content marketing campaigns, seek to know your target audience, serve their needs, and solve their problems, and you’ll soon have an army of brand evangelists who market your brand for you.
Editor’s note: This post was originally published in April 2019 and has been updated for comprehensiveness.

How to Use Facebook: A Beginner’s Guide
Facebook has changed quite a bit since I first signed up for an account in 2008. Back then, Facebook was still called “The Facebook”, and my bio literally said, “Check out my MySpace, it’s waaaay better than my Facebook.”
Needless to say, Facebook has evolved at breakneck speed since my middle school years, and it’ll keep adapting at a swift pace for as long as it exists.
If you need a refresher on how to use Facebook for marketing your business or you want to sign up for a personal account, check out this in-depth explanation of how to use the most popular social media network in the world.

In addition to sharing their own ideas, users can engage with the content other people share on Facebook by reacting to it with a like, a laugh, disapproval, and even a hug. Comments and shares are additional ways users can interact with each other’s content.

Facebook for businesses works similarly, except businesses have Facebook Pages not profiles like individual users do. Businesses can use their Facebook Pages to engage with existing customers, target new customers, and administer customer support.
To fully understand Facebook and how it works, you’ll want to become familiar with common terms used on the platform. Here is a list of key Facebook terms and what they mean.
Profile
The Facebook profile is where your information will live. Your name, photo, hometown, workplace, education history, and so on can all be added to your profile. You can make your profile as public or private as you want by disabling the information you don’t want publicly visible.
Newsfeed
This is the place where all of your friends’ posts will appear. You’ll also see updates from business pages that you’ve liked. Your posts will also appear in the newsfeed where your friends can see them.
Timeline
Often confused with a newsfeed, the timeline is your personal record of all the posts you’ve shared and posts you’ve interacted with. While you won’t usually see friend’s status updates here, there is one exception — if they’ve tagged you in a post or a photo, it’ll appear on your timeline. Your friends can see your timeline by default if they search your name unless you’ve set your privacy settings to do the contrary.
Algorithm
The algorithm is an elusive concept. Essentially, the algorithm is a series of computations that Facebook’s servers do every second to determine what content you want to see, interact with, and click on next. The algorithm uses dwell time (how long you view a post), engagement, page likes, posts, and more to determine the type of content you might like to see. Over time, the algorithm gets better at determining what content to show you.
Status/Post
The two terms are often used interchangeably, but “post” is the term Facebook uses to describe something you share on the newsfeed. Text, images, videos, and location are just a few of the types of posts you can share to the newsfeed for your friends to see.
Friends
These are people you’ve either sent a request to and they’ve accepted or people who have sent you a request and you’ve accepted. Unlike other social networking sites that allow someone to follow you without you following them back, Facebook’s friend system requires both you and the other person to be friends with each other. A personal account for an individual cannot have more than 5,000 friends (and it’s not a good idea to make a second Facebook profile to get around this rule).
Followers
Facebook has a follower option as well. When you add new friends, you automatically follow them (and they follow you, too). This is Facebook’s way of adding this new friend to your newsfeed and making sure you see their posts (at least for a little while unless you stop engaging with them). For individuals who exceed 5,000 friends on their personal Facebook profiles, people can opt to follow them instead to stay up to date on their posts. Keep in mind, while Facebook automatically follows your friends for you, you can manually unfollow them without unfriending them. This action removes these individuals’ posts from your newsfeed. If you do this, you’ll need to search your friends individually and surge their timelines to catch up on their latest posts.

Groups
Facebook users with similar interests might find it helpful to create a group on the platform. A group is a community of users who interact with each other based on various topics set by the group’s admins and other users. Only individual users can be added to groups — pages cannot be part of Facebook groups. Admins have a wide range of permissions they can enable or disable to have the group function in a particular way.

Pages
Businesses use Facebook Pages to create a presence on the social network. Pages are not individual Facebook users — think of them as profiles for businesses. They can post updates, images, videos, and all the other types of content that profiles can. However, they have an advantage — Facebook Pages have the ability to connect to Facebook for Business and run ad campaigns.
Events
With so much community happening on Facebook, individual users and businesses have the option to advertise events. The events can accept RSVPs, create a guest list, and share the date time, and location of the event. Events can be virtual through a video platform or they can be in person with a physical location.
Messenger
Instead of a direct messaging platform in the native Facebook app, Facebook Messenger exists as a separate application so users can chat one-on-one or in a private group setting. When using Facebook.com on a desktop computer, the messenger is accessible through the native Facebook website.
Story
Like Instagram stories, Facebook stories are another way individual users and business pages can connect with their friends and followers. Stories are short pieces of content that are visible for just 24 hours. After 24 hours, the stories disappear from the newsfeed.
Notification
Represented by the bell icon in the third circle below, a notification informs you when a friend engages with your posts, photos, videos, or timeline, you’ll receive a notification that explains what they engaged with and when. Friend requests will also appear here.
Now that you have an idea of what Facebook is and how it works, here’s a handy guide to using Facebook.
How does Facebook Work?
Facebook is powered by an algorithm that is able to learn each user’s preferences and interests. Then, the algorithm displays content like images, status updates, and videos posted by friends and businesses that the user might be interested in. The goal for Facebook is to get users to engage with, consume, and share content.
Along with this, Facebook runs advertisements for businesses and these ads are sprinkled in between organic content shared by your friends on the news feed. The ads are tailored to your interests so you see what the algorithm thinks you might be interested in based on content you’ve interacted with in the past. This is called behavioral targeting.
How the Facebook Algorithm Works
In the past, Facebook used a chronological timeline. This means that the posts on your newsfeed were listed in the order in which they were most recently shared by your friends on the platform. If your mom posted three hours ago and your best friend posted five minutes ago, you’d see your best friend’s post first, then your mom’s. However, that all changed in September 2011 when Facebook officially announced that it was doing away with the chronological newsfeed and replacing it with a more personalized experience. Rather than seeing your friends’ posts in the order they were shared, you now see the content Facebook’s algorithm thinks you’ll enjoy the most. This newsfeed is still around today.
1. Sign up for a Facebook account.
To sign up for a Facebook account, follow these three easy steps.
- Visit Facebook’s website.
- On the homepage, enter your first name, last name, mobile number or email, new password, birthday, and gender.
- Click Sign Up.
2. Set up your privacy settings.
After you’ve signed up for a Facebook account, you can adjust your privacy settings to control who can see your profile and information. Follow these four simple steps to change your privacy settings.
- Click on the downward pointing arrow that’s located on the top right corner of any Facebook page.
- Click Settings.
- In the left sidebar, select Privacy.
- Set who is allowed to see your past and future posts. You can also control how people can find and contact you.
Odds are, there’s probably someone on Facebook who has the same name as you. To differentiate yourself from these people and help your friends and family find you on Facebook, personalize your profile by adding a profile picture, cover photo, and some personal information.
3. Personalize your profile.
Picking a Profile Picture
- Go to your profile and click on your profile picture.
- To pick your profile picture, choose a photo that you’re already tagged in on Facebook, one that you’ve uploaded to Facebook, or a photo from your computer. You can also add a frame to your profile picture.

Choosing a Cover Photo
- Click the camera button on your cover photo, which is on your profile.
- To choose your cover photo, you can pick a photo from your Facebook profile, a selection of Facebook’s own cover artwork, create a collage, or upload a photo from your computer. You can also reposition or delete your current cover photo.
Updating Your Profile
- Click the About section on your profile page.
- In this section, you can fill in information about your work and education, the places you’ve lived, contact and basic info, family and relationships, details about you, and life events.
4. Like and follow public pages.
On Facebook, you can follow and get updates from your favorite brands, celebrities, sports teams, and publications. The best way to do this is by searching for them on Facebook and liking or following their public page, which will have a blue verified check mark next to their name. After you like or follow their page, you’ll start to see their updates in your news feed.
5. Review your timeline.
Your timeline is a digital log of your Facebook activity in reverse-chronological order. Your status updates, uploaded photos and videos, and the photos you’re tagged in will appear on your timeline.
6. Add friends on Facebook.
There are three ways you can add friends on Facebook. You can either search for them, find them in the Find Friends tab, or import a list of contacts from your email, iCloud, or phone.
To find friends on Facebook, go to your profile, select the Friends tab, and tap the Find Friends button. You’ll see a list of friend requests from other people and a list of people you may know that you can add as a friend on Facebook.
If you upload a list of contacts onto Facebook, you can add your friends as you sort through each of your contacts.
7. Post on Facebook.
The main purpose of Facebook is to help friends and family connect with each other. And the best way to connect with your friends and family is by updating them about your life with status updates. To share a Facebook status, go to the text box at the top of your news feed page or on your profile page.
With status updates, you can share text with 15 different colored backgrounds, photos, videos, GIFs, stickers, and links.
You can also share other types of posts, like:
- Feeling/Activity: Share how you’re currently feeling or what you’re currently doing.
- Check In: When you visit a city, location, or place, check in and let your friends know where you’re at.
- Tag Friends: If you’re hanging out with your friends, tag them in your status and share what you’re doing.
- Tag Event: If you’re at an event, you can tag it in your status and share what event you’re attending.
- Ask for Recommendations: If you just moved somewhere or you’re about to visit a location, you can ask your Facebook friends for recommendations on where to go.
- Poll: Ask your Facebook friends what their opinion is on a certain topic.
- Support Nonprofit: Choose a nonprofit organization of your choice and share it through your status. Your Facebook Friends can then select the donate button to support the chosen organization.
- Answer a Question: Choose a predetermined question to answer or create your own question to answer and share it with your Facebook friends.
- Lists: Choose a predetermined topic to make a list for or create your own topic and share it with your Facebook friends.
- Facebook Stories: All the content that you can share through a status update is shareable through your Facebook story. You can also upload content to your stories by clicking the Add to Your Story button on the right sidebar. Additionally, you can watch all your friends’ Facebook Stories by clicking on their picture in the Stories section, which is also located on the right sidebar on your home page.
8. Add photos and videos.
On Facebook, you can add photos, videos, albums, and live video broadcasts to your profile for all your friends to see.
Uploading photos or videos
To upload photos or videos to your profile, follow these four simple steps:
- Go to your Profile.
- Select the Photos tab.
- Select Add Photos/Video.
Upload pictures or videos from your computer.

Creating photo or video albums
To create a photo or video album, follow these four simple steps:
- Go to your Profile.
- Tap the Photos tab.
- Tap Create Album.
Upload pictures or videos from your computer.
Facebook Live
To do a live broadcast on your Facebook account, follow these three simple steps.
- In the box that says What’s on your mind?, select Live Video.
- Once you select Live Video, you can write a description about your broadcast, tag people in it, add a feeling or activity, check in to an event, support a non-profit, or add a poll. You can also title your live broadcast or tag a video game if you’re live streaming someone or yourself playing a video game.
- Select Go Live when you’ve finished describing your live broadcast.
9. Connect with friends.
On your news feed, you’ll see updates from your friends, family, or public pages you follow. To interact with them, you can like and react to their posts, share content on their timelines, and communicate with them through text or video chat.
Like, Comment, Or Share
If you like someone’s post, give them a thumbs up, comment on their post, or share it.

Other Reactions
If your Facebook friend’s post evokes a stronger reaction in you than a like, you can also express that you love, laughed, are amazed, sad, or angry at their post by holding down the Like button.

Sharing Content on Your Friends’ Timelines
Anything you can post on your status, you can also post on your friend’s timeline.
Facebook Messenger
To chat with your friends or public pages on Facebook, use Facebook Messenger. You can access it by tapping the Messages button at the top right corner of any Facebook page or selecting the Messages button on the left sidebar of the home page.
Next, select New Message and type in your friend or brand’s name that you want to connect with. Facebook Messenger also lets you create group chats by clicking on New Group. After that, all you have to do is name your group and add the friends you want to include in the group.
When you message your friends or group on Facebook Messenger, you can upload pictures, videos, and files from your computer, as well as stickers, GIFs, emojis, and take pictures and videos from your computer’s or phone’s camera.
You can also view Messenger on its own page, where you can search for past conversations and manage your settings. To view Messenger on its own page tap the Messages button in the top right corner of any Facebook page and then tap the See All in Messenger button.
To instant message your friends’ who are logged onto Facebook at the same time as you, tap the Chat button on the bottom of any Facebook page and strike up a conversation with your friends who are online.
Phone and Video Calling
When you have Messenger open on its own page, you can search for any of your friends or groups, click on their name, and tap the phone or video chat button to call them.

10. Review your newsfeed.
Your news feed is a curated feed of posts from your friends, family, and public pages you follow that Facebook’s algorithm thinks you’ll be interested in. You’ll also see ads from brands who think you’ll enjoy consuming their content or products.
To customize your news feed, tap the downward pointing arrow in the upper right corner of any Facebook page and tap News Feed Preference.
From there, you can prioritize whose posts you’ll see first, unfollow people and groups to hide their posts, reconnect with people and groups you unfollowed, discover public pages that match your interests, and hide apps from your news feed.
11. Discover additional Facebook features.
Facebook isn’t just a platform for viral content and connection. It’s also a hub for community communications, video streaming, marketplaces, and games.
Events
The Events page on Facebook will show you any upcoming events that are popular with your Facebook friends or have been set up by the groups you belong to. You can also find events based on their date, location, and category.
To find the Events page, select the Home button. Then, on the left sidebar, you’ll see the Explore section, where you can select Events
Groups
The Groups page on Facebook will show you which groups you manage and belong to. You can also discover groups to join based on Facebook’s suggestions and a ton of other categories.
To access the Groups page, tap the Home button and then on the left sidebar, you’ll see the Explore section, where you can click Groups.
Facebook Watch
On the Facebook Watch platform, you can watch videos from the shows you’re following and search for other shows and videos.
To access Facebook Watch, select the Home button. Then, on the left sidebar, you’ll see the Watch button right under the Marketplace button.
Marketplace
Not only does Facebook compete with Netflix in the streaming industry, but they also compete with eBay in the marketplace industry. With Facebook Marketplace, you can browse for all kinds of products, join groups to buy and sell products with people in your area or who share similar interests, shop for products sold from different shops, shop by category, and sell your own products.
To access Facebook Marketplace, select the Home button. Then on the left sidebar, you’ll see the Marketplace button right under the Watch button.
Games
Facebook Games is one of Facebook’s best features. They host a huge collection of massively popular games, and you can browse the most popular games on the platform by top charts and categories. You can even play most of the games with your friends, too.
 Editor’s note: This post was originally published in October 2018 and has been updated for comprehensiveness.


A Beginner’s Guide to Facebook Insights [+ Step-by-Step Instructions]
If your brand has a business Facebook page, you’ll want to invest time understanding your Insights dashboard.
It holds important data that helps you understand how your page is performing and is key to growing your page.

Features like weekly insight summaries and competitive data on other business pages make Facebook Insights a powerful tool that every marketer should leverage.
Let’s dive into what Facebook Insights is, how to access it, and how to interpret the metrics it tracks.
Facebook Page Insights vs. Facebook Audience Insights
Despite having similar names, Facebook Insights and Facebook Audience Insights have completely different functions.
Facebook Insights visualizes incoming data from your business page so you can learn how users are behaving on your page, what content they’re engaging with, and how your page matches up to competitors.
Facebook Audience Insights, on the other hand, is used for ad campaigns and helps marketers understand Facebook audiences in general (which can also include those who follow your page).
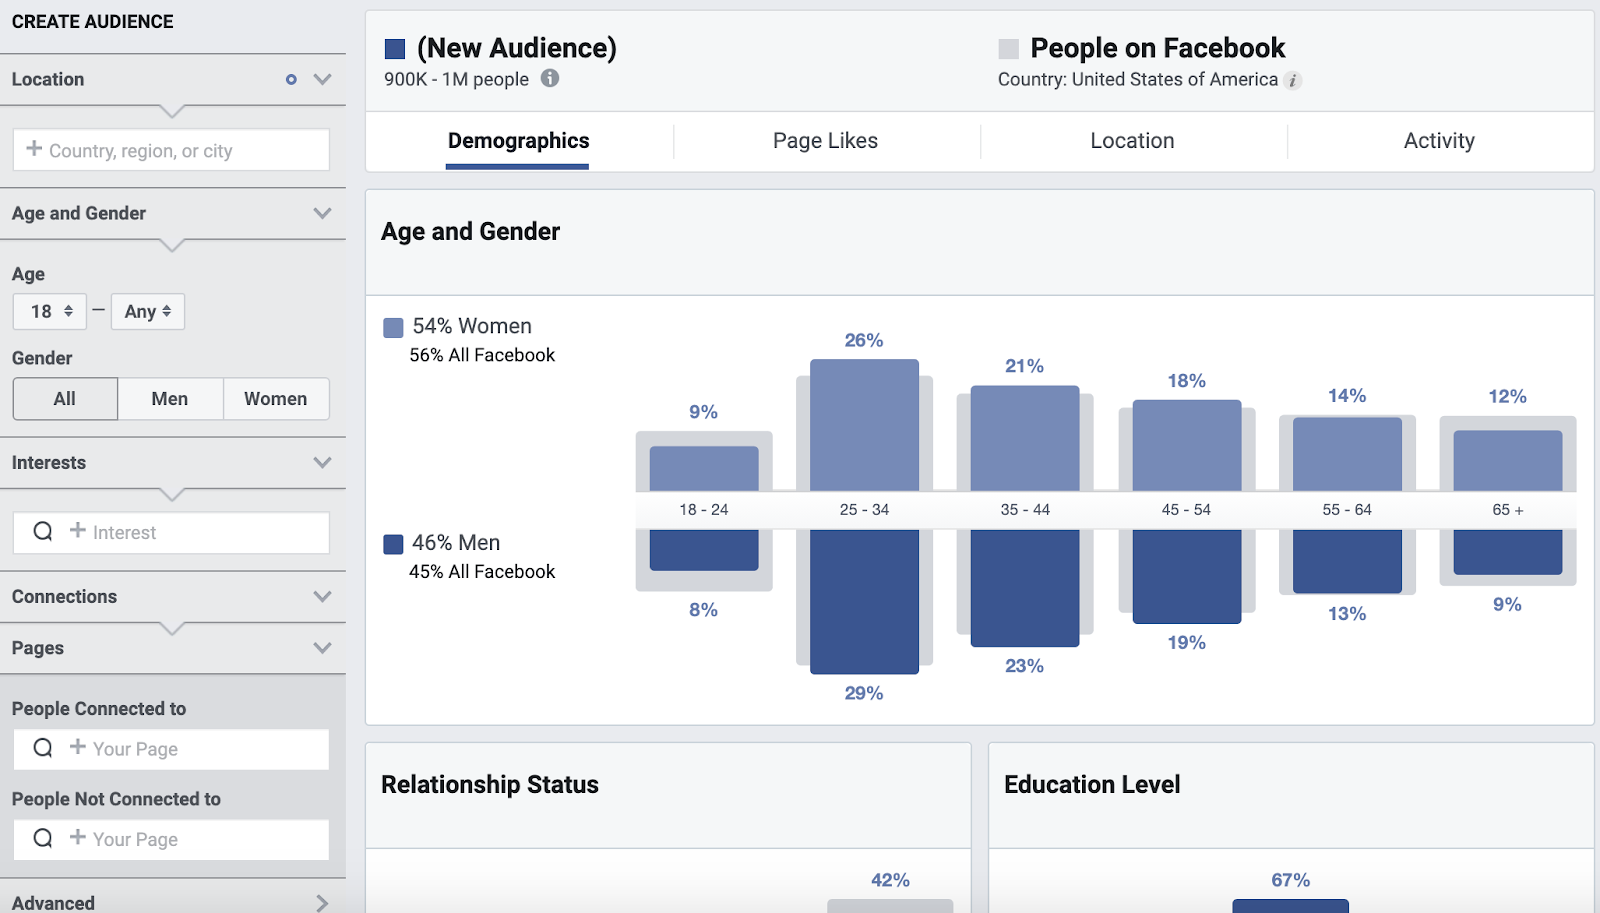
The platform includes information on user demographics, such as location and relationship status as well as user behavior, including average ad clicks and comments.
Where is Facebook Insights?
To access Facebook Insights, you’ll need to have a business page. Then, follow the steps below:
-
Once you log into Facebook, head to your business page. Then, click on “Insights,” located on the sidebar to the left of the page.
-
You’ll land on the “Overview” page which features a dashboard with three main categories. The first is your page summary, which shows key metrics from the last seven days. However, you can also view data from today, yesterday, and the last 28 days.
-
Once you scroll down, you’ll see insights on your most recent posts.
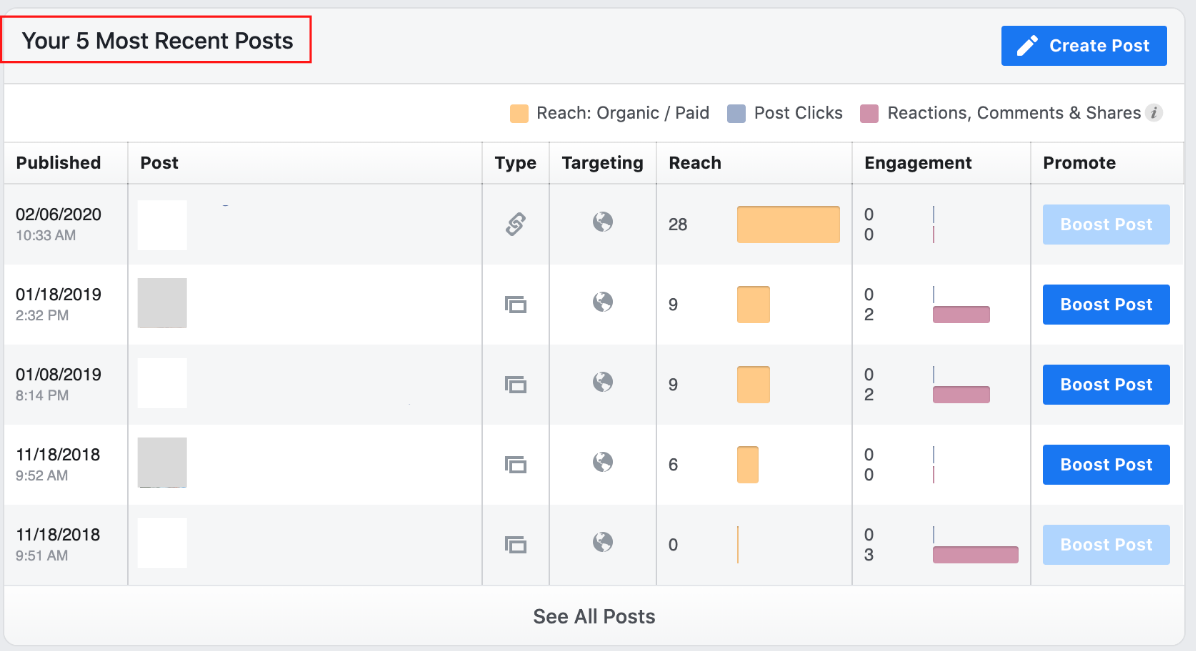
-
The last section features insights from your competitors. In this section, Facebook can recommend pages to watch, but you can also customize which brands’ performance you track by clicking “Add Pages.”
-
To dive deeper into these metrics, you can click each category listed on the sidebar to the left of the dashboard.
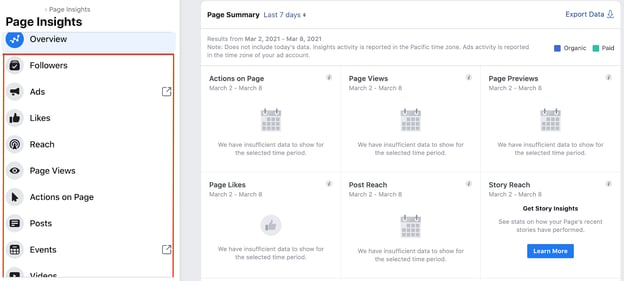
How to Use the Facebook Insights API
The Facebook Insights API, also known as the Ads Insights API, allows you to fetch ad data to track your ad performance. The API is particularly useful because it allows marketers to pull the exact data they want to track, no matter how granular.
To fetch the data from the API, you must determine what data you want to pull and create an access token for that ad, so that only your team can access that information. You’ll then need to determine where to import that data, like Google Sheets or HubSpot’s ads software within the Marketing Hub.
It allows you to pull your Insights API into the platform and match it against with data already in the CRM. This will provide a better understanding of the customer journey and give you a 360-degree view of how your ads are performing.
How to Export Facebook Insights Data
-
Start on your dashboard overview. On the top right corner of your “Page Summary,” you’ll see “Export Data.”
-
A window will pop up. From there, you’ll narrow down what data to export, the data range, file format and layout.
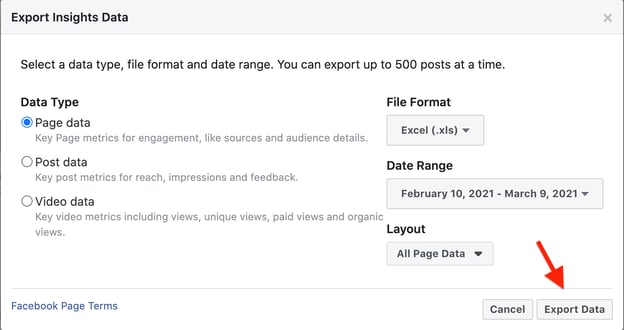
-
Click “Export Data” and you’re all set.
Top Facebook Insights Metrics
Your Facebook Insights dashboard displays top metrics about your business page. On any given day, you can get a snapshot of your page’s performance and adjust your strategy accordingly. Top metrics include:
- Page views – The number of times your page has been viewed by Facebook and non-Facebook users.
- Page likes – How many Facebook users like your business page.
- Actions on page – How many actions users take on your business page, such as to click on a website link or ask for directions to your store.
- Post reach – The number of users on Facebook who saw your post.
- Post engagement – How many people liked, shared, reacted, or commented on your post.
You also have video insights, which can tell you how your videos are performing. Key metrics include:
- Minutes viewed – The total amount of time users have spent watching your videos.
- Video views – The number of users who watched your video for three seconds or more.
- Audience retention – How long you maintained your video’s audience in a video.
For tips on how to interpret your video insights, jump to this section.
How to Interpret Facebook Insights
Before you start analyzing your data, make sure you know what questions you want answered. This will help you narrow down which key metrics to focus on.
Once you know that, start looking through the data to identify patterns.
For instance, let’s say you notice that your how-to posts get shared at a much higher rate than your other content.This may indicate that this type of content resonates more with your audience and adds value to them and their community. As such, you may want to double down on these posts if your goal is to get higher engagement.
Analyzing the data is one thing, but what’s more important is what you do next. As you notice trends, take note of them and conduct experiments to learn more about what your audience wants. This will help you learn more about your audience and develop content that meets their needs.
If your team wants to focus on video insights, scroll down to the “Videos” tab on the left sidebar and click on it. Once there, you’ll see your top video metrics, such as watch time and top video performers.
For tips on how to understand your video insights, watch the video below. It dives into how to navigate your video insights dashboard and what your insights can tell you broken down by performance, loyalty, audience, and retention.
Your Facebook Insights dashboard holds so much information about your page’s performance and your audience. If you leverage that data, you can create better content and generate more revenue for your brand.
