
Welcome to My Blog
11 Tips for Virtually Pitching Marketing Campaigns
It’s no secret that agencies are accustomed to wooing clients during in-person pitches.
In fact, the term “pitch theater” is regularly used in the agency world to describe over-the-top presentations that go to great lengths to win accounts.
But, with the recent shift to remote work, agencies can no longer rely on a firm handshake, in-person meetings, and casual small talk to help land them a client.
If you’re one of the many marketers or agency members who thrive during in-person pitches, you might still be learning how to create a presentation that brings your memorable charm and flair to a small computer screen.
Luckily, as you pivot some aspects of your presentation style to a new video-friendly format, you can leverage your inner creativity, meeting software, and other digital tools to give you a leg up against other agencies vying for the same clients.
With a creative mindset, it actually isn’t too hard to give a concise virtual presentation that answers most of a prospect’s burning questions. In this post, I’ll highlight 11 tips for planning, practicing, and presenting virtual pitches.
11 Tips for Giving Virtually Pitching Marketing Campaigns
Preparing Your Pitch
1. Map out a plan for a smooth virtual presentation.
With the growth of video call technology, most or all elements of a pitch can be virtual. For example, you can simply share your screen to show your peers a presentation, or send a video pitch to your team if you can’t book a full meeting. However, virtualizing your presentation will still take careful planning.
As you map out your pitch, take the time to figure out which parts require a screen share as well as who on your team will be presenting. Then, once you’ve outlined your presentation, practice using features like screen share ahead of time to prevent technical difficulties during the actual pitch.
As you’ll plan, you’ll also want to identify pitching elements that might be more challenging virtually.
For example, if you’re pitching a physical product or campaign asset in-person, you might pass the item around, or let a member of your audience test-run it. Or, you might be a fan of asking audiences to raise their hands if they agree with a statement relating to a pain point that your campaign will solve for.
The interactive in-person presentation tactics above might not be possible during your virtual pitch where everyone is looking at your slide deck. So, you’ll want to come up with alternatives. Instead of having an audience member demonstrate something, perform the demo yourself. Or, instead of polling the audience by asking them to raise their hands, ask them to answer a question with “yes” or “no” in your video call’s chat area.
2. Remember: Timing is everything.
When giving an in-person pitch, you might have a half-hour to give the actual presentation and answer questions. Then, you might even get some bonus time after the meeting if stakeholders stick around to ask questions, or chat with you as you walk out of the meeting room. While you’ll have lots of opportunities to leave a good impression in person, you’ll likely be limited to an exact time slot if you’re just hosting a video call.
While you might be tempted to bring all the fun elements of in-person “pitch theater” to a short video call, you’ll actually want to cut to the chase and give stakeholders the information they need as soon as possible.
Quickly, but concisely, describe your project idea, why you think it will be a good investment, any data-backed evidence of your claims, and what resources you’ll need to complete the campaign.
You’ll also want to address the concerns your team leader or client might have and explain how your project will avoid those blockers. Addressing an audience member’s concerns in your presentation might eliminate some of the need for a question-and-answer period and will make your prospect believe that you value their goals and mission.
Practicing Your Pitch
3. Record yourself as you practice pitching.
Like with any virtual or in-person presentation, practice makes perfect.
One great way to practice a virtual pitch could be to record yourself doing it through a screen recorder or video call software. After you record yourself, rewatch your pitch and make notes of where you need improvement. While you can make notes about your speaking or the content of your pitch, you can also make notes on more technical aspects, like how well you navigated to your slideshow or any presentation glitches that occurred.
Recording and reviewing your practice sessions will ensure that your clients or teammates see a crisp and clear presentation when you’re giving it online.
Aside from recording yourself, consider hosting a video call with a few of your teammates where you run through your presentation. While the recording will help you troubleshoot many things, it’s always helpful to have another person give feedback or point out any technical issues they discover from their computer.
For example, many schools using Zoom to host classes have discovered that some students and teachers can’t use its Whiteboard tool because the feature isn’t available on Chromebooks. If you discover something like this when practicing your marketing pitch with other users on the call, you’ll have time to pivot and adjust your pitch accordingly.
4. Test your visuals, videos, and sound before your call.
For any type of pitch, a slide deck with videos and visual aids enables your clients to see quick facts, visualize the campaign you’re pitching, and grasp any hard data that you throw at them quickly.
But, as you create a presentation, keep in mind that company stakeholders will be viewing it over a video call software. And. while some videos or visuals might look and sound absolutely stunning in-person, they could show up poorly on video calls, especially in areas with slower internet speeds.
As you practice your pitch with your team on a video call, or while recording yourself privately, make sure you know how to play a video within your slide show, ensure that your graphics are high resolution, double-check that any GIFs placed will play automatically, and turn your volume up to test any sound elements.
Cut anything from your pitch that will look or sound poorly over a video call. For example, if a video in your presentation seems to be buffering, blurry, or sounds muffled, consider swapping it out with a photo or GIF.
Additionally, accept feedback from your team if they see blurry imagery or can’t hear something when you’re giving a practice run. This is how members on my team recently discovered that having your headphones plugged in when playing a video can prevent your call attendees from hearing the sound. Had one of our colleagues not rehearsed for us, we wouldn’t have caught and resolved this potential technical difficulty ahead of time.
Giving Your Campaign Pitch
5. Prepare your workspace for virtual meetings.
As you would with any other virtual meeting, pick or create a workspace that offers you a professional-looking background, limited noise, and a solid internet connection.
In a HubSpot Blog post, my colleague, Lindsay Kolowich gave a great example of a poor virtual meeting workspace:
“A colleague of mine once had a call with a client whose neighbor was mowing the lawn right outside his home office window. Sounds super distracting, doesn’t it?” Kolowich said.
“Be mindful of where you are and what’s going on in the background,” advised Kolowich. “Certain rooms are noisier than others, even if you’re at home. And while it’s probably adorable when your dog jumps on your lap and peers into the camera, you’re typically better off letting pets go outside to play before the meeting starts.”
6. Embrace video call “waiting rooms.”
Some video call tools now offer a “Waiting Room” feature. This allows those on the call to be shown just the call’s title and other basic information until the host allows them to enter the meeting.
When you’re hosting a video call, having a Waiting Room will enable you to enter the call first, see a list of who’s on the call, and let them in all at once or one at a time. The room also ensures that your attendees will only see you when you’re ready to be seen.
The Waiting Room feature might be a great option for hosts that want to avoid the awkwardness of saying hello to everyone one by one, or for teams that want to get on a call a few minutes ahead of time for a quick chat before their eager clients log on.
Here’s a look at how the Waiting Room feature works on Zoom.
7. Greet your client or teammates before sharing your screen.
As with any in-person meeting, greet your teammates or clients, and possibly make a bit of small talk before jumping into a pitch. This will allow the team to bond with you and see you as a person who cares about their time. You should also thank this team for attending your meeting before the pitch as well as after.
8. Look at the camera for the entire call.
During an in-person pitch or presentation, you can work the room or energize the audience by moving around, making eye contact, or speaking directly to a few specific stakeholders in your meeting. On a video call, these speaking tactics can obviously be much more challenging. This is why simply turning on your camera, looking directly into it, and speaking energetically can go a long way with your audience.
When you enter your video call, be sure to turn on the camera as soon as possible if it isn’t already showing you onscreen. Surprisingly, some marketers and telecommuters regularly forget to do this.
“Turn on the video during your meetings,” advised Christina Perricone, a senior marketing manager, in a recent blog post.
“Ninety-three percent of communication is non-verbal,” Perricone added. “Being remote puts you at a disadvantage when it comes to reading facial expressions and body language during meetings. Video calls mitigate the disconnect that can arise from not being in-person.”
Once you turn the camera on, remember that your audience of team leads or clients will be able to see you even when you are sharing a presentation on your screen. While it might be tempting to focus on your presentation when there’s no immediate audience in the room with you, eye contact is still an important way to grab and hold attention from your audience.
Although you’ll be doing a pitch virtually, you can mimic making eye contact by looking at the camera or the center of your screen rather than reading the text directly from your slides.
9. Make sure your notes aren’t on your screen share.
Presentation notes can be a helpful way to remind yourself of data, points to make, or transitions to add in your presentation. However, things can get pretty awkward if you share your screen and accidentally show your audience your private notes at the same time.
Depending on which video software you use, you can likely share just your presentation with your audience using screen share settings. When you do this, you’ll still be able to see your presentation and a digital notepad with text for each slide. However, your audience will only be able to see the presentation.
Before you begin your presentation or during a practice session, have a colleague log on to the video software earlier in the day and test your screen sharing strategy to ensure that they see only your slides and not your notes.
Wrapping Up Your Pitch
10. Turn your screen-share off and allow time for questions.
After you give your pitch, you should leave a bit of extra time to answer your client or team leader’s questions about the project. This can also be a great time for you to continue making connections with the people you’re pitching to. To ensure that everyone is talking to each other face-to-face, make sure you turn your screen share off so you have a better view of who you’re talking to.
At the conclusion of the call, thank your audiences again for their time and discuss what next steps they can take if they’re interested in accepting your pitch.
11. Leverage your video call recording in follow-up emails.
Sometimes, important stakeholders who were invited to your call won’t be able to attend, or your stakeholders might want to refer back to your presentation later. When you give an in-person pitch, it might be more challenging or odd to have someone film your presentation just in case. But, with video calls, recording your presentation is possible and feels much more natural
Before you begin your presentation, be sure to inform your attendees that you’ll be recording it, just in case someone wants to hide their video or is uncomfortable with being recorded. Once the presentation is done, you’ll be able to send that recording in a follow-up email to stakeholders that could and couldn’t make the presentation.
Aside from sending the recording, which can help stakeholders reflect on the questions answered and the discussions that happened during the pitch session, you can send other digital documents like the slide deck, links to marketing content or any other assets you think will seal the deal.
Like any good follow-up email, be sure to thank attendees for their time and note that you enjoyed your conversation with them. Also remind them that they can reach out to you with questions, comments, or feedback related to the pitch you’ve given. For a few follow-up email examples, check out this blog post.
Nailing Your Virtual Pitch
If you’re used to pitching marketing campaign ideas in person, virtual pitching could be quite the transition. However, while you’ll need to make a few tweaks to adapt your pitch to a video call setting, it’s certainly possible to effectively persuade teams with virtual presentations.
At its core, a pitch clearly explains a campaign or tactic, research that defends why it might work, and how you plan to efficiently execute on the strategy. These are all important tidbits of information that can easily be explained or shown visually in a video-based presentation.
To learn more about how to perfect a virtual pitch, check out this post related to pitch deck design, this piece that creatively compares pitches to debates, and this guide to running virtual meetings

How to Build Community-Centric Virtual Events, According to Moz’s CMO
As you’re probably well-familiar at this point, 2020 has brought with it plenty of disruption and change.
Consider, for instance, the fact that I’m writing this post from my living room, which has slowly morphed into my full-time office (as well as a workout studio, movie theatre, and popular after-work happy hour spot).
Along with a personal change in routine, the pandemic has severely altered how companies conduct nearly every aspect of business.
And one major change? Conferences.
In the early months of 2020, many businesses were faced with a similar problem: Should we host our event or conference entirely online, and if so, will it deliver the same value for attendees?
Moz was no different, but while many companies were shifting a smaller-scale event online, Moz was dealing with an entirely different beast: MozCon, a 15-year-old SEO and digital marketing conference with thousands of attendees from across the globe.
Here, I spoke with Christina Mautz, CMO and Head of Sales at Moz, to learn how business leaders can still build impactful events virtually — plus, how leaders can foster a sense of collaboration and community, even when entirely remote.
Best Practices for Shifting Your Event Online
1. Re-envision your event entirely when shifting to online — don’t just “copy and paste” the in-person schedule.
Venturing into virtual events is unknown territory for many businesses. While some companies believe they have experience due to hosting webinars, events are an entirely different beast.
Moz has 15 years of experience creating world-class events. But shifting from in-person to virtual required “all hands on deck”, given our goal was to recreate an experience our attendees have come to love and expect from us.
We decided to shift to virtual just before our governor’s ban of large-scale events, which left us only two-and-a-half months to re-envision and re-plan the event. While pivoting was a difficult choice, it needed to be made for the safety of our company, the community, and our attendees.
Thankfully, MozCon is a valued and well-known event for our community, so we were successful in hitting our goal for the number of tickets we needed to sell to break-even (we do not run the event for profit), even though the timeline was greatly condensed.
The goal for MozCon Virtual was to provide attendees with the same awesome content experience and overall value they would get from the usual live format. This required us to shorten the event (as our typical three-day conference just wasn’t going to fly online) and come up with a new design and attendee engagement strategy.
2. Pre-record sessions ahead of time to increase accessibility, and design a dynamic agenda to keep participants engaged.
Given that our primary goal was to ensure superior content, we focused much of our attention on confirming and/or convincing our existing (expert) speakers to participate. This included the decision to pre-record all sessions with enough time to allow for full closed captioning, to aid in accessibility for all attendees.
We made the decision to make the video recordings available not just during the event but immediately after to increase participation from our many international attendees in different time zones — this was a great success for the participants who joined us from 49 different countries. We also sought support from our partners Seamless Events to ensure our speakers had high-touch support to pre-record their session using high-quality A/V tools like:
- Logitech C920 HD Pro Webcam
- Neewer Backdrop Support System
- Neewer Gray Photography Backdrops
- UBeesize 8-inch Selfie Ring Light w/ Tripod Stand
- Z ZAFFIRO USB Lavalier Lapel Clip Microphone
- Vilcome 4-in-1 USB C Hub Adapter
Finally, we knew that it is often challenging to stay engaged during online events — even when the content is incredible. So we purposely designed a dynamic agenda with sessions we could view together mixed in with a plethora of “birds of a feather” break-out sessions to allow for actual live interactions with attendees.
We chose a virtual event platform among the many available that enabled live break-out sessions as well as live-chat with the speaker and other attendees while viewing each pre-recorded session.
Challenges of Hosting MozCon Virtually
1. Our first challenge was ensuring our marketing team could still “work the event” — plus, fostering collaboration digitally.
Building and executing an in-person conference requires an incredible team, but don’t assume virtual events are any easier or less labor-intensive. The challenges are different and can make or break the experience attendees walk away with. Critical to our success was ensuring that we still made space for our marketing team to both plan and “work the event” with the support of our long-time partner, Proper Planning.
We also spent a lot of time thinking about the different challenges we would face. For example, how do you foster collaboration using screens so people feel as if they’re in a breakout room? For us, that equated to creating an environment that felt authentic and community-oriented.
We accomplished this by providing an avenue for our speakers to connect through chat while sessions ran, and by creating “Birds of a Feather” sessions allowing us to speak freely and network. These sessions included topics like:
- Ask a CMO
- Ask an SEO
- B2b2c Marketing
- Evergreen Backlinks
- Separating SEO and Content Marketing
- Current Trends in the Agency World
2. Our second challenge was creating a safe, welcoming virtual environment.
Similar to our expectations for MozCon in years past, our mission to foster a safe environment remained top of mind. To us, this means more than ensuring physical safety. We believe in full inclusivity which extends to a responsibility on our part to ensure that all speakers, sponsors, and attendees are able to participate in a welcome, nurturing, and safe environment.
We do not tolerate disrespect or harassment of speakers or conference participants in any form, so moderators were stationed in each virtual room to moderate chat and quickly handle any issues. Of course, participants remained respectful and collaborative, but it was important going in that people knew they would be welcomed as part of our community and that they had support should an issue arise.
So … Did It Work?
For those planning virtual events, I encourage leaders to be realistic about expectations and goals. At Moz, our event isn’t intended to make a profit.
However, with meticulous preparation we were able to break-even and double our usual number of attendees.
In part, this was due to lowering the price point and being able to accommodate more people virtually than in-person. This was a huge win.
Here are a few recommendations:
- Record sessions like we did here so efforts can continually be amplified and reach new people
- Use a combination of live and pre-recorded sessions so speakers (and your own sales and customer success teams) have the option to interact with attendees throughout the event
- If live sessions are the only route available, ensure a moderator is present to facilitate questions
- Ensure sponsors are a good match for your attendees, and provide them with a unique space within your virtual event — either a “hub” on your platform or a designated space on your agenda
- Prioritize a strong social media engagement plan — before, during, and after the event; it provides attendees, speakers, and even sponsors ways to build excitement before, share learnings during, and continue the conversation after — on platforms that also provide great exposure for your brand
How to Foster Community Digitally
1. Leverage pre-recorded videos, so speakers have the time to answer questions and engage with attendees in-the-moment.
Moz has a robust community of marketers and search engine optimization professionals who love to engage, so we made the decision to leverage pre-recorded videos, giving our speakers the freedom to interact as the video ran and answer questions from attendees the moment they arose. Our attendees loved the opportunity to engage directly with speakers versus the typical in-person event experience of waiting in the long line near the stage just to say hello.
While this approach might seem surprising, it fostered collaboration, provided high-quality resources and meant our guests would be engaged instead of simply “watching” for hours on end.

What a Serial Entrepreneur Learned From Spending Nearly $1M on Facebook Ads
When it comes to Facebook ads, you might feel like you’ve won the lottery if your ads perform well.
However, you couldn’t be further from the truth. In fact, I’ve spent more than $900K on Facebook ads in over 4 years.
Facebook ads are a complex and nuanced form of marketing.
Spending close to a million on ecommerce, real estate, festivals, mobile apps, and much more, I can say that I’ve learned a thing or two about running successful Facebook ads.
1. Keep a bigger audience.
When people start running Facebook ads, they often try to have the most laser-targeted audience and often end up aggregating around 100,000 people. This might seem like a big audience, but it really isn’t.
What’s more? By targeting “interests” people have, you have to remember that those are not set in stone.
For example, Facebook thinks I like hunting but I’ve never done it before. That’s why it’s important to target a larger audience of at least one million people at first and let Facebook find people who like what you’re promoting.
2. Retarget with a large enough audience.
Don’t start segmenting your retargeting at the beginning. For example, you could have segmented audiences of people who visited your website in the last 7 days, 14 days and 21 days, but you shouldn’t just yet.
I suggest regrouping all your custom audiences at the beginning to make sure your audience is big enough. If you don’t, everyone in your retargeting audience will have seen your ads 100 times and you won’t see results.
3. Don’t scale unless you get results.
A lot of people want to spend more on Facebook ads too aggressively. Let’s say they spent $2, made $10, and now want to spend $100 a day. But you shouldn’t do that just yet.
Make sure you get sales every day for at least two weeks before starting to be aggressive with your scaling. You might have been lucky with the first sale but it doesn’t mean you’ll find consistency and that’s what you need to scale.
4. Retargeting is everything.
You’ll make most of your money from retargeting. I know your budget for Facebook retargeting is often smaller than the one from your cold audience, but it’s the most important audience.
You should spend as much time creating new Facebook ads creative for your custom audiences as you do your cold audiences.
5. Low CPC doesn’t equal results.
You should measure your return-on-investment on your Facebook ads rather than your CPC.
Getting a good cost-per-click is awesome if your goal is just to get traffic, but not all traffic is created equal. I’m sure you’d rather have 4 people converting from 50 visitors than 1 person converting from 1,000 visitors.
6. Analyze and optimize your demographics.
It’s essential to take a look at which ages, gender or location brings you the most results.
One word of caution — don’t draw conclusions until after you’ve at least reached 2,000 to 10,000 people. If you don’t, you’ll become really confused because your conclusions are probably false.
7. Pay attention to cash flow management.
Make sure you have a credit card limit high enough to spend the amount you want. Take into consideration that it might take you a little bit of time for your credit card to receive your payment.
This is cash flow management, but for scaling it’s very important. One trick is to have multiple credit cards, because if your ads stop you most likely will lose the optimization you had and thus your results.
Also, make sure Facebook allows you to spend the daily amount you want to spend.
One last word of advice — go slowly. You might realize that $100/day gives you the most profits, just like you might realize that $100K/day gives you the best results.
Once you’ve mastered all the technicalities of Facebook ads, all that matters is being aware of the traffic temperature of your audiences.
You essentially want to create ads that attract people by finding a way to make them appreciate what your brand is about. The best results we got from Facebook ads didn’t come from the ads themselves but rather the relationship the brand had prior with their clients.
Remember, Facebook ads are only a distribution channel and there’s only so much you can say to change people’s minds. The art is in the entire digital marketing strategy. Everything has a part to play in your success.

How to Learn Excel Online: 19 Free and Paid Resources for Excel Training
Like many marketers, I have a bit of experience with Microsoft Excel. I’ve used it to organize events, plan meals, and sort data — but I don’t have nearly the advanced knowledge I wish I did.
And thanks to those limited skills, I’m constantly subjecting myself to the tedium of updating my spreadsheets manually.
Like me, you’re missing out on a world of Excel training courses that could teach me how to automate my reports and save hours of time.
When I asked even my most Excel-savvy colleagues where they picked up their knowledge, they told me things like, “I mostly learned from colleagues and friends,” or, “When I have a specific question, I ask someone or search on Google.” Fair enough. But as a beginner, I probably have a few too many Excel questions to rely on colleagues — or Google — to answer every one.
I can’t be the only one out there who wants to master the world’s most popular data analysis and visualization solution — or at least learn how to create charts and graphs that’ll impress my manager.
So in the spirit of becoming a more productive, data-driven marketer, I scoured the internet for the best online resources for learning Excel. Half of them are free, and the ones that aren’t might be worth the investment. In these trainings, you’ll learn the following:
Learning Excel
- Create PivotTables to find relationships between data.
- Enter formulas across cells, rows, and columns.
- Conduct a VLOOKUP across an entire column.
- Run accounting functions to track business finances.
- Group, ungroup, and reformat rows and columns.
- Perform data validation to control the format of cell values.
- Use keyboard shortcuts to make quick changes to cell values.
- Create charts from your spreadsheet data.
- Develop histograms of data from the charts you create.
- Create dashboards to manage multiple groups of performance data.
- Add conditional formatting to rows and columns that fit certain criteria.
- Print your Excel spreadsheet for presenting to others.
Take a look at the free and paid resources below. Bookmark your favorites and get that much closer to working more efficiently in Excel.
How to Learn Excel With Free Training Resources
1. Microsoft’s Excel for Windows Training
When it comes to learning a new application, why not start at the source? After all, no one knows Excel better than the people at Microsoft.
In fact, they’ve done a great job putting together this resource hub for all Microsoft Office applications and services. The Excel training has a whole bunch of free tutorials that cover the latest version of Excel organized into functional learning modules.
Source: Microsoft
2. HubSpot Excel Resources
Seeing as Excel is one of the most in-demand skills for data-driven marketers — and because we want marketers like you to succeed — we’ve created some of our own educational content about Excel here at HubSpot. From free ebooks, to templates, to video tutorials, we aim to cover a wide range of Excel-relevant topics.
Here are a few of our best:
- “How to Use Excel: The Essential Training Guide for Data-Driven Marketing” (free ebook)
- The Ultimate Guide to Using Microsoft Excel (long-form content)
- “9 Excel Templates to Make Marketing Easier” (free templates)
- “How to Create a Pivot Table in Excel: A Step-by-Step Tutorial” (video & blog post)

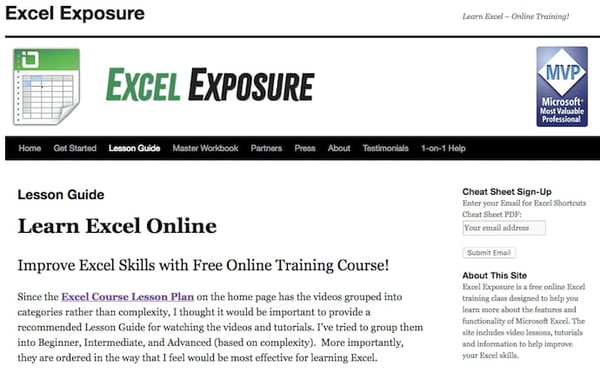
3. Excel Exposure
Excel Exposure is a free series of written and video-based courses to help you learn Excel regardless of your skill level. There are nearly 40 lessons — split into “Beginner,” “Intermediate,” and “Advanced” — each no more than 20 minutes long.
In addition to this a-la-carte curriculum, Excel Exposure offers a “Master Workbook” that lives directly in Excel to help you practice what you learn in each lesson. Learnings include data and time functions, how to group and ungroup rows and columns, using conditional formatting, PivotTables, chart design, and more.
4. The Spreadsheet Page
Here’s a very well-organized site that’s chock full of helpful Excel tips, collected by an expert named John Walkenbach. Over the past 30 years, he’s written more than 60 Excel books for users of all levels, and around 300 articles and reviews for magazines like InfoWorld, PC World, and PC/Computing. At one point, he wrote the monthly spreadsheet column for PC World. In other words, the man knows his stuff — and he knows how to present it.
The most helpful part of his website is probably the Excel Tips tab, which has a long list of useful pointers on formatting, formulas, charts and graphics, and printing. The tips themselves include everything from working with fractions, to unlinking a pivot table from its source data, to spreadsheet protection FAQs.
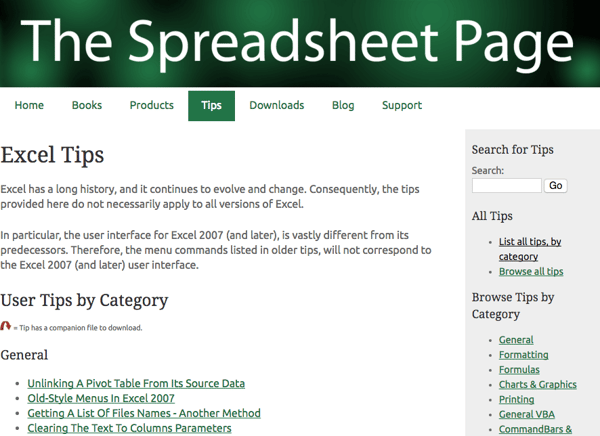
The Downloads tab is another particularly helpful section of Walkenbach’s site, where he’s added free, ungated download links to files he created, like free Excel workbooks and add-ins. For example, there’s one Excel workbook available for download that gives examples of custom number formats, which you can play with and tweak on your own time, and get familiar with them without having to start from scratch.
5. Contextures
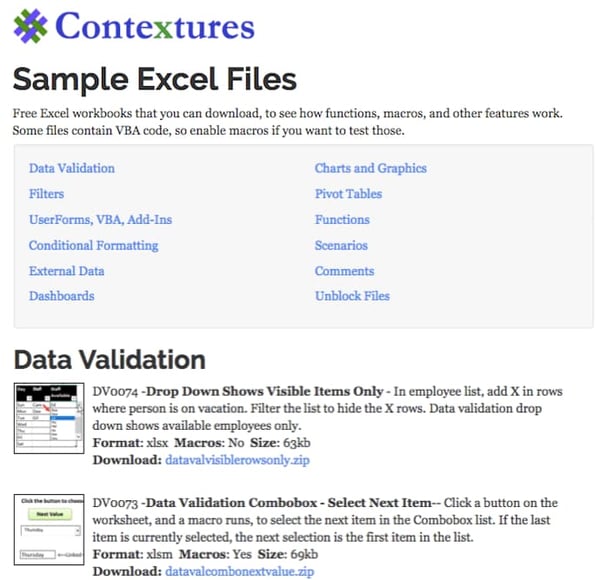
Contextures is a place for free Excel instructions in the form of quick tips, blog posts, a newsletter, and even .zip files you can download to see how various functions work in the context of real tables of data.
This resource has literally hundreds of downloadable spreadsheets that open in Excel and offer step-by-step instructions for performing data validation, adding filters to rows and columns, adding conditional formatting to rows and columns, designing charts, creating PivotTables, running functions, and more.
6. Chandoo.org
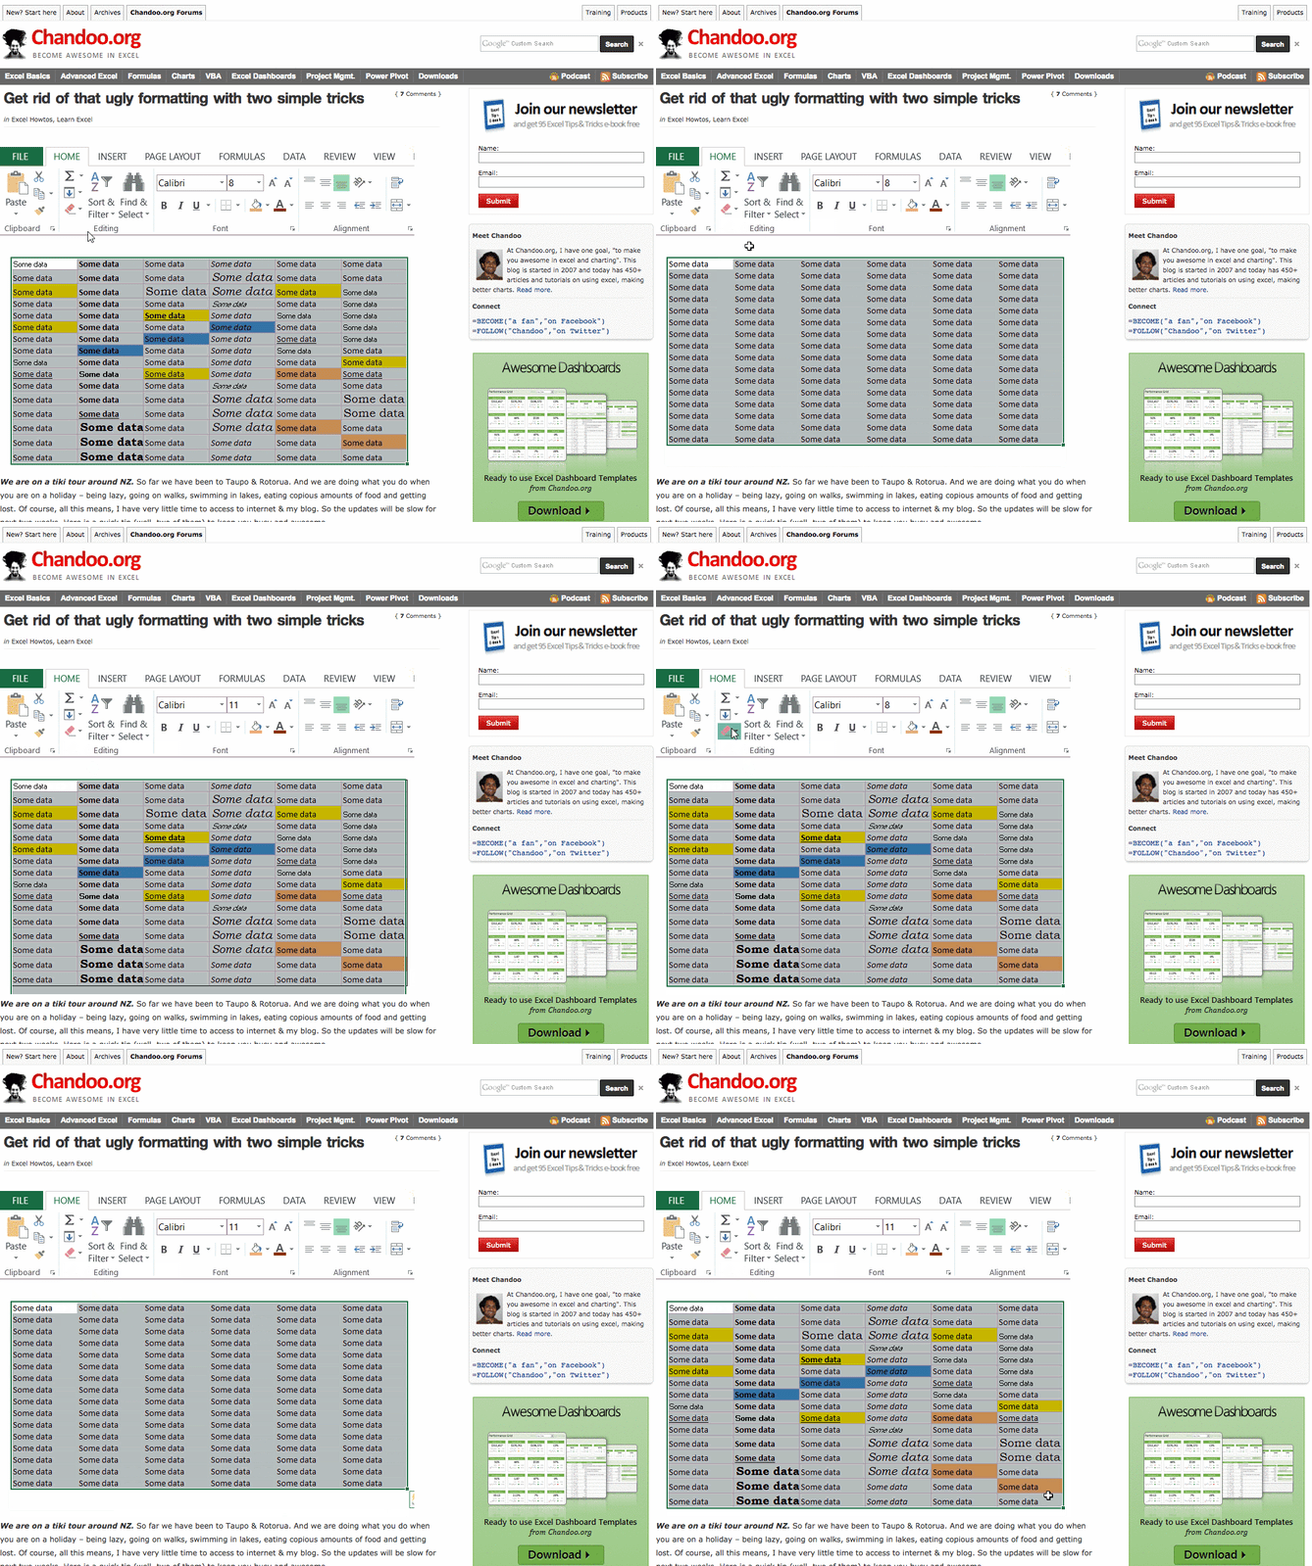
Purna “Chandoo” Duggirala, Chandoo.org‘s founder, says he has one goal: “to make you awesome at Excel and charting.” He started the blog in 2007 and, today, it contains more than 450 articles and tutorials on using Excel and making better charts. He’s built the blog as a community, citing values like humility, passion, fun, and simplicity.
He also works to make it a valuable resource for the folks for whom English is not their first language.
Most of his tips stem from forums, where people ask questions about Excel — about formulas, formatting, shortcuts, pivot tables, and so on — and anyone can answer them. Chandoo then uses some of the more helpful forum questions to create articles and tutorials.
 Source: Chandoo.org
But it’s not all so formal. For example, Chandoo once created a digital Easter egg hunt for a blog post, which included a downloadable Excel workbook containing seven hidden pandas. Readers were challenged to locate the pandas using clues, Excel techniques, and even “I-Spy” skills.
 Source: Chandoo.org
While the articles, forums, and other parts of the site are free, you can pay to join one of Chandoo’s structured training programs, like Excel School ($147 – $247), or VBA Classes ($97 – $347). Plus, there’s always the option to buy one of his books — The VLOOKUP Book or Excel Formula Helper Ebook.
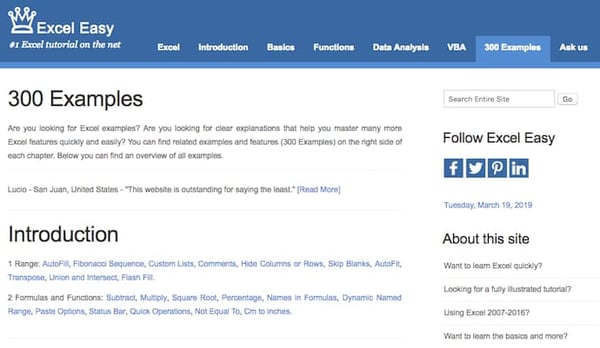
7. Excel Easy
Excel Easy is a comprehensive tutorial for learning Excel, breaking down its learnings into chapters. Those chapters are sorted into the following sections:
- Introduction
- Basics
- Functions
- Data Analysis
- VBA
- Examples
In each chapter, Excel Easy walks you through what it perceives to be the fundamentals of Excel, in the form of written guides with screenshots to help you master each concept. At the end of the tutorial, you have access too 300 examples showing you how to perform each concept in real scenarios. Concepts include basic formulas and functions, how to create a ribbon, creating multiple worksheets, formatting cells, data validation, table creation, and more.
 8. MrExcel.com
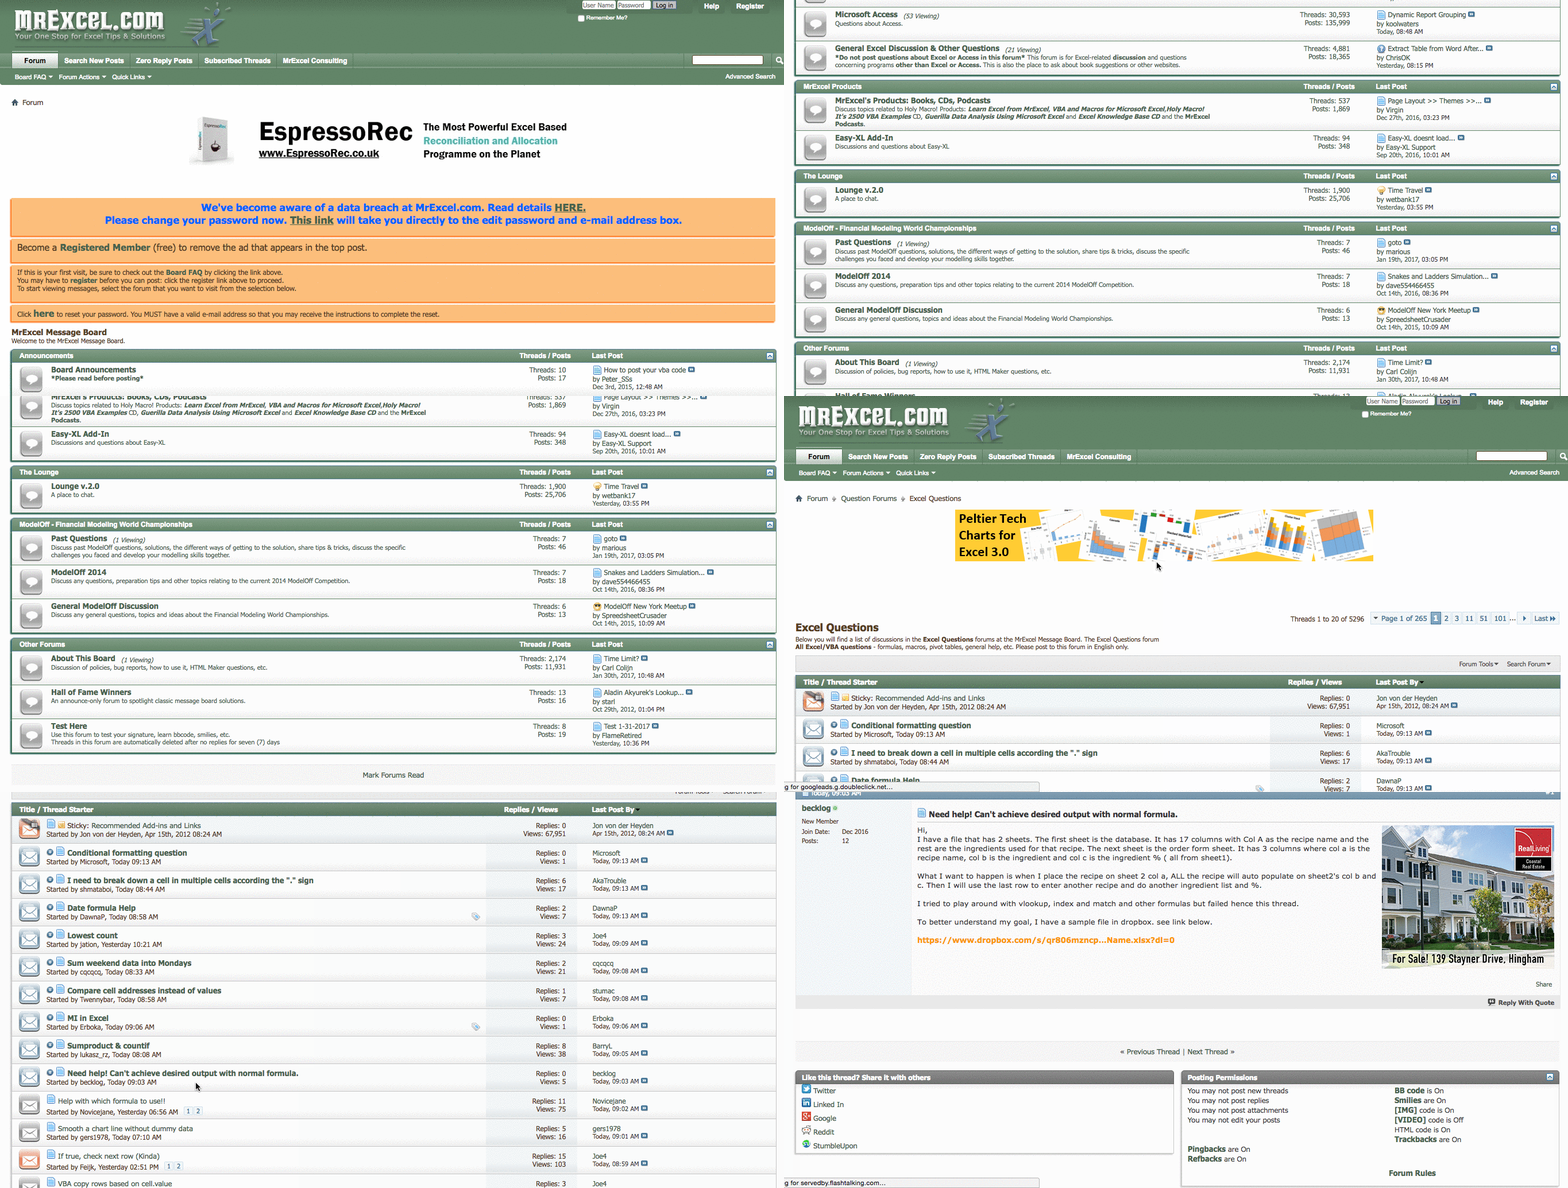
Here’s a resource that puts we mere mortals in touch with Excel experts. MrExcel.com‘s claim to fame is its interactive message board, which is constantly monitored by its community of Excel gurus.
The board is organized according to subject, like general announcements, questions, and MrExcel.com products. When a user posts a question, a member of the MrExcel.com expert community will reply with an answer. The questions range from simplifying an Excel task, to solving urgent inquiries.
Not a native English speaker? You can ask questions in your native language.
Aside from posting questions on the message board, you can also browse Mr. Excel’s “Hot Topics” — found on the left-hand side of its homepage — which includes things like finding the cumulative sum of even or odd rows, or removing the leading zero within a text field. The site also has a library of helpful Excel books and ebooks, and if you need help with problems that are more complex, you can even hire an Excel consultant directly from the website, for a fee.
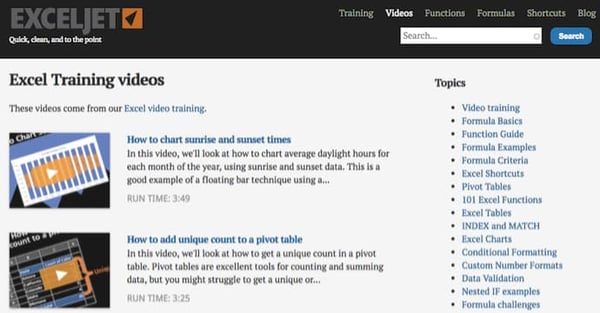
9. Exceljet
Exceljet offers hundreds of free formula walk-throughs, videos, and blog posts that allow you to itemize your Excel training based on the project you’re working on. It also has several paid programs that take a deeper dive into specific Excel topics its users — of which there are more than 10,000 — are interested in.
10. EdX Excel Courses
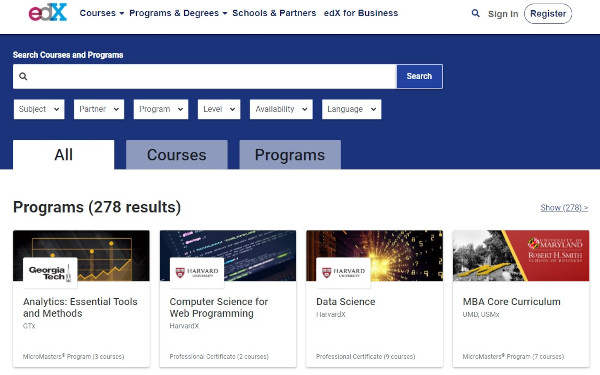
Here’s a budget-friendly option for those in search of a more formal course, rather than a one-off tutorial: EdX is a nonprofit that provides free education for people around the globe — with an interesting model of Excel training sessions, both timed and self-paced.
When users enroll in a course that’s marked as “Verified,” they have the option to pay a fee in exchange for an instructor-signed certificate with the institution’s logo, to verify the achievement and increase job prospects. Those fees are used to fund the courses, giving you the option to take them for free if you don’t mind foregoing the certificate.
Otherwise, there are some courses offered at a “Professional Education” level, for which the fee isn’t optional. One example is the Business and Data Analysis Skills course, offered for $149.
To help you choose the right one, each edX course includes reviews (with a rating up to five stars), and information on length and amount of effort, usually measured in hours per week. There are also details on the level of knowledge required, along with video transcripts.
11. Annielytics Video Tutorials
Annie Cushing, a web analytics data expert, created the Annielytics blog and YouTube channel to share her knowledge with the world. Don’t let the punny name fool you — both are chock full of really good, specific, and in-depth web analytics tips.
While the content here isn’t all Excel-related — much of it is about Google Analytics, for example — it does contain some great Excel video tutorials. Even better, they were created with marketing and web analytics in mind, so they’re directly applicable to things like marketing data reports. The Excel-specific videos can be found here, or by searching her YouTube channel for “Excel”.
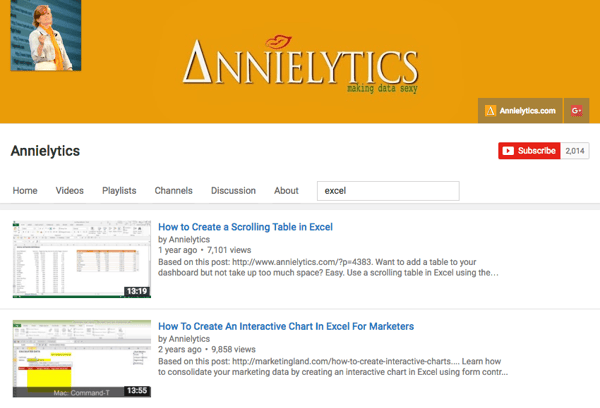
The Excel topics vary widely, from how to create interactive pivot tables, to how to add a scrolling table to your dashboard using the INDEX function. The videos also vary in length depending on topic complexity, ranging from two-and-a-half-minutes, to those over half an hour long. To give you an idea of what the videos are like, here’s one of our favorites, which covers a comprehensive overview of Excel charts:
12. Khan Academy
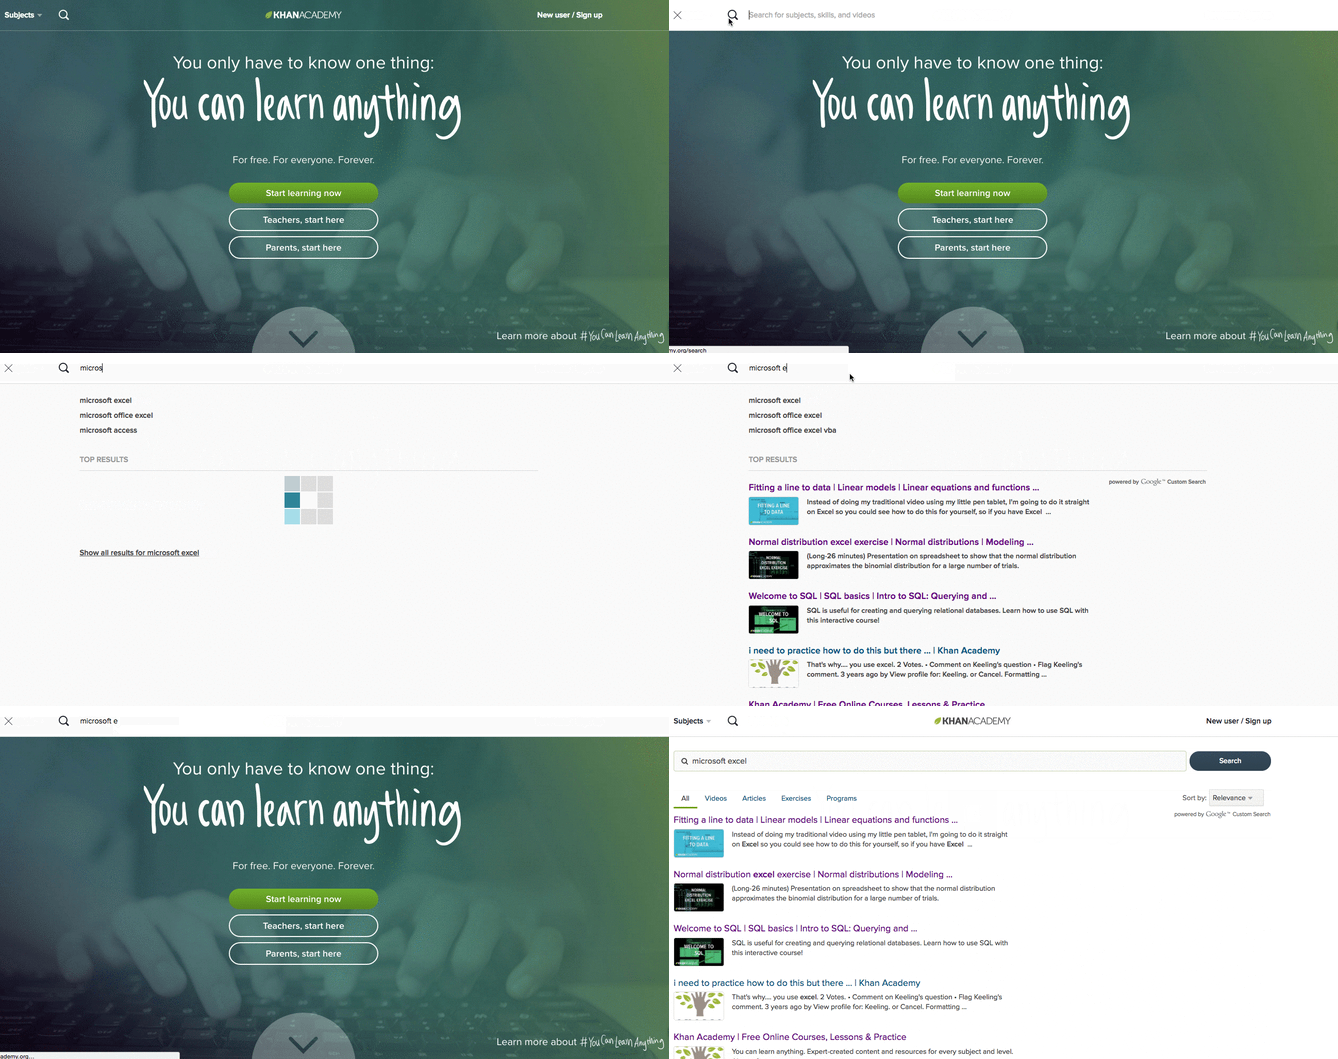
When visitors arrive at the Khan Academy website, they’re greeted with two simple but powerful lines of text: “You only have to know one thing: You can learn anything.” And from algebra to astronomy, this resource offers a plethora of free courses on, well, almost anything — for free.
That includes a few video tutorials on Excel. Most of them are part of larger, multi-installment courses on broader topics, like statistics. A general search for “Microsoft Excel” yields what might look like limited results, but they actually explain some fundamental parts of using Excel, like distributions and fitting lines to data.
How to Learn Excel With Paid Training Resources
13. Lynda.com’s Excel Training and Tutorials
Price: Free to try | $29.99/month membership
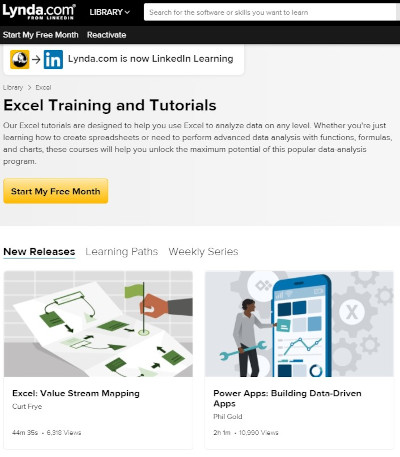
If you’re willing to invest a little cash in your Excel training, Lynda’s Excel Training and Tutorials are a worthwhile place to spend it. Members of this LinkedIn subsidiary have access to thousands of courses on business, technology, creative skills, and software that’ll help you work toward your personal and professional goals.
Included are over 100 courses on Excel, and over 4,000 video tutorials covering every version of the program, at any level of expertise. They cover a broad range of topics, from something as general as “Statistics with Excel Part One,” to more niche topics, like “Data Visualization Storytelling Essentials.”
14. Coursera
Pricing varies per course
While Lynda.com asks for a monthly all-access membership fee, Coursera charges on a course-to-course basis. Partnering with top universities and organizations worldwide, the site offers online classes on a number of topics, ranging from music production to coaching skills.
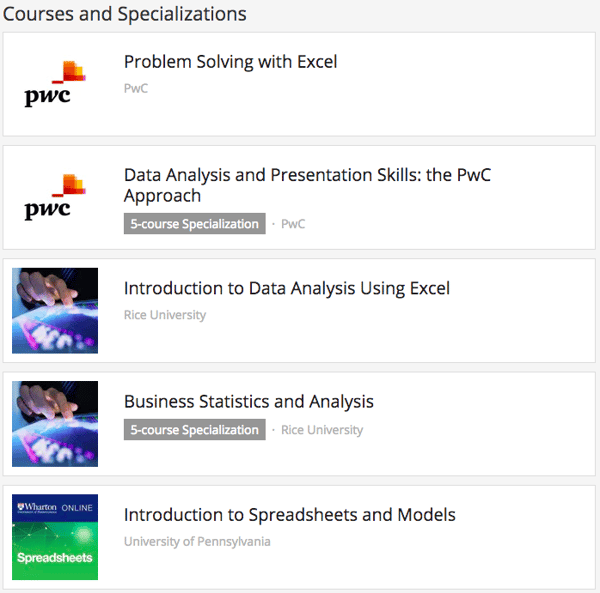
There are only a few courses pertaining to Excel, but if you’re looking for one that’s on a formally academic level, they could be a good fit for you. In fact, many of the Excel-related courses come from Duke University, such as “Excel to MySQL: Analytic Techniques for Business Specialization.”
That said, these courses don’t come cheap — after all, they’re the same ones that are taught at top universities around the world. And like many real-world classes, each includes video lectures, interactive quizzes, peer-graded assessments, and the opportunity to connect with fellow students and instructors. Once you finish a course, you’ll receive formal recognition, along with an optional course certificate.
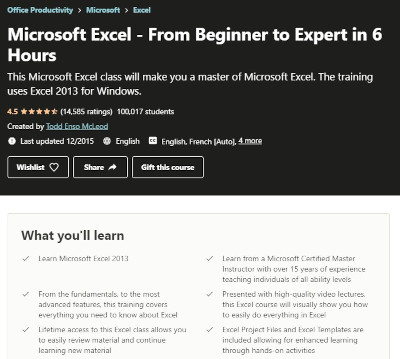
15. Udemy’s “Microsoft – From Beginner to Expert in 6 Hours”
Price: $12.99
If you had six hours to spare, how would you use them? “Sleep,” “clean the house,” and “bake something” are some of the things that come to the top of my mind, but try this on for size — what if you could become an Excel expert in that amount of time?
That’s what Udemy promises in its “Microsoft Excel – From Beginner to Expert in 6 Hours” course. Udemy is one of the most bountiful online learning resources out there, and its Excel courses certainly don’t end with that single option. In fact, when I return to the homepage, it displays several additional lessons on the topic, in case I want to explore my options.
Those options are many. In fact, just typing “Excel” into the search bar yields dozens of results, each one displaying a star rating, price, length, and level.
16. Excel Everest
Price: $159
The name of this resource may look intimidating, but you’d be surprised how convenient the training is.
Excel Everest is an out-of-the-box resource that teaches you Excel while you’re in Excel. The product you buy downloads an Excel file to your computer, where you’ll open Excel and engage in walk-throughs of 41 different Excel functions right from a sample spreadsheet. Topics covered include conditional formatting, VLOOKUP, chart creation, and so much more.
This Excel training resource offers hundreds of exercises, along with video tutorials embedded directly in a sample Excel spreadsheet. By applying these concepts in Excel as you learn them, you’ll feel them stick with you long after you complete Excel Everest’s training.
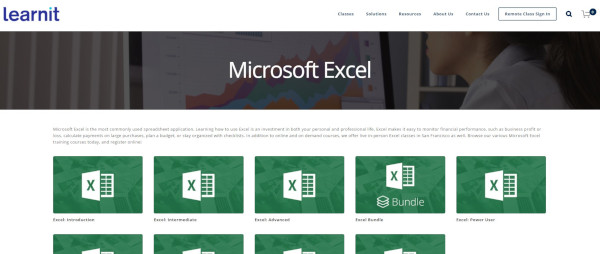
17. Learn iT!
Price: $135 – $290
Learn iT! offers Excel training in a variety of formats and breaks every lesson down by module. It’s the best solution for Excel users who might not be receptive to just a video series or written step-by-step guide.
With Learn iT!, Excel users can select from five different courses: Pivot Tables, Intro to Data Analysis, Programming with VBA, Excel Power User, and a basic Excel course for general users. Each course states the course’s duration (in days) and the number of modules the course consists of.
The best part about Learn iT! is that you can take your selected course four different ways: an in-person instructor-led session, live online with classmates, privately in a custom-made session, or a self-paced mix of instructor-led and interactive e-learning courses.
18. LinkedIn Learning Products
Price: Free to try | $29.99 mo.
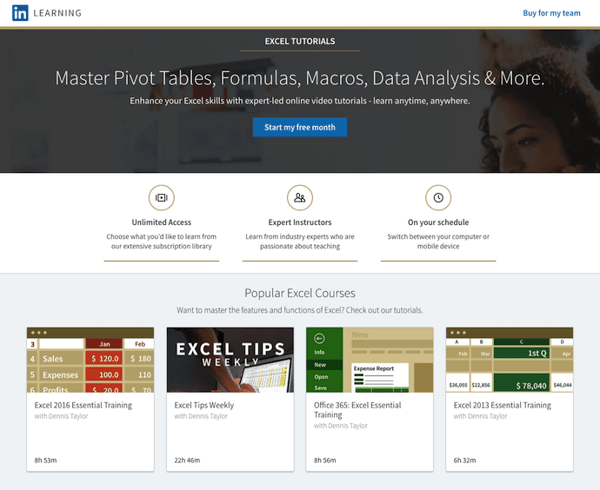
LinkedIn isn’t just for professional networking. You can also learn a ton on various business topics with the help of subject matter experts (SMEs) who host trainings on the LinkedIn Learning platform. Microsoft Excel is one such topic.
Dennis Taylor, a business consultant you can also learn from on Lynda.com, is one SME who hosts Excel training courses on LinkedIn. His courses range from six hours to 23 hours in total training time, and can be completed on your schedule.
Check out LinkedIn Learning for all available Excel courses.
19. eLearnExcel
Price: $24/month
Not only does eLearnExcel give you eight Excel training courses to choose from, but it awards seven Excel certifications as well.
eLearnExcel makes this promise: by taking all of its Excel courses, you’ll have a skill in Excel that’s greater than 99% of Excel users today. Trusted by Microsoft itself, this suite of training products breaks down Excel’s concepts in easy, digestible video modules — allowing you to learn the Excel concepts that are most relevant to you. Courses range from 45 minutes to six hours in duration.
Seven of these courses award you a certification that corresponds with the course you took. If you complete all seven, you’re awarded an Excel Master Diploma. It’s not a bad item to put on your resume — or on your business’s website, if multiple employees enroll in eLearnExcel’s courses as part of a business subscription.
Ready to get started? With these tools, you’ll be using Excel with little-to-no-sweat, in no time. Plus, practice makes perfect — that’s why there are so many tiered levels of courses available.
Start where you can, and as you begin using more functions and commands, you can continue to expand your knowledge and implement the power of Excel for your projects.

Should Marketers Use Pop-Up Forms? A Comprehensive Analysis
As inbound marketers, we care about creating lovable experiences for our website visitors — but we also want to generate as many leads as we can for our sales teams. Most of the time we can do both without any problem. But when it comes to pop-up forms, conflict does emerge.
Pop-ups are everywhere these days. Over the past few years, pop-up forms have re-emerged as a popular marketing tactic for promoting content, driving blog subscriptions, growing email lists, and fueling lead generation.
Some pop-ups are fairly benign and you hardly notice them. Others are distracting, and quite frankly, downright poopy (see the example below).
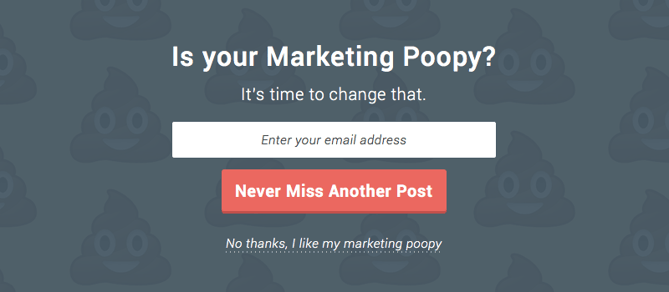
Pop-ups have become so prevalent that even Google has had to weigh in, announcing that they will begin to penalize websites that use what they call “intrusive interstitials” (we call them “crappy popups”).
So the million dollar question for inbound marketers is this: Should we be using pop-up forms? Before we dive in and attempt to answer this question, let’s take a step back and re-acclimate ourselves with the world of pop-ups.
What Is a Pop-Up Form?
According to Wikipedia, the first ever pop-up ad appeared in the late 1990s on the web hosting website Tripod.com. In their early days, pop-ups were primarily used by third-party advertisers, and they were particularly cringe-worthy. Do you remember the first time a brightly colored pop-up jumped out on your screen, alerting you that you’d won some sort of content or prize? I know I do. And as far as I can remember, I never collected any of those fabulous prizes.
Over time, consumers and web browsers alike got better at hiding or ignoring these types of pop-ups, and eventually, advertisers gave up. Nowadays you’ll rarely see a sketchy third-party pop-up — unless you find yourself on a particularly sketchy website.
For a time, pop-up ads largely disappeared from the internet. But they eventually became replaced by pop-up forms. Only this time it wasn’t third-party advertisers that were using this pop-up format … it was marketers like you and me.
Because of the association of intrusive ads with this pop-up functionality, marketers need to be careful of when and how they appear as well as the type of content they present.
Pop-ups come in many shapes and sizes, but here’s a graphic that depicts the most common ones you might see on a web page:
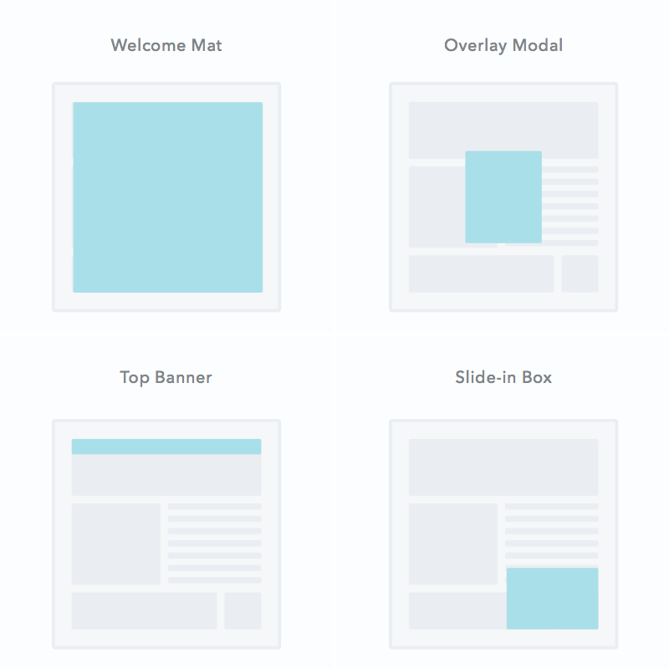
Let’s dive a little deeper into these pop-up formats:
1. Welcome Mats
These are full-screen pop-ups that slide above the page content. The up-side to these is that they bring the offer front and center in front of website visitors. You may consider doing this if the offer is highly relevant to your content and important to your strategy. Otherwise, a welcome mat pop-up may be a little too intrusive and annoying for your users.
2. Overlay Modals
As close to the traditional pop-up as you can get, these are center screen pop-ups that appear on top of page content. Unlike the welcome mat, overlays don’t block the rest of the content from being shown, but the user will have to click out of the pop-up to continue what they’re doing. While some users do feel that overlay modals are intrusive, they often have high conversion rates if the offer is compelling.
3. On-Click Pop-Ups
An on-click pop-up is a specific type of overlay modal that pops up with a form when a user clicks a call-to-action or other page element. They’re perfect for when an in-line form would clutter the page but you want to decrease friction to a particular offer. The UX tends to be easy, which reduces friction on the conversion path.
4. Gamified Coupons
Another type of overlay modal, gamified coupons will let you play a game for a discount or prize of some kind in exchange for the users information. They often come in the form of a prize wheel or scratch-off ticket and are best for fun ecommerce store brands (since the coupon can then be applied at checkout).
5. Top Banners (Also Called Sticky Bars)
These are small banners that manifest as a bar at the very top of the page, asking the user to take action on something. They are typically a more permanent conversion element than other types of pop-up and are best used for broad offers such as newsletter subscriptions, coupons, or even general announcements.
6. Slide-In Boxes
Slide-ins are small boxes that slide in from the side/bottom of the page, similar to an overlay modal but with less obtrusive behavior. These are great for presenting offers as the user is scrolling through the content of the page.
Pop-Up Triggers
As more and more marketers have started using pop-up forms, a mini-industry of pop-up providers has emerged, offering bells and whistles that were never available before. Most notably, pop-up tools have proliferated the types of triggers that prompt a pop-up to appear.
Among the most popular pop-up triggers are:
- Page entrance: Pop-up appears when the visitor first gets to the page. These are often considered the most annoying and but can be used effectively with the less-intrusive formats such as the top banner.
- Page scroll: Pop-up appears when the visitor scrolls to a certain point on the page. These are great for long-form content when you don’t want to embed CTAs in the content.
- Element interaction: Pop-up appears when the visitor clicks on or hovers over a specific element. These are highly effective since the user took a specific action with intent to convert.
- Time on page: Pop-up appears when the visitor has been on the page for a specific amount of time.
- Exit intent: Exit intent pop-ups appear when the visitor scrolls towards the top of the page to leave. Consider it a last-ditch effort to capture their attention before they leave.
- Inactivity: Pop-up appears when the user has not taken action on the website in a while.
Now that we know a little more about pop-up forms, let’s get back to the core question: Should marketers be using them?
And in order to properly answer that question, we need to consider two slightly more specific but related questions:
- Do they work?
- Is it possible create inboundy pop-up forms that don’t, well, suck?
Let’s dig in.
Do Pop-Up Forms Work?
I’ll answer this one right off the bat: The answer is yes. Pop-up forms do work, and this is the main reason so many marketers are using them.
According to research conducted by Sumo, the top performing 10% of pop-up forms convert at a whopping 9.3%. Now I don’t know about you, but an additional 9.3% conversion rate across my website sounds pretty good to me.
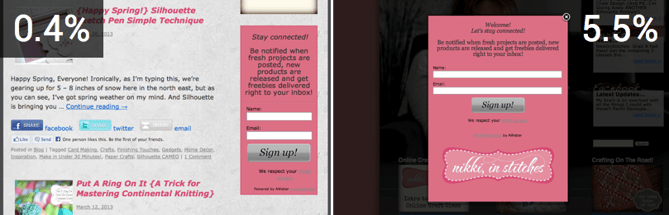
Source: AWeber
The numbers don’t lie: Pop-up forms work. However, is that worth sacrificing the experience that a visitor has on your site? The inbound answer is no. User experience trumps all else.
But what if you didn’t have to sacrifice performance for experience? What if you could create user-friendly pop-ups that didn’t suck?
Is There Such a Thing as an Inbound Pop-Up?
If you ask someone how they feel about pop-ups, they’re likely to offer an emotional response that loosely resembles a child eating vegetables (I call this expression “blegh”).
People hate the idea of pop-ups. Most pop-ups out there are annoying. What’s more, the pop-ups that annoy you the most are the ones you’ll remember the longest.
But here’s the thing: not all pop-ups are bad. Pop-ups can be used for good, and they can be a healthy part of an inbound strategy.
Just think about email marketing for a second. Email is another example of a channel that has been heavily abused. We’ve all gotten some crappy emails throughout the years. But as inbound marketers, we know to use email responsibly and to only send contextualized email that adds value to people’s lives.
The same goes for pop-ups. When used correctly, they can actually enhance the experience a user has on your website, as well as boost your conversion rates.
4 Tips for Crafting High-Converting Pop-ups (That Don’t Suck)
But how do we make sure that our pop-ups are helpful and not spammy? Here are some guidelines.
1. Offer something relevant and valuable.
The problem with most pop-ups is they get in the way of the visitor’s experience on a website, rather than enhance it. Oftentimes this is because what’s being offered in the pop-up is either not valuable to the visitor, or it has nothing to do with the page they’re on.
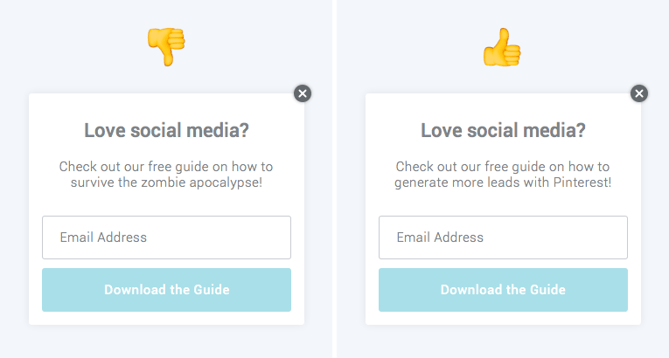
To boost engagement with your pop-up as well as enhance the experience that someone has on your site, be sure to offer something that is both valuable and relevant to them, given the page that they’re on. For example, if I were writing a blog post on social media, I would offer a free ebook on the same topic:
2. Think about the way people engage with your pages.
Another common mistake marketers make with pop-ups is having them appear at the wrong time, which adds to the annoyance factor. Be strategic about the timing and trigger of your pop-ups. Think about the way that visitors interact with certain types of pages on your site.
For instance, when someone engages with a blog post, they do so by scrolling down the page as they read the content. If you want to catch your visitors while they’re most engaged, then you should customize your pop-up to appear when someone has scrolled halfway down the page.
Similarly, you might find that people who stay on your product or pricing pages for more than 30 seconds are highly engaged because they’re taking the time to read through and consider their options. In this scenario, you could use a time-based pop-up that appears when a visitor has been on the page for a specific number of seconds.
To better understand exactly how your visitors engage with different pages on your site, try looking into Google Analytics data, such as bounce rate and average time on page. Better yet, use a tool like HotJar or Crazy Egg to record users on your site to build heat maps of where they click and scroll. This will give you a better sense of how people engage with your content.
3. Use language that’s specific, actionable, and human.
Most pop-up forms have a fairly basic layout. You get a headline, some body copy, and maybe an image. In other words, you don’t have a lot of real estate to work with.
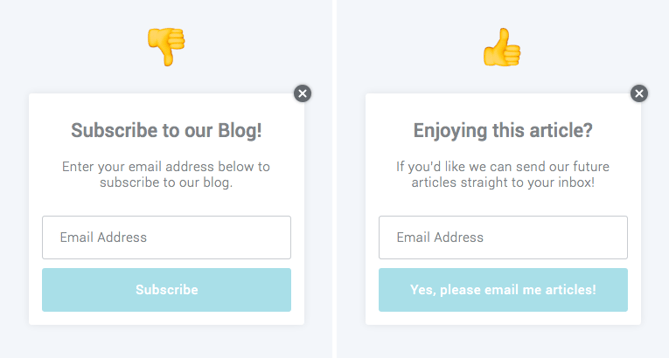
This means it’s super important to nail the copy on your pop-up form. In order to do that make sure your copy is specific, actionable, and human:
- Specific: Specify exactly what a visitor is going to get if they click on your pop-up. Don’t tell them it’s a guide; tell them it’s a 10-page guide with actionable tips. Don’t encourage them to join your email list; ask if they’d be okay with getting two to three emails on a given topic per week.
- Actionable: Let visitors know exactly what you’d like them to do. Instead of “Click Here,” try “Download our Free Guide,” or better yet, “Get my Free Guide.” Craft a compelling call-to-action that will inspire your visitors to take action.
- Human: Remind visitors that there’s a real person behind the pop-up form. Use colloquial language to make your forms friendly. Instead of “Join our email list,” try “Mind if we email you twice a week?” Instead of “Subscribe to our blog,” try “We’d be happy to notify you whenever we publish new articles.”
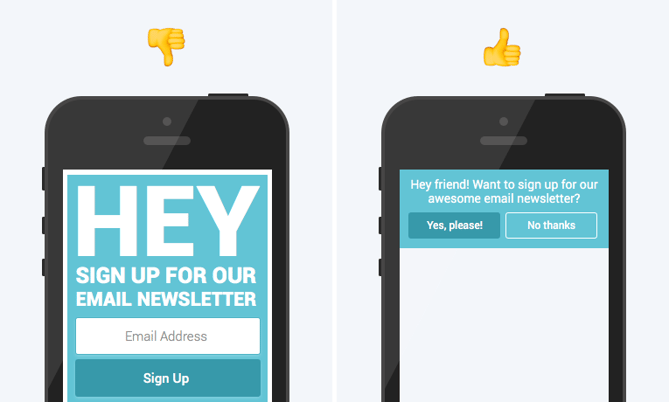
4. Don’t ruin the mobile experience.
In an effort to improve mobile user experience, Google announced that they were going to start penalizing websites that use what they call “obtrusive interstitials” — in other words, pop-ups that mess with the user experience. Now I don’t know about you, but I certainly don’t want my Google rankings to go down from using pop-up forms.
To ensure a user-friendly mobile experience and avoid being penalized by Google, be sure exclude your pop-up forms for mobile, or use pop-ups that don’t take up the entire screen of the page on mobile devices. Most pop-up tools already offer this type of functionality, but if what you’re currently using doesn’t, you may need to find a new solution.
Need a Free Pop-Up Tool?
So there you have it. To sum up: Pop-up forms do work, they can be inboundy, and you should be using them.
If you’re looking to get started with pop-up forms, we’d recommend that you try HubSpot’s free marketing tools. We built it ourselves to help marketers generate more leads across their entire website without sacrificing the user experience.
Editor’s note: This post was originally published in October 2016 and has been updated for comprehensiveness.


Everything Marketers Need to Know About Sender Scores
Email marketing seems like an easy win for your inbound marketing strategy. Write an awesome email, put in some snazzy images, fire it off to your opt-in list, and watch the customers roll in.
Even if it all was that easy, though, the step marketers often overlook is just how difficult it can be to actually get your email into a recipient’s inbox in the first place. Seems basic, but there are tons of moving parts involved in email deliverability, and a huge one is the reputation of the email sender.
Luckily, there’s a service called Return Path that has a metric called Sender Score, which gives you insight into your reputation as an email sender.
Have you checked your Sender Score? If you do know your Sender Score, do you know what it means for your reputation as an email marketer? If you’re interested in your reputation as an email sender, read on to learn everything you need to know about Sender Score.
To collect your Sender Score, Return Path gathers data from over 60 million mailboxes at big ISPs like BellSouth and Comcast. They record if people frequently unsubscribe or report spam from certain email senders, and then assign you a Sender Score based on that monitoring.
It’s a crucial number to stay on top of, because mail servers will often check your Sender Score before deciding what to do with your emails. The lower your Sender Score, the harder time you’ll have getting into someone’s inbox. There are plenty of things that can impact the deliverability of your email, but Return Path reports that 83% of the time an email is not delivered to an inbox, it is due to a poor sender reputation.
Even if an email network or ISP doesn’t query your Sender Score to determine whether they will deliver your email, the factors used in determining your Sender Score are similar to those used by email networks and ISPs to determine your sender reputation. As such, the score is a great, free email sender reputation tool to ensure you are aware of and have the opportunity to fix any deliverability problems.
Domain reputation and IP reputation are just a few of the considerations that are used to determine your overall Sender Score. Other characteristics include spam complaints, industry blacklists, and more.
Now that we know a little more about how your Sender Score is determined, let’s learn how to check your score.
Checking your Sender Score is actually an easy process. Use the steps below to get started.
1. Go to SenderScore.org.
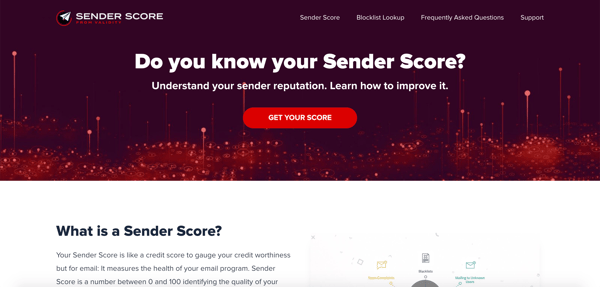
To get started, go to the SenderScore.org home page.
2. Click “Get Your Score.”
Then, click the “Get Your Score” button in the middle of the page.
3. Input your IP address and contact information.
Next, fill out the form on the page.
As Sender Score is a free email reputation evaluation service from Return Path by Validity, you’ll have instant access to detailed reputation reports and other free tools.
Sender Score provides an indication of the trustworthiness of an email sender’s IP address. Mailbox providers evaluate the reputation of senders to determine whether to deliver messages into the inbox.
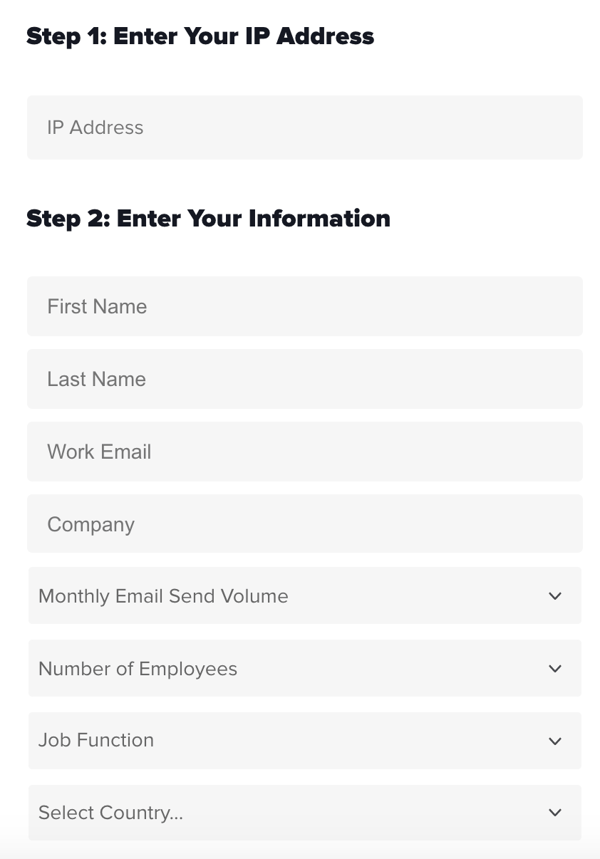
4. Submit.
Lastly, click “Submit” and find out your Sender Score.
Once you know what your score is, you might be wondering, “What do I do with this information?” Below, let’s dive into how to interpret your score.
How Do I Interpret My Score?
To check your Sender Score, visit Return Path’s registration page, and you’ll soon have a report that looks something like this (but with different data, of course!)
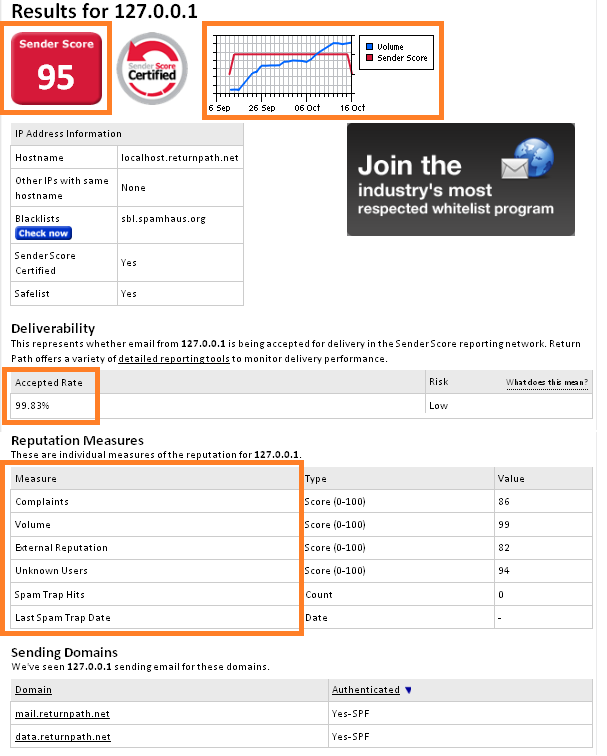
Scores are calculated on a rolling, 30-day average and represent the rank of an IP address against other IP addresses, much like a percentile ranking.
The closer your score is to 0, the worse it is, and if you’re close to 100 like Return Path is in this sample report, well you’re in pretty great shape! Now let’s break down what each of the items you’re being scored on in this report mean:
- Complaints: How complaints about that IP address compare to all other IP addresses. Complaint rates are calculated as complaints divided by accepted mail, and complaint scores are a rank based on your complaint rates.
- Volume: While not an indication of a good or bad sender reputation alone, it is an important part of the overall reputation algorithm. For example, an IP address which sends 100 messages and receives 99 complaints is problematic, while an IP address which sends 100,000 messages and receives 99 complaints is probably okay. A higher score equates to larger volume monitored by the Sender Score Reputation Network.
- External Reputation: How the IP address compares to all other IP addresses on a variety of external blacklists and whitelists.
- Unknown Users: The rank of the IP address’ unknown user rate compared to all other IP addresses. Unknown user rates are taken directly from incoming SMTP logs of participating ISPs, tracking how often an IP address attempts to send a message to an address which does not exist.
- Rejected: This represents how often messages are bounced compared to other IP addresses.
- Accepted: The number of email messages accepted for delivery, this number is expressed as the number of messages seen minus the number of messages rejected.
- Accepted Rate: The ratio of email messages accepted for delivery compared to email messages attempted. This is the number of messages accepted for delivery, divided by the number of messages seen.
- Unknown User Rate: The ratio of unknown users, or invalid email addresses, compared to the amount of email seen.
So, what’s a good score? If your score is over 80, congratulations! That’s a very good Sender Score. If your score is between 70 and 80, something isn’t right — move on to the next section of this blog post to see what you could be doing wrong that’s impacting your email deliverability. If your score is less than 70, well … you need to repair your sender reputation.
What Do I Do If I Have a Bad Sender Score?
The first step is knowing, so good job on checking your score. It can take weeks or months to fix a low Sender Score, so the sooner you’re aware of the problem, the better. There are several aspects of your email marketing that you need to check and possibly change to improve your Sender Score and email delivery rates — here are the ones that Sender Score takes into serious account:
- Inconsistent Volume of Email Sends: See the graph in the top right corner of the Sender Score report? Their email send volume goes up at a pretty steady rate, and as a result, their score maintains a pretty even number. However, if you were to send 5,000 emails on Monday, 200 on Friday, nothing for a week, and then suddenly another 15,000, you would likely get dinged for sending inconsistent volumes of emails.
- Frequency of Sends: Just as the volume of sends should be consistent, so should the frequency with which you email recipients. Email every day, every other day, every week — whatever your needs are. Just make sure you don’t jump on the email marketing bandwagon, abandon it after a month, then hop back on and expect no deliverability penalties. As you perfect your email marketing machine, you’ll be able to test the optimal email sending frequency for your recipients.
- Cold IP Address: If you’re new to email marketing, you may have neglected to warm up your IP address. Start email marketing on a new IP address with small batches of the best people on your email list — you know, the ones who love you and won’t mark you as SPAM or unsubscribe from your communications. Progressively increase the amount of people you email to warm up your IP and prove you’re a safe sender.
- Being Blacklisted: There are about 50 known blacklists out there that denote which IPs are spammers. Return Path has a service that lets you see if you’re on a blacklist. Assuming you’re a legitimate email marketer who just didn’t know some of the rules for good email deliverability, visit the sites of those who have blacklisted you to consult their information for being removed from their blacklist. If you contact them for removal, they will help you understand why you were blacklisted in the first place and what you can do to improve your email marketing methods.
- Getting Caught in a Spam Trap: A spam trap is an email address that was once valid, but no longer is, and will thus garner a hard bounce notice when you email them. However, when a mail server sees consistent traffic going to the dead email, they can turn the email into a spam trap that will stop returning a hard bounce for the known bad address, and instead accept the message and report the sender as a spammer. The moral of the story here is, if you’re not monitoring your hard bounces and removing them from your active email list, you could be perceived as a spammer.
- SPAM reports: Finally, if your email recipients think you’re a spammer and identify you as such via a SPAM report, your sender reputation is going to suffer. Check the rate at which your emails are marked as SPAM — an acceptable rate is 1 in every 1000.
There are several other factors to getting your email into a recipient’s inbox — the content of your email, email infrastructure, recipients’ personal filtering preferences — more of which you can learn about in this email post about email deliverability.
Additionally, if you’re looking to start email marketing on the right food, consider taking HubSpot’s course on “Understanding Email Deliverability.“
To be successful with your email marketing, you need to build trust with the people receiving your emails. To build trust, you need to provide value. And to provide value, you need to know how your emails are performing to a healthy email deliverability strategy.
Editor’s note: This post was originally published in February 2012 and has been updated for comprehensiveness.

Facebook’s Testing New Email Marketing Tools: Here’s What We Know So Far
Each day, millions of brands launch ads, create business pages, and test out lead-generating marketing strategies on Facebook.
While Facebook offers a robust selection of marketing tools, one big marketing staple they’ve never really explored is email marketing. That might be about to change.
This summer, a small number of Facebook Business users were given access to a new email marketing tool, which Facebook later confirmed it was experimenting with.
While you might not expect a major social media platform like Facebook to invest in email marketing tools, this move actually makes a lot of sense.
In the last decade, Facebook’s amped up its advertisement and lead-generation offerings. While B2C companies could easily launch an ad for a product and see ROI roll in, the platform has also enabled B2B companies aiming to sell higher-priced offerings to connect their CRM and generate leads via lead ads or landing pages.
Facebook has consistently been expanding to make its platform a stronger lead generator for brands. And, now that Business Pages are able to gain contact lists from the platform, it makes sense for Facebook to consider an email tool that allows brands to reach out directly to those audiences.
“We’re evaluating whether these tools are beneficial for people and businesses before deciding whether to expand it further,” Facebook told AdWeek.
Since Facebook began the email marketing tool’s test, marketers have caught on. At one point Meg Coffey, a social media strategist, tweeted screenshots of the tool after discovering it:
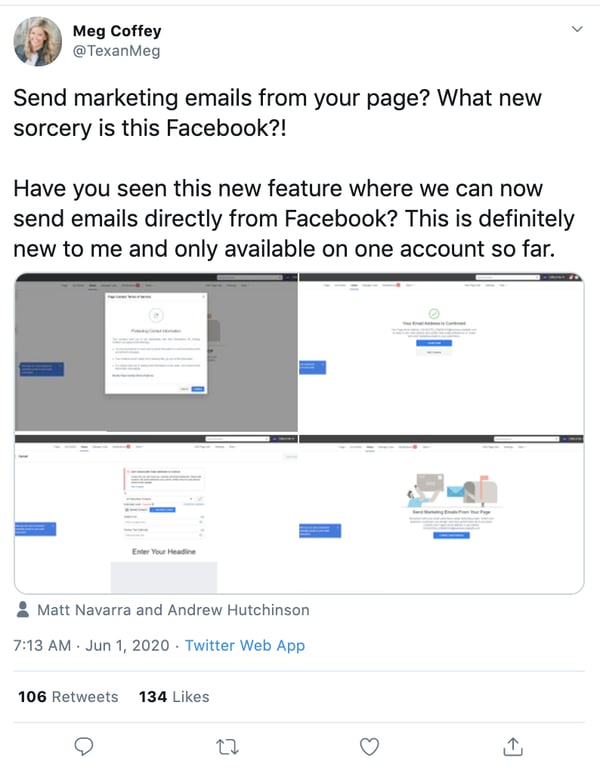
In the replies, a number of marketers shared their thoughts on the new email tool.
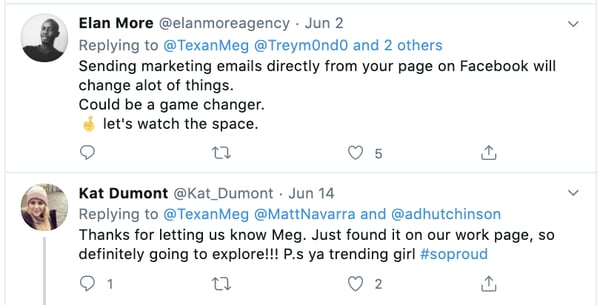
In the tweet’s thread, many marketers were optimistic about what Facebook’s email and CRM compatibility could mean for lead-generation.
Facebook’s email tool might seem interesting, but before you drop your marketing email tool for this one, keep in mind that it’s still in its testing phase. While some brand pages have the ability to use it, others do not. Additionally, if the test fails, there’s a possibility the tool won’t ever fully launch.
If you do want to learn more about the tool and how it could benefit your Facebook marketing strategies if and when it goes live for all pages, here’s a quick rundown of what we know about it so far.
What to Know About Facebook’s Email Marketing Tool
Although Facebook’s email marketing tool is in its testing phase and not yet available to all users, social media marketers and page admins have shared a number of screenshots to demonstrate what it’s capable of.
Here’s what we know based on the screenshots and information we could dig up.
1. Facebook’s email marketing tool will follow GDPR subscriber list regulations.
Sending emails to people who didn’t knowingly sign up for them infringes on GDPR regulations — and emails sent through Facebook’s new tool won’t be an exception
And although Facebook is primarily a social media network, it will follow email privacy regulations by instructing users to only send marketing emails to contacts who sign up for them.
According to social media posts, Facebook marketers will see a warning and disclaimer about what they can and can’t send contacts when they click into the email tool.
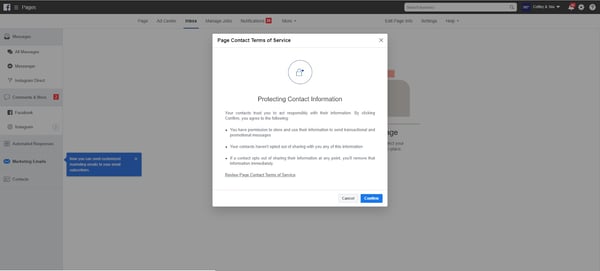
2. You can’t build email lists with addresses from your contacts’ Facebook profiles.
When hearing that Facebook offers email marketing, you might think that the marketing emails could simply go to someone’s Facebook Messenger or the emails associated with Facebook accounts that Like your business page.
However, like any other email marketing platform, your contacts will need to subscribe to a list and have an address associated with their contact name to get sent an email from Facebook’s platform.
Luckily, if your connected CRM already has an email subscriber list, you can just select it from a drop-down menu seen in this image:
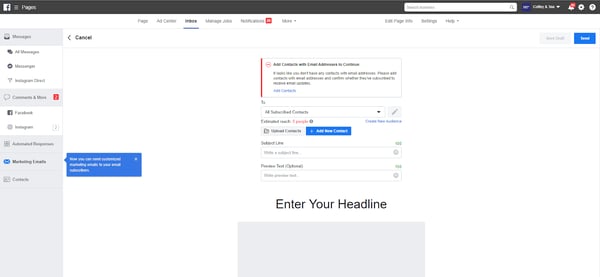
If you don’t already have a subscriber list, there are a few ways to create one. You could build a form on your website that promotes your new email and encourages people to subscribe, or you could launch a Facebook lead ad that promotes the email subscription.
3. Facebook’s tool might not be as advanced as other free email marketing software.
Available screenshots of the tool show that users can customize email headlines, subject lines, and body copy, but marketing organizations like IMPACT say it’s unclear how much design control email marketers will get related to images, color schemes, links, and formatting.
In a follow-up tweet, Coffey said that there are “far more robust email marketing tools out there,” but that the Facebook tool might be useful for those “getting their feet wet” with email marketing.
In its current form, the email tool might be useful for entrepreneurs or less tech-savvy Facebook page owners who are beginning to try email marketing. But, because reviews of the tool hint that it’s fairly basic, it might not be robust enough for businesses that require solid customization, personalization, and performance tracking.
Developing an Email Marketing Strategy
Even if Facebook’s email tool doesn’t pass its test-phase and fully launch, Facebook’s interest in marketing email proves one thing: Email certainly isn’t dead.
Email marketing from any tool helps with boosting brand awareness, can keep you connected to your audiences, result in ROI from customers, and even bring solid non-organic traffic to your website.
If you’re a beginner to email marketing, here are a few things you’ll want to keep in mind regardless of which tools you use to create your message.
- Respect your contact’s privacy: If a contact fills out your lead-gen form but doesn’t want to receive email — listen to them. Similarly, don’t build your email list by purchasing contacts from other brands. This is against GDPR regulations.
- Provide valuable content: Once you get a list of subscribers, provide them with content that they’re most interested in seeing, as well as the content you promoted when encouraging them to subscribe. For example, engaging email content could include discounts or links to helpful blog posts. Remember, don’t just overpromote or blast your subscriber list with emails about your products. This could cause your messages to get marked as spam.
- Grab the reader’s attention: Because emails sent through Facebook, or other email marketing tools will go directly into a number of crowded inboxes, try to create catchy subject lines, preview text, and body text that will grab the attention of a busy person who’s just scrolling through emails on their smartphone.
If you’re testing out email marketing for the first time or trying to improve your current strategies, check out this ultimate guide for more expert tips and tricks.

How to Drive Local Foot Traffic With Twitter Ads
Want more customers for your local business? Have you considered using Twitter to connect with customers? In this article, you’ll discover how to use Twitter ads and organic techniques to bring more foot traffic to your local business. #1: How to Build a Local Audience via a Twitter Follower Campaign Before you reach out to […]
The post How to Drive Local Foot Traffic With Twitter Ads appeared first on Social Media Examiner | Social Media Marketing.
from Social Media Examiner | Social Media Marketing https://ift.tt/3bHF1wr
via socialmediaexaminer
The 5 Kinds of Digital Marketing Collateral You Should Be Creating
It goes without saying, but your marketing materials shouldn’t be limited to conventional outbound advertisements — particularly if your business is B2B. Sure, capturing attention is part of the battle, but what happens when a prospect visits your website and sees nothing but some product descriptions and a pricing page?
There has to be more there. You need to have some material to show that you can walk the walk. One kind of content that helps get you there is known as marketing collateral, and it can come in a variety of shapes and sizes.
Here, we’ll get a more in-depth understanding of the concept and go over the five most important marketing collateral formats you can use to help establish legitimacy and supplement your sales efforts.
At its core, marketing collateral is a way to let prospects know that you know what you’re talking about. It’s not supposed to be as flashy as conventional advertisements. In creating marketing collateral, your first priority generally isn’t to capture attention — it’s to retain and enhance it.
In most cases, the prospects who are looking at your marketing collateral are curious about your company, but they might not be intimately familiar with you or your offering. Well-crafted marketing collateral can put them at ease. It can help build the kind of trust necessary to start and sustain a customer relationship.
Marketing collateral tends to be educational in some capacity. When done right, the informative nature of the format lets you separate yourself from the competition by letting you showcase an extensive understanding of your industry that others in your space might not be projecting.
If all of your marketing materials are solely dedicated to talking up your product or service, you’re selling yourself short. When prospects are deciding to buy, they’re not just considering what’s for sale — they’re considering your company as a whole.
They want to know they’ll be taken care of by a competent, capable, knowledgeable organization that they can rely on to address any issues and concerns they might have as they arise. Creating thoughtful marketing collateral is one way to help that cause.
1. Blog Posts
Producing good marketing collateral is often a matter of consistently providing value to your audience. One of the better forums to create and promote the kind of material that does that on an ongoing basis is a well-maintained company blog.
It allows you constantly to supplement your sales efforts with helpful insight and audience engagement — driving traffic to your website and generating leads through actionable advice, expertise, and entertainment.
Like any other kind of effective marketing collateral, good blog posts can project authority in your industry. You want to show you’re staying abreast of industry trends and understand the nuances of your space — constantly churning out high-quality, helpful content can help that cause and put your prospects at ease.
2. Ebooks
Ebooks are similar to blog posts in that they should project industry authority through engagement, but they tend to be longer, more in-depth, and less snackable than typical blog content. This type of marketing collateral generally attracts prospects with a vested interest in your industry. Here are some examples from HubSpot.
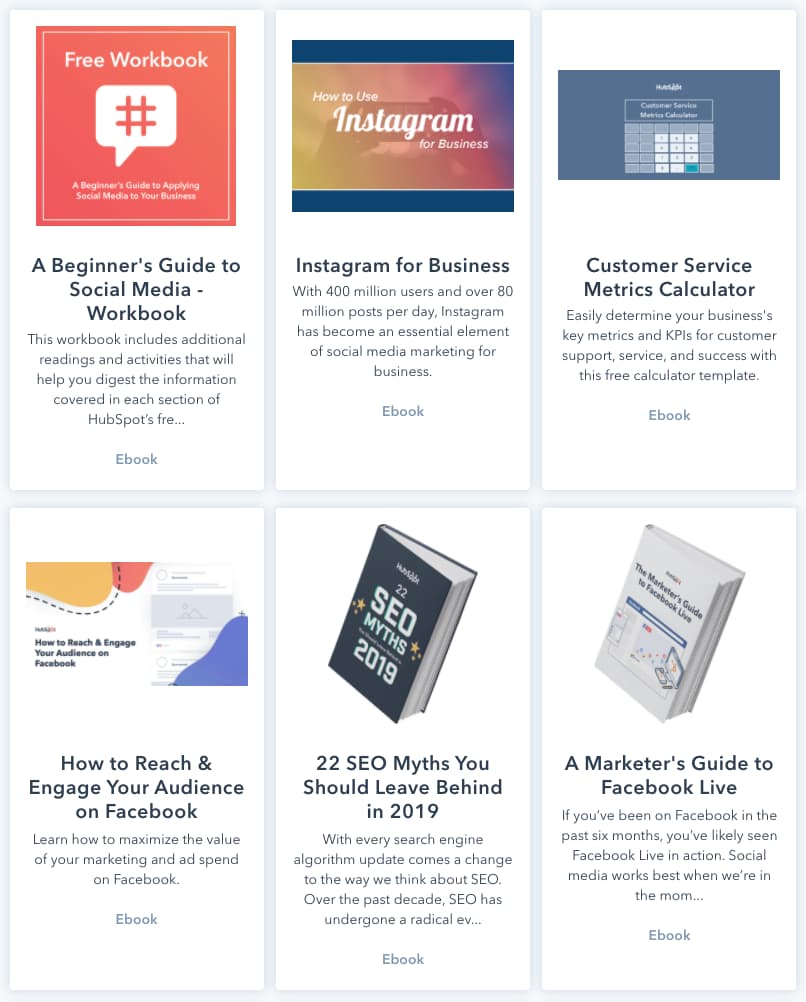
In some ways, an Ebook could be likened to an extended blog post or a few blog posts strung together. Like blog content, an Ebook generally contains accessible language and directly actionable advice.
In many cases, Ebooks are downloadable and can only be accessed in exchange for a prospect’s contact information — making them a powerful vehicle for lead generation.
No matter where your company stands, you likely have the resources and knowhow to channel your industry-specific knowledge into a thoughtful Ebook. Remember, your marketing collateral should be designed to build trust with prospects and customers.
If you can put out Ebooks to reliably bolster their knowledge of your industry, you can convince them they’re in good hands when they buy your product or service.
3. Case Studies
Case studies are offering-specific documents that detail how specific customers saw success as a result of leveraging your product or service. This format is different from the previous two in that it’s never product-agnostic. Here’s an example from HubSpot:
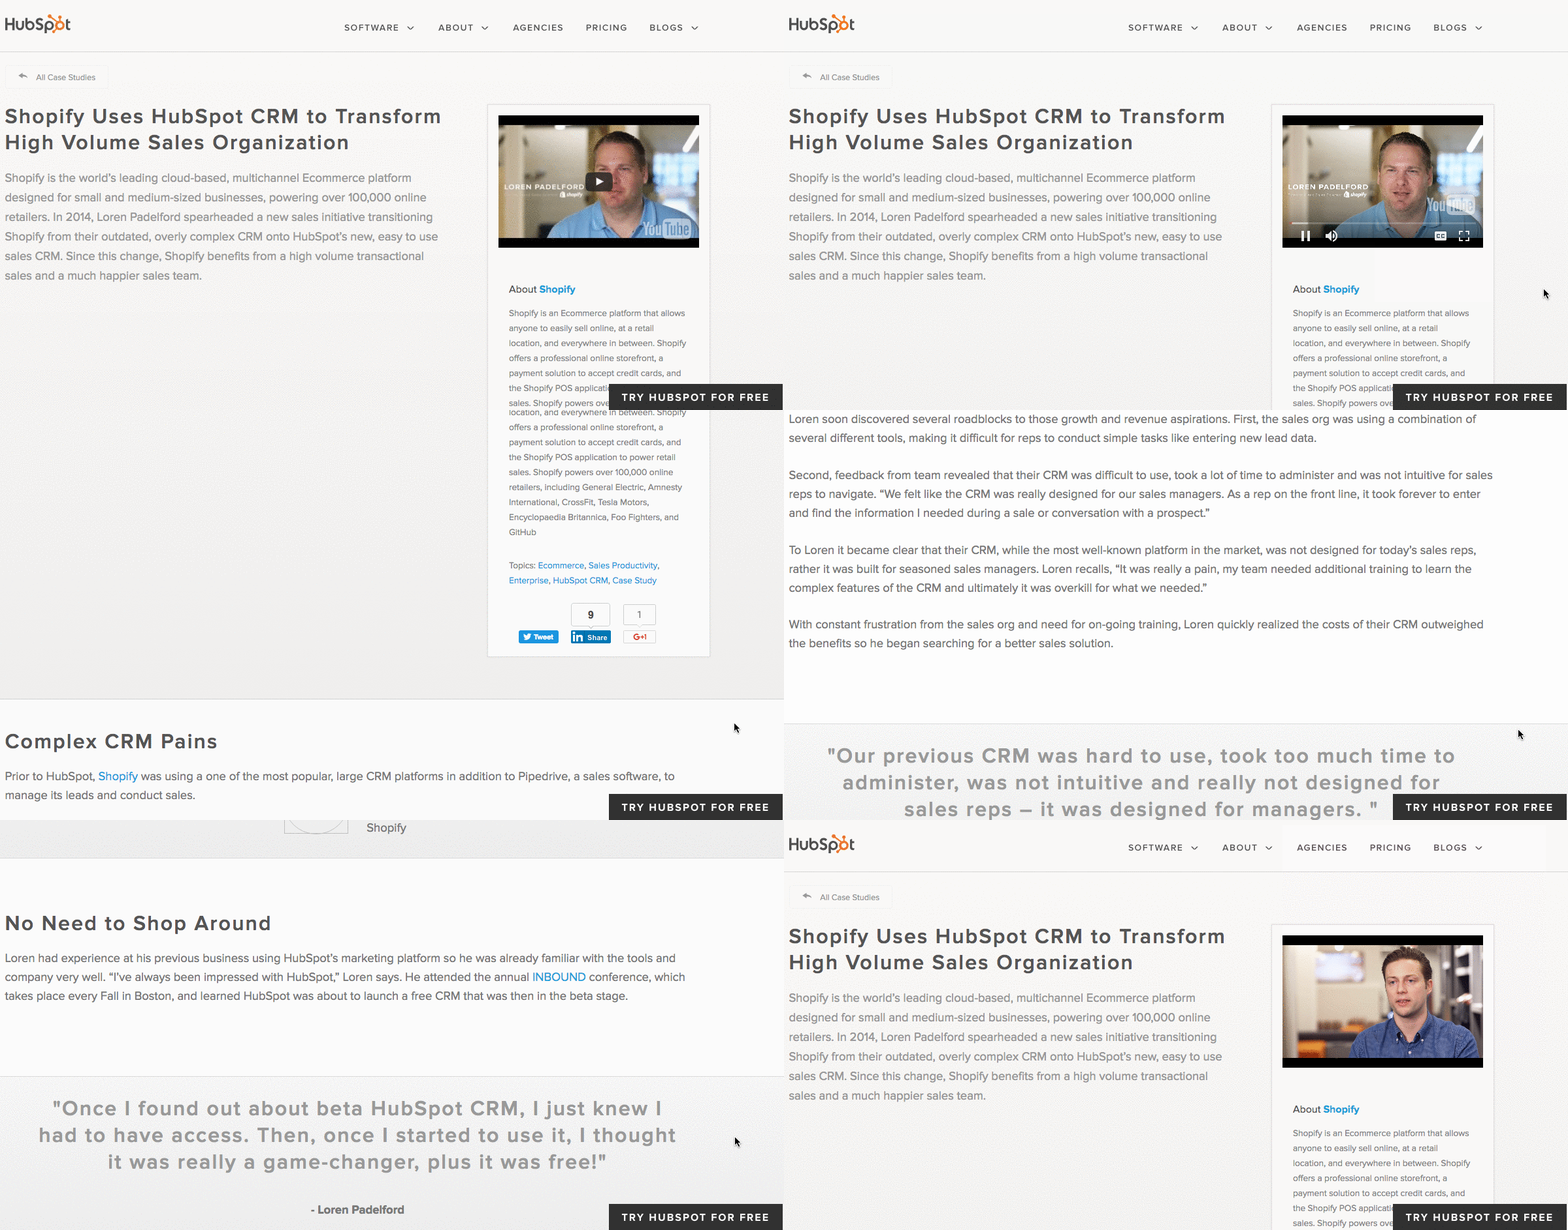
Every case study is made in collaboration with a satisfied customer. It’s a form of cross-promotion that shows what your product or service is like in practice — a roadmap that lets prospects imagine what you could do for their business.
Like almost every other example on this list, case studies are educational. They provide a more thorough explanation of how your product or service works through an active example. It’s also another avenue for building trust.
If you can point to reputable customers who are willing to vouch for your business in extensive detail, you can bolster your company’s reputation as a solid, knowledgeable organization with a product or service that delivers results.
4. Testimonials
Testimonials are essentially condensed, snackable case studies. Many — if not most — prospects don’t have the time or interest to delve into a full-on case study. If you want to reach them, you’re going to have to provide quick-hitting content that they can glance over passively. Testimonials can do just that.
Here’s an example of one from HubSpot:
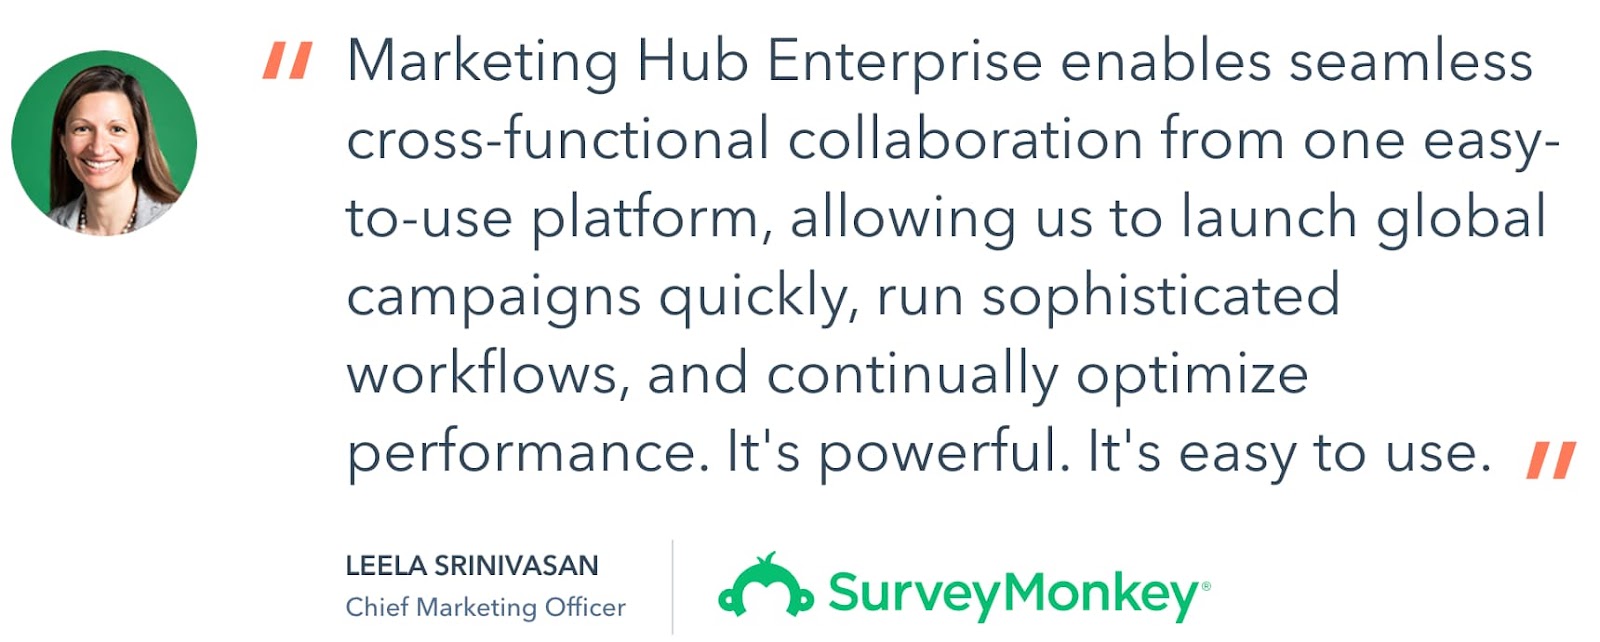
This testimonial follows the format’s best practice. It’s visually engaging, clearly establishes who provided the quote, and references specific benefits — a solid example of an appropriately informative, easily digestible piece of marketing collateral. Ultimately, a good testimonial helps project the company’s legitimacy while inspiring potential customers to further explore the product it’s promoting.
5. White Papers
A white paper is a persuasive, authoritative, in-depth report on a specific topic. Generally, one of these documents will raise a problem and present a solution to it.
It’s typically more technical and less accessible than an Ebook. It’s meant to draw a crowd more intimately involved with or interested in your industry — an audience that might naturally run into the issue at the core of the document.
White papers shouldn’t be product pitches. It’s best practice to keep them objective and educational. That being said, the topics you choose need to be relevant to your company or space.
This kind of collateral also needs to be thoroughly researched, thoughtfully formatted, polished, and written in a serious tone. That means no flashy language or cute gimmicks. Here are some examples of topics from HubSpot’s Not Another State of Marketing Report.
As I keep mentioning, every format listed in this article is tailored to project authority to some extent — the white paper is the purest example of that trend. It’s a technical document that’s meant to demonstrate technical knowledge to a crowd with technical prowess.
Well-crafted marketing collateral can give you a leg up on your competition. Not only is it an excellent vehicle for lead generation, but it can also offer your business an element of authority and trustworthiness to make potential customers more comfortable and inclined to buy from you. If your company isn’t producing it, consider trying out one of the formats listed above.

12 Tried-and-True Ways to Promote Your Blog Posts
The initial phase of starting your blog is one of the most fun and exciting parts of your journey.
After pouring all that time and effort into the ideation process, researching your target market, and narrowing in on your niche — this is the part where your efforts begin to pay off.
However, in order for your blog to be successful from the get-go, there are certain steps you have to take to lay the groundwork. That’s right: There’s research involved in this stage, too.
If you don’t have a good plan of action for the launch of your blog, things can fall apart during execution.
Here, we’ll walk you through a simple but thorough blog promotion checklist.
Read on to learn about all the things you should have in place when you first go live with your blog, plus, what you can do to ensure your blog is successful for the long-run.
Benefits to a Blog Promotion Checklist
You might be thinking, “Haven’t I already done enough planning and research? Let’s get the ball rolling!”
Yes, you have put a lot of hours into the blog already. But without a proper promotion plan, all that hard work will go to waste. Nobody wants to have a grand opening to crickets.
By having a checklist to work with, you gain the following benefits:
- Less procrastination: It’s easy to slip up once all the planning and research is done and go a little ‘easy’ on your execution. Focusing on your efforts at this stage will change that.
- Better content management: As your blog goes live, you’ll still have to write a consistent amount of quality content regularly and keep up with the momentum you set at the start. Having the right plan and tools to organize your tasks can help you stay on track.
- Better organized marketing: A lot of your efforts at the start of your blog going live will center around its promotion. How else will people know it exists? Knowing what the promotion phase will look like can help you better organize a strong blog marketing strategy.
A lot of this is dependent around how you structure your time and activities. It’s a lot like having a standard operating procedure for blog promotion.
Rolling out your blog in a phase-by-phase approach will add the above perks and ensure the entire process of execution won’t seem as overwhelming.
Pre-Promotion Checklist
Before starting a blog promotion campaign, you need to make sure that it’s ready for the world to see.
Remember: not all blogs get the spotlight. The ones that do are there for a reason — they have a strong selling point. No influencer will be interested in promoting a spammy blog.
As such, you have to find out what makes your blog stand out and work towards promoting that.
Let’s see what you should put on your pre-promotion checklist.
1. Figure out whether you need to hire freelancers.
Promoting your blog is no easy feat! It involves a lot of overlapping tasks and resources.
Depending on where you are, that can be anything from doing the campaign yourself to hiring a bunch of freelancers.
In my case, I do a combination of both. I do the important tasks (think: strategy, optimization, etc.) myself, and outsource menial tasks to my VAs.
This option is great if you have other priorities, as promoting your blog by yourself can be quite the hustle. What’s more, it’s typically relatively cheap to hire freelancers. Plus, you can hire several freelancers and manage a remote team to work on your blog while on-the-go.
Another important factor to look into is organization, which involves how you’ll go about promotion. Here, you can follow a phase-by-phase approach to focus on what’s best first, and even create a solid project management plan to manage your blog promotion strategy.
My point is, promoting a blog is no easy feat, but today, there’s several ways to (successfully) promote it without too much time or money. That said, you just need to know your blog well, who you’re targeting, and how.
Which brings me to my next point.
2. Make visuals to complement blog posts.
Media like images and videos make your blog posts more visually appealing and memorable. Consumers remember 65% of visual content versus only 10% of written content, meaning that adding visual media to your blogs can help readers retain information and remember your brand.
Another way to help your blog content resonate with readers is to develop original images for your blog. This applies to blog headers as well as original infographics, graphs, and other types of visual media.
Save countless hours by using these pre-made templates to design your infographics.
Visual content can also help drive traffic to your blog. Image alt text alone can help boost your blog SEO — an experiment we ran at HubSpot that saw a 25% increase in blog traffic. (Image alt text also contributes to your blog’s accessibility, an equally important feature to optimize.)
3. Ensure you have high-quality content.
Before you consider how you’ll promote your blog, make sure you’re creating high-quality blog content. Creating content for the sake of creating content won’t help your business in the long run. Your blog should contain helpful, unique content that relates to your product and brand.
Aside from how-to content and ultimate guides, feature guest writers on your blog, too. Not only will this mix up the type of content you’re publishing, but it will highlight different voices from your network, employee base, and even current customers, which provides valuable insight for readers.
Don’t shy away from trends. While every blog needs evergreen content, content based on trends, seasonality, and recent news can keep your brand relevant and blog interesting.
Remember, even the best promotion plan won’t matter if you’re promoting low-quality blog content.
4. Make your blog searchable.
In addition to creating interesting, helpful content, don’t forget to optimize your blog content for search. Employ on-page and off-page search engine optimization (SEO) tactics to help your content show up on search engine results pages (SERPs).
To write blog posts for SEO, do keyword research to identify high-ranking terms and naturally integrate those terms throughout your content. Link to relevant internal pages as well as influential external sites.
Optimizing your blog for search allows readers to organically discover, read, and share your high-quality blog content. Better yet, it’s more cost-effective than paid promotion.
5. Build real relationships with your readers.
Not all blog promotion needs to happen online and on your blog; building real relationships with readers can be just as beneficial.
First, establish and build a loyal base of readers. (One way to cultivate this base is via email, which we’ll talk about in the next section.) You can count on these readers to provide feedback for and share your blog content, effectively distributing it for you.
Another way to leverage real relationships for blog promotion is to build off-site relationships with other bloggers and businesses. Share other people’s content on social media, in your emails, and through links in your blog content — you never know who will share yours in exchange.
1. Repurpose your content.
Content repurposing requires you to re-imagine your top posts into other forms of content. This can only be done if you have a birds-eye view of what you have published already and what each one offers to your audience.
For example, a blog post can be repurposed by turning it into an infographic, a video for YouTube, a podcast, or even a presentation on Slideshare.
You can also leverage your blog post with CTAs that encourage your readers to become leads. For instance, you might add an online course to it for readers to sign up, or a free e-book.
Repurposing your content can triple your blog traffic, and will also provide a better engagement rate.
2. Build links to your site.
Once you know the ins-and-outs of the content you have, you can start to build organic links.
You must have heard this a lot of times already. If you really want to rank on Google, then you want to invest in link-building.
Building links to your site is one of the best ways to ensure you’re cultivating a good, long-term SEO strategy for your blog.
Of course, there are different ways to build backlinks to your sites. One of them is guest posting, which we’ll discuss more in phase three.
3. Create a UTM link to track marketing campaigns.
What is one technical opportunity you can capitalize on with your content? UTM links.
UTM links add some code to the end of your blog post URL, which makes it easy to monitor and track your marketing campaigns on Google Analytics.
Using Google Analytics alone will only provide you with some simple metrics, such as which websites or search engines your users are coming from. But with a UTM link added to your post URL, you can see a detailed result that makes it easier to track the exact content driving the traffic.
You can also use a custom link management tool or URL shortener to track your links.
Pro tip: If you organize your content ahead of time on the basis of which posts you want to drive for a specific marketing campaign, you can then assign priority UTM links to those.
4. Share your blog on social media.
This is likely not your first time hearing about social media promotion.
Sharing your blog post on social media will always be one of the best ways to promote your content.
Of course, you’ll want to take the time to cultivate a strong social media presence, and ensure you aren’t posting swipe-up links to your content daily. Instead, try creating a diverse social media content calendar with a variety of engaging posts, and have 3-4 a month drive traffic to a new or relevant blog post.
Even if a social media post doesn’t explicitly mention a blog post, you can still aim to increase followers on your social media accounts, and over time, those followers will become naturally curious and take a look at your blog for themselves.
Additionally, try leveraging a social media automation tool that helps you share and manage all your social media accounts from one dashboard.
5. Answer questions on Quora.
Quora is one of the best platforms for engaging with people that might be interested in topics you discuss on your blog. And, as a new blogger, Quora can be a great promotion opportunity.
Create a Quora account and make it a daily obligation to go on Quora and answer questions relating to your niche.
Don’t simply copy-and-paste your blog URL into each Quora answer, though, which can come across as spammy and might even get you blocked on Quora. Instead, try to genuinely help Quora users with useful answers, and simply keep the URL of your blog on your profile for users to find on their own if they’d like.
6. Post on subreddits.
Subreddits on Reddit are another good place for sharing your knowledge with a ready audience looking for more information on a topic.
Just like Quora, Subreddits are topics in which you can join and add to the conversation. This is another way of sharing your post and building your influence.
7. Flip posts to Flipboard.

Flipboard is a social network site that aggregates news from the web and stores it on its cloud for readers.
Flipboard also allows bloggers to flip their blog posts to Flipboard and allow their followers to read the content directly from the platform.
Flipboard could be another opportunity to drive traffic to your blog depending on your content and audience’s preferred channels.
8. Reach out to influencers.
Reaching out to influencers in your niche is one of the most promising opportunities to promote your blog, but comes with a good number of rejections by influencers.
To get an influencer to say yes to your outreach email, you need to build a relationship with the influencer before asking for a favor in return.
As mentioned above, it can be helpful if you link to influencers’ blogs or social media sites in your blog posts, which might help you form a relationship with them that you can nurture for the long-run.
Pro tip: While working on your outreach campaign, make sure to verify emails to increase your email delivery rate.
9. Guest post on popular blogs.
Guest posting is one of the oldest marketing techniques around, and it’s still as effective as ever.
Guest posting requires you to reach out to similar blogs in your niche and then pitch ideas for them to publish to their blog. This is a win-win for the two parties involved — it provides a high-quality, unique piece of content for the blog host, while giving you a backlink to your own website.
However, guest blogging isn’t easy and requires a lot of work. Other than sending outreach emails to the bloggers in your niche, you also need to take the time to craft high-quality guest blog posts.
To do this on a larger scale, you will need to hire freelance writers that can help you write the blog post while you conduct the outreach process.
10. Network on related or similar blogs.
Many bloggers have neglected to leave a comment on other blogs simply because they believe it won’t affect their SEO rankings. And yes — they’re right, it won’t. But the benefits of leaving a comment on another, related blog are still worthwhile.
Leaving a comment on another blog can help you get on the radar of other bloggers in your industry, and begin cultivating relationships within your community.
While admittedly small, this is still a potential avenue for getting your name out there without spending money or sacrificing too much time.
11. Use heat maps.
Creating a website heat map is a great way to review user engagement on a page-by-page level.
Heat maps are a great visual way for you to collect your data into insights that you can use to make your user experience even better. In terms of websites, they show which features users engage with and rank them from a ‘hot’ to ‘cold’ level using appropriate colors.
This can vary from showing elements such as what pages users click on, where they choose to exit, where they scroll, what content they look at, etc.
By using a heatmap, you can better visualize your user’s experience and work toward improving it.
12. Leverage SEO tools to audit and monitor your website performance.
Ultimately, your blog content won’t rise to the top of search engines if you don’t have a healthy website.
You might consider using an SEO tool to conduct an analysis on your website performance and identify areas for improvement to ensure your website is optimized for both users and search engines alike.
Where to Promote Your Blog
Where you promote your blog posts is just as important as how you promote them. In this section, we’ll talk about where you can distribute your content and grow your audience.
Email is a uniquely powerful blog promotion tool. You can use it to cultivate your reader audience as well as connect with industry experts and guest writers.
First, consider starting a blog newsletter to build your list of readers. Include a simple call-to-action (CTA) on your blog for those interested in reading new posts. This is a great way to convert readers into subscribers and, eventually, into paying customers.
Once you build a substantial list, start to segment your subscribers by topic interest. You can decipher these interests based on what blog links each subscriber clicks on, what content offers they download, or what products they buy.
Another way to leverage email for blog promotion is to reach out to people you mentioned or quoted in your content. Not only does this alert them to their name or brand being mentioned, but it gives them an incentive to share your content with their networks. Email, in this case, is also more personal than Twitter, which we’ll discuss next.
Social Media
Social media is a great way to share blog content in a friendly way as well as engage with readers and customers. Twitter is beneficial for content promotion as many professionals are active on the network and can jump into conversations or mention your blog with a short tweet. As you promote your content on Twitter, tag relevant people (including those you mentioned in your blog or may be interested in your post).
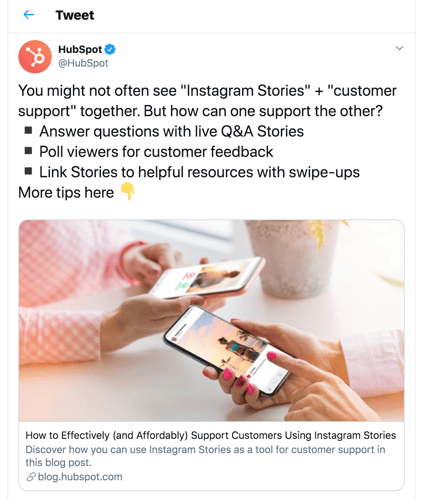
When posting on social media — Twitter included — take note of the timing of your posts. Research when your audience is online and post within those windows. Promote your blog on as many channels as possible, sometimes posting multiple times with the same link. Also, be sure to add context with each link you share, otherwise, your followers may not open and read it.
Website
Your website can be a helpful tool for promoting your blog content. First, make sure your blog is a prominent link on your site menu. Throughout your website, encourage readers to check out your blog. Also, include a subscription CTA on your website so that visitors can sign up to receive new posts.
Ultimately, it’s important to remember that blog promotion won’t happen overnight. You’ll want to lay a strong foundation to ensure your blog is successful in the long-run, rather than relying on tactics that only encourage “quick hits” in traffic.
The very best blog content can’t engage readers and convert customers without a solid promotion plan. Put these blog promotion tactics to work to grow your reader base and convert more customers.

Do Sponsored Instagram Contests Really Work? A Case Study
Do you want more followers on Instagram? Wondering if a sponsored Instagram giveaway contest will work for you? In this article, you’ll find key insights from a case study to help you understand the pros and cons of sponsored giveaways on Instagram. What Are Sponsored Instagram Giveaway Contests? If you’re interested in running an Instagram […]
The post Do Sponsored Instagram Contests Really Work? A Case Study appeared first on Social Media Examiner | Social Media Marketing.
from Social Media Examiner | Social Media Marketing https://ift.tt/3i9EyWn
via socialmediaexaminer
Google Forms y otros formularios de contactos para que los eCommerce capten leads
A estas alturas, los eCommerce deben tenerlo claro: los leads son oportunidades de negocio. Una forma eficiente de captarlos es a través de formularios de contacto como los de Google Forms.
Cuando alguien proporciona su correo electrónico o cualquier dato se marca el inicio de una relación. En el mejor de los casos, esta se transformará en la conversión deseada.
Pero no es tan sencillo recabar datos. Es necesario inspirar confianza en el lead potencial, de esta forma será más factible que proporcione su correo electrónico.
Lo único que tienes para convencerlo es la imagen de tu formulario, página web y redes sociales.
Es por eso que te recomendamos poner especial atención en los formularios de contacto. Básicamente, deben cumplir estos 3 requisitos:
- #1. Deben verse profesionales y tener un diseño sencillo: incluir colores atractivos, tipografías claras y textos precisos. Puedes incluir imágenes pero cuida que no saturen.
- #2. Tienen que ser cortos: los formularios infinitos corren el gran riesgo de perder la atención del usuario.
- #3. Es necesario dejar claro al visitante web qué beneficio obtendrá si comparte sus datos.
Si necesitas inspiración, mira lo que hicimos en Socialancer.
A continuación, te invitamos a leer cómo puedes hacer formularios de contacto con Google Forms y otras 4 herramientas más.
> > Lead Marketing: 6 ideas y herramientas para la captación de leads.
Formularios de Contacto gratis con Google Forms
Crear formularios de contacto en Google Forms es tan fácil como hacer un documento de Word.
El que lo crea necesita una cuenta de gmail pero quien lo rellena, no. Tiene varias plantillas o puedes trabajar con un lienzo blanco.
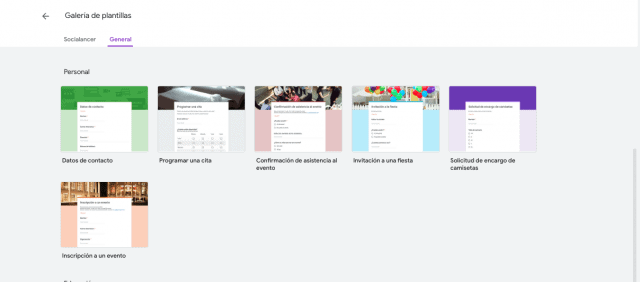
Si lo único que quieres es recabar datos, recomendamos utilizar la plantilla que se llama Datos de Contacto, ya que solicita cosas muy básicas:
- Nombre.
- Correo electrónico.
- Teléfono.
- Dirección.
- Deja abierta la posibilidad de que el lead agregue comentarios.
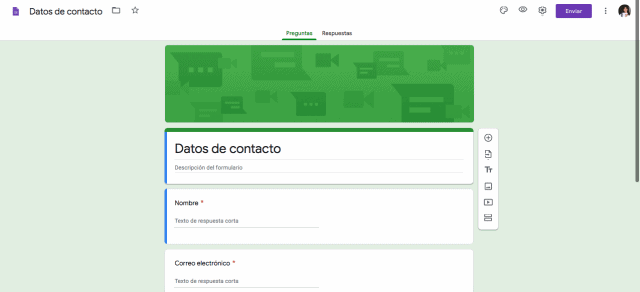
Lo interesante es que puedes personalizar la plantilla y agregar tus propios textos, tipografías, fotos e, incluso, video.
El formato de cada pregunta también es personalizable. Puedes seleccionar una respuesta cerrada del tipo “Sí” o “No”, una respuesta corta o un párrafo.
También puedes determinar cuáles preguntas es obligatorio contestar para que se pueda enviar el formulario.
Esto te conviene evaluarlo bien. Hay dos aspectos en ese sentido:
- Si es obligatoria puede provocar que alguien se desaliente y no deje sus datos.
- Si es opcional, puede ser que no te sirva ese lead porque le faltan aspectos básicos como el email, por ejemplo.
Te recomendamos poner como respuestas obligatorias solo los datos que te sean esenciales. Si no, será un lead desperdiciado.
¿Cómo insertar Google Forms en tu sitio web?
Compartir los formularios de contacto de Google Forms es sencillísimo. Es posible integrarlos a tu sitio web a través de un fragmento de código o difundirlos a través de una url, ya sea que la agregues a tus redes sociales, la envíes por mail o por grupos de WhatsApp.
Para hacerlo debes pulsar el botón de Enviar (en la captura de pantalla está en color morado)y se desplegarán las opciones.
Al final, Google Forms te dará los datos de los leads organizados en una hoja de Excel. Tú podrás exportarlos y agregarlos a la herramienta que más te funcione, por ejemplo, tu plataforma de email marketing.
> > > Todo sobre los formularios de Google.
Recomendación de Privacidad con Google Forms
Las legislaciones en materia de protección de datos obligan a los eCommerce a ser claros con los usuarios que rellenan formularios de contacto. Los leads tienen el derecho a saber qué se hará con su correo electrónico.
Nosotros recomendamos agregar al final del formulario de contacto una leyenda que explique el tratamiento de los datos.
En ese caso, podrías configurar para que sea una pregunta de respuesta cerrada: “Sí acepto la política de tratamiento de datos” o “No acepto la política de tratamiento de datos”.
Para hacerlo, debes seleccionar la opción de respuesta: “Con Varias Opciones”.
También deberás incluir una URL hacia una página donde expliques a fondo tu política de privacidad.
Esa pregunta deberá tener carácter obligatorio. Te compartimos captura de pantalla para que quede más claro cómo hacerlo.
Wishloop para integrar Formularios de Contacto con Mailchimp
Wishloop es una herramienta que permite realizar PopUps para la captación de leads a través de formularios de contacto.
Trabaja con plantillas predeterminadas que se personalizan. Utiliza el sistema de soltar y arrastrar, así que no es difícil crear algo con calidad profesional.
Hay más de 30 elementos que le darán dinamismo a tus formularios. Para ver todas las imágenes, haz clic en la flecha.


En esta herramienta entienden que los visitantes a un sitio eShop no precisamente están listos para hacer la compra. Por ello, permiten diseñar un camino.
A partir de que una persona llena el formulario de contacto, podrás desplegar una estrategia con contenido desencadenante personalizado. Por ejemplo, puedes enviar cupones de descuento.
Otro aspecto a favor es que tienen plantillas optimizadas para verse bien en dispositivos móviles.
De hecho, puedes generar campañas específicas sin que pasen por la versión de escritorio.
Otra cosa interesante es que te da estadísticas en tiempo real tanto de las impresiones de que obtuvieron tus formularios de contacto como de las conversiones.
Esta información no la proporciona Google Forms..
Cada formulario de Wishloop se puede insertar en:
- Sitios web propios o en banners de publicidad.
- Redes Sociales.
- Correo electrónico.
- Webinars.
- Campañas de Ads.
¿Qué hace Wishloop con los datos de los formularios de contacto?
Los datos que captes a través de los formularios de contacto de Whisloop tienen dos opciones para extraer los datos:
- Almacenarlos en una base de datos interna.
- Integrarlos a plataformas de email marketing como MailChimp, Aweber, GetResponse, entre otras.
> > > Email marketing gratis: plataformas para no perderte en un mar de leads.
Ejemplos de Formularios de Contacto con PopUp Domination
PopUp Domination es un software pionero en la industria de los formularios de contacto para la captación de leads.
Ellos trabajan con ventanas emergentes que saltan en los sitios web.
Como muestra, adjuntamos la captura de pantalla con el PopUp que salta a los 5 segundos de estar navegando en la página de PopUp Domination.
Es sencillo, concreto y si das tus datos te permiten descargar una plantilla. Ese es el gancho para captar leads.
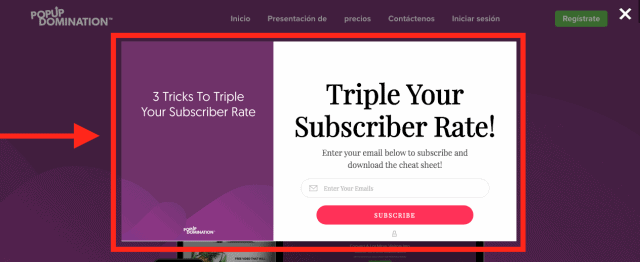
Antes de seguir, queremos comentarte que desde nuestro enlace tienes una prueba gratuita de 14 días para que conozcas los formularios online que PopUp Domination maneja.
Esta herramienta tiene varios tipos de plantillas.
Lo interesante de los PopUps es que los puedes programar. Por ejemplo, que se activen a un determinado tiempo de que alguien entra a tu página o, mejor, que salten cuando están a punto de abandonarla.
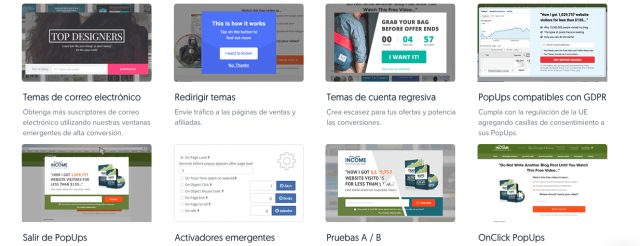
Los usuarios promedio de esta aplicación incrementan considerablemente su captación de correos cuando utilizan PopUps.
Estas ventanas emergentes se integran a cualquier sitio web y proveedores de correo electrónico.
Por último, queremos destacar sus planes. Todos los que se suscriben tienen acceso a las mismas herramientas, el precio varía en función de las vistas emergentes.
Esto quiere decir que pagas solo por lo que utilizas.
Quizitri: formularios de contacto para captar MÁS leads
En Internet nos encontramos con el siguiente testimonio: un agente inmobiliario utilizó los formularios de contacto de Quizitri y en solo 3 días captó alrededor de 500 leads súper orientados a su nicho.
Esta herramienta permite crear encuestas Online e insertarlas en los sitios web y redes sociales.
Hacer encuestas es una vía muy poderosa para captar leads. La razón es simple: nos gusta opinar.
El usuario se sentirá entusiasmado expresando sus intereses y al final le será más sencillo compartir su correo electrónico.
Para demostrarlo, la gente de Quizitri realizó un experimento en el nicho vegano. Realizó un formulario web con dos preguntas:
- ¿Cuánto tiempo llevas siendo vegano?
- ¿Crees que estás obteniendo los suficientes beneficios?
De acuerdo a las respuestas, enviaba a cada usuario a determinados mensajes de registro.
Con estas dos preguntas aumentaron la base de leads en un 70%. Recalcamos, solo dos preguntas.
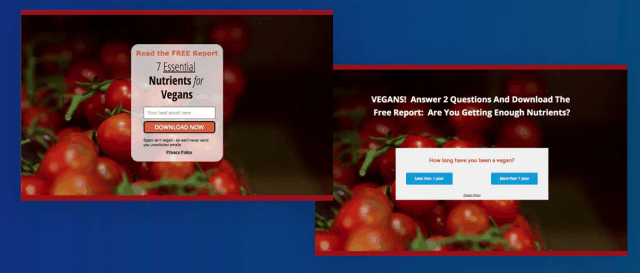
Justo eso es lo interesante de Quizitri, que permite segmentar el formulario de registro de datos.
Por ejemplo, el agente inmobiliario del que hablábamos al principio también hizo dos preguntas: ¿Quieres vender una casa?, ¿Quieres comprar una casa?
Como el formulario de registro estaba personalizado de acuerdo a la respuesta, fue más fácil crear confianza en los usuarios para que dejaran sus datos.
RGDP con Quizitri
Cada plantilla de Quizitri permite agregar la política de privacidad de la empresa y el tratamiento de los datos.
Además, se integra con cualquier herramienta de email marketing para facilitar el trabajo de envío de campañas.
> > > Quizitri, el creador de encuestas para conseguir leads y ventas
Formularios de Contacto WordPress
Si tu sitio web está realizado en WordPress, puedes crear formularios de contacto fácilmente con algunos plugins.
Un plugin es un complemento que se agrega a tu editor de WordPress y tiene una serie de funciones y aplicaciones.
Uno de los más descargados es Ninja Forms. Hay que pagarlo, no es gratis.
Es muy intuitivo de usar y las plantillas permiten crear formularios con aspecto profesional aunque seas principiante en la materia.
Se integra con diferentes autorespondedores y si necesitas hacer formularios para ventas, es posible agregar métodos de pago.
Contact Form 7 gratis para formularios de contacto
Este plugin para hacer formularios de contacto en WordPress es gratuito, sin embargo, agradecen las donaciones que los usuarios puedan hacer. Ojo, no es obligatorio para usarlo.
Cuando lo descargas aparece en la barra izquierda de tu editor de WordPress.
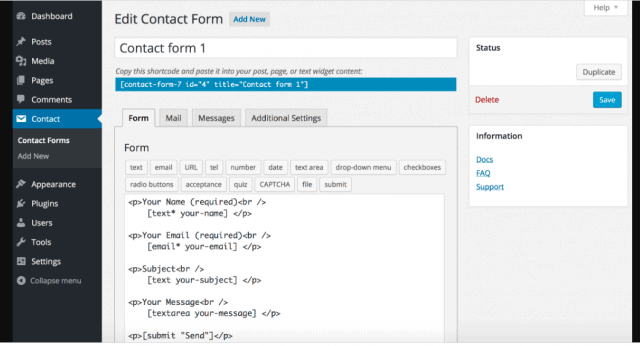
Permite gestionar varios formularios de contacto. Estos se pueden personalizar fácilmente.
Otra cosa interesante es que los formularios son compatibles con envíos por Ajax, CAPTCHA, filtrado de spam, Akismet y varios otros.
El punto en contra es que para guardar los mensajes enviados en la base de contactos necesitas instalar otro plugin, aunque también es gratuito.
Conclusión de Formularios de Contacto
Esperamos que después de leer este artículo te haya quedado la sensación de que agregar formularios de contacto a tu sitio web o redes sociales para captar leads es algo sencillo y barato. Hay algunas soluciones que, incluso, son gratis.
Ya que solucionaste la parte técnica, es decir, con qué herramienta hacerlos, debes centrarte en el contenido.
Te recordamos nuestras recomendaciones: hazlos claros, cortos, atractivos y especifica qué obtendrá el usuario si se suscribe.
Te deseamos mucho éxito y no olvides suscribirte al blog de Socialancer para no perderte ninguno de los contenidos que publicamos cada semana.
from Socialancer https://ift.tt/3jVldso
via
How 6 Brands Use Instagram Live in Their Marketing Strategy
83% of Instagram users say they find new products or services by browsing the platform. So, how can you ensure your brand attracts new audiences on Instagram?
One way is with Instagram Live.
The live feature is part of Instagram Stories and allows you to stream video and engage with followers in real-time. When a user goes live, Instagram notifies their followers and highlights their profile picture in the Stories section, making it appear first in line on their followers’ feeds.
Live video can be an effective tool to highlight your business offerings and host engaging events for users to join. In fact, 82% of people prefer live video over social posts from a brand according to a survey hosted by Vimeo Livestream and New York Magazine!
But enough from me — now, I’ll let you take inspiration from those already using Instagram Live to grow their brand.
How 6 Brands Use Instagram Live
1. Global Citizen
Global Citizen is a non-profit organization with a mission to end extreme poverty by 2030. Earlier this year, the brand used Instagram Live to promote their #TogetherAtHome campaign — an effort to encourage social distancing in order to slow the spread of coronavirus.
To attract viewers, Global Citizen partnered with numerous celebrities to host an at-home concert series. Below is their Instagram Live collaboration with H.E.R., a musical artist.
In this livestream, H.E.R. advocated for quarantine, performed a few songs, and responded to live comments to lift spirits during difficult times. Besides the many heart-eye emoji reactions, viewers also shared comments such as, “This song brings me so much peace.” and “Music does heal.” to express their enjoyment.
Our socially-distant world also helped to make the #TogetherAtHome campaign popular because it was able to bring people together virtually.
The takeaway for your business: Research influencers in your industry to collaborate with and host Instagram Live takeovers. By doing so, your business will likely reach new audiences who are more willing to learn about your brand. You can also interact with the viewers in real-time in the comments or have your guest share a message about your business.
Lastly, consider tying Lives to current events to make your livestreams relevant to national or global conversations. These actions will boost your brand awareness.
2. Barry’s Bootcamp
Barry’s Bootcamp is a worldwide fitness studio offering workout classes. The company has been using Instagram Live to their advantage by sharing high energy workout sessions.
The live feature works well here because it can be more engaging for viewers to follow along with a live class rather than watching a pre-recorded session. In Live, they can also see how many other viewers are tuning in and watch their reactions to the class. The instructors also offer motivational words of encouragement to keep the energy going.
For Barry’s Bootcamp, live fitness classes align with their company brand and mission while providing valuable content to fitness enthusiasts. This helps to increase their brand equity and capture future converting customers.
The takeaway for your business: Instagram Live can also be used to host live workshops from your business. Lives make it easy for users to follow along and can serve as something people look forward to in their day.
Think of Instagram Lives as a way to create a virtual community of people coming together to do something. Similarly, a wellness company may host live meditation sessions. Any activity is up for grabs as long as it supports the business vision.
3. Chipotle
Chipotle is a fast food chain serving Mexican food and the company uses Instagram Live to share tasty recipes. In the below example, Chipotle’s executive chef shares how to make margaritas for Cinco de Mayo.

In this Live, Chef Chad takes viewers step-by-step through his margarita-making process and explains his thought process behind each step. This tutorial is one that viewers can trust and learn from since it comes from a top chef at the restaurant, especially if they’re already a fan of Chipotle.
It’s also worth noting how this Instagram Live celebrates Cinco de Mayo, which naturally ties into the restaurant’s Mexican cuisine. Chipotle leveraged this holiday as a great opportunity to provide entertaining and informational content.
The takeaway for your business: Ask yourself: What can we, as a business, teach members of our audience? Depending on the answer to that question, Instagram Live could be a great place to educate your audience while responding to their feedback and questions in real-time.
From the above Chipotle example, you can also better understand how acknowledging well-known events and holidays (e.g. cultural events, sports, and awards seasons) can work in your favor for this type of marketing strategy.
4. Bon Appetit
Speaking of food, Bon Appetit is a magazine all about cooking and recipes. Recently, Bon Appetit used Instagram Live as an opportunity to host a virtual dinner party with various celebrity guests. Each guest pairing was also creatively named after courses of a meal, from appetizer to digestif. Below is a screenshot from dessert:

Throughout the series, the chefs and guests carried out relaxed and casual conversations about anything and everything (you know how it goes at a dinner party). Bon Appetit was able to create a laid-back, yet engaging atmosphere. For those watching, this could’ve been an immersive experience to feel as if they were chatting with their friends over dinner.
The takeaway for your business: Instagram Live doesn’t have to be formal. Let your guard down and show your authenticity. Bon Appetit’s Dinner Party concept is both fun and creative — brainstorm potential themes you may be able to incorporate into your livestreams to achieve the same results.
Moreover, creating a series of Lives will incentivize people to follow your account and stay tuned for new content. Also, take advantage of Instagram’s guest feature to add someone else into your brand’s conversation.
5. Chewy
If you prefer more structured programming, then look to Chewy, an online retailer for all pet essentials, for inspiration. Targeting pet owners, Chewy provides educational content on how to care for a variety of pets. An example of this is their Vet to Vet Live:
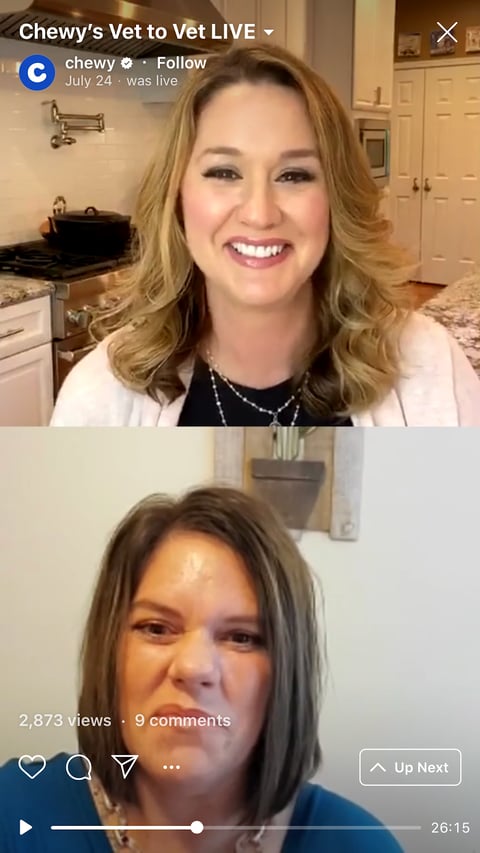
These Q&A sessions provide valuable insight from experts for pet owners. Pet parents can also input their questions in the comment section for instant expert advice. As a brand, these informational videos help Chewy establish itself not only as a place to shop, but also as a resource they can turn to for any pet-related needs.
The takeaway for your business: Using Instagram Live to conduct Q&As and interviews can provide insightful tips and advice for your audience. This educational content will be appreciated by your audience members who are eager to learn and help you increase customer loyalty. Additionally, listening to a conversation between multiple people, and watching that interaction live, can also be more enjoyable than a one-man show.
6. Origins
Origins is a cosmetics company creating products from naturally-derived ingredients. Origins aligns Instagram Live with their brand by showcasing products and hosting conversations about skincare.

As shown in the screenshot, the Origins representative presents one of their products up close to the camera. This is important because products online often only show the packaging of the product, so revealing what the product itself looks like lends potential customers a better understanding of how they might expect the product to look and feel.
The two hosts also share what they like about the products and how they use it in their day-to-day lives. Sharing their stories provokes viewers to consider how they can incorporate the product into their own routines, which ultimately pushes them closer to purchase.
The takeaway for your business: Live is the perfect place for product demos and to show customers what they can expect from your business. This can resolve any hesitations related to making a purchase. It also offers a place for experts and current users to answer any concerns about the product a prospect may have. Assess your current offerings and create a live session to discuss how the customer can use and benefit from your products.
No matter which industry your business is in, all successful Lives have one theme in common — they provide valuable content for viewers that’s entertaining and/or educational.
Now that you know how other companies are marketing with Instagram Live, see the exact steps you need to start your next Live.

How to Write Facebook Ads That Reduce the Barrier to Purchase
Need to move people to action? Wondering how to improve your sales with Facebook ad copy? In this article, you’ll discover how to create Facebook and Instagram ads that generate sales. #1: How to Write Discount Ad Copy to Prompt Purchases Discounts are simple but effective. You’ve likely seen an ad in your Facebook news […]
The post How to Write Facebook Ads That Reduce the Barrier to Purchase appeared first on Social Media Examiner | Social Media Marketing.
from Social Media Examiner | Social Media Marketing https://ift.tt/3bzOJ3O
via socialmediaexaminer
9 Guidelines for Exceptional Web Design, Usability, and User Experience
When it comes to designing or redesigning a website, it’s easy to get hung up on the aesthetics.
That shade of blue doesn’t look right…
Wouldn’t it be cool to have the logo on the right side of the screen?
How about we put a giant animated GIF in the middle of the page?
However, if you’re truly trying to accomplish something with your online business (e.g., brand awareness, lead generation, etc.), you’ll need to focus on more than just how your website looks.
In a world where folks have more than a billion websites they can potentially land on, you need to make sure yours is designed for usability, how easy your website is to use, and user experience (UX), how enjoyable it is to interact with your website.
Now, you could spend years studying the ins and outs of usability and UX. But for the sake of giving you a jumping-off point, we’ve assembled a list of the fundamental guidelines you can apply to your next website redesign or website launch. Then, we’ll review 10 features you’ll need on your site to put these recommendations into practice. Let’s dive in.
1. Simplicity
While the appearance of your website is certainly important, most people aren’t coming to your site to evaluate how slick the design is. They want to complete some action, or to find some specific piece of information.
Therefore, unnecessary design elements (i.e., those which serve no functional purpose) will only overwhelm and make it more difficult for visitors to accomplish what they’re trying to accomplish.
From a usability and UX perspective, simplicity is your best friend. If you have all the necessary page elements, it’s hard to get too simple. You can employ this principle in a variety of different forms, such as:
- Colors: Basically, don’t use a lot. The Handbook of Computer-Human Interaction recommends using a maximum of five (plus or minus two) different colors in your design.
- Typefaces: The typefaces you choose should be highly legible, so nothing too artsy and very minimal script fonts, if any. For text color, again, keep it minimal and always make sure it contrasts with the background color. A common recommendation is to use a maximum of three different typefaces in a maximum of three different sizes.
- Graphics: Only use graphics if they help a user complete a task or perform a specific function (don’t just add graphics willy-nilly).
Here’s a great example of a simple but effective homepage design from HERoines Inc:
2. Visual Hierarchy
Closely tied to the principle of simplicity, visual hierarchy means arranging and organizing website elements so that visitors naturally gravitate toward the most important elements first.
Remember, when it comes to optimizing for usability and UX, the goal is to lead visitors to complete a desired action, but in a way that feels natural and enjoyable. By adjusting the position, color, or size of certain elements, you can structure your site in such a way that viewers will be drawn to those elements first.
In the example below from Spotify, you can see that the main header “Listening is everything” sits atop the visual hierarchy with its size and page position. It draws your eye to their mission before anything else. This is followed by the “Get Spotify Free” CTA, which prompts action. Users can click this CTA, or scan the menu items above for more actions.
3. Navigability
Planning out intuitive navigation on your site is crucial to help visitors find what they’re looking for. Ideally, a visitor should land on your site and not have to think extensively about where to click next. Moving from point A to point B should be as frictionless as possible.
Here are a few tips for optimizing your site’s navigation:
- Keep the structure of your primary navigation simple (and near the top of your page).
- Include navigation in the footer of your site.
- Consider using breadcrumbs on every page (except your homepage) so users remember their navigation trail.
- Include a search bar near the top of your site so visitors can search by keywords.
- Don’t offer too many navigation options per page. Again, simplicity!
- Include links within your page copy, and make it clear where those links go.
- Don’t make users dig too deep. Try making a basic wireframe map of all your site pages arranged like a pyramid: Your homepage is at the top, and each linked page from the previous forms the next layer. In most cases, it’s best to keep your map no more than three levels deep. Take HubSpot’s site map, for example.
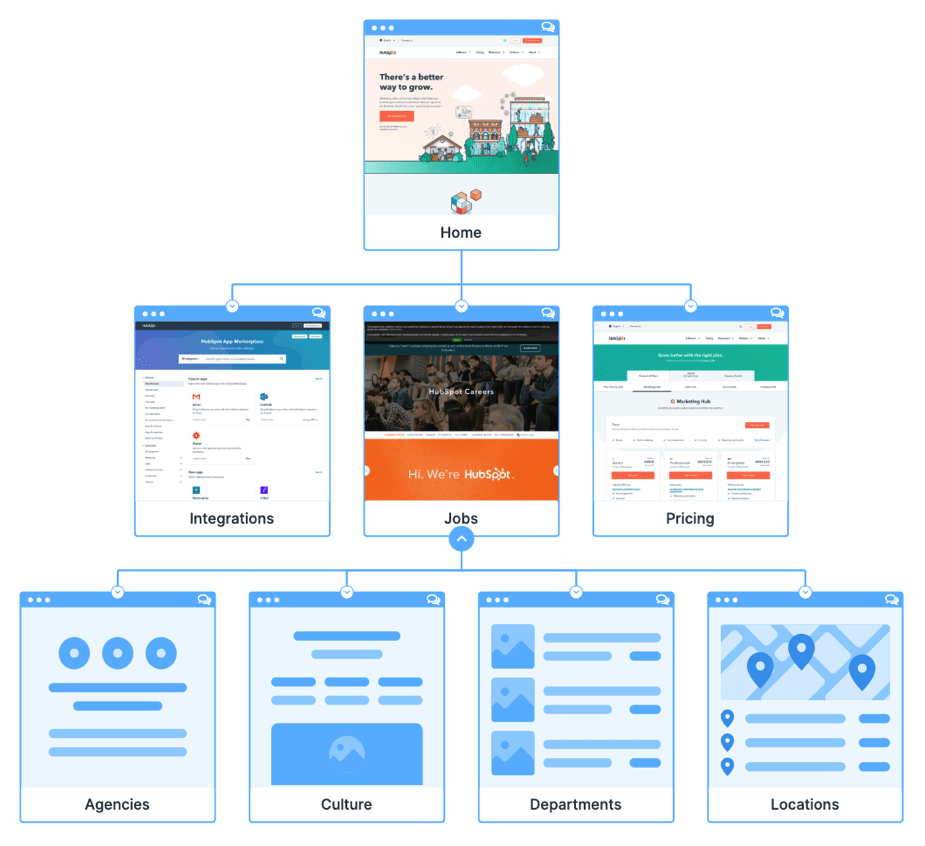
One more pointer: Once you’ve settled on what your site’s main (top) navigation will be, keep it consistent. The labels and location of your navigation should remain the same on every page.
This leads us nicely into our next principle…
4. Consistency
In addition to keeping your navigation consistent, the overall look and feel of your site should be similar across all of your site’s pages. Backgrounds, color schemes, typefaces, and even the tone of your writing are all areas where consistency has a positive impact on usability and UX.
That’s not to say every page should follow the same layout. Instead, create different layouts for specific types of pages (e.g., landing pages, informational pages, etc.). By using those layouts consistently, you’ll make it easier for visitors to understand what type of information they’re likely to find on a given page.
In the example below, you can see that Airbnb uses the same layout for all of its “Help” pages, a common practice. Imagine what it would be like from a visitor’s perspective if every “Help” page had its own, unique layout. There would probably be a lot of shoulder shrugging.
5. Responsivity
According to Statista, 48% of page global views were from mobile devices like smartphones and tablets. And according to our research, 93% of people have left a website because it didn’t display properly on their device.
The takeaway here: To provide a truly great user experience, your site has to be compatible with the many different devices that your visitors are using. In the tech world, this is known as responsive design.
Responsive design means investing in a highly flexible website structure. On a responsive site, content is automatically resized and reshuffled to fit the dimensions of whichever device a visitor happens to be using. This can be accomplished with mobile-friendly HTML templates, or by creating a special mobile site.
Ultimately, it’s more important to provide a great experience across different devices than look identical across those devices.
Alongside mobile-friendliness, it’s worth your while to test your website’s cross-cross browser compatibility. In all likelihood, you’ve only viewed your site on one web browser, be it Google Chrome, Safari, Firefox, or something else.
Now is the time to open your pages on each of these browsers and evaluate how your elements appear. Ideally, there won’t be much difference in presentation, but you can’t know for sure until you see for yourself.
6. Accessibility
The goal of web accessibility is to make a website that anyone can use, including people with disabilities or limitations that affect their browsing experience. As a website designer, it’s your job to think of these users in your UX plan.
Like responsiveness, accessibility applies to your entire site: structure, page format, visuals, and both written and visual content. The Web Content Accessibility Guidelines (WCAG), developed by the Web Accessibility Initiative and the World Wide Web Consortium, set the guidelines for web accessibility. In a broad sense, these guidelines state that websites must be:
- Perceivable: Visitors are aware of the content on your site.
- Operable: The functionality of your website should be possible in different ways.
- Understandable: All content and alerts can be easily understood.
- Robust: Your website is usable across different assistive technologies, devices, and browsers.
For a deeper dive into this topic, see our Ultimate Guide to Web Accessibility.
7. Conventionality
A big challenge in web design is balancing originality with your expectations. Most of us are expert internet users, and there are specific conventions we’ve grown accustomed to over time. Such conventions include:
- Placing the main navigation at the top (or left side) of a page.
- Placing a logo at the top left (or center) of a page.
- Making the logo clickable, so it always brings a visitor back to the homepage.
- Having links and buttons that change color/appearance when you hover over them.
- Using a shopping cart icon on an ecommerce site. The icon also has a number badge signifying the number of items in the cart.
- Ensuring image sliders have buttons users can click to manually rotate slides.
While some might opt to throw these out the window for the sake of uniqueness, this is a mistake. There’s still plenty of room for creativity within the constraints of web conventionality.
Let’s briefly consider another field of design, architecture. Building codes are put in place so that folks can easily and safely use indoor spaces. An architect doesn’t complain about these codes or violate these designs because, aside from being against the law, they assure safety and comfort. It doesn’t matter how dazzling the building appears — if you trip on uneven stairs, or you can’t get out in a fire, you’re going to hate that building.
In the same way, you can craft a memorable experience while meeting user expectations. If you violate what users anticipate, they may feel uncomfortable or even frustrated with your site.
8. Credibility
Sticking to web conventions lends your site credibility. In other words, it increases the level of trust your site conveys. And if you’re striving to build a site that provides the best user experience possible, credibility goes a long way.
One of the best methods to improve your credibility is to be clear and honest about the product or service you’re selling. Don’t make visitors dig through dozens of pages to find what it is you do. Be up-front on your homepage, and dedicate some real estate to explaining the value behind what you do.
Another credibility tip: Have a pricing page, also linked on the homepage. Rather than force people to contact you to learn more about pricing, list your prices clearly on your site. This makes your business appear more trustworthy and legitimate.
Here’s an example of an effective pricing page from the Box website:
9. User-Centricity
At the end of the day, usability and user experience hinge on the preferences of the end-users. After all, if you’re not designing for them, who are you designing for?
So, while the principles detailed in this list are a great starting point, the final key to improving the design of your site is to conduct user testing, gather feedback, and implement changes based on what you’ve learned.
And don’t bother testing usability by yourself. You’ve already invested a lot of time into your design, which brings your own biases into the equation. Get testers who have never seen your site before, the same as any first-time visitor.
Here are a few user testing tools to get you started:
- Website Grader: Our free tool evaluates your website based on several factors: mobile, design, performance, SEO, and security. It then offers tailored suggestions for improvement. You can learn more about Website Grader in our dedicated blog post.
- Crazy Egg: Track multiple domains under one account and uncover insights about your site’s performance using four different intelligence tools — heat map, scroll map, overlay, and confetti.
- Loop11: Use this tool to easily create usability tests — even if you don’t have any HTML experience.
- The User Is Drunk: Pay Richard Littauer to get drunk and review your site. Don’t believe me? We tried it.
For even more helpful options, see our list of the best user testing tools.
Hopefully, these guidelines are useful in informing the structure of your web pages and website as a whole. But, how does one put these guidelines into practice? In the next section, I’ll run down the essential page elements that you should strongly consider including in your design plan.
1. Header and Footer
The header and footer are a staple of just about every modern website. Try to include them on most of your pages, from your homepage, to your blog posts, and even your “No results found” page.
Your header should contain your branding in the form of a logo and organization name, menu navigation, and maybe a CTA, and/or a search bar if well-spaced and minimal. On the other end, your footer is where many users will instinctively scroll for essential information. In your footer, place contact information, a signup form, links to your common pages, legal and privacy policies, links to translated versions of your site, and social media links.
2. Menu Navigation
Whether it’s a list of links across the header or a tidy and compact hamburger button in the corner, every website needs a guide for navigation positioned at the top of at least your homepage and other important pages. A good menu limits the number of clicks to reach any part of your website to just a few.
To reduce clutter, you might consider making some or all menu options a dropdown menu with links within it, as can be seen on HubSpot’s homepage.
3. Search Bar
In addition to menu navigation, strongly consider placing a search bar at the top of your pages, so users can browse your site for content by keyword. If incorporating this functionality, make sure your results are relevant, forgiving of typos, and capable of approximate keyword matching. Most of us use a high-quality search engine every day, be it Google, Amazon, YouTube, or elsewhere. These all set the standard for your own site search.
4. Branding
Remember the conventions we’ve discussed? One that you see practically everywhere is a logo in the top left corner. On first landing, many visitors’ eyes will instinctively shift to this region to check they’re in the right place. Don’t leave them hanging.
To reinforce this notion, incorporate your company branding into every element you add, piece of content you post, and color scheme you create. That’s why we recommend establishing brand guidelines if you haven’t already — check out our style guide for a reference.
5. Color Palette
Color choice plays a major role in your site’s usability and UX as well. This decision tends to be more subjective than other requirements in this list. But, like everything else we’ve discussed, try to simplify — limit your color selection to 3-4 prominent colors at most.
Starting a color palette from scratch can be surprisingly difficult the first time. We seem to intuitively pick up on which colors work well together and which don’t, but we stumble when trying to pick from the infinite combinations available.
The solution? Try a color palette that’s been shown to work on other websites. Take influence from your favorite sites, and see our list of our favorite website color schemes to get started.
6. Headers
Headers are key to establishing the visual hierarchy we discussed earlier, especially on text-heavy pages. As users skim your pages what you need, a clear and to-the-point header alerts readers to stop scrolling after finding what they want. Use only as many headers as there are distinct sections of your page, as too much blown-up and bolded text will dampen this effect.
7. Clear Labels
Whenever a user takes an action on your website, it must be obvious exactly what they’re doing and/or where they’re going. All buttons should have clear text or an icon to precisely and concisely signal their purpose. The same goes for in-text links and widgets (simple interactive elements, like dropdowns and text forms).
For example, a button linking to a pricing page should just read “Pricing” — anything beyond that (e.g., “See our prices”, “Check out the pricing page for a deal”) is superfluous. A search bar/button only needs a search glass icon (🔍), and perhaps also the word “Search”, to denote its purpose.
User testing can be a major help here. While you yourself know what all of your interactive page elements do, the same can’t be said for a new user. Testing will give valuable insight into what users think your labels mean beyond your own perspective.
8. Visuals and Media
When incorporating static images, gifs, videos, and other media into your pages, remember to be consistent and intentional in your choices. These elements will draw attention over most other text and will likely stay in users’ minds, so choose wisely.
Here’s just one example of effective media on a homepage. Notice how every image complements the page aesthetic and supports the offer of personalized fitness training with results.

Also, all images and videos should be optimized for search engines and include descriptive alt text for accessibility.
9. Calls to Action (CTAs)
Having a pleasing website is great, but how do you know whether your visitors are actually doing what you want? Are they engaging with your content? This is where CTAs come into play.
A CTA is any page element that prompts user action. The action could be adding a product to a card, downloading a content offer, or signing up for an email list. Make your CTA elements prominent in the visual hierarchy (remember our Spotify example), but not intrusive or distracting like many click-through ads tend to be.
If you need ideas for sleek CTAs that drive more conversions, see our CTA examples list.
10. Whitespace
That’s right, sometimes it’s about the elements you don’t include. After reading these guidelines and requirements, you may feel tempted to stuff your pages with all the bits and bobs needed for a flawless UX. Don’t forget that your viewers need room to digest all this new info, so give your elements room to breathe.
But, how much whitespace should you have? That’s another personal call, and varies from site to site. So, user testing is handy here as well. What are people focusing on? Do they feel overwhelmed with the density of content? Once again, it all ties back to our first guideline, simplicity.
Design that Puts Users First
Indeed, web design is largely subjective — your website’s look and experience isn’t going to please everyone. However, there are also tried-and-true UX principles that, when carefully considered and incorporated, help visitors feel more at home.
According to Amazon Web Services, 88% of website visitors are less likely to return to a website after a poor experience. And how could you blame them? We’ve surely all been there.
So, as a final bit of usability/UX wisdom, start caring more! Imagine yourself into the shoes (or, more accurately, browser windows) of your visitors, and keep them in mind every step of the design process.

TikTok for Business: Why Marketers Should Consider TikTok
Wondering how to use TikTok for business? Looking for proven advice that goes beyond basics? To dig deep into TikTok for marketing, I interview Michael Sanchez on the Social Media Marketing Podcast. Michael is a TikTok marketing expert who specializes in helping consumer-focused brands increase their reach and exposure on TikTok. He also founded TikTok […]
The post TikTok for Business: Why Marketers Should Consider TikTok appeared first on Social Media Examiner | Social Media Marketing.
from Social Media Examiner | Social Media Marketing https://ift.tt/31UnHky
via socialmediaexaminer
How to Launch a Virtual Conference for Lead Generation and Customer Acquisition: A Step-by-Step Guide
When we say “virtual conference,” we don’t just mean webinars. We mean interactive, live panels, and microsites dedicated to the single purpose of promoting one event with various sessions a person can “attend.”
Virtual conferences have become a popular medium to develop and reach large audiences. From marketing to recruiting and sales to education, businesses in various industries have realized hosting online events are far cheaper than an in-person event — thus making it cheaper to build awareness around a brand.
We’re going to get into a lot, but by the end of this post, you’ll see the value in hosting a virtual conference and know how to organize and host your own event. You’ll have another medium to accelerate brand awareness, generate more leads, and develop authority as an industry leader.
In 2017, I helped launch Inbound Sales Day here at HubSpot, and I’m here to teach you how it’s done. Continue reading to download my project management templates and emails I used to book speakers — all available for free.
Table of Contents
1) What is a virtual conference?
2) Why should you host a virtual conference?
3) A Virtual Conference by HubSpot
4) How to plan a virtual conference
Set the vision
Speaker outreach
Creation of assets
Promotion
Go live
Analysis
5) Virtual Conference Takeaways and Tips
What is a virtual conference?
Imagine a conference. There are dozens of rooms, booths with vendors trying to sell you their product, and a lot of people walking around. You might run into some very influential leaders in your industry, and you expect to see people on stage sometime during the event. You’re excited to hear them share lessons and tips they’ve learned from their own experience and journey to success.
Now, imagine a similar experience — but without having to leave your desk.
You log into an “event” online, where you can meet and interact with people through messaging platforms. You go into “rooms” (aka web pages) where you can watch speakers present their knowledge in the form of a recorded video.
It’s a simple concept: Get the content you would receive at a conference on your own time, when it’s convenient for you. It aligns perfectly with the culture and popularity of on-demand services, such as:
Lyft, with on-demand car rides
Drizly, with on-demand alcohol
Soothe, with on-demand massages
Virtual conferences, with on-demand quality content and insights about the industry.
Virtual events began in 1993, presented by Alan Saperstein and Randy Selman. They started by videotaping trade show exhibitors booths and attaching the video to HTML floor maps. These events have become more popular among marketers for their lower cost and effort to produce.
Here’s an example of an HTML floor map:
Examples of virtual events include:
- Inbound Sales Day, hosted by HubSpot
- Digital Agency Day, hosted by HubSpot and Unbounce
- Sales Acceleration Summit, hosted by InsideSales
- Digital Sales Engine, hosted by Sales For Life
You might be thinking, “There’s no way these events were produced by a small team.”
That’s fair. But I can tell you that I coordinated and launched Inbound Sales Day, a full-day virtual event with over 10 hours of video that garnered over 15,000 registrations globally. And I did most of it by myself in only three months. For a comparison, the team that organizes HubSpot’s live INBOUND event has over 10 people involved in planning the event for the entire preceding year.
It’s possible to host and launch one of these things, even with a small team, but why should you host a virtual conference in the first place? Why not just host a physical event instead?
There are numerous benefits to hosting online events. Let’s dive in.
Why should you host a virtual conference?
Consider some of the reasons you’d host a conference, either virtual or in-person:
- To grow awareness for your business. Depending on your market, there may already be competitors or other companies targeting the same target audience as you. You can use an an online conference as a means of partnering with those other companies.
- To generate leads.
- To acquire new customers.
- To create a revenue stream from sponsorships. People host these conferences strictly as a revenue stream. (Curious how? Sam Parr explains how he made a profit from hosting Hustle Con.)
- To build relationships with influencers.
Below are expenses to consider for a physical event (based on a 400-person hosted by Hustle Con):
- Venue ($5,000)
- Vendors, i.e., caterer, bartender, decorator, photographer, videographer, etc. ($10,000)
- Equipment rental ($2,000)
- Licenses and permits (dependent on venue)
- Transportation and parking for attendees and speakers (dependent on venue)
- Service fees and gratuities ($1,000)
- Speakers’ fees ($0 – $10,000+ per speaker)
- Signage ($500)
- Registration materials ($300)
- Security and staff ($2000)
Even for a smaller event, that totals at least $20,000. Soon, you’re underwater and either hiring contractors or using half your team’s day to get all the little details right. To top it off, there always seem to be attendees or speakers who are an absolute nightmare to deal with.
I’m getting stressed just thinking about it.
For an online conference, a few weeks of work and a small budget are all that’s needed. In fact, all of the software I used to organize everything was free:
- Trello for project management (check out my free template below)
- Google Sheets to manage the assets (you’ll get a template of this, too)
- YouTube to host videos
- Dropbox to host files
- Canva to create images
Plus, when you create assets for your event online, you continue reaping the benefits of long-tail keyword SEO and organic traffic from evergreen content for months to come.
Depending on your resources, you may want to hire freelancers to help you with asset creation or to run Facebook ads to get more awareness about your event.
In many cases, you end up cutting expenses dramatically by hosting an online event instead of an in-person conference. Let’s dive into how we decided HubSpot should host an online conference about inbound sales.
A Virtual Conference by HubSpot
HubSpot revolutionized marketing in 2006 by introducing the concept of inbound marketing and telling the story of how marketing had changed. Since then, sales has also changed, and we’ve introduced the concept of inbound selling.
However, similar to when inbound marketing was a new concept in 2006, people needed to be educated about the concept of inbound selling.
We had various goals that overlapped with each other when thinking about hosting a virtual event:
- Spread the message of inbound selling
- Generate leads for our sales products
- Develop authority in the sales industry
- Promote the first sales-focused track at our INBOUND event
What better way to educate our audience and develop credibility around inbound selling than by hosting real experts to talk about it? Influencers already have an audience who will listen to them. They have their own methodologies and many of those ideas aligned perfectly with inbound selling.
By hosting a virtual conference, we were able to scale influencer marketing and associated the credibility of those influencers with the HubSpot brand.
Plus, with the changing landscape of content and more consumers preferring video content, this was an opportunity to develop high-quality video content we could continue to use.
Still interested in hosting your own online conference? I’m going to lay out all the steps I took to organize Inbound Sales Day that you can replicate for your own event. I’ll also give you the project management and email templates I created that kept me organized throughout the whole process.
How to Plan and Execute A Virtual Conference
Before we jump into the planning, decide how you’re going to manage the project. I used a combination of Trello and spreadsheets to manage my work.
I laid out all activities in my project management Trello board, which gave me a bird’s-eye view of the timeline, what needed to be done at the moment, and what was coming up. This allowed me to catch situations where I would need to delegate work or ask for help ahead of time.
All assets that were created (landing pages, emails sent, social posts, videos, etc.) were listed in an asset management spreadsheet. This way, I had access to every asset in one place without having to search for it.
The campaign was executed in six phases, which I’ll walk you through below:
- Set the vision
- Conduct speaker outreach
- Create assets
- Promote
- Launch
- Analyze
Phase 1: Set the vision
What do you want the event to look like? What topics do you want to cover? Who’s your audience? How many registrations do you expect?
All of this will be important for your speaker outreach as those will be your selling points. If you can pinpoint your target audience (try the MakeMyPersona tool to help with that), you can find speakers who also want to reach that audience. If you have a set number of expected registrations, you can attract speakers with an idea of what their reach will be if they participate.
Phase 2: Conduct speaker outreach
The most important step to producing a viable virtual conference is to get speakers in your industry. This will benefit you in two ways:
- You can build relationships with these industry experts.
- You can associate your brand with these experts, making yours more credible.
I highly recommend getting experts within your company to speak on the subject matter and promote the event by giving a talk or interviewing another expert so that your employees will come to be seen as trusted industry thought leaders.
My goal was to get on a video call with the potential speakers I emailed. A video call allows you to sell them on the idea and show them how excited you are.
Here’s the email template I used:
Hi [NAME]!
[YOUR COMPANY] is launching [NAME OF VIRTUAL CONFERENCE], a virtual event for [#] [TYPE OF PEOPLE YOU’RE TARGETING] on [DATE] and we would love to have you as a featured speaker.
We’re inviting top experts in [INDUSTRY] to help [PROFESSIONALS] become more successful by providing actionable information about [BROAD OVERVIEW OF TOPICS].
I watched your talk on [TOPIC] and think you’d be a great fit for our audience.
If you’re interested in speaking, we have many speaking options available that can be flexible with your schedule. I’d love to discuss them with you on a quick call.
Let me know if you’re interested and we can schedule time this week or next to talk through the details.
For your convenience, here’s a link to my calendar so we can schedule time right away: [MEETINGS LINK]
Best,
[YOUR NAME]
Pro tip: If you’re a HubSpot customer, I recommend using the HubSpot Sales Meetings and Templates tools to make scheduling meetings really, really easy.
Once I got the meeting scheduled, I made sure to hit the following points for each conversation:
- Explain the event and why you’re doing it.
- Emphasize what the speaker would get out of participating. (We emphasized that we were aiming to reach over 10,000 salespeople and they would get their own landing page with links to their website and social profiles.)
- Tell them about other speakers you’ve booked to develop credibility around your event and that it’s something worth being a part of.
- If they’re interested, explain what we need from them right then and there: I asked for a rough title and outline of their talk, and the format they preferred (live Q&A, recorded interview, or recorded lecture-style video).
After the call, I immediately sent a follow-up email which:
- Recapped the call included topic and format of their talk
- Attached a speaker agreement form
- Asked for their availability to schedule introduction to interviewer, recordings, and dry-runs
- Listed specific deadlines of when everything is due
Here’s a template I used:
Hi [NAME]!
I’m glad we got to connect today. We’re very excited that you’re going to join us for [CONFERENCE NAME]. Here’s a recap of what we discussed earlier — feel free to revise any of it.
- Working session title: [SESSION TITLE]
- Working session description: [DESCRIPTION]
- Format: [FORMAT]
- What I need from you by [DATE]:
- Bio (max 200 words)
- Preferred headshot
- A page you want us to link to
- A rough outline of your presentation
Again, it was great connecting today! Please let me know if you have any questions.
Hope you have a great week!
Best,
[YOUR NAME]
A week later, I followed up again for all those items. Speakers are really busy, and it’ll take a few emails and calls to get those details from them. This is why I suggest you begin the process at least two months before your launch date.
Some speakers will ask for a packet with more details. You can use this template to create your own speaker packets.
Phase 3: Create assets
On my Trello board, I laid out a timeline of when all assets were created and used a spreadsheet to keep track of them as they were created.
Landing Pages
Your landing page is going to be a selling point for your event to get speakers and attendees. Don’t expect to attract many of either if your page doesn’t look sharp.
Below you can see the homepage, agenda page, and session pages we created for Inbound Sales Day.
The homepage highlighted the benefits of attending and the various speakers we featured.
The agenda page shared more details about what topics will be discussed and the main takeaways of each talk. This gave viewers an opportunity to see who would be speaking and do their research or reach out to influencers before the event.
The session page is where the fun happened. Each video had its own landing page on the HubSpot domain so viewers wouldn’t have to leave our website to see the content. We had over two-dozen of these pages.
| Landing Page | Agenda | Session Page |
|
|
 |
 |
Click the images to see the full versions
Video Hosting
I recommend using YouTube Live to broadcast live videos and to host all videos to take advantage of its video SEO. I then embedded all the videos on landing pages so people wouldn’t have to leave our website to watch the video.
Video Production
There were three different session formats which each required different preparatory measures. Here was my process for each format:
Live Q&A
- Speaker chose topic
- Researched their online material (blogs, videos, interviews) and created a Google Doc of canned questions
- Introduced the speaker to the employee who would host the session via email and set up a call to develop their rapport
- They reviewed the list of questions together and brainstorm more questions
- We prioritized top five canned questions to ask in case there were no live questions
- A week before the live session, get on a call with the speaker to do a final check-in (the meeting was hosted using a private YouTube Live session so they understood how to sign in)
- Live broadcast: Speaker was expected to sign into YouTube Live an hour ahead of time for audio and video check, review the talk points with HubSpot host, and build rapport for the session
Recorded Interview
- Speaker chose topic
- Researched their online material (blogs, videos, interviews) and created a Google Doc of canned questions
- Introduced the speaker to the employee who would host the session via email and set up a call to develop their rapport
- They would review the talk track outline and go back and forth about what topics the speaker would want to hit on
- We agreed on five questions that would be asked by the interviewer to guide the conversation
- Booked an hour with the speaker and interviewer which gave enough time for audio and video check, review talking points, and record at least twice (in case the first run was too rough
Recorded Lecture
- Speaker chose topic and provided outline of talk track
- Provided feedback on their outline based on what our sales audience is interested in (based on previous campaigns and blog performance)
- Two recording options:
- Book an hour of their time to record the session via YouTube Live
- They recorded on their own and sent the video
Question Submission Form
For live events, we created a Google Form for people to submit questions ahead of time. These questions were used to inform talking points for relevant sessions.
Social Media Images
The obvious goal for social media images is to make a person stop scrolling through their newsfeed and read what the event was about. We went with blinking GIFs that included photos of the speakers.
Phase 4: Promote
As with content distribution in general, this was the most difficult part of the process. We leaned into speakers a lot and asked them to promote the event to their email list and on their blogs and social profiles.
Speakers: Email, Blog & Social
We asked each speaker to send an email to their list, write a blog post, and post on social media about the upcoming event. We made it as easy as possible for speakers to promote the event by creating speaker promotion packets, which provided pre-written emails, blog posts, social media copy, and images. All they had to do was copy and paste the text and insert the image.
We also gave each speaker their own unique tracking URL (learn how to do it using HubSpot software) to use in promotional materials. This showed us how much interest each speaker drove and how many registrations they contributed.
Don’t start a packet from scratch, get the free speaker promotion packet template.
Blog Posts
Brainstorm blog post topics based on the topics your speakers will discuss, and come up with a publishing cadence for your promotional posts. If you already have an editorial calendar, I’d suggest you avoid making every post promotion and instead periodically insert promotional posts.
Social Posts
I met with HubSpot’s Social Media team two months before the event launch to discuss the campaign and come up with a promotional cadence that made sense for each channel.
I used a spreadsheet to organize all social media posts. I wrote most of the copy in bulk and scheduled the posts in batches as each date came up.
Your promotion strategy will vary depending on which channels you have access to. I sat with my team and brainstormed promotional tactics before deciding which were most viable. A few of those included:
- Pop-up forms on highly trafficked site pages
- Calls-to-action on the home page
- Posts in relevant LinkedIn and Slack groups
- Links to the event in sales reps’ email signatures
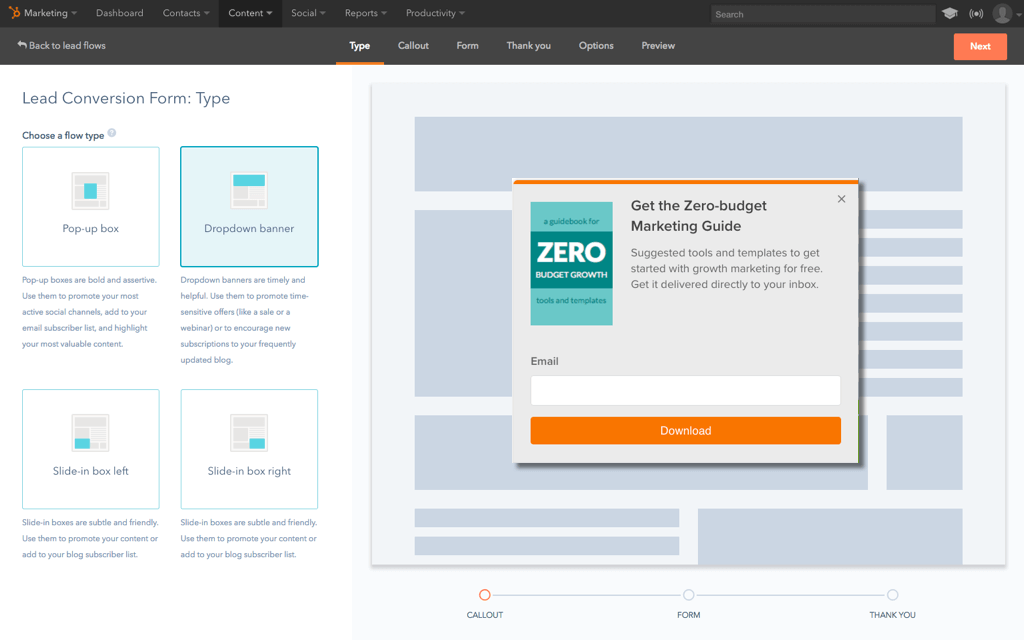
Phase 5: Launch
The night before your launch, make sure:
- All recorded videos were hosted on YouTube
- Landing pages that hosted videos were tested
- Reminder email to registrants have been scheduled so they remember to watch the videos
- Emails are pre-scheduled to notify speakers to log into YouTube Live an hour before the broadcast time
On the day of the event:
- Monitor your social media hashtag if you have one
- Keep an eye on your email if case people have trouble accessing the event
Phase 6: Analyze
To prove that the virtual conference was worth the time and effort, do an analysis of the traffic and registrations you received, how many video views you got, and send a survey to your registrants.
The best way to prove value is to tie it all back to revenue. How many qualified leads did you get, and what is the monetary value of a lead? How many new software signups did you get and what is the worth of each signup? How many new clients did you get and how much are they paying you?
Learning Lessons and Tips for Hosting A Virtual Conference
As always, no matter how successful the event, things can always be better. Here are a few things I wish I had done differently that you can learn from.
Align with your sales team.
This event would’ve been great for sales enablement. Sales reps could use the conference as a piece of content to share with prospects and be helpful. It’s also good to let reps know about the event and how to talk about it in case prospects bring it up on a call.
Get speakers with large audiences.
This may be more difficult for your first event as you start developing credibility for your event, but get speakers with large audiences if you can. It’s even better if you can get them to commit to driving a certain number of registrations.
Have a post-event plan.
Ideally, you’re going to get a lot of registrations for the event. What are you going to do with them after the event? Have a communication plan for your registrants, whether it’s sending them content, telling them about your products or services, or asking for feedback. Don’t leave them hanging.
Build anticipation before the event.
How can you get registrants to share the event before it happens? Maybe a contest or giveaway? How can you get registrants to engage with speakers before the event?
As more companies work to get a foothold in their industries and the marketing industry evolves to encompass more video content, virtual conferences will become more and more common. And as with any marketing tactic, as virtual conferences become more common the medium will become less effective.
Host your first virtual conference now before your competitors and gain first-mover advantage. Good luck.
Here are all the resources and templates I’ve shared throughout this post:
- Project management template for Trello
- Speaker information packet template
- Speaker promotion packet template
Thanks to Kendrick Wang, Cambria Davies, and Scott Tousley for reviewing drafts of this post.
Editor’s note: This post was originally published in April 2017 and has been updated for comprehensiveness.

Everything Our Paid Team Learned From Attempting a Reddit Advertising Strategy
With a ranking as one of the top ten most popular sites on the internet, Reddit is undoubtedly an intriguing channel for advertising purposes.
However, the site can often seem intimidating, and perhaps even too random to create a cohesive advertising strategy. Plus, since its primary purpose is to expose viewers to the top-trending content of the moment, Reddit users are notoriously anti-marketing.
Regardless of its challenges, its potential advantages proved too good an opportunity to pass up. At HubSpot, we decided to implement a strategy to see for ourselves whether Reddit can serve as a promising channel for the future.
Here, learn what our team figured out about advertising on Reddit, and whether it’s worth the attempt for your own company. Plus, we’ve provided a step-by-step tutorial on how you can advertise on Reddit if you determine it’s a valuable option for your own company.
The Strategy Behind Reddit Advertising
1. Identify subreddit topics which are well-aligned with your target audience.
To investigate the benefits of advertising on Reddit, I first spoke with Josh Chang, a Senior Marketing Manager at HubSpot. He told me HubSpot’s initial strategy on Reddit involved highly targeted campaigns on specific subreddits, including r/entrepreneur and r/sales.
“The goal of the campaign,” Chang explained, “was to drive awareness and conversion for our products. In terms of results, we saw cost-per-acquisition similar to what we’ve achieved on Facebook in North America, although we did notice a lower activation rate from Reddit — suggesting lower-quality conversions.”
If you’re interested in testing out a campaign for yourself, then, you’ll want to start by identifying subreddits which can likely help foster genuine connections between your brand and your ideal audience. Consider topics your target audience is most interested in, and make a list. Then, narrow your list by investigating how many subscribers each subreddit topic has, whether it’s relatively active, and whether self-promotion or sharing content is allowed on the subreddit topic.
Chang told me, “One of the main things we learned was targeting subreddits specifically was much more effective than broader interest targeting. However, this strategy requires a lot of research, and getting to know which subreddits are most relevant to your audience.”
Additionally, Chang said, “We noticed tailoring our ad creative for individual subreddits helped improve our conversion rates.”
2. Begin engaging with your subreddit communities.
Once you’ve cultivated a list of subreddits that are likely of interest to your target audience, it’s time to start engaging with those subreddit communities.
However, it’s critical you don’t begin by promoting your own content.
To build a level of trust and authentic connection, begin by upvoting other submissions you find interesting and that align well with your brand. Next, share valuable content — but not your own. Instead, post interesting content produced by other media outlets or blogs that you believe will be useful to your subreddit community.
It’s vital you genuinely use the Reddit platform as an opportunity to get to know your target audience before you offer them your own content. Not only will this show your community you’re not simply joining the site to self-promote, but it will also help you tailor your content more accurately down-the-road.
3. Begin promoting your own content, paid or otherwise, on the subreddit platforms.
At this point, you might consider simply posting valuable content from your company that you feel will benefit your community — for free.
However, you might alternatively try spending money on a paid sponsored post, which essentially guarantees your post will be pinned to the top of the subreddit. Here’s what a sponsored post looks like, for context:
In many ways, this post looks similar to all other Reddit content. However, there’s a blue “Promoted” tag in the top left, signifying it’s a paid ad.
In HubSpot’s case, we decided to test out the power of paid advertising on the site. However, it’s still critical you follow the steps listed above to cultivate authentic relationships with your subreddit communities.
Think of it this way — if I begin engaging with a brand on one of the subreddit groups I’ve joined, and notice they typically post helpful content (including content from other publications), then I’m much more likely to take notice when they pay for a sponsored post. If they appear out of nowhere, I have no sense of brand awareness and probably won’t trust the advertisement.
Reddit Advertising Cost
As of right now, the minimum daily spend for an ad on Reddit is $5.
Additionally, Reddit FAQ states, “The Reddit Ads platform uses a second price auction based system, which means you pay a cent higher than the next highest bidder. Because we are using an auction based system, there is a risk of 20% over-delivery when setting up an individual campaign.”
However, as of January 2019, Reddit changed their pricing model from CPM (cost-per-impression) bidding to CPC (cost-per-click). The CPC model will likely make it easier for brands to track conversion or traffic goals, and could result in changes in prices over time.
Advertising on Reddit: Worth it?
When I asked Chang whether he felt advertising on Reddit is a worthwhile investment, he offered a candid response, admitting HubSpot has temporarily halted its efforts on Reddit.
“We saw promising results,” Chang told me, “But because we were targeting specific subreddits, it wasn’t crazy volume that could really move the needle. However, we have on our docket to re-test Reddit to see if we can improve performance and scalability in the future.”
It’s important to note, there have been success stories — Findlay Hats, for instance, drove $28,000 in sales from one viral Reddit post.
However, most brands see better results simply by relying on Reddit for community engagement and brand awareness. Alex Berman found one of his free, unpromoted videos got 25,000 views when it hit the top of a subreddit — but, when he put $250 behind his Reddit posts, he acquired zero leads.
1. Make a company profile.
You’ll want to ensure you’re running advertising campaigns on your company profile, not your personal Reddit account.
Along with evoking a sense of professionalism, a company Reddit profile is necessary since users can click on your account and see other content you’ve viewed and upvoted — so you want to ensure that content aligns well with your brand. Additionally, when responding to comments on your ad, you’ll want to be able to respond from a company profile, not a personal one.
To set up a profile, go to https://ssl.reddit.com/login and fill out the Sign Up form, shown below:
2. Set up an advertising account.
To start advertising on Reddit, you’ll need to set up an advertising account. To do this, go to ads.reddit.com and fill out the necessary fields:
Once you’ve inputted your information and selected “Sign Up”, you’ll see an advertising dashboard, as shown below:
Before you can begin advertising on Reddit, you’ll want to add your billing information by clicking the drop-down menu on your username and selecting “Billing”:
Additionally, if multiple people on your team will be involved in advertising on Reddit, ensure you add users by clicking “Manage permissions” underneath your username, and then adding their emails and permission level (including “Analyst”, “Creator”, and “Administrator”):
Once you’ve clicked the blue “Invite” button, your colleagues should receive an email with next steps.
3. Find your audience on subreddits.
It’s important to note, you don’t want to spend money advertising on the homepage of Reddit. Reddit users visit the homepage to browse popular posts and trending news, so it’s too big of an audience for you to target your ideal persona.
Instead, you’ll want to explore subreddits to find your ideal Reddit audience. For instance, let’s say you sell e-commerce software. To find an interested audience, then, you’ll want to explore retail-related subreddits, such as r/retail (8.2K members), r/AskRetail (4.5K members), or even r/retailmemes (733 members).
Make a list of subreddits that might fit your audience, and then spend some time perusing the content that already exists on that subreddit. Does it seem to match content your customer would be interested in? Additionally, does it look like the subreddit community could be filled with high-intent prospects (like a retail advice subreddit), or is it too superficial for your needs (like retail memes)?
To help you find your audience, try a tool like RedditList to sort through various reddit communities and find the ones of highest value for you.
4. Ensure the subreddit(s) you find have enough page views.
This is important enough to warrant its own section: you can’t necessarily advertise on any subreddit you want. Once you make your list of potential subreddits, you’ll need to ensure it has enough page views to be eligible for advertising.
To figure out whether a subreddit has enough page views, consider that one Reddit advertising campaign has a minimum spend of $5, and it costs $0.75 per thousand page views. Additionally, you can purchase up to three months out.
With those requirements, you’ll need roughly 6,700 page views over three months to achieve the $5 minimum spend.
To figure out how many page views you’re likely to receive on a subreddit, take a look at how many users are currently on the subreddit. For instance, you can see at 2 p.m. on a Monday, there are roughly 2K users on the r/marketing subreddit:
Dividing 6,700 by 90, you’ll note you need roughly 74 viewers per day on a subreddit to reach the minimum requirement — r/marketing, then, is way over the daily required page views, but there are other smaller subreddits with only 5-10 users per day, which could make it more difficult for you to reach minimum spend. Plus, you want to choose subreddits that enable you to have the highest reach possible.
5. Set up your campaign.
Once you’ve chosen your subreddits, it’s now time to set up your campaign. In your account, start by clicking on “Dashboard” in the top left of your screen, and then select “Create Campaign”.
Next, you’ll need to create a name for your campaign, a funding instrument, and a campaign objective:
After you click “Continue”, you’ll need to narrow down your audience — including interests, communities, and device type — your budget, and your bid (the maximum price you’re willing to pay per 1,000 impressions). Additionally, you’ll need to figure out a schedule for your ad, including what time(s) of day you want it to appear, and when you want your campaign to end.
Once you click “Continue” again, you’ll be able to add third-party trackers to distinguish how many unique web page visits or social media viewers you’ve gained from your Reddit advertisement.
Here, you’ll also either create a new post or upload an existing advertisement that you might’ve designed for another platform. Feel free to take a look at Reddit’s internal advertising resources — including Reddit’s Advertising Help page — to learn best practices when designing an ad for Reddit.
Once you’re happy with the creative assets, click “Review”:
Once you’ve reviewed all the information regarding your campaign and have determined it’s accurate, click the blue “Submit” button to submit your advertisement for consideration. You’ll get an email once your ad is live.
6. Analyze your campaign performance to improve over time.
Once your campaign is up-and-running, you’ll want to track its performance. You can monitor within the Reddit advertising dashboard itself, as well as through third-party tools like Google Analytics. Additionally, ensure you’re taking the time to respond to any comments left on your ad.
As with any advertising campaign you run, you’ll want to use analytics on this campaign to iterate and improve for the next one.
Ultimately, it’s worth considering using Reddit as a platform for sharing content for the sake of helpfulness and audience engagement, rather than as a cost-effective advertising strategy.
