Welcome to My Blog
The Ultimate Guide to Integrations and Why Your Business Needs Them
Have you ever found yourself working on a project in which you had to toggle between multiple software and applications? Perhaps you had to plug data from one system into another or rewrite the same content over and over again to ensure it was in multiple locations.
Although few people have the time or patience for this type of tedious work, it’s highly common and often critical to your business’s success — these mundane tasks need to get done.
What if there was a way to connect your software to the applications you use in a way that successfully brings them together? This would mean all of your information and data would live in a central location with no manual entry required, even if those applications don’t actually come with the software itself … sound nice?
Well, good news! This type of solution exists … it’s called an integration.
Integrations are a complex topic to understand. So, let’s simplify the concept with the help of an analogy we can reference throughout this guide. Let’s pretend you want to plug your MacBook laptop into your TV using a connector cable so you can watch reruns of Friends on Netflix on the big screen. And integration kind of works like this — I’ll explain more as we go.
Back to our analogy: If your software is your laptop, you’ll use a connector cable, or integration, to then watch Friends on the TV, or application.
Now, let’s run through some commonly asked questions about integrations to help you get a better grasp on what they are, how they work, and why your company needs them.
Why use integrations?
Integrations solve and simplify your need for new software as your business grows and evolves. They allow you to keep the system you’re currently using by simply adding connections to third-party applications to enhance system functionality and provide additional features you may need but aren’t able to build within your software. You can keep your current laptop and TV, and simply use the connector cable to watch Friends on the big screen.
By leveraging integration connections across your systems, you can power your business to achieve a much wider range of tasks on your software as you enhance its functionality. This is especially helpful as your business expands since your needs are bound to change.
Although your software may have the functionality you need when you start your business, you’re likely going to want additional applications to provide the features you end up needing later on, as you grow.
There are many types of integrations, each of which have specific functions to help meet different needs. The easiest way to think about the various types of integrations is by category. Some integrations have several functions, meaning they could technically fit into many categories because they serve more than one main purpose. Other integrations have one specific function.
Who needs integrations?
Integrations are helpful tools for virtually every business, no matter the size or industry. There are integrations suited for every type of company (startups, SMBs, and enterprise companies) with any purpose (advertising, analytics, or content).
If you sell software, as we do at HubSpot, you’ll find yourself not only using connections for your internal software but also for your customers to use along with your software. This is because your software may not have every feature and function your customers need to run their business. So, by adding an integration, they’ll get that added feature or function while continuing to use your software.
Referring back to our analogy, without the integration, or connector cable, your laptop wouldn’t be able to communicate with your TV to allow you to watch Friends on the big screen. You need that integration, or cable, to allow for added functionality and watch the show on TV — without it, this wouldn’t be possible.
How do you get integrations?
Integrations are almost always located in some type of marketplace, where customers can review and browse all of their options. The HubSpot Integrations & Application Marketplace is an example of this. Our marketplace allows visitors to search and learn more about the various integrations and their functions, and then connect HubSpot to their integration of choice.
(No, you can’t go to Best Buy to pick up your integration as you would with your connector cable to watch Friends on your TV… you’re right, the example doesn’t quite work here.)
How do integrations work with APIs?
API stands for application programming interface. An API is an interface that software uses to receive information (whether that’s data, servers, applications, etc.).
All of the integrations we’re going to discuss below are built on APIs. By building integrations on APIs, you can connect your integrations to your software and use them in tandem with one another. The integration allows for the flow of information to and from apps and devices in real time — APIs allow them to talk to one another.
Think about this in terms of our analogy from above: The application is the TV, the programming allows your laptop to communicate with the TV, and the interface is how you (the user) are able to interact with the application (by watching Friends on your TV). In this example, the API is the port on the side of your laptop in which you actually insert your integration (the cable) to then connect your laptop to your TV.
Integration vs. iPaaS Solution
If you’ve heard of integrations before, chances are you’ve also heard about iPaaS, or Integration Platform as a Service. The difference between the two is an important distinction to make when determining which one you need for your business. While an integration is a one-to-one, direct connection solution, an iPaaS solution is not.
Instead, iPaaS is a cloud-based platform that connects your applications and systems — whether that’s in the cloud or on-premise — between an organization and third-party software without the use of middleware.
So, if you look for an integration solution on your software’s marketplace and don’t find the connection you’re looking for, then you’d turn to an iPaaS solution to solve your need for that connection. There are a few integrations available today (called “connector integrations”, which we’ll cover an example of below) that can help you build custom integrations..
So, which integrations should you actually use? Let’s look at a list of some of the most popular integrations available.
Popular Integrations
The following integrations are categorized by business need to help you browse through your options. (Almost all of these integrations fit into multiple categories, as they have functions that allow them to do multiple things. Below, we placed them in the category they’re best suited for.)
It’s important to note these are just some of today’s popular integrations — there are hundreds of more integrations to learn about and choose from as your business grows.
The list we’ve compiled below is of integrations that connect with HubSpot. This isn’t to say these HubSpot integrations don’t also work with other software. In fact, most of these integrations are compatible with dozens of programs in addition to HubSpot.
Let’s take a look.
Advertising Integrations
Advertising integrations help you market to and reach your target audience. Data about the success of your ads and/ or the leads obtained from them is automatically added to your HubSpot CRM so you can learn more about the people who interact with your ads and nurture them into customers.
1. Facebook Ads
The Facebook Ads integration allows you to connect your Facebook Ads account to HubSpot. This integration gives you the ability to attribute your ads directly to the contacts who interact with them. It also allows you to review real data about which ads impact your bottom line. This simplifies the reporting process for all of your Facebook Ad efforts.
2. AdRoll
Different businesses and products have various buyer personas. The AdRoll integration gives you the opportunity to create personalized retargeting ads for different lead segments in your HubSpot contacts. You can personalize several parts of the ads, such as content and formatting, that will best relate to your prospect. This allows you to focus on your audience’s attributes so you can effectively reach your prospects — you can gather intricate details about your prospects from your CRM via the integration so you’re able to successfully retarget them.
3. Instapage
If you’re not a developer, creating your website’s landing page might sound like an overwhelming task. The Instapage integration provides a straightforward option for anyone who wants to create and personalize their landing page and then send lead information straight to HubSpot. These details are automatically placed under the associated contact in HubSpot for you— meaning, there’s no need to perform this transfer manually.
Account-Based Marketing (ABM) Integrations
ABM stands for account-based marketing. ABM integrations help you leverage your account and audience data so you can tailor your messaging, CTAs, and marketing strategies to close deals and attract customers.
1. OrgChartHub
The OrgChartHub integration allows you to efficiently build customer organization charts without ever leaving HubSpot. You can create customer organization charts while in HubSpot so you’re able to easily identify unknown contacts, visualize key stakeholders, and customize your sales personas without manually sending any of this information back and forth.
2. CaliberMind
With the CaliberMind integration, you’ll be able to look at your cross-channel account engagement and create alerts for your reps about which deals they should focus on closing to meet quota. The integration takes your contacts directly from HubSpot and automatically matches them to their associated accounts so you don’t have to.
3. Metadata
The Metadata integration provides account-based advertising services. You can automatically identify specific target accounts and contacts from HubSpot to create personalized advertisements at scale to help you close more deals and reach your target audience more effectively.
Analytics and Data Integrations
These integrations help you measure your success across a number of analytics platforms. You can look at your data in different ways and ensure all of this information is well-organized in HubSpot so your team can review it at any time. These integrations help you learn more about which of your efforts are working and which ones need to be modified.
1. Databox
With the increase of remote employees across businesses and the number of people who access their work while on-the-go, having the ability to review and manage your key performance indicators (KPIs) from anywhere can be quite helpful. The Databox integration provides you with access to all of your analytics data in HubSpot from a wide variety of sources including Google Analytics, SEMRush, mobile, desktop, Facebook, and more.
2. Hotjar
In a world where many website visitors are uninterested in completing forms and providing their personal information, Hotjar is a great way to learn about who your visitors are and what they’re looking for on your site. The Hotjar integration gives you insight into who your website and mobile visitors are and what their needs consist of directly from HubSpot.
3. Klipfolio
The Klipfolio integration shows you your most important metrics in real-time and creates easy-to-read dashboards in HubSpot so you can track and analyze performance across all of your platforms from one location. This allows you to improve your data transparency and reach your targets faster.
Calling Integrations
Whether it’s a meeting with fellow employees or your prospective and current customers, calling integrations will make all phone and video call interactions simple. Your contact’s information and details about the call will be recorded in HubSpot for easy access. This also provides sales reps and support team members with the necessary background information to assist the prospect or customer appropriately.
1. UberConference
With UberConference, it takes just seconds to schedule your meetings with colleagues and prospective customers so you can focus on tasks that require more attention. The integration allows you to schedule meetings quickly and easily without ever having to leave your HubSpot portal.
2. Aircall
Phone calls remain one of the most effective ways to interact with your prospective and current customers. Whether it’s a sales or support call, the Aircall integration allows you to manage your call flows and attentively assist your leads and customers all within HubSpot so your contact’s information lives in one, central location.
3. CallRail
The CallRail integration is a call tracking and analytics system which allows you to customize segments and actions based on your specific calls with prospects and customers. All of your call and text data will automatically be added and organized in HubSpot under the associated contact so you don’t have to manually enter any data.
Connector Integrations
Connector integrations provide you with access to dozens of applications which sync to HubSpot to save you time and add functionality. Some connector integrations offer a wide range of applications and some have more specific types of applications. Additionally, some connector integrations can assist in creating a custom integration to suit your needs.
1. Automate.io
The Automate.io integration connects to HubSpot to give you access to over 80 applications. By syncing with these apps, you’ll be able to transfer data to them to create customized integrations so you can manage all of your data in a way that works for your business all within HubSpot.
2. Zapier
The Zapier integration allows you to automatically connect your software to over 1,000 applications. It links your apps to HubSpot for you in just a few clicks to save you time. There’s no coding required and your apps will be able to begin sharing data in an easy-to-read workflow format in your HubSpot portal.
3. PieSync
The PieSync integration provides real-time, two-way contact sync. This means every time you add a contact to HubSpot, it automatically syncs to an application (such as Google Contacts or Outlook), and vice versa — you don’t need to worry about any importing or exporting, expediting and simplifying your contact syncs.
Content Integrations
Content integrations help you create, design, and share custom content for your website. They also help you learn about who’s interacting with the content and how they’re interacting with it. That information is then synced to HubSpot so you can organize it and add it to specific contacts.
1. Beacon
If your website has a collection of blog posts, the Beacon integration might be a good option for you. The integration ensures your content looks professional and allows you to drive more leads by getting more value out of your existing content — it connects to HubSpot to automatically convert your blog posts into downloadable content such as eBooks.
2. briX
The briX integration connects to HubSpot so you can design and personalize web pages for your site. You don’t need a background in web design or coding to create beautiful pages — the drag-and-drop template and 100+ customizable features make it easy to organize your content in any way you choose. This integration is ideal for easily designing and personalizing web pages directly from HubSpot.
3. Belch.io
Customized landing pages, web pages, and emails provide a professional look and feel for your visitors, leads, and customers while interacting with your business online. The Belch.io integration connects to HubSpot so you can personalize and brand all of these things in just minutes. It’s a great option for anyone without a background in coding or web development who wants to design and customize their site pages and emails to complement their brand all from HubSpot.
Customer Success Integrations
Customer success integrations connect to HubSpot to make your internal and external interactions with employees (cross-team) and customers straightforward. They simplify communication and help you share information and/or data when you need to.
1. Slack
The Slack integration is a digital workspace and communication tool that allows you to connect and talk with your team members. The integration is ideal for team collaboration and coordination from anywhere. By connecting the integration to your software, you can use Slack’s and HubSpot’s features in either the application or the software so you don’t have to waste time toggling back and forth — the same information will be found in both locations in real time.
2. Zendesk
Zendesk offers a ticketing system to keep track of customer inquiries and allows you to keep details about all of your customer interactions in one place. It helps you provide consistent customer experiences among your fellow employees and customers.
By connecting HubSpot to the Zendesk integration, you’ll be able to bring the work of your sales, marketing, and support teams together in a central location. It also allows these departments to communicate with each other while in HubSpot as well.
3. LiveChat
The LiveChat integration allows you to communicate with potential customers in real-time when they need assistance or guidance while on your website from HubSpot. Whether it’s a question about your product or the need for help in the checkout process, LiveChat allows you to walk them through the information they need to help you boost conversions and build strong relationships with prospects and customers.
Ecommerce Integrations
If you have an online store, ecommerce integrations are a great way to learn about what your customers and visitors are doing while they’re on your website. By connecting these integrations to HubSpot, you’ll know when your visitors are most frequently abandoning your site or their carts so you can create re-engagement content to regain their interest.
1. Shopify
The Shopify integration allows you to easily incorporate all of your ecommerce data and customer data within HubSpot. It automatically syncs customer, product, and deal information in HubSpot under the associated customer’s profile, so your entire team can view all of these details in one location. You can also create cart abandonment nurturing tactics, re-engagement ads for your website from HubSpot once you connect the integration to the software.
2. Typeform
The Typeform integration helps you create and design web and mobile forms for your leads. You can create contact forms, sign up forms, quizzes, and more, and all of your responses will automatically be sent directly to HubSpot so you can easily review your results and responses and compile them under the associated contact in HubSpot.
3. Magento
The Magento integration helps you create and send upsell, cross-sell, and reorder emails as well as develop abandoned cart nurturing tactics to boost your conversions. It automatically sends all of your customers’ ecommerce-related data, as well as emails between you and your customers, straight to their respective HubSpot contact record.
Email Integrations
Email integrations help you track a prospect’s interactions with sales reps, personalize your email automation with certain contacts, and measure the success of your email campaigns among your target audience — all from HubSpot.
1. MailChimp
The MailChimp integration allows you to sync HubSpot with your email service provider. You can build email campaigns and rest easy knowing the Intelligent Error Handling feature will continue engaging your contacts even if a syncing error occurs between the software and application. By connecting MailChimp to HubSpot, you’ll have the ability to automatically add contacts from HubSpot into your application’s email lists and vice versa so you never have to do it manually.
2. Privy
Privy helps you make more sales and turn more prospects into delighted customers. The integration uses targeted pop-up ads, banners, bars, and more to help you boost conversions and decrease page abandonment. It also automatically syncs all of your new leads from your website to HubSpot so the software can help you nurture them and convert them into customers.
3. Front
The Front integration is a collaborative inbox, meaning all members of your team can see and access your contacts, review deals, and see all activity history while working in HubSpot. All of these details are automatically synced in Front and your CRM. This helps you improve your customer experience and ensure it remains consistent no matter which employees your customers work with.
Event and Webinar Integrations
Whether it’s an in-person event, a webinar, an online meeting, or a video conference, the following integrations simplify every aspect of hosting an event. They allow your contacts to book meetings with you and you can update all information related to your contacts post-event or meeting in HubSpot.
1. Eventbrite
Eventbrite helps you use inbound marketing tactics to attract more prospects and customers to your in-person events. Once connected to your software, the integration automatically takes data from your contact lists in HubSpot to help you uncover effective ways to connect with your target audience, face-to-face.
2. GoToWebinar
No matter the type of event you’re hosting, the GoToWebinar integration automatically syncs all of your registrant and participant information in HubSpot under the associated contact. You’ll never have to worry about manually importing data about your webinar contacts again — instead, you’ll have more time to focus on the event itself.
3. Setmore
The Setmore integration simplifies appointment scheduling for you. It automatically imports your booked appointments (and information about the customer who booked the appointment) to HubSpot under the correct contact’s profile so you don’t have to do it manually.
Lead Generation Integrations
Lead generation integrations help you transition early-stage leads into delighted customers. All of your leads’ information will automatically be synced to HubSpot so you can view it at any point during the buyer’s journey. This is helpful to learn more about your target audience and to manage customer information so your sales and support teams can refer to it if needed, all from one location.
1. WordPress
The WordPress integration helps you optimize and align your WordPress website with the data about your contacts and business goals you have in HubSpot. Your HubSpot account and all of your growth tools will automatically be connected to your WordPress site so you can work to attract, engage, and delight site visitors and customers on your site from either WordPress or HubSpot.
2. Unbounce
The Unbounce integration helps you with the lead capturing and nurturing processes. You can create lead generation forms and send all data collected about your leads directly to HubSpot. At any point in time, you can take this data about your leads and use it to create campaigns. You’ll also have the ability to export any data in just seconds from your Unbounce account and share it anywhere.
3. SurveyMonkey
With the SurveyMonkey integration, you can create and distribute custom surveys to your prospects and customers, collect all data obtained, and view your responses within HubSpot. This is ideal because you can then segment and organize all your contacts based on their survey responses to easily manage the type of content and/or follow up they receive.
Live Chat Integrations
By adding live chat integrations to your website, you’ll be able to communicate with prospects in real time and nurture them into customers. You can answer their questions, respond to their concerns, and assist them in their purchase decisions. Then, this data is compiled into HubSpot under the specific contact it belongs to so you can follow up appropriately.
1. Intercom
The Intercom integration allows you to capture new leads and prospective customers with the help of live chat on your website. Intercom allows you to convert more leads by actively engaging with them at any time while they’re on your website once connected to HubSpot. You can then qualify your leads with custom bots, talk with them directly, and track them — and then you can have all of this information automatically organized under their contact in HubSpot.
2. ManyChat
Once connected to HubSpot, the ManyChat integration allows you to automate your messenger marketing so you can easily organize, nurture, and track your leads from the software. You can also take any HubSpot form and submit information obtained from it by sending custom field data to HubSpot Form Submissions.
3. Drift
The Drift integration provides live chat for your website so you can assist your leads in real time form HubSpot. The integration allows you to watch and save all of the lead’s activity on your site in HubSpot under the correct contact. Additionally, your sales reps can use Drift to customize their outreach and follow-ups based on that activity to improve the chances of conversion.
Sales Integrations
Sales integrations help you bring your sales tools, tactics, and prospects’ information together using HubSpot. You’ll be able to keep your marketing, support, and sales details in a central location for all teams to access, analyze, and refer to as needed.
1. HelloSign
Once connected to HubSpot, you’ll automatically be notified of any action a prospect takes on any document you send them with the HelloSign integration. Examples of the actions you’ll be notified about include when a prospect or customer receives, opens, or signs the document. Then, this activity data is sent to the contact it belongs to in HubSpot so reps know where the prospect or customer is in the buyer’s journey and how they should go about following up with them.
2. Salesforce
If you’re a Salesforce user, you can automatically sync all of your contacts’ information from the database into HubSpot once connected to the Salesforce integration. This allows you to work with reps to get strong lead intelligence and revenue reporting. You can mesh your marketing and sales work, content, and information so you and your team can access any information from either system at any point in time.
3. PandaDoc
When it comes to sales work, there are many tasks involved that don’t necessarily include the process of actually closing a deal. The PandaDoc integration automatically organizes and reviews information from HubSpot about your prospect to help you with non-selling tasks like creating and sending quotes, proposals, and contracts.
Social Media Integrations
Understanding your social media following is a huge part of successful marketing. Social media integrations help you learn about your followers, understand the type of content they interact with and share, and automate specific parts of your social media strategy.
1. Facebook
With the Facebook integration, you can automatically connect your business’s Facebook account to HubSpot. Schedule Facebook posts ahead of time analyze and measure post’s performance. This integration is ideal if you want to manage your Facebook marketing strategy alongside your other social media marketing strategies directly from HubSpot.
2. LinkedIn
By connecting your LinkedIn account to HubSpot through the LinkedIn integration, you can easily engage with your network and communicate with all of your contacts from HubSpot. You can also auto-publish your blogs and share specific content with your followers to nurture them into leads and customers. This integration is also great for tracking engagement along with all of your other social media channels and marketing efforts all from HubSpot’s social media tool.
3. Twitter
Schedule Tweets ahead of time, monitor Twitter streams, view Tweets and Twitter interactions of your competitors, and monitor accounts that are important to your brand from HubSpot with the Twitter integration. All information about your current and new followers will be added to your contact lists in HubSpot so everything is organized appropriately.
Video Integrations
With the rise of video and video marketing in business today, integrations that help you incorporate this media on your website have become quite useful. They allow you to create and implement videos on your site pages and forms as well as measure the success of your video marketing efforts.
1. Wistia
The Wistia integration provides you with the ability to integrate videos on your website, and then incorporate HubSpot forms with those videos to improve video engagement (and hopefully, conversion) rates. If any lead converts on a video, their information is automatically sent to HubSpot so you’ll have their video-viewing data paired with their contact details.
2. YouTube
The YouTube integration connects your YouTube channel to HubSpot. This way, you can easily report on your video and channel success and compare this data to that of your other social platforms using HubSpot’s analytics and social media tools and dashboards.
3. Promo
With the Promo integration, you can choose from over three million clips, templates, and music options to use to create a video for your site directly from HubSpot. You can easily throw in custom messaging, branding, or logos to personalize the video for your business based on a specific prospect’s needs and interests, found under their specific contact in HubSpot.
Get Integrated to Grow Better
Integrations have the power to enhance all aspects of your business. No matter the software you use to run your company, you can find integrations that can help simplify your processes, optimize your efforts, and empower your fellow employees. So, find the right integration marketplace for your software and begin connecting to the applications suited for your business needs.

A Content Marketing Playbook for Times of Crisis
The COVID-19 pandemic has sent businesses scrambling to pause plans, edit emails, and cancel campaigns. And while everybody seems to know what not to publish these days, many marketers are asking: what should we put out into a world in the throes of a crisis?
It’s a conundrum facing countless creators across the globe.
They’re wondering how to be empathetic without being disingenuous. How to offer value without seeming opportunistic. And how to be there for their audience without adding to the noise.
These are important questions to ask at a time like this. Essential, in fact. But underpinning all of them is a much simpler question that gets to the very heart of what content marketing has always been about. A question that every creator staring at a blank canvas right now should be asking: how can we help?
Because now, more than ever before, audiences are seeking help.
Increasing Engagement Rates
Entire industries have been forced into hibernation in recent weeks, but this does not mean audiences’ appetites for helpful content has gone away. On the contrary. Consumers are increasing searches for valuable information and engaging with businesses at record rates.
According to an analysis of anonymized data from HubSpot’s global customer base, engagement with marketing emails, website traffic, and live chat sessions have all been on the rise, with email open rates an eye-catching 25% higher than pre-pandemic levels.
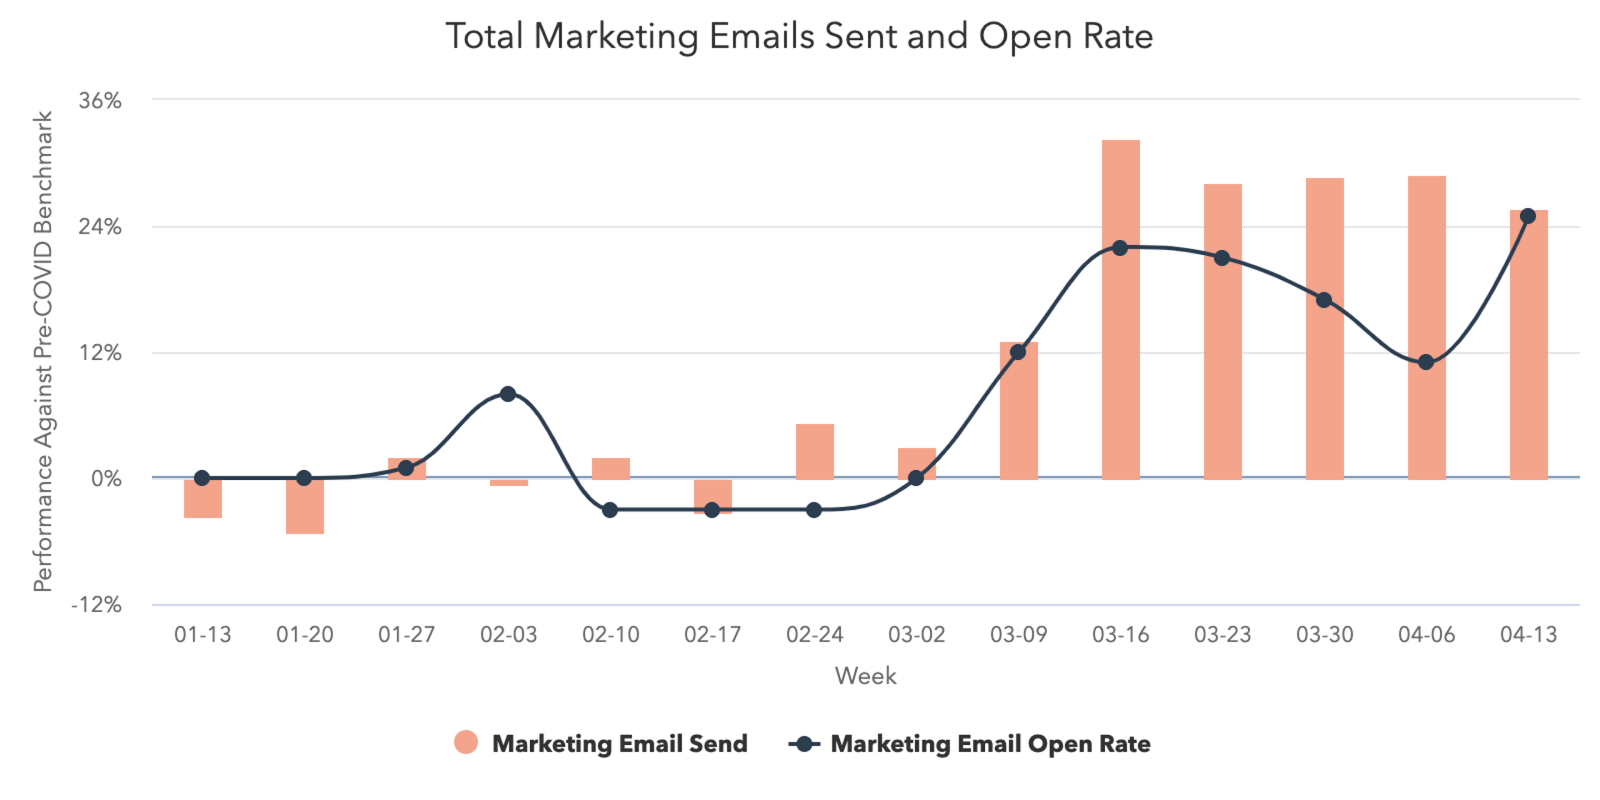
Meanwhile, traffic to HubSpot Academy, our free online training program, has more than doubled in recent weeks, and our Marketing Blog has experienced a 40% increase in weekly organic traffic.
The pandemic has triggered a striking surge in the very thing that many marketers care about most: audience attention. And such a high level of interest in the content companies are sharing, coming at such a sensitive time, places a huge responsibility on marketers to deliver materials that are not only relevant to the current moment, but genuinely impactful, too.
Those that fall short run the risk of doing damage to their reputation — according to Edelman, “71 percent of consumers agree that if they perceive that a brand is putting profit over people, they will lose trust in that brand forever.”
But those that succeed will leave a lasting impression on their audience — according to Gartner, brands that meet consumer’s needs at this time can “re-establish trust through customer-centric actions.”
So, it is not only engagement rates that are high during this crisis. The stakes are high, too. And a situation this unique requires a unique strategy to match.
When a Crisis Descends, Pause Before Planning
When times of crisis strike, the first thing marketers should think about is what not to do. Planned projects, campaigns, and announcements should be reviewed and postponed if possible. For those assets that are released as planned, it’s likely they’ll need a new tone that’s appropriate for the new environment.
Marketers should examine every article, email, ad, and social media post scheduled to be published to ensure that the tone of each asset is empathetic and respectful.
If this sounds like a lot of work, it’s because, in many cases, it is. No one team can manage a company-wide content audit alone.
Communications teams have expertise in developing messaging, social media teams have deep connections to their online community, email marketing teams have a strong understanding of brand tone, and customer-facing teams, including sales to service, have their fingers on the pulse of how customers are feeling — all of these teams should be consulted on content strategy during a crisis to ensure that a consistent and helpful approach is adopted across every touchpoint with the public.
At HubSpot, before we began creating new content for the new environment, we significantly reduced the frequency of our social media posting, dialed back the promotion of a major product launch (CMS Hub), and created a centralized set of guidelines on how we as a company should be communicating during this crisis.
Making such sweeping adjustments on short notice isn’t simple, but for us, two things helped make it easier.
First, we have an established decision-making process for crisis communications that minimizes confusion in the moment.
Second, by centralizing all of our customer interactions in a shared CRM, we’re able to see what communications customers are getting and roll out adjustments quickly to marketing, sales, and service.
Creating New Content in Times of Crisis
When it comes to creating new content during a crisis, marketers’ sole focus should be on delivering work that is genuinely helpful to their audience, without being opportunistic or adding more noise to a topic that has already been widely covered by others.
According to research conducted by Edelman, 85% of people expect companies to use their power to educate their audiences during the COVID-19 crisis. For some companies, that could mean writing in-depth articles that offer expert advice on relevant topics or aggregating publicly available information to make it more accessible for readers.
Intuit, for example, did this well when they teamed up with GoFundMe to create a Small Business Relief Initiative and when they built an interactive tool to help small businesses learn if they are eligible for government-provided financial relief.
We saw similarly helpful content from Care.com, whose team leveraged their deep knowledge of caregiving best practices to share expert advice on the precautions for families and caregivers facing the global health crisis.
These powerful examples directly address the situation at hand. But for other companies, providing helpful content could mean offering an alternative to the cacophony of crisis-centric content flooding feeds all day, every day.
For example, NPR has unsurprisingly witnessed a spike in listenership to its news shows as people seek up-to-date, reliable information as the pandemic evolves. But it has also seen a 120% increase in weekly visits to its Tiny Desk Concerts — an entertainment series — indicating that audiences are not only interested in information directly about the crisis, but are also desiring content that provides an escape from it.
This should make content marketers feel encouraged.
It suggests that help can take many forms in the midst of a crisis and that there are multiple ways creators can add value to the lives of their audiences at this time.
For marketing teams that don’t have the necessary resources to create new content given the trying economic environment, there are still creative ways to adapt to audiences’ needs. Gathering together old content that’s relevant to the current situation, updating it as needed, and presenting it as an easily digestible ebook or content series can be efficient ways of overcoming resource shortages.
At HubSpot, we did just this when we published a new landing page featuring all of our articles about remote work to offer some timely support to companies and employees adjusting to the new normal of working from home.
During times of crisis, there are a number of ways for marketers to approach new content creation — some that directly address the unique environment at hand, others that look to complement the new patterns of behavior that are emerging — but the one thing that should be consistent is an honest effort to help.
Choose Channels Carefully, Distribute Delicately
Marketers have an abundance of options for how they distribute their work, but just because we can publish content on multiple channels doesn’t always mean that we should.
Our research tells us that marketing email send volumes have increased significantly in recent weeks, meaning that subscribers’ email inboxes are even busier than usual. As well-intentioned as a new article or video might be, if it isn’t distributed delicately and at a considerate cadence, it could end up doing more harm than good in a company’s efforts to help audience members.
Marketers should reserve their most intimate communications channels, like email and push notifications, for key content updates during a crisis and adopt more subtle distribution approaches for their more niche materials.
For example, an SEO-optimized article that’s easily discoverable through search may be a more appropriate way to share certain new content offerings than a direct email or paid social media post, both of which could come across as excessively promotional or tone-deaf.
At HubSpot, when the pandemic was declared, we cut our social media posting by approximately 50% in the first week and reduced the number of ads we were sending to avoid overloading our audience with information at a time when there’s already a lot to process.
And when we developed a new educational content series, Adapt 2020, we made clear to potential subscribers what type of content to expect, as well as where and when it would be distributed.
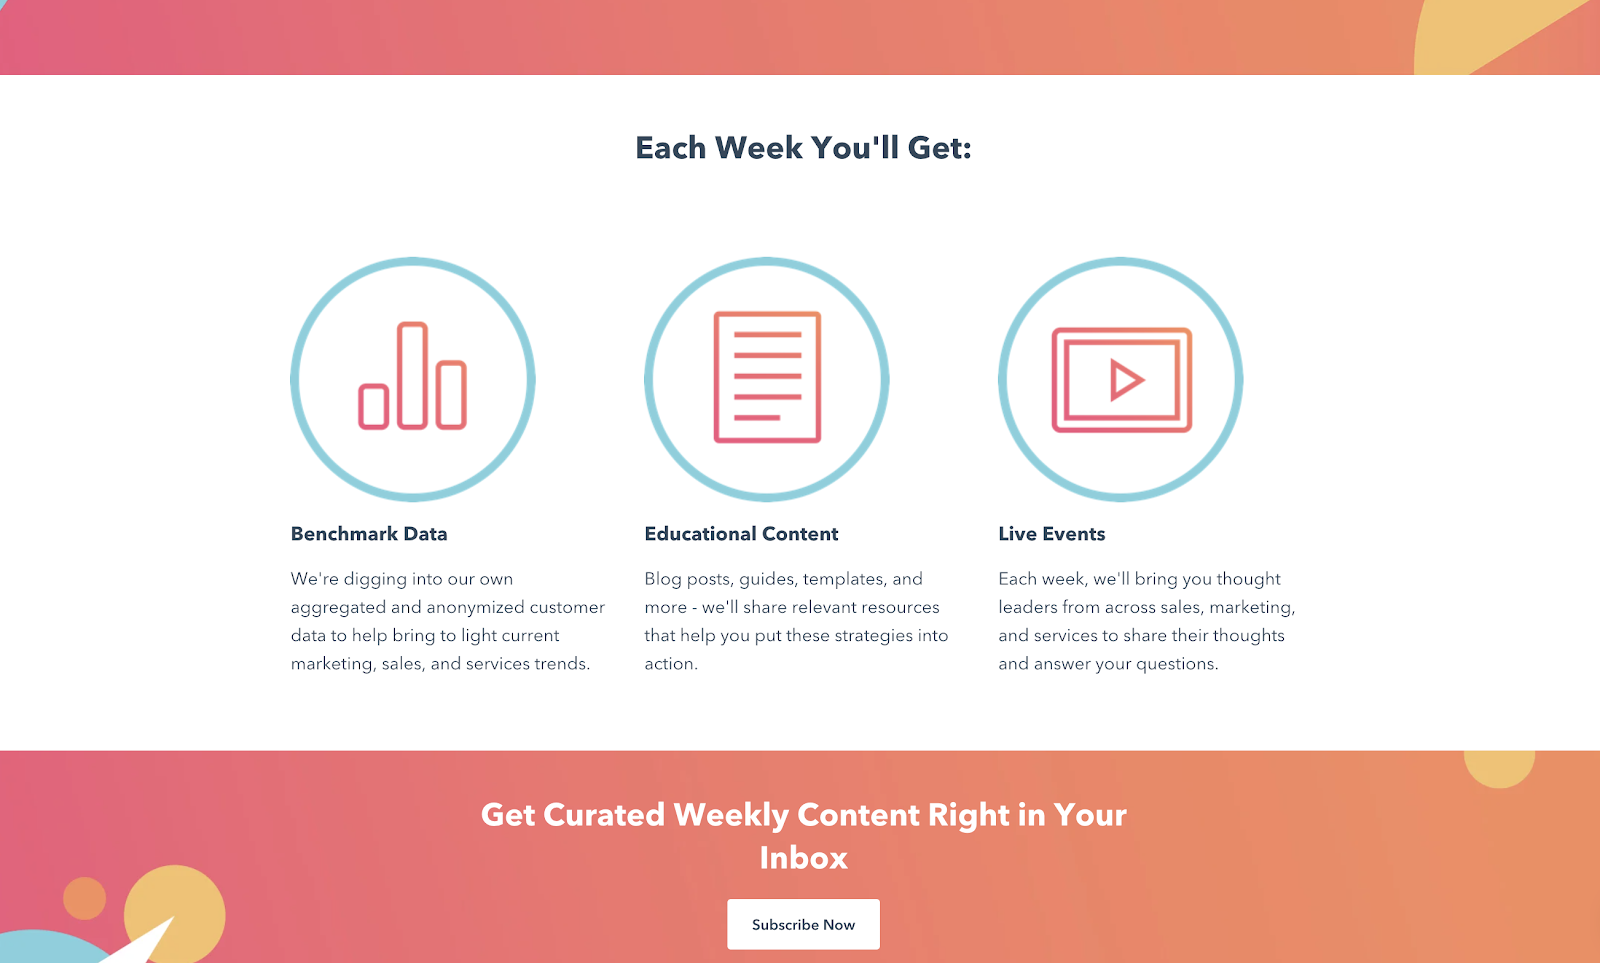
The Adapt series became the cornerstone of our content strategy during the current crisis and provided a powerful proof point of the value of the diverse app ecosystem that’s deeply integrated with HubSpot’s suite of tools.
With Looker we’ve been able to share regular updates on shifting trends in sales and marketing, with Canva we’ve been able to quickly design on-brand assets to promote upcoming webinars, and with Slack we’ve been able to collaborate with confidence on all of the elements that make up the weekly content series.
With distribution channels and cadence established with our subscribers, we have been able to turn our attention towards monitoring how the crisis and the needs of our audience are evolving from week to week.
Adapt Early, Adapt Often
Crises are unpredictable by nature. And what was deeply valuable to audiences last week, may be irrelevant by the next. To provide helpful content for the duration of a crisis, marketers should prepare to continually evolve their strategy in line with their audiences’ shifting needs.
Choosing the right metrics to monitor is key to not falling behind the pace of change. Creators should closely monitor metrics that indicate engagement — such as ‘average time spent on page’ for articles and show-up rates for webinars — to gain an insight into whether or not their new content is resonating with audiences. And from there, they can use those learnings to look for ways to improve the relevance and helpfulness of their next offering.
At HubSpot, we initially focused on delivering content aimed at helping businesses to set up virtual events and adapt to the new normal of remote work.
We then quickly shifted focus to creating content to help businesses take advantage of new relief measures available by publishing the pricing and packaging changes we’ve made along with an overview of the U.S. Stimulus Package.
Following that, we shifted focus to creating content to help businesses adjust their medium- and longer-term strategies and prepare for the post-pandemic economy.
We have never witnessed such sudden and dramatic shifts in what audiences need, and the marketers that are nimble enough to adapt their strategy quickly are the ones most likely to provide meaningful help for the duration of the crisis at hand.
And by doing so, they stand to establish long-lasting levels of loyalty with their audience.
What Content Marketing Has Always Been About
It’s no secret that consumers’ trust in companies has been dwindling in recent years. According to HubSpot Research, 55% of people no longer trust the companies they buy from as much as they used to, and 71% do not trust sponsored ads on social networks.
However, times of crisis create unique environments and unexpected outcomes, one of which can be the recovery of some of that lost trust, and the deepening of long-term relationships between consumers and companies.
Audiences are turning in record numbers to businesses for resources, information, and support. Customers are taking to social media to rally support for their favorite businesses. And content marketers are returning to first principles and re-establishing helpfulness at the heart of their strategies.
There are many challenges facing businesses at this time — content strategy is just one of them — but I am hopeful that marketers adopting the advice outlined here will see their efforts rewarded in the form of closer relationships with the audiences, and the fulfillment of knowing they’ve provided help when it’s been needed the most.
After all, that’s what content marketing has always been about.

45 Slack Tricks to Boost Productivity & Improve Collaboration
Slack is an undeniably popular messaging channel for businesses — it’s used by over 12 million people worldwide, and 87% of its users say Slack improves communication and collaboration.
As a daily Slack user myself, I can attest that it’s an incredibly helpful tool for sending quick questions to your manager, organizing meet-up times with colleagues, or even sharing the occasional dog photo in the company’s #dog-channel.
However, despite using Slack daily for the past two years, I had no idea that I could star important messages (which essentially “bookmarks” them), set up reminders within Slack to respond to messages whenever I’m ready, or create a custom emoji.
There are plenty more tricks to using Slack more efficiently, as well — here, NetCredit collected 45 of them. Take a look at this infographic to learn how you can streamline your own processes to become more productive while using Slack, or how you might create a better experience for your colleagues.


2020 Social Media Marketing Industry Report
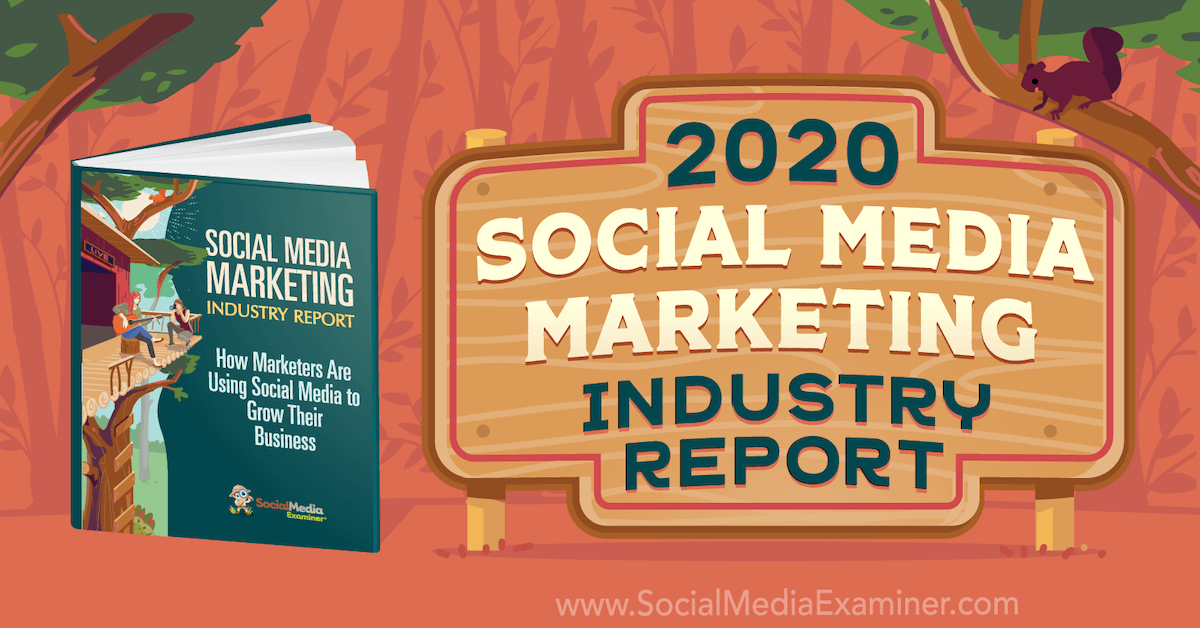
Wondering how fellow marketers are using social media? Want to know what marketers plan to do with organic social activities, video marketing, and social ads? In our 12th annual social media study, we surveyed more than 5,200 marketers who reveal details you won’t find anywhere else. How Are Marketers Using Social Media? To understand how […]
The post 2020 Social Media Marketing Industry Report appeared first on Social Media Marketing | Social Media Examiner.
from Social Media Marketing | Social Media Examiner https://ift.tt/3bn1Q6A
via socialmediaexaminer
HubSpot’s Management & Leadership Development Expert Shares Tips for Staying Productive When You Work From Home
One of the best training sessions I’ve attended for my career was the PeopleFuel®️ program by The Energy Project at HubSpot.
Here, I learned that to be most productive at work, I needed to manage my energy, not my time.
The training was led by Nick Congelosi, HubSpot’s Management and Leadership Development Head.
His team is responsible for overseeing global leadership development across HubSpot with workshops, certifications, and trainings like PeopleFuel®️.
When I left that workshop, I felt confident that I could revitalize my work day.
That’s why I decided to grab a virtual coffee with Congelosi and learn all about his best tips for staying productive when you work from home.
Below, let’s review Congelosi’s remote work productivity tips, how to stay productive during remote meetings, and best practices for running a productive remote training session.
1. Place a side table next to your desk.
Have you ever worked on a cluttered desk? I know I have, and that’s how I know how distracting it can be.
To help you stay focused during your day, Congelosi recommends placing a side table next to your desk about an arm’s length away.
You can place your notebook and to-do list on this table, so whatever you’re working on is the only thing on your desk. If it’s your computer, only have one tab open (or however many you actually need to get that one task done).
This should help limit distractions when you’re working on a certain task.
However, if you’re in a meeting, but need something to do with your hands, you can use a pen or pencil so you won’t be distracted.
2. Create clear stopping points.
When you work in an office, there are usually organic stopping points throughout your day. However, when you work remotely, those breaks don’t happen naturally.
“We hear all the time that people work more hours or their work bleeds into their evening, when they work remotely,” Congelosi says.
To avoid this, you should designate clear stopping points. For instance, Congelosi has stopping points at 10:30 a.m., noon, 3:30 p.m., and 5:30 p.m.
Unless you’re working on something mission critical, be religious about taking these breaks. You can go for a five minute walk or just get up and stretch.
3. Keep short-term and long-term (STLT) benefits in mind.
When your motivation and energy is low, it can be hard to stay productive.
If this happens, Congelosi recommends thinking about the short and long-term benefits of the task at hand.
This can remind you why you’re doing what you’re doing, keep your motivation up, and increase productivity.
Congelosi personally calls out these benefits in his notebook.
“You need to zoom out so that we can be more specific about what we’re zooming in on. As I zoom out, it’s going to help me reprioritize. It’s going to help me be more task focused,” Congelosi says. “It’s going to help me remember why I’m here and what I’m doing. So I think that that’s a huge, huge element that happens when you identify those short term and long term outcomes.”
While you don’t need to do this for every task, it’s important to do when you lose sight of what you’re doing or feel scatterbrained.
4. Own your calendar.
To own your calendar, you should have your non-negotiables already booked. For instance, Congelosi blocks off his calendar on Friday’s from 2-5 p.m. so he can wind down for the week.
“I recommend booking your lunch hour and breaks, recurring. Your calendar is what you have true autonomy over,” Congelosi says.
Additionally, Congelosi recommends not scheduling back-to-back meetings. You can use Speedy Meetings in Google to help with this.
With Speedy Meetings, your calendar will default to book 25 and 50 minute meetings (instead of 30 minutes or an hour), so you have time between your meetings. You’ll never have to rush to an online meeting again.
5. Use a notebook or to-do list app.
If you’ve ever felt scatterbrained, you know that it’s important to have lists and keep track of everything you need to do.
One thing you can do is use a notebook. You can write out your to-do list or just brainstorm ideas.
To do this online, you can use a to-do list app. Congelosi recommends the Microsoft to-do app.
6. Take more breaks.
In HubSpot’s Remote Work Report, we found that 45% of remote workers take less than an hour lunch break, and 25% work through lunch.
Additionally, 58% of remote HubSpotters take 1-2 breaks a day, with 29% taking 3-5, and 10% taking none.
When you don’t take enough breaks throughout the day, you’re actually sacrificing more than productivity.
While work culture has told us to ignore our body, Congelosi recommends taking more breaks throughout the day and listening to your physiology.
You can plan your break times around the hours that you’re most productive.
If you do a time audit and/or know when you’re most productive, you can ensure that you’re working during that time, and taking breaks during unproductive times.
7. Don’t forget about work life balance.
According to HubSpot’s findings, communication with co-workers, feelings of loneliness, and overworking are challenges that remote workers face daily.
We know this is a problem, but how can you increase your emotional energy throughout the day?
Congelosi says companies need to focus more on work/life balance because those that still work on a “factory clock” don’t have high retention rates.
To increase emotional energy throughout the day, try these tactics:
- Reach out to your team.
- Say good morning to coworkers on Slack.
- Leaders should leave loudly. If you’re a manager, message your team at the end of the day and let them know that you’re signing off.
- Exercise, even if it’s just a 10 minute walk.
- Find hobbies you enjoy. Congelosi says, “For people that are lonely, I’d be curious if their identity and self-worth is wrapped up in work. If it is, that’s not right.”
- Appreciate people. Take a few minutes to write a note of appreciation twice a week. This brings about inclusion, connection, and belonging.
At the end of the day, Congelosi says “You get what you give.”
8. Build lasting habits.
You might be thinking that a lot of these tips are based around building new habits. However, building a habit that will last isn’t easy.
One of the best ways to build a new habit is to self-incentivize. For example, once you get a certain task done, you can reward yourself with a new book (or whatever it is that’ll work for you).
If self-incentivizing isn’t doable for you, you can try to build one habit that will enable other habits.
For instance, if you focus on building the habit of keeping autonomy over your calendar, that will enable other habits such as taking more breaks or exercising throughout the day.
Congelosi says, “Be kind to yourself and allow your habits to change. If they don’t stick, they’re not the right habit for you.”
9. Give your employees resources.
As a manager, you need to give your employees the resources they need to be productive.
Congelosi says, “You have to, have to, have to have a resource that you’re actually giving employees.”
For example, when you give an assignment, you should tell your employee what the goal is and then give them examples of what it should look like.
Additionally, another resource you can use is public boards to increase collaboration among your team.
Congelosi says, “Be clear about the goal, but flexible about how to get there.”
Now that we’re ready to take on the day as productive remote employees, you might be wondering, “How does this apply to meetings?”
Below, let’s review a few tips on how to stay productive during a remote meeting.
How to Stay Productive in Remote Meetings
1. Have an agenda.
Of course, the obvious way to remain productive during a remote meeting is to make sure you have an agenda. Before you go into any meeting, you should be clear about what you’re talking about.
Having an agenda will help you stay on track so you don’t forget anything.
2. Add structure.
An agenda will help you add structure to your meetings. For example, you should actually write down when there’s going to be five minutes of random catch-up conversations.
This will help people on your team self-regulate, so you don’t have to go through the awkwardness of transitioning from chit-chat to business.
3. Keep balance of power in mind.
As a remote employee, it can be awkward when a few coworkers are in the office and you’re the only remote person involved in the meeting.
If you’re going to have a mix of remote and in-office employees, Congelosi says it might be better to just have everyone dial in remotely. This will level the playing field for your team and make your meeting run more smoothly.
4. Use the seconds counter on your computer clock.
When you’re running a gigantic meeting, it’s important to keep track of time. One thing that Congelosi does is use the seconds counter on his computer clock.
“We find ourselves often at moments like, ‘Shoot, it’s 12:59′, but it’s really 12:59 and 59 seconds which is no time,” he adds.
Using the seconds counter will help you keep track of how much time you actually have left on a certain topic in your agenda.
5. Be intentional about psychological safety among your team.
With remote meetings, you might’ve felt that watercooler awkwardness when two people are catching up on something, but everyone else is quiet. Or perhaps multiple people have responded to someone at once, causing confusion.
While these issues often get misconstrued as a remote problem, Congelosi says they’re actually an inclusion problem.
He adds, “Nothing on camera is subtle. That spotlight effect is really, really hard to deal with.”
That’s why it’s important for managers to focus on the psychological safety of their team.
“The option to be included is paramountly critical,” Congelosi says.
To improve psychological safety in your remote meetings, try these tactics:
- Round-robin conversation. When you ask a question or you’re doing an ice breaker, go round-robin so everyone has a chance to speak.
- Extrapolate other questions when a conversation is excluding people. For example, if people are talking about something that not everyone knows about (the latest music, sports, TV shows), managers can ask something like, “It sounds like that team certainly has put in a lot of effort. Where else have you seen that?” This helps the discussion become about the bigger picture, and not the “thing” that’s excluding people.
- Use a ‘Working With Me’ document. These documents are helpful for managers to use so everyone knows how everyone works. It’s also a great way to get to know people. Additionally, this helps employees build trust and psychological safety with their manager and team. Congelosi says, “We spend so much of our lives trying to glean through magic who you are as a person. There’s a lot of cognitive effort you spend trying to read people. Let’s just talk about it.”
- Talk about norms. It’s important for teams to establish norms with each other. For example, if someone is comfortable sitting quietly before a meeting, but someone else on your team wants to be engaged, it’s important for a manager to know that and set norms so the expectation isn’t uncertain.
- Do a ‘This or That’ activity. This is a great low risk activity that can help build psychological safety. With ‘This or That,’ you just go around and ask your team this or that questions.
- Go through a ‘I am…but I am not’ activity. With this activity, people on your team will go around and say “I am…but I am not” statements. For example, a low risk statement I can say is “I am from Orange County, but I’ve never seen Laguna Beach.” This activity is high risk, but it’s great for building psychological safety. Congelosi says, “Managers need to assess the risk level of an activity and think about it in sequence. Start low risk and move up from there.”
Now that we know how to stay productive during our work day and remote meetings, you might be thinking, “What else is there?”
Well, if you’ve had to run training sessions or onboarding remotely, you might be wondering how to do it productively. Below, let’s review a few of Congelosi’s top remote training productivity tips.
Remote Training Productivity Tips
1. Get a producer.
If you’ve had to run a training session with more than 20 people, you should consider getting a producer. This person will monitor the chat, answer questions, and send links to resources that are discussed in the session.
For example, if the trainer references a book, the producer will send a link to the book in the chat.
2. Know what the best user experience is.
While Congelosi generally recommends leaning away from slides, if you have to use them, make sure you know how to ensure the best user experience for your audience.
For example, if you’re on Zoom, you should take time at the beginning of your training to make sure everyone has a side-by-side view set up.
3. Annotate your slides.
Don’t be afraid to annotate your slides. When you’re conducting remote training, going through slides can be difficult to get through.
The annotation feature will help you run a more agile training.
4. Use the whiteboard feature.
When I asked Congelosi about trying new things in remote meetings, he told me a story about Larry King.
He said King’s first words on the radio were, “I don’t know what I’m doing, but I want to do it well.”
Running a remote training session can be like that. If you haven’t used the whiteboard feature before, you might be scared to try it because it’s new.
However, Congelosi says to take advantage of the fact that we’re in an unprecedented time.
“Take the risk. If you’re a virtual trainer, moderator, interviewer…take the risk with Zoom, and use the whiteboard.,” he says.
5. Set expectations.
People expect what you tell them to expect. If you’ve never done something before, you can be honest and authentic about that.
While there’s a balance between self-confidence and self-awareness, being vulnerable in an appropriate way is encouraged.
Being remote isn’t always easy for managers or employees. Staying productive can even seem like an elusive goal at times. However, forming small habits every day can help you achieve success when you’re working remotely.

17 Online Team Building Games to Try with Colleagues
“As the saying goes, the whole is greater than the sum of its parts. This is especially true in the context of distributed teams,” says Meaghan Williams, HubSpot’s Remote Work and Inclusion Program Manager.
Essentially, this is why team building is important. Team building gives your team a greater sense of togetherness.
Most likely, you can envision team building games in your head: exciting team outings, fun outdoor activities, or after-work happy hour chats.
But what does team building online look like?
When members of your team work remotely, it can be a slight hurdle to foster team building without face-to-face contact. Williams notes, “It can be hard to build that same sense of belonging and commitment to the team when you’re remote. That’s where remote team building comes into play.”
Although it can be tough to figure out how to build team morale virtually, the task isn’t impossible.
Remote team building games improve the morale of your team and their sense of belonging, which is essential for your team’s overall productivity and employee satisfaction
We’ve put together a list of exciting team building exercises and games for your remote team to try out. Let’s go over them in the next section.
Online Team Building Games
When coming up with ways to bond with your team online, Williams suggests assuming that anything is an option. This mindset combats restrictive thinking with games and opens up new realms of possibilities.
“This mentality has led to everything from remote yoga to remote holiday parties, and we’ve had so much fun along the way,” she says.
So with that in mind, let’s go over exciting options for building up your team.
1. Remote MTV “Cribs”
Similar to the workings of the hit MTV show “Cribs,” you and your team could spend some time showing off your remote work spaces. This is an inspiring and fun way to get a look into the workspaces of your teammates.
To give it a “challenging” aspect, have team members vote on their favorite workspace at the end, and the winner can enjoy the bragging rights of having the most impressive remote work setup.
2. Remote Work Bingo
Using a bingo template, create a bingo card and schedule a quick game as a “brain break” for you and your team. You can make it personalized to fit your company and team like the one below:
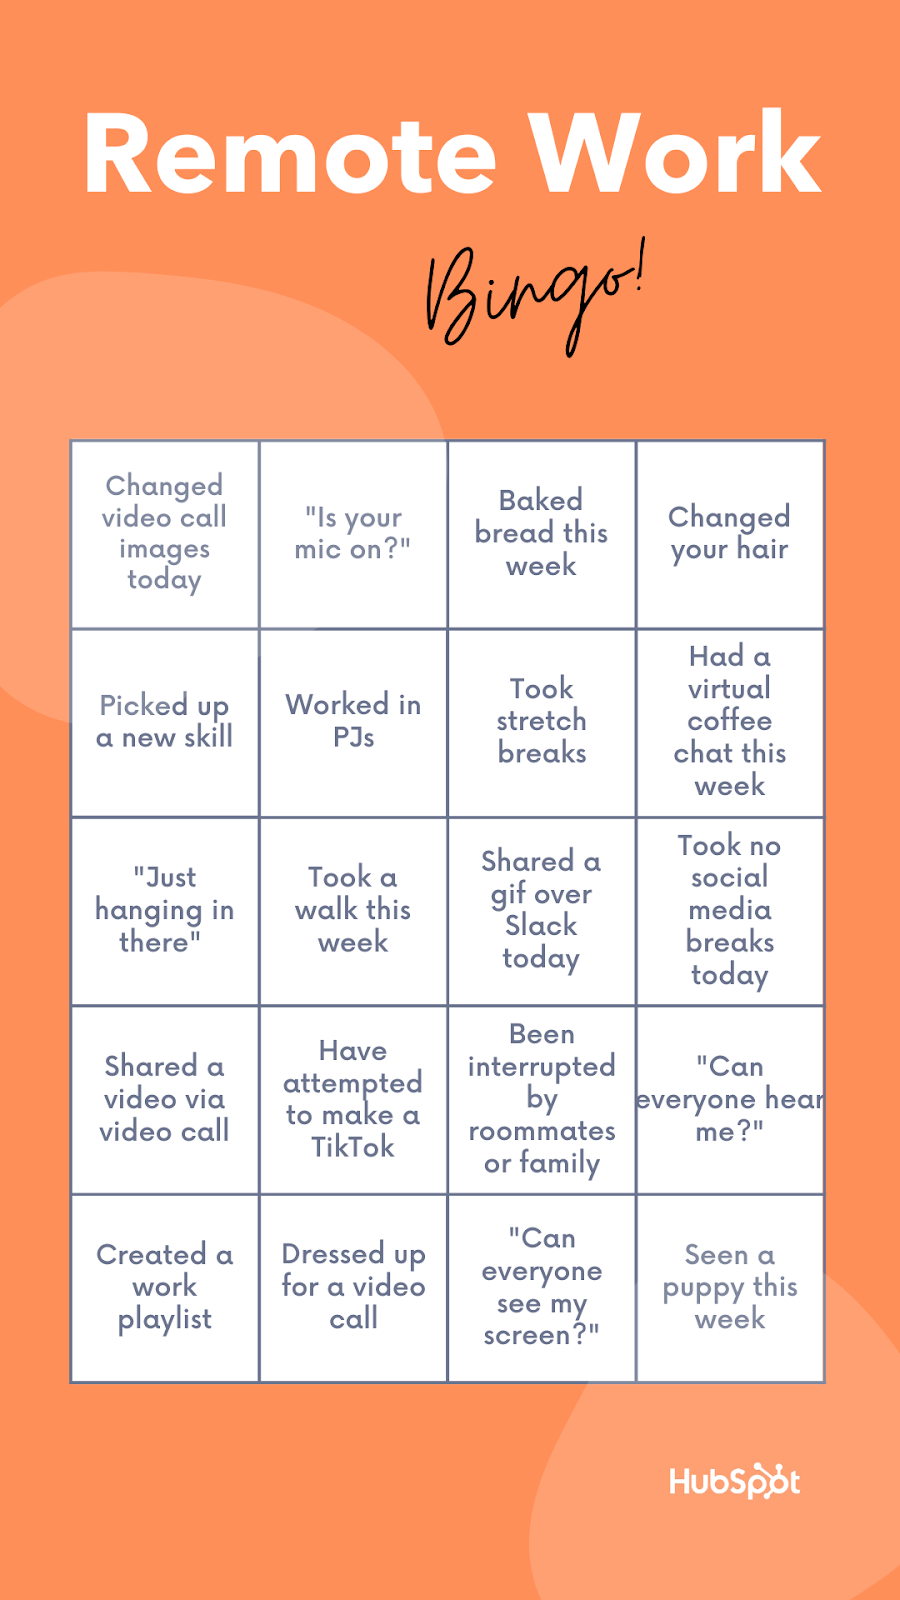
Have your teammates submit ideas for Bingo spaces to make it a collaborative process. You can even offer a prize for the winner, such as an online gift card. Another plus — Bingo is easy enough to be built into a routine meeting.
To make Bingo work remotely, pick one person to be the moderator. They would call out a random phrase and wait a few seconds for players to search their card for that phrase. If the player has that phrase on their card, they’d use a tool, such as paint, to mark that space.
Once a player has marked enough spaces in a row, they’d announce “Bingo!” in the video call and wait for the moderator to check their answers. If the row is vertical, horizontal, or diagonal, and matches the spaces, that colleague wins.
3. Mafia
Mafia is known by a couple of different names, and is often played by large groups. Essentially, the game is a “whodunnit” mystery-solving challenge. One of the players is a silent “killer,” and it’s up to everyone else to figure out the culprit.
There’s a couple of roles to assign in Mafia to keep organizational structure, like “Doctor,” “Townspeople,” and “Detective.” The best part about the game? It can all be played over a video call. Click here for a full run-down of how to play Mafia.
4. NATO Alphabet
If you’re unaware, the NATO alphabet describes the process of connecting letters to common words so others can better understand how to spell something. Typically, this is done for phone calls and commonly starts with “A as in apple,” or “B as in boy.”
Develop a new NATO alphabet with your team. Participants each add on a new letter until the alphabet is formed. The catch?
Before adding on, the team member must recite the alphabet thus far. Good luck in advance to the team member who lands on “Z”!
5. Origami Crafts
Do you remember making origami crafts when you were younger? Origami is the process of folding and cutting paper to resemble real-life objects. You might consider hosting an origami session with your team and deciding who has the best paper-folding skills.
You can find simple origami crafts to make here. As an end result, your desk will have a new decoration.
6. Show and Tell
For show and tell, consider picking a theme — like favorite pastimes, favorite snack, or household pets — and have your team show them off in a video call. Show and tell allows participants to share items that are important to them.
Will you bring your favorite video game and share how it’s the perfect time-waster? Or will you show off your favorite afternoon snack, the one you always have to have on hand?
7. Emoji Stories
Using less than six emojis, begin to write a story in an instant message thread or the chat section of a video call. Then, one by one, your coworkers will add to that story using five more. You can keep going until every teammate has had a turn, or until you run out of ideas.
To get the ball rolling, here’s a potential story starter: 🏘⛈💡🚫 … what happens next to the neighborhood with no power during a storm?
8. DIY Cooking Show
Are the members of your team obsessed with shows like MasterChef or Chopped? Alternatively, are they big into YouTube cooking shows, like Bon Appetit’s Gourmet Makes? If so, it could be fun to challenge your colleagues to create their own version of a popular cooking show or a tutorial of their favorite comfort food recipes!
This can be done in a variety of ways, but to give it a “challenging” aspect, pick one dish that’s simple to make, like a patty melt or mac and cheese. Give your team one week to film their own versions of the recipe, upload it to a Google Drive, and choose the winner based on creativity of the dish.
Cooking is an awesome way to express creativity, and as the saying goes, food often brings people together. Plus, leftovers mean there’s no extra thinking to do when it’s lunchtime!
9. Call of the Champions
To liven up meetings and make them more interactive, consider a “Call of the Champions”-style meeting. This game incorporates roles into meetings and helps inspire engagement during video calls.
Some of the roles you can include in this meeting are as follows:
- Cheerleader — The meeting cheerleader will encourage new ideas and suggestions, and inspire the other meeting attendees to follow suit.
- Mover and Shaker — If your team gets off topic during the meeting, it’s this person’s job to reign everyone back in and continue with accomplishing the goal of the meeting.
- Photographer — Are your video meetings photogenic? It might be fun to assign someone the role of photographer — this person will scope out photo-ready opportunities, ask for the team’s consent to be pictured, and snap a screenshot to share on social channels.
- Scribe — This role is a writer’s dream: All they have to do is record the highlights of the meeting. It could be helpful to have a Scribe if your meeting is mandatory, but some team members aren’t able to make it.
10. Pop Culture Trivia
What song did Britney Spears perform at the 2001 VMAs? What fictional town does sitcom Parks and Recreation take place in? Unwind with your coworkers in a friendly game of pop culture trivia — 2000’s style.
You can come up with questions with your team, or look up fun prompts online. Assign a moderator, split your team up into groups, and let the games begin!
11. Museum or Farm Field Trip
Did you know that some museums offer virtual gallery tours? From The American Museum of Natural History’s Facebook Live tours, The Frick Collection, the Smithsonian, and more, you can set up a day with your team to explore.

You can either set up a scavenger hunt for teams, (i.e. “Find something related to prehistoric times,”) let members choose a museum to present to the group, or tour the same museum as a group. Field trips are a great bonding experience for groups and museums are making that experience more accessible for remote teams.
Alternatively, you might chat with a local farm to see if they’d be willing to set up a remote farm tour for your team. We’ve done this at HubSpot, and it’s a great way to bond with colleagues as you virtually fuss over the adorable pigs or goats you see on-screen.
12. Scavenger Hunt
When was the last time you went on a deep dive of your company website? If your answer is, “Never,” here’s your chance to challenge your colleagues. Choose pages or tabs from your company’s website for yourself and team members, and come up with a group scavenger hunt.
Break off into teams, or make it a solo venture. After 20 minutes, whoever gets the most points, wins! An idea to get the scavenger hunt ball rolling: “Find the testimonial from X customer.”
13. Lunch and Learn
RSVP time with your team to join a webinar and learn a new skill. Alternatively, have your colleagues take turns to host mini Lunch & Learn sessions for tips about how to perform job functions in a simpler way. For instance, if I were to host a session, it might be “How to Create Awesome Meta Descriptions in Less Than 15 Minutes.”
If your team members have very specific roles that differ, this could be a cool opportunity to learn a little more about what your colleagues do. For instance, your social media manager might host one session about his role regarding social accounts, while your web designer hosts another about her experience designing for UX.
These sessions would give the other insight into how to perform a job function and build a new appreciation for the day-to-day of colleagues.
14. Never Have I Ever
“Never Have I Ever: Remote Work Edition” is another quick stress reliever that helps you learn more about your colleagues. Here are the rules: a team member says something they’ve never done before, but if those playing have done it, they lower one of their fingers. The person with the most fingers left wins the game.
If I were to host a version of the game, my first entry might be, “Never have I ever bought noise-cancelling headphones.”
15. Virtual Dance Party
If you’re like me, you’re known for your pretty amazing work playlists. What better way to wind down after a long workday than with a no-judgement dance party with your colleagues? You can even pull up a song from the Just Dance video game series and learn together (you just need a smartphone!):
There’s no pressure to explode into a fully-choreographed sequence a la Mamma Mia! — all dance styles are encouraged. Blow off steam and enjoy a friendly competition with your team.
16. Happy Hour
One of the most fun remote team building events I’ve done with my team has been Remote Happy Hour. It’s a time for your colleagues to get together and bond outside of work.
Participants can bring any beverage they choose (tea, seltzer, or other non-alcoholic beverages should be encouraged as well), talk about what they’ve brought, and enjoy a relaxed atmosphere. Happy Hours are great because they can take place after the workday is done and offer a fabulous, relaxing opportunity to catch up with your team.
17. Book Club
It’s easy to get video call fatigue after signing off for the day or during a lunch break. To give my eyes a screen break, I’ve turned to the books I’ve had gathering dust on my shelf. To turn reading into a group bonding experience, you might consider polling your coworkers about books they’d be interested in reading, and host a virtual book club.
This can be a recurring event or a one-time session, but the purpose is to discuss ideas outside of team projects. It can be a nice break from your day to discuss a good book — whether it’s every month or a couple of times a year.
“Not every idea is going to be a winner, but what’s important is that you’re willing to be vulnerable with each other and give new ideas a try,” Williams says.
Additionally, she adds, “If you’re just embarking on this journey for the first time, be honest with your team about this and ask them to provide feedback on what’s working and what isn’t. Even better, ask them to contribute their own ideas and lead the way on initiatives that they’re excited about.”
Team building is all about strengthening the bond of your team through different and fun activities. You can host a Pictionary session through a video call or encourage different areas of discussion during meetings. For more ideas on team building games, Williams suggests giving these options a whirl:
Most importantly, remember to just have fun with your team and enjoy the time you have together!

80 Things to Check Before, During, and After Launching a Website
Admit it: Launching a new website is stressful — even for the most seasoned digital marketers.
Websites are complex. There are so many things that are easily overlooked, like a broken link or a misspelled word.
And of course, a handful of things could go very, very wrong. Like what if you forget to test an important data capture form and then lose out on generating a bunch of new leads? Or worse, what if you forget to properly set up site redirects, and those valuable search engine visitors get a page not found message?
Instead of worrying about the what ifs, wouldn’t it be much easier to have a comprehensive website checklist to run down before every site launch? One that you could use for enterprise websites, microsites, landing pages, and everything in between?
What You Should Do Before Beginning Your Site Design
Whether this is your first website that is being built from scratch or you are doing a website redesign, there are a few steps that you should take before hiring a web designer or diving in yourself.
1. Analyze your previous website (if applicable).
In order to make good decisions, you must first understand where you’ve been. That starts with your existing website if you have one. Ask yourself:
- What is the purpose of a new design or overhaul?
- What haven’t hasn’t been accomplished with this existing site?
- How will a new design serve the new organization?
The answers to these questions can help you identify your gaps, which can then inform goal setting for the new site.
2. Crawl your old site (if applicable) and document its structure.
You can get an idea of your site’s existing structure, pages, and assets by using a crawling tool such as Screaming Frog. This is a necessary step in creating your website development plan because you’ll have a more concrete view of what pages existed before, what redirects are in place, and what the meta data currently looks like.
3. Obtain benchmark data from your previous website (if applicable).
Not only will you want to compare how your new site performs compared to the old, but you’ll also want to continue identifying gaps that will provide data-driven insights to aid your new strategy.
4. Identify your goals for the new design, how you’ll achieve them, and how you’ll measure success.
Once the gaps are fully fleshed out, you can begin crafting your goals for the design. You may come to conclusions such as:
- The current site is unwieldy, and we need ease of use.
- The current site no longer looks trendy, so we need a visual refresh.
- The current site doesn’t perform, so we need a more SEO-friendly structure with a better UX.
Whatever your goals, you’ll want to understand exactly how a new site will help you achieve them so that you can craft its implementation accordingly.
5. Choose a Solid CMS.
If you’ve never launched a site before, the long list below might intimidate you. However, it actually shouldn’t take too long to run through most of the aspects on this list — especially if you built your website with a solid CMS.
A CMS, or content management system, often allows you to design a website from a pre-created template, optimize your content for SEO, and edit content after it’s published. If you’ve already built your website, you might have already gained experience with using a CMS.
But, if you’re still building a website, one way to make going through this checklist less time consuming is by building your pages on a CMS that already does a lot of the work for you.
For example, HubSpot’s CMS that allows you to create and edit content including landing pages and blog posts. It’s features also allow you to organize your content, schedule it, track analytics, and optimize it for SEO.
Alternatively, you can also test out CMS platforms like WordPress, Wix, or even Drupal.
6. Develop a consistent brand.
Decide on a consistent brand message and tone, one that you’re committed to presenting consistently across. This will make you look more legitimate, credible, and memorable.
- Understand your value proposition.
- Choose a mission statement, vision statement, and tagline that represents that value as well as your brand identity.
- Choose colors and fonts that convey that identity well.
- Decide on the type of imagery that you’ll use to further convey your messaging.
7. Create your technical SEO strategy.
Take some time to ensure that your website has been given a solid foundation for SEO success. From site architecture and content hierarchy to metadata and XML sitemaps, do not leave any stone unturned.
- Perform keyword research and decide what you want to rank for.
- Create a content strategy that satisfies those keywords.
- Understand how your existing pages (if applicable) can be adjusted and which pages will need to be created new.
- Figure out which pages are no longer necessary.
- Map out where unnecessary pages can be redirected to (using a 301 redirect).
8. Strategize your conversion paths.
Once you have an understanding of the primary pages that will exist on your site, you’ll need to figure out exactly what actions you want users to take and how you’ll capture their information. This includes thinking through:
- What premium top-of-the-funnel offers are needed
- What bottom-of-the-funnel action will be presented on main pages
- What forms need to be created
- What landing pages and thank you pages need to be created
- How conversions will be tracked
- What actions will happen after a website visitor converts (email responder, etc.)
9. Set up analytics software.
- Choose which analytics platforms you will be using on the new site.
- Decide if any previous Analytics tracking scripts will be used or if new accounts/scripts are needed.
- Set up new accounts (if applicable).
What to Check Once You’ve Built Your Site
Once you’ve chosen a CMS and built a site that you’re ready to launch, here’s a list of 80 things to check before, during, and after going live. Feel free to copy, edit, and make your own based on the software you’re using to launch and host your website.
Don’t have time to check all 80? Here’s a list of the most important highlights from each section:
Website Launch Checklist
- Make sure text is accurate and error free.
- Replace all placeholder images with final images and designs.
- Ensure copy aligns with the new brand.
- Check that all styling preferences have been implemented.
- Ensure your design is aesthetically pleasing.
- Ensure that rights to images, fonts, and other content have been properly licensed or cited.
- Test the site for User Experience (UX).
- Check that the conversion paths have been implemented properly.
- Create your site backup strategy.
- Store passwords and credentials in a secure place.
- Audit the technical SEO implementation for errors.
- Test the site for user experience again.
- Test your conversion path’s functionality.
- Check that integrations with third-party tools are running smoothly.
- Make a copy of the final website for backup purposes.
- Ensure that backups are running properly.
- Make sure your site is secure.
- Comply with all applicable laws.
- Crawl the site to ensure no errors happened on launch.
- Check the technical SEO components for errors.
- Optimize your metadata.
- Set up analytics.
- Build anticipation with teasers before the site is live.
- Create a social media strategy for the announcement.
- Identify exciting ways to promote engagement for the new site.
- Send an email to your existing database.
- Continue to promote the launch for a month.
We’ve grouped items based on pre-launch and post-launch, making sure to touch on page content, design, functionality, SEO, branding, analytics, security, and compliance. Keep on reading to make sure you don’t forget a thing before your next launch.
Website Pre-Launch Checklist
Before you launch, it’s important to review all of the content on your website with a fine-tooth comb. Of course, that means page content, but don’t forget about your premium content too. From data-driven content and downloadable documents to rich media such as videos and images, you want to make sure everything is in place, working properly, and looking beautiful.
1. Make sure text is accurate and error free.
- Site content has been proofread for spelling and grammar.
- Company contact details are accurate throughout the website.
- Generic content, such as lorem ipsum, has been properly removed and replaced.
- All premium content, such as case studies, ebooks, and whitepapers, have been proofread. Spelling and grammar are correct.
- Copyright date (perhaps in the footer) includes the current year.
2. Replace all placeholder images with final images and designs.
On occasion, a website designer may use a placeholder image if they didn’t have the correct asset at the time of the page’s creation. It’s up to you to make sure each page is picture-perfect.
3. Ensure copy aligns with the new brand.
- The text has been copy-edited to ensure consistent brand voice and style.
- All company taglines and mission statements are up to date.
4. Check that all styling preferences have been implemented.
- Paragraphs, headers, lists, and other formatting are correct.
- Brand colors have been implemented correctly, including link and button colors.
5. Ensure your design is aesthetically pleasing.
- Scripts are optimized across web pages.
- Images are optimized across web pages.
- CSS is optimized across web pages.
6. Ensure that rights to images, fonts, and other content have been properly licensed or cited.
Even if you outsourced the design to a web designer/developer, the responsibility falls on you to ensure there are no copyright licensing issues. Otherwise, you could end up with a hefty infringement settlement on your hands.
7. Test the site for User Experience (UX).
- Website pages are compatible across browsers.
- Website pages are compatible across devices.
- Images, videos, and audio files are in the correct places, formatted and working on all devices.
- All premium content, such as case studies, ebooks, and whitepapers, are stored in their proper libraries/databases and work properly.
- Internal links across web pages are working properly.
- Social media share icons are associated with the correct accounts.
- Company logo is linked to the homepage.
8. Check that the conversion paths have been implemented properly.
- All necessary forms are present.
- Landing pages and thank you pages have been implemented.
- The correct buttons and calls-to-action (CTAs) are present in the proper locations.
- Everything is linked together appropriately.
9. Create your site backup strategy.
You can prevent loss of data and protect against malware and other damages by properly setting up site security and regular backups. Check that:
- Backup schedule has been created.
- Backup location has been identified.
- A plan for implementation is set to be put in motion after launch.
10. Store passwords and credentials in a secure place.
Many individuals have likely been involved in the website launch up until this point, so ensure that passwords are reset when the time comes and proper password etiquette is followed.
11. Audit the technical SEO implementation for errors.
- Pages have unique page titles.
- Pages have unique meta descriptions.
- Each page has a specific purpose, and pages meant to rank organically are optimized around a single keyword or set of keywords.
Website Post-Launch Checklist
Let’s say you’ve done it. The button has been pushed, the domain is pointing to the new site, and you’re about ready to tell the world…
But wait just one second because you still have things to check for now that your site is officially live.
12. Test the site for user experience again.
Just in case there was an issue with the implementation, you’ll want to ensure the experience is consistent with what you reviewed before it went live.
- Ensure your design is rendering as you expected it to across browsers.
- Ensure your design is rendering as you expected it to across devices.
- Ensure CSS/HTML is properly validated.
- CSS styling is rendering properly.
- Favicon is in place and rendering properly.
- Internal links across web pages are working properly.
- External links across web pages are working properly, and open in a new tab.
- Social media share icons are working properly.
- Feeds are working properly (RSS, news, social media).
- Company logo is linked to the homepage.
- 404 Redirect pages are in place (page-not-found.aspx).
13. Test your conversion path’s functionality.
Take some time to test and validate all of the different features on your website. Lead generation forms, CRM integration, and any other technology should work flawlessly across your website.
- Forms are submitting data properly.
- Thank you message or page displays after form is submitted.
- Form data is being emailed to a recipient and/or stored in a company database.
- Auto-responders are working properly (if applicable).
14. Check that integrations with third-party tools are running smoothly.
Integrations such as your CRM, e-commerce software, and/or marketing platform link to your site and help you run your business. If there is a potential issue that can cause data loss, you don’t want to find out way after the fact.
15. Make a copy of the final website for backup purposes.
Now that everything is in place and finalized, you want to have a pristine copy of it should you experience data corruption or loss.
16. Ensure that backups are running properly.
Now is the time to check the implementation of your backup strategy. Check that ongoing copies of the website are being created and stored on a regular basis.
16. Make sure your site is secure.
- 24/7 monitoring scripts are installed.
- There’s a plan in place for updating plugins (if applicable).
- Ensure that all applicable parties are aware of your organization’s password etiquette policies.
17. Comply with all applicable laws.
Make sure your website complies with any applicable laws and regulations. Internet law can be sticky, and each industry has its own set of rules to follow. So it’s best to consult with your legal counsel to make sure you aren’t missing anything — this post is not legal guidance. Here are a few you might need to know about:
- Web pages offer accessibility for users with disabilities (WAI-ARIA).
- Web pages announce if the website uses cookies (required in some countries).
- Website is compliant with usage rights for purchased or borrowed code, images, and fonts.
- Terms and privacy policies are visible to website visitors.
- Website is PCI compliant (if you’re storing and processing credit cards).
18. Crawl the site to ensure no errors happened on launch.
Compare the crawl to the previous crawl and see if you find any inconsistencies that were not intentional. You’ll also want to ensure that all pages have the proper search engine indexing settings.
18. Check the technical SEO components for errors.
- Page titles, meta descriptions, and URLs are all present and match the original technical SEO strategy.
- Load time for site pages is optimized.
- A dynamic XML sitemap has been created.
- The XML sitemap has been submitted to search engines.
- Page URLs consistently reflect site information architecture.
- 301 redirects are in place for all old URLs (redirecting old to new pages).
- rel=”nofollow” tags are in place on applicable links and pages.
19. Optimize your metadata.
- Metadata is properly in place for any content in an RSS feed.
- Metadata is properly in place for any social media sharing content.
- Spelling and grammar are correct in all metadata.
- Alt tags have been added to every image.
20. Set up analytics.
Make sure your website is set up to capture web data and analytics. This valuable information will allow you to continually improve your website going forward, so you don’t want to forget this stuff.
- Your website analytics codes and tracking scripts have been inserted on website.
- Relevant IP addresses have been excluded from analytics tracking.
- Funnels and goals have been properly created in your analytics software (if applicable).
- Google Webmaster and Google Analytics accounts have been properly synced.
- Google Ads accounts have been properly synced (if applicable).
How Do You Announce a New Website Launch?
This (hopefully) wasn’t a vanity project; you did all of this work so far for the benefit of your website visitors, prospects, and existing customers. Your next step is to tell the world about your new site design. Here’s how:
21. Build anticipation with teasers before the site is live.
A launch of a new product, a launch of a new movie, and — yes — a new site launch all require marketing before the actual release. Think of the last movie you watched in the theater. Did you see the trailer before you decided to buy those movie tickets and popcorn?
Teasers for your website launch can only help to build anticipation and get users wondering what the new experience will be like. This can build buzz and interest once you finally break the news.
22. Create a social media strategy for the announcement.
Decide what channels you want to promote the news on, how you will make the announcement, and how long the promotion will last. As you craft your messaging, remember to focus on new features and how they benefit your audience.
23. Identify exciting ways to promote engagement for the new site.
For users who aren’t as involved in your brand, a new site launch might not seem like a big deal. Your goal, then, is to make it one. Provide an exclusive offer for the first users who visit the site. Or, create a contest that promotes engaging with the site’s new features. Whatever you choose, make sure you make it fun and interesting.
24. Send an email to your existing database.
You may want to give existing leads and customers a head’s up about the new design, especially if it will cause any confusion when they next visit. You can break the news as a matter of courtesy but also sneak in ways to underscore the value you’re providing.
25. Continue to promote the launch for a month.
Just because you post about your new website once on social media does not mean that your audience will drop everything to visit the site in droves. Make your launch a big deal, and keep the new functionality top of mind so that your audience is prompted multiple times to check it out.
Resources for Launching Your First Website
Launching a new website can be a tedious task, but you can alleviate some of the stress by using this comprehensive website launch checklist.
If you’re just getting started on your first website, here are a few tools that can help you streamline your process
- CMS: As mentioned above, a CMS can help you design your website, optimize and publish content, and track your analytics once it’s launched. If you’re looking to test out a few CMS options, start by checking out our 14-day free CMS trial.
- Blogging Guides: If you’re interested in using your website to publish a blog that could help you boost brand awareness, it can be helpful to start brainstorming topics. Here’s a great guide to how to be a better blogger with tips from our team.
- Landing Page Templates: A landing page is a great way to highlight a product or resource that your brand is offering. It’s important to know what elements lead to a landing page that will convert. Here’s a guide with examples. Additionally, when using a CMS like HubSpot’s, you can create landing pages from pre-designed templates.
Editor’s Note: This blog post was originally published in August 2014, but was updated for comprehensiveness and freshness in May 2020.

New Pinterest Tools for Marketers
Welcome to this week’s edition of the Social Media Marketing Talk Show, a news show for marketers who want to stay on the leading edge of social media. On this week’s Social Media Marketing Talk Show, we explore Pinterest’s new shopping capabilities, Verified Merchant Program, and new marketing tools with special guest, Jennifer Priest. Tune […]
The post New Pinterest Tools for Marketers appeared first on Social Media Marketing | Social Media Examiner.
from Social Media Marketing | Social Media Examiner https://ift.tt/2WE6g3L
via socialmediaexaminer
How to Set & Achieve Marketing Objectives in 2020
In the marketing industry, setting objectives can be a double-edged sword. On the one hand, constantly raising the bar can incentivize your team to sustain your growth rate over long periods of time. On the other hand, it can incentivize your team to prioritize your company’s needs over your customers’ needs.
Contrary to popular belief, solely focusing on the results doesn’t actually produce results. Focusing on serving your customers is what produces results. Tim Cook, Apple’s CEO, is famous for sparking this customer-centric movement. In 2015, he spoke at Goldman Sach’s Technology and Internet Conference in San Francisco, and a reporter asked him what some of Apple’s biggest accomplishments from the past year were. He responded, “We’re not focused on the numbers. We’re focused on the things that produce the numbers.”
In marketing, what produces the numbers is a passion for your craft. Sometimes, we can get so obsessed with optimizing for results that we forget what actually generates the views and leads we desperately desire — compelling content.
In this blog post, we’ll show you how to set realistic marketing objectives that will help you craft audience-centric content, prioritize your customers’ needs, and hit your numbers, all at the same time. Read on to learn how to identify your marketing objectives’ purpose and process and why it’s just as important as the numbers you aim to hit.
What Are Marketing Objectives?
Marketing objectives are the goals your team wants to achieve during a certain period of time. They’re usually a hard number or metric that serve as metaphorical finish line for your team to sprint towards. However, setting marketing objectives isn’t just limited to determining what you want to achieve. You also need to specify how you’re going to reach your goals and why you want to reach them.
In his insightful blog post about setting goals, Jay Acunzo, the founder of Unthinkable Media, reveals a subtle yet potent problem that has pervaded the content marketing industry over the years — traditional goal setting lets you measure what you do, but it doesn’t lend itself to gauging how you do it or why, which is what ultimately gives your work meaning and resonates with prospects.
In marketing, you obviously need to aim for concrete targets. But, as we said earlier, only focusing on the results can sometimes incentivize you to take a course of action that prioritizes your organization’s needs over your customers’ needs.
To help you focus more on your purpose and process instead of just your results, Acunzo recommends considering two additional factors things when setting a marketing objective — your hunger and your aspirational anchor.
Your hunger is your current dissatisfaction with your work today or why you want to achieve your goal. Your aspirational anchor is your vision of your work in the future or how you’ll achieve your goal. These two factors drive your motivation and keep you on track to create work that better serves your customers. When you add your numerical goal to the equation, you’ll be able to simultaneously produce customer-centric work and create business impact.
How to Set Realistic Marketing Objectives
The first thing to understand is the subtle difference between a goal and an objective. A general goal is going to be your broader vision while your marketing objective is that more concrete specification of how that vision is achieved. In order to craft your marketing objective, you must start with vision first by defining three main things:
- Hunger – What is the driving force — or the “why” — behind what you want to achieve? What pain or problem has led you to this point, and why must it be solved?
- Aspirational Anchor – What does success look like — or “how” does the end vision solve that problem?
- Goal – What steps must be taken — or the “what” — for that aspiration to come to fruition?
Now that we understand the “why” and the “how” behind setting marketing objectives, let’s go over how you can root the “what” in reality with the SMART goal framework.
SMART goals are realistic, quantifiable, and focused targets that you can easily aim for. If you’re wondering what SMART means, it’s an acronym that helps you clearly define your goals.
Specific
In terms of marketing, you should choose the particular metric you want to improve upon, like visitors, leads, or customers. You should also determine what each team members will work on, the resources they’ll have, and their plan of action.
Measurable
If you want to gauge your team’s progress, you need to quantify your goals, like achieving an X percentage increase in visitors, leads, or customers.
Attainable
Make sure that X-percentage increase is achievable in your specific situation. If your blog traffic increased by 5% last month, try to increase it by 8-10% this month, not 30%. It’s crucial to base your goals off of your own analytics, not industry benchmarks, or else you might bite off more than you can chew.
Relevant
Your goal needs to relate to your company’s overall goal and account for current trends in your industry. For instance, will growing your Facebook following lead to more revenue? And is it actually possible for you to significantly boost your organic reach on Facebook after their most recent algorithm change? If you’re aware of these factors, you’ll be more likely to set goals that are realistic, achievable, and beneficial to your company.
Time-bound
Attaching deadlines to your goals puts pressure on your team to accomplish them. And this helps you make consistent and significant progress in the long-term. If you don’t give yourself a deadline, you can very easily fall into the trap of procrastinating on action items, leading to a slower rate of success. For example, which would you prefer: Increasing leads by 5% every month, leading to a 30-35% increase in half a year or trying to increase leads by 15% with no deadline and achieving that goal in a year?
By analyzing two different goal setting frameworks, we’ve learned how to identify the “why,” “how,” and “what” behind your marketing objectives. Now, we can blend the two frameworks to set a realistic goal that fulfills your customers’ needs and helps you hit your numbers at the same time. Check out the examples below for more detail.
Marketing Objective Examples
- Increase blog subscribers by 25% month over month this year.
- Reach 35,000 visitors to the website from our organic search monthly by the end of the year.
- Improve the mobile traffic conversion rate site-wide from 2.3% to 5% by Q3.
- Convert 500 Leads to MQLs by the end of the year.
- Increase our average monthly open rate from 25% to 40% by Q1.
- Increase our MQL-to-SQL conversion rate from 25% to 35% by Q2.
- Improve our NPS score from 31 to 35 in 6 months.
- Improve our Facebook engagement by 30% month-over-month.
Now that you know how to write a marketing objective, you can get ideas from some metaphorical samples. Below, we’ll start with one long example breaking out the above methodology step-by-step, and then we’ll provide other examples to fuel your inspiration.
1. Increase blog subscribers by 25% month over month this year.
For this example, let’s begin with the aspirational vision framework from earlier in the blog post.
- Hunger (Why) – Our blog educates our audience well but it doesn’t resonate emotionally with them enough.
- Aspirational Anchor (How) – Run a blog that consistently resonates with our audience and that people look forward to reading every time they receive our email digest.
- Goal (What) – Increase blog subscribers as an indication of our success.
With this goal setting framework, you can see how the “why” and “how” behind a goal incentivizes behavior that better serves customers and hits numbers at the same time.
For instance, in the example above, this blog team refuses to just do whatever it takes to boost their blog subscription. They want to craft emotionally resonant stories that their audience actually values, or content that’s worth subscribing to, and this is what will lead to their growth in subscribers and create long-term value for their business.
If this blog team didn’t identify their hunger or set an aspirational anchor, however, the only thing that would guide them toward the finish line is the finish line itself. And that could incentivize short-sighted behavior that helps them achieve their goal at the expense of prioritizing their audience’s needs over their own.
Once the aspirational vision and the general goal has been defined, now it’s time to pivot to a concrete objective using the SMART goal framework:
Specific
Our blog educates our audience well, but it doesn’t resonate emotionally with them enough. Let’s start running a blog that can consistently provide value, that people look forward to reading every time they receive our email digest, and that can attract more subscribers.
Measurable
Increase month-over-month blog subscribers by 25% this year.
Attainable
Last year, we increased month-over-month blog subscribers by 15%, so we know this is doable.
Relevant
If we can craft emotionally resonant stories that our audience actually values, we can build deeper relationships with them, attract more subscribers who we can also build deep relationships with, and hopefully do business with them in the future.
Time-Bound
Monthly over the course of a year.
2. Reach 35,000 visitors to the website from our organic search monthly by the end of the year.
Let’s say our organization’s goal is to grow its online organic presence to attract more leads. Those are Hunger and Aspirational anchors, so they must be translated into a SMART goal if we want to take steps to achieve it:
- Specific – Increase website visitors from organic search.
- Measurable – Reach 35,000 visitors monthly.
- Attainable – Must be sure that number is reachable by increasing or improving variables within our control.
- Relevant – Must be the right traffic since the ultimate goal is to increase leads.
- Time-bound – By the end of the year.
3. Improve the mobile traffic conversion rate site-wide from 2.3% to 5% by Q3.
Traffic alone is not enough to generate leads and, ultimately, revenue. We need mechanisms in place to convert the traffic we’re already getting. Let’s say we notice that our site converts a lot better on desktop than mobile. This means we could be losing a ton of lead opportunities who arrived at our site on a mobile device. That’s why we decide to improve the mobile experience. Here’s how we turn that goal into an objective:
- Specific – Improve mobile traffic conversion rate.
- Measurable – From 2.3% to 5%.
- Attainable – Must identify roadblocks to conversion and how we plan to remove them.
- Relevant – Must actually have enough mobile traffic to justify the effort.
- Time-bound – By Q3.
4. Convert 500 Leads to MQLs by the end of the year.
With inbound marketing, it’s easy to get swept up in blogging, offer creation, and lead conversions. At the same time, if we don’t have mechanisms in place to move those leads closer to a purchasing decision, these efforts don’t pay off the way they could. Part of our jobs as marketers is to foster relationships with our leads while qualifying them so that the sales team focuses on prospects who are ready to buy.
Let’s say we have a top-of-the-funnel lead generation engine where website visitors convert on eBooks and guides. Our goal is now to bridge the gap between where they’re at in their journey vs. where we want them to go (becoming a customer). We decide to do that through an ongoing educational email drip sequence, and we start with our objective:
- Specific – Convert Leads to MQLs.
- Measurable – From the existing number to 500.
- Attainable – Must ensure we already have a large enough pool to extract those MQLs from (or a fast-enough lead generation engine to supply them).
- Relevant – Must have a clear definition for what constitutes as an MQL and a plan to obtain those parameters.
- Time-bound – By the year’s end.
5. Increase our average monthly open rate from 25% to 40% by Q1.
In order for us to effectively nurture leads, we want people to be reading our content… which they won’t do if they don’t get past the subject line of the email. Here’s how we position this concept into a concrete objective:
- Specific – Increase average monthly open rate.
- Measurable – From 25% to 40%.
- Attainable – Must analyze existing email tactics to identify gaps.
- Relevant – Must only include the most relevant marketing emails in the metrics to avoid skewing data.
- Time-bound – By Q1.
6. Increase our MQL-to-SQL conversion rate from 25% to 35% by Q2.
Never forget the primary goal of marketing, which is to promote an organization’s goods or services in the effort of generating more sales. At the same time, fewer than half of marketers consider their departments aligned with sales.
A relevant goal might be to improve the effectiveness of our marketing efforts by solidifying the marketing to sales hand-off. Our concrete objective might break down like this:
- Specific – Increase the MQL-to-SQL conversion rate.
- Measurable – From 25% to 35%.
- Attainable – Must ensure we already have a large enough pool to extract those SQLs from (or a fast-enough lead generation engine to supply them).
- Relevant – Must have a clear agreement between the marketing and sales departments for what constitutes as an SQL.
- Time-bound – By Q2.
7. Improve our NPS score from 31 to 35 in 6 months.
Marketing doesn’t end once the prospect becomes a customer, and that means also working on ways to fuel the flywheel i.e. turning customers into brand advocates who purchase from us and tell their friends to do the same. NPS is a solid measurement of customer happiness, so improving that number is a solid place to start building our objective:
- Specific – Improve the NPS score.
- Measurable – From 31 to 35.
- Attainable – Must analyze existing NPS roadblocks to identify gaps.
- Relevant – Must ensure there’s a mechanism for collecting and analyzing NPS input.
- Time-bound – In 6 months.
8. Improve our Facebook engagement by 30% month-over-month.
One of the best ways to grow a brand’s marketing efforts exponentially is by investing in its community of customers and prospects. The goal might be to stay top of mind and energize the community by raising the bar on each social media platform. For example:
- Specific – Improve engagement on Facebook.
- Measurable – By 30%.
- Attainable – Must identify the content that’s engaging our existing user base and see if 30% is a reasonable number to strive for.
- Relevant – Must ensure that there’s a solid definition of what metrics are being counted as engagement.
- Time-bound – On a monthly rolling basis.
Once you understand the importance of vision, identifying broad goals, and using the SMART goal framework to make concrete marketing objectives for those goals, it’s time to identify the gaps in your marketing and begin outlining your own objectives.
Once you do, it’s important to write those objectives down and commit to creating a solid plan of action to achieving them.

How To Write Meta Descriptions That Don’t Suck
I’ll be the first one to admit it: The first time I wrote a blog post, I had a lot of new terminology to learn.
SEO, alt text, headers, all of it was new to me. Thankfully, learning how to use these acronyms to my advantage was a quick learning process.
However, there was one function of a blog post that took some time getting used to, and that was a meta description. At first, I didn’t know the purpose of a meta description, and why it was so important that I should add one to a blog post.
“Google will show the accurate text of my blog posts in search results,” I thought, “So there’s no need for me to add meta descriptions, right?”
Not necessarily.
This post will show you why meta descriptions are important and how to write effective ones. Before all that, though, let’s discuss what a meta description is.
What is a meta description?
A meta description is the snippet of information below the blue link of a search result. Its purpose is to describe the contents of the page to the searcher.
Any words that match the search term are bolded in the description. The end goal is to convince and persuade the searcher to click through to your website. Here is an example of a meta description as it would show up on a search engine results (SERP) page:
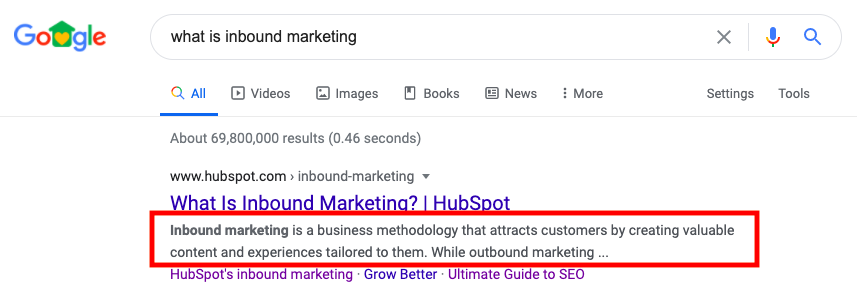 Notice that, because the query is “What is inbound marketing?”, the two words are bolded in that meta description.
Meta descriptions are important because they let Google know what your webpage will be about. If Google can read and comprehend the content of your meta description, they will have an easier chance of ranking your page to answer search queries.
🧡 TL;DR: Meta descriptions increase organic traffic and bring more eyes to your webpages.
If you don’t include a meta description, Google will display a snippet of text from the first paragraph of your page. If there’s a search keyword in that text, it’ll be bolded. While this isn’t a bad thing, not including a meta description means missing out on the chance to personalize the message you deliver to browsers.
Meta Description Examples
Meta descriptions should be quick, one- to two-sentence summaries of the content within your web page. They should tell the reader what they can expect to find after clicking on your link. For example, here’s a meta description for a data-driven marketing report:
 This meta description accurately describes what will be found in the report, who is presenting the information, and why the content will be helpful to readers. If browsers were typing in queries such as, “SEO trends in 2020,” it’s likely that this meta description will appear in their results.
Meta descriptions follow a few simple rules: They’re short, descriptive, and use keywords. But after that, you have free reign to play around with what they will say. Use this to your advantage when you’re creating your meta description:
 If you know that your webpage will present content that’s usually considered a bit dry, the way to engage browsers is to make a compelling meta description, like this one for third-party cookie alternatives. A meta description like this would make me interested in everything this post has to offer because it shows personality.
Readers often check only the first page of results for their search queries. Because of this, where you rank on a webpage matters. Even though meta descriptions aren’t the be-all, end-all that determines your rank, (you’ll want to fully optimize On-Page SEO for that), they sure do help.
A great meta description has the potential to appear on the first page of results, and a great one might even be first, like this example below:
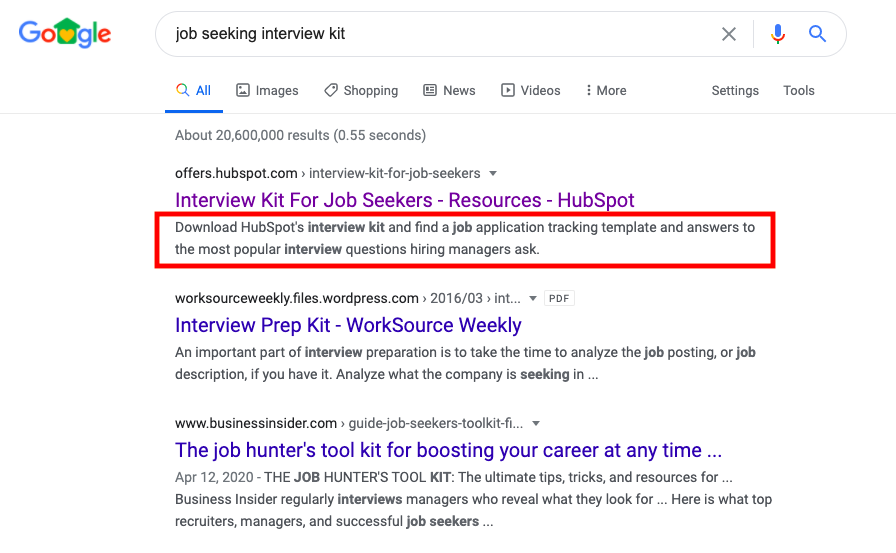
The meta description told Google how their page will fix the challenge of the query.
Now, you may be wondering if there’s a secret key or formula to writing a perfect meta description, other than the rules above. While the secret key hasn’t been located yet, there are some tips and tricks you can follow when writing your meta description. Let’s talk about a few, next.
Meta Description Tips
Google suggests that a meta description should tell users what that web page is about. Based on the information in a meta description, the search engine ranks results on relevancy.
Think of meta descriptions as a pitch for your webpage. Communicate why the page will be helpful to the reader, and make sure it accurately reflects what’s on the page. If a reader doesn’t find what the meta description promises, they’re probably going to click away.
Let’s get into some tips for writing an amazing meta description.
1. Answer the question.
It’s likely that people are on Google searching for an answer to a question. Try to get into their heads and think about what they’re looking for that your content can help with.
Use your meta description to answer that question with a solution or benefit. For example, let’s say your web page provides readers with a free template for writing standard operating procedures.
The question audiences will most likely Google is “What is an SOP?” Your meta description, then, should tell readers that they can use your guided template to learn how to write one. For instance, this would be my meta description if I were to write one to answer this query:
💻“Learn everything there is to know about writing a standard operating procedure (SOP), and find out how to write one that’s amazing.”
This meta description answers the question, and provides a little detail about the rest of the contents of the post.
2. Mention a solution to the challenge.
Provide a solution to the challenge your readers are looking to solve. For instance, if you’re writing a blog post that’s a listicle roundup of helpful CRM software, mention how many items are in the post and why that post will be valuable to readers.
If I were to write a meta description for a roundup, in this case, I would go with something like this:
💻“Discover the 15 best CRM software options for your small business and learn why they’re great for simplicity, customer retention, and organization.”
Remember, meta descriptions are the elevator pitch of your page — sell the content of your post in a way that will get readers to click. This description tells readers how many options they will read about and why they’re important to know.
3. Keep the description concise.
The body of your page is where you’ll educate your audience, so the meta description doesn’t need to be lengthy. Provide a quick summary of the page — or the point of the page that will stand out to readers. Meta descriptions should be under 160 characters long.
A good way to check the length of a meta description is to draft a tweet. Twitter limits you to 280 characters and lets you know when you reach your limit:
 If your description fills more than half of the circle in the tweet box, you should think about trimming it down. Meta descriptions should serve as a snapshot, not the body text of the post — save that for when the readers access your page.
4. Don’t overuse the keywords.
While your meta description should have keywords, it also should read naturally to the reader. If you overuse keywords just to get a high rank, readers might not understand your meta description. A tough-to-follow description could turn a browser away from your page.
For example, let’s say your webpage is delivering a content offer for interview materials and the primary keywords are “interview success,” “tips for great interviews,” and “interview preparation.”
You could write a meta description that reads along the lines of, “An interview success offer that’s free to download to be successful in preparing for interviews.” However, this reads a little clunky and is hard to follow, right? Instead, try going with something more smooth:
💻“Learn the tips and tricks for acing interviews with this downloadable job seeking kit.”
This description still uses two keywords, but also makes sense to the reader and gives them the background information they need to know how that offer page will help them.
5. Be engaging and unique to readers.
If you can, make your meta descriptions fun and engaging to read. Something eye-catching that will stop the reader from scrolling through a SERP. This is especially helpful if your webpage content is meant to be engaging and unique.
Match the tone of the content in your meta. Let’s say the content for your webpage is a blog post about funny workplace memes. Your description of this could be straightforward and accomplish everything a meta description should, such as, “These 20 workplace memes are funny, timely, and shareable.”
A description like that covers all of your bases, but it leaves the personality out. The post sounds like it was fun and interesting to put together, so that shouldn’t stop with the body text! Instead, try this more compelling approach:
💻 “Brighten your work day with these fresh, fun memes that any professional can relate to. Cat videos, anyone?”
A description like that sells your content, tells readers what they can expect, and still manages to be interesting in just two sentences.
Your meta description is your chance to win over readers. Be sure to create an engaging meta description for your website that persuades people to choose your content first. After all, if your webpages are made to be helpful and valuable to browsers, so should the content that’s describing it.

How to Run A Content Audit in 2020
Think of all the content you create — the good, the bad, and the ones that take a scary amount of time.
Now think of how you organize it. How do you keep track of how content is performing? Do you use those metrics to improve for future campaigns?
If not, you could be, with the help of content audits.
Content audits keep track of your content, including blog posts, social media posts, events, and web pages, and provide analysis for how they impact audience. Additionally, they can provide insights into how to improve underperforming content, so you know how to properly update your posts for higher conversion rates.
If you’re missing this kind of organization for your company, consider investing in a content audit. They are an excellent planning resource and roadmap for future content creation, while organizing analytics so you can refer back to high-performing posts if needed.
Content Audit Goals
Running a content audit for your website can prove to be beneficial for your traffic and improve the experience of your readers.
First, content audits help you take note of the areas on your website that aren’t properly optimized for search engine rank. For example, you might add meta descriptions to your blog posts as part of your current strategy, but if that always wasn’t the case, a content audit helps you locate which posts need to be updated.
Content audits also help you identify new SEO rules that you may not be implementing on your website already. Did you know that adding keywords to the headings on your site give search engines more clues about what your web page is about?
If search engines have enough knowledge as possible about the content on your website, they’ll be able to suggest your webpages at a higher level than they already are.
Running an audit is a chance for you to update the content on your website to improve the comprehension of your site by readers. For example, you might not know the links on one of your product pages are broken, but a content audit provides you with a reminder to update those links.
Your content audit should accomplish bringing your content up-to-date, improving the rank of your web pages, and making the website you present to readers easy to navigate and free of error.
To make sure your content audit is valuable, carve out enough time to complete it. But you don’t have to be in it alone. In fact, you can find plenty of templates to guide you through a content audit if you’re unsure of where to start.
Let’s look at a template, next.
Let’s dive into what content audits look like, how to run one, and tools to help you create the most effective content audit for your needs.
Content Audit Template
This template guides you through checking the On-Page SEO of your website. It works for a multitude of page types. For instance, a home page, landing page, blog post, or even a form page. There’s a space in the template for you to note the page type, so you can keep the template organized.
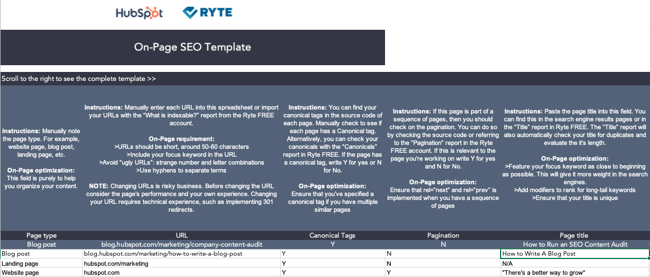 Under each section, the template will tell you why it matters for on-page optimization. So for example, when you note if you have multiple pages that are similar, canonical tags will make sure they’re properly grouped together.
Below, we’ll talk about the sections of the template.
In the first column, you’ll specify your page type for each page you’re auditing. Then, you’ll fill in the URL and note any canonical tags your site may have. Remember, you can find canonical tags in your page’s source code.
After that, you’ll note if your page is a part of a sequence of pages. This will ensure that your code is properly formatted for sequencing.
Next up, you’ll fill in some details about the page’s copy. For instance, the page title. If I were including a blog post similar to this one in the audit, for example, I would put “How to Run an SEO Content Audit” in this section, shown below:
 This section makes sure you’ll have keywords in your page title, boosting SERP rank. Similarly, in the next section, you’ll define the goal of each page and the focus keywords of that page.
So, for this blog post, I would define the purpose as, “Educating readers about creating a content audit,” and my keywords would be something akin to “On-Page SEO,” and “Content Audits.”
After that, you’ll note the headlines on your page. A good rule of thumb is to make sure at least one keyword appears in an H2 to help your rank. Same thing with meta descriptions, the next section — a short, concise description of your content should also contain a keyword to improve rank.
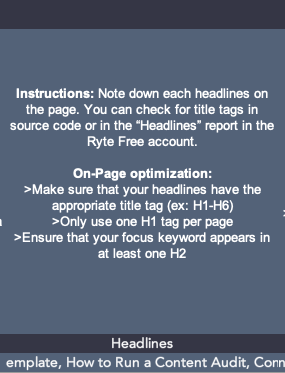 Once you outline your headings and include your meta description, then you’ll focus on images. Include the file name of your image and note the alt text of those images. Recall that alt text tells Google what your image is about, so if your images don’t have any, this is a good reminder to add them.
Next, you’re going to focus on links: internal and outbound. Take away broken internal links, and make sure your page has at least 2-3. (Remember, internal links give an opportunity for you to boost the traffic of other pages).
Following your link optimization, note the page speed. If your page takes longer than 2 seconds to load, it might not keep the reader’s attention.
Finally, the last section makes sure your page is available for sharing on socials and is mobile-friendly. These functions of the page improve the accessibility of your webpage.
This template also offers a checklist. The SEO Audit Checklist is another spreadsheet that makes sure the content of your website is fully optimized and up-to-date. So, the first template helps you update the On-Page SEO of your website, while the checklist gives you an in-depth reference for running the audit:
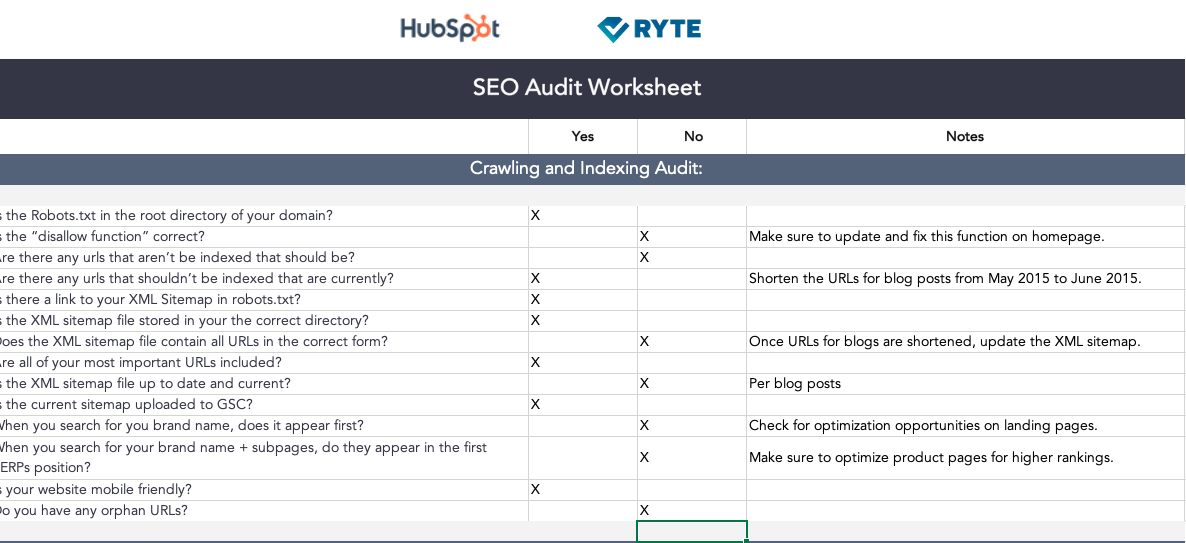 For example, when you go through the worksheet, you can expect to include information about the On-Page elements of your website, but you’ll also be checking for crawling and indexing, ranking factors, the content and link structure, status codes, coding, and internalization.
To use the checklist, you’ll simply mark “Yes” or “No” for each task, and add any notes to refer to.
How to Run a Content Audit
1. Think of your goals.
First, think about what you want to accomplish. When you have your goals in mind, you will have a better idea of how to categorize your audit later.
Ultimately, a content audit identifies engaging content for your audience, and can include information on SEO and conversion rates. One goal to consider could be to identify which of your pages need to be SEO-optimized. Alternatively, you might think about finding the most interesting and best-performing content for your website visitors, and place that on your homepage or in an email newsletter.
Identifying company goals will ensure your content audit is useful for both bookkeeping and updating your strategy with tactics to improve. After this is complete, then it’s time to collect your content.
2. Gather your content.
Which content are you going to audit? The types of audits are typically those for product descriptions, blog posts, multimedia, and publications. Decide this, and gather the backlog of all of that content.
To accomplish this, collect the URLs of the web pages you’ve chosen to audit. If you have a small website, you can do this manually and put them in a spreadsheet, however, there are also online tools to do it for you, like SEMrush, Screaming Frog, and HubSpot.
SEMrush and Screaming Frog will provide this information based on your sitemap. A sitemap is a file that has all of your website’s information and can be created for free online. For more information on sitemaps, check out our guide here.
3. Categorize your content.
After receiving your audit, categorize it on the spreadsheet. Some online tools categorize the information for you, but if you want to go through it yourself, that’s also doable. The categories will keep you organized so you can ensure your content audit meets your needs.
Some categories you can include are content type, author(s), publication date, and content format. Think of categories that are useful to know from different pieces of content. For instance, if you are auditing blog posts, important information to pull would be the date of publication or update, the author, the type of content, and metadata (Such as the title and description).
Another important category is metrics. Some online tools will include them in the audit, but Google Analytics can also pull data for you. Metrics can provide more information for your analysis later.
At this point, your spreadsheet should have URLs of your content, categories, metadata (if included), and metric data.
4. Analyze your data.
Now, it’s time to look at your data critically. This is the step that will give you a good measure of the state of your content. When analyzing your data, here are some things to take note of:
- Content that’s missing — What is your audience interested in that you haven’t covered?
- Content that’s underperforming — Which pieces of content aren’t getting the numbers you want?
- Outdated content — If you have old content, can it be updated or reworked to maintain optimization?
- Home run content — Content that has performed extremely well.
Based on the results of this analysis, organize them in the spreadsheet. A way to do this is to assign different colors based on what you’re analyzing and highlight the rows with those colors so you have an idea of which category is which, and which ones take up the largest portion of your overall content library.
5. Create action items.
In this step, you will finalize and clean up your audit. You now know what to focus on based on the analysis and can go from there. Think about the posts to delete, update, re-write, or re-structure.
To organize these action items, add one last column to the spreadsheet — one that’s close to the front so you can keep tabs on it. This column will let you know the action to take on a specific URL. Are you going to keep, update, delete, or re-write that blog post?
If you plan on ranking by priority or including a timeline for this audit, now would be the time to include that, as well. Some organizations use full-blown content calendars, while others don’t need it. To make a priority timeline that fits in best with your content audit, think back to your goals and which items make sense to execute first.
Now, let’s go over some content audit tools you can use to further automate your content audit process.
Content Audit Tools
1. Screaming Frog
Price: First 500 links free, unlimited for $150/year
Screaming Frog is a website crawler. It collects URLs from your sitemap and create an SEO audit for you. If you have a smaller site, Screaming Frog can audit up to 500 links for free.
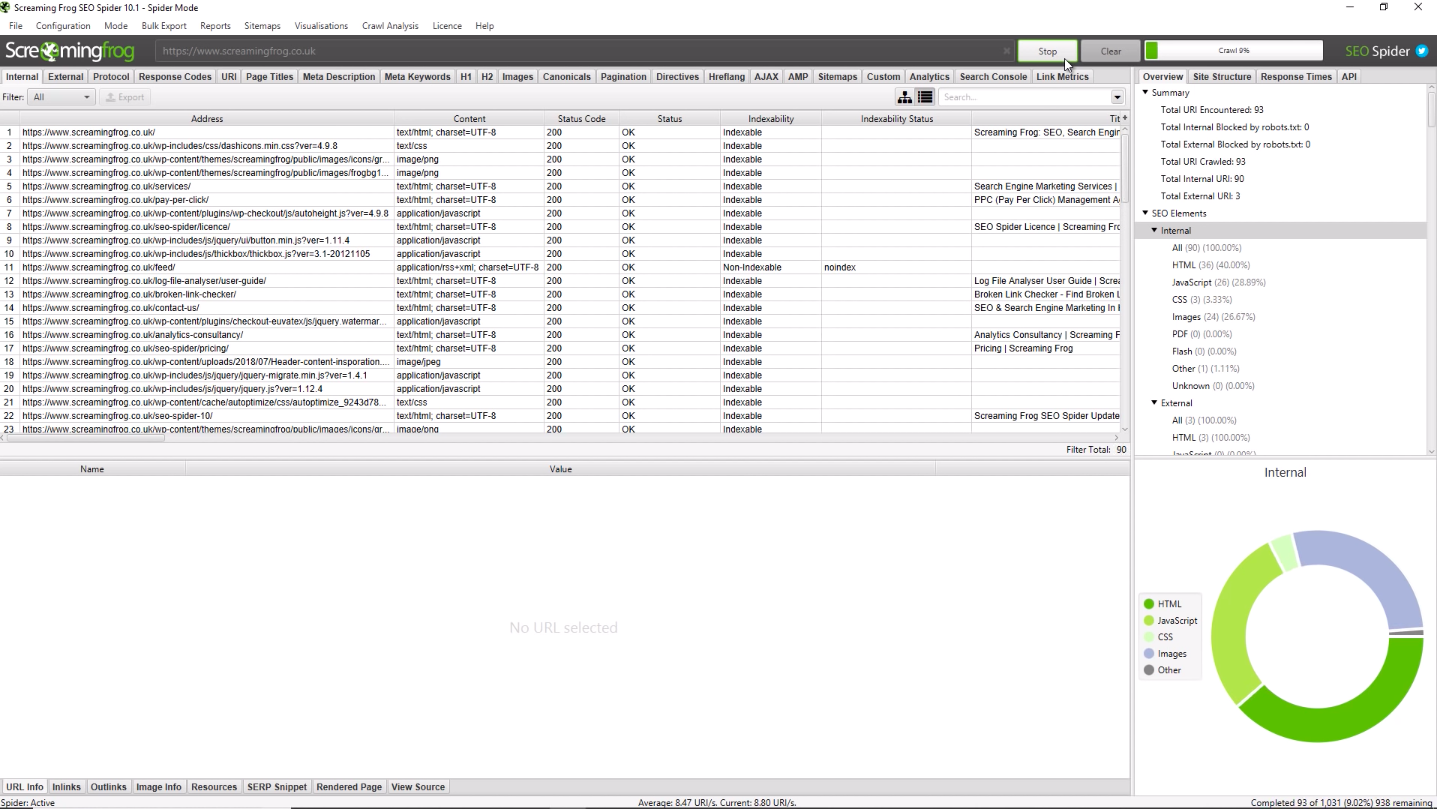
The desktop Screaming Frog website is great because it provides you a ton of analysis about your website, and categorizes it for you. Because the audit is SEO-based, it also gives you information on how to improve your SEO, which is likely useful, depending on your goals.
2. SEMrush
Price: Free plan, or $99-$399/month
In three steps, users of SEMrush can receive a robust audit. By putting in the desired domain, you’ll get a customized report that shows you where you can improve your site:
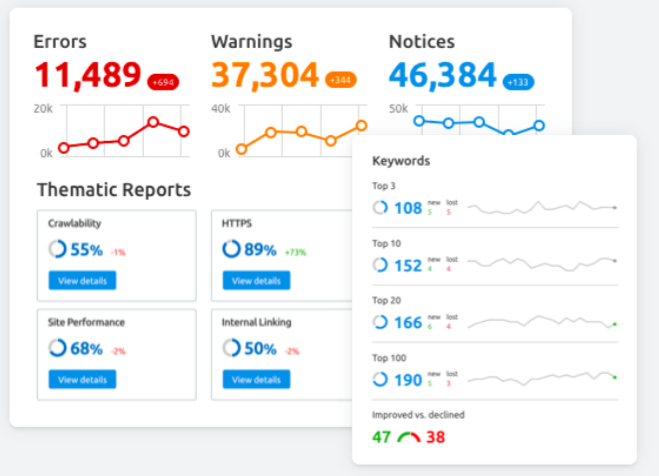
From there, you can connect an analytics tool account, like Google Analytics, if you want to see more information about your sitemap, like posts that are the most engaging for your audience. You can use this information when developing strategy — identifying content that performs well for your audience gives you an idea of what to cover.
3. Google Analytics
Price: Free
While Google Analytics doesn’t give you a traditional audit, it provides good information that will help you formulate your audit. It lets you know who is visiting your website, and from where. Additionally, it gives a rundown on the behaviors of your visitors:
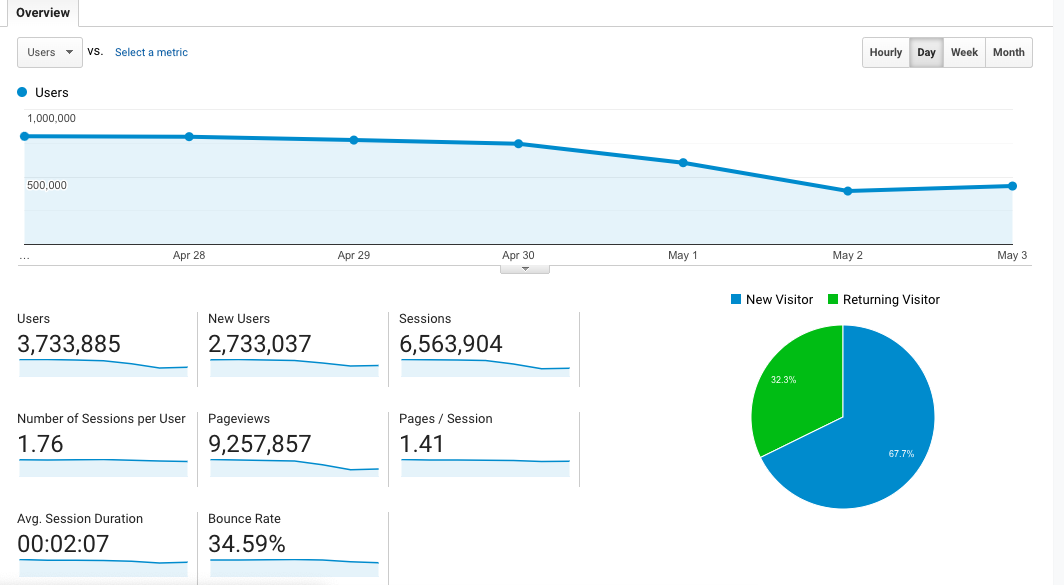 It gives you data about the amount of time visitors are seeing on webpages, the most popular webpages, and different patterns seen in your visitors. One of these patterns could be the most popular blog post in the US from visitors aged 18-24.
4. DYNO Mapper
If you’re looking for a sitemap generator, DYNO Mapper has that function available. Also available on DYNO Mapper — a content audit tool. This website is really good at finding potential problems in the SEO of your content.
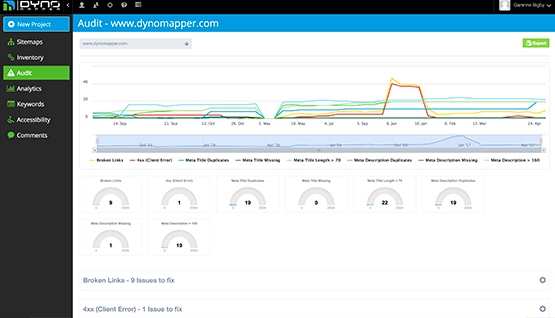
DYNO Mapper also keeps a progress report of your audits, so you can monitor how they’re improving and performing. The audits themselves present how your content can be given in the best way to search engines, an excellent metric for content audits.
5. WooRank
WooRank has two amazing features for content auditing: SEO monitoring and Site Crawler. SEO Monitoring from WooRank lets you know the state of performance on your landing pages, which is information you can put into an audit. It also lets you know if your website ever goes down and how that affected SEO, another metric to import if you’re tracking web page metrics in your audit.
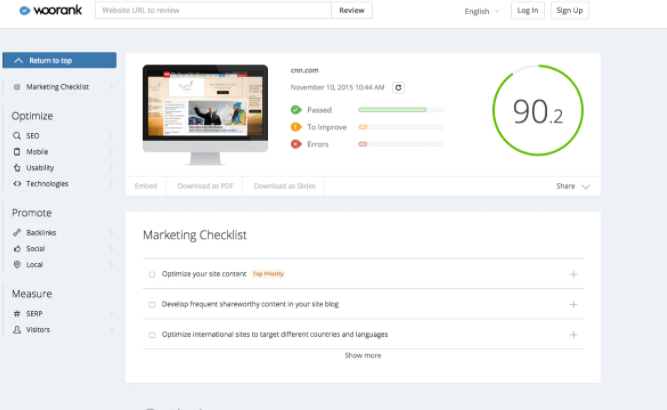
The Site Crawl feature lets you know how Google sees your site and interprets the information for search engines. This information is great knowledge to make audits more effective when you’re coming up with action items for the future.
Now that you know ample knowledge about content audits, how to create them, where to source them, and important essentials to include, you are fully prepared to incorporate them into your organization. Give it a try, and use it to elevate your next campaign. Happy auditing!

Twitter’s Testing a Fleets Feature: What Marketers Need to Know
Following the success and buzz around Instagram Stories, Facebook Stories, Snapchat, and now LinkedIn Stories, Twitter is experimenting with its own ephemeral content feature.
In March, Twitter announced it had begun testing a new feature called “fleets,” short for “fleeting tweets” in Brazil.
Fleets, which aren’t yet available in the U.S., are similar to that of Instagram Stories. Like Instagram’s layout, Twitter users who have Fleets will see a bar with circular Story icons from each account above their Twitter feed.
From their homepage, a user can tap on a circular Fleet icon to see what an account posted in their Fleets area.
Unlike tweets, the text, video, or photo published shows up in a vertical format, similar to Instagram Stories.
Below are two photos that show how the Twitter feed and Fleets feature look to users in Brazil.

Because this content disappears after 24 hours, similar to Instagram Stories or Snapchat snaps, Twitter’s experimenting to see if this format will promote deeper and more personal conversations on the social media platform.
To make Fleets even more “personal,” other users cannot retweet or share the link to them. Twitter users can also only reply to Fleets via direct message.
As Twitter began to test the new Fleets feature, the company surveyed some of the first beta testers. As expected, most who used Fleets said they felt more comfortable publishing more personal thoughts or opinions than they’d publish in standard tweets. This was because the users knew that this content would eventually disappear.
“We hope that those people who are not usually comfortable with Tweeting use Fleets to talk about the reflections that come to their head,” said Mo Al Adham, a Twitter product manager explained, in Twitter’s announcement.
Fleets is still in its testing phase. But this move still signifies yet another move social media platforms are taking towards embracing ephemeral content and social media Story formats.
While disappearing video, text, and Stories might’ve sounded like gimmicks back in the earlier days of social media, ephemeral content features are increasingly common in today’s online landscape.
Although Twitter is just beginning its Fleet experiment, you might still want to take notice and identify ways that you could implement ephemeral social content into your own social media strategy.
In this post, I’ll highlight a few commonly used ephemeral content strategies that could potentially also boost brand awareness on Twitter Fleets. If Fleets doesn’t become a global feature, you could still use these tactics on many other social media platforms, like Instagram or Facebook.
How Brands Could Use Twitter Fleets
1. Publishing Limited-Time Offers
Want to sell out a lot of one product quickly? Or, offer a promotion to your most engaged Twitter followers? One great way to do both of these things could be using Fleets to promote temporary sales, offers, or coupon codes.
Since Fleets only last for 24 hours, users won’t be able to find the codes or promotions forever. That could mean that these audiences might feel a sense of urgency to make a purchase, use a given coupon code, or just visit your website to learn more about your product.

2. Hosting Daily Giveaways
Along with posting about short-term sales and coupon codes, Fleets — and other Story platforms — could be great places to promote giveaways. With a Story-like platform, you can include more text, video, and photo about the products you’re giving away and explain the rules of your giveaway within multiple pages.
While you can announce a giveaway in standard tweets, all of this information might have to be published in multiple posts or a thread due to Twitter’s character count limitations. And, because Twitter’s feed is so fast-paced, you’ll likely need to post more than once to get a large number of contest entries in a limited time.
With a platform like Fleets, you’ll not only be able to post multiple pages of tweets in the same Fleet story, but your content will also appear in the Fleets area above a user’s feed. This might mean that there’s less risk in your contest announcement being buried by tweets from other accounts.
Additionally, because Fleets and Stories only last for 24 hours, viewers might feel a sense of urgency. Like with coupons or sales, audiences might want to enter your contest, view your entire Story, or go to your website before the Fleet disappears.
To give you some added inspiration, here’s an example of a contest that a brand once ran on Instagram Stories:
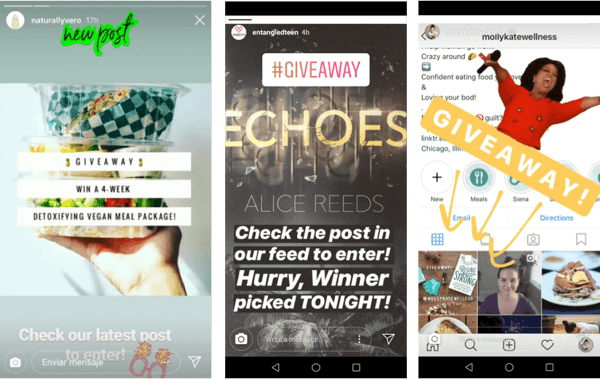
3. Embracing Live Events on Social Media
Want to leverage live events or short-term news in your social media marketing strategy without it clogging up your Twitter profile? Consider covering the event with ephemeral content. That way, when the event is over, users focus back on your overall brand and business.
In this example below, the NBA’s Instagram Story featured coverage of the Toronto Raptors parade in Ontario, Canada. At this point in the Story, a Raptors team member took selfies with the rapper, Drake.

4. Interacting With Loyal Fans
While Twitter’s highly public platform already allows brands many opportunities to find and interact directly with fans, Fleets could also be a helpful tool for this.
On Instagram and Facebook Stories, you might regularly see content where brands ask users to DM them questions or content. Then, a brand might create a Story with user-generated quotes, images, or videos. This tactic makes users who participated feel like the brand cares about their thoughts. Meanwhile, an interactive Story like this allows other audiences to see that the brand appreciates its most engaged followers.

Aside from question-and-answer interactions, you could also go one step further by publishing Fleets with user-generated content from customers or fans. One brand that frequently does this on Instagram Stories and Facebook is Planet Fitness. In the story below, they highlight fitness journey photos sent to them by their actual customers:
Not only does this Story allow loyal Planet Fitness fans to contribute to the brand’s social media content, but it also allows prospects to see how real people have benefited from the gym’s services.
5. Offering Behind-the-Scenes Content
Most of us know that people love seeing behind-the-scenes content from celebrities, athletes, and influencers on Instagram Stories, Facebook Stories, and Snapchat. But, research shows that consumers also enjoy behind-the-scenes material from brands.
While tweets offer brands a platform to create quick well-worded posts or publish heavy-lift content, Fleets could allow brands to show audiences behind-the-scenes content or insights that make them look more authentic and relatable. This is something we’ve seen brands frequently do on their temporary Instagram Stories.
In the Story below, the New England-based Caffe Nero highlights a Barista of the Year competition that it holds with its staff every year. The Story highlights how Caffe Nero baristas are dedicated to serving customers and shows off an authentic piece of the restaurant’s company culture that many customers might not know about.

5. Informing Audiences About Complex Industry Topics
When you craft a tweet, you need to sum up your message in 280 characters or start a thread. But with Fleets or other social media Stories, you can add further information or insight with photos, videos, or multiple pages of text. This could allow brands to offer Twitter users a stronger variation of valuable, easy-to-create content that isn’t limited to tiny tweets, pricey marketing videos, or time-consuming live streams.
Here’s an example of how HubSpot discusses more complex industry topics via Instagram Stories. While you might not be able to add the same level of imagery to Fleets content, you could potentially leverage multiple pages of text in a similar way.
Navigating Ephemeral Content
Can content that disappears really leave an impression? Well, if Snapchat, Instagram, Facebook, LinkedIn, and Twitter have taught us anything — the answer to that question is, “Yes!”
While ephemeral platforms are a new and exciting opportunity, it does take creativity and brainstorming to create content that will grab your audience in a memorable way.
To get better acquainted with key ephemeral content tips and strategies, check out this introduction to the content type. Then, learn more about how major brands are leveraging current ephemeral platforms like Instagram Stories, Facebook Stories, and Snapchat.

Using Facebook Ads in Uncertain Times
Wondering if you should make changes to your Facebook ads strategy? Looking for tips to guide your decision-making during times of uncertainty? To explore how to navigate Facebook advertising during the COVID-19 pandemic, I interview Amanda Bond on the Social Media Marketing Podcast. Amanda is a Facebook ads expert and founder of The Ad Strategist. […]
The post Using Facebook Ads in Uncertain Times appeared first on Social Media Marketing | Social Media Examiner.
from Social Media Marketing | Social Media Examiner https://ift.tt/2A7XfIF
via socialmediaexaminer
15 of the Best Account-based Marketing Software for 2020
Are you in the market for your new account-based marketing software solution?
If so, then you’ve come to the right place.
Recall that account-based marketing is a marketing strategy that targets companies, rather than individual customers. Account-based marketing means catering your message to the top decision makers for target accounts with a blend of marketing of sales tactics.
In this day and age, having software to help you do that is imperative. As HubSpot’s Senior Manager of Accelerated Leadership Programs, Ryan Batter states, “The one common thread for all ABM strategies is a CRM in which teams can track company interactions, ideally across marketing and sales teams.”
So, when you’re looking for software, make sure you choose one that is full-service and has ample tools to support the functions of marketing and sales.
“Beyond that,” Batter states, “The beauty of using an ABM strategy is that it’s customizable to a team’s readiness and budget. Look for a CRM that enables strong integrations to ABM-specific tools to customize your strategy.”
With that in mind, let’s go over some account-based marketing software choices that are scalable, functional, and fit for your campaigns.
Account-based Marketing Software
We’ve talked about what to look for in the perfect software choice. Marketing and sales capabilities, the support of teams and organizations, and measurable data tools. These should be at the frontlines of what you choose.
Further, your software should complement your main campaign functions. Are you going to be doing a lot of ad targeting? Are metrics the most important to you? Look for software that delivers what you need in these areas.
Let’s go over some choices.
1. HubSpot
Price: Available for Marketing Hub Professional ($800/mo.) and Sales Hub Professional ($400/mo.)
HubSpot’s ABM software lets you carry out a fully-fledged campaign right in your CRM. When using it, you can make an ideal customer profile, or ICP. This ICP will help HubSpot automatically tier prospects based on how good of a match they are to your profile.
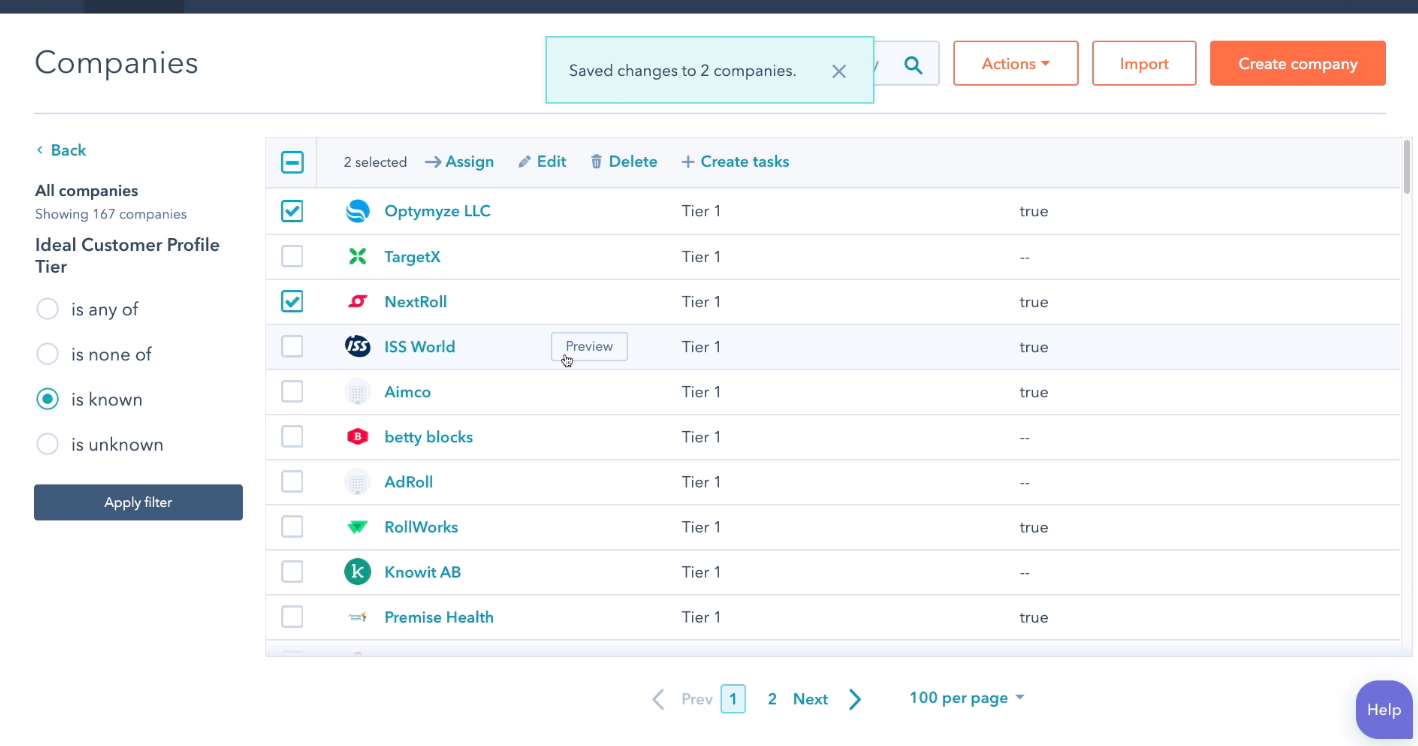
Additionally, you can import a spreadsheet of your target accounts. This can also be done manually.
HubSpot’s software helps you identify challenges of prospects so you can personalize specific marketing messages to attract them. You can also use Marketing Hub tools, such as ads, web pages, and social media posts, to market to your customers and make your campaign successful.
2. Terminus
Terminus is a platform that offers full-service ABM software. It helps you build account lists equipped with the data you need to personalize your strategies.
With Terminus, you can find accounts where they are and run campaigns that target them directly. For instance, you can manage retargeting, automation, and email campaigns within the software and access performance metrics of those campaigns. Analyzing these metrics will give you a better understanding of how to better target accounts.
3. Demandbase
Price: Contact for pricing
Users of Demandbase’s software experience ABM programs throughout the entire customer journey. The platform allows users to scale their efforts with accounts, rather than using a bunch of confusing point solutions.
Demandbase was built with B2B marketing in mind and offers a user-friendly interface. Within the platform, you will find solutions for engagement and conversion. These help you identify potential accounts, personalize your strategy, and experiment with new ways to close deals.
4. Triblio
Price: Contact for pricing
Triblio is an ABM platform that specializes in the growth of account pipelines. Users can leverage ads, analytics, web, and sales tools to help them execute a carefully constructed strategy to attract accounts. Users can also find out when the best time to reach an account is based on the platform’s ability to analyze the web behavior of industries — all from their dashboard.
With the software’s 1:1 account marketing setup, you’ll be able to target larger accounts and cater to their challenges directly, right from your dashboard. Triblio also offers a guide for ABM — think of it as a crash course — that teaches you how to use the software for your business.
5. 6Sense
Price: Contact for pricing
This platform focuses on providing its users with the intent of accounts. It provides users with the capabilities needed to engage with customers. With their service, you can collect insights about an account’s challenges and market to them in a way that provides immediate impact.
With the engagement platform, you can align your sales and marketing strategies together using data. You’ll be able to use the data provided about accounts to prioritize your strategy and engage customers based on their unique interests. With this setup, you can deliver consistent experiences that scale with your customer’s journey.
6. Engagio
Price: Contact for pricing
With Engagio, B2B marketers can provide a personalized approach to engagement for accounts. This is done by using the platform’s tools for sales insights, multi-channel creation, and analytics that cover the entire buyer’s journey.
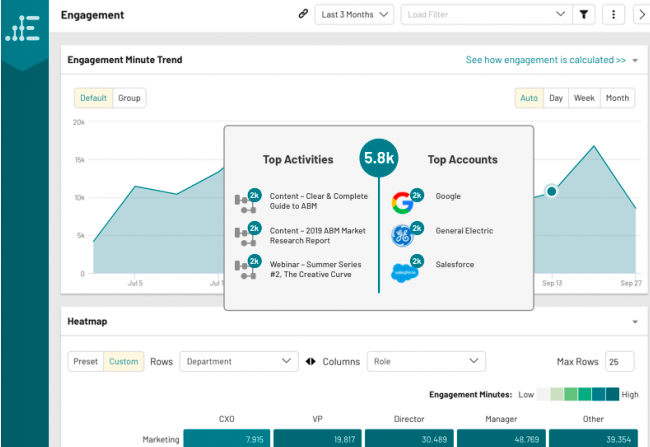
Engagio’s users are able to unify data from their accounts onto one platform, making easier and more accurate analysis possible. With that data, you can accurately align your sales and marketing strategies, highlight areas to focus on, and execute those strategies.
7. LeanData
Price: Contact for pricing
LeanData’s software is focused on providing its users with the data they need to connect with accounts accurately. You can use the software to align marketing and sales goals, as well as align revenue operations.
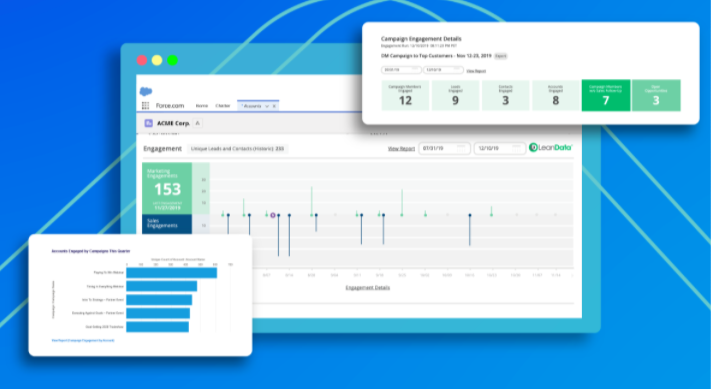
If you want to unify the data and processes you use across your go-to-market (GTM) teams, LeanData is a great software option. You’ll be able to build a GTM plan, execute it, and access performance analytics with the software.
8. Bound
Price: Contact for pricing
This platform is intuitive and is built to provide marketers with the tools needed to personalize account-based strategy. With Bound, you can build audiences, create dynamic content, and measure the success of campaigns.
Bound lets users analyze the web behavior of accounts and build audience segments based on that data. They can also choose how to target those segments using software offerings like email and copy templates. Finally, users can see how their segments are performing and adjust their personalization strategy as needed to best reach accounts.
9. Zymplify
Price: By contacts, (Example, $649/mo. For 5,000 contacts)
If you want to find prospective accounts and nurture those leads, Zymplify lets you do that on one platform. It offers automated lead qualification tools, so you can turn prospects into customers.
Their scale-based services let you cater to customers throughout their entire buyer’s journey. Automated services, such as demand generation, prospect identification, sales, and reporting, saves marketers time when creating strategy.
10. MadisonLogic
Price: Contact for pricing
MadisonLogic is a platform that offers tools for ABM advertising and content syndication. With the software, you can also accelerate your accounts’ customer journey, access insights about campaign performance, and offer a formatted content marketing package.
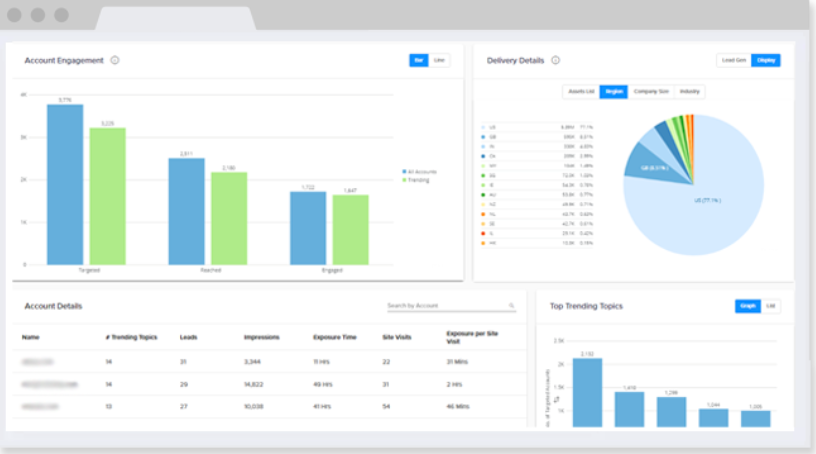
This software lets you engage with relevant advertising content, and syndicate that content across multiple channels. That way, you can easily find new and relevant contacts. With their content marketing formats, you can engage with your contacts in a highly stylized and compelling fashion.
11. ActiveDemand
Price: Contact for pricing
If you work for an agency, ActiveDemand is a great option to look into. It offers services specifically for agencies or marketers to execute their ABM campaigns.
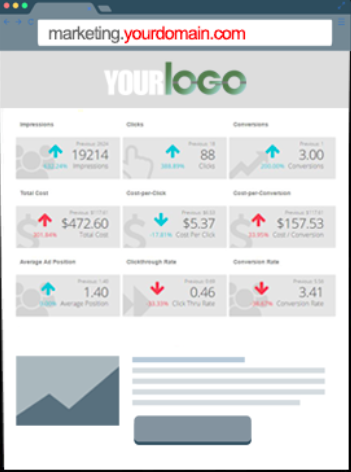
ActiveDemand’s software lets you engage accounts by delivering campaigns that are relevant and valuable to the challenges of prospects. It allows agencies and small businesses to execute campaigns by offering a full-service suite of tools. For instance, this software provides email marketing, content creation, reporting, and form building.
12. Vainu
Price: Based on sales team size (Example, $7,250/yr for a team of 5)
Vainu is a platform that focuses on personalizing the interactions you make with accounts. Users are able to spot who is interacting with your content and why, so you can accurately enrich those leads (shown below). So, if conversion is one of your big goals for ABM, this might be a good choice.
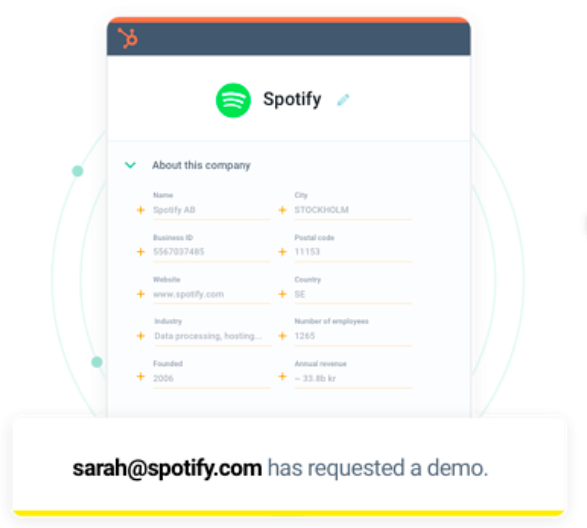
The platform aims to help its users find ideal potential accounts, know when to reach out to them, and how to send the message that will catch their attention. It offers synchronization features, such as company contacts, build customer lists, and provides ROI analytics based on sales functions.
13. Leadiro
Price: Free plan, or up to $399/mo.
Leadiro is a B2B customer data platform that helps businesses connect directly to the key decision makers at companies. The software uses demographic profiles to help its users identify their ideal customers, and it offers segmentation tools to organize those prospects into lists, like what’s shown below:
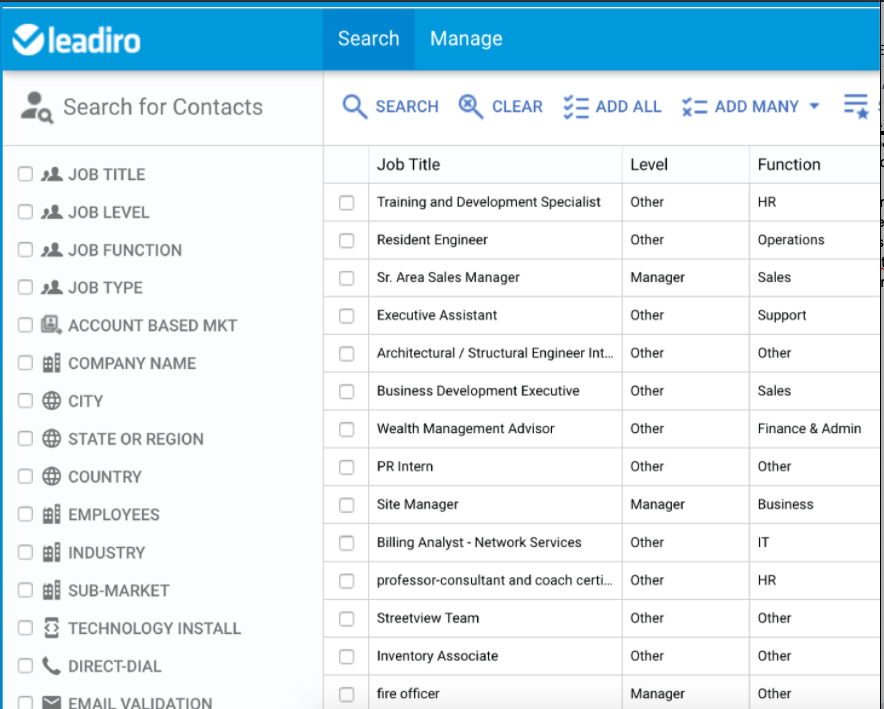
This platform is extremely helpful for targeting because you can choose specific geographic regions in which to find prospects. If you want to generate more leads globally, this software is a good option. Leadiro also integrates with HubSpot, so customers of both can sync their data.
14. AdDaptive Intelligence
Price: Contact for pricing
With this service, users can target, engage, analyze, and optimize their account-based marketing campaigns. Its main focus is to provide its users with the tools to connect with high-value decision makers for B2B accounts.
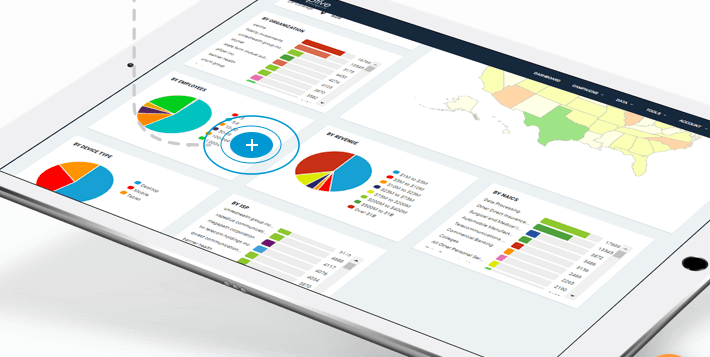
AdDaptive’s software lets you boost your advertising messages to the right business audiences to help you maximize ROI. It also has the capabilities to target customers, analyze advertising analytics, and optimize your future campaigns.
15. RollWorks
Price: Contact for pricing
RollWorks is a software that helps you drive demand, run digital ad campaigns, and automate sales functions, such as customer outreach. Its software is based around turning target accounts into customers by using machine learning and data. This helps users identify ideal customers and engage them across multiple channels.
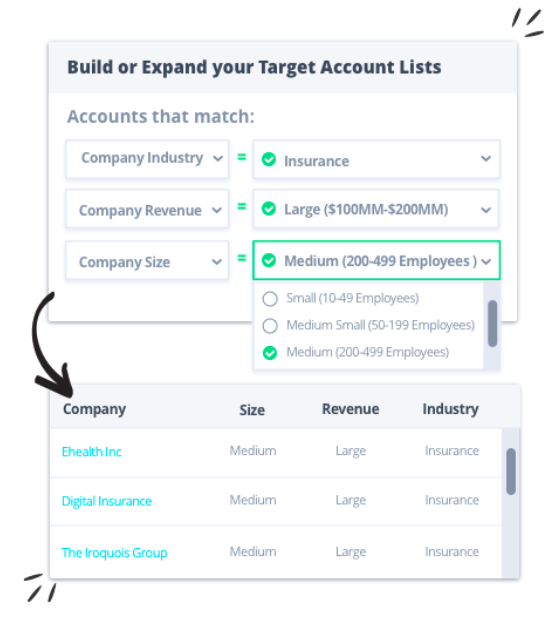
The software lets you create an ideal customer profile so you can begin to find key contacts. You can also run cross-channel campaigns with the platform, and run digital ads through it. From those campaigns, RollWorks will analyze their performance and provide you with key metrics about their impact.
Batter states, “As teams increase commitment and budget to ABM, it likely makes sense to complement a CRM with more focused tools that can provide deeper sophistication in a certain category – ads targeting, company enrichment, intent data, events management.”
As your business grows, so will the tools you will need for account-based marketing. So, when you’re picking software, make sure it’s scalable, and can grow with you.

How to Write the Perfect Page Title With SEO in Mind
In high school, the hardest part of writing an essay for me was coming up with the title.
To be honest, titles are still a struggle for me to this day.
However, writing titles for blog posts or page titles are a part of my day to day as a marketer.
And now I have to think about SEO as well.
If you’re anything like me, it’s helpful to learn best practices you can refer to when you’re writing a title.
Below, let’s learn how to write the perfect page title while keeping SEO in mind.
Page Titles and SEO
A page title is the title tag that tells a search engine like Google what the title of your web page is.
When you type in a query on Google, these are the titles you see on the search engine results page (SERP).
So, why do you have to keep SEO in mind when you’re writing a page title?
The main reason is because your page title (and other meta tags) signal to the search engine what your page is about. Your page title helps search engine’s determine if your web page satisfies search intent and answers a user’s question.
Now, you might be wondering, “How can I get started?” Below, let’s review the best practices to keep in mind when writing SEO page titles.
Best Practices for Writing SEO Page Titles
1. Be specific.
Every page on your site should have a specific purpose. Think about the page in front of you, and try to describe it.
If you’re using “and” to combine multiple thoughts on this page, it’s time to make some new pages.
When writing the titles for each of these pages, keep the specifics of the page in mind. If this is a page just about “toasters”, the title should include your keywords centered around “toasters”, and not a more generic keyword phrase like “kitchen appliances.”
2. Explain why this page is unique.
Just like every page title should be specific to each page, you should also make sure that each page title is unique across your entire site.
If you’re following the first rule and making sure that every page is laser-focused on a single topic, it should be extremely easy to also make sure that each page title is unique.
3. Be compelling.
When you’re looking at a search engine results page, there’s only three things that appear for a visitor – the page title, the page description (bonus points if you’ve got a unique and targeted meta description), and your page’s URL.
Try and treat your page titles like the titles for your blog posts, and make them compelling.
In the example below, HubSpot used a unique and compelling title to tell user’s that the CRM software is free and compatible with small and enterprise businesses.
4. Don’t be repetitive or stuff keywords.
Your page titles shouldn’t include multiple variations of similar keyword phrases.
A great example of a bad page title is “Toaster, toaster oven, kitchen toaster, college toaster, 8 slice toaster, bagel toaster | Chris’ Toaster Emporium”.
Titles like this promote worst practices and often lead to having the same page titles used across most (if not all) of the pages in your site.
Plus, it doesn’t help user’s understand what’s on the page.
5. Pay attention to length.
Any page title more than 70 characters is a waste.
If you’re not able to describe this particular page with less than 70 characters, then maybe you need to break this down into multiple pages.
From a practical standpoint, Google will cut your title off around 70 characters, and you’ll be left with a set of ellipses at the end of the title – and everything you’ve written above the 70 character limit is essentially negated.
In the example below, Capterra’s page title is cut off and the user is left unsure of what’s on the page.

6. Don’t put your company name at the front.
In most cases, your website will already rank high for your company name.
Leverage the fact that search engines allocate more weight to the words that appear at the beginning of a page title, and form your titles using your keyword phrases first, and then your company name.
7. Include your primary keyword.
While you don’t want to stuff your page titles with keywords, it’s still a good idea to include your primary keyword.
If you can, putting it near the front can help search engine’s and user’s determine what your page is about quickly.
If you can’t include your primary keyword, you should try to include some type of variation of your keyword that satisfies search intent.
8. Write for the user.
At the end of the day, your content should be written for the reader, not for the search engine. User experience is far more important than a search engine.
While writing titles can be hard, it doesn’t have to be. Keep these best practices in mind when you’re crafting your next page title.
Editor’s note: This post was originally published in May 2010 and has been updated for comprehensiveness.

The Ultimate Guide to Video Marketing
Brands need a video marketing strategy — this idea isn’t new. What has changed is how important video has become on every platform and channel.
Video is no longer just one piece of your overall marketing plan. It’s central to your outreach and campaign efforts … especially your social strategy.
Video has absolutely dominated social. HubSpot Research shows that four of the top six channels on which global consumers watch video are social channels.
Why is this important? If you aren’t creating video, you’re likely falling behind. But don’t fret. For most videos, the more simple and raw it is, the more authentic the content seems … and that’s what really matters to your audience.
Better yet, video production is more cost-effective than ever — you can shoot in high-quality, 4K video with your smartphone.
Regardless, between camera equipment to lighting to editing software, the topic of video marketing can still seem pretty complicated. That’s why we compiled this guide.
Continue reading learn everything you need to know about video marketing strategy, or use the links below to jump to a specific section.
Why should you focus on video marketing today?
The last handful of years saw a surge in the popularity of video as a content marketing format.
Specifically, in 2017, video rise to the top of your marketing tactic list. Video as a tactic was likely streamlined by your creative team as a one-to-many awareness play, with lots of focus on expensive production and little analysis to show for it.
2018 and 2019 transformed video from a singular marketing tactic to an entire business strategy.
Today, video is a holistic business approach, meaning video content should be produced by all teams in a conversational, actionable, and measurable way.
Learn how personalized video is shaping the future of marketing, sales, and customer service.
According to a report from HubSpot Research, more than 50% of consumers want to see videos from brands … more than any other type of content.
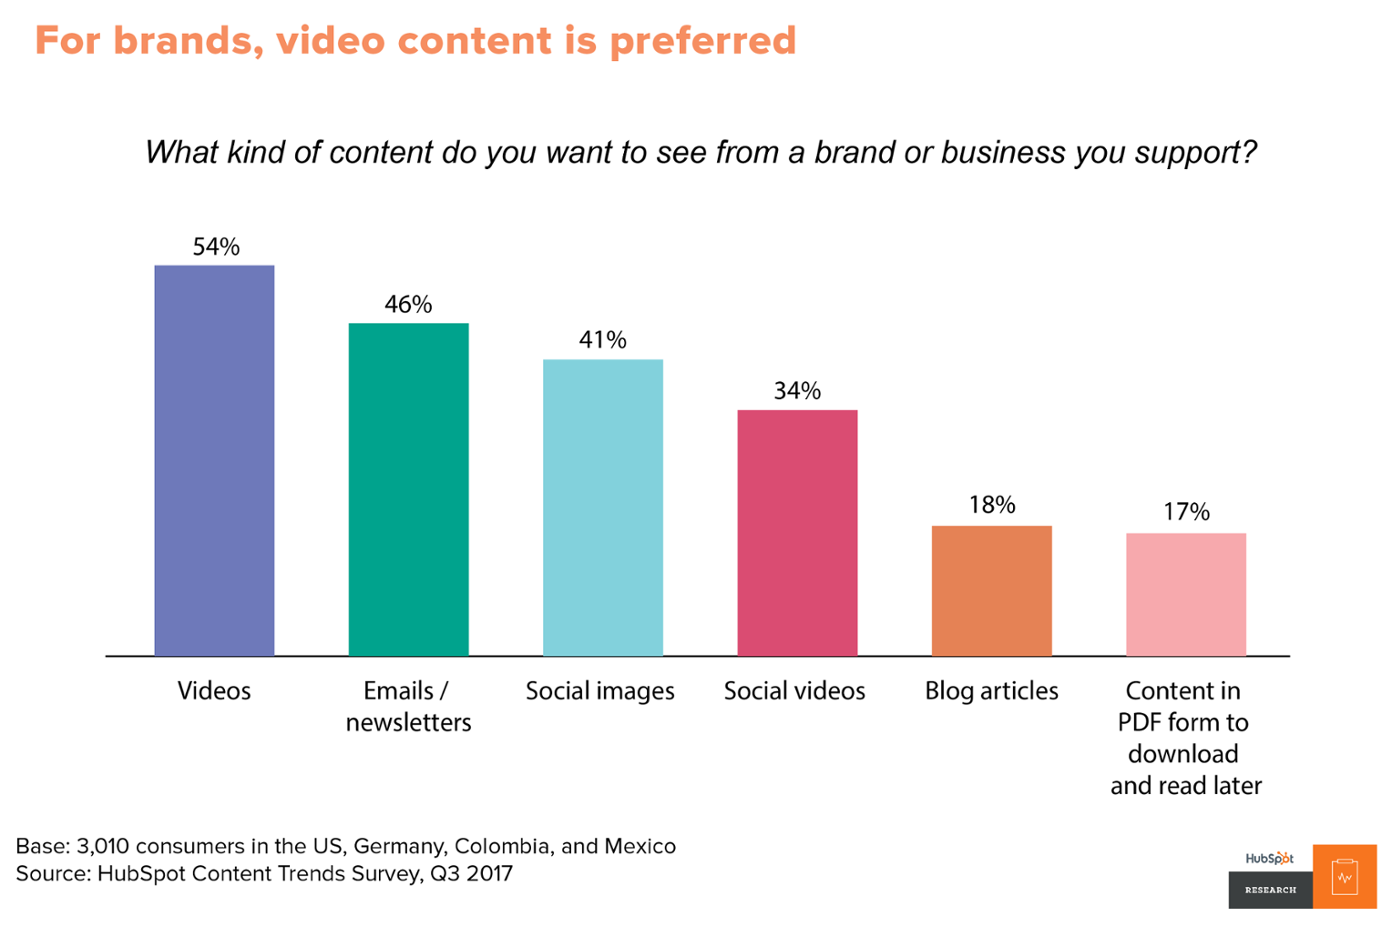
Video is useful for more than entertainment, too. Video on landing pages is capable of increasing conversion rates by over 80%, and the mere mention of the word “video” in your email subject line increases open rates by 19%. 90% of customers also say videos help them make buying decisions.
But video hasn’t only transformed how businesses market and consumers shop; it’s also revolutionized how salespeople connect with and convert prospects and how service teams support and delight customers. In short, video is incredibly useful throughout the entire flywheel — not just to heighten brand awareness.
Video can be a versatile tool for salespeople throughout the entire customer buying journey, and it can do much more than increase engagement. Backend analytics also help salespeople qualify and prioritize cold or unresponsive leads.
According to Gary Stevens, head of research at HostingCanada.org, “retargeting our website visitors on social media has led to a 47% increase in visitor value site-wide.” The granularity of video analytics on platforms like Facebook is one reason why, in 2018, 93% of businesses reported getting a new customer on social media thanks to video.
The options are also endless for service teams — onboarding videos, knowledge-based videos, meet the team videos, support video calls, and customer stories are just a few ways that video can create a more thorough, personalized customer support experience.
Lastly, according to HubSpot Research, consumers and customers actually prefer lower quality, “authentic” video over high-quality video that seems artificial and inauthentic.
Video is within reach for businesses of virtually any size — team and budget alike. 45% of marketers plan to add YouTube to their content strategy in the next year. Will you join them?
The 12 Types of Marketing Videos
Before you begin filming, you first need to determine the type of video(s) you want to create. Check out this list to better understand your options.
1. Demo Videos
Demo videos showcase how your product works — whether that’s taking viewers on a tour of your software and how it can be used or unboxing and putting a physical product to the test.
Learn how to use video in each stage of the buyer’s journey.
2. Brand Videos
Brand videos are typically created as a part of a larger advertising campaign, showcasing the company’s high-level vision, mission, or products and services.
The goal of brand videos is to build awareness around your company and to intrigue and attract your target audience.
3. Event Videos
Is your business hosting a conference, round table discussion, fundraiser, or another type of event?
Produce a highlight reel or release interesting interviews and presentations from the gathering.
4. Expert Interviews
Capturing interviews with internal experts or thought leaders in your industry is a great way to build trust and authority with your target audience. Find the influencers in your industry — whether they share your point-of-view or not — get these discussions in front of your audience.
5. Educational or How-To Videos
Instructional videos can be used to teach your audience something new or build the foundational knowledge they’ll need to better understand your business and solutions. These videos can also be used by your sales and service teams as they work with customers.
6. Explainer Videos
This type of video is used to help your audience better understand why they need your product or service. Many explainer videos focus on a fictional journey of the company’s core buyer persona who is struggling with a problem. This person overcomes the issue by adopting or buying the business’s solution.
7. Animated Videos
HubSpot created the following video to promote a key (intangible) theme from the 2017 State of Inbound report.
Animated videos can be a great format for hard-to-grasp concepts that need strong visuals or to explain an abstract service or product. For example,
8. Case Study and Customer Testimonial Videos
Your prospects want to know that your product can (and will) solve their specific problem. One of the best ways to prove this is by creating case study videos that feature your satisfied, loyal customers. These folks are your best advocates. Get them on-camera describing their challenges and how your company helped solve them.
9. Live Videos
Live video gives your viewers a special, behind-the-scenes look at your company. It also draws longer streams and higher engagement rates — viewers spend up to 8.1x longer with live video than with video-on-demand. Live-stream interviews, presentations, and events, and encourage viewers to comment with questions.
Learn how Facebook Live video can increase your social following and brand awareness.
10. 360° & Virtual Reality Videos
With 360° videos, viewers “scroll” around to see content from every angle — as if they were physically standing within the content. This spherical video style allows viewers to experience a location or event, such as exploring Antarctica or meeting a hammerhead shark. Virtual reality (VR) allows viewers to navigate and control their experience. These videos are usually viewed through devices such as Oculus Rift or Google Cardboard.
11. Augmented Reality (AR) Videos
In this style video, a digital layer is added to what you are currently viewing in the world. For example, you can point your phone’s camera at your living room and AR would allow you to see how a couch would look in the space. The IKEA Place app is a great example of this.
12. Personalized Messages
Video can be a creative way to continue a conversation or respond to someone via email or text. Use HubSpot Video or Loom to record yourself recapping an important meeting or giving personalized recommendations. These videos create a delightful, unique moment for your prospects and can drive them further down the purchase journey.
There’s a lot that goes into making a video. This section will walk you through the detailed process of creating and publishing a video for your business. Grab your camera and follow along.
1. Plan your video.
Before you set up, record, or edit anything, start with a conversation about the purpose of your video. Why? Every decision made during the video creation process will point back to your video’s purpose and what action you’d like your audience to complete after watching it.
And, of course, without a clear purpose agreed upon by your team, you’ll find yourself in a whirlwind of re-shooting, re-framing, editing … and wasting a lot of precious time.
There are typically a lot of players when making a video. How can you ensure they’re all aligned?
Create a questionnaire using Google Forms or SurveyMonkey and pass it along to the stakeholders of the project. This way, you can ask the same questions of everyone and aggregate your answers in one place.
Who’s your target audience?
What buyer persona are you targeting? This may be a segment of your company’s typical buyer persona.
What’s the goal?
Is it to increase brand awareness? Sell more event tickets? Launch a new product? Ultimately, what do you want your audience to do after watching the video?
Where’s the video going to live?
On Facebook? Behind a landing page form? You should begin with one target location — where you know your audience will discover the video — before repurposing it for other channels.
When’s it due?
Always start with a timeline. A video on which you have a few months to work will have very a different budget and creative scope than a video needed in a few days.
What’s the budget?
Video can be expensive, but it doesn’t have to be … if you set a budget. Do your research and set realistic parameters, especially before you answer the next question.
What are the creative requirements?
With your budget, skills, and resources in mind, think about the creative roadblocks that might arise. Do you need a designer to create lower third graphics? Are you going to create an animated video or a live-action video?
What will constitute success for the video?
Choose several key performance indicators that correspond with your video goals — or hop down to the chapter in this guide on measuring and analyzing video.
2. Script your video.
There’s a time and place for videos to be off-the-cuff and completely unscripted. You have tear-jerking documentaries, vlogging rants, and, of course, the holy grail: cat videos.
That being said, most business videos need a script.
If you skip this step, you’ll find yourself editing more than you need to, releasing a video longer than it should be, and probably losing your audience along the way.
Start writing your script the way you would begin a blog post — with an outline. List out your key points and order them logically.
Do all of your drafting in Google Docs to promote collaboration and real-time commenting. Use the “Insert > Table” function to adopt one of television’s traditional script-writing practices: the two-column script. Write your audio (script) in the left column and insert matching visual ideas in the right column.
Don’t make the viewer wait until the final seconds to understand the purpose of your video … we promise they won’t stick around. Similar to a piece of journalistic writing, include a hook near the beginning that states the purpose of the video, especially for educational and explainer videos.
Notice, in our example below, that we don’t let the audience get past the second sentence without understanding what the video will be about.

As you begin creating videos, you’ll notice a key difference between video scripts and your typical business blog post — the language. Video language should be relaxed, clear, and conversational. Avoid using complex sentence structures and eloquent clauses. Instead, connect with your audience by writing in first person and using visual language. Keep the language concise, but avoid jargon and buzzwords.
Following the “Little-Known Instagram Hacks” example, note how a section from the original blog post could be transformed for video by using fewer words and relying on visuals.
- Blog Post Version: “When someone tags you in a photo or video on Instagram, it’s automatically added to your profile under “Photos of You,” unless you opt to add tagged photos manually (see the next tip). To see the posts you’ve been tagged in, go to your own profile and click the person icon below your bio.”
- Video Script: “The bigger your following gets, the more people will tag you in their posts. You can find all of these under the “Photos of You” tab on your profile.”
Most video scripts are short … probably shorter than you think. Keep a script timer handy to check your script length as you write and edit. For example, a 350-word script equates to a video that is nearly 2 minutes long.
Words on paper sound a lot different than they do when read out loud. That’s why we encourage organizing a table read of your script before you start filming. The point of a table read is to smooth out the kinks of the script and nail down inflection points.
Have a few people (writer and talent included) gather around a table with their laptops and read the script multiple times through. If you accidentally say a line different than what the script prescribes, think about why and consider changing the language to make it sound more natural.
3. Understand your camera(s).
Too often the fear and uncertainty of equipment keep businesses from trying out video marketing. But learning to shoot video doesn’t have to be overwhelming.
It’s likely you have a great, easy-to-use camera right in your pocket: your iPhone.
Shooting with Your iPhone
Before filming with your iPhone, ensure your device has enough storage. Also, don’t forget to enable your iPhone’s Do Not Disturb feature to avoid distracting notifications while filming.
Once you open the iPhone’s camera, flip your phone horizontally to create the best possible viewing experience. Then, move close enough to your subject so you don’t have to use the zoom feature — it often makes the final video look pixelated and blurry.
Your iPhone might do a great job of focusing on the subject when you take photos, but when it comes to video the camera will continue adjusting and re-adjusting as you move around the scene. To solve this problem, lock the exposure before you press record. Hold your finger down on the subject of the video until a yellow box appears with the words “AE/AF Lock”.

Shooting with Prosumer and Professional Cameras
While iPhones are great for filming on the fly or becoming acclimated with video, at some point you may feel ready to graduate up to the next model. With all the digital cameras on the market, there are a ton of choices to pick from. Below we’ve identified a few options to simplify your search.
The first choice you make will be between purchasing a “prosumer” camera and a professional camera.
Prosumer cameras are considered the bridge between basic compact cameras and more advanced cameras. They’re perfect for someone interested in creating more video but want the option to just press record. Most have a fixed lens to keep things simple.
Professional cameras, like DSLRs, give you fine control over the manual settings of shooting video and allow you to achieve the shallow depth of field (background out of focus) that people rave about. While they’re primarily used for photography, DSLRs are incredibly small, work great in low light situations, and pair with a wide range of lenses — making them perfect for video. However, DSLRs do require some training (and additional purchases) of lenses.
If you’re interested in going the prosumer route, take a look at the Canon PowerShot ELPH 340. The GoPro HERO5 is another fun option for adventurous shoots with lots of movement.
Considering the expense of a DSLR camera, research your options and read plenty of reviews. Top of the line options (from most expensive to least) include the Sony Alpha a7SII, Nikon D810, and Canon EOS 5D Mark III. For a more cost-effective option, check out the Canon EOS 7D Mark II, Canon 80D, Nikon d3300, or Canon EOS Rebel T6.
Understanding Your Camera’s Manual Settings
If you choose a DSLR, there are a few settings you need to understand before your first shoot: frame rate, shutter speed, ISO, aperture, and color balance. Definitely keep your camera nearby as you read — manual settings can seem quite abstract without testing them for yourself.
But before we dive in, we want to stress that this is a high-level overview of each setting. If you find yourself wanting more, dive in and do some of your own research. There’s plenty to learn about how to manipulate these settings and use them together to create different looks.
Lastly, there will be a different method for adjusting these settings based on your specific camera. Always refer to your camera’s instruction manual.
Frame Rate
As with video concepts, there are tons of customization options. The most basic customization option when it comes to frame rate is shooting your video at 24 frames per second (fps) or 30fps.
Video experts often credit 24fps with a more “cinematic” look, while 30fps is more common, especially for videos that need to be projected or broadcasted. A good rule of thumb is to ask the end-user of your video what his or her preferences are and shoot based on that. Then, be sure your resolution is at least 1920 x 1080 to maintain quality footage.
Once you’ve set your frame rate and resolution in your camera’s settings, it’s time to determine your aperture, shutter speed, and ISO. Be sure to turn your camera to manual mode to control these settings.
(While we’ll define each of these individually, know that these three variables are meant to work in tandem with each other. In fact, many photographers use the term Exposure Triangle to describe how they relate to light and how it interacts with the camera.)

Aperture
Aperture refers to the size of the opening in the lens. Like a human eye, a lens opens and closes to control the amount of light reaching the sensor. Aperture is measured in what’s called an f-stop. The smaller the f-stop number, the more open the lens is, while a larger number means the lens is more closed.

What does aperture mean for your video? When a lot of light comes into the camera (with a low f-stop number), you get a brighter image and a shallow depth of field. This is great for when you want your subject to stand out against a background. When less light comes into the camera (with a high f-stop number), you get what’s called deep depth of field and are able to maintain focus across a larger portion of your frame.

Shutter Speed
To understand shutter speed, we first have to talk about photography. When taking a photo, shutter speed refers to the length of time the camera’s sensor is exposed to light. Think of it as how quickly or slowly the camera blinks.
If you’ve seen a perfectly timed photo of a hummingbird seemingly frozen in time, you’ve witnessed a very fast shutter speed. Meanwhile, an image of a rushing river with the water blurring together was probably taken with slow shutter speed.
Shutter speed is measured in seconds, or in most cases, fractions of seconds. The greater the denominator of the fraction is, the faster the shutter speed. So, 1/1000 would be faster than 1/30.
But what does shutter speed mean for video? We won’t go too deep into the science of shutter speed, but to pick the adequate setting, you’ll have to do a little math. First, multiply your frame rate by 2. So if you’re shooting in 24fps, that would be 48. This number becomes the denominator of your shutter speed fraction.
Since shutter speed is only available in a few increments, you’ll need to round 1/48 up to the next closest setting: 1/50. Here are some common shutter speeds and how to calculate them:
- At 24fps, 24 x 2 = 48, equalling a shutter speed of 1/50
- At 30fps, 30 x 2 = 60, equalling a shutter speed of 1/60
- At 60fps, 60 x 2 = 120, equalling a shutter speed of 1/20
Remember, this process is just a guideline for choosing shutter speed. Traditionalists stick to these calculations, but there’s always room to tweak shutter speed slightly to achieve a desired effect. In the case of video, rules can be broken — as long as you have a good enough reason.
ISO
Last in the Exposure Triangle is ISO. In digital photography and videography, ISO measures the camera sensor’s sensitivity to light. On your camera, you’ll see the settings referred to with numbers in the hundreds or thousands (e.g. 200, 400, 800, 1600, etc).
The higher the number, the more sensitive your camera is to light … the lower the number, the less sensitive. ISO also affects the graininess of the image. Low ISOs produce a crisp shot, while high ISOs create a more noisy, grainy shot.
When choosing an ISO, consider the lighting. If your subject is well-lit (for example, if you were outside), you can get by with a lower ISO, ideally around 100 or 200. If you’re indoors in a low-light situation, you’ll need to bump up the ISO — just be careful of how grainy it makes your shot.
This is where you can begin to see how the three factors of the Exposure Triangle work together. When you have a low-lit situation, for example, you may choose a lens that can shoot with a low f-stop to let more light into the camera and avoid making the shot too noisy with a high ISO.

If you’re just starting out with manual video settings, don’t be overwhelmed. Understanding the ins and outs of the Exposure Triangle takes time and a lot of practice. Here are two tips to beat the learning curve:
- Start with photos. By switching your camera off video mode, you’ll be able to see the relationship between aperture, ISO, and shutter speed. Take a ton of photos and change each setting incrementally. Over time, the numbers will be less intimidating and switching between settings will make more sense — and become easier to apply to video.
- Form a process. Every videographer has their own method, but we suggest setting your shutter speed first according to the math described above. Then adjust aperture according to the depth of field you want to create. Then, ISO. Finally, circle back to shutter speed for any fine adjustments.
While aperture, shutter speed, and ISO may be the three main pillars of manual photography and videography, there is a fourth piece of the puzzle that’s just as important: white balance.
White Balance
White balance tells your camera the color temperature of the environment you’re shooting in. Different types of light have different colors. For example, incandescent bulbs (like what many people put in a lamp) have a very warm color. The fluorescent lights (if you’re reading this in an office, look up) are a little bit cooler. Daylight is cooler yet. Before you begin shooting, you have to adjust your camera’s white balance according to your setup.
The exact settings on your camera will depend on your model, but there’s likely an auto option, a bunch of presets (daylight, cloudy, tungsten, etc.), and custom. Avoid auto white balance at all costs and opt for a preset or custom instead. If you have a top-of-the-line DSLR, there may also be an option to manually set the color temperature of the room, measured in Kelvin.
To help you understand the importance of setting your white balance, consider the difference between these two photos. The environment is lit with yellow fluorescent lights. You can see how the appropriate setting looks natural, while the daylight setting adds a blue tint to the scene.

Focus
Focus isn’t one of the key settings of shooting, but it’s definitely important to keep in mind. With a DSLR, you have the option to shoot with autofocus or manual focus. It depends on the camera and lens you have, but typically autofocus is not the most accurate.
Instead, flip your lens to manual focus. Use the (+) and (-) buttons to enlarge the viewfinder and move in close to your subject’s face. Then, adjust the focus on the lens. For shooting a stationary setup like an interview, make sure the subject’s eyelashes are in focus — that way, you can be certain your footage is clear and sharp.
4. Set up your studio.
When you begin building your in-office studio, the purchases can add up quickly. Not only do you need a camera, but the more you read, the more you realize you need tripods, lights, microphones, and more.
Take a breath. With a little bit of know-how, building your studio doesn’t have to be overwhelming. There are plenty of cost-effective choices and DIY hacks to make sure your videos look top-of-the-line.
Basic Equipment
Always shoot with a tripod. It should go without saying, but the handheld method you use for your Snapchat story isn’t going to cut it. Tripods will ensure you maintain a steady shot and not break any expensive equipment in the process.
Tripods range tremendously in price, and the quality of your tripod should depend on the level of camera and lens you have. If you’re shooting with your phone, you can get by with a table mount like the Arkon Tripod Mount or a full-size tripod like the Acuvar 50” Aluminum Tripod. For a DSLR, Manfrotto makes a variety of trustworthy tripods starting with the Manfrotto BeFree and increasing in quality and price from there.
Along with the tripod, stock up on camera batteries and SD cards. Recording video will cause you to run through both much quicker than taking photos.
Audio Equipment
If you’ve begun testing out your camera’s video capabilities, you’ve probably noticed that it has an internal microphone to record audio … don’t use it.
If you set up your camera at a reasonable distance from your subject, you’ll quickly learn that the internal microphone isn’t powerful enough to adequately record audio. Instead, you should begin investing in a few pieces of quality sound equipment.
When you’re shooting with your iPhone, there are a ton of microphone options that are all easy to use and decently cheap. For example, the Movo MA200 Omni-Directional iPhone microphone will give you a plug-and-play solution for capturing audio on the fly.
Opinions vary greatly among sound engineers on the best method and equipment for recording audio with a DSLR. You’ve likely seen many videos that use a lavalier microphone — the small piece that clips below the collar of the talent’s shirt.
Lavaliers come in both wired and wireless options. However, lavaliers can be a bit obtrusive both for the talent (who has to have a wire threaded down his or her shirt) and for the viewer (who has to see a microphone for the whole video).
Instead, if you know you’re recording in a controlled environment (like a conference room in your office) we suggest recording with a shotgun mic. They’re reliable, remain out of the shot, and record background noise in a natural-sounding way.
To create a shotgun mic setup in your office studio, you’ll need a shotgun mic like the Sennheiser ME66, a shotgun clip, light stand, XLR cable, and Zoom H4N recorder. The Zoom recorder will allow you to record audio separately on an SD card and adjust the gain for the environment you’re shooting in.
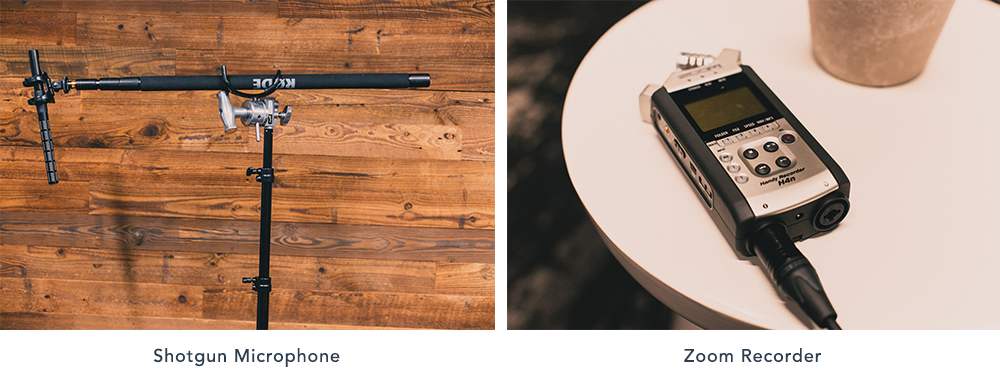
We admit these audio purchases may sound like a lot. But a shotgun mic setup is a worthy investment that will last for years. If you’re looking for a more cost-effective solution, look into the Rode VideoMic that mounts on top of your DSLR and plugs right into the camera body.
Lighting Equipment
You have a camera. You have audio. Now, let’s talk about lights.
To outfit your studio without breaking the bank, head over to your local home improvement store. Pick up extension cords and a few clamp lights with bulbs. You’ll also need three light stands, which are available on Amazon.
The traditional setup of video lights is known as three-point lighting. As you might guess, it involves three lights placed strategically around the subject, wrapping them in light and creating appealing shadows on their face.
First, you’ll need a key light. Place this at a 45-degree angle to the left or right of the subject. Lift the light above their head and aim it downwards. As the name suggests, this is the key light and should be bright enough that it could be the only light in the scene … if it had to be.
Next, place the fill light at a 45-degree angle on the other side and lift it close to or just above eye level. The purpose of the fill is to soften the shadows created by the key, but without getting rid of them completely. Therefore, the fill should be dimmer than the key light. If you have to use the same type of light for both, scoot the fill back and diffuse it by clipping a clear shower curtain onto the clamp light with clothespins.
Finally, the backlight will add a third layer of dimension. Scoot your subject away from the background. Lift a light above the subject’s head and place it behind them and off to the side so it’s out of the frame. The light should be aimed at the back of their head, creating a subtle rim of light and separating them from the background.
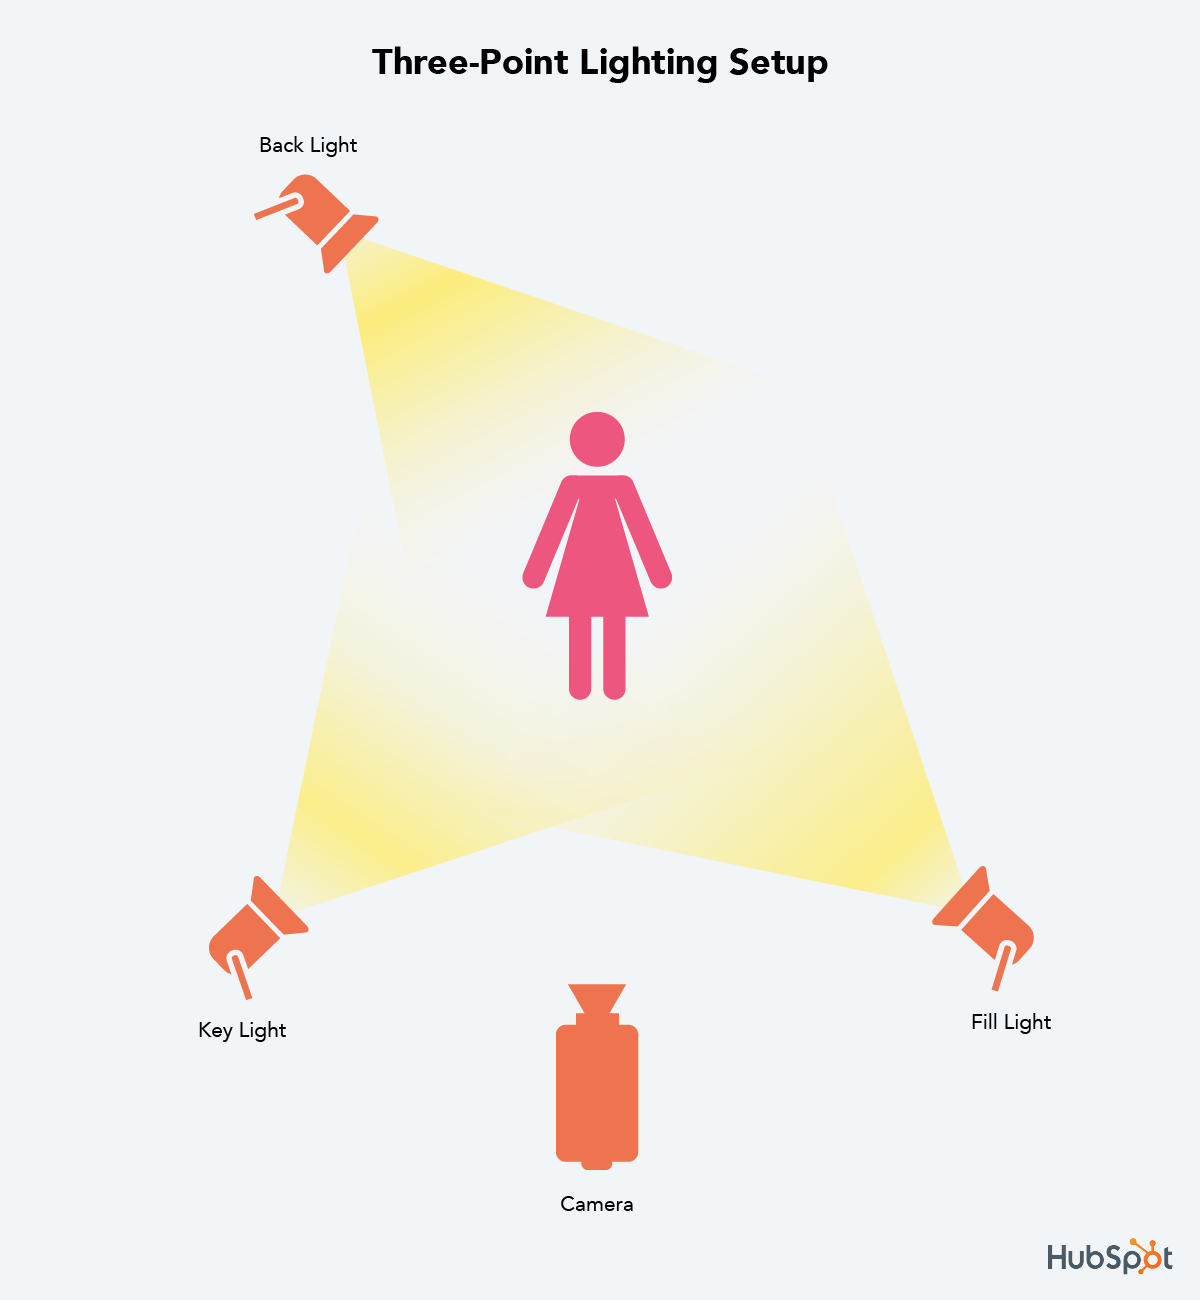
Setting Up Your In-Office Studio
Now that you have all of your equipment, you’re finally ready to build your office studio. While you could always grab a closet to store your equipment in, let’s go a bit bigger and claim a conference room.
By having a designated studio, you’ll save loads of prep time for each shoot. Just make sure the conference room isn’t too empty. If you have to, bring in a couch, chairs, or blankets to minimize the echos in the room.
Speaking of sound, pay special attention to the hum of the air conditioning. Find a room with minimal noise or turn down the fan during recording. Consider purchasing photography paper to create a background that’s a little more appealing than a white conference room wall.

When it comes time to shoot, clear out unnecessary people from the room and turn off the overhead lights. With your three-point lighting setup, there will be no need for those harsh fluorescents. When — and only when — everything is set up, call in your talent. There’s nothing worse than being nervous, and then having to anxiously watch as lights are turned on and the camera is tested.
5. Prepare your talent.
If you have experienced, confident actors in your company, you’re lucky. Video talent is a rare resource. But with a little bit of coaching (and a fair share of nervous laughter), you can help your teammates thrive in front of the camera.
No matter if it’s your first video or your fiftieth, remember that getting in front of the camera is scary. Schedule plenty of time and give your talent the script early — but make it clear they don’t need to memorize it.
Instead, place a laptop below the eye-line of the camera. Break the script into short paragraphs and record it section by section until you capture a great take of each. If you plan in advance when the final video will show b-roll (supplementary footage or screenshots), you can have your talent read those lines directly off the laptop like a voice over.
During the shoot, your job goes beyond pressing record. First and foremost, you need to be a coach. Balance critical feedback with support and be quick to give encouragement after each take. This is why conducting a table read during the scripting process is so important: It’s easier to give feedback when there’s not a camera in the room. Remember, be a little silly during the shoot or your talent will be on edge and uncomfortable — and it will show in the footage.
But while you’re maintaining the fun level on set, remain vigilant. It’s your job to pay attention to the little things, like making sure all of the mics are on or noticing if the lighting changes. Record each section many times and have your talent play with inflections. When you think they’ve nailed the shot … get just one more. At this point, your talent is already on a roll, and options will help tremendously during editing.
Finally, circle back to the beginning of the script at the end of your recording. Chances are your subject got more comfortable throughout the shoot. Since the beginning is often the most crucial part of the video, record that section again when they’re feeling the most confident.
Composition Basics
There are some films that are simply beautiful. It’s not the story or even the picturesque setting. In fact, the scene might take place in the dingiest of sets, but somehow each shot just feels right.
That’s the power of composition. When objects appear where they should in the frame, the quality of your video increases exponentially.
For video, the rules of composition are similar to what you may have learned in a photography or art class. First, consider the rule of thirds — the idea that you can create a sense of balance by imagining the canvas with two horizontal lines and two vertical lines. Key elements should occur at the intersection of these lines.

For example, if you are shooting an interview or a how-to video, the subject’s eyes should align with the top horizontal line around one of the two intersections. For this “talking head” shot, you can also improve your composition by leaving enough (but not too much) headroom. This is the empty space above the person’s head.

One of the best ways to improve the look of your video is to include b-roll. B-roll is the supplementary footage included as a cutaway. This might include shots of a customer service rep talking on a phone, a designer editing your website, visuals of your office, or even screenshots of your product. The key with b-roll is to make sure each and every piece enhances the story.
When you’re collecting b-roll, include a mix of shots from varying angles and distances. In fact, film professionals use different names to describe these variations.
- Establishing Shots: Wide shots allow the viewer to see the entire scene. These are great to use when introducing the scene at the beginning of a video.
- Medium Shots: Tighter shots that focus on the subject or a portion of the scene. Your classic interview shot could be considered a medium shot.
- Close-ups: Tightly cropped shots zoomed in to show detail. These might feature someone’s hands typing on a keyboard or pouring a cup of coffee.
As practice, try telling a story with your b-roll and planning out a shot sequence. For example, your subject might open a door from the hallway, walk into their office space, sit down at their desk, open their laptop, and begin typing. Seems simple, right? But a shot sequence showing this 10-second scenario might consist of six or more different b-roll clips.
Here’s where the final lesson of composition comes in: continuity. Continuity is the process of combining shots into a sequence so that they appear to have happened at the same time and place. A key part of continuity is making sure any ancillary objects in the scene — for example, a cup of water on a desk — stay in the same place (and have the same amount of water) throughout all of the shots.
The other part of learning continuity is match on action. For the scene described above, you’d want to record the subject opening the door and walking in from both inside and outside the room. In post-production, you could then flip between the clips at the exact right time to make the cut seamless.

6. Shoot for the edit.
When it comes to video, some are better at shooting while others are better at editing. Whatever side you claim, you should understand the process and pain points of each.
For instance, as the person behind the camera, you may believe you collect ample footage and ask all the right interview questions. But to the editor, you may actually be shooting too much of one type of shot and missing out on some that would make their job easier.
Filmmakers teach a valuable lesson here: shoot for the edit. By remembering that the footage you record will be edited later, you can make smarter decisions and save countless hours in the editing room.
The first step in adopting a shoot-for-the-edit mindset is remembering to leave a buffer at the beginning and the end of each clip. There are called handles and can save editors from the headache of cutting too close to an important shot.
In the section on preparing talent, we discussed how to record your script in short sections. If the editor were to stitch these sections together side-by-side, the subject’s face and hands might abruptly switch between clips. This is called a jump cut, and for editors, it poses an interesting challenge. Thankfully, this is where b-roll comes in handy, to mask these jump cuts.

Example of a jump cut
As a producer, your job is to capture plenty of b-roll to make sure your editor never runs out. Create a shot list of more b-roll ideas than you think you’ll need and mark them off as you record them.
To mask jump cuts, you can also shoot with two cameras, especially if you’re recording an interview without a script. Camera A would be the traditional, straight-on shot. Camera B should be angled 30 to 45-degrees to the side and capture a distinctly different shot. The editor could then flip between these two views to make the cut appear natural.

Example of switching between interview angles
A note about shooting with two cameras: Your editor will need to sync the footage between the different views. To help them do this, clap your hands loudly in the view of both cameras right before you ask the first interview question … yes, just like an old fashion clapboard. Modern editing software has auto-sync features, but this loud clap will help you initially line up the clips.
Finally, mark your good clips. Even if you’re recording a scripted video, you might have to record each section 10 or more times. Once your subject nails the take, wave your hand in front of the lens. That way, the editor can scrub directly to this visual cue and save time on footage review.

7. Organize your footage.
Yes, file organization is boring. But when video editing, it just might save your project.
Capturing video will force you to take a hard look at your computer and file organization habits. If you’re one of those people who work off a cluttered desktop — you know who you are — you’ll find yourself in a world of hurt.
First, video format files are incredibly large, so it’s very unlikely you’ll want to store any of them on your internal hard drive. You’ll quickly run out of storage, and your computer’s processing speed will begin lagging under the weight.
Instead, invest in an external hard drive like one of the Lacie Rugged models. External hard drives come in a variety of sizes and port options (Thunderbolt, USB 3.0, etc.). Multimedia creators will use the phrase “working off of an external” to describe storing all of their project files on this hard drive. This method also makes it easier to collaborate with teammates because you can easily share the drive.
Second, video editing programs are very particular about where you keep your files. If you don’t stick with the original file structure, you may find yourself buried in error messages. (We’ll cover software options and best practices in the next section.)
On your external hard drive, you should create a separate top-level folder for each project. Within this folder, there should be a prescribed set of “buckets” to store your video footage, audio, design assets, and more. Create a template project folder that you can copy and paste for each project using the image below as a guide.
When you import your footage from your camera, place it in the “footage” folder on your hard drive.
For both the project folders and your editing files, follow a consistent naming structure. For example, you could start each name using YRMODA (year-month-date). So a video on Instagram Hacks might be named “180625_instagram_hacks” if it was started on June 25, 2018.
Even with a perfectly organized external hard drive, you’re not yet out of the weeds. You need to back up your files (and maybe even back up your backup files). It’s not uncommon to have an external hard drive for everyday work, another external for backups, and a third set of backups in the cloud via Dropbox or Google Drive.
8. Edit your video.
Okay, you’ve filmed your video footage. Congrats — you’re halfway there!
Now it’s time to talk about editing. We get it, video editing can be confusing. It’s easy to feel overwhelmed at first, especially when you see software price tags! Luckily, there are many options for video editing based on your skill level, operating system, and budget. There are even free programs and mobile apps! Let’s go over a few options.
Intermediate: Apple iMovie
iMovie is Apple’s video editing software. Compatible with Macs and other iOS devices, iMovie is simple, user-friendly, and free on all Apple products. iMovie allows you to create and edit your videos by cutting together clips, adding titles, music, sound effects, basic color correction, filters, and special effects.
The program even provides helpful templates that simplify the editing process. The platform supports high-quality clips like 4K video footage and makes it easy to share your work directly to a video hosting platform. Limited access to advanced color correction and editing features mean it isn’t commonly used by professionals, but iMovie is still a great option if you’re just starting out.
Advanced: Adobe Premiere Pro
Adobe Premiere Pro is a leading video editing software program used by amateurs and professionals alike. With a customizable interface and numerous advanced editing tools, the platform is often called the industry standard for video editing and has been used to edit major Hollywood movies like Gone Girl and Deadpool.
Premiere makes it easy to collaborate with other editors, organize your material, and sync with other programs in the Adobe suite like After Effects and Photoshop. The platform supports high-quality footage (4K and higher) and includes advanced, built-in color correction and grading tools that set it apart from cheaper or free options like iMovie.
The only downside to Premiere is the cost. A year-long subscription to the latest Premiere Pro CC comes in around $240. If you’re new to video editing, you may want to experiment with a cheaper option like iMovie or Adobe Premiere Elements before investing in the Premiere Pro. On the fence? Check out some Adobe Premiere Pro tutorials here.
9. Choose your music.
What’s the first thing that comes to mind when you think about video? I’m guessing the actual video footage. While it’s important to concentrate on your video footage, don’t forget to factor music into your overall plan and budget.
Music is a powerful tool that can alter your video’s mood and tone — just watch the videos above! Choosing the right music often makes the difference between an amateur project and a professional piece of content. When used properly, it can help keep your viewer’s attention, evoke emotions, and define your overall editing style.
Before you start filming, set a music budget and research your local copyright laws. Copyright law can be very difficult to decipher, especially when you’re dealing with digital content. Bottom line: Most music isn’t free. If you use another artist’s music without permission or proper licensing, you risk video removal and legal action.
In order to avoid copyright infringement, you’ll need to find royalty-free tunes or pay a composer to create an original score. Royalty-free songs aren’t free to use; they’re quality songs available for a single flat fee. This means you don’t have to worry about paying additional licensing fees or royalties in the future. YouTube, Pond5, and PremiumBeat are all great sites to find royalty-free music.
Next, consider your audience and the overall mood for your production. Are you targeting a small audience that will appreciate the newest, underground hip-hop track, or do you need something that will appeal to many demographics? Are you creating a practical product tutorial or an upbeat event recap? Be sure to choose music that enhances the overall tone of your video.
In addition to considering your audience, be sure to contemplate the purpose of the music. Do you need background music or something with real impact? Will you be narrating or speaking in the video? If so, don’t let the music get in the way of your content. Sometimes the best music is the music you don’t remember at all.
After you’ve determined the type of music you need, it’s time to start analyzing potential songs. Consider the song’s pacing. Songs with a steady rhythm are easy to change to suit your video style. Hoping to include your favorite, Top 40 hit? Popular, radio songs are usually structured in 4-5 parts and can be difficult to transition.
Try to choose simple songs that are easy to loop. If you’re looking for an instrumental song, be sure to find something that was recorded with real instruments. Songs made with digital samples can make your video feel unprofessional and out of date.
Finally, consider adding intro and outro music. Intro and outro music, or bookends, can serve as a theme for your content. These are a great choice if you don’t need music throughout your entire video. Bookend music can help set the tone for your video, naturally split your content into chapters, and leave your viewers feeling they had a complete experience.
While some videos feel unfinished without background music, others just need a few tunes to tie the project together. Pay attention to videos that have a similar style to see how others utilize music.
10. Record your voice over.
You have your video footage and music — now it’s time to chat about voice overs. A voice over is the separate video narration that’s not spoken by the speaker on-camera. Voice overs are an effective tool that can help make your content more relatable, emotional, and fluid.
It’s important to remember that video audio is just as important as video visuals. The good news is that you don’t have to be the next Don LaFontaine or hire a professional to record a great voice over. Below are a few tips to capture audio on a budget.
- Find a location. Decide on a spot to record. If you can’t go to a professional studio, try to pick a quiet room away from distracting external sounds like sirens, opening and closing doors, and people talking on the phone. Read your script aloud, and pay attention to the room’s acoustics. Does your voice echo or sound muffled? If so, consider recording in a different space or adding furniture to fill in the room.
- Prepare. Practice makes perfect! Before you record, read through your script a few times and take note of any difficult pauses, transitions, and words. On the big day, be sure to stay hydrated and avoid wearing noisy clothing or jewelry. Also, use a stand, laptop, or teleprompter while recording so you aren’t rustling through a printed script.
- Test and listen. Think you can record the perfect voice over in just one take? Think again! Invest in a good pair of headphones and keep an eye on your audio quality throughout the recording process. It’s easier to get a new take of audio than trying to fix it during the editing process. We recommend running through your script a few times, especially the first few paragraphs, to ensure that your voice is fully warmed up. If you hear popping or hissing sounds, try standing further away from the mic or invest in a pop filter.
- Relax! Be sure to read slowly, pause, and take breaks while recording your voice over. Sometimes all you need is a sip of water to get back on track.
Video Hosting Platforms
You’re ready to publish your video. You shot the footage, edited it together, added music and a voice over, and exported it for the web. Now it’s time to get your video online so your audience can start viewing, sharing, and engaging with it.
You have several options for hosting videos online, and in this section, we’ll talk about some of the best ones.
YouTube
When you ask your friends which online video platform they use, the answer you probably hear the most is YouTube.
YouTube is the largest video hosting platform and the second largest search platform and second most visited website — both after Google.
Every single day, people watch over five billion videos on YouTube. It’s also free to upload your videos to YouTube and optimize them for search.
In addition to its massive audience, YouTube offers several other features that make the platform a good option for hosting your video. Because YouTube videos are hosted on individual channels, the platform allows you to build a dedicated audience of subscribers. Users who follow your channel are more likely to see additional videos you upload.
Within your channel itself, you can also organize videos into playlists, making it easy for your audience to search within your content. As a social platform, viewers can engage with your videos by liking and commenting on them, providing you another chance to interact with your audience. YouTube also offers a variety of advertising options for more sophisticated targeting.
Although YouTube offers the benefit of reaching a large audience with no cost to upload and host videos, there are several downsides to the platform. While video ads can be a great tool for promoting your own content, the number of ads on the platform from other advertisers can detract from your viewer’s experience.
YouTube is also (surprise, surprise!) highly addicting. 83% of viewers prefer YouTube over any other video platform. Once viewers are on the platform, they usually stick around to watch another video … or 20. This can make it difficult to drive traffic back to your site from the platform. Despite these barriers, YouTube is a great platform for hosting videos and growing your audience.
Vimeo
If your friends didn’t answer your earlier question with “YouTube” then they most likely responded with Vimeo, the second largest video hosting platform.
Vimeo’s audience is significantly smaller (715 million monthly views) than YouTube’s, but there are still many benefits that make it a favorite for content creators and viewers alike.
Among these is a simpler, cleaner, user interface that makes it easier to navigate the platform. Unlike YouTube, Vimeo has very limited ads and commercials that would otherwise detract from your viewers’ experience. Videos on Vimeo also tend to be higher quality than on YouTube, and the audience on the platform is likely to be more professional.
Vimeo offers several different premium account options to better suit businesses. The premium accounts provide additional storage, advanced analytics, customer support, player customization, access to lead generation tools, and much more. In addition to premium accounts, Vimeo also partners with businesses to produce quality marketing content.
If you’re looking to showcase high quality, artistic content, Vimeo might be the platform for you. Its engaged audience and beautiful aesthetic make it a great place to host creative videos. However, if you’re focused on quantity over quality and increasing your reach, you may want to explore other platform options.
Vidyard
Vidyard is a video hosting platform built specifically for businesses. It’s not just another option to store and manage your videos; instead, it allows you to become a fully video-enabled business. Here’s what we mean.
These days, we know posting your video to YouTube isn’t enough. You need channel-specific video content for Facebook and Instagram, not to mention for your website. Enter: Vidyard. The platform allows you to publish and update to all of these places from a central location.
From this portal, you’ll find all sorts of viewer insights. Discover what types of video content your audience likes and how they watch their videos. Then, channel those insights directly into your marketing automation software or CRM. For example, if that prospect you’ve been monitoring views your latest case study video, you’ll be notified straight away.
One of the coolest features of Vidyard is the ability to personalize videos with the viewer’s name or company directly in the video design. This is a creative addition as you begin working video into your marketing and sales strategies.
How to Create a Video Social Media Strategy
We’ve learned how to create high-quality videos for your business. Now, let’s make sure those videos fit within each social network’s best practices.
Creating and posting videos on social media should always help you drive toward your existing marketing goals.
For example, if your goal is to get more people to download an ebook, you could create a short teaser or how-to video and post the full link to the ebook’s landing page in the copy of your social post.
Let’s drill down into best practices for each social network.
Promote a new blog post, engage with your audience, or even drive viewers to a landing page with Twitter videos. When teasing a blog post or piece of content on Twitter, always keep your video short and sweet – brevity is a core factor on this channel.
Short clips that are easy to consume tend to perform the best. Try pinning your video to the top of your profile for some added exposure.
If you want to get a little more experimental with using video on Twitter, you can try making short, custom videos to engage with your audience. These highly personal, one-to-one response videos are an awesome way to make your brand more human while building personal connections with your engaged followers.
Facebook and Instagram
When you walk onto a bus or train for your morning commute, how many people are scrolling through their smartphones to see the news and content they’ve missed overnight? Pretty much everyone – but not everyone is wearing headphones.
For this reason, make sure your video works with or without sound. BuzzFeed is the master of silent auto-play — just take a look at their Facebook page. The reason their silent auto-play strategy works so well is because of this rise in mobile video views and the way people scroll through and consume content on social media. They often post quick recipes or quick how-to’s, often with easy-to-follow imagery or helpful text to describe what is happening.

Facebook also favors longer videos in their newsfeed algorithm. The goal with this shift is to better surface videos that are most relevant to the viewer.
So what does this mean for you? Don’t panic; this just confirms what we already know is true. Creating the “right” content for your audience is more important than churning out it out for the sake of it.
Secondly, upload videos directly to Facebook. Facebook continues to make a compelling case for uploading your videos natively to the platform — the primary reason being that your content will be seen by more eyes.
Brand awareness videos that are light-hearted and entertaining tend to perform well on Facebook for this very reason – their algorithm takes into account a user’s previous video-related actions when determining what videos to show them on subsequent visits. Make a video that’s super relevant to your audience, share it on Facebook, and see what type of engagement you can drum up!
Lastly, grab attention instantly… and keep it. Did you know that Instagram was the first social channel to initiate silent, auto-playing videos? It’s true! Shortly after, Facebook followed suit, so it’s safe to say that catering to this type of video when creating content for social media is the way to go. It might seem daunting to try and grab someone’s attention so fast and without sound, but here are a few best practices you can use to make things easier:
- Start off your video with motion to grab your viewer’s attention while they’re scrolling through the feed.
- Videos that feature people speaking are great for landing pages or your website, but try to stick to visually stimulating videos for Facebook and Instagram (unless you’re going Live, which we’ll talk more about later).
- Incorporate text or include captions so that viewers can follow along with or without audio.
YouTube
On YouTube, post with a specific strategy in mind. Think of YouTube as a giant library of video content where people go to either educate themselves or to be entertained. YouTube reports over 1 billion unique users per month – sounds like a social media gold-mine, right? Well, sometimes, yes.
There are, however, a few questions you should ask yourself before going forth with posting every video you’ve ever made to your YouTube account:
- Can you make the specific video content they’re searching for there?
- Do you need these prospects to end up on your website?
- If you’re purely seeking some broad brand awareness, YouTube could be an awesome channel for you? (Just don’t expect much in the way of driving tons of traffic back to your site.)
Establish and grow a dedicated channel of subscribers by creating informative, educational content that is in high demand, and you’ll start to see some real success!
For a long time, LinkedIn was one of the less video-friendly social networks, that’s changed. Users can now upload videos, and brands (whether that’s your company brand or personal brand) can now get even more creative with the content they share.
Considering this fairly recent development, what should you be considering when creating and uploading LinkedIn videos? LinkedIn recommends four different themes for creating video to be used on its platform:
1. Show it.
If you’re in a fast-paced industry that’s always evolving, brands and thought leaders can take the lead by showcasing new technologies in video format, or providing tutorials on how a new physical product works.
2. Transport them there.
Video is the perfect medium for giving audiences a taste of what it’s like to really be somewhere. The most obvious use case here is industry conferences and events. If your company hosts them, uploading videos of the event to LinkedIn is a great way to demonstrate the buzz you’re creating in your industry.
If you’re working on your personal brand, bringing snapshots of the things you’re learning at the event to your connections can be the perfect way to help your community or develop your own thought leadership by sharing your perspective of everything that’s happening there.
3. Teach it.
If you have a time-saving hack to share or have learned something new that might help other people in your network, video is a super effective medium for sharing that knowledge. If you’re thinking about this on behalf of your company, ask yourself what your buyer personas often struggle with, and see if you can teach them a solution in video format.
4. Share it.
This is one for the opinionated amongst us. If you have thoughts on a recent announcement or piece of industry news, let people know what you’re thinking in a video! Likewise, if your company has some news, or has made a recent key hire that your followers and wider industry would want to hear about, a video is a personable take that can be used alongside the traditional press release.
Of course, you don’t have to stick to these four themes — get creative and test to see what works best for you.
Lastly, upload videos directly to LinkedIn. Here’s how to create and upload a video for LinkedIn:
- Go to the LinkedIn app and tap the video icon in the share box in the top right-hand corner.
- Select the video icon to record now, or choose a pre-recorded video from your phone’s camera roll.
- If you chose to record now, you’ll begin recording a video inside the LinkedIn app itself.
- Add a description to your video to sit alongside it when you post.
- Hit Post and your video will start to appear in your followers’ feeds.
Live Video: Facebook & Instagram
While Instagram’s traditional features let users record short video clips and post them online afterward, new live features on Facebook and Instagram take a different approach, allowing users to post live video streams of what they’re doing at that very moment.
When you’re setting up videos for Facebook Live or Instagram Live, make sure you’re following the steps in the first section of this guide. If you do this, you’ll have much higher quality live videos, which will set you apart from other live videos being shown. In addition to these steps, we have a few more things to keep in mind.
Consider timing.
Keep in mind that your live video will be broadcast from the platform (Facebook or Instagram) itself, so that’s where you’ll be promoting your broadcasts primarily. Do some research on your Facebook/Instagram audiences to find out when they’re most engaged with your posts.
Even if some of your followers miss out, the app will save your videos to the app by default (although you can delete them manually if you want to), and they’ll be available for viewing by your followers after the fact.
As for the length of your video broadcasts, remember that most people’s attention spans are fairly short — especially on mobile. If your broadcasts aren’t captivating from the get-go, users will likely stop viewing your stream.
Spend time coming up with a compelling title.
It’s vital that your title describes what your video is and why people should either tune in now or replay your stream later (up to 24 hours). Here are a few styles that make effective titles:
- Straight-Forward: Sometimes, the most effective title will tell people exactly what you’re going doing in the video. For example, Elijah Wood once posted a live video with the title “Jellyfish” whilst visiting the aquarium — which is exactly what the video showed; nothing more, nothing less.
- Exclusive: A title that lets users believe they’re seeing exclusive footage can be super compelling. For example, you might broadcast a video titled, “I’m live from my show!” for all the viewers at home. Another version of this could be “A Backstage Look Into…” or something along those lines.
- Unique: Broadcasting something unique, rare, or just plain weird? Own it. One of my personal favorites was, “My Fridge: 100 Viewers and I’ll Drop Eggs.”
Respond to comments live.
One of the coolest features on Facebook is that people who are watching your stream in real time can comment and “like” the broadcast (which show up as hearts, like on Instagram). Other viewers are able to see these comments and the number of hearts your video has. Acknowledge or even respond to these comments out loud on the live broadcast to encourage engagement and make the experience feel like more of a two-way conversation.
Experiment with use cases.
Since Facebook and Instagram Live features are still relatively new, there aren’t solidly defined ways to use it, especially for brands. This is a unique opportunity for you to experiment with different ways of using it and what type of content your audience likes most.
Facebook Live lets you analyze a few key stats you’ll want to keep track of while you’re figuring out what works. Once your video ends, the app lets you see how many live viewers you had, how many viewers replayed your video, and how many hearts your video received (this number updates automatically as users continue “liking” your video from the time it ends until it expires).
Finally, as you experiment with different recording environments, keep in mind that background noise is easily picked up by microphones — so you’ll want to make sure you’re in a relatively controlled environment if doing a more serious or professional broadcast.
How to Use Video Throughout the Flywheel
Too often, companies jump at the opportunity to create their first video. They spend tons of money on an explainer video for their homepage, but as soon as the project is complete, all future video ambitions screech to a halt.
On the other hand, plenty of businesses churn out a slew of social videos. But since they’ve simply replicated fads they’ve seen, their videos hardly consider their audience’s challenges or habits.
Considering the time, money, and resources involved, video marketing can’t be an impulsive guessing game. Instead, you need to create a comprehensive video marketing strategy that applies to every facet of your flywheel. This means thinking in the context of the inbound methodology.
The inbound methodology is the marketing and sales approach focused on attracting customers through content and interactions that are relevant and helpful. Each video you create should acknowledge your audience’s challenges and provide a solution. Looking at the big picture, this content guides consumers through the journey of becoming aware of, evaluating, and purchasing your product or service.
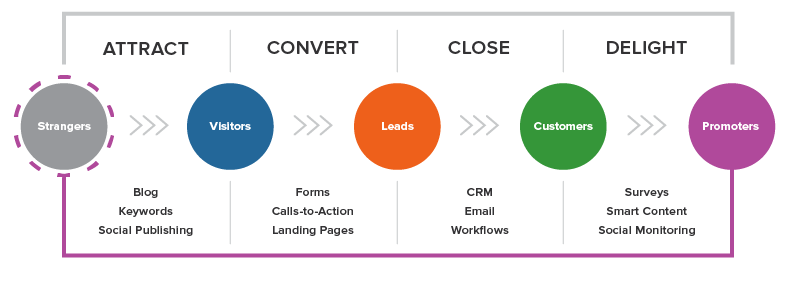
In the following sections, we’ll cover the types of videos you should create for each stage in the image above. To start, plan to create at least two videos for each. Don’t forget to include call-to-actions to help lead your audience through their purchase journey and into the role of “promoter.” Over time, you can improve based on conversion rates and the content gaps you discover.
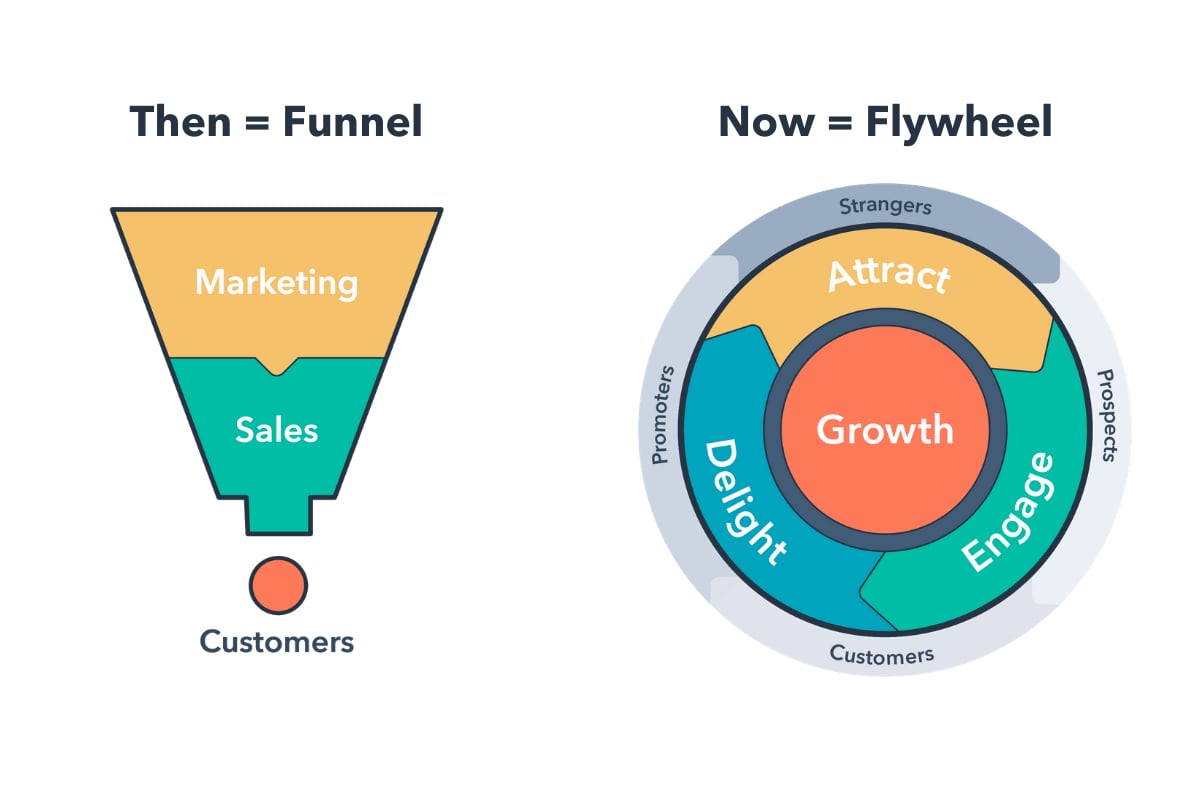
Attract
The first step of the inbound methodology is to attract — or turn strangers into visitors. Consumers at this stage are identifying their challenges and deciding whether or not they should seek out a solution. Therefore, the videos you create should empathize with their problems and introduce a possible solution in your product or service.
Ultimately, the goal of this kind of video is to expand reach and build trust. Because you are looking to garner shares for your video, it’ll likely be more entertaining and emotion-evoking than educational. But, you should still provide enough information to associate yourself as an authority on the topic.
Examples of videos in the “attract” stage include snackable social videos that show off your brand’s personality, thought leadership videos that establish you as a source of industry news and insight, brand films the share your values and mission, or explainers and how-to videos that provide relevant tips for solving your audience’s pain point.
Discover 75 tips for creating, sharing, and optimizing video for Facebook and Instagram.
For any “attract” video, avoid speaking too much about your product. Instead, let your brand values and personality be your north star(s). Finally, because these videos can live on a variety of channels, keep in mind the strategies of each platform. For example, a Facebook video might have a square aspect ratio and text animations for soundless viewers.
Convert
Now that you’ve attracted video viewers and website visitors, the next step is to convert these visitors into leads. With most inbound marketing content, this means collecting some sort of contact information via a form. Video can aid this process by visualizing a solution to the buyer’s problem, whether that’s before the form on a landing page or as the offer itself. Overall, the goal of this kind of video is to educate and excite.
“Convert” videos may include a webinar filled with tactical advice, product demos sent via email, landing page promotional videos, case studies, or more in-depth explainer and how-to videos. For example, while an “attract” video might provide a quick tip for nailing a sales pitch, a “convert” video could be an animated explainer video that breaks down the inbound sales methodology.
Close
You’ve attracted a new audience with your videos and converted the right visitors into leads. Now’s the time to close these leads into customers. Yet, as important as this stage is, “close” videos are often the most overlooked by marketers and salespeople.
At this point, the consumer is weighing their options and deciding on the purchase. Therefore, the goal of this kind of video is to make your audience visualize themselves using your product or service — and thriving. There’s a reason 4X as many customers would rather watch a video about a product than read about it. Videos are able to display functionality and leverage emotions in ways a product description never could.
Great “close” videos include testimonials of customers with relatable stories, in-depth product demos, culture videos that sell viewers on your quality of service, or even personalized videos that explain exactly how your product could help their business
Delight
A purchase may have been made, but there’s still a lot of video can do to leverage the post-conversion stage of your flywheel. During the “delight stage” of the inbound methodology, your goal is to continue providing remarkable content to users that makes their interaction with your product or service as incredible as possible.
It’s also in hopes that they’ll tell their connections about their experience or up-sell themselves. Therefore, the goal of this type of video is to encourage your customers to embrace your brand and become brand evangelists.
Your first opportunity to delight comes directly after the purchase. Consider sending a thank you video to welcome them into the community or an onboarding video to get them rolling with their new purchase. Then, build out a library of educational courses or product training videos to cater to consumers who prefer self-service or simply want to expand their expertise.
Defining Your Goals and Analyzing Results
At this point, you know how to create a video and where to host it. You’re ready to get started, right? Not quite. Before you dive in, you need to define your video goals and identify the best metrics for determining whether you’ve accomplished those goals.
Before launching any marketing campaign, it’s important to determine your primary video goal. This could be to increase brand awareness, engagement, or even conversions for a free trial. It’s crucial to pick out just one or two goals for each video. When you define more than that, your video will seem unfocused, making it difficult for viewers to determine what they should do next.
When thinking of your goals, be sure to keep your buyer persona and target audience in mind. How old are they? Where do they live? What are their interests? How do they typically consume media? What stage of the buyer’s journey are they in?
All of these questions can help determine what type of video you should make and where you should post it. For example, if your target audience is not familiar with your company, you probably want to make a video that focuses on brand awareness before producing an in-depth, product video. You’ll also want to host your video on a site that already has a large reach, like YouTube.
Next, let’s talk about metrics. Understanding these will equip you to define and measure your success and set your goals. When you post a video, it’s easy to get obsessed with one metric — view count. While view count can be an important metric, there are many others that may be more relevant to your campaign.
Below are some popular metrics you’ll see when you publish and track video.
- View Count: View count is the number of times your video has been viewed — also referred to as reach. This metric is great to track if your goal is to increase brand awareness and have your content seen by as many people as possible. However, it’s important to remember that every video hosting platform measures a view differently. For example, a view on YouTube is 30 seconds while a view on Facebook is only 3 seconds. Be sure to read the fine print before reporting on your video view count.
- Play Rate: Play rate is the percentage of people who played your video divided by the number of impressions it received. This metric helps determine how relevant or appealing your video is to your audience. If thousands of people see your video, but only a handful of people play it, it’s probably time to optimize your content.
- Social Sharing and Comments: If you’re on social media, you’re probably familiar with sharing and commenting. Social shares and comments are good indicators of how relevant your content is with your target audience. If a viewer watches your video and takes the time to share it with their network, you probably created a great piece of content. Social shares are also important because the more times your video is shared, the more it’ll be viewed. If your goal is to reach a lot of people, social shares is a good metric to track.
- Video Completions: If you took the time to make a video … you probably want people to watch the whole thing, right? A video completion is the number of times a video is played in its entirety. This metric can be more reliable than view count when trying to determine your video’s success.
- Completion Rate: Completion rate is the number of people who completed your video divided by the number of people who played it. Completion rate and other engagement metrics are a great way to gauge a viewer’s reaction to your video. Do you have a low completion rate? Are people all dropping off at a certain point? This might be a sign that your video content is not resonating with your target audience.
- Click-Through Rate: Click-through rate (CTR) is the number of times your call-to-action (CTA) is clicked divided by the number of times it’s viewed. CTR is a great indicator of how effective your video is at encouraging people to take your desired action. If your CTR is low, consider revising the design or copy of your CTA.
- Conversion Rate: Conversion rate is the number of times visitors completed your desired action divided by the number of clicks on your CTA. If your goal is to have your viewers complete an action like signing up for a free trial, try adding a video to your landing page to see if your conversion rate increases.
- Bounce Rate and Time-On-Page: Are you thinking about adding a video to a web page? Take note of the page bounce rate and the amount of time people spent on the page before you add the video. Be sure to check the metrics after you place the video to see if changes the way people interact with your other content.
Finally, what about your video social media marketing strategy? How do you measure that?
Measuring performance on each social media platform provides valuable information, especially to determine whether video really is the right content type for your audience on each platform.
Across all platforms, in addition to the metrics above, be sure to measure views over time to determine the life of your videos. You may find that videos need to be refreshed every few weeks, or months, in order to stay relevant with your audience. You also want to always be tracking and comparing engagement of your videos. This will help you determine which topics encourage the most sharing, and therefore will have a higher and longer lifetime value.
Ready, Set, Action!
I’m guessing you’re feeling a little overwhelmed right now. Don’t worry, you’re not alone. Video editing and marketing can seem daunting at first, but with a little practice and patience, you can easily produce high-quality content that is unique to your brand.
With 71% of consumers watching more video online than they were a year ago, brands can no longer ignore their growing popularity. Thankfully, creating great content has never been easier!
Try turning a written blog into a video or create a product tutorial. Using video to showcase information in a new, interesting way is sure to interest and delight your audience. Pick up a camera, start filming, and watch your engagement levels increase. It’s time to make video a key part of your marketing strategy!
Editor’s note: This post was originally written in August 2018 and has been updated for comprehensiveness.

The Ultimate Guide to Advertising in 2020
When you hear the word advertising, what comes to mind?
Do you think of banner ads on your favorite website? Those hilarious Super Bowl commercials? The billboards along the highway or posters in the subway stations?
While most of us have a pretty good idea of what advertising looks like, it’s a little harder to nail down exactly what it means — and how to do it well.
From the printing press to pop-up ads, advertising has certainly changed with the times. Despite this, though, the need for advertising hasn’t changed, and neither have the techniques and best practices that make for quality advertising. That’s what we’ll cover in this guide.
Good advertising is designed to be extremely influential, memorable, and, at times, risqué. It breaks through the clutter and noise of everyday life, disrupts the viewer’s attention, and demands their focus.
Whether on a billboard or the back of a restaurant menu, advertising can go to work for your company in a variety of ways:
-
To raise awareness for your brand
-
To drive potential customers to your business
-
To promote sales for both new and existing products
-
To introduce a new product or service to the market
-
To differentiate your product from your competitors’
Advertising can also be executed in various ways. Radio commercials, billboards, branded t-shirts, and social media endorsements all count as advertising — as we’ll discuss later on in this guide.
But, first, how does advertising differ from marketing?
Marketing includes a number of different channels, such as social media, email marketing, public relations, SEO, and paid advertising.
Alternatively, advertising is just one component of marketing.
A company’s overarching marketing strategy will typically include an advertising plan. The advertising portion zooms in on the specific process of creating and publishing the persuasive messages to get customers to take action.
A Brief History of Advertising
Advertising is one of the oldest segments of business, save for currency and trade. Once products and services arose, so did the need to make them known.
The oldest confirmed piece of advertising dates back to 3,000 B.C. Technically, it was a print ad from ancient Egypt promoting the capture and return of an escaped slave. Incidentally, the ad also mentioned the slave owner’s shop — a rug business — which inherently advertised his storefront, too. The slave was never caught, but the rug owner did discover a brand new method of bringing in traffic: advertising.
Let’s fast-forward about 4,000 years. Here’s a brief look at the past five centuries of advertising:
1472: The first poster advertisement is placed on church doors in London.
1650: The first newspaper ad — a reward for 12 stolen horses — is published. (What’s with the reward-based advertisements?)
1704: The Boston News-Letter prompts its readers to place ads in its paper.
1870: The Powers style of ad copy is born. This style packed a punch — it was short, to-the-point, truthful, and convincing. Powers said the focus should be on why the consumer should buy your product or service — a message that still resonates for good reason today.
1880: Postcards become one of the hottest new ways to reach customers.
1902: Unilever creates the “longest client-agency relationship in advertising history” when it hires J. Walter Thompson Company to advertise its Lifebuoy Soap.

1902: Mellins Food advertises its brand on 25 airship flights, becoming the first brand to take this approach.

1904: The Campbell’s Kids are created, piloting the change in advertisement focus from a single ad to an entire campaign.
1922: Radio ads are born, and businesses purchase 10 mins for $100. Two years later brands would increase their investment by sponsoring an entire radio show, a concept that would eventually become known as “sponsored content.”
1925: Advertisers start to appeal to emotions, focusing on what pleasure customers would receive from their product or service. This old Ford ad exemplifies this perfectly.

1975: VCRs are introduced, and consumers begin to record shows and, therefore, skip advertisements.
1990: Computers become more popular and accessible at home, with over 5 million homes connected to the internet.
1994: The first email spam campaign launches. Banner ads are also introduced.
1995: Search engines like Yahoo! and Alta Vista are born. Ask Jeeves and Google would follow in 1997 and 1998, respectively.
2005: YouTube and Facebook (for college students only) launch.
2008: Brands start to realize the importance of having an online presence for their potential customers. Procter and Gamble pilot the concept of the content hub with BeingGirl.com.
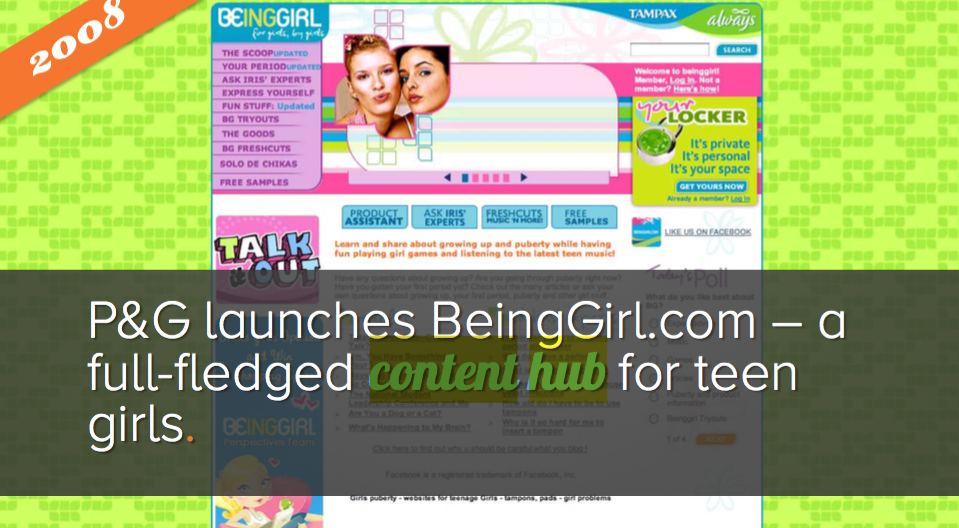
2012: Online videos reach almost 170 million viewers.
2013: Sites like Pinterest and Instagram join the social network scene.
2020: Advertising soars on digital platforms including social media, podcasts, pay-per-click (PPC), and more. Customer data plays a larger role in advertising targeting and retargeting. Lastly, a rapid increase in mobile devices sees a boost in mobile ads and SMS marketing.
History teaches us that advertising is an ever-changing concept, just like shopping habits and how and where consumers spend their time.
Whereas almost 140 years ago, postcards were the newest form of advertising, brands today are building chatbots for Facebook Messenger and integrating artificial intelligence into their marketing and sales platforms.
Things in the advertising world move fast. Now, let’s take a look at how advertising methods have changed and what marketers and advertisers are using today.
Advertising can look like many different things. Here are the different formats and channels that advertisers have been using over the years.
1. Print Advertising
Print advertising refers to posters, postcards, bulletins, mailers, flyers, and other physically-printed promotions. It also refers to newspaper and magazine ads.
How we design and consume print advertising has changed over the years, but it’s been a steadfast advertising medium — especially as digital advertising has evolved (which we’ll cover next).
Unlike digital media, print advertising can’t be tracked and analyzed as clearly. Fortunately, brands have found brilliant ways to incorporate print advertising into broader digital campaigns.
2. Billboards and Public Transit Ads
Billboard advertising encompasses print advertising on a much larger scale. Due to their size, the design, placement, and cost of billboard and public transit ads are different than typical print advertising.
For example, billboards are typically designed with few to no words so that viewers have time to process the message while passing by in a car or train. Also, these ads are used for brand awareness, so they usually only include a brand name or phone number (versus a website).
3. TV Commercials
TV commercials are short advertisements developed and paid for by companies and organizations looking to capture the audience of a TV show or network program. TV ads have been around since the invention of the television and have since changed drastically with the birth of streaming TV.
TV ads have a wide reach (millions) and provide viewers with a multi-sensory ad experience — something print ads and some digital ads can’t quite do. Alternatively, TV ads are expensive, avoidable by your audience, and hard to target as accurately as other channels.
4. Radio
Radio advertising refers to spoken advertising spots aired on radio channels between music and other programs. This method dates back to 1920 when commercial radio first aired.
Radio advertising is particularly powerful for local and regional advertising. Nowadays, podcast advertising is a similar but more effective method, especially for national audiences.
You’ll notice the above advertising methods don’t dive into digital advertising — that’s what we’ll unpack next.
How to Advertise Online
As of today, there are over 4 billion people using the internet. This number is up 300% from 2005. Point being, internet usage is skyrocketing, and it’s not stopping.
If you’re not advertising online, you’re behind the curve. Not only does the internet offer you direct access to more than half the global population — including more than half of your target audience — but it also provides so many different channels on which to advertise.
Marketers now have the flexibility to reach their target audiences on multiple fronts, in multiple ways, for multiple budgets. There are also a number of tools (many of which are free) that can help you execute your advertising strategy.
Here are the most common ways to advertise online:
Paid Search Advertising
Whether Google, Yahoo, or Bing, all search engines have their own paid advertising. This is referred to as pay-per-click, or PPC, and involves bidding on keywords and placing ads at the top or sides of search results.
When someone performs a query using one of those search engines, advertisers have the ability to display ads above organic search results. That’s what makes PPC so powerful — it gives your advertisements prime real estate in front of people already searching for relevant topics.
Here’s an example on Google:
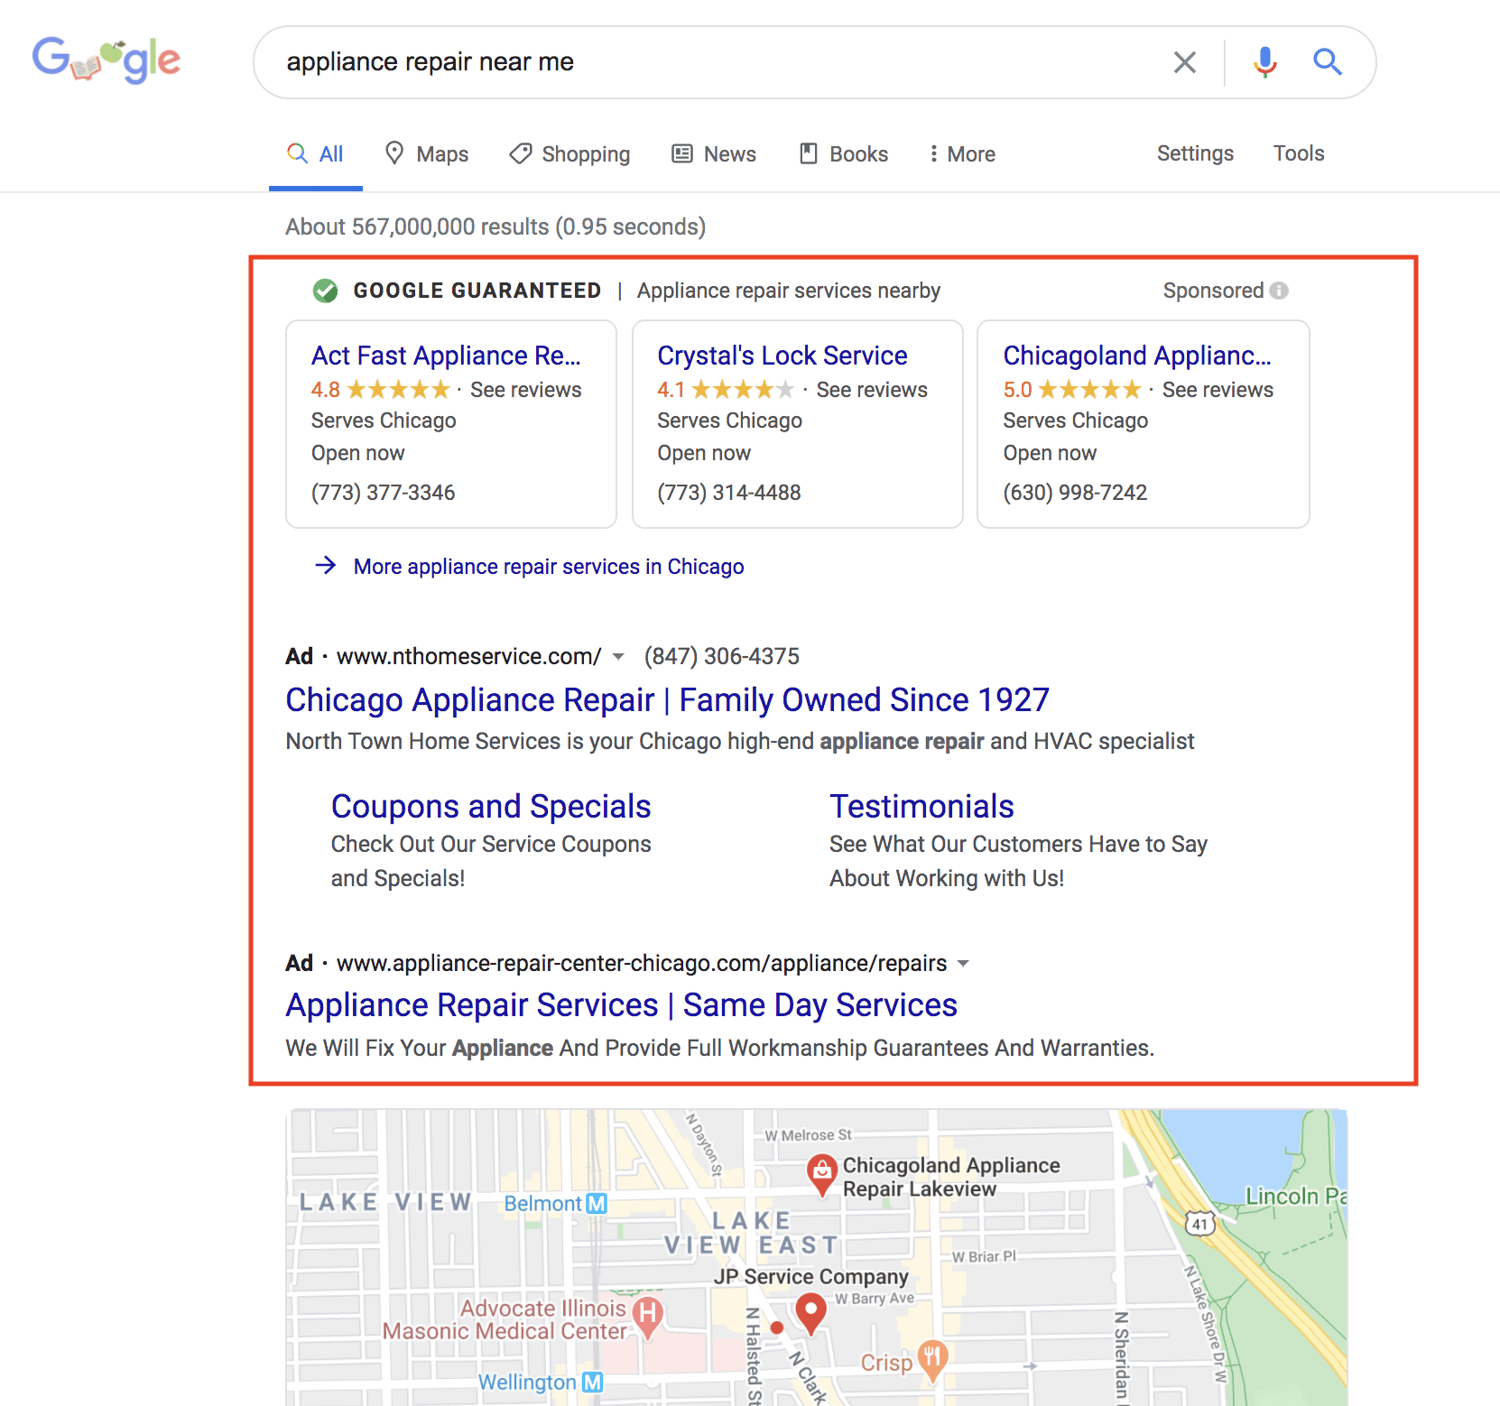
The top listings in the red box are advertisements. Organic search results, those that came up as a result of SEO, were below the map snippet.
Social Media Advertising
Social media platforms know how valuable their content is, and that’s why they offer the option to sponsor or boost posts. Social media ads put your message in front of your target audience and encourage them to engage, click-through, and buy.
More and more, social media sites are prioritizing ad space over organic content because, well, it brings in more revenue.
Whether you’re a budding or brand new business, consider running some social media advertisements. These will not only advertise your products and services but also promote your social media pages and grow your following.
Platforms like Facebook, Instagram, LinkedIn, and Twitter each have their own version of ads like these.
Here’s how they appear on their respective feeds:
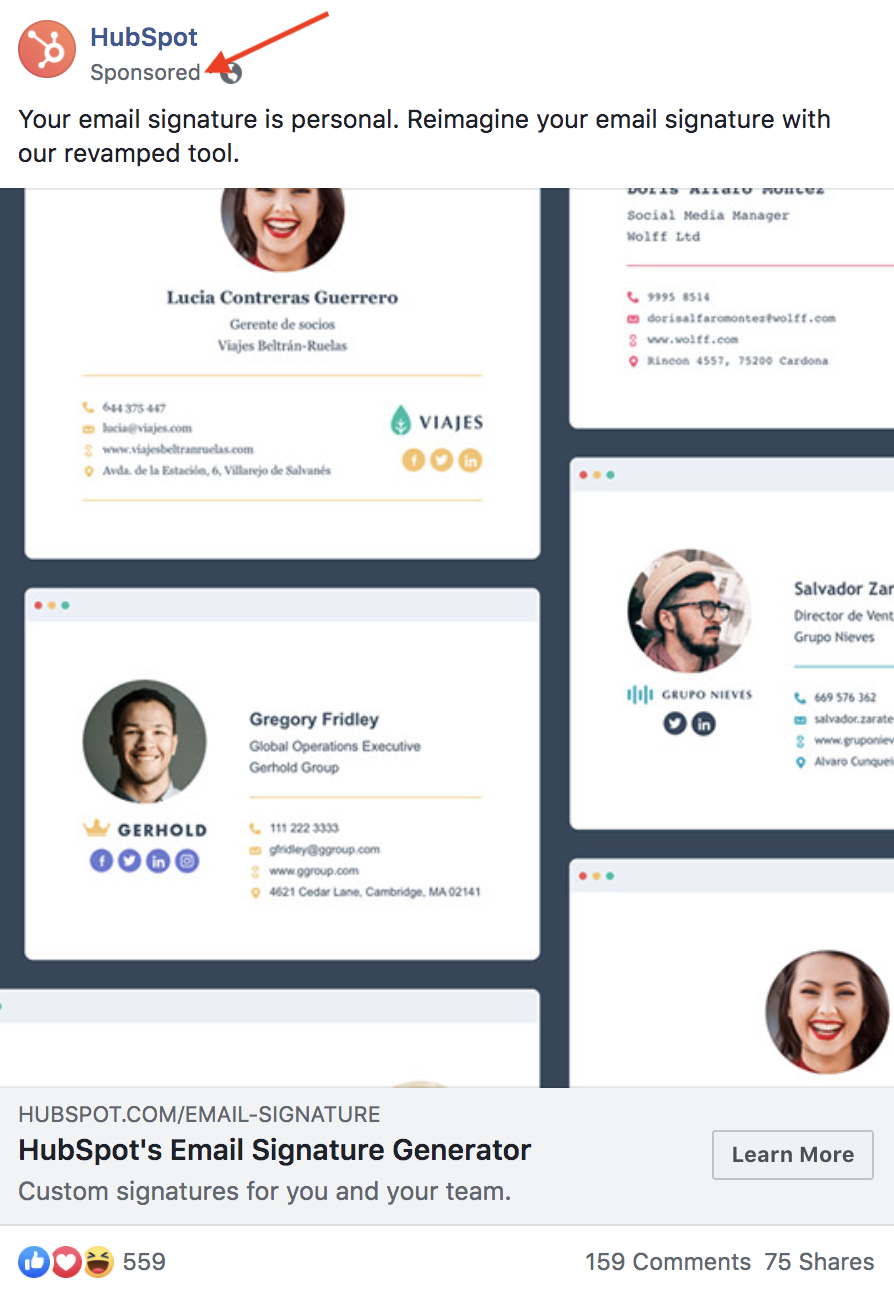
Download our free lookbook of 50 Facebook Ad Examples We Actually Clicked.

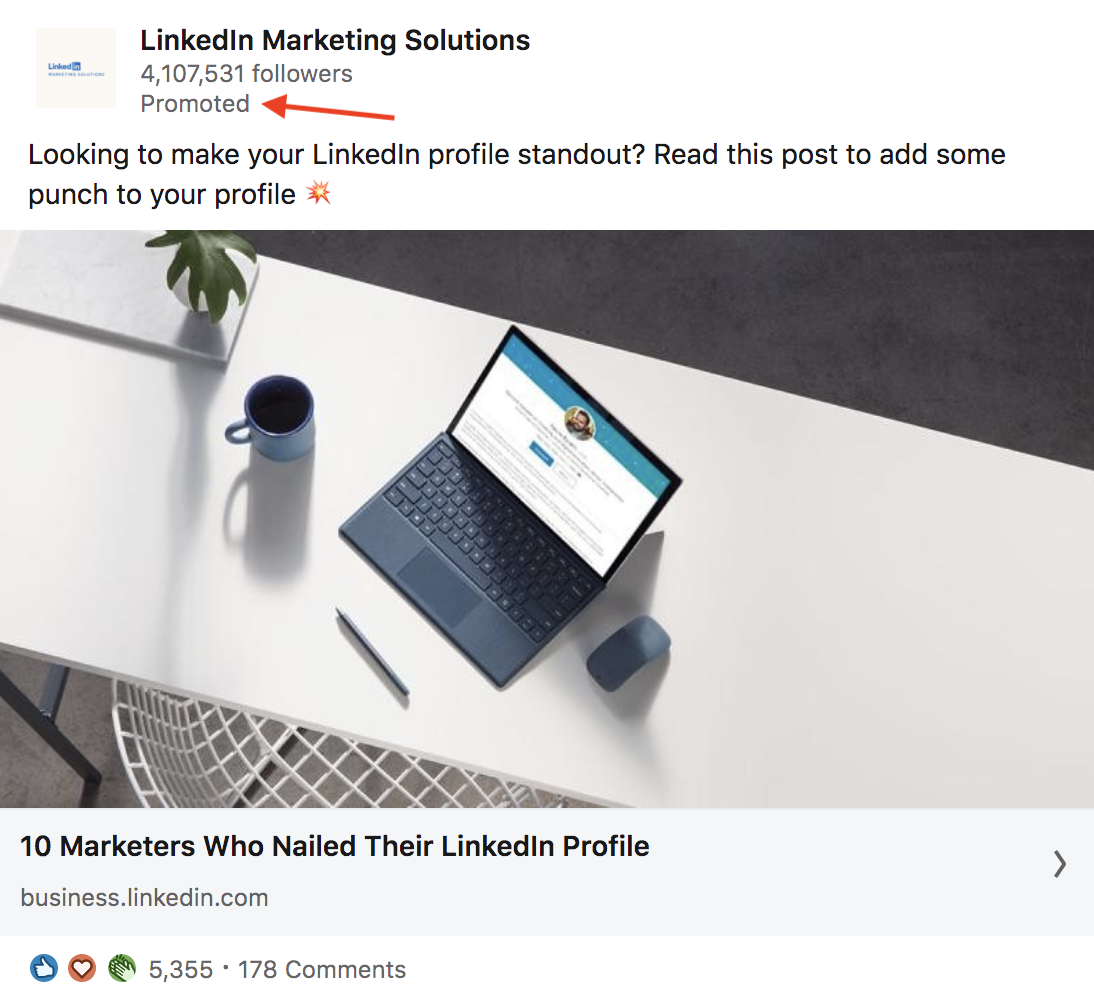
Download our free guide on How to Run Successful LinkedIn Ads.
Download our free guide on How to Use Twitter for Business.
Native Ads and Sponsored Content
Sponsored content has been around since 1922, when brands would sponsor entire radio shows. Today, sponsored content refers more to native ads and blog or article content subsidized by brands.
Have you ever read a Buzzfeed article that heavily referenced or recommended a certain product or service? It was likely sponsored by a certain brand.
Check out this article, 10 Reasons To Put Away Your Phone On Your Next Trip, promoted by agoda, a hotel or destination booking site. Does it blatantly promote agoda’s services? No. Its primary purpose is to entertain and inform, although agoda is referenced a few times throughout the content.
At the top, the byline reflects agoda’s sponsorship, just before the content starts. And, as you scroll down the page, another ad sits within the content.
Sponsored content is a great way to promote your brand in content your audience is already familiar with.
Banner and Display Ads
Banner and display ads are an extension of search ads and follow a similar PPC model. But instead of a text-based ad, consumers see a more visual advertisement.
Banner ads are typically the horizontal boxes on top of a web page, whereas display ads are smaller in nature and shown on the side (like in the screenshot above).
Whether you opt for traditional print ads in magazines or subway stations or choose online promotion on social media or search engines, there are a few rules that make for great advertising. Below are some advertising best practices to apply to all your ads.
Advertising Best Practices
There are a lot of best practices, tips, and tricks when it comes to advertising. It’s an art that’s been perfected over the years, and with the rise of modern advertising and new media, best practices continue to manifest.
In this section, though, we’re going to cover five famous advertising concepts that still work today — regardless of what advertising method or medium you’re using.
When used correctly, these advertising techniques will do wonders for your brand and products.
Appeal to emotions.
While you may not consider the ASPCA a business, their unforgettable Sarah McLachlan commercial is the perfect example of using emotional appeal to entice people to take action.
For most of us, the images in that commercial are hard to watch — we may even turn away. But since it tugs at our heartstrings, we’re more likely to donate to animals in need after seeing the horrors they’re going through.
Studies show that people rely on emotions, rather than information, to make brand decisions. Emotional responses to ads influence a person’s intent to buy more than the actual ad content.
Whether you try to evoke happiness, sadness, fear, or anger, appealing to emotions can help your target audience feel your message — not simply read or hear it.
Create positive associations.
When consumers associate your product with a feeling of happiness, state of achievement, or accomplished goal, they’re more likely to take notice, remember your product or service, and make a purchase.
Actually, you’ve probably been on the receiving end of this before without even realizing it. Have you ever seen your favorite celebrity or Instagram influencer posing with a product or brand and found that you wanted to be, do, or look the same? Companies create this subconscious connection in advertising hoping that you associate your positive feelings with the product or service they’re promoting.
Catchy songs like “Nationwide is on your side” is an example of helping people associate friendliness with the Nationwide brand. Coca-Cola has a brand advertising campaign that associates their product with friends, family, and fun. When you consider what refreshments to serve at a party or bring on a picnic, Coca-Cola wants you to think of them.
As you create your advertisements, consider what feelings, desires, or goals with which you want your brand to be associated. Weave these feelings or goals into your advertisements through stories or videos. Look for influencers who align with your brand’s core values and demeanor and include them to promote positive association.
Establish a bandwagon effect.
People want to fit in. It’s human nature. Neither you nor I are immune to it.
And it’s this base human desire that makes the bandwagon effect so effective. People don’t want to be left out. They find value in their peers’ opinions, and they certainly don’t want to be the only ones not using the latest and greatest product.
Brands like Maybelline understand this concept well and use it to their advertising advantage. One tube of their top-selling mascara is purchased every two seconds, a statistic that establishes social proof and further supports their claim of “America’s Favorite Mascara.”
Use customer testimonials, survey data, or shareable content to advertise your brand as one worth following or buying into. Take another approach by promoting a discount for sharing your brand with a friend or family member — so your audience will do the selling for you. Either way, use your advertising to create an inclusive environment people will want to join.
Focus on benefits over features.
Features and benefits are two very different things. Features are the details of the product or service you’re selling, such as the measurements of a couch or the ingredients of a protein bar. Benefits, on the other hand, explain why a person should buy a couch or protein bar from you and how their life would, well, benefit from such a purchase.
Advertising should focus on the benefit your product or service brings, not explain what you’re physically selling.
Consider how Southwest Airlines advertises. Instead of explaining, line by line, what a Business Select ticket offers, Southwest paints a picture of what life would be like if you made a purchase. In this advertisement, they focus on the benefits.

Rather than wasting precious ad space on your product specifications or service details, talk about the ways a purchase might positively impact your customers. If you do it right, your creative, benefit-packed advertisement would then inspire them to research the features on their own.
Use storytelling.
Not unlike our desire to fit in is our penchant for a good story. Storytelling helps paint a bigger picture of a brand or company, not simply promote a single product or service. Also, when stories resonate with someone, it’s far easier to motivate him or her to take action.
Storytelling is the one technique you should try to infuse in all your advertising. In fact, if you haven’t started crafting your brand’s overall story, you should definitely do so. Research shows that stories that illustrate a brand as “necessary, believable, and integral” are the most effective for engaging and influencing consumers.
Dove employs storytelling in its campaign partnership with Operation Homefront. The videos feature real stories of military men and their families being reunited. The advertisements don’t directly promote Dove products but instead tell the Dove brand story (and pull on a few heartstrings, too).
Determining your brand story will help you learn how to best discuss your brand in all marketing efforts, not just advertising.
Next, let’s take a look at some of the most memorable ad campaigns, a few of which put these best practices in action.
Five Memorable Ad Campaigns
The best advertisements are the best teachers. Whether it’s the copywriting, design, medium, or target audience, well-executed campaigns can always teach you something new about advertising or positioning.
(Consider Westinghouse Electric’s “We Can Do It” ad …)
Here are five campaigns that left a noticeable mark on advertising history:
1. Nike: Just Do It
In the late 1980s, Nike launched its “Just Do It” campaign.
At the time, Reebok was outselling Nike, and Nike needed to act fast to compete against the sneaker conglomerate.
But it wasn’t just the three-word phrase that earned global attention. Their new ad campaign also focused on real people wearing and working out in their products, as opposed to simply featuring clothes and sneakers themselves.

This powerful combination of people plus product helped Nike go from $800 million in 1988 to $9.2 billion just 10 years later.
2. The Absolut Vodka Bottle
Did you know Absolut’s “Bottles in the Wild” ad series is the longest uninterrupted campaign in history?
The campaign was Absolut’s attempt to grow their name internationally, especially throughout the United States. It featured the Absolut bottle in different cities and countries worldwide.

It launched in 1985 and ran until 2000 — lasting an impressive 25 years.
Absolut’s campaign helped grow the company from a tiny slice of the vodka market share (2.5%) to over half the U.S. imported market share.
To this day, the Absolut brand is the fourth largest spirit company, thanks to its focus on the overall story, not just the product itself.
3. Miller Lite
The folks at Miller Lite used differentiation to reach their goal: to get “real men” to willingly drink light beers. With their “Great Taste, Less Filling” campaign, they maintained a leading position in the light beer market for several decades after this first campaign aired.

4. Volkswagen
Though Volkswagen has officially discontinued its production of Beetles, its iconic “Think Small” campaign will be forever ingrained in advertising history.
Doyle Dane & Bernbach (DDB) advertising agency knew it had to change the mind of consumers if it wanted to compete with industry leaders. So, VW admitted that though the Beetle was, in fact, tiny, it was still a force to be reckoned with and worth a purchase.

Authenticity and honesty went a long way in this seemingly small campaign.
5. Dos Equis
With its edgy, cool, and sophisticated aesthetic, it’s no surprise “The Most Interesting Man in the World” campaign put Dos Equis on the map.
This campaign created a positive association between the Dos Equis beer and the feeling of sophistication and poise. Sales quickly jumped by 22% after the campaign launched.

Even more impressive was how Dos Equis found success in a time when craft beers grabbed a foothold in the market and imported beer took a 4% hit. This campaign was a major component of that success.
To learn how to grab the attention of your audience, learn from the professionals. These campaigns are a great example of how brands have used real stories, real people, and real talk to grow their businesses.
Advertising Helps You Grow Better
Equipped with a dense, dynamic history, advertising is an incredible tool to add to your marketing tool box.
Between print ads, radio sponsorship, TV commercials, and social media promotion, the opportunities to advertise and promote your brand are endless.
To best connect and engage with your audience, speak your customer’s language, appeal to their emotions, and tap into their desire to be a part of a community, create a clear and authentic brand story to illustrate how your brand aligns with their values.
By applying these tried and true practices to your advertising, you’ll build a magnetic brand that attracts customers, establishes a following, and generates revenue.
Do this and your brand will grow into a household name that stands the test of time — just like advertising itself.
Editor’s note: This post was originally published in July 2018 and has been updated for comprehensiveness.

Deal Performance in April Yields Cautious Optimism for May [COVID-19 Benchmark Data]
The economic impact of COVID-19 is undeniable. Businesses all across the globe are learning how to adapt to these new circumstances and we’re all learning how to operate in a “new normal” that’s constantly changing.
That’s why we’ll be publishing week-over-week trend data for core business metrics like website traffic, email send and open rates, sales engagements, close rates and more. We hope to establish useful benchmarks to measure your business against, and serve as an early indicator of when short- or long-term adjustments may be needed in your strategy.
While this post focuses on the highlights of last week, you can explore all the data we’re publishing here.

About the Data
- These insights are based on aggregated data from over 70,000 HubSpot customers globally.
- The dataset includes weekly trend data for core business metrics in 2020, focusing on changes occurring during and after March 2020.*
- Charts depict the performance of a given metric against pre-COVID benchmarks, calculated using weekly averages from January 13, 2020, to March 9, 2020. They do not depict week-over-week percentage changes.
- Because the data is sourced from HubSpot’s customer base, it reflects benchmarks for companies that have invested in an online presence and use inbound as a key part of their growth strategy.
*The spread of COVID-19 has had a different timeline in different regions, so we are using the World Health Organization’s declaration of a global pandemic on March 11, 2020 as our “official” start date.
NOTE: Because the data is aggregated from HubSpot customers’ businesses, please keep in mind that individual businesses, including HubSpot’s, may differ based on their own markets, customer base, industry, geography, stage, and/or other factors.
What We’re Seeing
This week, we’ve gathered the top insights from our COVID data which now includes a breakdown for seven different industries. In the sections below, we’ll provide you with your weekly metrics update, some notable industry insights, and how metrics are fairing in countries and regions around the world.
1. Deals closed show signs of recovery after a low in early April.
Last week was end-of-month for sales teams, and we saw deals closed increase by 4%. With that boost, our customers closed more deals the last week of April than they had since the week of March 16 when the economy really began to deteriorate. This was a hopeful sign of recovery that indicated we might be trending in a positive direction.
On the other hand, rep optimism for May isn’t increasing after last week’s metrics. Deals created experienced a slight decline, staying essentially flat.
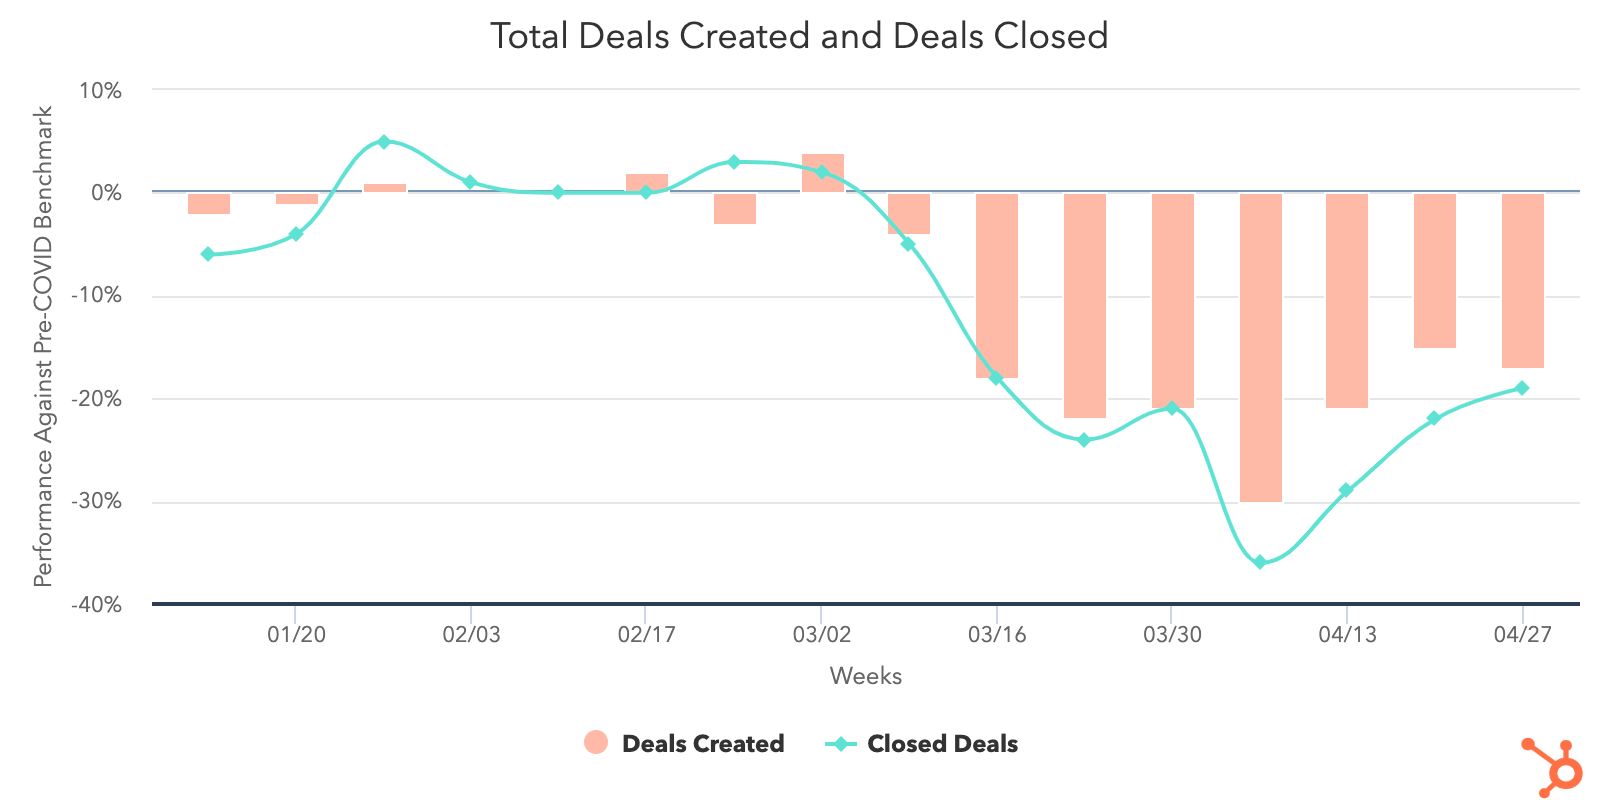
Contact growth is also down 14% across all portals last week. Businesses with 26-200 and 201+ employees saw 31% and 25% drops, respectively, while companies with 1-25 experienced a 24% increase and now sit 22% above pre-COVID averages. Smaller businesses noticeably outperformed their larger counterparts in marketing email sends, and with open rates continuing to be at an outstanding high, this could explain why contact growth was so strong for 1-25 businesses last week.
During the week of April 27, the number of sales emails sent from portals dropped 9%, but email send rates are still above pre-COVID levels. Total email responses remained far below pre-COVID rates.
While companies with more than 201 employees actually saw an increase in total sends during the week of April 27, they also saw the biggest decrease in their response rates with a -10% drop, while 1-25 and 26-200 had smaller dips at only 1% and 3%. This, coupled with a decrease in deal creation rates for companies with over 201 employees, suggests that the increase in sales activity did not successfully result in business generation.
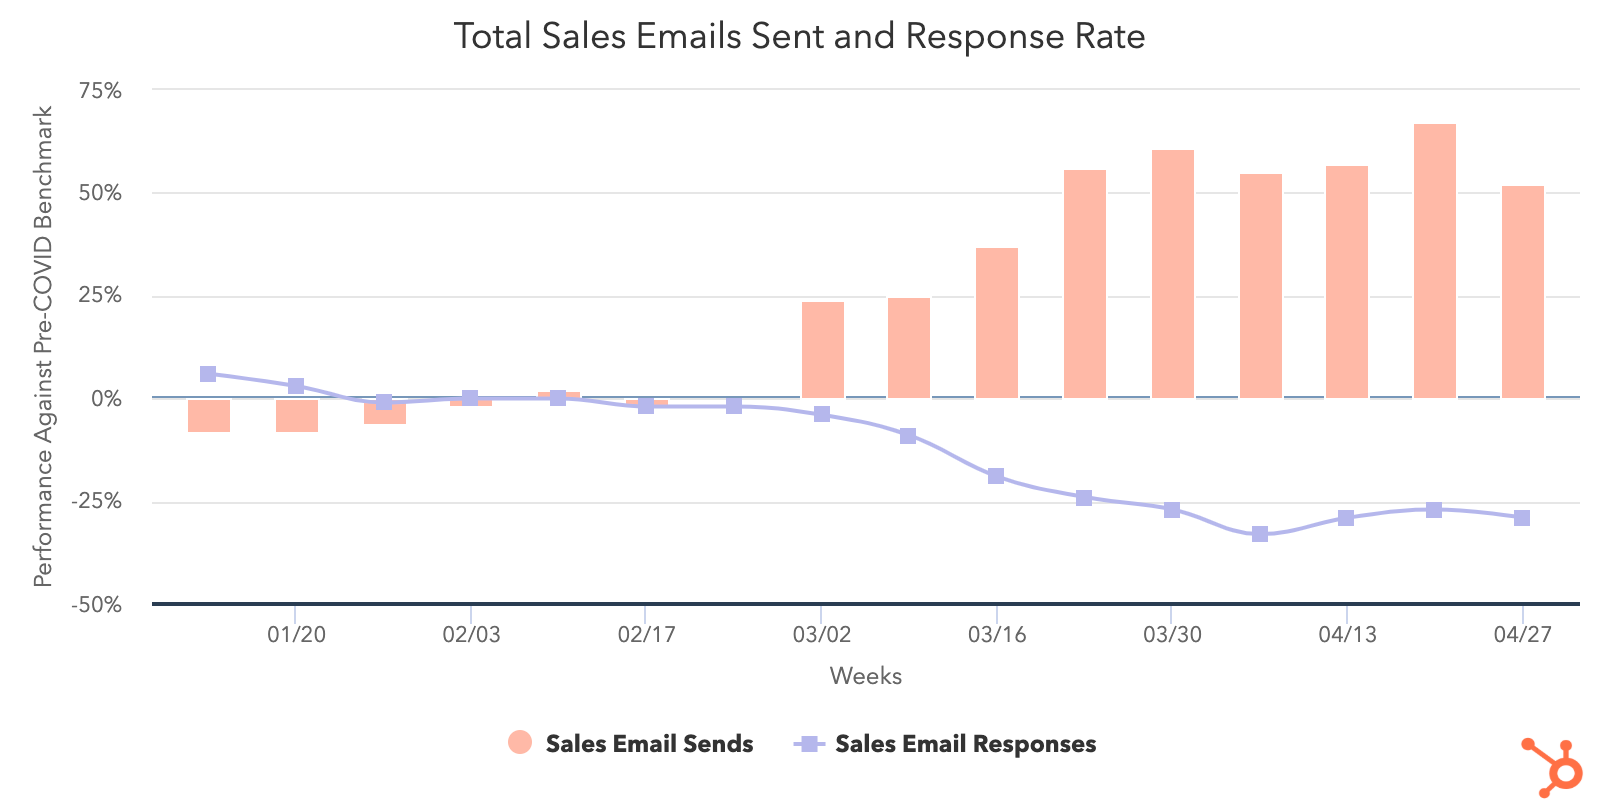
Much to our surprise, open rates on marketing emails continue to rise. Even as marketers sent 27% more emails than they then did pre-COVID, engagement remains strong as we move towards May. We’ve been expecting to see open rates decline as consumers grow wary of marketing emails, but the data indicates that hasn’t happened yet.
Total marketing email sends are up 2% last week. Total open rates continue to rise for the fourth week in a row and are up 3% compared to April 20. As open rates continue to remain strong, companies of all sizes are really leaning into email as a channel to effectively connect with customers.
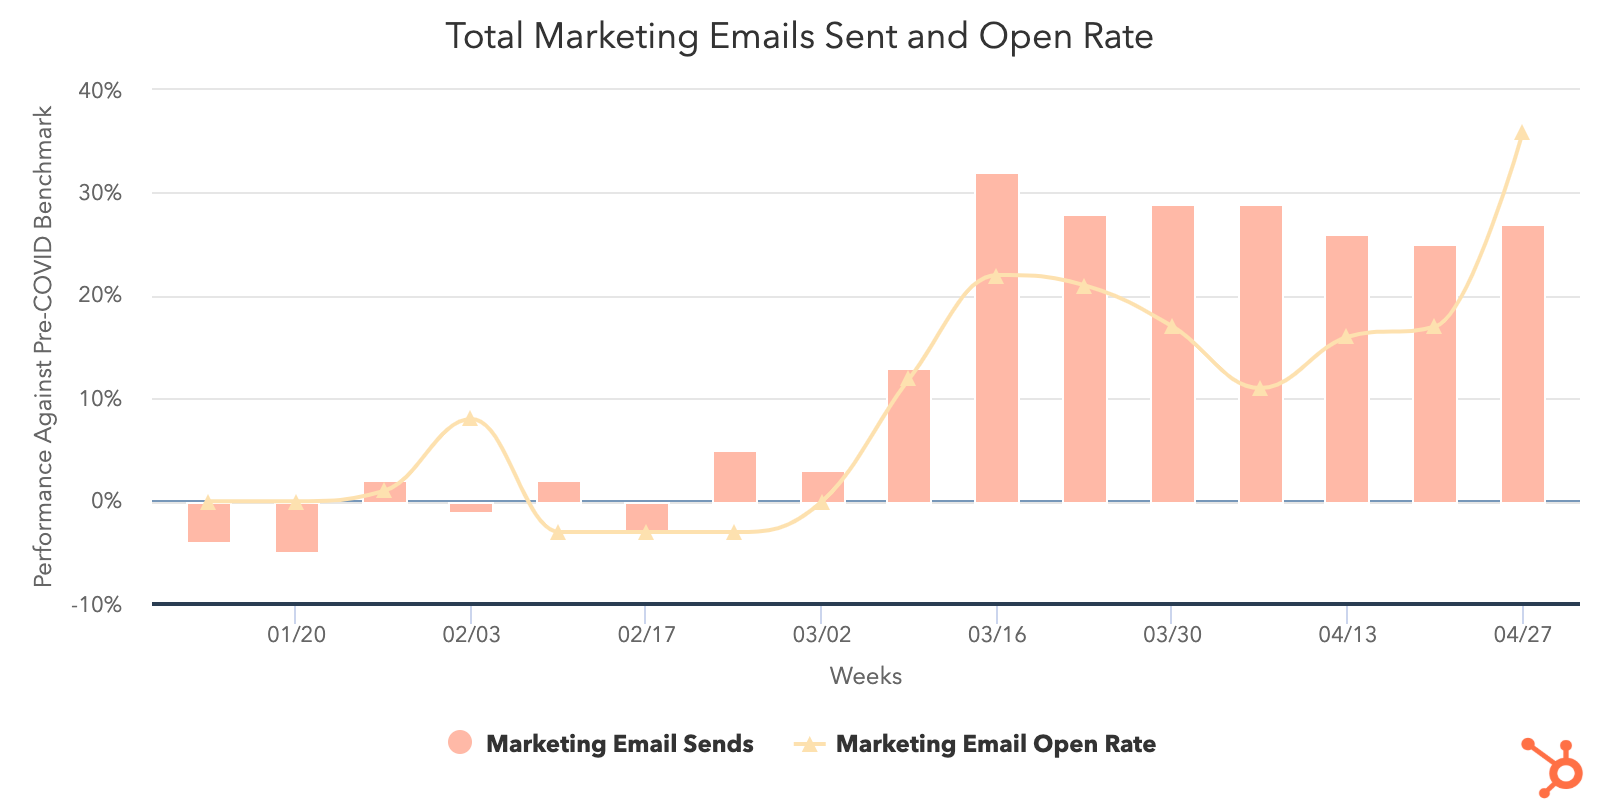
Web traffic remained mostly stable across all portals. The good news is that active conversation interactions, like messaging and live chat, continue to increase, currently performing 26% above pre-COVID weekly averages. The strongest trends were seen in companies with 1-25 employees and in the NORTHAM region.
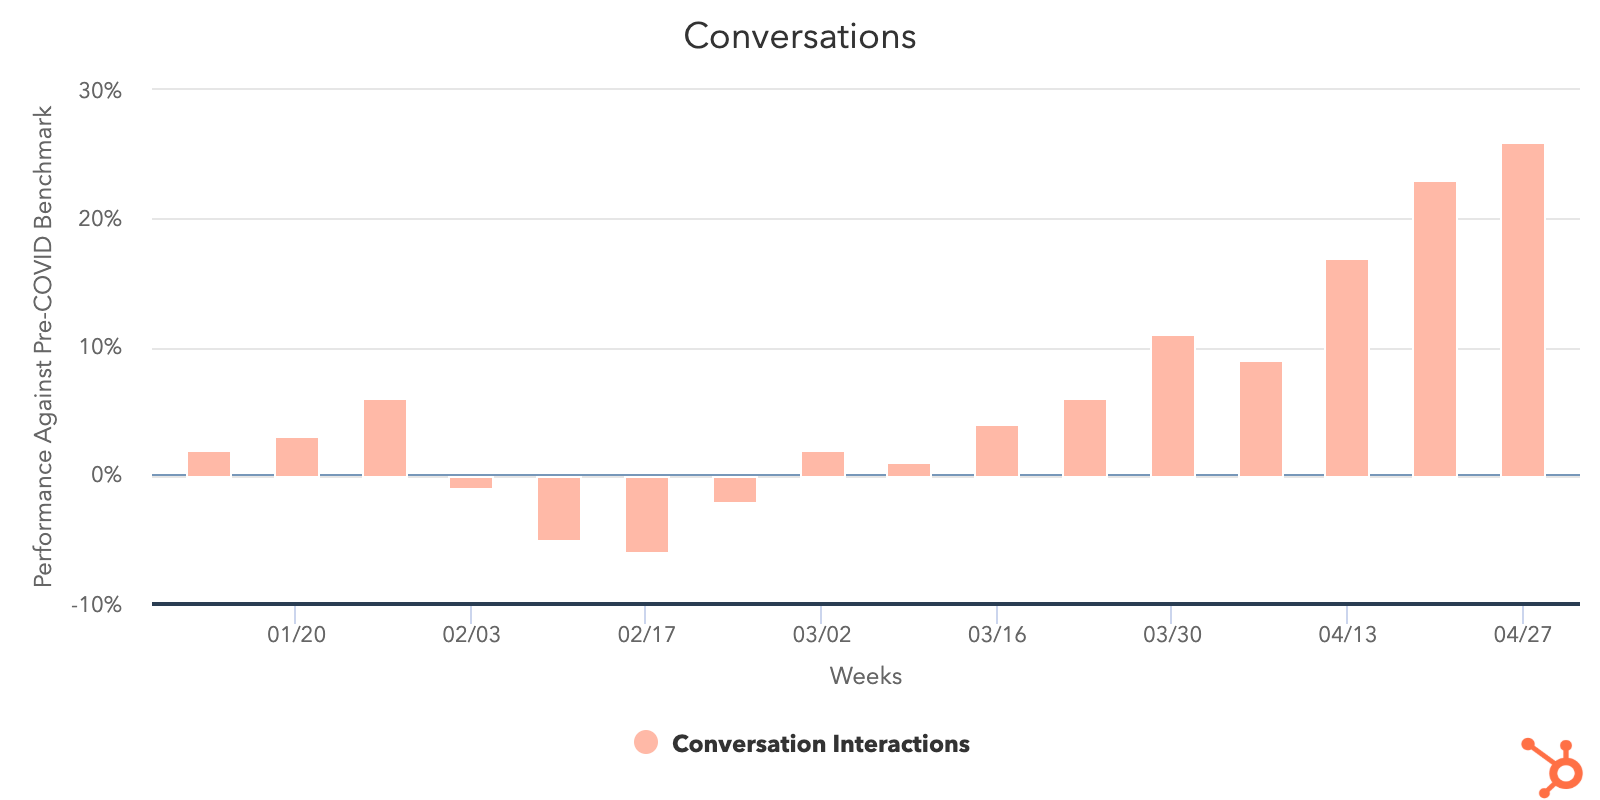
2. Industries can be categorized into two groups: less-impacted and more-impacted.
Less-Impacted Industries
Despite all industries experiencing a dip in deal creation, there are a few standouts that seem to be faring better than others. This may be due to these industries having been deemed “essential,” and/or haven’t been as affected by COVID restrictions. We’ll keep a close eye on them moving forward and see what they’re doing to stay ahead of the curve.
Computer software is one of the best performing industries in terms of deals created, despite seeing an 8% decline last week. Though not as high as construction, its sales email volume remains steady and — with the exception of entertainment — response rates for this industry have suffered the smallest decrease from pre-COVID numbers. This is because website traffic is trending well above pre-COVID averages as consumers are turning to software to help them weather the storm.
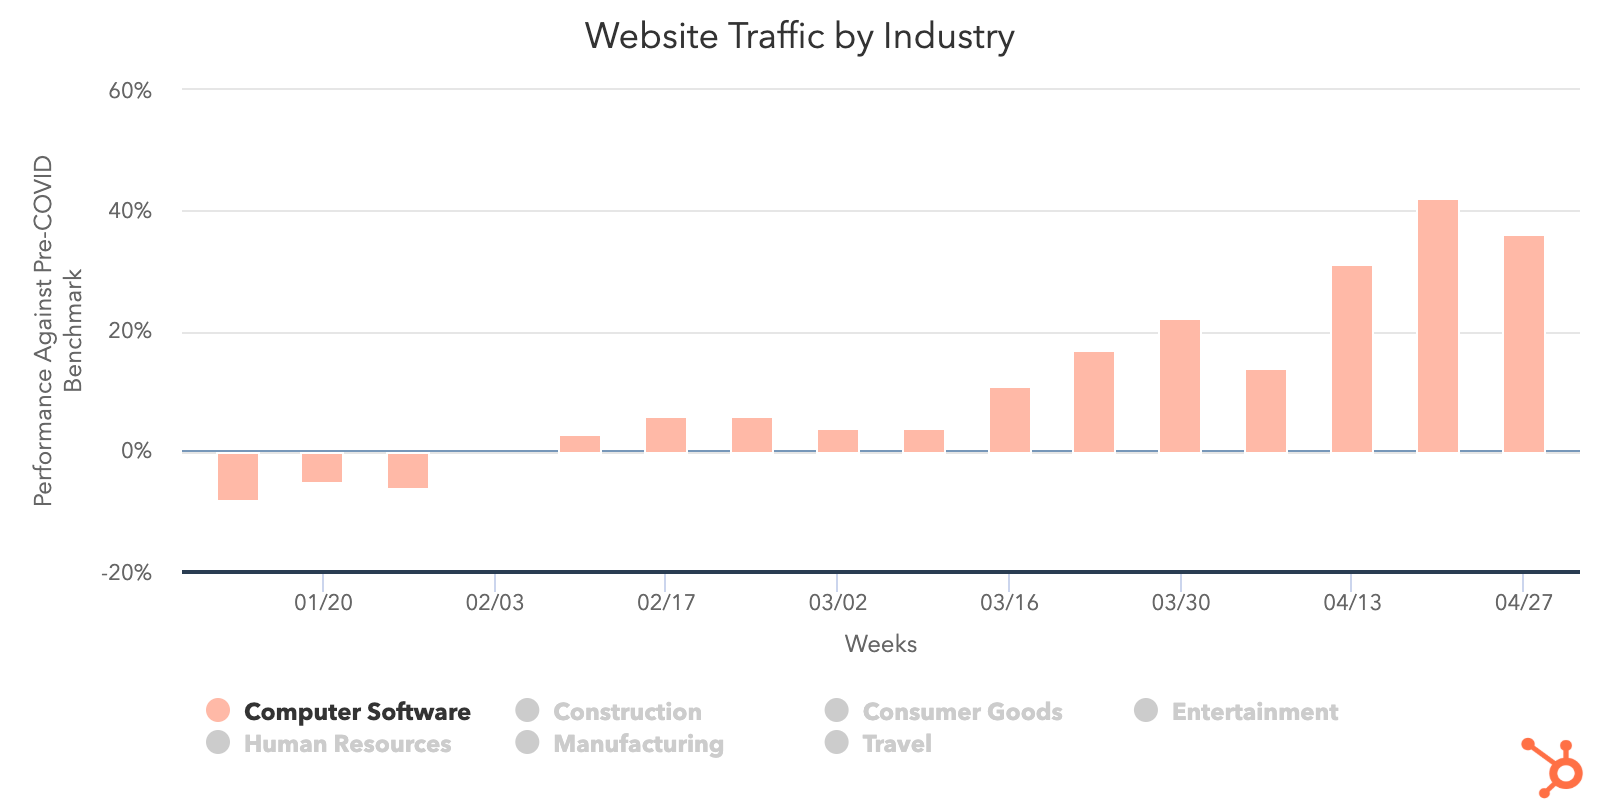
Another standout is construction as many companies in this industry have continued operations under essential work permissions. Construction is only 1% below the benchmark for deals created and has seen a 13% increase in deals closed since the beginning of April.
The volume of sales emails sent for construction is exceptionally high (248% above benchmark the week of April 27) however, its response rates remain below pre-COVID averages. And, with web traffic increasing 5% last week, it’s becoming increasingly important for construction companies to communicate with new and long-standing clients as they navigate through uncertain times.
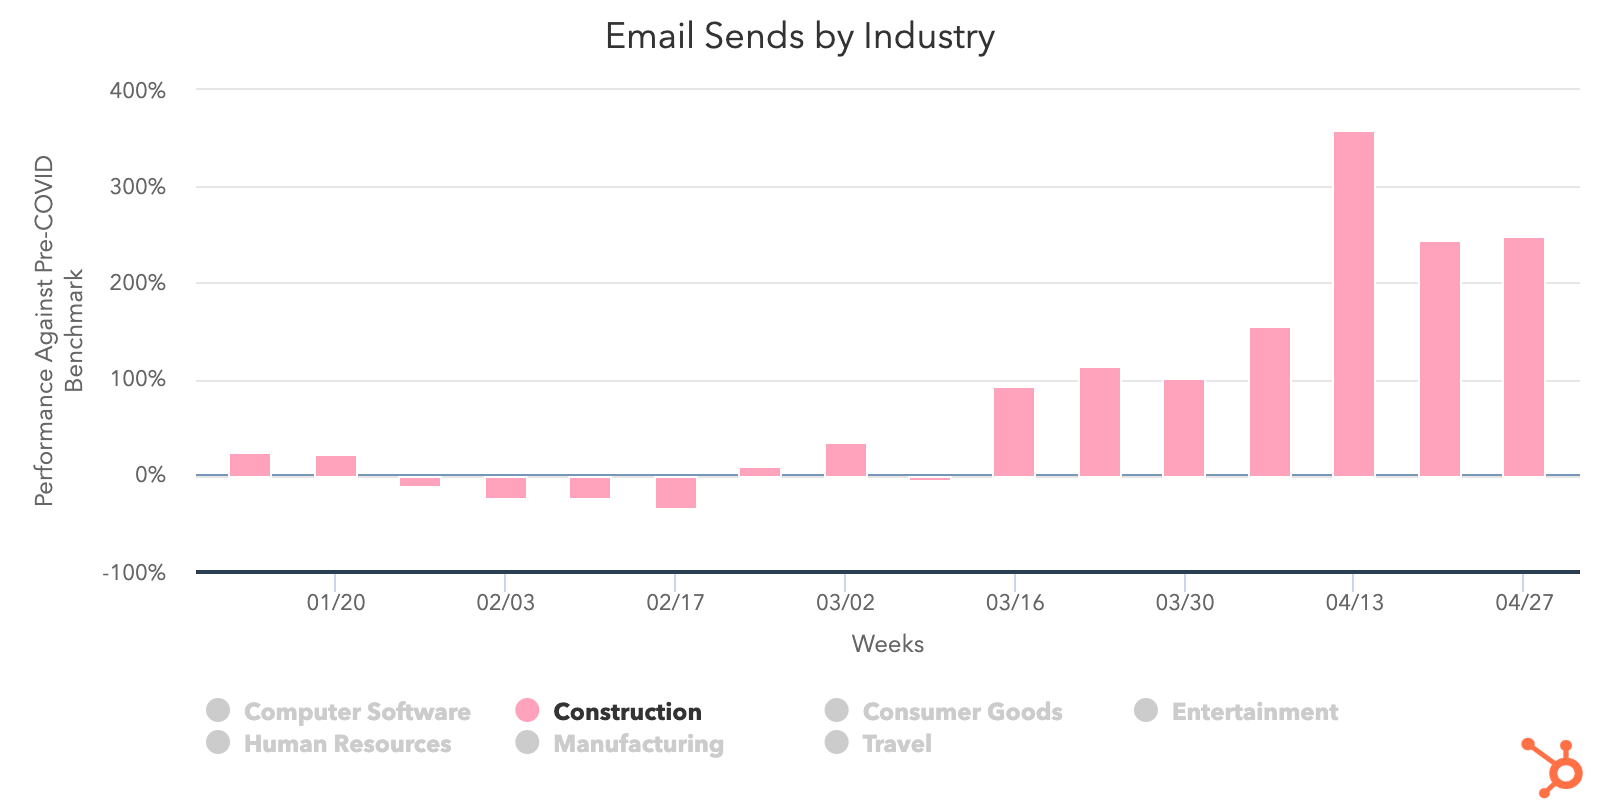
Manufacturing is another industry that’s been deemed essential and is permitted to operate in most countries. This explains why its deals created is only 7% below the pre-COVID benchmark and deals closed has risen 28% in the last two weeks. Similar to construction, manufacturers need to be constantly updating their long-term clients, which is why sales email sends for this industry have doubled since pre-COVID and why response rates have dropped so dramatically as well.
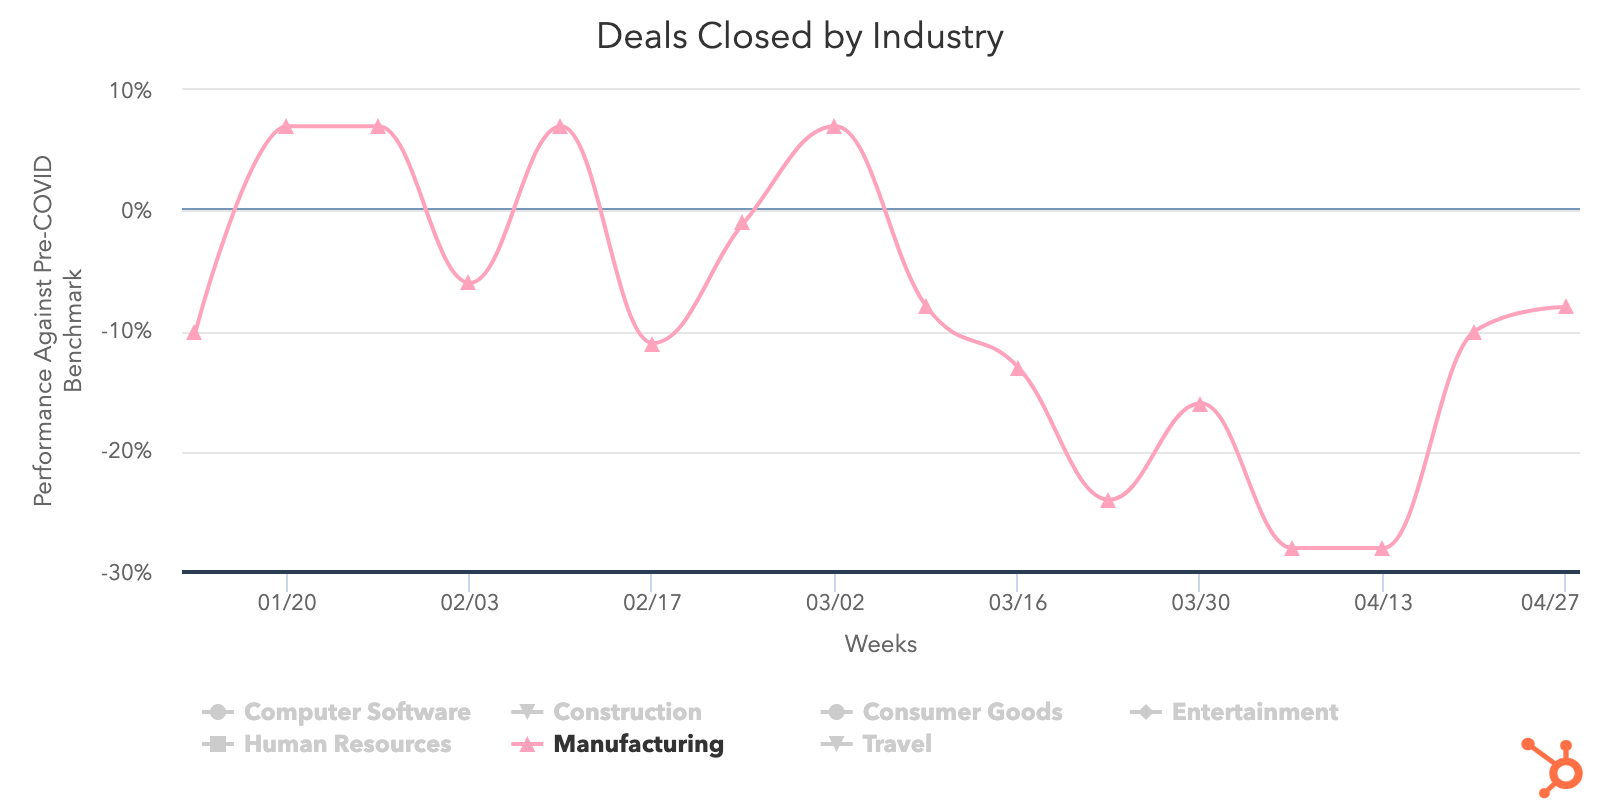
More-Impacted Industries
Some industries by default are facing more challenges than others in the battle against COVID-19. Some are subject to restrictions that affect their sales process, some are working tirelessly to attract new leads, and others simply can’t open their doors until the local legislature permits them. These are the industries we want to keep a close eye on so we can provide valuable insights that help them overcome roadblocks where we can.
Sadly, travel is one industry that’s been the hardest hit across all of the metrics we’ve recorded. It’s seen a huge decline in deal performance, standing 43% below the benchmark for deals created and 29% below for deals closed. Web traffic is down 19% percent since pre-COVID and Inbound demand has dropped off. Not to mention, outbound efforts by reps to engage new leads have struggled as well.
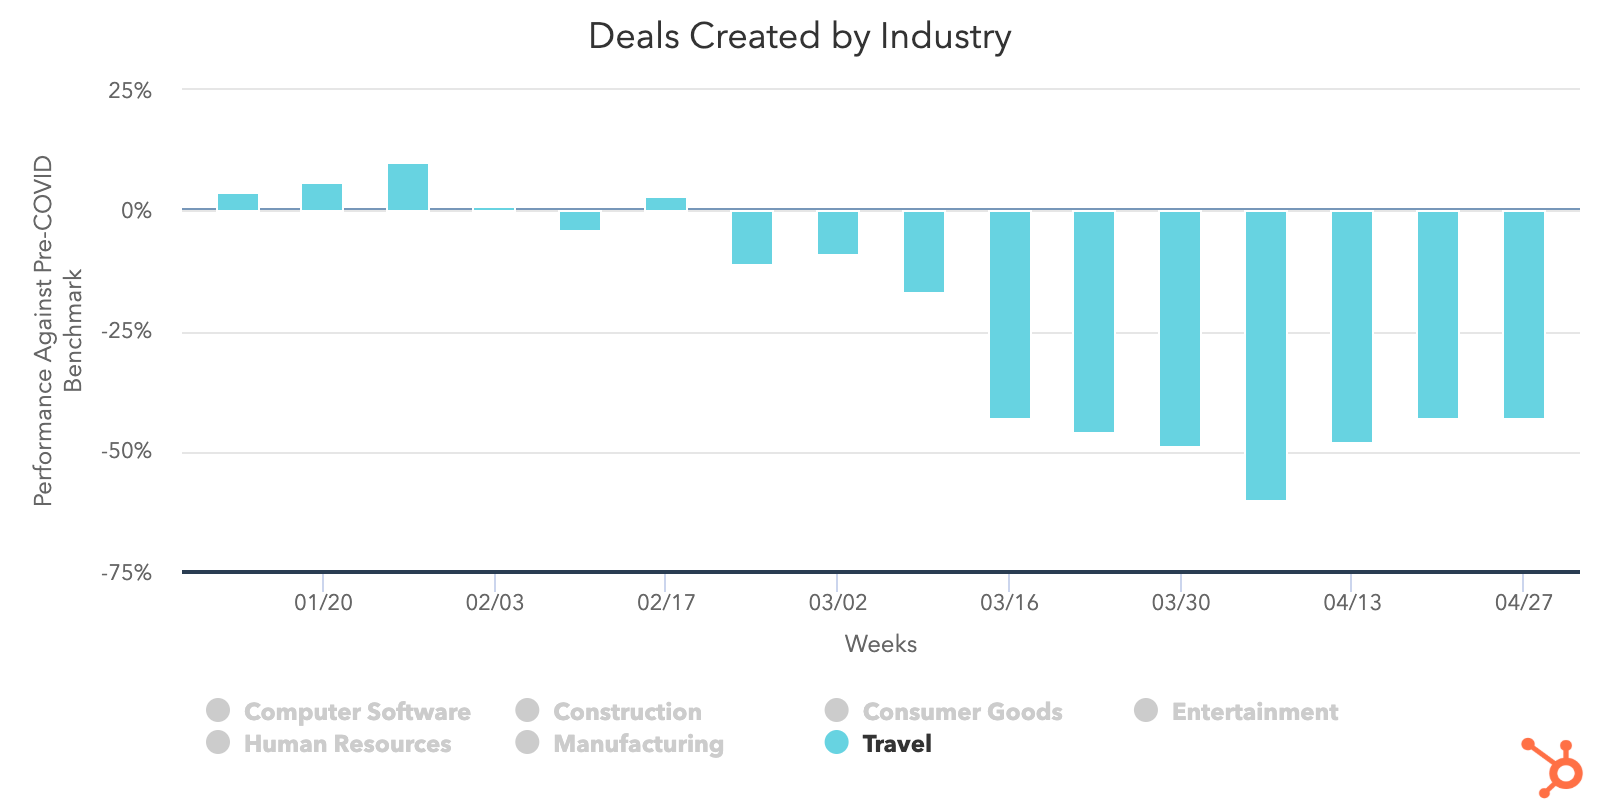
Another industry that’s been heavily affected over the past few weeks is entertainment. Entertainment saw a 10% dip in deals created last week and its deals closed is trending 48% below pre-COVID levels. This drop comes after an 8% week over week decrease in sales email responses after increasing email volume by 13% the week of April 27. Even though web traffic and marketing email open rates remain strong, sales teams continue to struggle as entertainment businesses find ways to adapt until they can return to normal strategies.
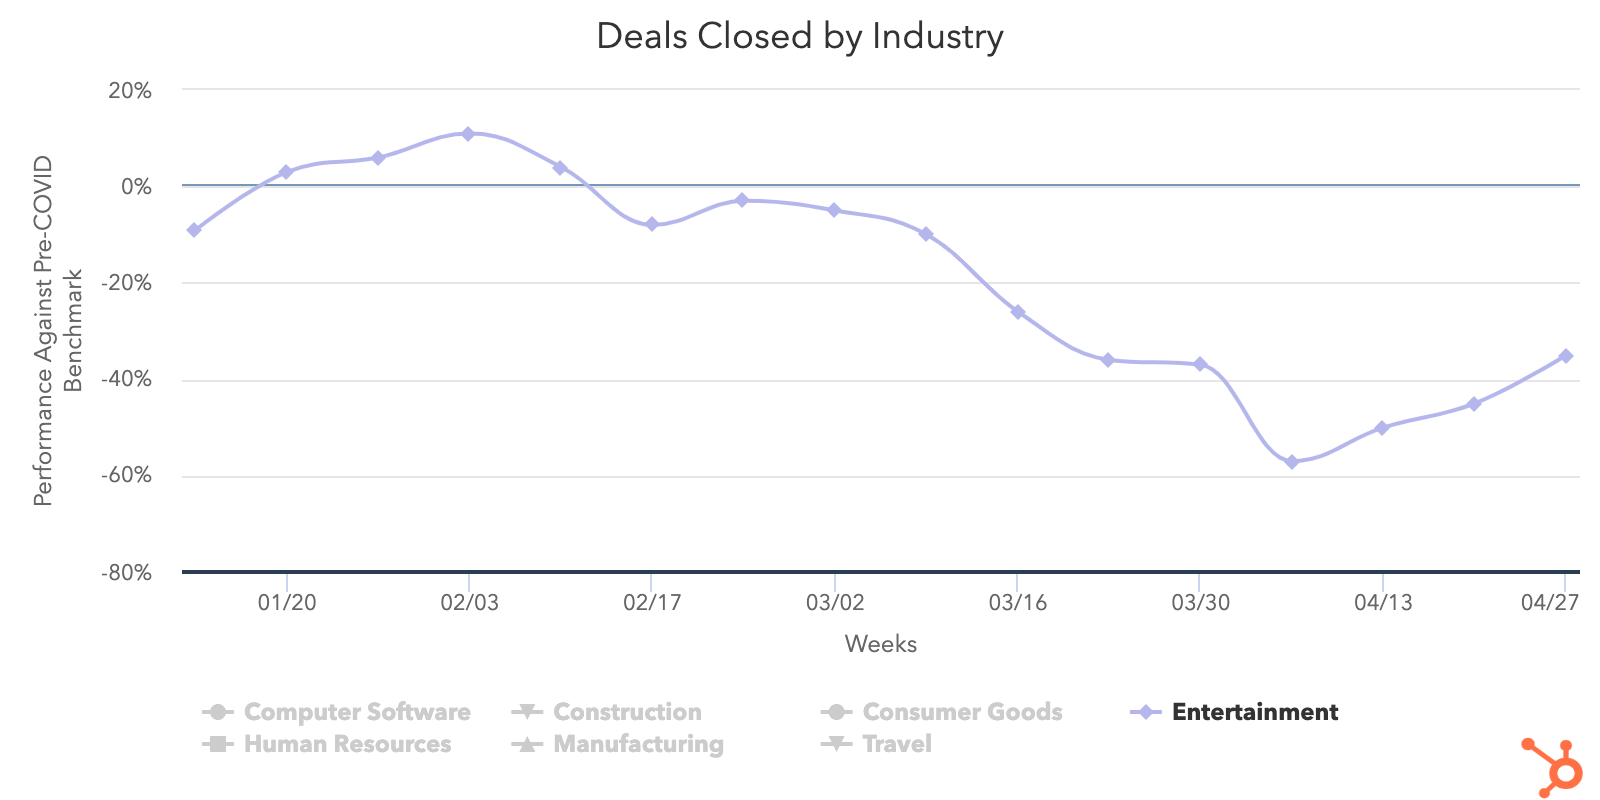
Despite working to reinvent itself quickly, the human resources industry is one of the lowest performers for deals created dropping 18% last week. Sales responses have also reached new lows, sinking 10% and reaching its lowest recording since the week of March 16. While marketing email send and open rates are up, web traffic continues to fall below pre-COVID levels as human resource companies shift focus to building their lead pipelines while businesses aren’t currently hiring at a rapid pace.
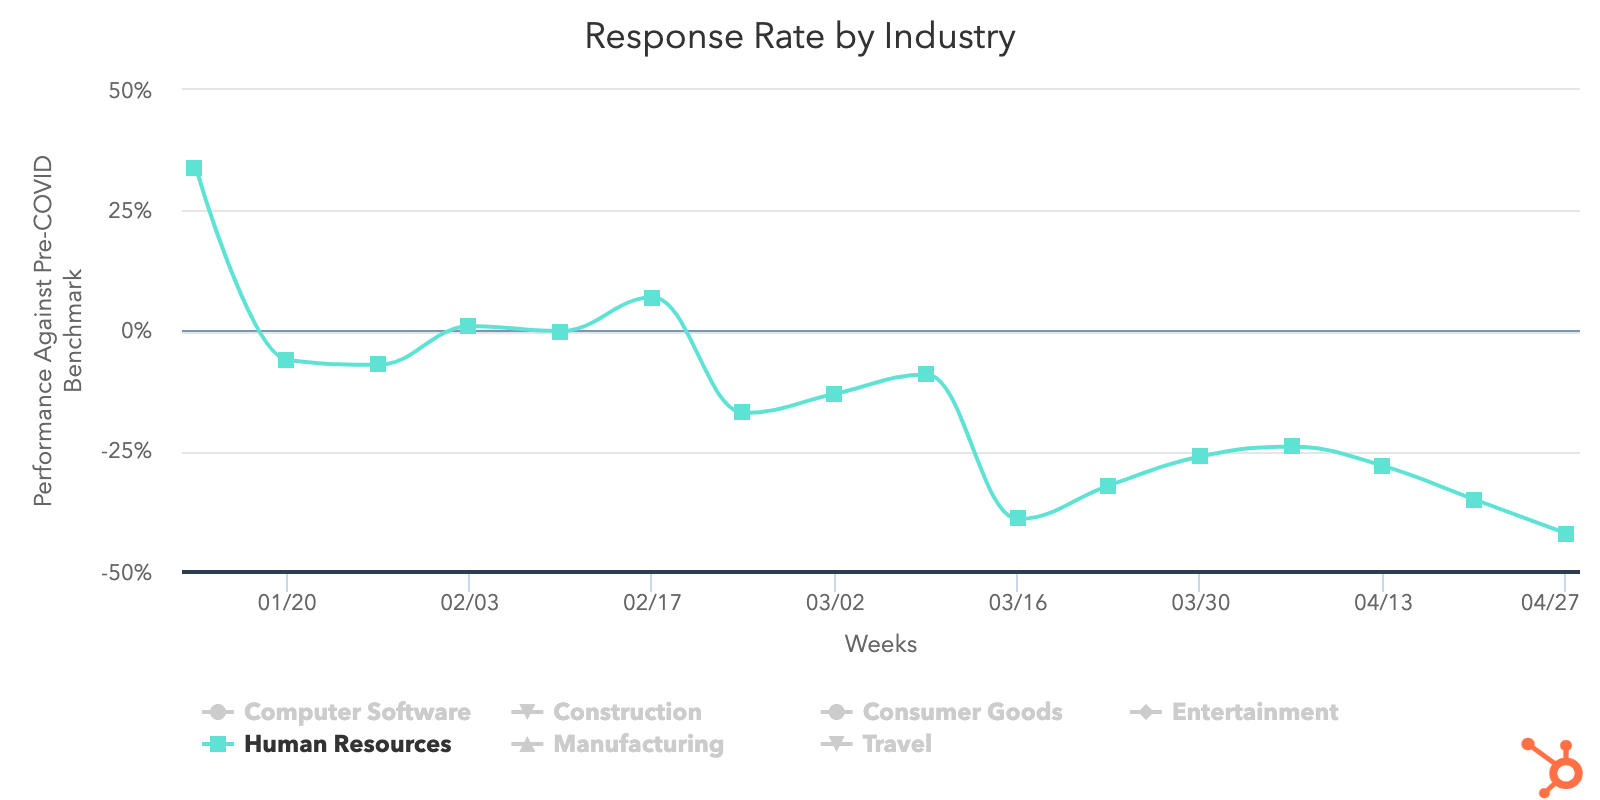
3. NORTHAM’s sales metrics hold steady, while EMEA trended the opposite direction.
Regionally, deal metrics favored NORTHAM last week as it was the only region that avoided a decline in deal creation. EMEA recorded the largest drop at 7%, while APAC decreased by 2% and LATAM by 3%. EMEA was also the only region to decline in deals closed, dipping 3% the week of April 27. This can be compared to NORTHAM with a 10% growth, LATAM with 5%, and APAC with 4%.
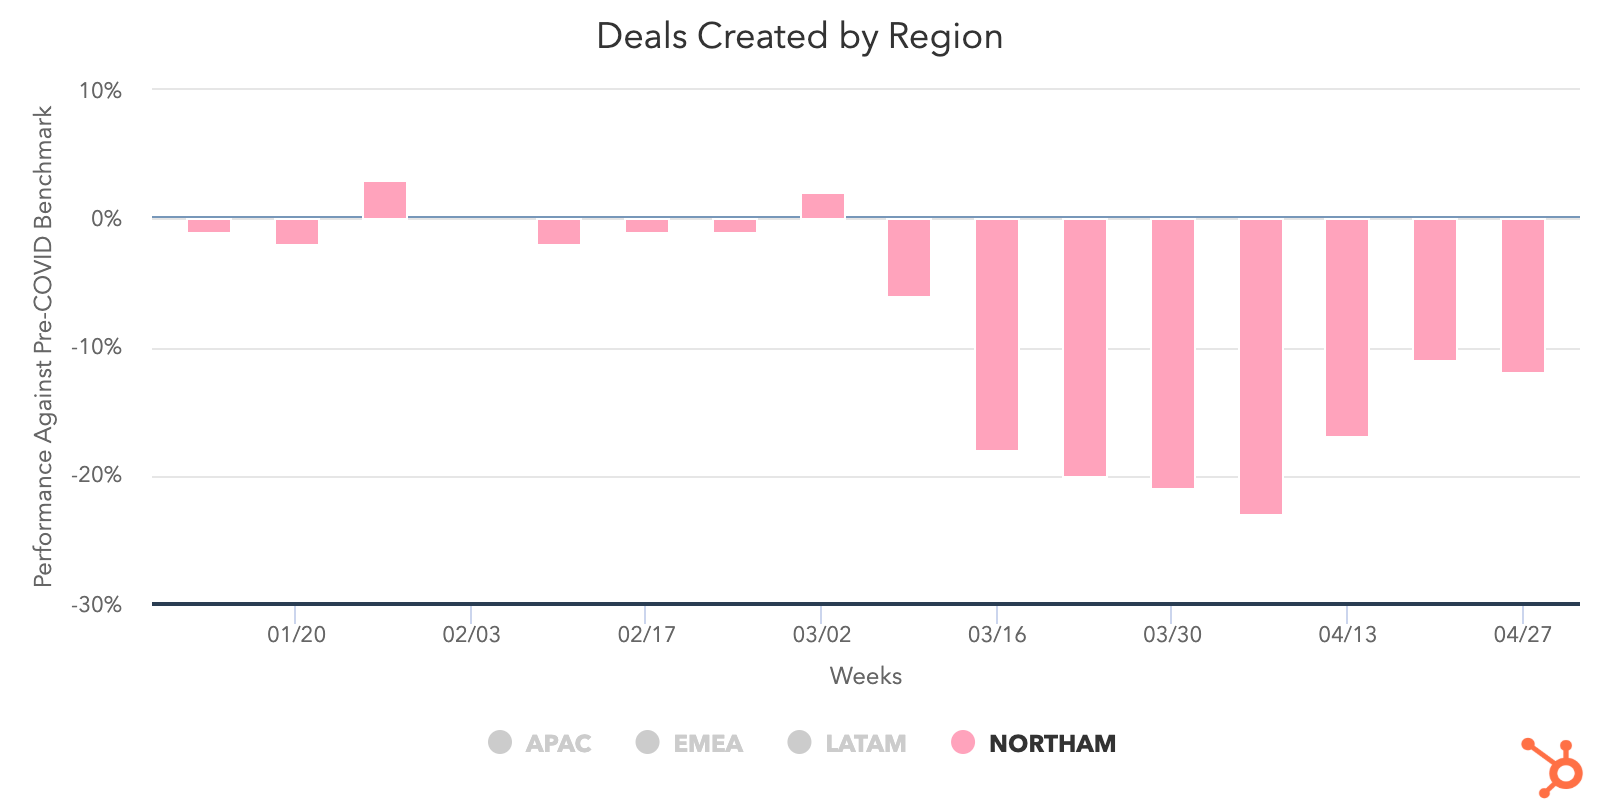
Germany had a notable drop in deals created (-22%) after experiencing a 41% boost the week of April 20. It also saw a 15% dip in deals closed as that metric slipped to 17% under pre-COVID averages. This could be related to the overall 11% drop that EMEA countries like Germany, Spain, and Italy experienced during the course of last week.
Australia, on the other hand, continued a 4-week streak with a 7% increase in deals created, pushing to just 5% below the pre-COVID benchmark. Deals closed are up 5% week over week and contact growth is up 103% since April 6. That’s important to note, too, as APAC dropped 40% as a region in terms of contact growth, second only to LATAM which declined 48% last week.
Narrowing in on the NORTHAM region, Canada had a 15% increase in deals closed, the biggest positive change for any country we recorded last week. The United States is now working on four steady weeks of increases, as it’s deals closed is 11% below pre-COVID averages after a 7% bump last week. NORTHAM was also the only region that didn’t experience a drop in sales email response rate as every other region dropped by at least 5%.
What This Means for Businesses
Transition from outside sales to inside sales.
The last few weeks have doubtless been a time of tremendous change for companies that employ an outside sales model. Temporarily adjusting to an inside sales model is virtually a requirement for businesses hoping to maintain or grow.
In times like these, knowing how to build strong relationships remotely is key. Invest in videoconferencing software to have “face-to-face” conversations online, and build trust by starting conversations with educational content instead of a generic pitch.
Ensure the quality of your sales conversations doesn’t suffer by taking essential parts of the sales process online. Whether it’s training your sales teams on cloud communications so they’re able to call prospects without physical phones, working with your marketing team to digitize educational content that prospects use to research your products, or learning how to conduct demos online, you’ll need to create online equivalents for formerly offline processes. And of course, you’ll need the right tools to keep your sales team running — see below for a dedicated analysis of the technology your team needs.
The last piece of the puzzle is integrating sales enablement with your inside sales engine. Build workflows that ensure the right information is reaching your sales team and that they can easily access it, whether it’s through a project management platform, team wiki, etc.
Resources to Help
- Learn to run an online demo with this list of do’s and don’ts.
- Transition your sales process online with this sales kit.
- Learn best practices for sales enablement in this certification.
Improve prospecting with targeted, creative outreach.
Our data shows that historic numbers of buyers are visiting and engaging with businesses. Yet we haven’t seen a corresponding increase in sales volume. Why?
Part of this decline was inevitable. Companies across the world are tightening their belts and cutting down on nonessential investments. But that can’t fully explain historic lows in sales engagement.
The answer lies in prospecting — the root of most good and bad sales outcomes. The huge increase in email prospecting accompanied by decreases in responses is both troubling and revealing. Instead of maintaining their standard balance of activities, sales professionals are prioritizing the technique that allows them to touch the largest number of prospects in the least amount of time. Not only has this change had the opposite intended effect, it may also hamstring salespeople who find they’ve burned through their database by blasting irritating emails to prospects who may have been a good fit down the line.
It’s time to get back to basics. Buyer interest is at historic highs, and sales teams that take the time to target buyers who have expressed interest in their products will be better at capturing their interest than teams who are merely emailing as many people as possible.
Encourage your sales team to add a human touch to outreach. For example, recording personalized videos to attach to email messages is a way to stand out in crowded inboxes. Leading with relevance and empathy is more important than ever, and incorporating personalization into your outreach process will drive sales teams to slow down and focus on good-fit prospects.
Resources to Help
- Refresh your email outreach with these sales templates.
- Start using video in your sales outreach to engage more prospects.
- Use this guide to increase your sales close rates.
- Lead with empathy in sales emails to build rapport and increase response rates.
Remove friction from your sales process with the right technology.
Friction is never good. But in an economic downturn, friction can be deadly. Our data shows that record numbers of buyers are turning to company websites and chat to conduct research. There are a number of ways you can remove friction from your sales process to form more connections between these prospects and your sales team.
Automate and digitize interactions that formerly took place in person. Many steps of the sales process that used to happen face-to-face will need to move online. Chatbots are a useful way to automate parts of the qualification process. Invest in self-service resources like pre-recorded demos, and ensure your sales team has the right technology to add a human touch to email outreach, and run sales calls online.
Invest in conversational marketing. Conversational marketing offers a real-time way to answer customer questions and automates the lead routing process so your business can serve prospective and existing customers even when your team is out of the office. Additionally, chatbots can help your company meet the increase in inquiries by providing customers with lightning-fast answers, automating lead qualification, and booking meetings on behalf of your sales and service teams.
Enable self-service. Whether it’s through chatbots, online meeting booking, eSigning, or self-service meetings links, implementing technology that allows prospects to engage with your business on their schedule will make the process easier on your prospects and more efficient for your team.
Resources to Help
- Equip your team with these essential inside sales technologies
- Streamline your sales process with this guide to frictionless selling (and this course)
- Check out what HubSpot’s app partners are offering at this time with this list of relief initiatives
Free Software to Get Started
- HubSpot CRM is free and comes with included sales acceleration tools, including free 1:1 video, meetings, and chatbot tools
- Gmail and Google Calendar integrations with HubSpot
- Zoom integration with HubSpot
- LinkedIn Sales Navigator integration with HubSpot