
Welcome to My Blog
How to Use Internal Linking to Improve Your Website’s SEO
Great content and attracting inbound links are major elements of your SEO strategy.
If you’ve created an exciting blog post or ebook, you’ll naturally want to work on making sure that you are driving as much traffic to it as possible. Part of that strategy should always include internal linking, and understanding how the other pages of your website can contribute value toward your new page.
If you’re working on any important campaign, it’s absolutely critical to figure out which of your already great, high-authority pages should be linking to your new page, or what ongoing efforts can continue to build link authority for your site over time. This process is called internal linking.
With great internal linking, ranking for very difficult keyword phrases is made much easier as you share the authority of your other best content with your new efforts.
Why Internal Linking Is Important
Remember that a search engine’s ultimate goal is to surface the very best few pages about a topic on the web. With the focus that most linkbuilders and SEO specialists have on inbound links and developing links from other sites, it is easy to overlook how internal linking is important. If you’ve heard that inbound links are like other sites voting for your content and telling search engines what your content is about, internal links are like voting for yourself and also letting the search engine know about your vote.
While it’s obviously better to have more people than just yourself voting for your content, if you don’t start by voting for yourself, the search engines will have a difficult time considering your page as one of the best on the web. Internal links are valuable not just because they are a direct signal that your content is important, but also because those links themselves pass on their own link authority.

When you consider that the link authority of each page is being shared into your website from these internal links, the value of your blog and other linked pages is more obvious to search engines.
While these pages are ranking well and bringing traffic into your website on their own, there is a second layer of SEO benefit that they can bring to your website if you properly apply them to your internal linking strategy.
How to Establish an Internal Link Structure
If there’s a page on your website that you care about a lot and that has a lot of value to you, you should be thinking about how you can explain that value to a search engine. One quick way to do this is by creating an internal linking strategy around it.
Start by considering how a search engine understands the value of an internal link; it’s looking at how many pages on your website link to that page, and how they link to it. If every page of your website links to something, it must be important to you — like your homepage, or your blog’s homepage.
If the only links in to your blog are from your ‘About Us’ section and nothing from your homepage or your website’s main navigation, you have already sent a strong signal to search engines that your blog is not very strong.
On the other hand, if your blog is in the main navigation on your website, Google and Bing will treat it like one of your top pages.
This works similarly to specific blog posts, as well as your blog. If you write an extensive blog post that defines something, such as a strategy or trend in your industry, you can link phrases in follow-up blog posts to it to prove to Google that this page is valuable to your readers.
To leverage internal linking to the fullest, do an audit of your website’s main pages and where you can interlink between them. As you write blog posts, you can also have your writers and others publishing on your website to interlink to your other blog posts and pages when it feels natural.
To help you further develop your internal linking structure, check out the tips below.
3 Ways to Improve the Internal Linking on Your Website
Here are three exercises you should go through to ensure you are effectively using the authority of your internal pages.
1. Sketch out a map of your website.
Make a list of each page in your main navigation and what links are on each of those major pages. This will help you understand the links that you already have between each section of your site, and how you’ve linked it together in the past. Sometimes, laying out your whole website visually is the only way to understand what you’ve overlooked and what’s working. You might just uncover that the reason some of your best pages are ranking well is because you subconsciously did a great job building your own links into them from your other content.
2. Look at the topics that you frequently write about.
If you’re writing regularly about something, you should have another dedicated page on your website about that topic — like a landing page with an offer, for example. Each of those posts should be linking to that authoritative page on the subject, and it should be optimized for conversions. If your landing page has a prominent call-to-action, your effective use of internal linking will help drive more new leads through the offer.
Also consider where that page lies in your navigation, and if it’s worth linking to from your homepage or products page. Depending on your business, you might even find that linking to a specific blog post or page from your website’s main navigation might suit you well. For example, if your company often needs to explain your business to people who discover you, that would make a good blog post that deserves major promotion across your site.
3. Think about every other page that could link to your ranking page.
If it is a page related to a topic you frequently blog about, make sure each of your new blog posts about that topic reference that page and link into it. You can see this in how HubSpot ranks for the term ‘how to use facebook for business.’
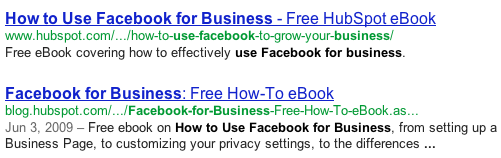
One of the major factors behind its rank is that we regularly write about how to use Facebook for Business, we have a lot of very powerful links from our blog posts about using Facebook for business, and we have at least one link in each of those entries to our Facebook for Business landing page. Those blog posts we wrote over the last five years about this topic all have great authority of their own because people have linked to them, and each of them links to our landing page to further build that value.
Editor’s Note: The blog post was originally published in Feb. 2012, but was updated in March of 2020 for comprehensiveness and freshness.

How to Calculate ROI in Marketing [Free Excel Templates]
It’s a brand new month, everyone! It’s a time for new beginnings. New campaigns, new landing pages, new blog posts, new emails, and new social media posts are all on the horizon.
But wait … aren’t we forgetting something? With last month’s activities all done, we need to pause for a second to examine what worked and what didn’t. And you can’t do that just by saying last month’s activities were “great” … “great” doesn’t pay the bills.
If you can prove that your marketing activities actually made an impact in your business, you’ll have many more opportunities at your disposal. More budget to play with. And more potential hires to bring on board. Sounds like every marketer’s dream, right?
So how do you go about first, finding the right metrics to use, and second, proving your marketing’s ROI to your boss? Why, with a monthly marketing report template, of course. Download our completely revamped PowerPoint and Excel templates by clicking here, and then keep reading to learn how you can use them in real life.
For example, if you’ve been running a campaign for three months, and you’re seeing a sales growth of 5% per month, then your ROI calculation will take out that trend.
Additionally, if you’re a HubSpot customer, you can access an ROI calculator programmed with the same formula in our CRM.
Which Metrics Should You Track?
First things first — which metrics should you be paying attention to in the first place? Not all metrics were created equal, and if you’re going to capture your boss’ attention with this PowerPoint deck, you’re going to need to tell your story efficiently through data. Click through our marketing metrics template and get tips on how you can put together your marketing report deck.
How to Create Your Own Marketing Metrics Report
So now you know what metrics you need … but what about customizing the PowerPoint slides to fit your business? Follow these four steps so you’ll have engaging, accurate, and concise slides to show to your boss.
1. Download our monthly marketing reporting templates for Excel and PowerPoint.
Seriously, you haven’t downloaded it yet? 😉
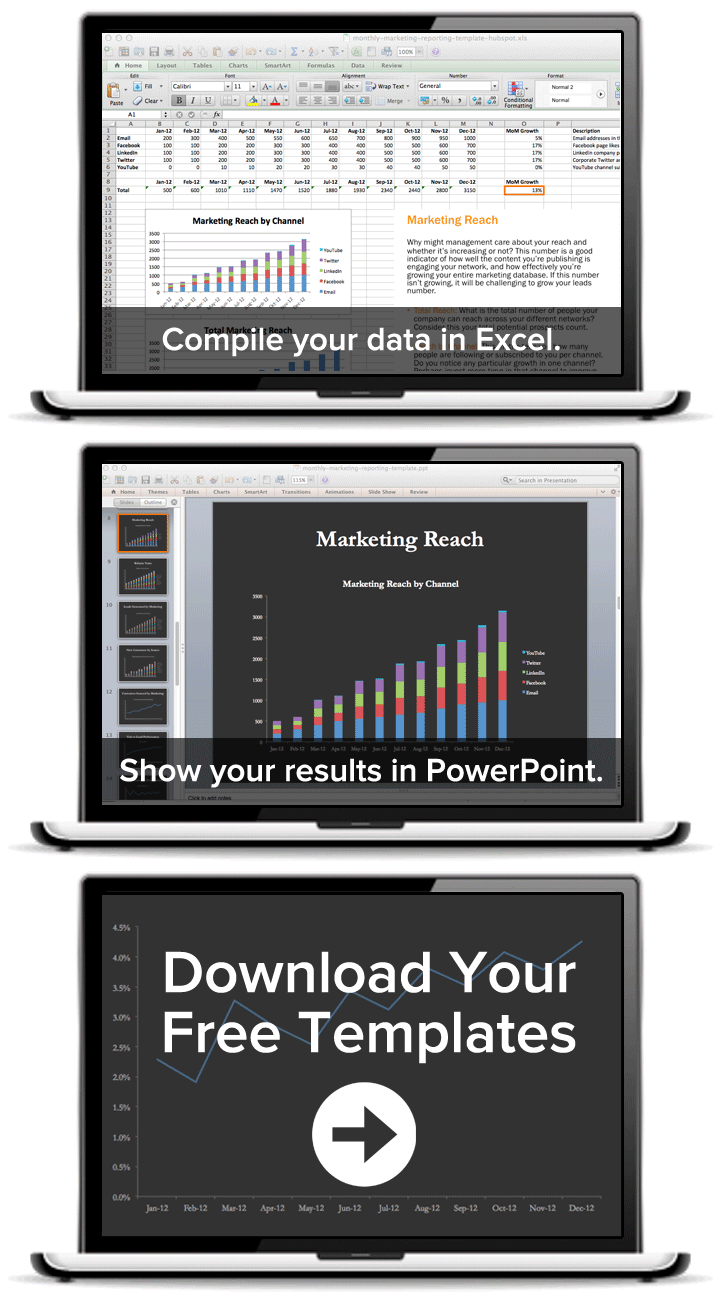
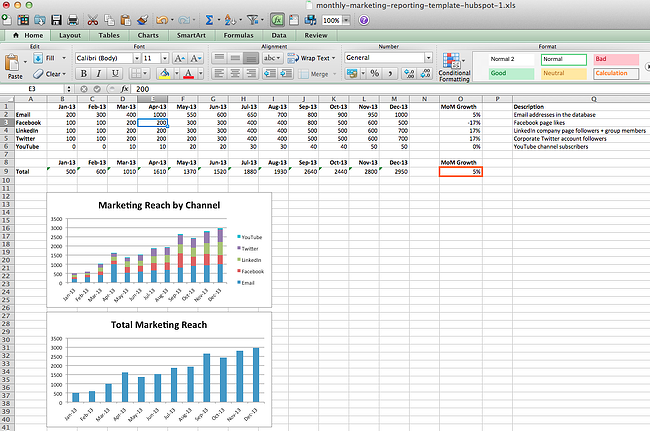
2. Open up Excel, and fill in the metrics you want to track.
Equations and graphs will automatically populate based on the metrics you add.
3. Copy the graphs and paste them into PowerPoint.
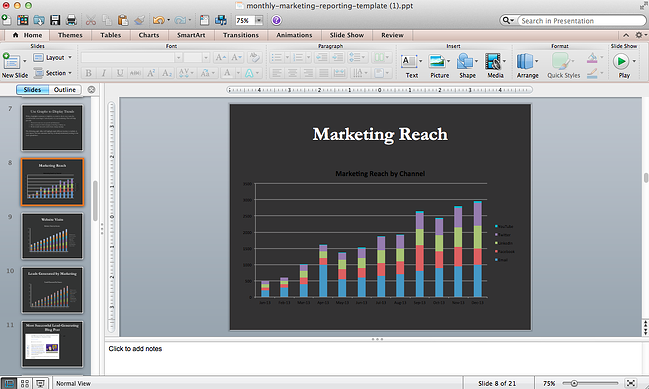
4. Customize your graphs and charts to fit your company’s theme.
After crunching a bunch of numbers, you probably need a little creative break anyway. Click on individual elements in the graph to customize them. If you really want to get fancy with your presentation, check out these five simple PowerPoint tips.
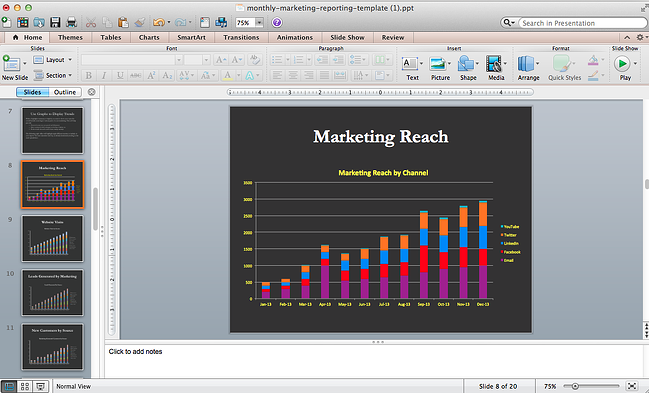
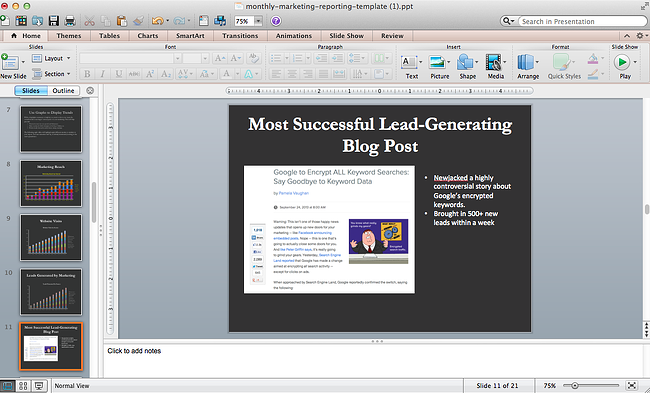
5. Add relevant examples to back up your graphs.
If you truly want to explain your marketing team’s success from the past month, don’t forget to include a slide here or there that touches on specific examples. For example, if you have a blog post that drove a crazy number of leads in a month, you could include that example slide with a few bullet-point takeaways after the “Leads Generated by Marketing” slide. These specific examples give color to your presentation and justify time spent on future projects.
ROI Excel Templates
Excel is one of the best tools to use when you’re tracking and calculating ROI on a regular basis.
Download our monthly marketing reporting templates for Excel and PowerPoint.
In the above collection of marketing reporting templates, you’ll get to fill in the following contents (and more) to suit your company:
Below, let’s review the five excel templates, and what you’ll find in each one.
1. Reach
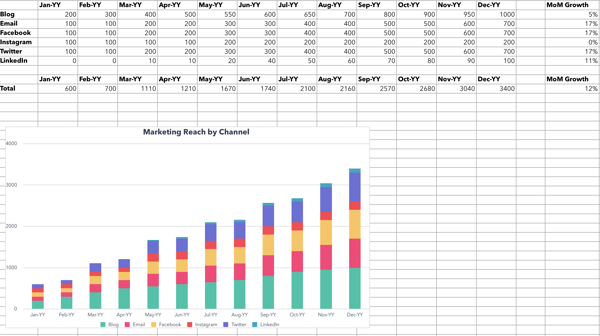
In this template, you can fill out the data to calculate your marketing reach. For example, you can calculate reach of your blog, email, or social media.
Then, the graphs below will help turn your data into a visual graph.
2. Visits
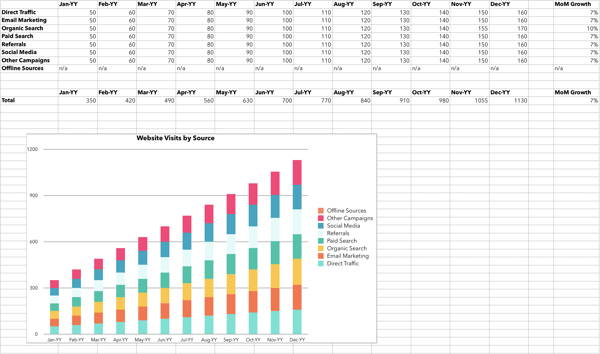
With this template, you can fill out the information to calculate your visits. This will include visits via several sources and channels including paid traffic, direct traffic, and social media referrals.
Then, the graph below will create a visualization of your data.
3. Leads
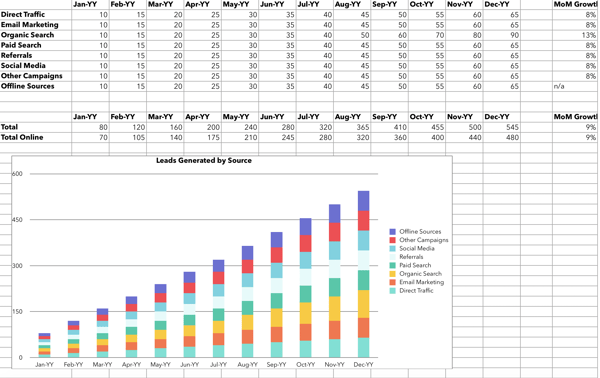
In this template, you can input your information, for how many leads are generated with your marketing campaigns.
In the graph below, you can visualize your leads depending on the sources.
4. Customers
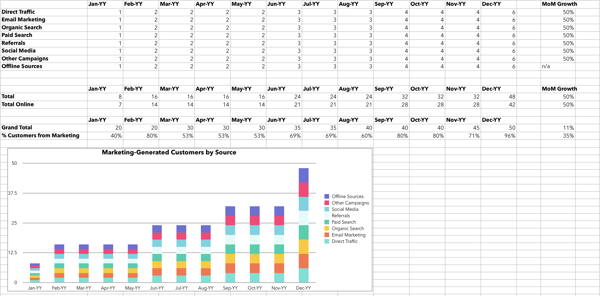
In this template, you can calculate your customers via traffic source. In the below graph, you can visualize your customers.
5. Conversion Rates
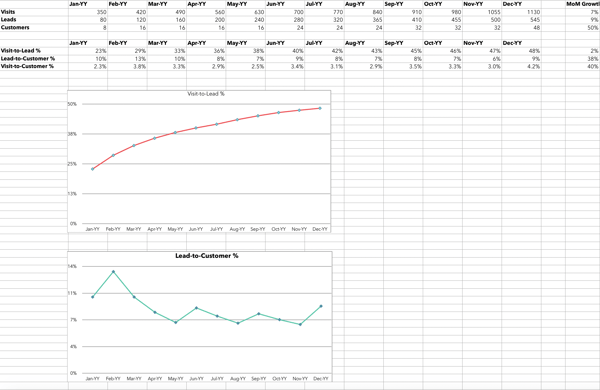
In this template, you can calculate conversion rates by inputting your information.
And that’s it! Easy peasy way to track your team’s success. After a few months of this, who knows, you may have an even bigger budget or a brand new marketer on board.
Editor’s note: This post was originally published in September 2013 and has been updated for comprehensiveness.

The Plain-English Guide to Meta Tags & SEO
In 2018, HubSpot found 64% of marketers said they actively invest in search engine optimization (SEO).
Good SEO can get you in front of the potential customers who are searching for your products or services, and great SEO can help those users become long-term customers, and even brand loyalists.
SEO is a landscape that involves many on-page and off-page factors, and it’s critical to understand how to incorporate meta tags into each one of your web pages. Meta tags can help search engines correctly identify and categorize your pages, which may result in higher rankings and more exposure to the audience you’re trying to reach.
If you’re anything like me, though, you might be thinking, “Wait … what’s a meta tag again?”
What Are Meta Tags?
Here, we’re going to define meta tags, identify some of the most important meta tags you need to worry about, and provide instructions so that you can begin incorporating meta tags into your HTML today.
SEO & Meta Tags
A meta tag is a snippet of descriptive text you’ll include in the code of a web page but it doesn’t appear on the page itself. Meta tags help search engine crawlers understand what your site is about and index your page, which is critical when you want to rank on SERPs for the right keywords.
Meta tags are useful from an SEO perspective since they allow search engines to more easily categorize your web page’s content. There are several types of meta tags and their attributes, and how you use them will depend on your strategy.
Meta Tags Example
Examples of meta tags include canonical tags, meta content type, robot meta tags, meta descriptions, and title tags. You might use a canonical tag to tell search engines which page is the ‘master’ one. Alternatively, you might use robot meta tags to ensure search engines don’t index a page you don’t want on the SERP’s, like a search results page on your site.
Let’s dive into some of these now.
1. Canonical Tags
If you have a single page with multiple URLs, or different pages with similar content (such as a page with a mobile and desktop version), search engines see these pages as duplicate versions of the same page.
For instance, as a human, you know “www.google.com” and “https://google.com” point to the same page — if you search for either, you’ll land on Google’s homepage.
But Google sees “www” and “https://” as duplicate versions of the same page. If you don’t specify which page you want to be the “real,” or original, source, Google will choose which source it dubs original and crawl the other pages less often.
This could mean that Google consistently crawls your mobile version of your homepage and rarely checks your desktop version.
For this reason, it’s often important to include a canonical tag, which simply tells Google, “Hey, if you find this same content elsewhere — please disregard. This is the source I want you to see, and this is the version I want to appear in the SERPs.”
This is especially important for pages like your homepage. To insert a canonical tag, simply put this code in your HTML:
<link rel=”canonical” href=”https://ift.tt/2TD2Z5p” />
2. Meta Content Type
The meta content type enables you to specify the media type (e.g. “text/html”) and character set for each web page — you’ll want to include this on all of your web pages. Different browsers render information differently, and different languages have different character sets. Using meta content type tags ensures your pages are displayed correctly on all browsers.
Here’s an example of the code you’d use for meta content type:
<meta http-equiv=”Content-Type” content=”text/html; charset=utf-8″ />
3. Robots Meta Tags
By default, search engine crawlers move through your entire site and follow internal and external links. However, this may not align with your strategy if you are looking to control how some pages appear in SERPs. In addition, a high number of outbound links may negatively affect the value passed through your links (also known in the SEO community as “link juice”).
If you don’t specify a robot meta tag, search engines will obey the default index,follow command. Robots meta tags can influence the behavior of the search engine crawling and indexing, resulting in more strategic control of how your site shows up in SERPs and what “link juice” it retains.
Here are a few common robot meta tags:
- noindex — Prevents the page from being indexed.
- nofollow — Prevents Googlebot from following links from this page.
- nosnippet — Prevents a text snippet or video preview from being shown in the search results. For video, a static image could be shown instead.
- noarchive — Prevents Google from showing the Cached link for a page.
- unavailable_after:[date] — Allows you to specify the exact time and date you want to stop crawling and indexing of this page.
There are various reasons you might use a robots meta tag. You might input the “nofollow” command, for instance, if your web page has a comments section. Since you can’t control which links are posted by readers in the comments section (which could be off-topic to your page’s content), it might be smart to tell search engines not to follow those links.
Alternatively, “noindex” is a popular tag for a few reasons. Let’s say you’re planning to launch a website redesign, but you want to test the redesign on a development server that lives in a subdomain on your website. You’ll want to use the “noindex” tag to ensure Google won’t release the site in search before it’s ready.
You might also use “noindex” if you have a gated content offer you don’t want users to be able to find on search engines — since you want them to fill out a form to access it.
Lastly, you might use “noindex” if your website creates unique web pages whenever someone does a site search. Search engines might think those pages are part of your website, which will hurt your SEO. It’s best if you incorporate “noindex” to ensure site search results aren’t displayed on the SERPs.
To incorporate a robots meta directive, input this code into your HTML:
<meta name=”robots” content=”noindex, nofollow”>
4. Title Tags
Title tags help readers initially understand what your content is about, and they are also a major factor in helping search engines understand your content’s subject matter. Additionally, a title tag can ensure consistency, since the title tag will show up on your web page, on the web browser, and in social networks.
If you don’t include a <title> tag, Google will create one for the SERPs for you — which can hurt your ranking. Ultimately, you want to create a compelling, click-worthy title that will intrigue readers while accurately portraying what your page is about.
Include a title tag on each of your web page’s by pasting this code into your HTML:
<head>
<title>Example Title</title>
</head>
It’s important to note, alt text is technically not a tag — it’s an attribute. However, you’ve likely heard the term “alt tag”, which is why you might think alt text is part of the meta tag family (I know I did …).
Regardless of its categorization, alt text is incredibly important for your overall SEO strategy, particularly since Google places more value on visual search nowadays. When a search engine crawls your page, it’s going to look for the alt text of an image as an identifier for what your web page is about — so it’s critical you correctly title your alt text.
Here’s a code example for alt text to incorporate in your HTML: <img src=”metatag.jpg” alt=”Meta tag picture”>.
5. Meta Keywords
Meta keywords are an attribute of the “meta name” tag that get added if you want to use keywords to describe what a page is about. These keywords would not appear on the page but rather in the page’s code, and search engines used to use them as a ranking factor.
Note: While it doesn’t hurt to use them, meta keywords are no longer relevant for most SEO strategies. In 2009, Google announced that it no longer factored meta keywords into their search algorithm for ranking.
6. Meta Descriptions
Meta descriptions are one example of a meta tag — simply put, a meta description is a 160 character-limit snippet of text a user can read on a search engine. A meta description tells the user what they’ll find if they click on your content — which, if done correctly, can greatly increase click-through rates.
The tag doesn’t influence ranking directly, but it’s nonetheless an important element of SEO — a good meta description can compel readers to click on your article, and if the meta description accurately describes your content, the user is more likely to stay on the page. Click-through rates do influence search engine ranking, so meta descriptions are important for SEO.
Here’s an example of the code you’d use to manually input a meta description into your web page’s HTML:
<head>
<meta name=”description” content=”This is an example of my meta description.”>
</head>
Meta Tags vs. Meta Descriptions
These two often get conflated since they both contain the word “meta.” One thing to understand is that meta descriptions are just one example of meta tags, which encompass all of the items in the above list.
While meta descriptions are a subcategory of meta tags, there is a fundamental difference between the two — purpose. Meta tags are used to help search engines figure out the content of your site, but meta descriptions are used to help a user sort your content.
For instance, consider what happens when I search “what are meta tags”:

The meta descriptions for the following two articles are more than likely the primary reason I’ll choose one article over the other.
How to Write Meta Tags
- Understand that not all meta tags need to be written. Some are just codes.
- Create a swipe file to use for copy/pasting those codes.
- Paste the canonical tag into the HTML header if the page has duplicate content.
- Use the robots noindex tag if you don’t want the page to show up in SERPs.
- Use the robots nofollow tag if you don’t want Google to follow links on this page.
- Create a short headline to use in your title tag. This should compel readers to click.
- Write a concise meta description.
- Add alt text tags that are keyword-optimized and descriptive to any embedded images on the page.
1. Understand that not all meta tags need to be written. Some are just codes.
After reading this article, you’ve learned that there’s not one single “meta tag” but rather several categories that fall under this umbrella. Some meta tags require creativity while others are snippets of code that you can simply copy and paste.
2. Create a swipe file to use for copy/pasting those codes.
For the instances in which you don’t need to write anything, it’s helpful to have this coding handy anytime you’re creating pages.
3. Paste the canonical tag into the HTML header if the page has duplicate content.
As a reminder, if there are multiple versions of a page on your site, you’ll want to use canonical tags to specify the original source for that content. For any duplicate content, you can pull your canonical code from your swipe file to specify it as such.
4. Use the robots noindex tag if you don’t want the page to show up in SERPs.
There are many reasons you might not want a particular page to be indexed. Perhaps it’s a thank you page that should only be viewed once a user takes a certain action, or maybe it’s a piece of content that you don’t want showing up in the SERPs. Whatever your reason, the noindex tag will signal to Google not to index that particular page.
Add this specification to your robots meta tag code in your swipe file. Then, paste it into your HTML header for the page in question.
5. Use the robots nofollow tag if you don’t want Google to follow links on this page.
If you have a comments section where you want to prevent Google from associating random links with your website, you can do this with the nofollow tag. The nofollow tag is also helpful for controlling your site’s “link juice” in a strategic way. If you don’t want Google to follow any links on a page, pull this code from your swipe file. It also goes in the HTML header.
6. Create a short headline to use in your title tag. This should compel readers to click.
Your title tag should be unique for each page you create because it essentially names the page. The title tag shows in the SERPs, in the browser, and on social media. For that reason, it should be written for your target audience. Some things to keep in mind as you write:
- What value are you providing to them?
- What will they get if they visit the page?
- What benefits or advantages do you offer?
- How can you present that information while enticing them to click?
Another best practice is to include your page’s target keyword as close to the beginning of the headline as possible.
7. Write a concise meta description that supports your title tag and further entices readers.
Since the meta description also shows up in SERPs, this is an additional meta tag that essentially advertises your content. The goal here is to expand on the title/headline with enough elaboration while also enticing them to click. The challenge is doing it in under 160 words. Here are some strategies to consider:
- Use your primary keyword in the meta description to make it more relevant to their query, catching the reader’s eye.
- Set the stage for the content, giving the reader expectations about what you’ll be delivering.
- Open a loop or create intrigue to make them want to read more.
8. Add alt text tags that are keyword-optimized and descriptive to any embedded images on the page.
Alt text describes images for search engine crawlers and screen readers. With that in mind, you should:
- Describe what’s happening in the image as concisely as possible.
- Include a keyword to make the image more relevant from an SEO standpoint.
How to Use Meta Tags with HubSpot
- In your HubSpot account, click the Marketing tab in the navigation.
- Hover over Website, then choose either Website Pages or Landing Pages (depending on where the page in question is located).
- Click the name of the page to open up the editor.
- Click the “Settings” tab at the top of the page editor.
- Click “Advanced Options” at the bottom of the page.
- Locate the Head HTML field under “Additional code snippets.”
- Paste in the code for the most applicable meta tag(s).
- Ensure that the code is correct for what you want to achieve.
- Publish or Update the page.
- You can verify that the code is now live by visiting the page, right clicking somewhere on the page, choosing “View Source,” and searching for your code in the new window.
Now that you know what meta tags are and how to implement them on your site, you can check this task off your SEO to-do list. Your pages will now be much more easily crawled and indexed by search engines like Google. Keep in mind, however, that meta tags are only one part of optimizing pages for organic search. There are many other SEO factors that could affect your traffic and ranking performance.
Editor’s Note: This post was originally published on Mar 8, 2019 but was updated on Mar 10, 2020 for comprehensiveness.

How to Determine Your Internet Marketing Plan Based on Your Revenue Goals
91% of marketers are confident that they’re making marketing decisions that will positively impact revenue.
Are you one of them?
As marketers, we’re well-versed in the main goals of internet marketing: to generate leads and new business. Revenue generated from online marketing justifies why we include online channels in our marketing efforts.
Some companies use revenue as a jumping-off point to build their marketing plans. This method determines if current marketing efforts should be changed or repeated based on lead generation and customer acquisition data. A tactic like this measures and drives the growth of a business.
To put it another way, some companies use revenue marketing when planning online marketing strategies. Revenue marketing is about coming up with a campaign that is driven by the desire to create more leads and drive sales.
How then, do marketers come up with a winning online marketing strategy that directly ties to their revenue goals?
If you’re unsure of the answer, we’ve got you covered.
To give you a starting point of how you can follow suit we’ve come up with some steps you can take to begin marketing planning based on revenue.
Revenue Marketing
When we talk about revenue marketing, we’re talking about a method of marketing that’s used for lead generation. Some marketing campaigns are implemented to increase brand awareness or support a product launch, but revenue marketing puts all hands on deck towards increasing just that.
Let’s explain revenue marketing a little bit more.
If you were to implement a revenue marketing plan, you would look at your revenue goals first instead of your business goals. This method turns those goals into a campaign.
Let’s dive into how you can develop a revenue marketing plan.
.png)
1. Set SMART revenue goals.
To reach your revenue goals, you have to make them! If you’re a little confused on how to start making them or unsure of how to set them so they’re effective for marketing campaigns, let’s talk about how you can set measurable goals.
Before you set out to conduct online marketing strategies, your goal should be clearly defined and understood by the team working on the campaign. The easiest way to do that is to make sure your goal(s) is SMART: Specific, Measurable, Attainable, Relevant, and Time-based.
For a little refresher on SMART goals and how they pertain to setting revenue goals for marketing campaigns, let’s walk through an example.
Let’s say a marketing team for a company is generating $10,000/month in revenue through online and traditional marketing efforts, but wants to generate more revenue through beefing up digital campaigns. They have decided on a goal to double their revenue.
While doubling revenue is a fantastic goal, it doesn’t have any basis for how to get there. To make this goal SMART, the team can add some terms to make their path a little more clear.
So, instead of the marketing teams’ goal being “Double revenue,” it can be restructured to, “Through an online marketing campaign, the goal is to double revenue in six months by using channels chosen based on previous ROI data.”
This goal gives a time span, is specific, relevant to the task, and measurable. While doubling revenue is a high goal, SMART goals can change; they’re merely a guide to making sure your goals are reachable.
Begin by planning out your revenue goals. If you are still shaky on SMART goal making, HubSpot offers a free template you can download to guide you while writing them.
2. Audit your current website and marketing ROI.
Marketing analytics software can be used to measure the number of visits, leads, and generated sales you earn for each of your marketing channels. For example, HubSpot’s Marketing Hub offers the tools marketers need to measure the success of their digital marketing campaigns, such as website metrics.
When you want to determine the initial ROI of online marketing efforts, using analytics tools is extremely critical. These tools have customizable settings that you can configure, so the platforms only track the metrics you care about.
If you want to use your revenue goals to inspire your internet marketing plan, the metrics that will be useful may vary based on your business goals, but here are a few that are especially helpful: SEO metrics, ROI from pay-per-click (PPC), your blog’s conversion rates, and social media engagement.
Those metrics will tell you how your marketing efforts are ranking on Google, how many people are clicking on your ads or campaign offers, how helpful your content is to readers, and how your brand is perceived by its audience.
In general, if you intend to make money from a marketing channel, it’s important you continue to measure and iterate your strategy based on that channel’s core metrics. Once you know your analytics, you can use that data, paired with monthly revenue data, to estimate the conversion rate you aim to earn with your next campaign.
3. Conduct research to determine actionable steps.
If you’re unsure of how to determine actionable steps in your plan, it’s always helpful to do some research.
I know, I know: you might not have the time to devote to copious amounts of research. However, by seeking out some information, you’ll be able to uncover actionable steps that work for similar companies’ revenue marketing efforts.
For instance, we’ve talked about how leveraging data can help build your online marketing strategy. Before you start planning, if you’re unsure of where to begin, refresh your memory of must-haves when writing a marketing plan. This post is a good place to start.
You can also look into downloading a report from a company that used revenue marketing. For instance, HubSpot offers this study, which details how revenue marketing worked for a campaign, and provides highlights of the report for those strapped for time.
Additionally, you can look at a case study to get an understanding of how a revenue marketing plan looks from a bird’s eye view. This directory of case studies is organized based on industry, company size, and company goals, so you can easily find a case study that illustrates the plan you’re considering for your own business.
Don’t forget to look into how using SEO can help make smarter marketing decisions. If you are confident in your SEO efforts, look at keyword and competitive data to figure out how much time and money you should invest in pay-per-click to hit your goals.
Finally, research can help you determine if you’re following the best practices for lead generation and tracking. You can find new ideas for converting leads into customers using online marketing channels, such as blogging and email, as nurturing tools.
To gain an understanding of how your marketing efforts help one another, and how to structure a chronological plan, a little research is necessary.
4. Put it all together.
Once you’ve got an idea of your current return, have set reasonable revenue goals, and know a bit more about the channels and methods you want to use, it’s time to put it all together.
When you’re building your internet marketing campaign, keep in mind that every step in your plan should be based on revenue goals. If you’re going to use Facebook Ads as part of your campaign, for example, it should be understood by the team why that method will help you reach your revenue goal.
Spend some time ensuring the content you want to create for the campaign will resonate with its audience, as well. Blog posts need to be valuable to readers (Keyword research helps you figure out what readers are searching for) and social media content needs to engage followers, for example.
During your internet marketing planning process, outline how you’re going to measure success. Revenue is the obvious metric to measure, but what software will you be using? How are you going to interpret the revenue you earn?
Once you’ve worked through your marketing plan, you should have all the resources in place to write a marketing report or case study from your findings on your own. Who knows — your report could even turn into a valuable content offer for your next revenue-based campaign.
Happy planning!

14 Time-Saving Tools for Managing Your Twitter Following
According to Hootsuite, Twitter has 145 million monetizable daily active users, and that number is growing. This and the open nature of the ecosystem makes it a great platform to put content in front of your ideal customers. At the same time, the Twitterverse is fast-paced. In fact, Moz estimates that the average lifespan of a tweet is only 18 minutes, which means that your posts have less time to capture their attention.
That said, maintaining a healthy following and publishing schedule on Twitter is challenging, perhaps much more so than other social networks. You can’t help but want more followers, but if you’re going to extreme lengths just to build up that number with empty names and faces, it’s not worth the time and resources. After all, effective engagement occurs with real, interested followers, not eggs and inactive accounts.
If you want to streamline your following and uncover analytics that can be used to refine your strategy, you need the right set of tools. Ones that actually work.
To help, I’ve collected 14 tools that can help you keep on top of your social media following. All the tools vary in price and network specificity, so you’re sure to find something that meets your team’s unique needs.
Twitter Following Tools
- Crowdfire
- Commun.it
- Followerwonk
- Sprout Social
- Tweepi
- Social Inbox
- ManageFlitter
- Likeable Hub
- Narrow.io
- Statusbrew
- Buzzsumo
- Circleboom
- AgoraPulse
- RiteTag
1. Crowdfire
Price: Free for personal use, starts at $7.48/month for more advanced features
People follow accounts that produce content that appeals to them, so growing any Twitter following means managing a publishing cadence and creating quality content. Crowdfire helps curate content, schedule posts in advance, analyze what’s working, and manage engagement. To support those goals, it offers:
- Article and image curation help
- RSS support and tools for curating content from your own assets
- Queued posting
- Hashtag recommendations for increasing reach
- Social, post, and competitor analytics tools
- A unified inbox for mentions
2. Commun.it
Price: Free, starts at $19.99/month for more advanced features
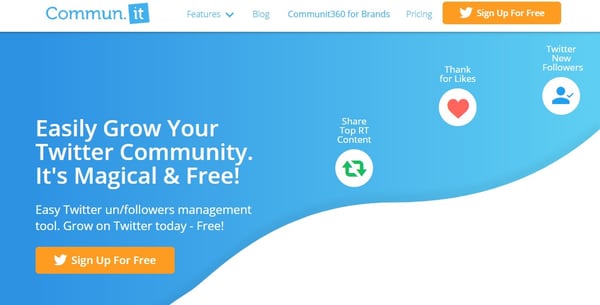
Commun.it’s goal is to help individuals, organizations, and brands grow on Twitter. The tool allows users to quickly and easily filter through all of the noise so they can prioritize the interactions that really matter. Here are a few of the tools most noteworthy features:
- Suggests top Twitter users and influencers to follow
- Helps you maximize relationships on the platform by seeing your history with them and the content they like
- Allows you to engage your community by optimizing communication in a unified inbox
- Provides robust analytics reports
3. Followerwonk
Price: Free for personal use, $29/month for more advanced features
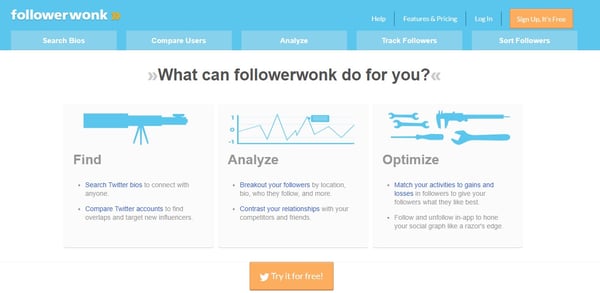
There is often key information about people in their Twitter bios that can be used to learn more about them. These short introductions to a person’s Twitter feed aim to distill the purpose of their Twitter existence into 160 characters. These bios can even be search engine optimized. FollowerWonk helps you take advantage of those optimized bios and find the people who want to be found. Here’s what you can expect:
- Search bios to turn up relevant Twitter users
- Track and sort followers
- Compare individual followers
- Match activities to gains and losses
4. Spout Social
Price: Starts at $99/month per user
This social analytics tool has been designed with brand marketers and social teams in mind … and it shows. Sprout Social’s platform helps give businesses of all sizes more advanced insights into their social media. These insights can then be used to build out successful Twitter strategies that draw in the right audience. Here are a few of the tool’s most valuable features:
- Social listening to capitalize on trends
- Social publishing for teams
- Unified inbox for managing engagement
- Analytics, social data, and dashboards
- Robust collaboration and automation features
5. Tweepi
Price: Starts at $10.75/month
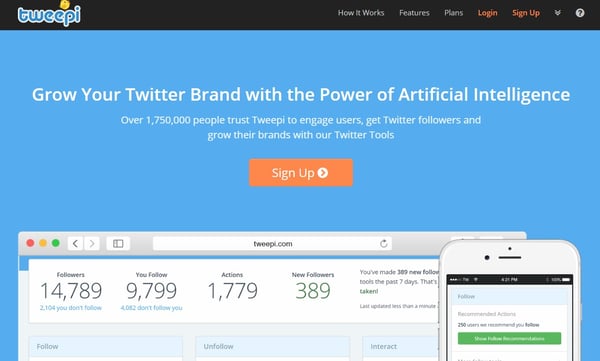
Tweepi uses artificial intelligence to help you grow your Twitter presence without spending so much time on the platform doing manual tasks. Tweepi’s AI targets specific users and prompts you to interact with them in a seamless way, helping you get noticed, grow your following, and become more active. Here’s a rundown of some of the key features:
- Easy way to unfollow inactive or undesirable Twitter users
- AI-driven Twitter actions including retweets, likes, replies, and following
- Competitor, user, and hashtag monitoring tools
- Advanced user search features
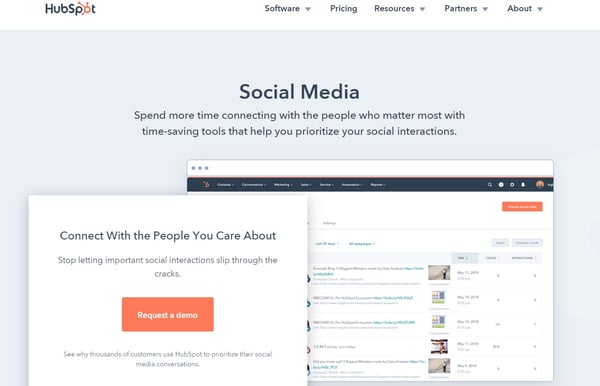
6. Social Inbox
Price: Included in HubSpot Marketing plans starting at Pro for $800/month
Social media brings a human element back to marketing. Each platform provides businesses with an opportunity to interact, build relationships, and learn from those they follow… but it can get noisy. HubSpot’s Social Inbox App gives users the tools they need to manage their day-to-day interactions and engagement in a way that makes sense. Here’s a quick look at some of Social Inbox’s capabilities:
- Get a quick hit list of new followers and content that’s resonating
- Schedule and publish posts informed by clicks and interactions data to keep your following engaged
- Tie interactions back to contacts in your HubSpot database
- Create targeted streams for simplified social monitoring
7. ManageFlitter
Price: Starts at $12/month, $49/month for more advanced features
One of the biggest challenges of social media, and especially Twitter, is finding out when people are online and looking at your content. ManageFlitter has a built-in tool that helps you determine what time is best for publishing Tweets based on your followers’ activity. Here’s a look a few important tasks you can accomplish with the tool:
- Advanced filtering to find Twitter users based on keywords, followers, bio, and even location
- PowerPost interface that helps you post during high-impact times
- Analytics and reporting tools to give you comprehensive insights about your following
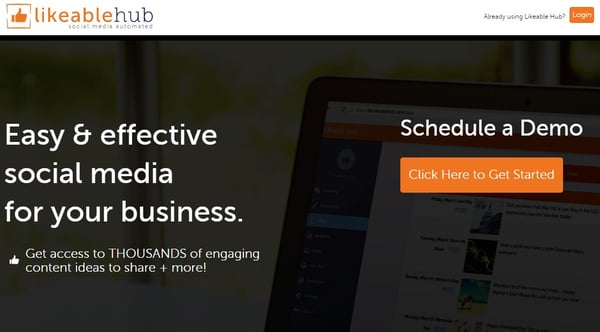
8. Likeable Hub
Price: Starts at $299/month
Managing social media can be a grind, and it takes time. No matter what tricks you have, nothing beats good content. Likeable Hub is all about helping businesses provide great content and promote it effectively.
With customizable, industry-specific content, it makes for your business to attract a qualified following — one that sees the value in your messages. The content is particularly meaningful because it’s not auto-generated, but instead carefully curated by real people. Here’s a closer look at what the tool really does:
- Builds audience with Turbopost™ post amplification
- Tracks different topics on Twitter to find out what your audience cares about
- Tracks page growth and engagement
- Provides a content library to discover content that works best in your industry
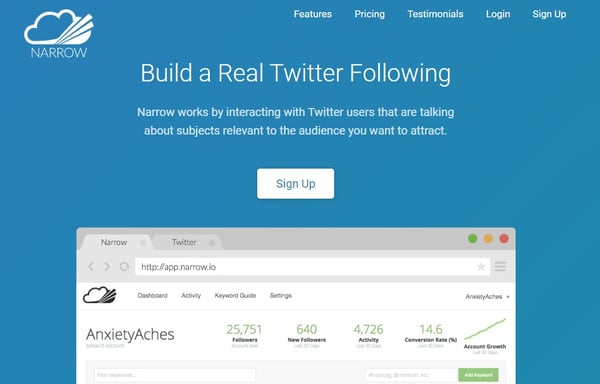
9. Narrow.io
Price: Starts at $19/month
Good marketing starts with showing up where your target customers hang out. Online, that means finding the right people who are interested (and talking about) the right things. Narrow.io can help you identify users that are talking about subjects relevant to your product or service, i.e. your target demographic. After identifying this audience, you can start following and engaging with these highly targeted Twitter users.
- Audience research tools to narrow in on the right users
- Robust user filtering based on keywords, hashtags, and locations
- Analytics and user insights to inform your strategy
10. Statusbrew
Price: Starts at $12/month billed annually for posting features, $99/month billed annually for essential management features
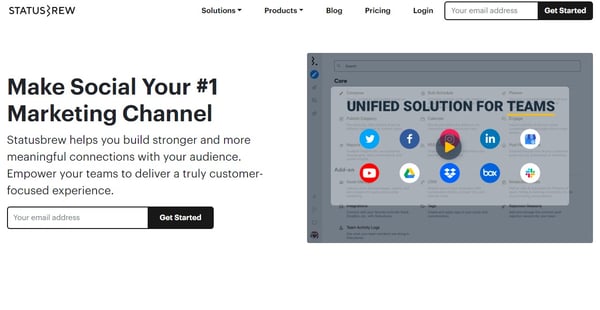
Statusbrew was developed with high-performing teams in mind. As an all-in-one platform that encompasses everything from publishing to brand monitoring with workflows for approval and collaboration, small businesses and above can leverage this solution to improve their Twitter management strategy. It even comes with custom reporting and white labeling for an even better experience.
- Brand listening and monitoring for yourself and your competition
- Unified inbox and saved replies for streamlined communication
- Slack integration
- Data-driven insights on follower growth, engagement, and more
- Bulk publishing and URL shortening
11. Buzzsumo
Price: Starts at $99/month
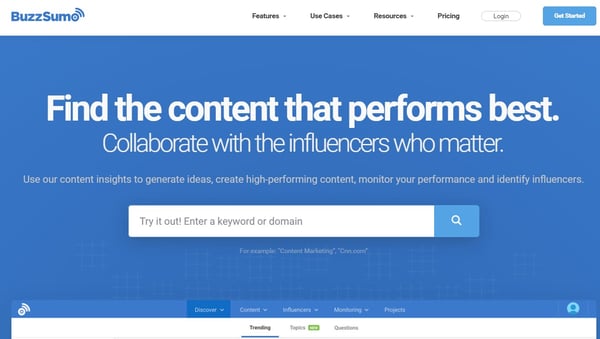
BuzzSumo functions primarily as a content discovery engine. What this software does really well is identify trending topics in your niche so that you create buzz-worthy content on your own and/or engage with existing online discussions. This keeps you always at the center of what’s hot and trendy.
Not only does BuzzSumo provide these insights from a content creation standpoint, but it also includes features that enable collaboration with influencers, making it a great all-in-one platform for growing your following in a content-forward and social manner. Here are some of BuzzSumo’s most powerful features:
- Billions of data points to help you research and discover relevant articles
- Advanced search features and easy interface for exploring trends
- Ability to identify key influencers to connect with
- Monitoring features for tracking competitors and industry updates
- Alert and notification system for keywords that matter
12. Circleboom
Price: Free, starts at $7.99/month for more advanced use
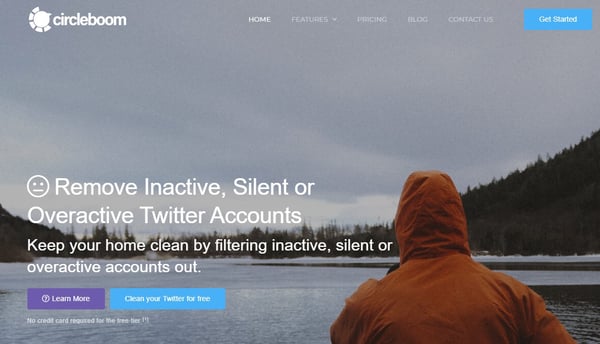
If you’re interested in an all-in-one Twitter management platform, Circleboom has a massive list of features, focused primarily on strengthening your “circle.” In addition to being able to unfollow inactive users and identify spam accounts, you’ll also enjoy a rich feature set that includes:
- Automating curated content in the industry of your choice
- Ability to add articles to your publishing queue
- Filtering and sorting your likes and retweets (and bulk unlike them)
- Identifying fake, bot, inactive, and overactive accounts
- Ability to remove unwanted followers without blocking
13. AgoraPulse
Price: Starts at $79/month billed annually after a free trial
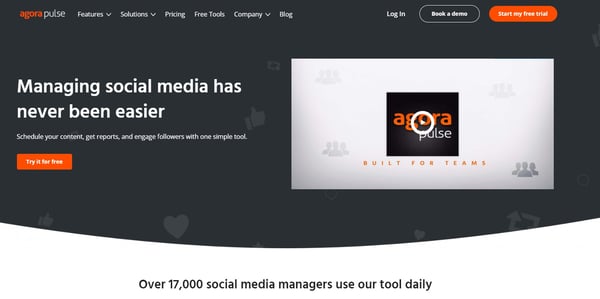
AgoraPulse is another all-in-one social media management solution for Twitter. The primary goal of this tool is making publishing content and engaging with users simpler, even in collaborative environments. Features such as saved responses and one-click PowerPoint exports for reporting can help you achieve your goals faster and more efficiently. Here are some other benefits to the tool:
- Flexible post scheduling, rescheduling, and queuing
- Bulk post uploading
- Unified social inbox with automated moderation capability
- User collaboration perfect for teams and agencies
14. RiteTag
Price: $49/year
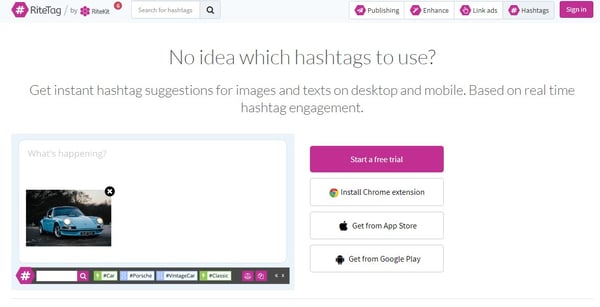
Part of growing your following comes down to the discoverability of your content. With RiteTag, you can get instant tweet enhancement suggestions, including hashtag optimization that will give the post the best reach possible. It works by analyzing hashtag engagement in real-time and suggesting the most relevant and trendy tags for your post. There are additional enhancement features such as:
- Automatically adding relevant emojis and gifs
- Extracting images from your links
- Pulling text into a shareable image
- Appending the Twitter handle of post authors
Now that you know the top tools to help you manage and grow your Twitter presence, you can find the right ecosystem that works for you. With a combination of tools, resources, and content that your followers will love, you’ll be on your way to seeing ROI from Twitter marketing in no time.
Editor’s Note: This post was originally published on Nov 5, 2015 but was updated on Mar 16, 2020 for comprehensiveness.

How to Bridge the Gap Between In-Person and Online Lead Generation
From a marketing standpoint, the great benefit of online channels is the ability to track and measure how effective they are.
Knowing which social links led to a conversion, or which web pages ultimately influenced a customer to purchase your product, makes us better and more effective marketers.
But what about the power of in-person events? How do you measure the value of a speech or understand the influence a conference had amid all the other interactions a prospective customer had with your company online?
Linking the online and offline activities has long been a challenge for marketers — but it’s not impossible.
Here, let’s dive into a few ways you can bridge the gap between in-person and online lead generation. Additionally, we’ll explore how to transition to online lead generation if you find some of your traditionally in-person events are now cancelled and replaced with virtual customer interactions.
How to Transition In-Person Events to Online Lead Generation
1. Provide an option for your attendees to download slides.
Speaking at an event carries with it a tremendous amount of potential — more than any vendor table or collateral seat-drop can offer. You have the capacity to captivate an audience, teach them something new, and form a lasting impression.
But even the best speeches are lost opportunities if you don’t translate them to visits to your website and potential conversions. Giving your email or website URL alone may not be enough to get audience members to look you up. Instead, take a page from the inbound marketing playbook and offer them something of value.
When I first started speaking at events, I’d often get requests over Twitter or in-person for a copy of my presentation slides. Having the slide deck makes it easier for people to bring what they’ve learned at the conference back to their colleagues.
One strong way to provide attendees who are really interested in what you said with a takeaway is to create a landing page on your website where attendees can fill out a small form and download your slides or any other materials you presented.
Creating a landing page with your presentation materials offers two benefits:
- It gives those who are interested in learning more or evangelizing what you’ve presented the materials they need to do so.
- The conversion on your website bridges the gap from in-person to online activity, enabling you to better track the lead and further nurture the relationship.
Put up the landing page before your speech and optimize it just as you would any other landing page. Position it both for the attendees of your talk and the larger audiences who may hear about it through social media or other means.
In the last slide of your presentation, include an easy-to-remember short link to your slides. We often use bit.ly because it’s free and allows you to customize the link to a more memorable phrase like the conference or talk name. In addition to including the link in your presentation, share it out on social media with the conference hashtag after the talk.
2. Zap business cards right into your contact database.
In the basement of my apartment next to my washing machine sits a collection of business and partnership opportunities gone to waste. I’m not proud of it. But I’m coming clean because I’m guessing a few of you have been there too. You go to a conference or a trade show, meet scores of interesting people and, like summer camps of years past, you promise to stay in touch.
Then you stuff their business cards into your pockets, leave the conference, grab a coffee, catch a plane home, unpack your bags, go to work, wince at your swelling inbox and fail to remember the treasure trove of business cards piled up at home.
Now, maybe you’re better than me at this, or maybe you’ve already discovered a useful app like FullContact Card Reader.
Card Reader is an app that translates in-person business cards to online contact records. I first learned about them because HubSpot has a new integration with them that allows you to take pictures of business cards at an event which then automatically translates into contacts in your HubSpot database, enabling you to toss the business cards, send follow-up emails, and better understand the contact’s future activity on your site. If you’re a HubSpot customer you can log in here to try the integration yourself through Zapier). But you don’t have to be a HubSpot customer to use FullContact Card Reader. You can download their iPhone or Android app for free and start using Card Reader at your next event.
A business card left abandoned in a contact database is just as lonely as one left to gather dust by my abandoned sock bin, so to get the most out of this tool, you want to have a good follow-up strategy. When you digitize the business card, include a note to remind you what you and the new contact discussed and make sure any follow up is tailored, relevant, and in the words of Dharmesh Shah, “human.”
I asked Brad McCarty, Content Director at FullContact, what tips he had for quality post-event follow up. He offered the following advice — “My philosophy is three fold: segment, wait, make it personal,” he explained. “After any big event, I like to wait until the middle of the following week before touching base with the people that I’ve met. That gives those people a chance to catch up from the out of office time, and it seems to increase my response rate versus faster follow ups. I don’t do phone calls unless someone specifically asks for one, mainly because I find them to be invasive. That being said, I do try to make sure that my email to them is as personal as possible. It takes more time, but any good relationship requires that investment.”
3. Offer an exchange.
When he was CEO of Gemvara, an online custom jewelry company, Matt Lauzon came to speak at our company about his approach to growing a business.
At the end of his talk Matt did something that was equal parts old-fashioned and innovative. He made us a deal. He held up a collection of printed gift cards to Gemvara, each with a unique code on them. He thanked us for attending and told us he would give the free gift cards to anyone who wanted them so long as they promised to do one thing in return.
His one request was that if we used the gift card, we had to promise to drop him a note afterwards to tell him how our experience was with the company.
People have been giving out discounts and coupon codes for a while now at companies, but often they’re handed out as an after-thought. By asking for something in return, Lauzon not only added more significance to the exchange, he also furthered the relationship. He’s able to link the event and the online purchase with a code from the card, and can isolate the portion of highly engaged customers based on who followed through on their promise to email with feedback.
Robert Caldini, professor of psychology and marketing and author of Influence: The Psychology of Persuasion, explains this as the rule of reciprocity. There are six key principles of influence, he writes, the first of which is reciprocity.
By offering someone something of value and requesting, even lightly, something in return, Lauzon brought his audience to a deeper level of engagement and commitment.
Not everyone followed through, but he certainly gained more post-talk connections than he would have otherwise.
I’ve given you a few tips on what to do to bridge the gap between in-person and online lead generation, now let me close with one to avoid. The fastest way to ruin a good in-person interaction is to follow it up with a canned and robotic email response. Sometimes emails are hard to get out right away. It takes time to follow up in a personal way.
Ultimately, tailored and relevant follow-up communications are always more meaningful and memorable than a form email. Whenever possible, leave the canned emails to … well … just leave those emails in the can. Focus on the person, what stood out about your conversation and the real reason you decided to follow up.
How to Implement a Lead Generation Strategy Entirely Online
If your in-person events suddenly get cancelled, or you don’t have the opportunity to attend in-person events, you’re in luck — you can still create a highly effective lead generation strategy entirely online.
Here’s how to get started:
1. Host an online webinar with a CTA at the end.
Similary to the strategy outlined above, if you can’t attend an in-person event, you can still create meaningful video content online with the option to download your webinar materials at the end on a landing page.
Webinars are incredibly effective — in fact, 73% of B2B marketers say a webinar is the best way to generate high-quality leads.
To host a webinar, you’ll want to begin by considering some of your prospects’ primary questions or concerns and how you might be able to answer them. For instance, if you work for a SaaS company, you might consider hosting a fireside chat on “Technology and AI 2020 Predictions” with some industry leaders.
Alternatively, you might explore a more niche topic if you feel your research has uncovered specific questions your audience wants answers to, such as “How to Leverage Instagram Advertising”.
To ensure you’re covering topics your audience cares about, you can explore LinkedIn communities to take note of highly-asked questions in your industry, or even post a poll on your social pages to get input from your followers.
What’s great about webinars is the ability to access them even after the live premiere, whenever and wherever your prospects want to tune in — to fully leverage this option, you might consider creating a webinar landing page with all your webinars posted for viewing, like Sprout Social did.
Once you’ve completed your live webinar, use the same strategy above to let viewers download webinar content to share with colleagues by filling out a landing page form.
Take a look at How to Setup and Promote Your First Marketing Webinar to learn more about how to create and promote your first webinar.
2. Create online learning courses to further nurture leads.
At HubSpot, we have an entire Academy team dedicated to creating a wide variety of courses and certifications to further educate our prospects and help them grow their own careers.
By offering educational content to your own prospects and customers, you’re able to position your company as an industry expert, while proving your value even before prospects make a purchase.
The more value you can provide prospects upfront, the better. With online learning courses, you’re able to build both brand awareness and credibility, and when prospects are eventually ready to make a purchase, they’ll already see the value in your brand.
Creating learning courses doesn’t have to be expensive, either. Consider Moz’s Whiteboard Friday’s, which are incredibly valuable and educational — and yet, only involve a whiteboard and a camera.
As next steps, you can include ebooks or additional downloads to further nurture leads once they’ve seen value in the courses you post, either to your website or social channels.
3. Use email, social media, or blog posts for the ultimate lead generation strategy.
In-person events are great for building rapport and meeting face-to-face with potential prospects, but they’re also limited in scope. A typical conference enables you to meet a few hundred people, at most.
Online, of course, your audience is much larger — with over 3.4 billion of the world’s population online, it’s critical you optimize your website, blog content, social media pages, and email to ensure you’re able to nurture leads from around the globe, even when those leads can’t meet in-person.
To learn more about how to create a lead generation strategy from start-to-finish, take a look at Lead Generation: A Beginner’s Guide to Generating Business Leads the Inbound Way.
For now, though, let’s provide a few quick takeaways:
- Use keyword research and, if possible, align your content team with your SEO team to ensure your blog content can reach and convert the highest possible number of potential leads
- Ensure each blog post has a CTA (call-to-action) that invites leads to build a deeper relationship with your brand
- Use email marketing to create a newsletter with valuable information for leads who are interested in inviting your brand into their inbox — depending on your leads and strategy, you might send a bi-weekly, weekly, or daily newsletter (of course, ensure your emails are GDPR compliant)
- Have your social media team analyze a diverse range of social platforms to decide which ones work best for attracting your ideal audience. Depending on your business’s needs, you might take advantage of Instagram, Facebook, Twitter, Snapchat, LinkedIn, Pinterest, Quora, TikTok, or a variety of others to ensure you’re engaging with your prospects wherever, and whenever, they want
In an ideal world, we’d have the resources to connect with our prospects both in-person and online — but ultimately, if you have valuable content, your leads will be interested in learning more about your business regardless of where they hear of you first.
Try some of the tactics listed above to reach and convert as many potential customers as possible, and whether you meet in-person or online, always ensure you’re ready to provide next steps to cultivate deeper relationships with prospects from across the globe.

Why You Should SEO-Optimize Your Content, Even if Your Goal Isn’t Organic Traffic
Nowadays, you can’t conduct a successful content marketing strategy without incorporating SEO methods.
Neil Patel explained it well when he wrote: “Good SEO … means consistent output of content. Consistent output means that you’re doing content marketing, and you’re doing it right. There isn’t any way around it.”
I can imagine you might be thinking — “OK, but my goal for content marketing isn’t just SEO. It’s also creating thought leadership content, and lead generation, as well.”
Of course, every marketer should consider more than organic traffic when analyzing success metrics. After all, SEO isn’t the only component of a successful marketing strategy.
But SEO efforts don’t just help you reach organic traffic goals — they can also help you achieve your brand awareness and lead generation goals, as well.
Here, let’s explore how SEO can help you meet all your marketing goals, even if those goals don’t require organic traffic.
How SEO Can Help You Reach the 3 Main Content Marketing Goals
Before we dive into how marketers can use SEO strategies to reach their content marketing goals, let’s take a short detour and refresh ourselves on three of the primary reasons for doing content marketing:
- Lead generation. If you have salespeople ready to close sales but need to fill their pipeline with more qualified leads, the primary goal for your content marketing is probably lead generation. Lead generation is the process of converting people who’ve heard of your company into people who want to hear from your company more often. And then when those leads trust you and view you as an expert in your industry, they’re more likely to convert into customers.
- Thought leadership/brand awareness. If you’re hoping to position your company as a knowledgeable expert within your industry, your primary content marketing goal is probably thought leadership. Consistently getting thought leadership content published in trusted publications — whether through guest-contributed articles or press mentions — is a fantastic way to build credibility with your audience.
- SEO. If there’s a lot of competition in your space and you’re gunning for the top spot in your target audience’s mind, your primary goal for content marketing is probably SEO. SEO works to get your website to the top of the list when your audience looks for certain keywords in search engines. The content on your site and the pages that link to your site give your website a better score, boosting your overall credibility with the search engine.
If you didn’t have a specific content marketing goal in mind before you started reading, pick the one from the list above that’s most important to you right now. Keep that goal in mind as you keep reading.
SEO Strategies to Reach Any Content Marketing Goal
Now that you have a specific goal in mind, let’s take a look at a few SEO strategies that can help you improve your content marketing results, as well as how you can apply these SEO strategies to reach your content marketing goals.
1. Keyword Research
To put it simply, keyword research lets you see what search terms you’re currently ranking for, what others in your industry are ranking for, and which keywords could use more of your attention.
For example, you might discover that your audience is looking for “guides on creating a content marketing strategy.” While a certain publication you want to partner with might not be looking for an article that spells this out in a lengthy, detailed how-to guide, you could write a higher-level article for that publication that links to a white-paper on your site that dives deeper into the process of developing an effective content marketing strategy.
This would allow you to create content that your audience is looking for, while also publishing in an important publication that helps demonstrate your brand as a thought leader in the industry. Of course, researching your keywords will look the same regardless of your content marketing goal — but the way you use that information will differ.
If your primary goal is lead generation, keyword research can enable you to identify pain points or sales objections you might want to cover in your content. This will allow you to tailor your content to what your audience actually wants to know and strategically use keywords related to your audiences’ searches so you can reach them in search results. Once you reach them there, you can hopefully lead them to your site to engage with your company further.
Focusing on thought leadership? Keyword research can help you find out what questions your audience has so you can provide answers and position your company as authorities in your industry. You can include short-tail (e.g., “AI”) and long-tail (e.g., “what is artificial intelligence”) keywords in your content to rank for those keywords and further solidify your place as a thought leader online. After all, if your audience members don’t find you when they search for information related to your expertise, they probably won’t consider you a credible expert.
If SEO is your focus, keyword research lets you see how you stack up against the competition when it comes to ranking for important keywords in your industry. It will give you insight into what keywords your content initiatives should focus on so you can improve those rankings and be more competitive on search engine results pages.
To conduct keyword research, analyze your website’s current rankings, identify keywords your competition doesn’t rank for but that might be good opportunities, look for question-based keywords you can focus on to answer your audience’s queries, and cluster your findings so you can identify trends. Google’s autocomplete, similar searches, or Keyword Planner are accessible ways to explore what your audience is searching for. If you want to go deeper, you can use a keyword tool like Ahrefs, SEMrush, or Moz to get a more well-rounded picture.
2. Topic Clusters
Search engines’ algorithms favor topic-based content, so it can be beneficial to link related content under “topic clusters.” Basically, building topic clusters allows you to provide deeper coverage across a range of core topics and create an efficient information architecture.
You can develop a pillar page for each of your company’s main focus areas. Then you’ll build out more specific subtopics, or “cluster content.” These pieces of cluster content will provide more detail related to a specific long-form keyword that’s related to the main topic you covered on the pillar page. The pillar links to each cluster page, and each piece of cluster content links back to the pillar with the same hyperlinked keyword.
For example, at my company, Influence & Co., we created a pillar page titled “The Ultimate Guide to Content Marketing.” This is a longer piece of content that covers six ways readers can take their content marketing to the next level, diving deep into how to achieve the advice in each section. This pillar page links out to multiple cluster pages (and the cluster pages link back), which results in that solid architecture I just mentioned.
We also produced a couple of guest-contributed articles related to this pillar page to create a comprehensive content plan that provides a wide range of specific, tactical content to help our audience better understand content marketing — and how to do it well.

If you’re focusing on lead generation, this linking ecosystem enables you to keep your audience members engaged with your content longer, which boosts the likelihood that they’ll fill out a form or reach out to you. Plus, as your audience members spend more time on your site, they learn more about your company, making them more qualified leads once they do decide to take the leap and give you their information.
Topic clusters can benefit a thought leadership strategy as well, because this approach lets you create overview content and in-depth content, which positions you as a thorough expert on the subject matter that your audience is interested in and cares about.
Finally, working to achieve SEO goals? This model can help you organize your site’s structure.
Building a strong information architecture can lead to better rankings in organic search across a broad subject area. Those hyper-focused pieces of cluster content will allow you to work toward that strong architecture while also maintaining your focus on producing content that your audience cares about. Plus, creating one high-performing cluster page can elevate search rankings to all of the other pages that are linked to the same pillar.
A great way to plan out your topic clusters is to develop a content map. Before you even begin creating content, decide what your pillar page will focus on. Then nail down topics for a few cluster pages. You can even take it a step further and identify what subjects you’d like to cover in guest-contributed articles related to that overarching topic. We’ve put together a free content map template that you can use to get started.
3. Optimizing Blog Posts
Blogging can position your website as a relevant answer to your target audience’s burning questions. And optimizing those posts for search can help you actually reach your audience members so you can provide the value they’re looking for.
Blog post optimization can advance both thought leadership and lead generation goals because if the content you’re producing for your site isn’t ranking well, it isn’t showing up as a relevant answer to your audience’s questions. This means you won’t be perceived as an expert, and you most definitely won’t generate more leads.
If you’re focusing on SEO as your primary goal, optimizing blog posts is a given. Your content isn’t going to rank well if you’re not including relevant short- and long-tail keywords that your audience cares about.
To optimize your blog content, focus on one or two long-tail keywords that line up with the intent of your target readership, and include those keywords in your post where they fit in naturally. For example, if your audience has been searching for information on creating a predictive analytics strategy, you’ll want to publish a blog post about the strategy and techniques behind predictive analytics.
When writing that post, you’ll need to include long-tail keywords for which people are searching. Those might include “how to do predictive analytics,” “predictive analytics strategies,” and “predictive analytics techniques.” This way, your blog post will show up in search results for people who are looking for more detailed insights on developing a predictive analytics strategy.
In addition, make sure your blog is responsive and mobile-friendly. Creating a meta description that’s keyword-rich, optimizing your images with alt text, and linking to other pages on your blog whenever possible will also help you rank.
These are just a few SEO strategies that can help you reach your content marketing goals, whether you’re focusing on SEO itself, thought leadership, or lead generation. This certainly isn’t an exhaustive list, but it’ll get you started on your journey of optimizing your way to better content marketing results.

Everything You Need to Know About Business Process Automation
When I think of automation, my first thought is that judgment day from “The Terminator” is upon us.
However, conspiracy theories aside, automation can actually help marketers grow better and do their jobs more efficiently.
In fact, 29% of marketers are using automation to help them personalize customer engagement. Overall, marketers’ adoption of artificial intelligence has grown by 44% since 2017.
When marketers use business process automation, they have more time for high-level, creative tasks.
Without manual duties, automation can even allow your team to get more done.
Below, let’s review everything there is to know about business automation including what it is, the top benefits, and examples for how to use it. Then, we’ll dive into the best business automation tools.
You can use business process automation in many departments including marketing, human resources, sales, and customer service.
For example, chatbots are a form of business process automation for marketing. Similarly, you can automate contract management for sales.
Now, you might be wondering, “What tasks can I automate?”
Ultimately, if a process is repeatable, needs to be free from human error, and requires consistency, then you should consider automation (more on this below).
Before we dive into examples of business process automation, you might be curious why you should use it? Let’s review some of the top benefits below.
Business Process Automation Benefits
Business process automation can help improve customer relationships, create reporting dashboards, and standardize your processes.
But, how does this help you?
Below, let’s discuss the top benefits of business process automation:
1. Saves time.
At the end of the day, grunt work takes more time than you think. While these tasks are important and cannot be skipped, they don’t necessarily need to be done by a human.
Business process automation will save your employees time by completing the menial tasks, such as paperwork.
Automation will instantly execute tasks that normally take time to complete.
Additionally, this saved time will give your employees more time to complete higher-level tasks, such as building relationships and research. This means they can create more value and make more money for your business.
2. Reduces human error.
I don’t know about you, but I’ve been known to mix up my words and numbers from time to time. That’s just human. But, if an invoice number is mixed up, that can cause a major fiasco for your company.
With automation, you won’t have to worry about human errors like that. You can process paperwork, transfer documents, and gather signatures instantly.
Additionally, automated tools can send reminders in case your human employees forget to complete a task.
3. Results in happier employees.
Menial tasks are usually the most hated. People don’t like doing grunt work, no matter how necessary it is.
With automation, your employees won’t have to do that anymore. This will result in happier employees who are empowered to do their job.
4. Streamlines information.
Business process automation will streamline all your data and tasks. For example, a business process automation software will have an entire process documented. The information for all the steps in a project are accessible to your entire team.
This will make reporting and decision making easier for your team. Automated processes lead to clear accountability, valuable insights, and possibly faster turnaround times.
Additionally, information and notifications can be customized. This allows your team to have customized notifications on when to send a certain email or when a task is due on a project.
5. Improves customer satisfaction.
When your processes are streamlined, you’re typically running more successful marketing campaigns and responding to your customers quickly.
All of this leads to happier customers. Business process automation tools can help you consistently meet the high standards of your customers.
6. Promotes compliance.
Many processes in a marketing campaign need to be compliant. For example, with emails, you need to follow GDPR and CAN-SPAM laws.
With business process automation tools, you can ensure your campaigns are compliant. You can set up systems that check for this compliance, so you only have to implement the information once.
Now that you understand the benefits, you might be wondering “How can I use business process automation in my business?” Below, let’s review some examples.
Business Process Automation Examples
Business process automation can be used in several departments, including marketing, customer service, human resources, and sales. Below, we’ll dive into some examples in each category.
1. Project Management
As a marketer, you’re often managing several campaigns and projects. With business process automation, you can digitize your workflows and automate the entire logistical part of a campaign.
For example, task management tools can tell you who’s doing what and when it’s due.
When an employee finishes a task, the system can automatically notify the next person within the workflow.
Additionally, managers can see dashboards for which employees are doing what and how they’re doing. If someone’s late with a deadline, managers are instantly notified.
2. Customer Service
Customer service is one of the best departments to automate. With business process automation, your customer service team can automate replies if certain keywords show up in an email or chat.
Additionally, if you have a list of FAQs, you can create automated responses on social media chatbots, or chatbots on your site.
Other business process automation tools can analyze, classify, and assign support tickets to the right department and team member.
3. Social Media
Posting on several social media platforms every day can be exhausting. And it takes more time than you think.
With social media automation tools, you can schedule posts in advance, so you don’t have to manually upload your posts every day.
Additionally, other social media tools help with content curation. These tools are a great place to streamline your idea process.
4. Approvals
If your business requires ordering of any kind (most businesses do), business process automation software can streamline the approval process.
Sometimes just managing requests can be a full-time job. With automation tools, you don’t have to track down five team members to get approval. You can just send approval notifications to your team and have them do it online.
5. Onboarding
Onboarding is a menial process. There’s documentation that needs to be signed, tax documents to fill out, and signatures to gather.
With business process automation tools, your recruiting and human resources team doesn’t need to manage that manually. They can send these requests online and look at the software to see what’s been completed and what hasn’t.
6. Customer Relationship Management
As a marketer, customer relationship management is important. You don’t want to send the same email to a lead twice. With all in one software, like HubSpot, you can see your contact’s engagement with your company in one place.
Additionally, customer relationship management programs help you nurture leads and workflows. Plus, it helps identify when a lead moves from an MQL to an SQL through automated lead scoring.
7. Sales
A menial task for sales reps is creating and tracking invoices. With business process automation software, this can all be set up with your software, saving your sales time valuable time.
Additionally, software like HubSpot’s Sales Hub can help manage contracts, create email sequences, and automate the day-to-day tasks of a sales rep.
Once you’ve decided what you want to use business process automation for, you can begin to look at the best tools. Below, let’s review some of the tools you can use.
Business Process Automation Tools
Deciding what automation tools you want depends on what process you want to automate. Before you purchase new automation software, you should have an understanding of the tasks involved in the process you want to automate, have a clear goal, and make sure you have the time to train employees in new software.
Additionally, you’ll want to assign a team leader who’s responsible for helping your team during this adjustment period.
It’s important that you don’t just purchase new software and leave it to your team to figure out how to implement it. There needs to be a plan for how it’s going to be used and who’s responsible for assigning certain tasks.
With that said, below are some business process automation tools you can use for your team:
- HubSpot Marketing Hub
- HubSpot Sales Hub
- HubSpot Service Hub
- MailChimp
- Constant Contact
- Hootsuite
- Buffer
- Salesforce
- Basecamp
- Asana
- Monday.com
Ultimately, business process automation will make your life easier. It can complete recurring tasks that need to be free from human error. Plus, it’ll free up your time for important, high-level tasks and help your company grow better.

5 Steps to Create an Outstanding Marketing Plan [Free Templates]
Do you take a good, hard look at your team’s marketing strategy every year?
You should. An annual marketing plan helps you set your marketing on the right course to make your company’s business goals a reality. Think of it as a high-level plan that guides the direction of your team’s campaigns, goals, and growth.
Without one, things can get messy — and it’s nearly impossible to put a number on the budget you’ll need to secure for the projects, hiring, and outsourcing you’ll encounter over the course of a year if you don’t have a plan.
Keep in mind there are variations to the marketing plan you need, depending on your industry and the goals of your marketing team. To make your plan’s creation easier, we’ve put together a list of what to include in your plan and a few different planning templates where you can easily fill in the blanks.
To start, let’s dive into how to create a marketing plan and then take a look at what a high-level marketing plan has inside.
1. Conduct a situation analysis.
Before you can get started with your marketing plan, you have to know your current situation.
What are your strengths, weaknesses, opportunities, and threats? Conduct a basic SWOT analysis is the first step to creating a marketing plan.
Additionally, you should also have an understanding of the current market. How do you compare to your competitors? Doing a competitor analysis should help you with this step.
Think about how other products are better than yours. Plus, consider the gaps in a competitor’s approach. What are they missing? What can you offer that’ll give you a competitive advantage? Think about what sets you apart.
Answering questions like this should help you figure out what your customer wants, which brings us to step number two.
2. Define your target audience.
Once you have a better understanding of the market and your company’s situation, make sure you know who your target audience is.
If your company already has buyer persona’s, this step might just mean you have to refine your current personas.
If you don’t have a buyer persona, you should create one. To do this, you might have to conduct market research.
Your buyer persona should include demographic information such as age, gender, and income. However, it will also include psychographic information such as pain points and goals. What drives your audience? What problems do they have that your product or service can fix?
Once you have this information written out, it’ll help you define what your goals are, which brings us to step number three.
3. Write SMART goals.
My mother always used to tell me, “You can’t go somewhere unless you have a road map.” Now, for me, someone who’s geographically challenged, that was literal advice.
However, it can also be applied metaphorically to marketing. You can’t improve your ROI unless you know what your goals are.
After you’ve figured out your current situation and know your audience, you can begin to define your SMART goals.
SMART goals are specific, measurable, attainable, relevant, and time-bound. This means that all your goals should be specific and include a time frame for which you want to complete it.
For example, your goal could be to increase your Instagram followers by 15% in three months. Depending on your overall marketing goals, this should be relevant and attainable. Additionally, this goal is specific, measurable, and time-bound.
Before you start any tactic, you should write out your goals. Then, you can begin to analyze which tactics will help you achieve that goal. That brings us to step number four.
4. Analyze your tactics.
At this point, you’ve written down your goals based on your target audience and current situation.
Now, you have to figure out what tactics will help you achieve your goals. Plus, what are the right channels and action items to focus on.
For example, if your goal is to increase your Instagram followers by 15% in three months, your tactics might include hosting a giveaway, responding to every comment, and posting three times on Instagram per week.
Once you know your goals, brainstorming several tactics to achieve those goals should be easy.
However, while you’re writing your tactics, you have to keep your budget in mind, which brings us to step number five.
5. Set your budget.
Before you can begin implementing any of your ideas that you’ve come up with in the steps above, you have to know your budget.
For example, your tactics might include social media advertising. However, if you don’t have the budget for that, then you might not be able to achieve your goals.
While you’re writing out your tactics, be sure to note an estimated budget. You can include the time it’ll take to complete each tactic in addition to the assets you might need to purchase, such as ad space.
Now that you know how to create your marketing plan, let’s dive into the elements that a high-level marketing plan should include.
Marketing Plan Elements
Marketing plans can get quite granular to reflect the industry you’re in, whether you’re selling to consumers (B2C) or other businesses (B2B), and how big your digital presence is. Nonetheless, here are six elements every effective marketing plan includes:
1. Business Summary
In a marketing plan, your Business Summary is exactly what it sounds like: a summary of the organization. This includes the company name, where it’s headquartered, and its mission statement — all of which should be consistent with the business as a whole.
Your marketing plan’s Business Summary also includes a SWOT analysis, which stands for the business’s strengths, weaknesses, opportunities, and threats. Be patient with your business’s SWOT analysis; you’ll write most of it based on how you fill out the next few marketing plan elements below.
2. Business Initiatives
The Business Initiatives element of a marketing plan helps you segment the various goals of your department. Be careful not to include big-picture company initiatives, which you’d normally find in a business plan. This section of your marketing plan should outline the projects that are specific to marketing. You’ll also describe the goals of those projects and how those goals will be measured.
3. Target Market
Here’s where you’ll conduct some basic market research. If your company has already done a thorough market research study, this section of your marketing plan might be easier to put together.
Ultimately, this element of your marketing plan will help you describe the industry you’re selling to, an analysis of your competitors, and your buyer persona. A buyer persona is a semi-fictional description of your ideal customer, focusing on traits like age, location, job title, and personal challenges.
4. Market Strategy
Your Market Strategy uses the information included in your Target Market section to describe how your company should approach the market. What will your business offer your buyer personas that your competitors aren’t already offering them?
In a full-length marketing plan, this section can contain the “seven Ps of marketing.” These Ps are product, price, place, promotion, people, process, and physical evidence. (You’ll learn more about these seven sub-components inside our free marketing plan template, which you can download below.)
5. Budget
Don’t mistake the Budget element of your marketing plan with your product’s price or other company financials. Your budget describes how much money the business has allotted the marketing team to pursue the initiatives and goals outlined in the elements above.
Depending on how many individual expenses you have, you should consider itemizing this budget by what specifically you’ll spend your budget on. Example marketing expenses include a marketing agency, marketing software, paid promotions, and events (those you’ll host and/or attend).
6. Marketing Channels
Lastly, your marketing plan will include a list of your marketing channels. While your company might promote the product itself using certain ad space, your marketing channels are where you’ll publish the content that educates your buyers, generates leads, and spreads awareness of your brand.
If you publish (or intend to publish) on social media, this is the place to talk about it. Use the Marketing Channels section of your marketing plan to lay out which social networks you want to launch a business page on, what you’ll use this social network for, and how you’ll measure your success on this network. Part of this section’s purpose is to prove to your superiors, both inside an outside Marketing, that these channels will serve to grow the business.
Businesses with extensive social media presences might even consider elaborating on their social strategy in a separate social media plan template — which you can download below.
Free Marketing Plan Template [Word]
Now that you know what to include in your marketing plan, it’s time to grab your marketing plan template and see how best to organize the six elements explained above. The following marketing plan template opens directly in Microsoft Word, so you can edit each section as you see fit:
Download your marketing plan template here.
In this marketing plan template, you’ll get to fill in the following contents to suit your company:
Business Summary
- Company Name
- Marketing Leadership Team
- Headquarters, Office Locations
- Mission Statement
- SWOT Analysis
Business Initiatives
- Overarching company initiatives
- Marketing initiatives, goals, metrics
Target Market
- Industry Name
- Buyer Persona(s)
- Competitive Analysis
Market Strategy
- Product
- Price
- Promotion
- People
- Process
- Physical Evidence
Budget
Marketing Channels
Social Media Marketing Plan Templates
As marketing departments grow, so will their presence on social media. And as as their social media presence grows, so will their need to measure, plan, and re-plan what types of content they want to publish across each network.
If you’re looking for a way to deepen your social media marketing strategy — even further than the marketing plan template above — the following collection of social media marketing plan templates is perfect for you:
Download 10 social media reporting templates here.
In the above collection of marketing plan templates, you’ll get to fill in the following contents (and more) to suit your company:
- Annual social media budget tracking
- Weekly social media themes
- Required social media image dimension key
- Pie chart on social media traffic sorted by platform
- Social media post calendar and publish time
Below, let’s review the 10 social media reporting templates, and what you’ll find in each one.
1. Social Media Questions
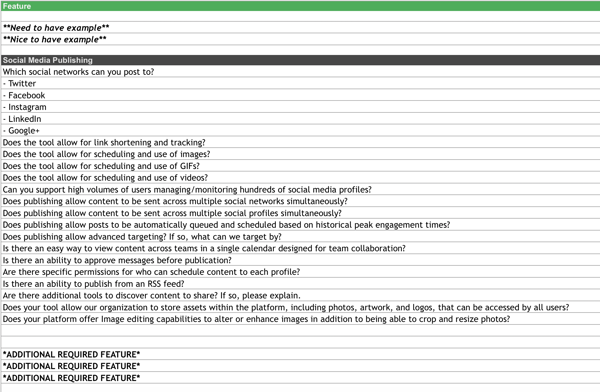
This template lists out questions to help you decide which social media management platform you should use.
Once you know what social media tactics you’re going to implement in your marketing plan, it’s time to figure out what channels are right for you. This template will help you do that.
2. Hashtag Holidays
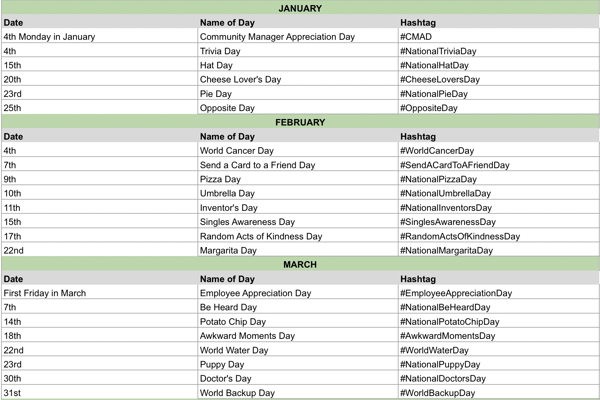
If you’re going to lean in to social media in your marketing plan, you can use hashtag holidays to generate ideas.
These holidays are a great way to fill out your social media publishing schedule. With this template, you’ll get a list of all the hashtag holidays for the year.
3. Facebook Live Schedule
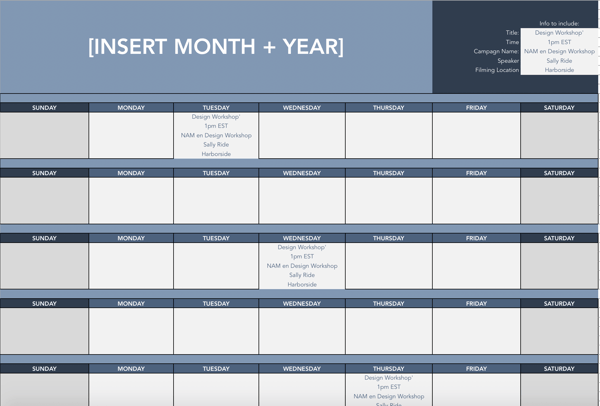
If Facebook live is one of the marketing tactics in your plan, this template will help you design an editorial calendar. With this template, you can organize what Facebook live’s you want to do and when.
4. Instagram Post Log
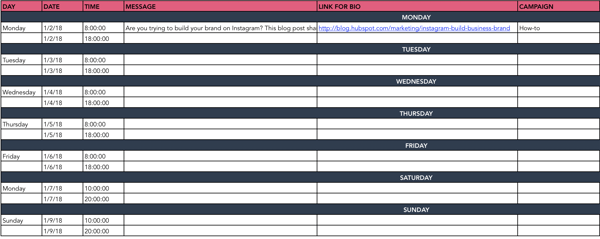
Are you going to begin using Instagram regularly? Do you want to increase your following? With this template, you can organize your Instagram posts, so everyone on your team knows what posts are going live and when.
Additionally, you can organize your assets and campaigns on this doc.
5. Paid Social Media Template
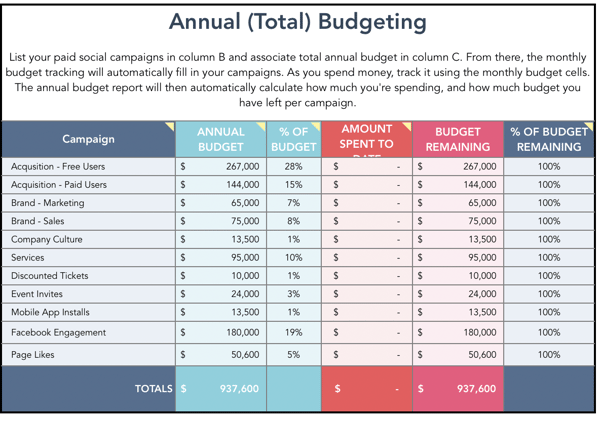
With this template, you can organize your annual and monthly budget for your paid social media calendar.
6. Social Media Audit
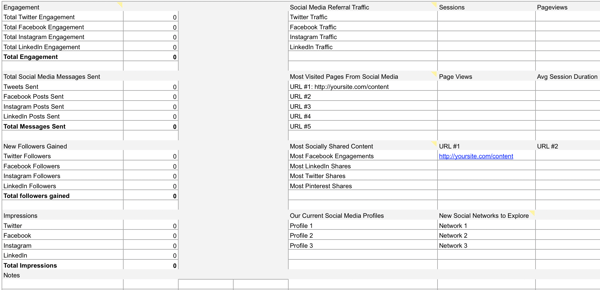
Conducting a social media audit? You can use this template to help you gather the right analytics.
7. Social Media Editorial Calendar
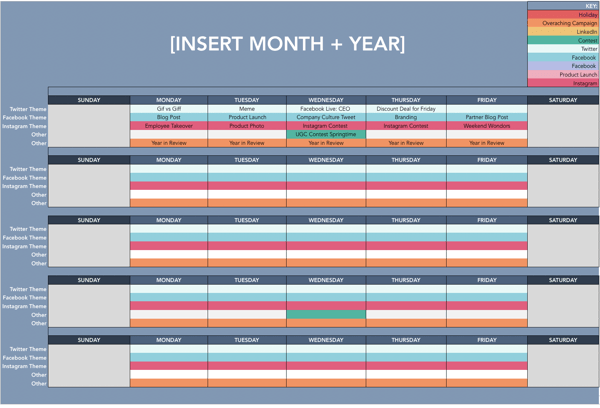
With this template, you can organize your social media editorial calendar. For example, you can include social media posts for each platform, so your team knows what’s going live on any given day.
8. Social Media Image Sizes

With this template, your team can have the latest social media image sizes handy. This template includes image sizes for all major social media platforms, including Facebook, Instagram, and Twitter.
9. Social Media Marketing Proposal
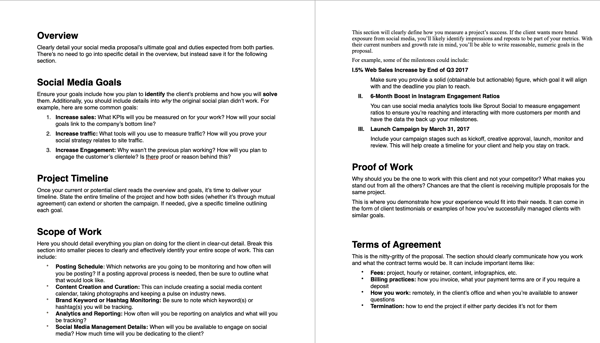
With this template, you can create an entire social media marketing proposal. This will outline the social media goals, scope of the work, and the tactics that you plan to implement.
10. Social Media Reporting Template
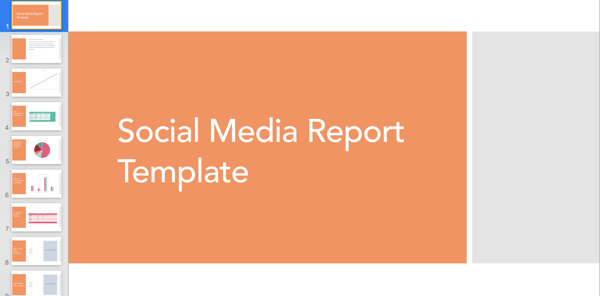
With this template, you’ll gain access to a slidedeck that includes templates for social media reporting. If you plan to implement social media in your marketing plan, these reporting templates can help you track your progress.
Simple Marketing Plan Template
Of course, this type of planning takes a lot of time and effort. So if you’re strapped for time before the holidays, give our new Marketing Plan Generator a try. This tool simplifies yearly planning and lays your strategies, initiatives, and goals out in a simple template so you can identify what’s most important for the coming year.
Try our free Marketing Plan Generator here.
Once you’ve filled in your information, you’ll come away with a plan that helps you:
- Outline your annual marketing strategy
- Identify your most important annual initiatives
- Nix the projects that won’t help you hit your 2017 goals
- Track the right metrics throughout the year
- Align your team through a common mission
Pro Tip: The best way to set up your marketing plan for the year is to start with quick wins first, that way you can ramp up fast and set yourself (and your team) up to hit more challenging goals and take on more sophisticated projects by Q4. So, what do you say? Are you ready to give it a spin?
Editor’s note: This post was originally published in December 2016 and has been updated for comprehensiveness.

How to Structure a Kick-Ass Marketing Team for Any Company
Companies are taking note of inbound marketing and revamping their strategy and talent pool to generate higher quality leads at about a 60% lower cost per lead than outbound marketing . Want to know how you can transform your marketing department to become an inbound lead generating machine helping your sales team KILL it and grow your business?
Here’s how: Talent.
All your inbound excitement won’t deliver results if you don’t have the right skills to adapt. After years of working with thousands of customers, we’ve got a pretty good picture of what a high performing inbound marketing team might look like across a variety of company sizes.
First, let’s define what we mean by different company sizes. You may not agree with all of them, but that’s fine; at least we have a common lexicon.
-
SMB (Small to Medium Sized Business) = Somewhere between 5-100 Employees
-
Midsized Business = Somewhere between 101-1,000 Employees
-
Enterprise = Upwards of 1,000 employees, but NOT including your massive Fortune 1000, big brand-type companies where it starts to get extremely big, siloed and global. (That could be a book!)
Now that we’ve agreed on sizes, let’s talk about who you need to hire to rock inbound at each level.
Marketing Department Structure
Structuring your marketing team(s) is a huge task. Marketing is an ever-changing industry, and as the industry changes, so do team structures and job roles.
Hiring the best talent will require knowing the best skills for each role. And, even if you’re hiring for a startup or small business and only have resources for 1-2 marketing roles at the moment, it’s still helpful to know the most transferrable skills that will help you hire people who can grow into new roles in the future.
This section will cover different types of roles within teams, and what skills are needed to excel in those teams. We will also go over how to build that team depending on your business size. Are you ready to take the first step to find your rockstar team?
1. Social Media Team
Skills needed: Content creation, graphic design, basic SEO knowledge, social media management, project management.
Your social media team will create and execute social media marketing efforts. This team will need to have knowledge of how to make engaging content to drive brand awareness, generate leads, and connect with audiences.
To properly perform these job functions, your social media team should have a working knowledge of creating, scheduling, and measuring the performance of social content.
Basic graphic design skills or knowledge of design tools like Canva or Adobe will be necessary for the content creation side, while social media management tools will help teams track performance, measure success, and schedule content.
Teams also need to be comfortable with customer service, as social media teams will be the ones responding to customers who engage through social media tags or posts. They will also be communicating to customers through content copy, blog posts, and comment sections, so an understanding of the company voice and ideal customer is key.
To help small teams, social media management software provides marketers with the tools they need to execute an entire social media strategy, such as the tools within HubSpot’s Marketing Hub.
Structure by team size:
SMBs with a team member dedicated to marketing should have a general comfortability with basic marketing practices and social media experience to build an online presence. If you can afford multiple marketing roles, start specializing in marketing functions like social media manager, which can be its own role.
Enterprise teams can structure their social media team by having specialists and managers to lead and oversee social media strategy, as well as roles for day-to-day social media activities, such as creating Instagram Stories and Posts, video editing for Facebook, and content management.
Potential roles
- Account Manager
- Head Account Manager
- Content Creator
- Content Media Strategist
- Digital Marketing Specialist
2. Search Engine Optimization Team
Skills needed: Writing, editing, problem-solving, experience with programming and technical thinking, analytics, spreadsheets, drive, the ability to adapt.
The SEO team will mainly be driving traffic to your webpages by optimizing content and ensuring your brand is aware of the keywords necessary to rank on the SERPs for topics related to your product or service. Occasionally, they’re also required to lend expertise to make business decisions. To accomplish these goals, SEO teams need to be made up of individuals with strong technical, programming, and writing skills.
Some SEO functions require writing, editing, and proofreading content to optimize it for audiences. This is where having a strong writing background will come in handy. SEO teams should be excellent problem-solvers and think about how to optimize content specifically for search engines.
These hires should be comfortable finding and implementing keywords, which will improve how high your business ranks on Google. They will also have to develop strategies for link building and develop a basic SEO protocol for the company.
In addition, SEO specialists should be fluent in analytics software to ensure they’re able to incorporate the lessons from those metrics into their overall strategy.
Structure by team size:
If you work for a small company, your SEO strategist might be melded with another role. If that’s the case, make sure that the SEO functions are being carried out by someone who has an understanding of analytics and optimizing content for search engines, as well as conducting thorough keyword research..
In other words, if they can’t speak Google or Bing’s language, they probably aren’t the right fit.
Comprehending analytics and optimizing content for SEO purposes will help your business rank on search engines and reach new prospects, or nurture leads until they’re ready to purchase..
For businesses that are large enough to build a team, hire for different specialties within SEO. For instance, you can hire for historical optimization, link building management, or raising webpage traffic.
From there, you can hire project managers and team managers who are experts in the field of SEO and can offer seasoned advice to other team members, as well as manage multiple SEO projects at once.
Potential roles
- SEO Strategist
- Senior SEO Strategist
- Optimization Specialist
- Historical Optimization Writer
- Senior Historical Optimization Writer
3. Acquisition Team
Skills needed: Customer service, excellent written and verbal communication, customer-obsession, solution-driven mindset, collaborative and approachable spirit, attention to detail
Though the entire marketing team should be customer-obsessed, your Acquisition team will be made up of those who live and breathe methods for delighting the customer through every step of their buyer’s journey.
Acquisition hires are the first contact with customers — they will introduce audiences to your brand. Your acquisition team will communicate to the customer as a representative and advocate for the company, and need excellent customer-facing skills and company knowledge to do so.
Another skill valued in an acquisition team is attention to detail; these teams have to be experts in how products can help customers and capitalize on little moments that can enhance the customer experience.
The biggest question for an Acquisition team to answer is, “How can we delight the customer for every stage of the buyer’s journey?” and projects should reflect that. For instance, creating compelling content offers and tracking the performance of these CTAs will be essential for teams to make impactful strategies for driving growth.
Structure by team size:
For companies whose members don’t have the resources to build a full Acquisition team, make sure the team member you designate for acquisition can effectively communicate your brand. They should know how to delight customers every step of the way.
If you’re building a team for a larger company, hire for an Acquisition team with roles that are either exclusively customer-facing or exclusively non-customer-facing. Individual hires will be able to focus their job functions based on their interaction with customers.
For example, someone in a non-customer-facing acquisition role could have duties such as developing CTAs and content offers, so writing experience and an understanding of basic graphic design practices are critical. Customer-facing roles, then, will onboard customers, source and contact them, and identify and ease pain points they might have in their journey.
Potential roles
- Lead Acquisition Specialist
- Customer Acquisition Specialist
- Content Acquisition Manager
- Acquisition Editor
4. Product Marketing Team
Skills needed: Research, analyzation, strategic planning, cross-functionality, writing, customer service, a creative problem-solving mindset, technical knowledge, pricing strategy, solving for the customer.
This team is so important because they will communicate the features and benefits of your product to the customer. They’ll organize and drive the messages of a product and how it connects to your brand and the customer.
Product marketers identify target audiences to communicate with through product pages and ad copy. In addition, product marketers need to be star planners with keen attention to detail, as they will be planning the campaigns for your products or services.
When you hire a product marketer, look for someone who demonstrates a deep understanding of overall marketing functions since, for start-ups, they might be your only marketer. They need to know how to research, analyze metrics, use that knowledge to plan future campaigns, and target the customer’s needs in all of your business’s marketing materials.
In order to bring a product to life, a product marketer needs to know how to build an effective product page, and include content that will highlight that. They need to be able to present their strategies to other decision-makers and have plans for every strategy.
Structure by team size:
The product marketer you hire as a small business owner is likely your only marketer, or the one leading marketing efforts with another team member. Hire someone with a background or demonstrated knowledge in writing, presenting marketing, and business.
Remember, the product marketer will communicate the product’s usefulness to customers, so the team member’s skills should be robust. If you are hiring for a larger team, then, you can have a little more flexibility. You can hire product marketers by product stack, so for instance, phones and personal laptops could be product stacks for a tech company.
You can structure your product marketing team by specialty, as well — a role-based solely on developing copy or producing strategy, for example.
Potential roles
- Brand Specialist
- Product Manager
- Product Marketing Manager
- Product Marketing Specialist
- By product stack team
5. Content Creation Team
Skills needed: Writing, editing, organization, creative problem-solving, multimedia production, photography, graphic design, spirit of collaboration.
Your content creators will be the ones making sure your brand has enough content to tell a cohesive, compelling story. The content they produce will be useful in every facet of your marketing functions, from video to blog posts.
Content creators are skilled writers; they usually know how to create a solid blog post or webinar. They also have to be keen with editing — their blogs, videos, and social media content depends on it.
This team will be the go-to for production of high-quality multimedia assets for your business, including podcasts, videos, ebooks, or other materials as needed. They may have to work on projects with other teams to make sure the messaging is correct, so your content creators should be ready to collaborate with others.
When building this team, make sure that your content creators are familiar with online management software, like HubSpot’s Marketing Hub. This makes their job easier. Instead of having to analyze data from multiple different sources, online software keeps all of that data in one place.
Structure by team size:
In a startup, your content creation team might also be your social media and product marketing team. Though the roles are similar, content marketers need to have good organization and time-management skills in a fast-paced environment, so make sure the person you hire can work autonomously and in a team setting.
Hire a content creator who understands the story of your brand and brand voice. Their methods of sharing your voice through video, podcast, or ebooks should ultimately incentivize prospects to learn more about your business.
Larger companies hiring for a content creation team can hire by skill or by the needs of other teams. For example, Social Media Agencies need content creators for every client or group of clients.
Potential roles
- Jr. Content Creator
- Content Creator
- Head Content Creator
- Video Production Specialist
- Producer
- Video Editor
- Web Editor
- Staff Writer
- Head of Content
6. Web Design Team
Skills needed: Programming, Creative Suite programs, interpersonal communication, Website and email design, user-experience orientation, content management software, understanding of web standards and best practices, SEO
Of course, any business needs a website. And as your company grows, you may find the need to hire someone full-time to maintain your website. This team will be responsible for all things dot com, so you should hire a creative proficient in web design, web strategy, and optimization.
Your web design team will use their mastery of programming and web design tools to create and maintain the message your website is conveying. They will work closely with product marketing and content teams on web page execution, so the ability to collaborate across teams is essential.
They will be the point-of-contact for someone who runs into a problem on your website, and should be able to fix any technical issues that may arise. You should trust your web design team to create a user-experience that keeps customers coming back.
Structure by team size:
The general function of a web designer is to make the web page experience seamless, optimized, and engaging for every visitor. They’ll use their expertise to deliver a delightful experience to customers who interact with your business’s web pages.
You can structure your web design by need, but if you can afford to build out an entire team, you can start hiring Senior Web Developers to bring your site up to current standards and maintain it, while Associate level hires can assist with those job duties as your design team grows.
Potential roles
- Designer
- Web Developer
- Senior Web Developer
- UX / UI Designer
- Front-end Web Developer
- Web Designer
- Visual UX Developer
- Graphic Design Specialist
Hiring in this environment can be tricky. You can find folks who have done tons of email marketing but have never had to come up with the actual content offer itself. Steer clear of one-trick ponies, and opt instead for someone with perhaps a little less depth of experience but great overall communications skills and marketing savvy.
Regardless of company size or type, hiring great talent is one of the most difficult growth challenges you’ll face. Resist the temptation to hire an okay person; there are stellar talents out there who are worth the wait.

How to Do A/B Testing: A Checklist You’ll Want to Bookmark
When marketers like us create landing pages, write email copy, or design call-to-action buttons, it can be tempting to use our intuition to predict what will make people click and convert.
But basing marketing decisions off of a “feeling” can be pretty detrimental to results. Rather than relying on guesses or assumptions to make these decisions, you’re much better off running an A/B test — sometimes called a split test.
A/B testing can be valuable because different audiences behave, well, differently. Something that works for one company may not necessarily work for another. In fact, conversion rate optimization (CRO) experts hate the term “best practices” because it may not actually be the best practice for you.
But A/B tests can also be complex. If you’re not careful, you could make incorrect assumptions about what people like and what makes them click — decisions that could easily misinform other parts of your strategy.
Keep reading to learn how to do A/B testing before, during, and after data collection so you can make the best decisions from your results.
To run an A/B test, you need to create two different versions of one piece of content, with changes to a single variable. Then, you’ll show these two versions to two similarly sized audiences and analyze which one performed better over a specific period of time (long enough to make accurate conclusions about your results).
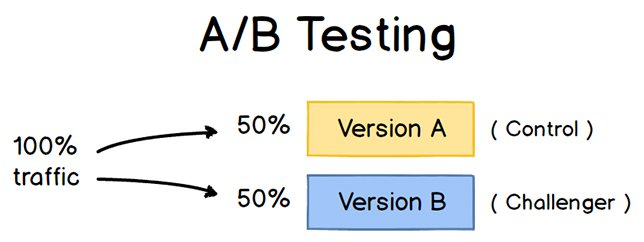
A/B testing helps marketers observe how one version of a piece of marketing content performs alongside another. Here are two types of A/B tests you might conduct in an effort to increase your website’s conversion rate:
Example 1: User Experience Test
Perhaps you want to see if moving a certain call-to-action (CTA) button to the top of your homepage instead of keeping it in the sidebar will improve its clickthrough rate.
To A/B test this theory, you’d create another, alternative web page that reflected that CTA placement change. The existing design — or the “control” — is Version A. Version B is the “challenger.” Then, you’d test these two versions by showing each of them to a predetermined percentage of site visitors. Ideally, the percentage of visitors seeing either version is the same.
Learn how to easily A/B test a component of your website with HubSpot’s Marketing Hub.
Example 2: Design Test
Perhaps you want to find out if changing the color of your call-to-action (CTA) button can increase its clickthrough rate.
To A/B test this theory, you’d design an alternative CTA button with a different button color that leads to the same landing page as the control. If you usually use a red call-to-action button in your marketing content, and the green variation receives more clicks after your A/B test, this could merit changing the default color of your call-to-action buttons to green from now on.
To learn more about A/B testing, download our free introductory guide here.
The Benefits of A/B Testing
A/B testing has a multitude of benefits to a marketing team, depending on what it is you decide to test. Above all, though, these tests are valuable to a business because they’re low in cost but high in reward.
Let’s say you employ a content creator with a salary of $50,000/year. This content creator publishes five articles per week for the company blog, totaling 260 articles per year. If the average post on the company’s blog generates 10 leads, you could say it costs just over $192 to generate 10 leads for the business ($50,000 salary ÷ 260 articles = $192 per article). That’s a solid chunk of change.
Now, if you ask this content creator to spend two days developing an A/B test on one article, instead of writing two articles in that time period, you might burn $192 because you’re publishing one fewer article. But if that A/B test finds you can increase each article’s conversion rate from 10 to 20 leads, you just spent $192 to potentially double the number of customers your business gets from your blog.
If the test fails, of course, you lost $192 — but now you can make your next A/B test even more educated. If that second test succeeds in doubling your blog’s conversion rate, you ultimately spent $284 to potentially double your company’s revenue. No matter how many times your A/B test fails, its eventual success will almost always outweigh the cost to conduct it.
There are many types of split tests you can run to make the experiment worth it in the end. Here are some common goals marketers have for their business when A/B testing:
- Increased Website Traffic: Testing different blog post or webpage titles can change the number of people who click on that hyperlinked title to get to your website. This can increase website traffic as a result.
- Higher Conversion Rate: Testing different locations, colors, or even anchor text on your CTAs can change the number of people who click these CTAs to get to a landing page. This can increase the number of people who fill out forms on your website, submit their contact info to you, and “convert” into a lead.
- Lower Bounce Rate: If your website visitors leave (or “bounce”) quickly after visiting your website, testing different blog post introductions, fonts, or feature images can reduce this bounce rate and retain more visitors.
- Lower Cart Abandonment: Ecommerce businesses see 40% – 75% of customers leave their website with items in their shopping cart, according to MightyCall. This is known as “shopping cart abandonment.” Testing different product photos, check-out page designs, and even where shipping costs are displayed can lower this abandonment rate.
Now, let’s walk through the checklist for setting up, running, and measuring an A/B test.
How to Conduct A/B Testing
 Follow along with our free A/B testing kit with everything you need to run A/B testing including an test tracking template, a how-to guide for instruction and inspiration, and a statistical significance calculator to see if your tests were wins, losses, or inconclusive.
Before the A/B Test
1. Pick one variable to test.
As you optimize your web pages and emails, you might find there are a number of variables you want to test. But to evaluate how effective a change is, you’ll want to isolate one “independent variable” and measure its performance — otherwise, you can’t be sure which one was responsible for changes in performance.
You can test more than one variable for a single web page or email; just be sure you’re testing them one at a time.
Look at the various elements in your marketing resources and their possible alternatives for design, wording, and layout. Other things you might test include email subject lines, sender names, and different ways to personalize your emails.
Keep in mind that even simple changes, like changing the image in your email or the words on your call-to-action button, can drive big improvements. In fact, these sorts of changes are usually easier to measure than the bigger ones.
Note: There are some times when it makes more sense to test multiple variables rather than a single variable. This is a process called multivariate testing. If you’re wondering whether you should run an A/B test versus a multivariate test, here’s a helpful article from Optimizely that compares the two.
2. Identify your goal.
Although you’ll measure a number of metrics for every one test, choose a primary metric to focus on — before you run the test. In fact, do it before you even set up the second variation. This is your “dependent variable.”
Think about where you want this variable to be at the end of the split test. You might state an official hypothesis and examine your results based on this prediction.
If you wait until afterward to think about which metrics are important to you, what your goals are, and how the changes you’re proposing might affect user behavior, then you might not set up the test in the most effective way.
3. Create a ‘control’ and a ‘challenger.’
You now have your independent variable, your dependent variable, and your desired outcome. Use this information to set up the unaltered version of whatever you’re testing as your “control.” If you’re testing a web page, this is the unaltered web page as it exists already. If you’re testing a landing page, this would be the landing page design and copy you would normally use.
From there, build a variation, or a “challenger” — the website, landing page, or email you’ll test against your control. For example, if you’re wondering whether including a testimonial on a landing page would make a difference, set up your control page with no testimonials. Then, create your variation with a testimonial.
4. Split your sample groups equally and randomly.
For tests where you have more control over the audience — like with emails — you need to test with two or more audiences that are equal in order to have conclusive results.
How you do this will vary depending on the A/B testing tool you use. If you’re a HubSpot Enterprise customer conducting an A/B test on an email, for example, HubSpot will automatically split traffic to your variations so that each variation gets a random sampling of visitors.
5. Determine your sample size (if applicable).
How you determine your sample size will also vary depending on your A/B testing tool, as well as the type of A/B test you’re running.
If you’re A/B testing an email, you’ll probably want to send an A/B test to a smaller portion of your list to get statistically significant results. Eventually, you’ll pick a winner and send the winning variation on to the rest of the list. (See “The Science of Split Testing” ebook at the end of this article for more on calculating your sample size.)
If you’re a HubSpot Enterprise customer, you’ll have some help determining the size of your sample group using a slider. It’ll let you do a 50/50 A/B test of any sample size — although all other sample splits require a list of at least 1,000 recipients.
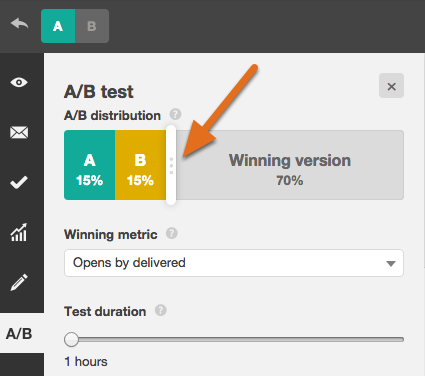
If you’re testing something that doesn’t have a finite audience, like a web page, then how long you keep your test running will directly affect your sample size.
You’ll need to let your test run long enough to obtain a substantial number of views, otherwise it’ll be hard to tell whether there was a statistically significant difference between the two variations.
6. Decide how significant your results need to be.
Once you’ve picked your goal metric, think about how significant your results need to be to justify choosing one variation over another. Statistical significance is a super important part of A/B testing process that’s often misunderstood. If you need a refresher on statistical significance from a marketing standpoint, I recommend reading this blog post.
The higher the percentage of your confidence level, the more sure you can be about your results. In most cases, you’ll want a confidence level of 95% minimum — preferably even 98% — especially if it was a time-intensive experiment to set up. However, sometimes it makes sense to use a lower confidence rate if you don’t need the test to be as stringent.
Matt Rheault, a senior software engineer at HubSpot, likes to think of statistical significance like placing a bet. What odds are you comfortable placing a bet on? Saying “I’m 80% sure this is the right design and I’m willing to bet everything on it” is similar to running an A/B test to 80% significance and then declaring a winner.
Rheault also says you’ll likely want a higher confidence threshold when testing for something that only slightly improves conversation rate. Why? Because random variance is more likely to play a bigger role.
“An example where we could feel safer lowering our confidence threshold is an experiment that will likely improve conversion rate by 10% or more, such as a redesigned hero section,” he explained.
“The takeaway here is that the more radical the change, the less scientific we need to be process-wise. The more specific the change (button color, micro copy, etc.), the more scientific we should be because the change is less likely to have a large and noticeable impact on conversion rate.”
7. Make sure you’re only running one test at a time on any campaign.
Testing more than one thing for a single campaign — even if it’s not on the same exact asset — can complicate your results. For example, if you A/B test an email campaign that directs to a landing page at the same time that you’re A/B testing that landing page … how can you know which change caused the increase in leads?
During the A/B Test
8. Use an A/B testing tool.
To do an A/B test on your website or in an email, you’ll need to use an A/B testing tool. If you’re a HubSpot Enterprise customer, the HubSpot software has features that let you A/B test emails (learn how here), calls-to-action (learn how here), and landing pages (learn how here).
For non-HubSpot Enterprise customers, other options include Google Analytics’ Experiments, which lets you A/B test up to 10 full versions of a single web page and compare their performance using a random sample of users.
9. Test both variations simultaneously.
Timing plays a significant role in your marketing campaign’s results, whether it’s time of day, day of the week, or month of the year. If you were to run Version A during one month and Version B a month later, how would you know whether the performance change was caused by the different design or the different month?
When you run A/B tests, you’ll need to run the two variations at the same time, otherwise you may be left second-guessing your results.
The only exception here is if you’re testing timing itself, like finding the optimal times for sending out emails. This is a great thing to test because depending on what your business offers and who your subscribers are, the optimal time for subscriber engagement can vary significantly by industry and target market.
10. Give the A/B test enough time to produce useful data.
Again, you’ll want to make sure that you let your test run long enough in order to obtain a substantial sample size. Otherwise, it’ll be hard to tell whether there was a statistically significant difference between the two variations.
How long is long enough? Depending on your company and how you execute the A/B test, getting statistically significant results could happen in hours … or days … or weeks. A big part of how long it takes to get statistically significant results is how much traffic you get — so if your business doesn’t get a lot of traffic to your website, it’ll take much longer for you to run an A/B test.
In theory, you shouldn’t restrict the time in which you’re gathering results. (Read this blog post to learn more about sample size and timing.)
11. Ask for feedback from real users.
A/B testing has a lot to do with quantitative data … but that won’t necessarily help you understand why people take certain actions over others. While you’re running your A/B test, why not collect qualitative feedback from real users?
One of the best ways to ask people for their opinions is through a survey or poll. You might add an exit survey on your site that asks visitors why they didn’t click on a certain CTA, or one on your thank-you pages that asks visitors why they clicked a button or filled out a form.
You might find, for example, that a lot of people clicked on a call-to-action leading them to an ebook, but once they saw the price, they didn’t convert. That kind of information will give you a lot of insight into why your users are behaving in certain ways.
After the A/B Test
12. Focus on your goal metric.
Again, although you’ll be measuring multiple metrics, keep your focus on that primary goal metric when you do your analysis.
For example, if you tested two variations of an email and chose leads as your primary metric, don’t get caught up on open rate or clickthrough rate. You might see a high clickthrough rate and poor conversion rates, in which case you might end up choosing the variation that had a lower clickthrough rate in the end.
13. Measure the significance of your results using our A/B testing calculator.
Now that you’ve determined which variation performs the best, it’s time to determine whether or not your results statistically significant. In other words, are they enough to justify a change?
To find out, you’ll need to conduct a test of statistical significance. You could do that manually … or you could just plug in the results from your experiment to our free A/B testing calculator.
For each variation you tested, you’ll be prompted to input the total number of tries, like emails sent or impressions seen. Then, enter the number of goals it completed — generally you’ll look at clicks, but this could also be other types of conversions.

The calculator will spit out the confidence level your data produces for the winning variation. Then, measure that number against the value you chose to determine statistical significance.
14. Take action based on your results.
If one variation is statistically better than the other, you have a winner. Complete your test by disabling the losing variation in your A/B testing tool.
If neither variation is statistically better, you’ve just learned that the variable you tested didn’t impact results, and you’ll have to mark the test as inconclusive. In this case, stick with the original variation — or run another test. You can use the failed data to help you figure out a new iteration on your new test.
While A/B tests help you impact results on a case-by-case basis, you can also apply the lessons you learn from each test and apply it to future efforts.
For example, if you’ve conducted A/B tests in your email marketing and have repeatedly found that using numbers in email subject lines generates better clickthrough rates, you might want to consider using that tactic in more of your emails.
15. Plan your next A/B test.
The A/B test you just finished may have helped you discover a new way to make your marketing content more effective — but don’t stop there. There’s always room for more optimization.
You can even try conducting an A/B test on another feature of the same web page or email you just did a test on. For example, if you just tested a headline on a landing page, why not do a new test on body copy? Or color scheme? Or images? Always keep an eye out for opportunities to increase conversion rates and leads.
Learn how to best carry out some of the steps above using the free ebook below.

The Ultimate Guide to Social Media Analytics
There are over 3.8 billion social media users across the globe.
As you can probably imagine, that’s a major reason why businesses want to be active on social, too. Businesses use social media to market, sell, and provide support to their target audience and customers as well as learn about and bond with them.
The key is to understand what types of posts on which platforms are most effective in resonating with these audience members and customers. This will allow your business to consistently produce engaging content that positively impacts your bottom line.
How do you do this? Well, it requires social media analytics and reporting.
What is social media analytics?
Social media analytics is the process of gathering and analyzing data and reports based on metrics from one or multiple social media accounts.
Social media analytics provides insight into a number of important factors that are directly tied to the success of your marketing efforts and your business as a whole.
Here’s a list that explains the importance of social media analytics:
- Develop a deeper understanding of who your target audience is and where they spend their time
- Identify which social platforms receive the greatest amount of traffic
- Determine what type of social content leads to the most conversions, engagements, etc.
- Discover what type of social media post has the greatest reach and resonates best with your audience on certain platforms
- Learn about what is and isn’t working in terms of social media campaigns and ads among your audience while they’re live and after they wrap up
- Develop a stronger social media strategy for your business’s specific goals related to things like your marketing, sales, and service efforts
Social Media Analytics Reports
Social media analytics reports provide an overview of specific metrics and data points — such as engagements and impressions — related to the content you share on various social media platforms. Simply put, reports are how you’ll review your social media analytics.
Social media analytics tools (which we’ll review next) make the creation of reports simple — some of these resources provide reports from one social platform at a time while others provide reports from multiple social platforms.
Either way, social media analytics reporting tools are typically customizable — meaning, you can view and pull the data and reports that matter most to you and your business.
With the tools we’re going to review below, reports can be automatically made and shared for you. But, here are some of the unique aspects of social media analytics reports that you can typically customize:
- Statistics and data points that matter to you and will be displayed in the report
- Time frame (weekly, monthly, quarterly, yearly, campaign start to end)
- Progress growth (i.e. how you’ll share your progress growth over time through a report — typically, either in the form of a snapshot or a comparison of stats in a given time period).
Learn how to create impactful monthly reports to show ROI on your social media efforts.
As stated, your reports will be unique based on the analytics software or tool you use. However, let’s look at some of the most common social media analytics reports that you may come across or create at some point.
Types of Social Media Analytics Reports
To give you an idea of some of the different types of social media analytics reports available in commonly-used tools, let’s look at HubSpot’s social media analytics reporting options.
1. Audience Analytics Report
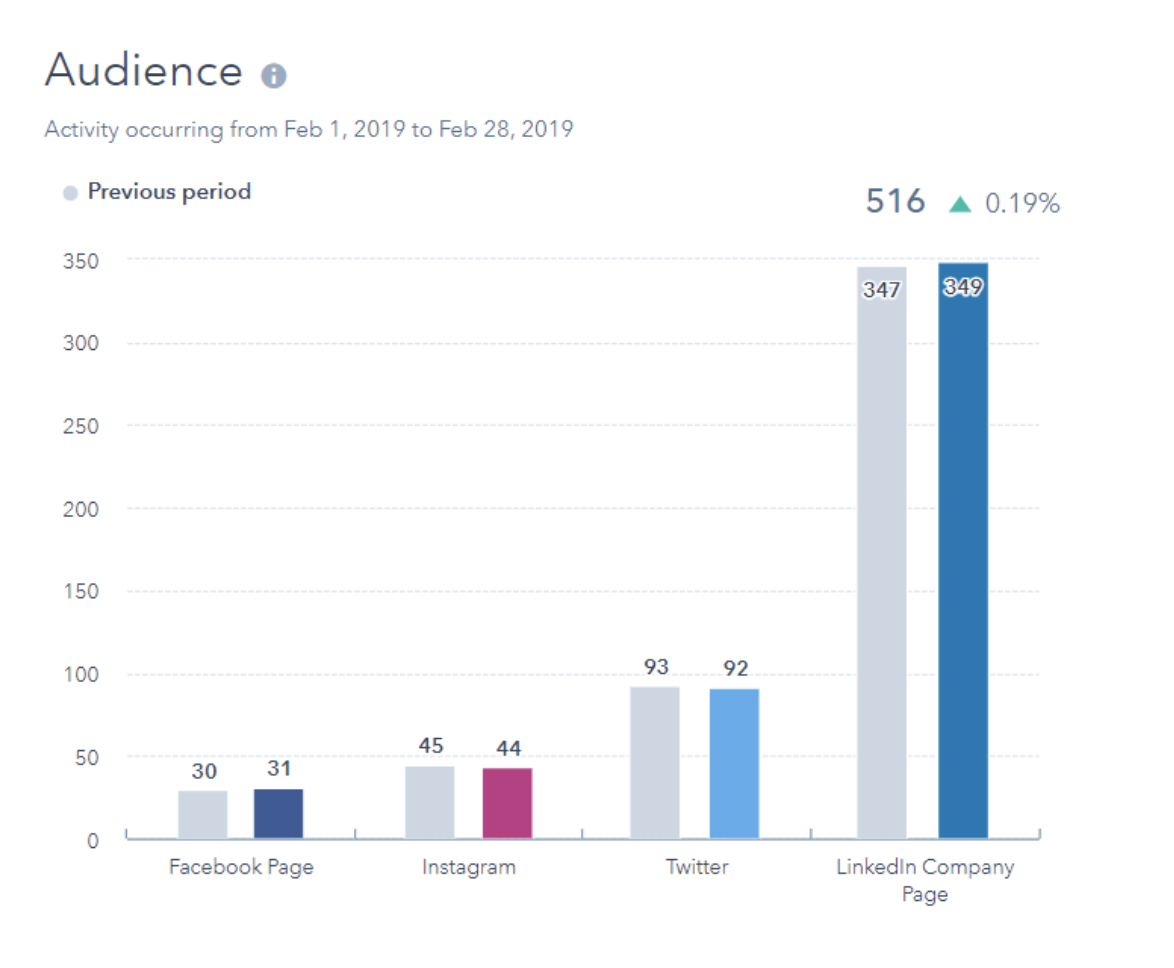
The Audience report displays your current number of followers for each of your social accounts compared to the number of followers you had in a previous time period.
2. Published Posts Analytics Report
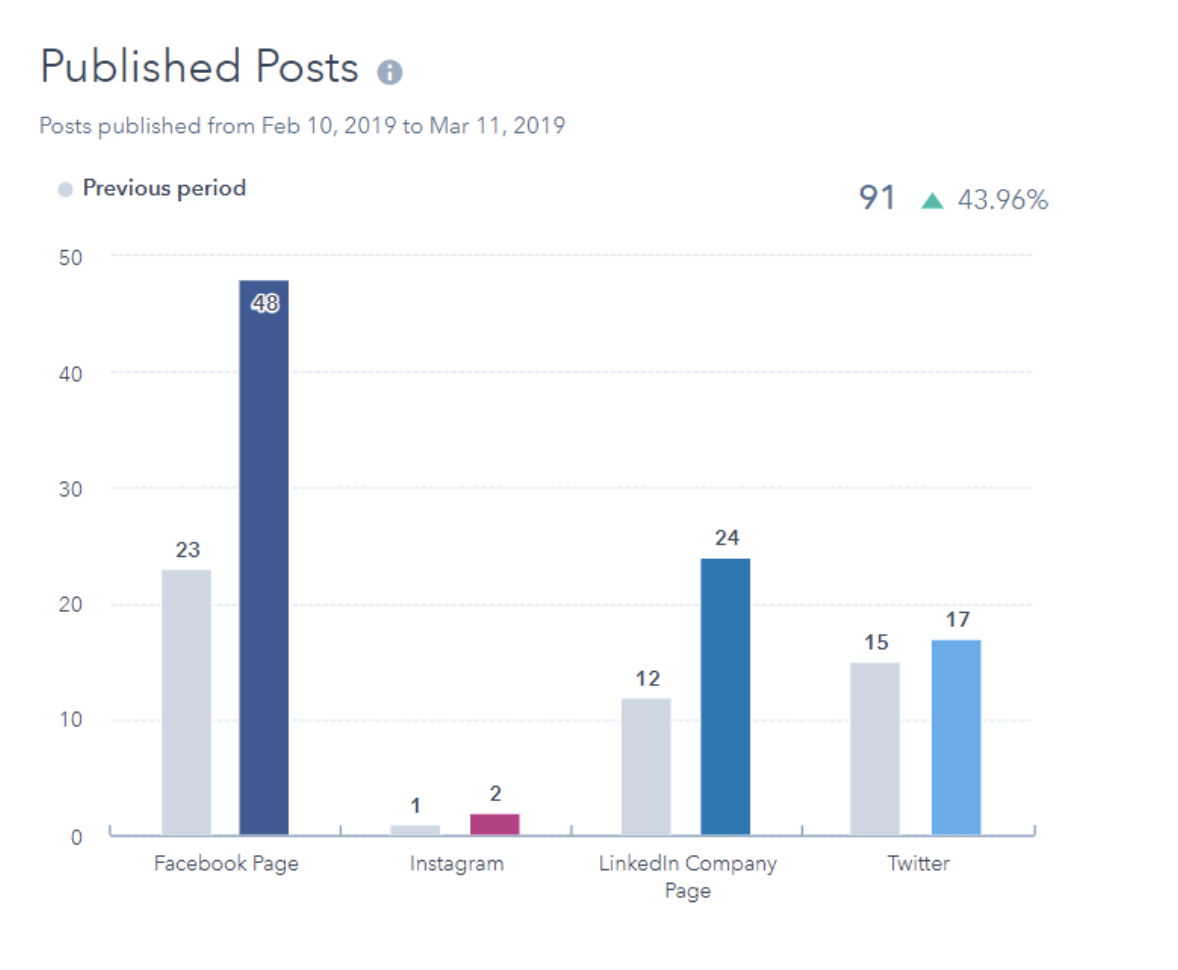
The Published Posts report shows the number of social posts published across your social accounts during a specific time period.
3. Interactions Analytics Report
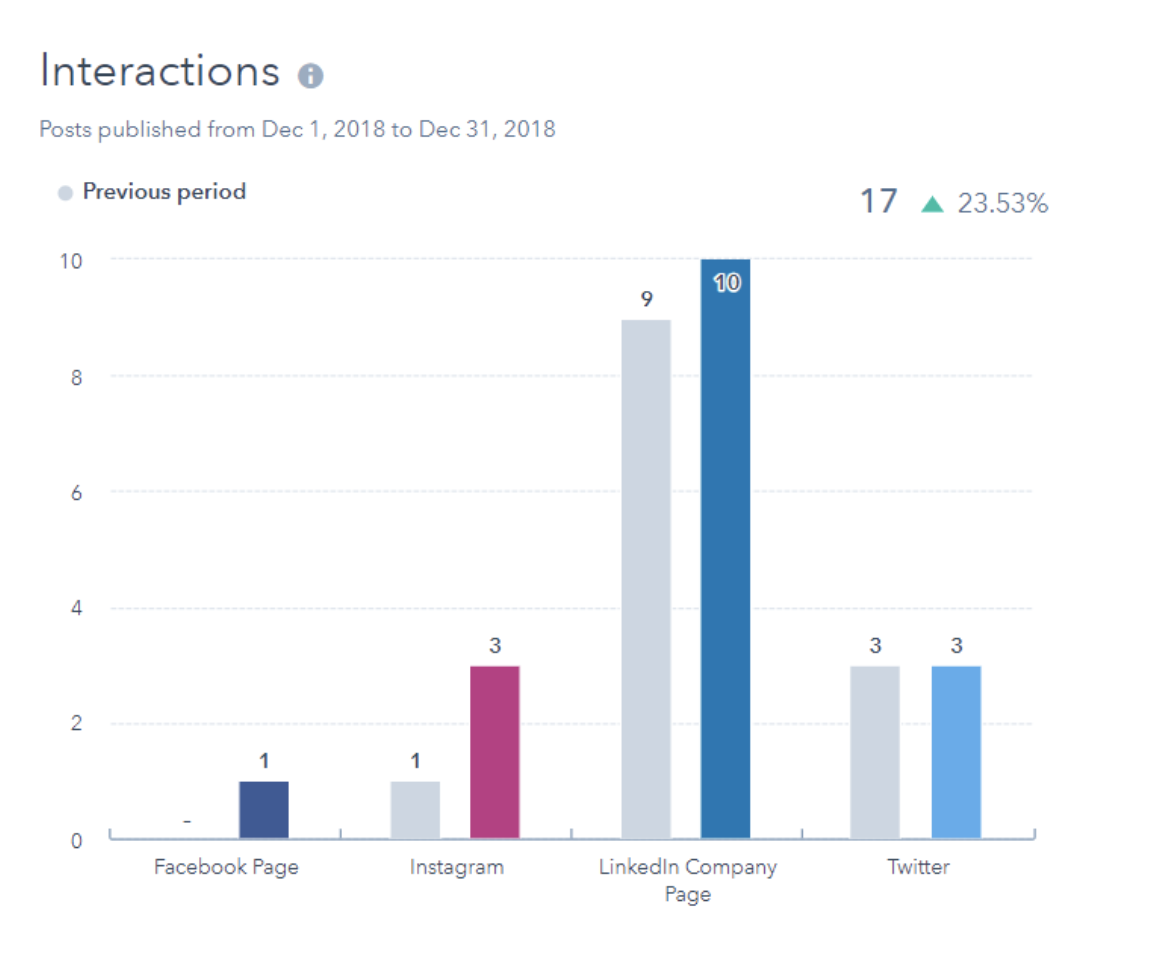
The Interactions report displays the number of likes, reactions, and comments on all of your posts across multiple platforms.
4. Clicks Analytics Report
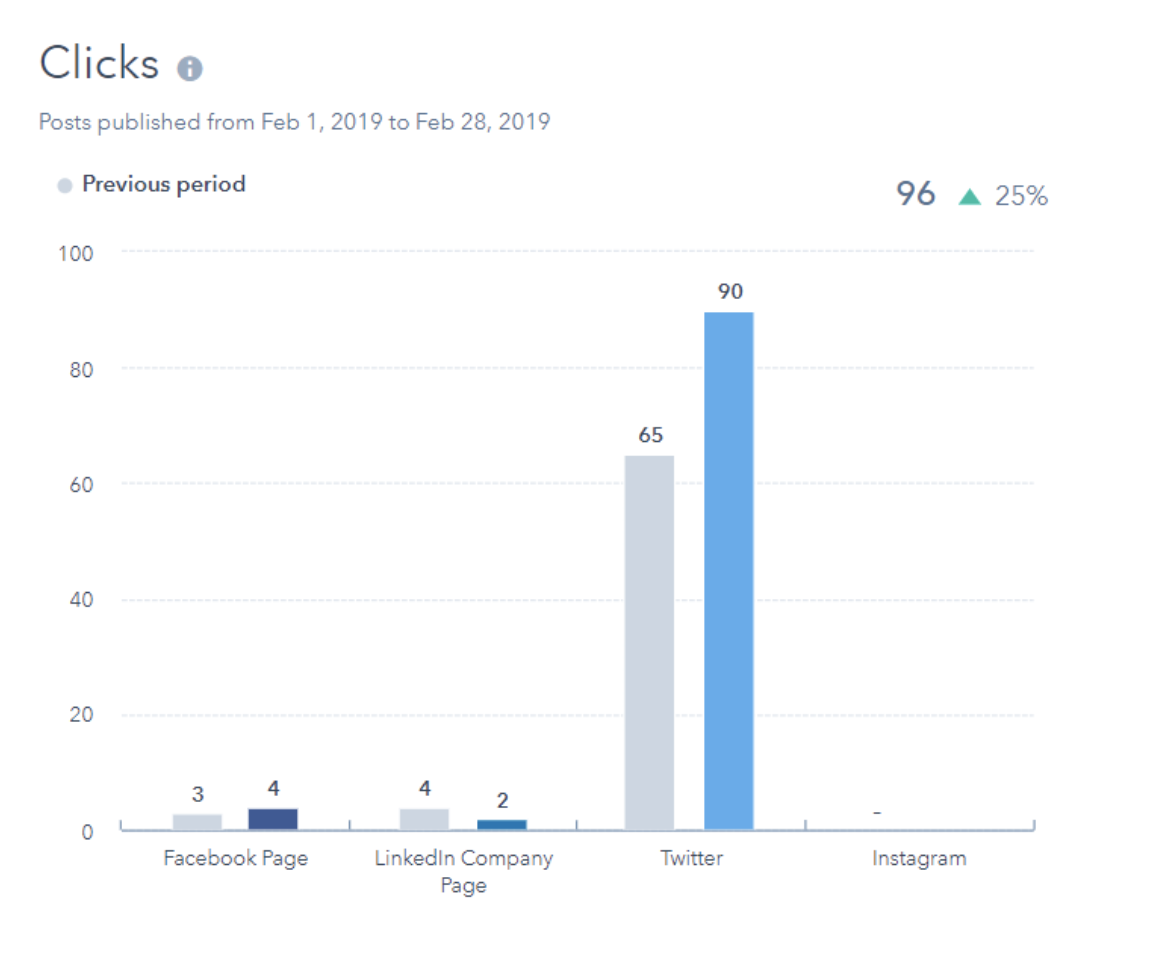
The Clicks report displays how many clicks you get on your social posts published through HubSpot.
5. Shares Analytics Report
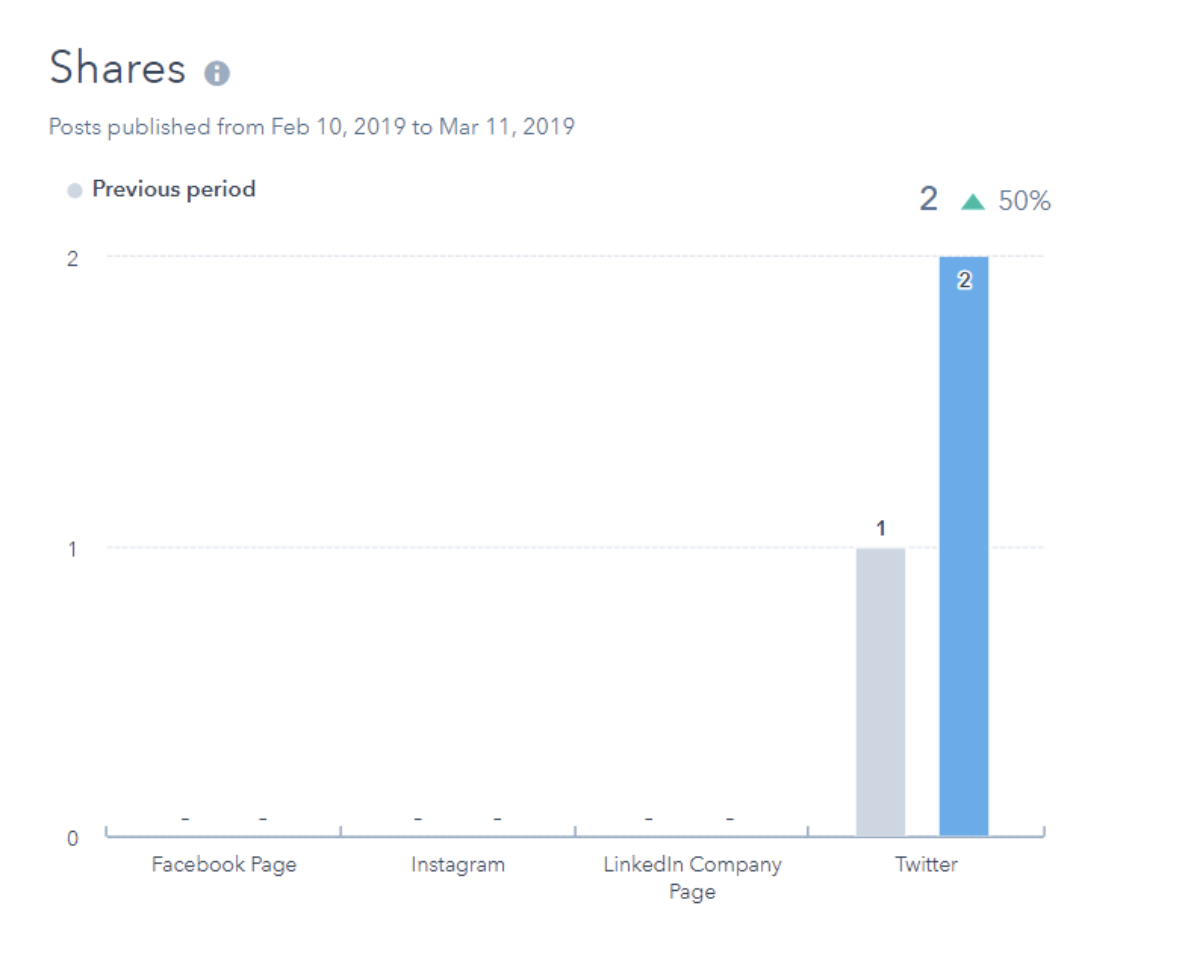
The Shares report displays the amount of your posts that were shared by your audience members.
6. Impressions Analytics Report
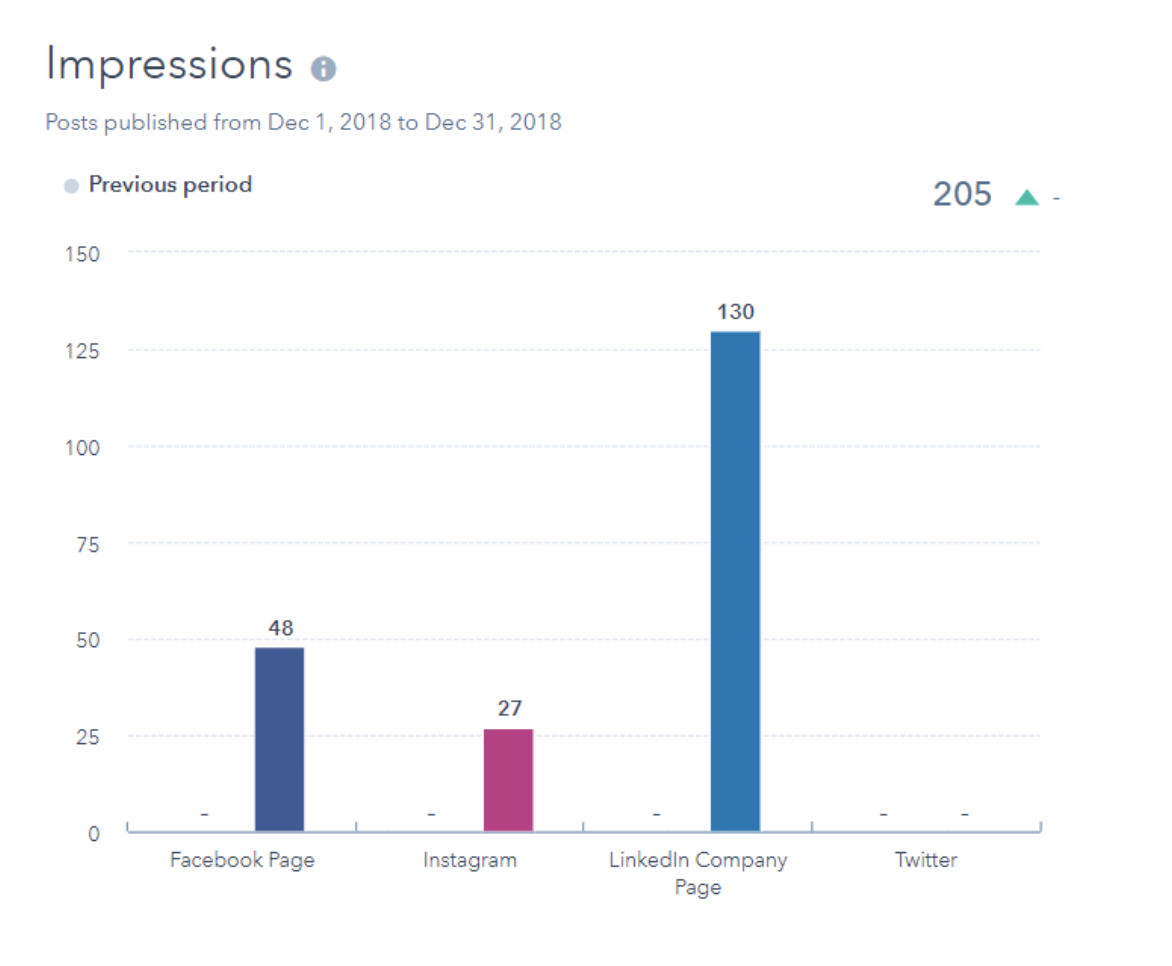
The Impressions report shows the number of views that posts on your LinkedIn, Facebook, and Instagram pages received.
7. Sessions Analytics Report
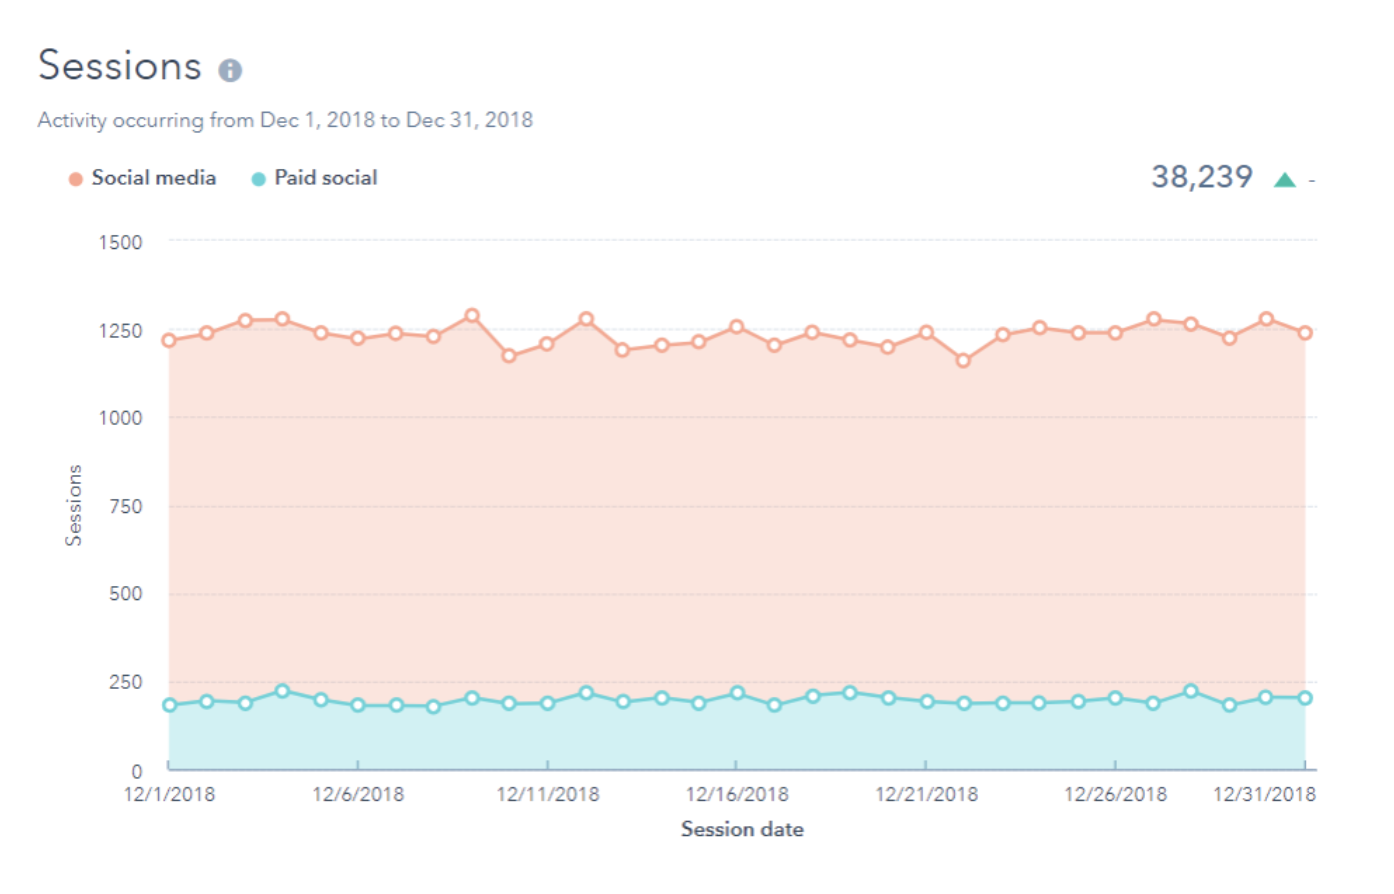
The Sessions report displays how many web sessions took place within a given time period on your site that were driven from social media.
8. New Contacts Analytics Report
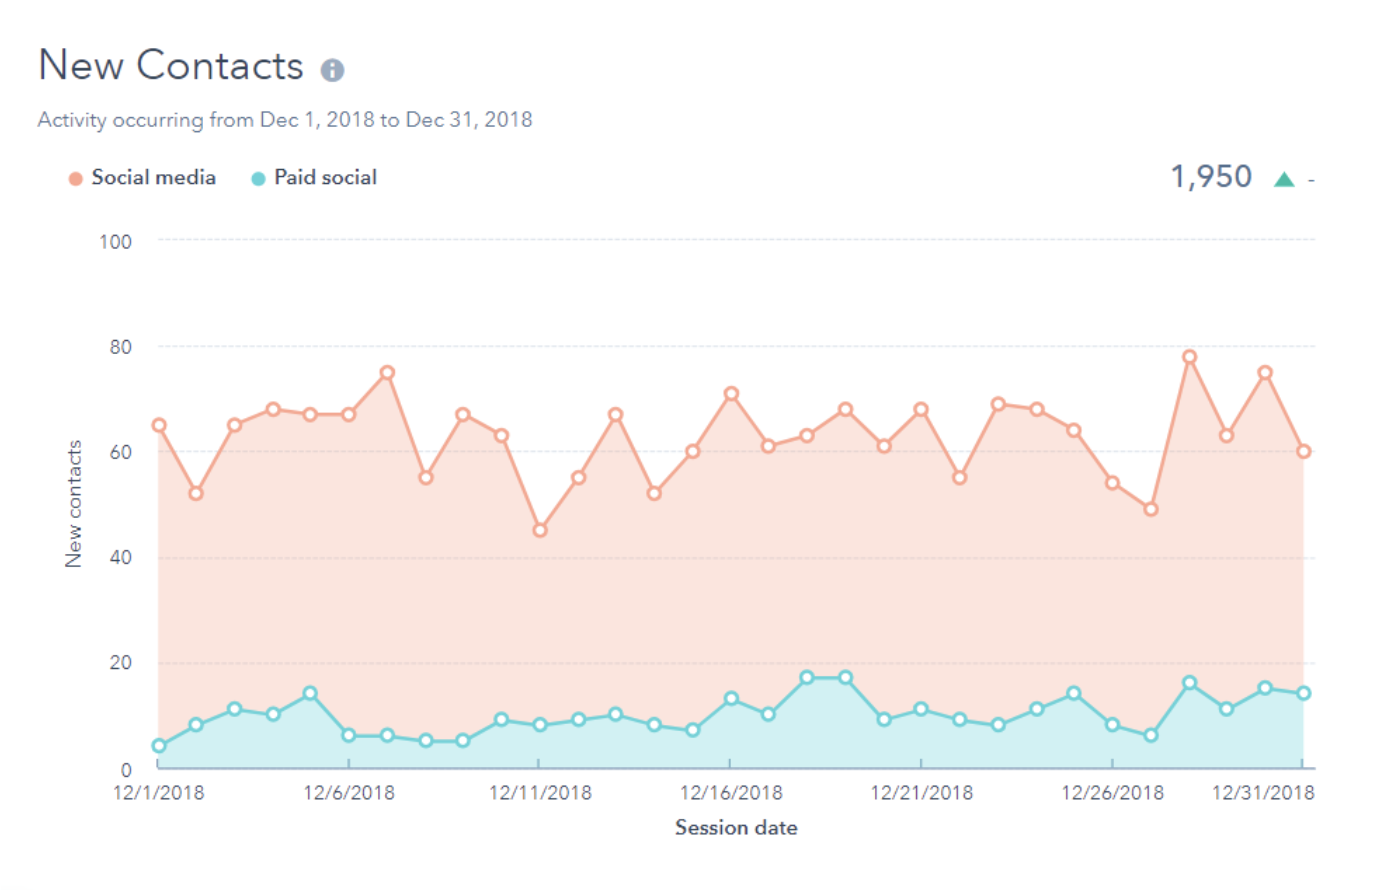
The New Contacts report displays how many new contacts have been created in HubSpot as a result of web sessions driven from social media within the selected time period.
Now you may be wondering what tools are available to help you pull these reports and data — next, we’ll cover some of your options.
Social Media Analytics Tools
There are a plethora of social media analytics tools available today which is why identifying the right one for your business can seem like a daunting task. We’ve compiled the following list of seven of our favorites to help get you started.
1. HubSpot Social Media Software
HubSpot Social Media Software gives you insight into the customer journey through integrated analytics tools. These help you understand which of your marketing tactics are working best among your audience, determine how your marketing efforts are impacting your bottom line, and learn about your search engine optimization (SEO)-related ROI.
Try HubSpot’s social media tools free for 30 days.
In addition to this HubSpot’s Social Media Software, there are a number of resources including social media analytics report templates, free social media analytics tools, and social media courses available for you to implement in your strategy.
Note: HubSpot also integrates with other analytics software, like Oktopost, as well as major social platforms and their respective analytics tools such as LinkedIn, Facebook, Instagram, and Youtube (among many others, which you can learn about in the HubSpot integrations marketplace).
2. Tweet Deck
Tweet Deck is an analytics tool used for Twitter. It works in real-time to help you view and analyze your Tweet engagement, organization, management, and tracking on the platform.
3. Tweet Reach
Despite what you may think based on its name, Tweet Reach isn’t just used for Twitter. The analytics tool creates snapshot reports to help you efficiently monitor and pull key takeaways from your Twitter, Instagram, and Facebook profiles based on factors you identify as most important to your business.
4. Buffer
Buffer provides an in-depth look at how you can strategize to grow your brand on social media. The software does this by measuring your performance on various social platforms, creating detailed reports about the data points that matter to you, and recommending ways to improve your reach, engagement, and more.
5. Hootsuite
Hootsuite allows you to create customized social media reports using over 200 metrics over any of your social channels and campaigns. These reports are easily shareable with members of your team as well as your clients to keep everyone on the same page and prove ROI.
6. Sprout Social
Sprout Social provides a look into the needs of your customers through the conversations your customers and followers are having on social. The software also measures your specific content and campaign work across various platforms and channels to determine what’s working best among audience members and what should be improved upon.
(Note: Sprout Social is another social media software that integrates with HubSpot.)
7. Mention
Mention is a tool that allows your company to monitor, listen, and analyze your posts as well as your interactions with and among audience members via different social channels and platforms. The software also makes it easy to create automated reports to share this data with fellow employees or clients.
Next, let’s look at how to apply these tools and resources in your day-to-day work by reviewing the steps involved in tracking social media analytics (also known as your social media analytics strategy).
Work through the following steps to begin tracking your social media analytics and gaining a better understanding of which parts of your processes are working and which need to be modified. Again, you can think of this as your social media analytics strategy.
1. Set SMART social media analytics goals.
Create and set SMART goals to help you achieve your social media analytics goals. By ensuring your goals are SMART, they’ll be Specific, Measureable, Attainable, Relevant, and Time-bound — meaning, you’ll be able to focus your strategy to reach or even exceed your expectations efficiently.
To begin, ask yourself, “What do I want to learn from my social media analytics?” Then, dive into each part of the SMART goal. Here’s an example of a SMART goal related to your social media analytics strategy for reference.
Use a free template to help you create SMART goals and achieve them.
Specific: I want to use social media analytics to identify specific data points related to my marketing tactics to determine which posts and campaigns are working best in reaching and engaging our audience members.
Measurable: I want to be able to identify some specific data points to accomplish this goal.
Attainable: I will work to identify three specific data points to help accomplish this goal.
Relevant: These data points will help my team and I measure our success in reaching and engaging our audience members across social media channels as well as identify any gaps or areas for improvement in our social media strategy.
Time-bound: I want to identify these specific data points over the course of the next month — this way, in four week’s time, we can begin using them to measure our success in reaching and engaging audience members across social channels and identify gaps and areas for improvement in our social media strategy.
2. Decide which metrics you’ll and focus on and track.
Now it’s time to decide which social media metrics you’re going to track. There are a number of commonly-tracked social media metrics for your consideration. Metrics may vary by social platform as well as which analytics tool you chose. But, here are some all-encompassing metrics applicable to virtually every social channel and analytics tool to get started.
- Reach is the total number of people who have seen your content.
- Engagements are all interactions including shares, likes, and comments.
- Impressions are the number of times or content is displayed on someone’s feed.
- Mentions are the times your business and brand are referenced on social media by audience members or other businesses.
- Social ROI provides insight into whether the investment you’ve put into your social media marketing is resulting in an increase or decrease in customers, sales, brand awareness, and customer loyalty.
- Social listening is when you monitor conversations about your business and brand on social to see what customers and audience members are saying about you.
- Likes are when an audience member taps (or double taps) on your social content to show they’re a fan of your post.
- Retweets/ shares/ reposts are when audience members post the content your business published on their profiles.
3. Determine which social media analytics tools you’ll use.
Next, determine which social media analytics tools you’ll use — we covered some popular choices above but you can always review other options through a simple Google search.
Before making a decision regarding which tool or tools you’ll use, think about the following questions:
- Do you want a tool or software to help you manage your social media analytics across multiple channels and platforms (e.g. Twitter, Facebook, LinkedIn) or just one (e.g. Twitter)?
- Which metrics did you decide you’re going to track (as we touched on in the above step)?
- What is your budget? Do you need a tool with flexible pricing options and features that you can add to or remove from over time? (To find this information, review the pricing pages like this page on Sprout Social’s website.)
- Which tools and software options are suited to help you achieve the SMART goals you set? (Check out feature pages for this type of information, like this page on Oktopost’s website.)
- Do you want your tool to integrate with the greater software your team uses to run your business (such as HubSpot’s CRM, for example)?
4. Measure the success of your social media analytics efforts.
Once you implement your social media analytics software, you’ll be able to measure the success of your efforts. To do this, you may use the analytics tool you implemented — depending on your software, you might have the ability to create customized reports and dashboards or pull the specific details about data points you care most about.
In addition to applying your tools to help measure your success, you may also consider your answers to the following questions:
- Did you achieve your SMART goals?
- Did the metrics you chose to focus on tell a story that’s helpful for your business?
- Did the software or tool you implemented support your business needs?
5. Make necessary social media analytics adjustments.
Once you measure the success of your social media analytics efforts, you’ll be able to determine whether or not any part of your strategy needs to be changed or updated.
Maybe you realize one of your data points isn’t providing the level of insight into your marketing efforts across social platforms, so you need to identify a new one to measure. Maybe your software doesn’t allow you to customize cross-channel reports the way you want to, so you need to implement a new tool. Or, if you’re happy with the way your social media analytics reporting and strategy is working, be sure to revisit your strategy in the future to ensure it continues meeting your expectations.
Begin Tracking and Applying Social Media Analytics
By tracking and applying the process of social media analytics to your strategy, you’ll be able to more effectively reach your audience. And when you do this, you’ll see improvements in factors that are directly tied to your ROI like engagement, conversions, loyalty, and more. Consider which tools and software are best for you and determine how you’ll track your social media analytics to create deeper relationships with your customers and followers.

35 Podcast Stats That Advertisers Need to Know in 2020
If you’re trying to connect with younger audiences, like millennials or Gen Z, odds are you’ve thought about creating a podcast for your brand.
I probably don’t need to tell you that podcasting takes time and effort. Not only do you have to figure out which topics will intrigue and captivate audiences, but you’ll also have to take time to book guests, record interviews, and build a solid recording space where you can create high-quality audio content.
As a busy marketer, you want to make sure you’re going to get a good return on your investment before you start spending time and money building a podcast.
One great way to see if podcasting could be a viable marketing tactic for your company or personal brandis through podcast advertising or sponsorships. With these tactics, you can identify podcasters with a price-point and audience target that makes sense for your brand. Then, you can work with them and leverage their expertise by sponsoring the content they’ve made. Alternatively, you could also create a native ad that aligns with their discussion topics.
If you aren’t sure if creating your own podcast is a good marketing strategy for your brand, you might see a return on podcast ads or sponsorships.
If you’re interested in a pursuing a podcast advertising strategy but aren’t sure if the right opportunities exist for your company, check out this list of more than 30 podcast advertising stats. We’ll cover podcasting’s biggest marketing opportunities, where podcasting is headed, and the demographics who tune in the most.
Podcasts and Advertising
- In 2018, 17% of marketers were actively planning to add podcasting to their strategy. (HubSpot)
- Podcast ad spending is expected to hit $354 million this year. (Statista)
- The average podcast ad slot costs between $10 to $50, with additional premium fees for shows with high listenership. (HubSpot)
- 54% of podcast consumers say that they are more likely to consider the brands they hear advertised on podcasts. (Edison Research)
- Podcast advertising revenue is expected to pass $1 billion by 2021. (IAB Podcast Ad Revenue Report)
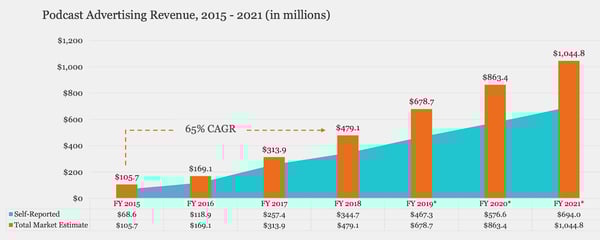
Podcast Growth
- In 2018, there were more than 750,000 active podcasts. (Podcast Insights)
- By the end of 2019, the number of podcasts jumped to 800,000 (Podcast Insights)
- Monthly podcast listeners grew from 24% of Americans to 26% year over year in 2018. (Edison Research)
- The number of podcast episodes climbed to over 30 million in December 2019. (Podcast Insights)
- The number of people that said they listened to a podcast at least once a week rose by 17% between 2018 and 2019. (Podcast Insights)
- Between 2018 and 2019, the number of people who listened to podcasts at work doubled. (EX-IQ)
Podcast Demographics
- Roughly 51% of people over the age of 12 in the U.S. have listened to a podcast at least once. (Edison Research)
- 56% of podcast listeners are men. (Podcast Insights)
- One-third of millennials regularly listen to podcasts. (EX-IQ)
- 27% of men and 24% of women listened to podcasts in 2018. (Edison Research)
- Roughly 34% of those making $50,000 to 75,000 annually and 32% of those making $75,000 to 100,000 listen to podcasts daily — more than any other income levels. (EX-IQ)
- The biggest increase in podcast listenership in the past year has come from those in the 12-to-24 age group. (Edison Research)
Podcast Listener Behaviors
- 32% of people listen to podcasts monthly while 22% listen at least weekly. (Edison Research)
- Only 42% of generations older than millennials will listen to a podcast of 26 minutes or longer, compared to 60% of Gen Z and 52% of Millennials. (EX-IQ)
- While 49% of podcast listeners tune in from home, 22% listen in the car. (Podcast Insights)
- Roughly 64% of people learn about podcasts through social media while about 40% of listeners say they hear about them from other friends or word of mouth. (EX-IQ)
- 80% of podcast listeners stay tuned in for most or all of the episodes they listen to. (Podcast Insights)
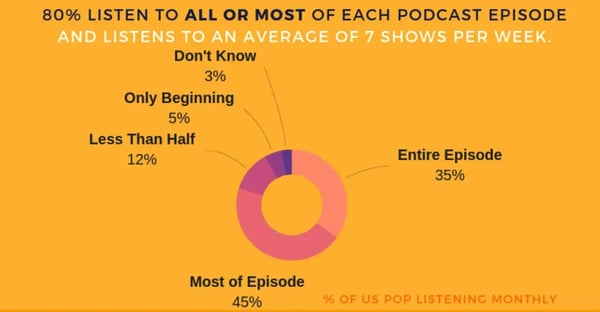
- Podcast listeners are more likely to own a smart speaker. (Edison Research)
- Podcasts are the number one audio source by time of consumption among podcast listeners. (Edison Research)
- In 2018, more than 67% of podcast listeners agreed that podcasts contribute to their intellectual growth. (EX-IQ)
- Millennials and Gen Z are 5% more likely to listen to podcasts for professional reasons than older generations. (EX-IQ)
- Roughly 50% of customer service reps have listened to a podcast at work. (EX-IQ)
- While 43% of people who listen to podcasts at least monthly listen via Spotify, 35% use Pandora. (Edison Research)
- More than half of millennials listen to educational podcasts. (EX-IQ)
- 62% of podcast listeners say they’d be more likely to share podcasts with friends if they were able to share one short segment or highlight of it, rather than an entire episode. (EX-IQ)
- In late 2018, premade edited in podcast ads made up 51% of placements. However, dynamic ads rose from making up 44% of ad placements in 2017 to 48% in the following year. (IAB Podcast Ad Revenue Report)
- The amount of branded content in podcasts increased by nearly 10% between 2017 and the end of 2018. (IAB Podcast Ad Revenue Report)
- More than 38% of podcast advertisements are sold and purchased on a quarterly basis. (IAB Podcast Ad Revenue Report)
- Nearly 86% of podcasters charge for ads with cost-per-mille pricing. (IAB Podcast Ad Revenue Report)
- NPR notes that 75% of its podcast listeners will respond or take action after hearing sponsored content. (National Public Media)
Considering podcast advertising?
As you’ve seen with the stats above, podcasting is growing in popularity — especially among younger generations. And while it is often considered a form of “entertainment,” podcast content can be incredibly versatile.
For example, although millennials or Gen Z listen to podcasts that feature interviews with big celebrities, they’ll also listen intently to smaller shows that educate them about new trends or news that impacts their life or career.
Because there are so many podcasts, and so many listeners with buying potential, you might want to consider podcast sponsorships in your future advertising plan.
To learn more about how to advertise on a podcast that’s appropriate for your industry, check out this step-by-step guide with tips from HubSpot’s own podcast expert.

9 of The Best Facebook Groups We’ve Ever Seen
Let’s face it: the way people are using and interacting with Facebook is shifting. The same can be said for businesses, too.
In the past, businesses looking to market using Facebook had one major tool at their disposal — their Facebook Page. In fact, for a long time, Pages were the reason many businesses joined Facebook in the first place.
Facebook is a very different place compared to when it first entered the marketing scene. Organic reach is harder to come by, advertising is more important than ever, the amount of competition is overwhelming, and the more traditional tactics — like posting frequently or asking users to like or share your content — don’t seem to work anymore.
However, it’s not all doom and gloom. There is another tool marketers have at their disposal: Facebook Groups.
Groups are nothing new to the marketing world, but they present a variety of interesting business opportunities. They are an excellent place for two-way communication between businesses and their customers. And if a Group is public, it’s a great place for prospects, too.
Ultimately, Groups give businesses the chance to engage with their audience in a more meaningful and authentic way than they ever could using their Page.
So, we took some time and scoured the web to find businesses who do a really good job at utilizing Groups to engage and delight their customers, and prospects too, in new and exciting ways. Here are nine Facebook Groups that are crushing it to help inspire your future Facebook marketing strategy.
1. Instant Pot
Members: 2.5 million
While the Instant Pot Facebook Page has a follower count of about 267,000, their Group — Instant Pot Community — has a whopping 2.5 million members.
The Group sees about 10,000 posts every 30 days. Talk about a high level of engagement! The popular electric cooker brand uses its group to create a space where the international community of Instant Pot users can ask questions, post unique recipes, and share the joy of cooking with their products.
They also offer limited trouble-shooting in the case that any customers experience any issues or have product-specific questions. They rarely ever promote their products within the Group, outside of the occasional giveaway where members can enter to win prizes to use with their Instant Pot.
This is a great example of a brand using Facebook Groups to create an environment where members who share a common interest — in this case, cooking with the Instant Pot — can interact and engage.
2. Gold’s Gym
Members: 6,000
Every year, Gold’s Gym hosts The Gold’s Gym Challenge where members sign-up for a 12-week fitness program. Instead of just offering a unique training program, Gold’s Gym took it a step further. They used Facebook Groups to create a space where current, and past, members can share their progress on their 12-week challenge, find support, and document their journey.
If you’ve ever attempted any sort of fitness challenge, you know how meaningful and important support from people in the same program or challenge can be.
3. National Geographic
Members: 66,000

When it comes to the art of inspiring and being a voice for change, there are very few who do it quite as well as National Geographic. Their group, Women of Impact, focuses on “celebrating world-shaping powerhouses” and encourages anyone who is passionate about women breaking barriers in their fields to join.
A group doesn’t always need to be directly related to products or services and this is a great example — National Geographic originally started out as a magazine. The publication uses Facebook Groups to connect with an audience that deeply aligns with issues and initiatives the brand also cares deeply about.
4. Elementor
Members: 57,089
Elementor, a WordPress page builder plugin, has a Facebook group that consists of just over 50,000 members. Where they really excel, however, is using their group to drive engagement. On average, the group sees over 4,000 posts every month. 4,000! Let that sink in for a second. That level of engagement is unheard of on a business Page.
And when it comes to engagement, not only do Groups beat out Pages, but Facebook prioritizes Group content over Pages.
5. Peloton
Members: 245,000
Similarly to Instant Pot, Peloton — an American company that makes high-end exercise equipment and hosts virtual fitness classes — created the Official Peloton Member private group where anyone who owns one of their products can connect and network with others who have Peloton’s products, too. And when it comes to exercise, this type of network or group provides value to its members as they’re able to share exercise plans, techniques, schedules, and training methods with one another.
Like some of the other groups in this list, Peloton created a private community, meaning members need to request access. This is a good tactic when you’re trying to create an exclusive experience for customers or members who are invested in your product. The exclusive community adds an element of value to their experience.
6. MobileMonkey
Members: 32,403
Here’s an example of a company whose reach potential for their Group far surpasses that of their Page. MobileMonkey‘s business Page only has 6,000 followers. Their Facebook Group, however, has a staggering 32,400 members. Their Group — MobileMonkey Island — is product-specific and provides an environment where members can ask questions and share knowledge about Facebook Messenger, chatbot marketing, and advanced Facebook Ads with MobileMonkey.
Instead of creating, or even building, a separate community, MobileMonkey does a really great job at meeting their users where they’re already active — on social media.
7. HubSpot Academy
Members: 7,000
Okay — shameless-plug, we know — but there are a few reasons why HubSpot Academy’s Content Marketing Pros Group makes the list. It is a closed group, so members need to request to be a part of it. Once in the group, members can share ideas about content challenges, projects they’re working on, and even share ideas for courses they would like to see HubSpot Academy produce in the future.
It’s a great example of how you can invite your customers to be a part of the process, and show them that you value their feedback and input. This type of group works especially well for B2B businesses.
8. Canva
Members: 10,000

Like MobileMonkey, Canva’s Group — Canva Design Circle — is product-specific where members can make the most out of their tool through Canva’s Design School. They can also get the latest updates, tips, and insights directly from the Canva team. This is a great example of a company using Groups to help members navigate their product in a larger community with other members who might be sharing similar challenges.
9. Tasty
Members: 47, 000
Tasty calls it’s public group, the Tasty Community, a Global Potluck. The group connects a global community of people who share a common interest — a love for Tasty and food. Members share recipes, ideas for substitutes, and cooking tips.
The group drives engagement by encouraging its members to share their recipes and stand a chance of having that recipe featured on their website, Tasty.co. By creating these competitions or incentives they’re encouraging members to participate in the community and connect with other members.
When you’re thinking about how you can incorporate Groups as a part of your Facebook strategy, remember to think of it as an additional resource that you’re providing to your customers and prospects.
If you’d like to learn more about how you can use Groups as a part of your Facebook Marketing Strategy, check out HubSpot Academy’s new Facebook Marketing Course.

How to Use LinkedIn Ads to Reach Your Target Audience
Are you reaching the right audience on LinkedIn? Wondering how to better target prospects and leads with LinkedIn ads? In this article, you’ll discover how to target your ideal audience with LinkedIn advertising. #1: Use LinkedIn Audience Attributes to Describe Your Ideal Customer We know that LinkedIn is the number-one social media platform for B2B […]
The post How to Use LinkedIn Ads to Reach Your Target Audience appeared first on Social Media Marketing | Social Media Examiner.
from Social Media Marketing | Social Media Examiner https://ift.tt/3d6gUrr
via socialmediaexaminer
The Ultimate Guide to Email Marketing
The first marketing email was sent in 1978, resulted in $13 million in sales, and kicked off what has become one of the most highly used marketing channels even to this day. Given its early beginnings, email isn’t as shiny as some newer channels like messaging and social, but it is an effective way to build an owned audience that gets results.
Email isn’t dead. It’s one of the few marketing channels we can use to build an authentic connection with the humans that keep our businesses alive.
Email marketing isn’t spam. It’s not a personal note from an old colleague either. It’s something in between. Your customers don’t give their information lightly, and — if used right — email marketing can be both a relationship-building and profit-building tool.
You should use email to build upon an existing relationship with your subscribers and leads by providing relevant, valuable information that will help them take action on their goals.
That’s right, email marketing isn’t just about you, or your company. It’s about your customer.
If you keep this golden rule in mind, your subscribers will not only read your emails, but they will look forward to hearing from you every time.
Unless you have the (wo)manpower, free time, and capital to individually build a personal relationship with each one of your prospects and customers, email should be your best marketing friend.
So, how does email marketing actually work anyway?
Now let’s review when you should use email marketing and some benefits and statistics that support the reason why email marketing is so valuable.
Master the fundamentals of email marketing with a free online course.
When to Use Email Marketing
There are many ways to use email marketing — some of the most common including using the tactic to:
- Build relationships: Build connections through personalized engagement.
- Boost brand awareness: Keep your company and your services top-of-mind for the moment when your prospects are ready to engage.
- Promote your content: Use email to share relevant blog content or useful assets with your prospects.
- Generate leads: Entice subscribers to provide their personal information in exchange for an asset that they’d find valuable.
- Market your products: Promote your products and services.
- Nurture leads: Delight your customers with content that can help them succeed in their goals.
Email Marketing Benefits
- There are 3.8 billion email users worldwide, so if you’re looking for a way to reach your customers, email is the perfect place to find them.
- On average, email generates $38 for every dollar spent, which is a 3,800% return on investment.
- Two thirds of customers have made a purchase as a direct result of an email marketing message.
- Only 20% of leads that are sent directly to sales are qualified, meaning they need to be nurtured via email and great content.
- When it comes to customer acquisition, email is 40X more effective than Facebook and Twitter combined.
- Perhaps the best reason to use email marketing is that you own the channel. Outside of compliance regulations, there is no external entity that can impact how, when, or why you reach out to your subscribers.
Featured Resource
Email Marketing Stats by Industry
Email marketing rules change based on your industry and who you’re marketing to. Below are some email marketing trends for B2B, B2C, ecommerce, and real estate companies that can inform your email marketing strategy.
Email Marketing Stats for B2B
- Emails that are triggered by an action perform 3X better than nurture emails or drip campaigns
- For 86% of professionals, email is their preferred communication channel
- 60% of marketers believe that email marketing produces a positive ROI
- Clickthrough rates are 47% higher for B2B emails than B2C
- Subject-line emojis accounted for increased open rates for 56% of brands
Email Marketing Stats for B2C
- 78% of consumers have unsubscribed from lists because a brand was sending too many emails
- Over 90% of consumers check their emails daily
- Email subscribers are 3X more likely to share social content than others
Email Marketing Stats for eCommerce
- 86% of consumers would like to receive a promotional email from brands they subscribe to at least once per month
- Segmented emails generate 58% of company revenue
Email Marketing Stats for Real Estate
- The majority (53%) of real estate companies obtain subscribers from their website
- Businesses that blog get twice as much traffic from email as those that don’t
- 40% of real estate companies use list segmentation
Getting Started with Email Marketing
Before you get overwhelmed with the vast possibilities of email marketing, let’s break down a few key steps to get you started building a strong email campaign that will delight your customers. You can think of these steps as the way to create a successful email marketing strategy.
Create an Email Marketing Strategy
Each of your customers receives 121 emails every day. That means, if you don’t take the time to develop a strategy, your emails will get lost in crowded inboxes, or worse, be sent to the spam folder.
You can learn how to build an effective email strategy and send emails that people actually want to read. It just takes a plan (one that can be broken down into a few key steps).
Think of the following five steps as an outline for your email strategy. We’ll dive deeper into some of these in a moment.
Featured Resource
1. Define Your Audience
An effective email is a relevant email. Like everything else in marketing, start with your buyer persona, understand what they want, and tailor your email campaign to your audience’s needs.
2. Establish Your Goals
Before you come up with your campaign goals, gather some context. Research the average email stats for your industry and use them as benchmarks for your goals.
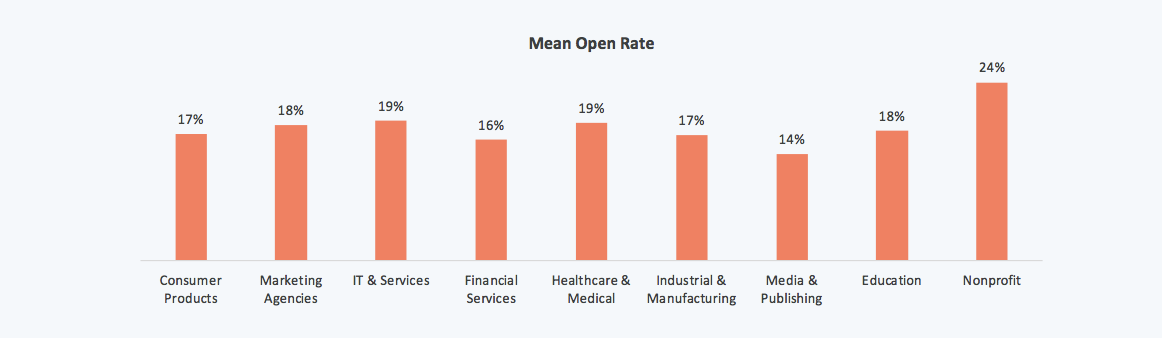
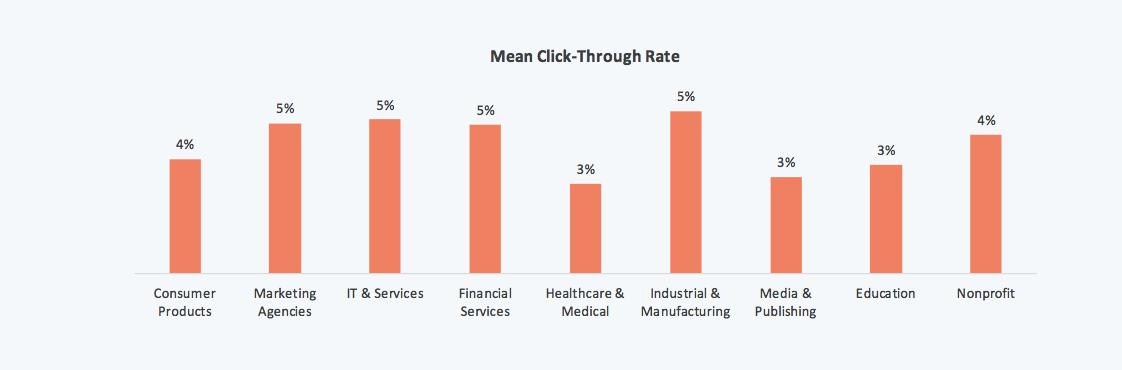
3. Create a Way for People to Sign Up
You need people to email, right? An email list (we’ll cover how to build your email list in the next section) is a group of users who have given you permission to send them relevant content. To build that list, you need several ways for prospects to opt in to receive your emails.
Don’t be discouraged if you only have a few people on your list to start. It can take some time to build. In the meantime, treat every single subscriber and lead like gold, and you’ll start to see your email list grow organically.
4. Choose an Email Campaign Type
Email campaigns vary and trying to decide between them can be overwhelming. Do you send a weekly newsletter? Should you send out new product announcements? Which blog posts are worth sharing?
These questions plague every marketer. The answer is subjective. You can start by learning about the different types of email campaigns that exist, then decide which is best for your audience. You should also set up different lists for different types of emails, so customers and prospects can sign up for only the emails that are relevant to them.
5. Make a Schedule
Decide how often you plan to contact your list, inform your audience upfront so they know what to expect, and stick to a consistent schedule to build trust, and so they don’t forget about you.
6. Measure Your Results
This should come as no surprise. As marketers, we measure everything. Being meticulous about every key metric will help you make small changes to your emails that will yield large results. We’re going to touch on the exact KPIs to monitor in a bit (or you can simply jump ahead).
Now that you understand the steps to creating an email marketing strategy, we’ll look at what’s involved in building your email list.
How to Build Your Email List
Now to the fun part: filling your email list with eager prospects that are excited to hear from you.
There are many creative ways to build your email list (and, no, purchasing emails ain’t one). Tactically speaking, list building comes down to two key elements that work cohesively to grow your subscriber numbers: lead magnets and opt-in forms.
Featured Resources
Here’s how to get started building and growing your email list.
1. Use lead magnets.
Your lead magnet is exactly as it sounds: something that attracts prospects to your email list, usually in the form of a free offer. The offer can take a number of formats, should be valuable to your prospects, and is given away for free in exchange for an email address.
There’s just one problem: People have become hyper protective of their personal information. You can’t expect to receive an email address without exchanging it for something valuable.
Think about a lead magnet that is relevant, useful, and makes your prospects’ lives easier.
Here are a few types of lead magnets you could create:
- Ebook
- Whitepaper
- Infographic
- Report or Study
- Checklist
- Template
- Webinar or Course
- Tool
If you’re short on resources, you can even repurpose your existing content to create lead magnets.
How to Create a Great Lead Magnet
Remember that your lead magnet should be relevant to your prospects. Here are a few guidelines to ensure you’re creating a valuable asset for your potential list.
Make your offer solution-oriented and actionable.
Provide practical information that solves a problem and create a realistic way to achieve the solution.
Ensure that the asset is easy to consume.
Lead magnets should be delivered in a digital format. Whether it’s a PDF, a webpage, a video, or some other format, make it easy for your new lead to obtain and consume it.
Create your offer with future content in mind.
There’s nothing worse than signing up for a great offer only to be disappointed by the content that follows. Make sure your offer is aligned with the value that you will provide throughout your relationship, otherwise you risk damaging trust.
Treat your lead magnet as a stepping stone to your paid solution.
The point of your email list is to eventually guide subscribers to a paid offer. You offer free content to demonstrate the value that you provide as a company, and those free offers should eventually lead to your product or service.
Create offers that are relevant to each stage of the buyer’s journey.
Every new lead will be at a different stage of the buyer’s journey, and it’s your responsibility to know which. Segment your list from the beginning by providing separate opt-in offers that pertain to each stage of the buyer’s journey. You can tell a lot about a prospect’s mindset by the content they consume.
2. Create an enticing opt-in form.
Your opt-in form is how you get a prospect’s information to add them to your list. It’s the gate between your future leads and the incredible asset that you created with them in mind. Here are some tips for creating an enticing opt-in form:
Create an attractive design and attention-grabbing header.
Your form should be branded, stand out from the page, and entice people to sign up. You want to excite readers with the offer.
Make the copy relevant to the offer.
While your goal is to get people to enter their information, it isn’t to deceive them. Any information on your form should be a truthful representation of the offer.
Keep the form simple.
This could be one of your first interactions with your prospect. Don’t scare them away with a long form with several fields. Ask for only the most essential information: first name and email is a good place to start.
Set your opt-in form for double confirmation.
It may seem counterproductive to ask your subscribers to opt in to your emails twice, but a study on open rates proves that customers prefer a confirmed opt-in (COI) email 2.7X more than a welcome email.
Ensure that the flow works.
Take yourself through the user experience before you go live. Double check that the form works as intended, the thank you page is live, and your offer is delivered as promised. This is one of your first impressions on your new lead — make it a professional and positive one.
Next, let’s take a moment to cover some universally-accepted email marketing best practices regarding how to send marketing emails.
If all goes well, you’ll have built a robust list of subscribers and leads that are waiting to hear from you. But you can’t start emailing just yet unless you want to end up in a spam folder, or worse, a blocked list.
Here are a few extremely important things to keep in mind before you start emailing your precious list that you worked so hard to build.
1. Choose an email marketing service.
An email marketing provider (ESP) is a great resource if you’re looking for any level of support while fine-tuning your email marketing efforts.
For example, HubSpot’s Email Marketing tool allows you to efficiently create, personalize, and optimize marketing emails that feel and look professional without designers or IT. There are a variety of features to help you create the best email marketing campaigns and support all of your email marketing goals.
Additionally, you can analyze the success of your email marketing so you can share the data that matters most to your business with your team. The best part? You can use HubSpot’s Email Marketing service for free.
Here are examples of features services like HubSpot offer to consider when choosing an email service provider:
- CRM platform with segmentation capabilities
- Good standing with Internet Service Providers
- A positive reputation as an email service provider (ESP)
- Easy-to-build forms, landing pages, and CTAs
- Automation
- Simple ways to comply with email regulations
- Ability to split test your emails
- Built-in analytics
- Downloadable reports
2. Use email marketing tips.
While you probably don’t think twice about the formatting or subject line of an email you send to a friend, email marketing requires a lot more consideration. Everything from the time you send your email to the devices on which your email could be opened matters.
Your goal with every email is to generate more leads, which makes crafting a marketing email a more involved process than other emails you’ve written.
Let’s touch on the components of a successful marketing email:
Copy: The copy in the body of your email should be consistent with your voice and stick to only one topic.
Images: Choose images that are optimized for all devices, eye-catching, and relevant.
CTA: Your call-to-action should lead to a relevant offer and stand out from the rest of the email.
Timing: Based on a study that observed response rates of 20 million emails, Tuesday at 11 AM ET is the best day and time to send your email.
Responsiveness: 55% of emails are opened on mobile. Your email should, therefore, be optimized for this as well as all other devices.
Personalization: Write every email like you’re sending it to a friend. Be personable and address your reader in a familiar tone.
Subject Line: Use clear, actionable, enticing language that is personalized and aligned with the body of the email.
Featured Resource
3. Implement email segmentation.
Segmentation is breaking up your large email list into sub categories that pertain to your subscribers’ unique characteristics, interests, and preferences.
Our subscribers are humans, after all, and we should do our best to treat them as such. That means, not sending generic email blasts.
We talked about segmentation briefly above. The reason why this topic is important enough to mention twice is that, without it, you run the risk of sending the wrong content to the wrong people and losing subscribers.
Why should you segment your email list?
Each person who signs up to receive your emails is at a different level of readiness to convert into a customer (which is the ultimate goal of all this).
If you send a discount coupon for your product to subscribers that don’t even know how to diagnose their problem, you’ll probably lose them. That’s because you’re skipping the part where you build trust and develop the relationship.
Every email you send should treat your subscribers like humans that you want to connect with, as opposed to a herd of leads that you’re trying to corral into one-size-fits-all box.
The more you segment your list, the more trust you build with your leads and the easier it’ll be to convert them later.
Not to mention, segmented emails generate 58% of all revenue.
How to Segment Email Lists
The first step in segmentation is creating separate lead magnets and opt-in forms for each part of the buyer’s journey. That way, your contacts are automatically divided into separate lists.
Beyond that, email marketing platforms allow you to segment your email list by contact data and behavior to help you send the right emails to the right people.
Here are some ways you could break up your list:
- Geographical location
- Lifecycle stage
- Awareness, consideration, decision stage
- Industry
- Previous engagement with your brand
- Language
- Job Title
In reality, you can segment your list any way that you want. Just make sure to be as exclusive as possible when sending emails to each subgroup.
4. Personalize your email marketing.
Now that you know who you’re emailing and what’s important to them, it will be much easier to send emails with personalized touches.
Sure, you’re speaking to 100+ people at one time, but your leads don’t need to know it.
To really drive this point home, consider this: Personalized emails have 26% higher open rates, and an improved click-through rate of 14% when compared to others.
You’ve gathered all this unique data. Your email marketing software allows for personalization tokens. You have no excuse for sending generic emails that don’t make your leads feel special.
Here are a few ways to personalize your emails:
- Add a first name field in your subject line and/or greeting
- Include region-specific information when appropriate
- Send content that is relevant to your lead’s lifecycle stage
- Only send emails that pertain to the last engagement a lead has had with your brand
- Write about relevant and/or personal events, like region-specific holidays or birthdays
- End your emails with a personal signature from a human (not your company)
- Use a relevant call-to-action to an offer that the reader will find useful
5. Incorporate email marketing automation.
Automation is putting your list segmentation to use. Once you’ve created specific subgroups, you can send automated emails that are highly targeted. There are a couple ways to do this.
Autoresponders
An autoresponder, also known as a drip campaign, is a series of emails that is sent out automatically once triggered by a certain action, for instance, when someone downloads your ebook.
You’ll use the same guidelines for writing your emails that we discussed previously to ensure that your readers find your emails useful and interesting. You should decide how far apart you’d like your emails to be sent, say every few days or weeks or even months.
The great thing about autoresponders is that you can set it and forget it. Every user that is part of your autoresponder will receive each email that you’ve added to the series.
Workflows
Workflows take autoresponders a step further. Think of Workflows like a flow tree with yes/no branches that will execute actions based on the criteria that you set.
Workflows have two key components: 1. Enrollment criteria, or the action that would qualify a user for the workflow. 2. Goal, or the action that would take a user out of the workflow.
Workflow tools are smart enough to know if a user opened an email or downloaded an offer, and it will set off a series of actions based on that behavior. That means, it can send an email series, or even change a prospect’s lifecycle stage based on what a user does.
Here’s an example of how a workflow could be set up:
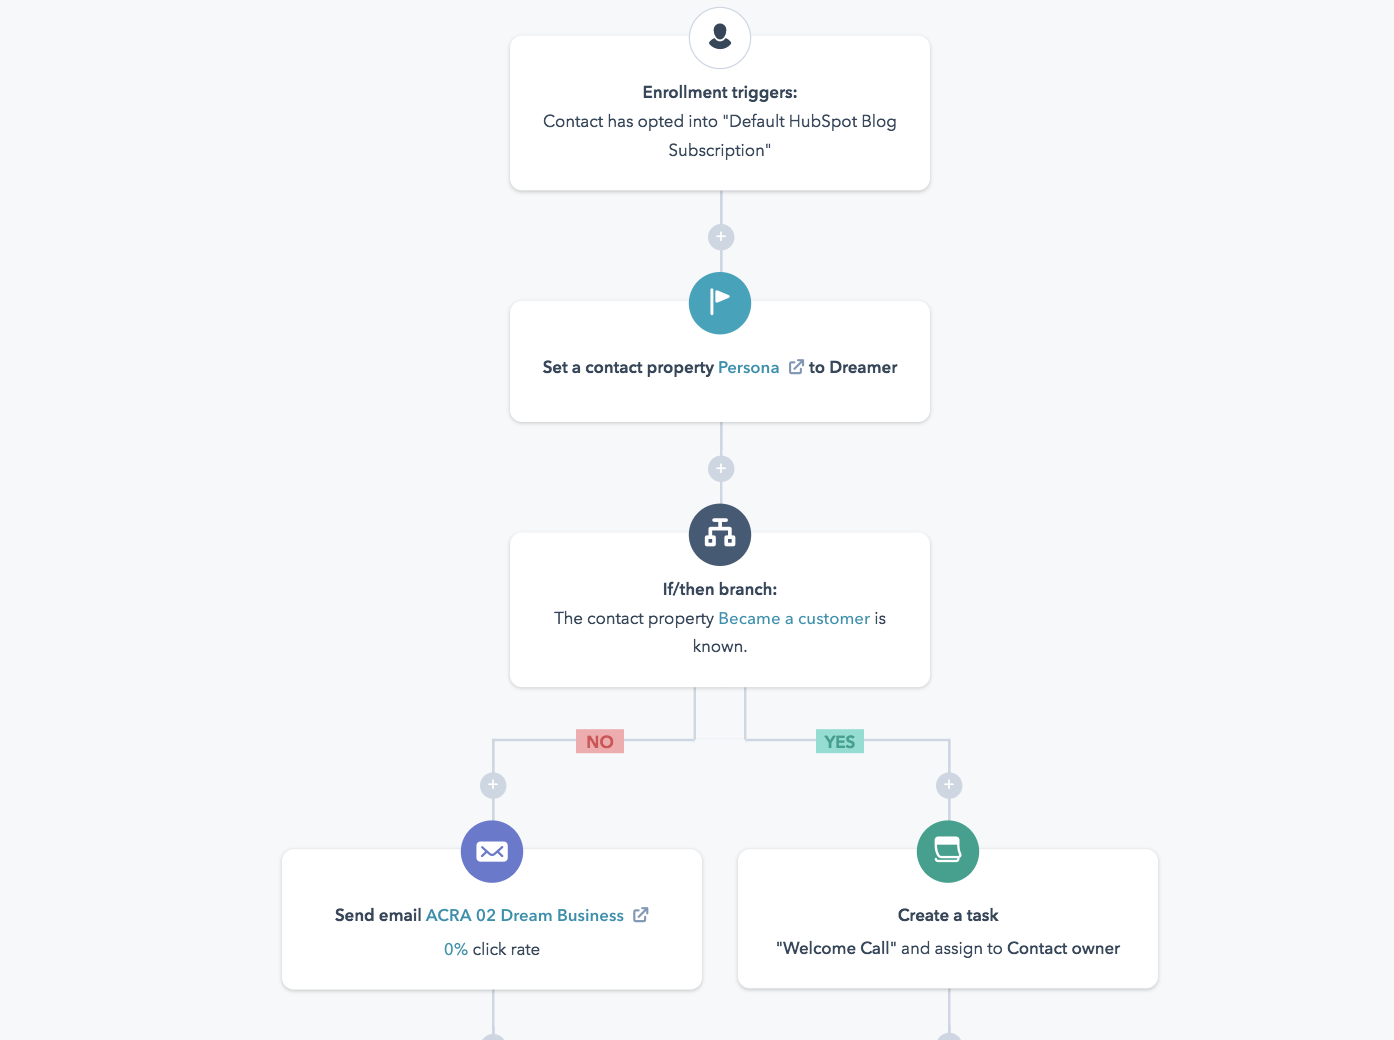
The key difference from an autoresponder is that workflows are smart: They can change the course of your automated series based on what your prospect will find useful.
For instance, if a new subscriber receives a welcome email and the subsequent email is set up to send them an offer that they already found and downloaded on your site, the workflow tool will know and adapt. In an autoresponder, a user receives a specific set of emails at specific time intervals no matter what action they take.
Why is this important? Sending the right email at the wrong time is detrimental to your bottom line. Companies see a 20% increase in revenue when they send emails based on lifecycle stages.
6. Use email marketing templates.
Email marketing templates — like these ones from HubSpot — are another great resource to help you with your email marketing.
Unless you’re a designer and developer on top of being a skilled marketer, templates will save you a ton of time — they take the design, coding, and UX-definition work out of crafting your emails.
Just one caveat: when making your selection, choose email templates that are proven to be effective. The highest-quality templates come from the most reputable ESPs that have tested them against thousands of alternatives. So, stick with the professionals.
And speaking of things like quality work and great reputation, there are some email regulations to be aware of when crafting emails and developing your marketing strategy.
Email Regulations
Email regulations are consistent with consumers’ desires to know how and why their information is being used. If there’s anything we care about, it’s complying with what our customers—or potential customers—want.
1. CAN-SPAM Compliance
Technically, CAN-SPAM is an acronym for Controlling the Assault of Non-Solicited Pornography and Marketing (because sometimes the two go together).
In practice, it’s a way to protect your subscribers’ right to only receive emails that they’ve requested.
The law was passed in 2003 and applies to any commercial emails used for business purposes.
Here are the ways to ensure that your emails are CAN-SPAM compliant:
- Include your company name and address in every email.
- Place visible unsubscribe links within your emails.
- Use real email addresses in the “From” and “Reply to” fields.
- Write subject lines that indicate the contents of the email.
Please note: This is not to be confused for legal advice. See the FTC’s site for more specific legal information regarding CAN-SPAM laws.
2. GDPR Compliance
“GDPR is wholly consistent with the inbound approach to business” – Brian Halligan, HubSpot CEO
While some may view these newly implemented email regulations as burdensome and unnecessary, General Data Protection Regulation (GDPR) actually moves us closer to building long-lasting and trusting relationships with our customers.
GDPR is about giving your customers the right to choose. They choose your emails. They choose to hear from you. They choose your products. And that is exactly what inbound marketing is about.
Something important to note about GDPR is that it only applies to businesses that operate in the European Union and businesses that market to EU citizens. Noncompliance will result in significant fees that aren’t worth the risk, so make sure read the GDPR guidelines entirely.
Here’s an overview of how you can comply with GDPR laws:
- Use explicit and clear language when requesting consent to store personal information.
- Only collect contact data that is necessary for and relevant to your business.
- Store contact data in a secure manner and only use it for the agreed-upon purpose.
- Retain data for justifiable business purposes only.
- Delete contact data on request.
- Make it easy for contacts to unsubscribe from your list or update their preferences.
- Comply promptly to a contact’s request for access to their data.
- Keep company records to prove GDPR compliance.
These regulations will be taken seriously (as they should), so it’s a good idea to create a GDPR strategy for your business before you start sending out emails.
3. Avoid Spam Filters
You spend time creating the perfect email and adhering to regulations, so the last thing you want is to end up in a spam folder.
You’ll want to avoid the spam folder because:
- It hurts your deliverability rates across the board.
- Your contacts will likely miss all of your emails.
- You won’t be able to accurately measure your email marketing effectiveness.
- Your analytics will be skewed.
You can avoid being deduced to spam by:
Getting whitelisted.
A whitelist is the opposite of a blacklist, meaning it’s a list of approved senders that are allowed to reach the subscriber’s inbox. The easiest way to accomplish this is to have your new subscriber add your email address to their address book. Include directions on how to do this in your welcome email.
Minding your copy.
Avoid using all caps and multiple exclamation points, as well as spam trigger words, like “opt in”, “click below”, and “order”, that are easily detected and marked down by Internet Service Providers (ISPs).
Using a reliable email service provider.
Your email service provider’s reputation affects your deliverability, so stick to established, well-known companies.
Implementing a double opt-in.
After someone opts in to your email list, send an email asking them to confirm. This ensures that your new subscriber is genuinely interested in your emails and will likely be more engaged.
(Check out more ways you can avoid the spam filter.)
And last but certainly not least, you need to consistently measure the success of your email marketing efforts. There are a number of options you can choose from when it comes to your business’s email marketing analytics.
Email Marketing Analysis
By diving into your email marketing analytics, you’ll be able to make better decisions that are sure to positively impact your business’s bottom line, resonate with your subscribers, readers, and customers, and justify your work to the rest of your company.
Here are the best ways to analyze the effectiveness of your email marketing campaigns.
1. A/B test your marketing emails.
Not all email lists are created equal. Some audiences prefer personalization and others will think it’s spammy. Some audiences will like bright, eye-catching CTA buttons, and others will prefer a more subtle call-to-action.
You’ll never know what type of people make up your email list until you test the variables. That’s where A/B testing comes in handy.
A/B testing, or split testing, is a way to see what type of email performs best with your audience by analyzing the results of email A against email B.
Here’s the step-by-step process for A/B testing your emails:
- Select one variable to test at a time, e.g., subject line, CTA, images.
- Create two versions of the email: one with and one without the variable.
- Allow your emails to be sent out simultaneously for a period of time.
- Analyze your results and keep only the version that performed better.
- Test a new variable and repeat the process.
Most email service providers will have A/B testing built into their software, which will make it easy for you to compare email results without much manual work.
Featured Resource
2. Set email marketing KPIs.
There are four keys metrics to pay attention to when evaluating the effectiveness of your email marketing campaign.
- Deliverability measures the rate at which emails reach your intended subscribers’ inboxes.
- Open rate is the percentage of people that open your email once it reaches their inbox.
- Clickthrough rate (CTR) is the percentage of people that click on your CTAs.
- Unsubscribes measures the number of people who opt out of your email list once they receive an email from you.
3. Adjust different email element to improve results.
Many factors impact your KPIs, and it’s going to take some experimentation and guesswork to figure out which tweaks to your emails will yield that biggest changes.
If you aren’t getting the numbers you want, try playing with these variables to improve your email results.
Deliverability
- Ensure that you’re following best practices when it comes to avoiding spam filters.
- Remove inactive people from your email list to keep only engaged subscribers.
- Check which emails hard-bounced and remove those email addresses from your list.
Open Rate
- Play with the language in your subject line to entice people to click on your email.
- Adjust the time and day that you send your email to see what works best.
Clickthrough Rate (CTR)
- Evaluate your offer to ensure that it provides value to your segmented list.
- Rewrite your copy to make sure that it’s clear what you want the reader to do.
- Try different CTAs, e.g., graphic versus Inline copy, bold versus subtle.
Unsubscribes
- First, consider if this a blessing in disguise, as uninterested parties are removing themselves from your list.
- Evaluate whether the email you sent is aligned with your brand.
- Ensure you haven’t performed a bait-and-switch by promising one thing and delivering another.
- Make sure your emails are providing value to your audience before trying to upsell.
4. Use an email marketing report template.
Your data does no good if you can’t report it in an organized fashion.
An email marketing report is a spreadsheet where you can record your results in one place to help you make inferences from your KPIs and take action to improve them.
Here’s how you should organize your report:
Metrics:
- Total number of emails sent
- Number of emails delivered
- Deliverability Rate
- Bounce Rate
- Open Rate
- Clickthrough Rate
- Unsubscribe Rate
Data:
- Subject line
- Length of email body
- Offer
- CTA (inline or graphic)
- List segment
Questions To Ask:
- Was your deliverability rate high in comparison to previous periods?
- How did your CTR compare to your open rate?
- Were your unsubscribe numbers consistent with other emails?
- Did a certain subject line perform better than others?
- Does the length of email make a difference in CTR?
- Could another style of CTA perform better?
- Was the offer appropriate for the list segment?
Begin Email Marketing
While there are many rules to sending a marketing email, the most important is this: Treat your subscribers like humans.
You can achieve all of your email marketing goals if you keep this golden rule top-of-mind in every autoresponder, lead magnet, and subject line.
When in doubt or if you’re ever in need of inspiration, turn to some of the greatest email marketing examples. You can also take a look at some quick additional tips in this video by HubSpot Academy:
And remember, your subscribers want to hear from you and they want to relate to you. Be a genuine resource, and they will look forward to opening an email from you just like they would any friend of theirs.
Editor’s note: This post was originally published in 2019 and has been updated for comprehensiveness.

How to Write a Blog Post: A Step-by-Step Guide [+ Free Blog Post Templates]
You’ve probably heard how paramount blogging is to the success of your marketing. But it’s important that you learn how to start a blog and write blog posts for it so that each article supports your business.
Without a blog, your SEO can tank, you’ll have nothing to promote on social media, you’ll have no clout with your leads and customers, and you’ll have fewer pages to put those valuable calls-to-action that generate inbound leads.
So why, oh why, does almost every marketer I talk to have a laundry list of excuses for why they can’t consistently blog?
Maybe because, unless you’re one of the few people who actually like writing, business blogging kind of stinks. You have to find words, string them together into sentences … ugh, where do you even start?
Well my friend, the time for excuses is over.
Today, people and organizations of all walks of life manage blogs to share analyses, instruction, criticisms, and other observations of an industry in which they are a rising expert.
After you read this post, there will be absolutely no reason you can’t blog every single day — and do it quickly. Not only am I about to provide you with a simple blog post formula to follow, but I’m also going to give you free templates for creating five different types of blog posts:
- The How-To Post
- The List-Based Post
- The Curated Collection Post
- The SlideShare Presentation Post
- The Newsjacking Post
With all this blogging how-to, literally anyone can blog as long as they truly know the subject matter they’re writing about. And since you’re an expert in your industry, there’s no longer any reason you can’t sit down every day and hammer out an excellent blog post.
What makes a good blog post?
Before you write a blog post, you should understand what makes a good post. You should know the answers to questions like “Why would someone keep reading your entire blog post?” and “What makes your audience come back for more?”
To start, a good blog post is interesting and educational. Your blogs should answer a reader’s question and help them with a problem they might have. Maybe more importantly, you have to do this in an interesting way.
It’s not enough just to answer someone’s questions. You have to provide actionable steps, while being entertaining. For example, your introduction should hook the reader to continue reading the post.
Then, you can use examples to keep your readers interested in what you have to say.
A good blog post is interesting to read, while also providing educational content to its audience.
Want to learn how to apply blogging and other forms of content marketing to your business? Check out HubSpot Academy’s free content marketing training resource page.
How to Write a Blog Post
1. Understand your audience.
Before you start to write your first blog post, have a clear understanding of your target audience. What do they want to know about? What will resonate with them? This is where creating your buyer personas comes in handy. Consider what you know about your buyer personas and their interests while you’re coming up with a topic for your blog post.
For instance, if your readers are millennials looking to start their own business, you probably don’t need to provide them with information about getting started in social media — most of them already have that down. You might, however, want to give them information about how to adjust their approach to social media from a more casual, personal one to a more business-savvy, networking-focused approach. That kind of tweak is what separates you from blogging about generic stuff to the stuff your audience really wants (and needs) to hear.
Don’t have buyer personas in place for your business? Here are a few resources to help you get started:
- Create Buyer Personas for Your Business [Free Template]
- Blog Post: How to Create Detailed Buyer Personas for Your Business
- [Free Tool] Make My Persona: Buyer Persona Generator
 2. Create your blog domain.
Next, you’ll need a place to host this and every other blog post you write. This requires choosing a content management system (CMS) and a website domain hosting service.
Sign Up With a Content Management System
A CMS helps you create a website domain where you’ll actually publish your blog. The CMS platforms available for you to sign up for can manage domains, where you create your own website; and subdomains, where you create a webpage that connects with an existing website.
HubSpot customers host their website content through HubSpot’s content management system. Another popular option is a self-hosted WordPress website on WP Engine. Whether they create a domain or a subdomain to start their blog, they’ll need to choose a web domain hosting service after choosing their CMS.
This is true for every blogger seeking to start their own blog on their own website.
Register a Domain or Subdomain With a Website Host
Your own blog domain will look like this: www.yourblog.com. The name between the two periods is up to you, as long as this domain name doesn’t yet exist on the internet.
Want to create a subdomain for your blog? If you already own a cooking business at www.yourcompany.com, you might create a blog that looks like this: blog.yourcompany.com. In other words, your blog’s subdomain will live in its own section of yourcompany.com.
Some CMSs offer subdomains as a free service, where your blog lives on the CMS, rather than your business’s website. For example, it might look like “yourblog.contentmanagementsystem.com.” However, in order to create a subdomain that belongs to a company website, you’ll need to register this subdomain with a website host.
Most website hosting services charge very little to host an original domain — in fact, website costs can be as inexpensive as $3 per month. Here are five popular web hosting services to choose from:
3. Customize your blog’s theme.
Once you have your blog domain set up, customize the appearance of your blog to reflect the theme of the content you plan on creating.
Are you writing about sustainability and the environment? Green might be a color to keep in mind when designing the look and feel of your blog, as green is often associated with sustainability.
If you already manage a website, and are writing your first blog post for that website, it’s important that your blog is consistent with this existing website, both in appearance and subject matter. Two things to include right away are:
- Logo. This can be your name or your business’s logo, either one helping to remind your readers who or what is publishing this content. How heavily you want to brand this blog, in relation to your main brand, is up to you.
- “About” page. You might already have an “About” blurb describing yourself or your business. Your blog’s “About” section is an extension of this higher-level statement. Think of it as your blog’s mission statement, which serves to support your company’s goals.
4. Identify your first blog post’s topic.
Before you even write anything, you need to pick a topic for your blog post. The topic can be pretty general to start with. For example, if you’re a plumber, you might start out thinking you want to write about leaky faucets.
Then, as you do your research, you can expand the topic to discuss how to fix a leaky faucet based on the various causes of a faucet leak.
You might not want to jump right into a “how-to” article for your first blog post, though, and that’s okay. Perhaps you’d like to write about modern types of faucet setups, or tell one particular success story you had rescuing a faucet before it flooded someone’s house.
If a plumber’s first how-to article is about how to fix a leaky faucet, for example, here are four other types of sample blog post ideas a plumber might start with, based on the five free blog templates we’ve offered to you:
- List-based Post: 5 ways to fix a leaky faucet
- Curated Collection Post: 10 faucet and sink brands you should look into today
- SlideShare Presentation: 5 types of faucets that should replace your old one (with pictures)
- News post: New study shows X% of people don’t replace their faucet on time
Find more examples of blog posts at the end of this step-by-step guide.
If you’re having trouble coming up with topic ideas, check out this blog post from my colleague Ginny Soskey. In this post, Soskey walks through a helpful process for turning one idea into many. Similar to the “leaky faucet” examples above, she suggests that you “iterate off old topics to come up with unique and compelling new topics.” This can be done by:
- Changing the topic scope
- Adjusting the time frame
- Choosing a new audience
- Taking a positive/negative approach
- Introducing a new format
5. Come up with a working title.
Then you might come up with a few different working titles — in other words, iterations or different ways of approaching that topic to help you focus your writing. For example, you might decide to narrow your topic to “Tools for Fixing Leaky Faucets” or “Common Causes of Leaky Faucets.” A working title is specific and will guide your post so you can start writing.
Let’s take a real post as an example: “How to Choose a Solid Topic for Your Next Blog Post.” Appropriate, right? The topic, in this case, was probably simply “blogging.” Then the working title may have been something like, “The Process for Selecting a Blog Post Topic.” And the final title ended up being “How to Choose a Solid Topic for Your Next Blog Post.”
See that evolution from topic, to working title, to final title? Even though the working title may not end up being the final title (more on that in a moment), it still provides enough information so you can focus your blog post on something more specific than a generic, overwhelming topic.
6. Write an intro (and make it captivating).
We’ve written more specifically about writing captivating introductions in the post, “How to Write an Introduction,” but let’s review, shall we?
First, grab the reader’s attention. If you lose the reader in the first few paragraphs — or even sentences — of the introduction, they will stop reading even before they’ve given your post a fair shake. You can do this in a number of ways: tell a story or a joke, be empathetic, or grip the reader with an interesting fact or statistic.
Then describe the purpose of the post and explain how it will address a problem the reader may be having. This will give the reader a reason to keep reading and give them a connection to how it will help them improve their work/lives. Here’s an example of a post that we think does a good job of attracting a reader’s attention right away:

7. Organize your content in an outline.
Sometimes, blog posts can have an overwhelming amount of information — for the reader and the writer. The trick is to organize the info so readers are not intimidated by the length or amount of content. The organization can take multiple forms — sections, lists, tips, whatever’s most appropriate. But it must be organized!
Let’s take a look at the post, “How to Use Snapchat: A Detailed Look Into HubSpot’s Snapchat Strategy.” There is a lot of content in this post, so we broke it into a few different sections using the following headers: How to Setup Your Snapchat Account, Snaps vs. Stories: What’s the Difference?, and How to Use Snapchat for Business. These sections are then separated into sub-sections that to go into more detail and also make the content easier to read.
To complete this step, all you really need to do is outline your post. That way, before you start writing, you know which points you want to cover, and the best order in which to do it. To make things even easier, you can also download and use our free blog post templates, which are pre-organized for five of the most common blog post types. Just fill in the blanks!
8. Write your blog post!
The next step — but not the last — is actually writing the content. We couldn’t forget about that, of course.
Now that you have your outline/template, you’re ready to fill in the blanks. Use your outline as a guide and be sure to expand on all of your points as needed. Write about what you already know, and if necessary, do additional research to gather more information, examples, and data to back up your points, providing proper attribution when incorporating external sources. Need help finding accurate and compelling data to use in your post? Check out this roundup of sources — from Pew Research to Google Trends.
If you find you’re having trouble stringing sentences together, you’re not alone. Finding your “flow” can be really challenging for a lot of folks. Luckily, there are a ton of tools you can lean on to help you improve your writing. Here are a few to get you started:
- Power Thesaurus: Stuck on a word? Power Thesaurus is a crowdsourced tool that provides users with a ton of alternative word choices from a community of writers.
- ZenPen: If you’re having trouble staying focused, check out this distraction-free writing tool. ZenPen creates a minimalist “writing zone” that’s designed to help you get words down without having to fuss with formatting right away.
- Cliché Finder: Feeling like your writing might be coming off a little cheesy? Identify instances where you can be more specific using this handy cliché tool.
For a complete list of tools for improving your writing skills, check out this post. And if you’re looking for more direction, the following resources are chock-full of valuable writing advice:
- The Marketer’s Pocket Guide to Writing Well [Free Ebook]
- How to Write Compelling Copy: 7 Tips for Writing Content That Converts
- How to Write With Clarity: 9 Tips for Simplifying Your Message
- The Kurt Vonnegut Guide to Great Copywriting: 8 Rules That Apply to Anyone
- Your Blog Posts Are Boring: 9 Tips for Making Your Writing More Interesting
- The Beginner’s Guide to Starting a Successful Blog in 2019
9. Edit/proofread your post, and fix your formatting.
You’re not quite done yet, but you’re close! The editing process is an important part of blogging — don’t overlook it. Ask a grammar-conscious co-worker to copy, edit, and proofread your post, and consider enlisting the help of The Ultimate Editing Checklist (or try using a free grammar checker, like the one developed by Grammarly). And if you’re looking to brush up on your own self-editing skills, turn to these helpful posts for some tips and tricks to get you started:
- Confessions of a HubSpot Editor: 11 Editing Tips From the Trenches
- How to Become a More Efficient Editor: 12 Ways to Speed Up the Editorial Process
- 10 Simple Edits That’ll Instantly Improve Any Piece of Writing
When you’re ready to check your formatting, keep the following advice in mind …
Featured Image
Make sure you choose a visually appealing and relevant image for your post. As social networks treat content with images more prominently, visuals are now more responsible than ever for the success of your blog content in social media. In fact, it’s been shown that content with relevant images receives 94% more views than content without relevant images.
For help selecting an image for your post, read “How to Select the Perfect Image for Your Next Blog Post” — and pay close attention to the section about copyright law.
Visual Appearance
No one likes an ugly blog post. And it’s not just pictures that make a post visually appealing — it’s the formatting and organization of the post, too.
In a properly formatted and visually appealing blog post, you’ll notice that header and sub-headers are used to break up large blocks of text — and those headers are styled consistently. Here’s an example of what that looks like:
Also, screenshots should always have a similar, defined border (see screenshot above for example) so they don’t appear as if they’re floating in space. And that style should stay consistent from post to post.
Maintaining this consistency makes your content (and your brand) look more professional, and makes it easier on the eyes.
Topics/Tags
Tags are specific, public-facing keywords that describe a post. They also allow readers to browse for more content in the same category on your blog. Refrain from adding a laundry list of tags to each post. Instead, put some thought into a tagging strategy. Think of tags as “topics” or “categories,” and choose 10-20 tags that represent all the main topics you want to cover on your blog. Then stick to those.
10. Insert a call-to-action (CTA) at the end.
At the end of every blog post, you should have a CTA that indicates what you want the reader to do next — subscribe to your blog, download an ebook, register for a webinar or event, read a related article, etc. Typically, you think about the CTA being beneficial for the marketer. Your visitors read your blog post, they click on the CTA, and eventually you generate a lead. But the CTA is also a valuable resource for the person reading your content — use your CTAs to offer more content similar to the subject of the post they just finished reading.
In the blog post, “What to Post on Instagram: 18 Photo & Video Ideas to Spark Inspiration,” for instance, readers are given actionable ideas for creating valuable Instagram content. At the end of the post is a CTA referring readers to download a comprehensive guide on how to use Instagram for business:
See how that’s a win-win for everyone? Readers who want to learn more have the opportunity to do so, and the business receives a lead they can nurture … who may even become a customer! Learn more about how to choose the right CTA for every blog post in this article. And check out this collection of clever CTAs to inspire your own efforts.
11. Optimize for on-page SEO.
After you finish writing, go back and optimize your post for search.
Don’t obsess over how many keywords to include. If there are opportunities to incorporate keywords you’re targeting, and it won’t impact reader experience, do it. If you can make your URL shorter and more keyword-friendly, go for it. But don’t cram keywords or shoot for some arbitrary keyword density — Google’s smarter than that!
Here’s a little reminder of what you can and should look for:
Meta Description
Meta descriptions are the descriptions below the post’s page title on Google’s search results pages. They provide searchers with a short summary of the post before clicking into it. They are ideally between 150-160 characters and start with a verb, such as “Learn,” “Read,” or “Discover.” While meta descriptions no longer factor into Google’s keyword ranking algorithm, they do give searchers a snapshot of what they will get by reading the post and can help improve your clickthrough rate from search.
Page Title and Headers
Most blogging software uses your post title as your page title, which is the most important on-page SEO element at your disposal. But if you’ve followed our formula so far, you should already have a working title that will naturally include keywords/phrases your target audience is interested in. Don’t over-complicate your title by trying to fit keywords where they don’t naturally belong. That said, if there are clear opportunities to add keywords you’re targeting to your post title and headers, feel free to take them. Also, try to keep your headlines short — ideally, under 65 characters — so they don’t get truncated in search engine results.
Anchor Text
Anchor text is the word or words that link to another page — either on your website or on another website. Carefully select which keywords you want to link to other pages on your site, because search engines take that into consideration when ranking your page for certain keywords.
It’s also important to consider which pages you link to. Consider linking to pages that you want to rank well for that keyword. You could end up getting it to rank on Google’s first page of results instead of its second page, and that ain’t small potatoes.
Mobile Optimization
With mobile devices now accounting for nearly 2 out of every 3 minutes spent online, having a website that is responsive or designed for mobile has become more and more critical. In addition to making sure your website’s visitors (including your blog’s visitors) have the best experience possible, optimizing for mobile will score your website some SEO points.
Back in 2015, Google made a change to its algorithm that now penalizes sites that aren’t mobile optimized. This month (May 2016), Google rolled out their second version of the mobile-friendly algorithm update — creating a sense of urgency for the folks that have yet to update their websites. To make sure your site is getting the maximum SEO benefit possible, check out this free guide: How to Make a Mobile-Friendly Website: SEO Tips for a Post-“Mobilegeddon” World.
12. Pick a catchy title.
Last but not least, it’s time to spruce up that working title of yours. Luckily, we have a simple formula for writing catchy titles that will grab the attention of your reader. Here’s what to consider:
- Start with your working title.
- As you start to edit your title, keep in mind that it’s important to keep the title accurate and clear.
- Then, work on making your title sexy — whether it’s through strong language, alliteration, or another literary tactic.
- If you can, optimize for SEO by sneaking some keywords in there (only if it’s natural, though!).
- Finally, see if you can shorten it at all. No one likes a long, overwhelming title — and remember, Google prefers 65 characters or fewer before it truncates it on its search engine results pages.
If you’ve mastered the steps above, learn about some way to take your blog posts to the next level in this post. Want some real examples of blog posts? See what your first blog post can look like, below, based on the topic you choose and the audience you’re targeting.
1. List-Based Post
Example: 10 Fresh Ways to Get Better Results From Your Blog Posts
List-based posts are sometimes called “listicles,” a mix of the words “list” and “article.” These are articles that deliver information in the form of a list. A listicle uses subheaders to break down the blog post into individual pieces, helping readers skim and digest your content more easily. According to ClearVoice, listicles are among the most shared types of content on social media across 14 industries.
As you can see in the example from our blog, above, listicles can offer various tips and methods for solving a problem.
2. Thought Leadership Post
Example: What I Wish I Had Known Before Writing My First Book
Thought leadership blog posts allow you to indulge in your expertise on a particular subject matter and share firsthand knowledge with your readers. These pieces — which can be written in the first person, like the post by Joanna Penn, shown above — help you build trust with your audience so people take your blog seriously as you continue to write for it.
3. Curated Collection Post
Example: 8 Examples of Evolution in Action

Curated collections are a special type of listicle blog post (the first blog post example, described above). But rather than sharing tips or methods of doing something, this type of blog post shares a list of real examples that all have something in common, in order to prove a larger point. In the example post above, Listverse shares eight real examples of evolution in action among eight different animals — starting with the peppered moth.
4. Slideshare Presentation
Example: The HubSpot Culture Code
Slideshare is a presentation tool owned by the social network, LinkedIn, that helps publishers package a lot of information into easily shareable slides. Think of it like a PowerPoint, but for the web. With this in mind, Slideshare blog posts help you promote your Slideshare so that it can generate a steady stream of visitors.
Unlike blogs, Slideshare decks don’t often rank well on search engines, so they need a platform for getting their message out there to the people who are looking for it. By embedding and summarizing your Slideshare on a blog post, you can share a great deal of information and give it a chance to rank on Google at the same time.
Need some Slideshare ideas? In the example above, we turned our company’s “Culture Code” into a Slideshare presentation that anyone can look through and take lessons from, and promoted it through a blog post.
5. Newsjacking Post
Example: Ivy Goes Mobile With New App for Designers

“Newsjacking” is a nickname for “hijacking” your blog to break important news related to your industry. Therefore, the newsjack post is a type of article whose sole purpose is to garner consumers’ attention and, while offering them timeless professional advice, also prove your blog to be a trusted resource for learning about the big things that happen in your industry.
The newsjack example above was published by Houzz, a home decor merchant and interior design resource, about a new mobile app that launched just for interior designers. Houzz didn’t launch the app, but the news of its launching is no less important to Houzz’s audience.
6. Infographic Post
Example: The Key Benefits of Studying Online [Infographic]
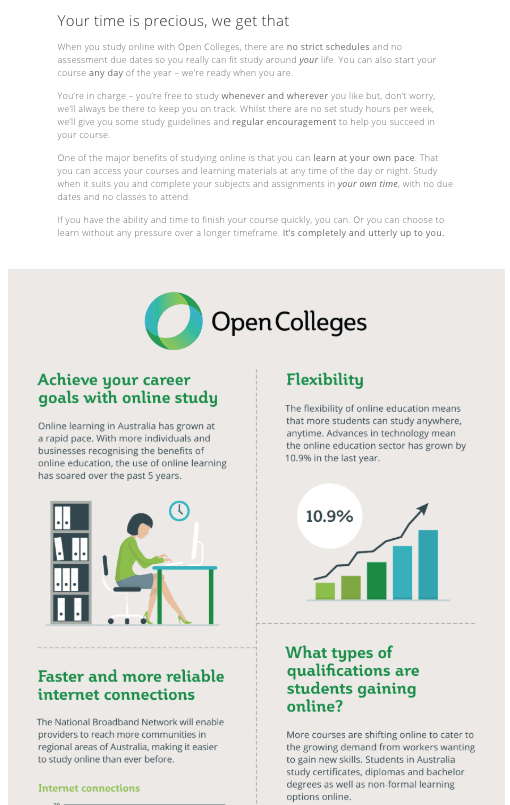
The infographic post serves a similar purpose as the Slideshare post — the fourth example, explained above — in that it conveys information for which plain blog copy might not be the best format. For example, when you’re looking to share a lot of statistical information (without boring or confusing your readers), building this data into a well-designed, even fun-looking infographic can help keep your readers engaged with your content. It also helps readers remember the information long after they leave your website.
7. How-to Post
Example: How to Write a Blog Post: A Step-by-Step Guide
For this example, you need not look any further than the blog post you’re reading right now! How-to guides like this one help solve a problem for your readers. They’re like a cookbook for your industry, walking your audience through a project step by step to improve their literacy on the subject. The more posts like this you create, the more equipped your readers will be to work with you and invest in the services you offer.
8. Guest Post
Example: Your Bookmarkable Guide to Social Media Image Sizes in 2020 [Infographic]

Guest posts are a type of blog post that you can use to include other voices on your blog. For example, if you want to get an outside experts opinion or take on a topic, a guest post is the perfect place for that.
Additionally, these type of posts give your blog variety in topics and viewpoints. If your customer has a problem that you can’t solve, a guest post is a great way to solve that problem.
If you begin accepting guest posts, it’s important to have a set of editorial guidelines. This will help you edit guest posts so it’s still up to the same standards as your own posts.
Ready to blog? Don’t forget to download your six free blog post templates right here.
Editor’s note: This post was originally published in October 2013 and has been updated for comprehensiveness.

The 5-Step Process HubSpot Uses to Optimize Facebook Advertising Costs
When Mark Zuckerberg shocked the digital marketing world with his announcement that Facebook would overhaul its algorithm to let users engage with their friends and family more and less with brands, the social media giant’s CPM skyrocketed 122% — the highest spike in Facebook ad prices over the previous 14 months.
Today, organic and paid reach are still flatlining, causing ad costs to balloon to unprecedented levels. And in a space where advertising has historically been cheap, how can marketers sustain their revenue without having to increase their Facebook ad budget?
One word: optimization. In a nutshell, ad optimization is getting the maximum bang for your buck for every single dollar you spend distributing content. To do this, you need to constantly test your Facebook ad strategy and use data to course correct it enough to maximize your results every time you send out an ad. There are a number of ads tools available that can help — many of which are free. But still, ad optimization is easier said than done.
To help you implement an efficient and effective Facebook advertising strategy, we’ll flesh out HubSpot’s five-step process for optimizing Facebook advertising costs. Read on to learn about our approach to Facebook advertising.
The 5-Step Process HubSpot Uses to Optimize Facebook Advertising Costs
1. Choose a campaign objective.
From a fifty-thousand foot view, we usually pursue two types of Facebook advertising campaigns: direct response and branding.
Direct response campaigns aim to get people to take a desired action, like a download, signup, or purchase. Branding campaigns aim to get as many eyeballs on our content as possible. Clicks aren’t the goal here, exposure is.
Facebook also knows which users are most likely to click on ads and which ones are not, so whatever objective they chose at the start of their campaign, the social media giant will distribute their ads to the right audience.
2. Pick a bid strategy.
On Facebook, there are two main ways to buy advertising space: Cost Per Thousand Impressions (CPM) and Cost Per Click (CPC).
When we use CPM bidding, the risk is completely on us. We’re paying for impressions, not clicks, so if our offer or creative isn’t compelling, we’re wasting their money.
When we use CPC bidding, we share the risk with Facebook.We need to craft compelling ads and Facebook needs to distribute them to the right audience. Otherwise, both parties lose.
3. Build out targeting.
One way we like to target our ads is by building a custom audience. A custom audience is a list of people who have specific attributes, like being one of HubSpot’s monthly active users or CRM signee, that we plug into Facebook. Facebook then analyzes this list of people to match them with their Facebook profiles and builds a more robust audience for us.
A couple of years ago, we used a custom audience to target ads to CMOs who use Google Chrome.We wanted to see if their strategy would decrease our cost per acquisition and cost per click for one of HubSpot’s Google Chrome extensions.
But we also had a hunch: We could convince CMOs who use other browsers that HubSpot’s extension was valuable enough to switch browsers for.We ended up being right. When we broadened our targeting to all browsers, we discovered that we could acquire twice as many users for HubSpot’s Google Chrome extension compared to only targeting Chrome users.
| Experiment | Cost Per Regular User | Cost Per Click |
| Chrome | $19.32 | $3.60 |
| All Browsers | $9.63 | $1.07 |
Another way we target our ads and optimize our spend is by creating lookalike audiences. To do this, there are two relatively easy options we can leverage:
- Pull lists of people who have specific attributes from HubSpot’s database, like anyone who is a CRM signee or invited additional team members to sign up, and plug them into Facebook.
- Pixel one of HubSpot’s web pages, like the blog’s homepage, so the list of people who visited the page are tagged with a cookie. This way, Facebook can match these people back to theirFacebook profiles and distribute ads to their newsfeed.
Whichever route we choose, Facebook will generate a much larger group of users who “look like” the people in these lists. We can then distribute ads to a cohort of new prospects who are likely to convert into users.
For instance, during one of their Facebook advertising campaigns that promoted CRM signups, we found out that creating lookalike audiences based off people who have decision maker titles, are activated users, or are listed as a sales rep in HubSpot’s CRM helped us acquire team registrations at a lower cost than lookalike audiences based off people who visited certain pages on HubSpot’s website.
| Seed List | Cost Per Team Registration |
| Decision Maker Titles | $20.31 |
| Activated Users | $20.48 |
| All Sales Reps In CRM | $23.95 |
| Registered Users | $24.33 |
| CRM Homepage Visitors | $27.66 |
| Sales Exec Same | $28.55 |
| All HubSpot Visitors | $31.48 |
| SB4 Visitors | $33.48 |
| Sales Blog Visitors | $34.14 |
4. Craft compelling ad creative.
When we sit down to write ad copy, our goal is write something so compelling that it can grab the attention of a distracted millennial slouched in front of the TV, with their smartphone in one hand and a slice of pizza in the other.
So what’s the process for convincing our audience to ignore that pizza and read HubSpot’s content? After testing over 500 ad creatives during the past two years, we’ve boiled the art of crafting compelling ad creative into three steps.
Pique Your Audience’s Curiosity
A little intrigue goes a long way in marketing. Humans are biologically driven to investigate our world, rather than respond to it. And if you can evoke enough curiosity in your audience so they can’t help but satisfy it, they’ll click on your ad.
For instance, when we used the tagline “The hidden gem buried within your Google Calendar, brand new from HubSpot”, it produced better results than the tagline “Scheduling meetings just got a whole lot easier with HubSpot’s CRM”.
Why? Without revealing what it actually is, the first tagline describes a new tool that’s right in your email inbox, evoking curiosity and excitement for something that seems valuable yet easily accessible.
On the contrary, the second tagline immediately gives away what the new tool is — a meeting scheduler. This doesn’t evoke enough curiosity or interest to compel people to click on the ad.
Blend Into The News Feed
Most of your audience’s news feeds are filled with posts from their friends and family, especially after Facebook’s latest algorithm update. To avoid screaming “I’m an ad”, include a photo that actually looks natural.
For instance, the picture below looks like a stock photo. And when people see a stock photo, they’ll immediately know the post isn’t authentic.

However, the next picture looks like a regular picture a friend might post, organically blending in with your audience’s newsfeed and making a genuine first impression with them.

Sell A Feeling, Not A Product
Psychology tells us that emotions drive our behavior, while logic justifies our actions after the fact. Marketing confirms this theory — humans associate the same personality traits with brands as they do with people. Choosing between two alternatives is like choosing your best friend or significant other. The people we decide to live our lives with make us feel something.
This is also the reason why pitching a product’s features is a lousy attempt at persuasion. Features only appeal to the logical part of your brain, which science suggests doesn’t drive action nearly as well as appealing to the emotional part of your brain does.
To pinpoint the exact emotion that resonated with our audience the most when we promoted our CRM through Facebook ads, we tested over 30 emotional angles against cost per regular user and click through rate. Here are our best and worst ones.
| Angle | Cost Per Regular User | Click Through Rate |
| Free/Alleviates Frustration | $2.86 | 1.07% |
| Transformation Version 2 | $3.95 | 0.76% |
| Data Enrichment | $4.08 | 0.68% |
| Saves Time | $4.10 | 1.02% |
| Transformation Version 1 | $4.97 | 0.72% |
| 360 Degree View of Sales Process | $9.65 | 0.53% |
| No More Falling Behind On Leads | $10.47 | 0.56% |
| Cuts Down On Stress | $10.57 | 0.64% |
5. Design a simple landing page.
Just because you’ve grabbed someone’s attention with your ad doesn’t mean your work is done. You still need to design a compelling landing page that clearly conveys the value of our offer. To help you do this, here are three principles we live by when we design our landing pages.
Again, Pique Your Audience’s Curiosity
Curiosity is the best way to convert an audience. Don’t reveal too much about your offer, but make sure to highlight its benefits.
Don’t Distract Your Audience With External Links
Allowing people to exit your landing page through an external link pokes a hole in your funnel — users will leak through, diminishing your conversion rate. If visitors can leave your paid acquisition funnel, there should only be two exits: exiting out the page or signing up for the offer.
Test Out A Video
Even though videos can explain the value of your offer in a more engaging way than text, they also serve as a distraction. This might lead to a dip in your landing pages’ conversion rates, but we’ve noticed that videos actually increased our landing pages’ activation rate, which compensated for our loss in conversions.
| Variation | Cost Per Regular User | Cost Per Activated User |
| Video | $21.56 | $78.37 |
| No Video | $15.76 | $85.32 |
Never stop testing.
Testing your Facebook ads is like gambling — most of the time you’ll fail. But if you can quickly figure out which strategies work and which ones don’t, you can refine your Facebook advertising to the point where you’ll almost always earn the maximum bang for your buck on every dollar you spend distributing content on the social network.
Now that you know how HubSpot figures out ad costs, might be asking, “How much is all of this gonna cost me?”
In the next section, we’re going to cover how to calculate Facebook Ads costs as much as possible (because, like with figuring out when to send emails, the answer varies).
Let’s look at some strategies and tests you can use to figure out how much to spend on Facebook Ads. These suggestions can scale to your business size and goals. Feel free to use these as tips to get the ball rolling.
1. Spend at least $1 a day.
It’s tricky to find out how much to spend on ads, and it may require some trial and error. This doesn’t mean “Throw your entire budget at Facebook Ads and see what happens,” trial and error, but more of a “Look at your data and plan accordingly,” strategy.
So, let’s think about a test ad strategy for Facebook Ads. For five days, spend $1 for every 100 clicks your website gets. So, if your website gets 10,000 clicks in a day, you’ll spend $100 per ad set.
Ad sets can test different target audiences, such as “Teens ages 13-17,” or “Millennials in urban North American communities.” You can choose audiences based on your marketing goals and buyer personas.
Within your ad, include free content you created to help customers solve their challenges. For instance, if your targeted audience is small business owners, insert a blog targeted towards small business owners. After you’ve included beneficial content, you’re ready to test.
When you run the test, you’re looking to see which Facebook ad set generates the most leads for the lowest cost. Once you’ve figured that out, you can start to determine how much to spend on an ad strategy that cost-effectively serves your Facebook audience in the best way.
2. Think about your intended goals.
What are your intended goals when you run your Facebook ad campaign? You’ll want to ensure they’re SMART goals, since it’s critical you’re spending money when and where it counts. Goals that are clearly defined can help you decide how much to spend.
Once you’ve defined your goals, think about if you have enough budget to devote to Facebook ads. If, after running a test ad, you decide Facebook Ads are too expensive for you, try other ways of Facebook marketing until you have the budget to run ads successfully.
Next, make sure you have some numbers at the ready, including your overall revenue goals. In other words, how much are your projecting to make from your ad campaign? Identifying this goal will help you shape your ad budget.
Once you’ve defined goals, you can start thinking about ballpark numbers for Facebook ad spend. When you know who you’re planning to reach, how much you have to spend, and how much you want to spend, you can begin to build your overall ad strategy accordingly.
3. Use a calculator to estimate costs.
You can use a calculator or a few simple math formulas to help you figure out how much you want to spend on ads. HubSpot offers a free ad spend calculator, but if you want to do some calculating on your own, let’s talk about the figures to find.
The first step will calculate how many sales you need to make in order to hit your target revenue. You’ll need to divide your revenue target by your average revenue per sale. This will get you the number of sales you need to make as it stands.
For example, let’s say that in order to make $7,000 in revenue at $43.75 per product, you have to make 160 individual sales.
In the next step, you will look at your metrics to determine if you can get a valuable return on acquisition (ROA). Take your website conversion links, current click-through-rate (CTR) of ads, and the reach required to hit those targets. Then, fill those figures in.
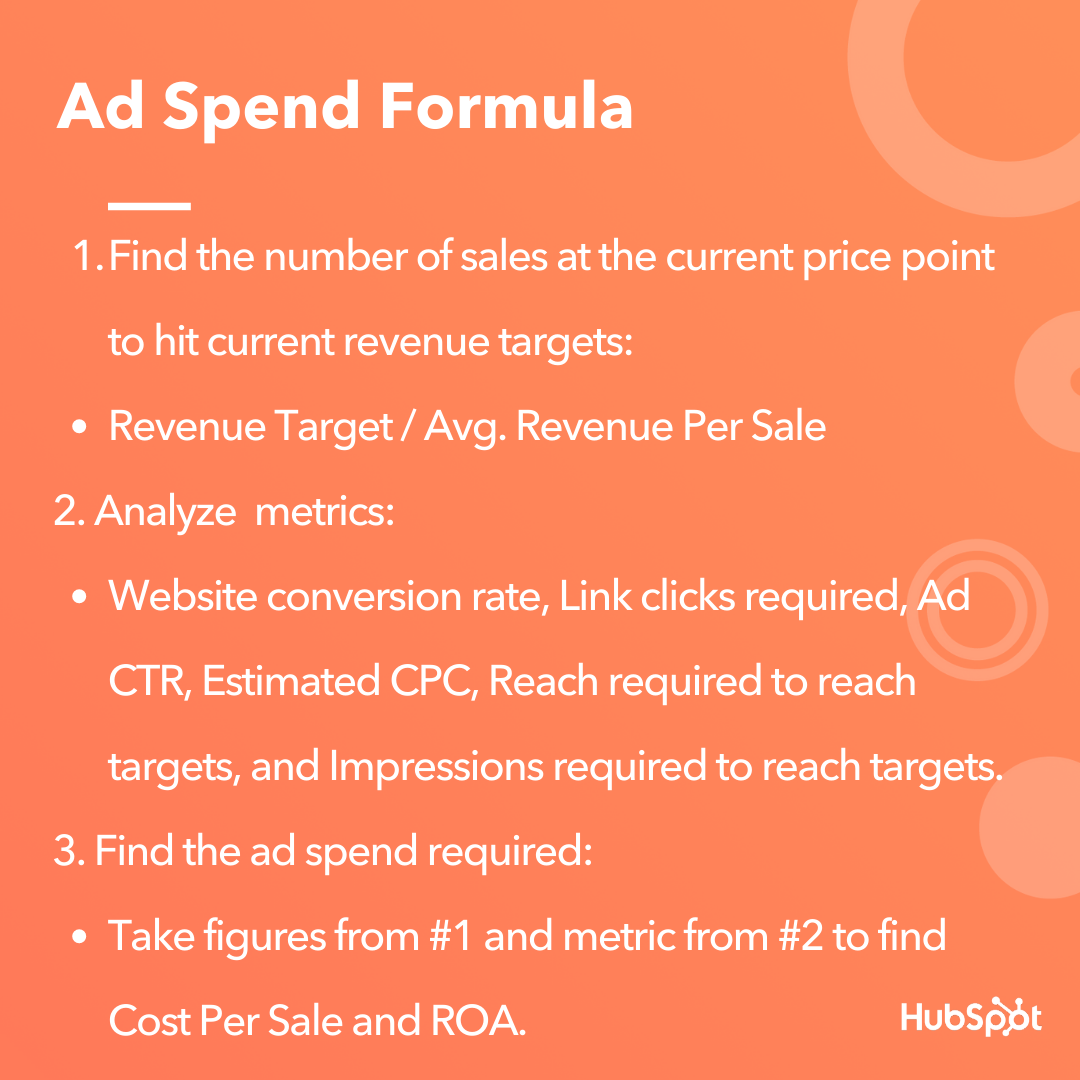 After calculating how many sales you need to make and analyzing metrics, you can figure out the ad spend required to make a ROA. Let’s use these figures in an example.
If you wanted your wanted target to be $5,000 for the month and your average order value is $31, then you’ll have to generate 161 sales to hit that number at a 2% website conversion rate. (Step 1). If you find that your budget based on metrics is $2,500 (Step 2), then you’d want to aim to make $2 for every $1 you spend.
The calculations will let you know how many impressions your ad will have to make to reach those numbers.
4. Focus on your audience size.
Next, set benchmarks focused on your audience. For example, if you want to target two million audience members on a budget of $4 a day, it’ll take you months to see a return on your investment. This is because you’d be spending too little money on too wide of an audience to see any real impact in under a year’s time.
Similar to the first example, your goals should reflect your audience size. To see a return on Facebook ad investment, you have to be ready for one thing: spending money.
Spending money doesn’t mean spending millions of dollars, but it also doesn’t mean spending a total of $20. Based on your audience, set benchmarks for yourself that leave you room to recover if you find that ad spend isn’t profitable for you right now.
5. Keep best practices in mind.
Ads can be a tricky thing to get a hang of, and at times, stressful. To negate some of that stress, when you’re creating your ads, keep these best practices in mind to impact their effectiveness.
First, don’t keep your focus solely on building conversions. You can use Facebook ads to help a ton of other business goals, such as attracting leads or building brand awareness. If you put all of your efforts into one corner, you may be missing out on how these ads can really impact your overall marketing strategy.
Next, make sure your ad has visual elements. Videos are popular on Facebook, but if you don’t have the resources to produce a video, use some type of visual that will pull scrollers in. For instance, if you have a useful graphic, company commercial, or podcast with a bright cover image, you can use them in place of a video.
Additionally, when measuring the ad’s return, keep the tools you use to analyze your success to a minimum. Facebook has its own Ad Manager, but you should only be using two or fewer tools to understand the success of your campaign.
If you are using more than two tools to measure the success of one platform’s ad campaigns, think of consolidating resources to keep yourself organized and your numbers accurate. For example, HubSpot’s Marketing Hub offers tools that measure and build reports of ad performance.
Though the process for researching, building, and measuring ads can be a long one, don’t take the easy way out and spend all you have on ads. Additionally, consider other Facebook Marketing options if you feel you don’t have the budget to focus on Facebook ads at this time.
Marketers don’t need to spend thousands of dollars to be successful, but you do have to conduct research to figure out how to get the most out of your ads.
