Welcome to My Blog
How to Use Instagram Insights (in 9 Easy Steps)
Data helps you understand your audience. It tells you how they do things, what they prefer, and who they are. You can certainly make business decisions based on gut feeling, but you’re much more likely to hit the mark when you can validate assumptions with cold, hard facts.
Data and analytics help you measure the impact of your marketing efforts across different channels to see if there’s something you need to do differently — like target a different audience, post at a certain time of day, or experiment with a new content format.
Social media isn’t any different than other aspects of your marketing in the sense that it can be measured and improved upon. That’s why you’ll be able to create a more effective Instagram strategy using Instagram Insights.

Here are the analytics on this channel that marketers need to know and understand — and how to use them.
To use Instagram Insights, you must first have a business profile. If you’re already using a personal account, you can switch to a business profile. Here’s how to convert your account in a few simple steps.
1. Create a Facebook Business Profile for the same persona if you haven’t already.
An Instagram business profile will allow you to access additional features and tools to help you grow your audience. However, in order to set up an Instagram Business Profile, you’ll need to have a Facebook Page for your business. It’s through Facebook that you add payment credentials and more. Click here for instructions for setting up your Facebook Page if you don’t already have one.
2. Make sure your Instagram profile is public. Private profiles cannot be used as business ones.
You want to grow your audience and have your posts seen by Instagram users who are not familiar with your brand. For this reason, your Instagram profile will need to be made public before you convert it to an official Instagram Business Profile. Here are the steps:
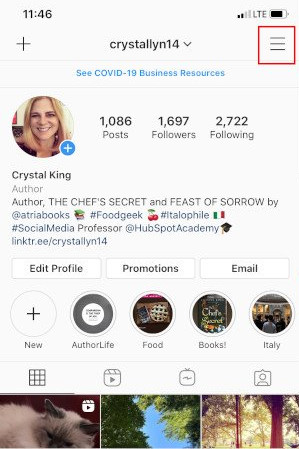
Step One: Navigate to your profile and tap the hamburger icon in the top-right corner.
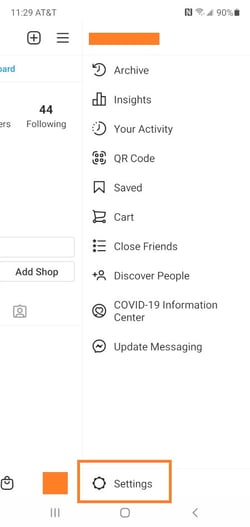
Step Two: Tap the gearshift wheel icon to access your Settings.
Step Three: Select “Privacy.”
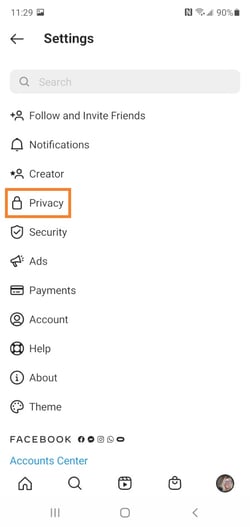
Step Four: Flip the toggle next to “Private Account” on.
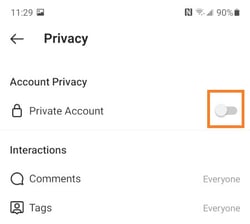
Your Instagram profile is now public.
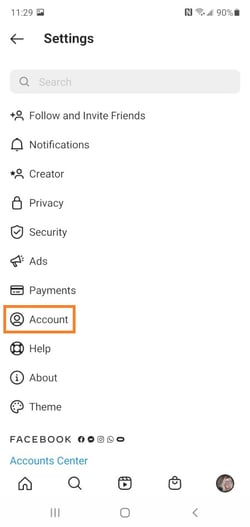
3. Return to your Settings page and tap “Account.”
Return to your Settings page by clicking the hamburger icon and tapping the gearshift wheel icon. Alternatively, you can use the back button on your phone to get there.
Tap Account in the Settings menu.
4. Select “Switch Account Type” and choose “Switch to Business Account.”
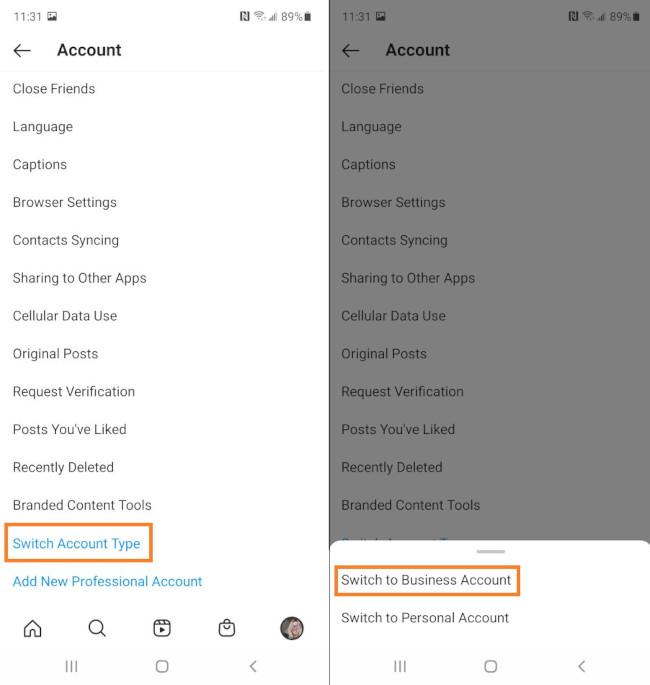 By choosing Switch to Business Account, you’re effectively converting your Instagram Profile into an Instagram Business Profile.
5. Follow Instagram’s prompts to set up your business profile.
You will be asked to review and change details about your business including business category, contact information, and more. You’ll also be prompted to select the Facebook Page you want to be associated with your profile (from Step 1).
6. Tap “Done.”
Once your set up as a Business Account, you can begin to use Instagram Insights. Here’s how to get started.
1. Open the hamburger menu and click “Insights.”
To view insights into your overall Instagram account, start by visiting your profile. Then, at the top, click the hamburger icon and select Insights from the menu.
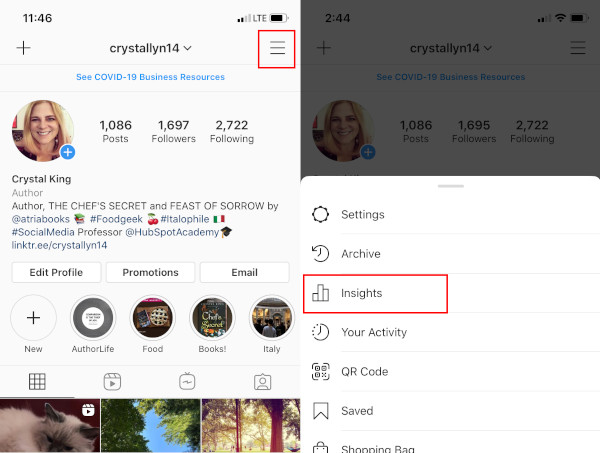
From there, you’ll reach the Recent Highlights page where you’ll see some general information about how people are engaging with your profile, like how many followers you gained or lost in the past week.
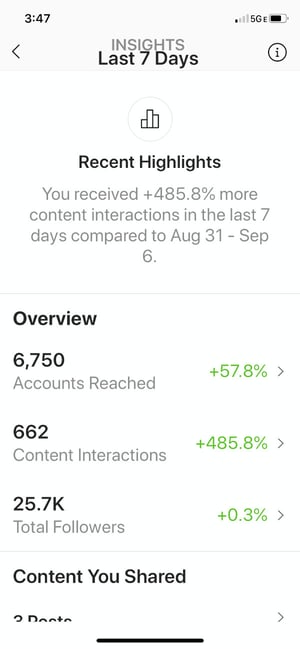
Next, we’ll get into the more specific profile insights you can explore.
2. Measure reach.
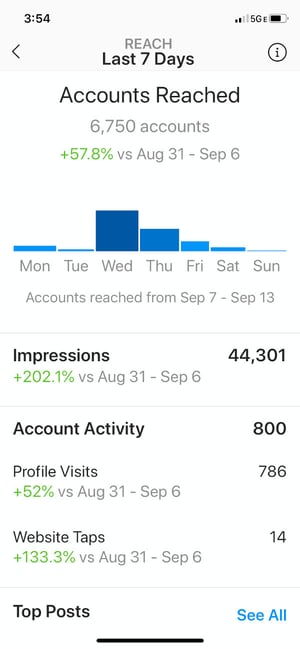
Click the Accounts Reached section. Reach reflects the number of unique users that have seen any of your Instagram posts.
Within this category, you’ll see insights for:
- Impressions – How many times your posts were seen.
- Account Activity – Profile visits, website taps, and other activity.
- Top Posts – The posts that generated the most reach and engagement.
- Top Stories – The Instagram Stories posts that generated the most reach and engagement.
- Top IGTV Videos – The IGTV videos that generated the most reach and engagement.
Some of these insights can be expanded for more insights.
3. Track profile visits and followers.
On the Accounts Reached page under Account Activity, you’ll be able to see Profile Visits.
Profile Visits reflects the number of times your profile has been viewed.
4. Determine website clicks.
Website Taps can also be found under the Account Activity section. This insight reflects the number of times any links you’ve included in your business profile have been clicked.
5. Track content interactions.
Navigate back to Recent Highlights and tap Content Interactions. This will bring up a page that shows how your content is performing in terms of engagement, breaking down the metrics by content type.
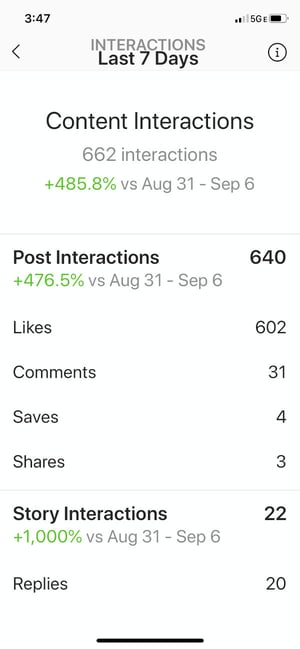
Likes speaks for itself, reflecting the number of users who liked your post. As with likes, Comments reflects the number of comments left on your post. Saves highlights the number of unique users or accounts who saved your post or clicked the bookmark-like icon that appeared below it in their feeds.
6. Track your followers.
Navigate back to Recent Highlights and click Total Followers. You’ll then reach the Follower Breakdown page.
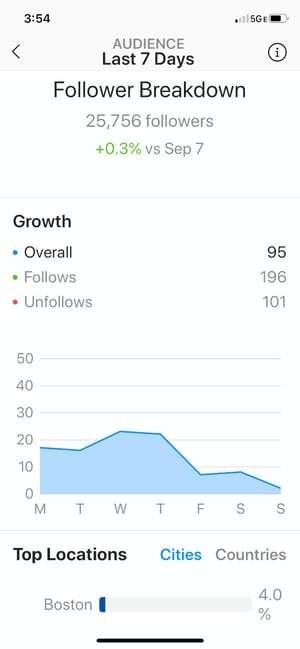
This page reflects how many followers you’ve gained or lost over the past week, as well as the average times of day when your followers are using Instagram — data that can be highly beneficial when planning posts.
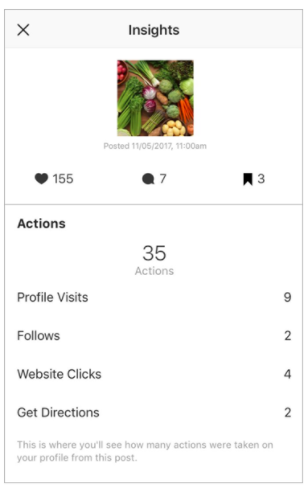
7. Learn which actions were taken on your post.
To view insights for a specific Instagram post, start by visiting your profile. Tap on the post you’d like to look into, then click View Insights below the image.
These insights indicate the number of actions that users took on your profile as a result of seeing your post — things like visiting your profile, then taking an action like clicking on your website link or following you.
Source: Instagram
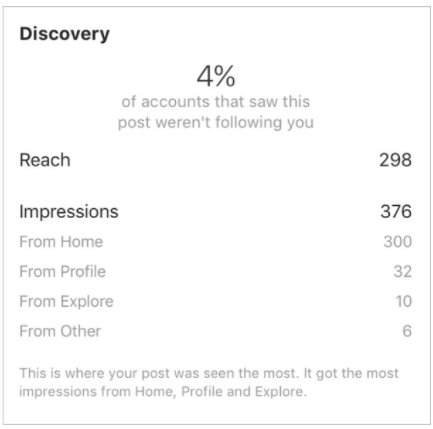
8. Use “Discovery” to see where your post showed up in feeds.
As the name might suggest, these insights indicate where your post was seen — or discovered — the most, including how many accounts weren’t already following you when they first saw the post.
This section includes metrics on Impressions, which reflect the number of times your post was discovered from a particular place within Instagram, like the user’s home feed, a search, your profile, a location tag, or a hashtag.
Source: Instagram
Discovery insights also include data on a post’s reach — which reflects the number of unique accounts that saw your post.
9. View Story insights.
Finally, Instagram users with a business profile are able to view insights into their ephemeral Stories.
To view your Story insights, navigate back to Insights and scroll down to Content You Shared section on the Recent Highlights page.
Scroll down to the Stories section, and you’ll be able to see insights for older stories, as well as any that have not yet expired.
Next, we’ll get into the more specific insights you can explore.
Impressions
This insight represents how many times your Story was seen.
When viewing these insights, keep in mind that you’re able to add multiple images or videos to your Story. When you do this, every piece of visual content in your Story is counted as a single photo or video in your post.
Let’s say you add six photos to your Story. Whether someone only views one or views all six, Instagram only counts your entire Story having received one impression.
The same goes for Story content that has been viewed by a single user more than once. Instagram still only counts that interaction as the entire Story having received one impression.
Reach
This insight reflects the number of unique users that have seen your Story.
Taps Forward
This insight reflects the number of times a user taps your Story photo or video to skip to the next piece of media.
Taps Back
This insight reflects the number of times a user taps your Story photo or video to go back to the previous piece of media.
Replies
This insight reflects the number of times users send messages through the Send Message text box on your Story.

Swipe Aways
This insight reflects the number of times users swipe to skip to the next account’s Story — not to be mistaken for “tap forward,” which reflects users skipping ahead to your next piece of Story media.
Exits
This insight reflects the number of times a user leaves the Stories section entirely to return to the home feed.
Measuring Your Effectiveness With Instagram Insights
Now that you know how to access data to inform your strategy with Instagram Insights, you can analyze that data and determine what’s working for your audience (and what’s not). From there, creating content that gets a ton of engagement will be a lot easier as you consider those benchmarks.
Editor’s Note: This post was originally published in January 2018 but has been updated for comprehensiveness.

How to Use Pinterest to Promote Your Business or Blog [Free Templates]
When I was getting married, one of the main tools that helped me plan was Pinterest. In fact, that’s usually the number one place I go to when I’m planning a party.
However, Pinterest isn’t just used for event planning. You can use the social media platform as a way to market your business, drive traffic to your website, and increase sales.
I’m not the only one who goes to Pinterest when I need new ideas. In fact, more than 200 billion pins have been saved on Pinterest. And 90% of weekly Pinners make purchase decisions on Pinterest.
That’s why it’s important for businesses and marketers to be active on the platform. Read on to learn how you can use Pinterest to meet your business and marketing goals.

Why Use Pinterest for Business?
As noted above, regular Pinterest users often leverage the platform to help inform their purchasing decisions. But that’s not the only reason to use Pinterest for Business.
Pinterest streamlines conversion.
Pinterest effectively operates as a massive, visual search engine filled with images tailored to specific user interests. As a result, if users are looking at your Pinterest page, chances are they’re already curious about what you’re selling — and are more likely to click through.
Pinterest boosts traffic.
Because each pin you make can contain a link back to your website, it’s easy for users to click through and boost your overall traffic, in turn raising your search engine rank.
The caveat? Great pin content is critical — if users aren’t inspired, they won’t click.
Pinterest engages users.
The core concept of Pinterest revolves around users creating and sharing pins of things they’re interested in with like-minded people — which means they’re already engaged when they log into the site. If your page aligns with their interests, they’re happy to visit your site, share your posts, and help boost your brand’s reach.
How to Set Up Your Pinterest for Business Account
If you’re new to Pinterest, then you’ll need to create a business account to get started. Don’t worry, this is a simple process as outlined below.
- Head to pinterest.com/business/create.
- Add your business name and website.
- Customize your profile.
- Claim your other accounts.
Let’s break down each step in more detail.
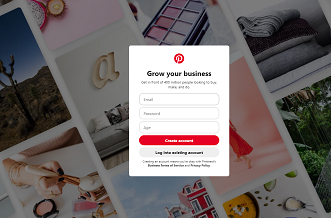
1. Head to pinterest.com/business/create.
Enter your email and a password and then select “Create Account” to get started. If you already have a personal Pinterest account, make sure you’re logged out.
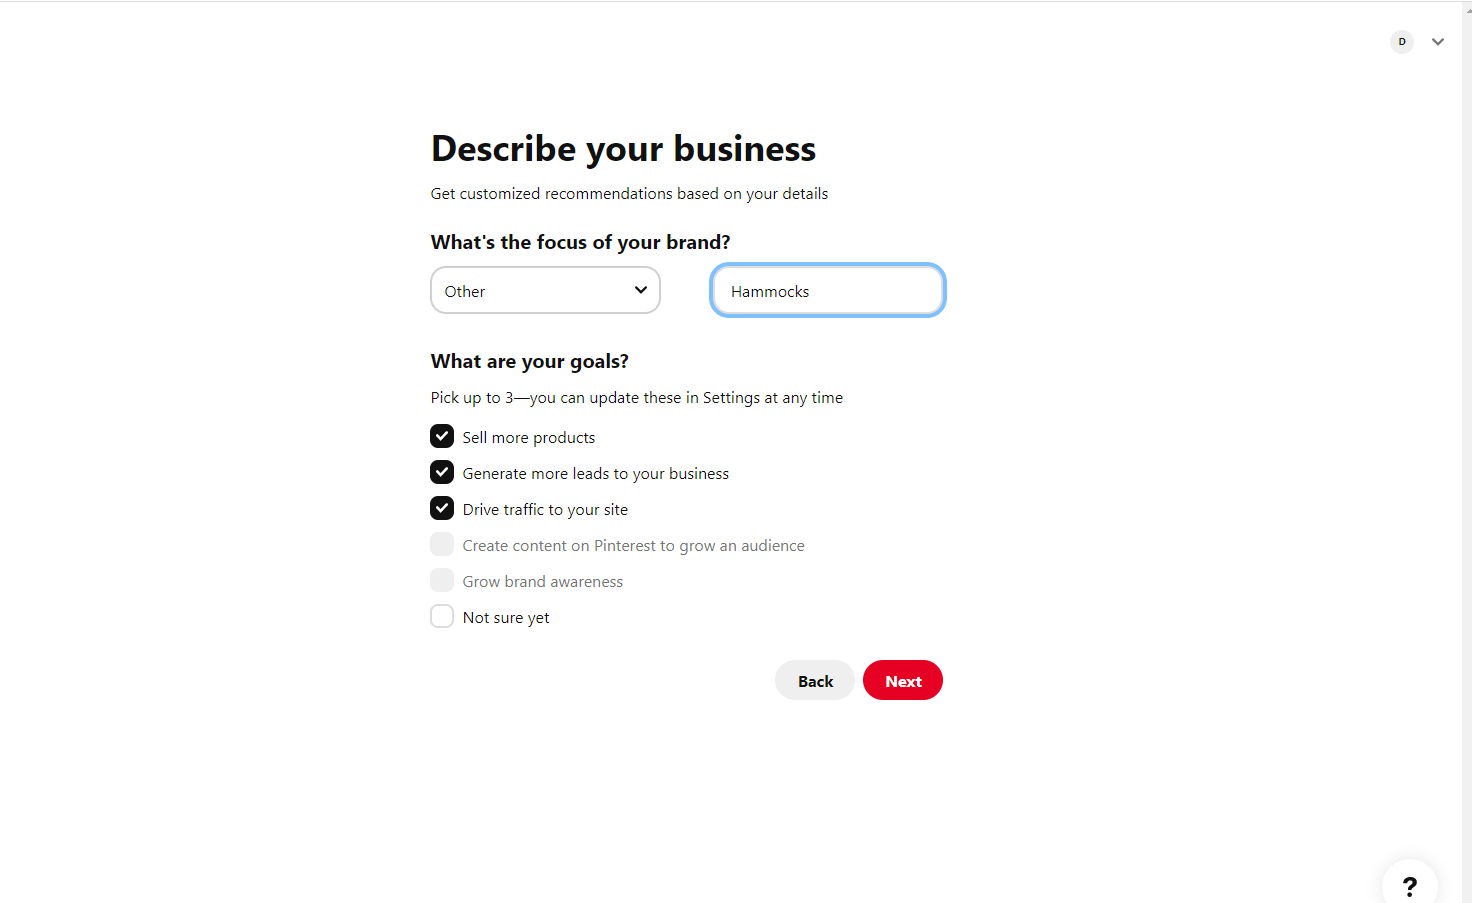
2. Add your business name and website.
Next, Pinterest will ask for your business name, business type, and your website details. If your brand doesn’t fit into a listed category, don’t worry — just select “I’m not sure.”
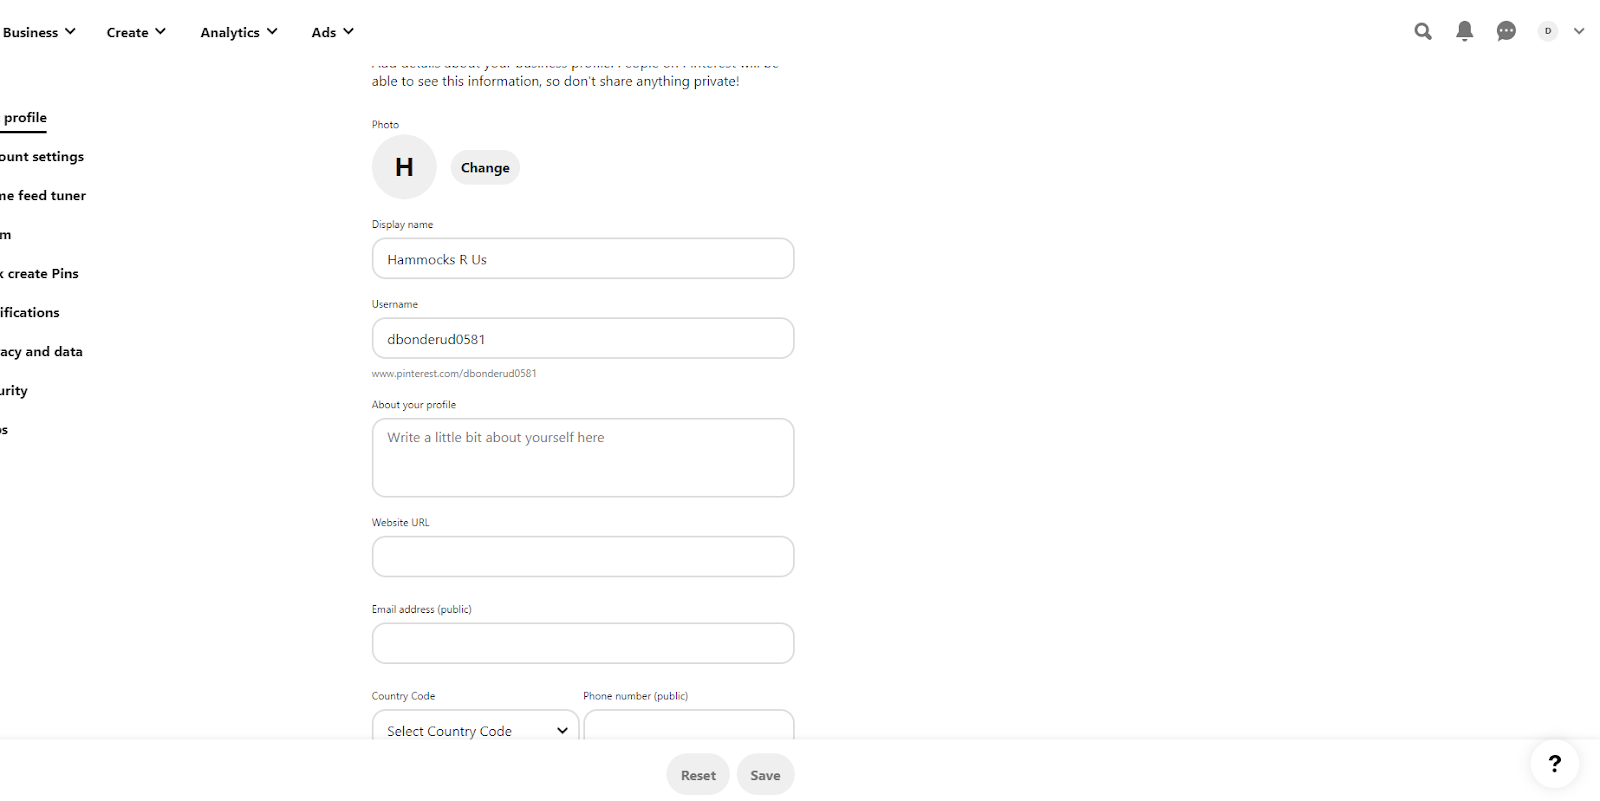
3. Customize your profile.
Next up is customizing your profile. Here you can add a profile picture, display name, user name, and information about your brand that will help Pinterest users find your board.
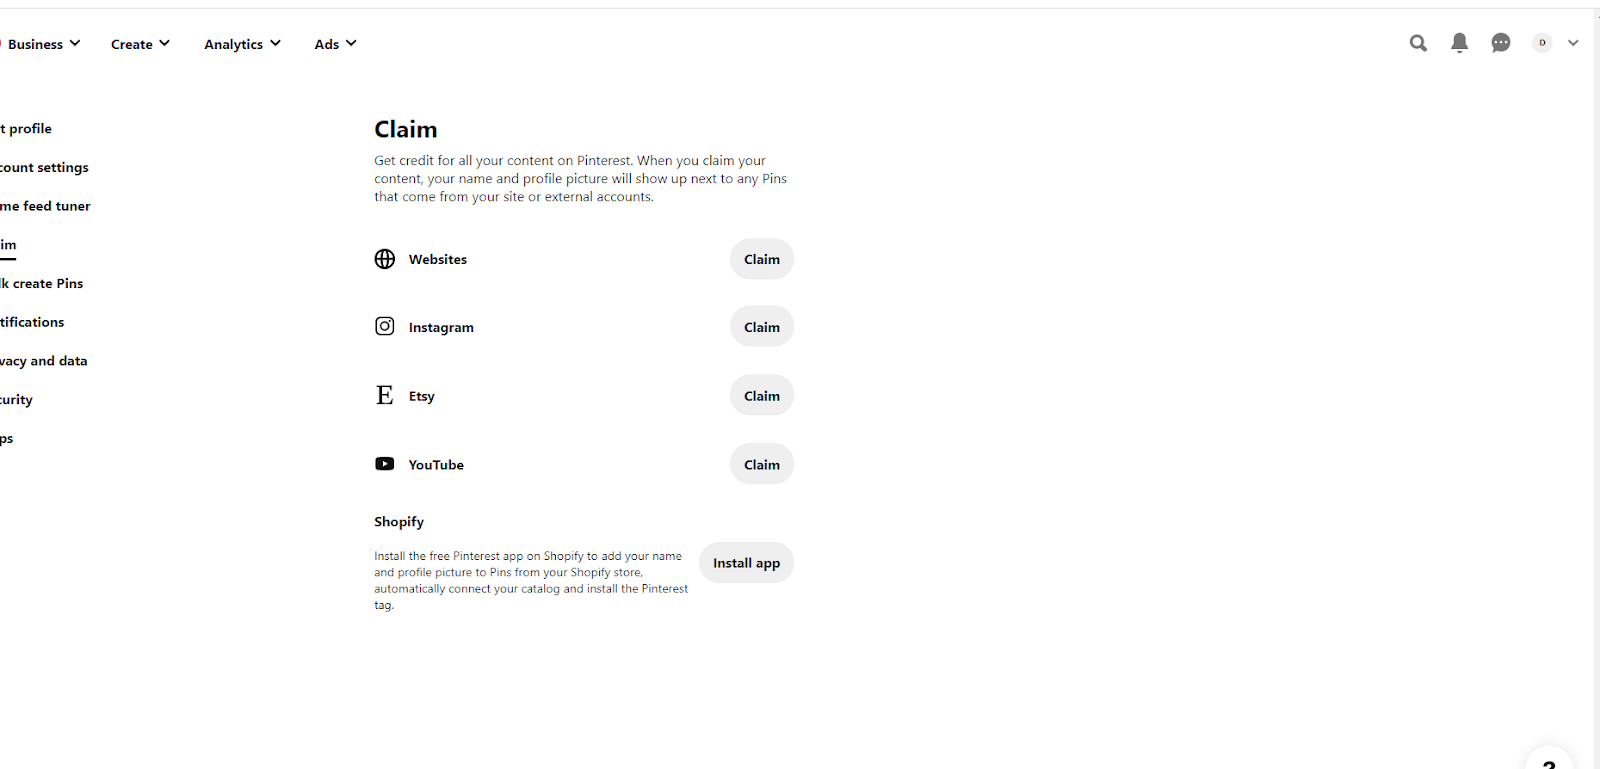
4. Claim your other accounts.
Last but not least? Claim your website name and any other accounts to ensure you get attribution and analytics for all of your content on Pinterest, even if you posted it before creating a Pinterest for Business account.
Once your business account is set up, it’s time to start diving into the strategy of how you’re going to use your page to grow your business.
Is Pinterest for Business free?
Pinterest for Business is free, and it’s worth taking the time to make an account, since it allows you to directly link your brand with your Pinterest page to drive increased traffic and conversion.
With your business account set up, you’re ready to get started using Pinterest for Business. Here are six best practices to keep in mind:
1. Determine the type of content you want to post.
As with any social media site, it’s important to understand your target audience. What type of content do they want to see on Pinterest?
More importantly, think about the type of content that they’ll engage with. Is it infographics, tips and tricks, or perhaps blog posts? To find this out, do some research into the type of content they currently pin on their pages.
Additionally, make sure that you don’t sell yourself with every pin. You should share relevant and helpful information on your page as well. When you have a good idea of what your audience wants or needs to see, creating pins will be easier.
2. Consider your design.
Now that you know what you want to post, it’s important to consider what your images look like. Your designs should be pleasing to the eye and stand out in a sea of images on your audience’s page.
Additionally, your images need to follow your brand guidelines. If you don’t have a designer on hand, you can utilize tools like Canva to get started.
3. Optimize your pins.
When you’re ready to start posting on Pinterest, remember to optimize your pins. You might be wondering, “How do I optimize my pins?”
Use the following checklist to get started:
- Include a URL (could be a link to a blog post)
- Use keywords in titles, descriptions, and image file names
- Create boards that are aligned with your keywords
- Arrange your boards and choose a board cover image
- Use hashtags
- Add a call to action
- Add a Pinterest widget to your site
- Respond to follower comments
- Follow popular boards and comment
- Create a board dedicated to your blog posts
These tactics will help you grow your business with Pinterest and help your posts be discovered.
4. Learn about categories.
On Pinterest, you can assign each board to one of 36 categories. These categories help your pins become discovered.
For example, since I was interested in finding wedding ideas when I was engaged, most of the pins that showed up on my feed were pins that were tagged in the wedding category.
You can scroll through the categories and see which ones are related to your business. This could even help you come up with board ideas.
5. Use rich Pins.
Rich Pins offer a way to provide more information about pinned images. For example, the Product Pins subset of rich Pins lets you add pricing information, product details, and other data to help engage users and drive conversion.
6. Leverage Pinterest Lens.
Pinterest Lens is available as part of the platform’s mobile app on both Apple and Android devices. It allows users to take a picture of any object and discover similar items on Pinterest. For businesses, Pinterest offers a way to improve contextual marketing: Take a picture of your product, see what Pinterest returns and then leverage similar tags to help capture user interest.
Once you’ve thought about this strategy, it’s time to create your boards. If you blog, think about blog topics and create boards surrounding those topics.
Let’s dive a little deeper into how to use Pinterest for your blog.
1. Create infographics.
A great way to use Pinterest to promote your blog is through infographics. If you have blog posts centered around an infographic, post it on Pinterest.
Additionally, you can repurpose old blog posts into infographics. Pinterest is a great place to repurpose content and reach a new audience that might not have read your post.
2. Choose the best blogs to post.
You don’t need to promote every single blog post on your Pinterest. Instead, just choose the ones that make the most sense for the platform. For example, choose blogs that have engaging images, great downloadable offers, or have an infographic.
Additionally, think about your board topics. You should promote blogs that relate to your boards.
3. Customize your images.
When you create a pin, it’s important to use engaging, custom images. To promote a blog, you can use your featured image and include customized text.
For instance, many pins that promote blog posts include the title of the blog on the custom image. The title is a great way to draw people in and get them interested in your blog post.
4. Write an optimized pin description.
When you write the description for a pin promoting a blog post, it’s important to tell people what to expect in the post.
While you want to leave some mystery and pique their interest without giving away too much, they need to know what it’s about.
5. Engage with Pinners.
Pinterest is all about engagement and interest driven by images. To maximize your brand’s impact, you need to regularly engage with Pinners who follow your board.
This means regularly pinning new content, re-pinning great content from your followers, and taking the time to directly answer any questions asked on your blog by Pinterest users.
6. Use a sound SEO strategy.
As noted above, Pinterest is effectively a visual search engine — but just like a text-based search engine, keywords are critical. To ensure your pins get noticed, use solid SEO practices. Make your blog title the same as your board title, include relevant keywords for all of your blog posts and images descriptions, and make sure you’re also using keywords in any image “alt” tags.
Pinterest for Business Examples
So what makes a great Pinterest for Business board? Here are six standout examples.
1. HubSpot
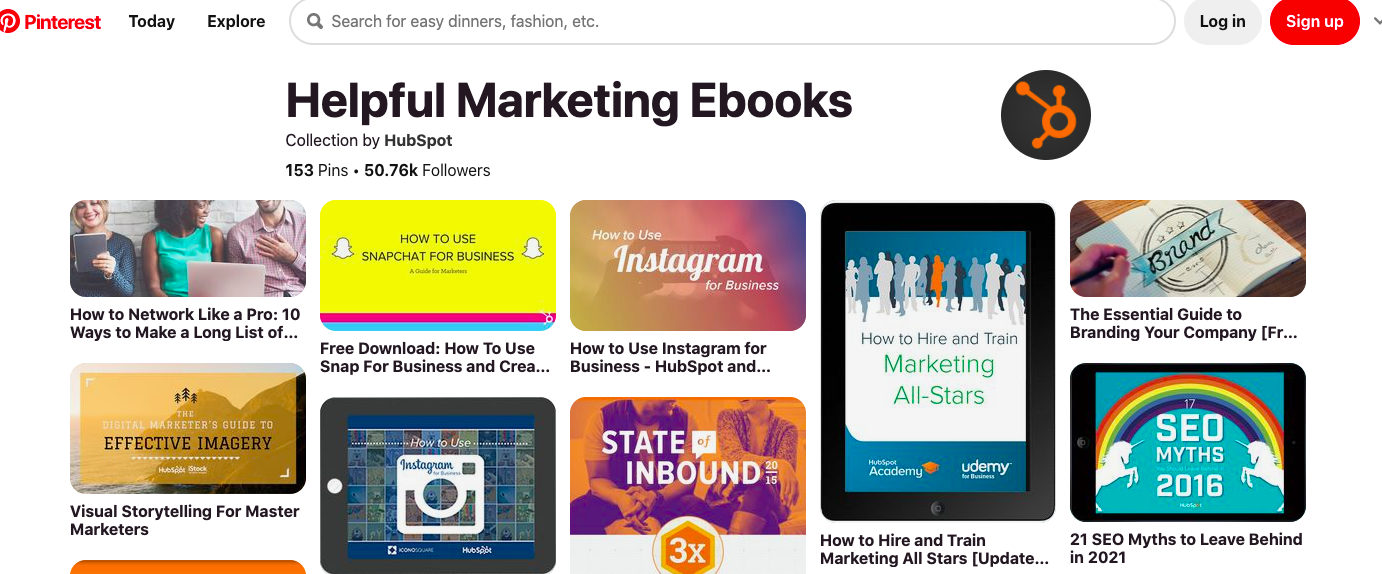
HubSpot’s Pinterest page generates more than 4.5 million views per month and offers a host of great content to Pinners including infographic templates, content creation tips, and even career advice. It’s a one-stop shop for all things marketing.
2. Bossy
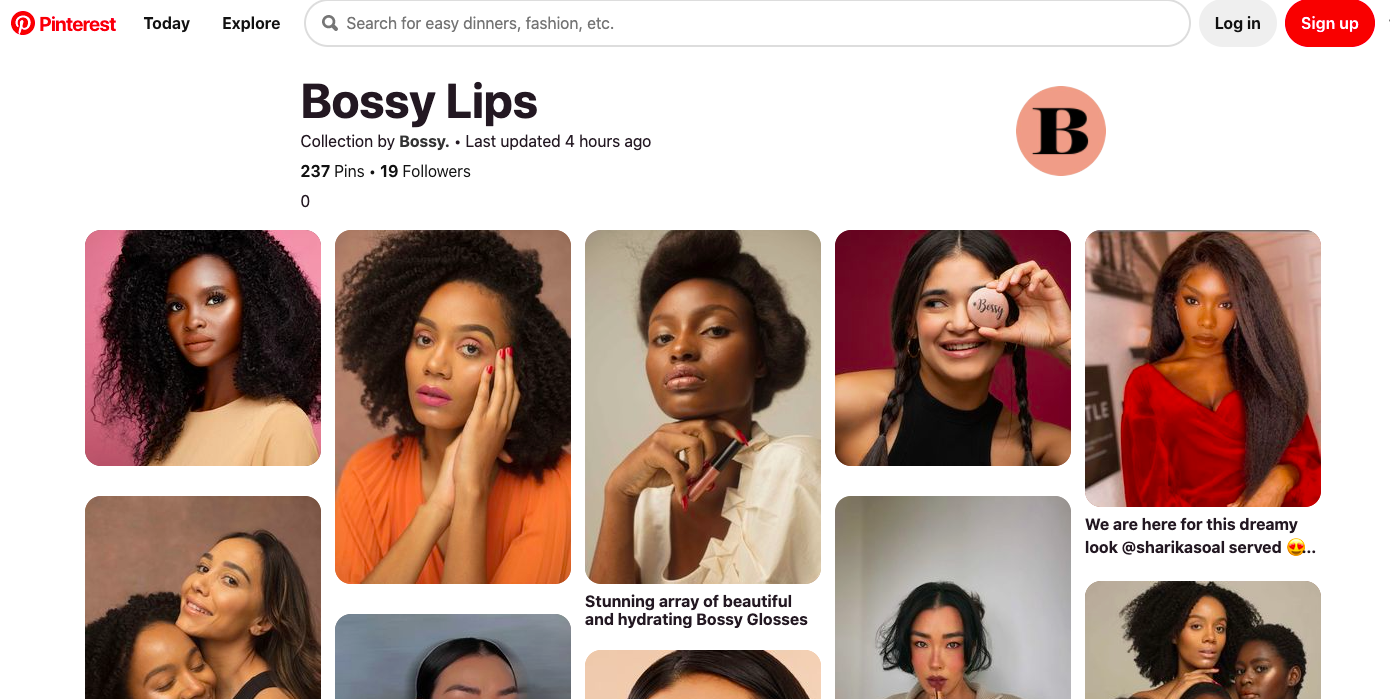
Bossy is a growing, female-founded beauty brand with a focus on attention-capturing, long-lasting lipsticks and a Pinterest page that showcases its commitment to diversity.
3. Ruggable
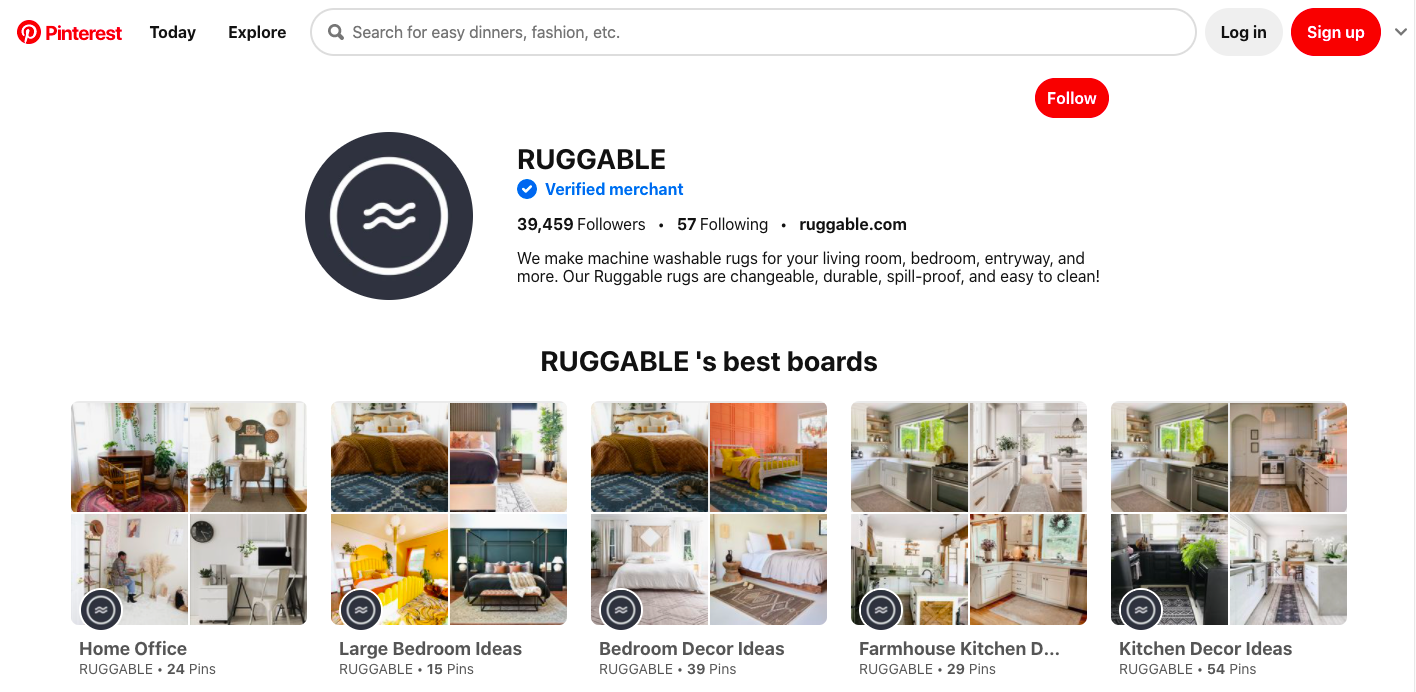
Ruggable’s value proposition is simple: Washable rugs for any space. These rugs are changeable, durable, spill-proof, and easy to clean — so it’s no surprise that its Pinterest page generates more than 10 million views per month.
4. Etsy
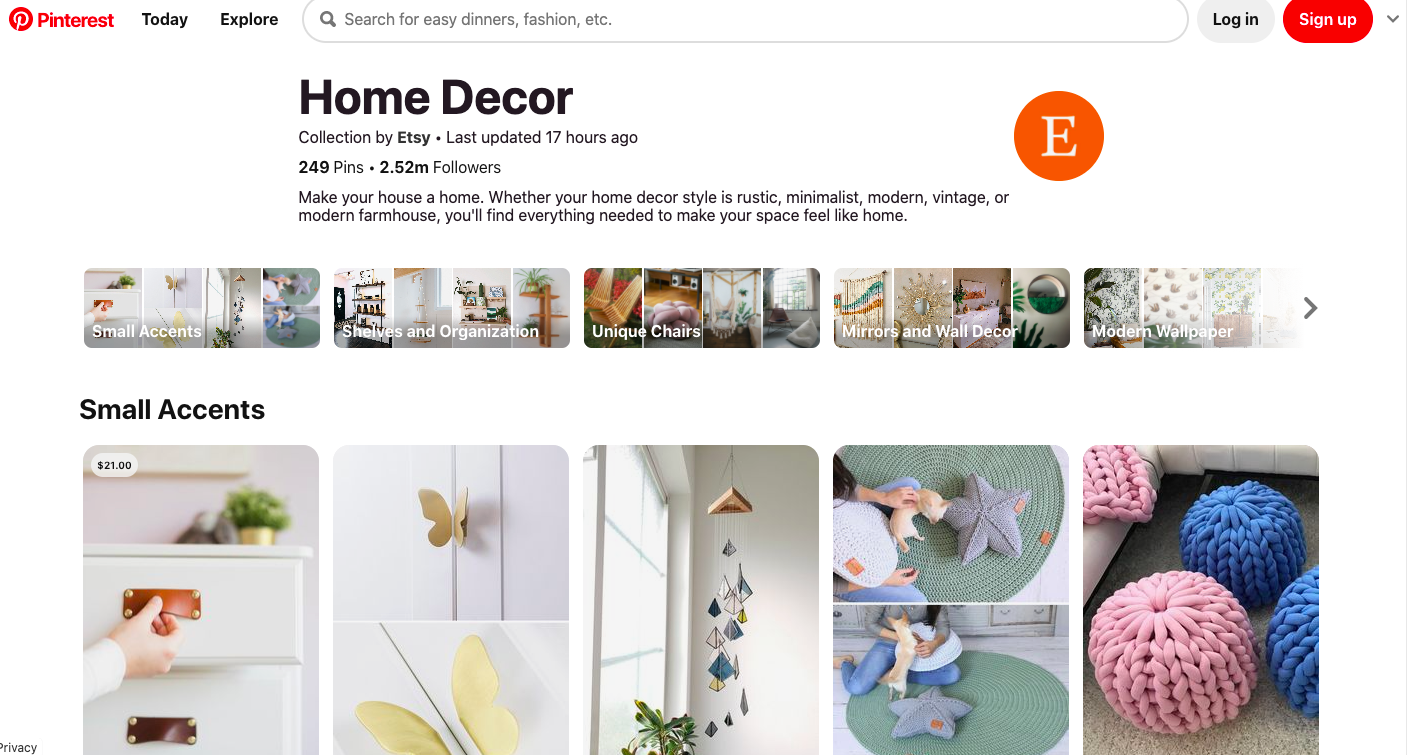
This custom-made market store has made significant market inroads and is now using Pinterest to showcase some of its most popular items. Looking for something unique? Something that makes a statement? Chances are you’ll find it on Etsy — and see it on Pinterest.
5. Bustle
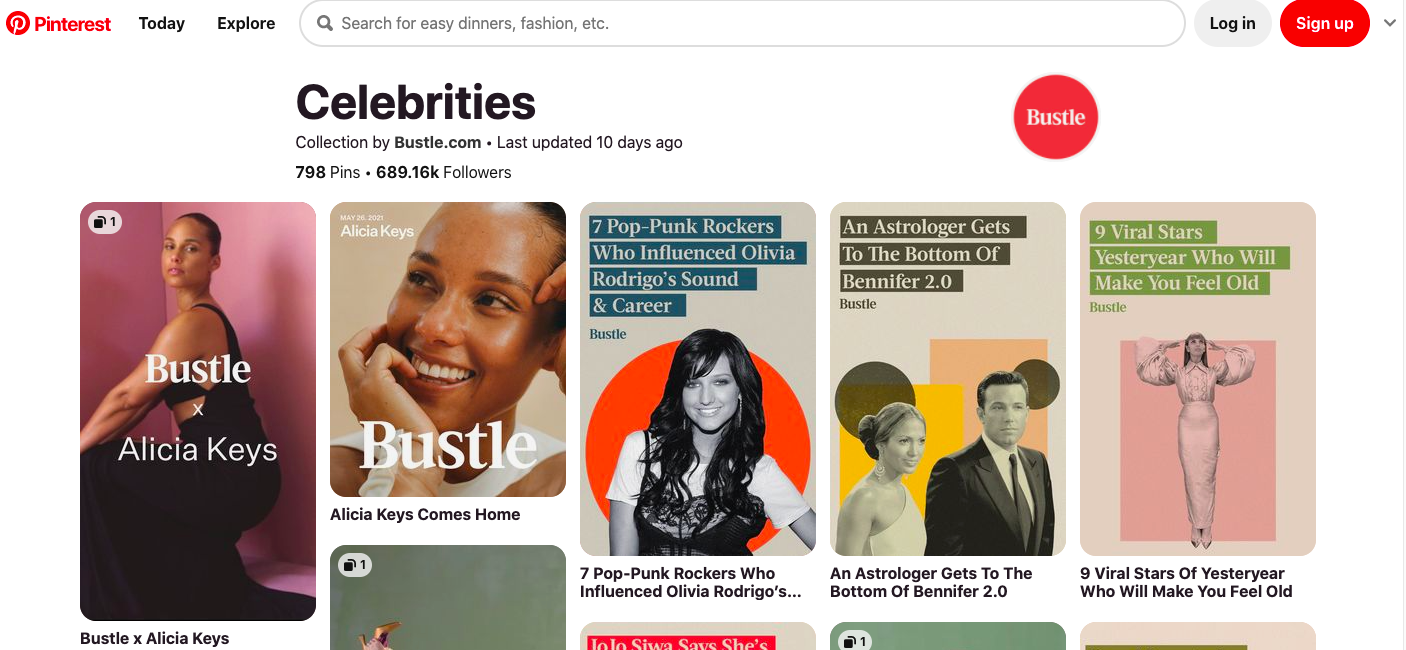
Bustle is on the leading edge of social zeitgeist, and has a Pinterest page to match. With a mix of celebrity content, human interest stories, recipes, and fashion advice, Bustle captures user attention immediately.
6. Asutra
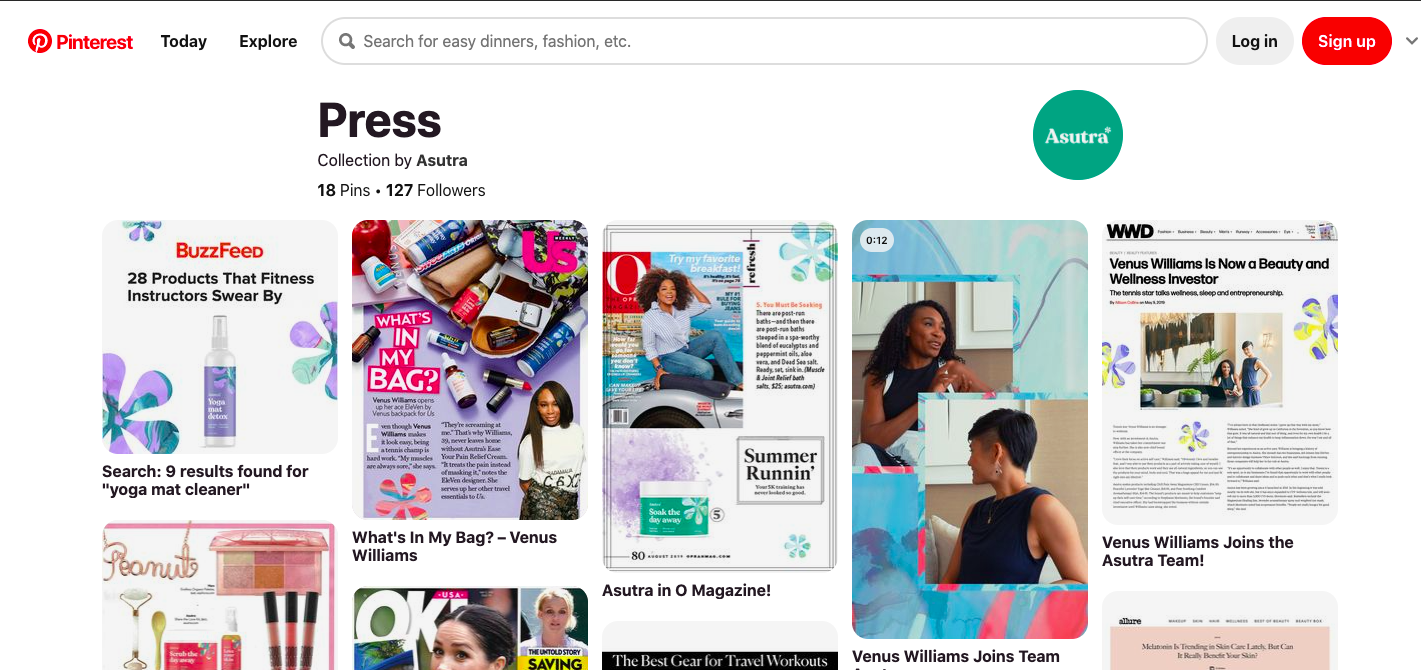
Committed to creating clean, accessibly-priced, wellness products, this women-owned and led brand has made the move to Pinterest and is already seeing almost 200,000 views per month.
Pin It to Win It
When it comes to marketing your business, Pinterest for Business offers a way for your brand to win market share and generate organic customer interest. The picture-driven nature of the site can help shift the conversion away from simple to conversion and instead inspire your audience to use your products and services in their lives — or just inspire them in general.
With a practical, step-by-step approach, it can be your products and services that users are pinning – and purchasing.


The Beginner’s Guide to Brand Pillars
Although the practices of marketing and branding have been around for centuries, the industries started to shift in the 1990s.
The digital age came about and companies began to market their brands more than their products with the goal of giving their company a personality.
As a millennial born in the early 90s, I grew up at the same time as the digital revolution. In fact, millennials have a reputation for spending all day on their phones and being lazy.
However, I’d argue that as the digital age and technology began to evolve, so did society’s work expectations. Businesses, and even employees, are expected to be a brand in and of themselves that has value and positively impacts society (instead of just selling products).
As a marketer or business owner, you might be wondering, “How can I create a brand that my audience connects with?”
In this post, we’ll discuss how to create brand pillars that clearly communicate your brand identity to your audience.
For example, brand pillars can be core values, important strengths, or aspects of a brand that support or add dimension to the core idea of “Who are you?”
Essentially, these brand pillars can be anything that your customers find important — perhaps it’s innovation, reliability, on-time delivery, etc.
Brand pillars are meant to differentiate your brand and should be valued and endorsed by your customers. When someone asks why your customers like your brand, they’ll probably be able to list off your brand pillars if you’re clearly communicating your brand well.
These pillars should be decided on strategically to provide better products or services to your customers.
I know this might sound slightly conceptual. Brand pillars can be easier to understand when we break them down into categories.
Below, let’s learn about the five brand pillar categories you can use to determine your own brand pillars.
What are the five brand pillars?
The main brand pillars are purpose, perception, identity, values, and brand experience.
1. Purpose
Purpose can be described as the mission and foundation of your company. It will answer questions like “Why did you start your company?” and “What are you hoping to achieve?”
Think about this strategically. What do you want to communicate to your audience as your purpose? What do you want to communicate to employees or potential employees? Knowing your purpose will help you hire employees who align with your mission and correctly target your audience.
Purpose can even be described as the culture of your company. For example, at HubSpot, our culture is about growth-minded individuals who have HEART (they are humble, empathetic, adaptable, remarkable, and transparent). The acronym HEART is one of our brand pillars as a company.
2. Perception
Perception is about how your customers perceive your company/brand. You’ll want to either evaluate how current customers view your brand, or if you’re a new company, write down some characteristics that you’d like customers to associate with your brand.
This could be something like hospitality or leadership. If these are your perception brand pillars, then you want customers to view you as a leader in your industry that is a trusted, good host (this makes sense for a hotel, for example).
3. Identity
This brand pillar is about who you are as a brand. A brand is something you are, it’s not something you have. It’s all about your personality as a company.
For example, an identity brand pillar could be something like “cheeky” or “bold.” This means that you want customers to see you like a cheeky personality. The reason to define this brand pillar is so you have a guiding light for how to be human and interact with your customers.
4. Values
Your values are about communicating your overall position to your audience. What’s important to you as a company? How do you want to make a difference? This could be something like valuing integrity and ownership.
5. Brand Experience
Lastly, brand experience is a pillar that will help you promote your products and services. People use products and services when they like a brand. When there are so many options to choose from these days, customers will choose to buy from companies they like. This means you need to create a positive customer experience and association with your overall brand.
By using these brand pillars as a basis, you can create a brand identity that sets you apart from your competition. Companies that fail most likely haven’t considered what their brand pillars are and how they align.
If you have a robust strategy, but you don’t have a purpose or identity, people won’t feel compelled to purchase from you. On the other hand, if you promise that you value user experience, but the perception is off, then you also won’t find success.
In the next section, let’s review how you can use these categories to define your brand pillars.
How to Determine Your Brand Pillars
To determine your brand pillars, you should ask yourself a series of questions to come up with the top characteristics that you want to communicate to your audience.
Purpose
- Why did you/are you starting your company?
- What do you want to accomplish?
- How do you want to serve your customers?
- What value do you offer to customers that support your mission and vision?
Your purpose should serve as a magnet for employees and customers who share similar values. It will also provide a hook to tell your company’s story and differentiate yourself from your competition.
Perception
- What role do you play in your customer’s mind?
- What do they perceive your value to be?
This pillar could be something like education. Perhaps people view you as a place they go to learn about your industry. This is completely owned by your audience and how they interpret your brand through messaging and reputation and management.
Identity
- What’s your culture like?
- What’s your point of view?
- What kind of tone of voice do you use in communication?
- What are your convictions and behaviors that define your brand?
Defining your voice and brand is about strategizing how you want to speak to your audience on several platforms. The brand personality signals what employees might be like, how they behave, who your customers are, etc.
Values
- What’s important to you in your interaction with your audience?
- What do you value above all else, even before your own financial interests?
Again, this pillar will help define what you care about as a company.
Brand Experience
- How do customers interact with you at each touchpoint?
- What kind of experience do you want customers to have?
- What makes your customer experience better than your competitors?
This pillar will define much of your perceived personality and reputation.
When creating your brand pillars, think about what your customers get from you. Do they get convenience, higher quality, time savings, etc.?
To determine your brand pillars, think about your brand strategy and come up with things that clearly define your personality, voice, customer experience, your purpose, and how people will perceive your brand.
Brand Pillar Examples
1. Hilton Brand Pillars
Hilton’s brand pillars are very clearly stated on its website. They value hospitality, integrity, leadership, teamwork, ownership, and now (sense of urgency).
These are stated as their values, but they’re really brand pillars that showcase how the company wants to be perceived, what their identity is, what the customer experience is like, and what they value.
2. Patagonia Brand Pillars
Patagonia is a brand that has personality and purpose. Their mission is to inspire and implement solutions to the environmental crisis (this is their purpose). Additionally, Patagonia offers a minimalistic style and values simplicity and utility (this is their personality and values).
3. Nike Brand Pillars
Since it was founded, Nike has been consistent in its brand pillars. They are all about competition and surpassing one’s limits. All the company’s advertising, messaging, and investment decisions support that personality and value.
Brand pillars are a great way to define and differentiate your company from the competition. It’s not just about making products anymore — it’s about having a voice and point of view that offers value to its customers.


What Netflix Bingeing Taught Me About Digital Experience
Next time you open Netflix, I want you to try something.
When you see your tailored suggestions, as the platform starts the video right where you left off on your iPad, stop and take note of that experience.
How do these experiences actually make you feel?
Does the device handoff give you a rush of excitement and gratitude?
Probably not.
Start over. Imagine opening Netflix again.
Your recommendations are gone, replaced with an unfiltered list of content. The list feels random, but then you’d expect at least a couple of shows to be of random interest. They’re not. That episode you’re halfway through on your iPad? You’ll have to scroll back and forth to find your place. Ultimately, you’ll probably just rewatch parts of the episode “just to be safe”.
![Download Now: Digital Experience Audit [Free Workbook]](https://no-cache.hubspot.com/cta/default/53/72275ab2-74a2-4d36-8098-7b25d51c89ec.png)
If you’re like me (my apologies if you are), you’ll react more to this moment of friction than the moment of seamless performance. The seamless experience is largely invisible — it’s unfelt — while the bad experience is impossible to ignore. Based on how bad it is, it’ll haunt you and sometimes make you question your life choices.
It may even push you toward Hulu or Disney +, or another platform that you trust more.
The same dynamic is at play for the digital experiences you deliver to customers.
2020 and 2021 accelerated digital transformation across industries, creating a new set of expectations in your customers’ personal and professional lives.
For them, being delighted isn’t a capstone to their experience as your customer; it’s the cornerstone your relationship is built on. Today’s buyers have more options, and disruptors are acquiring — and retaining — new business through the experience they provide their customers.
These new expectations present huge opportunities for those who are willing to rethink their digital experiences and a huge risk for those who are not.
So, why are so many businesses failing to meet these expectations?
Is it because they just don’t care about the customers’ experience? Sometimes — but not usually. A vast majority of businesses would love to deliver a delightful experience.
The reason they don’t is mostly because cobbled-together point solutions can’t deliver a clear view of the customer.
After all, scaling companies are in a constant state of adaptation. As new needs and opportunities arise, companies introduce a network of individual solutions that solve discrete problems: a CRM to manage customer data, a CMS to build their website, and marketing automation to scale their efforts.
Over time, as you add more solutions, your company’s tech stack grows so unwieldy it becomes a barrier between you and your customers instead of a bridge. It keeps you from the agile reporting you need and makes automation way more complicated than it should be. It makes personalization unreliable and messaging fragmented.
Since the dawn of the digital age, the status quo has been to rely on a separate CRM, CMS and automation tool. It’s what many marketing leaders have accepted as a necessary evil — despite the friction it causes for customers.
So, how do today’s companies win?
By delivering a best-in-class, unified digital experience that exceeds customer expectations. Doing this requires two foundational elements.
1. Information
Any marketing based on assumptions is doomed to failure. To get the digital experience right for every individual customer at scale requires reliable, organized and actionable data.
Not just ‘who are your customers?’ but ‘who is this customer?’ How and where have they interacted with you digitally? What do they need from you right now, and more importantly, what will they need from you next?
At HubSpot, we built the Customer Code with this philosophy in mind: Use the data you have access to, don’t abuse it. But in order to leverage the data you gather to create better digital experiences, all of your customer-facing teams need a single source of truth for that data — a key ingredient that’s beyond the reach of companies that still use cobbled-together solutions. That’s where centralization comes in.
2. Centralization
Providing a seamless experience across touchpoints is really a matter of shifting from ad hoc point solutions to a crafted, unified platform that provides a single view of the customer. When a CMS sits alongside key sales, services, and marketing tools in a centralized system, every customer-facing team knows how customers are interacting with their business and — more importantly — how they can help.
And this is the key: if you want your marketing, sales and service teams to deliver a great experience, you have to give them a fighting chance. You do this by having the systems and data they use aligned and unified.
For example, consider a repeat visitor to your pricing page. If both marketing and sales can see this activity, the marketing team can send a discount code or helpful resources that contextualize your pricing while sales can reach out to offer guidance or a product demo.
With this centralized platform and toolset, you can see and anticipate customer needs and take action immediately. You can tailor digital experiences on an individual level, across touchpoints, using the most up-to-date insights on customer needs, questions or interests — just like they expect you to.
The CRM for Today’s Customer Expectations
The answer to these business challenges isn’t just to use a CRM. You probably already have one of those. If you’re really unlucky, maybe even two. It probably doesn’t allow you to easily do any of what I just described, and it likely can’t deliver the seamless experiences your customers expect.
Instead, you need a CRM platform that has been designed specifically to meet today’s sky-high customer expectations; one that you can adapt to changing customer expectations, align your teams around, and adopt without an uphill change management battle. (And no, there are no change management battles that are downhill).
To pull off this digital experience at scale, you need to rethink the underlying components of the experience itself.
The customer-facing pieces — your website, email content, advertising, member portals — are front and center. But only touchpoints that are powered by a modern, purpose-built CRM provide the personalization and timeliness that distinguish an average digital interaction from an elite one.
And whether it’s Netflix, HubSpot or your corner cafe, delivering elite customer experiences is the key to navigating uncertain times, thriving in the digital-first era, and ultimately, growing better.

How 3 New Facebook & Instagram Shopping Features Could Help Marketers Boost Sales
For years, millions of brands have flocked to Instagram and Facebook to spread awareness to millennials, Gen Z, and members of other generations on the app.
And, at this point, marketing on these platforms has proven to be a smart tactic. On Instagram alone, 90% of its 1 billion-plus users follows a Business page on the platform.
Now, with Facebook’s launches of Facebook Shops, Instagram Checkout, and Live Shopping in the last 12 months, many of the tiny remaining friction points between discovering and buying products on social media platforms have been eliminated.
In this blog post, I’ll highlight the newest free features that brands can use to make sales directly from Instagram’s or Facebook’s platform, as well as any brand requirements for using them.

3 New Instagram Shopping Tools to Know About
1. Facebook Shops
Technically, this tool was launched by Facebook, which owns Instagram. However, your Instagram followers won’t need a Facebook account to make purchases with this feature.
Facebook Shops, launched in May, enables brands to create online stores that link directly to a brand’s Instagram, WhatsApp, Messenger, or Facebook Business Page.
When creating a free Shop, brands can upload bulk or individual product listings with photos, prices, and descriptions; change the store’s button colors and text to make it consistent with their brand; and choose to have visitors buy products directly from the shop or through an integration with an ecommerce website they already use.
Facebook Shops can be created on Facebook Commerce Manager. To get started, you’ll need admin privileges to the Instagram Business or Facebook Business account you’ll be linking the Shop to — as well as admin privileges for your brand’s Facebook catalog.
Once a Shop is created, it can be linked directly to your Instagram Business profile. When this is done, an icon that says “View shop” will appear on your mobile profile under your bio. At this point, you can access Facebook Shops on desktop from Facebook Business profiles, but not from Instagram or WhatsApp desktop sites.
Here’s what the Shop experience looks like when an Instagram app user visits the account of Ink Meets Paper, a printing company which offers a Facebook Shop:


Facebook Shops, which is free to all businesses that fulfill the business page requirements noted above, could be a great option for small or medium-sized businesses that are interested in ecommerce but don’t have the time or bandwidth to create and promote a full ecommerce site around their brand.
To learn more about how Facebook Shops works and the background of why Facebook launched it, check out this post.
2. Instagram Checkout
For brands that want to sell a few select products on Instagram, or don’t have time to create a Facebook Business Page or catalog to open a Shop, Instagram also now offers an in-app Checkout experience that links to Instagram Shoppable posts.
Before 2020, several brands were already using Shoppable posts. These posts, which often highlighted an image of a product or experience, allowed users to tap the content to view it in an online catalog outside of the platform.

But, in March, Instagram launched a Checkout feature that allowed Shoppable purchases to happen directly in the app.
In an announcement, Instagram explained that it launched in-app Checkout to keep users on the platform when they were inspired to make a purchase.
Instagram also adds, “Businesses can truly leverage the full ecosystem of Instagram Shopping features to build experiences that drive awareness and transactions all in one place.
Currently, Checkout is free to brands through until at least 2021. However, there might be selling fees for businesses after that.
“We also want to help reduce the cost of doing business during this tough economic time, so we’re waiving selling fees for businesses that use Checkout on Instagram through the end of the year,” Instagram’s post said.
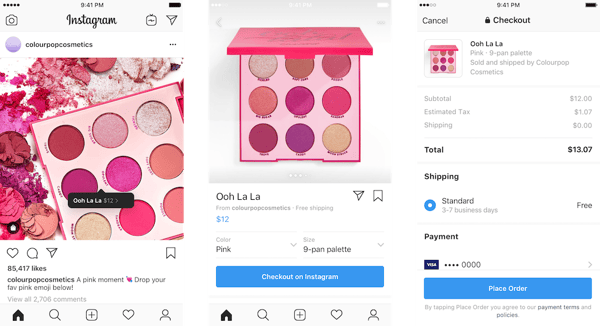
Now, when users click on a Shoppable post that links to the Checkout feature for the first time, they’ll be asked to give their name, billing information, and shipping address and can then click “Place Order” directly on Instagram. To further eliminate friction, users can set the app to remember purchasing information so they don’t need to submit it each time they place orders.
At this point, you might be wondering, “How is this different from Facebook Shops?”
Both tools similarly allow consumers to make purchases directly on Instagram. However, a Shop is a mini-online store where you can purchase one of many products listed by one brand. Meanwhile, Checkout allows consumers to buy a product they happen to see on an Instagram Shoppable post within their feed or a brand’s profile page.
Additionally, to use the Checkout feature, you’ll need to fulfill the same requirements as Facebook Shops, plus approval for Instagram Shopping.
Checkout might be a good option for your brand if you want to dabble in internet sales but don’t want to monitor how multiple products are selling in a wider shop. With Checkout, you can choose to sell one or two products within a few posts, and monitor your content for engagements and sales metrics.
3. Instagram and Facebook Live Shopping
While the features above integrate with Instagram and Facebook to allow audiences to buy products from posts or pre-published stories, Facebook has also unveiled live shopping features for both of its platforms.
Instagram Live Shopping
Aside from adding Checkout to posts within a feed, Instagram Live Shopping, the first live shopping feature launched by a Facebook-owned brand, brings a similar purchasing experience to live content streamed on the app.
Essentially, Instagram Live Shopping lets brands or Instagram influencers present a small CTA for a product at the bottom of an Instagram Live stream. Below is an example where an influencer discusses a product live as its Checkout CTA is highlighted at the bottom of the screen:

When an Instagram Live viewer sees the Checkout CTA and clicks “Add to Bag,” they can either save the order for later if they want to continue watching the stream, or they can purchase the product immediately via Checkout.
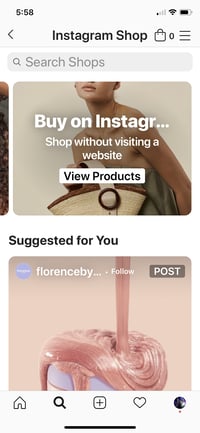
If a user places a product in their Instagram Bag, they can find it by going to the app’s Explore tab and tapping “Shop” in the top navigation. Fram the Shop page, they can then tap the bag icon in the upper right corner to see carted products:
Because users who purchase items via Instagram Live Shopping will be directed to Instagram Checkout to finalize the purchase, brands will need to gain access to Instagram Checkout before using Live Shopping.
Facebook Live Shopping
If your audience is primarily on Facebook, you can also leverage Facebook’s new live shopping feature — which was unveiled in spring of 2021.
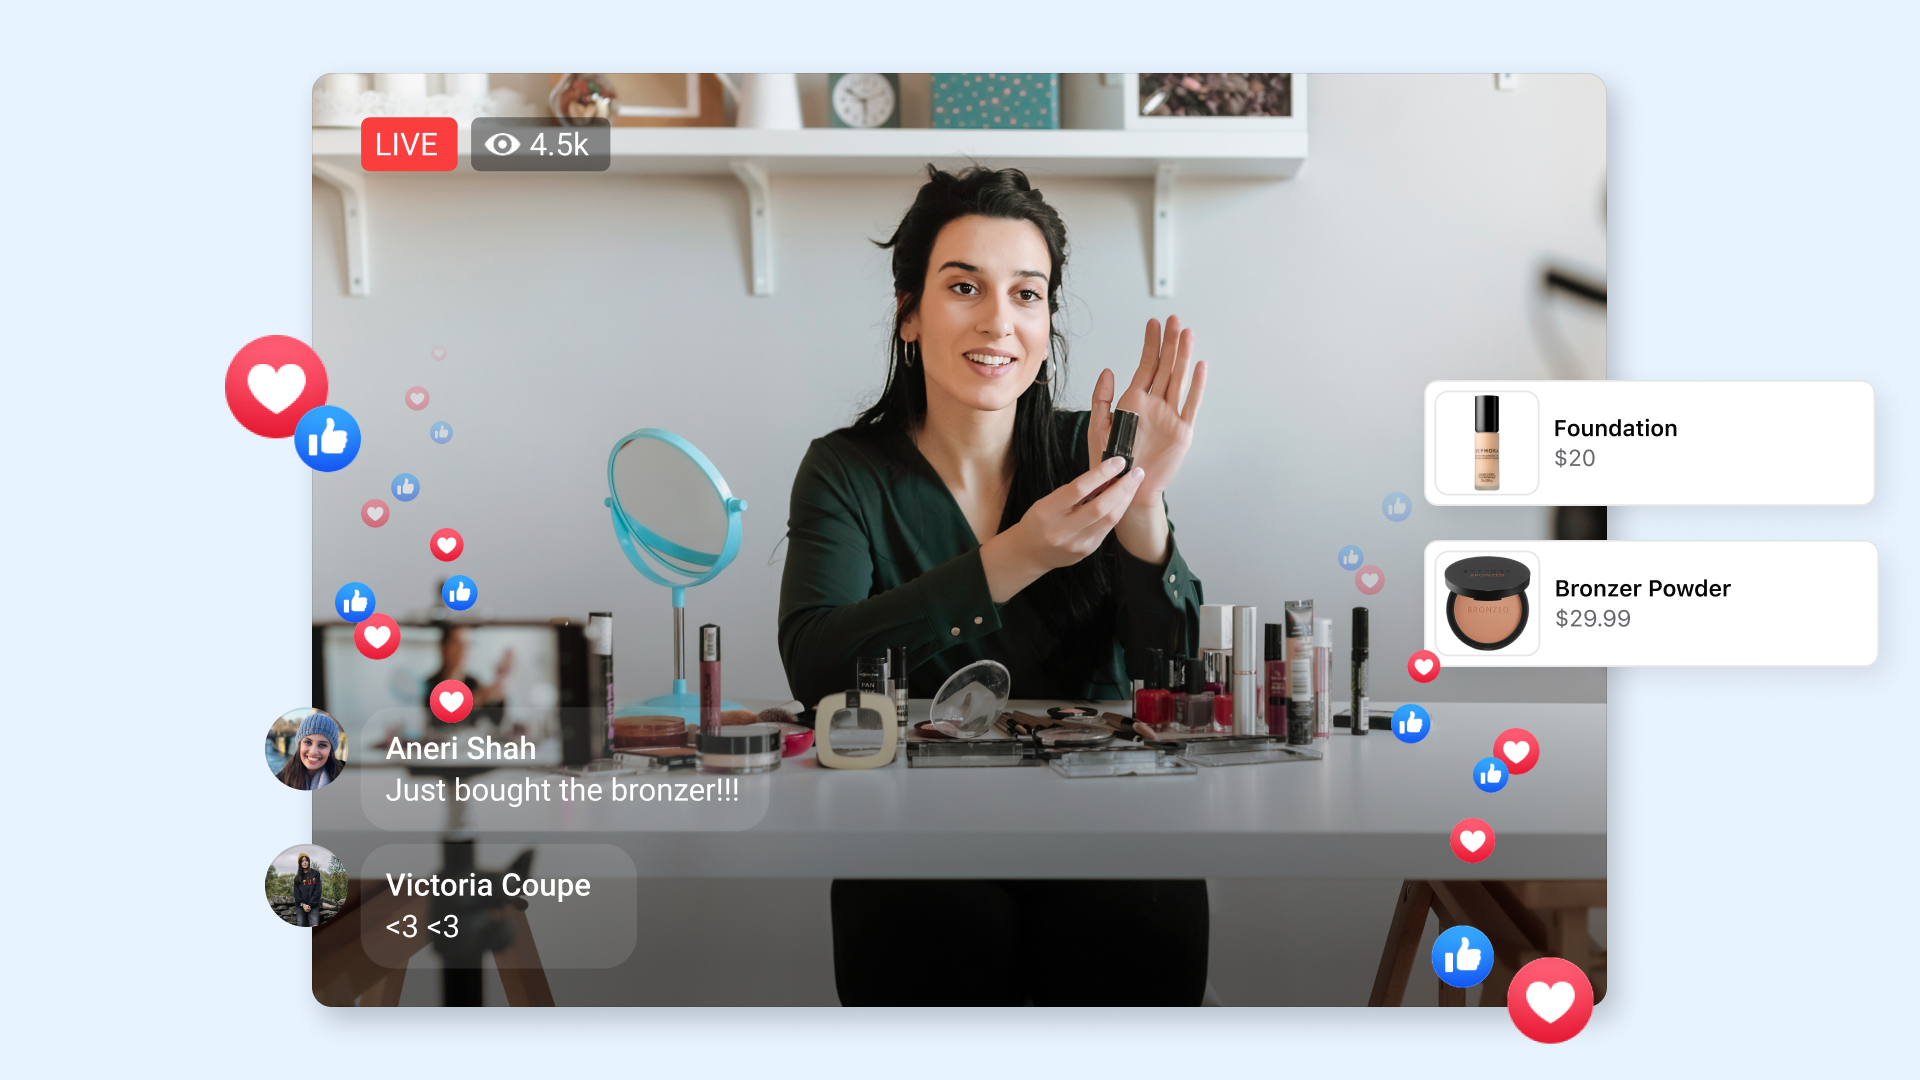
Like Instagram Live Shopping, this feature allows audiences viewing Facebook Live streams to see related products pop up. From there, the user can click the pop-up to buy those products while still watching Facebook Live videos.
The process of promoting your products during a Facebook Live stream is similar to promoting in Instagram:
- First, you’ll need to start a Facebook Shop for audiences to buy seamlessly through Facebook Live.
- Once your shop is all set, go to create a Live video for your Facebook account and click the Live Shopping tab, and toggle on “Enable Live Shopping.”
- Once you’re live with shopping enabled, you can click or tap a button that says “Products from Shop” and select the products you’d like to feature as you’re recording.
For those getting used to Facebook or Instagram Live Shopping, Facebook offers a helpful list of best practices for streaming on its website. These tips include rehearsing with a private live event, repeating key information about the products, saving the live feed to your timeline, and following up with people who shared comments on your feed after you’ve recorded.
What to Keep in Mind When Selling Products on Instagram
At this point, you might be ready to sell your brand’s products using Instagram’s in-app shopping features. However, as you would with any new marketing or selling technique, you’ll want to keep a few key things in mind:
Your content strategy is still key.
While it might sound tempting to blast your followers with posts filled with product shots or basic promotional messaging, and hope that users click the Checkout button immediately, some audiences might not respond well to content that feels like a basic advertisement.
Remember, social media users see ads with product shots and bland descriptions daily. If your content doesn’t stand out above all the other promotional posts out there, your audiences might disengage from you, even if they like your brand.
Rather than posting basic images or videos of products linked to Checkout, consider going a step further. For example, you could air a live stream tutorial where an influencer discusses your product, or publish user-generated content such as customer testimonials. These types of content will show audiences more valuable details than a basic product shot, while also presenting how real people benefit your product. This could persuade them to click and buy your items much faster.
You’ll want to pick the right feature for your company.
While Shops will allow customers to buy a bunch of different products from you all at once, Checkout and Instagram Live Shopping allow you to zone in on specific items or services through your content. While Facebook Shops might be great for brands that can deliver multiple products at once and handle potential high demand, Checkout and Live Shopping could be beneficial for smaller businesses that are more comfortable highlighting one standalone product at a time.
Additionally, if you have a killer supply chain, tons of products to sell, and no time to make content, a Facebook Shop could help you move your inventory. Meanwhile, if you have a great content team, but only have a few key products to sell, you might want to create solid product marketing content paired with Instagram Checkout.
You’ll want to monitor your metrics, including revenue.
Although brands don’t need to pay for Facebook Shops, Checkout, or Live Shopping, time and effort will still go into creating and maintaining a Shop or content that highlights items sold in Checkout. Because of this, you’ll want to monitor the money and engagement-related metrics of each strategy you take on. While these metrics can help you learn what to do, and what not to do, they can also help you determine if these features are worth your team’s time.
If you’re considering an ecommerce strategy on Instagram or another online platform and don’t know where to start in your planning, bookmark our Ultimate Guide to Ecommerce. If you’re interested in learning how other brands shifted to ecommerce in 2020, check out this piece.
Editor’s Note: This blog post was originally published December 2020, but was updated in June 2021 to add new information about Facebook and Instagram features.

13 of the Most (& Least) Successful Brand Extensions to Inspire Your Own
I was in awe of Hailee Steinfeld’s performance after watching her in The Edge of Seventeen. Her performance was so good that it earned her a Golden Globe nomination for Best Actress.
But what amazes me about Steinfeld isn’t her acting prowess. It’s that she’s also just as accomplished as a singer. Steinfeld has collaborated with some of the most famous musicians like Zedd, Florida Georgia Line, and Alesso to produce three hit songs that have all reached the Billboard Hot 100 record chart.
Although Steinfeld is mainly known for her acting chops, her singing abilities bolster her esteem as a performer and stretch her brand to more audiences and fans. And just like her venture into music, companies often extend their brand to develop new products in industries where they don’t have any market share.
These initiatives are called brand extensions, and they allow companies to leverage their brand awareness and equity to create more revenue streams.
In this article, you’ll learn more about what a brand extension is and see examples of extension ideas that could inspire you.

What is a brand extension?
Brand extension is a marketing strategy that involves a company using its well-established brand name or image to introduce a new product or product categories to its customer base.
This strategy works best when the new product category is related to its parent category and is something consumers and customers want.
Many companies use brand extensions because it allows them to leverage their parent brand’s brand awareness and authority to reach new demographics and open up new sales channels.
One company that does brand extensions well is Apple.
Although Apple started as a technology company that makes only computers (Macs), it soon extended its product line to include music players (iPods), mobile devices (iPhones), and tech accessories (Apple Watch and Earpods). Even though all these new products are different, the extension works because Apple didn’t drift too far from its parent product category. Instead, it leveraged its brand name to make penetrating the market a success.
What are the types of brand extensions?
Depending on the type of customers you have and what you want to achieve as a brand, you need to decide which brand extension strategy is right for your company.
Here are five different extension strategies that could work for you.
Line Extension
A line extension is when a parent brand launches a new product line in a category already familiar with its customers. With a line extension, brands don’t have to create new categories.
An excellent example of a line extension is when soft drink companies introduce new flavors to their existing drink lineup. Other examples could include introducing new scents, sizes, and colors to a product line.
Complementary Product Extension
Another way an established brand can extend itself is by creating complementary products for its main products.
For example, Nike, a sports brand, creates various equipment, wears, and other sport-related products that complement each other. We’ve also seen toothpaste companies use this type of extension for their original brand by adding toothbrushes and other oral care products as new categories.
Customer Base Extension
A company can create a branding extension for itself by launching different product categories for a single demographic.
Procter & Gamble (P&G), for example, does this well with the Pampers brand. Although P&G specializes in various products, the Pampers line focuses on making products like diapers and wipes for babies.
Company Authority Extension
Companies with high levels of authority in their sector can leverage this authority to create new products.
For instance, Samsung has a huge brand name in the technology space that allows them to launch different products in related categories with a measure of success. And because of its brand image, most consumers wouldn’t mind using a new product, whether it’s an air conditioner or a mobile phone.
Brand Lifestyle Extension
Who would have thought a tequila line from an energy company would sell out within a few hours? Well, Tesla did it. And it was primarily due to the personality and lifestyle of its CEO, Elon Musk.
However, Elon and Tesla are not the only ones to use a celebrity’s lifestyle to extend an existing brand. Other instances include Adidas/Kanye West’s Yeezy lineup and Fenty (a brand under LVMH) with Rihanna.
What separates the best brand extensions from the worst?
Historically, the most successful brand extensions are the ones that closely tie to the company’s core brand or flagship product, like Gerber’s baby clothes and Dole’s frozen fruit bars. By entering tangential markets that can preserve their brand’s unique associations and perceived quality, companies can launch new products that consumers intuitively understand the benefits of, even though they’ve never seen them on a shelf.
On the flip side, a company can also exploit its brand and, in turn, ruin it.
Developing a new product in a market that isn’t closely tied to your flagship product or core brand, like what Zippo did with its women’s perfume, could cause some problems.
It could result in undesirable associations to your brand and weaken its existing associations and hurt your established products’ perceived quality.
So whether you’re a SaaS company or a consumer brand thinking about extending your product line, check out our list of the most and least successful brand extensions to help inspire your own.
Brand Extension Examples
- Reese’s Puffs Cereal
- Food Network’s Kitchen Items
- Gillette’s Razors & Shaving Supplies
- Colgate’s Toothbrush
- Star Wars Action Figures
- Honda’s Lawn Mowers
- Sunkist’s Vitamin C Tablets
- Cadbury’s Instant Mashed Potatoes
- Levi’s Tailored Classics
- Pillsbury’s Frozen Microwave Popcorn
- Samsonite’s Outerwear
- Arm & Hammer’s Underarm Deodorant Spray
- Colgate’s Kitchen Entrees
Examples of Good Brand Extensions
1. Reese’s Puffs Cereal

Reese’s Puffs was my favorite cereal growing up, so I might be a little biased here. But with all the chocolate-flavored cereal around in the mid-90s, Reese’s Peanut Butter Cup’s entrance into the cereal market was smart and natural.
Today, with some ad campaigns highlighting how kids can eat their favorite candy for breakfast, Reese’s Puffs has helped General Mills, its conglomerate, capture the second-biggest slice of the cold cereal market share.
2. Food Network’s Kitchen Items
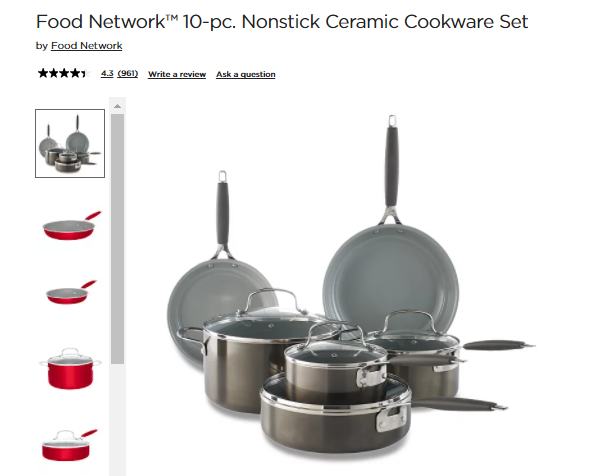
With an audience of over 13 million people, Food Network remains one of the world’s biggest TV channels.
Considering that many people were interested in what it does, Food Network saw an opportunity to extend its brand by partnering with Kohl’s Corporation to launch its kitchen and cookware products.
The partnership was a success because Food Network served a specific audience with what they needed.
3.Gillette’s Razors & Shaving Supplies
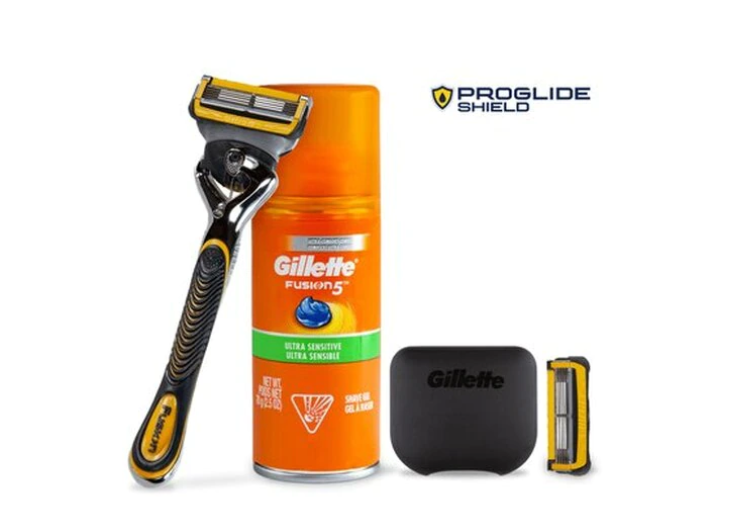
Gillette’s extension into making shaving products alongside its safety razor blades was a smart move. Why? It’s hard to imagine someone shaving without using shaving cream, foam, or gel?
It was almost a necessity for Gillette to produce this complementary good for its flagship product.
4. Star Wars Action Figures

Although Star Wars was popular among adults when the movie was first released in 1977, many children didn’t like it as much.
So how did the franchise become popular today? The Star Wars brand extended into the toy market. With action figures from characters in the movies, Star Wars was able to attract a new audience, build brand awareness and make a ton of sales in the process.
5. Colgate’s Toothbrush
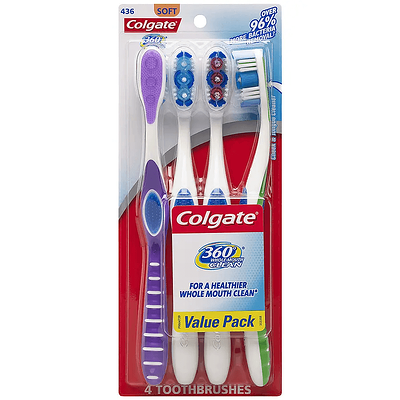
Just like Gillette’s razors and shaving products, Colgate’s toothpaste and toothbrush are complementary goods. But unlike the former example, you literally need a toothbrush to use toothpaste. Otherwise, you can’t brush your teeth.
In my opinion, Colgate’s decision to enter the toothbrush market was a necessity and one of its best moves, helping it secure the third-largest slice of the oral care market.
6. Honda’s Lawn Mowers

Honda’s line of lawnmowers might not elicit the most enjoyable memories of my childhood. Still, its entrance and success in a saturated market speak volumes for a company primarily known for selling cars.
By leveraging its expertise in small motors to enter the lawn mower market in 1978, it now boasts the seventh-largest slice of market share in the global lawn mower industry.
7. Sunkist’s Vitamin C Tablets

Featuring orange juice as its flagship product, Sunkist’s brand has associations with oranges, health, and energy. Sunkist produced vitamin C tablets that spawned an entire arm of business dedicated to vitamins and supplements to both bolster and leverage this association simultaneously.
Examples of Unsuccessful Brand Extensions
Not every brand extension can be a hit. Here are a few examples of brands that have made brand extension mistakes — and the lessons you can learn from them.
8. Cadbury’s Instant Mashed Potatoes

Cadbury is known for making high-end chocolate and candy. When it started producing low-end food products, like instant mashed potatoes, it’s not surprising to learn that its association with the finest chocolates weakened.
Smash, its instant mashed potato brand, actually reached mainstream success, but it was at the expense of lowering its flagship product’s perceived quality. Cadbury eventually sold Smash in 1986, over 20 years after introducing its instant mashed potatoes to the world.
9. Levi’s Tailored Classics

When Levi’s introduced Tailored Classics in the early 1980s, it already owned a large share of its target market, so it wanted to enter some new markets to sustain its high growth rate.
One of these markets was men’s suits, but since its brand was heavily associated with a casual, rugged, and outdoorsy lifestyle, Levi’s new product line conflicted with its core identity and failed to catch on.
Consumers trusted Levi’s to produce durable clothing that could endure the wrath of mother nature, but, for that very reason, they didn’t trust them to deliver high-end tailored suits.
10. Pillsbury’s Frozen Microwave Popcorn

Even though Pillsbury is known for producing foodstuffs, its frozen microwave popcorn couldn’t compete with Orville Redenbacher or General Mills’ Pop Secret because its product positioning of being “frozen for freshness” didn’t offer enough value. Sure, sticking your popcorn in the freezer is convenient (I guess), but that benefit pales in comparison to enjoying a better-tasting popcorn.
11. Samsonite’s Outerwear

While Samsonite’s outwear is more fashionable than Levi’s Tailored Classics, it still suffers from the same problem as Levi’s failed product line — the brand extension doesn’t align with Samsonite’s core identity.
Samsonite is known for making high-end luggage, suitcases, and business bags. So unless it thinks its flagship product’s elegant traits can transfer to a completely unrelated product line, its venture into the clothing industry could diminish its brand equity. This is most likely the reason Samsonite doesn’t list outerwear on its website anymore.
12. Arm & Hammer’s Underarm Deodorant Spray
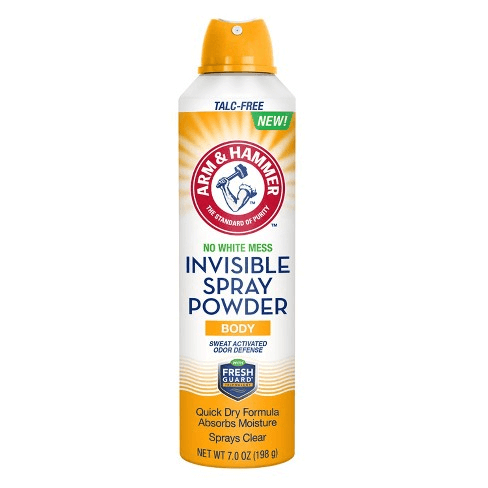
Arm & Hammer has successfully extended its brand from an odor-neutralizing baking soda to laundry detergent, carpet deodorizer, and even cat litter. But one product line that isn’t the best fit for its brand is an underarm deodorant spray. Applying a product that shares an ingredient with heavy-duty cleaning supplies to such a sensitive part of the body doesn’t jive well with consumers.
13. Colgate Kitchen Entrees

Although Colgate did well by extending its brand and creating different oral care products, it failed to enter the food space.
This brand extension was a failure mainly because selling frozen food was in sharp contrast with Colgate’s brand identity. Since its audience already associated the brand name with dental care, it was hard for them to see the company differently.
Grow Your Brand
While a brand extension has its benefits, you also need to know that extending your brand into unchartered waters would also come with challenges.
So before you implement any extension strategy for your business, ensure it’s in line with what your ideal consumer wants.
Does it make any logical sense to start marketing a new product to my customers? What benefit would a consumer derive from this new brand or product? Have I done enough research to know how a brand extension would affect my original brand?
Once you answer those questions, then you can start thinking about effective ways to grow your brand.

Here’s How to Add a Link to Your Instagram Story [Pro Tip]
More than 500 million accounts use Instagram’s Stories feature, and one-third of Instagram’s most-viewed Stories are created by brands (Instagram). It’s clear that this feature has resonated with Instagram’s base, and businesses can leverage it to drive awareness and engagement with their audiences.
But with all of that comes the question: How can brands use Stories to their fullest advantage, in the effort of driving traffic and conversions for their businesses? It starts with knowing how to add links to Instagram Stories with the Swipe Up feature so you can promote your website. Let’s dive into that now.
![New Data: Instagram Engagement Report [2021 Version]](https://no-cache.hubspot.com/cta/default/53/9294dd33-9827-4b39-8fc2-b7fbece7fdb9.png)
You’ll be able to post exciting content regarding a new product, service, or event, and then encourage your audience to “swipe up for details.” This gives brands a low-friction way to drive traffic from the Instagram platform, and it allows users to more seemlessly interact with brands directly from those brands’ Stories.
Who can use Swipe Up on Instagram?
The Swipe Up feature is intended for brands and Instagram users, so Instagram limits availability to those who fit three criteria: You must have a business profile, it must be a verified account, and you must have at least 10,000 followers.
If you meet this criteria, continue reading to learn how to add a link to your Instagram story. If you don’t meet the criteria, click here to find out your alternative options.
1. Check that you have 10,000 followers or a verified account.
You won’t be able to follow the steps below if you don’t.
I used HubSpot’s official Instagram account for these instructions, since my personal account isn’t verified (I also, you’ll be surprised to hear, don’t have 10,000 followers … ).
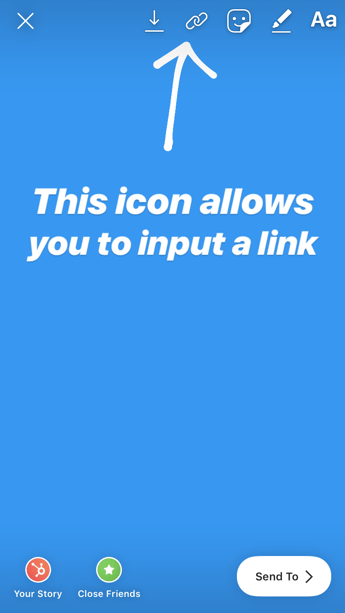
2. When uploading to your Instagram Story, click the icon at the top right that looks like a chain.
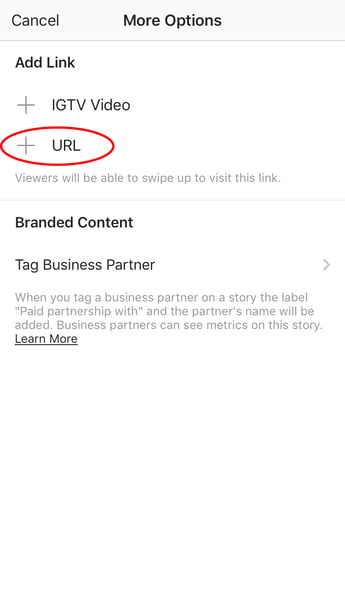
3. Click “+URL” to add a link to a web page.
This will allow you to designate which link to add to your Story. If you were interested in linking your Story to your IGTV video, you could choose that option instead.
4. Type the URL into the text box.
This will be the page that the user gets directed to when they swipe up on your Story. You’ll want to copy it into the text box labeled “URL.”
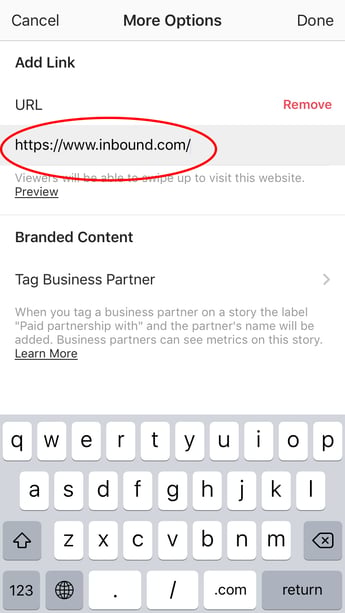
5. Click “Done” in the top right of the screen.
From there you’ll be prompted to go through the process of publishing your Story.
6. When you’re ready to publish, click the “+ Story” button at the bottom right.
Now, your published Story has a “See More” Swipe Up link.

How to Add a Link to Instagram If You Don’t Have 10K Followers
If you want to promote products off of the platform, you may have to get a little creative to do it. Here are your options:
1. Directing your audience to an IGTV video.
IGTV (Instagram TV) is an app that allows you to create Instagram videos with a minimum length of 1 minute and a maximum length of 15 minutes (via mobile) or 60 minutes (via web). Unlike regular Instagram posts and Stories, however, IGTV allows you to add clickable links to the video description.
While Stories get more attention than IGTV videos, one tactic you can use is creating a Story that promotes the IGTV video with your link. This will allow you to get some level of click-through from your Story.
2. Directing your audience to the link in your bio.
Instagram also allows you to drop a link in your profile bio. In many cases, this real estate is best used to list the homepage of your website. However, if you want to drive traffic to a particular page, you could conceivably add the promo link and then include “link in bio” language in your Instagram Story to direct people there.
The main downside, however, is that you wouldn’t be able to promote multiple links at once, so you’d have to coordinate the link you place in your bio to match the content you’re currently creating.
Both of these methods may result in lower conversions because of the extra steps the user has to take in order to access the links. However, they’re both excellent ways to earn traffic from Instagram as you build your audience to 10,000 followers.
Instagram Swipe Up Link Examples
1. @Detoxinista Recipes
Food bloggers such as @Detoxinista use Instagram Stories’ Swipe Up link to embed recipes on the platform. They wisely post images of delicious-looking food, which incentivizes users to swipe up to learn how to make it themselves. The link isn’t a direct advertisement, but users are directed to Detoxinista’s website, where they can find her cookbook and become familiar with her brand.

2. @Blavity #worldnotobaccoday
Blavity is a media company “created by and for Black millennials.” They provide their audience with news, editorial, and lifestyle content that informs and entertains. In a recent campaign with L.A. Quits, Blavity promoted World No Tobacco Day to raise awareness of the harmful effects of smoking. You’ll notice the “Swipe Up” call-to-action on the left. By doing so, users are directed to the L.A. Quits website where they can get resources for living a healthier tobacco-free life.

3. @Alifedotowsky Clothing Items
If you’re a Bachelorette fan, you might’ve noticed the growing trend among Bachelor and Bachelorette contestants to become product influencers and embed Swipe Up links in their Stories. As a fashion and style blogger, Ali often takes pictures or videos of outfits she’s wearing, with Swipe Up links so users can buy the items online. She also often incorporates discounts if users swipe up, further incentivizing a user to purchase an item from a brand’s website.

4. @Popsugarfitness Summer Sculpt Series
One of the most effective ways to use the Swipe Up feature is to offer your followers something of value, for free. @Popsugarfitness, for instance, introduced a Summer Sculpt series with a tempting offer — “Swipe Up for a 10-Minute No-Equipment Booty-Shaping Workout”. Who could say no to that? Ideally, as users obtain more value from your site, they’ll spend longer on it and become stronger brand advocates.
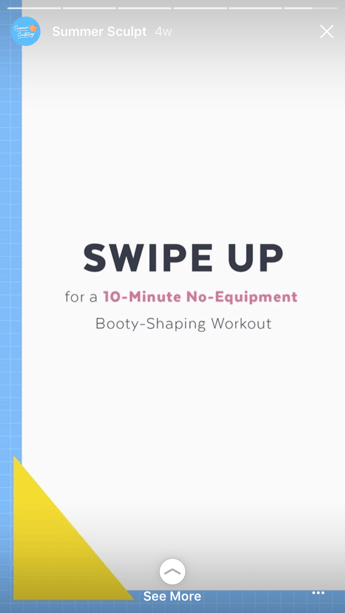
5. @TheLipBar Cosmetics
The Lip Bar is a beauty brand that creates inclusive, vegan, and cruelty-free cosmetics products ranging from lipstick to tinted moisturizer. In this Instagram Story, The Lip Bar is promoting their summer sale with the tagline “Are ya’ll ready for summer?” By swiping up on the Story, you can view one of their promoted products.

6. @Reebok Be More Human Campaign
Reebok created a powerful and timely campaign called “Be More Human”, celebrating women’s empowerment through fitness. On their Instagram Stories, they raise awareness for the campaign by showing famous women like Gigi Hadid or Danai Gurira, and when you swipe up, you learn more about Reebok’s campaign and how you can get involved. On the site there are opportunities to purchase t-shirts or donate money, but it’s evident Reebok is committed to staying focused on their messaging above all else, a noble pursuit.

Driving Traffic from Instagram
Instagram is a thriving platform, one that your customers are likely on. It only makes sense to use these tactics as well as other Instagram strategies to build awareness for your brand and grow your business.
Editor’s note: This post was originally published in February 2020 and has been updated for comprehensiveness.

How to Build a Website: 2 Methods, 9 Easy Steps, & 35 Amazing Tips
Studies show that 76% of consumers research a business online before visiting in person. That means having a website is as necessary for companies today as having a phone number.
Maybe you’re starting a new business venture or developing your personal brand. Or, maybe you’re looking to update your company’s outdated website. Whatever the case, creating a new website can feel overwhelming, particularly without technical expertise or a budget for web developers.
We’ve put together a comprehensive, step-by-step guide to creating a website. Best of all, you won’t need a coder, web designer, or big budget to create one — you’ll just need to follow the steps below.

In general, you’ll carry out these steps before launching your site. But before you get started, you’ll need to choose a platform.
We’ll walk you through the two options you have: a website builder or a content management system (CMS).
Start Building Your Website By Choosing a Platform
The first thing you’ll need to decide is whether you want to create a website using a website builder or a CMS.
Let’s take a look at the definitions of each below.
| Website Builder | Content Management System (CMS) |
|
A website builder is a solution that offers domain names, SSL certificates, and templates in one package, typically at a monthly or yearly subscription fee. |
A content management system is a platform where you place your website’s content and media files. Domain names, SSL certificates, and hosting is typically purchased separately. |
Both website builders and CMS platforms provide the out-of-the-box features, pre-designed templates, and extensions required to create a custom site without coding, but they offer different experiences for creating and managing a website. Below, we cover some of the differences you should consider before making a choice.
Website Builders vs. Content Management Systems
| Website Builders | CMS Platforms |
|
|
Website builders provide everything you need to launch a site. You get website building tools, hosting, domain registration, SSL certification, templates, and support in one place, often for a low monthly rate.
This ease of use and pricing appeals to many site owners; however, free website builders, as well as the more expensive alternatives, tend to be limited in flexibility. For example, you can’t add your own custom code, or drag and drop elements anywhere on your posts and pages.
If you want more control over the functionality and appearance of your site, use a CMS. A CMS will provide the content management features, advanced functionality, and customization options required to build larger, more complex sites.
If you decide that a CMS is the best option for your business, consider the software, ease of use, customizability, security, and pricing of different platforms to narrow down your selection.
Let’s look at some examples of both website builders and CMS platforms you could potentially use.
| Website builder examples | cms systems examples |
|
|
Here are some resources comparing some CMS systems with popular website builders:
- HubSpot vs Drupal vs WordPress vs Joomla: Which Is the Right CMS for You?
- WordPress.org vs WordPress.com: What’s the Difference?
- Which Should You Use, Wix or WordPress? Things to Know
- A Head-to-Head Comparison of Weebly vs. WordPress
- The Most Critical Differences Between Squarespace & WordPress
- Shopify vs. WordPress: Where Should You Set Up Shop?
Below, we’ll walk you through the steps to build a website using both a website builder and a CMS.
How to Build a Website with a Website Builder
Have you decided that you’d like to use a website builder? Excellent! This is the easiest way to start for most beginners.
You won’t need to know how to code, and everything you need is typically included in one convenient package — so if you don’t want to go through the hassle of finding a hosting service, domain name, and SSL certificate, this is the option for you. Let’s go through the process of creating your site using a website builder.
1. Choose a website builder.
First up, choose a website builder that fits your needs and budget. You’ll need to consider the following:
- Cost: Your budget will be by far the most important factor when choosing a website builder. Most require a paid subscription to include premium features such as domain names and increased storage.
- Features: Website builders typically offer different features depending on their target market. Shopify, for example, is specifically designed for ecommerce websites, while WordPress.com is primarily known for blogging.
- Extensions: Check out the extensions and add-ons library for each website builder you’re considering. If they don’t offer something you need for your site, skip that builder.
- Themes and Templates: Some website builders provide more themes and templates, while others provide less variety but more well-designed choices. Check out the template library so you can see what your site could potentially look like once it’s finished.
- Ease-of-use: All website builders are designed to be easy to use: simply sign up on the platform and start building. But some are more intuitive than others. Play around with different builders to find out which one you prefer.
- Support: Is the website builder’s support team known for its responsiveness? Do some research beforehand to ensure the premium subscription will also get you premium support.
No matter what, you’ll want to start with a free trial — that way, you can give the platform a test run before committing. While most website builders come with a free subscription tier, it doesn’t offer a free domain name or the features you need to build a strong website. Our recommendation is to opt for a paid subscription once you’ve decided on a platform.
Below, we break down some of the most popular website builders you could choose.
| Website Builder | Plans | Good Fit For: |
| WordPress.com | $4 to $8/month | Blogs |
| Wix | $14 to $39/month | General Websites |
| Weebly | $6 to $26/month | General Websites |
| Shopify | $29 to $299/month | Ecommerce Stores |
| Squarespace | $12 to $40/month | Creative Websites |
Here are a few more resources to help you choose a website builder:
- Best Website Builders Today and How to Choose One
- Best Free Website Builders to Check Out This Year
- Top Ecommerce Website Builders
And here are some posts listing alternatives:
2. Sign up for a subscription plan that meets your budgets and needs.
As we mentioned above, you won’t want to go for a free plan because those typically don’t include enough features to launch a professional website. You’ll want to upgrade, but you’ll need to take a close look at the features included in each tier to choose the right subscription for you.
Consider the following questions before choosing a subscription plan:
- How much storage will you need?
- Do you want ads to be removed from your site?
- Will you be setting up an online store?
- Will you want a professional email with your domain name?
- Will you want to customize the site using CSS and HTML?
- How much support do you expect you’ll need?
Here’s an example of a feature comparison chart from Weebly’s pricing page:
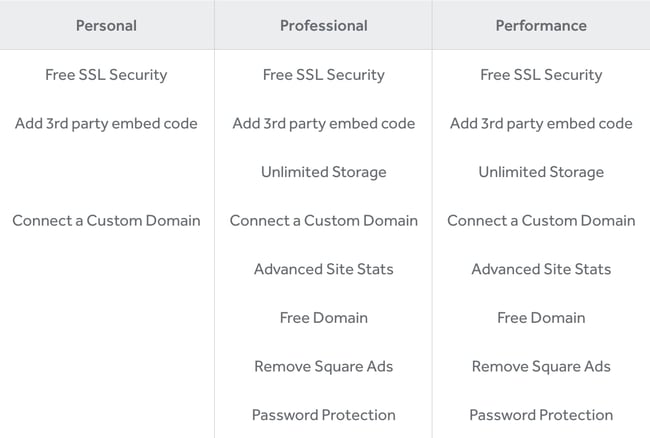 Most website builders have a pricing page that lays out the differences between plans in an easy-to-scan list. The best part is that you can start with the simplest subscription, then upgrade as you require more features and functionalities.
3. Choose a short and catchy domain name.
Some website builders offer a free subdomain for your site, but you’ll want to upgrade to a paid subscription to get a custom domain.
A custom domain name is one of the easiest ways to appear more professional and legitimate as a company. Imagine you were looking for a freelance writer. Are you more likely to hire me if my website address is carolineforsey.weebly.com or carolineforsey.com? An extension like “weebly.com” can confuse visitors and dilute your brand identity. Worst case scenario: a visitor might assume you can’t afford a premium hosting service or custom domain, and draw conclusions that your business is not fully established.
The good news is that after you upgrade, your premium website builder subscription will include a domain name for free, at least for the first year. You’ll be able to choose it as you’re setting up the site, or do it later.
When choosing a domain name, pick something short and descriptive. The .com top-level domain will work for most websites, but if you’re planning on launching an organization, you can also consider the .org domain.
Domain names are a surprisingly complicated art — you must choose something memorable that doesn’t yet exist. As you make your choice, avoid the following:
- Including dashes
- Using numbers
- Using a trademarked name
Before signing up on your website builder platform, consider looking up available domain names using a service such as GoDaddy. That way, you can make sure the domain you want is available before you pay for a subscription on the website builder platform.
Here are some more resources for picking the perfect domain name.
- The Plain-English Guide to Domains & Domain Names
- Tips for Choosing the Perfect Domain Name
- .net vs. .com, and More: What’s the Best Domain Extension?
4. Pick a premade website template.
During your setup process, the website builder will take you to a template library, where you can choose a premade layout to set up your site.
Squarespace lists its templates publicly so you can get a taste of the websites you can set up using its services.
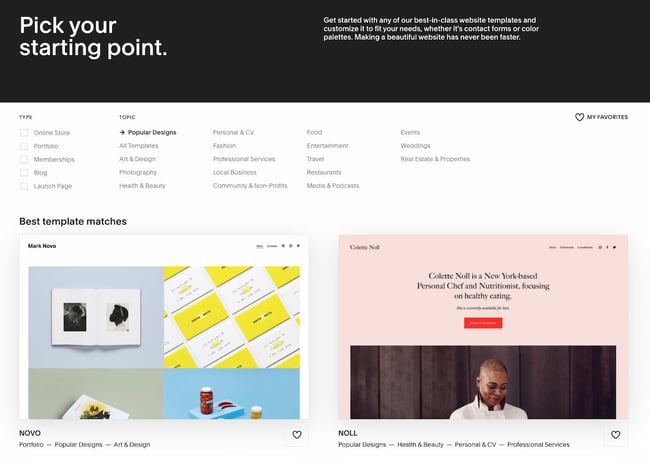
Most website builders will create a different template depending on the type of business or brand you run. For instance, you can choose a template that’s specifically made for:
- Freelancers
- Bloggers
- Local Businesses
- Creatives
- Resume Websites
Every template should have essential features such as a built-in responsive setting and drag-and-drop page editor. Your website builder should also allow you to import demo data, so that you only have to replace the images and text and not tinker with anything else during the setup process.
5. Customize the template.
You don’t want your site to look like anyone else’s, so you’ll need to customize the template to your liking.
On most platforms, you’ll be able to change the color palette, replace the images, insert social media icons, add personalized forms and menus, and change the size, colors, and fonts of buttons.
Have fun, and don’t forget to use your brand colors. This will be the best part of building your website: making it look like you want it to.
6. Add pages to the site.
Next, it’s time to add pages to your site. You’ll need to create, at a minimum:
- A home page
- An about page
- A contact us page
- A services page, if you’re offering any
- A product page, if you’re selling any
- A blog page
You’ll also want to create specific service pages. For instance, if you’re selling “Digital Marketing Services,” you’ll want to create pages titled “Social Media Marketing Packages” and “Search Engine Marketing Services” under the digital marketing services umbrella.
Our top suggestion would be to put the topic of your page — or your target keyword — in the title of these new pages. Instead of having a page titled “Services,” you would title it “Digital Marketing Services.” You’ll want to do the same thing for your home page. You don’t want it to be titled “Home.” Instead, title it “Freelance Digital Marketing Specialist – Your Name.”
Your title shows up in the search results, so it plays an important role in telling visitors what you do.

Here are more resources on creating great page titles:
- What’s a Website Title (Title Tag) & Why Does It Matter for SEO?
- How to Write the Perfect Page Title With SEO in Mind
7. Write optimized content.
This is arguably the most important step. Now that you have your pages set up, what will you put on them?
It’s time to write optimized content to put on all of the pages you’ve created. Get content ideas from your competitors, and don’t forget to aim for at least 800 words per page. Remember, however, that you can always come back later to write more content. So if you have to write short pages at first, it’s totally fine. Set a date for when you’ll return and add more copy.
Write your content in an editor such as Google Docs and use a grammar checker such as Grammarly to ensure your copy is error-free. When you upload images, be sure to compress them beforehand with a tool such as Toolur or TinyJPG.
These steps will ensure your content helps you rank on Google and other search engines. Check out the following articles on how to write optimized content:
- The Ultimate Guide to Content Creation
- What Is Content Writing? Plus Tips to Take Your Content to the Next Level
- The Ins and Outs of Writing Long-Form Content
- The Ultimate Guide to On-Page SEO
- How to Do Keyword Research for SEO: A Beginner’s Guide
8. Fill in general settings.
Before pushing your site live, you’ll want to fill in general settings. It’s the same list you would run through if you were setting up your site on a CMS platform.
Here’s what you’ll want to adjust:
- Page titles
- Headings
- Meta descriptions
- Image alt-text
- Structured markup
- Page URLs (or slugs)
- Internal linking
- Mobile responsiveness
- Site speed
Make sure you include a site title and tagline in the “Settings” of your website builder. Go through, and check out the URLs — are those optimized for search?
Any website builder you’re using to build your site should make it easy to optimize these elements on every post and page. With Wix, for example, you can add image alt-text, meta descriptions, headings, and custom URLs right in your content editor.
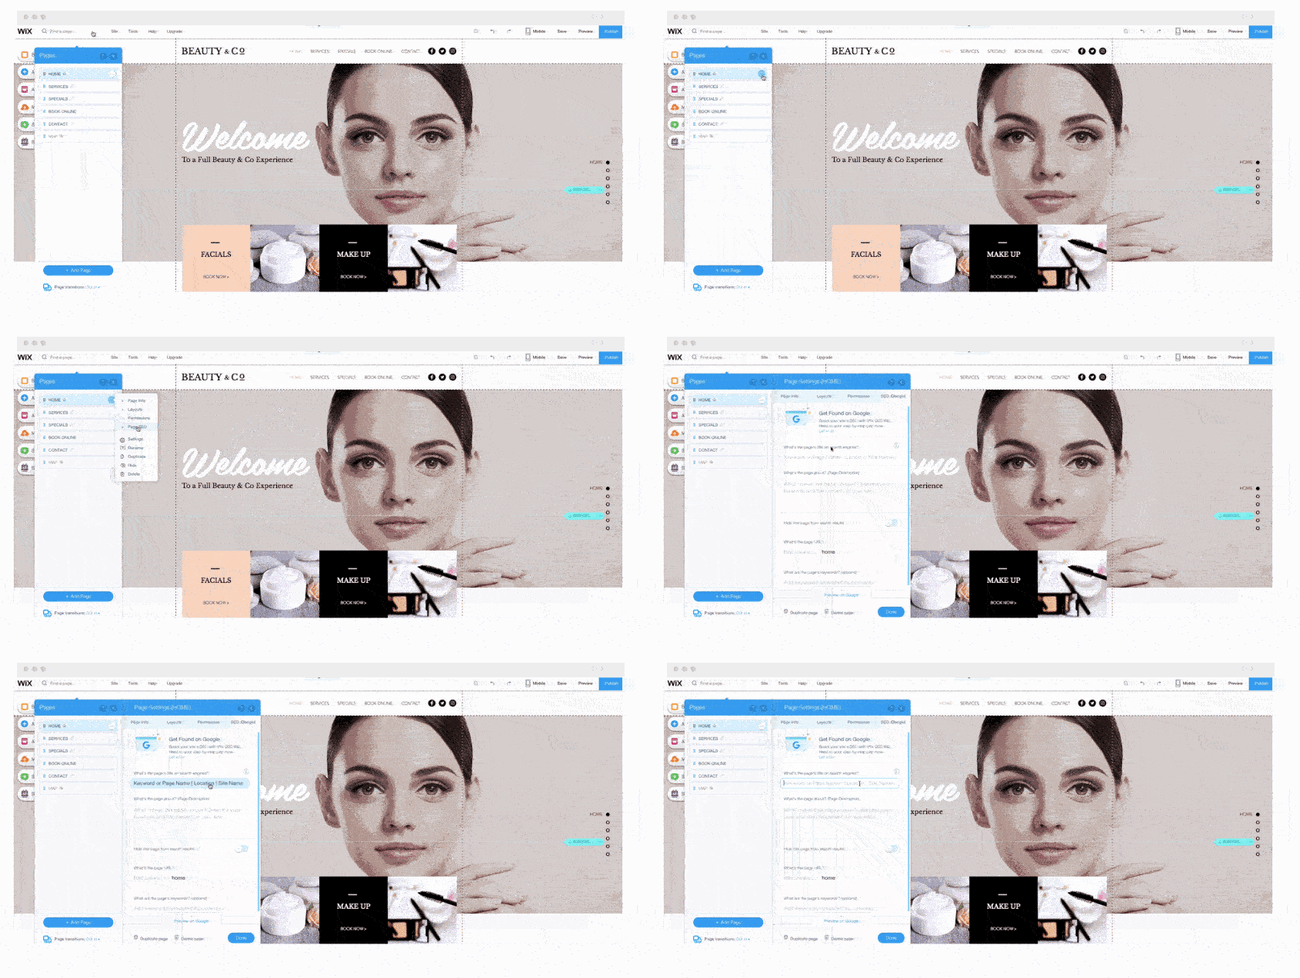 Image Source
9. Install extensions and apps.
Last but not least, install add-ons that will increase your website’s functionality. Each website builder typically has a library of extensions and add-ons that you can choose from. For instance, in the Shopify app store, you can install an Instagram slider that shows an Instagram feed in each product page.
Take a look at the add-ons you have access to on the following popular website builders:
- Squarespace Extensions
- Weebly App Center
- Wix App Market
- Shopify App Store
- WordPress Plugins (Available for both WordPress.com and WordPress.org websites)
Once your pages, content, and plugins are in place, it’s time to push your site live. The website builder will typically have a button you can click to launch your site into the web. After, simply watch your organic traffic grow. And remember: if your website builder doesn’t work for you, you’ll always be able to switch over to a CMS.
How to Build a Website with a CMS
Have you chosen to go with a content management system instead?
The process of building a website with a CMS is a little different than setting up a site with a website builder — mainly because you’ll have to buy a domain name and web hosting on your own. But the process is just as simple, and the powerful customization options make the extra steps worth it.
Below, we cover the process of building your website using a CMS from start to finish.
1. Choose a CMS.
The best CMS system for your business will align with your site’s needs and goals.
WordPress, for example, is a popular open-source CMS that provides thousands of themes, plugins, and modules for customizing your site. In exchange for this flexibility, you will have to spend more time and money downloading, installing, and maintaining the extensions.
On the other hand, WordPress alternatives like the CMS Hub provide more built-in functionality, app integrations, and security features so you can focus on creating web content and attracting leads.
Below, we break down some of the most popular website builders you could choose.
| CMS | Plans | Good Fit For |
| CMS Hub | $270/month or $900/month | Growing Businesses |
| WordPress.org | Free | General Websites |
| Adobe Experience Manager | Custom Pricing | Enterprise Businesses |
| Joomla | Free | General Websites (Recommended for Advanced Users) |
| Drupal | Free | General Websites (Recommended for Advanced Users) |
It’s worth noting that while WordPress.org, Joomla, and Drupal are free, you’ll have to pay for domain names, SSL certificates, hosting, and premium themes and templates, adding to your set-up costs. You might also need the help of a developer if you opt for Joomla and Drupal.
It’ll be hard to choose, but you can narrow it down with a few questions. For instance, do you need a platform that allows you to add your own custom code or one that supports multiple languages? Would you like a proprietary CMS to help share the responsibility of protecting and maintaining your site, or would you prefer an open-source CMS? You might also narrow your list by comparing the selection of templates and add-ons offered by each system.
Here are some resources to get you started:
- The Best CMS Systems Today and How to Choose One
- Features Your CMS Absolutely Needs
- The Best Content Management Systems for SEO & Why
- CMS 101: The Beginner’s Guide to CMS Hub
- 8 Things You Need to Know to Get Started With HubSpot’s CMS
Here are some comparison and alternatives posts:
- Drupal vs WordPress vs Joomla vs HubSpot: Which Is the Right CMS for You?
- Sitecore vs. WordPress: Which CMS is Best for Your Business?
- WordPress Alternatives & Why You Might Want Them
- Drupal Alternatives to Check Out This Year
- Joomla Alternatives & Why You Might Want Them
- Adobe Experience Manager Alternatives to Check Out
Once you’ve chosen the best CMS platform for your needs, continue to step two.
2. Select a hosting plan.
Web hosting is a service that enables individuals or businesses to run a website on the Internet. The service provider, known as a web host, will store your website files on a secure server that it keeps up and running, and then deliver and display that web content to visitors who type in your URL in their browser.
Website builders include hosting in their packages. Content management systems, however, don’t work this way. You’ll have to find your own hosting provider, which will take time and lots of research. There are hundreds of web hosts on the market. Each one might offer different types of hosting, including shared hosting, VPS, and dedicated hosting. Let’s briefly look at the differences below.
- Shared Hosting: In shared hosting, your website shares the same server and resources with other websites. It’s the most popular type of hosting, particularly among new site owners, because it’s the cheapest option.
- VPS Hosting: If you go for a Virtual Private Server hosting solution, your site will sit on the same server as other websites; however, it will isolate server resources for your site specifically. That means your site will be able to handle higher volumes of regular traffic. It’s a pricier alternative to shared hosting.
- Dedicated Server: With a dedicated server, your site will sit on a server whose resources and space is reserved for your site only. If you’d rather not share a server with any other website, you can upgrade to dedicated server hosting.
Virtually every web host offers shared hosting. However, because your website has to share the same server with many other websites, it can’t support high volumes of traffic and is most vulnerable to hackers and other security threats.
Once you’ve decided what type of hosting you need, you can pick a provider. DreamHost, HostGator, and Bluehost are among the most popular third-party providers and offer free domain registration for the first year. That will simplify the next step in building a website.
Here are resources about hosting you’ll want to check out:
- The Ultimate Guide to Web Hosting
- What Is VPS Hosting? Why It Might Be the Best Option for Your Site
- The Best WordPress Hosting Providers This Year
- Best Free WordPress Hosting Providers This Year
- Bluehost Review
And some comparisons to help you choose the best one:
- SiteGround vs. HostGator Review: Which Is Better for Your WordPress Site?
- Bluehost vs. HostGator: Which Is Better for Your Website?
3. Get a domain name from a domain name provider.
No matter what type of CMS you chose to build your site, you’ll likely have to purchase a domain name.
Purchasing a domain name is typically inexpensive — even for those who sign up for a hosting plan that does not include free domain registration for a year. There are two different approaches you can take.
You can visit a domain site, purchase and register a domain name there, and then connect it to your hosting account. Both Godaddy.com and Namecheap.com are cheap, secure, and effective options for buying a domain name, with added benefits such as SSL security and Office 365 inboxes.
Or you can complete the entire domain name search and registration process on your hosting provider’s site. For example, after signing up for a Bluehost plan, you’ll be taken to this page to sign up with a domain name.
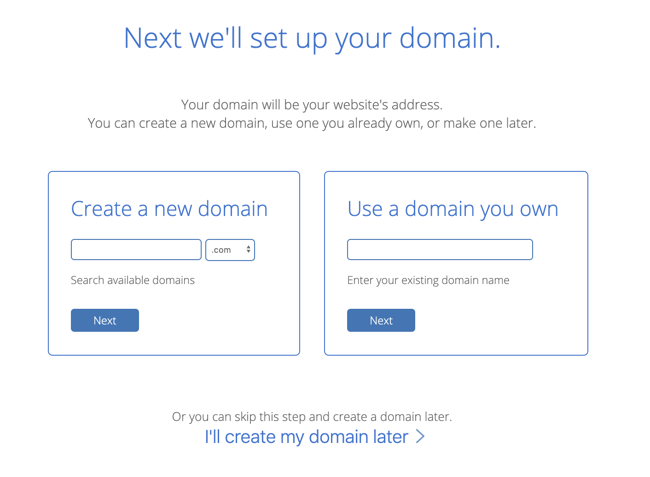
Here’s where it gets tricky. You’ll need to choose a domain name as similar as possible to the name of your company, but with over billions of websites out there today, your company’s name might already be taken.
If your ideal domain name is already taken, consider using a different extension. Use one of the three most common extensions if you can: .com, .net, or .org. However, if it makes sense for your business, you might want to check out an alternate extension like .us or .shop.
As we covered in the previous section, avoid using dashes, numbers, or trademarked words. Play around with it. Once you’ve chosen and paid for a domain name, you’ll usually also get personal email accounts attached, so make sure you’re happy to use your domain name as your main online identity.
Below you’ll find some resources about choosing and buying a custom domain:
- Best Domain Registrars to Consider This Year
- How to Choose a Domain Name
- Everything You Need to Know About Custom Domains
- The Simple Guide to Transferring a Domain to Another Registrar (Good read if you’ve already purchased a domain name)
4. Choose a theme for your site.
Now, for the fun part.
Themes allow you to easily change the look and feel of your site without having to code HTML and CSS from scratch. Themes are made up of templates, modules, images, and global content that control your site’s overall design.
On whatever content management system you chose, take the time to browse through the selection of themes available. Many will come with a directory of free themes, where you can use filters or the search bar to find themes related to your industry, with a specific layout, and more.
Tip: It’s important your theme is responsive, so your site will look the same on all devices.
Other considerations will be specific to your business and site. You might be looking for a static header or a slideshow header, for example. Or you may need a theme that comes with a front-end builder. Below are some questions you can answer to find the right theme for your site:
- Do you need a variety of layouts or just one?
- Are you looking for a theme with built-in social media widgets or any other functionality?
- Would you like to install a demo site or start from scratch?
- Do you want to purchase a theme that includes its own theme builder?
Ultimately, no one knows your business better than you. Take the time to consider which theme would best represent your brand and most likely appeal to your ideal demographic.
You’ll have a wealth of choices right in your CMS. Take a look, for instance, at the theme marketplace in CMS Hub:
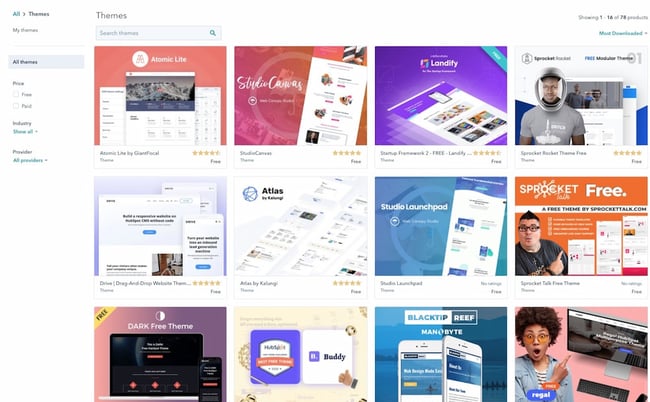
You’ll want to stay away from hard-to-read fonts or flashy backgrounds that could distract a consumer from understanding your core message. When in doubt, you can’t go wrong if you choose something clean with straight lines and a limited amount of text.
If you can’t find a free theme that meets your exact specifications, try looking for premium themes in third-party marketplaces.
Below are some resources to get started if you’ve opted for the WordPress CMS:
- The Ultimate Guide to WordPress Themes
- Best Small Business WordPress Themes
- How to Use Multiple WordPress Themes on Your Web Pages
- Best Clean WordPress Themes
Once you’ve selected and installed a theme on your site, move on to the next step.
5. Customize your theme and templates.
Once you’ve chosen a theme, take the time to customize it and its individual templates. Your site’s design and functionality is your chance to persuade an audience to take a closer look. It’s imperative your design makes sense to your ideal consumer and works to enhance your product’s success rather than hinder it.
That’s why you should think of your theme and templates as a starting point, rather than the final look. Depending on the website platform you’ve used to build your site, you’ll have different degrees of control over your site’s appearance.
On more flexible platforms like CMS Hub, you’ll be able to edit your theme’s global settings to make sitewide changes. That means you can make changes to your font and other elements in one place and they’ll be implemented across all pages on your site.
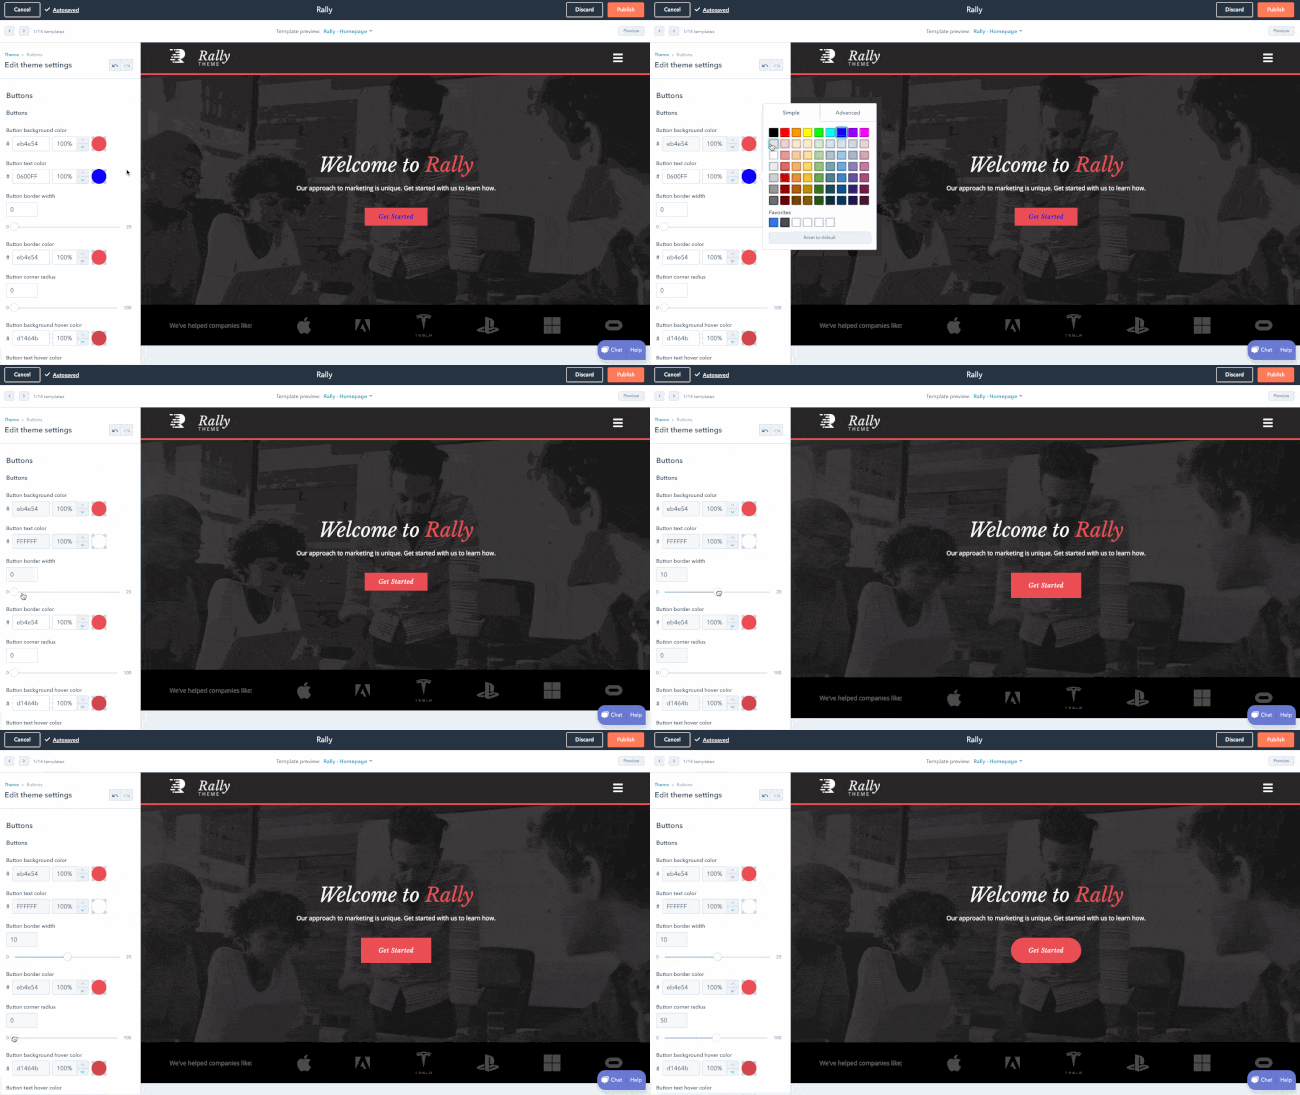 Image Source
Here’s a great resource if you’re using WordPress:
6. Add pages to your site.
It’s important to plan exactly which pages you’ll need to include in your site. While it varies business to business, you’ll need at least a homepage, an “About Us” page, a “Services/Product” page, and a “Contact Us” page.
You should also add a blog homepage. There are serious benefits to business blogging.
While every CMS is different, it’s typically easy to add and remove pages on whichever platform you use. Let’s take a closer look at the process on WordPress, for example.
- Start by logging into your WordPress dashboard.
- On the left side of the screen, click Pages > Add New.
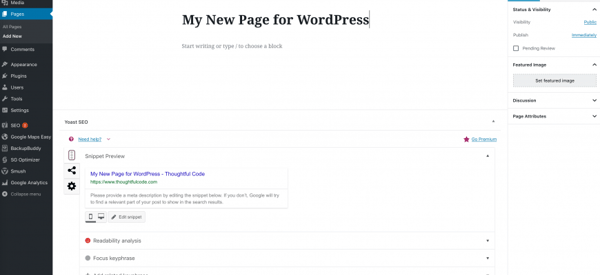
- You can add text, insert images, embed videos, and make any other changes you like.
- When you’re ready, click Publish.
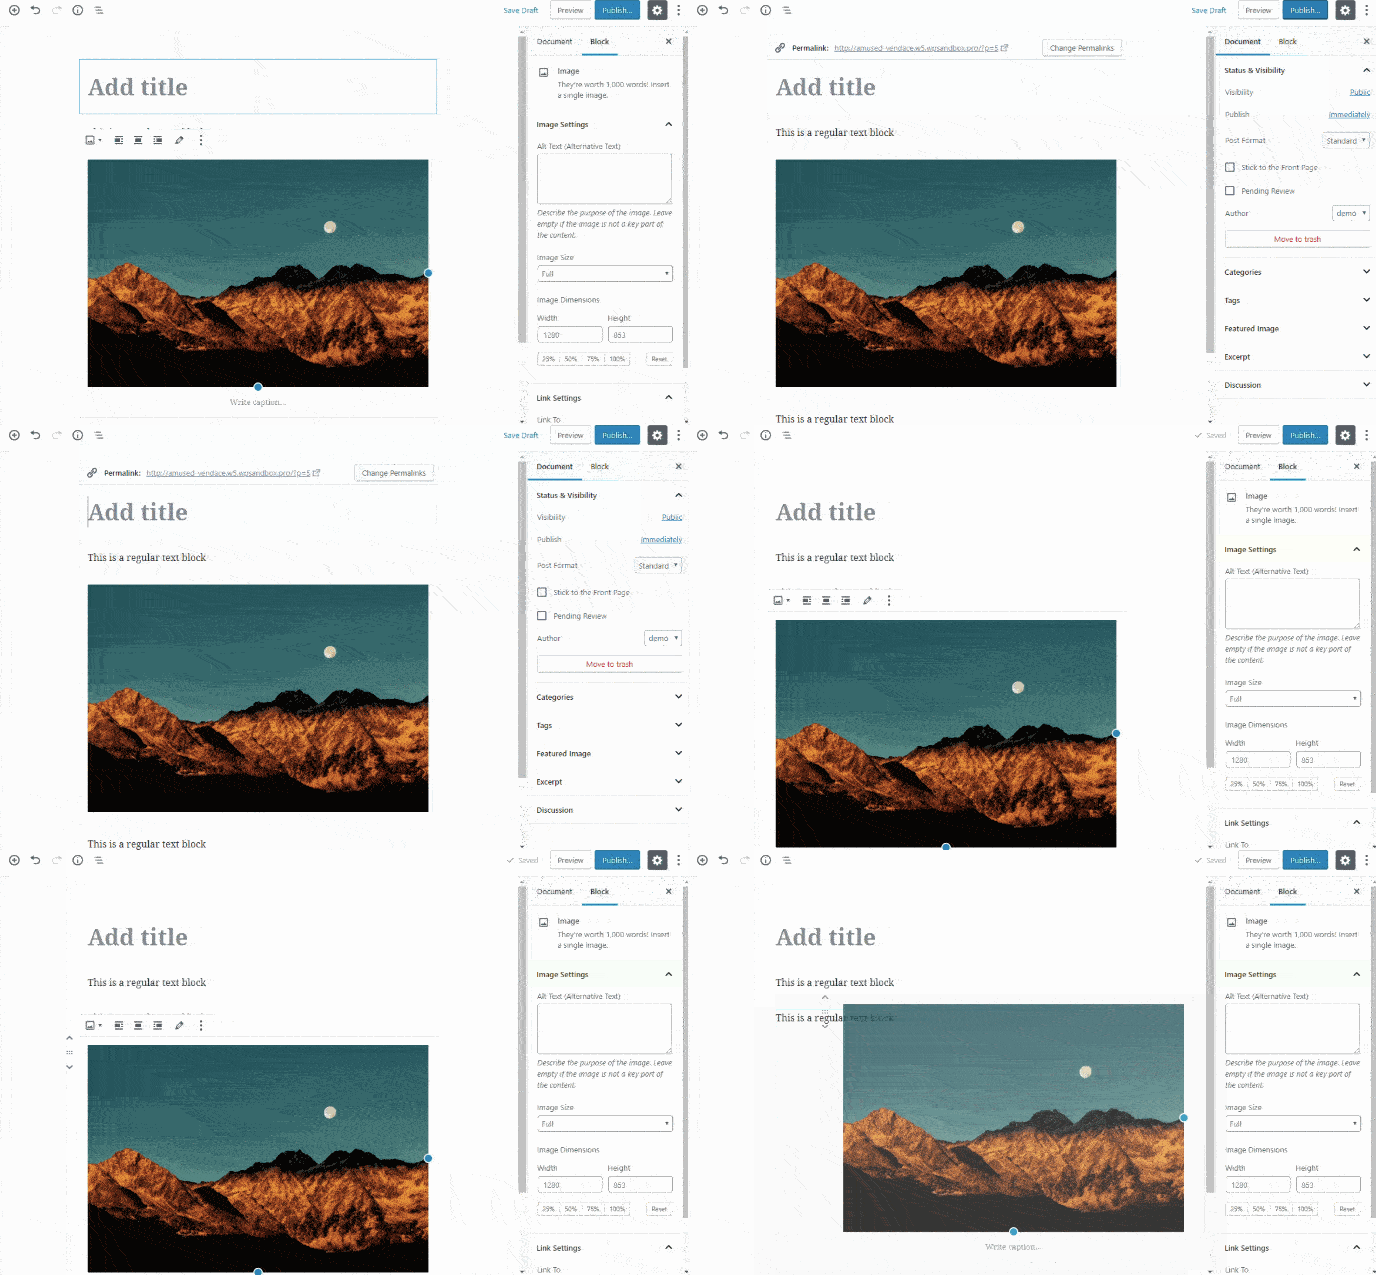
Once you’ve decided what pages you need on your site, make sure to add them to the navigation bar. You can rearrange page topics any way you want, or combine them.
You can visit other company websites within your industry to get ideas for how to organize your navigation bar, or which pages to include and exclude if you’re unsure.
7. Write content.
You guessed it: It’s time to write the content you’ll put on your site.
Write rough drafts for pages like your “About Us” page and landing page. Talk with coworkers and stakeholders — what message do you want to put out there? What tone do you want to set? Should you make jokes and be funny, or aim to be more inspirational?
If your online audience stumbled across your site, what questions would they have first?
Imagine your website is your only chance to have a full conversation with a potential customer.
The home page is the preliminary introduction: “Hey, we do XYZ.” Your “About Us” page digs deeper: “We are XYZ.” And your products or services pages are your big push to the finish line: “You want to work with us? Great, here’s how you’ll benefit.”
During this stage, it’s imperative you do your keyword research.
For instance, if you’re selling eyeglasses, and you notice “retro eyeglasses” is a more popular search term than “vintage eyeglasses,” you might use this research to steer the direction of the content on your site.
If you’re stuck, check out competitor’s websites to gauge what other companies in your industry are doing.
We’ve compiled a few more resources to help you get started:
- The Ultimate Guide to Content Creation
- What Is Content Writing? Plus Tips to Take Your Content to the Next Level
- The Ins and Outs of Writing Long-Form Content
- The Ultimate Guide to On-Page SEO
- How to Do Keyword Research for SEO: A Beginner’s Guide
8. Fill in general settings.
Once you’ve filled in your pages with optimized content, it’s time to fill in the general settings. By adding or adjusting the SEO elements, you can increase your search visibility.
It’s the same as if you were building your site on a website builder. On your pages, you should include:
- Page titles
- Headings
- Meta descriptions
- Image alt-text
- Structured markup
- Page URLs (or slugs)
- Internal linking
- Mobile responsiveness
- Site speed
Each of these elements are essential to your on-page SEO. They not only help to tell Google about your website and how you provide value to visitors and customers — they also help optimize your site for human eyes as well as search engine bots.
9. Install add-ons.
Lastly, take a look at your site and figure out what you’re missing. Ideally, your platform will offer all the add-ons you need to extend the functionality of your site.
It’s important to note these add-ons might be called apps, extensions, modules, integrations, or plugins, depending on the platform you use.
If you’re running an ecommerce site on HubSpot, for example, you might use HubSpot’s Shopify extension. Or, maybe you want to ensure your WordPress website is secure, to protect client data. In that case, you might download the Wordfence Security plugin for firewall protection against attacks, malware, and other threats.
If you’re lacking out-of-the-box features for security, SEO, image compression, and social media, check if your platform offers an app or integration to add that functionality to your site. It’s much easier to do all this work in one place rather than having to log on to several disconnected platforms.
How to Make a Website with HubSpot
Let’s take a look at how to make a website with CMS Hub. If you’re already using HubSpot’s CRM, it probably makes the most sense to build a website within HubSpot to integrate all your sales and marketing needs in one place.
CMS Hub offers a variety of plugins and extensions, themed templates, and sophisticated tools for SEO analysis.
If you want to build a website with CMS Hub, it’s easy and intuitive. Don’t forget to get a domain name and hosting before starting to build your site. Here’s how:
1. Create a homepage.
Within your HubSpot portal, click “Marketing” on the dashboard at the top of your screen. Navigate down to “Website,” then click “Website Pages.”
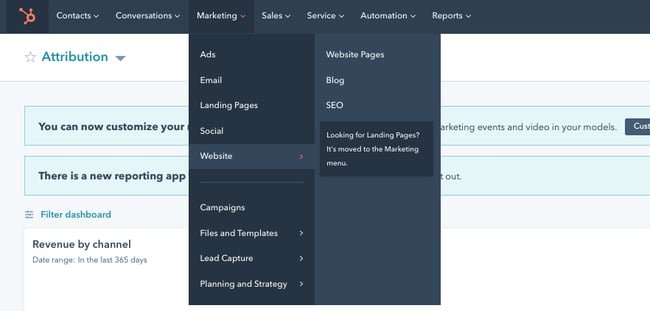 After that, click the orange “Create” button and choose “Website Page” from the drop-down.
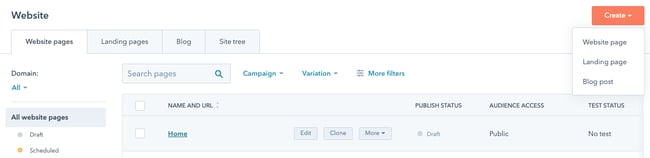
2. Select a theme.
Now, you’ll be taken to this “Choose a theme” page. Scroll through your options, search page templates, or check out the Marketplace. When you’ve found a template you like, select it.
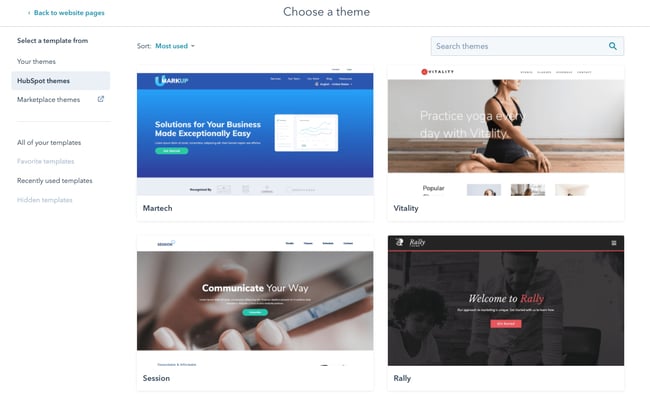
3. Edit the modules.
This is your page. You can scroll over text boxes, images, or other modules to edit them. In the below picture, I scrolled over the “Practice Yoga” Banner Text, and when I click it, it allows me to edit that text.
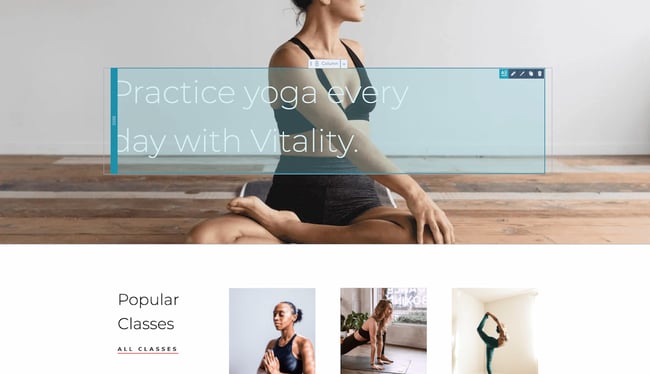 You can also click the “Contents” tool on the left side of your screen and edit from there. For instance, I selected one “Rich Text” option, which directed me to the “Vinyasa” paragraph on the page.
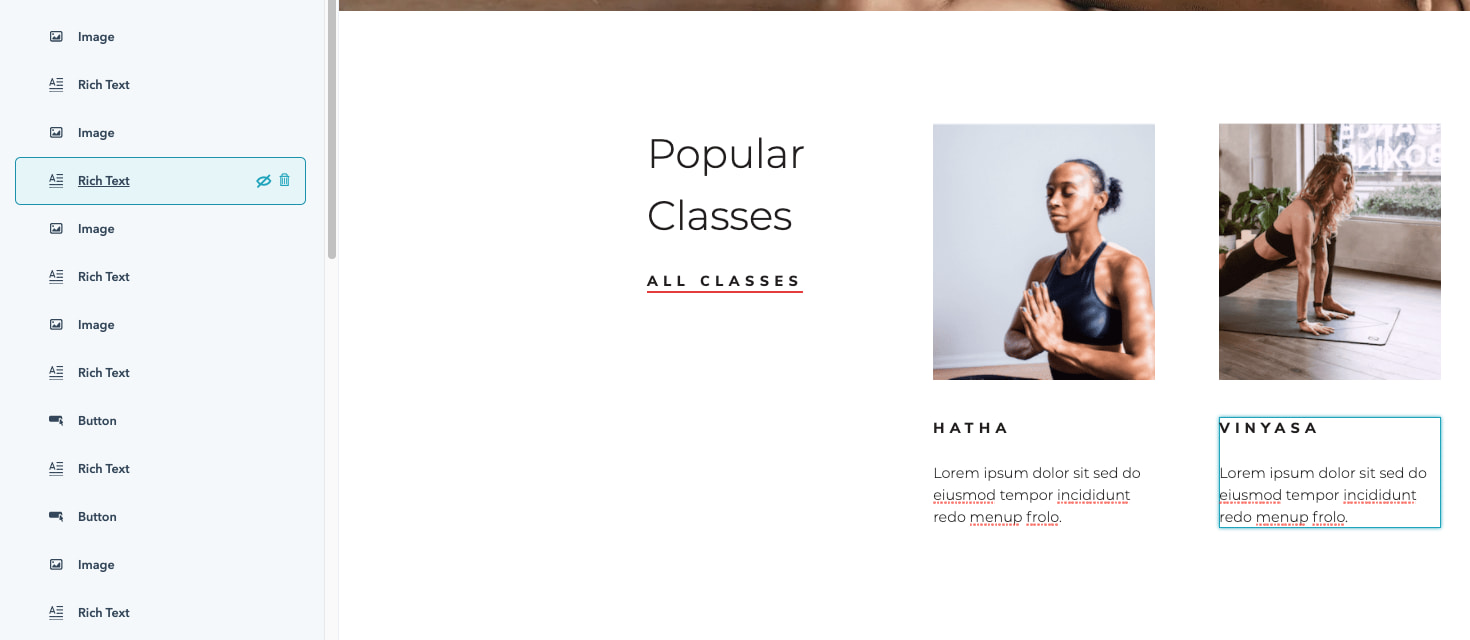 You can then add text, images, sections, forms, and more when you edit it in “Expanded” view.
4. Create other pages on your website.
When you’re happy with your landing page and want to move on, go back to your dashboard and click “Marketing” at the top of your screen, and then “Website Pages” again.
Here, you’ll click the orange “Create” button and name your page, just like your home page. Then, you’ll be taken through a similar process of choosing a template and adding content. If you want a more in-depth tutorial, check out a quick tour of website pages.
5. Incorporate social media accounts.
If you want to incorporate your social media accounts, go to “Marketing,” then “Social” on your dashboard. You can monitor all your social media accounts and also publish tweets, Facebook statuses and comments, Instagram pictures, and other content straight from your HubSpot dashboard.
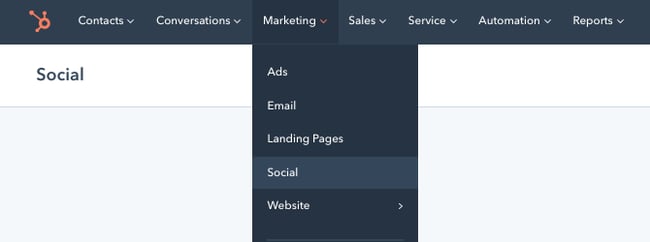
6. View analytics.
If you want to check out your site analytics, go to “Reports” and then “Analytics Tools”. You’ll need to install the tracking code, which is easy to do within the HubSpot platform by clicking the orange “Install the tracking code” button. If you’re still unsure, check out how to install the HubSpot tracking code.
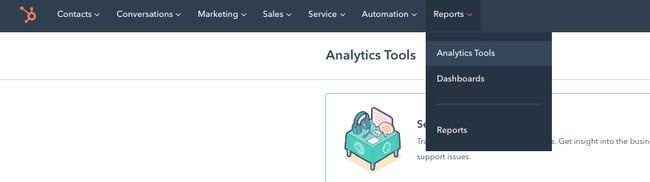
7. Add a blog to your site.
If you want to write blog posts, go to “Marketing” > “Website” > “Blog” on your dashboard to create, publish, and monitor your website’s blog posts.
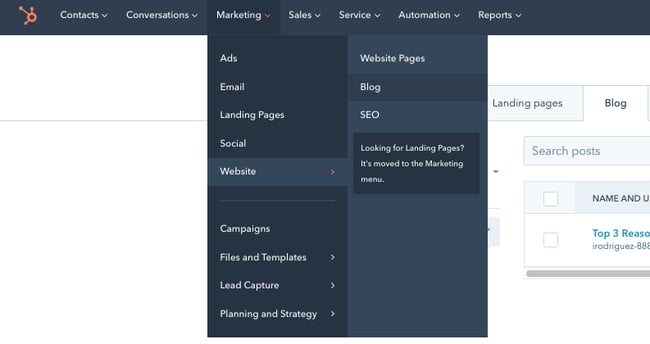
8. Install add-ons.
Last, it’s time to install an app from the HubSpot marketplace to extend the functionality of your website. Here’s how.
- In your HubSpot account, click the Marketplace icon in the main navigation bar.
- Under Manage, select Connected apps.
- Click Visit App Marketplace.
- Use the filters in the left sidebar to browse for an app.
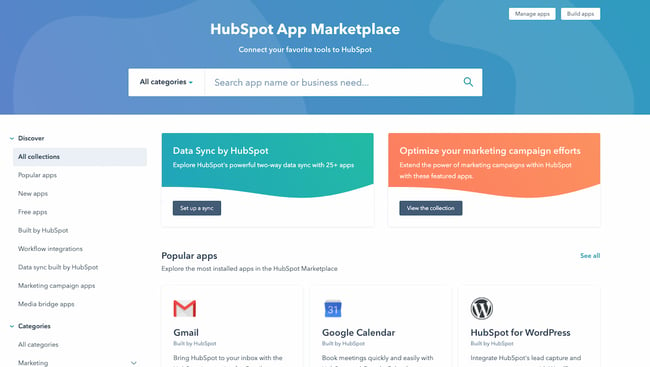
- Click on an app to see more information.
- On the right, you can review the details of the app. Under Requirements, check whether or not the app is compatible with your HubSpot subscription, and see if there are any app-side subscription requirements.
- When you’re ready, click the Install app button in the top right corner of the screen.

Once you’ve completed these steps, just click “Publish” and your site is ready for use.
This is a fairly broad and general overview to get you started building a website with CMS Hub, but there are plenty of more in-depth features and tools you might want to explore with a HubSpot specialist, or by checking out some courses on academy.hubspot.com.
Once you’re done building a website via CMS Hub, it’s important to check that you’re not missing any crucial elements or going live with any glaring errors. Once you’ve gone through this list above and feel like you’re close to a website launch, check out your website launch checklist for a detailed list of things to check before you go live.
Build a Website: FAQs
Below, we cover some frequently asked questions about building a website.
How much does it cost to build a website?
The cost of building a small business website can range from $500 to $2,500, but the price can be higher if you’re working with a developer. You should also take into account recurring costs such as hosting, domain name registration, and SSL certification.
Here’s a resource to help you gauge costs:
How hard is it to build a website?
Building a website isn’t hard at all, especially if you opt for a website builder that packages everything for you. In general, you won’t need to touch a single line of code.
How do you create a website for free?
You can create a website for free by signing up for a free subscription on a website builder platform such as Wix or Weebly. However, you’ll have a branded subdomain from the provider (e.g. yourname.weebly.com). You’ll also have the branding on your website, and free websites are often limited in design, features, and functionalities. We recommend avoiding it unless you’re a hobbyist or only wanting to practice before launching your site.
How do you build a website from scratch?
You can build a website from scratch using HTML, CSS, JavaScript, and sometimes, PHP. You compile these files and then upload them to your web host’s file manager. (You’ll still need to purchase a hosting service and register a domain.)
How much does it cost to hire someone to build a website?
Thumbtack reports that a freelance web designer costs from $640 to $1,000. Upwork reports a $15 to $30/hour range for hiring a web developer on their platform. This is on the low end and accurate pricing for building a small website. For hiring a web developer for a custom or long-term project, you can expect to pay in the $8,000 to $25,000 range.
Here are some more resources:
- How to Hire a Freelance Web Developer
- Web Designer vs. Web Developer: What’s the Difference & Who Should You Hire?
How long does it take to build a website?
A website takes, on average, three to six months to build if your brand is small or just getting started. If you’re creating a custom or complicated project, you can expect your website to take a year or longer before it is up and running.
Build Your Website: Tips
Ready to build your own site? Let’s take a look at tips you can use to guide the creation of your site.
- Choose a one-page design if you want to launch your site more quickly.
- Include a high-contrast button on the top right of your navigation bar telling visitors to contact you.
- Use Lorem Ipsum text to preview what the written content will look like as you adjust the layout. That way, you don’t have to write all the content right away.
- Buy an SSL certificate if your CMS doesn’t include one already.
- Make good use of white space to keep your site as simple and easy-to-read as possible.
- Set your domain and hosting subscriptions on auto-renew to avoid service interruption.
- Create Terms of Use and Privacy Policy documents if your site gathers user data.
- Double-check that your website is responsive by accessing it from your mobile device. Most CMS systems and website builders will automatically make your site responsive, but you always want to double-check.
- Resize your browser window to test what the elements look like at different browser sizes.
- Access your site from different browsers (Safari, Chrome, Opera, Microsoft Edge) to see how the elements render depending on the browser.
- Learn basic HTML and CSS so you can more easily customize your site later.
- Include high-contrast buttons throughout the page that allow visitors to get in contact with you.
- Stick to five navigation bar items at most.
- Ensure your navigation bar shows up in all pages.
- Create submenus for your navigation items to effectively group your subtopics.
- Create an XML sitemap for search engine crawlers to find and index your site.
- Submit your website to Google Search Console once you’ve launched it. That way, Google can crawl it much more quickly.
- Use an analytics tool such as Google Analytics to see who’s accessing your site and from where.
- Link internally from page to page so that search engines understand how the pages are related to each other.
- Use keyword-rich anchor text when linking to internal pages.
- Link to other strong sites in your niche to signal relevancy to Google.
- Add your business or personal brand to social media sites and link back to your website.
- Research other sites in your niche and get content ideas from them.
- Compress all images to under 250KB. The smaller, the better.
- Publish and maintain a blog — we’re serious about that. Try to post once a month.
- Aim for a minimum of 800 words per page and per blog post.
- Use a grammar-checker such as Grammarly to ensure your copy is error-free.
- Avoid duplicate and boilerplate content — even one paragraph can be enough to hurt the credibility of your page.
- Recheck your site architecture to make sure that your page hierarchy makes sense.
- Create a backup of your site whenever you make major changes.
- Seek guest posting opportunities and link back to your site in your author bio.
- Join industry organizations and link back to your site from your member profile.
- Avoid duplicating pages to use the same layout. If you do, double-check that your slug doesn’t read .com/original-page-copy. This happens more often than you think. If it happens, change your slug. Here’s how to change your slug in WordPress, in case you’re using that CMS.
- Keep your page URLs short and user-friendly. If the title of a blog post is “50 Ways to Conquer Your Fear of Heights and Fly Worry-Free,” don’t have a URL that reads example.com/20XX-03-25/blog/50-ways-to-conquer-your-fear-of-heights-and-fly-worry-free. Consider instead: example.com/conquer-fear-of-heights.
- Add breadcrumbs to your website to clarify your site structure. Here’s how to add breadcrumbs in WordPress.
Build a Website to Grow Your Online Reach
Building a website is a must-do for anyone who wants to be online. Without it, you won’t be found at all, and it can help you look more professional and established. Using this guide, you’ll be sure to publish a site that helps your business or your personal brand grow better.
Editor’s note: This post was originally published in May 2018 and has been updated for comprehensiveness.

The Ultimate Guide to Starting a Minority-Owned Business [+ Expert Tips]
COVID-19 presented more challenges than one for businesses, and the pandemic took an even more tremendous toll on minority business owners.
With minority business owners experiencing a cash crunch, not many could secure loans to keep their doors open.
In 2020, 400,000 small businesses decided to permanently close due to the effects of the pandemic — many of which were in underserved communities. Whether you’re in the idea phase or already established, this guide will help you get your minority-owned business off the ground.
Before you dive into this guide, check out this blog on how to start a business if you’re still in the idea phase.
When you finish reading this piece, you’ll have everything you need (and more) to thrive as a minority business owner — from how to get certified as a minority-owned business, to funding options and growth resources.

Get Certified as a Minority-Owned Business
After you’ve nailed down your business idea, plan, and registered your company, it’s time to get certified as a minority-owned business. This certification isn’t required, but it will help inform consumers and potential partners about your company’s leadership.
You may also need this certification may also if you want to apply for government-funded minority business grants and loans, or other programs.
Illinois, Ohio, California, and New York have local agencies to get certified as a minority-owned business on a state level. There are various ways to get certified from local state and business agencies, so it might be best to consult them directly based on where your business is registered.
Here are a few other high-level agencies to consider getting a minority-owned business certification from:
- The National Minority Supplier Development Council (NMSDC): Headquartered in New York, NMSDC manages 22 regional affiliate councils around the U.S. NMSDC offers minority-owned business certifications and business development programs. The council has a network of more than 1,750 corporate members and has matched more than 12,000 minority-owned businesses with these member corporations. The certification process includes an online application, fee, interview, and site visit upon approval.
- The Small Business Administration’s 8(a) Business Development program: The federal government committed to awarding five percent of all federal contracting dollars to small disadvantaged businesses with an 8(a) designation each year. This is an SBA-specific minority-owned business certification needed if your company plans to compete better for federal government contracts.
These same organizations and agencies may offer women-owned and LGBTQ-owned business certifications, as well.
Apply for Minority Business Grants
Minority founders often start bootstrapped, launch crowdfunding campaigns, or even try and raise initial funding through family and friends.
You can take various routes to fund your startup, but if you’re on your own when it comes to financing, seeking grant funding is a great start. Grants.gov distributes more than 1,000 small business grants for an open search, and this is where all federal government agencies post their grant opportunities.
Here are a few business grant opportunities for minority founders:
- The Coalition to Back Black Businesses Fund: This initiative was created to aid small Black businesses struggling through the pandemic. The coalition is awarding 300 grants amounting to $5,000 each.
- The U.S. Department of Agriculture (USDA): This agency runs the Rural Business Development Grant Program for businesses operating in rural areas, with a population under 50,000 residents. The program offers grants to minority small businesses ranging from $10,000 to $50,000.
- Rebuild the Block (RTB): As part of its Small Business Relief Fund, RTB award 15 grants monthly to Black business owners affected by the pandemic. There isn’t a specific monetary value on each grant, and freelancers and other creatives are encouraged to apply.
- First Nations Development Institute (FNDI): Deadlines and opportunities vary, but this nonprofit provides financial and technical support to Native American organizations. FNDI has provided 2,150 grants totaling $43 million to Native projects across 40 stages and regions.
- The National Black MBA Association: Since 2017, the association has been hosting the Scale-Up Pitch Competition, which awards grants ranging from $1,000 to $50,000 to Black business owners. Someone from the company must be a member of the association to apply for this opportunity.
- Asian Women Giving Circle (AWGC): This grant is exclusive for Asian American women-owned businesses. AWGC awarded 11 grants ranging from $2,500 to $10,000 each in 2020, and this year, the maximum grant amount is $15,000.
- SoGal Foundation: This rolling program awards $5,000 and $10,000 to Black women founders and Black nonbinary entrepreneurs.
- FedEx: Each year, FedEx hosts a nationwide Small Business Grant Contest, and while it’s not exclusively for minority small businesses, many of the past winners have been minority founders. Winners receive grants ranging from $15,000 to $50,000, plus funds for FedEx printing services.
If you’re looking for more opportunities, Please Assist Me Co-founder and CEO Stephanie Cummings suggests subscribing to newsletters distributed by 1863 Ventures and Backstage Capital.
Each organization sends out a monthly newsletter loaded with updated grant and funding opportunities specifically for minority founders.
Apply for Minority Business Loans
Another financing option could be applying for loans. Historically, minority founders have struggled to secure business loans due to credit inequality and discrimination, but there are still reasonable loan options out there.
Here are a few business loan opportunities for minority founders:
- Accompany Capital: Looking to support immigrants, refugees, and women entrepreneurs specifically, Accompany Capital offers microloans of $500 to $50,000 with repayment terms ranging from six months to three years.
- U.S. Small Business Administration (SBA): SBA manages a few loan opportunities, including its Microloan Program and Community Advantage Loan Program. Open to all small businesses, the Microloan Program offers loans up to $50,000 with loans averaging $13,000 each. For the Community Advantage Loan Program, SBA encourages community lenders, mainly nonprofit financial entities, to make loans up to $250,000 to minorities, women, veterans, and other underserved founders.
- Business Consortium Fund: Offered to NMSDC certified businesses, the fund offers loans and lines of credit ranging from $250,000 to $750,000 with repayments terms of up to five years.
- USDA: As part of its Business and Industry Loan Guarantee Program, USDA offers up to $1 billion in loan guarantees to local banks and direct lenders operating in rural areas with a population under 50,000 residents. Minority businesses can also directly apply for a USDA loan, ranging from $200,000 to $5 million with a maximum cap of $10 million.
Tap into Additional Minority Programs and Resources
Even if you may think you have it all figured out, a little extra guidance wouldn’t hurt.
Here are ten accelerators, startup programs, and other resources for minority founders:
- The Visible Hands fellowship runs a 14-week virtual program to provide company-building services and investments up to $200,000 to underrepresented entrepreneurs. The inaugural cohort will welcome more than 30 fellows.
- Dedicated to diversity in tech, Black Founders provides programs and hosts events for Black tech entrepreneurs.
- Operation HOPE runs an eight-week entrepreneurial training program designed to help entrepreneurs in low-income communities.
- SBA’s Business Development program helps minority business owners better qualify for SBA loans. Your company must be registered as a small business with SBA to participate.
- The Minority Business Development Agency, an agency within the U.S.Department of Commerce, was created to provide greater access to capital and resources to minority founders. The agency manages business centers across the nation and hosts business development programs.
- 1863 Ventures–a business development organization working to promote people of color, women, immigrants, LGBTQ people, veterans, and physically disabled business owners–runs two accelerator programs. Its Pipeline program is for pre-growth stage companies, and its Acceler8 program is for growth to scale stage businesses.
- Y Combinator’s Startup Library includes a wealth of resources spanning 15 years.
- The National Minority Business Council provides minority business owners with educational opportunities, entrepreneurial boot camps, seminars, business assistance, and more. Membership is encouraged.
- The U.S. Minority Chamber of Congress is a nonprofit advocating for small business rights. The organization has chapters across the U.S. that host networking events and offer local entrepreneurial resources.
- Founder Institute put together the Black American Startup Resource List filled with 742 resources for idea-stage entrepreneurs. If you’re looking for accelerators, investors, or even events, this list is a great place to start.
Indulge in Motivational Tips from Other Minority Founders
Starting a business from scratch is hard, but doing so as a minority may pose more challenges.
Many disparities get in the way for minority business owners, but hopefully, these opportunities and resources will ease some hassles. While starting a minority-owned business may be the same as starting any other company, there are a few extra things you can do — like getting certified — to tap into some unique opportunities made just for minorities.
I reached out to some minority business owners who have done the hard work and are still striving to grow their ventures. Here are some tips if you’re feeling discouraged:
- “Understand that starting a busy is hard, and it’s 10X harder for minority founders. If you are committed to your dream, work hard, dig in and let your work speak for itself.” — Stephanie Cummings, co-founder and CEO of Please Assist Me.
- “Just do it — one of my favorite slogans. As minorities, we often don’t see similar faces on the cover of Forbes or elsewhere. This is slowly changing. But that doesn’t mean you can’t do it. What matters at the end of the day is if your business is actually helping others.” — Nhon Ma, co-founder and CEO of Numerade.
- “Don’t get too attached to ideas. Spend your time getting attached to your values, and know what you stand for as a person — your values will be your guiding light, not the ideas.” — Ronnie Kwesi Coleman, co-founder and CEO of Meaningful Gigs.
- “Leverage your networks to build brand awareness organically, but don’t forget who helped you get there once you get some momentum.” — Leela Bhatia-Newman and Mariana Magala, co-founders of DistrictlyLocal.

Why People Visit YouTube & How to Engage Them [New Data]
YouTube is the second largest website globally with over 2 billion global users.
Still, despite its huge audience, it can be challenging to gain engagement on your videos.
Ultimately, to gain views, likes, shares, and even subscribers, your content will have to engage at least part of YouTube’s huge audience while fulfilling their needs.
But, if you’re just starting on YouTube, or struggling to grow your strategy, you might not know what the platform’s audience wants just yet.
To help marketers learn more about YouTube’s huge user pool, and their interests, I asked nearly 300 consumers: “Why do you most commonly visit YouTube?”
Here’s what they said.
![→ Free Templates: How to Use YouTube for Business [Download Now]](https://no-cache.hubspot.com/cta/default/53/b33cfd44-133a-49e3-a943-086c5679d485.png)
Why Do People Visit YouTube?
Before we dive into what people picked as the most common reason they visit YouTube, it’s worth mention one thing you won’t see on the list below: product discovery.
Just a measly 3% of respondents visit YouTube primarily to “learn about products.”
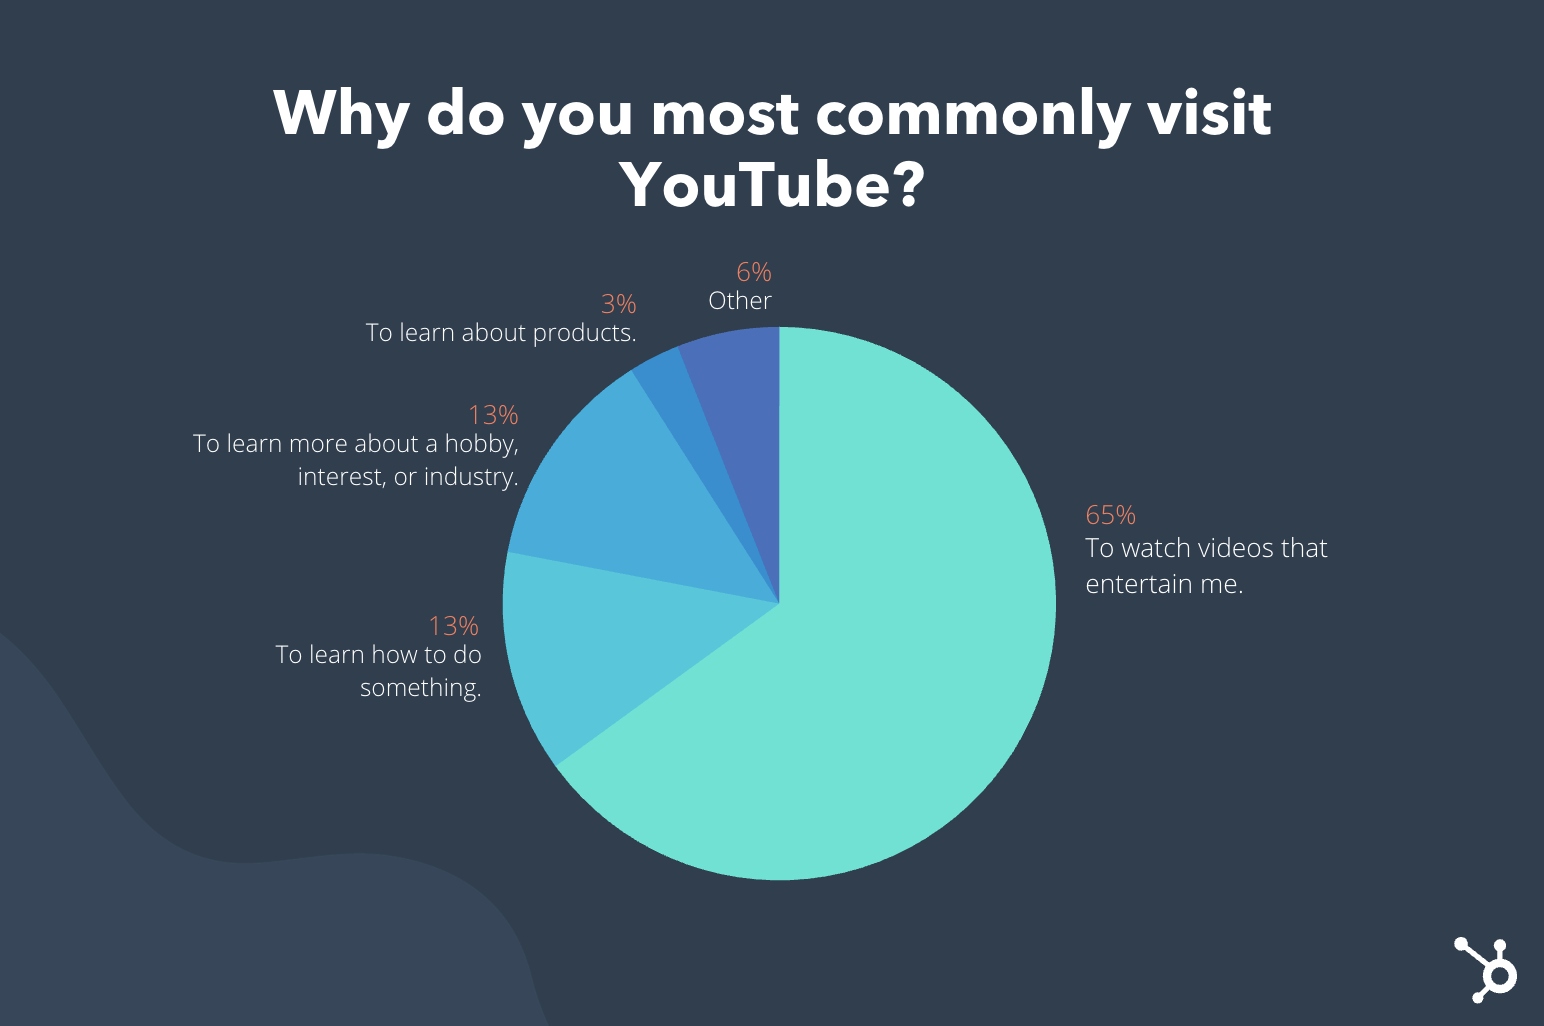
However, you shouldn’t panic just yet. Keep in mind that we just polled a small group of general consumers about their most common reason for visiting YouTube. Had we asked them for their top three reasons, polled a larger group, or polled a specific demographic, the results could have been different.
It’s also worth noting that many demographics search out product videos when they’re researching a prospective purchase.
In fact, in a 2020 recent survey, 94% of people said they watch explainer videos to learn about products. While many YouTube users might not go to the YouTube platform just for product videos all the time, they probably still watch them when they’re relevant to their buyer’s journey.
However, knowing what YouTube audiences are looking for on YouTube will help you make a video related to your brand or product that still mixes in elements that can engage them and fulfill their viewing needs.
So, why do people visit YouTube? Let’s dive into the three most popular motives.
1. To watch videos that entertain me.
When we asked consumers why they visited the world’s second-largest platform, a whopping 65% of them said they did so for pure entertainment.
This stat might be terrifying for marketers, especially if you sell a product that might not be considered super flashy or attention-grabbing.
But, the stat above shouldn’t have you panicking just yet. Keep in mind that this is just one small survey. Had we asked people of certain age groups or industries this specific question, the results could have swayed in another direction.
However, it is very important to keep in mind that people on YouTube want to be entertained or at least intrigued by the content they’re watching. So, whether you’re planning to launch YouTube video ads or standard videos, you’ll want to add a touch of entertainment, action, or interesting information to them.
Here’s a great video, created by Headspace and LOL Network, that features actor Kevin Hart struggling to meditate and using the Headspace app to help him relax while jogging.
Even if you can’t work with a big-name celebrity, this video is still a great example of content that tells an entertaining story about how a product solves common problems. While Hart’s fame might pull people in, watching him worry about relatable, everyday things as he jogs could be relatable and funny to audiences.
2. To learn how to do something.
We’ve all had a moment in life where we couldn’t figure out how to do something and scoured the internet for a video that could help. That’s why it’s not surprising that 13% of respondents primarily visit YouTube to “learn how to do something.”
As a marketer, you can leverage the YouTube audience’s need for advice and guidance with videos on how to do things related to your brand, industry, or even your product.
On top of zoning in on the how-to format, you could also mix in entertaining elements, such as an influencer or entertaining video host, to fulfill a viewer’s need for interesting content
Here’s an example of a how-to video from B Simone Beauty, a cosmetics brand named after its founder B Simone. In the video, Simone, also known for her work as a stand-up comedian, offers a step-by-step tutorial on how to give yourself a glamorous makeover.
While the video highlights B Simone Beauty products, it focuses on makeup tutorial tips. Not only does this help audience members who have purchased cosmetics from the brand, but it also gives prospects helpful tips. By watching this video, you not only see what using B Simone products is like in real life, but you also learn how knowledgeable Simone is about makeup. Both of these elements could enable viewers to trust the company and product quality.
3. To learn about something, such as a hobby, interest, or industry.
While some people use YouTube to find step-by-step guides on how to do something, some just watch videos to soak up as much valuable information as possible. In our poll, 13% of respondents said they visit YouTube to “Learn about something related to a hobby, interest, or industry.”
As a marketer, you can also leverage this YouTube user need in your videos or in-stream ads. Here are just a few ways to weave valuable information into your next video.
- Leading the video with a surprising or interesting stat.
- Featuring expert tips or insight-filled interviews from your company leaders or industry experts.
- Recording an explainer video with fun graphics, charts, and interesting information about a topic related to your industry or brand.
Here’s an example of a video HubSpot posted that discusses how TikTok’s audience has begun to mature by discussing stats and facts about the platform.
Although HubSpot isn’t a TikTok tool, it has a large marketing audience that the company is engaging with this video that educates viewers on a highly trendy topic.
By creating informative or educational videos related to your industry, you enable the viewers with similar interests to learn something new while also developing trust for your company. So, even if you aren’t explicitly mentioning your product, viewers could remember your brand and your expertise next time they’re shopping in your immediate space. Similarly, if someone does do product research and comes across your YouTube channel, they might trust that a brand with solid knowledge around an industry will create high-quality products.
Other Answers
Aside from the top three responses, 3% of people said they go to YouTube primarily to watch videos of their “favorite celebrities or influencers” while another 3% primarily use the platform to find videos related to “news and trends.”
While these responses don’t need to inform your strategy, they align well with the themes that people are looking for entertainment and interesting information.
Catering to YouTube’s Giant Audience
Ultimately, it’s unlikely that every single YouTube viewer will love your content or search out the types of videos you make. However, since the audience is so broad, there’s at least a large segment of it that could engage with your marketing strategy. As you develop or fine-tune your tactics, keep these tips in mind:
- Know your audience: Learn the ins and outs of who uses the platform, identify the best demographics or targets to go after, and look at what types of videos they engage with most.
- Mix education with entertainment: While many people visit the platform for entertainment or escape from their daily lives, others crave valuable or helpful information. So, try to create content that intrigues viewers, while also giving valuable information related to your brand or industry.
- Don’t limit yourself to product videos: While you can certainly post a few demos, interesting customer stories, and mention your product in a few videos, keep in mind that YouTube visitors might not be looking for commercial-like content. Try to add variation with explainers, expert interviews, or other interesting, but on-brand, video formats.
Need more help with developing or expanding your YouTube strategy? We’ve got you covered.
Check out this data on why people click out of YouTube videos, this Ultimate Guide to YouTube Marketing, or download the free resource below.

The 4 Go-To Social Media Video Platforms & How to Engage Their Audiences [New Data]
Last week, HubSpot’s 2021 State of Marketing Report reveals that video is the top content marketing strategy used by brands while social media is ranked as the top marketing channel.
With data like that above — and all the growing social media video platforms out there — it’s become obvious that social media marketing and video content go hand in hand.
While creating great social media videos for your company can be an incredibly effective marketing tactic, each social media content strategy shouldn’t be a one-size-fits-all approach. To ensure that your videos are seen and spread quality brand awareness, you’ll need to ensure you’re making the right videos for the right audiences on the right platforms.
With new video publishing options appearing on social platforms regularly, determining where your content will live is part of the content marketing battle.
To help you figure out where to publish your video content — and which types of videos to post — we surveyed 300+ consumers to find out where they most commonly watch videos on social media.
Below, we’ll reveal the results and a few expert tips for building the best social media video-sharing strategy for 2021 — including one from an expert at Wistia.

Where are Consumers Watching Social Media Videos?
In recent years, Gen-Z-targeting platforms like TikTok and Instagram have been on the rise. But if you think that everyone’s primarily watching video on these platforms, you might be surprised by what our poll found.
When I asked consumers “On which social media platform do you most commonly watch videos?”, 35% of respondents said YouTube.
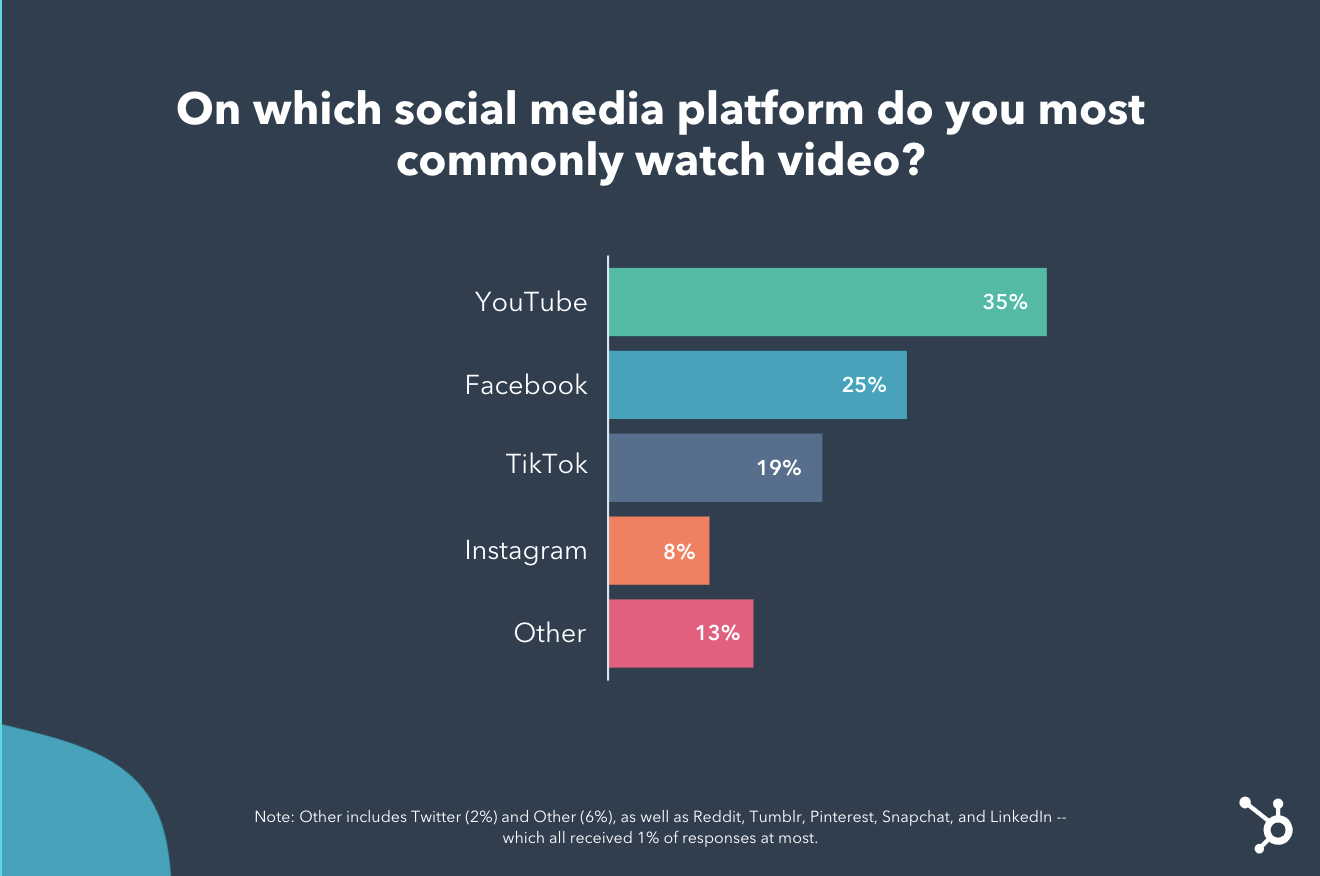
While it’s not surprising that YouTube or Facebook, some of the world’s biggest online platforms, are the preferred video viewing sites, only 8% of respondents said they primarily watch videos on Instagram — one of the pioneers of Stories and live video.
Another surprising find was that 20% of respondents — or 1 in 5 people — primarily use TikTok (the youngest social network on the list) for video viewing. While this doesn’t necessarily mean you need to shift your whole strategy to TikTok, it does show that the platform could continue to have a promising future for content marketers.
If this data has you worried that you’re publishing videos on the wrong platforms, take a breath. Remember that this is just one informal consumer survey. Had we polled a specific age group, people from a specific industry, or consumers from different regions, the results might have swayed to other platforms — like LinkedIn or Twitter.
However, even though this is just one small survey, it does remind us that a mix of older and newer platforms, like YouTube and TikTok, are the go-to video platforms for vast audiences.
Now that we’ve gotten an idea of where consumers are primarily watching social media videos, we’ll walk you through a few tips for sharing the best videos for different social media audiences.
Tips for Sharing Social Media Videos
1. For most platforms, zone in on snackable content.
The world is becoming more fast-paced every day. While many people are watching social media videos in their spare time, some are watching them between meetings, while in line at the store, or on public transit. Even if people do have time to watch hours of video, there’s so much out there that they’ll want to scroll to more content almost immediately after their video starts.
That’s why one social media video strategy to focus on in 2021 is mastering the art of “snackable” or super short-form content.
“Using snackable videos on social can actually drive more engagement than static images,” says Meisha Bochicchio, Content Marketing Manager at Wistia. “A recent study found that 60% of marketers saw more clicks with video posts compared with static images.”
When it comes to creating effective snackable content, Bochicchio says, “First things first, keep in mind that most social media platforms will automatically start playing video content as viewers scroll. So, make sure your videos are autoplay-friendly. Keep them short and put your key messaging in the first few seconds. For example, take a look at this video from Wistia announcing their State of Video Report.”
“Remember that most people won’t hear your audio, so make sure your videos are also silent-friendly,”Bochicchio advises. “Consider text overlays, or upload captions directly on platforms like LinkedIn, Twitter, and Facebook.
In the video example below, Wistia marks the launch of their series “Show Business” with a captioned video that allows viewers to get key information without any sound.
To learn more about this strategy, check out this post on snackable content, or this post that highlights the latest short-form video trends.
2. Test different video formats, too.
While snackable content is a great tactic to harness in 2021, you can still publish longer videos, as long as they’re engaging and valuable to your audience.
For example, while people might not want to watch a two-hour commercial, they could watch a longer live video Q&A, an interview with a thought leader, or a video that tells a longer, but entertaining story.
Here’s a great example of a TV-episode-length, Clio-winning video created by Pepsi:
While you can certainly test longer-form video, you can also test out other formats, such as live streams, interactive videos, and shopping videos on platforms like Instagram and Facebook.
As new video formats emerge, it can be helpful to determine if they might work for your brand and design a test around them.
Be sure you identify and track the right success metrics. For example, if you’re testing a longer video, look at its views and dropoff rate to see how long viewers stay tuned. Meanwhile, if you try a more interactive approach like a live stream or Q&A you can also take note of comments, engagements, and shares on the content while you’re live.
3. Meet your video audiences where they are.
As with any social media strategy, some content will perform better on some social media platforms rather than others. While snackable, consumer-facing content might perform well with YouTube, Facebook, and TikTok’s large consumer audiences, a B2B marketing video or a Q&A with a corporate thought leader might perform better on a professional-facing network like LinkedIn.
Luckily, to create a great marketing strategy, you don’t (and shouldn’t have to) place your videos on every single social media platform. However, you should research the demographics of each major network, identify which audiences might engage most with your content, and start publishing videos where it makes the most sense for your brand and goals.
Then, continue to keep an eye on platforms you’ve ruled out in case they continue to evolve and provide your brand more audience opportunities in the future.
4. Don’t always lean on repurposed content.
When I was a startup marketer, I loved to repurpose content whenever it was possible. And, back then, when social media platforms were less evolved, this strategy would work.
Today, it can still be beneficial for brands to repurpose some video content for different platforms when they have similar audiences and features. This can also be a great way to test whether your content strategy for one platform will work with one audience.
However, because knowing your social media audience is more important than ever, you might want to consider having a slightly different video strategy for your most important video platforms. While there will be times where you can easily repurpose content to save time or bandwidth, some platforms like TikTok and Instagram are evolving with algorithms that could deprioritize your content if it has a watermark from another network.
5. Embrace influencers — and customers.
Even if you’ve done all of your research and churn out videos daily, it can still be incredibly hard to post a viral piece of content that grows your audience.
Luckily, there are experts on every social media platform who know how to create videos. And, some of them will even create videos for you — and then share them with their audiences.
That’s why one great growth strategy can involve reaching out to influencers or thought leaders with expertise in your industry and either featuring them in your videos or getting them to endorse your brand in their content.
If you can’t afford to have an influencer help boost your video strategy, you can also look towards happy consumers. With this strategy, you can encourage customers to share a video about their experience with your brand on social media, or you can create a video filled with multiple pieces of user-generated content from happy customers.
Because today’s consumers crave authenticity from brands, user-generated content not only can provide you with free video content but can also spread brand awareness to prospects or people researching you on social media.
Navigating Social Media Content
More than ever, social media and content marketing are always evolving. As a marketer, it’s important to stay up to date with the latest trends and data to better inform your strategies — whether you’re investing in video or other tactics.
To learn more about the latest marketing trends, download our free 2021 State of Marketing Report below.


Your Brief Guide to Using Goal Seek in Excel
Successful marketers make informed decisions quickly using a combination of gut instincts and data analysis. They know the end goal, and figure out what it takes to get there.
One way to fill in those gaps is by using Goal Seek in Excel. The function is helpful when you know your desired result, but you’re not sure how to reach it.
Maybe you want to improve your conversion rate to get more qualified leads but don’t know how many people you need to attract. Or let’s say your marketing team is aiming for an audacious revenue goal and you want to know how many customers you have to bring in with an upcoming campaign. If you’re running a promotion, you likely need to figure out what discount to apply so you don’t wind up with a loss.
![Download 9 Excel Templates for Marketers [Free Kit]](https://no-cache.hubspot.com/cta/default/53/9ff7a4fe-5293-496c-acca-566bc6e73f42.png)
Goal Seek is the answer. Understanding how to apply it to your marketing or sales efforts can inform your strategy by letting you calculate the numbers required to achieve your goals.
This post will explain how to use Goal Seek so you can start planning for your next campaign or making projections for the upcoming quarter.
What is Goal Seek in Excel?
Goal Seek is a powerful Excel function for conducting a what-if analysis. Also known as a sensitivity analysis, it helps you understand what can happen when you change one or more variables. Essentially, it’s a way to conduct a reverse calculation within an Excel spreadsheet.
Imagine you’re creating a marketing strategy for the next six months. You can use the Goal Seek Excel function to figure out the following unknowns.
- What percentage of month-over-month growth do you need to double your reach by the end of the year?
- How much can you spend on freelance design work without exceeding your outsourcing budget?
- How much revenue do you need to bring in to break even on (and profit from) your upcoming email marketing campaign?
Finding answers to these questions can prevent unexpected outcomes and missed goals. Instead of wondering “what-if” when building a strategy, you can cut out uncertainty and give yourself a roadmap for success.
Before you finalize any plans, let’s walk through the steps to conduct an analysis.
How To Use Goal Seek In Excel
Setting up a Goal Seek calculation is simple once your data is organized.
In the following example, I want to evaluate the percentage of customers coming in through various marketing channels. The goal is to bring in 50% of customers through marketing efforts by the end of the year.
I first populate the table using the average month-over-month (MoM) growth to see the projections for June to December. I know I have an email campaign planned for the beginning of December, and I want to see how many customers I’d have to bring in to reach my 50% goal.
Step 1: Select the cell with the output you want to change (i.e., % of customers from marketing).
Step 2: Under the Data tab, select What-If Analysis, then Goal Seek.
Step 3: A pop-up window will appear. Make sure the cell from Step 1 appears in Set cell.
Step 4: Write your desired value in To value.
Step 5: In the By changing cell box, select the cell you want to change to reach your desired outcome.
Step 6: Click OK to see the Goal Seek calculation. The new number will appear in the cell from Step 5, not in the pop-up box.
Step 7: If all looks good and you want to keep the calculation, click OK again.
Using Goal Seek, I can tell that if my MoM growth stays the same, I need to attract at least 16 customers through my December email campaign. Yes, this is a simple example. But you can expand it to much more complicated efforts, like projecting sales needed to meet revenue goals or calculating how much net income you’ll earn from a campaign.
Goal Seek Analysis In Excel
Let’s look at another example of Goal Seek analysis. I want to bring in 130 new customers, but I don’t know how many visits I’ll need to reach my goal. Before doing the Goal Seek analysis, I organize my data to find the average MoM visit-to-customer percentage.
Step 1: Select the cell with the output you want to change (In this case, the customer goal).
Step 2: Under the Data tab, select What-If Analysis, then Goal Seek.
Step 3: In the pop-up window, make sure the cell from Step 1 appears in Set cell.
Step 4: Type the number you want to hit into To value (My goal is 130 customers).
Step 5: Select the cell you want to change in the By changing cell box (Mine is for Projected Visits).
Step 6: Click OK to see the Goal Seek analysis. (Now, I know that in order to get 130 customers, I need to attract 5055 visits).
Once you fill in the missing variable using Goal Seek, you can figure out other variables. For instance, I found that with 5055 visits, I would need 910 leads to reach my desired number of customers. Having these numbers can also help me judge if the marketing and sales efforts for the month are on track to meet the goal.
Goal Seek Function In Excel
In business, uncertainty can spell the downfall of even the most thoughtful strategy. But you can take control of the variables that seem out of your control with the Goal Seek function.
Being proactive and judging the business impact of a marketing campaign or new sales effort can not only gain you respect within your company, but it can help you meet, and even exceed your goals. You’ll be ready when the unexpected happens. And you’ll know how to make informed decisions or tweak the strategy with your new what-if analysis skills.

The Simple Guide to Creating an HTML Email [+ Free Templates]
When you create an email using a drag-and-drop or module-based tool, you’re actually generating an HTML email.
There are two main types of email you can send and receive: plain text emails (these are exactly what they sound like — any email that contains just plain old text with no formatting) and HTML emails, which are formatted and styled using HTML and inline CSS.
HTML emails are easy to spot — most of the styled, multimedia marketing emails in your inbox are HTML emails.

As a marketer, you’ve probably compared HTML emails versus plain-text emails and realized that there are different benefits to each type. HTML emails aren’t inherently better than plain text emails, and in different situations, both types can be part of a successful email marketing program.
Here’s what an HTML looks like on the front-end. Click on the HTML button to see the code behind it.
See the Pen HTML Email Template from HubSpot by Christina Perricone (@hubspot) on CodePen.
In this article, we’ll cover how you can get started creating HTML emails, regardless of your experience level and comfort with coding, and share some free templates you can use. Let’s dive in.
How to Create an HTML Email
Good news: You actually don’t need to know how to code to create an HTML email.
Most tools that create and send email (like HubSpot) will offer pre-formatted, ready-to-go HTML templates that enable you to design emails without ever needing to access the actual code on the back-end.
As you make changes in the email editor, those changes will be automatically coded into the final product. Email building tools like this are an ideal option if you don’t have an email designer on your team, but you still want to send professional-looking marketing emails.
Still want to create an HTML email from scratch?
If you’re comfortable with HTML and want more direct control over the code of your emails, most email tools will allow you to import HTML files directly for use as custom email templates.
There are a wide variety of free HTML email templates available on the web (some of which we’ll share below), and if you know your way around an HTML file, it’s usually quite straightforward to adapt the template to the email building tool of your choice.
To create an HTML email completely from scratch, you’ll need to have an advanced knowledge of HTML (or work with a developer who does). This guide offers a solid overview of coding a basic HTML email. Because the process of creating an HTML email from scratch can be quite involved, we recommend working with a developer or using a pre-made HTML email template instead.
Developing an HTML email specifically for HubSpot?
If you’re developing an HTML email template specifically for use in HubSpot, you’ll want to make sure you include the required HubL tokens (these ensure your emails can be customized and are compliant with CAN-SPAM laws). You can find a complete guide to coding HubSpot-specific HTML email templates here. Or alternatively, just use our simple what-you-see-is-what-you-get email editor.
Now that you understand the basics of what goes into developing an HTML email, let’s go over a few important best practices you should keep in mind. No matter what method you plan to use to create HTML emails, these best practices will help improve the design, user experience, and deliverability of your emails.
1. Make sure your HTML email is responsive for different screen sizes and devices.
The way your email looks in a user’s inbox depends on a wide variety of different factors.
One of the biggest and most obvious factors is the screen size of the device it’s being viewed on. An email that looks amazing and well-formatted on a desktop can easily devolve into a tangle of illegible, overlapping text and images when viewed on a smartphone screen.
To ensure your HTML emails look the way you intended across a wide spectrum of screen sizes, the best thing you can do is keep your layout simple and straightforward. When you start adding more complex elements like multiple columns and floated images, it becomes more difficult to translate the format of your email for different screen sizes.
If you do decide to develop a more complex layout, make sure you’re actively solving for how the elements will be rearranged to suit different screen sizes. For example, if your email displays as multi-column on desktop, that same structure won’t fly on mobile — you’ll need to use media queries to define how elements will be displayed on different screen sizes.
Remember, developing truly responsive HTML emails goes beyond the structure and format of your message. Think about how the overall user experience of your email will be perceived on different devices. Make sure your font choices are just as legible on mobile as they are on desktop, and use mobile-friendly buttons or CTAs in place of hyperlinked text (have you ever tried to tap a little line of hyperlinked text on mobile? It’s not very easy).
You can find our more in-depth guide to mobile email best practices right here.
2. Make sure your styling works in different email clients.
Another big factor that heavily impacts the way your HTML emails appear in your subscribers’ inboxes is the email client they’re using to open the message. Every email client loads emails slightly differently, so an email that looks a certain way in Gmail will likely look different in Outlook.
Luckily, if you know how most popular email clients load particular HTML and CSS elements, you can create a pretty consistent experience across different users’ inboxes. It’s all about knowing which unsupported tags to avoid and adapting accordingly. This comprehensive guide explains how the most popular email clients (including Gmail and multiple versions of Outlook) support and render different styling elements.
You can also check out an article we wrote on optimizing emails for different email clients.
3. Be conscious of how long your HTML emails take to load.
How long your email takes to load could very well be the difference between gaining a new customer and losing a frustrated subscriber. While it can be tempting to take advantage of all the different styling options and opportunities to incorporate visuals that HTML emails offer, none of that matters if your email takes too long to load.
As you design your HTML email, remain conscious of how long your email will take to load — especially if someone is, say, opening your message on their morning subway commute with a weak data connection. Here are a few little steps you can take that will go a long way towards improving load time.
Use images sparingly.
That way, you’ll bolster the message you want to get across to subscribers. Always use an image compressor (like Compressor.io) to reduce the file size as much as possible. Most image compressors can significantly reduce the file size of an image without compromising on quality, so taking this extra step won’t hurt the visual integrity of your email.
Use standard web fonts.
Custom fonts are great for spicing up a landing page, but they can add an extraneous layer of complexity when added to an email. As we talked about above, all email clients handle style elements differently, and this especially extends to fonts. To be safe, use standard web fonts and check to make sure the email client most of your subscribers use supports a particular font.
Try an HTML minifier.
An HTML minifier (like minifycode.com and smallseotools.com) automatically removes code that isn’t needed in an HTML file. Repetitive, extra elements will be stripped out, but the actual rendering of your email should remain the same (always test it out!). Each line of code impacts how long an email takes to load, so taking the time to remove junk code can have a positive effect on load time.
Keep your message focused on a single objective.
The best way to reduce email load time is to reduce how much content you add to each of your email sends. It might seem obvious, but too many marketers try to stuff too much content into their emails. Not only does that lead to an off-putting user experience (nobody wants to read a novel in email form), but it can send your load time off the charts and cause users to abandon your email. Keep it simple, and your users will thank you.
4. Plan (as much as you can) for end-user inconsistencies.
The screen size and email client aren’t the only factors that can alter the way your HTML email renders in your subscribers’ inboxes. Elements like the version of their email client, their operating system, their unique user settings, their security software, and whether or not they’re automatically loading images can all impact how your email loads.
As you can probably guess by that hefty list of factors, trying to solve for all of them (every single time you send an email) would probably be enough to make you throw your computer across the room.
But you don’t have to be completely helpless in the face of these variables — you just have to do a little pre-planning.
Consider creating a webpage version of your email.
This is kind of like giving your email a fail-safe button. If for some reason — due to one of the many factors discussed above — your lovingly designed email renders like an absolute mess when a subscriber opens it, they will at least have the option to click “view as web page” and see the email as you intended it to be.
Since style elements render much more consistently across web browsers versus email clients, you’ll be able to have way more control over the web page version of your message. In HubSpot, there’s an option you can turn on that will generate a web page version automatically.
Create a plain text version of your email.
A plain text version is exactly what it sounds like — an alternative version of your HTML email that renders in completely plain text. Adding a plain text version of your HTML email is important because some email clients and user settings can’t (or choose not to) load HTML.
If this is the case, the client will look for a plain text alternative version of your HTML email to load for the user. If one doesn’t exist, it could signal to the recipient’s email server that your message is spam — or potentially dangerous.
Most email tools like HubSpot will automatically provide a plain text version that displays if a recipient’s email server requires it, but if you’re coding an HTML email from scratch, you’ll need to create something called a multipart MIME message.
A multipart MIME message is an email that contains both a plain text and HTML version of the same email. If a recipient’s email client or security system doesn’t allow HTML email, the plain text version will be displayed. This is a process that requires an advanced knowledge of coding, so we recommend working with a developer.
Make sure your email still makes sense if the images don’t load.
Some users have automatic image-loading turned off, which means they’ll see your email without images when they open it. For this reason, don’t rely entirely on images to get the meaning of your message across, and always add alt-text to the images you do include. Alt-text will load even when images don’t, so your subscribers can get the general idea of what the visuals include.
5. Conduct thorough testing.
Finally, you’ll need to test your HTML email at every stage of development to ensure it works across different email clients, operating systems, and device types. Don’t wait until the very end of the process to test out your email — testing as you work is the best way to spot inconsistencies between different email clients and ensure you’re creating the most consistent experience possible for your recipients.
Some email tools (like HubSpot) offer in-app testing within their email builders to make the process easier. If you’re working from scratch, you can use a tool like HTML Email Check or PreviewMyEmail to get a better idea of how your email will look in different email clients and devices.
Simple and Free HTML Email Templates
There are an overwhelming amount of HTML email templates available on the web, and they vary in quality, responsiveness, and price. We’ve pulled together a selection of free HTML email templates that provide a responsive user experience. Be sure to read the terms and conditions on each individual template before use.
1. HubSpot Free HTML Email Template
Included in the free version of Marketing Hub, this template is a great place to start if you’re looking for a template with more room for customization. You can easily add images, text, and buttons in an intuitive drag-and-drop editor, and you can be confident that the templates you design will be fully responsive on any device.
2. Company News HTML Email Template by Campaign Monitor
 This modern template is sophisticated and minimal. The subtle color palette and simple design make it a versatile option for many different industries and purposes, and it’s been tested on different email clients and devices to ensure a consistent user experience across different platforms.
3. Free HTML Email Template by Unlayer
Though this template was designed for a fitness company, you can easily adapt it for your own. This clean, muted template is a great way to display content your team has created and connect subscribers with your most recent products or blog posts. The design features two fully responsive columns with multiple color scheme options, and room at the top to highlight a call-to-action.
4. MINImalist Free HTML Email Template
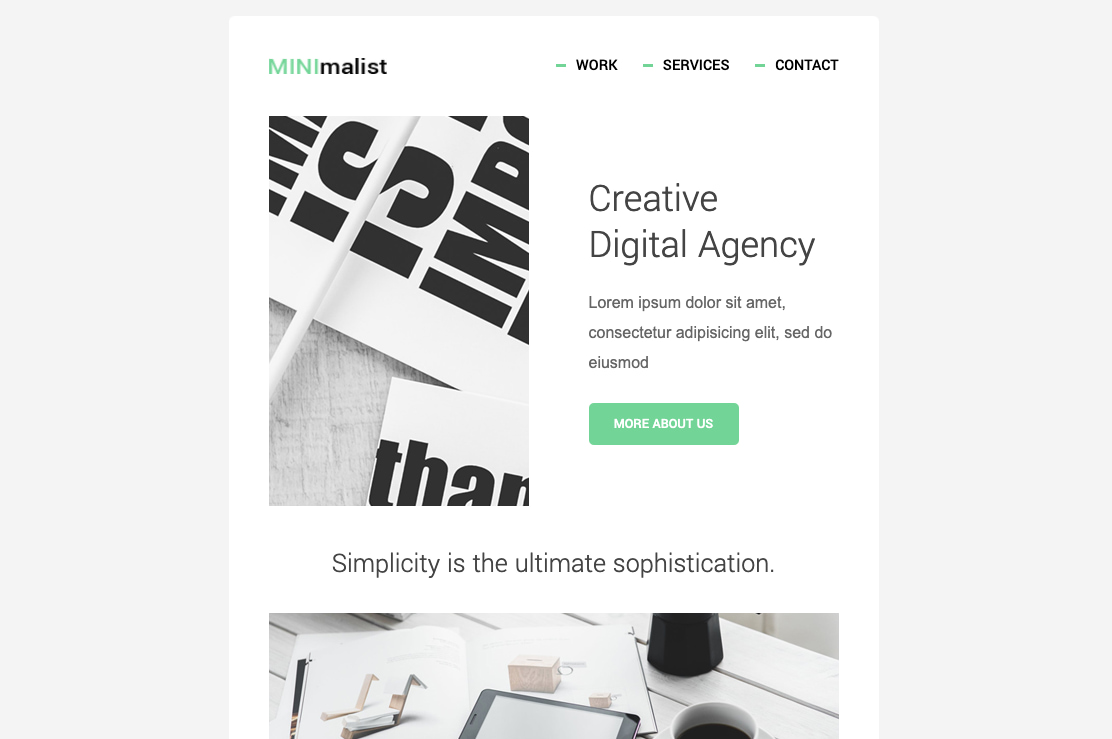
Proof that sometimes less really is more, this easy, fully responsive design makes the most of whitespace and keeps the focus firmly on your words and visual elements. Without design distractions, your content can really shine — on any device.
5. Free HTML Email Templates from Bee Free
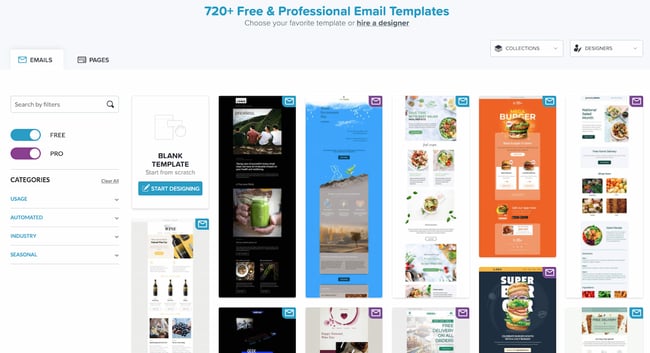
This collection of free, open-source templates are completely responsive and tested across popular email clients. You can edit and build on them on the Bee Free platform, then export the HTML file to your local drive.
These are an ideal option if you want a more styled, polished starting place, but you still want to be able to customize the design to fit your company’s needs. Each template is available in multiple formats for different marketing purposes, like transactional emails, NPS collection, and email subscriber re-engagement.
6. Free HTML Email Template by Campaign Monitor
This sleek, responsive design from Campaign Monitor would be perfect for sending out a discount code — but it could also serve as a stylish way to showcase your latest products to email subscribers. It’s also worth checking out Campaign Monitor’s full library of responsive email templates.
Create HTML Emails to Increase Your Subscriber Count
HTML emails are an engaging way to share what’s happening in your business and keep subscribers coming back for more. With the tips and templates we’ve shared, you’re well on your way to creating beautiful HTML emails without writing a single line of code.
Editor’s note: This post was originally published in June 2019 and has been updated for comprehensiveness.

How to Effectively Disavow Links & Protect Organic Ranking
If you’re confused about when, why, and how to disavow links — you aren’t alone.
We all know that backlinks are critical to your SEO success, but the quality of those backlinks can make all the difference in that success.
This post will help you understand when and how to submit a Google disavow file, which is important for protecting your domain.
Let’s dive in — but first, what is the disavow tool?
![→ Download Now: SEO Starter Pack [Free Kit]](https://no-cache.hubspot.com/cta/default/53/1d7211ac-7b1b-4405-b940-54b8acedb26e.png)
What is the disavow tool?
The disavow tool gives you the opportunity to ask Google to ignore low-quality backlinks to your website.
When you submit a disavow file to Google, you are asking them to ignore certain links that are pointing to your domain. There is no obligation for them to respect your request, but if they do, those links won’t be used in determining your ranking in search results.
It’s important to understand, however, that disavowing backlinks doesn’t remove them from your backlink profile.
Do you actually need to use the disavow tool?
Google has made it clear that they only want you to use the disavow tool if you need to.
They recommend using it if you have a manual spam penalty, or if you knowingly took part in link-building practices that might be harming you.
In 2019, Google Senior Webmaster Trends Analyst John Mueller talked about the disavow tool during Google Webmaster Central office hours.
He says, “I think for most websites out there, pretty much the really largest majority of websites, you don’t need to use the disavow tool. That’s why we have the disavow tool so separate from search console so that you don’t get tempted to using the disavow tool because it looks like this normal part of search console that everyone should be using.”
Mueller says, “[The disavow tool] is really something that you only really need to use in really extreme cases.”
To decide if you might benefit from filing a disavow, you’ll need to analyze your backlink profile, which you can learn more about below. But if you knowingly participated in what would be considered unethical backlink practices, chances are a disavow would be helpful.
What is considered a ‘bad’ backlink?
Before we tell you how to do a disavow, it’s important to understand what makes a backlink a bad one.
Google considers any link created to manipulate PageRank or a website’s ranking to be a bad link. They want you to work on creating great content that gets linked to naturally!
If you’ve purposely taken part in any kind of link-building campaign, then chances are you might have bad backlinks.
This could include:
- Purchased backlinks
- Link schemes
- Product for backlinks
- Link exchanges
- Footer links
You might look at your backlinks in various tools and see lots of spammy-looking backlinks and think you need to get rid of them — but you don’t need to worry about those.
Google will understand spammy links to some extent and ignore them.
As an example, here are some backlinks from a website pulled from Ahrefs. These are all spam, and none of them have DR ratings:
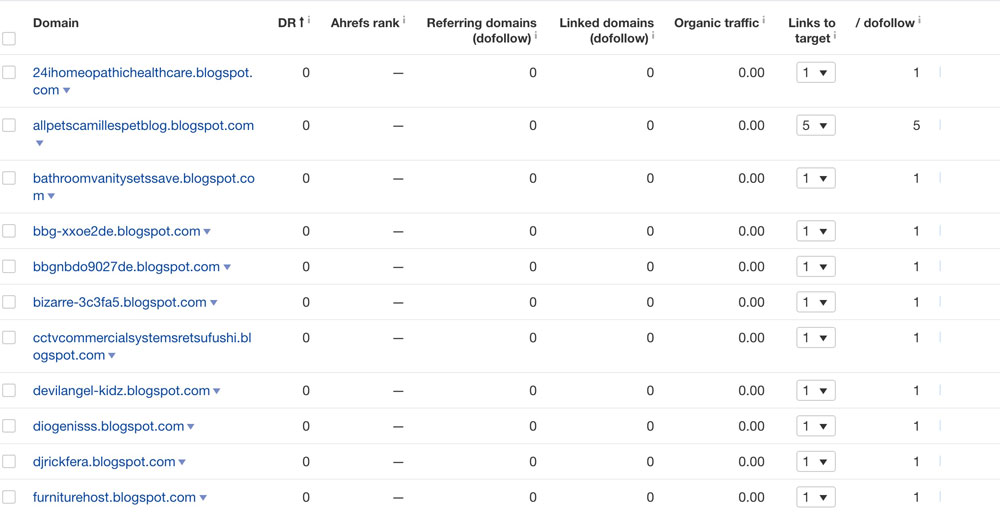
I wouldn’t bother disavowing these since these are probably backlinks that a lot of websites have, and Google is smart enough to know we didn’t create them to manipulate our backlink profile.
When should you create a disavow file?
Google has stated that most websites will not need to disavow links, and only in certain circumstances should it be used.
Below are some examples of when a disavow might be recommended or needed.
1. Manual Action: Unnatural Links To Your Site
This is the one occasion where you will absolutely want to file a disavow. If your website has been hit with a manual penalty due to link building practices, then disavowing links is a must to have that penalty removed.
If your website is connected with Search Console — and it should be — you will be notified if there is a manual action on your website.
At this point, you would begin analyzing the backlinks you have in Search Console and trying to find the links that may be seen as violating Google’s guidelines.
If you find offending backlinks, the first step would be to contact the website owner where the backlink is and ask them to remove it. If that doesn’t work, then you can try using a disavow file.
Once you have removed or disavowed the links, you can select the “Request Review” button in your Manual actions report to ask them to remove the action.
2. Link Schemes
If you knowingly participated in link schemes, then you may benefit from adding them to your disavow file. These are links you – or someone you may have hired – paid for. These may be private blog network (PBN) links or even guest posts on websites of no relevance to your niche.
3. Directories
A long time ago, adding profiles to every directory that existed with a link to your website with your “money keyword” as the anchor text was all the rage. Maybe you are guilty of this, or the SEO you hired is – but these are backlinks that should be removed. If you can manually remove them that would be best, but adding them to the disavow is recommended if you cannot remove the link.
4. Comments
Another old tactic was to spam comments on other blogs and add keyword rich anchor text in the comments box or even for the name field.
If you have any backlinks from comments, directories or editorial links with anchor text like “buy red widgets” or “best tennis shoes” it would be recommended to add them to your disavow file if you cannot get the link removed or changed. Normally for these types of links it would be expected to be your first name or brand name.
Finding all of Your Backlinks
To create the most accurate analysis, you will need to retrieve as much backlink data as you can and understand how to analyze that data.
You can use a variety of tools to review your backlinks, and you can choose to download them all to a spreadsheet to manually review them or do an analysis right from within the tool.
Here are a few options of tools to use for finding backlinks:
1. Google Search Console.
In Google Search Console you can go to the links area and click the export external links button and then the more sample links option to get a full list of the backlinks to your website.
2. Semrush, Ahrefs, Moz, or your preferred tool.
Export your list of backlinks and merge it with your Google Search Console file or analyze your data in the software.
3. A Link Audit Tool.
There are a few tools that can really minimize your time in auditing your backlinks like LinkResearchTools.
Semrush also has a backlink audit tool that shows all of your backlinks and gives them a toxicity score based on a variety of factors. You can work right from your dashboard to assess the links and determine if they truly are toxic or not.
If they are, you can then add them to a disavow right from the tool. When you are done reviewing them all you can then download the formatted disavow .txt file and submit it to the tool.
While this is a useful tool, it does not have all of your backlinks in its database! You should still do a manual review using other tools as well.
Creating A Disavow File
Once you are done assessing your links you can create the disavow.txt file that will be uploaded to Google Search Console.
Creating A Disavow.txt File
Below are some guidelines from Google on how to create your file.
- The file name must end in .txt
- File size can be no larger than 2MB and 100,000 lines
- Each URL should be on its own line
- If you want to disavow a whole domain you should start the line with domain:
- If you want to disavow a URL you can just enter the URL
Below is a sample portion of a disavow file that I recently created as an example.
By adding a # before text you can add comments, these lines will be ignored by Google.
If you would like to test your disavow file before uploading it you can use the Disavow File Testing Tool which was created by Fili Wiese, a former Google Engineer.
Uploading a Disavow File
Once you have completed your disavow file it can be uploaded to the Disavow Tool in Google Search Console.
Below are a few easy steps to uploading your disavow.
- Login to Google Search Console
- Go to https://search.google.com/search-console/disavow-links
- Select the property you would like to add a disavow file to
- Click the upload disavow list button and find your .txt file to add
If you had uploaded a previous disavow.txt file, your new one will override that one. If your file has any issues, you will see error messages and be prompted to upload a corrected version.
While there is no guarantee that submitting a disavow file will help, there have been reports of success when using it.
It will take some time for Google to process the information you uploaded, so you will have to have a bit of patience.
There is no way to really know if the disavow.txt file is doing what you want it to do, but keeping an eye on your rank, organic traffic and impressions could be a good indicator.


How to Embed Video in Email [Quick Tip]
Nowadays, video is an undeniably popular channel for marketing purposes.
In fact, in 2021, 86% of businesses use video as a marketing tactic.
If you’re an email marketer, I’m willing to bet you’ve considered how you might spruce up your subscription and click-through rates with video. It’s a good idea in theory, with roughly two-thirds of consumers preferring video over text when learning about new products or services.
In reality, however, it can be tricky. Major email clients including Gmail, Yahoo, and Outlook don’t support embedded videos, so your subscribers either won’t be able to watch your video within the email, or worse — they won’t see your email at all, because it’ll end up in their spam folders.
Fortunately, there’s a creative workaround to help you embed part of your video within your email, and incentivize subscribers to click-through to watch the rest. Here, let’s explore how to do just that.
Embed YouTube (or Any Other) Video in Email
There are two options you might consider when embedding a video within your email — you can either embed a GIF of your video with a “click here to watch full video” CTA, or you can embed a still photo of your video, and when subscribers click the “Play” button, they’ll be re-routed to your video’s URL.
Let’s explore the GIF option, first.
You can use the following instructions on any video from a video hosting platform of your choosing, including YouTube, Vimeo, Facebook, DailyMotion, etc. In the following examples we used a Facebook URL, but a YouTube URL would work just as well.
1. Find the URL of the video you want to include, or download and save your video to your computer.
To create a GIF of a video I wanted to include in my email, I first went to HubSpot’s Facebook page and copied the URL of a recent video the team uploaded to the site — “How a Senior SEO Strategist Sees the World”.
 2. Go to Imgflip.com, a tool that enables you to create GIFs of videos.
 3. Choose a starting point and end point for your GIF.
Once you’ve chosen a clip you’d like to use for your GIF, click “Generate GIF”.
4. Download your GIF.
Once your GIF has been generated, you’ll have the option to copy-and-paste the image link or image URL. Instead, click “Download .gif”.
5. Drag-and-drop your GIF into your email, and add a video CTA linking to the full video.
Now comes the fun part! Simply create your email to send to your subscribers, and drag-and-drop your GIF from your desktop into the email itself.
Below the GIF, create a video CTA, like “Click to view full video here” with a URL to your video (the URL will likely lead to your own website, YouTube, Facebook, or another social platform).
You can spruce up your email subject line with “Video included” to further incentivize click-through rates.
Of course, you’ll want to use email marketing best practices when embedding a GIF, and ensure the video you want to include is truly a compelling, interesting piece of content for your email subscribers.
This is a unique opportunity to further engage with your prospects and customers, so make sure to use it wisely — don’t just send a video advertisement for your products or services.
Next, let’s explore how you might include a still image of your video with a “Play” button.
How to Create a Still Image of Your Video With a Play Button
1. For this example, I’ll use the same video as before. Instead of copying the URL, however, I simply screenshotted a paused section of the video.

2. When I paused the Facebook video, it automatically included a “Play” button. However, if you screenshot a video while it’s playing, you might not have a “Play” button. To add one to a still image, go to the website Add Play Button to Image, upload your image, choose a play button design, and click “Create Play Button Image”.
Then, click “Download Image”.
3. Next, simply click “Insert Photo” in your email to include the image with the Play button. Then, highlight the image and select “Insert Link”. Copy-and-paste the link to the full video (in this case I pasted the Facebook URL, but you can also paste a URL to a website with your video, or YouTube).
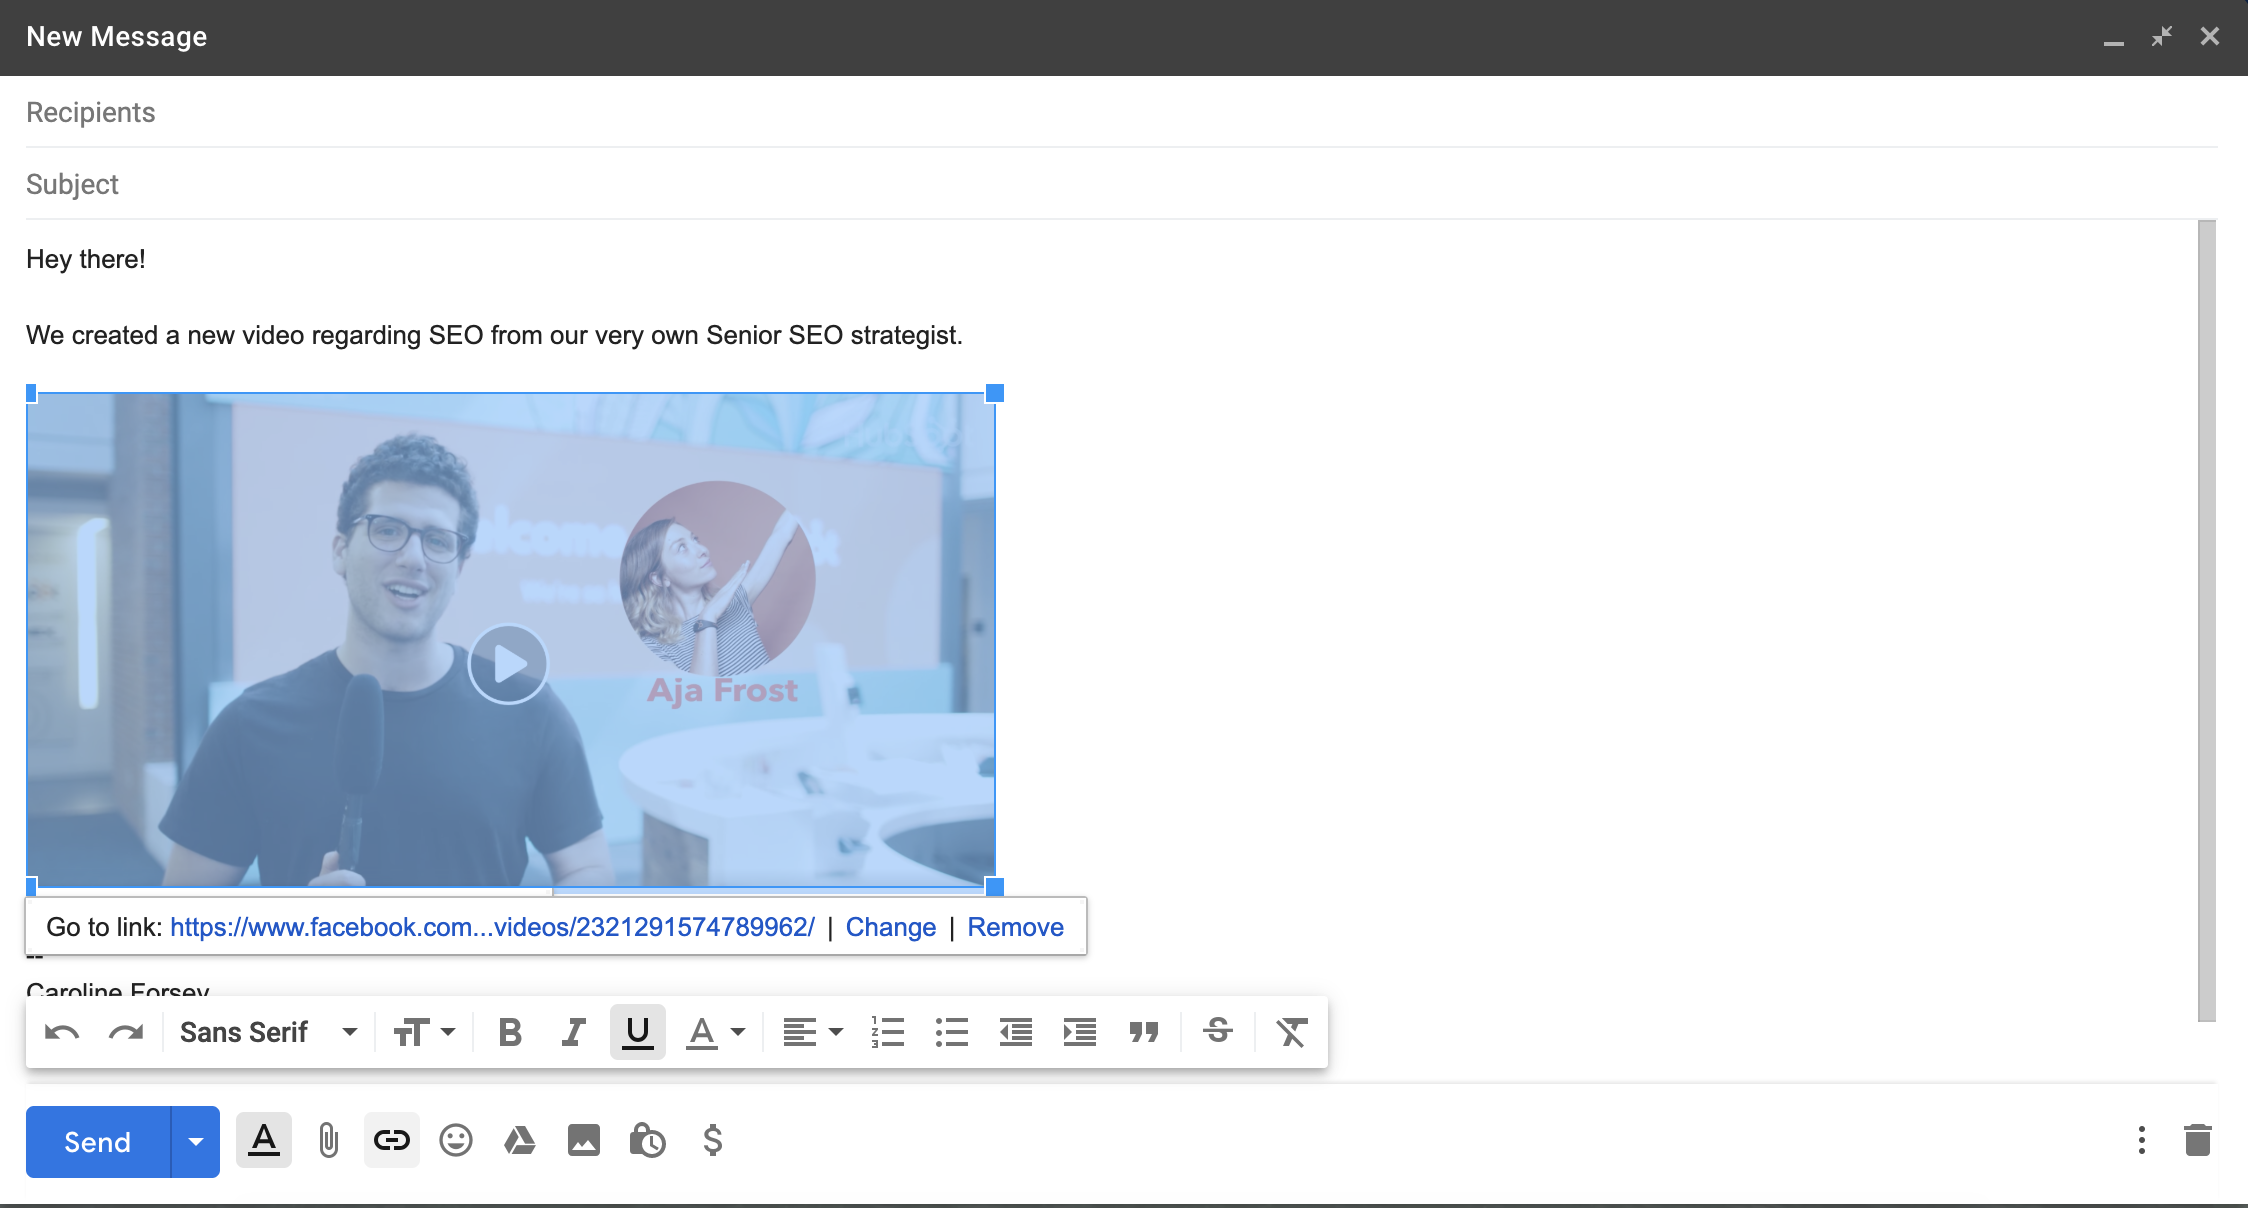
4. And that’s it! Now, when a subscriber clicks on your image, they’ll be redirected to the full video. Ensure the video auto-plays so the subscriber doesn’t have to click “Play” again.
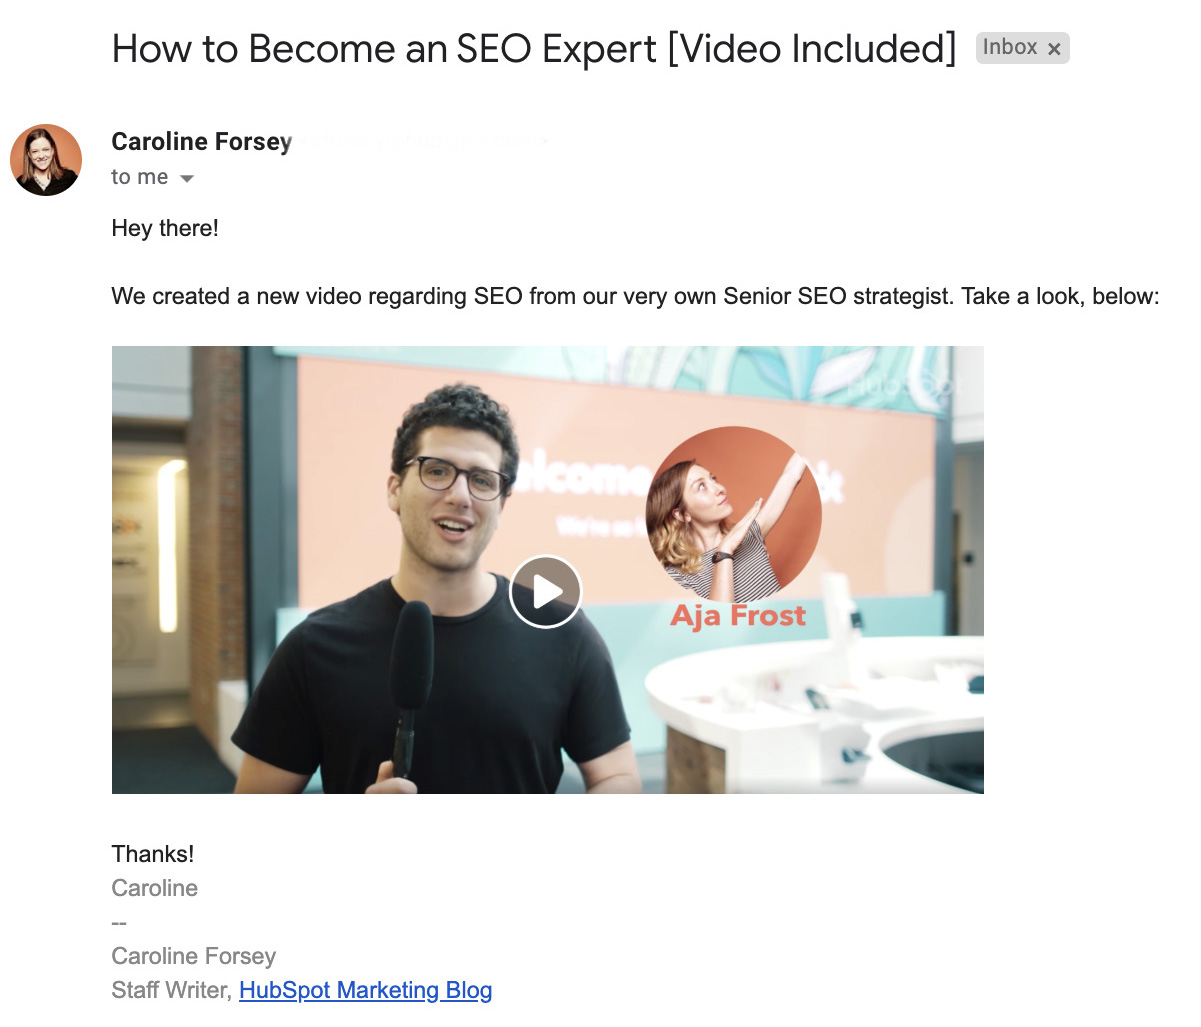
How to Embed a Video in a HubSpot Email
1. If you’re a HubSpot email tool user, you’ll see a Video module on the left-side of your screen when you’re creating an email.
Simply drag-and-drop the module into the section of the email you’d like to include a video.
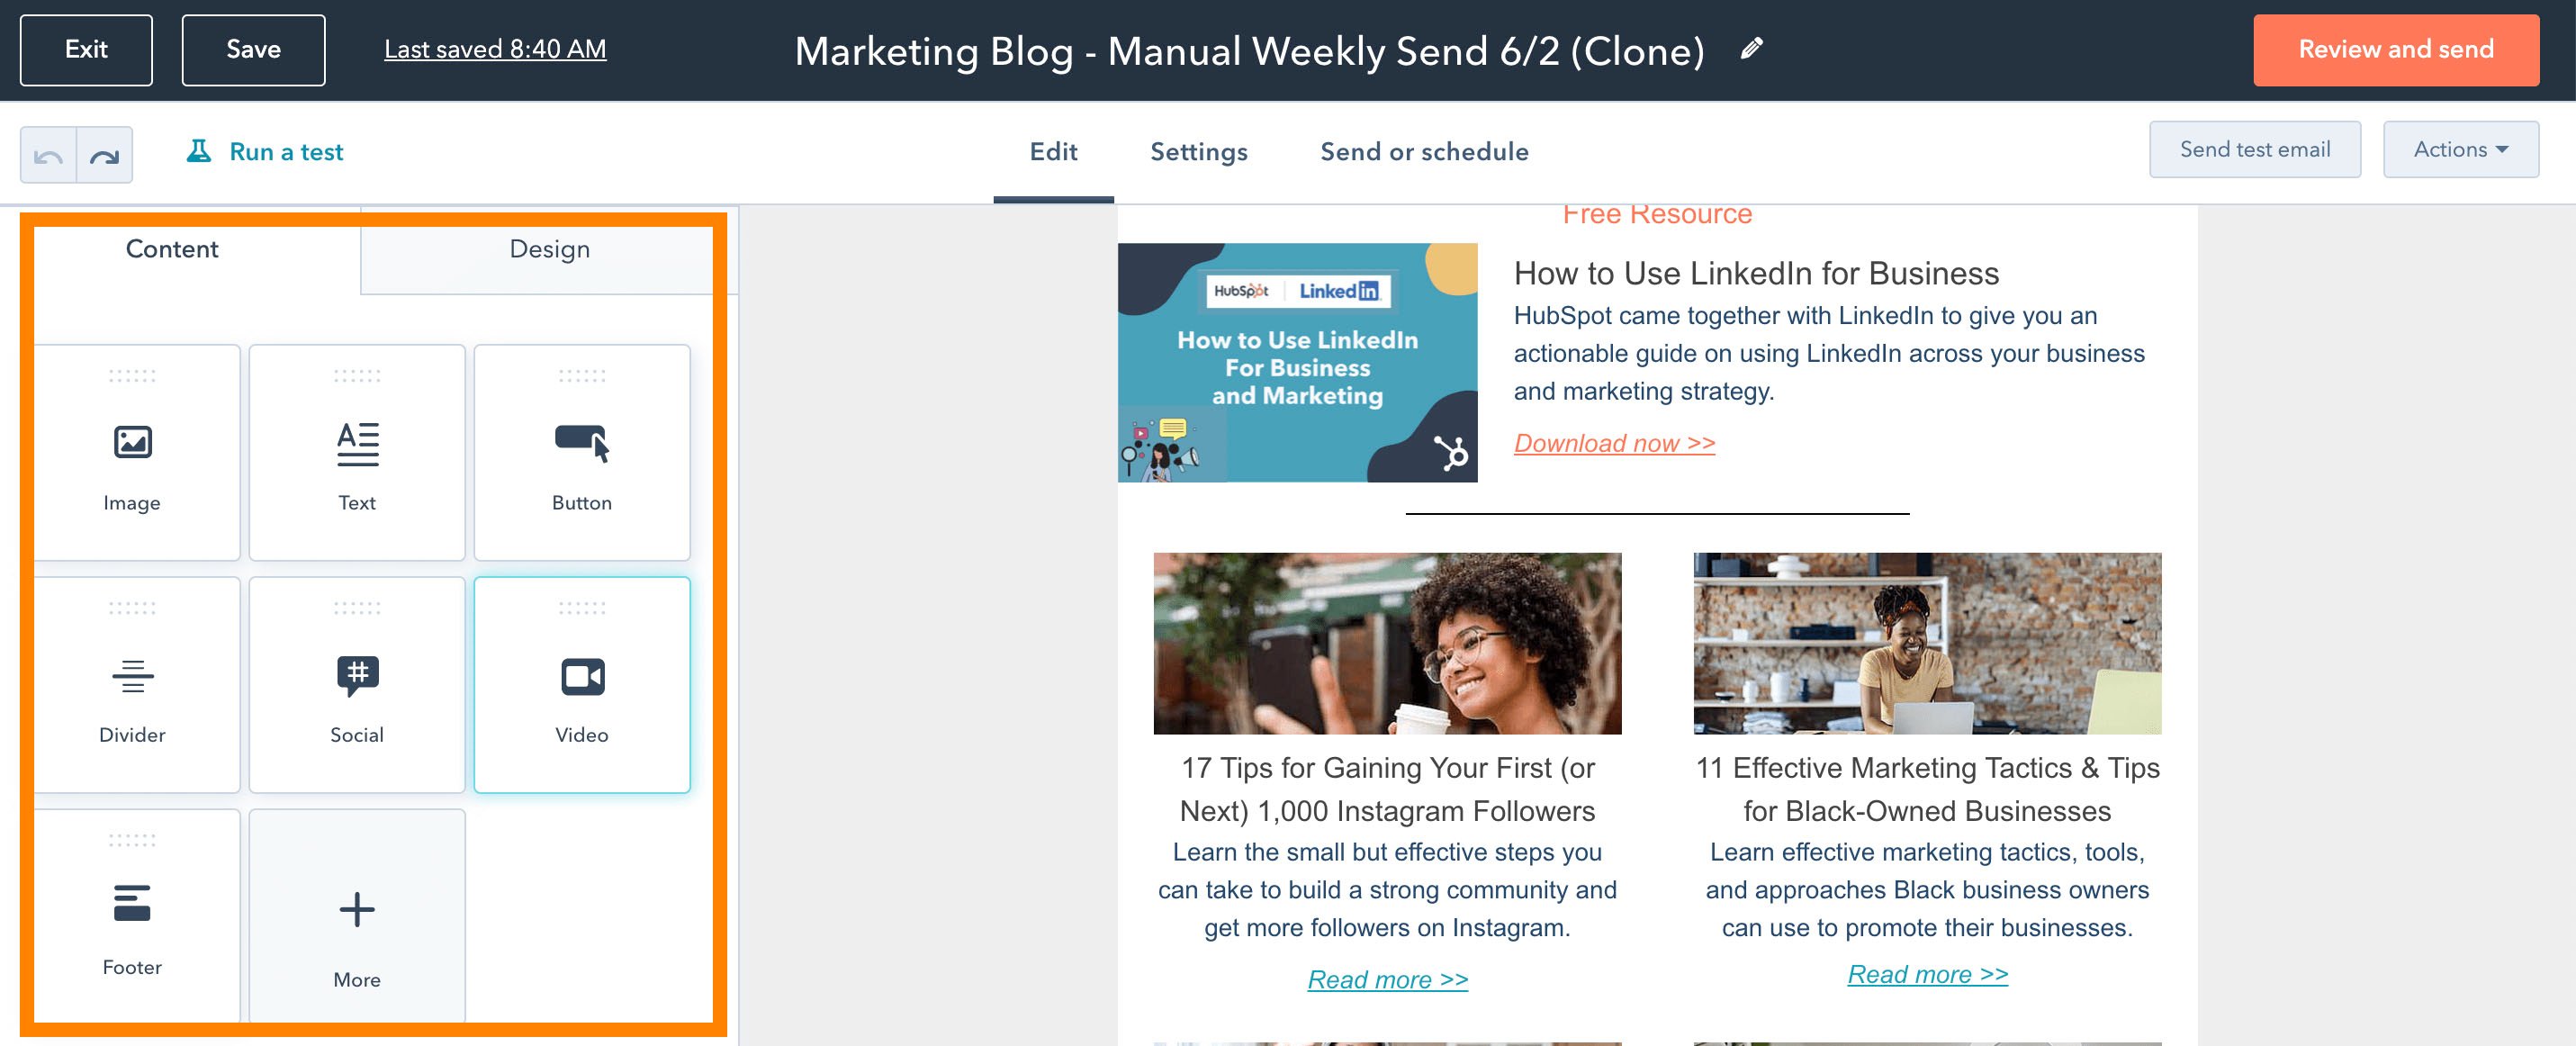
2. Next, you have the option to Embed a video using a URL, or uploading a video to your COS. For our purposes, let’s copy-and-paste a YouTube URL into the text box.
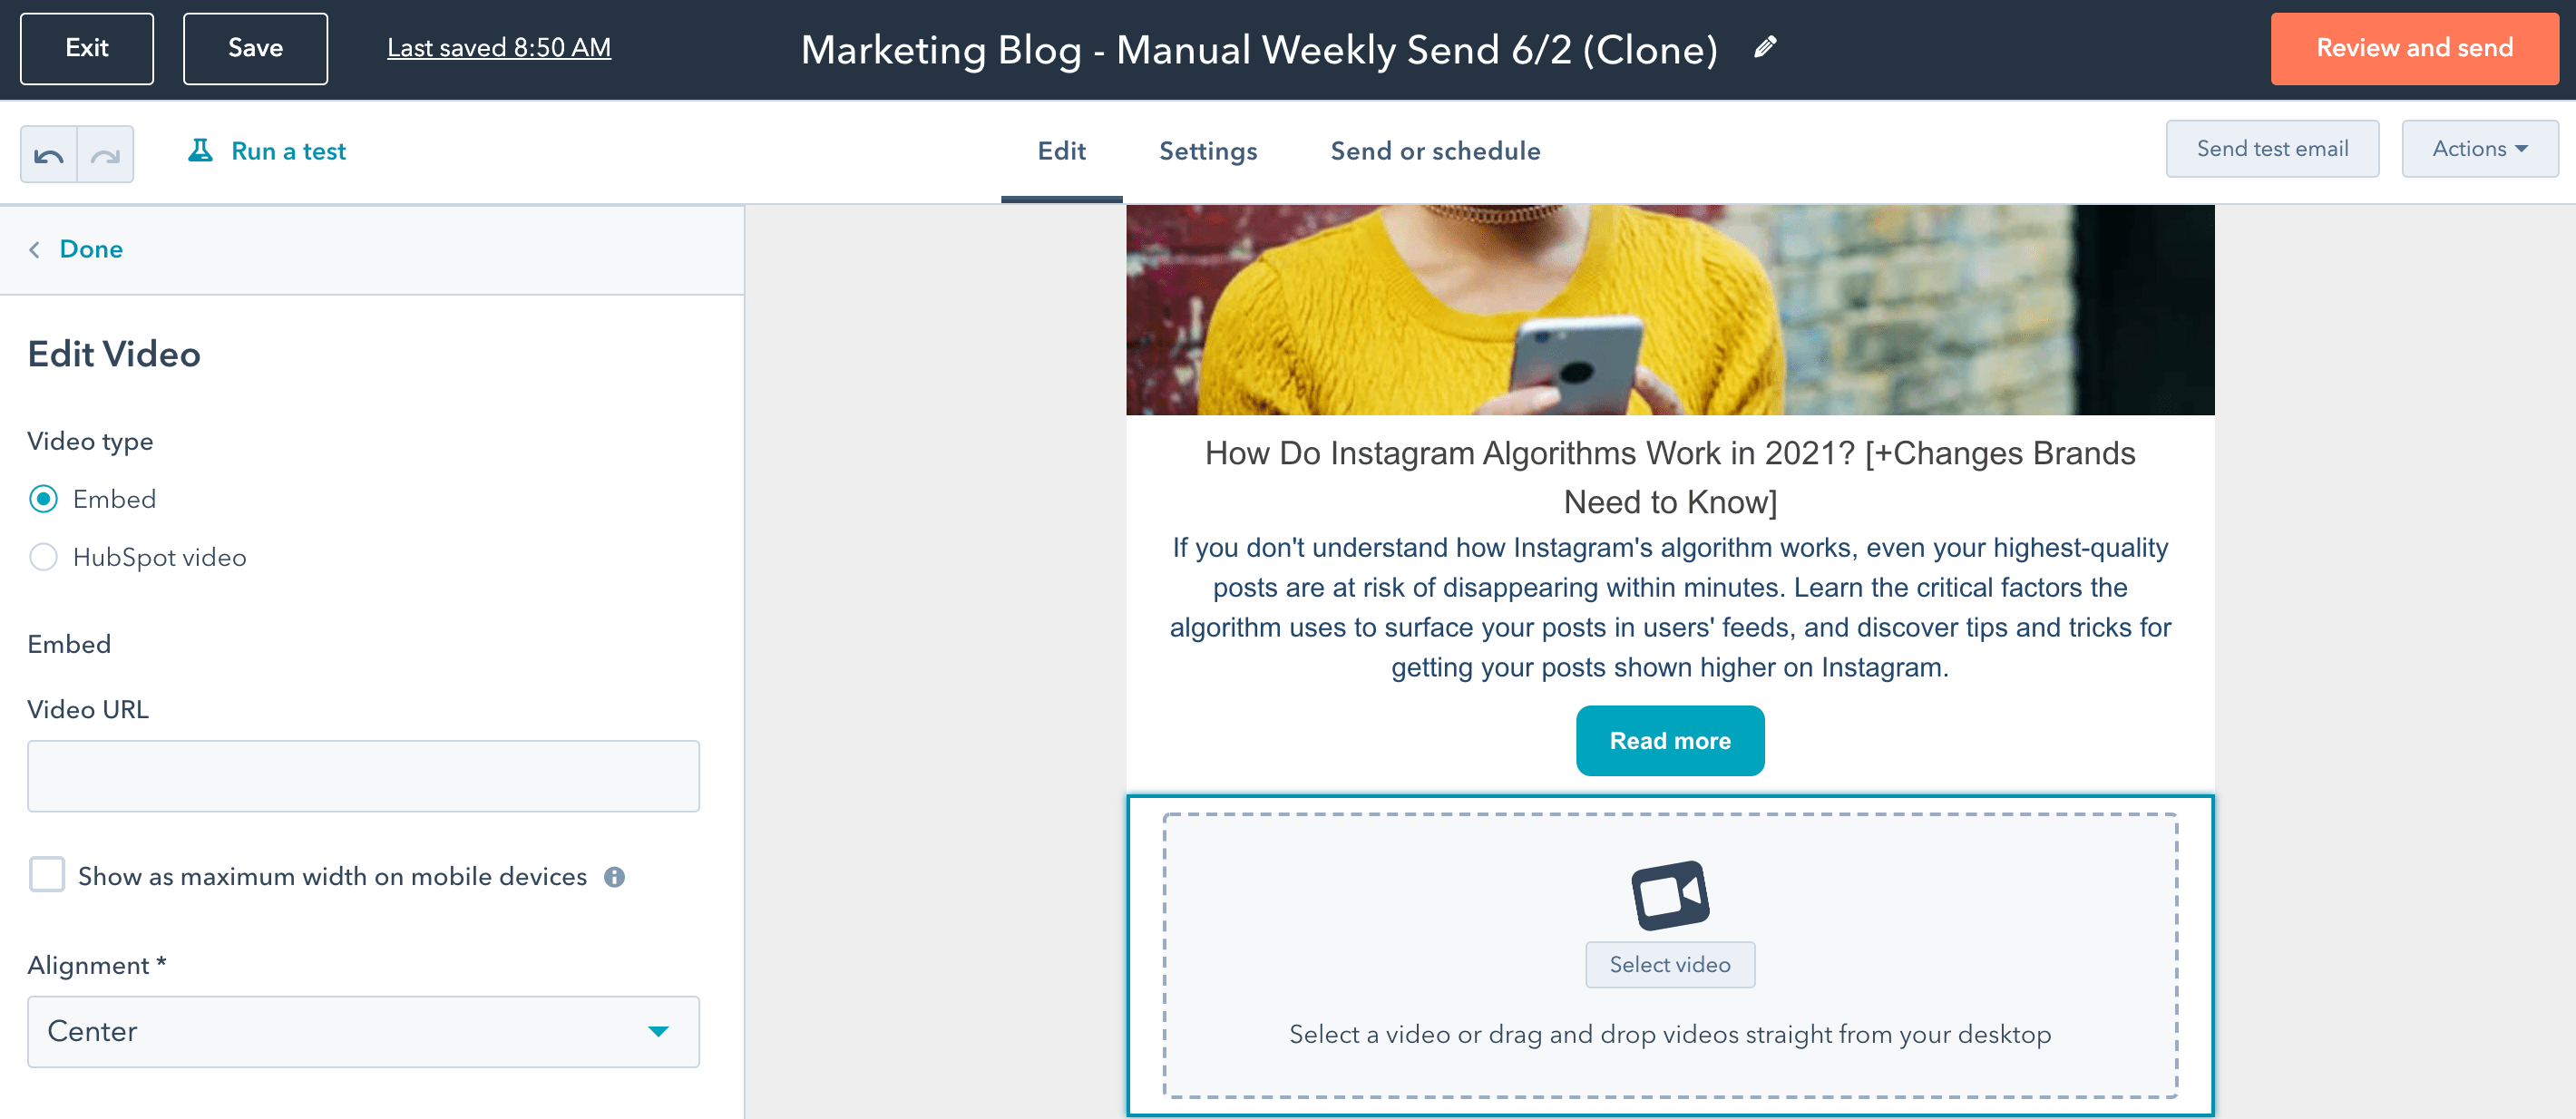 3. Finally, edit the video to suit your needs. You can modify the video’s width and height, and even create a custom thumbnail.
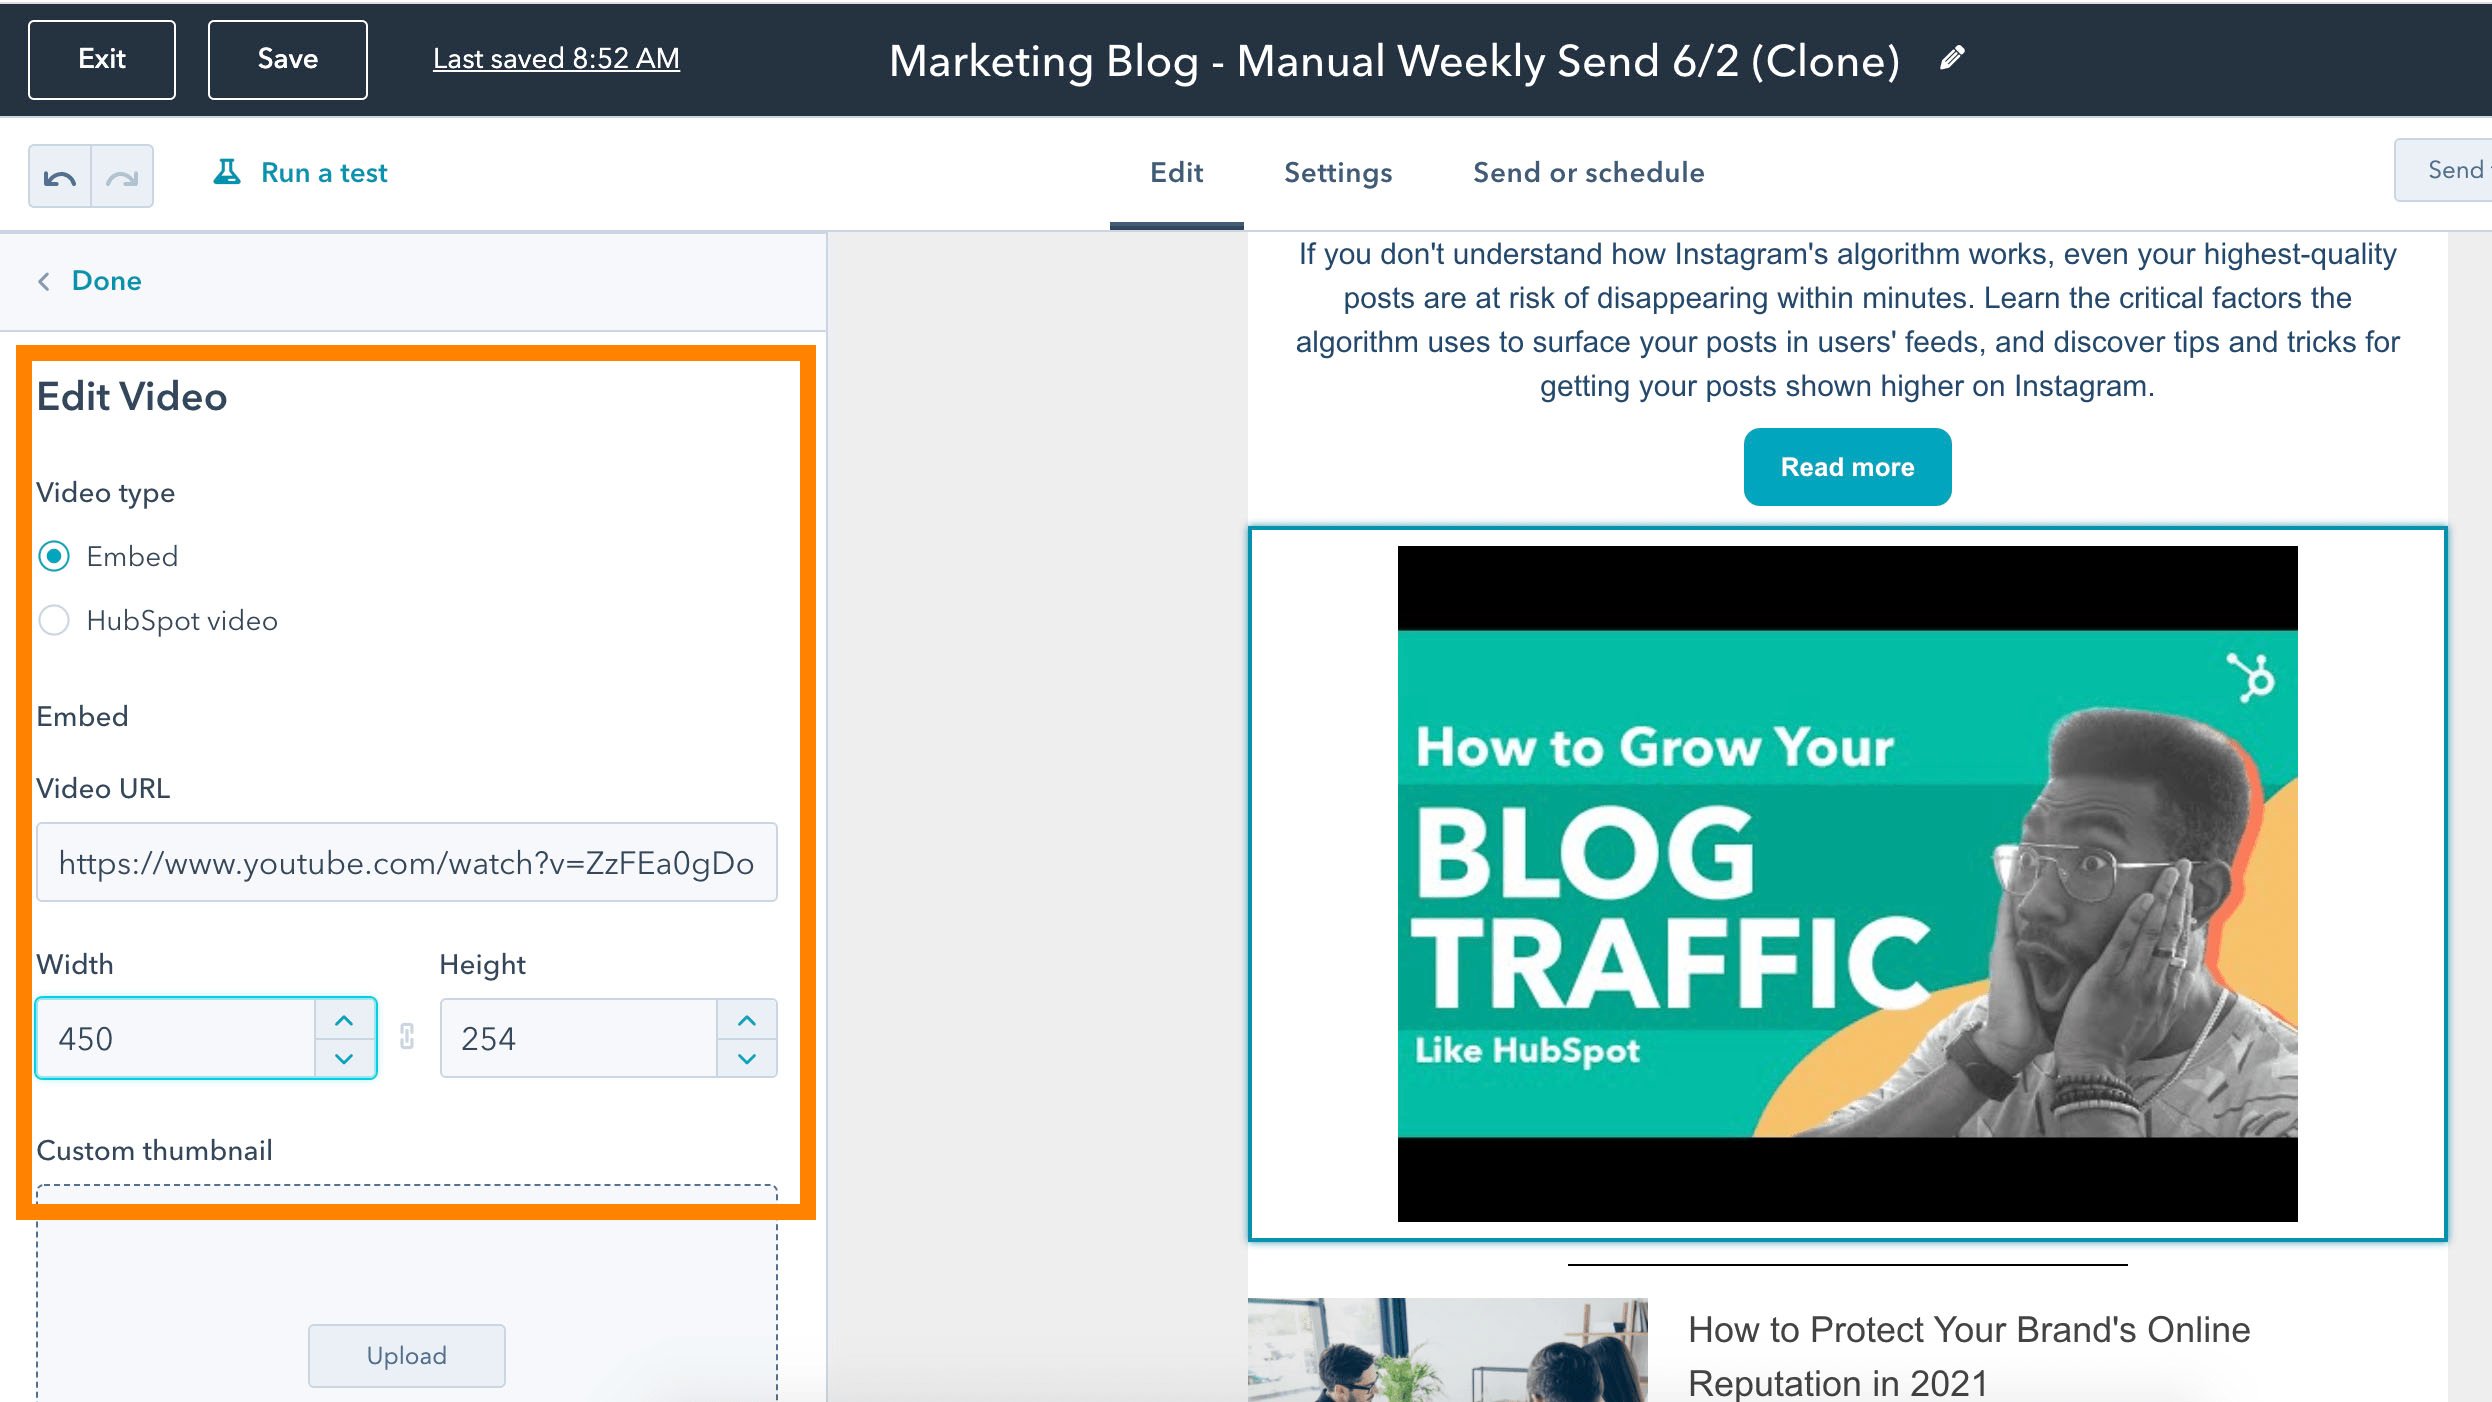 4. When you’re ready, click the orange “Review and send” button at the top-right of your screen.
How to Use HTML5 Code to Embed Video in Email
Finally, some email clients do support embedded video. If you feel it’s the right strategy for your subscribers, you can embed a video within email using HTML5.
Here’s an example of an HTML5 code you might use in your email:
<video width=”300″ height=”200″ controls>
<source src=”movie.mp4″ type=”video/mp4″>
<source src=”movie.ogg” type=”video/ogg”>
https://ift.tt/36q5Odu
</video>
If the video isn’t supported, your subscriber can see a static image linking to another page, instead.
If you don’t have experience coding, you might consider asking a developer to help you, or take a look at W3 School’s HTML5 Video article.
However, it’s important to note — we don’t recommend this strategy, since you risk either ending up in your subscribers’ spam folders, or using code that many of your subscribers’ email clients won’t support. Ultimately, it could be more trouble for many of your subscribers’ than it’s worth.
To ensure your video can be seen by all your subscribers, I’d recommend one of the strategies listed above, instead.
If you’re looking for other opportunities to boost email click-through rates and conversions, take a look at HubSpot’s free email marketing tool.

25 Google Search Statistics to Bookmark ASAP
In many ways, marketing is a game of trend watching. The marketer who’s best at spotting and using trends earns their business market share, brand recognition, and ultimately, revenue.
But how do you search for trends? And where do you start?
Well, since it owns more than 92% of the global search engine market, the answer to both of these questions is, Google.
![Download Now: State of Marketing Report [2020 Version]](https://no-cache.hubspot.com/cta/default/53/6baeae42-e710-4ecd-beb9-ceb2fb9f0877.png)
Google’s nearest competitor, Bing, only holds 2.5% of market share, while Yahoo accounts for 1.5%. The distribution has remained relatively stable over the past few years with Google consistently claiming competitive victory thanks to detailed search results, in-depth analytics, and evolving service offerings.
Consider the rapid uptake of “Google” as a verb meaning, “to search” — “I’ll just Google it,” “can’t you Google that?” “isn’t it on Google?” It’s not an exaggeration to say that when it comes to searching for information online, Google is — by far — the digital frontrunner.
Google also makes efforts to personalize search results, in turn, increasing the chances that users will opt for Google the next time they have a question. For users that aren’t logged into a Gmail or another Google account, the company uses anonymously stored browser cookies to get a sense of search histories and preferences.
For users signed into their Google account, Chrome’s browser history provides the data necessary for Google to construct a profile based on age, language preference, gender and search preferences, which informs the type of search results returned. Location offers an easy example of this approach — if users have location services turned on, Google search results will be filtered by geographic location to increase overall relevance.
Now, let’s look at a few of this year’s top Google Search statistics and take a deeper dive into the trending searches that guide your marketing strategy.
Top Google Search Statistics in 2021
Now that we know how to search for trending topics, let’s look at how Google influences search with these latest statistics.
- The top five Google searches in 2020 were “Election results,” “Coronavirus,” “Kobe Bryant,” “Coronavirus update,” and — unsurprisingly — “Coronavirus symptoms.” (Google)
- More than 50% of Google searches end without a click. (Search Engine Land)
- 92% of all search queries are long-tailed keywords. (Backlinko)
- As of October 2020, there were more than 267 million unique U.S. visitors to Google. (Statista)
- 89% of URLs and 37% of URLs in positions 1-20 rank differently on mobile and desktop. (SEMRush)
- There are now more than 1.8 billion Gmail users worldwide. (TechJury)
- Compressing images and text could help 25% of web pages save more than 250KB and 10% save more than 1 MB. These changes reduce bounce rates and increase page rank on Google SERPs. (Google)
- Chrome accounted for 69% of web browser market share in 2020. (Net Marketshare)
- In 2021, 56% of web traffic took place on mobile phones. (Broadband Search)
- 14% of Google searches are a question. (Backlinko)
- In 2020, 500 keywords accounted for 8.4% of all search volume. (Backlinko)
- The average click-through rate for first place on desktop is higher than that of mobile, at 31.5% and 24% respectively. (Advanced Web Ranking)
- Four times as many people are likely to click on a paid search ad on Google (63%) than on any other search engine — Amazon (15%), YouTube (9%), and Bing (6%). (Clutch)
- 55% of teens use voice search on Google every day. (Marketing Dive)
- 55% of people clicking on Google search ads prefer those to be text ads. (Clutch)
- For every $1 businesses spend on Google Ads, they make an average of $2 in revenue. (Google)
- The average click-through rate in Google Ads across industries is 3.17% in the search network and 0.46% on the display network. (WordStream)
- The average cost-per-click for a keyword is about $0.61. (Backlinko)
- The average cost-per-click in AdWords across all industries is $48.96 for search and $75.51 for display. (WordStream)
- More than 90% of web pages receive zero organic traffic from Google. Just about 5% receive 10 visits or less each month. (Ahrefs)
- A third of all Google searches are for an image and 13% of SERPs feature an “Image Pack.” (Moz)
- The average keyword is roughly two words long. (Backlinko)
- The average conversion rate in AdWords across all industries is 3.75% for search and 1.77% for display. (WordStream)
- There are over 190 different versions of Google Search. (GiT Magazine)
- 25. When Google opened its proverbial doors in September 1998, it only averaged about 10,000 daily search queries. (“The Search
With search volumes constantly fluctuating in response to world events and evolving news coverage, it’s worth knowing what searches are trending, how quickly they’re ramping up, and how they tie into similar keyword queries.
While one option is a scattershot approach — simply type a potential trend term into Google and see how many total results are reported — more targeted options often provide an easier path to improved search performance.
Let’s review some of the most useful tools available in the section below.
1. Google Trends
Review the “Year in Search,” take Google Trends lessons, and see what’s trending now. You can also view the peaks and valleys of topic interest over time, which uncovers seasonality and allows you to plan your marketing calendar accordingly. Plus, find related topics and queries, and identify sub-regions your topic has been trending to better target your campaigns.
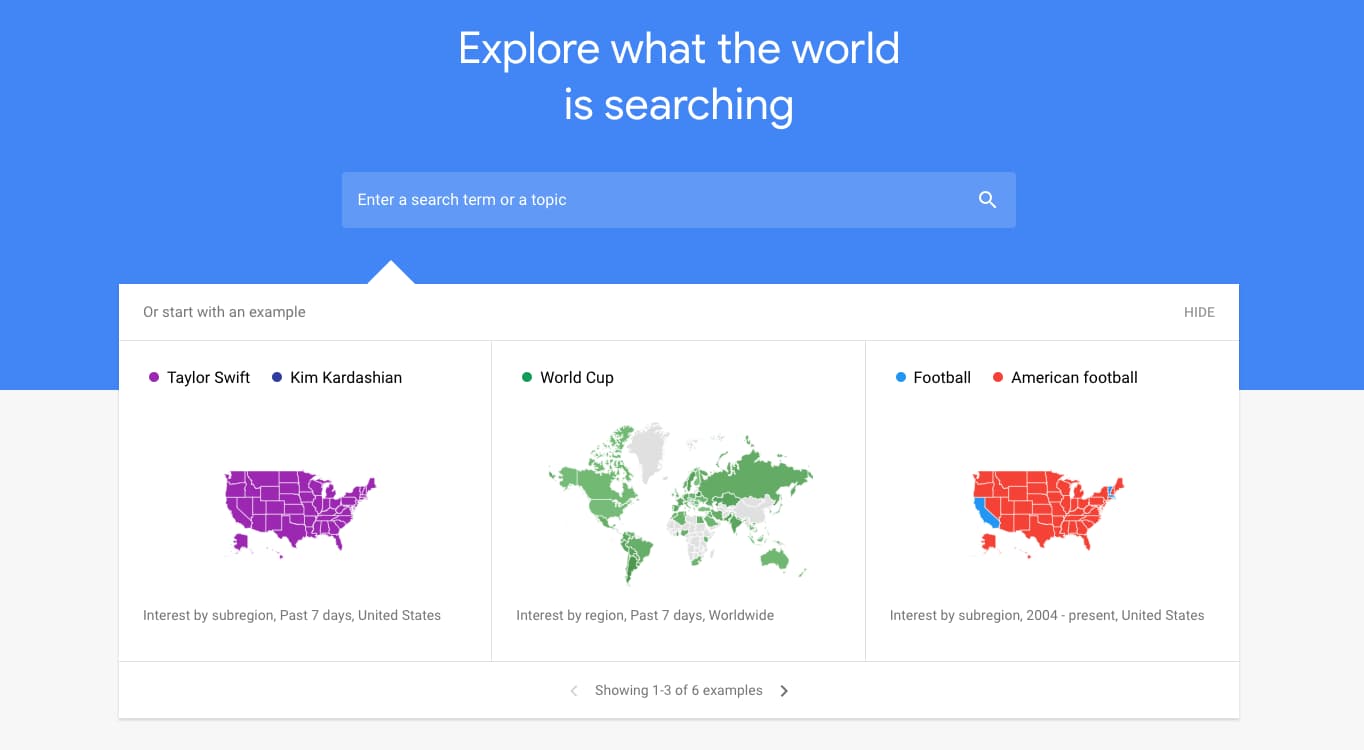
2. Think with Google
Discover articles, benchmark reports, and consumer insights that keep you up to speed on search. From ad bidding strategies to brand jingles, you’ll find interesting content that helps you think bigger while staying educated on how to leverage Google search for your business.
3. Twitter
Sign on to Twitter for more than vaguely hostile political debates. Use the “trends” feature to uncover what’s trending in your state, country, or around the globe. When you click into a trend, you’ll see top tweets about the topic, relevant news stories, and live responses as well.
4. BuzzSumo
Identify the most shared content in the previous 12 months or the last 24 hours with BuzzSumo. BuzzSumo allows you to drill down and analyze the topics that matter to your industry, your competitors, and the influencers you learn from.
5. Feedly
This RSS feed aggregator allows you to follow your favorite brands and see their most recent content in one place. Add your favorites and discover new publishers by searching your industry, skills, or — you guessed it — trending topics. Feedly also allows you to set up keyword alerts, so you’re always tracking the latest trends on topics you’re interested in.
6. Reddit
Freshness and user-based voting determine how content is prioritized on Reddit. A quick visit to the homepage shows you trending or popular posts. And, you can filter by country or recency for a more relevant feed.
7. Ahrefs
Conduct competitive research, home in on a keyword, or search for trending topics. Ahrefs helps you identify trending content and shows you what to do to outrank your competitors.
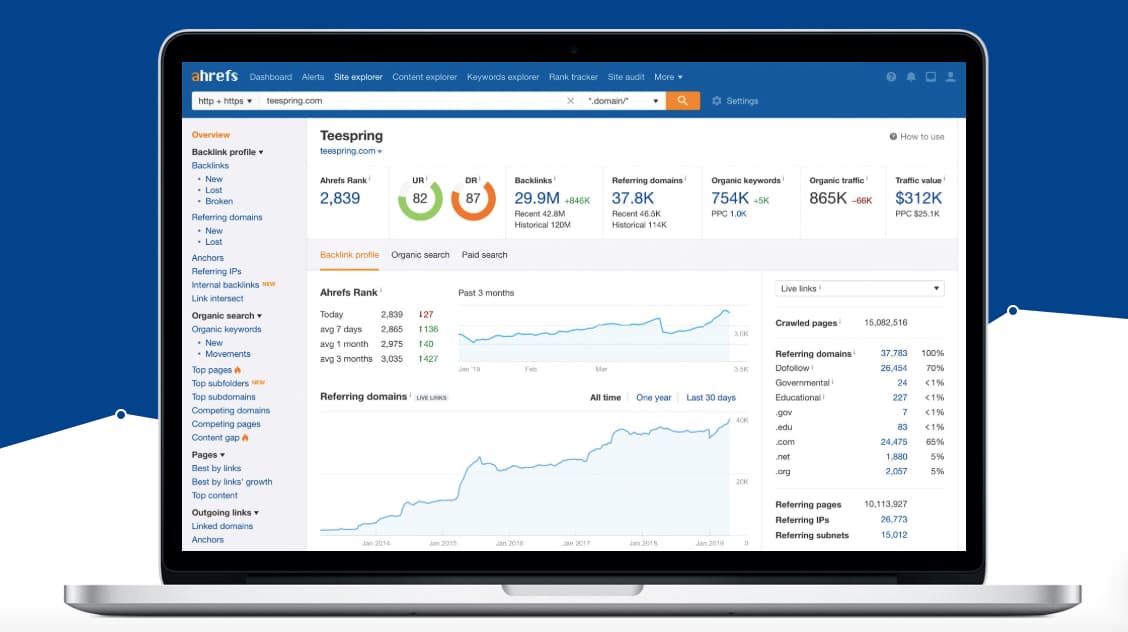
8. Pocket
Pocket allows you to save content from anywhere on the web. Review your content whenever you wish and head to the Explore page to find trending topics that are relevant to you.
9. Quora
Sign up for Quora and select topic areas that interest you (e.g., “startups,” “marketing,” and “economics”). Quora will stock your feed with questions related to your content interests. This gives you insight into what your customers are asking, real-time debates about competitors, and even allows you to answer questions about topics you have experience in.
Expanding Your Google Impact
Bottom line? Google owns the largest piece of both search and web browser market shares and provides a host of interconnected services that empower the company to deliver personalized, real-time search results.
For marketers, this makes Google an irreplaceable tool for boosting consumer loyalty, courting new clients, and improving customer conversions. Armed with actionable trend data and relevant source statistics, marketing teams can expand their Google impact and ensure the right content gets seen by the right customers to jumpstart the sales process.

The Modern, Inside Scoop on Google PageRank In 2021
If you have been in SEO for a while, you may remember the days of working hard to increase the PageRank of websites — it was the metric every SEO cared about and wanted to improve.
Improving PageRank meant improving your authority (usually with backlinks), which in turn could result in higher rankings and more traffic.
But what happened to PageRank? It’s rarely talked about anymore.
Believe it or not, PageRank is still used as a ranking signal for Google, even if you haven’t heard it mentioned in a while. Here, we’ll explore what you need to know about Google PageRank in 2021.
What is Google PageRank?
Google PageRank is a very complex concept, but we are going to try and break it down to make it easy to understand.
PageRank uses a mathematical formula to score the value of a page based on the quality and quantity of the pages linking it to it.
The PageRank formula will look at the number of inbound links, external links, and the PageRank of those links to determine authority. The formula will create a score using a logarithmic scale with values ranging from 0-10.
The higher the PageRank score of a page, the more authoritative that page is.
You can get more in-depth information about the PageRank formula in the original paper that was published back in 1997.
The PageRank Toolbar
Years ago, there used to be a toolbar that could show you the PageRank of any webpage you visited.
Unfortunately, the toolbar was removed by Google back in 2016 — and the mystery of what your PageRank is has existed ever since.
The problem with the toolbar was that it created an obsession and caused many SEOs to try and find ways to manipulate it.
Essentially, the Google team realized that making this score public was adding little value to website owners and decided to stop investing in it.
Does Google still use PageRank?
Yes, Google does still uses PageRank.
While it may not be a metric that website owners have access to, it is still used in their algorithms.
A tweet by John Mueller, a Senior Webmaster Trends Analyst at Google, solidifies that PageRank is still used as a ranking signal.
How important is PageRank?
There is no clear measure of how important PageRank is. With there being over 200 Google ranking factors, they do not provide data on the importance of each factor.
But we do know that backlinks play a very large part in SEO success. So it’s safe to assume that PageRank still plays a part in how highly your pages rank.
Spending time trying to improve your PageRank is probably not the best use of your time. But building relevant and authoritative backlinks to your website is an undeniably effective SEO strategy, and will likely improve your PageRank as a result.
You may not see the improvement as a metric, but you will see it in your organic traffic.
What influences Google PageRank?
There are some factors you should know about that can positively impact your PageRank. Let’s dive into a few of those, now.
1. Backlinks
The primary way to improve your PageRank is through backlinks. The more relevant, high authority websites that link to you — the higher your PageRank will be.
Below are some ways to build valuable backlinks:
- Build relationships with influencers and community members in your niche.
- Create original infographics, webinars, videos, and other creative assets that encourage website owners to share and link to your post.
- Participate in forums and communities that are related to your niche.
- Share your content on social networks — tag relevant people if they are part of your content so they can share, too.
- Create amazing content!
Building backlinks is one of the best ways to grow your website, but it needs to be done properly. Be authentic, do not spam groups or communities, and most importantly — create content with which people can engage.
You also want to be sure you have cleaned up any bad backlinks. You can learn more about how to Disavow Links here.
Getting links from directories or pages that have a lot of links is not as beneficial for improving PageRank. Every link on a page will dilute the value of your link, so while directory-type links can be valuable in other ways, they will not be a big help for improving RageRank.
2. Internal Linking
One of the most underrated SEO tactics is internal linking. By using internal links to pass PageRank from one page to another, you can make a big impact on your rank and traffic.
As an example — your homepage will usually have the highest PageRank because of the number of websites linking to it.
Every link from your homepage to another page on your website will boost the authority of the page being linked to.
Additionally, consider using an SEO tool to identify pages within your website that have high authority, and adding links from those pages to lower-authority pages (when relevant) to give your pages a boost.
A quick trick is to look at your Google Analytics — usually the pages with the most organic traffic are the highest authority pages. So you can start using those pages to build internal links to less authoritative pages to give them a quick boost, as long as the links are relevant to the content on the page.
3. External Linking
One of the biggest myths I can remember about external links is that linking out from your content can diminish the PageRank of that page.
This is not true. Remember, the whole premise behind PageRank is links.
While the number of links on a page might affect the “value” of that link to the page being linked to, it does not harm your own. If you find a resource that is helpful for your viewers, then you should absolutely add a link to that resource.
A study done by Reboot showed that there was a positive correlation between rankings and the outbound links of a page.
How To Check Your PageRank
Unfortunately, there is no way for you to accurately know what your PageRank is.
There are some websites that claim to provide you with your PageRank, but these are not verified tools so there is no proof they are providing accurate data.
Other tools — like Ahrefs, SEMrush, and Moz — have all created their own version of numerical values that were meant to replicate the PageRank score.
For example, SEMRush has what they call an “authority score”, which offers a numerical value that can signal how helpful a backlink from a website may be. This score is based on the following:
- Monthly traffic to a website
- Average keyword position
- Backlink data
But Google doesn’t use these scores in their ranking algorithm. So, while you can use them as a guide to understand your website authority, they do not replace PageRank.
While most SEOs don’t give much thought to PageRank anymore, and do not try to optimize for it, it’s still worth understanding. Ultimately, if you’re working on building backlinks, improving your internal linking, and using authoritative external links, your PageRank will thank you for it.

How to Build a Market Development Strategy [Free Planning Templates]
Your business is getting by just fine – but still, the questions remain: Could you be selling more? Is there an opportunity to increase market share? Is there any way you could further your product diversification efforts?
Companies hoping to increase revenue can do so in a variety of ways — such as increasing their advertising budget, expanding their sales teams, and investing heavily in product development.
However, one of the often overlooked ways to strengthen your gross sales is a purposeful, well-researched, and expertly executed market development strategy.
In this article, we’ll explain what market development is and how you can employ it to increase sales and grow your business. Then, we’ll take a look at some examples of market development strategies that work for top businesses today.

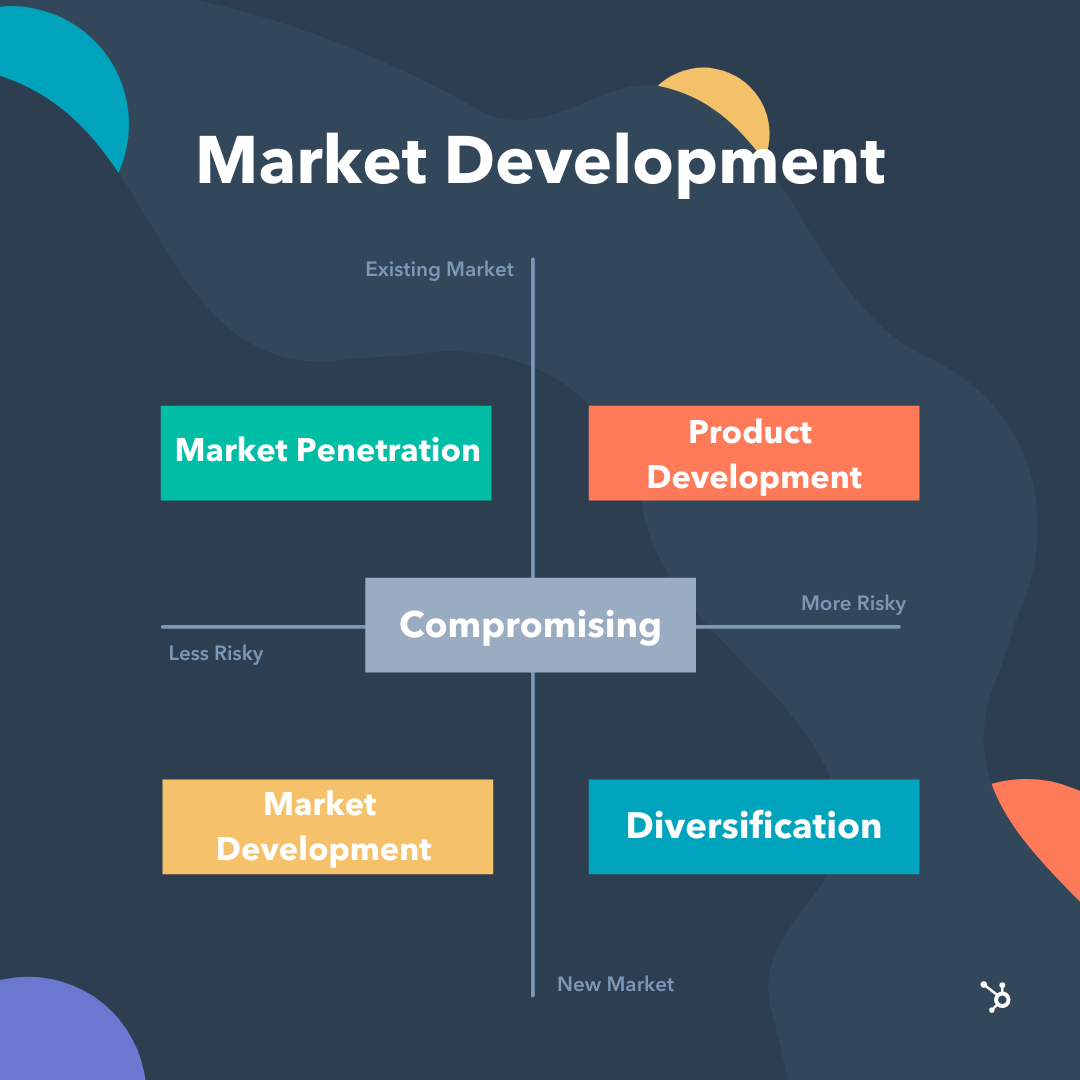
Each category rests upon two axes — one for market and one for risk. A company can expand its efforts into new or existing markets and each poses more or less risk to the business.
Market Penetration
When businesses want to expand within their existing markets with low risk, they might attempt a market penetration strategy. In this scenario, TAM increases because by offering a new product or service, a business can effectively increase the maximum amount of revenue it can possibly attain from its existing customer base. A product launch is an effective way to execute this strategy.
- Product Launches — A company may release new iterations of a product they already sell successfully within the market. The purpose of launching a new product is to generate excitement and buzz around the brand to increase sales.
Product Development
A more high-risk way to expand within an existing market is through product development, but make no mistake — this market development strategy can be rewarding. Developing new products is a delicate process. Businesses should be keenly aware of their market as market interest is a driving factor for product development. If the audience isn’t receptive due to a lack of education around the product, a poor marketing campaign to promote the product, or even poor timing of launching the product, this strategy can be difficult to execute. However, companies that have failed at developing new products usually have in-depth learnings to apply to their next market development strategy. Product development comes in many forms, here are a few:
- Rebranding — If a business has been around for a long time or has been in hot water recently, it’s possible that the market has become disconnected from the brand. This can happen due to a lack of advertising around the brand itself, outdated positioning of a product when compared to the competition, or distrust within the market. Companies can rebrand themselves to reconnect with their existing market while positioning themselves as a viable option among the competition. Adjusting the packaging of a product, offering a new size, flavor, or color, or even changing the name of the product or brand can help a company rebrand a product to have a better position within its existing market.
- Repricing — Another way to gain traction within an existing market is for a business to make its products more accessible or desirable to that market through its pricing. Repricing doesn’t necessarily mean lowering prices, although that is one way to execute a product development strategy. It could mean shifting the brand within the market to showcase value or luxury, thus justifying a rise in prices to capture those consumers.
Market Development
It’s possible to take a less risky approach when expanding into new markets. To develop a market, a business may offload some of the risks. In this example, TAM increases because a business is adding more people to its target market — thus being able to service new customers without investing in a new product line. Here are few ways a business can develop a new market:
- Geographic Expansion — Research can reveal markets that are suitable for a business to thrive within based on where the business currently operates. Geographical expansion can work for both brick-and-mortar as well as online businesses.
- Franchising — Giving individual business owners the right to use the brand and trademarks associated with a company is another way to expand into a new market without high risk. In franchising agreements, the franchisee usually pays an upfront fee to the franchisor to obtain the rights to operate the business.
Diversification
Occasionally, a business may step out of its normal operations and market to create a product for a completely different industry and market. For this reason, diversification can present a major risk to the business, but it can be very rewarding if it’s carried out effectively.
- Similar Product Diversification — A company may realize that the raw materials or byproducts of the goods they sell can be repurposed into a completely new product that can be marketed to a different audience than the one currently purchasing its products.
- Unique Product Diversification — Rather than using existing products, a company may take a completely unique approach to penetrate a new market by offering a product or service that is different from anything offered in its industry.
The decision of when and how to develop your existing market should be a methodical process.
Just because your business has struck lightning once does not mean your new expansion plan is a guaranteed success.
Because of that reality, follow these steps and use these resources to determine if you should develop your market, how it should be developed, and whether or not the initiative is successful.
Step 1: Research your development opportunities.
It’s always tempting to go after the hottest trends – whether that means adding more areas of focus to your consulting business or adding more items to your restaurant menu.
However, before you spend time, money, or resources on developing your market based on trends, take these steps to determine if the expansion is worthwhile.
Review Your Buyer Personas
Featured Tool: HubSpot Buyer Persona Templates

When expanding your market, you face the potential need for net new or revised buyer personas, which are semi-fictional representations of your ideal customer based on market research and real data about your existing customers.
Consider the motivations, demographics, and backgrounds of your new target market to help you decide whether or not the development initiative makes sense.
Research Your Market
Featured Tool: HubSpot Market Research Kit

Understanding your hypothetical positioning in a market is key before attempting to enter it. To that end, conduct market research exercises like Porter’s Five Forces Analysis or a SWOT Analysis to determine your strengths, weaknesses, buyer power, the threat of substitutes, or other attributes compared to competitors in this new market.
Additionally, you’ll want to calculate market penetration before moving forward with any plans to expand.
Survey Your Customers
Featured Tool: Customer Satisfaction Survey Templates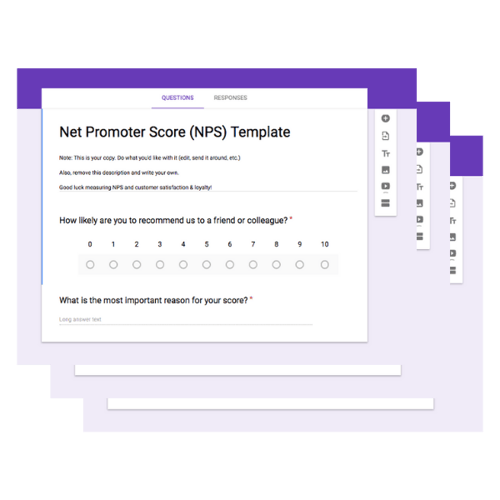
If you’re hoping to expand your current product line to generate more revenue from existing customers, make sure your intended expansion will be warmly received. Asking yourself why this development makes sense coming from your organization is a good first step.
However, talking to and surveying your customers to see if your proposed expansion is beneficial to their lives (and, more importantly, whether or not they would purchase it from you) is a necessary proof point before expanding your offerings as a business.
Step 2: Set your growth goals.
A successful market development will come with added sales, profit, employees, customers, products, users, locations, or some combination of these criteria.
Because there’s so much on the line, develop goals for which facets of your business you intend to grow, in addition to what your growth goal for each criterion is.
For example, by adding one more location, you may set the following growth goals:
- Increase customers by 90%.
- Increase revenue by 100%
- Double annual profits after recouping the initial investment.
- Increase employee headcount by 20 people.
During this stage, you should also consider the requirements needed to help you hit your growth goals, such as initial funding, tools, and software to help you get the initiative successfully up and running.
Lastly, the most important metric to measure before attempting to expand or develop your market is ROI. In this step of the process, compare the upfront costs of developing your market as intended with the projected revenue numbers of a successful expansion.
If the ROI is not encouraging enough to move forward with, you may need to go back to the drawing board and determine a new growth strategy and set of goals.
Featured Tool: Growth Strategy and Planning Template

Using the template above, outline your growth goals and strategy to lay the foundation for your market development initiative. This template will help you plan out the steps necessary to achieve your goals and help you determine whether or not they are realistic for this project.
Step 3: Create your marketing plan.
An increased market means an increased need for effective marketing.
To generate demand – or to capture existing demand in your market – make sure your marketing plan is up-to-date and reflective of the initiatives it will take to grow your market share to its desired level.
Consider all of the following initiatives and how they’ll play a role in generating more revenue in your newly developed market:
- Email Marketing: Will you communicate with existing prospects via email to alert them of your initiative? Do you have a list of saved contacts who expressed interest in what you sell, were unable to make the purchase, and might now be able to purchase from you?
- Social Media: Do you have organic and paid initiatives to generate buzz and spread the word to grow awareness on social media?
-
Content & SEO: Do you have website and blog content planned to capture the interest of website visitors hoping to learn more about what you’re selling?
- Local Marketing: If you’re developing your market on a regional level, are you working with local publications, PR agencies, or advertising platforms to appeal to nearby potential customers?
Featured Tool: HubSpot’s Marketing Plan Template

Document your marketing plan supporting your market development with the template above, and make adjustments to it as needed to ensure you’re reaching your market in an accurate, appealing, and consistent fashion.
Step 4: Go to market.
The time has come – your research and planning are complete, and you’re ready to formally enact your development strategy, whether it’s opening the doors of your new location or making your new product available for purchase on your website.
But before you start collecting revenue, there are a few final steps to take – specifically, aligning your team on the best way to conduct this go-to-market launch.
Go to market successfully by managing three imperative internal tasks – all of which can be done with this Product Go-to-Market Kit:
Campaign Planning
The campaign plan should be a one-stop shop for anyone who has a stake in the success of this project. It should provide a general purpose for the market development project, in addition to the tactical and strategic elements team members need to adhere to in order to see the project go off without a hitch.
Sales Planning
The sales plan should provide more specific insights for the sales team – especially regarding overall projections, team or individual goals, and strategies for how the organization intends to meet these goals
Team Email Updates
For the company at large – particularly for individuals who need to be informed but may not have set tasks to complete – team email updates are a staple of communication during market development. This messaging should contain a status check for the launch timeline and outstanding tasks, and any notifications the company should be aware of during their day-to-day work.
Featured Tool: HubSpot Go-to-Market Kit
To centralize your internal planning and communication efforts during your market development process, use the HubSpot Go-to-Market Planning Kit.
Step 5: Analyze your results.
Once you’ve taken the necessary actions to develop your market, the work has only begun. After launch day, you’ll need to be sure customers are satisfied, products and services are high-quality, employees are retained, and – most importantly – goals are met.
Start collecting sales data as soon as possible so that you can begin analyzing whether or not you’ll meet your projections. If not, you may have to determine a plan to either adjust your goals to become more realistic or adjust your strategy to ensure your goals are met.
Once data is available, make sure you’re presenting your findings accurately and clearly so that stakeholders can fully understand what the results are, how you achieved them, and what the next steps of your market development strategy are.
Featured Tool: Marketing Reporting Templates
Available in PowerPoint, Excel, and Google Drive, these templates will help the project driver communicate the results of your market development strategy to your team.
Market Development Strategy Examples
1. Carl’s Jr. and Hardee’s – Geographic Expansion

Although these two companies started as separate restaurants — Carl’s Jr. on the west coast and Hardee’s on the east coast — they merged in the late 1990s to become one company under two names. From a high-level perspective, this might seem like a branding and marketing nightmare, but within their respective geographic markets, the different names have been successful. Carl’s Jr. took the opportunity to acquire Hardee’s, thus expanding the burger chain across the country, becoming one of the largest burger chains in the United States.
2. Popeyes Louisiana Kitchen – Market Penetration
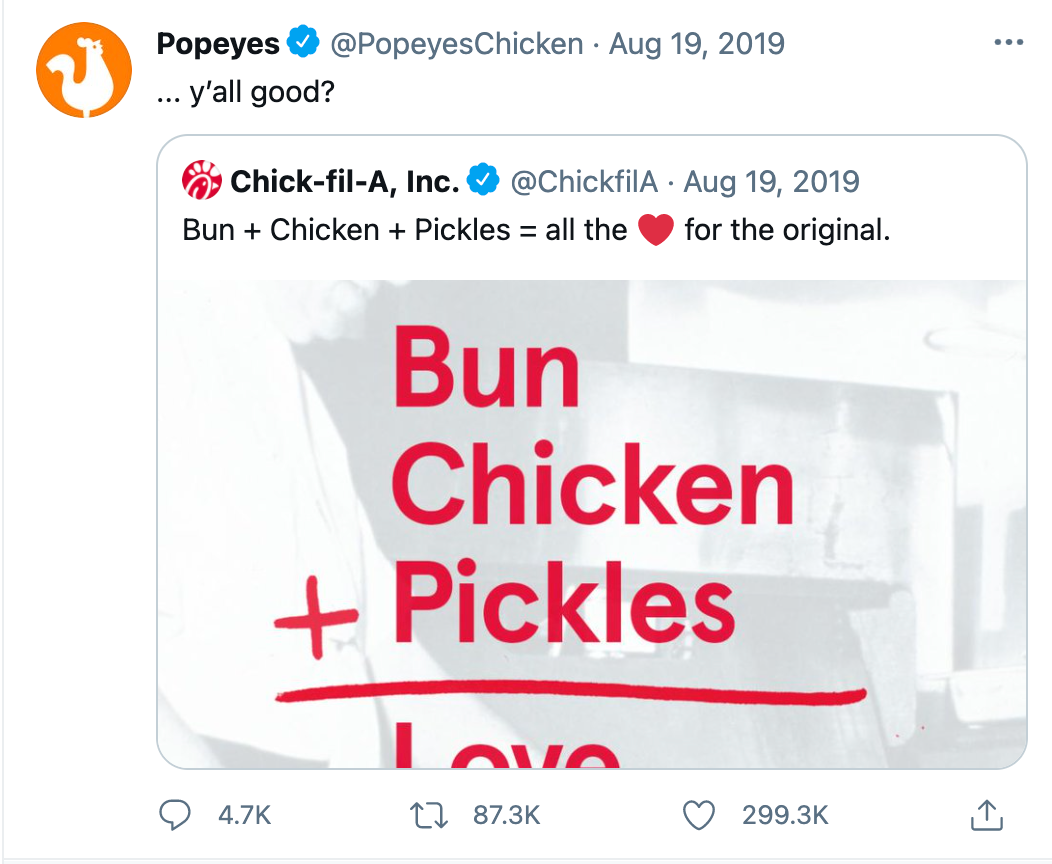
Sometimes, a market development opportunity can appear when you least expect it. That was the case with Popeyes Louisiana Kitchen. The company’s brand was so well-integrated into its marketing operations that a simple tweet in response to Chick-Fil-A prompted a tumultuous beef over which brand had the best chicken sandwich. Once the Tweet gained traction, Popeyes quickly capitalized on the opportunity to sell more of a product they had recently launched.
Although there were some logistics issues that caused supply and demand imbalances, the brand was able to maintain a stronghold on the market with lines wrapping around parking lots and into the streets once the sandwiches were back in stock.
As recently as Q2 2021, Popeyes is still running TV ad campaigns for the chicken sandwich — more than two years after the incredibly successful product launch.
3. The Lash Lounge – Franchise
Since 2010, The Lash Lounge has been scaling its presence across the United States through franchising. As of 2020, the company has grown to 108 locations, most of which opened around 2019. Franchising helped this company expand into new markets with relatively low risk.
The Lash Lounge team trains the new franchisees on their techniques and immerses them in the culture to create one cohesive team that doesn’t feel disjointed.
4. Unilever – Diversification
Today, we know Unilever as the parent company of some of the most notable brands like Dove, Breyers, and Hellmann’s. However, the company initially went into business selling soap. After realizing that the ingredients for making soap shared similarities with those needed for making margarine, they diversified and expanded into a new market with a new product. Over time, Unilever created and acquired new brands in the soap, cosmetics, butter, and ice cream industries, essentially diversifying its product line and market.
Developing Your Market
Before you follow the latest trend in marketing, take a moment to analyze your strategy thus far to forge a path that will yield success. By planning a market development strategy, you’ll have the opportunity to assess your company’s risk tolerance and understand where your business stands within the market so you can turn your market development idea into a reality.
Editor’s note: This post was originally published in November 2020 and has been updated for comprehensiveness.