
Welcome to My Blog
18 Instagram Apps to Make Your Posts Stand Out
With 500 million daily active users on Instagram, it’s not enough to just rely on the 24 standard filters and tools available within the app anymore. To truly set yourself apart from the other brands competing for attention, you’ve got to supplement your Instagram game with some extra apps.
Lucky for you, there are plenty of apps and tools available to help you edit Instagram photos, gain followers, attract likes, and analyze your performance. Unfortunately, a lot of these tools aren’t as helpful as they seem.
To help you take your Instagram posts to the next level, we’ve compiled a list of all the best apps and tools that will help you at any stage of your Insta journey. These tools will make your Instagram content distinguishable, memorable, and impactful. You might not be able to reach all 500 million potential customers, but you’ll be able to reach the ones that matter most to your brand.
Best Instagram Apps
- VSCO
- Priime
- Snapseed
- Pixlr
- Litely
- Followers for Instagram
- Social Rocket
- Crowdfire
- Tracker for Instagram
- Followers & Likes on Instagram
- InstaTag
- Get Instant Likes and Hashtags
- Magic Liker for Like Tags
- Instagram Insights
- Hootsuite Analytics
- Iconosquare
- Union Metrics
- Squarelovin
Instagram Photo Editing Apps
Instagram’s in-app filters leave something to be desired. If you’re looking for an easy way to make your photos look more professional and unique, try out one of these alternative photo-editing apps. Whether you’re looking for a wider selection of filters developed by professional photographers, or just want to remove blemishes from selfies, these will do the trick.
1. VSCO
- Price: Free
- Available on: Android and iOS
VSCO provides free filters that often beat Instagram’s in-app options in terms of quality and professionalism. VSCO also offers plenty of editing tools (like customized sharpen, brightness/contrast, and skintone correction), so you can fully tweak your photo before exporting to Instagram. Plus, like Instagram, VSCO offers its own social capabilities: you can follow people directly on VSCO, and post and share photos from within the app.


2. Priime
- Price: $2.99
- Available on: iOS
Priime offers a selection of over 100 filters created in collaboration with professional photographers. If you aren’t sure which filter will look best, you can even receive recommendations from Priime’s Smart Suggestions.

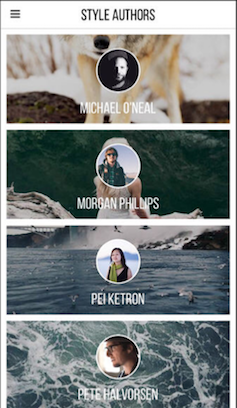
Images via App Store
3. Snapseed
- Price: Free
- Available on: Android and iOS
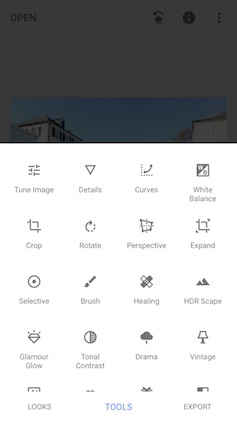
Sometimes, your photo has varying degrees of darkness and brightness and you don’t want to auto-enhance all of it. Snapseed’s brush tool allows you to selectively adjust for exposure, saturation, and color temperature, which is ideal for situations where you’d rather selectively edit. Snapseed also gives you plenty of control and fine-tuning, and even provides tools to remove small blemishes or unwanted objects.

4. Pixlr
- Price: Free
- Available on: Android and iOS
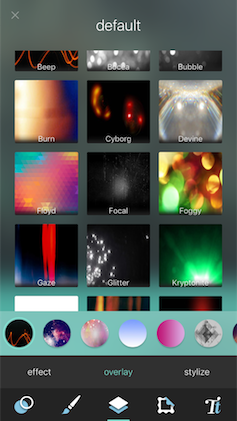
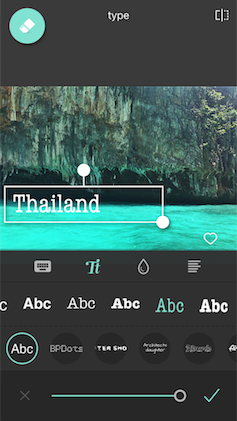
With Pixlr, you can build your own filters with effects, overlays, and textures. When you’re happy with a filter you’ve created, you can save that filter and use it again. This can be particularly useful if you’re trying to build a unique brand image. Pixlr also lets you selectively adjust your brightness and sharpness. It includes a red-eye fixer and an array of photo-editing tools.
5. Litely
- Price: Free
- Available on: iOS
If you’re frustrated by photos that look overly filtered and edited, Litely is the tool for you. Litely offers uniquely subtle filters with the intent of enhancing the natural beauty of a photo. You can drag your finger anywhere on the image to make adjustments, and tap your finger to compare “before” and “after” versions. You can also choose different variations of the same filter (like “argyle,” “argyle high,” or “argyle faded”) to ensure the filter looks natural with your photo.


Instagram Apps for Followers
There aren’t many automated ways to gain followers, which makes the task a tedious challenge for any social media manager. Fortunately, the following tools can combat this challenge. Although the apps won’t let you buy followers, they offer legitimate options to gain and manage followers organically. You can decipher why people unfollow you, how to improve your social media visibility, and how to keep your followers long-term. With the help of these tools, you can attract a larger following and ensure your current followers are happy.
6. Followers for Instagram
- Price: Free
- Available on: Android and iOS
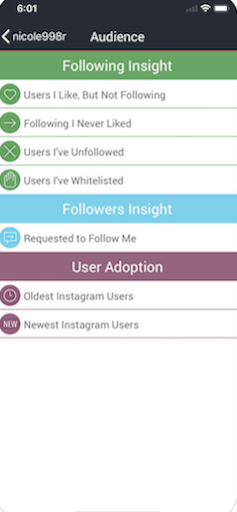
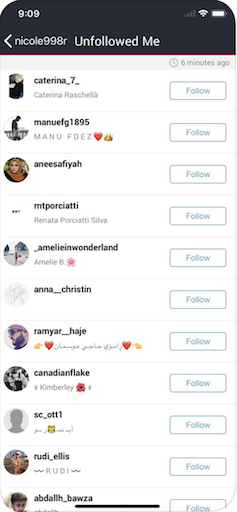
Followers for Instagram shows you accounts that unfollowed you, accounts that haven’t followed you back, and accounts you should be following based on similar accounts you already follow. You can use this data to strengthen weak relationships, make your followers happier, and understand the reasons an account might unfollow you. You might find that accounts are unfollowing you for simple, fixable reasons — like posting infrequently. Hopefully, fixing these issues improves your relationship to your Instagram audience longterm.

Images via App Store
7. Social Rocket
- Price: Free
- Available on: iOS
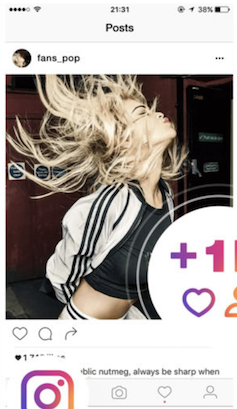
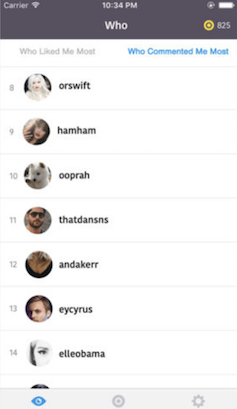
Social Rocket is a “likes/followers” marketplace: every time you like someone else’s post, you gain points to exchange for followers or likes on your own posts. Although this is probably an inefficient long-term solution, it can be helpful in the beginning when you’re trying to build an initial following and want your content to spread.
Images via App Store
8. Crowdfire
- Price: Free
- Available on: iOS
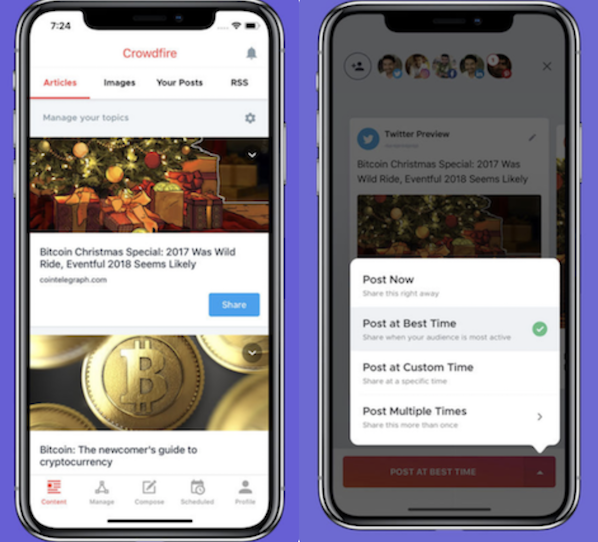
Crowdfire identifies your inactive followers. If you know your inactive followers, you can delete them from your followers pool and fix your ratio to get better analytics. Crowdfire also provides automated DM messaging, recognizes when people unfollow you, and helps you find new followers.
Images via App Store
9. Tracker for Instagram
- Price: Free
- Available on: iOS
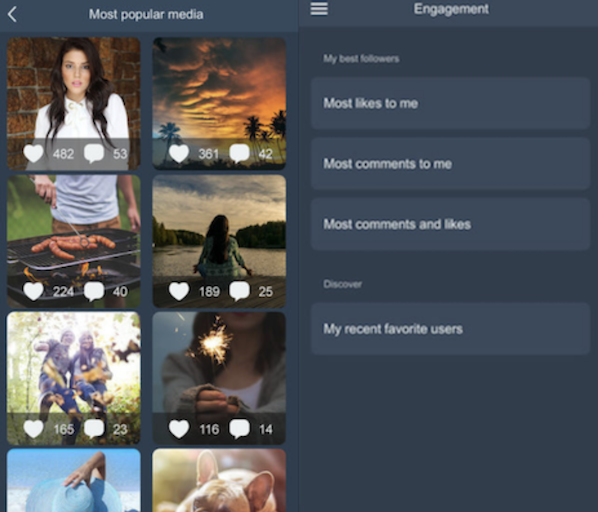
Instagram doesn’t offer any efficient tools for unfollowing or following accounts in bulk. Tracker for Instagram allows you to do this directly from the app. It also shows you your overall post performance, and analyzes how followers engage with your account, so you can discover your most active users.
Images via App Store
10. Followers & Likes on Instagram
- Price: Free
- Available on: iOS
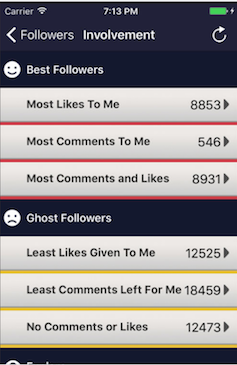
Followers & Likes on Instagram creates lists of your most engaged and least engaged followers, which is helpful because it gives you a better understanding of your target audience. It also shows you which posts attract the most likes and comments from your best followers. Knowing your most popular posts helps you evaluate and modify your future content strategy.
Images via App Store
Instagram Apps for Likes
On Instagram, likes are the strongest indicator we have when evaluating whether our audience is happy. Plus, the more likes your post gets, the higher it’ll appear on people’s feeds, and the more popular it’ll become. While there are no apps that allow you to buy likes, there are apps that help you attract more likes by offering suggestions, popular hashtags, and favorable captions.
11. InstaTag
- Price: Free
- Available on: Android
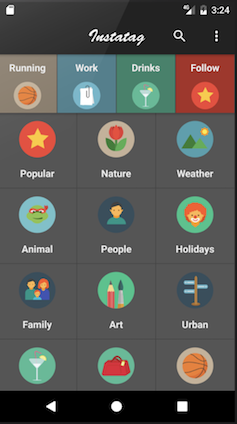
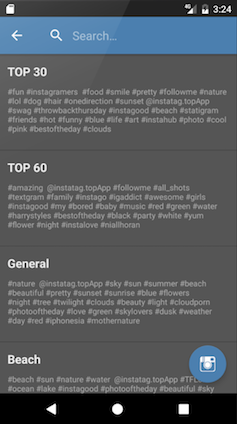
InstaTag allows you to discover the highest trending hashtags, which is valuable since popular hashtags change daily. By knowing the trending hashtags, your posts are more likely to show up ahead of the less relevant competition. There are dozens of categories and hundreds of tags, and you’re even able to search tags across categories.
Images via Android Apps on Google Play
12. Get Instant Likes and Hashtags
- Price: Free
- Available on: Android
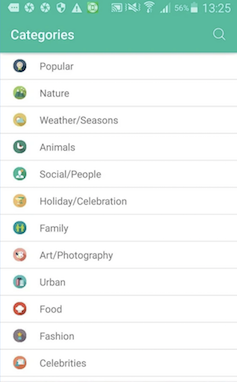
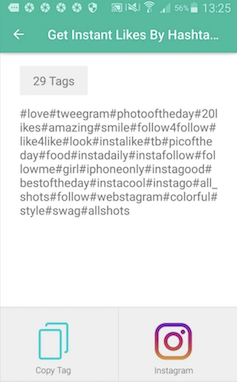
Get Instant Likes and Hashtags gathers the top tags for each category and shows you the most popular ones, making it easy to make hashtag decisions quickly. You can also add, edit, and remove categories, and create custom hashtags, so you can copy all your hashtags at once and paste them into your post.
Images via Android Apps on Google Play
13. Magic Liker for Like Tags
- Price: Free
- Available on: iOS
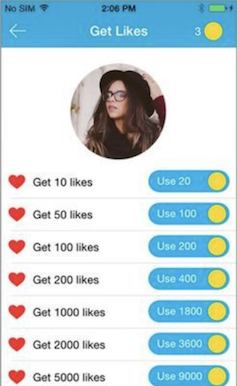
Magic Liker helps you search multiple tags at the same time, find popular tags suggested by the app, search through daily suggested tags, or search posts by category like, “only videos,” or “only photos.” It also provides captions that are currently popular, for additional caption-writing inspiration.
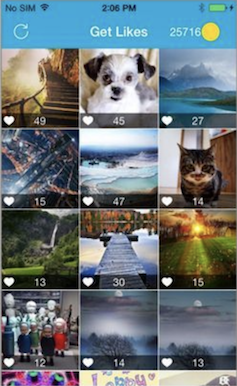
Images via TopAppsLike.com
Instagram Analytics Apps
Regardless of where you are in your Instagram strategy (i.e. still creating it, or have been implementing it for years), it’s important to gather analytics to figure out how well you’re doing, and where you could be doing better. With the right Instagram analytics tools, you’ll be able to improve your strategy, attract a larger audience, and make your existing followers happier than ever.
14. Instagram Insights
- Price: Free
- Available on: Android and iOS
Instagram actually does offer its own native analytics tool. Instagram Insights does require you to have a Facebook Business profile, but if you don’t have one, it’s a simple four-step process to get set up. The tool offers powerful insights, including how many times people use the Send Message option on your Instagram story, how many people have saved your posts, and how well your Instagram advertisements are doing.
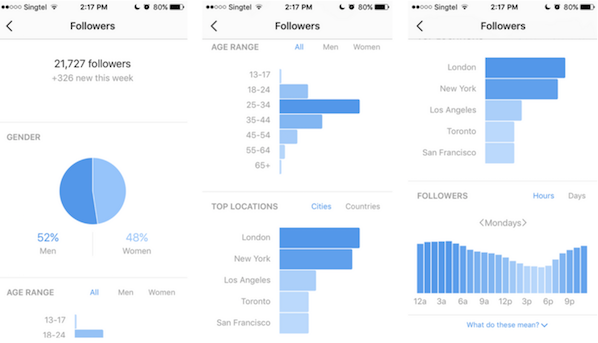
Image via Buffer Blog
15. Hootsuite Analytics
- Price:Free 30-Day Trial, Professional Version is $30/month
- Available on: Android and iOS
Along with metrics like audience growth and traffic, Hootsuite gathers insights like how people react to your posts according to language or gender, and what types of action your followers are taking. You can also customize the insights you collect, which is particularly helpful if you’re testing out unique engagement factors or collecting specific data.
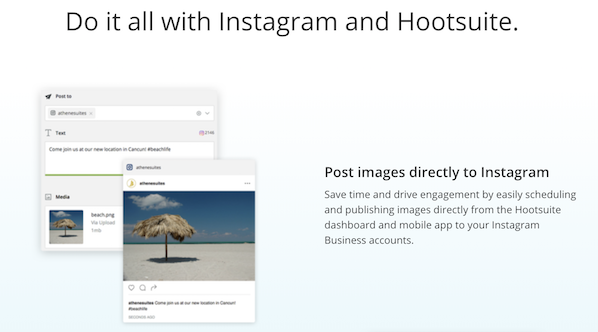
Image via Hootsuite
16. Iconosquare
- Price: Free 30-Day Trial, Professional Version is $30/month
- Available on: Android and iOS
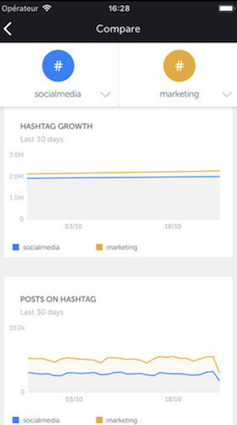
While the above two tools focus on your business alone, Iconosquare also examines the community (and competition) by identifying the most important Instagram influencers in your industry. This is great if you’re interested in hiring influencers to promote your brand, but aren’t sure where to find them. It’s also helpful if you’re just starting to build your Instagram strategy, and want to see what other brands are doing for inspiration. Iconosquare also provides analytics on engagement, and analyzes hashtag growth and popularity.
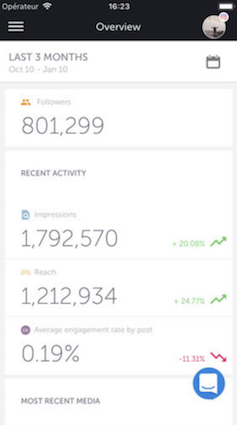
Images via App Store
17. Union Metrics
- Price:Free Account Checkup, Lite Version is $23/month
- Available on: Android and iOS
Union Metrics’ free Instagram Account Checkup shows you the best time to post for your network, your most loyal followers, your top hashtags, and your best-performing posts. The paid version gathers more specific information including a profile analysis, analytics, and hashtag monitoring. If you’re unsure about paying for it, test out the free Checkup Tool and see what you think.
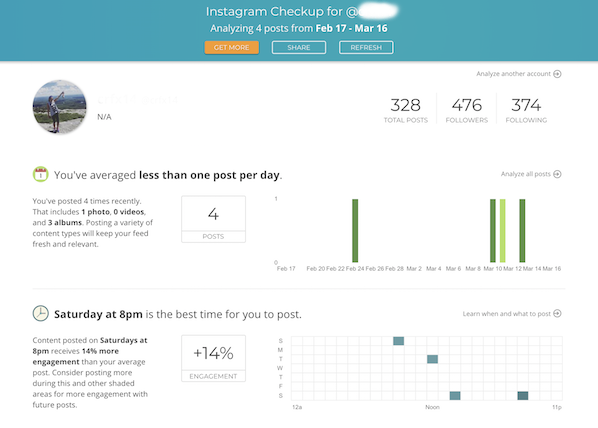
Image via Union Metrics
18. Squarelovin
- Price:Free
- Available on: Android and iOS
Squarelovin provides analytics regarding growth, engagement, number of followers, best and worst times to post, and top hashtags. Best of all, the analytics are delivered daily, weekly, and monthly, allowing you to narrow or broaden your focus and your analytics as you see fit. This is especially helpful if you want to A/B test a few different Instagram strategies throughout the month, and want to compare weeks or even days.
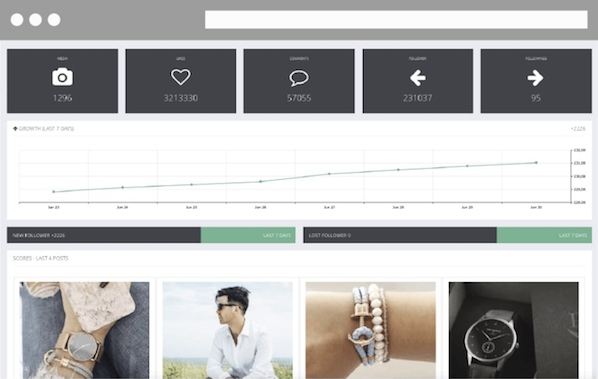
Image via Squarelovin

What Is Change Control in Project Management?
How to Promote Your Business on Facebook
I was only 12 years old when Facebook became available for anyone with a valid email address.
By the time I was 14, one of the top trends was to create a fan page that anyone could follow. I remember that feature being used by friends as a way to tell jokes and post funny content.
But things are a bit more sophisticated in the world of social media nowadays.
Now, Facebook is a great place to advertise your business and interact with prospective and current customers.
Below, let’s discuss how you can use Facebook to promote your business.
1. Sign up for a business page.
The first thing you need to do is create a business page. This is a simple process. All you have to do is log on to Facebook, click “Pages” in the left sidebar, and then “Create New Page.”
To get started, you’ll upload a profile picture, a cover photo, and basic information about your business. This will include what type of business you run whether you run a B2B business, a local business, or an ecommerce site.
Once you sign up, it’s smart to start optimizing your page.
2. Optimize your profile.
Now that your profile is up and running, you’ll want to optimize your page. This means writing your About section, adding business information like your website and business hours, and including a call to action button such as “Book Now,” “Shop Now,” or “Sign Up.”
Additionally, you’ll want to draft several posts that will engage your audience. Think about what type of posts they might like on social media. How are they interacting with your competitors? What posts perform well for your competition? This is the type of content you’ll want to model yours after.
Now that you’ve built and optimized your business page, it’s time to engage with your community.
3. Be active in Facebook groups.
A great way to promote your business on Facebook is to participate in Facebook groups. You can engage with public groups or join private Facebook groups.
To get started with this, you’ll want to consider what type of groups your audience would be a part of. Once you’ve finished brainstorming, you can join the same communities that your audience is active in.
4. Create your own Facebook group.
While it’s important to engage with your audience where they’re at, it’s also important to attract your audience to your own pages. You can do this with your own Facebook group.
Krystal Wu, a social media community manager at HubSpot, says, “Facebook Groups allow our audience to connect with each other and have valuable discussions. Businesses who center a Group around their brand or industry can build a community around it — making our brand and products even more valuable to potential customers.”
5. Promote events.
Another way to promote your business on Facebook is to use the social media platform to promote your events. If you’re a local business, this is especially important.
Attracting people to an event can feel like an undertaking, and you need to use all the tools at your disposal to promote it. That’s why you should post your event on Facebook and also plan an ad campaign.
6. Interact with your followers.
This might seem like social media 101, but it’s important to interact with your followers. The best way to get engagement on social media is to make sure your posts show up for your followers. To do that, you need to create interaction. Make sure you answer questions, respond to comments, and participate in your online community.
7. Use live streaming.
Facebook live is an excellent tool to promote your business and provide valuable content to your audience. You can use this feature to showcase your company culture, host a panel discussion on industry topics, or even display your industry expertise.
Additionally, you can host events virtually on Facebook live as a way to interact with your audience that can’t be at an event in person. This is a great way to promote your business because going live will notify your followers and prompt them to engage with your page.
8. Run Facebook ads.
One of the best ways to promote your business with Facebook is to use Facebook ads. The social media giant has created one of the most popular ways to reach your audience with its advanced targeting options.
To get started with ads, you can review this lesson from Facebook directly. Make sure that you review the types of Facebook ads and various bidding strategies to help you succeed.
9. Talk about your company culture.
When you post on social media, your content should promote your overall brand messaging. A great way to do this is to talk about your company culture. Showcase your employees and their day-to-day tasks.
You can also use Facebook as a recruitment tool, hosting panels on what it’s like to work at your company, or posting jobs right on your business page.
10. Manage contests and giveaways.
Encouraging engagement is one of the main objectives of Facebook promotion. To do this, you can host contests and giveaways that your audience will want to participate in. This will help increase brand awareness and encourage interaction from your followers.
11. Have a customer service representative field comments and requests from customers.
Social media is a great way for your customers to get in touch with you. However, if they choose to reach out to you on Facebook, you need to be prepared to answer their questions and address their requests. To do this, consider having a few people from your customer service team answer messages or comments from your customers.
12. Post valuable content.
Ultimately, the best way to promote your business on Facebook is to provide valuable content for your audience. Content is what attracts people to your social media profile and is the way you’ll build an audience online. You’ll want to include different types of content including images, videos, text, Stories, or even polls.
Facebook is an essential part of your social media marketing. No matter what type of business you’re running, it’s important to develop both organic and paid social media strategies to promote your business on Facebook.

6 Reasons You Really Need to Write A Business Plan
Starting a business can be a daunting task, especially if you’re starting from square one.
It’s easy to feel stuck in the whirlwind of things you’ll need to do, like registering your company, building a team, advertising, the list goes on. Not to mention, a business idea with no foundation can make the process seem incredibly intimidating.
Thankfully, business plans are an antidote for the new business woes that many entrepreneurs feel. Some may shy away from the idea, as they are lengthy documents that require a significant amount of attention and care.
However, there’s a reason why those who take the time to write out a business plan are 16% more likely to be successful than those who don’t. In other words, business plans work.
What is a business plan, and why does it matter?
In brief, a business plan is a roadmap to success. It’s a blueprint for entrepreneurs to follow that helps them outline, understand, and cohesively achieve their goals.
Writing a business plan involves defining critical aspects of your business, like brand messaging, conducting market research, and creating pricing strategies — all before starting the company.
A business plan can also increase your confidence. You’ll get a holistic view of your idea and understand whether it’s worth pursuing.
So, why not take the time to create a blueprint that will make your job easier? Let’s take a look at six reasons why you should write a business plan before doing anything else.
1. Legitimize your business idea.
Pursuing business ideas that stem from passions you’ve had for years can be exciting, but that doesn’t necessarily mean it’s a sound venture.
One of the first things a business plan requires you to do is research your target market. You’ll gain a nuanced understanding of industry trends and what your competitors have done, or not, to succeed. You may find that the idea you have when you start is not likely to be successful.
That may feel disheartening, but you can always modify your original idea to better fit market needs. The more you understand about the industry, your future competitors, and your prospective customers, the greater the likelihood of success. If you identify issues early on, you can develop strategies to deal with them rather than troubleshooting as they happen.
It’s better to know sooner rather than later if your business will be successful before investing time and money.
2. Give your business a foundation for success.
Let’s say you’re looking to start a clean beauty company. There are thousands of directions you can go in, so just saying, “I’m starting a clean beauty company!” isn’t enough.
You need to know what specific products you want to make, and why you’re deciding to create them. The Pricing and Product Line style=”color: #33475b;”> section of a business plan requires you to identify these elements, making it easier to plan for other components of your business strategy.
You’ll also use your initial market research to outline financial projections, goals, objectives, and operational needs. Identifying these factors ahead of time creates a strong foundation, as you’ll be making critical business decisions early on.
You can refer back to the goals you’ve set within your business plan to track your progress over time and prioritize areas that need extra attention.
All in all, every section of your business plan requires you to go in-depth into your future business strategy before even acting on any of those plans. Having a plan at the ready gives your business a solid foundation for growth.
When you start your company, and your product reaches the market, you’ll spend less time troubleshooting and more time focusing on your target audiences and generating revenue.
3. Obtain funding and investments.
Every new business needs capital to get off the ground. Although it would be nice, banks won’t finance loans just because you request one. They want to know what the money is for, where it’s going, and if you’ll eventually be able to pay it back.
If you want investors to be part of your financing plan, they’ll have questions about your business’ pricing strategies and revenue models. Investors can also back out if they feel like their money isn’t put to fair use. They’ll want something to refer back to track your progress over time and understand if you’re meeting the goals you told them you’d meet. They want to know if their investment was worthwhile.
The Financial Considerations section of a business plan will prompt you to estimate costs ahead of time and establish revenue objectives before applying for loans or speaking to investors.
You’ll secure and finalize your strategy in advance to avoid showing up unprepared for meetings with potential investors.
4. Hire the right people.
After you’ve completed your business plan and you have a clear view of your strategies, goals, and financial needs, there may be milestones you need to meet that require skills you don’t yet have. You may need to hire new people to fill in the gaps.
Having a strategic plan to share with prospective partners and employees can prove that they aren’t signing on to a sinking ship.
If your plans are summarized and feasible, they’ll understand why you want them on your team, and why they should agree to work with you.
5. Communicate your needs.
If you don’t understand how your business will run, it’ll be hard to communicate your business’s legitimacy to all involved parties.
Your plan will give you a well-rounded view of how your business will work, and make it easier for you to communicate this to others.
You may have already secured financing from banks and made deals with investors, but a business’ needs are always changing. While your business grows, you’ll likely need more financial support, more partners, or just expand your services and product offers. Using your business plan as a measure of how you’ve met your goals can make it easier to bring people onto your team at all stages of the process.
6. It makes it easier to sell your business.
A buyer won’t want to purchase a business that will run into the ground after signing the papers. They want a successful, established company.
A business plan that details milestones you can prove you’ve already met can be used to show prospective buyers how you’ve generated success within your market. You can use your accomplishments to negotiate higher price points aligned with your business’ value.
A Business Plan Is Essential
Ultimately, having a business plan can increase your confidence in your new venture. You’ll understand what your business needs to succeed, and outline the tactics you’ll use to achieve those goals.
Some people have a lifetime goal of turning their passions into successful business ventures, and a well-crafted business plan can make those dreams come true.

Live Video Strategy: How to Improve Your Facebook and YouTube Results
Want to use live video more strategically? Looking for tips to guide your live video strategy across Facebook and YouTube? In this article, you’ll discover three goals live video can help you achieve, and find out how to produce each type of live stream to ensure success. To learn how to improve your live video […]
The post Live Video Strategy: How to Improve Your Facebook and YouTube Results appeared first on Social Media Examiner | Social Media Marketing.
from Social Media Examiner | Social Media Marketing https://ift.tt/3lFl2SE
via socialmediaexaminer
12 WordPress Live Chat Plugins to Connect With Users
Let’s be honest. No one wants to send a support email only to receive a (possibly automated) response 48-hours later. Similarly, no one wants to be put on hold for 30+ minutes while being told they’re the next caller in line.
We live in a world of instant gratification. Your customers are busy and they want to speak to you on their terms and get the help they need on their time.
Live chat allows for you to provide immediate, personalized, and efficient support for your customers and prospects.
So, if you’re part of the 37% of internet users with a WordPress website and you need live chat functionality, this guide is here to help. We’ll cover 12 WordPress live chat plugins to engage visitors and offer effective and speedy support.
1. HubSpot WordPress Plugin
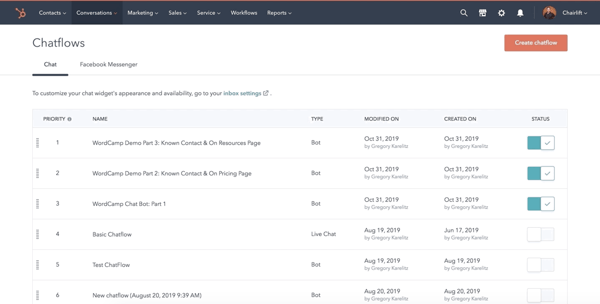
With HubSpot’s WordPress plugin, you get more than just live chat — you also get forms and pop-ups, CRM and contact management, email marketing, marketing automation, and reports and analytics. Plus HubSpot integrates with over 500 other tools.
In addition to the capabilities just mentioned, the plugin also allows you to add chatbots that function 24/7 to your site. This way, you can automate some of your support (e.g. use chatbots, rather than reps, to answer FAQs) and offer assistance to visitors when your team is offline (a.k.a. when reps are asleep). HubSpot’s WordPress plugin is simple to install and applies to all plans and products.
2. Tawk.To Live Chat
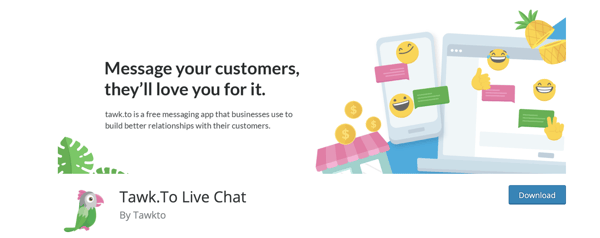
Tawk.To allows you to monitor live chat and engage users on your site in real-time for free. Interact with visitors from anywhere, whether on desktop or mobile. You can also use any of the free iOS, Android, Windows and Mac OSX apps to connect with customers.
The plugin has a single, multi-purpose dashboard through which reps can access multiple websites and work in tandem with other reps while answering live chat requests. All you need to do to get started with Tawk.To is create a free account.
3. Zendesk Chat
With Zendesk Chat, you can manage multiple live chat conversations through a single dashboard. The live chat widget is customizable and you can add mobile functionality so visitors are able to speak with reps via mobile device.
The plugin has triggers which allow you to automate actions when certain conditions are met by visitors who reach out via live chat — this way, you’re able to reach every visitor who wants support. You can add information about your customers, improve workflow routing, and handle spam requests too.
With the analytics dashboard, keep tabs on a visitor’s flow around your site and identifiable usage patterns to determine when a customer needs assistance.
4. Pure Chat
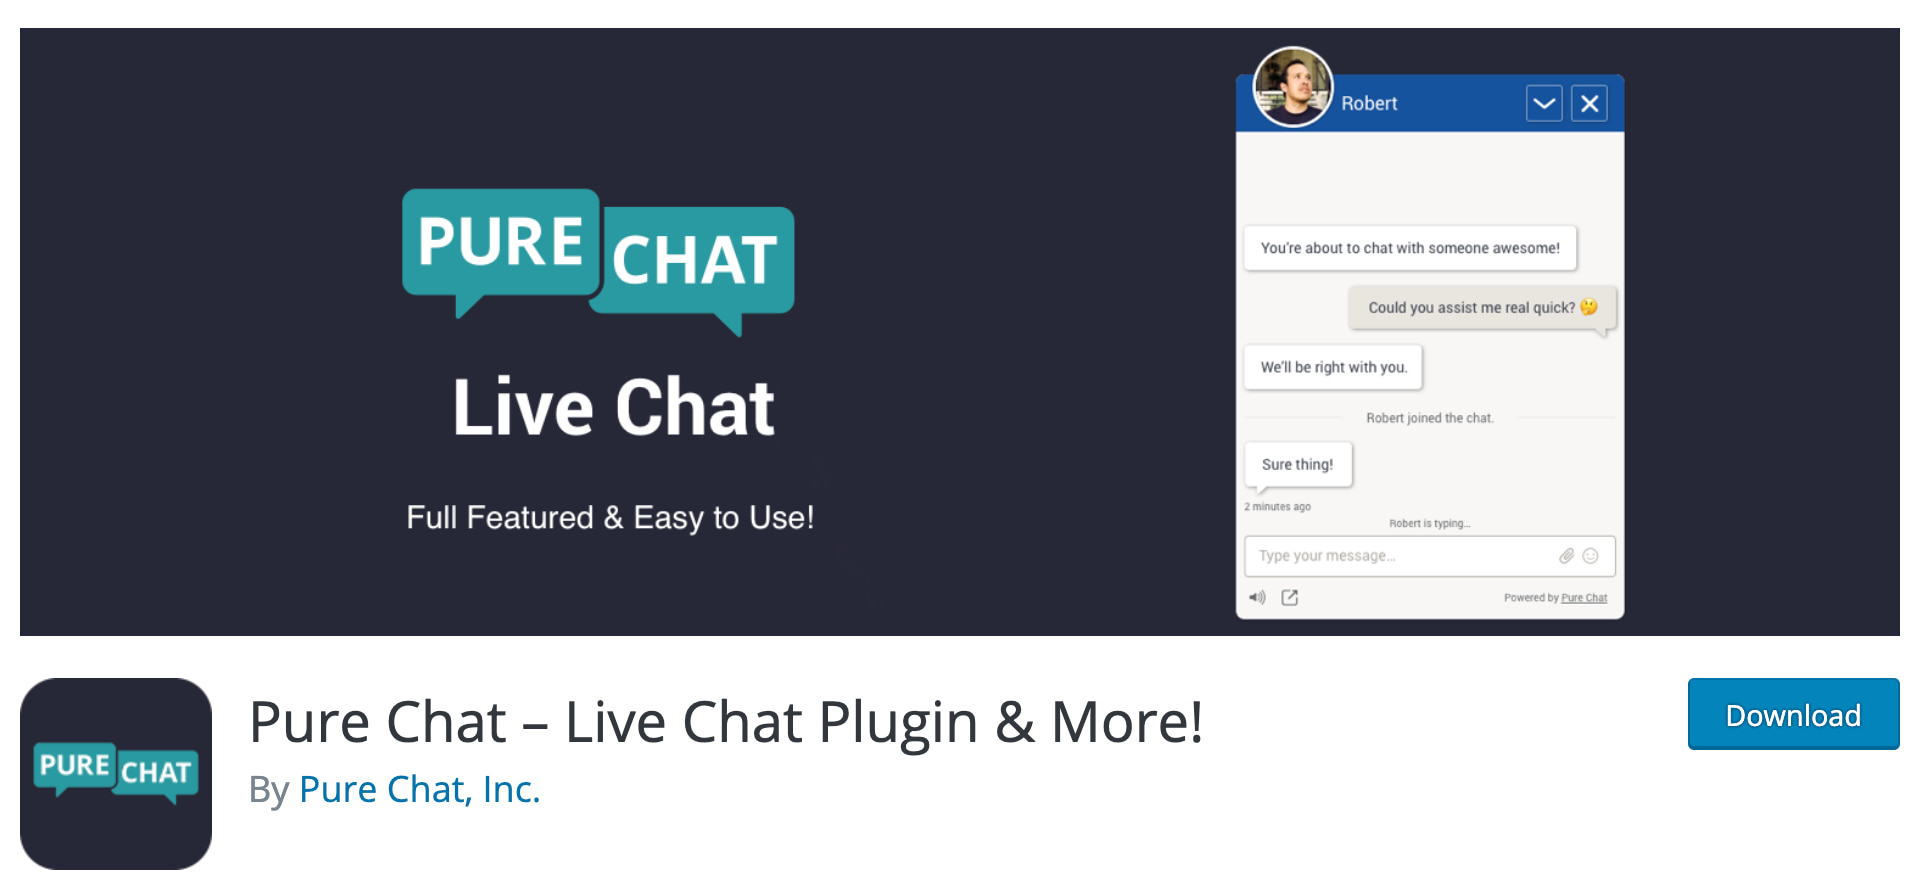
With Pure Chat, your live chat widget is fully customizable. Receive full transcriptions from rep-to-customer conversations and create automatic triggers for actions visitors take to boost the efficiency of the support you provide.
Decide whether or not you want your widget to display an offline indicator when reps aren’t available — this signals to customers that they should email support instead or check back later. Lastly, there are analytics and visitor tracking on your site to help you better understand customer behaviors and needs.
5. Drift
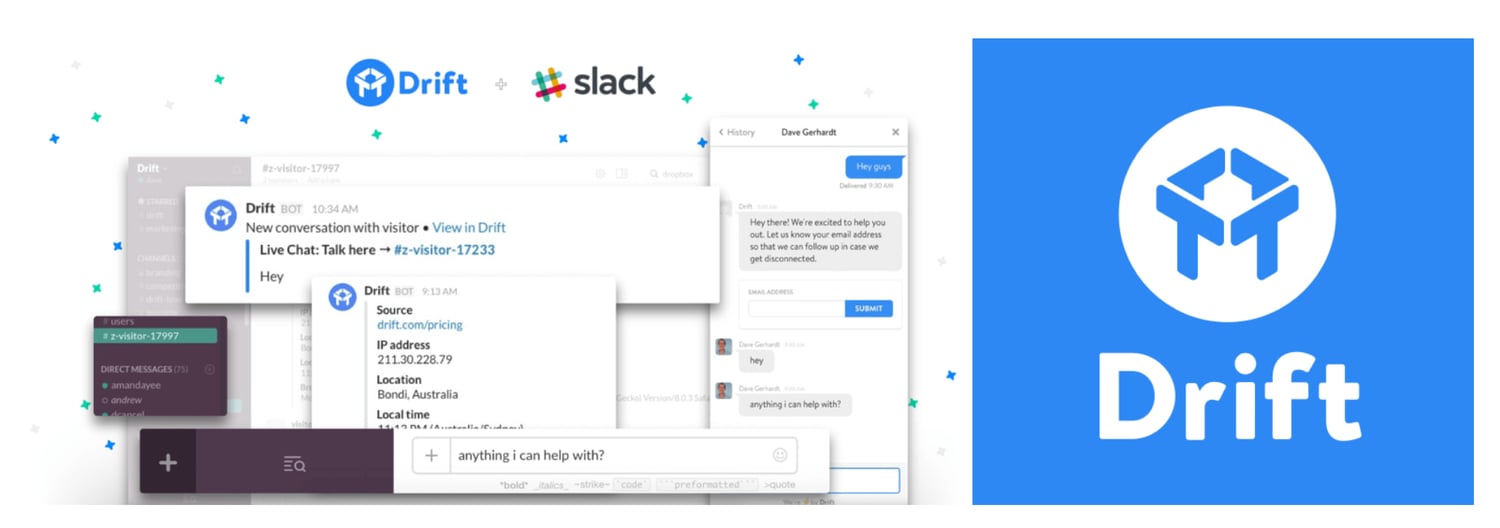
Drift makes adding free live chat to your WordPress site simple. With the plugin, you can get real-time notifications (on Slack) so your team knows when a customer is reaching out. You can also set the expectation that your support team is not available 24/7 on live chat by adding an offline/away mode to your chat widget.
The Drift plugin will help you capture and save visitor email addresses once they start the live chat conversation. You can also set up browser targeting to identify and set rules related to a customer’s actions — this feature provides you with information necessary to reach out to a specific visitor and engage them in a personalized way.
By adding the Tidio plugin to your WordPress site, you’ll get more than just live chat — you’ll also get access to other communication channels including chatbots, email marketing, and Messenger.
Email your visitors when they leave your website and/or live chat and send them campaign content with the plugin’s Email Automation feature. Also, customize the look of your widget so it’s complementary to your branding.
7. LiveChat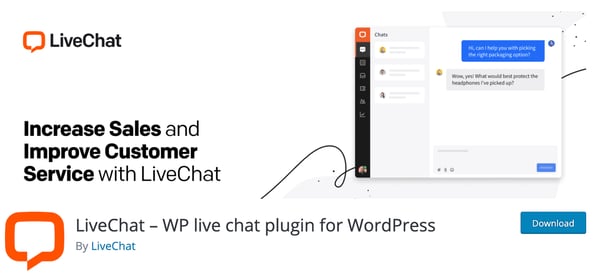
LiveChat has proactive chat invitations so your team can have personalized messages automatically sent to visitors. Work as efficiently as possible by managing multiple chat sessions at the same time and using canned responses for FAQs. Reps can also send links to visitors via live chat — this way, they’re able to share knowledge base articles, directions, product information, and more.
LiveChat seamlessly integrates with services and apps — such as your HubSpot CRM — and you can select which pages of your site include live chat widgets. In fact, you can add a live chat widget to all pages of your website, including the checkout page, if you choose.
8. Live Chat (Messenger API) + PolyLang
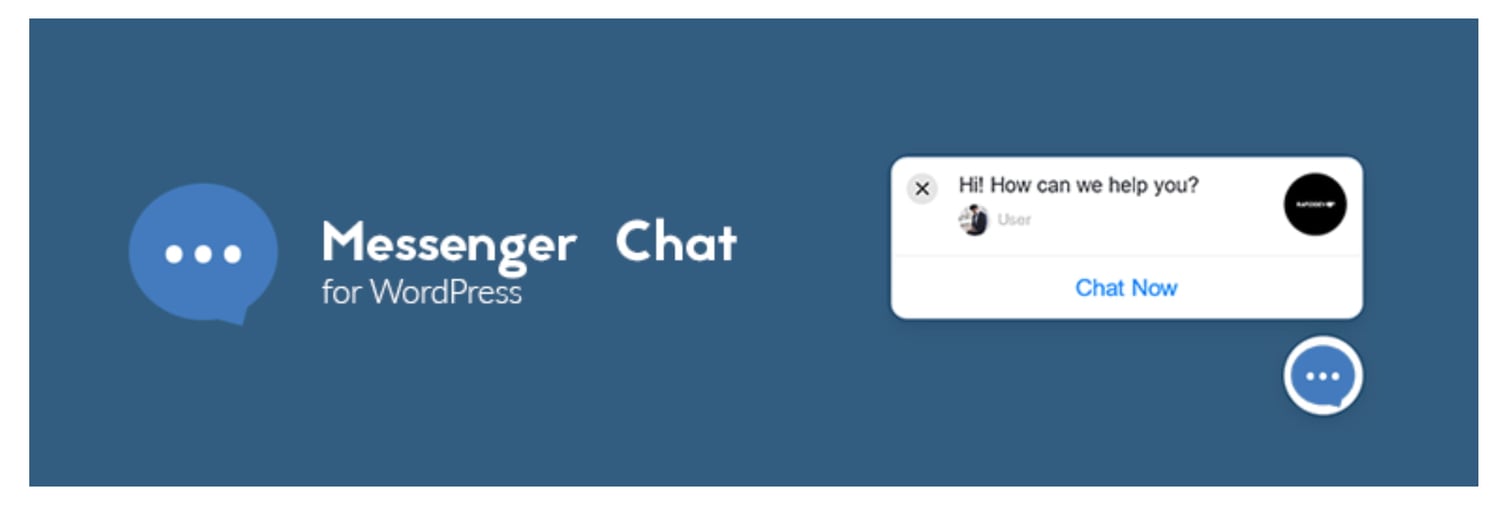
This plugin adds Facebook Messenger to your website and it’s integrated with PolyLang which is another WordPress plugin that helps create bi- or multi-lingual sites.
The chat widget is customizable — you can adjust its color, location, language, and more so it’s complementary to your branding. You can hide or delay the chat widget so it appears only when support is online or a few seconds after visitors land on your site.
9. Live Chat by Formilla
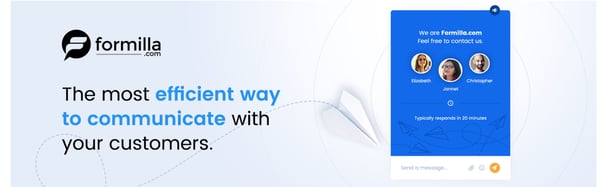
In addition to using this plugin for live chat, you can add AI-powered chatbots to your site to manage FAQs that don’t need human-to-human interaction. You can also create and share canned responses with site visitors to save reps time to focus on more complex customer challenges. Sign into your Live Chat account via app on an iPhone, iPad, or Android device to chat with visitors from anywhere.
There’s a language support feature so you can customize the text of your widget to accommodate a wide audience. The live chat widget is also responsive, meaning it’ll adjust in size based on whatever device your site visitors are viewing it from (desktop, mobile device, etc.).
10. WP-Live Chat by 3CX
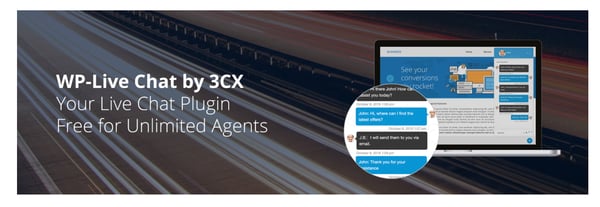
With WP-Live Chat, customize your site’s live chat by adding animations, surveys, and polls to make the experience of getting support more engaging for visitors. Create a custom message that appears when reps are offline and store all messages that are received while reps are offline for your records.
Make the chat anonymous to allow for greater visitor privacy if necessary. Additionally, WP-Live chat is compatible with multiple translation plugins so you can effectively help customers who are from or located in different parts of the world.
11. JivoChat
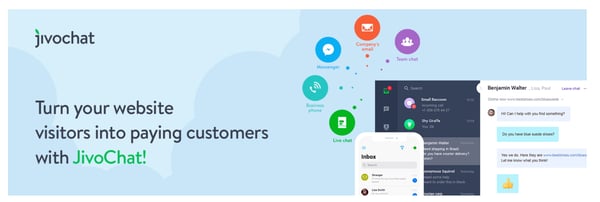
JivoChat doesn’t just offer live chat for your WordPress site — it also has communication capabilities for phone, email, and social media support so you can manage all conversations from a single tool.
If your business doesn’t offer 24/7 support, visitor inquiries that happen while reps are offline stay on-hold in an inbox. Those inquiries are paired with visitor contact information so your team can get in touch with them during work hours. Reps can also transfer chats to other team members — for instance, a rep can send a customer’s query to another rep who has greater expertise in that customer’s specific problem area than they do.
12. Crisp
With the Crisp plugin, you get inboxes for marketing, sales, and support. Use marketing live chat to get visitor contact information and tag specific conversations to create a qualified contact list for your team. Use sales live chat to answer questions that come in from prospects about your product or service. And use support live chat to help customers work through challenges and roadblocks that arise.
You can also share a live chat availability schedule on your site so visitors know the hours reps are online and ready to assist them.
Install a Live Chat Plugin
Live chat plugins have a wide variety of capabilities and helpful features to assist your team and make reps work more efficiently. This way, reps save valuable time that they can then put towards supporting customers with more complex issues. Get started by installing a plugin on your WordPress site to streamline the process of providing support to your visitors and customers.
Editor’s note: This post was originally published in April 2019 and has been updated for comprehensiveness.

7 Steps to Use Trigger Marketing in Any Content Campaign
When you hear the phrase “marketing automation,” what do you think of first? A detailed diagram of emails sent to different segments, broken out by email engagement, drawing a line from lead to customer? This has become the norm, yet it is among the least effective automation paths you can set up as a marketer.
The inherent flaw in this strategy is that it starts with the marketer’s timeline rather than the prospect’s. The marketer sits down and defines what information the prospect will consume next, what actions the prospect will take next, and the path the prospect will take from becoming a lead to becoming a customer.
But if we’re honest with ourselves, we would admit that the world is not as straightforward as that. You might define the funnel stages as Lead to Marketing Qualified Lead (MQL) to Sales Qualified Lead (SQL) to Opportunity to Customer, where leads download an ebook, then become an MQL when they start a trial, an SQL when the sales person follows up with that prospect, an opportunity when they do a trial review call, and customer when they purchase.
… But what if they start a trial and then download an ebook? Or what if they get into a sales conversation after just downloading an ebook, never become a customer, and then go cold until they start a trial months later? The reality is that you can’t control what your prospect does or in what order your prospect does it. What you can control, however, is how you react to your prospect’s behaviors. And this is where automation and trigger marketing becomes powerful.
The “triggering” event can be anything measurable by your CRM and automation software. Here are just a few examples:
- Form conversions
- Email opens (or lack thereof)
- Number of pages viewed
- Chatbot interactions
- Meeting certain descriptive criteria
As a result of the triggering event, you can automate tasks/actions with your marketing automation software. Here are some examples:
- Send them an email (or sequence of emails)
- Update their CRM record
- Add them to a list
- Assign them to a sales rep
- Send an internal notification about them
1. Understand your buyer persona.
Know your buyer persona: It should go without saying in the context of any marketing activity, but in marketing automation, it’s doubly important.
If you think through the lifecycle stages, pains, and motivations of your target audience(s), you can craft better trigger marketing strategies to guide them along their path to purchase.
The goal of marketing automation is to provide a great experience at scale, and part of that means meeting them where they are. When 80% of customers are more likely to make a purchase when brands offer personalized experiences, it just makes sense.
2. Think in terms of ‘ifs’ and ‘thens.’
Software is simple. It sees in black and white rather than the complex outcome that you’re moving toward. However, you can reverse engineer a great trigger marketing strategy using automation by thinking through your outcome and the path to get there as a series of if/then statements:
- If x happens, then do y.
- If the prospect fills out this form, then send them this email.
- If the prospect has visited the pricing page, then notify a rep.
The “if” is the criteria. The “then” is the action you want to take.
3. Figure out your triggering events.
In order to get your messaging to the right people at the right time, you must identify the “trigger” (in HubSpot, it’s called “enrollment criteria“). This is the “if” part of the equation, the concrete indicator that the software can use as a green light to execute the actions.
Triggering events are only limited by the information you have in your system and your marketing automation’s capabilities. Common ones include:
- Actions taken on the website
- Criteria met in the database
- Responses to past emails or campaigns
4. Determine the actions you want your system to perform.
Once you know your “trigger” or enrollment/starting criteria, then you can decide what happens next. This is the “then” part of the equation. Common actions include:
- Sending an email
- Enrolling in a sequence
- Categorizing the contact in the database
5. Craft personalized messaging.
Remember that 80% of customers are more likely to purchase after a personalized experience? If your action (“then” statement) includes a marketing task such as email sends or campaign enrollment, it’s critical to know exactly how this contact is different from others in your CRM and what messaging will uniquely appeal to them. Ask yourself:
- Where are they at in their journey?
- How can I provide value and move them to the next step?
6. Identify and eliminate repetitive marketing tasks.
If you’re still not sure where to begin with marketing automation, start by creating a list of your most repetitive tasks. For example, if you send the same email over and over again to multiple contacts, using automation to eliminate this task from your day will increase productivity and, as a result, performance. This will help you focus on higher impact tasks that can’t be automated.
7. Increase the value of your CRM.
As mentioned previously, your only limits are the capabilities of the software you’re using and the quality of your data. If you have messy data, marketing automation may hurt you. If you have incomplete data, you won’t be able to do the advanced personalization and segmentation that will make a world of difference.
With that in mind, you will have to understand how to make the most of your CRM. Part of this comes down to using automation to update CRM records and categorize contacts, but ultimately you’ll have to think about how your organization uses their CRM and ask yourself these questions:
- What data can you gather about your prospects (and when) to help the effectiveness of your campaigns?
- How can you use automation to ensure the cleanliness and accuracy of your database?
- How often can you audit your database to ensure the integrity of these efforts?
Trigger-Based Email Marketing
We briefly discussed that marketing automation provides a big opportunity for email marketing efforts. Triggered emails — automated marketing messages based on a prospect’s behaviors — are powerful because they are inherently relevant and timely. The key to an effective email is relevance plus timeliness plus value, and the first two are baked into triggered emails. It’s up to the marketer to jump on that opportunity and align a valuable offer to those recipients.
Not using triggered emails? Here are a few recipes of triggered marketing automation to get you started.
Trigger: Downloaded an Educational Offer
This is a great place to start if you don’t have any triggered emails set up, as this is the broadest trigger — engaging the prospects at the earliest stage of the buyer’s journey.
What to Send: Transactional Email With Next Step Call-to-Action
In this situation, your triggered email can be a transactional email — confirming the download (or registration or request) and including any information related to that download.
For example, if this is a follow-up to downloading an ebook, include the name of the ebook and a link to the PDF. If it’s a follow-up to registering for a webinar, include the webinar information, including the time and date and how to log in.
Once you’ve covered your bases on the transactional information, it’s time to think about what you want your prospect to do next. You have their attention — take advantage of it! Do you want them to convert on a middle-of-the-funnel offer like a demo request or complementary consultation? Or do you want to encourage them to share this offer with their network, to expand the reach of your content? Think about that ideal next step, and include a call-to-action for that in your follow up email.
Trigger: Took One Action in a Series, but Not the Next
Say your prospect gets close to taking the action you want — like starting a trial of your product — but they don’t quite get to the finish line. They visit the trial landing page, or view some content about your product, but don’t start that trial. This is an opportunity for you to follow up to get them to cross that finish line.
What to Send: Related Content and an Alternative Action
Perhaps they didn’t complete that action because of some hesitation — they didn’t want to fill out a form, or they had some additional questions that stopped them from starting that trial. This is an opportunity to follow up with related content (like product videos or resources for the trial) and an alternative action (maybe they don’t want to use a trial, they simply want to get a demo or speak directly with a sales rep).
You can even simply ask them in your email … what stopped you from signing up? Anything we can do to help? You’ll be surprised by how many responses you’ll get. After all, these are people who got close to taking an action but had some specific hesitation. You want to both discover and address that hesitation head-on.
Trigger: Viewed Specific Content
Whether you have content on specific topics (product pain points, for example), or content aligned with specific parts of the funnel (product pages vs. blog articles), when your prospects view that content, you have more data to use in your follow-up emails.
What to Send: Tailored Follow-Up Content
Whether you trigger an email immediately or save this intelligence for future communications, the data you collect about which content people view can be used to make your marketing that much more relevant on a one-to-one basis.
For example, if you have content on your website (case studies, blog articles, etc.) that’s related to specific industries or target markets, you can infer that people who view that content are in that industry, and tailor your future marketing messages accordingly. Or, if you have content on your website that is related to specific topics of interest or pain points that you address, you can infer that people who view that content care about that pain point, and tailor your future marketing messages around that topic.
Think about the various behavioral data points you have about your prospects, and what you can draw from that to determine what they care about.
Trigger: Recently and Highly Engaged or Lacking in Engagement
Figure out what your bar is for a highly engaged prospect (perhaps they downloaded at least three ebooks and viewed at least ten blog articles) as well as an unengaged prospect, and respond and market to them accordingly.
What to Send: Timely Next Step Call-to-Action or Reengagement Campaign
For your highly engaged prospects, you once again have attention you can leverage. One great option is to encourage them to share the content they just downloaded. But also remember that triggered marketing automation does not need to be solely external (sent to prospects), it can also be internal (sent to your fellow employees)!
When a prospect becomes highly engaged, this is a great opportunity to notify that prospect’s sales representative that this is a good time to follow up with the prospect. For your unengaged prospects, send a proactive reengagement email. You may even want to have multiple trigger points (e.g. haven’t clicked on an email in three months, six months, one year) where you send different campaigns to reengage these prospects.
For example, after three months, send a reminder to update their email preferences. After six months, ask them if the content is irrelevant and offer them to unsubscribe. And finally, after one year, tell them you will not email them anymore unless they respond.
Trigger: Interacted With Your Company, or Mentioned Your Competitors or Industry, in Social Media
As you listen to what your prospects are saying in social media, you have the opportunity to follow up with those who interact with your company, or those who mention your competitors or specific pain points that you address.
What to Send: Comparison Guides, Product Information, or Educational Content
Pick a common and valuable interaction that occurs between you and your prospects in social media — it may be asking questions about your product, mentioning that they’re evaluating a competitor, or simply asking a question that relates to the pain points your product addresses.
If responding by social media, you likely don’t actually want to automate your response — it will be very easy for your prospect to recognize the impersonal nature of that interaction. However, you can supplement your one-to-one social media engagement with a triggered email campaign with supporting content. For example, if your prospect asks questions about your product, you can send how-to and product feature information. If your prospect mentions they’re evaluating a competitor, you can send comparison guides, third party reviews, or case studies for them to use in their evaluation process. Or if your prospect simply asks a question related to your industry, you can follow up with educational content on the topic of interest.
At the end of the day, any of these triggered emails are likely to get a higher response — and higher return on your effort — compared to the typical linear marketing automation campaign. Using some of the same technology, you can reorient your marketing to work around your prospect’s timeline instead of your own, while continuing to drive the actions you desire.
Editor’s note: This post was originally published in April 2014 and has been updated for comprehensiveness.

The Surround Sound Series: How We Created A New Content Marketing Program & Improved SERP Visibility Beyond SEO (Part 2 of 3)
This post is a part of Made @ HubSpot, an internal thought leadership series through which we extract lessons from experiments conducted by our very own HubSpotters.
The way people shop has radically changed.
Back in the day, going shopping meant visiting a few shops — maybe some with brands you knew you liked. Now, customers have a wealth of options available online 24/7. They can compare features and prices, read recent reviews, or even get suggestions from influencers and magazines. They can go back and forth between their best options, until they find what suits them best.
In this new context, if you want your products or services to be considered when customers weigh their options, you have to be visible where they search for options. You have to be everywhere that matters — in recommended lists, comparison articles, review websites, etc. — so your brand stays top of mind. This is what we call creating a surround sound content strategy for your brand.
In this article, I’ll take you through how HubSpot uses surround sound to track and improve its products’ visibility and awareness.
What is the surround sound strategy?
At HubSpot, “surround sound” is the name Alex Birkett gave to a program that aims to make HubSpot products visible every time someone searches for a product-related keyword (e.g. “best help desk software” or “best live chat software”).
The goal is for potential users to see HubSpot mentioned in all or most of the pages that rank in Google top results for those keywords. This is the “surround sound” effect!
How to Start a Surround Sound Content Program
If you’re looking to start a surround sound program for your business, these next steps will show you exactly how to go about it.
It’s important to note that this guide is based on HubSpot’s last 18 months of experimenting with this program. While we learned a lot on this journey, this is still a work in progress with many opportunities to explore.
Depending on your industry, your program might need to be adjusted. So we hope these steps offer you initial guidance and help give you kick-start your own surround sound content program.
1. Define your product-exploration keywords.
As Alex Birkett mentioned in the previous post of this series, the goal with a surround sound content program should be to “be everywhere a customer is searching when they seek out products like yours”.
That means that you first need to put together a list of keywords that potential customers typically use to discover their options for a given purchase. We call these product-exploration keywords (or surround sound keywords).
Product-exploration keywords are search queries potential customers use to discover, for any given purchase:
- What options are available to them across the market (e.g. “language learning apps”)
- The most recommended solutions (e.g. “best language learning apps”)
- Alternatives to something they are already using but may want to change (e.g. “best Duolingo alternatives”)
Start building your list by following these three patterns. Certain keyword research tools like Ahrefs, SEMRush or MozPro can suggest related terms with high search volume. That way, you can build your list much faster and get extra information, like search volume or difficulty, to help you prioritize terms.
If you’re using Ahrefs, look for Keyword ideas by search volume to expand your list:
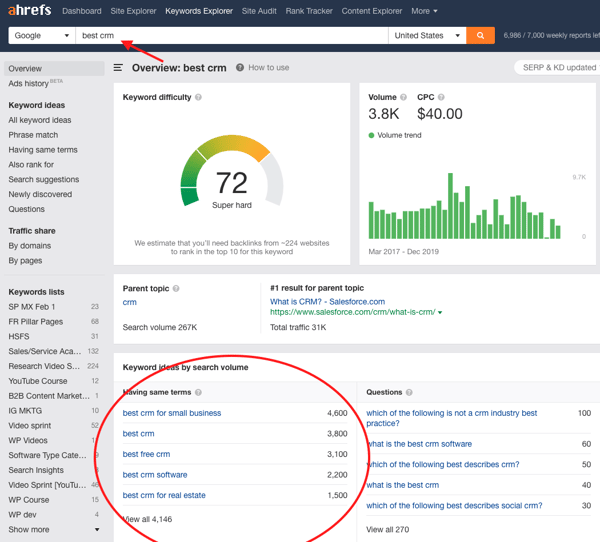
Product-exploration keywords are typically the highest intent and highest converting, but you can also expand your selection to “product-led content.” This is content that is centered around your product, but typically teaches something product agnostic.
For example, a product exploration keyword for ProProfs could be “best NPS survey software,” but they can also consider something like “how to create an NPS survey” as a product-led content keyword.
2. Determine your current performance for product-exploration keywords.
Once you have your list of product-exploration keywords, it’s time to see how many of the top 20 search results your product or service currently ranks for.
You can do this manually by checking each of the top 20 pages for your brand mentions:
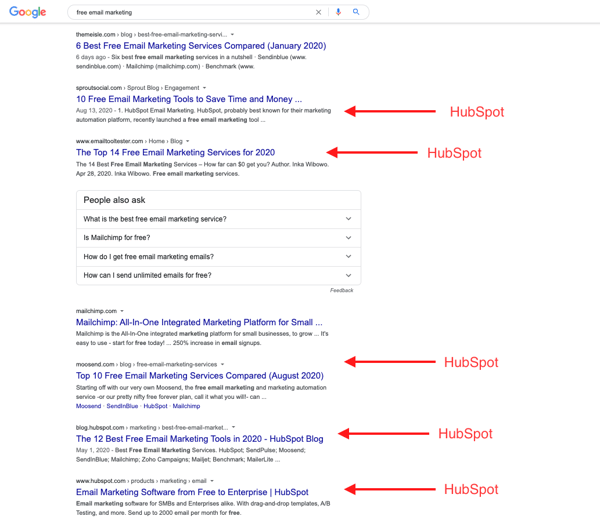
In the end, you should find yourself with a list of keywords, mentions, and visibility scores like this one:
| Keyword | Monthly search volume | mentions in top 20 | visibility score |
| CRM providers | 170 | 7 | 35% |
| sales management tools | 110 | 11 |
55% |
| enterprise CRM | 210 | 5 |
25% |
We calculate the Visibility Score as a % of mentions in the top 20. So, if HubSpot is mentioned in 7 out of 20 pages that rank for “CRM providers”, then the visibility score for that keyword is:
Visibility Score % = (7 ➗ 20) x 100 = 35%
At HubSpot, we’re monitoring around 600 product-exploration keywords. So, checking for mentions manually meant checking around 10,000 URLs (if we consider that some pages appear for more than one keyword).
That’s where Alex stepped in and built a “SERP tracker” — a tool that calculated the percentage of search results for any given query that mentions a brand, product, or service.
The SERP tracker was a game-changer for HubSpot’s surround sound content marketing program as it made monthly reporting and tracking changes a matter of hours, instead of days.
Note: If you’re looking for more information about Surround Sound reporting, stick around and follow this series as that’s exactly what the next post is about. In the meantime, you can geek out on this generic R script for the SERP tracker that Alex wrote about on his blog.
3. Understand your brand’s current visibility on the SERPs.
To understand your brand’s visibility when people are looking for products or services like yours, you need to measure your visibility at 1) a keyword level, 2) a topic level, and 3) a product level. This will allow you to understand your overall performance and track it against competitors.
At HubSpot, we track around 600 surround sound-specific product-exploration keywords grouped by feature, product, and Hub:
-png.png)
This allows us to either track our progress at a granular level or just look at the overall Hub performance.
Here’s an example of a dashboard for HubSpot Marketing I created using a mix of spreadsheets, the SERP tracker that Alex built, and Google Data Studio.
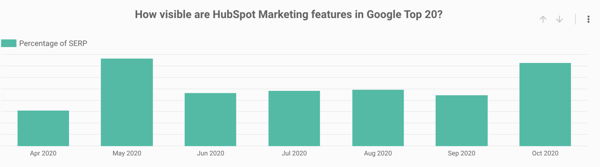
Once you have your visibility calculated, you’ve got your baseline from which you can start improving.
Expect your visibility score to fluctuate over time. This is because new content is constantly published that ranks for those keywords you’re monitoring. Depending on whether the content mentions your brand or not will affect your visibility score as well. There will also be fluctuations that are not related to a drop or an increase in visibility, but they are just a consequence of adding more keywords to your score calculation.
Most importantly, your own efforts to build partnerships will impact your visibility. The more successful you are at getting bloggers or review websites to mention your brand (in new or existing content), the more likely your visibility will increase.
A visibility increase can result in more referral traffic, direct signups, and generated leads, but more importantly (and far more difficult to tie to the bottom line), it can impact your brand awareness.
More people will know about and recognize your products or services simply because they stumble upon them every time they search for “recommendations of best X.”
4. Identify opportunities to improve your SERP visibility.
Spotting opportunities can be challenging when you’re monitoring mentions for more than 10 keywords.
At HubSpot, we monitor over 500 keywords for our surround sound program, so we built a formula that takes into account both our visibility for each specific keyword as well as the average monthly number of searches for that keyword.
Opportunity = (100% – Visibility Score) x Avg Monthly Searches
Say for the keyword “CRM software” (54,000 average monthly searches), our visibility in the Google top 10 search results is 80%. This means that HubSpot is mentioned in 8 out of 10 pages that rank in the Google top 10 for this keyword.
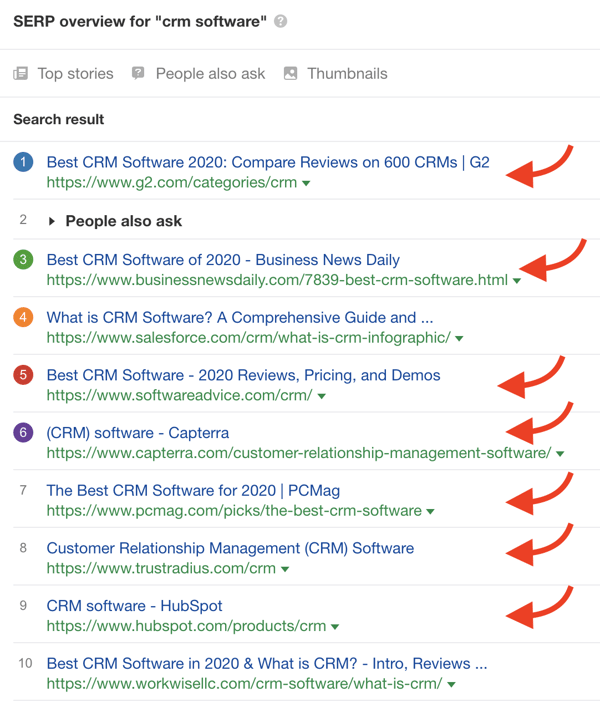
Opportunity for “CRM software” = (100% – 80%) x 54,000 = 10,800
To establish an order of priority, calculate the opportunity level for each keyword, and sort your list from highest to lowest opportunity value.
5. Define a clear goal for your visibility score.
Once you have your priorities in check, it’s time to dig a bit deeper and look at all the URLs that don’t already mention your brand. The question to ask yourself now is: Which ones of these would potentially mention my brand if I reach out to them?
Some websites, like big media publications, will never respond or update their content. So you’re better off by removing these in the first place.
You’ll be left with a list of potential targets (URLs and websites). To establish your surround sound goals, calculate your visibility scores for the same list of keywords — but this time, take into account the potential targets.
And there you have it: your baseline and your visibility goal.
Now what you need to do is figure out how you can persuade your target companies to mention your brand.
Types of Surround Sound Partnership Agreements
Depending on your industry and what companies rank for your surround sound keywords, you’ll be targeting many types of companies to potentially partner with.
Some of the most common ones we see ranking for our target keywords here at HubSpot are:
- Review websites such as G2, Capterra, and Digital.com
- Other SaaS companies and competitors such as Mailchimp and Zoho
- Other marketing blogs such as Neil Patel and Content Marketing Institute
- Big publishers such as Forbes, Inc., and ReadWrite
Each one of these companies has its own goals and objectives. The “secret” to succeeding with your surround sound content strategy is understanding these goals and how you can help and provide value to these companies and publications. In turn, you can extract value as well.
In other words, don’t expect other publishers to list you just because you reach out. You need to look at this as a partnership that you build for the long-run.
So here are some ways in which you can help your potential partners:
- Promote their products or content.
- Provide digital PR on their behalf.
- Include affiliate marketing links to their products or services.
Once you have a battle plan of how you’ll approach each partner so that each benefits from the collaboration, you’re ready to execute on your surround sound content program.
6. Start outreach for long-term partnerships.
This is the part that can make or break your surround sound content program.
A good outreach plan involves a relevant, personalized, timely (think about the tough social and economic times we’re transitioning), and well-targeted email sequence that’s persuasive enough to get your prospects to respond positively.
Remember this is not meant to be a one-off collaboration, but a long term, mutually-beneficial partnership. Your outreach goal should be to spark a conversation with your potential partner. To work together, you first need to learn more about their goals and the best way to meet both parties’ needs.
Note: If you’re new to outreach, check out this post on how to write the perfect cold outreach email, this extensive guide on email outreach and this list of tools you can try out. Email outreach is an art and a science, and getting this part right is crucial.
Once you have kick-started a genuine partnership, make sure you keep track of all of the communication so Sales and Marketing can see it if needed. The best way to do that is to use your CRM software.
At HubSpot, we’re lucky enough to have our own CRM to manage everything — from email sequences to project tracking and partner communications to reporting on our outreach progress.
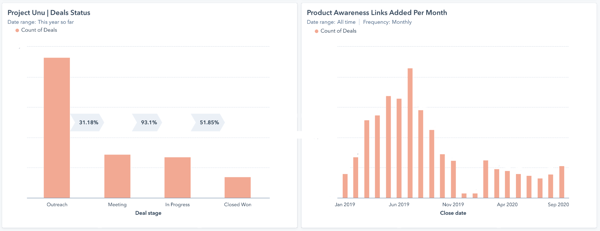
On top of using the Google Data Studio dashboard to track our visibility progress, we use the HubSpot CRM to keep track of each individual partnership and the mentions that contributed to our growth.
Summary: How to Successfully Execute a Surround Sound Content Marketing Program
The way people shop has changed, so marketing needs to evolve and adapt, too. That’s why the surround sound strategy is a tactic you need to consider for 2021 and beyond. It’s a simple concept, but the execution can pose some challenges.
That’s why we put together this step-by-step guide to hopefully help you structure your upcoming program. Here’s a summary of what it’s all about:
- Start with a list of keywords that are relevant to your products and services.
- Measure your visibility and opportunity for each keyword.
- Prioritize potential partnerships based on opportunities.
- Figure out how to get in touch with each partner and draft a message.
- Schedule a kick-off meeting and get to know your partner’s priorities and goals.
- Keep track of your partnerships (CRM).
- Measure your program results.
- Communicate regularly with partners and stakeholders.
Curious to learn more about the SERP tracker, and what results we saw at HubSpot with Surround Sound? Follow this series as we have more in depth posts coming in the next couple of weeks. In the meantime, don’t miss part one: a behind-the-scenes introduction to the surround sound content strategy.
This article walked through the execution of the surround sound strategy. Stay tuned for Part 3 that will dive into our results as well as the technical details on how we built internal tools to help us accomplish these feats.

How to Turn a Case Study into a Customer Success Story
Expression, passion, style, persuasion, authenticity.
These five elements encompass a customer success story — a transformation from a regular case study to an enticing piece of content that encourages a reader to explore what your company has to offer.
When people think about writing a case study, they might feel a daunting rise of tediousness, or perhaps writer’s block. This article omits both by showing you exactly how to turn a case study into a customer success story through an authentic writing style.
Case studies are more than proving your company’s achievements. Through eloquence and thoughtfulness, you can demonstrate your product or service’s power by telling a real story.
Think about it: Real customers use your product. Real employees deliver successful projects. Real customers, real professionals, real people.
What does it mean to be human in digital form? It means delivering a story with facts and emotions. It’s educating a prospect through a thoughtful perspective, and answering the following questions: How did the client feel at the beginning, and how did they feel at the end? What struggles did the project manager face, and how did they feel when they overcame them?
These questions are part of what encompasses a customer success story.
So how do you make a case study passionate, motivating, and authentic?
Along with the five elements that shape a success story, there are five criteria for forming the facts.
Here, we’ll dive into each step you need to take to create an engaging customer success story and convert leads.
1. Find the right client.
First thing’s first: finding the right client.
Ask your project management or sales team about their latest projects and which one stood out. You’re looking for a client with a uniquely knotty problem, one that your company was able to solve. The more complex the project, the more you can show off your company’s skills.
If most of the projects seem standard, pick the client that was the most hands-on and the most responsive. The more involved the client, the more likely they are to give you more information in their interview.
Send an Enticing Email
Before you begin, get permission from the client and inquire about their interest in participating in a case study. You can incentivize them through social media publication, tagging their company on all social platforms, and including a link to their website at the end of the case study.
Here’s an example from Trujay that you can use to write an enticing email to your client:
Hi [Name],
My name is [Your Name], I’m a [Job Title/Position] here at [Company Name]. I’m so pleased to hear your experience with us was worth it! We’re glad we could make all the needs of your project happen and hope you continue to enjoy the results.
Since your project was such a success, I wondered if you would be interested in participating in a case study. We like to inquire about this opportunity to only a few select customers because we find some projects have a compelling story. Yours happens to be a particularly special project, and we’d love to promote your brand by showcasing the results.
All you would have to do is answer six questions about your experience of working with us. You may answer them directly in response to this email, or we can have a phone or video call. Whatever way you’d prefer! Most of our clients like to copy and paste the questions in response and simply fill in the answers.
If you would like to interview over [Zoom, Google Meet, Skype, Other], let me know a good time and date that works for you. The call shouldn’t take more than 30 minutes.
I’ve attached a few examples of previous success stories to get a feel for the final product. We also conduct a social media campaign so you and your company can get as much exposure as possible.
We thank you for using our services and wish you the best of luck in your future endeavors! Should you ever need our services again, know that [Company Name’s] got your back. We hope you find interest in participating and look forward to hearing from you.
Warmest,
[Email Signature]
Once you have permission, let your project management or services team know that a case study is underway.
2. Create interview questions for both project manager and client.
You’ll want to create two sets of questions — one for the project manager, and one for the client. These questions will give way to both sides of the story, enlightening you on the experience from both ends.
Client Questions: The Background
The formatting of the client interview questions is essential. You want to get as much detail as you can without overwhelming the client with loaded questions.
Client interview questions are straightforward and relate to a customer’s company, goals, passions, and plans. You want to find out how your company solved a significant problem through the clients’ perspective. What did the project management team accomplish, in their eyes?
First, get four pieces of standard information:
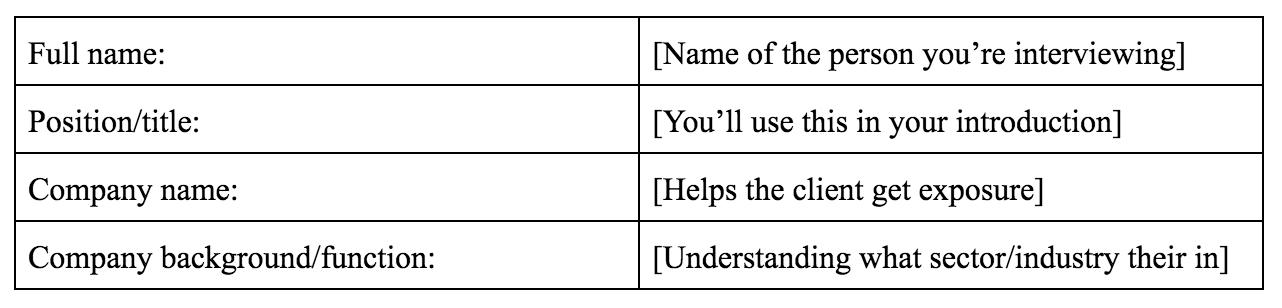
Here’s an example of how you’ll use this information in your introductory piece and throughout the success story:
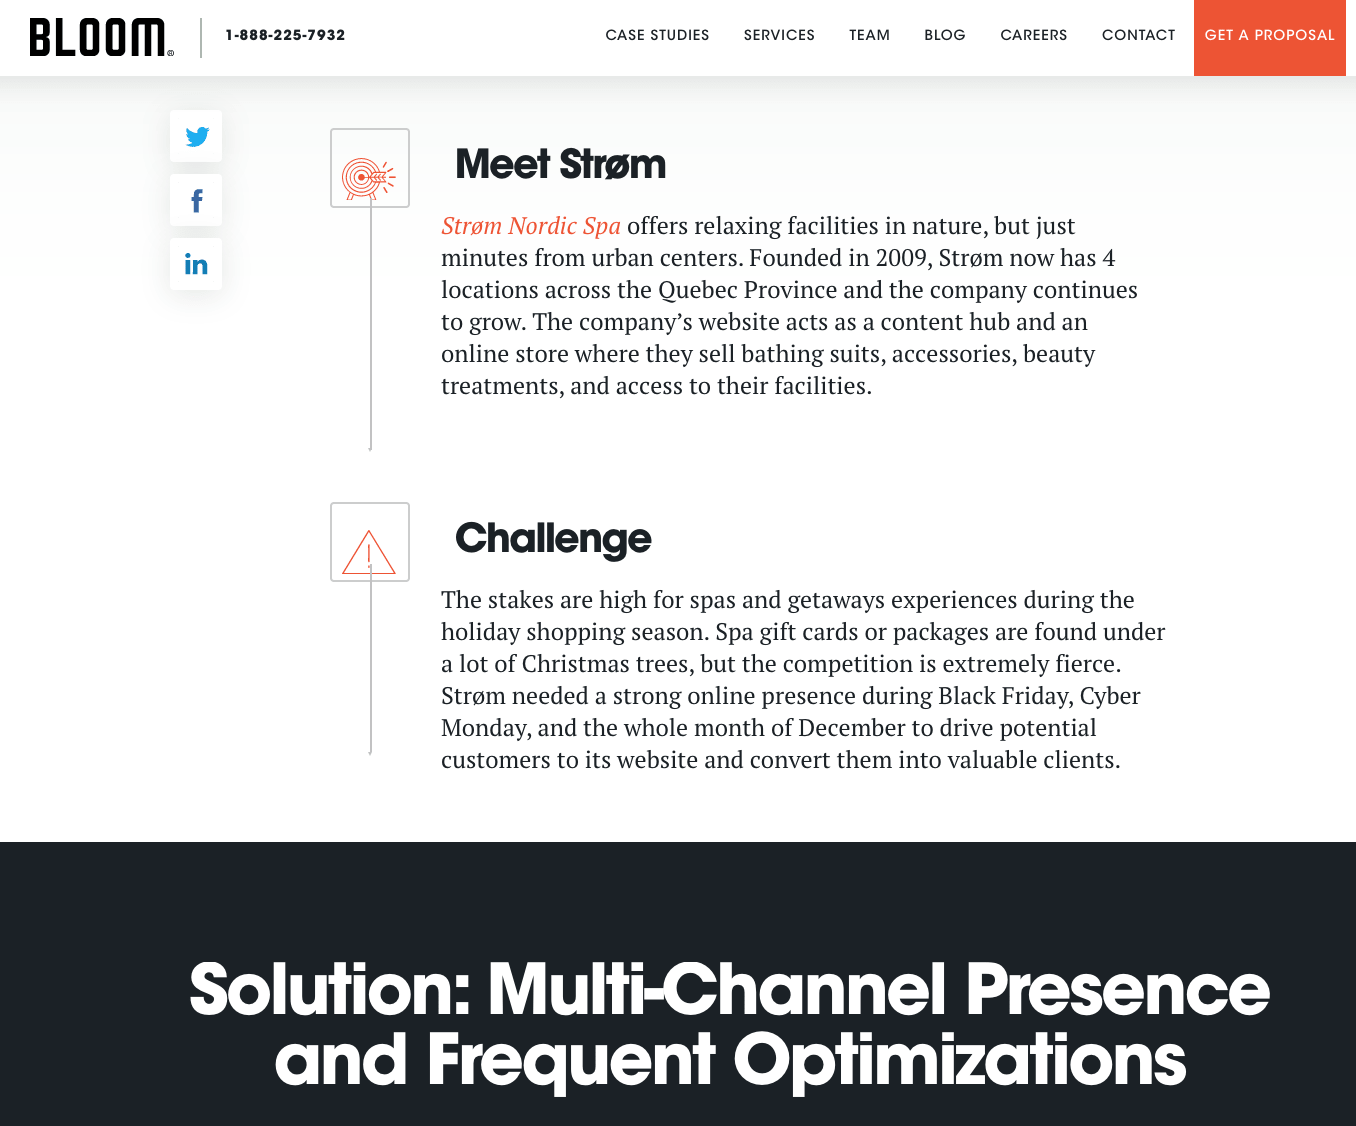
Once you introduce the interviewee and their company clearly and thoughtfully, the client interview questions will shape the rest of your story.
Client Questions: The Real Story
First, you want the client to describe what their previous experience was. What didn’t they like about it? What did it do to cause friction in their business process? And most importantly, how was their previous experience not serving their company’s needs?
Next, you want to get the facts. What was the name of their previous service provider, and what made them switch? How did they find your company? Was it a referral, a Google search, or something else?
By knowing how the client found your company, you’ll know which of your marketing efforts are working and which need improvement. For example, if the client found your company through a keyword search, that means your SEO strategy is working. Alternatively, if the client found your company by referral, that means your reputation is credible by word-of-mouth.
Below are six questions you can ask your clients:
- What company and/or product were you previously using, and what were the issues?
- What special requirements did you have that the previous company lacked in delivering?
- Which solution did you switch to, and what made you choose it?
- How did you find the new company/solution?
- What was your experience throughout the project? (Orientation, beginning stages, experience with your account manager, understanding the tech if applicable, etc.)
- How were you satisfied with the results, and what was your favorite part? (Could be anything from communication to a more technical logic.)
Project Manager Questions
The project manager questions should inform you of the entire technical and onboarding process. These questions aim to prove technical savviness and expertise, showing the reader that your product or service works excellently.
Below are four interview questions you could ask the project manager or technician in charge of the account:
- What were the challenges the client was facing? Is there a main one in particular? Be as detailed as possible over what problems the client had, including but not limited to their project experience, current issues, and dislikes.
- What were the biggest challenges of this project, and what did you find most challenging in solving the problem? Were there complications you have or have not seen before? Be descriptive.
- What did you recommend, and how did you know to suggest that plan? Was there anything peculiar about their use case, or was it pretty standard? How do you know what actions to take for a specific project, precisely the one in question?
- What was the execution plan, and how did you use it to satisfy the client’s needs?
Make sure you’re interviewing the team leader of the project and other colleagues who worked on it. You’ll want to do this to make sure you get the whole story and the perspectives of everyone involved. The more information you have, the easier it will be to write the story.
When interviewing the project management team, analyze their responses in a marketable way. What about their answers gives appeal, and where is the sweet spot for authenticity?
Every project is unique, even if there is a standard method in place. It’s the client’s problem that makes the project unique, and how the services team solved that very problem to the fullest extent.
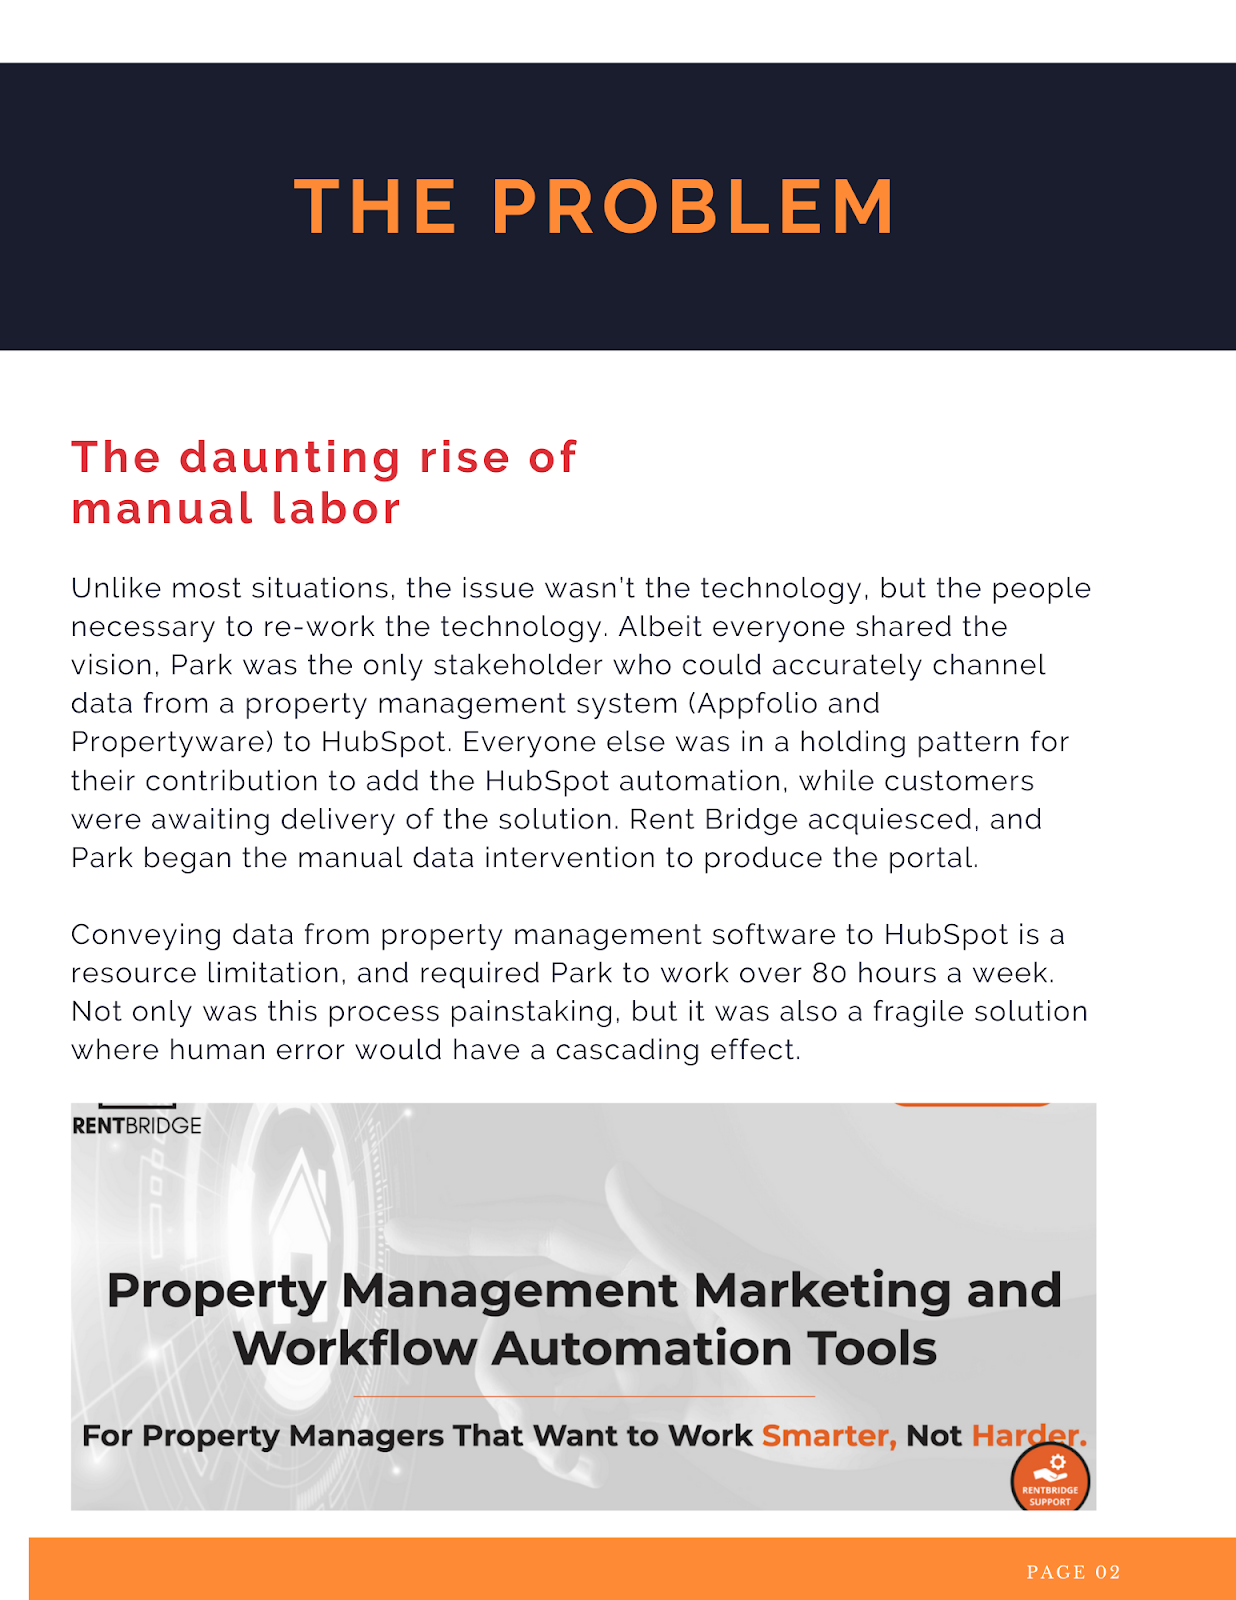
Below is an example of how you can integrate the project manager responses into a well-written overview of the problem and its challenges:

3. Tell the story using a standard outline.
The responses to your interview questions don’t necessarily need to be in a particular order. You can either start with the project manager or client questions.
Let’s say you get the client’s responses first. What are you looking for, exactly?
You’re looking for the message behind their words. Some call it reading between the lines. I call it the sweet spot of authenticity. What about their responses jumps out at you? Here is an excellent place to know your buyer personas and identify what kind of client they are.
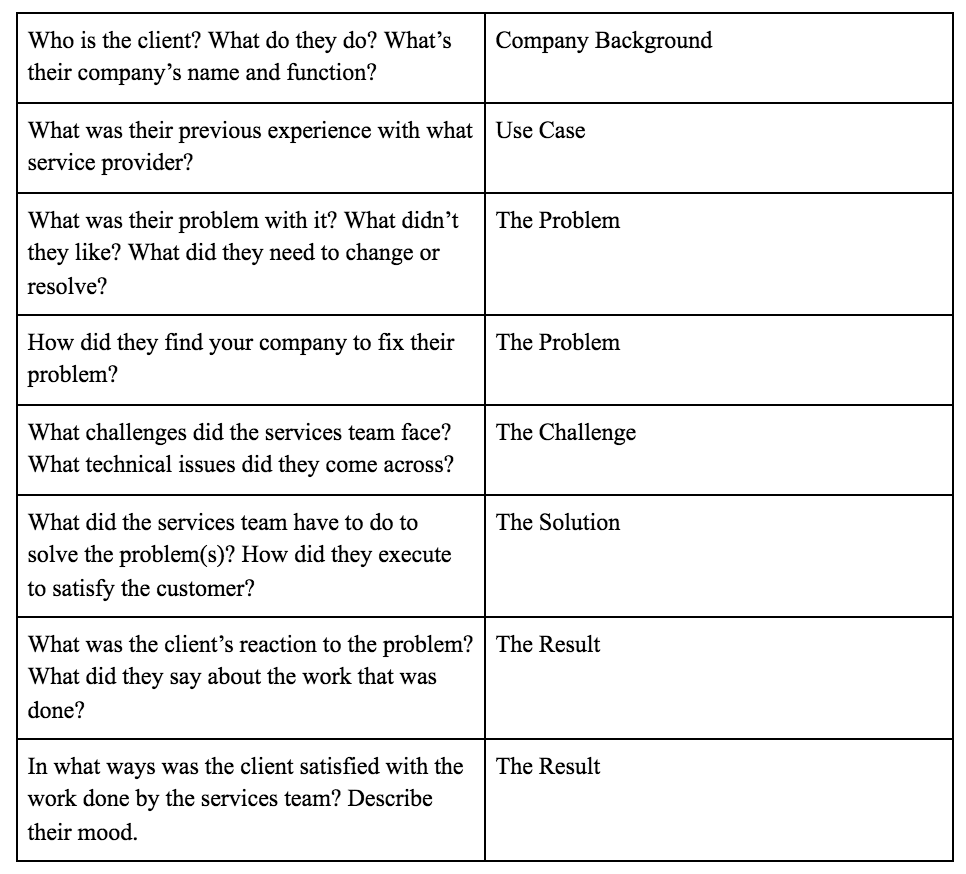
After reviewing both sets of interview responses, try telling the story to yourself from beginning to end using the questions below. In your own words, speak the story out loud. Doing so will turn fact into fiction and organize your written outline.
Place Quotes in Your Outline
Quotes from the client are paramount. Words that come directly from the source are vital to proving your company can achieve results and make customers feel cared for. The more quotes you have, the better you can showcase your customer’s achievements.
Quotes of high-quality give prospects significant confidence in choosing your services — almost as much as referrals. The quotes should never be modified unless using proper quotation rules.
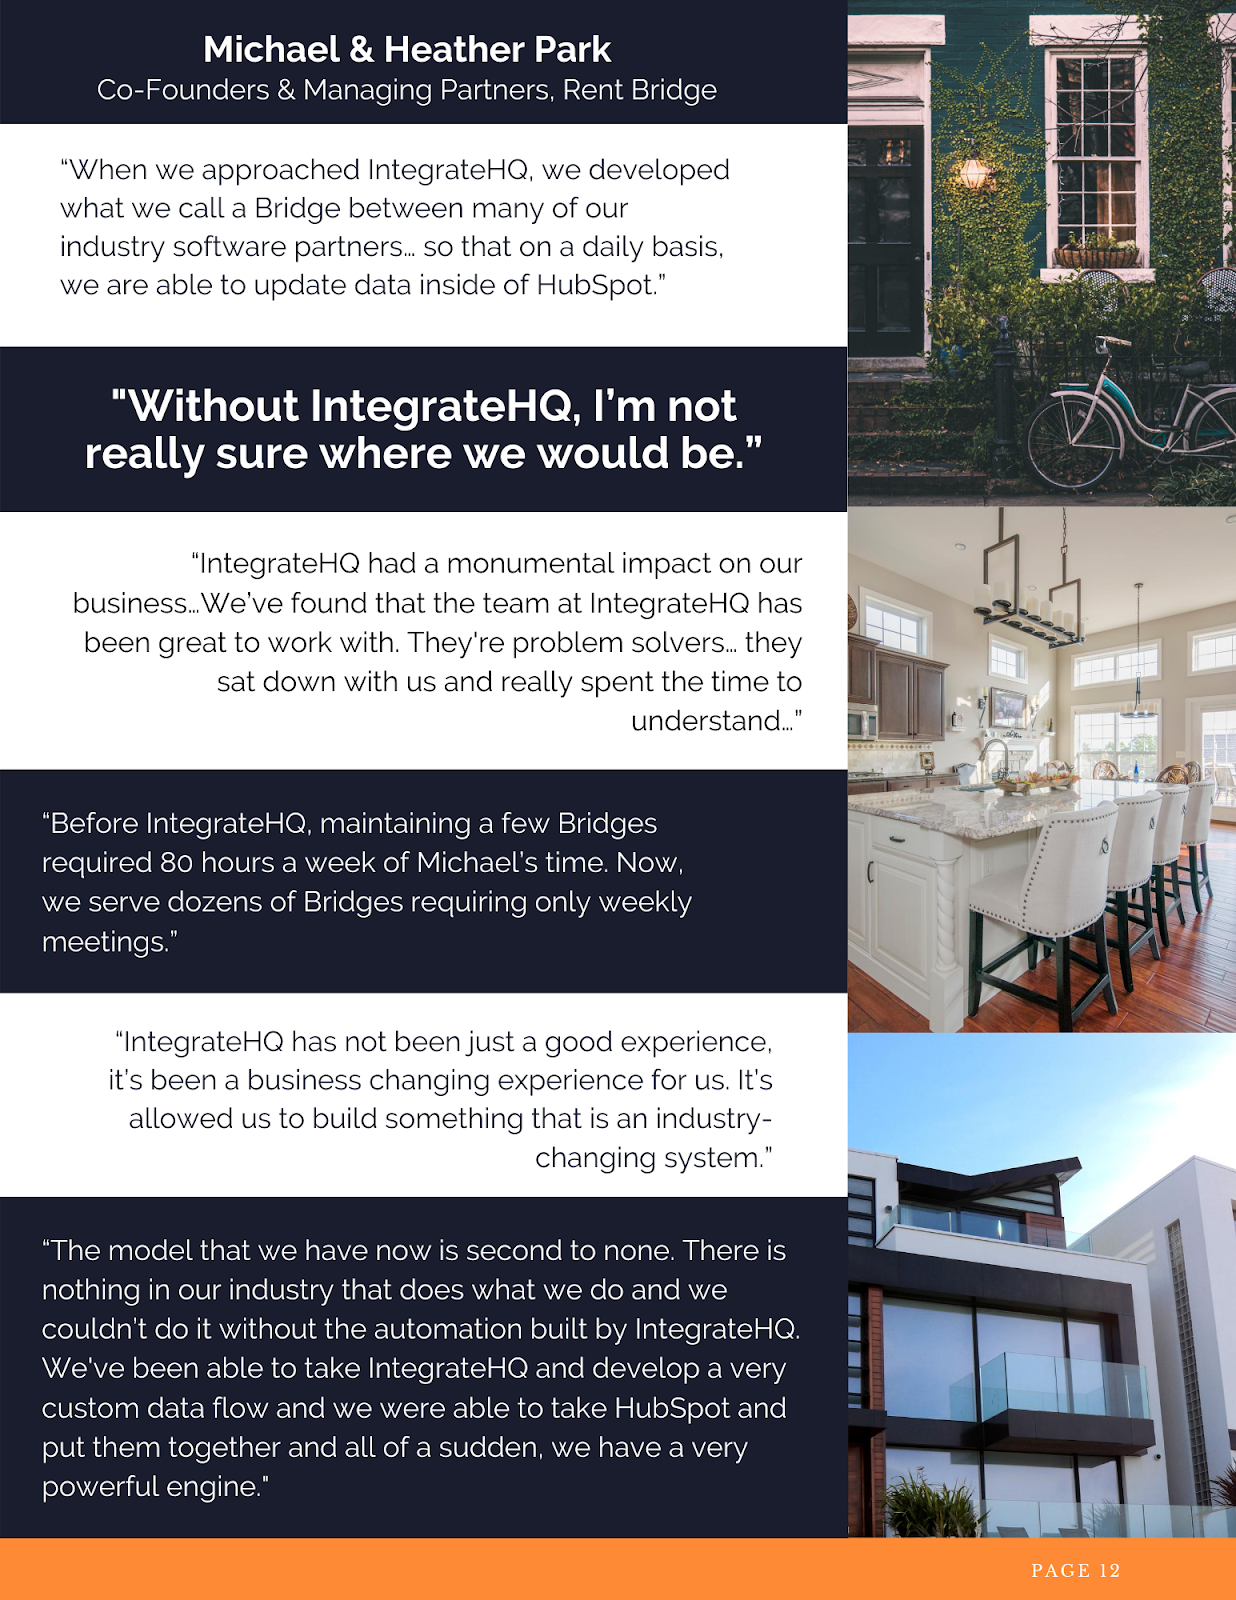
Below are examples of strong quotes:
Ask for Video Testimonials
If and when possible, getting video testimonials from your client can make your story go above-and-beyond. If the video content editing is just right, you can move your readers in a heartfelt way. That might sound odd, so take a look at the video below. It could very well be the beacon of your success story and the element that sets it apart, like this example from HubSpot, below:
Testimonials of this kind of caliber make your success story real. Additionally, consider placing quotes in various and relevant areas of your success story — you can have a quote for each one of the aspects that make up a standard, outlined case study.
4. Use concise, clear language to tell a story.
You don’t need to use fancy jargon to create a compelling customer success story — in fact, it’s preferred that you don’t. You’ll want to make it so the reader can clearly understand how your company helped solve a client’s problem, which doesn’t require superfluous language.
Here’s an excerpt that’s written clearly, and without jargon:
James felt that [company 1] had way more “bells and whistles,” which can be extremely healthy for some companies. In James’s case, however, he was only using a fraction of the features. Sometimes, too much of anything is never a good thing. Just because a system has more features doesn’t mean it will serve a specific company to its highest degree. Sometimes, less is more, and for James, “it was time to change.”
5. Design your story for visual appeal.
Ultimately, visuals are powerful opportunities to support and strengthen your story.
If you want to persuade prospects that your company is the right choice for them, you’ll want to have a well-written story, but you’ll also want to create visually-appealing materials to help support the story.
Design applications like Canva are great for combining text with imagery. Create beautiful and eye-catching case study e-book covers, or create designs to highlight quotes throughout the piece. Alternatively, consider using images related to the client and company — with permission, you might even consider using clients’ LinkedIn photos to put a face to the text.
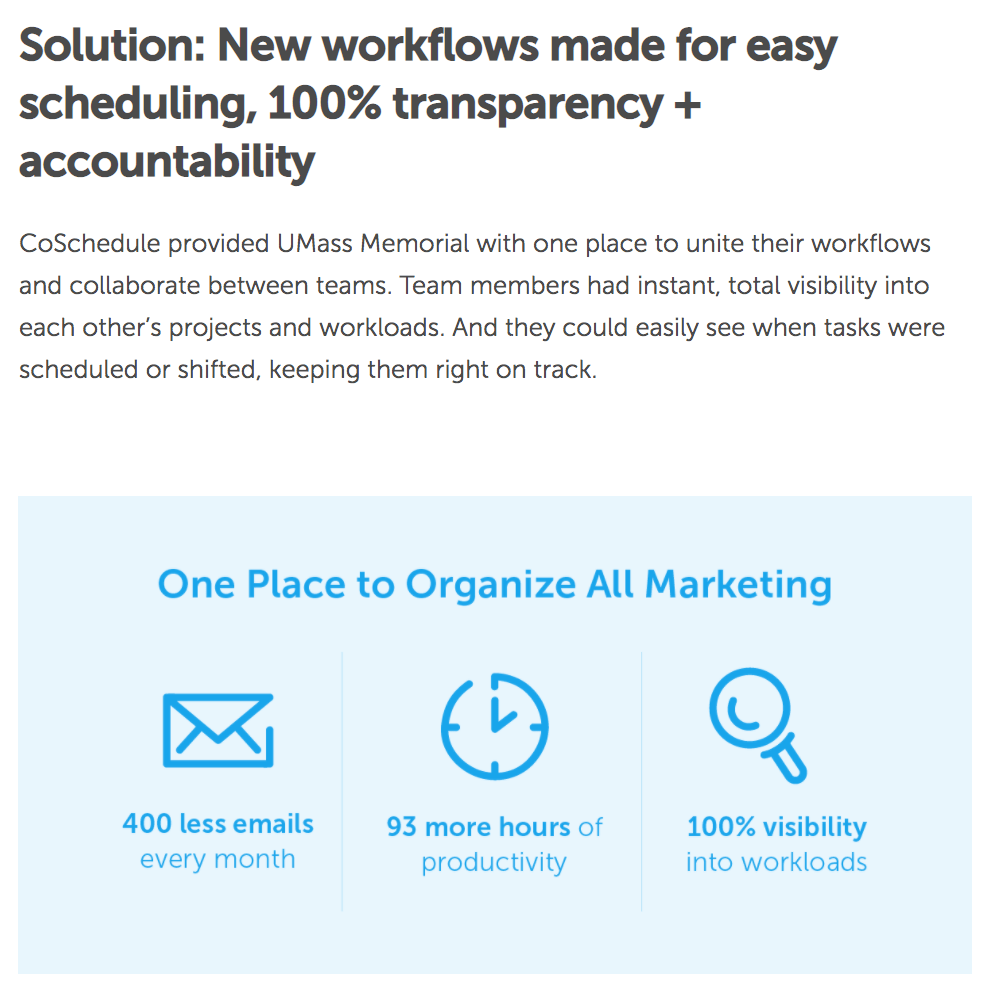
Here are some examples of customer success stories with a design for visual appeal:
1. CoSchedule Customer Success Story: UMass Memorial Health Care
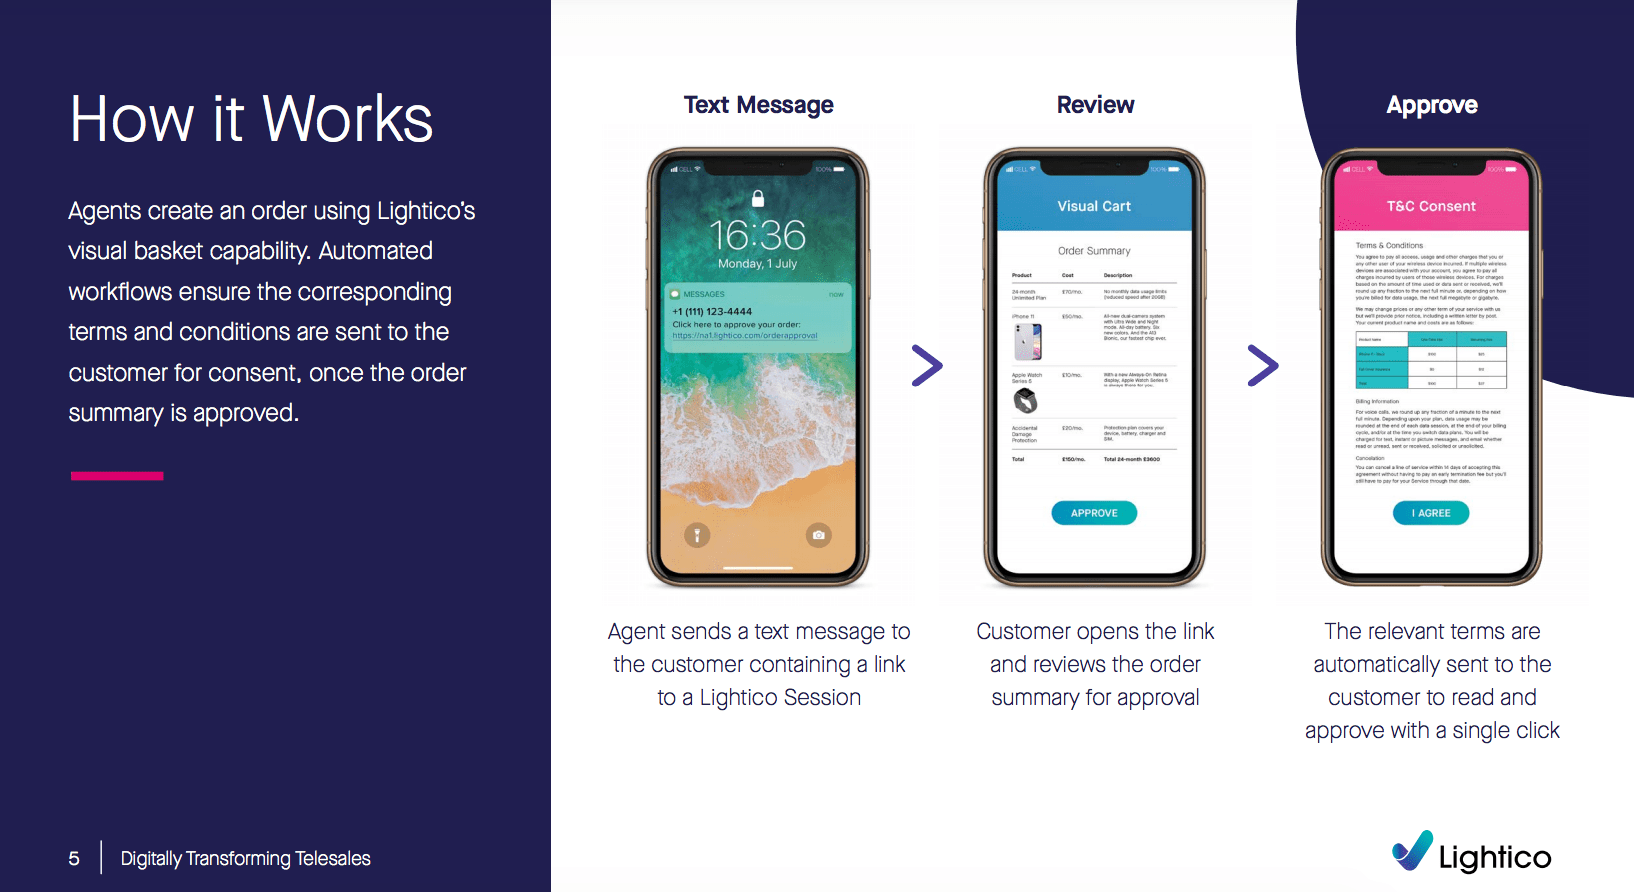
2. Lightico Customer Success Story: A1 Comms
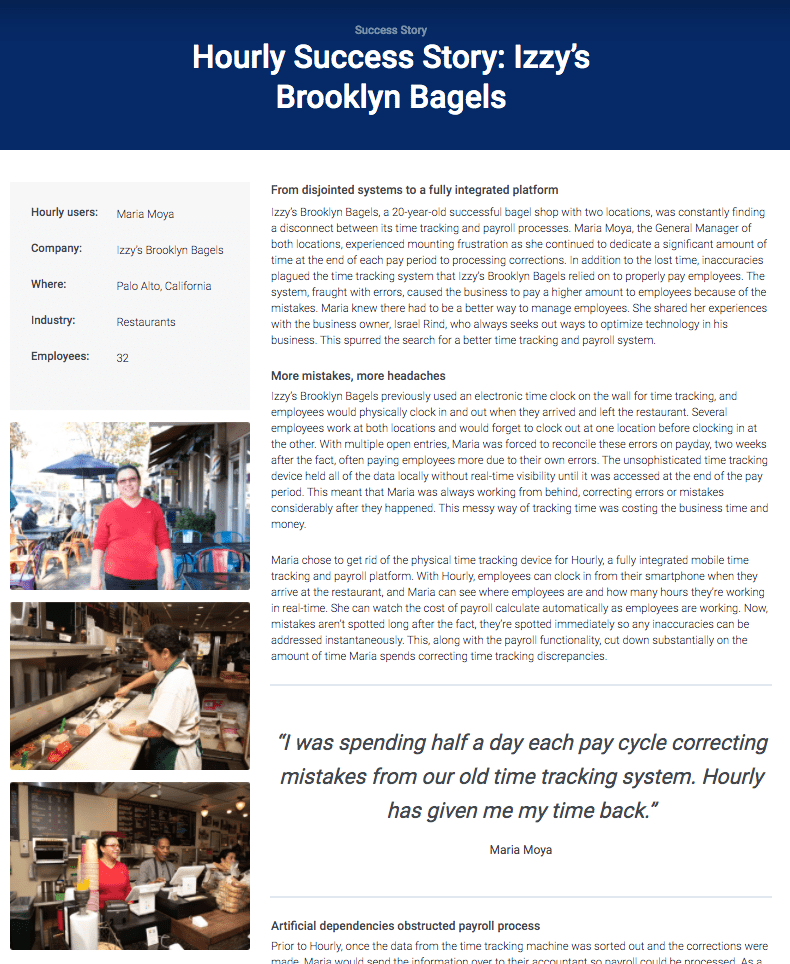
3. Hourly.io Customer Success Story: Izzy’s Brooklyn Bagels
Case studies work to showcase a company’s function to the fullest degree. They represent the facts of what happened, who was involved, and what the outcome was.
The main goal of a case study is to earn prospective customers’ trust and motivate them to choose you over your competitors.
Turning a case study into a customer success story is done through a meticulous and investigative process.
Now that you have everything you need to get started, design a visually appealing piece of content that gives the reader more than just words, but sparks their imagination of what it would be like to work with your company. They’ll want to reap the benefits of your services — and may even become the star of your next customer success story.

How to Create Custom Reports in Google Analytics
Tired of struggling with Google Analytics to find the data you need? Wish there was an easy way to customize your reports? In this article, you’ll find a step-by-step tutorial to build and save valuable Google Analytics custom reports. You’ll also learn how to find out where you’re losing valuable traffic via 404 pages and […]
The post How to Create Custom Reports in Google Analytics appeared first on Social Media Examiner | Social Media Marketing.
from Social Media Examiner | Social Media Marketing https://ift.tt/2GSNr9d
via socialmediaexaminer
13 Examples of Facebook Ads That Actually Work (And Why)
On average, Facebook is home to 3 billion users — from CEOs to students to consumers. And while the community is clearly there, connecting with them from a marketing standpoint isn’t always easy.
For brands, posting on Facebook alone isn’t enough anymore — especially for ones just starting out. Sure, you can throw money at your efforts to drive people to your Facebook Page and send them to your website, but that only works if you’re smart about it.
One way to do just that is to create optimized Facebook Ads targeted at the right audience. Optimized ads can help you spend your PPC budget wisely and see a positive return on your investment.
So, what does optimized Facebook advertising actually look like? If you’re looking for best practices for a successful ad along with examples for inspiration, you’re in the right place.
Components of Successful Facebook Ads
1. It has a clear objective.
Facebook advertising is an excellent tactic to use in your marketing strategy, but it isn’t as simple as paying Facebook and expecting customers and revenue in return. Instead, you must craft a clear ad strategy, knowing exactly how each ad functions in support of your marketing goals.
By doing this, you’ll be better able to measure success by tracking the metrics that matter, and you’ll even be able to craft better ads by choosing the most effective Facebook ads setup, including which Facebook ads objective to use.
2. It’s visual.
Visual content is not only treated more favorably in the Facebook algorithm, but it’s also more likely to be shared and remembered than written content. The lesson for Facebook marketers? No matter what type of ad you create, your image needs to be visually appealing.
3. It’s not text-heavy.
If you’re running a Facebook ad with a photo, ensure that the textual elements cover less than 20% of the image. Otherwise, your ad will fail to perform. Consider using a text overlay tool to check the ratio before setting your ads live.
4. It’s relevant.
Relevance is critical for success when using Facebook advertising. Remember, you are spending money when someone views or clicks on your ad (depending on the settings you use). If you’re showing ads that aren’t relevant to your target audience, you’re wasting your time and money and will likely not see success with any kind of advertising.
Back in February 2015, Facebook launched a feature in the Facebook advertising platform that rates your ads and gives you a relevance score, similar to Ad Rank in Google Ads. The more relevant your ad image, ad copy, and destination page is to your audience, the higher your score is — and the more favorably Facebook will treat your ads.
5. It includes an enticing value proposition.
A value proposition tells the reader why they should click on your ad to learn more about your product. How is your product or service different from any other? Why should the viewer click on your ad to see your website?
Your value proposition should be believable. For example, saying you have the greatest sandwiches in the world will not make people come to your business’s Page, but maybe offering 20% off will. Or, perhaps adding social proof will help — something like, “Sandwiches loved by over one million people every year! Come try yours today and get 20% off your order with this coupon.”
6. It has a clear call-to-action.
A beautiful and relevant ad is great, but without a call-to-action (CTA), your viewer might not know what to do next. Add a CTA like “Buy now and save X%,” or “Offer ends soon” and add a sense of urgency to your viewer. Your CTA should encourage people to click on your ad now.
The 3 Primary Formats for Facebook Ads (With Examples)
Format 1: The Right Column Ad
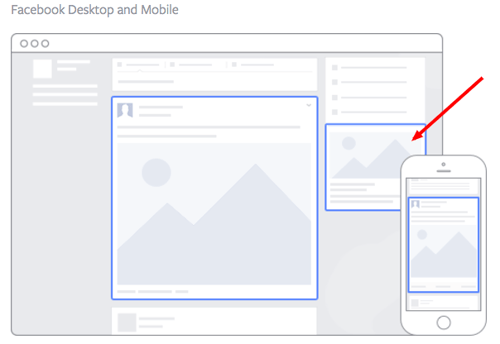
Source: Facebook
This type of ad is the most traditional on Facebook, it appears on the right side of a user’s Facebook News Feed. This is the first type of advertising Facebook had, and it still exists today.
Although ads in the News Feed are likely to get higher engagement metrics due to its native advertising features, right column ads shouldn’t be forgotten. We often see less expensive clicks and conversions when using these ads. In order for a right column ad to be successful, it needs to be relevant, have a value proposition, a good visual, and have a call-to-action. Let’s look at an example below from Winc (formerly known as Club W):
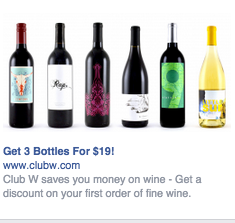
Here’s what makes this ad great:
- It’s visual. The visual is clear, simple, and appealing to all types of wine-lovers.
- It’s relevant. This came up in my wine-obssesed colleague’s News Feed. Need I say more? Two thumbs up on relevance.
- It includes an enticing value prop. Three bottles for $19? What a steal. They also pull the viewer in with an additional value: a discount on their first order of wine.
- It has a strong call-to-action. The word “get” is strong call-to-action language, and it’s used twice here. A time limit on this offer would have made it even stronger.
Format 2: The Desktop News Feed Ad
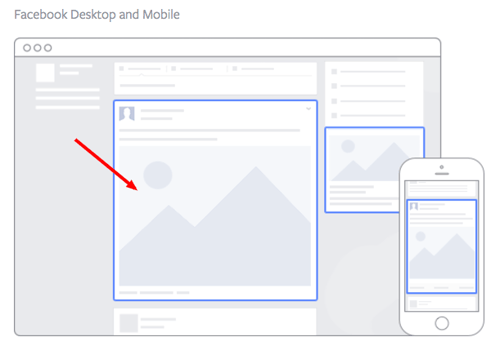
Source: Facebook
This type of ad appears directly in a user’s News Feed when they access Facebook on a desktop computer, and it looks more like native advertising. In our experience, these ads have a higher engagement rate than right column ads, but they can also be more expensive. These ads must follow organic Facebook posts best practices and be both engaging and visual.
This is how an ad from Amazon looks in the News Feed on a desktop:
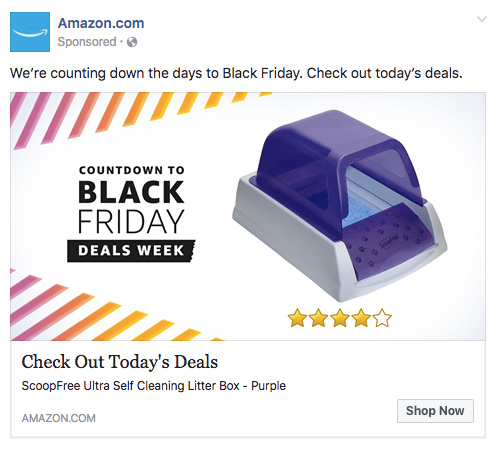
Here’s what makes this ad great:
- It’s visual. Not only is this image larger than the right column ad display, but it also uses warm colors, white space, and directional lines which drew my eye towards the featured product.
- It’s relevant. As a cat mom, this offer is clearly tailored to my consumer needs.
- It includes an enticing value prop. Amazon has advertised a self-cleaning litter box here, which is of tremendous value for any cat owner. Additionally, it shared the strong customer ratings below an image of the product. (Social proof, anyone?)
- It has a clear call-to-action. Amazon instructs me to click on its ad today, after which point the deal for the litter box will presumably disappear. “Now” is strong CTA language that compels clicks.
Format 3: The Mobile News Feed Ad
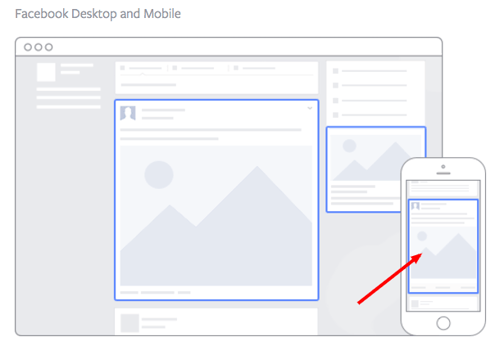
Source: Facebook
Like the desktop News Feed ad, this type of ad appears in the user’s mobile News Feed and displays like an organic posts from people and Pages that they follow.
This is what a mobile News Feed ad for The New York Times looks like:

Here’s what makes this ad great:
- It’s visual. The quirky cartoon drew my eye as I scrolled on my mobile News Feed through lots of text and photography. The nontraditional illustration pulled me in for a closer look at the content.
- It’s relevant. I’m a person in my 20s, and I used to write about health care. This is an article I would definitely be interested in reading, and it helps that the ad appears like a native post promoting an article in my New Feed.
- It includes an enticing value prop. The ad shows me which of my Facebook friends also like, and presumably read, The New York Times. This social proof makes me more likely to click and read the article.
- It has a clear call-to-action. This ad is dedicated to increasing the page’s Likes, and by asking a question in the ad, the call-to-action makes me want to click the article to learn more.
Types of Facebook Advertising & Some of the Best Facebook Ad Examples
Now that we’ve covered the three main ad formats, let’s dig into a sampling of the wide variety of post types you can use.
1. The Facebook Video Ad
Video ads appear fairly large in the user’s New Feed and offer more engaging content than static posts. And with billions of videos being watched on Facebook every day, it serves as an interesting — and potentially profitable — ad type for marketers to try out.
Need some inspiration? Check out this example from Key Jewlers below:

Why this works:
- It’s visual. Even though this is a video, I have a general idea of what I will be watching, thanks to the screen capture it started with. Additionally, I can understand the gist of this ad without playing with the sound on, which is important given that 83% of videos on Facebook are now viewed without sound.
- It’s relevant. It’s relevant to me because I was recently scouring jewelry websites, specifically for necklaces like the one in the ad.
- It’s valuable. Kay shows potential customers the value of purchasing with the help of the happy reaction from the woman receiving the gift in the ad. Plus, who doesn’t love dogs?
- It has a solid call-to-action. This ad is set up to drive Page Likes, which is an easy, one-click way for me to get more relevant content served up to me.
How can you create your own video ad? First, understand Facebook video ad requirements including length and video size. We suggest keeping your video as short as possible, even though Facebook allows you to upload a much larger video.
2. The Photo Ad
Another type of rich media advertising on Facebook is a post of an image. This is one of the most popular types of ads ever since Facebook began favoring visual content. The optimal size for News Feed photo ads is 1200×628 pixels, otherwise your image will get cropped. Adjust your image based on the target audience’s needs and by what will appeal to them the most.
Here’s an example of a photo ad from NatureBox:
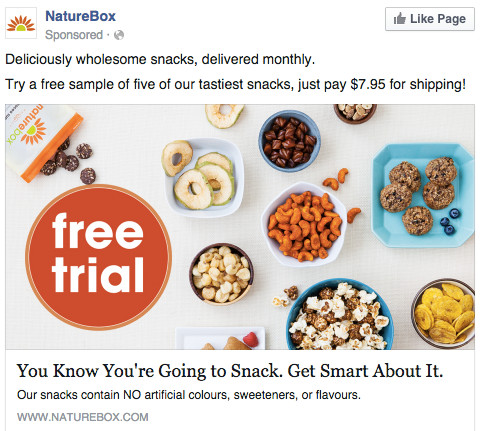
Why this works:
- It’s visual. The image shows you exactly what you’re getting, and it calls out the “free sample” CTA well.
- It’s relevant. Everyone likes to snack. In all seriousness, the person who saw this is a fan of several lifestyle subscription companies, which is what NatureBox is.
- It’s valuable. This ad is full of value. First, the “free trial” callout is the first thing your eyes go to when looking at the image. Second, it clearly mentions the healthy aspects of the goodies in its product.
- It has a clear call-to-action. Nature Box is asking you to try its free sample. It couldn’t be easier to know your next step.
3. The Link Click Ad
One of the most common ad objectives is driving traffic to an external (off-Facebook) website. You can do that using a link click ad.
By including a call to action button on the ad, you’ll be able to generate link clicks to a destination that you specify, often a landing page on your website. Paired with a compelling offer and interesting imagery, you can get lower cost per click (CPC) than other types of advertising along with a great click-through rate.
Here’s an example of a link click ad from Fragrant Jewels:

Why this works:
- It’s visual. While it’s technically a link click ad, Fragrant Jewels used a video to show off the product and then make the offer (click below to crack the egg). The video included captivating imagery, including this attention-grabbing dragon egg in dynamic blues.
- It’s compelling. The egg itself presents a sense of mystery. What’s inside?
- It has a clear call-to-action. Fragrant Jewels uses the image to present drama and intrigue but also clearly guide the audience to click the button. The audience will happily “learn more” to crack the egg.
- It’s valuable. In addition to the egg gimmick, the ad also presents an offer: 26% off and free shipping. If the products in the video are of interest to the audience, this offer provides more inertia to the video’s theme and the action it’s asking them to take.
4. The Multi-Product Ad
Multi-product ads allow advertisers to showcase multiple products within one ad. Viewers can scroll through the images and click on individual links to each product. You can promote multiple of anything, not just products — like different blog posts, ebooks, or webinars.
Here’s an example of a multi-product ad from Shutterfly, along with the additional images that are used in the ad. Each image has a different offer, to appeal to many different demographics in one ad.
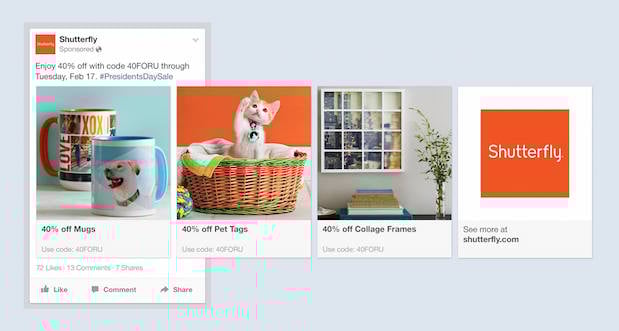
Why this works:
- It’s visual. This series of images is displayed on a consistent color pallette, making it feel both cohesive and on brand. (Having a cute cat doesn’t hurt either.)
- It’s relevant. The person who saw this loves taking photos and creating sentimental gifts. Spot on, right?
- It’s valuable. There is a very clear value for the user, 40% off each of the products being advertised. The code and sale end date are also clear in the ad description. This ad also has an added level of value, it is showing the many different ways people can use Shutterfly, in ways many may not be aware of.
- It has a clear call-to-action. I know I need to use this before February 17th when this deal expires, so I would be encouraged to take action right away.
5. The Local Ad
Local ads on Facebook only work if your business has a physical location that you are trying to drive real foot traffic to. If you fall into this category, then locally targeted Facebook ads may be a great fit for you, as you can hyper-target on Facebook down to the mile.
If your business has an offer or event going on at your store, set up a few Facebook ads that appear only to people within a short distance of your store. Have these ads appear a few days prior to the event and on mobile devices while the event is happening. You may want to reach some people the day of the event who happen to be in the area and checking their Facebook account on their smartphones.
Take this ad for example from Mizzou Campus Dining:
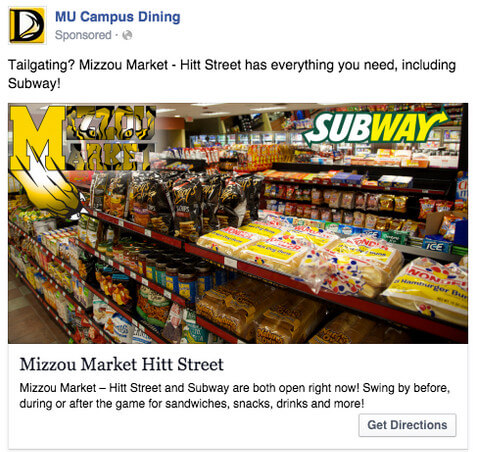
Why this works:
- It’s visual. This image has college pride, a variety of salty and sweet treats, and a well-known logo to attract hungry college students.
- It’s relevant. This ad is likely only being shown to students on campus who are in its target audience. It also mentions the sports game that was going on at the time, and plays to the student’s current needs: snacks and Subway sandwiches.
- It’s valuable. Mizzou Market is telling hungry college students that it has everything students need for the big game.
- It has a clear call-to-action. This ad has the option to show directions, making it extremely easy for a college student on the go to follow the walking directions to this market.
6. The Offer Ad
An offer ad is a newer form of Facebook advertising where a business can promote a discount on a product or service that can be redeemed on Facebook. The benefit of this? It eliminates one step in the buyer’s journey, which ultimately increases sales.
The offer ad has many benefits. First, it drives the user directly to the offer. The user claims it directly on Facebook, removing any added friction of needing to to go to your website for the offer. You also can reach any type of audience that you want, as all the Facebook targeting options are possible.
Finally, you can include all the information needed for the user to decide if they want it or not, including the time period it is usable, the number of people who has already claimed it, and the exact amount the offer is. This will eliminate any unqualified clicks, which cost you money.
Here’s an example of an offer ad Boston Sports Club:
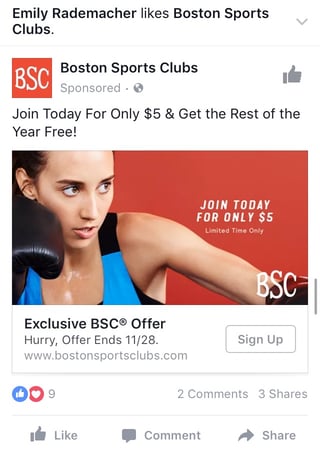
Why this works:
- It’s visual. The featured photo uses bold colors and clear typography to draw my attention to the details of the offer, and the woman exercising gives me an idea of what I could gain from purchasing the offer.
- It’s relevant. I recently moved to Boston and have been searching for gyms in my area online, so this ad is highly relevant to my recent Facebook and search activity.
- It’s valuable. Paying $5 for a monthly gym membership is a great deal. Even though the price may increase in the future, the low price definitely makes me want to click.
- It has a clear call-to-action. The CTA emphasizes that the discount offer is limited and should be claimed quickly using the word “hurry” and telling me when the offer expires.
7. The Event Ad
Event ads promote a specific event. The CTA on these ads usually send users directly to the ticket purchase page, wherever that happens to be hosted.
Using this type of ad will help drive a targeted group of people to attend your event. These will show up in the News Feed of the specific audience you’ve chosen. Events are a big part of most businesses, but getting people to attend even a small event, can be tricky. Promoting your event to a targeted specific audience on Facebook can help drive the right kind of attendees.
A good ad in this format will clearly show the benefit of attending the event: The price, dates, and a clear CTA to purchase a ticket. The events ad below for the Tortuga Music Festival displays the date and time and the bands playing:
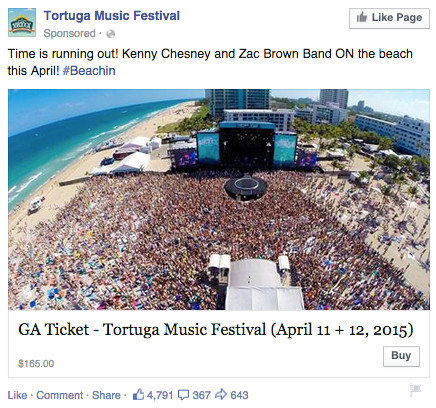
Why this works:
- It’s visual. The picture alone is worth a thousand words about how much fun this concert would be. Not only is it on the beach, it was also taken on a gorgeous day and the stage looks amazing. Also, it clearly represents what to expect during the event, and it catches the eye as someone scrolls through their News Feed. (The beautiful ocean water definitely helps.)
- It’s relevant. The person who saw this ad is a fan of Kenny Chesney and has been to his concerts before. They’re also originally from Florida, which is where this event takes place.
- It’s valuable. Since the image was taken on a beautiful day, it looks like an ideal place to be — especially to those of us viewing it from our office desks. It also clearly tells you the cost of the ticket so you know before you click. (This is also good for the advertiser: By including the price, the ad allows users to self-select based on whether they can afford the ticket. If they can’t afford it, they won’t click through, thus saving the advertiser money on unqualified clicks.)
- It has a clear call-to-action. The CTA is clear: “Buy.” The advertisers also add urgent wording with the title “Time is running out!”, encouraging you to purchase your ticket now before it’s too late.
8. The Retargeting Ad
A retargeting ad promotes an ad to a specific list of previously identified people. Have you ever seen ads follow you across the internet after visiting a certain website? Then you’ve seen a retargeting ad.
Facebook has the same capability. An advertiser can advertise to a list of leads or customers by uploading a list of email addresses it already has to make a custom audience. A good retargeting ad acknowledges that the brand knows you’re already interested in its product. (Because, let’s face it … retargeting can be a little creepy.)
Last week, I started shopping around for a bridesmaid dress for an upcoming wedding. Today, this ad appeared in my News Feed:
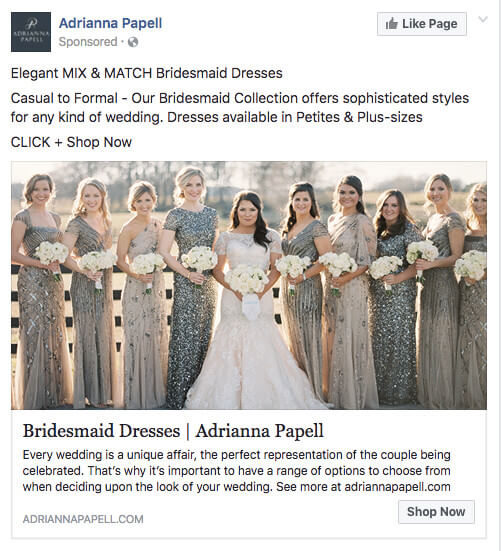
Why this works:
- It’s visual. The image gives me a good idea of what to expect from the designer’s website, and it definitely helps that the gowns are both unique and stunning. Talk about a showstopper.
- It’s relevant. The ad called out that I was already shopping for bridesmaid dresses, and what’s more, I had previously looked at dresses on this exact website, so this ad is highly relevant to my search.
- It’s valuable. The variety of dresses in the ad’s image and in the description make this website worth a visit for someone trying to find the perfect gown out of thousands of options.
- It has a clear call-to-action. The CTA is “Shop Now,” which encourages me to click to purchase the beautiful dresses in the ad’s image.
9. The Dynamic Product Ad
Speaking of retargeting ads that seem to “follow you around,” dynamic product ads do this at another level. Have you ever visited a product page and then thought, “Well, now’s not the right time?” and then left? Fact of the matter is that we’re not going to win every buyer on their first impression with us, so the key is to stay top of mind until they time is actually right.
Dynamic product ads are a form of the multi-product ad… with a twist: The ad will auto-populate items based on the audience’s past interactions with your website. This may include things they left in the cart or even items of a similar type. For example, here’s an ad from Etsy advertising products based on my browsing preferences:
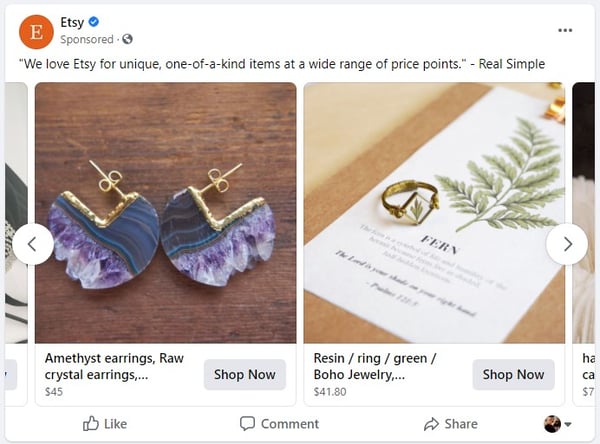
Why this works:
- It’s relevant. Etsy is saying “We know your taste, and you can find products that match it here.”
- It’s valuable. The prices are clearly displayed, and the ad even alludes that there’s more to be found “at a wide range of price points” if the ones on this ad aren’t compelling.
- It’s visual. All items in the carousel have professional photography and a similar color scheme. The uniqueness of the items also draws the eye.
- It has a clear call-to-action. “Shop Now” is an invitation to find out what products they have in their marketplace, and it’s not an overly salesy CTA. After all, who doesn’t love to shop?
10. The Boosted Post
A boosted post is an organic Facebook post that was originally on the homepage of a company’s Facebook, and that later was boosted with advertising money.
This is different from the above ads because it’s not created in the Facebook Ads Manager. You can include more in the description, as there is no limit to word count on boosted posts like there is in ads. You can also have a link in the copy.
The cons? Boosted posts leave you fewer options for bidding, targeting, and pricing. You also cannot run any types of A/B tests because you’re promoting a post that’s already been creating, not creating one from scratch.
Here’s an example of a boosted post from Bustle, who promoted one of its articles on Facebook:
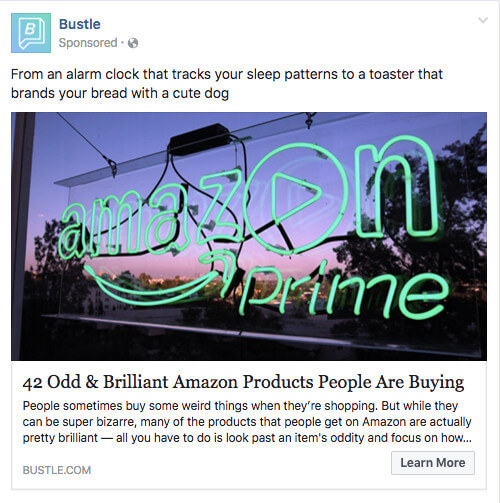
Why this works:
- It’s visual. Lots of people are familiar with the Amazon Prime logo, but not in neon lights in a window display. It made me do a double-take while scrolling through Facebook.
- It’s relevant. As we’ve already learned from earlier examples, I like shopping on Amazon and also read Bustle, so this article is a combination of those two behaviors.
- It’s valuable. “Brilliant” is a strong adjective to describe products, which makes me curious to learn more about purchasing them.
- It has a clear call-to-action. The ad entices me with information about useful and “brilliant” gadgets I can get delivered to my door within two days, which I’m happy to click to learn more about.
Getting Started
There you have it: A list of all the different types of Facebook posts and a few examples of awesome ones from all different brands. The Facebook Ads Manager platform will walk you through how to set these up with simple, step-by-step instructions — so don’t feel overwhelmed.
Editor’s Note: This post was originally published in June 2012 and has been updated for freshness, accuracy, and comprehensiveness.

Pasarelas de Pago: cómo diseñar tu pago online para combatir el abandono de compra
Las buenas pasarelas de pago se pueden transformar en ventas concretadas. Para demostrarlo, te contaré una historia.
Desde que comenzó la cuarentena por el nuevo coronavirus quería comprarme un par de pesas para hacer ejercicio en casa.
Como en todo momento tenía la sensación de que la actividad iba a normalizarse, cada mes aplazaba la decisión sustituyendo las pesas con botellas de agua.
Varias veces estuve a punto de concretar la comprar, pero o tenía que ir a buscar mi tarjeta para rellenar los campos y me desalentaba o la página tardaba mucho en cargar o tenía que hacer demasiados clics.
Una mañana, antes de levantarme, me encontré con una oferta en Instagram.
El anuncio no tenía nada de espectacular, pero era claro y manejaba una pasarela de pago que yo ya había usado, por lo tanto estaban guardados los datos de mi tarjeta.
Cuando me di cuenta, había concretado la compra que tanto aplacé.
Esta historia viene a cuento porque si comercializas productos o servicios, sabes lo importante que es ofrecer vías de pagos online fáciles y seguras.
Por eso, voy a abordar el tema de las pasarelas de pago: cómo funcionan, qué opciones hay en el mercado y cómo elegir la mejor.
Además, te hablaré de GrooveSell, un carrito de la compra tipo Paykickstart donde podrás integrar tus pasarelas de pago.
Está incluido tanto en la licencia GRATIS como en la de pago de GrooveFunnels.
Pasarelas de pago, ¿por qué los clientes no terminan su compra?
Según la empresa de análisis Baymard, en lo que va de 2020 las pasarelas de pago complicadas fueron la tercera razón por la que los adultos en Estados Unidos abandonaron el carrito de la compra.
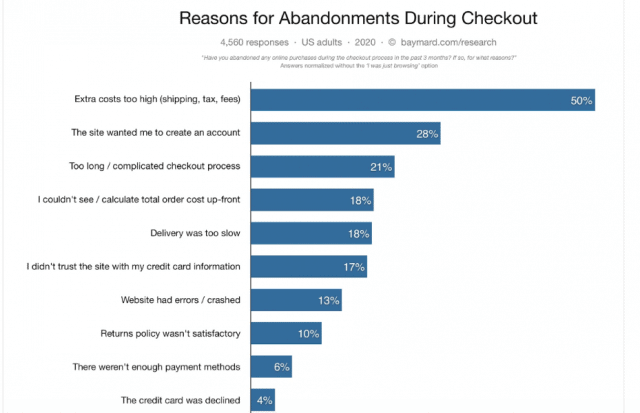
Hay que contextualizar que muchas de las personas que agregan un producto al carrito de la compra, en realidad solo están mirando y no tienen una verdadera intención.
Para el estudio que aquí mencionamos, solo se tomaron los datos de quienes realmente querían comprar.
La razón número 1 del abandono del carrito fueron los costos extra como el envío o impuestos; la número dos, el tener que registrarse en una eCommerce para comprar.
Registrarse implica un grado de fidelidad que los clientes no precisamente están dispuestos a asumir.
Sin embargo, la publicación citada insiste en el tema de las pasarelas y formatos de pago online.
En resumen, afirman que las pasarelas de pago deben ser sencillas, rápidas y confiables.
Las pruebas de usabilidad de Baymard revelaron que el proceso de pagos online ideal debe implicar que el cliente rellene formularios de entre 12 y 14 elementos. Si pueden ser de entre 7 y 8, mejor.
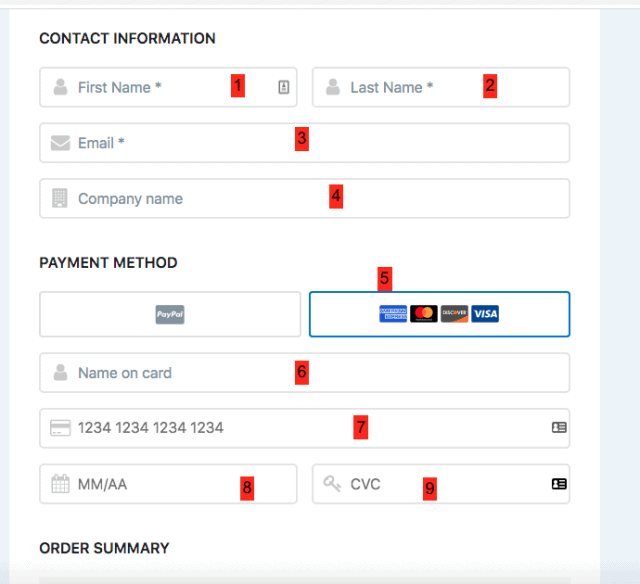
El estudio concluye que si un eCommerce facilita los procesos de sus pasarelas de pago, podría aumentar las conversiones hasta en un 30%.
>>> ¿Quieres conocer otro truco para aumentar las conversiones en un 30%? En este post lo explicamos.
Retomando el tema, estas son las recomendaciones para combatir el abandono de carrito con los formatos de pago online:
- Sintetiza al máximo los elementos del formulario de la pasarela de pago.
- Evita pedir al cliente que cree una cuenta contigo para comprar.
- Trata de informar el precio lo más acercado a lo real, con impuestos y costo de envío.
- Si las pasarelas de pago hacen una redirección, infórmalo al cliente. Salirse de tu página puede generar desconfianza.
- Usa pasarelas de pago con prestigio.
¿Qué es lo que hace buenas a las Pasarelas de Pago?
Antes que nada, es necesario saber cómo funcionan las pasarelas de pago.
En realidad, son intermediarios entre el dinero electrónico del cliente (el de su cuenta de banco) y tú.
La pasarela de pago cifra los datos del cliente para evitar que cualquier hacker en la red los tome y los use para estafar.
De forma segura, la pasarela transfiere el dinero del banco a tu caja. Por hacer este proceso, cobra una comisión.
Ahora, ¿cómo saber cuáles son las mejores pasarelas de pago para tu eCommerce?
Estos son los elementos en los que tienes que poner atención:
Integración de los pagos online
Antes de decidirte por cualquiera de las pasarelas de pago en el mercado, debes ser consciente de tus recursos.
Si no tienes un desarrollador, por ejemplo, tendrás que buscar una pasarela que sea fácil de integrar.
En Latinoamérica, Mercado Pago se integra con la facilidad de agregar un plugin a tu sitio web.
Te contamos esto porque hay algunas pasarelas de pago que necesitan la instalación de un software.
Si no puedes integrar la pasarela a tu sitio, no tiene sentido. Además, este proceso debe ser rápido.
Otro aspecto es que debes asegurarte de que la pasarela acepte pagos desde dispositivos móviles.
No pierdas tiempo, si no tienen esta funcionalidad, no te sirve.
Costo de las Pasarelas de Pago
Obviamente, el costo de las pasarelas de pago es un aspecto muy importante a tener en cuenta.
En el Reino Unido, por ejemplo, PaymentBrain compara el costo total de las pasarelas de pago en función del número de transacciones y el promedio del ticket. Para ver ambas imágenes, haz clic en la flecha.
De manera general, los 3 costos que deberás tener en cuenta son:
- Instalación.
- Transacción.
- Mantenimiento.
La gestión de pago directo o API
Esto hace referencia a algo que comentaba en párrafos anteriores, si un cliente tiene que salir de la tienda para completar el pago, corres el riesgo de perderlo, ya sea porque siente que lo hace perder tiempo o porque desconfía.
Por eso convienen pasarelas de pago con una interfaz de Programación de Aplicaciones, lo que seguramente has leído como API.
Esta función te permitirá gestionar los pagos desde la misma tienda.
Garantiza la seguridad
Las pasarelas de pago deben cumplir mínimo con dos protocolos de seguridad: SSL y AVS.
De esta forma podrás garantizar a tus clientes que no hay riesgo en su compra.
- El protocolo SSL cifra los datos de la transacción, así se evita que la información termine en manos de un desconocido. Una forma de saber si un sitio cumple con este protocolo es verificando que la dirección comience con https:// y que tenga el símbolo de un candado cerrado.
- El AVS (Sistema de Verificación de Dirección, en español) está orientado a proteger al eCommerce. Solicita al comprador la dirección fiscal vinculada a la tarjeta. Así se comprueba que el comprador es el propietario de la tarjeta para minimizar el riesgo de fraude.
Atención al cliente de las Pasarelas de Pago
Esto lo sabes bien, un equipo de soporte eficiente hace la diferencia. Si no dominas inglés, asegúrate de que la atención al cliente de la pasarela de pago esté en tu idioma.
Debes tener en cuenta también los canales de comunicación disponibles (chat, email, teléfono) y el horario (24/7, etc).
>>> Atención al cliente: el caso de los zapatos rojos que se venden por medio de un chat visual.
Preferencias del cliente
Al tener un eCommerce parte de lo que vendes es credibilidad. Por tal motivo, no es mala idea usar pasarelas de pago consolidadas en el mercado.
Si tu negocio tiene capacidad internacional, debes elegir alguna que te permita cobrar con moneda extranjera.
9 Pasarelas de Pago en Europa y América Latina
Si estás buscando pasarelas de pago, estas son algunas de las más utilizadas tanto en Europa como en América Latina:
#1. PayPal: funciona en todo el mundo. Su punto fuerte es su reputación. Su aspecto débil es que las comisiones son caras.
#2. Redsys: atiende principalmente al mercado español. Su ventaja es que cuenta con la confianza de los consumidores. En contraparte, el proceso de contratación suele ser lento y la integración no es sencilla.
#3. MercadoPago: es la reina en América Latina. Es rápida, está bien consolidada y ofrece a los usuarios la posibilidad de pagar en cuotas o puntos físicos. Esto es útil para conservar a los clientes que no están bancarizados. Su punto en contra es que las comisiones son altas.
#4. Pagantis: se enfoca en el mercado español. Su fortaleza es que permite pagar en cuotas, por lo que se recomienda para los eCommerce con tiquets de compra altos. Además, las comisiones son bajas. El punto débil es que redirige al comprador a otra web para concretar el pago.
#5. Braintree: funciona en todo el mundo. Su mayor fortaleza es que está optimizada para pagos desde dispositivos móviles. Su integración es rápida y las comisiones son bajas.
#6. CoinGate: sabemos que el entorno de las criptomonedas todavía no está masificado, pero aún así hay eCommerce que aceptan este tipo de pagos. CoinGate opera con más de 50 criptomonedas, su comisión es baja y su integración, rápida. Su punto en contra salta a la vista, las criptomonedas no son una forma de pago popular.
#7. PayU: es la alternativa en Latinoamérica a Mercado Pago. Su integración es rápida, pero cobra comisión tanto por transacción como por transferencia del dinero a tu cuenta.
#8. Latterpay: es una muy buena opción para los comercios porque al cliente le ofrece la posibilidad de pagar en 3 cuotas pero al eCommerce le abona el costo total de la venta. La pasarela de pago asume el riesgo por la financiación.
#9. Divvy: es una pasarela de pago basada en la economía colaborativa. Permite dividir el pago entre varias personas. Esto es útil, por ejemplo, si varios amigos van a hacer un viaje y cada uno debe pagar su parte del alojamiento.
GroveSell para integrar tus Pasarelas de Pago al funnel de ventas
Si vendes infoproductos o cualquier producto digital, GroveSell es una solución gratuita de carrito de la compra para integrar las pasarelas de pago a tu funnel de ventas.
Es el equivalente a Paykickstart, es decir, te permite agregar a tu funnel de ventas un carrito de compra con gestión de afiliados para infoproductos y productos digitales.
Lo mejor: no pagarás ni tarifa mensual ni costo por transacción.
Tiene filtros para que puedas ver las transacciones de todos los afiliados, no afiliados o afiliados específicos.
Los clientes pueden descargar facturas, cambiar los datos de su tarjeta de crédito y gestionar devoluciones.
Además, muy pronto, agregarán la posibilidad de dar cupones para fidelizar clientes. Puedes integrarlo a tu cuenta de PayPal, Stripe, Braintree, etc.
Es parte de la suite de GrooveFunnels, una herramienta de marketing que engloba varias soluciones por un pago único y de por vida:
- Editor de video.
- Su propio sistema de afiliados (paga comisiones de entre el 20% y 40%).
- Plataforma de email marketing.
- Próximamente tendrá plataforma de webinars.
- Próximamente tendrá plataforma de alojamiento de videos, y más.
Puedes conseguir GrooveSell al abrir una cuenta gratuita de GrooveFunnels, que te permitirá crear 3 embudos de venta gratis con dominio y alojamiento.
La versión de pago se llama GrooveFunnels Platinum, que incluye todas las herramientas y funnels ilimitados.
Conclusión de las Pasarelas de Pago
Adquirir la intención de compra de un cliente tiene un costo, tú lo sabes. Por ese motivo, debes evitar perderlo solo porque las pasarelas de pago no funcionan bien.
Una recomendación final es que ofrezcas la mayor cantidad de métodos de pago que te sean posibles: tarjeta de crédito, débito, depósito en efectivo o transferencia bancaria.
Además, no olvides asegurarte de que el pago a través de dispositivos móviles sea sencillo y claro.
¿Cuál es tu experiencia con las pasarelas de pago?, ¿hay alguna que nos quieras recomendar?
from Socialancer https://ift.tt/3lDj9G7
via
17 of the Most Creative ‘Meet the Team’ Pages We’ve Ever Seen
To a prospect seeking out a new service provider, it can all be a little overwhelming. It’s easy to wonder: Who are the real people behind all the smoke and mirrors?
Adding a “Meet the Team” page or section to your website is an easy, effective way to give your business a accessible face. It gives prospects an idea of who exactly they’ll be working with, and shows potential employees that you’re proud of the people on your team.
For some inspiration, see how these companies introduce visitors to their most important creative assets: their people.
1. Yokel Local
Yokel Local is a Platinum HubSpot Agency Partner who positions themselves as an extension of their clients’ marketing teams. For that reason, they showcase the people on their staff to highlight the humans behind the brand.
What’s pleasing about this particular ‘meet the team’ page is the matching blue backgrounds and cool palette. The grid design provides a modern feel, and if you click on one of the faces, a box will open with more information about the team member, including their bio, credentials, and social profiles.
2. Digital Marmelade
Since most employee bios read a lot like a list of stats (“10 years in the industry … 4 years at the company … Managed 80 website redesign projects … “) the folks at Digital Marmelade decided to have a little fun with the format.
Each employee at the London-based marketing agency has a trading card-style profile detailing their actual marketing accomplishments and personal facts, as well as their fictional superhero abilities.
It’s a quirky twist that gives visitors a colorful snapshot of the agency’s team, highlighting both their impressive experience and friendly culture.
3. CloudHorizon
CloudHorizon is a mobile product development company. On their about page, they say, “Some of the more rewarding projects we have had the honour to be involved in, started with simple ideas and grew profitable businesses from the ground up.”
With this in mind, their ‘meet our team’ section is a great way to illustrate that idea. When you hover over an image of a team member, their thumbnail flips over to reveal a photo from their childhood with a small caption of what they wanted to be when they grew up. The idea being that it takes time and innovation to become great things.
4. Bolden
Bolden’s team bios are more conventional than some of the others on this list, but what they lack in invention they more than make up for with style.
Hovering over each team member’s picture produces a colorful stacked card effect, revealing brief employee bios in coordinated fonts. This is a great example of a minimal, accessible “Meet the Team” page that manages to look cool and introduce the faces behind the agency without going over the top.

5. Rock Kitchen Harris
Rock Kitchen Harris, a full-service agency, decided to skip the photos altogether and showcase the cartoon versions of their employees instead.
Each employee at the English agency had a custom caricature drawn up, and every single one has a different personality. While some employees opted for representations reminiscent of LinkedIn profile pictures, others got a little creative with it, dressing their cartoon selves up as Ewoks and other characters.
6. FCINQ
FCINQ, a creative studio, introduces us to their team with a collage of colorful bubbles.
Hovering over an employee’s individual circle produces a zoomed-in effect, and clicking expands their headshot with their name and social profiles. The splashy set up is a stylish alternative to the expected rows of team photos and names.
7. Zulu Alpha Kilo
This Canadian agency presents their founding team with refreshing comedic flair. While many agency leaders choose to represent themselves with stoic business portraits, the three leaders of Zulu Alpha Kilo opted for playful photos and cheeky bios.
Here’s an excerpt from the bio of Marcus Alpha — the agency’s “Ultra Chief Creative Director Officer”:
Marcus has a reputation for pushing his creative teams further than any other creative director. He makes them work late nights, weekends and through holidays in pursuit of that one truly breakthrough creative idea. And when they’ve finally cracked it after weeks of gruelling and thankless work, Marcus will triumphantly stand in front of the client and present it as an idea he had in the shower that morning instead.
8. Stink Digital
We love this expertly color-coordinated slideshow of team members form Stink Digital.
This creative agency has offices in five major cities around the world — including New York, Paris, and Berlin — but having a personable “Meet the Team” section helps give their business an accessible edge. They don’t call themselves “a global company with a local feel” for nothing.
9. Drexler
This “Meet the Team” section from Drexler is perfect proof that you don’t necessarily need a whole page devoted to introducing your employees — just a small section can do the trick.
This simple but polished team member marquee appears at the bottom of the Baltimore, Maryland-based agency’s “About” page, and adds a welcome personal touch to their website.
10. Matchstic
As a branding agency, Matchstic knows the importance of identity, creativity, and individuality.
Not only does their ‘who we are’ section on their About page provide that identity by highlighting the human element of their brand, but it also shows their creative side. When you hover over each thumbnail, a goofy illustration is overlaid onto the photo.
In addition, the custom cursor, which only shows up on the About page, is a strong callback to the Matchstic brand, implying a kinetic energy that starts with the lighting of a match.
11. LiveChat
LiveChat, an AI customer service and chatbot solution, approached their “meet the team” page in a completely different way. Instead of just listing out each team member’s roles and experience, they created a photo for each team member that illustrates who they are in a conceptual, fun, and metaphorical way.
This is extremely effective for showcasing the uniqueness of their team, and it compels the website visitor to take the team to look at each picture and read each bio, which results in longer time on page, an important engagement metric.

12. Etsy
Many large companies forgo the “meet the team” page because there are so many team members that it doesn’t make sense to display them all.
At Etsy, though, they acknowledge all the people that make the popular online marketplace possible with a tiled “people board” that scrolls for days.
13. Atlassian
Atlassian, a company behind many of the software solutions used in businesses worldwide, highlights photos of their team on their “people” page, interacting at the office and hard at work.
Below, they showcase their leadership team with colorful headshots that break out of colorful background boxes. When you hover over them, attractive vector graphics appear relating to the individual’s unique role. In addition, a popup appears on click with social icons and a bio. What’s particularly interesting is that there’s also the ability to download their headshot, making the “People” page have extra utility for media professionals.
14. The Correspondent
The Correspondent is an organization that offers news without fear-mongering or financial gain. In true journalistic style, the site features each team member in a beautifully rendered cartoon style, providing an artistic feel to the page.
Clicking on each thumbnail leads the website visitor to a place where they can subscribe to that particular writer and view a feed of their pieces. Best of all, the individual’s mission is displayed across the top and contact information in the sidebar.
15. SmartBug Media
SmartBug is a HubSpot Agency Partner with a distributed team across the U.S. They demonstrate their embrace of remote work by including an interactive map with the locations of all their employees.
You can also browse through their team below, clicking on each headshot to get expanded bios that include 2 fun facts about each team member.
16. Bluleadz
What better way to convey the personality of your team than to display their favorite gifs on mouse hover? That’s what digital marketing agency Bluleadz does. You can almost imagine these folks in the scenarios their gifs represent.
Another unique feature of this “meet the crew” page is the ability to filter Bluleadz employees by function. Each button at the bottom corresponds to a team and brings up the individuals who “make the magic happen” in that area of the business.
17. Media Junction
Bold blocky pops of color? Yes please. HubSpot Elite Agency Partner Media Junction displays their team thumbnails on solid backgrounds with vector shadows. Each photo is a little silly, and many of them bring their furry friends into the picture with them.
In addition, their leadership team’s thumbnails are clickable so that you can read more about them and even send them a message for more information.
“Meet the team” pages resonate because people like to buy from real people, not faceless brands. Best practice is to determine what your brand stands for and create a “meet the team” and About page that conveys that in the strongest possible way.
Editor’s note: This post was originally published in December 2016 and has been updated for comprehensiveness.

How To Optimize Your TikTok Bio 5 Easy Steps [+ Examples]
TikTok is quickly becoming the next big thing in social media, both for individuals and for brands.
Fortunately, the dance and lip-sync app can be a lot more than that if your brand uses it strategically. And the first place to start with that strategy is in your TikTok bio.
As it is on any social media platform, your bio is your chance to introduce yourself and your brand to every potential follower.
You don’t have the time to re-introduce yourself in every video you create, so your bio gives you the chance to do just that. This is your chance to tell your potential followers who you are and why they should follow you.
Here, we’ll cover how you can optimize your TikTok bio to increase followers and, ultimately, attract more qualified leads for your business.
5 Steps To Optimizing Your TikTok Bio
Creating a converting TikTok bio doesn’t have to be difficult. In fact, you only have to follow five steps to create a bio that is sure to help you grow your following. Let’s dig deeper into each of these five steps.
1. Describe your account or brand.
Tell your followers who you are and what you do. They might be able to put together some idea of what your profile is all about based on your videos, but you don’t want to rely on that.
What if you decide to create a video that’s important to you but has nothing to do with your brand? Your visitors need to have another way to learn what your business is about.
This only needs to be a few words, so make sure you boil down exactly what you want people to know before they decide whether or not they’re going to follow you. Make sure your language is engaging, compelling, and gets across your brand’s value or purpose efficiently.
2. Add emojis.
Almost every TikTok bio has an emoji in it. An emoji helps you further emphasize your brand’s personality — additionally, it can help you showcase your brand’s products or services without taking up too much space in your bio.
For instance, if you work for an ecommerce brand that sells clothing, you might include a t-shirt emoji (👕). Alternatively, if your company sells video tools, you might include a video camera emoji (📹).
You can also add emojis to tell people what to do. If you want them to click the link below or hit the follow button above, you could add arrows to express that without using extra characters to ask your visitors to take action.
3. Add a CTA.
Like any good social media bio, you should have a call-to-action in your bio. This tells your visitors exactly what to do next so they know how best to interact with you. For instance, you might include a CTA to direct followers to a blog post link, an ecommerce website, or another social channel like Instagram or YouTube.
At the very least, ask your visitors to follow you on TikTok. You want to get in the habit of adding a call-to-action to almost every single piece of content or communication you share with your followers. This way they’ll be more enticed to take action immediately after viewing your content.
4. Don’t exceed the character limit.
Of course, TikTok has a character limit for their bio, and it isn’t very big. You only have 80 characters to communicate your entire bio. That’s just over half of the limit you have on Instagram, which can already feel tight!
This is one of the reasons emojis are so useful. You want to be able to save your characters and use them wisely to be able to fully communicate your brand quickly to your audience. Pick out the most important aspects of your brand and highlight those in your bio.
5. Add a link in your TikTok bio.
TikTok gives you space for a link, so if it’s currently available to you, you should definitely use it. This is a valuable way to direct traffic from TikTok off the platform to other pages you want to promote.
From there, you might direct followers to a relevant e-book or landing page to capture their contact information and add them to your email list, or you can share the sales page for the most recent product you touted in your video.
There are a couple of different ways you can optimize the link in your bio, and there are a couple of things you should be aware of before you try to add one yourself. Let’s dive into those, next.
URL Options
First, when you’re putting a link in your bio, you have the option to send traffic to only a single URL. You can pick your most recent blog post, your homepage, a dedicated landing page, social media profile, or any other page you’d like.
The other option is to promote multiple links through a link in bio service. With this kind of service, you can drive people to a web page that has a collection of page links they can visit.
You could include links to your blog, affiliate links, products, or even your other social media sites. Using a link in bio service for your TikTok allows you to give your visitors more options of where to go and connect with you outside of TikTok. This also saves you the hassle of needing to edit your link every time you upload a new video promoting a different product or service.
Accessing the Link in Bio on TikTok
However, there is a caveat to the link in bio option: not everyone has the ability to add a link to their bio yet. It seems like most, if not all, Android users have this option, while some iOS TikTok users are still waiting on their capability. If you want to check to see if you have this option:
1. Go to “Edit your profile”
2. Check to see if you have an option that says “Website” underneath the section where you can edit your bio
If you don’t have that ability yet, don’t worry. There’s another way you can add a link to your bio, even if you don’t see that option in your app. You can join the TikTok Testers program.
To join the program, you need to download a separate app called Testflight through the app store.
Next, open your existing TikTok app and go to the three dots in the upper right hand corner of your profile page to access “Settings”. Then, scroll to the bottom and click “Join TikTok Testers.”
Follow the instructions from there, and you’ll be able to access the various Beta versions of TikTok as they release them. TikTok offers this program to ensure that only the best features make it to the primary app, and it helps keep the app as bug-free as possible.
TikTok Bio Examples
So now that you know all the elements you need for a fully-optimized TikTok bio, let’s take a look at some excellent examples so you can see these strategies in action.
1. Fashion
There is no shortage of fashion influencers, accounts and people who just love fashion on TikTok.
Here, Shanda Rogers uses her bio to share that she’s a fashion, lifestyle, and beauty blogger. She has emojis and her location, and she also has a link in her bio to her website.
2. Travel
Travel might be almost as popular as fashion on TikTok. Whether you’re documenting your own travels or sharing interesting things about your hometown for people who may visit, there are plenty of ways to showcase travel images and videos on TikTok.
This account, @movchai_travel, has a great bio that includes a brief description, location, emoji and then two different ways to reach out and either contact them, or peruse their Instagram profile instead.
3. Sports
People are interested in all kinds of sports, so if you have a sports-based account, make it easy for people to find you and check out your videos. BMX bike rider @yusufbmx has a well-optimized bio.
He shares what he’s known for — including being India’s Gold Medalist — uses emojis, and has a link to his Instagram where people can see more.
4. Food
Food: something almost everyone loves to see. We’ve seen on Facebook the popularity of food videos like those made by Buzzfeed’s Tasty brand.
It makes sense that TikTok users would love to see the same sort of thing. Perhaps one of the internet’s favorite and most loveable vegan’s, @iamtabithabrown, has made quite a name for herself on TikTok.
She shares delicious-looking vegan recipes, and she does it with a lot of love. You can see that her bio is well-optimized, with a brief description of who she is, an emoji, a link to her website, and even a call-to-action encouraging visitors to purchase merchandise on her website.
Putting Your TikTok Bio Together
By combining these five elements of a great TikTok bio, and with the inspiration of these four different accounts, you should have a pretty good idea of the changes you might need to make to yours.
Before you open up TikTok, take out a piece of paper and write out the few words you would use to describe your brand or profile, and also decide on your call-to-action.
Then, you can get into the app and work on the wording until you have your bio looking just the way you want. Don’t forget to add emojis, and a link if you can!
For more inspiration, take a look at How 7 Brands are Using TikTok.

How and Why to Delete Previously Disapproved Facebook Ads
Ever had a Facebook ad disapproved? Wondering if past disapproved ads can adversely affect your current ads? In this article, you’ll discover how to locate and remove problematic Facebook ads to help ensure future ads aren’t jeopardized by past mistakes. How Disapproved Facebook Ads Affect Your Ads Account Facebook often changes their advertising policies without […]
The post How and Why to Delete Previously Disapproved Facebook Ads appeared first on Social Media Examiner | Social Media Marketing.
from Social Media Examiner | Social Media Marketing https://ift.tt/33NWRLK
via socialmediaexaminer
How to Create an Ecommerce Checkout Experience Shoppers Don’t Hate
Four-night trip to New Orleans, flight and hotel included, for $499? Awesome! Buy now!
…It wants my login information? I’ve never even been on this site before.
Oh, apparently I have, and I set up a username and password. Well, I don’t remember them, so I’ll just check out as a guest.
There’s no guest checkout? I just want to go to New Orleans! Whatever, I probably can’t get off work that week anyway.
Does this sound familiar? If so, you’ve been the victim of a terrible, horrible, no good, very bad online checkout experience. We’ve written about how to design your website to entice browsers to turn into shoppers, and we’ve covered how to nurture shoppers who abandon their carts. But we haven’t told you how to design a seamless, efficient checkout experience that ensures customers complete their purchases the first time they’re in your shopping cart.
It all boils down to simplicity. The more options, barriers, and annoyances you put in front of an online shopper, the less likely they are to complete a purchase. In this post, I’ll show you how to set up the perfect ecommerce checkout experience for your customers, and help you enjoy better shopping cart conversion rates as a result.
But first, let’s review the basics.
Seems straightforward enough, especially if you’re using an ecommerce platform like WooCommerce or Shopify to help you. In reality, however, there’s a lot of room here for both frustration and optimization. You’ve done so much work to get the user to this point, why drop the ball now?
So, let’s now review 12 best practices for ecommerce checkout that will increase delight and reduce friction for your customers:
1. Don’t require registration or login.
I already gave this one away, but it’s so important that it’s worth reiterating.
When someone is excited about a purchase, they want it, and they want it now. What a bummer to think you’re minutes away from completing an order, only to find out you have an additional few minutes of required registration ahead of you.
Or worse, you’ve already been through the registration process and you can’t remember your login information, so you have to go through the rigamarole of confirming your high school math teacher’s last name to retrieve your login credentials.
While it is more convenient for your lead nurturing to establish a login, this is a significant barrier to purchase and will deter a good chunk of potential first-time customers. A guest checkout option ensures you won’t lose a customer and revenue today.
Instead, give the option to register after the customer has received a purchase confirmation. Now that you’ve secured the purchase, this puts less pressure on the buyer and presents an opportunity to expedite future purchases from your site. You can also use this information to track shoppers’ interactions using an integrated CRM like HubSpot for WooCommerce.
2. Let shoppers save personal information.
On the flip side, shoppers that do choose to register with your site before completing their purchase should be able to reap the benefits of a faster checkout. That means you’ve saved certain pieces of personal information with their permission, like name, address, and credit card information.
On the sites I visit and purchase from often, I like to create a login and save my information for future purchases. And let me tell you, it feels great to complete an order with a click.
3. Make it short and simple.
Even if your checkout experience seems quick and easy to you, it might not feel that way to a shopper. Fortunately, there are a couple of tricks you can employ to keep visitors from becoming overwhelmed.
First, break up the checkout experience into steps across multiple pages or page sections. You might start with just basic information, like name and email address, then encourage the shopper to click through to the address step, then the payment step, etc. Working in phases like this not only helps a shopper feel closer to their purchase — it also lets you capture lead information that, should the shopper abandon their shopping cart, enables you to recover the sale through automated email offers.
Note that this isn’t a license to add as many steps as possible. Only include the essential stages of your buying process to limit distractions and barriers along the way.
Also, the fewer fields a visitor needs to fill out, the better. Like your landing page forms, only ask for information you absolutely need. You can also eliminate steps by offering shortcuts like a checkbox that lets them indicate that their shipping and billing addresses are the same.
4. Give indicators of progress.
A multi-step checkout approach does have some pitfalls when not executed well. If a shopper has no idea how many steps are involved, they’ll assume that they’re so far from the end they can’t even see the finish line.
Instead, take a cue from clothing e-retailer ModCloth, which breaks up its checkout into four steps:
.png?width=1500&name=How%20to%20Create%20an%20Ecommerce%20Checkout%20Experience%20Shoppers%20Dont%20Hate%20(update).png)
Each step is clearly numbered and labeled, but the current step is highlighted to reinforce progress. Plus, the Continue button is designed like a good call-to-action: A bright, contrasting color signals what to do next, and gives shoppers a feeling of control over the process.
Other design elements, like an accordion or a progress bar, can achieve the same effect, as long as the current step and number of remaining steps are evident.
5. Make complementary product recommendations.
You might think of cross-selling and upselling as opportunities because they drive more revenue. You’re right, but it also makes for a happier customer if they choose to take advantage of your recommendation.
Just look at what Amazon recommends I purchase based on my addition of decorating bags to my shopping cart:
-1.png?width=1500&name=How%20to%20Create%20an%20Ecommerce%20Checkout%20Experience%20Shoppers%20Dont%20Hate%20(update)-1.png)
Good call, Amazon. Buying a ton of decorating bags wouldn’t be that useful if I didn’t have the tips to go with them. Or, maybe I already have the tips at home, but after decorating a bunch of cakes I’ve realized how annoying it is to keep switching between multiple icing bags. Good thing they have that handy dandy decorating bag holder!
If I don’t purchase any of these additional items, that’s okay. It didn’t hinder my checkout experience in any way to see the recommendations. But if you recommend complementary products so I can enjoy my purchase more, I’ll be a happy camper…and you will be too once you’re rolling in all that dough (baking pun intended).
6. Set up forms in a logical flow.
Most shoppers come to their carts prepared to divulge a lot of information, but their willingness to complete the process weighs on whether you collect the information in a logical way. Online shoppers are accustomed to a certain checkout flow, something like you see in the ModCloth example above:
- Contact information including name, email address, and phone number
- Shipping information, or the physical address to which the order will be shipped
- Billing information, typically your credit card information and an affirmation that the contact information and address provided before are associated with that card
There are more steps involved in most other checkout processes, but this is the basic information any ecommerce site will require, presented in the order that most of us expect. Don’t start off asking for credit card information, then move to phone number, then ask for their billing address, and then, well, you get the picture.
Also, remember that this flow should go both ways with the help of a “back” button. If a user needs to undo a step, make it obvious how to do it. A user shouldn’t need to restart the entire process if they punch in the wrong credit card info.
7. Offer rush processing and shipping.
When you offer rush processing and multiple shipping options, you’re providing another win-win for you and your customer. If necessary, they get their order processed and shipped quickly, and you get the benefit of earning a little extra money from their purchase.
But, importantly: This only works if you’re clear about the additional cost associated with these services before the customer opts-in.
Imagine you found a great deal for that trip to New Orleans on a site that had a smooth checkout, and then decided to go shopping for a new bathing. You found one you love, added it to your cart, and saw the e-retailer offered rush shipping. You think to yourself, “Self, I should probably get this rush shipped in case it doesn’t look good, and I need to return it and order a new one before the trip.”
You select the rush shipping option, which offers no indication that it costs more than the regular shipping option. You click to review and complete, and…hold on, rush shipping costs $35?! You decide you’d rather spend $35 on Bourbon Street, and cancel your order.
Long story short, tell shoppers the cost of your rush processing and shipping costs up-front so they don’t suffer sticker shock and abandon the whole purchase.
8. Keep your contact information handy.
This is a basic, yet oft-overlooked change to your checkout process. Include customer service contact information in every stage of your checkout, so shoppers can contact someone for help if necessary. The alternative is confused or reticent shoppers abandoning their shopping carts before completing a purchase.
This information could take the form of a phone number, email address, contact form, and/or live chat directly to a support team member. If possible, avoid sending the user off to a different web page, as this distracts from their goal.
9. Call attention to mistakes quickly and clearly.
When filling out the required fields, many shoppers will mistype information. It happens, we’re all human. Do your part as an awesome ecommerce business by alerting them (nonjudgmentally) as soon as possible.
For example, if someone enters only 9 digits for their phone number, they probably just slipped up. But don’t wait until the end of the checkout process to flag the error — tell them right away!
Even worse, don’t make it impossible to find and understand the mistake. Warnings should be in big, bright, bold letters with explanatory text so shoppers don’t have to troll through all of the fields to find and correct the problem. For instance:
-2.png?width=400&name=How%20to%20Create%20an%20Ecommerce%20Checkout%20Experience%20Shoppers%20Dont%20Hate%20(update)-2.png)
10. Let customers review and modify their order before placing.
Too many shoppers have been burned by ecommerce companies that tack on surprise taxes, shipping costs, or other surcharges unannounced. Some of those companies don’t even provide a chance to review your purchase before it is submitted, which means a shopper will pay more than they intended.
I’m sure you’re not going to pull a fast one on your customers on purpose. But, this review screen helps them ensure all the little details are correct, like shipping address, order quantities, and credit card information. If a change needs to be made, like a product removal or swap, make this possible on the same screen. Also, product info and photos help them review their order at a glance.
A quick final review will make customers more likely to return, and decrease the need for returns and customer service attention.
11. Reassure buyers that you’re secure.
People are increasingly wary of providing personal information, and there’s a good reason for this. In 2018, over $20 billion was stolen due to credit card fraud, and this number is climbing year over year. Thousands of ecommerce transactions occur every second, and each one is an act of trust between buyer and seller.
First — and this is essential — acquire an SSL certificate for your entire website if you haven’t already. An SSL certificate means your site conforms to HTTPS protocol (the “S” means “secure”), which is the secure connection standard for modern websites. If you don’t have one, browsers like Google Chrome might warn your visitors — this will obviously deter some from finishing.
.jpeg?width=1500&name=How%20to%20Create%20an%20Ecommerce%20Checkout%20Experience%20Shoppers%20Dont%20Hate%20(update).jpeg)
Next, assuage your customers’ concerns by placing visible indicators of security in your checkout. Don’t overdo it — a single third-party trust seal in each step will do the job, and consider placing a link to your privacy policy for those extra-scrupulous shoppers. Also, a well-designed website overall will instill more trust in your business, and therefore your security.
12. Make it mobile-friendly.
It’s official: More people are conducting their online shopping on mobile devices than desktop. A quick glance at Google Analytics or another reporting tool might even confirm this on your own website.
This probably doesn’t come as a surprise. However, it does mean every page of your site, including your checkout pages, must be responsive in its design. Essentially, your pages should detect the size of the viewing screen and display elements appropriately.
Of course, all of the practices in this guide also apply to the mobile checkout experience. But if a user can’t conveniently navigate from page to page and enter their info with ease, you’re going to see a lot of abandoned carts. So, accommodate for eyes and thumbs. Larger buttons and text, greater spacing between page elements, and intuitive navigability all impact your user experience and conversion rate.
Don’t Zone Out at Checkout
If you’re just starting a business, just getting visitors to the buying stage is the hardest part, and it’s a huge accomplishment! Now, all you need to do is streamline the experience and get them to the “Place order” button as smoothly and safely as possible.
As you implement more recommendations from our checkout checklist, keep a close eye on how these changes affect your purchases, abandoned carts, and any requests or common problems among your customers. Every business is different, so whether you’re selling clothing, cake decor, or a New Orleans vacation, it’s crucial to listen to your customers and see how to best implement these practices on your unique site.

How to Increase Your Instagram Engagement Rate
debut prompted 25,000 downloads in just one day. Two years later, Facebook purchased the app for $1 billion.
In 2020, the app has grown larger than expected, with 500 million daily users. Its popularity has led it to become a source of income for content creators and brands worldwide, many using the app as their sole source of income.
Since the potential to make money, connect with your audience, and build a reputable brand on Instagram is so high, understanding how to use it is essential. While there are various ways to market yourself or your business on Instagram, it’s impossible to do so without first understanding your Instagram engagement rate.
Why does Instagram engagement rate matter?
Instagram engagement rates are significant because they measure an audience’s interest, brand relevance, and social authority.
Audience Interest
If your content appeals to your target audience, your engagement rate will be higher. If you take the time to review your best performing content, i.e., posts with the most likes, shares, saves, and comments, you’ll get a feel for what your users want to see. It’s important to note high impressions may indicate that your content has been viewed a lot, but engagement is typically defined as concrete interactions with your posts.
Relevance
If you have a high engagement rate, it’s likely your audience sees you as a relevant source of information. They may favor your content over competitors because your content sets you apart. However, if you have a high engagement rate now, will it stay the same in three months? Is it higher than it was last year? If you aren’t monitoring your engagement rate and using it as a benchmark for relevance, your score can decline.
Social Authority
While you’ve probably already identified your target instagram audience, it’s never bad to add new followers and fans to the list. These new users will take notice of your engagement — your followers, likes, comments, etc. — to decide whether or not to follow you. They’re likely to move on to your competitors if they notice your brand’s engagement, a.k.a. social authority is not strong.
What is the average Instagram engagement rate?
There is no one-size-fits-all definition of a “good” engagement rate. They vary by industry and depending on your strategic goals.
However, Instagram does have higher engagement rates than other social media networks. According to the HubSpot Instagram Engagement Report, posts on the platform generate 23% more engagement than Facebook, even though Facebook has 2x more monthly users.
If you want a numerical value to compare your score to, Rival IQ found that the average engagement rate across all industries is 1.22%. Specific sectors have higher rates, like higher education with 3.57%, sports teams with 2.33%, and influencers with 1.67%.
Because of this, it’s safe to assume that an engagement rate of around 1% is a good engagement rate.
If you’ve already run the numbers and found that your engagement rate is significantly lower than average, don’t fret. There’s room for improvement — but maintain a healthy perspective. Assess how your engagement rate has changed over time and begin devising strategies to raise your score. Start this process by calculating your engagement rate.
How To Calculate Your Engagement Rate On Instagram
There is debate among marketers on the best way to calculate your Instagram engagement rate, as different industries define success in different ways. Your preferred method depends on your goals as a brand or influencer.
Calculating Instagram engagement rate for brands
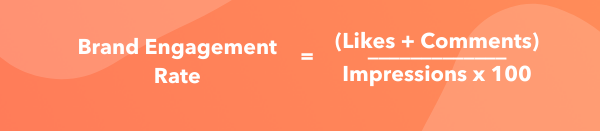
Business Profiles to see impressions.
Calculating Instagram engagement rate for influencers
Since sponsors often recruit influencers on Instagram based on their likes and follower count, their engagement rates incorporate these two factors. Since this metric doesn’t require any personal data, it’s possible to compare your engagement rates to competitors.
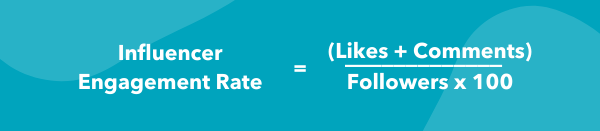
No matter your engagement rate, there are always steps to be taken to raise your score.
1. Maintain consistent branding.
Maintaining consistency with your content is extremely important, and there are a variety of actions you can take to do so.
Firstly, your username should be similar or the same to your other social media usernames. For example, if your twitter handle is @greenbookworm, your Instagram handle should be the same if it’s available (or something very similar).
You should also make sure that your content is visually consistent as well, and you should have a format that you use for all of your posts. Take a look at Nike’s Instagram, for example. 
Whenever they post content that includes typography, they use the same backgrounds and font. When they post photos, they’re high quality and use the same filter.
There’s data to back this up — WebDam found that 60% of the best-performing brands on Instagram used the same filter every time they post.
2. Understand your audience.
You can’t begin creating content without knowing your intended audience. Developing Instagram personas is a helpful tool for increasing your engagement rate. If you know who your followers are, creating content that they want makes them more likely to engage with you. Take the time to monitor your audience statistics, and update your personas accordingly.
You can use Instagram insights to get a demographic understanding of your followers. If you have an Instagram business account, navigate to the audience tab from the Insights menu.
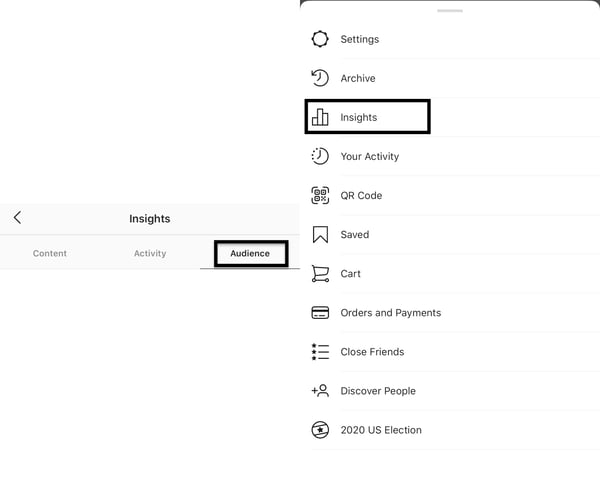 From here, you can see the top locations your users are in, your users’ age ranges, and their gender. All this information will give you an understanding of your users.
 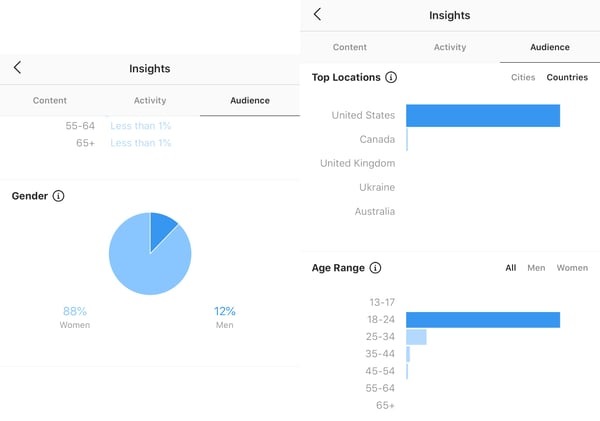 If you’re a HubSpot user, you can utilize the Social Reports data to find these same insights.
Regardless of your target audience, your content needs to be accessible. Utilizing Instagram’s accessibility tools is crucial, and you can use it to add image alt text, subtitles, and captions to your content.
3. Post regularly.
Once you know your target audience, post content they’ll enjoy and do it regularly. In 2018, 60% of Instagram users reported visiting the site daily, and 38% of those users visited multiple times a day.
The number of times you post depends on your marketing strategy, but the average brand posts 1.5 times per day. Again, this metric is an average, and it may not work for everyone. Posting too much content can overwhelm your users, and they won’t hesitate to unfollow if their feed is clogged.
It’s also important to know the best times to post for your followers. Instagram insights will also tell you the best days and hours to post.
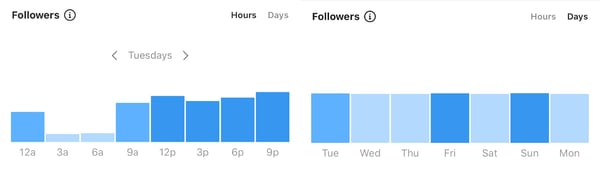
4. Create better captions.
Unless you’re @world_record_egg, who posted a photo of an egg with no caption that has generated over 12 million likes, you need to focus on your captions. Use the brand voice you’ve developed to sound consistent and keep your intended audience in mind. You can create short captions that are serious or light-hearted.
You can also create longer captions that tell stories and take your users on a journey. Take the instagram account @humansofny as an example. They regularly feature the personal stories of people around the world.

Hand-in-hand with writing better captions is using quality hashtags — Instagram was built on them, after all. It’s still the algorithm’s primary method of filtering through content. If you’re unfamiliar with hashtags, here’s a summary.
Captions can hold up to 30 hashtags per post, but there must be a balance. Hashtag dumping, which is similar to keyword stuffing, may make the algorithm think you’re spamming for engagement, and you can be shadowbanned. The goal is to figure out what works for you and stick to it.
Your hashtags should be a mix of popular and specific, long-tailed keywords. For example, if you’re running an Instagram for your hotel, you’ll want to use common hashtags like #hotel and #travel. However, those are also very broad, as a search for the #hotel tag has 31 million posts. Be more specific and targeted towards your needs, and maybe say #hotel, #travel, and #hotel + your hotel name + the name of the city you’re in. So, for example, #hotellisamiami.
You can discover the best hashtags to use by doing keyword research and categorizing those that work best for you and your brand. You may also want to consider coming up with a brand-specific hashtag that users can recognize as yours.
5. Engage with your followers.
After you post, engage with your followers. While Instagram has the ‘Turn off comments’ feature, opt to keep them on.
Reply to comments that your followers make. Maybe they’re asking questions or proclaiming their excitement for your product. Paula’s Choice, a beauty brand, is an excellent example of this.
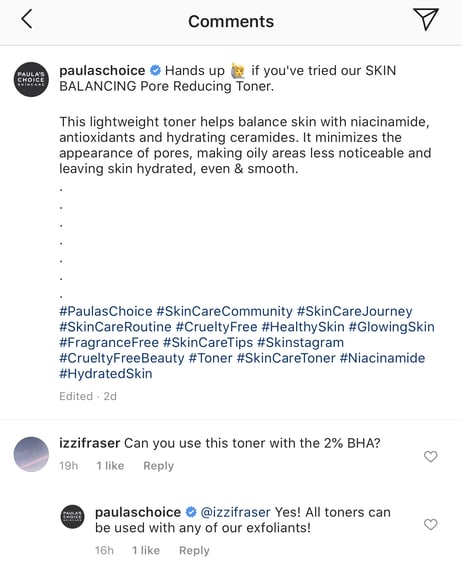
They regularly host Instagram Q&A’s, where users ask questions and they answer them on their Instagram stories.
They’re taking actions that they know will entice their audience into interacting with their Instagram content, which factors into engagement rates.
Engaging with your followers also entails sharing their content on your site, known as user-generated content (UGC). Surfing through your brand-specific hashtags can help you find users that are posting about you. You can screenshot their content to share on your story, and even post on your feed.
Your followers will be excited that you interact with them, as engagement may signify a personal relationship with your brand. Here’s an example of Paula’s Choice posting UGC.

6. Engage with similar accounts.
There wouldn’t be a point to using Instagram if you’re not following and interacting with other accounts.
Using the platform to engage with accounts similar to yours is extremely important. If you’re a brand, this can mean partnering with influencers in the same industry. If you share products with them, they’ll post content wearing your brands. If they tag you, their followers will see your account, and many may follow you—all of these metrics factor into your engagement rate.
Emma Chamberlain is a popular YouTuber, holding almost 10.4 million Instagram followers at only 19-years-old. She regularly posts sponsored content, and her sponsors post her. She entices her followers to interact with those brands, and vice versa.
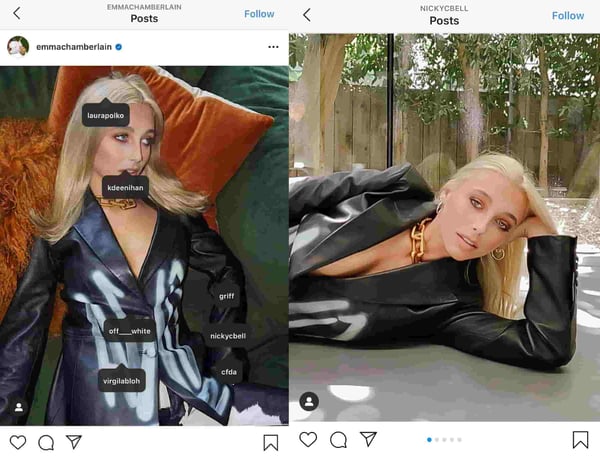
7. Create mixed content.
When the app was first launched, all you could do was post photos. Now, there are five types of content posts supported on Instagram: photos, videos, Instagram TV (IGTV), Instagram Reels, and Instagram Stories.
It’s no longer enough to just post photos; you need to do all of it.
Videos
Zenith Media estimated that the average person would spend 84 minutes a day watching videos in 2020. That’s a significant amount of time spent watching videos, so use it to your advantage.
There are five video options within Instagram: Reels, IGTV, Story videos, Instagram Live, and video posts. You’ll need to decide which method is best for you, but a well-rounded Instagram strategy will include all. If people are watching content on your page, they’re spending more time on your site, factoring into your impressions rate.
If you’re a sports brand, post enticing videos of recognized athletes using your equipment to practice their sport.
Stories
Instagram Stories are essentially the same as Snapchat stories. HubSpot’s Instagram engagement report found 22% of users watched branded content Stories from a company, business, or brand more than once a week, and 36% liked, commented, or shared branded Stores.
You can take advantage of these numbers and use this feature to draw attention to your new posts by sharing them on your Story or simply posting Story exclusive content.
This feature can also be used to engage with your audience. Post quizzes and questions and make them shareable for other users. Stories can also be used to get feedback from customers, asking them to submit experiences with your products and services.
Circling back to influencer sponsorships, having them go live on your account via Instagram Live is a great strategy. Instagram Live’s can also be saved to your account, so new users can watch them even if they occurred three months before.
8. Use calls-to-action (CTAs).
A CTA is an image, line of text, hashtag, or swipe-up-link that is meant to entice your audience to take action — hence the call-to-action.
The specific action you’re asking users to take should be decided based on your brand, service, or influencers’ needs. This may mean notifying them of a sale by including a swipe up link in your Instagram story, asking them to tag a friend in the comment section, or sharing links to partner-posted content.
While links to other sites don’t directly impact your Instagram engagement rate, they still require users to spend more time on your profile, and you can convert them into leads on other platforms. Here’s an example of National Geographic advertising a new product on their story using a swipe-up CTA.

9. Track your statistics.
Why would you bother taking action to improve your engagement rate if you’re not taking the time to understand if it’s working? Tracking your progress is extremely important, and it should be something you focus on.
Trial and error is expected, and it should be used to inform your current and future strategies. Use your preferred CRM to find your most effective posts or pieces of content, and use the strategy employed in those for your next content posts.
After you’ve calculated your engagement rate for the first time, you should devise a timeline in which you’ll recalculate it again. Maybe you’ll set a goal of raising your score by .10% in a year, so you may plan to re-calculate the numbers every three months. This can also help you understand what isn’t working — if your numbers haven’t budged, something needs to change.
All in all, Instagram engagement rate is a measure of how your audience interacts with your content. Your rate is an indication of your Instagram profiles’ social authority, relevancy, and audience interest.
If your content is good and your followers are engaging, your engagement rate will demonstrate that. When you spend time working on your engagement rate, you collect valuable data to inform your entire Instagram marketing strategy.
You should see your engagement rate as a benchmark for customer loyalty and satisfaction.
If your users like you, it’ll show.

What You Need to Know About Commercial Use
As marketers, we’re often tasked with designing, producing, and creating a variety of content to use across social channels, blog posts, and email.
This often includes the use of a wide variety of design tools — including Adobe Photoshop, Canva, and even Getty Images.
And yet, we often don’t pause to consider: Can I actually use this software for business purposes?
More than likely, your team has already ensured you have a commercial license to use the products you design for business purposes.
But, despite it being a legal term, it’s still critical your familiar with the concept of “commercial use” as a marketer, so you can ensure you’re following the law when it comes to creating and distributing content.
Here, let’s dive into the differences between commercial use and non-commercial use.
Simply put, any activity you conduct at your company would be considered for “commercial use”, since the ultimate goal of that activity is to increase sales.
As such, you’ll need to purchase the appropriate commercial licensing agreement with any design software or third-party tools you use to complete your project.
Commercial use extends to offline activities, as well. For instance, let’s say you use Adobe to design a billboard sign, and FontCreator to edit the font you’ll use for that billboard. In this case, you’re using the billboard for business purposes with the desire to earn financial gain as a result of your ad — which means it’s for commercial use.
Before creating your billboard, you’ll want to ensure you have a commercial licensing agreement with both Adobe and FontCreator. Otherwise, these companies could take legal action against you.
You can figure out whether you’re allowed to use software for commercial purposes in the “Terms of Use” section on the software’s website. If it’s stated that the software is unintended for commercial use, you’ll need to either upgrade to the business-version of the software, or find another solution entirely.
For instance, in Adobe’s General Terms of Use, they’ve stated the following regarding their NFR (non-functional requirement) licenses: “You may install and use the NFR Version only for the period and purposes stated when we provide the NFR Version. You must not use any materials you produce with the NFR Version for any commercial purposes.”
This means, if you’ve purchased the NFR version of Adobe, you can only use the software for non-commercial purposes. But what does non-commercial use mean, anyway? Let’s explore that, next.
Non-commercial use involves any activity you’ll conduct that you don’t plan on marketing or selling for-profit. Common examples of non-commercial use are often related to education. For instance, let’s say you use the same Adobe and FontCreator design software, listed above — except this time, it’s used to create a presentation for your college history class.
Since you won’t make money off your presentation, it falls under non-commercial use, and is fair game.
Additionally, people often use certain software or even brand logos when designing gifts for loved ones. If your little brother is obsessed with Disney, you might make him a homemade Disney-themed blanket, and use the Disney logo. Since you aren’t selling that blanket for-profit, this is allowed.
However, you wouldn’t be allowed to sell that same blanket on Etsy, since you don’t have a commercial license to use Disney’s logo, and you’d be expecting money in exchange for your design.
The final definition we should cover is “limited commercial use”, which falls into a gray area in-between commercial and non-commercial use.
Simply put, limited commercial use means you can use the software, design, logo, or tool on products you intend to sell — but only for a limited amount. For instance, let’s say you have a Getty Image agreement which states you can use an image for limited commercial use up to 5,000 times.
This means you won’t want to use that image if you intend to distribute the design to an audience bigger than 5,000. However, if you’re planning on designing materials that will only be sent to 100 of your top customers, it’s acceptable to use that image on those materials.
Of course, when in doubt, you’ll want to confer with your legal team to ensure you’re following legal requirements when it comes to creating any marketing materials you’re hoping to use at your company.
