
Welcome to My Blog
Catálogo Online y Menú Digital para restaurantes: cómo diseñarlos para que sean más que un PDF
Hacer un pdf es la forma más básica de diseñar tu catálogo online y menú digital para restaurantes.
Sin embargo, tal vez no te has dado cuenta de que estás ante la oportunidad de mejorar la experiencia de tus clientes.
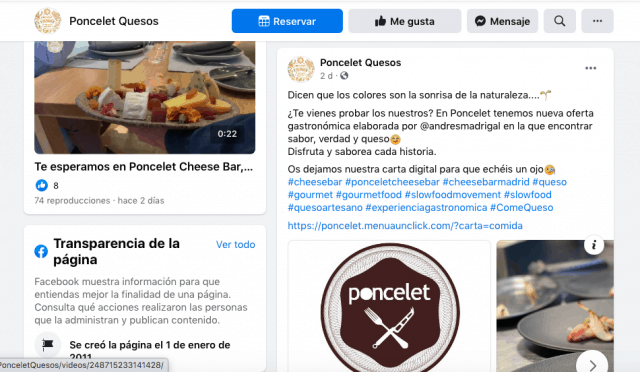
Nos dimos a la tarea de buscar un ejemplo para ilustrar cómo debe ser una buena digitalización. Encontramos la iniciativa Menú al Click de Poncelet Cheese Bar, una tienda de quesos en Madrid.
Desde su perfil de Facebook comparten una url que lleva a su menú digital.
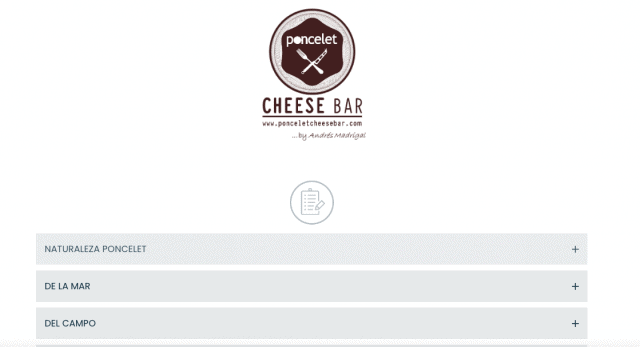
El usuario se encuentra con una página interactiva en la que agruparon los productos por categorías.
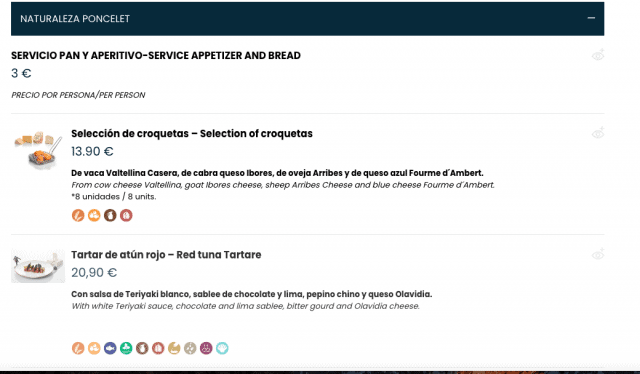
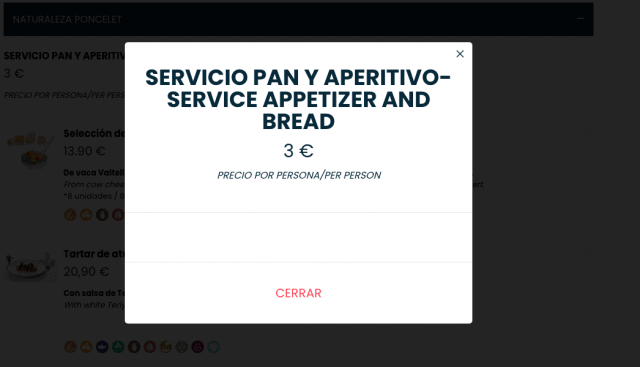
Al hacer clics, se accede a información cada vez más detallada.
Esto satisface la necesidad de dos públicos: los que quieren hacer la compra ya y los que necesitan saber hasta el nombre de la vaca que dio la leche para el queso.
Incluso, desde el menú, se puede hacer una llamada por FaceTime al local.
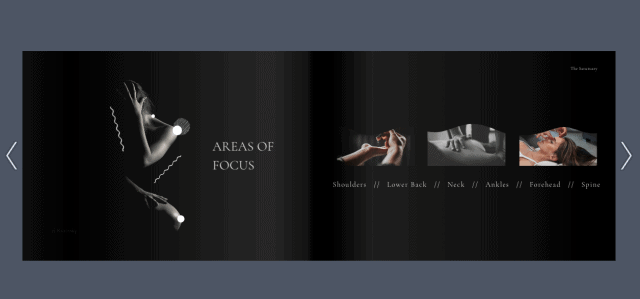
Para ver todas las imágenes de este catálogo online, haz clic en la flecha.
Los tiempos de la COVID-19 están obligando a tiendas y restaurantes a reinventarse.
Son muchos los países que exigen a los restaurantes que tengan un menú digital para su reapertura.
Por otro lado, tras las cuarentenas, el comercio electrónico experimentó un boom. Esto significa que el catálogo digital se ha vuelto una necesidad.
En este artículo abordaremos los elementos que debe tener un catálogo online y menú para restaurante en aras de enriquecer la experiencia de compra.
Además, hablaremos de las siguientes herramientas:
- Clickkosh para añadir elementos clicables y comprar desde la foto del producto.
- Sqribble para convertir tu catálogo en un ebook interactivo.
- Google my Business para que el menú aparezca en tu geolocalización.
- Código QR para restaurante, catálogo y formas de pago.
- WhatsApp for Business para agilizar la comunicación.
¿Qué no debe faltarle a tu Catálogo Online o Menú Digital?
El catálogo online y el menú digital pueden (y deben) ser algo más que un pdf.
Son una oportunidad para enriquecer la experiencia de los usuarios. Por eso, piensa siempre en interactivo.
Estas son algunas ventajas de la digitalización:
- La inversión es menor a la de imprimir.
- Vinculas a tu marca con acciones medioambientales.
- Cumples con los protocolos de bioseguridad porque los documentos digitales no se comparten.
- No tienes los límites del formato impreso, así que puedes agregar más detalles.
- Si entretiene, tu marca será más memorable para los usuarios. Por eso, diseña experiencias interactivas.
- Mientras más fácil sea comprar, más posibilidades tendrás de cerrar la venta.
- Es más sencillo actualizar los documentos digitales y corregir errores.
- Aumenta el tráfico en tu web.
Ahora sí, estos son los 4 elementos que no deben faltarle a tu catálogo online:
#1. Inserta videos: en lugar de hacer la clásica portada con una foto, inserta un video muy corto. También es buena idea poner un video en los productos que quieras potenciar.
#2. Jerarquiza los productos y organiza por categorías: es la mejor forma de optimizar la experiencia de tus clientes. Si eres claro en tus categorías, les das la oportunidad de ir directamente a lo que les interesa. Curiosamente, ahorrarles tiempo aumenta tus posibilidades de que permanezcan más revisando tus productos.
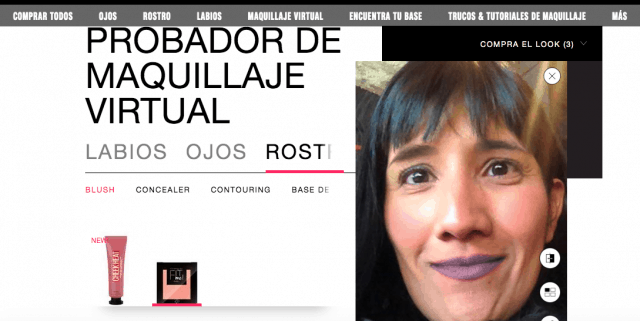
#4. Agrega interacción: nos gusta pinchar, agrandar fotos, compartir. Revisar tu catálogo también puede ser una experiencia entretenida. Por ejemplo, Maybelline desarrolló un probador virtual de maquillaje. Solo debes subir una foto.
#5. Facilita el proceso de compra: tu objetivo es que el cliente necesite realizar la menor cantidad de clics para realizar la compra, no lo pierdas de vista. Aprovecha para que desde tu catálogo sea facilísimo comprar.
5 Herramientas para crear Catálogo Online y Menú Digital
Hemos recopilado 5 herramientas que te ayudarán a crear tu catálogo online y el menú digital de forma innovadora. Algunas son gratis y otras de pago.
#1. Clickkosh: Catálogo Online que permite comprar desde una foto
Como ya te habíamos comentado, un buen catálogo online tiene que facilitar el proceso de compra. Clickkosh es la herramienta ideal para eso.
Lo que hace es insertar elementos clicables en imágenes. ¿Cómo funciona eso?, fácil.
A las fotos se les agregan íconos, cuando un usuario hace clic se despliega:
- Información del producto.
- Formularios.
- Páginas de checkout.
¿Se lee muy interesante, no? Si quieres ver la herramienta en acción, te compartimos nuestra demo.
Los elementos clicables de Clickkosh le van a dar un montón de interacción a tu catálogo o menú de restaurante.
La herramienta tiene un editor integrado de imágenes, así que podrás trabajarlas al 100% desde ahí.
Cuenta con más de 600 íconos animados y 100 sonidos para que los clics sorprendan a tus usuarios.
Además, puedes integrar las imágenes a cualquier plataforma de eCommerce como Shopify, a tu plantilla de WordPress o cualquier CMS.
Lo mejor, tendrás estadísticas para ver cuántas personas hicieron clic.
Esta será una buena forma de conocer la cantidad de procesos de checkout que no se concretaron o cuál de tus productos es el que genera mayor interés.
Si compras Clickkosh desde nuestro enlace, podrás acceder a un pago único.
#2. Sqribble: más que un Catálogo Online
Sqribble es una herramienta para crear ebooks pero fácilmente puede funcionar para hacer un catálogo online o brochure.
Trabaja a partir de cientos de plantillas prediseñadas que se personalizan con tus colores, fotos y textos.
>>> Aspectos fundamentales del marketing del color.
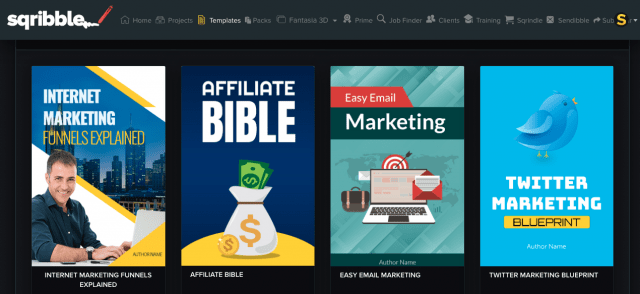
Esta herramienta facilita la creación de tablas de contenidos, numeración de páginas, copiar y pegar texto o importarlo desde un archivo.
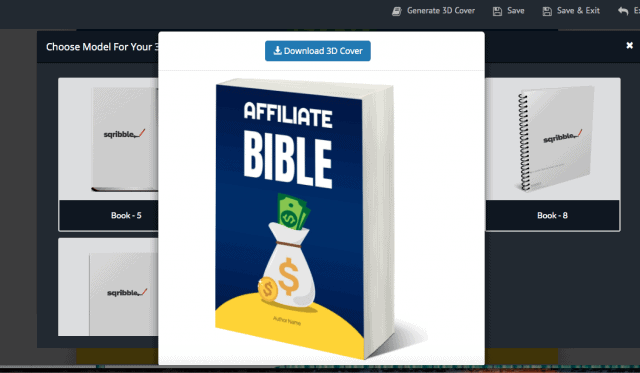
Al comprar la licencia básica y después ampliar a la OTO 2, hay dos funcionalidades muy interesantes:
- Hacer un catálogo online estilo flipbook:

- Hacer una portada en 3D para tu catálogo o menú digital:
#3. Menú digital: usa Google My Business
Google My Business les permite a las empresas administrar su presencia en Internet a través del buscador y los mapas.
Al abrir un Perfil de Negocio, cuando un usuario te encuentre en el mapa podrá ver información valiosa sobre tu negocio.
Por ejemplo, fotos, ofertas, medios de contacto e, incluso, reseñas de clientes categorizadas por estrellas y con detalles de comentarios. Haz clic en la flecha para ver todas las imágenes.
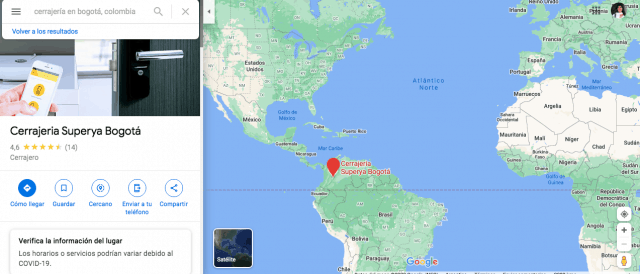
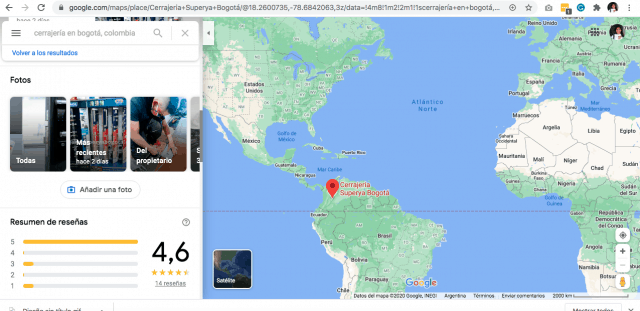
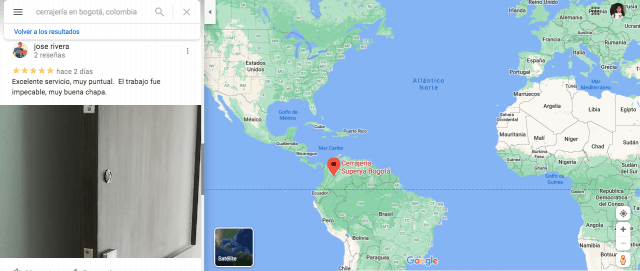
Lo interesante para los restaurantes es que pueden agregar elementos de su menú digital.
Podrás subir tus platillos con sus fotos, precios y agruparlos por categorías: postres, platos principales, platos fuertes, etc.
Así, cuando tus clientes se encuentren con tu negocio en el mapa, conocerán de antemano lo que ofreces.
Por ejemplo, lo que hizo el restaurante de la captura de pantalla es buena idea.
Además de agregar las fotos de sus productos, insertaron un link a su menú digital y otro para hacer pedidos. Para ver esa captura de pantalla en específico, haz clic en la flecha.


#4. Código QR para restaurante, catálogo online y formas de pago
Si tienes una panadería de barrio, una pequeña ferretería, un gimnasio local… es decir, un negocio pequeño que tal vez ni siquiera tiene página de Internet, el catálogo online y menú digital siguen siendo una opción para ti.
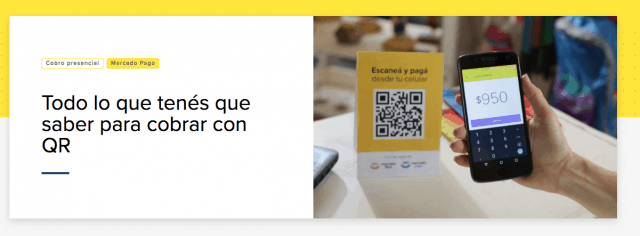
Los códigos QR son opciones simples, muchas veces gratis, de digitalizar tu información. Ponlos a la entrada de tu local o en cada mesa.
Alguna información que podrás añadir es la siguiente:
- La carta del restaurante.
- Los datos de contacto de tu negocio.
- La información de la contraseña de WiFi de tu local.
- Colocarlo en tus estanterías para dar más información de tus productos.
- Si repartes volantes o flyers, agrega un código de descuento o cupón.
- Vincularlo a algún tipo de monedero digital o tarjetas de prepago para que los clientes paguen directamente desde sus celulares.
#5. Posibilidades de WhatsApp for Business
Las opciones de catálogo online y menú digital para los pequeños negocios son bastante interesantes. También cuentan con WhatsApp for Business.
La aplicación se descarga de forma gratuita y permite hacer lo siguiente:
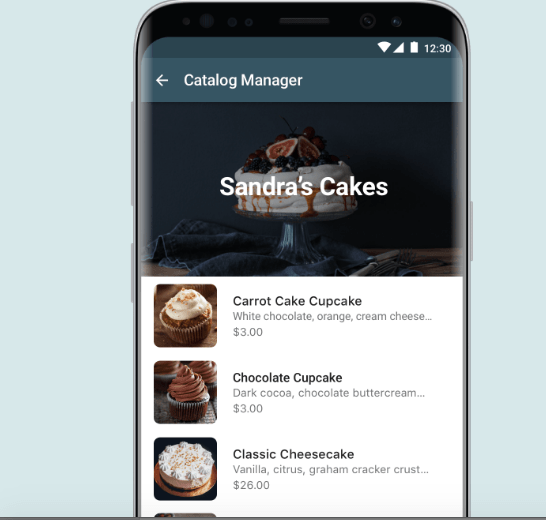
- Crear un catálogo de productos y servicios.
- Tiene función de respuestas rápidas para guardar mensajes y contestar preguntas frecuentes de forma fácil.
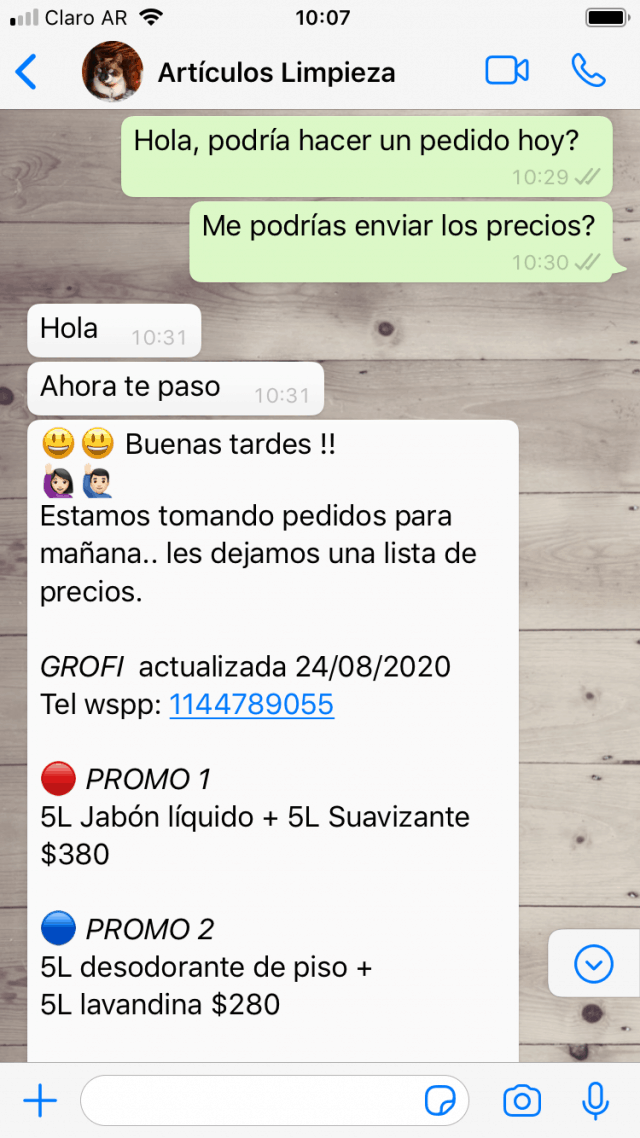
- Además, es posible dejar mensajes automatizados para cuando no puedas responderlos tú.
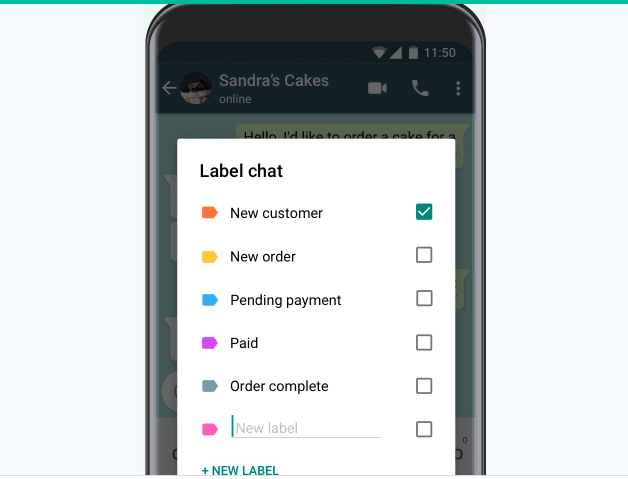
- Otra función interesante es la de poner etiquetas, así organizarás los contactos. Por ejemplo, nuevos clientes, pedidos en proceso, órdenes de pago, etc.
Conclusión para hacer un mejor Catálogo Online
Por más que tu negocio sea físico no te conviene mantenerte como una empresa offline. Tus clientes, sin importar su tamaño, están en internet. Por tal motivo, es recomendable tener un catálogo online o menú digital.
Además, en estos tiempos, las empresas tienen que asumir su responsabilidad para garantizar la salud pública.
Paralelo a lo anterior, los catálogos siguen siendo muy importantes en la decisión de compra del cliente.
Nuestra recomendación es:
Atrévete a dar el salto hacia lo digital.
Las ventajas son muchísimas. Para ahondar en una: vas a poder medir la forma en la que los clientes interactúan con tu marca.
Sabrás la cantidad de clics, los productos que más llamaron la atención, los que tienen más tiempo de permanencia, etc.
>>> ¿Quieres saber cómo medir el comportamiento de tus usuarios web? Lee nuestro post.
Redactamos este artículo porque estamos convencidos de que la digitalización potencia a las empresas, esperamos que te sea de utilidad.
¡Nos encantará recibir cualquier duda o comentario de tu parte!
from Socialancer https://ift.tt/3iB2kd0
via
How to Use User-Generated Content on Instagram
Want to share your customers’ posts on Instagram? Wondering how to find and use their content without breaking Instagram’s Terms of Service? In this article, you’ll learn how to encourage people to create user-generated content (UGC), how to find UGC, and how to legally share it. To learn how to use user-generated content on Instagram, […]
The post How to Use User-Generated Content on Instagram appeared first on Social Media Examiner | Social Media Marketing.
from Social Media Examiner | Social Media Marketing https://ift.tt/3nck4yW
via socialmediaexaminer
7 Tips for Running Engaging Instagram Giveaways (+Tools to Get You Started)
With 80% of Instagram users following at least one business, it makes sense you want to increase your own visibility and reach on the platform — but with such immense competition, it can be a difficult task to accomplish.
Fortunately, there are a few specific Instagram marketing strategies you can implement that have proven effective. For instance, you might optimize your posting times to ensure maximum engagement, partner with an influencer to spread awareness, or designate a content creator to craft more compelling content.
Additionally, to delight your current followers and attract new visitors to your page, you might consider hosting an Instagram giveaway.
Simply put, an Instagram giveaway allows you to offer something for free in exchange for an Instagram like, comment, or other pre-determined requirement.
For instance, take a look at this giveaway from Fabletics:

There are a few reasons why this giveaway works — first, Fabletics partnered with Blissworld, which enables both businesses to reach the other brand’s audience. Second, Fabletics asked viewers to “tag your bestie” and follow both brands. This doubles the reach they might’ve had if they’d only asked one follower to comment.
When done correctly, giveaways can help you establish your brand on Instagram, cultivate a loyal following, and share your impressive products or services with a larger audience than you could organically.
Here, we’ve created a complete guide on how to run your own giveaway, to ensure you’re able to delight and engage both new and existing followers on Instagram.
1. Choose the prize for your giveaway.
The first thing you’ll want to do is decide on the product, service, or experience you’ll giveaway as your prize. This will vary depending on your goal — if you want to spread awareness around a product launch, for instance, you’ll likely want to giveaway that specific product as your prize.
Alternatively, perhaps you want to partner with a brand and create a unique prize that will appeal to each of your audiences.
Lastly, you might try offering an experience instead of a specific product or service — like a weekend trip, a spa day, or the chance to meet a leader in your industry.
2. Determine the entry-criteria for your contest.
Your entry-criteria depends, again, on your ultimate goal. For instance, if you simply want to spread brand awareness, you might ask each participant to like your post and comment with the name of a friend — this allows you to increase your reach quickly, and could result in new followers.
Alternatively, maybe you want to draw attention to your blog, or another page on your website. If this is the case, you might ask participants to go to your blog or web page to find entry-criteria there — such as a question you then want them to answer in your Instagram comments section.
Lastly, perhaps you’ve partnered with a brand and, in exchange for one of their products as a prize, they’ve asked you to include a request to follow their brand as part of your entry-criteria.
3. Decide on a goal for your Instagram contest.
By determining a specific goal, you’re able to tailor your strategy more specifically and keep track of whether or not your giveaway was successful.
Your goal might be an increase in website traffic, more followers, an increase in engagement, or a boost in sales — it’s to you to choose what makes the most sense for your brand.
4. Consider a brand partnership.
To explore the benefits of brand partnerships for Instagram giveaways, I spoke with Conor Janda, an Associate Manager of Marketing Partnerships at Chomps. He told me, “A giveaway is a nice way to align with peer brands and partners, and drive traffic to your account.”
Janda also mentioned giveaways are particularly successful when new brands partner together. “For instance, a brand might post a recipe, and then mention specific brands in the ingredients section,” he told me. “A successful giveaway is typically when a brand partners with a content creator or influencer to make something specific, and then they push that prize out through both of their channels.”
Ultimately, a giveaway could allow you to reach a similar brand’s followers, and vice-versa — a win, win.
5. Select a campaign hashtag.
On Instagram, hashtags help your content surface on Explore channels, and oftentimes increase visibility on the platform. Consider creating a compelling and unique campaign hashtag to help spread awareness of your giveaway. For instance, along with #giveaway, you might include #winitwednesday #[yourbrand]giveaway #[yourbrand]contest, or something of similar nature.
6. Put a time-limit on your contest.
Tell your participants how long they have to complete your requirements by putting a time limit in your caption, and then adding “Giveaway Closed” at the end of that time. For instance, you might put, “Giveaway! Over the next 24 hours, please tag a friend in the comments and include your favorite place to travel for a chance to stay overnight at one of our resorts.”
The time-limit will ideally create a sense of urgency, and incentivize followers to engage with your post more quickly — which will also help your giveaway stay at the top of your followers’ Instagram feeds.
7. Launch and promote your Instagram contest.
Once you’ve chosen your prize, entry-criteria, potential partners, hashtag, time-limit, and goal, you’re finally ready to launch and promote your post! Remember, Instagram users favor posts during a certain time in the day, so you’ll want to plan wisely.
Additionally, you’ll likely attract further attention to your giveaway if you also post giveaway details on a blog post, Facebook page, or another social channel. Consider where else you can promote your giveaway for optimal results.
Instagram Giveaway Rules
Instagram’s rules are relatively simple when it comes to giveaways.
First and foremost, it’s critical you include a statement like the following, so viewers know your promotion is not tied to Instagram:
“Per Instagram rules, this promotion is in no way sponsored, administered, or associated with Instagram, Inc. By entering, entrants confirm that they are 13+ years of age, release Instagram of responsibility, and agree to Instagram’s terms of use.”
Additionally, you’ll want to ensure you don’t ask participants to tag themselves in your content, or tag something that isn’t in the photo — Instagram will penalize you for this.
Take a look at Instagram’s promotion guidelines for a full list of rules and regulations.
Instagram Giveaway Ideas
Once you’re ready to post your giveaway, there are a few different action items you might ask your participants to accomplish in exchange for the chance to win.
Here’s a list of some of the more common giveaway ideas:
- Like to win: Have followers like your post for a chance to win a free product or service. This helps you boost engagement.
- Tag a friend to win: Have followers tag one of their friends in the comments section for a chance to win. This allows your brand to reach new potential leads on Instagram and grow your audience.
- Like and share to win: You might ask followers to like your giveaway and repost it on their own channels for the chance to greatly expand your brand’s reach — if ten followers with 100 followers each re-post, that’s a chance to reach 1,000 new people.
- Follow to win: Ask followers to follow your brand, or a partner (or both) for the chance to win. This is a popular tactic since it’s an easy way to increase your follower count.
- Photo contest: Ask participants to upload a photo of themselves using your product or service. This is another easy opportunity to spread brand awareness, since your participants’ posts will be seen by their own network of followers and friends. You should ask participants to include your brand’s hashtag, or tag your brand, for optimal visibility.
- Caption this: Some brands post images and leave the caption section blank with a “Caption this for a chance to win” command. Your participants will enjoy the chance to offer creative captions for your image, and you’ll be able to add the caption to your post with credit to the winner once your giveaway ends.
Instagram Giveaway Picker Tools
Once you’ve closed your giveaway contest, it’s time to pick a winner — but how can you do that and ensure fairness?
There are a few tools you can use to truly randomize your winner. Here are a few options:
1. Use a free number generator.
While admittedly tedious, particularly if you have hundreds of entries, you might consider counting the total number of participants who engaged with your giveaway, and then using a number generator to select your winner.
For instance, let’s say you count 500 participants in your comments section. Go to Google and type “random number generator” into the search box, and Google’s number generator will appear as a box in the search results (you can also use another number generator tool, if you want).
Your minimum should stay 1, and your maximum should be the total number of participants. When you click “Generate”, the tool will provide a random number. Now, simply go back to your comments section and count until you land on the username that matches that number.

2. Use Easypromos’ Instagram Sweepstakes App.
You might consider using a tool like Easypromos’ Instagram Sweepstakes App to organize your giveaway, which can help you ensure fairness and efficiency when choosing a winner.
With Easypromos’ app, you can filter finalists based on number of mentioned friends. Once you’ve closed your giveaway, the tool can randomly select between one and 1,000 winners, and alternate winners automatically. The tool provides a test run that you can try before the final draw.
Best of all, Easypromos’ offers a link to a certificate of validity that guarantees the draw has been random, ensuring a level of transparency and honesty between you and your participants. You can customize the certificate for your brand.
3. Use a random name picker.
This last option is likely the most tedious, but if your giveaway participant pool is relatively small, you could consider using a random name picker to choose your winner by username instead of number. Particularly if you’ve already compiled your list of names into a spreadsheet, this could be a good option for you.
To use a random name picker, go to a website like Miniwebtool.com and input all usernames, each on a separate line, into the text box. Then click the “Pick a name” button.
1. Wishpond
Wishpond is a great tool that can help you organize and track your Instagram giveaways.
With Wishpond, you can run an Instagram hashtag giveaway and view all the entrants on your dashboard. You can even add a voting capability for users to vote on the best entry.
The goal of this type of tool is to help you take your giveaway and promotions to the next level. If you want to run regular contests on Instagram, it might make sense to invest in a platform like this.
2. Easypromos
Similar to Wishpond, Easypromos makes running an Instagram giveaway or contest a seamless process.
This tool will help you track comments on one or several posts. It will help you determine if people tagged the right amount of friends in the comments section and help you randomly choose the winner.
The basic plan is affordable, with no-frills added. This is a great option if you want to run simple giveaways without adding on landing pages or marketing automation.
Alternatively, if you are running enterprise level giveaways, there are other paid options that will include the features you need.
3. Woobox
With Woobox, you can easily create and run successful contests, giveaways, polls, coupons, forms, and more.
You can download your Instagram comments and pick one or several random winners. Additionally, this tool allows you to easily collect winner contact info and export Instagram comments.
If you’re looking to use an affordable tool, this is an excellent option. There is a free plan for smaller giveaways, but also an enterprise level power plan for larger contests.
Using a tool is a great way to organize and track your giveaways. Now, let’s see what a giveaway looks like in action.
Instagram Giveaway Examples
1. Domino’s
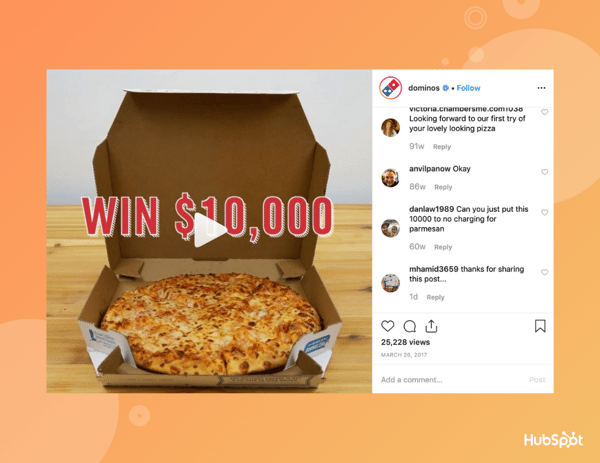
One of the more impressive giveaways in this list, Domino’s offered the chance to win $10,000 for any participant who followed @Dominos, posted a picture to prove they’re a superfan, and used the hashtag #PieceofthePieContest.
With simple, clear instructions, I’m willing to bet this was a successful giveaway as followers quickly spread the word about their love for Dominos — and likely incentivized followers to order a pizza from the brand.
2. Ali Fedotowsky
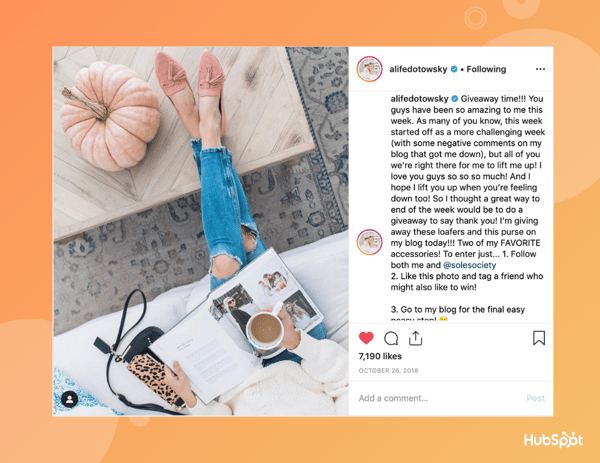
Ali Fedotowsky, a lifestyle and fashion blogger and ex-Bachelorette, partnered with Sole Society to giveaway a pair of loafers and a purse. Since she’s also well-known as an affordable fashion influencer, the partnership makes sense, and likely resulted in new followers for both Ali and Sole Society.
Additionally, Ali wisely instructed participants to check out her blog for the final requirement, likely resulting in an up-tick in traffic.
3. Cakesmiths
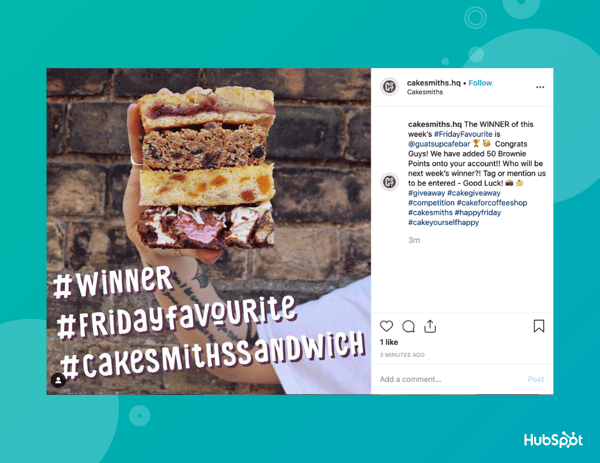
Cakesmiths does a giveaway every Friday and uses the same hashtag, #FridayFavourite, to evoke loyalty and engagement from their Instagram followers. Cakesmiths is proof you don’t need any outrageous prizes for a giveaway — sometimes, a simple treat will do.
4. Dig Local Asheville
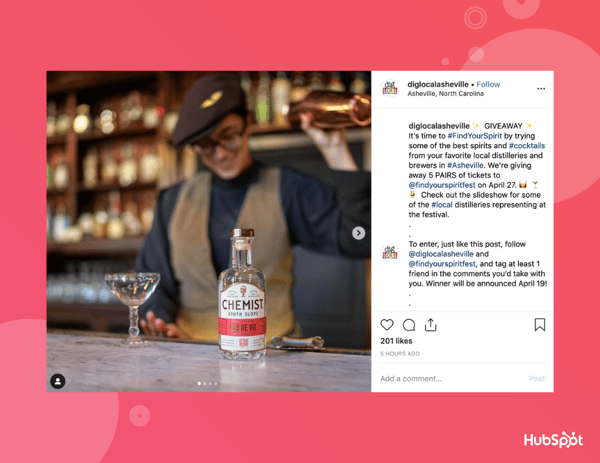
Dig Local Asheville partnered with @findyourspiritfest to inspire people to visit distilleries in the local Asheville, N.C. area. This is a good example of how you might use your giveaway to increase awareness and excitement regarding one of your company’s upcoming events.
5. SojoS Vision

SojoS Vision cleverly asked participants to like six of their photos instead of just one, which likely helped them increase their Instagram engagement rates. Additionally, SojoS included ‘Giveaway’ text at the top of the image — if your followers don’t often stop to read captions, this is a smart way to draw more attention to your giveaway.
If you’re interested in learning more about Instagram marketing, consider taking an online course, like HubSpot’s Instagram Marketing Course.
Ultimately, running a social media giveaway should help you increase your brand recognition and attract more followers.
Editor’s note: This post was originally published in April 2019 and has been updated for comprehensiveness.

How to Create an Editorial Calendar in Google Calendar [Free Templates]
One of the most frequent questions we get from aspiring and current inbound marketers is, “How do you manage all of that content?”
When we tell them we use an editorial calendar, the next question is often, “Oh, how much does that cost?”
Nothing. Because, for the most part, we use Google Calendar.
Surprised? There are a lot of great calendar tools out there you can choose from. (In fact, for those of you who are HubSpot customers, there’s a marketing calendar built right into HubSpot’s software.) But after trying a ton of other solutions, our team found that we really operated the best with just a simple Google Calendar. In fact, this has actually been the longest-running editorial calendar solution our team has ever seen.
Here’s how we set it up.
Follow Along With Free Editorial Calendar Templates
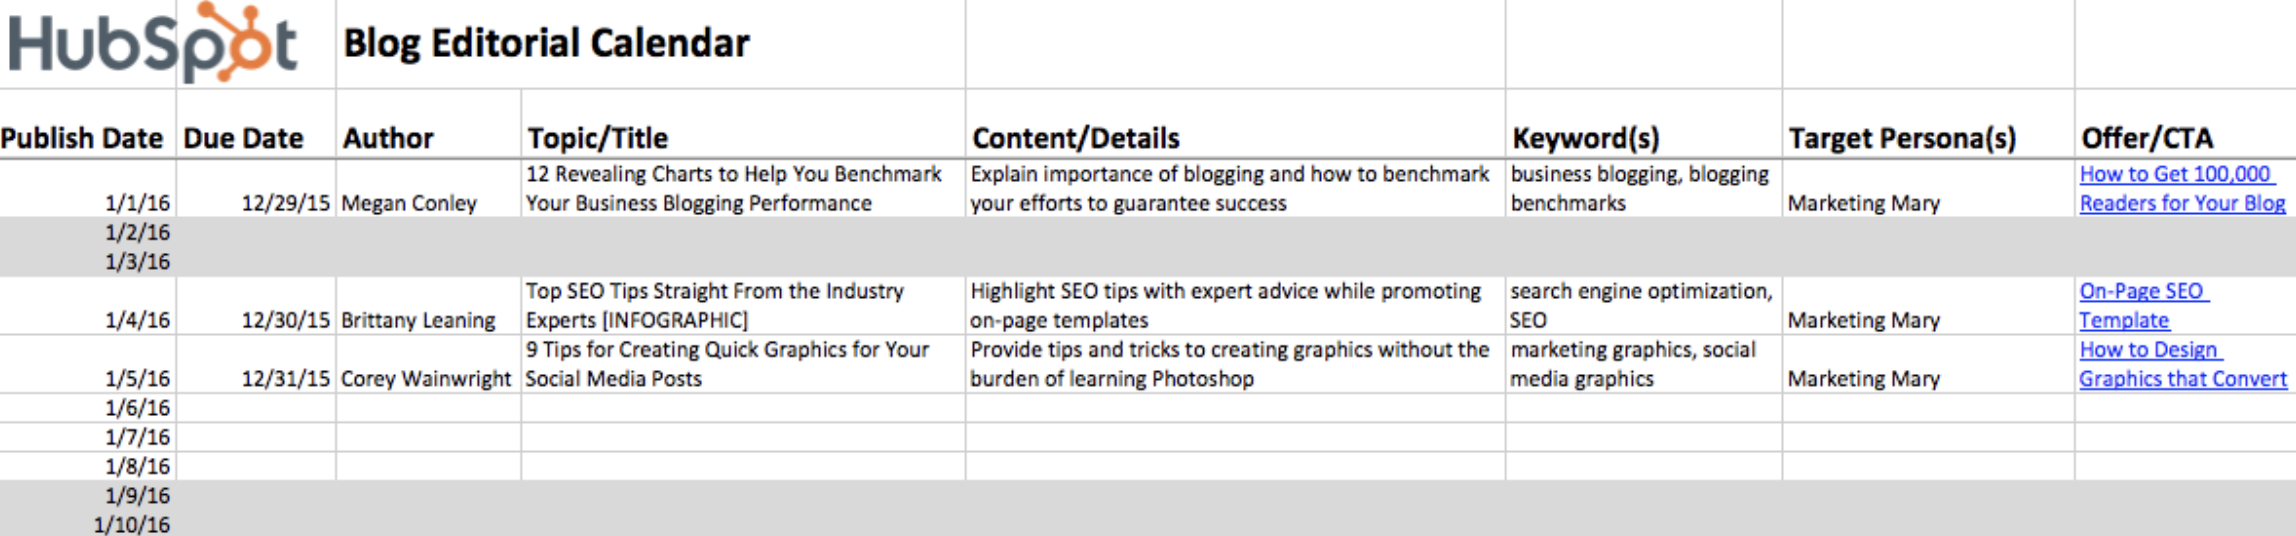 Download the Template for Free
1. Download HubSpot’s free editorial calendar templates.
First thing’s first: Download the calendar templates, above (they’re free.) By doing this, you’ll have three editorial calendar templates on your computer to use at your leisure: one for Google Calendar, one for Excel, and one for Google Sheets. In this blog post, we’ll be going over how to import the Excel template into Google Calendar.
2. Customize your template and prepare for import into Google Calendar.
By default, the publish dates on the templates you download will be stamped for the year 2016. Feel free to change them to the present year in the spreadsheet itself — you can also drag them to the dates of your choosing after you upload the file into Google Calendar.
Google Calendar makes it easy to load a calendar you might have pre-created in another program into Google. This includes Microsoft Excel. Here’s how to import the Excel calendar template you downloaded in the previous step into Google Calendar:
3. Open Google Calendar.
Once you’ve downloaded (or, for that matter, created) a calendar that opens in Microsoft Excel, it’s time to open Google Calendar. Just make sure you’re already logged into the Gmail account you want this calendar to give access to.
4. Use the lefthand dropdown menu to create a new calendar.
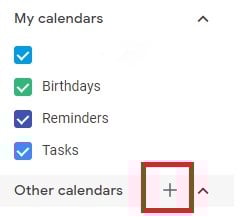
Now it’s time to set up your Google Calendar to accommodate the information in your Excel spreadsheet. First, go into your Google Calendar and click the plus sign to the right of “Other Calendars,” as shown in the screenshot below. In the dropdown menu that appears, select “Create new calendar.”
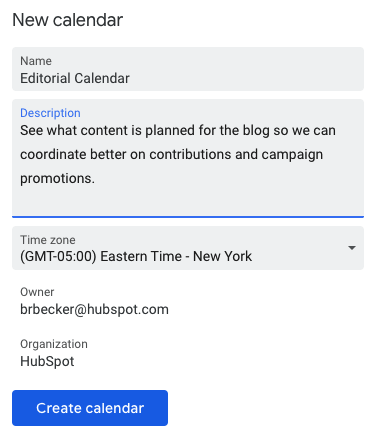
5. Fill out the details of your new calendar.
Fill out the fields that appear on the next screen. This includes a brief description of your calendar, as shown below, to give people proper context when you invite them into this calendar. When you’re done filling in the details, click “Create calendar.”
6. Import your XLS or CSV file from the same dropdown menu.
Using the same dropdown menu you used to create your editorial calendar, you’ll now import the Excel file itself into Google Calendar. Click that plus sign and select “Import.”
Click the upload box that reads “Select file from your computer,” and locate the file entitled “Blog Editorial Calendar – Excel” that was included in the ZIP file you downloaded in Step 1, above.
7. Select which calendar to add this file to.
In the second box below your imported file, click the “Add to calendar” dropdown. Be sure to choose the name of the calendar you just created from the dropdown menu, as shown below. Then, click “Import.”
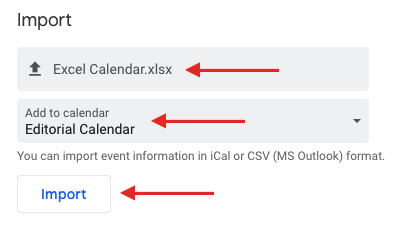
8. Click Import.
Once you’ve uploaded your Excel file and selected the calendar you want to add this file to, click “Import.” You should see an Import calendar dialog box telling you that seven events were successfully imported. Click “Close.”
Now, if you didn’t change the dates of the first seven assignments in the original Excel document, you can now. Navigate to January 3, 2016, which is the start of your calendar. Be sure all of your other calendars are temporarily hidden by clicking the colored box to the left of the calendar name. On the week of January 3, 2016, you should just see one “Blog TBD” calendar event on each day from 10 a.m. to 11 a.m.
Use the edit window of each assignment to change the publish date. For example, if you’re satisfied with the 10 a.m. publish time, you can simply change the date from January X, 2016 to January X, 2019. Each assignment will then appear as event blocks in your 2019 monthly calendar view.
9. Determine your publishing schedule.
Now that you have your calendar created, it’s time to fill it in with assignments for the year. This is when you have to make some decisions about your blog’s publishing schedule.
While the Excel file you imported accounts for one blog post per day, this doesn’t mean you need to publish seven days a week. Maybe you want to publish every Monday, Wednesday, and Friday. Or perhaps you plan on publishing on just Thursdays. Remember, the key to successful blogging is quality over quantity. Don’t overcommit to a blogging schedule if the quality of your content will take a hit. (Read this blog post for some great benchmark data on how often companies should blog.)
If you decide to decrease the number of days you want to publish, click on the calendar event of that day and select “Delete.”
Even if you wanted to publish multiple times a day, updating this calendar is as easy as adding an event. Select a slot on your calendar to add another “Blog TBD” event and copy the default description from another one of the events you imported.
Next, it’s time for some minor adjustments. Currently, the “Blog TBD” events are set for 10 a.m. Feel free to move these events to whichever time your blog publishes during the day.
10. Set up recurring events.
Now that you have your publish dates and times set, you can make these recurring events on your calendar. If you have a regular publishing schedule, like every Monday, Wednesday, and Friday at 10:00 a.m., then put that in as a recurring “slot” on your calendar. It’s okay if you don’t have a piece of completed content — or even a working title — to put there yet. It’s just a reminder that you want to publish something that day.
To add your recurring slot, click on your first “Blog TBD” event and click the pencil icon to edit your event. This will take you to the details of the post, where you can create a custom recurring schedule for each assignment, as shown in the screenshot below.
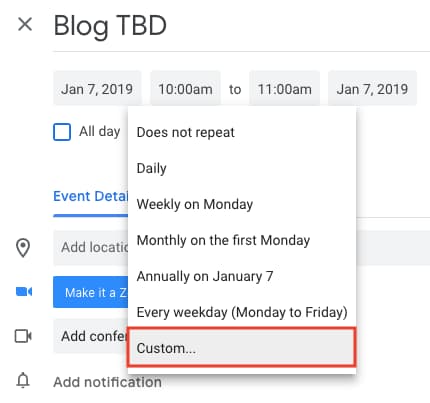 You can set the post up as a recurring post so it automatically appears every Monday, Wednesday, and Friday at 10:00 a.m. (or whatever days and times you want).
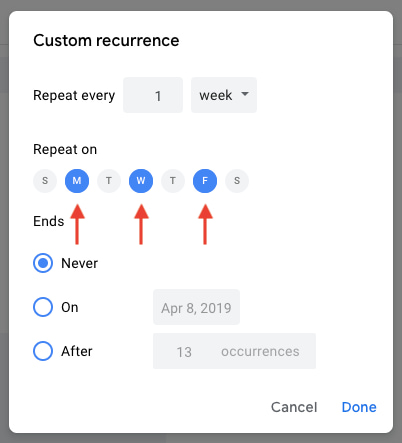
Once you’ve selected the recurring days, hit “Done” and “Save,” and you’ll have an editorial calendar framework to work with.
For now, keep the title of the event as “Blog TBD,” but feel free to customize the description with any extra details you want to be sure you include for each post. Wait to invite any guest, as we’ll use this to assign posts to an author once you begin filling in your topics. With everything complete, click “Save.”
If you don’t have a recurring schedule like this, you might not be in need of an editorial calendar just yet — but it is a good way to set goals for yourself. If you know you want to publish a certain number of posts each week, even if you don’t hit every single slot, it’s a good reminder for yourself and your team that this is something you should all be striving for.
11. Fill your publishing slots.
Now that you know all of the slots you want to fill, you gotta actually … you know … fill ’em. (If you don’t have topic ideas yet, check out this free topic idea generator. It’ll give you some good ideas for content to put in the calendar.)
Let’s say one of the posts you want to write is “10 Surprising Facts About Tapirs,” and one of the posts you’ve already written and want to publish later is “Think You’re Cut Out to Own a Tapir? Read This First.” Cool! Just add ’em both to the calendar by clicking on “Post – TBD” on the correct date, choosing “Edit Event,” and then changing the “Post – TBD” text to the actual title of the post.
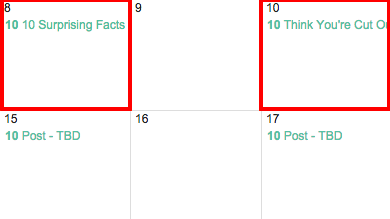
Now, let’s say you don’t actually want to write “10 Surprising Facts About Tapirs,” and you want your colleague to write it instead. To assign the post an author, you’ll invite them to the event as a guest. To do this, click on the event, hit “Edit Event,” then invite that colleague to the post by typing his or her name or email address into the “Add guests” box, selecting “Add” when their name pops up, and hitting “Save” on the event once you’re done.
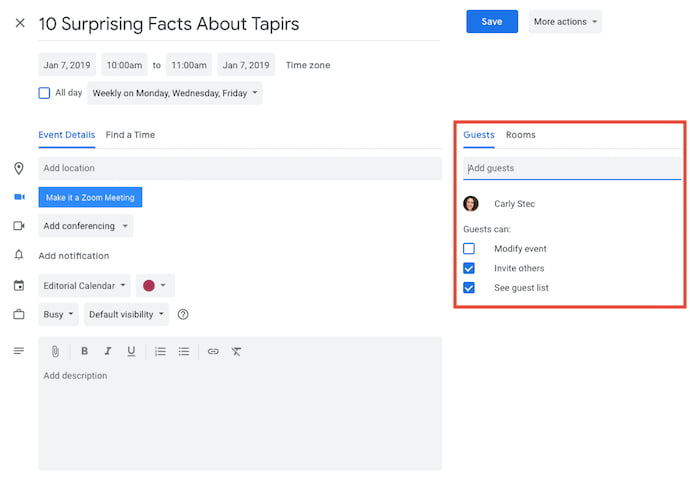
Now, anyone can see who is responsible for writing the post that’s going up in that time slot.
You can take it a step further by adding details to the “Description” box of the event, as shown in the large box in the screenshot above. You might include a quick synopsis, the keywords you plan to target the post for, the target audience you’re trying to reach, and the offer or CTA you will direct the reader to at the end of the post. Don’t forget a due date for the draft.
Before Google Calendar will let you save the event, you’ll see a dialog box asking if you would like to change just this event or all of the events in the series. Select “Only this event.”
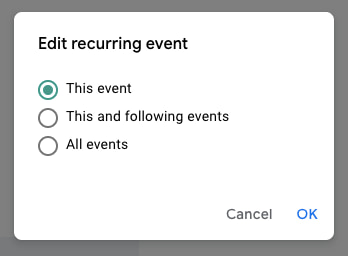
Repeat these steps to assign each blog topic today and in the future.
12. Share your editorial calendar with others.
Now that you have your calendar set up, you can start to invite people to see it. I’d recommend you start with your immediate team and regular contributors — as well as anyone who regularly asks you about publishing content on your company blog.
To share this editorial calendar with people, simply find your editorial calendar under “My Calendars,” as shown below. Click the three dots next to the calendar name and then select “Settings and sharing” when it appears in the dropdown menu. You’ll be taken to the same screen we saw when you first filled out the details of your editorial calendar in Step 2.
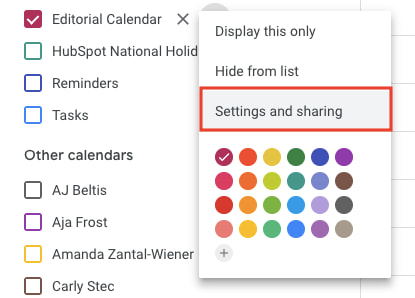 Then, you can add in the names of people with whom you’d like to share the calendar and set the right permission levels for each invitee.
It’s wise to keep those with the permission settings to manage changes and sharing to a minimum so there aren’t too many cooks in the kitchen — but I recommend you let everyone see all event details so it’s clear exactly what content is going up in each slot.
Under the “Share with specific people” heading, enter the email addresses of those on your content team and decide if they have viewing, editing, or admin privileges. Save your updated settings.
Why Using Google Calendar as an Editorial Calendar Works
I mentioned earlier that we tried a lot of different editorial calendar solutions, and this is the only one that’s stuck for more than a couple months. I think one reason for that is because we use Gmail for our corporate email, which means everyone on our team is already in Gmail (and their calendar, specifically) all day. As a result, it isn’t hard for people to form a habit of checking the editorial calendar, because it’s not difficult for them to find it.
Google Calendar also makes things really easy to move around and schedule because … well … it’s already a calendar. It has all the functionality you need to schedule stuff out and let the people who need to know about it know. When we were using other solutions for this, we were trying to hack a calendaring function instead of just relying on one that already existed.
Along those lines, adding people to view your calendar is simple, which makes it easy for multiple teams to collaborate, see what’s being published, and figure out when they might be able to launch content and campaigns.
Finally, this sets a precedent for other teams to coordinate with you in a really simple way. You can have a calendar for upcoming campaigns, offers, social media pushes, product launches — you name it. And you can all share those calendars with one another for a single-screen view of everything that’s going on so you can coordinate more easily.
Are there other solutions of there for maintaining an editorial calendar? Of course. But if you’re looking for a minimum viable product, and a free one at that, this ain’t too shabby. It’s kept our content team sane, agile, and transparent for quite some time — and I think it could do the same for you.
Editor’s note: This post was originally published in January 2019 and has been updated for comprehensiveness.

Instagram Visual Design: How to Improve Your Branding on Instagram
Want to create amazing visuals on Instagram? Wondering how to develop a recognizable Instagram style without needing a design background? To explore how to improve your design on Instagram, I interview Kat Coroy on the Social Media Marketing Podcast. Kat is a designer who teaches small business owners to look amazing on Instagram. She creates […]
The post Instagram Visual Design: How to Improve Your Branding on Instagram appeared first on Social Media Examiner | Social Media Marketing.
from Social Media Examiner | Social Media Marketing https://ift.tt/34fSS9S
via socialmediaexaminer
The Beginner’s Guide to Usability Testing [+ Sample Questions]
My favorite part of the writing process is when my editor reviews my work. By the time I’ve submitted the first draft of most of my blog posts, I’ve invested so much time and effort into my piece that I’m too emotionally attached to it. I need to distance myself from it.
My editor also has fresh editing eyes, so she can discover any overlooked errors and new creative opportunities to sharpen my piece. After I address her edits, my piece always looks more polished.
Asking other people to evaluate your work applies to almost every discipline, especially user experience and design. It’s not smart to rely on yourself when evaluating your own product or website design. You’re partial towards it, and that can skew your perception of reality. Learning directly from the people that your work is actually for — your users — is what enables you to craft the best user experience possible.
UX and design professionals leverage usability testing to get user feedback on their product or website’s user experience all the time. So we interviewed some of HubSpot’s Senior UX Researchers and Designers to teach you what exactly usability testing is, its benefits, and how to effectively conduct your own study.
What is Usability Testing?
Usability testing is a method of evaluating a product or website’s user experience. By testing the usability of their product or website with a representative group of their users or customers, UX researchers can determine if their actual users can easily and intuitively use their product or website.
UX researchers will usually conduct usability studies on each iteration of their product from its early development to its release. This allows UX researchers to uncover any problems with their product’s user experience, decide how to fix these problems, and ultimately determine if the product is usable enough.
Identifying and fixing these early issues saves the company both time and money: developers don’t have to overhaul the code of a poorly designed product that’s already built, and the product team is more likely to release it on schedule.
During a usability study, the moderator asks participants in their individual user session to complete a series of tasks while the rest of the team observes and takes notes. By watching their actual users navigate their product or website and listening to their praises and concerns about it, they can see when the participants can quickly and successfully complete tasks and where they’re enjoying the user experience, encountering problems, and experiencing confusion.
After conducting their study, they’ll analyze the results and report any interesting insights to the project lead.
Benefits of Usability Testing
Usability testing has five major advantages over the other methods of examining a product’s user experience, like a questionnaire:
- Usability testing provides an unbiased, accurate, and direct examination of your product or website’s user experience. By testing its usability on a sample of actual users who are detached from the amount of emotional investment your team has put into creating and designing the product or website, their feedback can resolve most of your team’s internal debates.
- Usability testing is convenient. To conduct your study, all you have to do is find a quiet room and bring in portable recording equipment. If you don’t have recording equipment, someone on your team can just take notes.
- Usability testing can tell you what your users do on your site or product and why they take these actions.
- Usability testing lets you address your product’s or website’s issues before you spend a ton of money creating something that ends up having a poor design.
- For your business, intuitive design boosts customer usage and their results, driving demand for your product.
Examples of What Usability Testing Can Do
Usability testing sounds great in theory, but what value does it provide in practice? Here’s what it can do to actually make a difference for your product (with examples):
1. Identify points of friction in the usability of your product.
As Brian Halligan said at INBOUND 2019, “Dollars flow where friction is low.” This just as true in UX as it is in sales or customer service. The more friction your product has, the more reason your users will have to find something that’s easier to use.
Usability testing can uncover points of friction from customer feedback.
For example: “My process begins in Google Drive. I keep switching between windows and making multiple clicks just to copy and paste from Drive into this interface.”
Even though the product team may have had that task in mind when they created the tool, seeing it in action and hearing the user’s frustration uncovered a use case that the tool didn’t compensate for. It might lead the team to solve for this problem by creating an easy import feature or way to access Drive within the interface to reduce the number of clicks the user needs to make to accomplish their task.
2. Stress test across many environments and use cases.
Our products don’t exist in a vacuum, and sometimes development environments are unable to compensate for all the variables. Getting the product out and tested by users can uncover bugs that you may not have noticed while testing internally.
For example: “The check boxes disappear when I click on them.”
Let’s say that the team investigates why this might be, and they discover that the user is on a browser that’s not commonly used (or a browser version that’s outdated).
If the developers only tested across the browsers used in-house, they may have missed this bug, and it could have resulted in customer frustration.
3. Provide diverse perspectives from your user base.
While individuals in our customer bases have a lot in common (in particular, the things that led them to need and use our products), each individual is unique and brings a different perspective to the table. These perspectives are invaluable in uncovering issues that may not have occurred to your team.
For example: “I can’t find where I’m supposed to click.”
Upon further investigation, it’s possible that this feedback came from a user who is color blind, leading your team to realize that the color choices did not create enough contrast for this user to navigate properly.
Insights from diverse perspectives can lead to design, architectural, copy, and accessibility improvements.
4. Give you clear insights into your product’s strengths and weaknesses.
You likely have competitors in your industry whose products are better than yours in some areas and worse than yours in others. These variations in the market lead to competitive differences and opportunities. User feedback can help you close the gap on critical issues and identify what positioning is working.
For example: “This interface is so much easier to use and more attractive than [competitor product]. I just wish that I could also do [task] with it.”
Two scenarios are possible based on that feedback:
- Your product can already accomplish the task the user wants. You just have to make it clear that the feature exists by improving copy or navigation.
- You have a really good opportunity to incorporate such a feature in future iterations of the product.
5. Inspire you with potential future additions or enhancements.
Speaking of future iterations, that comes to the next example of how usability testing can make a difference for your product: The feedback that you gather can inspire future improvements to your tool.
It’s not just about rooting out issues but also envisioning where you can go next that will make the most difference for your customers. And who best to ask but your prospective and current customers themselves?
The 9 Phases of a Usability Study
1. Decide which part of your product or website you want to test.
Do you have any pressing questions about how your users will interact with certain parts of your design, like a particular interaction or workflow? Or are you wondering what users will do first when they land on your product page? Gather your thoughts about your product or website’s pros, cons, and areas of improvement, so you can create a solid hypothesis for your study.
2. Pick your study’s tasks.
Your participants’ tasks should be your user’s most common goals when they interact with your product or website, like making a purchase.
3. Set a standard for success.
Once you know what to test and how to test it, make sure to set clear criteria to determine success for each task. For instance, when I was in a usability study for HubSpot’s Content Strategy tool, I had to add a blog post to a cluster and report exactly what I did. Setting a threshold of success and failure for each task lets you determine if your product’s user experience is intuitive enough or not.
4. Write a study plan and script.
At the beginning of your script, you should include the purpose of the study, if you’ll be recording, some background on the product or website, questions to learn about the participants’ current knowledge of the product or website, and, finally, their tasks. To make your study consistent, unbiased, and scientific, moderators should follow the same script in each user session.
5. Delegate roles.
During your usability study, the moderator has to remain neutral, carefully guiding the participants through the tasks while strictly following the script. Whoever on your team is best at staying neutral, not giving into social pressure, and making participants feel comfortable while pushing them to complete the tasks should be your moderator
Note-taking during the study is also just as important. If there’s no recorded data, you can’t extract any insights that’ll prove or disprove your hypothesis. Your team’s most attentive listener should be your note-taker during the study.
6. Find your participants
Screening and recruiting the right participants is the hardest part of usability testing. Most usability experts suggest you should only test five participants during each study, but your participants should also closely resemble your actual user base. With such a small sample size, it’s hard to replicate your actual user base in your study.
To recruit the ideal participants for your study, create the most detailed and specific persona as you possibly can and incentivize them to participate with a gift card or another monetary reward.
Recruiting colleagues from other departments who would potentially use your product is also another option. But you don’t want any of your team members to know the participants because their personal relationship can create bias — since they want to be nice to each other, the researcher might help a user complete a task or the user might not want to constructively criticize the researcher’s product design.
7. Conduct the study.
During the actual study, you should ask your participants to complete one task at a time, without your help or guidance. If the participant asks you how to do something, don’t say anything. You want to see how long it takes users to figure out your interface.
Asking participants to “think out loud” is also an effective tactic — you’ll know what’s going through a user’s head when they interact with your product or website.
After they complete each task, ask for their feedback, like if they expected to see what they just saw, if they would’ve completed the task if it wasn’t a test, if they would recommend your product to a friend, and what they would change about it. This qualitative data can pinpoint more pros and cons of your design.
8. Analyze your data.
You’ll collect a ton of qualitative data after your study. Analyzing it will help you discover patterns of problems, gauge the severity of each usability issue, and provide design recommendations to the engineering team.
When you analyze your data, make sure to pay attention to both the users’ performance and their feelings about the product. It’s not unusual for a participant to quickly and successfully achieve your goal but still feel negatively about the product experience.
9. Report your findings.
After extracting insights from your data, report the main takeaways and lay out the next steps for improving your product or website’s design and the enhancements you expect to see during the next round of testing.
The 3 Most Common Types of Usability Tests
1. Hallway/Guerilla Usability Testing
This is where you set up your study somewhere with a lot of foot traffic. It allows you to ask randomly-selected people who have most likely never even heard of your product or website — like passers-by — to evaluate its user-experience.
2. Remote/Unmoderated Usability Testing
Remote/unmoderated usability testing has two main advantages: it uses third-party software to recruit target participants for your study, so you can spend less time recruiting and more time researching. It also allows your participants to interact with your interface by themselves and in their natural environment — the software can record video and audio of your user completing tasks.
Letting participants interact with your design in their natural environment with no one breathing down their neck can give you more realistic, objective feedback. When you’re in the same room as your participants, it can prompt them to put more effort into completing your tasks since they don’t want to seem incompetent around an expert. Your perceived expertise can also lead to them to please you instead of being honest when you ask for their opinion, skewing your user experience’s reactions and feedback.
3. Moderated Usability Testing
Moderated usability testing also has two main advantages: interacting with participants in person or through a video a call lets you ask them to elaborate on their comments if you don’t understand them, which is impossible to do in an unmoderated usability study. You’ll also be able to help your users understand the task and keep them on track if your instructions don’t initially register with them.
Usability Testing Script & Questions
Following one script or even a template of questions for every one of your usability studies wouldn’t make any sense — each study’s subject matter is different. You’ll need to tailor your questions to the things you want to learn, but most importantly, you’ll need to know how to ask good questions.
1. When you [action], what’s the first thing you do to [goal]?
Questions such as this one give insight into how users are inclined to interact with the tool and what their natural behavior is.
Julie Fischer, one of HubSpot’s Senior UX researchers, gives this advice: “Don’t ask leading questions that insert your own bias or opinion into the participants’ mind. They’ll end up doing what you want them to do instead of what they would do by themselves.”
For example, “Find [x]” is a better than “Are you able to easily find [x]?” The latter inserts connotation that may affect how they use the product or answer the question.
2. How satisfied are you with the [attribute] of
Avoid leading the participants by asking questions like “Is this feature too complicated?” Instead, gauge their satisfaction on a Likert scale that provides a number range from highly unsatisfied to highly satisfied. This will provide a less biased result than leading them to a negative answer they may not otherwise have had.
3. How do you use
There may be multiple ways to achieve the same goal or utilize the same feature. This question will help uncover how users interact with a specific aspect of the product and what they find valuable.
4. What parts of [the product] do you use the most? Why?
This question is meant to help you understand the strengths of the product and what about it creates raving fans. This will indicate what you should absolutely keep and perhaps even lead to insights into what you can improve for other features.
5. What parts of [the product] do you use the least? Why?
This question is meant to uncover the weaknesses of the product or the friction in its use. That way, you can rectify any issues or plan future improvements to close the gap between user expectations and reality.
6. If you could change one thing about
Because it’s so similar to #5, you may get some of the same answers. However, you’d be surprised about the aspirational things that your users might say here.
7. What do you expect [action/feature] to do?
Here’s another tip from Julie Fischer:
“When participants ask ‘What will this do?’ it’s best to reply with the question ‘What do you expect it do?’ rather than telling them the answer.”
Doing this can uncover user expectation as well as clarity issues with the copy.
Your Work Could Always Use a Fresh Perspective
Letting another person review and possibly criticize your work takes courage — no one wants a bruised ego. But most of the time, when you allow people to constructively criticize or even rip apart your article or product design, especially when your work is intended to help these people, your final result will be better than you could’ve ever imagined.
Editor’s note: This post was originally published in August 2018 and has been updated for comprehensiveness.

Marketing del Color SIN lugares comunes (no, no vamos a decir que el verde da hambre)
Cuando se habla del marketing del color es común encontrarnos con afirmaciones tajantes como las que aseguran que usar el color rojo en tu logo hará que las personas compren desesperadamente porque genera sensación de urgencia.
En realidad, el proceso es un poco más complejo.
Hay bastante investigación orientada a demostrar que la empatía con una marca se asocia a sucesos relevantes de la persona.
Para generar una verdadera propuesta valiosa hacia nuestros posibles clientes, debemos estimular su conjunto de emociones, recuerdos y pensamientos.
Por más analítico que sea un individuo, la compra es emocional. Por eso es que se recomienda realizar estrategias de publicidad y marketing basadas en las emociones.
>>> 8 herramientas de diseño gráfico para crear Ads de impacto
En todo ese universo, ¿el marketing del color tiene alguna relevancia para despertar la empatía de los clientes o solamente es un cuento de los grandes publicistas para lograr que nos portemos bien?
¡Sigue leyendo y descúbrelo!
Marketing del Color: viaje al centro del cerebro
Empecemos con un ejercicio para demostrar si el marketing del color es real o no.
Mira las dos imágenes de la botella de salsa (sin leer el texto, no hagas trampa) y contéstanos, ¿cuál de las dos es la versión light?
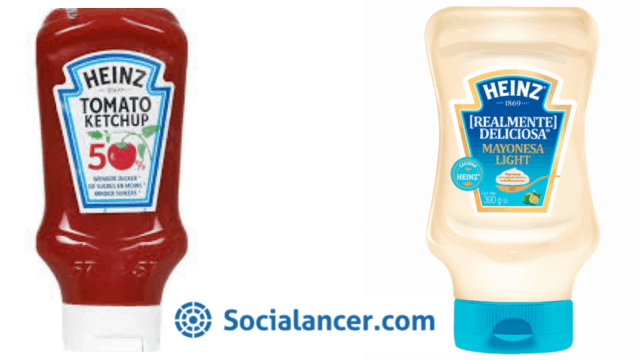
Ahondaremos en otro ejemplo: ¿has escuchado el término impuesto rosa?
Hace referencia a un hecho real, los mismos productos, con características iguales, cuestan más caros solo por ser de color rosa.
Pintarlos de ese tono los segmenta directamente al público femenino.
Haz clic en la flecha para ver la diferencia del precio de la misma maquinta de afeitar en su versión azul y en su versión rosa.
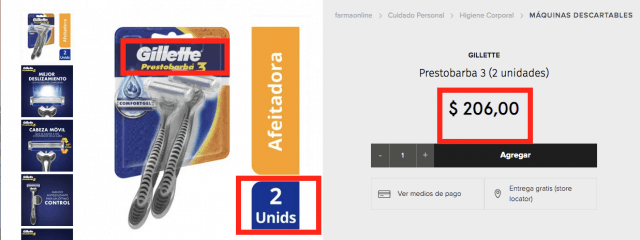
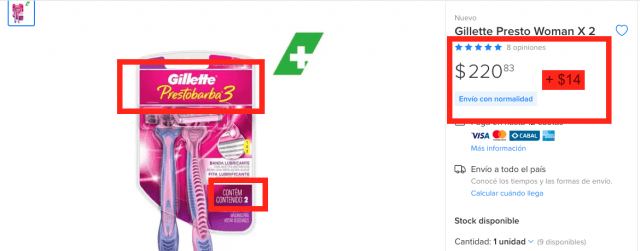
Hasta aquí ya podemos hacer la primera afirmación:
El color del producto o logo segmentará a tu público meta y puede ayudarte a definir el precio.
Ya desde 2004, Luc Dupont, publicista y profesor de la Universidad de Ottawa, afirmó
“El color penetra en la mente del consumidor y puede convertirse en un estímulo directo para la venta”.
Por otra parte, una investigación del Institute for Color Research probó que una persona emite un juicio subconsciente sobre un producto dentro de los 90 segundos posteriores a la visualización inicial.
Entre el 60% y 90% de ese juicio se basa en el color.
Pero no debes perder de vista que el significado que le damos a los colores cambia de acuerdo a la edad, género y país de procedencia.
Cuando vayas a elegir colores para tu producto o marca, investiga cuál es la representación socio-cultural del momento.
¿Cómo saber si los colores de tu Landing Page venden?
Si quieres saber si los colores de tu landing page están funcionando o no, la vía más fácil es preguntarle directamente a tu audiencia.
Para ello, deberás realizar una prueba A/B. Usa los mismos textos y gráficos, lo único que deberás cambiar es la tonalidad.
Revisa aspectos como cuál tuvo más clics, tiempo de permanencia y usuarios recurrentes.
Otra cosa cosa que deberás revisar son los datos demográficos de los usuarios de cada landing page.
Al final, escoge la que mejores resultados te dio.
En Socialancer estamos promocionando una plataforma muy útil en materia de landing pages. Se llama GrooveFunnels y es una todo en uno.
Te permite, entre otras cosas:
- Editar fácilmente sitios web, landing pages y embudos de venta con el sistema de soltar y arrastrar. Esto se hace desde una herramienta llamada GroovePages.
- Personalizar los sitios con los colores de tu marca.
- Incluye un carrito de la compra para que tus clientes puedan pagar desde tu sitio.
- Está vinculada a su propia plataforma de email marketing para que nunca tengas que pagar por ese servicio de forma externa.
- Tiene su propio sistema de afiliados. Si tú vendes GrooveFunnels obtendrás un 40% de comisión del precio total de la venta.
Todavía está en fase beta y por eso se puede adquirir por un precio promocional único y de por vida. Cuando lancen la versión final, la cobrarán mensualmente.
En los próximos meses incluirán la función de hacer pruebas A/B.
¿Cómo usar el marketing del color en tu estrategia?
Repasemos los dos conceptos sobre marketing del color que hemos abordado hasta el momento:
- El color segmenta tu producto o servicio y puede ayudarte a determinar el precio.
- El simbolismo que le damos al color está en función de la edad, género, país de procedencia e historia del usuario. Por ejemplo, antes el morado era morado. Ahora, algunos sectores del feminismo lo relacionan con su causa.
La pregunta lógica entonces es, ¿cómo usar el marketing del color?
Estos son dos abordajes:
El color eres tú
Una forma de usar el marketing del color es que te apropies de un tono.
Por ejemplo, lo que hizo la Tarjeta Naranja en Argentina: su estrategia de marketing del color se basó en crear una gama de servicios Naranja.
De hecho, no invitan a tramitar una tarjeta de crédito sino “tu Naranja”.
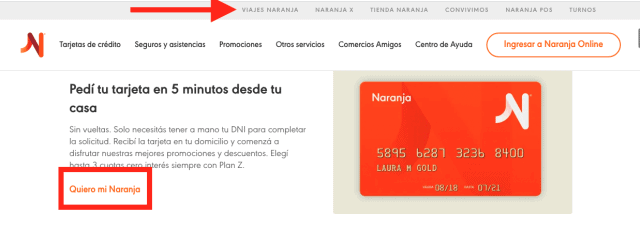
Esta es una forma muy efectiva de diferenciarte. Ni qué hablar de Greenpeace, ¿no?
Solo con poner la palabra “verde” se relacionan directamente con la naturaleza.
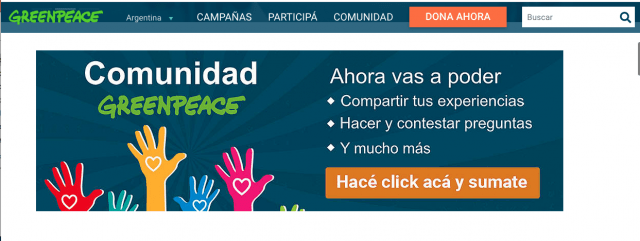
Lo que tienes que tomar en cuenta es que de una comunicación así es difícil volver.
Si te llamas Azul Zapato, toda tu historia estará relacionada a ese color.
Representa con un color a tu cliente ideal
Piensa en los anuncios de los automóviles. Nunca ponen un auto color plata en los comerciales orientados a jóvenes.
Este tono suele asociarse con productos de alta gama y para perfiles más senior. En la captura de pantalla podrás verificar que el Ecosport es azul.
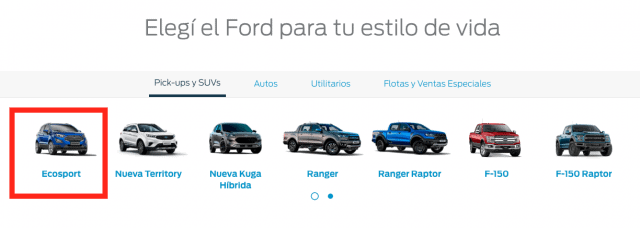
Salvo que seas Coca Cola, que invierte millones y prácticamente cambiaron la forma de hacer publicidad, es muy difícil que un producto sea para todos.
Por eso es buena idea segmentar a tu cliente por los colores que lo representan.
>>> Filtros para fotos y elementos clicables: tips de uso para marcas
Guía de colores y referencia de usos en el Marketing del Color
Si bien el significado que le damos a los colores cambia de acuerdo a las particularidades socio-culturales, también es cierto que hay una serie de convenciones que usa el marketing del color.
Esto quiere decir que ha habido un trabajo de años y años en materia de educación emocional relacionada a los colores.
El azul es para los niños, el rosa para las niñas. El negro es para cuando estás de duelo y para casarse hay que usar el blanco.

De acuerdo al marketing del color, estos son algunos significados asociados a ciertos tonos:
- Azul: es percibido como confiable. Es muy usado por las empresas financieras porque inspira estabilidad
- Rojo: activa la glándula pituitaria por lo que, al verlo, se incrementa el ritmo cardíaco. Esta respuesta visceral hace que sea energético, provocativo y capte la atención.
- Verde: los oscuros se asocian a la riqueza y prestigio; lo claros son calmantes.

- Amarillo: está asociado con el sol. Refleja optimismo, luz y calidez.
- Púrpura: evoca sofisticación, espiritualidad y realeza.
- Rosa: generalmente está orientado a las mujeres.

- Naranja: hay investigaciones que revelan que los tonos más claros atraen al mercado con mayor poder adquisitivo.
- Café o marrón: está asociado a lo terrestre, pero hay que tener cuidado porque también puede denotar suciedad.
- Negro: connota sofisticación.
Conclusión de Marketing del Color
Definitivamente, el marketing del color existe y hay que tenerlo en cuenta. Las marcas son recordadas por su logo y reconocidas por sus tonalidades.
Te recomendamos poner mucho cuidado en todo el diseño de tu comunicación gráfica.
No estás transmitiendo un dibujito sino los valores de tu producto o servicio.
Un buen uso del marketing del color te ayuda a:
- Darle atractivo a tu producto.
- Atraer la atención del consumidor.
- Darle personalidad a tu producto, servicio o marca.
- Segmentar a tu público por género, edad y clase socioeconómica.
Esperamos que este texto te sea de utilidad y cuéntanos, ¿cuáles son los colores de tu marca y por qué decidiste utilizarlos?
from Socialancer https://ift.tt/3jkFxDn
via
How to Implement & Succeed With Marketing Automation
Emails. Social media posts. PPC campaigns. Wait — another email. Don’t miss that new lead that just downloaded your online course!
The life of a marketer or business owner is busy. Your brain is constantly swirling with ideas, which doesn’t help you get to the bottom of your never-ending task list. Believe me — as both a marketer and business owner, I know how this feels.
In the past 20 or so years, new tools and technology have helped simplify some of these tasks … but this increase has also served to heighten customers’ expectations: Oh, our audience is expecting abandoned cart emails now? Okay, let me add that to the list…
One technology improvement has made marketers’ lives abundantly easier, however — marketing automation. This guide will walk you through the ins and outs of marketing automation, including:
Let’s dive in.
If you’ve ever done some midnight shopping (ahem, like me) and immediately received a confirmation email, you’ve been met with marketing automation. You didn’t think there was a poor guy sitting behind his computer at 1:00 AM waiting for new purchases to come through, did you?
No, that online store likely has some pre-written and scheduled email automations ready to go out when their customers complete certain tasks on their website. We’ll talk more about email marketing automation below.
Other marketing automations include social media, advertising, and SMS marketing automation, as well as internal automations that help you manage and triage marketing tasks.
Nearly 70% of marketing leaders are currently using a marketing platform. Of those who are automating marketing, 23% are automating their content delivery.
Marketing automations can certainly make life easier, but it shouldn’t replace human touch. As I said in the introduction, a recent increase in technology has been met with increased or changed consumer expectations. Marketing automation is no exception — consumers appreciate the timeliness and thoughtfulness of automation, but they also can also read between the lines of bot-written copy or stale imagery.
Marketing automation should complement your current marketing efforts, not replace them.
What is marketing automation primarily used for?
Marketing automation is primarily used to mechanize and automate otherwise manual marketing tasks like sending emails, posting social media messages, collecting information, and managing internal tasks.
Benefits of Marketing Automation
There are countless benefits of marketing automation. A few I’d like to highlight include:
- Efficiency: Wasted time is a marketer’s nightmare. Marketing automation can help you complete repeatable tasks in an efficient and effective manner.
- Nurtured leads: It takes a lot of time and energy to effectively nurture every individual lead; however, it’s too important not to. Marketing automation allows you to nurture your leads on a mass scale while still personalizing each lead’s experience with your brand. 70% of the companies report that the most important benefit of automation technology is better-targeted customer communication.
- Increased revenue: The more you nurture your leads, the more leads that’ll likely convert to users. Marketing automation can result in increased revenue as more leads become paying customers.
- Better reporting: Marketing automation streamlines important marketing tasks and allows you to review and analyze your activity and its results.
Types of Marketing Automation
Marketing automation can take many forms. Let’s unpack the different types of automation and how you can use them in your marketing.
Email Marketing Automation
Email marketing automation is perhaps the most common use case for automation. From welcome emails to post-purchase emails and re-engagement emails, there’s a lot that goes into email marketing. Without email marketing automations and workflows, email would be an otherwise very manual process.
Email automation is typically triggered by time or action. Time-based emails are sent on certain occasions, such as a customer’s birthday (don’t you love those free birthday drinks from Starbucks?) or a holiday (Black Friday discounts, anyone?).
Action-based emails are a bit more involved. These automated emails are triggered by actions taken by a website visitor, lead, or customer who then receives an email or series of emails related to that particular action.
Let’s return to my midnight shopping example. Instead of completing my purchase and receiving the subsequent confirmation email, let’s say I exit the site with items still in my cart—and within 30 minutes, I receive an email reminding me about the forgotten items. This is called an “abandoned cart” email, and many online stores deploy them in hopes that shoppers return and complete their purchases. This is an example of an action-based email marketing automation.
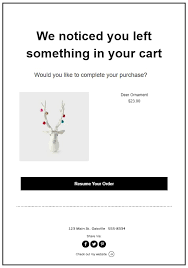
Email automation campaigns are among the top three tactics used by email marketers to improve performance, and email marketing automation has many benefits. The best one (in my opinion) is how it saves precious time and energy by otherwise priceless tasks. Automated emails can help you generate leads and increase revenue, but that doesn’t mean your marketing team has to spend all their time sending and monitoring them. That’s what marketing automation is for.
Learn everything you need to know about email marketing in our free HubSpot Academy course.
Digital Marketing Automation
Although email marketing is a common use case for marketing automation, it’s not the only one. Let’s talk about other forms of digital marketing automation (both external and internal).
Social Media Marketing Automation
Anyone who works in marketing knows how time-intensive social media marketing can be. If you’re going to do it right, you’ve got to do, well, nonstop. Thankfully, marketing automation can help. Tools like HubSpot and Hootsuite allow you to schedule content, set social media monitoring filters, and even automate the response process — although this should never replace genuine, human interaction with your followers and customers.
Advertising Automation
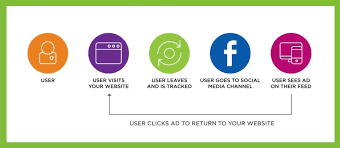
You’ve heard of retargeting, yes? Now … could you imagine having to go into every advertising platform and change the copy, graphics, and timing based on each customer’s individual actions or behavior? Whew, that’d be a lot. Retargeting is an example of advertising automation, as it automatically shifts and smartens its strategy in response to consumer behavior. If a customer visits your website, your retargeting automation will respond by displaying relevant ads on the sites they browse next.
Mobile Marketing Automation
As SMS marketing becomes more popular and effective, companies are adding mobile marketing to their marketing automation tool belts. Like emails, text messages can also be automated and triggered based on time or actions, and they tend to have a higher (and faster) open rate than emails.
CRM with Marketing Automation
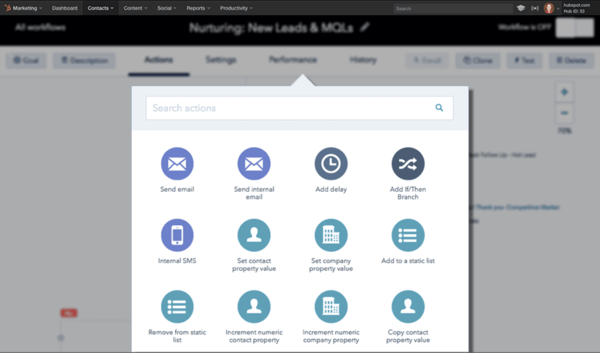
Ah, the CRM—a marketer’s best friend. Thankfully, your CRM and marketing automation can go hand-in-hand. A simple update in your database can trigger a whole host of internal tasks, including lead scoring and alerting your sales team to new prospects. You can also use your CRM to trigger email workflows, either based on user data or user actions.
Marketing Automation Software
As a marketer, your marketing technology stack may or may not be your best friend … I know mine sure is.
Do you have a favorite tool or two? Let me guess — a marketing automation software (if you’re currently using one) just crossed your mind.
I don’t blame you. These tools sure make our lives easier and our customers happier. If you’re looking for new tools to add to your list, or you’re wanting to check out marketing automation for the first time, take a look at the marketing automation software tools we’ve compiled in this article. Here are a handful of of my favorites:
HubSpot
The HubSpot CRM, as mentioned above, provides many marketing automation features. As a standalone tool, HubSpot’s marketing automation allows you to automate a variety of tasks, from setting up simple email workflows to building a complex network of rules to target users with tailored emails, live chats, and more.
Drip
Drip specializes in e-commerce marketing automation. It’s mostly used for email marketing and provides email automation workflows, multi-channel marketing, full campaigns, and more.
ManyChat
ManyChat allows you to extend your marketing automation strategy beyond email. Use this tool to build a smart bot to engage with prospects and customers on Facebook Messenger and over SMS. While your marketing automation shouldn’t replace a human touch, ManyChat can help you get the conversation started with prospects — it also captures information from prospects and adds it to your CRM.
Sprout Social
I had to include at least one social media marketing automation tool on this shortlist. Sprout Social can help lighten the load of manual social media tasks — responding to messages, tracking engagement, and measuring audience sentiment. Moreover, Sprout Social provides easy onboarding documentation and resources so you can hit the ground running.
Marketing Automation Strategy
Your marketing automation strategy should vary depending on what tools you use and what goals you set. For example, if you choose to use HubSpot to nurture leads that download a free ebook, your strategy would focus on converting those leads using information relevant to why they perhaps downloaded the ebook—and how your product or service could help meet those needs.
Regardless of your marketing automation strategy, however, make note of these few marketing automation best practices:
- Know your audience. You can’t create personalized marketing — whether automated or not — without knowing what your audience’s pain points are and how you can meet them. Build your buyer personas to get to know your audience before building your marketing automation workflows.
- Know your customer journey. A key determinant of successful marketing automation is meeting your lead wherever they are. You can’t do this unless you know their journey to become your customer. Map out your customer journey and match your marketing automation to those lead stages.
- Review on a regular basis. Although marketing automation is pretty hands-off, it is not a one-and-one strategy. Review your marketing automation workflows on a monthly, quarterly, and yearly basis. Your automation should change as your business, products, and customers do.
Check out this blog post for more marketing automation tips.
Automate Your Marketing to Grow Better
Marketing automation may seem like a lot to learn upfront … but imagine what it’ll feel like to kick back and relax once you’ve got everything in place. OK, maybe not relax, but marketing automation will certainly help you shorten that to-do list.
From email marketing to advertising and retargeting to internal tasks, marketing automation can help you save time, energy, and money — and make your customers’ lives easier and happier. It truly is a marketer’s best friend.

Gantt Chart vs. PERT Chart vs. Network Diagram: What Are the Differences?
How to Make the Best of Facebook Ad Targeting, According to HubSpot’s Paid Ad Specialist
With a potential advertising reach of 1.9 billion users, Facebook is undeniably one of the most powerful platforms to market your products or services.
As an avid online shopper, I know the power of Facebook advertising firsthand. Consider, for instance, the ad I saw on my Facebook feed a few hours after completing a purchase on Free People’s website:

Despite my recent Free People purchase (and dwindling clothing budget … ) I couldn’t help but click. I’d just been on their website, but I hadn’t seen these clothes yet.
Which leads me to my point: the power of targeted advertising.
With over 7 million advertisers on Facebook, it can be difficult for brands to stand out on Facebook amidst the masses.
Here, we’ll dive into the various Facebook ad targeting options you might consider to get the highest ROI on your campaigns — plus, Facebook advertising tips from HubSpot’s Paid Ads specialist, Nicole Ondracek.
Facebook Ad Targeting Options
It’s important to note, you’ll find all these ad targeting options within your Facebook Ads Manager. Once you begin creating a new ad campaign, you’ll have the option to “Create New Audience” or “Use Saved Audience”.
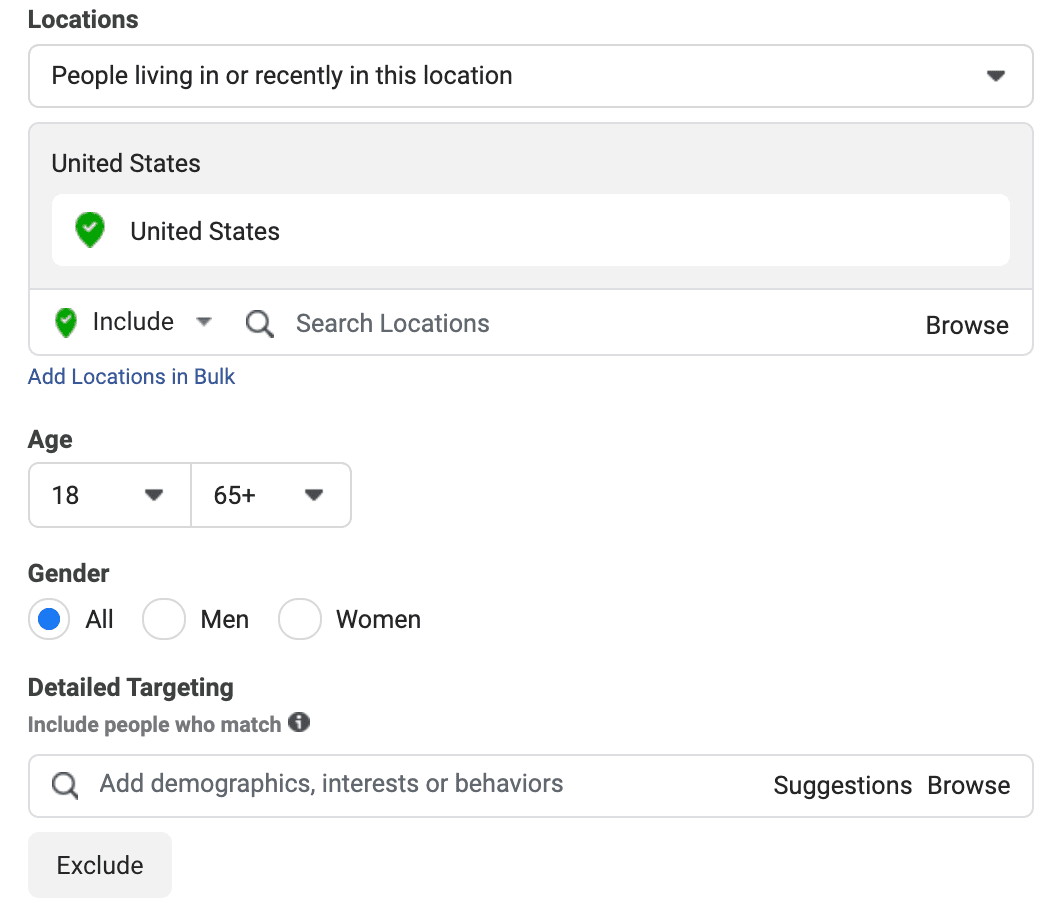
If you opt to create a new audience, you’ll see a field for “Custom Audiences” at the top (in which you can add a custom or lookalike audience, both of which are described below), a section for demographics (including Location, Age, Gender, and Languages), and sections for more detailed targeting or connections.
1. Demographic
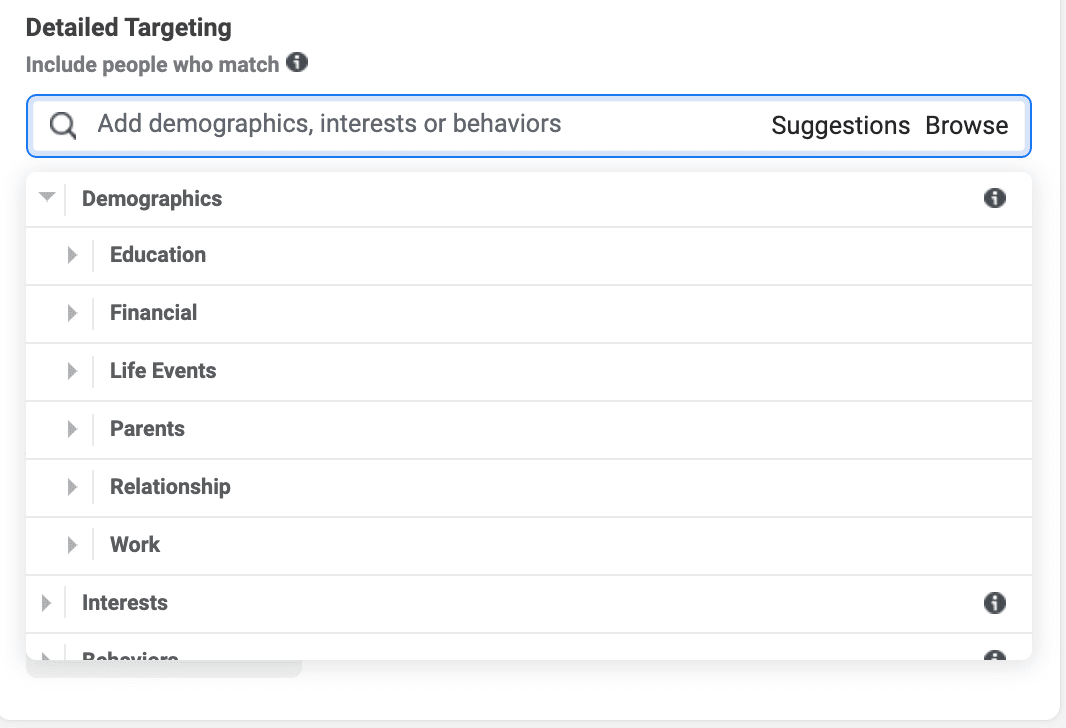
Demographic Facebook ad targeting options include the opportunity to segment your audience(s) based on age, location, language, work, education, and more. If you sell a product or service that pertains primarily to a certain demographic, this is a good ad targeting option for you.
For instance, maybe your audience is primarily millennial females, people who work in the medical industry, or anyone who lives in Spain — all of these factors can help you hyper-target to ensure you’re reaching the prospects who are most willing to buy your product or service based on an ad they see on Facebook.
2. Interests
Consider how much you’re able to learn about someone from their Facebook activity.
For instance, in the last six months I’ve Liked pages of various restaurants in Boston, MA; I’ve watched yoga videos via Facebook Live; and I’ve shopped for clothing on Facebook Marketplace.
All of these activities suggest the types of hobbies I’m interested in, and, tangentially, what types of products or services I’d be interested in purchasing.
Perhaps you sell a product or service that doesn’t pertain to an audience’s demographic as much as it pertains to an audiences’ interests.
A good example of this? Workout gear. Sure, you can guess that your audience is primarily 20 to 30-year-old women, for instance, but a more powerful opportunity for targeting would simply be to target anyone who’s Liked fitness pages, or engaged with fitness videos, over the last couple months.
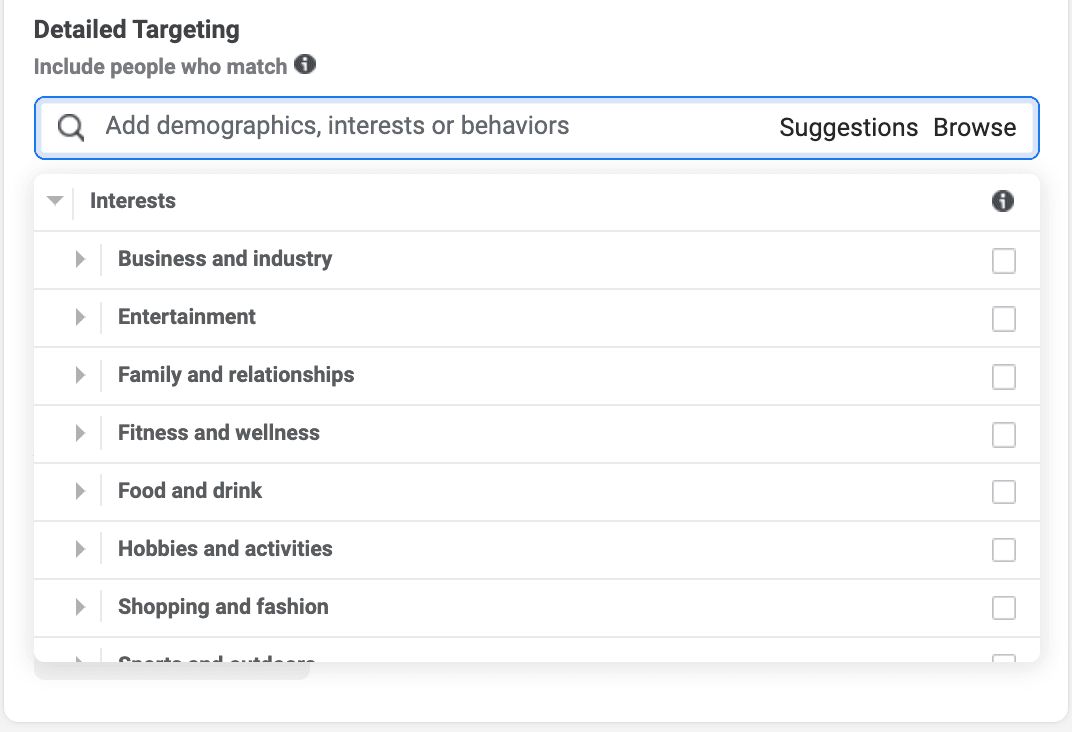
3. Behavior
There are plenty of user behaviors you’d want to keep track of before sending a Facebook ad their way — for instance, consider my example earlier, in which I’d shopped on Free People’s website before receiving a Free People ad on Facebook.
Additionally, it’s often most effective to target prospects who’ve already shown interest in your brand. For instance, you might find your Facebook ads perform better with audiences who’ve already read some of your blog posts or followed you on social media.
Ultimately, “behavior” can help you target audiences who’ve consumed certain types of content, visited certain websites, used certain browsers or devices, or even donated to certain charities.
This is a particularly good targeting option for ecommerce re-engagement ads, in which you display ads to users who’ve added items to their check-out cart on your website. Alternatively, you might consider serving ads to users who’ve visited a certain landing page on your website.
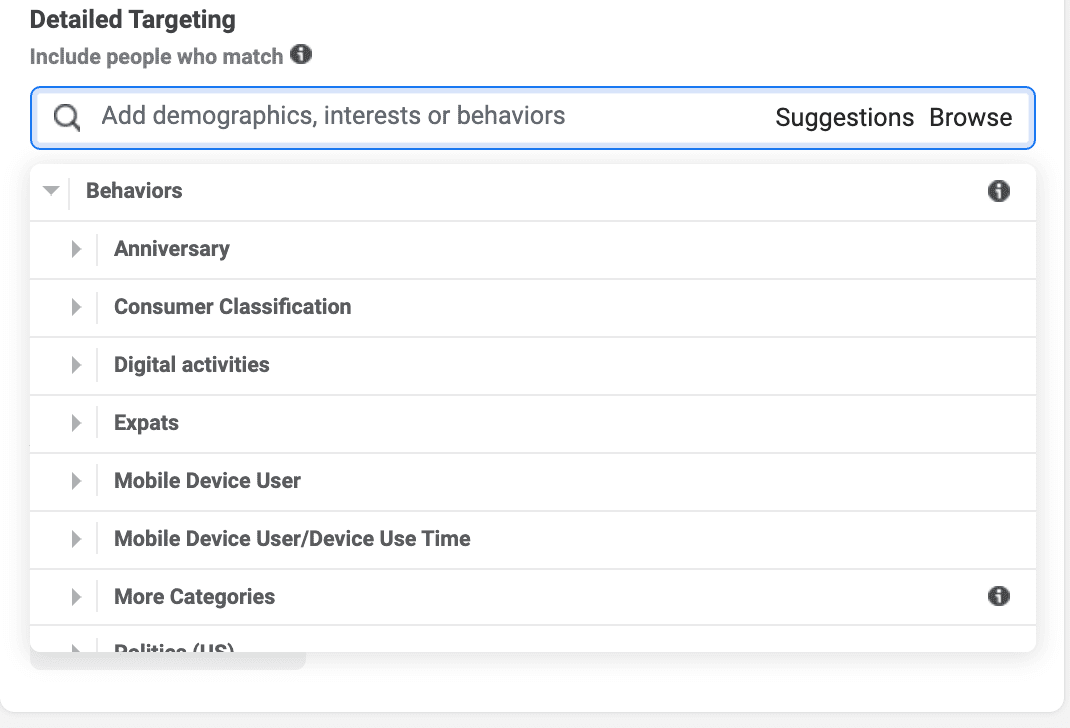
4. Connections
If you have a specific page, app, or event listed on Facebook that attracts visitors to whom you’d like to serve ads, you’re in luck. With “Connections”, you can do exactly that.
For instance, let’s say you recently held a networking event and added 300+ users to the event-specific Facebook page — after-the-fact, you might consider sending specific ads towards those users, who are now more aware of your brand and likely interested in your offerings.
Additionally, you can expand your ad’s potential by sending the ad to friends of people who’ve attended your event, as well.
5. Custom Audiences
If you already have a good list of leads in your database and want to reach them on Facebook, you could simply create a Custom Audience to attract and convert those leads.
A Custom Audience enables you to provide specific information you’ve gathered about your leads, such as a phone number or email, and then target those leads with ads.
This is a good targeting option if your goal is to up-sell to existing customers. For instance, perhaps you have a database of customers who currently use your product, but you’ve recently released new features in a Professional version.
One of the best opportunities to attract and convert existing customers is to use Custom Audiences to serve your Professional-product Facebook ads to those customers already in your database.
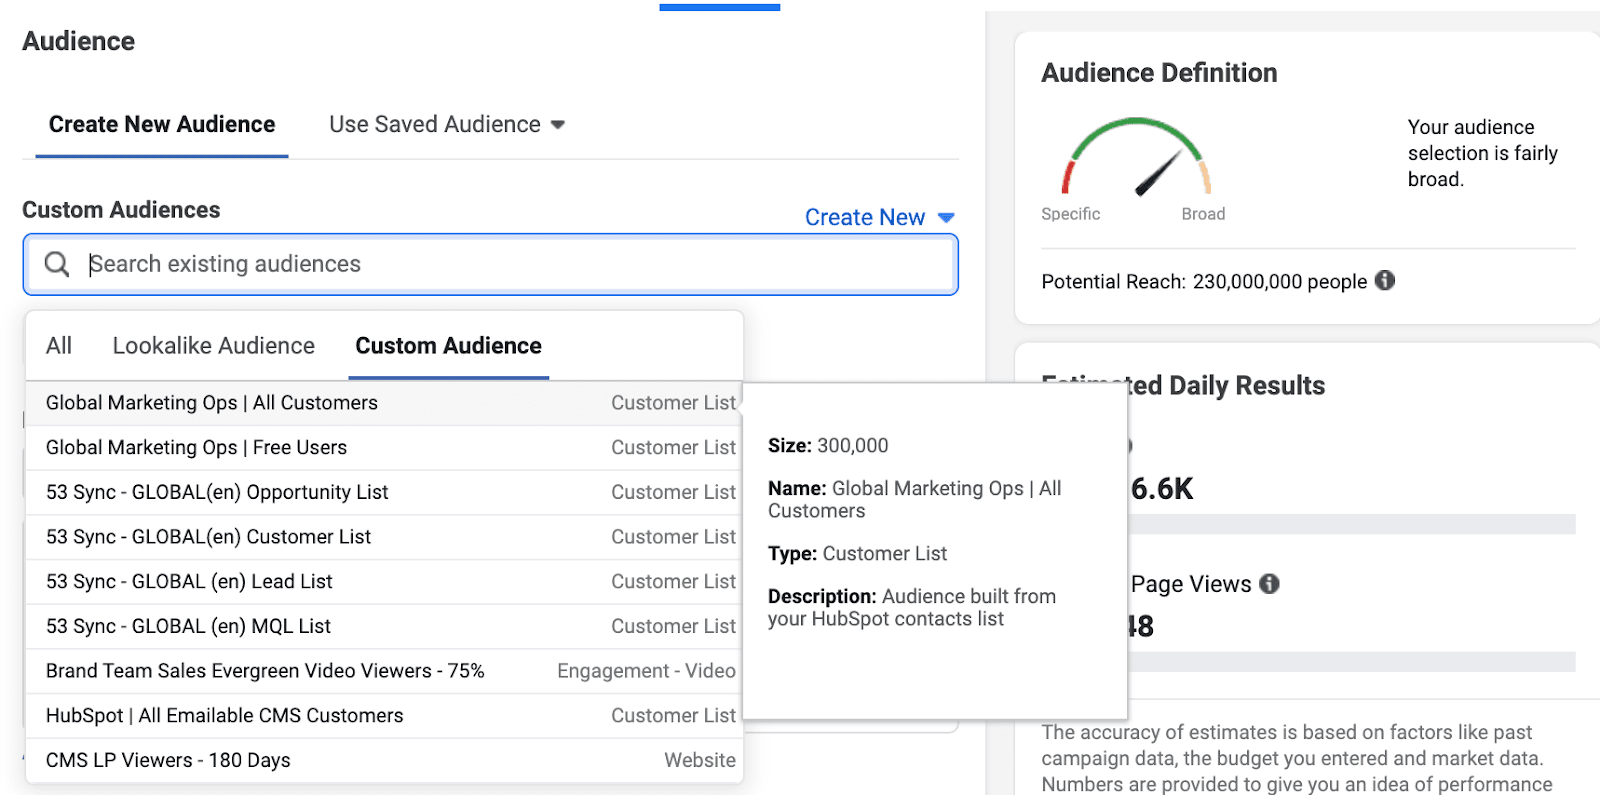
6. Lookalike Audiences
Lookalike Audiences is a fantastic opportunity to perform cold outreach towards prospects who look similar to your existing prospects and customers. As the name implies, Lookalike Audiences allows you to target ads towards users who match similar characteristics to people who’ve shown interest in your brand.
To further understand what it means for an audience to “look” like your existing database, consider the following example: let’s say you upload your email subscriber list to Facebook as a custom audience.
Facebook then identifies the following consistent features about your list: users are primarily in their mid-to-late thirties, they live in the United States, they work in banking, and they’ve shown an interest in travel.
Facebook could then find users on Facebook who match all of these qualifications, since users with those criteria seem most interested in what your brand has to offer.
Similar to Custom Audiences, you’ll need to upload a custom audience for Lookalike Audiences to work — for instance, perhaps you upload a list of email subscribers, event attendees, or website visitors.
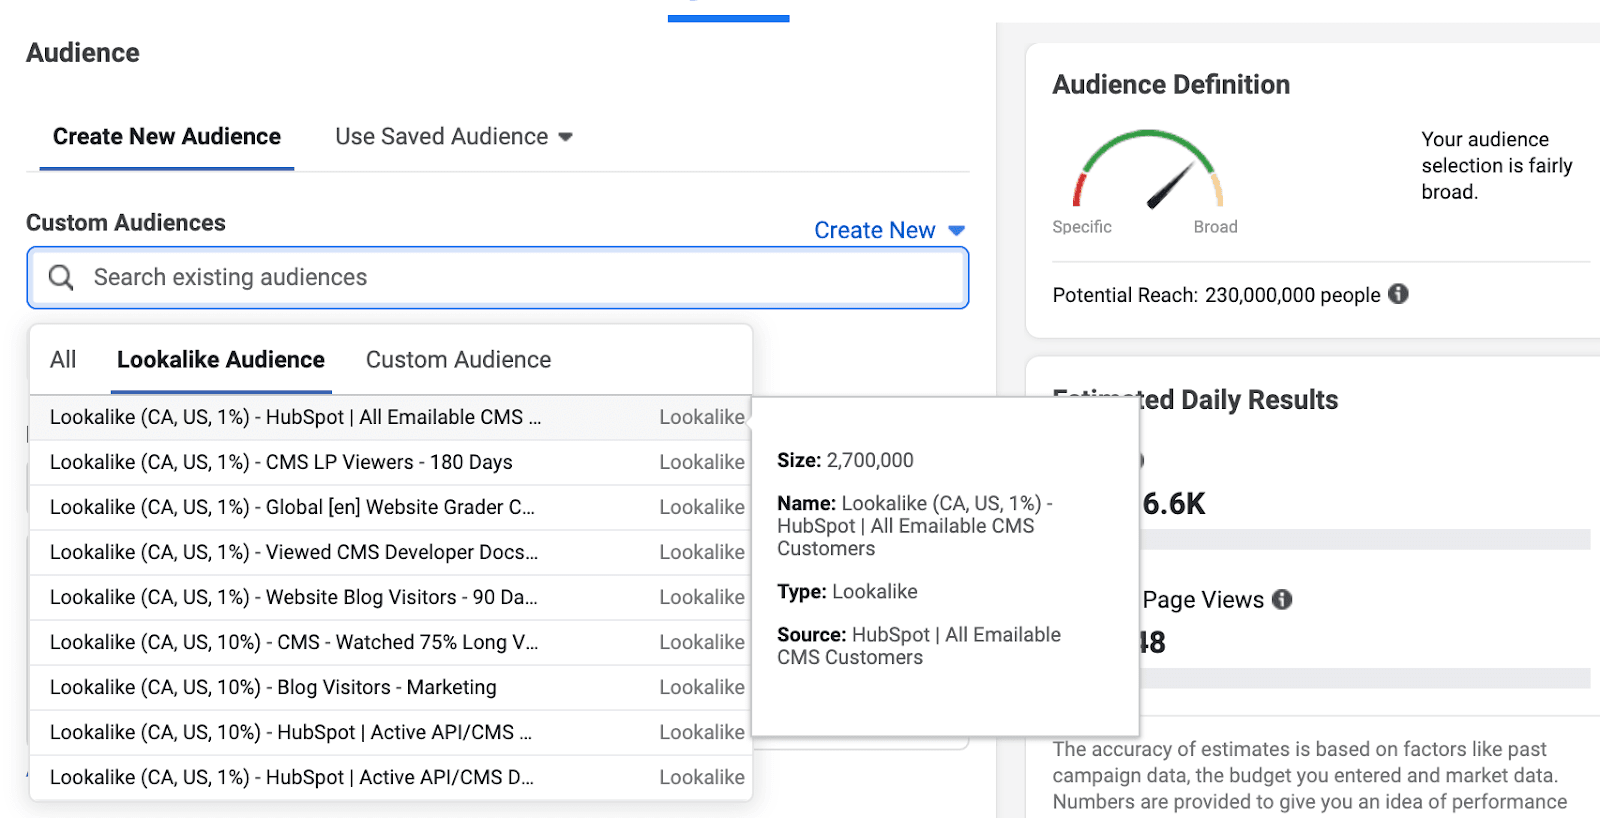
Facebook Ad Targeting Tips
1. Repurpose your highest-performing content as a Facebook ad.
If you have a few high-performing pieces of content that already attract and convert leads, why not put some paid ad spend behind it?
We’ve seen success with this strategy at HubSpot. For instance, each quarter I send a list of top-performing and high-converting content to the paid ad team, and they reformat it into an advertisement for Facebook.
Ondracek adds, “This can apply to different goals throughout a customer’s lifecycle. For example, if our goal is to drive more brand awareness to our site, we’ll test a blog post that generates a large amount of site traffic. On the other hand, if our goal is more focused on generating leads and submissions, we’ll instead test a high-converting content offer, since we care more about conversions than traffic.”
Ondracek told me, “It’s all about finding the right content that matches up to your campaign objective.”
Of course, not every piece of content that performs well organically will perform well as a social ad, which is why you want to be highly selective and pay attention to metrics like social media views when choosing posts.
But, nonetheless, choosing these high-performers is a good starting point and ensures you’re providing new audiences with content that already delights your existing audience.
2. Retarget ads to prospects most likely to convert.
With Facebook advertising, you’re able to target prospects who’ve already shown interest in your content, which could be more effective than cold-targeting Facebook users who haven’t shown any interest in your brand.
With retargeting, you can send ads towards prospects who’ve already watched a product demo, interacted with a blog post, or downloaded an ebook — which are all signs they’re intrigued by your brand and could be interested in learning more.
For instance, let’s say you work in the ecommerce industry and sell athletic apparel. You might consider creating a gated video on fitness tips from top health experts. Once you’ve collected an email list of users who’ve downloaded that video, you can target a follow-up “Top Workout Routines” Facebook to those same video viewers.
Ondracek says, “Retargeting is a really powerful approach, and we’ve found it works best when used to go after an audience similar to the seed list. For example, we’ve seen success retargeting visitors who have previously visited our pricing page with direct response product ads since they’re already in that consideration stage and more likely to buy.
She adds, “On the flip side, when we tried retargeting awareness video ad viewers with these types of down funnel ads, we saw worse performance since these two audiences have completely different behaviors.”
Of course, it’s vital to note, you’ll want to retarget ads that align well with your products or services. If people have shown interest in content that isn’t high-converting and doesn’t align with your product, you likely don’t want to retarget those viewers, since there’s no evidence they’ll turn into qualified leads.
3. Leverage existing fans of your business.
Similar to the tip above, it’s often more worthwhile to target users who’ve demonstrated their appreciation for your brand by liking your Facebook’s business Page. Consider how you might convert those users by retargeting ads towards them.
For instance, Facebook Ads expert Jon Loomer found his ads ROI increased dramatically when he targeted fans, rather than non-fans. In fact, his fan-targeted ads returned 129 conversions and resulted in $9,481.50 in revenue — 45.9X ROI. When he targeted non-fans, he didn’t convert at all.
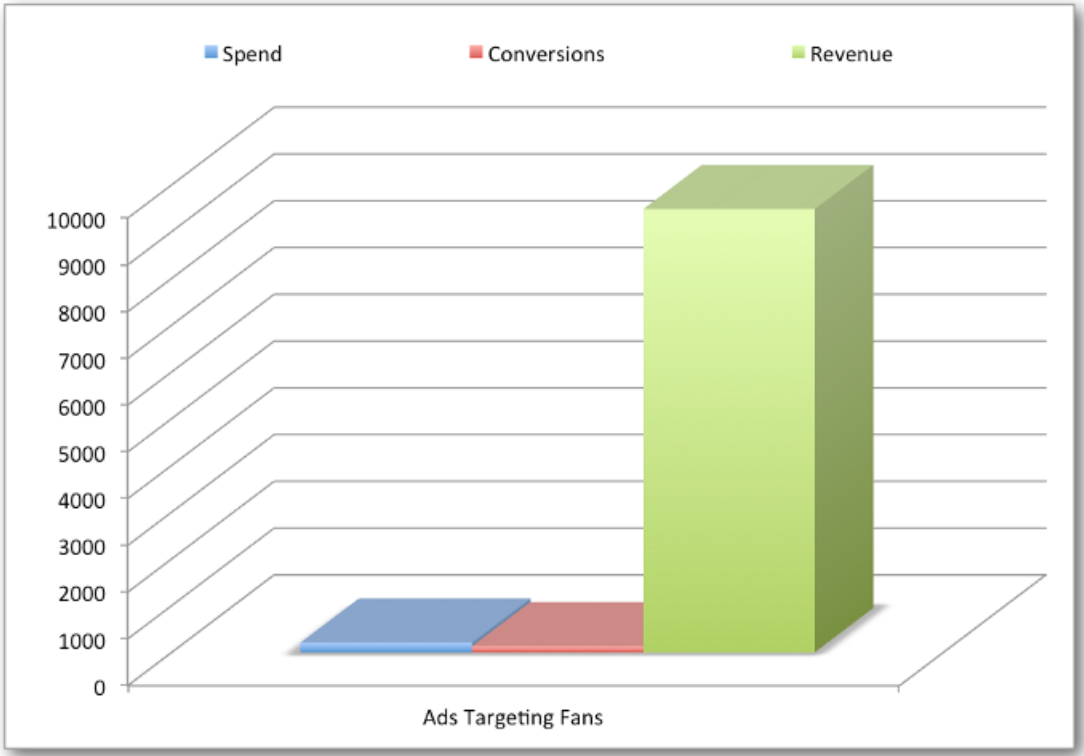
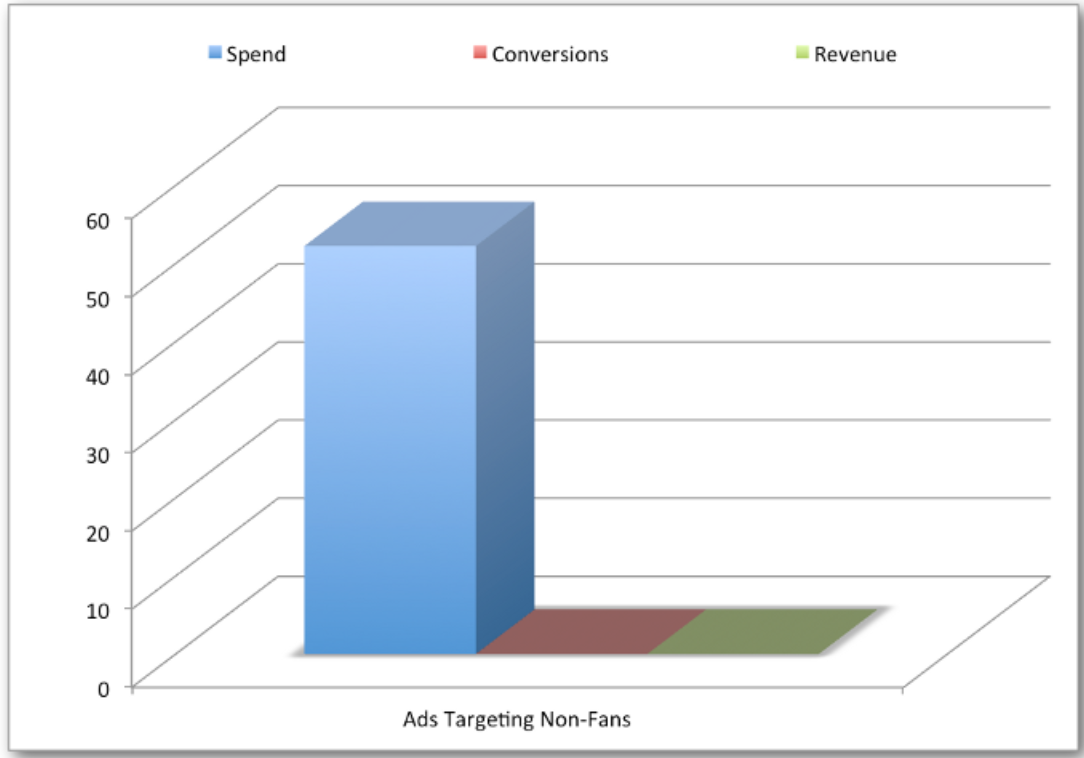
Ultimately, it’s much less obtrusive to target ads towards people who want to see content from your brand and have demonstrated an interest in your company. Save time and money by targeting your brand’s fans first.
Additionally, Ondracek told me, “You can also get creative and try layering on some criteria here. For example, you could try targeting fans of your page who haven’t purchased a product to try and influence some buying power. Or on the other hand, you could try targeting fans who have previously purchased a product if you sell something that can be purchased multiple times —like clothing in the FreePeople ad.”
4. Take advantage of custom audiences to up-sell and build loyalty with existing customers.
Targeting Facebook ads isn’t just effective for attracting new prospects to your business — it’s also a good strategy for retaining and up-selling your existing customers.
And, considering it’s 5-25X more expensive to acquire a new customer than it is to retain an existing one, it makes sense to leverage the customers in your database already rather than only sending ads to brand-new prospects.
To up-sell via Facebook ads, think about your existing customers who might benefit from an additional feature, product, or service that you can offer them. For instance, perhaps you’ve just released new features on a Pro version of your product. More than likely, users of your free or beginner product would be interested in learning about those features, particularly if they’re enjoying your product and considering an upgrade.
Alternatively, maybe you simply want to target helpful content towards existing customers to increase brand loyalty. You might consider creating a Custom Audience list of customers who’ve read your social media blog posts, for instance, and then serve ads on your upcoming social media webinar to that audience.
5. Create lookalikes of top-performing audiences to keep improving upon what works best.
Ondracek suggests that, once you find an audience that works well following the tips above, you can always create a lookalike of the same audience.
She says, “If, for example, you find targeting people who like your page works best, you can create a Lookalike of this same audience to test. This new audience allows you to expand your reach to new prospects and might even perform better.”
Additionally, Ondracek told me, “At HubSpot, we tend to see the most positive results and improvements when testing with Lookalike Audiences. As digital platforms become more and more automated, you’ll find yourself having to put more faith into the algorithms.”
“And what’s pretty cool is that these algorithms tend to work! When you upload a list of customers to Facebook and create a lookalike from them, Facebook’s algorithm is going to do its best to target your ads to people most similar to your existing customers.”
Ondracek adds that you’ll want to make sure you have some conversion tracking setup on your campaigns, so that Facebook will be able to tell who’s actually converting and optimize to find more people similar to those users.
Of course, if you don’t have enough data or conversions for the system to optimize, it’s going to be harder for this approach to work — which is why you’ll want to aim to run an audience test for at least two weeks, so there’s enough data to work with.
Additionally, Ondracek says, “What’s also great about Lookalikes is that if you find a Lookalike audience performing well, you can increase the size of it to test if a larger audience performs better or worse than a smaller one. In the Facebook interface, you have the option to test between 1-10% Lookalike audiences. The smaller the size, the more similar the audience is supposed to be to your seed list.”
6. Keep an eye out for frequency.
Finally, when targeting your ads, you’ll want to keep an eye on the frequency metric to make sure someone isn’t seeing your ad too often.
Ondracek advises, “If the frequency is too high, you risk hurting your brand perception. We can all name that one brand we see way too many ads for. On the other hand, it can be beneficial for someone to see your ad more than once to increase your brand awareness. You’ll have to play around with a sweet spot that works best for your company, but aiming for a frequency of 3-4 can be a good place to start.”
Ondracek adds, “If you do start to see the frequency increase, there are a few ways to solve for this. First, you can create a larger-sized lookalike audience as mentioned above, which will expand your reach. Second, you can create new custom audiences to add to your campaign. And, finally, you can add in interest or behavioral targeting since those are large pools of audiences to begin with.”
“Additionally, you can swap out with new creative so the same audience is at least seeing some new fresher content.”
“One of the most exciting parts of paid advertising is being able to continuously test and find what works best. There are so many different options and ways to target, so if you find an audience not working, don’t be afraid to try a new one.”
Undoubtedly, there are endless opportunities for increasing customer lifetime value by retargeting Facebook ads in an effort to demonstrate your brand’s empathy and commitment to helping customers with all their various needs.

Why Consumers Sign Up for Webinars [New Data]
In 2020, brands are leveraging virtual events more than ever.
And, although some marketers once believed that “webinars were dead,” many are now rethinking that statement as they find themselves scheduling and promoting this exact type of event.
Webinars, or online events often modeled like a class or seminar, often include a lesson, slide deck, interactive elements such as polls, and, occasionally, time for audience members to virtually ask questions.
Because of their educational format, webinars can offer a number of great perks to brands.
First, you can build a sense of credibility by hosting a webinar on a topic your company has expertise in. Second, webinars can enable your fans to interact with you digitally.
Lastly, and most importantly, webinar signups can lead to a bigger contact list, more prospects, or purchasing conversions.
But webinars aren’t always easy to plan and execute.
Because webinars require viewers to sign up and remember to tune in, it takes clever marketing to ensure that a large audience actually attends. Additionally, with most brands going virtual in 2020, a number of competitors in your space might very well be planning a similar webinar that your audiences might be more drawn to.
Luckily, by researching your target audience, and learning more about what drives attendees to sign up for webinars, you can create and promote an event that effectively pulls in and delights your audiences.
So, where do you start?
To help you research the best webinar tactics for your brand, I surveyed 400 consumers about their webinar preferences and what motivates them to attend these virtual events. In this blog post, I’ll highlight a few key findings that you can keep in mind as you develop and promote your webinar content.
What Consumers Say About Webinars in 2020
People want webinars that help them explore their passions.
When choosing which webinars to sign up for, are people drawn mostly to events that help them elevate their career, or are they attending them for more recreational purposes?
To learn more about consumers’ motivations for attending a webinar, I asked 400 consumers, “Which webinars are you most likely to attend in 2020?”, 27% chose, “Webinars that teach me more about a passion or hobby;” while 24% chose, “Webinars that entertain me.”
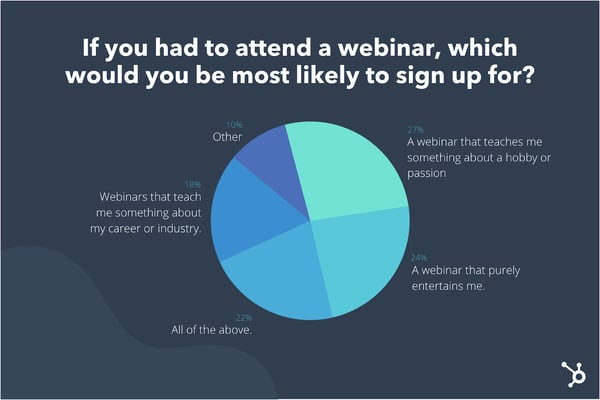
If you have a webinar strategy or series that aims to help people boost their careers or work tactics, don’t panic. Nearly one-fifth of the group (18%) said they wanted to attend webinars that helped them learn more about their career or industry, while 22% said “All of the above.” These results indicate that consumers will definitely still sign up for a webinar that tackles career, work, or industry-related topics.
Additionally, you should also keep in mind that this survey was delivered to a small general consumer pool of all ages and career levels. Had this been given primarily to executives or B2B business reps, the results might have leaned towards industry-related content.
Regardless of what industry you’re in, or the size of this survey pool, marketers should keep the data above in mind when creating and promoting a webinar. Because people are naturally curious and want to learn, your webinar promotions should intrigue them by clearly stating what they’ll learn, noting any experts that might be featured, and highlighting how attendees will be able to use the knowledge they’ll gain from the event.
Webinar viewers sign up to learn something — but prefer certain teaching styles over others.
Just like any in-person class, each professor — or webinar host — might have a slightly different teaching style.
While some hosts might come in with a great slide deck presentation, others might bring in an expert and have the audience ask them questions. Or, they might bring in a few experts and host a panel discussion where the audience just listens rather than asking questions.
There are many ways to format an informative webinar, but which teaching style actually intrigues people enough to get them to sign up?
When I asked, “Which webinar format sounds most engaging to you?”, 30% of participants said, “A presentation that teaches me how to do something specific.” Meanwhile, 20% said “All of the above.”
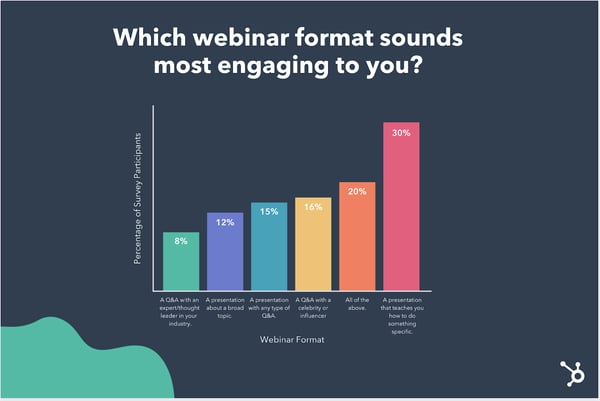
The results above hint that a simple how-to webinar with fewer frills could still engage audiences if you’re feeling low on bandwidth and creativity. However, if you have the time to coordinate a webinar that feels more like a live Q&A, this could also be a great formatting option. 39% of people said they were drawn to one of the webinar formats that included a Q&A.
Although a more basic presentation or lecture styled webinar will still catch the attention of potential viewers, content marketers should still make sure their presentations educate audiences on something specific — like a strategy — rather than discussing an incredibly broad or very vague topic — like an entire industry. Only 12% of respondents say they’re driven to webinars that will feature a presenter discussing a broad topic.
Odds are, a person attending a webinar already knows the basics of their hobby, industry, or passion. But, they want to learn more or become an expert at something related to it. For example, as a content marketer, I might not attend a webinar with a broad topic of “Marketing,” but I might attend webinars like, “Advanced Blogging Tips from Managing Editors,” or “The Basics of SEO in Marketing.”
As a marketer or webinar creator, you’ll need to build a buyer persona for your target audience to determine the best expertise level to create valuable content around. If your audience is filled with beginners in a topic, you might want to create more granular webinars that discuss basic tasks or tactics. If your audience is made up of topic experts, your webinars might need to be more advanced.
Interactive Content: The Key to an Engaging Webinar?
In the modern classroom, teachers will often zest up a number of different class outlines by adding opportunities for students to interact or test their knowledge. These could include polling the class by asking them to raise their hands, pop quizzes, or allowing them to ask questions.
When it comes to online events, a number of tools and video software enable marketers to make their webinars more interactive and engaging. And, based on our research, it seems like consumers enjoy interactive webinars.
When asked, “Which element would you most like to see in a webinar?”, “A host or presenter that takes questions from the audience,” received 22% of the votes, followed by “No preference as long as the webinar feels interactive,” with 19% of the votes. Another 20% say they’d like to see polls or quizzes.
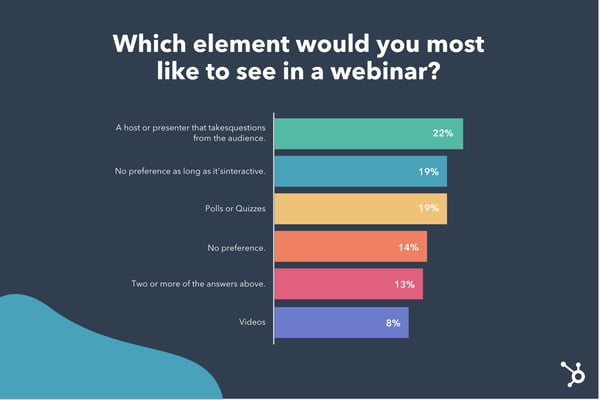
If you’re a marketer who regularly creates webinars, it might be worth it to consider where you can make your programming more interactive.
For example, if you’re hosting an expert, consider leaving time for the audience to ask questions in the webinar tool’s chat area. Or, if you’re discussing a strategy that’s common in your field, poll your audience to see if they’ve used the tactic.
Although polls or Q&A might seem like a super basic webinar element, they might make your audiences listen more actively and enjoy the content they’re consuming more. This ultimately could lead to them engaging more with your brand, signing up for future webinars, or converting to a customer.
If you’re marketing a webinar that has interactive content in it, be sure to promote that aspect. For example, in your messaging, emails, and follow-up emails, directly tell your audiences they’ll be able to actively participate in quizzes, polls, or a Q&A during your event.
In a competitive webinar pool, anything you can do to make your webinar seem more active and engaging than others that are more basic could help boost signups and attendance during the actual event.
Creating and Promoting a Successful Webinar
While creating a unique and engaging webinar will be one crucial step in your virtual event strategy, the proper promotional tactics will also be vital.
Once you’ve created a webinar plan that will inform audiences, allow them to interact with you, and fuel your contact list, be sure to promote all of the great things your online event will cover.
As you promote your webinar, don’t forget to note aspects that will make your event stand out — such as polls or Q&As. This transparency will show audiences exactly what they can expect and differentiate you from competitors with vague webinar promotions.
To learn more about creating a truly compelling webinar, check out this ultimate guide. Want to learn how to promote your next online event? Here are a few great tips from HubSpot marketers.

The 11 Best ClickFunnels Alternatives & Competitors in 2020
The marketing technology landscape is expanding rapidly, and it’s becoming cheaper and easier for marketers to run powerful campaigns on their website or other channels.
So, if you want to build a powerful inbound marketing engine, what do you need?
Well, first off, you need a website.
It also helps to have dedicated landing pages, sales pages, splash pages, and lead capture forms. Additionally, you’ll want messaging tools like email, push, or SMS to communicate with your leads and prospects.
All of these tools are invaluable in helping you build powerful inbound marketing systems and predictable revenue.
To help consolidate all of these marketing elements in one place and test new campaigns, there are powerful suites like ClickFunnels that you might try out — but ClickFunnels isn’t for everyone.
Here, we’ll explore 11 alternatives to ClickFunnels that will help you create high-quality campaigns and drive more revenue in 2020 and beyond.
But first — what is ClickFunnels?
What is ClickFunnels?
At its core, ClickFunnels is a company that tries to help you with all of the above. It’s a full suite sales and website funnel building tool, primarily predicated on landing pages and basic marketing automation functionality. The magic is that you can set up pretty clever workflows and funnels without the help of developers.
This means you can move faster, test new campaigns rapidly, and therefore, drive more revenue.
Some of ClickFunnels features include:
- Landing pages
- Sales pages
- Squeeze pages
- Webinar pages (you need to integrate with a 3rd party tool)
- A/B testing functionality
- Email and SMS
- Pre-designed templates
- Automation and sequences
- A/B testing
- Shopping cart
- Full integrated shopping cart platform to sell your products.
- Lead capture forms
- Analytics
- Easily see your revenue, conversions, etc.
- Contacts database
- Lists and segmentation
- Personalization
ClickFunnels also has a raving fan community that loves the company. This makes it easy to find help when you need it.
However, not everyone is a fan and the tool isn’t for everyone.
While it has many features, sometimes you don’t want or need every one of them, or you’d like to use a more powerful tool to accomplish something specific (such as email or landing pages). Additionally, there are often stronger point solutions for a given functionality.
Whatever your reason for seeking an alternative to this popular funnel and landing page building tool, this list should help you with your shopping.
1. HubSpot Marketing Hub
HubSpot’s Marketing Hub includes a myriad of free tools that help marketers do everything from managing your paid ads to collecting leads, building landing pages, and setting up email marketing campaigns.
The coolest part is all of your contacts data is stored in the free CRM, so you can easily access insights and use CRM data to improve and personalize your campaigns.
As an alternative to ClickFunnels, the all-in-one aspect of HubSpot is a big selling point.
Specifically with regards to the landing pages functionality, you’re able to build out beautiful pages — sales pages, squeeze pages, downsell pages, upsells, webinar funnels, etc. — using the simple drag-and-drop editor. There are several landing page templates available to get you started, as well.
Pros
- Easy drag-and-drop builder
- All-in-one platform that plugs into a free CRM
- Get started for free
- A/B testing functionality embedded in most features
- Excellent customer support and documentation
- Embed a calendar to book meetings on your landing page for free
Cons
- Usage limits on free plan
- No custom modules for free
- Not as large a library of templates as other alternatives
Pricing: Starts free and then Starter Tier pricing begins at $50/month.
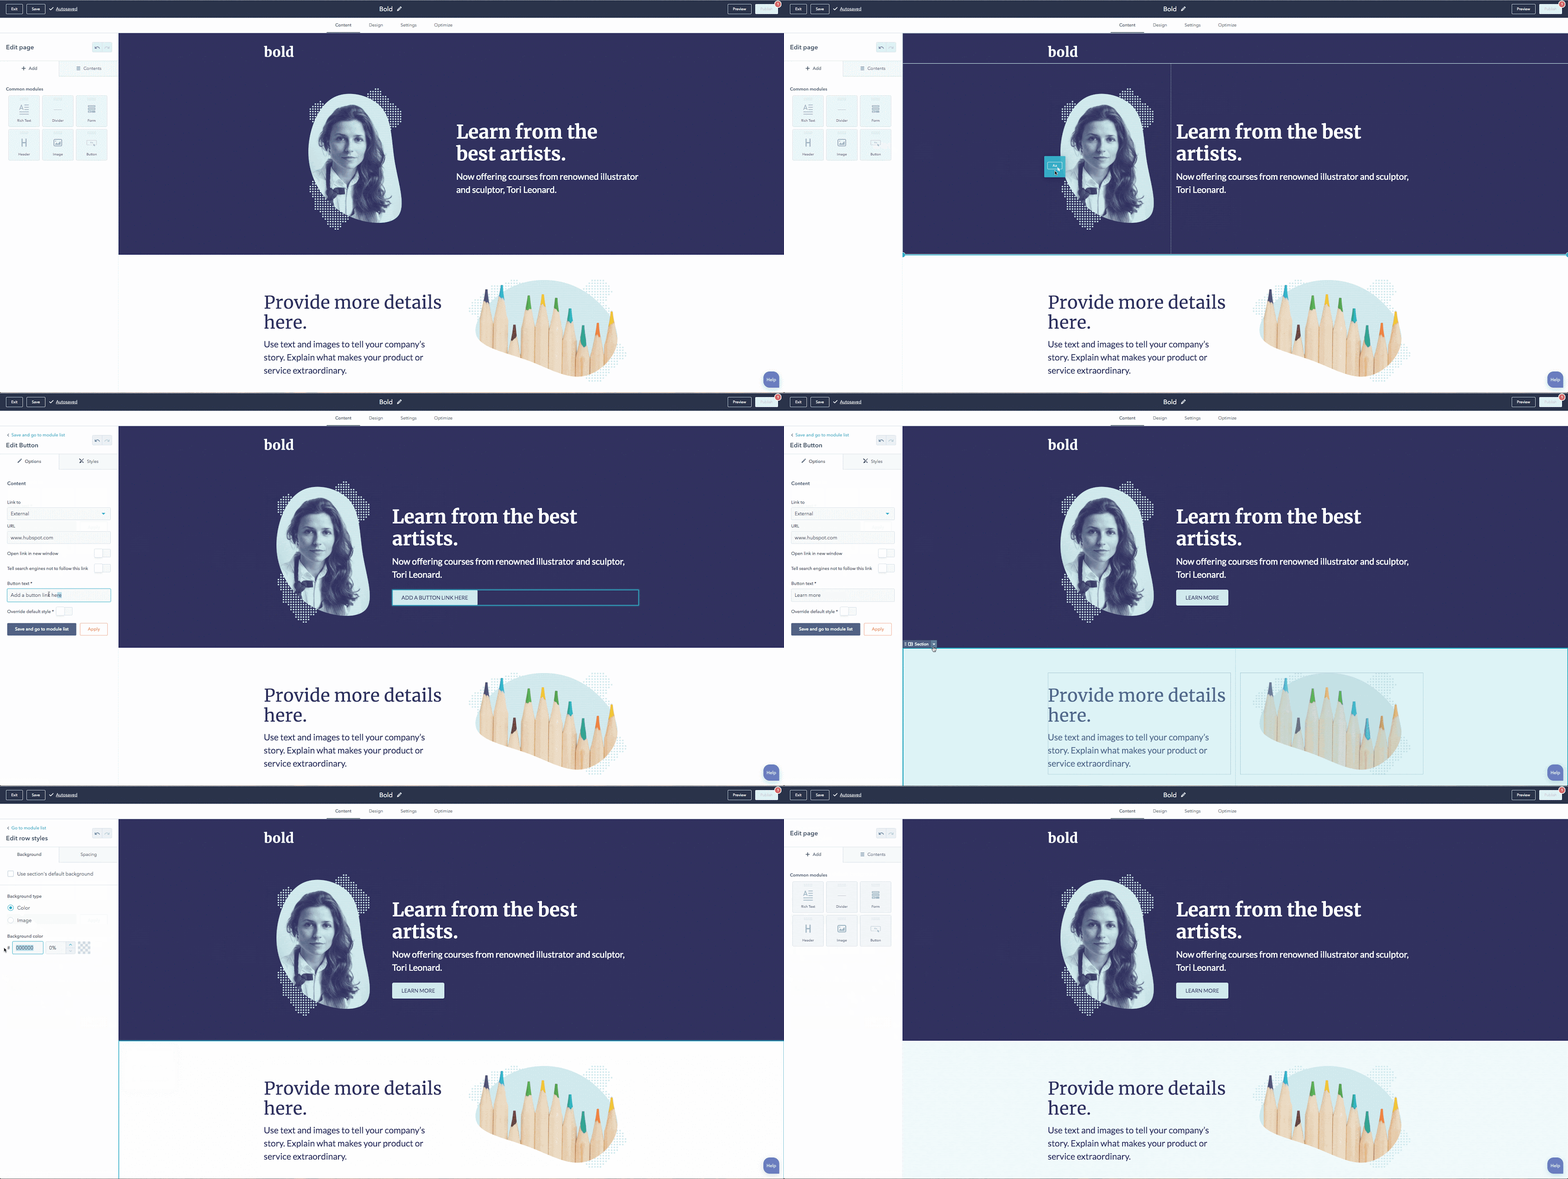
2. Leadpages
Leadpages is a strong contender in the marketing technology world, and it’s an especially popular landing page builder.
Essentially, it allows you to build no code (or low code) websites and landing pages. It also includes handy tools for lead capture and funnel building, such as popup forms, alert bars, and an impressive list of native integrations.
Previously, Leadpages had also owned a marketing automation platform, Drip, though they have since diverged in Leadpages’ recent acquisition. Still, you can easily integrate Drip with Leadpages (or basically whatever marketing automation tool you use).
Pros
- Beautiful drag-and-drop page editors
- Ability to build a full website or landing pages
- Great lead capture tools
- Affordable pricing
Cons
- No email or campaigns functionality
- Lack of robust native analytics reports
- Not the most customizable/complex feature set
Pricing: Starts at $25/month
3. Unbounce
Unbounce is one of my favorite landing page builders.
Their landing page editor is easy to use, but the product is also one of the most powerful and flexible I’ve tried out. You’ll be just as satisfied with the tool whether you’re a marketer who can’t code, a marketer who can code, a designer, or a developer. It’s a great product for landing pages at scale.
While landing pages are their bread and butter, they also have some truly great lead capture tools, as well. The pop-up editor is the same WYSIWYG editor that their landing page editor uses, so it’s easy to build beautiful pop-ups (not to mention, they’ve got great templates available, too).
Unbounce has also built a substantial community of users, agencies, and developers. So if you’re looking for help with design, SEO, or PPC campaigns, there are so many agencies that specialize with Unbounce.
One of the coolest features they’ve recently launched is “smart traffic.” This feature uses machine learning to dynamically deliver the right landing page to the right traffic (my guess is through reinforcement learning, but who knows).
Pros
- Easy to use WYSIWYG editor
- Huge community and brand support
- Good customer support
- Mobile-friendly editor
- Strong lead capture tools
- Smart traffic delivers ML-based landing page automation
Cons
- Starting price is a bit more expensive than competitors
- Drag-and-drop functionality can get a little buggy, so your best best is to work with a coder or designer
Pricing: Starts at $80/month
4. Instapage
Instapage is one of the most popular landing page tools on the market.
They’re well-respected among marketers, and offer one of the most scalable solutions when it comes to high-budget growth marketing programs. This includes programmatic personalization, solid experimentation functionality embedded within the product, and AdMaps to visualize the mapping between your pre-click experience on ads and your post-click experience on landing pages.
Underpinning all of this advanced technology is a user-friendly page builder that any marketer can master easily.
Pros
- Powerful feature set great for high scale marketing teams
- AdMap visualizations to link up ad creative to landing pages
- Personalization and experimentation embedded in product
- Strong reputation for lightning fast page speed
Cons
- Higher price point than other alternatives
- Lack of native messaging or campaigns features
Pricing: Starts at $199/month
5. Wishpond
Wishpond is an all-in-one marketing platform that might be one of the easiest to use.
First off, they have a stunning array of features. They have ads tools for Instagram, Facebook, and Google, social media promotion tools, email marketing software, lead management, referral programs, landing pages, website pop-ups, cart abandonment triggers, forms, call tracking, and automation.
So if you want the full bucket of features and then some, Wishpond is an impressive platform.
The tools are all built for marketers, so they’re easy to use without the help of a developer.
Pros
- Every feature a marketer could wish for
- Easy-to-use page editor
- Great pop-up building and behavioral triggering
Cons
- Too many features can get confusing and not all are best in breed
- A/B testing functionality is limited
Pricing: Starts at $75/month
6. GetResponse
GetResponse is one of my favorite all-in-one marketing platforms. To be honest, I’ve mainly used them and love them for their email marketing solution. Great deliverability.
But their landing page builder is also impressive. They have some unique features, like robust marketing automation and webinars, as well as some standard tools like forms and pop-ups.
You can easily set up sales funnels or lead magnet funnels, and you can even manage and create social media ads in the platform. Sitting on all of this is a powerful set of analytics tools to visualize exactly how your funnels are performing.
Pros
- Amazing email marketing tool
- Easy-to-use page builder
- Sales and lead magnet funnels
- Integrated webinar functionality
- Affordable entry price
Cons
- Too many features leaves some neglected (lead capture tools aren’t super strong)
Pricing: Starts at $15/month
7. Keap
Keap, formerly known as Infusionsoft, is one of the premier marketing automation solutions out there.
Since rebranding and rolling up into Keap, the company has built out a robust platform complete with a CRM as well as various sales features like invoice management, an appointment scheduler, and a sales pipeline manager.
However, most marketers know this company for Infusionsoft, the powerful and long running marketing automation platform. This tool has the whole suite — landing pages, lead capture tools like forms and pop-ups, an email delivery service, automation functionality, and pretty good native analytics reports.
All of this makes it a wonderful solution to manage your sales funnel and online business in general.
Pros
- Powerful and flexible automation features
- Strong community and support network
- Integration with Keap’s CRM and sales tools
Cons
- Can be a difficult learning curve with some features
- More expensive than other tools on this list
Pricing: Starts at $199/month
8. Elementor
Elementor is an insanely popular WordPress page builder.
While many ClickFunnels alternatives on this list are full featured marketing platforms, you can get pretty far with WordPress, a page builder like Elementor, and a messaging service (there are many free email marketing tools).
Elementor has over 5 million active installations on WordPress, and it’s easy to see why. It’s an incredibly easy-to-use landing page builder, and any marketer can use it to quickly get started building beautiful pages.
Moreover, it starts out free and is quite affordable even at the paid tiers.
If you need a simple and effective page builder to act as a funnel builder, Elementor is a great option.
Pros
- Easy to use drag-and-drop editor
- Hundreds of premium templates
- Dozens of embedded widgets available
- Plug-and-play with WordPress
- Affordable
Cons
- Only builds pages, so you’ll have to use other tools for messaging and automation
- Sometimes lacks flexibility and customization
Pricing: Starts free, next plan begins at $49/month
9. Landingi
In my opinion, Landingi is one of the most underrated landing page builders.
First off, it’s easy to use. Additionally, they’ve got a powerful assortment of features, including a mobile-friendly design editor, pop-ups and lead capture functionality that you can use anywhere on your site, a ton of integrations, and optimization and testing capabilities in-app.
Plus, this tool was built as a mobile-first landing page builder. It can often be frustrating designing mobile-friendly pages, so if that’s a concern for you, you should consider this tool.
Finally, if you’re a WordPress user, they have a great WordPress plugin to help get you up and running.
Pros
- Mobile focused, so you can easily design beautiful mobile pages
- Lead capture and pop-up tools
- A/B testing and optimization features
- Easy to use
Cons
- No module building, so it’s not the most scalable solution if you need tons of landing pages
- Not as feature rich as other solutions on this list
Pricing: Starts at $47/month
10. Ontraport
Ontraport is another all-in-one marketing solution.
It starts with the Ontraport CRM, where all your data lives. Then you have email and SMS tools to communicate with your prospects and your customers.
And of course, you have a great landing page builder. This also comes with embedded web forms and membership sites, which makes this a wonderful alternative to ClickFunnels.
Pros
- All-in-one feature set that competes head to head with ClickFunnels and Infusionsoft
- Solid page builder
- Good customer support
Cons
- Complains of buggy drag and drop functionality, especially creating emails
- Limitations and lack of flexibility with certain tools, like designing emails or landing pages
Pricing: Starts at $79/month
11. Pagewiz
Pagewiz is a dedicated landing page builder — and a powerful one, at that.
They’re a product-led company, putting tons of resources into building a secure, easy-to-use, and flexible page builder. Therefore, if you want best in breed for your landing pages, this is a good bet.
Pagewiz comes replete with every feature you need to build perfect pages — a mobile responsive editor, good A/B testing functionality, video widgets, design features like parallax scrolling, and tons of ready-to-use templates.
You can also integrate with pretty much any other marketing tool you’re currently using.
Pros
- Great product reliability and rich feature set
- Forms and lead capture capabilities
- Mobile responsive editor
- Easy to use WYSIWYG
Many integrations
Cons
- Not as much education, community or support materials for technical issues
- Lack of additional messaging and campaigns features
Pricing: Starts at $29/month
The 5 Best Free ClickFunnels Alternatives
1. HubSpot Marketing Hub
2. Elementor
3. Wix
4. GrooveFunnels
5. BuilderAll
Finding the Best ClickFunnels Alternative
Whatever your reason for seeking a ClickFunnels alternative, know that there are many options on the market now and there will likely be more in the future. The marketing technology landscape continues to expand, not only giving marketers more options, but better and more powerful tools as well.
Some tools on this list serve specific purposes, such as landing pages (Unbounce, Instapage, etc.), but some have all-in-one platforms that have all the features ClickFunnels has, and in some cases, many more.
For an all around effective growth platform, HubSpot’s Marketing Hub is a great solution. You can start out free on many of the tools, including the landing page builder, form builder, CRM, and email marketing platform.
Beyond that, the paid tiers increase the scope and power of what you’re able to accomplish. The sky’s the limit.

9 Ways to Improve Your Marketing on LinkedIn
Wondering how to get more out of LinkedIn? Are you using LinkedIn effectively? In this article, you’ll discover nine LinkedIn ideas to improve your networking and marketing. #1: Maintain Top-of-Mind Awareness With 1st-Level LinkedIn Connections Every update you see in the LinkedIn feed is an opportunity to understand what the people and businesses you follow […]
The post 9 Ways to Improve Your Marketing on LinkedIn appeared first on Social Media Examiner | Social Media Marketing.
from Social Media Examiner | Social Media Marketing https://ift.tt/30BFSKX
via socialmediaexaminer
How To Do a Poll on Instagram: A Beginner’s Guide
I’m a little embarrassed to admit this, but checking Instagram is one of the first things I do in the morning.
But, I know I’m not alone.
Did you know that Instagram went from one million users in December 2010 to over one billion in 2020?
In fact, it’s one of the most popular social media platforms in the world. So, you might be wondering, “How can I use this platform?”
Well, a great way to engage with your audience is through an Instagram poll.
According to HubSpot research, quiz or poll stickers are one of the most popular Instagram Story formats.
Polls are a great way to keep in touch with your audience and even conduct market research.
In this post, let’s learn how to set up a poll on Instagram and discuss how you can use this feature.
1. Open Instagram and swipe left.
To get started with Instagram polls, the first thing you need to do is open the app. Then, you’ll swipe left. This will take you to the screen where you can post on your Stories.
2. Make sure you’re posting to Story (underneath the record button).
Once you’re here, make sure that you’re posting to your Story. Underneath the record button, you’ll see whether you’re posting a Story, a Reel, or going Live.
To post a poll, make sure you’re posting to your Story.
3. Take the video or picture you want to post.
Now, just take the video or picture you want to post.
If you have it saved, you can just select the content from this screen by clicking on the picture icon on the bottom left. This will take you to your camera roll where you can select a video or image.
4. Click the sticker icon on the top right.
To add the poll, click on the sticker icon on the top right. It’s the third icon from the left.
5. Scroll down and choose poll or look for the sliding poll.
Now you should see different sticker options including location, time, questions, and more. Scroll down and choose the poll icon.
You can either do a question and answer poll, or a sliding poll. To choose a sliding poll, you’ll want to scroll until you find the slide bar option.
6. Type in the question and responses.
If you chose the question and answer poll, it’s time to type in your question and the possible responses.
If you chose the slide bar, you’ll want to type in your question and then add an emoji to the sliding bar.
7. Click “Send To” and then share your poll to your Story.
Now all that’s left to do is post. To do this, just click “Send To” and then share the post on your Story.
8. Track results.
Once you’ve posted a poll, it’s time to wait for the responses. To view the results, you’ll want to watch your Stories.
Then, click the “Seen by” icon in the bottom left corner. This will show you who voted and the results.
Here, you’ll also see a button to “Share Results.” You can click that and post the results to your Story to let your viewers know the outcome of the poll.
When you’re creating a poll, remember to place it strategically.
You don’t want people to have problems voting because of the placement. Make sure your poll is placed near the center, and not too high or low that the other Story icons block it.
As you can see, posting a poll on Instagram is a simple process. But, how do you use this feature?
Here are some of the top ways you can use Instagram polls:
- Learn about your audience. Polls are a great way to talk to your followers. You can learn about their interests and opinions using a simple poll.
- Market research. Instagram polls can also help you discover what your audience wants to see from your brand. For example, I’ve seen a powder protein company ask questions on what flavors customers want to see and then deliver on those flavors. This makes your audience feel like they’re a part of a community and like you value their opinion.
- Gather feedback. If you want to know what your customers think, why not just ask them? You can use polls to gather feedback and information from your followers.
- Share your content. Instagram polls are a great way to get your audience interested in the content on your site. Hopefully, the poll will strike enough interest that your followers go to your site to see a blog.
- Enter a giveaway. I’ve seen plenty of influencers use the sliding bar to gather giveaway entries. After posting a few Story slides on the giveaway, the last slide usually says, “Slide this bar so I know you entered.”
- Increase engagement. Polls are very helpful for the Instagram algorithm. The more engaged your audience is with you, the more likely they are to actually see your content in their feed.
Ultimately, the point of using Instagram polls is to engage with your followers and capture their attention. To learn more about Instagram marketing, you can take HubSpot’s Instagram Training course.

How to Craft Brand Messaging Your Target Audience Will Love
As a consumer — and a marketer — one of my favorite brands to watch is Taco Bell. In the last five years or so, Taco Bell has begun making strides in its brand messaging.
The brand has reinvented itself on social media, introducing a new, bold personality. With its food, packaging, marketing campaigns, events, philanthropic efforts, and interior design, Taco Bell reinvented itself into a full on lifestyle brand.
Doing this — telling a compelling brand story through messaging — isn’t easy.
Marketers need to have an entire brand identity to communicate what their business does, what it’s about, and why it’s different. Oh, and it needs to resonate with people and strengthen your company’s values and reputation.
This is because, according to research from Bergische University, brands produce similar feelings as the ones we feel when we like someone. So, we actually feel similarly about brands as we do about people.
That’s why marketers need to craft brand messaging that their audience can relate to.
Below, let’s review brand messaging — what it is and a framework to get started.
It’s how your consumers can have a relationship with your brand. Ultimately, it’s the culmination of language, design, events, and philanthropic efforts that tell the story of who your brand is.
So, how do you get started crafting brand messaging that your target audience will love?
You need to know two things like the back of your hand: your target audience and unique value proposition.
Then, you can begin to write out a brand identity that’ll help your company make all its marketing decisions. Would a brand that cares about “X” do this? Would a brand that’s motivated by “Y” sell this?
Your brand identity will inform your company’s behavior because it’ll tell you why your brand matters, what it stands for, and why it’s different from other brands.
A brand identity that your audience relates to and has a personality — or talks to your audience like a friend — is how you’ll continue to remain relevant to your consumers and create loyal customers.
Brand Message Framework
With a full understanding of brand messaging and creating a brand identity, you might be wondering, “Now what? How do I get started?”
And it’s a fair question. That’s why we’ve created a brand message framework that you can use to begin crafting a brand message or identity.
1. Figure out who you are.
To get started, your brand message needs to answer these questions:
- How do you differentiate from your competitors?
- What is your unique value proposition?
- What kind of messaging will resonate with your target audience?
- Who is your target audience? What do they care about?
- Does your brand message tell a story?
- What are your company’s goals? (No one is perfect and your target audience can’t relate to a seemingly perfect brand).
- What are your company’s values?
While you’re answering these questions and beginning to map out who your brand identity is and what your brand messaging will look like, remember that your brand message answers the question, why? Why does your audience care?
2. Know your audience.
Now that you have a better idea of what you offer and who you are, you need to understand who your audience is. If you haven’t already, create buyer personas that represent who your customers are and their goals. This will help you find alignment between your brand and your consumers.
3. Start a document that explains your brand message.
After you’ve answered the questions above and written out your personas, begin compiling this information in a document that explains what your brand message is, your unique value proposition, and key themes that are core to your brand identity.
Then, start to figure out how your brand identity relates to your buyer persona. What are the patterns and what do they have in common? This is how you’ll make decisions on brand messaging. You’ll see what your audience cares about that align with your values and can derive messaging opportunities.
4. Brainstorm messaging opportunities.
With a clear document that represents who you are and who your audience is, you can then begin to look for messaging opportunities. How can you relate your current campaigns to your brand message? How can you use content to convey your values?
Once you have an idea, you can create a tagline that communicates who you are and your unique value proposition.
At this point, you should have created a brand message and identity that’ll inform your messaging. Now, we wanted to review a few tips for creating messaging that stays true to your brand:
- Stay focused on the brand positioning: With all the content you write, ask yourself, “Is this true to our values?”
- Relate to your audience: When you create content, use your buyer personas and brand messaging document to ensure that you’re talking about something that’s relevant to your audience.
- Don’t be perfect: Similarly to the point above, people aren’t perfect and brands shouldn’t be either. Don’t over promise and communicate that you’re perfect, because you aren’t and it’ll come off disingenuous.
- Communicate your message everywhere: In everything you write and all your marketing decisions, think about your brand message. Whether you’re writing copy for your website, creating slogans for packaging, or marketing an event, your copy needs to communicate your brand message.
- Be simple: Keep it simple. If your brand’s personality or overall values are confusing or hard to discern, people won’t relate to you. The last thing you want to do is create a brand message that your audience is confused by.
1. Taco Bell
As mentioned above, Taco Bell has started to create a reputation for its strong, funny brand. If you tweet them, they will likely respond with a humorous comment.
The goal is to be so relatable that customers love to interact and talk about Taco Bell. When people are talking about you and with you, they’re more likely to be loyal customers.
Below is an example of a tweet that represents Taco Bell’s brand identity and messaging. They respond to tweets like a sarcastic, funny best friend would.
2. TheSkimm
TheSkimm is a daily newsletter that aims to quickly inform young women of current events. The brand is known for having a bold, witty personality similar to that of its target audience — millennial women.
The goal? To mirror its target audience. Act like the fun, irreverent best friend to help readers get started with their day.
In the tweet below, theSkimm stays true to its brand messaging and identity by starting off with a sharp, witty comment on Congress.
3. Proclaim
Proclaim is a lingerie line that is “expanding the definition of nude, one ethically made bra at a time.” They tackle the lack of inclusivity in women’s undergarments by creating products for all skin tones, and they do it with sustainable, Earth-friendly products. This value proposition is combined with their messaging, which celebrates diversity and nature.

4. FabFitFun
When I think of FabFitFun, I think of trendy products that are popular with self-care influencers. The brand has cultivated a following by partnering with influencers on Instagram who are trendy, fashionable, and take care of themselves.
And this image of self-care and trendy products is carried out through its content as well. Below, the company tweeted its blog about trendy tech accessories. This type of content is right in line with the brand messaging consumers hear about on Instagram.
5. Trader Joe’s
Trader Joe’s is a grocery store that has created an almost cult-like following through its brand messaging. They are a fun, cheap, organic food store with a small-town, neighborhood feel. For example, they even put out an old-fashioned newsletter called the “Fearless Flyer.” This includes product roundups and recipes.
The content Trader Joe’s puts out reinforces its brand image as a small, neighborhood grocery store. With brand messaging that is consistent with its unique value proposition and personality, customers relate to the brand as if it were a person.

6. Taylor Swift
Besides the fact that Taylor Swift is one of my favorite singer/songwriters, I had to include her because her brand messaging is on point.
From the time she was 16, Taylor Swift has used social media and brand messaging to connect with her fans. This is another example of someone who has created a cult-like following through brand messaging.
Taylor Swift’s brand is that she’s like the girl next door, something her audience relates with. In the example below, someone on Tumblr posted a tweet on Swift’s birthday, and Swift responded like … well, like the girl next door. A fun, outgoing best friend you can easily talk to on social media.
7. Hillary Weiss
Large brands have more resources to invest into branding and awareness, so this list would not be complete without at least one personal brand (since I’m not sure that Taylor counts). Hillary Weiss is a great example to look to if you want an example of brand messaging that speaks directly to prospects. Her personality literally jumps off the page…
… And it’s her goal to make others’ do the same with their brand positioning and copywriting. She comes right out and says it on her website:
“I’m Hillary Weiss, and I turn small businesses like yours into HUGE obsessions. Since 2011, I’ve helped thousands of personality-fueled brands define their Statement Piece — a.k.a. the big idea that makes them unmissable in their market, and radically relevant to their perfect people. Now it’s your turn. Let’s get loud (and rich) together.”
8. Loom
Good messaging often comes down to conveying value to your target audience and why you’re doing what you’re doing. Loom is a great example of this, and it helps that they have an amazing product.
Their homepage says, “Say it with video” along with their tagline: “The expressiveness of video with the convenience of messaging. Communicate more effectively wherever you work with Loom.” The rest of their website backs up the assertion with facts to provide their point. For example, “You talk up to 6 times faster than you type” and “Video conveys emotion and tone of voice that text simply can’t.”
Even better, their brand messaging is further underscored in the testimonials of brand evangelists who truly believe in this value:
@loom you’re changing lives over here. I know @imcatnoone and @ConnorPM feel similarly. pic.twitter.com/a9qzt1shfm
— Alberto Orsini 🇵🇷 (@albertojorsini)
August 28, 2020
9. Dove
Branding goes so further than what you sell and why it’s valuable. Dove recognizes this by making their brand about more than just having the best soap and care products. To them, their products mean enhancing the natural beauty of their customers and (more importantly) that beauty should be “a source of confidence, not anxiety.”
That’s why Dove invests into realizing that mission with their Self-Esteem Project and taking a different approach with their advertising than simply discussing the features of their soap.
10. Métier Brewing Company
Speaking of missions, Métier Brewing Company, founded in 2018, isn’t just a brewery; it’s an organization that’s embedded in the community (and that means making the community better). According to their website, “Great beer should be for everyone, and we don’t just mean the people drinking it. At MBC, we brew beer with everybody in mind: the suppliers who produce our ingredients, the brewers brewing, the staff who serve pints, and the broader community enjoying the beer.”
They embody this mission in all facets of their business from their beer hall and event space for hosting concerts and family gatherings to their support of The Major Taylor Project (an after-school bike education program to foster a sense of belong and empower youth, particularly those from underrepresented communities).
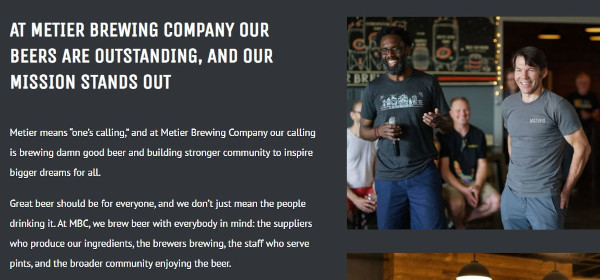
Your personality and values should be evident and align with that of your audience. Your brand message is something that’s strategically created to help you stand out and relate to your customers. For this reason, it can make a big difference in how you’re perceived by prospects (and whether or not they want to do business with you), so start building your brand today.
Editor’s note: This post was originally published in December 2019 and has been updated for comprehensiveness.

How to Analyze Facebook Live Video: A Marketing Tutorial
Wondering if your Facebook Live videos are working? Need a deeper understanding of your live video metrics? In this article, you’ll find a deep dive into Facebook Live video Insights in the Creator Studio dashboard. Discover which metrics actually help you improve your Facebook lives and find out why most marketers get their data and […]
The post How to Analyze Facebook Live Video: A Marketing Tutorial appeared first on Social Media Examiner | Social Media Marketing.
from Social Media Examiner | Social Media Marketing https://ift.tt/36hNOo6
via socialmediaexaminer
5 Myths About Video Marketing, Debunked
By now, you’ve probably heard video marketing is a powerful tool for generating leads and capturing new customers.
So why aren’t you using it yet?
For many small to medium businesses, the reluctance to adopt video comes from a fear of the unknown. Video marketing feels expensive, cumbersome, and difficult to track. And these would be valid reasons … if any of them were still true in 2020.
Video technology has come a long way in the past few years. We’ve gone from “put it on YouTube and hope the millennials find it” to video enablement platforms which empower small businesses to create, share, and analyze videos without the agencies, actors, or expense.
If you haven’t seen what video can do for your company, it’s time to stop putting it off.
In this post, let’s review the top video marketing myths.
5 Video Marketing Myths, Debunked
1. Video is too expensive.
Sure, HBO’s Westworld may have beaten The Game of Thrones’ record with a price tag of $10 million per episode, but you don’t have to play their game. In fact, stay as far away from it as possible.
Video doesn’t have to be expensive. Today’s buyers and consumers actually appreciate authenticity over production value.
According to Fast Company, consumers prefer lower quality but “authentic” goods and services over those of a higher quality but which seem “inauthentic.”
This craving for authenticity is why we’re seeing such an explosion in micro-influencer marketing and user-generated content. With both of these marketing strategies, brands rely on their own buyers to create content, usually with little more than an iPhone.
With your own video content, don’t stress over having a low production budget if you have something valuable to say. For example, Vidyard produces Chalk Talks where they ask experts within their company to chat about topics like outbound sales, analytics, and video strategy in front of a chalkboard. The videos have been shared thousands of times, and the cost? A few minutes of someone’s time and a lot of colored chalk.
2. Video is cumbersome.
What many small business owners typically mean by this is “I don’t know where to begin.” When they think of video, they imagine a time-consuming process of coming up with scripts and storyboards, procuring actors and equipment, and hiring someone in jockey pants to operate the clapperboard and shout, “Action!” Yet modern video marketing is worlds apart from Hollywood and requires a lot less effort.
When it comes to camera equipment, the age-old aphorism still holds true: the best camera is the one that’s with you.
Today, most iPhone cameras rival all but the top-of-the-line DSLRs and video equipment and are a great substitute. You can easily capture videos of yourself, your office, events, and customers giving off-the-cuff testimonials when your sales and account teams pay them a visit.
And when it comes to actors, don’t worry that you can’t afford Gal Gadot: you don’t need her. Your employees will do a far better job because they actually know your products, your customers, and the details of your industry. After the initial awkwardness of seeing themselves on camera fades, you’ll have all the actors you need.
And finally, not everything needs to be scripted. Writers are great and preparation has its place, but a lot of great content can be created with little or no forethought. Take entrepreneur and internet personality Gary Vaynerchuk, for example. He built a media empire from selfie videos recorded on his mobile phone. The below video of him giving advice to young entrepreneurs might be what the internet would call “potato quality” but it still gets the powerful point across.
If you feel like you don’t know where to start, HubSpot’s Video Marketing course can serve as a great guide to helping on your way.
3. Our industry doesn’t really use video.
What most brands hopefully mean by this one is “our industry doesn’t use video yet.” Video is industry agnostic and the demand is being driven not by businesses, but the people who work within them. Remember, both B2B and B2C are really just B2H (business-to-human), and humans love video. One need only look at the numbers for a reminder:
- 54% of people want to see more video content from marketers.
- Overall, 83% of consumers worldwide prefer YouTube to watch video content.
- Overall, 73% of consumers worldwide prefer seeing videos on social media that are “entertaining.”
- In 2019, video was the #1 form of media used in content strategy, overtaking blogs and infographics.
In fact, the industries with the greatest opportunities are those where video has classically been underused. Just look at the recent proliferation of online video in places like
-
, where agencies are suddenly embracing everything from drone flyovers to virtual reality walk-throughs. To see similarly outsized gains ask yourself,
“What would the people who make up our customer base, business or otherwise, like to see?”
4. Video is hard to track.
Videos can indeed be difficult to track, but only if you’re using a bare bones video hosting platform like YouTube or your website’s video feature. These platforms only show you total video views which is like measuring your website’s success based solely from visits.
What if 95 percent of your video’s viewers dropped off in the first three seconds? You’d never know. A true video enablement platform, on the other hand, can give you insights into how people watch your videos, who they are, what they liked and didn’t like, and what they did afterward.
You see, video has some unique characteristics that make it highly trackable. Because it’s linear and people watch it from end-to-end, video enablement platforms, like TwentyThree and Wistia, can tell you what parts viewers watched, where they skipped, and where they revisited. From this, you can automatically infer an individual’s interest in particular products or value propositions that appeared in the video.
And, with CRM and marketing system integrations, you don’t have to spend all your time on these analytics. You can trigger actions based on how your viewers watched the video. Did they only complete 25 percent of it? Better send them a different video. Did another viewer rewatch the part where the product is shown over and over? Better ping your sales team because you might have a qualified lead on your hands.
5. Video doesn’t have enough uses.
Of all the excuses, this one invariably makes our editor cough and spit out her coffee in surprise. Video is perhaps the most dynamic and repurpose-able type of content that you have: It increases open rates for email, boosts click through rates for landing pages, encourages shares on social media, increases time on page for websites, and drives more leads than text alone. And, with a great video editing platform, you can optimize one video for all channels.
A good video editing platform provides small to medium businesses with the tools they need to easily cut up, edit, and optimize one video into many formats for many channels. This scales easily because users can easily A/B test videos just as they would an email and can render dynamic content to personalize videos to viewers, such as inserting logos, names, or even swapping out different products. With the right tools, video has more uses than you’ll know what to do with.
Video is easier than you think.
Once you have the epiphany that unscripted and low production value videos are both desirable and trackable, you’ll also realize that it’s useful for more than just marketing and sales.
You can use video in your customer support to demonstrate how to use your product, in your internal communications to update your remote teams, and as a way for people within your company to communicate on a day-to-day basis.
So, knowing that video isn’t nearly as expensive, difficult, or untraceable as you previously thought, are you ready to stop putting it off?
Editor’s note: This post was originally published in August 2017 and has been updated for comprehensiveness.

How to Make an Instagram Post Template for Your Business or Brand
Instagram is an undeniably powerful marketing tool, but with over 25 million businesses on the platform today, it’s critical you take the time to create well-designed and thoughtful Instagram posts to stand out.
You’ll need to apply a strategic design plan to your business’s Instagram to attract a loyal following and find success on the app, long-term.
However, creating a clean and cohesive Instagram feed takes design skills you might feel you lack. Plus, Instagram’s algorithm favors brands that post at least once a day — that time commitment could be adding to your stress.
If that’s the case, you’re in luck — there are ways you can create pre-made Instagram post templates, so you’ve got a stash ready-to-go. Plus, by ensuring you use the same templates for different posts, you’ll have an easier time creating a cohesive and aesthetically-pleasing feed.
1. Use Instagram Post Templates
Let’s face it — you don’t always have the time, resources, or personnel to design noteworthy Instagram posts. That’s why we recommend using Instagram Post Templates for Business which you can build from and customize.
Here are some options to create and save Instagram post templates, so you can have stunning posts on-hand whenever you’re ready to publish.
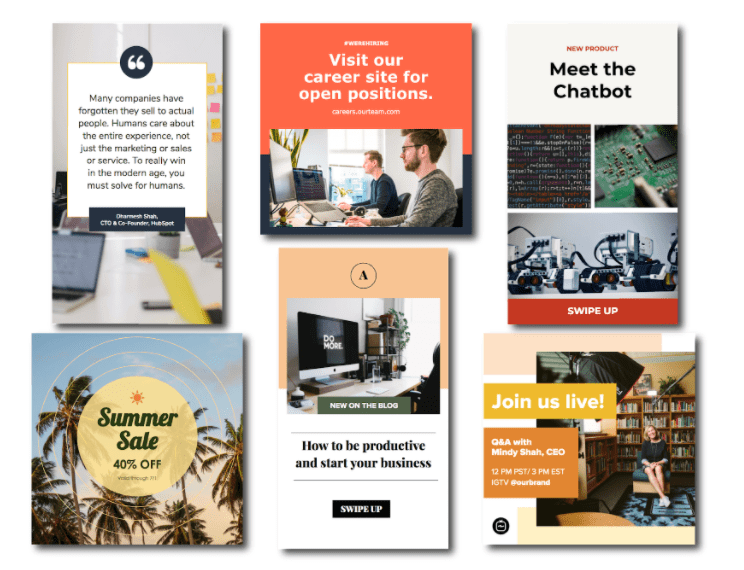
Featured Resource: 16 Free Instagram Post Templates for Business
Need templates to get started? Download HubSpot’s free Instagram post templates for both traditional posts and stories, which you can tailor as you see fit when it comes to your brand. You can alter any and all parts of the template – the image, the copy, and the design elements – to ensure you’re publishing posts to grow and engage your follower base.
2. Choose Your Post Format
While traditional Instagram posts to your permanent timeline are more long-lasting and allow for comments and likes, you shouldn’t underestimate the power of Instagram Stories, which can be used for more immediate needs and occasions.
In fact, 500 million accounts use the Instagram Stories feature daily. So, when you’re creating your post, ask yourself if it warrants publication as a story or as a traditional post.
3. Choose an Image
Maybe you’ve decided your post doesn’t need a photograph and that text overlay on a solid-color background will work for you. If that’s the case, hop over to the next step.
If you’ve decided you do want to use a photograph – particularly if you want one as the background for text overlay – you’ve got a few options.
- Take a photo on your phone or with a camera. No need to be a professional photographer for your Instagram posts – you can learn how to take great photos with your phone here.
- Use a photo from your company’s files. This works well if you need to utilize team photos or product photography, which may be better quality.
- Use a stock photo that pertains to your business (just make sure you don’t use the same one multiple times!).
Whichever photo you do decide to use, simply replace it as the background for the template you’re using in the HubSpot Instagram Post Template collection and resize the photo so it’s to your liking (and is good quality).
4. Add Design Elements
Instagram post templates come with design placeholders for text with special fonts and other elements. Your next step is to alter, add, or remove any elements that you see fit.
This includes updating the copy so it reflects the information you want followers to know and/or the action you want them to take.
5. Save the Photo
When you’ve done all you can in the template builder of your choosing, save your photo to be posted on Instagram. All you’ll have to do here is click “File” > “Download” > “PNG Image” or “JPEG Image.” Then, just name the photo file, email or message it to yourself, and save it on your phone so you can post it.
6. Upload to Instagram
Once you have your photo saved, it’s time to upload it to share with your followers. For a traditional post, open Instagram, click the “+” button in the bottom center, choose your photo, add any filter, description, or hashtags, and click “Share.” (Take a look at How to Post on Instagram: a Step-by-Step Guide if you’re still unsure.)
For an Instagram Story post, click on the camera icon in the top left of your screen, access your camera roll in the bottom left of the screen, choose your image, minimize the date that shows up to the point where it can’t be seen, and add any further design elements – like a GIF or additional copy – to the image. From there, click “Your Story” on the bottom left.
Other Ways to Design Instagram Posts
Here are some other options to create and save Instagram post templates, so you can have stunning posts on-hand whenever you’re ready to publish.
1. Canva
Canva offers thousands of customizable Instagram post templates. To create an Instagram post on Canva, go to Canva’s Create a Design page, click “Instagram Post”, and then follow these steps:
1. On the left side, you’ll see an array of template options — some cost money, while others are free. Choose one.
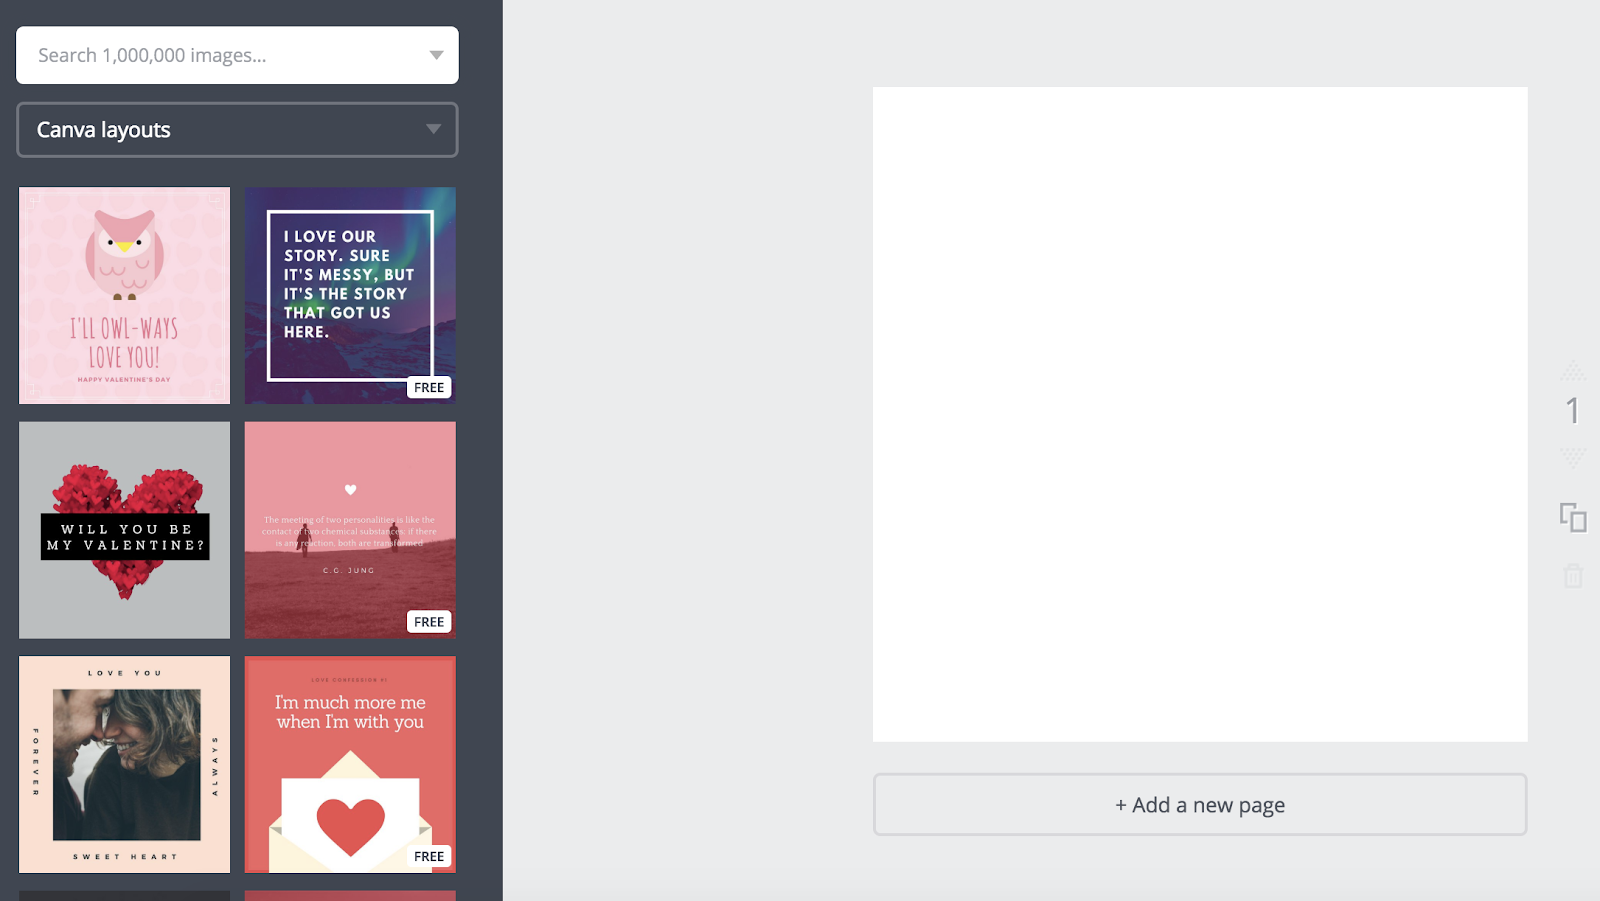
2. Once you choose a template, click on the text box to write something. There are colors at the top if you want to alternate your text color — you can also change font, size, and spacing.
3. When you’re finished with your text, click the background of your image (outside the text box). This will allow you to filter your background, adjust the brightness and contrast of the image, and more.
4. When you’re happy with your template, open up the Canva app on your phone. Click on your Instagram post design.
5. Click “Share” in the top right.
6. Now, you can post straight to Instagram by clicking “Import with Instagram”. If you aren’t ready to post it, you can also “Save Image” and it will appear in your camera roll for later.
7. If you are immediately posting to Instagram, choose whether you want to upload to your “Story” or “Feed”.
8. Edit the Instagram post like you would any other post — add tags, a caption, location, etc. When you’re ready, click “Share” in the top right.
Remember, your template is automatically saved to your Canva account. You can access it in the future, on both desktop and app versions of Canva, and edit it with new text to post the same design again.
Alternatively, you might consider creating a few posts now, and then saving them to your camera roll to post them in the future.
Besides Canva, there are a few other design editors that offer free pre-made Instagram templates. In particular, here are three tools you might consider:
2. ReciteThis
If you’re interested in creating a template for quote posts, it’s easy to do — in fact, we’ve already curated a list of nine apps to help you make quotes for Instagram.
For our purposes, we’ll try just one — ReciteThis.
To create a quote template for Instagram, go to ReciteThis, then follow these three easy steps:
1. Enter your quote in the text box.
2. Below, click the left or right arrows to peruse templates and choose one you like. Once you’ve chosen a template and written your text, click the “Create” button in the text box.

3. Click “Download Image” to post to Instagram’s desktop version, or email it to yourself to post on your phone.
3. Creative Market
If you’re willing to shell out the cash, you might consider buying one of Creative Market’s Instagram Template bundles.
For instance, you could purchase this 1053 Quotes social media pack.
Alternatively, you can purchase a bundle with Instagram Story content, like this Animated Stories bundle.
Finally, you might consider purchasing a bundle to help you create a cohesive theme for your Instagram feed, like this The Grid template.
And that’s it! You’re all set to create and save pre-made Instagram templates, so you can focus on attracting a loyal following without tediously designing a post from scratch every day.
Check out our Instagram Marketing: The Ultimate Guide for more Instagram tips and tricks.
Editor’s note: This post was originally published in October, 2018 and has been updated for comprehensiveness.
