
Welcome to My Blog
The Best 16 Landing Page Builders for Any Business
Lead generation is essential for driving sales and growing an online business.
There are plenty of different methods for generating leads, but one of the most effective options is a well-designed landing page.
Building a fully-optimized landing page has never been easier — in fact, it’s now possible to create a lead generation gold mine using drag-and-drop tools without seeing a single line of code.
Whether you’re managing one or multiple pages, there are now so many options available that it can be tricky to find the best one of your needs.
More than likely, the hardest part of designing a landing page is choosing the right tool to get started — plus, you don’t want to waste months designing a landing page before realizing the software simply isn’t up-to-speed with what you need.
To ensure you’re able to choose the best landing page builder for your team’s goals, we’ve cultivated a list of the 14 best — but first, let’s explore some key features to look for in a landing page builder.
Key Features of a Landing Page Builder
Although there are many landing page builder options with unique strengths and weaknesses, there are certain features you’ll want to see in any landing page builder.
Here are four:
1. Easy-to-use visual builder.
These days, users demand ease-of-use, and landing page builders tend to feature a drag-and-drop interface which makes it easy for anyone to build a landing page quickly — without coding. You’ll want to ensure your landing page builder offers a simple and intuitive interface. If it doesn’t, you should check out alternatives.
2. Integration with CRM software.
The point of a landing page is to generate leads or make sales, so it’s vital that your landing page builder integrates with software that can store those leads and allow you to analyze data on potential prospects.
Ideally, a landing page builder will link to a powerful CRM that can pull together a customer’s data and integrate with marketing, sales, and customer management software.
3. A/B testing and optimization.
Testing and optimizing your landing page is an integral part of the process.
It’s unlikely you’re going to nail it on the first try, so you want software that enables testing customer behavior and optimizing the content and layout to maximize conversions.
This can either be a part of the product itself, or provided by a third-party, as long as your landing page builder offers the option to integrate with third-party A/B testing tools.
4. Analytics tools.
Most services offer built-in, specialized landing page analytics tools which enable you to dig into your user data.
Whether providing detailed reports, heat maps, or plain old page-views, analytics tools are essential in assessing how your landing page is doing.
Now that we’ve explored four key components of any landing page builder, let’s take a look at 14 of our favorite options.
1. HubSpot Landing Pages
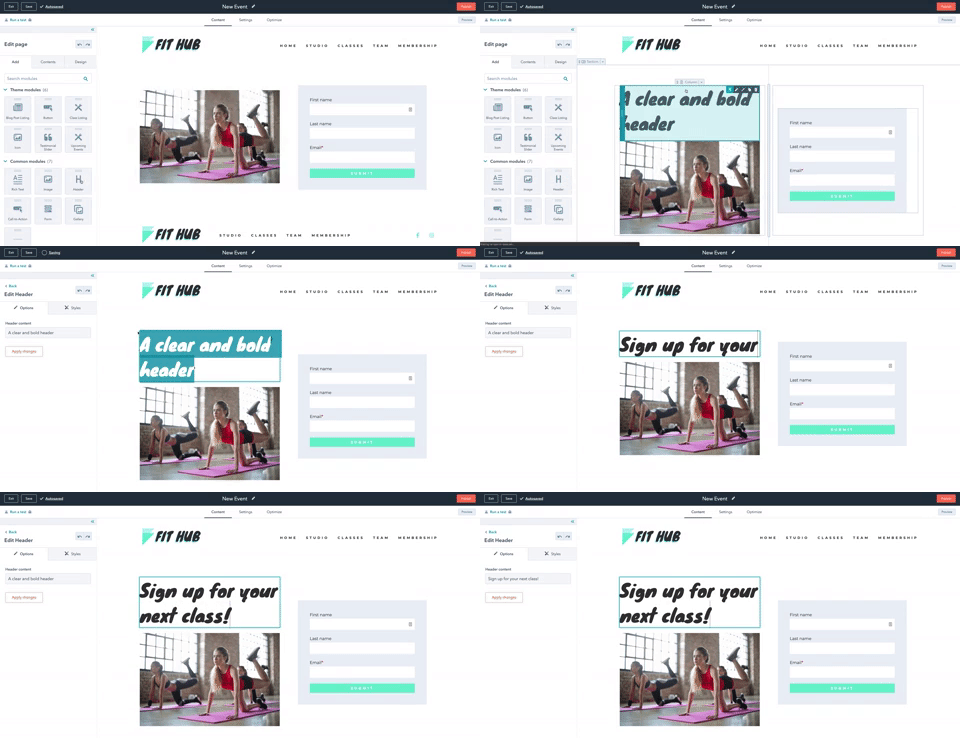
HubSpot offers one of the most feature-rich, intuitive landing page builders on the market — which becomes even more useful when combined with HubSpot’s free CRM. As with most things HubSpot, the landing page builder is slick, easy-to-use, and powerful.
The software is suitable for single users, small teams, large teams, and even agencies managing multiple pages. You can simply add more paid features as you need them.
For beginners, the software walks you through the process of building a fully-customized landing page, starting with one of the hundreds of tried-and-tested templates.
For more advanced users, there are a host of tools and technologies to play with. One of the most advanced features is the capability for personalization to individuals, utilizing your existing HubSpot contacts and data. The builder also features HubSpot’s advanced analytics tools and testing software so you can optimize your page to capture as many leads as possible.
Pages are fully responsive on all devices, as you would expect, and it’s possible to create professional looking pages in minutes.
2. Landingi
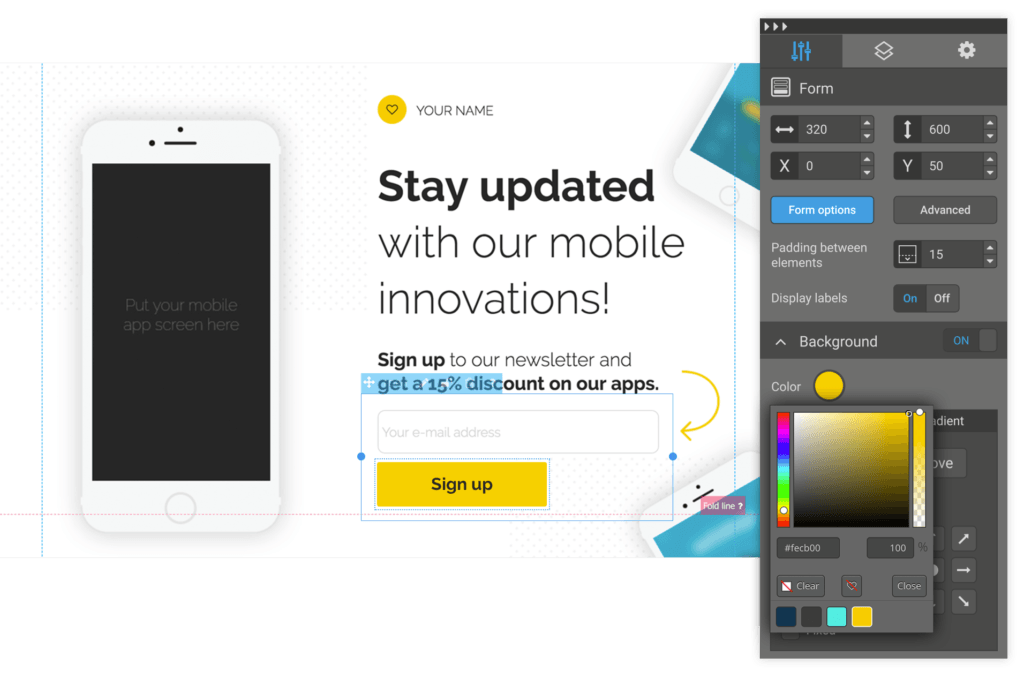
Landingi bills itself as the “landing page builder for non-programmers” — it’s all about ease-of-use, and offers more than 200 templates. The interface is drag-and-drop, which enables you to build a page in minutes. It also offers A/B split testing and optimization features.
This is a cheaper option and one that’s good for beginners, but if you are looking for more advanced features or scalability, the premium tiers quickly bring you up to the price of more powerful tools without offering the same functionality.
3. OptimizePress
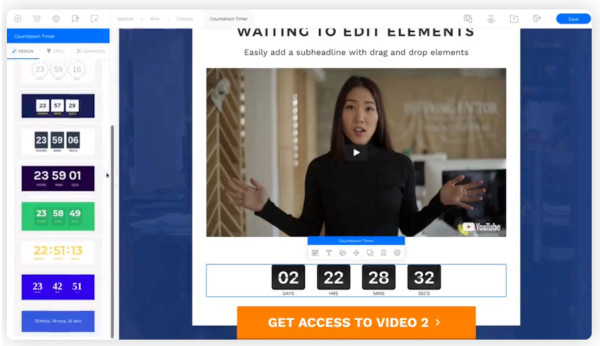
OptimizePress is a WordPress-based landing page builder with hundreds of templates for lead generation pages, sales pages, and more. It has a library of graphic elements and useful plugins for easy customization, and also integrates with email marketing services like Mailchimp or ActiveCampaign.
It operates on a one-off fee structure, which includes one year of support and updates. This means you only pay for the features you need as you grow.
4. GetResponse
GetResponse is a good option if you want to quickly build optimized and responsive landing pages. It has a user-friendly interface and allows you to publish your page to your own domain.
Along with landing pages, you can also create webinars and email marketing campaigns. Additionally, GetResponse has built-in analytics features and the ability to add a PayPal button for easy mobile payments.
Although it offers an intuitive landing page builder and an all-in-one marketing suite, landing pages are not what GetResponse specializes in — but it’s still a good option for marketers at this price point.
The most basic option offers email marketing and landing pages for up to 1,000 responses. If you grow beyond this point, you will have to go for the more expensive Pro tier, which offers the full landing page building capabilities.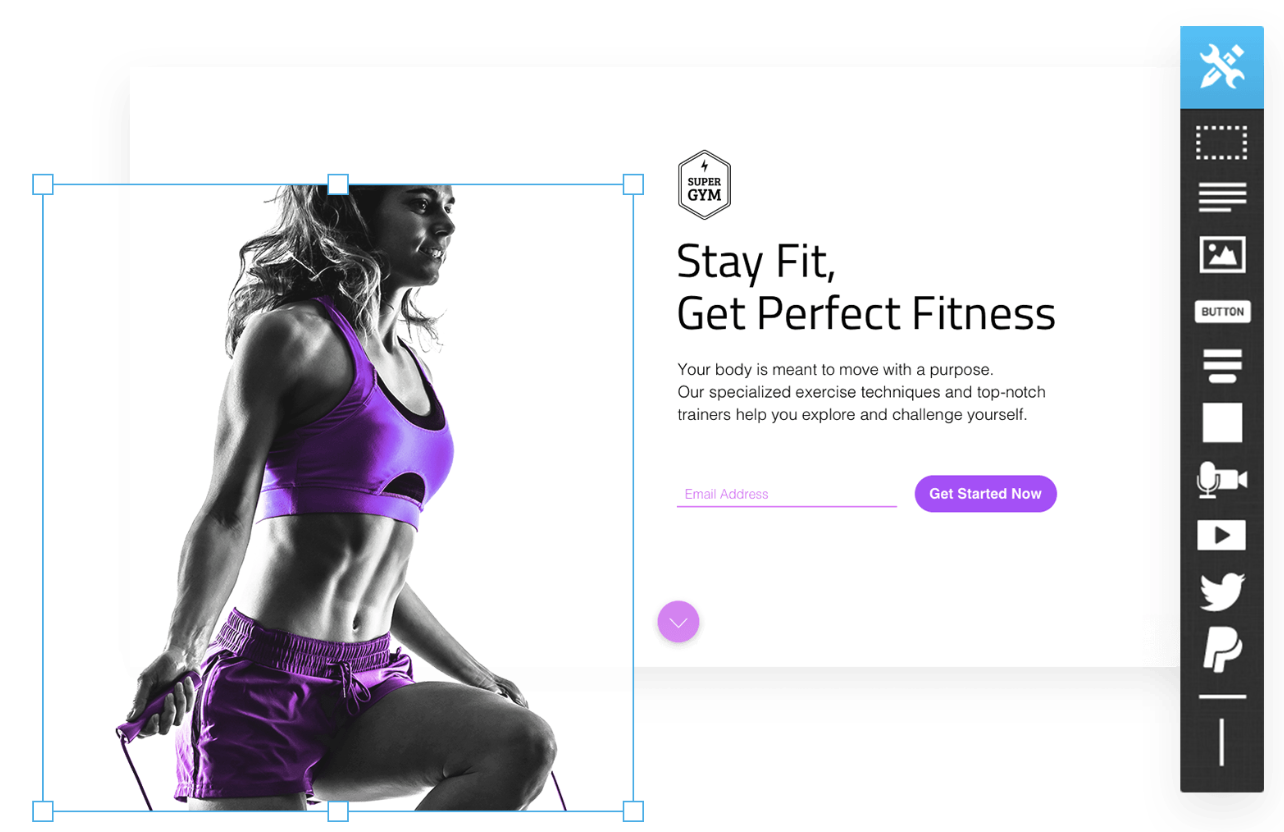
5. Mailchimp
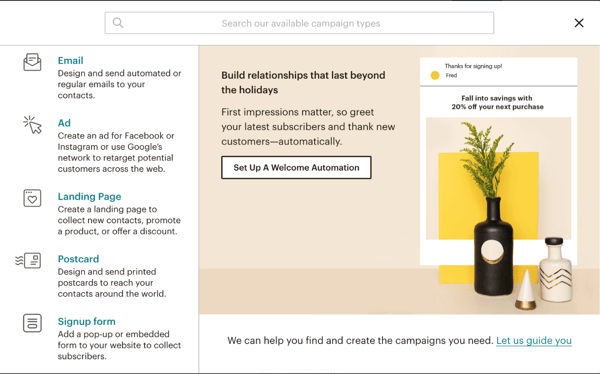
Mailchimp’s landing page builder, unsurprisingly, is geared towards email marketing. It’s all about building pages that visually match your Mailchimp email campaigns, and enable you to easily add contacts to your existing lists.
The software is easy-to-use and offers impressive support with a ton of troubleshooting content available. The seamless integration with the Mailchimp suite is a plus if you already use the software, but landing pages are not Mailchimp’s main focus, so the editor is limited. In fact, it’s not much more advanced than Mailchimp’s simple email creation tool.
It is good for email campaigns but a bit limited as a landing page builder. More advanced users will want to go with the optimization, testing, and analytics features of some of the other options in this list.
On the plus side, for novices, you can get a landing page built for free on the most basic tier and build up from there.
6. Unbounce
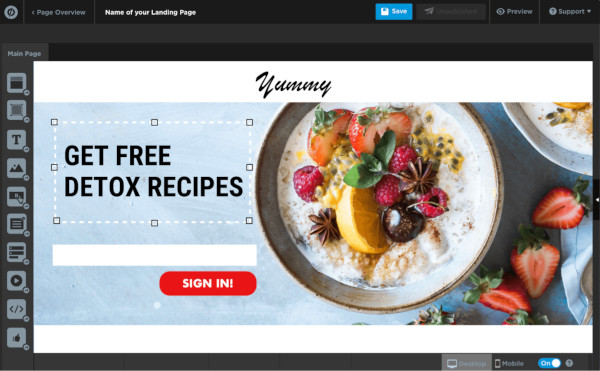
Unbounce was one of the first dedicated landing page builders to come to market and remains one of the leaders. It features an easy-to-use drag-and-drop editor, custom plugins, mobile optimization, and the ability to add pop-ups and sticky bars.
The product is feature-rich — it offers WordPress integration, A/B testing, and dynamic keyword insertion for SEM campaigns. While it doesn’t offer its own analytics tools, it can be integrated with other services like Mailchimp, HubSpot, or WordPress to achieve this.
Overall, Unbounce is one of the best tools out there — but it comes at a premium. It is favored by larger marketing agencies with a focus on search engine marketing, but doesn’t have the all-rounder capability of tools like HubSpot.
7. Instapage
Instapage is another leader for landing pages, with a user-friendly drag-and-drop builder and the option to easily integrate your landing pages into your website without coding. It is one of the easiest tools to use, comes with a host of plugins for maximum customization, and offers a simple analytics tool and report generator.
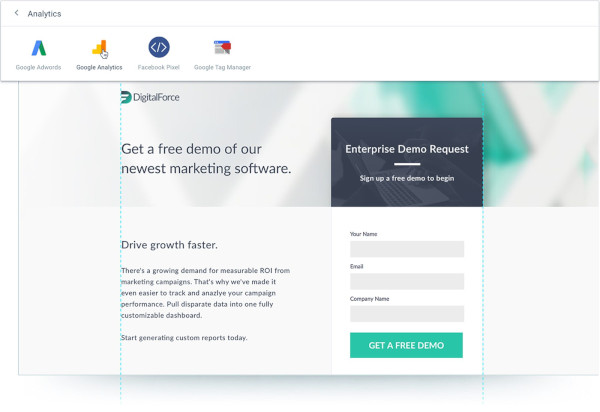
For optimization, there are heatmaps, A/B split testing, dynamic keyword insertion for PPC campaigns, and codeless integration with Google Analytics and Facebook ads. For more advanced options, you’ll have to contact the sales team for a tailored price, but you’d be looking at upwards of $175 per month for an agency or team plan.
8. Squarespace
Although Squarespace is considered a website builder, not a specific landing page tool, it has all the functionality of a landing page builder — including the benefits of hosting your site and providing you with analytics, G Suite, integration with other CRM’s, and much more.
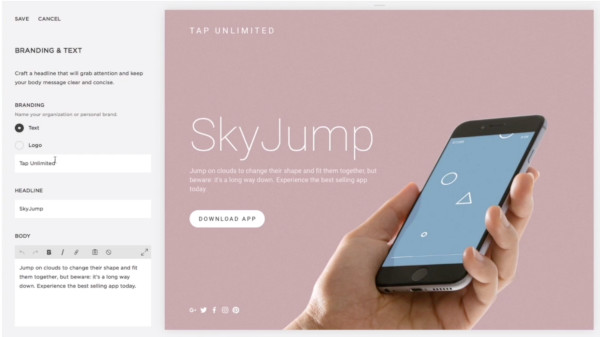
Squarespace is a great option for beginners who don’t need all the specific optimization features of a dedicated landing page builder. With the Cover Pages tool, it’s easy to create a page using one of the hundreds of templates and drag-and-drop tools.
There is a built-in analytics tool. Additionally, you can hook up Squarespace with a CRM software to use the CRM’s optimization and email marketing tools on your Squarespace page.
9. Leadpages
LeadPages is a cheaper option with a fairly easy to use drag-and-drop builder. However, the interface is a little awkward to use at times and looks a little outdated.
If you want to publish to your own URL, it’s not as easy, although if you are a WordPress user there is integration with your site. Overall, it’s a reasonable value option if you don’t need the higher-end functionality and support of the market leaders — but it’s tricky to get the page looking exactly as you want.
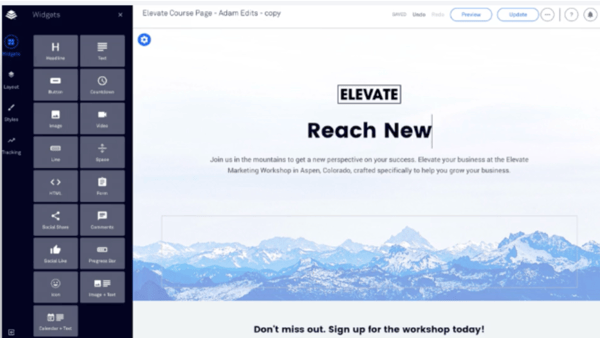
10. Thrive Architect and Thrive Optimize
Another WordPress-based builder, Thrive Architect is probably the best bargain option available, especially when combined with Thrive Optimize, its optimization tool.
It offers a simple drag-and-drop builder with 250+ templates and a number of conversion elements including testimonial blocks, timers, and CTAs to choose from. This makes it a good option for a quick build at a low price.
Best of all, you can get it for life for a one-off fee.
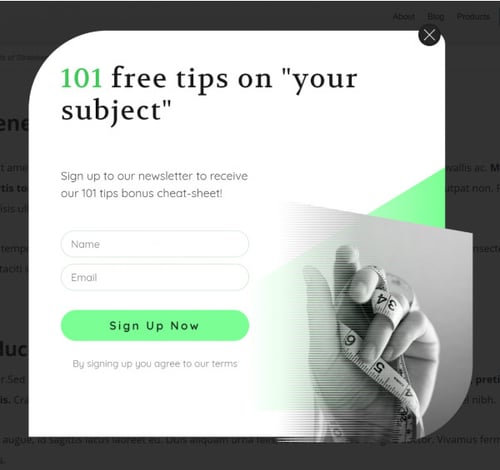
11. Lander
Lander targets small businesses and entrepreneurs with a rock-bottom price point and simple builder. Although it doesn’t offer the best customization or advanced features like some of the others in this list, it’s nonetheless a good option as a simple landing page at a low price.
The app offers over 100 SEO-optimized templates, and supports A/B split testing. It also offers a rare feature among landing page builders — Facebook integration. Without any coding, you can build your own Facebook tabs and connect them with your account.
Pricing tiers are limited by the number of visitors and domains, so it’s prohibitive to larger businesses and agencies.
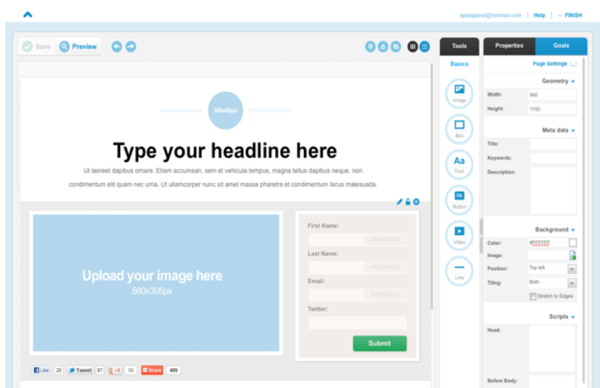
12. LaunchRock
If you’re looking to quickly create high-converting landing pages for free, LaunchRock is the most basic option in this list.
With a focus on simple but impactful visuals, it comes with loads of customizable templates and is an effective starting point for small businesses to jump into the world of landing pages and lead generation forms. Plus, it includes promotional features for running competitions.
It lacks A/B testing and customization is limited, but the super-quick builder is perfect for those who need a landing page without all the bells and whistles, fast.
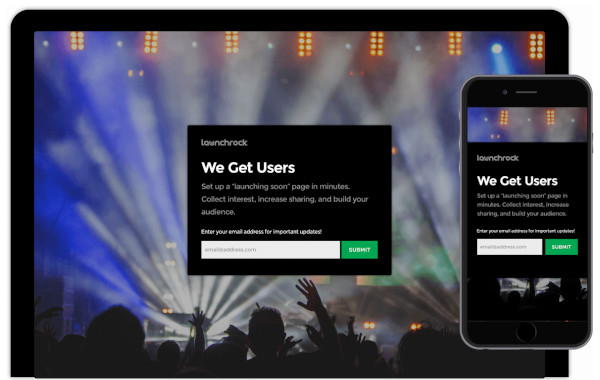
13. KickOffLabs
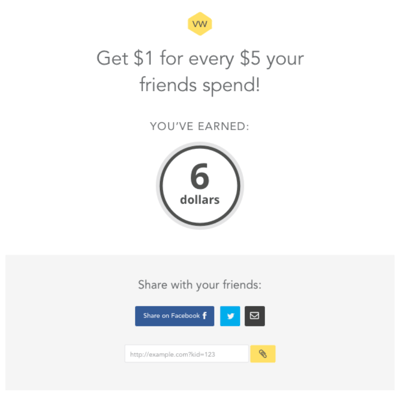
KickOffLabs is based on the idea of generating leads via viral marketing campaigns — it allows you to run appealing contests, sweepstakes, and product launches.
It also happens to be a decent landing page builder in its own right, but focuses its marketing efforts on the promise of viral traffic generation.
The templates are mostly geared towards coupon giveaways, referral rewards and the like, so if this is something you’re interested in, KickOffLabs helps you quickly and easily create a professional-looking landing page. Whether or not it will go viral — who knows?
14. ShortStack
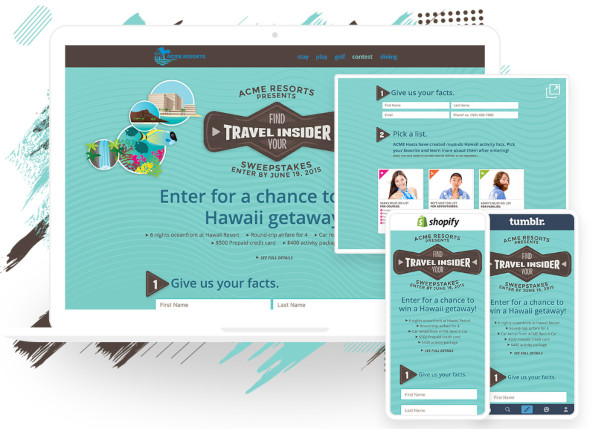
Shortstack specializes in landing pages for contests, giveaways, and quizzes.
It includes email marketing tools to run the competitions and keep contact with participants. The drag-and-drop builder is focused on speed and offers a multitude of templates.
With built-in analytics, you can keep track of your campaigns. Plus, integrations with email services like Mailchimp make it easy to store the leads you collect.
You can build all the pages you want with the free tool, and upgrade at any time for additional features and tools.
15. ConvertFlow
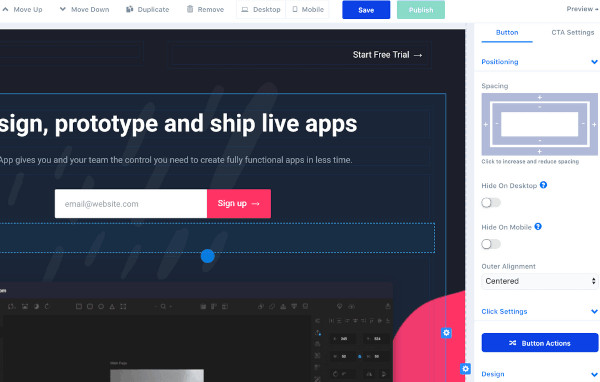
ConvertFlow is a fantastic option when you need both the power of an easy visual builder as well as more complex features suxh as multi-page forms, conditional logic, and automation.
You can have prospects skip steps based on previous actions, add automation for list segmentation, run custom code for event tracking and retargeting, and increase conversion rates by providing a personalized experience. Best of all, it integrates with CRMs, allowing you to get a comprehensive understanding of your leads’ behavior.
16. involve.me
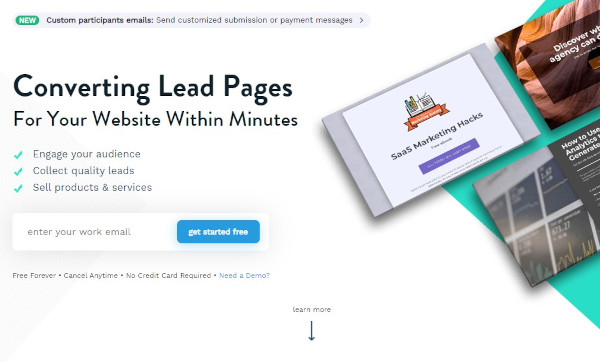
With this tool, you can create landing pages without a developer and either host them as standalone pages or as part of your existing website.
One powerful feature of involve.me is the ability to get data from partial submissions that can lead you to conversion optimization insights. In addition, the software comes with the ability to create automated drip sequences to collected leads.
There are so many tools available to build landing pages, but it ultimately comes down to which is right for your specific purpose.
If you’re looking for a user-friendly landing page builder that integrates all your customer data and analytics tools from HubSpot’s market-leading software suite, get started with HubSpot Landing Pages today.
Editor’s note: This post was originally published in May 2019 and has been updated for comprehensiveness.

10 Extensiones de Chrome para SEO que pondrán a tu web en el Top de Google
Las extensiones de Chrome para SEO son herramientas que facilitan el trabajo de posicionamiento web o auditoría SEO.
Se instalan en el navegador de Google y se accede a ellas desde ahí. Es decir, no bajas ningún programa. Son botones que agilizan procesos o proveen información útil.
En este artículo, recopilamos 10 extensiones de Google que te ayudarán en el proceso de optimización SEO. Explicaremos qué hace cada una y cómo se agregan al navegador.
Antes de entrar en la materia, también queremos recomendarte SEMrush, una herramienta completísima de búsqueda de palabras clave y auditorías SEO. Si te inscribes en nuestro enlace, obtendrás una prueba gratis de 14 días y un acompañamiento vía email para que aprendas a utilizarla mejor.
>>> Posiciona tu web con SEMrush + Ejercicios Prácticos
¿Cómo instalar extensiones de Chrome?
Cualquiera de las extensiones de Chrome, incluidas las de SEO, se instalan de la misma manera.
Debes entrar en el Chrome Web Store. En el buscador agregas el nombre concreto de la extensión que estás buscando o alguna palabra clave. Por ejemplo: “YouTube SEO Checklist” (que es el nombre de una extensión) o simplemente la palabra “SEO”. Después, debes hacer clic en el botón azul de Añadir a Chrome.
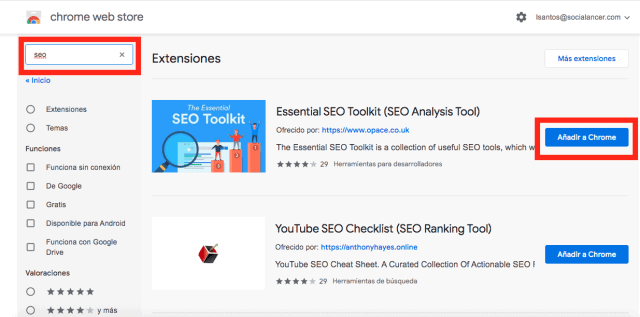
Las extensiones que agregues te van a aparecer a un costado de la barra de navegación y para acceder a ellas solo debes pulsar en su iconito correspondiente.

Extensiones de Chrome para SEO móviles en 4 pasos
Las extensiones de Chrome también se pueden instalar en el teléfono. Los pasos son los siguientes:
- #1. En el market de tu sistema operativo (Apple Store, Google Play, etc.) busca la aplicación de Chrome.
- #2. Descárgala.
- #3. Busca la extensión que deseas, ya sea por nombre o palabra clave.
- #4. Presiona Agregar al Escritorio.
10 Extensiones de Chrome para SEO
A continuación detallaremos las 10 extensiones de Chrome más interesantes y que te ayudarán en tu posicionamiento web.
Por cierto, tal vez te interese leer nuestro post con consejos para alcanzar la posición 0 de Google.
#1. Keyword Surfer gratis para Palabras Clave
Es muy útil porque te permite conocer el volumen de búsqueda de cada palabra clave y su costo por clic sin necesidad de entrar en el planificador de palabras clave de Google.
Simplemente, pones el término en el buscador de Google y Keyword Surfer te muestra la información.
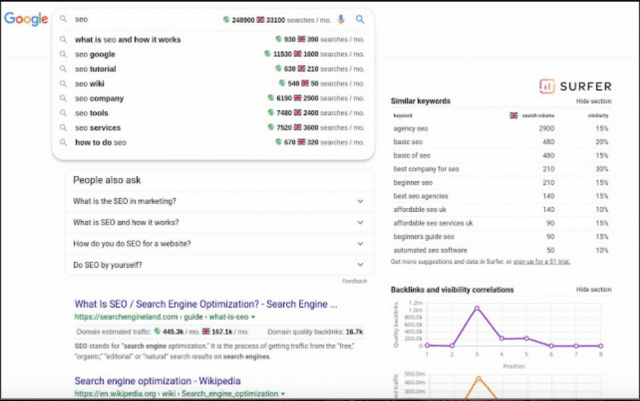
Además de eso, puedes agregar las palabras clave a una lista para que la extensión haga una comparativa o te muestre palabras similares. Esto es útil cuando estás redactando contenido.
Si quieres posicionar un contenido, lo que te recomendamos es que determines una palabra clave principal y varias secundarias relacionadas. Así le dirás a Google a quiénes debe mostrar tu contenido.
Por ejemplo, en este artículo la palabra clave principal es “Extensiones de Chrome” pero también usamos “Extensiones para Chrome”, “Extensiones Google Chrome”, etc.
Keyword Surfer, además, debajo del título de cada resultado orgánico, informa el número de palabras clave con las que cuenta esa url y el tráfico orgánico estimado. Tú puedes elegir los contenidos mejor posicionados y redactar algo similar pero con mejor calidad.
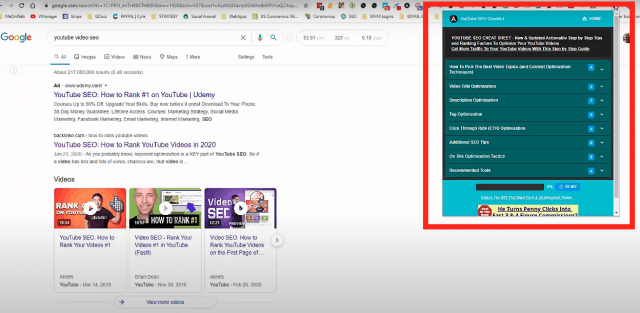
#2. YouTube SEO Checklist: extensiones de Chrome para monetizar YouTube
La monetización de YouTube depende directamente de la cantidad de reproducciones que tenga cada video. Esta extensión de Chrome te ayudará a hacer tus videos más visibles.
Lo que hace es compilar una serie de tips y recomendaciones de expertos SEO para optimizar tus videos en diferentes aspectos:
- Cómo poner títulos que atraigan tráfico.
- Cuál es la mejor forma de redactar la descripción.
- Qué etiquetas debes usar para el motor de búsqueda.
- Aspectos adicionales que influyen en la optimización.
Cada uno de los tópicos tiene ejemplos. El punto en contra es que está en inglés.
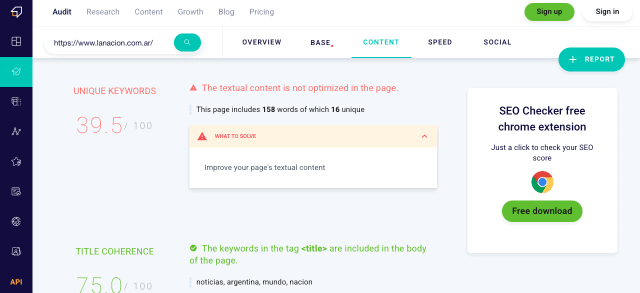
#3. SEO Checker Tool para Auditoría SEO gratuita
Es una de las extensiones de Chrome más útiles porque te ayudará a realizar una auditoría SEO de cualquier página web.
Usarla es muy simple: vas a la url que quieres analizar y haces clic en el ícono de la extensión. La versión gratuita te permite hacer una auditoría al día.
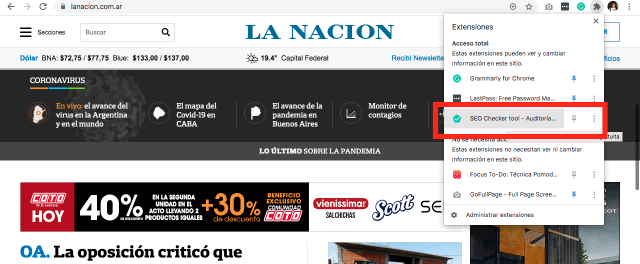
La auditoría aparecerá en otra ventana. La extensión analiza cosas como:
- Los competidores de la url.
- Estimación de tráfico.
- Localización de errores que Google podría penalizar.
- Hace un informe completo del contenido.
#4. Extensiones de Chrome: Moz Bar de pago y gratis
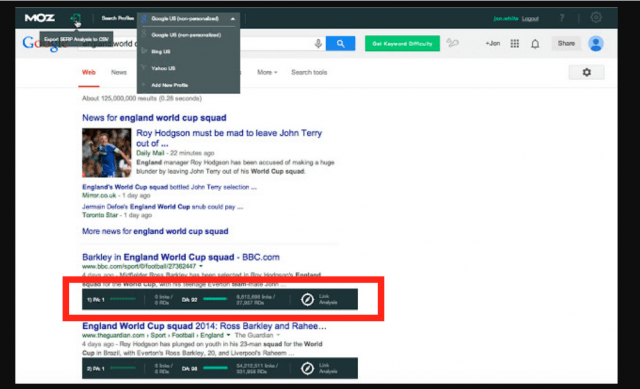
Esta extensión también ayuda a hacer auditorías SEO y provee la siguiente información:
- Búsquedas por país, región o ciudad de cada URL.
- La autoridad de la página y del dominio de cualquier sitio.
- Métricas de enlaces entre páginas. Revela los enlaces DoFollow, NoFollow, internos y externos.
- Palabras clave en una página.
- Exporta la información a un archivo CSV.
La versión de pago provee más métricas, dificultad de palabras clave y consejos de optimización de contenido.
#5. Detailed SEO Extension para el SEO OnPage
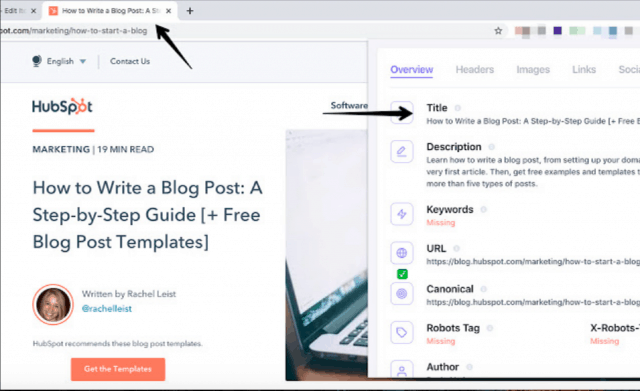
Está dentro del mundo de las extensiones de Chrome para el SEO OnPage, es decir, las optimizaciones que puedes hacer dentro de tu página que ayudarán a que cobre más relevancia para Google.
Los aspectos que podrían afectar a tu web son: URL rotas, contenido duplicado, títulos duplicados, imágenes que no se cargan, entre otros.
Con solo hacer clic en el ícono de la extensión, Detailed SEO Extension te proporcionará esos datos y el lugar de tu página en el que se encuentra el error, si es que hubiera alguno.
#6. Web Developer: extensiones de Chrome para desarrolladores
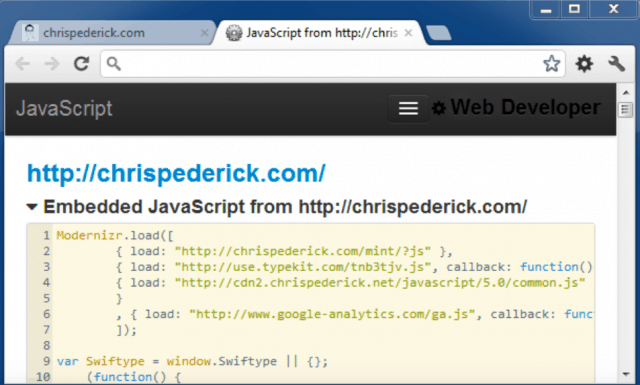
Si no tienes conocimientos sólidos de desarrollo web, esta extensión te servirá de muy poco, pero definitivamente tendría que tenerla la persona que se encargó de programar tu sitio.
Sirve para revisar los elementos del diseño web que podrían estar afectando a tu SEO. Recuerda que a Google le gustan los sitios que están bien programados.
Estas son algunas de sus funcionalidades:
- Activar y desactivar el CSS y JavaScript para ver que la maqueta de tu sitio web esté correcta.
- Muestra los atributos ALT de las imágenes. Las que no tienen ese atributo, las marca en rojo.
- Resalta errores de ALT, encabezados o textos duplicados.
#7. Link Research para estrategia de backlinks
Los backlinks ayudan a darle autoridad a un sitio frente a Google. Esa es la razón por la que son muy importantes si quieres mejorar el ranking SEO de una web.
Sin embargo, el proceso para realizar una estrategia suele ser lento. Hay que tratar de conseguir que sitios con autoridad agreguen un backlink al tuyo. Afortunadamente hay extensiones de Chrome que te ayudan a encontrar candidatos.
Link Research te proporciona la siguiente información:
- Cuántos links tiene una página en la que te interesa insertar un backlink.
- Informa si una página tuvo cambios drásticos en la cantidad de enlaces.
- Con base en su autoridad, informa si una página es buena candidata para que insertes un link.
- Podrás conocer qué tan popular es una página en redes sociales.
- Verificar las páginas más sólidas en función de sus palabras clave.
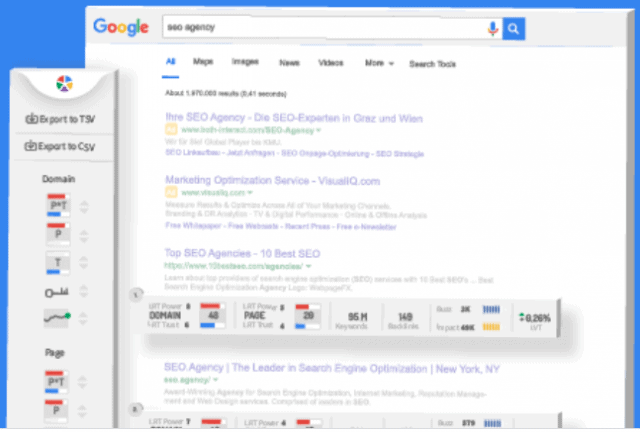
Debes tener en cuenta que este es solo el primer paso. Ya que determines los sitios en los que te sería conveniente insertar un link, deberás ponerte en contacto para solicitar algún tipo de intercambio, puede ser de contenido o incluso, pagarlo.
#8. FATRANK. Extensiones de Chrome para ver tu posicionamiento
Te permite rastrear cómo está posicionando tu sitio en Google por palabras clave y frases. Cuando estés en un sitio web, haces clic en la extensión y después agregas el término que quieres rastrear.
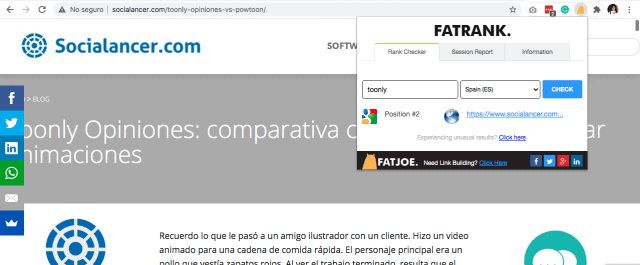
Para proveerte la información, la extensión usa tu configuración local, por lo que obtendrás datos del país en el que estás.
#9. Detecta contenido plagiado con Plagly
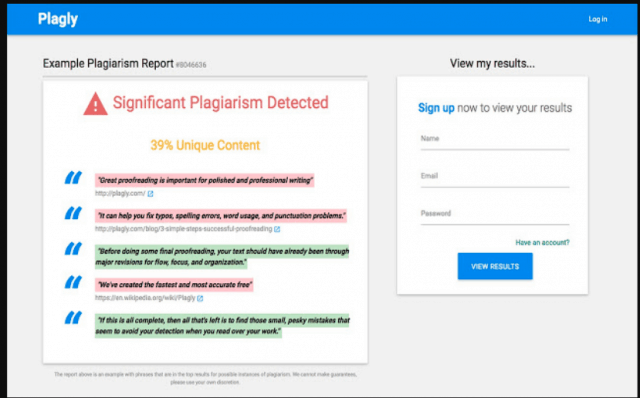
Esta es una de las extensiones de Chrome orientadas al contenido. Básicamente, Plagly compara un texto con todos los que aparecen en Internet para detectar plagio.
#10. Tag Assistant: extensiones de Chrome para rastreo de analytics
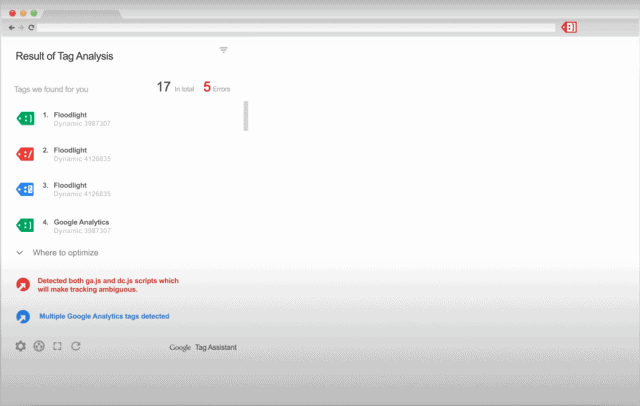
Esta extensión ayuda a administrar las etiquetas de Google, incluidas Google Analytics, Google Tag Manager, seguimiento de conversiones de Adwords, entre otras.
Lo que hace es verificar si se instalaron correctamente en tu página. Al visitar un sitio y hacer clic en su respectivo ícono, Tag Assistant te dirá qué etiquetas tiene, si hay algún error o si podrías implementar alguna mejora.
Extensiones de Chrome para SEO: Conclusión
Las extensiones de Chrome para SEO te permitirán visualizar datos importantes de forma sencilla.
Te recomendamos no convertirte en un coleccionista y nada más. Instala las que realmente creas que te pueden ayudar a optimizar tu web.
Una forma de determinarlo es plantear objetivos concretos, por ejemplo: aumentar el tráfico, aumentar la cantidad de backlinks, revisar el SEO OnPage, etc.
De esta forma podrás ir determinando cuál extensión es la que te será de utilidad.
Recuerda que el posicionamiento SEO es una estrategia, no una serie de acciones al azar.
Nos gustaría leerte, ¿hay alguna extensión que recomiendes y que no hayamos incluido en este post?
from Socialancer https://ift.tt/2QHAIaN
via
How to Get Started With Marketing Analytics: A 5-Step Framework
Want to better understand if your marketing is working? Need to do more with marketing analytics? In this article, you’ll discover a five-step framework for marketing analysis. You’ll also learn how to plan and build systems that deliver key insights so you can effectively forecast and optimize your marketing efforts. #1: Set Up a Framework […]
The post How to Get Started With Marketing Analytics: A 5-Step Framework appeared first on Social Media Examiner | Social Media Marketing.
from Social Media Examiner | Social Media Marketing https://ift.tt/2EzUmTM
via socialmediaexaminer
10 Zoom Backgrounds HubSpotters Love
When I first started working remotely, I quickly realized that I didn’t like the available backdrops in my house.
First, there’s the cluttered living room. Then, there’s the rarely spotless kitchen. Or I could go with the yellow wall.
That’s when I started looking into Zoom backgrounds.
I found a few funny ones, some professional ones, and even a couple of creative options. It turned out to be really fun to express myself with a Zoom background.
If you’re in the same predicament, look no further.
Below, let’s learn how to set up a Zoom background, and then we’ll show you our favorite ones.
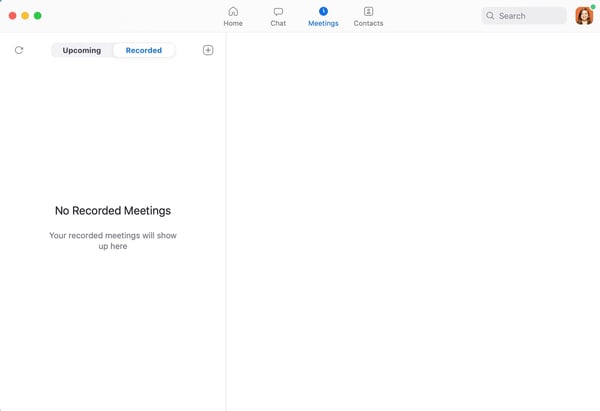
1. Open Zoom
Before we dive into our favorite Zoom backgrounds, let’s learn how to set one up. To start, open your Zoom app and log in.
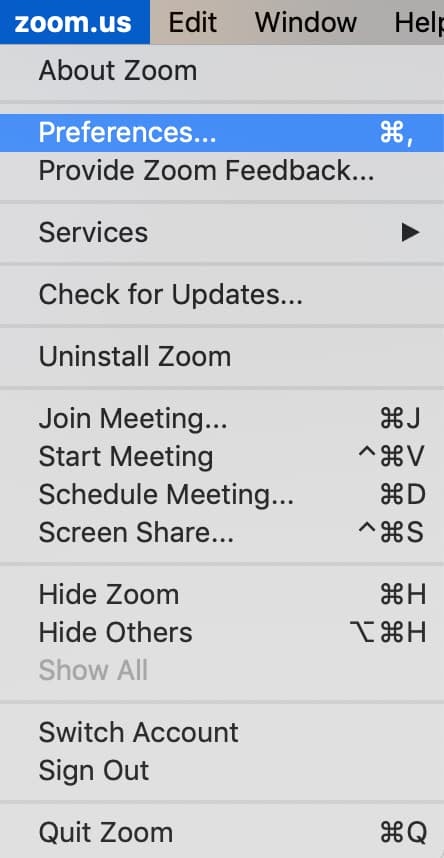
2. Go to Zoom “Preferences”
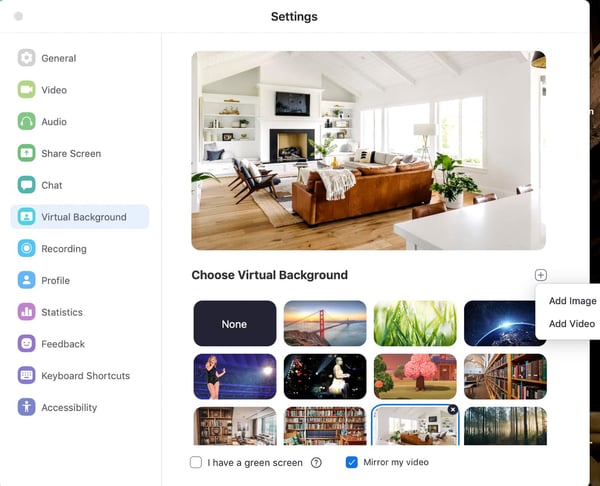
Once you’re logged in, click “zoom.us” on the top left and then hit “Preferences.” You can also get to this page by clicking your profile image on the top right corner, and then clicking “Settings.”
3. Click “Virtual Background”
When you’ve opened your settings, click “Virtual Background” on the left-hand side.
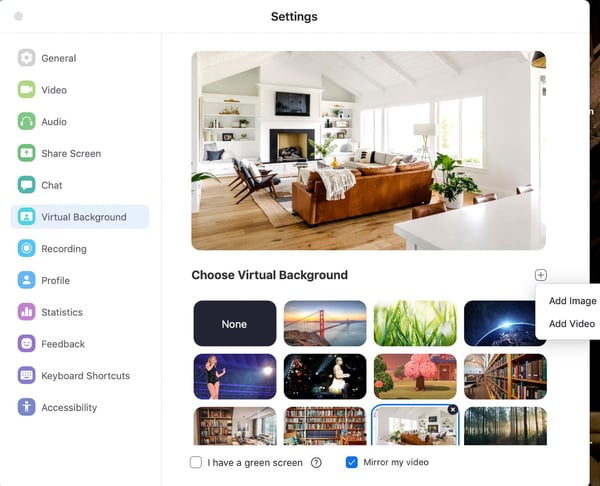
4. Click the “Plus” sign and “Add Image”
Now, click the plus sign on the right, and click “Add Image.” Voila. Now you can add any image that you have the rights to and that meets the image guidelines.
Tips for Determining When to Use a Zoom Background
So, when should you use a Zoom background?
Well, some days you might wake up and your living room is a mess, or the dishes haven’t been washed, or your roommates are walking around.
In fact, I’ve actually had to take meetings in the bathroom because it was the only empty room in my house and I had an important meeting.
Whether it’s a noise-related issue or you want to limit distractions in the background, that’s when Zoom backgrounds come in handy.
Plus, these backgrounds can be a great way to break the ice. They can often be used as a conversation starter. A lot of people on my team were actually surprised when they learned that my house did not look like the Zoom background I always use (see screenshots above).
However, it’s important to remember the tone of the meeting when you’re choosing a background.
If there’s a professional meeting, it probably isn’t time to break out a Taylor Swift concert background (which I have and use for informal meetings).
Additionally, your Zoom backgrounds shouldn’t be distracting. In fact, sometimes the point of the background is to lessen distractions.
So try to avoid super bright, or complex images. Also, make sure you have the rights to use the images you’ve downloaded. Your images shouldn’t require licensing or attribution.
How to Troubleshoot Glitchy Backgrounds
Now, this probably isn’t a surprise, but sometimes technology doesn’t work as planned. If your background is glitching, try a few of these quick options to fix it.
- Sign out and sign in again
- Ensure virtual backgrounds are enabled
- Make sure your background meets the image requirements
- Update your Zoom app
Our Favorite Zoom Backgrounds
Now for the fun part. Choosing Zoom backgrounds is one of my favorite activities. Below are some of our top picks at HubSpot.
Zoom Backgrounds for Casual Meetings
1. Vacation Vibes

2. Cute Animals

3. Nature

4. Concert

Zoom Backgrounds for Formal Meetings
5. Library

6. House

7. Minimalist Architecture

8. Splash of Color

Original Zoom Backgrounds from HubSpot
9. Colorful Background

10. Bubbles

Zoom backgrounds can be a great way to limit distractions and start a conversation. Just remember to think about the tone of the meeting when you’re choosing your background images.

8 Innovative & Inspiring Examples of Augmented Reality in Marketing
For now, augmented reality (AR) is still largely a novelty — AR’s newness alone contributes to its ability to surpass print, online, and television advertisements in terms of shock-factor. As The Drum reports, AR can capture people’s attention for over 85 seconds, increase interaction rates by 20 percent, and improve click-through rates to purchase by 33 percent.
Right now, people will stop and look at AR-inspired experiences, regardless of the campaign’s overall quality. But as more companies incorporate AR into their marketing strategies, and as AR technology becomes more ubiquitous, you’ll need to produce more thoughtful campaigns to impress your audience. Eventually, AR will become mainstream, and its prevalence in the industry will make it harder to compete.Tim Cook, Apple’s CEO, has said that AR will one day be as important in our everyday lives as “eating three meals a day.” So, the question is — how can your marketing strategy effectively capture an audience’s attention, once AR has become commonplace?
Here, we’ll look at eight companies that use AR in innovative and inspiring ways. These examples should be all the inspiration you need to brainstorm and execute a brilliant long-term AR marketing strategy.
Augmented Reality Examples
Augmented Reality for Product Marketing
1. Home Depot
Decorating a home isn’t easy — how do you know if you’ll actually like the yellow paint that looks beautiful online, but might be too bright in your bathroom? What if that coffee table doesn’t fit in your living room like you’d hoped?
In 2015, Home Depot released their Project Color app, which uses patent technology to show users what a paint color will look like in their home. The AR technology takes into account lighting, objects, and shadows in the room, so you can see how that yellow shade will look in real life. If you don’t trust your own judgment, you can also share images from the app on social media, to get a friend’s opinion.
In 2017, Home Depot took it a step further — now, you can also use their app to check out how objects like patio furniture, faucets, and other products look in your home.
Home Depot isn’t the only home furniture store to use AR to create value for their users — Lowe’s and Ikea have similar AR technology built into their apps.

2. Timberland
If you’re anything like me, the idea of trying on items in the dressing room can sometimes deter you from shopping at all. More than once, I’ve said, “I’ll buy it, try it on at home, and return it if I don’t like it,” just to avoid the hassle of carrying a pile of clothes into a dressing room line.
In the interest of convenience and comfortability, Timberland created a virtual fitting room in Moktow Gallery in 2014. Using Kinect motion sensing technology, Timberland’s virtual fitting room allowed shoppers to see an image of their face, and a similarly-sized model body, in different outfits.
If you’re going to use AR, you’ll want to brainstorm unique ways to help your customers avoid an otherwise burdensome process. While fitting rooms might not be the end of the world (first-world problems?), Timberland stands out as a helpful brand by offering customers a fun and useful alternative.
3. Sephora
There’s a reason many women don’t buy makeup products online — it’s impossible to know if you’ll like the lip color or foundation coverage if you don’t try it on, in-store.
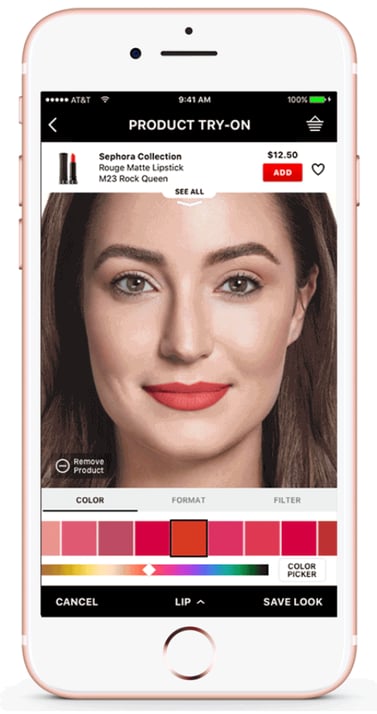
Sephora understands this struggle, and created an augmented reality experience, Virtual Artist App, with ModiFace to ensure Sephora app users can see how makeup products will look on their face via their phone’s camera. Users can also find out which tools or products they’ll need to apply certain products.
Additionally, Modiface’s augmented reality technology can show users the effects of months of skincare on their skin — a visual they won’t find in-store.
Bridget Dolan, Sephora’s head of innovation, appreciates the necessity of a long-term AR strategy. “When it comes to augmented and virtual reality, it can only be successful if it’s truly useful,” Bridget told Glossy. “We weren’t interested in just buzzy. A lot of things like technical accuracy and timing had to come together, and there was a time last year when, during testing, we hit a tipping point.”
Sephora’s use of augmented reality isn’t just helpful for users — it also drives sales by appealing to Sephora’s more tech-savvy consumers, and encouraging those consumers to become brand ambassadors by recording and sharing their augmented reality experiences online.
4. AMC Theaters
Delivering a message when and where your audience wants to receive it is a critical component of a successful marketing strategy. This is especially true when it comes to AR.
AMC Theaters, understanding their audience is most interested in upcoming movie trailers when they’re at the movies, incorporated AR technology into their AMC app. When a user sees a movie poster in a theatre, they can open the AMC app on their phone, scan the poster, and receive relevant information, including a cast list and a trailer.
If they’re interested in the movie after scanning, they can also purchase a ticket immediately, within the app.
Ultimately, AMC Theatres is providing optimal convenience with their use of AR — while a user can YouTube a trailer or Google a review, there’s an added incentive to check the movie out and purchase a ticket when the user can do it all in one place.

5. Taco Bell
There are two big reasons you’d visit a Taco Bell in 2012 — to try their new Doritos taco shell, or to play with their augmented-reality packaging.
Taco Bell placed an AR feature on each Locos Tacos box and soda cup for their Doritos shell campaign. When a user scanned the box with the Taco Bell app, they could see product-related Twitter and Facebook content on their phones.
By connecting their users with live social media content, Taco Bell successfully used AR to cultivate a stronger sense of community. They also showcased their brand as a major player in innovation, particularly in the fast-food industry.

6. StubHub
Augmented reality enables you to both visualize and interact with a space — two critical functions when choosing how much you’re willing to pay for a stadium seat.
For Super Bowl LII, StubHub introduced an AR feature on their mobile app that allowed ticket buyers to see a virtual 3D model of the U.S. Bank Stadium, as well as nearby parking garages and concession stands. This enabled potential buyers to visualize their full experience before purchasing, and minimized the risk of paying for a subpar seat.
StubHub’s reliance on AR solved for a common customer problem — as StubHub CTO Matt Swann points out, “We’re solving for real pain points, not just tech for the sake of tech. For a lot of people, it’s not an event you just show up for, it’s kind of a bucket list item.”
Particularly for out-of-towners, the ability to virtually compare different seat locations adds a level of comfort for hesitant buyers.
Back in 2016, the company also introduced a “virtual view” option on their app, letting ticket buyers preview their view from their seats before purchasing. The results were tremendous — StubHub saw app engagement more than double within one year.

AR and Experiential Marketing
7. Netflix
To market season two of the Netflix original series Stranger Things, the streaming company launched a series of AR/VR lenses on Snapchat. With the lens shown in the video below, users could record videos of themselves walking through one of the houses seen in the show, as monsters called Demigorgons pop out of the wall.
Aside from this lens, which is incredibly immersive for a mobile app, Netflix has also leveraged AR filters to promote its content. The video below highlights just a few that were featured on apps like Facebook and Snapchat.
8. Pepsi
In 2014, Pepsi installed AR technology in a London bus shelter, making it appear as if a lion, UFOs, flying saucers, and other objects were headed straight for Londoners.
The production showcased Pepsi’s playful personality and provided the audience with an exceptional experience. Afterwards, a video of the bus shelter’s AR technology attracted over six million views on YouTube — making it one of YouTube’s most viewed advertising campaigns.
Pepsi’s campaign highlights the effectiveness of AR when a company truly knows their audience. Pepsi didn’t need to use AR to advertise their products — instead, they trusted their consumers to appreciate the surreal experience and naturally share the story with friends, creating buzz around their brand as a result.

The State of AR in Marketing
While a number of brands still can’t access AR quite yet, marketers can still take a note from how these brands creatively implemented a new technology into their content marketing strategies.
Ultimately, as the media landscape changes and technology gets more advanced, marketers at business of different sizes might have more opportunities to implement technology. And, when they do, they’ll need to think creatively and innovatively about how they invest in it.
To learn more about AR in marketing, check out this ultimate guide. If you want to dive deeper into virtual reality, you might enjoy this list of examples.

Bing PPC Ads: How They Work (and Compare to Google Ads)
If Googling has ever let you down, you may have come across another search engine called Bing.
This search engine is powered by Microsoft and strives to outdo Google at every turn. Bing wants to revolutionize digital search and rival the industry’s long-standing powerhouse.
It’s an ambitious goal, but one place where Bing differentiates itself is through its Pay Per Click ads, or PPC. According to our guide, Pay Per Click ads are, “a form of search engine marketing (SEM) where the advertiser pays for clicks on an ad.”
Simply put, the advertiser has to pay the publisher whenever a visitor interacts with the ad. In exchange, the ad is added to the search engine’s database, which displays the ad whenever the content matches a visitor’s searched keyword.
While Google Ads offers a popular PPC feature, Bing’s has unique advantages that distinguish itself from the search engine giant. And, if you’re the owner of a small- to medium-sized business, you may be more interested in Bing’s PPC benefits than Google’s.
In this post, let’s break down how Bing PPC ads work, as well as how they compare to Google Ads.
Bing PPC
Bing PPC ads operate on Microsoft’s three popular search engines: Bing, Yahoo, and AOL. When you use Bing campaigns, your content is shared across all of these platforms at once. With over five billion monthly searches being made on the Microsoft network, this makes Bing PPC a notable marketing tool for paid ad campaigns.
In terms of functionality, Bing PPC ads work similarly to Google ads. You bid on keywords based on their traffic volume, then your ad is displayed when that keyword is searched, and finally, you pay Bing whenever a visitor clicks on your ad. Like Google, your ad’s copy can have up to 80 characters and Bing even has support tools that can help your team build a cost-effective keyword list, so you never waste money on ads that aren’t being displayed.
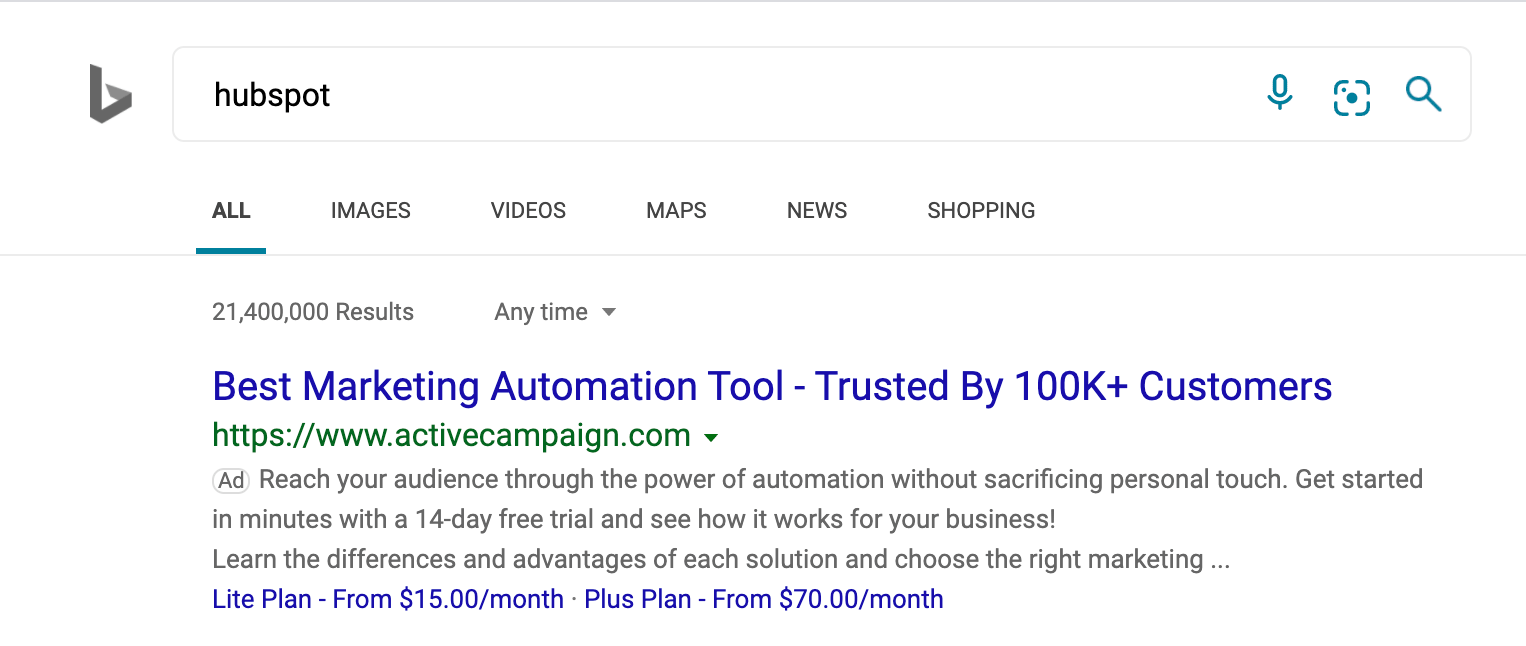
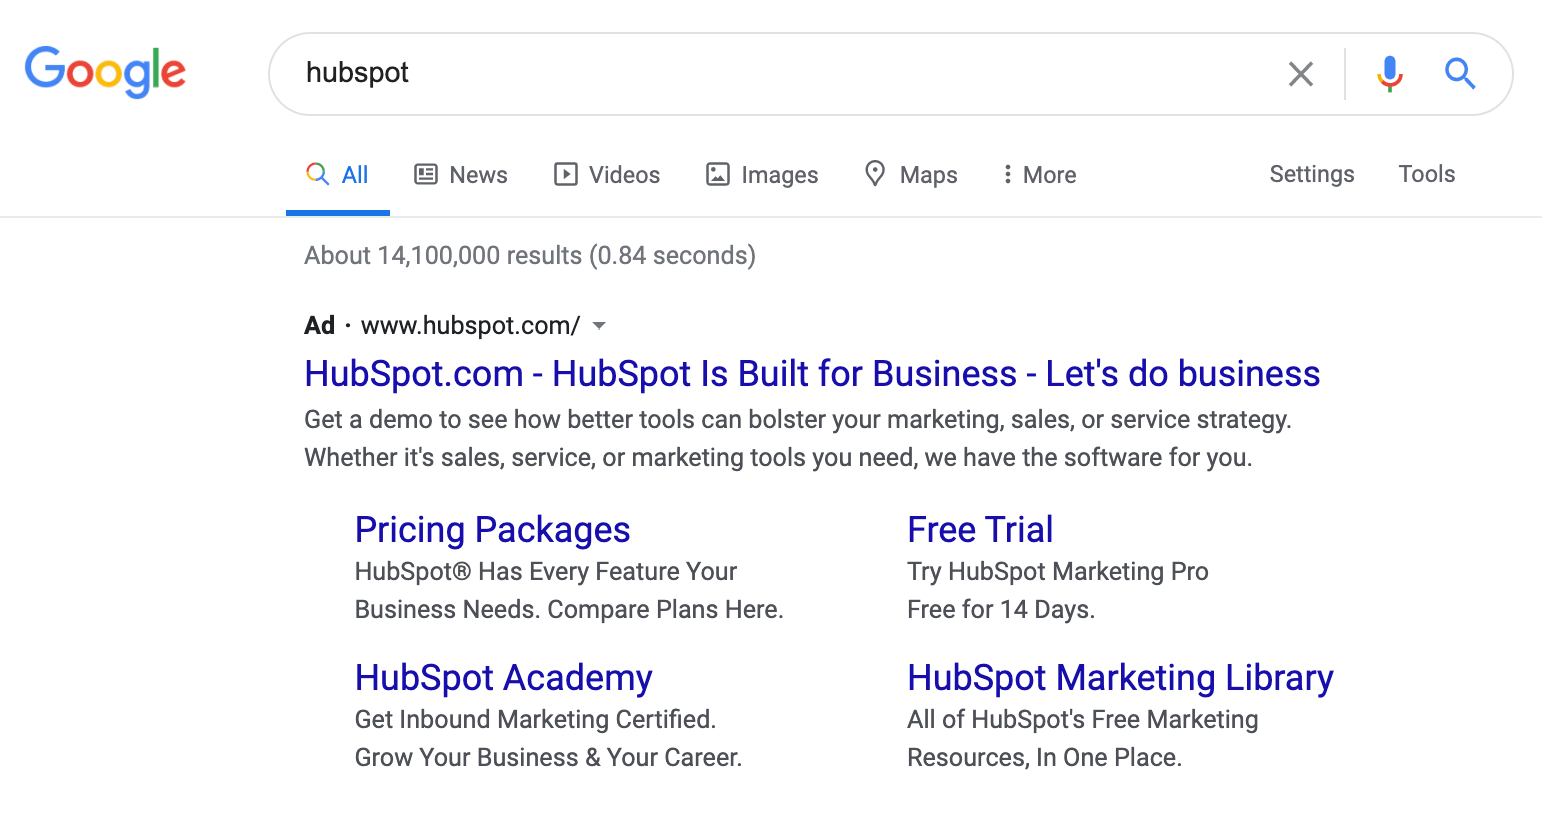
With Bing, you can also set up targeting filters that determine where and when an ad will be published. For example, if you want your ad to only appear on mobile devices, you can select the mobile traffic option. Or, if you want the ad to appear solely on Yahoo, you could filter it from Bing and AOL. This gives your team more flexibility and optimizes the effectiveness of your PPC campaign.
Bing PPC ads present a timely opportunity for marketing teams. It’s less competitive than Google AdWords, and its users shop online 36% more than any other search engine. While Google AdWords is still a very powerful tool, there are some advantages of Bing that makes it attractive for small- to medium-sized businesses. So, now that we’re familiar with how Bing PPC ads work, let’s discuss some of the key differences between Bing PPC and Google AdWords.
1. Bing Ads offers unique filter options and social extensions.
While both Bing PPC and Google AdWords allow you to filter your ad’s targeting, Bing’s software has a unique innovation that sets it apart from Google. With Bing, you can set age filters for your search ads, so only visitors of a certain age group will see them. Or, you can set up a location filter so visitors in a certain part of the world see your content. This way, you’ll ensure qualified leads are being exposed to your marketing campaigns.

Another key feature that Bing has an advantage in is its social extensions. Social extensions are a line of copy on your ad that tells the visitor how many social media followers your business has. On Bing, this feature shows your social following for Facebook, Twitter, and Instagram. Google AdWords, however, can only show you the number of Google+ followers.
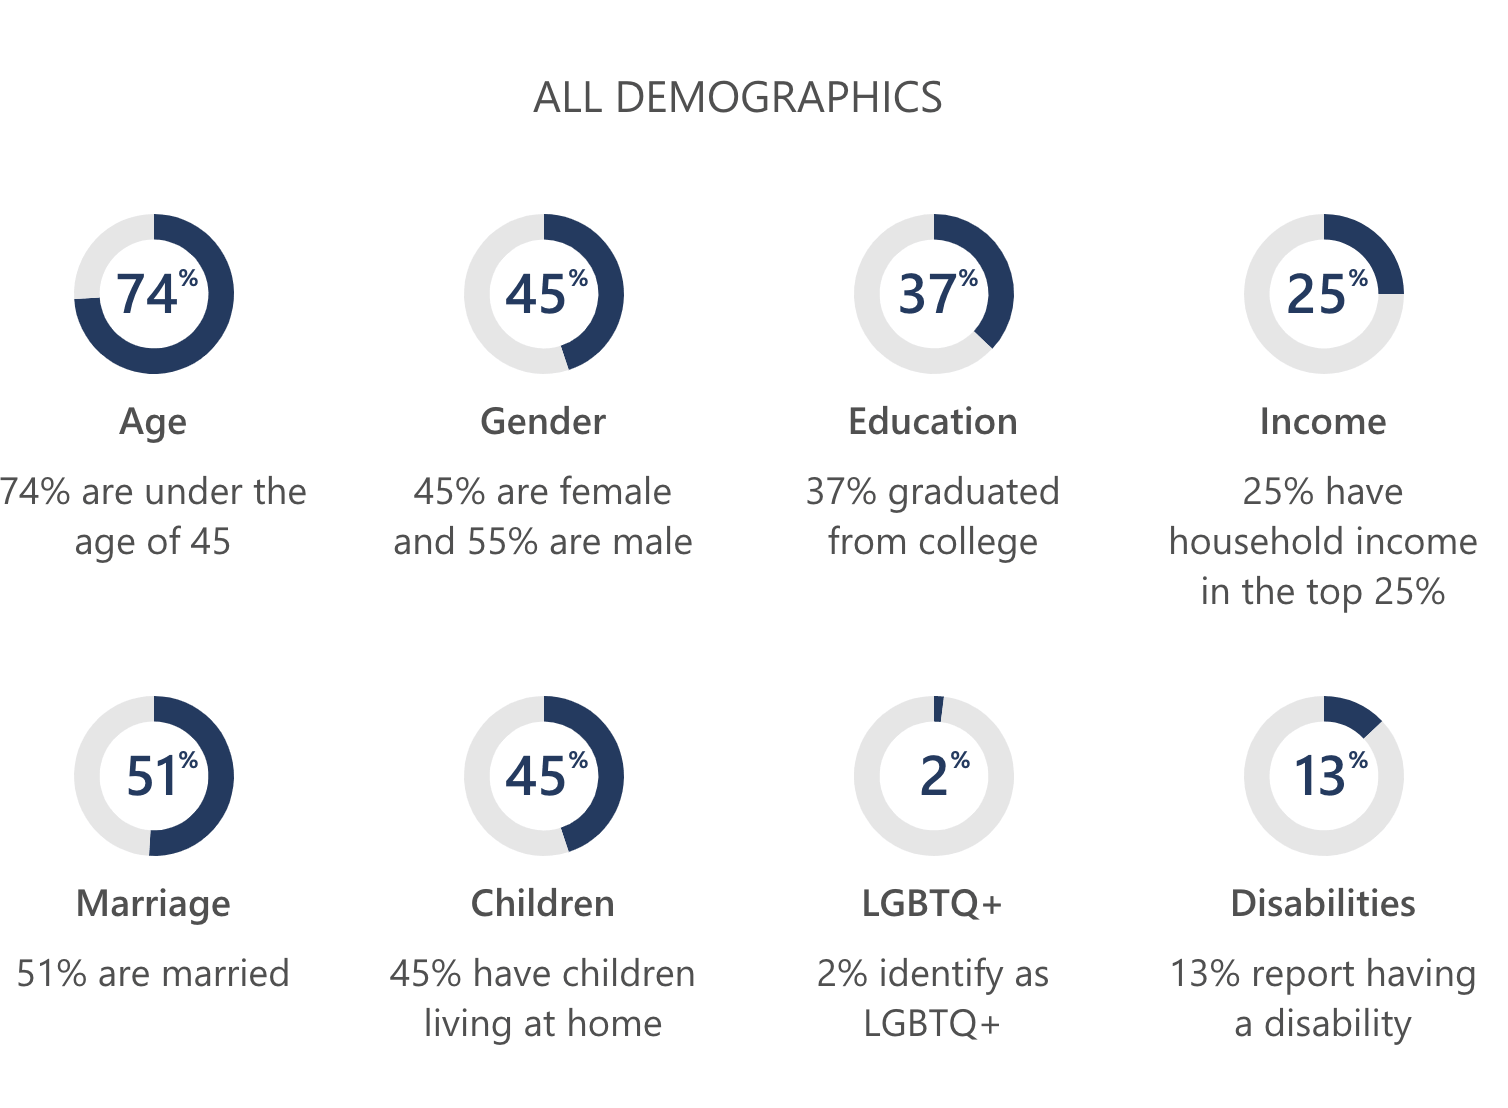
2. Google has a bigger reach, but Bing’s audience is older and tends to have higher income.
According to Microsoft, Bing represents more than 34% of the world’s desktop search engine marketplace. That means about one in every three people will use Bing over another search engine.
And, more importantly, Bing’s PPC ads can reach 60 million users that Google AdWords cannot.
In terms of the largest audience, Google is the outright favorite. But, that doesn’t mean Bing isn’t worth your investment. Bing has over 137 million users who search roughly six billion times each month. These people tend to be older than Google’s users, and have an income of more than $100K.
So, even though Google has a larger audience, Bing works with users who have substantial buying power.
3. Bing users are interested in financial and shopping services, so you might see higher conversion rates on Bing depending on your industry.
When tested by Blue Corona, Bing PPC experienced a 34% higher click-through rate than Google ads.
Additionally, new research found that financial and shopping services have experienced the most success with Bing PPC. This is mostly attributed to MSN’s and Yahoo’s popular financial reporting, which yields more keywords related to online shopping and business reports.
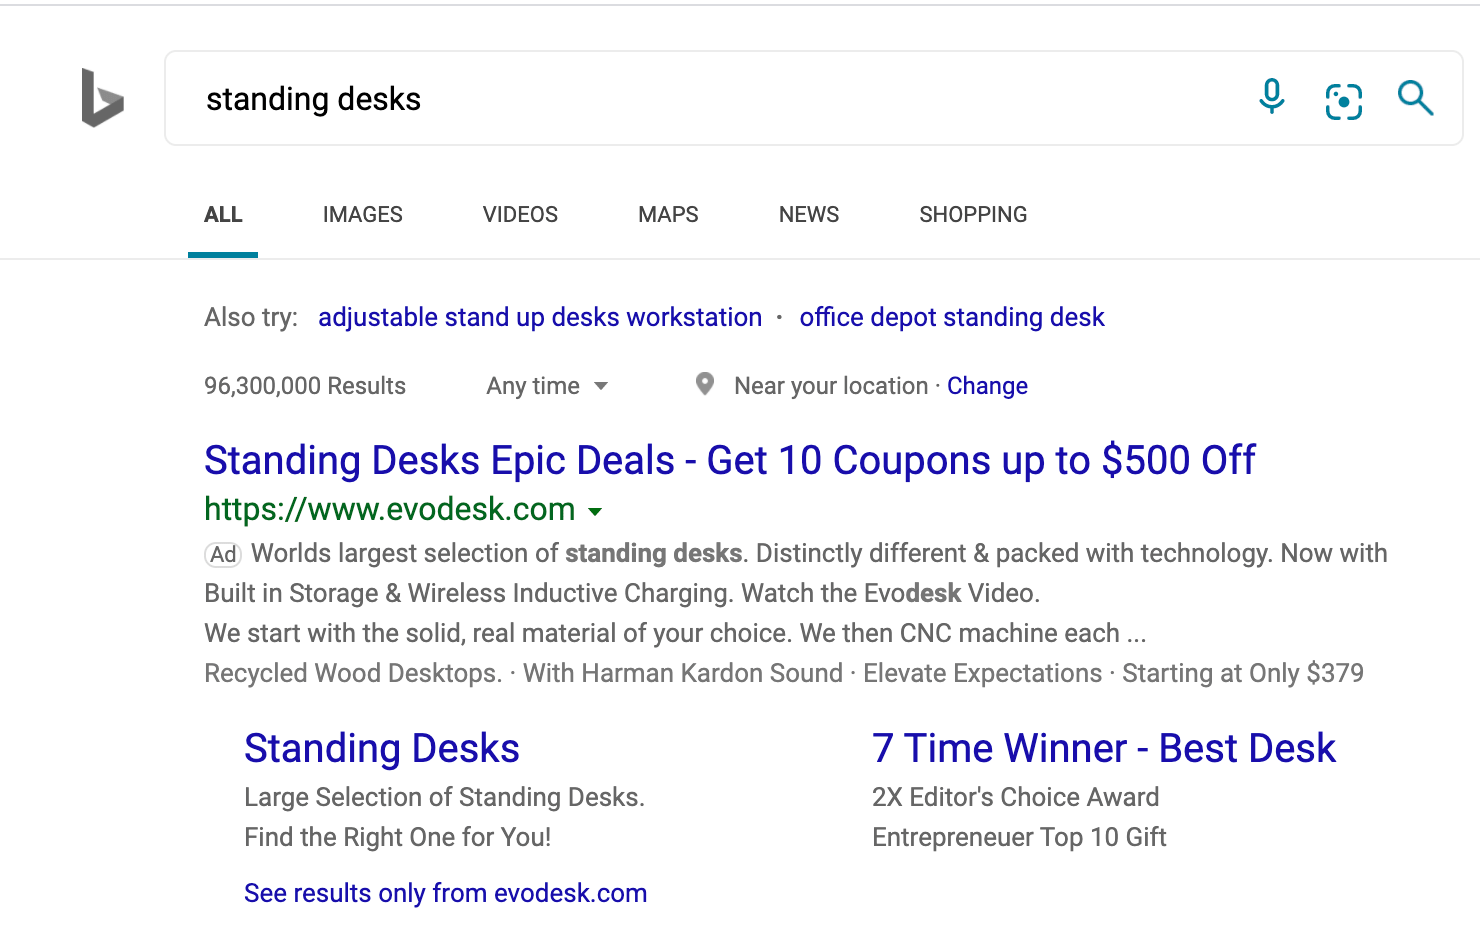
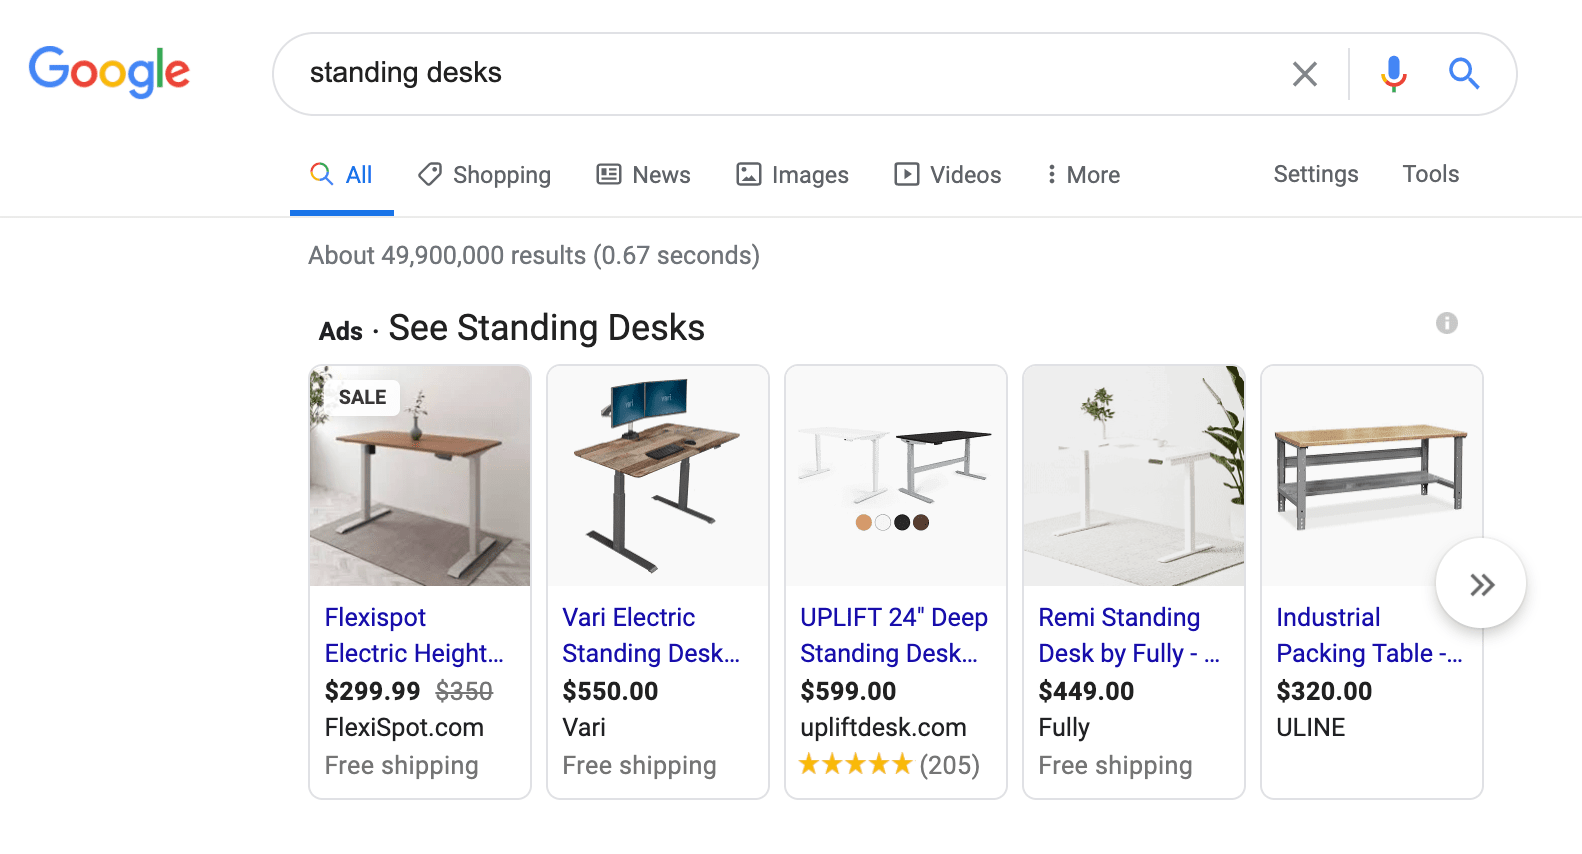
Bing users tend to be more engaged with sites after ad clicks, as well. In one industry, Bing ads had a 56% higher conversion rate than Google AdWords. That’s because Bing users typically have more interest in e-commerce and are willing to spend money online.
4. Bing Ads often appear higher on the search results page.
Since there are fewer users on Bing, its ads tend to display higher on search results than Google AdWords. In fact, Bing ads appear 35% higher in search results than Google ads.
Bing copies Google’s keyword auction technique, which favors its users because they don’t have to outbid Google’s massive user base. With Bing’s less-competitive market, you won’t have to bid as much on keywords to maintain your spot on the search results page.
5. Bing has lower cost-per-click.
With fewer competitors bidding on keywords, you can expect to spend less on your Bing ads. In fact, one business spent 35% less on Bing ads than it did on Google AdWords.
In terms of cost-per-click (CPC), ReportGarden found that the average CPC for Bing was $7.99 whereas Google’s was $20.08. Since there’s less overall traffic occurring on Bing, CPC is typically less expensive.
This presents an opportunity to obtain a strong ROI if you can capitalize on the right keyword at the right time.
Google Ads vs. Bing Ads: Which One is Right for Your Business?
If you’re choosing between Google AdWords and Bing PPC, both tools can be valuable assets to your marketing team.
With Google, you have access to a massive audience with users from many demographics, and you can trust that your content will be displayed on the world’s preferred search engine.
However, this space is highly competitive, and you’ll need to monitor your campaign diligently if you want to see a positive return on your investment. Your marketing team will need plenty of means and experience to make Google AdWords a reliable source of lead generation.
Bing PPC presents a lower-risk option for paid ad campaigns. You still have access to a large audience, but keyword bidding isn’t as competitive as Google.
The tradeoff here is that Bing traffic is significantly lower than Google’s. So, while your ads may be positioned higher and cost less, they may not be seen by as many people. That limitation may be discouraging to larger companies that have bigger marketing budgets.
For more information about PPC ads, read these PPC campaign tips.

Email Marketing GRATIS: 5 plataformas para no perderte en un mar de leads
El email marketing gratis y de pago sigue siendo una de las formas de comunicación más poderosas de los eCommerce y emprendedores.
Sin embargo, siempre salta la pregunta de cuál es la mejor plataforma para realizar campañas de email marketing exitosas.
En este artículo analizaremos los pros y contras de 5 plataformas de email marketing: Mailchimp, Acumbamail, GetResponse, Benchmark y AWeber.
Puedes leerlo completo o simplemente hacer clic en el índice e ir directamente a la plataforma que te interesa.
Email Marketing Gratis: Mailchimp en Español no existe
Mailchimp es una plataforma de email marketing gratis con opciones de pago. Es una de las herramientas más populares, pero no tiene versión en español.
Si no dominas el inglés, tendrás que arreglártelas con el traductor de Google. De cualquier forma, es muy fácil de usar.
Cuenta con plantillas que se editan con el sistema de soltar y arrastrar, por lo que podrás realizar estrategias de email marketing bien diseñadas.
La versión de email marketing gratis incluye lo siguiente:
- 2 mil suscriptores.
- Automatizaciones básicas.
- Orientación por comportamiento (si un suscriptor abre o no abre tu mail puedes realizar estrategias para nuevos reenvíos).
- Set de plantillas básicas.
- CRM de marketing.
- Realización de encuestas.
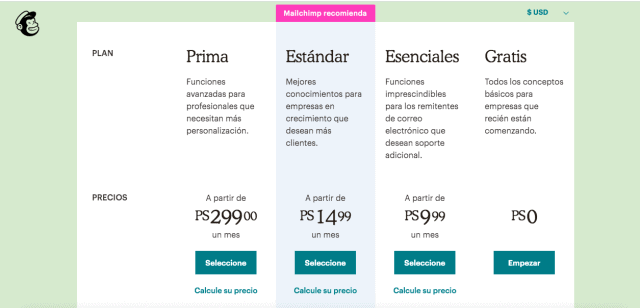
Ahora vamos a ahondar en sus características más importantes.
Automatizaciones de marketing de Mailchimp
La versión de email marketing gratis solo permite crear automatizaciones de un paso.
Con los planes de pago puedes crear tus propios flujos de trabajo. Es decir, si el receptor de tu campaña hace tal o cual acción (abrir, no abrir, hacer clic) es posible programar acciones posteriores para nuevos envíos y darle un seguimiento.
Sin embargo, si lo que buscas son soluciones más sencillas, tanto en la versión gratis como las de pago, tiene preconfiguradas las siguientes automatizaciones:
- Envío de mail de bienvenida a tus nuevos suscriptores.
- Mandar un correo con el fin de recuperar un carrito de compra.
- Puedes agradecer a un cliente después de su primera compra.
- Es posible dar seguimiento a los productos comprados para obtener recomendaciones o evaluación del servicio.
- Envío de correo de feliz cumpleaños.
Análisis en Tiempo Real
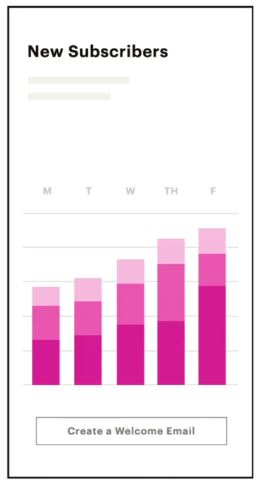
Mailchimp gratis ofrece los siguientes datos:
- Estadísticas en tiempo real de apertura y comportamiento para medir lo que está funcionando en tu campaña de email marketing gratis.
- Perfil de quienes realizaron alguna acción: comprar, descargar, etc.
- Comparar la apertura y cancelación de suscripción con las campañas de email marketing de tu competencia.
- Revisar cuántas ventas se realizaron a través de tu mailing.
Si contratas a partir de la versión Estándar, te informará también los siguientes datos:
- Valor de por vida del cliente.
- Probabilidad de compra con base en su comportamiento.
- Recomendación de audiencias similares.
Conecta tu tienda con Mailchimp
Tanto en la versión de email marketing gratis de Mailchimp como en las opciones de pago están disponibles más de 200 integraciones y servicios web útiles para los eCommerce.
En este artículo, detallaremos las 5 integraciones que nos parecieron más atractivas:
- #1. Photoshop para editar las imágenes de tu campaña.
- #2. WooCommerce para sincronizar los datos de tus clientes, pedidos y enviar campañas específicas.
- #3. Calendy para reservar eventos con clientes.
- #4. Ecwid para agregar productos en vivo a tus correos electrónicos.
- #5. 40Nuggets, una plataforma en la que se realizan PopUps para captar leads.
Contras de Mailchimp
Nosotros vemos como una debilidad el idioma, ya que no está en español.
Por último, consideramos que la integración con WordPress y Paypal podría ser mejor.
Acumbamail Opiniones para la comparativa de email marketing gratis
Acumbamail es una plataforma de email marketing gratis que nos gusta recomendar porque está en español y cumple con los requisitos de RGPD, muy importantes para los usuarios de España.
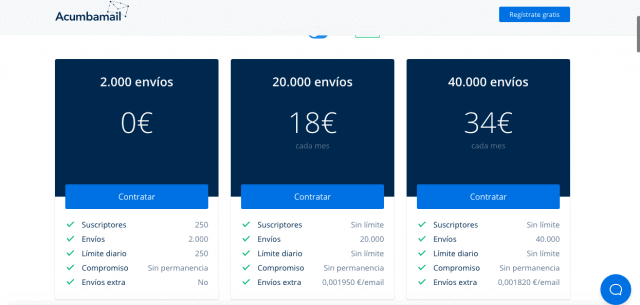
La versión gratis permite realizar 2 mil envíos al mes a 250 suscriptores. Lo que nos gusta es que puedes comprar créditos por ocasión única.
Esto quiere decir que si un mes necesitas hacer más envíos por cualquier razón, pagas solo lo que necesitas.
Otra cosa que destacamos es que mientras más envías, menos pagas.
Acumbamail cuenta con una serie de plantillas que se personalizan. Honestamente, la variedad es amplia y suelen agregar algunas de acuerdo a la estación, por ejemplo, para campañas de email marketing gratis lanzadas durante el Black Friday.
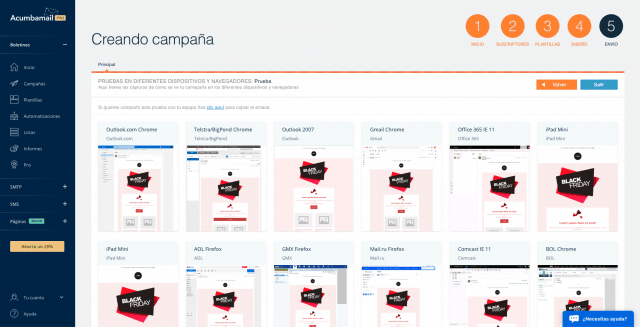
Ahora, entremos en la herramienta para ver algunos de sus aspectos más destacables:
Automatizaciones de Acumbamail Pro
Las automatizaciones que vamos a mencionar solo están disponibles en la tarifa PRO, es decir en la de pago:
- Reenviar la campaña a los suscriptores que no abran y así se incrementan las posibilidades de apertura. Aquí te sugerimos cambiar el asunto para intentar llamar la atención.
- Enviar a cada suscriptor a su hora más activa. El algoritmo de Acumbamail recopila la información de a qué hora los usuarios abren tus correos, entonces hace envíos diferenciados a cada uno.
- Automatizar en función del comportamiento del suscriptor: a los que abrieron, los que hicieron clic o los que se acaban de suscribir. En esos casos puedes hacerles envíos específicos para que sigan el camino de tu embudo de ventas.
>>> Diferencia entre landing page y embudo de ventas.
Estadísticas que ofrece Acumbamail
Acumbamail ofrece informes detallados incluso a quienes se suscribieron a su versión de email marketing gratis. Te permite saber lo siguiente:
- Los correos abiertos, sin abrir, los que se fueron al spam y los usuarios que cancelaron la suscripción.
- La tasa de apertura por dispositivo: PC, tabletas, teléfonos.
- La procedencia de las aperturas por país.
- Cuenta con un mapa de clics para campañas de email marketing gratis.
Al analizar estos datos, podrás determinar qué es lo que funciona o no de tu campaña.
Un tip: si tu correo tiene un Call To Action y éste tiene pocos clics, prueba ponerlo al principio del correo electrónico.
Contras de Acumbamail
Tiene menos presencia en el mercado que otras plataformas y las automatizaciones todavía no son muy elaboradas.
GetResponse Opiniones: no tiene email marketing gratis
GetResponse no es una herramienta de email marketing gratis. Sin embargo, sí tiene una prueba gratuita de 30 días.
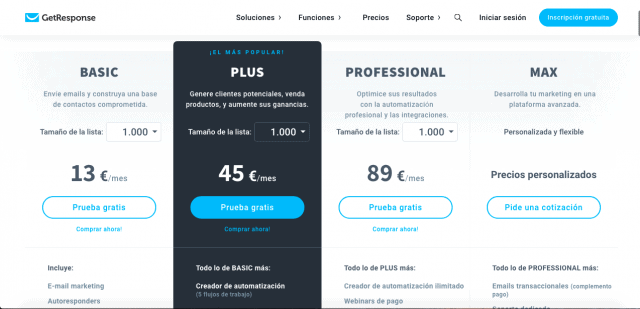
Decidimos agregar la plataforma en este texto porque es muy completa. No solo es una herramienta de email marketing: puedes hacer webinars, diseñar embudos de conversión, landing pages e incluso crear Facebook Ads.
Email marketing GetResponse
Tiene todo lo necesario que ofrecen las plataformas de email marketing gratis y de pago:
- Puedes hacer envíos de campañas con newsletters, publicidad, autorespondedores, entre otros formatos.
- Trabaja con plantillas prediseñadas.
- Hace automatizaciones.
- Ofrece estadísticas.
- Puedes hacer pruebas A/B.
- Se conecta con PayPal, WordPress, WooCommerce, Shopify, entre otros.
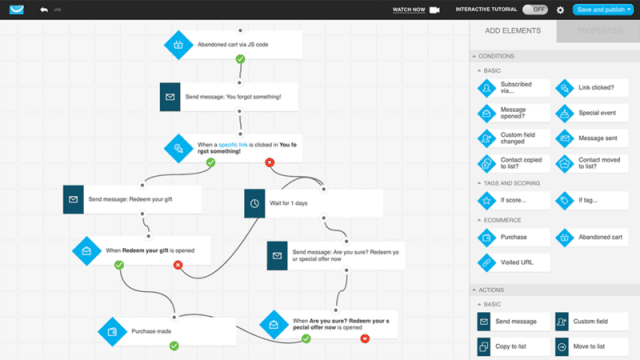
GetResponse Funnel de Ventas
Esta plataforma también tiene un creador de embudos de ventas. Trabaja con plantillas prediseñadas. Puedes hacer varios tipos de embudos:
- Funnels de venta para productos o servicios.
- Embudos de venta para clientes potenciales.
- Embudos de marketing para comercializar tus webinars.
Tiene más de 30 escenarios prediseñados y optimizados para la conversión. Cada uno incluye imágenes y textos de venta profesionales
Hacer Landing Page con GetResponse
Es posible diseñar tus propias landing pages y conectarlas con los embudos de ventas.
Lo que puedes agregar es lo siguiente:
- Formularios.
- PopUps.
- Relojes de cuenta regresiva.
- Webinars.
- Herramientas de eCommerce.
- Dirigir tráfico de alta calidad desde Facebook e Instagram.
Además, hay integraciones para las páginas de aterrizaje con plataformas útiles como WordPress, PayPal, WooCommerce, Shopify, Stripe, entre otras.
Los diseños que se realizan son responsive y GetResponse está integrada a Shutterstock por si necesitas un banco de imágenes.
Desde GetResponse podrás configurar y publicar anuncios de Facebook Ads. La plataforma tomará solo los datos de tu cuenta, esto te permitirá realizar campañas de Ads súper dirigidas.
Es posible apuntar a audiencias similares o a tu lista existente.
Te damos un tip: después de que lances tu anuncio, podrás ver quiénes aterrizaron en tu landing page y diseñar una estrategia de remarketing con ofertas atractivas.
Contras de GetResponse
Las estadísticas de GetResponse pueden ser poco intuitivas.
A medida que crece tu lista de contactos, la plataforma se va encareciendo.
Otro aspecto que no nos gusta es que en las landing pages no puedes tocar código.
Benchmark para Email Marketing gratis
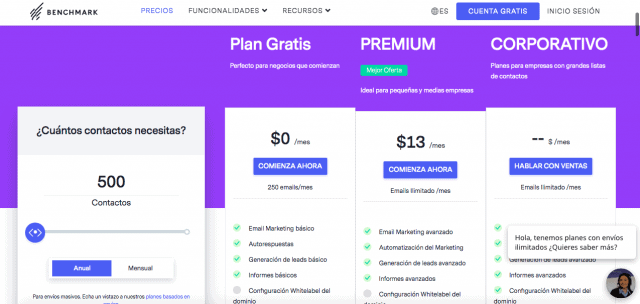
Benchmark es una herramienta de email marketing gratis que cuenta además con dos opciones de pago: una Premium para pequeñas y medianas empresas y otra Corporativa para compañías con listas de contactos abultadas.
Como todas las demás plataformas de email marketing, tiene plantillas que se ajustan a tus colores, imágenes y textos. Pero si tienes un mayor nivel de conocimientos, también podrás crear las tuyas con su editor HTML.
En la versión gratis tendrás una capacidad de 250 envíos al mes, programar autorespuestas y opciones de generación de leads básicas.
Ahora desarrollaremos algunas de sus funcionalidades que nos parecen más útiles
Benchmark Mail: automatizaciones
La versión gratis tiene automatizaciones básicas como el envío de autorespuestas.
Por otro lado, los planes de pago permiten diseñar emails de bienvenida. Cuando llega un suscriptor nuevo se desencadena una campaña de email marketing.
Tiene automatizaciones para intentar recuperar los carritos abandonados. Hace un seguimiento de los usuarios con intención de compra y detecta el punto en el que abandonaron el embudo.
Esto te permitirá enviar una campaña orientada.
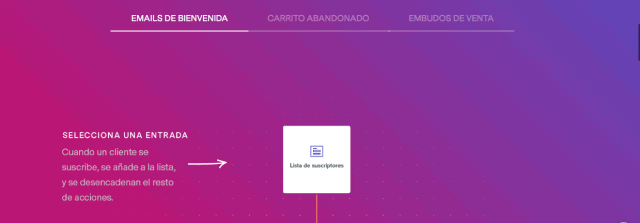
Otro aspecto destacable es que tiene plantillas para diseñar las siguientes automatizaciones:
- Para atraer suscriptores.
- De conversión de clientes.
- De confirmación de compra.
Generación de Leads
La plataforma de email marketing gratis Benchmark está consciente de lo importante que es el proceso de captación de leads. Si no tienes prospectos de clientes potenciales, ¿a quién le vas a enviar tu campaña?
Tanto en la versión gratis como en la de pago, hay plantillas para desencadenar las siguientes estrategias de captación de leads:
- Formularios de registro: los puedes colocar en tu sitio web. Con los leads que captes a través de esos formularios, Benchmark te permitirá segmentar las listas, importarlas e integrarlas a servicios como WordPress.
- Autorespuestas: puedes programar correos que se desencadenen a partir de una acción de tus suscriptores (un clic, por ejemplo). También es posible hacer campañas de envíos basadas en fechas determinadas.
- Encuestas y sorteos: estas plantillas te ayudarán a conocer a tu audiencia e incentivarlos a que te dejen sus datos. Si ganan algo en un sorteo, es más probable que los usuarios accedan a compartir contigo su correo electrónico.
Páginas de Destino
Su funcionalidad de landing page tiene un editor con el sistema de soltar y arrastrar. Trabaja con plantillas o lienzos en blanco. Ten en cuenta que no está disponible en la versión gratis.
Te permite insertar formularios, fusionar con campañas de Ads y personalizar las urls con tu dominio.
Lo más importante es que te da estadísticas para medir el ROI con base en conversiones o engagement de tus suscriptores.
Contras de Benchmark
El espacio de almacenamiento de imágenes es muy reducido. Si necesitas más de 10MB, tendrás que pagar.
AWeber optimizado para email marketing gratis
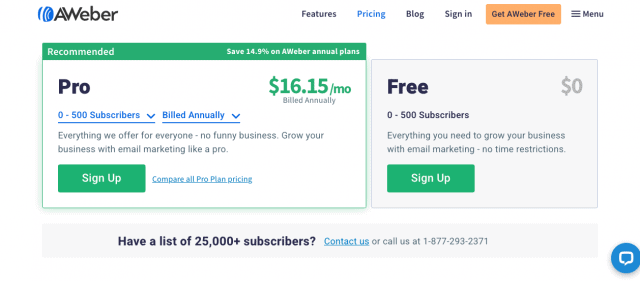
Lo primero que nos interesa destacar de la plataforma de email marketing gratis AWeber es su sencillez en los planes que manejan.
Tienen una licencia gratis para un máximo de 500 suscriptores. A partir del suscriptor 501 el precio se va incrementando (de 501 a 2500, de 2500 a 5000, etc), pero las funcionalidades son las mismas.
Como en todas las demás plataformas, hay plantillas para diseñar tus correos, pero también existe la posibilidad de crearlos desde 0 con código HTML.
La gran desventaja es que no tiene servicio en español.
Ahora, entraremos en el detalle de sus características.
AWeber: automatizaciones de email marketing
La automatización por comportamiento se hace a través de triggers o desencadenantes. Tiene dos opciones: cuando el suscriptor abre tu correo y cuando hace un clic. A partir de ahí, puedes automatizar para que la campaña siga determinado camino.
Otra cosa que puedes hacer es poner etiquetas a tu lista de contactos. Esto te permitirá segmentar mejor: los que compraron, los que abandonaron el carrito, clientes recurrentes, etc.
Por último, tiene una opción de texto dinámico para personalizar tus campañas. De esta manera, tus correos electrónicos comenzarán saludando al usuario por su nombre.
Analytics y reportes de AWeber
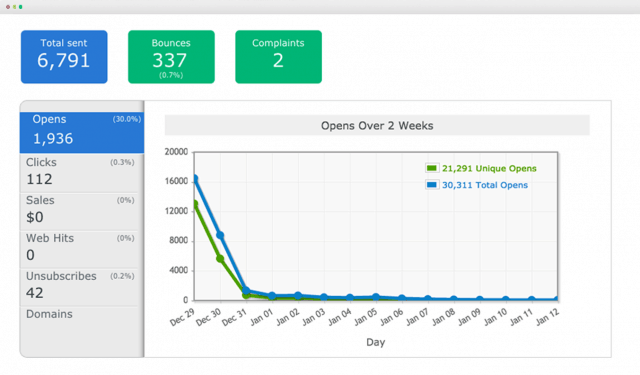
Aweber otorga los datos analíticos clásicos como tasa de apertura, mapa de clics y porcentaje de usuarios que se dieron de baja.
Sin embargo, tienen algunas especificaciones interesantes:
- Los informes detallan qué mensajes se abrieron más y qué enlaces se visitaron más.
- Especifican los suscriptores y las campañas que se transformaron en dinero, no solo por ventas directas sino por otras actividades generadoras de ingresos (por ejemplo, un webinar).
- Detallan también las aperturas a lo largo del tiempo y los clics que hizo cada suscriptor. Esto permite determinar su valor.
- Muestra también el comportamiento del suscriptor en tu sitio web después de que hizo el clic: si visitó más páginas cuáles, etc.
Landing Pages de AWeber
Desde la versión de email marketing gratis de AWeber los usuarios tienen funcionalidades avanzadas de creación de landing pages.
Se pueden crear de forma ilimitada, usando plantillas prediseñadas, con imágenes profesionales disponibles, con la posibilidad de agregar videos e integrarlas con Google Analytics y el Pixel de Facebook.
En la versión gratis no puedes remover la leyenda: Realizada con AWeber.
Conclusión de email marketing gratis: ¿cómo es la atención al cliente?
Al momento de elegir una herramienta de email marketing gratis o de pago, para nosotros es muy importante evaluar su servicio de atención al cliente.
Si en algún momento tienes problemas, un buen equipo de soporte hace la diferencia.
A manera de conclusión, esto es lo que ofrece cada una de las plataformas que mencionamos:
- Mailchimp: para todas las versiones tiene disponible una base de conocimiento que compila las preguntas más frecuentes y 30 días de asistencia gratis vía correo electrónico. A partir de ahí, los de la versión gratis se quedarán sin asistencia.
- Acumbamail: desde la versión gratis hay atención al cliente vía correo electrónico y por chat a través de la plataforma, además es en español… un lujo.
- GetResponse: todos los planes de pago tienen atención al cliente por chat y correo electrónico.
- Benchmark: desde la versión gratuita cuenta con un servicio de atención al cliente Online y vía chat. La ventaja es que es en español.
- AWeber: es el más completo porque ofrece atención al cliente por chat, correo electrónico y teléfono, incluso en la versión gratuita. La desventaja es que no está en español.
Si tienes un eCommerce o eres un emprendedor que ofrece un servicio, no tienes que dudarlo, necesitas una plataforma de email marketing gratis o de pago para comunicarte con tus posibles clientes.
Es una vía efectiva y directa para acompañar el viaje de compra de tus potenciales clientes.
Por cierto, ¿cuál de las plataformas que mencionamos te pareció más interesante y por qué? Nos gusta leerte.
from Socialancer https://ift.tt/2YJAJPU
via
Webinar Marketing Strategy: A Proven Path to More Sales
Thinking of using webinars to sell your products and services? Wondering how to promote and conduct your webinars to maximize participation and sales? To explore marketing with webinars, I interview Amy Porterfield on the Social Media Marketing Podcast. Amy, an expert on webinars and course creation, is the host of the Online Marketing Made Easy […]
The post Webinar Marketing Strategy: A Proven Path to More Sales appeared first on Social Media Examiner | Social Media Marketing.
from Social Media Examiner | Social Media Marketing https://ift.tt/3gK1zO9
via socialmediaexaminer
How to Determine a Bidding Strategy for Different Types of Ads
When I first learned how to ride a bike, I remember being scared. It was a daunting process because I’d never done it before and was terrified of falling.
I actually remember feeling similarly when I first started getting into paid advertising campaigns at the marketing agency I worked at. The first time doing anything can be an intimidating process.
But as a marketer, it’s important to understand how to set up your paid advertising campaigns so you get the most out of your budget.
To do this, you can use several types of bidding strategies for different types of ads.
Below, let’s review the bidding strategies that will drive results when you use Facebook ads and PPC/Google Ads.
Facebook Ads Bidding Strategy
When you’re just getting started with Facebook Ads, it’s not easy to figure out what strategy to use.
Luckily, Facebook has a guide that explains the different bidding strategies you can use. Let’s dive into those strategies and figure out how to determine which one is right for you.
1. Lowest Cost (Auto Bid)
With this strategy, you won’t have a lot of manual work to do. In fact, Facebook is the one who sets up the bid automatically.
If you want to spend your full budget, this is a good choice for you. It’s a hands-off strategy and you can get more bang for your buck while spending your budget.
So, how do you know if this is a strategy you’d want to implement? Well, this is a good idea if the goal of your campaign is brand awareness, impressions, traffic, post engagement, or lead generation.
2. Bid Cap
This strategy is slightly different because of the manual processes. For this one, you’ll be the one who sets up the bidding.
This is a good option if you want more control over the cost. In fact, with this strategy, you might not even spend your full budget.
This type of strategy works for the same types of ads as the lowest cost strategy, it’s just more manual and gives you more control over your spending. Plus, it can help you increase competitiveness against other advertisers.
3. Cost Cap
If the goal of your ads is traffic, event responses, offsite conversions, or lead generation, then this is a good option as well.
With this strategy, Facebook sets the bidding while you determine the maximum amount you’re willing to spend.
You could use this type of bid strategy if you want to maximize cost-efficiency and keep cost within a certain threshold.
4. Target Cost
Another semi-automatic option, this strategy will allow Facebook to choose the bid while you set a target price. This is the price that you’d like to strive for, but Facebook could over or underspend slightly.
If you want to maintain a consistent cost, this is a good strategy to look into. You’ll be able to predict your cost and get the most conversions possible at your target cost.
However, it’s important to keep in mind that you could lose out on other cheaper options.
This is a good strategy if the goal of your ad is traffic, lead gen, or conversions.
5. Value Optimization with Minimum Return on Ad Spend (ROAS)
If you set your objectives to app installs, conversions, or catalog sales, then this is an interesting bid strategy to consider.
With this strategy, Facebook sets up the bid that’s specific to optimizing value. If you’re using ROAS as the primary metric of success, this is a good option.
This bid strategy will focus the campaign on the bottom line, so you get the most opportunities while maintaining a minimum ROAS.
6. Highest Value
If you want to spend the full budget and get the highest ROAS, then this is a good bidding strategy.
It’s hands-off, meaning Facebook manages the bidding. You can spend your budget, while achieving the highest value results.
This is a good strategy if the goal of your ad is app installs, conversions, or catalog sales.
Now that we know more about Facebook ads bidding strategies, let’s dive into strategies you can use with pay-per-click (PPC) ads, whether it’s through Google or another search engine.
Google Ads/PPC Bidding Strategy
Similarly to Facebook ads, getting started with PPC ads can seem like a difficult task if you’ve never done it before.
Before you review the options for Google bidding strategies, it’s important to understand how to build a campaign.
In the video below, HubSpot Academy reviews how to build your first Google Ads campaign and explains how the Google Ads auction system works.
Now, let’s dive into the options that Google has for bidding strategies.
1. Manual Cost Per Click (CPC)
Similar to the manual strategies for Facebook, if you want to have more control over the cost and spend, this is a good strategy for you.
With manual CPC, you select the price that you’re willing to pay for each click. Then, Google will ensure you never spend over that amount for a click.
2. Target Cost Per Acquisition (CPA)
With this strategy, you can set a target CPA that lets Google know how much you want to spend on producing an action.
According to Google, “Using historical information about your campaign and evaluating the contextual signals present at auction-time, Target CPA bidding automatically finds an optimal bid for your ad each time it’s eligible to appear. Google Ads sets these bids to achieve an average CPA equal to your target across all campaigns using this strategy.”
With this set up, you pay for conversions rather than clicks.
3. Target ROAS
Similar to the ROAS strategy for Facebook, you can determine how much you want to get back from your ad spend with PPC ads as well.
This is a great strategy to use if you want to get more conversion value at a target ROAS that you’ve set yourself.
4. Maximize Clicks
Sometimes when you set up a PPC campaign, all you care about is maximizing your clicks.
When that’s the case, you can use this strategy to let Google adjust your campaign automatically to get the most amount of clicks.
This is the simplest, most straightforward way to bid for clicks. All you need to do is set your average daily budget and Google will do the rest.
5. Maximize Conversions
On the other hand, if conversions are the main metric you’re using for success, you might want to look into a maximize conversions strategy.
With this strategy, Google will focus on optimizing your bid strategy to help you get conversions.
This is a good strategy to use if you want to spend your entire budget while getting the most conversions possible.
6. Target Search Page Location
If you want your ad to rank in a specific place on the search engine results page, this is a good strategy to consider.
Google will optimize your bidding strategy to get your ad to show up in a specific place.
7. Target Outranking Share
With this type of strategy, Google allows you to choose how often you want to outrank your competitors.
This is a good strategy if you’re focused on increasing the competitiveness of your ads.
8. Enhanced CPC
With this strategy, you can automatically adjust your manual bids to try to maximize conversions.
This is just an enhanced version of the manual CPC strategy. If you’re testing out CPC ads, this is a good strategy to learn more.
Ultimately, you should experiment and figure out which strategies work for your business. Even if you do an automatic bidding strategy, you should watch it carefully and monitor the results.

The Ultimate Timeline of Google Algorithm Updates (+ Recommendations)
Google is a fickle beast. The search engine is imperative to the success of your web content, but no one truly knows how the Google algorithm works (except for the elusive Google search-quality team, of course).
Google’s search engine is also ever-changing. Google didn’t become the number one search engine in the world without prioritizing its user experience. It achieved this leading position by continually updating its algorithm to meet its user’s needs and delivering the best possible results (not to mention engaging users with new daily doodles on the Google homepage).
If your content doesn’t keep up with these Google algorithm updates, you risk losing valuable space on the search engine result page (SERP) … as well as potential visitors, leads, and customers.
In this guide, we’ve covered everything you need to know about the Google algorithm, its nine most recent updates, and how your company and content can follow suit.
While the exact number isn’t certain, SEOs believe there are certain ranking signals that Google considers when displaying results. These include factors like keyword usage, domain history, site usability, and more.
This is why, as businesses and marketers, we must optimize our on-page SEO, off-page SEO, and technical SEO to make it easier for our pages to rank and so consumers can find our content.
Did you know over 3.5 billion Google searches are made every day? The search engine is by far the most popular among its competitors, which means the vast majority of your audience (and potential audience) is actively searching Google for information your website or blog can deliver.
How can you ensure your content ranks high enough on the SERPs to get your audience’s attention? By adhering to the Google algorithm and its updates.
Since its conception twenty years ago, Google has made thousands of updates to how its search engine works, including the ones in this timeline. In fact, the team makes small updates to its algorithm on an almost-daily basis.
Google also releases Core Updates a few times a year — you can read about Google’s recommendations on those here.
In this post, I’ve detailed nine of the biggest and most impactful Google algorithm updates in chronological order.
1. Google Panda (2011)
Release date: February 23, 2011
Google released the Panda Update to combat thin, duplicate, or plagiarized content, keyword stuffing, content farms, websites with high ratios of ad-to-content, and other quality issues. It was also released to reward unique, high-quality content.
Google Panda gives every web page an internal quality score that attempts to mimic human qualification, i.e. how a human might respond to and rank a piece of content. This score is then factored into how each website ranks on the SERPs.
Panda was originally introduced as a filter for search engine results, but in January 2016, it was added to the core algorithm.
How to adjust for the Google Panda Update:
- Use a site crawler like Botify or Screaming Frog to identify thin (e.g. low word-count or duplicative) content on your website and blog. If you find any, consider combining and/or archiving those pages.
- Ecommerce sites are especially vulnerable to duplicative content — in these cases, use canonical URLs to indicate to Google which version of each page should be prioritized in the SERPs.
- Rewrite and update content to reflect better grammar, syntax, and language. Keep content formatting consistent.
- Remove or rework any low-quality or underperforming content. (You can identify this content based on low traffic and/or low conversion rates.)
- Focus on creating genuinely unique content that provides unique value to your visitors and customers. Google provides 20+ questions to help you determine quality and value.
2. Google Penguin (2012)
Release date: April 24, 2012
The Google Penguin Update was released to combat black-hat link building techniques, such as spammy links, link directories, and keyword-stuffed anchor text. Google calls them “black hat webspam” and defines them as “techniques that don’t benefit users, where the intent is to look for shortcuts or loopholes that would rank pages higher than they deserve to be ranked.”
Prior to the Penguin Update, link volume — regardless of quality — was a heavy influence on how pages ranked on the SERPs. Penguin attempts to better understand how websites were earning their links and ensure that only high-quality, trustworthy, and relevant links were rewarding the sites they led to.
Google Penguin only affects inbound links — the links leading to a site, not away from it. Penguin monitors for black-hat link building techniques and over-optimized anchor link text. This is when too many inbound links for one website contain the same anchor text, which can alert Google that the links aren’t natural or earned.
Penguin was also added to the core algorithm in late 2016.
How to adjust for the Google Penguin Update:
- Follow white-hat link building techniques to build high-quality, relevant backlinks.
- Don’t participate in Private Blog Network (PBN) link schemes, which often lead to site penalties.
- If you hire an agency or freelancer for link-building, make sure you ask how they’re building links. No money should be exchanged between the agency and the person or organization linking to your site.
3. Google Hummingbird (2013)
Release date: August 20, 2013
Google released the Hummingbird Update to provide a more conversational, human search experience. Google wanted to better understand the context of what people were searching for — versus the specific terms within their search query.
The Knowledge Graph was introduced the year before, but Hummingbird improved upon this feature. This update also brought about Google Authorship, which was discontinued in 2014.
Hummingbird uses natural language processing that includes semantic indexing, synonyms, and other features to interpret queries and produce results. It weeds out keyword-stuffed, low-quality content to create a more personalized, accurate search process and show SERP results that matched searcher intent.
How to adjust for the Google Hummingbird Update
- Focus on conceptual content, not simply keyword-driven content. Expand your keyword research to include different phrasing, commonly asked questions, and similar terms.
- Use tools like AnswerthePublic to expand on context when doing keyword research.
- Conduct competitive analysis by searching your keywords on a new Google SERP and see what related content and SERP features (like Knowledge Graphs or featured snippets) pop up.
4. Google Pigeon (2014)
Release date: July 24, 2014 (in the US) and December 22, 2014 (in the UK, Canada, and Australia)
Google released the Pigeon Update to better calibrate the local algorithms with the core algorithm. The goal of this update was to reward local businesses that have a strong organic presence with better SERP visibility. It was also to answer user search queries with accurate local results influenced by traditional web search ranking signals.
Pigeon treats local search the same as traditional organic search, just with local cues. It considers searcher location when displaying SERP results, and allows searchers to treat Google Search and Google Maps the same. For example, you can search “best accountant near me” in both engines, and the results should be similar.
How to adjust for the Google Pigeon Update
- Leverage on-page SEO and off-page SEO tactics to ensure Google recognizes your business’s location and other local ranking factors.
- Create content and media that associates your business with a specific location, such as a neighborhood, town, or city. This will help improve your local SEO.
- Register with Google My Business to manage how your business information appears on Google SERPs. Create and manage profiles on other important directories like Apple Maps, Facebook, Factual, Foursquare, Superpages, and Yelp.
- Make sure your location information is consistent across all your web properties, i.e. your website, social media, Yelp listings, etc.
5. Google Mobilegeddon (2015)
Release date: April 22, 2015
The Google Mobile Update (nicknamed “Mobilegeddon”) officially incorporated mobile-friendliness as a ranking signal. The update prioritized mobile-friendly websites on mobile SERPs, and the sites that weren’t mobile-friendly were either penalized or removed from the SERPs altogether.
Mobilegeddon was yet another effort by Google to continue providing the best possible search experience for its users. “When it comes to search on mobile devices, users should get the most relevant and timely results, no matter if the information lives on mobile-friendly web pages or apps,” Google announced in 2015.
Mobilegeddon penalizes websites that aren’t mobile-responsive and rewards those that are. It only affects mobile searches and individual web pages (not entire websites), and it affects queries and websites globally, in all languages.
(Since Google moved to mobile-first indexing, however, the mobile-friendliness of your site now impacts how you rank for every query.)
How to adjust for the Google Mobilegeddon Update
- Confirm your website is mobile-optimized! (Here’s a blog post on how to do this.)
- Use Google’s Mobile-Friendly Test tool to see how your website performs. This tool will show you how your site looks on a mobile device and alert you to any loading or processing problems.
6. Google RankBrain (2015)
Release date: October 26, 2015
The Google RankBrain Update was part of Hummingbird. RankBrain is a machine-learning powered component of Google’s algorithm that works to better understand searcher intent and deliver the most accurate, relevant SERP results.
Many SEO strategists believe it serves to measure how searchers interact with search results and then ranks the results accordingly. (This could explain why your SERP looks different when you search for the same thing multiple times.)
It has also been theorized that the RankBrain algorithm identifies relevance features for the websites that rank for a given query, establishing query-specific ranking factors and signals.
Google has called RankBrain the third-most important ranking signal.
How to adjust for the Google RankBrain Update
- Refer to the recovery steps recommended for the Hummingbird Update.
7. Google Snippet Length Increase (2017)
Release date: November 30, 2017
Google’s Snippet Length Increase Update increased the Google meta description length from 155 to 300, almost doubling the word count. The goal of this update was to provide more useful descriptions of web pages and help searchers better understand how a result might be relevant to their query.
For about six months, meta description lengths were reported to be between 160-300 characters (depending on the search and resulting content), but as of May 13, 2018, Google rolled back most snippet lengths to about 150 — where they originally were.
How to adjust for the Google Snippet Length Increase Update
- Given that Google rolled back their meta descriptions to their original length of ~150, we don’t recommend changing your snippets at this time.
- Keep your descriptions under 150 characters to ensure the full snippet shows up on SERPs.
8. Google Mobile-First Indexing (2018)
Release date: March 26, 2018
The Mobile-First Indexing Update was another nod from Google to those websites that are using a mobile-friendly website.
Here’s how Google explains: “[Historically,] our crawling, indexing, and ranking systems have typically used the desktop version of a page’s content, which may cause issues for mobile searchers when that version is vastly different from the mobile version. Mobile-first indexing means that we’ll use the mobile version of the page for indexing and ranking, to better help our – primarily mobile – users find what they’re looking for.”
When producing search results, Google will continue to pull from a single index of data; this update means they’ll be populating more of this index with mobile versions of website content. Also, this update primarily affected how websites are indexed, not how they are ranked — but that’s not to say it’ll affect rankings down the line.
“Having mobile-friendly content is still helpful for those looking at ways to perform better in mobile search results,” Google says. “[But] we may show content to users that’s not mobile-friendly or that is slow loading if our many other signals determine it is the most relevant content to show.”
How to adjust for the Google Mobile-First Indexing Update
- As always, ensure your website is mobile-friendly. (If you have AMP and non-AMP pages, Google will prefer to index the mobile version of the non-AMP page.)
- If you have separate URLs for your mobile site (an m-dot site), confirm that your mobile page reflects the same content as your desktop site. (Google prefers to index your mobile URL.)
- Make sure structured data and metadata are used on both your desktop and mobile versions.
- Read through Google’s best practices for how to prepare for mobile-first indexing.
9. Google Medic Update (2018)
Release date: August 1, 2018
The Google Medic Update was the third, broad, core algorithm update of 2018. The disproportionate impact it has on sites in the health and wellness industries is how it received its nickname. However, it didn’t target those industries; it also had a large impact on websites in all other industries.
In general, SEO specialists theorized that the Medic Update was another update that targeted “quality” issues like thin, duplicate content, slow load times, inaccurate title tags, and bad user experience.
Unlike the other updates on this list, the Medic Update didn’t target a specific type of web content or release a new part of the core algorithm. However, Google released an official statement about it: “There’s no “fix” for pages that may perform less well other than to remain focused on building great content. Over time, it may be that your content may rise relative to other pages.”
How to adjust for the Google Medic Update
- Make sure your off-page SEO and technical SEO are intact and that there are no underlying issues.
- Continue to produce helpful content that provides unique value to your visitors.
- Follow white-hat link building techniques.
10. Google BERT Natural Language Processing Update (2019)
Release date: October 25, 2019
The Google BERT (Bidirectional Encoder Representations from Transformers) update was an effort by Google to better understand the language in which people search. It’s similar to RankBrain and serves as an additional effort to understand searches; it didn’t replace it.
BERT was a significant search algorithm update. As reported by Google: “With the latest advancements from our research team in the science of language understanding … we’re making a significant improvement to how we understand queries, representing the biggest leap forward in the past five years, and one of the biggest leaps forward in the history of Search.”
In short, BERT helps Google users find useful and accurate information. The update allows Google to capture more of the nuance and context in queries and not lean so heavily on the use of prepositions or phrasing to clarify questions. (Check out some live examples of BERT here.)
BERT was also applied to featured snippets in over two dozen countries and languages.
How to adjust for the Google BERT Update
- Focus on writing high-quality, clear content and avoid writing for machines (as BERT) is Google’s effort to not be a machine.
- Refer to the recovery steps recommended for the Hummingbird Update.
Grow Better with Google Updates
As a business owner and marketer, these Google updates may seem repetitive, detailed, and a lot of work. You’re not wrong. When I first reviewed these and considered the changes I needed to make to my website, I’ll admit I was a little overwhelmed.
But it’s important to remember that Google wants to create a fantastic search experience for its users … including you and me. These algorithm updates are designed to prune out the lazy, low-quality, and illegal content that’s not only filling up our search queries but also competing with our own business and marketing content.
In short, these algorithms are good things! It’s up to you to use them to your advantage.
Editor’s note: This post was originally published in August 2019 and has been updated for comprehensiveness.

Understand Market Penetration and How to Create a Strategy
Everyone wants their business to grow. This seems pretty intuitive considering effective and successful growth means your business is experiencing boosts in revenue, brand awareness, brand loyalty, and more — and we know this to be true by looking at the most successful and well-known companies today (e.g. Apple, Amazon, etc.).
The question is: What do these highly-successful companies do to ensure they put themselves in a position for strong and consistent growth?
Of course, there are a number of answers to this question based on who you ask. However, the one we’re going to focus on in this blog post is market penetration. So, what is market penetration?
How to Calculate Market Penetration
If you’re using market penetration as a measurement, use the following formula to discover how much a product or service is used by customers compared to its total estimated market. In other words, take the current sale volume for your product or service and divide it by the total sale volume of all similar products available in the market.
(Number of Customers / Target Market Size) x 100 = Market Penetration Rate
Frequently monitoring your market penetration is important in order to identify any increases or decreases in penetration. If you’re wondering how often to calculate market penetration, a good rule of thumb is to calculate it after every marketing and sales campaign you run. This will highlight any changes in penetration — and, as a result, you’ll also have a better idea of the success of your campaign(s).
Next, let’s dive a little deeper into what market penetration is and why it’s such an effective growth strategy.
Understanding Market Penetration
A company can use market penetration at the industry level to review potential for specific products or services or on a smaller scale as a way to gauge the market share of a product or service. It offers insight into how the market and your customers view your product or service.
What is high market penetration?
When it comes to market penetration, you want yours to be high. There are many benefits to high market penetration.
For instance, think about Nike. The company is a market leader in athletic shoes. When you go to the sneakers section of a store like Foot Locker or Dick’s Sporting Goods, Nike consistently takes up a large portion of the space.
That’s because retailers like Foot Locker and Dick’s know Nike delivers in sales. They also know their customers expect a wide selection of Nike products in their stores. Nike’s popularity and brand name warrant better shelving space and visibility, too. This is all a result of Nike’s high market penetration.
Similar to Nike, when you have a high market penetration…
- You’re an industry leader.
- You sell products or services that are already established within the industry.
- You have a widely-recognized brand.
- You have good visibility in the market.
- You have strong brand equity.
- You likely make your product for less than you would be able to if you were a less-established business due to the scale of your operation.
- You have a high sale volume which means you have leverage among suppliers and sellers.
High market penetration offers marketing advantage and more potential for continued growth and success as a business. Needless to say, high market penetration is the goal — but, how do you achieve it? Well, market development is a good place to start.
Market Development vs. Market Penetration
You may have heard of the term market development used in relation to market penetration before. Market development is a necessary strategy or action when trying to increase market share or penetration — it requires a clear set of steps that will lead to a boost in the number of potential customers. To increase market penetration, first focus on market development. Let’s look at an example.
Example of Market Development Increasing Market Penetration
A successful leggings brand, Booty by Brabants, has made waves in recent years in the athletic-wear industry. The brand has established itself as a seller of high-quality and unique leggings for women of all sizes.
By reviewing their market penetration, BBB was able to identify a small, existing market they could tap into — kids leggings. They determined that selling kids leggings could help them broaden their target audience and customer base for little added cost and effort.
Although BBB Kids leggings aren’t a major source of revenue for the company, they’re complementary to its existing product line and bring in new customers. BBB was able to identify an existing market they hadn’t taken advantage of yet and determine clear steps to successfully enter that market. As a result, they expanded their product line, customer base, and market penetration.
Now, let’s look at the most effective ways to get started on your market penetration strategy.
As you begin working on your market penetration strategy, you may hear the words: Ansoff Matrix.
The Ansoff Matrix is a tool with four growth strategies listed for businesses to consider.
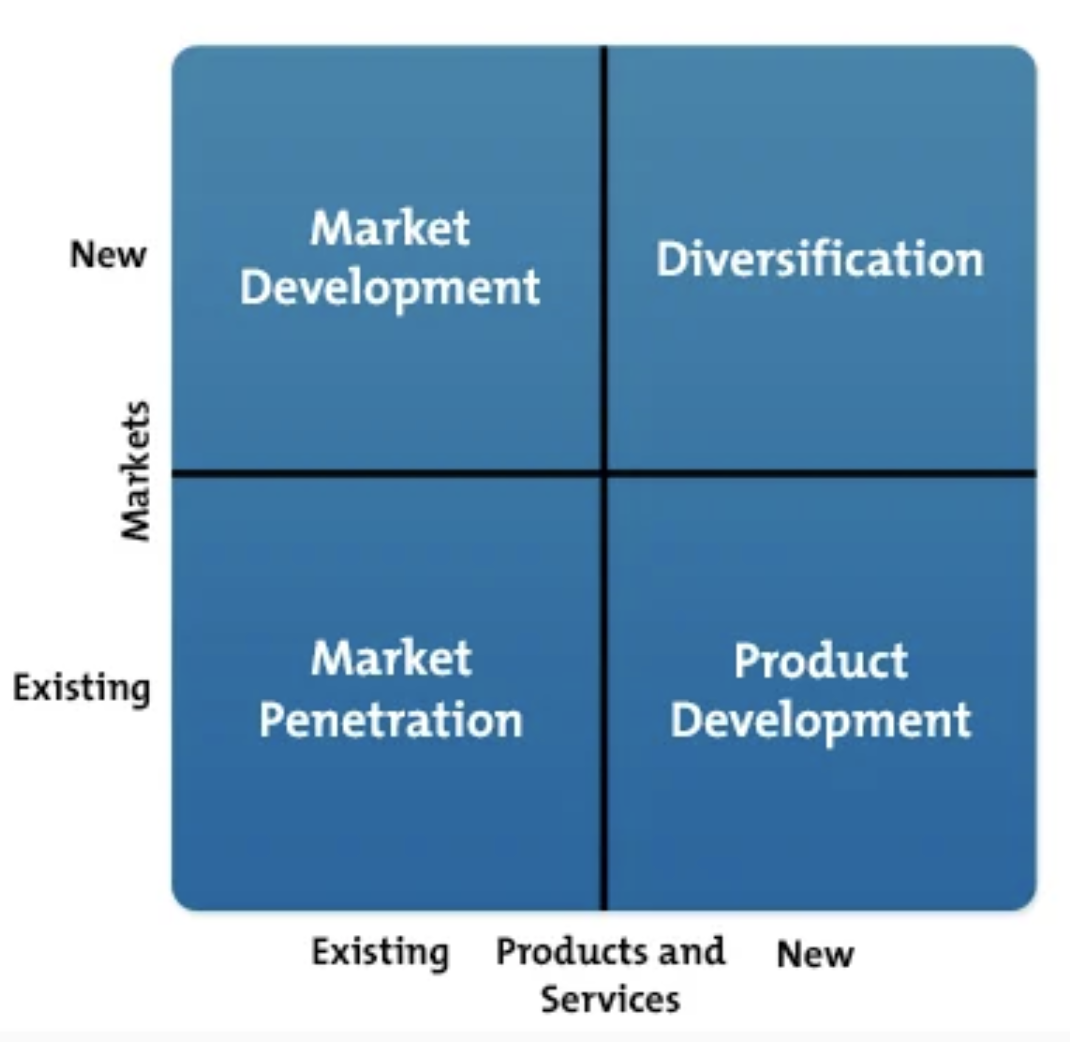
As you move right and up on this matrix, the growth strategies become riskier for businesses. We’ve included information about the Ansoff Matrix in this article because it further proves and highlights the fact that market penetration is a highly-valuable and achievable way to effectively grow a business, even for the risk averse.
At this point, you might be wondering about the specific strategies under the umbrella of market penetration that you can deploy at your company — let’s talk about some of those next.
Market Penetration Strategies
Here are some examples of effective market penetration strategies that you may choose to focus on and/or implement at your company.
Change your pricing.
Lower or raise the cost of one of your products.
Revamp your marketing.
Rework your marketing plan and/or roadmap.
Identify the need for a new product and launch it.
Survey and analyze your customers and target audience to identify the need for a new product (or feature). Then, create that product and sell it.
Update or change your product (or a specific feature of your product).
Resolve the challenges of your customers and buyer personas more effectively by updating or changing a product or feature.
Grow business in new territories and offer for franchise opportunities.
Identify new territories in which you can expand and grow business. Ask yourself: Which new areas can we open our stores or prospect and perform outreach? You might also begin offering franchise opportunities to expand your brick-and-mortar business.
Identify a business partner to work with.
Partner or merge with another business in a way that’s mutually beneficial (e.g. run a co-marketing campaign).
Purchase a small business or competitor in your industry.
If you have the resources, consider acquiring a small business or competitor in your industry to broaden your base of customers and your offerings/ capabilities. (HubSpot did this a while ago.)
Offer a promotional program to boost loyalty.
Give customers an opportunity to sign up for a loyalty program that provides them with perks in return for giving you their contact information (e.g. discounts, birthday gifts, inside information, etc.).
Develop a new marketing campaign.
Create and launch a marketing campaign or initiative to promote your product line in a unique and new way that your customers haven’t seen before. Analyze your campaign’s success so you can refer to it in the future.
Boost sales rep activity.
Encourage sales reps to increase the number of interactions they have with qualified prospects (e.g. focus on social selling and meeting prospects where they are).
Lastly, let’s look at an example of market penetration in action.
What’s an example of market penetration?
There are a number examples of companies using market penetration to grow their business. For the sake of this piece, let’s look at Dunkin’.
Dunkin’ (formerly, Dunkin’ Donuts) was started in Quincy, MA back in the 1940’s. Since, Dunkin’ has become a globally-recognized brand. Dunkin’ has since grown substantially and opened stores in 46 countries — yet, the company’s most-loyal customers remain in New England. In fact, there are 12,500 Dunkin’s worldwide (9,000 of which are in the U.S.) — yet, over one-third of Dunkin’s stores are located in New England. In terms of market penetration, Dunkin’ continues to tap into their large and loyal market by opening and maintaining that large portion of their stores in New England.
Check out the following map for example — Boston is a small city, and you can walk between almost all 10 of these Dunkin’ locations in just minutes.
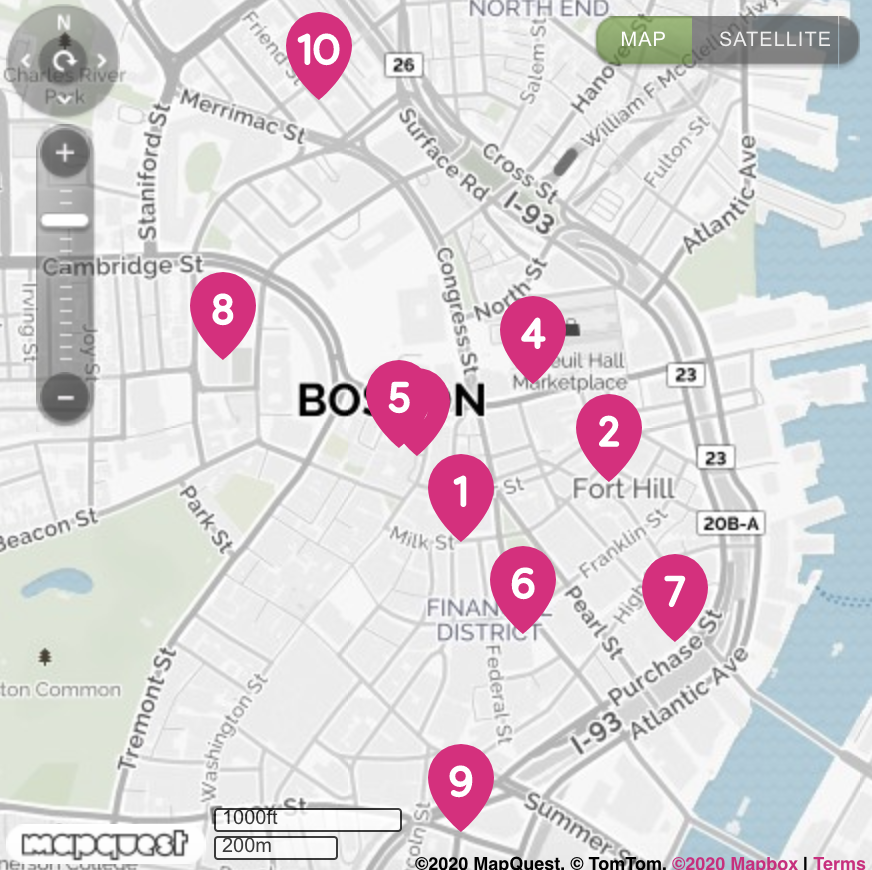
Dunkin’ knows where their customers are and that those customers want a Dunkin’ store every… well, city block.
Not only has Dunkin’ successfully penetrated their market by opening and maintaining so many stores in New England, but they’ve also increased market penetration by making specific changes to their branding and menu.
Most notably, they changed their name from Dunkin’ Donuts to Dunkin’. The company does 60% of their business in coffee and other drinks, so the “Donuts” aspect of their original name was arguably a bit misleading. The CEO of Dunkin’ said this move was important because the new name, “… speaks to the breadth of our offerings.”
The brand name change also gives a signal to customers that there are a number of other menu items available, aside from donuts. In fact, the name change was paired with many menu additions, including healthier options as well as offerings for non-dairy and vegan customers including their Beyond Sausage and almond milk.
All of these changes broadened Dunkin’s customer base and target audience by accommodating more people within the market they were already penetrating.
Invest in Market Penetration to Grow Better
We just covered a number of reasons why market penetration is so beneficial to your business’s long term success. And as you’ve learned throughout this blog post, it’s a highly-effective growth strategy that’s typically low-risk.
There are a number of market penetration strategies to choose from, plan, and implement at your company, so pick the best option for your goals and get started.

How to A/B Test Your Pinterest Ads: A Step-by-Step Guide
Pinterest is ideal for sharing visual content and discovering new ideas. Personally, I’m a huge fan of the platform and use it as a source of inspiration — I make Pinterest boards related to my interests (travel, style, etc.).
Pinterest is a unique social platform in many ways but one similarity it has with many other platforms is that it has ads located throughout the feed.
Enter: business opportunity.
In a letter to shareholders last year, Pinterest stated that its revenue from shopping ads grew over 100% from the first to second half of 2019. Pinterest’s 335 million active users are always searching for new ideas and your ads can be a great way to pique their interest.
An effective way to determine which types of ads grab the attention of your target audience members on the platform is to use A/B testing.
A/B Test Your Pinterest Ads
We have a complete guide to A/B tests here, but I’ll give you the long story short.
The goal of A/B testing — which is also referred to as split testing — is to run simultaneous experiments between two marketing variables to determine which results in a better conversion rate.
When it comes to Pinterest ads, the variables you decide to test may include your copy, call-to-action, and/or visual. A/B testing these types of variables allows you to understand what speaks most to your audience so you’re able to serve ads that speak the right message to your target audience at the right time.
Next, let’s review the steps involved in this process.
How to A/B Test Pinterest Ads
1. Set up a Pinterest business account.
To run ads on Pinterest, you’ll need a business account on the platform. Create one by signing up on Pinterest’s homepage or by adding a business account to your existing personal account under Settings.
Some basic information about your business will be required when you register including your company name, website, and industry.
2. Create an ad campaign.
To A/B test ads, you’ll need to create an ad campaign to serve as the home base for the experiment. You can get started by going to the Ads drop-down in the top menu and then clicking Create ad.
You’ll be taken to Pinterest’s ad creation dashboard where you can create campaigns based on a business goal of awareness, consideration, or conversion. Choose your objective and Pinterest will work hard to help you meet your goals.
Scroll down a bit more to name your campaign and assign spending limits. While it’s easier to name a campaign something simple like, “Mug 1,” it’ll help you stay organized and focused on your goals if you’re more descriptive. For example, consider a name such as “US – Brand name – Mugs – Ocean Mug” so the ad location, product brand, product category, and product name are included.
As for the spending limit, this is Pinterest’s way of ensuring they stay within your budget. This field is optional to include, but can help to prevent overspending and will not affect your campaign pacing. (More on this in step four.)
3. Define your audience.
Now, it’s time to hone in on your target audience. As you go through these steps, you’ll see Pinterest automatically adjust the potential audience size you might reach on the right-hand side.
Sticking with mugs as a product example, see how Pinterest adjusts my audience size from 85m+ to 158k-175k once I added mugs in the Add interests section. The “Search all interests” search bar is a quick shortcut to help you find your niche. The decrease in potential audience size is not something to worry about.
In fact, you want to focus on a smaller audience to ensure you’re actually targeting people who are likely to be interested in what you have to offer.
As you work through this page, you’ll get several more opportunities to define your audience. In the below section, you can add more detail about audience demographics when you choose the “Pick specific…” criteria option.
4. Craft your ad delivery strategy.
Alright, it’s time for some spending. In the Budget & schedule section, you’ll be asked to assign a budget to your campaign, meaning how much money you’re willing to spend for Pinterest to distribute your ads.
You can choose how much to spend per day (daily budget) or allocate a total budget and let Pinterest calculate how to best spend the money (lifetime budget). You also have the freedom to decide when to begin and end your campaign down to the exact time and date.
In Optimization & delivery, select how you would like to bid for your ads, since ads are served based on which advertiser wins the highest bid. The choice is up to you, but it’s worth noting Pinterest optimizes your budget in automatic mode.
5. Create and upload the ads you’ll A/B test.
Here’s your opportunity to get a little creative. Design two versions of your ad with a difference in the variable you’re testing. When creating the ads, only focus on one variable you want to test (e.g. product picture, ad copy, ad layout) for best results. Services such as Canva or PicMonkey are simple online design tools to help you get started.
In the mug example below, the product picture is the single variable and it’s the only difference between the two versions. This allows for clear and actionable results.

Next, upload your ads into the Ads section. The ads will be formatted like any other pins on the platform, so fill in all the necessary information. You definitely don’t want to miss the destination link, which takes users to your site!
6. Launch your ad campaign.
Now we’re ready for takeoff! Select your A/B ads and click that red Launch button — which I know you’ve been eyeing throughout this whole process — to send these ads out into Pinterestverse.
Kick back, relax, and check this task off your to-do list!
7. Observe and gather ad results.
When the ad campaign is underway, you might be eager to constantly check its progress in the ads overview dashboard.

I’m there with you, but be wary of jumping to conclusions. You’ll want to give your test enough time to produce statistically significant results before analyzing, which can take anywhere from hours to weeks. In simpler terms, you’ll want to get your ads in front of as many people as you can before parsing the data.
We created a free significant test calculator to help you out, along with all other tools you’ll need to run effective A/B tests.
You did it! Kudos on your Pinterest A/B test, but the work doesn’t stop there. Ads are a continuous game of experimentation. Build on your test results and consider other variables you can test in the future. Your consistent effort will improve your overall ad performance and increase conversions. Good luck!

15 Effective Ways to Cut Costs in Business
When I first moved out of my parent’s house, my spending was out of control. I bought take-out regularly, new clothes often, and fun products frequently.
However, I quickly realized that I was spending too much money on unnecessary things.
After racking up some credit card debt, I realized that I needed to cut costs somewhere.
As a business owner, it can be just as easy to overspend as it was for me.
When that happens, it’s time to review your bottom line and see how you can reduce your spending.
In this post, let’s go over some of the top ways you can cut costs in your business.
1. Analyze and track the efficiency of your business.
Before you can reduce costs in your business, you need to take a step back and analyze what you’re currently spending money on.
Take a look at your balance sheet and your budget. Look at your production costs, and do an in-depth analysis of your current processes.
Asking yourself questions like, “Is what I’m doing efficient?” and “Am I spending needless money somewhere?”
Once you have a full picture of what your spending looks like, you’ll have a better idea of where you can cut costs.
2. Negotiate with your vendors.
A great way to cut costs in business is to negotiate with your vendors. You should price shop and compare vendors in almost every area of your business.
For example, if you’re deciding on insurance providers or looking at supply costs, you should communicate with the sales reps that you’re looking at other companies as well.
This will let them know that you aren’t afraid to walk away and are ready to negotiate costs based on your research.
3. Bring efforts in-house.
Outsourcing can make sense if you don’t require a full-time employee to do a task. However, bringing your efforts in-house might save you money if you’re outsourcing several projects that could be assigned to one person in-house.
To decide if you need to bring efforts in-house, take a look at your current outsourcing budget, and compare it to the cost of one part-time or full-time employee.
4. Eliminate products that don’t sell well.
Developing products requires time and money. Instead of selling a bunch of products that don’t sell well, focus on the products and services that make the most money.
By concentrating on the products that sell, you can deliver higher quality products. Plus, you won’t waste money on the services that aren’t selling.
5. Hire the right people.
Hiring the right people is important for several reasons. If you choose employees that have specialized skills and are experts in their field, you’ll have an efficient staff.
When your employees aren’t sure how to complete a task, they’ll spend time researching and learning about it on your dime. That can possibly waste both time and money.
If you focus on hiring the right people, you won’t have to worry about whether your staff knows what they’re doing.
Additionally, you should also hire for culture fit as well. You don’t want to have too much turn over, because that can also waste money.
6. Crowdsource when necessary.
While you should bring efforts in-house if you’re spending too much money on outsourcing, if certain tasks don’t require a full-time employee, you can work with freelancers.
Freelancers are generally less expensive because you only have to pay for labor on a certain task. You won’t need to pay for benefits or training.
If you don’t need to have a full-time staffer on board to complete an assignment, consider using freelancers.
7. Evaluate your technology.
One of the top ways that businesses waste money is by subscribing to software you don’t need or stopped using.
It’s important to evaluate your technology needs on a regular basis and ensure your software is up to date.
You can hire an IT person to be in charge of consolidating your software needs and make sure you don’t overspend on technology.
8. Consider a remote set-up.
When I was in college, I worked on a fully remote team of 10 people. If you’re running a small business that doesn’t necessarily require a physical office space, you should consider going remote.
Office space is one of the most costly expenses that companies spend money on, and you might not need to.
In fact, not all companies require physical space. Some positions are suited perfectly fine to a remote set up. This could end up saving you thousands of dollars a month.
9. Buy in bulk.
Of course, a great way to save money is to make purchases in bulk. However, when you do this, make sure that you’re saving money.
Not all items need to be bought in bulk. For example, if your team doesn’t drink a lot of coffee, you don’t need to make that purchase in bulk. However, if your team can drink through bulk coffee quickly, then buying it in bulk will save you money. It just depends on your needs.
To save money, evaluate which items should be bought in bulk and which items can be bought on a smaller scale.
10. Participate in loyalty programs.
Let’s say your company spends money on paper every month. This is probably a repeat purchase that you’ll likely continue making for the duration of your business.
With these types of purchases, you should do some research and see if your suppliers offer loyalty programs.
You might be able to save money from the stores that you make purchases from all the time.
Additionally, you could also work out a trading system with other companies. Don’t be afraid to talk to other business owners and see if you can work out a system with them.
11. Become eco-friendly.
Environmentally friendly appliances are great for the environment, as well as your budget. That’s why you should consider becoming eco-friendly with your purchases.
For example, you could consider going solar, buying an eco-friendly fridge for your kitchen, etc. A lot of appliances can be made eco-friendly and save you money.
12. Treat employees well.
When employees are happy, they become advocates for your company and will want to stick around. This means you’ll spend less money on training and onboarding.
When companies are more focused on the bottom line than their employees, they’ll likely experience a lot of turnover.
I’ve seen this first hand and having a rotating door of employees will end up costing you more money than just treating your employees well from the start.
13. Consider bundling your services.
This might seem like a simple suggestion, but a lot of purchases can be bundled together. If that’s an option, you should consider it.
For example, services such as phone and internet are usually bundled together. Bundling services will typically save you money.
14. Automate processes.
When your processes can be automated, you should do it. This means you’ll spend less money on labor and you’ll have a more streamlined process in place.
For example, if you use marketing automation software, your marketing team won’t have to manually post on social media or send emails every morning. Instead, they can automate that process and it’ll save them time and save you money.
15. Use reward credit cards.
As a business owner, you’re going to spend a lot of money. That’s why you should spend money wisely.
For example, you can get a business credit card to charge things to so you can make use of rewards or cash-back programs. This way your purchases will add up to rewards and bring you money back.
When it comes to reducing costs in business, it’s not about looking for ways to cut corners or take advantage of your employees. It’s about streamlining your processes so they’re working for you.

How to Manage Virtual Teams: Team Building, Tips & Tools
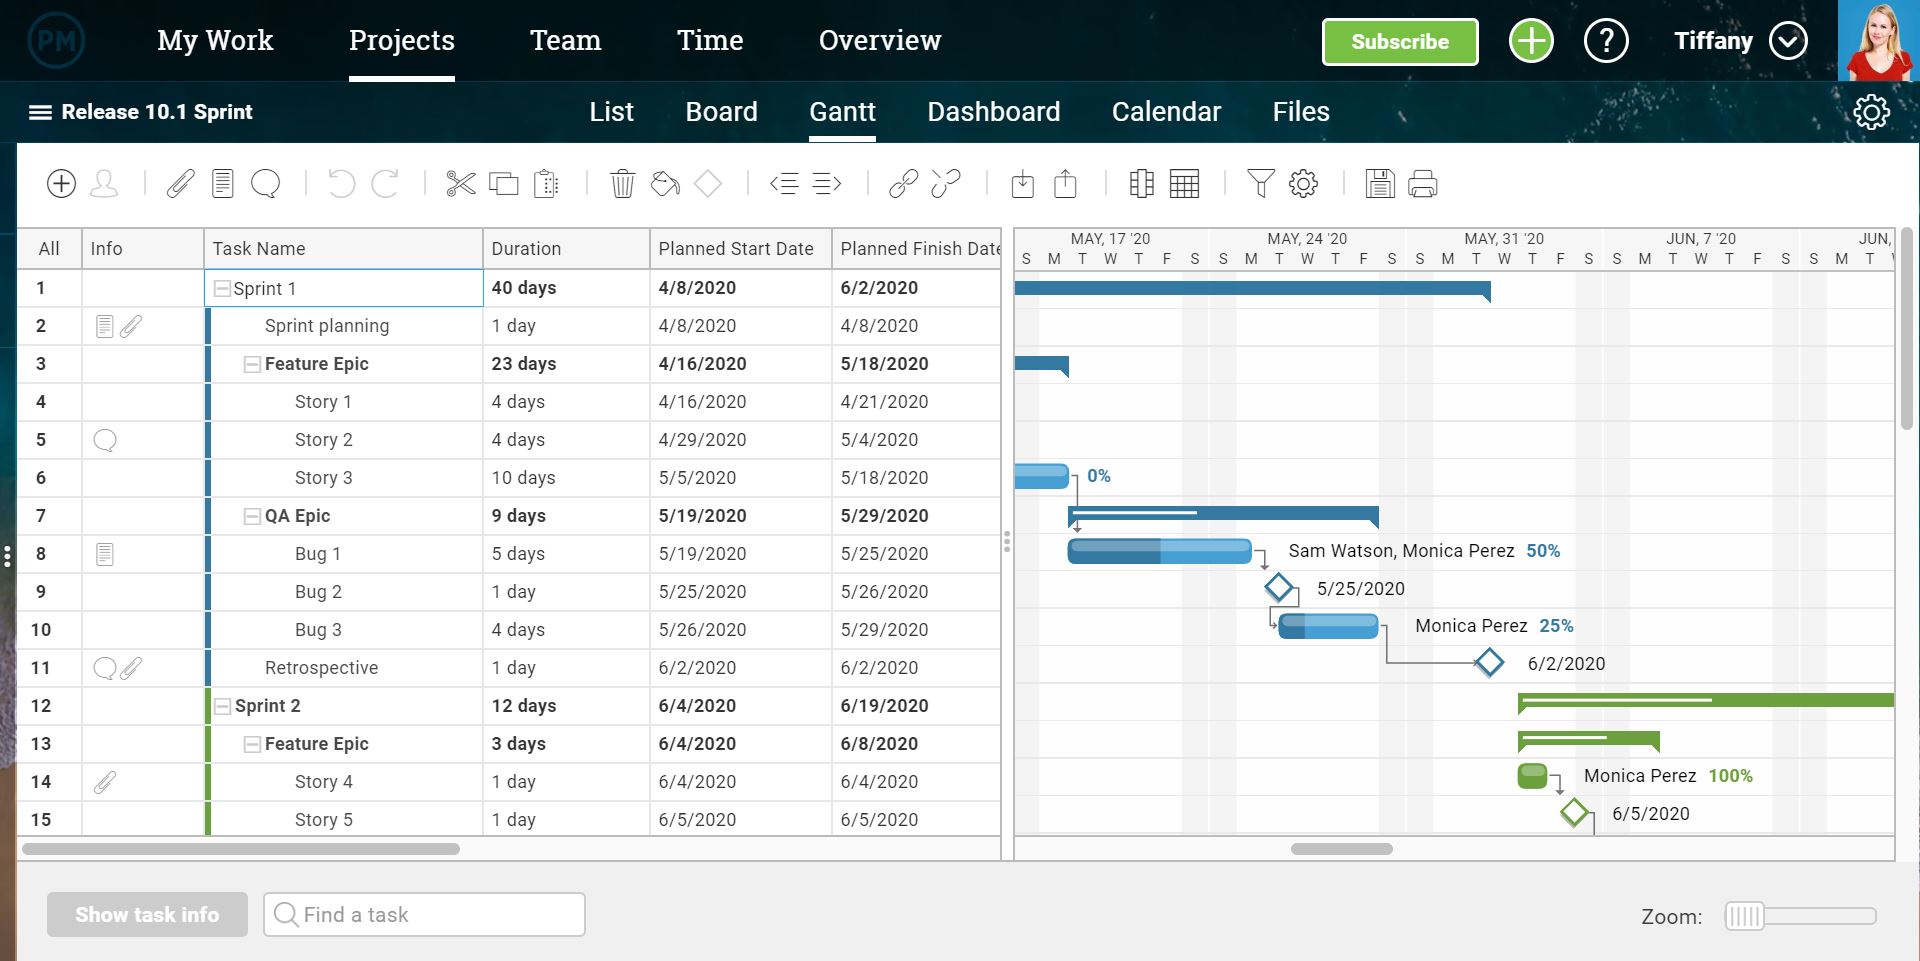
How to Plan a Facebook Ad Campaign for the Holidays
Are you planning to use Facebook ads to promote your products or services this holiday season? Looking for a process to ensure your campaigns succeed? In this article, you’ll discover five key steps to get the best results possible from your Facebook ad campaigns during the peak holiday sales periods. #1: Optimize Your Website for […]
The post How to Plan a Facebook Ad Campaign for the Holidays appeared first on Social Media Examiner | Social Media Marketing.
from Social Media Examiner | Social Media Marketing https://ift.tt/3lk9KUJ
via socialmediaexaminer
How to Use Instagram: A Beginner’s Guide
Over the past few years, Instagram has seen exponential growth — from one million users in December 2010 to over one billion in 2020.
If you’re interested in getting an Instagram account, or just created one but aren’t sure how to use it, you’re in luck. Here, we’re going to cover all the basics, so you can see why Instagram is the top social media platform for engagement today.
It’s hard to remember a time before Instagram. “Do it for the ‘gram” has become a common saying, which means, essentially, “Do something so we can take a picture and post it to Instagram.”
If you’re not part of the one billion on Instagram, you might want to reconsider. The app is a great chance to stay apart of friends’ lives — when I want to see how my college friends are doing, I don’t check Facebook, I check Instagram. Plus, you can follow your favorite celebrities or political figures to see candid photos of their everyday lives.
Additionally, it’s a phenomenal platform for investigating what other brands are doing — for instance, Nike uses the Instagram Stories’ feature to promote inspirational athlete stories you won’t find anywhere else.
How to Sign Up for Instagram
- Go to the Instagram site on your desktop, or download the Instagram app from the App Store (iPhone) or Google Play Store (Android).
- If you’re on desktop, click “Log in with Facebook”, or fill in the form with mobile number or email, name, username, and password. Then click “Sign up”.
- On Android, click “Sign Up With Email or Phone Number”.
- On iPhone, select “Create New Account”.
- Enter your email address and phone number, then click “Next”. Alternatively, you can also sign up with your Facebook account on the app.
- Once you’ve filled out your username and password, you will be instructed to fill out your profile info. Then, tap “Done”.
- If you register with Facebook, you’ll need to log into your Facebook account if you’re currently logged out.
How Do Instagram Notifications Work?
When your account is created, you’ll want to adjust your notifications so you only receive the information you want. For instance, you can choose to receive notifications when you get likes from everyone — but, alternatively, you might decide to only receive notifications when you get a like from someone you follow. Or, you might turn off notifications for likes altogether.
You can adjust notifications to “Off”, “From People I Follow”, or “From Everyone”, for the following categories — Comments, Comment Likes, Likes and Comments on Photos of You, Follower Requests, Accepted Follow Requests, Friends on Instagram, Instagram Direct, Photos of You, Reminders, First Posts and Stories, Product Announcements, View Counts, Support Requests, Live Videos, Mentions in Bio, IGTV Video Updates, and Video Chats.
If you’re overwhelmed by that list, I get it — I am, too. If you’re unsure what notifications you want to receive, you might start with your notifications on “From Everyone”, and if certain notifications begin to annoy you, you can turn them off later.
To customize which notifications you receive, follow these steps:
1. Go to your personal account (which you’ll find by pressing the person icon at the bottom right of your screen). Then, click the “Settings” icon (the circle icon beside “Edit Profile”).
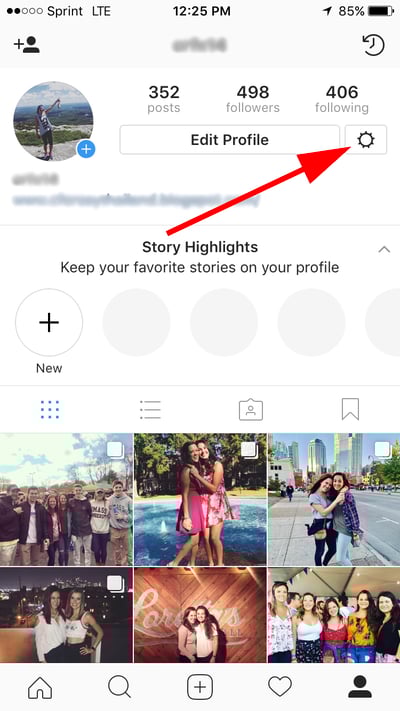
2. Scroll down to “Push Notification Settings”.
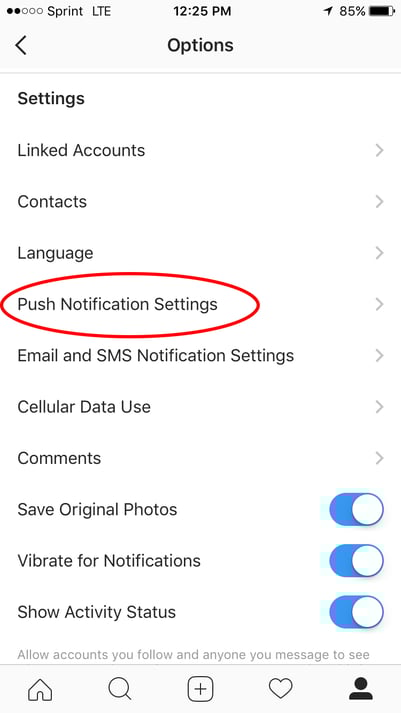
3. Check off the notifications you want to receive.
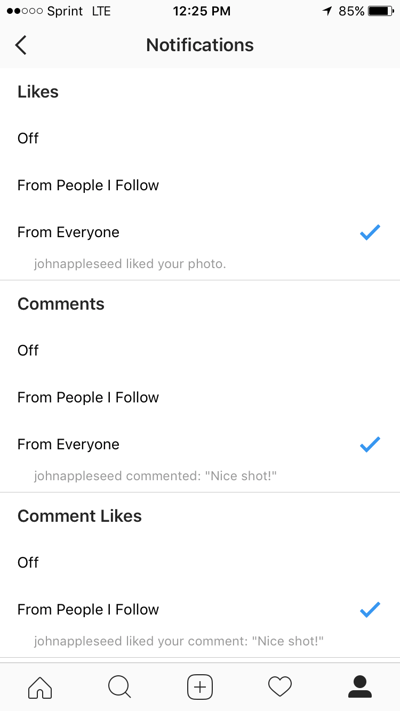
And that’s it! Next, let’s explore how to connect your other social media accounts to your Instagram, so when you post an image to Instagram, you can share it with your other online audiences, as well.
Connect to Other Social Accounts
When you post an image to Instagram, you have the option to share it on other social media accounts, like your Facebook or Twitter.
To link your other social media accounts to your Instagram, follow these steps:
1. Go to “Settings” and click “Linked Accounts”.
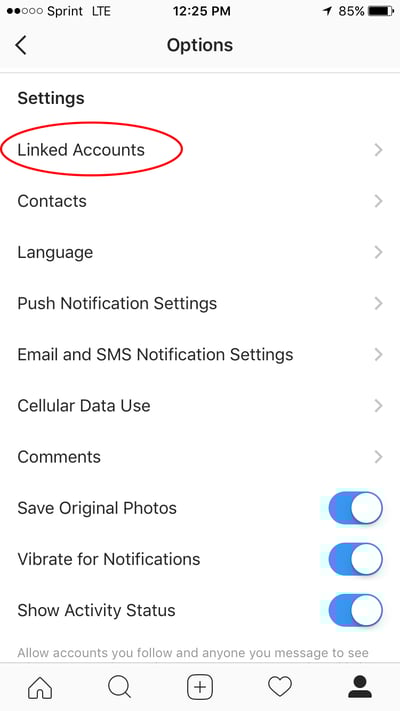
2. Select whichever social media channels you’d like to link to, and input the necessary information to incorporate the channel with your Instagram.
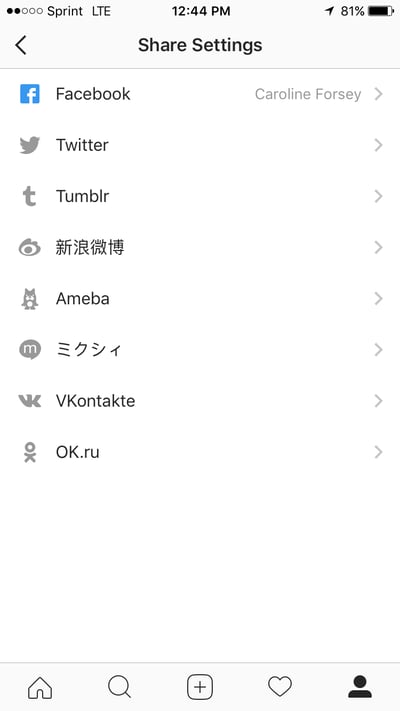
In the next section, “Upload, Edit, and Post an Image”, I’ll show you when a linked account comes in handy.
Upload, Edit, and Post an Image
Now, for the most important part of Instagram — how to upload and post an image.
Instagram is an entirely visual platform. Unlike Facebook, which relies on both text and pictures, or Twitter, which relies on text alone, Instagram’s sole purpose is to enable users to share images or videos with their audience.
On Facebook, you might choose to post 100 photos in an album. On Instagram, you need to be choosier about which photos you post. There are a few reasons for this — first, you don’t want to post more than once a day (typically). For the purpose of scarcity alone, you don’t want to post too many similar photos. For instance, it would be odd for you to post ten photos from the same beach vacation on your Instagram. Instead, you might choose one or two.
Additionally, you want your overall profile aesthetic to look diverse.
To learn more about Instagram account themes and get inspiration, take a look at “12 Stunning Instagram Themes (& How to Borrow Them for Your Own Feed)“.
Now that we’ve covered that, let’s explore how to upload, edit, and post an image.
1. Click the “+” icon in the bottom center of your screen.

2. Here, you have three options. You can look through your Photos library on your phone, you can take a new picture from right within Instagram, or you can take a new video. For our purposes, I looked through my Photos library and found a picture of Boston I wanted to use. Then, I clicked “Next” in the top right.

3. There are two categories you can use to edit your image — “Filter” and “Edit”. Instagram automatically shows you filters first. You can scroll through the carousel and click any of the filters to apply it to your image. Additionally, if you want to use a filter but you want to tone it down, double tap the filter and move the cursor to the left to lessen the intensity of the filter.

4. Next, click “Edit”. Here, you can adjust contrast, brightness, structure, warmth, and more. When you’re happy with your edited image, or if you don’t want to edit it at all, click “Next” in the top right.

5. Now, you can add a caption, tag people (you can only tag someone if they also have an Instagram account), and add a location. Additionally, click the button beside Facebook or another linked social media account to share your image on that platform, as well. When you’re ready to publish, click “Share” in the top right.
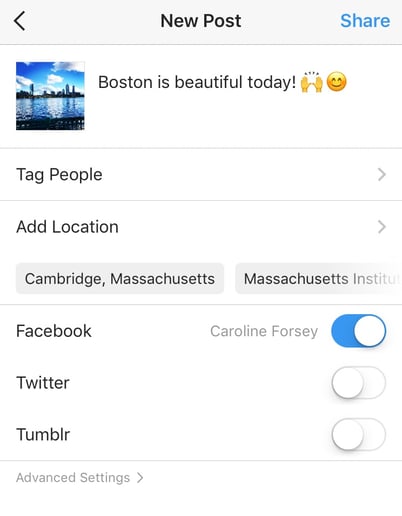
Upload a Image or Video to Your Stories
In 2016, Instagram launched “Stories”, a feature that allows you to post videos or images that disappear after 24-hours. Instagram’s Stories feature is similar to Snapchat in terms of content — users often post more casual and candid videos and images, offering glimpses into their every day lives.
For instance, you might post a heavily-edited picture of yourself and friends at a baseball game. But you might post a more candid video to your Story of the stadium singing “Sweet Caroline”.
To learn how to upload an image or video to your Stories, follow these steps:
1. Click the camera icon in the top left.

2. Once your within the Stories feature, you can take a picture or video right from within the app. Alternatively, if you have an image saved to your phone that you’d like to use, click the small square in the bottom left corner.

3. Click on a photo you’d like to use in your Stories.

4. In the top right, you have a few different editing features. The smiley face lets you add a location, hashtag, time, date, and other fun images or emojis to your picture. The pencil lets you handwrite or draw on your image. And the “Aa” icon is your text button. Once you click “Aa”, you have the option to change your font by clicking “Classic” at the top.

5. If you click the smiley face icon, you’ll see the following screen. Simply click on one of the icons to add them to your image. If you don’t like it, drag it to the bottom, and a trash can will appear so you can delete it.

6. For instance, I clicked the smiley face icon to add a location and hashtag to my image. You can also swipe to the left or right to add filters to your photo or video. Once you’re happy with your content, you can either click the “+ Your Story” icon in the bottom left, which allows you to share your Story with everyone who follows you, or select “Send To” to send the post to someone specific.

Follow Users
It’s incredibly easy to find and follow users. Using Instagram’s search feature, you can find celebrities, brands, and friends. Additionally, you can search “Tags” or “Places”. “Tags” is particularly useful if you know what type of content you want to find, but you’re not sure who posts about it.
For instance, you might search “#familyrecipes” under tags — your results will include any images with that hashtag. As you peruse, you might find someone who posts content you really like, and you can choose to follow them so their content appears on your feed.
To follow someone, follow these three easy steps.
1. Click on the search icon on the bottom of your screen (it looks like a magnifying glass).
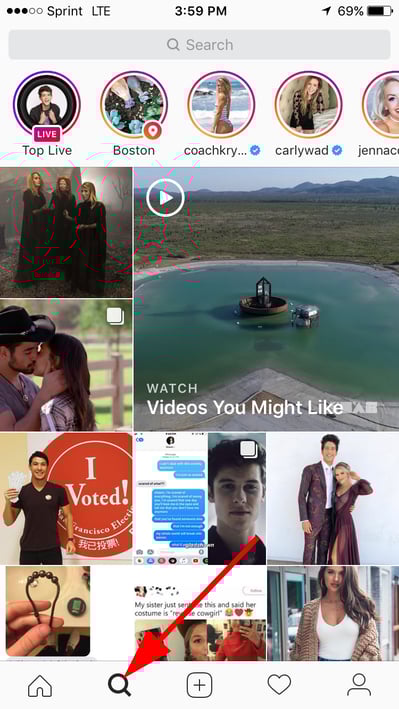
2. Next, type in a person or brand. For this example, I began searching “mandym” (Mandy Moore) and found her as #1 in the search results. Alternatively, I could’ve clicked “Tags” or “Places” to search those categories.
3. Once you’re on someone else’s account, you’ll see a blue “Follow” button at the top. For public profiles, you can click and immediately begin following that account. However, if the profile is private, you may need to wait for them to accept you first.
And that’s it! You’re on your way to becoming a pro. To take your account to the next level, plan out your next posts using an array of content ideas and templates.
Editor’s note: This post was originally published in November 2018 and has been updated for comprehensiveness.

Lead Marketing: 6 ideas y herramientas para captación de leads de calidad
Para hablar de lead marketing vamos a empezar con un ejemplo: vas a una cita de trabajo y se te hizo tarde. Caminas con apuro pero al pasar ves en la vidriera de una tienda ese objeto que llevas tres meses buscando.
No estás en el momento de detenerte a comprar, pero al menos quieres saber cuánto cuesta. Recordemos que tienes el tiempo encima. Entras a la tienda a preguntar el precio con la intención de salir lo antes posible.
El vendedor no se anda con rodeos, te informa el costo y te pide tu email para enviarte las promociones. A cambio te ofrece un cupón de descuento. Este regalo te hace aceptar y le das tus datos.
Igual llegas tarde a la cita, tu vida sigue y tres días después recibes un correo electrónico de la tienda con sus descuentos de la semana. Te hace recordar que necesitas ese objeto, que ya sabes dónde comprarlo y que tienes un cupón de descuento.
Algo muy similar sucede cuando estás en una estrategia de captación de leads. La diferencia es que la tienda no es un local físico sino tu sitio web.
Sigue leyendo porque vamos a desarrollar 6 estrategias que te ayudarán a obtener los datos de tus clientes potenciales.
¿Por qué hacemos hincapié en la palabra potenciales? Porque tener un montón de emails te sirve de poco si son de personas que no están interesadas en tu producto.
Conceptos de Lead Marketing: ¿qué es un Lead de Calidad?
Se entiende por lead marketing al proceso cuando una persona te deja sus datos. Puede ser porque visitó tu página, le llegó un correo electrónico o se suscribió a un formulario.
Sin embargo, los leads de calidad son aquellos que tienen potencial de conversión. Es decir, cuando la persona que te dejó sus datos realmente está interesada en tu producto o servicio.
Por ejemplo, nosotros desde el chat de Socialancer solemos pedir a los usuarios que nos dejen su email. Si no les interesa nuestra comunicación, obviamente pueden desuscribirse. Pero consideramos que si alguien nos busca por esa vía es porque tiene interés en las herramientas que recomendamos.
¿Todavía no tienes un chat de atención al cliente? Hicimos una comparativa.
Estas son las características que los leads deben cumplir para considerarse de calidad:
- Que el usuario tenga el perfil adecuado de acuerdo a tu producto o servicio. Si vendes ropa para bebé, tal vez te servirá de muy poco el email de un joven soltero de 18 años.
- Es necesario que tenga un interés real. Tal vez todos queremos comprar un auto, pero no en este momento.
- Que tenga capacidad de compra real. Volviendo al ejemplo del auto, tal vez todos queremos un BMW…
Ahora, debes tener en cuenta que no todos los leads se van a convertir en clientes. De hecho, solo lo hace una pequeña proporción.
Por una cuestión de estadística simple, es por lo que conviene un volumen alto en tu captación de leads.
En el lead marketing es importante saber decir adiós
Retomemos, te conviene tener una base de datos abultada de lead marketing pero debes saber que es dinámica.
Las buenas prácticas recomiendan darle la opción a los usuarios para que se desuscriban de tu base de datos.
Puede ser que ese lead no tenga el perfil para ser un cliente recurrente, aunque ya haya comprado, o que simplemente perdió el interés.
Como sea, siempre agrega la opción de Darse de Baja ya sea en los correos electrónicos, formularios o alguna parte de tu sitio web.
Tipos de lead
En el lead marketing se considera que hay tres tipos de leads:
- Lead: no están ni siquiera en la fase inicial de la compra, solo han aceptado recibir información. Puede ser a través de correo electrónico, tu blog o algún infoproducto. Debes trabajar para convertirlos, una estrategia es enviarles contenido interesante que les aporte conocimiento.
- Marketing Qualified Lead o MQL: ha mostrado interés varias veces. Tal vez es un usuario recurrente en el chat o ha descargado varios contenidos. Puedes enviarle un correo electrónico que le amplíe la información. Cuando promocionamos GrooveFunnels, una potente suite para crear embudos de venta con programa de afiliados, mandamos un correo con estrategias para vender la herramienta.
- Sales Qualified Lead o SQL: son aquellos que ya están listos para la compra, por lo que hay que darles un empujón. Debes ofrecerles información súper orientada y precisa. Puede ser una demo, un trial o, incluso, hacerles una llamada telefónica. Siguiendo el ejemplo de lo que hicimos con GrooveFunnels, enviamos un correo con un testimonio de éxito REAL.
>>> ¿Qué es un lead? Tipos y cómo captarlos
6 Ideas y herramientas para nutrir tu Lead Marketing
Hasta este punto te hemos contado qué hacer con los contactos que captaste en una estrategia de lead marketing, pero es necesario dar un paso atrás.
¿Cómo se consiguen los leads de calidad? Te compartiremos 6 acciones para la captación de leads y sugerencias de herramientas.
#1. Videos Interactivos para la captación de leads
Un video interactivo es aquel en el que el usuario tiene opciones para modificar la historia de acuerdo a sus intereses. Por ejemplo, Maybelline lanzó una campaña en la que, dentro del mismo video, los espectadores podían elegir si veían un tutorial para maquillaje de día o de noche.

Queremos contarte también lo que hizo SGOSS, una institución benéfica de Londres orientada al sector de la educación. Realizó un video interactivo para captar leads. Un niñito invitaba al usuario a tomar varias decisiones hasta llegar el momento en el que le pedían el correo electrónico al espectador.

Esa sola campaña le permitió a la fundación recabar los datos de 3 mil 144 interesados en un mes.
¿Qué herramienta puedo usar para captar leads con videos interactivos?
La joya de la corona es Interactr, un software que con el sistema de soltar y arrastrar te permite realizar tus propios videos interactivos. Hay un montón de posibilidades que puedes agregar, entre ellas está la de insertar formularios dentro del contenido.
Tiene una función en la que, para permitir que el usuario siga viendo el video, es necesario que deje sus datos de contacto.
#2. Los juegos son ideales para aumentar el Lead Marketing
El aspecto lúdico es muy importante para generar un engagement positivo entre la marca y los usuarios. Si necesitas lanzar una campaña de lead marketing, una buena idea es diseñar un juego online.
Puedes insertarlo tanto en tu página web como en redes sociales. Te contamos la estrategia de Brightsun Travel, una agencia de viajes británica. Agregaron en su página home una rueda de la fortuna.

Esta acción la hicieron durante el mes de enero, que es la época fuerte en materia de ventas para ese sector. Por lo tanto, es un momento en el que tenían buena cantidad de tráfico.
Al girar la rueda, el usuario ganaba algún tipo de descuento u objeto. Con esta acción transformaron a los simples mirones de su sitio web en leads.
Con EasyPromos puedes hacer Juegos Online
Nosotros adoramos EasyPromos. Es una herramienta muy intuitiva que permite realizar juegos, promociones y concursos entre tu audiencia.
Tiene plantillas predeterminadas que puedes personalizar con tus datos.
Nosotros sorteamos una suscripción a EasyPromos para San Valentín y fue muy fácil agregar la plantilla a nuestro sitio web. Solo necesitamos copiar y pegar un código.

La herramienta permite realizar el sorteo de forma aleatoria para determinar al ganador de una forma muy transparente. Esto les da certezas a los usuarios.
#3 Lead Marketing: el poder de las encuestas
Las encuestas para el lead marketing tienen dos funciones: por un lado ayudan a captar leads pero también dan información sobre la audiencia.
Esto hace que sean muy útiles si estás buscando leads de calidad. Generalmente las tenemos asociadas a la calificación de un servicio. Es decir, ya que el cliente compró algo, lanzamos una encuesta para medir cómo se sintió.
Pero también puedes aprovecharlas en el proceso previo. Es decir, antes de la compra. Eneco Holanda, un proveedor de gas natural, realizó una encuesta con un juego de palabras que les permitió captar mil leads cuando ellos esperaban 200.
Social Surveys para crear encuestas de captación de leads
Social Surveys es una aplicación online para crear encuestas. Incluye 25 plantillas personalizables, biblioteca de imágenes para hacerlas más llamativas y encuestas de audio.
Algo que la hace muy atractiva es que es de pago único, por lo que tienes el control total de tu inversión.
#4. Añade ventanas emergentes o PopUps en tu lead marketing
Las ventanas emergentes o PopUps son cuadros que se despliegan en un sitio web. Generalmente, puedes personalizarlos para que aparezcan en un tiempo determinado, por ejemplo a los 15 segundos de que un usuario entró en una página.
Son muy utilizados en el lead marketing pero hay algunas reglas de cortesía. Ponemos de ejemplo lo que hizo Coobis, una plataforma de branded content: agregaron el formulario a un costado de la página, por lo que no interrumpió la lectura del contenido.
Otra cosa que recomendamos es que le des al usuario la oportunidad de minimizar el PopUp.
Además, debes ser conciso. Informa en pocas líneas a tus usuarios qué ganarán si te dejan sus datos.
¿Con qué herramienta puedo hacer PopUps?
Whisloop es una completa suite para crear PopUps. Tiene una amplia biblioteca de plantillas para diseñarlos con mayor facilidad. Otra función muy interesante es que permite programar y optimizar procesos en redes sociales.
#5. Usa botones clicables en tus imágenes
Agregar botones clicables en tus imágenes es una forma creativa y fácil de captar leads.
Funciona de la siguiente forma: a una simple foto le agregas un ícono y cuando el usuario hace clic, se despliega un formulario de contacto.
Esto te permitirá tener un lead marketing de calidad porque los botones los puedes poner directamente sobre tus productos. Te habla de que quien hizo el clic está interesado.
Estos botones se agregan con ClickKosh, una herramienta para agregar íconos interactivos a tus imágenes.
#6 Capta lead marketing a través del chat de atención al cliente
Vamos a tomar como ejemplo la acción de lead marketing de VideoRobot, una herramienta que permite crear avatares en 3D para que funcionen como presentadores de videos.
Cuando entras a su chat, piden que dejes tu correo electrónico.
Aquí necesitamos hacer un alto para hablar de buenas prácticas. Como comentamos en párrafos anteriores, quienes utilizan tu servicio de chat seguramente son leads de calidad porque tienen un interés real en tu servicio.
Sin embargo, el hecho de que usen esa vía de comunicación no quiere decir que estén interesados en recibir información recurrente de tu parte.
Por ese motivo, tendrías que darles la posibilidad de elegir si quieren estar en tu lista de correos o no.
En Socialancer agregamos un texto explicando a los usuarios que si colocan la palabra STOP ya no recibirán mensajes de nuestra parte.
Cómo transformar GRATIS tu chat en herramienta de lead marketing
MobileMonkey es una herramienta que se integra a tu chatbot de Messenger. A través de una serie de preguntas va guiando a los usuarios.
Al final, el cliente puede compartir su correo electrónico y MobileMonkey tiene una función para descargar la base de contactos.
Tiene una versión gratuita con funcionalidades muy útiles y no pone un límite a la cantidad de leads que te permite captar.
Conclusión sobre cómo hacer lead marketing de calidad
En el lead marketing conseguir los contactos es solo la primera fase del proceso. Para que los leads se conviertan en compradores o realicen la conversión que deseas (tal vez suscribirse a tu programa, etc.) debes hacer un trabajo posterior.
Lo que recomendamos es ir guiando al lead con contenido a través de tu embudo de ventas. Incluso, a los usuarios que se mostraron interesados y en alguna fase del proceso dejaron de interactuar, podrías guardarlos en otra lista y después aplicar una estrategia de reventa.
Te recomendamos también tener clara la diferencia entre el embudo de ventas y la landing page.
Esperamos que este artículo sea de utilidad para ti. Si aplicas alguna de las estrategias que aquí mencionamos, nos gustaría mucho conocer tu experiencia.
from Socialancer https://ift.tt/3aV52YB
via
How to Set Up Facebook Shops to Sell Your Products
Does your business sell physical products? Wondering how to sell your products using Facebook Shops? In this article, you’ll learn how to create a shop on Facebook, use Commerce Manager to add products to your shop, and promote the products in your Facebook shop. You’ll also discover whether your business is a good fit for […]
The post How to Set Up Facebook Shops to Sell Your Products appeared first on Social Media Examiner | Social Media Marketing.
from Social Media Examiner | Social Media Marketing https://ift.tt/34ty1le
via socialmediaexaminer