
Welcome to My Blog
How Behavioral Targeting Gets Your Content Seen By the Right Audiences
What optimization strategies are you using to improve the performance of ads? If you’re like almost half of marketers, your answer probably includes ad placement and targeting.
As we know, targeted ads are used to find the most qualified leads by showing audiences content that’s relevant to them.
Targeted ads connect you with the leads that are going to be the most interested in what you offer.
So, how can you be sure that you’re generating the most qualified leads with your targeted ads? While there’s no sure fire way to tell, there’s an optimization strategy you may be missing: behavioral targeting.
Targeted advertising allows you to use demographic information, including location or age, to surface ads to relevant audiences. Behavioral targeting uses web behavior as the determining factor, instead of demographics. This increases the impact ads have on audiences.
Some of the criteria behavioral targeting looks at includes previously visited websites, search history, and past purchases.
If a marketer spent 20 minutes browsing CRMs, Googling software prices, and reading customer management blogs, behavioral targeting would analyze those actions to show that person ads for a CRM product the next time they visited a site like Facebook.
Behavioral targeting is used to improve campaign effectiveness. The sales manager weighing their CRM options would likely be more interested in a product ad for one rather than an SEO strategist, making them a qualified lead for the software company.
Now, let’s talk about how behavioral targeting can boost sales. If I were in the market for a social media scheduler and browsed websites like Loomly and Sprout Social before turning to Google, the search engine’s behavioral targeting features would show me ads for the sites I visited first.
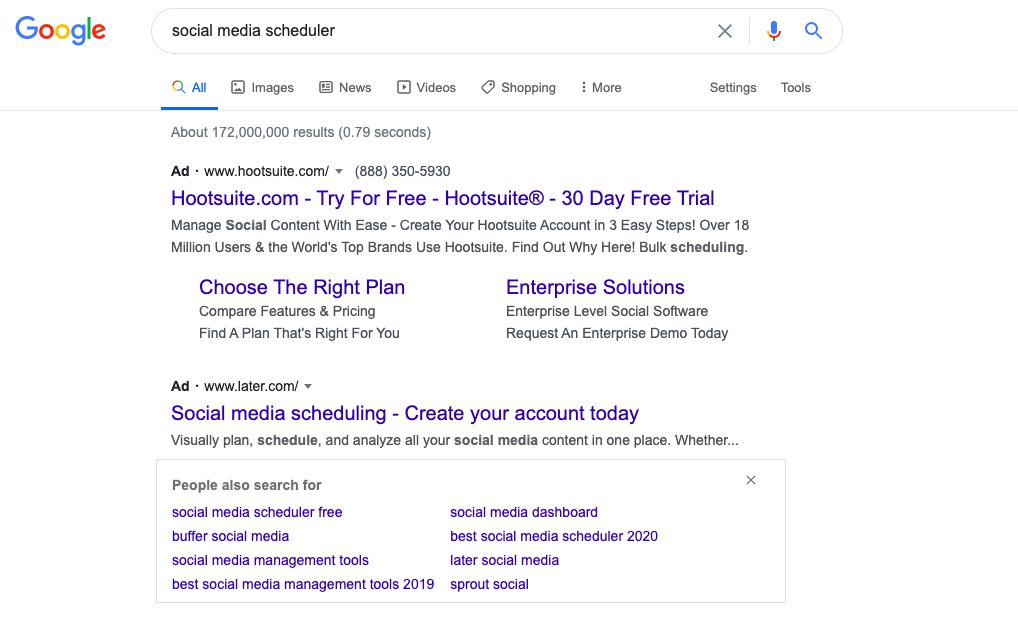
My previous internet behavior told Google what type of sites I’d already visited, so the search engine pulled the top list of options that are related and relevant to my search. And, when I checked my Facebook account a little while later, I saw that my web behavior influenced my ads there, as well:
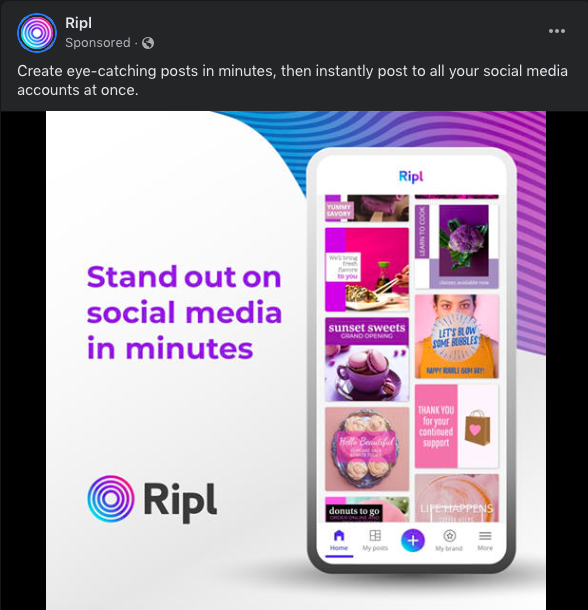
Pretty cool, right? And to run behavioral targeted ads, you wouldn’t have to stray too far from your ad strategy. If your ad host offers targeted options, like Facebook or Twitter do, create audience segments based on demographics, like location and age. You can also choose psychographics, like interests and values.
After that, the software will do the work, choosing browsers to show your content based on the preferences you set.
So, now we know that behavioral targeting helps reach those leads who are intending to make purchases. But what about the potential customers who are in a different stage of their journey?
Enter: predictive behavioral targeting.
Behavioral targeting uses website history to show users ads that relate to their interests. Predictive behavioral targeting is a form of analysis — it looks at those targeted ads as a whole, so advertisers can come to conclusions about audience interaction.
For instance, this is a behavioral targeted ad I came across on Facebook. If I, and others with similar demographics, interact with the ad in the same way, WordStream’s advertisers can infer that audiences like me respond well to similar content offer ads.
Predictive behavioral targeting helps improve the performance of ads for audience segments. It lets advertisers look critically at the similarities of customers and cater to them. This improves the effectiveness of behaviors being targeted.
If you’re still on the fence about using this strategy, don’t worry. Let’s look at the good and bad of behavioral targeting to help you make your decision.
Pros and Cons of Behavioral Targeting
There are a lot of ad types to choose from, and it’s up to advertisers to choose ones that maximize the effectiveness of campaigns. Like with all types, behavioral targeting has its upsides and downsides. Let’s look at a few.
Behavioral targeting pros
1. Nurture leads through the buyer’s journey.
Behavioral targeting helps you fill in the gaps you may have with your ad strategy. If you’re seeing excellent ROI from brand awareness ads, but want to drive more conversions from content offer ads, behavioral targeting can help.
For example, if you’re using an ad to promote a new webinar you’ve hosted, turning on behavioral targeting will increase the ad’s chance of reaching audiences who have been looking for webinars like yours.
2. Make more sales.
Behavioral targeting makes retargeting a better experience for customers. Retargeted ads catch website visitors who have abandoned your site without making a purchase. Behavioral retargeting takes that up a notch by crawling more previous web visits.
When you use behavioral retargeting, your ads will convey a more personalized message to audiences. They’ll remind those who closed your site to visit again with content that’s already tailored to their interests.
3. Improve the overall customer experience.
When you analyze behavioral targeting results, you can begin to draw conclusions about how your audience engages with ads. For instance, if you find that millennial customers are looking for a certain product stack, you can start tailoring your ads in response.
Behavioral targeting shows customers data-driven ads based on their web behavior. Based on the data you collect from the ads, like click-through rate and conversions, you can tweak the messaging or content of those ads to fit the browsing patterns of your audience.
Behavioral targeting cons
1. Behavioral targeting can get costly.
Running pay-per-click ads isn’t the most budget-friendly solution. Behavioral targeting falls under that umbrella, and it can get expensive. Make sure to check your advertising budget — and set budget caps — to make sure you have the financial bandwidth to produce ads for the entire campaign.
2. Ads can fail without proper audience knowledge.
If you don’t know your audience, it’s likely behavioral targeting won’t give you positive results. Generally, the ads are shown based on audience segments you select. But, without proper knowledge of what customers respond to, there’s room for lack of resonance from your target market.
For instance, your buyer persona may be a 30-year-old marketer who’s looking for a CRM to make the team she manages more organized. So, you decide to show that portion of your audience a brand awareness ad.
But, if that ads messaging fails to capture the interest of the majority of your target audience, it won’t be very effective. Behavioral targeting finds the right customers, but it’s up to your ad to seal the deal. Make sure you’re up-to-date with how your target market responds to ads to improve performance.
3. Behavioral targeting can lead to an advertising overload.
Be wary of producing too many. They can lead to an oversaturation of content and ultimately deter customers from wanting to engage with your ads. As a consumer, if I’m presented with numerous targeted ads from the same companies, I begin to mentally block out any advertising messages from that business.
Use behavioral targeting sparingly. It’ll save you money and catch customers at the right time. Be sure to modify your ad settings so you’re not showing users targeted ads every five minutes, just which it’s the most impactful.
Behavioral targeting is just one of the many advertising optimization strategies that are great for generating leads. It’s also one of the most effective. If you’re finding that your current ad strategies aren’t producing the ROI you’re looking for anymore, this tactic could be your answer.
How do you plan to use behavioral targeting to revamp your ad strategy?

How to Create 4 Facebook Custom Audiences That Convert
Want better Facebook ad results? Do your Facebook ads reach the right people at the right point in the customer journey? In this article, you’ll learn how to develop Facebook audiences for cold, warm, and hot prospect targeting and deliver ad creative that reaches hot prospects who abandon their carts mid-purchase. To learn how to […]
The post How to Create 4 Facebook Custom Audiences That Convert appeared first on Social Media Examiner | Social Media Marketing.
from Social Media Examiner | Social Media Marketing https://ift.tt/2PRLqLz
via socialmediaexaminer
How to Adapt Your Content Into an Instagram Story, According to HubSpot Marketers
If you’re a marketer, at some point, it’s likely you’re going to be asked the question, “Is it on brand?”
This is especially true for social media content. Companies with social media pages generally have a theme that relates to the organization. The use of colors, sensory details, and styling all contribute to the overall theme of a page. I, for one, love thematic Instagrams — they’re so aesthetically pleasing.
When the colors, text, and photos all fit, I find myself going through all the content because it’s so easy to look at — the same is true for Stories.
Sometimes, I come across posts that make me think, “How did this marketer turn a simple content idea into this engaging Instagram Story?” And, as always, curiosity got the best of me. I had a question, and I was ready to search for the answer.
Fortunately, I knew exactly who to look to for help. I wanted to know just how social media marketers choose the right pieces to include in Stories, so I turned to the experts. I asked HubSpot’s marketers this question and compiled their tips.
Let’s see what they had to say.
1. Look for buzzy, trendy content.
When choosing content to add to Instagram Stories, HubSpot Audience Growth Writer Pam Bump, asks herself a question: “Is the content buzz-worthy?”
“Trend or buzz-worthy content usually relates to a topic, trend, or piece of research that people in my industry are talking about or sharing on social media,” she says. “If a topic is already being widely discussed and shared, it might be more engaging as a story on a social platform.”
For instance, if you find that a hot topic in your industry is, say, personality tests, and you have a blog post all about them, think about how you can adapt that into a story.
Check out this example from HubSpot:
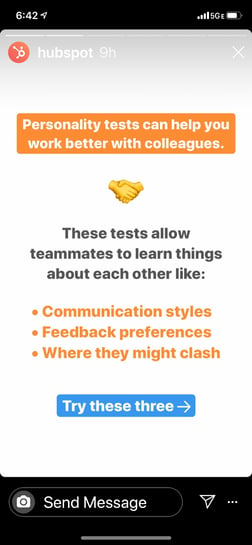
This story corresponds with a post about free personality tests. It takes the main ideas from the article and uses short, digestible sentences to recap the content. Additionally, the story’s following tiles included a few of the options outlined in the blog:

This tile includes a “Swipe Up” function, so audiences can see the post and get details about the test. Remember, the swipe-up tool is a great one to use for backlinking. You can bring new browsers to your website without making them exit the app.
Sharing buzz-worthy content will throw your company into the conversation and keep the content fresh and topical on your page.
2. Choose media that’s easy to comprehend.
When you want to adapt content, think about what can be split up into small, comprehensive pieces. If an audience member is scrolling through Instagram during their lunch break, it’s likely that they’re not interested in reading Stories that are full of text.
“Odds are, much of your audience is on Instagram looking for quick entertainment during a work break or daily commute,” notes Kelsey Yamada, one of HubSpot’s social media managers. “This is why my most important tip is to start your story actively rather than passively.”
Yamada suggests that, to keep audiences engaged, “Grab the reader’s attention with an interactive element, interesting fast-fact, a video, or eye-popping graphic. Then, use the following pages of the story to go into depth about the topic.”
Let’s look at a visual:

This first tile asks the reader a question to get them thinking. The Story doesn’t use much text, and instead, includes an interactive function — the emoji slider sticker. The next tile gives survey data to add background.
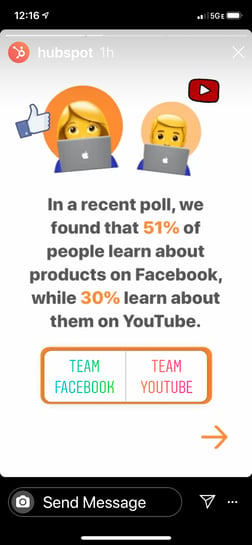
This content is easy for audiences to engage with as a quick brain break from their busy day. It takes data that was previously collected by HubSpot and turns it into a visually appealing guess-and-check for marketers.
You can use stats, like survey data, for Instagram Stories. Use short questions to engage users right off the bat, then use the following tiles to give them the full story.
3. Think about if you can make the story interactive.
One question Bump asks herself when choosing content for Stories is, “Can I make this content interactive?” For instance, you might have some less-than-glamorous topics covered on your blog or web pages, but take a look at them from a different perspective.
Bump notes, “Even a bland topic can be zested up with a quiz or poll. For example, sometimes, when adapting a post with heavy research into an Instagram Story, we’ll format the story like a quiz. Then the last page will offer readers the ability to swipe up to read more about the answers.”
For example, this story was adapted from a post about the difference between millennials and Gen Z:
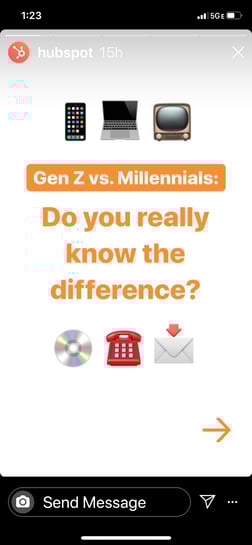
It might not be the most exciting topic, but using Instagram Stories can make the content interactive, raising the interest level of audiences. If I were to see this story before the blog post, I would stop in my tracks and ask myself, “I think I know the difference, but what does HubSpot have to say?”
Alternatively, if I saw the blog post, I might not want to engage. But this story makes the content fun, gives the value of the post, and brings readers to the content in a new format. If the last tile included a link to the post, you could boost the number of reads.
4. Decide if you can make the text sparse and actionable.
“One thing the social media teams I’ve worked with are mindful of are the amount of text and the amount of pages in each story. I’ve seen that more than a paragraph of text on one story page can result in reader fatigue, which, in turn, could cause people to drop out of your story,” notes Yamada.
Remember, it’s likely that your Instagram audiences are checking their feeds as a quick brain break or a source of entertainment. Bombarding them with text-filled stories will take away from that experience.
Instead of using a paragraph of text, include bullet points. This will break up text and allow for emojis, stickers, or other content that will make a story visually appealing.
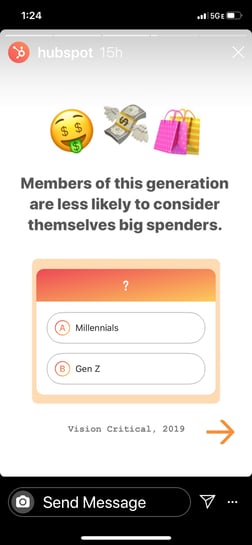
“If you can include a swipe-up with more content, consider a less-is-more approach where you include a quick tip, poll, or quiz related to a topic. Then, encourage the reader to swipe-up to learn more about the topic,” recommends Yamada. “If you can’t, but the story is more complex, consider breaking it up into a larger amount of pages.”
5. Experiment, experiment, experiment.
What works for HubSpot’s socials might not be the case for companies in different industries. So, remember to experiment with your content to find what works the best for your audience.
Bump recalls, “While you should do research and keep social media manager guidelines in mind as you craft a story strategy, don’t be afraid to try something different. For example, if you have a low drop off rate and most of your audience gets to the end of your Stories, you could experiment with a longer story to see how far they’ll get.”
Don’t be afraid to think outside of the box. Sometimes, new ideas are the ones that will be the winning ticket to better engagement. That sales metric that you’re unsure about sharing? Experiment with it, and see if you can change the wording to make it enjoyable.
“Regardless of which experiments you do,” Bump continues, “Be sure to start with a hypothesis, know which metrics you’ll be monitoring, and identify what you’ll do if the experiment works or doesn’t work. This will allow you to develop a strong set of learnings around your audience and their behaviors.”
As for metrics to look for, Bump recommends looking at story views, impressions, swipe ups, and exits. Outside of the app, analyze overall Instagram traffic, or use a tracking URL. ” If you include a swipe-up to your full web content, use a tracking URL, such as one made with HubSpot or Bit.ly, as your swipe-up link,” she says.
“A tracking URL will allow you to see how many page views you received from the story. If you have a CMS with an analytics dashboard that can distinguish social media sources, like HubSpot, you can also see how much traffic your post has coming from Instagram.”
6. Be mindful of story length.
We’ve talked a bit about keeping the audience’s attention. The length of your story could impact their engagement. So when you’re choosing content, think about how many tiles it would take to convey the message. Can you do this in less than five?
Yamada says, “If someone doesn’t get to the end of your story where a swipe-up link is located, they won’t swipe up. So, I try to keep Instagram Stories content within 4-5 pages if it will include a swipe-up.”
Remember, in our personality test example, the story had five tiles. At the end of the last tile, there was a link to the corresponding blog post. This captures the reader’s attention quickly and backlinks the source before they exit:
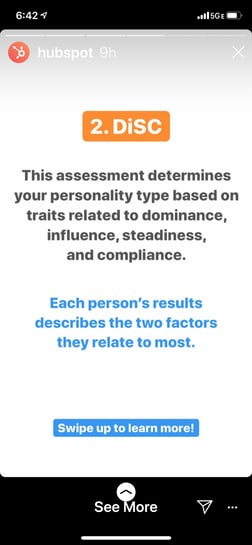
“Do your best to cut the content down to the biggest takeaways. If your audience wants all the details, provide a link to the source material in a swipe-up or in the DMs if anyone reaches out. If a piece of content can’t be summarized and cut down, it’s not the best fit for Stories,” Yamada explains.
In the example above, the content explains a test the audience can take, where they can find it, and how to get more information. Basically, the story is used as a “preview” for the rest of the content. Is there content in your arsenal that’s similar — like a study you just performed?
7. Put yourself in the audience’s shoes.
Keeping your audience in mind is at the forefront of content creation. Remember to think about their motivation as much as their interests.
“Whenever I’ve adapted long-form content into Instagram, Snapchat, or Facebook Stories, I’ve tried to imagine what my audience will be doing and thinking when they aimlessly tap through Stories and come across my brand’s,” states Yamada.
Think about how you interact with Stories on Instagram. A story that’s short, simple, and includes visual elements probably keeps you more interested than a story that’s too busy, with a lot of moving parts. It’s jarring to tap to a story and see a huge video with no explanation, right?
To choose content that your audience will be intrigued by, Bump encourages marketers to “Think about what your audience likes to see from you on Instagram. If you get a ton of engagement on sales-related content, for example, try adapting a blog post about sales into a short-form story.”
As Yamada notes, “Adapting your existing content into stories will give it the opportunity to provide value on a different platform to a different audience.” If your audience misses content you want to boost, or you want to present it in a different way, take to your Stories to give it more exposure.
Adapting your content into stories gives audiences a rounded view of what your brand is about from a different perspective.
“Why shouldn’t more people see the awesome content you’ve already worked on creating?” she asks. “You’ll also find yourself saving time when adapting content, as you won’t have to create a whole new piece just for Stories. A win-win!”
These tips made me excited to jump into my content and see what I could turn into the next high-performing story. I can’t wait to find new data or research that I can make more engaging with a few emojis. Plus, I feel more confident about what I can put out there. Knowing I have a solid direction now, I’m ready to be bold and experiment.

The 30-60-90 Day Plan: Your Guide for Mastering a New Job [Template + Example]
With all the joy and excitement of landing a new job, you can feel just as much fear and anxiety. The same can go for the hiring manager.
Overcoming a new role’s learning curve and the desire to make a lasting impression on your employer can put a lot of pressure on you. What if you can’t adapt in time?
Fortunately, there’s a way to organize and prioritize your time and tasks, helping you seamlessly adapt to your new environment. It’s called a 30-60-90 day plan. And following it enables you to soak in as much information as possible, master your core job responsibilities, and sets you up to make a lasting impact on your new team.
Think of a 30-60-90 day plan as a new employee’s North Star, keeping your sights set in the right direction and guiding you toward success. But before we show you how to write this plan, let’s go over what exactly it is and how it’ll enhance your performance during your (or your employee’s) first three months on the job.
In this post, we’ll cover everything you need to know about 30-60-90 day plans whether you’re writing one for yourself or a new hire on the team.
There are two situations where you’d write a 30-60-90 day plan: during the final stages of an interview process and during the first week of the job itself. Here’s how each type can be executed:
30-60-90 Day Plan for Interview
Some hiring managers ask candidates to think about and explain their potential 30-60-90 day plan as a new hire. They want to see if they can organize their time, prioritize the tasks they’d likely take on, and strategize an approach to the job description.
For a new hire, a well thought-out 30-60-90 day plan is a great way to help the hiring manager visualize you in the role and differentiate yourself from all other candidates.
Of course, it can be difficult to outline your goals for yourself before you accept a new job. So, how are you supposed to know what those goals are? Start with the job description. Normally, open job listings have separate sections for a job’s responsibilities and a job’s qualifications. Work to find commonalities in these two sections, and how you might turn them into goals for yourself staggered over the course of three months.
For example, if a job requires three years of experience in Google Analytics, and the responsibilities include tracking the company’s website performance every month, use these points to develop an action plan explaining how you’ll learn the company’s key performance metrics (first 30 days), strengthen the company’s performance in these metrics (next 30 days), and then lead the team toward a better Google Analytics strategy (last 30 days).
30-60-90 Day Plan for New Job
The second situation where you’d write a 30-60-90 day plan is during the first week of a new job. If you’re the hiring manager, this plan will allow you to learn how the new employee operates, address any of their concerns or preconceived notions about the role, and ultimately help them succeed.
If you’re starting a new job, and are not asked to craft a 30-60-90 day plan during the first week of that job, it’s still a good idea to write one for yourself. A new job can feel like a completely foreign environment during the first few months, and having a plan in place can make it feel more like home.
Even though 90 days is the standard grace period for new employees to learn the ropes, it’s also the best time to make a great first impression.
The purpose of your plan is to help you transition into your new role, but it should also be a catalyst for your career development. Instead of just guiding you over your job’s learning curve, the goals outlined in your plan should push you to perform up to your potential and raise your bar for success at its every stage.
30-60-90 Day Plan for Managers [Template]
Almost all 30-60-90 day plans consist of a learning phase, a contributing phase, and a leading phase — which we’ll go over in the example plan below. This includes plans that are designed to guide people in new management roles. What sets apart a manager’s plan from any other is their obligation to their direct reports and the decisions they’re trusted to make for the business.
If you’re accepting (or hiring for) a new manager role, consider any of the following goals and how to roll them out at a pace that sets you up for success.
Get to your know your team’s strengths and weaknesses.
Recommended phase: First 30 days
Everyone is learning the ropes in their first month at a company. For managers, much of that learning happens by talking to the team.
If you’re a new manager, grab some time with your direct reports and get to know their roles. What do they like about them? What are their biggest pain points?
Making your team happy is a hard goal to measure, but it’s an important responsibility to take on as a manager. Your first step is to figure out how you’ll manage and coach your employees through their day-to-day work.
Improve the cost-effectiveness of your team’s budget.
Recommended phase: Final 30 days
Managers often have access to (and control over) the budget for their department’s investments — things like software, office supplies, and new hires. After you spend the first couple of months learning what the team spends its money on, consider using the final 30 days of your plan to make suggestions for new investments or how to reallocate money where you think it needs to be.
Is there a tool that can automate a task that’s taking your team forever to do manually? Draft a financial strategy that includes this tool in the following quarter’s budget.
Help a direct report acquire a new skill.
Recommended phase: Second 30 days
Even though you’re new to the company, you were hired for a reason: You’ve got skills. And you can bring these skills to the people you work with, particularly those people who report to you.
After meeting with and learning about your new colleagues, you might use the second month of your on-boarding plan to find skill gaps on your team that you can help fill.
Do you have expert-level experience with HubSpot, and your new company just started using HubSpot Marketing Hub? Teach them how to do something in the platform they didn’t know before.
Draft a training strategy that can help guide your direct reports into new roles.
Recommended phase: Final 30 days
You won’t be expected to promote people in the first three months of your new job, but that doesn’t mean you shouldn’t have learned enough about your team to decide who’s good at what and how to coach them to where they want to be.
In the final 30 days of your 30-60-90 day plan, you might agree to a goal to develop a training strategy that outlines how to manage your direct reports, and ultimately how to guide them into new roles in the future.
30-60-90 Day Plan for Executives
Executives are a little different from managers in that there’s higher performance expectations coming in. As an executive, you’ll need to be highly engaged with the organization from the first day and implement high-impact changes in your role as soon as you can. At the same time, context is important, and you’ll need to understand the culture, team, current operating processes, and challenges before you solve for them.
Here are some critical steps to include in your 30-60-90 day plan in an executive role.
Soak up as much information as possible.
Recommended phase: First 30 days
There’s no point in taking action without context, so start your ramp-up period by gathering information and charting the lay of the land. That means reviewing existing documentation, attending as many meetings as you can, meeting with direct reports and skip levels, and ask a lot of questions.
Create alignment between you and the team.
Recommended phase: First 30 days
In the first 30 days, you’ll be meeting new people and understanding their roles in the organization. Ultimately, your job as an executive is to set the vision for the organization while removing roadblocks for your team as they strategize and execute on it.
One of the best questions you can ask as you familiarize yourself and align with your team is, “In your opinion, what are some existing threats to our business (external or internal)?”
This shows that you care about their opinion and trust their expertise while getting unique perspectives from multiple vantage points in the organization. Plus, if you start hearing some of the same points from multiple team members, you’ll be able to identify the biggest pains, equipping you to make the highest impact changes.
Create goals based on what you’ve learned.
Recommended phase: Second 30 days
When you are interviewing or shortly after you’re hired, you’ll get a feel for the types of pains that the executive team has and the objectives in mind for bringing you on.
Once you have more context about how the organization works, you can take this vision and translate it into concrete, measurable goals that will take your department to the next level.
Identify the A players on the team.
Recommended phase: First 30 days
An A player is a member of your team that goes above and beyond what’s expected in their role. While not every employee will be an A player, you’ll want to ensure that critical roles and teams have at least one A player to lead, inspire, and strengthen camaraderie.
From there, you can figure out the existing gaps in staffing and training, whether it’s team members who need a lot of guidance and must be coached up to performance or empty roles that need to be filled altogether.
Diagnose process issues.
Recommended phase: Second 30 days
Companies of all sizes run into operational issues as they implement processes that are efficient and work at scale. Sometimes, when an executive team isn’t aligned with middle management, processes can become unwieldy.
Learn why things are done the way they are and then figure out if there are workarounds you can implement to streamline operations. Perhaps it’s as simple as eliminating bottlenecks or adding automation to certain functions.
Put together and implement hiring plan.
Recommended phase: Final 30 days
You know your A and B players, and you hopefully have a plan to retain, invest in, and mentor them. However, you’ll likely come across gaps that you need to fill and positions that need to be created to eliminate bottlenecks. From there, you’ll want to create a hiring plan to execute, both for short-term, middle-term, and long-term needs.
Effect changes in operations.
Recommended phase: Final 30 days
Speaking of bottlenecks, your final 30 days of your plan should be focusing on the areas of the business that can achieve the results the fastest. Once you’ve identified these, you can focus on removing these roadblocks to start hitting goals and achieving higher performance.
Contribute to broader company goals.
Recommended phase: Final 30 days
As a member of the executive team, you’ll also be looped in one high-level company initiatives, and the other executives of the company will be relying on you to contribute your deep discipline expertise and experience.
Be ready to lean in on executive meetings and contribute to the vision and strategy of the organization as it moves forward.
How to Write a 30-60-90 Day Plan
No matter what the level of the job for which a company is hiring, improving an employee’s skills requires concrete performance goals, so watch out for vagueness in the objectives you set for yourself.
“Write a better blog post,” or “get better at brainstorming” are terrific ambitions, but they don’t give you a way to measure your progress in them. Set goals that are realistic, quantifiable, and focused. You’ll know exactly how to achieve them and gauge your success.
To write challenging yet feasible performance goals, ask yourself the following questions:
What are my team’s goals?
Try to understand the purpose behind your team’s goals. It’ll give you more insight into why you and your team should achieve them, motivating you to work as hard as possible to meet those goals.
What will be my main priorities?
By connecting your personal responsibilities to your team’s goals, you’ll know exactly how to align your tasks with the needs of the team, which keeps you accountable and compels you to help your team achieve their goals.
How will I measure my progress?
Tracking your progress helps you gauge your performance and rate of improvement. To see how you’re doing, set up weekly meetings with your manager to ask her what she thinks of your work and track the improvement of your own performance metrics, like the growth of your blog posts’ average views or the amount of qualified leads your eBooks generate.
Reaching your performance goals isn’t the only path toward future success in your new role, though. You also need to study the ins and outs of your team and company, take initiative, and develop relationships with coworkers — all things that a lot of new hires underestimate the importance of.
Consider setting the following types of goals during each stage of your 30-60-90 day plan:
- Learning Goals – How will you absorb as much information as possible about your company, team, and role?
- Initiative Goals – What will you do to stand out?
- Personal Goals – How will you integrate with your company and team?
Aiming to achieve these types of goals will help you hit the ground running in all the right areas of your job. And if you stick to your plan, you’ll notice you’ll be able to spend less time learning and more time executing.
30-60-90 Day Plan Template With Examples
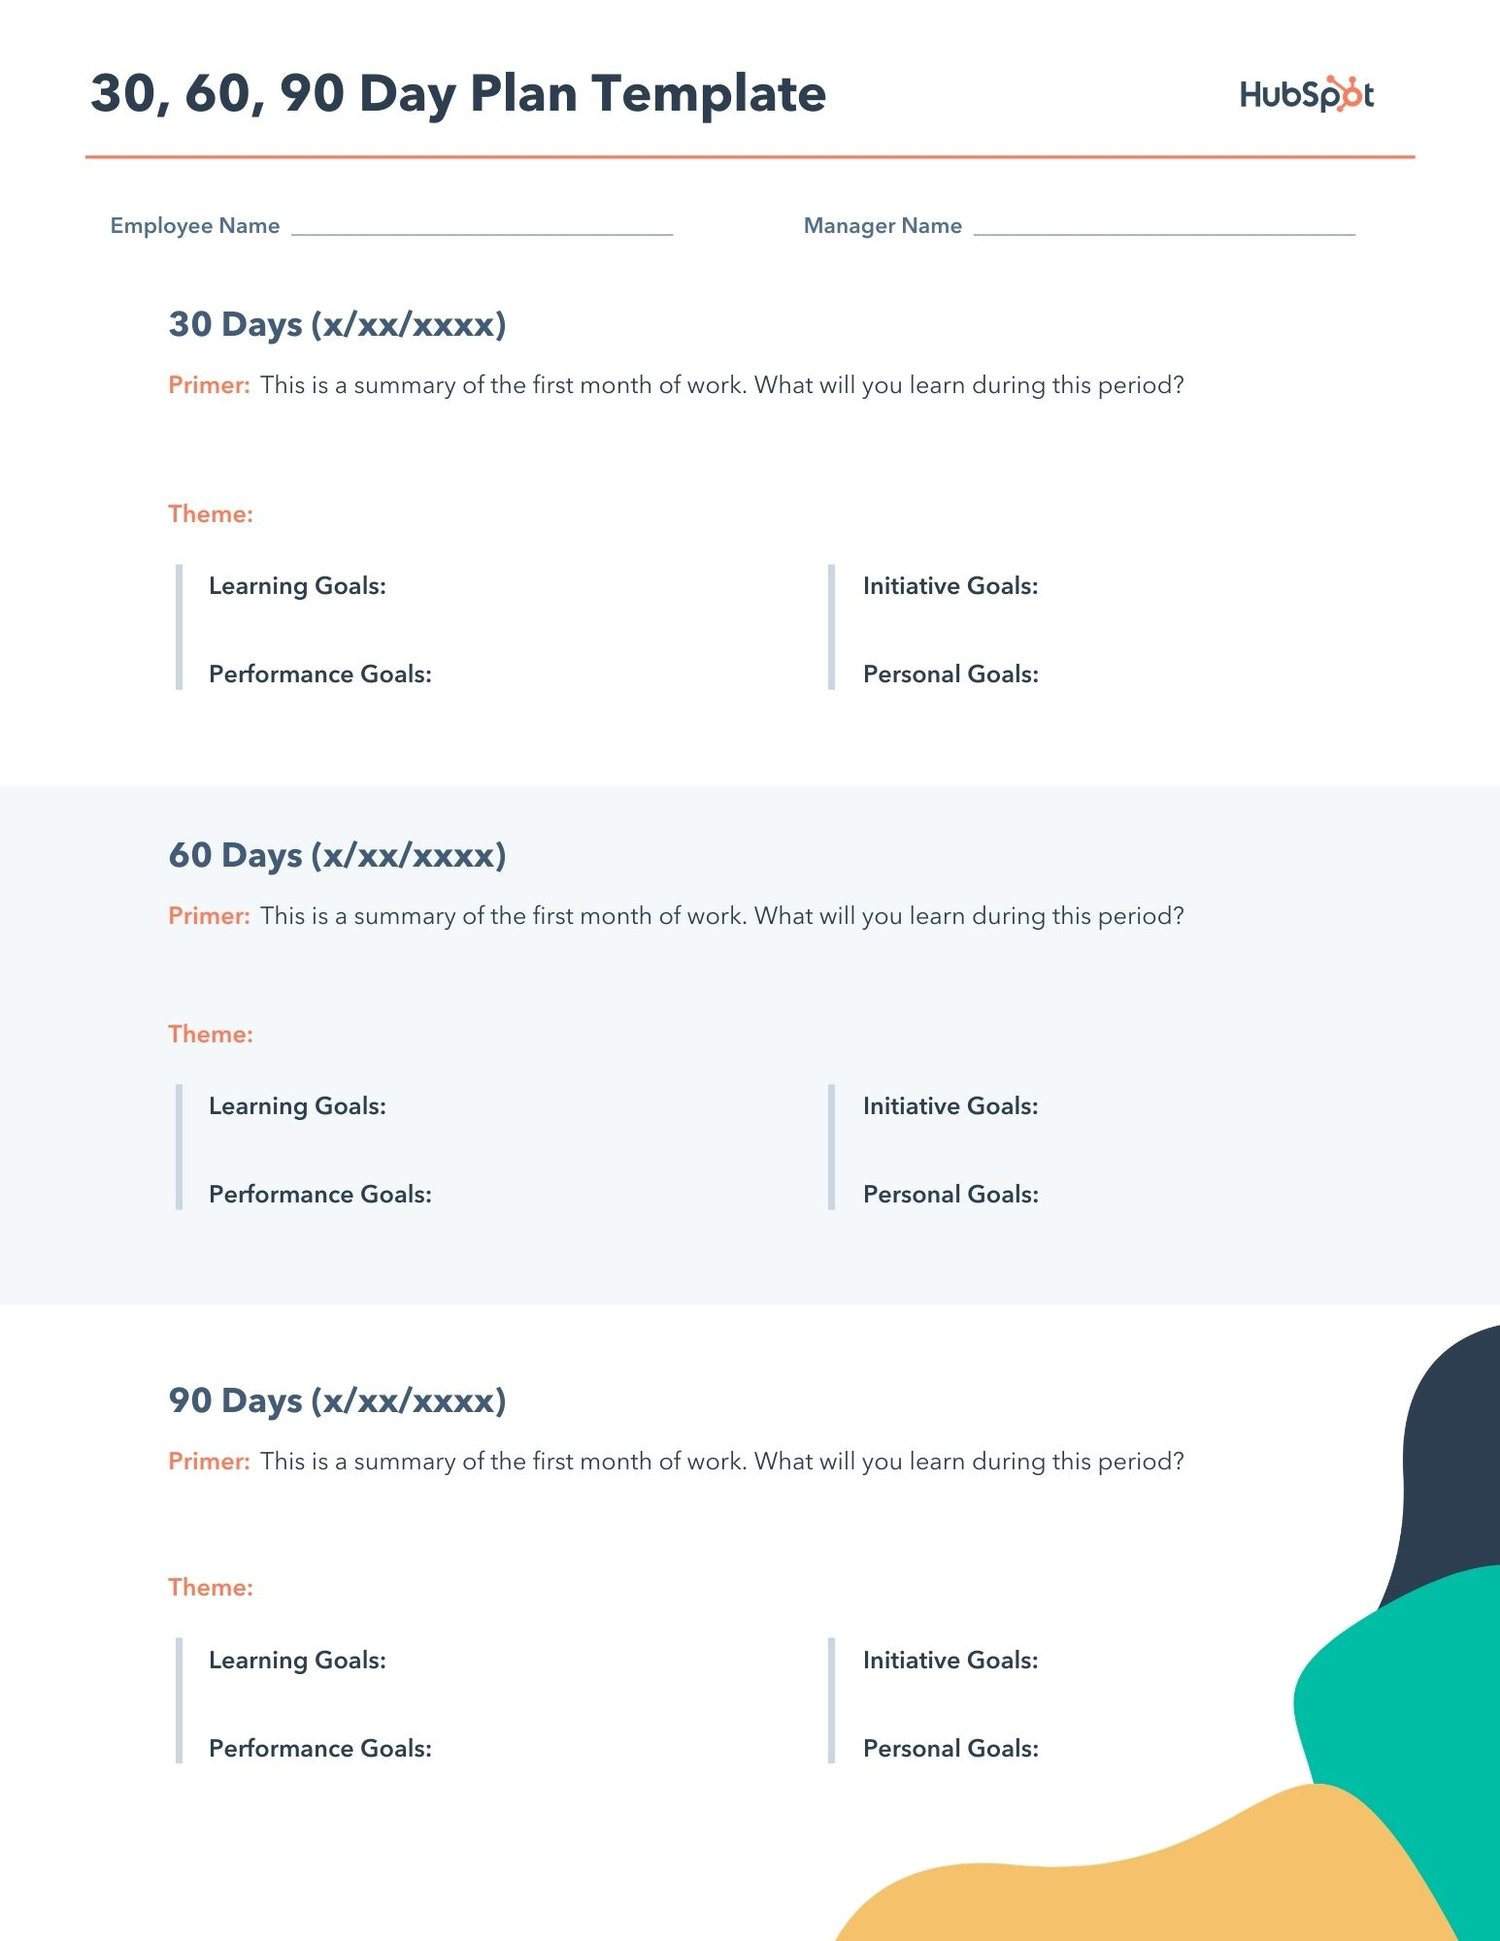
Behold, your 30-60-90 day plan template. Click the image below to download your own copy.
So, how might you fill in the lines shown in the template above? Here’s an example:
30 Days
Primer
Many new hires are eager to impress, so they dive head-first into their work or try to make suggestions about their team’s process with limited experience in how their new team operates. But have patience.
Understanding your company’s vision and your team’s existing strategy is crucial for producing high-quality work and actually making an impact. If you don’t know the purpose behind your role or the optimal way to perform, you’ll risk missing the mark and your early efforts won’t pay off the way you expect them to.
It’s always better to over-prepare than under-prepare. And it’s okay to take time to learn the ropes — it pays huge dividends in the long run. In the first 30 days of your employment, your priority is to be a sponge and soak in as much information as possible. Once you do that, you can then try to improve more specific parts of your team’s work style.
Theme: Be a Sponge
Learning Goals
- Study my company’s mission, vision, and overarching strategy.
- Read my company’s culture code to learn more about our company culture and why we implement it.
- Read the customer persona and target audience overview to truly understand who our customers are, their pain points, and how our product and content can help them.
- Meet with my team’s director to learn about how meeting our goals will help our business grow.
- Read up on our team’s new SEO strategy, editorial process, and traffic goals.
- Learn how to use the SEO Insights Report to plan and structure blog posts.
- Review my team’s pillar-cluster model overview and understand how to match posts to clusters.
- Meet with my manager to learn more about her expectations.
Performance Goals
- Complete new hire training and pass the test with a 90% or higher.
- Be able to write 3 blog posts per week.
Initiative Goals
- Run the Facebook Instant Article experiment that my manager recommended me to do.
Personal Goals
- Grab coffee with everyone on my team, so I can get to know them on a professional and personal level.
60 Days
Primer
By the end of your first 60 days, you should ramp up your workload, start overachieving, and make a name for yourself on your team.
To do this, start speaking up more at meetings. Don’t be afraid to share your ideas about improving your team’s processes. This shows you’re quickly conquering the learning curve and recognizing some flaws that your colleagues might’ve overlooked. You still have a fresh perspective on the company, so your insight is invaluable.
Theme: Be a Contributor
Learning Goals:
- Learn how to optimize a new post from scratch based on both the SEO Insights Report and my own competitive research.
- Read every other marketing team’s wiki page to learn about other marketing initiatives and how our entire department works together to grow our business.
- Deep dive into my company’s product roadmap and strategy to fully grasp our mission and vision.
Performance Goals
- Be able to write 5 blog posts per week.
- Be down to one cycle of edits per post.
- Understand how to edit a guest post — clean up at least one rough draft.
Initiative Goals
- Share content strategy idea at my team’s monthly meeting and ask if I can spearhead the project to boost blog traffic.
- Ask my manager if I can oversee Facebook messenger and Slack distribution strategy.
Personal Goals
- Meet with my colleagues on other teams to learn about their marketing initiatives and develop relationships outside of my team.
90 Days
Primer
By the end of your first three months, you should have a firm grasp of your role, feel confident about your abilities, and be on the cusp of making a breakthrough contribution to your team. Instead of reacting to problems that pop up at random, be proactive and spearhead a new initiative for your team.
You should also be cognizant of how you can collaborate with other teams to improve your own team’s processes. By taking on some new projects outside of your main role, you’ll start turning some heads and catch the attention of the department at large.
Theme: Be a Leader
Learning Goals
- Do an analysis of my highest and lowest performing blog post up to date. How can I use this information to optimize new content so it performs better out of the gate?
Performance Goals
- Be comfortable with writing five blog posts per week
- Edit one guest post per week
- Try to have 75% of my blog posts not require revisions.
- Write at least one new post that generates over 10,000 views in one month.
Initiative Goals
- Ask SEO team if they want to partner with product marketing team to brainstorm content topics related to our product road map.
- Ask social media team if they’re willing to develop a relationship where we can share each other’s content.
- Ask sales team what our customers’ pain points are, so we can write content that our target audience craves and help them close more qualified leads.
Personal Goals
- Join the yoga club.
Learning the nuances of your new role in less than three months won’t be easy. But crafting a strong 30-60-90 day plan is your best bet for accelerating your development and adapting to your new work environment as quickly as possible.
Editor’s note: This post was originally published in April 2019 and has been updated for comprehensiveness.

How to Write a Request for Proposal with Template and Sample
Whether you’re working for a small agency or a major marketing firm, you’re probably eventually going to need to fill out a Request for Proposal, or RFP.
Your company can’t do everything internally, and when your business needs to purchase a product or service from elsewhere, you might need to shop around. An RFP allows you to collect offers from various vendors and select the vendor that best meets your criteria, both in regards to skill and budget.
Any time you outsource work to a supplier, there’s a potential for issues such as miscommunication around the scope of the work and the compensation. What a good RFP does is eliminate gray area so that both parties understand what needs to be delivered, when, and for how much.
RFP Template
Here, we’ve provided an RFP template you can follow for initial structure, as well as a sample RFP for further inspiration. But it isn’t one-size-fits-all — you’ll need to tailor your RFP to best articulate your company’s needs.
%20Template,%20Blog%20Image.jpg?width=1500&name=Request%20for%20Project%20Proposal%20(RPT)%20Template,%20Blog%20Image.jpg)
Download a free, editable RFP template.
RFPs come in all shapes, sizes, and visual formats depending on the needs of your company and the work that must be performed. At the top of a standard RFP, you’ll find the following:
Project Name or Description
Company Name
Address
City, State, Zip Code
Procurement Contact Person
Telephone Number of PCP
Email Address of PCP
Fax Number
The body of the RFP will contain additional details about the project, including:
- Background/Introduction
- Project Goals and Scope of Services
- Anticipated Selection Schedule
- Time and Place of Submission of Proposals
- Timeline
- Elements of Proposal
- Evaluation Criteria
- Possible Roadblocks
- Budget
Read on to learn more about what goes into each of these sections so that you can build an RFP of your own.
1. Background/Introduction
In your introductory paragraph, you’ll want to include useful background information about your company — who founded it, what product or service your company offers, what sets you apart from competitors, and where you’re located. If any vendor is serious about working with you, they’ll want this information before moving forward.
2. Project Goals and Scope of Services
Next, you’ll want to outline the project you need completed, and the goals you expect to accomplish from the project. It’s important you get as specific as possible — even outlining individual tasks and criteria involved. You’ll want to include phrases such as “The award will be given to X firm,” with the “X” establishing how you’ll determine the best candidate.
3. Anticipated Selection Schedule
It’s crucial you include a detailed schedule so vendors know if they can meet your deadlines. You’ll also need to give vendors a window for when they can ask questions regarding your project. This’ll limit the hassle, for you and for them.
4. Time and Place of Submission of Proposals
Similar to paragraph #3, this is important information you’ll want to clearly present, so vendors know how and where to submit themselves for consideration.
5. Timeline
By including a time frame in your RFP, you’re able to eliminate any vendor who can’t work within your time constraints. If you’re flexible on your time, you can write something like, “Our company hopes to finish the project within six months, but we’re open to negotiation for the right candidate.”
6. Elements of Proposal
If you don’t outline clearly and specifically what you expect bidders to include in their proposal, you can’t necessarily fault them if they don’t include it. It’s critical you outline a checklist so vendors know which elements you’re expecting to receive. It’s also a good test for who’s capable of handling your demands — if a vendor can’t complete all elements of your proposal, you probably can’t trust them to finish your project, either.
7. Evaluation Criteria
Outlining your expectations will help eliminate vendors who don’t meet them. For this section, you’ll want to do some brainstorming with your team to come up with a mandatory list of items you feel are the best indicators of impressive candidates. Your list could include samples of past work, a proven success record with companies in similar industries, the expertise and technical skills to meet your demands, and a cost of services within your price range.
8. Possible Roadblocks
Here, you’ll want to outline any roadblocks, such as limited resources or a custom website, that might prevent certain vendors from successfully completing the project. This allows you to eliminate unsatisfactory bidders, and it will also help you determine which vendors have the skills and expertise to tackle those challenges.
9. Budget
Any vendor needs to know how much you’re able to pay them for their services before they’ll move forward with their bid.
RFP Sample
The above elements might manifest on the page in a number of ways. For example, here is an RFP sample from TemplateLab.
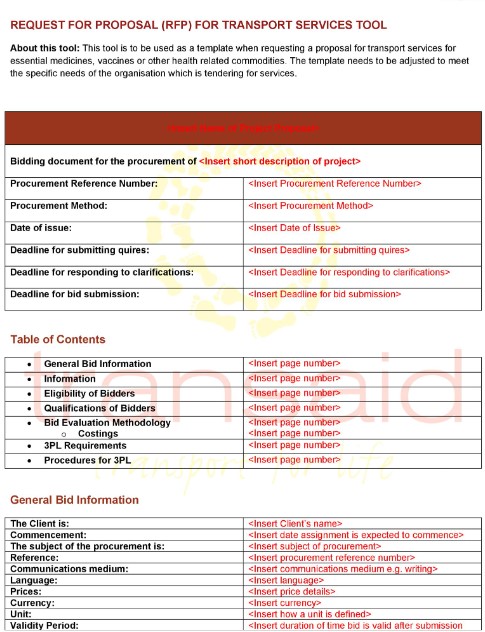
Now that you understand the elements of an RFP , you can build your own template and then fill it out so that you can start accepting bids. We’ll use a fictitious company, Caroline’s Websites, Inc., to illustrate exactly how each section should be executed, starting with the header:
Project Name or Description: Marketing Services
Company Name: Caroline’s Websites, Inc.
Address: 302 Inbound Ave.
City, State, Zip Code: Boston, MA 29814
Procurement Contact Person: Caroline Forsey
Telephone Number of PCP: 227-124-2481
Email Address of PCP: cforsey@consulting.com
Fax Number: N/A
Next, we’ll go into each of the elements of the RFP with information using the same fictitious company.
1. Background/Introduction
Caroline’s Websites, Inc. is a web design firm created by Caroline Forsey in 2010. Caroline’s Websites, Inc. prides itself on a team-oriented, solutions-based approach to web design. We provide our clients with web design services including coding, development, and branding. Our staff is located in two offices in Massachusetts.
2. Project Goals and Scope of Services
Caroline’s Websites, Inc. is seeking the services of a full-service communications and marketing firm to develop and execute a comprehensive integrated marketing plan that increases our SEO presence; attracts more social media followers; and effectively completes a lead generation campaign. The award will be made to a responsive and responsible firm based on the best value and professional capability.
The selected firm will be responsible for the development and implementation of a comprehensive and cost-effective marketing plan.
Tasks include but may not be limited to the following criteria:
• Lead generation campaign
• Paid media strategy
• Production of creative material including collateral and direct mail
• Online marketing campaign
• Website enhancement
• Search engine optimization
• General account management
• Other communications and/or marketing-related assistance as required
3. Anticipated Selection Schedule
The Request for Proposal timeline is as follows:
Request for RFP: June 1, 2020
Deadline for Bidders to Submit Questions: July 5, 2020
[Company Name] Responds to Bidder Questions: July 20, 2020
Selection of Top Bidders / Notification to Unsuccessful Bidders: July 31, 2020
Start of Negotiation: August 5, 2020
Contract Award / Notification to Unsuccessful Bidders: August 31, 2020
4. Time and Place of Submission of Proposals
The RFP will be posted on our website, Carolinewebsites.com, and can be downloaded from there directly as of 10 a.m. on June 1, 2020.
Respondents to this RFP must submit one original and five copies of their proposal. Responses must be received no later than July 25, 2020. Responses should be clearly marked “RFP-MarketingServices” and mailed or delivered to the contact person listed above.
5. Timeline
Caroline’s Websites, Inc. needs the project completed within 8 months.
6. Elements of Proposal
A submission must, at a minimum, include the following elements:
• Description of the firm that includes a general overview, names and credentials of creative team, number of full-time employees.
• A one-page narrative outlining the firm’s strengths and distinguishing skills or capabilities as they might relate to Caroline’s Websites, Inc.
• A representative selection of social media ads, direct response material, collateral, and website development created for current and past clients.
7. Evaluation Criteria
The successful respondent will:
• Have been operating continuously as a marketing agency for a minimum of 24 months and possess full-service, in-house capabilities for marketing, creative services, production, media planning and placement, direct response and research.
• The education, experience, knowledge, skills, and qualifications of the firm and the individuals who will be available to provide these services.
• The competitive cost of services.
• The expertise of the firm in working with similar customers.
8. Possible Roadblocks
At this time, Caroline’s Websites, Inc. currently has custom coding on our website, of which bidders should be aware.
9. Budget
Caroline’s Websites, Inc.’s budget for the project is $8,750.00.
These elements were written in a way to clarify the scope of the project that Caroline’s Websites, Inc. wants completed so that suppliers know whether or not to make a bid. Defining the project allows the bidder to determine if they’re a good fit and how much they’d likely charge. Being as transparent as possible serves to benefit (and even protect) both parties in the long run.
To use some of these elements in your own RFP, start with an RFP template and adjust it to your liking.
Editor’s note: This post was originally published in June 2018 and has been updated for comprehensiveness.

11 of the Best Professional Bio Examples We’ve Ever Seen [+ Bio Templates]
Is your professional bio as good as it can be?
In this article, we have nine real bio examples you should definitely compare yours to — and a series of free bio templates you can use to perfect it.
Most people don’t think about their professional bio until they’re suddenly asked to “shoot one over via email,” and have approximately one afternoon to come up with it. That’s when we scramble, and our bio ends up reading like this:
Rodney Erickson is a content marketing professional at HubSpot, an inbound marketing and sales platform that helps companies attract visitors, convert leads, and close customers. Previously, Rodney worked as a marketing manager for a tech software startup. He graduated with honors from Columbia University with a dual degree in Business Administration and Creative Writing.”
Woof, that was dull. Are you still with me? I swear, not even adding a tidbit about his cats would liven that bio up.
To be fair, in certain contexts, your professional bio does need to be more formal, like Mr. Erickson’s up there. But in many cases, writing a bio that’s readable — even conversational — is actually a really good thing. That means dropping that traditional format of listing your accomplishments like a robot and cramming as much professional-sounding jargon in there as you can.
How to Write a Bio
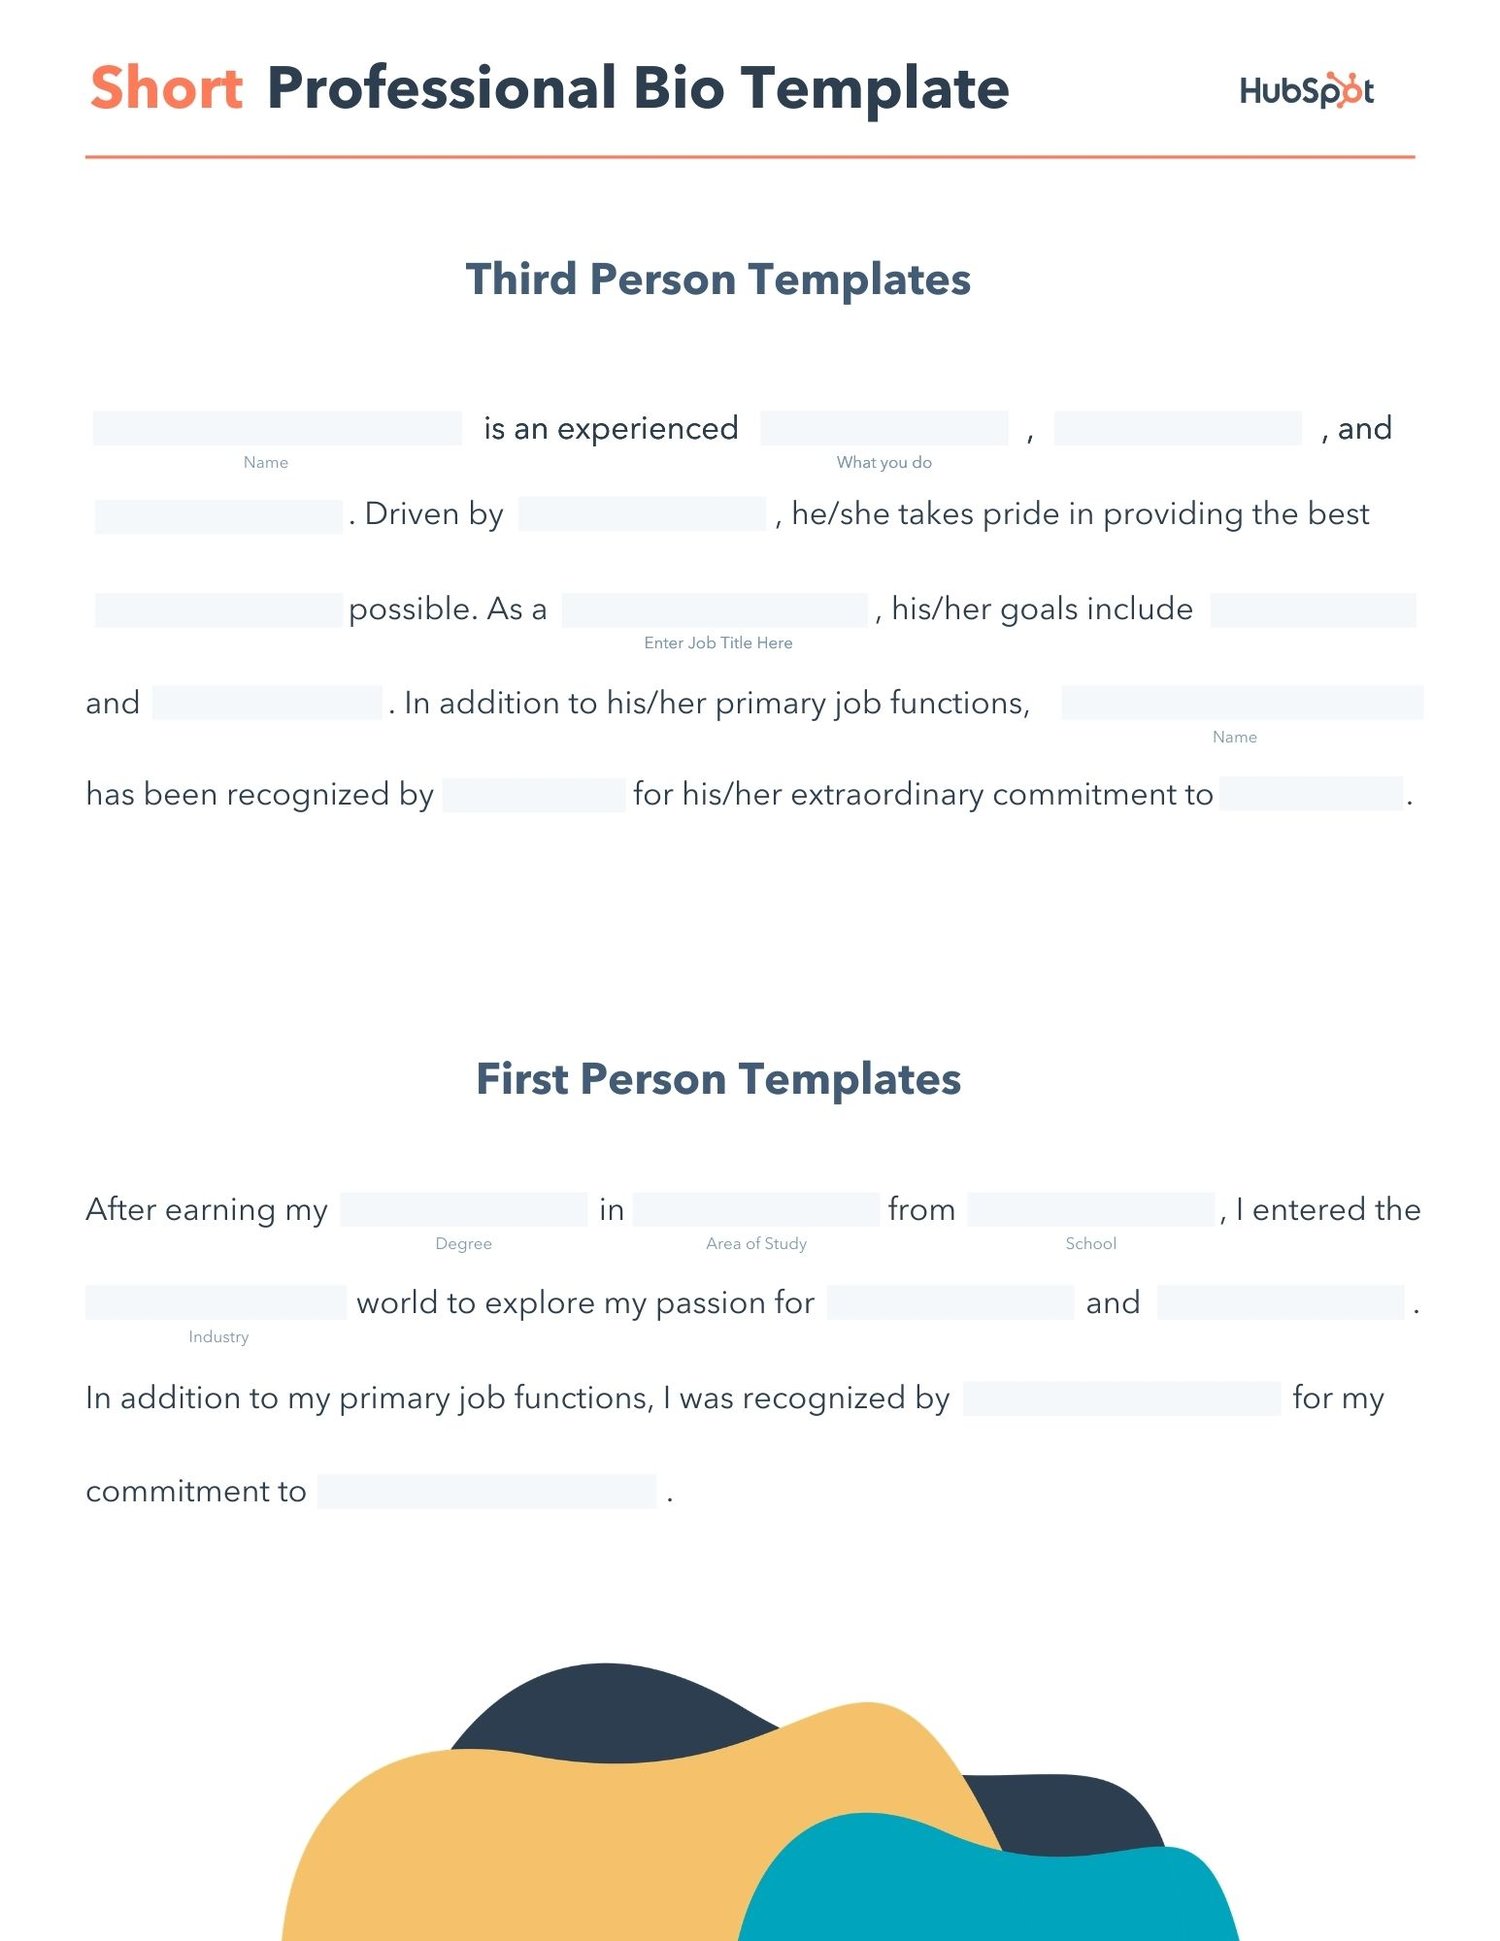
Download a free, editable short professional bio template.
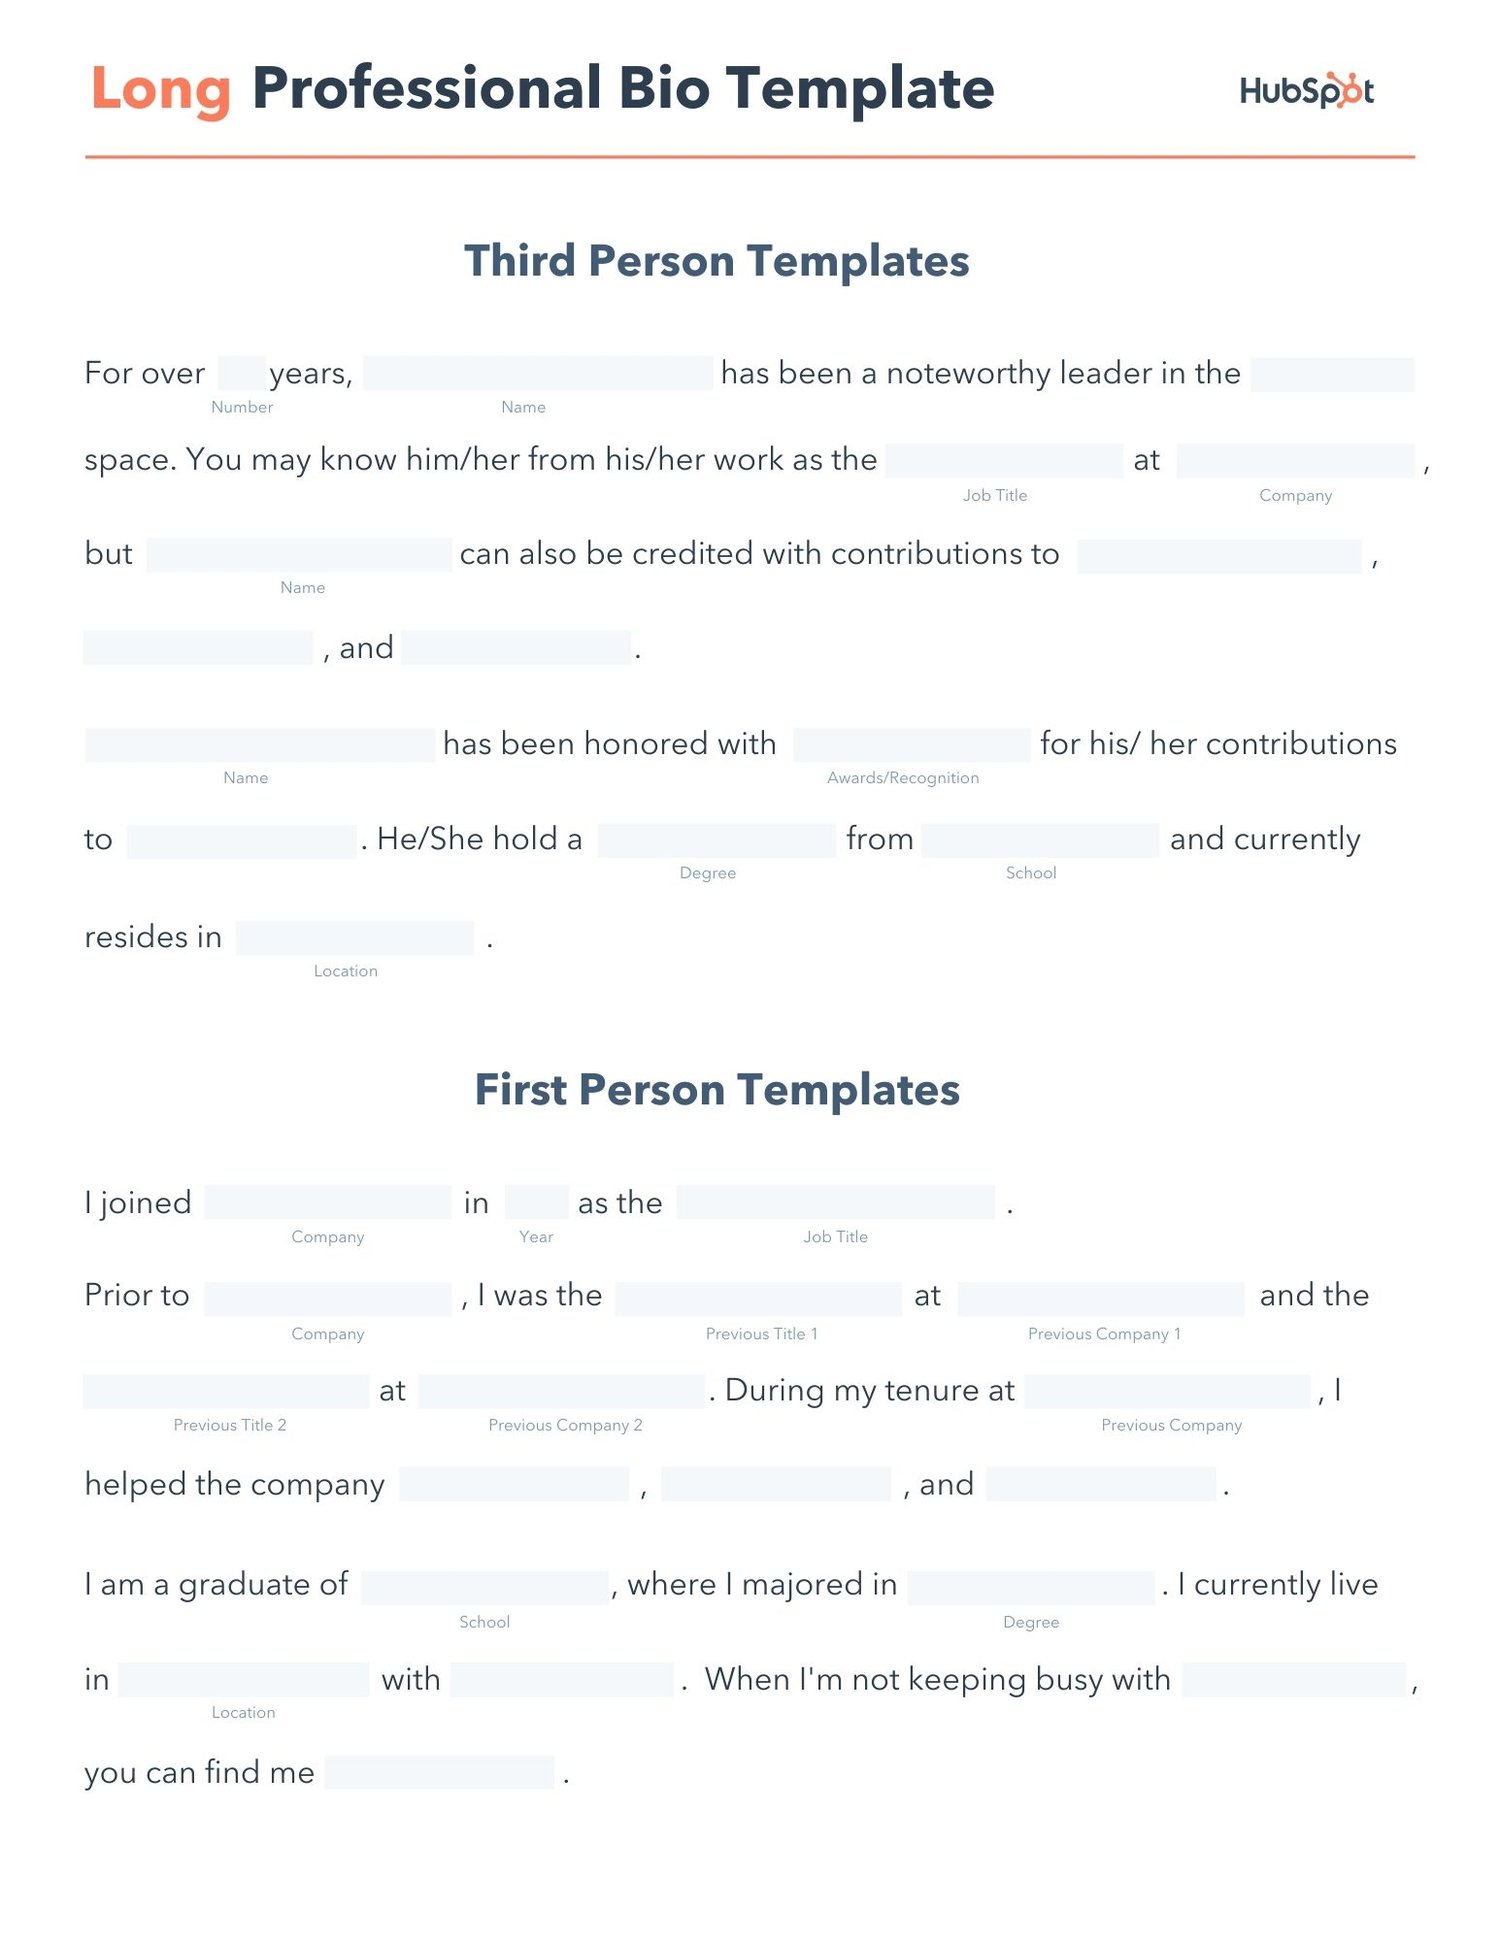
Download a free, editable long professional bio template.
Writing a professional bio that captures your brand and what you offer to your audience can help you grow better. But doing it right is just as important. Here’s how to write a bio, step-by-step.
1. Create an ‘About’ page for your website or profile.
Before you can publish your professional bio, you need a living space for it. Here are a few to consider (some of these you might already have in place):
- Facebook Business page
- LinkedIn profile
- Instagram account
- Personal website
- Personal blog
- Industry website
- Industry blog byline
As you’ll see in the professional bio examples below, the length and tone of your bio will differ depending on which of the above platforms you choose to be on. Instagram, for example, allows only 150 characters of bio space, whereas you can write virtually as much as you want on your personal website — or even your Facebook Business page. But once created, this bio should represent who you are in the eyes of your audience.
2. Begin writing your bio with your first and last name.
If your readers don’t remember anything else about your bio, make sure they remember your name. For that reason, it’s a good idea for your first and last name to be the first two words of your professional bio. Even if your name is printed above this bio (hint: it should), this is a rare moment where it’s okay to be redundant.
For example, if I were writing my own bio, I might start it like this:
Lindsay Kolowich
Lindsay Kolowich is a Senior Marketing Manager at HubSpot.
3. Mention any associated brand name you might use.
Will your professional bio represent yourself, or a business you work for? Make sure the brand you want to be associated with is mentioned in your bio. If you’re a freelancer, perhaps you have a personal business name or pseudonym you advertise to your clients. Here are a few examples:
- Lindsay Kolowich Marketing
- SEO Lindsay
- Kolowich Consulting
- Content by Kolowich (what do you think … too cheesy?)
Maybe you founded your own company, and you want its name to be separate from your real name. Don’t be afraid to keep it simple: “Lindsay Kolowich is the founder and CEO of Kolowich Consulting.”
4. State your current position and what you do.
Whether you’re the founder of your company or a mid-level specialist, use the next few lines of your bio to describe what you do in that position. Don’t assume your audience will naturally know what your job title entails. Make your primary responsibilities known for the reader, helping them paint a picture of who you are during the day and what you have to offer the industry.
5. Include at least one professional accomplishment.
Just as a business touts its client successes in the form of case studies, your professional bio should let your own audience know what you’ve already achieved. What have you done for yourself — as well as for others — that makes you a valuable player in your industry?
6. Describe your values and how they inform your career.
Why do you do what you do? What might make your contribution to the market different than your colleagues? Better yet, what values do you and your colleagues share that would make your business a worthwhile investment to others? Start to wrap up your professional bio by simply explaining what gets you up in the morning.
7. Briefly tell your readers who you are outside of work.
Transition from describing your values in work to describing who you are outside of work. This may include:
- Your family
- Your hometown
- Sports you play
- Hobbies and interests
- Favorite music and travel destinations
- Side hustles you’re working on
People like connecting with other people. The more transparent you are about who you are personally, the more likable you’ll be to the people reading about who you are professionally.
8. Consider adding humor or a personal story to add flavor to your professional bio.
End your professional bio on a good note — or, more specifically, a funny note. Leaving your audience with something quirky or uniquely you can ensure they’ll leave your website with a pleasant impression of you.
It’s important to follow the steps above when writing your bio, but don’t obsess over any one section. Remember, the people reading your bio are suffering from information fatigue. If you don’t hook ’em in the first line, you’ll lose them quickly.
(P.S. Want to give your professional brand a boost? Take one of HubSpot Academy’s free certification courses. In just one weekend, you can add a line to your resume and bio that’s coveted by over 60,000 marketers.)
Why Good Bios Are Important for a Professional
Alright, I know what you may be thinking … So what? It’s just a bio. I mean, how many people actually read professional bios, anyway?
The answer: A lot of people. More importantly, though, there’s no way to tell exactly who is reading it — and you always want it to be ready for when the right people come across it. And when they do, you want it to catch their eye. In a good way.
You see, while your resume is only useful for when you’re actively applying for specific positions, your professional bio is much more visible. It can live on your LinkedIn profile, your company’s website, your guest blog posts, your speaker profiles, your Twitter bio, and many other places.
And, most importantly, it’s the tool that you can leverage most when you’re networking.
Bottom line? People will read your professional bio. Whether they remember it, and whether it makes them actually care about you, is a matter of how well you present yourself to your intended audience.
So, what does a top-notch professional bio look like?
Below, we’ve curated some of the best real professional bio examples we’ve ever seen on Twitter, Instagram, Facebook, LinkedIn, and the various websites where you might describe yourself.
Check ’em out, and use them as inspiration when crafting your own.
11 of the Best Professional Bio Examples We’ve Ever Seen
1. Ann Handley
Bio Platform: Personal Website
If you’re a marketer, you’ve likely heard of Ann Handley. Her list of credentials is lengthy, and if she really wanted to, she could go on and on and on about her accomplishments.
But when people list out all their accomplishments in their bios, they risk sounding a little egotistical. Sure, you might impress a handful of people with all those laurels, but many people who read your bio will end up feeling either intimidated or annoyed. Think about it: Is that how you want the majority of your readers to feel when they read your bio?
To minimize the egoism that comes with talking about yourself, think about how you can list out your accomplishments without sounding like you’re bragging. Ann does this really well, choosing a tone in her bio that’s more approachable.
It starts with the excerpt in the footer of her personal website. Give it a quick read, paying close attention to the opening and closing lines:
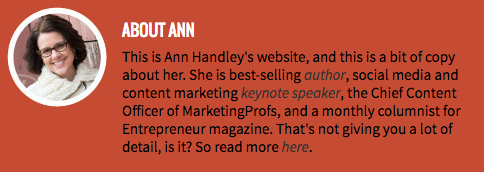
“This is Ann Handley’s website, and this is a bit of copy about her … That’s not giving you a lot of detail, is it? So read more here.” This is the kind of simple, friendly language that invites the reader in rather than shutting them out.
Follow the link and you’ll be led to a page dedicated to a fuller bio, which she’s divided into two parts: a “short version” (literally a bulleted list of key facts) and a “long version,” which includes traditional paragraphs. There’s something in there for everyone.
2. Rebecca Bollwitt
Bio platform: Instagram
Instagram is a notoriously difficult platform on which to write a good bio. Similar to Twitter, you simply don’t have room for a professional bio that includes everything about you. And because Instagram is primarily a mobile app, many viewers are reading about you passively on their mobile device.
Instagram’s limited bio space requires you to highlight just your most important qualities, and blogging icon Rebecca Bollwitt does so in her own Instagram bio in an excellent way.
Rebecca’s brand name is Miss604, and cleverly uses emojis in her Instagram bio to tell visitors exactly what makes her a valuable content creator. Take a look in the screenshot below.
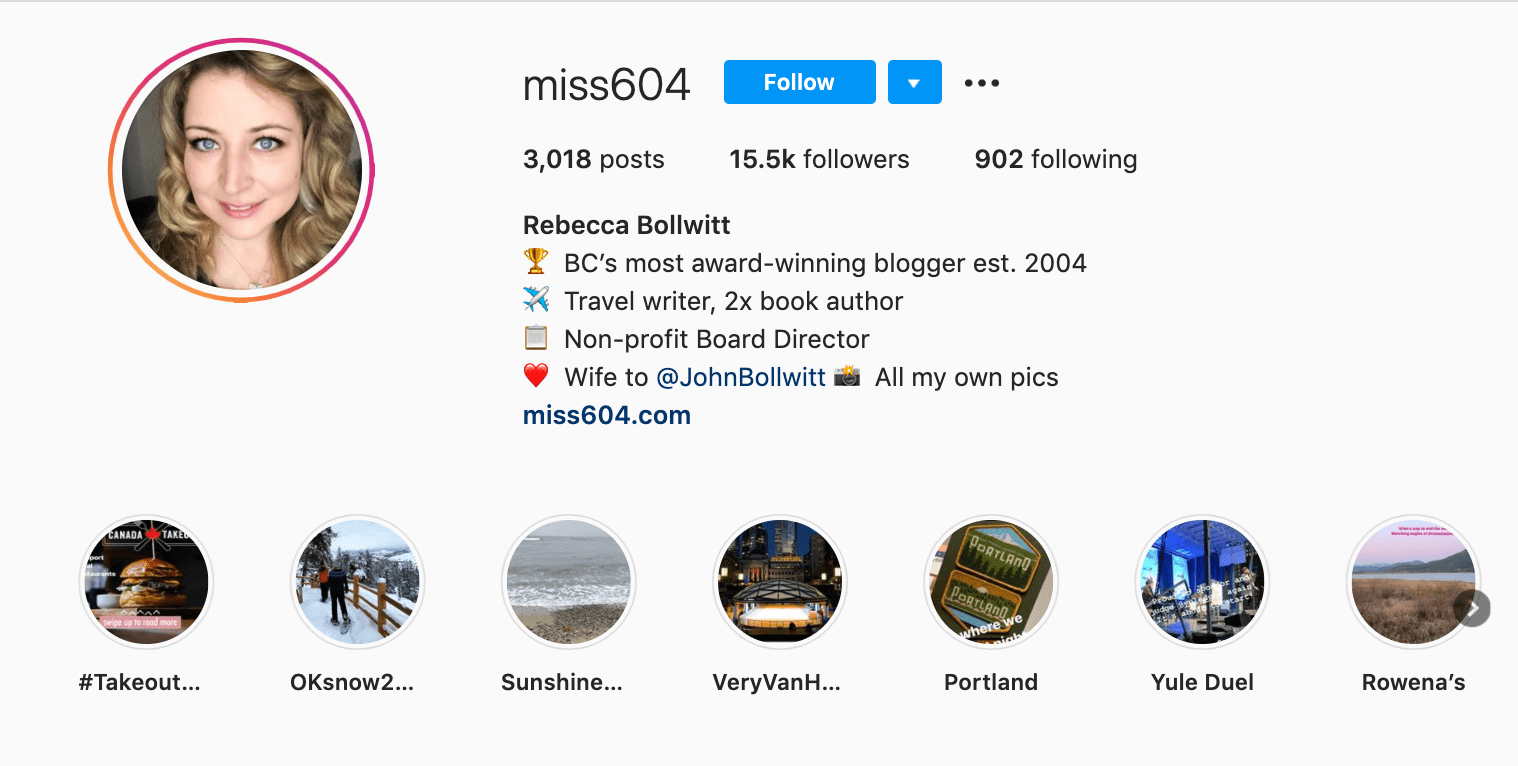
Starting with a trophy emoji, Miss604 says she’s BC’s most award-winning blogger. I haven’t even looked at her pictures yet and the introduction of her bio has already sucked me in.
The rest of her bio follows suit, breaking up the text with an appropriate emoji and a perfect collection of nouns to tell me who she is as a person. She even links out to her husband’s Instagram account after the heart emoji (an adorable addition), and assures her followers that all of her pictures are authentically hers.
Take a lesson from Miss604, and show your personal side. Just because you’re branding yourself as a professional doesn’t mean you have to take your human being hat off. Often your most personal attributes make for the best professional bio content.
3. Mark Gallion
Bio Platform: Twitter
As a venture capitalist and an executive at several start-ups, Mark Gallion has different versions of his bio all over the internet. You can imagine some are more formal than others. But when it comes to his Twitter bio, he carefully phrased his information in a way that helps him connect with his audience — specifically, through the use of humor.
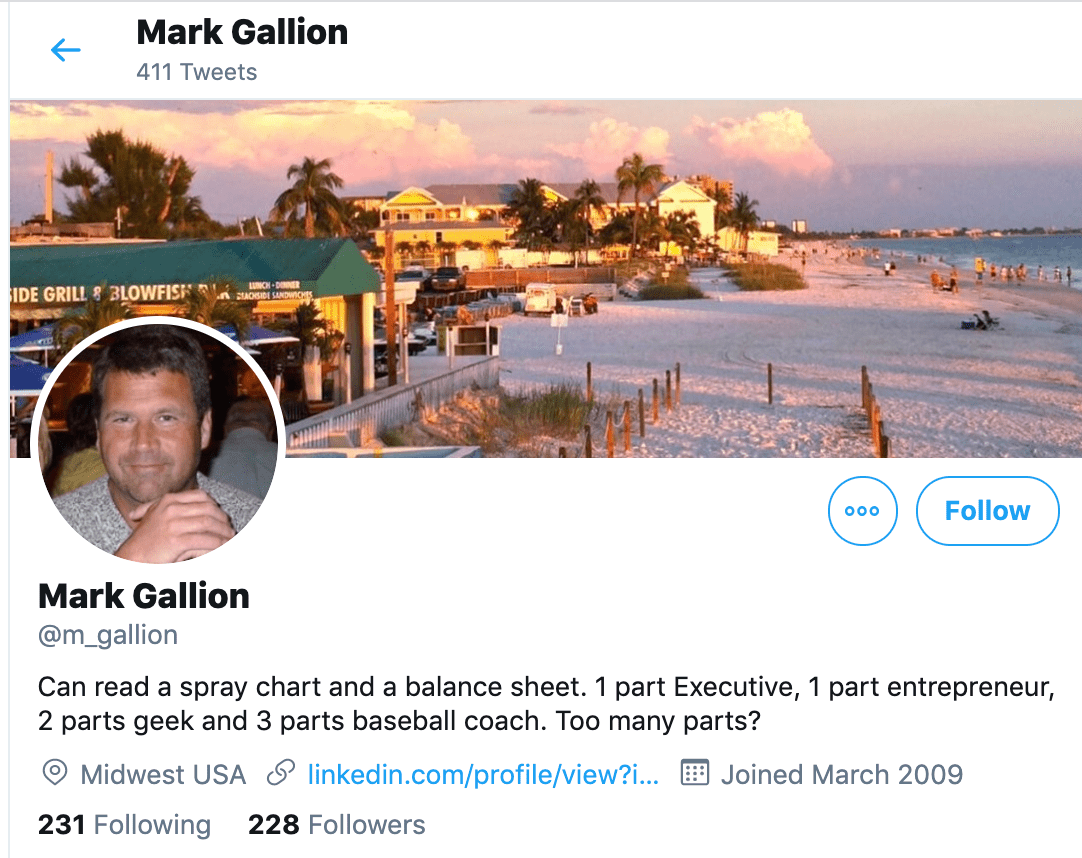
Why would he choose humor when he runs four start-ups and constantly seeks funding for them? Well, Mark’s tactic is totally intentional: it’s a lever he pulls to refresh his brand while maintaining his already impressive and established identity as an entrepreneur.
Mark leverages his Twitter bio because it’s place where he can be human. And it helps him relate to his followers and potential investors.
When crafting your own Twitter bio, consider your audience and the personal brand you’re trying to create for yourself. Use it as an opportunity to be relatable. (And check out this list of amusing Twitter bios for inspiration.)
4. DJ Nexus
Bio Platform: Facebook
This New England-based DJ has single-handedly captured the Likes of more than 2,000 people in and beyond Boston, MA. And even if you don’t listen to the type of music he produces, it’s hard not to listen to his compelling Facebook bio.
Stage-named DJ Nexus, Jamerson’s professional bio makes use of nearly every Page field inside the About tab. Right away, his audience knows which genres he plays in, where he’s from, and who else he’s worked with. The latter — under “Affiliation,” as shown in the screenshot below — is unique and seldom mentioned in professional bios today.
Our favorite part about DJ Nexus’s bio? His tagline, under “About” — “Quiet during the day. QUITE LOUD at night!” DJ Nexus tells you when he works in an awesome way. I got goosebumps just imagining a dance club he might play his music in.
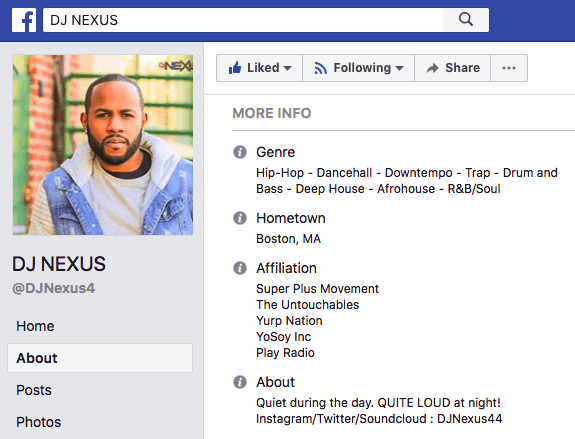
DJ Nexus’s bio brilliance doesn’t stop there.
The great thing about Facebook Business Pages is that you can write as much as you want without overwhelming your Page visitors. For those who just want Jamerson’s basic info, they have the four categories shown above. For those who want to learn more about him, he tells an excellent story of his career. Here’s just a preview of his story, below:
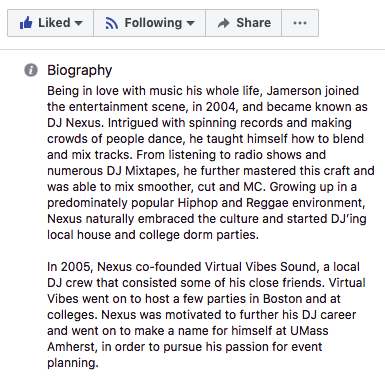
In this story, DJ Nexus describes both when he “became known as DJ Nexus” and a company he founded shortly afterward — all before going to college. This is a terrific lesson for Facebook Businesses today: customers want to learn about you, and as Facebook increasingly becomes a place for meaningful interactions, there’s no better place to tell your story than on your Facebook Business Page.
5. Lena Axelsson
Bio Platform: Industry Website
When it all comes down to it, your professional bio is no different than any other piece of persuasive copy — no matter where it lives. One of the most common mistakes people make is thinking of it as its own beast, separate from other pieces of writing. If you think about it that way, you’re far more likely to write something painfully uninteresting.
When you sit down to write your professional bio and you’re watching that cursor blinking on the screen, think about how you would introduce a blog post. You don’t just dive right into the meat of the thing, now, do you? No. You start with an introduction.
The best bios are often concise (around 200–300 words), so you don’t have a lot of room to play around. But a single sentence that tees your reader up and provides context for the accomplishments that follow could make the rest of your bio that much more persuasive.
Take Lena Axelsson’s bio, for instance. She’s a marriage and family therapist — a job where empathy and compassion are a big part of the job description. That’s why she chooses to open her bio with a great introductory sentence: “When human beings experience trauma or severe life stressors, it is not uncommon for their lives to unravel.”

Then, she goes into why she’s passionate about her job, how she helps her clients, and how she caters her approach to each individual patient. The necessary educational information is left for the end, after the reader has been hooked.
Your bio doesn’t have to be super serious, nor does it have to start with a joke. This bio shows how you can capture your reader’s attention by being empathetic and showing how that empathy shapes a valuable professional.
6. Mark Levy
Bio Platform: Personal Website
Mark Levy is a small business owner who’s taken a more traditional approach to the professional bio on his website — but in a way that takes care to speak to his intended audience.
What we love about his bio is the way he’s set it up: On his business’ “About” page, he’s listed two biographies, which he’s labeled “Mark Levy’s Biography #1” and “Mark Levy’s Biography #2.”
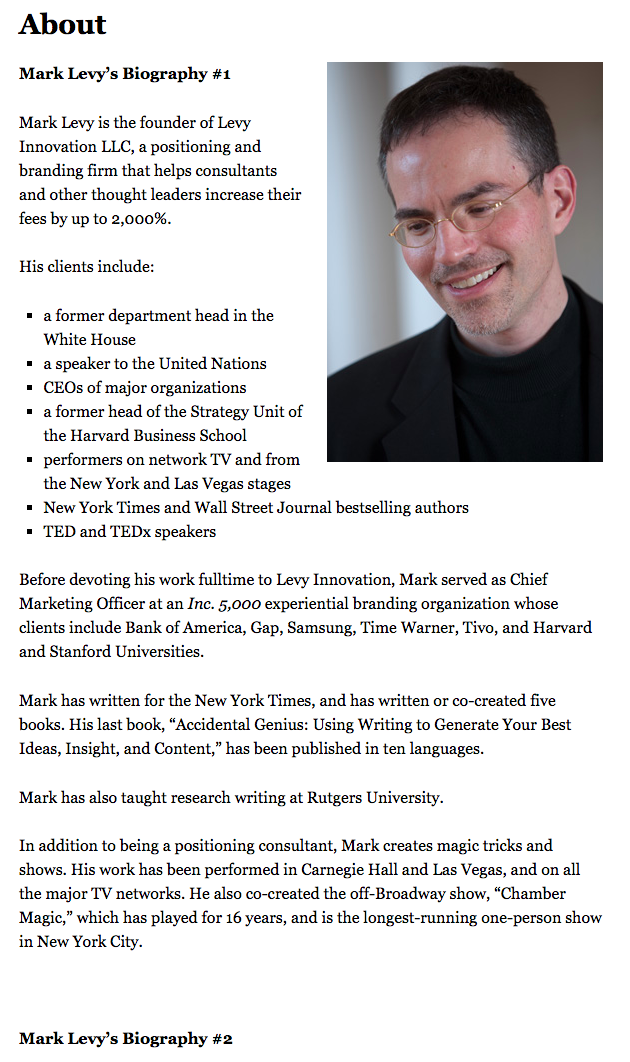
Click here to see the full version.
Like Ann, Mark’s given his readers two different options. The first biography is a “short version,” which includes a combination of bullet points listing his credentials and a few short paragraphs.
The second is the “long version,” which is actually even more interesting than the first one. Why? Because it reads like a story — a compelling one, at that. In fact, it gets really funny at parts.
The second sentence of the bio reads: “He was frightened of public school, loved playing baseball and football, ran home to watch ape films on the 4:30 Movie, listened to The Jam and The Buzzcocks, and read magic trick books.”
Here’s another excerpt from the middle:
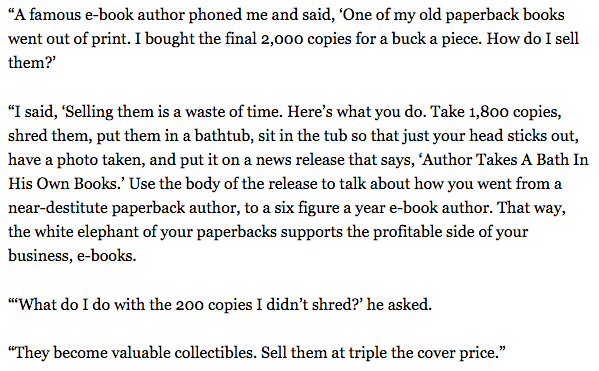
Of course, the fantastic copywriting isn’t a surprise, given that this guy wrote several books. But the conversational tone and entertaining copy let his quirky personality (and great writing skills) shine.
7. Corey Wainwright
Bio Platform: Blog Byline
Corey Wainwright is the director of content here at HubSpot. She’s written content for HubSpot’s Marketing Blog for years, and her blog author bio has caught my eye since before I ever started working for HubSpot. (Back then, it started with, “Corey just took a cool vacation.”)
What I love most about Corey’s bio is that it’s a great example of how to deliver information about yourself without taking things too seriously. And in this context, that’s totally appropriate.
Despite having a number of impressive accomplishments under her belt, she simply doesn’t like displaying them publicly. So, she prefers making her author bio a little more “light.”
Her bio (pictured below) reads, “Corey is a Bruce Springsteen fan who does content marketing, in that order.”
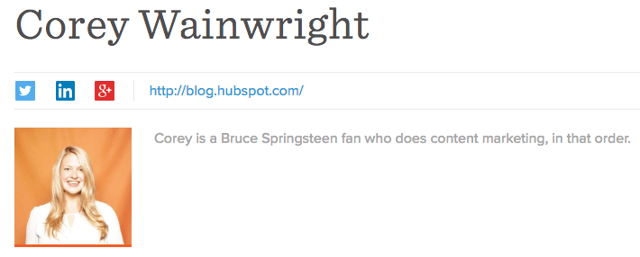
It works in this particular context because, at HubSpot, our blog authors often prefer to make themselves as friendly and approachable as possible — while letting the content speak for itself.
It helps that authors’ social media accounts are located right below our names and above our pictures. For folks who really do want a list of Corey’s credentials, they can click the LinkedIn button to go to her LinkedIn page. (You can read this blog post to learn how to create social media buttons and add them to your website.)
8. Marie Mikhail
Bio Platform: LinkedIn
Marie Mikhail checks off nearly every box for what makes an excellent bio. A professional recruiter, she expresses her “passion for recruiting” upfront, in the first sentence, while using that sentence to hook her profile visitors into a brief story of her background.
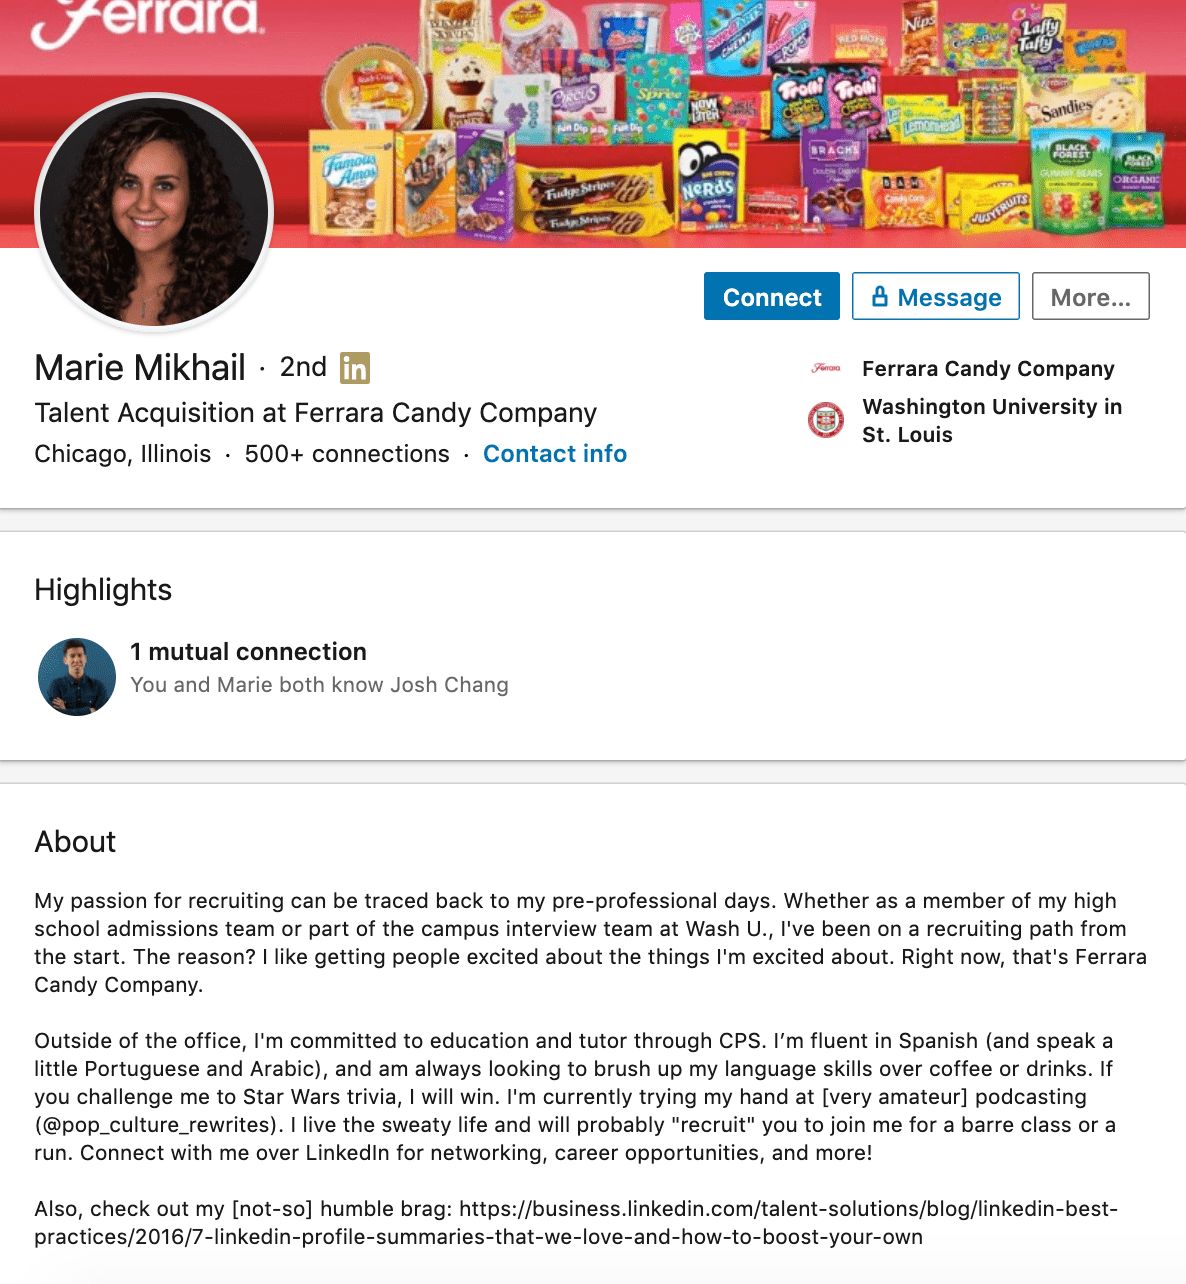
But there are a lot of recruiters out there, and Marie knows that. So, to differentiate herself, she closes the first paragraph of her bio explaining that she likes “getting people excited about the things [she’s] excited about.” It’s a well-put value proposition that sets her apart from the rest of the HR industry.
Marie Mikhail finishes off her bio by including a smooth mixture of professional skills, such as her Spanish fluency; and personal interests, such as podcasting and Star Wars (she mentions the latter with just the right amount of humor).
9. Wonbo Woo
Bio Platform: Personal Website
Wonbo Woo is the executive producer of WIRED’s video content, and he has a number of impressive credits to his name. What does this mean for his professional bio? He has to prioritize. With this in mind, Wonbo opens his bio with the most eye-catching details first (if the image below is hard to read, click it to see the full copy).
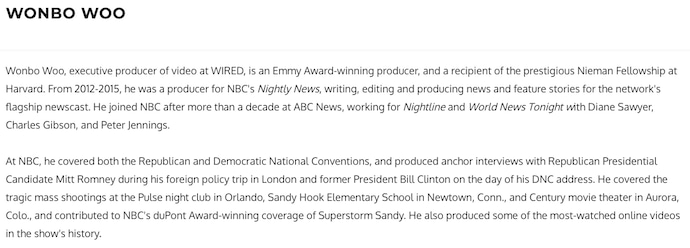
Not only does Wonbo’s bio start strong, but he also takes readers on a suspenseful journey through some of his most harrowing assignments — where he was when news broke and how he responded. You can see this quality below.
 The accomplished journalist concludes his gripping bio as strong as it began, measuring his experience by the number of states, countries, and continents to which he’s traveled in his career. See how this looks above. All in all, it’s a fantastically concise bio for as much detail as it holds.
10. Chris Burkard
Bio Platform: LinkedIn
If you’re writing your bio but having trouble figuring out how to showcase your accomplishments without boasting, photographer Burkard’s LinkedIn bio is a great example for inspiration.
Written in third-person, his bio tells a fluid story, starting with his ultimate mission — “capture stories that inspire humans to consider their relationship with nature” — before diving into more tangible accolades (giving a TED talk, publishing books, etc.).
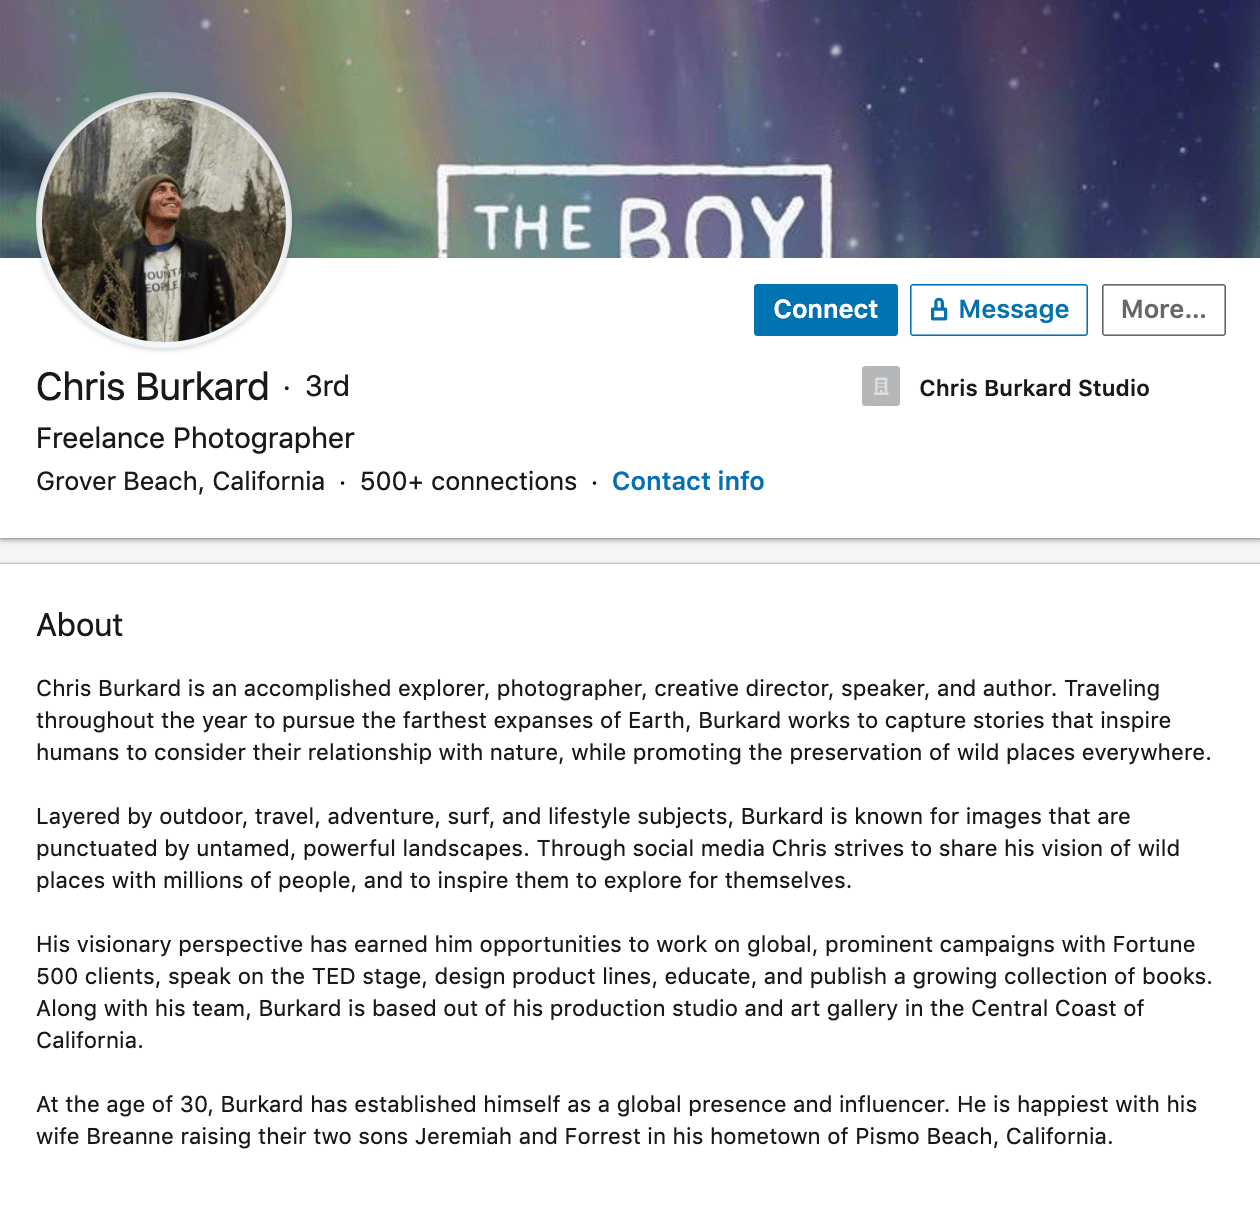
Best of all, rather than using his bio as an opportunity to brag, he instead ties his talents into how he hopes to help others, writing, “Through social media Chris strives to share his vision … and inspire [his followers] to explore for themselves.” I wouldn’t necessarily be inclined to follow Chris if his bio had simply read “I post beautiful images” … but inspire me to travel? Now that’s something I can get behind.
Lastly, he ends on a humble, sweet note, writing “He is happiest wth his wife Breanne raising their two sons”. Don’t be afraid to inject some personal information into your bio — it could help you seem more approachable as a result.
11. Megan Gilmore
Bio Platform: Instagram
Megan Gilmore is a best-selling cookbook author, and she often posts healthy recipes on her Instagram page to inspire followers’ to realize that you don’t have to sacrifice taste for the sake of health.
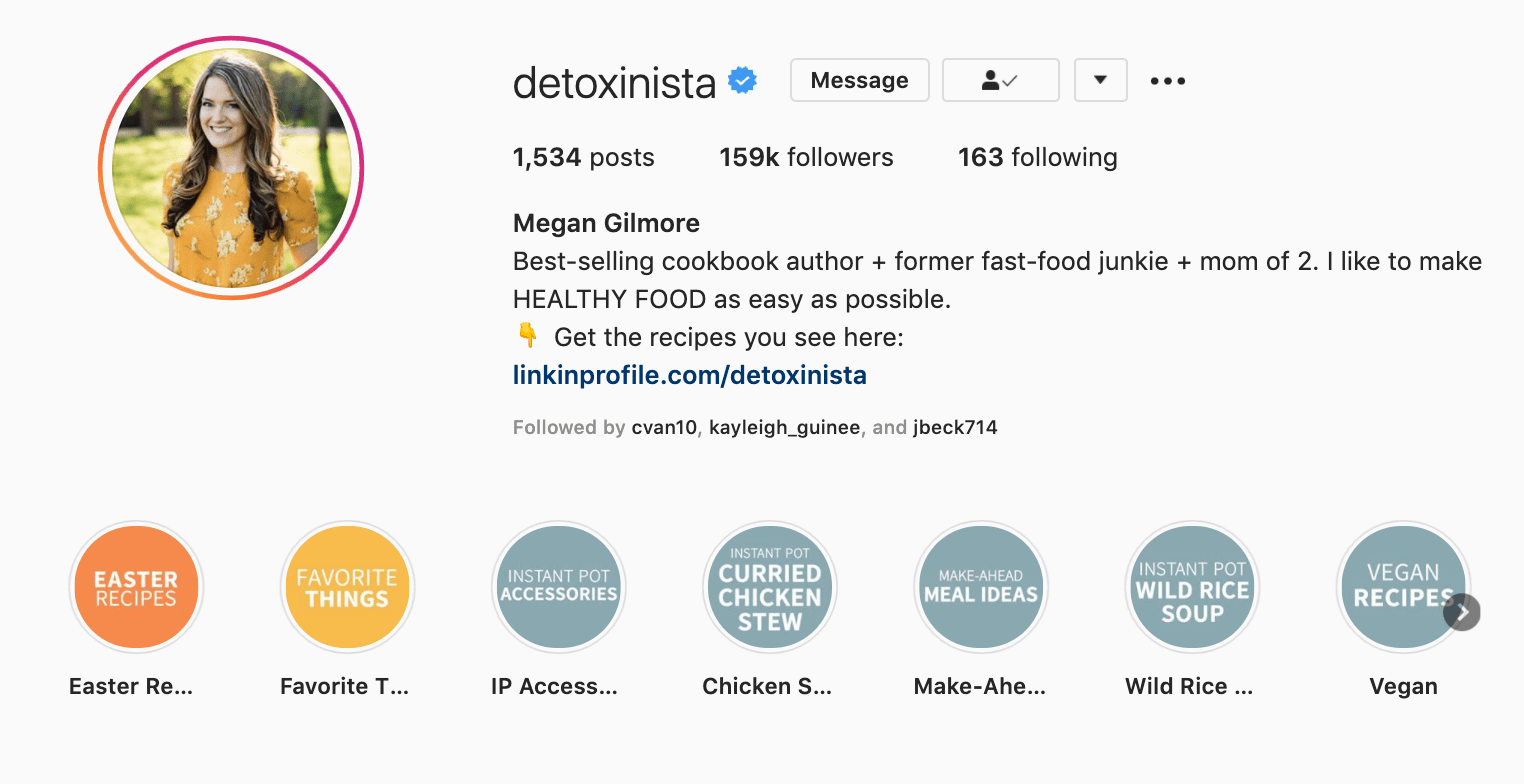
Fortunately, you glean most of this information immediately from her Instagram bio, which is short and to-the-point: “Best-selling cookbook author + former fast-food junkie + mom of 2. I like to make healthy food as easy as possible.” Her “former fast-food junkie” call-out shows followers she’s relatable (and that her recipes are likely delicious yet healthy alternatives), and by mentioning she’s a mother, you get the sense that her recipes really will actually be quick and easy.
Plus, Gilmore includes a CTA link within her Instagram bio that leads followers to free, ready-to-use recipes. You might be thinking — Why would she do that, since it discourages people from buying her book? But that couldn’t be further from the truth.
By giving her followers the chance to try out her recipes, she’s slowly turning leads into customers. After I tried a few of her Instagram recipes and loved them, I decided to go ahead and buy her book, knowing I’d like more of what she had to offer.
Want more? Read How to Write a Cover Letter That Gets You the Job [Bookmarkable Template + Examples].
Editor’s Note: This post was originally published in November 2019 and has been updated for accuracy and comprehensiveness.

How to Write an Effective Communications Plan [+ Template]
Remember the “Tide Pod Challenge?” That horrendous time at the beginning of 2018 when adolescents filmed themselves ingesting laundry detergent?
While it was a funny (albeit dangerous) start to the new year, this small boost of infamy was a PR mess for the detergent brand in question, Tide, whose crisis communication team had to figure out how to respond to America’s teens swallowing their toxic product. Tide’s parent company, Procter & Gamble, was swift in their response, thanks in large part to their communication plan.
Communication plans can help you clarify the purpose of a product launch or new initiative and officially determine the messages you want to deliver to your intended audience(s).
Additionally, a communication plan can help your business during a time of crises if a previous marketing message or business decision damaged your reputation with internal stakeholders or customers.
If companies don’t have a communication plan, they’ll be unprepared when disaster strikes. It may be unlikely that your company will find teenagers eating your product for internet fame, but not so unlikely that you’ll never find yourself needing a procedure to effectively handle difficult situations.
Now that we’ve gone over how a communication plan can be helpful, let’s learn how to write one that will be effective.
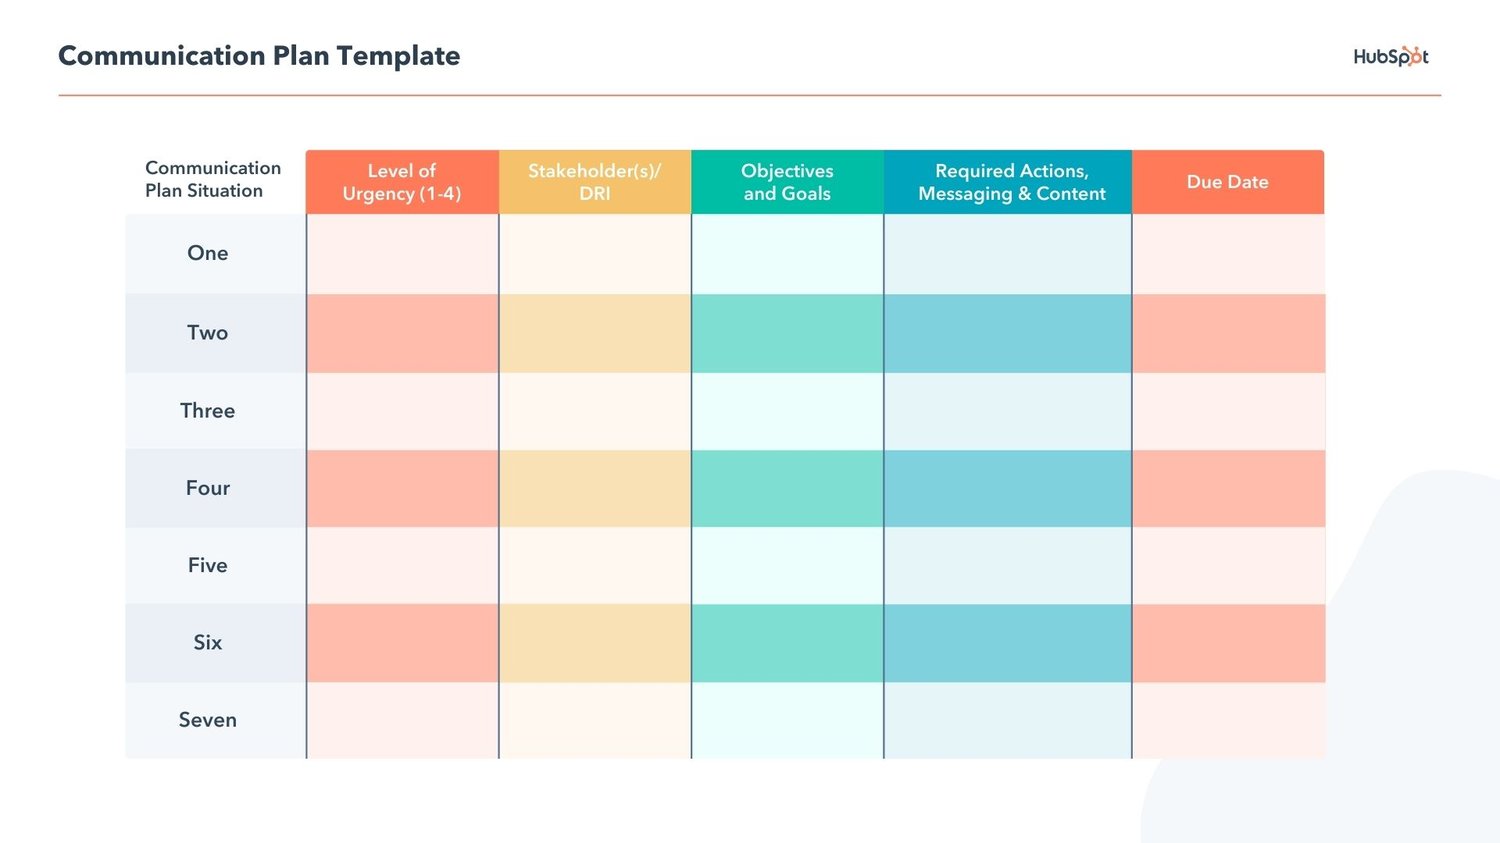
Download a free, editable communication plan template.
Need a free, easy-to-use communication plan template? HubSpot has 12. Check out this toolkit for everything you need to build your own.
This is part of a template offered in the toolkit. For this particular template, the organization is separated into phases, a description of that phase, and who needs to complete that action.
Communication plans can get tricky, but writing an effective one will prove itself with its longevity.
This communication checklist below, by Prezly, gives a great overview of the details of a crisis plan from beginning to end. It can be used as an effective guide when drafting a crisis management strategy.
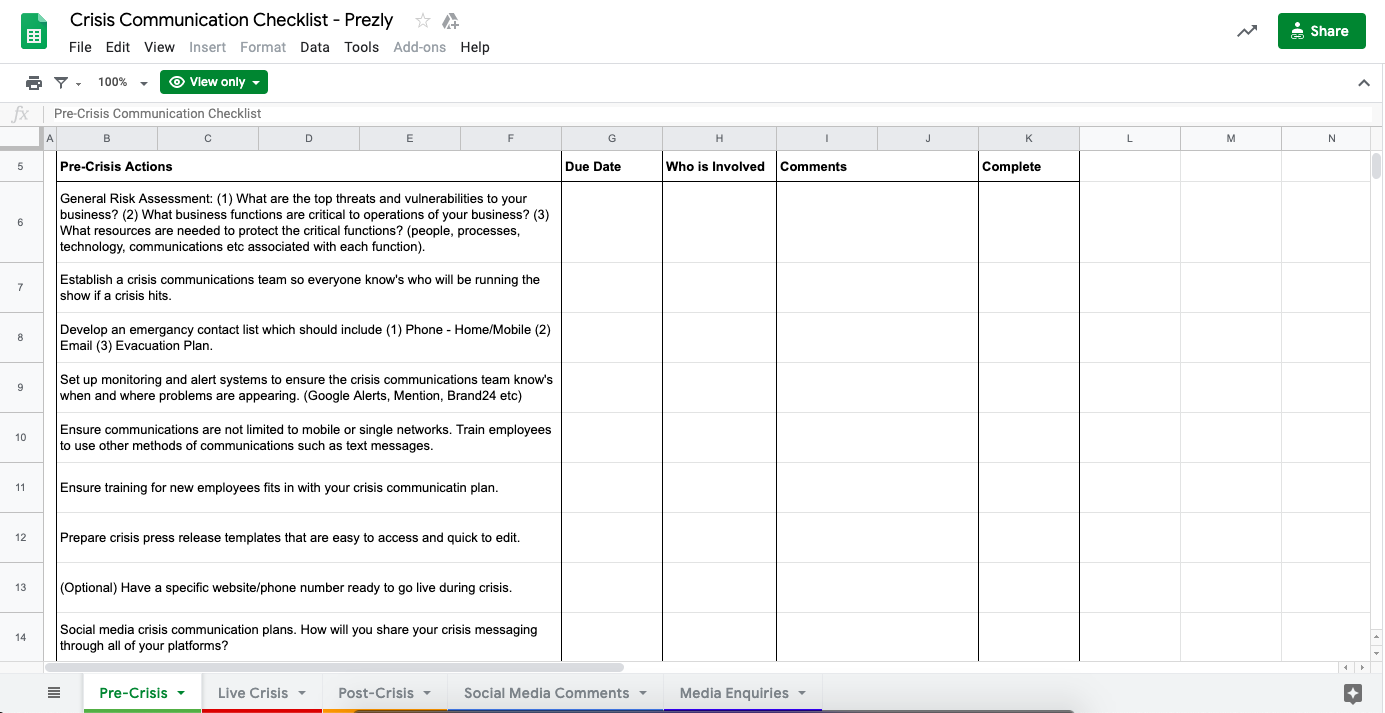
Image source: Prezly
1. Conduct an audit of your current communications materials.
Before sitting down to get rollin’ on your plan, you need to first decide where it’ll fit into your business. So it’s important you complete a “state of the union”, or an audit of the current climate of communications within your company. This can help you identify any problem areas.
For instance, let’s say you need to create a communications plan for a new product launch. To create your plan, you’ll first need to perform an audit to identify gaps in your current marketing approach.
After performing the audit, you might find there is a major gap in your marketing materials in which you rarely discuss a topic that aligns well with your new product. You’ll want to ensure this topic makes it into your communications plan.
To conduct an audit, you’ll need to carefully gather and interpret data on your current marketing plan performance and build a path forward based on those results. Additionally, you might consider hosting focus groups or sending surveys to your audience to find gaps in your current communications materials.
Of course, you’ll want to have the goal of your communications plan in-mind when conducting an audit. In the example above, noticing you’re lacking material on a certain subject only matters if your goal is to drive leads and conversions to a product that aligns with that subject.
For instance, if you’re launching a new email marketing tool and you notice you’re lacking content on Google Ads, this might not be relevant information for your communications plan. However, if you’re missing content on email marketing best practices, that’s important information you can use to tailor your communications plan appropriately.
2. Set SMART goals for your communications plan based on the results from your audit.
After your audit, you’ll want to lay out a few goals based on the data from the results. What do you want to achieve with this plan?
When in doubt, remember that your goals should be SMART: Specific, Measurable, Attainable, Relevant, and Time-based.
For instance, if a small agency is writing a communications plan for its client, they might write a goal along these lines: “We plan to increase employment applications for our client by 25% over the course of one quarter.”
Alternatively, perhaps your HR team needs to write a communications plan to pitch designing a new growth matrix for individual contributors who don’t want to become managers.
If that’s the case, your HR team will need to identify specific goals they hope to achieve as a result of their plan, even if the results are less quantifiable — for instance, their goal might be to “increase employee retention rates by 10% over the next year” or even “increase employee satisfaction, as indicated by their next NPS scores.” They’ll need to pitch these goals to stakeholders to get leadership on-board.
3. Identify the audience to whom you plan to deliver your communications plan.
Good communication starts with knowing and understanding your listener. In this case, if a crisis communication plan is for stakeholders, which one(s) are you writing for? Stakeholder examples include employees, investors, customers, local government officials, or media outlets.
If you’re writing for media outlets, a press release detailing your goals is a good idea for that audience. There should be a process for who will speak to the media outlets, an outline of what they will say, and an action plan put in place moving forward.
Alternatively, if your audience is your employees, you might want to create an up-to-date internal document for employees to refer to, as well as the contact information for the internal DRI if they have follow-up questions.
4. Outline and write your plan, keeping your audiences in-mind.
When you’re ready to outline and write your plan, it’s likely easiest if you start with a table or chart to identify the messages you need to promote, to whom you’re targeting those messages, and on which channel(s).
Once you’ve created a general outline, here’s how you’ll want to structure your communications plan (feel free to copy these sections into a Table of Contents for your own plan):
- Purpose (what is this communications plan for)
- Escalation Framework (including ‘first line of defense’ and ‘greater response team’)
- Roles and responsibilities of each employee
- Do’s and Don’ts
- How to maintain an effective response plan
(If you need help writing a communications plan, download our free, ready-to-use communications plan templates.)
When writing your communication plan, work with groups or representatives from your stakeholders to improve accuracy. Strategies should solve for goals or potential risks.
For instance, if you work for an agency aiming to promote a client’s product, a risk might be spending money on paid ads without a guaranteed ROI. To solve for that risk, the agency should detail different steps to ensure the ads are effective before going public.
5. Determine the channel(s) on which you need to deliver your messages.
The channels you choose to communicate with your audience depends on your message, and to whom you want to deliver that message. For instance, if you’re creating a communications plan for internal employees, you might send out your communications plan in a company-wide email, or use in-person team meetings to deliver your message.
Alternatively, if you’re communicating with customers, you might determine it’s best to communicate via an email newsletter, or via a press release.
Of course, the channel(s) you choose will depend on your goals, but it’s important as you’re writing your communication plan that you keep your distribution methods in-mind.
6. Decide which team members are responsible for delivering the message.
Once you determine your audience and channel(s) on which you’ll deliver your communications plan, figure out the DRI for delivering the message.
For instance, if your HR team is pitching a new growth matrix to leadership, you might ask your Director of HR to deliver the initial pitch in the first meeting. Once leadership is on-board, you might ask each HR representative to deliver one training session for each internal team to ensure every employee understands what’s changing internally, and why.
7. Estimate a timeline for how long each step should take.
You should have a ballpark estimate of how much time each step in executing your strategy will take. For instance, if your plan needs to go from the higher-ups down to the employees, it’s good to take into account how long going through the chain of command will take. It’s also smart to infer how long a media cycle will last.
For instance, for a minor slip-up on an ad campaign, the advertising agency might estimate the cycle for controlling the issue will take a month — including meeting with the client, stakeholders, and employees to discuss steps moving forward.
8. Measure the results of your plan after presenting to stakeholders, and determine successes and areas for improvement.
There’s always room for improvement. Measure the results of the plan after presenting it to stakeholders, and determine aspects that went well, and areas for improvement next time.
For instance, the ad agency might not have met its goal of increasing prospective applications by 25% within a quarter. They might rework their goals to give themselves more time or pivot their quarterly focus to fit those goals.
Alternatively, if you notice certain language in your communications plan evoked a level of stress or fear with internal stakeholders, consider how you can re-word next time to ensure your communications plan feels helpful, beneficial, and positive.
Some aspects of building a communication plan can be a “choose your own adventure” journey. The key is choosing aspects that best reflect what your business needs in times when effective communication is key. What do your stakeholders need to know, and how are you going to best communicate that?
Communication Plan Examples
A basic communication plan should include an analysis for the stakeholders you’d respond to and the procedures for what to include in those conversations. You might also include an overview of your business, potential communication challenges, and risk management strategy.
Bright Hub Project management has an example that includes how to put this information — and more — into your communication plan as a project manager.
This example is great because it details how communication managers write crisis plans and acknowledges that sometimes the busy marketer or project manager does as well.
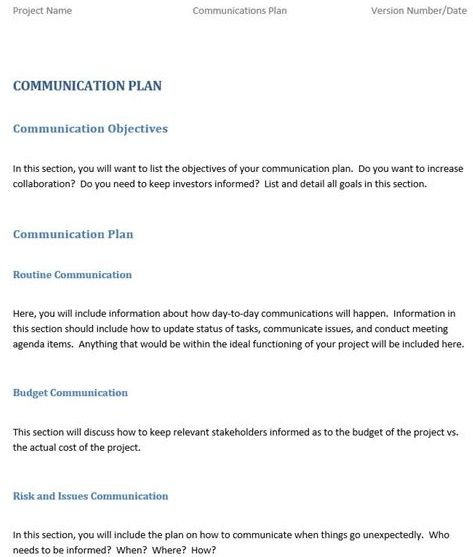
Source: Bright Hub
The National School Public Relations Association has a free version of a sample communication plan in PDF format. It’s a great example of how to format a crisis strategy and how to fit your budget into the plan:
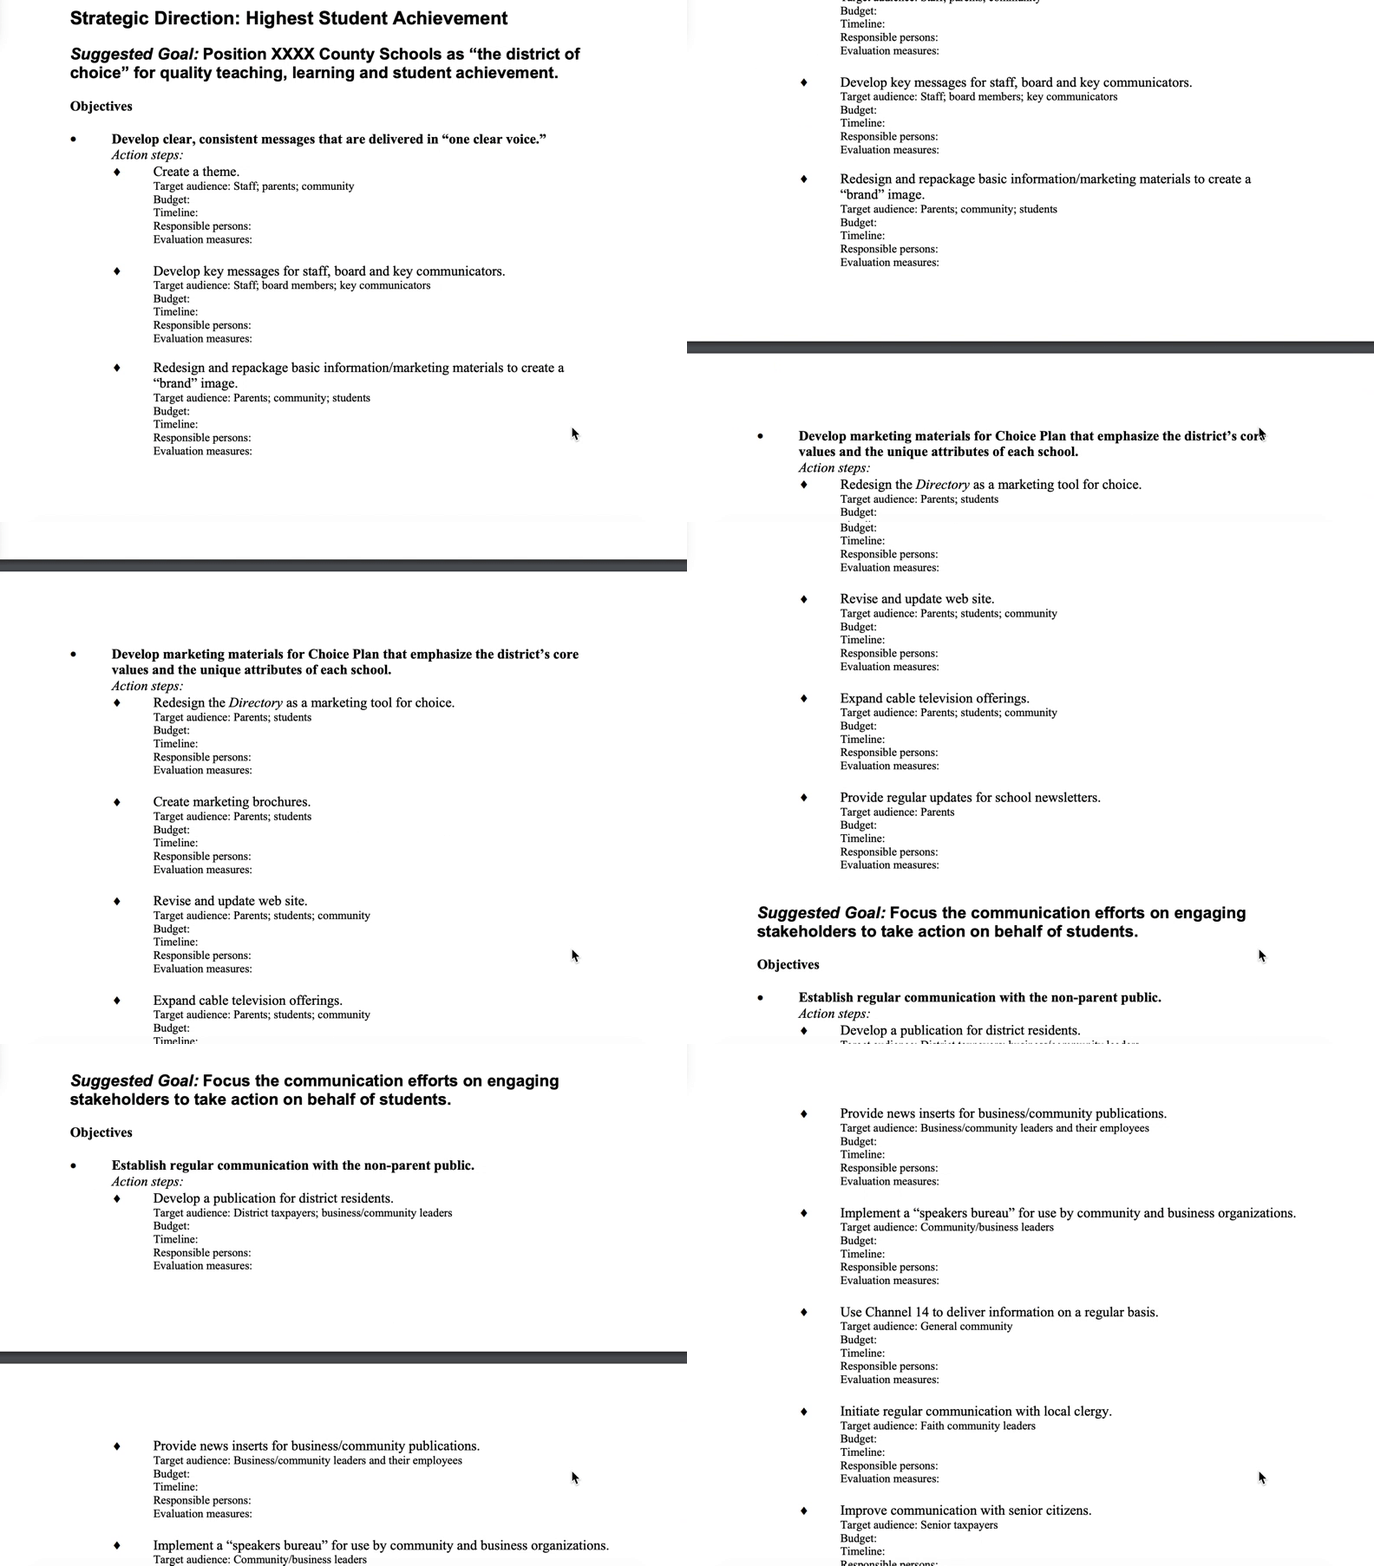
Finally, here’s an example of a Billing Upgrade Project from Simplicable. As you can see, the communications plan includes necessary sections including audience, goals, format, and DRI:
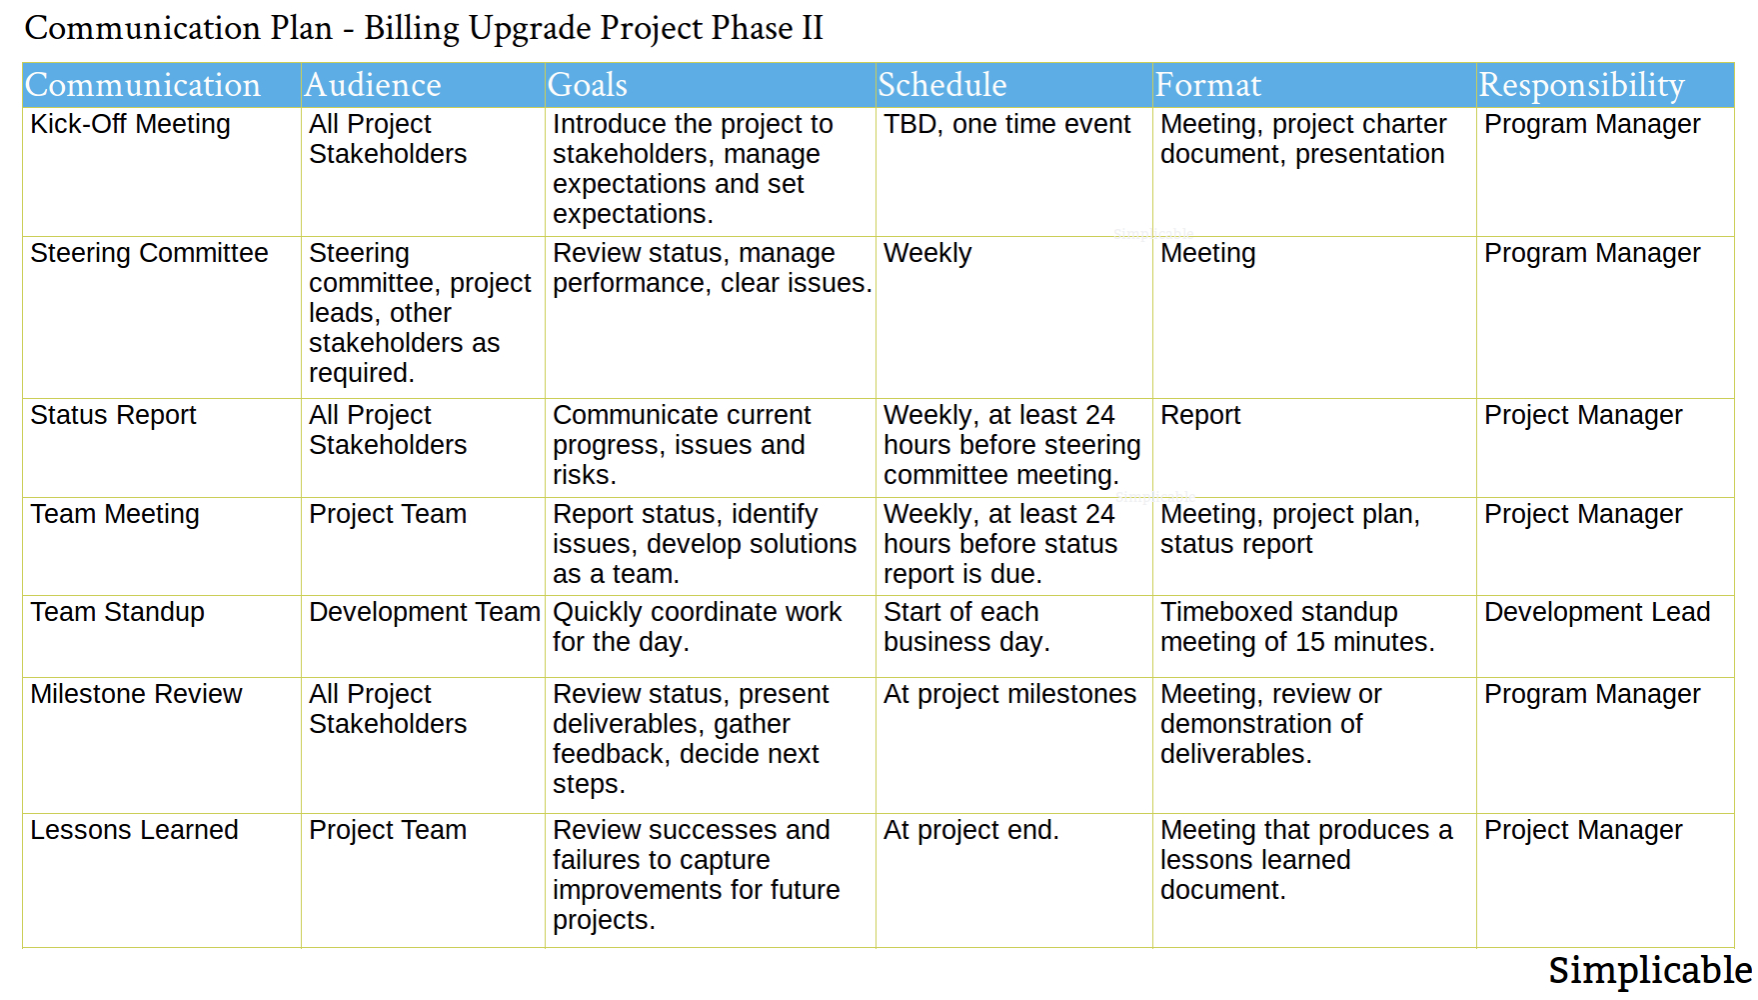 Source: Simplicable
Finally, here are some extra tips to keep in mind to help your plan shine: when describing procedures for handling crises, include who the situation involves. This lets stakeholders envision decision-making processes.
Additionally, if you’re part of a larger company with a broad stakeholder list, it’s okay to split up target audiences for your plan.
For instance, maybe your audience is more than just “consumers.” Split stakeholder groups for easier comprehension and more distinct solutions.
Ultimately, your communications plan needs to clearly and succinctly provide necessary information to everyone involved in the business decision, product launch, or PR crises. Use the strategy mentioned above, as well as our communication plan templates, to ensure yours is as effective as possible.

The Ultimate Guide to Communication
The key to any relationship is communication.
This includes romantic relationships, of course, but it also applies to friendships, coworker relationships, manager-team relationships, and even brand-customer relationships.
Any scenario that requires you to convince, inform, entertain, or engage with another involves communication.
The topic of communication is quite broad, right? I mean, it encompasses an entire college major at most universities. But we won’t be covering everything about communication in this guide.
Download a free, editable communication plan template.
Below, you’ll be reading about communication as it applies to the workplace and to your customers — two pretty important topics, right?
We’ll also be sharing ways to improve your communication and learn how your colleagues and customers communicate, too.
Keep reading to get started, or use the chapter links below to jump around.
In simpler terms, communication is said to be the “creation and exchange of meaning.” Communication is also a process … a series of actions. It’s not a single phenomenon, and it varies based on method, channel, and person.
As a partner, friend, coworker, boss, and brand, you have a responsibility to learn how to best communicate. Let’s talk about how to communicate effectively.
How to Communicate Effectively
Not all communication is good communication. In fact, not communicating at all is better (in some circumstances) than communicating poorly.
Not adhering to effective communication practices can exacerbate or worsen a communicative environment, break trust, and make messages harder to receive.
Effective Communication Skills
Effective communication isn’t just speaking clearly and honestly. It also involves creating a safe, comfortable space for communication — even if you’re not the one talking. Employ these effective communication skills to give and receive information successfully.
1. Listening Actively
Effective communication is less about talking and more about listening. Active listening isn’t just hearing what the other person has to say; it also involves understanding their emotions and point-of-view.
The goal of effective communication is to empathize and understand the person or party with whom you’re communicating. Here’s how:
- Focus on the other person. Don’t look at your phone, look around the room, or begin speaking to someone else. You can’t pick up on voice inflection or nonverbal cues if you’re not paying attention.
- Show interest in what the other person is saying by nodding your head or saying “yes.”
- Try not to judge or assume as the other person speaks. We talk more about these barriers in the next section.
- Ask questions and provide reinforcing feedback, such as “What I’m hearing is…” or “Is this what you mean?”
When you practice active, engaged listening, you becoming fully in-sync with what the other person is saying and feeling. That’s the point of effective communication.
2. Asserting Yourself
Being assertive means considering your thoughts, opinions, and feelings and communicating them in a clear, respectful way. It doesn’t mean being demeaning or aggressive. (We talk more about the different communication styles in the next section.)
Asserting yourself can help you stay clear on your own goals while empathizing with others. Here’s how:
- Get clear on your own values and opinions before you engage with someone else so that you don’t get confused or change your mind to make a conversation easier.
- Positively express negative thoughts or opinions. Try to avoid outright anger or demeaning language or attitudes.
- Be comfortable enough to say “no” or “I don’t agree.”
Although effective communication is about understanding the other person, it doesn’t mean we should forget about our own perspectives.
3. Minimizing Stress and Communication Barriers
Whether you’re speaking or listening, minimizing stress in communication helps create a healthy, effective environment. Here’s how:
- Stall or pause to collect your thoughts. This can help you avoid outbursts or speaking before you think … and saying something you might regret.
- Make one point at a time so that you or the other person don’t get confused or overwhelmed.
- Don’t interrupt or make unnecessary comments or noises while the other person is speaking.
- Try to stay objective and upbeat as you speak and listen. Keep the mood and tempo of the conversation elevated.
It’s also important to recognize and remove any communication barriers like the ones we describe below. Anyone with a perceived “upper hand” in a relationship — like managers, executives, or parents — should especially keep these in mind.
Common Barriers to Communication
Here are a handful of common communication barriers that may be hindering communication in your relationships. I’ve also included an example of how these might apply in the workplace.
Language/Cultural Communication Barriers
Language or cultural barriers occur when two parties don’t speak the same language or perhaps have different understandings of the same language.
Example: An international intern is shirking his duties to coworkers. The team lead gives feedback by saying “You’re passing the buck.” The intern doesn’t understand the jargon. He isn’t sure how to improve in his role and continues making his mistake, further frustrating the team and team lead.
Today’s workplace environments are more diverse than ever, meaning collaboration happens among all kinds of cultures. The best way to remove cultural or language barriers is by choosing common, clear phrases that are universally understood. If you’re speaking with someone who speaks a different language, try to use a translator or a verified translation tool.
Psychological / Attitudinal Communication Barriers
Psychological barriers happen when one or both parties carry cultural assumptions or are restricted by emotional hurdles or taboos. They also happen when there’s a lack of trust, attention, or empathy.
Example: A female employee is returning from maternity leave and needs a place to pump breast milk. In her previous job, her male manager wasn’t accommodating to her needs as a new mother, so when she approaches her current male superior with her request, she’s defensive and nervous … thus creating a tense, tough conversation.
In this specific case, if the male superior was aware of her previous experience, he’d be able to inject more empathy and patience to make the employee more comfortable. Otherwise he might be uncomfortable with her defensiveness. While the female employee can’t help her previous experience, she could try to approach the new manager without any assumptions.
Everyone’s mind is different, as is their upbringing. When it comes to psychological and attitudinal barriers, the responsibility falls on both parties to set aside expectations and prejudices and prioritize empathy, patience, and understanding.
Physical Communication Barriers
Physical barriers refer to anything that physically stands in the way of clear communication. These barriers typically exist through email, social media, text, or phone communication (anything that isn’t face-to-face) or when hearing or speaking handicaps are present.
Example: A remote employee is awaiting important feedback on a new project. His superior replies, via email, in a way that could be construed as cold or harsh — even though she was quite happy with the results. The remote employee assumes she’s unhappy with the project and loses confidence in his ideas and progress.
In today’s world, digital and text-based communication is very common, especially with remote work.
Receivers can avoid these barriers by not assuming the meaning behind a message or by simply asking for clarification. Also, senders can make their messages easier to receive by adding clarifying punctuation or words when communicating nonverbally.
Lastly, always be aware of personal handicaps with which others might be dealing.
The Four Communication Styles
Personality tests, like DiSC and Myers-Briggs, help others better understand your needs, strengths, and weaknesses.
The same goes for communication styles. Understanding the different styles below gives you a better understanding of how and why others communicate the way they do.
Passive Communication Style
Passive communicators act indifferent and often yield to others. On the outside, they may seem meek, quiet, or flexible. They likely aren’t good at saying “no” or dealing with conflict, but they’re easy to get along with as they typically “go with the flow.”
Phrases you might hear from passive communicators are:
- “It doesn’t matter to me.”
- “This isn’t worth fighting over. Let’s just keep the peace.”
Aggressive Communication Style
Where passive communicators are meek and quiet, aggressive communicators are loud, brash, criticizing, and physically aggressive. Their communication style reverberates through their behavior, volume, and wording. Aggressive communicators issue commands, interrupt, and often talk down to people.
Phrases you might hear from aggressive communicators are:
- “You’re wrong.”
- “This is your fault. Fix it.”
Passive-Aggressive Communication Style
The passive-aggressive style displays a mixture of both. On the surface, this type of communicator might seem passive, but they probably harbor an aggressive side underneath. Behaviorally, they might seem agitated and display facial expressions or nonverbal cues that don’t match what they’re saying.
Phrases you might hear from passive-aggressive communicators are:
- “Whatever, but don’t blame me if the team doesn’t agree.”
- “That’s fine.” (and then proceeds to do the opposite)
Assertive Communication Style
Assertive communicators are said to follow the most effective and healthiest communication style. These communicators can express their own needs, opinions, and commands while also considering the needs and opinions of others.
They typically communicate to reach a compromise or win-win situation, and will often employ “I” statements to take ownership of feelings while still expressing a need or desire.
Phrases you might hear from assertive communicators are:
- “I respect your opinion, but I disagree and here’s why …”
- “I feel frustrated when you miss deadlines.
Understanding your own communication style, as well as your team’s and colleagues’, can be helpful when conversations get tough. It can also alert you to ways in which you can improve your own communication skills and challenge others to do the same.
The Four Types of Communication
Communication isn’t limited to face-to-face speaking conversation; it applies to any exchange of information. Below, we walk through the four main types of communication and how you might see them in the workplace.
Verbal Communication
This type of communication is exactly what it sounds like: verbal conversation that includes sounds, words, and language. Verbal communication is said to be the most effective way to express emotions, feelings, opinions, and needs. If used correctly, words can help you be very straightforward and concise while leaving little room for question or assumption.
There are four types of verbal communication.
- Intrapersonal, which is when we communicate to ourselves through our thoughts or out loud.
- Interpersonal, which is when we communicate one-on-one with someone else.
- Small group, which is when two or more people are involved. Team meetings, small presentations, and press conferences are examples of small group communication.
- Public, which is when one person communicates to a large group. Public speeches, company-wide meetings, and TV commercials are examples of public communication.
Nonverbal Communication
Nonverbal communication happens when messages are sent and received without words. It typically applies to body language, tone of voice, inflection, facial responses, and other gestures.
It also includes creative or aesthetic means of communication such as dance, painting, and pottery. (Note: Nonverbal isn’t the same as visual, which is explained below.)
Some examples of nonverbal communication include:
- Making eye contact (or lack thereof)
- Shaking hands
- Crossing or uncrossing legs
- Folding or unfolding arms
- Fidgeting
- Hugging
- Moving eyebrows
- Smiling or frowning
Written Communication
Written communication is any message sent through written words or text. This form unique because, unlike verbal or nonverbal communication, written communication can be edited and changed before messages are sent.
Written communication also encompasses components of visual communication when sent through electronic means, such as phones or computers.
Examples of written communication include memos, emails, letters, reports, articles or blog posts (like this one!), social media posts, and print advertising.
Visual Communication
Visual communications involves sending and receiving a message with the help of visual aids. While visual communication encompasses some written communication, it mostly refers to symbols, images, and video.
Movies, TV shows, video, and plays are all visual communication as receivers need to watch them to receive their messages. Icons and emojis are also considered visual communication. The most common form of visual communication, though, is the internet, which sends us messages using a combination of text, colors, images, symbols, and design.
Communication in Business
Whether you know it or not, you’re communicating right now by reading this guide. You’re the recipient of this message that I’ve written and transmitted via blog post.
Communication happens all around us, and it’s especially important in business. Not only are we communicating non-stop with colleagues and teammates, but through marketing, advertising, sales, and support efforts, we’re also sending and receiving messages with our customers and consumers.
Communication in the Workplace
This section is about internal communication, meaning communication that happens within the workplace. This communication can refer to conversations with your boss, project collaborations with teammates, or perhaps reading your company’s internal wiki to learn about another team’s updates.
Regardless, here are some tips on communication in the workplace.
Communication as a Manager
As a manager or team lead, you’re dealing with a lot, right? Not only do you have your own responsibilities, but you also have to oversee and organize those of your team.
One of the hardest parts of managing can be figuring out how to systematize and catalog important communications happening within and around your team.
Building an internal communications strategy can help you manage this. Here’s how.
1. Assign a communication medium for specific types of communication.
It’s hard to speak up at work. People aren’t always sure who to trust. They also aren’t sure which information will stay private, and which information will come with consequences if shared.
This is where it’s up to you, as a manager, to create a safe, healthy environment for effective communication. One way to do that is to “assign” specific media or channels for specific types of communication.
For example, constructive criticism or feedback should take place in-person and privately. Instead of sending random emails or criticizing employees during team-wide meetings, consider scheduling one-on-one feedback sessions every quarter. This reassures your employees that hard conversations will remain private, and it also builds trust by showing your employees that you respect them enough to speak in-person.
Here are some other types of communication that might need their own medium or channel.
- Praise
- Collaboration or Project Updates
- Strategies or Processes for Cross-Team Collaboration
- Concerns or Questions
- Important Business Updates
2. Encourage your team (and other teams) to adhere to these processes.
Once you define these communication processes, write them down and share them with your team. Encourage your team — and other teams — to adhere to the processes in respect of themselves and their colleagues.
Where appropriate, record your communication. This creates a record for others to reference and makes it easier to review and improve your processes … which is the next step.
3. Review every six months to see how you can improve.
Twice a year or so, survey your team and colleagues to make sure your internal communications strategy is working for everyone. Carve out time to receive feedback from your own employees. Remember, communication is a two-way street.
Communication Across Generations and Cultures
Whether you’re a brand new employee or a CEO, it’s crucial to understand that we all communicate differently. In the beginning of this guide, we reviewed some common communication barriers, namely cultural barriers.
The vast diversity of today’s workplaces (something to be celebrated!) means that people of all backgrounds, upbringings, and ages are collaborating. It also means that workplaces will have a myriad of communication styles and preferences.
Here’s how to prepare and stay aware of those differences.
- Educate yourself on how others communicate. Based on our upbringings and education, we all prefer to receive praise, feedback, and instruction in different ways. Take the time to ask your employees and colleagues how you can best communicate with them.
- Define communication as it applies to each culture. What does silence mean to each employee? How do they prefer to collaborate? What does disagreement look like? How do they like to receive praise? Start the discussion and foster an open environment within your team and company. Stay diligent and work to meet everyone’s preferences.
Communication to the Consumer
This section is about external communication, which refers to communication that your business has with consumers and customers. This communication includes marketing and advertising efforts, sales pitches, support conversations, and any public relations and crisis communications.
When it comes to any communication you have with the consumer, it’s wise to have a strategy to keep your business functions aligned and keep brand communication strong.
Whether your posting on social media, publishing a press release, or building a new marketing campaign, all communication to the consumer — whether words, images, or video — should be consistent in tone, personality, and overall branding.
Over to You
Communication really is the key to any relationship. It may be a broad, vague topic, but it’s still able to be mastered in the workplace. Prioritizing communication among your team and company can help resolve conflict, strengthen collaboration, clarify strengths, and prepare you to do the same with your customers and clients.
Editor’s note: This post was originally published in August, 2017 and has been updated for comprehensiveness.

How to Plan Your Instagram Posts [+ Free Instagram Planning Templates]
When you’re not following a plan on social media, it’s easy to forget to post regularly.
Additionally, creating image and video-based content that’s meant to drive revenue for your business can seem far away from your bottom line.
However, nowadays, 71% of businesses are on the platform — to compete with other companies in your industry, then, it’s critical you have a solid Instagram strategy in-place, particularly if your intended audience uses the app.
Fortunately, once you have an ideal plan for your Instagram content, you’re able to create content more intentionally and ultimately drive more results for your team and your organization.
In this post, we’ll cover everything from determining what kind of content you want to post, to picking a content theme. Then, we’ll get into the details of planning individual posts.
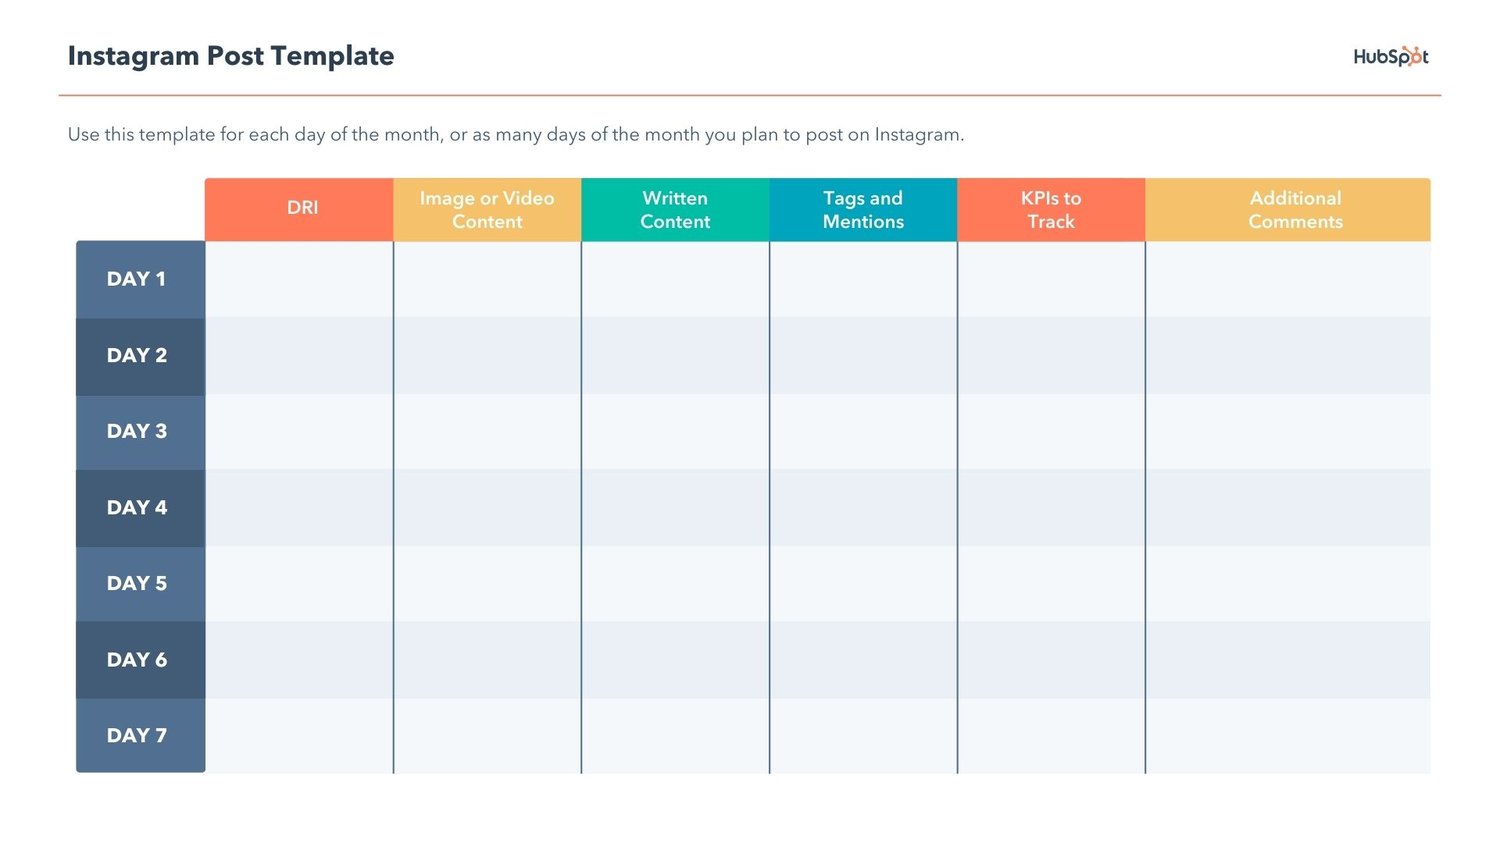 HubSpot, AdobeSpark, and Iconosquare teamed up to create a 30-day planning guide for business Instagram planning.
We’ve also thrown in 30 templates to help you get started. Click here to get the planning guide.
Type of Content to Post on Instagram
Regardless of which kind of content you decide to post, it should always be content that attracts your ideal audience. Think beyond your product, service, or office — what does your ideal customer actually care about, and what motivates them to follow a business account on Instagram?
If you know your audience is interested in consuming bite-sized education on social media, you might use Instagram to share industry tips and tricks. Videos or well-organized captions can be useful vehicles for providing your audience with well-researched information for their benefit, rather than the benefit of your business.
If your product or service lends itself to being photographed, consider sharing photos or videos of real customers using it. You can lighten your own content creation load by relying on user-generated content, too. Have your customers send in photos of your product in-action.
Here’s an example of how Beats by Dre uses Instagram to showcase customers using their products:

Still, there’s no need to make these product or service posts promotional. Instead, the value for your Instagram following would come from drawing personal connections with real stories about how others have successfully used your product.
However, if your audience isn’t consuming education on Instagram and your product or service isn’t easily photographed, you can take a more aesthetically-focused route, posting images and videos that people would simply love to consume. These may not drive a significant number of conversions, but a visual-first Instagram can amass a large amount of followers.
The key with the aesthetically-pleasing route is to check in frequently to make sure your posts are driving actual value (perhaps in the form of brand awareness or community among your followers) for your business.
If you’re unsure of the type of content you want to post or the kind of content that will succeed for your brand, pick the one that you believe your audience will be most interested in seeing — product-agnostic education, product-centric and usage-focused content, or aesthetically pleasing content — and try it consistently for a month.
Then, try another type for the following month and compare engagement rates. How many people are liking and commenting on your content? How many followers did you gain each month? What other business outcomes, if any, were impacted by your Instagram posts?
In addition to deciding the general topics you’ll post on Instagram, you’ll want to experiment and decide on which content formats you’ll post. For example, if you take an educational approach, experiment with videos versus text-focused images, and various lengths of captions.
Alternatively, if your educational content lives on your blog, knowledge base, or in another library, consider using Instagram posts to point people to those resources rather than squeezing too much information into one Instagram.
For example, HubSpot Academy’s Instagram often promotes in-depth courses that HubSpot Academy produces rather than trying to dive into the details in the caption, image, or video itself. The account keeps followers interested by sharing short clips and tips from the courses, too:
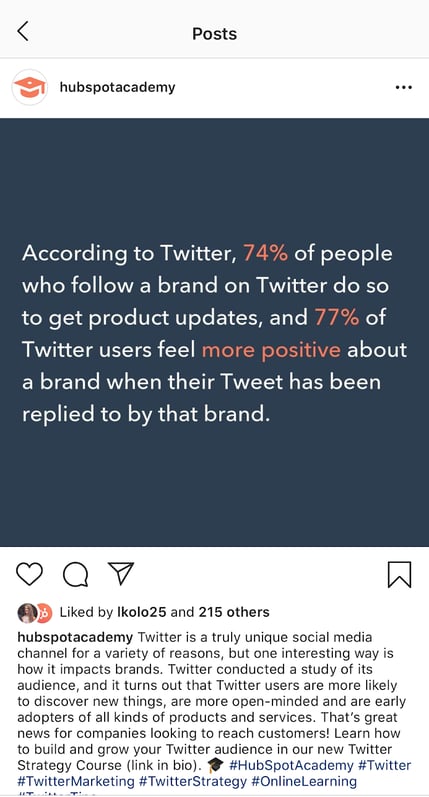
Additionally, we’ve put together this downloadable calendar of creative content ideas if you’re not sure what type of content to try first.
Your Instagram’s Visual Theme
Once you’ve decided on the type of content you want to post, you’ll want to select a visual theme for your posts.
Aesthetic consistency will help you in several ways:
- When an Instagram user finds your business’s account, the images will appear coordinated and well-thought-out.
- Your followers will begin to sense pattern in your content and pause when they see your post as they scroll because they recognize that pattern.
- When you’ve pre-selected a go-to font and color scheme, it takes some of the planning pressure off of you. There are fewer decisions to make for each new post.
If you use Adobe Spark, you can download our free Adobe Spark Instagram templates to get started on creating a new post with a template rather than starting from scratch. You’ll also get access to the previously-mentioned calendar of content ideas.
To establish visual consistency across your posts, pay attention to the colors in your photos, the filters you use, the fonts you use in your images, and, if you’d like, the pattern of content types you’re posting.
- Colors: Keep your brand colors top-of-mind when creating Instagram posts. Pick a few colors that complement your primary brand color and ensure that the most prominent color in each of your posts is one of those colors.
- Filters: When using filters, do so lightly, as over-editing can dilute the quality of your photos. If you decide to use filters, use the same one or two across all posts.
- Fonts: Select one font to use whenever you want to overlay text on photos or videos. Since Instagram is a friendly platform, aim to use an easy-to-read, sans-serif font and keep it the same across all posts. Use the same couple of font colors, too.
- Content Pattern: To create a visual pattern for your overall feed, make sure that every third post has a certain background color. Since Instagram has three columns in the grid view, you’ll end up with a column that shows you thoughtfully plan your posts. You might consider using a white background with the same font style and color to share an industry tip for every third post, for example.
Tools for Making the Most of Your Instagram
In order to stay organized, we recommend using two types of tools — a post scheduling tool, and a tool that allows you to link to several different places from your Instagram bio.
By using a post scheduling tool, you’ll be able to plan out as far in advance as you’d like, ensuring you have a steady stream of content ready to be posted even when other projects pop up in your day-to-day work. Posting consistently is important for follower retention and will give you more opportunities to experiment and figure out which posts get the most engagement.
Scheduling your posts also allows you to visualize which types of posts you have coming out and swap posts if need be. You can see the weeks for which you’ve planned enough content and those during which there are still empty slots.
You can also use a spreadsheet like this one (download for free here):
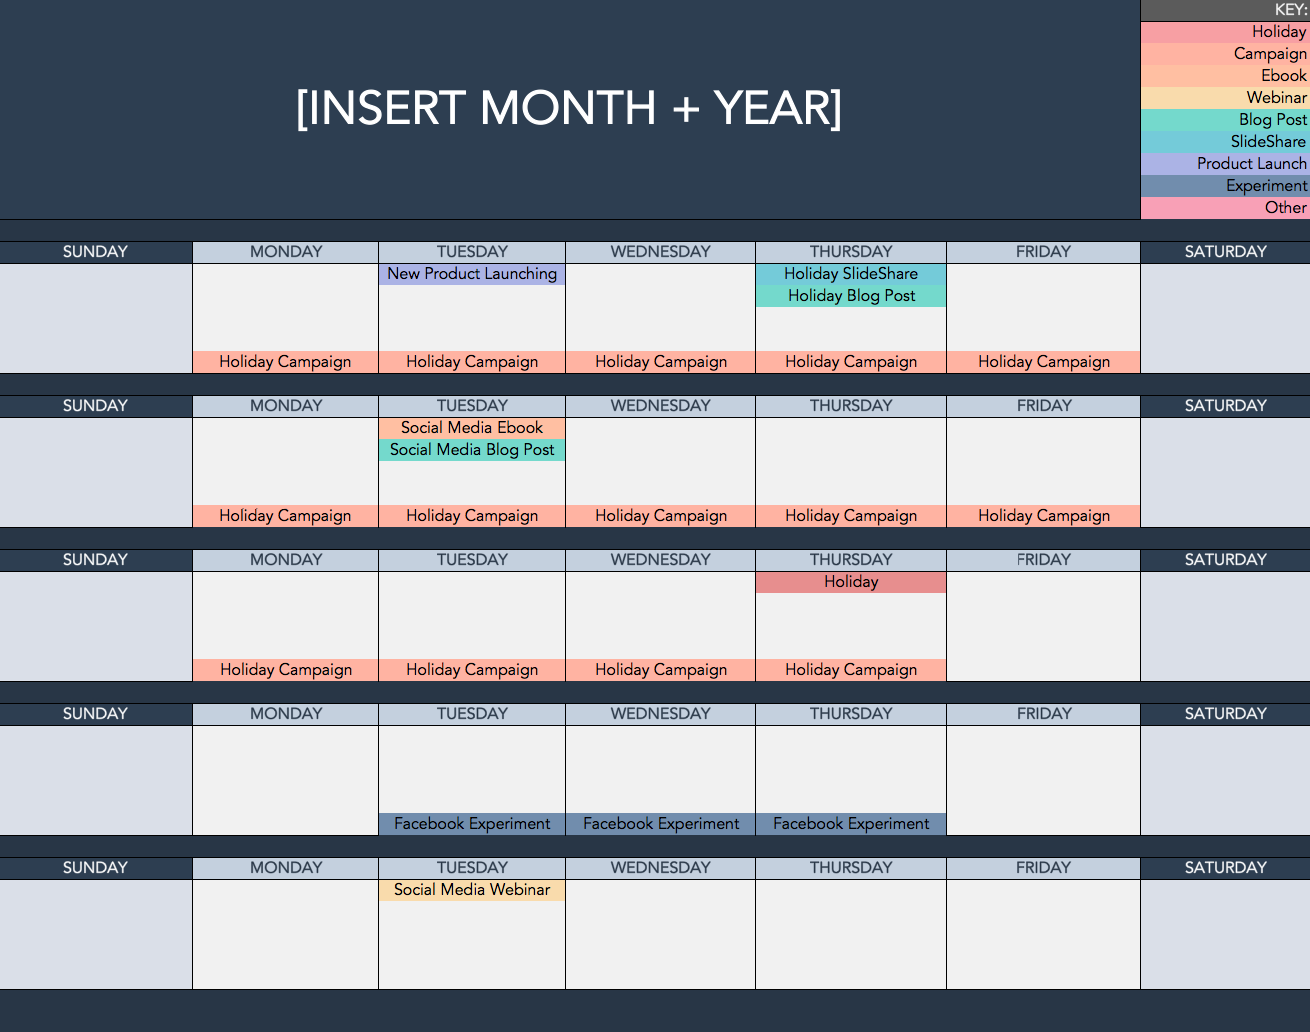
Examples of post scheduling tools: HubSpot Social Tools, Later, Buffer, Hopper
Since Instagram only allows you to place one hyperlink in your bio at the top of your profile, we also recommend investing a few dollars per month in a tool that lets you create one landing page that links out to several other pages.
Then, in individual posts, you can reference clickable links available at the link in your bio, which provides a much more user-friendly experience than having your followers copy a URL manually into their browser, toggling between apps.
Examples of post scheduling tools: Linktree, Lnk.Bio, Link In Profile
Planning Process
Once you’ve decided on the content type and visual theme that you’ll use on your brand’s Instagram account, it’s time to start planning posts.
Create a spreadsheet with the following columns (or download our free, pre-made spreadsheet along with planning templates for all of your other social media channels, too):
- Date of publication
- Time of publication
- Image caption
- Image file name or a link (if it has been uploaded to the web)
- The link that you’ll add to your bio when the post goes live (or add to a Linktree-type multiple links tool)
- Campaign/Goal: What is the goal for this post? Are you trying to amass more followers? Drive sign-ups for your product, a free trial, a consultation, or another next step toward becoming a customer? Whatever it is, an articulated goal will help you make sure that each post exists for a purpose — you won’t be creating a dead end for your followers, but rather an opportunity for continued engagement with your account, brand, or product.
When you’re done, it should look like this:
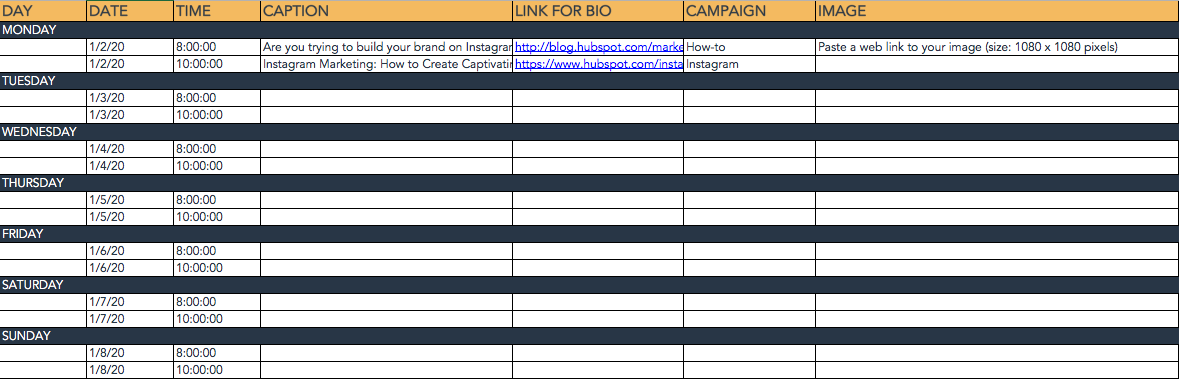
A hint — duplicate the spreadsheet tab for Instagram Stories, as well, to leverage Instagram’s other avenue for engaging with your followers. Stories are best used for interactive content like polls and quizzes, sharing lots of photos or videos from live events, and more casual, friendly updates.
Once you have your spreadsheet ready to go, decide on your frequency. We recommend ramping up to posting around three times per week.
Post at least once a week to establish a reliable posting pattern for your followers. You’ll risk losing followers if people feel that they’re not consistently seeing interesting or helpful content from your account.
To ensure you establish that consistent pattern, set dates and times for posting first. For example, if you decide to post every Monday, Wednesday, and Friday, fill in the date and time column with the next month’s Mondays, Wednesdays, and Fridays.
Then, add a recurring event to your calendar for post planning for the following two to four weeks. Set a recurring, 10-minute calendar invitation at your selected posting times to reference your spreadsheet and quickly post whatever you’ve planned if you’re not using an automated scheduling tool. With the planning sheet handy, you’ll be able to simply copy and paste captions and links, and you can then locate the image easily.
When slotting specific posts into your spreadsheet, begin in whichever column you’d like. You could start by evenly splitting the rows into separate campaigns and then filling in the caption or image link for each post later.
If you already have a repository of photos that you can post, though, you might start pasting the links into the Image File Name/Link column and fill in the other columns afterward.
You’ll also want to start creating more visual content for future posts. Consider repurposing event images that your company has taken, soliciting photos of your employees or customers using your product, or simply creating visually-appealing text graphics like this one on a tool like Canva or Photoshop.
Upload each photo to a centralized folder and make use of a standardized naming convention so that it’s easy to find the file you’re looking for. If you’re not using a post scheduling tool, you’ll likely have to post directly from your phone.
To easily access photos with their file names from your phone, you can upload photos to a Google Photos album on your computer and then use the Google Photos app on your phone to directly download the content prior to posting.
Finally, decide on your caption for each post. The ideal caption style depends on your audience and the type of content you’re sharing. For example, aesthetics-focused content may perform best with a quirky, short, and clever caption, while education-focused content may be most likely shared and liked if the caption includes a couple of concise, clear tips.
Make sure to include three to five thoughtfully planned hashtags in your caption or in a comment on your own post to ensure it gets in front of new audiences. You’ll want to include a mix of branded hashtags (eg. #HubSpotAcademy or #OnlineLearning) and trending hashtags so that your post is seen by more people.
You can research the hashtags you might want to use by typing them into Instagram (head to the ‘Search’ tab and then tap ‘Tags’) to see how much volume they get. Prioritize the higher-volume ones.
By taking a thoughtful approach to planning your Instagram content, you can ensure that your posts deliver value to your followers, convert those followers into leads or product users, and expand the reach of your brand’s messaging to new audiences.
Editor’s note: This post was originally published in October, 2019 and has been updated for comprehensiveness.

15 Free Professionally-Designed Landing Page Templates
When it comes to turning web visitors into leads, 68% of B2B CEO’s use strategic landing pages as part of their strategy.
A strong landing page usually offers your website’s visitors a resource, such as a piece of content, in exchange for contact information. Sharing or hyperlinking to the URL of a landing page, rather than a homepage, also increases the likelihood of turning traffic into conversions.
While landing pages can play a vital role in lead generation, they don’t have to be complicated. In fact, you should aim for a page that’s concise and inviting, rather than complex and overwhelming.
Rather than just placing a rigorous contact form on a page, it can be more productive to tease an interesting offer or a free resource in exchange for only a small amount of information.
Even when you know what you’re going to offer and what information you’d like to receive from a visitor, the idea of building a landing page can still feel daunting.
If you don’t have the bandwidth to build a page yourself, have little experience in design software, or have limited resources to hire a designer, using a pre-designed template could be the most efficient way to launch a professional looking page in a short amount of time.
We’ve put together a list of 15 free, easy-to-use templates that can guide you through the process of building your next landing page.
15 Free Professionally-Designed Landing Page Templates
1. Royce
Available on Squarespace
Royce is specialized for event reservations. There is no navigation bar, but the layout features a customizable background image, a headline, and a call-to-action button that says “RSVP.”

To fill out the form and reserve a spot, visitors can click the RSVP button to see a form appear, or scroll down below the fold to see a static reservation form. This is an interesting template because it amplifies visuals and keeps the layout simple while still offering visitors two ways to convert.
2. Invest
Available on HubSpot
This design includes a photo, customizable text, no navigation (to keep visitors focused on your offer), and a short form. Users can also customize and add other elements such as the icons seen at the bottom of the image. Below the fold, users can also add more information about the offer or company.
3. Hubstrap
Available on HubSpot
The Hubstrap template has a simplistic look and feel but devotes a bit more room to text. This might be a good option if your content offer has less imagery to go with it. For example, you might use this page to describe an offer or a long whitepaper on a topic related to your industry. Users can similarly personalize the design and add drag-and-drop sections to the page.
Unlike the above landing pages, this example does include navigation. However, it’s simple enough that it doesn’t detract from the offer.
4. Landing Form
Available on HubSpot
This template includes a background image with a dark overlay, a headline, text, bright call-to-action buttons, and a form. It eliminates the navigation bar but includes a button at the top of the page. The image also has a dark overlay to keep it visible, but less distracting. As you scroll below the fold, this template also includes spots for more imagery and details that could relate to the product or offer.
5. Gradient
Available on HubSpot
Gradient is sleekly designed for a content-based offer. It has a simple layout with a form, headline, description text, photo, and logo, but continues the theme of no navigation. Like the other HubSpot templates, users can add a photo or product shot, a background image that appears behind a gradient color, and descriptive text. They can also adjust or change the gradient background’s color.
6. University
Available on Wix
This layout may be useful for those seeking leads for an educational event, course, or a similar service. The form is more detailed, but the layout itself also allows room for more text and imagery. Above the fold, you can see a headline, supporting images, and a form. If you keep scrolling, there are additional sections where more text and imagery can be placed.
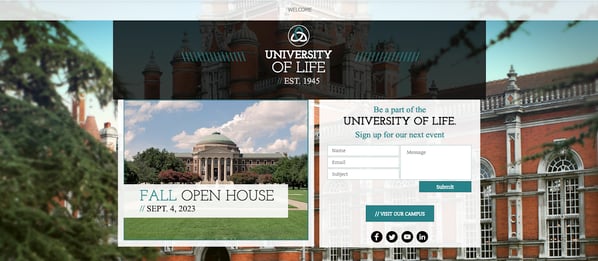
7. Skyline
Available on Wix
This template may be helpful to a company or individual that hasn’t yet launched a website or product but still wants to gain early leads in the meantime. Above the fold, there’s a giant headline area, where the template has “Coming Soon” printed.
When you scroll down, you can see a quick description of the company and a box where visitors can add their email. Users can also add a photo or video to the background.


8. Online Store Coming Soon
Available on Wix
This template is very simple. Like the above “Coming Soon” template, the text could be edited to use this layout for a different purpose. There is no navigation and any information about the company is off to the corners. This layout allows space for a clear product shot, as seen with the shoes. Headline text, a small amount of descriptive text, an email box, and a button are pre-designed in the layout. Users can also link their social media accounts to the icons under the “Notify Me” button.

9. Lead-Gen Landing Page
Available on Wix
This template seems specialized for B2B products. It allows users to edit and customize the text and images through Wix. Users can also place background videos into the layout. The page is designed to be long, with the form and call-to-action above the fold followed by sections that detail different aspects of a company or firm, such as staff information.

10. Fagri
Available on WordPress.org
Fagri was designed broadly for multiple purposes and industries. According to its description, the theme’s widgets, such as the contact form are customizable. Users can also change the text and images. Although there is a navigation bar, the layout’s design still draws attention to the text, call-to-action buttons, and the contact form.
11. Real Estate Landing Page
Available on Wix
Although this template doesn’t offer a resource for information, it can be edited and customized to include an offer. As you scroll down the page, the background image can remain static. With the current page’s design, there is room to add company information below the fold. There is also a second form at the very bottom so visitors will have another chance to convert.
12. Construction and Lawyer Landing Pages
Both Available on WordPress.org
WordPress also offers two similar Lawyer Landing Page and Construction Landing Page templates. Although the original designs are targeted at the two job fields, they can be customized to fit other brands and industries. Both have a header image, overlaid text, and an arrow pointing to a decently sized form above the fold. They also both offer the visitor a free quote.
13. Gardenhouse
Available on MailChimp

This template does not include a navigation bar, which forces a visitor to focus on the given offer. Towards the bottom of the page, it can be customized to include logos or other company information. Like all MailChimp landing page themes, this layout is optimized for mobile and will automatically adjust to different screen sizes.
14. Bandmates
Available on MailChimp
This template is also pretty simple with room for customization. It similarly removes navigation and keeps the company logo, text description, and a subscribe form above the fold.
Users can also drag in more elements, like text or form boxes, into the design. Just below the form, users can include a product shot or another image. The blue background allows the form and call-to-action button to pop, but these colors can also be customized to fit your brand.
15. O-Book
Available on Unbounce
Unbounce layouts come with its subscription, but here’s one of the landing pages that you can test out with a free 14-day trial. This template is focused on book-specific lead generation. There is a clear spot for a product image, headlines, detailed description text, and a form box.
The top navigation is minimal, but it does include social media buttons. Since this layout is only free for a trial period, this might be a better option for a company that has already gained revenue from landing pages and is looking to test out a more detailed, but affordable design.
Landing Page Best Practices
The above templates already follow a number of landing page best practices. For example, many of them exclude a navigation bar, which may detract attention or clicks away from the offer on the page. Most of them also leave room for a photo or video. While photos offer a great product tease, videos have also been seen to increase conversions by 86%.
To learn about other landing-page best practices, check out this guide.
Editor’s note: This post was originally published in May, 2019 and has been updated for comprehensiveness.

How to Build A Business Plan That Stands Out [Free Template]
Nowadays, it seems like a new company is starting every hour.
But, while starting a company may seem easier now than ever before, entrepreneurs have an uphill battle from the moment they start a business. On average, a new business will need to compete with 25 competitors in order to stand out and thrive in its industry.
Aspiring business owners that go in blind without a clear, actionable plan for marketing, hiring, finances, and operations are destined to face significantly more difficulties on their journey to building a successful company — which is why crafting a business plan is an essential step in the entrepreneurial process.
In this post, we’ll walk you through the process of filling out your business plan template, like this free, editable version:
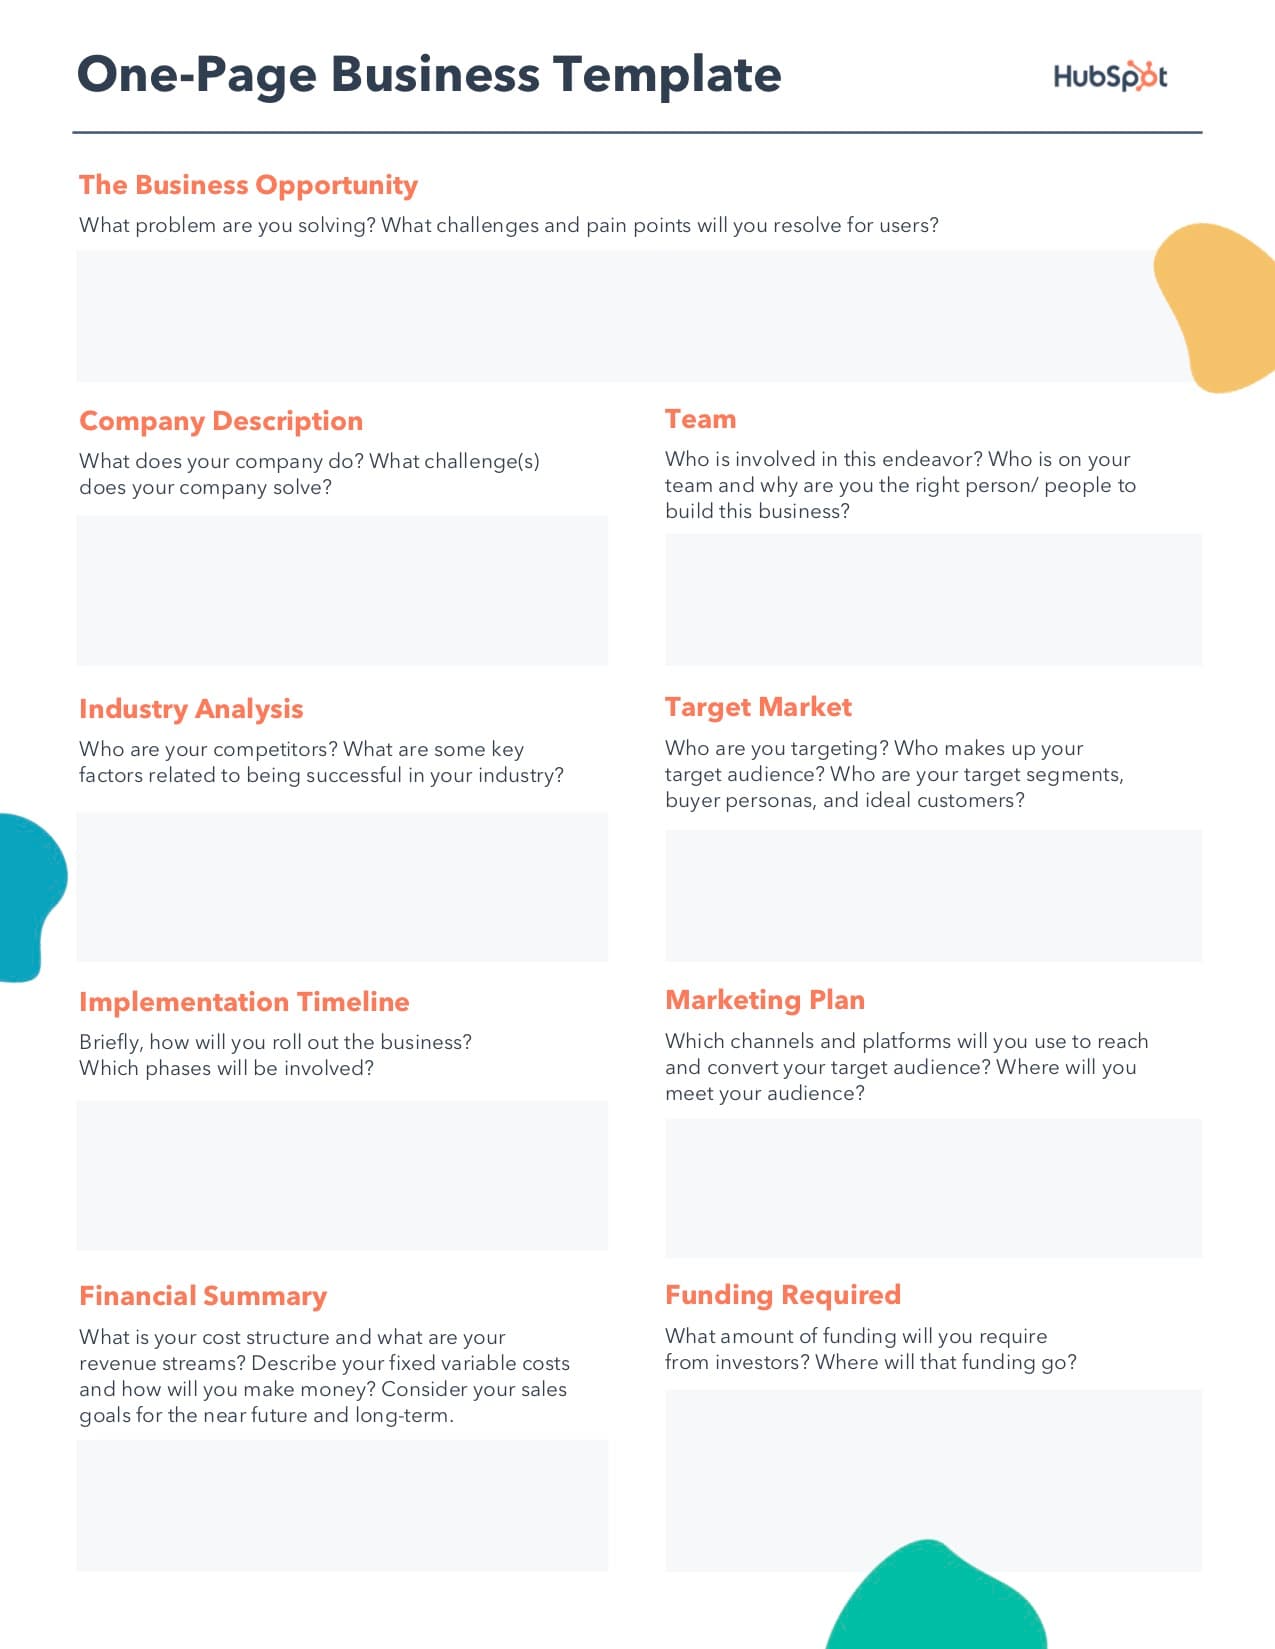
Download a free, editable one-page business plan template.
This way, you’ll be able to show them how organized and well-thought-out your business idea is, and provide them with answers to whatever questions they may have.
When looking at a blank page on a laptop screen, the idea of writing your business plan can seem impossible. However, it’s a mandatory step to take if you want to turn your business dreams into a reality.
That’s why we’ve crafted a business plan template for you to download and use to build your new company. You can download it here for free. It contains prompts for all of the essential parts of a business plan, all of which are elaborated on, below.
Featured Resource: Free Business Plan Template

1. Cover Page
Your business plan should be prefaced with an eye-catching cover page. This means including a high-resolution image of your company logo, followed by your company’s name, address, and phone number.
Since this business plan will likely change hands and be seen by multiple investors, you should also provide your own name, role in the business, and email address on the cover page, as well.
2. Executive Summary
The executive summary of your business plan should provide a one or two page overview of the business and highlight the most crucial pieces of information for readers. Intended to grab the reader’s attention, this section should summarize critical information regarding your company overview and upcoming short-term and long-term goals.
The executive summary is essentially a boiled-down version of your entire business plan, so remember to keep this section to-the-point and filled only with essential information.
Typically, this brief section includes:
- A mission statement.
- The company’s history and leadership model.
- An overview of competitive advantage(s).
- Financial projections.
- Company goals.
- An ask from potential investors.
3. Company & Business Description
In this section, you’ll provide a more thorough description of what your company is and why it exists.
The bulk of the writing in this section should be about your company’s purpose – covering what the business will be selling, identifying the target market, and laying out a path to success.
In the Company & Business Description portion of your business plan, you can also elaborate on your company’s:
- Mission and/or vision statement.
- Core values.
- Team & organizational structure.
3. Product & Services Line
Here’s where you’ll provide a more in-depth overview of the makeup of your business’s product and/or services line. You should provide each product or service’s name, its purpose, and a description of how it works (if appropriate).
Next, add some color to the sales strategy by outlining your pricing model and mark-up amounts.
If you’re selling tangible products, you should also provide an explanation of production and costs, and how you expect these factors to change as you scale.
4. Market Analysis
The market analysis section is where you’ll provide details about the audience to which you’re marketing your business. This should encompass the size of your total addressable market, your market’s demographics and psychographics, and a location analysis for your business’s operating space.
It helps to reference your market research documentation here, like a Porter’s Five Forces Analysis or a SWOT Analysis (templates for those are available here). You can also include them in your appendix.
If your company already has buyer personas, you should include them here as well. If not, you can make them right now using the Make My Persona Tool.
5. Marketing Plan
Unlike the market analysis section, your marketing plan section should be an explanation of the tactical approach to reaching your aforementioned target audience. List the channels you’ll be advertising on, what organic marketing methods you’ll employ, etc.
If your company has a fully fleshed out marketing plan, you can attach it in the appendix of your business plan. If not, download this free marketing plan template to outline your strategy.
6. Sales Plan
It doesn’t matter if your sales department is an office full of BDRs or a dozen stores with your products on their shelves. The point is – like all companies – all sales strategies are different, so you should clearly outline yours here. Common talking points include:
- Sales team structure, and why this structure was chosen.
- Sales channels.
- Sales tools, software, and resources.
- Prospecting strategy.
- Sales goals and budget.
Like with your marketing plan, it might make sense to attach your completed sales plan to the appendix of your business plan. You can download a template for building your sales plan here.
7. Legal Notes
Your investors may want to know the legal structure of your business, since that could directly impact the risk of their investments. For example, if you’re looking for business partners to engage in a non-corporation or LLC partnership, this means they could be on the line for more than their actual investment. Because this clarification is often needed, explain if you are and/or plan to become a sole proprietor, partnership, corporation, LLC, etc.
You should also outline the steps you have taken or will need to take in order to operate legally. This includes necessary licenses, permits, registrations, insurance requirements, etc. that are needed to follow the law. The last thing your investor wants to hear after they’ve sent you a big chunk of change is that you’re operating without proper approval from local, state, or federal government.
8. Financial Considerations
Ultimately, investors want to know two things:
- When they will earn their money back.
- When they will start seeing returns on their initial investment.
That said, you’ll need to be clear, calculated, and convincing in this section. It should cover:
- Startup costs.
- Sales forecasts for the next several months/quarters.
- Break-even analysis for time and dollars.
- Projected P&L statement.
Most importantly, you’ll want to explain the why behind each of these sections. Facts and figures are key here, so be as specific as possible with each line item and projection, in addition to why you’ve included it.
If you have pages upon pages of charts and spreadsheets for this section (which – arguably – you should), you may want to distill them into a page or two and include the rest of the sheets in the appendix.
9. Appendix
The best business plans are filled with imperative information, spanning dozens or even hundreds of pages long. To avoid disrupting the flow of the business plan with visuals, charts, and spreadsheets, consider including all of these resources in the appendix. Aside from what we’ve already mentioned – marketing plan, sales plan, department budgets, financial documents, etc. – you may also want to attach the following in the appendix:
- Floor plans for your location.
- Images of social media pages.
- Your logo and any graphic design assets.
- Mock-ups of your product.
- Renderings of your office space or location design.
Adding these pieces to the appendix enriches the reader’s understanding of your business and proves you’ve put the work into your business plan without distracting from the points throughout the plan.
Use a Business Plan Template to Get Started
Writing a business plan shouldn’t be an insurmountable roadblock to starting a business. Unfortunately, for all too many, it is.
That’s why we recommend using our free business plan template. Pre-filled with detailed section prompts for all of the topics in this blog post, we’re confident this template will get your business plan started in the right direction.

How to Make an Instagram Post Template for Your Business or Brand
Instagram is an undeniably powerful marketing tool, but with over 25 million businesses on the platform today, it’s critical you take the time to create well-designed and thoughtful Instagram posts to stand out.
You’ll need to apply a strategic design plan to your business’s Instagram to attract a loyal following and find success on the app, long-term.
However, creating a clean and cohesive Instagram feed takes design skills you might feel you lack. Plus, Instagram’s algorithm favors brands that post at least once a day — that time commitment could be adding to your stress.
If that’s the case, you’re in luck — there are ways you can create pre-made Instagram post templates, so you’ve got a stash ready-to-go. Plus, by ensuring you use the same templates for different posts, you’ll have an easier time creating a cohesive and aesthetically-pleasing feed.
Here are some options to create and save Instagram post templates, so you can have stunning posts on-hand whenever you’re ready to publish.
1. Canva
Canva offers thousands of customizable Instagram post templates. To create an Instagram post on Canva, go to Canva’s Create a Design page, click “Instagram Post”, and then follow these steps:
1. On the left side, you’ll see an array of template options — some cost money, while others are free. Choose one.
2. Once you choose a template, click on the text box to write something. There are colors at the top if you want to alternate your text color — you can also change font, size, and spacing.
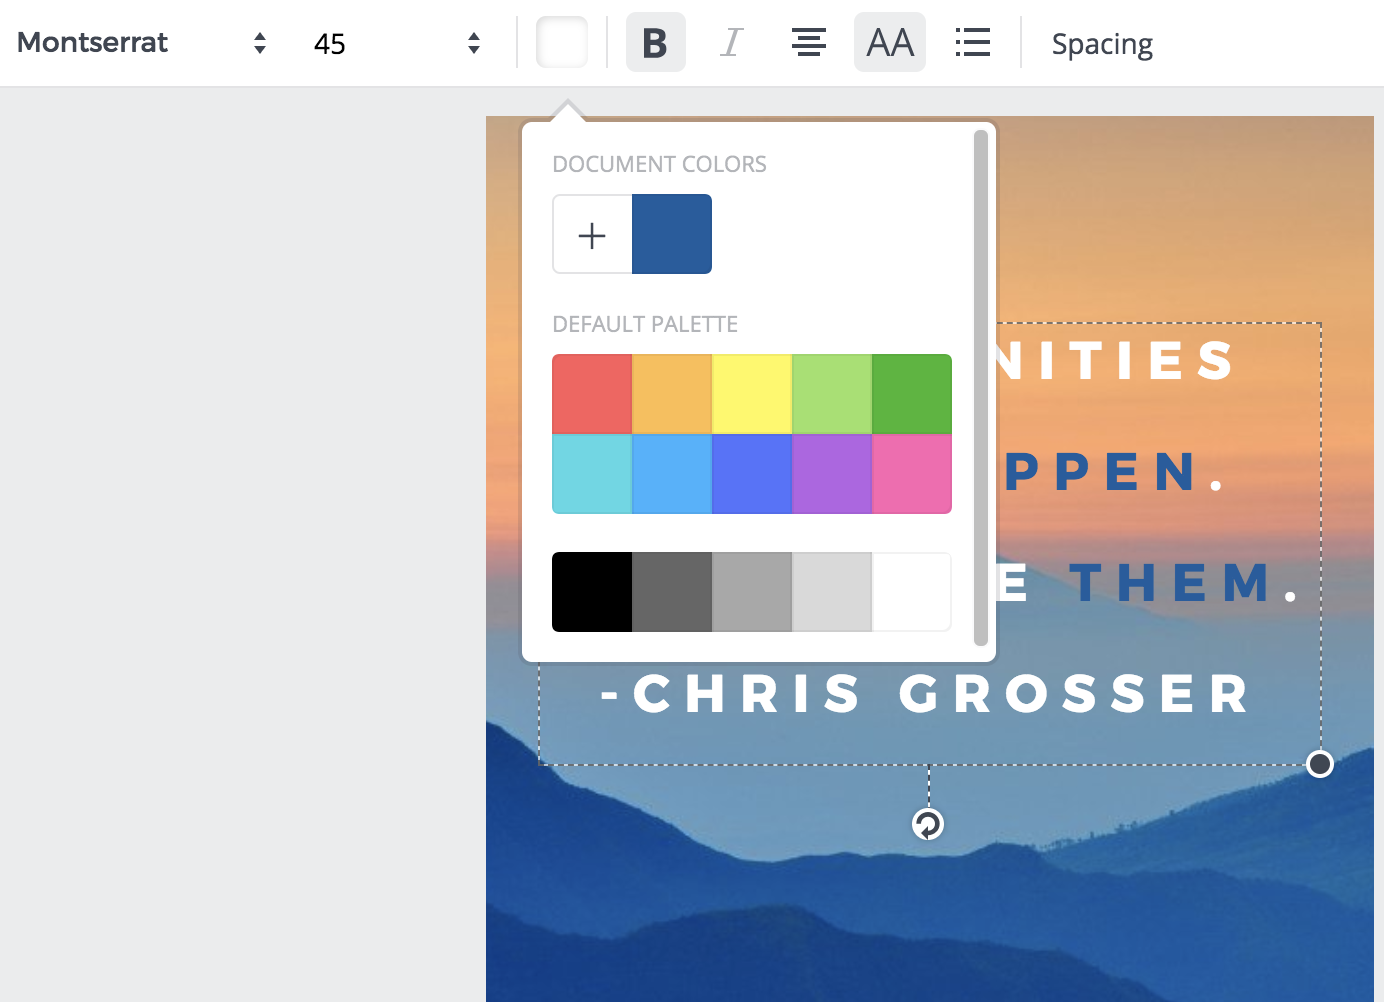
3. When you’re finished with your text, click the background of your image (outside the text box). This will allow you to filter your background, adjust the brightness and contrast of the image, and more.
4. When you’re happy with your template, open up the Canva app on your phone. Click on your Instagram post design.
5. Click “Share” in the top right.
6. Now, you can post straight to Instagram by clicking “Import with Instagram”. If you aren’t ready to post it, you can also “Save Image” and it will appear in your camera roll for later.
7. If you are immediately posting to Instagram, choose whether you want to upload to your “Story” or “Feed”.
8. Edit the Instagram post like you would any other post — add tags, a caption, location, etc. When you’re ready, click “Share” in the top right.
Remember, your template is automatically saved to your Canva account. You can access it in the future, on both desktop and app versions of Canva, and edit it with new text to post the same design again.
Alternatively, you might consider creating a few posts now, and then saving them to your camera roll to post them in the future.
Besides Canva, there are a few other design editors that offer free pre-made Instagram templates. In particular, here are three tools you might consider:
2. ReciteThis
If you’re interested in creating a template for quote posts, it’s easy to do — in fact, we’ve already curated a list of nine apps to help you make quotes for Instagram.
For our purposes, we’ll try just one — ReciteThis.
To create a quote template for Instagram, go to ReciteThis, then follow these three easy steps:
1. Enter your quote in the text box.
2. Below, click the left or right arrows to peruse templates and choose one you like. Once you’ve chosen a template and written your text, click the “Create” button in the text box.

3. Click “Download Image” to post to Instagram’s desktop version, or email it to yourself to post on your phone.
3. Creative Market
If you’re willing to shell out the cash, you might consider buying one of Creative Market’s Instagram Template bundles.
For instance, you could purchase this 1053 Quotes social media pack.
Alternatively, you can purchase a bundle with Instagram Story content, like this Animated Stories bundle.
Finally, you might consider purchasing a bundle to help you create a cohesive theme for your Instagram feed, like this The Grid template.
And that’s it! You’re all set to create and save pre-made Instagram templates, so you can focus on attracting a loyal following without tediously designing a post from scratch every day.
Check out our Instagram Marketing: The Ultimate Guide for more Instagram tips and tricks.
Editor’s note: This post was originally published in October, 2018 and has been updated for comprehensiveness.

The Ultimate Guide to RFPs
Have you been tasked with the job of creating a request for proposal, or an RFP?
Whether you have no idea what that is or haven’t written one in awhile, today’s guide can help.
We’re diving into the specifics of what an RFP actually is, why you might need one, and how to create your very first one today.
To start, you should understand what all these letters even mean.
When your company has a new (often large) project, or one that’s more complex and requires a bit of outsourcing, an RFP can help you get the job done right the first time.
The RFP doc becomes a way for you to quickly uncover the strengths and weaknesses of potential vendors in relation to your project without having to spend too much of your time hunting for them yourself.
RFPs can also give you a sneak peek into different strategies you may not have considered since each vendor will include their own unique action plan along with their bid.
And you’ll have this information before you ever have to commit to the vendor.
Keep in mind, this should not be confused with an RFQ.
RFP vs. RFQ
An RFQ, or request for quotation, is slightly different than an RFP since it’s just the quote itself. Here, companies solicit multiple price quotes from various vendors to compare services based on price alone. While an RFP includes a price quote (along with several other specifics), an RFQ does not detail anything other than price.
As opposed to an RFP, an RFQ is a request for quote or quotation.
Here’s how to understand the difference:
While you’re technically receiving a quote in an RFP, you’re also getting information like the action plan, timeline of completion, deliverable schedule, and the list of services provided as well.
But with an RFQ, you’re only receiving the quote itself for the service or products you’re interested in purchasing.
In most cases, simply comparing quotes is not enough to see if a potential vendor is the right fit for your company, which is why an RFP is more appropriate in these situations.
The RFP Process Explained
Before potential bidders can submit their proposals, an RFP must be drafted by the company requesting the work. (P.S. We’ll show you how to do this later in this guide)
This gives potential contractors a better idea of what your company is looking for.
Once your RFP is sent out, contractors or vendors can review it and submit their best bids to compete for the job.
In these proposals, vendors generally include the following items:
- An action plan of how they’re going to solve the issue
- A timeline of what you can expect
- Any necessary background information
- How much they expect the entire project to cost
In certain cases, bidders may come back and say specific components of the RFP need to be adjusted based on their experience in the industry.
At this point, you can either review their feedback and create a new RFP to adjust for the changes, or you can leave the original as is and keep it in mind while considering the other submitted bids.
Once you receive all the proposals, it will be almost effortless to compare each one and determine which vendor is the best fit for your company.
Out of the stack of bidders, you’ll want to narrow this down to a handful of your top three, five, or 10 favorites to consider, depending on how many you receive or are interested in.
From here, you’ll want to spend time vetting potential vendors further to determine who’s really the ideal fit for the job.
Some companies may request one more best and final offer from their top vendors after they’ve started this negotiation process to ensure they’re not only getting the right person or company for the job, but at the right price, too.
While this may sound like an extra step, it’s one that may save you money, time, and headaches down the road.
But this also leads us to a big question: Is all of this really necessary?
Can’t you just spend time reviewing two or three vendors on your own?
As you’ll see next, that route is definitely not in your best interest.
Why Issue a Request for Proposal?
Let’s briefly compare these two scenarios:
- Option #1: Spend time finding the perfect vendor on your own.
- Option #2: Use an RFP to get potential vendors to come to you.
Choose the first route, and you’ll probably use your coworkers, friends, and networking groups to help solicit possible referrals for the job.
Or you might perform a Google search to check out the top vendors in your area.
After you review the website of a possible candidate for the job, you’ll craft the perfect message to reach out and learn if they can even help.
Then, you’ll have to explain the specifics of your project and you may or may not ask them to submit a proposal before deciding to choose them for your project.
It’s not a complicated process, but did we mention you have to repeat it for every promising referral or vendor you come across?
Imagine how long that’s going to take!
Now, what if these potential contractors already knew your project details and they came back with their best plan of action and a formal bid for you to review?
So instead of having to explain your needs each time, you would simply outline it once, and send it out to the masses.
And to save you even more time, it would be up to potential contractors — not you — to reach out.
The RFP route also gives you a sneak peek into each vendor’s real plan of action, not the one they talk you into over the phone or in person.
Since potential candidates have to submit a formal bid, they’ll need to spend time outlining the solution and really working through the problem at hand.
And if they don’t, you have an easy way to weed out vendors and cut through the stack of options fairly quickly.
But, to get to this point, you can’t make this next mistake.
Here’s What Not To Do With an RFP
If you want to find the right vendor, you need your RFP to be specific.
Only asking “yes” or “no” questions won’t get you anywhere.
That’s why you must create specific questions that require thoughtful answers.
Try to use sentences similar to these:
- Can you share an example of how you’ve solved this problem or a similar one for another company? Did you encounter any unforeseen roadblocks? What would you do the same or differently this time?
- With your proposed redesign, how long would it take a non-tech savvy person to complete the new registration form? How much time do you estimate this could save?
With these tips in mind, you’re ready to draft your first RFP.
How to Write an RFP
Here’s the basic structure of an RFP and what to include in yours:
1. Project Overview
Before you go into the specifics of your company, you should give a brief introduction to the project itself so vendors know right away if it’s something worth bidding on.
2. Your Company Background
This shouldn’t be a long history of your company. Rather, it should give contractors a better idea of what your company does and who you serve as a target market.
3. The Goals of Your Project
Clearly identify what you hope to accomplish with this project and what you see as a “win” so everyone is on the same page.
4. Project Scope
The details of the project are essential in an RFP. In the same way you don’t want to use vague questions, a vague project scope won’t help you find the right vendor either.
Spend time really detailing your project scope so there’s no surprises later on.
5. Target Deliverable Schedule
Even if your deadlines aren’t super tight, you should still have a target deliverable schedule in mind. This needs to be included in your RFP so potential vendors can properly gauge if they have the resources and bandwidth to complete the job on time.
6. Possible Roadblocks
Don’t hide your existing or potential issues under the proverbial rug if you want them to disappear. A successful RFP is explicitly clear about any technical issues or possible roadblocks, such as: Are you dealing with custom coding or an outdated platform? Does your team have limited resources?
By explaining these up front, potential vendors will know exactly what they’re getting into.
You’ll also naturally weed out contractors who can’t handle the task due to those constraints.
But you’ll also connect with companies that know how to work around these common issues with skill and finesse.
Remember, it’s far better to find this out now than after you’ve accepted the bid and started work.
7. Budget Constraints
It’s also important to be upfront with your budget too. The more you can eliminate surprises, the better for all parties involved.
8. What You’re Looking For in Potential Vendors
Another way to reduce or eliminate surprises is to explain exactly what you’re looking for in potential contractors.
All you have to do is outline what matters most to your project (i.e., time, solution, budget, etc.) and show how you’ll be evaluating their proposals based on that.
We’ll show you how this is done soon, but before we do, there’s one more thing to add here: an RFP cover letter.
Just like a cover letter for a resume, an RFP cover letter creates a professional image for your brand and sets the tone for prospective vendors. It signals that they should take the proposal and the project seriously.
The good news is there are a number of tools to make creating RFPs easier and less stressful than you’re imagining.
Proposal Software Tools to Help You Manage RFPs
In this article, we outlined 10 tools to help you manage and create professional looking proposals in less time.
For today’s purposes, the following five tools are great places to get started:
1. RFPIO
RFPIO Solves the problem of responding to RFPs, from project management to collaboration, to integrating with other software. Their solution includes reporting dashboards, auto-response features, and automated generation of proactive proposals from within your CRM. RFPIO also includes an intelligent answer library that turns previous RFP responses into on-demand intelligence that empowers revenue teams with enterprise content at their fingertips wherever the work.
And what’s better? RFPIO has an integration with HubSpot that will automatically sync your RFP with your portal, making it easy to share information with your team.
2. PandaDoc
To create customized RFPs with your own branding, consider using the proposal software PandaDoc.
Here you can set up your first RFP within minutes and even collaborate with team members using real-time updates within the document itself.
3. Nusii
Similar to other proposal software on the market, Nusii uses a drag and drop editor that makes building RFPs a breeze — especially for beginners.
Thanks to its clean, modern, simple design, it’s also really easy to figure out too.
One of the most helpful features of Nusii is using it for re-working existing RFPs to save you time. Just copy the content from an RFP you like and edit information to fit your new request.
4. Loopio
How do you plan on organizing all the responses to your RFPs?
One standout feature with Loopio is its RFP response library, which gives you instant access to all your answers from previous RFPs. This saves you the hassle of digging around to find what you need in a crowded inbox.
Their magic feature will even help you auto-populate a response if it appears similar to one you’ve already done.
Plus, you can manage your entire RFP process — including sending automated responses — and collaborate with your team all in one place with their intuitive dashboard.
And if proposal tools are out of the budget right now, or if you’d like to try your hand at creating your own first, use this template as a starting point.
5. RFP360
RFP360 streamlines your approach to RFP response management. Their intuitive knowledge management, workflow and collaboration features make it easy to create, review, update and approve compelling responses in a single library. Proposal automation and answer intelligence (AI) capabilities accelerate your ability to answer questions, suggesting the best possible responses and automatically completing them in bulk.
You can also import RFPs in various formats and generate polished final proposals, and integrated extensions allow anyone across your organization to use content from your knowledge library in Microsoft Office files, online questionnaires and forms — without leaving those applications.
Free and Editable RFP Template
Download a free, editable RFP template.
To use this template, simply download it here or fill out the form below. You can remove sections or pieces of information that don’t pertain to your project and add whatever else you need for your RFPs.
Over To You
Now that you have a better idea of what an RFP is and how to create your first one, you’re ready to get started.
Sit down with your team to narrow down your project’s specifics, goals, and scope of work. Then determine when the project needs to be completed and your budget before moving on to the drafting phase.
With this intel gathered, you’ll be ready to plug everything into our template.
You can also use this tried-and-tested proposal formula to ensure your RFP is professional and polished too.
Follow these steps and you’ll have an RFP template you can quickly update. Your next project will be a success that much faster.

Advanced Facebook Audience Targeting for eCommerce Businesses
Want to do advanced Facebook ad targeting? Looking for tools to make it easier to track custom events on Facebook? To explore how eCommerce businesses can use advanced Facebook ad targeting, I interview Miracle Wanzo on the Social Media Marketing Podcast. Miracle is a Facebook ads expert and co-founder of Discovery Marketing, a Facebook ads […]
The post Advanced Facebook Audience Targeting for eCommerce Businesses appeared first on Social Media Examiner | Social Media Marketing.
from Social Media Examiner | Social Media Marketing https://ift.tt/3imgVJP
via socialmediaexaminer
How to Create Content for Every Stage of the Buyer’s Journey
No one wakes up in the morning and decides, “I’m going to buy something today.” Instead, they go through a path to purchase that includes research and evaluation before committing to a sales call.
That journey is called the buyer’s journey. Because consumers are more informed and more empowered than ever before, it’s important to deeply understand your buyer persona and the journey they make so you can create content that helps them along that path while positioning you as an authority in your space.
In this post, we’ll cover:
- Understanding the Buyer’s Journey in Marketing
- What a Marketing Funnel Is
- Marketing Channels for Each Stage of the Funnel
- Creating Content for Each Stage of the Buyer’s Journey
Understanding the Buyer’s Journey in Marketing
In most cases, with the exception of impulse buys, an individual begins their journey in an “unaware stage.” This individual likely fits the demographics of your ideal client (also known as your buyer persona), but they are not aware of your product or in need of it.
However, they may experience a triggering event that changes their situation or a pain that needs to be solved. This kicks off their buyer’s journey.
When you don’t have a complete understanding your audience, a disconnect is created between your business and your potential customers. For content marketers, this usually means you’re putting out content that your readers don’t really relate with, which can cause you to lose them.
As is the case in all marketing disciplines, it’s important to understand your audience: how they think, the answers they seek, and the path they tend to take to find a solution. From that research, you can begin crafting a documented content strategy that maps your content to the various stages of the buyer’s journey.
Developing the buyer’s journey for your business is the first step to creating content that resonates with your buyer and building out your marketing funnel so that you can meet them at each stage of their journey.
What Is a Marketing Funnel?
A marketing funnel — more commonly known as a sales funnel since its output is revenue — describes the different stages a customer goes through leading up to their purchase, from looking at your website for the first time and subscribing to your email list to reading your emails and talking to a sales associate.
How the funnel works is simple. The top of the funnel indicates they are further away from a purchasing decision while those who make it to the bottom of the funnel are closer to a purchasing decision.
Often, it’s a marketer’s job to attract your buyer persona in the early stages of their journey and hand off qualified prospects to the sales team to engage them. Once they become a customer, your service team delights them so that they buy from you again and again and tell all their friends.
The funnel is a useful tool when used in the context of the buyer’s journey. However, keep in mind that the funnel has one issue: It puts customers as the output. At INBOUND 18, HubSpot officially retires the funnel in favor of the flywheel.
 The result puts customers at the center, which creates a more unified and less linear approach to all your marketing, sales, and service activities.
Marketing Funnel Stages
Even so, the funnel is still a good starting point before you begin moving to your flywheel strategy.
All you have to do take the buyer’s journey and ask the question: “How do we attract and engage this person so they become a customer?”
Whether you subscribe to the funnel or the flywheel methodology, earning business from your prospects comes down to three simple things:
- Attracting strangers
- Engaging prospects
- Delighting customers
As you create create content that performs these functions, you’ll consider the stage they’re at in their journey and the best channels to put the content in front of them.
The internet has made it easier for marketers (and salespeople) to engage customers at the various stages of their journey using content marketing. That’s one of the main reasons that 60% of marketers consider content as ‘very important’ or ‘extremely important’ to their overall strategy.
However, it can be challenging to create the right content, for the right people, at the right time.
Marketing Channels for Each Stage of the Funnel
Building a content strategy starts with identifying the channels in which you’ll reach your audience.
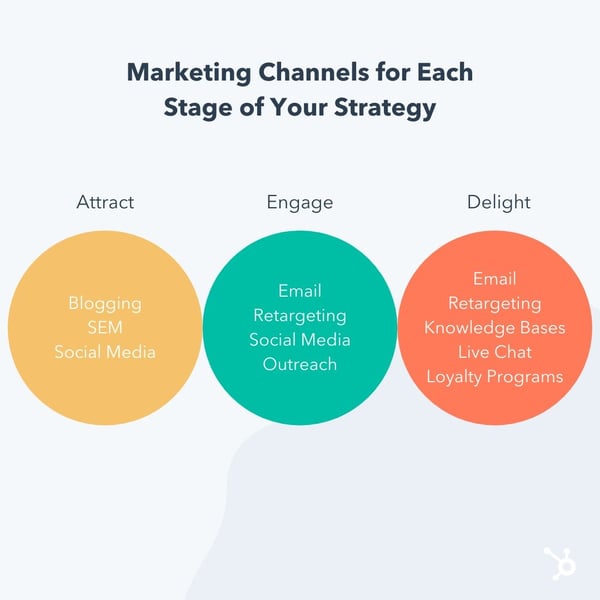
Marketing Channels for the Attract Stage
 Remember, a large majority of your prospects may even be in the awareness stage of their buyer’s journey when you begin to attract them. That means your goal is to solve for their pains/problems by creating content they can easily discover and consume.
At this point, a buyer is trying to solve problems, get an answer, or meet a need. They’re looking for top-level educational content to help direct them to a solution, like blog posts, social content, and ebooks. Their value as a lead is low because there’s no guarantee that they’ll buy from you. But those who find your content helpful and interesting may journey on to the middle of the funnel.
The ideal channels for your attract stage may include:
- Blogging
- Search Engine Marketing
- Social Media Marketing
Marketing Channels for the Engage Stage
When someone moves into the middle of your funnel, it means you’ve captured their attention. They know they have a problem that has to be solved, and now they’re trying to discover the best solution. The need for a future purchase commitment creeps up as they’re evaluation their options.
While the top of the funnel is designed to educate a prospect, this is the stage where you want to show why your solutions in particular are the best fit.
(You also want to help people determine if they’re not a good fit, which will be very important later for healthy customer retention. If you convince customers to buy who aren’t a good fit for your business in the long run, you could be shooting yourself in the foot in the form of high churn rate later.)
The middle of the funnel is typically a point of extended engagement where you’re nurturing a lead, building a relationship, and establishing trust between the audience and your brand.
The ideal channels for your engage stage may include:
- Email Marketing
- Retargeting/Remarketing
- Social Media
You also need to engage prospects at the bottom of your funnel.
The bottom of the funnel is where someone is making the actual purchase decision. They’re ready to buy, but that still doesn’t guarantee that they’re going to buy from you. That’s the last choice they have to make: Where do they get the solution they’re seeking?
In most cases, leads at the bottom of your funnel just need that final nudge and that compelling call-to-action to get them to make a purchase decision. The right offer and content at this stage can have a dramatic impact on lifting your conversions.
You might also consider sales outreach to engage qualified prospects and continue to engage them through personalization and contextual marketing.
Marketing Channels for the Delight Stage
Marketing shouldn’t stop once someone becomes a customer. Cultivating a relationship with your customer beyond the sale can lead to higher customer lifetime value as well as word-of-mouth referrals and more.
The key here is to go above and beyond their expectations and provide a customer experience that’s easy and frictionless.
The ideal channels for your delight stage may include:
- Email Marketing
- Retargeting/Remarketing
- Self-Service Channels Such as Knowledge Bases
- Live Chat and Chatbots for Service
- Loyalty Programs
On the surface, this process seems really linear, but you can also target multiple stages of the buyer’s journey across channels.
For example, you may still be able to attract someone in the consideration stage or delight someone who isn’t a customer yet. Your knowledge base might convince someone in the consideration stage to buy since they perceive that you have great service, or someone in the awareness stage could engage your chatbot to find the content they need.
One of the joys of content marketing is thinking outside the box.
Creating Content for Each Stage of the Buyer’s Journey
Once you have an idea of who your buyer persona is and what channels will work best for your business, you can begin creating content for your buyer at different stages and tailor that content per channel.
Doing so can help you map your content to the relevant stages of the buyer’s journey to make your funnel.
- Top of the Funnel: The “awareness” stage, where people looking for answers, resources, education, research data, opinions, and insight.
- Middle of the Funnel: The “evaluation” stage, where people are doing heavy research on whether or not your product or service is a good fit for them.
- Bottom of the Funnel: The “purchase” stage, where people are figuring out exactly what it would take to become a customer.
Your funnel may look very different depending on factors like your industry, business model, product, pricing, and audience. Some B2C customers, for example, spend very little time in the middle of the funnel compared to B2B customers that require far more nurturing, engagement, and relationship development before a purchase is made. A $50 pair of sneakers, for instance, requires a lot less handholding when it comes to making purchase decisions than a $10,000 business software investment.
Content Ideas for Each Stage of the Buyer’s Journey
Because audiences can vary so widely based on industry and intent, persona research is of the utmost importance. Only by understanding their unique process for awareness and evaluation will you be able to create a truly effective content marketing strategy, packed with custom content that best supports their journey toward making a purchase.
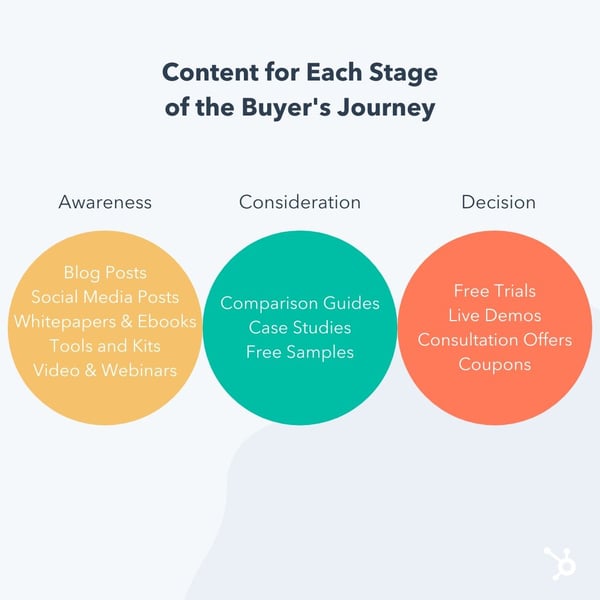
Blog Post
A blog post is an ideal piece of content targeting the awareness stage. By targeting a pain, problem, or other topic your target audience wants to discover and then posting it to your website, you’re creating a brand asset that’s crawlable by Google and discoverable by search engine users. You can also promote your blog content across other channels.
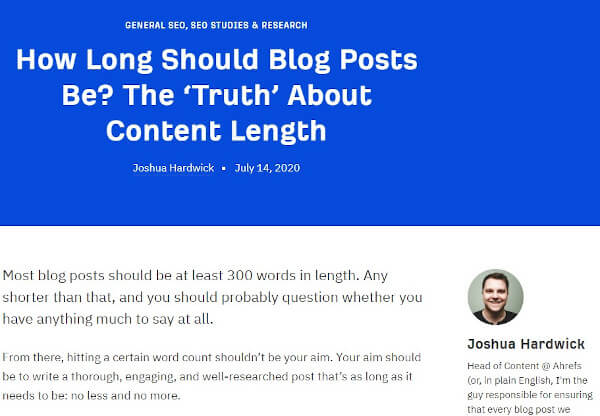
Ahrefs is a great example of a brand that does blog content right. They include original data and informational advice to create long-form articles that serve their audience.
Social Media Post
Social media is a channel that can be used to promote your other content, and you can also create content specifically for the channel. According to Pew Research, 72% of the public uses some form of social media, so it’s likely that your audience is native to this channel. Unlike blog posts, social media posts are likely shorter form, and video consumption is also on the rise.
In the above example, HubSpot Agency Partner Yokel Local shares attractive customer marketing tips on the LinkedIn platform. SlideShare formats are popular on LinkedIn, so the content is created to be snackable with short-form take-aways.
Whitepaper
A whitepaper is an organization’s report or guide on a particular topic. Whitepapers are especially useful as downloadable offers when a reader wants to go more in-depth on a particular subject they’re reading about. For whitepapers, it’s important to provide information that can’t be found elsewhere so that your audience understands the value of the report and is compelled to get it.
Every year, HubSpot publishes a survey on the state of marketing to provide helpful guidance based on thought leadership to marketers, sales professionals, and business owners. Inside, readers find statistics from a broad survey as well as industry experts’ opinions on what the data means and where the industry is going.
Checklist
For tasks that are complicated and have a lot of moving parts, individuals may simply want a blueprint that spells out what they’re supposed to do to achieve their end goal.
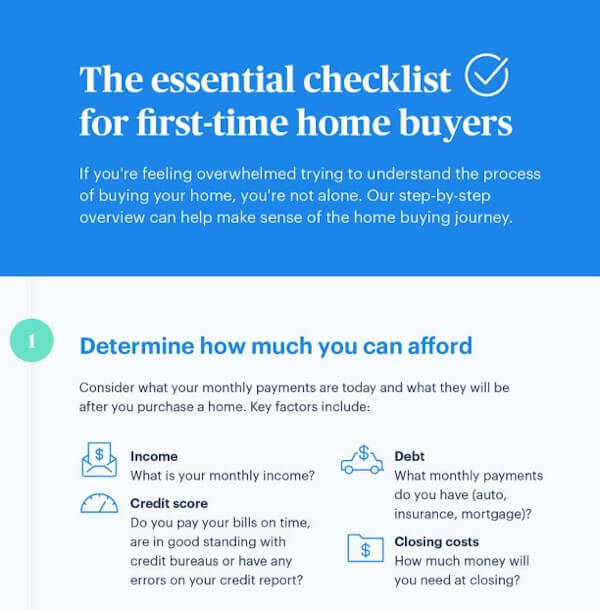
Buying a home is a perfect example of this, and Opendoor meets their audience’s need by providing a handy checklist (in infographic form!) for the reader that spells out all the steps that need to be taken. The graphic is aesthetically pleasing and even allows room for a few tips along the way.
How-To Video
Sometimes, the best way to solve a pain or problem is to learn a new skill. Sure, a purchase of some kind may be required along the way, but the audience may need to become more informed about the problem and how to solve it. That’s where instructional video content comes in.
Whiteboard Fridays is a popular video series by Moz where SEO principles are broken down to the audience in easy-to-understand language and visuals. Moz knows that SEO is a difficult subject and aims to make it accessible to their viewers.
Kit or Tool
Informational content provided to a broader audience may not always be enough for your buyer persona to make a decision or take action of some kind. In some cases, they may require a little more utility or personalization. That’s why kits and tools are a great piece of content to create to help the reader along their path to purchase.
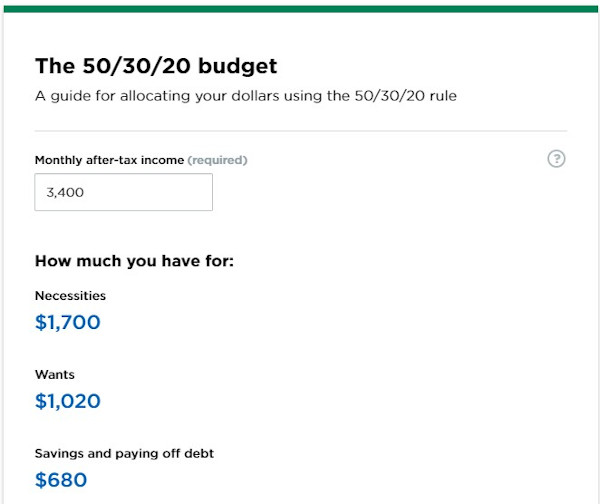
Nerdwallet creates content around several financial topics, budgeting being one of them. It can be difficult to create a budget, though, so they developed a calculator that allows the user to provide their own numbers in order to receive a customized recommendation.
Ebook or Tip Sheet
Similar to whitepapers, ebooks and tip sheets are great options for downloadable content. In contrast, they tend to be shorter form and more actionable.
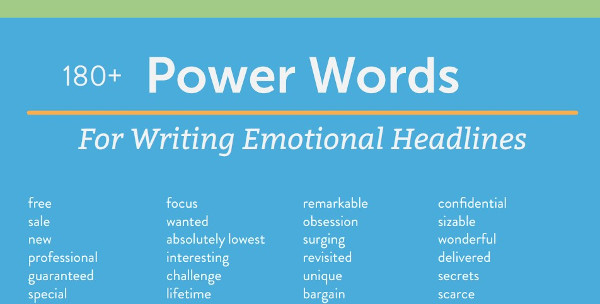
CoSchedule combines a few tactics by promoting their headline analyzer tool with a blog post about writing great headlines that drive traffic. On that blog post, they include a great tip sheet of powerful words to include in headlines if you want to catch a reader’s attention.
Educational Webinar
A webinar is a web seminar where information is typically provided through video. A webinar can be prerecorded or streamed live, and this opens up tons of possibilities to disseminate information to an audience who wants more visual and auditory content.
SEMrush makes webinars a key part of their content marketing strategy, often running a valuable topic multiple times to get more mileage out of the content.
Product Comparison Guides
In the consideration stage, the buyer persona is still considering solutions to their pain or problem. For this reason, product comparisons are a great way to help them make a decision.
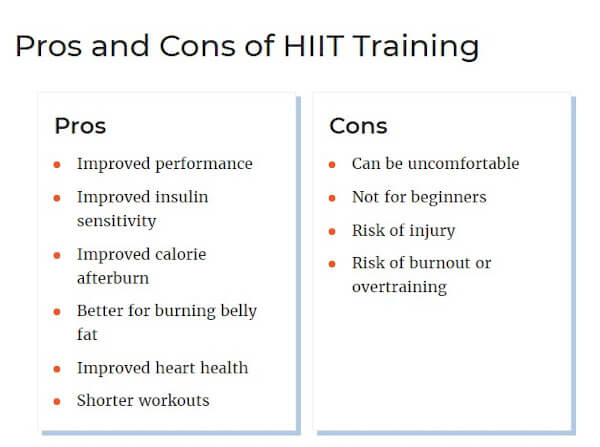
Verywell Fit provides such a comparison to help their readers choose between high-intensity workouts vs. steady-state cardio, providing the pros and cons and use cases for each.
Case Study
A case study can be used in both the consideration stage and the decision stage simultaneously by convincing the reader that the solution works by establishing that the provider achieves results for their clients by administering the solution. A good case study will appeal to the emotions and logic of the persona by providing detailed information and quantitative data on the final solution.
HubSpot Partner Agency Blueleadz does this by telling a story about their client and the problems they had while providing a detailed account of how they solved it.
Free Sample
A free sample is another example of content or an offer that overlaps between buyer’s journey stages. Consider this: An individual wants to paint the inside of their home, but they don’t know what color.
As they consider which color (the solution), they pick up paint chip cards from their hardware store. These cards are created by a provider based on their individual solution. When the individual falls in love with a color, they already know who the provider is that makes it.
SILKCARDS taps into this buying behavior by offering samples of their unique printing methods on the content that they create. They know that their business is tactile, and digital content alone is not enough to close a deal. Once their prospective customer holds the sample in their hands, other business cards are put to shame.
Free Trial or Live Demo
What better way to know if you want to purchase a product than take it for a spin? Car dealerships have been using the “test drive” tactic for years because it works. If the product itself checks all the boxes the buyer has, all the sales team has to do is handle their objections and make the close.
Hellosign does this well. Though they have a free option with limitations, they know that the key to getting clients into their larger tiers is by offering a free trial upfront. Their pricing page sets the prospect’s expectations and points them to the free trial.
Consultation Offer
A consultation is another example of providing just a little bit of service in exchange for the opportunity to close the sale. The best consultation offers reduce the anxiety of entering into a sales conversation by promising something concrete they can walk away with (a strategy or actionable advice) in exchange for their time.
Blk Bld & Co.’s consultation offer is a great example because it reduces the friction of scheduling a consultation. By removing friction, this organization increases the chances of conversion.
Coupon
A coupon appeals to a fear of missing out (FOMO) mindset. By reducing the price by a certain amount, a coupon is handing a price objection while convincing the prospect that they’re leaving money on the table if they don’t use the coupon. This inertia enough to win the prospect’s business.
Fragrant Jewels does this well by gamifying their coupons. By spinning the wheel, the website visitors have the chance to get a coupon before checking out the products. They’ll likely be evaluating the products that are a good deal with the coupon they won.
In addition to decision stage content, you should also create content to delight your existing customers. This may include FAQ and knowledge base content to make the customer experience easier, coupons for the opportunity to upsell, and additional educative content that deepens their understanding of a topic.
Mapping Content Across All Stages of the Funnel and Buying Cycle
Every business has a unique sales funnel, sculpted and designed around their buyer’s unique journey. It’s a recipe that can’t necessarily be replicated from one business to another. When creating your own buyer’s journey, there are a number of factors specific to your business to take into consideration.
That said, the general approach remains the same: Understand your audience, develop your funnel around your industry and audience intent, and create a documented content marketing strategy that maps custom content specifically to each phase of their journey through the funnel.
Do it well, and this process will have the greatest possible impact on your customer relationships, as well as the greatest possible lift in your overall conversions.
Editor’s note: This post was originally published in August 2016 and has been updated for comprehensiveness.

The Optimal Instagram Story Dimensions [+ Tips for Best Quality]
New social media sites continue to emerge, new features are added, and algorithms are always being updated, making it tough to keep up with social media best practices.
However, social media is here to stay. According to Instagram, there are more than one billion active users monthly and more than 500 million Stories active every day.
In fact, Instagram Stories are a popular trend that isn’t going away. Pamela Bump, audience growth writer at HubSpot, writes about Instagram Stories in this blog. She says, “Instagram Stories serves as an outlet for brands to creatively show their products, services, or happy customers in action. Branded Instagram Stories also enable audiences to learn more about topics related to your brand’s industry. Helpful and valuable content might also allow prospective buyers to trust your brand more.”
With this knowledge, you want your marketing team ready to develop a strategy for your Instagram Stories. To create this strategy, your team should decide what kind of images or videos they want to post. How do you plan on taking those images? With phones or professional cameras?
Below, you’ll learn the Instagram Story dimensions and why it’s important to add Instagram Stories to your strategy.
How do I fix the quality of my Instagram Stories?
You might be asking, why do you need to know about the specific Instagram Stories dimensions? There are instances in which you might find that your Stories aren’t uploading with the quality that you’d like. The following tips can help you isolate the problem and improve the look of your brand assets:
1. Ensure your content is high-quality before you upload.
Instagram will compress images during the upload process, so an already grainy or pixelated image will only get worse it gets to the platform.
Check that your images are at least 72 ppi resolution and clear on your computer before you add them to Instagram.
2. Upload the right size and shape.
Instagram is strict about adhering to its dimensions in order to ensure quality photos and videos. When you upload a vertical image or video from your phone, you most likely won’t have to think about these dimensions because Instagram will automatically format them.
However, if you have horizontal photos that don’t fit the dimensions, Instagram will crop your photos, zoom in on content, or zoom out (making your image look small and placing it on a background). This typically results in lower quality images and videos.
3. Use photo editing apps.
Photo editing apps can help you control the quality of your Stories and ensure you’re always using the right dimensions. In order to edit your photos for Instagram, you can use sites including:
- Canva: This is the perfect option for creating images for your Instagram Stories. To get started, Canva has templates that are designed with the Instagram dimensions in mind. Canva offers free and paid plans.
- Lumen5: This software makes it easy to produce videos for Instagram Stories. Once you get started creating a video, you can choose the right dimensions on the platform. Lumen5 starts at $19/month.
- Easil: Easil has templates for Instagram Stories to help create engaging content. They have templates for single images, and multi-card Stories as well. Easil offers free and paid versions.
- Adobe Spark: Adobe Spark makes creating images and video graphics for Instagram Stories easy. You can build your own Stories with their typography and imagery options. Adobe Spark has free and paid plans available.
- Embed Social: Embed Social is a different kind of tool for Instagram Stories — with Embed Stories, you can make your Stories Shoppable by adding CTAs, and creating embeddable code that you can add to your website. Embed Social offers free and paid plans.
With these tools, you can input the specifications, upload images and videos, and complete the editing process. These work well if you have higher quality images taken with a camera or want to add graphics or text to your images or videos.
Here’s what the process would look like for Canva. Click on “Templates” and choose “Instagram Story” to see templates that are the right dimensions for Instagram.
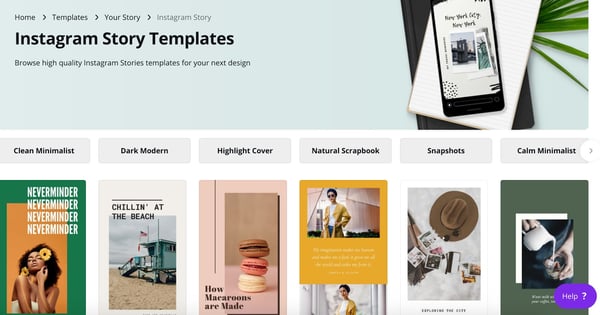
Image source: Canva
4. Check if the quality is better on other devices.
If your internet connection is poor, Instagram stories will appear lower quality than the would on a faster connection.
Instagram does this to save resources for user experience as you interact with other areas of the site. Consider asking someone you know if the quality is low on their end as well. They — and your audience — may be viewing your stories with no issues.
5. Turn off Data Saver.
Data saver is a feature that prevents videos from loading in advance, which helps reduce your data usage.
If your connection is fine but you’re still having issues with quality, this feature may be lowering the quality of your feed on your end.
6. Test photos from different cameras.
As a last resort, test whether there’s a difference in quality between your phone’s integrated camera vs. the Instagram camera. The photos you take with your phone’s camera vs. the in-app camera (or vice versa) may weather Instagram’s compression settings better.
Stats & Tips You Should Know About Instagram Stories
Why should you care about Instagram Stories? Here are a few stats from Instagram:
- 90% of accounts follow a business on Instagram
- More than 1 billion Instagram accounts worldwide are active every month
- More than 500 million accounts use Instagram Stories every day
Sophia Bernazzani, HubSpot blog writer, wrote about how to use Instagram Stories for business in this blog. She says you can use Instagram Stories to:
- Post footage of an office event
- Post breaking news about your industry
- Demonstrate your product
- Promote a company event
- Preview one of your company’s blog posts
- Mention other companies who follow or work with yo
Using Instagram Stories is a tactic that all marketers should consider. With active and engaged users, using Stories can improve your discoverability and increase brand reputation and awareness.
Editor’s note: This post was originally published in October 2019 and has been updated for comprehensiveness.

Is a Virtual Team Right for You? The Pros and Cons of Virtual Teams
Copywriting para Vender: 31 tips de línea editorial para escribir tu Landing Page
Olvida todas las otras guías de copywriting para vender. Esta es la única que vas a necesitar si quieres escribir una landing page que sí convierta. Además, los 31 tips que compartiremos te ayudarán a ir perfilando tu línea editorial
Si tu página de pedidos está más desierta de lo que te gustaría, un camino para comenzar a devolverle la vida es optimizar tu página de ventas y landing page.
Seguramente te has esforzado mucho en la redacción de tu contenido y tal vez no entiendas por qué no tienes resultados.
Es por eso que hemos creado esta lista de tareas práctica y fácil de usar en la que te explicamos cada fase del proceso de copywriting para vender.
Estas técnicas funcionan en landing pages, páginas para recabar datos, upsells y más – no importa lo que estés vendiendo, siempre puedes darle un empujón.
Si todavía no tienes una landing page o embudo de ventas, o quieres mejorar la existente, entonces échale un vistazo a GroovePages, un editor online que tiene versión gratuita.
Copywriting para vender: conoce a tu audiencia y vencerás
Es mejor tener una pista de quién es tu audiencia antes de empezar a pensar en tu copywriting para vender, pero incluso si estás utilizando test AB o planeando contenido a largo plazo, nunca está de más limitar el enfoque. Esto te ayudará a ir perfilando tu línea editorial
Dicho proceso es útil porque después será más sencillo actualizar tus contenidos. Ya tendrás un norte hacia dónde debes dirigir tu redacción digital.
| Utiliza la herramienta ConnectExplore para encontrar intereses ocultos en tu audiencia. Te da datos más detallados que el administrador de anuncios de Facebook. |
Ya que los detectaste, las recomendaciones son:
- ¿Puedes identificar un sub nicho de mercado que se beneficiaría más con alguno de tus productos? Si es así, segmenta para ellos – tu producto será más relevante para esos pocos y no atraerá a compradores desinteresados que es más probable que terminen solicitando un reembolso.
- En lugar de hacer una oferta para encontrar a quién venderle, identifica a tus clientes primero – o más bien, sus necesidades, problemas y miedos – y después ofrece la perfecta solución.
Una vez que sepas a quién le estás hablando, revisa tu oferta. Si solo estás vendiendo una cosa. Incluye extras que se transformen en más funnel o embudo de ventas y comunícalos con copywriting para vender.
Por ejemplo:
- Up-sell – si tu cliente no está interesado en tu oferta principal, ¿podría estar buscando algo más grande/mejor/más caro?
- Cross-sell – ¿tu producto principal puede tener productos complementarios o suplementarios, por ejemplo recambios o empaques a granel?
- Down-sell – ¿puedes captar la atención con un precio más bajo o un producto de menor calidad?
>>> Upsell y Downsell, qué son y cómo usarlos para vender más
Después de que ya tienes a tu audiencia y la oferta es tiempo de trabajar en la forma de escribir tu landing page.
Atrae con Copywriting para Vender: el título en una Landing Page
Estos son nuestros 4 tips de copywriting para vender si quieres redactar el mejor título para tu landing page.
- #1. Hazlo grande, fuerte y con gusto – el título va en la parte de arriba de tu página, con un estilo de letra serif de gran tamaño.
- #2. No sobrecargues el título de información, ¿qué es lo que realmente tu audiencia quiere saber? Usa eso.
- #3. Evita los títulos con anzuelos o sobreexpectación, lo que le llaman clickbait. Ya no se usan.
- #4. Llama la atención de tu audiencia usando un ejemplo específico o término técnico que estás seguro de que van a entender.
Plantea un problema con Copywriting para Vender
El copywriting para vender te puede ayudar a varias cosas. Una de ellas es instalar un problema en la mente de tu cliente ideal.
- #5. Plantea el problema que tu target está sufriendo pero todavía no muestres a tu producto como la solución.
- #6. Usa una historia real para describir el problema. Puede ser una experiencia tuya o un testimonio.
- #7. Diseña la introducción como si fuera un saludo informal y no como un adelanto de tu producto. Por un momento deja de vender y enfócate en agrandar el problema en la mente de los lectores para que cuando menciones el producto, parezca la solución perfecta.
- #8. Evita los párrafos largos. Los párrafos de una o dos líneas son más fáciles de leer cuando realizas copywriting para vender.
- #9. Enfatiza el impacto que el problema o miedo puede tener en la vida de tu audiencia y la necesidad que tienen de encontrar una solución – no tengas miedo de improvisar, ¡aunque sea un poco!
Técnicas de copywriting para vender: La Revelación
Debes usar con cuidado el copywriting para vender al momento de hacer la revelación, es decir, contarle a tu audiencia por qué tu producto es la solución a su problema. Te recomendamos ser sutil pero convincente. Utiliza estas técnicas:
- #10. Muestra tu producto con una letra clara en negritas y, si es posible, agrega una imagen.
- #11. Si tienes un producto de lujo, enfatiza su calidad o aquello que lo hace único. Si, por el contrario, tienes un producto de uso diario, habla sobre el valor y utilidad.
- #12. Seduce a tu audiencia con un elevator pitch convincente: explica tu producto, comunica qué lo hace único y despierta su imaginación con una pregunta. Por ejemplo: “Imagina un trapeador o fregona que use menos agua para limpiar y sea 8 veces más eficiente, ¿cuánto te podrías ahorrar en el recibo del agua?”.
Usa testimonios en el Copywriting para Vender
Los testimonios aumentarán la credibilidad de tu copywriting para vender. Recuerda, deben ser reales. Nuestros tips son:
- #13. Usa demostraciones sociales – testimonios, casos de estudio y otro tipo de experiencias de la vida real – en tu carta de ventas para agregar credibilidad.
- #14. ¿Todavía no hay clientes? ¡No hay problema! Pídele a amigos o familiares que sepas que te van a decir la verdad su opinión sobre el producto – puedes ofrecerles ayuda a cambio o darles gratis el producto.
- #15. Agrega evidencia como fotos de usuarios, fotos de antes y después o notas de prensa.
- #16. Incluye cualquier logotipo o publicaciones donde se haya presentado tu producto.
- #17. Agrega estrellas junto a los testimonios favorables para atraer la atención de los ojos de los usuarios a esa parte de la página.
- #18 Diseña la información claramente, usa columnas, líneas y espacios en blanco para separar las secciones.
Redacta Características y Beneficios con copywriting para vender
En este apartado aprenderás el orden que debes seguir al momento de pensar tu copywriting para vender.
- #19. Conoce la diferencia entre las características y los beneficios y aprende cuándo hablar de cada uno (beneficios primero, características segundo). Retomemos el ejemplo del trapeador o fregona: los beneficios podrían ser tener pisos limpios, una casa ordenada y una mejor salud por estar en un ambiente más higiénico.
Las características podrían ser que está hecho con microfibras, mango de bambú o que tiene un mecanismo antigoteo.
- #20. Enumera cada problema que tu audiencia podría tener. (Los puedes utilizar en la introducción para hacer el problema más grande en la mente de los lectores).
Después de cada uno de los problemas que pensaste, explica cómo tu producto los soluciona. ¡Boom! – ¡Verás beneficios al instante!
- #21. Crea una lista de estilo “impacto y sorpresa ”. Esto es una lista de puntos muy cortos que describen las características de tu producto, los beneficios, lo que lo hace único y otros aspectos como usuarios notables (alguna celebridad) o resultados que sorprendan al lector.
- #22. En este punto considera los contras que tu lector podría tener ¿Le preocupa el precio?, ¿la confianza?, ¿la disponibilidad? En cada oportunidad que tengas, neutraliza esos miedos.
- #23. Usa listas estilo bullet, es decir, con puntos. Esto permite un formato llamativo y es más fácil de leer (¡lo que estamos haciendo en este post!).
- #24. Usa un lenguaje hiperespecífico en tu sector, con esto agregas credibilidad en la audiencia. Por ejemplo, utiliza tecnicismos de la pesca con mosca en una página que vende productos para pescar con mosca o da una explicación detallada de lo caótica que es la rutina matutina para mandar a los niños a la escuela si tu target son los padres.
Crea la Sensación de Urgencia en el copywriting para vender
En el copywriting para vender no hay tiempo para perder. Te contamos cómo elaborar una buena sensación de urgencia.
- #25. Un temporizador de cuenta regresiva agrega urgencia visual a los lectores para comprar.
- #26. Solo agrega urgencia cuando realmente exista – no catalogues algo como una “edición limitada” si planeas volver a venderlo en un corto tiempo.
- #27. Es más difícil crear una urgencia para los productos digitales ya que, generalmente, las cantidades son ilimitadas (hay maneras de limitar las copias digitales pero el reto es convencer a la audiencia).
Algunas ideas son ofrecer un descuento por pago anticipado, un regalo por un tiempo limitado o una versión beta más barata del producto con la oportunidad de incorporar los comentarios del usuario en la versión final.
>> La sensación de urgencia en la estrategia de marketing
Copywriting para vender: ¿Cómo hacer un Llamado A la Acción?
Seguro lo has leído en todos los manuales. Tu landing page debe tener un llamado a la acción claro, pero ¿cómo se hace eso? El copywriting para vender te da la solución.
- #28. Los Call To Action, Llamadas a la Acción o CTA deben ser imposibles de pasar desapercibidos, con colores brillantes y preferentemente en la parte inferior de la pantalla.
- #29. Deja claro lo que quieres que haga el lector, por ejemplo “Compra Ahora” o “Únete al Club”.
- #30. Asegúrate de que el proceso de pago y el propio pago sean lo más rápido y fácil posible para limitar los molestos pensamientos secundarios que pudieran desincentivar a la compra.
- #31. Logra que tus clientes se sientan bien después de la compra – incluye mensajes de agradecimiento y recuérdales que recibirán lo que adquirieron en óptimas condiciones.
Conclusión y ¡Bonos de copywriting para vender!
Aunque lo intentamos, no pudimos terminar los tips de copywriting para vender aquí. ¡Por eso, agregamos algunos más!
- ¿Cómo atraer tráfico a tu página de ventas? Pensar en el marketing digital de forma diferente te puede ayudar a difundir tu landing page y a encontrar nuevos usuarios. Si no lo has hecho todavía, considera pagar anuncios en Facebook ¡Es muy fácil, barato y muy efectivo!
>>> ¿No sabes hacer anuncios de Facebook? En este tutorial te lo enseñamos
- Escribe como autor invitado en algunos blogs relevantes para tu nicho. De hecho, si quieres colaborar con Socialancer en este link encuentras las pautas para ser guest blogger.
- Pregúntale a tus conocidos, amigos y personas influyentes si estarían dispuestos a ayudarte a correr la voz sobre tu página.
- Desarrolla un programa de afiliados para tu producto con servicios como JVZOO y Clickbank. GrooveFunnels es un creador de embudos de venta online que tiene un muy interesante programa de afiliados con comisiones de entre el 20 y 40%.
- Observa a tu audiencia: ¿dónde pasean?, ¿qué hacen cada día y con quién hablan?, ¿hay alguna forma de contactarlos que no hayas probado en el pasado y por qué?
- No olvides revisar tu página en tu teléfono celular para verificar que la versión móvil está a la altura. ¿El texto es legible?, ¿algo quedó oculto detrás de otro elemento?, ¿los formularios son fáciles de llenar en una pantalla chica?
- Finalmente, asegúrate de que las imágenes estén optimizadas para verse bien en las pantallas móviles y son interesantes – las fotos claras y de alta calidad sobre un producto funcionan mejor, así como los rostros humanos mejoran el engagement.
Seguir estos consejos debería ayudarte a conseguir más conversiones – ¡así que no olvides decirnos cómo te va!
from Socialancer https://ift.tt/3a0nuyE
via