
Welcome to My Blog
Why Marketers Should Implement User-Generated Content: 23 Stats to Know
As a Boston-based young professional, the biggest product I’ve had to invest in was an over-priced apartment.
And this year, with apartment tours going fully virtual, I’ve found it even harder to do the extreme research needed before committing to a lease. Now, as I research apartment after apartment online, my new process feels like an intense buyer’s journey.
In my research phase, I spend hours on end scouting listings, looking up addresses on Google Maps, researching neighborhoods, skimming through Yelp reviews of prospective property managers, and analyzing photos or video tours for potential problems that an unseen apartment could have.
Ultimately, I’ve found that the apartment listings I’m most drawn to have links to video tours filmed by current tenants.
When I’ve watched tours filmed by tenants, they’ll explain what they like about their apartment, note major pros and cons, and give tiny — but authentic — details that the average salesperson might not offer. For example, in one video, a tenant honestly revealed one pro and one con about a bathroom by saying, “The bathtub has a great jacuzzi, which makes up for the lower water pressure.”
After viewing a pleasant and seemingly trustworthy virtual tour, I feel like I’ve gotten an in-depth and authentic look at the product, as well as thoughts from a previous customer who is an expert on the product. Additionally, because the tenant often voluntarily offers their time to host the create video or virtual tour, I also get the sense that they are willing to help a trusted landlord find a new tenant.
Ultimately, I’m more likely to respond to an apartment listing with a great tenant-generated virtual tour than a listing with over-produced images or videos edited by an outsider.
When it comes to smaller purchases, I feel the same way about promotional content created by customers. This content shows me what the product is like in real life and proves that customers are delighted enough about their experience to promote a trusted brand.
And, I’m not the only consumer (or marketer) who thinks this. An estimated 90% of consumers say user-generated content (UGC) holds more influence over their buying decisions than promotional emails and even search engine results.
Below, I’ll highlight more stats, facts, and figures that demonstrate the benefits of user-generated content.
23 User-Generated Content Stats to Know in 2020
Benefits of User-Generated Content
- Consumers find UGC 9.8x more impactful than influencer content. (Stackla, 2020)
- 79% of people say UGC highly impacts their purchasing decisions, (Stackla, 2020)
- 48% of marketing professionals believe that content created by customers can help humanize their marketing. (TINT, 2018)
- 34% of TINT users surveyed and 45% of marketing professionals agreed that UGC helps increase key social media KPIs. (TINT, 2018)
- 42% of marketers say user-generated content is a vital component of their marketing strategy. (TINT, 2018)
- Ads featuring UGC garnered 73% more positive comments on social networks than traditional ads. (Jukin Media, 2018)
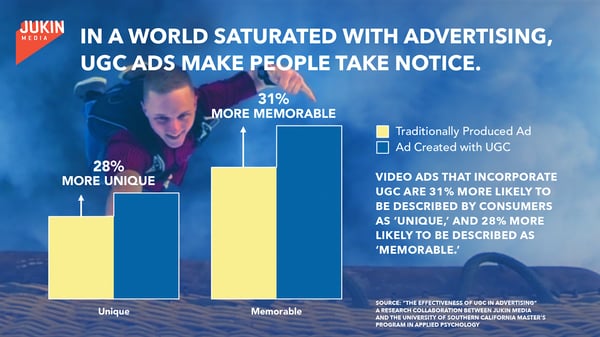
- 31% of consumers say advertisements that feature UGC content are more memorable than traditional ads without it. (Jukin Media, 2018)
- 28% of consumers say ads with UGC content in them are also more unique than ads without this type of content. (Jukin Media, 2018)
UGC Tactics
- 50% of marketers have utilized user-generated content in email marketing, (TINT, 2018)
- Meanwhile, 58% of marketers have implemented UGC in ad campaigns. (TINT, 2018)
- Nearly half of marketers use UGCto support their overall marketing campaigns. (TINT, 2018)
- 41% of marketing professionals ranked content engagement as their top KPI for tracking user-generated content. (TINT, 2018)
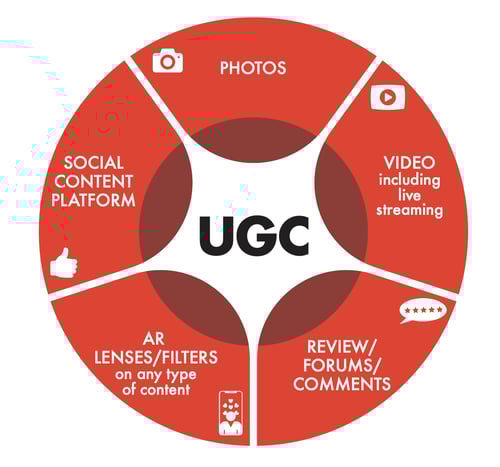
- The most common types of UGC are photos, videos, social media content, customer reviews or forums, and content created with branded AR filters. (IAB, 2019)
Brand Authenticity
- 60% of consumers believe UGC is the most authentic marketing content. (Stackla, 2017)
- 75% of marketers believe user-generated content feels more authentic than other types of content. (TINT, 2018)
- Although 92% of marketers think they’re creating authentic content, 51% of consumers think their favorite brands offer authenticity. (Stackla, 2020)
- 57% of consumers think that less than half of the content brands create resonates as authentic. (Stackla, 2017)
- Consumers are 2.4x more likely to say user-generated content is authentic compared to brand-created content. (Stackla, 2020)
- 56% of internet users say they find out about products from friends or acquaintances while 32% rely on customer reviews. (Statista, 2020)
- On average, 20% of consumers have unfollowed a brand on social media because they felt their content was inauthentic. (Stackla, 2017)
- 70% of the time, consumers are able to distinguish between consumer-created content and brand-created content. (Stackla, 2017)
UGC Audiences
- Demographically, more Gen Z YouTube viewers prefer UGC to professional videos more than older generations. (YouTube, 2020)
- Globally, Gen Z and millennial generations watch more user-generated content than Gen X and Boomer generations. (YouTube, 2020)
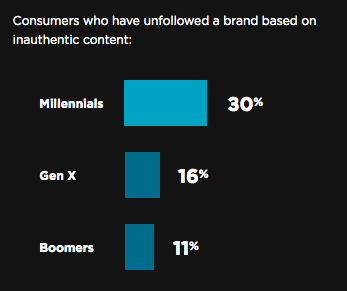
- More than 30% of millennials have unfollowed a brand due to inauthentic content. (Stackla, 2017)
Defining a User-Generated Content Strategy
As you can see from the stats above, user-generated content not only saves you production time, but it can also make your brand more authentic and trusted.
If the data above has persuaded you to implement UGC in your marketing strategy, here are a few next steps you can consider:
- Get inspiration from other brands: Seeing successful examples of UGC from brands in a similar industry will give you an idea of which customers to reach out to and how to amplify their positive thoughts about your product. For a few great UGC examples, check out this blog post.
- Determine how you’ll get the content: Will you encourage fans to send you videos on social media, host a content-related contest, or directly ask your clients to promote a product via email? For tips on this step, read this post,
- Be authentic: Remember, the biggest strength of user-generated content is that it allows audiences to see an authentic view of your product. Don’t be afraid to promote UGC that might be lower quality but highlights all the best features of your brand or product.
To learn more about how to leverage user-generated content in your marketing, click here.

How to Create a Social Media Report [Free Template]
Social media is an undeniably powerful channel for marketing in 2020.
In fact, social networks are the biggest source of inspiration for consumer purchases, with 37% of consumers finding purchase inspiration through social channels.
However, if you’re using social media as a tool for organic exposure and brand awareness, rather than just a channel for paid ads, it can be difficult to track the success of your efforts.
As any social media manager knows, successful implementation of a social media strategy is contingent on countless factors — and all companies prioritize different channels, metrics, and criteria for success.
For example, is paid more important than organic to your business, and if so, to what extent?
Is more importance placed on audience engagement, or audience growth?
Has a posting cadence been directly tied to revenue?
With so many areas of focus for social media marketers, it’s crucial to choose, analyze, and report on your key social media metrics with a social media report.
A social media report can help you clearly convey what factors your social media team prioritizes, why those factors matter, and how you’re performing against those goals.
In this post, we’ll highlight the importance of a social media report, list the metrics you should consider including in one, and walk through a step-by-step process for building a social media report yourself.
For a quick and easy solution to your reporting woes, click here to download HubSpot’s Free Social Media Reporting Template.
Why Use a Social Media Report?
A social media report is the best way to distill the key metrics your social media team is tracking on a daily, weekly, monthly, quarterly, and/or annual basis.
Since social media encompasses so much, gathering and reporting on the data and channels that you’ve determined are most important for your business provides a lens of focus for your social media marketing team, and delivers a necessary high-level overview for leadership.
Social media doesn’t just affect marketing. Prospects ask questions, customers write reviews, and thought leaders follow you for company news. Because social media coincides with nearly every aspect of your organization, gathering and distributing the state of your social media channels is a move that shows transparency and encourages cross-company alignment.
You can also use a social media report to report on campaign-level analytics. If your social media account is serving as a cog in a larger company initiative, this report shows to what extent social media contributed to the project’s success.
Featured Resource: Free Social Media Report Template
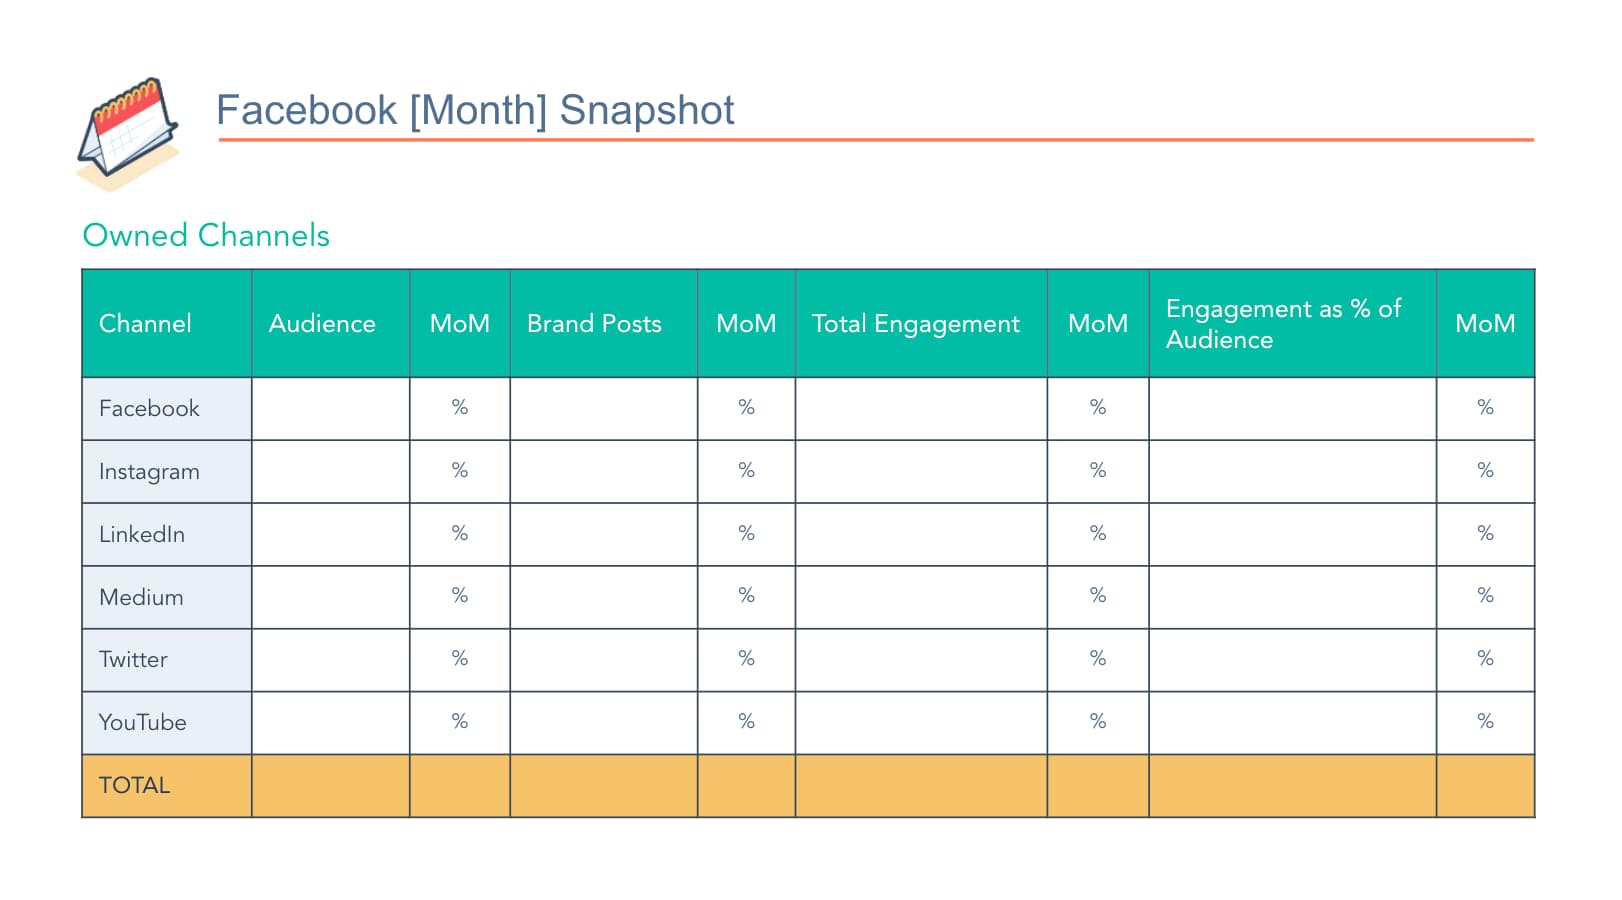
HubSpot’s free social media report template has pre-made slides for you to report on all of your predominant social media metrics. Download the template today and simply plug in your own metrics to customize a social media report for your organization.
Social Media Metrics to Report On
Your business likely values some metrics over others when it comes to social media reporting. Likely, these metrics also vary between your channels — since LinkedIn doesn’t let you retweet, and Twitter doesn’t let you click a cry-face button.
Before you start reporting on your social media channels’ performance, read through this list of options of social media metrics so you can determine which ones you should include in your report.
1. Audience Size and Growth
This metric tells you how large your reach is and how quickly that reach is growing. This is typically seen as the core social media metric, as it shows how large of an audience you can leverage with your posts and content.
2. Cadence of Posts
A rather self-explanatory example, this metric represents how many times you posted in a given time period. This metric is usually compared alongside other metrics — such as engagement rates — to help you determine the right cadence for your audience.
This metric should also be channel-specific, because it makes sense to post more frequently on some channels than others.
3. Post Engagement
Post engagement measures how your fans and followers are reacting to your posts with likes, comments, and shares. A healthy post engagement suggests you have a loyal audience — and that your content is reaching them.
You can also track engagement as a percentage of your audience to determine engagement rate.
4. Mentions
One metric you have a little less control over is mentions. You can track mentions from customers, prospects, and even news outlets to gauge perception of your business and brand online.
5. Clickthrough Rate
When a post links to a page on your website, you can measure how many people and what percentage of your audience clicked through to the page. A strong clickthrough rate shows you’re sharing website pages that your audience finds relevant.
6. Conversions & New Contacts
Conversions comes into play if you’re using social media to generate leads, subscribers, or even customers. If you want to attribute contacts to your social media team’s efforts, make sure you’re using proper tracking and setting reasonable goals, as it’s rare in some industries to go straight from social media to becoming a customer.
7. ROI
Directly tracing ROI (return-on-investment) to social media efforts can be tricky. However, if you determine it’s worth reporting on this metric, make sure you have proper expectations set and attribution models established.
8. CPM / CPC
This metric is essential for monitoring the performance on your social media ads. If you’re solely reporting on organic social metrics, you can ignore this one.
9. Competitor Metrics
To provide a benchmark, consider analyzing the aforementioned metrics for your competitors. Obviously, these metrics can vary drastically based on publicity, paid budget, and the size of the company, but it’s still worthwhile to make the comparison.
How to Make a Social Media Report
Step 1: Choose Your Presentation Method
For consistency and clarity, make sure you’re using a social media report presentation, spreadsheet, or memo template. This way, each time you update your metrics, you’ll simply need to copy over your most up-to-date metrics onto that template rather than reinventing the wheel every time.
We suggest using a PowerPoint or Google Slide Deck template, because you can share it with your team via email, use it for an in-person meeting or presentation, or both.
Need a template to get started? Try this one.
Step 2: Determine the Metrics You’ll Be Reporting On
Like we’ve established, different companies and different social media teams value different social media metrics.
It’s your job to choose the metrics that matter most to your team and your organization.
Using the list from the section above, narrow down the essential metrics you believe are worth presenting to your team at large. Remember, you can change which metrics you report on for each of your organization’s social media platforms.
If your social media report is campaign-specific, reach out to the project stakeholders to see if they’re hoping to see reporting on any certain metrics in the social media report.
Pro Tip: For your first few ongoing social media reporting presentations, ask your peers which metrics they’d like to see, or which ones they need clarification on. Making these changes sooner rather than later helps you keep your team informed and engaged.
Step 3: Gather Your Data
Once you know what you’re reporting on and how you’re reporting it, it’s time to start collecting data.
When you’re first setting up your social media reports, create bookmarks for your data sources. Make a folder for the analytics page for each social media channel you’re analyzing and/or your social media reporting software for an all-encompassing view.
If you’re tracking click-throughs to your website, make sure you’re analyzing from a single master location, such as your tracking URL builder or your traffic tracking tool like HubSpot or Google Analytics.
Step 4: Add in Some Visuals
A chart of numbers on a slide deck is, well, pretty boring.
While a numerical chart is important for sharing as much info as possible in an organized way, using visuals is a better way to convey the growth and success metrics of your social media performance. Try incorporating one or all of the following into your social media reports:
- Linear graphs to show followers over time.
- Pie charts to show clicks to different pages of your website (blog pages vs. case studies, for example).
- Bar graphs to show number of engagements on each platform.
These examples are more eye-catching than numbers on a slide and further illustrate what you want your team to walk away with. If data visualization is new to you, check out our Guide on Data Visualization for Marketers.
Step 5: Think of Your Story
A running social media report should always remind people about where you came from and where you plan on going. That said, make sure your reports make reference to how your numbers have changed since the last period of time on which you presented, in addition to why numbers have changed.
Did follower growth as a percent increase drop last month? Maybe that’s because one of your posts from the month before went viral and resulted in unprecedented growth that was impossible to match. Make that clear and add context to the numbers.
Additionally, each report should contain clear action items about how you plan to continuously improve your social media performance. Social media is constantly evolving, so your approach and strategy for it should, too.
Now that you’re equipped with the knowledge to build, design, and share your social media report, download your social media report template and get to work!

How to Set Up and Measure a TikTok Influencer Marketing Campaign
Want to get your product in front of TikTok’s growing audience? Wondering how to partner with influential creators on TikTok? In this article, you’ll discover tips and tools to set up and analyze a TikTok influencer marketing campaign. How TikTok Influencer Campaigns Work While still in its infancy, TikTok has become ripe for businesses interested […]
The post How to Set Up and Measure a TikTok Influencer Marketing Campaign appeared first on Social Media Examiner | Social Media Marketing.
from Social Media Examiner | Social Media Marketing https://ift.tt/31sd0WA
via socialmediaexaminer
12 of the Best Marketing Techniques for 2020
When content marketing was gaining steam, there were really only a few techniques you could leverage.
On a typical day, you’d write a blog post, hope it ranked on Google, send it to your email subscribers, and post it to your social media profiles.
That was pretty much it.
This is still the main strategy most marketers use nowadays, but since content marketing has exploded in popularity since its early adoption, it has developed into a much more nuanced and complex type of marketing with many techniques for reaching and resonating with an audience.
To help you learn about the most effective marketing techniques around today, we’ve rounded up the best ones to add to your content marketing arsenal.
1. CTA Copy Test
Every company has a different set of customers, so there’s no one-size-fits-all formula for designing the most optimal CTAs. To figure out which CTA copy will produce the best results for your company, you must discover what your unique set of customers prefer.
With A/B testing, you can run an experiment between two variables, like a red and blue CTA, and identify which one produces better results. A/B testing shouldn’t be confused with multivariate testing, though, which allows you to simultaneously test many variables.
To conduct an A/B test, you can use HubSpot’s A/B testing kit. With this kit, you’ll get guidelines for A/B testing, learn what variables to test, and gain access to a simple significance calculator to track your results.
2. Email Preview
Did you know that more than 50 percent of U.S. respondents check their personal email account more than 10 times a day, and it is by far their preferred way to receive updates from brands.
This means that there isn’t a lot of room for error when you send an email. To avoid any issues, a great marketing technique to implement is to begin previewing your email in different email providers before sending.
There are plenty of tools you can use to preview your emails such as HubSpot’s free email software. With an email preview tool, you can test your emails before you send them and see how they look in every service provider.
3. Blog Post Title Test
When you write a blog post, do you use the first title you came up with or do you write a few?
Most marketers write several headlines before deciding which one to use. However, it’s not always easy to decide.
To make this decision, you can run an A/B test and see which types of titles work best for your audience.
Additionally, you can use tools like this headline analyzer to see what you can do to improve your headline.
4. Brand Storytelling
In the neuroscience field, researchers have proven that storytelling is the best way to capture people’s attention, bake information into their memories, and resonate emotionally with them. The human brain is programmed to crave, seek out, and respond to well-crafted narrative — that’ll never change.
So just like your favorite Netflix show, you can craft a series on YouTube to entice your viewers subscribe to your updates. This can get your audience more excited for your show’s newest season than they currently are for the latest season of Stranger Things.
Before you green light another slew of listicles, how-to posts, and ultimate guides, remember how powerful storytelling is and consider crafting a YouTube series, podcast, or social media hashtag chock-full of conflict, surprise, and emotion that your viewers will relate to your brand.
5. A Topic-Based Content Strategy
Since people heavily rely on Google to provide accurate and relevant answers for most of their questions today, Google needs to understand the intent and context behind every single search.
To do this, Google has evolved to recognize topical connections across users’ queries, look back at similar queries that users have searched for in the past, and surface the content that best answers them. As a result, Google will deliver content that they deem the most authoritative on the topic.
To help Google recognize your content as a trusted authority on marketing, sales, and customer service topics, consider implementing the pillar-cluster model on your blog.
Essentially, the pillar-cluster model is a topic-based based content strategy. This means that you generate and organize ideas for your blog by topic.
By creating a single pillar page (an ultimate guide, for instance) that provides a high-level overview of a topic and hyperlinks to cluster pages (subtopic blog posts) that delve into the topic’s subtopics, you can signal to Google that your pillar page is an authority on the topic.
Hyperlinking all of the cluster pages to the pillar page also spreads domain authority across the cluster, so your cluster pages get an organic boost if your pillar page ranks higher, and your cluster pages can even help your pillar page rank higher if they start ranking for the specific keywords they’re targeting.
6. Growing Email Subscriptions
As of now, subscribing to your favorite online publications through email is the best way to keep up with their latest stories and news. And since it takes an average of six to eight touch points to generate a qualified sales lead, persuading people to subscribe to your emails and, in turn, constantly consume your content will generate more leads and revenue for your business.
Growing an engaged, loyal subscriber base also speaks volumes about the quality of your content and its emotional resonance. Even though hoards of content saturate the internet and most people’s inboxes today, people are still actively engaging with your content, which is a clear sign that they actually value it.
To build your email list, you’ll want to use an email marketing software like HubSpot. This way you can create, personalize, and optimize marketing emails without needing a developer.
7. Historical Optimization
In 2015, HubSpot made a revolutionary discovery about our organic monthly blog traffic — the overwhelming majority of it came from posts published prior to that month. In fact, 76% of monthly blog views came from these old posts.
Today, the groundbreaking revelation rings louder than ever — 89% of our monthly blog views currently come from posts that were published at least six months prior, and we’ve developed an entire strategy dedicated to refreshing and republishing these historical pieces of content.
These types of blog posts are called “updates”, and they comprise 35-40% of HubSpot’s editorial calendar. By refreshing posts with new information and effectively republishing them as new blog posts, HubSpot can build upon its existing organic value that these posts have accumulated through backlinks and user engagement and double or even triple their traffic. This process also helps HubSpot optimize our blog for efficiency, decreasing the amount of new content we have to create while increasing our organic traffic and conversions.
8. Podcasting
According to a content format study conducted by Edison Research and Triton Digital, people age 12 and older are listening to online audio content at unprecedented levels. On average, people spend 17 hours per week tuning into their favorite podcasts, online radio shows, and audiobooks. There are also 14 million more weekly podcast listeners this year compared to last year, which is more than Guinea’s entire population.
The demand for audio content has exploded, but that doesn’t mean people will listen to your branded podcast just because it’s a podcast. In reality, they’ll only listen to it if it can hold their attention and, ultimately, entertain them. Otherwise, producing yet another interview-an-expert podcast like everyone else will only add to the noise flooding the internet.
9. Link Building
Earning high-quality inbound links from websites and pages with high authority scores is crucial for boosting your domain authority. But, unfortunately, “If you write it, they will link to it,” is not a viable SEO tactic.
An effective method for earning high-quality links is by asking other websites that have the same or higher domain or page authority score than you to link to your top content. You should also make sure your content is relevant to the referring website’s content.
Another way you can earn quality backlinks is by using Backlinko’s skyscraper method. The skyscraper method is an SEO strategy where you find content that ranks well for keywords you want to rank for and then create content that’s better than the top ranking posts. Then, you use SEO tools to find all the sites that have linked to your competitor’s content and ask the most relevant sites to replace your competitor’s link with a link to your improved content.
10. Social Media Based Public Relations
Today, over 30% of time spent online is dedicated to social media. Needless to say, people spend more time on social media than ever before. And public relations professionals are pivoting their strategy from solely focusing on placing their stories in news outlets’ publications to concentrating on driving traffic to their social media profiles too.
In order to successfully pitch your stories to journalists and news outlets nowadays, you need to account for the content that performs well on their social media profiles and their publication. So before you pitch your story, make sure it’s relevant and interesting to the news outlet’s social audience.
11. Audience Segmentation
In a world overflowing with digital noise, creating irrelevant or unwarranted content won’t catch anyone’s attention.
To create personalized marketing campaigns for each slice of your target market, consider leveraging audience segmentation, which separates your target market into specific, accessible groups of people based on personal attributes like their demographics, psychographics, and behavioral information.
To properly implement an audience segmentation strategy, you can use a marketing software like HubSpot. For example, with HubSpot’s marketing software, there’s a lead collection and tracking feature where you can segment and nurture your leads. This makes it easy to build an email list, automate campaigns, and expand your database.
12. Brand Extensions
Big companies often extend their brand to develop new products in industries that they don’t have any market share in. These initiatives are called brand extensions, and they allow companies to leverage their brand awareness and equity to create more revenue streams.
Historically, the most successful brand extensions are the ones that closely tie to the company’s flagship product or core brand, like Gerber’s baby clothes and Dole’s frozen fruit bars. So by entering tangential markets that can preserve your brand’s unique associations and perceived quality, you can develop new products that consumers intuitively understand the benefits of, even though they’ve never seen them on a shelf.
On the flip side, a company can also exploit its brand, and, in turn, damage it. If they develop a product in a market that isn’t closely tied to their flagship product or core brand, audiences might attach undesirable associations to a brand, weaken its existing associations, and hurt its established products’ perceived quality.
When you’re developing a new marketing plan, it’s important to consider new marketing techniques. Don’t forget to continuously innovate on your strategies.
Editor’s note: This post was originally published in May 2019 and has been updated for comprehensiveness.

What is Latent Semantic Indexing & Why Does it Matter for Your SEO Strategy?
If you’re anything like me, you probably read the title of this post and thought, “Latent semantic indexing … wait, what is that?”
Latent semantic indexing (LSI, for short) can be an overwhelming and confusing term for anyone hearing it for the first time.
Luckily, although it sounds like something that requires a degree in computer science, it’s actually a concept you’re already probably familiar with — particularly if you have some basic knowledge of keywords and their close relationship with search engine optimization (SEO).
In this post, we’ll define LSI and how the process can potentially benefit your overall SEO strategy, take a closer look at ways to find LSI-driven keywords, and outline how to add these keywords into your content.
Let’s dive right in, shall we?
Access Now: Technical SEO Glossary
What is latent semantic indexing?
Latent Semantic Indexing, also known as latent semantic analysis, is a mathematical practice that helps classify and retrieve information on particular key terms and concepts using singular value decomposition (SVD).
Through SVD, search engines are able to scan through unstructured data and identify any relationships between these terms and their context to better index these records for users online.
Before SVD, it was rather difficult for computers to try and grasp differences between synonyms or semantic changes.
To help paint a picture, take the words “silly” and “string”. When separated, these words represent two very independent definitions, but when brought together, their formation creates a brand-new concept: “silly string”.
If you work for an e-commerce company that sells silly string, you don’t want your content arising for the word “silly” alone — in that case, you’d need to use LSI keywords to help let search engines know for which searches they should serve up your content.
As technology adapted, the quality of user search was highly improved due to stronger patterns in relevancy. Through “stemming”, computers began taking into account the various forms a word could represent on a page.
Depending on the site’s content, Google would then serve up results based off relevancy (not using mind-reading, but something called LSI keywords).
Search engines use LSI keywords to help add context to pages in order to provide better search results.
As LSI became more sophisticated, the ability to group thematically came into place, which for many rank-driven content writers meant synonyms became your best friend.
So … the more ranking LSI keywords, the better your overall position, right? Well, it depends.
What are LSI keywords?
LSI keywords are based off the idea that using similar keywords throughout your content to strengthen your topic or theme can help boost your overall SEO performance.
After all, if you end up ranking for one keyword, the possibility of you ranking for a related keyword sounds reasonable.
However, that necessarily isn’t always the case. There is quite a bit of contradictory analysis challenging how much LSI truly boosts your content.
As Google and other search engines have become more sophisticated and advanced, we have learned there are many outside factors that influence overall ranking.
In fact, there is no certainty behind the idea that LSI is a part of Google’s ranking algorithm. LSI is a practice dating back to the 1980s and in this day and age, we know Google’s too smart to rely on just synonyms to retrieve and index information.
So the power of “LSI keywords” comes into question. There are arguments, that even if Google isn’t using LSI, there is no damage done in adding synonyms to your content, so long as they are not overstuffed and used naturally.
So what are a couple ways to help boost SEO that doesn’t rely on LSI?
- Use structured data! There is nothing Google likes better and will reward than data that users can understand. For more information on what structured data is and how to add it to your website check out the Beginner’s Guide to Structured Data for Organizing & Optimizing Your Website.
- Practice co-occurrence, which relies on concept relativity, frequency in keyword occurrence, and closeness in keywords across different websites. Search engines will tend to use this method to scan and index websites most closely related. Therefore, if you’re looking for a place to start, you should:
- Identify a long-tail keyword or phrase you would like to rank for
- Research the top trending articles
- Find which concepts or keywords they have in common
- Incorporate and optimize on your findings!
Now, this doesn’t mean LSI driven keywords are bad for SEO, it just means it shouldn’t be your catch-all. In fact, there are a multitude of ways your content can benefit from LSI keywords. So let’s dive a little deeper into how you can use LSI content to your advantage.
Benefits of LSI-Driven Keyword Research
Search engines are constantly hunting for the most relevant and thorough content for a given query. The internet is much like the universe, ever expansive and well, big. That said, it’s not an easy task for even the best of search engines, like Google to determine what a page’s content is really about.
Better targeted categorization helps publishers, marketers, and users alike. For example, publishers can boost engagement since LSI-driven content is directed and selected for a specific audience. Online users mutually benefit since the queries they’re searching for are served up quicker and more accurately.
And, at the end of the day, users who find content that answer their questions are happy users, and happy users are more likely to engage or convert.
5 Ways to Find LSI Keywords
You’re one step closer to becoming an LSI expert. Congrats! Now that you’ve learned a little bit on the importance of LSI keywords, let’s walk through the various ways you can identify new keywords for upcoming blog posts and content.
1. A Simple Google Search
One of the easiest ways to find LSI keywords is Google itself. When you enter a term in the search query field, it automatically shows the keywords related to the particular query.
Let’s use the earlier example of “silly string” again. An initial search of the word provides these results:
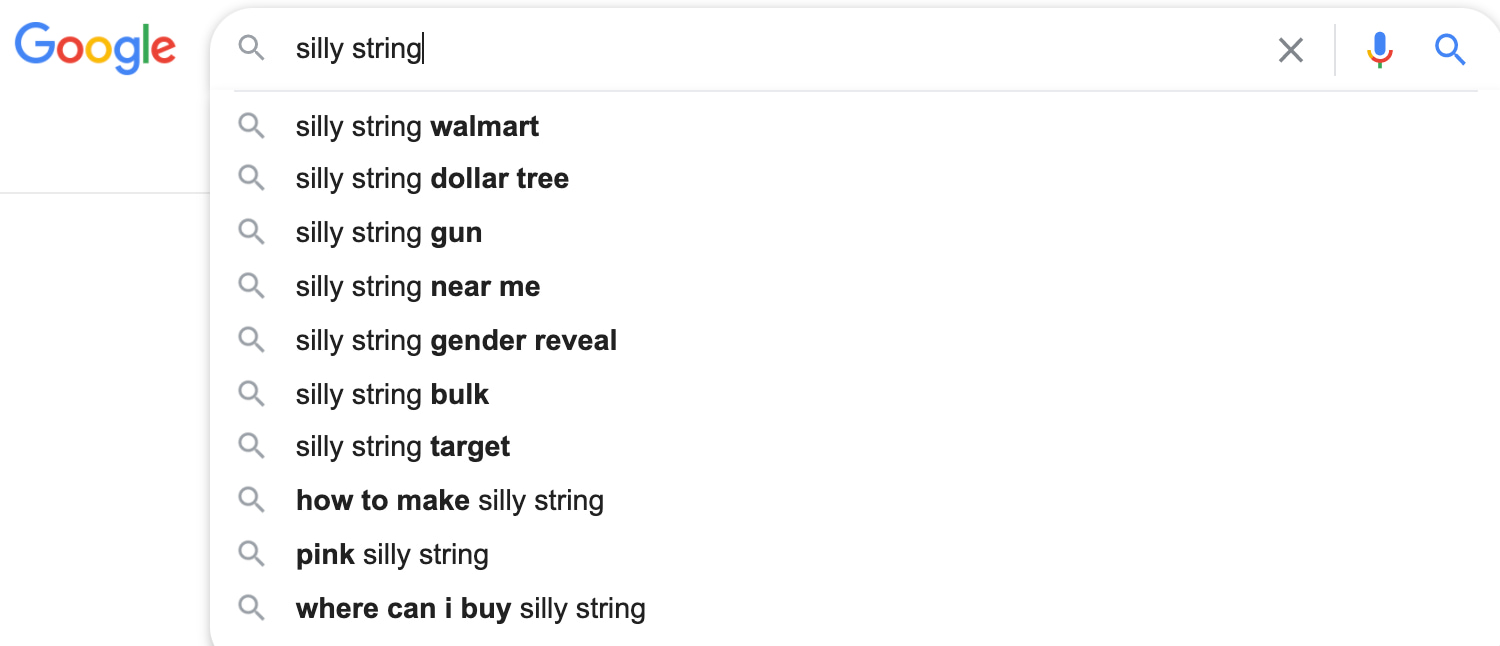
Again, there are a lot of pages this particular keyword could point to which is why we need to use LSI to add more context. If you continue to scroll down to the bottom, you’ll find a section titled, “Searches related to” and your given query:
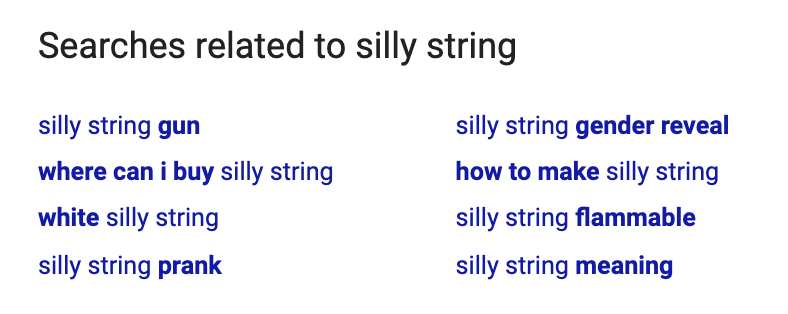
Use the list of keywords as a starting point for potential LSI keywords because it reveals what Google already associates with your primary keywords.
The best part? This method is 100% free!
2. Use the Keyword Planner Tool via Google AdWords
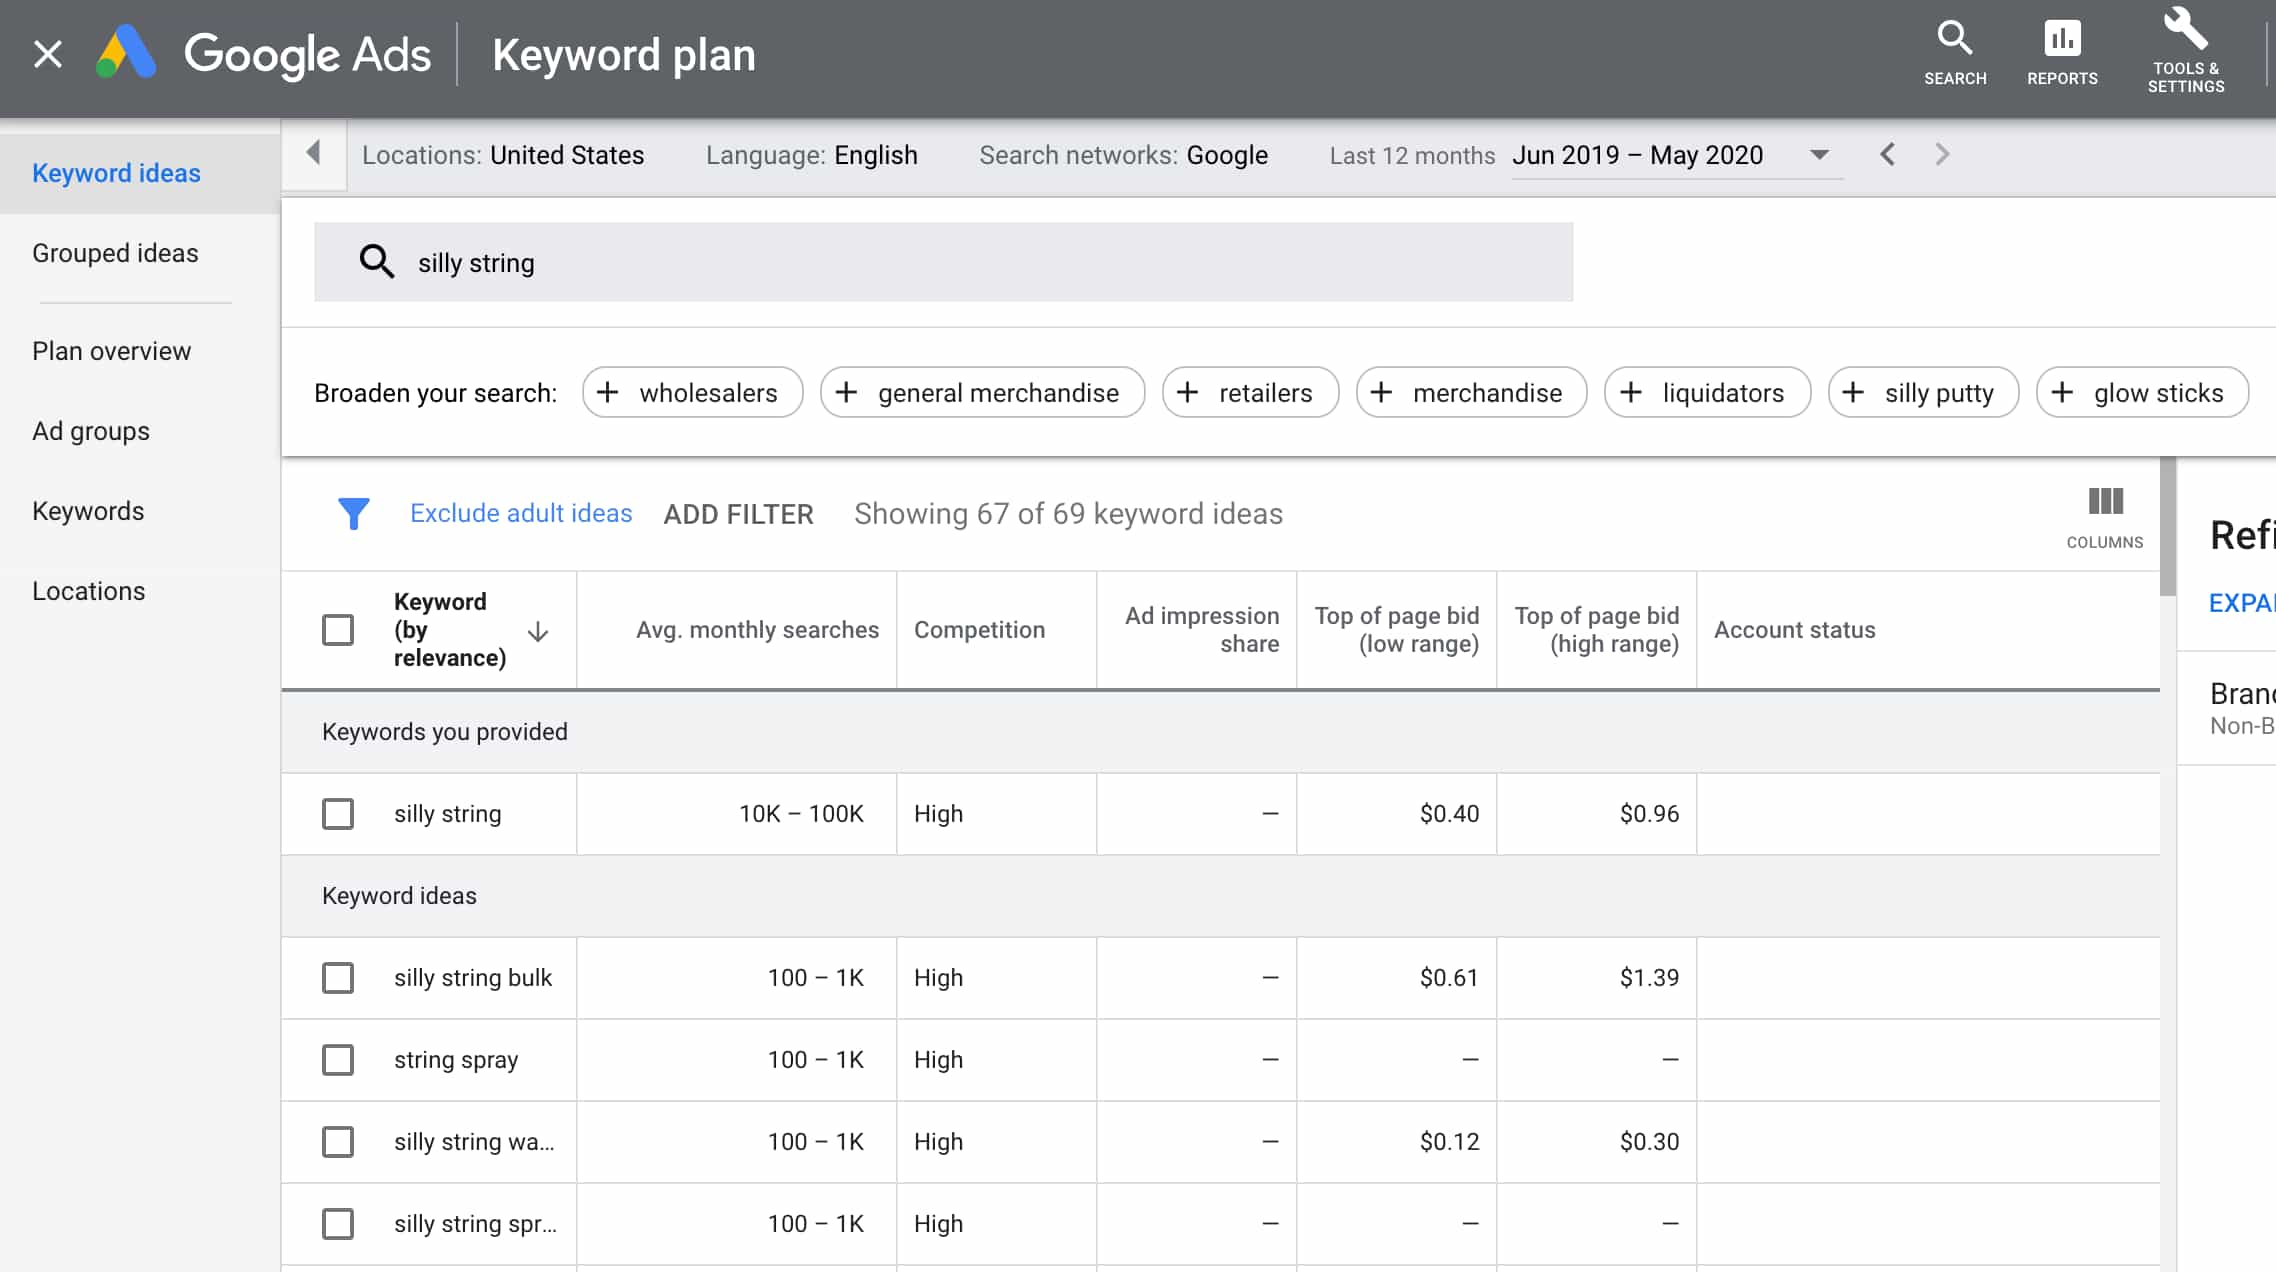
If you have access to Google AdWords, you can also use their Keyword Planner tool.
Again, we’ll use the “silly string” example. Begin by adding the term into the initial query box. Click “Get ideas” and you’ll be redirected to a page that offers related keywords and an idea of how competitive search rankings are for said term.
3. Take Advantage of SERP Stat’s Keyword Research Database Tool
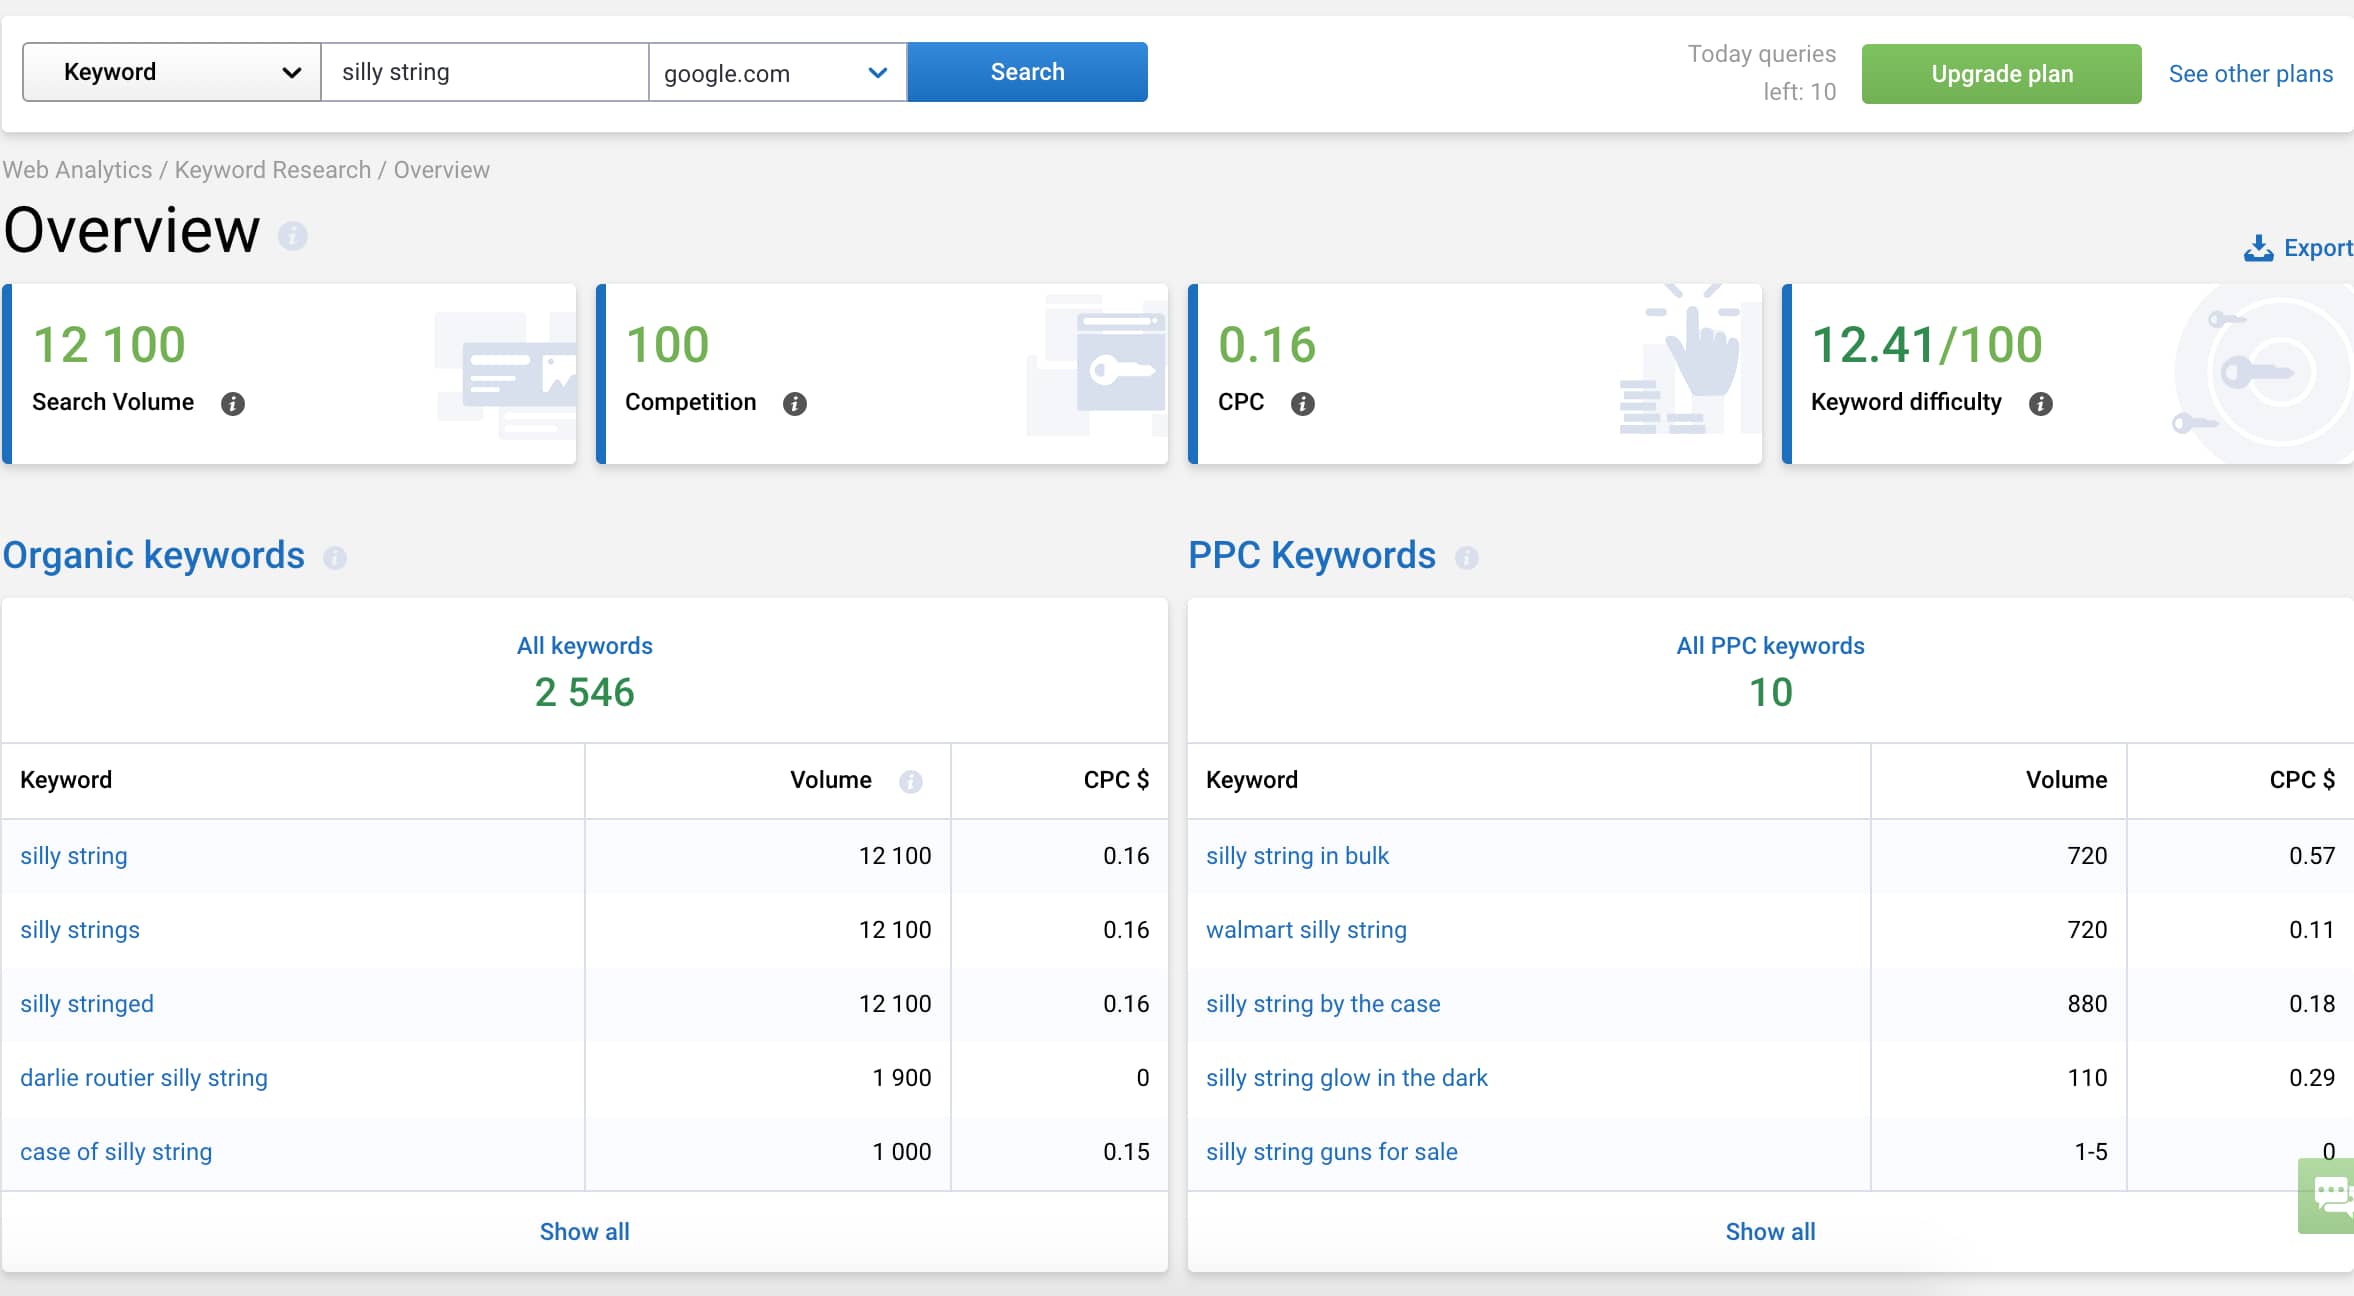
Another free tool for you to use comes from SERP Stats. SERP Stat’s Keyword Research Database Tool is very similar to Google’s Keyword Planner. Simply add your query into the search bar and you’ll receive results based on volume of searches and CPC.
4. Use the LSI Keyword Generator
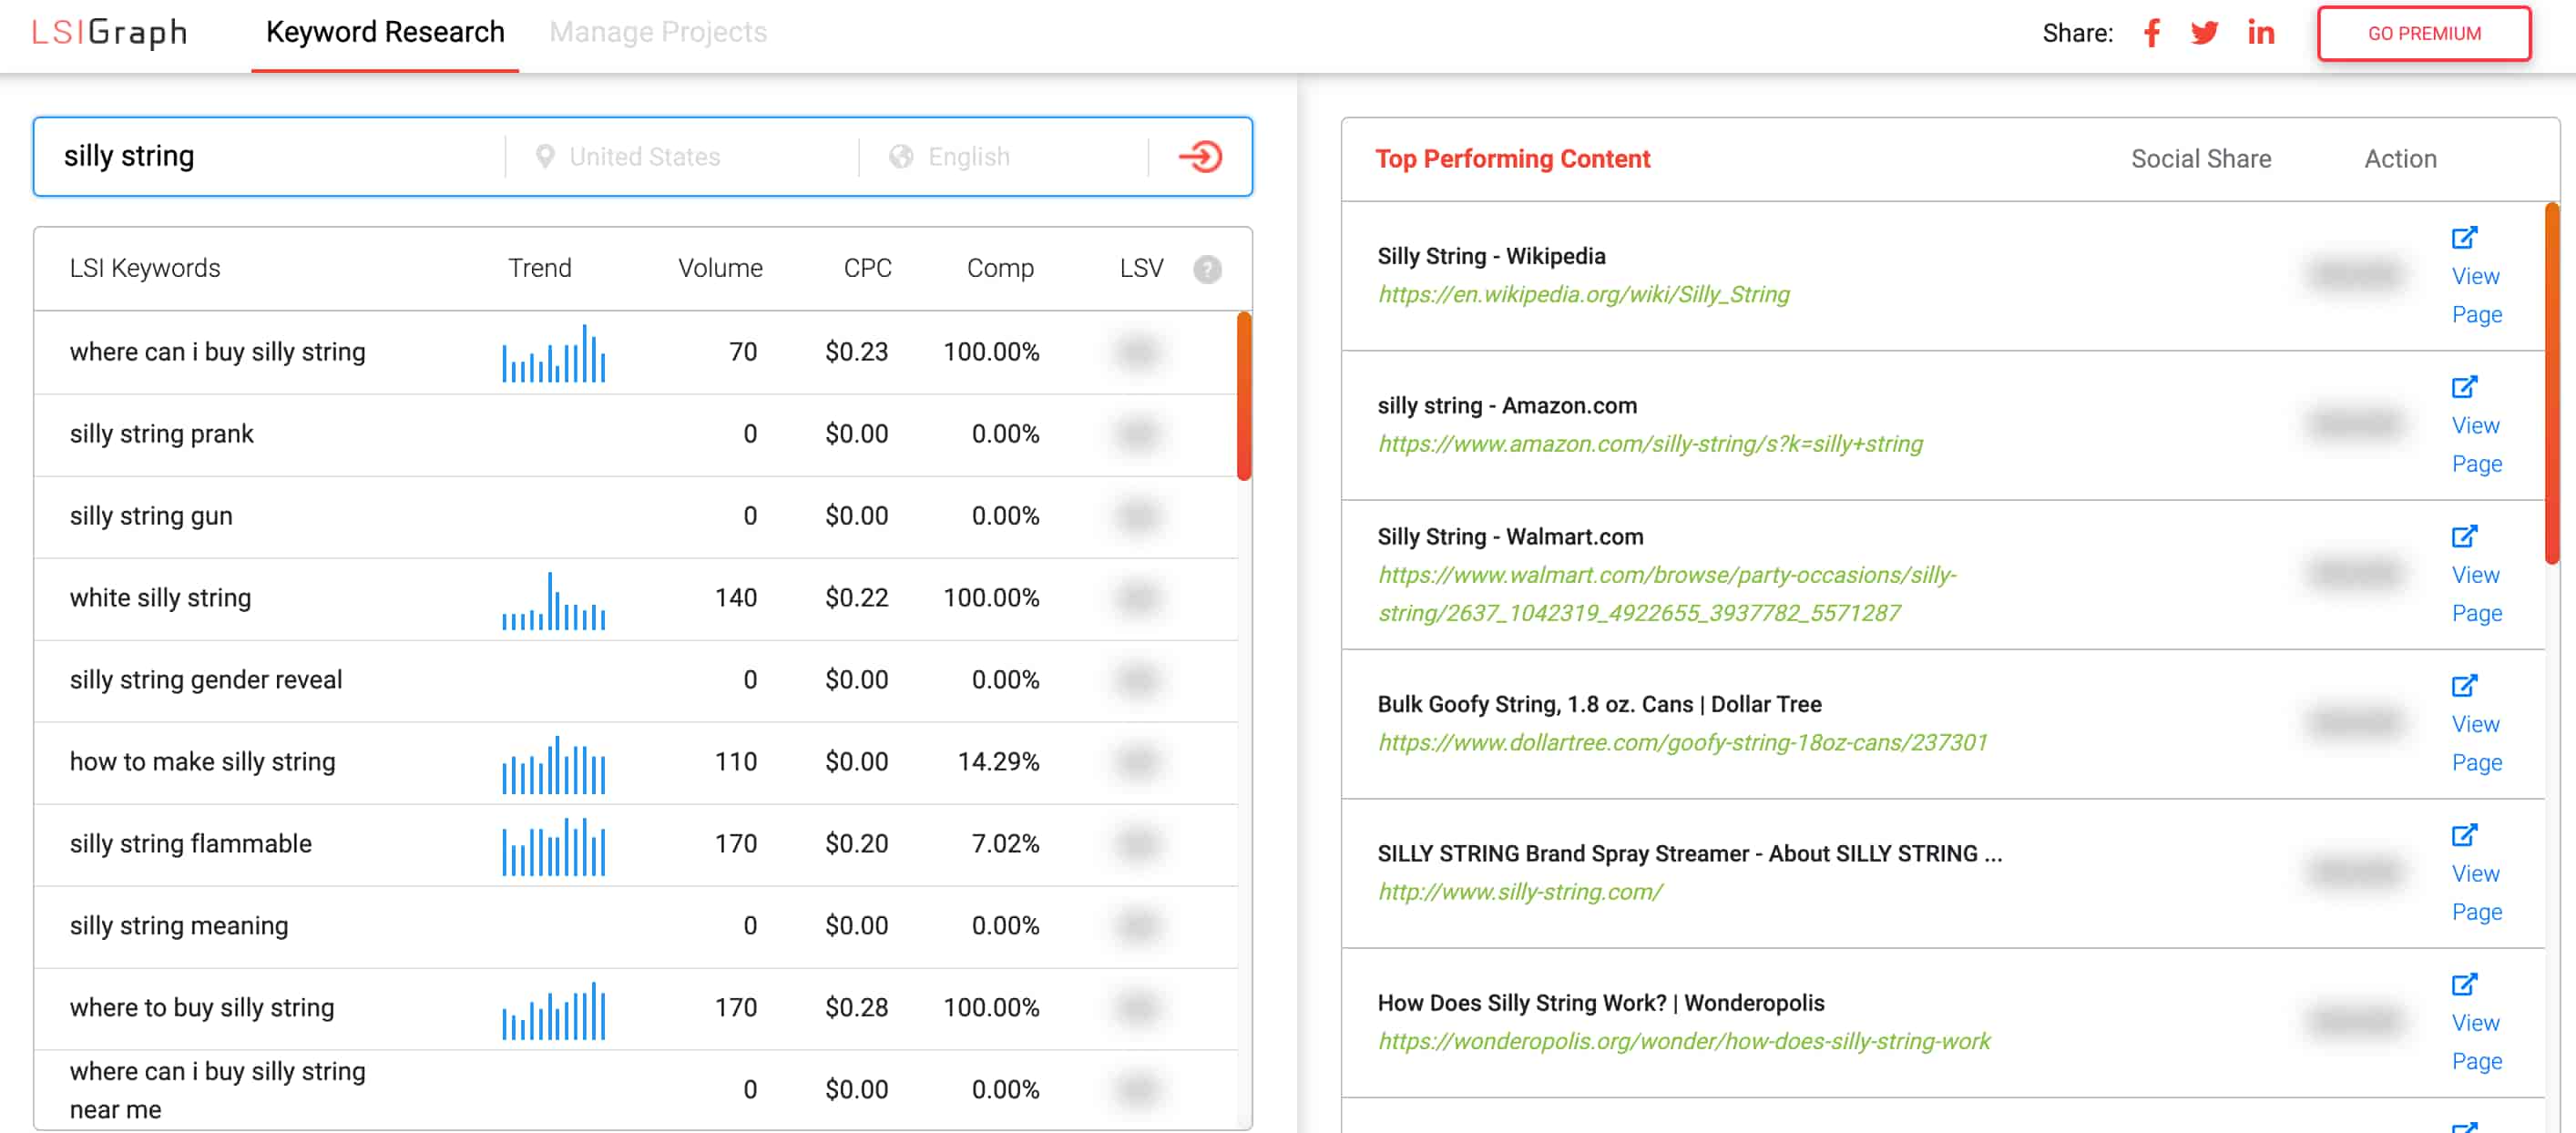
The LSI Graph/LSI Keyword Generator is another free tool that’s perfectly made for identifying LSI keywords. Similar to the previous tools mentioned, it follows the same rinse and repeat process. Add a term into the search bar, click “generate” and choose from a variety of related keywords below.
5. Try Ubersuggest
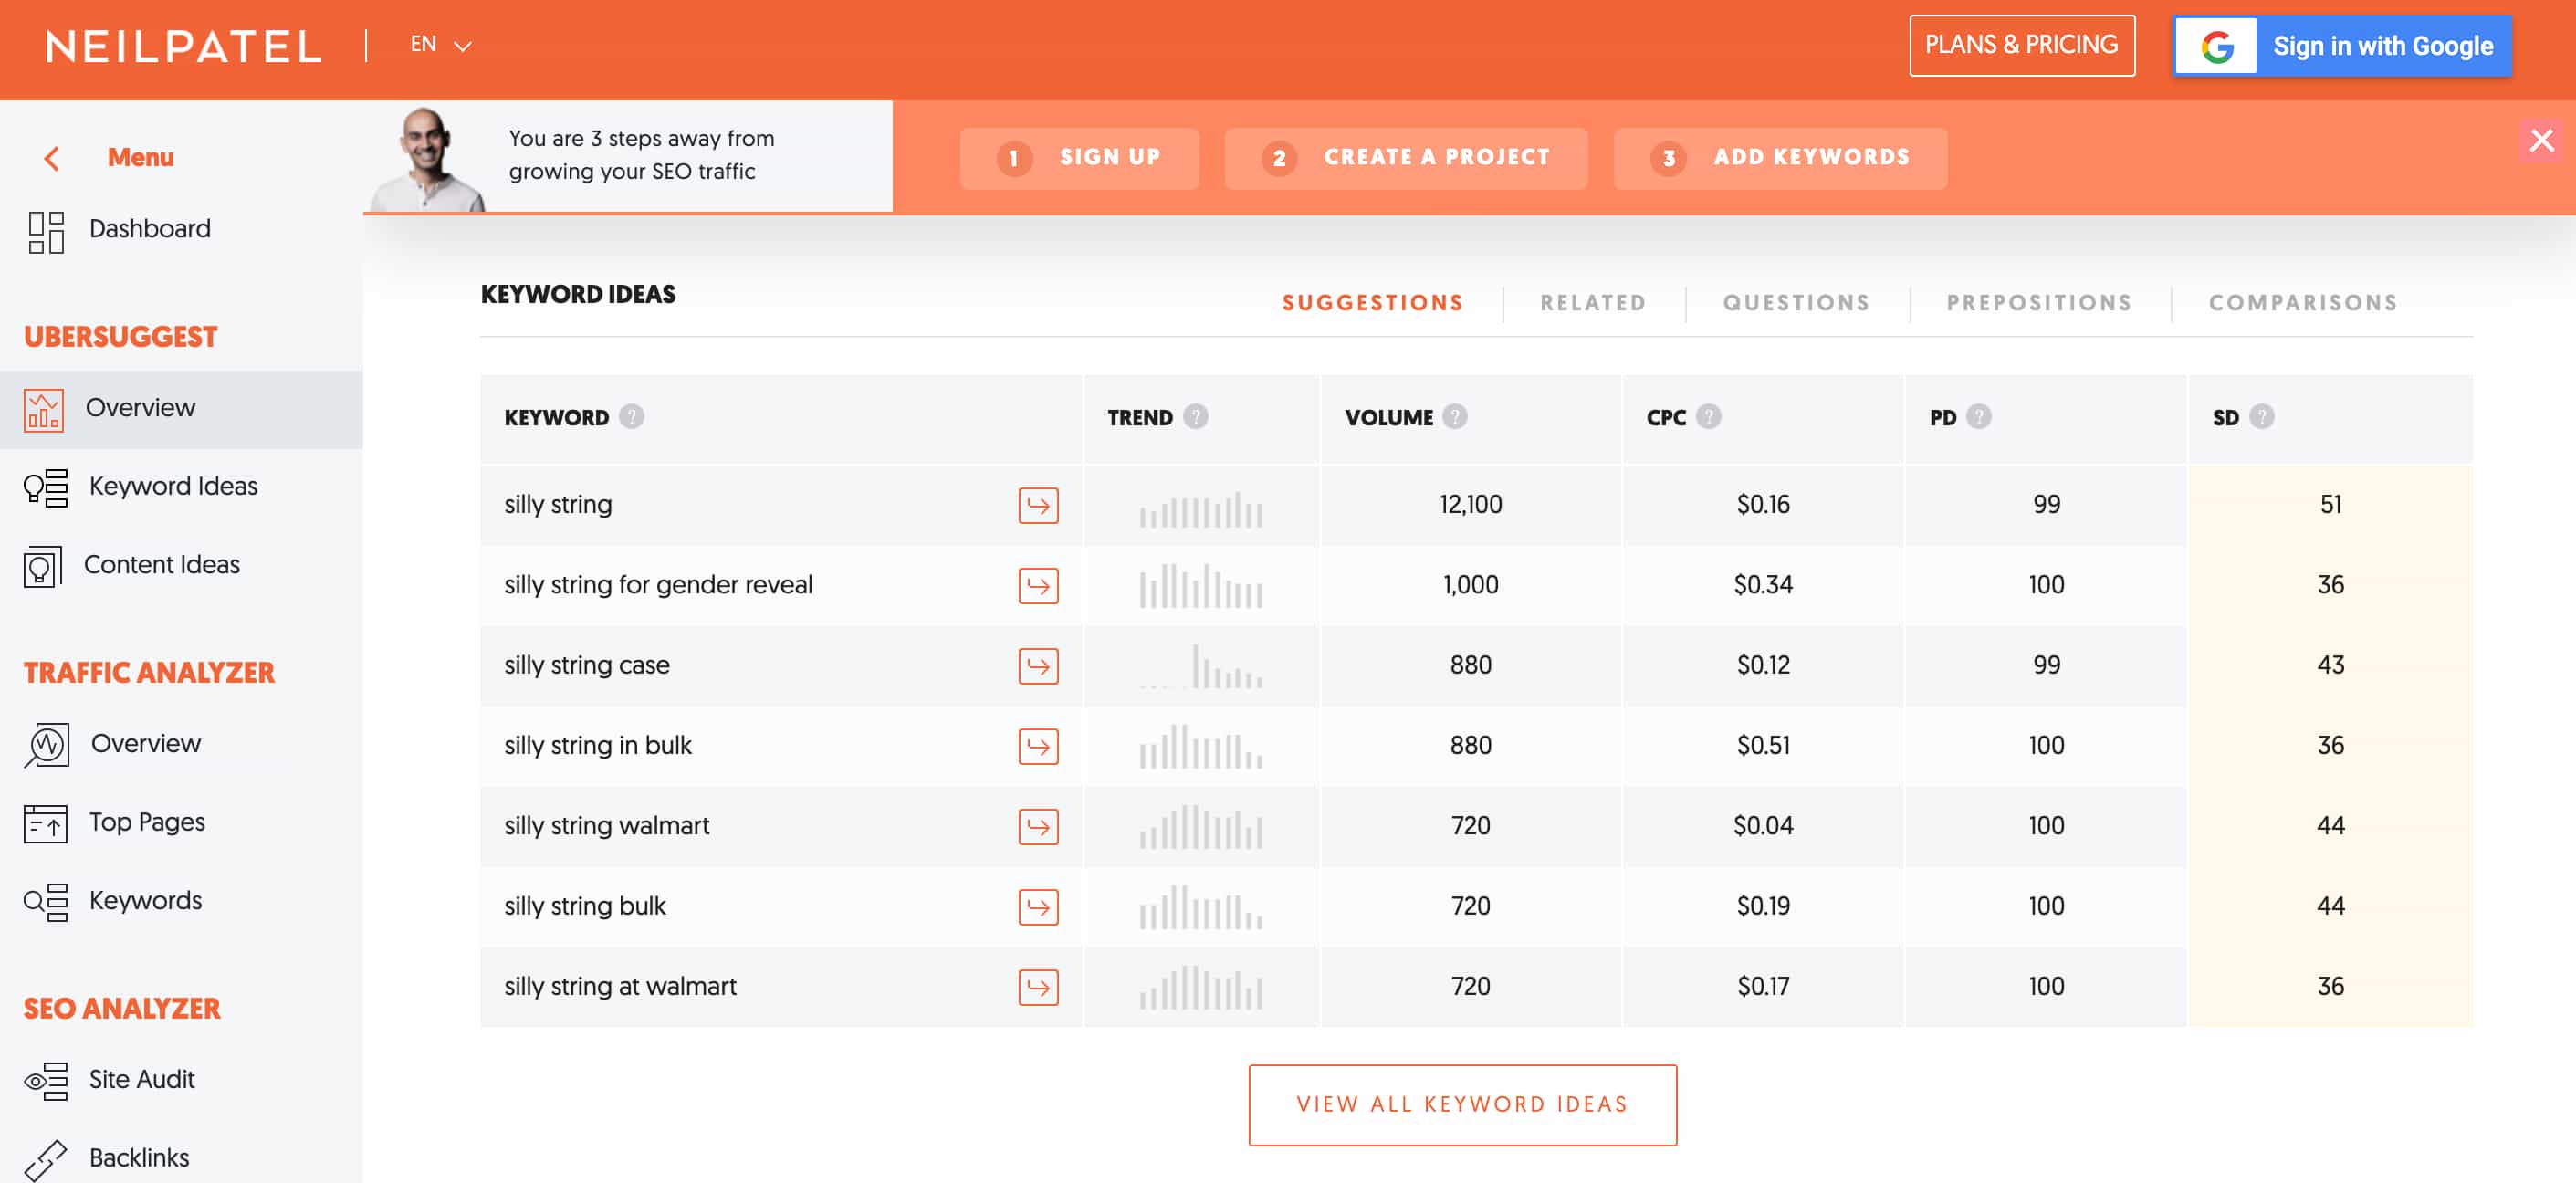
Lastly, another freebie to discover LSI keywords with is Ubersuggest. I’m sure at this point, you can guess how simple each of these tools are. All you need to do is enter you primary keyword, and Ubersuggest does the rest! From search volume, keyword difficulty, and CPC, you can expect a generated list of related search terms.
How to Select (and Use) the Best LSI Keywords
By this point, it’s likely (and normal) to have a long list of potential LSI keywords. The best way to cherry pick the finest keywords is to narrow down your options to those keywords that are most related to your content and have a sufficient search volume. Extra points if you can determine those golden nugget keywords with both high search volume and low keyword difficulty.
Understand the Three Different Types of Intent
It’s vital that your LSI keywords help answer any questions people might have about your primary keyword, so be sure to do some research on your target audience to figure out the types of queries they might put into Google to find your content.
We’ll refer back to “silly string” again, this time in the context that it’s on a site dedicated to exploring “how silly string works”. Below are three different types of intent someone on Google might have when searching for “silly string”:
- Informational intent: This type of query is typically on a much broader scale. An example would be, “How does silly string work?”
- Navigational intent: This is a more specific type of query. For instance, someone might want to know who invented silly string, or what it’s made out of.
- Transactional intent: This type of query relates to purchasing something. In regards to our example, it could be related to purchasing silly string.
Choose Words That Add Context, But Don’t Overstuff
A misconception some people have is that you should use as many LSI keywords as possible to give your content a better chance at outranking others.
This is called overstuffing your content, and it’s a practice you’ll want to avoid because it could actually deter you from ranking. The best way to make sure your content isn’t overstuffed is to reread your content once all the keywords are added. If a specific word doesn’t sound natural, leave it out.
Remember That LSI Is Only Part of an Effective SEO Strategy
LSI is just potentially one of many factors that determine how well your content ranks in search engines. To achieve the best results and set your content up for success, an effective SEO strategy should also consist of proper website architecture, relevant backlinks, ongoing optimizations, etc.
With that said, it’s definitely worth taking the time to discover and add relevant LSI-driven keywords into your content, particularly since it can help your readers find the most relevant, helpful information to meet their needs, faster.

How to Grow Your Email Subscribers With a Facebook Messenger Giveaway
Want to quickly grow your email list? Looking for a frictionless signup process you can use over and over? In this article, you’ll learn how to set up an evergreen Facebook Messenger promotion to easily increase the size of your email list. Why Facebook Messenger Giveaways Work for Email Signups Giveaways have long been used […]
The post How to Grow Your Email Subscribers With a Facebook Messenger Giveaway appeared first on Social Media Examiner | Social Media Marketing.
from Social Media Examiner | Social Media Marketing https://ift.tt/3g6IzZX
via socialmediaexaminer
How to Be a Better Marketer Through Mindfulness and Meditation
Let’s get this out into the open: I bite my nails. Or at least I did. (Kinda gross, right?)
But a few summers ago, I watched as my then three-year-old son chomped down on his fingernail. That was it. The final kick in the butt I needed to see to finally stop a decades-old bad habit.
Little did I know that in my quest to stop biting my nails, I’d unlock something much bigger for myself — both personally and professionally. It was mindfulness.
According to the folks at U-Cal Berkeley’s Greater Good Science Center, mindfulness is about “maintaining a moment-by-moment awareness of our thoughts, feelings, bodily sensations, and surrounding environment.”
For me, mindfulness has helped me make better decisions, listen more, and above all, be present. Amidst the chaos of our busy, multi-screen, too-many-browser-bookmarked lives, it helps me return to a more centered self.
More and more, people are embracing both big and small mindfulness tactics. So, what can you do to get in on the goodness? I’ll tell you. Here’s how I met mindfulness.
Consulting a Mindfulness Expert
I knew that guided meditation and hypnosis was probably a good bet to kick the nail-biting habit.
So, I reached out to Paul Gustafson, a Boston-area consulting hypnotist. Gustafson helps people — via guided meditation and hypnotic suggestion — with anything from quitting smoking to overcoming a fear of flying.
I sat down with him for three, 30-minute sessions where he talked me into a deep relaxation and then, as I reached a deep meditative state, he provided guidance and suggestions for me to figuratively cut the cord of my past nail-biting behavior. From there, I kept his guided meditation recording on repeat.
“The immediate benefit of guided meditation is profound relaxation,” Gustafson told me.
“It’s impossible to be stressed or to worry while enjoying deep meditative bliss. One of the long-term benefits of meditation is that the relaxation becomes the rule rather than the exception. People who meditate are happier, and often feel less affected by the pace of day-to-day life. They’re healthier and more productive.”
Paul has become an oft-invoked name at my house. My wife, also a marketer, has gone to see him and notes that it’s been entirely transformative in finding her chi, both in and out of work. (After all, anyone with small children can attest to the need for mindfulness.)
How Mindfulness Contributes to Better Marketing
Mindfulness is a terrific asset for today’s marketers … but you’re probably wondering where the data is, right?
Well, a study conducted by INSEAD and The Wharton School of the University of Pennsylvania found that 15 minutes of mindful meditation could help a person make better decisions. That same study shows that mindfulness “can reduce confirmation bias and overconfidence, allowing decision makers to better differentiate between relevant and irrelevant information.”
This isn’t the only study that points to how mindfulness can help you in the business world. More recent research suggests that 10 minutes of mindfulness each day can lower stress, improve your mood, and make you more creative.
Considering the vast information available to marketers, having a filter for the superfluous can let you focus on what’s most important and make decisions accordingly.
Gustafson has helped patients deal with stress related to dealing with a boss, or co-worker, too.
“I’ve had many clients come to me because of work-related stress. When someone repeats a stressful response to certain situations it becomes a pattern. Over time, patterns become rooted, and people feel powerless to change the situation. Guided meditation enables individuals to release and become free of unpleasant patterns,” Gustafson told me.
Some companies — like Google, Goldman Sachs, and Medtronic — have gotten on board the mindfulness train, too.
I’ve been lucky enough to work for a company that values its employees’ approach to work, rather than just the output.
The HubSpot perk I took full advantage of while in my role was the Nap Room in the Cambridge, Mass. office.
For me, the nap room is a meditation chamber. Just 20 minutes of guided meditation — or slow, deep breathing as the hammock gently rocks back and forth — will clear the mind and bring a sense of focus that even the strongest cup of coffee can’t conjure.

But, unfortunately, many companies don’t have a Nap Room. Some also don’t take time to encourage mindfulness or positive mental health practices. If you’re in this type of situation, there are still a number of ways to embrace mindfulness in any environment.
How to Practice Mindfulness and Meditation
What You’ll Need
When you really need to pause, contemplate life, or navigate stress, here’s a quick and simple recipe for a solid meditation session:
Mindfulness Ingredients:
- A quiet spot
- An open mind
- 20 minutes each day
Optional:
- Headphones, with guided sessions
- Popular apps for reminders or self-guided meditation
Mindfulness Tips
1. Meditate in the mornings.
Akin to the adage that a trip to the gym in the morning gives you
more energy, a trip to mindfulness early in your day sets your mind up for success, too. You don’t even have to leave the comfort of your bed. Just put on the headphones as you awake.
2. Or, try to meditate at night.
At the other end of the day, it’s entirely acceptable and effective to
fall asleep as you meditate. If you’re using a guided meditation track, whether you’re awake or asleep, your mind is taking in the information.
3. Block out time for meditation, yoga, or other mindfulness activities.
Set up a recurring daily calendar item so that others don’t cut into your “mindfulness meeting.” My colleague
Steve Haase has written quite a bit on meditation and mindfulness. Haase and other colleagues sit in silence for 20 minutes on Wednesday mornings to clear their minds for the day.
4. Practice deep breathing.
Sometimes the biggest rewards come from the smallest of actions. Deep breathing falls into that category. Take deep breaths throughout the day when you feel overwhelmed, overstimulated, or just need to top off the mindfulness tank.
5. Fight distractions while meditating.
The brain is a muscle. And, when you work out any muscle, it can be hard to try doing something that feels unnatural with it. Sitting in quiet is something that is challenging for the brain, especially when you’re busy or stressed, but this is something you can train yourself to do.
For many of us, our instincts when idle — in line at the grocery store checkout, in the elevator, at the traffic light — are to fill the void with a few swipes of the screen. Don’t do it. In much the same way that good ideas sometimes arrive whilst in the shower, lying in bed, or even sleeping, simply being present can be the difference in finding clarity or that elusive good idea you’ve been chasing.
6. Practice mindfullness and meditation regularly.
Like any new workout, you might fail the first couple of times you try to meditate. For some, it can be surprisingly hard. And, no matter how much you feel like you’ve gotten mindfulness down, your mind can still slip on any given day.
Are you going to enter a state of deep bliss every time you sit down to meditate? Probably not. Your mind will wander. Just like some runs or workouts feel better than others, so do meditation sessions. No two are alike.
Mindfulness Apps and Software
While finding a quiet space and trying to clear your mind will provide a good foundation for mindfulness and meditation, there are also a number of digital aids that can ease you into a more mindful state. Here are just a few:
Headspace
Headspace is a mobile app and subscription service which allows you to stream or purchase thousands of guided meditations from mindfulness experts. When search “Best meditation apps” on Google, it appears at the top of the list on a number of blogs.
Aside from meditations, Headspace also offers sleep sounds and mindfulness workouts that people can try before going to sleep.
Although you can get a free trial for Headspace, the subscription costs $12.99 per month. At the moment, Headspace is also offering free subscriptions to those who are unemployed.
Calm
For those looking for a cheaper app, Calm (Roughly $6 a month or $70 perr year) similarly provides guided meditations, mindfulness training, and sleep sounds. The app allows a 7-day free trial before charging users.
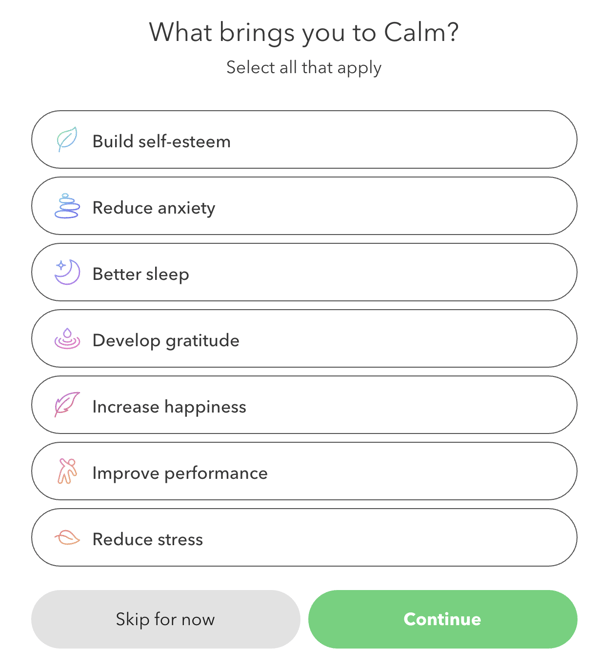
When joining the app, you can answer a few questions about why you’re looking to learn more about mindfulness and meditations. This will help the software send meditations that fit your lifestyle.
 For businesses and academic institutions that want to embrace mindfulness, managers and colleges can invest in a company Calm membership, which allows employees globally to use the app on multiple devices. This membership price is not specified on Calm’s site.
Ten Percent Happier
If you’re skeptic of meditation, but interested in learning scientifically-backed meditation practices, you can consider the paid app, Ten Percent Happier.
The app takes a realistic approach to meditation. The creators and brand admit that meditation isn’t perfect, easy, or an answer to all of life’s woes. However, science does prove that it can help you in some areas. The primary goal of the subscription is to make users just 10% happier.
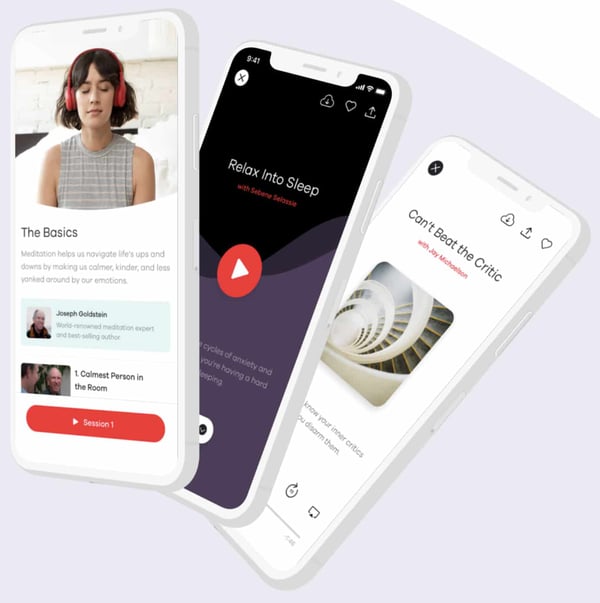
Pricing is not directly listed on the app’s website, however, a paid membership includes hundreds of guided and daily meditations, as well as access to one-on-one conversations with a meditation coach.
Ten Percent Happier offers both a free trial of the full membership and a limited free version which offers basic meditations and information, stats related to meditation performance, and daily notifications reminding you to meditate.
Sound Machines or Voice Assistants
While sound machines might offer a plethora of natural relaxing sounds or white noise that can drown out roommates or traffic outside, a voice assistant, like an Amazon Echo or Google Home, might have a number of meditation or sound related skills pre-programmed on the device. Investigate what your voice assistant or sound machine can offer and identify ways to implement these machines in your mindfulness strategy.
Benefits of Mindfulness
Still feeling skeptical about whether or not you should try mindfulness and meditation practices? I’ll leave you with just a small handful of benefits to keep in mind:
1. Your mind will become more open to opportunities.
If you expect a lot from yourself, you’ve probably experienced the anxiety of your expectations actually
getting in the way of success. With mindfulness, you can open yourself up to the moment. You can focus less on the eventual outcome (though
mindful of that goal) and instead be present to new ideas.
2. Stress-management could become easier.
Do I get worked up still? Sure (ask my wife). But more often I can find myself navigating stressful situations with a bit more grace or awareness of solutions rather than focusing on frustrations.
3. Planning things on the spot might get easier.
A less cluttered, focused mind tends to provide more room for planful thought. I’ve found myself able to pull together a thoughtful response or tidy plan in less time.
4. Being present can improve your outlook on life.
Take it
from Bill Murray. We do our best when we’re present. But it’s not easy.

7 YouTube Features That Will Help You Get More Views
Did you know that YouTube is the second-largest global search engine and the biggest video platform of all time?
That’s right. Each day, millions of people around the globe visit the site to learn more about a topic, find YouTube content when Google-searching a question, or stream a YouTube video embedded on another brand’s website.
But, despite the YouTube’s ginormous audience, developing a strategy for the broad platform can be an absolute mystery to marketers.
One of the biggest hurdles brands and new creators often face is learning how to pull in solid views for each video. Despite the millions of people who use it regularly, unlocking solid viewership can feel daunting, impossible, or like a total waste of time.
According to many marketers who manage video successfully, this content is definitely worth your effort in 2020. Recently, our State of Marketing Report revealed that brands were prioritizing video over all other types of marketing content — including blogs.
And, as we’ve seen from a number of companies and influencers who pull in millions of views on YouTube each month, it certainly is possible to gain success on the platform. In fact, YouTube even offers a number of tools to help you create the content your fans are craving.
In this blog post, I’ll highlight seven of the most valuable YouTube features that can help you get more video views.
Tools That Help Boost YouTube Views
YouTube Studio Features
The YouTube Studio is an all-in-one place where video creators can go to monitor, improve, and optimize there overall channel. Within the Studio, you’ll find a Channel Dashboard, Analytics, Insights, Comment Filters and other tools that can inform your strategy. Before we dive into some of the key YouTube Studio features you’ll want to use, here’s a quick demo of how the overall tool works:
1. Channel Dashboard
YouTube Studio is a dashboard that tracks the performance of your videos and channel. It also will inform you of trends, news, and comments that are buzzing on the YouTube platform. You can use this dashboard to learn which videos performed well, which didn’t, or how your channel is progressing. You can also use it to learn about trends or news topics that can inform your content strategy.
To get to your Studio, simply go to your channel, and click the blue YouTube Studio button.

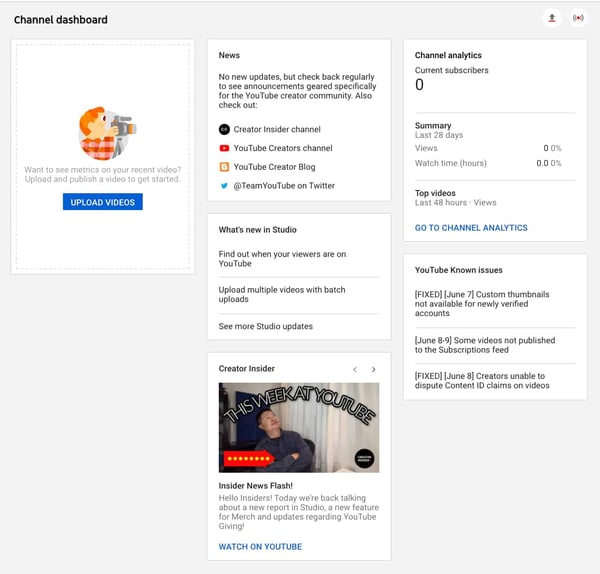
Once you click this button, you’ll be sent directly to the Channel Dashboard. Here’s a look at what it looks like before you actually post videos:
2. Channel Analytics
The Analytics tab of the YouTube Studio offers data about how your videos and overall channel are performing. While looking at this data can’t directly get you views, you can use it to make informed decisions about which types of videos will gain more views.
For example, if you post a well-made explainer which gets high views and sees high average view times, and then post a product promotion that gets lower views, this might mean that your fans prefer to learn more about your brand through the explainer format rather than an over-promotional one.
The Analytics tab will show you a number of helpful data points including (but not limited to):
- Average view times for each video.
- Channel-specific views and subscribers.
- Drop-off points where many viewers exited the video.
- View numbers for each video.
- Demographic information about your audience and their interests.
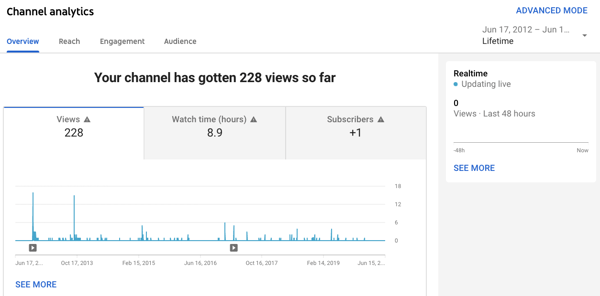
Here’s a quick peek at what an Analytics tab on YouTube looks like:
Other Ways to Get More YouTube Views
3. Search Optimization Tools
YouTube might not have inherently created video descriptions, channel About pages, and video or playlist titles for the sake of SEO, but these areas are still incredibly important to optimize for the video search engine, and other sites like Google, Yahoo, and Bing. Aside from optimizing your content by filling in descriptions, you can also customize your video or channel by assigning keywords related to your niche or industry.
By filling out your descriptions concisely and informatively, you increase the chance of internet users finding you when they search for content related to your channel’s.
Aside from optimizing your channel on the platform itself, you can also use a number of handy and affordable tools to research search keywords you want to target with your content, similarly to how you would do SEO research for a blog post.
For a more in-depth guide to optimizing your YouTube channel, check out this great post. You can also watch this video walkthrough from our Senior SEO Strategist Braden Becker:
4. Featured Video or Playlist Autoplay
On your main YouTube channel, you can feature a video or playlist that can welcome new subscribers or intrigue viewers who might subscribe to your channel. At this point, YouTube even allows you to set a different video for new viewers and subscribers. This means you can create informative or introductory content to convince new visitors to subscribe while still featuring more in-depth content for your current followers who already know what your channel is about.
To update your featured content, simply click the Customize Channel button on your profile and you’ll land on a page which allows you to personalize your images and your featured content.
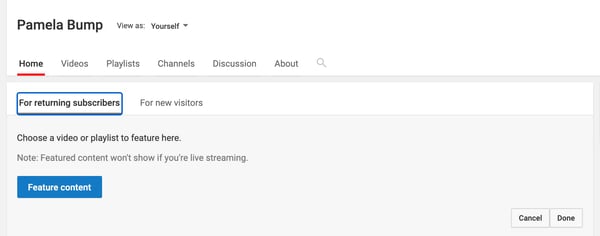
Aside from enabling you to create a more personalized experience for new and returning viewers, featured videos will also pull in views when watched. Once the featured video is selected, you can also set it to autoplay. This might also score you some additional views if a visitor does not pause the video too quickly.
5. Online “Share” Button
Next time you film or edit a YouTube video, consider encouraging viewers to share it on their social channels. They. can easily do this with YouTube’s built-in share function.
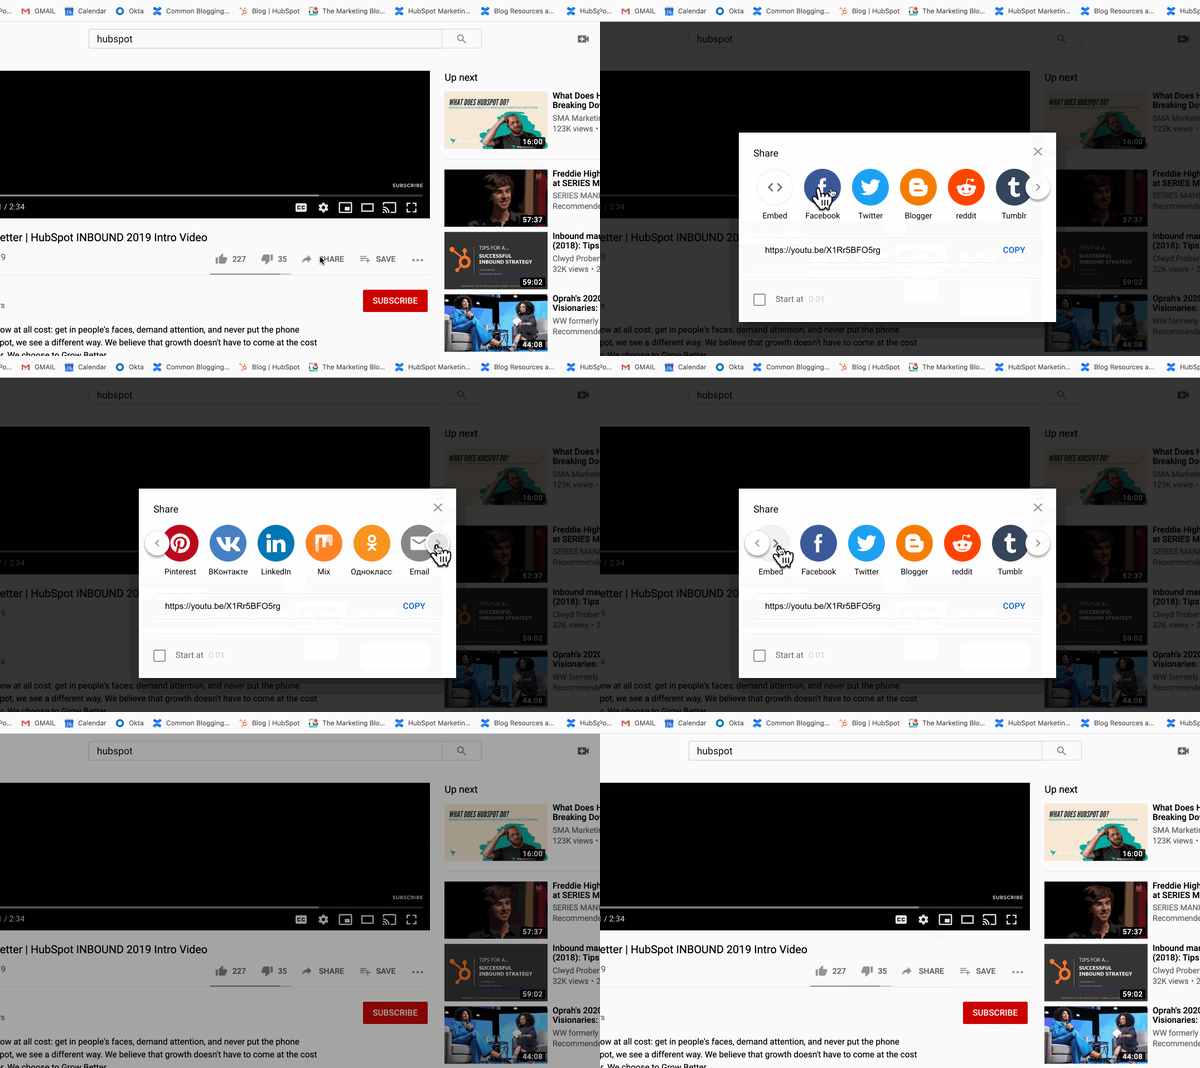
6. Cards (Formerly Video Annotations)
For almost a decade, YouTube has allows users to post links to other videos or approved websites within a video. This feature, which was formerly called “Annotations” was improved for mobile experience and renamed as “Cards” in 2017. The Card creator for each video can be found in the YouTube Studio. Here’s a quick overview of how to set up these prompts:
Aside from pointing your audience back to your channel or other videos, Cards can be used to direct traffic to your site, or even add interactive features such as polls. This type of internal linking can also help with SEO rankings.
7. Links in Video Descriptions
When you’re writing a handful of blogs, odds are, you’ll link them to pages or other blog posts on your site so that way you get multiple views from a handful of visitors. This is no different with YouTube descriptions, which appear under your video.
By adding links to your channel or related videos, as well as a quick description of each title, you add to the viewer’s experience by handpicking content suggestions for them while also optimizing your video and channel for search engines.
This is a common strategy used by Lilly Singh, the host of A Little Late With Lilly, and a popular YouTube creator. Here’s a quick look at the description inserted in one of her most recent videos:

Increasing Your YouTube Views
Although YouTube has a list of helpful features, you’ll still want to create a strategy as well as engaging content to gain a solid following. Building a solid content strategy might include the following steps:
- SEO or Keyword Research: This will help you identify which topics or keywords are highly searchable and could inform a successful video’s angle.
- Content Promotion: Once your video is live, you’ll want to take steps to make sure it gets views outside of just search traffic. In the video, or in a social media post, encourage your viewers to watch and share with their networks.
- Tracking: As you launch your videos, be sure to look at everything from the Analytics tab to the video comments to learn what audiences like and don’t like about your videos. This will help you determine what to keep doing and what content might be worth pausing.
To learn more about how a YouTube strategy can benefit your brand awareness and conversion rates, check out our Ultimate Guide to YouTube Marketing.

How to Grow Your Instagram Following: Strategy for Businesses
Want more followers on Instagram? Wondering how to find and engage with the right people? To explore how to grow your Instagram following, I interview Tyler J. McCall on the Social Media Marketing Podcast. Tyler is an Instagram marketing expert and founder of the Follower to Fan Society. He’s host of the Online Business Show, […]
The post How to Grow Your Instagram Following: Strategy for Businesses appeared first on Social Media Examiner | Social Media Marketing.
from Social Media Examiner | Social Media Marketing https://ift.tt/2Zehltx
via socialmediaexaminer
The Plain-English Guide to Negative Keywords
When I woke up this morning, I groggily shuffled to my kitchen, where I made a distressing discovery: I was out of coffee grounds.
Suddenly full of energy, and wanting to remedy the situation as quickly as possible, I frantically ran to my desk, opened my laptop, and typed “ground coffee beans” into Google.
I received numerous results: coffee alternatives, drip coffee beans, coffee bean blends, listicles about coffee grounds, and even a list of nearby coffee places. But even though I was given all of this information, I still hadn’t found what I needed.
So, I continued.
After scrolling through recipes that use ground coffee beans, and a section labelled, “Research ground coffee beans,” I finally located a section where I could purchase ground coffee beans!
When I secured my refill, I thought about all of the options I’d been given for “ground coffee beans,” and how many ads I clicked on or ignored because they didn’t match my search intent. “Imagine advertising coffee and wasting ad spend from queries like mine,” I thought.
“Surely,” I thought, “There must be a marketing method you can use to avoid this scenario.”
The answer? Negative keywords.
Also known as a negative match, negative keywords make sure that certain words or phrases don’t trigger an ad being shown on a SERP or website. This improves targeting: When you prevent keywords from being associated with an ad, you can be more certain that it will be shown to the right audiences.
For instance, let’s say you’re running an ad for a webinar series about becoming an entrepreneur. Your target audience is the working professional wanting to start his or her own company.
However, you find your webinar series, “How to Succeed in Business: A 6-Week Course,” is being viewed by prospective university students looking for preliminary courses before applying to become a business major.
To make sure your ad gets seen by the right people, you’ll want to add “university,” and “business class,” as negative keywords. That way, prospective students hoping to major in business are less likely to across your ad, ensuring your ad spend is targeting the right persona: aspiring entrepreneurs.
The improved targeting of your ad keeps the focus on keywords that are the most important.
For the business course, that’s most likely, “entrepreneur courses,” “business webinars,” and “how to open a business.”
An ad with exceptional targeting, being seen by the right people, improves ROI.
How are negative keywords different from other keywords?
Using negative keywords helps ensure you don’t waste ad spend. Enhancing the power of keywords by adding conflicting ones gives you more control over who will see your ads, and heightens the focus on the most valuable keywords.
Negative keywords make sure the unintended audience won’t see your ads. Both are an effort to increase the ROI (return-on-investment) and targeting of ads.
To clarify, we’ll consider an example: Let’s say you’re advertising social media analytics software for agencies. It’s a PPC ad, and you’re bidding on the phrases “social media analytics,” and “social media software,” without negative keywords.
However, as your campaign is running, people might search “social media software” in an attempt to find social media scheduling tools. They’ll see your ad, but they won’t engage with it, because they aren’t interested in social media analytics for agencies.
This results in a loss of ROI and CTR. If you add negative keywords, however, like “social media scheduler,” “beginner social media software,” and “social media software for influencers,” you can avoid those losses.
Essentially, negative keywords are different from other keywords because they allow for your ad to be more focused with a different method. They improve the focus of your campaign and who interacts with each ad. Choosing the words you want to avoid heightens ROI.
How to Find Negative Keywords
So we’ve covered why negative keywords matter — now, how do you figure out which keywords should be negative?
For starters, when you’re conducting keyword research for an upcoming campaign, make a a negative keywords list at the same time. If you come across search queries that could possibly be in conflict with your persona’s intent, add them to your list.
Think about words that fit under the umbrella of keywords and fill in the gaps. Negative keywords can be specific if the keywords are broad.
For instance, let’s say your work for a breakfast syrup distributor and your keywords are “syrup brands.” That’s a pretty broad category — there’s breakfast syrup, simple syrup, cough syrup, and infused syrups. To fill in the gaps, negative keywords can zero in on what isn’t relevant to your product, like the many syrup variations.
If your target audience is large, you can still have amplified reach when you cut out the portion of an audience who won’t find value from your product or service.
For example, if you’re promoting a launch of online products, you want a negative keywords list to include things that suggest physical purchasing, like “in-person,” or “brick and mortar.”
Identifying keywords sounds like a mind-reading process, but with keyword software, you can eliminate some of those stresses. Additionally, if you have a Google Ads account, you can open the search term report, which shows you which search terms triggered your ad being shown.
If you come across a phrase that brought in a lot of impressions but limited conversions,, consider eliminating the search term by adding the phrase as a negative keyword.
How to Use Negative Keywords
When you make a negative keyword list, don’t go overboard. You don’t want to drastically reduce the reach of your ads because of a huge list of restricted words. Search terms should be similar to your keywords, but make distinctions your keywords don’t.
For example, if you’re selling sunglasses and your keyword is “glasses,” think about the subcategories that are attached, like water glasses and eye glasses. Those are negative keywords to add to your list, but “bifocals” and “cute glasses” probably don’t need to be excluded — they can still fit under the “sunglasses” category.
There are three types of negative keywords: broad match, phrase match, and exact match.
Let’s talk about when to use each.
- Negative broad match — Negative broad match keywords prevent your ad from being shown if the query contains all negative search words. However, if only a few of those words are in the query, your ad still may be shown. If your negative keywords fit in no other category, they’ll be considered negative broad match.
Example — if the negative broad match keyword is “wax melters,” the ad could still show up for the searches “wax melts,” and “pink max melters,” as well as “melter for wax,” because the queries still contain a few of the keywords. Negative broad match keywords are a good idea if you want to have the largest reach possible with negative keywords.
To add broad match keywords in Google Ads, enter keywords with no formatting, such as plus marks or quotations.
- Negative phrase match — If you want the query to use your negative keywords in the order you listed them, you’d be using negative phrase match. While your ad won’t show if the terms are in the same order, the search doesn’t exclude extra words. Additionally, if the search adds characters, like an exclamation point or question mark, your ad won’t be excluded.
Example — If your negative phrase match keyword was “wax melters,” your ad can still show up for “pink wax melts,” and “melter for wax,” but wouldn’t for “pink wax melters” and “where can i find wax melters?”
This is because the first search queries include the negative keywords in a different phrase, while the latter use the phrase in that order. Use negative phrase match if you want to appear to a large audience, but recognize tiny words that could change the meaning of a query.
To add negative phrase match keywords in Google Ads, enter keywords with a quotation around them, such as “wax melters.”
- Negative exact match — Your ad won’t be shown for the queries that have the exact keyword(s) in the exact order if you categorize them as negative exact match. The only stipulation here is that your ad has a chance to be seen if the query adds additional words.
Example — Your negative exact match phrase is “wax melters,” which means anyone searching for the exact phrase, “wax melters,” won’t be shown your ad. However, queries like “melter for wax,” and “pink wax melts” can. And while it’s unlikely that “where can i find wax melters that are pink?” will be shown to your users, it still might be because there’s multiple words surrounding the phrase.
If your negative keyword phrase is very broad, and can be interpreted in multiple different ways, use negative exact match. This is also a good keyword category if you’re focusing on a very targeted, specific audience.
To add negative exact match keywords in Google Ads, put a bracket around your keywords, like so: [wax melters].
Remember, the idea of negative keywords is to eliminate wasted ad spend and maximize ROI with targeting. You’ll want to use them as an additional tool for making ads show up in the right places.
As a consumer, I want to find valuable answers to my search queries, and so does Google. Negative keywords only help that process, especially for advertisers. They’re used to maximize your reach, and ensure your ads are seen by the right people.
Ultimately, negative keywords are an extra step that could drive a lot of positive return. Even if you aren’t part of a company that sells ground coffee beans, think about how negative keywords can aid with the goals of your next ad.

How to Hire a Freelance Web Developer
So your company is growing. Things are exciting. Everyone is motivated and ideas are coming in from left and right.
Then it happens.
You say something along the lines of, “Wouldn’t it be cool if we could build [revolutionary idea here]? It would cut costs/generate a ton of new leads/change the way we operate.”
The team is rallying around the idea, the boss is giving you the wink and the gun, everything feels right in the world — until the dread hits. Who’s going to build it?
Hiring your first freelance developer can seem difficult, but it doesn’t need to be. With the right plan in place and an understanding of your company’s needs, finding the right freelancer for the job can be a largely painless process.
I’ve worked on both sides of this equation as an independent, freelance web developer and as someone who’s run a large development team. Follow these steps to make the process smoother for both you and your new freelance partner.
How to Hire a Freelance Web Developer
First, ask yourself: What do I need?
Before identifying a freelancer to work with, you should first know what you’re asking for. This should always be step number one. Are you looking to update some images on a web page? Do you need an entirely new site? Is it a mobile app? Is something wrong with your analytics? Do you need a new tool created?
The answer to any of these questions will set the tone for how you start your search, and who you ultimately hire.
Now that you’ve identified the type of project, it’s time to think about the scope, and how your freelancer will fit into the equation. When you find that special someone, you’ll want to tell them exactly what you need. Is it five pages and two emails? What’s the content of those pages? Do you have a design? Is any of the content dynamic? And most importantly, what’s the deadline?
Before you jump into the hiring process, make sure you can define everything up front. Don’t leave anything to chance or assumptions — because we all know what happens when you assume, right?
Having all of this information ahead of time will help you identify the skill set you’re looking for in a developer (we’re not a one-size-fits-all solution), and ensure your project is completed to your expectations on schedule.
Another major benefit to scoping is that it will also help you avoid scope creep as your project progresses. Scope creep is bad. It’s bad for you and it’s bad for the freelancer.
It’s bad for you because it will cost extra money and will (probably) force you to miss your deadline. It’s bad for the freelancer because they were working on a specific set of criteria that now is expanded upon or blown up. It will also (probably) prevent them from starting other projects on time which costs them money.
Second, ask yourself: Do I need a web developer?
Additionally, it’s important to consider that you may not need a web developer.
If you’re trying to find someone to help you create a subdomain or create a more personalized business site, you can use a CMS like HubSpot’s.
Where to Hire a Freelance Web Developer
Now that we know what exactly we’re hiring someone for, let’s go find your developer. Assuming you don’t already have someone in mind, there are a number of places online where you can find strong developers.
Check out websites like Upwork, Fiverr, or Freelancer.com for freelance help. You can search developers by reviews, location, and by skill set. Remember that little scoping exercise you did earlier? Well now you know if you’re looking for someone with CSS chops or if they need to know JavaScript.
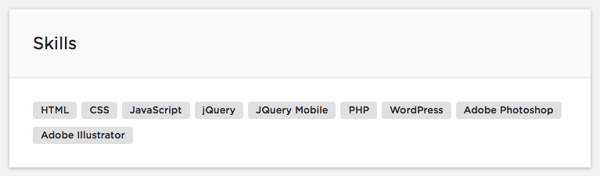
Take a look at some previously completed projects. If you like what you’re seeing, reach out and ask questions, but be respectful. You haven’t hired this person yet, so the time they’re spending with you is time they’re not spending on another project. When you’re confident you’ve found your developer, it’s time to make a deal.
Let’s make a deal.
You’ve found your developer. You know what they’re building. Now it’s time to get it down on paper. Handshakes are cool, as are verbal agreements, but make sure you get it in writing. This isn’t to say that you’re going to get swindled. The reason you want a contract is so that you have your scope, your deliverables, and your timelines outlined. A contract will also give you the opportunity to build in check-ins, testing time, and a payment schedule (we’ll get back to this).
It’s also important to remember that this isn’t a one way street. Your freelancer will — and should — have a say about the timeline and scope of the project. Remember: you’re hiring them because they have expertise in a field that you do not.
While I wouldn’t say you should have implicit trust in someone you probably just met, you should respect their evaluation of the situation, and take it into account as you map out your project and the role they will play. If they tell you something isn’t possible within a certain timeframe, or provide alternative options to accomplish your goals, you should listen and evaluate those options in relation to your goals.
Now here comes the tricky part, right? The money! Freelancers traditionally work in two ways, hourly or per project. The definitions are just how they sound. Hourly freelancers get paid for the time they work so you negotiate an hourly rate (Rate x Hours Worked = Pay). Per project freelancers work on a — you guessed it — per project basis, meaning you pay them an agreed upon fee for the project in total.
Two things to consider here:
- You get what you pay for. This isn’t the place to skimp out. If you’re trying to save a buck, don’t be surprised if the final project doesn’t meet expectations or if the freelancer takes on a higher paying project in addition to yours. Before getting upset, put yourself in their shoes. You’d expect to be paid fairly for your work, the freelancer expects the same.
- Be honest about your budget. If you only have a certain amount of money available, let the freelancer know and see if you can’t work something out. Maybe the scope will have to change, maybe the fee will work after all. You don’t know until you ask.
No matter what payment structure you agree to, put together a payment schedule. This will keep things on track. Freelancers will have different expectations. For some it will be a 50/50 split between the start and finish of a project. For others they’ll split it up into three (33%) or four (25%) installments. No matter what you agree to, do not pay for your project in full before the work is completed and delivered. Once you’ve made a deal, it’s time to get to work.
This is where the magic happens.
You’ve hired your freelancer. They understand the ask. The final delivery date is agreed upon. It’s time to send emails and texts every five minutes, right? Wrong.
Development, design, video editing, writing, and others, are all highly technical skills that require time and concentration. Let your freelancer do the job you hired them for. It’s okay to reach out every once in a while if you haven’t heard anything, but this is probably a good time to refer to the check-in schedule you added to your contract.
With that said, it’s still important that you make yourself available in case they have any questions. And remember, this isn’t the time for scope creep or assumptions. This is the part where the work gets across the finish line.
What happens next?
The work has been delivered. It looks and functions great. Now what? Make sure you pay your freelancer. Whether this is where you part ways or before you start the conversation about your next project, please pay your freelancer.
Editor’s note: This post was originally published in May 2018 and has been updated for comprehensiveness.

10 Social Media Calendars, Tools, & Templates to Plan Your Content
What do cross-country road trips, wedding speeches, and social media marketing have in common?
You could improvise all three, but it’s better to have a plan for what direction you’re heading — especially when developing your social media content strategy.
By now, most marketers recognize that social media plays an integral role in an effective inbound marketing strategy. And with so many social networks to manage and publish on, it’s important to stay organized and have a plan for when and what you’re going to share on these platforms.
In this post, we’ve rounded up some of the most helpful tools and templates for building out an effective social media content plan. Check them out below.
The Benefits of Using a Social Media Content Calendar
We’re all busy. And when we’re busy without a plan in place for the tasks we have to get done, things inevitably slip through the cracks. Social media content is no exception.
Just like with blogging, a successful social media strategy requires regular publishing and engaging with followers to see positive results — whether that be in terms of SEO, brand recognition, lead generation, or all three.
So, if you’re not already using a social media content calendar, hear me out:
- Calendars help you get organized to avoid the dreaded scramble when things come up. With a social media calendar, marketers can plan out posts for entire weeks or months in advance, which frees up working hours to strategize for the future — and to dash off any posts about breaking news in your industry. Otherwise, you’ll spend valuable time each day searching the internet for that day’s content to share, which is a known productivity killer.
- A calendar helps you plan for each social network to customize posts instead of spamming all platforms with the same message. Social media marketers should take the time to craft custom messages for each network, and doing this in advance will save time throughout the week and ensure you’re being thoughtful and intentional when you do post.
- Calendars can help you track performance and plan for future posts. Without a calendar, social media marketers are publishing content into the void and are unable to track big-picture and past performance. With a calendar, marketers can look back and analyze which content performed best so they can adjust their strategy accordingly.
- With the help of a calendar, marketers can plan for holidays and observance days, such as National Cat Day, when they can tailor their content and engage with a wider audience.
- Social media calendars improve efficiency. According to Content Marketing Institute, 72% of B2B marketers attribute the success (which has increased annually) of their content to the development of a formal content strategy.
Now that you understand the merits of having a social media content calendar in place, check out our list of top tools to stay organized and on top of your game.
Social Media Content Calendar Tools to Plan Your Messaging
1. Microsoft Excel Downloadable Template
Content Calendar
Marketers might already use Excel for different types of reports and data analysis in their roles, but it’s a highly useful tool for social media content calendar organization, too. Excel can be customized according to whatever priorities or metrics a team is focused on, so it’s a great tool for planning ahead.
The good news? We’ve already done the heavy lifting for you by creating a free, downloadable social media content calendar template using Microsoft Excel. Marketers can use this template to easily plan out individual social media posts — monthly or annually — while keeping an eye on bigger picture events, holidays, publications, and partnerships.
For more on how to use the templates, check out this in-depth guide from my colleague Lindsay Kolowich.
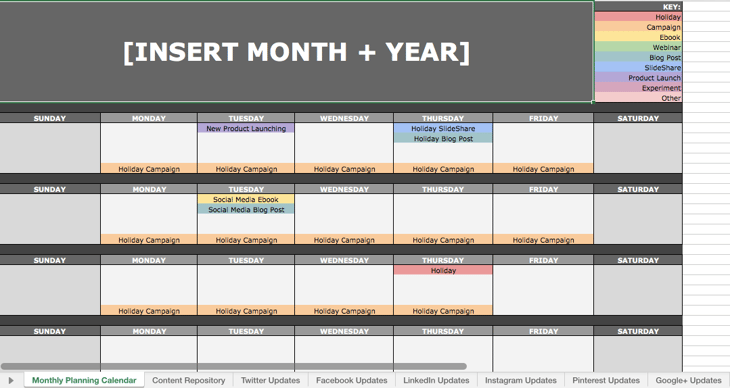
Use the Monthly Planning Calendar Tab above to get a bird’s-eye view of what’s coming down their content pipeline in a given month.

In the Content Repository tab, users can record the content they’re publishing on this tab to keep track of which pieces have been promoted and to easily recall older content that can be re-promoted on social media.

On the Social Network Update tabs, users can draft and plan out social media posts in advance. These tabs are for organizational purposes, and the content of the posts themselves must be uploaded into a social media publisher.
This free resource can be used to draft social media posts, or it can be bulk-uploaded into a publishing app to maximize efficiency. (HubSpot customers: You can use this spreadsheet to organize content and upload it directly into Social Inbox. For instructions on how to do so, check out the template’s cover sheet here.)
2. Google Drive
Content Calendar and Asset Organization
Google Drive has several helpful features that make it easy for social media marketers to build out an effective content calendar.
Here’s an example of how a team might use Google Calendar to track both their editorial and social media calendars to make sure they’re aligning posts with new blog content. These calendars can be easily shared with multiple teams to avoid scheduling conflicts and ensure that campaigns are aligned.
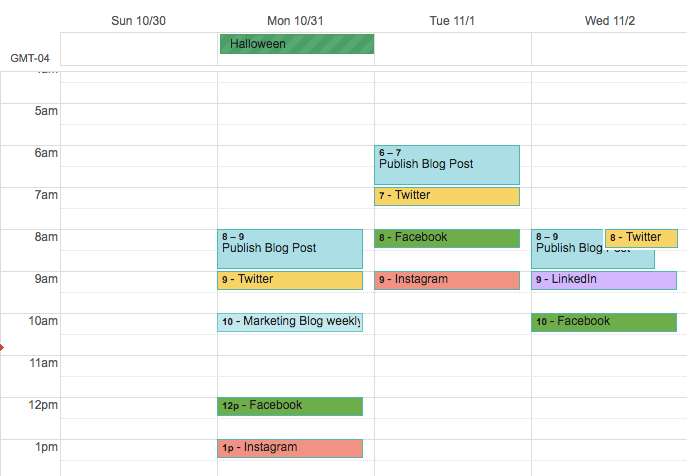
Marketers can also use shared Google Sheets to schedule posts on social media, track the status of different pieces of content, and assign tasks to team members — all on the same platform as their calendar.
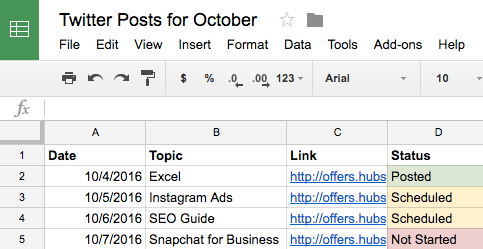
With the help of Google Docs, users can keep comments all in one place and can collaborate on different projects without emailing back-and-forth or having to schedule a meeting. This is a particularly useful feature when editing content for social media, which may need to be drafted and approved quickly.
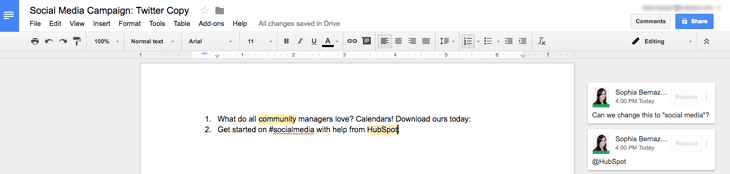
(HubSpot customers: You can link your Google Drive account to your HubSpot portal to easily upload files from Drive into your HubSpot software.)
3. Loomly
Content Planning, Creation, Publishing, and Calendar
If you want more mileage out of a content calendar than publishing dates, you can turn to an all-in-one content planning and publishing platform such as Loomly.
Loomly offers tools beyond the management of content, going even so far as to provide post inspiration and ideas to help you create content. It also allows you to manage your content assets, schedule posts, manage them in both a list view and a calendar view, and analyze what’s working.
Their most robust feature set, though, includes a collaboration and approval environment so that teams can submit mockups, provide comments, see version logs, and flag for approval. This can help you streamline for efficiency when it may otherwise seem as though there are “too many cooks in the kitchen” on a particular project.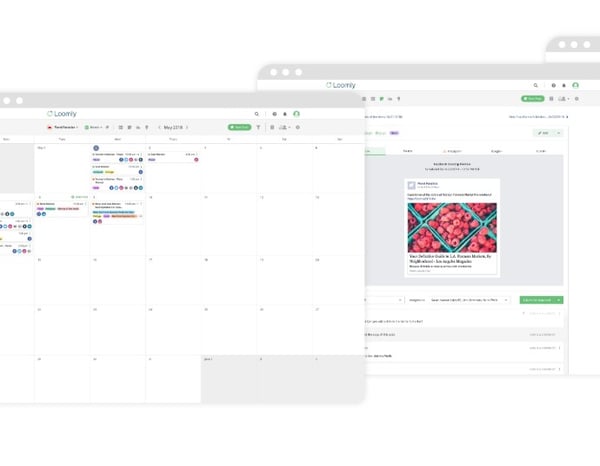 Image Source
4. Trello
Task Management and Content Calendar
Trello is another organizational tool that’s highly effective for team collaboration. More specifically, social media managers can use Trello’s flexible assignment “cards” and customizable “boards” and “lists” to map out to-do lists, manage a content calendar, plan a campaign, and house ideas from a brainstorm.
Here’s an example of a Trello board a social media marketing team might use to plan posts for the upcoming week:
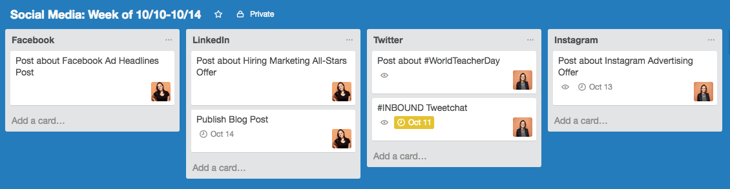
But you’re not limited to just one structure: Users can customize boards according to their needs. For example, a team could create a board to organize social media posts for a given week, on a specific platform, or post ideas around a topic, such as a campaign or awareness day.
Trello cards allow for a ton of customization as well. Here’s a fictitious social media editorial calendar card with Twitter copy options around a piece of blog content. Note that you can track progress toward completing a checklist, which could be useful for social media marketers looking to track campaign progress.
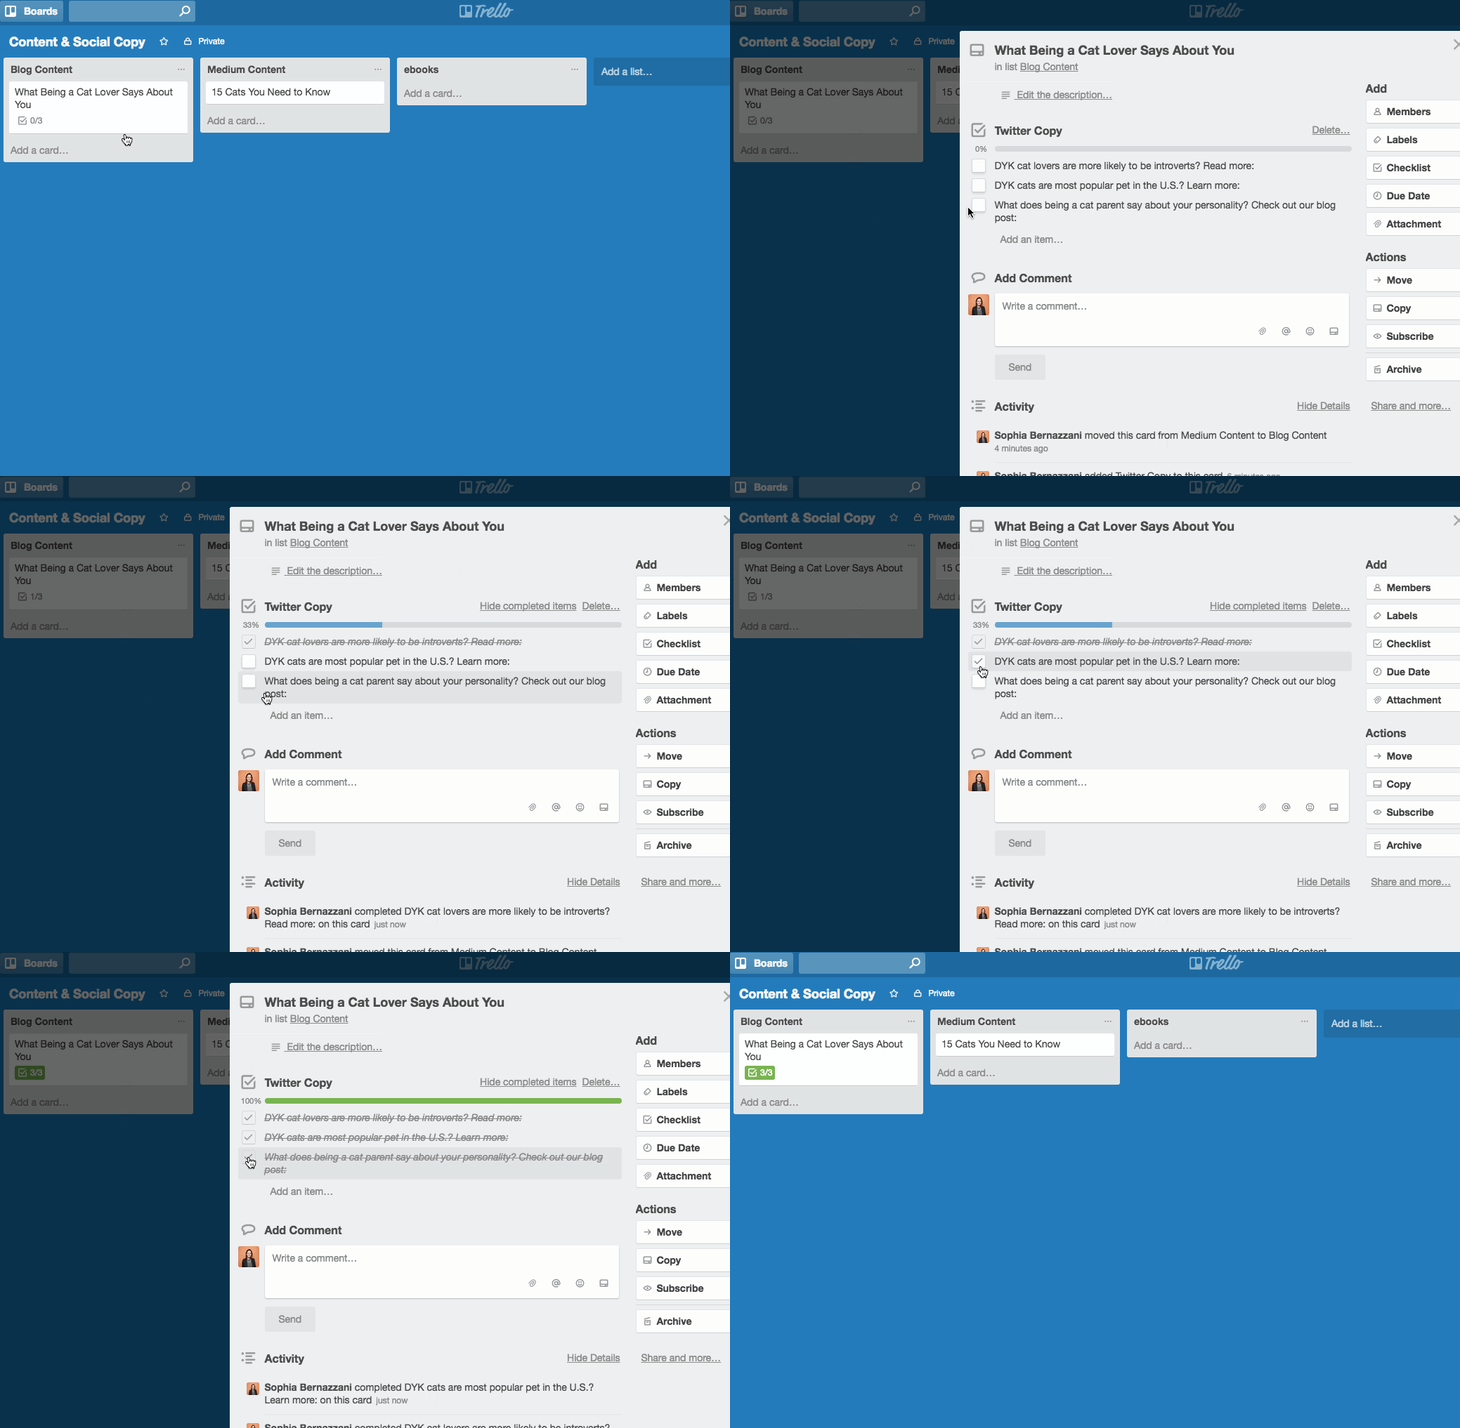
Additionally, Trello cards can be assigned to different team members, marked with due dates, and commented on. Users can even customize the labels (as in the image below) with different publication statuses so the entire team can see the progress of their social media posts and when they’re due on the calendar. The labels could also indicate different social networks that content is being published on.
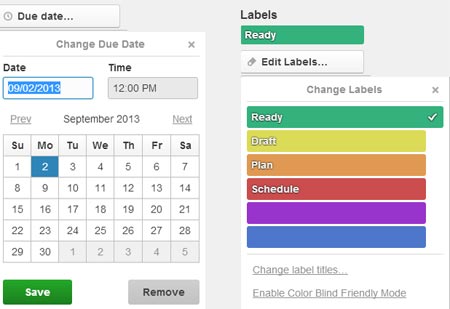
Trello also offers a full calendar view (shown below) which makes it easy to visualize what content is going out, and when.
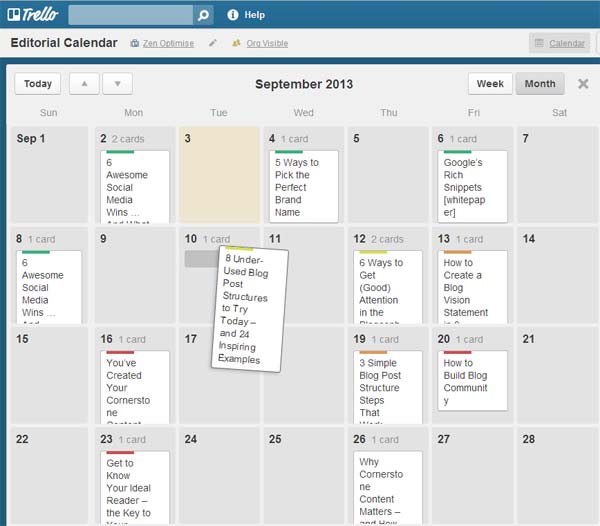
5. Evernote
Content Calendar, Task Management, and Asset Organization
Evernote is a note-taking app that marketers can use to keep track of all the moving parts that comprise a social media campaign.
The tool also features yearly, monthly, weekly, and hourly logs, which make it easy to keep track of when you’re publishing content on social media, when you’re producing blog content, and other team-wide priorities. (Evernote offers customizable templates for each of these that can be downloaded into the app.)
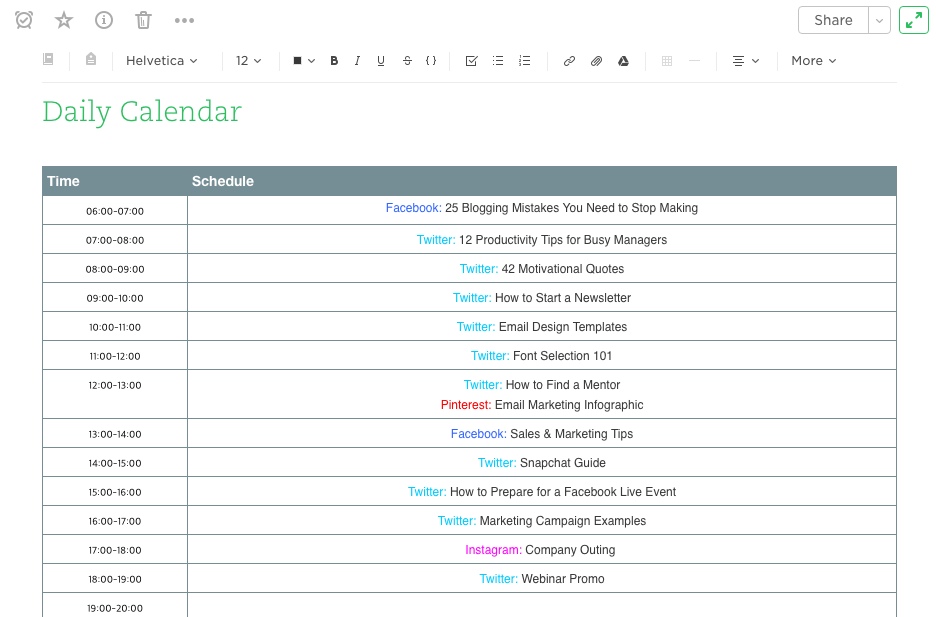
Another useful feature? Evernote’s Web Clipper extension for Chrome. Marketers can use this tool to easily save links to their Evernote Notebook for sharing later on.
The Evernote mobile app also boasts some interesting features to help marketers keep their social content ideas straight. For example, you can easily snap a photo and save it to your Evernote files for review later.
This feature is of particular valuable for social content creators looking to maintain a backlog of photos to publish on Instagram.
6. Hootsuite
Social Publishing and Content Calendar
Hootsuite offers a built-in Planner tool to help you create campaigns, identify publishing gaps, and collaborate with your content creation team. Its primary features are in social publishing so that you can release content to your networks in advance, but it also has rich features for collaboration and post approvals. You can also curate content from other sources without logging into your account. Once your content is created, you can preview it with the Composer tool, which displays according to each social network’s unique format.

7. Agorapulse
Social Publishing and Content Calendar
Similar to Hootsuite, Agorapulse offers social publishing tools and a content calendar so that you can manage your social media accounts with ease. This includes scheduling (or rescheduling), queuing, and bulk uploading posts, which is incredibly helpful for those who do quarterly or monthly content plans. What makes Agorapulse different, though, is its social inbox that allows you to manage all the interactions from various platforms in a single place. After all, content isn’t just a one-and-done activity; it’s about building awareness and engagement with your readers as well.
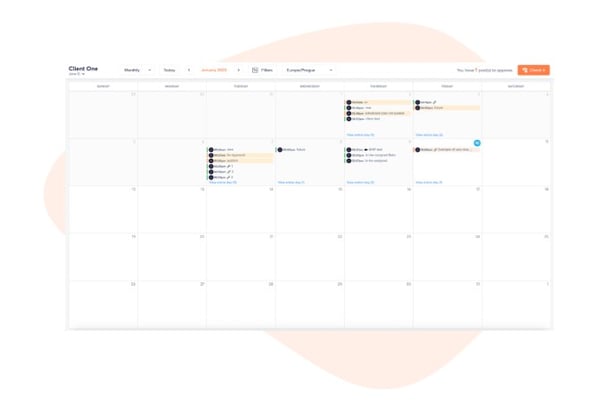
8. StoryChief
Content Planning and Distribution
If you want more from your content calendar than simply knowing when posts go live, StoryChief is a good option. With StoryChief’s smart calendar, you can better strategize and plan your content strategy across channels. It not only displays your timetable; it also allows you to assign collaborators to tasks and filter by campaign. StoryChief self-describes their tool as a “content distribution platform” that unifies analytics and publishing across multiple channels for a more simplified approach to content creation. Best of all, it syncs with your favorite calendar apps as well as HubSpot.
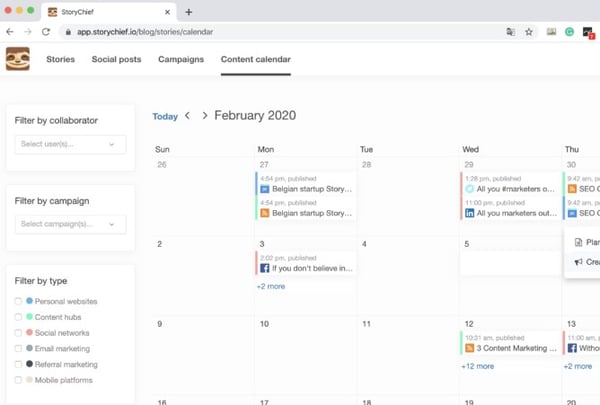
9. ClearVoice
Content Creation and Management
So what about content planning and creation? ClearVoice offers content creation tools to fit into your workflow. While their big claim to fame is their Talent Network Search which allows you to find and connect to content creators to work on your projects, ClearVoice also has features for task management for internal and external collaborators. You can create, edit, and approve projects in an interface that makes editorial management easy. They also have a dashboard and dynamic editorial calendar with plenty of interactive functionality, and there’s integrations with other popular software.
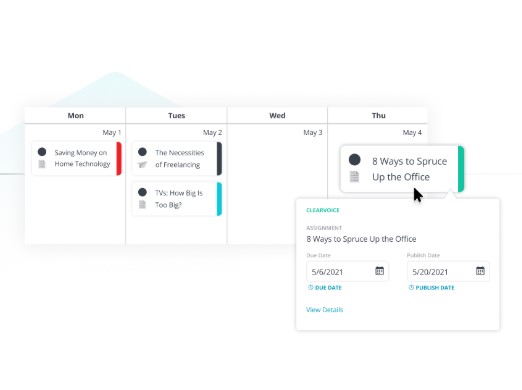
10. Zerys
Content Creation and Management
Zerys is another platform that matches you with your ideal content creation freelancers. However, it markets itself as a platform dedicated to content success, offering features for content planning, production, publishing, promotion, conversion, and analytics. You can manage unlimited content projects, plan keywords and titles for blog content, hire writers, and view all deadlines on an integrated calendar. Your in-house writers can use the platform, too, with the project management features that Zerys offers. It also integrates with HubSpot so that publishing is a breeze.
Social Media Templates
HubSpot’s Social Media Calendar Template
If you’re new to setting up social media calendars, HubSpot offers a pre-made, free, and downloadable template that you can use to schedule out full weeks of posts.
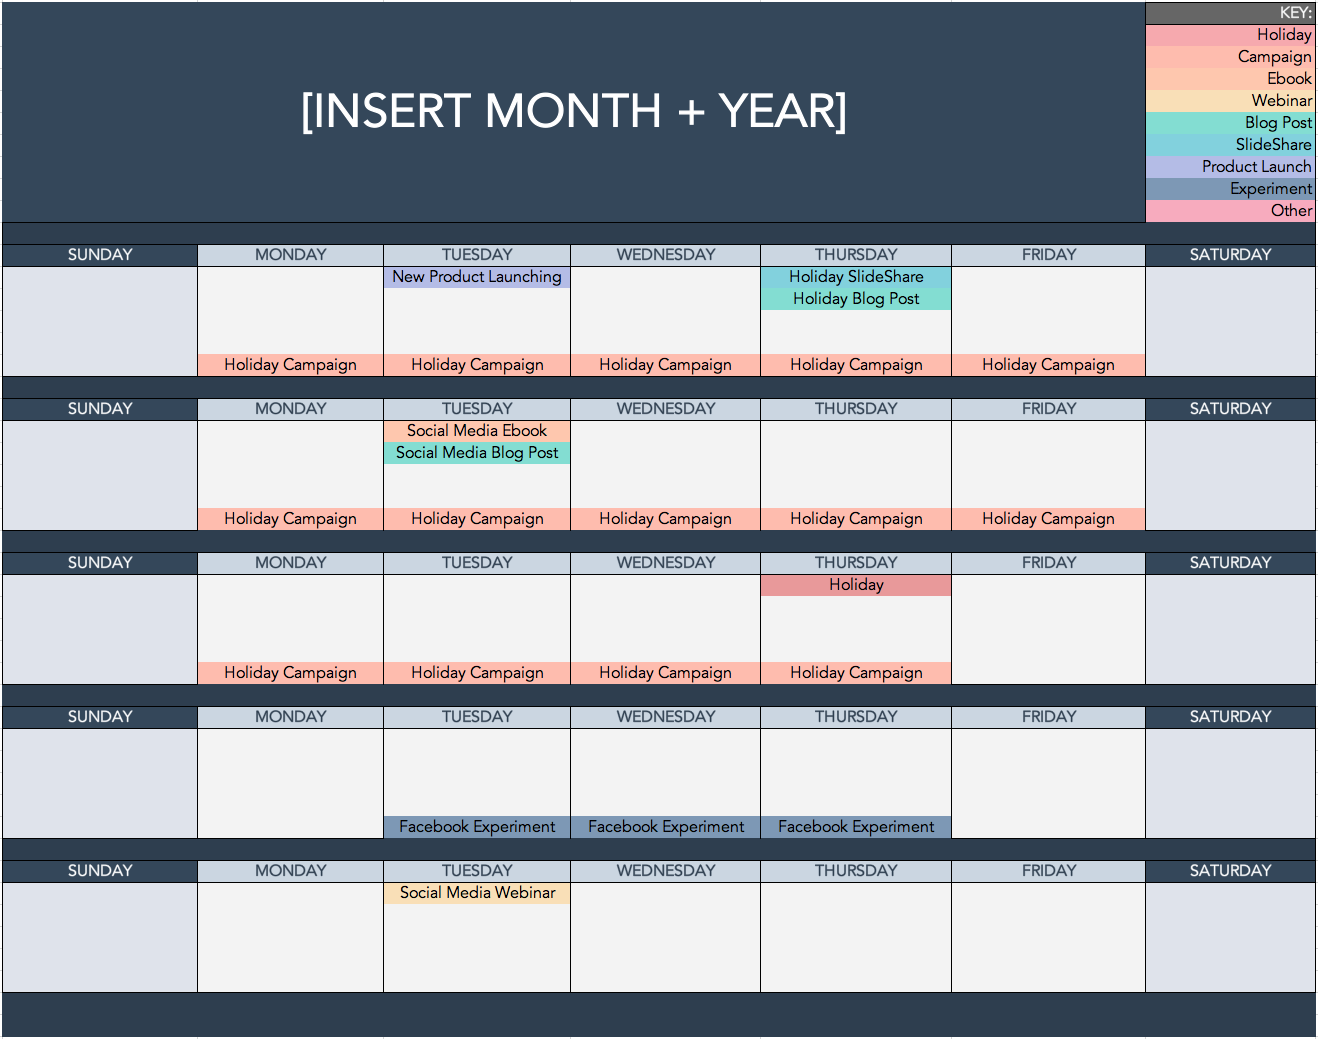
HubSpot’s Social Media Content Calendar Template for Startups
This template is very similar to the one seen above, but also has tabs that work as a repository for content ideas. The template also includes helpful tips for posting on specific social media networks.
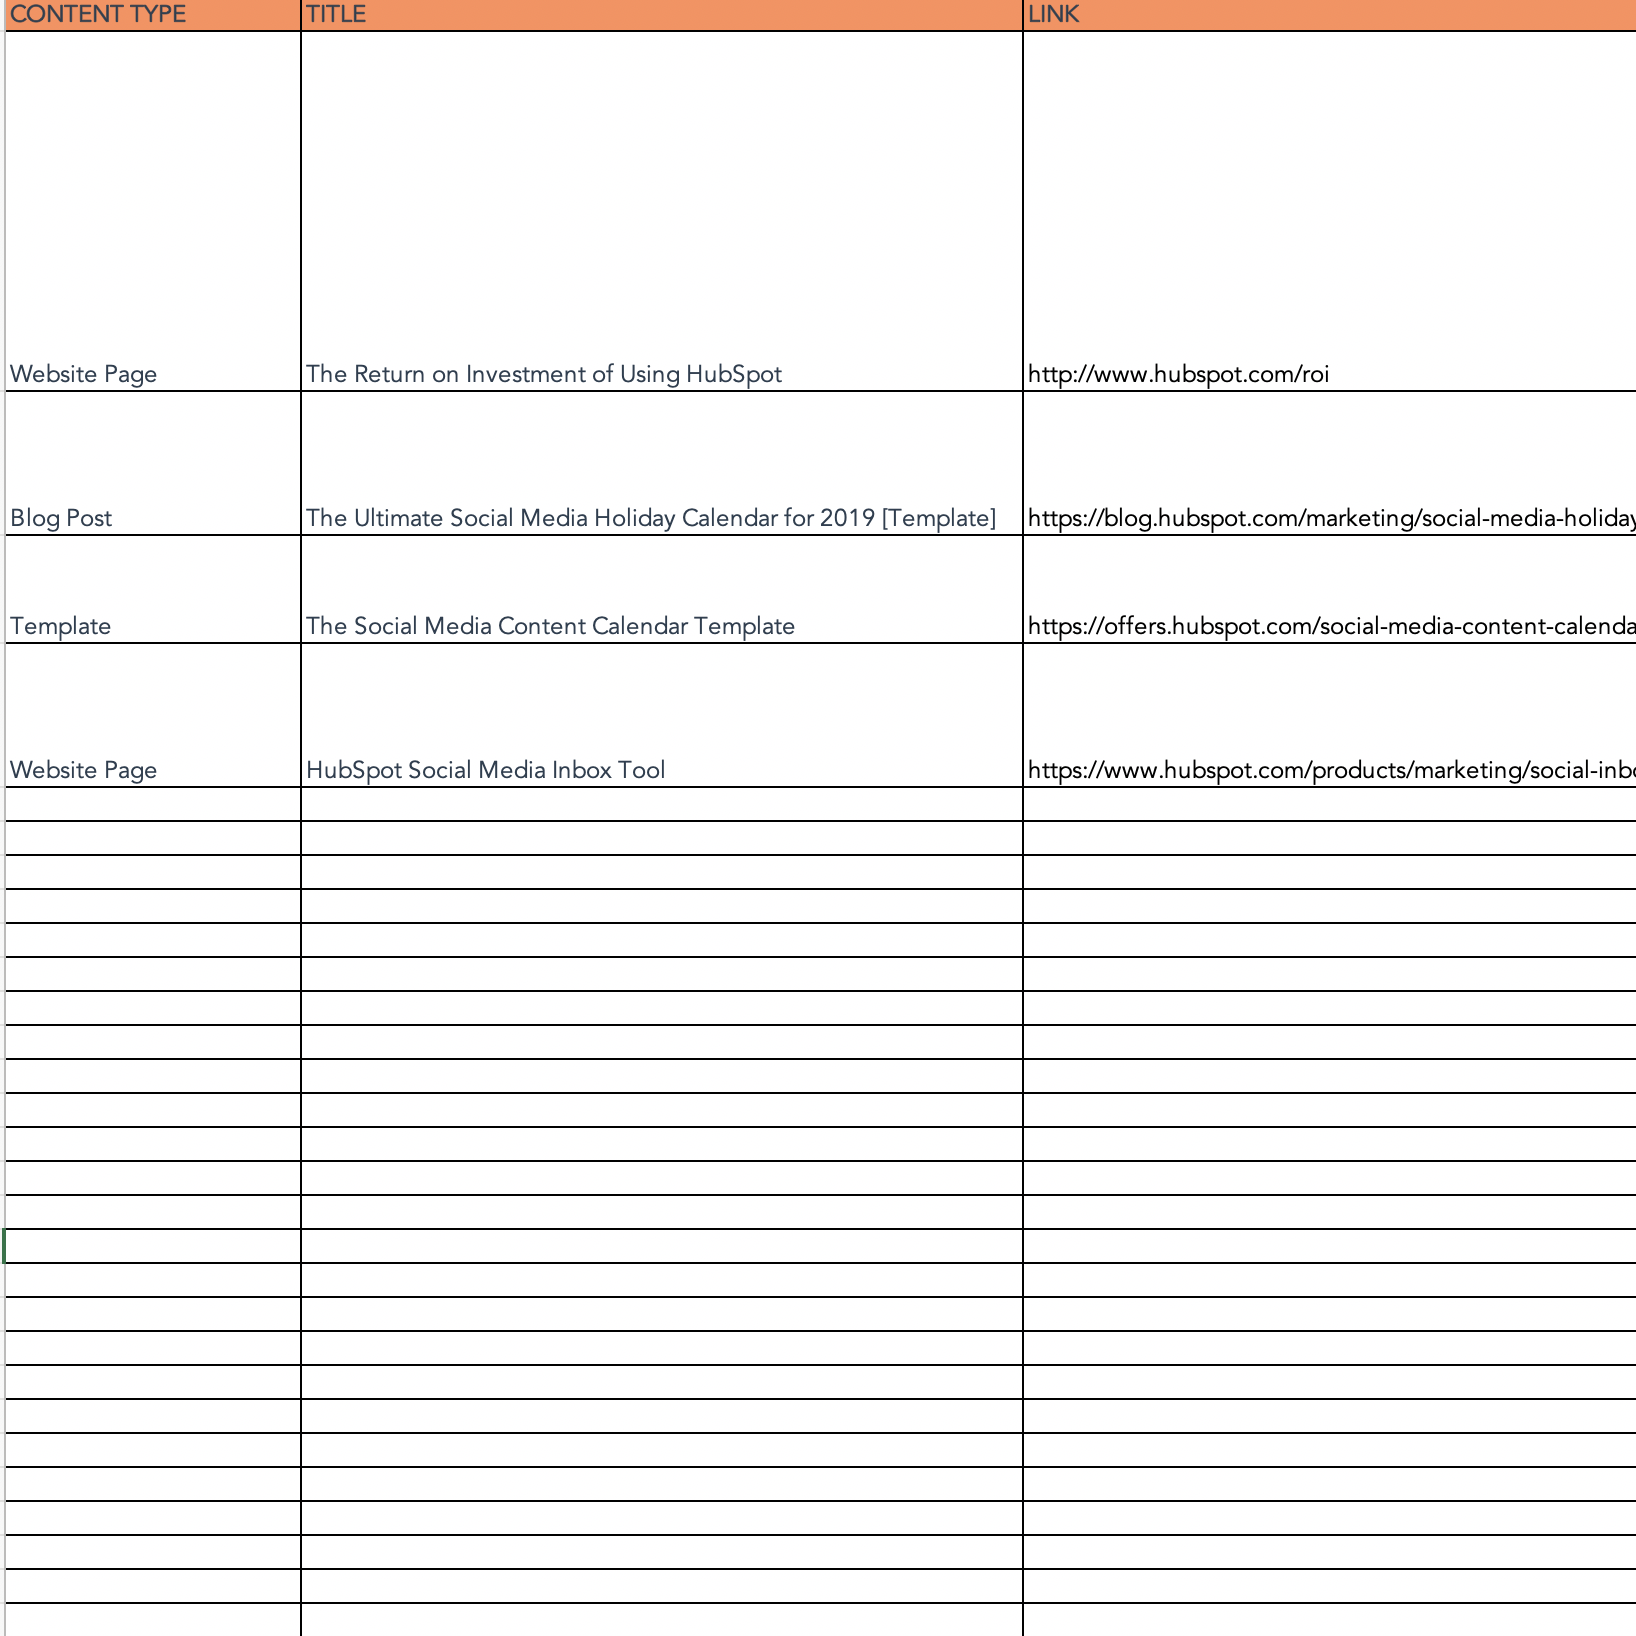
If you’re aiming to get all of your ideas down in order to develop a big-picture plan for your social assets, we recommend starting with this template.
Getting Started on Your Social Media Schedule
Now that we’ve reviewed a few helpful tools to kick your social media strategy into high gear, experiment with them. Every social media team is different, and it could be a combination of these tools that helps you execute your strategy efficiently to drive ROI.
Editor’s note: This post was originally published in 2017 and has been updated for comprehensiveness.

The Designer’s Guide to Color Theory, Color Wheels, and Color Schemes
When you’re sifting through your News Feed, what tends to catch your attention? More likely than not, it’s YouTube videos, pictures, animated GIFs, and other visual content, right?
While text-based content is always important when seeking answers to a question, creating visuals such as infographics, charts, graphs, animated GIFs, and other shareable images can do wonders for catching your readers’ attention and enhancing your article or report.
I know what you might be thinking: “I don’t know how to design awesome visuals. I’m not creative.”
Hi. I’m Bethany, and I will be the first to tell you that I’m not naturally artistic. And yet, I found a strength in data visualization at HubSpot, where I’ve spent most of my days creating infographics and other visuals for blog posts.
So, while I wouldn’t say I’m naturally artistic, I have learned how to create compelling visual content. So can you.
And you can do this by learning color theory. Consider this your introductory course, and we’ll be covering the following topics:
- What Is Color Theory?
- Why Is Color Theory Important in Web Design?
- Color Theory 101
- Additive & Subtractive Color Theory
- How to Choose a Color Scheme
- Color Tools
What Is Color Theory?
Color theory is the basis for the primary rules and guidelines that surround color and its use in creating aesthetically pleasing visuals. By understanding color theory basics, you can begin to parse the logical structure of color for yourself to create and use color palettes more strategically. The result means evoking a particular emotion, vibe, or aesthetic.
Why Is Color Theory Important in Web Design?
Color is an important aspect, if not the most important aspect of design, and can influence the meaning of text, how users move around a particular layout, and what they feel as they do so. By understanding color theory, you can be more intentional in creating visuals that make an impact.
While there are many tools out there to help even the most inartistic of us to create compelling visuals, graphic design tasks require a little more background knowledge on design principles.
Take picking the right colors, for instance. It’s something that might seem easy at first, but when you’re staring down a color wheel, you’re going to wish you had some information on what you’re looking at.
Read on to learn about the terms, tools, and tips you should know to pick the best colors for your designs.
Color Theory 101
Let’s first go back to high school art class to discuss the basics of color.
Remember hearing about primary, secondary, and tertiary colors? They’re pretty important if you want to understand, well, everything else about color.

Primary Colors
Primary colors are those you can’t create by combining two or more other colors together. They’re a lot like prime numbers, which can’t be created by multiplying two other numbers together.
There are three primary colors:
- Red
- Yellow
- Blue
Think of primary colors as your parent colors, anchoring your design in a general color scheme. Any one or combination of these colors can give your brand guardrails when you move to explore other shades, tones, and tints (we’ll talk about those in just a minute).
When designing or even painting with primary colors, don’t feel restricted to just the three primary colors listed above. Orange isn’t a primary color, for example, but brands can certainly use orange as their dominant color (as we at HubSpot know this quite well).
Knowing which primary colors create orange is your ticket to identifying colors that might go well with orange — given the right shade, tone, or tint. This brings us to our next type of color …
Secondary Colors
Secondary colors are the colors that are formed by combining any two of the three primary colors listed above. Check out the color theory model above — see how each secondary color is supported by two of the three primary colors?
There are three secondary colors: orange, purple, and green. You can create each one using two of the three primary colors. Here are the general rules of secondary color creation:
- Red + Yellow = Orange
- Blue + Red = Purple
- Yellow + Blue = Green
Keep in mind that the color mixtures above only work if you use the purest form of each primary color. This pure form is known as a color’s hue, and you’ll see how these hues compare to the variants underneath each color in the color wheel below.
Tertiary Colors
Tertiary colors are created when you mix a primary color with secondary color.
From here, color gets a little more complicated. And if you want to learn how the experts choose color in their design, you’ve got to first understand all the other components of color.
The most important component of tertiary colors is that not every primary color can match with a secondary color to create a tertiary color. For example, red can’t mix in harmony with green, and blue can’t mix in harmony with orange — both mixtures would result in a slightly brown color (unless of course that’s what you’re looking for).
Instead, tertiary colors are created when a primary color mixes with a secondary color that comes next to it on the color wheel below. There are six tertiary colors that fit this requirement:
- Red + Purple = Red-Purple (magenta)
- Red + Orange = Red-Orange (vermillion)
- Blue + Purple = Blue-Purple (violet)
- Blue + Green = Blue-Green (teal)
- Yellow + Orange = Yellow-Orange (amber)
- Yellow + Green = Yellow-Green (chartreuse)
The Color Theory Wheel
Okay, great. So now you know what the “main” colors are, but you and I both know that choosing color combinations, especially on a computer, involves a much wider range than 12 basic colors.
This is the impetus behind the color wheel, a circle graph that charts each primary, secondary, and tertiary color — as well as their respective hues, tints, tones, and shades. Visualizing colors in this way helps you choose color schemes by showing you how each color relates to the color that comes next to it on a rainbow color scale. (As you probably know, the colors of a rainbow, in order, are red, orange, yellow, green, blue, indigo, and violet.)

When choosing colors for a color scheme, the color wheel gives you opportunities to create brighter, lighter, softer, and darker colors by mixing white, black, and gray with the original colors. These mixes create the color variants described below:
Hue
Hue is pretty much synonymous to what we actually mean when we said the word “color.” All of the primary and secondary colors, for instance, are “hues.”
Hues are important to remember when combining two primary colors to create a secondary color. If you don’t use the hues of the two primary colors you’re mixing together, you won’t generate the hue of the secondary color. This is because a hue has the fewest other colors inside it. By mixing two primary colors that carry other tints, tones, and shades inside them, you’re technically adding more than two colors to the mixture — making your final color dependent on the compatibility of more than two colors.
If you were to mix the hues of red and blue together, for instance, you’d get purple, right? But mix a tint of red with the hue of blue, and you’ll get a slightly tinted purple in return.
Shade
You may recognize the term “shade” because it’s used quite often to refer to light and dark versions of the same hue. But actually, a shade is technically the color that you get when you add black to any given hue. The various “shades” just refer to how much black you’re adding.
Tint
A tint is the opposite of a shade, but people don’t often distinguish between a color’s shade and a color’s tint. You get a different tint when you add white to a color. So, a color can have a range of both shades and tints.
Tone (or Saturation)
You can also add both white and black to a color to create a tone. Tone and saturation essentially mean the same thing, but most people will use saturation if they’re talking about colors being created for digital images. Tone will be used more often for painting.
Additive & Subtractive Color Theory
If you’ve ever played around with color on any computer program, you’ve probably seen a module that listed RGB or CMYK colors with some numbers next to the letters.
Ever wondered what those letters mean?
CMYK
CMYK stands for Cyan, Magenta, Yellow, Key (Black). Those also happen to be the colors listed on your ink cartridges for your printer. That’s no coincidence.
CMYK is the subtractive color model. It’s called that because you have to subtract colors to get to white. That means the opposite is true — the more colors you add, the closer you get to black. Confusing, right?

Think about printing a piece of paper. When you first put a sheet in the printer, you’re typically printing on a white piece of paper. By adding color, you’re blocking the white wavelengths from getting through.
Then, let’s say you were to put that printed piece of paper back in the printer, and print something on it again. You’ll notice the areas that have been printed on twice tend to colors closer to black.
I find it easier to think about CMYK in terms of its corresponding numbers. CMYK works on a scale of 0 to 100. If C=100, M=100, Y=100, and K=100, you end up with a black color. But, if all four colors equal 0, you end up with true white.
RGB
RGB color models, on the other hand, are designed for electronic displays, including computers.
RGB stands for Red, Green, Blue, and is based on the additive color model of light waves. This means, the more color you add, the closer you get towards white. For computers, RGB is created using scales from 0 to 255. So, black would be R=0, G=0, and B=0. White would be R=255, G=255, and B=255.

When you’re creating color on a computer, your color module will usually list both RGB and CMYK numbers. In practice you can use either one to find colors, and the other color model will adjust accordingly.
However, many web programs will only give you the RGB values or a HEX code (the code assigned to color for CSS and HTML). So, if you’re designing digital images or for web design, RGB is probably your best bet for choosing colors.
You can always convert the design to CMYK and make adjustments should you ever need it for printed materials.
How to Choose a Color Scheme
- Consider your color context.
- Refer to a color wheel to identify analogous colors.
- Refer to a color wheel to identify complementary colors.
- Focus on monochromatic colors in the same hue.
- Use a triadic color scheme to create high contrast.
- Create a split complementary color scheme.
- Think beyond the presets, but start with just one color.
Now that we’ve got all of the basics of color theory down, let’s talk about how to actually use this newfound knowledge to form designs that perfect your brand and resonate with your audience.
You’ve probably noticed before that some colors look great together and others, well, just don’t. The colors we choose can help enhance a design, or it can take away from a design.
When you’re figuring out how to design a graphic, it’s important to remember that how we perceive colors depends on the context in which we see it.
1. Consider your color context.
Color context refers to how we perceive colors as they contrast with another color. Look at the pairs of circles in the example below to see what I mean.
The middle of each of the circles is the same size, shape, and color. The only thing that changes is the background color. Yet, the middle circles appear softer or brighter depending on the contrasting color behind it. You may even notice movement or depth changes just based on one color change.
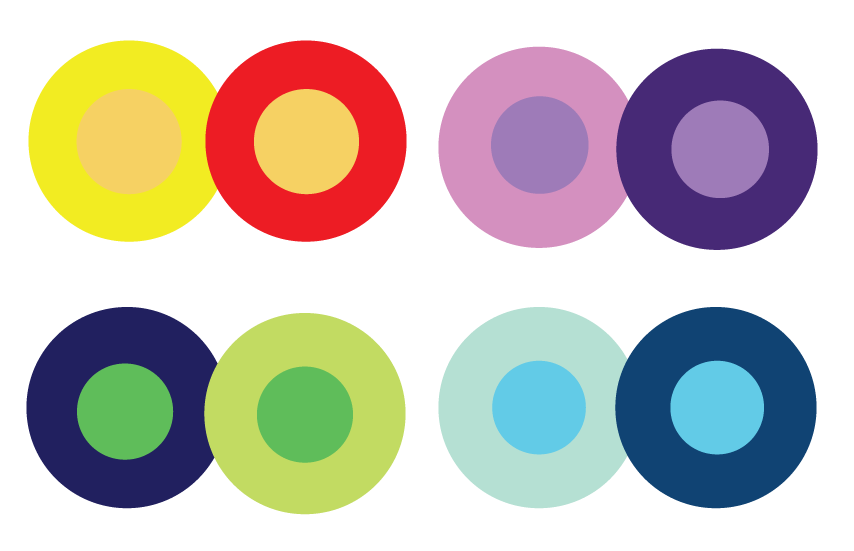
This is because the way in which we use two colors together changes how we perceive it. So, when you’re choosing colors for your graphic designs, think about how much contrast you want throughout the design.
For instance, if you were creating a simple bar chart, would you want a dark background with dark bars? Probably not. You’d most likely want to create a contrast between your bars and the background itself since you want your viewers to focus on the bars, not the background.
Choosing colors with high contrast, however, isn’t always as hard as choosing colors that look good together.
For me, this is where choosing color is trickiest. I could spend hours choosing colors for an infographic simply because it takes awhile to get a feel for what looks best together.
In reality, though, I usually don’t have hours to spend just choosing colors. (And that’d probably be a waste of time even if I did have a few hours.)
Luckily, there are logical rules for how to create color schemes that work together.
2. Refer to a color wheel to identify analogous colors.
Analogous color schemes are formed by pairing one main color with the two colors directly next to it on the color wheel. You can also add two additional colors (which are found next to the two outside colors) if you want to use a five-color scheme instead of just three colors.
Analogous structures do not create themes with high contrasting colors, so they’re typically used to create a softer, less contrasting design. For example, you could use an analogous structure to create a color scheme with autumn or spring colors.
I like to use this color scheme to create warmer (red, oranges, and yellows) or cooler (purples, blues, and greens) color palettes like the one below. There isn’t a high contrast between these colors, but don’t they just look nice together?
I’d probably use this palette to design an image rather than an infographic or bar chart as I would want all of the elements in the image to blend together nicely.

3. Refer to a color wheel to identify complementary colors.
You may have guessed it, but a complementary color scheme is based on the use of two colors directly across from each other on the color wheel and relevant tints of those colors.
The complementary color scheme provides the greatest amount of color contrast. Because of this, you should be careful about how you use the complementary colors in a scheme.  It’s best to use one color predominantly and use the second color as accents in your design.
The complementary color scheme is also great for charts and graphs. High contrast helps you highlight important points and takeaways.
However, if I were to use these colors in an infographic, I’d probably need to use a much lighter color for the actual background. Can you imagine choosing one of the oranges as a background with blues as accents and text? That’d probably be too overpowering and difficult to read.

4. Focus on monochromatic colors in the same hue.

Using a monochromatic schemes allows you create a color scheme based on various shades and tints of one hue. Although it lacks color contrast, it often ends up looking very clean and polished. It also allows you to easily change the darkness and lightness of your colors.
I like to use monochromatic color schemes for charts and graphs, but only when creating high contrast isn’t necessary. However, monochromatic schemes don’t tend to “pop,” so if you’re looking for a color scheme that’s bright and attention grabbing, this one isn’t your best bet.
Check out all the monochromatic colors that fall under the red hue, a primary color.

5. Use a triadic color scheme to create high contrast.
Triadic color schemes offer high contrasting color schemes while retaining the same tone. Triadic color schemes are created by choosing three colors that are equally placed in lines around the color wheel.
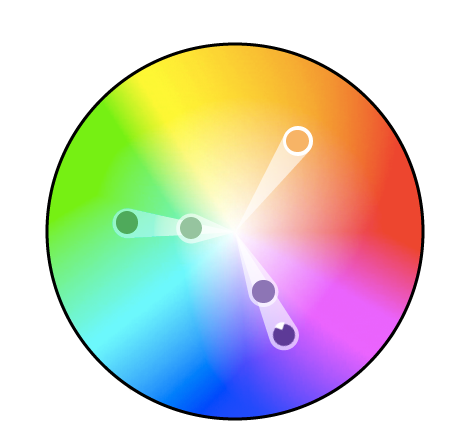
Triad color schemes are useful for creating high contrast between each color in a design, but they can also seem overpowering if all of your colors are chosen on the same point in a line around the color wheel.
To subdue some of your colors in a triadic scheme, you can choose one dominant color and use the others sparingly, or simply subdue the other two colors by choosing a softer tint.
The triadic color scheme looks great in graphics like bar or pie charts because it offers the contrast you need to create comparisons.
However, if I were using this color scheme to create an infographic, I’d be more likely to choose one color as the background color, such as the yellow or light green, and a darker contrasting color as the dominant color. I then might use the other three colors as accents throughout. By changing up the intensity of the colors in the design, I can highlight important points and takeaways.

6. Create a split complementary color scheme.
A split complementary scheme includes one dominant color and the two colors directly adjacent to the dominant color’s complement. This creates a more nuanced color palette than a complementary color scheme while still retaining the benefits of contrasting colors.

The split complementary color scheme can be difficult to balance well because unlike analogous or monochromatic color schemes, the colors used all provide contrast (similar to the complementary scheme).
I can imagine using the following split complementary color scheme in a variety of ways. I could use this in an chart or graph because it gives me the contrast I need and the colors remain visually appealing.
I could also imagine using these colors in an infographic, although I’d play around with the colors a bit more to see which pairs look best together.
The positive and negative aspect of the split complementary color model is that you can use any two colors in the scheme and get great contrast … but that also means it can also be tricky to find the right balance between the colors. As a result, you may end up playing around with this one a bit more to find the right combination of contrast.

No matter which color scheme you choose, try and keep in mind what your graphic needs. If you need to create contrast, then choose a color scheme that gives you that. On the other hand, if you just need to find the best “versions” of certain colors, then play around with the monochromatic color scheme to find the perfect shades and tints.
I’ve found that simply understanding how color schemes are built goes a long way for helping me choose the right color scheme. If I just think: “What is the goal of this graphic?” I can start to determine how much (or how little) contrast I need.
Remember, if you build a color scheme with five colors, that doesn’t mean you have to use all five. Sometimes just choosing two colors from a color scheme looks much better than cramming all five colors together in one graphic.
7. Think beyond the presets, but start with just one color.
Before I send you off to create amazing images to improve you blog and social posts, let me give you a few extra tips for choosing colors:
- Don’t stick with presets. Almost every program you use will automatically give you preset colors. Get past the presets and explore color on your own. Don’t let the program decide how you use color in your design.
- Start with one color you like. Every time I design something, I start with one color and build the color scheme from there. If you try and start with more than one color, you’ll have a harder time finding harmony between your colors.
- Save your color schemes. If you find a color (or color scheme) you like, it’ll probably be useful to you later. I wouldn’t suggest using the same color scheme for every chart or graphic you create, but you can always use different schemes in different ways later on.
- Practice makes perfect. The more you play with color and practice design, the better you get. No one creates their masterpiece the first time around.
Color Tools
There’s been a lot of theory and practical information for actually understanding which colors go best together and why. But when it comes down to the actual task of choosing colors while you’re designing, it’s always a great idea to have tools to help you actually do the work quickly and easily.
Luckily, there are a number of tools to help you find and choose colors for your designs.
Adobe Color
One of my favorite color tools to use while I’m designing anything — whether it’s an infographic or just a pie chart — is Adobe Color (previously Adobe Kuler).
This free online tool allows you to quickly build color schemes based on the color structures that were explained earlier in this post. Once you’ve chosen the colors in the scheme you’d like, you can copy and paste the HEX or RGB codes into whatever program you’re using.
It also features hundreds of premade color schemes for you to explore and use in your own designs. If you’re an Adobe user, you can easily save your themes to your account.
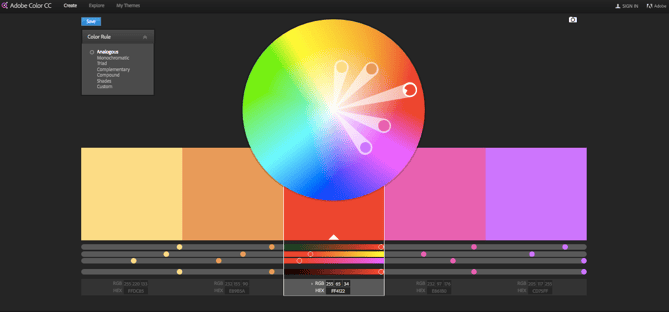
Illustrator Color Guide
I spend a lot of time in Adobe Illustrator, and one of my most-used features is the color guide. The color guide allows you to choose one color, and it will automatically generate a five-color scheme for you. It will also give you a range of tints and shades for each color in the scheme.
If you switch your main color, the color guide will switch the corresponding colors in that scheme. So if you’ve chosen a complementary color scheme with main color of blue, once you switch your main color to red, the complementary color will also switch from orange to green.
Like Adobe Color, the color guide has a number of preset modes to choose the kind of color scheme you want. This helps you pick the right color scheme style within the program you’re already using.
After you’ve created the color scheme that you want, you can save that scheme in the “Color Themes” module for you to use throughout your project or in the future.
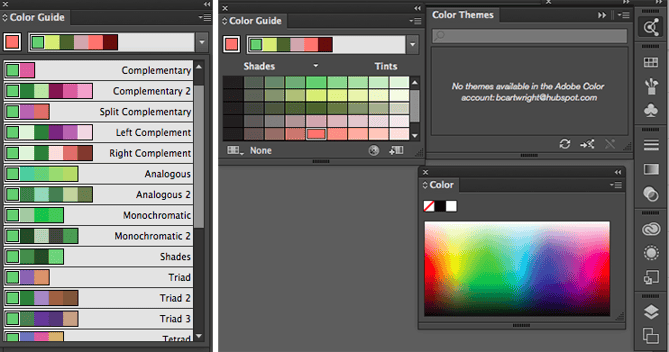
Preset Color Guides
If you’re not an Adobe user, you’ve probably used Microsoft Office products at least once. All of the Office products have preset colors that you can use and play around with to create color schemes. PowerPoint also has number of color scheme presets that you can use to draw inspiration for your designs.
Where the color schemes are located in PowerPoint will depend on which version you use, but once you find the color “themes” of your document, you can open up the preferences and locate the RGB and HEX codes for the colors used.
You can then copy and paste those codes to be used in whatever program you’re using to do your design work.
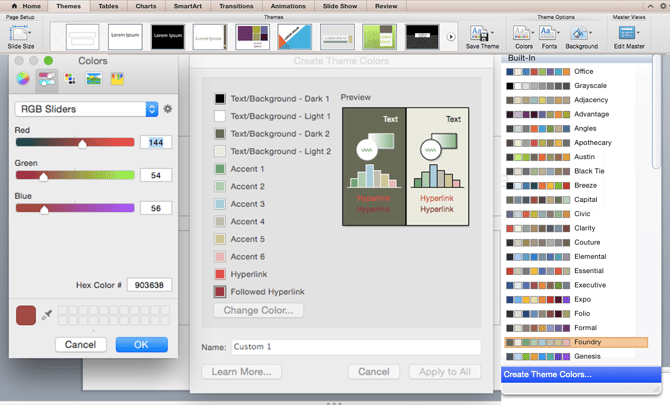
There’s a lot of theory in this post, I know. But when it comes to choosing colors, understanding the theory behind color can do wonders for how you actually use color. This can make creating branded visuals easy, especially when using design templates where you can customize colors.
Editor’s note: This post was originally published in October 2018 and has been updated for comprehensiveness.

How Our Marketing Team Used Sprint Planning While Working Remotely
This post is a part of Made @ HubSpot, an internal thought series through which we extract lessons from experiments conducted by our very own HubSpotters.
As marketers at HubSpot, we’re constantly tasked with driving cross-functional projects towards launch.
A recent challenge we’ve faced is having to do this remotely and entirely online. We’ve had to adapt our meeting structure and technology stack to create highly engaging and productive team meetings to make progress on our marketing campaigns.
If you’ve also had to remotely meet with your team to make big decisions on a project, you’ve probably faced similar challenges.
With recent changes to how our team normally works, we decided to adapt our project planning process and shift to a modified sprint process.
We’re going to share our strategies from running sprint planning sessions which have allowed us to distill weeks’ worth of work into only one week and have gotten us weeks ahead of our projects’ schedules — even while operating 100% remotely.
Many teams at HubSpot rely on the sprint process to make decisions that solve for our customers. Up until recently, we had never tried it in our campaign process.
Our Global Campaigns team works with a creative team of developers and designers. These folks have helped us build acquisition campaigns like Email Signature Generator, Make My Persona, Behind the Screens, and the newly launched State of Marketing.
The creative team is able to produce impressive work because of its efficiency in execution. How? One component that they credited was their use of sprint planning sessions.
Get Started with Your Sprint
Sprints aren’t perfect for every problem. The first step in every sprint is deciding if it’s necessary to run one. Here are a few questions to ask yourself:
- Are you clear on the problem that needs to be solved?
- Is the problem big enough that it needs multiple stakeholders to make a decision?
- Does solving the problem add real business value?
If you can answer “yes” to these questions, you can feel comfortable making the decision to organize a sprint.
Who to Include In Your Sprint
It’s common for teams to invite many voices into the room when a big decision needs to be made.
Although having more voices nets a wider perspective, we’ve seen that smaller meetings work better because they are more productive and collaborative.
Famous copywriter Robert Bly had a similar belief. He said, “Four reviewers or less is ideal. Six should be the maximum. Any more, and you are writing ads by committee — and committees cannot write effective ads.”
For your sprint, aim to invite five to seven people. Six people total worked well for us.
You’ll need a decision-maker involved in the sprint. This person should have the power to give go/no-go decisions in the room while also keeping discussions focused on achieving the sprint outcome.
For us, this person was our team’s Director of Acquisition. She helped us stay on track and translated our research into holistic marketing insights, like defining the value prop and developing communication frameworks.
For the other people in the sprint, invite experts who are related to helping you execute the project. Keep these few things in mind:
- A diversity of perspectives is important. Include people from different teams who share common goals with your team.
- Understand who you’ll need help from once you complete your sprint — involving people from other teams will motivate them to execute afterward.
- If your project requires development, it might be helpful to invite a developer to your sprint so this person can check if your ideas are technically feasible.
Your Role in Sprint
If you’re reading this, you’re probably accountable for getting a big project done within a certain time. In this role, you’ll be the facilitator of the sprint — meaning, you’re in charge of setting the agenda, objective, and daily facilitation of each sprint day.
In short, it’s your responsibility to spark conversation, keep an eye on the time, make sure everyone has a clear understanding of the sprint’s objective, and more.
Building Out Your Sprint Plan
When building out your sprint plan, start out with the objective: what are you hoping to achieve by the end of the five days?
Next, break your sprint objective up into goals by each day. At the end of each day, you and your team should complete something tangible that helps you work towards your desired sprint outcome.
Now, let’s unpack the five days of a typical sprint planning session.
The Five Days of Sprint
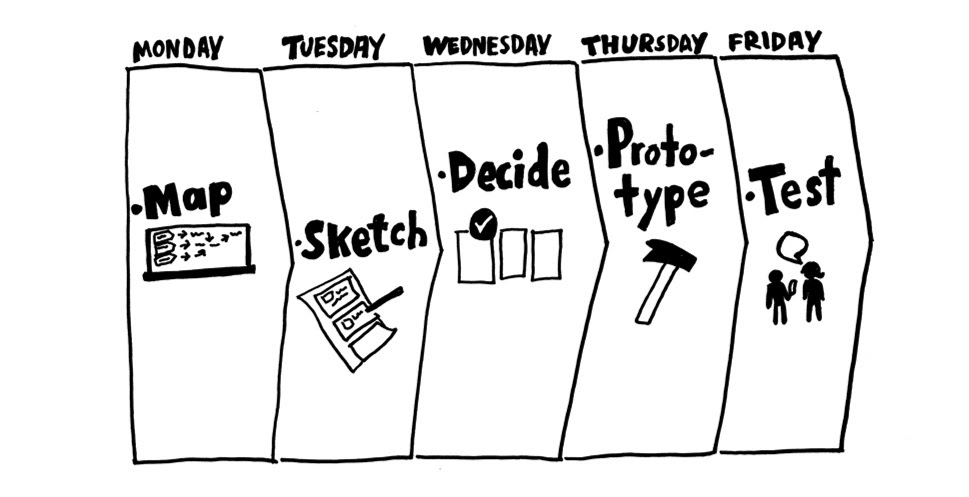
Here is the sprint planning session mapped out into five days. (Really … you only need five days.) Read more about our sprint planning session below.
Day 1: Map
Map the user journey, identify pain points along the journey, and decide how you might solve those. Pair up in teams of two to brainstorm topics for the promotional concept.
Day 2: Sketch
The pairs pitch their concepts, and the larger group provides feedback. The decision-maker collects insights into the campaign pitches and works with the group to finalize two promotional concepts for Wednesday (Day 3).
Day 3: Decide
Pitch the two promotional concepts to a VP or Director who was not involved in the sprint. For us, we pitched to the VP of Acquisition at HubSpot, Kieran Flanagan. The VP or Director provides feedback and chooses the one concept that the team should pursue.
Day 4: Prototype
With the creative concept decided, the team splits up into pairs to create promotional assets for channels (e.g. promotional video, Facebook ad, email, etc.) that will be used to pitch the target audience on Friday (Day 5).
Day 5: Test
Ideally, you want to test your concept to your target audience. In our case, that audience is marketers. We decided to invite five HubSpot marketers who were unfamiliar with our work to provide feedback. This helped us confirm what works, what doesn’t work, and what’s confusing about our concept. It’s key to invite folks from other teams so that they are bought-in early on.
This timeline is specific to creating a marketing campaign creative concept. However, it can be adapted to solve for your desired objective, though we recommend keeping the structure in place — you and your team building up towards a pitch to a decision-maker on Day 3 and then building out the concept to test with your audience on Day 5.
How Long Should Sprint Planning Meetings be?
Normally, sprint planning meetings are full-day sessions, Monday to Friday. The length of your meetings will ultimately depend on the impact of your decision.
For example, if you’re trying to decide what top three product features to build in the next three months, you’ll probably want full-day meetings.
Our team wanted to make decisions on our quarterly campaign’s concept — how we planned to tell the story of our campaign to an external audience. In this case, we decided that one to two-hour meetings per day were enough.
Work with your team to decide how much time you’ll need to achieve your sprint’s objective.
Regarding remote sprints, the biggest challenge is keeping your team engaged for a full two hours. We did this by scheduling the sessions in the mornings when people are more energized and having a structured agenda. The tight agenda gave us a sense of urgency.
Convincing Stakeholders to Block a Week for Your Sprint
Setting aside time for our sprint was hard. Not only was it tough finding two hours for each of the five days that fit everyone’s schedule, but it was also difficult convincing folks to show-up in the first place.
What helped was defining clear sprint outcomes. This clearly showed what could be achieved by conducting the sprint and told attendees how they’d be spending their time.
Finally, it helped to first have the decision-maker bought in first so that he or she — who’s usually in at least a Director role — can help you get buy-in from other stakeholders. For example, I worked with my manager to get our director bought in first. Then, our director helped us convince our experts to participate.
How Our Team Used Sprint Planning
This is how our Global Campaigns team used sprint planning to create our most recent acquisition campaign. As an administrative footnote, especially when this is remote, the facilitator should post the preview and objective of each day over a shared Slack channel, email thread, or your preferred communication tool.
Day 1: Map and Refinement (2 hours)
On Day 1, we reviewed the objectives of the creative sprint. (Our main objective was to define the creative promotional concept of our quarterly campaign). We confirm everyone understood the tasks, goals, and objectives moving forward.
Next, we presented the necessary campaign research to inform the team, including target audience, user, and competitive research.
We mapped the user flow to determine how visitors would interact with our campaign by listing pain points on the user flow where problems could arise in the user’s journey. Then, we addressed solutions to those pain points.
Finally, we teamed up into pairs and worked together to determine how to solve our objective with the given information.
As homework, we worked in our pairs to build one creative concept that promoted our campaign. We answered these questions:
- What tone do we want to communicate?
- What headlines promote our concept?
- What imagery (color scheme, mood board, and images) could be part of our campaign?
- What would the video look like?
- On what channels would this appear?
We used Miro to map out the user journey while fully remote. The blue notes describe the user’s journey, orange notes list out the pain points, and yellow notes describe possible solutions.
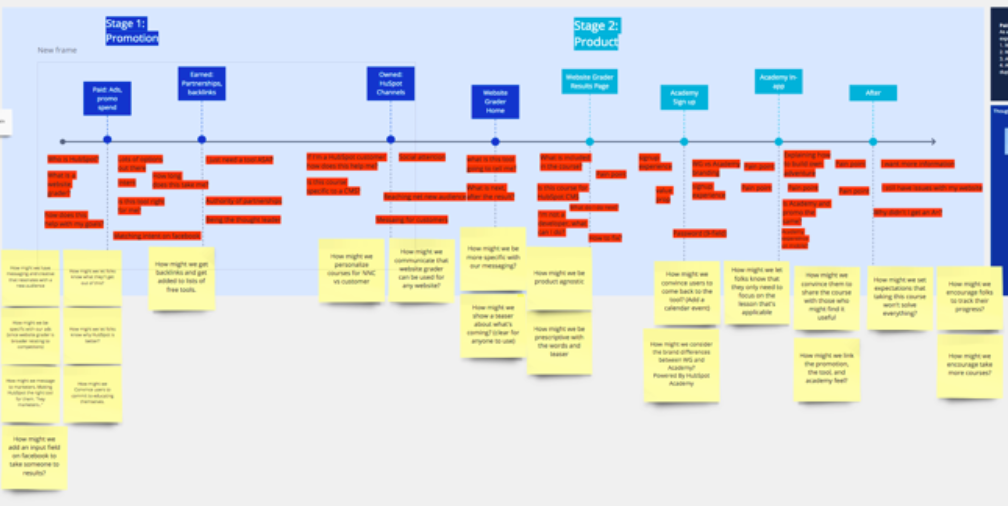
Day 2: Sketch and Concept (2 hours)
On Day 2, pairs pitched their creative concept from Day 1 to the group. The group provided feedback on the concepts and selected two final promotional concepts to move forward with.
The group then sketched imagery that could accompany the concepts. Of the two final creative concepts, we also created a pitch deck for the decision-maker.
Day 3: Decide (1 hour)
On Day 3, the group pitched the two creative concepts to the decision-maker. The decision-maker then chose the best creative concept — the concept that we used for our promotion.
Next, we assigned different marketing channels to people to create three variations of how the creative concept would look and feel (e.g. our emails, social posts, blog CTAs, ads, and videos).
Day 4: Prototype (1.5 hours)
On Day 4, we reminded the team about the final decision and feedback from the decision-maker. As a group, we created a promotional video story.
Pairs were then assigned to channels and tasked with creating mock-ups for channel assets, such as sketches or wireframes (using pen and paper or online tools).
At the end, we combined ideas into one deck for a pitch on test day. As homework, we completed and refined the pitch deck.
Day 5: Test (1.5 hours)
On Day 5, we reviewed our meeting goals and ensured the pitch was ready.
We invited a group of our target audience. (For us, since our audience was marketers, we invited marketers at HubSpot from different teams.) One team member pitched the creative concept to the audience, walking them through the promos across channels, and telling the full concept story.
After the pitch, we addressed any audience questions and asked the audience members to leave feedback in Google Forms privately before leaving feedback to the group. This keeps feedback from being biased.
Afterward, we regrouped to openly discuss the feedback. Based on the feedback, we reviewed opportunities to finalize our creative concept story and improve promo designs.
Day 6: Retro (30 minutes — optional, but encouraged)
Finally, on Day 6, we gathered feedback on our sprint from the team using an online feedback tool called ScatterSpoke. Members answered two questions:
- What the team did well?
- What the team did not do well?
ScatterSpoke lets people upvote suggestions. We asked members to vote on the biggest areas of improvement. This gave us a sense of what and how we can improve future sprints.
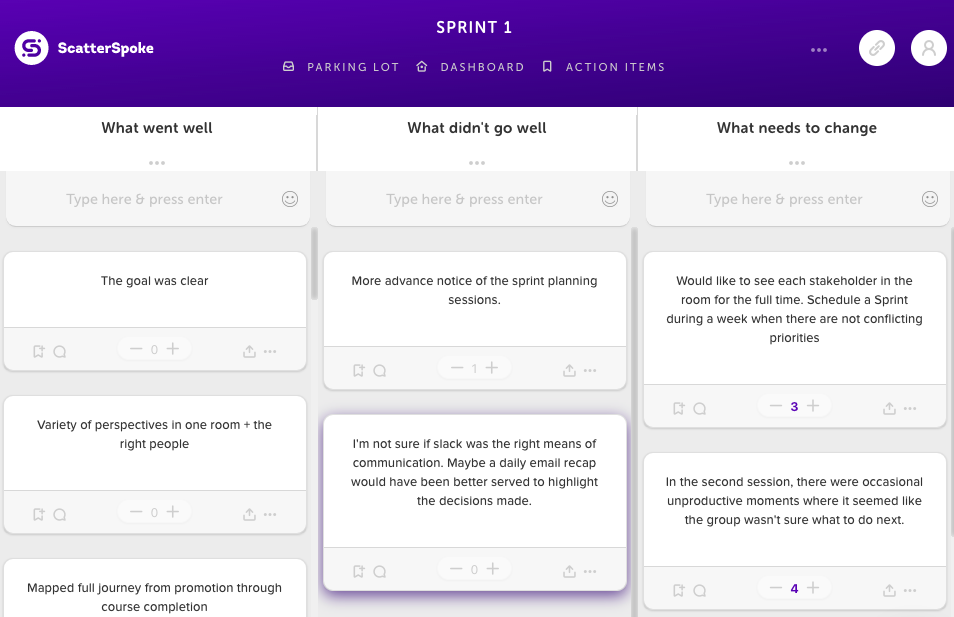
Marketing Sprint Best Practices
- Make sure that the objective and goals are clear for everyone involved.
- Include a variety of perspectives in one room while making sure that they are the right people.
- Mapping out the full user journey on Day 1 helps with understanding the project.
- Include stakeholder participation and ownership. How can you get your project’s stakeholders involved?
- Make sure everyone in the sprint is motivated and feels involved and heard. One person from our sprint said, “I left the first two days feeling like I had a clear vision of the mission we were on and possible plans of attack.”
- Include a clear agenda and proper facilitation of each meeting. In condensed sprint sessions, every minute is valuable. You must be efficient.
- Pairing up into groups of two helped us create better ideas.
- For the testing day (Day 5), inviting stakeholders from other departments at HubSpot was great for instant feedback.
Improving Our Future Sprint Planning Sessions
After running two remote sprint sessions so far, here’s how we plan to improve our future sessions.
Make sure that stakeholders are in the room for the full session.
We had occasions where folks couldn’t attend a day or only attended half a day. This was an issue because it interrupted the collaborative flow that we had as a group. For example, if we lost someone who proposed a great idea early on, we wouldn’t have that person in the room to flesh it out. We plan to solve this by getting buy-in from the decision-maker early so that the decision-maker can make the sprint a priority. We will also schedule the sprint 2-3 weeks in advance so that folks prepare their calendars accordingly. Lastly, we’ll get verbal agreements that the invited stakeholders can attend every session.
Meticulously plan the sprint agenda.
On Day 2, the Sketch day, there were occasional unproductive moments where it seemed like the group wasn’t sure what to do next. We plan to solve this by creating time slots in the agenda for Day 2 that clearly explain what the group will accomplish. We will also ensure the tasks prepare the group for decision day (day 3) and work towards preparing a pitch for the decision-maker.
Templetize the take-home work.
The homework part of our sprint produced good ideas of creative concepts, but when we brought our ideas back to the drawing board, they were all in different formats. We plan to solve this by creating templates of the homework assignments so that everyone works within the same format, saving time and allowing us to speak the same creative language.
Over to You
Adapting the sprint methodology as part of our team’s creative process proved to work extremely well. We’re now executing on these ideas and bringing them to life, whereas, before, it would have taken us a few weeks to determine the creative concept.
With our campaign launching in the summer, we’re confident that we’ll creatively communicate the value of our offering to marketers globally.
We hope these lessons were helpful for you to start your own remote sprint session. Remember, define the big objective, get the right people, schedule an efficient meeting, and come prepared. You’ll conquer your biggest projects faster.

What is the Purpose of Marketing? [FAQ]
Dictionary.com defines marketing as, “the action or business of promoting and selling products or services, including market research and advertising.”
If you work in a marketing role like I do, it’s probably difficult for you to define marketing even though you see and use it every day — the term marketing is a bit all-encompassing and variable for a straightforward definition.
This definition feels unhelpful.
The selling part, for instance, overlaps a little too snuggly with a “what is sales” definition, and the word advertising makes me think of Mad Men brainstorming sessions.
But upon digging deeper, I began seeing that actually, marketing does overlap heavily with advertising and sales. Marketing is present in all stages of the business, beginning to end.
At first, I wondered why marketing was a necessary component during product development, or a sales pitch, or retail distribution. But it makes sense when you think about it — marketers have the firmest finger on the pulse of your consumer persona.
The purpose of marketing is to research and analyze your consumers all the time, conduct focus groups, send out surveys, study online shopping habits, and ask one underlying question: “Where, when, and how does our consumer want to communicate with our business?”
Modern marketing began in the 1950s when people started to use more than just print media to endorse a product. As TV — and soon, the internet — entered households, marketers could conduct entire campaigns across multiple platforms. And as you might expect, over the last 70 years, marketers have become increasingly important to fine-tuning how a business sells a product to consumers to optimize success.
In fact, the fundamental purpose of marketing is to attract consumers to your brand through messaging. Ideally, that messaging will helpful and educational to your target audience so you can convert consumers into leads.
Today, there are literally dozens of places one can carry out a marketing campaign — where does one do it in the 21st century?
Types of Marketing
Where your marketing campaigns live depends entirely on where your customers spend their time. It’s up to you to conduct market research that determines which types of marketing — and which mix of tools within each type — is best for building your brand. Here are several types of marketing that are relevant today, some of which have stood the test of time:
- Internet marketing: Inspired by an Excedrin product campaign that took place online, the very idea of having a presence on the internet for business reasons is a type of marketing in and of itself.
- Search engine optimization: Abbreviated “SEO,” this is the process of optimizing content on a website so that it appears in search engine results. It’s used by marketers to attract people who perform searches that imply they’re interested in learning about a particular industry.
- Blog marketing: Blogs are no longer exclusive to the individual writer. Brands now publish blogs to write about their industry and nurture the interest of potential customers who browse the internet for information.
- Social media marketing: Businesses can use Facebook, Instagram, Twitter, LinkedIn, and similar social networks to create impressions on their audience over time.
- Print marketing: As newspapers and magazines get better at understanding who subscribes to their print material, businesses continue to sponsor articles, photography, and similar content in the publications their customers are reading.
- Search engine marketing: This type of marketing is a bit different than SEO, which is described above. Businesses can now pay a search engine to place links on pages of its index that get high exposure to their audience. (It’s a concept called “pay-per-click” — I’ll show you an example of this in the next section).
- Video marketing: While there were once just commercials, marketers now put money into creating and publishing all kinds of videos that entertain and educate their core customers.
Marketing and Advertising
If marketing is a wheel, advertising is one spoke of that wheel.
Marketing entails product development, market research, product distribution, sales strategy, public relations, and customer support. Marketing is necessary in all stages of a business’s selling journey, and it can use numerous platforms, social media channels, and teams within their organization to identify their audience, communicate to it, amplify its voice, and build brand loyalty over time.
On the other hand, advertising is just one component of marketing. It’s a strategic effort, usually paid for, to spread awareness of a product or service as a part of the more holistic goals outlined above. Put simply, it’s not the only method used by marketers to sell a product.
Here’s an example (keep reading, there’s a quiz at the end of it) …
Let’s say a business is rolling out a brand new product and wants to create a campaign promoting that product to its customer base. This company’s channels of choice are Facebook, Instagram, Google, and its company website. It uses all of these spaces to support its various campaigns every quarter and generate leads through those campaigns.
To broadcast its new product launch, it publishes a downloadable product guide to its website, posts a video to Instagram demonstrating its new product, and invests in a series of sponsored search results on Google directing traffic to a new product page on its website.
Now, which of the above decisions were marketing, and which were advertising?
…
The advertising took place on Instagram and Google. Instagram generally isn’t an advertising channel, but when used for branding, you can develop a base of followers that’s primed for a gentle product announcement every now and again. Google was definitely used for advertising in this example; the company paid for space on Google — a program known as pay-per-click (PPC) — on which to drive traffic to a specific page focused on its product. A classic online ad.
Where did the marketing take place? This was a bit of a trick question, as the marketing was the entire process. By aligning Instagram, Google, and its own website around a customer-focused initiative, the company ran a three-part marketing campaign that identified its audience, created a message for that audience, and delivered it across the industry to maximize its impact.
The 4 Ps of Marketing
In the 1960’s, E Jerome McCarthy came up with the 4 Ps of marketing: product, price, place, promotion.
Essentially, these 4 Ps explain how marketing interacts with each stage of the business.
Product
Let’s say you come up with an idea for a product you want your business to sell. What’s next? You probably won’t be successful if you just start selling it.
Instead, you need your marketing team to do market research and answer some critical questions: Who’s your target audience? Is there market fit for this product? What messaging will increase product sales, and on which platforms? How should your product developers modify the product to increase likelihood of success? What do focus groups think of the product, and what questions or hesitations do they have?
Marketers use the answers to these questions to help businesses understand the demand for the product and increase product quality by mentioning concerns stemming from focus group or survey participants.
Price
Your marketing team will check out competitors’ product prices, or use focus groups and surveys, to estimate how much your ideal customer is willing to pay. Price it too high, and you’ll lose out on a solid customer base. Price it too low, and you might lose more money than you gain. Fortunately, marketers can use industry research and consumer analysis to gauge a good price range.
Place
It’s critical that your marketing department uses their understanding and analysis of your business’s consumers to offer suggestions for how and where to sell your product. Perhaps they believe an ecommerce site works better than a retail location, or vice versa. Or, maybe they can offer insights into which locations would be most viable to sell your product, either nationally and internationally.
Promotion
This P is likely the one you expected from the get-go: promotion entails any online or print advertisement, event, or discount your marketing team creates to increase awareness and interest in your product, and, ultimately, lead to more sales. During this stage, you’ll likely see methods like public relations campaigns, advertisements, or social media promotions.
Hopefully, our definition and the four Ps help you understand marketing’s purpose and how to define it. Marketing intersects with all areas of a business, so it’s important you understand how to use marketing to increase your business’s efficiency and success.
Editor’s note: This post was originally published in May 2018 and has been updated for comprehensiveness.

How to Create an HTML Form That Sends You an Email
Sometimes, improving UX can cost a lot of money.
And oftentimes, some of the problems website visitors have are easy, simple fixes.
That begs the question: How can you find out if customers are enjoying their website experience?
The answer may be simpler than you think.
Having forms on your website is an effective way to get customer feedback about their experience during their visit. These forms give you insight about how to improve your website’s UX for higher conversions in the long run.
In fact, 74% of marketers use forms to generate leads, and of those marketers, over half say that it’s the tool that leads to conversion the most often.
Whether you want to convert more visitors to leads, collect information for your sales team, or create more loyal brand advocates, forms are imperative to an inbound strategy.
Ultimately, forms are critical for solving dissatisfaction in a customer’s experience, which ensures stronger customer relationships. If you don’t have a form on your website, you could be missing out on more leads, higher conversions, and happier long-term customers.
Here, we’re going to walk you through how to create a certain type of form — one that sends an email to you, as well as the customer, to ensure the form was received.
How to Create a Form in HTML and Send it to Email
It is possible to create an HTML form that sends emails, but it depends on how you work and on what platform you’re working. This is to say that things are a little different if the plan is to use a mix of HTML and different scripts.
Using the Basics
Using just HTML? We’ve got you covered. From starting fresh, here is a sample code for use:
This code will create a form that asks for the contact’s name, message, and includes a submit button. Note that this code is basic — it won’t look super snazzy. For a more beautiful one, you’ll have to add some more lines of code specific to your needs.
Another thing to note with this code is that it doesn’t directly send to email addresses, but it can open in an email client or tool window to submit the form.
While you can use just basic HTML, this isn’t the ideal option.
The Difficulty of Email Forms in HTML
Ideally, browsers would allow you to route form submissions directly to an email address. However, the reason they don’t is that emailing directly from an HTML web form would reveal the visitor’s email address, making the user vulnerable to malicious activities, such as phishing.
While the HTML code above can activate the default mail client on the user’s computer, the web browser does so by sending a request to the email service provider, not to the specified address.
There are a few problems with the mailto: option. For example, it isn’t 100% compatible with all browsers, it isn’t very user-friendly, and it’s impossible to control the formatting of the data when the form is sent by the browser.
Beyond that, a warning message will pop up when the user goes to submit the form, letting them know that the information they’re about to send will not be encrypted for privacy. This can spook the user out of submitting the form at all.
So, what HTML code allows you to send form submissions directly to an email address?
To make it so the form can work with your email server and send it to a mailbox, PHP is the answer — let’s explore that option now.
Making a Complete Form
To create a form subscribers can contact you with, the PHP script is going to be your best friend. I know, another acronym. This one stands for Hypertext Preprocessor, and this language collaborates with HTML to process the form.
Before jumping into the process, let’s break down a few form basics.
A webform has two sides: The front-end, seen in the browser by visitors, and a backend script running on the server.
The visitor’s web browser uses HTML code to display the form. When the form is submitted, the browser sends the information to the backend using the link mentioned in the “action” attribute of the form tag, sending the form data to that URL.
For example: <form action=https://ift.tt/2YYdvEM>.
The server then passes the data to the script specified in the action URL — myform-processor.php in this case. Using this data, the backend script can create a database of form submissions, direct the user to another page (e.g. payment), and send an email.
There are other scripting languages you can use in the backend programming, like Ruby, Perl, or ASP for Windows. However, PHP is the most popular and is used by almost all web hosting service providers.
If you need to make a complete form, follow the steps below.
1. Use PHP to create a page.
When you’re creating a webpage, instead of using the “.html” extension, type “.php” instead. This is similar to what happens when you save an image as “jpg” versus “png”.
By doing this, the server will know to host the PHP you write. Instead of saving the empty HTML page as such, save it as something like this: “subscriberform.php”. After your page is created and saved, you’ll then be able to create the form.
2. Make the form using code.
In this step, you’ll write the code to create the form.
If you’re not sure how to create forms in HTML, check out HTML Dog’s resource for a primer on the basics.
The following code is what’s needed for a basic form:
Because this is similar to the HTML-only write-up, these lines will also create a name for the form and an area for subscribers to type a custom message and send it to you.
An important difference is the “action=contact.php” part. This portion of code is what will make the page send the form when submitted. Recall that in the first example, that wasn’t an option.
3. Make forms send email.
After you create the form and add all the proper fixings depending on your design preferences, it’s time to create the email portion.
For this, you’re going to scroll to the beginning of the page (the very beginning, even before defining the HTML Doctype). To enable sending data in the email, we have to add code that will process the data. Copy this code or create something similar:
Recall that everything inside the first and last lines will tell the webpage to make these functions perform as PHP. This code also checks to see if a subscriber uses the form. From there, it checks to see if the form was sent.
Further breaking it down, “mail” sends the completed form as an email to “your@email.address,” and the subject line is what follows. In the next line, you can write copy of the email message inside the quotes, to be sent from whichever email address you choose.
To sum up the process to create HTML email forms:
Once the form is submitted, the page sends the data to itself. If the data has been successfully sent, the page sends it as an email. The browser then loads the page’s HTML — the form included.
With that, you have the basic code you need to create the form.
Note that this is just one way to do this — alternatively, you can also create a form using a CRM like HubSpot.
If you’re a HubSpot customer, keep reading to learn how to use HubSpot’s tool to create an HTML form that sends you an email.
Using HubSpot
HubSpot Forms is part of the Marketing Hub, and doesn’t require any previous technical knowledge.
If you want to learn how to receive an email after a form submission, take a look at our Knowledge Base article.
When you’re using HubSpot Forms, you can build custom forms that connect to your contacts list. You can also customize those forms and trigger automatic emails based on the completion of your forms. Note that the latter requires a premium upgrade. Click here for more information about HubSpot’s forms.
HTML forms are a fairly simple process and an excellent way to connect with subscribers. Having these on your site gives customers an easy way to contact your company or sign-up for emails.
Forms that send an email back to you keeps information in your inbox for reference and ease. Remember that these aren’t your only options for building forms. If you want a list of tools that help build forms, check out our post here.
Editor’s note: This post was originally published in December 2019 and has been updated for comprehensiveness.

Float in Project Management: A Quick Guide
How to Create a Cost-Effective Instagram Ads Funnel: 4 Tips
Wondering how to build an effective ads funnel on Instagram? Looking for tips to choose the right objectives or targeting audiences? In this article, you’ll find four ways to optimize your Instagram ads funnel for different stages of the customer journey. To learn how to improve your Instagram ads funnel, read the article below for […]
The post How to Create a Cost-Effective Instagram Ads Funnel: 4 Tips appeared first on Social Media Examiner | Social Media Marketing.
from Social Media Examiner | Social Media Marketing https://ift.tt/2VbFMqq
via socialmediaexaminer