
Welcome to My Blog
25 Free Resume Templates for Microsoft Word (& How to Make Your Own)
No matter what industry you work in (or your experience level in that industry), a plain, black-and-white resume written in Times New Roman font can actually weaken a job application.
But just because resumes have gotten more creative doesn’t mean you need special design software to make your application stand out. On the contrary, writing your resume in good old Microsoft Word is still the perfect way to develop your personal brand, while also communicating your experience and career goals.
Read on to find out how to make your resume in word, then download one of 19 amazing resume templates that open directly in Microsoft Word.
How to Make a Resume in Word
- Open Microsoft Word on your computer.
- Select either “Basic Resume” or “Bold Resume” from the template menu.
- Fill in your name and contact information at the top.
- Draft a brief summary of your experience and goals.
- Enter your school and latest education.
- Describe each job you’ve held using the lines prompted on the template.
- List all relevant skills.
- Describe any relevant accolades and accomplishments.
1. Open Microsoft Word on your computer.
If you have Microsoft Word installed on your computer, open the program and let it load for a moment. There will be a couple of helpful options waiting for you on the first screen, specifically for resume creation.
2. Select either “Basic Resume” or “Bold Resume” from the template menu.
Once you’ve launched MS Word, a window of templates will appear. Scroll down until you see the template options designed for resumes — there will be at least two of them. Double-click the one that suits your style and personal brand, but don’t be too particular about design just yet … you can customize these templates quite a bit.
3. Fill in your name and contact information at the top.
When your resume template opens, you’ll see placeholder text for each line of your resume, starting with your first and last name at the top. Delete this header text and enter your name, as well as any contact information by which you want the recruiter to contact you.
4. Draft a brief summary of your experience and goals.
Use the first line below your name and contact info to describe who you are, what you do, and what you’re looking for in your career.
5. Enter your school and latest education.
List any relevant degrees or certificates you received through schooling. You can safely exclude secondary education if you’ve graduated from an accredited college.
6. Describe each job you’ve held using the lines prompted on the template.
Your professional experience is frequently the most important section of your resume, so feel free to rank this section above your skills and education, depending on how many jobs you previously held.
7. List all relevant skills.
If you have experience in certain software, exercises, problem-solving, or management techniques, use them to populate your skills. Your resume’s “Skills” section helps reveal what all of your previous jobs or related experiences have in common, based on what they taught you and what you provided them.
8. Describe any relevant accolades and accomplishments.
Finish out your resume with any personal accomplishments or accolades you think a hiring manager in your industry would appreciate. Although this section shouldn’t include a Most Improved recognition from little league, for example, it should definitely include your Marketer of the Month award from your last position.
19 Resume Templates You Can Customize in Microsoft Word
Of course, if you’re already employed full-time, it’s hard to find the time to apply to a new job opportunity, let alone update your resume to reflect your qualifications. Luckily, there are numerous publishers out there who’ve created incredible resume templates for quick editing and formatting in Word.
To keep you from hunting the internet for the resume templates that are both free and compatible with MS Word, we’ve listed 19 more options below for you to customize with your own information right now. Some of them come with variations so you can pick your favorite design. Four of them cater specifically to marketers.
They’re so nice, you won’t believe they open up in Microsoft Word once you download them.
1. Modern Chronological Resume Template
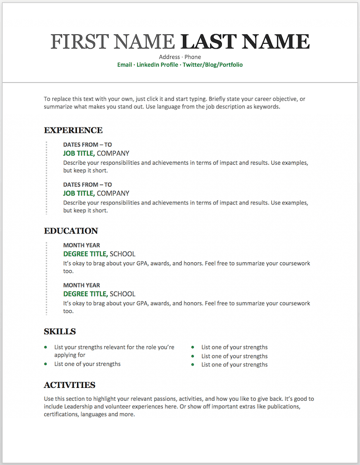
We’ll start with a simple one. This resume template is available from Microsoft itself, and it’s one of many free templates the company has prepared for those who depend on Microsoft Office tools to create content. Yes, it is written in Times New Roman — don’t freak out. Designs like this can borrow an old-school typeface and still impress recruiters with a clean layout and subtle use of color. You can also change the font if you wish (and the same goes for every template in our list).
Download this template here.
2. Digital Marketing Resume Template
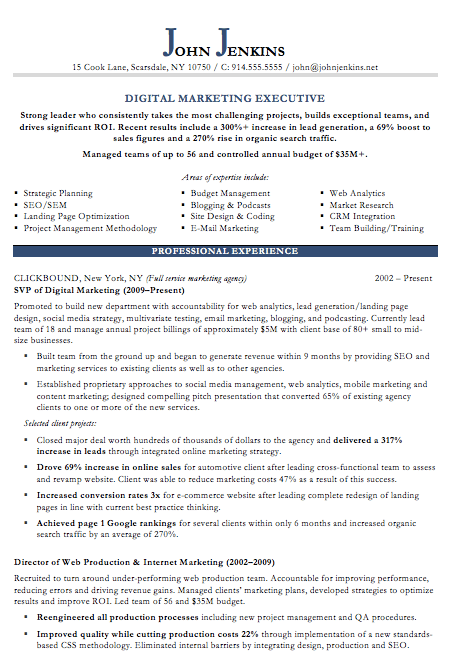
The digital marketing resume below comes from our own collection of resume templates, all of which open directly in MS Word. Coming with two pages total, this sheet holds a wealth of information and offers the perfect amount of style while maintaining professionalism. Mid-level marketers all the way up to CMOs can find this template valuable.
Download this template here.
3. Simple and Clean Resume Template
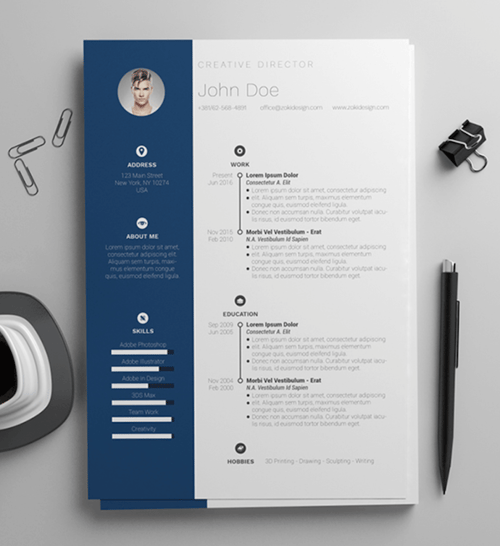
This template is the perfect balance of creative and modest — best for the professional who wants to seem casual, thoughtful, but not over the top. Not only does it feature a space for a headshot on the top-left, but you can customize the color of that entire panel. Created by Zoki Design, the resume template also comes with a matching cover letter template.
Download this template here.
4. Black and White Resume Template
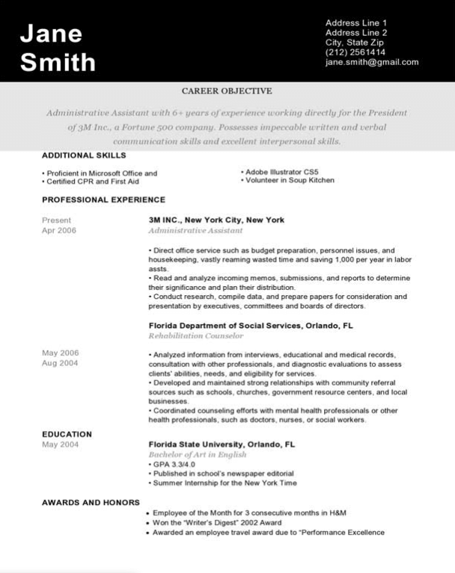
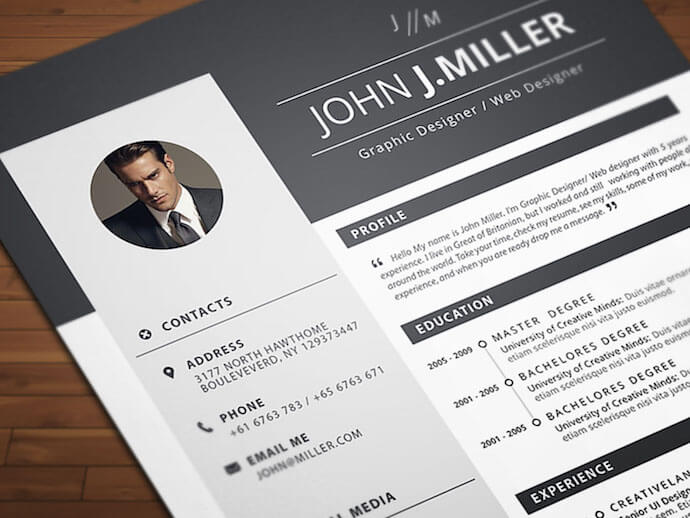
The Black and White resume template below suits professionals who prefer using color and shading to add structure to their resume. The black banner at the top contrasts the applicant’s name nicely to help make him/her more memorable to recruiters. The gray banner just below the header is perfect for a summary or career objective — it makes one’s goals known but doesn’t overpower the experience listed below it.
Download this template here.
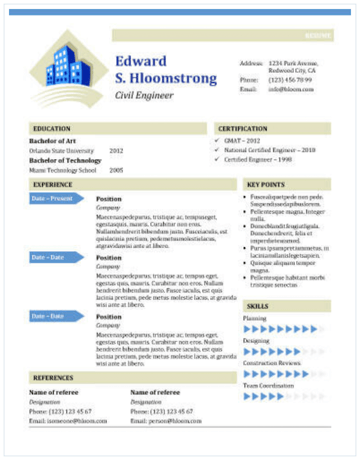
5. Urban Development Resume Template
The illustration on the top-left of this template shows who the designers at Hloom had in mind for this resume: civil engineers. But because it’s a Word document, that graphic is easy to edit and replace with an image that represents your line of work. Are you an analytics buff? Design a clever bar or line graph icon and place it next to your name in blue (or whatever color you’d like!).
Download this template here.
6. Email Marketing Resume Template
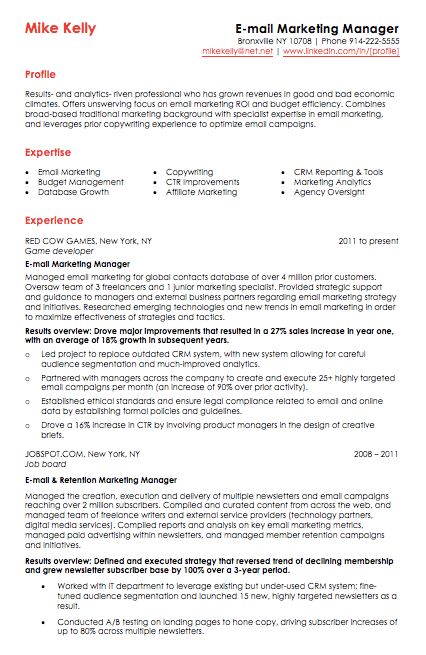
Red color never fails to stick out on a sheet of paper, especially if it’s included in small amounts. The resume template for email marketers, below, captures that balance. In addition to the professional title in the top-righthand corner, this template also stands out with a thin sans-serif font, helping make a lot of text easier for a recruiter to digest and read through.
Download this template here.
7. Info Pop Resume Template
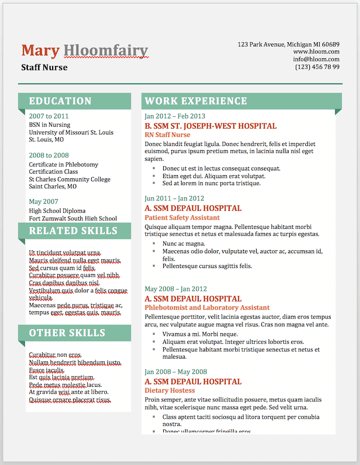
This one, also from Hloom, gives you exactly what the name suggests: ample space for the info you need, with headers that pop just enough to get your employer’s attention. Although the template fits a ton of text, its soft color palate prevents the document from seeming overwhelming.
Download this template here.
8. Dark Resume Template
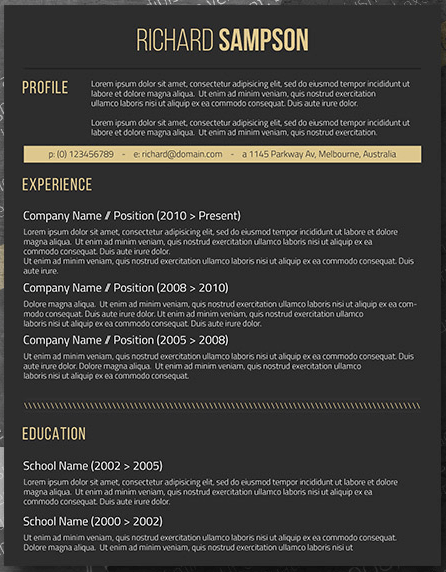
Ironically, a dark background could be just the thing to ensure your resume doesn’t fall into the black hole of resumes piled on the hiring manager’s desk. Using soft, yellow font, the resume template below inverts the usual color scheme of a resume without trying too hard to be creative.
Download this template here.
9. Neat and Confident Resume Template
Similar to the Simple and Clean template in #2, this resume design by Nowpixelse communicates a truly professional tone. The template’s muted colors work very well with the side panel layered over the top header.
Download this template here.
10. Inbound Marketing Resume Template
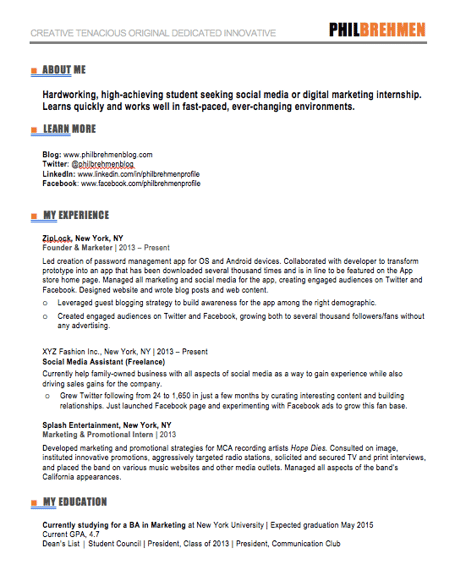
Here’s another resume template dedicated to the digital marketer. This sheet offers all the inbound marketing language you need to express your values as a passionate, brand-loyal professional. Similar to a few other templates on this list, it also uses just a dash of vibrant color in the applicant’s name at the top (where it matters most).
Download this template here.
11. Smart and Professional Resume Template
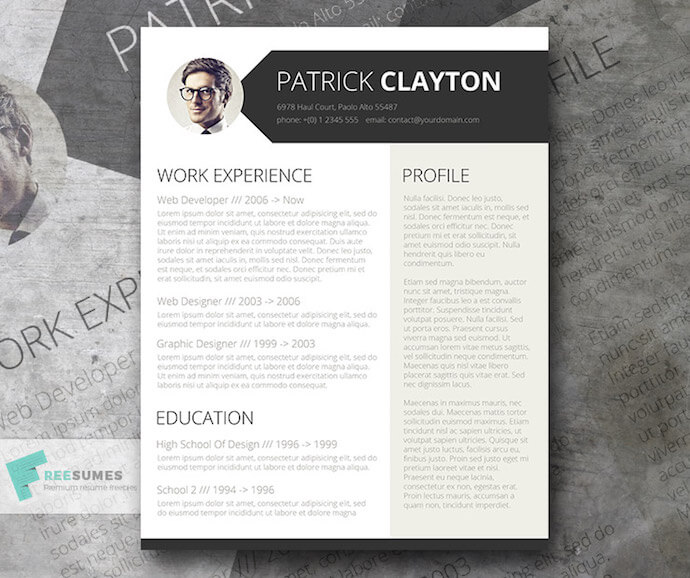
This is another sharp template that offers a basic but confident design for any professional. The warm-colored panel on the right-hand side is pre-formatted for a written profile, where you can write a summary of your background or a form letter to each employer. Just be sure to personalize this messaging to each new recipient so it works for the job you’re applying to. This template is available on Freesumes, and is free to users once they share the page to Facebook or Twitter.
Download this template here.
12. Spick and Span Resume Template
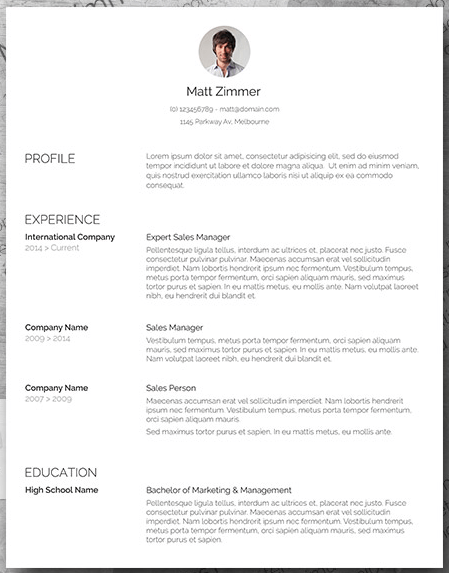
There isn’t a better name for the template below. The Spick and Span resume might be the cleanest-looking sheet on this list. It uses boldface, all-caps, and gray typeface to structure various headers of the document differently and maximize the hiring manager’s reading experience. And all that minimalism makes the professional headshot at the top pop off the page.
Download this template here.
13. Timeline-Style Resume Template
Hloom’s Timeline template is a super simple but creative way to tell your story. You can convey your progression through various jobs you’ve held on one side of the vertical line, and more static elements of your background — such as skills and education — on the other.
Download this template here.
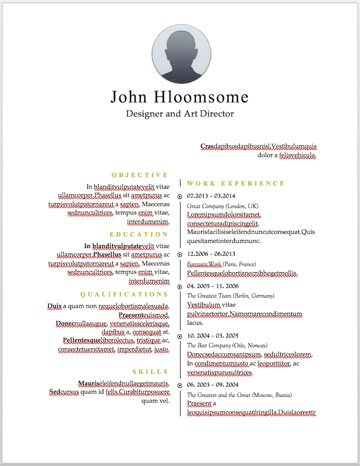
14. Content Production Resume Template
This basic resume template is suited for content producers at all stages in their career. By spreading out the header and “Skills” text horizontally, the resume below fits a lot of crucial information comfortably on one page (of course, it also comes with a second page if you need it).
Download this template here.
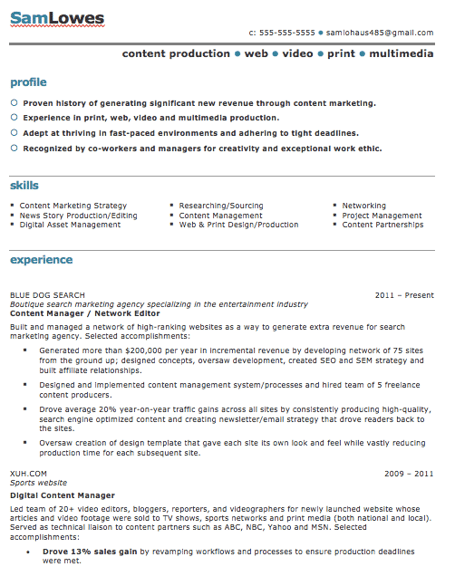
15. Fresh Resume Template
This is perhaps the most imaginative of all the Word-based resume templates on this list — with both a skills meter and a comic headshot. The template was designed by Venkata Naresh and comes with 12 different versions of the design you see below. Have you created a Bitmoji of yourself? Do you think your employer would find it creative? Match the template and add it as your photo.
Download this template here.
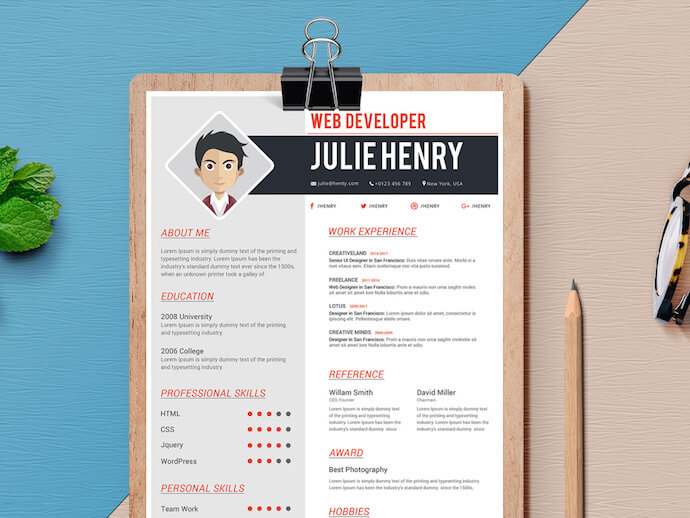
16. CV Resume Template
The curriculum vitae-style resume below flips the typical two-column resume so the basic applicant information is listed across the right side, rather than the left. Feel free to change the color of this sidebar in Microsoft Word if dark-red isn’t your thing — the template can pull off any color you wish.
Download this template here.
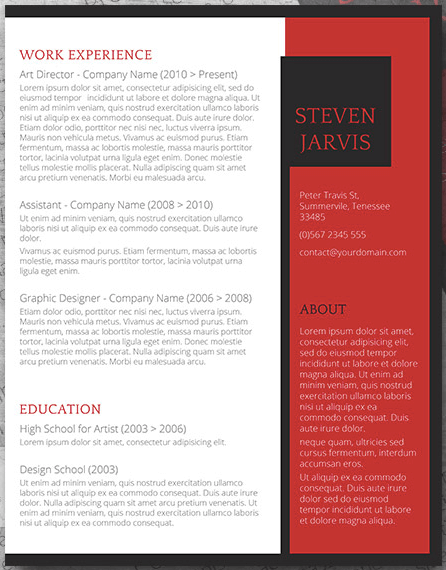
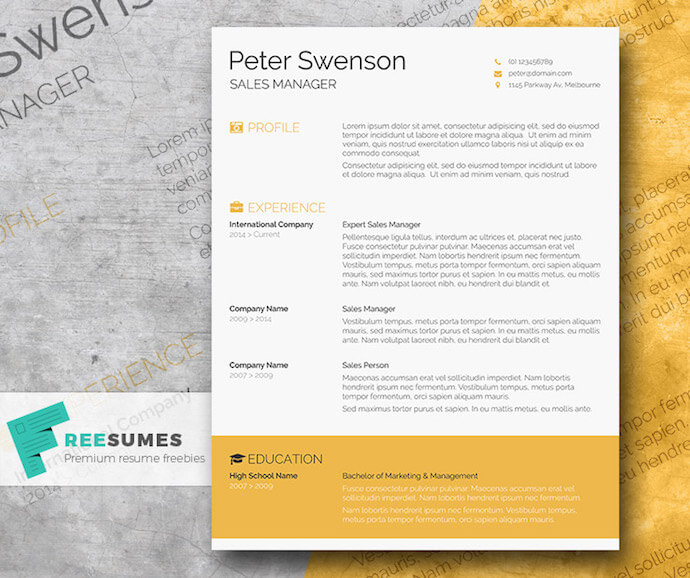
17. Goldenrod Resume Template
This template, also offered on Freesumes, dares to use yellow as the dominant color — but doesn’t sacrifice professionalism in the process. The document anchors the education section to a thick, bright banner across the bottom, but you can likely change this to a skills section with some simple editing in Microsoft Word.
Download this template here.
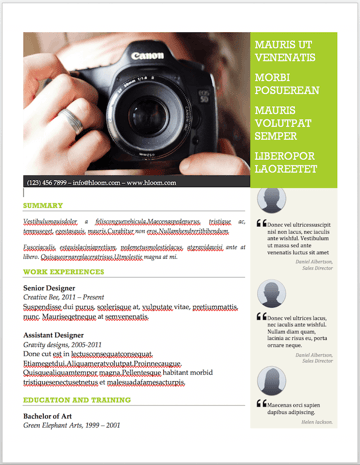
18. Resume Template With Personal Endorsements
This resume template has quite a flashy header — no photography pun intended — but it’s not just for photographers. What makes this resume unique is the space for references on the lower right-hand side. Does your field need others to vouch for your experience? This resume gives you room for three solid recommendations.
Download this template here.
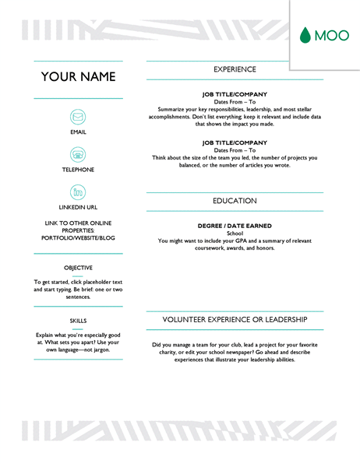
19. Creative Resume Template
This one was designed by the stationery experts at MOO and is offered for download by Microsoft. Simple but vibrant, this template hugs the text with an artistic header and footer — great for recent graduates who need to fill empty space on the page.
Download this template here.
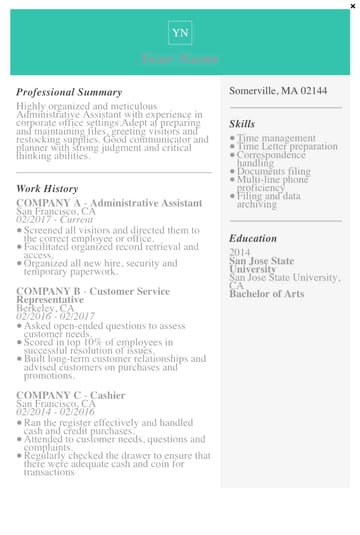
20. Modern Resume Template
This resume embraces simplicity with a slight touch of color to make things a bit more interesting. It also nicely sections off Skills and Education notes from the Work History list. With LiveCareer.com, you can generate a template with your basic information and then download it to add small details,
Download this template here.
21. Functional Resume Template
This NovoResume.com template is colorful and includes a place for your headshot which could make you look both interesting and confident to an employer. A colorful format like this might be great for someone in the media or advertising industry that wants to keep their job application visually memorable to prospective employers.
Download this template here.
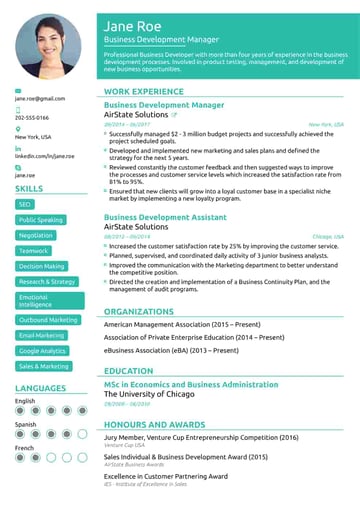 22. Elegant Resume Template
If you’re looking for simplicity and efficiency rather than something colorful, consider this Elegant Resume Template from Jofibo. With Jofibo, you can select this or other similar templates on the website, enter your information, and then download it quickly and easily.
Download this template here.
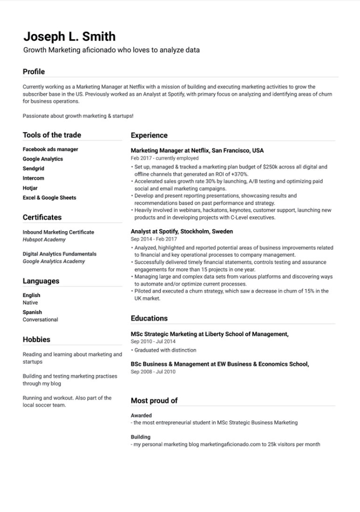 23. Blue Corporate HR Resume Template
Canva, an easy-to-use design template website, offers a few great resume templates. One of them is this simple resume with a touch of color in the background. Because of the color and image, it’s pretty memorable. But, for those who prefer a more conservative resume look, this template is fairly simple.
Download this template here.
.jpg?width=389&name=canva-blue-corporate-hr-professional-resume-MADftnj-Tj4%20(1).jpg) 24. Concept Resume
24. Concept Resume
This resume is great for people in the technical space because it adds a touch of color and feels more compact, which will force you to get right to the point about your key skills, certifications, and work experiences.
Download this template here.
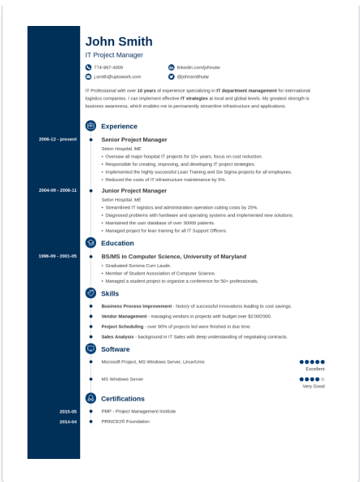
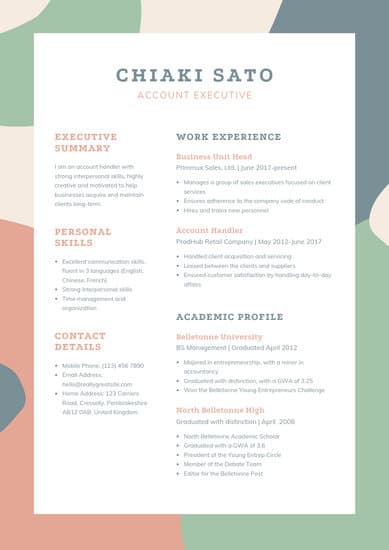
25. Cream and Green Account Executive Resume Template
This resume is also downloadable and editable on Canva. It was created for account executives but could also be great for graphic designers or people working in visual fields due to its unique, but still professional, color scheme.
Download or edit the resume template here.
How to Save Your Resume
Remember, once you’ve finished personalizing your resume, you’re not ready to submit an application yet. To ensure your resume’s format stays the same for everyone who receives it, save the document as a PDF. Best case scenario? Even the hiring manager won’t believe your resume came from Word.

How to Use WordPress: Ultimate Guide to Building a WordPress Website
The thought of creating your own website may seem overwhelming.
You might even think this task is impossible for anyone but a developer or a person with a background in web design.
Well, I have good news for you — there’s a software out there that’s so easy to use, virtually anyone can successfully create a unique and professional-looking website for their business, blog, or portfolio. It’s called WordPress.
But how?
This ultimate guide will cover a basic step-by-step process of creating your own WordPress website as well as a list of tips and tricks to remember while working with WordPress.
But first, let’s answer the question most people have when they begin thinking about their new WordPress website: What is the difference between WordPress.org and WordPress.com?
WordPress.org vs. WordPress.com
The difference between WordPress.org and WordPress.com has to do with who is actually hosting your website.
You host your own website or blog on WordPress.org, through a third-party hosting provider. You also have to download your WordPress software, buy a domain name on a third-party site, and manage your server. It’s a much more hands-on experience than with WordPress.com. Also, your URL with a WordPress.org site will look like this: www.mywebsite.com.
WordPress.com offers to host your website for you. You also don’t need to download any software or manage a server. If you choose WordPress.com, your website’s URL will look like this: https://ift.tt/1Pt8449. However, you have the option to also upgrade your WordPress.com account and buy a custom domain from a third-party provider (meaning your URL will look like this: www.mywebsite.com).
How to Choose Between WordPress.org or WordPress.com
You may be wondering whether WordPress.org or WordPress.com would be a better fit for you. Let’s review a few more of the pros and cons that come with both options, so you can make an informed decision.
WordPress.org is ideal if you want full power over customizing and controlling your website. However, there is a lot more responsibility that comes with managing a WordPress.org website. You have to purchase and set up your own domain name, upload and install all of your custom plugins and themes, edit your website’s code, and manage your website’s security. WordPress.org is free to use, but you have to pay for everything else that goes into having a website.
WordPress.com is preferable if you’re looking for an option that has most of the hard work done for you. You’ll never need to manage your server, pay for your hosting, or buy a domain. There are also a number of customization options that come with a WordPress.com plan to help you make your website look the way you want it to.
WordPress.com has a free and paid version. If you stick with the free version, you can’t upload any custom themes or plugins, and you will have a WordPress subdomain. However, there is always the option to pay for premium upgrades and other plans that provide you with even more features and control, as well as the option to buy a custom domain through a third-party site.
WordPress for Beginners: How to Use WordPress
There are a number of ways for you to create your dream website with WordPress. Users generally find the software easy to use, but getting started can be understandably intimidating if you’re completely new to the process.
That’s why we have built this “WordPress for Beginners” guide. Below, we will cover how to start creating your website.
WordPress is one of the most popular CMS options available today according to TechRadar. Its ease of use and versatility enable the majority of users and business owners to create a website that works for their needs with the software. Here’s how you can do the same.
1. Select a WordPress plan
To begin creating your website, select a WordPress plan. As stated earlier, with WordPress.org, you only have one (free) plan option — but it requires you to buy your domain, hosting provider, plugins, themes, and everything else related to your WordPress site.
When it comes to WordPress.com, you’ll have to choose between the five plans they offer.
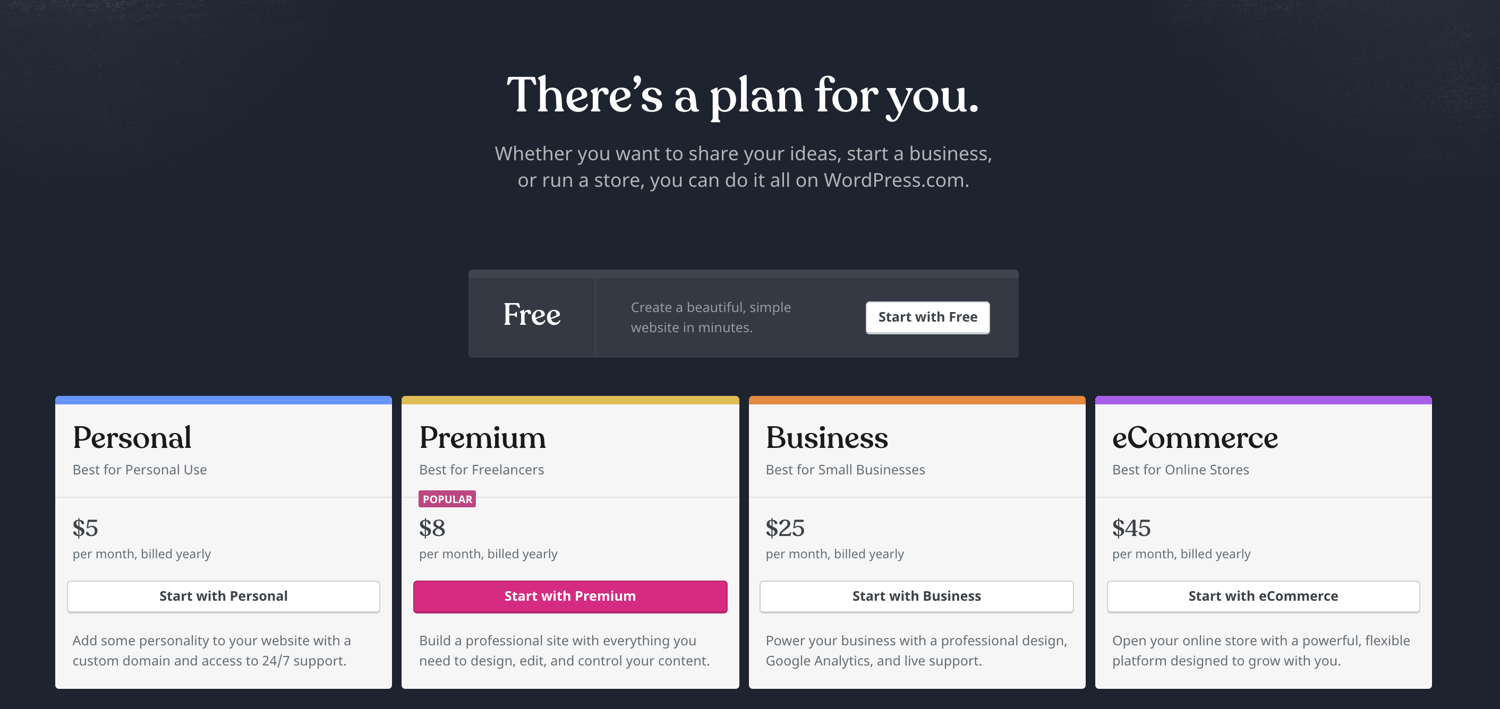
The main differences between the plans include the monthly fee, types of site customization, and access to marketing tools.
2. Set up your domain name and hosting provider
Setting up your domain name and choosing your hosting provider for WordPress typically happen around the same time in the website creation process.
Before we talk about how to complete those tasks, let’s cover the difference between your domain name and hosting provider.
Think about your domain name as your home address — it’s how your visitors are able to locate your website on the Internet. Your hosting provider is where your website is actually stored. Without a hosting provider, your site wouldn’t have space on a server to “live”.
Imagine your domain name is your home address and your hosting provider is your house. Your data files, which make up your website, are the furniture in your house.
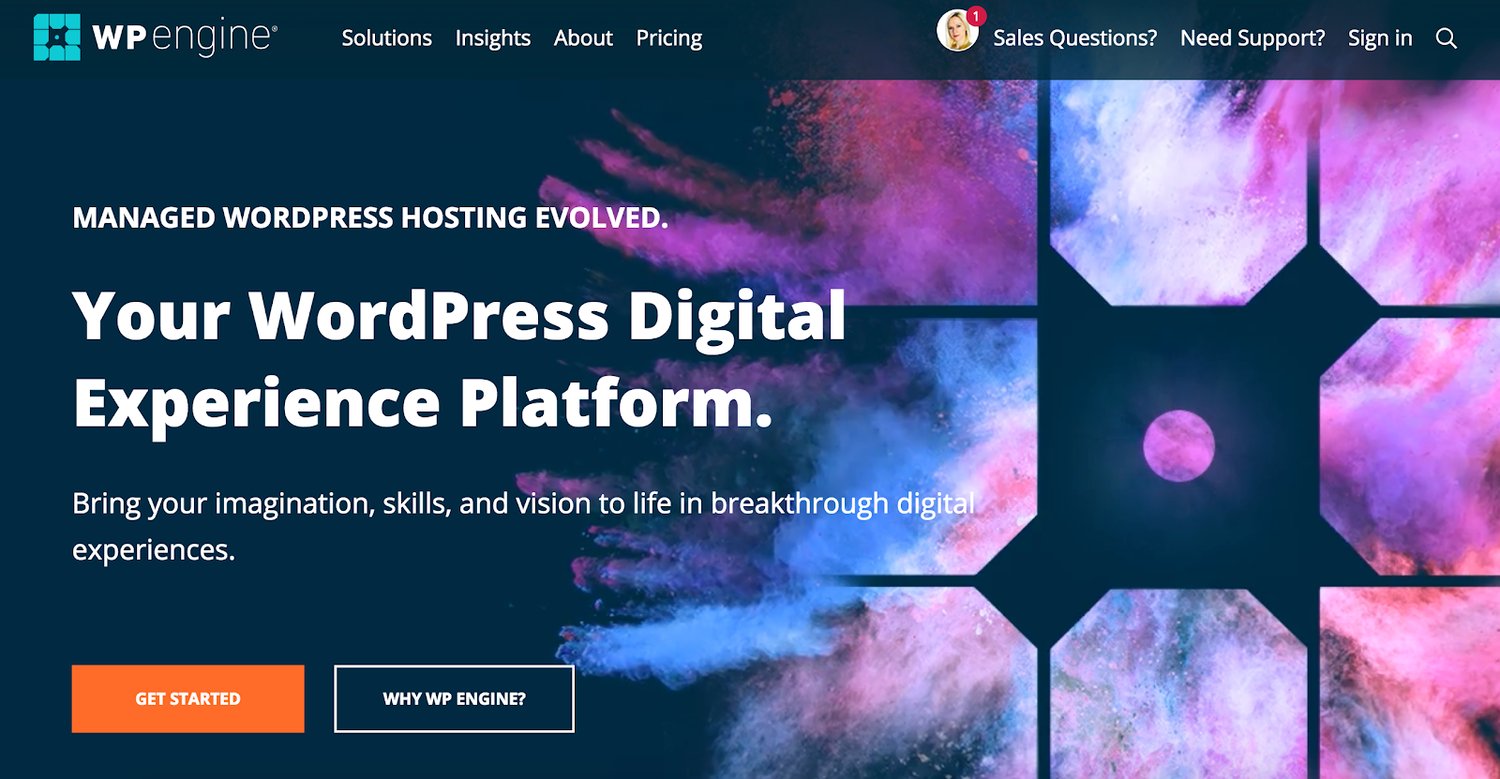
Your domain name will look something like this: www.example.com. Examples of some of the best WordPressing hosting providers are WP Engine and Kinsta, which you can learn more about here.
Source: WP Engine
How to pick domain and hosting providers
Again, WordPress.org requires you to create your own domain and find a third-party hosting provider for your website. WordPress.com allows you to decide whether or not you want a custom domain depending on the plan you choose, but you will still have to find a third-party hosting provider.
There are hundreds of third-party hosting services, such as GoDaddy or Bluehost, that provide you with the ability to create custom domain names. Your hosting provider is important because it impacts your website’s speed, security, and reliability.
There are hundreds of hosting providers to choose from, but the good news for you is we put together a list of 19 of the best WordPress hosting providers to help you decide what will work best for your own website. All 19 of these providers meet WordPress’ three hosting requirements (listed below). If you still have an interest in looking at other hosting providers for your site, make sure they meet the following criteria:
- PHP version 7.3 or greater
- MySQL version 5.6 or greater OR MariaDB version 10.1 or greater
- HTTPS support
Side note: If you are new to WordPress.com but have already purchased and created a domain name elsewhere, no problem — you’ll have the option to transfer or map it to your WordPress website.
For the sake of this guide, let’s assume you do not have a domain or hosting provider at this point. Here’s how to start creating your website on a third-party hosting site like Bluehost.
First, head to Bluehost’s website and click “Get Started”.

From here, you’ll be taken to Bluehost’s pricing page to choose from four different plans.
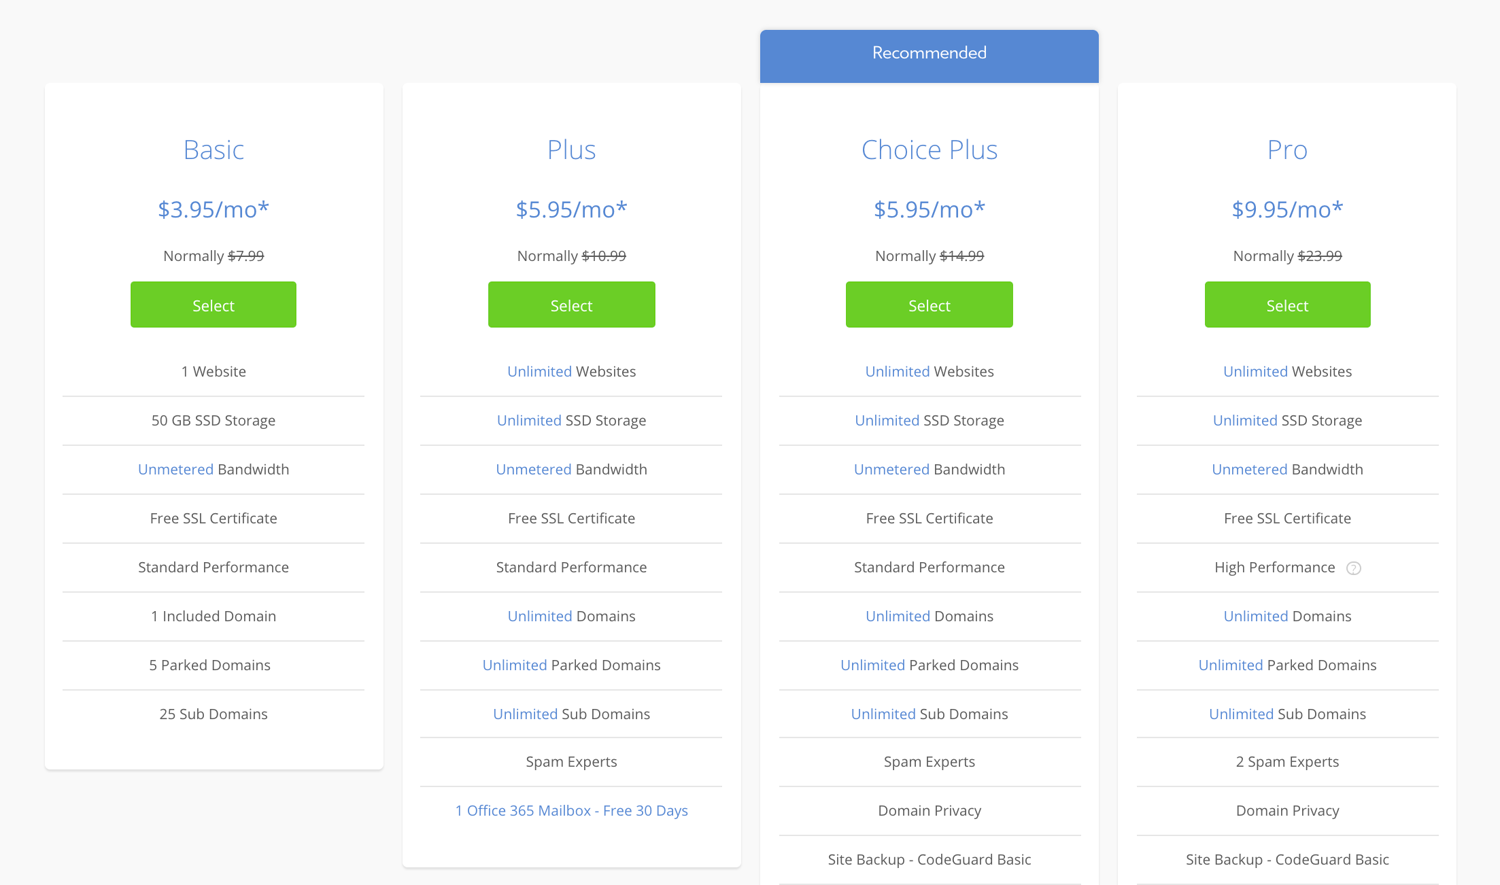
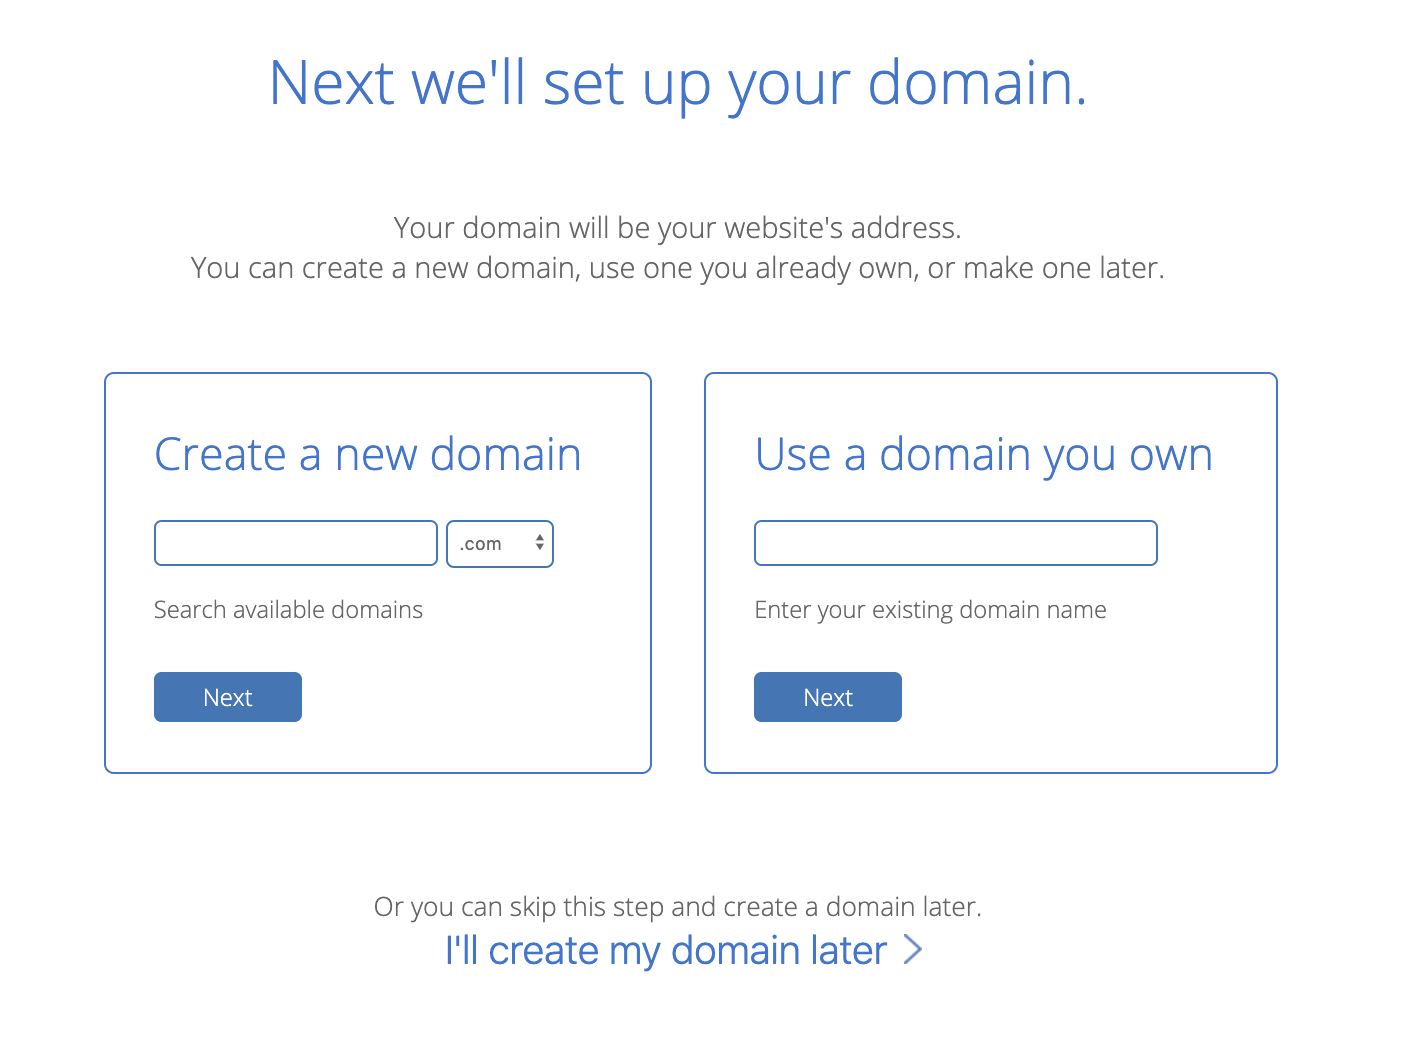
Once you choose your plan and click “Select”, you’ll be taken to another page to sign up with a domain name.
Source: Bluehost
Once you select your domain name, you’ll be brought to a page to complete your account and billing information for your purchase.
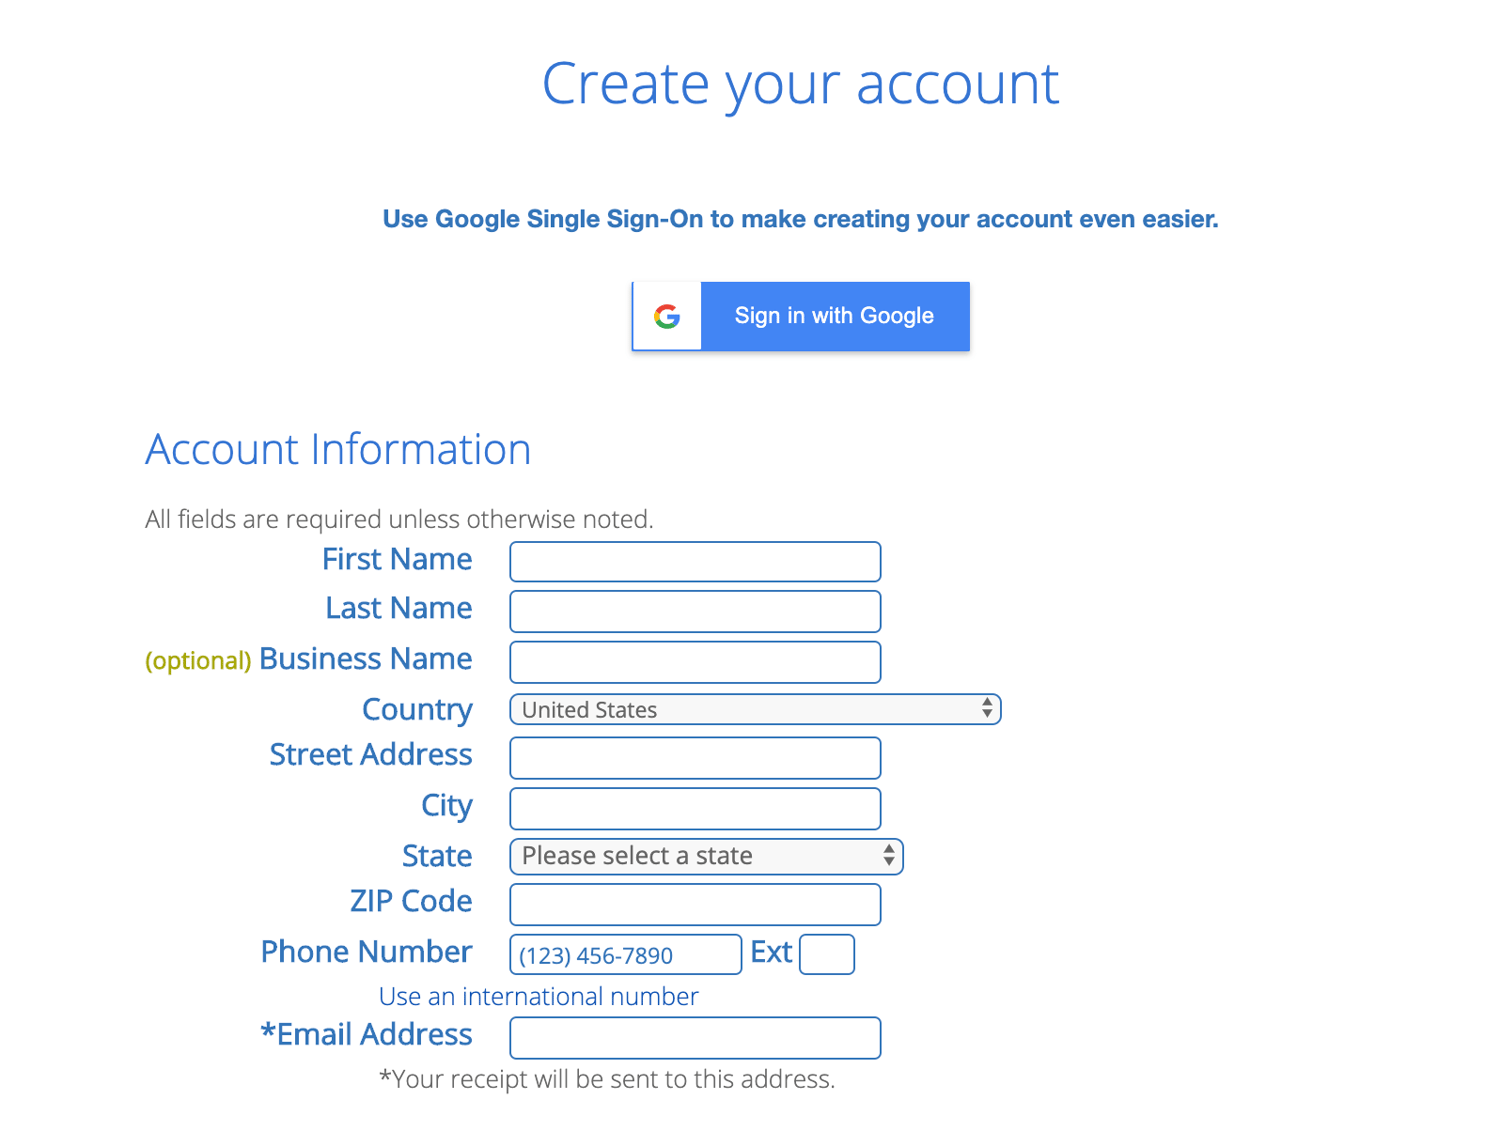
After confirming your account and purchasing your domain, you will gain access to your hosting dashboard where you’ll be able to install WordPress.
3. Install WordPress
If you are using a hosting provider outside of WordPress, you’ll need to install the CMS to connect your new domain to your website.
This time, let’s use GoDaddy as an example. (Don’t worry, no matter the hosting provider you choose, this process looks similar.)
To start, log into your GoDaddy account, click “Web Hosting”, and then “Manage”. You will be brought to a screen with your account details.
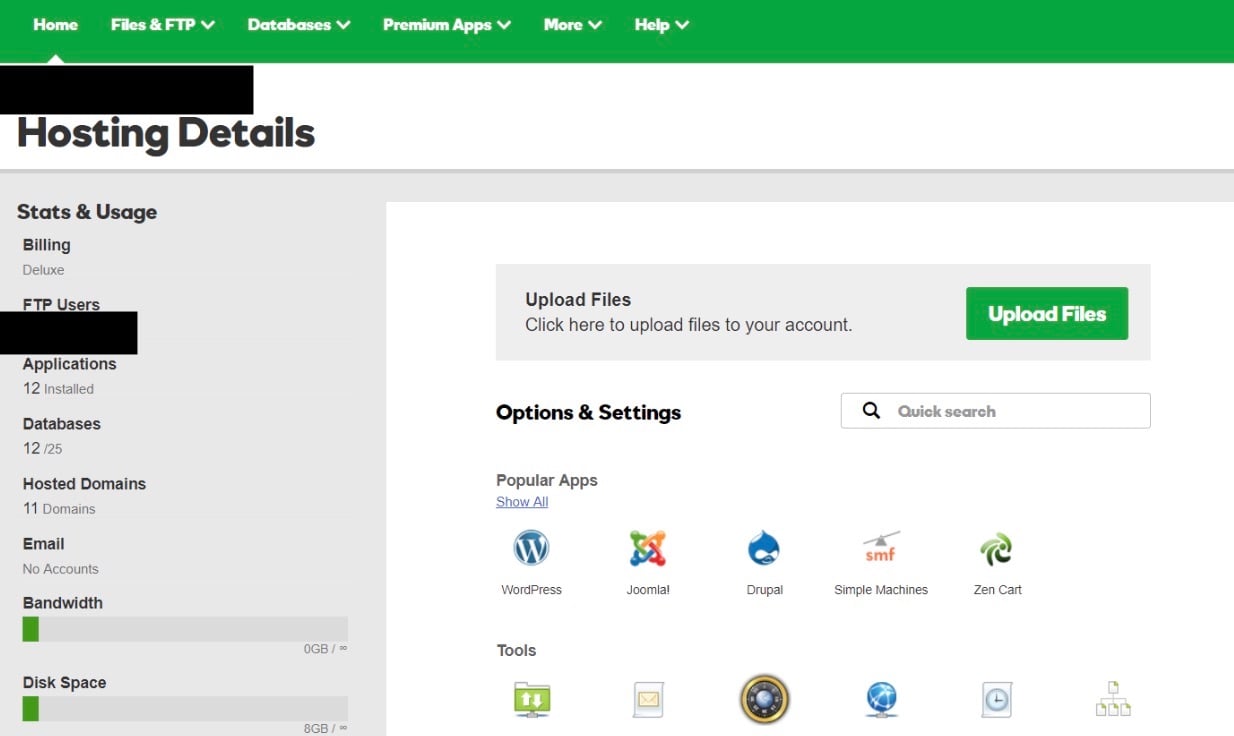
Source: GoDaddy
Scroll down and under “Options & Settings”, you will see an area titled “Popular Apps”. Click on the WordPress app to begin the installation.
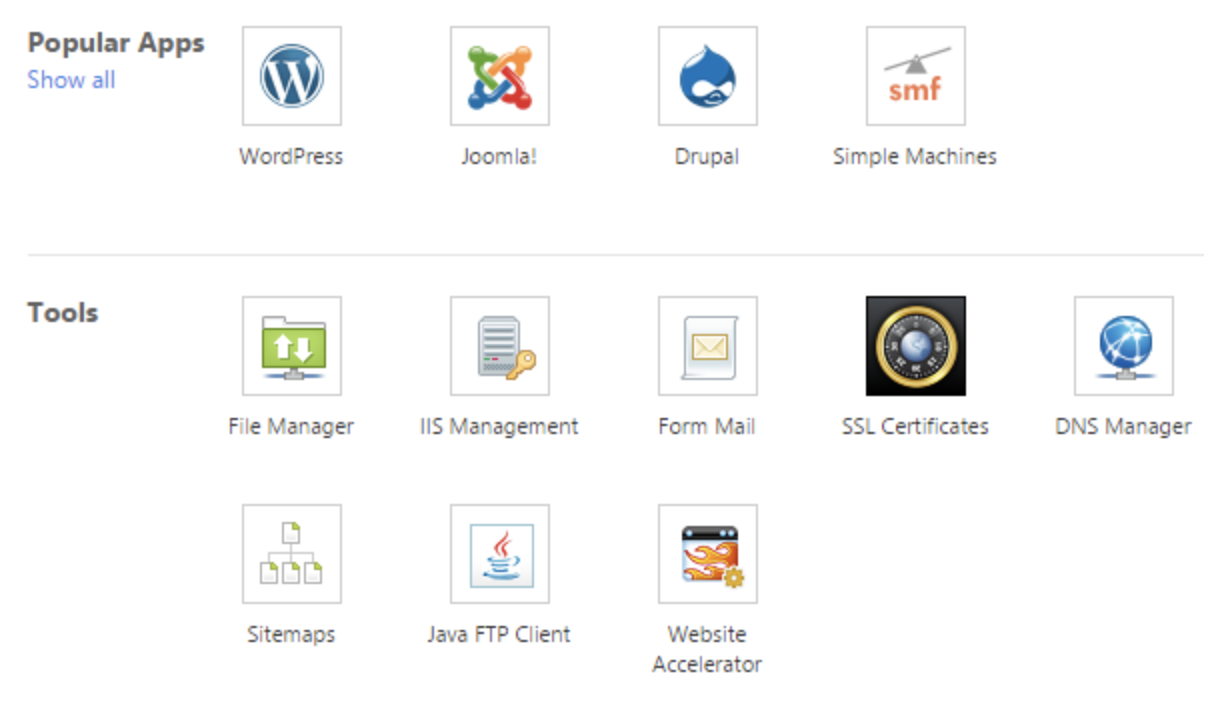
Source: GoDaddy
After installing WordPress, there will be a few questions to answer related to the domain you want to use, the directory where you want to install WordPress, and your admin information.
After about 24 hours, your website will be installed to your hosting account, and GoDaddy will send you an email confirmation.
Now that you have your domain set up and WordPress installed, we need to set up your “Primary Domain” within WordPress, so your visitors are see your website when they search your URL.
In WordPress, go to “My Site” and click “Domains”. Select the custom domain you want to make primary.
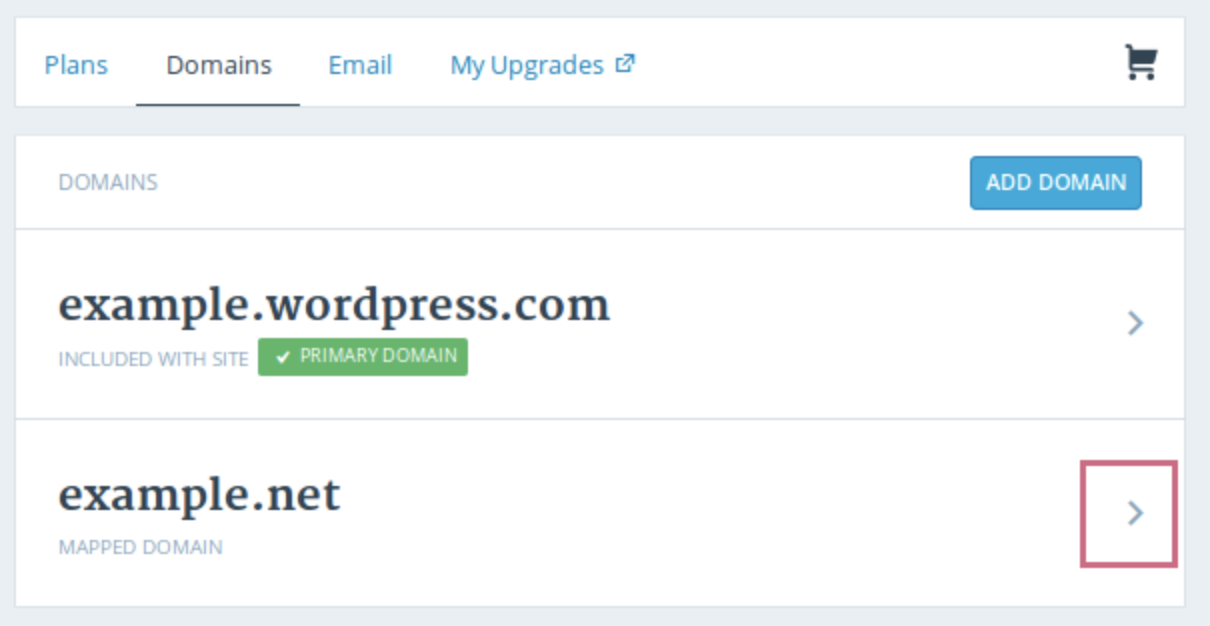
Source: WordPress
Then, click “Make Primary”.
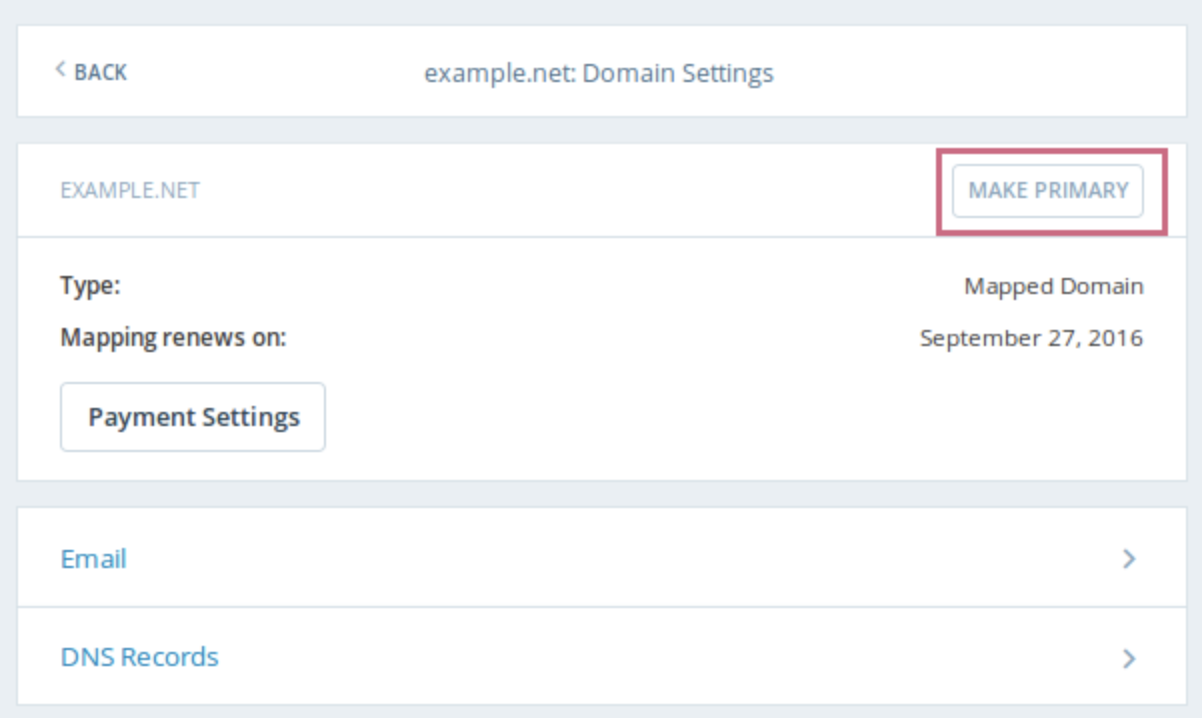
Source: WordPress
Confirm you meant to make this change by clicking “Update Primary Domain”.
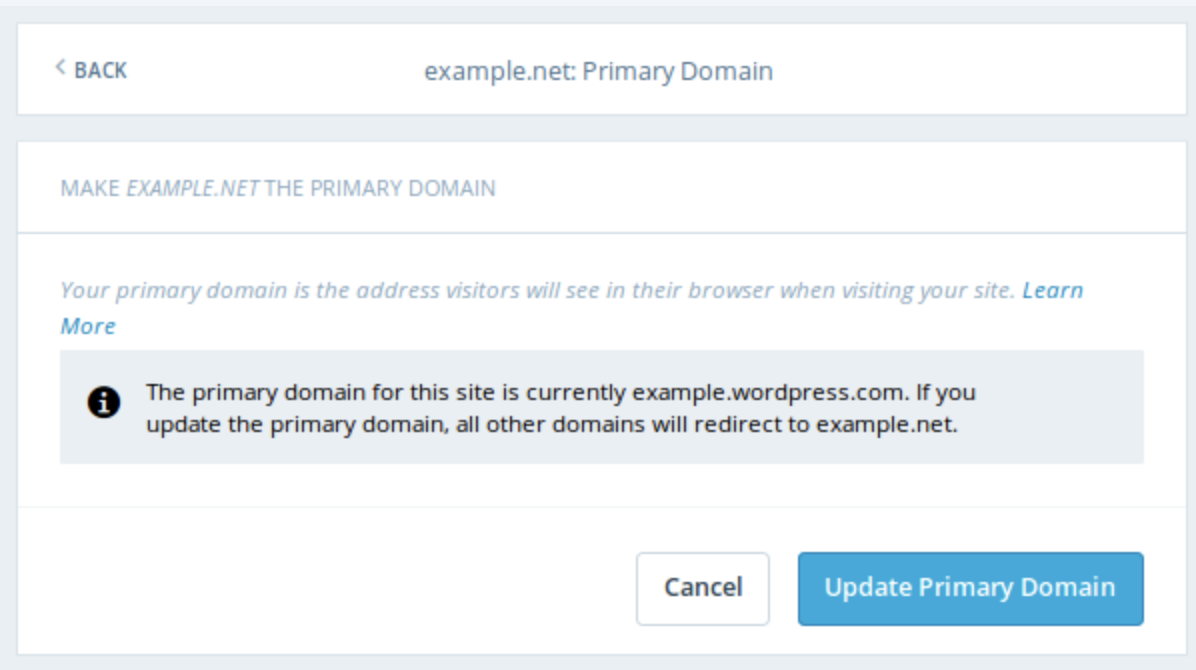
Source: WordPress
Verify the update was successful by looking for a green box with a checkmark that says “Primary Domain”.
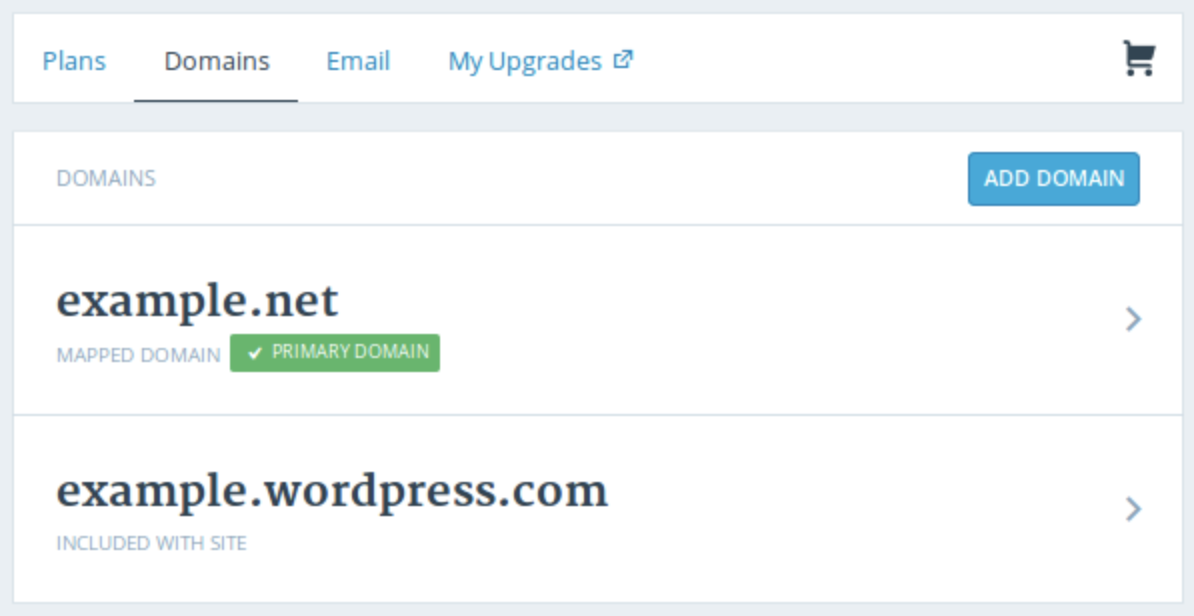
Source: WordPress
Onto step four — making your website look nice.
Side note: If you choose to use a managed WordPress hosting service like WP Engine or Kinsta, you won’t need to go through this process as those services were built specifically for WordPress and will have WordPress installed for you.
4. Choose your theme
You can customize your website using WordPress’ themes and templates, which contain a multitude of layouts, formatting styles, colors, fonts, and other visual options.
WordPress automatically provides you with a default theme that looks rather plain. Sure, you can keep it, but your website visitors may not be so impressed. A custom WordPress theme, whether it’s paid or free, will make your website appealing to your buyer personas as well as ensure it looks professional.
Similar to the wide range of hosting providers available, there are also hundreds of themes and templates to choose from. That’s why we’ve put together a guide to 20 of our favorite themes and templates and categorized them by purpose. Whether you’re looking for a theme versatile enough for multiple different business types, or one suitable for your ecommerce site, portfolio, blog, or niche business, there’s a theme that will work for your specific needs. If you can’t find one that’s right for you, you can build a custom website using a tool like Elementor.
To find a theme that works best for you in WordPress.org, head to your admin dashboard. Click “Appearance” and then “Themes”.
You will then be brought to another screen to browse all available themes or search for a specific one you have in mind.
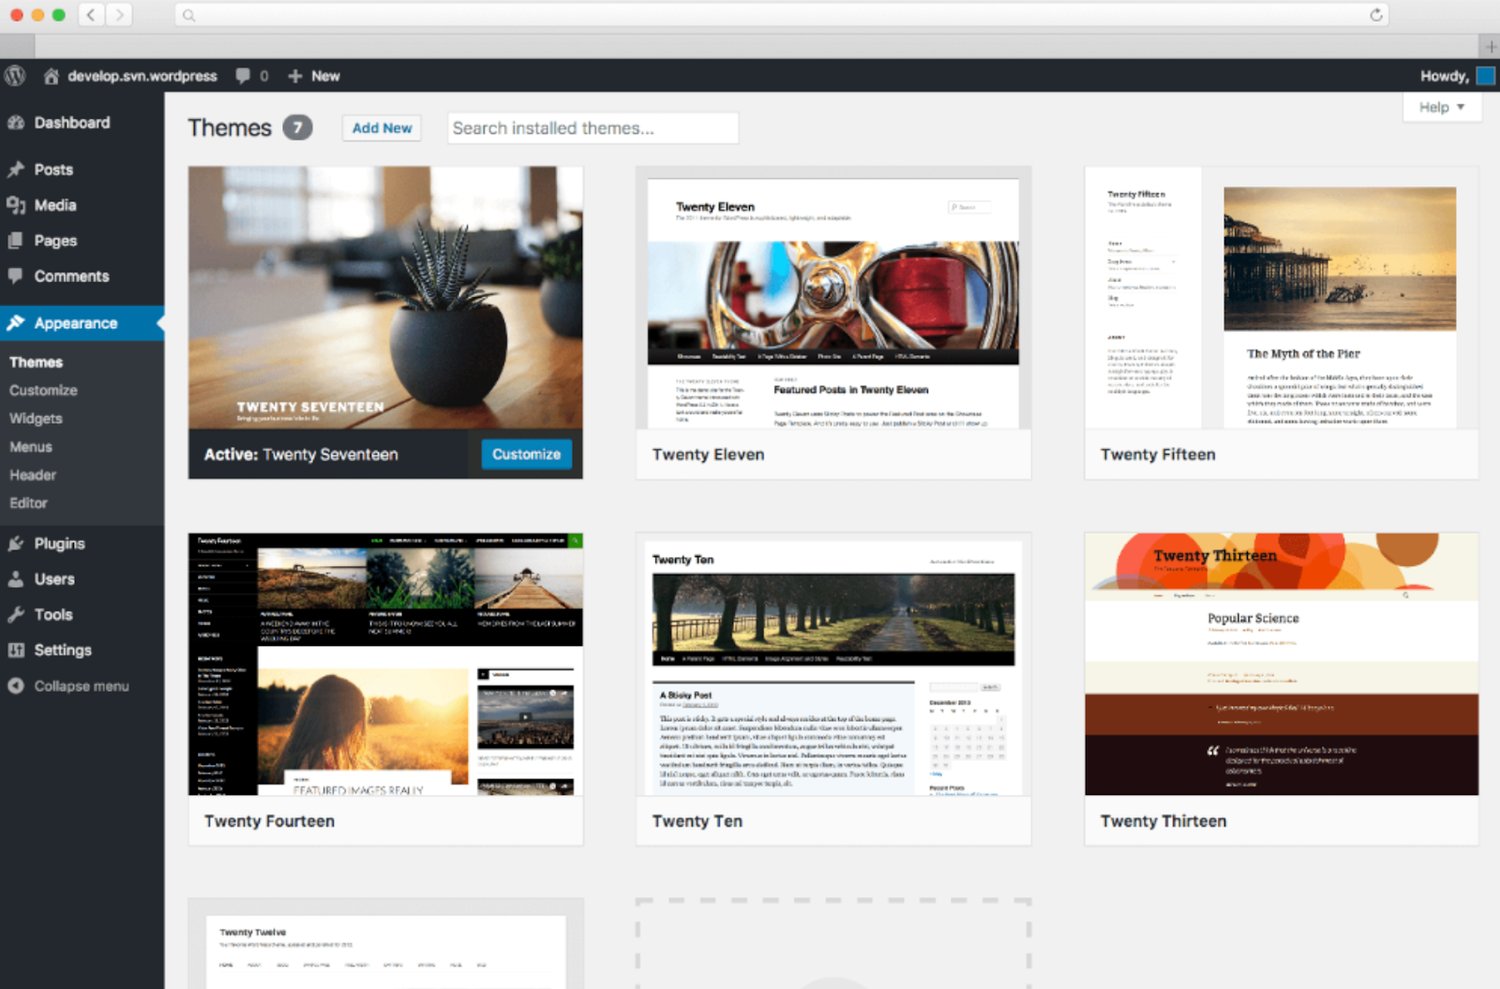
Once you discover the perfect theme, simply “Install” it to begin customizing it and adding your own content, posts, and pages. Each theme has different steps required of you during the customization process, so be sure to follow them closely. Each theme’s website (which are often accessible through the WordPress theme and template library) has helpful information as you work through the customization process.
5. Add posts and pages to your website
When you add content to your WordPress website, it’s displayed in the form of posts and pages.
Posts (or “dynamic pages”) are typically used for blogs and portfolios because they automatically place your newest website content at the top. Pages are static which is why they often appeal to business owners — the added content always remains in the same place.
Start by deciding whether you want a post or page to serve as the homepage (or any page) of your website. To add a post to your website, go to the admin dashboard, click “Posts” and then “Add New”. You can add a title for your post, insert photos, or change the format.
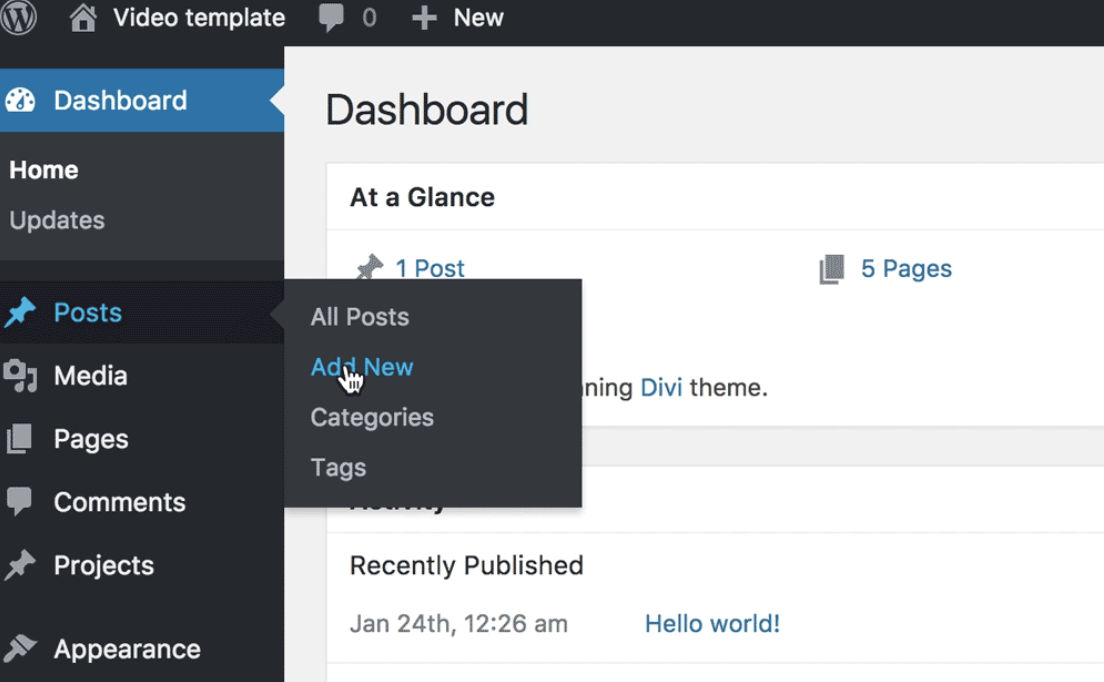
Source: First Site Guide
Click “Save Draft” to save your changes as a draft or click “Publish” so the post immediately goes live.
If you’re looking to add a page to your website, you’ll work through a very similar process. In your admin area, click “Pages” and then “Add New”.
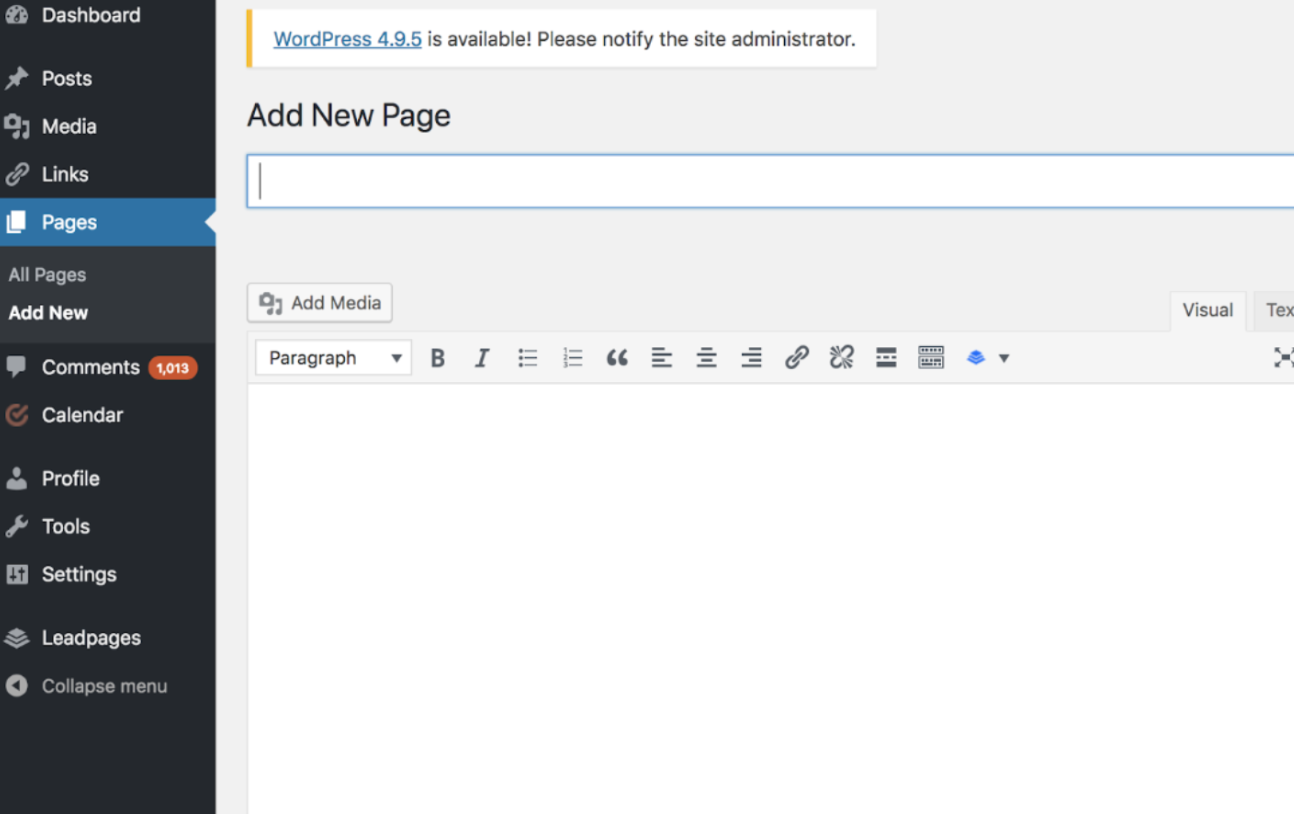 Source: The Hard Refresh
First, add a title to your page. Next, you can insert photos, embed videos, and add content. Follow the same steps to create multiple pages for your website.
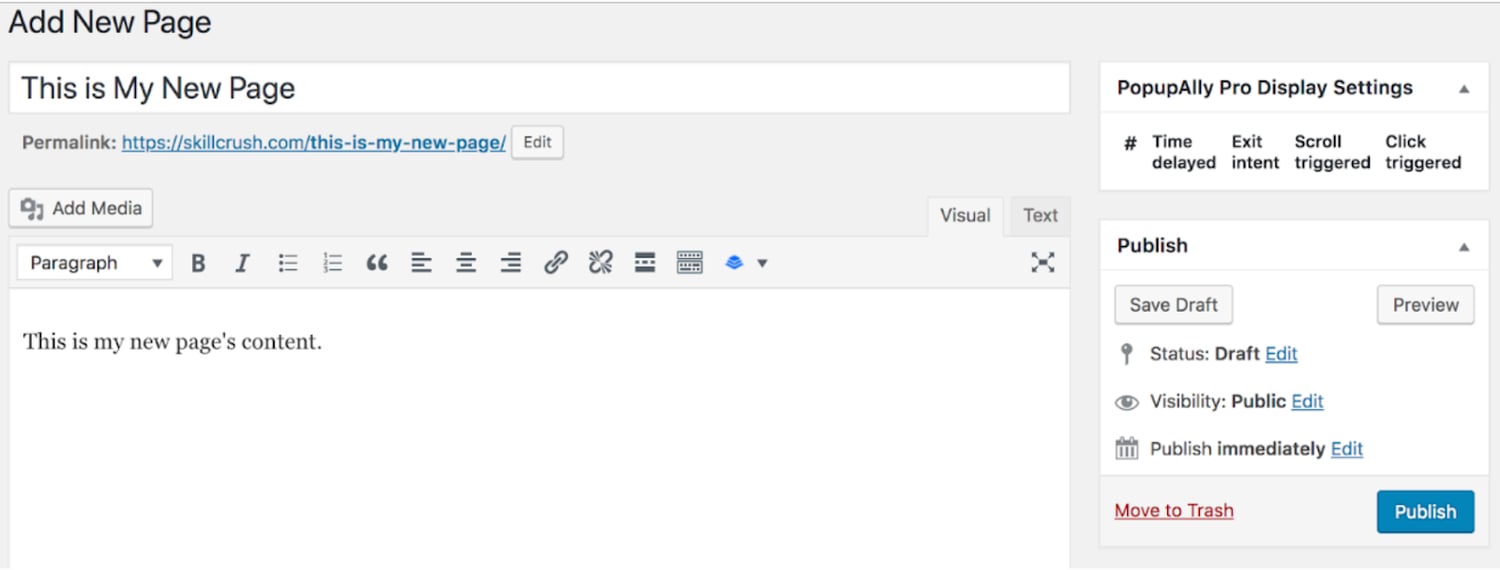
Source: The Hard Refresh
Don’t forget to click “Save Draft” or “Publish”.
6. Customize your website
There are a number of ways to further customize your website. Let’s review a few of the options.
First, create static or dynamic pages under the “Settings” tab in your WordPress admin page.
Consider using a static page if you’re a business owner who prefers having content remain in one place on your website. For example, it wouldn’t make sense for your “About Us” page to contain content that moves around — you’d want that content to remain in one location for consistency. Consider using a dynamic page if you’re a blogger who prefers having your newest content appear at the top of your pages. This way your visitors can easily find your latest posts.
On the left side, click “Settings,” then “Reading.” Choose between your latest posts or a static page.
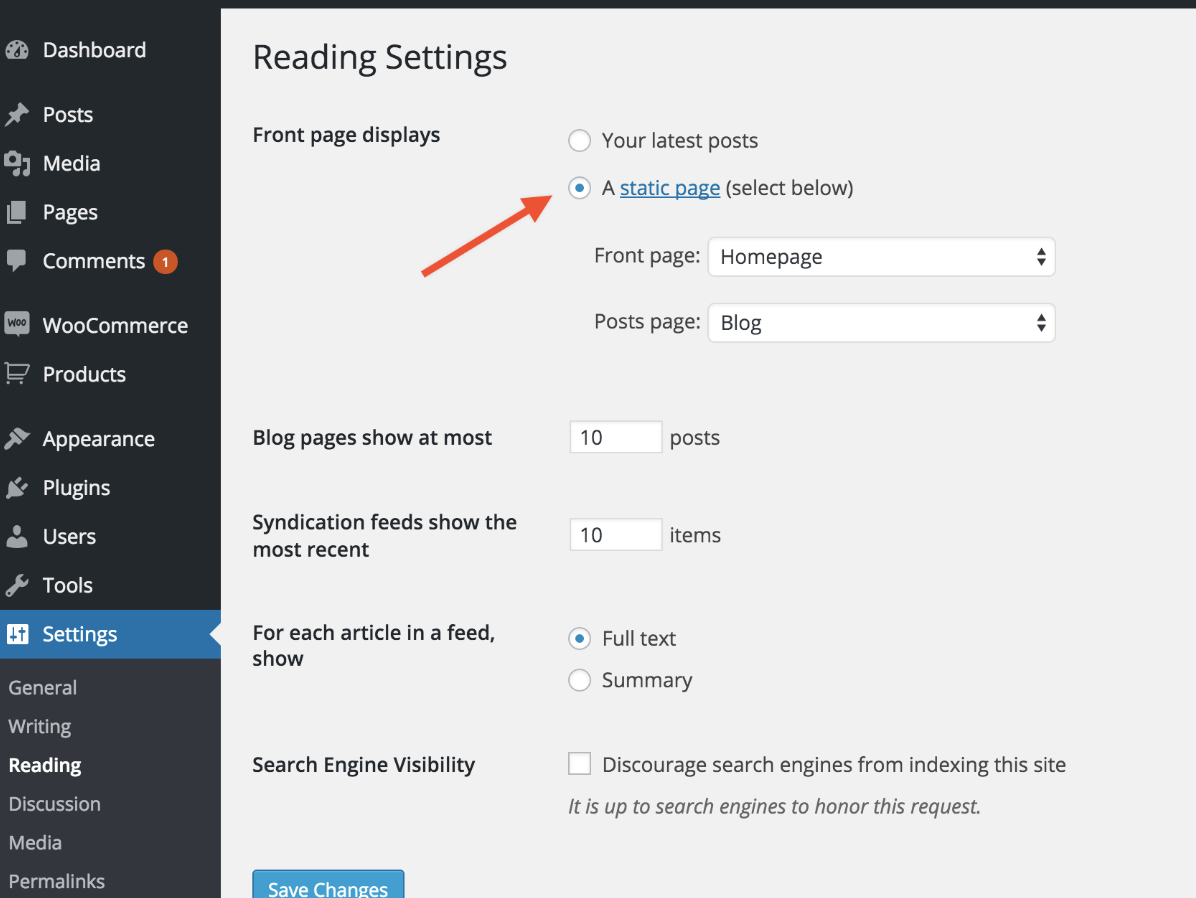
Source: WooCommerce
Your site title also can be customized — to do this, head to your admin dashboard. Under the “General”tab in “Settings”, add your website title and tagline.
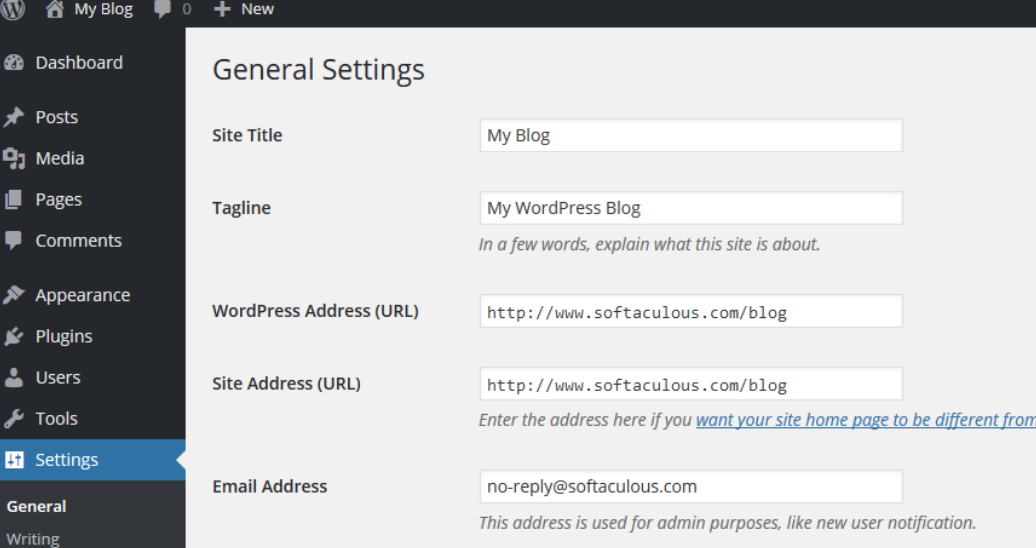
Source: Softaculous
The navigation bar is customizable, too. This enables your visitors to easily find information on your website.
You can add a navigation bar by going to your admin dashboard, clicking “Appearance” and then “Menus”.
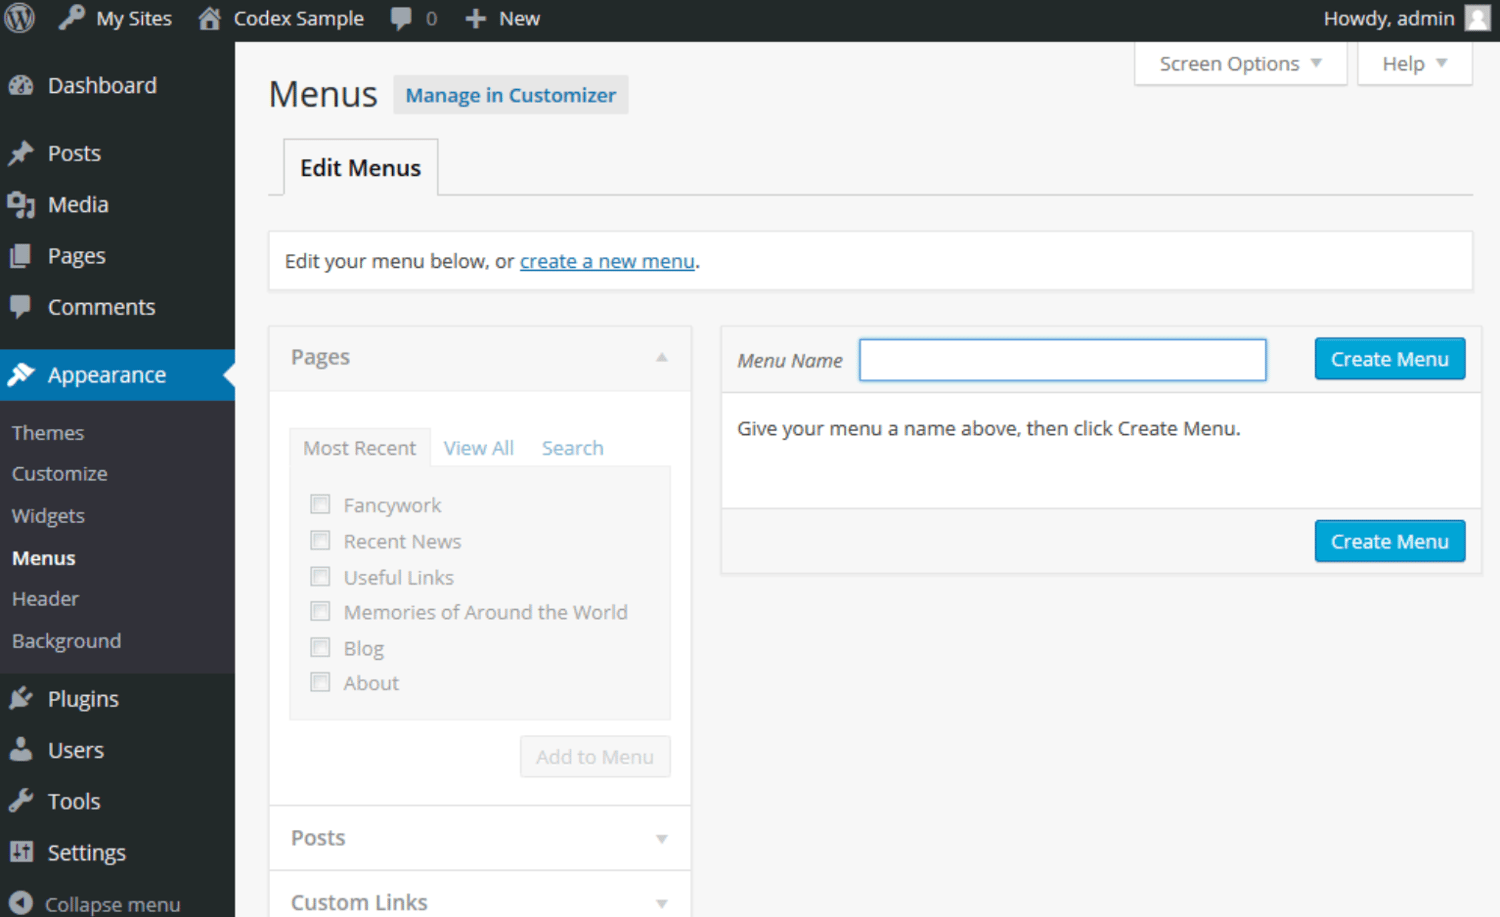
Source: WordPress
From here, you can determine how you want your bar to look, how many pages you want to include, what you want to title those pages, and what order you want them to be listed in.
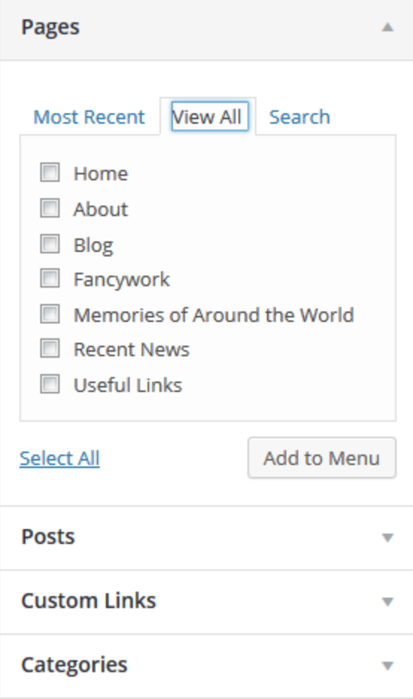
Click here for more information on your WordPress site settings and customization options.
7. Install your plugins
Plugins are pieces of software that add functionality to your website. They also enhance the user experience. With over 55,000 available plugins, there are options for most every type of website and user. Some of the most popular plugins available include WordPress Contact Form, Yoast SEO, TablePress, The SEO Framework, HubSpot Conversion Tools, and Pixel Caffeine.
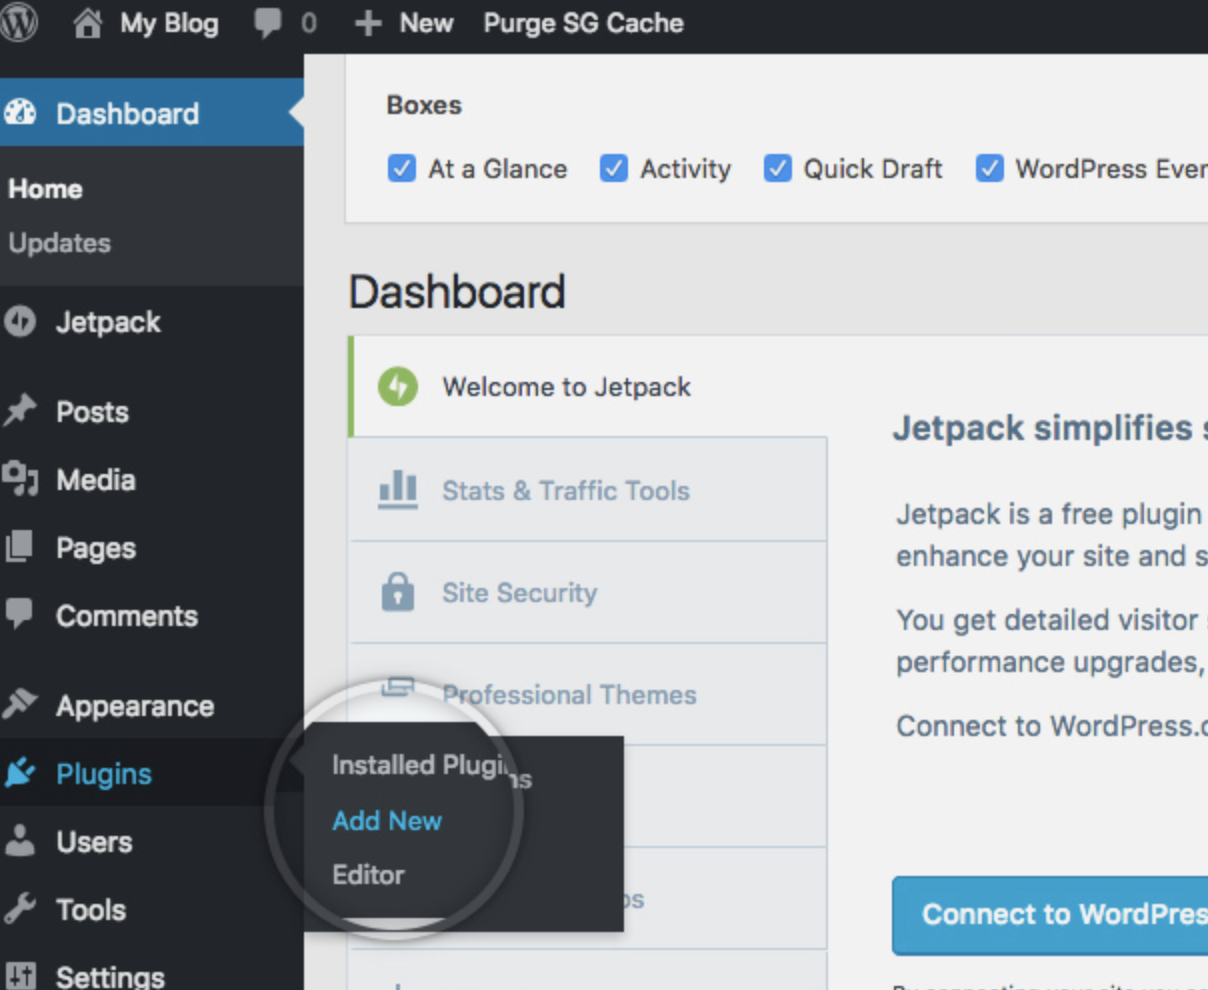
To begin installation, head to the “Plugins” section in your admin dashboard.
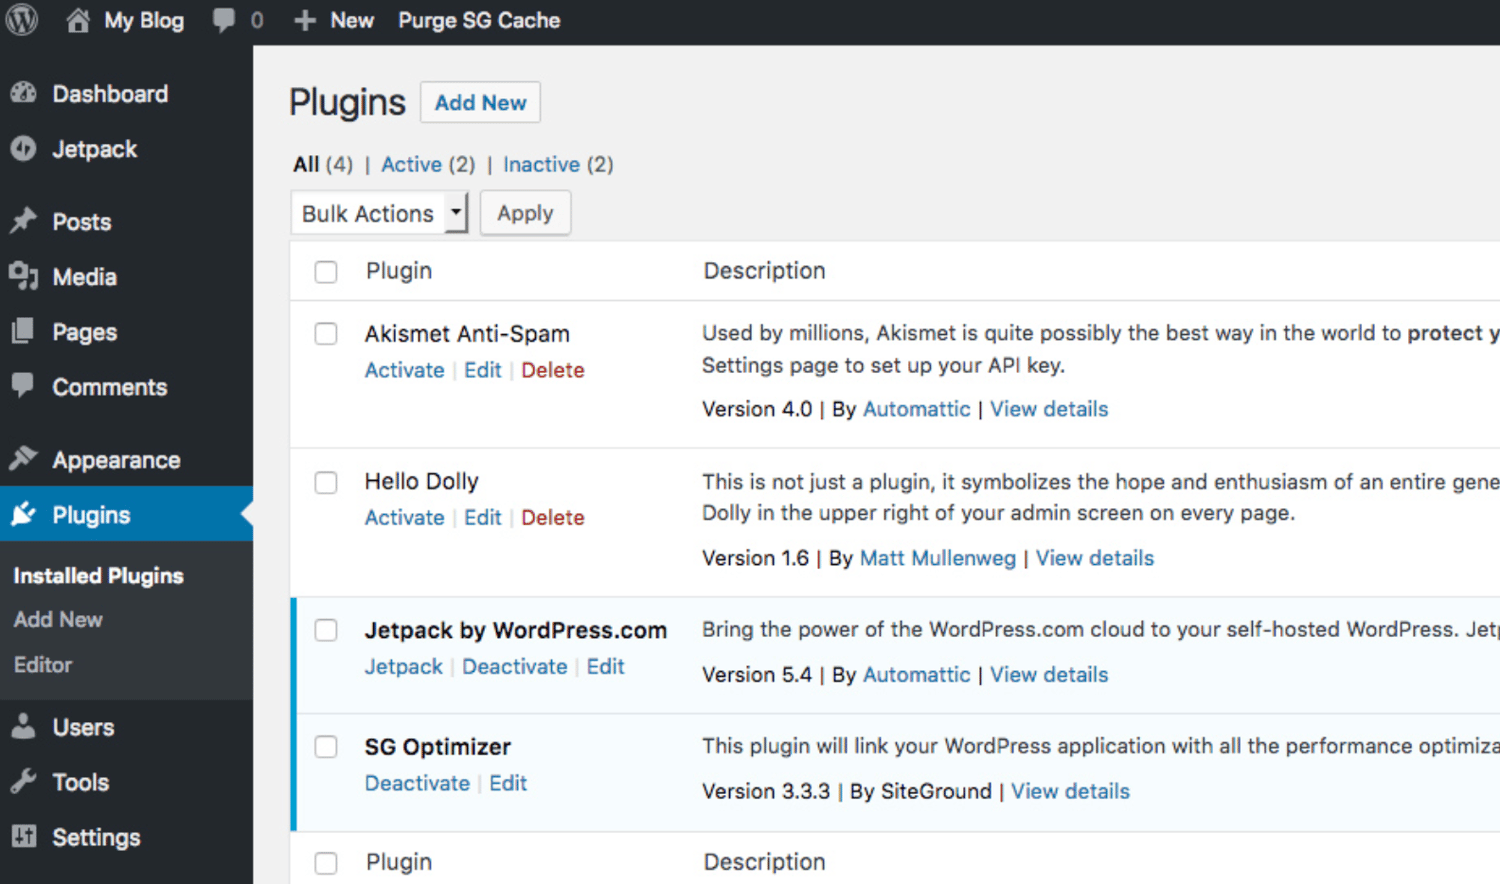
Source: SiteGround
Click “Add New”.
Source: SiteGround
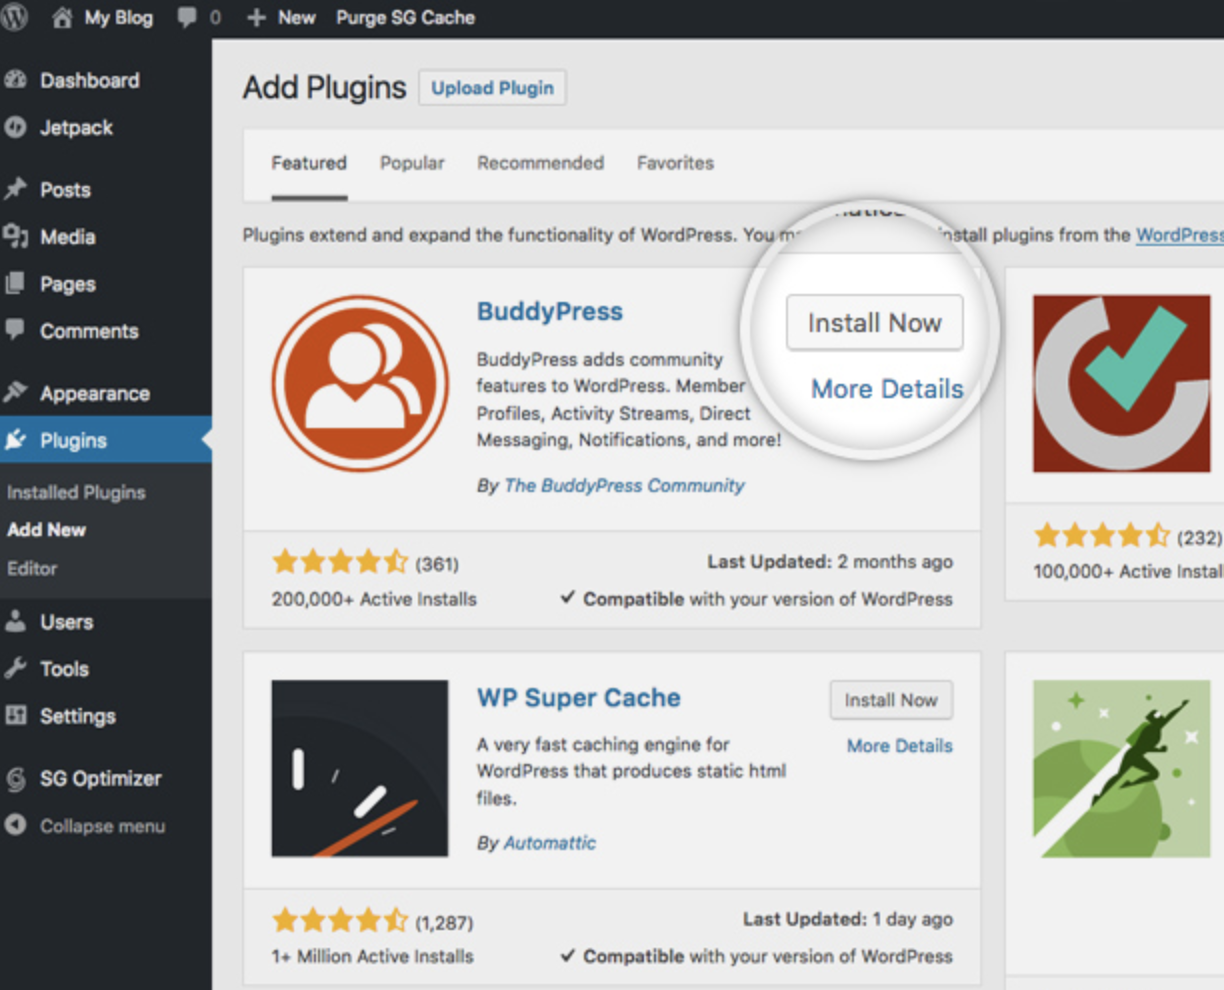
Browse or search for your desired plugin and then click “Install Now”.
Source: SiteGround
Get the WordPress CRM plugin that helps you organize, track, and nurture your leads.
8. Optimize your website to increase page speed
Website performance is a critical part of the user experience. If a page takes too long to load, your visitors will move quickly to another site. So, you don’t want to frustrate visitors with slow speed times.
You can improve your website’s performance by enabling browser caching. Browser caching is storing your website’s data to your visitors’ browsers. That way, your content doesn’t need to be processed for it to appear, which increases the website speed.
To enable caching for your website, install and activate a caching plugin. There are more than 1,900 available under Plugins > Add New.
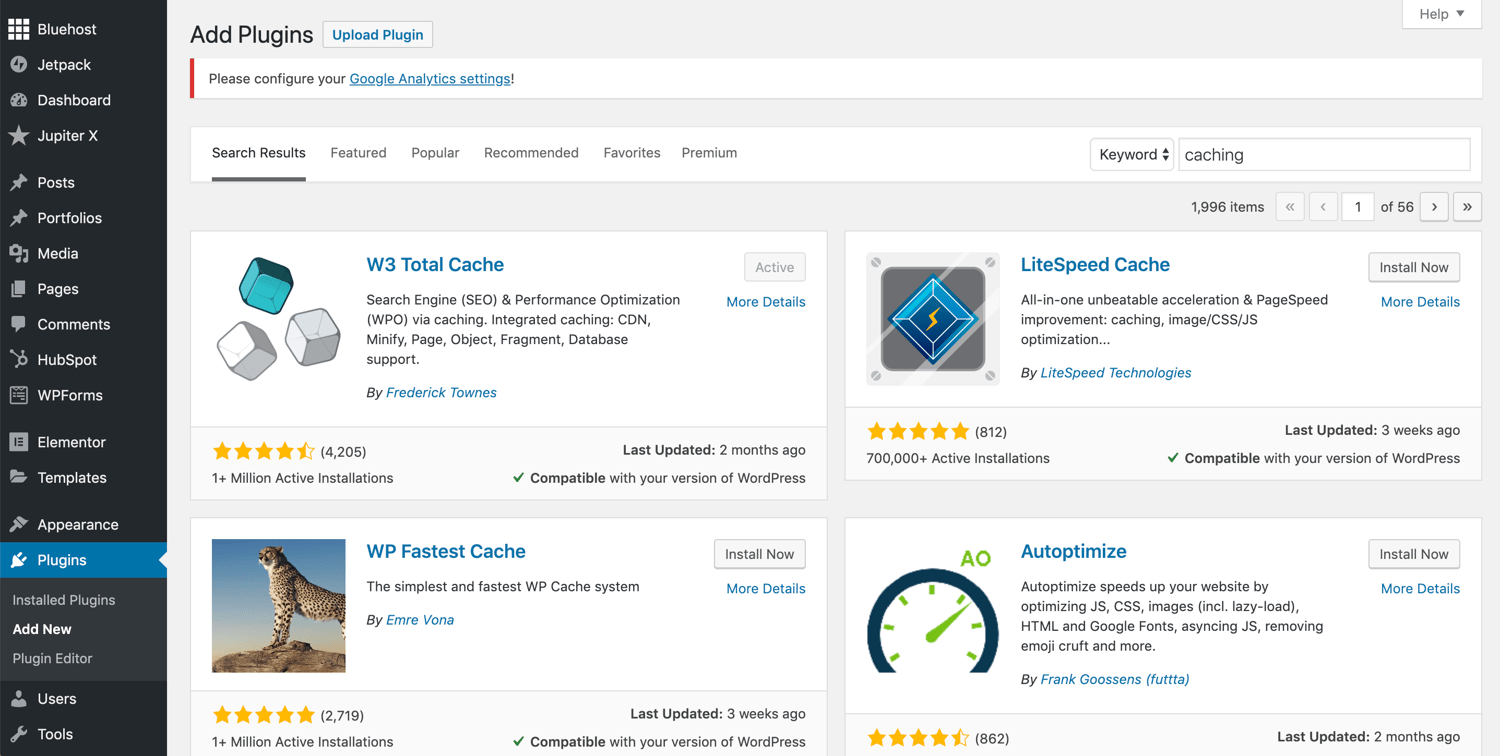
Let’s install and activate WP Fastest Cache. On the plugin’s page, click the box next to “Enable”. Then, click “Submit” at the bottom of the screen.
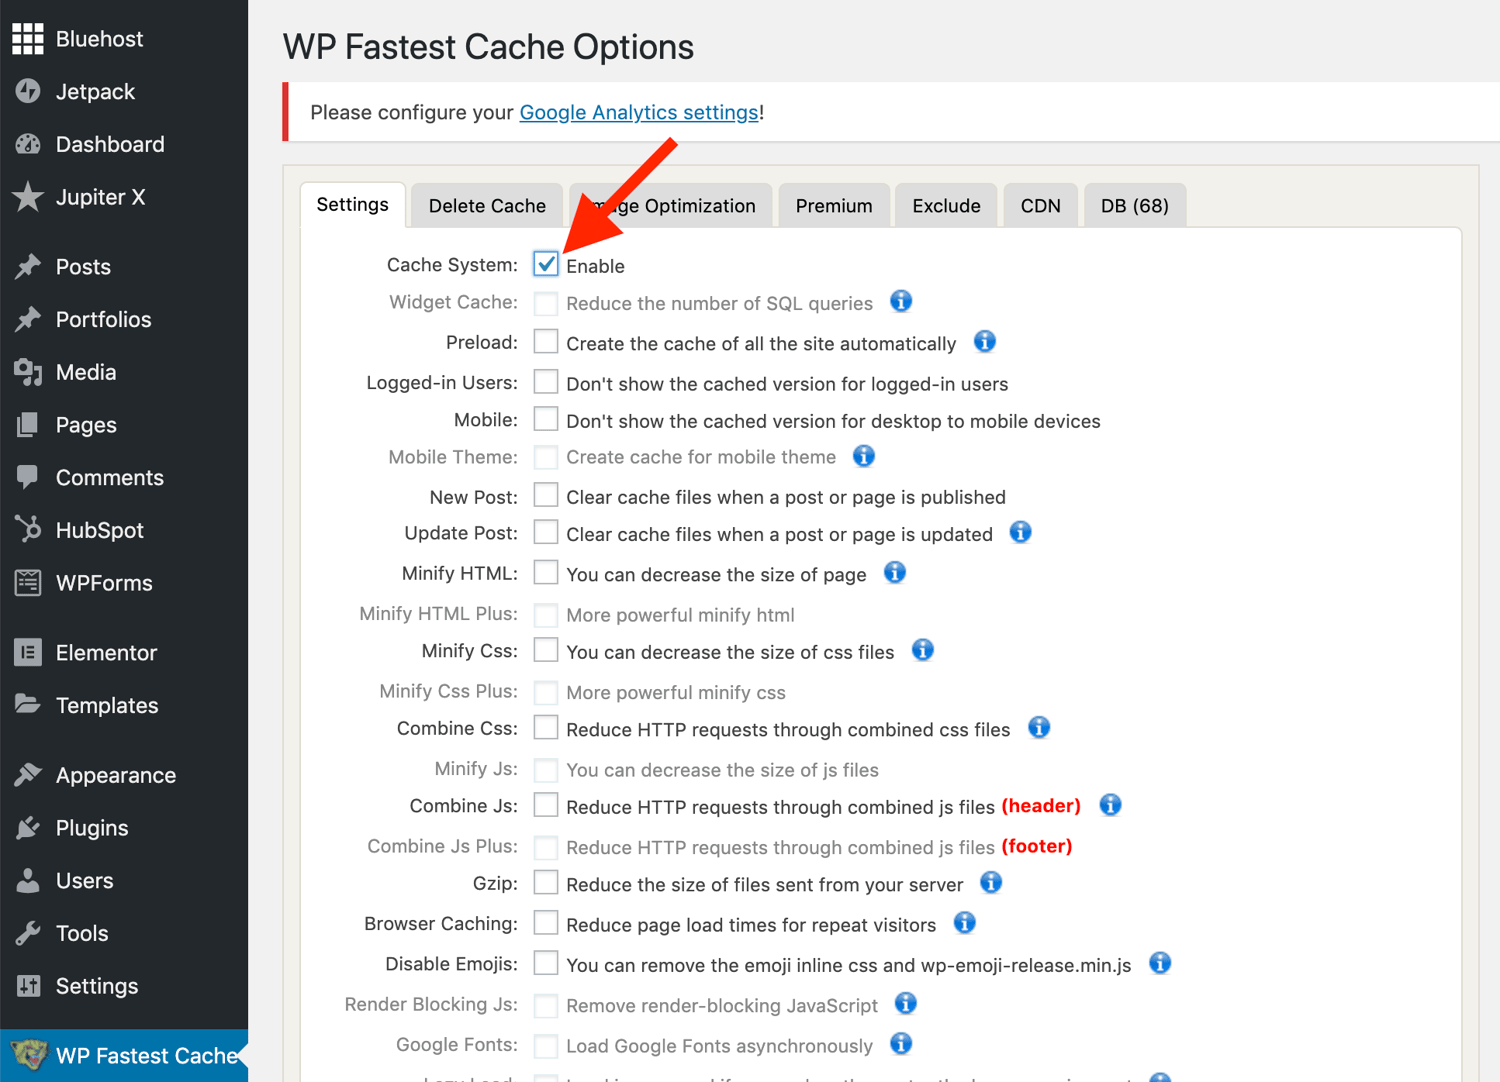
That’s it! This caching plugins will help increase your website’s performance.
9. Get inspiration from WordPress website examples
As you begin to customize your website, you may feel overwhelmed by all the possible options. No worries, you can grab some inspiration from other highly engaging WordPress websites.
In the example below, 99% Invisible is a popular podcast that focuses on design and architecture. Their website is a sleek, modern design. It offers easy navigation for visitors to quickly access each podcast episode.
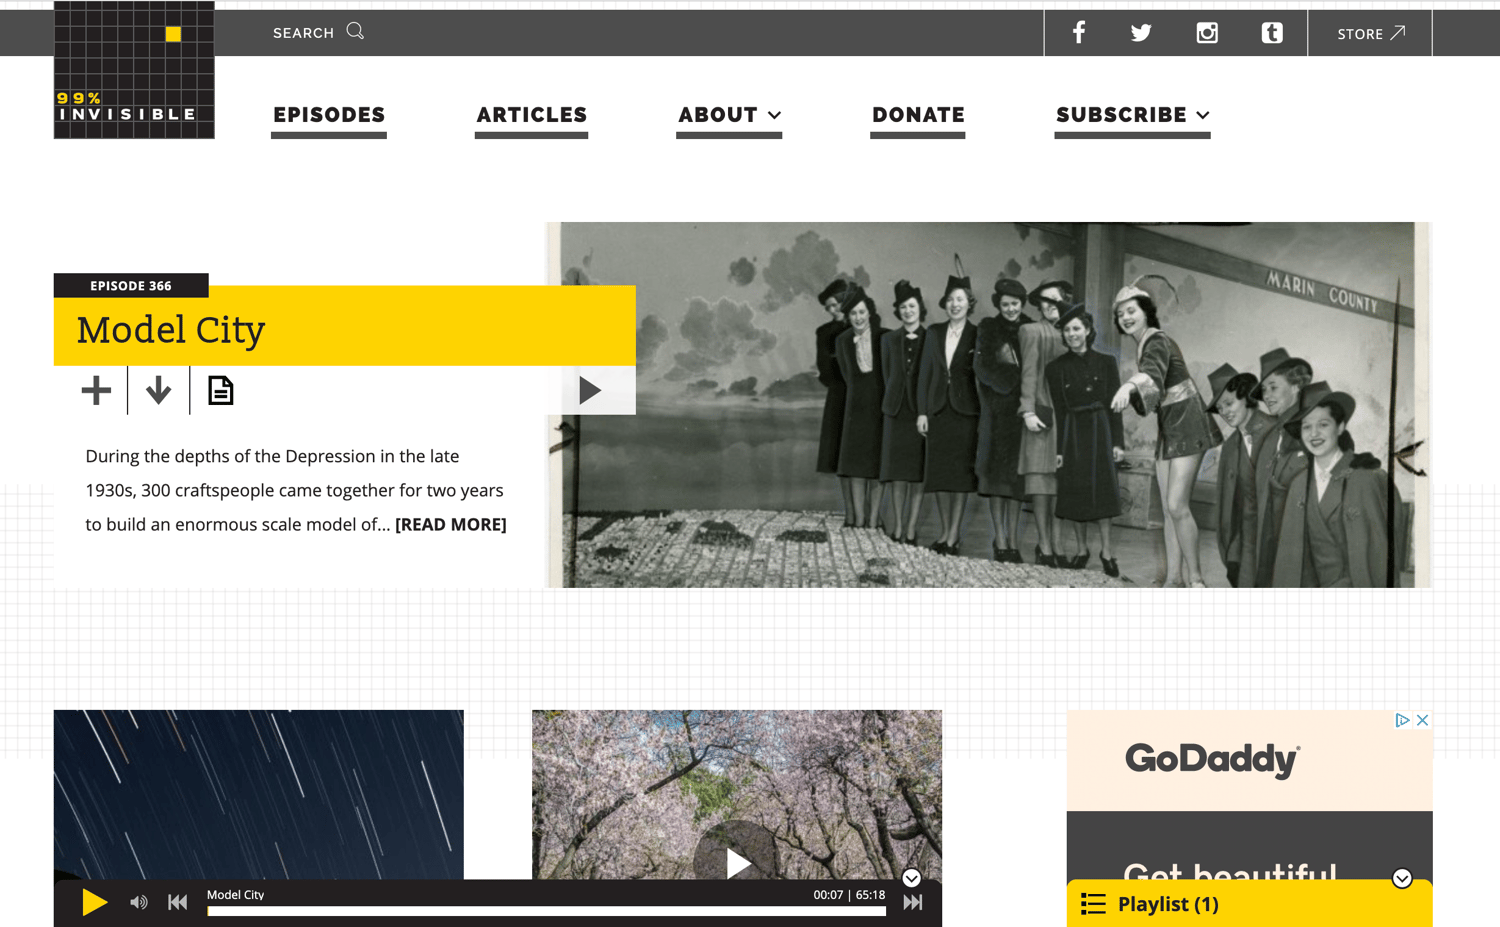
Source: 99% Invisible
The Houston Zoo’s website displays its main attraction on the homepage. The magnifying glass icon on the top menu bar makes searching the site effortless.
 Source: Houston Zoo
Awesome Motive, the creators behind several WordPress projects, engages their visitors with a polished, yet simple website. It features subtle animation to grab people’s attention.
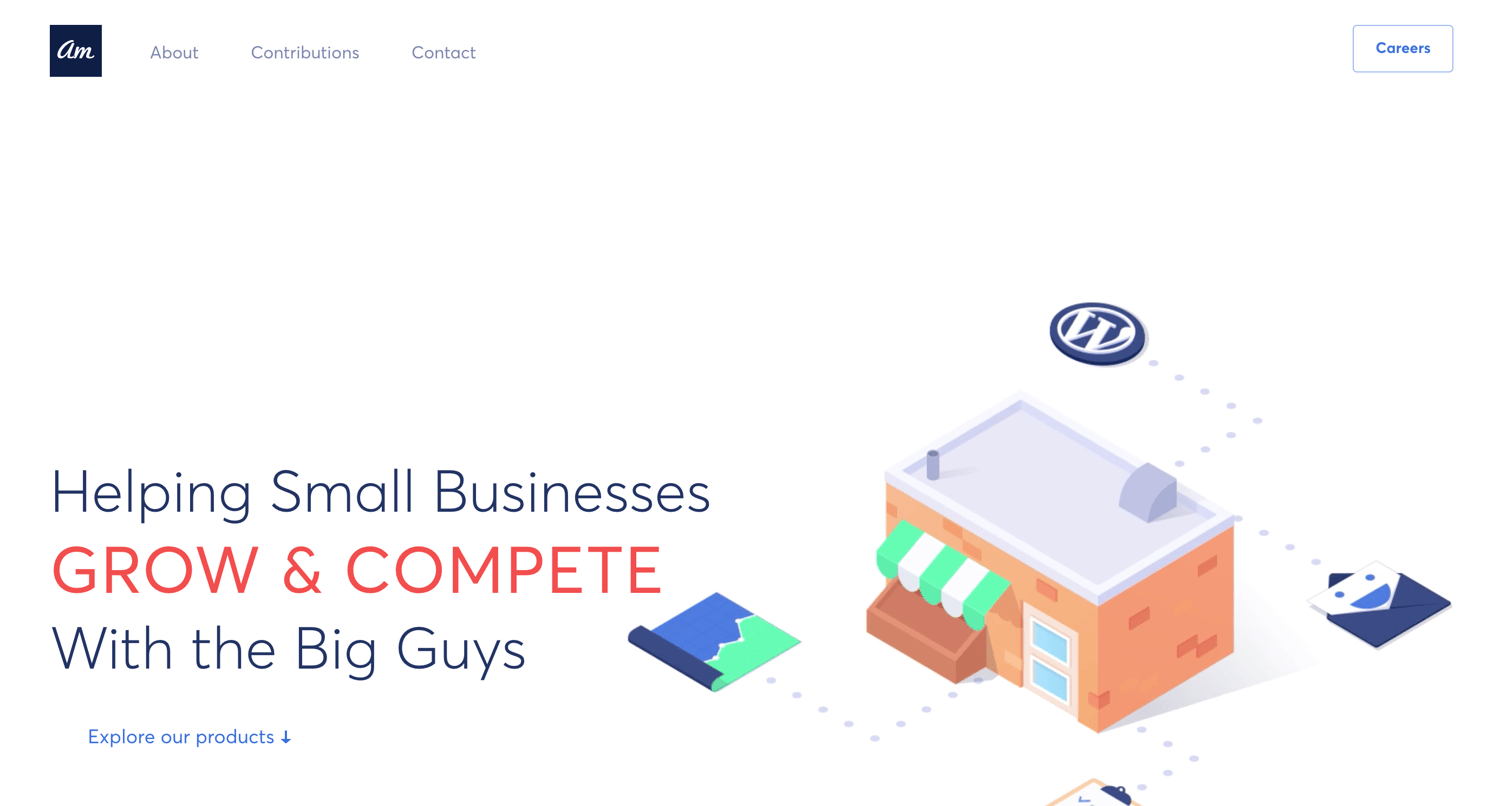
Source: Awesome Motive
WordPress Website Tips and Tricks
There are a number of WordPress tips and tricks to make your website as impactful and user-friendly as possible — we’ve listed 20 of them below to help you do just that.
1. Focus on the basics and create a great user experience with a WordPress theme that complements your business and website content.
2. Use dashes and not underscores when naming your files in WordPress. Google looks as underscores as joiners, meaning your file will look like one big word. That won’t help you with your SEO. Use dashes to make it obvious there are separate words. (For example, use https://ift.tt/2CWyE97, not https://ift.tt/2P8AhYz).
3. Use WordPress’ online support for any questions or concerns you may have while creating or using your website. There are a number of forums and ways to reach out to WordPress experts listed on their website.
4. Use Image Alt Text to your advantage. Image Alt Text can be used to improve your SEO and Google rankings.
5. Keep your sidebar as organized as possible. Stick to the essentials and think about what your website visitors and buyer personas really need quick and easy access to.
6. Back up your website regularly, so if you ever lose access or have technological difficulties, you have everything you need to completely restore your content. There are a number of plugins, such as Snapshot Pro, made specifically for backing up your WordPress content.
7. Learn and understand SEO basics to ensure your website is completely optimized so you can boost your conversions.
8. Create a custom homepage. As mentioned earlier, WordPress will provide you with a default homepage. Take the time to create your own with a theme that works for your business — remember, this is your visitor’s first impression of your business, blog, or portfolio.
9. Keep an eye on your website’s performance and know what is and isn’t working for your visitors. There are a number of useful WordPress plugins, as well as Google Analytics software, to help with this performance.
10. Include an “About Us” page on your website to show your visitors you’re a trustworthy person and/or business. “About Us” pages are known to be the second most-visited pages on websites (after homepages) — so introducing yourself is important.
11. Make sure your site is secure to ensure there are no hackers gaining entry. Again, there are plenty of plugins such as WP Defender to help you with security.
12. Create custom permalinks. Permalinks are the permanent URLs that you plan to keep static for the foreseeable future. They’re important because they improve user experience and enhance your WordPress website SEO.
13. Create a custom navigation bar (as we reviewed earlier) to make your site easy to use for your visitors.
14. Include excerpts on your blog posts so people don’t land on your blog page and see your entire piece at once. By only including excerpts on your blog page, you make room to list all of your blogs in one location. Visitors can then read the excerpts and click-through to read the posts they are most interested in.
15. Structure your website in a way that makes sense for your business, visitors, and buyer personas. For example, use posts if you’re a blogger and use pages if you’re a business owner.
16. Remove “Comment” and “Share” buttons from specific pages of your website. You don’t need (or want) a “Comment” or “Share” button on your “About Us” page, or any of your service pages for that matter.
17. Consider what your website looks like on mobile. It’s no secret people are searching the Internet while on their phones, tablets, and other mobile devices these days. Consider using a plugin to help you achieve a responsive, mobile WordPress design.
18. Use visuals and video content when possible to break up the text on your website pages.
19. Update your WordPress site and plugins regularly. WordPress will tell you when updates are released. This will keep your website looking fresh and working efficiently.
20. Use social proof to show your new website visitors how many other people have already subscribed to your site and content. There are plugins to help you do this in a matter of minutes.
Conclusion
Having a great website matters. It’s how you connect with your visitors and leads, create a positive first impression with new users, and boost conversions. The good news is creating your own website doesn’t have to be a daunting process … at least not with WordPress.
The easy-to-use CMS offers completely customizable plans suitable for all needs. With no prior knowledge necessary, you can start building your own site for your business, blog, portfolio, or online store immediately.

The Best Risk Management Tools & Techniques for PM Pros

How to Buy Business Software, According to HubSpot’s Learning & Development Manager
As someone who manages HubSpot’s learning technology, I’ve gone about buying software the wrong way at times. I’ve pushed ahead without the right technical partners, I’ve missed a contract auto-renewal deadline, and I’ve rolled out changes to my team without empathy for how it might affect their day-to-day.
From these experiences, and from working with others at HubSpot who procure and implement software, I’ve learned a lot. Today, I feel good about how I manage our technology and buying decisions.
I’ve come to realize a successful purchasing decision is less about vendor management and research (though those are important factors) and more about project management, change management, and getting buy-in for new ideas.
Here are some of my biggest lessons for those who are considering buying new software or are just curious to learn more.
Lesson #1: Establish a business reason before seeking buy-in.
In the past, I didn’t take the time to step back and assess what value my proposal would bring to the entire organization. Even if your new software’s user base will only be a small portion of employees, think about and communicate how it ties back to the company’s bottom line.
Here are some examples:
- A process is currently very manual, and you want to automate it. The business reason for this software would be to save time and money.
- Your team is trying to accomplish something, and you don’t have the skills, time, or functionality. The business reason for this software would be to extend the team’s capabilities.
- Recently, our L&D team at HubSpot wanted to be able to track how new hires performed in their training courses. The business reason for this software was so that we could provide managers will more insight into how best to spend their time coaching their new hires as they ramped into their roles.
Once you establish your business reason, you’re more likely to garner support from stakeholders.
Another important business factor to consider when getting buy-in is the cost-to-value ratio. Adding more software means another vendor to manage, another contract to consider, and another system for your coworkers and teammates to adopt.
Make sure you’ve thought this through and feel confident that this new software will bring enough value to outweigh these considerations. This will help you handle any initial objections.
Getting buy-in should happen far in advance of when you plan to buy the software. This process takes time. You need to talk to people outside of your department and often outside your company to ensure you understand the landscape of what’s already happening, what’s possible, and what it’s going to take to execute a new software.
Lesson #2: Understand you’re going to need help.
You might be the most experienced software buyer in the world, but you can’t do everything alone. In my experience, the best help you can get for buying and implementing software is the team whose very expertise is software: your IT team.
Loop them in early in your process, see what they’re already doing to solve the challenge you’ve identified, and ask at least one champion for feedback. Depending on your company, you may also need to loop in Security, Legal, and Finance so they can add their expertise and highlight any blind spots you might have.
You’ll also need two key people: someone to serve as a project manager, and someone who has expertise in the type of software you’re considering buying (which could be you with enough research).
It’s important to remember that you can’t make lone decisions about software and expect everyone to love and use it. You might think you know what’s best for the team, but you truly need feedback, and you need to get it before you dive in too deep.
You don’t have to take everyone’s opinion on as a requirement, but you should take into account anything mentioned by multiple people and capture this feedback. The more you document and share how you’re making your decisions along the way, the less pushback you’ll face when you’re ready to start finalizing the deal.
It might take some extra time up-front to write everything up and share it, but this process will save you a lot of time in the end.
Lesson #3 Be vulnerable and empathetic.
Change is hard for everyone. Even those who are most excited about using new software can get overwhelmed by the prospect of changing up what they’re used to. It’s important to be transparent and empathetic with your project team, coworkers, and the broader organization.
For example, if your team members generally love process and organization, acknowledge that a project is going to be hard because there will be a lot of things that will start out disorganized or unknown. A tried and true method for working through this as a team is to share your emotions openly and then collectively decide to press forward.
Encouraging your teammates to share their concerns can help further define your project’s direction and build a feeling of camaraderie that will be helpful when things get tough.
Regardless of what team you’re on, who your user base will be, or how many vendor demos you’ve watched before, these tips should get you started on the right track. Buying software isn’t easy but if done well, it can bring a lot of value, connect you with your colleagues, and help you discover the art of change management.

The 20 Top PR Conferences of 2020
Have you ever talked about the importance of professional development at work, then become so busy that six months and then a year go by without any of that development actually happening?
You’re not alone. Between writing press releases and media pitches, it isn’t easy to make time for professional development.
However, public relations (PR) is a constantly evolving industry. That’s why attending conferences and events should be a priority for all PR professionals. You can improve your strategy and tactics by hearing from industry leaders and professionals, networking, and brainstorming new and innovative ideas.
When you begin looking for PR conferences to attend, keep in mind that they don’t need to have a public relations focus. Conferences in any communications field can be helpful to your overall growth.
Below you’ll find the top 20 PR conferences to attend in 2020 and learn how they can help you as a PR professional.
1. PRSA North Pacific District Conference
- Dates: January 26-27, 2020
- Best for: All public relations practitioners
The Public Relations Society of America (PRSA) holds a biannual North Pacific District Conference. They cover a variety of topics for PR professionals, from the future of AI or automation in public relations, the role of public relations in civil discourse, journalism and public relations, branding, and social media and public relations.
The main goals of the conference, and the PRSA North Pacific District, are developing leadership, sharing knowledge and information, and providing networking opportunities. Uniquely, this conference is also available via live streaming if you can’t travel to the event — this is the perfect conference to fit into your busy schedule.
2. Crisis Communications Conference
- Dates: January 30, 2020
- Best for: Public sector, senior public relations professionals
Crisis communication is an important PR tactic. At the Crisis Communication Conference, PR professionals discuss how your organization is prepared for a crisis, building confidence in your crisis communication plan, short term versus long term consequences, and working with journalists during a crisis. This conference is specifically catered to senior public relations professionals in the public sector.
3. Social Media Strategies Conference
- Dates: February 4-6, 2020
- Best for: Junior public relations professionals
Social media is another vital public relations tactic that’s always changing. At the Social Media Strategies conference, PR professionals learn in-depth how social media strategy can position your brand for success. Distinctively, at this conference there is real-life feedback, discussions, and peer-to-peer learning. This is a great opportunity for young PR professionals to learn from senior-level, cross-industry professionals.
Below is an example of a session by Ryan Pena of MentorMate, who speaks on B2B paid optimization with LinkedIn.
4. B2B Marketing Exchange
- Dates: February 24-26, 2020
- Best for: All public relations practitioners
Although this is a marketing conference, the B2B Marketing Exchange gives PR professionals the chance to learn more about strategic messaging for B2B companies. This event focuses on real-world case studies and bringing actionable takeaways from every session. There are over 100 sessions, workshops, and keynotes to attend during the weekend.
5. PR News Crisis and Measurement Summit
- Dates: February 25-26, 2020
- Best for: Crisis management and senior level PR professionals
PR News gathers annually for the Crisis and Measurement Summit. Crisis management and measuring analytics are two important elements of public relations. Strategizing a crisis communication plan and measuring ROI for your goals will sharpen your skills as a PR professional. This conference also covers KPIs in-depth and tying measurement to your overall public relations goals.
Below is an example of a case study breakout session. This session, “B2B agency—How We Did It with Kevin Elliott,” features Crisis Communications Director Kevin Elliott speaking about crisis communication in-depth.
6. SXSW
- Dates: March 13-22, 2020
- Best for: All public relations practitioners
A popular conference, South by Southwest celebrates many industries — film, music, media, and more. The event features sessions, screenings, and exhibits, covering a wide range of topics. This is a good conference for PR professionals because it discusses key elements of a public relations campaign — creative, storytelling, branding, and professional development. The main goal of SXSW is help creative people achieve their goals.
7. ContentTECH Summit
- Dates: April 20-22, 2020
- Best for: Enterprise senior public relations professionals
ContentTECH Summit discusses content and technology — both widely relevant to a career in public relations. A noteworthy element of this conference is that it’s geared toward senior-level professionals in enterprise companies. Attendees are typically CMOs, CTOs, and enterprise leaders. Workshops discuss strategic messaging for content and making the digital experience of media consumption easier.
8. Content Marketing Conference
- Dates: April 21-23, 2020
- Best for: All public relations practitioners
Public relations professionals write strategic content for their campaigns. That’s why content marketing and public relations often coincide. At the Content Marketing Conference, PR professionals learn about brand reputation and how to humanize their brand. Ultimately, making an emotional connection with the public is the key to success for public relations. This conference features over 70 speakers, 50 sessions, 10 workshops, keynotes, and tracks.
9. Counselors Academy
- Dates: May 3-5, 2020
- Best for: Public relations agency owners
PRSA’s Counselors Academy focuses on helping public relations agency owners grow and retain clients. It is designed for agency leaders by agency leaders. This is a great conference for seasoned professionals who are ready to start their own PR agencies, drive growth, network with fellow agency owners, and learn from their successes and struggles.
10. Confab, The Content Strategy Conference
- Dates: May 17-20, 2020
- Best for: Junior public relations professionals
The Confab Content Strategy Conference can help public relations professionals learn how to plan, design, and create better content for their campaigns. Workshops focus on measuring performance, creating content for AI, hiring and managing staff at your PR agency, and more. This is a great conference for young professionals to learn more about content creation for their PR role.
11. International Association of Business Communicators World Conference
- Dates: June 14-17, 2020
- Best for: Senior public relations professionals
The International Association of Business Communicators (IABC) World Conference is a global conference focusing on professional development for communication professionals. Public relations professionals can network with practitioners from around the world, listen to keynote speeches, and sit in on panel discussions. The 2020 theme is “Shift #AreYouReady” ultimately turning an eye toward the latest trends, exploring new challenges, and solutions.
12. DigMarCon Midwest
- Dates: June 17-18, 2020
- Best for: All public relations practitioners
DigMarCon, short for Digital Marketing Conference, is an opportunity for PR practitioners to learn more about creating brand awareness and using digital tools to drive more productivity in business. As many of the tactics for digital marketing and public relations overlap, the workshops on content strategy, social media, and analytics and data can help PR professionals grow
Below is a keynote master class from the 2019 DigMarCon. Here, Ruben Dua of Dubb discusses best practices on leveraging video to grow your business.
13. Social Media Week Los Angeles
- Dates: June 17-18, 2020
- Best for: All public relations practitioners
Social media is an important element to a public relations campaign. The Social Media Week conference in Los Angeles brings together professionals in marketing, media, technology, and public relations to discuss new ideas, innovations, and social media trends. Different tracks have included The Future of Brands, The Influencer Equation, Paid Media Models, Social Content, and Social Media and Society. The goals of the conference are to give cross-industry professionals insights, ideas, and opportunities for success and professional growth.
14. INBOUND
- Dates: August 18-21, 2020
- Best for: Cross-industry communications professionals
INBOUND is an annual event for cross-industry professionals in communications, including marketing, public relations, customer service, and sales. INBOUND brings out big-name and break-out industry thinkers. With over 250 speakers and 24,000 attendees, there are workshops covering cross-industry topics including video marketing, building client relationships, social selling, Facebook ad hacks, and content strategy. Attendees can expect to learn from, connect with, and inspire one another.
Below is an example of a breakout session on brand-building. Bridgit Evans speaks about storytelling, narratives, and consumer perception.
15. Arthur Page Society Annual Conference
- Dates: September 13-15, 2020
- Best for: Senior public relations and corporate communications executives
The Arthur Page Society annual conference is ideal for senior public relations and corporate communications executives. You’ll learn to strengthen the enterprise leadership role of Chief Communications Officer (CCO). The 2019 theme was how CCOs are transforming their companies and careers. This conference brings expert speakers and practical resources together to help practitioners become better leaders, learn from their peers, and develop their teams. The 2020 theme is yet to be announced.
16. Annual Conference for Media Relations Professionals
- Dates: September 18-20, 2020
- Best for: Mid-level to senior public relations professionals
For public relations practitioners focusing on media relations, the Annual Conference for Media Relations Professionals focuses on the ever-changing media landscape. It discusses building a solid and successful media relations program. The event will highlight how to work with reporters, sharpen storytelling, and interact with editors and media professionals. This is the perfect conference for those at a mid-level or senior position.
17. PubCon
- Dates: October 12-15, 2020
- Best for: Mid-level to senior public relations professionals
PubCon is an educational conference where public relations professionals can learn about digital marketing, content strategies, paid advertising, and SEO. These tactics often overlap and coincide with public relations.
With over 30,000 attendees, PubCon is ideal for seasoned professionals. Public relations practitioners can network with cross-industry professionals and focus on professional development during this conference.
18. World Public Relations Forum
- Dates: October 12-15, 2020
- Best for: Senior public relations professionals
The World Public Relations Forum (WPRF) is an annual experience focusing on global communication trends. With inspiring speakers, networking, and social events, WPRF brings international leaders together to discuss relevant trends in public relations. Topics have included building authentic relationships, ethics and public interest, communicating across cultures, and more.
19. Content Marketing World
- Dates: October 13-16, 2020
- Best for: Junior public relations professionals
Content Marketing World is a great conference for public relations professionals to learn more about creating content for their campaigns. PR professionals build content on a daily basis. There are over 120 sessions and workshops on strategy, storytelling, ROI, artificial intelligence, and more. This conference is ideal for young public relations practitioners early in their career.
Below is an example of a keynote session from 2017. In this keynote, Kate Santore, creative content and excellence at Coca-Cola, discusses brand identity, awareness, and storytelling.
20. MarketingProfs’ B2B Marketing Forum
- Dates: November 3-6, 2020
- Best for: All public relations practitioners
The MarketingProf B2B Marketing Forum is a conference for industry leaders ready to share and learn about secrets to success. Public relations professionals have the opportunity to learn more about B2B clientele and how they brand their companies. There will also be creative networking and fun opportunities for attendees.
Professional development is important in any industry. Conferences give professionals a way to continue learning and developing new ideas for success. Even though some conferences aren’t specifically geared toward public relations, any communication conference is helpful for PR practitioners. There are also plenty of other conferences that aren’t on this list, however, many of them don’t have their 2020 dates released yet.
Want to learn more about industry conferences? Check out our blog, 18 Helpful Tips for Getting the Most Out of an Industry Conference.

Instagram Shopping: The Ultimate Guide
Glossier is an online cosmetics brand boasting $1 billion in sales, a rare sight for a four-year-old company. To what does the company owe its success? In part, to Instagram Shopping.
70% of shoppers turn to the app to do their online browsing. Because of this, Glossier CEO Emily Weiss brought Glossier to where her target audience was: Instagram.
While shopping on Instagram isn’t the newest integration for the social networking service, it has been creating, refining, and fine-tuning its shopping experience, adding new features to the shopping experience for consumers, like Checkout, which allows users to purchase directly in the app.
High fashion brands are releasing entire clothing collections on Instagram and businesses are offering online tutorials on the platform. Instagram is a multi-faceted way to get customers interested and keep them scrolling. So, who wouldn’t want in on Instagram shopping?
Well, let’s break down how to step up or start Instagram Shopping for your company. Here’s what you need to know.
What is Instagram’s Shopping Feature?
Instagram Shopping allows customers to make purchases directly through the Instagram app. Upload photos and tag products with the product name, price, and link to buy.
It’s something 130 million users each month are interested in, and marketers should take note. If your target audience includes anyone under 35, there’s a strong chance that they are using Instagram.
1. Create a business account
Instagram’s Setup guide offers a great checklist to see if your business qualifies for Shopping. TL;DR: your company’s market (location) needs to be supported on Instagram, sell physical goods, and offer e-commerce. Click here to see if your country’s market qualifies.
Your Instagram business account needs to be connected to Facebook. To connect the two, open Instagram and tap ‘Settings.’ Then, tap ‘Account,’ and open the section labeled ‘Linked Accounts.’ From there, sign into your Facebook profile.
2. Configure a catalog
After that, connect to a catalog on Facebook. The catalog is how your product tag, price tag, and sticker tag will end up on your Instagram images. Facebook will guide you through a list of steps to connect an existing catalog or create one.
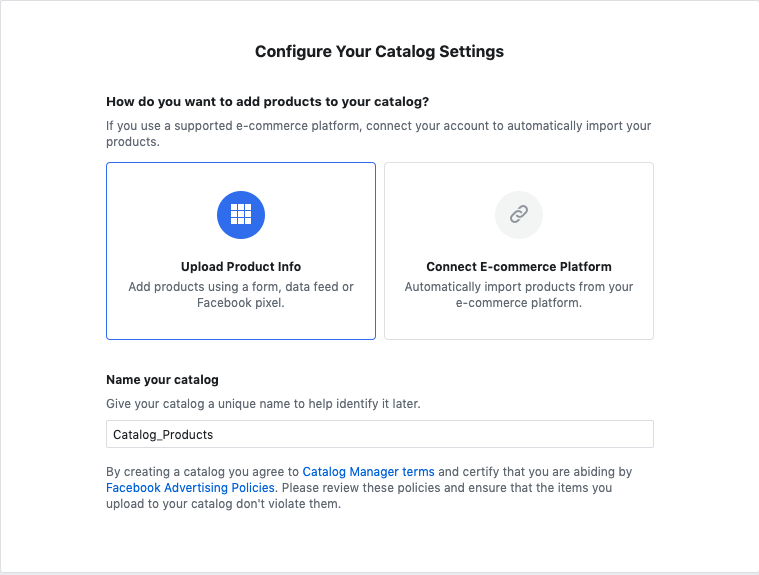
For online tags and price stickers to appear on photos, choose ‘E-commerce.’
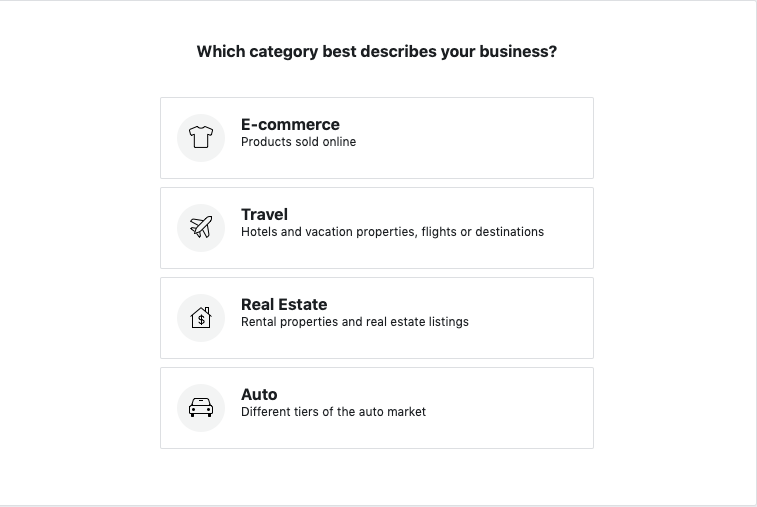
Once connected, Instagram will let you set up Shopping. Open the app and go to your profile’s settings. Once there, the sequence is “Business Shopping on Instagram.” You must submit your account for review. Give yourself at least a few days for the account review process, because it may take that long to be approved.
3. Be Patient
Instagram will notify you once you’ve been approved through the catalog manager. This process can take between a few days up to about a week and a half. Then, you can continue to set up Shopping in Instagram’s settings using the app.
4. Upload
Once your account has been approved, you’ll see a new option to tag products when you upload an image to your feed or Stories. Tapping this new prompt will let you select an item from the catalog you created on Facebook. From there, your followers will see the items up for sale tagged on your photos.
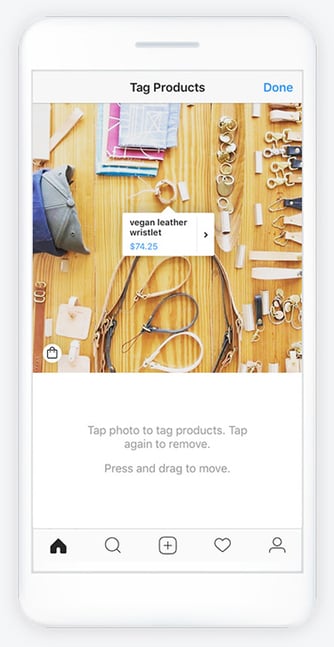
Image Source: Facebook
5. Share
Instagram imposes a limit of five products per photo and up to 20 for carousels. This option is how fashion and beauty industries release entire product collections on their feeds. Remember, you can go back and insert Shopping choices on older posts as well.
Shoppable Stories
To upload a shoppable story, the process looks a little different. When your account is approved for business and Shopping, stories are included.
With Stories, businesses can add one product sticker that’s shoppable. This leads the customer to the same shopping page they would visit if they saw this post on their feed. The sticker has the same product and pricing information as a feed post.
To do this, simply add to your story as you would do a regular post, opening up the Stories feature and choosing the option from the taskbar once you have a photo selected. From there, tap the sticker option and then click ‘Product’ to add your item. Remember, you can only add one of these tags per story.
Stories with a product tag will appear with a shopping bag icon on the post to notify customers there’s a product attached. The shopping bag icon can be selected by users. When selected, it takes customers to an in-app landing page with the option to view or buy the item on your company’s website.
Instagram Shopping Ads
It’s important to note that Shopping is currently a feature for organic sales only. This means businesses using ads on Instagram aren’t able to include Shopping posts in those ads. Even so, when advertising on Instagram, you can encourage shoppers to go to your feed to see new changes or updates.
A great way to let consumers know your business has added Shopping to their Instagram feed is to announce it on your story and advise them to check out your page for more information. Another way you can unveil Shopping is to use the image captions to make the big announcement.
Optimize Instagram Shopping
Shopping revolutionizes the way you market your products online. It facilitates a seamless purchasing process for consumers. Here are a few helpful tips to put your best photo forward when introducing Shopping to your audience.
1. Be consistent
Your photos and videos should accurately represent the product they’re advertising. For instance, if you’re a SaaS company using Shopping to sell your new software, the post should truthfully depict what the customer is buying and how it will benefit them.
For example, if you’re an advertising agency, it’s a good idea to have your posts geared towards client testimonials, client spotlights, and stats that draw potential customers into your business with a Shopping tag embedded into CTA posts. It’s probably not a good idea to post low-quality memes or content that strays from your company’s mission.
2. Descriptions
Captions are the key to acing the Instagram algorithm and hooking potential customers. As a consumer, a good caption can set a business apart and tell me that I want to learn more or move on. Using descriptive hashtags gives potential customers insight they need.
Users can follow hashtags like #veganrecipes, and descriptions can make your posts easier to find, such as #VeganRecipeEbook. Try using a mix of broad and specific hashtags. Going back to the software example, possible hashtags could be #B2B, #new software #tech #iOScompatible.
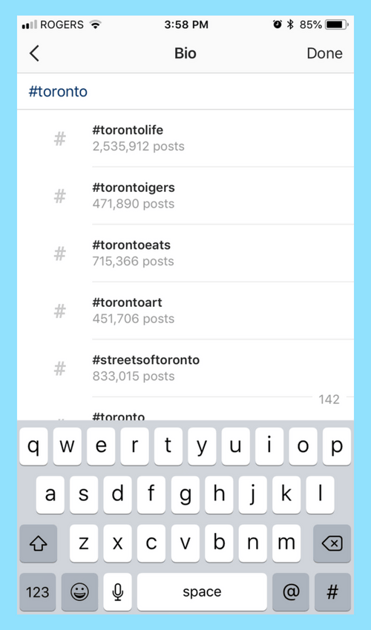
Image Source: Later
3. Use high-quality content
Consumers are going to be critical of Shopping posts — more than they are of other posts on Instagram. Make sure posts include high-quality photos, correct tagging, and website links. Match the aesthetic of your brand to stand out and keep your regular consumers coming back to what they know and engage with what they love.
For more inspiration on how to use Instagram Stories to engage your audience, check out these 19 examples, ranging from NASA makes space accessible with stunning visuals to how America’s Test Kitchen ranks the crispiness of their bacon.

The Ultimate Guide to Successfully Rebranding in 2019
When you’re first starting a business, branding is likely the last thing on your mind. After all, it’s hard to sit down and flip through fonts when you’re still trying to figure out who your customers are (and where to find them).
Plus, even if you made creating a brand identity a priority in the beginning, a change in business plans might have made your initial branding strategy obsolete.
Whether your branding design efforts started (and ended) with a logo jotted down on a napkin, or you whiteboarded your way through the complete branding process — from brand values to logo variations — somewhere along the way things stopped working.
However you got here, you’re not happy.
Fortunately, rebranding is not uncommon — many major brands, ranging from Dunkin’ Donuts to Uber, have successfully rebranded in the past.
If you’re considering a rebrand, keep reading to learn how to rebrand a company, plus examples of other brands who’ve successfully rebranded their website, name, logo, or entire company mission and purpose.
But first, let’s make sure you have the right reasons to rebrand.
The Right (and Wrong) Reasons to Rebrand
Rebrands are complicated, and carry big risks.
Even big brands aren’t immune — just look at Uber. After redesigning its logo, 44% of people were unsure of what Uber’s logo represented.
Ultimately, knowing the risks of rebranding can help you determine whether or not you’re going into a rebrand for the right reasons.
If you’re looking at rebranding your business because sales have been slow or brand awareness efforts don’t seem to be paying off, you might want to reconsider — these issues can potentially be solved by creating a new marketing strategy, or conducting market research to identify the underlying cause.
But if you’re considering a rebrand because your company’s vision, mission, values, and market are no longer reflected in your brand, then a rebrand might be the right decision.
There are a few other major reasons you might consider a rebrand, including:
- New locations — you might need to refresh your brand if you’re expanding to international markets who won’t identify with your current logo, messaging, etc.
- Market repositioning — brands are designed to connect companies with their customers, so if you reposition your business to target a completely new customer profile — whether through product, place, price, or promotion — your brand will need to follow suit.
- New philosophy — your business’s mission, vision, and values should govern every decision you make — including brand decisions. If your MVV are shifting and pivoting the direction of your business along with them, you’ll need to reevaluate your brand.
- Mergers and acquisitions — when two companies come together, two brands come together, as well. If your company was acquired or joined with another company, you can’t just let both brands battle it out. Finding a new brand that reflects the new entity will prevent confusion and build trust.
Additionally, here are a few reasons not to rebrand:
- Boredom — too often, people consider a rebrand because they’re sick of seeing the same logo and slogan every day. When you’re starting to feel restless with your brand, remember that your customers (who see it much less frequently) might love that signature color you’ve come to loathe.
- Covering Up a Crisis — whether you’re working against persistent internal issues or fending off bad press, a rebrand isn’t the answer. Most consumers and employees are smart enough to see right through your rebrand and recognize it for what it is — a cover-up.
- Impact and ego — for new managers, a rebrand might seem like the fastest way to make your mark. But most new managers aren’t implementing the kind of institutional change that justifies a rebrand. More often than not, new leadership that insists on a rebrand is doing it more for themselves than the company.
- Looking for attention — maybe sales have been floundering, or perhaps brand awareness efforts aren’t picking up, but either way, jumping into a rebrand is the wrong move. At best, you’ll generate some short-term buzz, without the sales and marketing strategy to sustain it. At worst, you’ll lose whatever brand recognition you had and set back your sales and marketing efforts.
If you’ve determined a rebrand is still the right choice for you, keep reading to learn how to devise a rebrand strategy.
Not all rebrands are created equal, so let’s first consider whether a partial or total rebrand is the best option for your business.
Partial vs. Total Rebrand
The more established your business and brand are, the more you have to lose from a rebrand.
If your business is more mature, a partial rebrand can help you retain the brand loyalty you’ve built, while refreshing your image to keep up with changing times.
Think of a partial rebrand as an adjustment focused on your visual brand identity to suit new offerings or markets — as opposed to a complete identity crisis.
That’s not to say that a partial rebrand can’t be effective. Just look at Old Spice. The men’s deodorant company redefined its place in the market and has seen massive growth every year since repositioning the brand — all while retaining what made Old Spice cool in the first place.
However, if you’re undergoing a complete identity shift and your company’s mission, vision, and values are changing, a total rebrand might be in order. This option is typically suited to situations like mergers, product overhauls, and other similarly foundational shifts.
Here, everything is on the table — from your name to your purpose, your market, or your brand identity.
If a partial rebrand is a quick touch-up, the total rebrand is a complete makeover.
Once you’ve determined whether you need a partial or total rebrand, take a look at the following five steps you’ll want to implement to successfully rebrand.
1. Reestablish your brand’s audience and market.
After extensive market research, including focus groups and analyzing the data, you’ve noticed something startling — your customers (or competitors) aren’t who you thought they were.
Maybe it’s a demographic with which you never thought you’d engage. Alternatively, maybe there’s a new competitor on the market and its products or services are directly competing with yours.
And you have the data to prove it.
Take a look at who’s actually buying from you — and who they’re buying from, instead of you. Comparing this against your initial target market and audience might reveal some stark differences.
Once you’ve established your actual market and audience, you’re ready to start rebranding your company to connect with your customers (and outsmart your competitors).
2. Redefine your company’s vision, mission, and values.
What are you doing? How are you doing it? Why are you doing it?
When you’re re-evaluating your vision, mission, and values during a rebrand, these are the three questions you’ll need to ask yourself. While it’s easy to take your messaging foundations for granted, they can change as a company grows.
New products, priorities, services, or stakeholders can completely undo what once seemed like a given.
Here are a few major components of your company you’ll want to analyze to decide which part(s) of your company need a little TLC.
Vision
This is a big one. Vision acts as the North Star for every action your company undertakes, so it’s critical you have a firm understanding of your vision before moving forward — additionally, perhaps overtime your vision has changed. That’s okay, but it’s vital you redefine your vision as quickly as possible to ensure all your employees are making decisions with that vision in-mind.
When you’re rebranding, company vision will affect everything from your website redesign to your hiring process.
Mission
If vision is your what, mission is your how. Maybe you’re still going in the same direction, but the way you’re getting there has changed. Ultimately, your mission is your company’s roadmap.
When your mission changes, your messaging needs to change as well — making it just as crucial as vision during a rebrand.
For instance, Sweetgreen’s mission statement is “To inspire healthier communities by connecting people to real food.” This motto will help define everything about Sweetgreen’s brand, from the images they use in advertisements to the language they use in press releases.
Values
Your values act as the why behind your brand. They’re why you’re working towards your vision, and why you’re dedicated to your mission.
But, as brands expand and change, some of their founding values might become unsustainable. If you can’t support your old values or you’ve come to prioritize new ones, you’ll need to update them to reflect what your company actually values today.
Brand Voice
As your vision, mission, and values change while rebranding, the way you convey these aspects of your company will also have to change. The vocabulary, tone, and voice you use for your brand has to match your message. So, if what you’re saying is changing, how you’re saying it will need to change, as well.
3. Rename your company during a rebrand.
Changing names is a big undertaking, one that can cost you brand recognition and organic search traffic in one fell swoop. So, if you’re renaming your company as part of your rebrand, make sure you have a plan for recovery as part of your post-rebrand strategy.
On the whole, if your name still fits, your best course of action is to keep it. But if your current name is a mismatch for your company identity, it might be time to go back to the drawing board. To help make that drawing board a little less daunting, here are some starter ideas for the renaming process:
- Make a new word
- Use an old word in new ways
- Say what you do (literally)
- Modify a word’s spelling
- Add a prefix or suffix
- Look to other languages
- Bring two words together
- Create an acronym
- Use a location
If you’re revisiting your name while rebranding, focus on alignment with your brand’s vision, mission, and values — more than just what sounds good. That way, your new name has a better chance of supporting your long-term growth and goals.
4. Reconsider your brand’s slogan.
A good slogan is catchy and captures your company’s mission and vision. It’s your company’s purpose, condensed. Unlike changing names, changing slogans is a little easier on your marketing efforts. But like changing names, you should still consider it carefully.
First, it’s critical you ask yourself, why do you really want to change your slogan?
It’s easy to fall into the trap of hating your slogan because you’ve heard it so many times. But it’s that same repetition that builds brand recognition. Even though you might have gotten sick of your slogan after seeing it constantly, your customers might love it.
If you’re on the fence, you can hold focus groups to see if the slogan is really resonating. If it isn’t, you can get some new ideas for slogans with these starting points:
- Make a claim
- Get metaphorical
- Use poetic language
- Provide instructions
- Leverage labels
- Compliment customers
5. Rebuild your brand identity.
The tangible elements you use to communicate your brand might have been in play for a few years by the time you start considering a rebrand. This means you’ve likely had plenty of time to reconsider their strengths and weaknesses before replacing them.
You might want to redesign your logo, use new colors in your brand material, or even create new brand guidelines. Here are a few common changes you might make as part of your rebranding strategy:
Your Logo
Maybe you loved your logo when you first started your company, but you’re finding your customers never really seemed to “get it”. Alternatively, perhaps your logo needs a refresh to reflect the other major changes you’ve made internally.
If you’re looking to do a logo redesign, going back to the basics of what makes a good logo will help you to get it right this time.
Stay simple. Jamming as much symbolism as possible into a logo generally doesn’t work out too well. But that’s a hard truth for young companies who are still trying to prove themselves. Now that you’re more established, show your confidence with a simple logo.
Make an impact. Maybe you went the opposite route in your original logo design and were too afraid to be bold, so you stuck with something safe. Your logo isn’t worth much if people can’t remember it, so when you’re redesigning your logo, don’t settle for something that won’t stand out.
Be adaptable. One thing you might have learned with your first logo is its limitations. Now that you know what shapes or styles might not be as versatile for the channels your business actually uses, bear those in mind during redesign.
Aim for appropriate. As companies mature and get to know their customers better, a logo that might have made sense at launch could now be considered completely wrong for that company’s target market.
Look to the long term. As fun as rebrands might seem, you don’t want to do this every year, so really look at your vision, mission, values, and purpose and consider whether this new logo can support them in the long run.
Maintain through-lines. Like your name, your logo is one of your brand’s most memorable components. When you’re rebranding, avoid losing too much brand recognition by trying to maintain the parts of your old logo that worked. If you can maintain a sense of continuity, you’ll be able to carry over some of the brand recognition your old logo initially had.
If we look at a few logo redesigns from 2019, we can see this process in-action. Take Zara and The Knot, for example, two companies that changed their logos this year:

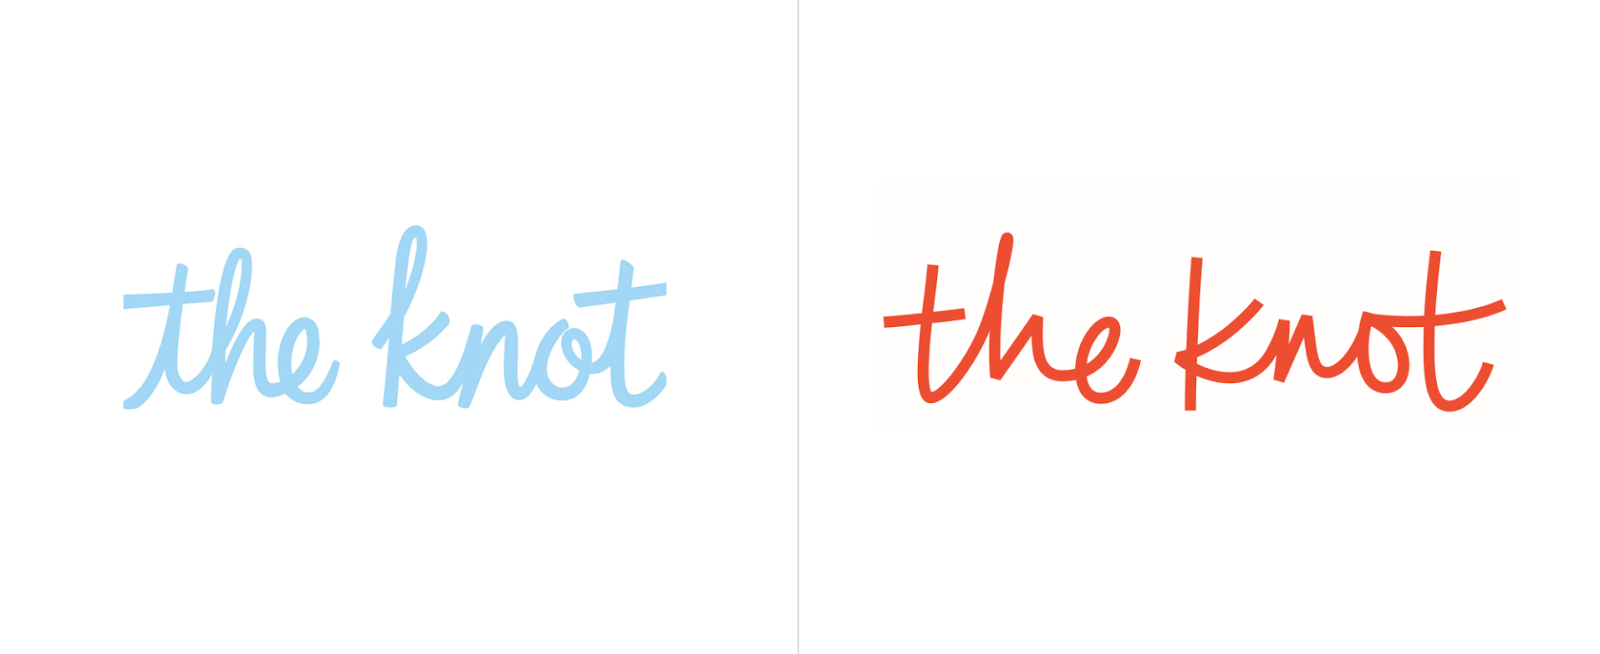
In these brand updates, elements of the old brand carry through. Zara kept its bold, black lettering, but pushed the kerning tighter and switched one Serif font for another. The Knot, on the other hand, stayed in the same typography family with a Script font, but swapped blue for orange in their color scheme.
Choosing Your New Color Palette
Color can have a huge impact on your brand — in fact, some colors are now synonymous with the brands that use them, like McDonald’s yellow. But choosing the right color can be difficult, and as your company develops, your color might need a brush up.
Looking at your brand colors with fresh eyes using color psychology and competitor research can help you evaluate whether they’re working with (or against) the brand image you’re looking to project.
Additionally, now that you’ve been working with your color(s) for a while, you may have noticed that the way your colors show up on-screen vs. in-print isn’t consistent. When considering colors during your rebrand, check to ensure the color looks the same on a variety of brand materials.
Typography
Like your color, your original font may have shown up differently in practice than in theory. When you’re reevaluating fonts, pay close attention to what worked and what didn’t with your old font, along with any difficulties you had — like accessing the font for web design or PowerPoints.
You might also want to consider whether your font is consistent with any markets or messages uncovered while rebranding. If your customers are more mature than you initially expected, that super hip Sans Serif font might be better off as a more traditional Serif font. After all, the medium is the message.
And now that you know your marketing channels, you’ll be able to make more educated decisions on weight and cuts — like which fonts show up well, and which leave your words looking wonky.
Shapes and Imagery Revisited
Like your logo, color palette, and typography, your imagery and shapes play a vital role in your brand identity. If you’re changing any of your brand’s other visual elements, it’s worth reconsidering your imagery and shapes to keep everything cohesive after you’ve rebranded.
But it’s not enough for your rebrand to look cohesive — it needs to support the core messages of your brand, as well. At every step in the branding design process, make sure the what, how, and why behind your brand are also behind your new brand identity.
Building New Brand Guidelines
If you’re going to go through all the trouble of creating a new brand identity for your business, you better make sure you use it correctly. Having (and actually using) brand guidelines will help you keep your brand consistent after the transition.
Brand guidelines are especially critical for logos. Logo guidelines are designed to make it as easy as possible for customers to see, recognize, and remember your logo — making up for any lost familiarity that comes with a rebrand.
Here are a few elements to consider when writing your logo guidelines:
- Logo elements. What visual elements make up your logo? When and how are each of them used?
- Color variations. What does the colored version of your logo look like? What about black and white? When are each of these used?
- Clear space. Also called padding, this is the space around your logo that prevents overlap or obscuring. Aim for at least 10% of width at all times.
- Unacceptable uses. What can never be done to your logo? What color variations, rotations, scaling, etc. do you want to avoid?
You’ll want to have your guidelines on hand if you’re doing a website redesign, creating a rebrand campaign, or creating other marketing materials.
At its best, a rebrand can act as an incentive to remain consistent and on-brand in all your marketing efforts moving forward — something that can slip in businesses over time.
Now that we’ve explored various aspects of rebranding, let’s take a look at examples for further inspiration.
1. Chobani rebrand

In 2017, Chobani made a few major changes to their brand in an effort to stand-out in the crowded, oftentimes homogeneous-looking yogurt industry.
First, they shifted their identity from a yogurt company to a “food-focused wellness company” with a new mission — “Fighting for happily ever after.” Under their Impact page on their website, you’ll see the statement, “The most important thing we make is a difference. It’s always been about more than yogurt.” You’ll see this focus on health and nutrition in their advertisements and their new products, including Less Sugar Greek Yogurt and Chobani Flip Yogurt.
Additionally, as shown above, Chobani changed its packaging — instead of using plain white cups with fruit photos, they redesigned their product packaging using 19th century American folk art with a variety of colors. Their rebrand helps their products stand-out from the other plain white yogurt packages on the shelves.
2. Candid rebrand

Rebranding is often a good decision after two companies merge.
For instance, Foundation Center was the largest source of information about philanthropy globally, and GuideStar was the largest source of information on U.S. nonprofit organizations. In 2019, the two organizations joined forces to become Candid, enabling both foundations to enhance the services they offer to millions of people who rely on them to help make the world a better place.
If you visit Foundation Center’s website, you’ll see a message that reads: “Foundation Center and GuideStar are now Candid. You were redirected to candid.org from foundationcenter.org.” The old GuideStar website is still visible and usable, but there is an explanation of the new corporate entity and a link to Candid’s page.
Candid, the new merged foundation, now boasts a sleek website with a mission statement, guiding principles, and a vision that combines the best of both Foundation Center and GuideStar.
3. Dropbox rebrand
In 2007, Dropbox launched as a file-storage and file-sharing web service — but in 2017, the company now wants you to think of them as ” the connective tissue for teams and businesses of all sizes”. Instead of just a file-sharing service, Dropbox is now a full suite with APIs, tools, and integrations.
Along with the internal mission shift, Dropbox refreshed its logo to reflect its new products. In a statement regarding the new logo, the Dropbox design team said, “Our old logo was a blue box that implied, ‘Dropbox is a great place to store stuff.’ The new one is cleaner and simpler. And we’ve evolved it from a literal box, to a collection of surfaces to show that Dropbox is an open platform, and a place for creation.”
4. Pet Food Experts rebrand
Pet Food Experts has a full timeline on their website that reflects all company changes since 1936, when the company first opened.
Among the most notable are the company’s name change from “Rumford Pet Center” to “Pet Food Experts” (in an “effort to establish itself separately from the Rumford Aquarium”), and the logo redesign in 2008. The 80-year-old company has grown significantly over the years, and is now a major distributor of pet products from coast-to-coast.
To reflect their change and growth over the years, the company has taken numerous successful steps to consistently refresh their brand to reflect their products and values as they change over time.
5. Dunkin’ Donuts rebrand

Beginning in January 2019, Dunkin’ Donuts, first introduced in 1973, adopted a new logo that dropped the “Donuts” on their name — now, signs, logos, and marketing materials simply read, “Dunkin'”.
The new name signifies the companies focus on coffee — Tony Weisman, Chief Marketing Officer, Dunkin’ U.S., said in a statement, “By simplifying and modernizing our name, while still paying homage to our heritage, we have an opportunity to create an incredible new energy for Dunkin’, both in and outside our stores.”
Despite the change in name, Dunkin’ continues to use the same pink and organic colors and iconic font to ensure long-time customers continue to recognize the brand.
6. IHOP rebrand
As you’ve likely gathered from this post, a rebrand is a fantastic opportunity to refresh your public perception and get consumers’ attention.
Which is exactly why IHOP used a rebrand as a marketing ploy to get people to pay attention to their new product — burgers. In 2018, IHOP announced that it was rebranding as IHOb, the International House of Burgers. It began using IHOb on social media, its website, and in-store promotions.
Eventually, IHOP admitted its rebranding was a joke to get people to pay attention to their new line of ground Angus ground beef burgers. Their “joke rebrand” was a smart play — it incentivized people to either vehemently fight for the importance of IHOP’s most important product (pancakes), while also calling attention to their other offerings.
IHOP has since switched back to its original name and logo.
Are You Ready to Rebrand?
Now that you know everything a rebrand entails, it’s time to consider if and how you want to rebrand your own business. Whether you end up going with a logo redesign, a website redesign, some refreshed messaging or a complete brand overhaul, these steps can help you to consider your best strategy for building a brand that gets it right this time.

Requirements Analysis & Ensuring Stakeholder Satisfaction
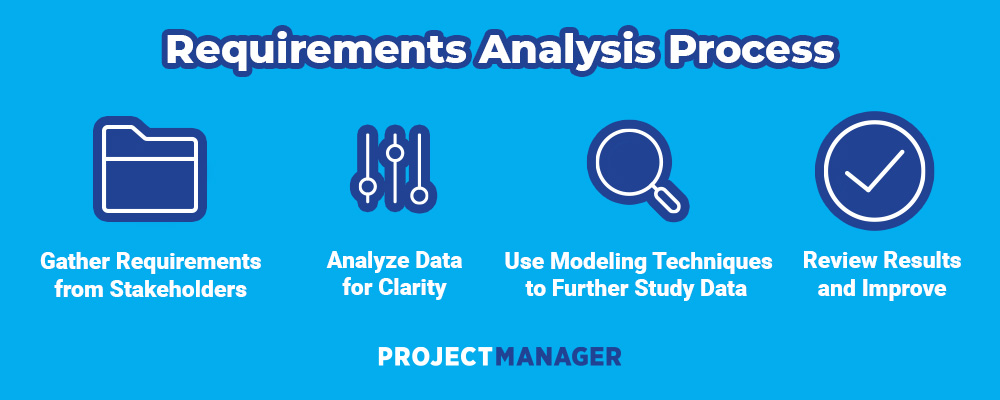
What does CRM-Driven Marketing Actually Mean
We’ve reached peak martech saturation. Just look at this graphic:
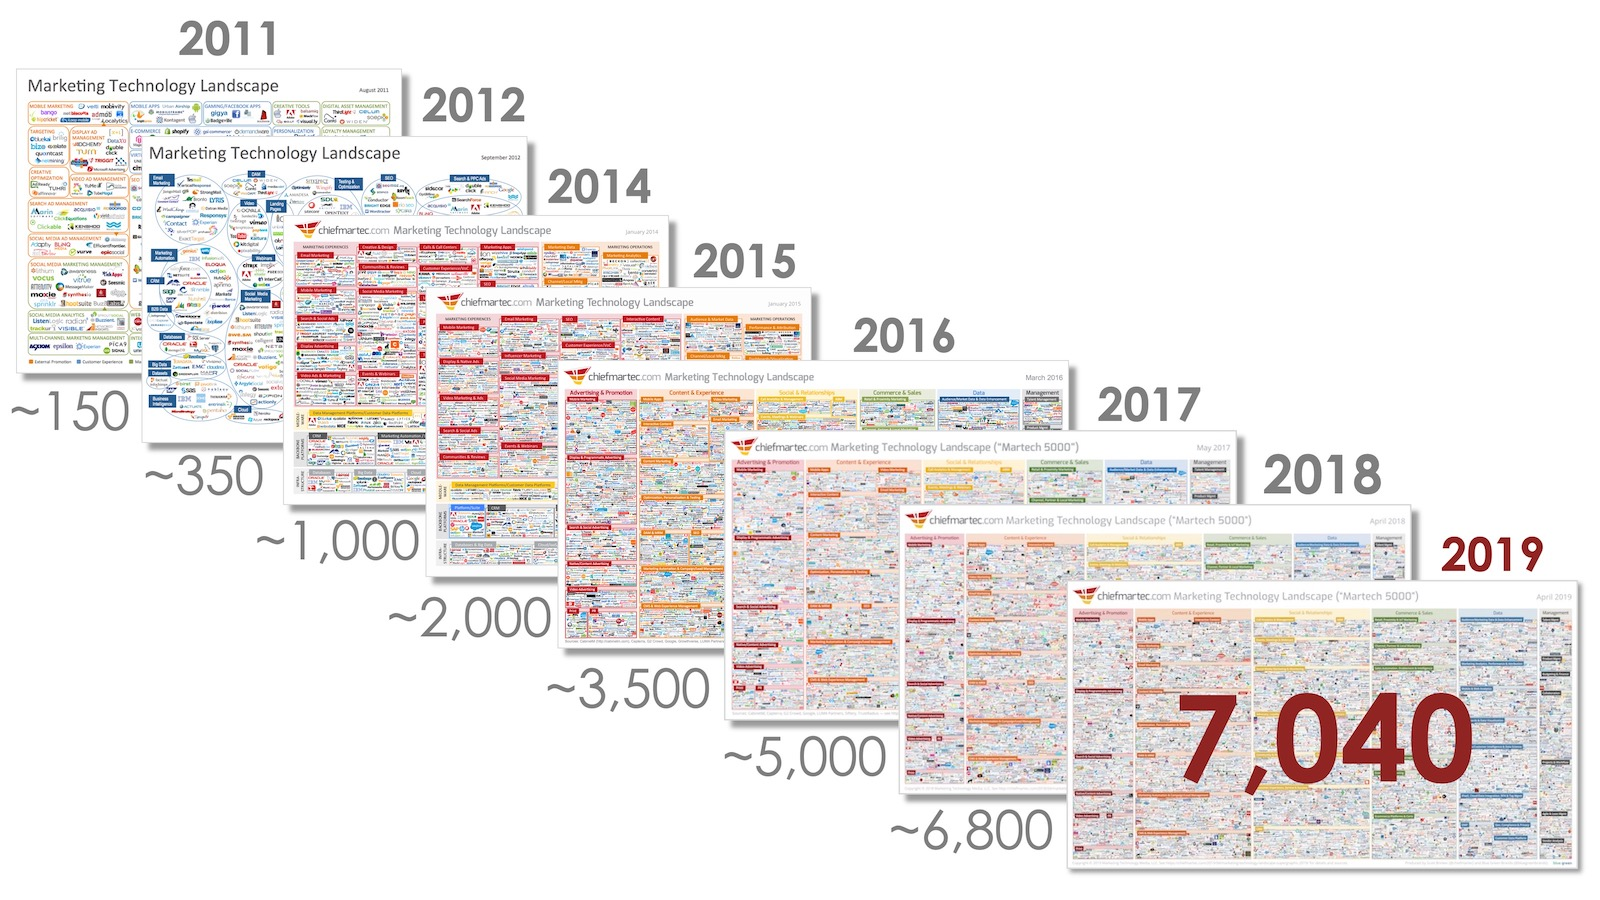
The first Martech map was created back in 2011. It had 150 solutions. In 2019, the number has exploded to more than 7,000. And we’re not slowing down.
More and more martech solutions will pop up on this map next year, because marketers can’t get enough of them. In fact, Blissfully estimates that small companies have, on average, 20+ SaaS solutions — and larger companies usually have more than 100.
This trend of adopting different martech solutions has hit our customer base, too. We’ve swapped our “all-in-one” marketing solution for an “all-on-one” platform that sees our average customer plugging in seven different tools to get the most out of HubSpot.
I’d argue that marketers are more in-tune with their tech stack than anyone else at a company. In 2018, most companies spent about 30% of their marketing budget on technology — with CMO’s often driving more tech decisions than even CIOs.
Technology is no longer optional — it’s essential for today’s modern marketer.
The advantages of being an early adopter of technology are long gone. Every single marketer has access to the same tools and resources. We’re all jostling for position amongst a sea of marketers that are all employing the same tools and tactics to help grow their companies. How does anyone get ahead in this?
Tools can be replicated. Remarkable customer experiences cannot.
Why You Need to Leverage Your CRM for Experience-Driven Marketing
The marketers who get ahead today are hyper-focused on the customer experience. Experience driven marketing puts your customers at the center of everything you do as a marketer.
It’s a major reason why HubSpot has adopted the flywheel. When focused on the customer experience, marketing attracts & feeds into sales. Sales engages and feeds into service. Service delights and feeds back into marketing. And all of this is only possible when the customer is at the center, managed by a CRM.

Leveraging your CRM is the secret to experience driven marketing. Experience driven marketing isn’t just a buzzword — it’s your secret to growth. Forrester research found that companies who said they were focused on experience grew 40% faster and increased customer lifetime value by more than 60% versus those who weren’t.
Very few marketers have all of their tools and tactics tightly integrated into a CRM — which often leads to disjointed customer experiences, siloed data, and an inability to know what’s working.
This is why we’re investing so much effort in tightly integrating HubSpot’s Marketing Hub with the CRM — to give your team a unified view of the customer experience, which allows you to create truly personalized experiences across all channels, and to help you properly measure your success as a marketer.
When your entire team operates out of a CRM, you get information that allows you to develop a customer experience from first touch, all the way through the delight phase. More importantly, your entire team is keying information about the buyer into the CRM — giving you the ability to work hand-in-hand with your sales and service teams. Marketers should absolutely create campaigns in the engage phase to drive renewals and win-backs, and also in the delight phase, driving feedback and referrals.
Chargebacks911, a SaaS company that helps online merchants manage the refund and chargebacks process, shows exactly how the CRM is creating a unified vision of the customer journey for their team. They took the data they had stored within their own CRM, and used the flywheel model to map out their customer experience. Across the flywheel, they marked different points of force and friction that were influencing their customers:
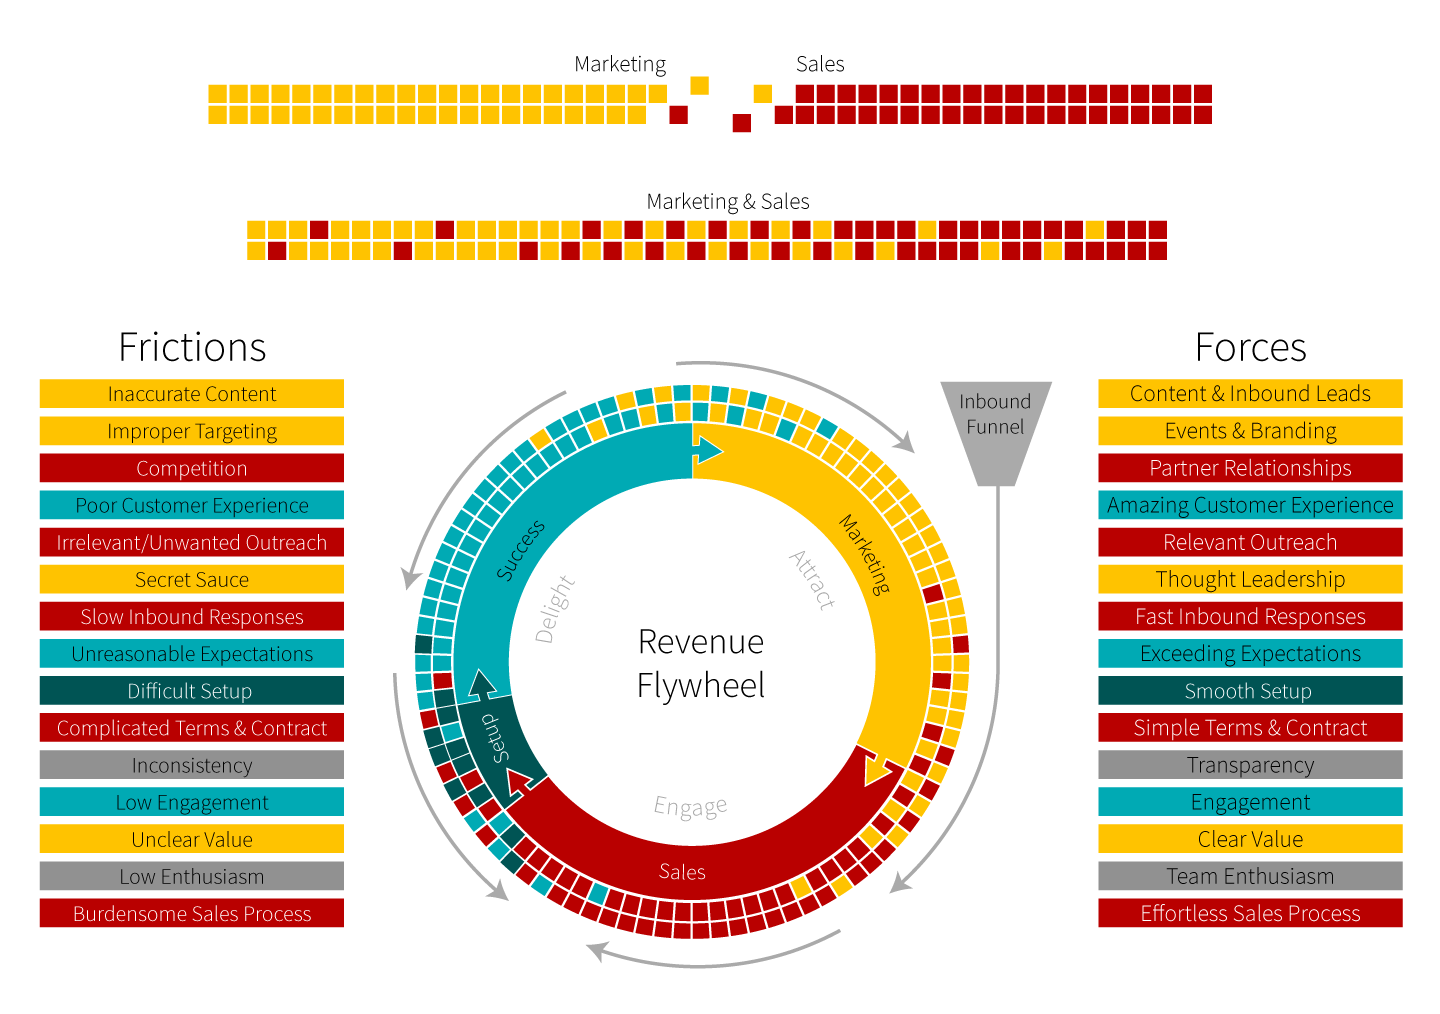
By leveraging the data in their CRM, and sharing it across teams, they were able to uncover a significant point of friction in their on-boarding process that was actually leading to negative momentum in their flywheel. They noticed their marketing materials were not clear enough for prospects evaluating their software, there was slow response time from the sales team on inbound leads, and there was a misalignment between what the sales team sold, and what the service team delivered during on-boarding.
Once they mapped out where their points of friction occurred across the buyer’s journey, they could start addressing them. First, they changed their marketing message to be more clear in the value Chargebacks911 provided.
They then focused on creating cross-team alignment. They began adding sales reps into service on-boarding calls to ensure the handoff between those two teams went smoothly. They also began hiring a number of cross-functional roles across marketing, sales, and service to sure up any gaps between the teams.
Jarrod Wright at Chargebacks911 says “Leveraging the CRM ensures we’re all speaking a common language. Sales informs our marketing message, marketing creates sales collateral, and we can easily see how this is impacting the customer.”
The results speak for themselves. Chargebacks911 was able to reduce customer churn by 30%. At the same time, they increased their closed leads by 10%. This is real business impact driven by focusing on the customer experience, through the lens of the flywheel, mapped to the data in the CRM.
A CRM Helps You Personalize Your Marketing Offers
Rooting your marketing in a CRM also lets you create personalized experiences across every channel. Personalization continues to be the holy grail for delivering a great experience. In this hyper competitive environment, it’s harder than ever to win attention — and we all know that the more you personalize, the greater your chances are of being noticed.
What does real personalization look like to me? Real personalization is when the content on your site changes, recommending content that your visitor hasn’t read yet. Or when that visitor has shown interest in one topic, so you show them an offer that’s related. Or when you have CTAs for customers and different ones for prospects. Or when the chat bot on your site remembers not only their name, but who their sales rep is. All of this is possible through CRM-driven marketing.
Without a CRM, personalization is largely a parlor trick.
Piloxing, a global exercise brand that hosts in-person and virtual classes in 92 different countries, leverages the HubSpot platform to create a personalized experience for their customers.
They’ve worked with both Media Junction and Impulse Creative to develop and integrate the platform to share personalized content for each of their three main personas — fitness instructors, class participants, and gym managers or owners. They needed a simple way to create content and marketing materials for each.
Through our tools, they’re able to create gated content for trainers and customers alike, personalize the content on their website based on previous interactions, and leverage data across the buyer’s journey to inform their email and ad campaigns. Personalization at the scale that Piloxing requires would normally require multiple custom solutions. But by leveraging the CRM, CMS, and our Marketing Hub together, they’re able to cater to each of their personas in one unified system.
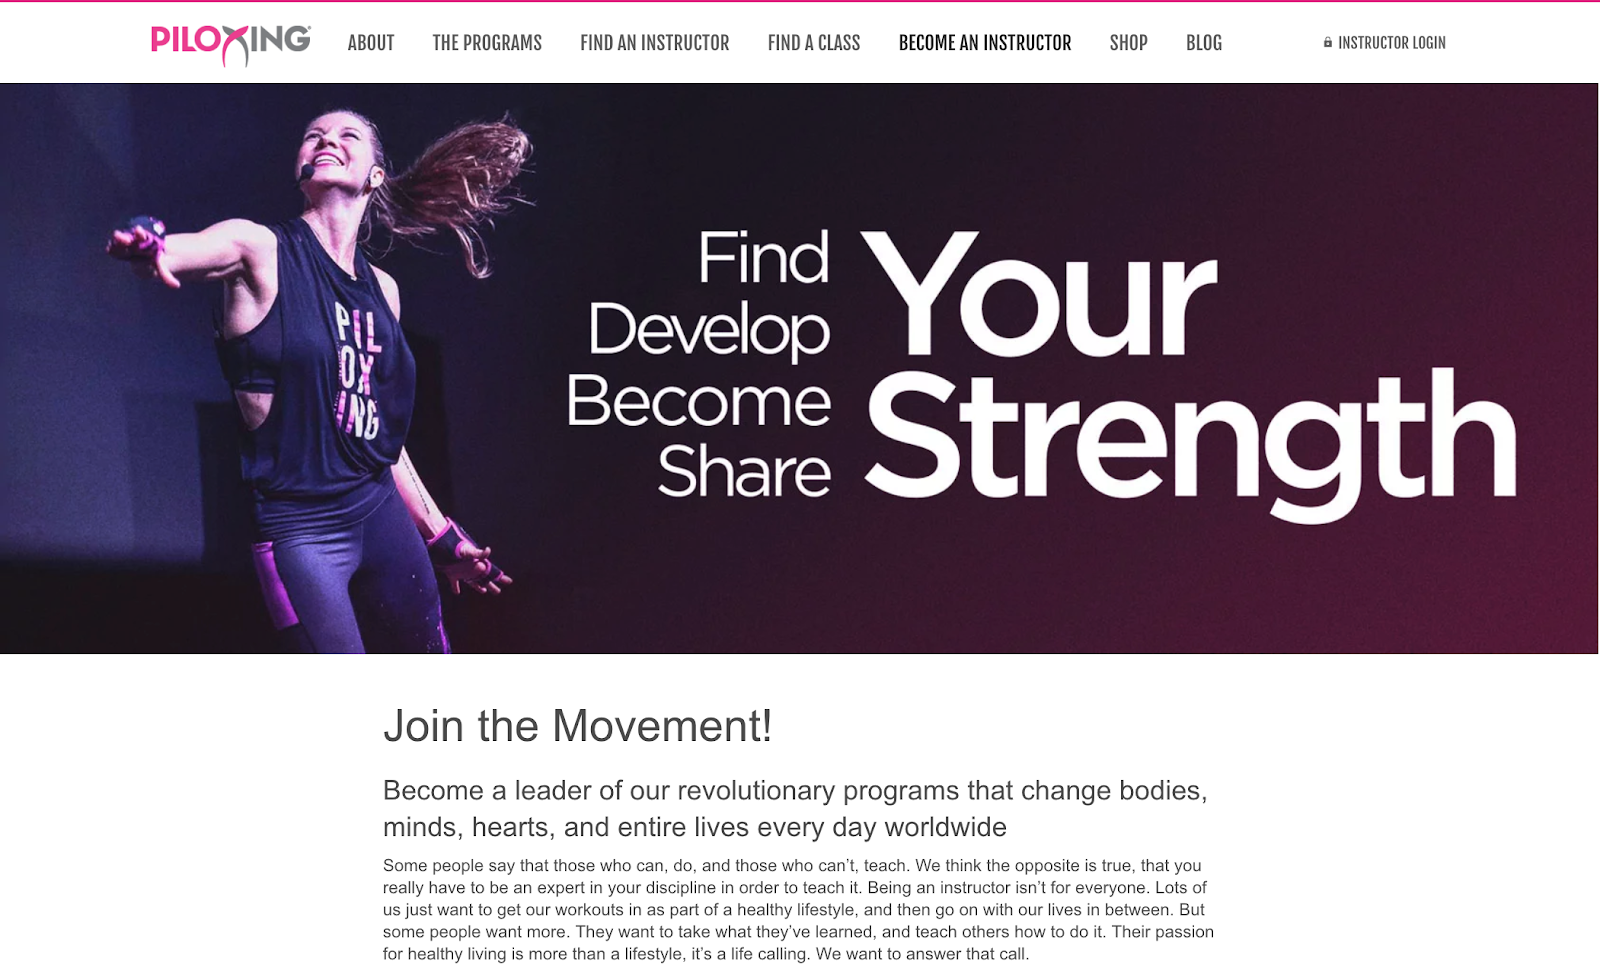
Your CRM Measures Your Business’s Success
Finally, let’s shift gears and talk about measuring your success. I’d wager that most marketers aren’t given the credit they deserve for driving growth at their companies. I believe CRM-driven marketing gets marketers the most credit for the work they do to drive revenue and overall growth.
Your CRM is your system of record. It’s here where you look at your business’ overall success. You can see how efficient you are at closing deals, which pipelines are driving the most revenue for your business, and where your leads are coming from. When you root your marketing tools in this system of record, you get one single place to report on both marketing activities and overall business impact.
This is something that HubSpot customer Automox is keenly aware of. Automox offers cyber hygiene solutions that give IT Managers confidence about the status of their system security. Automox knows that 80% of cyber threats can be avoided simply by automating cyber hygiene fundamentals, and offering attackers a more difficult target to exploit.
The problem? Too many companies are relying on detection and response efforts in isolation. As a result, Automox’s marketing team is focused on creating marketing materials that not only drive sales, but also educate the market on the importance of adopting a solution like theirs.
Camille Stauffer, a content marketing manager at Automox, wants to know that the content they’re creating is impacting their bottom line. Whether it’s enabling sales to close a competitive deal or it’s educational content that is driving awareness of the Automox brand, it’s critical for Camille to understand which marketing actions are making an impact so they can better allocate their resources.
This is a hard question to answer given that a customer’s journey is rarely a simple, clean line. Any potential customer might interact with a wide variety of marketing assets before ultimately deciding to buy.

As a product guy who builds software with marketers in mind, I view it as my job to ensure marketers like Camille and the rest of the team at Automox are able to answer seemingly simple questions like “which marketing materials do paying customers interact with?” Combining our CRM with all the marketing tools you use to engage your customers provides us with a strong foundation — now it’s time to surface the data necessary to give marketers the credit they deserve.
We announced that we’re working on multi-touch revenue attribution at INBOUND this year, and I cannot wait to bring this to all our customers soon.
I strongly believe that marketer’s are the architect of the flywheel. By taking ownership of the flywheel and leveraging their company’s CRM to ensure that customers are at the center of their business’ growth, marketers can start to build the delightful experiences that will truly differentiate themselves from the pack.
This content is derived from Nicholas Holland 2019 Keynote at INBOUND. Holland is the GM of HubSpot’s Marketing Hub.

12 Techniques to Reduce Your Facebook Ad Spend

Do you want to reduce unnecessary spending on your Facebook ads? Looking for a way to audit your work? In this article, you’ll discover how to assess and improve your Facebook ad campaign performance—from first click to landing page conversion. First, Ensure Your Facebook Campaigns Are Tracking Correctly If you see your lead costs rise […]
The post 12 Techniques to Reduce Your Facebook Ad Spend appeared first on Social Media Marketing | Social Media Examiner.
from Social Media Marketing | Social Media Examiner https://ift.tt/2nyVf6x
via socialmediaexaminer
The Optimal Instagram Story Dimensions [Bookmarkable]
New social media sites continue to emerge, new features are added, and algorithms are always being updated, making it tough to keep up with social media best practices.
However, social media is here to stay. According to Instagram, there are more than one billion active users monthly and more than 500 million Stories active every day.
In fact, Instagram Stories are a popular trend that isn’t going away. Pamela Bump, audience growth writer at HubSpot, writes about Instagram Stories in this blog. She says, “Instagram Stories serves as an outlet for brands to creatively show their products, services, or happy customers in action. Branded Instagram Stories also enable audiences to learn more about topics related to your brand’s industry. Helpful and valuable content might also allow prospective buyers to trust your brand more.”
With this knowledge, you want your marketing team ready to develop a strategy for your Instagram Stories. To create this strategy, your team should decide what kind of images or videos they want to post. How do you plan on taking those images? With phones or professional cameras?
Below, you’ll learn the Instagram Story dimensions and why it’s important to add Instagram Stories to your strategy.
You might be asking, why do you need to know about the specific Instagram Stories dimensions? Instagram is strict about adhering to its dimensions in order to ensure quality photos and videos. When you upload a vertical image or video from your phone, you most likely won’t have to think about these dimensions because Instagram will automatically format them.
However, if you have horizontal photos that don’t fit the dimensions, Instagram will crop your photos, zoom in on content, or zoom out (making your image look small and placing it on a background). This typically results in lower quality images and videos.
To ensure high-quality images, pay attention to the dimensions. In order to edit your photos for Instagram, you can use sites including:
- Canva: This is the perfect option for creating images for your Instagram Stories. To get started, Canva has templates that are designed with the Instagram dimensions in mind. Canva offers free and paid plans.
- Lumen5: This software makes it easy to produce videos for Instagram Stories. Once you get started creating a video, you can choose the right dimensions on the platform. Lumen5 starts at $19/month.
- Easil: Easil has templates for Instagram Stories to help create engaging content. They have templates for single images, and multi-card Stories as well. Easil offers free and paid versions.
- Adobe Spark: Adobe Spark makes creating images and video graphics for Instagram Stories easy. You can build your own Stories with their typography and imagery options. Adobe Spark has free and paid plans available.
- Embed Social: Embed Social is a different kind of tool for Instagram Stories — with Embed Stories, you can make your Stories Shoppable by adding CTAs, and creating embeddable code that you can add to your website. Embed Social offers free and paid plans.
With these tools, you can input the specifications, upload images and videos, and complete the editing process. These work well if you have higher quality images taken with a camera or want to add graphics or text to your images or videos.
Here’s what the process would look like for Canva. Click on “Templates” and choose “Instagram Story” to see templates that are the right dimensions for Instagram.
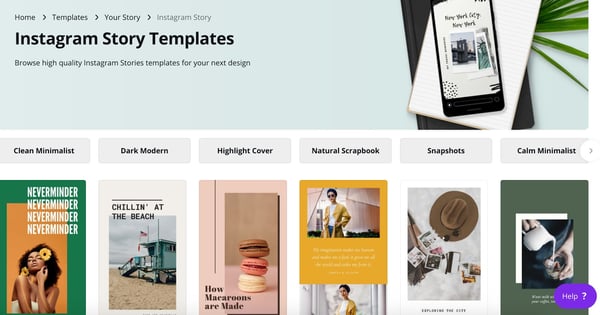
Image source: Canva
Why should you care about Instagram Stories? Here are a few stats from Instagram:
- 80% of accounts follow a business on Instagram
- One-third of the most-viewed Instagram Stories are from businesses
- 50% of businesses on Instagram worldwide created at least one story during a typical month
- 96% of US marketers surveyed plan to continue using Stories ads in the next six months
Sophia Bernazzani, HubSpot blog writer, wrote about how to use Instagram Stories for business in this blog. She says you can use Instagram Stories to:
- Post footage of an office event
- Post breaking news about your industry
- Demonstrate your product
- Promote a company event
- Preview one of your company’s blog posts
- Mention other companies who follow or work with yo
Using Instagram Stories is a tactic that all marketers should consider. With active and engaged users, using Stories can improve your discoverability and increase brand reputation and awareness.
Want to learn more about Instagram Stories? Download our free video series, How To Use Instagram Stories for Small Businesses: 6 Tips From The Pros.

6 Social Media Calendars, Tools, & Templates to Plan Your Content
What do cross-country road trips, wedding speeches, and social media marketing have in common?
You could improvise all three, but it’s better to have a plan for what direction you’re heading — especially when developing your social media content strategy.
By now, most marketers recognize that social media plays an integral role in an effective inbound marketing strategy. And with so many social networks to manage and publish on, it’s important to stay organized and have a plan for when and what you’re going to share on these platforms.
In this post, we’ve rounded up some of the most helpful tools and templates for building out an effective social media content plan. Check them out below.
The Benefits of Using a Social Media Content Calendar
We’re all busy. And when we’re busy without a plan in place for the tasks we have to get done, things inevitably slip through the cracks. Social media content is no exception.
Just like with blogging, a successful social media strategy requires regular publishing and engaging with followers to see positive results — whether that be in terms of SEO, brand recognition, lead generation, or all three.
So, if you’re not already using a social media content calendar, hear me out:
- Calendars help you get organized to avoid the dreaded scramble when things come up. With a social media calendar, marketers can plan out posts for entire weeks or months in advance, which frees up working hours to strategize for the future — and to dash off any posts about breaking news in your industry. Otherwise, you’ll spend valuable time each day searching the internet for that day’s content to share, which is a known productivity killer.
- A calendar helps you plan for each social network to customize posts instead of spamming all platforms with the same message. Social media marketers should take the time to craft custom messages for each network, and doing this in advance will save time throughout the week and ensure you’re being thoughtful and intentional when you do post.
- Calendars can help you track performance and plan for future posts. Without a calendar, social media marketers are publishing content into the void and are unable to track big-picture and past performance. With a calendar, marketers can look back and analyze which content performed best so they can adjust their strategy accordingly.
- With the help of a calendar, marketers can plan for holidays and observance days, such as National Cat Day, when they can tailor their content and engage with a wider audience.
- Social media calendars improve efficiency. According to Content Marketing Institute, 72% of B2B marketers attribute the success (which has increased annually) of their content to the development of a formal content strategy.
Now that you understand the merits of having a social media content calendar in place, check out our list of top tools to stay organized and on top of your game.
4 Social Media Content Calendar Tools to Plan Your Messaging
1. Trello
Trello is another organizational tool that’s highly effective for team collaboration. More specifically, social media managers can use Trello’s flexible assignment “cards” and customizable “boards” and “lists” to map out to-do lists, manage a content calendar, plan a campaign, and house ideas from a brainstorm.
Here’s an example of a Trello board a social media marketing team might use to plan posts for the upcoming week:
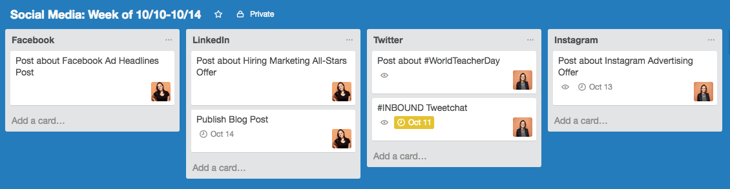
But you’re not limited to just one structure: Users can customize boards according to their needs. For example, a team could create a board to organize social media posts for a given week, on a specific platform, or post ideas around a topic, such as a campaign or awareness day.
Trello cards allow for a ton of customization as well. Here’s a fictitious social media editorial calendar card with Twitter copy options around a piece of blog content. Note that you can track progress toward completing a checklist, which could be useful for social media marketers looking to track campaign progress.
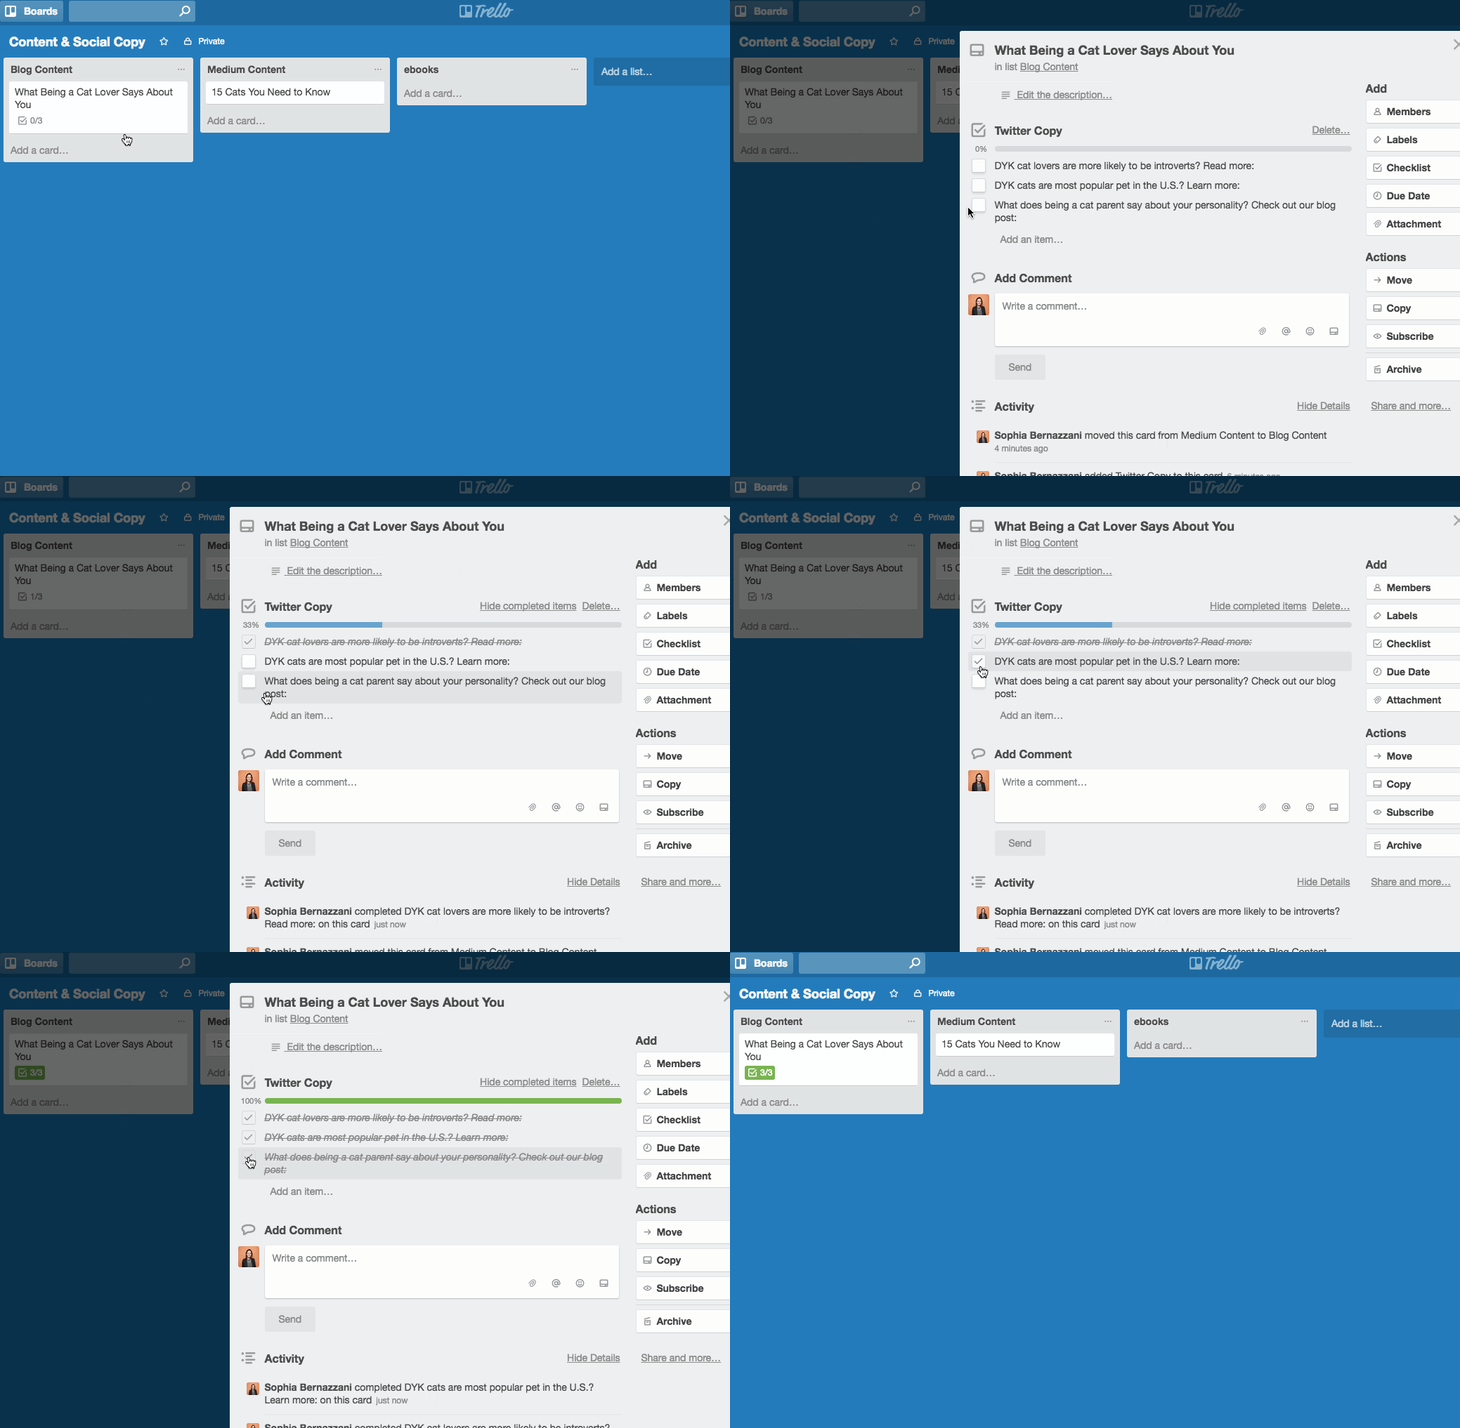
Additionally, Trello cards can be assigned to different team members, marked with due dates, and commented on. Users can even customize the labels (as in the image below) with different publication statuses so the entire team can see the progress of their social media posts and when they’re due on the calendar. The labels could also indicate different social networks that content is being published on.
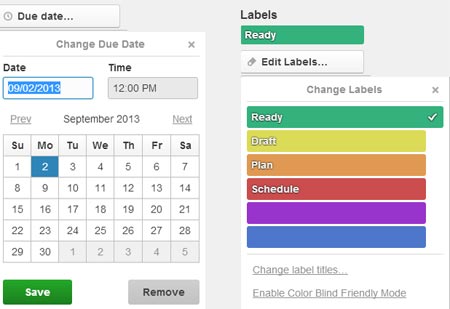
Source: BlueGlass
Trello also offers a full calendar view (shown below) which makes it easy to visualize what content is going out, and when.
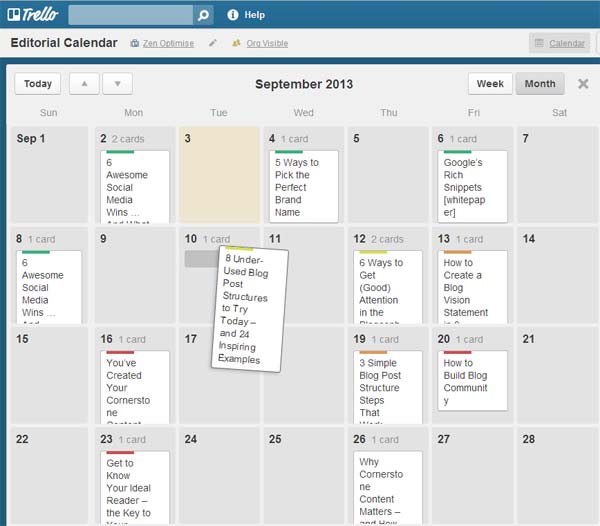
Source: BlueGlass
2. Microsoft Excel
Marketers might already use Excel for different types of reports and data analysis in their roles, but it’s a highly useful tool for social media content calendar organization, too. Excel can be customized according to whatever priorities or metrics a team is focused on, so it’s a great tool for planning ahead.
The good news? We’ve already done the heavy lifting for you by creating a free, downloadable social media content calendar template using Microsoft Excel. Marketers can use this template to easily plan out individual social media posts — monthly or annually — while keeping an eye on bigger picture events, holidays, publications, and partnerships.
For more on how to use the templates, check out this in-depth guide from my colleague Lindsay Kolowich.
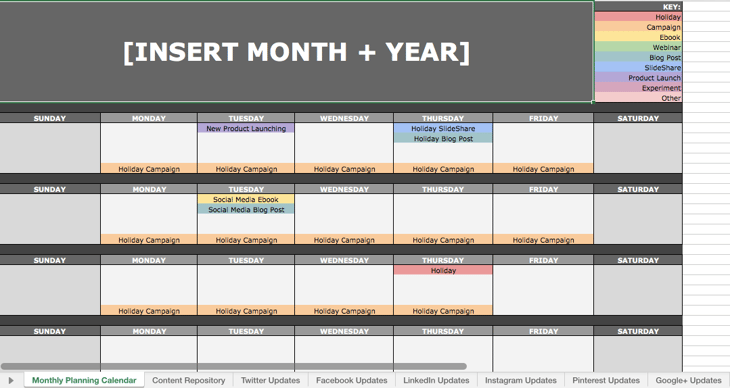
Use the Monthly Planning Calendar Tab above to get a bird’s-eye view of what’s coming down their content pipeline in a given month.

In the Content Repository tab, users can record the content they’re publishing on this tab to keep track of which pieces have been promoted and to easily recall older content that can be re-promoted on social media.

On the Social Network Update tabs, users can draft and plan out social media posts in advance. These tabs are for organizational purposes, and the content of the posts themselves must be uploaded into a social media publisher.
This free resource can be used to draft social media posts, or it can be bulk-uploaded into a publishing app to maximize efficiency. (HubSpot customers: You can use this spreadsheet to organize content and upload it directly into Social Inbox. For instructions on how to do so, check out the template’s cover sheet here.)
3. Evernote
Evernote is a note-taking app that marketers can use to keep track of all the moving parts that comprise a social media campaign.
The tool also features yearly, monthly, weekly, and hourly logs, which make it easy to keep track of when you’re publishing content on social media, when you’re producing blog content, and other team-wide priorities. (Evernote offers customizable templates for each of these that can be downloaded into the app.)
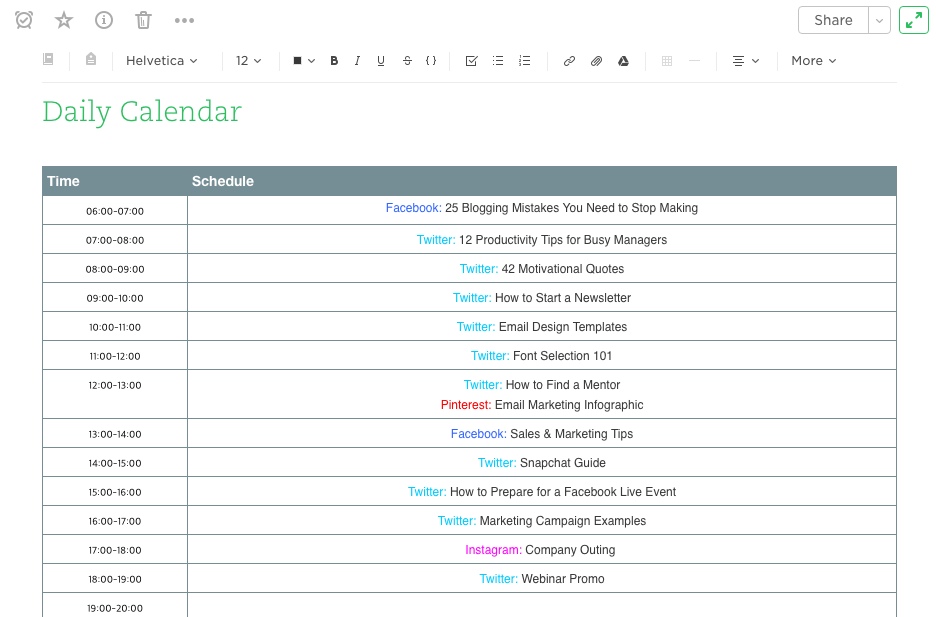
Another useful feature? Evernote’s Web Clipper extension for Chrome. Marketers can use this tool to easily save links to their Evernote Notebook for sharing later on.
The Evernote mobile app also boasts some interesting features to help marketers keep their social content ideas straight. For example, you can easily snap a photo and save it to your Evernote files for review later.
Source: Evernote
This feature is of particular valuable for social content creators looking to maintain a backlog of photos to publish on Instagram.
4. Google Drive
Google Drive has several helpful features that make it easy for social media marketers to build out an effective content calendar.
Here’s an example of how a team might use Google Calendar to track both their editorial and social media calendars to make sure they’re aligning posts with new blog content. These calendars can be easily shared with multiple teams to avoid scheduling conflicts and ensure that campaigns are aligned.
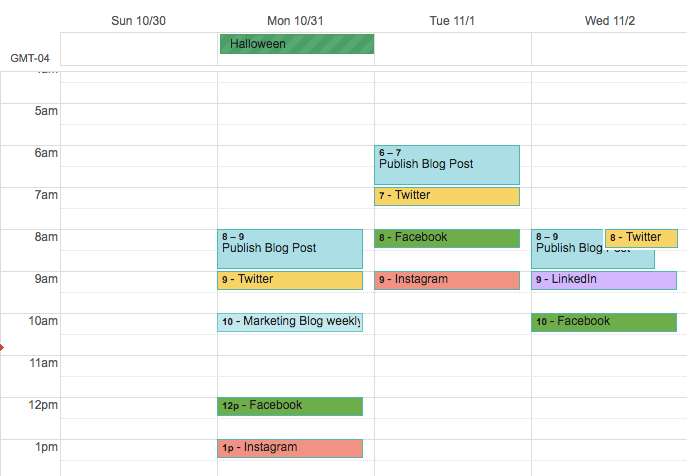
Marketers can also use shared Google Sheets to schedule posts on social media, track the status of different pieces of content, and assign tasks to team members — all on the same platform as their calendar.
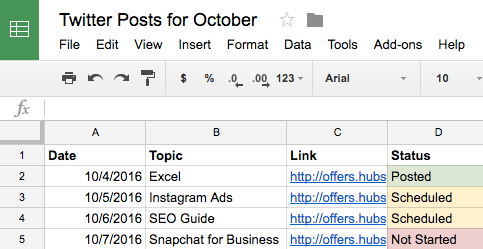
With the help of Google Docs, users can keep comments all in one place and can collaborate on different projects without emailing back-and-forth or having to schedule a meeting. This is a particularly useful feature when editing content for social media, which may need to be drafted and approved quickly.
(HubSpot customers: You can link your Google Drive account to your HubSpot portal to easily upload files from Drive into your HubSpot software.)
Social Media Templates
HubSpot’s Social Media Calendar Template
If you’re new to setting up social media calendars, HubSpot offers a pre-made, free, and downloadable template that you can use to schedule out full weeks of posts.
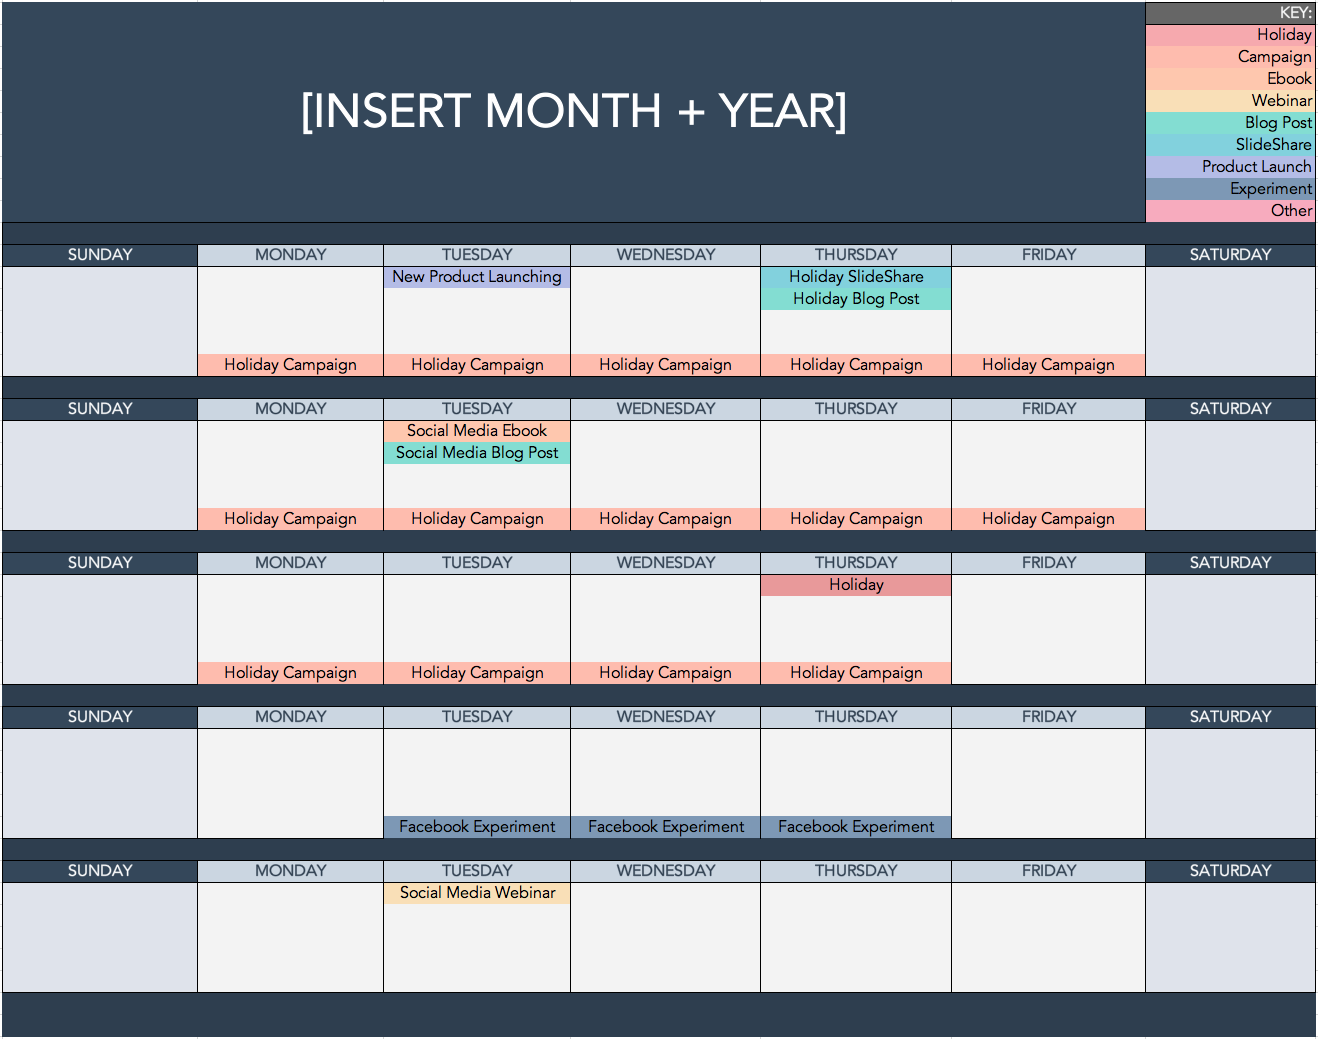
HubSpot’s Social Media Content Calendar Template for Startups
This template is very similar to the one seen above, but also has tabs that work as a repository for content ideas. The template also includes helpful tips for posting on specific social media networks.
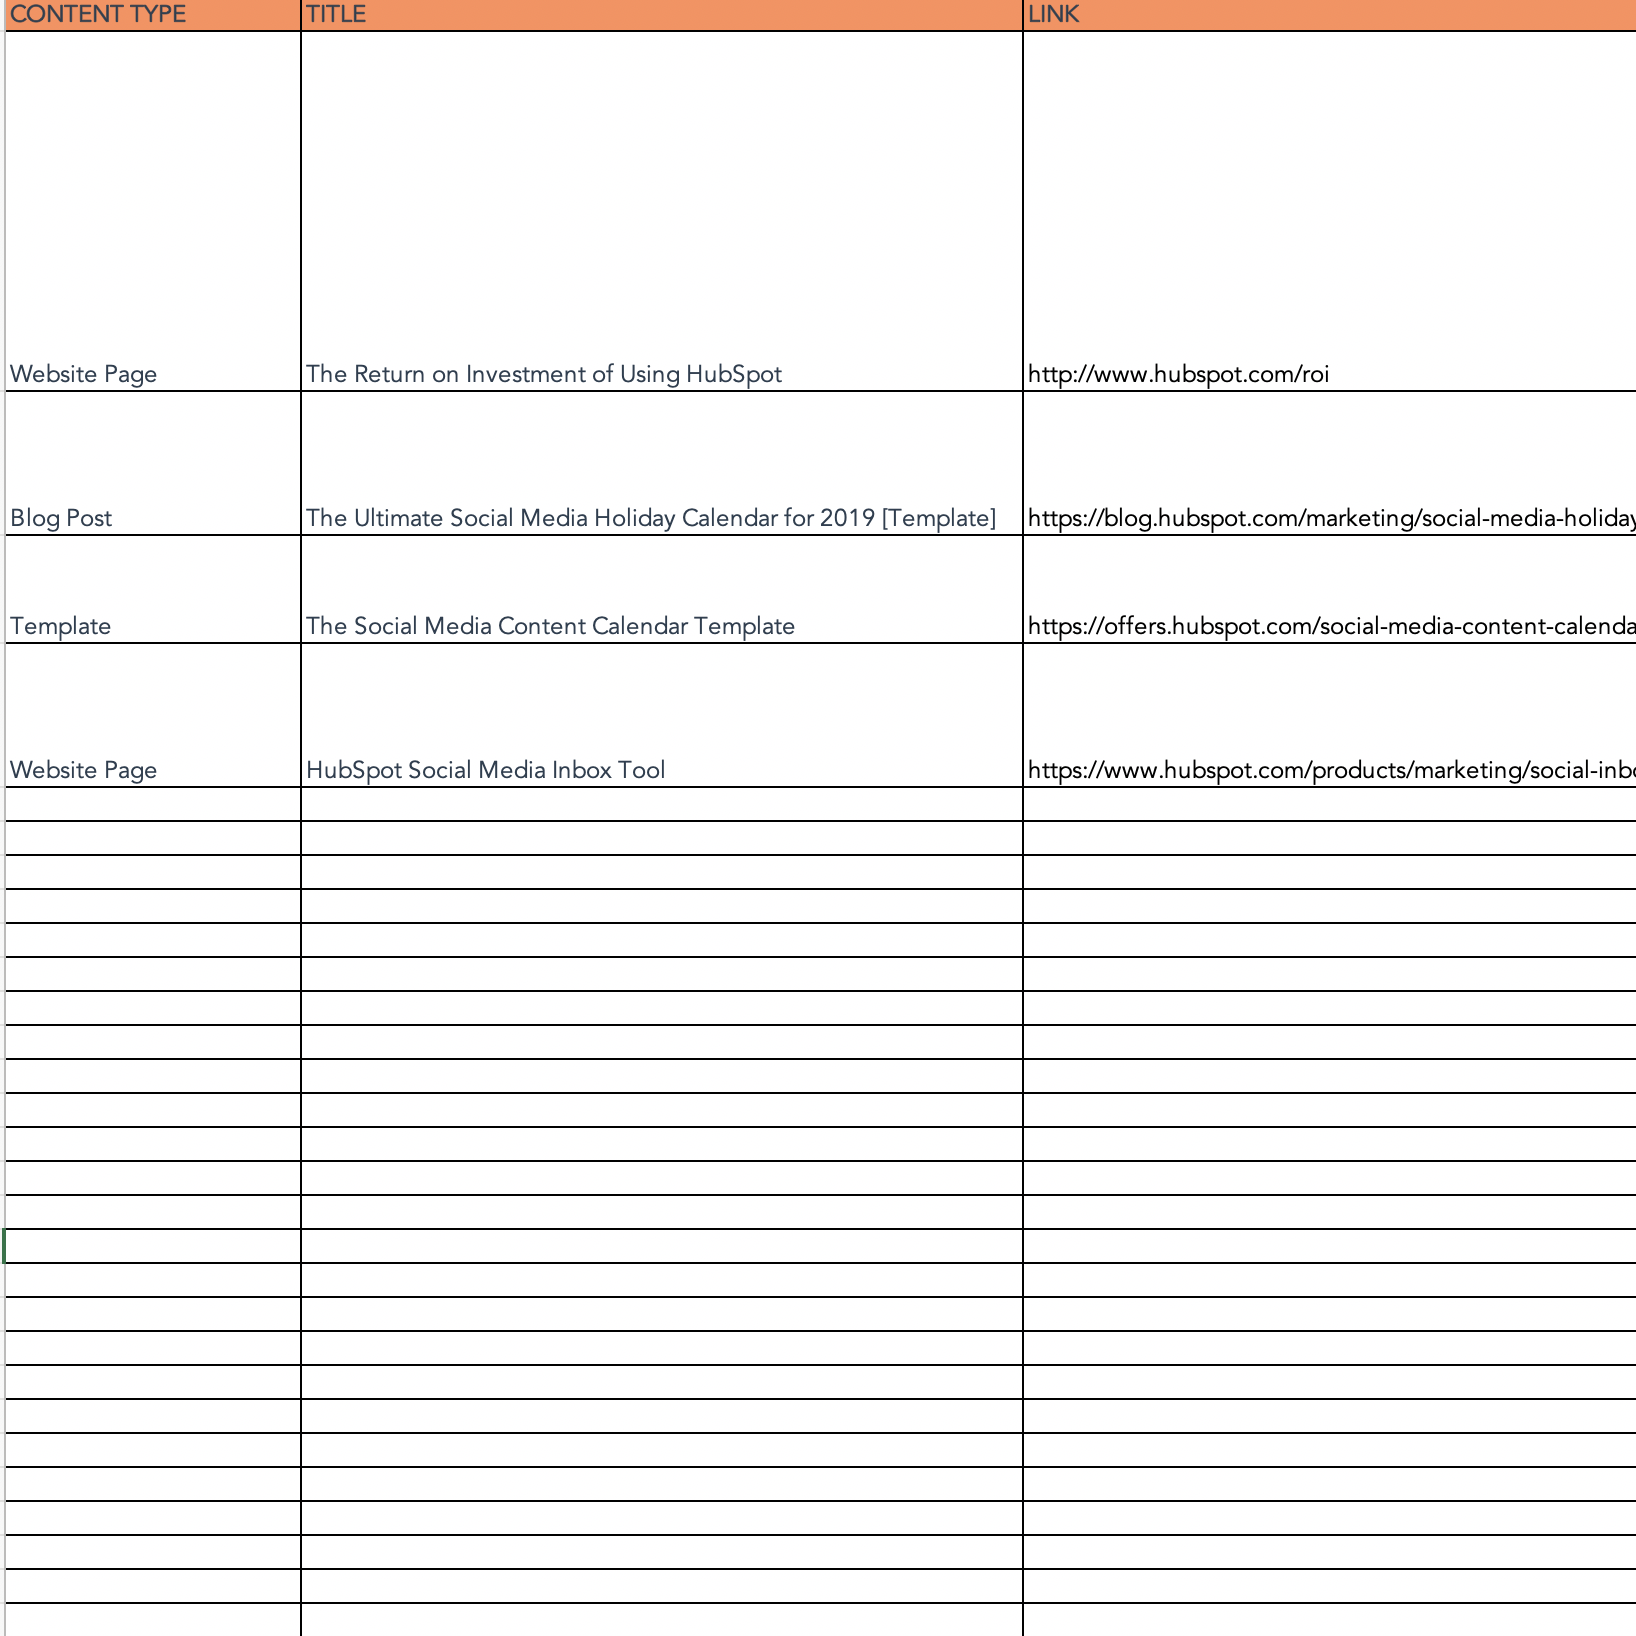
If you’re aiming to get all of your ideas down in order to develop a big-picture plan for your social assets, we recommend starting with this template.
Getting Started on Your Social Media Schedule
Now that we’ve reviewed a few helpful tools to kick your social media strategy into high gear, experiment with them. Every social media team is different, and it could be a combination of these tools that helps you execute your strategy efficiently to drive ROI.

Instagram Stories: What They Are and How to Make One Like a Pro
These days, social media is all about documentation.
Where you go, what you eat and drink, who you see, and what’s most memorable: These are the typical fodder of Instagram Stories — seconds-long glimpses of people’s lives, shared on Instagram for only 24 hours.
Below, we’ve created a guide for you to learn what Instagram Stories are, how to share them with your followers, and how to make sure those Stories are exactly what your audience wants to see. In this post, we’ll cover the following. Feel free to click on a bullet point below to jump to that section of the article.
- What are Instagram Stories?
- How do Instagram Stories work?
- How long are Instagram Stories?
- How to view Instagram Stories
- How to Make an Instagram Story
- How to Use Instagram Stories for Business
- Instagram Stories Tricks and Hacks for Awesome Instagram Stories
What are Instagram Stories?
Instagram Stories allow Instagram users to share photos and videos to their “Story” — which is visible to followers of the user’s Instagram account — and to specific users the Story’s sender follows. Like in Snapchat, Instagram Stories are ephemeral, meaning they disappear after 24 hours.
Your Instagram Story is published separately from the photos and videos found in the tiled gallery of one’s Instagram profile. And although you might know the basics of sharing them, there are hidden tools within the app that can make the photos and videos you add to your Story more creative and engaging.
How Do Instagram Stories Work?
Instagram Stories can drive a ton of engagement and value — whether you’re sharing a Story from a brand account or your own personal profile.
Since launching back in August 2016, a total of 250 million Instagram users have started sharing disappearing content on Instagram Stories — contributing to the huge jump in time spent in-app every day from 24 minutes to 32.
What’s more, a lot of brands have already seen success publishing content to this platform. Instagram Stories have fueled the growth of brands like Teen Vogue, Insider, and Bustle. Whether publishers are trying to grow brand awareness, grow traffic to videos or newsletter outside of Instagram, or share sponsored content, publishers are flocking to Instagram to publish fun disappearing content that infuses brand voice and personality without taking up too much of the average techie’s dwindling attention span.
What’s more, Instagram Stories are credited with fueling the massive growth of Instagram Direct — private one-to-one messaging between users within the app. Instagram Direct has grown into one of the most popular messaging apps in the world with a staggering 375 million users.
Even more impressive, TechCrunch reports that one in five Instagram Stories shared by a brand receives a Direct reply — giving brands a direct line to connect with their audience and learn more about them.
How long are Instagram Stories?
Instagram Stories last 24 hours on your profile before disappearing, but a video inside your Story can be up to 15 seconds long before cutting to the next piece of content. You can also use a third-party app to segment a longer video into 15-second increments to add to your Story.
Just as Instagram Stories only last 24 hours before disappearing, the photos and video themselves have a time limit when users view and play them.
As a blanket rule, the individual videos you add to your Instagram Story each have a maximum roll time of 15 seconds. If you add a video to your Instagram Story, for example, it’ll play for up to 15 seconds, regardless of how long the original video was, and then end.
Despite Instagram Stories’ 15-second runtime limit, there are ways to play longer videos in your Story. Specifically, you can split a video that’s longer than 15 seconds into 15-second segments and add each segment to your Instagram Story so they play one after another. Here are some mobile apps that can help you make it happen:
- Continual (iOS only)
- Storeo (iOS only)
- Story Cutter for iOS
- Story Cutter for Android
- CutStory (iOS only)
How to View Instagram Stories
Instagram Stories appear at the top of your screen when you’re on the Instagram mobile app. Because they’re often the first pieces of content users see when they open Instagram, these Stories can get a ton of engagement and help you advertise your regular Instagram photo gallery to more users.
1. Open Instagram and navigate to the home screen.
To start viewing Instagram Stories, open your Instagram mobile app and tap the home icon on the bottom-lefthand corner of your screen. Instagram Stories are not available for viewing on the desktop site.
Once you’ve navigated to Instagram’s home screen, you’ll see a series of circular icons along the top, each of which represents the active Stories posted by the users you follow. These icons are highlighted inside a red square in the screenshot below. As you can see, your own Story is available for viewing (and adding to) on the far left of the Stories you follow.

2. Tap on a circular icon to view that user’s Story.
Each circular icon you see at the top of your home screen shows you a small preview of the Story that user has posted. Tap on it to expand the user’s Story — it’ll either be a photo or a video, and the latter will play automatically once you tap on the Story.
3. Tap to navigate between a Story’s photos and videos.
A single Instagram Story can contain numerous individual photos and videos strung together in order of when the user posted them. The first piece of content you’ll see will be the most recent one. Tap your mobile device’s screen to cut to the next photo or video that user has posted to their Story.
4. Swipe to navigate from one Instagram Story to another.
Swiping left and right while viewing an Instagram Story will allow you to shuffle between Stories from different users. When you first open an Instagram Story, you’ll see the following menu:

Use the above screenshot as a reference for viewing the Instagram Stories of the accounts you follow.

How to Make an Instagram Story
- Open Instagram, and tap the camera icon in the upper left-hand corner of your phone.
- Share a photo or video you’ve already captured by swiping up on your screen to browse your gallery.
- Or, choose a camera lens to capture a photo or video in the app.
- Once you’ve edited your photo or video, tap “Your Story,” or tap “Next” to share it to your Story and to other friends at the same time.
You can make Instagram Stories this successful too — but it requires a few more hacks and tips to make them look like the Stories big brands and influencers share. (Some of my favorite Instagram Stories are shared by chef Chloe Coscarelli, actress Busy Phillips, mattress brand Casper, and interior design app Hutch — and don’t forget to check out HubSpot‘s Instagram Stories, either.)
But first, let’s review the basics of how to share an Instagram Story:
1. Open Instagram, and tap the camera icon in the upper left-hand corner of your phone.

2. Share a photo or video you’ve already captured by swiping up on your screen to browse your gallery.
Disclosure: Yes, I did a photoshoot featuring my cats. Can you blame me though?

3. Or, choose a camera lens to capture a photo or video in the app.

You have a few different options to choose from:
1. Live
If you toggle your screen to the “Live” option, you’ll start filming and broadcasting live on Instagram. Like Facebook Live, friends can follow along and leave comments, and when you’re done with the broadcast, you’ll have the option to let the video disappear, save it, or share it Instagram Stories for an additional 24 hours.
2. Normal
It means what it says: Tapping once will capture a photo, and holding down will record a video. Instagram Stories can be 15 seconds in length, so if you want to share a video that’s longer, film in 15-second stints, or use CutStory to split your longer clip into 15-second installments.
3. Boomerang
Boomerang mode films looping GIFs up to three seconds in length.
4. Superzoom
Superzoom is, on the surface, a video recording lens that zooms in closer and closer on your subject. But turn up the volume, and you can use Superzoom to create a dramatic soundtrack to accompany your video.
As my friend Marissa put it, “It’s like it’s BUILT for cats.”
I will forever be in love with this Insta lens!!!! pic.twitter.com/HvU6rarmNa
— Sophia Bernazzani (@soph_bern)
November 17, 2017
5. Rewind
Use the rewind lens to film a video in reverse.
6. Stop Motion
Use this lens to film cool stop-motion videos: several different still images woven together in one seamless video. Think of it like the video version of a flip book (like this example below):
Stop-motion artist Alex Unger spends months creating incredibly detailed pieces. pic.twitter.com/m6R4MNLIQj
— Business Insider UK (@BIUK)
November 14, 2017
7. Hands-Free
Use hands-free mode if you want to set up your camera to film a video for you. Make sure you prop it somewhere stable before you call “Action.” We’ll talk more about this feature in a minute.
4. Once you’ve edited your photo or video, tap “Your Story,” or tap “Next” to share it to your Story and to other friends at the same time.
You can also save your edited photo or video to your gallery by tapping “Save” in the lower left-hand corner.

How to Use Instagram Stories for Business
- Post footage of an office event.
- Post breaking news about your industry.
- Demonstrate your product.
- Promote a company event.
- Preview one of your company’s blog posts.
- Mention other companies who follow or work with you.
Knowing how to post to your Instagram Story is one thing, but knowing what to post is a different … well, story. For businesses looking to tell their Story on Instagram, it’s important to know who your ideal followers are and what they’d be interested in seeing on Instagram. Remember, Instagram is a visual platform, but that doesn’t mean you can’t teach or promote something in the process.
Here are a few ideas for using Instagram Stories to attract followers and build a customer base.
1. Post footage of an office event.
Sometimes, the best thing a business can do on Instagram is be as human as possible. One way to do this is to post a brief video of a company function. Whether it’s an office holiday party or an award banquet, posting footage of it to your Story is easy and in-the-moment entertainment for your followers. This content also shows people you’re a relevant and friendly voice in your market.
2. Post breaking news about your industry.
Just as you might on your company blog, you can use your Instagram Story to report on the latest happenings in your industry. With the right design work, you can turn small news breaks — that don’t merit an entire article — into a Story on your Instagram account. This keeps users coming back to you to stay abreast with market trends. You can even ask users what they think, as shown in the Instagram Story by HubSpot below. We’ll explain how Instagram “stickers” can help you do this in just a minute.
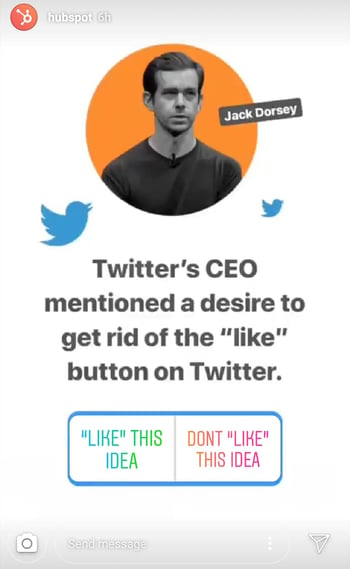
3. Demonstrate your product.
Your product might not be the simplest or sexiest product in the eyes of the layperson. Well, your Instagram Story is the perfect format for showing potential customers how that product is used. Post a long video, segmented into 15-second clips that show users what your product or service does and how it helps your customers.
If you sell software, for example, you might record a video of your computer screen, using a recording tool like Loom, that shows people how to log in, use the software’s dashboard, and navigate to the various functions included in the product.
Just remember to modify your video’s dimensions before uploading it to your Instagram Story. Remember, Instagram Stories’ image dimensions are 1920px high and 1080px wide, with an aspect ratio of 9:16.
4. Promote a company event.
Does your organization host a trade conference or attend a big one every year? Use your Instagram Story to promote the event and tell your followers to look for you there. Work with a graphic designer, or do some artwork yourself, to illustrate an event flier with all the information one would need to find you. Most of this you can do directly in Instagram. For example, use the native text options in your Story to add:
- The event’s name.
- Where the event is located.
- Dates you’ll be attending.
- Your booth number.
- The event’s official hashtag.
5. Preview one of your company’s blog posts.
Your blog posts need all the exposure they can get. Even if social media isn’t your blog’s primary source of traffic, your Instagram Story can help readers discover that blog for the first time and find it later.
In the screenshot below, Google used its Instagram Story to preview an article it published on six extraordinary young women involved in water technology. When you tap all the way to the end of the Story, Google prompts you to swipe up with your finger, where it then links you to the full blog post.

6. Mention other companies who follow or work with you.
As your Instagram following grows, you’ll eventually pick up other business accounts who want to follow you as well. Whether those accounts are your business partners or simply fans of yours, consider giving them shout-outs on your Instagram Story. This is a passive but effective way to nurture your relationships with the users that matter most to your business’s growth. We’ll explain how to link to other accounts in an Instagram Story in the tips below.
Now that you know the basics, let’s run through tips and hacks for producing high-quality, clickable Instagram Stories.
11 Instagram Story Tricks and Hacks
1. Use stickers.
Once you’ve captured a great photo or video, it’s time to jazz it up with some fun stickers. You can access these by tapping the smiling sticker icon in the upper right-hand corner of your screen once you’ve captured a photo or video — or swipe up from the bottom of your screen.

Change the size of your stickers.
You can pinch the sticker once you’ve added to your story to increase or decrease its size. You can also tap and drag it around the frame to change its position.

Check stickers every day for new and unique ones.
Instagram releases unique Story stickers often — whether it’s Monday, a holiday, or a season. Check this section every day for new and timely stickers to add to your Story.

Add location, hashtag, poll, and selfie stickers.
Boost the engagement on your Instagram Story by opening it up to other people doing the same things you are. Open up the stickers section, and tap any of these buttons to customize your story:

Location Stickers
Start typing in wherever you are, and you’ll be able to pull in a geographically-specific sticker to show where you are.
When people view your Story, they’ll be able to tap the location sticker and see other photos and Stories happening around the same place.
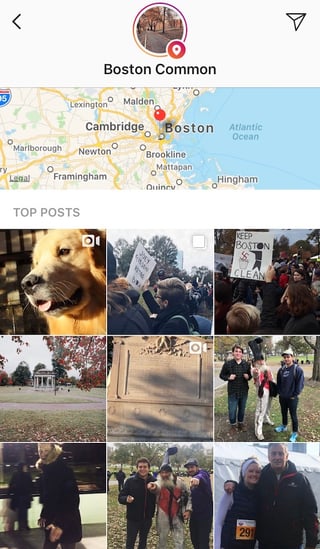
Hashtag Stickers
Same concept here: If you add this sticker and type in a hashtag, your Story will appear in searches for that hashtag, and viewers will be able to click it and see who else is using it. #MotivationMonday, amirite?
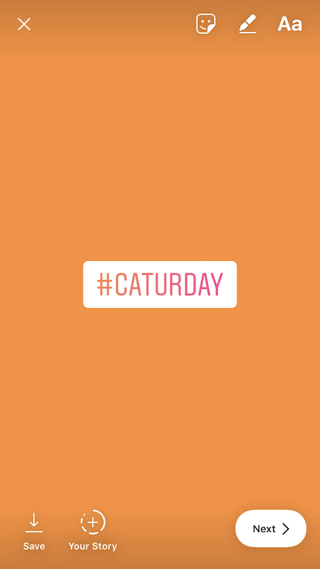
Poll Stickers
You can add a two-option poll to your Instagram Story, and you can even customize the possible answers so they’re more unique than “Yes” or “No.” Use a poll sticker to gauge if people are really engaging with your content.

Selfie Stickers
Open up the Stickers menu, and tap on the camera icon.

Then, take a selfie — or take a picture of anyone else’s face (that will work too). Then, you can use that face to decorate your Instagram Story. Somewhat creepy, but very memorable and funny, too.

2. Record a hands-free Instagram video.
If you’re a frequent video-recorder on Instagram, you know you need to hold your thumb against the record button for as long as you’re recording. This can make it tedious when attempting dynamic and interesting videos that require more hand mobility.
But did you know you can record these videos “hands-free“?

The hands-free video feature can be found in the carousel of camera lens options beneath the record button, as shown above. Simply tap the record button once to start the video, and again to stop it after you’ve gotten the footage you want.
3. Let viewers share your Stories.
Increase engagement and views of your Instagram Story by letting viewers share them with their friends — as Direct Messages.
Go to your profile, tap the gear icon, and navigate to “Story Settings.”
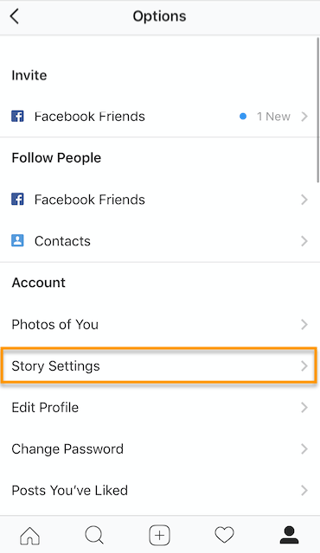
Toggle on “Allow Sharing” so viewers can DM your Story to friends to increase your audience reach. Voila!
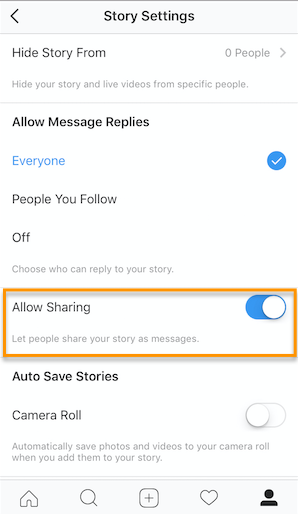
4. Use the pen.
Use the pen to add embellishment, symbols, or more text to your Story. If you tap the pen icon in the upper right-hand corner of your screen once you’ve captured a photo or video, you’ll open up your options.

From there, you can adjust the thickness of your pen stroke or change the color you’re writing with (more on that later).
I like using the highlighter pen (the third option) to add emphasis to words — or even the highlight of my photo or video.

5. Add a background color.
If you want to share a Story with a background color — like the images I’ve shared above — you can actually select it from the color palette.
Take a picture (it doesn’t have to be a picture of anything in particular), and then tap the pen icon to open up the color palette. (Here’s Leela again — my unwitting cat model.)
You can choose one of the colors from the three available menus, or if you want a specific shade of one of those colors, you can open up the full color spectrum by pressing and holding one of the colors.

Then, scribble anywhere on the screen, and hold your finger down until you get the background color you want to appear.

If you want to get really crazy, you could use the eraser tool (the fourth option) to create new words or shapes from the background, too.

6. Mention another Instagram account in your Story.
Sometimes, it’s just not enough to send an Instagram Story to a particular person — you need to give them a shoutout in the photo or video itself. In these cases, Instagram allows you to tag up to 10 specific handles directly in your Story’s photo or video.
To mention an Instagram account in your Story, shoot a photo or video and then tap the square “A” icon in the upper righthand corner of the screen. Enter the account you’d like to tag, starting with the “@” symbol and the account’s first letter. Scroll through the suggested accounts that appear below your cursor until you find the account you have in mind, and tap it. See what these options look like below.
Once you post this Story, the person or account you’ve tagged in the photo or video will receive a notification of your shoutout, regardless of whether or not you send the Story to them.
7. Make your text funkier.
The text on Instagram Stories is pretty basic — jazz it up with these tricks.
Customize your colors.
If you’re unsatisfied with the color palette Instagram offers, create your own from one of the colors in the photo or video you’ve captured.
Open up the text icon, and tap the eyedropper icon in the lower left-hand corner of your screen.
Use the dropper to sample a color from somewhere in the image you’ve captured, and use it when typing out text or using the pen tool.

Add a drop shadow to your Story’s text.
If you want to add some extra drama to your text, add highlighting or shadowing by retyping or rewriting your text in a different color. I recommend choosing black or white to add emphasis to a bright color you’ve picked. Then, move the text above or underneath the brighter text to add some drama to your words.
Turn your text into a rainbow.
This one’s tricky, but you can actually turn your text into a gradient rainbow.
Tap the text icon, and type out your message to add to your Story. Then, highlight your text.
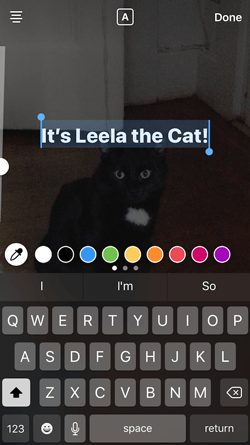
This is where it gets tricky: Turn your phone to the side so you can hold one finger down on the right side of your text, and with another finger, tap on a color and hold until the color wheel pops up.
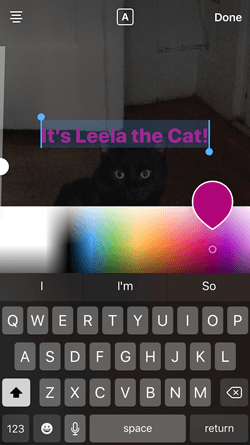
Then, slowly drag both fingers across both the text and the color wheel from right to left to create rainbow text. Go slowly, letter by letter until you’ve created a rainbow. (This one took me several tries before I nailed it, and I succeeded using both thumbs to highlight the text and the color wheel.)
I wonder if Leela knows she is my model for when I write step-by-step instructions in blog posts pic.twitter.com/OgcKhmIdNV
— Sophia Bernazzani (@soph_bern)
November 19, 2017
Gradually add text to a Story.
Sometimes, you might want to add text or stickers to an image to build on it — perhaps to promote a content offer or event, or to encourage viewers to swipe up to read a link you’ve shared (this is only available to verified accounts).
Start editing the photo you want to share, post it, and save it to your camera roll. Then, swipe up on your screen to add the screenshot to the next installment of your Story — adding new text or stickers on top of the first photo. Keep doing this for as long as you want the Story to last — just make sure to keep taking screenshots of your latest photo so you can add to it.



8. See who has viewed your Instagram Story.
Snapchat users have always been able to see which of their friends have viewed their snapped Stories over the 24-hour period that the Story is visible. Well, Instagram Stories can do the same thing — in exactly the same way.
To see who has viewed your Instagram Story, navigate to the homepage of Instagram on your phone and click on the circular icon denoting your Story. See what this looks like in the screenshot below.
 Image by Mari Smith
Click on “Your Story” from the Instagram home screen and swipe up from the bottom of your open Story. This will pull up a list of all the accounts that have viewed this content.
Seeing who’s viewed your Story might be an ego boost to personal Instagrammers, but business users can learn a lot about what their followers are interested in this way. By looking at which users view which Stories, you can figure out which types of photos and videos you should keep posting.
9. Center your text and stickers.
When you’re moving around text and stickers on your story, you’ll see blue lines appear vertically or horizontally in the frame. These are guiding lines you can use to make sure you’re keeping everything centered.
Don’t put your text too high or too low on the screen.
That said, make sure you don’t add anything to your Story too high or too low in the frame — or it will be cut off when viewers scroll through your Story, when Instagram adds things like your name and how long ago your story was posted that could block out your carefully-crafted text.
10. Add music to a Story.
This one’s easy: Turn on music using your phone’s native streaming app, and record a video Story. Once you get ready to edit and share, make sure the sound icon isn’t muted so your viewers can jam with you.
Alternatively, if you’d rather your video be muted, tap the sound icon so an “X” appears over it.
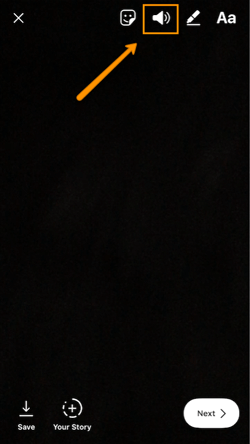

11. Upload Instagram Stories from your phone’s camera roll.
Great Instagram Stories aren’t just created through the Instagram app. You can also upload photo and video content from your mobile device’s native camera roll.
To upload a photo or video for use as an Instagram Story, open your Instagram Story’s camera lens and tap the little square icon on the bottom lefthand of the screen. See what this looks like below.

Tapping the icon shown above will call up your phone’s native media gallery, where you can select any photo or video to publish as an Instagram Story. It’s that easy.
We hope these tips help you post killer Instagram Stories your audience won’t be able to stop following. There are lots of hidden ways to take your Stories to the next level — some we may not even have covered here. Our best advice? Keep clicking around and see what you can do with the latest updates from the app. Happy ‘gramming!

3 Best Project Management Charts for Project Planning
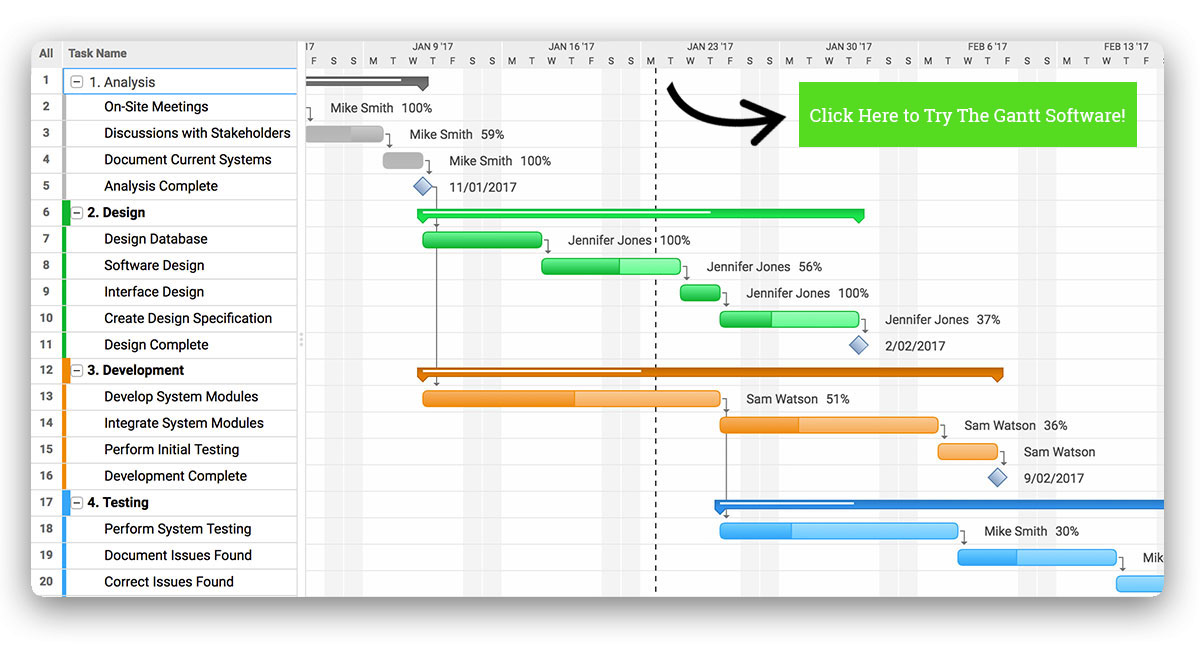
The Ultimate Guide to Social Media Marketing Campaigns
Every month, there are over two billion active users on Facebook, one billion on Instagram, and 365 million on Twitter worldwide.
In the U.S. alone, 77% of the population has a social media account of some kind. Whether it’s to chat with friends, stay connected to people across the globe, or for business and networking purposes, consumers are on social media for a multitude of reasons — and marketers know it.
Due to the sheer number of active users on these platforms, marketers are quickly learning about the importance of targeting their customers through social media. In fact, investments in social media advertising across the world are projected to grow to about 48 billion U.S. dollars by 2021.
With so many people checking their smartphone notifications and social media feeds while traveling, commuting, and even relaxing, what better way to market than on social media?
Social Media Marketing is Effective
Social media advertising reaches audiences in a low-cost, impactful, and effective way. This is exactly why social media campaigns have become a crucial marketing technique for businesses everywhere.
With billions of people on social platforms — and continued growth in monthly users and influence — it’s hard to imagine how businesses could remain relevant without creating a social media presence.
Using social media will allow you to reach your target audience, engage with current and potential customers, create brand loyalty, increase website traffic, and drive sales. Marketing on social isn’t just a trend, it’s a powerful industry technique that is here to stay and will help you reach more people all over the world.
How to Set Social Media Marketing Campaign Goals
When creating a social media marketing campaign, you should keep specific goals in mind to ensure your work is as effective as possible. Here are some goals to consider and examples of companies that executed them well.
To provide more context and help you get a better grasp on these campaign goals, we’ve paired them to related social media marketing campaign examples. Let’s take a look:
Improve Brand Awareness
Your business can improve brand awareness through social media by posting your campaigns on a variety of platforms. You can also use specific hashtags and provide followers with incentives for sharing your content and tagging their friends.
Improving your brand awareness through social doesn’t need to take a lot of time either. In fact, 91% of marketers said they noticed an increase in their brand visibility by only spending a few hours per week on social media. Once you have a plan for your campaign, you will be able to map out exactly where and when it should be posted to keep things efficient.
A great example of using social media marketing to raise brand awareness is Apple’s “Shot On iPhone” campaign. Apple’s impressive iPhone cameras allow their 90 million+ users to take pictures that look like they were taken with professional cameras.
Taking beautiful pictures has also become increasingly important for social media users over the years, especially with photo-focused platforms such as Instagram. Apple decided to mesh these ideas together and launch the “Shot On iPhone” campaign which features iPhone photos taken by customers.
Users take pictures with their iPhones, post them to social (typically on Instagram in this case), and use the campaign’s hashtag, #shotoniphone, which has been tagged in over 4.3 million posts thus far. Apple shares select photos on their Instagram page to their 6.8 million followers and gives participants a chance to have their photo on a billboard.
Apple’s social media marketing campaign increases brand awareness through their Instagram page, hashtag, and the requirement that people share their photos with their own followers.

Apple started the campaign, but iPhone users are the people doing the hard work. Through this campaign, the company builds a feed of the most beautiful and unique pictures that also serve as a way to improve brand awareness and market the iPhone camera feature.
Learn how to build your company’s brand with a free guide to effective and measurable branding.
Connect With Your Audience
Connecting with your audience is important in all types of marketing. In a world with growing distractions and diminishing patience, effective marketing tactics are more important than ever. The good news is that social media has made it easier to connect with potential customers anywhere around the world.
When working on a social media marketing campaign, you want to connect with your audience both on a surface level — through a follow, comment, or a “like” — and on a deeper level — through a relatable post that gets them feeling a certain way about your brand or products.
Coca-Cola’s ”Share a Coke” social media campaign successfully connects the company with their audience on a deeper level. By selling bottles of Coke with people’s names on them, Coca-Cola personalizes the buying experience which gets customers excited about purchasing and sharing the bottles.
Whether it’s their own name or the name of a family member, friend, or co-worker, customers feel a connection to these bottles of Coke. Some of the bottles even have stickers on them that customers can peel off and wear as a name tag or give to someone else.
Coca-Cola made the campaign even more relatable by creating labels with multiple different spellings of names and including less-common names. Customers can also personalize their own bottle on the company’s website for $5. The company found a way to engage with everyone through this campaign.
Coca-Cola also promoted a hashtag, #shareacoke, so social media users can share their pictures and videos with friends and followers. Since the campaign has gone viral, the hashtag has been used on millions of Twitter and Instagram posts. And for those who want to share a Coke, or post a picture about their own experience, there are links to more information about the campaign in the bio section of Coca-Cola’s social profiles.
The “Share a Coke” campaign gets people excited about a personalized bottle of Coke and makes customers feel connected to the brand on a deeper level. In turn, millions have been motivated to share pictures, videos, and stories on social media about their experiences buying and sharing a Coke.
Increase Website Traffic
Social media is a great way to boost website traffic. Simply putting your website in your profile bio helps guide users to your site where they can learn more about your company or a specific product. Customers have little patience and lose interest quickly. By including the URL in your bio, you will avoid any confusion and keep things simple for your potential customers.
Your campaign team can also respond to followers on social with URLs to specific landing pages on your website. Adding links to your website as part of a natural conversation or organic post is a great way to show them you are listening and boost website traffic.
Lastly, you can just add a website or landing page URL to your actual post on social. You will increase website traffic by providing followers with links to the resources they need to answer their questions and concerns on their own.
For example, many news stations across the country add URLs to their stories on social media. They are often seen posting an eye-catching image, video, quote, or statement along with a link to the actual story.
This works well because it increases their website traffic. If followers don’t follow the link to the station’s website, they can always click “Like”, or “Share” if they still want to interact.

Source
Drive Sales
Marketers want customers to get excited about their products and brand. When a business can do this successfully, they will most likely see an increase in sales. Social media campaigns are a great way to get people excited about new products because of the ability to share, use images, get the word out.
One example of this was the Starbucks Unicorn Frappuccino campaign. Starbucks has been known to create special “secret menu” items, and these drinks have become increasingly popular to photograph, as they often make for fun Instagram and Twitter posts. The company took advantage of this and started selling the Unicorn Frappuccino — a bright, colorful drink that was only in stock for a limited time.

Starbucks shared pictures of the Frappuccino all over social media and drummed up excitement around the drink. They also created a hashtag, #unicornfrappuccino, to encourage customers to share their experiences purchasing and drinking the beverage.
The $5 drink was so popular with customers that during the single week it was available in April 2017, there were over 180,000 posts on social media that featured the drink. The drink also led to an increase in same-store sales for the second quarter by 3%, and same-store sales were up 4% in March 2017.
Now that we have reviewed some of the most successful social media marketing campaigns, let’s dive into the ways you can kick start your own.
There are a number of ways to create a successful social media marketing campaign. Plans vary based on industry, social media platform, and campaign type. Use the following tips — which are centered around three major steps including researching your competition, crafting your strategy, and promoting your content — to create your social media marketing campaign.
1. Research Your Competition
In the planning stages of your social media marketing campaign, consider your competition.
- Which companies are similar to yours and already have successful social media accounts?
- Which companies have campaigns that you know did well?
- Do the companies you are reviewing typically conduct giveaways, contests, or live videos?
- What is engagement like on their social posts?
By taking a step back and asking yourself these questions, you’ll start to understand what’s working well in your industry. You will also be able to determine how you can make your own campaign unique.
Look for inspiration elsewhere, too. If your competition isn’t on social, you’re not a fan of their previous campaign style, or you have an exceptionally unique business, then look for other campaigns that inspire you and determine how you can apply elements such as a similar style, level of engagement, aesthetic, or a specific message to your own campaign.
2. Craft Your Strategy
Next, craft your campaign strategy. To determine your campaign goal, consider your target audience.
Appeal to your target audience.
- Who are you trying to reach?
- How would you classify your target audience?
- What are you hoping this campaign will achieve for your company and your audience?
- How can you create continued engagement with your followers throughout your campaign?
Ensuring your content and messaging appeals to your target audience should always be your top priority. Remember this important rule throughout your social media marketing campaign. Don’t lose sight of who you are trying to connect with and why.
Otherwise, your audience will likely scroll right by your social posts or lose interest in your campaign in a matter of seconds.
Here are some ways to appeal to your target audience on social media:
- Consider current trends. What do people want to view these days? For example, Instagram stories and live streaming have become quite popular. Can you incorporate these trends into your social routine and campaign?
- Be informative. Make your audience want to stop and listen. If you don’t have information worth their time, why would they check out your post or campaign? Provide your audience with an incentive — create a giveaway that requires your audience to read your description from start to finish. In addition, you should also tell them how to participate in the giveaway and when you will announce a winner.
- Create unique and compelling visual content. Whether it’s a video on Facebook or an edited picture on Instagram, make sure your visual content is compelling and entertaining. Give your audience something they haven’t seen before.
- Engage with your audience. After posting on social media, 84% of consumers expect companies to respond within 24-hours. If your followers leave questions, comments, or concerns on your posts, you should reach back out to them. You will form a personal bond with your audience that will make them more loyal to you and your brand. You will also earn their trust more efficiently.
Choose your content type and format.
To determine your content type, think about why you’re creating your campaign. Here are some instances in which a company might create a social media marketing campaign:
- Holidays
- Special occasions or milestones
- Partnerships with other businesses
- User-generated content promotions
- Contests or giveaways
Consider which content type should be used on what platform. For example, if your campaign uses a lot of still photography, then maybe Instagram is the platform for you. If you require live streaming and want to share longer videos, Facebook might be a good option. And if you want to release shorter bursts of information, Twitter could be a good fit. Think about what each platform is best for and go from there.
Manage the results of your campaign strategy.
No matter why you’re creating your campaign, you’ll probably be interested in knowing your campaign’s level of success. To make any conclusions about your success, you’ll need some type of metrics to measure and monitor throughout your campaign.
A popular way to do this is through a metric tracker such as Google Analytics or HubSpot’s social monitoring and metric tracking tool. This type of concrete data will provide you with information like the amount of overall campaign traffic, how many new followers that you attract (as well as how many followers you lose), your level of engagement, changes in website traffic, and any change in sales.
3. Promote Your Content
Now it’s time to start sharing your campaign and promoting your content. Consider the following techniques on how to promote and share your content.
Promote one message throughout your campaign.
You should start by promoting one message on multiple different platforms using content that fits the chosen platform. By consistently sharing the same message across your campaign, your followers will hear the same information over and over again, which will allow them to retain your message.
In fact, marketing campaigns in the past have proven that messages are most effective when repeated. Repetition will result in familiarity, which will foster trust between your audience and your message, brand, and product. Redundant messages stick.
Balance your promotional and non-promotional content.
Your followers will notice if you’re constantly pushing promotional content on them. By balancing promotional and non-promotional, your followers will perceive you as being helpful and will want to engage with you more.
This is about your followers not feeling pressured or pushed into becoming a customer. You will be most effective if you provide your followers with promotional content that is balanced out with content that they find helpful and engaging.
Ensure your content is unique to your business.
Create an aesthetic for your campaign that matches your brand. You want this to be unique — anyone that lands on your page should know that it’s yours without reading your profile handle. Being unique and authentic helps you stand out … it also gives people a reason to want to follow you over your competitors.
Engage with your audience regularly.
No matter how many followers you have, you should set aside a bit of time to answer questions, “like” comments, and respond to feedback. By taking the time to engage with your followers, you will give them a personal experience that they won’t forget. These are the types of relationships and experiences that keep followers invested in your brand.
Create a unique hashtag for your campaign.
All major social media campaigns have a hashtag that should be the same across your social platforms. Hashtags allow your team members to keep track of interactions and make it easy for your followers to engage with your campaign. Your hashtag should be unique and memorable.
For example, Snickers has a popular social media campaign, “You’re Not You When You’re Hungry.” They depict people lashing out, losing their minds, and even turning into different people because they are “hangry” … or hungry-angry. These people go back to their normal selves once they eat a bite of a Snickers bar and satisfy their hunger.
Their hashtag for the campaign is #EatASnickers. It’s straightforward, simple to remember, and action-oriented. Additionally, “Eat a Snickers” is also one of their ad taglines, which contributes to the uniformity across the campaign.

Source
Automate your content with scheduling software.
Although creating engaging content and interacting with your followers may be time-consuming, there is a way to schedule your campaign posts ahead of time to save you from having to do it in real-time.
Tools such as Hootsuite, Crowdfire, and CoSchedule allow marketers to schedule posts with text, photos, videos, hashtags, and more. Some of these scheduling tools even contain analytics that help users determine which scheduled posts are doing well and which posts may need to be modified.
Use live stream to your advantage.
By 2021, live streaming is expected to become more than a $70 billion industry. With live streaming, audience members can watch content in real-time from anywhere around the world, which creates a unique and engaging experience.
Facebook Live is one of the most popular ways to stream live content, followed by other platforms such as Twitter, Instagram, and YouTube. You can use live streaming to update followers on news as it happens, conduct giveaways and contests, interview guests and influencers, or simply make followers feel personally connected to your brand.
The way you promote your content is your decision, but don’t forget to test and analyze your results. This way, you’ll know if any immediate changes can or should be modified while the campaign is still live. You can also apply this information to future campaigns.
Begin Creating Your Campaign
Social media has taken the world by storm. Although some trends are changing, social media is here to stay. Social media marketing campaigns are a great option for businesses that want to remain relevant and promote their content effectively and efficiently.
With the possibility of significant reach, ability to directly engage with followers and customers, the ease of sharing your content with thousands (or even millions) of people, and the budget-friendly nature of the work, social media marketing campaigns are appealing to both businesses and consumers alike.
Get started creating unique and engaging content for your social followers and make an impact that drives sales and gets people pumped about your brand.

Maxfunnels, tu Creador de Landing Pages y Funnels de Ventas
Demo de MaxFunnels en Español
Características del Software
Arrastrar y soltar
Bonus Socialancer
Creación de formularios
Funnels
Informes detallados
Integración Autorrespondedores
Plantillas editables
Pop-ups
Responsive
Soporte en español
Test A/B
Videotutoriales Socialancer en Español
Públicos
Agencias
Autónomos / Freelancers
Bloggers
Consultores
Desarrolladores
Diseñadores
Emprendedores
Marketers
Negocios Locales
Profesionales SEO
Publicistas
eCommerce
Qué es MaxFunnels
Con MaxFunnels podrás crear atractivas Landing Pages y Funnels de Ventas de alta conversión para tus infoproductos, registro en webinars, captación de leads, descarga de materiales, páginas de bonus…
Maxfunnels es la solución ideal si necesitas:

- Convertir Usuarios en leads o clientes para tu negocio online o local
- Aumentar Clics y Conversiones en tus ofertas para vender más productos o servicios
- Generar más registros en tus Webinars para aumentar tu base de datos y vender mejor tus infoproductos
- Vender más consultorías o servicios de agencia o freelancers generando más reuniones, ofertas de cupones descuentos, usar contadores de urgencia…
- Generar más Lead Magnets, páginas de reseñas de producto, páginas de bonus…
- Llegar antes a tus objetivos de ventas
MaxFunnels cuenta ahora con 22 BONUS Socialancer para que saques mayor provecho a la herramienta desde el principio:
- Videotutoriales en HD y en español
- Soporte Socialancer en español
- 20 BONUS del lanzamiento de MaxFunnels
MaxFunnels en 3 pasos
#1. Elige la plantilla

Para empezar, elige entre 100 plantillas listas para utilizar dependiendo de tu nicho y objetivos. Cuenta con plantillas para Generación de Leads, Páginas de ventas, Registro a Webinars, Páginas para descargar materiales, Opiniones de productos y Páginas de Bonus, Páginas de Eventos… Puedes adaptar las plantillas a la versión móvil y también las podrás optimizar para SEO.
#2. Edita y personaliza las plantillas
Utiliza su sencillo editor de Arrastrar y Soltar de última generación para la página y su planificador de embudos de ventas para crearlo todo sin tener conocimientos de código ni de diseño.

#3. Publica y Vende como un Pro
Publica tus funnels de ventas, que funcionarán 24*7, atrae la máxima atención de tus leads y vende como un pro. También podrás consultar su apartado de analíticas para saber lo que te está funcionando y lo que puedes mejorar. Con esta herramienta podrás hacer distintos funnels, según tus objetivos:

- Embudo de ventas
- Leads Funnel
- Funnels para Lanzamiento de Info Productos
- Funnels para Webinar
- Lead Nurturing Funnels
- Embudos para cerrar ventas de Clientes
- Otro tipo de Marketing Funnels
Integraciones con Autorrespondedores

from Socialancer https://ift.tt/2mGNLhm
via
How to Use LinkedIn to Build a Powerful Network
Are you connecting with the right people on LinkedIn? Want to build a stronger LinkedIn network? In this article, you’ll learn how to make strategic LinkedIn connections to grow your influence and your business. Why Build a Selective LinkedIn Network? Whether you’re an entrepreneur or a business professional, LinkedIn is the perfect social media platform […]
The post How to Use LinkedIn to Build a Powerful Network appeared first on Social Media Marketing | Social Media Examiner.
from Social Media Marketing | Social Media Examiner https://ift.tt/2o5V5TY
via socialmediaexaminer
11 of the Best Meeting Scheduler Tools to Organize Your Day
We complain about spending countless hours in unproductive and mismanaged meetings.
But the greater crime is all the wasted time we spend scheduling the meeting.
The endless back-and-forth communication and steps — reviewing calendars, finding out the best place to meet, setting up a call-in number, adding the meeting to the calendar, and inviting all the necessary attendees. The process makes your meeting a hassle before it even starts.
Effortlessly scheduling meetings without the annoying back-and-forth emails. Get free access to HubSpot Meetings here.
Whether you’re trying to find the perfect window of time to catch up with your busy team, or looking for the best way to coordinate with your clients, these meeting scheduler tools have you covered.
1. HubSpot
A lot of meeting scheduler tools connect to your inbox, but what if you need your meeting schedule available in your CRM as well? HubSpot’s meeting scheduling tool integrates with both your calendar and your HubSpot CRM, so setting up meetings with customers, prospects, or leads is a painless process.
The Meetings tool provides users with a personalized booking link they can share via email to invite people to view their availability and book time. When someone schedules a meeting, it will automatically be added to your calendar, and pushed to the CRM.
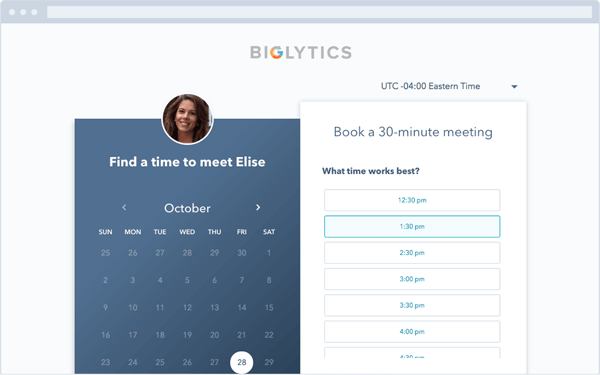
2. Rally
Finding a time for a group of people to meet can be a nightmare, especially if your team is large or includes remote employees. Rally lets you create a simple, straightforward poll where attendees can vote on a day for an event that works best for them. It also includes an open comment section on the meeting page, so attendees can plan the meeting agenda or discuss details before the event.
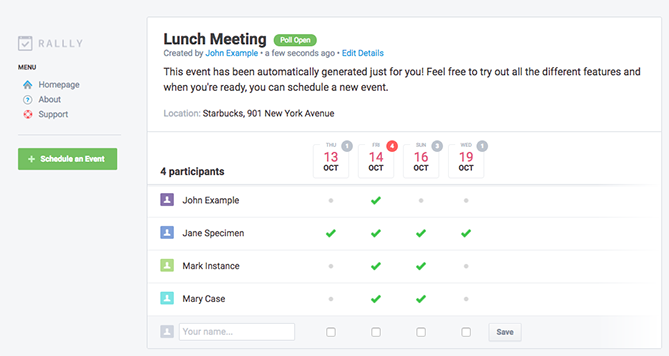
3. Assistant.to
Assistant.to lets you work directly from Gmail and Google Calendar to select available meeting times and share those open slots with the person you’re trying to schedule a meeting with.
From within the message compose screen in Gmail, you can select the meeting duration and location. This information is included in an email, allowing the recipient to click on the time that works best for them. Once you’ve agreed on a time, the app adds the meeting with all the relevant details to your calendar. Currently, group scheduling is not an option.
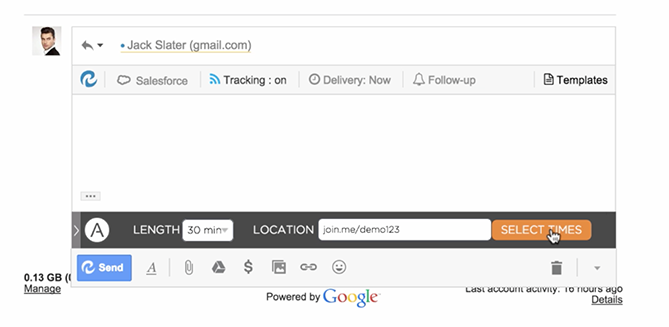
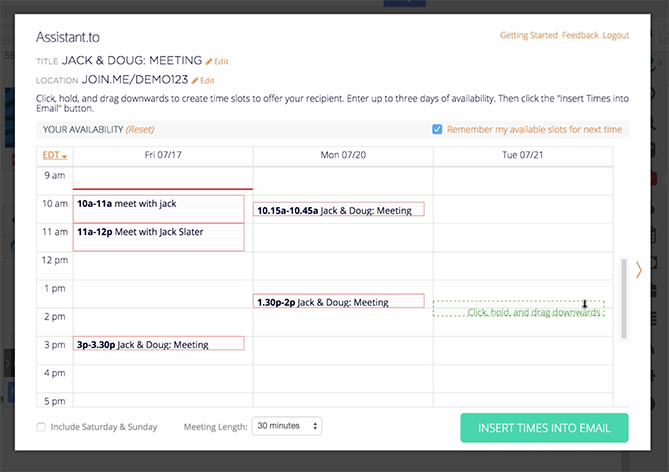
4. Calendar
Calendar, which recently acquired Timebridge, is a free service that integrates Google and Apple calendars. The app offers two ways to schedule meetings.
With the “outbound” method, hosts indicate their own availability, list the attendees they’d like to come to a meeting, and use the Calendar software to send out an email to collect everyone’s preferred times. After Calendar determines the ideal time for everyone to meet, the app will schedule the meeting for you. With the “inbound” method, Calendar gives you a personal URL where users can check your availability and request times to meet with you.
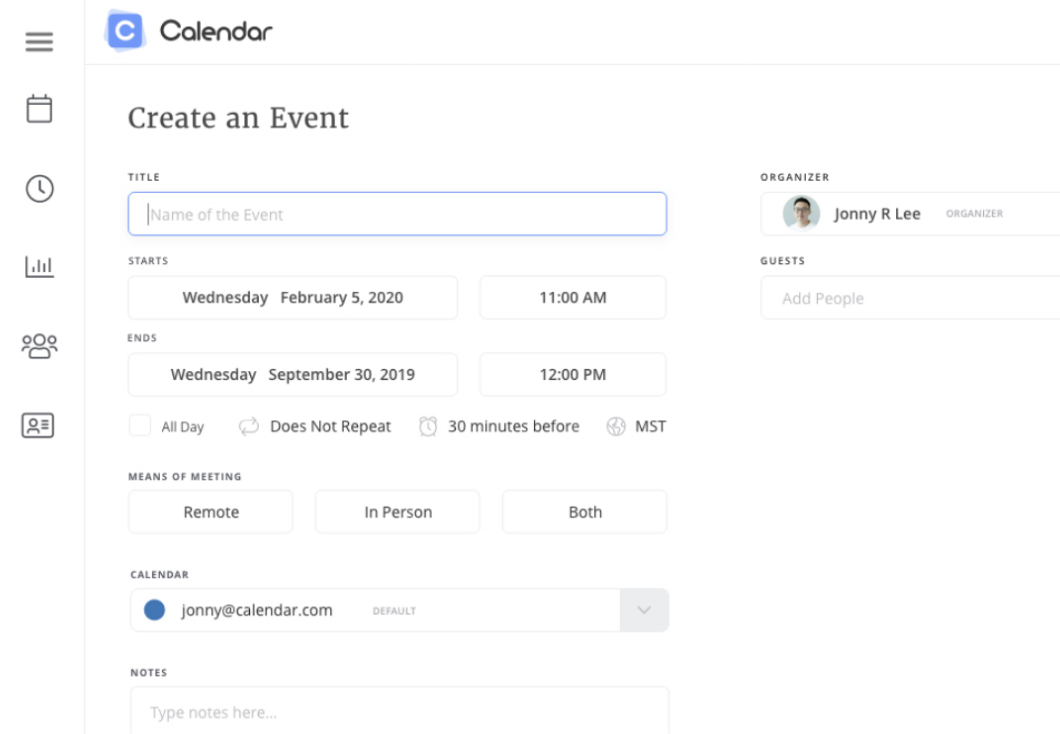
5. NeedToMeet
NeedToMeet doesn’t require you to sign up for an account to use their service. You simply enter a brief description of your meeting’s purpose, block off your availability on a calendar, and send the link to attendees. The free version doesn’t sync with your calendar, but they do offer a premium subscription which integrates with Outlook.
This tool differs from services like Rally and Doodle because it allows attendees to indicate their preferred date and times, rather than only choosing from a list of dates and times set by the meeting host.
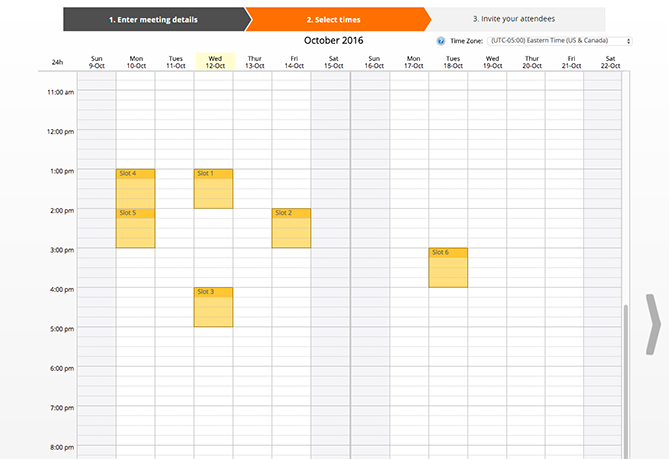
6. YouCanBook.me
If you find yourself struggling to make your availability known to clients, try out YouCanBook.me. This freemium service offers users a custom URL where users can view free spots on your Google Calendar or iCloud Calendar and book time with you.
The service allows you to customize your booking page with different layouts, colors, and your company’s logo.
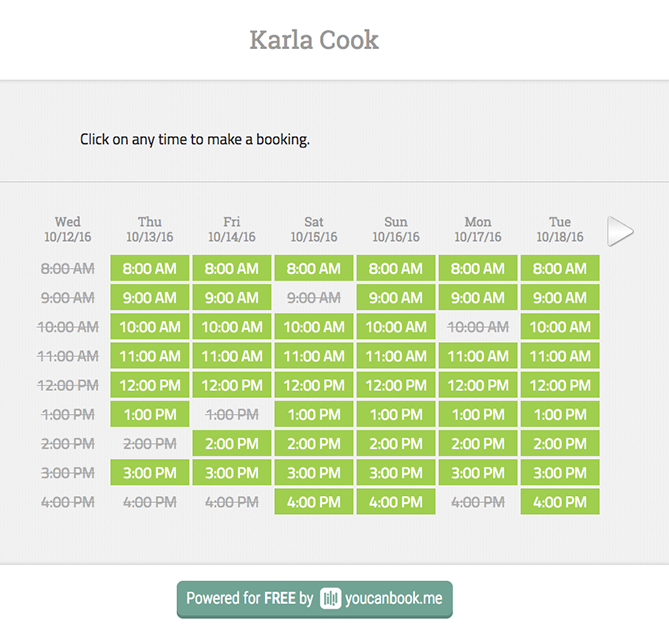
7. Pick
Pick automatically scans everyone’s Gmail calendars to find open slots, and then delivers a list of mutually available times. You can then send a calendar invite to all attendees directly from the app.
All members of your team need to be on Pick in order to share their availability. The app also provides users with an individual URL so you can share your availability with people requesting a meeting.
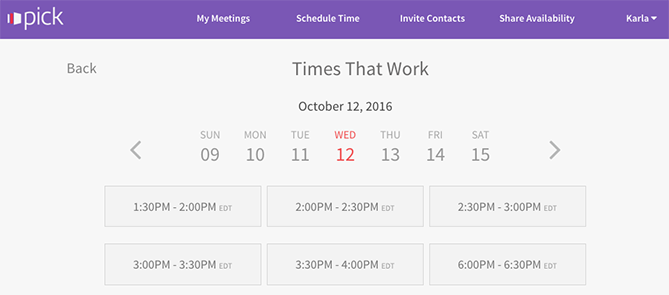
8. Doodle
With Doodle, you can pick date and time options, and poll a group to see what works best for them. You don’t have to sign up for a Doodle account to participate in a poll. You can also create a public Doodle URL, where individuals can request a meeting with you based on your listed availability.
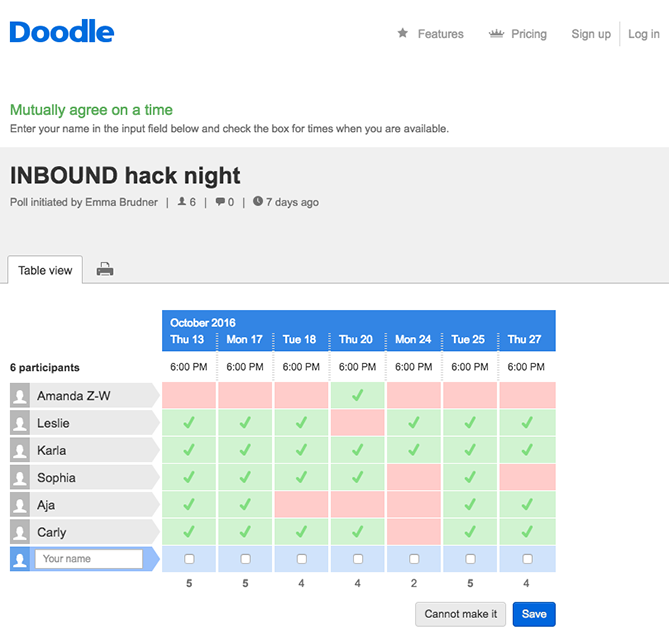
9. Calendly
Calendly integrates directly with your Google or Office 365 calendar, and gives you a personalized URL where people can view your availability and schedule times to meet you. They offer a basic free plan, and a paid premium plan that allows for group scheduling and other additional features.
To help you stay organized, the app lets you set up custom meeting types and durations, e.g., “30 Minute Check-In” or “60 Minute Project Review.” You can add also add custom questions to the form people use to sign up to meet with you, include a link to a document or web page people should review prior to your meeting, or even make events private.
10. Clara
Meet Clara, a virtual assistant fueled by machine learning who can schedule all your meetings and get acquainted with your scheduling patterns. Once you sign up, you indicate your preferences as to which days and times you are available for meetings and your favorite locations for coffee, lunch, or drinks.
If someone requests a meeting, you can CC Clara’s email address (which can be customized to your company’s domain), and the virtual assistant will determine a time, date, duration, participants, and location for the meeting. She also understands human commands like, “I’m sick, can you reschedule my meetings on Tuesday?”
It currently only works with Gmail, and it does have a hefty price tag, but it could be worth the cost if scheduling is a major pain point for your company. Especially considering it’s still significantly cheaper than hiring a human personal assistant.
11. Google Calendar
If your team uses the GSuite and would like to streamline scheduling processes, you can schedule meetings with others through Google Calendar.
If your work email is already part of a GSuite membership, you can go to your calendar, search another team member under the “Meet with” tab on your left, and then click their name to view their calendar up against your own. If you click on a time slot on that calendar, you can schedule a meeting with both yourself and that teammate.
If your teammates aren’t part of your GSuite, you can press the share button and share your calendar with their email address. From there, they can enter the calendar and schedule a meeting time with you.
Summary
The options are endless for meeting scheduler tools. The choice is ultimately up to you which one fits your personal workflow.
If you’re looking for a quick and easy way to book meetings faster without the back-and-forth emails … check out HubSpot’s meeting scheduling tool.

Editor’s Note: This post was originally published in July 2015 and has been updated for freshness, accuracy, and comprehensiveness.
