Welcome to My Blog
The Ultimate Guide to On-Page SEO in 2019
So, you’ve read dozens — if not hundreds — of SEO articles online. You’ve digested countless tips and tricks for improving your website’s SEO. You’ve even (over)paid that self-proclaimed “expert” to help you develop an SEO strategy that aligns with your business goals.
But after all of the reading and learning and strategizing, it dawns on you: You haven’t actually done anything yet. Perhaps you’re intimidated. Maybe you’re crunched for time.
Regardless, when it comes to on-page SEO, there’s no excuse for dragging your feet. On-page SEO has the power to bring countless new visitors — and customers — right to your website.
Download our free SEO Starter Pack and access everything you need to get your website and blog ranking in search in 2019.
On-page SEO is also completely up to you: You get to establish what the topic and/or goal of each page will be. You get to decide on the target audience for that page. And you get to choose the target keywords and phrases you want to focus on.
All you have to do is get started, and we built this guide to help you.
Google’s algorithm ranks your website on three main factors: on-page SEO, off-page SEO, and technical SEO:
- We’ll cover on-page SEO elements below.
- Off-page SEO refers to social sharing, external linking, and more.
- Technical SEO refers to all the SEO elements not included in on-page and off-page practices, such as structured data, site speed, and mobile readiness — the more technical parts of SEO.
Note: This SEO “trilogy” isn’t always divided into three clean sections; some of these SEO elements will overlap. You’ll see how and why throughout this piece.
Why is on-page SEO important?
On-page SEO is important because it tells Google all about your website and how you provide value to visitors and customers. It helps your site be optimized for both human eyes and search engine bots.
Merely creating and publishing your website isn’t enough — you must optimize it for Google and other search engines in order to rank and attract new traffic.
On-page SEO is called “on-page” because the tweaks and changes you make to optimize your website can be seen by visitors on your page (whereas off-page and technical SEO elements aren’t always visible).
Every part of on-page SEO is completely up to you; that’s why it’s critical that you do it correctly. Now, let’s discuss the elements of on-page SEO.
All on-page SEO elements fall into three main categories:
You’ll see these elements divided into sections below.
Content Elements
Content elements refer to the elements within your site copy and content. In this section, we’ll focus mostly on crafting high-quality page content that benefits your visitors and tells Google that your website provides value.
High-quality page content
Page content is the heart of on-page SEO. It tells both search engines and readers what your website and business is all about and how you can help.
The first step to creating high-quality content is choosing relevant keywords and topics. Conduct keyword research by searching Google for terms and seeing what surfaces for competitors and other websites. You can also use tools like Ahrefs, AnswerthePublic, and UberSuggest.
Also, read our Beginner’s Guide on How to Do Keyword Research for SEO.
Next, consider how your page content falls into the buyer’s journey and visitors’ search intent. These will affect how you will use your keywords and what types of content you will create:
| Stage in the Buyer’s Journey | Suggested Content/Website Pages |
| Awareness |
Blog posts, videos |
| Consideration |
Buyer’s guides, case studies |
| Decision |
Product demos, comparison tools |
Now, it’s time to write your page content or clean it up if you’re currently auditing your on-page SEO.
Here are a few best practices for writing high-quality page content:
- Incorporate short and long-tail keywords naturally.
- Add engaging and relevant visual content.
- Write for your specific buyer persona(s).
- Actively solve your audience’s problem.
- Develop content people will share and link to.
- Optimize for conversions with CTAs to offers and product pages.
Page content is your opportunity to communicate value to Google and your site visitors; it’s the heart of the on-page SEO process. All other on-page SEO elements stem from high-quality page content, so invest ample resources to develop and optimize it.
HTML Elements
HTML elements refer to the elements in your source code. Note: To see the source code for any page in your browser, click View > Developer > View Source in the top menu.
Page titles
Your website page titles (also known as title tags) are one of the most important SEO elements.

Titles tell both visitors and search engines what they can find on the corresponding pages.
To ensure your site pages rank for the proper intent, be sure to include the focus keyword for each page in the title. Incorporate your keyword as naturally as possible.
Here are some best practices for when developing a page title:
- Keep it under 70 characters (per Google’s latest update) … any longer and your title will be cut off in search results. Mobile search results show up to 78 characters.
- Don’t stuff the title with keywords. Not only does keyword-stuffing present a spammy and tacky reading experience, but modern search engines are smarter than ever — they’ve been designed to specifically monitor for (and penalize!) content that’s unnaturally stuffed with keywords.
- Make it relevant to the page.
- Don’t use all caps.
- Include your brand in the title, i.e. “The Ultimate Guide to On-Page SEO in 2019 — HubSpot Blog“.
Check out our free data-driven guide to writing effective page titles.
Headers
Headers, also known as body tags, refer to the HTML element <h1>, <h2>, <h3>, and so on.

These tags help organize your content for readers and help search engines distinguish what part of your content is most important and relevant, depending on search intent.
Incorporate important keywords in your
headers, but choose different ones than what’s in your page title. Put your most important keywords in your <h1> and <h2> headers.
Meta descriptions
Meta descriptions are the short page descriptions that appear under the title in search results. Although it’s not an official ranking factor for search engines, it can influence whether or not your page is clicked on — therefore, it’s just as important when doing on-page SEO.

Meta descriptions can also be copied over to social media when your content is shared (by using structured markup, which we talk about below), so it can encourage click-throughs from there, too.
Here’s what makes for a good meta description:
- Keep it under 160 characters, although Google has been known to allow longer meta descriptions — up to 220 characters. (Note: Mobile devices cut off meta descriptions at 120 characters.)
- Include your entire keyword or keyword phrase.
- Use a complete, compelling sentence (or two).
- Avoid alphanumeric characters like —, &, or +.
Image alt-text
Image alt-text is like SEO for your images. It tells Google and other search engines what your images are about … which is important because Google now delivers almost as many image-based results as they do text-based results.
That means consumers may be discovering your site through your images. In order for them to do this, though, you have to add alt-text to your images.
Here’s what to keep in mind when adding image alt-text:
- Make it descriptive and specific.
- Make it contextually relevant to the broader page content.
- Keep it shorter than 125 characters.
- Use keywords sparingly, and don’t keyword stuff.
Structured markup
Structured markup, or structured data, is the process of “marking up” your website source code to make it easier for Google to find and understand different elements of your content.
Structured markup is the key behind those featured snippets, knowledge panels, and other content features you see when you search for something on Google. It’s also how your specific page information shows up so neatly when someone shares your content on social media.
Note: Structured data is considered technical SEO, but I’m including it here because optimizing it creates a better on-page experience for visitors.
Site Architecture Elements
Site architecture elements refer to the elements that make up your website and site pages. How you structure your website can help Google and other search engines easily crawl the pages and page content.
Page URLs
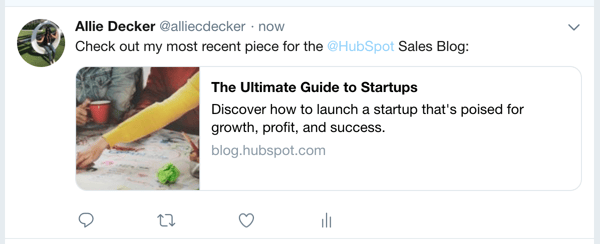
Your page URLs should be simple to digest for both readers and search engines. They are also important when keeping your site hierarchy consistent as you create subpages, blog posts, and other types of internal pages.

For example, in the above URL, “blog” is the sub-domain, “hubspot.com” is the domain, “sales” is the directory for the HubSpot Sales Blog, and “startups” indicates the specific path to that blog post.
Here are a few tips on how to write SEO-friendly URLs:
- Remove the extra, unnecessary words.
- Use only one or two keywords.
- Use HTTPS if possible, as Google now uses that as a positive ranking factor.
Internal linking
Internal linking is the process of hyperlinking to other helpful pages on your website. (See how the words “internal linking” are linked to another HubSpot blog post in the sentence above? That’s an example.)
Internal linking is important for on-page SEO because internal links send readers to other pages on your website, keeping them around longer and thus telling Google your site is valuable and helpful. Also, the longer visitors are on your website, the more time Google has to crawl and index your site pages. This ultimately helps Google absorb more information about your website and potentially rank it higher on the search engine results pages.
Download our free guide to Internal Linking for SEO.
Mobile responsiveness
Did you know over the last year, Google has started favoring sites that are optimized for faster mobile speeds — even for desktop searches? Mobile responsiveness matters.
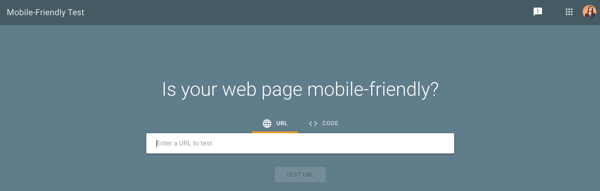
It’s critical to choose a website hosting service, site design and theme, and content layout that’s readable and navigable on mobile devices. If you’re not sure about your own site’s mobile readiness, use Google’s Mobile-Friendly Test tool.
Site speed
Whether being viewed on a mobile device or desktop, your site must be able to load quickly. When it comes to on-page SEO, page speed counts big-time.
Google cares about user experience first and foremost. If your site loads slowly or haphazardly, it’s likely your visitors aren’t going to stick around — and Google knows that. Moreover, site speed can impact conversions and ROI.
Check your website’s speed anytime using Google’s PageSpeed Insights tool. If your website is movin’ slow, check out 5 Easy Ways to Help Reduce Your Website’s Page Loading Speed.
Note: Mobile responsiveness and site speed are considered technical SEO, but I’m including them here because optimizing them creates a better on-page experience for visitors.

Now that you understand the different on-page SEO elements, let’s talk through the steps of auditing and improving your on-page SEO.
One of the more difficult parts of this process is organizing and tracking all of these various on-page SEO elements.
If you’ve been in search of a solution, you’re in luck: The HubSpot marketing team recently released an updated version of our On-Page SEO Template, an Excel document that allows you to coordinate pages and keywords — and track changes — all in one place.
In this section, we’ll be using this template as a guide as we walk you through a checklist for your on-page SEO management, step by step. Download the template now and follow along.
(Note: The fictional website “http://www.quantify.ly” will be used as an example throughout this post. It’s simply meant to help you imagine how your own website will fit into the template.)
1. Crawl Your Website
Get an overview of all of your website pages that search engines have indexed. For HubSpot customers, our Page Performance tool (under Reports) will allow you to do this. If you’re not using HubSpot, you can try using a free tool like Xenu’s link crawler.
After crawling your site and exporting the results into an Excel (or .csv) file, there will be three key columns of data that you should focus on:
- The web address (a.k.a. URL)
- The page title
- The page meta description
Copy and paste these three columns into your template.
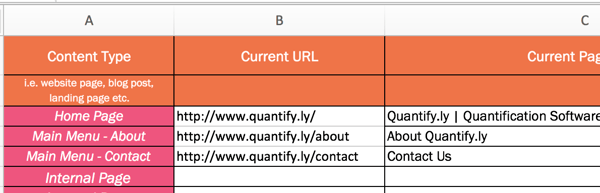
The URL should be pasted into column B, the page title into column C, and the description into column E.

2. Conduct an SEO Audit and Define Your Site Architecture
Now that you have a basic index of your site in the template, you’ll want to organize and prioritize your web pages. Start by defining where within your site architecture your existing pages currently sit. Do this in column A.
Note whether a page is your homepage (ideally you’ll only have one of those), a page in your primary (or secondary) navigation menu, an internal page, and so on.
3. Update URLs, Page Titles, and Meta Descriptions
Review your current URLs, page titles, and meta descriptions to see if they need updating. This is the beauty of using a template to organize your SEO: You get a broad overview of the type of content you have on your website.

Notice how column D and column F automatically calculate the length of each element. The recommended length for page titles is anything under 60 characters. (And, actually, a quick and easy optimization project is to update all page titles that are longer than 60 characters.)
The recommended length for page meta descriptions is 155-160 characters. This is the perfect length to ensure none of the description is cut off by the ellipses. Make sure you’re not too repetitive with keywords in this space. Writing a good meta description isn’t tough, but it deserves just as much consideration as the page content itself.
(Note: For some sites, you may also have to update the URLs, but that’s not always the case and thus was not included as part of this optimization template.)
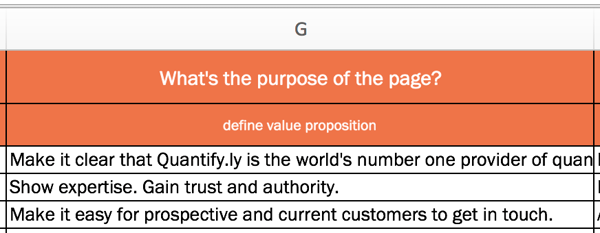
4. Establish Value Propositions for Each Page
A very important next step, which is often overlooked, is establishing a value proposition for each page of your website. Each page should have a goal aside from just ranking for a particular term. You’ll do this in column G.
5. Define Your Target Audience
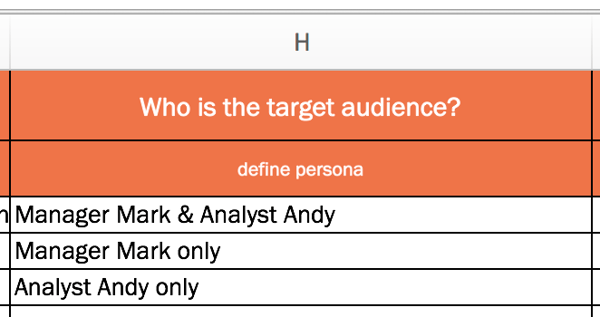
In column H, you have the opportunity to define your page’s target audience. Is it a single buyer persona or multiple personas? Keep this persona in mind as you optimize your site’s pages. (Remember, you are optimizing for humans, too — not just search engine robots.)
6. Plan New Page Titles
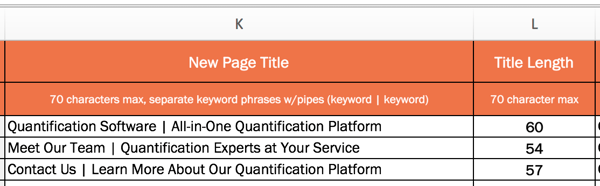
Now that you’ve documented your existing page titles and have established value propositions and target audiences for each of your pages, write new page titles (if necessary) to reflect your findings in column K. People usually follow the formula of “Keyword Phrase | Context.” The goal of the page title is to lay out the purpose of the page without being redundant. Double check each title length in column L.
7. Add New Meta Descriptions
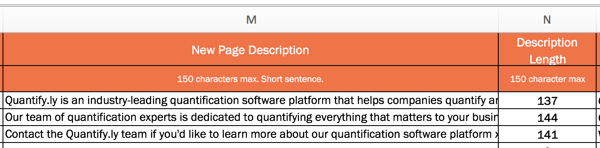
If you need to create new meta descriptions, do so in column M. Each meta description should be a short, declarative sentence that incorporates the same keyword as your page’s title. It should not reflect the content verbatim as it appears on the page. Get as close as you can to the 150-character limit to maximize space and tell visitors as much as possible about your page.
8. Track Keywords and Topics for Each Page
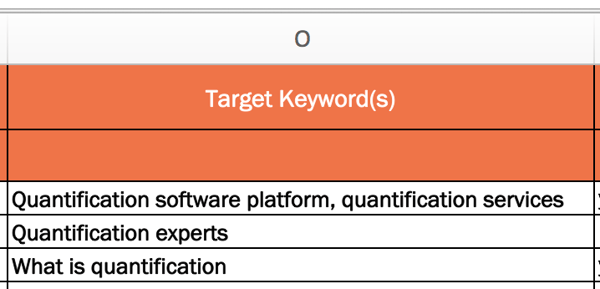
Think of your target keyword as the designated topic for a particular page. In column O, define just one topic per page. This allows you to go more in-depth and provide more detailed information about that topic. This also means that you are only optimizing for one keyword per page, meaning you have a greater chance to rank for that keyword.
There are, of course, a few exceptions to this rule. Your homepage is a classic example. The goal of your homepage is to explain what your entire website is about, and thus you’ll need a few keywords to do that. Another exception is overview pages like services and product pages, which outline what all of your products and services may be.
9. Review and Edit Page Content as Needed
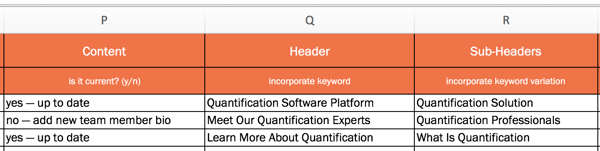
Good copy needs to be thorough, clear, and provide solutions … so, be compelling! Write for your target audience and about how you can help them. Compelling content is also error-free, so double check your spelling and grammar.
Aim to have at least 500 words per page, and format content to make it easier to read and digest with the use of headers and subheaders. Columns P through R can be used to keep track of changes that you’ve made to your content or to note where changes need to be implemented.
10. Incorporate Visual Content
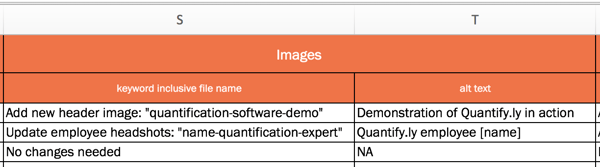
Content can be more than just text, so consider what kind of visual content you can incorporate into each page (if it adds value and serves a purpose, of course). Columns S and T allow you to note which visual elements need to be added. When adding an image to a page, be sure to include a descriptive file name and image alt-text.
11. Add Internal Links
Incorporating links throughout your pages is a must, but it’s often something that’s easily overlooked. Use columns U through W to plan for these elements if you don’t already have them, or to document how you’ll improve them.

Make sure that your anchor text includes more than just your keywords. The goal isn’t to stuff in as many keywords as possible, but to make it easy for people to navigate your site.
12. Optimize for Conversions
If you’re also not optimizing your site to increase the number of leads, subscribers, and/or customers you’re attracting … you’re doing it wrong.
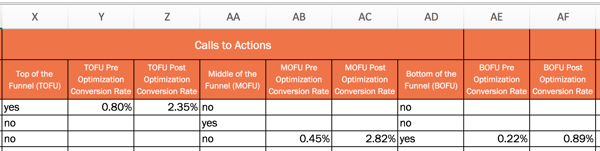
Columns X through AF allow you to plan for conversions. Remember that each page of your website presents a conversion opportunity. That means every page of your website should include at least one call-to-action (CTA), though many pages may have multiple CTAs.
Be sure that your site has a mix of CTAs for different stages of the flywheel.
(Note: The On-Page SEO Template refers to the stages of the buying funnel — top of the funnel, middle of the funnel, and bottom of the funnel. If you are a HubSpot customer, you can even use Smart Content to display these specific CTAs only to people in a specific part of the funnel.)
Also, as you add, edit, or update CTAs, be sure to note conversion rate changes in columns Z, AC, and AF.
Put Your On-Page SEO to Work
Once you finalize your SEO plans, implement these changes on your website or pass them along to someone to implement for you. This will take time to complete, so aim to work on 5 to 10 pages per week.
Remember: SEO is not a one-and-done deal. It’s something you should continually improve upon. You should treat this On-Page SEO Template as a living, breathing document that will help guide your SEO strategy for months (or years) to come.
Editor’s Note: This post was originally published in October 2012 and has been updated for freshness, accuracy, and comprehensiveness.


The Ultimate Guide to Video Marketing
Brands need a video marketing strategy — this idea isn’t new. What has changed is how important video has become on every platform and channel.
Video is no longer just one piece of your overall marketing plan. It’s central to your outreach and campaign efforts … especially your social strategy.
Video has absolutely dominated social. According to a recent HubSpot Research report, four of the top six channels on which global consumers watch video are social channels.
Why is this important? If you aren’t creating video, you’re likely falling behind. But don’t fret. For most videos, the more simple and raw it is, the more authentic the content seems … and that’s what really matters to your audience.
Better yet, video production is more cost-effective than ever — you can shoot in high-quality, 4K video with your smartphone.
Regardless, between camera equipment to lighting to editing software, the topic of video marketing can still seem pretty complicated. That’s why we compiled this guide.
Continue reading learn everything you need to know about video marketing strategy, or use the links below to jump to a specific section.

Why You Need to Focus on Video Marketing in 2019
2016 saw a surge in the popularity of video as a content marketing format. 2017 saw video rise to the top of your marketing tactic list. Video as a tactic was likely streamlined by your creative team as a one-to-many awareness play, with lots of focus on expensive production and little analysis to show for it.
2018 transformed video from a singular marketing tactic to an entire business strategy.
What does 2019 mean for video marketing? 2019 is the year for video as a holistic business approach, meaning video content will be produced by all teams in a conversational, actionable, and measurable way.
Learn how personalized video is shaping the future of marketing, sales, and customer service.
According to a report from HubSpot Research, more than 50% of consumers want to see videos from brands … more than any other type of content.

Video is useful for more than entertainment, too. Video on landing pages is capable of increasing conversion rates by over 80%, and the mere mention of the word “video” in your email subject line increases open rates by 19%. 90% of customers also say videos help them make buying decisions.
But video hasn’t only transformed how businesses market and consumers shop; it’s also revolutionized how salespeople connect with and convert prospects and how service teams support and delight customers. In short, video is incredibly useful throughout the entire flywheel — not just to heighten brand awareness.
Video can be a versatile tool for salespeople throughout the entire customer buying journey, and it can do much more than increase engagement. Backend analytics also help salespeople qualify and prioritize cold or unresponsive leads.
The options are also endless for service teams — onboarding videos, knowledge-based videos, meet the team videos, support video calls, and customer stories are just a few ways that video can create a more thorough, personalized customer support experience.
Lastly, 2019 has brought about a penchant for the authentic and raw. According to HubSpot Research, consumers and customers actually prefer lower quality, “authentic” video over high-quality video that seems artificial and inauthentic.
Video is within reach for businesses of virtually any size — team and budget alike. 45% of marketers plan to add YouTube to their content strategy in the next year. Will you join them?
The 12 Types of Marketing Videos
Before you begin filming, you first need to determine the type of video(s) you want to create. Check out this list to better understand your options.
1. Demo Videos
Demo videos showcase how your product works — whether that’s taking viewers on a tour of your software and how it can be used or unboxing and putting a physical product to the test.
Learn how to use video in each stage of the buyer’s journey.
2. Brand Videos
Brand videos are typically created as a part of a larger advertising campaign, showcasing the company’s high-level vision, mission, or products and services. The goal of brand videos is to build awareness around your company and to intrigue and attract your target audience.
3. Event Videos
Is your business hosting a conference, round table discussion, fundraiser, or another type of event? Produce a highlight reel or release interesting interviews and presentations from the gathering.
4. Expert Interviews
Capturing interviews with internal experts or thought leaders in your industry is a great way to build trust and authority with your target audience. Find the influencers in your industry — whether they share your point-of-view or not — get these discussions in front of your audience.
5. Educational or How-To Videos
Instructional videos can be used to teach your audience something new or build the foundational knowledge they’ll need to better understand your business and solutions. These videos can also be used by your sales and service teams as they work with customers.
6. Explainer Videos
This type of video is used to help your audience better understand why they need your product or service. Many explainer videos focus on a fictional journey of the company’s core buyer persona who is struggling with a problem. This person overcomes the issue by adopting or buying the business’s solution.
7. Animated Videos
Animated videos can be a great format for hard-to-grasp concepts that need strong visuals or to explain an abstract service or product. For example, we created the following video to promote a key (intangible) theme from the 2017 State of Inbound report.
8. Case Study and Customer Testimonial Videos
Your prospects want to know that your product can (and will) solve their specific problem. One of the best ways to prove this is by creating case study videos that feature your satisfied, loyal customers. These folks are your best advocates. Get them on-camera describing their challenges and how your company helped solve them.
9. Live Videos
Live video gives your viewers a special, behind-the-scenes look at your company. It also draws longer streams and higher engagement rates — viewers spend up to 8.1x longer with live video than with video-on-demand. Live-stream interviews, presentations, and events, and encourage viewers to comment with questions.
Learn how Facebook Live video can increase your social following and brand awareness.
10. 360° & Virtual Reality Videos
With 360° videos, viewers “scroll” around to see content from every angle — as if they were physically standing within the content. This spherical video style allows viewers to experience a location or event, such as exploring Antarctica or meeting a hammerhead shark. Virtual reality (VR) allows viewers to navigate and control their experience. These videos are usually viewed through devices such as Oculus Rift or Google Cardboard.
11. Augmented Reality (AR) Videos
In this style video, a digital layer is added to what you are currently viewing in the world. For example, you can point your phone’s camera at your living room and AR would allow you to see how a couch would look in the space. The IKEA Place app is a great example of this.
12. Personalized Messages
Video can be a creative way to continue a conversation or respond to someone via email or text. Use HubSpot Video or Loom to record yourself recapping an important meeting or giving personalized recommendations. These videos create a delightful, unique moment for your prospects and can drive them further down the purchase journey.
There’s a lot that goes into making a video. This section will walk you through the detailed process of creating and publishing a video for your business. Grab your camera and follow along.
1. Planning Your Video
Before you set up, record, or edit anything, start with a conversation about the purpose of your video. Why? Every decision made during the video creation process will point back to your video’s purpose and what action you’d like your audience to complete after watching it.
And, of course, without a clear purpose agreed upon by your team, you’ll find yourself in a whirlwind of re-shooting, re-framing, editing … and wasting a lot of precious time.
There are typically a lot of players when making a video. How can you ensure they’re all aligned?
Create a questionnaire using Google Forms or SurveyMonkey and pass it along to the stakeholders of the project. This way, you can ask the same questions of everyone and aggregate your answers in one place.
- Who’s your target audience? What buyer persona are you targeting? This may be a segment of your company’s typical buyer persona.
- What’s the goal? Is it to increase brand awareness? Sell more event tickets? Launch a new product? Ultimately, what do you want your audience to do after watching the video?
- Where’s the video going to live? On Facebook? Behind a landing page form? You should begin with one target location — where you know your audience will discover the video — before repurposing it for other channels.
- When’s it due? Always start with a timeline. A video on which you have a few months to work will have very a different budget and creative scope than a video needed in a few days.
- What’s the budget? Video can be expensive, but it doesn’t have to be … if you set a budget. Do your research and set realistic parameters, especially before you answer the next question.
- What are the creative requirements? With your budget, skills, and resources in mind, think about the creative roadblocks that might arise. Do you need a designer to create lower third graphics? Are you going to create an animated video or a live-action video?
- What will constitute success for the video? Choose several key performance indicators that correspond with your video goals — or hop down to the chapter in this guide on measuring and analyzing video.
2. Scripting Your Video
There’s a time and place for videos to be off-the-cuff and completely unscripted. You have tear-jerking documentaries, vlogging rants, and, of course, the holy grail: cat videos.
That being said, most business videos need a script.
If you skip this step, you’ll find yourself editing more than you need to, releasing a video longer than it should be, and probably losing your audience along the way.
Start writing your script the way you would begin a blog post — with an outline. List out your key points and order them logically.
Do all of your drafting in Google Docs to promote collaboration and real-time commenting. Use the “Insert > Table” function to adopt one of television’s traditional script-writing practices: the two-column script. Write your audio (script) in the left column and insert matching visual ideas in the right column.

Don’t make the viewer wait until the final seconds to understand the purpose of your video … we promise they won’t stick around. Similar to a piece of journalistic writing, include a hook near the beginning that states the purpose of the video, especially for educational and explainer videos.
Notice, in our example below, that we don’t let the audience get past the second sentence without understanding what the video will be about.

As you begin creating videos, you’ll notice a key difference between video scripts and your typical business blog post — the language. Video language should be relaxed, clear, and conversational. Avoid using complex sentence structures and eloquent clauses. Instead, connect with your audience by writing in first person and using visual language. Keep the language concise, but avoid jargon and buzzwords.
Following the “Little-Known Instagram Hacks” example, note how a section from the original blog post could be transformed for video by using fewer words and relying on visuals.
- Blog Post Version: “When someone tags you in a photo or video on Instagram, it’s automatically added to your profile under “Photos of You,” unless you opt to add tagged photos manually (see the next tip). To see the posts you’ve been tagged in, go to your own profile and click the person icon below your bio.”
- Video Script: “The bigger your following gets, the more people will tag you in their posts. You can find all of these under the “Photos of You” tab on your profile.”
Most video scripts are short … probably shorter than you think. Keep a script timer handy to check your script length as you write and edit. For example, a 350-word script equates to a video that is nearly 2 minutes long.
Words on paper sound a lot different than they do when read out loud. That’s why we encourage organizing a table read of your script before you start filming. The point of a table read is to smooth out the kinks of the script and nail down inflection points.
Have a few people (writer and talent included) gather around a table with their laptops and read the script multiple times through. If you accidentally say a line different than what the script prescribes, think about why and consider changing the language to make it sound more natural.
3. Understanding Your Camera(s)
Too often the fear and uncertainty of equipment keep businesses from trying out video marketing. But learning to shoot video doesn’t have to be overwhelming.
It’s likely you have a great, easy-to-use camera right in your pocket: your iPhone.
Shooting with Your iPhone
Before filming with your iPhone, ensure your device has enough storage. Also, don’t forget to enable your iPhone’s Do Not Disturb feature to avoid distracting notifications while filming.
Once you open the iPhone’s camera, flip your phone horizontally to create the best possible viewing experience. Then, move close enough to your subject so you don’t have to use the zoom feature — it often makes the final video look pixelated and blurry.
Your iPhone might do a great job of focusing on the subject when you take photos, but when it comes to video the camera will continue adjusting and re-adjusting as you move around the scene. To solve this problem, lock the exposure before you press record. Hold your finger down on the subject of the video until a yellow box appears with the words “AE/AF Lock”.

Shooting with Prosumer and Professional Cameras
While iPhones are great for filming on the fly or becoming acclimated with video, at some point you may feel ready to graduate up to the next model. With all the digital cameras on the market, there are a ton of choices to pick from. Below we’ve identified a few options to simplify your search.
The first choice you make will be between purchasing a “prosumer” camera and a professional camera.
Prosumer cameras are considered the bridge between basic compact cameras and more advanced cameras. They’re perfect for someone interested in creating more video but want the option to just press record. Most have a fixed lens to keep things simple.
Professional cameras, like DSLRs, give you fine control over the manual settings of shooting video and allow you to achieve the shallow depth of field (background out of focus) that people rave about. While they’re primarily used for photography, DSLRs are incredibly small, work great in low light situations, and pair with a wide range of lenses — making them perfect for video. However, DSLRs do require some training (and additional purchases) of lenses.
If you’re interested in going the prosumer route, take a look at the Canon PowerShot ELPH 340. The GoPro HERO5 is another fun option for adventurous shoots with lots of movement.
Considering the expense of a DSLR camera, research your options and read plenty of reviews. Top of the line options (from most expensive to least) include the Sony Alpha a7SII, Nikon D810, and Canon EOS 5D Mark III. For a more cost-effective option, check out the Canon EOS 7D Mark II, Canon 80D, Nikon d3300, or Canon EOS Rebel T6.
Understanding Your Camera’s Manual Settings
If you choose a DSLR, there are a few settings you need to understand before your first shoot: frame rate, shutter speed, ISO, aperture, and color balance. Definitely keep your camera nearby as you read — manual settings can seem quite abstract without testing them for yourself.
But before we dive in, we want to stress that this is a high-level overview of each setting. If you find yourself wanting more, dive in and do some of your own research. There’s plenty to learn about how to manipulate these settings and use them together to create different looks.
Lastly, there will be a different method for adjusting these settings based on your specific camera. Always refer to your camera’s instruction manual.
Frame Rate
As with video concepts, there are tons of customization options. The most basic customization option when it comes to frame rate is shooting your video at 24 frames per second (fps) or 30fps.
Video experts often credit 24fps with a more “cinematic” look, while 30fps is more common, especially for videos that need to be projected or broadcasted. A good rule of thumb is to ask the end user of your video what his or her preferences are and shoot based on that. Then, be sure your resolution is at least 1920 x 1080 to maintain quality footage.
Once you’ve set your frame rate and resolution in your camera’s settings, it’s time to determine your aperture, shutter speed, and ISO. Be sure to turn your camera to manual mode to control these settings.
(While we’ll define each of these individually, know that these three variables are meant to work in tandem with each other. In fact, many photographers use the term Exposure Triangle to describe how they relate to light and how it interacts with the camera.)

Aperture
Aperture refers to the size of the opening in the lens. Like a human eye, a lens opens and closes to control the amount of light reaching the sensor. Aperture is measured in what’s called an f-stop. The smaller the f-stop number, the more open the lens is, while a larger number means the lens is more closed.

What does aperture mean for your video? When a lot of light comes into the camera (with a low f-stop number), you get a brighter image and a shallow depth of field. This is great for when you want your subject to stand out against a background. When less light comes into the camera (with a high f-stop number), you get what’s called deep depth of field and are able to maintain focus across a larger portion of your frame.

Shutter Speed
To understand shutter speed, we first have to talk about photography. When taking a photo, shutter speed refers to the length of time the camera’s sensor is exposed to light. Think of it as how quickly or slowly the camera blinks.
If you’ve seen a perfectly timed photo of a hummingbird seemingly frozen in time, you’ve witnessed a very fast shutter speed. Meanwhile, an image of a rushing river with the water blurring together was probably taken with slow shutter speed.
Shutter speed is measured in seconds, or in most cases, fractions of seconds. The greater the denominator of the fraction is, the faster the shutter speed. So, 1/1000 would be faster than 1/30.
But what does shutter speed mean for video? We won’t go too deep into the science of shutter speed, but to pick the adequate setting, you’ll have to do a little math. First, multiply your frame rate by 2. So if you’re shooting in 24fps, that would be 48. This number becomes the denominator of your shutter speed fraction.
Since shutter speed is only available in a few increments, you’ll need to round 1/48 up to the next closest setting: 1/50. Here are some common shutter speeds and how to calculate them:
- At 24fps, 24 x 2 = 48, equalling a shutter speed of 1/50
- At 30fps, 30 x 2 = 60, equalling a shutter speed of 1/60
- At 60fps, 60 x 2 = 120, equalling a shutter speed of 1/20
Remember, this process is just a guideline for choosing shutter speed. Traditionalists stick to these calculations, but there’s always room to tweak shutter speed slightly to achieve a desired effect. In the case of video, rules can be broken — as long as you have a good enough reason.
ISO
Last in the Exposure Triangle is ISO. In digital photography and videography, ISO measures the camera sensor’s sensitivity to light. On your camera, you’ll see the settings referred to with numbers in the hundreds or thousands (e.g. 200, 400, 800, 1600, etc).
The higher the number, the more sensitive your camera is to light … the lower the number, the less sensitive. ISO also affects the graininess of the image. Low ISOs produce a crisp shot, while high ISOs create a more noisy, grainy shot.
When choosing an ISO, consider the lighting. If your subject is well-lit (for example, if you were outside), you can get by with a lower ISO, ideally around 100 or 200. If you’re indoors in a low-light situation, you’ll need to bump up the ISO — just be careful of how grainy it makes your shot.
This is where you can begin to see how the three factors of the Exposure Triangle work together. When you have a low-lit situation, for example, you may choose a lens that can shoot with a low f-stop to let more light into the camera and avoid making the shot too noisy with a high ISO.

If you’re just starting out with manual video settings, don’t be overwhelmed. Understanding the ins and outs of the Exposure Triangle takes time and a lot of practice. Here are two tips to beat the learning curve:
- Start with photos. By switching your camera off video mode, you’ll be able to see the relationship between aperture, ISO, and shutter speed. Take a ton of photos and change each setting incrementally. Over time, the numbers will be less intimidating and switching between settings will make more sense — and become easier to apply to video.
- Form a process. Every videographer has their own method, but we suggest setting your shutter speed first according to the math described above. Then adjust aperture according to the depth of field you want to create. Then, ISO. Finally, circle back to shutter speed for any fine adjustments.
While aperture, shutter speed, and ISO may be the three main pillars of manual photography and videography, there is a fourth piece of the puzzle that’s just as important: white balance.
White Balance
White balance tells your camera the color temperature of the environment you’re shooting in. Different types of light have different colors. For example, incandescent bulbs (like what many people put in a lamp) have a very warm color. The fluorescent lights (if you’re reading this in an office, look up) are a little bit cooler. Daylight is cooler yet. Before you begin shooting, you have to adjust your camera’s white balance according to your setup.
The exact settings on your camera will depend on your model, but there’s likely an auto option, a bunch of presets (daylight, cloudy, tungsten, etc.), and custom. Avoid auto white balance at all costs and opt for a preset or custom instead. If you have a top-of-the-line DSLR, there may also be an option to manually set the color temperature of the room, measured in Kelvin.

To help you understand the importance of setting your white balance, consider the difference between these two photos. The environment is lit with yellow fluorescent lights. You can see how the appropriate setting looks natural, while the daylight setting adds a blue tint to the scene.

Focus
Focus isn’t one of the key settings of shooting, but it’s definitely important to keep in mind. With a DSLR, you have the option to shoot with autofocus or manual focus. It depends on the camera and lens you have, but typically autofocus is not the most accurate.
Instead, flip your lens to manual focus. Use the (+) and (-) buttons to enlarge the viewfinder and move in close to your subject’s face. Then, adjust the focus on the lens. For shooting a stationary setup like an interview, make sure the subject’s eyelashes are in focus — that way, you can be certain your footage is clear and sharp.
4. Setting Up Your Studio
When you begin building your in-office studio, the purchases can add up quickly. Not only do you need a camera, but the more you read, the more you realize you need tripods, lights, microphones, and more.
Take a breath. With a little bit of know-how, building your studio doesn’t have to be overwhelming. There are plenty of cost-effective choices and DIY hacks to make sure your videos look top-of-the-line.
Basic Equipment
Always shoot with a tripod. It should go without saying, but the handheld method you use for your Snapchat story isn’t going to cut it. Tripods will ensure you maintain a steady shot and not break any expensive equipment in the process.
Tripods range tremendously in price, and the quality of your tripod should depend on the level of camera and lens you have. If you’re shooting with your phone, you can get by with a table mount like the Arkon Tripod Mount or a full-size tripod like the Acuvar 50” Aluminum Tripod. For a DSLR, Manfrotto makes a variety of trustworthy tripods starting with the Manfrotto BeFree and increasing in quality and price from there.
Along with the tripod, stock up on camera batteries and SD cards. Recording video will cause you to run through both much quicker than taking photos.
Audio Equipment
If you’ve begun testing out your camera’s video capabilities, you’ve probably noticed that it has an internal microphone to record audio … don’t use it.
If you set up your camera at a reasonable distance from your subject, you’ll quickly learn that the internal microphone isn’t powerful enough to adequately record audio. Instead, you should begin investing in a few pieces of quality sound equipment.
When you’re shooting with your iPhone, there are a ton of microphone options that are all easy to use and decently cheap. For example, the Movo MA200 Omni-Directional iPhone microphone will give you a plug-and-play solution for capturing audio on the fly.
Opinions vary greatly among sound engineers on the best method and equipment for recording audio with a DSLR. You’ve likely seen many videos that use a lavalier microphone — the small piece that clips below the collar of the talent’s shirt. Lavaliers come in both wired and wireless options. However, lavaliers can be a bit obtrusive both for the talent (who has to have a wire threaded down his or her shirt) and for the viewer (who has to see a microphone for the whole video).
Instead, if you know you’re recording in a controlled environment (like a conference room in your office) we suggest recording with a shotgun mic. They’re reliable, remain out of the shot, and record background noise in a natural sounding way.
To create a shotgun mic setup in your office studio, you’ll need a shotgun mic like the Sennheiser ME66, a shotgun clip, light stand, XLR cable, and Zoom H4N recorder. The Zoom recorder will allow you to record audio separately on an SD card and adjust the gain for the environment you’re shooting in.

We admit these audio purchases may sound like a lot. But a shotgun mic setup is a worthy investment that will last for years. If you’re looking for a more cost-effective solution, look into the Rode VideoMic that mounts on top of your DSLR and plugs right into the camera body.
Lighting Equipment
You have a camera. You have audio. Now, let’s talk about lights.
To outfit your studio without breaking the bank, head over to your local home improvement store. Pick up extension cords and a few clamp lights with bulbs. You’ll also need three light stands, which are available on Amazon.
The traditional setup of video lights is known as three-point lighting. As you might guess, it involves three lights placed strategically around the subject, wrapping them in light and creating appealing shadows on their face.
First, you’ll need a key light. Place this at a 45-degree angle to the left or right of the subject. Lift the light above their head and aim it downwards. As the name suggests, this is the key light and should be bright enough that it could be the only light in the scene … if it had to be.
Next, place the fill light at a 45-degree angle on the other side and lift it close to or just above eye level. The purpose of the fill is to soften the shadows created by the key, but without getting rid of them completely. Therefore, the fill should be dimmer than the key light. If you have to use the same type of light for both, scoot the fill back and diffuse it by clipping a clear shower curtain onto the clamp light with clothespins.
Finally, the backlight will add a third layer of dimension. Scoot your subject away from the background. Lift a light above the subject’s head and place it behind them and off to the side so it’s out of the frame. The light should be aimed at the back of their head, creating a subtle rim of light and separating them from the background.

Setting Up Your In-Office Studio
Now that you have all of your equipment, you’re finally ready to build your office studio. While you could always grab a closet to store your equipment in, let’s go a bit bigger and claim a conference room.
By having a designated studio, you’ll save loads of prep time for each shoot. Just make sure the conference room isn’t too empty. If you have to, bring in a couch, chairs, or blankets to minimize the echos in the room.
Speaking of sound, pay special attention to the hum of the air conditioning. Find a room with minimal noise or turn down the fan during recording. Consider purchasing photography paper to create a background that’s a little more appealing than a white conference room wall.

When it comes time to shoot, clear out unnecessary people from the room and turn off the overhead lights. With your three-point lighting setup, there will be no need for those harsh fluorescents. When — and only when — everything is set up, call in your talent. There’s nothing worse than being nervous, and then having to anxiously watch as lights are turned on and the camera is tested.
5. Preparing Your Talent
If you have experienced, confident actors in your company, you’re lucky. Video talent is a rare resource. But with a little bit of coaching (and a fair share of nervous laughter), you can help your teammates thrive in front of the camera.
No matter if it’s your first video or your fiftieth, remember that getting in front of the camera is scary. Schedule plenty of time and give your talent the script early — but make it clear they don’t need to memorize it.
Instead, place a laptop below the eye-line of the camera. Break the script into short paragraphs and record it section by section until you capture a great take of each. If you plan in advance when the final video will show b-roll (supplementary footage or screenshots), you can have your talent read those lines directly off the laptop like a voice over.
During the shoot, your job goes beyond pressing record. First and foremost, you need to be a coach. Balance critical feedback with support and be quick to give encouragement after each take. This is why conducting a table read during the scripting process is so important: It’s easier to give feedback when there’s not a camera in the room. Remember, be a little silly during the shoot or your talent will be on edge and uncomfortable — and it will show in the footage.
But while you’re maintaining the fun level on set, remain vigilant. It’s your job to pay attention to the little things, like making sure all of the mics are on or noticing if the lighting changes. Record each section many times and have your talent play with inflections. When you think they’ve nailed the shot … get just one more. At this point, your talent is already on a roll, and options will help tremendously during editing.
Finally, circle back to the beginning of the script at the end of your recording. Chances are your subject got more comfortable throughout the shoot. Since the beginning is often the most crucial part of the video, record that section again when they’re feeling the most confident.
Composition Basics
There are some films that are simply beautiful. It’s not the story or even the picturesque setting. In fact, the scene might take place in the dingiest of sets, but somehow each shot just feels right.
That’s the power of composition. When objects appear where they should in the frame, the quality of your video increases exponentially.
For video, the rules of composition are similar to what you may have learned in a photography or art class. First, consider the rule of thirds — the idea that you can create a sense of balance by imagining the canvas with two horizontal lines and two vertical lines. Key elements should occur at the intersection of these lines.

For example, if you are shooting an interview or a how-to video, the subject’s eyes should align with the top horizontal line around one of the two intersections. For this “talking head” shot, you can also improve your composition by leaving enough (but not too much) headroom. This is the empty space above the person’s head.

Image Credit: Hubspot Customer Success Story Featuring Parlor Skis
One of the best ways to improve the look of your video is to include b-roll. B-roll is the supplementary footage included as a cutaway. This might include shots of a customer service rep talking on a phone, a designer editing your website, visuals of your office, or even screenshots of your product. The key with b-roll is to make sure each and every piece enhances the story.
When you’re collecting b-roll, include a mix of shots from varying angles and distances. In fact, film professionals use different names to describe these variations.
- Establishing Shots: Wide shots allow the viewer to see the entire scene. These are great to use when introducing the scene at the beginning of a video.
- Medium Shots: Tighter shots that focus on the subject or a portion of the scene. Your classic interview shot could be considered a medium shot.
- Close-ups: Tightly cropped shots zoomed in to show detail. These might feature someone’s hands typing on a keyboard or pouring a cup of coffee.
As practice, try telling a story with your b-roll and planning out a shot sequence. For example, your subject might open a door from the hallway, walk into their office space, sit down at their desk, open their laptop, and begin typing. Seems simple, right? But a shot sequence showing this 10-second scenario might consist of six or more different b-roll clips.
Here’s where the final lesson of composition comes in: continuity. Continuity is the process of combining shots into a sequence so that they appear to have happened at the same time and place. A key part of continuity is making sure any ancillary objects in the scene — for example, a cup of water on a desk — stay in the same place (and have the same amount of water) throughout all of the shots.
The other part of learning continuity is match on action. For the scene described above, you’d want to record the subject opening the door and walking in from both inside and outside the room. In post-production, you could then flip between the clips at the exact right time to make the cut seamless.

6. Shooting for the Edit
When it comes to video, some are better at shooting while others are better at editing. Whatever side you claim, you should understand the process and pain points of each.
For instance, as the person behind the camera, you may believe you collect ample footage and ask all the right interview questions. But to the editor, you may actually be shooting too much of one type of shot and missing out on some that would make their job easier.
Filmmakers teach a valuable lesson here: shoot for the edit. By remembering that the footage you record will be edited later, you can make smarter decisions and save countless hours in the editing room.
The first step in adopting a shoot-for-the-edit mindset is remembering to leave a buffer at the beginning and the end of each clip. There are called handles and can save editors from the headache of cutting too close to an important shot.
In the section on preparing talent, we discussed how to record your script in short sections. If the editor were to stitch these sections together side-by-side, the subject’s face and hands might abruptly switch between clips. This is called a jump cut, and for editors, it poses an interesting challenge. Thankfully, this is where b-roll comes in handy, to mask these jump cuts.

Example of a jump cut
As a producer, your job is to capture plenty of b-roll to make sure your editor never runs out. Create a shot list of more b-roll ideas than you think you’ll need and mark them off as you record them.
To mask jump cuts, you can also shoot with two cameras, especially if you’re recording an interview without a script. Camera A would be the traditional, straight-on shot. Camera B should be angled 30 to 45-degrees to the side and capture a distinctly different shot. The editor could then flip between these two views to make the cut appear natural.

Example of switching between interview angles
A note about shooting with two cameras: Your editor will need to sync the footage between the different views. To help them do this, clap your hands loudly in the view of both cameras right before you ask the first interview question … yes, just like an old fashion clapboard. Modern editing software has auto-sync features, but this loud clap will help you initially line up the clips.
Finally, mark your good clips. Even if you’re recording a scripted video, you might have to record each section 10 or more times. Once your subject nails the take, wave your hand in front of the lens. That way, the editor can scrub directly to this visual cue and save time on footage review.

7. Organizing Your Footage
Yes, file organization is boring. But when video editing, it just might save your project.
Capturing video will force you to take a hard look at your computer and file organization habits. If you’re one of those people who work off a cluttered desktop — you know who you are — you’ll find yourself in a world of hurt.
First, video format files are incredibly large, so it’s very unlikely you’ll want to store any of them on your internal hard drive. You’ll quickly run out of storage, and your computer’s processing speed will begin lagging under the weight.
Instead, invest in an external hard drive like one of the Lacie Rugged models. External hard drives come in a variety of sizes and port options (Thunderbolt, USB 3.0, etc.). Multimedia creators will use the phrase “working off of an external” to describe storing all of their project files on this hard drive. This method also makes it easier to collaborate with teammates because you can easily share the drive.
Second, video editing programs are very particular about where you keep your files. If you don’t stick with the original file structure, you may find yourself buried in error messages. (We’ll cover software options and best practices in the next section.)
On your external hard drive, you should create a separate top-level folder for each project. Within this folder, there should be a prescribed set of “buckets” to store your video footage, audio, design assets, and more. Create a template project folder that you can copy and paste for each project using the image below as a guide.

When you import your footage from your camera, place it in the “footage” folder on your hard drive.
For both the project folders and your editing files, follow a consistent naming structure. For example, you could start each name using YRMODA (year-month-date). So a video on Instagram Hacks might be named “180625_instagram_hacks” if it was started on June 25, 2018.
Even with a perfectly organized external hard drive, you’re not yet out of the weeds. You need to back up your files (and maybe even back up your backup files). It’s not uncommon to have an external hard drive for everyday work, another external for backups, and a third set of backups in the cloud via Dropbox or Google Drive.
8. Editing Your Video
Okay, you’ve filmed your video footage. Congrats — you’re halfway there!
Now it’s time to talk about editing. We get it, video editing can be confusing. It’s easy to feel overwhelmed at first, especially when you see software price tags! Luckily, there are many options for video editing based on your skill level, operating system, and budget. There are even free programs and mobile apps! Let’s go over a few options.
Intermediate: Apple iMovie
iMovie is Apple’s video editing software. Compatible with Macs and other iOS devices, iMovie is simple, user-friendly, and free on all Apple products. iMovie allows you to create and edit your videos by cutting together clips, adding titles, music, sound effects, basic color correction, filters, and special effects.
The program even provides helpful templates that simplify the editing process. The platform supports high-quality clips like 4K video footage and makes it easy to share your work directly to a video hosting platform. Limited access to advanced color correction and editing features mean it isn’t commonly used by professionals, but iMovie is still a great option if you’re just starting out.
Advanced: Adobe Premiere Pro
Adobe Premiere Pro is a leading video editing software program used by amateurs and professionals alike. With a customizable interface and numerous advanced editing tools, the platform is often called the industry standard for video editing and has been used to edit major Hollywood movies like Gone Girl and Deadpool.
Premiere makes it easy to collaborate with other editors, organize your material, and sync with other programs in the Adobe suite like After Effects and Photoshop. The platform supports high-quality footage (4K and higher) and includes advanced, built-in color correction and grading tools that set it apart from cheaper or free options like iMovie.
The only downside to Premiere is the cost. A year-long subscription to the latest Premiere Pro CC comes in around $240. If you’re new to video editing, you may want to experiment with a cheaper option like iMovie or Adobe Premiere Elements before investing in the Premiere Pro. On the fence? Check out some Adobe Premiere Pro tutorials here.
9. Choosing Your Music
What’s the first thing that comes to mind when you think about video? I’m guessing the actual video footage. While it’s important to concentrate on your video footage, don’t forget to factor music into your overall plan and budget.
Music is a powerful tool that can alter your video’s mood and tone — just watch the videos above! Choosing the right music often makes the difference between an amateur project and a professional piece of content. When used properly, it can help keep your viewer’s attention, evoke emotions, and define your overall editing style.
Before you start filming, set a music budget and research your local copyright laws. Copyright law can be very difficult to decipher, especially when you’re dealing with digital content. Bottom line: Most music isn’t free. If you use another artist’s music without permission or proper licensing, you risk video removal and legal action. In order to avoid copyright infringement, you’ll need to find royalty free tunes or pay a composer to create an original score. Royalty free songs aren’t free to use; they’re quality songs available for a single flat fee. This means you don’t have to worry about paying additional licensing fees or royalties in the future. YouTube, Pond5, and PremiumBeat are all great sites to find royalty free music.
Next, consider your audience and the overall mood for your production. Are you targeting a small audience that will appreciate the newest, underground hip-hop track, or do you need something that will appeal to many demographics? Are you creating a practical product tutorial or an upbeat event recap? Be sure to choose music that enhances the overall tone of your video.
In addition to considering your audience, be sure to contemplate the purpose of the music. Do you need background music or something with real impact? Will you be narrating or speaking in the video? If so, don’t let the music get in the way of your content. Sometimes the best music is the music you don’t remember at all.
After you’ve determined the type of music you need, it’s time to start analyzing potential songs. Consider the song’s pacing. Songs with a steady rhythm are easy to change to suit your video style. Hoping to include your favorite, Top 40 hit? Popular, radio songs are usually structured in 4-5 parts and can be difficult to transition. Try to choose simple songs that are easy to loop. If you’re looking for an instrumental song, be sure to find something that was recorded with real instruments. Songs made with digital samples can make your video feel unprofessional and out of date.
Finally, consider adding intro and outro music. Intro and outro music, or bookends, can serve as a theme for your content. These are a great choice if you don’t need music throughout your entire video. Bookend music can help set the tone for your video, naturally split your content into chapters, and leave your viewers feeling they had a complete experience.
While some videos feel unfinished without background music, others just need a few tunes to tie the project together. Pay attention to videos that have a similar style to see how others utilize music.
10. Recording Your Voice Over
You have your video footage and music — now it’s time to chat about voice overs. A voice over is the separate video narration that’s not spoken by the speaker on-camera. Voice overs are an effective tool that can help make your content more relatable, emotional, and fluid.
It’s important to remember that video audio is just as important as video visuals. The good news is that you don’t have to be the next Don LaFontaine or hire a professional to record a great voice over. Below are a few tips to capture audio on a budget.
- Find a location. Decide on a spot to record. If you can’t go to a professional studio, try to pick a quiet room away from distracting external sounds like sirens, opening and closing doors, and people talking on the phone. Read your script aloud, and pay attention to the room’s acoustics. Does your voice echo or sound muffled? If so, consider recording in a different space or adding furniture to fill in the room.
- Prepare. Practice makes perfect! Before you record, read through your script a few times and take note of any difficult pauses, transitions, and words. On the big day, be sure to stay hydrated and avoid wearing noisy clothing or jewelry. Also, use a stand, laptop, or teleprompter while recording so you aren’t rustling through a printed script.
- Test and listen. Think you can record the perfect voice over in just one take? Think again! Invest in a good pair of headphones and keep an eye on your audio quality throughout the recording process. It’s easier to get a new take of audio than trying to fix it during the editing process. We recommend running through your script a few times, especially the first few paragraphs, to ensure that your voice is fully warmed up. If you hear popping or hissing sounds, try standing further away from the mic or invest in a pop filter.
- Relax! Be sure to read slowly, pause, and take breaks while recording your voice over. Sometimes all you need is a sip of water to get back on track.
Video Hosting Platforms
You’re ready to publish your video. You shot the footage, edited it together, added music and a voice over, and exported it for the web. Now it’s time to get your video online so your audience can start viewing, sharing, and engaging with it.
You have several options for hosting videos online, and in this section, we’ll talk about some of the best ones.
YouTube
When you ask your friends which online video platform they use, the answer you probably hear the most is YouTube. YouTube is the largest video hosting platform, the second largest search platform after Google, and the third most visited website in the world. Every single day, people watch over five billion videos on YouTube. It’s also free to upload your videos to YouTube and optimize them for search.
In addition to its massive audience, YouTube offers several other features that make the platform a good option for hosting your video. Because YouTube videos are hosted on individual channels, the platform allows you to build a dedicated audience of subscribers. Users who follow your channel are more likely to see additional videos you upload.
Within your channel itself, you can also organize videos into playlists, making it easy for your audience to search within your content. As a social platform, viewers can engage with your videos by liking and commenting on them, providing you another chance to interact with your audience. YouTube also offers a variety of advertising options for more sophisticated targeting.
Although YouTube offers the benefit of reaching a large audience with no cost to upload and host videos, there are several downsides to the platform. While video ads can be a great tool for promoting your own content, the number of ads on the platform from other advertisers can detract from your viewer’s experience.
YouTube is also (surprise, surprise!) highly addicting. 83% of viewers prefer YouTube over any other video platform. Once viewers are on the platform, they usually stick around to watch another video … or 20. This can make it difficult to drive traffic back to your site from the platform. Despite these barriers, YouTube is a great platform for hosting videos and growing your audience.
Vimeo
If your friends didn’t answer your earlier question with “YouTube” then they most likely responded with Vimeo, the second largest video hosting platform. Vimeo’s audience is significantly smaller (715 million monthly views) than YouTube’s, but there are still many benefits that make it a favorite for content creators and viewers alike.
Among these is a simpler, cleaner, user interface that makes it easier to navigate the platform. Unlike YouTube, Vimeo has very limited ads and commercials that would otherwise detract from your viewers’ experience. Videos on Vimeo also tend to be higher quality than on YouTube, and the audience on the platform is likely to be more professional.
Vimeo offers several different premium account options to better suit businesses. The premium accounts provide additional storage, advanced analytics, customer support, player customization, access to lead generation tools, and much more. In additional to premium accounts, Vimeo also partners with businesses to produce quality marketing content.
If you’re looking to showcase high quality, artistic content, Vimeo might be the platform for you. Its engaged audience and beautiful aesthetic make it a great place to host creative videos. However, if you’re focused on quantity over quality and increasing your reach, you may want to explore other platform options.
Vidyard
Vidyard is a video hosting platform built specifically for businesses. It’s not just another option to store and manage your videos; instead, it allows you to become a fully video-enabled business. Here’s what we mean.
These days, we know posting your video to YouTube isn’t enough. You need channel-specific video content for Facebook and Instagram, not to mention for your website. Enter: Vidyard. The platform allows you to publish and update to all of these places from a central location.
From this portal, you’ll find all sorts of viewer insights. Discover what types of video content your audience likes and how they watch their videos. Then, channel those insights directly into your marketing automation software or CRM. For example, if that prospect you’ve been monitoring views your latest case study video, you’ll be notified straight away.
One of the coolest features of Vidyard is the ability to personalize videos with the viewer’s name or company directly in the video design. This is a creative addition as you begin working video into your marketing and sales strategies.
How to Use Video Throughout the Flywheel
Too often, companies jump at the opportunity to create their first video. They spend tons of money on an explainer video for their homepage, but as soon as the project is complete, all future video ambitions screech to a halt.
On the other hand, plenty of businesses churn out a slew of social videos. But since they’ve simply replicated fads they’ve seen, their videos hardly consider their audience’s challenges or habits.
Considering the time, money, and resources involved, video marketing can’t be an impulsive guessing game. Instead, you need to create a comprehensive video marketing strategy that applies to every facet of your flywheel. This means thinking in the context of the inbound methodology.
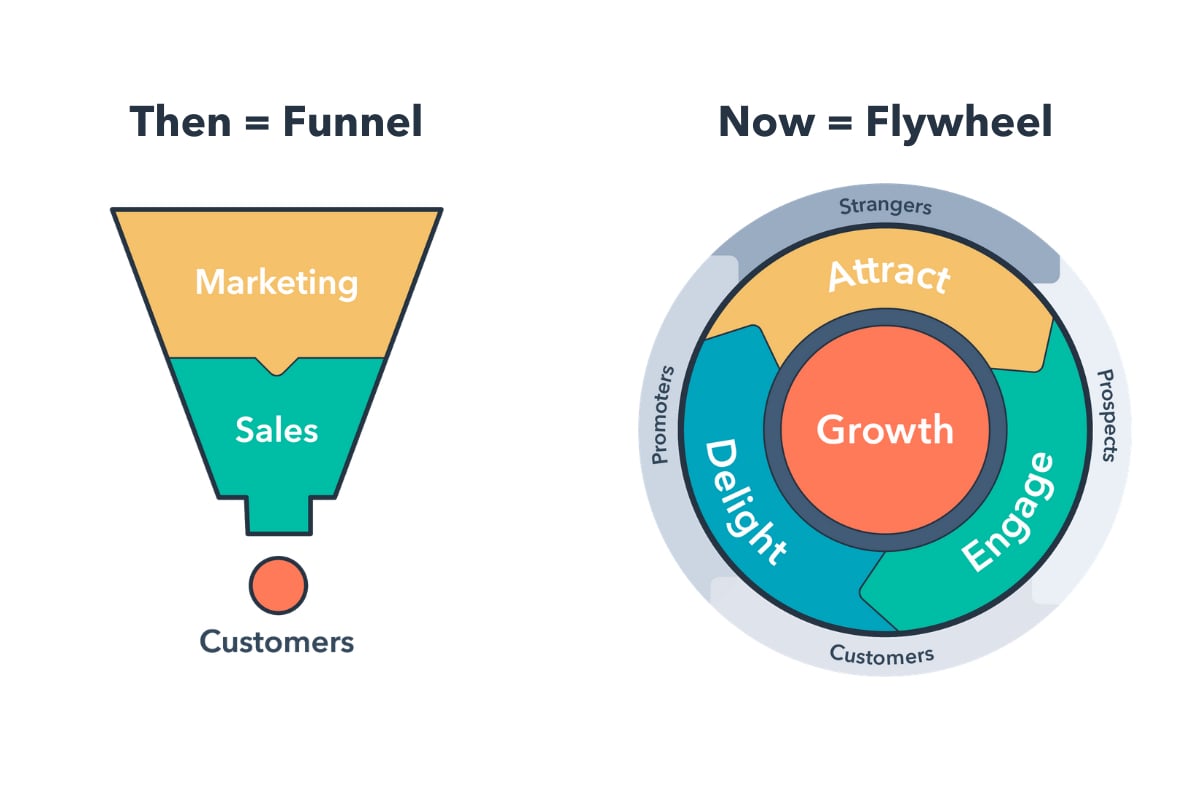
The inbound methodology is the marketing and sales approach focused on attracting customers through content and interactions that are relevant and helpful. Each video you create should acknowledge your audience’s challenges and provide a solution. Looking at the big picture, this content guides consumers through the journey of becoming aware of, evaluating, and purchasing your product or service.

In the following sections, we’ll cover the types of videos you should create for each stage in the image above. To start, plan to create at least two videos for each. Don’t forget to include call-to-actions to help lead your audience through their purchase journey and into the role of “promoter.” Over time, you can improve based on conversion rates and the content gaps you discover.
Attract (Marketing)
The first step of the inbound methodology is to attract — or turn strangers into visitors. Consumers at this stage are identifying their challenges and deciding whether or not they should seek out a solution. Therefore, the videos you create should empathize with their problems and introduce a possible solution in your product or service.
Ultimately, the goal of this kind of video is to expand reach and build trust. Because you are looking to garner shares for your video, it’ll likely be more entertaining and emotion-evoking than educational. But, you should still provide enough information to associate yourself as an authority on the topic.
Examples of videos in the “attract” stage include snackable social videos that show off your brand’s personality, thought leadership videos that establish you as a source of industry news and insight, brand films the share your values and mission, or explainers and how-to videos that provide relevant tips for solving your audience’s pain point.
Discover 75 tips for creating, sharing, and optimizing video for Facebook and Instagram.
For any “attract” video, avoid speaking too much about your product. Instead, let your brand values and personality be your north star(s). Finally, because these videos can live on a variety of channels, keep in mind the strategies of each platform. For example, a Facebook video might have a square aspect ratio and text animations for soundless viewers.
Convert (Marketing + Sales)
Now that you’ve attracted video viewers and website visitors, the next step is to convert these visitors into leads. With most inbound marketing content, this means collecting some sort of contact information via a form. Video can aid this process by visualizing a solution to the buyer’s problem, whether that’s before the form on a landing page or as the offer itself. Overall, the goal of this kind of video is to educate and excite.
“Convert” videos may include a webinar filled with tactical advice, product demos sent via email, landing page promotional videos, case studies, or more in-depth explainer and how-to videos. For example, while an “attract” video might provide a quick tip for nailing a sales pitch, a “convert” video could be an animated explainer video that breaks down the inbound sales methodology.
Close (Sales)
You’ve attracted a new audience with your videos and converted the right visitors into leads. Now’s the time to close these leads into customers. Yet, as important as this stage is, “close” videos are often the most overlooked by marketers and salespeople.
At this point, the consumer is weighing their options and deciding on the purchase. Therefore, the goal of this kind of video is to make your audience visualize themselves using your product or service — and thriving. There’s a reason 4X as many customers would rather watch a video about a product than read about it. Videos are able to display functionality and leverage emotions in ways a product description never could.
Great “close” videos include testimonials of customers with relatable stories, in-depth product demos, culture videos that sell viewers on your quality of service, or even personalized videos that explain exactly how your product could help their business
Delight (Service)
A purchase may have been made, but there’s still a lot of video can do to leverage the post-conversion stage of your flywheel. During the “delight stage” of the inbound methodology, your goal is to continue providing remarkable content to users that makes their interaction with your product or service as incredible as possible. It’s also in hopes that they’ll tell their connections about their experience or up-sell themselves. Therefore, the goal of this type of video is to encourage your customers to embrace your brand and become brand evangelists.
Your first opportunity to delight comes directly after the purchase. Consider sending a thank you video to welcome them into the community or an on-boarding video to get them rolling with their new purchase. Then, build out a library of educational courses or product training videos to cater to consumers who prefer self-service or simply want to expand their expertise.
Defining Your Goals and Analyzing Results
At this point, you know how to create a video and where to host it. You’re ready to get started, right? Not quite. Before you dive in, you need to define your video goals and identify the best metrics for determining whether you’ve accomplished those goals.
Before launching any marketing campaign, it’s important to determine your primary video goal. This could be to increase brand awareness, engagement, or even conversions for a free trial. It’s crucial to pick out just one or two goals for each video. When you define more than that, your video will seem unfocused, making it difficult for viewers to determine what they should do next.
When thinking of your goals, be sure to keep your buyer persona and target audience in mind. How old are they? Where do they live? What are their interests? How do they typically consume media? What stage of the buyer’s journey are they in?
All of these questions can help determine what type of video you should make and where you should post it. For example, if your target audience is not familiar with your company, you probably want to make a video that focuses on brand awareness before producing an in-depth, product video. You’ll also want to host your video on a site that already has a large reach, like YouTube.
Next, let’s talk about metrics. Understanding these will equip you to define and measure your success and set your goals. When you post a video, it’s easy to get obsessed with one metric — view count. While view count can be an important metric, there are many others that may be more relevant to your campaign.
Below are some popular metrics you’ll see when you publish and track video.
- View Count: View count is the number of times your video has been viewed — also referred to as reach. This metric is great to track if your goal is to increase brand awareness and have your content seen by as many people as possible. However, it’s important to remember that every video hosting platform measures a view differently. For example, a view on YouTube is 30 seconds while a view on Facebook is only 3 seconds. Be sure to read the fine print before reporting on your video view count.
- Play Rate: Play rate is the percentage of people who played your video divided by the number of impressions it received. This metric helps determine how relevant or appealing your video is to your audience. If thousands of people see your video, but only a handful of people play it, it’s probably time to optimize your content.
- Social Sharing and Comments: If you’re on social media, you’re probably familiar with sharing and commenting. Social shares and comments are good indicators of how relevant your content is with your target audience. If a viewer watches your video and takes the time to share it with their network, you probably created a great piece of content. Social shares are also important because the more times your video is shared, the more it’ll be viewed. If your goal is to reach a lot of people, social shares is a good metric to track.
- Video Completions: If you took the time to make a video … you probably want people to watch the whole thing, right? A video completion is the number of times a video is played in its entirety. This metric can be more reliable than view count when trying to determine your video’s success.
- Completion Rate: Completion rate is the number of people who completed your video divided by the number of people who played it. Completion rate and other engagement metrics are a great way to gauge a viewer’s reaction to your video. Do you have a low completion rate? Are people all dropping off at a certain point? This might be a sign that your video content is not resonating with your target audience.
- Click-Through Rate: Click-through rate (CTR) is the number of times your call-to-action (CTA) is clicked divided by the number of times it’s viewed. CTR is a great indicator of how effective your video is at encouraging people to take your desired action. If your CTR is low, consider revising the design or copy of your CTA.
- Conversion Rate: Conversion rate is the number of times visitors completed your desired action divided by the number of clicks on your CTA. If your goal is to have your viewers complete an action like signing up for a free trial, try adding a video to your landing page to see if your conversion rate increases.
- Bounce Rate and Time-On-Page: Are you thinking about adding a video to a web page? Take note of the page bounce rate and the amount of time people spent on the page before you add the video. Be sure to check the metrics after you place the video to see if changes the way people interact with your other content.

Ready, Set, Action!
I’m guessing you’re feeling a little overwhelmed right now. Don’t worry, you’re not alone. Video editing and marketing can seem daunting at first, but with a little practice and patience, you can easily produce high-quality content that is unique to your brand.
With 71% of consumers watching more video online than they were a year ago, brands can no longer ignore their growing popularity. Thankfully, creating great content has never been easier!
Try turning a written blog into a video or create a product tutorial. Using video to showcase information in a new, interesting way is sure to interest and delight your audience. Pick up a camera, start filming, and watch your engagement levels increase. It’s time to make video a key part of your marketing strategy!

The 8-Step Guide to Achieving 100% Google Page Speed
Nothing ruins a great website more than a poor loading experience. In fact, Google has said that visitors who experience a load time of seven seconds are 113% more likely to bounce off a page.
Page speed is so important to the user experience that Google began including it as one of its ranking factors in 2018. Now, even if you’re working hard on SEO strategies, a low page speed could allow another site — maybe even one of your competitors — to get ahead of you on a crucial search engine results page.
For those who want to gain insight on their loading times, Google offers a free PageSpeeds Insights tool which can score your page on a scale of zero to 100. Here’s a quick example of a report that PageSpeed Insights presents after you search “google.com”:
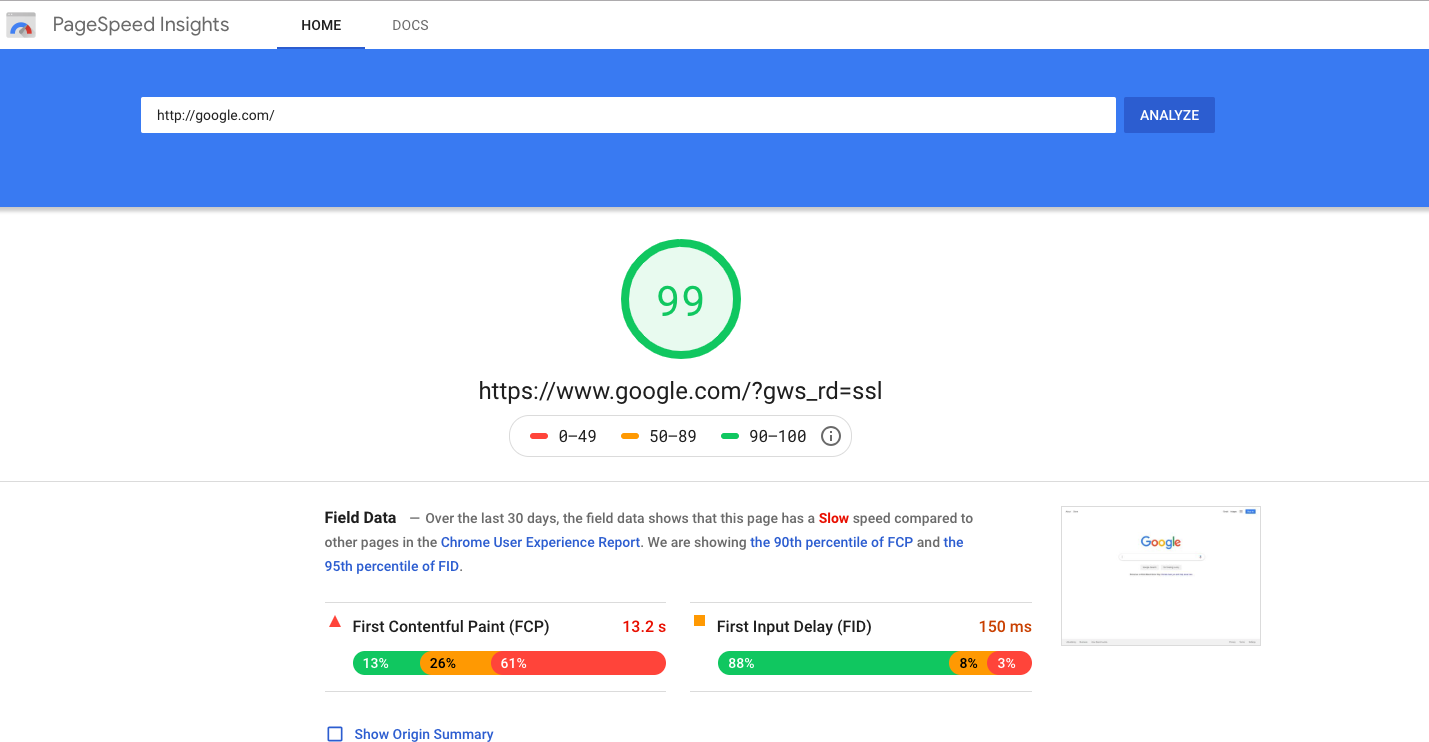
The report looks clean and simple. But if you aren’t the most tech-savvy person, it can be a little hard to comprehend what some of the report’s suggestions actually mean.
Here’s an example of a report that has a long list of jargony comments:
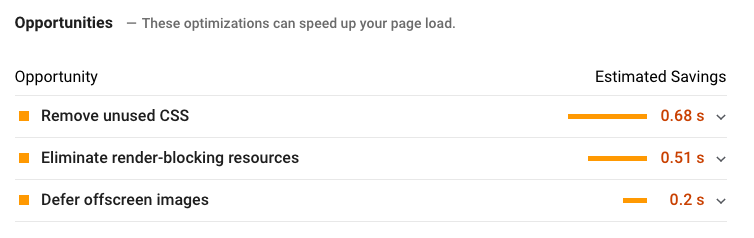
While the jargon above might look intimidating, many of the PageSpeed Insights suggestions could actually be pretty simple to take on — even if you aren’t an web developer.
To help you boost your user experience and address slow loading times, here’s an eight-step guide to achieving a 100% speed score. For each step, we’ll explain why it’s important, give you insight on how to do it, and let you know if a tech expert might need to get involved.
1. Determine if and where you’re lagging.
Many CMSs have built-in tools or plugin options that can help you figure out why your entire website or a particular page has a slow load time. Before you take any action on fixing your website’s load time, you should use one of these tools to gain a baseline understanding of where you currently stand. This will help you narrow down the actual steps you need to take to improve your website’s load time.
Here are five free tools you can try:
Google’s PageSpeed Insights, which we highlighted above, might be one of your best guides — especially if your goal is achieving a high Google page speed score specifically.
Some of the other tools listed are also helpful because they can give you a quick rundown of other details related to your site speed.
For example, KeyCDN will allow you to see how quickly your page loads in different countries. To get a solid understanding of where you currently stand, try using a few different tools and comparing the results.
2. Compress your images.
Large images are one of the most common causes of slow page speeds. There are many different opinions on what an optimal file size is. While some hosts say you should aim for files under 200KB, Shopify’s blog suggests going under 70KB. Google developers suggest going as small as you can before losing crispness.
To shrink your images without totally destroying the quality, we suggest compressing files with a free online software like Squoosh.app or Compress.io. You can also use Photoshop, too.
Before you upload an image, use Photoshop or other editing software to crop or size to the exact resolution that it will appear to be on the site.
Your display size is not the same as your file size. The display size is simply the size an image looks on your website.
Your file size is the size of the actual image that you uploaded. If you have a large file and a small display size, the large file still takes the same time to load as it would if it had a giant display size. Oppositely, if you upload a small file and present it at a small display size, it will load quickly.
A good rule of thumb is to crop the image to the exact display size it will show up on your page, then compress the image file to make it take up less storage space.
For example, if your CMS will automatically crop or resize an image to 500px by 300px, you should still crop it to that same exact size manually before you upload it. Even if you don’t see a giant image on the page, the large image file you uploaded could still be contributing to a major slowdown.
3. Shrink, or minify, your code HTML, CSS, and JavaScript code.
CSS, HTML, and JavaScript can contain a lot of extra, redundant, or completely useless code. Similarly to images, that data can slow your page.
To avoid this, Google developers suggest “minifying” your code. Minifying shrinks your code by removing useless language, notes, and spaces that might have gotten left behind when a page was being created or updated.
4. Eliminate render-blocking elements.
Sometimes, a page will be coded to load less important elements, like a sidebar or banner, before the main content. You want to prioritize your code so your main content comes first above the fold.
Once you know where these elements are, you can use this quick guide to learn how to eliminate them.
5. Accelerate your mobile speed.
In 2018, 60% of Google searches were done on mobile devices. Along with rewarding mobile-optimized sites in its search result rankings, Google will also give you a higher page speed score — and possibly a higher ranking — if your mobile site loads quickly.
PageSpeed Insights can show you how your mobile site is scoring. After you search your URL and see the report, you can toggle between Desktop and Mobile tabs to see the individual scores for each format.

If you’re lagging, try to streamline what the visitor views on the mobile site. Hide or minimize desktop site elements, like photos or extra text boxes, that might seem clunky or unnecessary on the small screen.
Services like AMP (which stands for Accelerated Mobile Pages) can guide you through creating simplified web pages that load quickly and auto-adjust to fit on different browser sizes or devices.
6. Avoid or minimize page redirects.
A redirect is when a visitor clicks or types one link and is then automatically directed to one or more different locations before they hit their desired webpage. Because this can take valuable time away from your page speed, you should only use redirects when absolutely necessary.
An example of this could be during a company or website rebrand. In that case, this post touches on how to create SEO-friendly 301 redirects.
7. Improve your server response times.
Google suggests having a server response time of under 200 milliseconds. A slow server can be caused by a number of different things, including your website host.
Addressing a lagging server can get a bit more technical than the last few steps. This guide to combating a 502 Gateway error has a few useful tips about diagnosing and resolving server-related issues.
If your website uses servers from a host company, like GoDaddy, contacting a knowledgeable representative might also help you determine and solve the problem.
8. Use a content delivery network.
A content delivery network (CDN) is a group of globally distributed servers that can store a browser cache of your website and load it quickly for visitors around the world. When someone from a far geographical place visits your website, pages will be loaded from nearby CDN servers close to the visitor, instead of your own server.
Why would you use this? Because visitors who are far away from your server might incur longer page load times. For instance, if your servers are based in California, a German web visitor would see a slower website speed than someone in a nearby place, like Seattle.
Because of their global locations CDN servers prevent this issue and will boost site speed for international visitors.
If you’ve built your site with a CMS, like HubSpot, it might already run on a CDN. GoDaddy and Squarespace are other examples of content management software that offer a CDN service. WordPress users can also set up a number of free plugins, like CDN Enabler.
If you don’t think you have a CDN, a few CDN providers include Amazon CloudFront, Cloudflare, and the AT&T Content Delivery Network.
Next time you look at your Google PageSpeed Insights report, keep this list of steps handy. These tips will guide you through how to quickly minimize and streamline your pages as you aim for that perfect 100% score.

Why Workplace Friendships are Good for You (and How to Form Them)
A happy work environment is critical for increased productivity and engagement among your employees. Additionally, happy employees can result in more loyal customers, and can positively impact your company’s bottom-line.
However, it can be easier said than done — how can you make your workplace a happier, more engaging place to be?
While there are many factors at play, one key element of a happy and productive work environment is close friendships between colleagues.
For instance, the people at Gallup have shown that job satisfaction can increase by 50% for those with good workplace relationships. And a white paper from the O.C. Tanner Institute demonstrates that having friends at work makes you feel like you can take on big challenges. That’s both a nice feeling, and a good professional attribute.
Of course, for anyone who has ever felt awkward and isolated at work, this may seem like a daunting task. If this sounds like you, take a look at this new guide to making friends at work. It’s worth the effort for your heart, mind, soul — and career!



Sentiment Analysis: What Marketers Need to Know
Do people talk about your business online? Do you know how to analyze the sentiment of online mentions to inform your marketing? In this article, you’ll discover how sentiment analysis can improve your marketing strategy. 4 Ways Marketers Can Use Sentiment Analysis Sentiment analysis is an algorithm applied to online mentions of your brand, products, […]
The post Sentiment Analysis: What Marketers Need to Know appeared first on Social Media Marketing | Social Media Examiner.
from Social Media Marketing | Social Media Examiner http://bit.ly/2IUR5fB
via socialmediaexaminer
How to Write a Great Email Signature [+ Professional Examples]
The average office worker sends 40 emails per day. That’s 40 opportunities to market yourself and your business in those individual emails you send, every single day.
A lot of people treat their email signatures like an afterthought, which makes for a real missed opportunity. Those signatures are a chance for you to make it clear who you are, make it easy for people to reach you, and give people a place to go to find out more — either about you, about your business, or about something you’re working on.

So if you’re just putting your name and a point or two of contact information in your signature, you’re not taking full advantage of the opportunity to connect and engage with the people you’re emailing. (Although you don’t want to go overboard, either. Jamming your signature full of links and information is just plain spammy and self-promotional.)
So, what does a great email signature look like? Here are some tips for creating signatures that are helpful and professional, including a few great examples. You can also use HubSpot’s free Email Signature Generator to make your own professional email signature template and easily add it to your email client.
1. Emphasize your name, affiliation, and secondary contact information.
As you might guess, your name comes first. Closely following your name, however, should be your affiliation and where else people can reach you.
Your affiliation could mean your job title, your company, your school, or a similar organization that you deem important to your recipients. Your name should eventually be its own draw, of course, but using a more popular brand name — and even its logo — ensures you get the attention of your readers and they take your message seriously.
Secondary contact information is important, too. You might not want to endorse your personal phone number, but you could take this opportunity to promote your personal website — a passive way to open the lines of communication without flooding yourself with outreach you don’t want.
Example
Here’s a sample email signature that hits on all three things described above nicely. Kevin’s first and last name is counterbalanced by his affiliation with the University of Connecticut, and he also manages to promote his personal website so his recipients have another outlet to see his work and contact him for more information.
Want to create a signature like the one below? Use HubSpot’s Email Signature Generator.
2. Keep the colors simple and consistent.
Branding is most effective when it’s consistent — and that includes your email signature. Adding color to your email signature is a nice touch that’ll help it stand out from the rest of your email. But if you do choose to use color, be sure to stick to one or two in addition to dark text.
Example
Use subtle highlights to match your logo or branding, like Brittany Hodak does in her email signature, below. Notice how her social media icons are the same blue hue as the ZinePak logo.
3. Use design hierarchy.
Good design is all about presenting your information in an easily digestible manner. Because your email signature is likely more a list of information than it is a compelling story, you’ll want to use hierarchy to direct readers’ eyes to what they should be reading first.
Example
Scale your name up to a larger font so that it attracts the most attention, like you would on a resume. Then, pick and choose information to bold and color based on importance so you can help guide people’s eyes logically through the design, as in the example below.
Image Credit: Envato
4. Include a call-to-action (and update it regularly).
One of the smartest things you can do in your email signature is include a call-to-action. The best email signature CTAs are simple, up-to-date, non-pushy, and in line with your email style, making them appear more like post-script, and less like a sales pitch. Choose a CTA that aligns with one of your current business goals, and update it when those goals change.
Example
Here’s a great example from HubSpot’s former Social Media Manager, Chelsea Hunersen. She changes her text CTA depending on her current social media goals. A few months ago, she used it to drive people to HubSpot’s Twitter account.
Once she created a unique Slack channel for inbound marketers, she switched up her email signature CTA to point people there, instead.
Links to videos can be especially noticeable because in some email clients like Gmail, a video’s thumbnail will show up underneath your signature. Here’s an example of what that looks like from our own Emily MacIntyre:
5. Include clickable icons linking to your social profiles.
Your social media presence is a major part of your personal brand because it helps you gain a following in your space and shows people what you care about. You can tell a lot about a person by what they post and how they portray themselves.
That’s why it’s a great idea to include links to your social media pages in your email signature. It not only reinforces your personal brand, but it also helps people find new ways to contact and follow you.
Even better? It can help drive traffic to your online content if you’re posting links to that content on social. So if you do include social icons in your signature, make sure you’re keeping your social profiles up-to-date and chock full of interesting, relevant content. (In other words, if you haven’t tweeted in six months, you may want to leave Twitter out.)
Why use social media icons instead of simply text links? Because icons are more easily recognizable for folks skimming your signature — and they’ll stand out from the rest of the text in there. According to research from NeoMam Studios, visuals shown in color increase a person’s willingness to read the rest of the content by 80%. That’s a huge advantage. Plus, icons are big space-savers in a place where you might be packing a lot of information.
Even if you have a presence on a lot of social media sites, though, try to cap the number of icons to five or six. Focus on the accounts that matter most to growing your business or building your personal brand.
If you do include a lot of social media icons, at least try to cut back on the other content if possible so your design isn’t too busy. Check out the example below, made using HubSpot’s Email Signature Generator.
6. Make links trackable.
So you put a few links in your email signature, including your CTA and your social media icons. But is anyone actually clicking on them?
To figure out whether the links in your signature are actually attracting clicks and making an impact, you’ll want to make those links trackable — just like you would any other link in your emails.
Follow these instructions to easily make a tracking link that helps you attribute traffic to your website to your email signature. From time to time, you might switch up the format of your signature or the wording inside your signature to see what drives the most clicks.
7. Use space dividers.
Although you never want to jam-pack your email signature for too much information, there are ways to fit a lot of text into a compact area like this one without compromising design.
This is helpful for breaking up different types of information, like your name and contact information, your logo, any calls-to-action you have, or even a disclaimer.
Example
Using space dividers within your design, as in the example below, is one great way to do this. You can also use glyph dividers, which is the vertical bar symbol (i.e., |.)

Image Credit: Canva
8. Let people book time on your calendar right from your signature.
If you find yourself emailing back and forth with colleagues and clients who want to book meetings with you, make it easy for them by including a link to book your calendar right in your email signature. Here’s an example from our own Bryan Lowry, below.
Example
There are many tools out there that’ll help people book appointments. Bryan from the example above uses HubSpot’s shareable personalized booking link. If you’re a HubSpot Sales customer, you can share your personalized meeting link with anyone who you want to book a meeting with and let them choose from your available times. If you want, you can make it so the HubSpot CRM automatically creates a new contact record for anyone who books a meeting if one doesn’t already exist.
If you aren’t a HubSpot customer, one great meeting tool is Calendly, which is free for Basic and lets you integrate your Google or Office 365 calendar. YouCanBook.me is another booking tool that goes for $7 per calendar per month.
9. Include an international prefix in your contact number.
If you work with people around the world, don’t forget the prefix for your country’s code when you list your contact phone number. Many people overlook this if they aren’t used to dialing international prefixes themselves, but it’s really helpful for your international colleagues and clients to have it right on there. Here’s a list of country codes if you don’t know yours.
Example
Here’s an example from Kit Smith, formerly of Brandwatch, a company that has offices in both the United States and Europe and works with international clients. Having the U.S.’s country code on their helps make it easier for folks in other countries to reach him by phone.
10. Make your design mobile-friendly.
According to Litmus, Apple’s iMobile accounted for 46% of all email opens in June 2018. Not only that, but mobile users check their email three times more often than non-mobile users.
The more people who read email on mobile devices, the more you’ll want to keep mobile users top-of-mind when you’re writing emails — including your email signature.
One major way to make your email signature mobile-friendly is to make your signature’s design easy to read and clickable for mobile users. This is where scale becomes really important. Make sure your text is large enough to read on small mobile screens, and that your links and buttons are large enough — and spaced out enough — for folks to tap on with their fingers.
Example
Check out the example below, and note how much space there is between different clickable elements like the social media icons. These are great for tapping with your finger on a mobile screen so that users don’t accidentally tap on the Facebook icon when they meant to go to Twitter.
Image Credit: Canva
Finally, as with any part of an email, make sure your signature looks as good as you think it does by testing it with various email clients. Microsoft Outlook doesn’t recognize background images, for example, so avoid using those. Other email clients don’t load images by default at all. Read this blog post to learn how to optimize emails for different email clients.
(HubSpot customers: You can preview what your emails look like in 30+ email clients right in the HubSpot Email App, as well as preview what your emails will look like on any device, including desktop, tablet, or mobile devices. Click here to learn how.


How to Know When to Kill a Project & Cut Losses
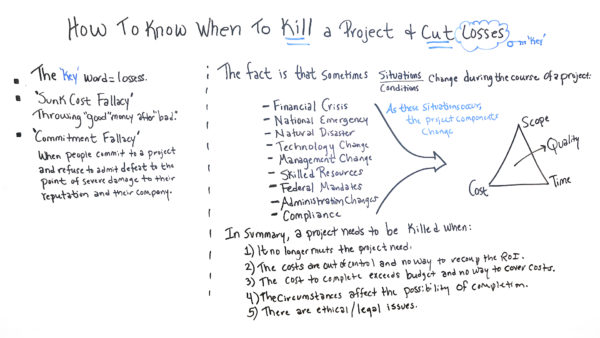
I Published 60 YouTube Videos in 30 Days. Here’s What Happened.
You can’t deny that video is a vital part of any business’s marketing strategy in 2019.
In fact, video traffic will be a whopping 82% of all global IP traffic by 2022 — up from 75% percent in 2017.
It’s clear that web visitors are shifting to video — Facebook Watch, IGTV, and of course, YouTube have all picked up steam in recent years. The only question is, are you going to take advantage of that trend?
I saw an opportunity to engage and grow an audience for my company, Niche Site Project’s YouTube channel, and decided to double down.
Literally. I decided to publish two videos per day for a month.
That might sound like a lofty goal — especially as a team of one — but I developed a workflow to do it without stressing out, using the help of two part-time Virtual Assistants (VAs).
The results exceeded my expectations for YouTube metrics. Compared to the previous month (when we were publishing once a day):
- Watchtime increased by 60%.
- Views increased by 80%.
- YouTube Subscribers increased by 37%.

There was also a clear ROI, which I’ll explain later.
In this post, I’ll discuss:
- How to use project management for small teams.
- Why I decided to publish so many videos.
- How to define the project and process flow.
- How to do the work and adjust when needed.
- What worked and what didn’t.
But first, a quick background on who I am: I’m a Project Management Professional (PMP) and worked as a corporate management consultant and project manager for 10 years. When I got laid off, I decided to turn my side hustle of Amazon Affiliate marketing and SEO into a full-time gig, and that’s what I do at Niche Site Project.
Why Do It?
First things first, you have to understand why you’re doing a project. I noticed that traffic from my YouTube channel converted to email subscribers at four times the rate of any other source.
Traffic from all sources convert at an average of 4.19%.
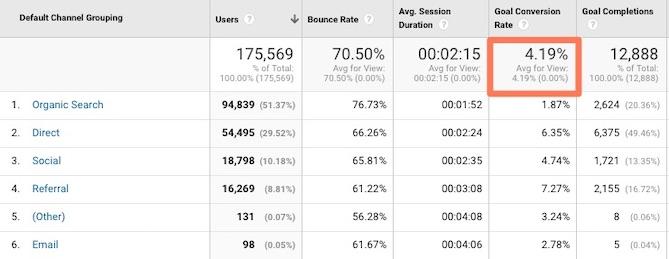
YouTube traffic, on the other hand, converted at about 16%.
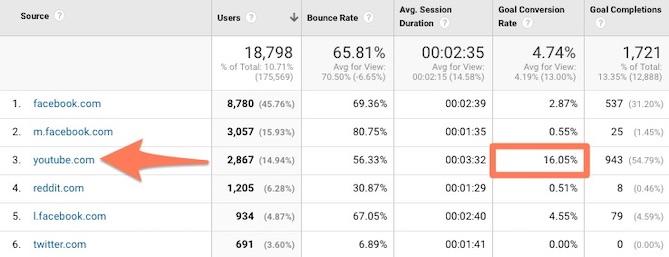
My business is dependent on email list growth, so it was a no brainer to put more time into YouTube.
Pro Tip: If you’re trying to get your boss to let you work on a project idea, data makes it easier for her to say yes. If you don’t have convincing data yet, develop assumptions that you can test on a small scale first.
You’ll want to outline your goals so you know how you’re doing during the project, and if you accomplished what you intended once you finish.
My ultimate goal was to grow the email list, but I knew a few metrics that would be able to guide me along the way. YouTube analytics are very good for creators, so they’d be perfect as Key Performance Indicators (KPIs) along the way.
I wanted to improve the following KPIs on YouTube:
- Watchtime
- Views
- YouTube Subscriber Count
- Quality (This is subjective but important for other metrics.)
You’ll notice I didn’t specifically note “grow my email list”. Based on the data from the previous 24 months, I already knew that YouTube traffic was converting well for my email list (4X more than other traffic).
By focusing on growth on YouTube, I knew it would help grow the Niche Site Project audience base. So, over time, YouTube growth would be beneficial.
All but the last goal are quantifiable data points. The video quality is a perception and thus subjective, but if the quality is good, the other three metrics will go up. Plus, if you work on something a lot in a dedicated way with the intent to improve, there’s a good chance you’ll do just that.
A Project Management Approach
This was my approach:
- Define the project and outline the process
- Create the team
- Execute the work and refine the process
- Review the lessons learned
This process is not a pure project management implementation that you’d see at the corporate level. It is, however, a model that works well for an individual or small team.
1. Define the Project
I’ve dabbled with YouTube for a few years. In 2017, I started publishing more videos on a regular basis. At the same time, I was watching a lot more YouTube, since my gym had great wifi.
I noticed the YouTubers I watched would typically do a month of daily publishing, and then review the growth. In the few examples that I studied, I saw they grew their channels a lot.
I thought about doing the same thing… and figured, well, why not double it?
2. Review with Peers
I normally work alone, so I like to review my ideas with other people before starting a project.
I talked to a few people who were more experienced about doing a content sprint on YouTube. I asked for advice and if they saw any pitfalls that I may be missing.
I phrased my question in a specific way:
“I’m planning on publishing two videos a day for a month. I’ve researched and have seen a few channels that have done it with great results. I have X, Y, & Z planned for the process. Do you have any experience doing a publishing sprint? Do you see any mistakes or flaws in my logic?”
There were no major issues with the general plan. Great!
Pro Tip: When you ask people about your idea, be careful. Some people imagine whether they could personally do something. If they don’t dream big, they might discourage you from even trying.
3. Outline and Develop the Process
Since I had been publishing YouTube content already, I knew the general process. I also knew what I liked and disliked.
I sketched out this process in about five minutes.
Pro Tip: Do it by hand and save time. You could use a tool or app to design your workflow, but simple is better.

By sketching out the process, it made it easy to identify the tasks that I did NOT want to do. Some things are better for me to focus on, like:
- Content
- Management
And some things are not fun for me to do, like YouTube admin work. That’s stuff like:
- Video descriptions
- Video tags
- Thumbnail images
I’m also a pretty slow video editor. While I enjoy the process, it’s not a good way for me to spend my time.
Working on things that you’re good at is more enjoyable, of course, but it’s usually more productive, too. I didn’t want to be the bottleneck in the process, so I got out of the way.
4. Tracking and Managing the Project Status
I like tools, apps, and new tech, so I wanted to have a sophisticated project management solution.
I wanted the process to be automated and optimized right from the start.
I’ll come back to this in the lessons learned section later, but for now, know that:
- I wasted a few days trying to automate the process.
- The simple solution is the best to start with, and sometimes simple is just better.
- You can always optimize later.
5. Building the Team
The process helps define the team. I’m a one-person shop, so occasionally, I hire VAs for ad hoc assignments. I was already working with two VAs for YouTube over the previous few months, so it was easy to fold them into this bigger project. Here was the team:
- Project Manager: Doug
- Content: Doug
- Video Editor: VA #1
- YouTube Assistant: VA #2
It was a lean team, and I got rid of the tasks that I was bad at or simply didn’t like.
Pro Tip: Before diving into such a big project, check with your Video Editor and YouTube Assistant to make sure they’re able to do some extra work during the sprint.
About Hiring Freelancers
When I first hired the Video Editor, it took a little time for me to find the right person for my team. I hired three editors for paid trial gigs to see how we worked together, and made sure they didn’t miss deadlines.
I suggest hiring for paid jobs and real work with deliverables that can be used. It’s hard to interview and actually determine if someone can do the job — completing real work is the only way to know.
Workflow and Standard Operating Procedures (SOP)
The team had been working together for a few months, slowly tweaking the process. So I was confident in the general process. However, I knew pressure testing the system would reveal weaknesses that would need to be refined.
Here’s how it worked:
- I shot a video, then uploaded it to Google Drive.
- I told the Video Editor a new video was ready.
- The Video Editor uploaded the finished video to Google Drive.
- I uploaded the video to YouTube. (More on this in the next section.)
- The YouTube Assistant did post-production work, like creating the thumbnail image or writing the YouTube description.
- I reviewed and finalized post-production work.
As you can see, my process included two handoff points between three team members — simple and straightforward.
Pro Tip: If you’re initially defining the process, then you should draft your best guess for the workflow and process. Then, run through the process a few times and adjust as needed. You will need to adjust, and that’s okay.
Executing on the Process
This part is where you do the “real” work! With all my preparation complete, this part was relatively easy.
In fact, most of the month was far less stressful than normal. It’s funny to imagine, but I talked about it with my VAs and it was the same for them.
Our goal was very clear during that month: publish a lot of videos. So each day we all knew exactly what to work on.
The goal was to have 50% of the videos done before the 30 days of publishing even started. I made a go-nogo decision the day before we started publishing just in case we didn’t have the 50% of the videos done.
It was a mad dash of work for about two weeks, but having half the work done early made the next 30 days much easier. If someone on the team became sick or if something unexpected happened, we would still be able to meet our goal.
Pro Tip: Things rarely go exactly as planned, so add a buffer to your timeline just in case.
In my corporate PM days, it was common to add time to the schedule to account for unplanned issues. If you finished ahead of time, it was great! But, most of the time, there was some external factor that caused a delay. The project schedule could handle it with the buffer time.
Refining the Process
In project management jargon, this is the “Monitor” phase.
For individuals and entrepreneurs, monitoring is skipped often, yet it’s the most important part.
During this phase, you’re looking for mistakes, issues, and opportunities to improve.
People don’t normally like looking for mistakes and being self-critical — even though it’s constructive.
Here’s why you should do it even if it’s uncomfortable:
- You can adjust your process.
- You can improve your results.
- You’ll learn what to do (or not do) next time.
Here’s how we monitored:
- Each week, my team met via video chat.
- We talked about what was going well.
- We talked about what wasn’t going well or could be improved.
We didn’t uncover anything that was causing major issues. Generally, things were going well, so the few things we changed were minor.
Pro Tip: Keep it simple, and create an open dialogue with your team.
Lessons Learned
The other huge benefit of a sprint-style project is that you learn fast by doing something daily. My video production skills increased massively in just 30 days.
What Didn’t Work
Here are some things that didn’t work so well.
1. Fancy Tools & Automation
I tried to use Google Sheets, Google Calendar, Trello, and Zapier in the beginning to have a sexy calendar view and spreadsheet that was integrated.
(Zapier is a great app that helps you integrate other apps — super powerful, but can be a bit confusing.)
I burned about three days setting it up, which was actually fun, but not worth the effort.
Plus, after I tested it, there were issues with the integration. It was a mess! I decided to just scrap that idea. Simple is better.
The simplest solution was a spreadsheet — here’s a stripped down sample in Google Sheets.
2. Batching Work
I batched a few tasks in the beginning, like shooting several videos in a row. Except, it turned out, I wasn’t batching often enough.
I needed to plan things out more intentionally (e.g. outline video ideas, shoot videos). The more work I could batch, the more efficient the whole workflow would be.
With batching I could shoot a week’s worth of videos in a few hours. It saved a ton of time with setup and breakdown of the camera gear and lighting.
3. Pre-Production Tasks
I dabbled in video for a little while but the content wasn’t highly produced — my videos were usually Live Streams of some kind. Producing video at a fast pace taught me a lot in a very short time frame. I never realized how much work goes into a video ahead of time. The more preparation you do, the better your video turns out.
Here are some of the pre-production tasks:
- Outline the video.
- Find references to support the content.
- Find graphics that could help make the point in the video.
- Understand what videos are going to be published in the future so a few videos can reference each other.
It seems obvious after the fact, but I was used to doing things on the fly.
4. Uploading the Video to YouTube was Slow
When the Video Editor finished editing a video, she uploaded the finished video to Google Drive for me to review.
If edits were needed, I asked for updates. If the video was final and no updates were needed, I downloaded the video and uploaded it. The video files are big, so that takes a few minutes each time.
I knew there was some way to move files from Google Drive to YouTube, but I was having trouble figuring it out. (More on this later.)
What Worked
Several things went well from the start and a few things improved along the way since we tried to constantly improve the process.
1. Working Ahead
50% of the videos were shot before I started publishing them. They still needed to have the post-production work (e.g. thumbnail, YouTube description, YouTube tags), but the bulk of the work was done.
This was a huge mental advantage, as the team started publishing two videos a day. We knew we could do it if we were able to do half of the work ahead of time.
2. Using a Simple Content Calendar
I find it exciting to integrate apps and automate things — but it’s overkill most of the time.
I wasted a few days trying to integrate a few apps when Google Sheets would’ve worked just fine. A spreadsheet didn’t have the fancy visual dashboard, but that wasn’t a requirement.
Pro Tip: You don’t need to optimize every solution. Simply meet the requirements to solve the problem.
I managed several multimillion-dollar projects for a tier-1 telecom company using a spreadsheet. That was the official PM tool at the company because it was simple and everyone had access to a spreadsheet app.
For my content sprint, Google Sheets suited my needs, and no integrations were needed. Always opt for simple over complex.
3. The Workflow
The heart of this system was the workflow. I delegated tasks I didn’t want to do (or shouldn’t do) to accelerate the process. The quality of the resulting work was higher, too.
Each of the steps in the workflow had start and endpoints. Each endpoint triggered the next action (e.g. handoff to the next person).
We didn’t need to adjust the main parts of the workflow, but there was one part that could be helped with the right tool.
4. Zapier for Transferring Files From Google Drive to YouTube
Google Drive has some interfacing capabilities with YouTube, but I was having trouble getting files moved over quickly. Instead of a seamless transfer, I was downloading and uploading big video files each and every time.
It took about 30 minutes on average for each video. Yes, a lot of it was just upload/download time, which is largely idle, but still a waste of time.
I started investigating Zaps on Zapier for YouTube and found the right one.
When the video editor uploaded a video to a specific folder, Zapier would transfer the file over to YouTube. Boom! This was a huge upgrade to the process.
Now, once the video editor uploaded a video, the video transferred to YouTube seamlessly. Then, my YouTube Assistant could do the post-production work. Finally, I did the final check before publishing.
Takeaways
This process is a great example of a sprint of work where I used relevant project management tools from the corporate world in a real-life application with a small team.
I started with a set of goals and some assumptions that I tested on a small scale.
The idea of continuous improvement is applied throughout the process by encouraging open dialogue within the team. We were able to improve along the way which made us more efficient.
Additionally, I noted what could be improved in the future. For example, I knew that Trello could have been a great solution to aid in the project management of video production. I didn’t use it for this project because the rest of the team hadn’t used Trello before.
After the sprint was complete, however, I introduced Trello to the team. It has some benefits over Google Sheets without adding too much complexity.
Conventional wisdom suggests that I should keep publishing more and more videos to grow. But there are other factors to consider besides just growing your watchtime and YouTube subscriber base. And, most importantly, it’s unsustainable over a long period of time if you have a lean team like I do.
However, the benefits are long lasting because the videos can be watched in the future if the topics are evergreen. So, the YouTube KPIs may not grow at the same rate after the sprint is complete, but the Niche Site Project audience continues to grow from YouTube. Another benefit I hadn’t considered is being seen as a YouTube Influencer, so companies and other influencers want to work with me.

8 Ways to Share Links on Instagram
Looking for ways to drive more website traffic from Instagram? Wondering how to share links in more places on Instagram? In this article, you’ll find eight distinct ways to share links on your Instagram profile and posts. #1: Add a Link to Your Instagram Bio Let’s start with the first and simplest way to place […]
The post 8 Ways to Share Links on Instagram appeared first on Social Media Marketing | Social Media Examiner.
from Social Media Marketing | Social Media Examiner http://bit.ly/2XSeSDp
via socialmediaexaminer
Subheadings: What They Are & How to Craft Great Ones
If you’re in marketing, you know that headlines are important. But did you know that subheadings are just as important?
Sure, the headline is responsible for capturing a visitor’s attention. But then what?
To give you a better sense of how it all works, I’m not only going to explain what a subheading is, but I’ll also detail a process that you can follow to use them to inspire action.
Once you’re done reading this article, you’ll know exactly how to unleash a killer headline, subheading, and CTA combo that will make people see, want, and click on your site.
What is a subheading?
First off, let me explain what I mean by subheading, which is also often called a subheadline. A subheading is text placed under a headline, often with a smaller font, which expands on what the headline says.
For example, a headline could announce the launch of a new product and a subheading could give more specific details about the product’s features.
Here’s a good definition from Wiktionary:
A smaller, secondary headline that usually elaborates on the main headline above it.
Similarly, Merriam-Webster defines the term as:
An additional headline or title that comes immediately after the main headline or title.
But rather than just tell you what a subheading is, let me show you. Here is an example from Mention. They use a big, powerful headline, and then a little bitty subheading:
It’s a secondary line of text that expands, advances, and otherwise informs the user beyond the standard headline.
Here’s another example from Kissmetrics:
Got it? Now, let’s talk about why they are essential …
Why do subheadings matter?
Subheadings are important because you can’t say everything you need to say in just a single headline.
Your headline should grab the reader’s attention. But what’s next?
Subheadings have the power to reel the reader in. While the headline may grab the user’s attention, you need to do more than that in order for the user to stay. You want to compel the reader to look, to click, to sample, to scroll, or to do whatever it is you want them to do. That usually takes more than just 10-20 words
The subheading also gives readers that extra nudge. Or, to put it in the word’s of Gary Korisko, “the often overlooked subhead is really a stealthy and lethal ninja writing weapon just sitting there quietly waiting to be put to good use.”
A winning headline, subheading, and CTA combo.
Now, let’s get into the good stuff: the surefire, failsafe, absolutely reliable way to make your subheading as atomically powerful as it can be.
I want to explain how you can create a subheading that will do what you want it to do. To do so, you must use your subheading strategically with two other elements: the headline and the call to action. Together, these three elements work like quick, successive bursts of information and opportunity.
It’s kind of like a three-man basketball team: one person dribbles it in and passes it to the second guy, the second guy tosses the layup, and the third guy dunks it.
Here’s another way to look at the formula:
- Headline. Grab their attention.
- Subheading. Draw them in deeper.
- Call-to-Action. Tell them what to do.
Now, let’s walk through what each element does.
1. Headline
The reason why headlines are such a big deal is because they are the first thing that a user looks at when they see a webpage. (Obviously, you want to make that first line really pop.)
Here’s a sample eye tracking study demonstrating the power of the headline. According to the map, more eyes spend more time on headlines than any other part of the page.
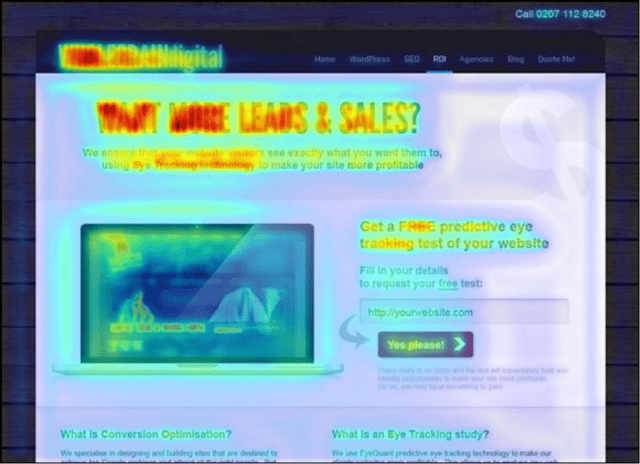
Image Credit: Wholegrain Digital
With your headline, you should say something that grabs their attention, revs up their engine, or makes them excited. If you don’t give them a strong reason to linger on your headline, then your subheadline won’t get read. End of story.
2. Subheading
Explosive headlines should pull the reader down into the content, making them want whatever it is you are featuring or talking about.
Here are three things that you can do with your subheadline:
- Explain more. If your product or service needs a bit more explanation, then try expanding on it with your subheadline.
- Talk about benefits. Benefit-focused headlines are great. By emphasizing how a product or service will improve the user’s life, you can dramatically advance the page’s power.
- Encourage action. A subheadline is also a great way to get users to do something. If you successfully encourage action, it’s only a short hop for them to click the call to action button below.
The nature of your subheadline depends on your headline. You can choose one of the techniques above, or split test different varieties to see which one is best for your users.
3. Call-to-Action
Your call-to-action closes the deal. Your headline and subheadline should bring the reader to the logical climax of acting on what he or she knows.
Without the call-to-action, the reader is left wondering “What now?” Don’t let that happen. Instead, make the user respond to the message that they have just read.
Let me review the model once more:
- Headline. Grab attention or spark curiosity.
- Subheading. Explain, show benefits, or encourage action.
- Call-to-Action. Give them a chance to do it.
What’s the impact of this three-step process on the reader?
- Headline. “What is this?”
- Subheading. “I want it!”
- Call-to-Action. “I’ll do it!”
Let’s take a deeper dive into the five things that will produce outstanding subheads.
5 Elements That Will Make Your Subheading Irresistible
Here are the key factors that will make your subheading shine.
The right words. Choose your words carefully because you can’t use very many. Here are some options, taken from Buffer’s “Big List of 189 Words That Convert”: new, sensational, remarkable, secret, take, you, introducing, improvement, amazing, free, because, suddenly, promote, increase, etc.
Here are a few tips to help you narrow your focus:
- Choose the right length. A good subheading should take just a few seconds to read. I recommend keeping your subheading between 10 and 30 words. Double the length of your headline is a good length.
- Aim for the right amount of information. Tell the user just enough. You don’t want to explain everything. You want some of that curiosity to stay with them so they will click on the CTA below.
- Include the right amount of persuasion. It’s important to use your subheading for its intended purpose — to coax the user to convert. Go ahead and pull out the persuasive stops.
Seeing helpful examples of headlines and subheadings is one of the best ways to learn the magic. Check these out.
1. Spotify
See how Spotify uses the top headline to grab your attention. It’s a short, punchy statement with visceral appeal. The subheading explains and encourages action.
2. Scratch Wireless
Scratch Wireless actually uses two subheadlines. I guess they needed to add a few extra benefits. The main headline is a head-jerking command and the subheading coaxes users with the word “free” and a few more benefits.
3. GitHub
GitHub’s subheading is a bit long, but it does a comprehensive job of encouraging action. If you’re ready to sign up, the subheading tells you what you need to know — product capabilities, scope, and price.

4. Oscar
Oscar health insurance uses a clean and simple interface to advance their idea of health insurance — smart and simple. They’re subheading (in black) explains what Oscar is.
5. Bellroy
The Bellroy shop has a bold three-word headline. Your eyes are naturally searching for an explanation, and the subheading provides it. The subheading explains what the product is and why you should consider buying it.
6. Avocode
Avocode uses their headline to explain the product, and their subheading advances this explanation with even more information and a benefit.
7. Kalexiko
Kalexiko’s brilliant site has a simple headline and simple subheading. The subheading explains what they are: a “digital design & development agency.”
8. Apple
Apple is the master of compelling subheadlines. Their products need little explanation or introduction, so they woo users with persuasive tactics.
9. Fitbit
Fitbit produces wearable fitness devices. Their subheading does a helpful job of explaining the image below in brief terms so users will want to see the product selection.
10. Chrome
Chrome takes the benefit-focused approach with their subheadline.
11. Keap
The main page for Keap, formerly Infusionsoft, offers a subheading that clearly explains what their software does.
12. Medium
Medium’s two subheadings explain and encourage action.
13. Crazy Egg
Crazy Egg is a tool that shows user-behavior on your website. The subheading helps to advance this concept further by explaining what the product does.
14. Samsung
Rather than using its usual formatting of a product-name headline, followed by a subhead that lists its features, Samsung changed things up on the Galaxy’s birthday. The “Happy Galaxy Day” headline draws attention because it feels different, and the subhead is used to explain that the Galaxy line of phones has turned 10 years old.

15. HubSpot
HubSpot’s subheading explains the products it offers as well as why a company should use them to pull in and nurture their customers. This is a good follow up to its headline which plays off of its slogan, “Grow Better.”
The most powerful subheadings are those that speak directly to the user and help them take the next step. By using the combo, following these tips, and writing with clarity, you can watch your website’s effectiveness increase.


Instagram Branded Content Ads: New Advertising Partnerships for Brands and Influencers
Welcome to this week’s edition of the Social Media Marketing Talk Show, a news show for marketers who want to stay on the leading edge of social media. On this week’s Social Media Marketing Talk Show, we explore Instagram branded content ads for brands and influencers, and Snapchat’s new native checkout feature with special guest, […]
The post Instagram Branded Content Ads: New Advertising Partnerships for Brands and Influencers appeared first on Social Media Marketing | Social Media Examiner.
from Social Media Marketing | Social Media Examiner http://bit.ly/2XeX1Jz
via socialmediaexaminer
A Short & Sweet Guide to Software Apps vs. Suites
Companies are increasingly turning to software suites that can help them streamline their work processes, organize data, and boost productivity.
Even back in 2017, 83% of enterprises were using Microsoft Office’s software suite to due daily tasks like managing email, writing reports, building spreadsheets, and presenting slideshows. Since then, other software suites like G Suite, which now boasts over five million paid users, have gained steam.
Although many people might interact with suites on a regular basis, some may still be asking, “What is a software suite?”
Also called an application suite, software suites are different from standalone applications because they are a group of apps that link together to create an overarching experience for the user.
Software suite users can often access all of a suite’s apps from a desktop app or through a web portal. For example, Adobe Photoshop is a photo-editing software within the Adobe Creative Suite. Those subscribed to the suite may also gain access to other apps like InDesign or Illustrator.
Currently, some of the most regularly used suites are built for productivity. Many also use cloud technology to store documents and data.
To help you determine if using a software suite is right for your company, here’s a list of six commonly used examples.
1. Microsoft Office 365
Cost: $5 per month/user (Business Essentials), $8.25 per user/month (Business), $12.50 per user/month (Business Premium)
Microsoft Office was one of the first software suites of its kind. Now branded as Office 365, it holds Microsoft Word, Excel, Outlook, and PowerPoint. Those who purchase the Business or Business Premium subscriptions can also opt into other 365 services like Exchange, Teams, and Sharepoint.
When multiple employees are using Office 365, they can also share documents the create to one shared cloud, called the OneDrive. This feature is available on all versions of the suite.
2. Google G Suite
Cost: $6 per user/month (Basic), $12 per user/month (Business), $25 per user/month (Enterprise)
Google’s G Suite is an alternative to Microsoft Office. It is mainly based online and includes Gmail, Google Sheets, Google Slides, Google Docs, and a number of other productivity tools. Data and documents are saved instantly in Google Drive and can be easily shared with other coworkers that have access to the suite.
The suite also offers simple peer editing and comment features, as well as integration opportunities with other office applications like Slack.
G Suite is quickly getting accepted in the office world because of its price, an easy-to-use interface, live editing, and document sharing features.

To learn more about how you can use G Suite to your advantage, check out our ultimate guide.
3. Apple IWork
Cost: Free for all Apple users
IWork is Apple’s response to Microsoft Office. IWork’s suite comes with all Mac computers and devices. It includes Pages for writing and reports, Keynote for presentations, and Numbers for spreadsheets. Apple also offers its users some initial free space on its cloud, which can be increased for a price later on.
When using applications in IWork, all of the interfaces are clean, simplistic, and easy to understand. Projects created with any of its applications can also be converted to Microsoft formats.
IWork also allows you to create documents that have a sleak, Apple-styled design. Pages, Keynote, and Numbers offer a wide-variety of templates and design options.. While this is also a benefit on Office 365 templates, it seems to be embraced more heavily on IWork apps.
4. Adobe Creative Cloud
Cost: $79.99 per user/month (Creative Cloud), $109.98 (Creative Cloud + Adobe Stock)
This suite is specialized for those working in design, video, and photography. It includes a number of well-known Adobe programs including Photoshop, Illustrator, InDesign, and After Effects.
Users can subscribe to the apps individually or in a bundle. Once users make a purchase, their apps can be accessed and downloaded through the Adobe Creative Cloud website or desktop application.
Users can save projects and data to Adobe’s cloud so that multiple users can work together on one document and share large files without hassle.
Video Embed: https://www.youtube.com/watch?v=V4VCTB2Pyio
5. HubSpot Enterprise Growth Suite
Cost: Varies based on user numbers
For the more established business, HubSpot’s Enterprise suite includes HubSpot’s Marketing, Sales, and Service Hubs. Customers can also choose to just invest in one or more of the hubs without taking on the full Enterprise suite.
To get more acquainted with the HubSpot software before making a big purchase, the company offers its Customer Relationship Manager, or CRM, for free. With this tool, you can manage customer contacts, track customer activity, and learn more about how the Enterprise Suite’s tools might help your company.
6. Apache OpenOffice
Cost: Free
For those in small businesses or students with a low budget, OpenOffice offers a similar, free suite to Microsoft and G Suite. Users can use the suite’s applications to make documents, spreadsheets, and slideshows. It does not seem like OpenOffice offers the same cloud storage and sharing options that the other office suites include.

Although OpenOffice has an old-school interface and isn’t as intuitive as the other suites, users can save files to a variety of different formats that will be openable with other software. For example, documents can be saved in Pages or Word format so that someone with IWork or Microsoft Office can view and edit them.
Things to Consider When Choosing a Suite
Whether you’re switching software suites, or choosing one for the first time, be sure to consider these factors:
- Cost: How many users will you need to pay for and how often do you wish to pay?
- Functionality: What are the main tasks that a suite could help you with? Will you use it for creating documents and traditional office tasks, or for audio or visual tasks?
- Necessity: Do you really need all the applications in a suite, or just a few?
- Data: Would you prefer to share and store data via a cloud service or through other means?
- Adoption: How quickly will your company adapt to the suite? Will they need training for any of the applications that they’ll need to use?

14 of the Best WordPress Survey Plugins
Are your users happy with your website, or are you simply assuming they are?
Whether you’re looking to improve the user experience on your website, increase your customer satisfaction, or simply learn more about your visitors, embedding a survey on your website is the fastest way to get the feedback you need.
Ultimately, knowledge is power.
In this blog post, we’ll take a look at some of the best WordPress plugins to collect user feedback on your website — without the need for a developer.

1. Survey Anyplace
Survey Anyplace allows you to create fun surveys, quizzes, and assessment tests for your WordPress website.
The free version is very generous. You can choose from a wide variety of question types to get the feedback you need — such as ratings, slide bars, or image choices, as well as traditional open-ended and multiple choice questions. Additionally, you can use basic question logic-skip to ensure you’re not asking redundant questions, based off a respondent’s previous answers.
If you don’t know what to ask your visitors, consider trying out one of the “tried and approved” survey questions templates, which can be personalized to your specific needs.
If a quiz is more what you’re looking for, Survey Anyplace won’t disappoint. Gauge your audience’s knowledge with timers and leaderboards.
You can playfully incentivize your respondents with digital scratch cards, and if you upgrade to a paid plan, you can even add slot machines to make your quizzes even more fun.
Pricing: There’s a free plan that offers a ton of flexibility in terms of what you can build, although you’re limited to 20 responses per month. For more answers and even more features, paid plans start at $25 per month.
2. Hotjar
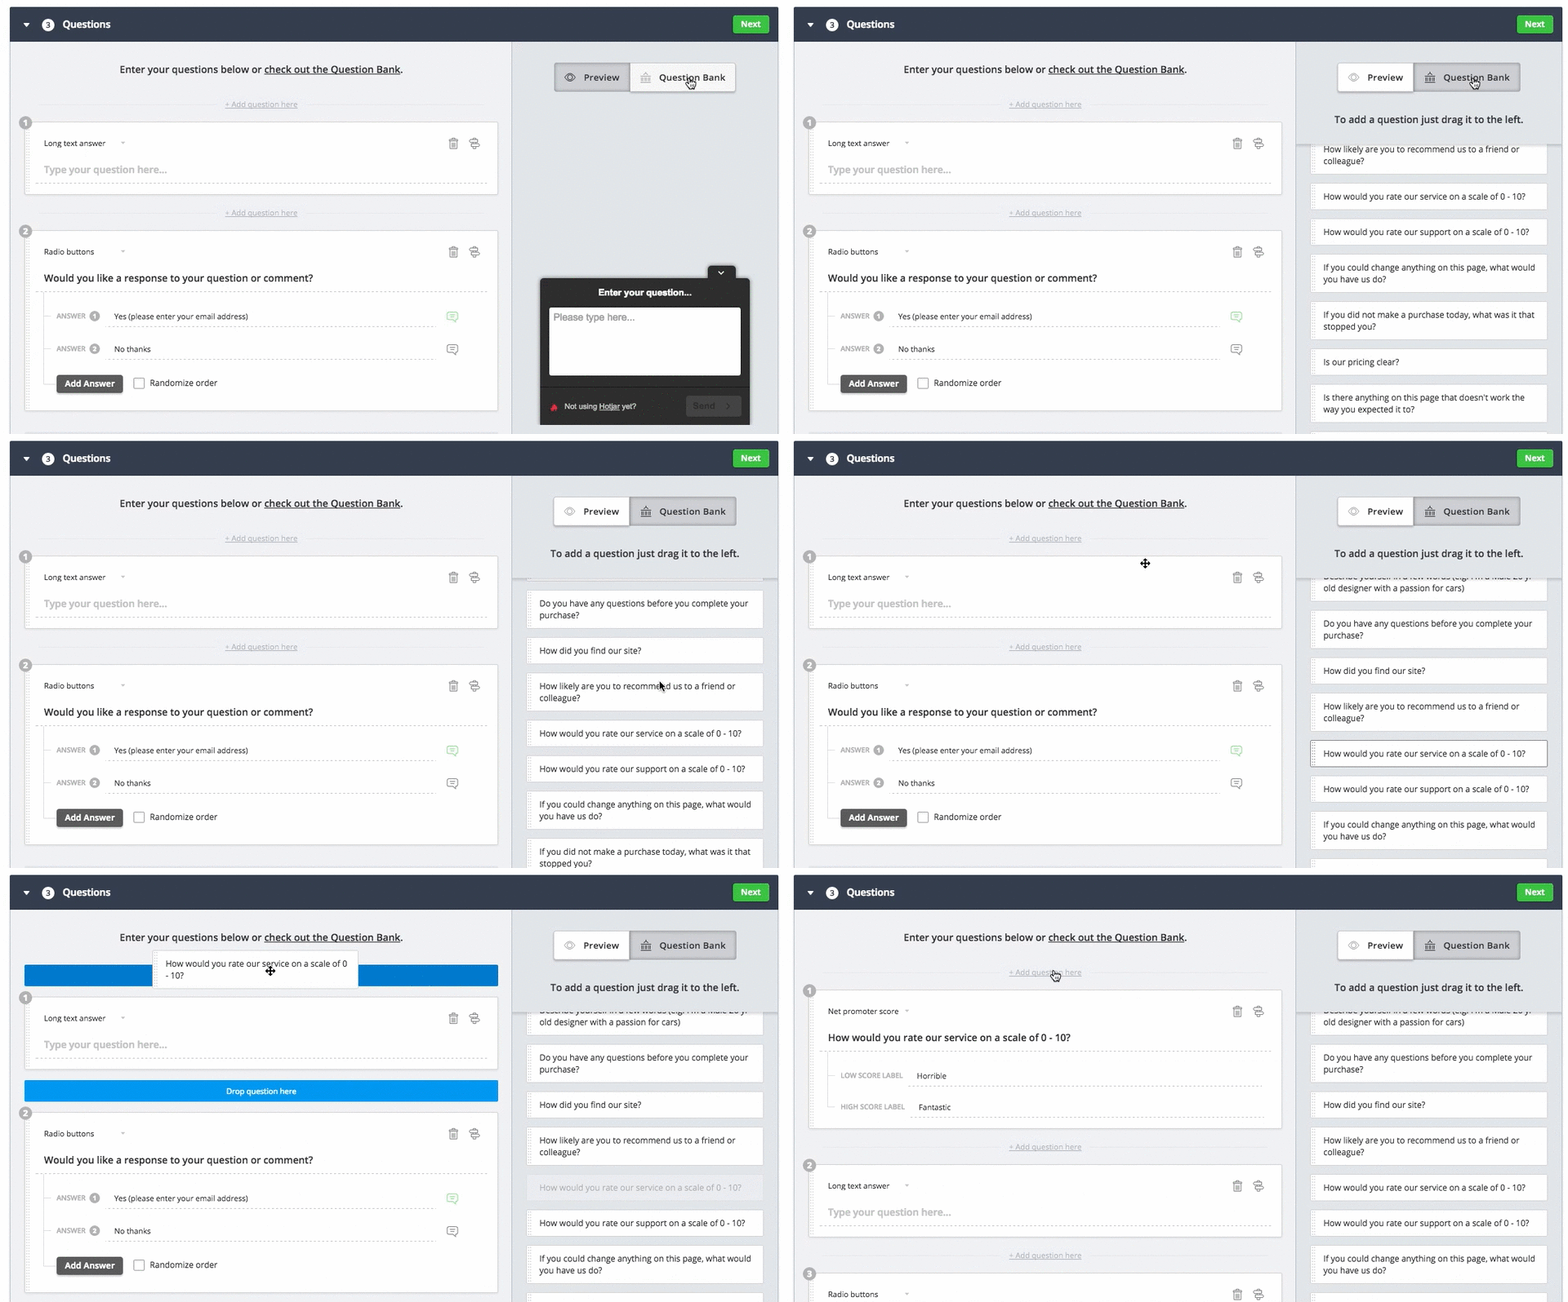
Hotjar is “the fast and visual way to understand your users.” They offer tools to help you uncover important insights for your site performance, including survey and feedback tools.
Their Form Analysis tool helps you improve your form completion rates by identifying which fields take too long to fill, which are left blank, and why your visitors abandon certain forms and pages.
Additionally, you can use Feedback Polls to create small, customizable widgets and improve the performance and experience of your website. Target questions to specific visitors anywhere on your web and mobile site, and choose from multiple trigger options such as time delays, scrolling, and exit-intent. You can ask multiple different types of questions, including Net Promoter Score. And if you need some inspiration, they even have a question bank for you to use.
Best of all, the Incoming Feedback tool gives your visitors an easy way to leave instant visual feedback on your site or app with the use of little emoji faces to express their satisfaction (or dissatisfaction) with your site. You can also create more complex surveys with the same targeting and trigger options.
The interface is drag-and-drop and incredibly user-friendly. Hotjar integrates with many popular business tools, including Hubspot’s CRM and Marketing software.
Pricing: You can start for free with the Basic plan and upgrade for more functionalities starting at $29 per month.
3. Poll, Survey, Form & Quiz Maker by OpinionStage
Opinion Stage lets you create interactive surveys to boost your engagement rates and get more qualified leads. This tool is used by large corporations including BBC, Uber, and TripAdvisor.
Its intuitive interface makes it easy to use. You can manage all of your polls and quizzes in a single dashboard and track your results thanks to detailed analytic reports, which track impressions, the number of votes, click-through rates, social sharing, and more.
Their built-in templates help you customize your surveys and polls to fit your brand. You can even add images and videos to your surveys to make them more engaging.
Additionally, when you upgrade to a paid plan, you can integrate forms into your surveys to capture leads’ contact information — plus, you have the option to incorporate ads, opening up an additional revenue stream for your business.
If you’re looking for more ways to engage with your audience, this tool lets you create tons of other types of interactive content, including forms, slideshows, and articles.
Pricing: The basic tool is free. To remove the Opinion Stage branding and unlock additional features, premium plans start at $19 per month.
4. GetSiteControl
Get to know your audience better with GetSiteControl. Add quick polls, multi-page questionnaires, star ratings, and skip-logic surveys to better understand your customers’ needs. Target new or returning visitors, those who are leaving your website, or a specific audience segment you’d like to learn more about based on their geographical location, browser or device type, language, traffic source, and more.
The tool helps you apply user behavior triggers to define when to start and stop showing a website survey, depending on time spent on page, scrolling depth, or exit-intent. You can even schedule the survey widget to be displayed only during specific days and hours.
Additionally, you can collect email addresses and subscribe users to your newsletter by connecting your survey forms to an email marketing platform, and have new contacts automatically added to your list. Plus, built-in A/B testing and instant analytic reports make it easy for you to measure your performance.
The tool is incredibly user-friendly and easy to set up. Your survey is live as soon as you activate the plugin. GetSiteControl is a great option for short surveys because of its many display options. However, because surveys are created in a widget format, they aren’t a good option if you want more complex surveys embedded on a page or blog post.
Pricing: You can try out the product for seven days for free. Paid plans start at $19 per month.
5. Typeform
Typeform is a contact form builder that also lets you create surveys and quizzes.
Choose from an epic selection of survey, questionnaire, and quiz templates that you can customize to your needs. Your surveys can include a number of different question types, including ratings, multiple choice, or closed and open-ended questions.
Your “typeforms” present your questions one at a time to keep users engaged, and can include images, GIFs, or videos. This tool includes Calculator, a PRO feature, for you to add calculations, scores, or prices to your questions. Each answer to a question can be assigned different values, and calculations can be made based off those values.
Your surveys and questionnaires can be embedded directly onto your page, open in a pop-up, or be accessed via a unique link.
Pricing: Start for free with basic question types and reporting. Paid plans start at $30 per month.
6. TotalPoll
TotalPoll is incredibly user-friendly. Control how your polls look with the Customizer. Your polls can be inserted onto any page via widgets or shortcodes.
In addition to creating regular surveys with the option to add images and videos, you can also run opinion and debate polls, or contests with scorecards at the end.
Best of all, the tool is optimized for search engines to help you rank on search results pages. You can make sure your poll is visible to Google’s crawlers by having it included in your sitemap. It supports Schema markup and is compatible with popular SEO plugins like Yoast All-in-One SEO.
Pricing: You can download TotalPoll Lite for free. But for more functionality, it might be worth purchasing the $29 license on CodeCanyon.
7. Modal Survey
Modal Survey is another popular option for building surveys, polls, and quizzes on WordPress. Its front-end builder makes it easy-to-use, and offers the option to customize the look and feel of your quizzes.
With Modal Survey, you get detailed visualization options to display your quiz results, including five different types of pie charts. For example, you can categorize questions to display the results of each category. This feature comes in handy, particularly when building personality tests.
This survey tool is great for building product recommendation quizzes. You can ask users to answer questions and then recommend products based on their results — which is particularly helpful if you own an e-commerce website.
Additionally, you can equip your quizzes with countdown timers, one for your overall quiz or one for each question, and subscribe respondents to your email list, thanks to the many email marketing service integrations available.
Pricing: You can purchase a regular license on CodeCanyon for $35.
8. Quiz and Survey Master
While its UI isn’t the most user-friendly, this plugin offers a ton of survey-specific functionality. You can give your users hints to help them answer certain questions and direct users to a specific landing page at the end of a quiz based on their results.
Just like with Modal Survey, you can group questions together to show users results based on those categories. You can also email your participants their results.
Additionally, you can purchase paid add-ons to unlock even more features, like email integrations, conditional logic, and analytics reports. The data you get from your survey and quiz results isn’t especially detailed or helpful, however, unless you purchase the add-ons.
Pricing: This plugin is free to use, but you can purchase different add-ons for more features, such as question logic, summary emails, and to remove ads.
9. Gravity Forms
Gravity Forms is a well-known premium form builder. While you can still create a poll with just the forms, their Survey, Polls, and Quiz add-ons make it easier to manage the data collected.
You can build powerful surveys with their drag-and-drop form builder. Plus, you can use conditional logic to create branching surveys that change based on previous responses, or set limits on the number of responses. You can choose to display the survey results publicly, and close the survey after a certain date or number of responses.
Gravity Forms is very developer-friendly, so it might not be the best fit for casual users and beginners.
Pricing: The add-ons are part of the $259 Elite License, i.e. the highest priced package that Gravity Forms has to offer. You get access to all of Gravity Forms’ really great tools, but if all you’re looking for is a survey tool, this likely won’t be worth the investment.
10. WPForms
Another popular contact form builder, WPForms has a Surveys and Polls add-on that shares the same powerful features as the form builder. Additional features specific to surveys include smart conditional logic to filter and personalize your questions, real-time polls, and smart survey fields from Likert scale and star ratings to multiple choice. Plus, you can get interactive survey reports with beautiful graphs and charts.
You have the option to show survey results on your WordPress website page with a shortcode, or to redirect users to a results page at the end of the survey.
Pricing: You can start using WPForms for free, but to access the Surveys and Polls add-on, you will need to upgrade to a paid plan starting at $39.50 per year.
11. Google Forms
While not an actual survey plugin by itself, Google Forms is a very popular free survey tool that is still worth mentioning. You can embed Google Forms on your WordPress website, either via a third-party plugin or via the HTML embed code provided by Google.
Google Forms is very straightforward and easy to use. You can ask multiple types of questions, including open-ended and multiple choice. And because the tool is provided by Google, it can be much more reliable than most free plugins out there.
You can set up restrictions for who to accept responses from, when to close the survey, and whether or not you would like to collect email addresses.
Get access to helpful graphs to help you visualize the data collected. You can also quickly swap between aggregate and individual responses.
Pricing: Google Forms is free. Its convenience makes it a good option if you’re looking for a quick way to collect user data. However, it may not look as professional as you’d like, and you won’t be able to remove the Google branding on the thank-you page at the end of the survey.
12. Responsive Poll
With Responsive Poll, you can take advantage of 18 templates and tons of customization options. Responsive Poll lets you choose from seven animated chart types for displaying your results — pie, bar, donut, line, radar, polar, and progress.
This plugin is a good choice if you’re looking for good quick-hit surveys or polls. However, you can only create surveys with a single question in them. You can still add multiple polls on one page, but for more complex surveys, it might not be the most optimal choice.
Pricing: You can purchase a regular license on CodeCanyon for $16.
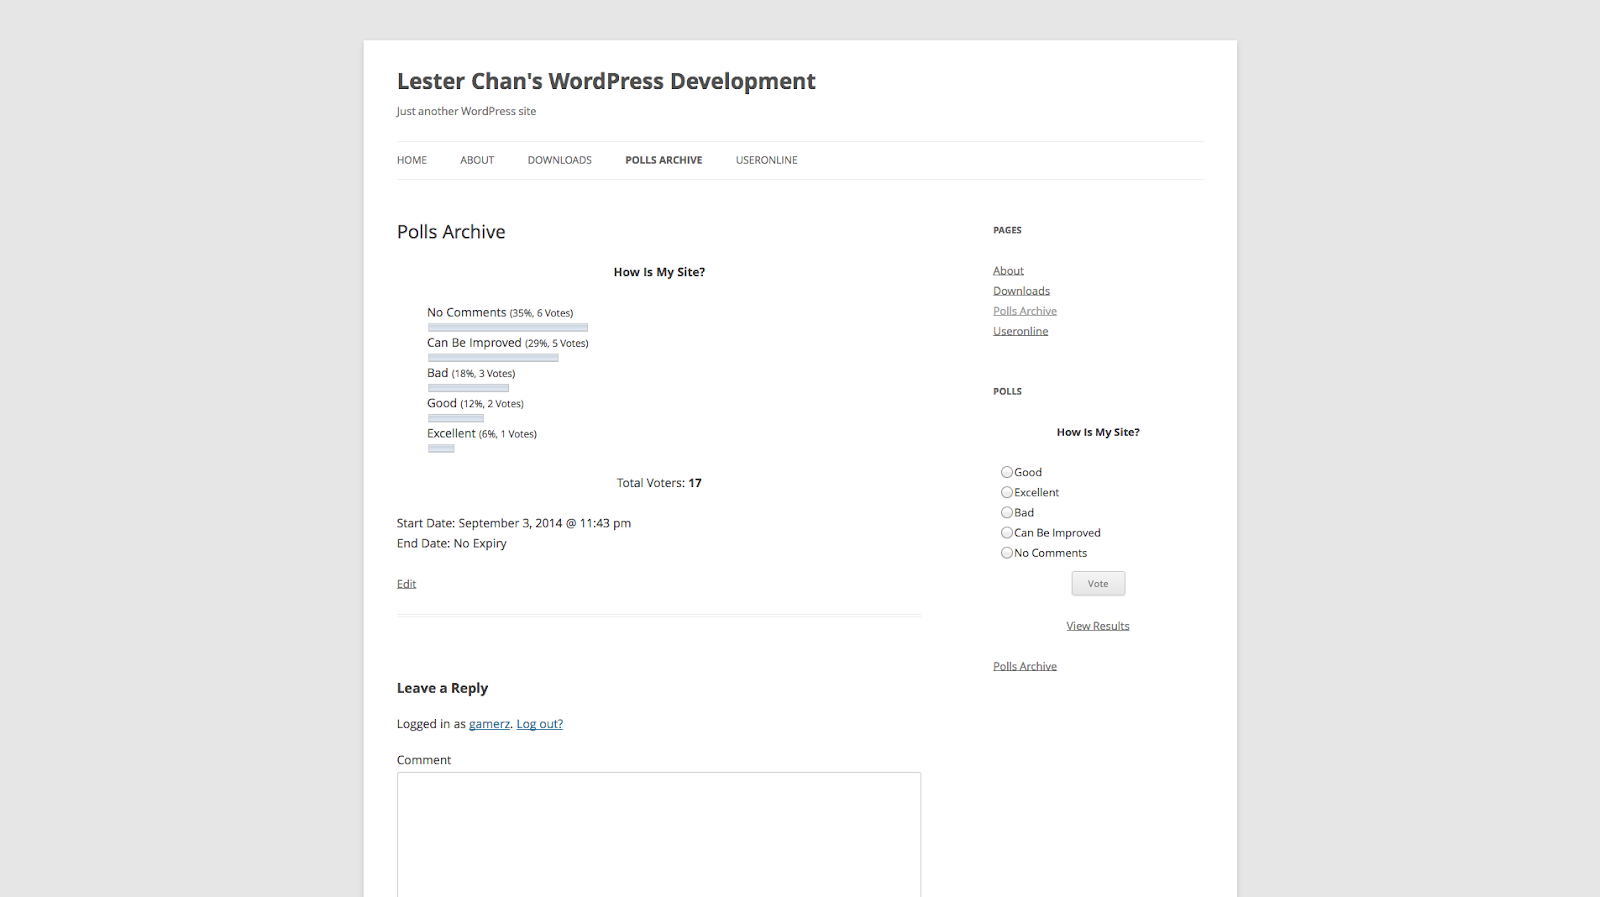
13. WP-Polls
WP-Polls is a popular option for free basic polling functionalities. Your polls are easily customizable via templates and custom CSS.
You can schedule your polls and even set expiration dates on them. Your users are automatically shown the results after voting.
You can keep a log of who voted on your polls, allowing you to manually keep track of duplicates.
With WP-Polls, you can only use radio buttons and checkboxes to collect answers. This is a good option if you just want to create simple polls, but it might not be enough to create more complex surveys.
Pricing: This tool is open-source, meaning it is 100% free to use.
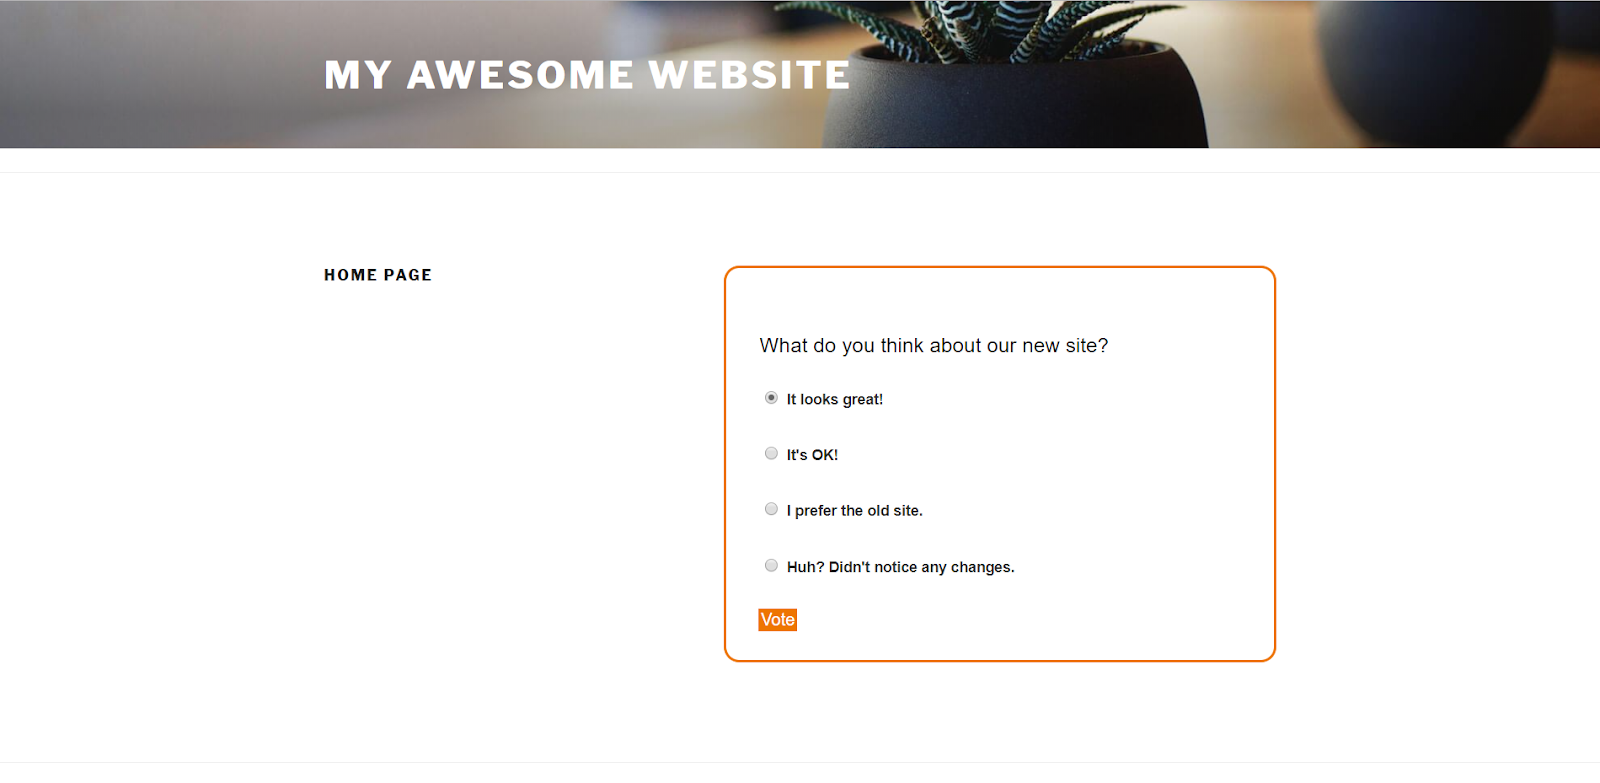
14. YOP Poll
YOP Poll lets you create polls that you can manage right from your WordPress dashboard. You’ll get access to customizable templates, and can schedule polls, set limits on votes, and restrict access to certain users based on their username or IP addresses.
The main drawback of this plugin is that it doesn’t allow for open-ended questions, except for an “other” fillable field. This tool is therefore ideal for predefined options. You also don’t get visual charts or graphs to visualize your data.
Pricing: You can use YOP Poll for free.
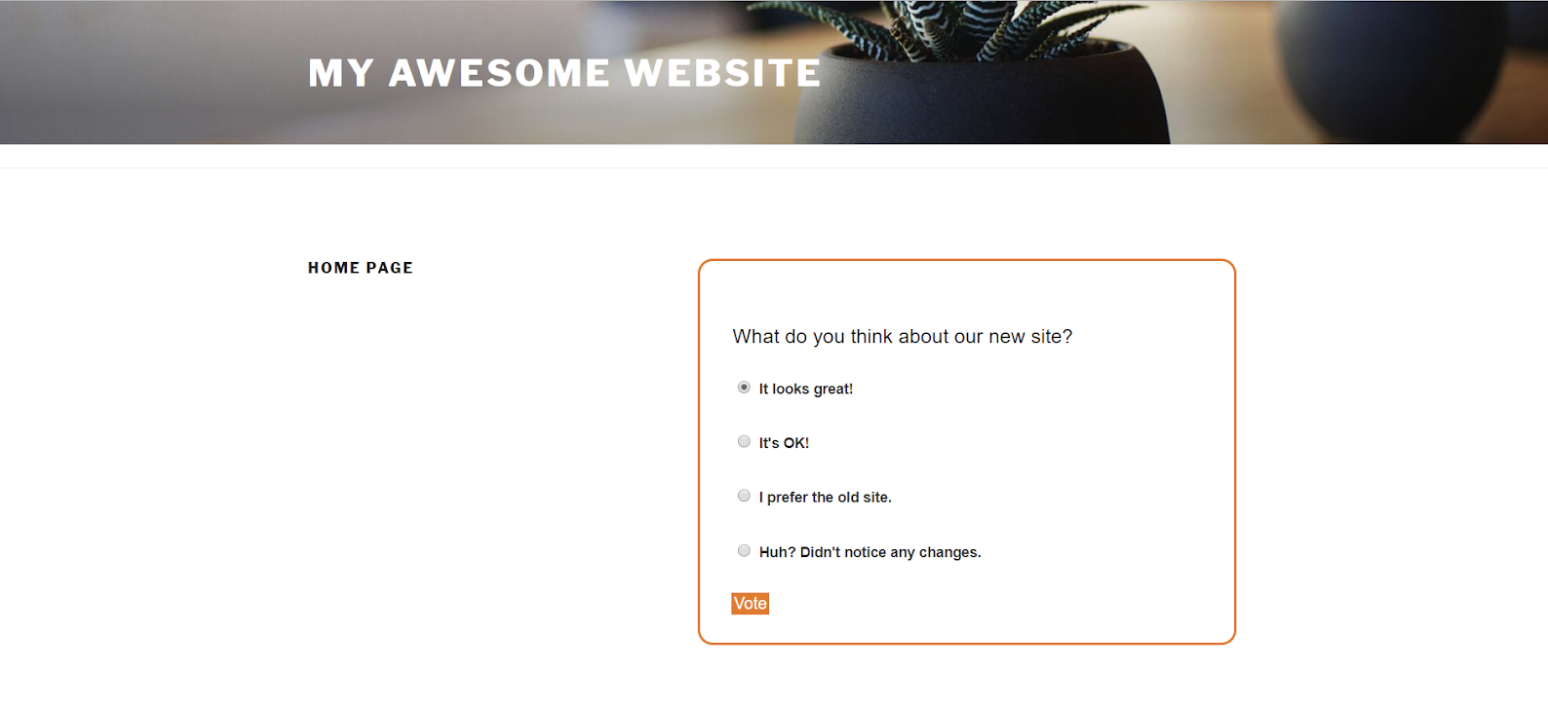

How to Track Attribution on Facebook and Google
Do you struggle to properly attribute your sales to your marketing efforts? Do you want to learn more about attribution with Facebook and Google? To explore the concept of attribution on Google and Facebook, I interview Chris Mercer. Chris is the world’s leading authority on Google Analytics, founder of Measurement Marketing IO, and the exclusive […]
The post How to Track Attribution on Facebook and Google appeared first on Social Media Marketing | Social Media Examiner.
from Social Media Marketing | Social Media Examiner http://bit.ly/31wWUs9
via socialmediaexaminer
The 67 Best Instagram Captions for Every Type of Post
If you’re anything like me, you take about four minutes choosing a filter for your Instagram photo, and about four hours deciding on a caption.
Worst of all, after much creative effort and advice from friends, I’m usually barely able to write a caption that goes beyond, “Had a fun day with friends!”
And I’m a writer — go figure.

Next time you’re contemplating a caption to go with your Instagram photo, take a look at our complete list of captions for any mood you need to evoke or audience you want to connect with.
You can incorporate many of them into an Instagram business strategy (just make sure your audience would indeed find your caption funny, clever, or the right amount of savage.)
Click one of the following links to jump to a section:
- Funny Instagram Captions
- Clever Instagram Captions
- Savage Instagram Captions
- Song Lyrics for Instagram Captions
- Business Instagram Captions
Funny Instagram Captions
- [Employee]’s favorite exercise is a cross between a lunge and a crunch … S/he calls it lunch.
- I need a six-month holiday, twice a year.
- We tried to be normal once. Worst two minutes of our lives!
- There are 16-year-olds competing at the Olympics and some of us still push on “pull” doors.
- Namast’ay in bed.
- That awkward moment when you’re wearing Nike’s and you can’t do it.
- I’m just a girl, standing in front of a salad, asking it to be a cupcake.
- What if we told you … you can eat without posting it on Instagram?
- We know the voices in our heads aren’t real, but sometimes their ideas are just too good to ignore.
- We don’t know what’s tighter: Our jeans or our company culture.
- Friday … Our second-favorite F word.
- We don’t care what people think of us. Unless they’re our customers. We definitely care what customers think of us.
- All you need is love … and investors. All you need is love and investors.
- Hi, we’re [company name]. We build amazing apps and eat amazing apps.
Clever Instagram Captions
- Patience — what you have when there are too many witnesses.
- Maybe she’s born with it, maybe it’s the Clarendon filter.
- “Life is short.” False — it’s the longest thing you do.
- Happy Sunday! There may be no excuse for laziness, but [I’m/we’re] still looking.
- Rejection is just redirection.
- Better an “oops” than a “what if.”
- You have stolen a pizza our hearts.
- The world is changed by your example, not your opinion.
- Seven billions smiles, and these are our favorite.
- Stop working hard and start working smart.
- When life gives you lemons, you make lemonade. When [company name] gives you [type of product], you make money.
- Imposter complex is just a byproduct of success.
- Life is simple. It’s just not easy.
- The best times begin at the end of your comfort zone.
- When nothing goes right, go left.
Savage Instagram Captions
- What’s a queen without her king? Historically speaking, more powerful.
- Be a little more you, and a lot less them.
- We’re an acquired taste. If you don’t like us, acquire some taste.
- Well-behaved people don’t make it into history books.
- Be sunshine mixed with a little hurricane.
- We got 99 problems, but an awesome marketing team ain’t one.
- Sometimes you just need to do a thing called “what you want.”
- You can’t do epic stuff with lame people. And we got the best in the biz.
- It’s not called being bossy, it’s called having leadership skills.
Song Lyrics for Instagram Captions
- “I’m gonna live like tomorrow doesn’t exist.” — Sia, “Chandelier”
- “I live for the nights that I can’t remember, with the people that I won’t forget.” — Drake, “Show Me a Good Time”
- “I hope you never lose your sense of wonder.” — Lee Ann Womack, “I Hope You Dance”
- “You may say I’m a dreamer, but I’m not the only one.” — John Lennon, “Imagine”
- “If you give, you begin to live.” -Dave Matthews Band
- “Outlining my findings, using life as a stencil.” — Kero One, “In All the Wrong Places”
- “Feeling good living better.” — Drake, “Over My Dead Body”
- “Say oh, got this feeling that you can’t fight, like this city is on fire tonight” — OneRepublic, “Good Life”
- “Time makes you bolder” — Fleetwood Mac, “Landslide”
- “If I fail, if I succeed, at least I’ll live as I believe” — Whitney Houston, “The Greatest Love of All”
- “The rest of the world was in black and white, but we were in screaming color.” — Taylor Swift, “Out of the Woods”
- “Lightning strikes every time she moves” — Calvin Harris, “This Is What You Came For”
- “We aren’t ever getting older” — Chainsmokers, “Closer”
- “Sing with me, sing for the years, sing for the laughter, sing for the tears” — Aerosmith, “Dream On”
Business Instagram Captions
- Good evening, [city]! We’re in town for [event] at Booth [#]. Stop by and say hi!
- “If you’re offered a seat on a rocket ship, don’t ask what seat. Just get on.” -Sheryl Sandberg, COO of Facebook
- Our [#]-person squad completed the [road race name]! And we did it all for the post-run sneaker selfie. 👟
- We got product in the pipeline … check back for an exciting announcement on [date]!
- Diversity isn’t a recruitment metric — it’s an ingredient for success. At [company], we thrive on the unique backgrounds, experiences, and perspectives of our people.
- Spot the CEO. 😉
- At [company name], our best asset is our people.
- We had a great time with our customers at [meeting/event]! @[client/partner], you guys rock.
- Thrilled to have [customer] at our office today! Come back any time. 😊
- [Company name] is off for [holiday]! We hope you all have a safe long weekend.
- Big things have small beginnings. [Company]’s HQ began right here.
- “It is better to fail in originality than to succeed in imitation.” -Herman Melville
- How many [company name] employees does it take to spell “TEAM”?
- Want to work with these awesome people, working on a lot of awesome things? We’re hiring! Click the link in our bio to see our current openings.
- Check, check, one, two … is this thing on? [Company name] is now on Instagram! Follow us to learn about our culture, product, and (awesome) people.


The Ultimate Guide to Press Release Distribution
To thrive as a small business, you need press coverage. But, unfortunately, coverage doesn’t just come naturally — you need to work for it.
Enter: The press release.
Press releases are important for increasing your brand awareness and helping your public relations (PR). But if nobody sees your release, you won’t get very far. You need to distribute it effectively to get your story picked up by national newspapers, magazines, or blogs.
In this guide to press release distribution, we’ll cover the following to help you put together a plan of action that results in coverage:
- What is press release distribution?
- Why is press release distribution important?
- How to distribute your press release
- Distribution mistakes to avoid
- Should you use distribution services?
Keep reading to learn how you can properly create, pitch, and distribute a press release for optimal brand awareness.

What is Press Release Distribution?
Before we dive any deeper, let’s iron-out exactly what press release distribution is.
Here’s a fancy definition: “Press release distribution is the process of circulating or seeding out your press release to journalists and members of the press.”
The purpose of distributing a press release is to land coverage in media publications such as newspapers, radio, TV news bulletins, podcasts, or blogs. That way, you’re positioning your brand in front of a wider audience.
Why Bother Distributing a Press Release?
People aren’t going to see your press release if you don’t distribute it.
And if it’s not seen, people won’t know about your business — which defeats the entire purpose behind creating your press release.
Gaining press coverage helps to get your business or brand name into the public forum. That’s helpful for building awareness of your brand — especially when 44% of journalists consider press releases to be the most trustworthy source of brand-related information.
Distributing a press release also has these benefits:
1. Press releases can boost your SEO.
Over three billion Google searches are made every day.
By implementing SEO tactics into your overall marketing strategy, you’re more likely to reach the top spots of users’ search queries, which will help potential customers and clients find you when they’re searching online for information related to your company, industry, product, or service.
Gaining links to your site from others is a huge ranking factor for SEO, as explained in a study by Backlinko:
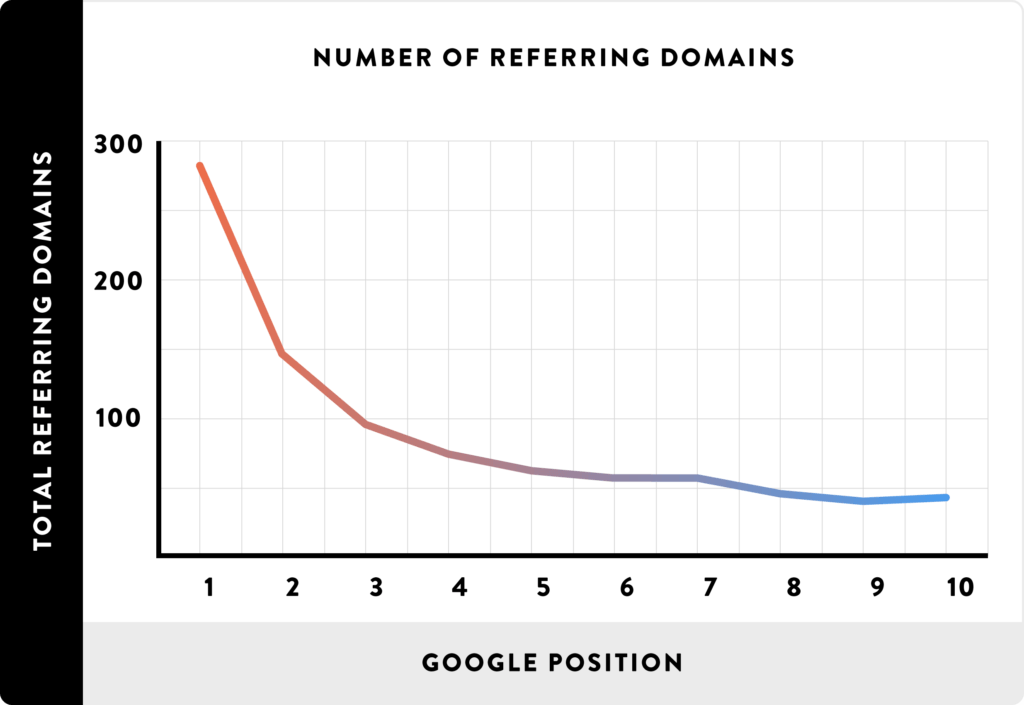
Distributing press releases can help you land coverage on huge publications. Additionally, there’s a chance those websites will link to yours, which can help to boost your own search engine visibility.
But what happens if you land awesome coverage without a backlink?
Don’t panic. Both Google and Bing have suggested that positive brand mentions may play a role in how they rank your site, meaning positive PR coverage can aid your SEO efforts even without a link.
2. A press release can drive local foot traffic to your store.
If your business is a brick-and-mortar shop, press release distributions can help to get people through the door.
Whether you’re running an event or simply launching an eye-catching sale, measuring foot traffic into your store after distributing a press release is a simple way to gauge how successful your release has been.
3. A press release can generate more sales.
If you’re launching a new product or an exclusive line, a targeted press release can have a significant impact on your bottom line. Why? Because it help drum up interest and make revenue from your stock, especially if the offer sets you apart from competitors.
Busy shopping days can be a great way to get your products in front of potential customers.
For instance, if you’re offering discounts on Black Friday or Cyber Monday, why not reach out to retail journalists to highlight your offers?
PR Agency One landed 52 pieces of coverage for their client with Black Friday press releases — all of which helped put them in front of consumers who were ready to buy.
A Step-by-Step Guide to Distributing a Press Release
You know how important PR is, and you’ve crafted a succinct, yet powerful, story. All that’s left to do is share it with the world.
But journalists have to write up to seven stories per day — so how do you ensure your press release is one of those stories? And just as importantly, how can you make your distribution email stand out in a crowded inbox?
Follow this five-step guide to learn how.
1. Find journalists who might be interested in your press release.
When you want to share some news, I’ll bet you’re tempted to tell as many people as possible. You want everyone to hear about it, right?
However, that’s not always the right thing to do — because not everyone is interested in your story.
(Brutal, but honest.)
Along with crafting a press release that journalists are interested in, you’ll need to be super-specific with the people to whom you send your pitches.
You can do that by searching for journalists who’ve already written about your topic or industry.
For instance, let’s say you run a car parts business. You’ve conducted some research around potholes, gathered some interesting data, and turned it into a killer press release. But mailing every journalist under the sun is probably going to be a waste of time.
Instead, it’s worth seeking out journalists who’ve covered similar topics before.
To do this, fire up Google, type in your topic (potholes), and navigate to the News tab:
As you can see, there are plenty of recent articles on this topic, meaning journalists are more than likely interested enough to cover it.
Next, read some of the articles on Google News and make a note of the journalists’ names.
A simple spreadsheet with the journalist’s name and the publication they write for is a good way to keep a log of your distribution plan:

If you have the budget, you can also use a media database such as Cision or Muckrack to find relevant journalists and reporters.
This method is much more likely to get you responses because you’re only pitching the release to journalists who’ve demonstrated an interest in your topic already.
2. Get the journalists’ contact details.
Next, it’s time to find some contact information for the targets on your press release distribution list.
This could be as simple as clicking on an author’s bio on their publication’s site.

… and making a note of their email address:

But, just like anything else in the world of PR, it’s not always that easy.
You’ll often have to do a little digging to find the contact details — starting with a simple Google search such as “[journalist’s name + email]”.
If that doesn’t do the trick, you could also use a media database like Muckrack:

Don’t have the budget for paid databases? Harness the power of social media.
LinkedIn is an excellent place to discover contact information for professional contacts (AKA, your journalists). Simply search for “journalist” and filter the results by selecting your target publication as “company”, then plug their name into Hunter to find their email address:
Twitter can also be a quick and easy way to get in touch with your target journalists, too — especially considering 46% of journalists are open to receiving pitches via Twitter.
3. Craft a killer pitch.
Email is the most effective way to send your press release quickly.
Don’t believe me? Cision’s 2017 State of the Media report found an overwhelming majority of journalists prefer to receive press releases via email:
However, there’s another obstacle you’ll need to overcome here — many journalists receive up to 200 pitches a day.
There are two factors you’ll want to consider when crafting a pitch. First — keep it brief.
Don’t waste the journalist’s time with a long-winded, self-absorbed introduction to yourself or your business. They probably don’t care.
Instead, get straight into the purpose of your email: The story, and why they should cover it in their publication.
Journalists are time-poor, so they’ll appreciate a nice, succinct message that sells your story in a few words—like this:
Image courtesy of Janet Murray.
As you can see in the example above, the entire story is sold in the first sentence, with a direct question asking if the journalist is interested — rather than just assuming so.
Follow this up with a couple more sentences to give the journalist some additional information about your story, before adding a line spacer and pasting your full press release.
Note: Avoid adding your press releases as attachments. Journalists don’t like opening attachments in fear of viruses or malware, so eliminate that problem by pasting the body of your press release below your pitch.
Second, it’s critical you personalize your pitch.
Did you know that personalized emails are 26% more likely to be opened?
Bear that in mind when you’re pitching news stories, and show some interest in the journalist’s previous work by indicating that you know they’re a good fit based on the topics they cover.
Try to build a relationship with the journalists first, rather than hitting them with a release and expecting instant coverage. Almost 15% of journalists consider this very important:
Image courtesy of Marketing Land.
Sometimes, it’s worth playing the long game by getting to know your target ahead of your pitch. Engage with them on LinkedIn, respond to their tweets, and generally work yourself into their notifications — and their radar.
3. Make your subject line irresistible.
According to research by Fractl, 85% of publishers decide whether to open a pitch email based on the subject line alone.
So, how can you make sure yours gets opened? Try these tips:
- Keep it short and sweet: 75% of publishers prefer subject lines with 10 or fewer words.
- Ensure it’s unique: A powerful subject line should be disruptive, innovative, or offer a human interest angle.
- Make it super-specific: Over half of journalists want descriptive subject lines that are tailored to their previously-covered topics.
- Provide exclusivity: If you’ve got some unique data or research, shout about it! Exclusivity can help to get a journalist’s eyes on your press release.
… And one thing to avoid? Clickbait. It’s really that simple.
4. Send your press release pitch (at the right time).
Press release? Check. Pitch email? Check. Contact details? Check.
… But that doesn’t mean you’re ready to distribute your press release.
You’ll need to think about the day (and time) you hit the “send” button because certain days and times have better success rates than others.
For instance, 61% of journalists prefer to receive press releases in the morning. That’s almost two thirds, so it’s probably worth getting your pitch out early to have the best chance of success.
However, remember that journalists have an average of 300 emails waiting for them in the morning. It might be best to wait an hour or so, and send your release mid-morning for a better chance of your pitch standing out in their inbox.
Additionally, it’s important to consider the day of the week. While modern-day businesses are often active seven days a week, there’s still a traditional lull in pick-up rates when it comes to press release distribution.
So, consider the day you send your release — it might land more coverage if you pitch it midweek, as opposed to sending first thing Monday morning.
According to an analysis of over 100,000 press releases by Ragan, Tuesdays and Wednesdays are the best days to distribute your story. And a further study by Prowly recommends sending on a Thursday, with data suggesting over 26% of press release emails are opened by journalists on this day:
Image courtesy of Prowly.
Both studies indicate that Mondays and Fridays are not as effective, and you should definitely avoid sending your story over the weekend.
However, there’s no one-size-fits-all rule — which is why you should test a few different days and times and see what works best for your industry.
Are you pitching a time-sensitive press release?
You can still send it ahead of time. Just make sure you embargo the information in your release until it’s ready to become public knowledge. You can do this by adding “Embargoed; not to be released before DATE” to the top of your distribution email.
5. Follow-up on your release.
An age-old question: Should you follow up on your press release?
It depends on who you’re asking, but generally, the consensus seems evenly split. Some people believe following up to be a big no-no, while others indicate that it can be fruitful.
If you have a release you’re particularly proud of, it won’t hurt to follow up if you’re struggling to land coverage — provided you’re tactful.
Don’t just spam the journalist’s inbox with the same press release and the same pitch, however. That can get annoying, and ruin your chances of getting your story picked up.
Instead, try slightly tweaking the angle of your pitch. PR expert Carrie Morgan recommends treating a follow-up email as “a fresh pitch transitioning MY news into THEIR NEWS.”
You could also try giving the journalist — however, only 23% of journalists welcome being contacted by phone, so if your target is one of the other three quarters, you may find yourself hearing hundreds of answering machines.
Either way, it could be worth following up, particularly if you’re confident your press release is a newsworthy piece that deserves coverage.
Common Press Release Distribution Mistakes
All set to send your next press release? Hang on a second.
Before you let fly and distribute your story, are you about to make any fatal errors? The last thing you want is to annoy the journalists on your target list. It might leave you with no coverage at all.
Here are some common mistakes people make, and how you can avoid them when you distribute your press release.
1. Your press release is too long.
Your story needs to be short and succinct — especially when journalists spend less than a minute reading a press release.
The easiest way to get your pitch read is to cut the fluff. Ditch anything that a journalist doesn’t need to read, or any sentences that won’t add value to a reader if your release is published in its current form.
Your story should be brief and to the point, but with enough detail to give the journalist the full story.
Consider taking it a step further and breakdown the “meat” of your press release into a handful of easy-to-digest bullet points. The same AdWeek survey says that 53% of journalists prefer to receive the facts in this format.
Remember — every sentence counts.
2. You’re targeting the wrong people or publications.
If you work for a small business looking to get some coverage, you’re more than likely going to get the most success from contacting local publications.
Don’t bother sending your press release to a national or international news outlet — it’s incredibly rare that a local story is important enough to make national news.
You should also double-check that your target journalists are a good fit. Many tend to specialize in one or two interests — emailing a sports reporter about a press release related to health isn’t likely to result in coverage.
Whatever your story, make sure the journalists and publications on your press release distribution list are relevant to your industry and audience.
3. Your story isn’t newsworthy enough.
Before hitting send and distributing your release, take a moment and ask yourself: “Is this story actually newsworthy?”
If your release is too self-promotional, you’ll probably find that journalists won’t want to turn it into a story. Their job isn’t to give you free publicity — they want to share stories that will entertain their audiences.
To avoid your release being sent straight to the trash, ensure it’s got a relevant angle, and includes solid information, statistics, and data.
Any accompanying quotes should bring the story to life, rather than over-selling your own company.
4. You didn’t include your contact info.
Imagine crafting that story, pitching it, and finding a reporter who’s interested and wants to contact you for a quote. But the journalist hits a dead end and is unable to contact you.
Unfortunately, if you don’t include your contact information on the press release, you risk losing out on the chance for increased exposure. The journalist shouldn’t have to go digging to find out how to contact you.
You need to make it easy for journalists to contact you by leaving a phone number and email address in your press release distribution email — ideally ones that are checked and answered frequently.
Should You Use Press Release Distribution Services?
Distributing a press release sounds time-consuming, doesn’t it? If only there was a way to get yours seeded out quickly, at scale.
Fortunately, there is.
If time is tight (and if you’re a small business owner, it usually is), a press release distribution service is your friend. These services allow you to send out your release to relevant journalists, without having to do any of the manual work yourself.
Although the cost of press release distribution might seem off-putting, just remember that time is money. And by letting the experts distribute your news story, you can spend more of your own time doing the things that make a difference to your bottom line.
So, if you fancy taking distribution off your plate, check out these five services that will gladly take the job off your hands.
1. PR Fire
Starting at just £50 (approx. $65 USD), PR Fire syndicates your release to journalists and media personnel in your chosen categories — all within four hours after uploading your content.
Additionally, you’ll get a report a couple of weeks after your campaign to show you how successful it was.
PR Fire also offers the option to have your press release re-written by a professional journalist for an extra £50:
Image courtesy of PR Fire.
Plus, you can have your story promoted on the popular forum Reddit — a great way to get your brand (and your press release) in front of an engaged online community.
PR Fire has landed its customers press coverage in a range of top tier publications, including BuzzFeed, Metro, The Huffington Post, and The Times, so it’s definitely worth checking out.
2. PR Web
PR Web is a tool owned by Cision. Their press release distribution service allows you to upload your press release (along with rich media like images and videos), then distribute the story to journalists and publications in your selected categories.
PR Web also provides you with a comprehensive analytics dashboard, so you can monitor the impact of your campaign and calculate important metrics such as ROI.
The basic option, at a cost of $99, allows you to publish your release on PRWeb.com.
Additionally, there are advanced options that may be worth a try if you have the budget. These range in price from $189 to $389, and include further distribution to media outlets, targeted journalists, and industry influencers:
Image courtesy of PR Web.
3. Response Source Press Release Wire
A popular service for PR professionals, Response Source offers a range of public relations tools, including media databases. And you can also release your news via the Response Source Press Release Wire.
There are several pricing options. If you’re an ad hoc user, you can pay £85 (approx. $110 USD) each time. Or, if you distribute press releases often, consider one of their package options.
With over 20 years of experience, Response Source has built up a thriving network of journalists and publications, so you can benefit from having your news distributed by email to useful contacts.
You’ll also get your own “newsroom”, along with access to analytics such as the number of views your press release received, and to how many recipients it was emailed.
Image courtesy of Response Source.
4. Presswire
Presswire has a live global database, allowing you to send your press release directly to the journalists who are most likely to pick up your story.
Worldwide distribution starts at $400 (or $250 if you only want the story distributed to journalists in the USA), but there are several add-ons you can include to boost your reach.
Key to Presswire’s offering is its advanced analytics platform — a system which tracks each recipient of your release, providing insight on:
- Who opened your press release
- Whether your release was forwarded
- How many times it was read
- How long people spent reading it
These insights can be helpful in allowing you to refine your approach for future press releases.
5. 24-7 Press Release
Using a cloud-based platform, 24-7 Press Release distributes your news to traditional and digital outlets with a user-friendly interface.
The basic “Visibility Boost” package is an ideal starting point for small business owners. Costing just $49, your release will be sent to over 50 premium news sites and published on the service’s RSS feed.
You’ll also receive a report that tells you if your story was picked up.
One thing to note is that the basic option has a two-day turnaround, so if your news is time-sensitive, you’ll need to be prepared in advance. The more advanced packages come with next-day turnaround, which is helpful if you’re in a rush.
Remember to Keep the Relationship Alive
When you need to create a press release, follow the distribution steps in this guide to boost your chances of landing coverage.
But remember — not every press release will get picked up and turned into a news story, so don’t get too disheartened if it takes a while to gain some traction.
Keep tweaking and refining your approach until you see success. Your first piece of coverage could well be the domino that starts the run. A story picked up by one news outlet can soon snowball from publication to publication.
Plus, if your story does get picked up, don’t forget to thank the journalist. It can facilitate a relationship with the journalist which you can then nurture, and might lead to easier coverage down the line.
Ultimately, you can never have too much good press!

The 24 Best Motivational Speeches Our Employees Have Ever Heard
It was halftime during one of my 7th-grade football games. And we were losing 14 – 0. With our knees planted in the grass, my team was quietly huddled, drenched in sweat and defeat. We all knew the game was over.
That’s when our assistant coach bursted through our circle and shattered our pity party, delivering one of the best motivational speeches I’ve heard to this day.
I can’t directly quote him because he said some things that are inappropriate for a blog post (and, in hindsight, probably for a bunch of 13-year-olds too). The point is, he harnessed the power of words to rejuvenate a physically and emotionally drained team. And we came back clawing to win the game.

Just like in sports, being motivated at work is crucial for your performance. This rings especially true when you have a looming deadline, an important meeting, or colleagues or customers depending on your performance.
Think about the last time felt generally unmotivated. What brought you out of that feeling? Sometimes all it takes is a good night’s sleep or seeing the fruits of your labor to fire you up. Still other times, you might listen to someone say something that resonates with you — that alters the way you’ve been looking at a particular task or problem.
Motivational speeches and speakers can come in all different forms, but this is the one thing they have in common — resonance. They hit the right listener at just the right time and in just the right way. Who knows, maybe this article is doing a bit of that for you right now … (I can dream, can’t I?)
To help you stay motivated, no matter what your job throws at you, we decided to compile 24 of the best motivational speeches from business, sports, entertainment, and more. If you want to get fired up for a project, watch these videos.
Trust me, I was wiping my eyes after I saw them. And while the messages vary from speech to speech, they will put you in the optimal frame of mind for tackling and crushing your next big challenge.
(Disclaimer: Some speeches — *cough* Al Pacino *cough* — may contain NSFW language.)
The Best Motivational Speeches of All Time
1. J.K. Rowling: “The Fringe Benefits of Failure, and the Importance of Imagination” (2008)
Theme of Speech: Failure
In J.K. Rowling’s 2008 Harvard commencement speech, the Harry Potter author explored how two phenomena — failure and imagination — can be crucial to success. While failure can help you understand where your true passion lies, and where you should focus your energy moving forward, imagination is what will allow you to empathize with other people so you can use your influence to do good.
We do not need magic to change the world, we carry all the power we need inside ourselves already: we have the power to imagine better.”
2. David Foster Wallace: “This Is Water” (2005)
Theme of Speech: Life and Career
From the opening minutes of David Foster Wallace’s 2005 Kenyon College commencement speech, in which he questions commencement speech conventions, it’s clear that Wallace has some serious wisdom to share. The crux of his speech: Many of us are oblivious to our own close-mindedness. We picture ourselves as the centers of our own, individual universes, instead of seeing the bigger, more interconnected picture.
If you’re automatically sure that you know what reality is and who and what is really important, if you want to operate on your default setting, then you, like me, probably won’t consider possibilities that aren’t annoying and miserable. But if you’ve really learned how to think, how to pay attention, then you’ll know you have other options. It will actually be within your power to experience a crowded, hot, slow, consumer hell-type situation as not only meaningful, but sacred — on fire with the same force that lit the stars: love, fellowship, the mystical oneness of all things deep down.”
3. Simon Sinek: Live2Lead 2016
Theme of Speech: Leadership
Simon Sinek is an author and public speaker, renowned for his talks about leadership in the context of business. In the talk above, he makes a humbling but ultimately inspiring claim: Today’s organizational leaders don’t know what game they’re in. They tend to take credit, whereas they should be taking responsibility. They tend to obsess over the competing product, whereas they should obsess over their own. But, once you accept this onus as a leader, the possibilities Simon lays out for business growth and employee success are sure to fire you up.
The infinite player isn’t playing to be number one … they’re playing to outlast the competition.
4. Fearless Motivation: “It’s Not Easy, But It’s Worth It” (2018)
Theme of Speech: Perseverance
Fearless Motivation is primarily a musical artist, but its library of inspirational messages is hard to ignore lately. The group’s most popular speech is the video above, and it preaches a powerful lesson about staying positive when things all seem to be negative. The final line is as powerful as the quote from the speech below — “Keep going. Your future self is begging you.”
It’s easy to be positive when everything is working out. It’s much harder, much much harder when nothing is working out. But that’s when we need it the most … Everything is worth the prize.”
5. Jim Carrey: Commencement Speech at Maharishi University of Management (2014)
Theme of Speech: Taking Risks
Jim Carrey might make a living as the goofiest comedian around, but in 2014, he combined classic Carrey humor with unforgettable insight at Maharishi University of Management’s graduation ceremony. Jim Carrey opened his speech dishing punchlines, but he eventually opened up about his upbringing and the role fear plays in our lives. You can actually hear the amazement in the students’ reactions in the video above.
“I learned many great lessons from my father — not the least of which is that you can fail at what you don’t want, so you might as well take a chance on doing what you love.”
6. Brené Brown: “The Power of Vulnerability” (2013)
Theme of Speech: Failure
The video above is an animated excerpt from researcher Brené Brown’s speech, “The Power of Vulnerability.” In the speech, Brown explores how our fear of not being good enough (among other fears) drives us to shield ourselves from our own vulnerabilities. The alternative to wearing this emotional suit of armor: Embrace vulnerability through empathizing with others.
Empathy is a choice, and it’s a vulnerable choice. Because in order to connect with you, I have to connect with something in myself that knows that feeling. “
7. Steve Jobs: “How to Live Before You Die” (2005)
Theme of Speech: Life and Career
Considering the YouTube video of Steve Jobs’ 2005 Stanford commencement speech has 24 million views (not counting the 10 million+ additional views from duplicate uploads), it’s likely that you’ve seen this one already. In the speech, Jobs plays on two themes: connecting the dots (anecdote: how taking a calligraphy class helped inspire the design of the Mac) and love & loss (anecdote: how getting fired from Apple helped inspire his greatest innovations). Perhaps the most memorable part his speech comes at the end, when he quotes the (now-famous) lines from the final issue of his favorite publication, The Whole Earth Catalog:
Stay hungry. Stay foolish.”
8. Ellen DeGeneres: Tulane University Commencement Speech (2009)
Theme of Speech: Life and Career
Ellen’s speech, as you might expect, has its humorous moments. But it also explores some of the very personal and tragic episodes in her life that helped push her into comedy in the first place. Two key themes of DeGeneres’speech: overcoming adversity and being true to yourself. ForDeGeneres, that meant pushing onward with her career after her sitcom was canceled in response to her publicly coming out as gay.
Really, when I look back on it, I wouldn’t change a thing. I mean, it was so important for me to lose everything because I found out what the most important thing is … to be true to yourself. Ultimately, that’s what’s gotten me to this place. I don’t live in fear. I’m free. I have no secrets and I know I’ll always be OK, because no matter what, I know who I am.”
9. Sheryl Sandberg: Harvard Business School Class Day Speech (2012)
Theme of Speech: Life and Career
In her speech to the HBS class of 2012, Lean In author and tech executive Sheryl Sandberg deconstructed the idea of the “career as a ladder.” For Sandberg, a career is about finding opportunities where you can make an impact, not about chasing titles and planning out a meticulous path. “If I had mapped out my career when I was sitting where you are, I would have missed my career,” she commented. What’s more, Sandberg eschews the traditional wisdom of keeping emotions out of the workplace. For Sandberg, you need to care not only about what you’re working on, but also who you’re working with.
“If you want to win hearts and minds, you have to lead with your heart as well as your mind. I don’t believe we have a professional self from Mondays through Fridays and a real self for the rest of the time … It is all professional and it is all personal, all at the very same time.”
10. Dan Pink: “The Puzzle of Motivation” (2009)
Theme of Speech: Life and Career
Commissions, bonuses, other incentives … in the business world, these are the things that motivate people, right? According to Dan Pink in his 2009 TED Talk, such extrinsic motivators (a.k.a. “carrots and sticks”) could actually be doing more harm than good. The most recent sociological research suggests that the real key to producing better work is to find intrinsic motivation inside of yourself.
There is a mismatch between what science knows and what business does. And what worries me, as we stand here in the rubble of the economic collapse, is that too many organizations are making their decisions, their policies about talent and people, based on assumptions that are outdated, unexamined, and rooted more in folklore than in science.”
11. Denzel Washington: “Fall Forward” (2011)
Theme of Speech: Failure
In his 2011 UPenn commencement speech, Denzel Washington highlighted three reasons why we need to embrace failure in order to be successful. First, everybody will fail at something at some point, so you better get used to it. Second, if you never fail, take that as a sign that you’re not really trying. And third, at the end of the day, failure will help you figure out what path you want to be on.
Fall forward. Here’s what I mean: Reggie Jackson struck out twenty-six-hundred times in his career — the most in the history of baseball. But you don’t hear about the strikeouts. People remember the home runs. Fall forward. Thomas Edison conducted 1,000 failed experiments. Did you know that? I didn’t know that—because #1,001 was the light bulb. Fall forward. Every failed experiment is one step closer to success.”
12. Elizabeth Gilbert: “Your Elusive Creative Genius” (2009)
Theme of Speech: Life and Career
Following the extraordinary success of her book, Eat, Pray, Love, people began asking author Elizabeth Gilbert the same question over and over and over: How are you going to top that? In her 2009 TED Talk, Gilbert explores that question while also examining how our ideas of genius and creativity have shifted over the generations. While once seen as separate entities or states of being that anyone could tap into, genius and creativity have increasingly become associated with individuals. And according to Gilbert, that shift has been putting more and more pressure on artists, writers, and other creatives to produce great work.
I think that allowing somebody, one mere person to believe that he or she is like, the vessel, you know, like the font and the essence and the source of all divine, creative, unknowable, eternal mystery is just a smidge too much responsibility to put on one fragile, human psyche. It’s like asking somebody to swallow the sun. It just completely warps and distorts egos, and it creates all these unmanageable expectations about performance. And I think the pressure of that has been killing off our artists for the last 500 years.”
13. Charlie Day: Merrimack College Commencement Speech (2014)
Theme of Speech: Taking Risks
Best known for his role in the sitcom It’s Always Sunny in Philadelphia, actor Charlie Day had lots of wisdom to share during the 2014 commencement speech at his alma mater, Merrimack College. Day explained to the audience how college degrees are inherently valueless, since you can’t trade them in for cash. Instead, it’s you, your hard work, and the risks you take that provide real value in life.
You cannot let a fear of failure or a fear of comparison or a fear of judgment stop you from doing the things that will make you great. You cannot succeed without the risk of failure. You cannot have a voice without the risk of criticism. You cannot love without the risk of loss. You must take these risks.”
14. Orlando Scampington: “The Pillars of C.L.A.M.” (2015)
Theme of Speech: Life and Career
Sometimes humor is the best motivator. So here’s an INBOUND Bold Talk from self-proclaimed author, thought leader, dreamer, cat owner, visionary, and “believer in unlimited human potential,” Orlando Scampington. As you’ll soon realize upon reading the quote below, it’s hard to explain what his speech is actually about — so I think it’s better that you just dive in and enjoy.
“Culture is the bitter drunken coachmen lashing motivation into the ungrateful workhorses, so they drag the wagon of growth down the road of success. I think that’s a very apt analogy.”
15. Vera Jones: “But the Blind Can Lead the Blind…” (2016)
Theme of Speech: Perseverance
Last year at INBOUND, Vera Jones told a moving story about the life lessons she’s learned from raising her blind son. She explains how having faith in your future and letting it lead you toward your true purpose will help you overcome blinding obstacles. She also discusses how following your passion and trusting your vision develops empathy, which is a critical leadership skill.
“Passionately play your position no matter how bad things get. You are significant. Why we are here is not for our own glory. Ultimately, we’re here to lead and serve everybody else. By doing that, we encourage others to do the same.”
16. Jim Valvano: ESPY Speech (1993)
Theme of Speech: Life and Career
Less than two months before he lost his battle to cancer, Jim Valvano delivered one of the most impactful and timeless speeches about living life to the fullest. My words can’t do it justice, so be prepared for some laughter, tears, and thought.
“I just got one last thing; I urge all of you, all of you, to enjoy your life, the precious moments you have. To spend each day with some laughter and some thought, to get your emotions going. To be enthusiastic every day, and Ralph Waldo Emerson said, “Nothing great could be accomplished without enthusiasm,” to keep your dreams alive in spite of problems whatever you have. The ability to be able to work hard for your dreams to come true, to become a reality.”
17. Kal Penn: DePauw University Commencement Speech (2014)
Theme of Speech: Life and Career
In 2014, Kal Penn delivered an uplifting speech that DePauw University will never forget. He advised graduates to strive for success but to not let it loosen their grip on the things that actually matter, like staying connected with loved ones, being adventurous, and acting selflessly. He also comforted millennials everywhere, convincing them that their futures are full of potential and promise because their generation’s identity is rooted in innovation.
“Opportunity is all around us. You’re graduating at a time where youth unemployment is high. And yet your peers are refusing to sit idly by. You’re the most active, service-driven generation, the most imaginative, the most tech-savvy. You’re creating opportunities, inventing gadgets, placing an emphasis on social responsibility over greed. So stop worrying so much. Why are you worried?”
Famous Short Speeches With Inspirational Takeaways
18. Charles Dutton: Speech from Rudy (1993)
In the film Rudy, Sean Astin’s character, Rudy Ruettiger, quits the Notre Dame football team because he has to watch one of his last games from the stands. After two years of grueling practices and never once being apart of the team on the sidelines, he’s done dealing with the humiliation. But his friend Fortune — played by Charles Dutton — flips the script on him. He shows Rudy that he shouldn’t be humiliated. He should be proud because he’s proven to everyone that his perseverance and heart can carry him through any challenge. He just needs to realize that himself. And the only way he can do that is if he stays on the team for the rest of the season.
“You’re 5 feet nothin’, a 100 and nothin’, and you got hardly a speck of athletic ability. And you hung in with the best college football team in the land for two years. And you’re also gonna walk outta here with a degree from the University of Notre Dame. In this lifetime, you don’t have to prove nothin’ to nobody – except yourself. And after what you’ve gone through, if you haven’t done that by now, it ain’t gonna never happen. Now go on back.”
19. William Wallace: Speech From the Battle of Stirling Bridge (1297)
OK, I’ll admit it: I couldn’t find a recording of the actual speech Scottish freedom fighter William Wallace gave at the Battle of Stirling Bridge in 1297 (the historian I spoke with said something about “nonexistent technology” and me “being an idiot,” but I digress). Historical accuracy aside, there’s no denying that Mel Gibson’s version of the speech from the 1995 film Braveheart can help get you pumped up.
“Aye, fight and you may die. Run and you’ll live — at least a while. And dying in your beds many years from now, would you be willing to trade all the days from this day to that for one chance, just one chance to come back here and tell our enemies that they may take our lives, but they’ll never take our freedom!!!”
20. Al Pacino: “Inch by Inch” (1999)
Yes, this speech is from a football movie (Any Given Sunday), but trust me: This isn’t your stereotypical rah-rah-go-get-’em sports speech. It’s deeper than that. It’s about life, and loss, and … gosh darn it just listen to Al Pacino, he’s pouring his soul out!
Either we heal as a team or we’re gonna crumble, inch by inch, play by play, till we’re finished. We’re in hell right now, gentlemen, believe me. And we can stay here and get the $&#@ kicked out of us, or we can fight our way back into the light. We can climb out of hell, one inch at a time.”
21. Sylvester Stallone: Speech from Rocky Balboa (2006)
I had to put this one next since it plays along the same themes as Denzel Washington’s UPenn speech. In the scene above, from the 2006 film Rocky Balboa, the title character (played by Sylvester Stallone) is having a heart-to-heart with his son. The advice he gives him: Don’t let your failures or the adversity you face slow you down. Keep. Moving. Forward.
Let me tell you something you already know. The world ain’t all sunshine and rainbows. It’s a very mean and nasty place, and I don’t care how tough you are, it will beat you to your knees and keep you there permanently if you let it. You, me, or nobody is gonna hit as hard as life. But it ain’t about how hard you hit. It’s about how hard you can get hit and keep moving forward. How much you can take and keep moving forward. That’s how winning is done!”
22. Frank Oz/Yoda: Speech from The Empire Strikes Back (1980)
This speech fromThe Empire Strikes Back felt like a natural follow-up to Charlie Day’s speech. In the scene above, Yoda — voiced by Frank Oz — is teaching Luke the ways of the force. One of his key teachings: Whether or not something can or can’t be done (e.g., lifting an X-Wing out of a swamp) is all in your head. So instead of doubting yourself, believe in yourself.
“Do, or do not. There is no try.”
23. Will Smith: Speech from The Pursuit of Happyness (2006)
Here’s another speech from the big screen, this time from the 2006 film The Pursuit of Happyness. In the scene above, Will Smith’s character explains to his son why he shouldn’t pursue basketball (because he’ll end up being “below average”) before having a major change of heart.
Don’t ever let somebody tell you … you can’t do something. Not even me. All right? You got a dream. You gotta protect it. People can’t do something themselves, they want to tell you can’t do it. If you want something, go get it. Period.”
24. Kurt Russell: “This is Your Time” (2004)
The Miracle on Ice is still considered the biggest upset in Olympic hockey history. And for good reason. The Soviet Union won six of the last seven Olympic gold medals, and the U.S. team consisted only of amateur players. It was obvious the Soviets were better. But, in the movie Miracle, which told the incredible story of the 1980 U.S. Olympic Hockey Team, Kurt Russell’s character — Coach Herb Brooks — knew that this game was different. The U.S. was better than the Soviets that day. And his speech conveyed such a strong belief in his team that they pulled off one of the greatest sports moments of the 20th century.
“If we played ’em ten times, they might win nine. But not this game… Not tonight. Tonight, we skate with them. Tonight, we stay with them. And we shut them down because we can! Tonight, WE are the greatest hockey team in the world. You were born to be hockey players, every one of you. And you were meant to be here tonight. This is your time.”
Want more? Read How to Motivate Yourself When You’re Absolutely Exhausted.

The Ultimate Guide to Nonprofit Marketing in 2019
Every marketing team is challenged to do more with less — especially nonprofit organizations. Often times, resources are tight, and teams are small. Sound like your organization?
We want to help. That’s why we created this nonprofit marketing guide. Your organization might not operate for profit, but it can still value from the traffic, funds, and awareness marketing brings in.
Bookmark this guide for later and use the chapter links below to jump around to sections of interest.
Inbound Marketing for Nonprofits
Your nonprofit organization likely takes up all of your time, and building a marketing plan might seem like an added responsibility that’s just not worth it.
We’re here to convince you otherwise. Inbound marketing is all about creating valuable experiences that have a positive impact on people and your business.
Inbound marketing for nonprofits can help you attract new supporters for your cause, connect to valuable donors, engage your constituents, and inspire your community.
Here’s how else nonprofit marketing can help.
Nonprofit marketing raises awareness.
Your nonprofit organization is a brand, therefore you need to raise awareness just like any other business or company. Marketing raises awareness of your brand, and brand awareness spreads the word about your organization and your overall cause.
Nonprofit marketing raises funds.
Nonprofit marketing and nonprofit fundraising go hand-in-hand. The more people that know about your organization, the more potential funding you can bring in.
Nonprofit marketing drives donor memberships and recurring donations.
Many nonprofit organizations offer donation memberships and monthly giving programs, like this one from Charity: Water. These programs are valuable because your organization doesn’t have to fundraise so actively and so often, and they can actually help you raise more money — the average monthly online donation is $52 ($624 per year) compared to the average one-time gift of $128.
Marketing your nonprofit gets your cause in front of fresh eyes and informs your donors about how they can consistently contribute.
Nonprofit marketing recruits volunteers.
Nonprofit marketing isn’t just for funding — it also drives manpower (and woman-power!) to your organization. Regardless of industry or size, all nonprofits benefit from volunteers, and marketing your organization can help bring in new hands.
Moreover, volunteers are twice as likely to donate as non-volunteers.
Nonprofit marketing promotes your services.
Awareness, funding, and volunteers are integral to your nonprofit, but what about the purpose of your organization? What about the people, animals, or cause you’re helping? Marketing can help with that, too.
The more people who know about your nonprofit organization, the more people you can help.
These are just a handful of reasons you should invest in marketing (particularly inbound marketing!) for your nonprofit. Now, let’s discuss how to build a nonprofit marketing plan so you can start bringing in new funds, volunteers, and constituents.
Crafting a nonprofit marketing plan might not be too different than a for-profit marketing plan, but it’s debatably more important. Increasing awareness and constituent engagement without exhausting your hardworking team requires approaching your marketing systematically.
That’s where a nonprofit marketing plan comes into play. Putting systems in place to produce and distribute your marketing content allows you to focus on operating and scaling your nonprofit.
Here’s how to create a successful nonprofit marketing plan.
1. Define Your Marketing Goals
Your nonprofit marketing plan exists to transform your organization’s mission and big-picture objectives into strategic, actionable goals.
For example, let’s say one of your objectives was to protect the welfare of animals in your community (like one of my favorite local rescues, ALIVE Chicago). I’d ask you to brainstorm three to five marketing ideas to advance that objective.
Some ways you could use marketing to advance that objective include:
- Create and publish content that educates your community on the state of animal welfare.
- Post on social media about your organization and the animals you have for adoption.
- Send a weekly email newsletter sharing your content, adoptable animals, and volunteer needs.
- Host a quarterly event with educational resources, foster training, and adoption opportunities.
Next, I’d ask you to turn these ideas into SMART goals. Let’s use idea number one as an example:
| Specific |
Educate the community on the state of animal welfare by producing one blog post per week. |
| Measurable |
Increase traffic by 15%. |
| Attainable |
Our blog traffic increased by 10% last year when we upped our publishing frequency to twice a month. A 15% boost in traffic with a 100% increase in production seems attainable. |
| Relevant |
An increase in blog traffic will boost awareness of our organization, educate the community, and alert more people of our adoption opportunities — thus, saving more animals and bringing in more funding. |
| Timely |
We will start producing one post per week and the start of next month. |
SMART Goal: By the start of next month, our blog will see a 15% boost in traffic by increasing our content production from two posts per month to one post per week. This increase will boost awareness of our organization, educate the community, and alert more people of our adoption opportunities — thus, saving more animals and bringing in more funding.
See how I turned the organizational mission into a marketing objective, and then into a SMART goal? SMART goals are especially important when it comes time to analyze and measure your marketing performance (which we talk about later), so be sure to finish this step before moving forward in your nonprofit marketing plan.
2. Understand Your Audience(s)
Nonprofit marketing is different from other types of marketing because your organization is likely targeting multiple groups: constituents, customers, volunteers, and donors.
It’s imperative to define and understand each of these audiences (a.k.a. buyer personas) because your marketing will differ based on who you’re talking to. (We’ll get into key messaging next.)
For example, following our animal shelter example from above, an email targeting donors will have different messaging than an email calling for volunteers.
One easy way to organize your different audiences is using a CRM to segment the different groups. By separating contacts with tags and lists, you can easily send marketing messages to the appropriate groups.
3. Craft Your Key Messages
Key messages encompass the information you want your audiences to hear, remember, and share about your nonprofit organization. Crafting these before you employ your marketing is important for a few reasons:
- Key messages keep your organization aligned. No matter who’s doing the marketing, you can be confident the same thing is being said and promoted.
- Key messages simplify your marketing. With these created ahead of time, you already know what you’re going to say in your marketing messaging.
- Key messages help organize your different audiences (as we talked about above). As a nonprofit organization, you’re likely talking to donors, volunteers, constituents, and your community … more personas than a typical for-profit business. Developing key messages for each of your audiences informs your team and your marketing to make sure you’re targeting the right groups.
Continuing with our animal shelter example, here’s a look at how you can craft a key message for different audiences.
Key message: We protect the welfare of animals in our community through education, adoption and fostering, and animal advocacy.
- For adoption customers/constituents: By adopting or fostering, or by alerting us of animals in need, you can help us protect the welfare of animals in our community.
- For volunteers: We protect the welfare of animals through round-the-clock animal care and advocacy.
- For donors: You can help us protect the welfare of animals by donating to support animal care, advocacy, and adoption promotion.
All of these key messages have the same purpose and undertone, but they vary slightly depending on your audience. Together with your nonprofit organization’s mission, vision, and goals, these messages will help effectively communicate and market your organization’s needs and purpose.
4. Choose, Plan, and Create Your Marketing Strategies
Many marketers jump right to this step — creating and publishing various marketing tactics. Marketing encompasses much more than an advertisement, blog post, or event. In order to execute successfully, you must complete all the steps prior to this.
Now that you’ve established your goals (what you want), your key messages (what you’re going to say), and your audience (who you’re going to say it to), you can determine your marketing tactics (how you’re going to say it).
Marketing tactics refer to channels like email marketing, social media, events, and more. We’ve dedicated an entire section to these marketing strategies — read about them in detail below.
Regardless of which tactic you choose, be sure to conduct thorough planning before and as you execute on it. Here are some questions to ask yourself as you prepare:
- What will you do with this marketing tactic?
- When will these marketing activities take place?
- Why is this tactic important?
- Who will be responsible for these activities?
- How much do we plan to spend?
- How does this tie to our organization’s marketing goals?
Tactical planning is an integral part of your overall nonprofit marketing plan. How you approach your marketing strategies and how they impact your organization is just as important as how you execute on them.
Before you hit the ground running on any of these strategies, be sure your team has a solid game plan and a full understanding of it.
5. Analyze Your Marketing Performance
Your marketing probably won’t perform perfectly from the get-go. That’s OK. Routine reporting and analysis help you figure out what’s working and what you need to change.
As you choose and establish your marketing channels, pay attention to the measurable performance indicators for each. Here’s a list of examples from our list of marketing strategies below:
| Marketing Strategy | Performance Indicator |
| Email marketing | Email opens |
| Event marketing | Ticket sales |
| Video marketing | Video views |
| Social media | Shares and comments |
| Website | Page views |
| Public speaking | Referrals |
| Content marketing | Subscriptions |
Remember the goals you defined in step one? The point of measuring your marketing performance is to stay aligned with those goals.
You can track these performance indicators using tools like Google Analytics, HubSpot, and the analytics tools built into Facebook, Twitter, and other social media sites.
If you know what you want to measure before you start marketing your nonprofit, you’ll know exactly what to look for — and how to determine success and impact — when your marketing is in play.
You’ve created your nonprofit marketing plan. Now, let’s talk about how to execute that plan with actionable marketing strategies.
Many of these nonprofit marketing strategies will overlap, like sharing your blog content on social media or releasing an event invite over email. These methods can and should be used in tandem, but we recommend introducing each strategy slowly so your team doesn’t overwhelm itself.
In fact, we recognize that your nonprofit is likely operating with a small (but agile!) marketing team. For this reason, throughout these sections, we’ll recommend tips for doing more with less. Ultimately, though, don’t hesitate to outsource your nonprofit marketing where needed.
Nonprofit Email Marketing
You might be using email sporadically to call for volunteers or confirm an online donation, but that’s not enough. Email marketing is a highly effective marketing resource, especially for nonprofit organizations. Why? It’s personal and powerful.
Here are a few ways to leverage email marketing to reach all of your audiences:
- Send a weekly newsletter with your newest content, updates about your organization, industry data, and volunteer needs.
- Send monthly emails with donation needs and opportunities.
- Set up an email sequence for new subscribers thanking them for joining and educating them on your organization.
- Set up an email sequence for new donors thanking them for their contribution and sharing how else they can support your organization.
Also, don’t forget to put information on your website about how to subscribe to your email list. Nonprofit organization Acumen does a great job of this by putting subscription opportunities on their homepage and in their main menu.
👉🏼Nonprofit marketing tip: Automate as much as possible. Email marketing automation (like HubSpot) saves precious time and energy for your team and can be the key to growing your email list, donations, and memberships. You can also automate an email sequence triggered by website visitor behavior indicating a high level of interest, such as downloading educational content.
Nonprofit Event Marketing
Event marketing is one of the most effective (and enjoyable!) ways to grow awareness of your organization, connect with your community, raise funds, and garner support for your cause.
PAWS, which stands for Pets are Worth Saving, is another local animal rescue that I’m a fan of. They hold a PAWS 5K race every summer to raise awareness and funding for the organization.
This type of event impactful for multiple reasons:
- It inspires competition and physical activity. Runners raise money for the organization and participate in the run.
- It brings people in the community together to celebrate the organization and bring awareness to the PAWS cause.
- It provides PAWS a channel to promote their services and adoptable pets.
- It’s fun to attend and be a part of! Many people go to the event to support runners, play with dogs, and simply be a part of the fun — all while supporting and sharing PAWS.
From fundraisers to auctions to competitions, there are many different kinds of events you can organize to market your nonprofit organization.
Nonprofit Video Marketing
Whether they’re consuming content for work, school, or fun, people prefer video content. As a nonprofit organization, video marketing is a surefire way to garner interest and support from all of your audiences.
Here are a few reasons that video can help you market your nonprofit:
- Video is visual. We process visual content 60,000 times faster than written content. We also remember more content, longer.
- Video is personal. It inspires empathy and emotions, which can’t be said about other types of marketing.
- Video is educational. Many organizations need to educate their communities on their causes in order to garner attention and funding. Video can help you do that.
- Video is shareable. Over 700 YouTube videos are shared on Twitter every minute. Consumers love sharing videos, especially those that inspire and resonate with them.
- Video is interesting. Viewers spend 100% more time on pages with videos on them. Keep your visitors, followers, and supporters engaged and interested with video.
The Girl Effect, a nonprofit that works to empower girls worldwide, is a great example of video marketing. The organization’s homepage is a video, which captures visitors’ attention right away. Moreover, when you click “See more,” the site opens an informative video telling you all about The Girl Effect.
Nonprofit Social Media Marketing
Social media is a highly popular marketing strategy among nonprofits. Not only is it free, but it provides an avenue for organizations to show their brand personalities and engage with their followers and supporters.
Here are some ways to use social media for your nonprofit marketing, as inspired by a HubSpot study of 9,000 nonprofits:
- Share news about your organization and cause
- Boost brand awareness and recognition
- Fundraise
- Recruit volunteers and employees
- Recognize donors, employees, and volunteers
Don’t forget to use the key messaging you crafted in your nonprofit marketing plan to keep your social media posts consistent and targeted. Also, make the most of each platform to promote your organization, such as the Donate button on Facebook.
HubSpot customer FIRST, which stands for For Inspiration and Recognition of Science and Technology, is a nonprofit organization that works to advance STEM (science, technology, engineering, and math) education among children.
FIRST makes use of social media in many different ways, such as using Facebook to post videos, news, fundraisers, and reviews — as well as making use of the Donate button. The organization has amassed almost 100,000 followers.
👉🏼Nonprofit marketing tip: Curate content from volunteers, customers, supporters, event attendees, and donors. Implementing a user-generated content (UGC) campaign not only lessens your workload, but it also acts as strong social proof. To enact your UGC campaign, put out a call for constituent stories, images, and videos. Create a hashtag that people can use to alert you of new UGC.
Also, let curation tools work for you. Use Google Alerts and social monitoring tools to alert you when your organization, hashtags, or relevant topics or keywords are mentioned. This provides opportunities to source UGC, get inspiration for new topic ideas, and participate in relevant conversations.
Nonprofit Website
Every nonprofit organization should have a website. A website serves as a digital home base for your organization and includes critical information — what you stand for and how visitors can participate and help.
Your website also houses important assets like your blog, social media streams, event information, videos, and more … basically the rest of your marketing strategies. Lastly, your website serves as a way to intrigue, inspire, and engage your audiences.
Nonprofit organization (and HubSpot customer) American Nursing Association (ANA) is an example of an organization with an outstanding nonprofit website. The site clarifies the ANA mission, shares news and educational content, and informs visitors how to get involved through memberships, events, certifications, or donations.

Nonprofit Public Speaking
It’s said that people buy into other people, not products. The same can be said about nonprofit organizations. If consumers believe in the people behind your organization, they’re likely to buy in your cause and donate money or time.
One of the best ways for consumers to get to know your leadership team, not to mention spread the word about your cause and organization, is public speaking. Whether you speak at a local event of 100 people or a multi-day conference with thousands, the impact is the same: telling a powerful story to real people who may not yet know about your cause.
charity:water founder Scott Harrison spoke at INBOUND18. While he shared some about the conception and organization of the nonprofit, he mostly talked about the people that his organization helps — and how the audience can support the mission. Harrison not only moved the audience of thousands but also effectively marketed the charity:water purpose and brand.
Nonprofit Content Marketing
Content marketing and blogging are valuable marketing assets for any nonprofit organization. Here’s why:
- Content educates your audiences about your mission, cause, and industry news and trends.
- Content (and SEO) bring in new visitors, subscribers, donors, and leads.
- Content is shareable and serves as free PR among your audiences.
- Content can be repurposed and made into different types of media, saving your marketing team precious time and energy.
Creating a nonprofit marketing blog isn’t always easy. Teams are short-staffed, budgets are low, and time is precious. Thankfully, there are lots of ways around those blogging challenges, such as sourcing story ideas from volunteers, donors, and customers as well as implementing an editorial calendar so you can plan ahead.
One of my very favorite nonprofit organizations is called Blurt Foundation, a UK-based organization that exists to increase awareness and understanding of depression and support those who struggle with it. There’s a lot of misconception and misunderstanding around depression, so Blurt Foundation uses their blog content and other content resources to educate constituents and supporters. They also incorporate these content assets into their emails, social media posts, and online store.
👉🏼Nonprofit marketing tip: Save time and resources by repurposing your content. Content is an appreciating asset that you can reuse and re-promote over and over. Repurposing content to create new marketing assets costs far less than creating entirely new content.
Outline all the ways you could repurpose the content you produce. For example, you could create the following list for your blog content:
- Short version for use in emails or newsletters with link back to full post
- Group with related posts for report
- Two to three visuals images to share on social
- Infographic with post information
- Reaction piece to original post
Since you’re not going to promote and distribute each piece of repurposed content immediately, your content pipeline is never empty.
Check out HubSpot’s free nonprofit content today.
Strengthen Your Marketing, Promote Your Cause
Raise your hand if your organization has to constantly do more with less. 👋🏼
If that sounds like your organization, we recommend you use this guide to build a nonprofit marketing plan ASAP. Your organization might not operate for profit, but it can still value from the traffic, funds, and awareness that systematic marketing brings in.
And not only will these activities and strategies help promote your organization, but they’ll take a valuable load off the backs of your team and volunteers — freeing them up to dedicate more time to your cause and constituents.