
Welcome to My Blog
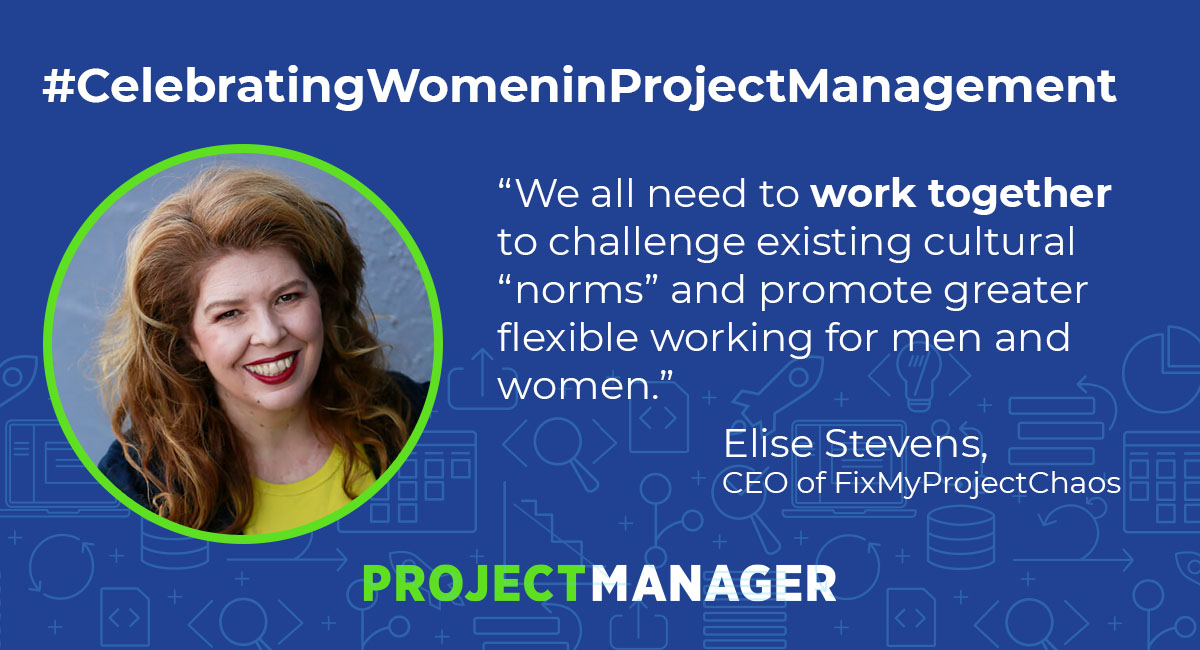
Celebrating Women in Project Management
What Is Semi-Structured Data?
To consider what semi-structured data is, let’s start with an analogy — interviewing.
Let’s say you’re conducting a semi-structured interview. This, as the name implies, falls somewhere in-between a structured and unstructured interview.
For context, a structured interview is one in which the questions being asked, as well as the order in which they are asked, is pre-determined by your HR team and consistent for each candidate. An unstructured interview, on the other hand, is one in which the questions, and the order in which they are asked, is up to the discretion of the interviewer — and could be entirely different for each candidate.
When you consider these two extremes, you can begin to see the benefits of semi-structured interviews, which are fairly consistent and quantitative (like a structured interview), but still provide the interviewer with a window for building rapport, and asking follow-up questions.
Semi-structured data is similar in nature to a semi-structured interview — it’s not as messy and uncontrolled as unstructured data, but not as rigid and readily quantifiable as structured data.

What Is Semi Structured Data
Semi-structured data is information that does not reside in a relational database or any other data table, but nonetheless has some organizational properties to make it easier to analyze, such as semantic tags. A good example of semi-structured data is HTML code, which doesn’t restrict the amount of information you want to collect in a document, but still enforces hierarchy via semantic elements.
Here, we’re going to explore the difference between structured, semi-structured, and unstructured data to ensure you have a good understanding of the terms.
Structured, Semi-Structured, and Unstructured Data
Structured data is known as quantitative data, and is objective facts and numbers that analytics software can collect — this type of data is easy to export, store, and organize in a database such as Excel or SQL. Structured data is valuable because you can gain insights into overarching trends by running the data through data analysis methods, such as regression analysis and pivot tables.
Here’s an example of structured data in an excel sheet:

Alternatively, semi-structured data does not conform to relational databases such as Excel or SQL, but nonetheless contains some level of organization through semantic elements like tags. For instance, consider HTML, which does not restrict the amount of information you can collect in a document, but enforces a certain hierarchy:
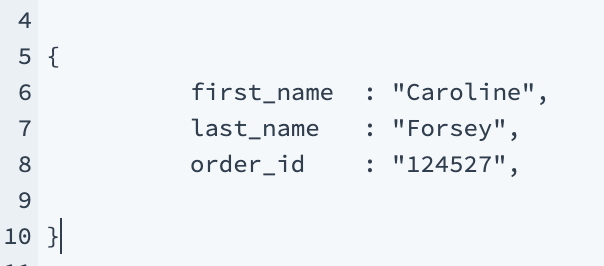
This is a good example of semi-structured data. As you can see, HTML is organized through code, but it’s not easily extractable into a database, and you can’t use traditional data analytics methods to gain insights.
Finally, unstructured data — otherwise known as qualitative data. When it comes to marketing, unstructured data is any opinion or comment you might collect about your brand. While what your consumers are saying is undeniably important, you can’t easily extract meaningful analytical data from those messages.
An example of unstructured data includes email responses, like this one:

Take a look at Unstructured Data Vs. Structured Data: A 3-Minute Rundown for more clarification on structured vs. unstructured data.
Semi Structured Data Examples
- CSV, XML and JSON documents
- NoSQL databases
- HTML
- Electronic data interchange (EDI)
- RDF

Is Facebook Organic Marketing Dead?
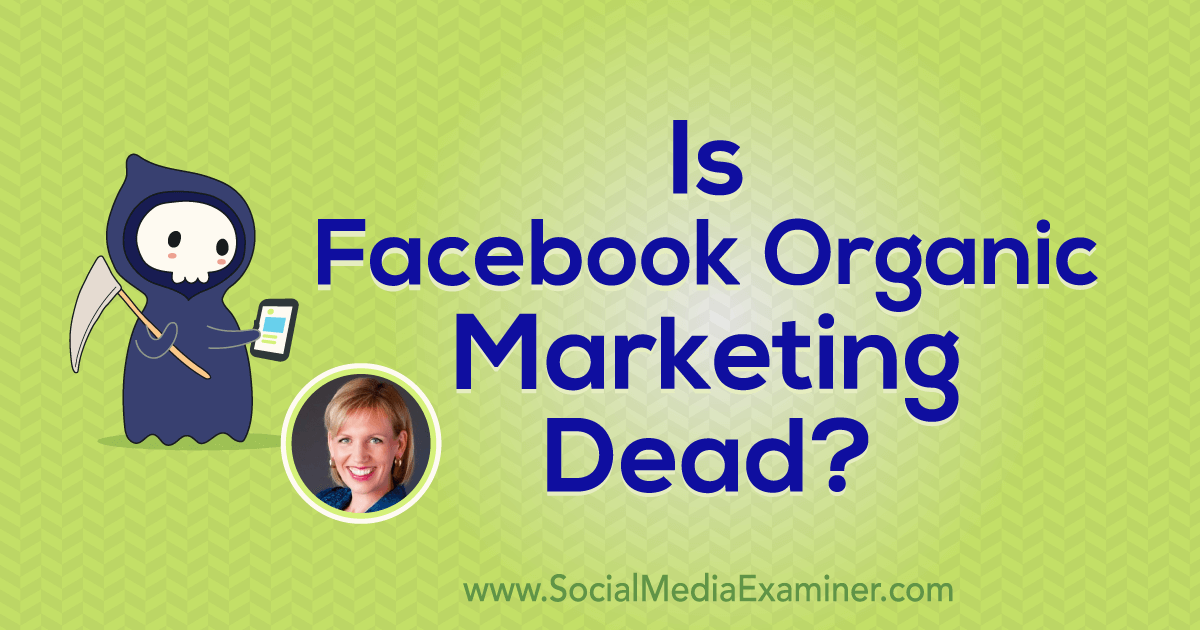
Have recent changes to Facebook impacted your marketing? Wondering what you should and shouldn’t be doing with your organic Facebook marketing? To explore Facebook organic marketing, I interview Mari Smith. Mari is a consultant for Facebook, and the leading expert on Facebook marketing. She’s also the author of The New Relationship Marketing: How to Build […]
The post Is Facebook Organic Marketing Dead? appeared first on Social Media Marketing | Social Media Examiner.
from Social Media Marketing | Social Media Examiner https://ift.tt/2V2d4GB
via socialmediaexaminer
The Beginner’s Guide to Editing YouTube Videos
As a video marketer, editing might be the most important part of post-production. If you can’t seamlessly weave your shots together or get your cut to hit the right frame, your video will seem unpolished and disengage your viewers.
That said, if you’re operating on a shoestring budget, you might not be able to afford video editing software. So what’s a video marketer to do without editing software? Fortunately, YouTube offers a web-based video editor that is completely free and accessible through its platform.
YouTube’s video editor is an extremely basic editing tool, but it can still let you trim clips out of any part of your video, so read on to learn how to chop up your videos right in the video platform.
How to Use YouTube’s Video Editor
1. Sign in to YouTube Studio
2. On the left side bar, click “Videos”

3. In “Uploads”, click the thumbnail of the video you want to edit.
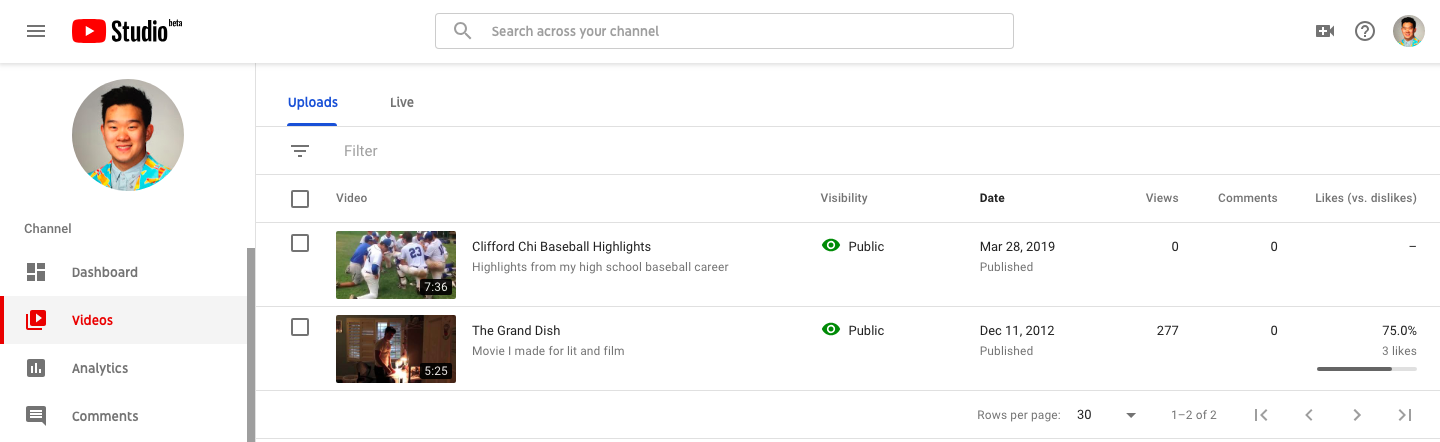 4. In the left sidebar, click “Editor”.

5. Trim the beginning or end of your video.
If you want to trim the beginning or end of your video, select “Trim”, which is right next to your video’s timer and right above your timeline panel.

Next, you’ll see a blue and white line on the sides of your timeline panel. Drag them to chop off parts of the beginning or end of your rough cut that you don’t want to include in your final version. Click “Preview” to view your edited video, and if it looks good, press “Save”.

6. Trim clips out of the middle of your video.
If you want to trim a certain clip out of the middle of your video, select “Trim”. Next,in your timeline panel, click the beginning of the clip that you’d like to trim out and press “Split”

Then, in your timeline panel, click the end of the clip that you’d like to trim out and press “Split” again.

Finally, click on the blue line at either the beginning or end of your clip and drag it to the other side to trim it out of your video. Click “Preview” to view your edited video, and if it looks good, press “Save”.

7. Add an End Screen to your video.
If you want to give your viewers the option to watch a related video, playlist, or subscribe to your channel at the end of your video, click “ADD AN END SCREEN” in your timeline panel.

You can either create an End Screen from scratch or choose from five End Screen templates.


7 Surefire Ways to Capture Email Leads in 2019 [+ Tools]
No matter what industry you’re in, email list building is still an important and high impact marketing activity.
Though you may see the occasional article proclaiming “email marketing is dead,” you can safely continue your campaigns, and know that “the money is in the list” (as they say).
Now, there are many ways to build an email list – tactics and tools beyond simple sidebar lead magnets and popup forms.
This article will cover 7 ways to capture email leads, and we’ll also outline 7 lead capture tools to help you do it.
7 Email Lead Capture Strategies in 2019
- Ask, “what’s in it for me?”
- Target the right segments of your audience
- Target your audience at the correct time
- Build a proper lead magnet (or several)
- Reduce friction where possible
- Match the intent of a blog post with the correct offer
- Choose the best lead capture tools for the job
1. Ask, “what’s in it for me?”
While every company in every industry may have a different tactical implementation to capture email leads, at the core of every strategy is this formula:
The value of your offer — the cost of giving you their email address = the probability of conversion
In other words, you need to make sure your offer is worth giving up in exchange for an email address (and for whatever information you’re asking). “What’s in it for me,” is such an underrated question in marketing.
In some cases, the value exchange is extremely straightforward. Take, for example, WaitButWhy. The blog’s author, Tim Urban, writes an incredibly comprehensive and interesting article (more like a book) every few months. The posts are amazing. The quality is unquestionable. So it’s enough of a benefit to simply be notified when these works of art are published:
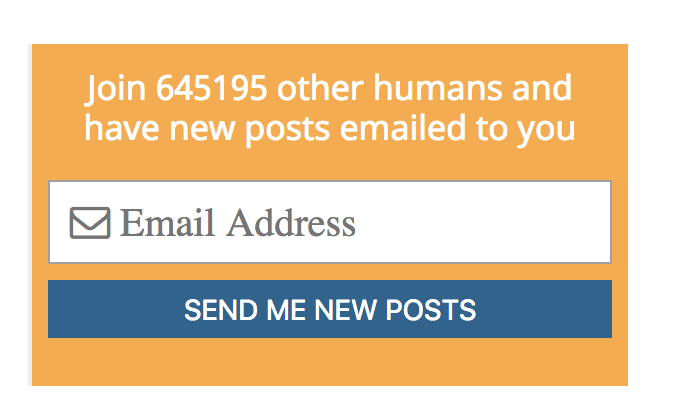
However, most business blogs can’t compete on that standard (it’s wildly time consuming and expensive to produce content like that).
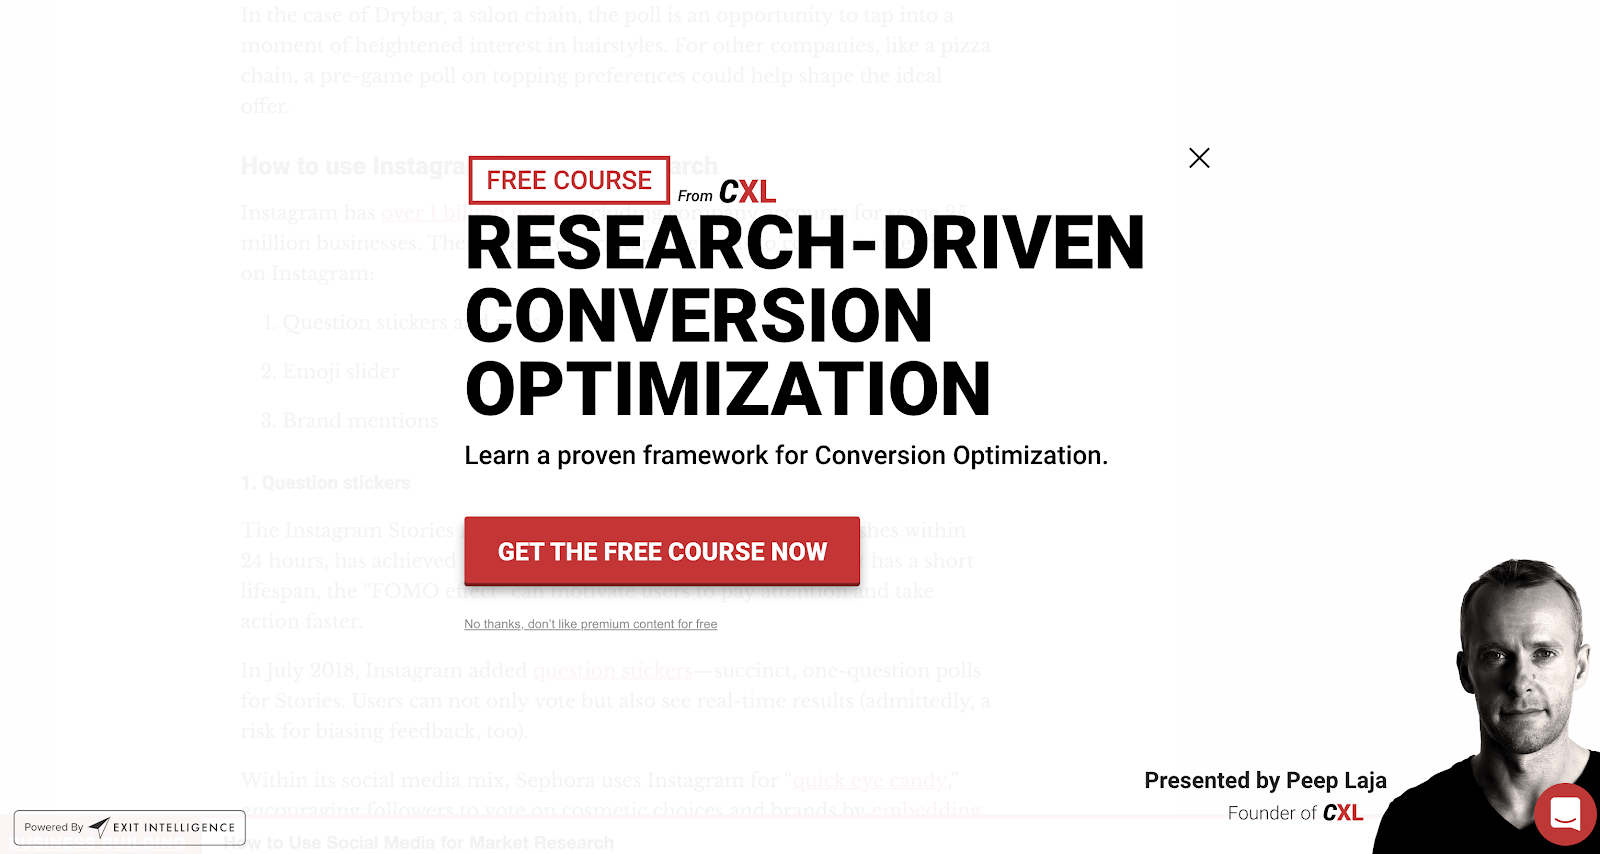
Therefore, most of us rely on “lead magnets” – exchanges of value for information. These are things like ebooks, free email courses, webinars, etc. Essentially, it’s a piece of premium content you can use to entice someone to sign up for your list.
Here’s a good example of a lead magnet from ConversionXL:
Or here’s an ecommerce-focused example from J Crew:

Both of these examples are great for their appropriate contexts. You can imagine the clear value given by offering a discount on a visitor’s first purchase in the case of J Crew, and with ConversionXL, that offer appeared on a blog post about conversion rate optimization. The value alignment is obvious.
2. Target the right segments of your audience
When first starting out, it’s probably okay to have one universal lead magnet or email subscription form for all of your visitors. This is particularly true if your traffic numbers are small and your visitors are relatively homogenous.
However, when you scale your content program and have many different articles with varying levels of intent and context, it becomes imperative to think about who you’re targeting.
For instance, our J Crew example above targets first time visitors, which makes a lot more sense than giving a 15% discount to a repeat buyer who was going to buy anyway.
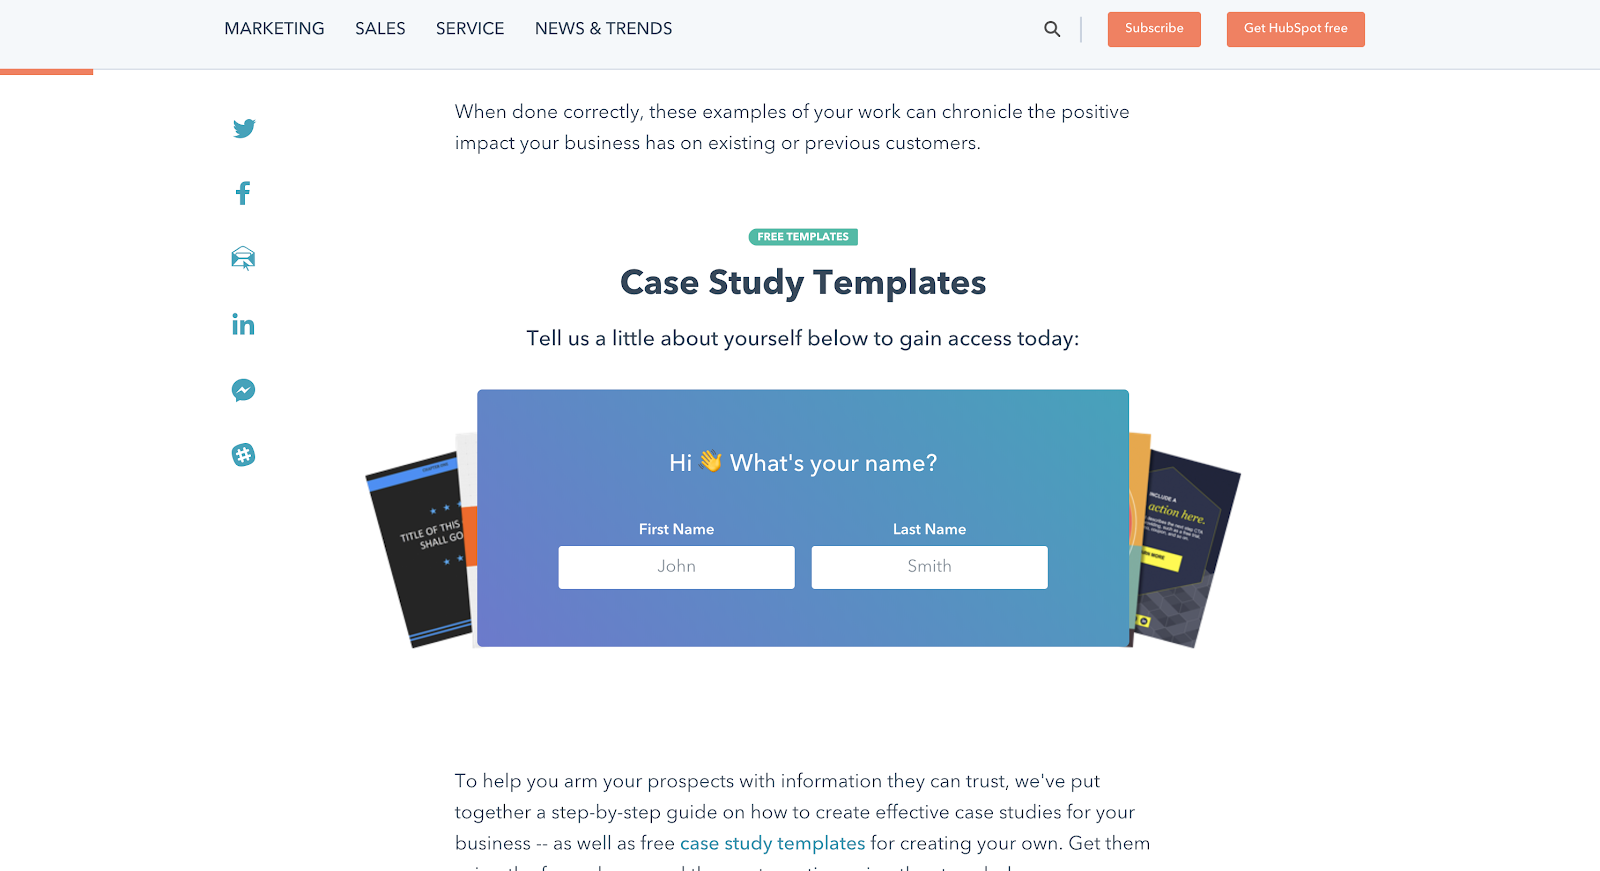
Even simple, you can target visitors by which blog post they’re reading. If someone is reading a post on, say, writing case studies, a good offer might be “case study templates”:
You should also consider the device someone is using. One of the biggest mistakes with lead capture is using the exact same tactics and design for mobile that you’re using for desktop. The context and user experience is just completely different, so it makes sense to test different thing on different devices.
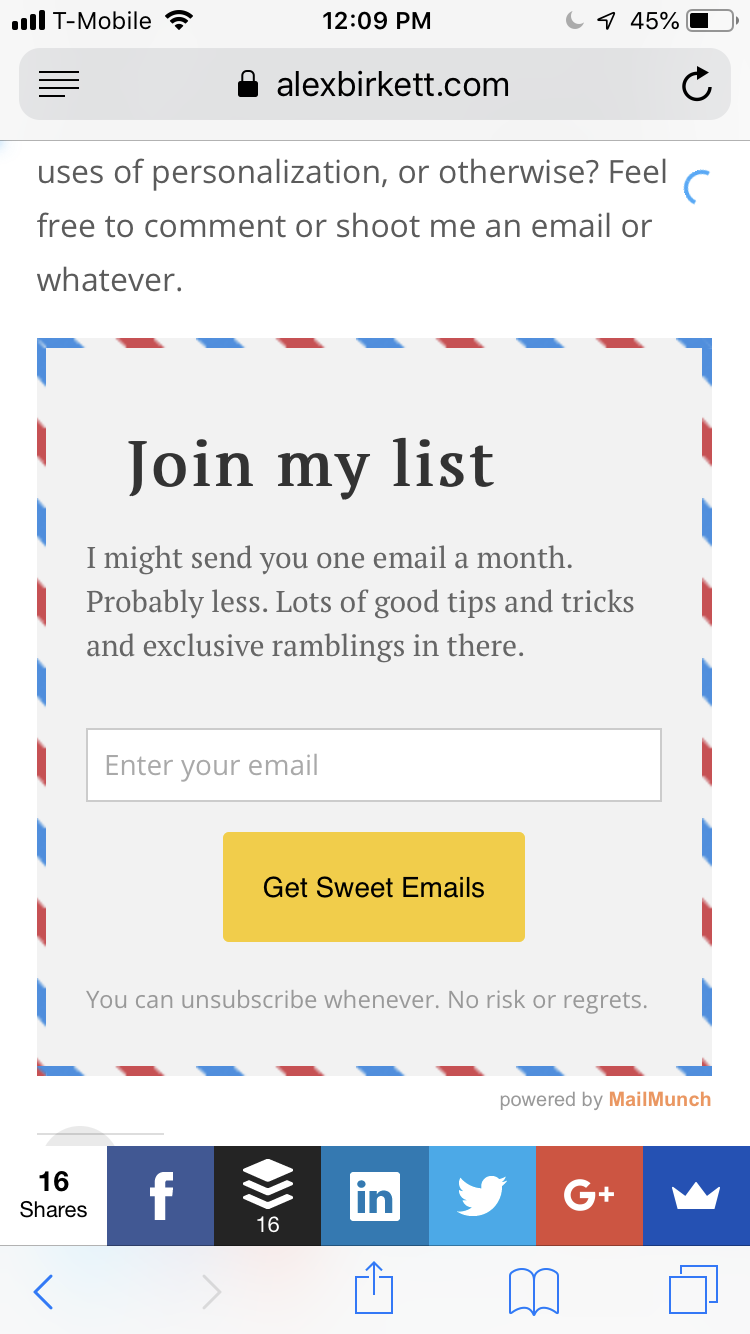
The point of this section isn’t to give you any specific, tactical suggestions for whom to target. It’s only to advise you to think about which portion of your audience sees which CTA. As a company and their content production capacity grows, it’s less and less effective to have a one-size-fits all approach.
3. Target your audience at the correct time
Who you target is very important, but when you target your audience is also important. For instance, with our J Crew first time visitors example, it certainly makes sense to deliver the discount as soon as possible (on arrival).
This person is probably comparison shopping, so you’re fighting for attention and want to hook them quickly. This is the case with many ecommerce lead capture messages, such as Ralph Lauren:
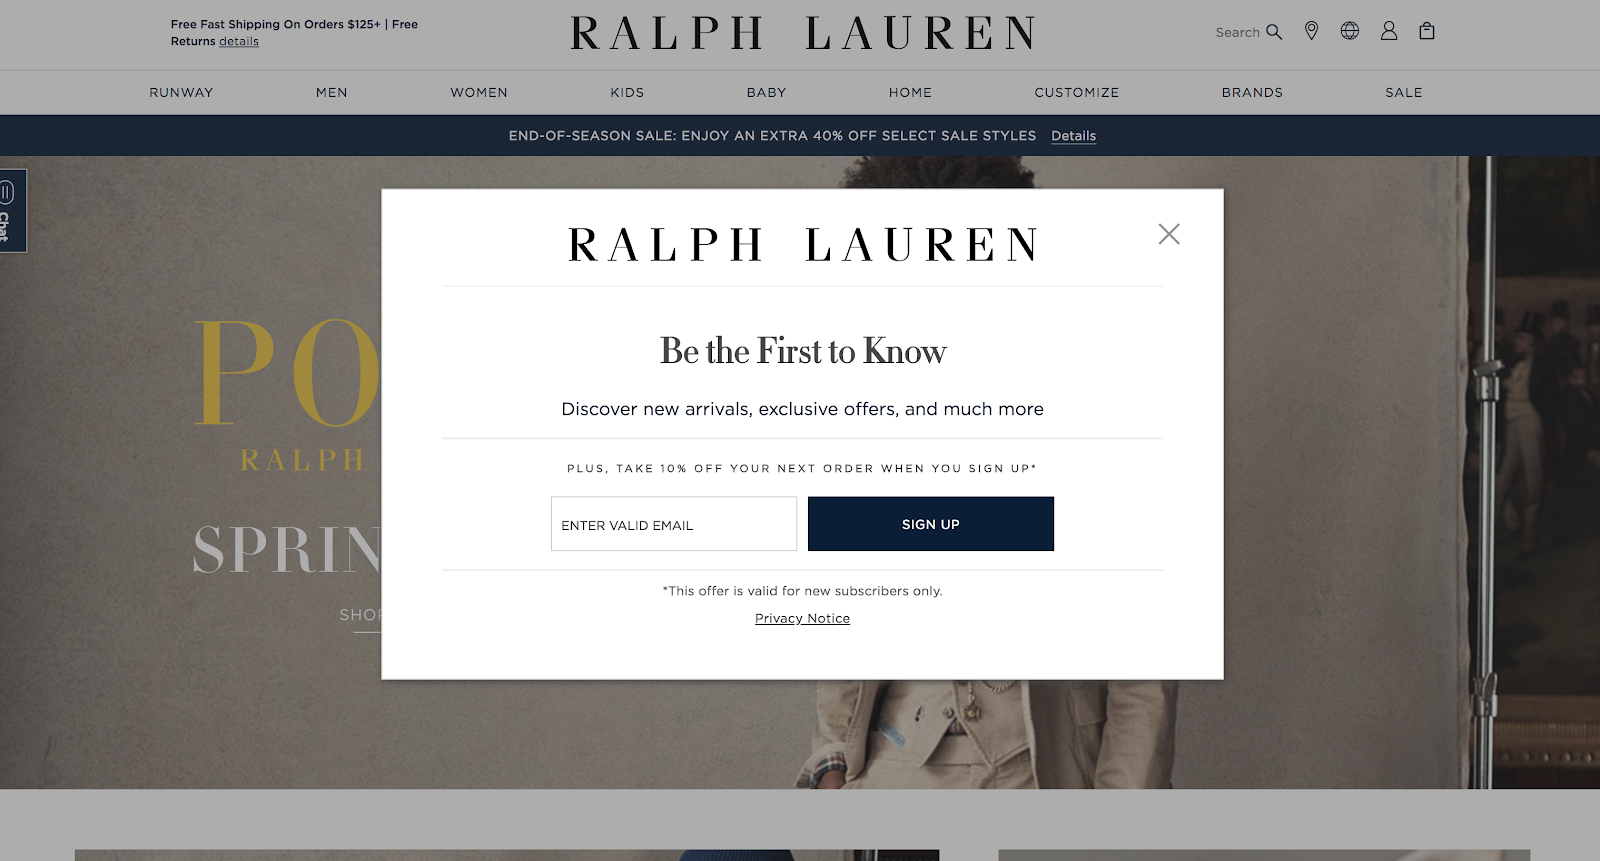
If you’re capturing emails on a blog post, however, you don’t want to interrupt the user experience before the reader even gets past the first paragraph.
That’s a good way to skyrocket your bounce rate. It’s also a common mistake I see with marketers who use “welcome mat” popups – those giant interstitials that completely take over your screen. Not a good way to entice a reader to continue with your content.
A better trigger for those pieces may be either a scroll-triggered popup or an exit intent popup. These are behaviorally triggered. The former shows up when someone scrolls past a certain point in the article, and the latter shows up when someone motions their mouse towards the corner of the screen, as if they were going to exit the window.
These are the types of popups I use on my own site, and we use them at HubSpot too. Here’s a great example of an exit intent popup from WaitButWhy (the copywriting is also great):
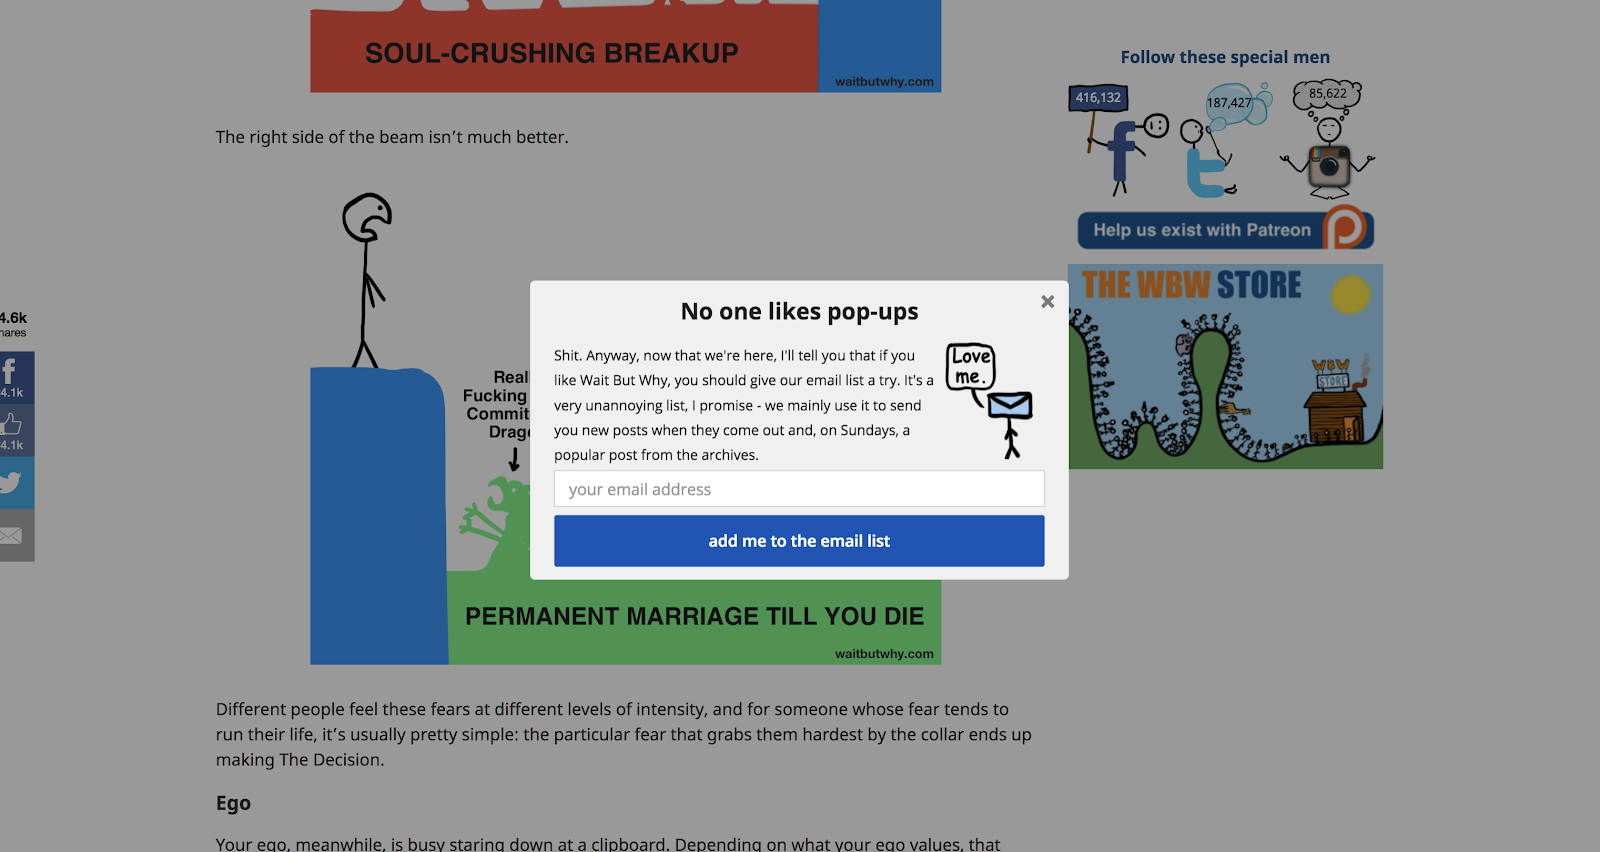
You can get creative with your time-based or behavior-based targeting as well. Does a behavioral event on your website imply intent or high interest in an offer? That’s a great time to trigger a CTA. An example is with templates. If you see someone is copying and pasting your templates, you can trigger a message that they’re also all available for download.
At a simpler level, you can leave a text link in your copy and use that as a signal of intent for trigger a form:
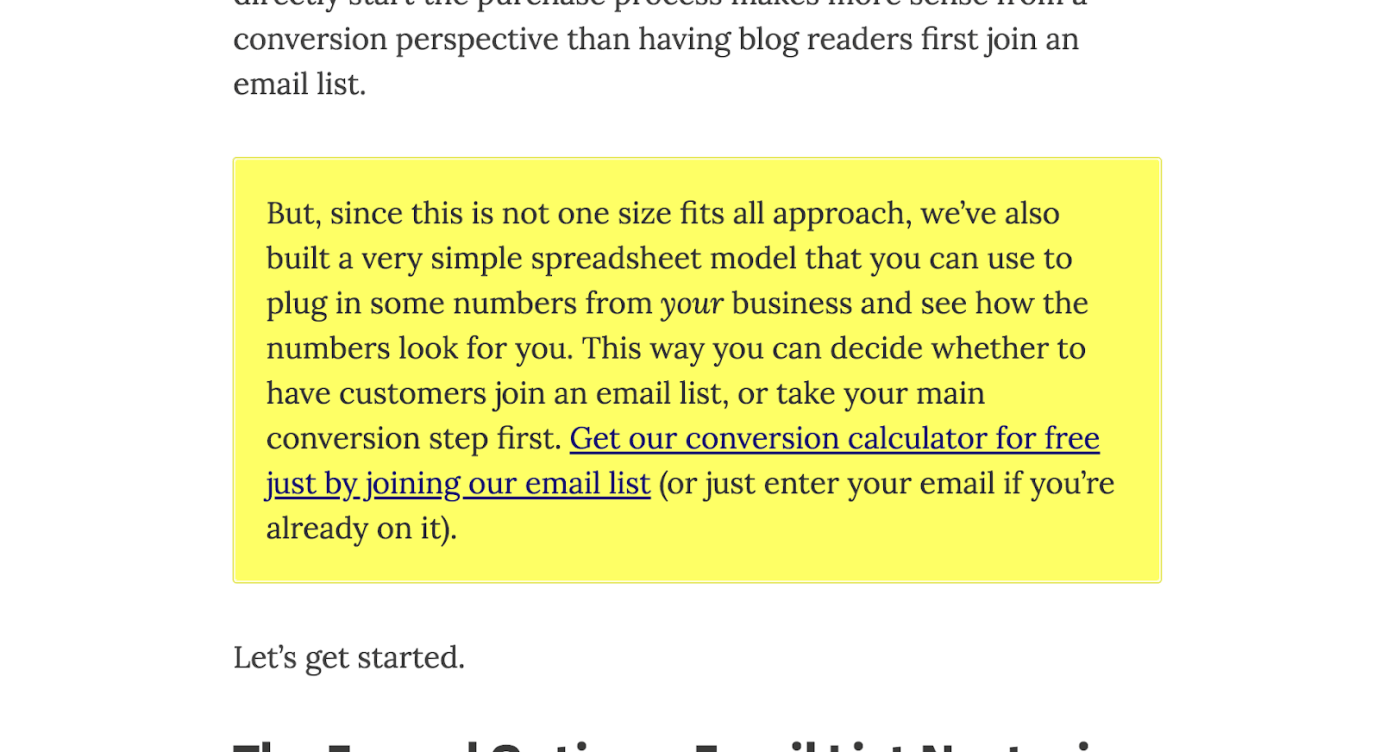
4. Build a proper lead magnet (or several)
We’ve already discussed the need to answer the question, “what’s in it for me,” and to create some sort of value exchange. But let’s dive deeper into the idea of a “lead magnet,” since it’s usually crucial to get this write (especially for B2B cases).
Stepping back, what’s a lead magnet anyway? A lead magnet is the free offer you deliver in exchange for a visitor’s information. This could be many things, but it usually looks like a long-form piece of content – an ebook, a webinar, a gated email course, a free tool, etc.
Here are several different lead magnet ideas and formats:
The ebook
The ebook is probably the most common form of a lead magnet, perhaps because it’s relatively easy to repurpose multiple blog posts into a giant ebook and get someone on Upwork to design it. Depending on the execution, though, they can be incredibly effective.
I find ebooks to be best suited for a few cases:
- The topic is complex and requires a lot of education
- The buyer is inquisitive and loves doing their own research into the topic
- It’s a sufficiently text-driven topic to form an engaging ebook
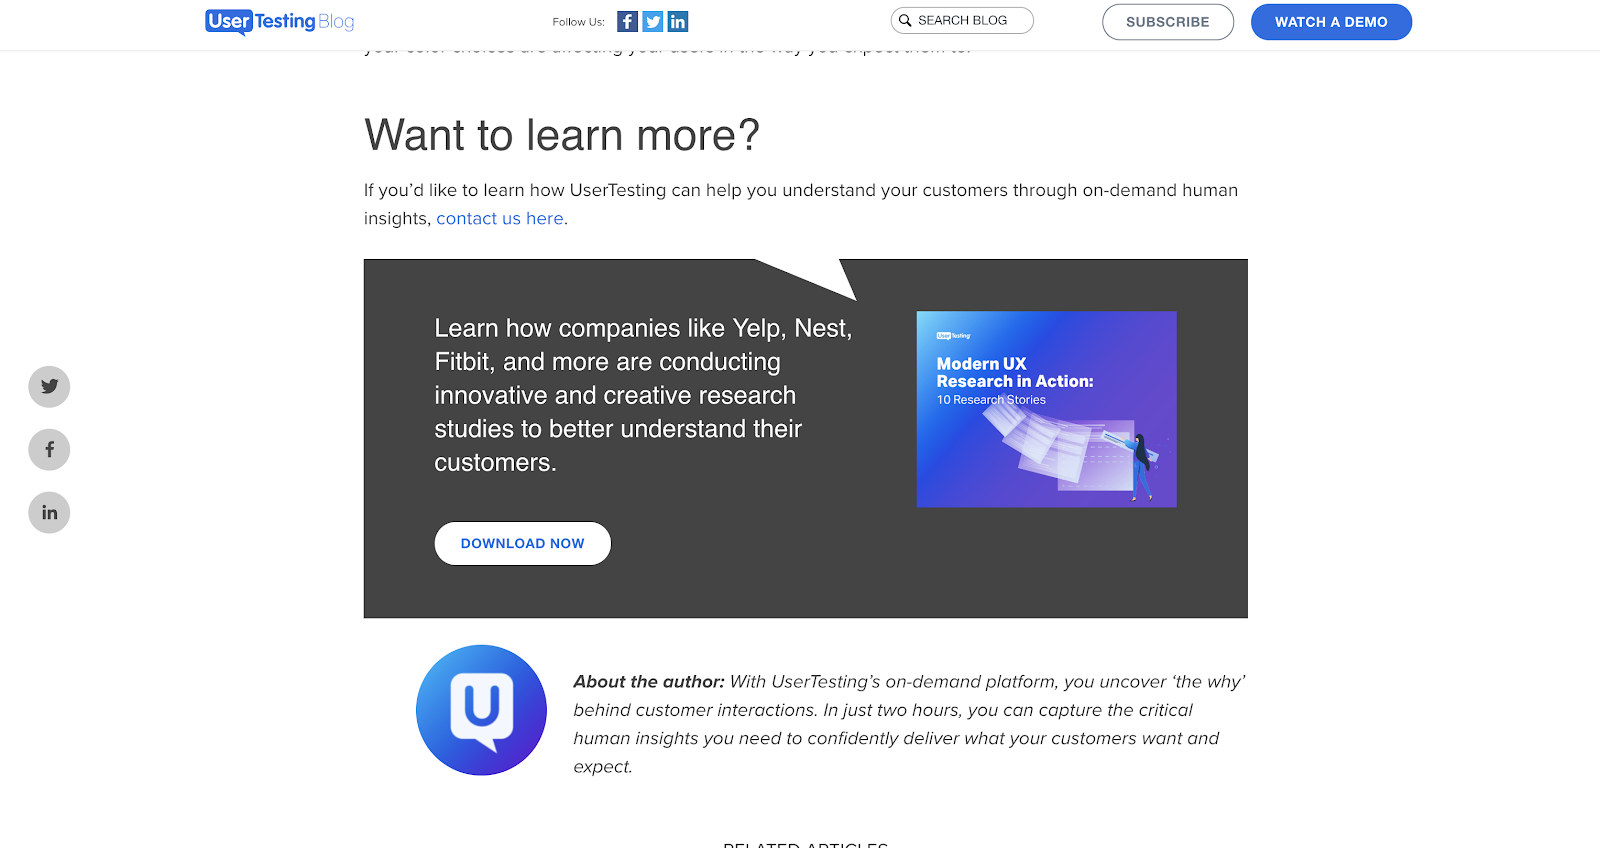
Topics like conversion rate optimization, user experience, or search engine optimization all make great ebooks because they fit the above criteria. Take, for example, this ebook from UserTesting on how to do proper user research:
The webinar
Webinars are probably the second most common lead magnet I see in the wild. They’re largely used by B2B businesses, and it’s especially a popular marketing tactic for SaaS companies.
Webinars tends to work well in a few environments:
- The topic is technical or needs to get quite granular
- You or your guest is charismatic on camera or well-known
- Your webinar topics can still be useful for those not using your product
For example, Unbounce reported wonderful results from their webinars (35% increase in free trial signups). At CXL Institute, we hosted webinars with our course instructors (well-known and super experts in their fields), and regularly got thousands of signups (as well as many directly attributable conversions).
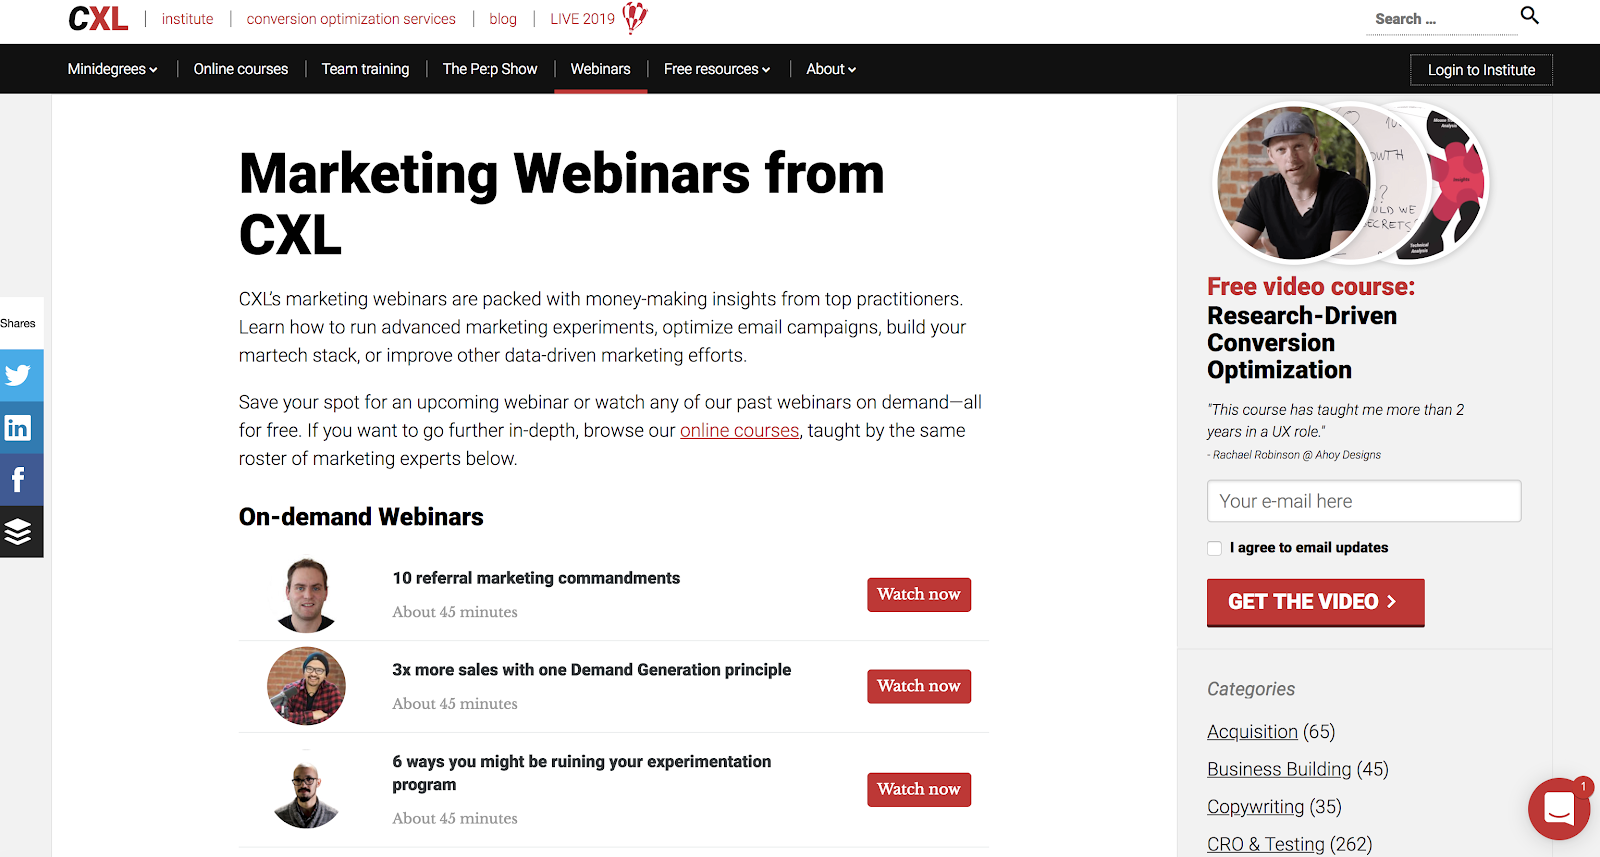
In my opinion, webinars are one of the highest potential lead magnets, but they’re usually the worst executed in reality. If you can get people to sign up for a webinar, that’s just the tip of the iceberg. The webinar needs to be entertaining as well as useful, which I can’t say about most webinars I’ve attended.
If you can do this and do this well (and at scale), you’ll surely be able to build an inbound lead generation machine with it.
The email course
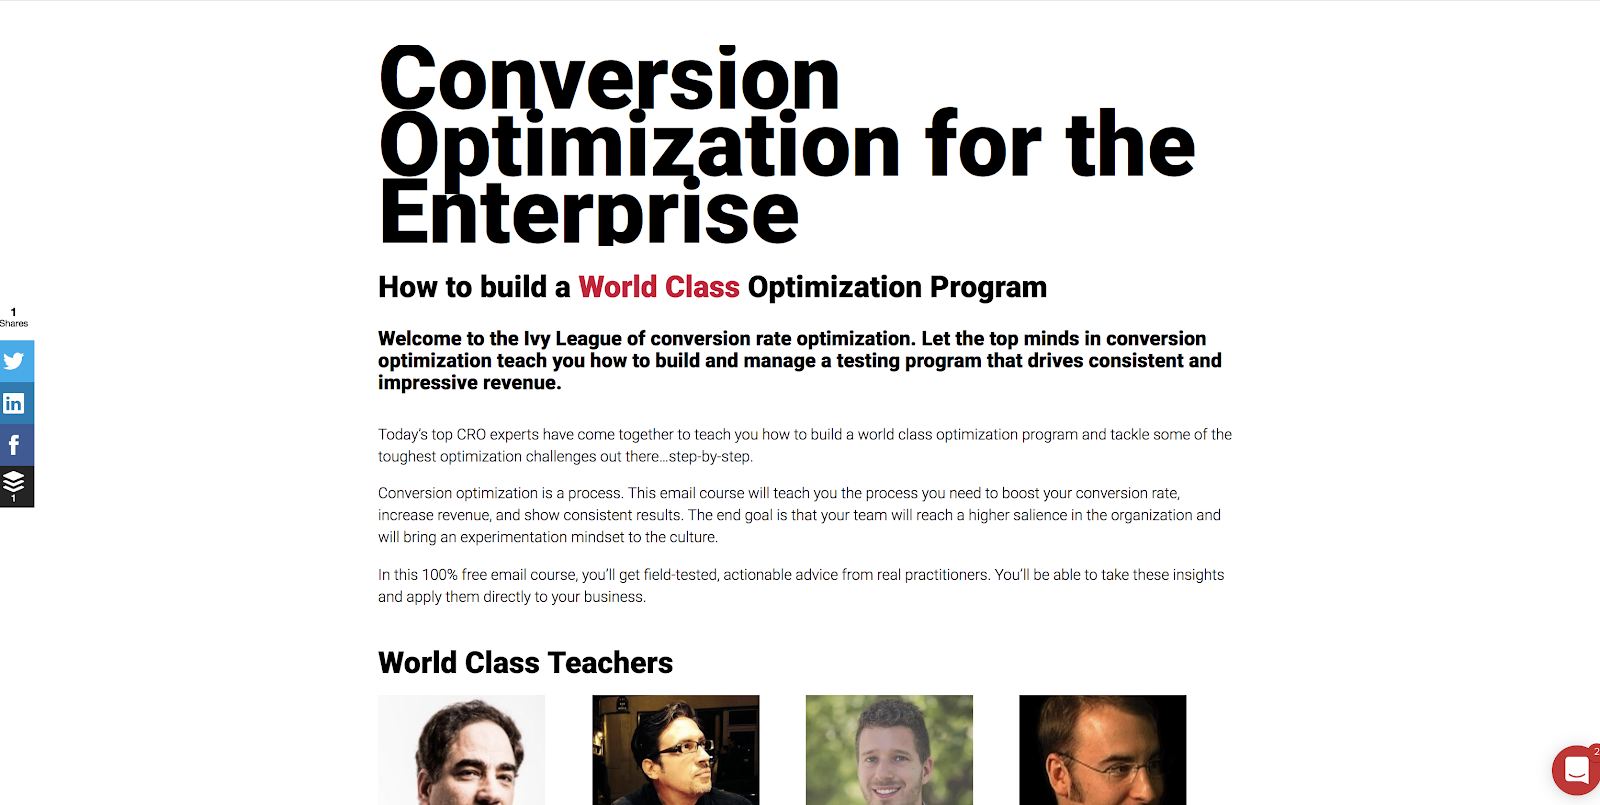
The email course is one of my favorite underutilized tactics. It’s essentially an ebook, but split into chapters and delivered via email. The best part is that you can normally get experts to write individual chapters, which not only distributes the effort required to produce the content, but if you choose your experts correctly, it also adds to the value for the subscriber.
This is another lead magnet we used at CXL Institute:
Invision also runs campaigns of this type:

In these lead magnets, your setup is the same: you’re promising informational value in exchange for an email address. The difference here is that you’re using email to deliver the core value, which perhaps leads to an increase in open rates and engagement with the actual email marketing.
It’s easy to set up on your side, as well. You just build an autoresponder for those enrolled in your email course. Simple, and in the long run, quite automated.
The free tool
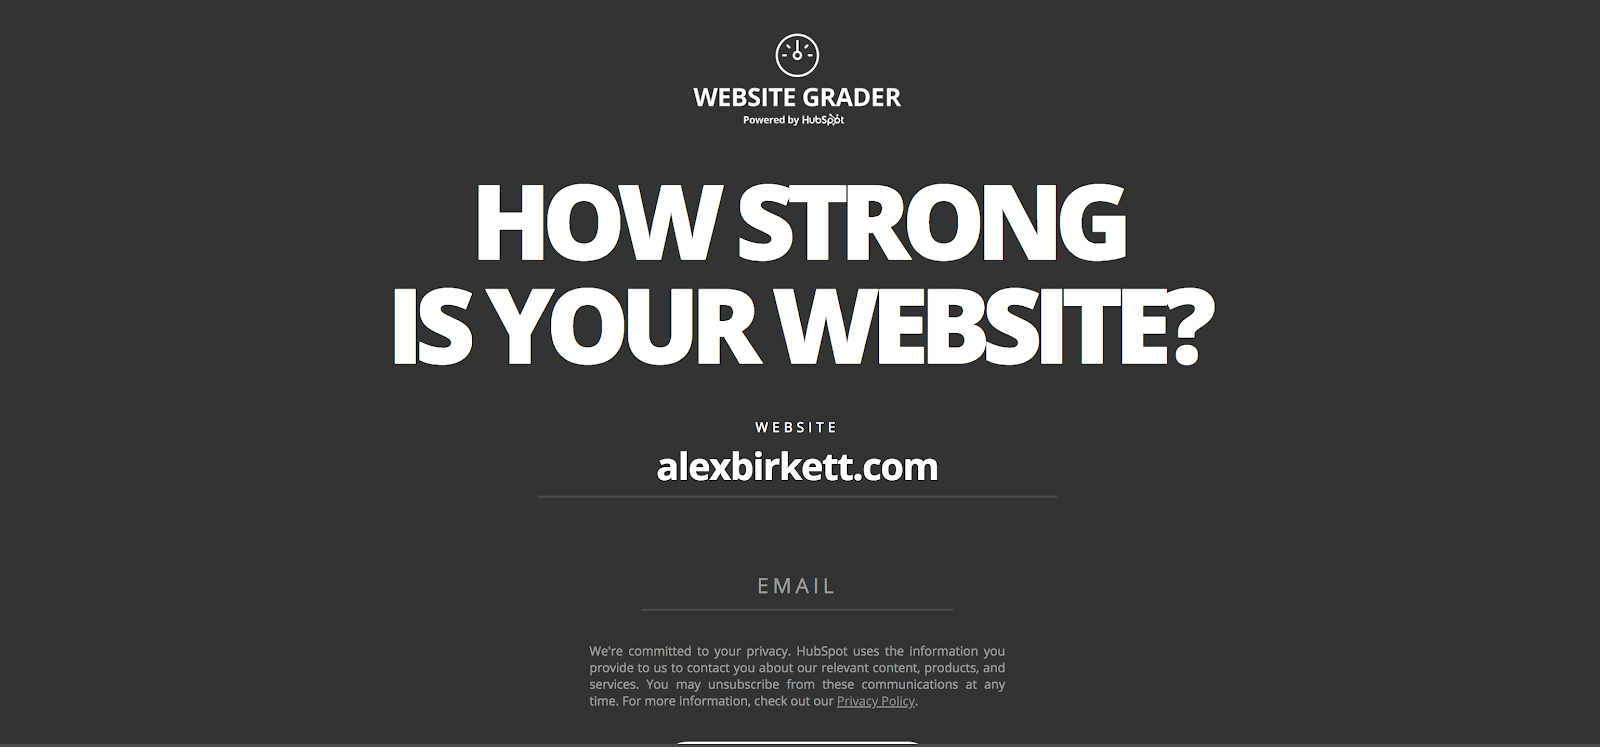
Free tools are also underrated, though tougher to create. Obviously, it requires resources to engineer a tool. However, if done right, it can really break through the noise. The best of example of this, of course, is HubSpot’s Website Grader:
The template/resource bundle
If the topic is the bait, then the lead magnet is the hook. If your topic interests someone, helping them accomplish what you talk about in the article can be a tremendously powerful hook.
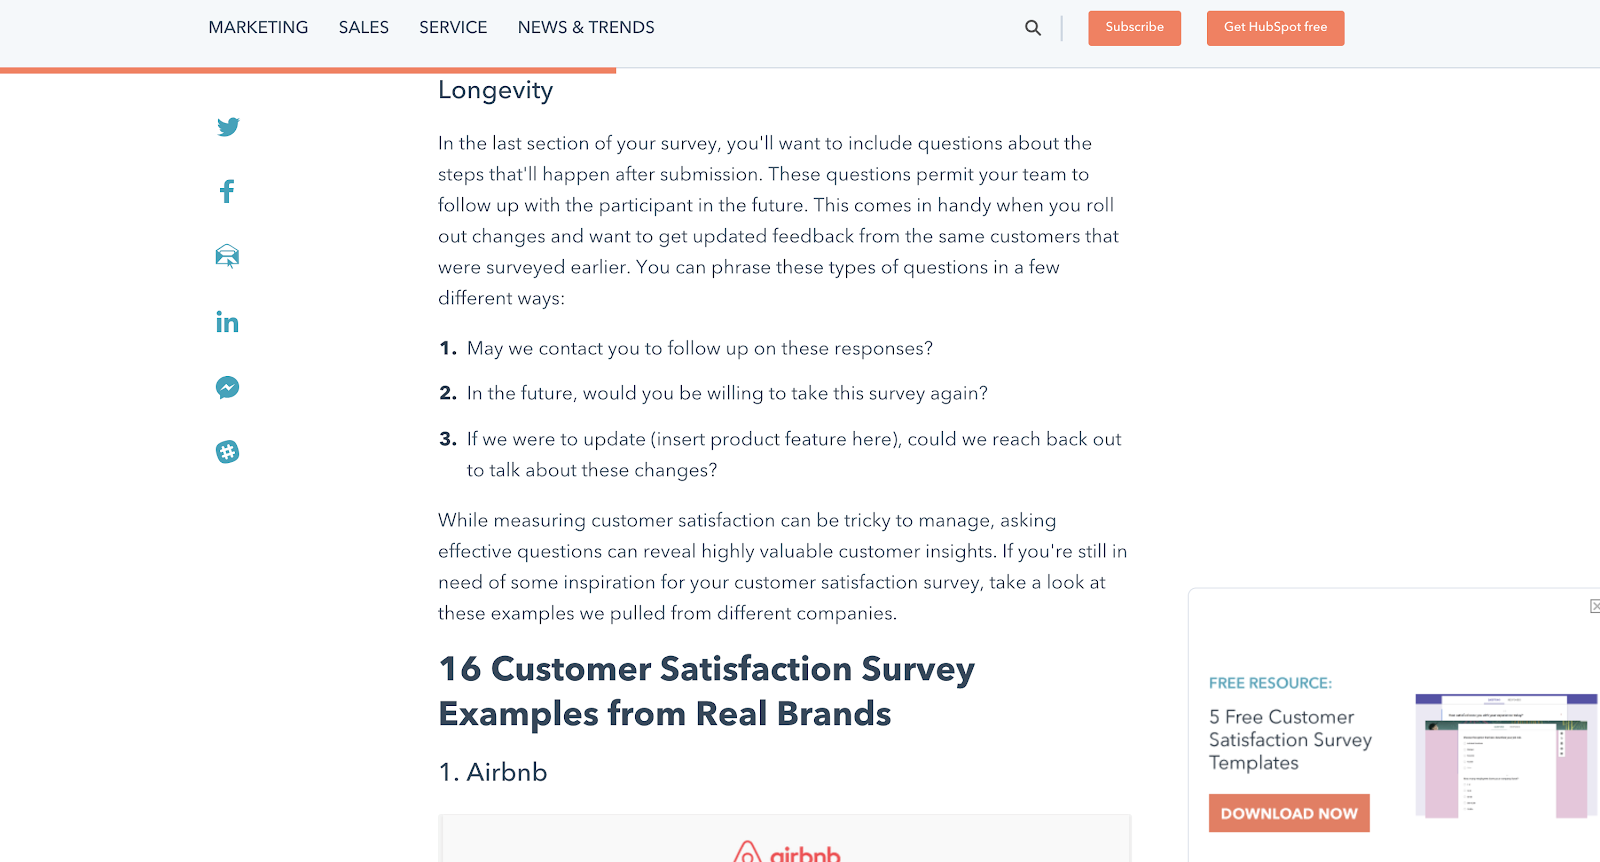
Normally, this is done with additional resources, templates, or tools designed to help the visitor implement whatever it is you’re talking about. A clear-cut example of this is with our feedback survey templates on posts related to feedback surveys:
The checklist
Similar to this is to offer a checklist. This is most appropriate for topics that are technically complex or at least require a lot of time and organization to accomplish.
Something like A/B testing is the perfect topic to offer a checklist. That’s what I do in a post I wrote on A/B testing guidelines:
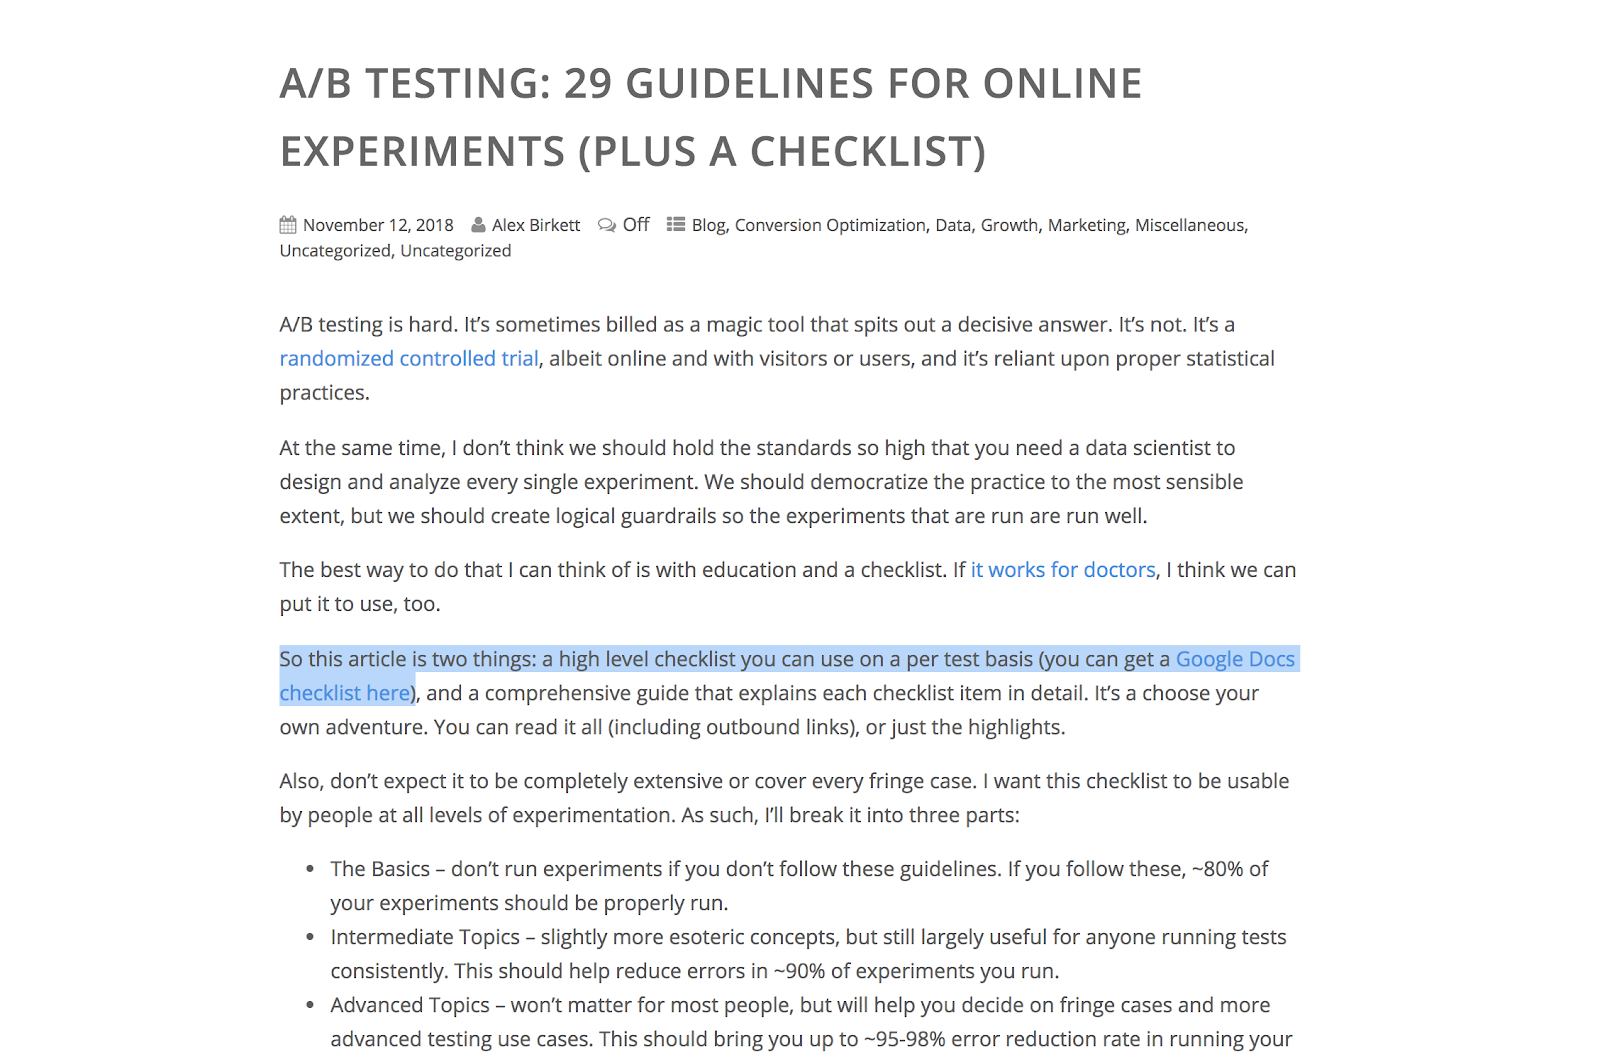
There are many more formats of lead magnets, but the above are some of my favorite types.
5. Reduce friction where possible
This is a good rule of thumb for all of marketing (nay, all of business): reduce friction.
Basically, if a visitors wants to sign up for your list, make it as easy as possible for them to do that. This is part of the premise behind the flywheel, but it makes a lot of sense when designing and optimizing web forms.
When designing forms, ask yourself questions such as:
- Do I need this piece of information I’m asking for? If so, can I ask for it later (a la progressive profiling) or enrich our data somehow?
- What form fields are causing the highest drop-off?
- Can we run some user tests to see where people are struggling with our forms?
- Do we have any basic usability or accessibility problems with our forms?
- Do our forms work on all browsers and devices?
You’d be surprised how much low hanging fruit you can find with a quick CRO audit on your forms.
6. Match the intent of a blog post with the correct offer
I’ve insinuating this above when talking about who you’re targeting, but a quick win for lead capture is to align the messaging on your lead magnet offer with the blog post it appears on.
You’d be surprised how often I see drastic mismatches. If your blog post is about “top marketing books of 2019,” it may not be prudent to offer an ebook on “The Ultimate Guide to Digital Analytics.” There’s a mismatch there. Some visitors may still convert, but it’s certainly not fully optimized.
Here’s a trick I like to use to align messaging properly. Go into Ahrefs and plug your blog post URL in the site explorer feature. Look at all the keywords it ranks for:
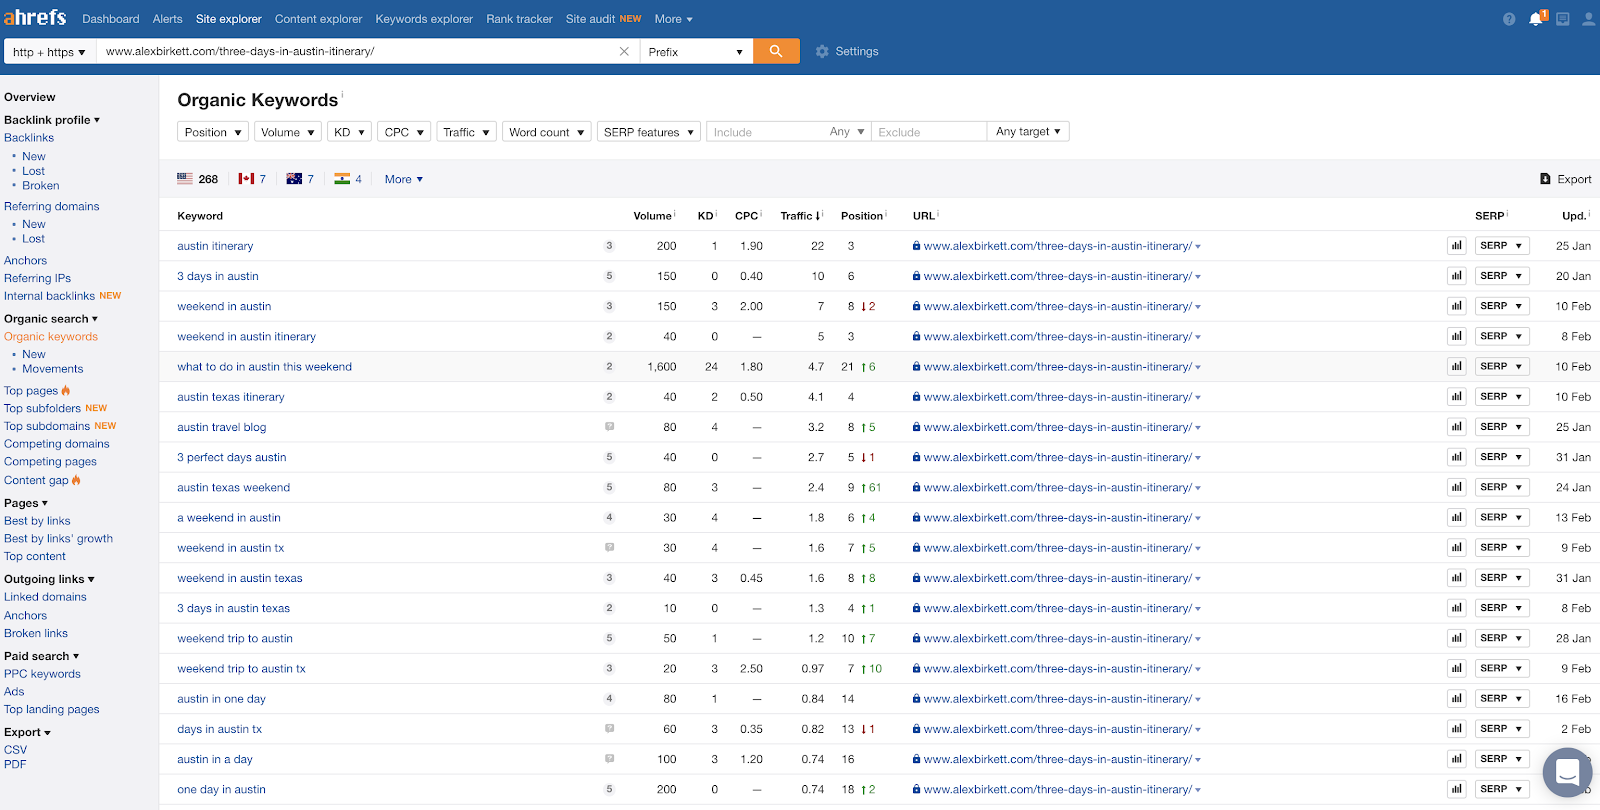
Your goal here is to understand broadly what your post ranks for, but also to try to find some “voice of customer” insights to steal for copywriting. For instance, this keyword “what to do in Austin this weekend,” might actually make a really good headline for an ebook or checklist I could offer.
7. Choose the best lead capture tools for the job
Finally, realize that you’re not stuck to only using web forms. You can use popups, surveys, live chat, and many more tools to capture leads.
Also realize that there’s no one tool that’s best for the job. We’ve seen all different kinds of successful approaches using different types of tools, different lead magnets, and different strategies in general. It’s only appropriate to choose the right tool for the job you want to accomplish, which is what the rest of this article is about.
7 Email Lead Capture Tools in 2019
- Web Forms
- Popup Forms
- Surveys and Quizzes
- Live Chat
- Chatbots
- Giveaways and Contests
- Content upgrades
1. Web Forms
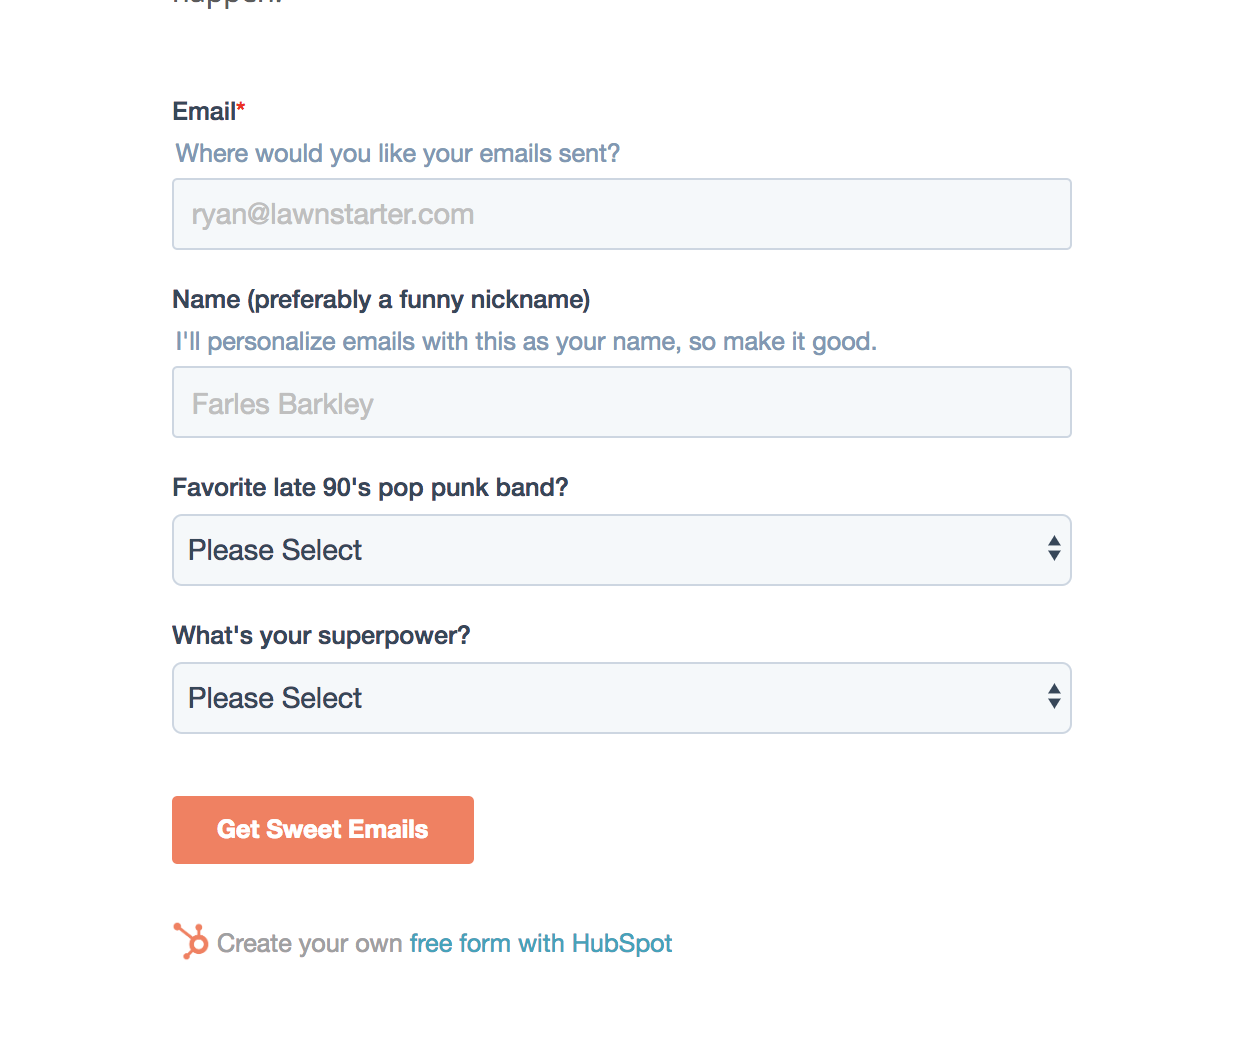
Web forms are still the gold standard of online lead capture. They’ve also come a long way since their early roots on the internet. Now we can easily design custom forms that can directly connect your CRM or email tool of choice using free tools like HubSpot Forms:
2. Popup Forms
Popups, once annoying an ill-designed, are now common and, when done correctly, are wildly effective and not at all a user experience hindrance.
When you can properly time and target the right audience at the right time, you can win at this method. At the very least, an exit intent form helps capture some would-be bouncers from your site. HubSpot Popup Forms is free and easy to set up for this.
3. Surveys and Quizzes
Surveys are, in my opinion, way underutilized. They’re engaging and entertaining, but in reality, you can collect the same visitor information with far less friction than traditional forms.
A great tool for this is Survey Anyplace. Here’s a great example from a customer of theirs who created a survey to engage attendees of a cycling event (using an iPad survey):

They put in their email and contact information to be entered into a contest at the end.
4. Live Chat
Live chat, sometimes viewed in the context of customer support and sometimes for sales, can also be used as a marketing tool.
Especially when you’re correctly targeting visitors, you can use live chat to engage heavy readers or people who have been to your site several times. CXL does this with visitors who come back frequently:
Though live chat is a less consistent way of collecting leads (it may be better at simply answering questions), you will find a few opportunities to engage visitors and collect their info.
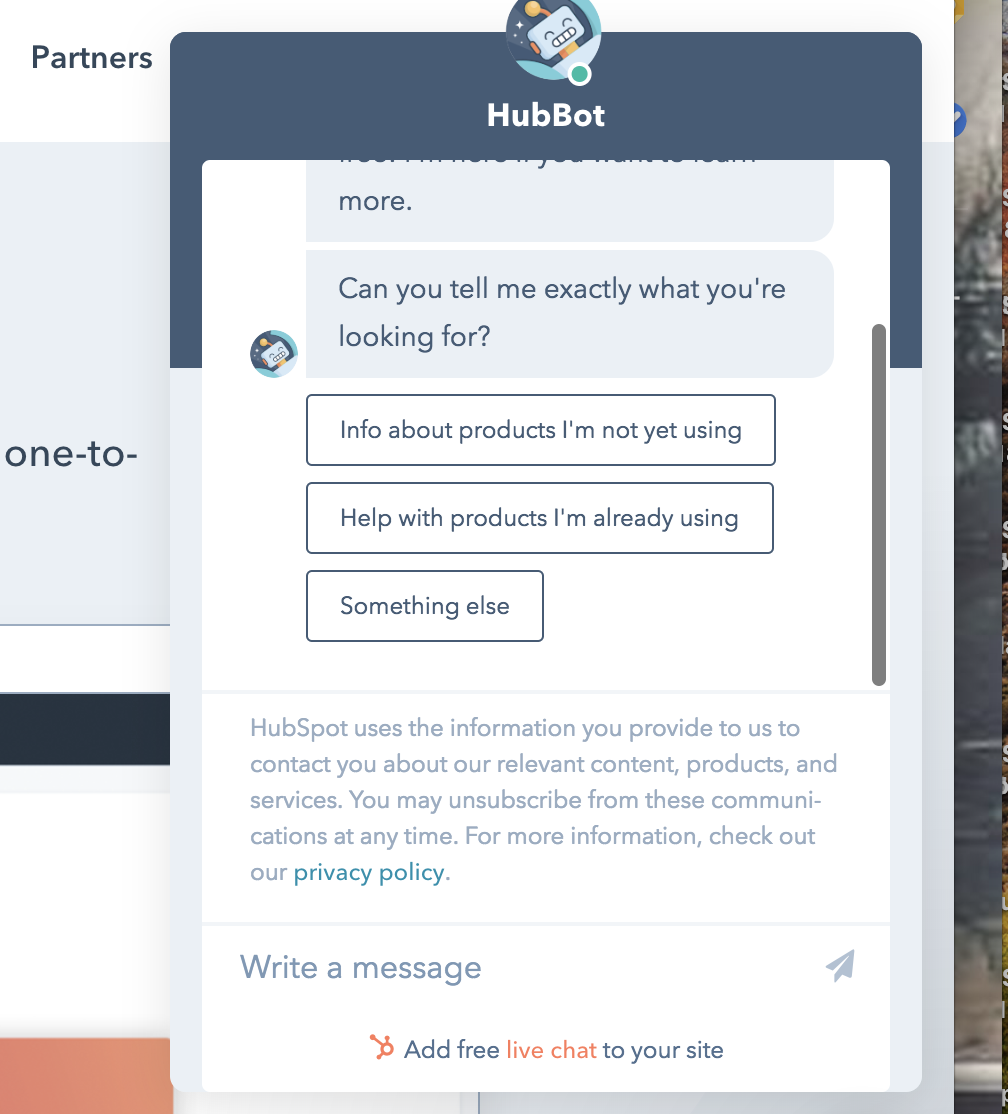
5. Chatbots
Chatbots are probably a better way to collect lead information. The fact that they’re automated saves you a lot of support rep time (opposed to running a live chat all the time), and you can often do better targeting and filtering as long as you design your bot the right way.
Chatbots are a technique that, in my opinion, is still in its infancy. Too many companies are still designing terrible bots and angering potential customers in the process.
With the right touch, however, I’ve seen chatbots skyrocket lead conversion rates.
6. Giveaways and Contests
Giveaways were very popular a few years ago. Though they’ve faded a little bit, I still see them all the time, particularly in B2C companies (and ultra-specifically, in travel or experience related industries).
Normally, you and several companies partner up, offer some sort of giveaway that is related to what all of your businesses do, and then promote the giveaways to your respective audiences. Then you share the email leads (presuming you’ve gotten proper opt-in permissions to do so).
This, while a good way to gather a large quantity of emails, has a big drawback: the quality of the emails probably isn’t very good. For two reasons:
- You’re sharing emails with a bunch of companies
- You’re relying on commercial incentives to get the email (in other words, they’re not interested in your company, they’re interested in winning that trip to Denmark).

A good tool for this, if you want to try it, is KingSumo.
7. Content upgrades
Finally, we have content upgrades. This is really a popup form, but I wanted to add it separately, since it is a click-triggered and behaviorally contextual popup. Basically, when someone clicks a link that says “get the PDF of this” or “click here to get a checklist,” they can then opt-in with a very simple, dynamic form:
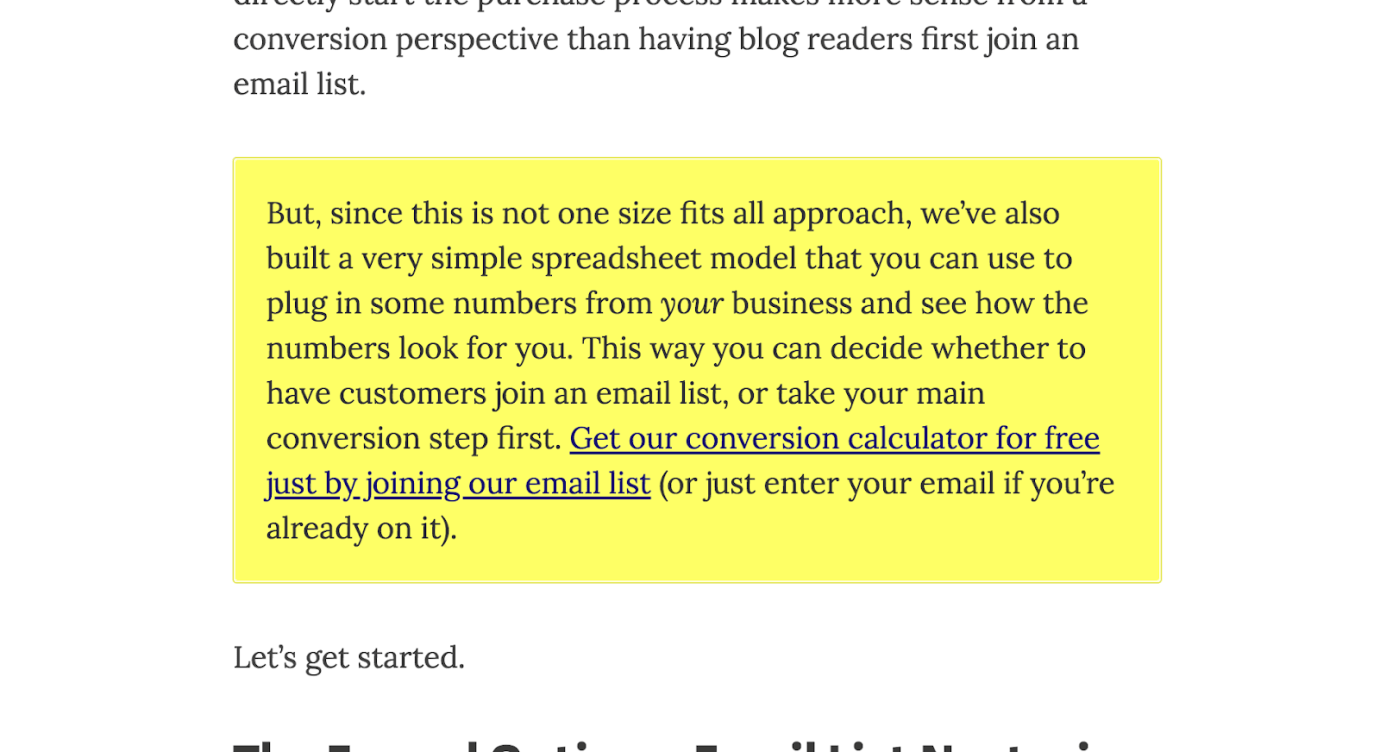
When you click the link, this comes up:
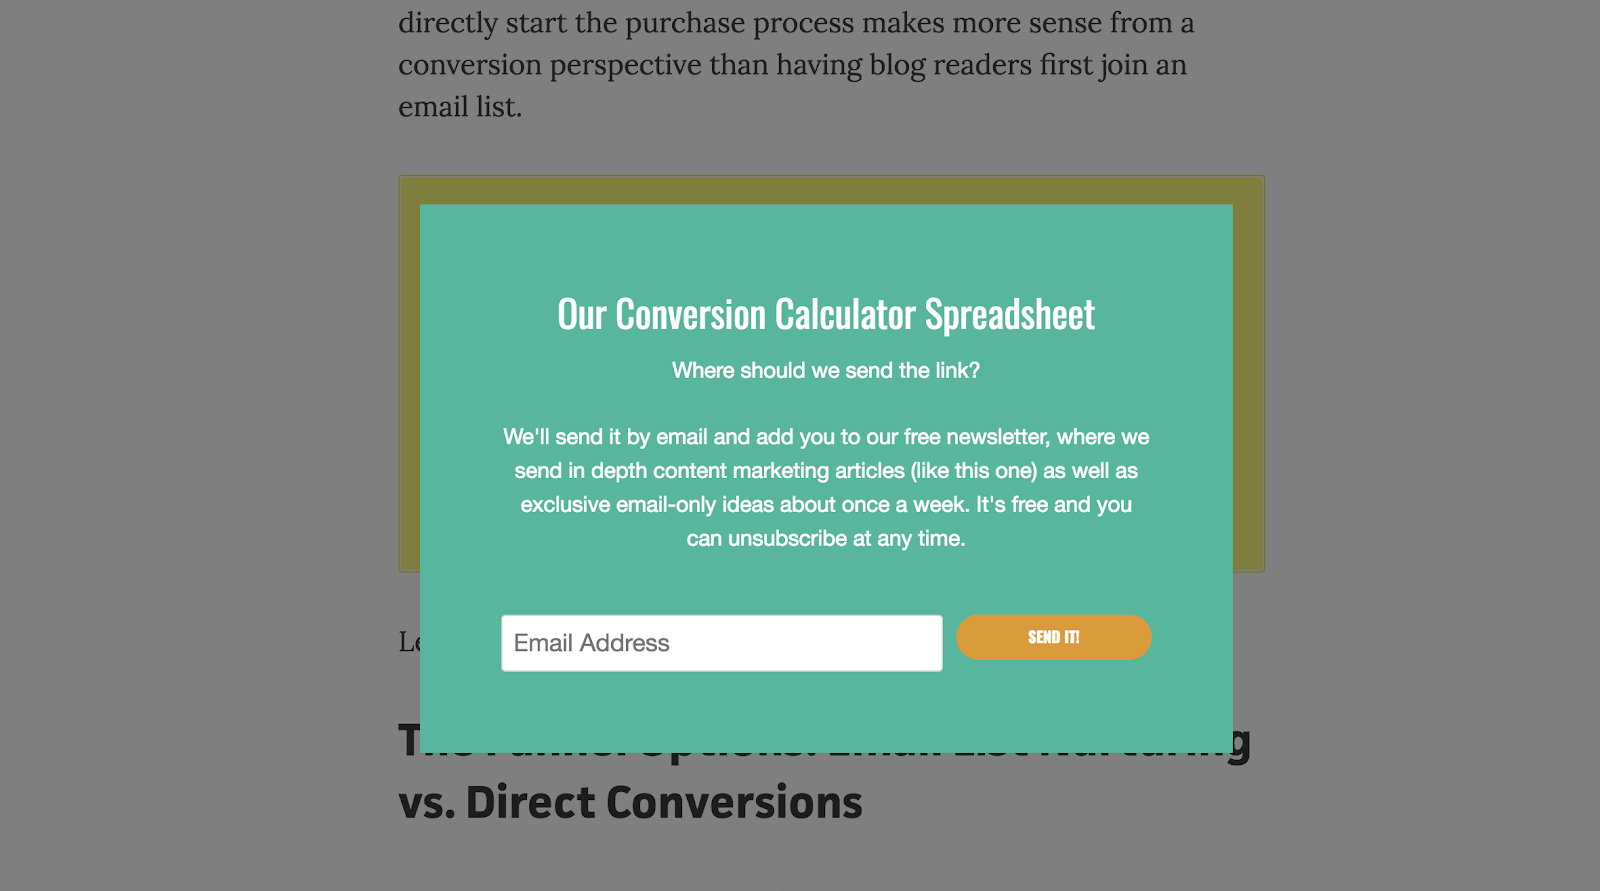
In terms of user experience, and all the strategies we went over above, content upgrades are some of the best ways to collect email leads. They’re relevant to the blog post, not a hindrance on user experience, and are only triggered to those who click on the link. I love content upgrades as lead capture method.
There are many ways and strategies to capture email leads.
This article gives a general outline as well as some ideas to do so; it also gives you some tools (most of them free) to accomplish the job.
As with anything, success requires some experimentation and tinkering. Try some of the above out, learn from it, and iterate to improve. Small wins compound and lead to greatness.
And if you want an easy way to implement some of these lead capture methods, check out HubSpot’s free lead generation tools.

The Ultimate Guide to Sales and Marketing
Peanut butter and jelly.
Puppies and the park.
Beach days and ice cream.
Some things just obviously go together — but what if I put sales and marketing together in that list? Would you still think they worked better as a pair?

More than likely, you haven’t quite considered your sales and marketing to be the “peanut butter and jelly” of your company. But, in 2019, alignment between those two teams is more critical than ever.
Simply put, alignment between marketing and sales is really about focusing on the customer — and, in 2019, the customer’s buying behavior has changed significantly.
Fortunately, the better you can align your sales and marketing teams, the more likely you are to delight a prospect. In fact, organizations with tightly aligned sales and marketing teams experience 36% higher customer retention rates.
Here, we’re going to explore why sales and marketing matter to a company — and, equally importantly, why they matter together.
Definition of Sales and Marketing
Marketing is the process of getting people interested in your company’s product or service, while sales encompasses any activities involved in selling that product or service to a consumer or business. One cannot exist without the other. You cannot sell without initially igniting interest in the consumer through marketing, and you cannot be a marketer without having a team prepared to sell the product once you’ve captured a consumer’s attention.
To start, let’s explore the advantages of both sales and marketing to your organization.
Sales is ultimately critical to your company’s bottom line. You cannot have scalable growth without an impressive sales team. At its most basic, your sales team’s goal is to first qualify prospects, reach out and build relationships with them, and ultimately, provide a solution that will benefit the prospect. When done well, a sales transaction results in a sale, a satisfied customer, and revenue for your company.
For sales teams to excel, your salespeople must be invested in the success of your customers. They must understand your prospects’ pain points and obstacles, and demonstrate how your product or service is a solution — the best solution — to those problems.
Alternatively, marketing is all about igniting interest in potential consumers, and telling the world your company, and its products or services, exists. Marketing uses both emotion and analytics to reach an audience, and convert curious viewers into qualified leads.
Here’s the thing, though — in 2019, a buyer isn’t following the traditional “marketing to sales to customer” funnel.
Instead, each individual prospect follows a unique path. One prospect might know they want to purchase your product before even speaking with a sales rep, because they’ve already been convinced by your Instagram account.
Alternatively, another prospect might speak with a sales rep first, and then require additional marketing in the form of webinars or blog posts, before closing the deal.
Your buyer has unlimited information at her fingertips — she can check out your Facebook page, blog posts, website, and customer product reviews before even speaking with a sales rep.
When a prospect who has already read thirteen customer reviews gets in touch with your sales rep, she’s going to require a different conversation than a prospect who’s only heard of your company from a Facebook ad.
That is why your marketing and sales teams need to be in tight alignment in 2019 — because your buyer needs to be communicated with, and sold to, wherever and whenever she wants. The traditional sales and marketing tactics no longer work. To find scalable growth, it’s critical your marketing team communicate all the information they have about a prospect to your sales team before a salesperson even gets on the phone.
Sales and Marketing Strategy
To truly delight your customer, it’s critical you reduce friction by implementing a strategy to align your sales and marketing teams. For instance, you might have your sales and marketing teams work together to craft a buyer persona, or document content gap’s along a buyer’s journey. While it might seem like the two teams have different measurements of success, they should ultimately share the goal of being customer-centric, even at the cost of their individual processes.
Sales and marketing alignment can help your company become 67% better at closing deals, and can help generate 209% more revenue from marketing.
Not aligning your sales and marketing teams isn’t just unhelpful for the customer — it’s also damaging to your bottom line.
But it’s easier said than done. Aligning sales and marketing, particularly when you have a growing company, can feel like an incredibly difficult process.
Fortunately, there are a few strategies you can implement to ensure a smoother relationship between the two teams, immediately.
1. Ask your marketing and sales team to create a buyer persona together.
Your marketers have a firm pulse on the consumer — they’ve conducted extensive research, they’ve engaged with prospects via social media and email, and they’ve held focus groups.
But, more than likely, your marketers haven’t spoken directly to these prospects. They might not fully understand your prospects biggest pain points, or the challenges they face that your product or service currently can’t solve. These insights can only be obtained from your sales team.
Ultimately, to get a full picture of your consumer, it’s critical that each team help craft the buyer persona. For instance, perhaps you have your marketing team create an initial buyer persona through research and brainstorming sessions — but then you gather input from salespeople to modify and refine that persona.
Getting initial input from salespeople, as well as asking for final approval on a buyer persona, is critical to ensure each team is working together with the same consumer in mind.
2. Document content gaps along a buyer’s journey.
Your sales and marketing teams should take the time to compile everything both teams have created to help solve for the customer — including white papers, infographics, e-books, case studies, and email streams.
Then, employees from each team should have a candid discussion about what’s missing. Maybe a sales rep notices your marketing team hasn’t created any e-books on an issue most of her prospects’ face. Alternatively, maybe your marketing team needs your sales team to provide input to craft a more useful customer case study.
Additionally, both teams should take the time to organize and understand what content works best for which stage of the buyer’s journey. While likely a tedious process, this will help both teams become more effective in their strategies over the long-term.
3. Keep track of every interaction your customer has with your company.
Nowadays, this is one of the most critical strategies you need to implement. It eliminates friction for the customer, and it also helps your sales reps close more deals.
For instance, consider how you’d feel if you spoke with a sales rep for the first time, and he already knew where you worked, how long you’d been there, which email newsletters you’d subscribed to, and which company networking events you’d attended. You’d likely be more impressed than if you spoke to a sales rep who’d never heard of you before, right?
It’s vital you find a way to keep track of each interaction your customer has with your company — a free CRM is incredibly useful for this.
4. Be customer-centric with your language.
All too often, marketers and salespeople use different language and rely on different analytics to measure success. For instance, a marketer’s measure of success might be based on blog traffic, Facebook likes, email subscriptions, or YouTube viewers.
Alternatively, a salesperson’s ultimate measure of success is revenue.
However, there is one goal both teams share — and that’s to be customer-centric.
To align both teams, it’s critical your salespeople and marketers consider, first and foremost, the customer. When a marketer emails a prospect, she should consider the person on the other end — and whether they want to receive that email, and how that email could be helpful for them.
Additionally, when a salesperson picks up the phone, she needs to remember the conversation isn’t about making a sale — it’s about solving a problem for a prospect.
With this in mind, your teams will have an easier time blurring the lines between their individual tasks and responsibilities, and recognizing their very unified desire to solve for the customer, even over their own processes.

How to Fund a Software Development Project
5 Essential SEO Tips That Have Helped HubSpot Become an Organic Powerhouse
In 2017, we experienced something that has never happened to us before — our blog’s monthly traffic flattened. Even worse, it started to decline. So after months of stressing over the mysterious cause of our blog’s traffic plateau, we decided to sit down, chug a bunch of coffee, and find the culprit.
What we discovered is that our strategy of brainstorming topics and relying on our intuition to determine our audience’s content preferences wouldn’t suffice anymore. And coupled with almost every social media platforms’ disdain for sending users outside of their website and the ever-growing mountain of emails piling up in people’s inboxes, we knew we needed to overhaul our editorial strategy. So we decided to focus our energies on the channel that has consistently generated the majority of our blog’s traffic for its entire existence — organic search.
Today, almost a year after we implemented our organic-only strategy, we’ve exceeded the majority of our monthly traffic goals and even broke some monthly traffic records. Needless to say, we’re thrilled (and relieved) that our new organic-only strategy refueled our growth in traffic again and shattered the great traffic plateau of 2017. And we’d love to share the essential SEO tips that helped us devise our strategy.
SEO Tips
- Optimize your content for people before search engines.
- Leverage the pillar-cluster model.
- Develop a link-building strategy.
- Implement a historical optimization strategy.
- Compress your images.
1. Optimize your content for people before search engines.
Even though an algorithm dictates the order of Google’s search engine results pages, you must remember that Google designed its algorithm to reward the web publishers that craft the best content on the internet, not the web publishers that are the best at gaming their algorithm.
In fact, part of Google’s search algorithm ranks your content based off engagement metrics, like total traffic, organic traffic, direct traffic through Chrome, time on site, bounce rate, SERP CTR, brand mentions on authoritative sites, and return visits.
So, to boost your website’s engagement and domain authority and, in turn, generate even better results in the long-term, there’s really only one way to do it — you must attract and engage a loyal audience by creating high-quality content. Only then should you start optimizing it for search engines.
The first step we usually take when optimizing our content for people is understanding the intent behind a keyword we want to target. To do this, we analyze the keyword’s search engine results page and determine the problems users are trying to solve when searching for this query.
After that, we figure out how to effectively solve these problems by mining information from trusted sources, examining our own research, and asking HubSpot employees who experience similar problems how they solve them.
The final and most important step of our content creation process is crafting the most engaging content possible. To do this, we tell stories and relate to our audience’s problems in our introductions, write clear, concise, and compelling copy, highlight interesting findings, data, and quotes in our body text, and include vivid images and videos to provide a variety of stimuli. At the end of each blog post, we keep the momentum going and remind our audience of the thoughts and emotions they just experienced, which leaves them yearning for more content.
2. Leverage the pillar-cluster model.
Since people heavily rely on search engines to provide accurate and relevant answers for most of their questions today, search engines need to understand the intent and context behind every single search. To do this, search engines have evolved to recognize topical connections across users’ queries, look back at similar queries that users have searched for in the past, and surface the content that best answers them. As a result, search engines will deliver content that they deem the most authoritative on the topic.
To help search engines recognize our content as a trusted authority on certain topics, we decided to implement the pillar-cluster model on our blog. By creating a single pillar page that provides a high-level overview of a topic and hyperlinks to cluster pages that delve into the topic’s subtopics, we could signal to Google that our pillar page is an authority on the topic.
Since hyperlinking all of the cluster pages to the pillar page shares domain authority across the cluster, our cluster pages will also get an organic boost if our pillar page ranks higher, and they can even help our pillar page rank higher if they start ranking for the specific keyword they’re targeting.
Another benefit the pillar-cluster model supplies is cleaning up our site infrastructure and providing a better user experience for our website visitors. Before we implemented the pillar-cluster model, we spent most of our time writing blog posts designed to rank for specific, long-tail keywords. This resulted in thousands of blog posts that weren’t organized, and some were so similar that they competed with each other on the same search engine results pages. Here’s a visualization of what our site architecture used to look like:

But by organizing our blog into topic clusters, our site architecture currently looks like this:

Not only is it easier for Google to crawl our blog, identify semantic relationships between our content, and boost our search engine visibility now, but it’s also easier for our audience to search for the content topics they’re looking for, find related content, and spend more time on our blog.
To learn how to implement the pillar-cluster model on your blog, take a look at the steps we took to do it.
3. Develop a link-building strategy
Earning high-quality inbound links from websites and pages with high authority scores is crucial for boosting your domain authority. But, unfortunately, “If you write it, they will link to it,” is not a viable SEO tactic.
The main way we earn high-quality links is by networking with other websites that have a higher domain or page authority score to link to our top content. We also make sure our content is relevant to the referring website’s content.
Another way you can earn quality backlinks is by using Backlinko’s skyscraper method. The skyscraper method is an SEO strategy where you find content that ranks well for keywords you want to rank for and then create content that’s better than the top ranking posts. Then, you use SEO tools to find all the sites that have linked to your competitor’s content and ask the most relevant sites to replace your competitor’s link with a link to your improved content.
In 2016, Backlinko asked 160 websites to link to their post about Google’s 200 Ranking Factors and they earned 17 inbound links. You might be thinking that 17 backlinks doesn’t seem like much, but a lot of those referring websites had high domain authority scores, so the post’s organic traffic increased by 110% in only two weeks.
4. Implement a historical optimization strategy
In 2015, Pam Vaughn, the current Principal Marketing Manager of HubSpot’s Web Strategy Team and former Editor of HubSpot’s Marketing Blog, made a revolutionary discovery about HubSpot’s organic monthly blog traffic — the overwhelming majority of it came from posts published prior to that month. In fact, 76% of our monthly blog views came from these old posts.
Today, Pam’s groundbreaking revelation rings louder than ever — 89% of our monthly blog views currently come from posts that were published at least six months prior, and we’ve developed an entire strategy dedicated to refreshing and republishing these historical pieces of content.
We call these types of blog posts “updates”, and they comprise 35-40% of our editorial calendar. And by refreshing them with new information and SEO optimization and then republishing them, we can build upon their existing organic value that they’ve built by collecting backlinks and earning domain authority and double or even triple their traffic. This process also helps us optimize our blog for efficiency, decreasing the amount of new content we have to create while increasing our organic traffic and conversions.
Historical optimization isn’t for everyone, though. It’s a strategy catered for a blog that generates a significant amount of organic traffic, has a considerable amount of blog subscribers and social media followers who can supply a surge of traffic, shares, and backlinks to your updates, and owns a substantial repository of old posts that are worth refreshing and republishing.
However, if you have all three of these things, we definitely recommend implementing a historical optimization strategy. To learn about the types of historical content you should update and the exact process of updating them, check out this blog post written by one of historical optimization’s pioneers — Pam Vaughn.
5. Compress your images
When you think about optimizing your content for search engines, compressing your images’ file size doesn’t seem like it should be a top priority. But, according to Braden Becker, HubSpot’s Historical Optimization Lead, your images’ file size directly affects your website’s page load speed, which is one of the ten most important Google ranking factors.
“The bigger an image’s file size, the longer it takes your web browser to load that image, which increases your website’s loading time as a whole. And the longer your website’s loading time, the more likely Google will penalize you,” he says.
Compression blends similarly colored pixels into single pixels to reduce the image’s resolution, and in turn, file size. But since the human eye is more sensitive to light and dark detail than color detail, we’re not able to detect the color differences between an uncompressed and compressed image, so the perceived quality stays the same, just like the pictures below.
Uncompressed Image (236 KB)

Compressed Image (48 KB)

As you can see, the uncompressed image’s file size is almost four times bigger than the compressed image. Yet, the compressed image still has the same perceived quality as the uncompressed image, and it’ll load much faster.
To diminish our images’ file size as much as possible, boost your website’s page speed, and avoid risking a penalty from Google, we use Squoosh to compress individual images and TinyPNG to compress batches of images.
SEO is always adapting, and you should too.
Even though we uncovered five tactics that helped us devise an SEO strategy that shattered a year-long traffic plateau and broke monthly traffic records, it’s entirely possible that they could become obsolete one day.
The moral of our story isn’t to glom onto these SEO tactics for the rest of your content marketing career. It’s to keep adapting and never settle for the status-quo, no matter how well you’re performing. Because one day your once thriving work might stagnate and even diminish. And the only way to recover is to take a leap of faith and overhaul your entire strategy.

How to Edit Your Video Without YouTube’s Retired Video Editor
Prior to September 2017, YouTube provided a built-in tool that allowed you to edit your videos before publishing to the platform.
However, as of last September 20, 2017, YouTube’s Video Editor tool is no longer an option. On YouTube’s Help Forum, Community Manager Marissa explained, “We’ve seen limited usage of these features, so we’ve retired them to focus our efforts on building new tools and improving on other existing features.”
Ultimately, YouTube’s Video Editor tool was convenient, but only offered basic features — fortunately, there are plenty of alternative editing tools that enable you to create sleeker, more professional-looking videos for the world’s second largest search engine.
Here, we’ll explore all the alternative tools you might consider using to craft better, more engaging YouTube content.

The Best Editing Tools For YouTube Videos
1. Shotcut
Shotcut, a free open source video editor that is available for Windows, Mac, and Linux, offers a variety of impressive features comparable to Windows Movie Maker. For instance, the tool allows you to cut video footage to a certain length before converting it, and offers filters and effects to make your video look sleeker. Shotcut can handle streaming in a variety of formats, ranging from HTTP to RTSP and UDP.
While the interface looks relatively bare, the tool is actually very comprehensive, and all of its video and audio filters are fully customizable. Best of all, you can add, remove, or alter your changes at any time, since editing on Shotcut is non-linear.

Price: Free
Available for: Windows, Mac, and Linux
2. Wondershare Filmora9
Referred to as “a video editor for all creators”, this tool is incredibly easy-to-use whether you’re a novice video editor, or a professional. With Filmora9 you’re able to use filters, overlays, transitions, and custom titles to spruce up your content for YouTube, and engage an audience.
Additionally, the tool offers audio features for key-framing and background noise removal, as well as an audio equalizer. If you have multiple clips you’re hoping to combine into one cohesive video, this is a good tool for you — it allows you to import up to 100 layers of media, and offers features so you can layer your clips.

Image courtesy of Wondershare.
Price: Free trial, $59.99 one-time fee or $44.99 annually
Available for: Windows, Mac, or app version for iOS or Android
3. VSDC Free Video Editor
VSDC allows you to either import existing clips or record directly from your webcam, making it an excellent option for YouTube vloggers. The interface is simple and easy-to-use, and the tool provides options to apply “Instagram-like filters”, voiceovers, titles, shapes, and other impressive visual and audio effects. Additionally, VSDC lets you export straight to YouTube or another social network easily.
It’s important to note, if you want to export your videos from the free version, you’ll want to select the cog icon in the top right, click “Acceleration options” and then uncheck the box marked, “Use hardware acceleration for encoding video”.

Image courtesy of VSDC.
Price: Free, or $19.99 for Pro Version
Available for: Windows
4. DaVinci Resolve 15
Matti Haapoja, a YouTuber with a channel that focuses on the filmmaking process, dedicated a video to this tool and compared it in quality to Final Cut Pro and Premiere Pro — except, unlike those programs, DaVinci Resolve 15 is completely free. DaVinci Resolve 15 provides tools for both offline and online editing, color correction, post-production audio effects, and visual effects. Additionally, the software lets you collaborate with others during the editing process, which could be particularly helpful if you have multiple video editors on your team.
Best of all, DaVinci Resolve 15 offers impressive features to help your video rank for SEO — for instance, you can use Smart Bins to automatically sort and display footage based on metadata criteria (you can also sort manually). Additionally, you’re able to enter custom keywords and tags.

Image courtesy of BlackMagicDesign.
Price: Free for DaVinci Resolve 15, or $299 for DaVinci Resolve 15 Studio
Available for: Windows, Linux, Mac
5. Premiere Pro
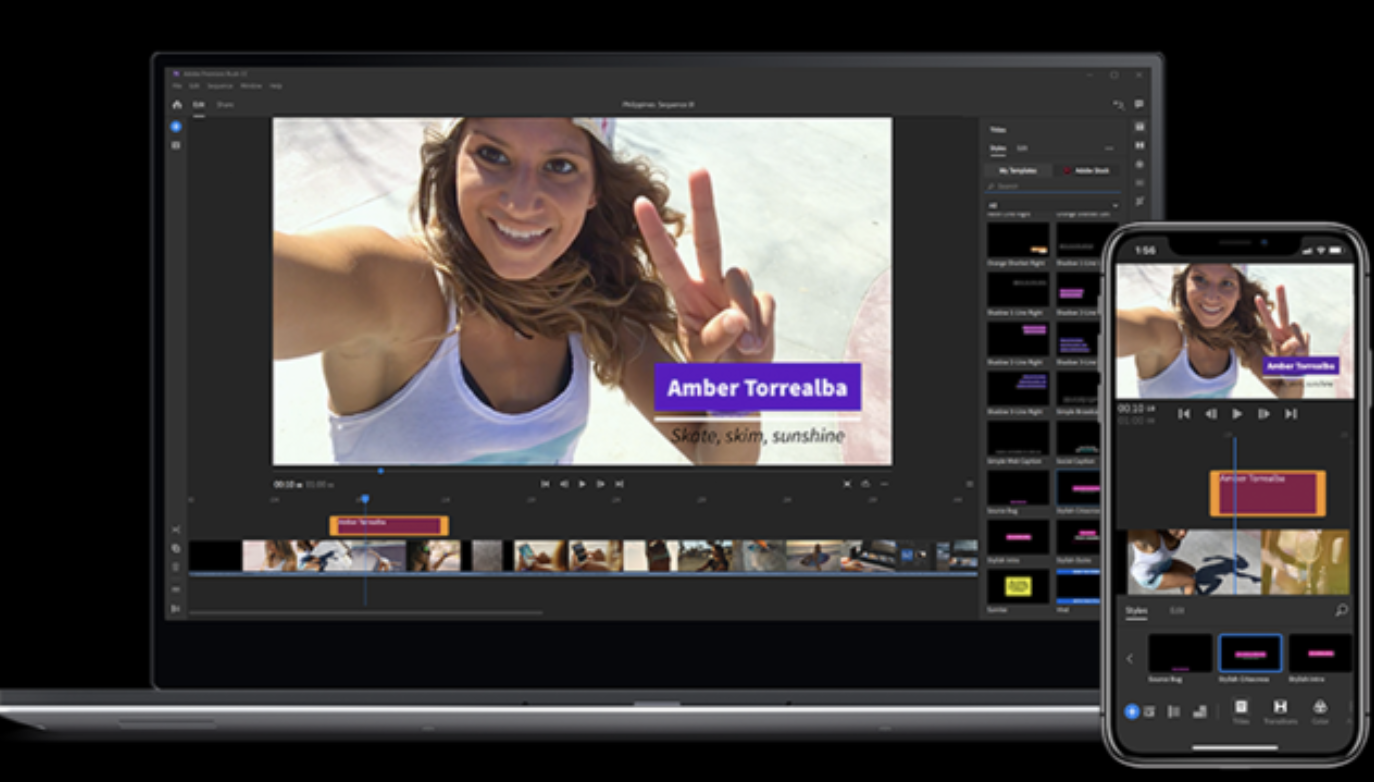
Last but certainly not least, Premiere Pro is one of the highest-quality video editor tools you’ll find. Used by Hollywood filmmakers, TV editors, and YouTubers, the software offers all the creative features you need to craft polished videos. Premiere Pro provides features for color grading, lets you create Motion Graphic visualizations of your data, and offers audio tools to remove background noise. Additionally, Premiere Pro now comes with Premiere Rush CC, which is an app you can use to edit footage on your phone, and then share directly to your social networks, including YouTube.
Price: As a standalone app, Premiere Pro is $239.88 per year
Available for: Mac, Windows
Additional Tools
I spoke with Leticia De Bortoli, a HubSpot Senior Video Editor, to gain insight into tools you might use to take your video editing process to the next level. She uses Premiere when editing her team’s videos, as well as Audition for sound, and DaVinci for color correction.
However, she also mentioned, ‘”You can attach a Zoom iQ6 mic directly to your phone, which is a great tool to get better sound. Additionally, I recommend purchasing a softbox kit for better lighting — both the Zoom iQ6 iOS Lightning X/Y Microphone, as well as the ESDDI 20’X28′ Softbox Photography Lighting Kit, are impressive options that are relatively cheap, as well.”
Additionally, David Guerrera, a HubSpot Senior Video Creator and Animator, mentioned the YouTube channel Film Riot for further inspiration. “They have some cool tutorial videos for special FX,” he said, “[and] they’re great for filmmakers who want to have high production quality, but on a lower budget.”
Ultimately, you’ll need to choose a process that works for your team and your budget — but creating high-quality YouTube videos doesn’t have to break the bank. In fact, plenty of the tools above are either free, or fall under $100.
Want to learn more about using video in your day-to-day? Check out these must-have video strategies for marketers from experts at Hubspot, Later, Uberflip, and Vidyard.


How to Use Google Analytics Ecommerce Reports: Standard vs. Enhanced
Do you sell products or services online? Wondering how Google Analytics can reveal useful details that impact your revenue? In this article, you’ll discover how to use Standard and Enhanced Ecommerce reports in Google Analytics. What Are Google Analytics Ecommerce Reports? In Google Analytics, Ecommerce reports help you learn more about the revenue displayed on […]
The post How to Use Google Analytics Ecommerce Reports: Standard vs. Enhanced appeared first on Social Media Marketing | Social Media Examiner.
from Social Media Marketing | Social Media Examiner https://ift.tt/2HVTVCg
via socialmediaexaminer
How to Create a Pinterest Pin Your Followers Will Flock To
When you first join Pinterest, pinning seems simple. You upload an image and a link to a board you have, and voila — you’ve got a pin. The fervor sets in and you begin to pin all the things you can find: photographs, infographics, logos, icons. As long as it’s an image, it gets pinned.
But if you’re trying to grow your business through Pinterest, that strategy won’t help you at all.

Sadly, you can’t pin a million things and expect people to click through to your content every time. You’ve got to make each pin count.
Optimizing pins instead of posting willy-nilly isn’t hard. It just calls for more thought into your brand: What exactly are you pinning? What does it say about your business? Why should your audience (and ultimately, your customers) care?
Keep reading to learn how to create your own pin, as well as the most important parts of a pin your audience will want to pin themselves.
How to Create a Pin on Pinterest
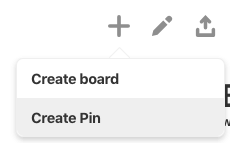
- Click the plus sign (+) at the top of your Pinterest profile.
- Select “Create Pin” from the dropdown menu.
- Upload an image file from your computer and add a destination link.
- Enter a destination link from which to save an image from that website.
- Title your pin.
- Add a pin description.
- Choose a board to add your pin to.
- Select “Save” to create your Pinterest pin.
1. Click the plus sign (+) at the top of your Pinterest profile.
To create your first pin, navigate to your profile by clicking your name and/or profile picture on the top-righthand corner of Pinterest.
2. Select “Create Pin” from the dropdown menu.
On your profile page, above the interest boards you selected when creating your Pinterest profile, click the plus sign icon (“+”) and select “Create Pin” from the dropdown menu that appears, as shown below.
3. Upload an image file from your computer and add a destination link.
If you’re using a desktop computer, clicking “Create Pin” from your Pinterest profile page will bring you to the pin-creation form shown below.
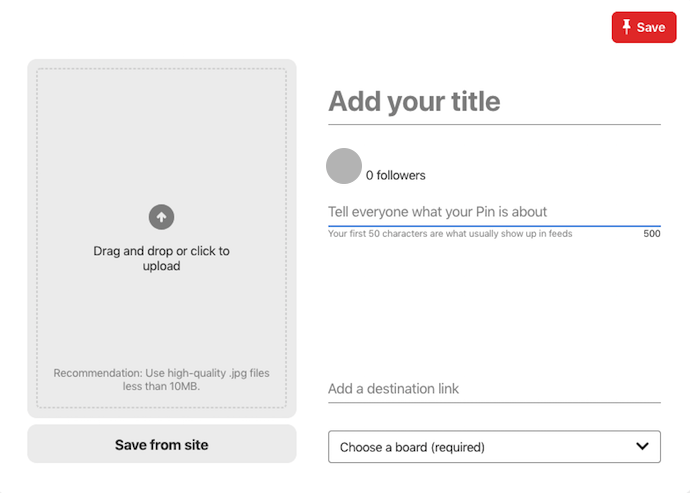
The first thing you’ll do is upload an image to represent your pin. You can do this in two ways:
- By uploading an image file you have saved on your desktop and adding a destination link (if you use this method, keep reading through this step)
- By entering the URL of the website hosting your image and then selecting your desired image (if you use this method, skip to step 4)
To upload an image file from a folder on your computer, simply click the gray box and select the image file from the window that appears on your screen. You can also drag the image file itself directly into this gray box.
Once your image is uploaded, click “Add a destination link” on the bottom-righthand corner of the form and enter the website you want this pin to link to when users click on it.
4. Enter a destination link from which to save an image from that website.
If the image you want to pin already lives online somewhere, click “Save from site” beneath the gray image-upload box, and enter the URL of the website. This will be the website your image automatically links to when your pin goes live.
In the window that appears, you might see more than one image to choose from — these are all the images Pinterest found living on the webpage you’re linking to. Scroll until you find the image you want to pin, and select it.
5. Title your pin.
With your image successfully uploaded, it’s time to optimize your pin with appropriate text. Click the “Add your title” preview text and give your pin an enticing preview that best represents the content of your pin — and the website to which the image links.
For example, if you’re pinning an image of a denim outfit, and linking to the purchase page of that outfit, you might title your pin “New Denim Wear by [Company Name].”
6. Add a pin description.
Add a description for your pin beneath your title, up to 500 characters. Keep in mind only the first 50 characters of your pin description will appear beneath the image in user’s Pinterest newsfeeds. We’ll talk about how to optimize your pin description in the next section of this blog post.
7. Choose a Pinterest board to add your pin to.
Your final task before saving your pin is to add this pin to a “board.” As a Pinterest user, you can create boards that sort your pinned content based on your various interests.
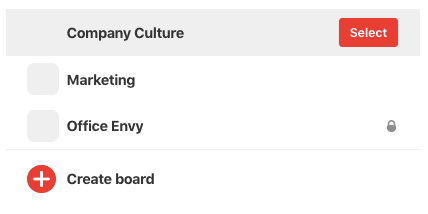
To select or create a board for this pin, click “Choose a board (required)” beneath your pin’s destination link. You’ll be taken to the page shown above, where you can choose or create a board that best represents the type of content you’re currently pinning.
8. Click “Save” to create your Pinterest pin.
Once you’ve selected a board to add your pin to, return to the pin-creation form and hit the red “Save” button at the top of your screen. Follow the prompts to push your pin live, and you’ll be all set.
The Anatomy of a Perfectly Optimized Pinterest Pin
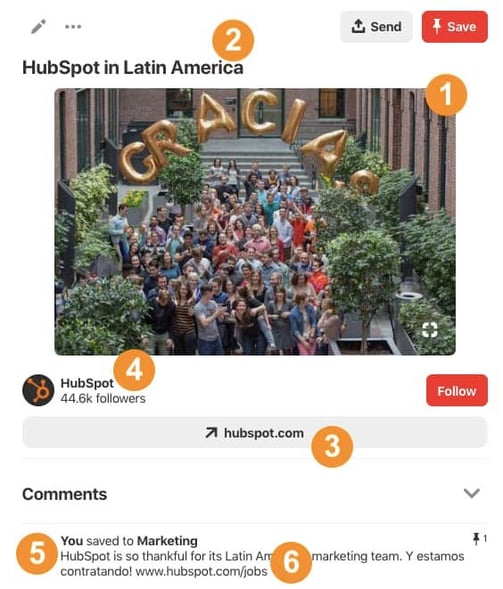
1. High-Quality Image
This seems like the most obvious of them all … but it has to be said. Images should be about 736 pixels wide (when expanded) with no pixelation. In general, tall images work best as they will appear on the screen longer while people are scrolling through their feed, but you don’t want your images to be overwhelmingly long.
There are lots of ways to make your pins look more beautiful, but if you’re just getting started, sticking to a large, high-resolution image will work. You don’t have to create every image you pin (though if you want to, here are some free tools to help you), but you should stay away from pinning cheesy stock photos — Pinterest users love inspirational, beautiful photos or graphics, or images that are extremely helpful, clever, or informational.
2. Accompanying Title and/or Descriptive Picture
Besides being high quality, the image should be indicative of what’s at the pin’s link. You don’t want to mislead your Pinterest followers with an image that doesn’t match up with the accompanying link — it feels like a bait-and-switch.
Instead, choose an image that reflects the link’s contents. If you’re struggling to convey an abstract concept, feel free to add text to your image to describe it. The above example didn’t need that — the icons themselves conveyed what was behind the link: free downloadable icons. If you want an example of a great pin with text on it, check the one out below. Without the title on the image, the pin wouldn’t nearly be as strong — people would have no idea that this was an ebook they could download.
Moral of the story here: make sure that people know what’s inside the pin so they feel enticed to click. If you feel like the image isn’t pulling its weight on its own, add text. That little bit of text could make the difference between someone clicking on your pin or not.
3. Links With UTM Parameters
Although you might provide a link to the content you’re promoting in the pin’s description (which we’ll talk about in step 5, below), it’s just as important to include this link in the image you’re pinning. If the image you’re pinning already lives somewhere online, this is easy to do — you’ll simply add the website link first, then select the image you want to pin once this link has been entered.
What Pinterest won’t prompt you to do, but you should do anyway, is add a UTM code to the end of this link. UTM codes, also known as tracking tags, allow you to identify where your website traffic came from if it didn’t come organically from a search engine. In this case, you can add a UTM code indicating when your website traffic came from a Pinterest pin.
New to using UTM tracking codes? Get the low-down on how they work here.
4. Attribution
Attribution goes both for pins you create yourself and pins you post from other people’s content. It’s really easy to get content stolen on Pinterest, so you want to make sure you’re always giving credit where credit is due and protecting yourself if others won’t do the same for you.
It’s pretty simple: If you’re pinning someone else’s content, give them credit in the description or the link you’re connecting to your pin. If you’re pinning your original content, add your logo or website URL in the photo — if folks share your content without attributing it to you, people will still know where it came from. In the example above, this is a design HubSpot made, so we threw up our logo in the background — it’s not intrusive, but it helps identify the image as ours.
5. Snappy, SEO-Rich Description
A pin’s description is one of the most overlooked parts of a pin — scroll through Pinterest and you’ll see lots of pins without any at all. Even though others are doing it, you shouldn’t. If you’re trying to use Pinterest to build your business, you can’t forget the description — it could have too big of an impact on your results.
Keep your copy concise, yet enticing. Tell readers what they’ll get if they click on the pin. Pinterest allots up to 500 characters of space for a pin description, reserving the first 50 characters for what will appear on most user’s Pinterest newsfeeds. All things considered, pins with descriptions around 100 characters are often ideal to maintain brevity while enticing users to click your pin.
Also make sure you’re using SEO-friendly terms to describe the content behind the pin so your pins can successfully rank in search engines. Notice in the example above we also include the phrase “we’re hiring” in Spanish to optimize the pin for keywords used by Spanish-speaking professionals — the target audience for this particular pin.
6. Call-to-Action
Even on Pinterest, where it’s a standard practice to click on links, people need a little overt reminder to click. Even though you have a link in the pin itself, add a little call-to-action in the description to the pin’s link — it could pay off big-time for you.
*Rich Pin Information
I know what you’re thinking: Why is this one a star instead of a number? Did Ginny make one huge typo in the middle of her blog post?
Nope — this is a special placeholder for Rich Pins. You’ll notice that the image isn’t one. Rich Pins pull extra data into a pin whenever you or someone else pins specific things from your website. If you’re a web developer, you can apply to Pinterest for permission to feature information on products, movies, articles, recipes, or places. Here’s an example of a Rich Pin featuring an adorable greyhound:

See that information right below the title of the pin? You can see that this wall art is in stock and costs $15 without having to click through.
The reason I included this as a star is because not all businesses can realistically use Rich Pins … but if your business can, you absolutely should. Rich Pins can perform much better than their not-so-rich counterparts. In fact, according to Shopify, 39% of “pinners” on Pinterest are more likely to be active shoppers than non-pinners, and 93% of Pinterest users are on the platform to explore potential purchases.
If you’re looking to optimize your Pinterest presence to the fullest and have content that could fall in a Rich Pin category, figure out how to get them enabled for your website’s content.
7. A Lot of Other Great Pins
This is kind of a trick element because it’s not technically in the pin itself, but because of the way the pin layout looks when expanded, I had to include it here. Try clicking on a pin in Pinterest — when you expand the pin, all the other pin images from the user’s board are pulled in. This gives you more opportunities to engage with your Pinterest followers all without doing a thing.
To make sure you’re optimizing the other pins on the board, all you have to do is follow all of the tips above for each pin. With a little more mindfulness when pinning, you’ll have more and more opportunities to grow your business through Pinterest. Sounds like a sweet deal to me.


5 YouTube Description Templates That Have Helped Our Videos Go Viral
YouTube is the second largest search engine, with over 1.8 billion users per month — so it’s an undeniably powerful channel for your marketing efforts.
However, if you don’t use YouTube for your current marketing strategy, you’re not alone. In fact, only nine percent of U.S. small businesses use YouTube to reach their audience.
In 2018, the HubSpot Academy team didn’t take advantage of YouTube, either. But in the latter half of the year, the team feared the major losses in traffic they could face if they didn’t hop on board — so they implemented a strategy that enabled them to grow YouTube subscribers by 25% in just two months.
Ultimately, if you’re ready to begin using YouTube to attract and convert an audience, it’s critical you optimize your video descriptions for SEO. If you’re unsure how to start crafting compelling YouTube descriptions, keep reading — here, we’ll explore various tactics you can employ, and provide templates to ensure you have everything you need to excel on YouTube.

How to Create Compelling YouTube Descriptions
1. Explain what your video is about.
To explore the best tactics for writing YouTube descriptions, I spoke with Eric Peters, a Senior Growth Marketing Manager on HubSpot’s Academy team. He told me, “[YouTube descriptions] is one of the primary ways YouTube knows what your video is about. Include links, additional resources, links to other videos and playlists, etc. Make sure the description box is easy to read.”
As Peters notes, explaining your YouTube video and incorporating keywords into your description doesn’t just help with SEO rankings — it also helps with accessibility for people who are deaf and hard of hearing. For that reason, adding closed captions to your videos is an absolute must, too.
For instance, take a look at one of HubSpot Academy’s YouTube video descriptions:

As you can see, a YouTube description is incredibly different from a web page meta description. In a YouTube description, you have the space to go in-depth and explain what your entire video is about, and even link to external resources.
Peters told me, “You get 5,000 characters total, so make use of it. A lot of creators use asterisks or all-caps to differentiate titles from body copy because it’s all plain text. Consider writing up a text version of the key points from the video, or even copying the transcription of the video into the description.”
2. Include a CTA.
Your YouTube description is a fantastic opportunity to ask viewers to continue to engage with your channel, or find additional resources that will help them learn more about a topic of interest.
For instance, let’s say you create a brief “How to add filters to Instagram” YouTube video, but you also have an in-depth, “How to Use Instagram for Marketing” blog post — why not link to it in the description? More than likely, anyone who is watching your Instagram video on YouTube would be equally grateful for the opportunity to learn more via a blog post.
Alternatively, perhaps you simply want to ask viewers to subscribe, turn on notifications, or share your content with their networks. These are all acceptable CTA’s for your description.
Additionally, it’s critical you format your description to ensure you put the most important information first — as Peters advises, “The first 200 characters are above the ‘more’ fold on the description box, so if you want your CTA/link to be seen by the most people, keep it within the first 200 characters.”
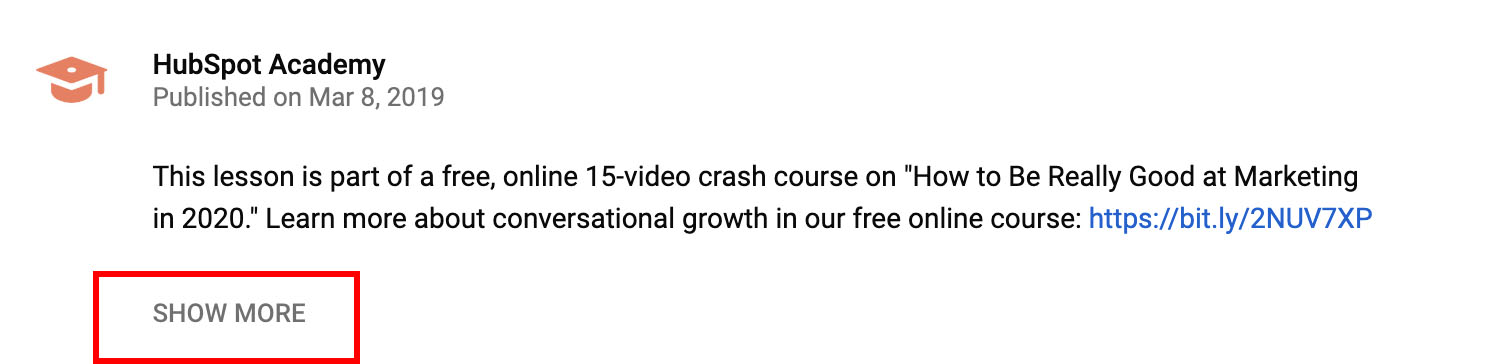
After the first 200 characters, your text will be cut-off, and viewers will need to click “Show more” to see the rest — so it’s vital you make your first 200 characters count.
3. Add your personality.
A YouTube description should be fun, and demonstrate your brand’s personality or unique voice to an audience. Unlike more traditional forms of advertising, this is an opportunity for you to instill creativity and humor into your content.
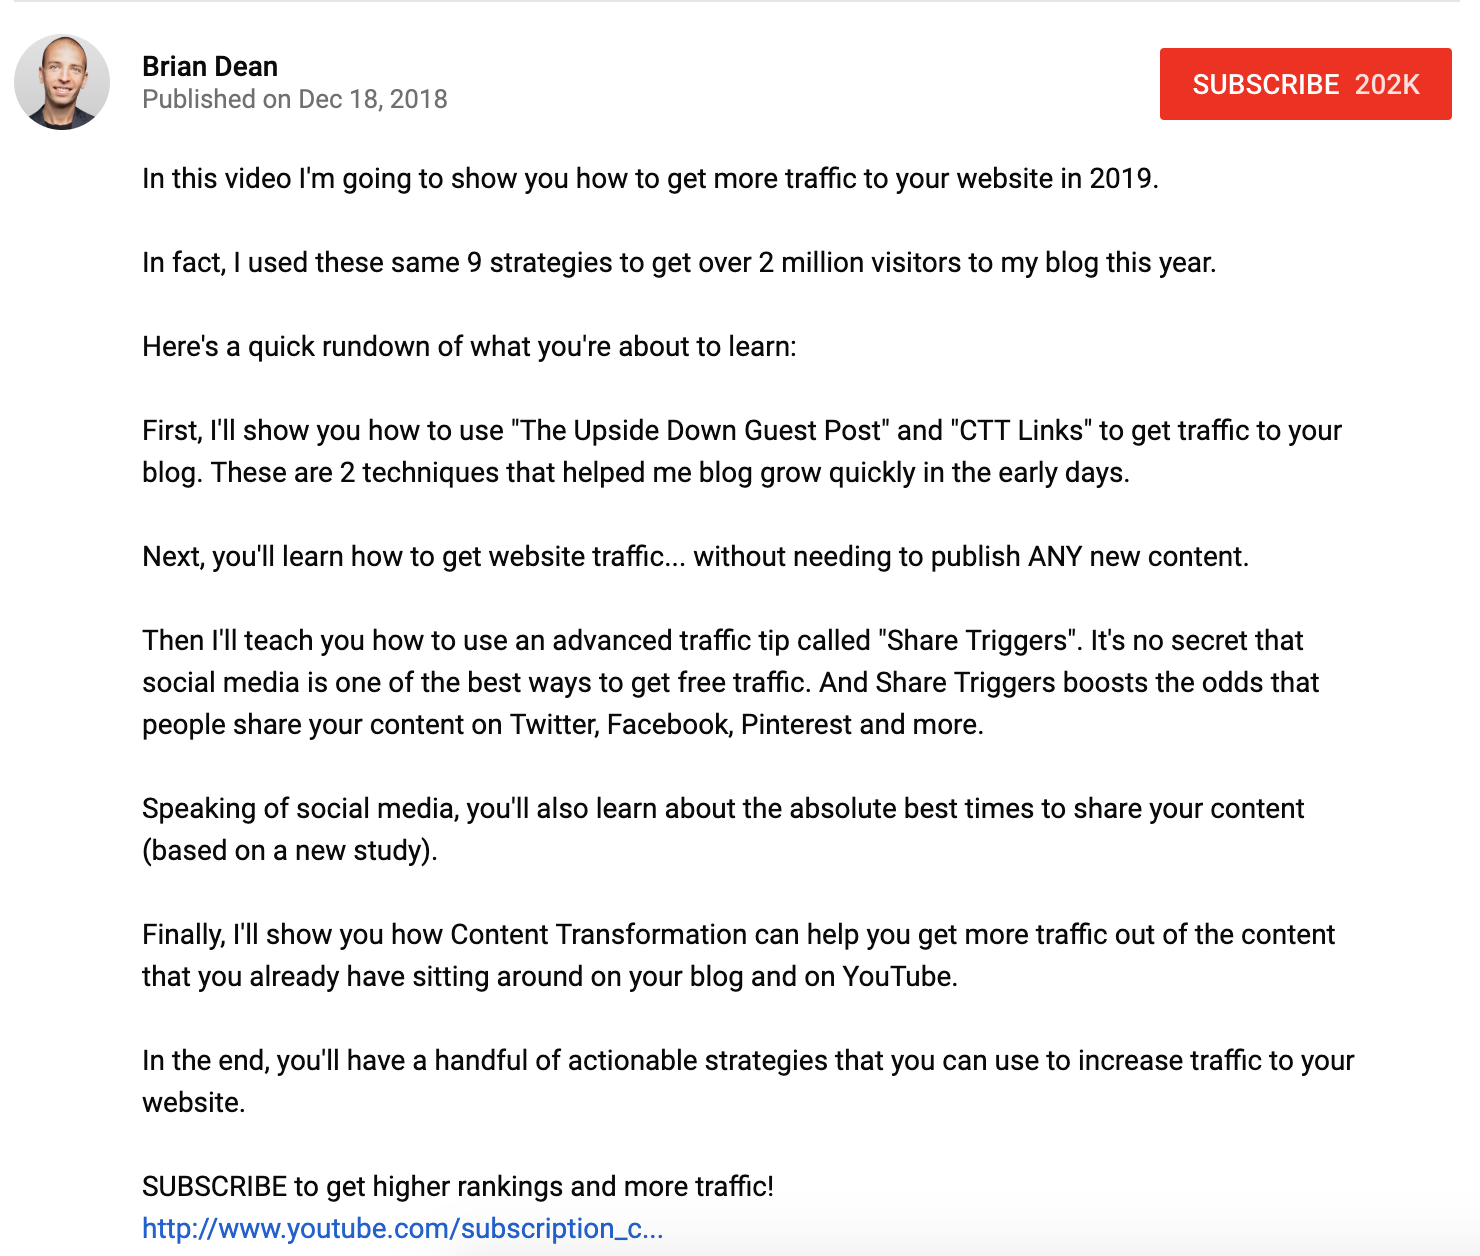
Brian Dean’s YouTube channel is a great example of this — his YouTube descriptions often mirror the way he speaks. The descriptions are candid and casual, and he makes it feel like he’s writing to a friend.
To learn more about using YouTube for marketing purposes, consider checking out HubSpot Academy’s comprehensive YouTube Marketing course.
YouTube Description Templates
Now that we’ve covered the basics, take a look at a few templates you can use to craft compelling YouTube descriptions today.
Templates for Your Channel Description
You might create a playful, easy-going channel ‘About Me’ description, like this one:
Hi, I’m [Name]. This is my channel about X, Y, and Z that you can use to grow your business.
If you’re a marketer who wants to learn X to get [result, i.e. more traffic to your site], subscribe to my channel.
My channel publishes videos that focus on X, Y, and Z. If that sounds like it could be helpful for you, please join me!
Alternatively, you can craft a YouTube description that describes what your company does from a third-person point of view, like this one:
Company A is the worldwide leader in X, Y, and Z. Since 2010, Company A has been on a mission to [insert company vision or purpose here].
To learn more about A, B, C, subscribe to our channel to stay informed.
Templates for Your Video Descriptions
If you’ve conducted an internal interview, you might keep your description short-and-sweet to describe your conversation and why it matters to your audience, as well as a CTA:
Hear how our CEO explains the difference between X and Y, and learn best practices for implementing your own strategy.
Learn more about X and Y in our course: www.XY.com
Alternatively, if you want your description to help new viewers find your various channels, try crafting a description like this one:
Hi there! New to [name of channel]? If so, here’s what you need to know — I like [interests related to channel] a LOT, so I use this channel to explore X, Y, and Z, to help you [desired result for viewer].
Where else you can find me:
INSTAGRAM: http://instagram.com/[accountname]
TWITTER: http://twitter.com/[accountname]
LIFESTYLE CHANNEL: http://www.youtube.com/[accountname]
Join our growing community for new videos every Tuesday and Friday!
BUSINESS INQUIRIES
Please contact [PR representative] at [email or phone number].
Finally, if you want to focus on crafting a description that explains what your video is about and incorporates a keyword description, try this:
Hey there! This lesson is part of a free online course. Take the full course here: www.company.com/course1
Some people are unsure what X is — at its most basic, X is [brief definition of keyword]. In this video, you’ll learn how to X, Y, and Z, to ensure you’re able to grow your brand online.
Additionally, we’ll explain how you can avoid doing A. Sometimes, A is all it takes to lose a customer.

10 Metrics to Track When Analyzing Your Social Media Marketing
Do you know if your social media marketing is working? Wondering how best to report on your efforts? In this article, you’ll discover 10 metrics worth tracking for your next marketing report. Create a Spreadsheet to Track Key Social Media Metrics Before diving into the individual metrics to include in your social media marketing report, […]
The post 10 Metrics to Track When Analyzing Your Social Media Marketing appeared first on Social Media Marketing | Social Media Examiner.
from Social Media Marketing | Social Media Examiner https://ift.tt/2UUZsNe
via socialmediaexaminer
23 Remarkable Twitter Statistics to Be Aware of in 2019
Twitter is one of the most popular (and powerful) social media networks around, and businesses everywhere are smart to continue using and innovating on it.
But how you use Twitter depends entirely on how its members use, follow, post, interact with, and hashtag the things they care about. Luckily, we curated some Twitter statistics to make your decision easier.
 So, how are people using Twitter nowadays? How are businesses using Twitter? How does the network impact people’s purchasing decisions? How do promoted tweets boost offline sales, and how connected do people feel to a brand as a result of your Twitter presence?
Twitter Stats
Check out some intriguing data about Twitter, below, and see for yourself. For more ideas on how and what to tweet — including 12 tweet templates to get you started — check out this blog post.
Twitter User Statistics
1. Twitter has 321 million monthly active users as of the end of 2018. (source: Twitter)
2. 79% of Twitter’s monthly active users are outside the United States. (source: Twitter)
3. 45% of Americans between the ages of 18 and 24 use Twitter. (source: Pew Research Center)
4. 73% of Twitter users also use Instagram. (source: Pew Research Center)
5. The number of U.S. adults who use Twitter has grown by roughly 10% since 2012. (source: Pew Research Center)
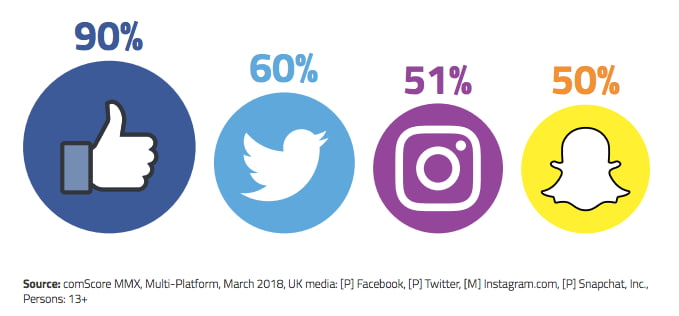
6. Twitter is the second-most popular social network in the United Kingdom, reaching 60% of the U.K.’s internet audience. The most popular is Facebook, at 90%. (source: Ofcom)
7. In Japan, Twitter Advertising reaches 38.6 million of Japanese citizens — the 9th-highest percentage reach of any other country on Twitter. (source: We Are Social)
8. The Philippines has just under 3 million female Twitter users — the most of any other country. India has the most male users, at 5.9 million. (source: We Are Social)
Twitter Followers Statistics
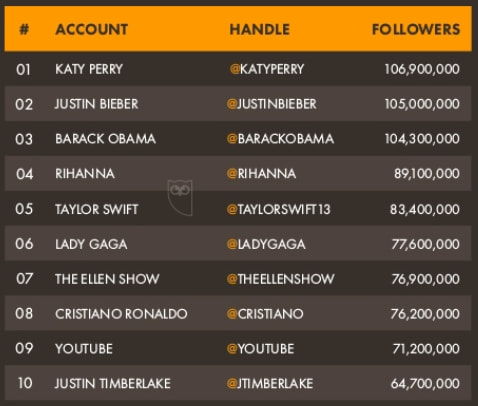
9. Katy Perry is the world’s most followed Twitter account, at 107 million followers, followed by Justin Bieber and then Barack Obama. (source: We Are Social)
10. The NBA and Google are the most followed non-media business accounts on Twitter. Their followers are 28 million and 21 million, respectively. (source: Friend or Follow)
11. The most followed news account on Twitter is CNN Breaking News, at 55 million followers. (source: Friend or Follow)
12. The most followed social media account on Twitter is YouTube, at 71 million followers. (source: Friend or Follow)
13. The average Twitter account has 707 followers. (source: KickFactory)
14. Netflix Brasil and Playstation Japan are the fastest-growing business accounts on Twitter, in terms of monthly follower increases. (source: SocialBakers)
Twitter Usage Statistics
15. The 😂 emoji is the most frequently used emoji on Twitter, having been used 2.3 billion times since 2013. Coming in 2nd is ❤️, followed by ♻️. (source: We Are Social)
16. SimilarWeb ranks twitter.com the 7th most visited website in the world. (source: We Are Social)
17. Twitter’s global average time per visit is just over 9 minutes. (source: We Are Social)
18. As of 2018, some of the most popular Twitter hashtags included #crypto, #influencermarketing, #womenintech, #deeplearning, and #fridayfeeling. (source: HubSpot)
19. Tweets that include hashtags can result in as much as a 1,065% increase in engagement compared to a similar tweet without hashtags. (source: HubSpot)
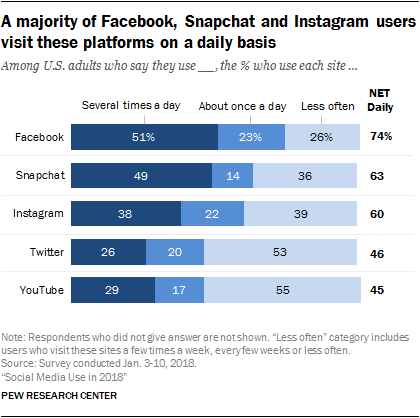
20. Approximately 46% of Twitter users are on the platform every day. (source: Pew Research Center)
21. In the U.K., the average time per visitor on Twitter is roughly 2 hours. (source: comScore)
22. As of Q3 2018, engagement with paid Twitter Ads increased by 50% year over year. For advertisers, the cost per engagement decreased by 14% over the same time period. (source: Twitter)
23. Twitter Ads are up to 11% better at mentally engaging with audiences during live events. (source: Twitter)

Direct Costs, Explained in 600 Words or Less [With Examples]
It’s surprisingly inexpensive to start a business today — as little at $3000, according to the Small Business Administration. However, as encouraging as that is to aspiring business owners, the costs to run that business every day are a bit more complex.
Before research and development, and before you even rent an office space, you might want to know how much money you’ll need to make your product. These are your direct costs.

Direct Costs
Direct costs are what you spend specifically to develop and maintain your product or service. These costs can vary over time as the product is improved upon. Direct costs range from employee salaries to the price of the items needed to build each unit of your product.
Are direct costs different from fixed and variable costs?
Actually, direct costs are a type of fixed or variable cost. These expenses are not mutually exclusive. Whether or not a direct cost is fixed or variable simply depends on how likely (or regularly) the cost is to change as your business grows. Here are two examples:
- Variable direct cost: A SaaS company that sells cloud-based software is responsible for storing the data their customers put on their software. That information is stored in the form of servers. The more clients the company has, the more servers the business will need to buy to store client data so the product can continue to operate. Server costs, in this case, are a variable direct cost to the business.
- Fixed direct cost: Consider the variable cost example, above. This company also employs an IT administrator to manage the storage of its customers’ data. Barring changes to his/her compensation, the salary the company pays this administrator remains unchanged each month. IT salaries are a fixed direct cost to the business.
Direct vs. Indirect Costs
Direct costs are invested “directly” in the development of a product or service. Indirect costs may affect the business’s overhead, but they do not directly contribute to the creation and quality of that service. These costs include office space rent, office security, and staff supplies.
Direct costs get their name because they have a “direct” line to the creation and management of your goods and services. You pay cost A in exchange for item B, you use item B to make product C. Cost A is a direct cost because product C can be traced back to the cost A you paid.
Indirect costs are more complicated and do not have this direct line to your product’s end result. You pay cost A in exchange for facility B, you use facility B to host machine C, machine C is used by team D to make product E. Cost A is an indirect cost because product E cannot be directly traced back to the cost A you paid. There are other direct costs that took place between A and E.
Examples of Direct Costs
- Physical materials
- Employee salaries
- Sales commission
- Servers
- Data center space
- Product transportation
It’s easy to attribute your direct costs to the money you spend physically making your goods and services. An automotive company, for example, might pay a steel manufacturer for the material used to create each car body. This is a direct cost to the car company.
However, there are other direct costs that can go into a product even if those costs don’t pay for the material your product is made out of. Here are some common examples of direct costs you can attribute directly to your product:
- Physical materials: The raw materials, ingredients, and parts needed to build your product are all direct costs to your business.
- Employee salaries: The individual salaries, particularly the ones you pay to those who make and sell your product, are direct costs.
- Sales commission: Every time a salesperson sells a unit of your product, he/she is paid commission. This is a direct cost to maintaining the value or your product.
- Servers: The servers needed to store customer data on your product, particularly if your product is in the form of software, is a direct cost to your business.
- Data center space: The data center space you rent or own to store those servers is a direct cost.
- Product transportation: The cost to ship your product to and from your office and customers is a direct cost.
Click here to learn more about the types of variable costs you’ll encounter when growing your business.


How to Build Up Your Work-Life Balance Muscle, According to Nestlé’s Chief People Officer
In recent years, viewpoints have shifted on the concepts of “having it all” and “juggling work and life.” We’ve come to recognize no one has it all, day in and day out; we may strike a healthy balance one week and find ourselves a bit lopsided the next. In other words, the battle for balance is ongoing. That’s why we have to build up what Judy Cascapera, Nestlé USA’s Chief People Officer, calls “the balance muscle.”
“We have to treat it like working out at the gym: You start small and build up that muscle, and over time it gets a little easier,” Cascapera says. “If you don’t use and maintain it, that muscle starts to atrophy. But you can recognize that and build it back up again.”
As an HR executive, Cascapera has made balance-supporting initiatives a cornerstone of her work for Nestlé’s people. That includes leading the company’s Parent Support Policy for U.S. employees, offering primary caregivers up to a total of 26 weeks of leave, which includes 14 weeks paid.
But for Cascapera personally, balance was something she found impossible as she rose through the ranks earlier in her career. She went back to work four weeks after having a child — twice. She stopped exercising. She even canceled planned family vacations.
“It wasn’t just a bad work-life balance; it was zero balance,” Cascapera told Glassdoor. “Eventually, it became, ‘How can I become this effective HR leader someday if I’m not even taking care of myself? If nothing else, how can I even do my best work?’ When I started to build this muscle, both my work and my life got so much better.”
Here’s how Cascapera recommends any worker can start building that balance muscle — and using it, so you don’t lose it.
Start Small
Shifting your view — and creating that balance muscle — takes time. So if you’re at the point where you’re drowning in work and balance seems impossible, tackle just one “life” aspect to prioritize.
“If that dental cleaning has been hanging over your head, just get it scheduled,” Cascapera says. “Put in your calendar, tell the team members you need to tell, and stick to it no matter what. Once you go, you’ll feel so much better, and it will also show you the world doesn’t end because you left the office for an hour to take care of your health — which makes it easier to get yourself doing more tasks like this over time.”
Build a Support System With Your Colleagues
Ideally, you would be working in a place that doesn’t expect or encourage an unhealthy amount of time at work. But even if the overall company environment doesn’t necessarily put balance first, you can create your own pockets of support for yourself and your colleagues. Identify a potential accountability partner — or several! — and talk with them about your goals of achieving better balance. Ask if they’ll help keep you to commitments like doctor’s appointments, or leaving the office by 5:30 next Wednesday so you can hit the gym. And you, of course, can do the same for them.
“Balance was particularly hard for me after I had my first child, and I leaned on a bunch of people,” Cascapera says. “I had been talking about how I could only get a haircut if I forced myself to get out of the house on a Sunday afternoon and take a walk-in at Supercuts. My coworker actually made me an appointment at the salon.”
Choosing a close friend at work, if you have one, is great. But your accountability partner can be anyone who wants to help. Over time, you can push not only yourself but your colleagues to keep balance and self-care top of mind daily.
If Work Must Bleed Into Time at Home, Schedule It
Wouldn’t it be lovely if we could all just leave work at the office? But for some jobs, it simply isn’t possible. Still, that doesn’t mean you have to spend every moment at home working. “I always tell other women you can’t have it all in that you can’t have a successful career and successful children and a spouse who’s always happy every single day,” Cascapera says. “It is a constant push and pull, a constant reprioritization, and that’s OK.”
She recommends setting realistic guidelines for yourself: Maybe you spend an hour or two sending emails when you get home from the office, so you can enjoy an outing with friends or a Netflix binge later. Or make a rule to put the phone away during dinner and bedtime routine with your kids, and then work from 8-9 p.m.
Those rules can shift as needed, Cascapera notes. If you know it’s going to be an exceptionally busy week at work, get it done and don’t berate yourself — just be sure to recalibrate the following week by promising yourself you’ll leave the office on time, and maybe plan a massage or time with friends to get that balance back.
Remember: the Big Moments in Life Are Rare, and Work Will Always Be There
The balance muscle is put into sharp focus when something big is happening in your life, whether it’s happy, like planning a wedding, or difficult, such as dealing with a family member’s illness. But those big moments are rare, and you may have to remind yourself that they’re more important. This is when that strong balance muscle you’ve been working on becomes paramount.
Cascapera wishes she had recognized that earlier in her career. At one job, she helped to lead the foodservice business, which was a challenging part of the operation; two people turned down the position before she accepted it. She was also a rare woman leader in the male-dominated consumer packaged goods field.
“I felt like I was in this pivotal time in my career, and that I had something to prove,” Cascapera says. “In my head, I made that out to be, ‘Well, that means I need to work all the time.’ I canceled many vacations with family last minute, and I am not proud of that.”
But in the end, she came away with a valuable lesson: “I learned that you can’t take for granted that you won’t get that time back. This is your life,” Cascapera says.
This article was originally published on Glassdoor, one of the world’s largest job and recruiting sites. Glassdoor combines all the jobs with valuable data to make it easy for people to find a job that fits their life, while also helping employers hire quality talent at scale. Are you hiring? Post jobs for free with a 7-day trial.

Direct Costs, Explained in 600 Words or Less [With Examples]
It’s surprisingly inexpensive to start a business today — as little at $3000, according to the Small Business Administration. However, as encouraging as that is to aspiring business owners, the costs to run that business every day are a bit more complex.
Before research and development, and before you even rent an office space, you might want to know how much money you’ll need to make your product. These are your direct costs.
Direct Costs
Direct costs are what you spend specifically to develop and maintain your product or service. These costs can vary over time as the product is improved upon. Direct costs range from employee salaries to the price of the items needed to build each unit of your product.
Are direct costs different from fixed and variable costs?
Actually, direct costs are a type of fixed or variable cost. These expenses are not mutually exclusive. Whether or not a direct cost is fixed or variable simply depends on how likely (or regularly) the cost is to change as your business grows. Here are two examples:
- Variable direct cost: A SaaS company that sells cloud-based software is responsible for storing the data their customers put on their software. That information is stored in the form of servers. The more clients the company has, the more servers the business will need to buy to store client data so the product can continue to operate. Server costs, in this case, are a variable direct cost to the business.
- Fixed direct cost: Consider the variable cost example, above. This company also employs an IT administrator to manage the storage of its customers’ data. Barring changes to his/her compensation, the salary the company pays this administer remains unchanged each month. IT salaries are a fixed direct cost to the business.
Direct vs. Indirect Costs
Direct costs are invested “directly” in the development of a product or service. Indirect costs may affect the business’s overhead, but they do not directly contribute to the creation and quality of that service. These costs include office space rent, office security, and staff supplies.
Direct costs get their name because they have a “direct” line to the creation and management of your goods and services. You pay cost A in exchange for item B, you use item B to make product C. Cost A is a direct cost because product C can be traced back to the cost A you paid.
Indirect costs are more complicated and do not have this direct line to your product’s end result. You pay cost A in exchange for facility B, you use facility B to host machine C, machine C is used by team D to make product E. Cost A is an indirect cost because product E cannot be directly traced back to the cost A you paid. There are other direct costs that took place between A and E.
Examples of Direct Costs
- Physical materials
- Employee salaries
- Sales commission
- Servers
- Data center space
- Product transportation
It’s easy to attribute your direct costs to the money you spend physically making your goods and services. An automotive company, for example, might pay a steel manufacturer for the material used to create each car body. This is a direct cost to the car company.
However, there are other direct costs that can go into a product even if those costs don’t pay for the material your product is made out of. Here are some common examples of direct costs you can attribute directly to your product:
- Physical materials: The raw materials, ingredients, and parts needed to build your product are all direct costs to your business.
- Employee salaries: The individual salaries, particularly the ones you pay to those who make and sell your product, are direct costs.
- Sales commission: Every time a salesperson sells a unit of your product, he/she is paid commission. This is a direct cost to maintaining the value or your product.
- Servers: The servers needed to store customer data on your product, particularly if your product is in the form of software, is a direct cost to your business.
- Data center space: The data center space you rent or own to store those servers is a direct cost.
- Product transportation: The cost to ship your product to and from your office and customers is a direct cost.
Click here to learn more about the types of variable costs you’ll encounter when growing your business.

How to Get Genuine and Totally Real Followers on Pinterest
Pinterest now attracts 150 million people per month. Its growth even supersedes traditional social network success stories — millennial use of Pinterest in particular has increased more than any other social network, even Snapchat.
It makes sense, then, why you want to increase your followers on Pinterest. The popularity of the platform makes it a good site to increase brand awareness — additionally, Pinterest users are particularly receptive to branded content. In fact, 78% of Pinterest users welcome content from brands.
But the popularity of Pinterest means it’s a crowded space, and the task of increasing followers can feel daunting. You might even be tempted to buy Pinterest followers — we’ll explain how to do this later (and why it’s a bad idea).
Fortunately, there are tactics you can implement right now to increase your real follower count on Pinterest. Here, we’re going to dive into everything you need to know to grow your Pinterest audience today.
How to Get Followers on Pinterest
- Post original images.
- Use keywords and hashtags.
- Be active and engaged on Pinterest.
- Follow other users.
- Add a Pinterest follow button to your newsletter or website.
- Use Pinterest sections.
- Promote your pins.
1. Post original images.
Over 80% of pins are re-pins — which means it’s critical you stand out by creating original content for your brand. Try posting original infographics, graphics, or photos that reflect your brand’s message. Additionally, when you do re-pin, make sure you’re re-pinning content that aligns well with your own brand.
2. Use keywords and hashtags.
Pinterest users typically find brands through hashtags and searches, so it’s important you include both in your descriptions and images. Additionally, Pinterest’s hashtag help page states, “If you have a business account, adding hashtags to the organic instances of your Promoted content can help distribute your content in those feeds.” Pinterest recommends no more than 20 hashtags per pin.
When adding a hashtag to your description, it’s critical you remain specific and descriptive. This ensures the highest chance that your pin will match a user’s true search intent. For instance, let’s say you have a pin for healthy dinner recipes. Using the hashtag #healthyrecipes is better than simply inputting #healthy — while more users likely search #healthy, those users are not necessarily looking for recipes. #Healthyrecipes helps you reach a more targeted audience.
3. Be active and engaged on Pinterest.
Like any social media site, Pinterest favors active accounts. This includes ensuring you pin on a regular basis, manually pin other people’s pin, and follow other boards. If you have trouble keeping up with your Pinterest activity, try using a tool like Tailwind, which allows you to schedule your Pinterest pins ahead of time.
One pin can drive up to two page visits and six page views. So it’s vital you re-pin, often. Consider going to the “Explore” and “Trending” pages, and re-pinning from there. The more you re-pin and engage with other boards, the more likely you are to increase your reach.
4. Follow other users.
If someone is following a business with similar content to yours, chances are, they’d be a good follower for you, as well. Take some time to research competitors’ and follow their followers — if your content is up-to-par, they’ll more than likely follow you back.
Alternatively, perhaps there are businesses with products or services that work well in conjunction with your own. For instance, let’s say you’re an interior designer, and you find a company that sells handmade furniture on Pinterest. You might follow some of their followers, since their followers are likely interested in either decorating or sprucing up their home.
5. Add a Pinterest follow button to your newsletter or website.
You can likely increase traffic to your Pinterest account if you embed a Pinterest follow button in an email newsletter, or on your website. Since traffic to your site, or subscribers to your newsletter, are probably already interested in your product or services, they’re a strong audience to target.
Plus, depending on where they are in their buyer’s journey, your Pinterest account might actually help them decide whether your business is the right fit for them.
6. Use Pinterest sections.
Pinterest sections are similar to H2 sections of your blog posts — they enable you to organize your full Pinterest board into categories, so users can more easily find exactly what they’re looking for.
For instance, take a look at Twins Mommy Blog’s board:
While the full board is about “Starting a Blog”, it’s then divided into five sections, including how to make money blogging, and blog traffic tips. A user might only check out the make money section, and re-pin that content without needing to see or re-pin the rest of the board.
Sections, then, make your individual content more likely to be found and re-pinned.
7. Promote your pins.
If you have a business account on Pinterest, you could consider putting money behind a pin to increase visibility and reach — similar to paying for an ad on Facebook.
For instance, take a look at what I see when I type “travel” into Pinterest:
One of the first pins, prominently displayed under the search term “Travel”, is Wikibuy’s promoted “How to Travel Like a Pro” pin. Promoted pins have been proven successful — in fact, 50% of Pinterest users have made a purchase after seeing a Promoted pin, and Promoted pins are re-pinned an average of 11 times.
For increased visibility and reach, then, why not?
Buying Pinterest Followers
There are tools you can use to buy Pinterest followers — such as Best Social Plan, which allows you to buy 1,000 followers for $15, or 4,000 followers for $60.
Buying Pinterest followers essentially means you’re buying fake accounts to increase the number of followers you have, which will make it look like your business is popular on Pinterest. This can be tempting — why do the hard work of cultivating a following, when you can pay less than $20 for 1,000 followers, instantly?
Unfortunately, however, buying followers does more harm than good. First off, your company could be banned from the site if Pinterest figures out you’ve bought followers, since it’s against their guidelines.
Additionally, increasing your follower count can actually harm your success on Pinterest, since Pinterest’s algorithm doesn’t just measure follower count — it also measures engagement metrics.
For instance, let’s say you have 100 real followers, and 1,000 fake ones. You post a pin that is re-pinned 10 times. Out of your real followers, that’s 10% — an incredibly good engagement number. But Pinterest calculates 10 re-pins out of 1,100 — which is less than one percent.
Ultimately, more followers could decrease your engagement metrics, which will make both Pinterest and your real followers believe your content isn’t actually that good.
Finally, buying followers is a bad idea because, simply put, those fake followers will never become real customers. You will become much more successful on the platform if you take the time and resources you would’ve dedicated to buying followers, and use it instead to implement some of the strategies listed above.
Ultimately, it’s critical you work diligently to find and engage with real people — because only real people can help you figure out what your potential future customers expect and prefer from their online content.
How to Delete Followers on Pinterest
You can’t delete followers on Pinterest, but you can block users so they can’t see your content or engage with your pins. To do this, navigate to the profile of the follower you wish to block, and click the flag icon. Then, click the “Block” button. The user will be blocked without warning.
